Community Brag Posts
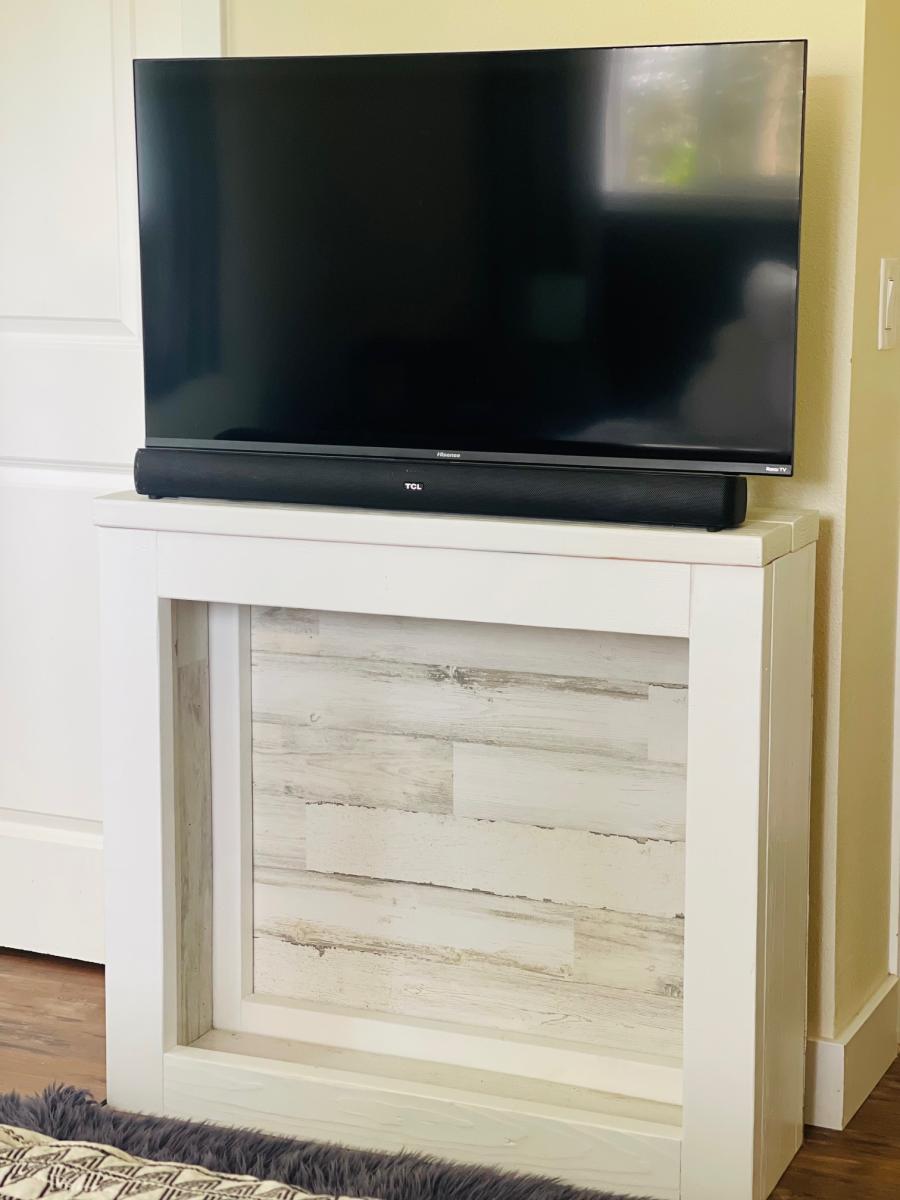
2x4 Farmhouse Console
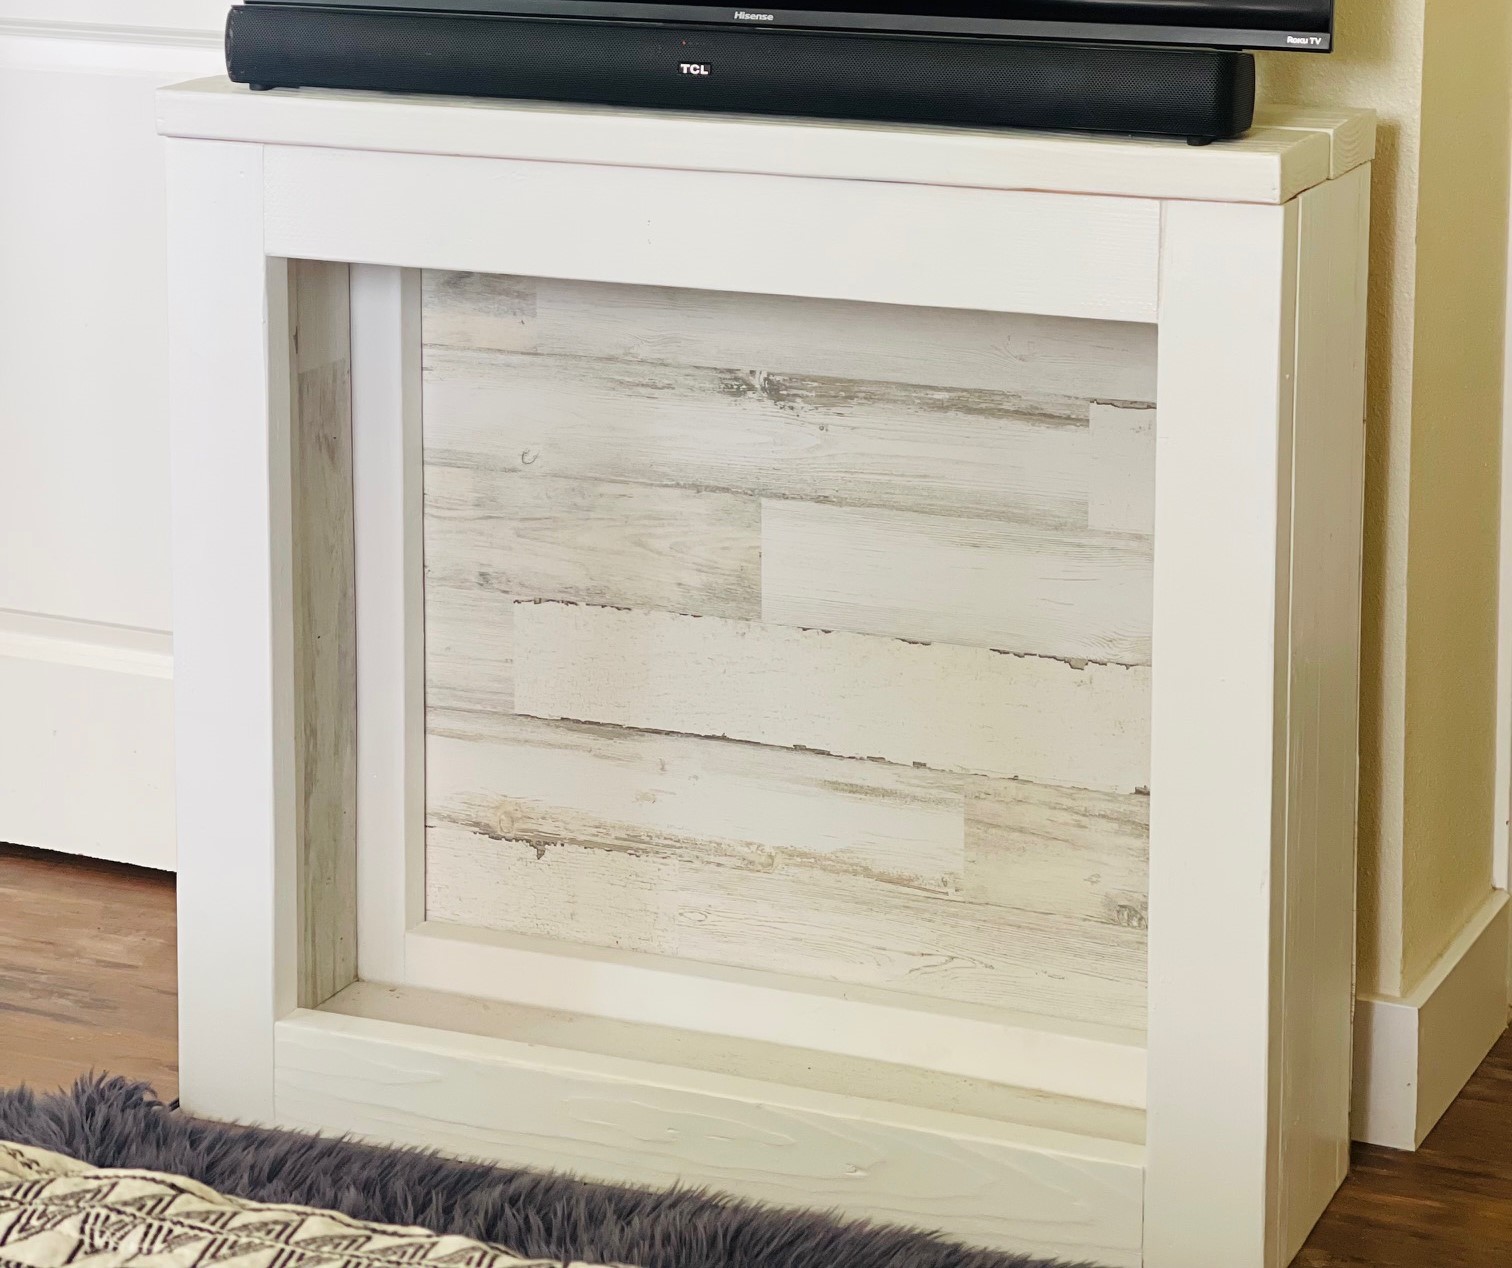
I had an idea to stack 2x4's for the main frame and then just use a piece of decorative paneling for the back and inside. I needed a place to set my tv against the wall in my room, so I built it to fit. Simple project that got the job done - more projects at Family_DIYnamic.
Nathan's Montreal Canadians bed

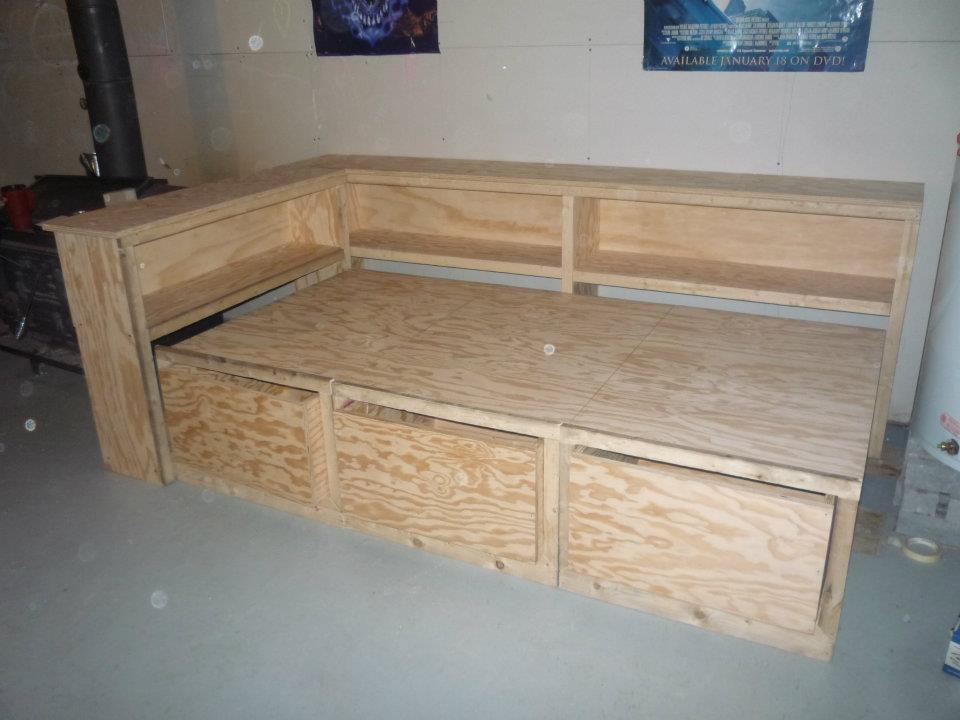
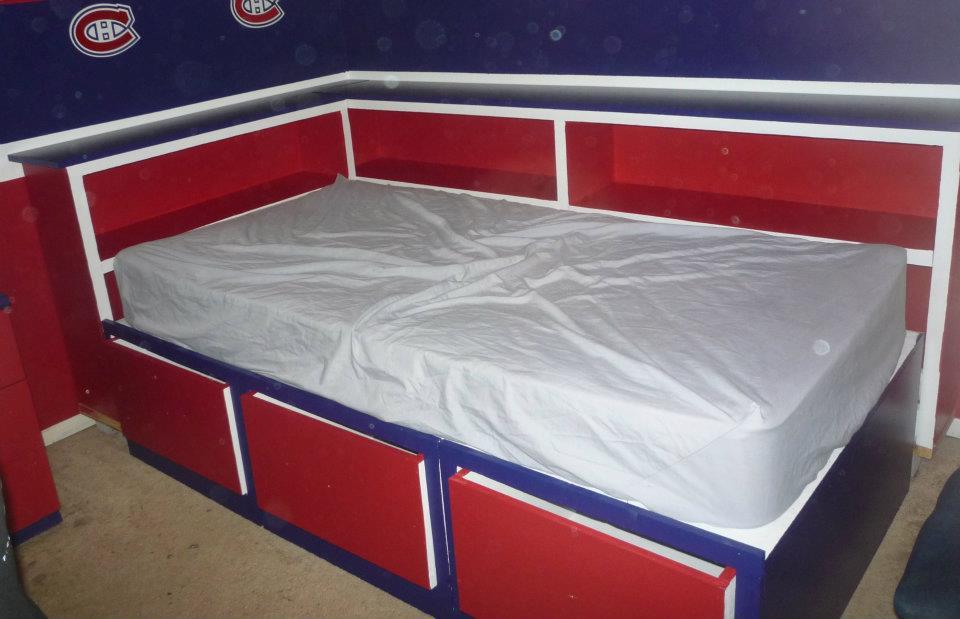
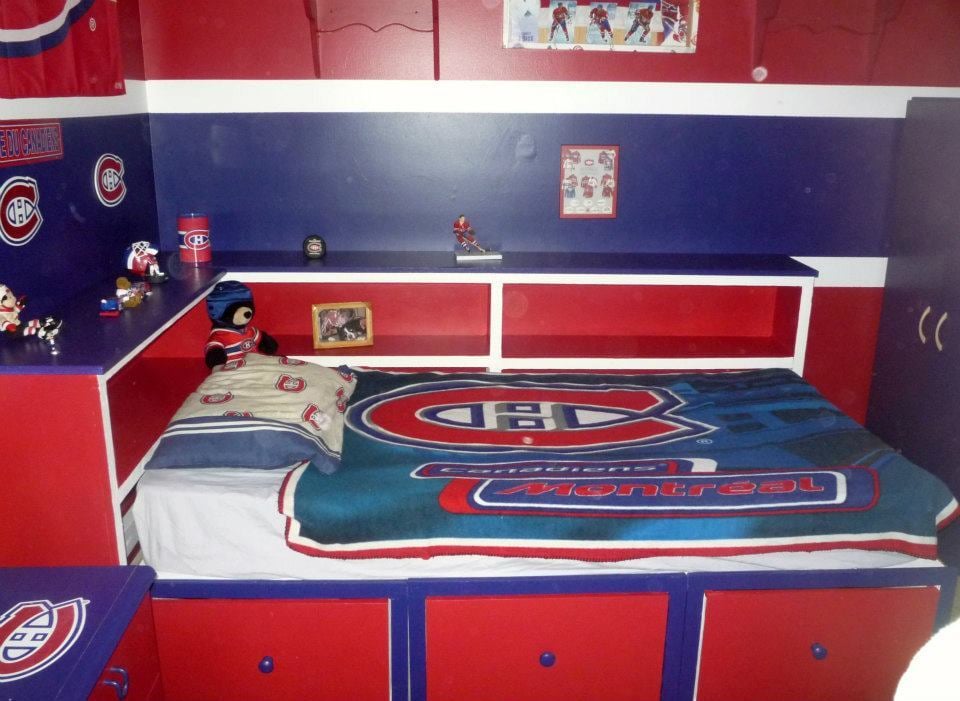
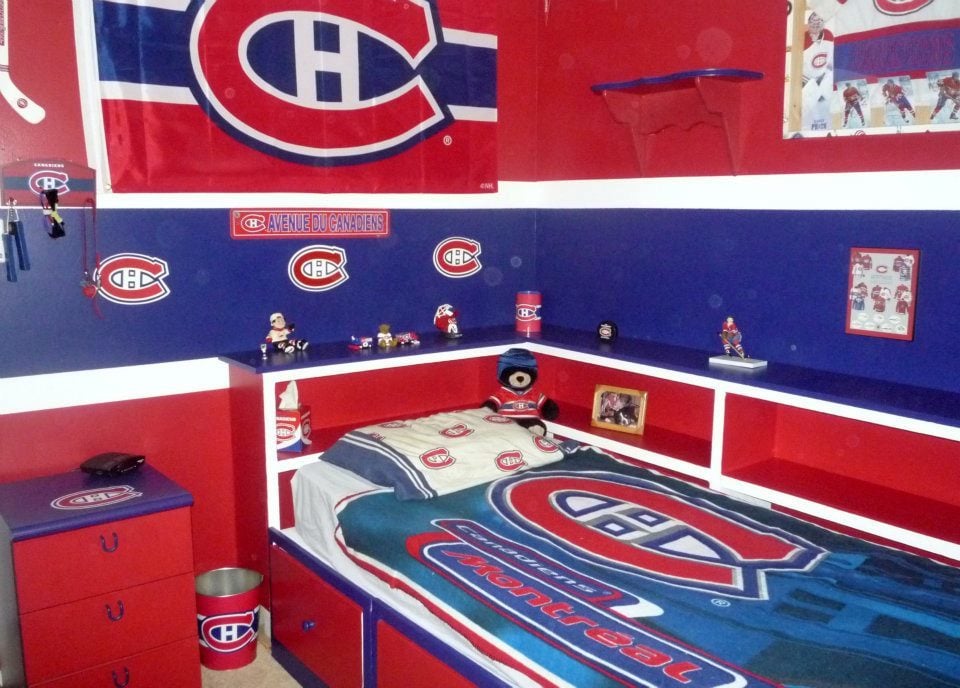
Our nephew Nathan really wanted a captain's bed like his friend. We built him one even better for Christmas this year. I couldn't find one plan with everything we wanted to I used the plans for the Storage Daybed for the base, and used the plans for the Cozy Corner twin bed collection wide bookcase unit. We combined both the headboard and sideboard into one unit (by extending the top to the short end) giving him an L shaped headboard for all his hockey stuff :) The only thing we messed up on was the height of the bookcase. He wanted it higher so it's on blocks for now to raise it. My sister did all the final painting to match his room and it looks AWESOME!!!
Steve had everything cut at work and we put it together in one 12 hour day! Nathan LOVES his new bed. Thank you Ana!
Built from Plan(s)
Estimated Cost
about $125
Estimated Time Investment
Weekend Project (10-20 Hours)
Finish Used
Nathan is a HUGE Montreal Canadian's fan. He applied 2 coats of wood primer, then his mom, my sister did the finishing paint with the official Montreal Canadians colours to match his room. A couple of little touch ups to be done but it looks great.
Recommended Skill Level
Beginner
Comments

Fri, 01/06/2012 - 16:52
Very cool, Great work
That is one nice, cool looking bed. Interesting colors, is it his school colors? I've never thought of painting plywood, you've given me some ideas.
Fri, 01/06/2012 - 21:24
The colors are the official
The colors are the official Montreal Canadiens hockey team's colors, My son is a HUGE fan! Nathan LOVES his bed. and it is very solid.
Fri, 01/06/2012 - 20:29
Ummm... The bookcases were
Ummm... The bookcases were too short because you didn't take the mattress height into account. Looks really good though.
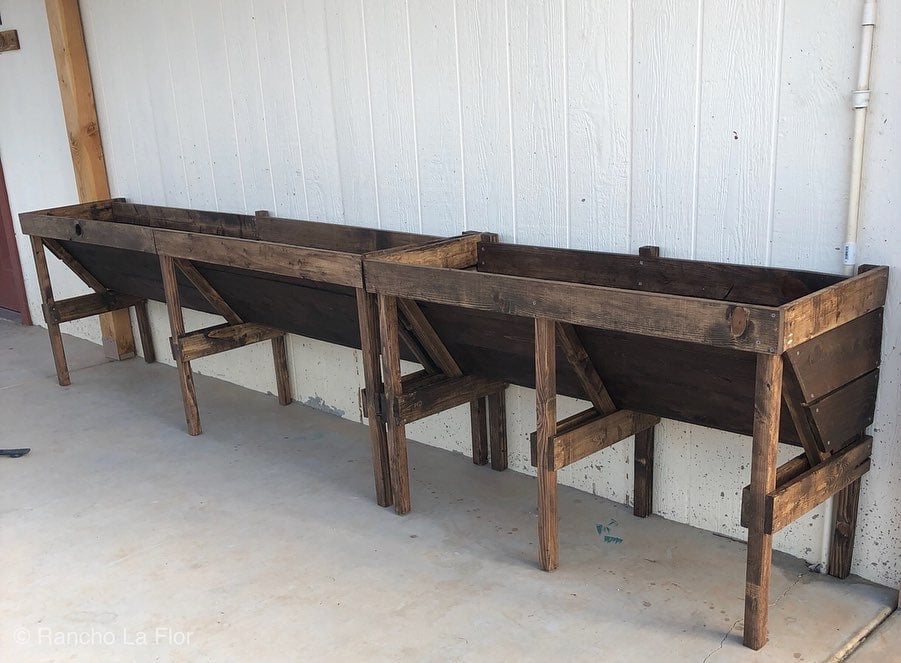
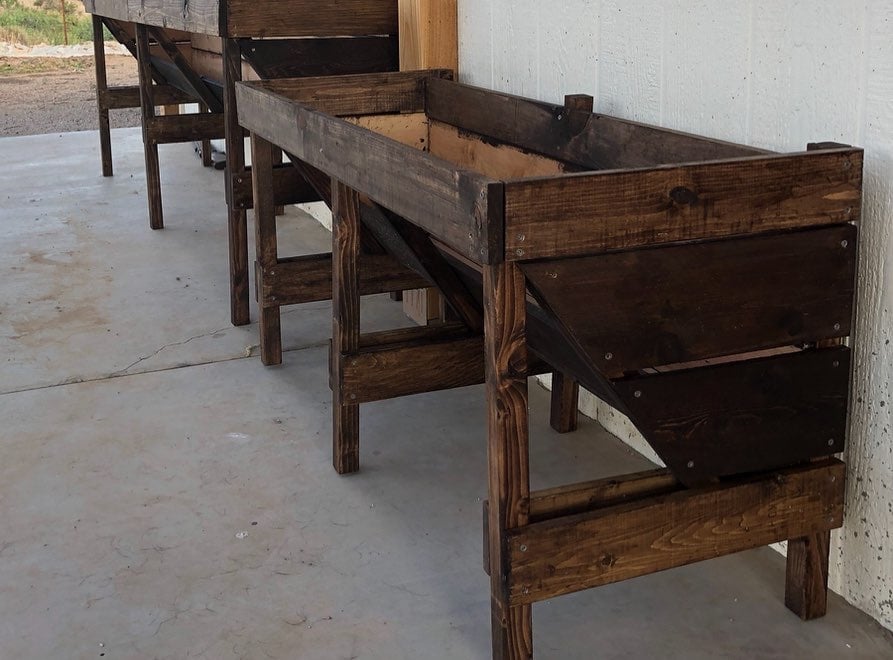
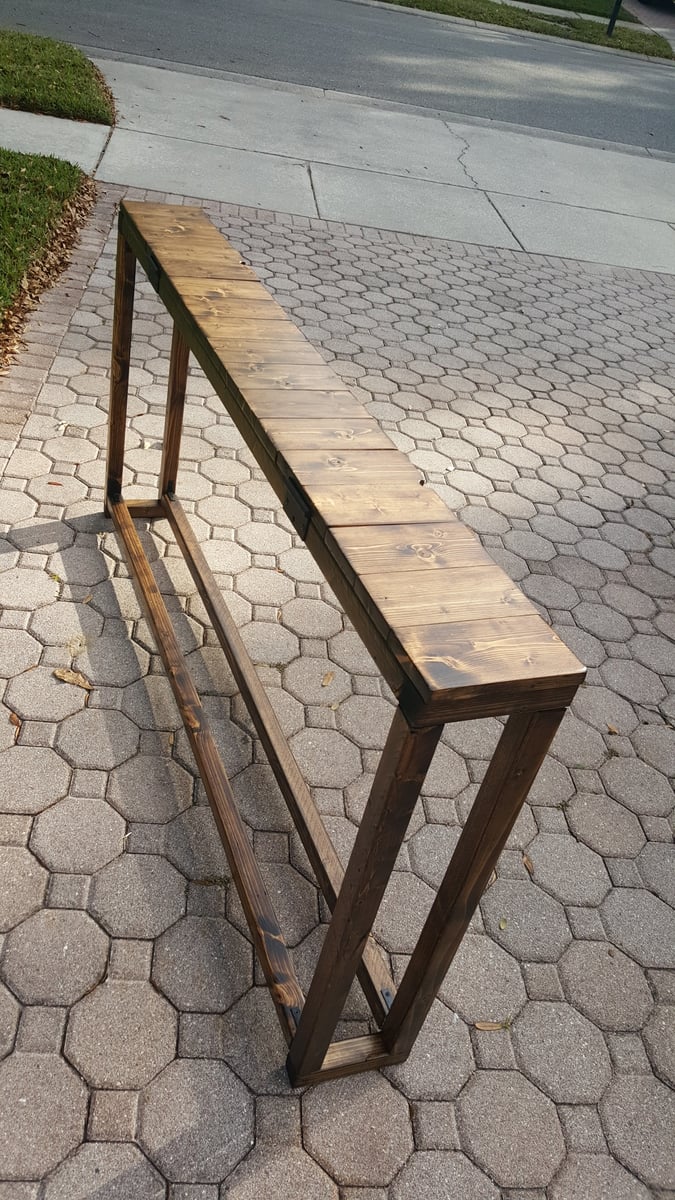
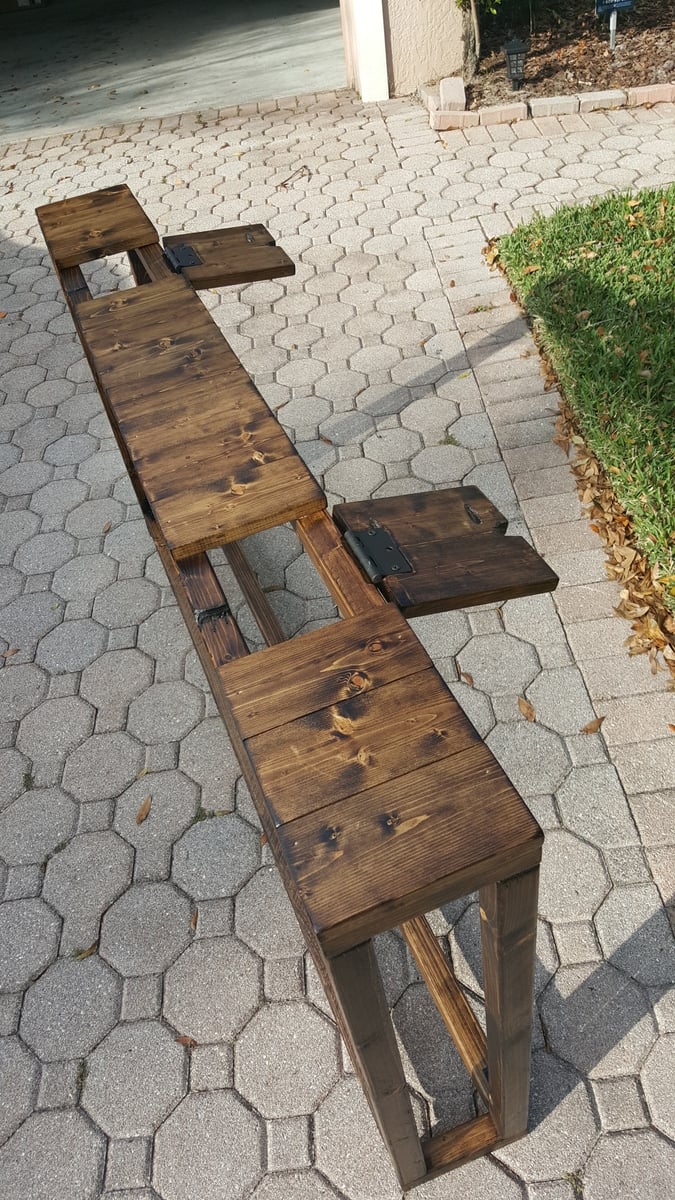
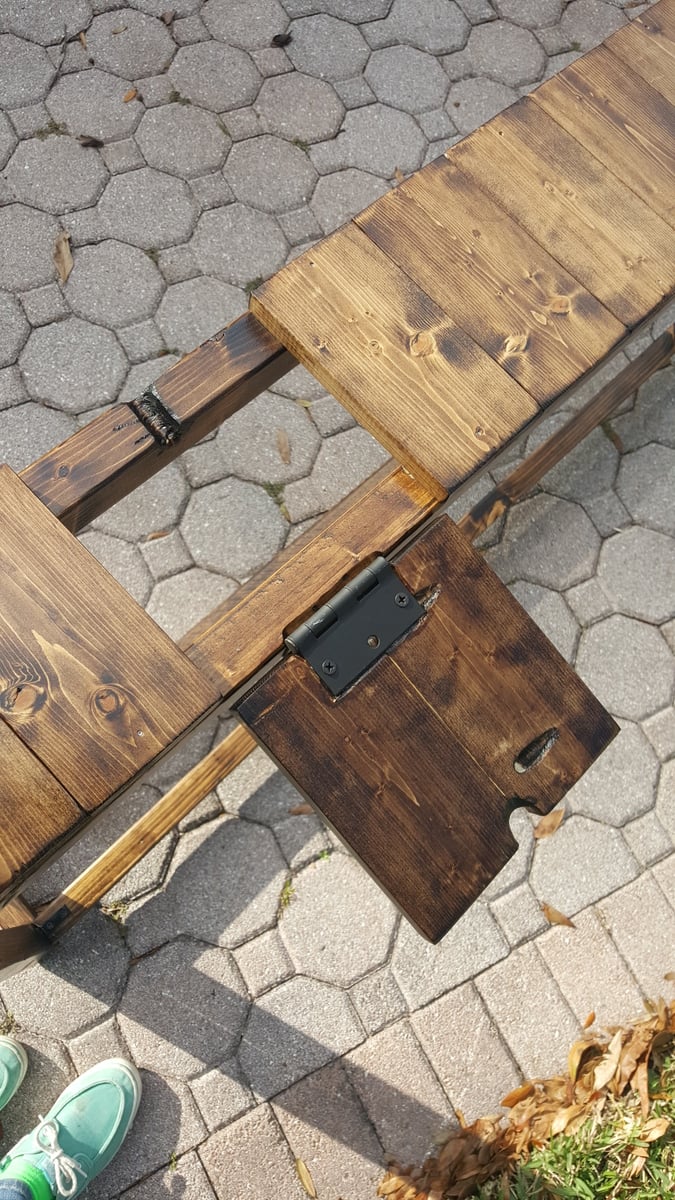
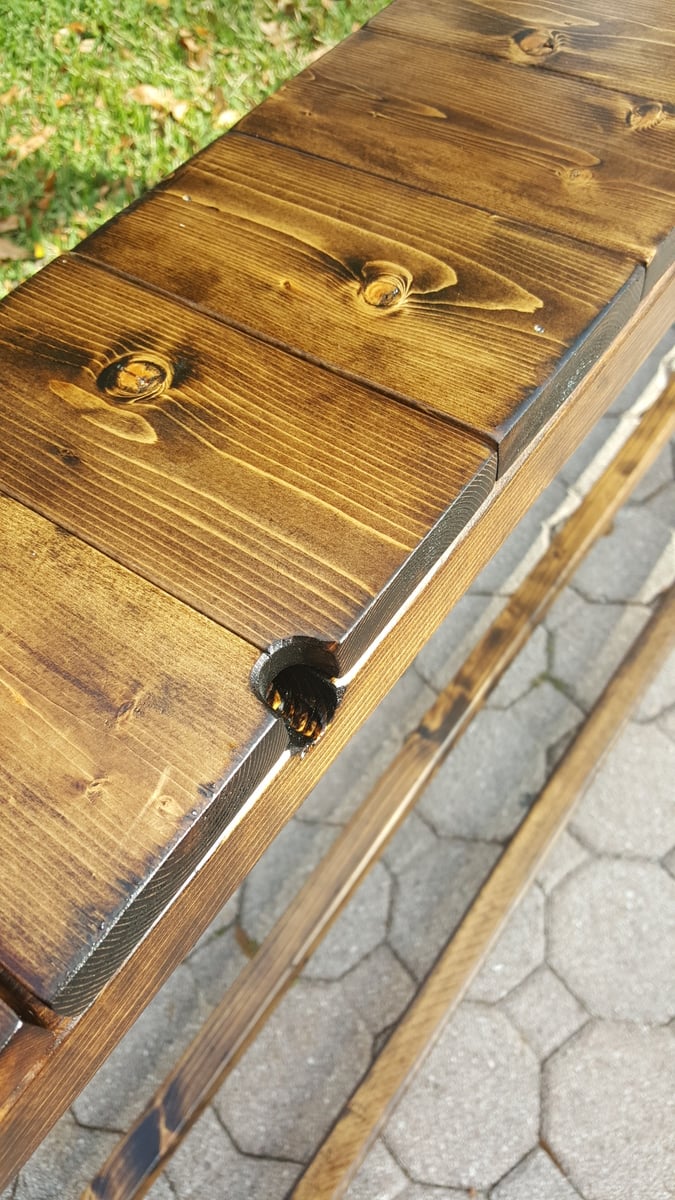
Slatted Sofa Table
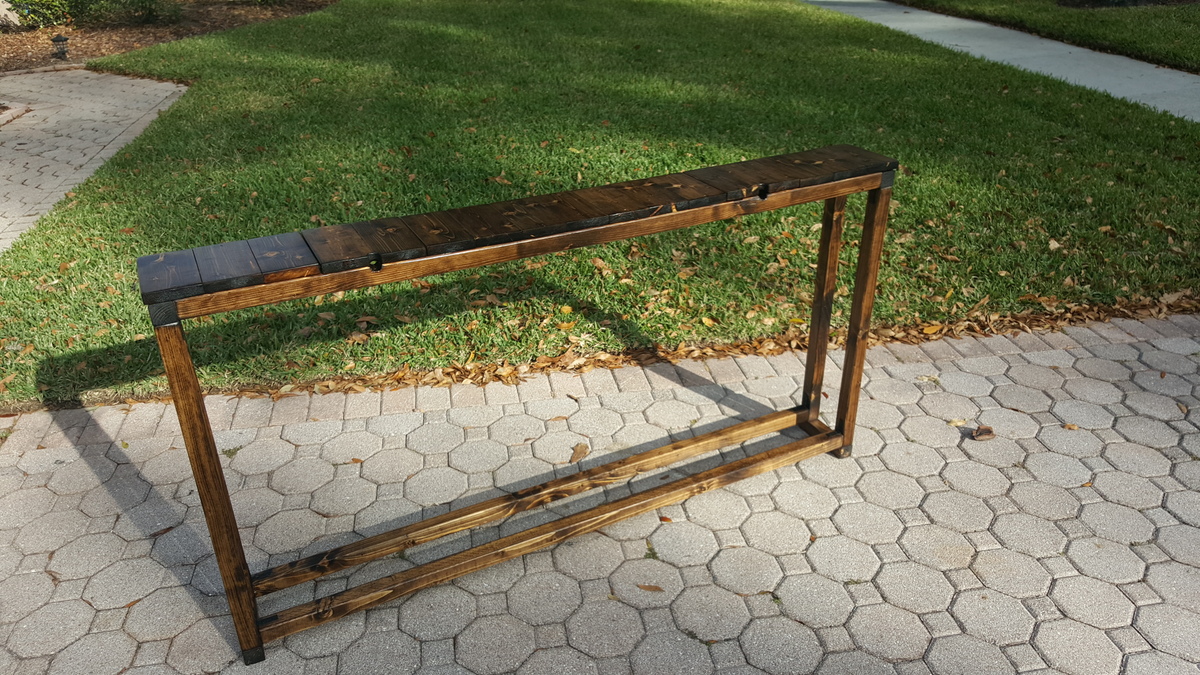
I based this design of the simple Sofa Table by Jenna Sue. Instead of a 2x8 across the top, I opted to use 1x4s side by side. This slatted look matched some of the other items in the house and to allowed me to create two hinged sections. These sections allow for easy access to wall plugs and include small notch for the cables to come through.

Built from Plan(s)
Estimated Cost
$35
Estimated Time Investment
Weekend Project (10-20 Hours)
Finish Used
Minwax Wodd Finish Dark Walnut Stain with Minwax Clear Satin Polyeurethane
Recommended Skill Level
Beginner
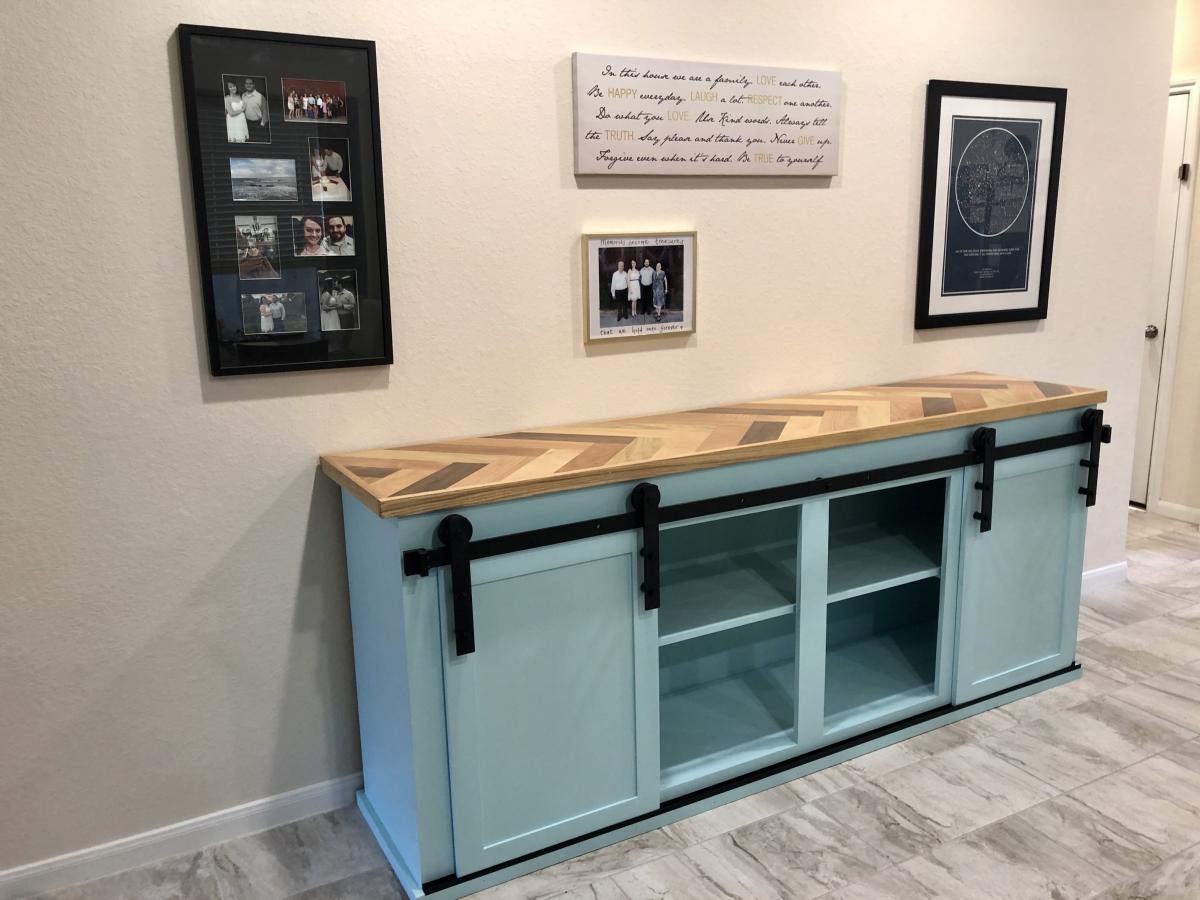
Herringbone Buffet
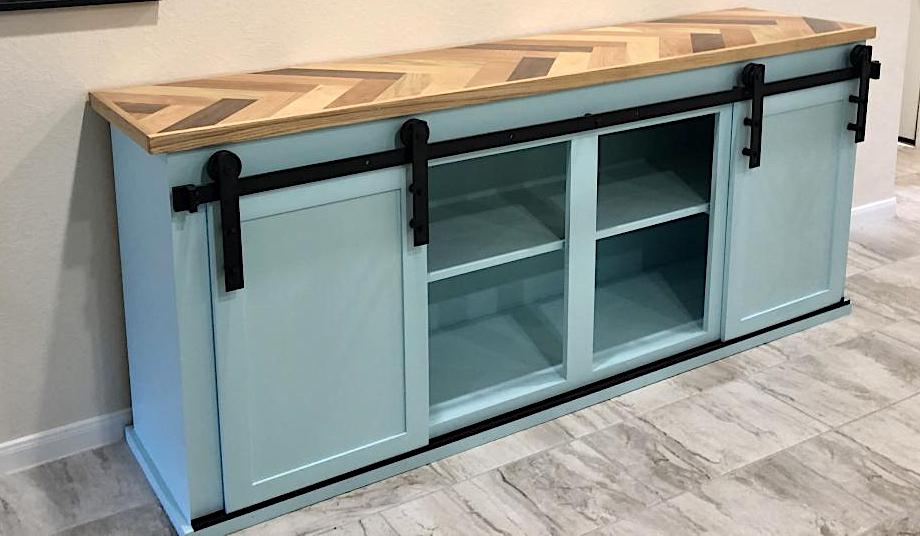
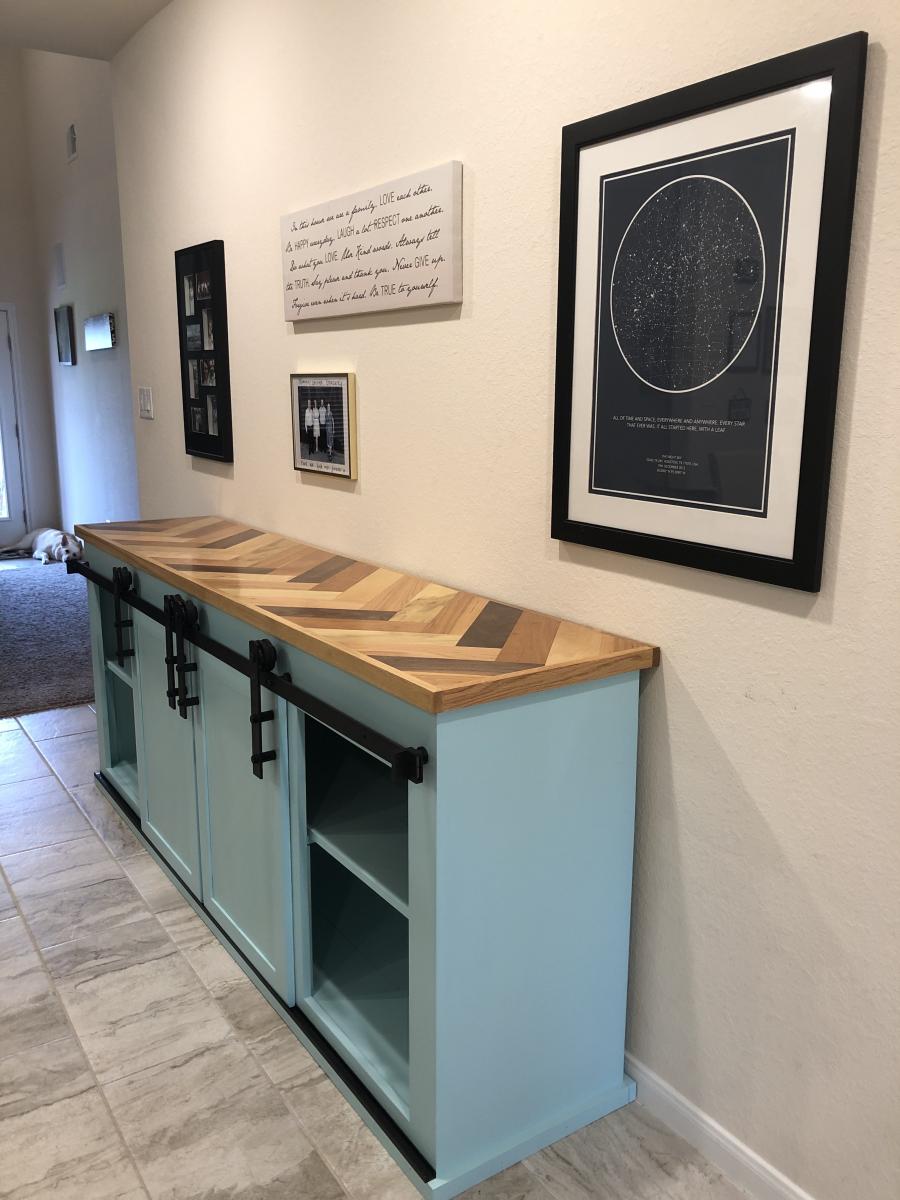
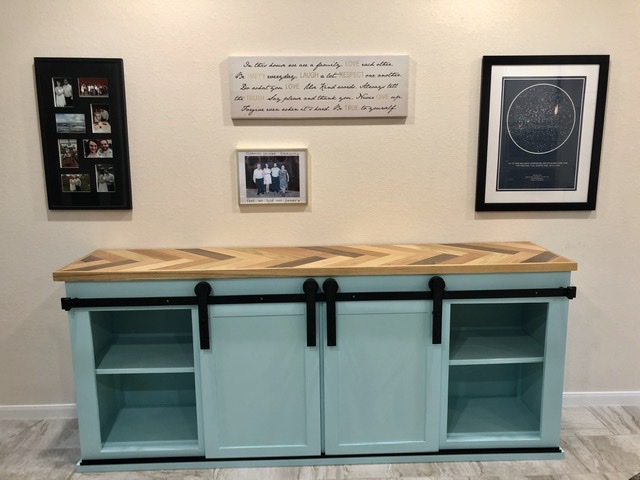
We wanted a large buffet for our hall and these plans were perfect. We modified the design to fit our needs, and painted the buffet a wonderful pop color that matched some accents throughout the house.
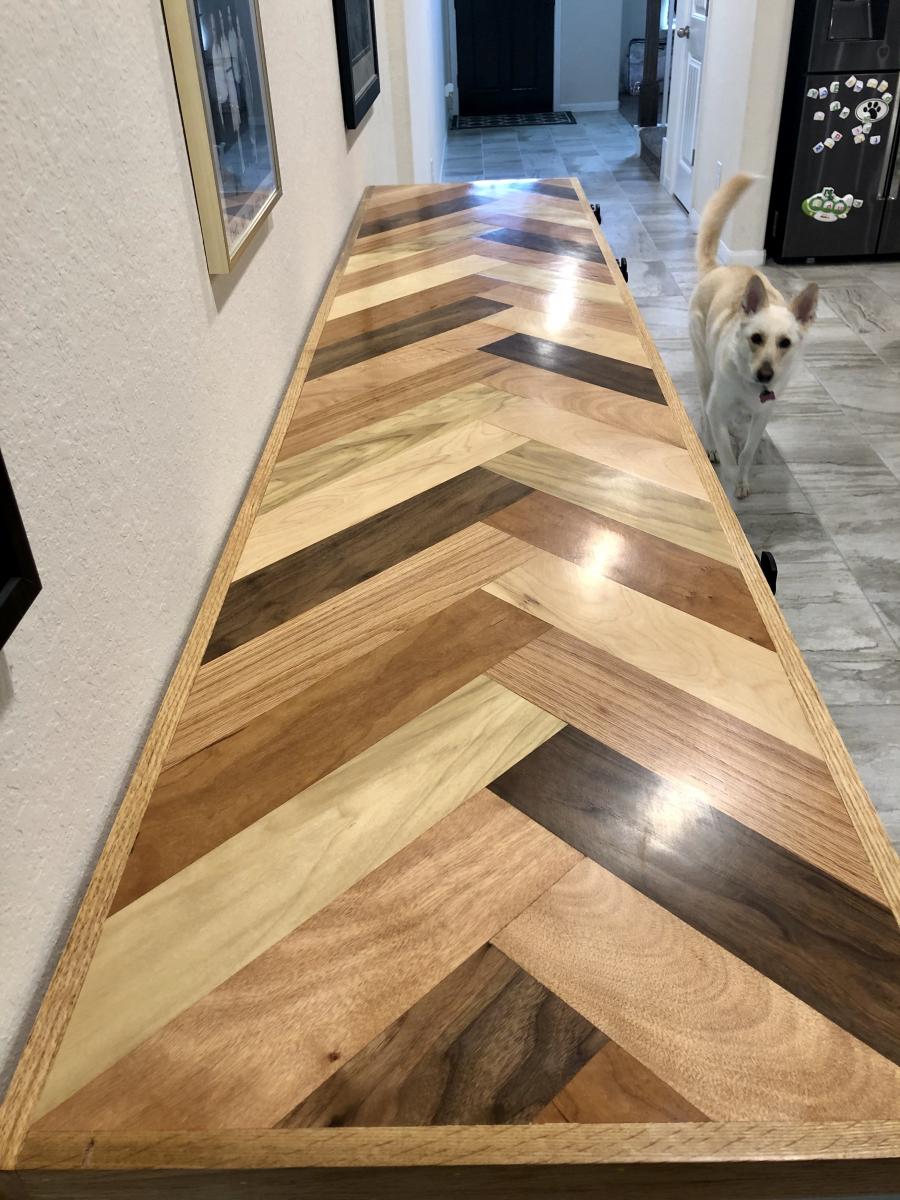
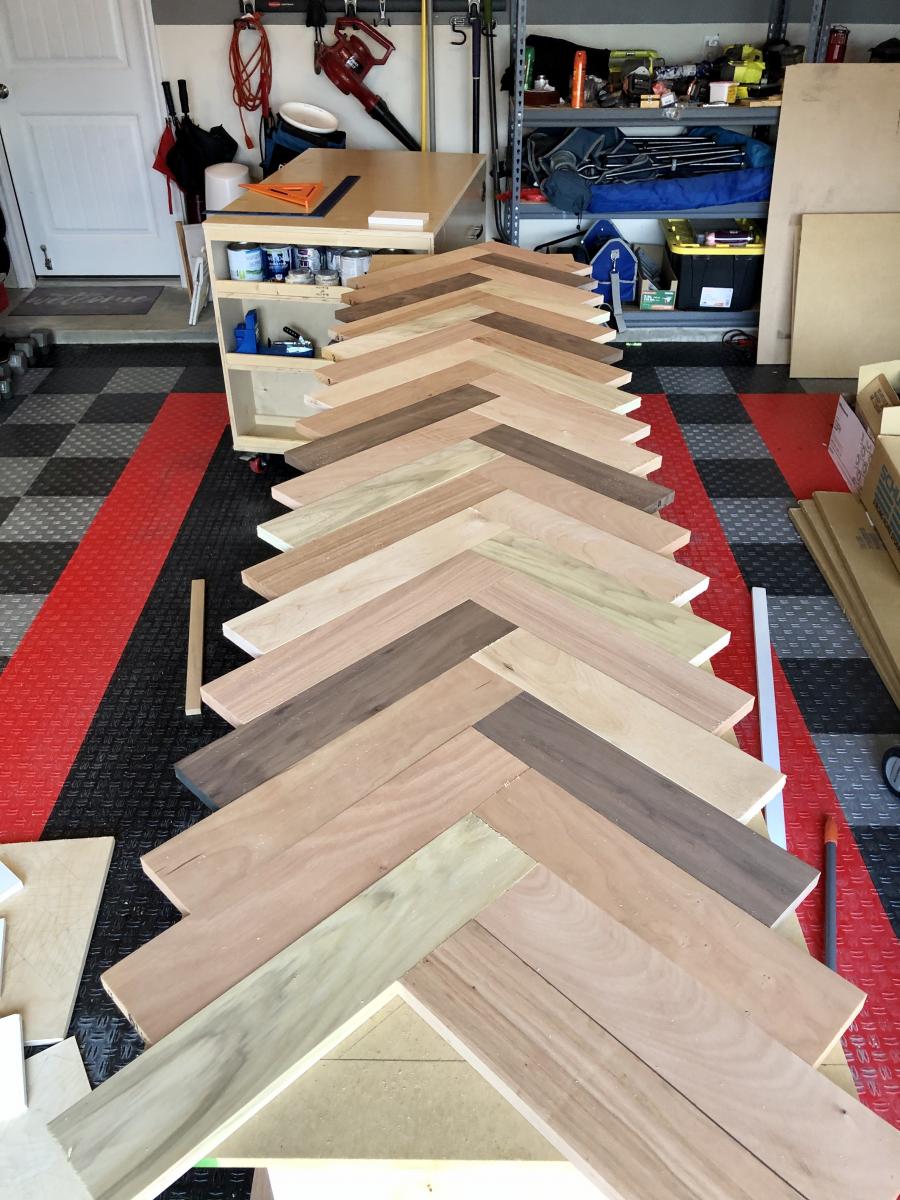
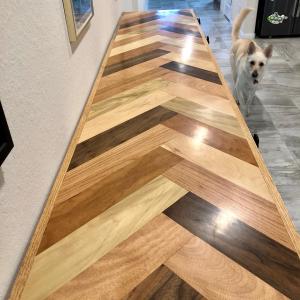
What really brought the project together was the herringbone top. We used 7 different species of wood sealed with poly and then finished with wax.
Built from Plan(s)
Estimated Cost
295
Estimated Time Investment
Weekend Project (10-20 Hours)
Finish Used
Sealed the painted sides with a clear polyacrylic. Since we used so many different types of wood on the top we decided to let their natural tones shined and just cleaned with mineral spirits and sealed with polyeurethane. We used steel wool and wax to get to the sheen we wanted.
Recommended Skill Level
Beginner
Comments

Wed, 10/02/2019 - 09:44
This piece is one of the…
This piece is one of the most stunning I've ever seen! Thanks so much for sharing a brag post!
Sat, 10/05/2019 - 20:19
Thanks and thank you for…
Thanks and thank you for always sharing incredible plans! Ever since I saw your miter station with carts I’ve been obsessed.
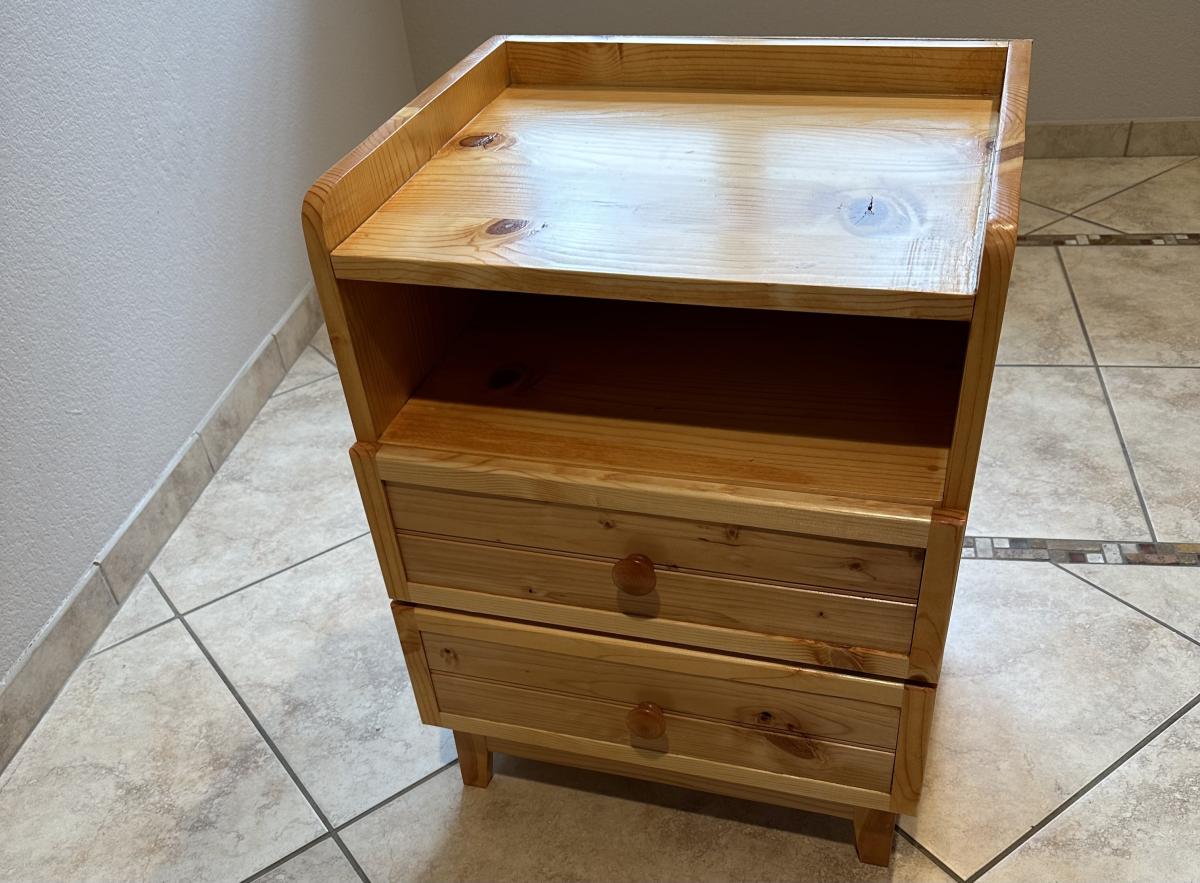
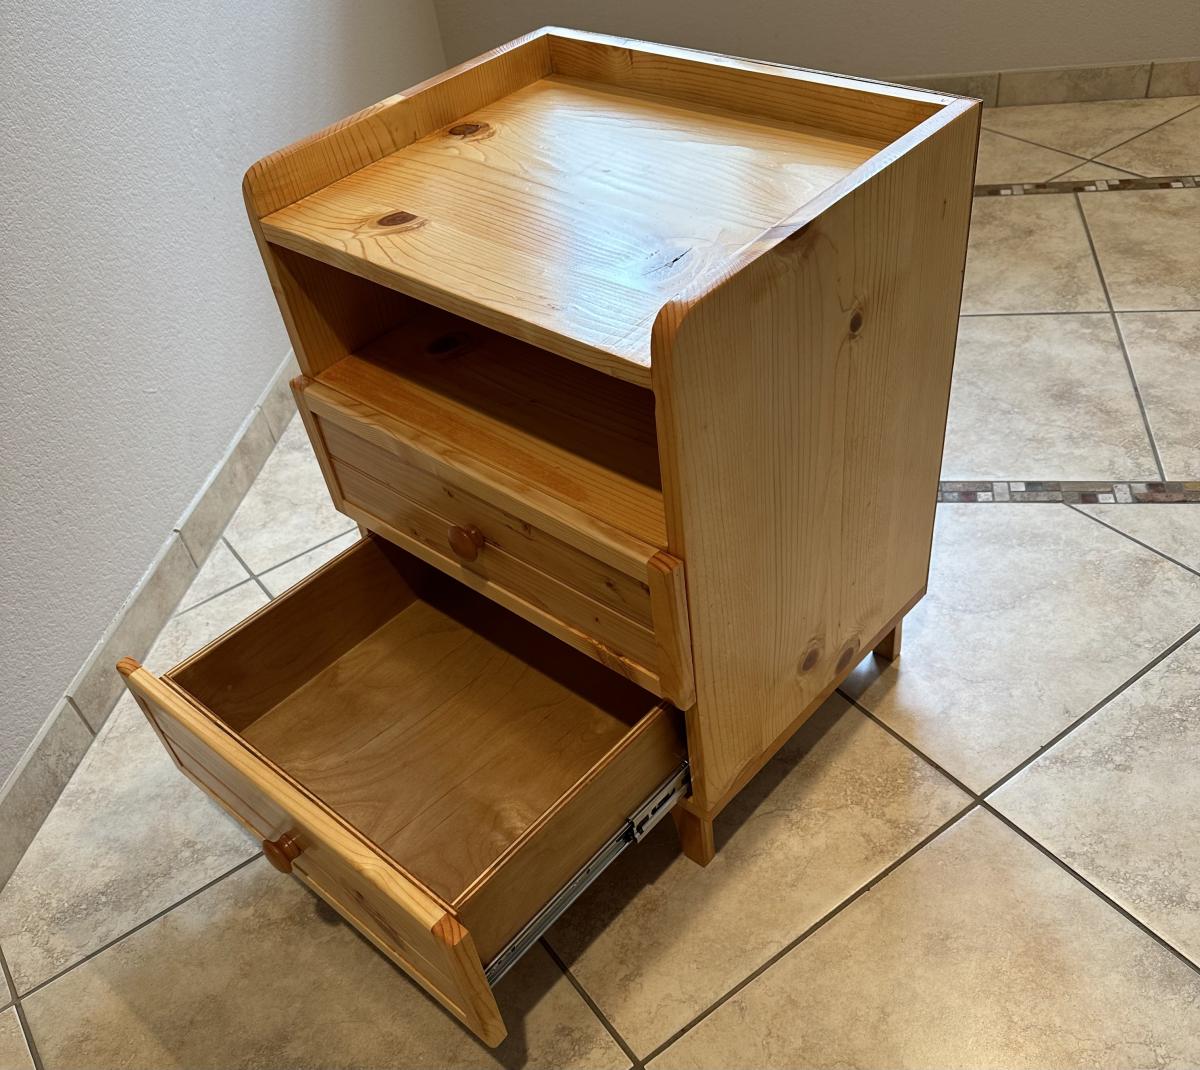
2 Drawer Nightstand
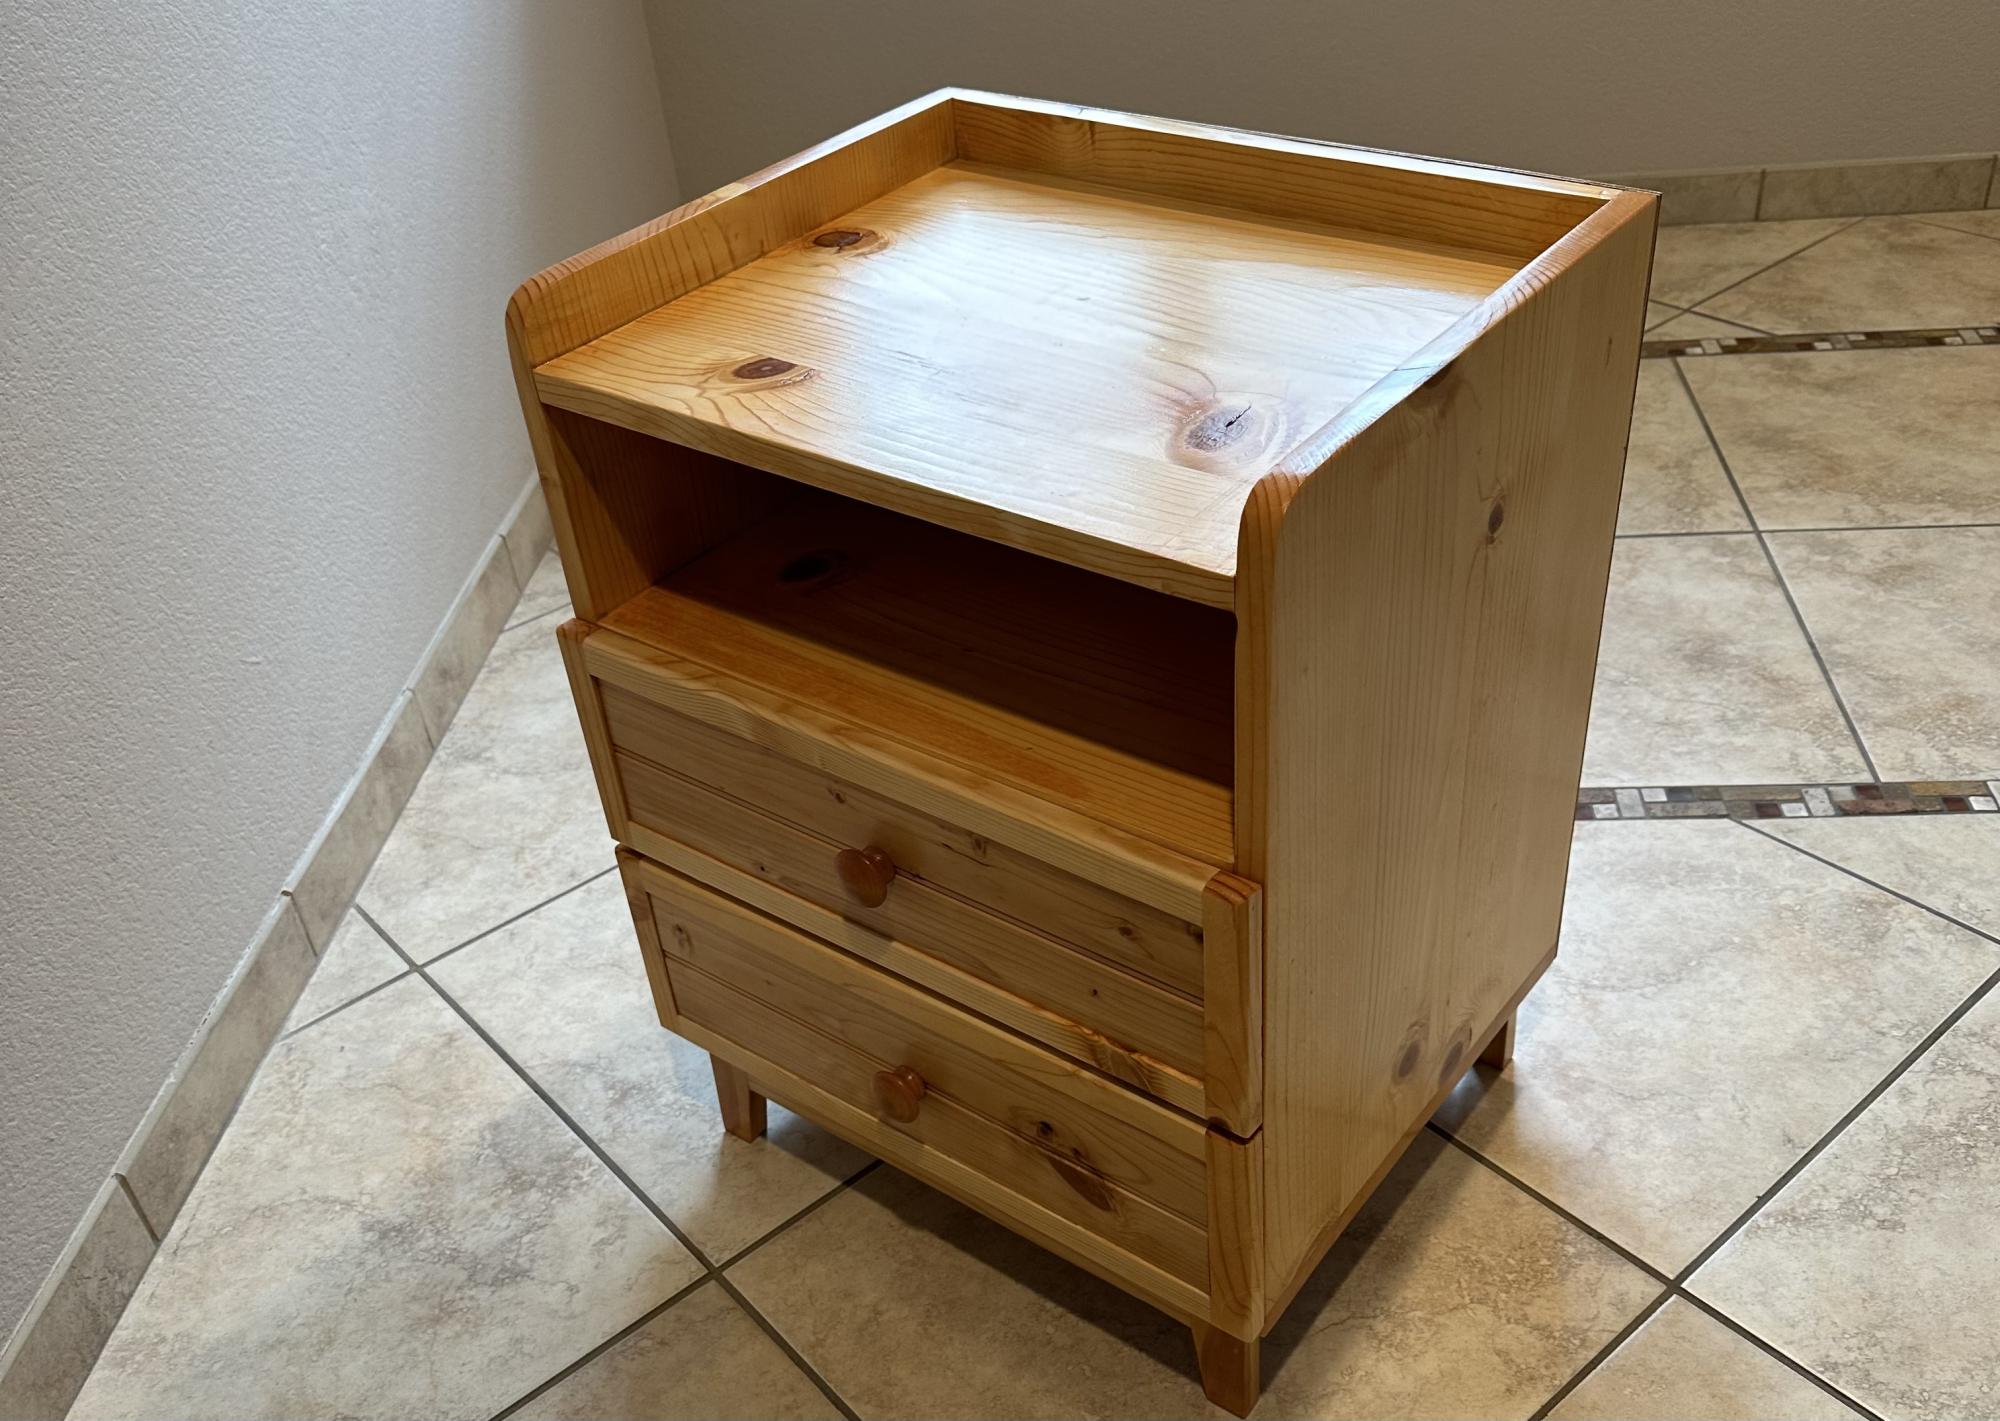
Thank you so much for your plan. I made some small changes. I used pine wood for the box sides and dividers, I moved the drawer faces to the outside and used 1/2 inch plywood for the drawer boxes to add some more space. The drawer faces have an inlaid to match my farmhouse bedroom I am currently building. The final product was stained with Minwax Golden Pecan and clear coated with warm semi-gloss.
Built from Plan(s)
Comments
Thu, 06/01/2023 - 09:15
Beautiful nightstand!
Great job on this build, love the finish choice! Thank you for sharing.
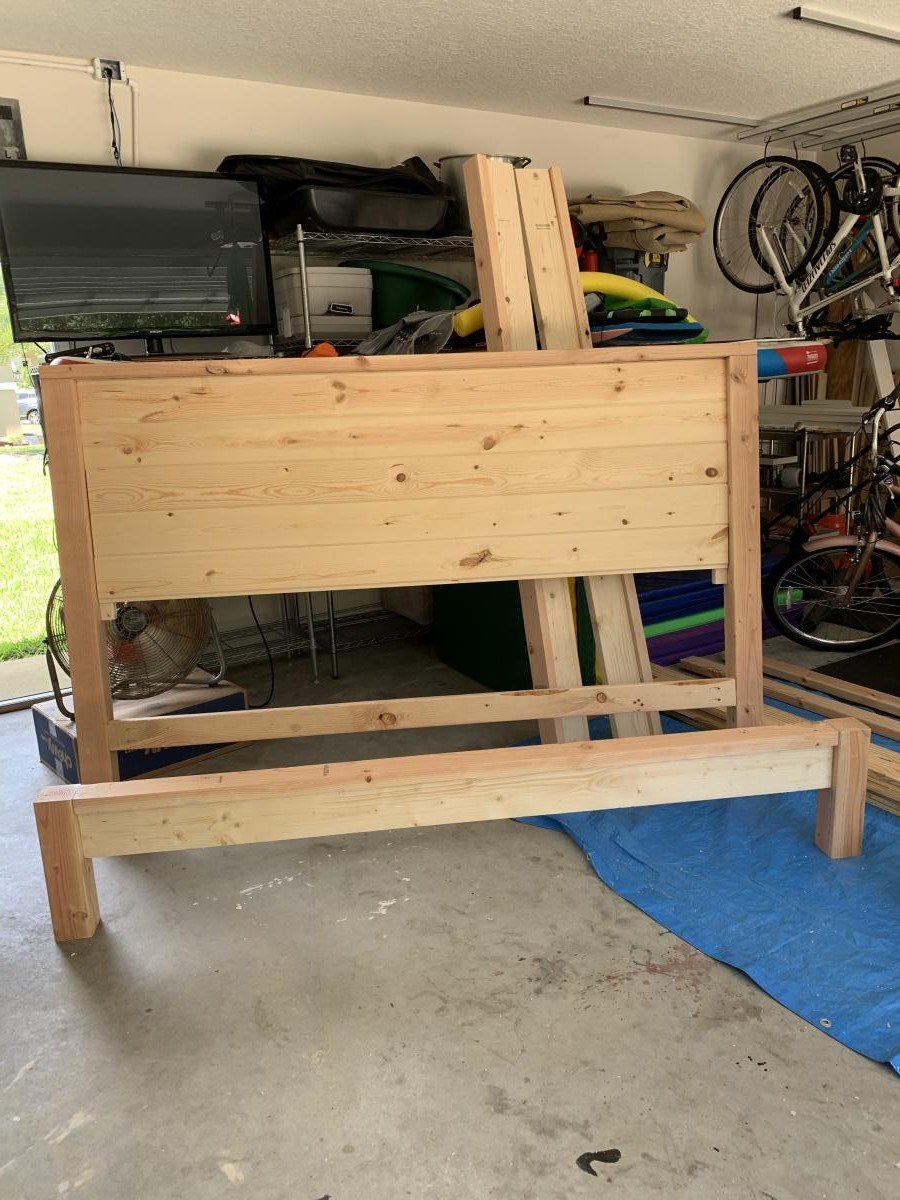
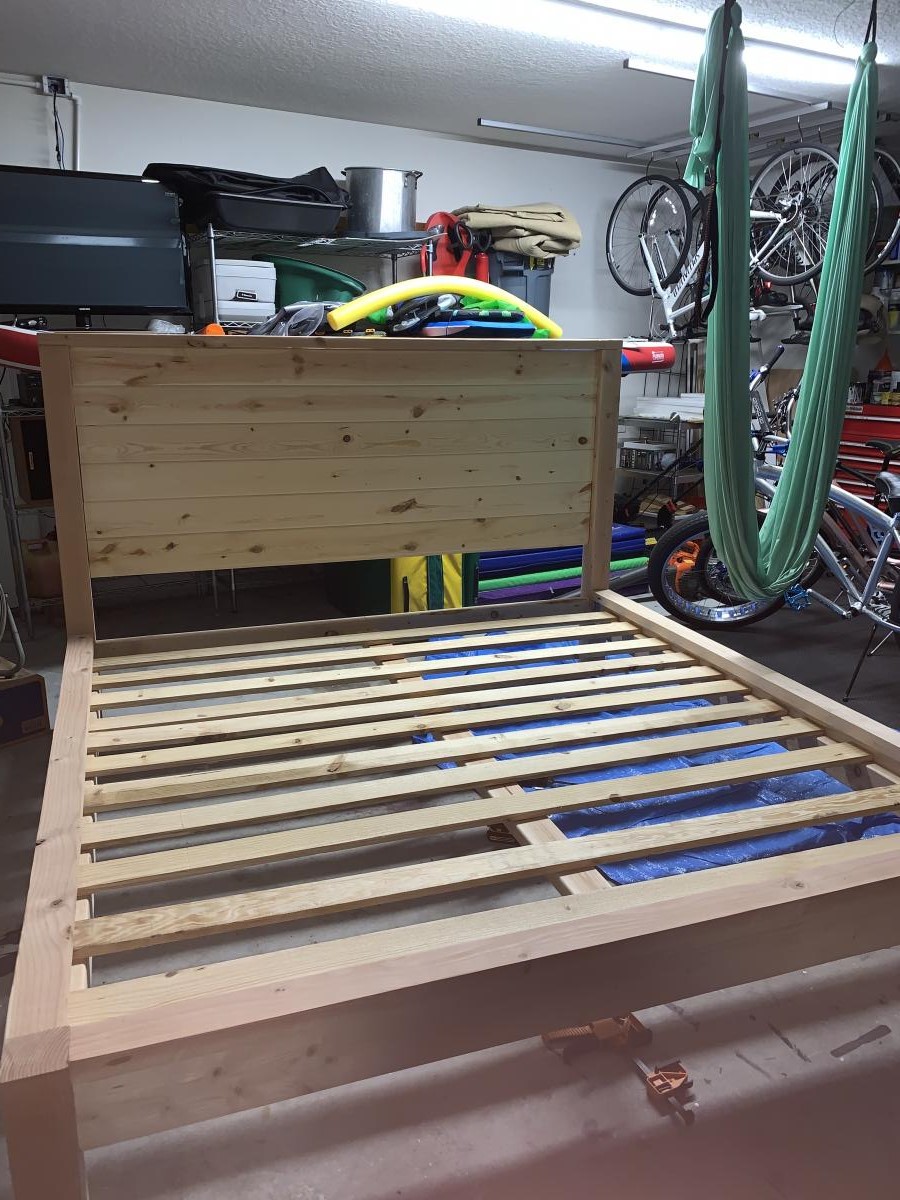
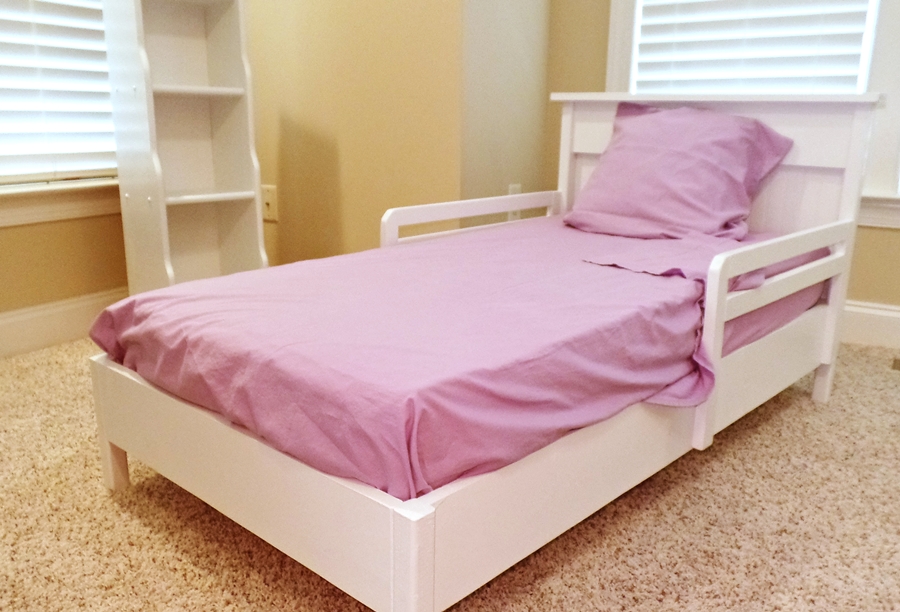
Bed for my teen princess
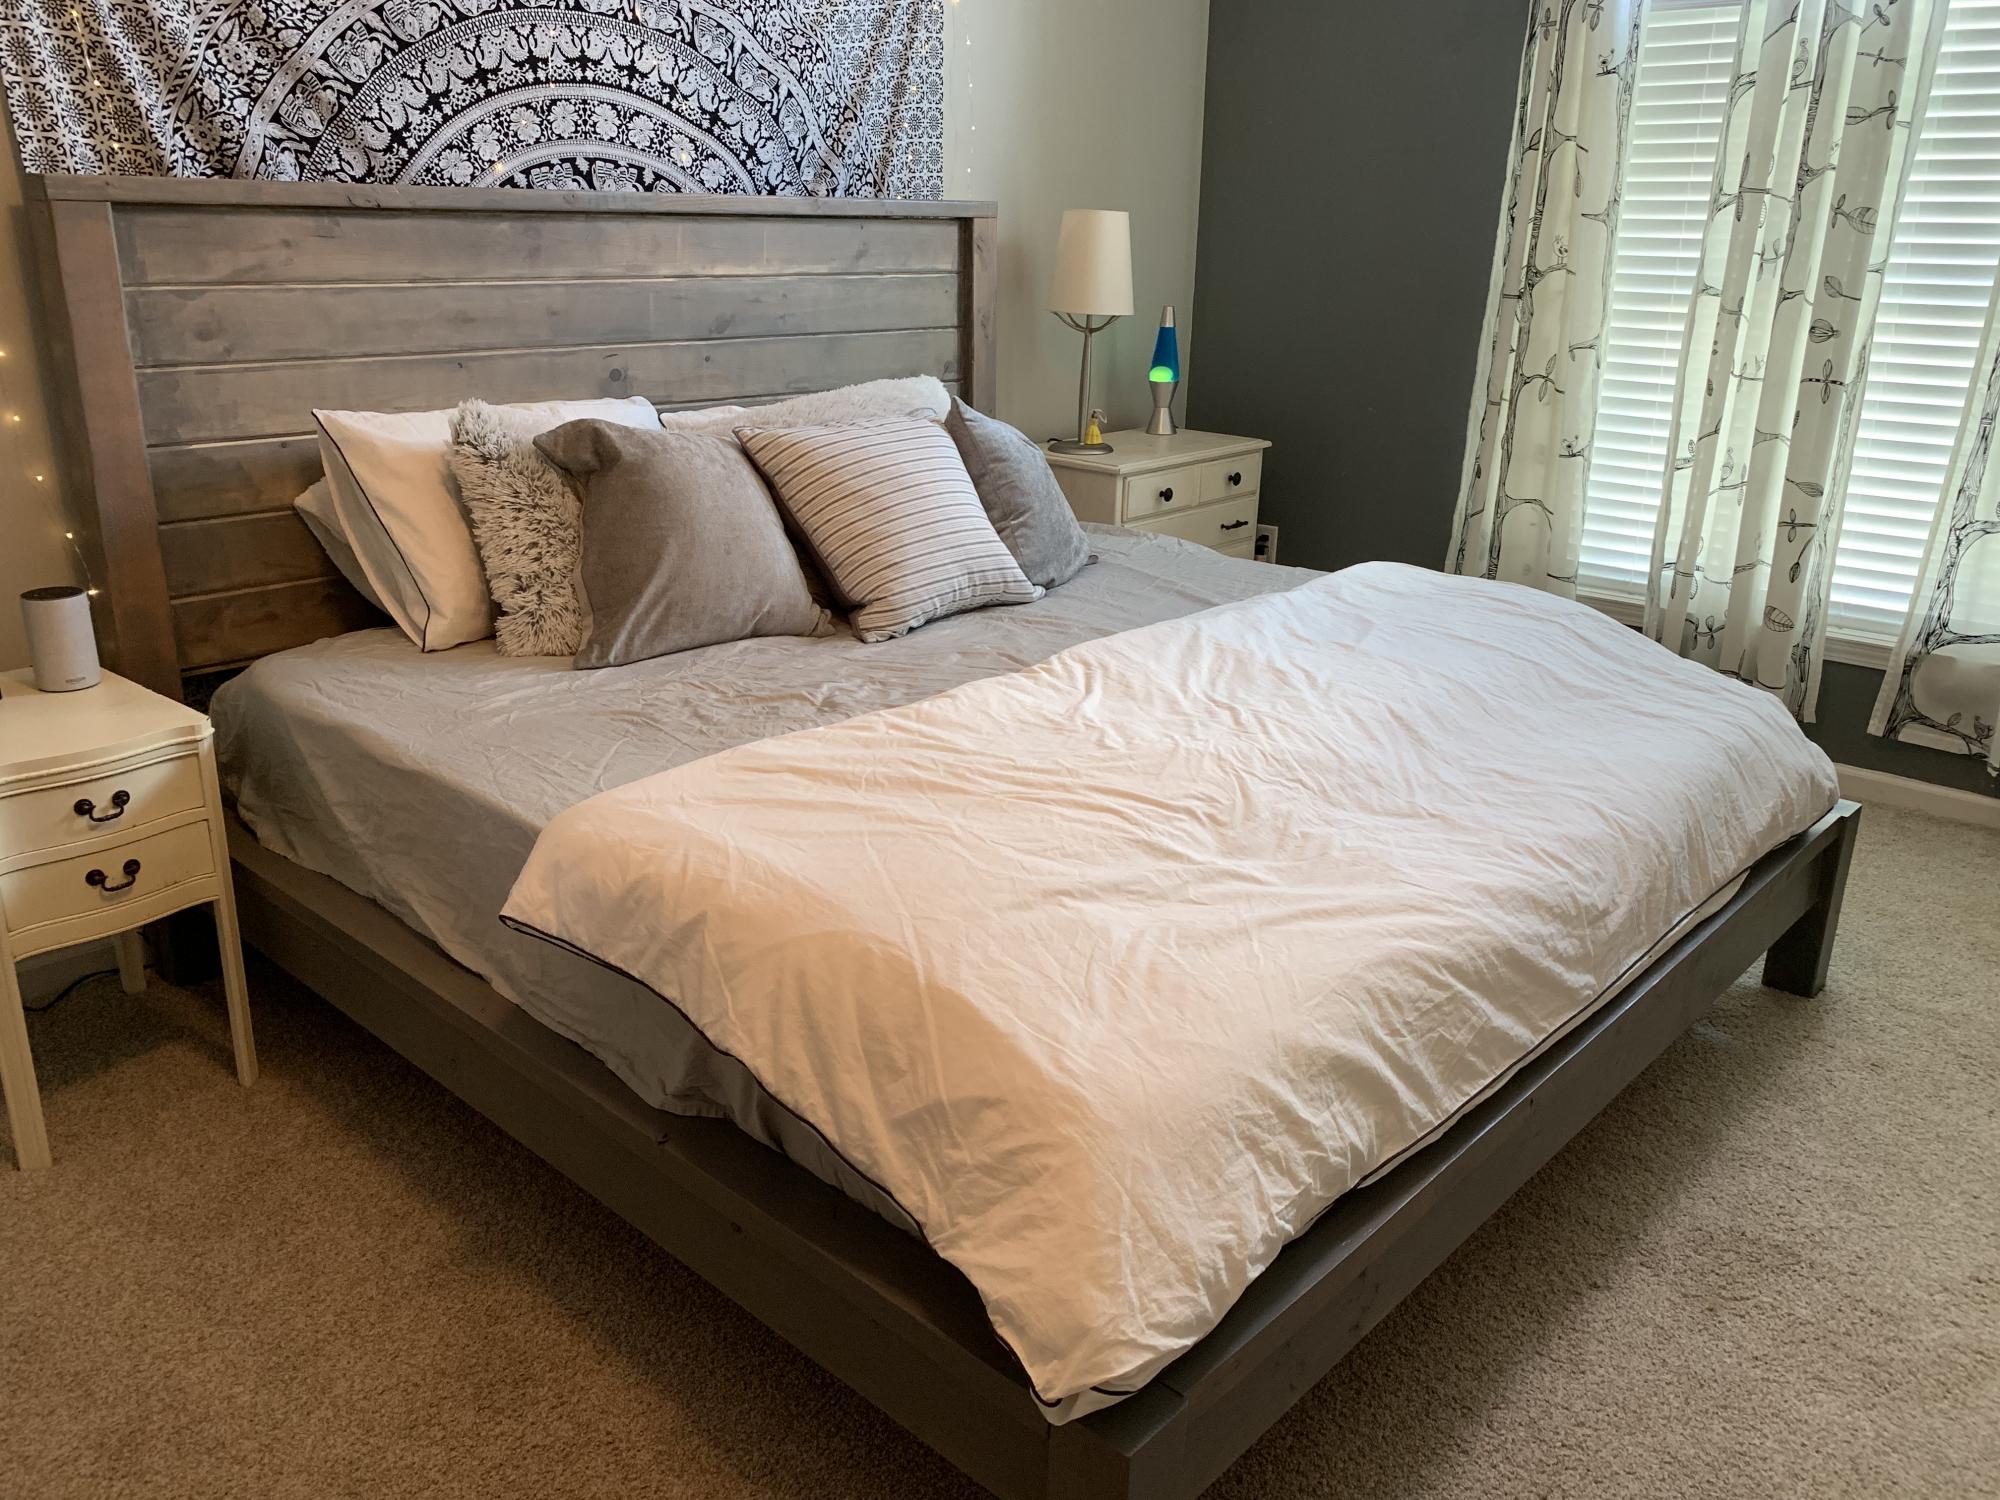
I built this bed for my daughters new “teen” room!! She loves it and I loved the cost and look if it ;)...
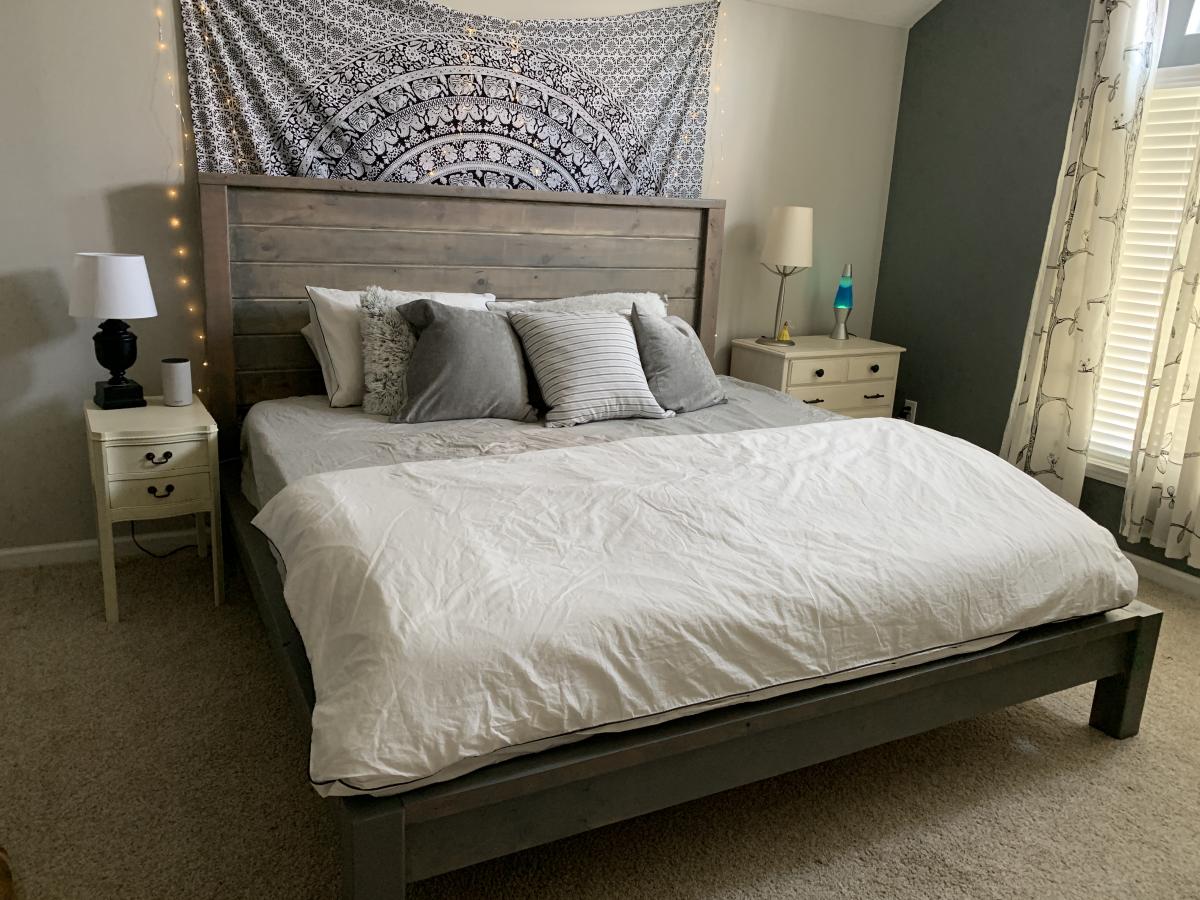
Built from Plan(s)
Estimated Cost
$130
Estimated Time Investment
Day Project (6-9 Hours)
Finish Used
Stain
Recommended Skill Level
Intermediate
Comments
Wed, 10/02/2019 - 10:37
This bed is beautiful!!! …
This bed is beautiful!!! Great job! It's perfect in your teen's room!
Thu, 10/17/2019 - 04:10
The bed looks great! What…
The bed looks great! What type of stain did you use?
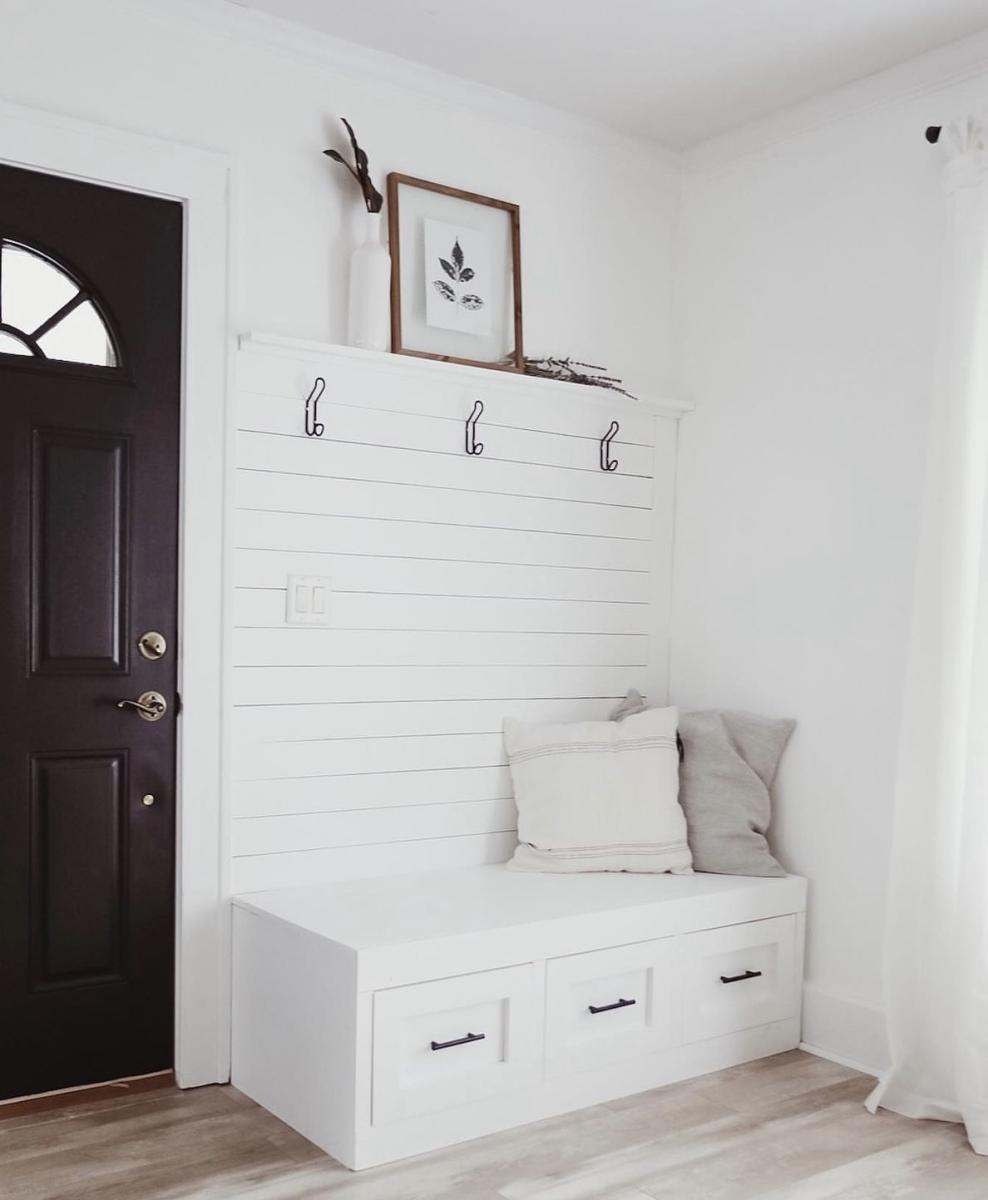
Mudroom Bench with Drawers
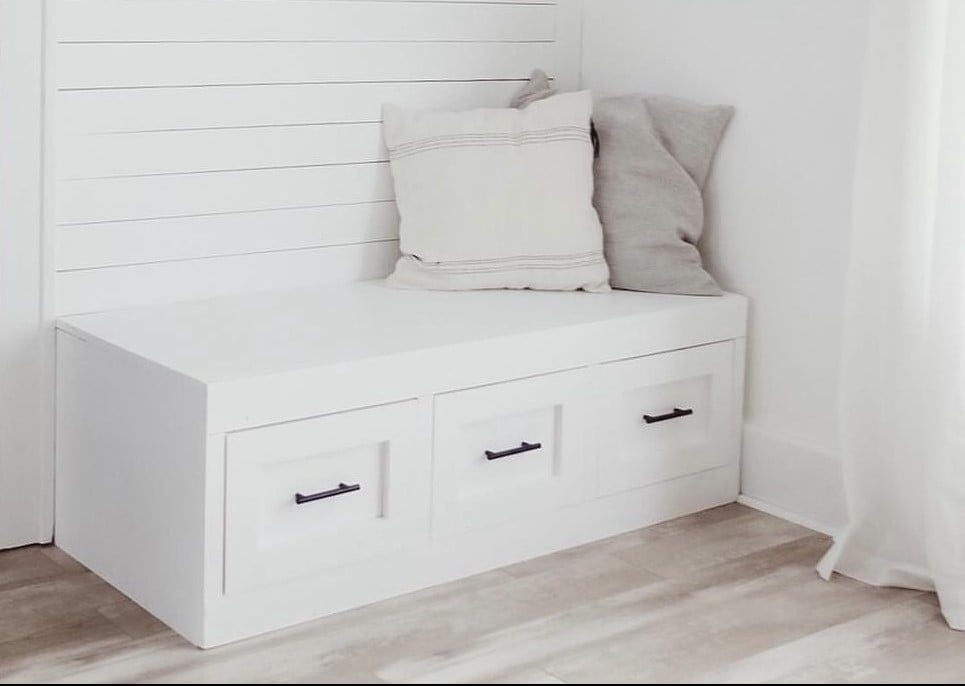
Second wood-working project to go with our shiplap wall. Pretty happy with how it turned out!
Built from Plan(s)
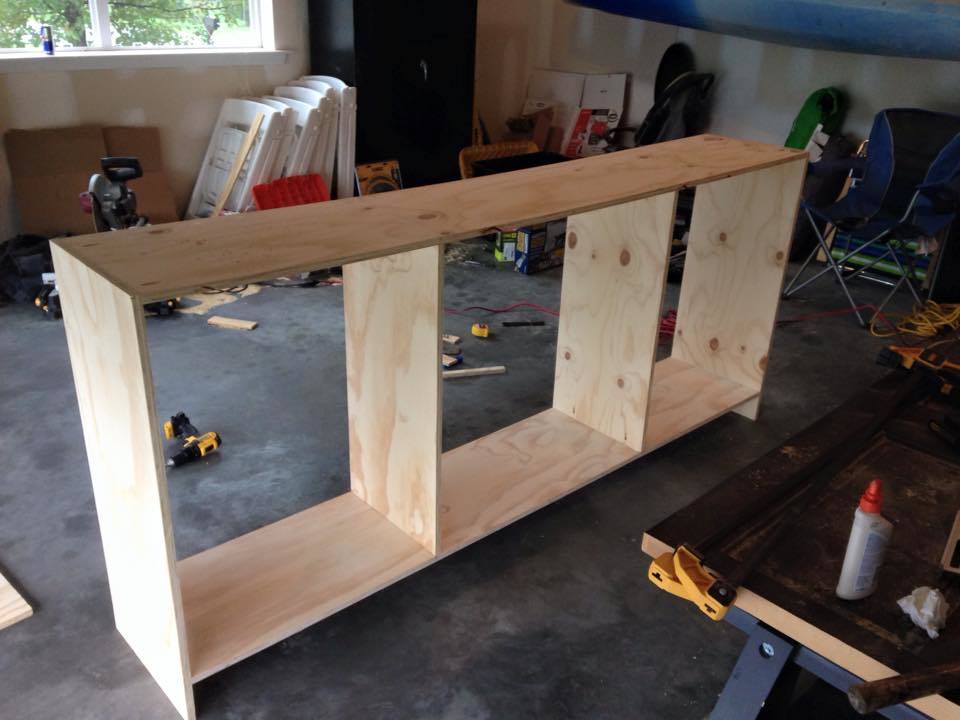
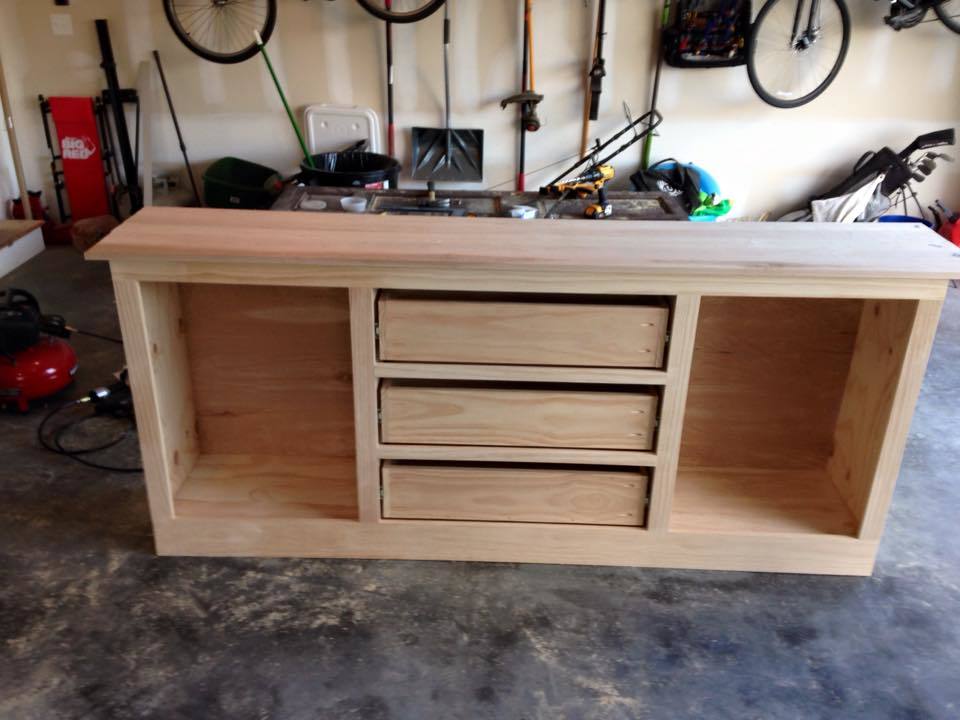
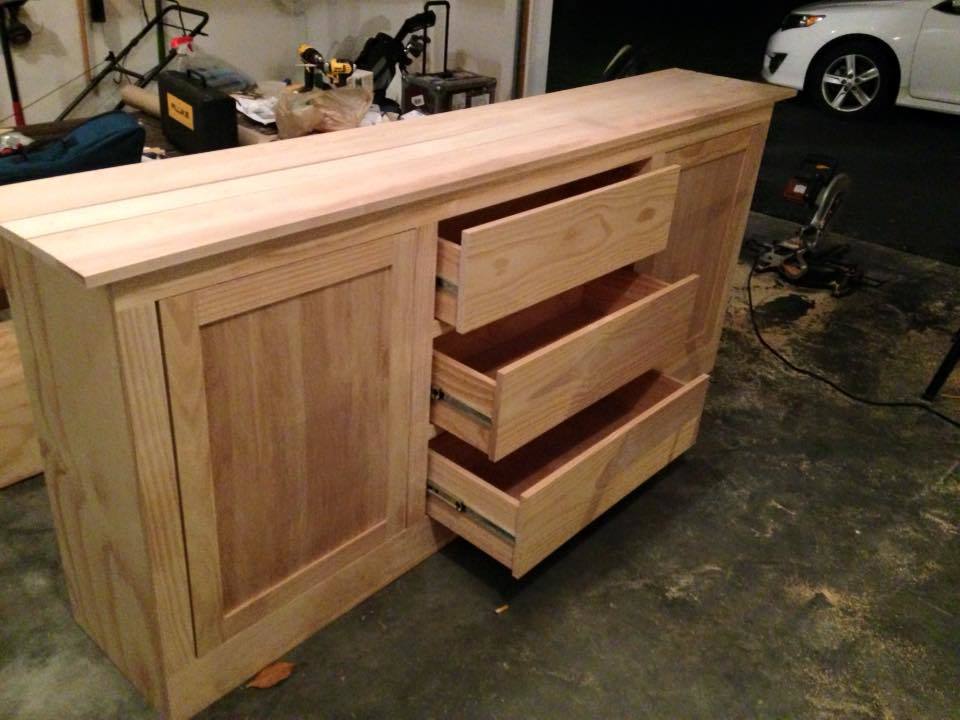
Media Cabinet Base of built-in
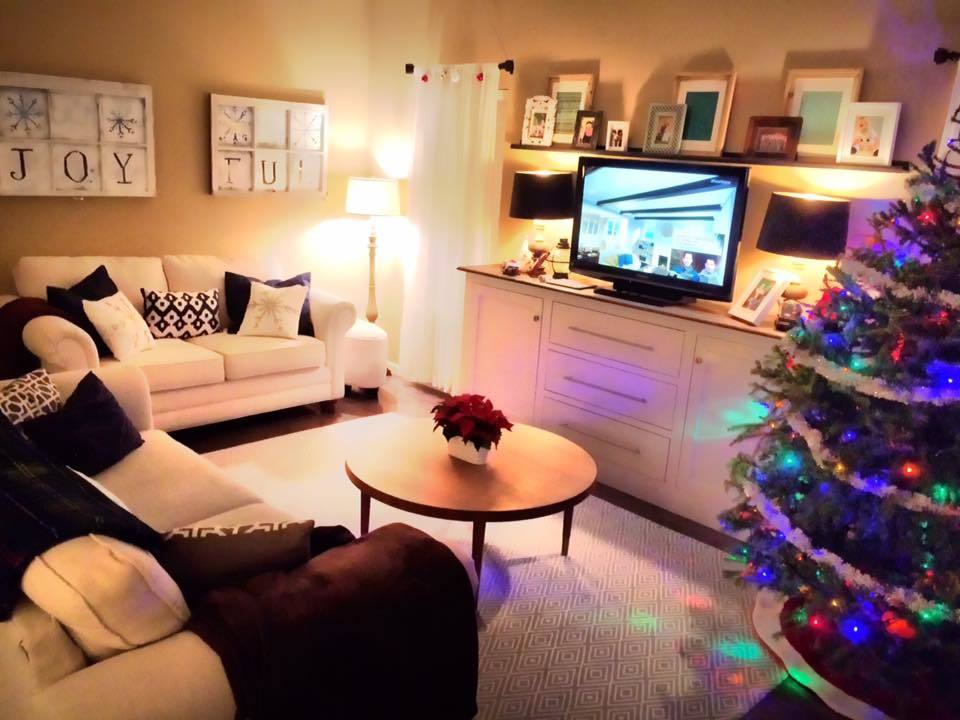
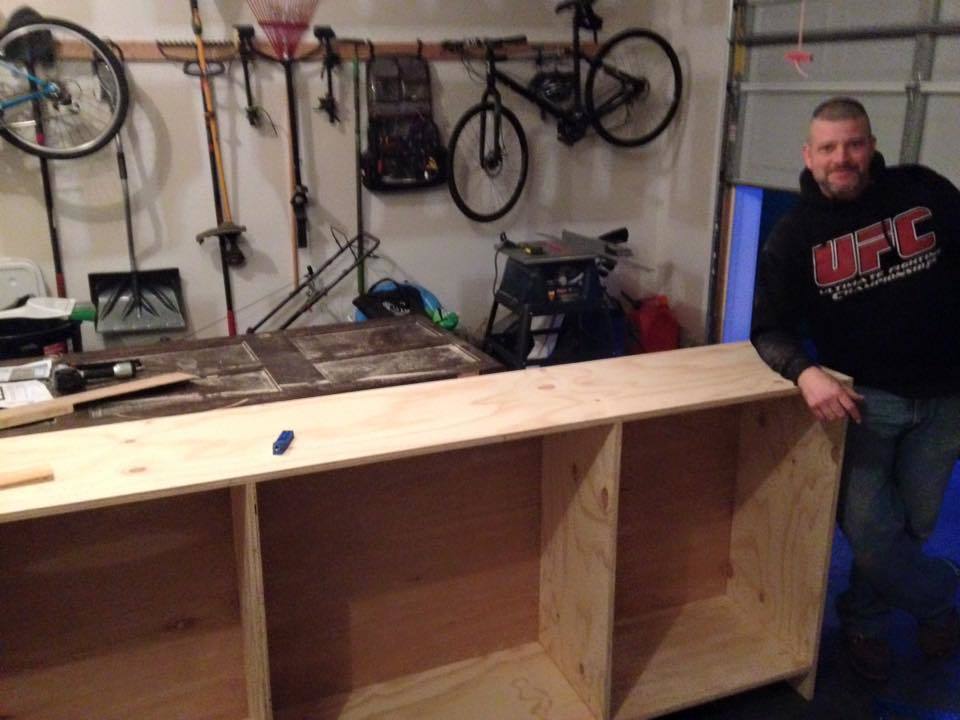
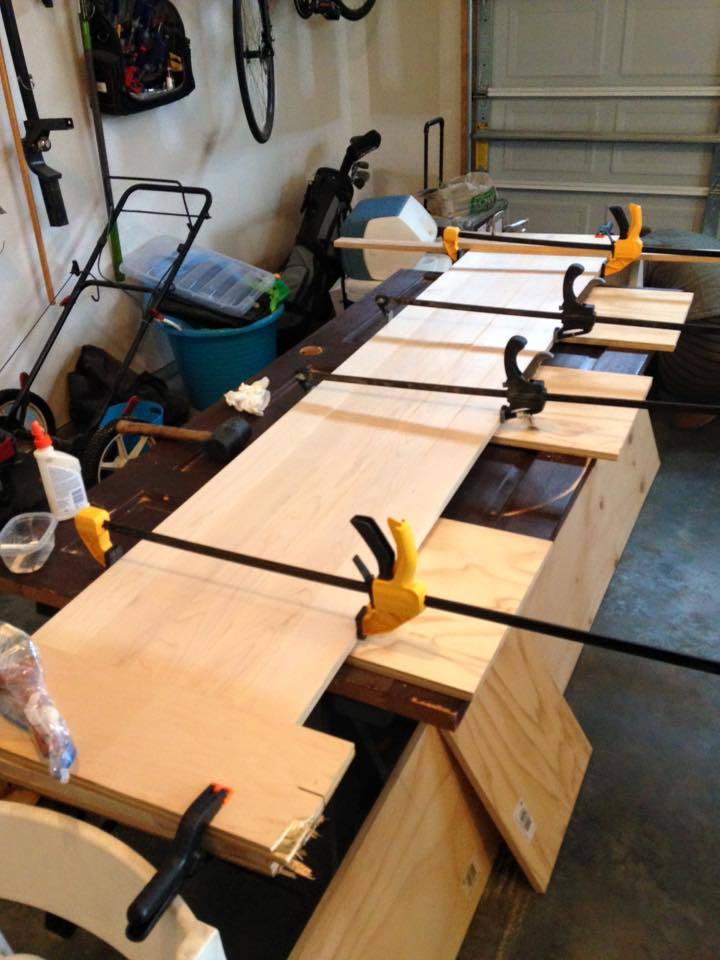
First furniture project. It was a little intimidating - but once you get the cabinet squared everything else is just about precision cuts and patience to get the finish you want. Inset drawers are tough because they really show any mistakes.
Completed over 3 weekends.
My wife loves it! Our plan is to use this as the base of the built-in, and surround the TV with shelving up to the ceiling. Applying the concepts to this build will allow me to custom build the top unit, probably at some point next year.
Cheers!
Built from Plan(s)
Estimated Cost
$1000
Estimated Time Investment
Week Long Project (20 Hours or More)
Recommended Skill Level
Intermediate
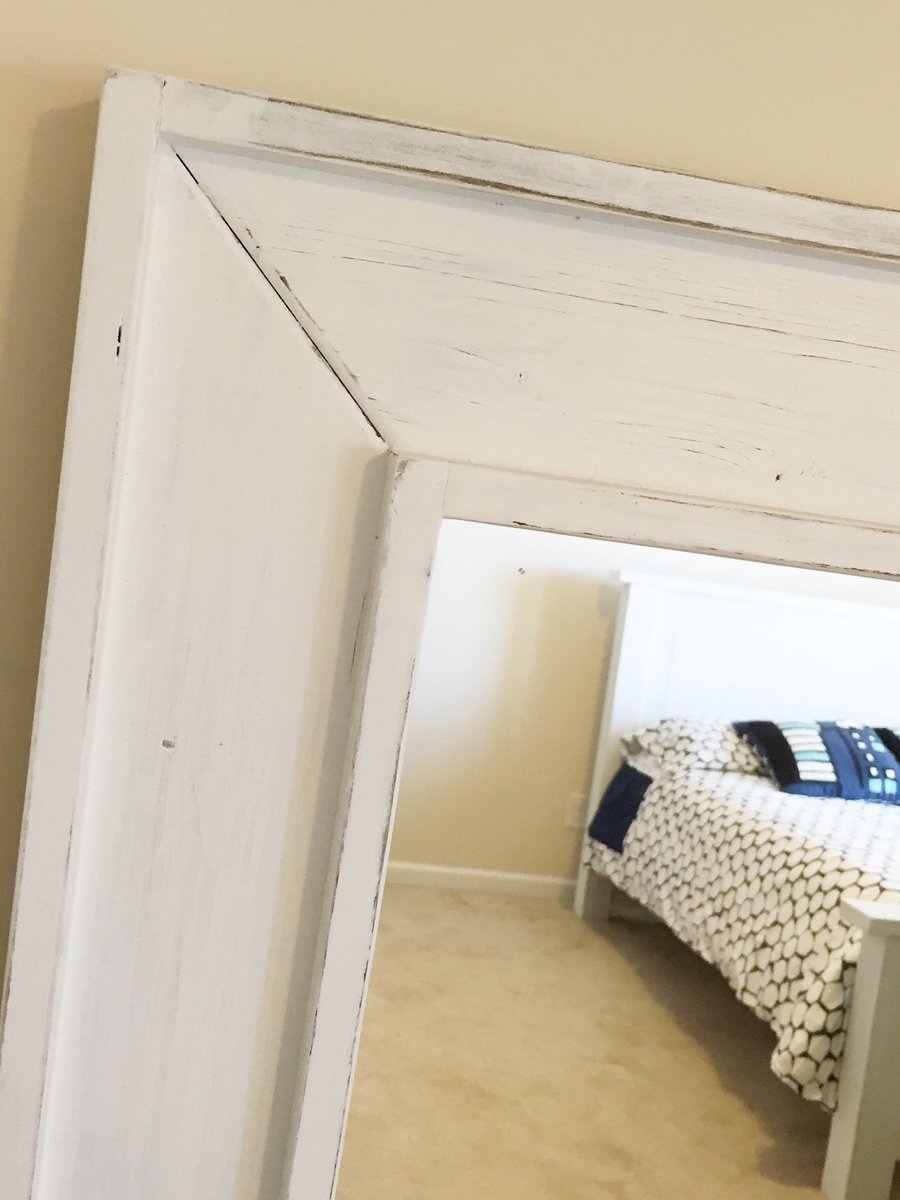
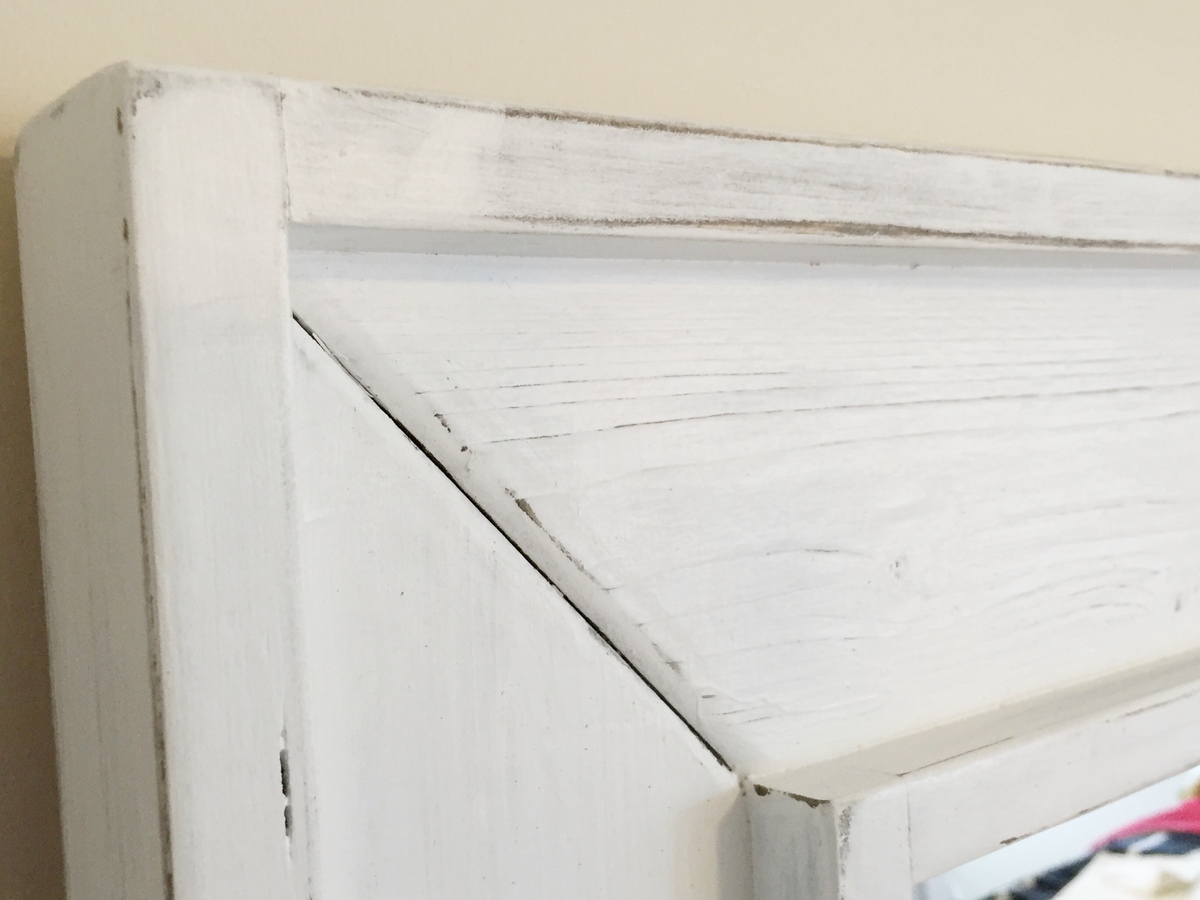
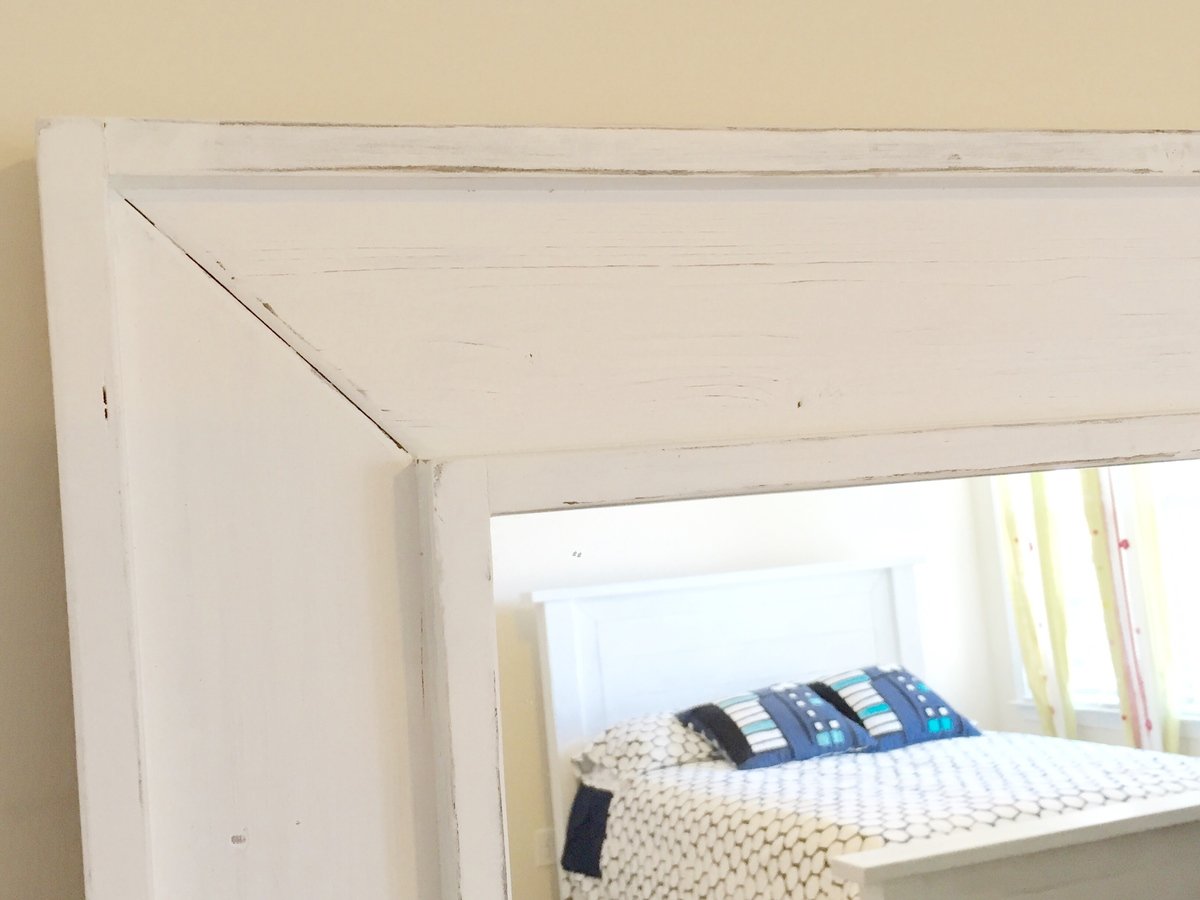
Full Length Mirror
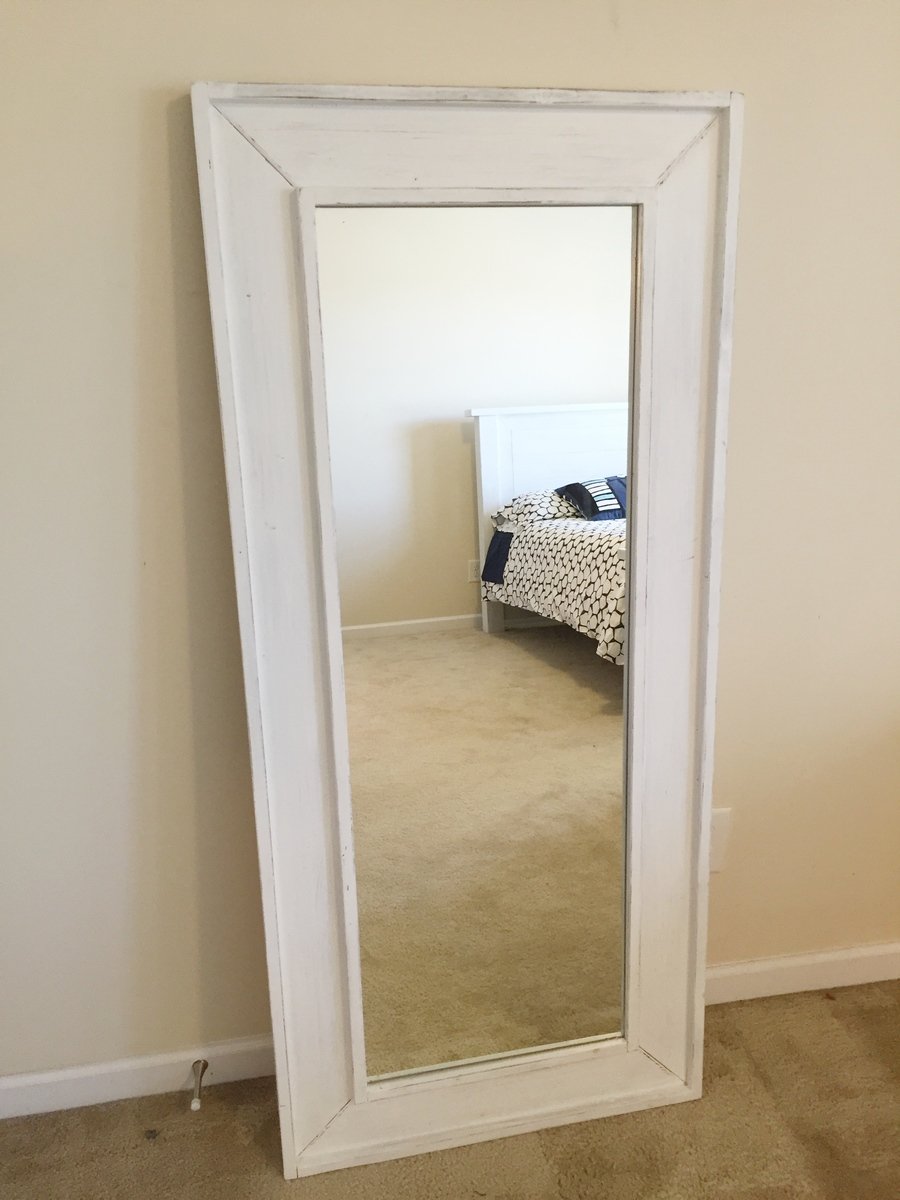
Full length mirror made from a cheap $10 unframed mirror from IKEA. Trimmed out with some 1 by 3, 1 by 4 and 1 by 2. Stained black and then painted white. sanded between coats of white to show some of black through and give antique worn look.
Estimated Cost
$35
Estimated Time Investment
Day Project (6-9 Hours)
Finish Used
Stained black and then painted white. sanded between coats of white to show some of black through and give antique worn look.
Recommended Skill Level
Beginner
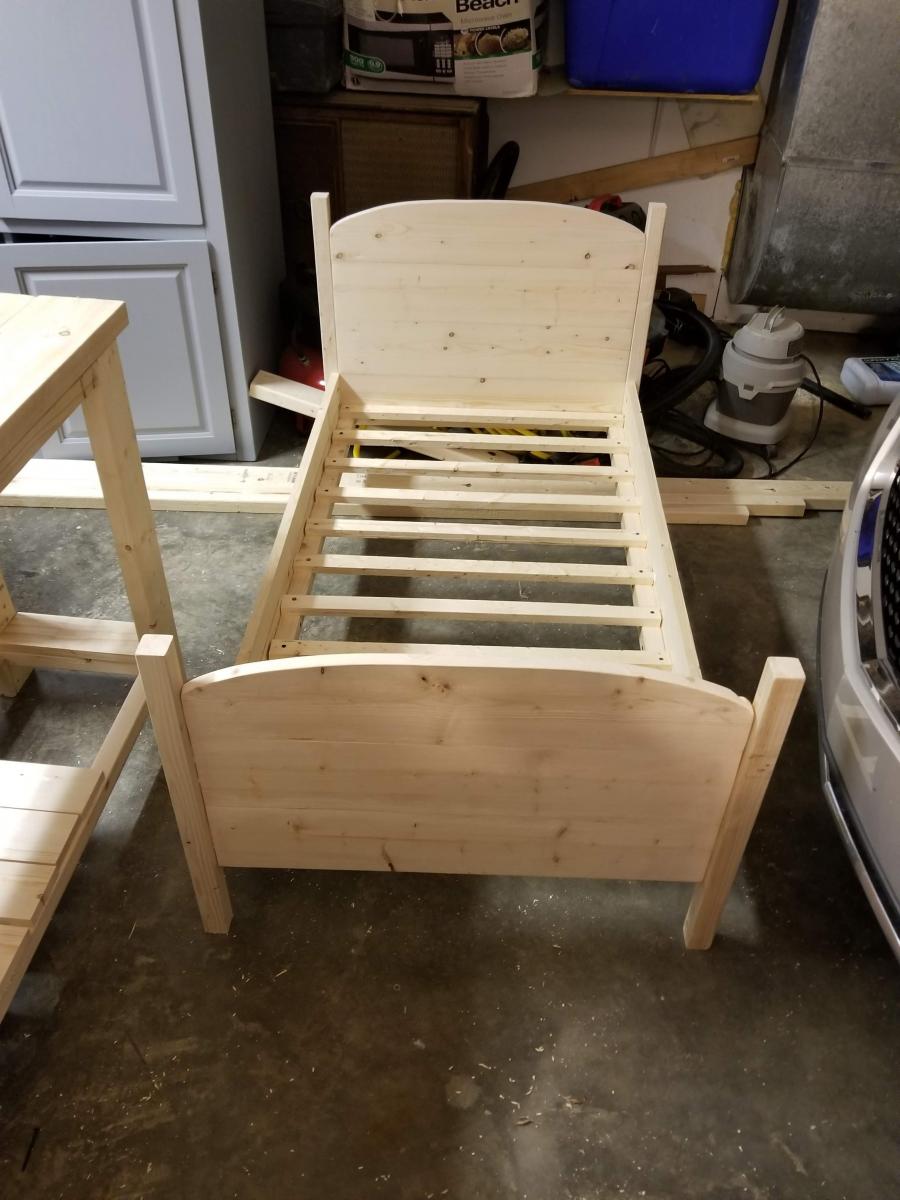
Toddler bed
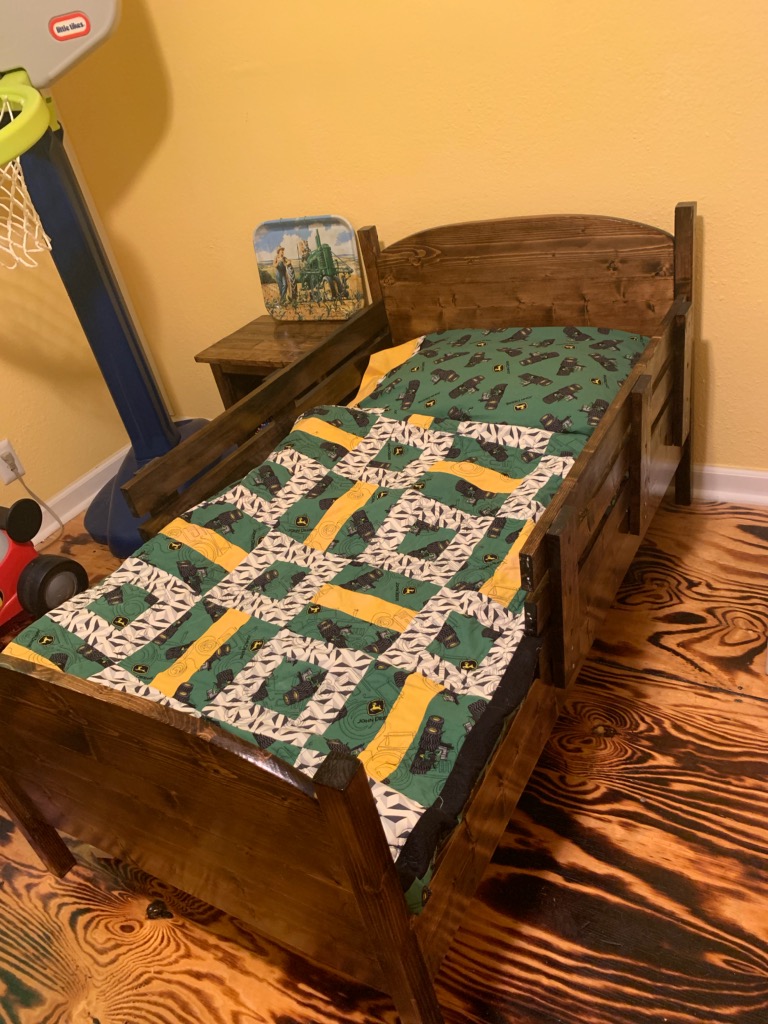
Built this classic bed for my grandson. It was one of the easiest builds yet. All of Ana White's plans are super user friendly.
Built from Plan(s)
Estimated Time Investment
Day Project (6-9 Hours)
Finish Used
Minwax, dark walnut stain, polyurethane
Recommended Skill Level
Beginner
Comments
Wed, 10/23/2019 - 18:36
Built this classic bed for…
Built this classic bed for my grandson. It was one of the easiest builds yet. All of Ana White's plans are super user friendly.
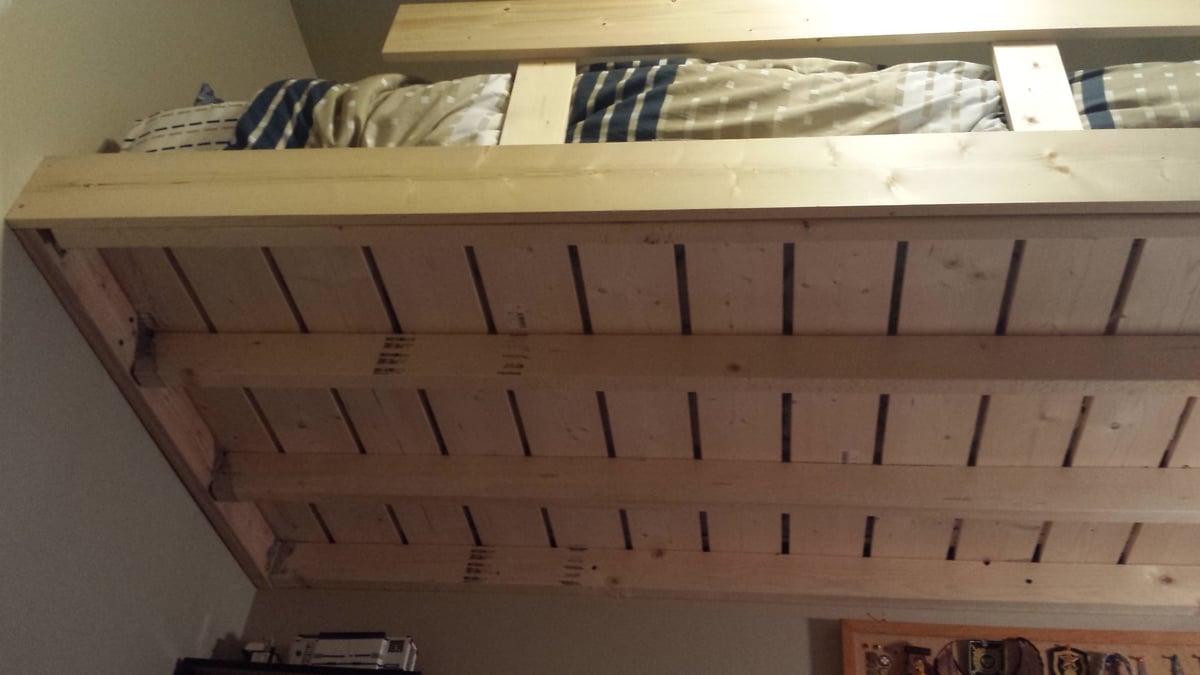
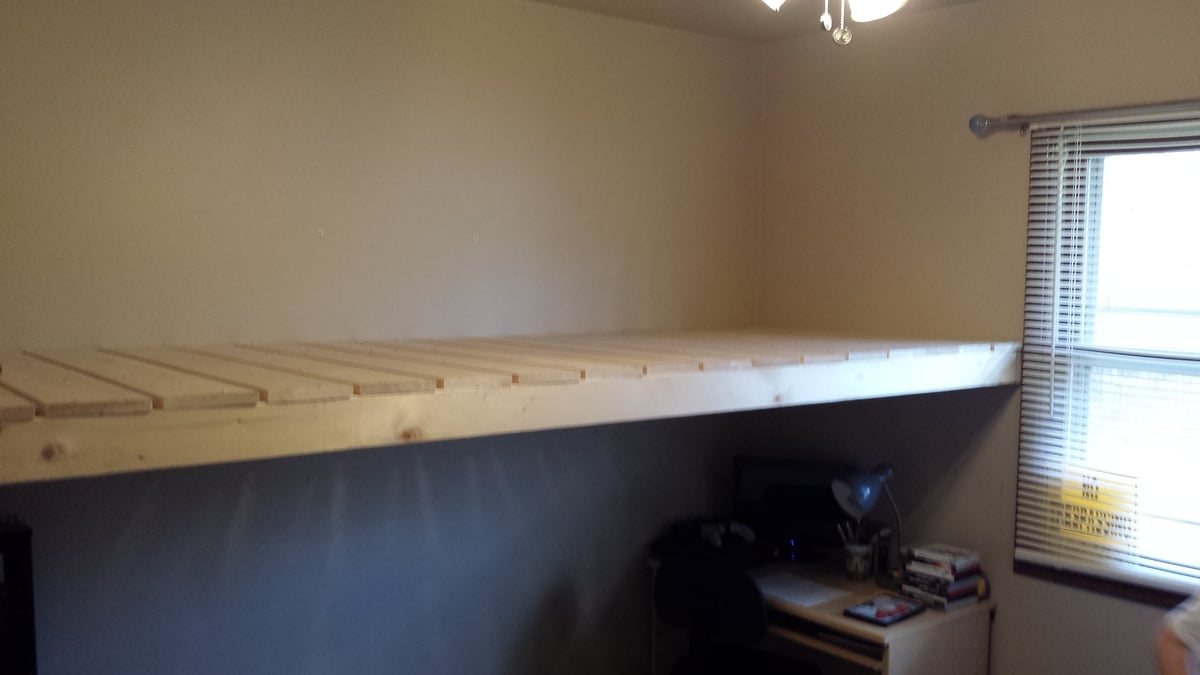
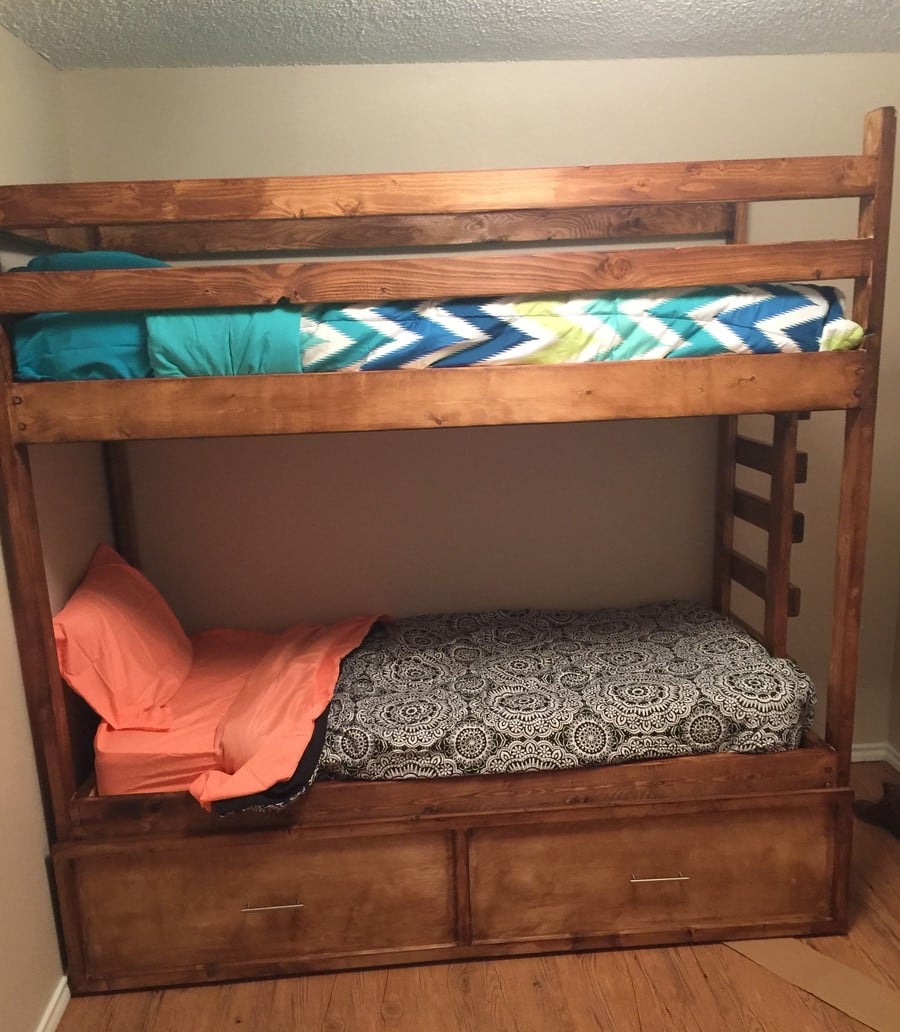
Loft Bed in a Day
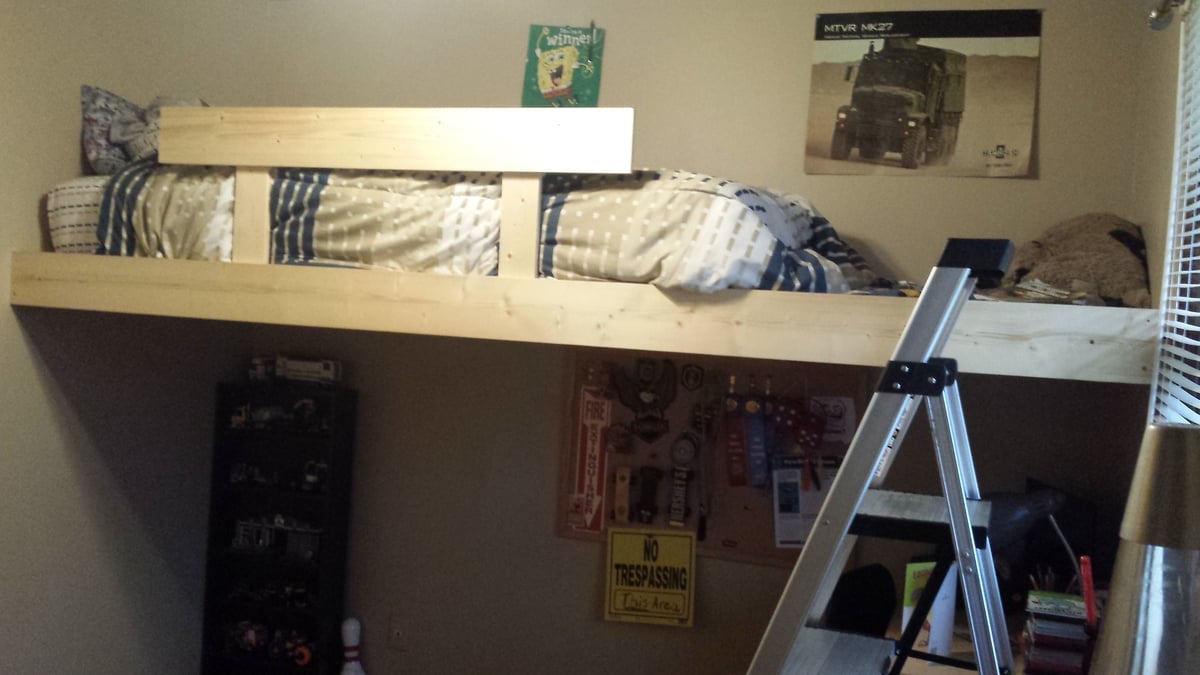
Yes, really a bed in a day! It took 24 hours from the time we bought our supplies to completion. So much nicer than any store bought we looked at, these plans are really a breeze even though I had never tackled a project like this before.
Built from Plan(s)
Estimated Cost
$100
Estimated Time Investment
Weekend Project (10-20 Hours)
Recommended Skill Level
Beginner
TWINNING!
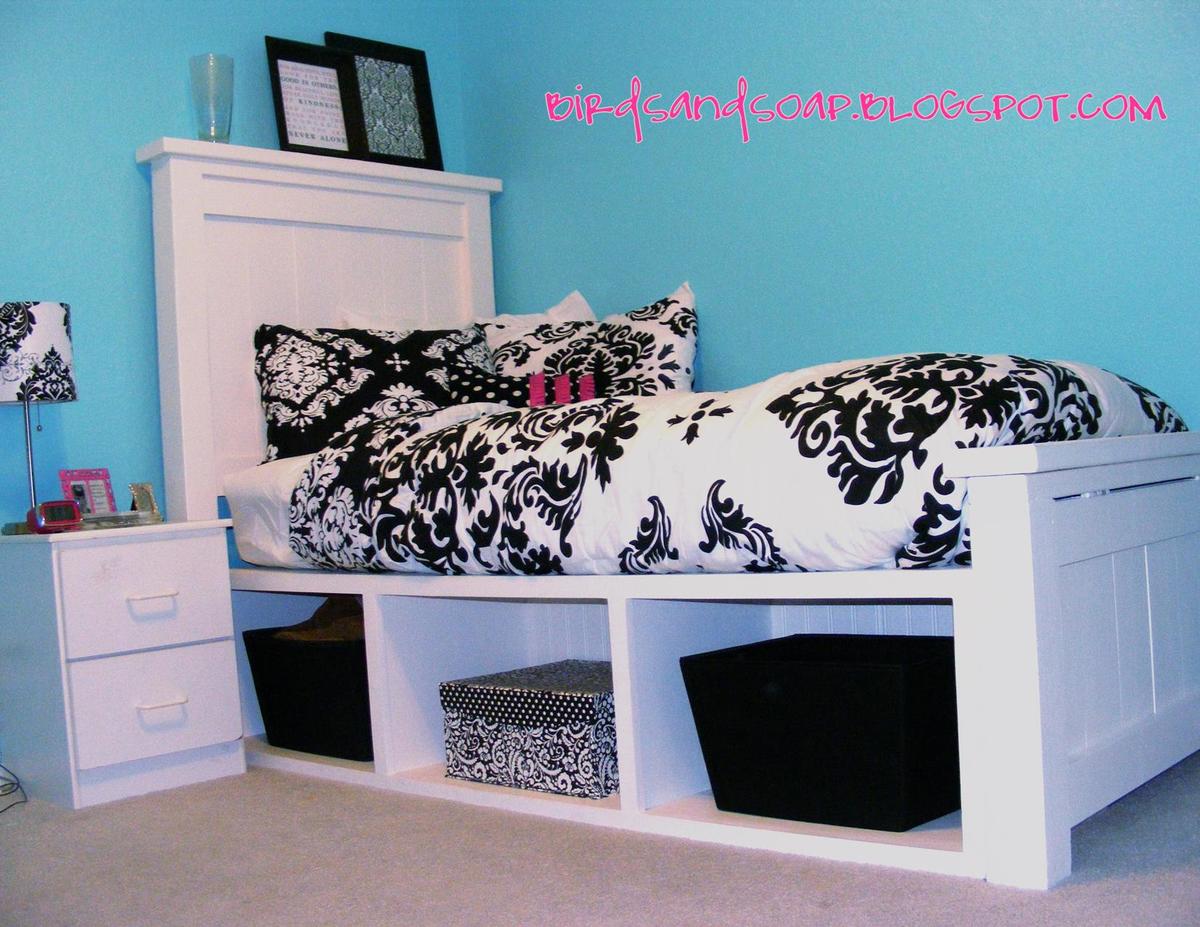
Twin Farmhouse Storage Bed With Hinged Footboard.
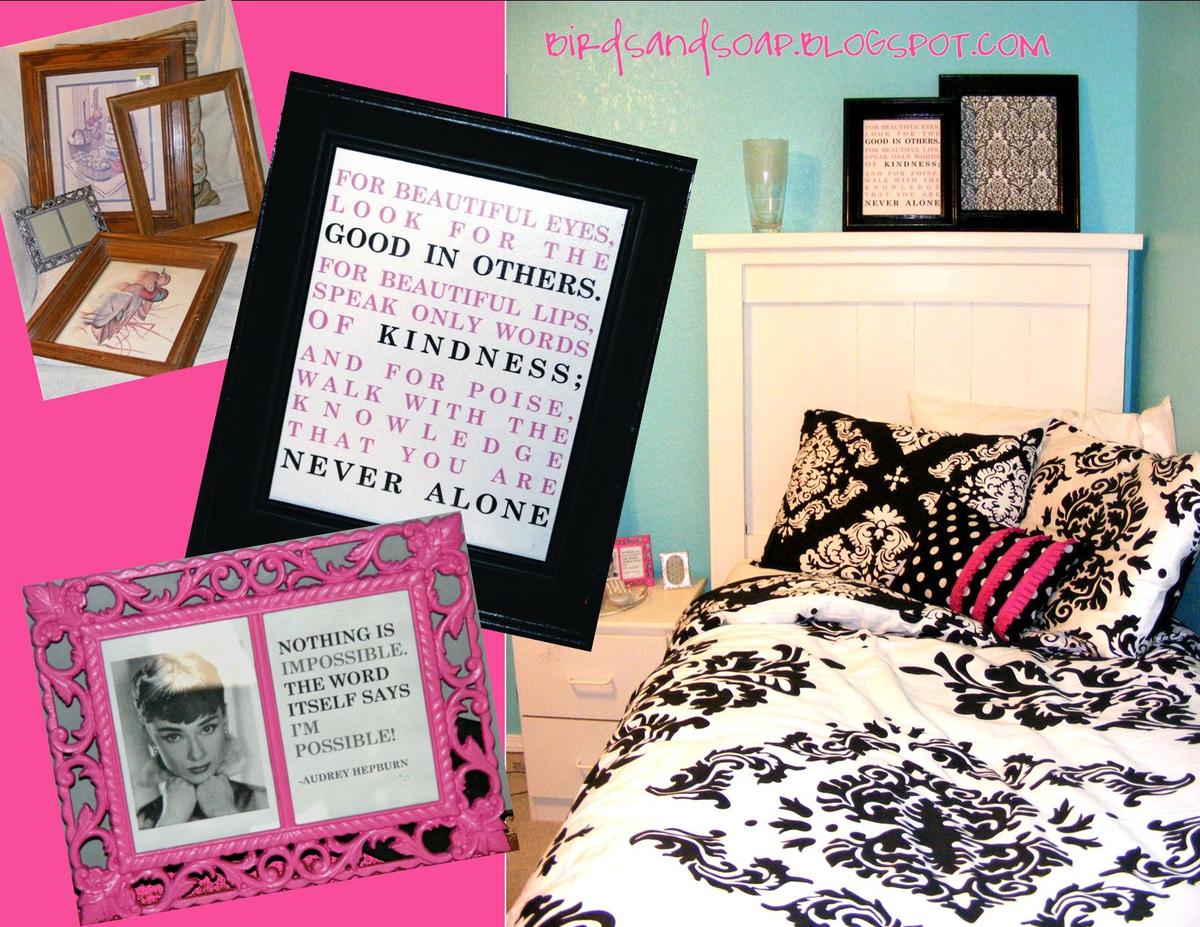
After making a queen-size for myself, I built this twin-sized version for my niece. Along with a "Breakfast at Tiffany's inspired" theme, she got a new bed and a new bedroom for her 15th birthday.
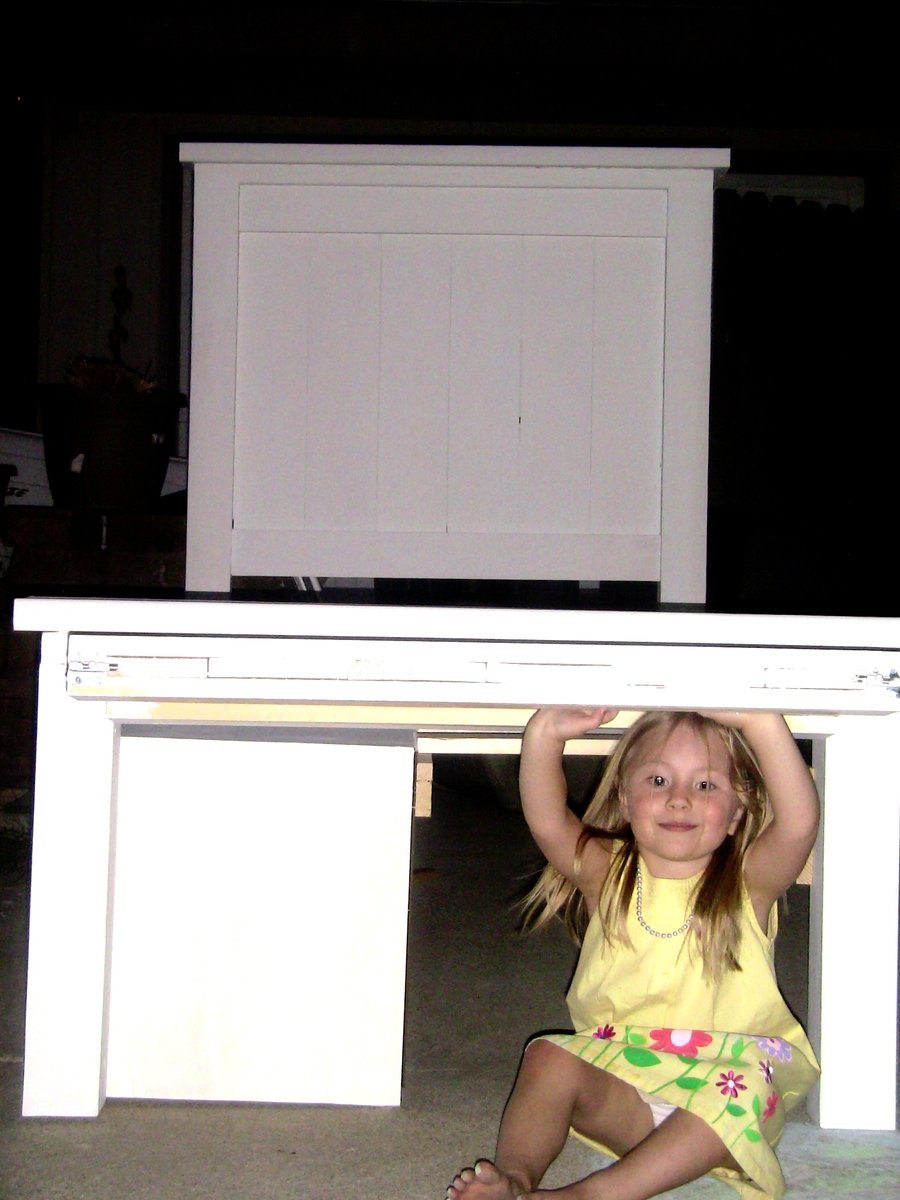
For this version of the bed, I made just one storage cubby because it sits against a wall. With the addition of the hinged footboard, she has a secret vault for storing her Super Secret Teen items (or shoes or snowboards). I followed the traditional farmhouse bed design, omitting one 1x6 in the head/footboard panels. This way, it is not as wide and the storage cubby meets the bedpost on center.
(Again, my daughter modeling the hinging action).
Built from Plan(s)
Estimated Cost
$150
Estimated Time Investment
Weekend Project (10-20 Hours)
Finish Used
Primed and painted with Olympic Heirloom Lace in Satin.
Recommended Skill Level
Beginner
Comments
Wed, 06/13/2012 - 02:06
Excellent posting here people
Excellent posting here people will get lot of information with the help of posted information & topics from this blog. nice work keep it going.
www.ahappydeal.com
Tue, 09/11/2012 - 20:43
I'm wanted to make my
I'm wanted to make my daughter a bed simple to this... Was wondering, since you took one 1x6 piece out on each end... How many inches is the gap from the wall to bed? I want to have my DD's bed against the wall but, since she is only 3 I don't want a big gap for her to fall into! I hope you understand what I mean. Thanks.

In reply to I'm wanted to make my by kad050209 (not verified)
Tue, 09/11/2012 - 21:53
Gap
The gap is actually determined by the widest part of the bed, which is the cap piece on the head and footboards. At most, your gap would be around 3 inches, but you can shove a foam pool noodle from the dollar store in that gap if you are concerned she will get stuck.
And just to be clear, I only removed (1) 1x6 from the headboard and (1) 1x6 from the footboard to match; not two boards from each panel. Wasn't sure if you understood.
Wed, 03/06/2013 - 02:05
like it
i like the theme of "Breakfast at Tiffany's inspired" . http://www.365trustbuy.com
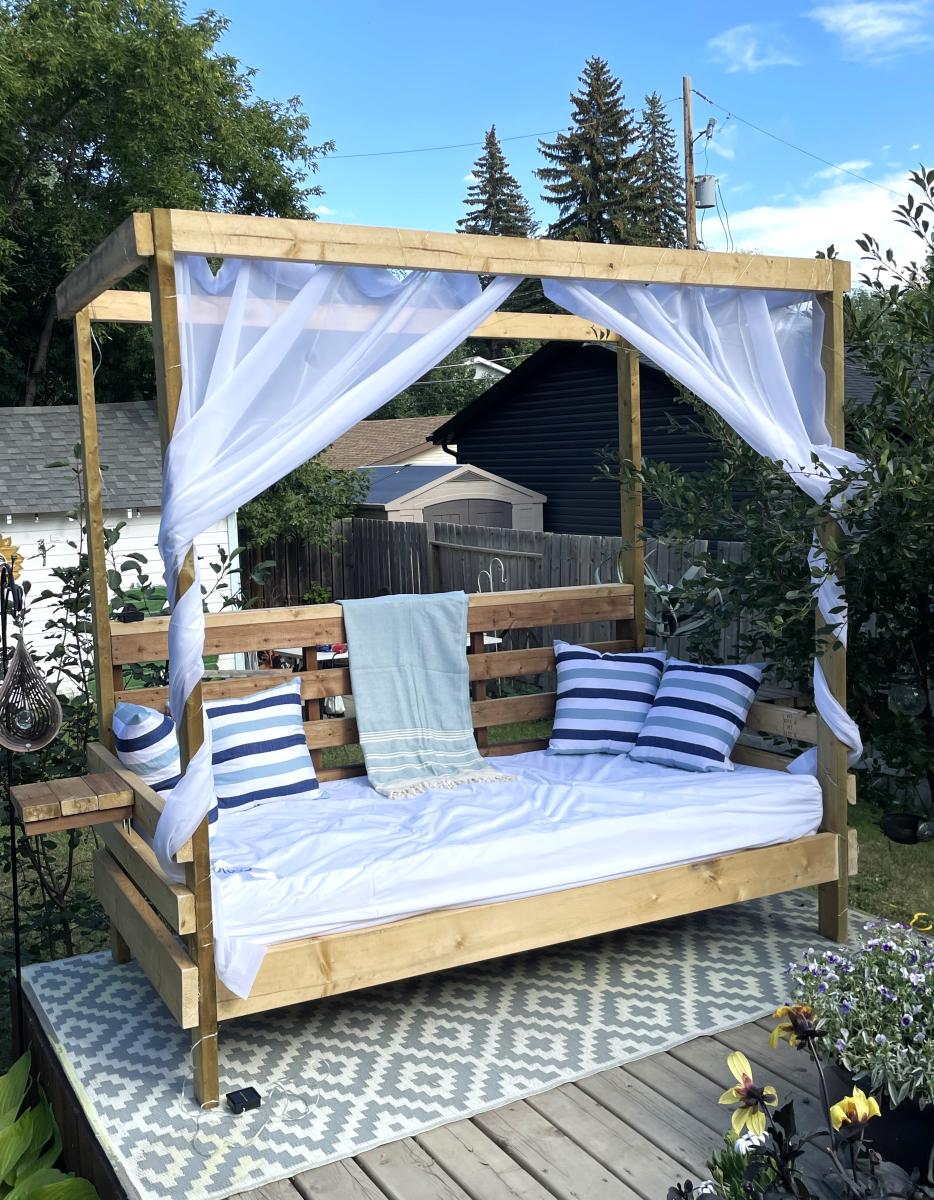
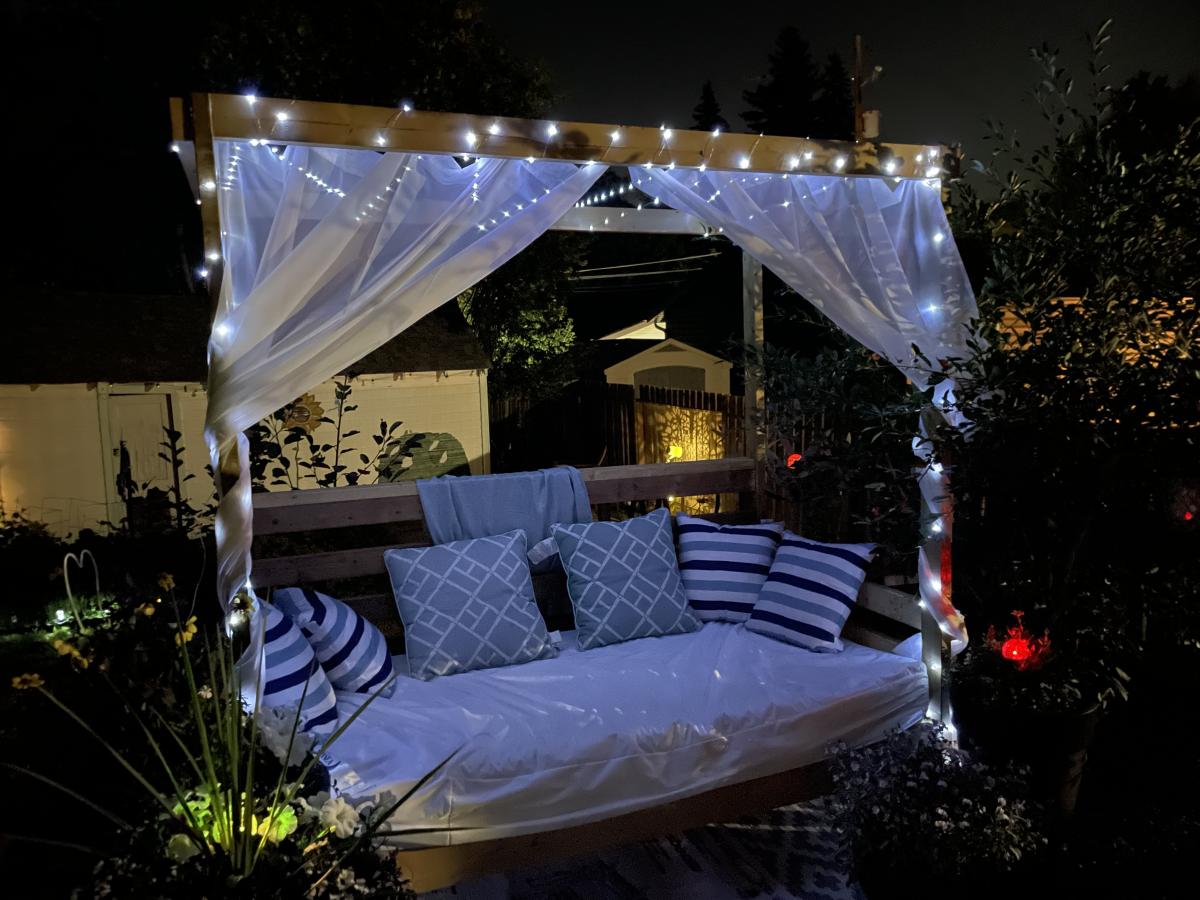
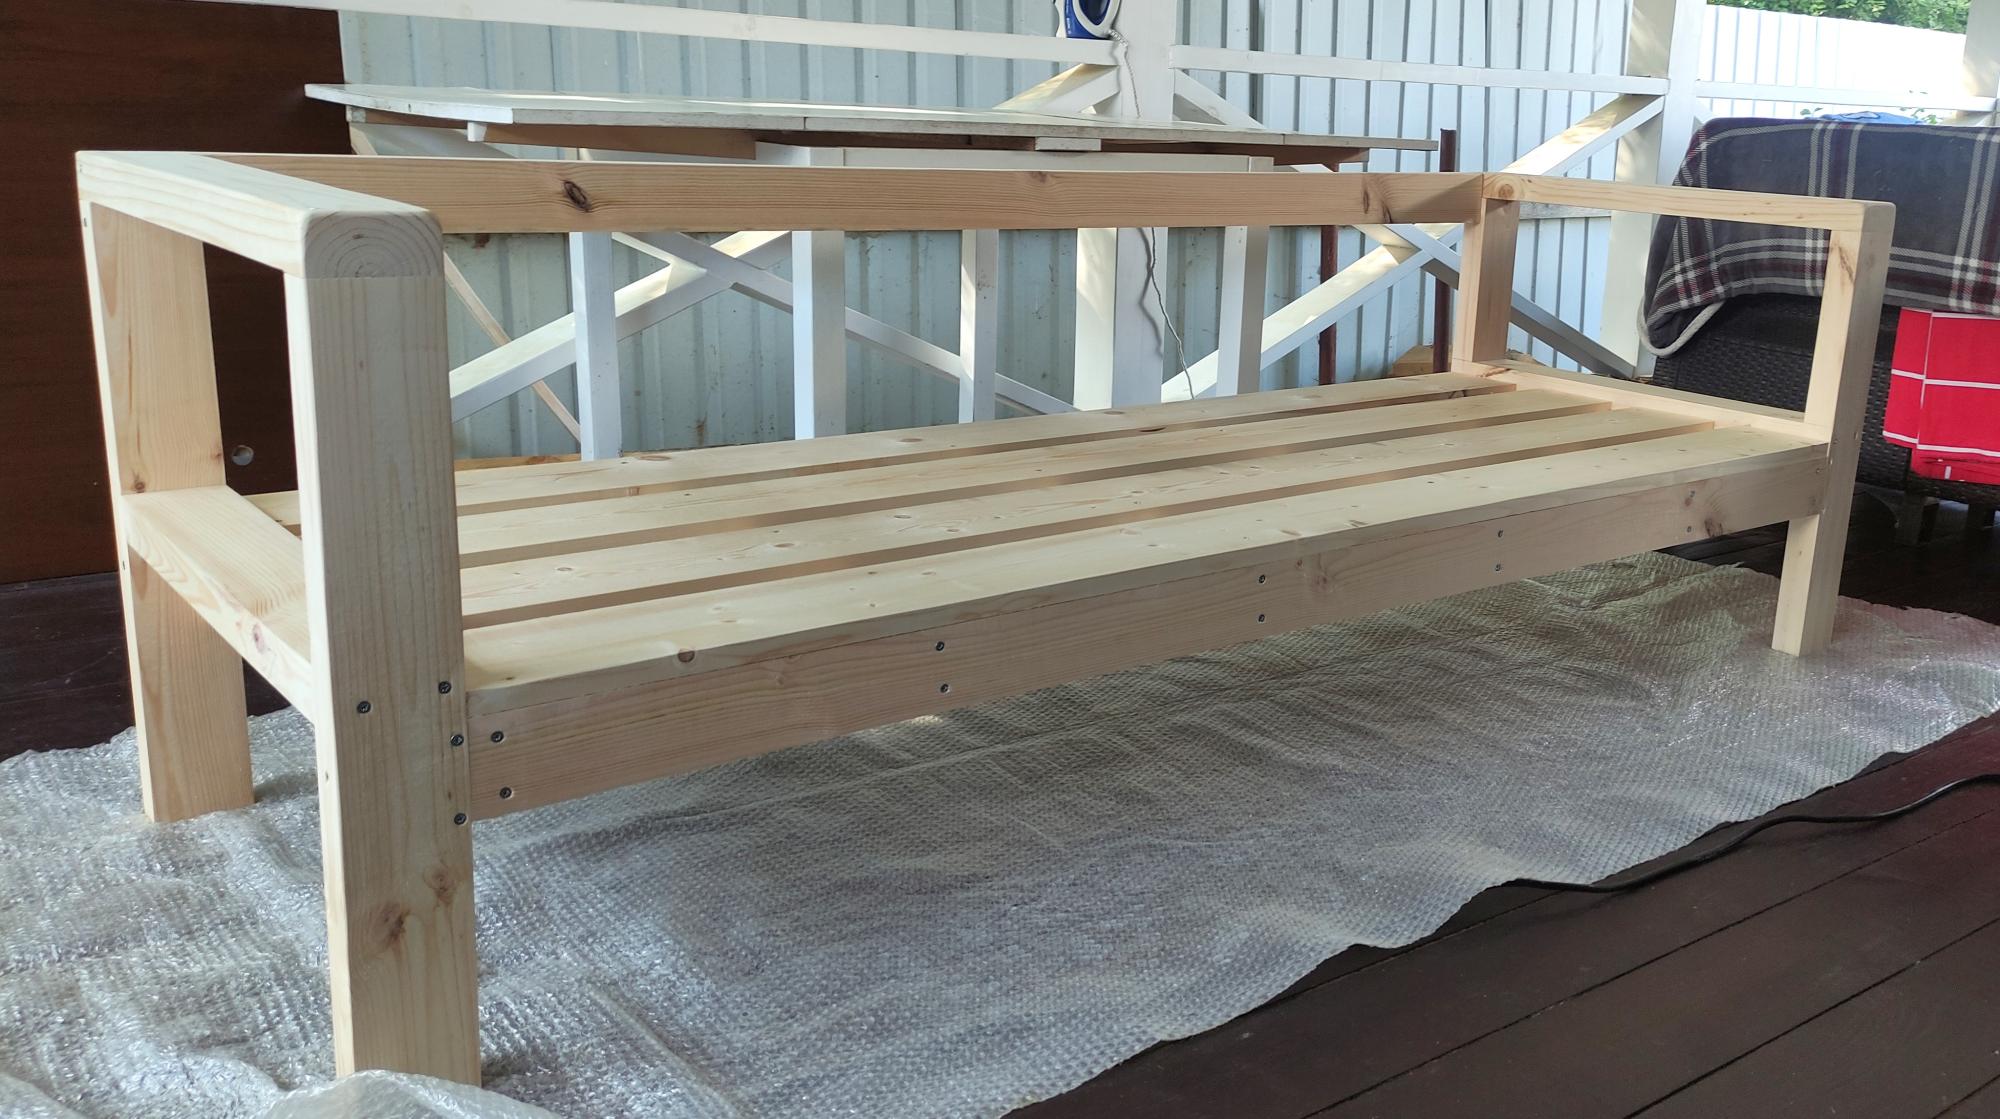
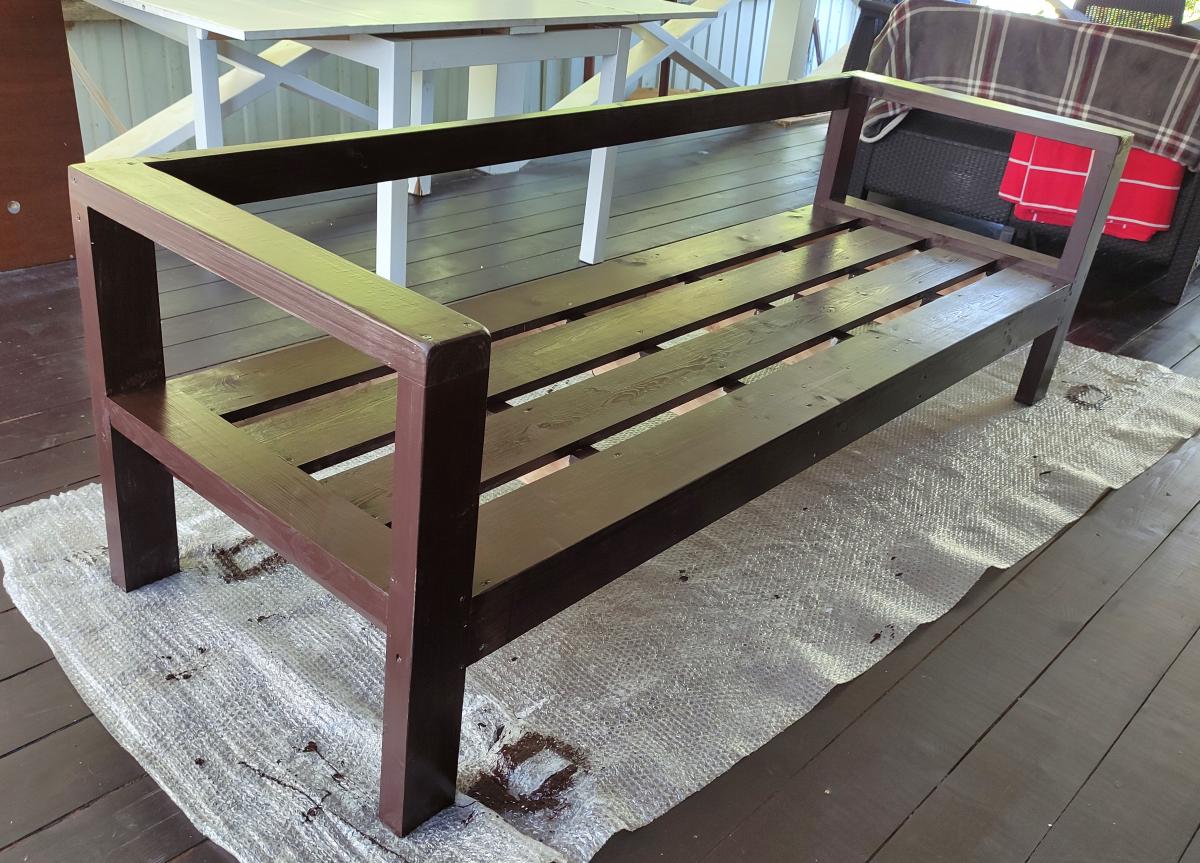
Outdoor Canopy Daybed - First Project!
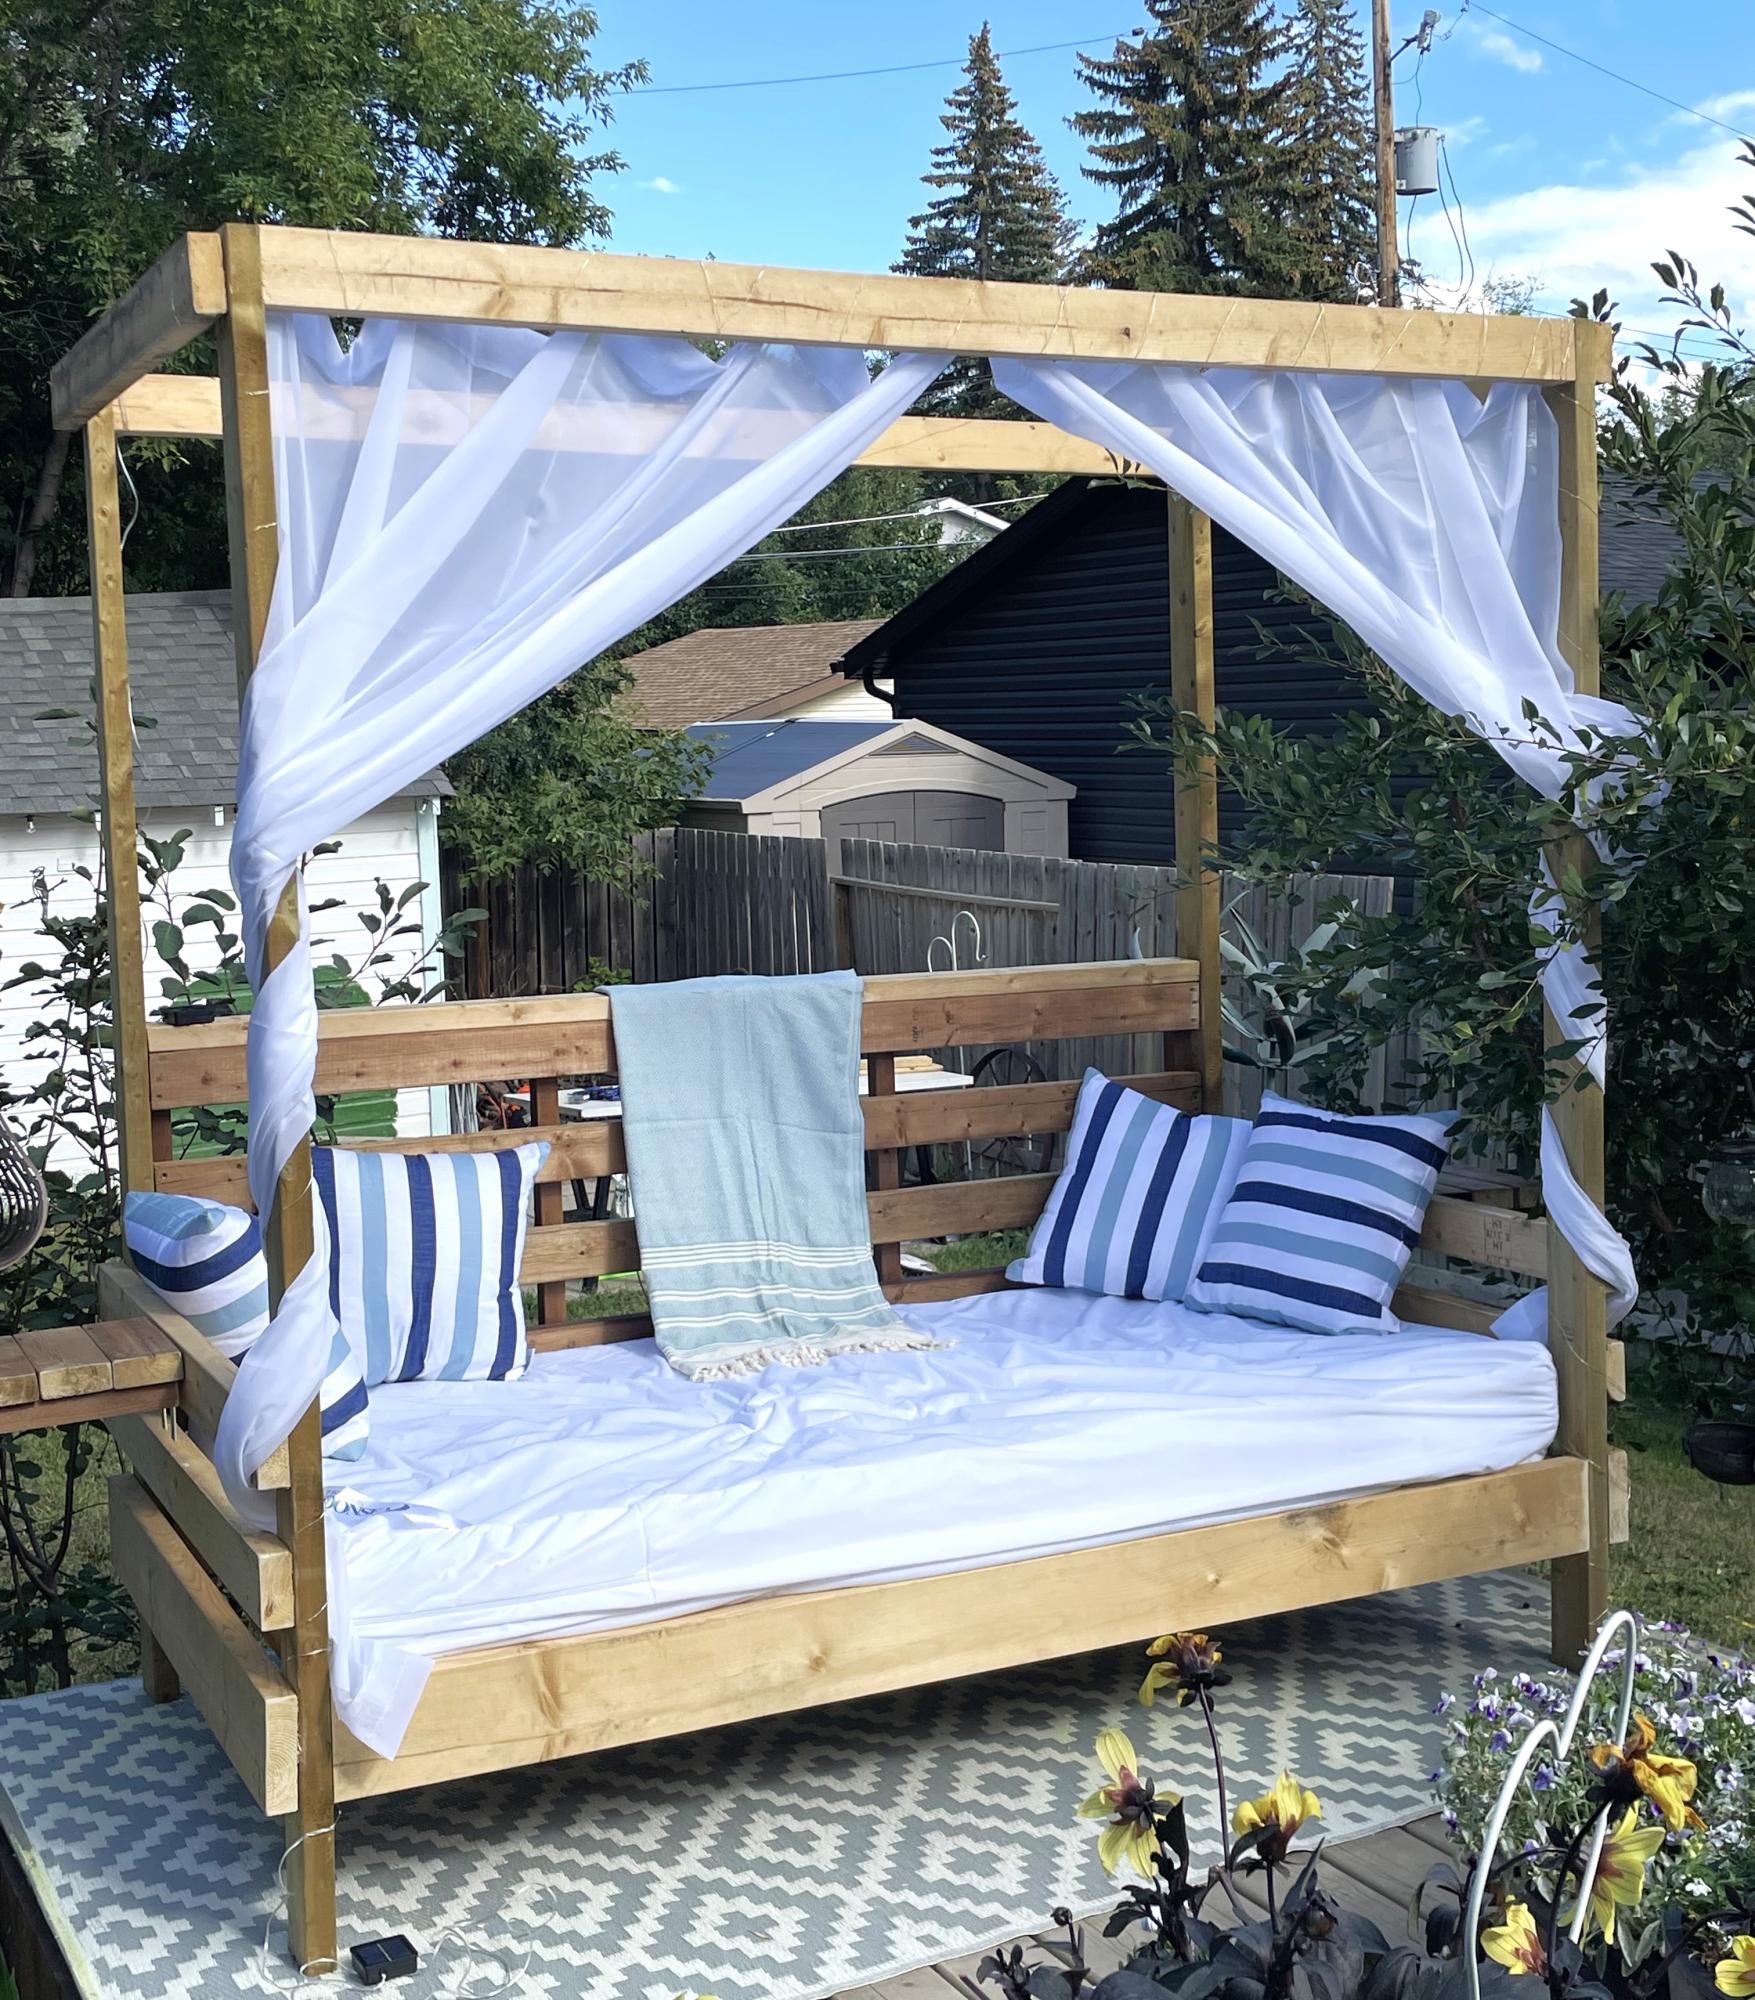
This was the first time I ever built anything - before this is hardly used a drill. It was big for a first build, and I did it entirely alone aside from a few text messages with questions. I added a couple little end tables to it for a book and a drink, and it’s now my favourite outside summer spot.
Facebook user @robyn.marie.3572
Built from Plan(s)
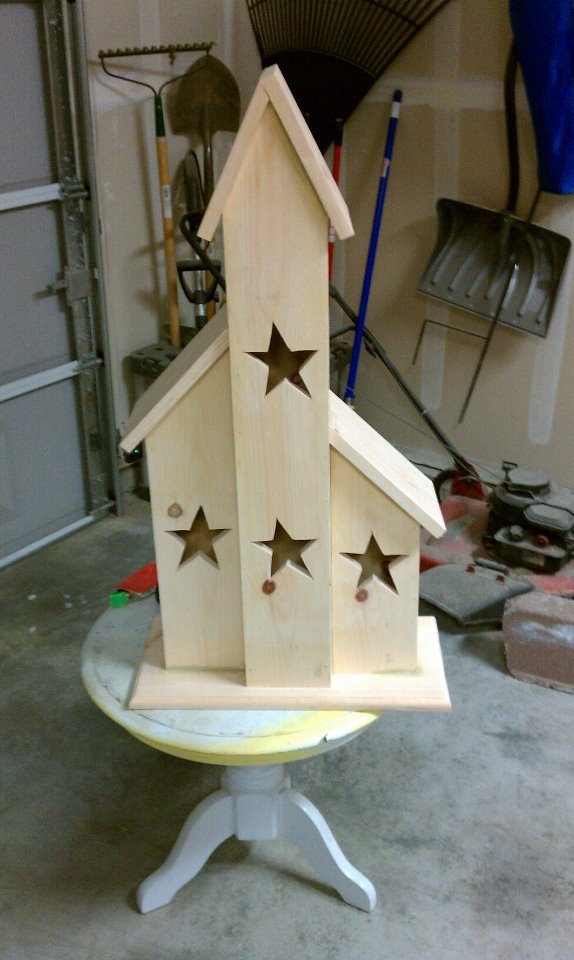
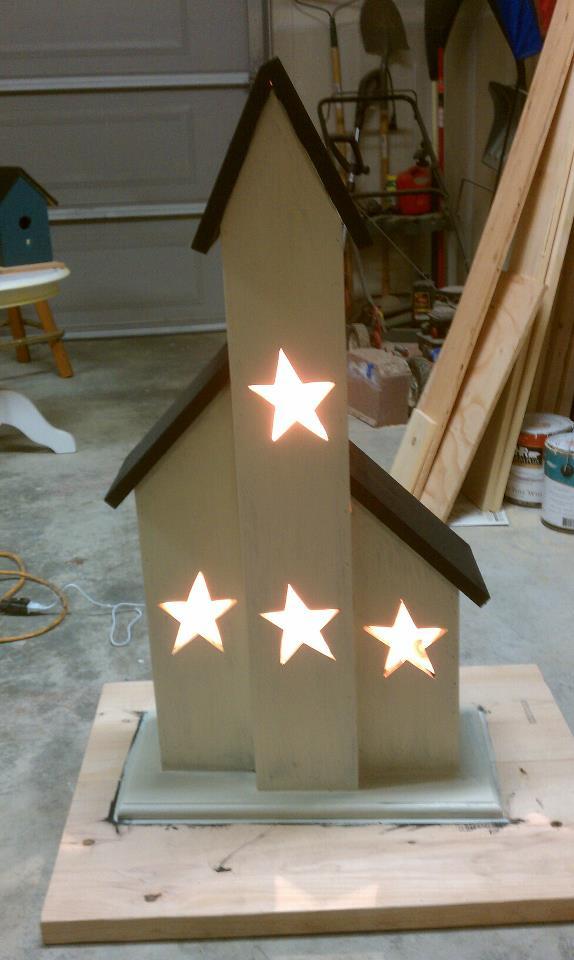
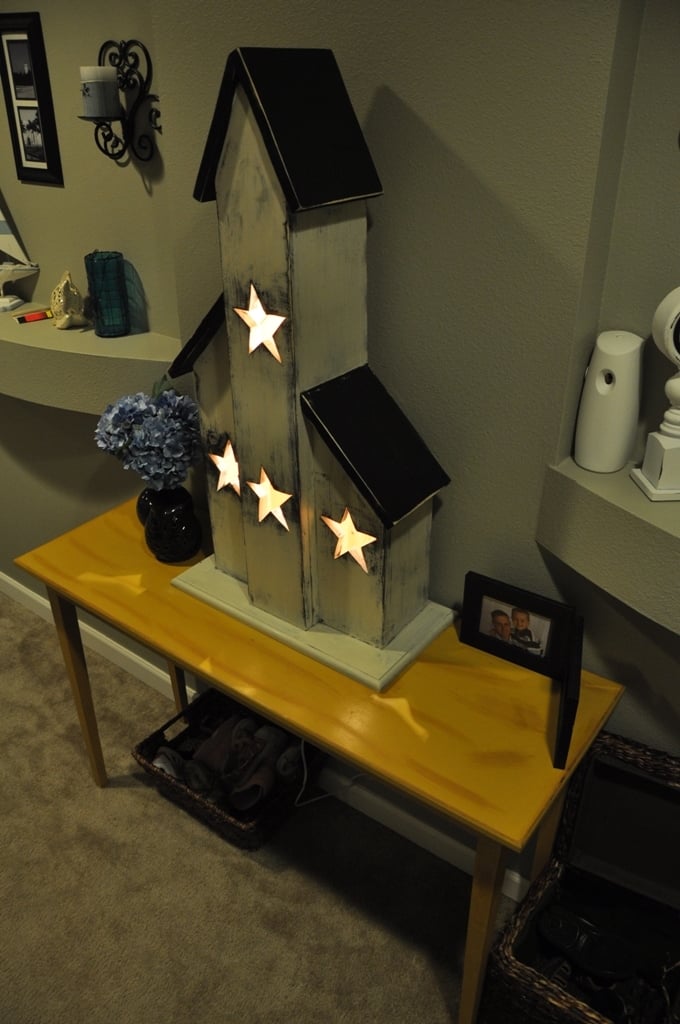
Lighted Saltbox House
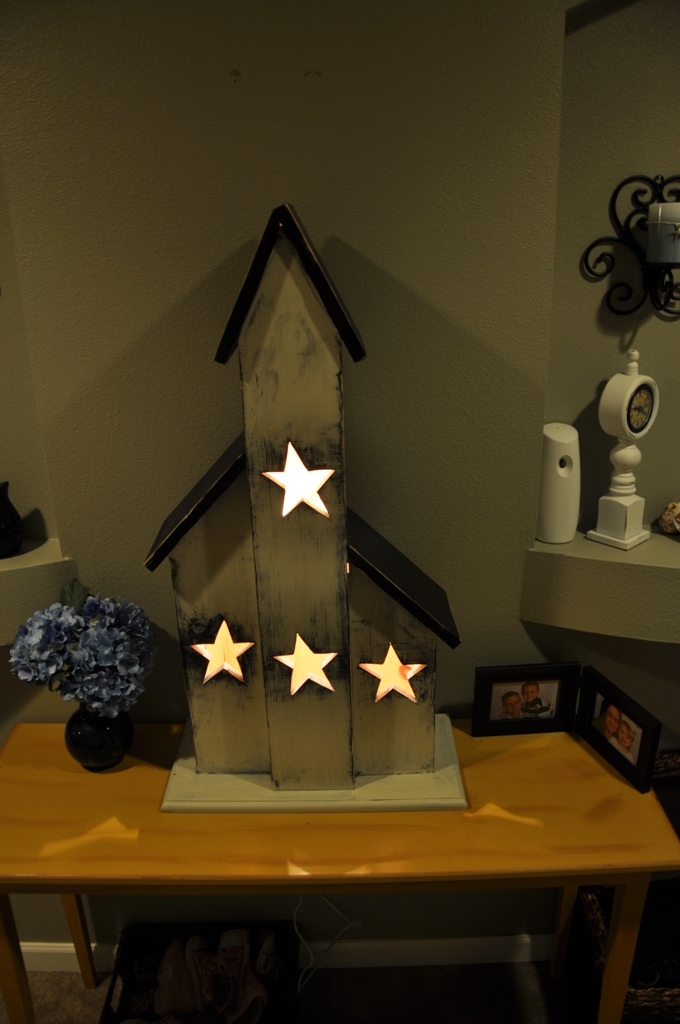
My wife went shopping one day in a primitive furniture shop and found this saltbox house that she loved. So I decided to get a picture of this house and build it myself. This project was a lot easier than I thought it would be. Hope you enjoy.
Estimated Cost
$18.00 for wood and left over paint sitting around.
Estimated Time Investment
Day Project (6-9 Hours)
Finish Used
One layer of black paint, covered with one layer of cream paint, distressed and clear coated.
Recommended Skill Level
Beginner
Comments
Sat, 08/22/2015 - 15:11
Would like dimensions for Lighted Saltbox House Please.....
First let me say Thank You for your service. I know this is an old post but any chance you could post dimensions/instructions to make the saltbox house? I think it is beautiful.
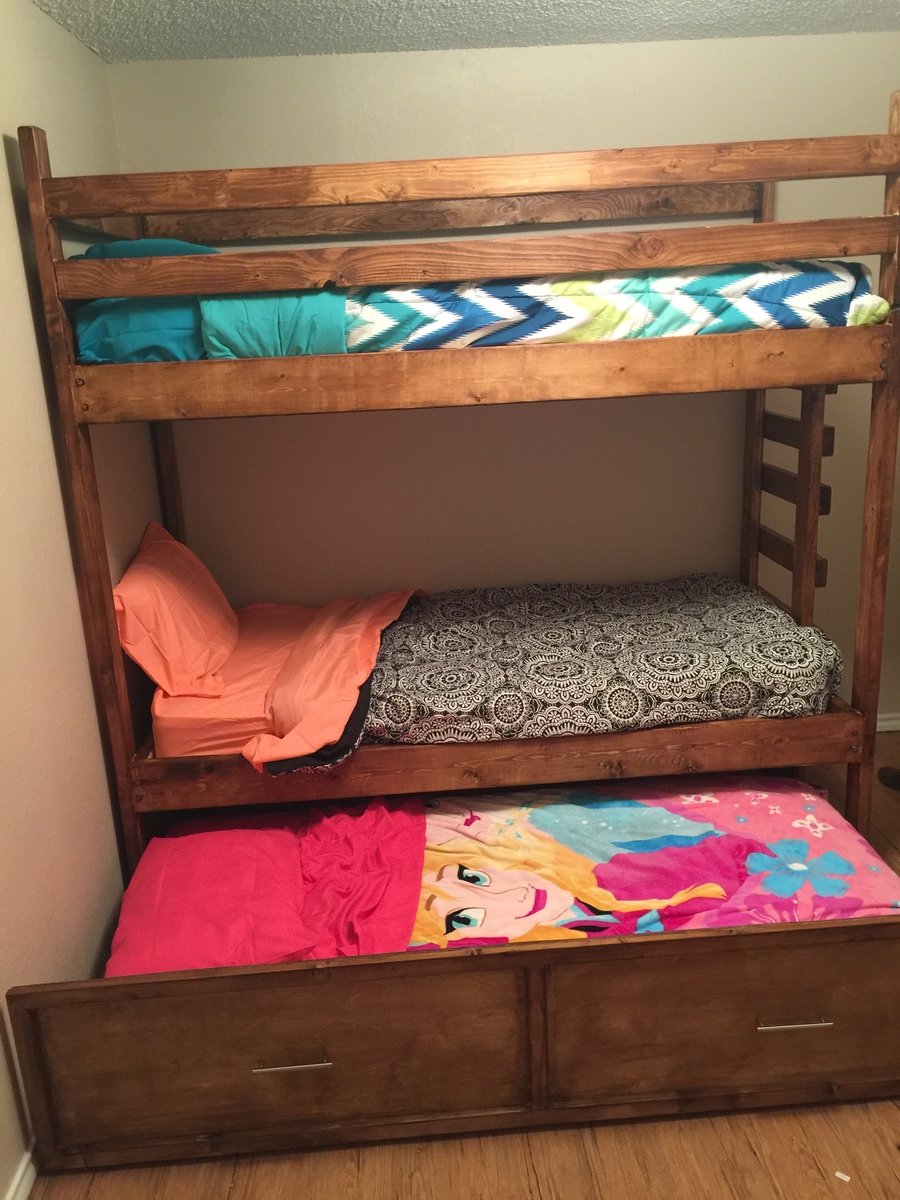
Ten dollar ledges
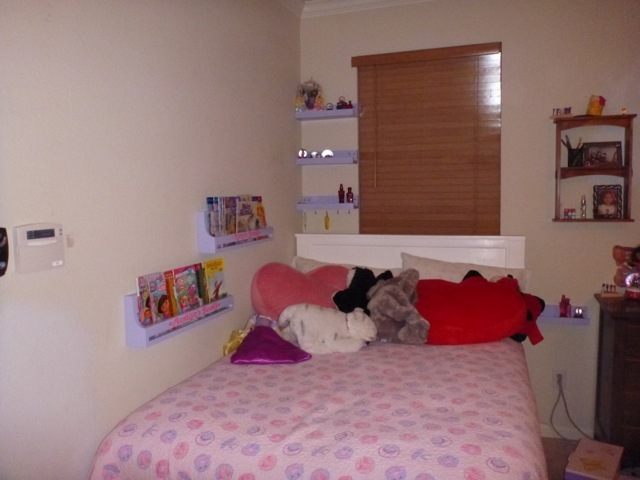
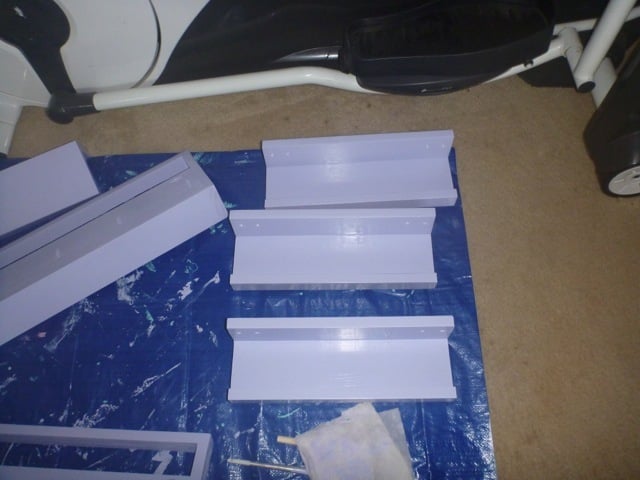
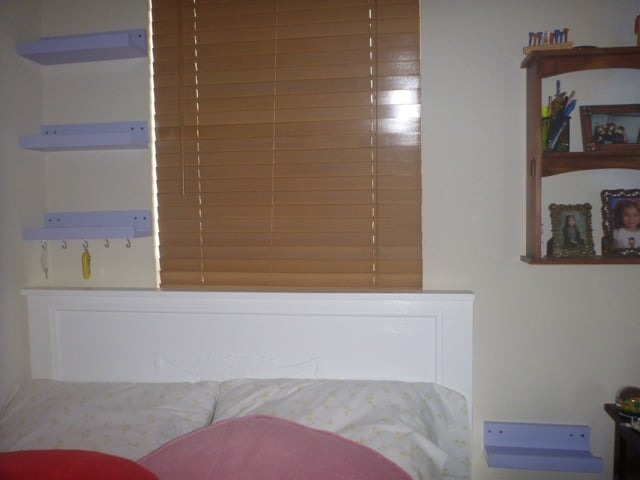
Here are a few of the ten dollar ledges we added around the girls bed. We had no room for tables so we thought we would give this a try. It's working beautifully. We hung the ledges in studs and they are standing up to constant use perfectly. The girls have space for their most cherished nik naks and a drink in case they wake thirsty in the night. We couldn't be more pleased. Now I'm seeing the possibility for ledges in every room.
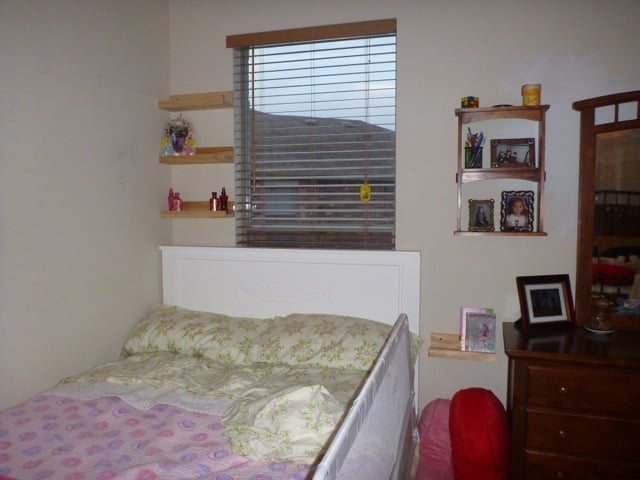

Built from Plan(s)
Estimated Cost
6.00 minus the paint.
Estimated Time Investment
Afternoon Project (3-6 Hours)
Finish Used
No voc semi gloss for easy cleaning
Recommended Skill Level
Beginner
Comments
Thu, 03/22/2012 - 00:34
nice post
nice post,thanks for sharing! BTW,check out my new android 4.0 tablet newfreeshipping.
Mon, 04/23/2012 - 22:14
It is nice that you posted
It is nice that you posted something like this [url=http://www.pandawill.com/twilight-turtle-night-star-constellation-p3557… ] Twilight Turtle [/url] and I am quite lucky to read it. Thanks for posting this!
Mon, 10/22/2012 - 03:56
I like all your post. I will
I like all your post. I will keep visiting this blog very often.
Tue, 06/26/2012 - 20:01
Your knowledge of this
Your knowledge of this subject comes through clearly in this article. I love to read this kind of articles, I hope you will update it. Thank you for sharing it with me.
http://www.sbwire.com/press-releases/how-to-get-your-ex-back/magic-of-m…
Thu, 04/19/2012 - 19:01
If converting existing floor
If converting existing floor space into a half-bathroom, such a renovation can cost as little as a few thousand dollars, making the addition of a powder room one of the few home improvement projects where the value added to the home exceeds the cost of the renovation.water damage Pearland tx
Fri, 04/20/2012 - 02:14
You can also use vinegar to
You can also use vinegar to remove heat stains on stainless steel cutlery and pans, or remove streaks and heat stains by rubbing with club soda or olive oil.Basement water Atlanta GA
Sat, 04/21/2012 - 00:28
Before you go to use it...if
Before you go to use it...if it's been sitting for awhile...give it a good shake. As you can see in this picture...it does tend to separate a bit. But after a quick shake it's good to go. To use: spray on stains as you normally would. I usually let mine "soak in" for a few minutes at least. Then launder as usual.water damage Temecula CA
Mon, 04/23/2012 - 22:11
It is nice that you posted
It is nice that you posted something like this [url=http://www.pandawill.com/mini-led-lcd-projection-clock-digital-keyring-…] Projection clock [/url] and I am quite lucky to read it. Thanks for posting this!
Fri, 04/27/2012 - 10:11
I have no experience to build
I have no experience to build a site like you said on this page. I need to learn to create a site and develop it, perhaps using new versions of Drupal could improve and make my blog more often visited by Internet users.water damage restoration Raleigh Durham NC
Fri, 04/27/2012 - 10:13
It is very fascinating,
It is very fascinating, You’re a very professional blogger. I’ve joined your feed and look ahead to in search of more of your excellent post.water damage restoration Raleigh Durham NC
Fri, 05/11/2012 - 07:40
This blog is really very
This blog is really very interesting and easy to understand the information provided in it. It is very nice to view this blog and it's nice to see the best information cited here.Water damage Lafayette LA
Fri, 05/18/2012 - 19:54
I used to be more than happy
I used to be more than happy to seek out this internet-site.I wanted to thanks in your time for this glorious read!! I positively enjoying each little bit of it and I have you bookmarked to check out new stuff you weblog post. Water Damage Anaheim CA
Fri, 06/01/2012 - 04:59
Quite insightful submit.
Quite insightful submit. Never believed that it was this simple after all. I had spent a very good deal of my time looking for someone to explain this subject clearly and you're the only one that ever did that. Kudos to you! Keep it up. Water extraction Lakeline OH
Sun, 06/17/2012 - 20:37
I'm so excited that I have
I'm so excited that I have found this your post because I have been searching for some information about it almost three hours. You helped me a lot indeed and reading this your article I have found many new and useful information about this subject. Paint Contractor Glendale AZ
Mon, 06/25/2012 - 03:45
Your knowledge of this
Your knowledge of this subject comes through clearly in this article. I love to read this kind of articles, I hope you will update it. Thank you for sharing it with me.
http://www.hcgrevival.com/
Wed, 06/27/2012 - 04:10
Sometimes it is so hard to
Sometimes it is so hard to find good and useful posts out there when doing research. Now I will send it to my colleagues as well. Thank you for being one of them.
http://www.reklama-internete.com/
Fri, 06/29/2012 - 01:15
Thanks for this exciting
Thanks for this exciting post. It is well written and has some great content. Do you have any others that I can go to about this subject?
http://www.californiahealthinsurancenow.com/Kaiser_Permanente.html
Tue, 07/03/2012 - 05:21
This information very useful!
This information very useful! I've been looking for books of this nature for a way too long. I'm just glad that I found yours. Looking forward for your next post. water damage restoration Raleigh Durham NC
Tue, 07/10/2012 - 15:35
Only with 10 dollars?
This is great stuff. Very handy these ledges are. lets see how many more can be added.
Nice, Thanks
Mon, 07/16/2012 - 22:55
The program is designed under
The program is designed under the same model as new homes built for Habitat families where the veteran will repay the zero interest loan necessary for these repairs, which is then deposited into a revolving fund to assist additional families in need of decent housing. Mold Inspection Covington LA
Thu, 07/19/2012 - 04:32
I hope people listen, too,
I hope people listen, too, but I'll be surprised if they do. In all the years I've been in the business, we're still fighting the same battle we were when I first started - most folks want the lowest ... Water Damage Restoration Colorado Springs CO
Wed, 08/01/2012 - 22:13
If you're involved in a
If you're involved in a head-on crash, the windshield must stay in place to keep you inside the car and to keep flying debris out. If the windshield flies out, so too may you or your kids. Improperly installed windshields can easily be dislodged during a crash. Architectural Engineer NYC
Thu, 08/02/2012 - 03:41
ecommerce web design
This blog is really amazing due to its unique and outstanding post.
Fri, 08/17/2012 - 06:48
You have to put efforts in
You have to put efforts in home maintenance to make sure everything is in right condition. If any part of your house needs repairing then have it repaired immediately. If you neglect the problem for too long then it might become even more complicated. Masonry contractor West Hartford CT
Mon, 09/03/2012 - 02:11
Thanks for the beautiful post
The girls have space for their most cherished nik naks and a drink in case they wake thirsty in the night. We couldn't be more pleased. Now I'm seeing the possibility for ledges in every room. http://www.genericviagratab.com/
Sat, 09/29/2012 - 09:29
I am very enjoyed for this
I am very enjoyed for this site. Its year informative topic. It help me very much to solve Some Problems. Its so fantastic and Opportunity are working style so speedy.
Outdoor Lighting Batavia IL
Tue, 11/20/2012 - 00:17
This is represented partly in
This is represented partly in the significantly higher frequency and register neutrality of connectives such as tak or totiž when compared with the English so and therefore but primarily by the nature of the mental spaces set up by the Czech lexemes. water damage Anaheim CA
Fri, 11/30/2012 - 03:19
The contemporary strategy is
The contemporary strategy is often focused on the development of specific skills and abilities. As a result, it fails to provide with the broader education and, instead of the formation harmonious, balanced personalities, it breeds specialists trained to work in a specific field. This is a good example like the ones http://bestsamplepapers.com does. People prefer more broad basis.
Thu, 02/07/2013 - 02:08
Pretty good post... I just
Pretty good post...
I just stumbled upon your website and wanted to say that I have really enjoyed reading your blog posts. Any way I'll be subscribing to your feed and I hope you post again soon.
Thu, 02/14/2013 - 23:45
I like
A lot of interesting things found on your blogs, like the topic! The author thanks and success in the blog. http://bbrencontresexe.com
Fri, 04/12/2013 - 05:55
As a Newbie, I am permanently
As a Newbie, I am permanently exploring online for articles that can be of assistance to me. Thank you
http://healthpharma.blogsome.com/
Toddler Bed
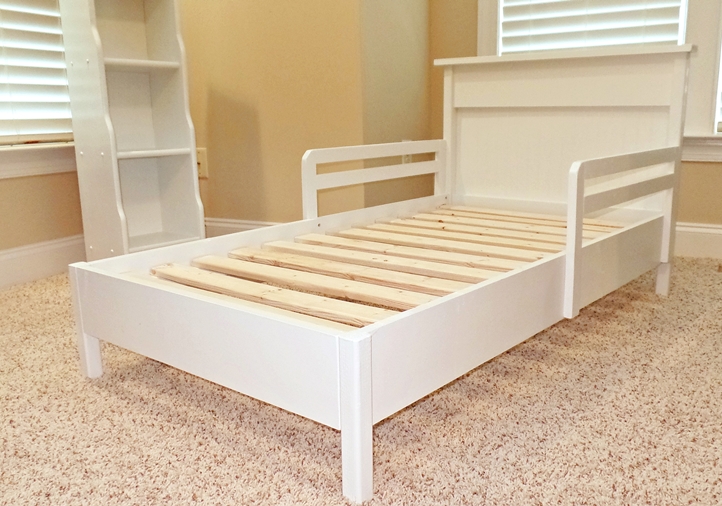
This was my second project from Ana White's plans. I felt confident in my new woodworking skills once I learned how to use the kreg jig for pocket holes. The child's table and chair I made came out so good, I decided why not try a toddler bed for my 4 yr old granddaughter. She loves her new bed. And I love how easy and fun it was to make.
I only had to make minor adjustments to the size to accomodate her mattress. I brought the footboard out to the edge of the legs because I needed to add an inch to the length, but the sides are set in like the plans. I also added a couple inches to the rail height since her mattress is 6 inches deep and I wanted it to be above the mattress.
I was afraid I couldn't get the rounded headboard neat, so I used the whole 6 inch board, adding to the height of the headboard a few inches. I also added the top board on the headboard because it just made it look cleaner on top. You might not be able to tell from the photo, but I did use the beadboard - I had a scrap the perfect size.
Built from Plan(s)
Estimated Cost
$40
Estimated Time Investment
Day Project (6-9 Hours)
Finish Used
Glidden Satin in White
Recommended Skill Level
Beginner
2x4 Outdoor Couch
Great outdoor seating built with 2x4's
Built from Plan(s)
Outdoor lounging

I used the plans for Simple Outdoor Lounge Chair with a few modifications. I used 2X8’s for a chunkier look. I also adjusted the seat position slightly for more of an Adirondack seating feel. It is finished with Cabot stain and seal (gold moon light).

Built from Plan(s)
Finish Used
Cabot stain and sealer - Gold Moonlight
Open Shelf Console with Modifications
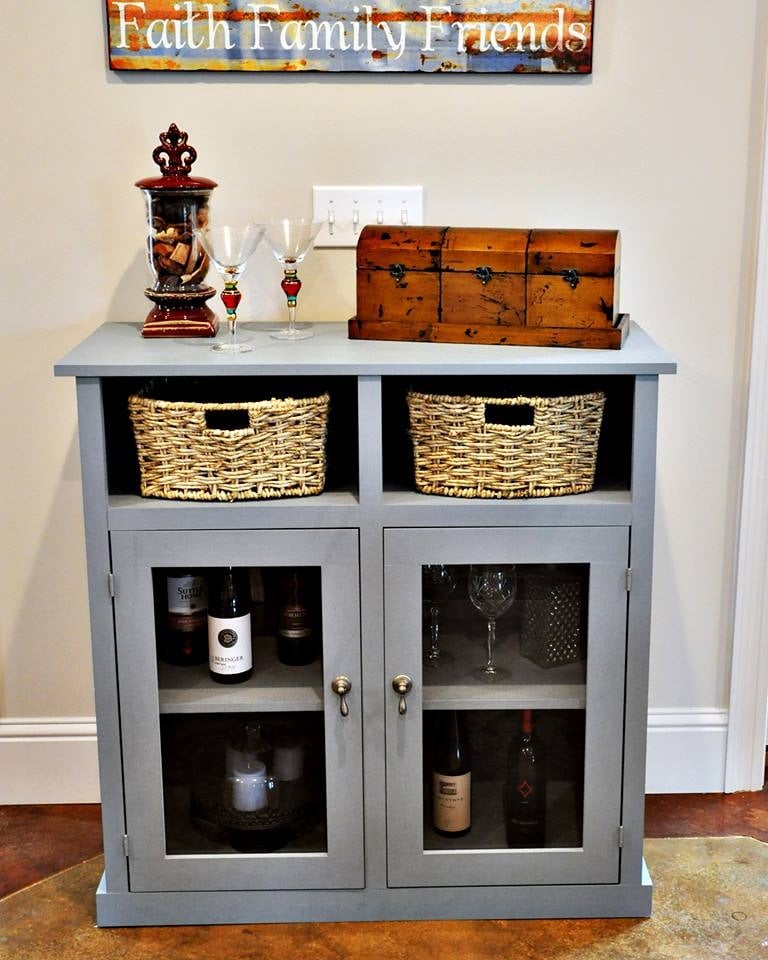
I modified the size of the original plan to better fit the space. It is slightly deeper and taller than the plans. I also used a router to create a rabbet for the glass inserts in the doors.
The finish is a homemade chalk paint followed by multiple coats of furniture wax. The build itself was quick and straight forward, but the finish took the most time.
The console really pops in a room full of stained furniture. I love the look, shape, and versatility of it--thank you for sharing the plans!
Built from Plan(s)
Estimated Cost
$75
Finish Used
I painted it with three coats of homemade chalk paint and followed by 3-4 coats of wax.
Recommended Skill Level
Beginner
Comments

Thu, 01/23/2014 - 08:36
Beautiful!
This project looks really good. I love the glass inserts and the color you chose.
Val @ artsybuildinglady.blogspot.ca