Community Brag Posts

Kentwood Twin Bed

My boys are young, so I wanted to do this without a foot board (I'm always nervous while they play that they'll hit their heads or something). I modified plans from the Hailey bed for the frame, by making it deeper.

Built from Plan(s)
Estimated Cost
$100
Estimated Time Investment
Weekend Project (10-20 Hours)
Finish Used
I mixed dark cherry and dark walnut. The cherry was too purple.
Recommended Skill Level
Beginner

Modified Cassidy King Headboard

Submitted by Radcrafter on Mon, 03/02/2015 - 19:41

Love this bed.  I found the Cassidy plan and immediately fell in love with the decorative detail of the headboard.  It wasn't until I was in the process of buying the wood that I decided to go in a different direction and use wood from my giant scrap piles to create the headboard instead of the wood shims.  I followed the plan with a few minor modifications to work with our existing metal frame as opposed to building the one in the plan.

The basic headboard and footboard went together in one day, but creating the design with the scrap wood for the headboard took an entire Saturday.  It was time consuming cutting pieces to fit and then staining each individual piece.

I marked this as a week long project because it does take several days to stain everything and then poly it.  Most of that is wait time not actual building time.


Built from Plan(s)
Estimated Cost
Approx. $70-80 for wood (used scrap for decorative part of headboard, so it would be more if you had to purchase additional wood) + $12 for 4 small cans of stain (already had the large can of Espresso).
Estimated Time Investment
Week Long Project (20 Hours or More)
Finish Used
Minwax Ebony, Special Walnut, Early American & Espresso Stain. Minwax Satin Polyurethane for top coat.
Recommended Skill Level
Intermediate

Comments

DIY Pantry Cabinet

Submitted by sdarnell1 on Thu, 06/01/2017 - 06:25

This pantry cabinet was inspired by a design from Ballard Designs.  I needed something a little less deep for my space and couldn't afford the $1900 price tag.  I was able to build this one for just around $100 and was able to customize it to fit my own space requirements.  The arched doors and half round moulding add a nice touch.  This versatile cabinet could be used for linens, kitchen storage, crafts, or just about anything else you can think of! 

Estimated Cost
$100
Estimated Time Investment
Day Project (6-9 Hours)
Finish Used
primed with Kilz water based primer, and painted with standard latex paint
Recommended Skill Level
Intermediate

Outdoor 2x4 sectional sofa

First wood project, thanks for the great plans Ana! I made the bottom cushions using 3" thick firm foam, 2" thick memory foam, and 1" thick batting (purchased in bulk and then cut to size), and covered them with outdoor fabric. The back cushions are 4" thick soft foam. I added easily removable/washable drop cloth covers on top of all the cushions. I don't have a finish on the clear redwood, but might add a clear coat to protect it. The memory foam makes this sofa very luxerious!

Estimated Cost
$1800
Estimated Time Investment
Weekend Project (10-20 Hours)
Finish Used
None
Recommended Skill Level
Intermediate

Toy Box

Submitted by LARMO on Tue, 04/16/2013 - 10:08

This was modified from a hose bench plan from Sunset Magazine website. I lengthened the front legs to 20 in and the back support legs to 36 in to accomodate a deeper box. It was made from 1x 6 scrap, a 36 in piano hinge, mdf pre-cut letters and two hinge supports. I painted the letters with yellow spray paint and the bench with two coats of exterior satin green paint. I also added a tray made from 1/8 in luan plywood timmed with 1x3 sides and screen molding sliding on a pvc 1x2. The seat was strengthened with additional cleats for sitting. Peel-n-stick decals

Estimated Cost
$42 -$14 piano hinge, $7 two hinge supports, $8 four letters, $12 for peel-n-stick decals all other materials and paint form previous porojects
Estimated Time Investment
Weekend Project (10-20 Hours)
Finish Used
Yellow gloss spray paint and exterior satin paint
Recommended Skill Level
Intermediate

I doubled the recipe and built a table that seats 12!

Submitted by JMRojas on Fri, 03/06/2015 - 14:07

I used the Farmhouse Table plans and just extended the measurements to build an extra-long outdoor table that seats 12.


Estimated Cost
$250
Estimated Time Investment
Weekend Project (10-20 Hours)
Finish Used
Tea, vinegar, and steel wool
Recommended Skill Level
Intermediate

Comments

Rustic end table

Submitted by Anonymous (not verified) on Sun, 06/04/2017 - 17:15

Awesome project!

Thanks Ana!

Estimated Cost
$120
Estimated Time Investment
Afternoon Project (3-6 Hours)
Finish Used
Distressed vinegar and steel wool mixture with a clear coat finish.
Recommended Skill Level
Intermediate

First ever project

Submitted by sidian3 on Sun, 07/18/2021 - 08:09

The one on the left was my first try. I had so much fun making these!

Estimated Cost
113
Estimated Time Investment
An Hour or Two (0-2 Hours)
Recommended Skill Level
Beginner

Comments

Pottery Barn Style Night Stand (thank you Ana)

Yesterday I built two of these for my wife and I's room, we just moved from Hawaii to Arizona. The plans were clear and simple, and the end product turned out awesome. Next I will tack the dresser/tv stand. Thank you Ana

Built from Plan(s)
Estimated Cost
$65 for two tables
Estimated Time Investment
Day Project (6-9 Hours)
Finish Used
MiniWax Espresso applied with a paint brush. I used an extremely thin coat.
Recommended Skill Level
Beginner

Patio Coolbox Box

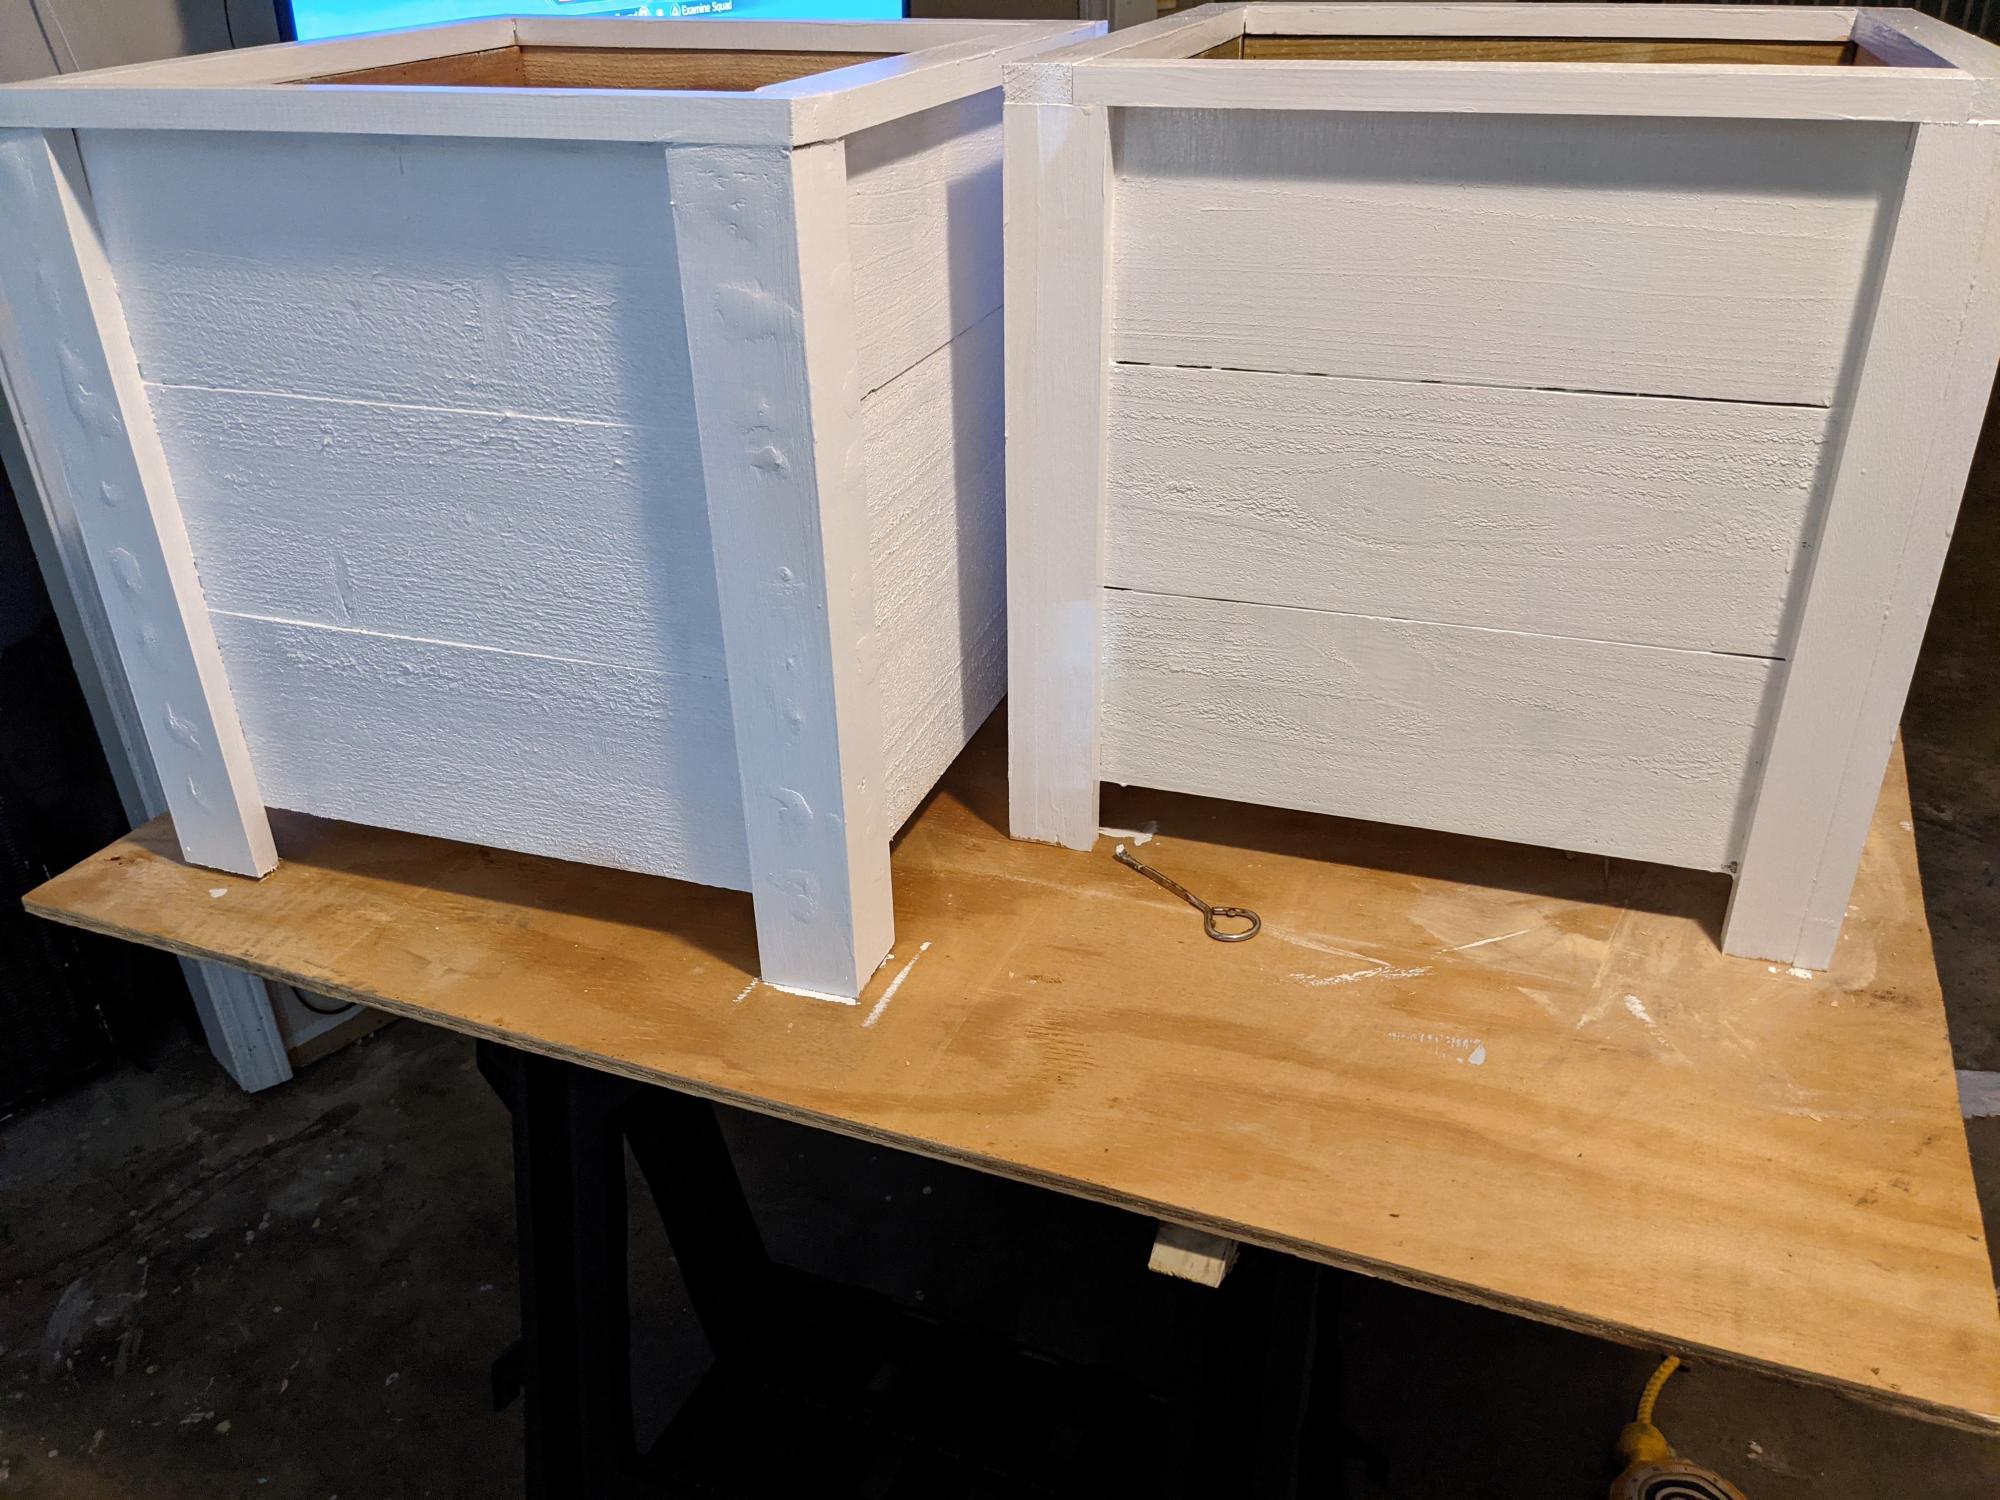
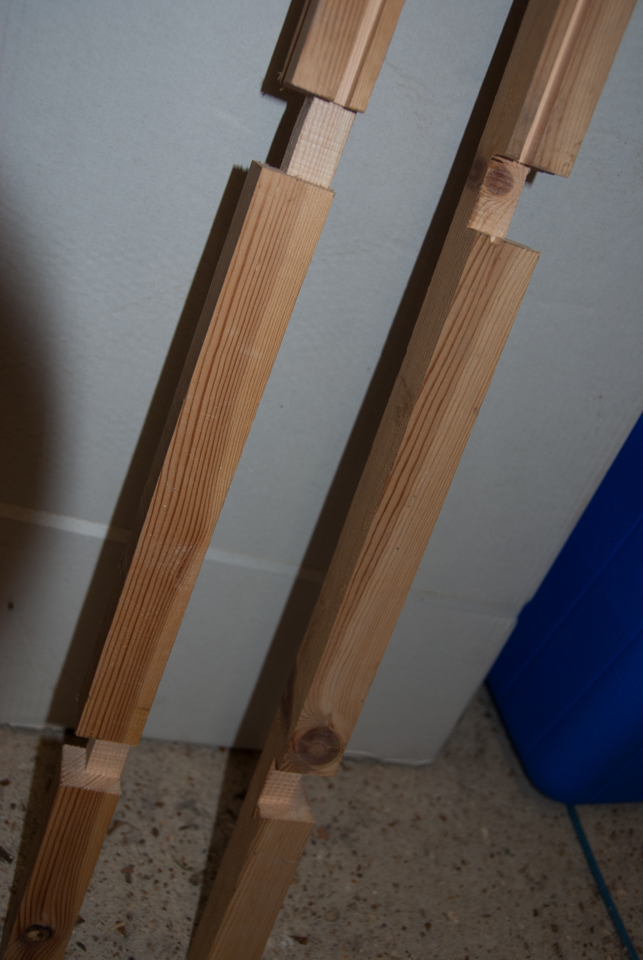
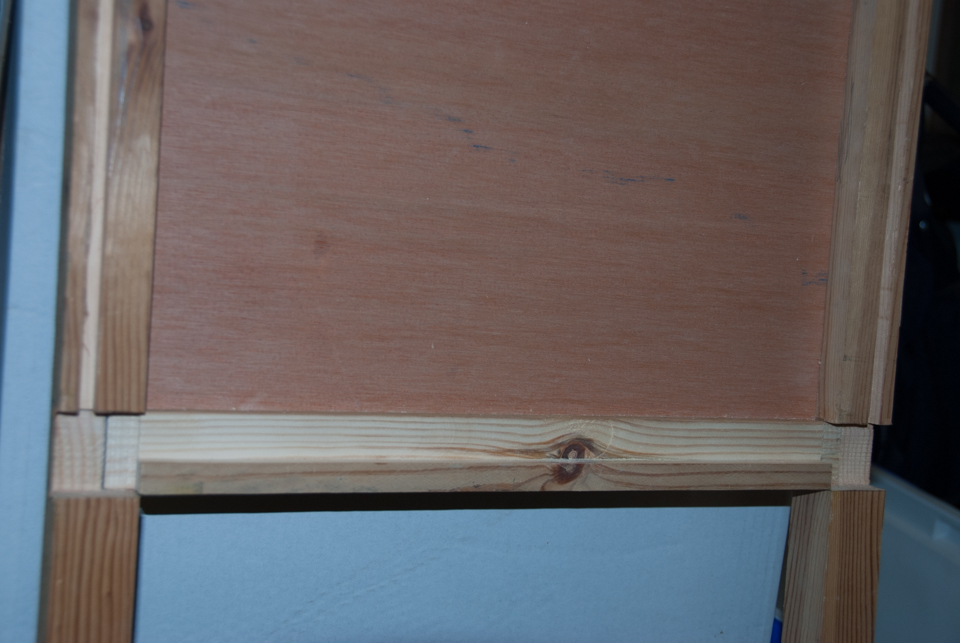
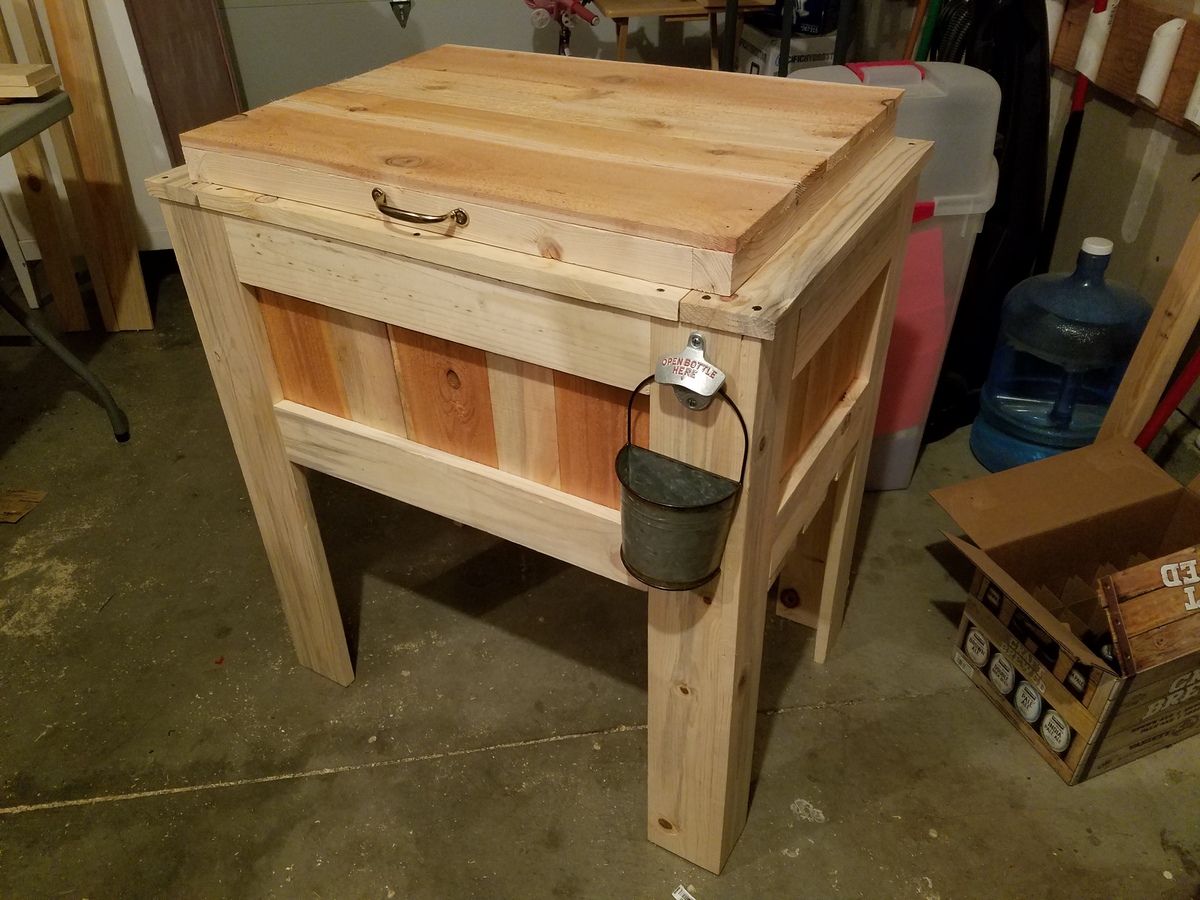
I wanted to make this project for my son-in-law for Christmas and use up wood I already had in the garage.  I also thought using 2x4's was a bit chuncky for the size of the coolbox, so while I used the idea, I did not really use the plans and made up my own.  I only used screws to attach the wood for the two shelves, all the other joints were cut and glue joints and at one point I felt I was making a jigsaw puzzle! 

Other changes I made were:

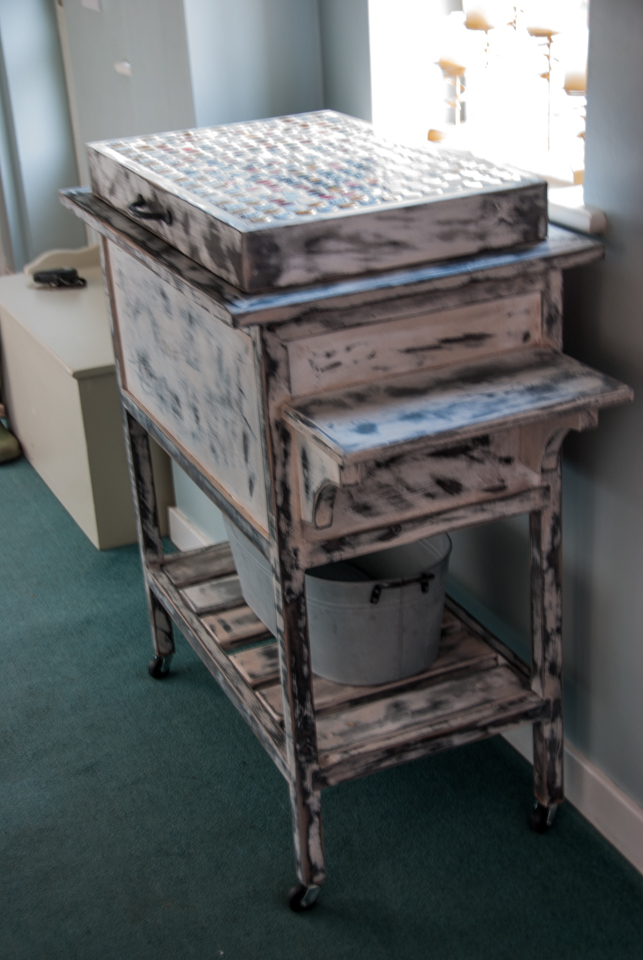
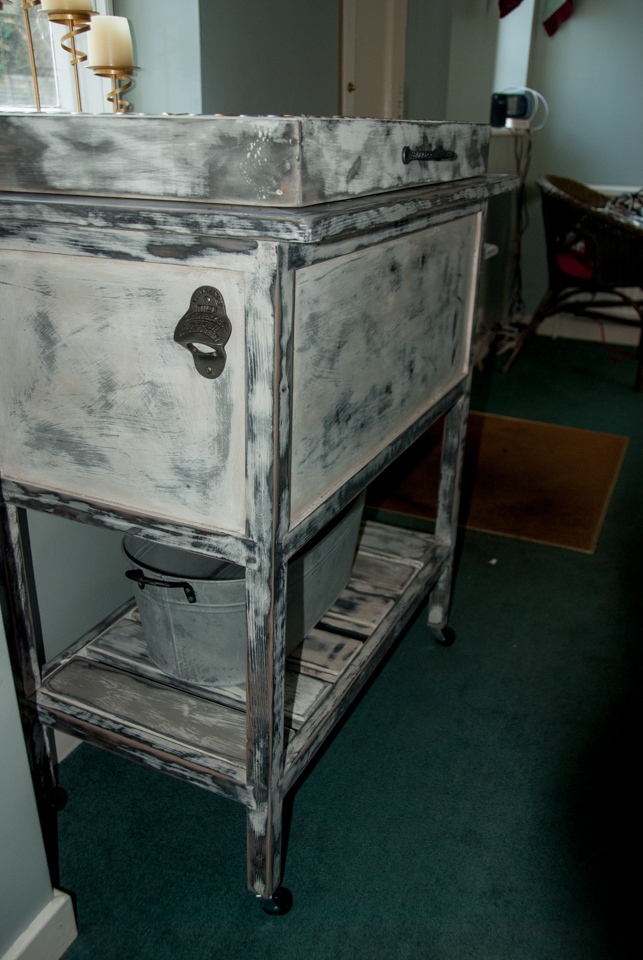
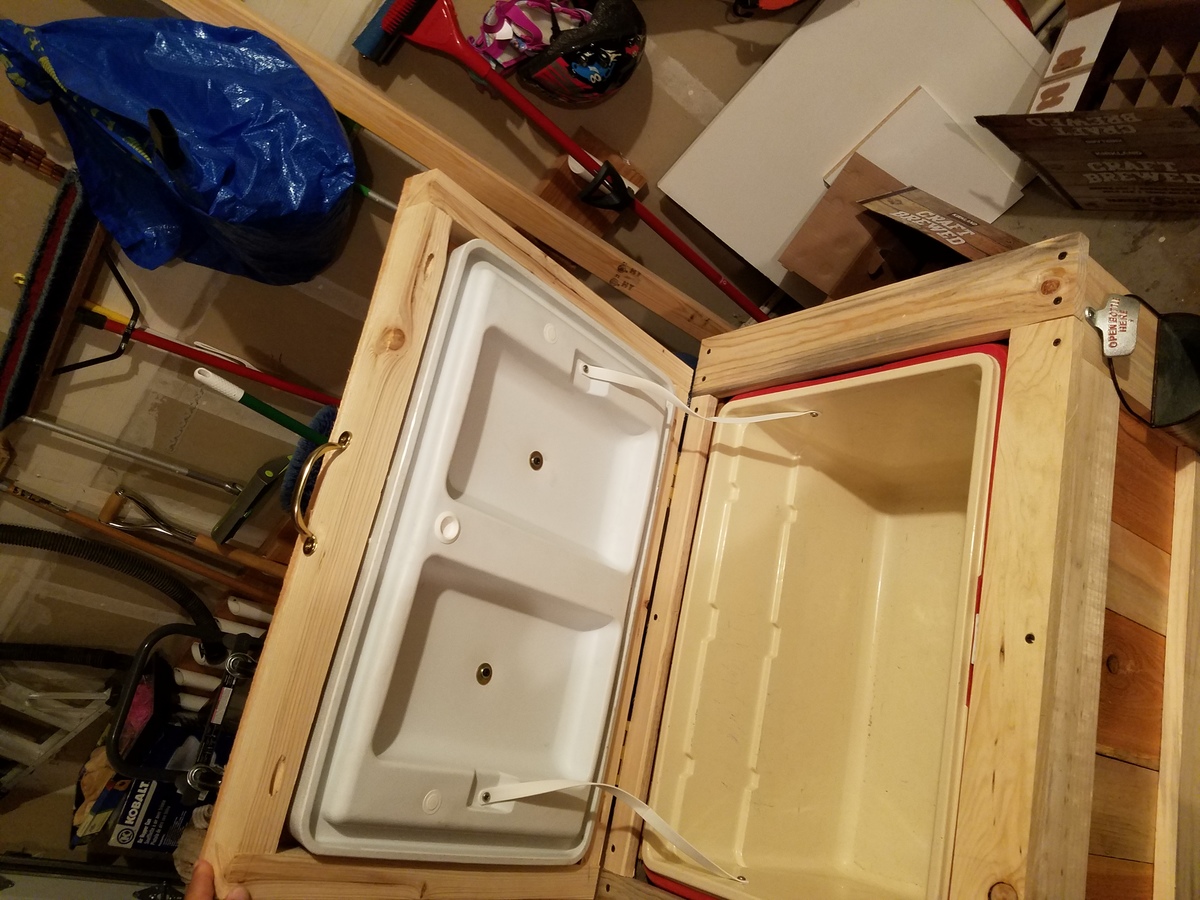
No water drain tap - The drain in the cool box is set slightly above the base of the coolbox.  I loved the idea of a tap for the external look of the finished project but for a practical purpose, it is very fiddly to install and you would still have to emply the bottom of the coolbox with a cloth as the water would not completely drain from the box.  I did not remove the handles and made the wooden box slightly bigger, just big enough to raise the handle and remove the coolbox for emptying and cleaning.

Decorative Bottle Caps -  Instead of putting these on the front, I designed the lid so that it could be covered with a layer of bottlecaps and grout (having first glued the caps on).  The provided a surface for putting hot food on should you want to use it as a 'hotpad' (although you would not be able to open it if you did) - but mostly, I thought they would be less likely to fall off, it povides a rain/weather barrier, and futher insulates the box. So the lid in my version is framed with wood, then has a layer of insulation, a layer of 3/4" wood, then the bottle caps/grout.

Bottle Cap Catcher -  I added a bottle opener to the side opposite the shelf and attached below it a 1/2 circle terricotta planter which comes with a hole in the bottom to catch bottle caps.

The whole thing was painted in 3 different layers of Anne Sloan chalk paint, waxed and sanded to give it the distressed look.

I have a list of the wood used (with sizes) if anyone wants it.  I plan to write the plans up better, but for now this is what I have.   

Built from Plan(s)
Estimated Cost
Just the price of the coolbox as made from scraps already to hand.
Estimated Time Investment
Week Long Project (20 Hours or More)
Finish Used
Anne Sloan Chalk Paint
Recommended Skill Level
Intermediate

Comments

Rolling Barn Door Cabinet

Submitted by bill_m on Thu, 07/29/2021 - 16:22

This is my version of the Barn Door Snack Cabinet. I made it for my shop/office and was just what I was looking for to add storage space. For the most part I used the published dimensions, but changed the construction method by notching the center divider and using a cutoff from the plywood panel as front and rear stretchers for attaching the top and the face frame. I also used nylon washers for the rollers to make the slide smoothly and quietly. I installed door stops to make sure the door wouldn't slide off the track, I added silicone door bumpers to the lower door guide to avoid wood to metal contact and finally, I ground a radius on the door straps to match the rollers.
Thanks Ana for the inspiration!

Estimated Cost
$200
Estimated Time Investment
Weekend Project (10-20 Hours)
Finish Used
Latex paint, amber shellac, wipe-on poly
Recommended Skill Level
Intermediate

Comments

Reclaimed 1x4 Coffee Table

I purchased reclaimed 1x4s from a deconstruction warehouse called Re-Use Hawai'i for 20 cents a foot! I cut the lumber to make an un-ordered stagger pattern, experimented with dowel joints to join the cut pieces into 4 ft. planks and used pocket hole screws (hidden by the table legs and supports) to join the planks. I used old salvaged 1x2 window framing for the legs using pocket hole joinery.

Estimated Cost
$5 using reclaimed lumber, perhaps $35 from home improvement stores.
Estimated Time Investment
Weekend Project (10-20 Hours)
Finish Used
I left most of the wood natural, except for one 4 ft. 1x4 that I stained with one coat of Minwax Red Oak (on hand). The legs I painted with Behr Ultra Pure White (on hand). I sealed the top with 3 coats of Watco Wipe-On Poly.
Recommended Skill Level
Beginner

Wine Cabinet from Barn Boards

Submitted by whittlevin on Fri, 03/13/2015 - 10:20

I used the plan more as inspiration. Most of the boards are from an old barn and had to be planed down. The cabinet holds 30 bottles. I also found some old hardware on a couple of drawers that were in the barn. 

Built from Plan(s)
Estimated Time Investment
Weekend Project (10-20 Hours)
Recommended Skill Level
Intermediate

Comments

Console Table

Submitted by wangbw on Sun, 06/11/2017 - 15:32

Quick and easy to follow plans.  Only issue I ran into was that my miter saw only cuts up to a 50° angle.  I set up a jig to hold the 2x2 perpendicular to the saw and set the miter to 30°.  Viola, easy 60° angles!  Pic attached for reference.


Built from Plan(s)
Estimated Cost
$80
Estimated Time Investment
Afternoon Project (3-6 Hours)
Recommended Skill Level
Beginner

Paint and Stain 2x4 Adirondack Chairs

Submitted by Anonymous (not verified) on Thu, 08/05/2021 - 11:22

Built for our Firepit.

Estimated Cost
$40 per chair
Estimated Time Investment
Weekend Project (10-20 Hours)
Recommended Skill Level
Intermediate

Comments

Lego/Storage Coffee Table

Submitted by Nami on Thu, 04/25/2013 - 07:02

I built this lovely lego/coffee table for my son, 7 and my sanity at night! This is my 3rd plan I tried from Ana's wonderful plans. (I made airplane shelf and $10 wall ledge before).

Estimated Time Investment
Afternoon Project (3-6 Hours)
Recommended Skill Level
Beginner

Comments

mrs.mama

Sat, 04/26/2014 - 11:57

Your table is just beautiful!! Question-- do you remember about how much it cost for the wood materials? I am dying to make one soon!
(Also, I would be curious to know which stain you used, it's gorgeous.)
Thanks!

TV Stand with Storage

Submitted by Phillip G on Mon, 03/16/2015 - 09:14

Loved the extra long buffet cabinet but did not need it, however I did need a television stand.  Here is my inspired project.


Removed the center drawers and added a glass door, adjusted the dimensions to 60x16x20... and this is what I've created.


Thank you for the inspiration!

Built from Plan(s)
Estimated Cost
$175.00
Estimated Time Investment
Week Long Project (20 Hours or More)
Finish Used
Early American
Recommended Skill Level
Intermediate

Comments

Cooler chest

Submitted by Anonymous (not verified) on Tue, 06/13/2017 - 09:40

I'll be honest I didn't use these plans to build this cooler chest but this was the first place I saw the concept of building a box around a cooler to make a cooler chest so I give anna props for inspiring me I already had an old cooler to use so it helped keep the cost down I also used 1x4 blue pine and cedar fence picketts and repurposed the bottle opener from a growler carrier (in hindsight the bottle opener on a growler carrier doesnt make sense) all told this cost me about $45

Estimated Cost
$45
Estimated Time Investment
Afternoon Project (3-6 Hours)
Recommended Skill Level
Beginner

Cedar outdoor table with scraps!

Submitted by Anonymous (not verified) on Sat, 08/21/2021 - 06:28

I had a pile of leftover wood after getting my deck rebuilt; so I had some brand new cedar as well as some used pressure-treated wood. (Of course, I made the deck builders leave anything worth keeping!) I thought it would be put to good use as an outdoor table for storage & serving on my new deck! I started off with the Rustic X Console Table plans from this website, and then I made just a few modifications on length (to fit the space better). I was able to re-use my leftover wood, and I think it turned out beautifully! It's been used several times for food serving when the neighbors come over for happy hour, for storage of random outdoor things, and for climbing on when I need to reach the TV above it...so it's definitely sturdy! Thank you, Ana White, for such great plans that are easy to use and easy to modify as needed. Really happy with this one!

Built from Plan(s)
Estimated Cost
Free
Estimated Time Investment
Afternoon Project (3-6 Hours)
Finish Used
None - naturally weathered cedar
Recommended Skill Level
Beginner

Comments

Bunk Beds for a Small Room

Our bedrooms are 9' x 9' so when our girls needed to move in together, we needed a bunk bed that would be short enough to fit under the fan, have a place for drinks, books, an alarm, and tissues, and also have a place where our youngest could have a dark sleeping space while older sister stays up later.

We're not going to be in this setup for long, so I used common board to keep the cost down as much as possible. The whole bed cost about $200, but I would suggest staying away from common board. It was really warped and couldn't be sanded smooth. We ended up going with a dark, thick paint to cover the wood imperfections. To deal with the warped wood, I made an outline of each end of the bed with painter's tape on the garage floor and used weights to hold the wood where it was suppose to be. I also modified the plans to make the bottom bunk a bit shorter and made the whole thing only 3 inches off the ground. All put together the bed is very sturdy and everything lined up well.

I used some scrap wood to make the holders for drinks and tissues and a holder for the iPod and speakers. These just rest over the railing, so we can move them around if need be. The book racks are Ikea hacks....they're just spice racks painted to match the bed. The curtains are just hung on a 1" dowel set into the same cups that closet rods are put up with. I also added some flower knobs from Target so that the girls can hang a robe when it's cooler outside.

Thanks for the plans Ana! My girls LOVE this bed!

Built from Plan(s)
Estimated Cost
$200
Estimated Time Investment
Week Long Project (20 Hours or More)
Finish Used
Paint and polyurethane coat.
Recommended Skill Level
Intermediate

Comments