Community Brag Posts

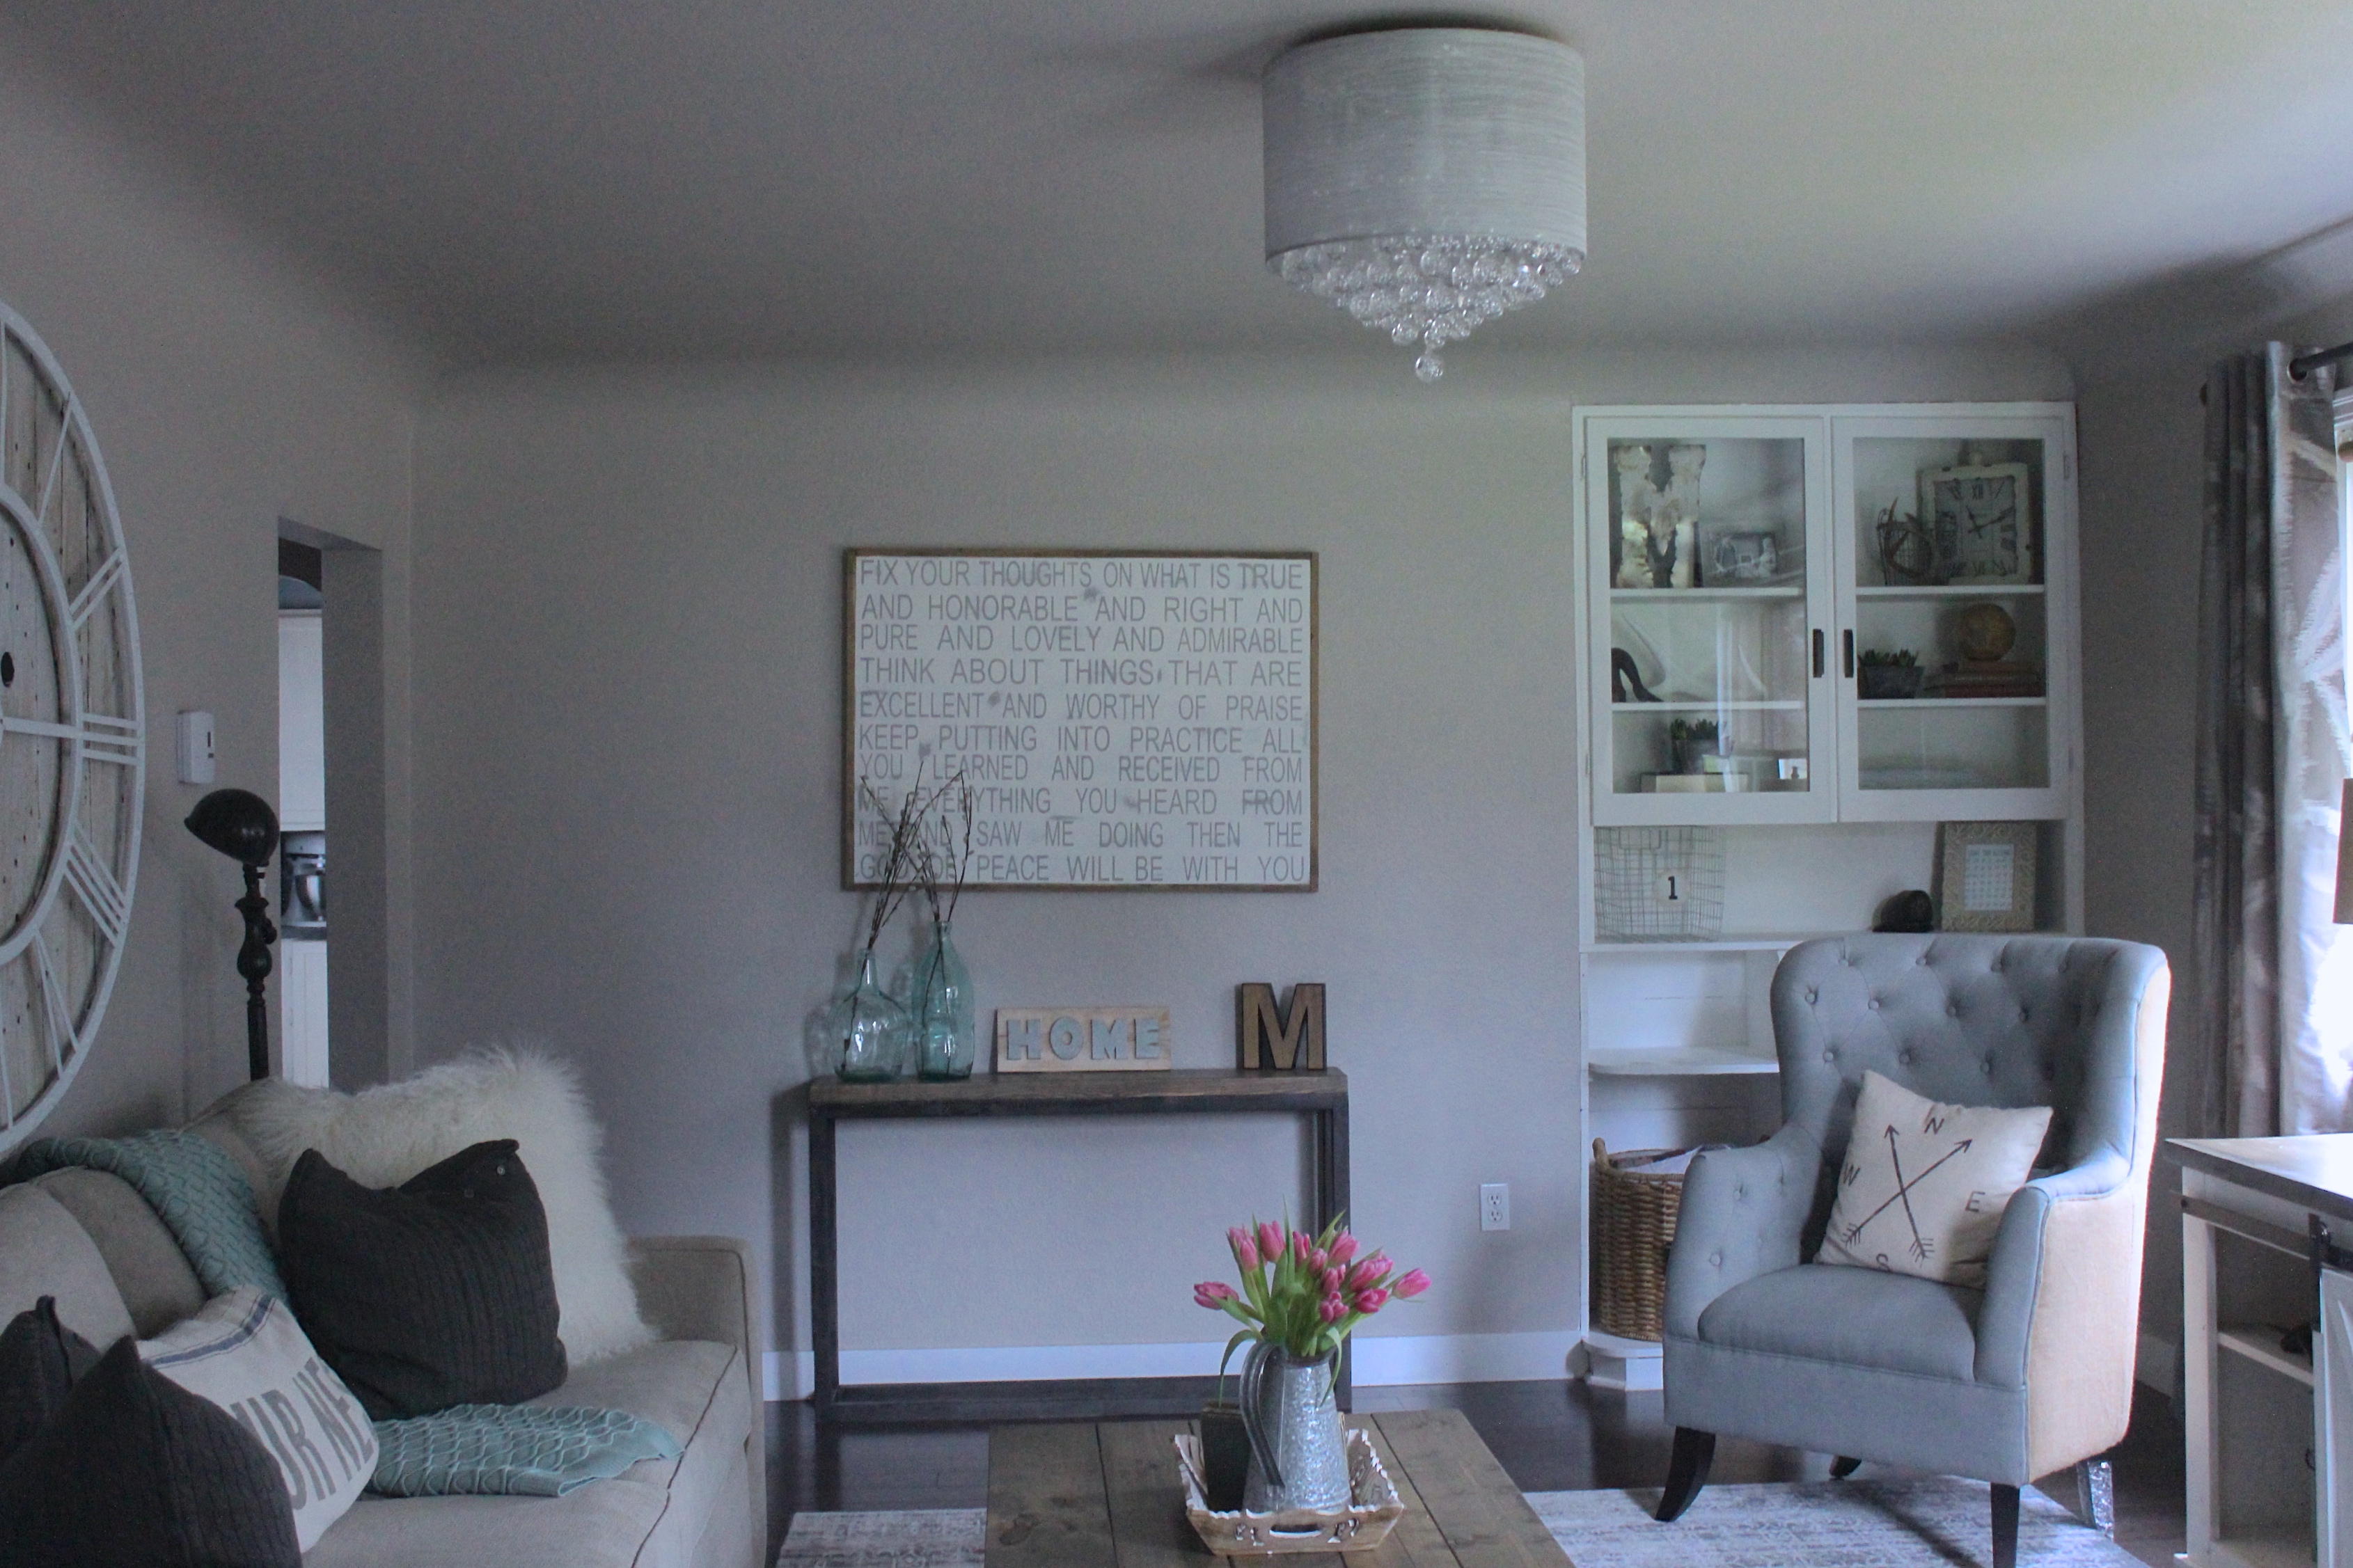
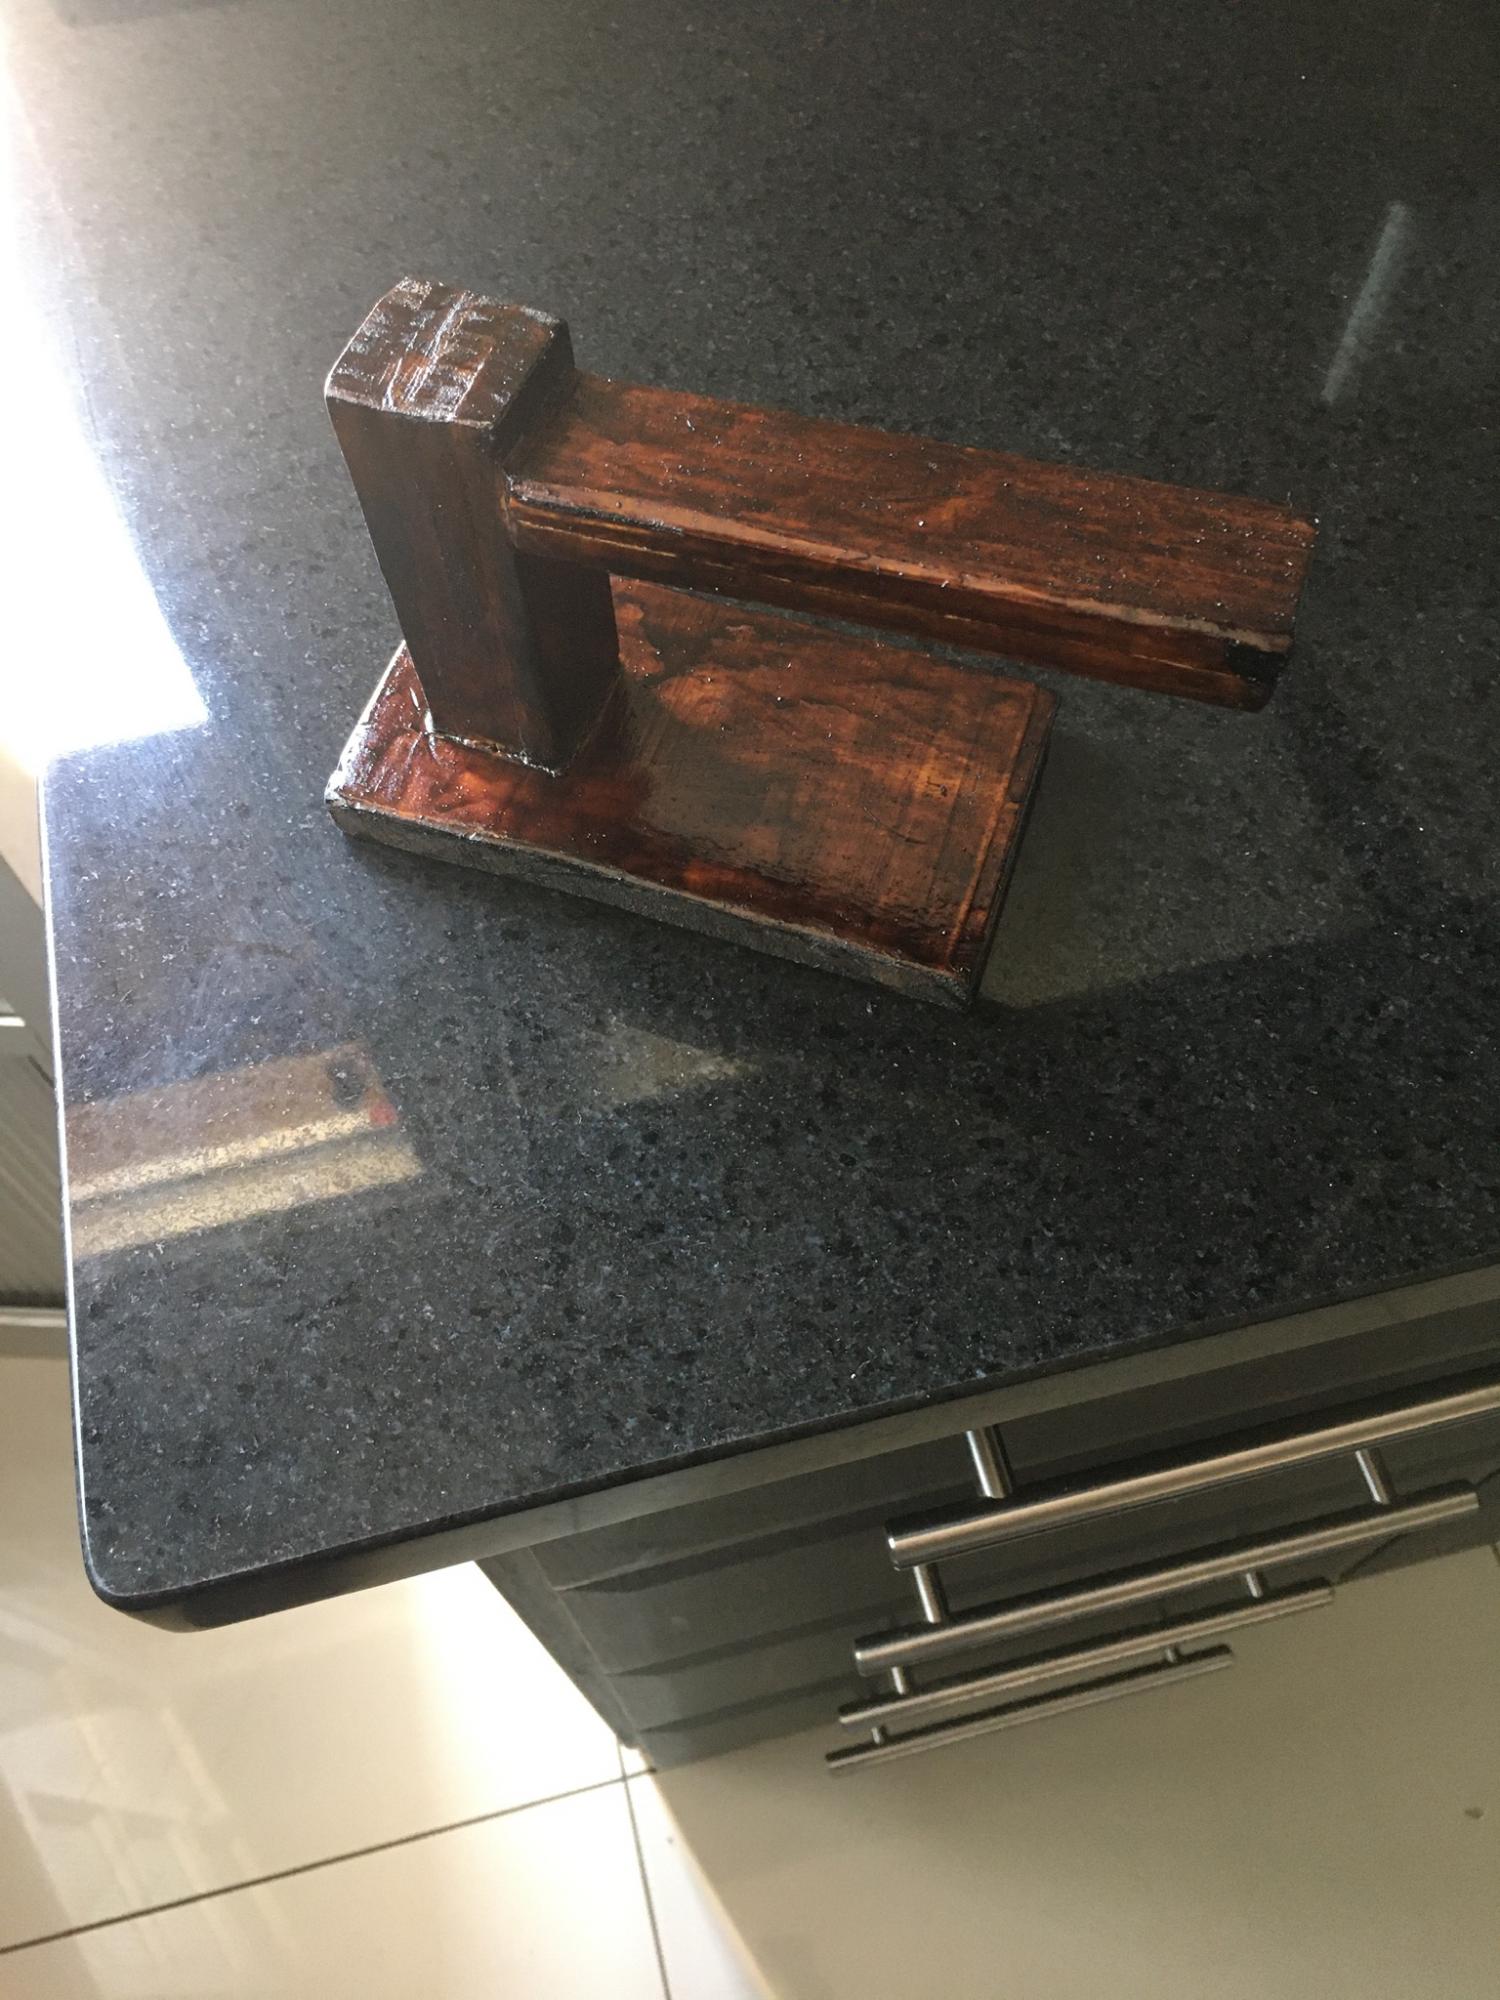
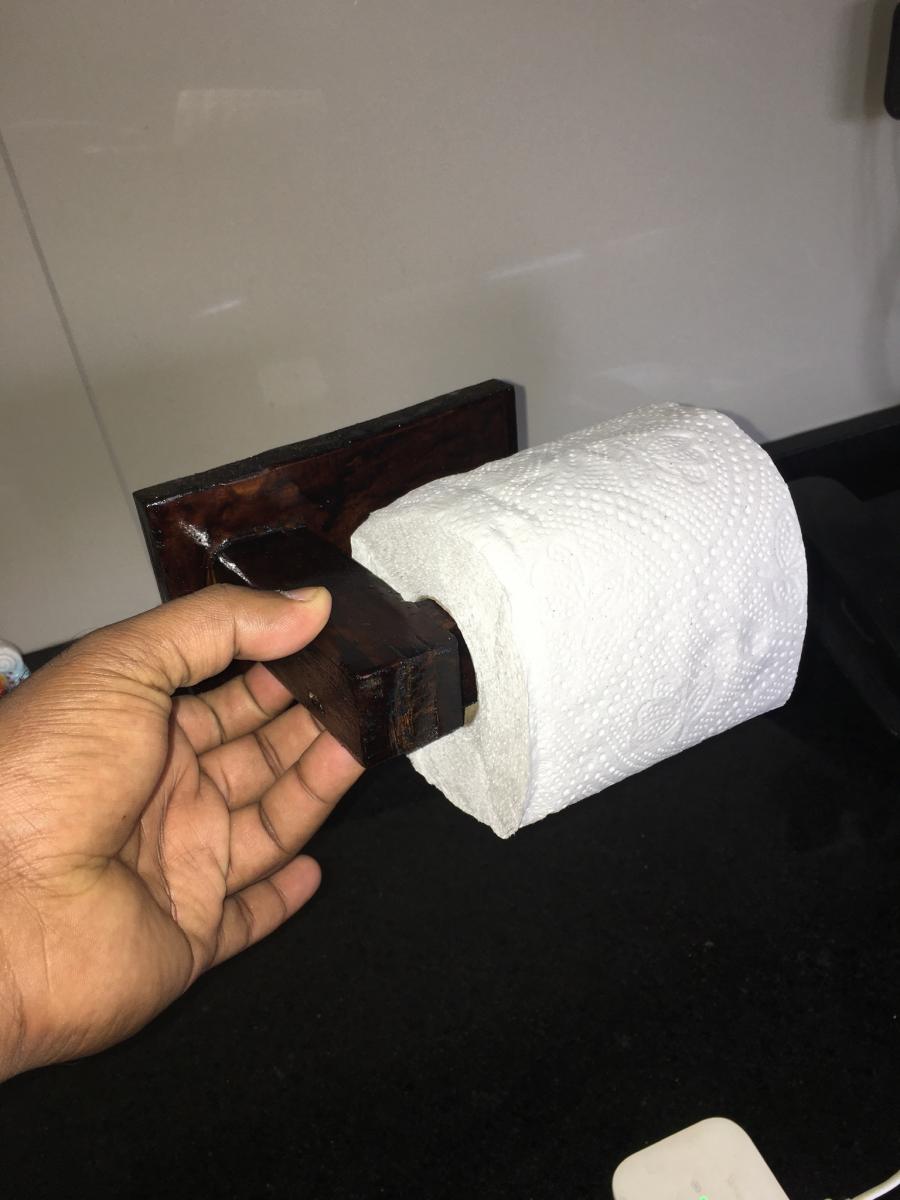
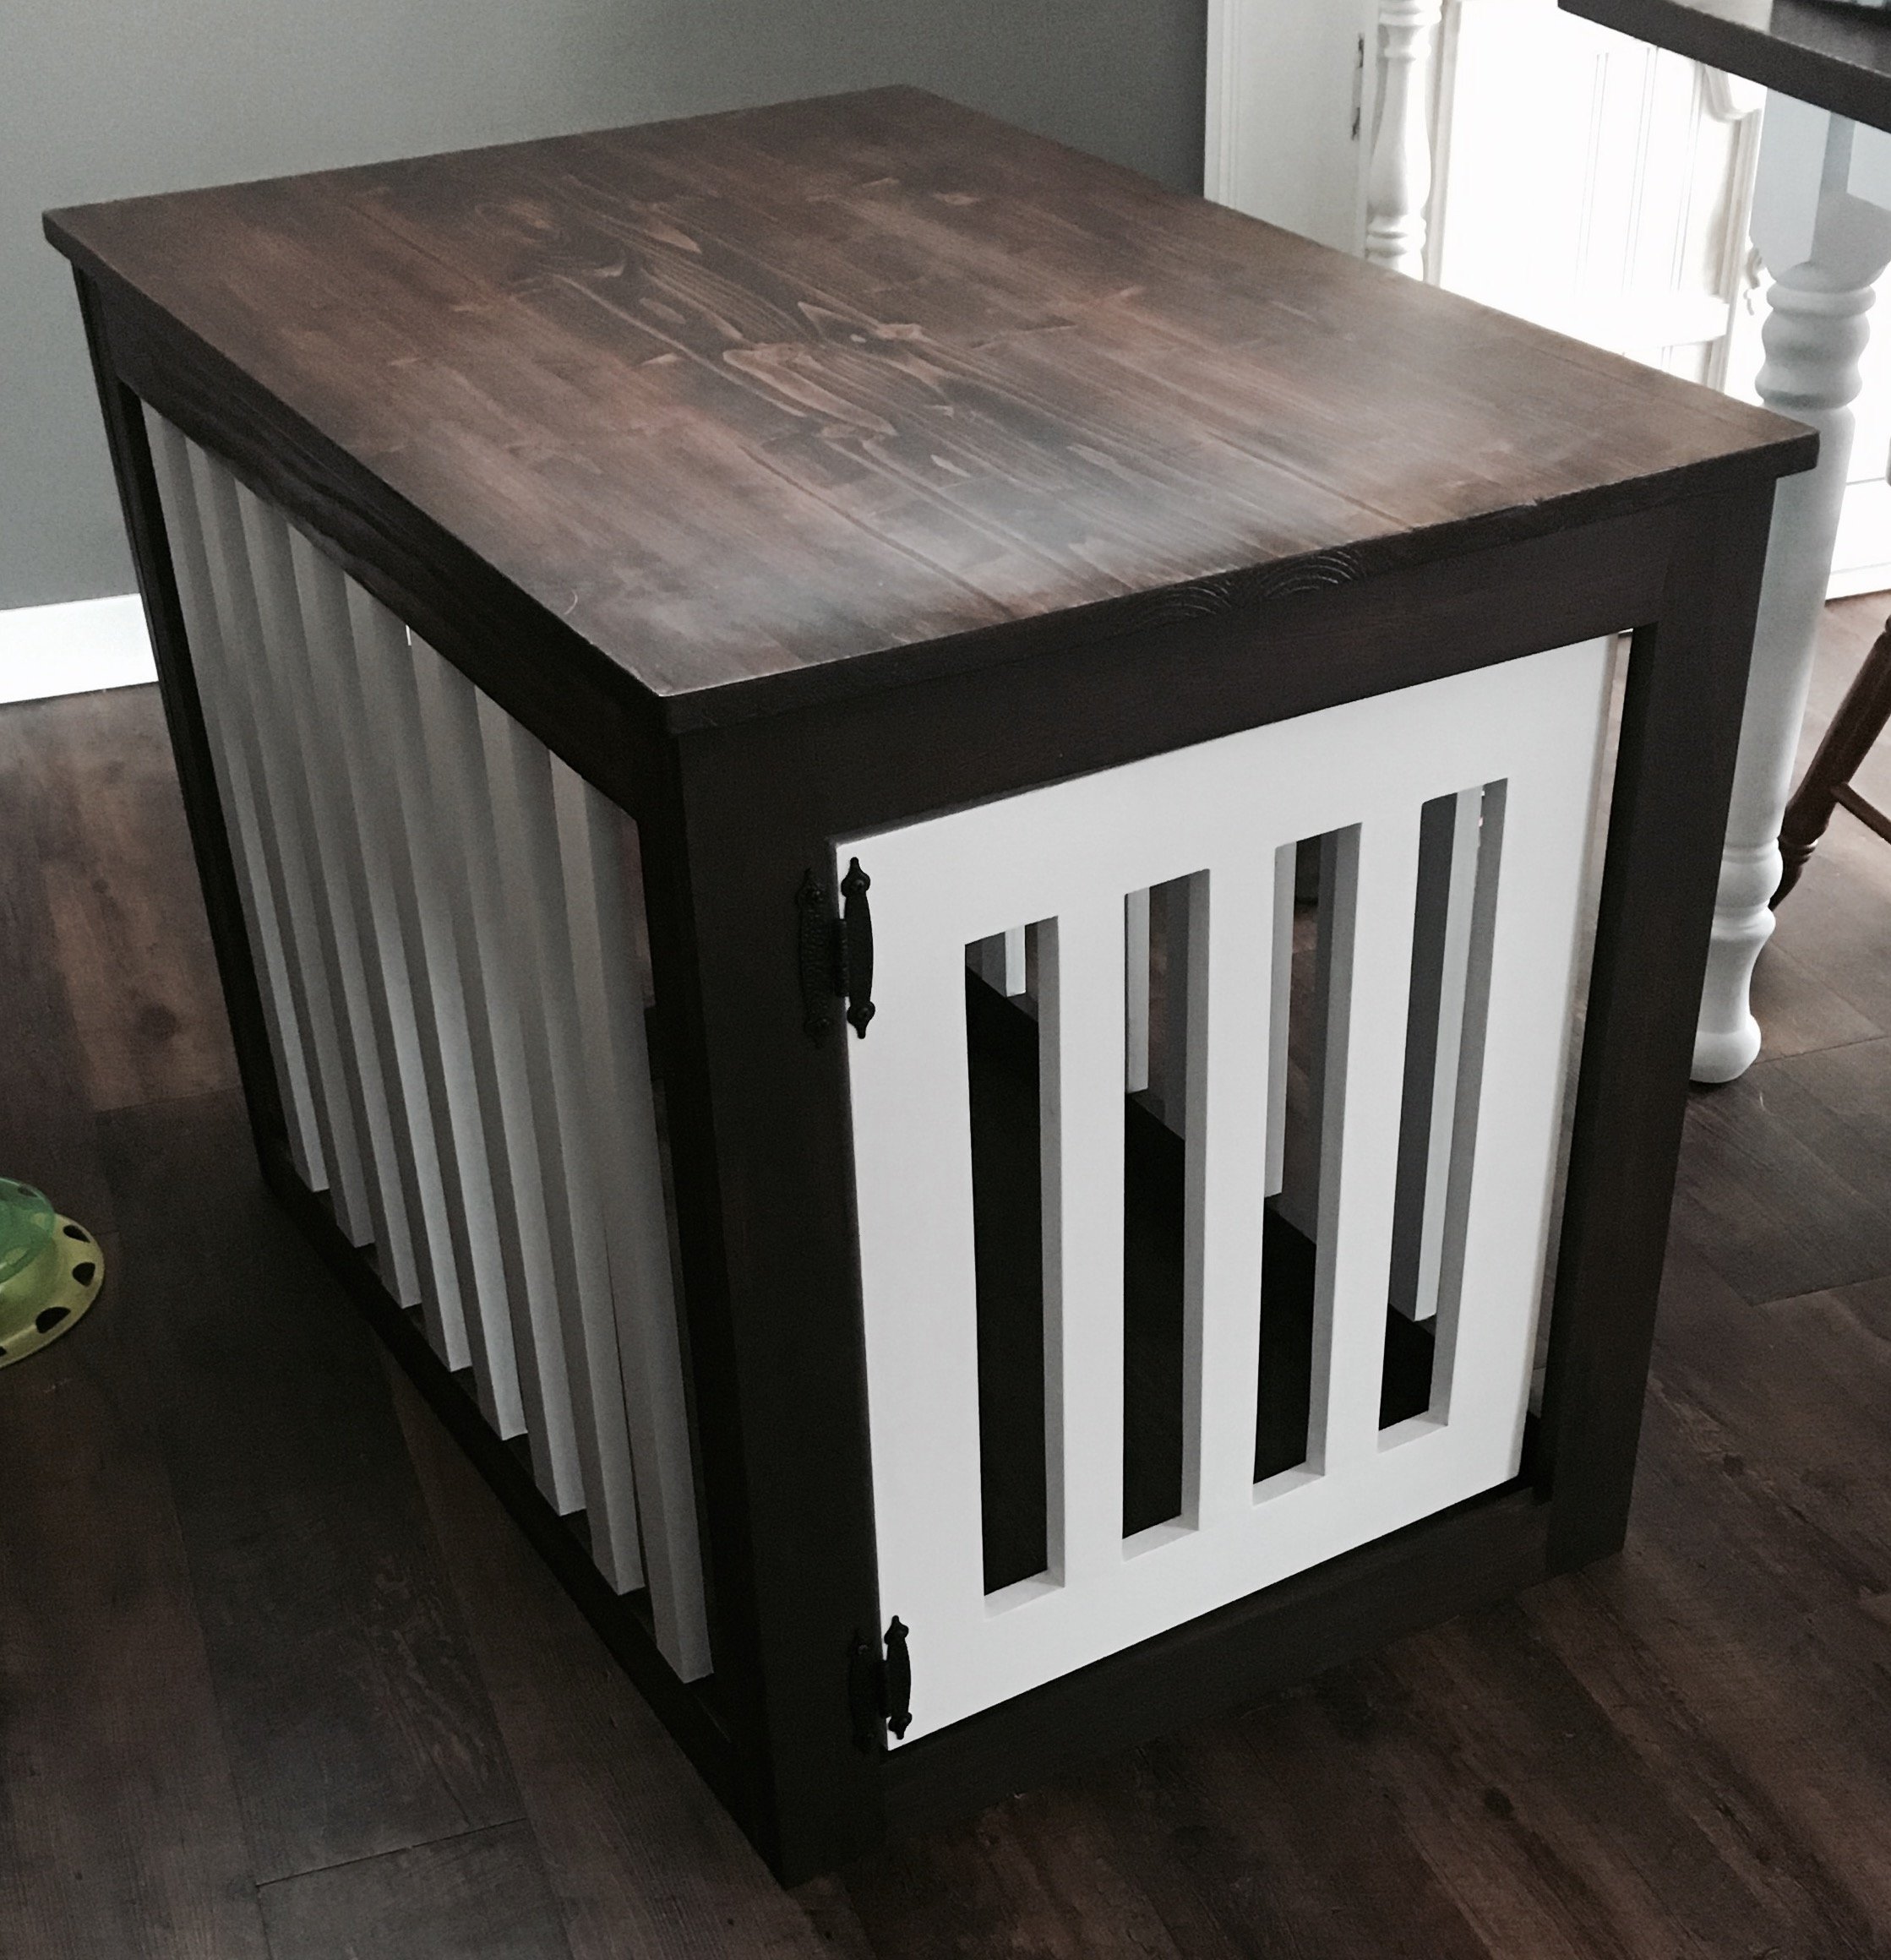
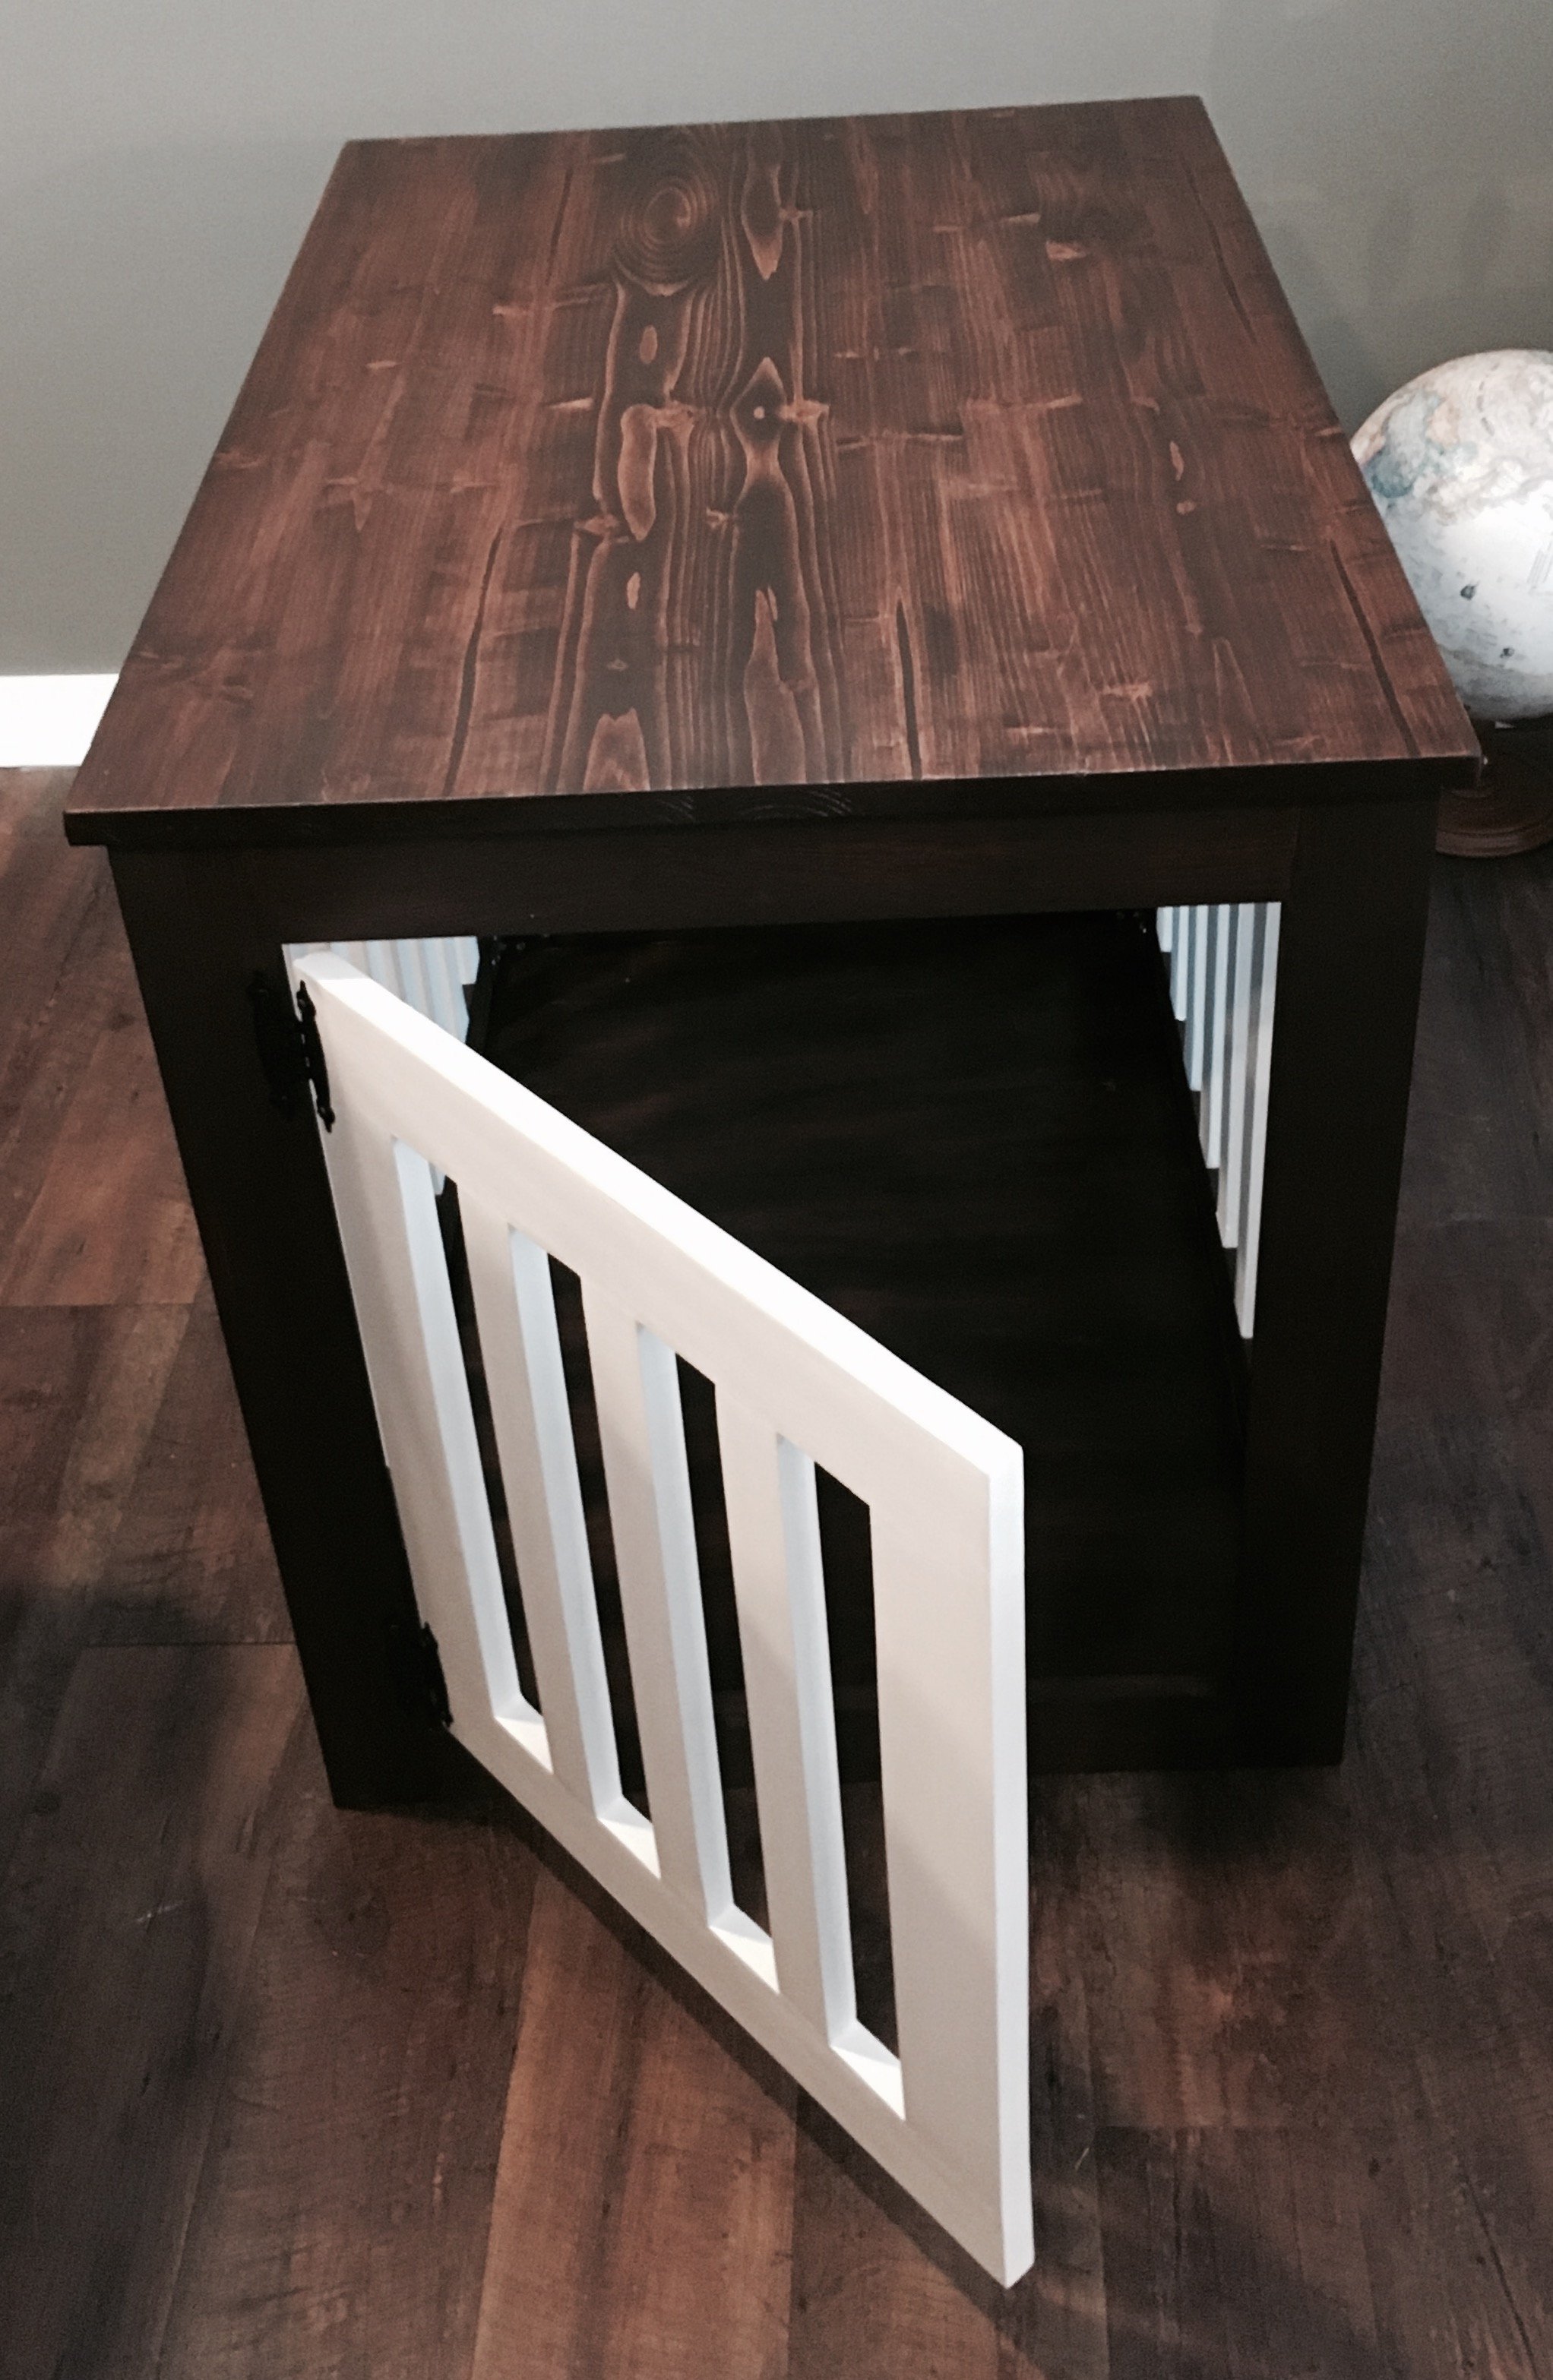
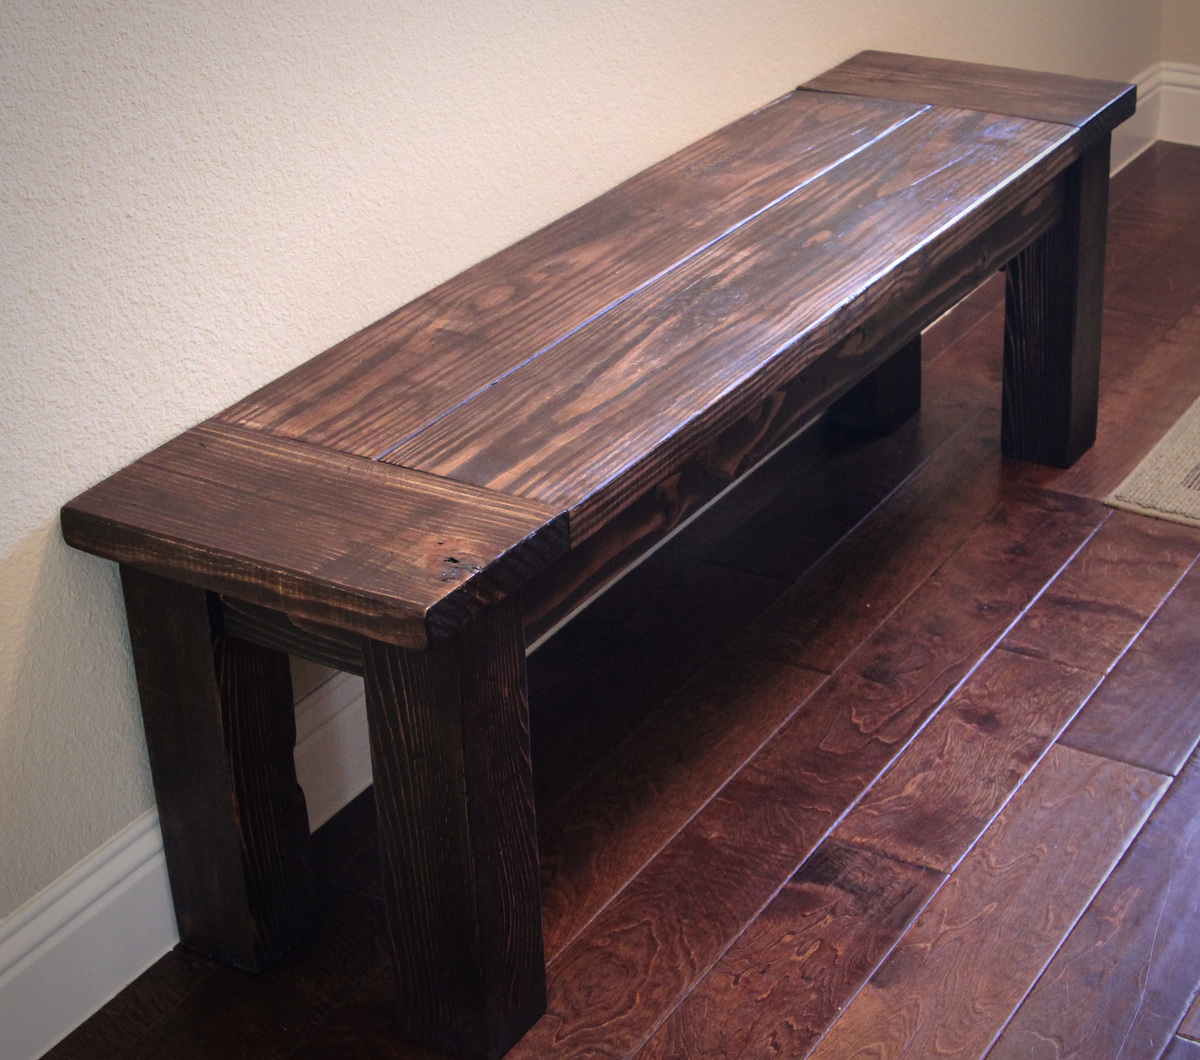
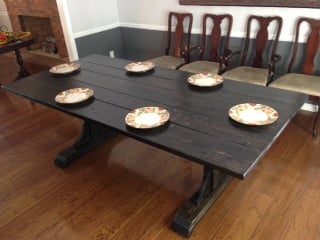
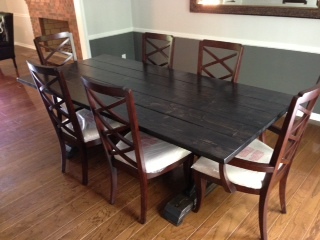
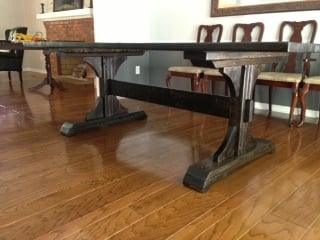
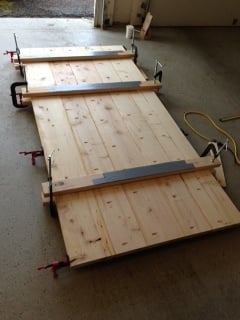
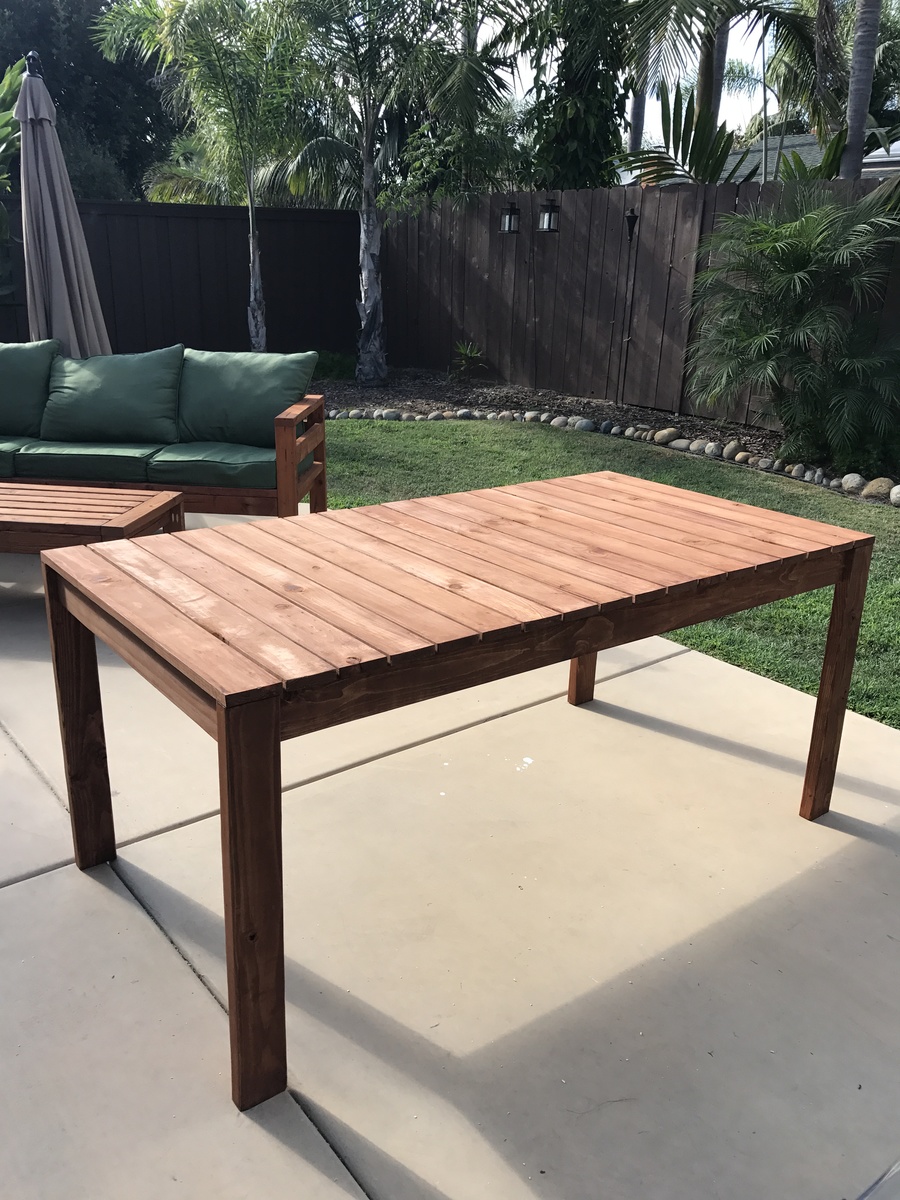
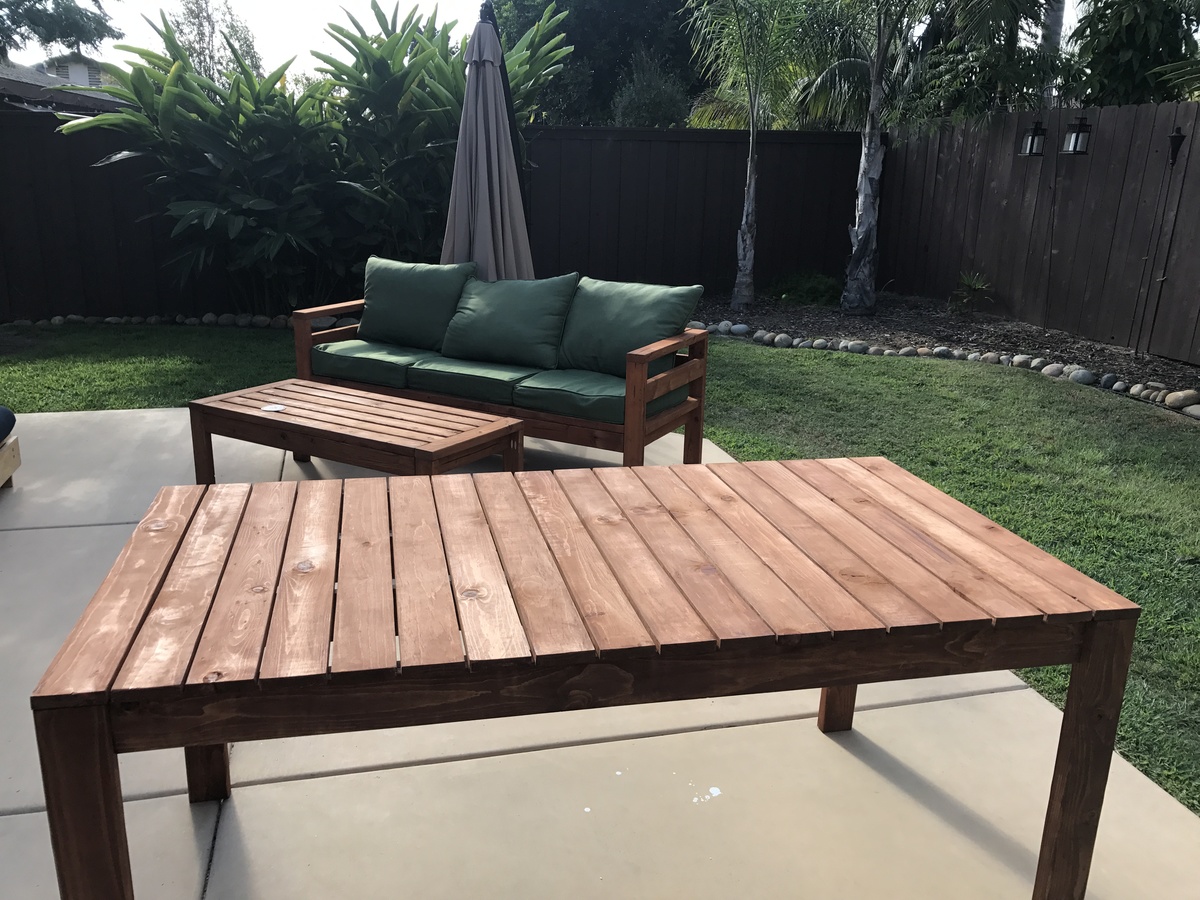
Industrial Coffee Table

Submitted by Anonymous (not verified) on Tue, 02/16/2016 - 12:24

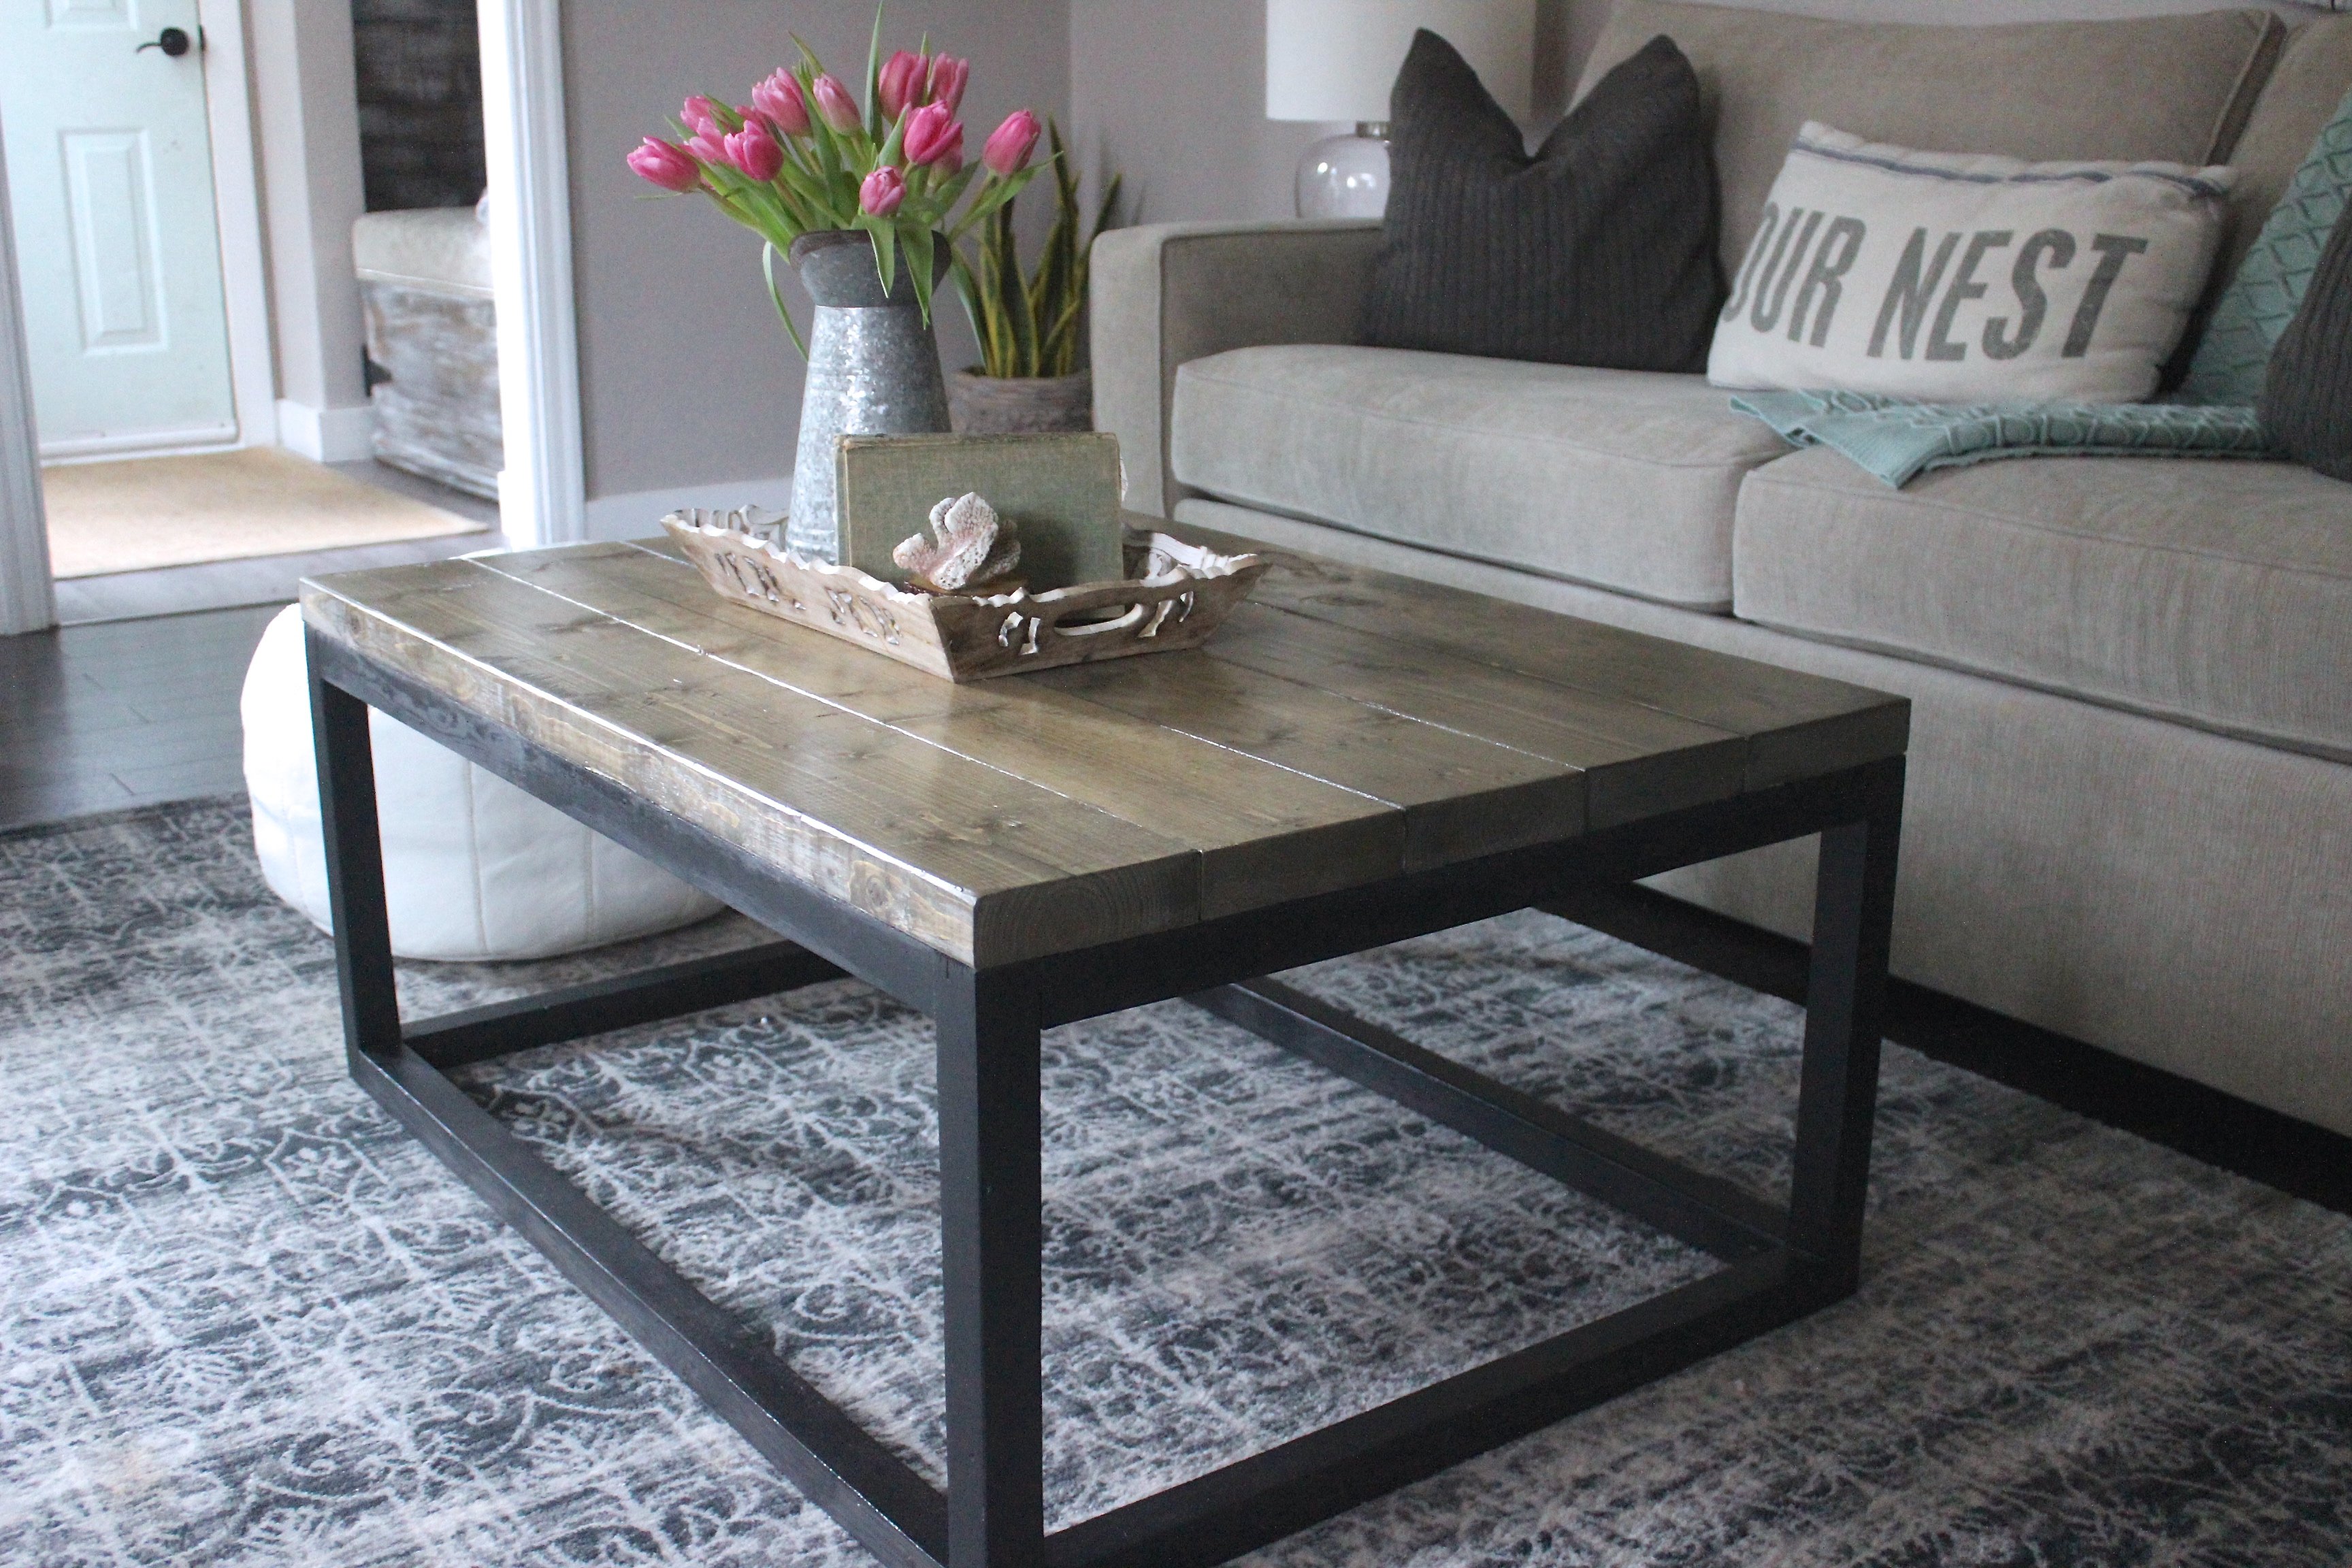
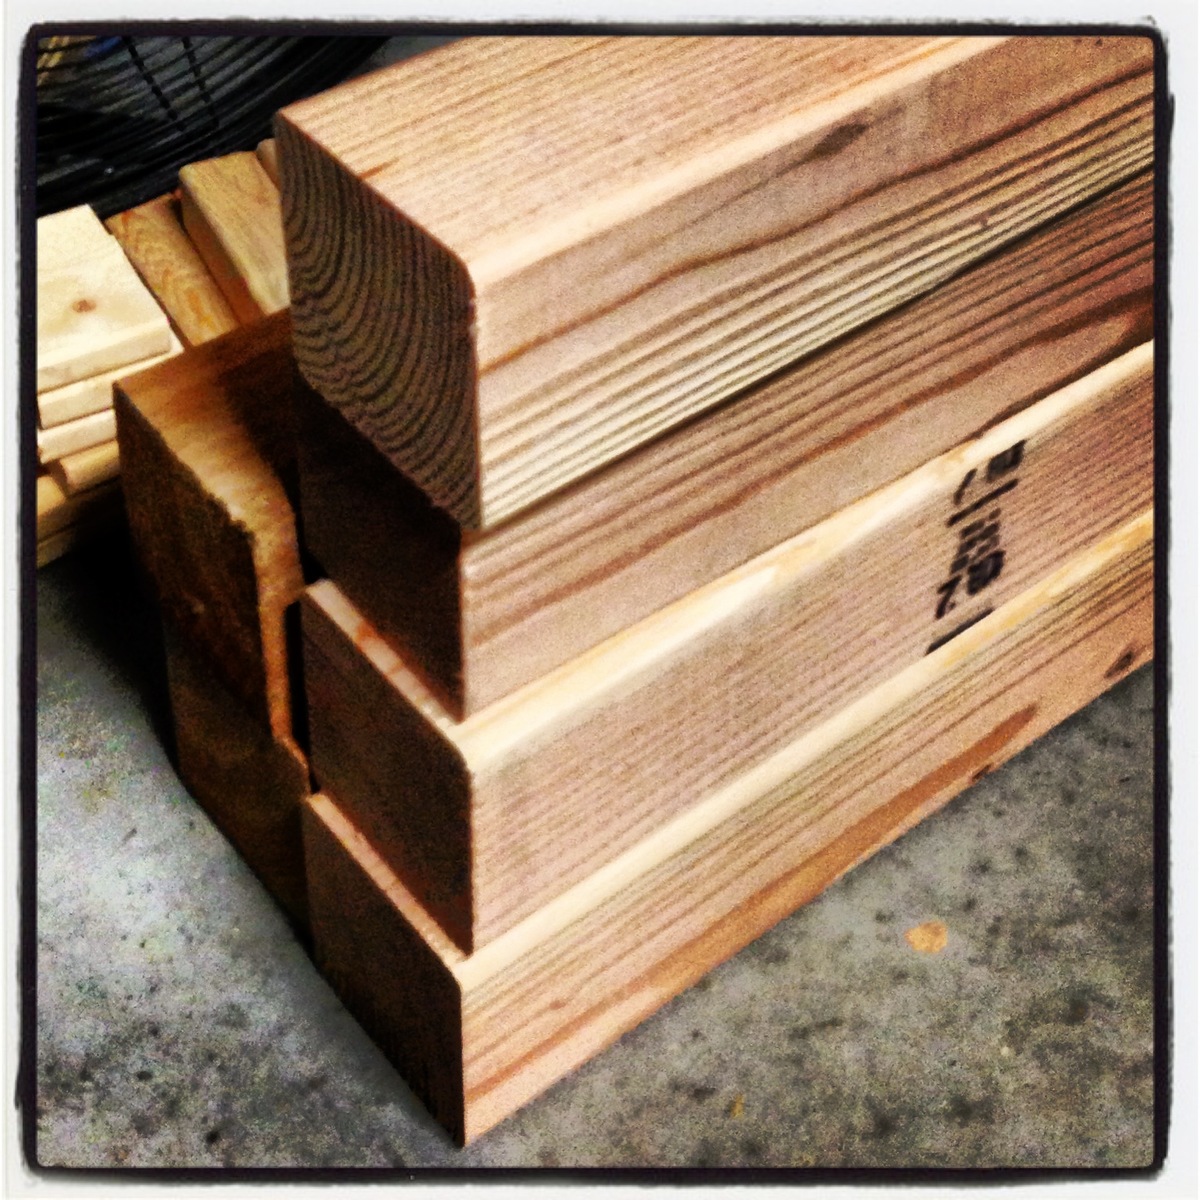
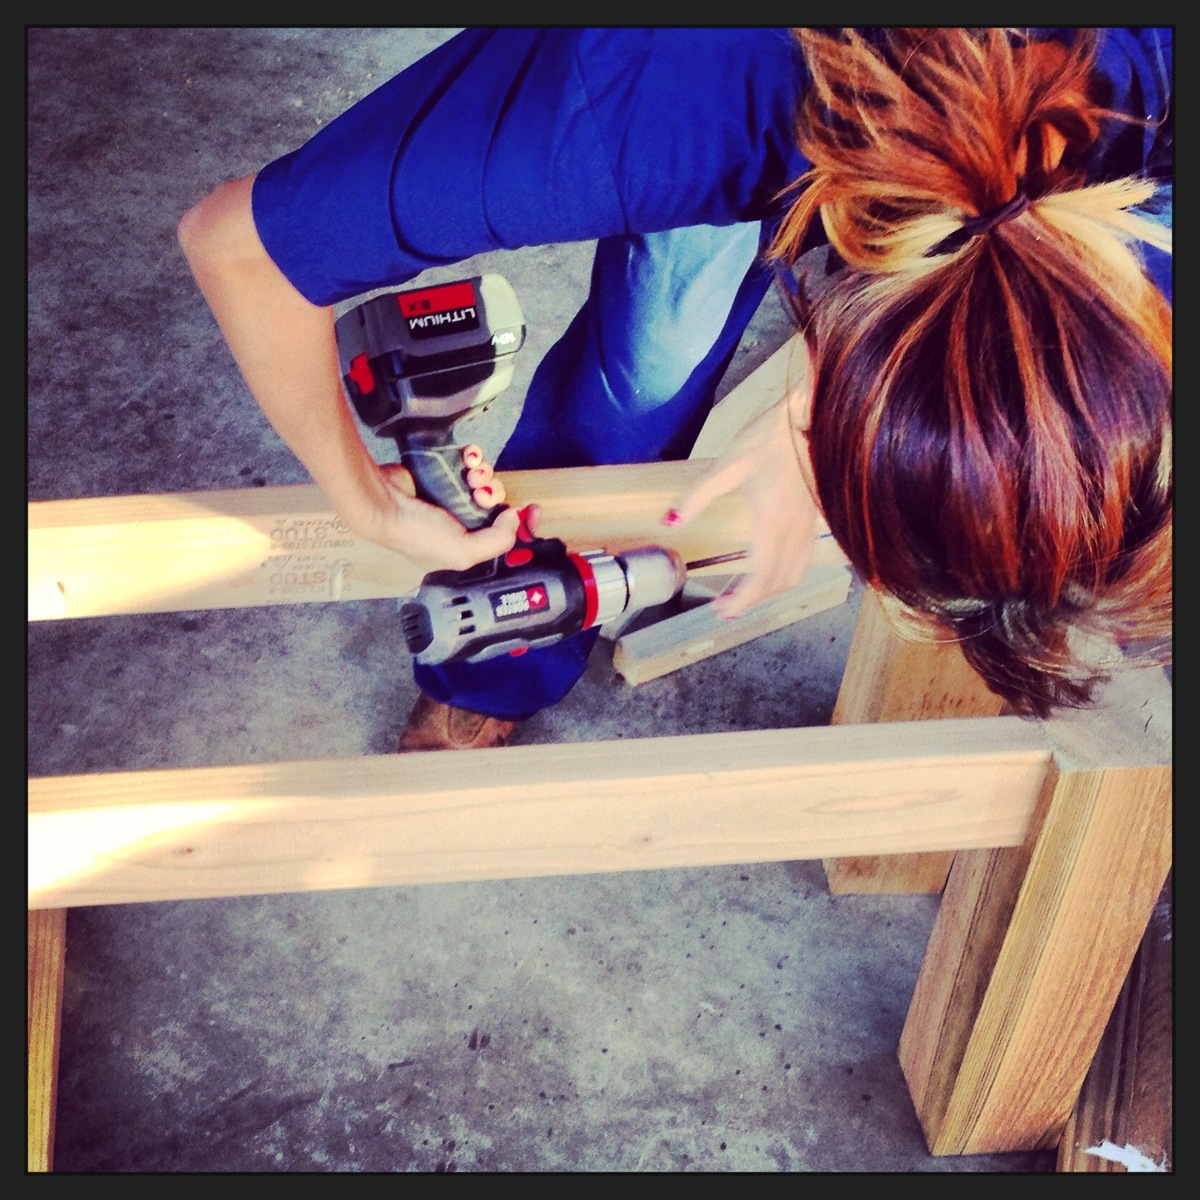
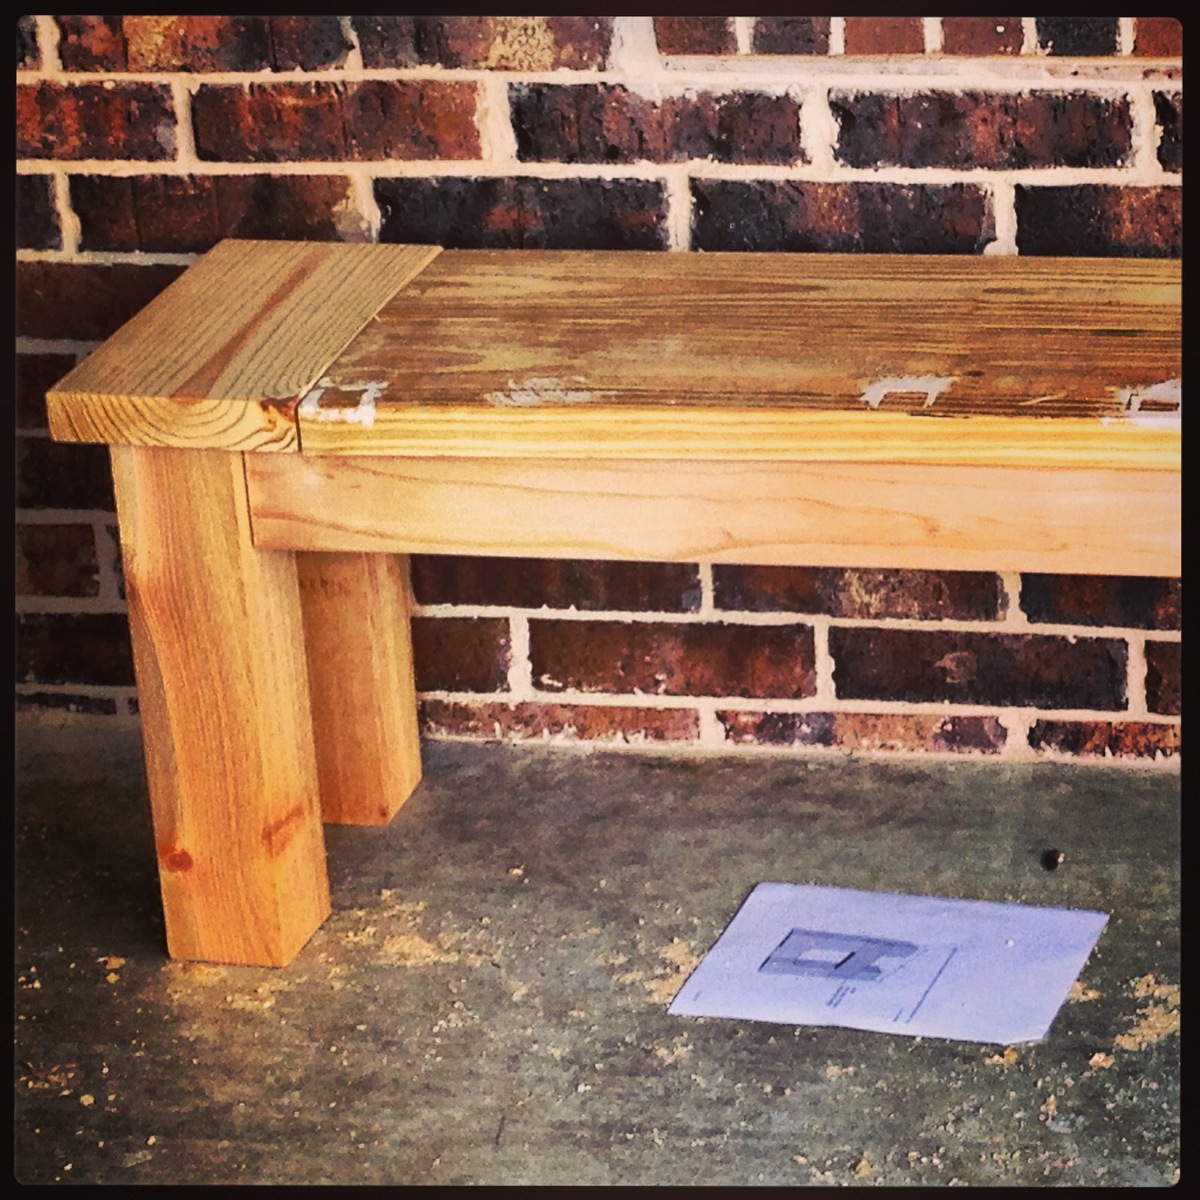
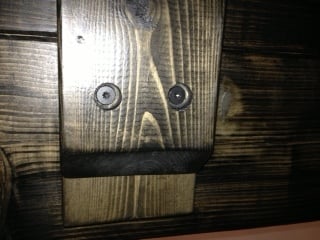
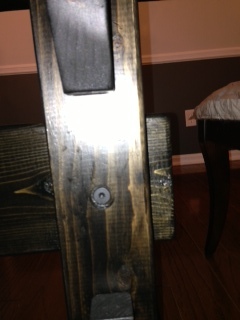
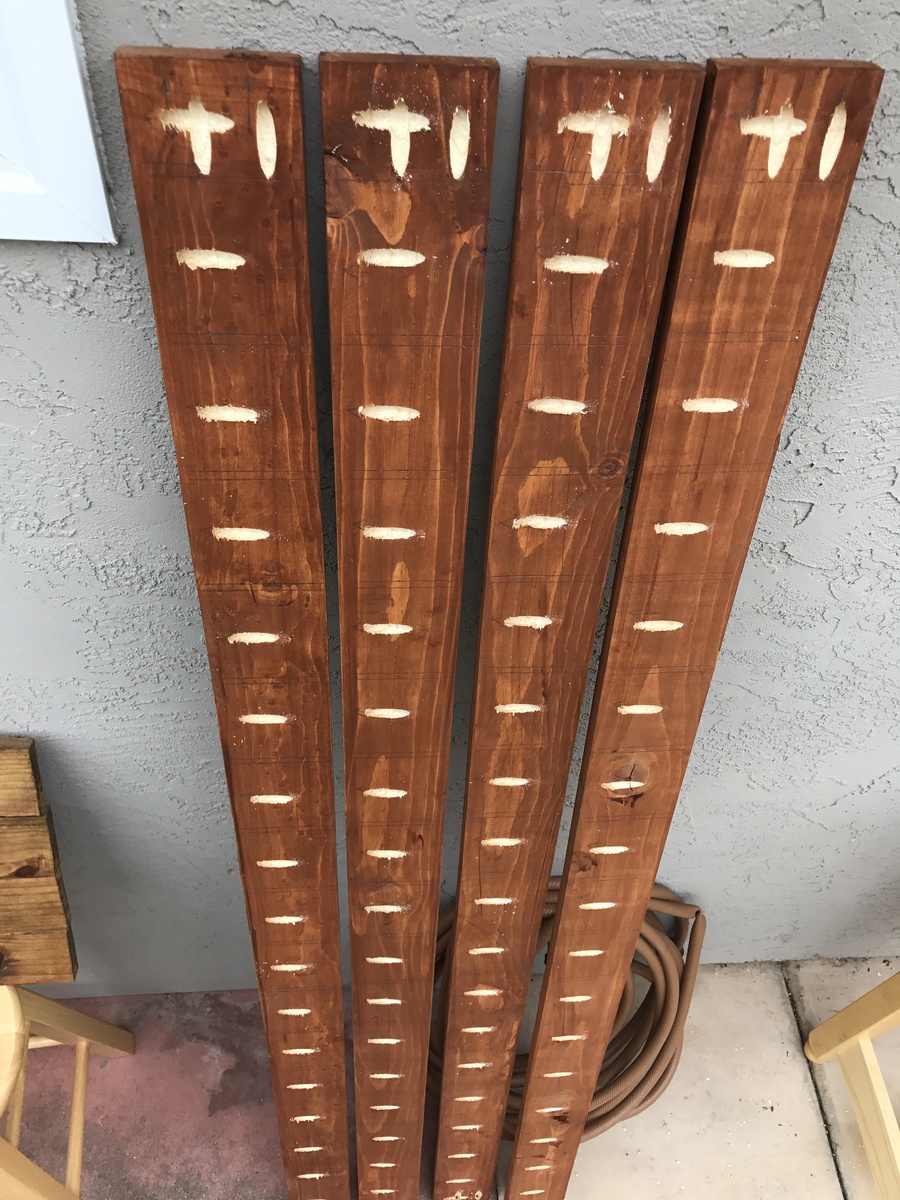
I was seeing this coffee table everywhere so I knew we had to make it. It's the easiest build ever. I think the only tricky part is the painting near the edge. We like a more sanded/finished top. We tried spray painting the base and then attaching the top, but then we sanded the top and the spray paint on the base near the top came off, so I had to cut in and I'm not good at that.

So we're still working on a way to do this properly. We tried making the top on the ground and then sanding & attaching it. But the top needs to be completely exact/square in order to do this. We live in a old farmhouse, so we prefer to attach it as we go - then sand. We also plane the top for a more exact and modern look. 

Estimated Cost
Under 50.00
Estimated Time Investment
Afternoon Project (3-6 Hours)
Finish Used
Top stained in our custom beachwood mix. A mixture of Minwax stains, Bottom spray painted in Oil Rubbed Bronze & semi-gloss polyurethane ( two coats )
Recommended Skill Level
Beginner

Comments

Build A House Bunk Bed

House Beds are a huge trend right now. I saw my first house bed over a year ago and I fell in love and I swore that as soon as we built our daughter a toddler bed someday, I would make a super cute pink house bed, decorated in cute pom pom buntings and it would be perfect. Well, fast forward a year, and she’s only 16 months, still a ways away from being in a toddler bed. Then I had a idea! We are in the process of decorating our boys bedroom. and we needed to build them a new bunk bed set as their old set was massive and took up half their room. Click link below to view the full tutorial!

Estimated Cost
53.00 ( we only had to buy the wood )
Estimated Time Investment
Afternoon Project (3-6 Hours)
Finish Used
Sanded with our dustless sander and then painted grey with chalk paint ( two coats ) and finished with a matte poly
Recommended Skill Level
Beginner

Full over Full Bunk Bed

Full over Full bunk beds. Adjusted for Full from a twin measurement. only 1" off floor for more head room.extra rail bar coverage upstairs for my daughter who rolls out of bed regularly.

Built from Plan(s)
Estimated Cost
used common board mix and a few premium cuts. Pine was more costly. @$250
Estimated Time Investment
Weekend Project (10-20 Hours)
Finish Used
White primer/paint
Recommended Skill Level
Beginner

Comments

bjerfr

Sat, 07/11/2020 - 10:12

What measurements did you use to adjust to a full size?

Shed Ramp Build

Submitted by mtairymd on Sat, 06/11/2016 - 06:07

Build Instructions:

http://www.instructables.com/id/Shed-Ramp/

Video:

https://youtu.be/WTqfV1HDstc

My garage was starting to get cramped so I decided I needed a shed for the lawn/garden equipment. I thought about building one but bailed and decided to purchase a 10’ x 14’ shed with 6’ wide doors from the nearby Amish community. To not be a total slacker, I decided I could at least build the foundation and ramp. I’ve never built a ramp so I did a little research online and found that there are an abundance of styles, both good and bad. Anyway, this is my attempt at ramp design. Hope someone finds it useful.

Estimated Cost
$100
Estimated Time Investment
Weekend Project (10-20 Hours)
Finish Used
None
Recommended Skill Level
Beginner

Custom Garage Shelving

Submitted by Anonymous (not verified) on Tue, 12/19/2023 - 17:43

I have to say, this turned out phenomenally for me. I set up my whole garage with new shelving, planned it all out so I have very little plywood waste by altering the widths a little. This is by far the best carpentry project I’ve ever completed. Thank you for the great video, and I love the Kreg jig. That made a big different too. Over 2 years since I installed them, and they are all still solid, level, and plumb.

Chris from Maine

Outdoor Living Space - Inspired by Ana's Plans

Submitted by Anonymous (not verified) on Thu, 05/07/2020 - 10:25

My wife and I were looking for a way to make our deck more enjoyable. I came across Ana's plans a year or so ago, and after building the couch and chairs, I decided to make a loveseat, add a rug and outdoor curtains. Hopefully one day I'll add some lights and an outdoor fan to complete the look.

Estimated Time Investment
Weekend Project (10-20 Hours)
Recommended Skill Level
Beginner

Comments

Seasonal And Holiday

Pallet Wood Planters

Submitted by Anonymous (not verified) on Mon, 04/01/2024 - 09:40

Did them for a friend that owns a bakery.
I don't have access to new lumber unfortunately.
The bulk of what I make is pallet. That's why there are four instead of 3 slats.
Same plan though. Pretty easy to follow.
I did add some handles to make it easier to move
since they will be brought in and out daily.

Yun

Kids Bookshelf

Submitted by Anonymous (not verified) on Sat, 04/27/2024 - 11:21

Perfect size for my granddaughter and her growing book collection. Turned out great! Thx so much.

Trevor

Built from Plan(s)

Toilet paper holder

Submitted by Anonymous (not verified) on Mon, 07/20/2020 - 11:08

Toil paper holder

Built from Plan(s)
Estimated Cost
Around 2$
Estimated Time Investment
An Hour or Two (0-2 Hours)
Finish Used
Teak varnishes
Recommended Skill Level
Beginner

Playhouse for Christmas...almost done!

Submitted by lprollins on Sun, 11/25/2012 - 14:57

My husband and I used our Thanksgiving break to build this playhouse and deck, using Ana's plans. We are NOT builders...this is very doable for beginners with the right tools. Read the plans thoroughly before starting. Total cost (including all lumber, hardware, and paint) was under $600.

We still have door and house trim to complete, a little painting, and a handrail/ladder.

Santa may bring a slide and some other fun accessories!

Thanks Ana!!!!!

Estimated Cost
$600
Estimated Time Investment
Week Long Project (20 Hours or More)
Recommended Skill Level
Beginner

Wood dog crate end table

Submitted by Anonymous (not verified) on Sun, 03/12/2017 - 17:11

Really fun build! I changed the plans a bit and made the spindles go all the way to the bottom. Made it more open for the dog. Took a while to finish since I would tinker when I had the extra time! Turned out great with the two tone, stained from and top with white spindles and door. Thanks for the plans!

Built from Plan(s)
Estimated Cost
$50-$80
Estimated Time Investment
Week Long Project (20 Hours or More)
Recommended Skill Level
Intermediate

Ana's Loft bed w/o the stairs

Submitted by Anonymous (not verified) on Tue, 04/18/2017 - 12:38

I fell in love with the loft bed but thought the stairs stuck out too far for my daughter's room so I revampd the plan just a bit to add three 'stairs' in the platform rather than the standard stairs in the plan.

I got started on the project on a Friday night, got my cuts made, my pocket holes drilled and pieces sanded for an early start Saturday morning, everything went together like a dream - though it would have gone MUCH faster if I had had a second set of hands; I had to balance all of the long peices on other peices to try and get them attached and it took much longer than it had too! 

It was all together, the holes filled and first coat of primer on by Saturday afternoon - I used Zinsser primer so the knot's did not bleed through. Sunday morning I was painting and it was in place and decorated by Sunday night!

Great, easy to follow plans (as always) Ana - thank you, I have one VERY happy daughter!

Estimated Cost
Approx $150
Estimated Time Investment
Weekend Project (10-20 Hours)
Finish Used
paint
Recommended Skill Level
Beginner

Farmhouse Bench

With lots of leftover wood from previous projects (farmhouse table and sideboard), I decided it was time to start another project. (I did head out to Lowes to get a piece of 4x4 for the legs...they only had Cedar. My friend found some Fir at Home Depot for a buck more).

Found the plans for the Farmhouse Bench, looked at other brag posts and their suggestions...then got to work!

Cutting the pieces was fast and relatively easy. Predrilling the pocket holes also went quick. Putting the pieces together was also very fast (though I did have to add extra pocket holes here-and-there so that the legs and two end-aprons were more sturdy).

Sanded the piece, then added a coat of Rustoleum Dark Walnut Stain, and then a couple coats of Deft Satin varnish.

Estimated Cost
$20 (for extra lumber and materials). Already had leftover lumber from previous projects.
Estimated Time Investment
Day Project (6-9 Hours)
Finish Used
Rustoleum Dark Walnut
Deft Satin Clear
Recommended Skill Level
Starter Project

3 Tier Planter

Submitted by ranlim on Thu, 05/18/2017 - 21:24

Love this planter. Used quality pine. Perfect size for the balcony! I use it for fresh herbs... i have have other people wanting one too!

Estimated Cost
17
Estimated Time Investment
An Hour or Two (0-2 Hours)
Finish Used
Special walnut
Recommended Skill Level
Beginner

Double Pedestal Table (Modified from Triple Pedestal and Farmhouse Table Plans)

This was my first build and I had a blast! Let me say at the outset that if I can build this table with limited tools and expertise, then so can you! What I lack in know-how, I made up for by not being afraid to try something new. If you do the same, you can sure build this table. This table combines Ana's Triple Pedestal Dining Room Table (pedestals from this plan) and her Farmhouse Table (tabletop modified from this plan). Because Ana's plans are so great and thorough, I will only make note of a few key areas where I either tried something different or where I recommend paying extra close attention. First, on the tabletop, I reduced the length to 90 inches to accommodate our space, and therefore eliminated the center pedestal. As you can see, I alternated 2x10's and 2x8's. I also eliminated the breadboards simply because my wife and I preferred the rustic plank style. I also moved the pedestals in to allow a full 15 inches for a chair to slide underneath. When constructing the tabletop, I used both glue (clamped) and pocket holes on the underside. Don't overdo the glue, as it will tend to drip down (which is the top of the table...I had some drip issues). I also strongly recommend buying/borrowing clamps to keep the top flush or making them from 2x4's as I did. I worked hard on this part, and I'm glad that I did. It was still hard to keep it flush. On the pedestals, I used slightly bulkier decorative pieces (I started the arcs 1.25" from the edge on both ends of the arc). I also attached the top plank directly to the underside of the tabletop rather than to the top of the pedestal in order to both bolster the tabletop and to more easily attach the pedestals precisely where I wanted them. Finally, I drilled shallow flat-bottom holes and used wood bolts to fasten both the pedestals and the crossbeam. This created a nice-looking, low-profile fastener that still enables disassembly should we ever need to move the table (it is HEAVY fully assembled!). The finish is two coats of Minwax Ebony Wood Finish (pre-treated with Minwax Wood Conditioner) and three coats of Minwax Fast-Drying Polyurethane (two coats on pedestals). Thank you, Ana, for the inspiration! Our family has a new table because of it! Thanks to all of you for sharing in our excitement, and I'm happy to share dimensions/details/etc should it be helpful to anyone.

Built from Plan(s)
Estimated Cost
$200
Estimated Time Investment
Week Long Project (20 Hours or More)
Finish Used
Minwax Ebony Wood Finish - 2 coats (pre-treated with Minwax Wood Conditioner); Minwax Polyurethane Satin Clear Coat - 3 coats on tabletop, 2 coats elsewhere
Recommended Skill Level
Intermediate

Comments

Lady Goats

Wed, 05/01/2013 - 12:56

I love what you did with the "arcs" (gotta be careful with words synonymous with this - the word "arches" makes me cringe since I had to rip arches out of nearly all the doorways in my house ;-))! Not sure that I'll ever get around to using this idea, but I must say that I love it!

Pabs

Thu, 07/18/2013 - 05:17

Beautifully done, I like the modifications. Could you please share the dimensions and any detail info please…much appreciated.

NoviceBuilder

Mon, 08/19/2013 - 10:41

Thanks for the kind words. I think I included all of the measurements that differed from the two plans used, but is there a specific measurement(s) that you are looking for? If so, I'd be happy to provide it. Good luck!

Price0909

Sun, 03/09/2014 - 17:23

Could you give me some sizes on the bottom posts? Cuts of 2x4's for the posts etc..
How far apart did you mount the 2 pedestals? We will be putting it in front of a corner bench.
Thanks

NoviceBuilder

Sun, 03/09/2014 - 18:47

The uprights for the pedestals are 22". When you add in the tabletop, the four lateral pieces, and the feet, the table is 30 1/4" tall. As for the spacing of the pedestals, I chose to allow 15" from each end for the chairs to slide all the way under. But it's plenty stable and you really have plenty of freedom here, depending on how many chairs you want to use and how long your table will be.

Simple Outdoor Dining Table - Kreg Jig Version

Submitted by mstephe7 on Mon, 09/18/2017 - 10:57

I followed the plans to the dining table with the suggested 1/4" spacing and extra slat so that this table will match the bench I will be making next.  I used the kreg jig for everything so that there are no visible screws.  This table is relatively simple to assemble and seems sturdy yet not too heavy.

Built from Plan(s)
Estimated Time Investment
Weekend Project (10-20 Hours)
Finish Used
Semi-transparent deck stain
Recommended Skill Level
Intermediate

Church Pulpit

Submitted by BBLinda on Sat, 06/08/2013 - 10:34

A good friend of mine, a pastor of a local church, asked me to build a pulpit for their recently finished church up in the countryside of Grenada. She showed me a picture of what she had in mind and based on that, I drew my own plan in SketchUp, and then built it out of Yellow Pine boards and Plywood.

Note to the dimensions:
After I drew the plan, and just when I was at the lumberyard to have the plywood and boards cut, I thought I might have had it estimated not wide enough, so I decided on the spot to make it 2" wider and the top panel 2" wider and deeper too. So if you'd like to build based on my plans, please consider if it's wide enough for your purposes.

This is what I used (corrected measurements here):

2x 2x8 26" long YP Boards (Base)
1x 18 1/2" x 6 1/2" Plywood (Base Support Panel)
1x 26" x 16" Plywood (Top)
1x 18 1/2" x 9" Plywood (Shelf Panel)
2x 45" x 9 1/2" Plywood (Side Panels ) - these are cut angled, see plans
1x 44 1/2" Wood Moulding (for the "stopper" on the top panel, and the "back" of the top shelf.

Estimated Cost
~ US$ 115 (material is very expensive here on the island, and I guess you could build it for about half or 2/3 of this in the USA)
Estimated Time Investment
Weekend Project (10-20 Hours)
Finish Used
MINWAX Polyshades / American Chestnut Satin (375)
Recommended Skill Level
Beginner

bookcase headboard

Submitted by bdp514 on Fri, 06/21/2013 - 09:20

I made this bookcase headboard to go with the haley bed I made from Ana's plans.

Estimated Time Investment
Afternoon Project (3-6 Hours)
Finish Used
stain with Early American and Kona wood stain. Topped with sprayed lacquer
Recommended Skill Level
Intermediate

Hall Tree and House Number Plantr

Submitted by tpsully225 on Sun, 12/26/2021 - 17:52

Hi Ana, I recently made two of your posts. First, the 2”x4” hall tree and then the house number planter. We found some unique hooks at Hobby Lobby for the hall tree. This is great to keep the kids’ backpacks off of the floor. On the house number planter I stained it with Antique Beige, but is more gray than beige. I then put 3 coats of spar urethane on it to protect from the TX sun.

Comments

Back