Community Brag Posts

Farmhouse bed

Submitted by Anonymous (not verified) on Sun, 01/15/2023 - 18:51

Needed a bed. After looking in town for premade beds, I wasn’t satisfied with the workmanship or price. I thought I could build one much nicer than what I was seeing. With these plans, I was able to make it happen. It turned out way better than expected. After a couple of strikes with paint, I watched a couple of YouTube videos on painting furniture black and that’s all it took to get exactly what I was looking for. Thanks so much for the plans. I also made the mini farmhouse bedside tables. I’ll put pics of it under the tables category

Comments

Modern outdoor 2x4 chair with modification

Submitted by Anonymous (not verified) on Fri, 03/08/2019 - 13:31

This chair was made off Ana white'smodern outdoor chair with modification to add back support. Without the back support the back pillow would keep falling off.  The cushion are 25x25 but very thick for comfort.

Estimated Time Investment
Afternoon Project (3-6 Hours)
Recommended Skill Level
Beginner

Comments

Brittsiana

Sun, 08/16/2020 - 10:03

Does anyone know what degree angle this is for the back support?
I would like to add it to my newly finished chairs I made over the weekend. The pillow keeps falling down.

Smaller Dog Crate / Kennel

Submitted by pamin on Wed, 11/02/2011 - 12:56

Smaller version of Ana's Dog Kennel. Took me about 3 weeks (working on weekends and few hours after work). Made from maple and cherry.

Built from Plan(s)
Estimated Cost
$70 ( I had the tools, just needed to by the wood)
Finish Used
Semi-Gloss Poly, sanding in between (120 -> 180 -> 220 -> 400 -> 600)
Recommended Skill Level
Beginner

Comments

Cindy from Indiana (not verified)

Sun, 11/06/2011 - 16:07

This really looks fabulous! Great job!

As a 'dog family', we always have rescues and visitors on board. This looks so much better than anything I've seen in stores and for less money, too.

I'm definitely adding this to my to-do list.

P.S. Your pup is adorable, too! ;-)

Ejade

Tue, 12/06/2011 - 16:44

I have 2 yorkies and would LOVE to make this for them, this is sooooo going on my todo list.

Koli is tooo cute as well!!!

Proud2busmc (not verified)

Sun, 07/22/2012 - 06:43

This version looks great, how did you do the sides to make it look fancier? I love the personal touches on this crate!

Farm House Table and Bench

Submitted by Anonymous (not verified) on Fri, 05/05/2023 - 08:52

Simple Outdoor Conversation Set

Submitted by cspires64 on Sun, 03/18/2012 - 13:13

Spring is around the corner and I had no outdoor furniture. My boyfriend had just talked me into a new weber grill, which did not leave much budget for new outdoor furniture. That's when I came across this web site and thought 'I can do that'. So I talked me boyfriend into helping build this Simple Outdoor Conversation Set. We used plans for the Simple Outdoor Lounge Chair and Simple Outdoor Ottoman and then followed the alterations by post for 'My Modern Outdoor Patio Collection' to make the loveseat.

The whole project came together over 5 days.
Day 1: Cut all boards (5 hrs)
Day 2: Sand all boards (5 hrs)
Day 3: Stain all boards (6 hrs)
Day 4 & 5: Assemble furniture (9 - 10 hrs)

The total project took about 25 hrs and cost about $350. Here's the breakdown wood and supplies $204 from Lowe's for pretreated wood. $145 on cushions (NOT ON SALE); $60 for the seat cushions from Home Depot and $80 for the back cushions from Wal-Mart. We were originally planning on only having the seat cushions, but the seats were long when you set in them with your back against the bear wood (I was setting so far back, my feet couldn't reach the floor) so we opted for thick back cushions to make it more comfortable. The project finished up just in time for our first BBQ party! (March 2012)

Estimated Cost
$204
Estimated Time Investment
Week Long Project (20 Hours or More)
Finish Used
Redwood toner and sealant
Recommended Skill Level
Starter Project

Comments

Tilt Out Garbage Center with Shelves

This was made for a friend. I looked up Ana's original plan and modified it a little. The end result was something she was very happy with.

Estimated Cost
$80
Estimated Time Investment
Afternoon Project (3-6 Hours)
Finish Used
Primer and red spray paint.
Recommended Skill Level
Beginner

Comments

N. Hunter (not verified)

Mon, 07/09/2012 - 20:39

I love your modifications.. Think I'll take it bit further and add another pullout on the other side of the shelf. This way I can put one hamper in each, and my whites and darks will already be separate.

DIY Farmhouse Cabinet

Submitted by Anonymous (not verified) on Thu, 08/10/2023 - 15:53

The inspiration for this piece came from an Instagram post. We decided on our overall dimensions (36" tall, 18" deep and 60" long), then more or less guessed what the size of the pieces for the face frame would be. We recreated it as best we could and I think it came out incredible. It has soft close drawers on top and the hand-made sliding shelves are also soft close. The raised panels for the doors were made on a table saw. The doors have soft close hinges. The cabinet is made from maple plywood, oak plywood, yellow pine and poplar. The top is made of cypress and stained with Minwax "fruitwood" color and semi-gloss urethane. Next step is to make the shelves which will be 48" tall overall.

Dave Patterson

Simple Farmhouse Nightstands

I built these matching nightstands to go with a king bed frame I built for a couple whose rebuilding their home that burned down. They were pretty simple to put together, but despite their simplicity, they are gorgeous. 

Estimated Cost
$20
Estimated Time Investment
Afternoon Project (3-6 Hours)
Finish Used
I used minwax pre-stain to prepare the wood. I then stained it using special walnut by Varathane (got it from The Home Depot). Finally, I finished it using a clear satin polyurethane by Minwax.
Recommended Skill Level
Beginner

Mary's sewing table

Submitted by Anonymous (not verified) on Mon, 12/23/2019 - 20:52

Built using your sewing table as the base idea. Pine cabinet, drawers and drawer fronts. The top is Hickory, poplar and red oak. base top dimension is 30x30 and folds out to 30x90. Mary will get this as a surprise on Christmas day. Cabinet and to is Varathane 3x. Casters are from Woodcraft and drawer slides are Hickory Hardware.

Built from Plan(s)
Estimated Cost
250.00
Estimated Time Investment
Week Long Project (20 Hours or More)
Finish Used
Varathane 3x
Recommended Skill Level
Intermediate

Comments

Balin TV Stand

Submitted by Anonymous (not verified) on Sun, 04/17/2016 - 18:21

This was my first furniture project and I simply wanted to hide all of the cords for my TV. My husband and I opted out of the drawers since we wanted a big area to store all of the other items (DVDs, playstation, etc.). We also did not put a back on the table so the electronics stored inside could properly ventilate without overheating.

Built from Plan(s)
Estimated Cost
We bought all lumber from Lowe's and it totaled to $180 for the lumber, sand paper, wood conditioner, stain, and polyurethane finish.
Estimated Time Investment
Week Long Project (20 Hours or More)
Finish Used
Wood conditioner, Varathane dark walnut wood stain (1 coat, applied a heavy coat with brush and wiped excess stain with a rag about 3-5 minutes after initial application), and finished with Minwax fast-drying polyurethan clear satin (1 coat).
Recommended Skill Level
Intermediate

Modified Raised Planter Box

Submitted by Anonymous (not verified) on Tue, 04/19/2016 - 17:47

I always wanted a raised planter box, but never took the time to try building 1 and certainly didn't want to buy 1. My hubbie saw these plans and decided to make it for me. He used wood from our deck that we just pulled up, so the only cost was for the 4x4s and the plywood used for the bottom shelf.

Estimated Cost
$14
Estimated Time Investment
An Hour or Two (0-2 Hours)
Finish Used
We have not yet added a finish and I don't know that we will. We added a bottom shelf and I have been debating whether to paint the piece, tile the bottom shelf, some combination, or leave the whole box natural.
Recommended Skill Level
Starter Project

Mudroom Bench with Easy Drawers

Submitted by GeekAthair on Mon, 01/06/2020 - 20:12

We've been desperate for more storage in our little house and this build really helped. The whole bench is 103“ wide and each drawer gives us 24"x17" of usable space. We had to do some custom shaping for the benchtop (two joined fir 2x12's) fit as the walls are not square but in the end we were really pleased.

The hardest part of the project was getting all of this built and in place while working around a busy family as this is our only meal space and the majority of cutting/forming was done either on the weekends or after bedtimes. If I were to do this again I'd prioritize sending the kids to grandparents for the weekend and know king everything except for paint out in one go. 

We could have spent less time with the benchtop by using plywood like in the plans but we wanted the look of a separate benchtop. We may replace the fir with stained oak down the line but this should be plenty sturdy for the next several years. 

Built from Plan(s)
Estimated Cost
$300
Estimated Time Investment
Week Long Project (20 Hours or More)
Finish Used
Valspar paint, minwax clear poly
Recommended Skill Level
Intermediate

Comments

Butcher Block Kitchen Island

I built this piece from ana white's plans. I modified the shelf design and also the dimensions to meet my needs. Instead of using 2x6 douglas fir for the top, I built the top out of hard maple. The top is built by ripping down several strips of hard maple 1.75 inches wide, turn the strips on there edge and gluing all the strip together. This is what is known as a edge grain cutting board. I finished the top with mineral oil and bees wax. The top is food safe and knife friendly. If you have any questions please don't hesitate to ask. - Brad

Built from Plan(s)
Estimated Time Investment
Week Long Project (20 Hours or More)
Finish Used
Cream brulee paint by behr
early american stain by minwax
mineral oil and bees wax
Recommended Skill Level
Advanced

Comments

romanweel

Tue, 01/28/2014 - 18:42

Did you use a planer to level your top and bottom surfaces here, or just lots of sanding? I've been told not to attempt butcher block construction without a planer...but I'm thinking of maybe going for it!

timberandsoul

Fri, 01/31/2014 - 23:01

I did use a planer for this top. But because my planer is only 12 inches wide I had to glue three individual boards together leaving two seams that I could not plane but instead had to sand out. Just sanding those two seams took a long time, I cannot imagine sanding 20 seams. I would not suggest attempting without a planer.

Calmly

Mon, 04/10/2017 - 18:45

is it possible for you to share your measurements.  I need a smaller island. Thank you.

Biff Loman

Wed, 02/05/2014 - 17:25

I'm curious how you joined the stretchers to the legs. The construction appears different from the plans. Did you use pocket screws or something more advanced like mortise and tenon?

timberandsoul

Fri, 02/07/2014 - 16:58

I am not sure exactly what you mean by stretchers. If you are referring to the shelf frame, yes it is different than the plans, I modified it. I felt the shelf design on the plans was not enough for the weigh that was going to be place on top. I used simple pocket holes to joint the frame to the legs. Hope this helps, have a great day.

voorheisb

Fri, 08/12/2016 - 10:41

Thank you Brad.  This is a really nice piece.  I recently picked up an old table from a college.  I discarded the base and plan to use the heavy butcher-block-style top to build something similar to this.  Do you have plans you could share?   Thanks again, Brian

Classy Farmhouse Table

Submitted by Anonymous (not verified) on Fri, 05/20/2016 - 11:23

This was my first table, so there were a few hiccups, but I was pretty content with it.

I recently made the bench that you see in the picture as well. I made it to match the table, so I pretended I was making a mini table. Used plywood for the top, padding, and wrapped it with fabric. I was trying to match the charis as much as possible. Finished it by making the buttons and tufting it.

Estimated Cost
About $120
Estimated Time Investment
Weekend Project (10-20 Hours)
Finish Used
Weathered Oak and sealed with a satin clear coat.
Recommended Skill Level
Intermediate

Concealed Wall Desk for Computer

Submitted by Gabie on Mon, 11/20/2023 - 10:51

I built this fold-up desk, out of sheer necessity. It's rather unassuming when closed, yet fully functional when open, with built-in power outlets and light, a large screen, a nook for the laptop and the chargers, etc. It's tailored to my needs and specific size limitations, but I think you could make a great general plan of it for anyone needing a small-space hideaway desk.

Barn Door Bookcase/ Side Pantry

Submitted by BmoreITguy on Wed, 04/22/2020 - 05:57

This took a lot of time and money but I like the way it looks. We have 4 kitchen cabinets and one drawer and no room for more so storage is tight.

Built from Plan(s)
Estimated Cost
400
Estimated Time Investment
Week Long Project (20 Hours or More)
Finish Used
Same as Ana’s
Recommended Skill Level
Advanced

Comments

BmoreITguy

Wed, 04/22/2020 - 06:00

Why is my picture sideways? Ana, one of the most frustrating things with this build was the mobile version of your site. Very laggy, typing lags, pages crash in the middle of typing or viewing and persistent ads are a nightmare

Beginner Farm Table & Benches

This was my first time building anything! The plans were so easy to follow along! Once I master some things like this, I can work on fine tuning things a bit more so I can build some more intricate plans. Thanks so much for your website! My kids are loving the BBQ's outside at the table!

Estimated Time Investment
Afternoon Project (3-6 Hours)
Finish Used
I haven't added a finish yet but will be soon.
Recommended Skill Level
Starter Project

Comments

Beryl

Tue, 06/02/2020 - 15:09

re the farm table. your cut list calls for 8 2 x 4 at 28 1/2 inches but the plan actually only needs 4 of them. The pics do not show you doubling the 2 x 4s for legs. Am I missing something.

Garage Shelving

Submitted by Anonymous (not verified) on Sat, 07/16/2016 - 17:17

I am a beginner diy'er and this was one of my first projects.  Also it was my first time using the Kreg jig and I loved it!  My shelving system was around 8 feet tall, 12 feet wide and 30 inches deep.  I added some extra cleats to support my deeper shelves (30") and also used thicker (5/8") plywood.  This was a fun and easy project to do!  Thanks so much!

Estimated Cost
$150
Estimated Time Investment
Day Project (6-9 Hours)
Finish Used
none
Recommended Skill Level
Beginner

Playhouse big build

I went a little out of control on the week of the 4th of July - I set out to build a picnic table, 4 sling chairs, a deck and a playhouse - and I did!!!! I owe Ana a great debt of gratitude for these amazing plans and empowering me to do it! I built the picnic table and the sling chairs as I was waiting for primer and paint to dry on the frame, inside and outside of the house. For the shutters - I scrounged around the garage and found some leftover wainscoting, and put a leftover 1x2 on them. The door frame wasn't straight - so I added a piece of leftover trim from my daughters bed I built. My only next step is curtains for the windows. I even moved the full kitchen set I built the kids a few christmas's ago into their. They have only been playing with it for 2 days and I can't drag them out of it!!!

Estimated Cost
$500-$550
Estimated Time Investment
Week Long Project (20 Hours or More)
Finish Used
Primer and paint
Recommended Skill Level
Intermediate
Seasonal And Holiday

Board & Batten Inspired Headboard

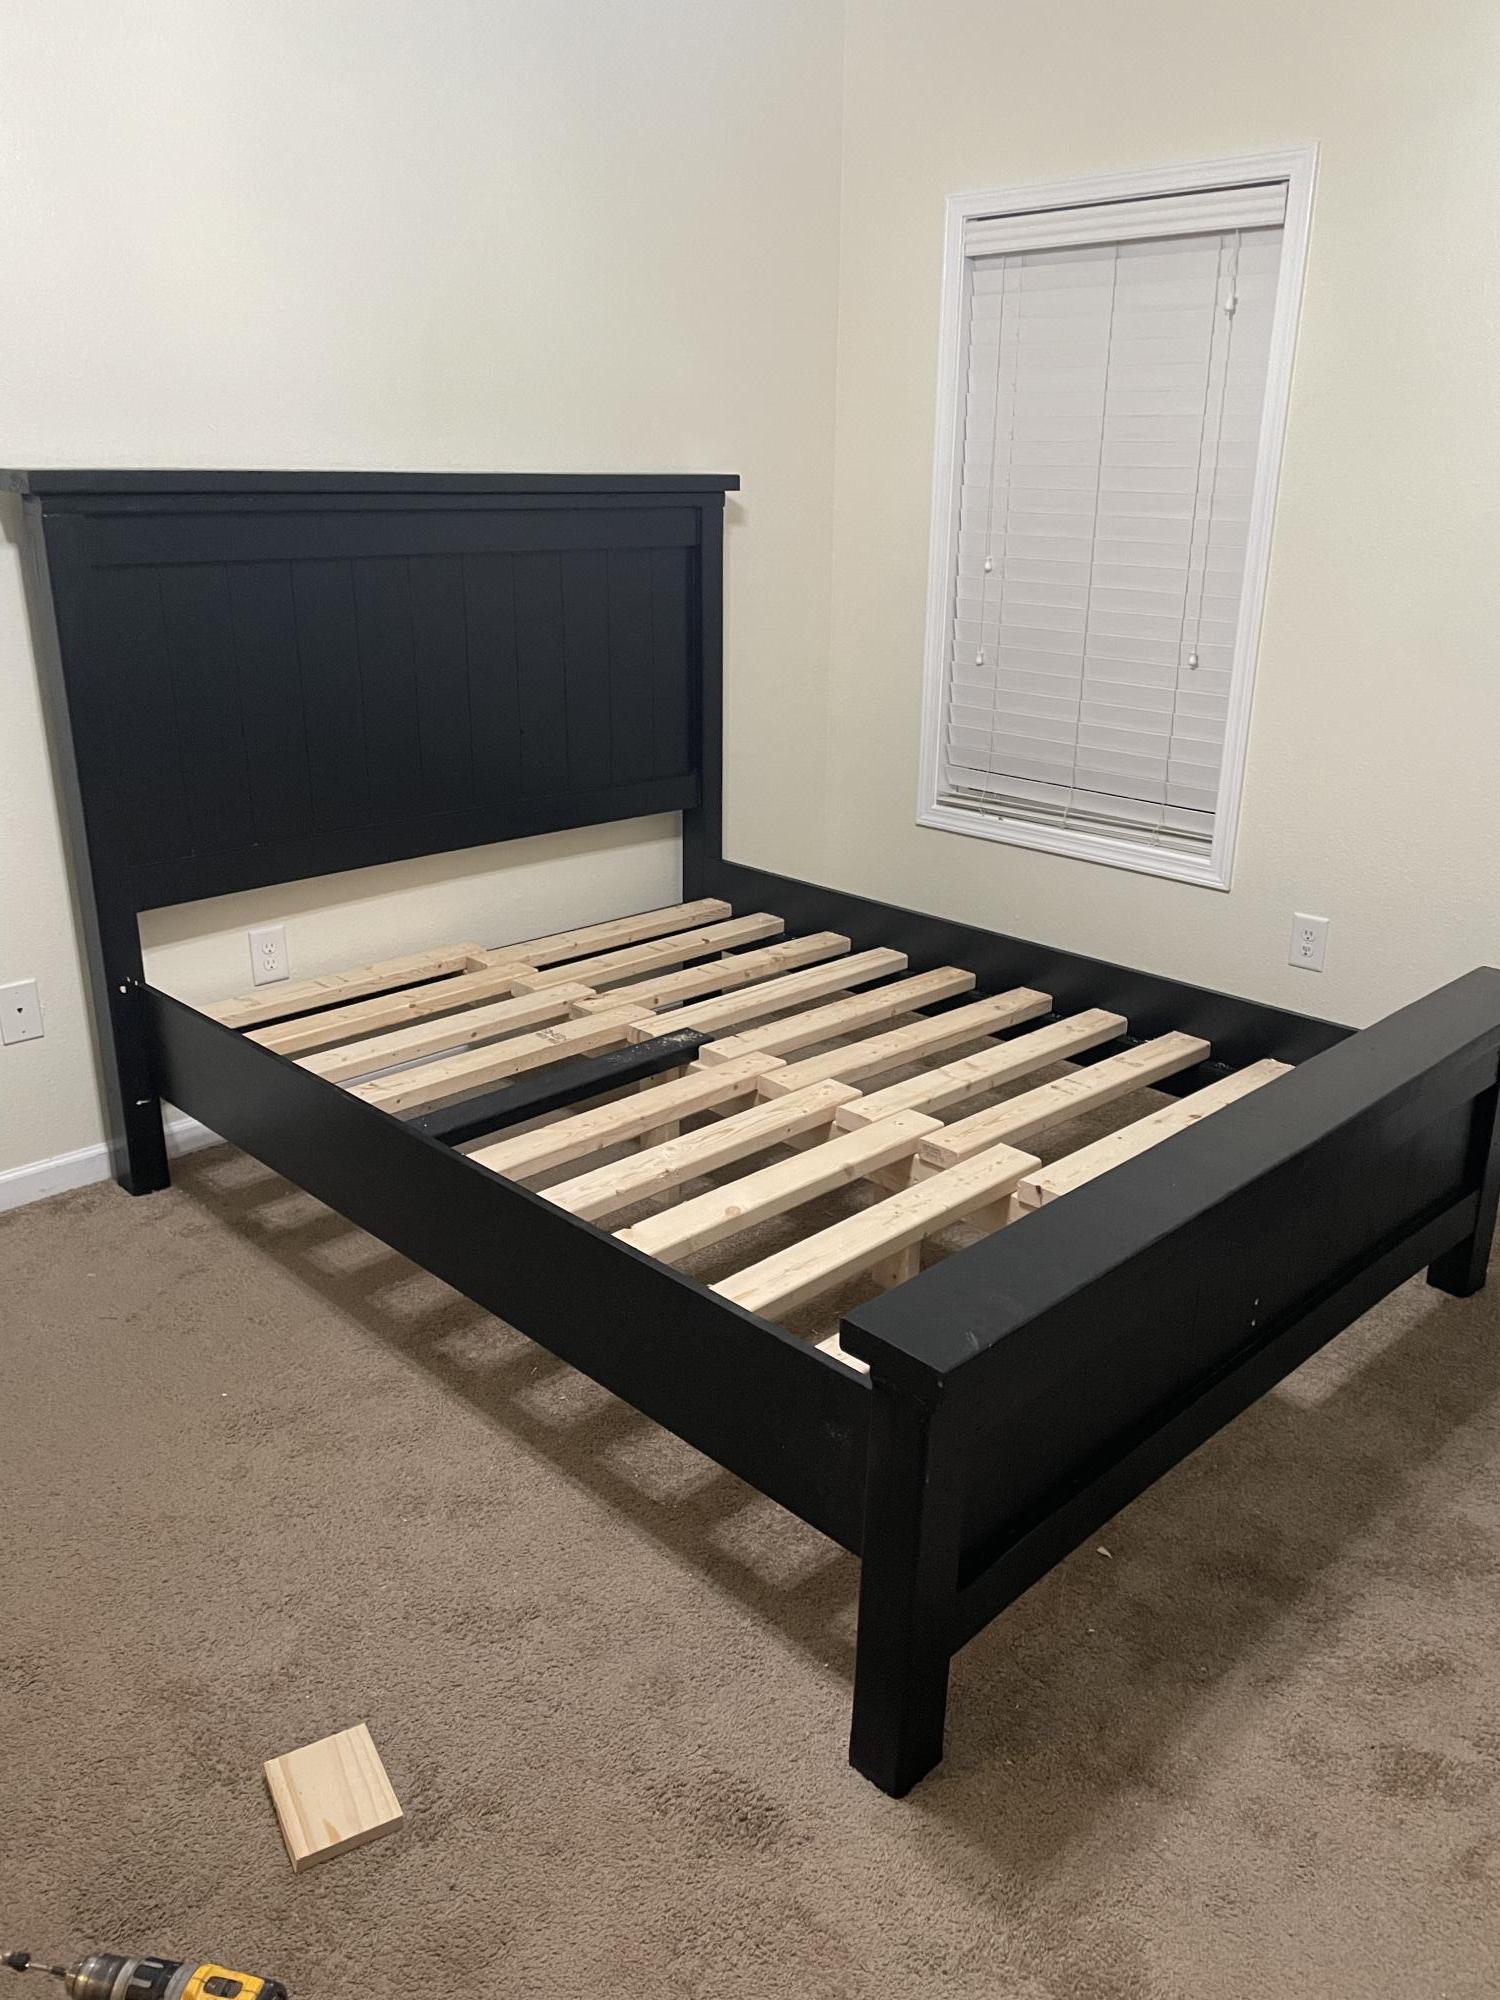
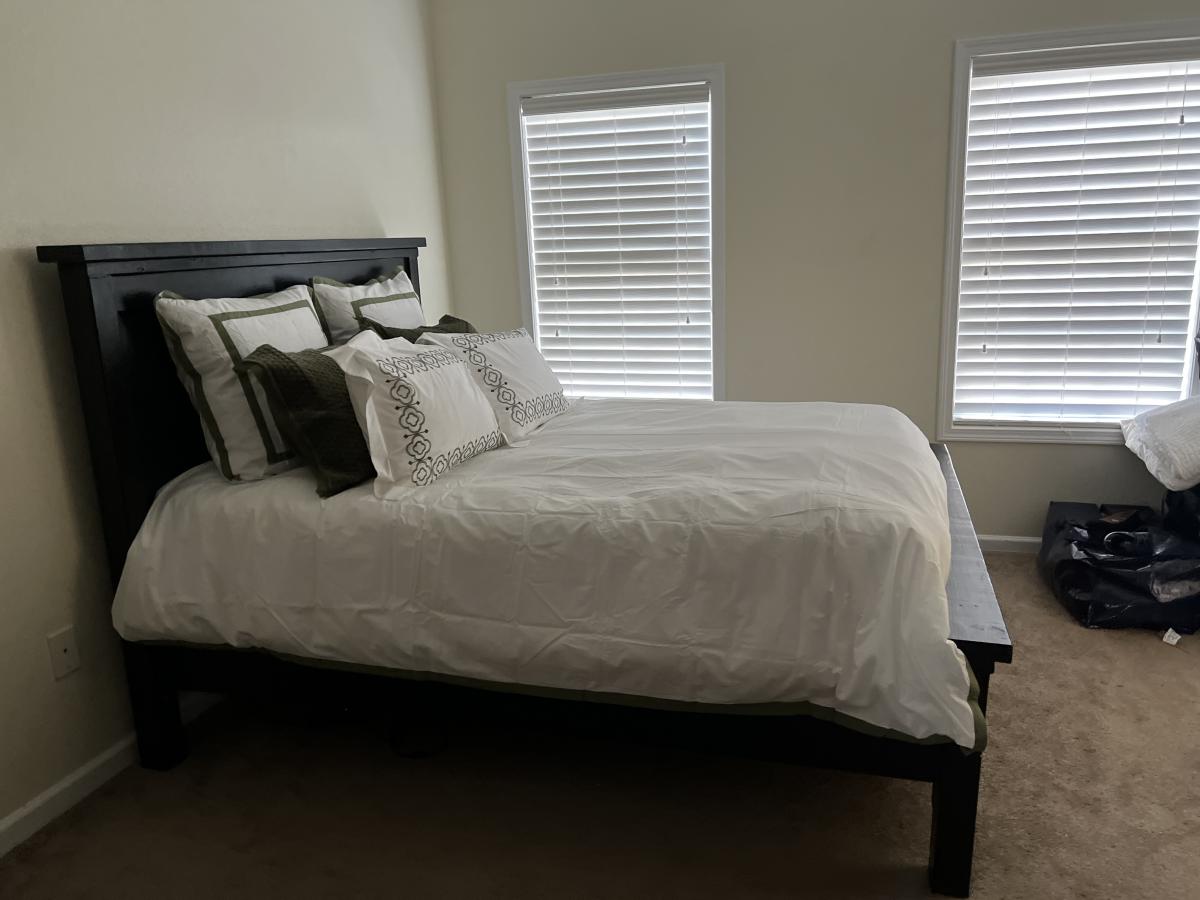
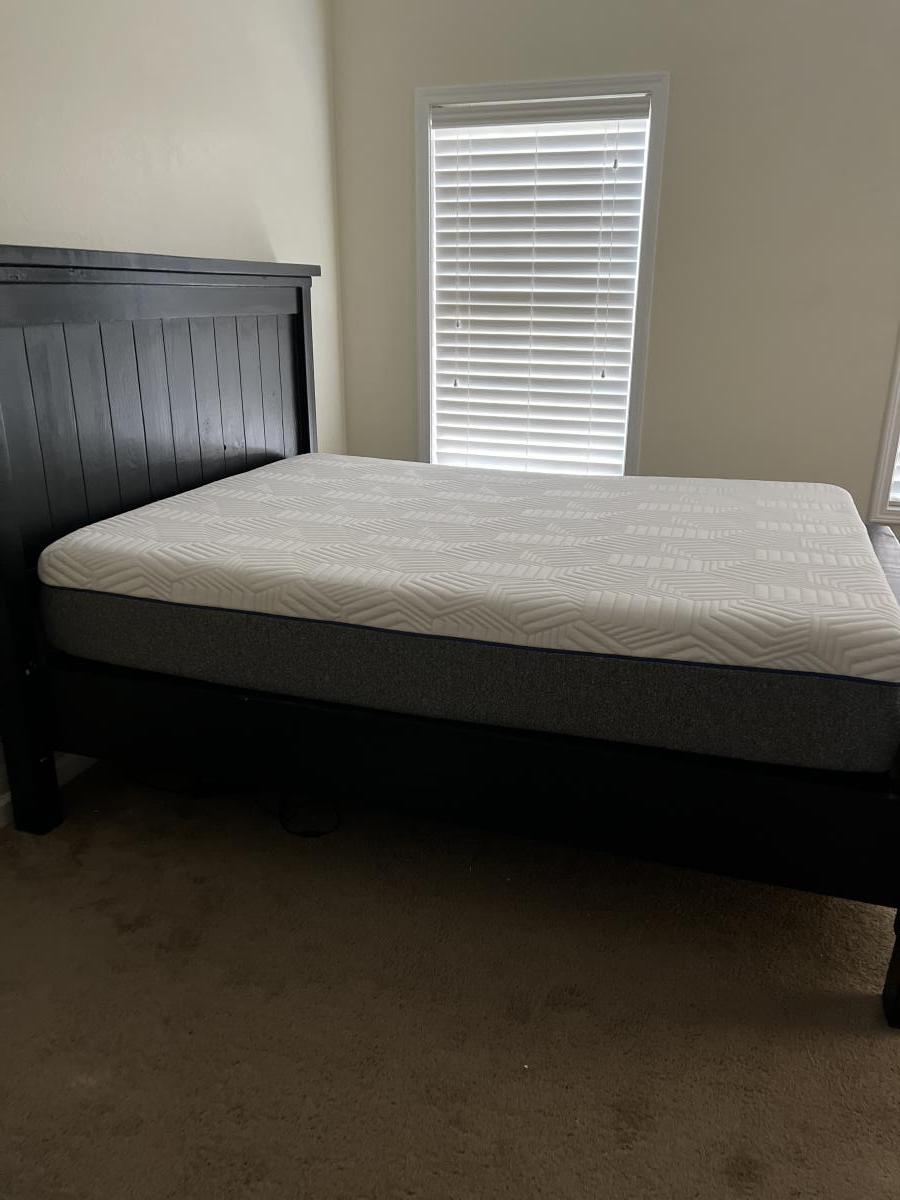
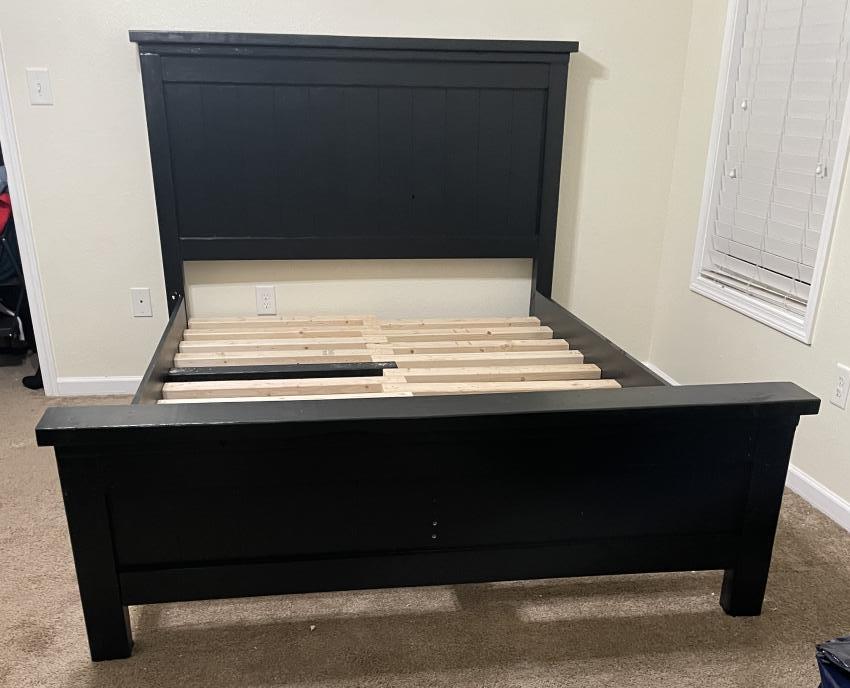
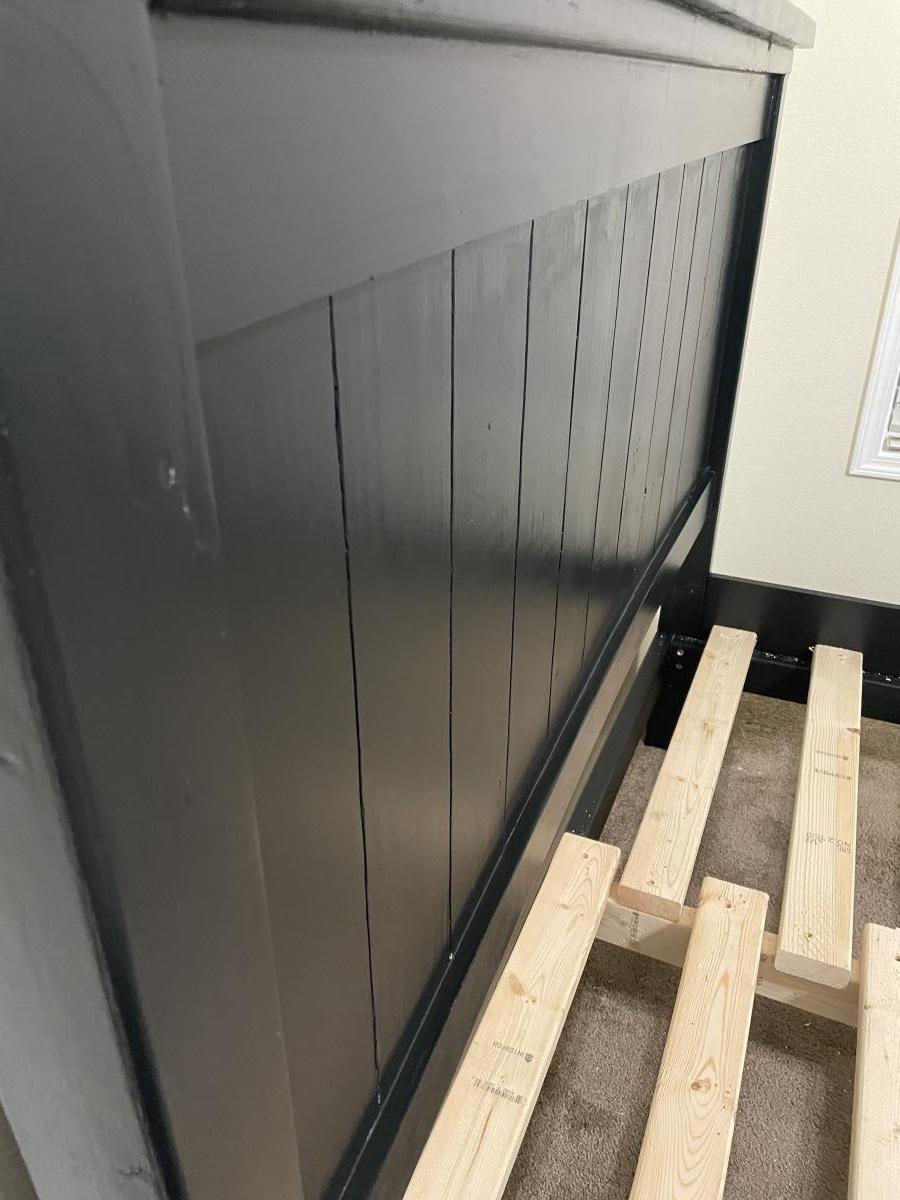
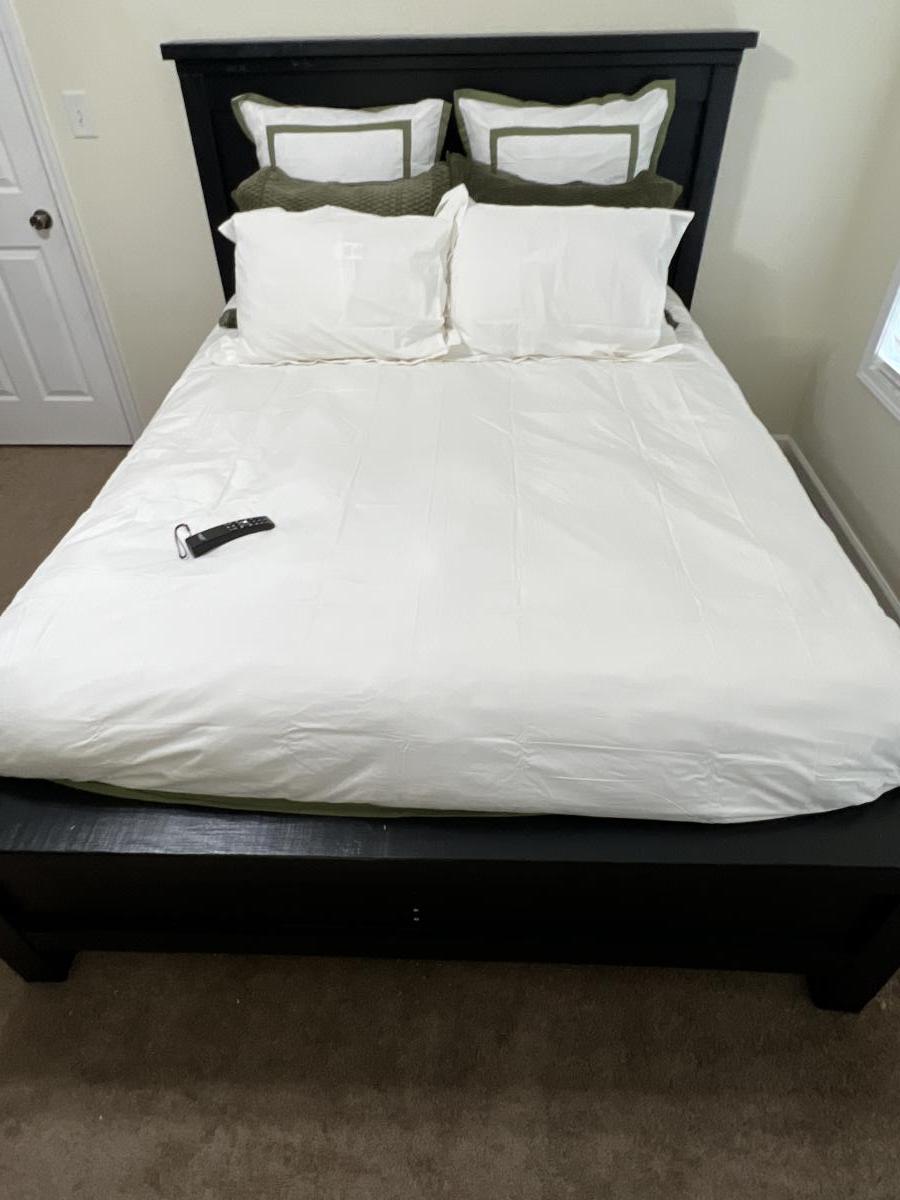
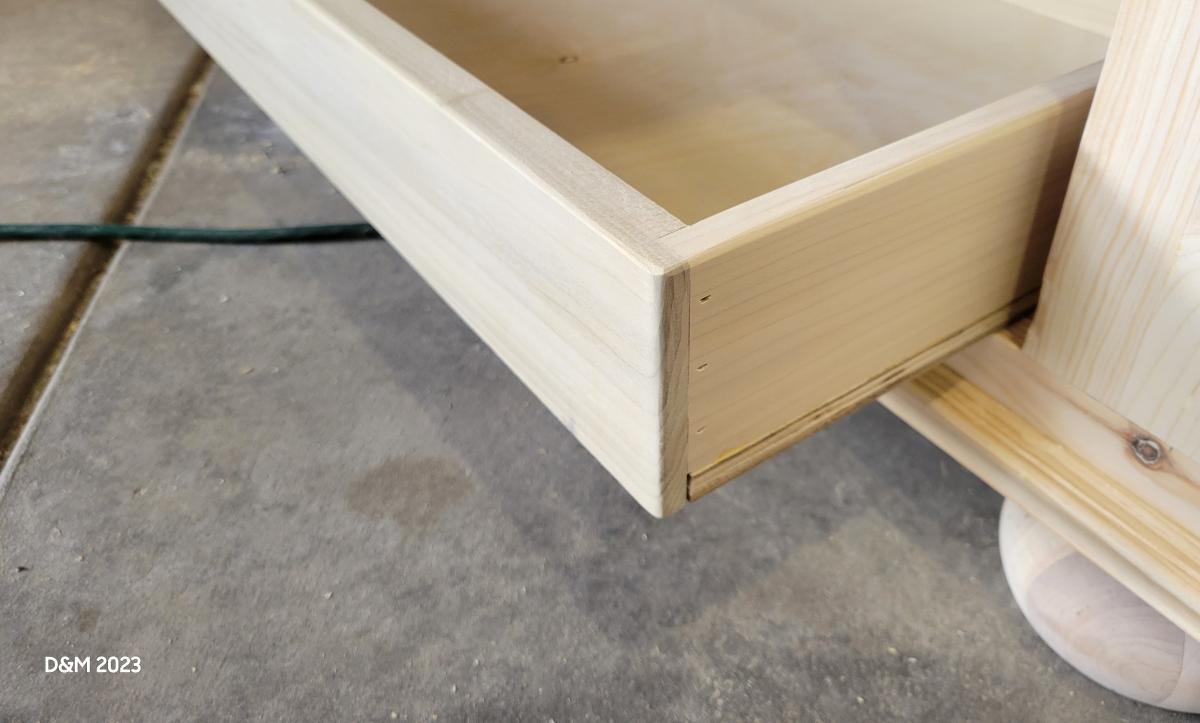
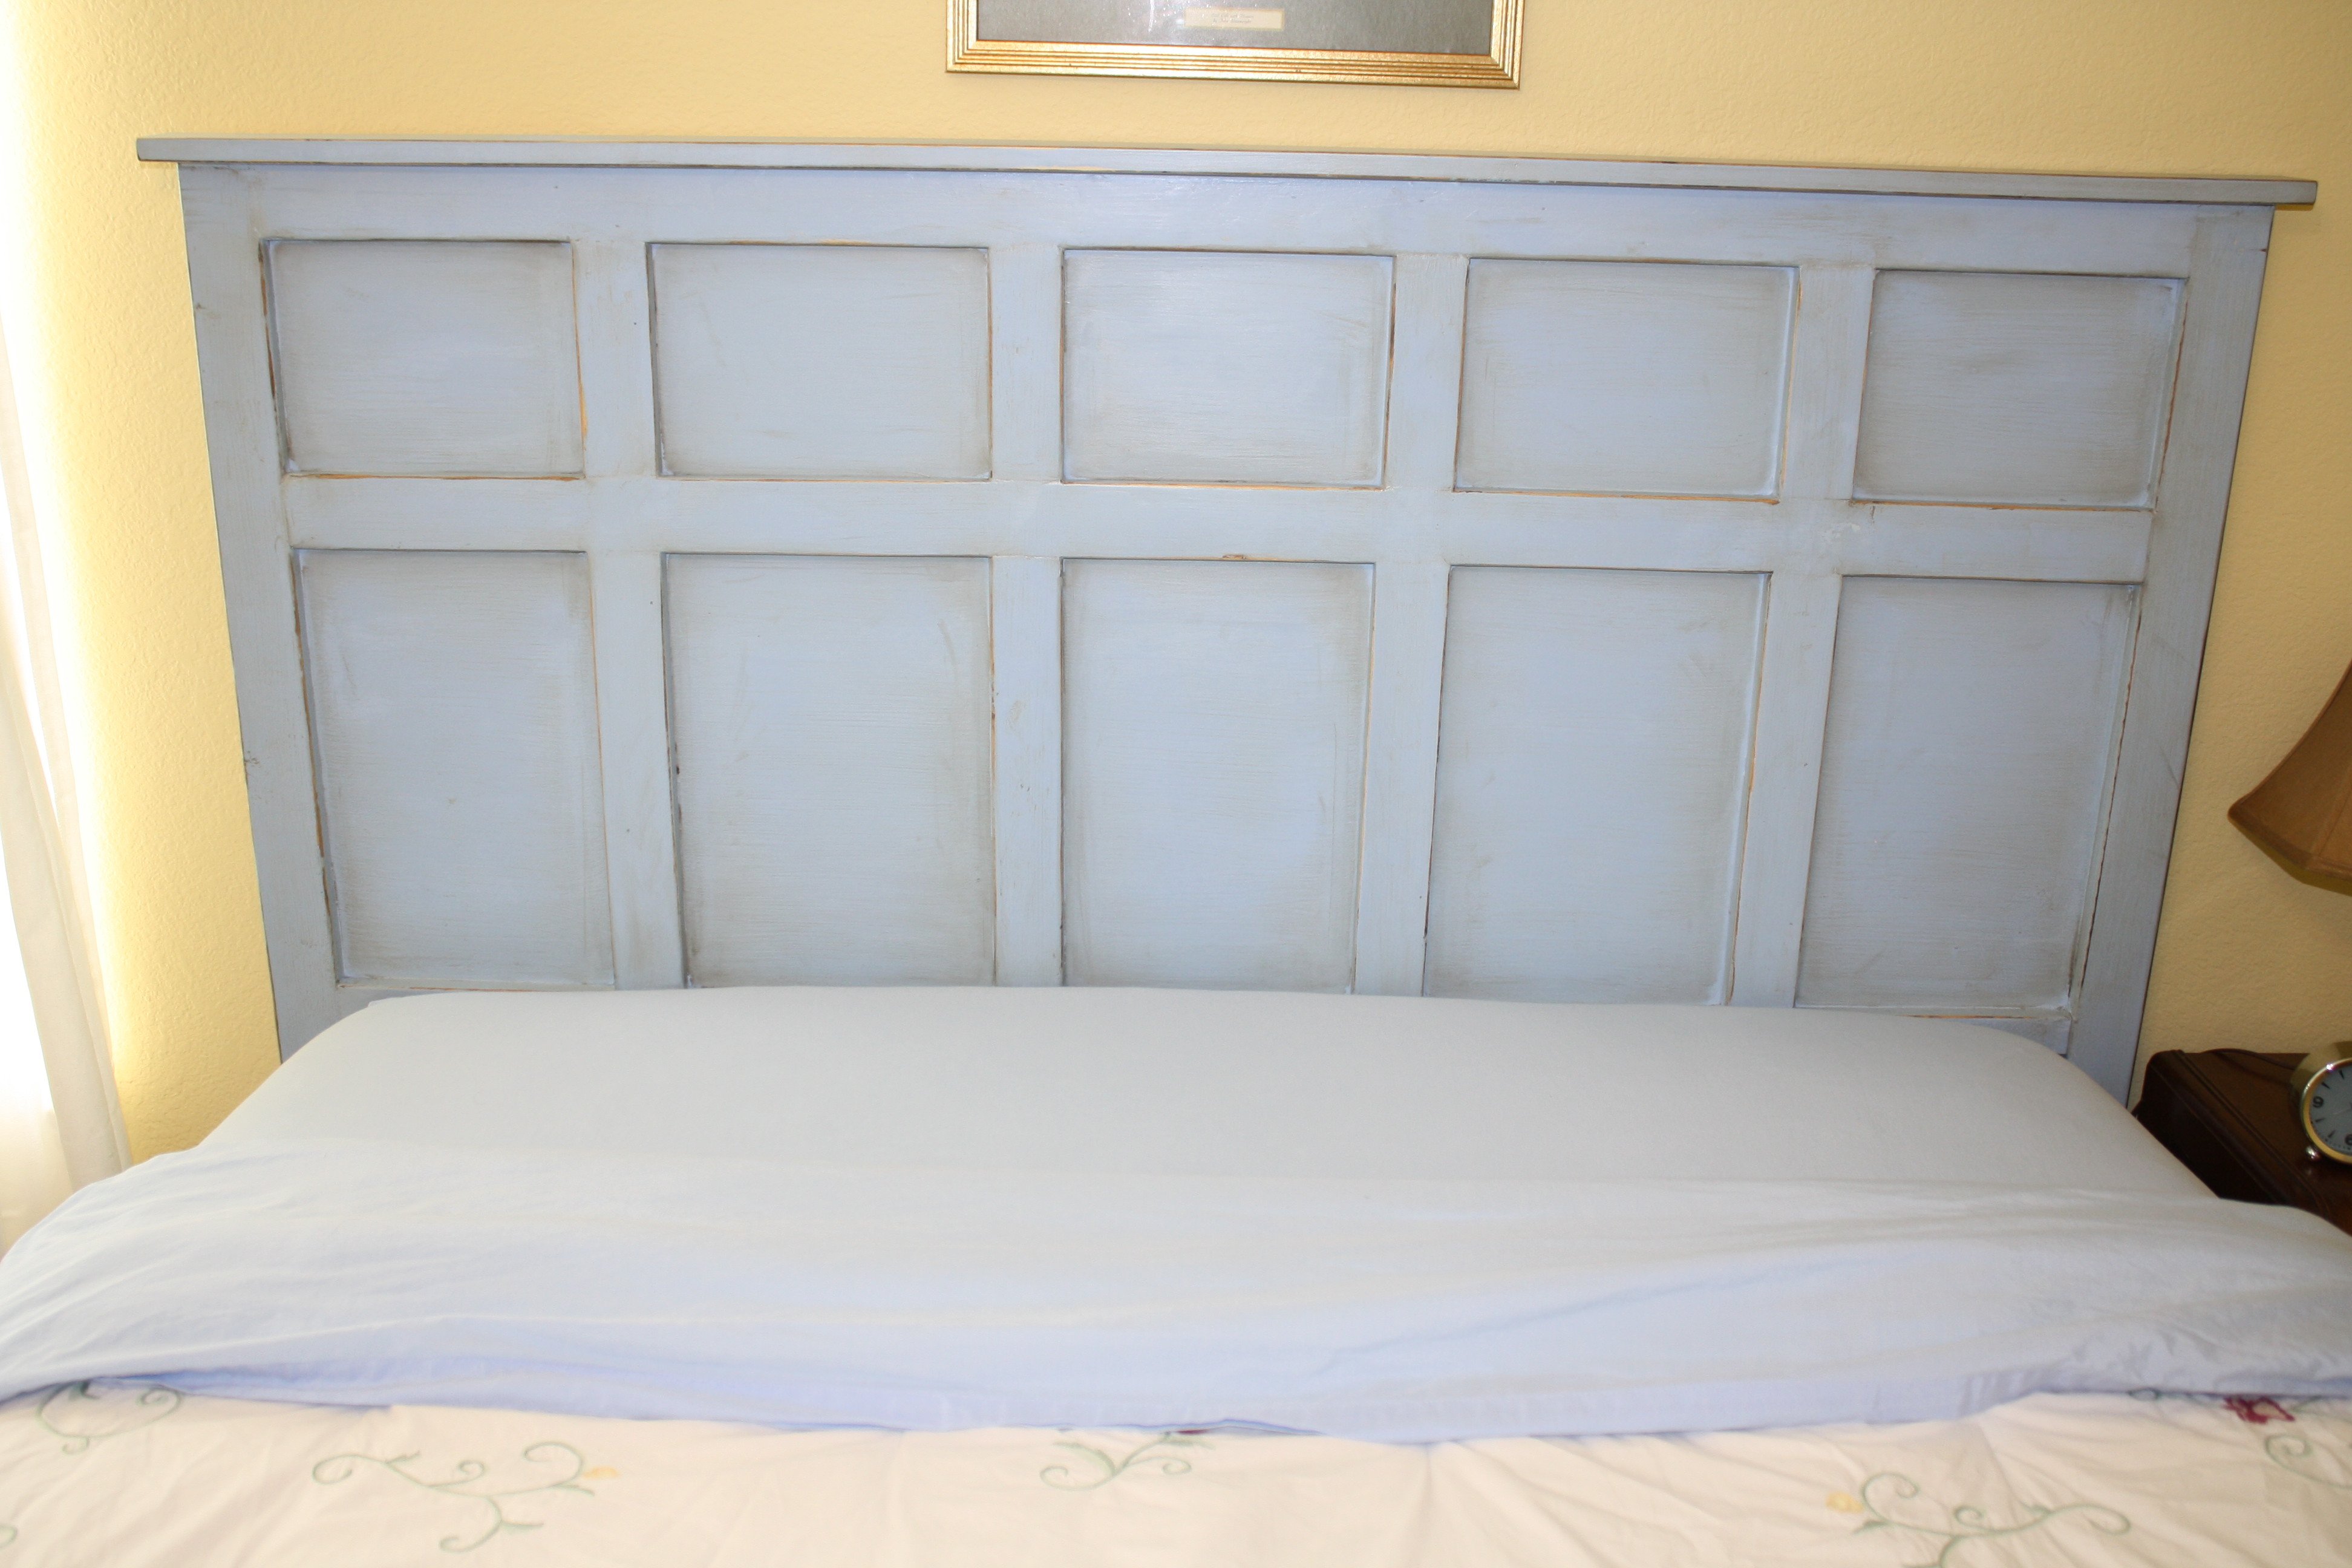
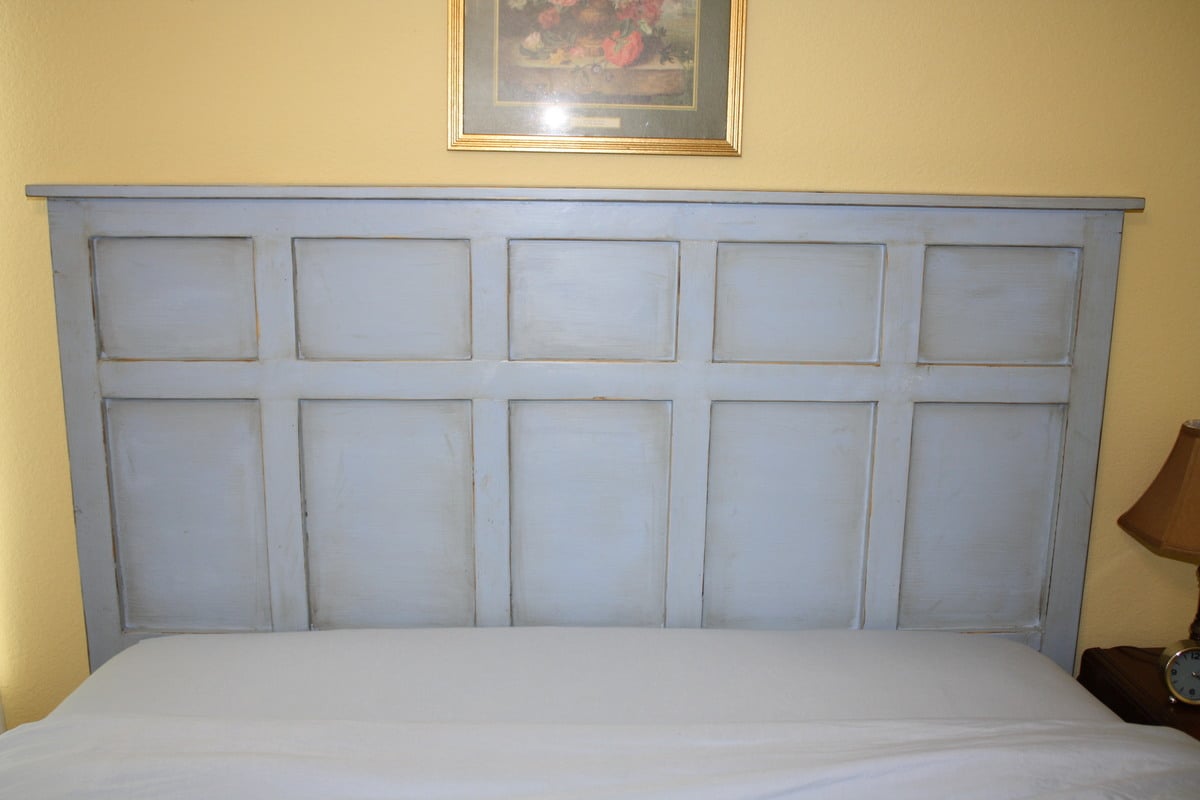
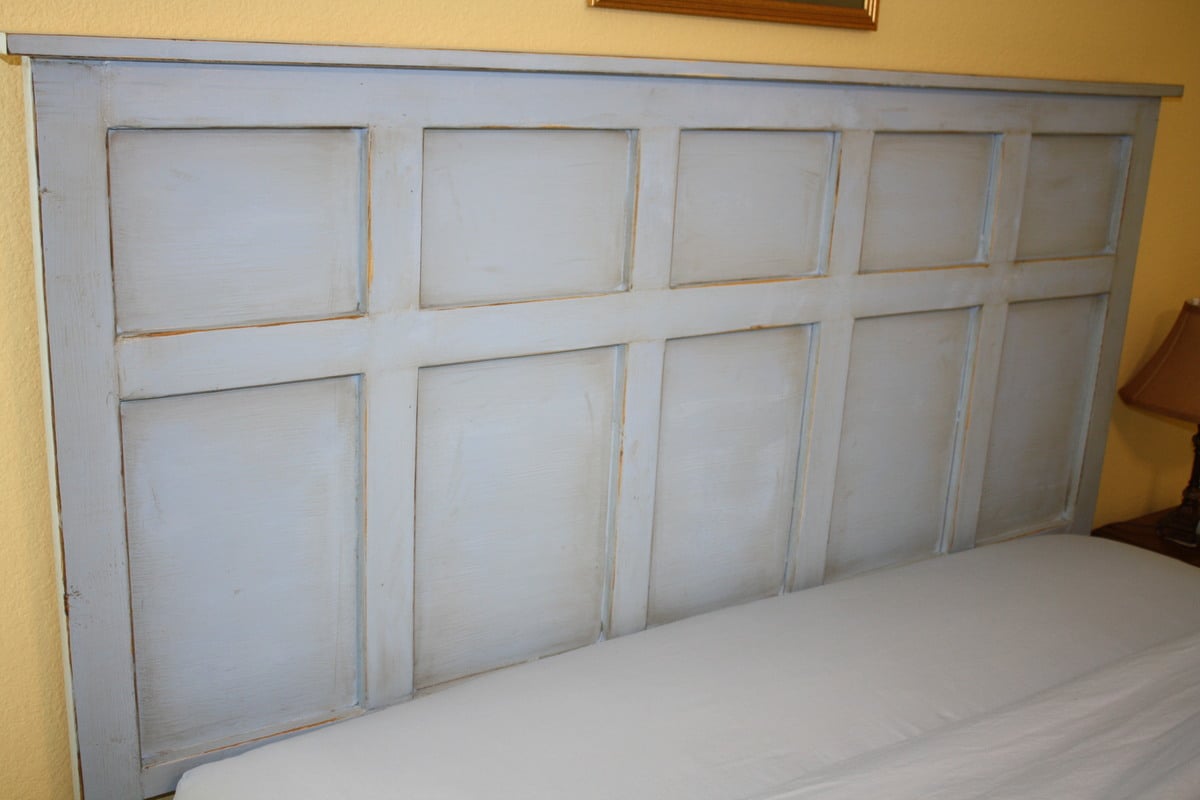
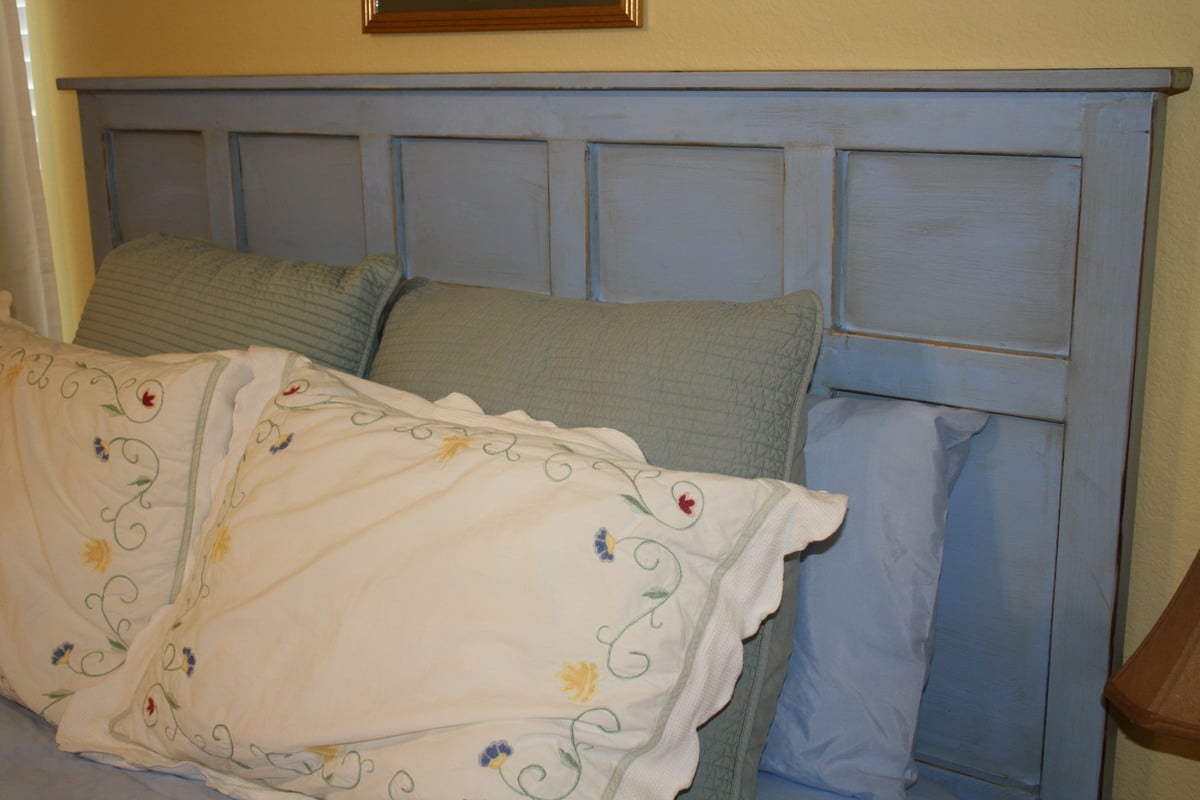
Our guest room finally has a headboard! I put together this queen size headboard using what I had learned building my daughter's headboard (and consulting the plans for the Reclaimed Wood Headboard) using the remainder of the plywood sheet from her headboard project, 2x3s for the legs, a 2x4 to join the legs (and connect to the metal bed frame), furring strips, and a 1x3 to top it off.

Our plywood had been cut to fit our car, so the first vertical furring strip was placed to hide the seam where I joined the two pieces back together. Then we evenly placed them from center as just looked right to us.

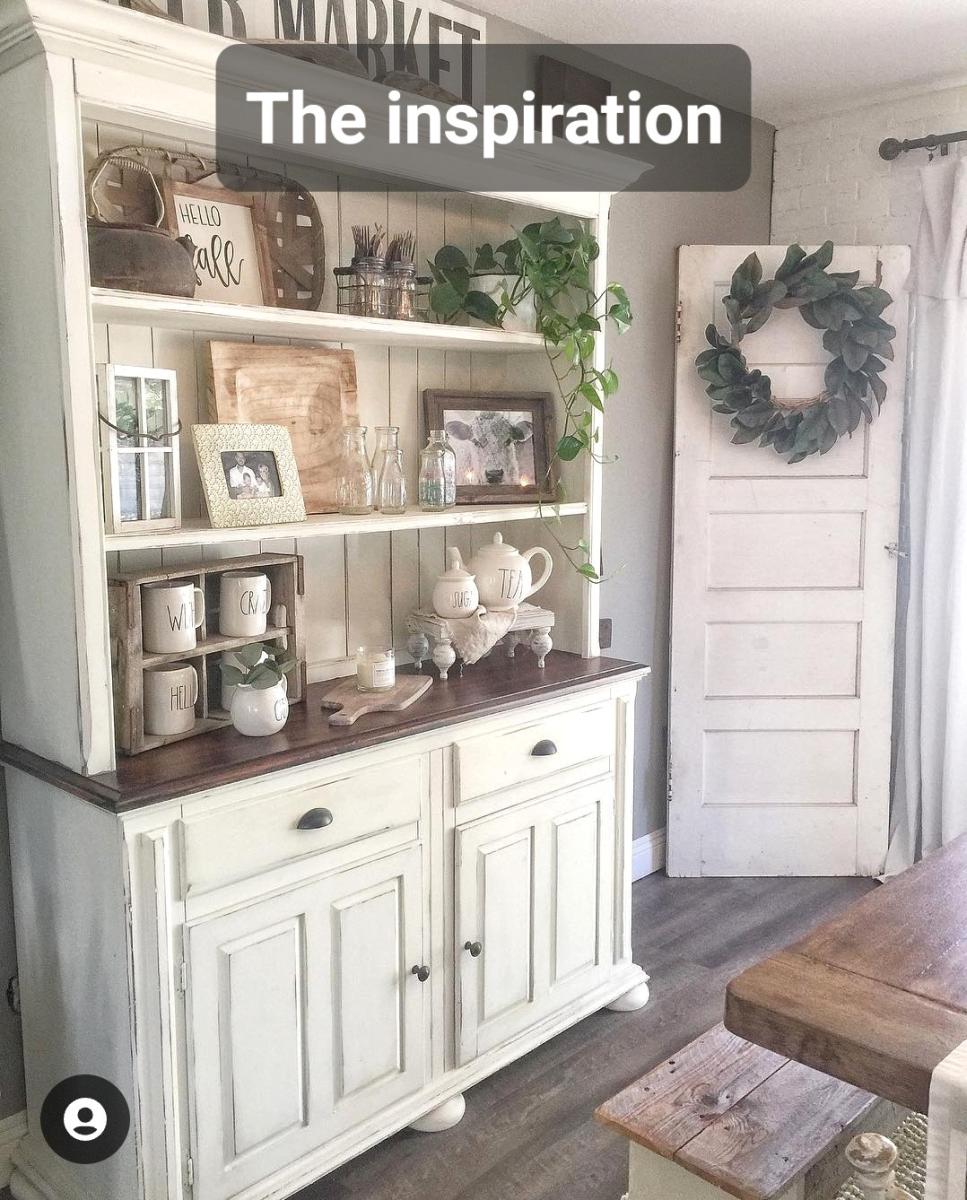
We had a great time seeing this come together as we didn't follow a specific plan, but were able to be a bit more creative inspired by various plans.

Estimated Cost
$45 including hardware & paint
Estimated Time Investment
Afternoon Project (3-6 Hours)
Finish Used
We painted with Martha Stewart's Stratosphere in a flat finish, distressed and rubbed on Minwax Provencial stain. Unfortunately, the stain gave the headboard a very green tint, so after a lot more sanding, we were able to finish the project with two quick coats of Minwax water based Poly.
Recommended Skill Level
Beginner

Comments

Portable work table

Submitted by nestico on Tue, 06/16/2020 - 18:47

This is my first build. I thought making a work table would be the ideal first project. I'm very happy I came across Ana's Youtube channel and website. I made some rookie mistakes with the cut list. I t was my fault but a good learning experience. In the past I have dreaded any kind of woodworking project. I became very frustrated using the garage floor or some makeshift work table. This sores nicely in the garage and is very functional. I did add a handle on the side of the work table to carry it to the work site. I'm looking forward to many new projects.

Estimated Cost
$30.00 That includes lumber and hardware.
Estimated Time Investment
Afternoon Project (3-6 Hours)
Finish Used
Unfinished
Back