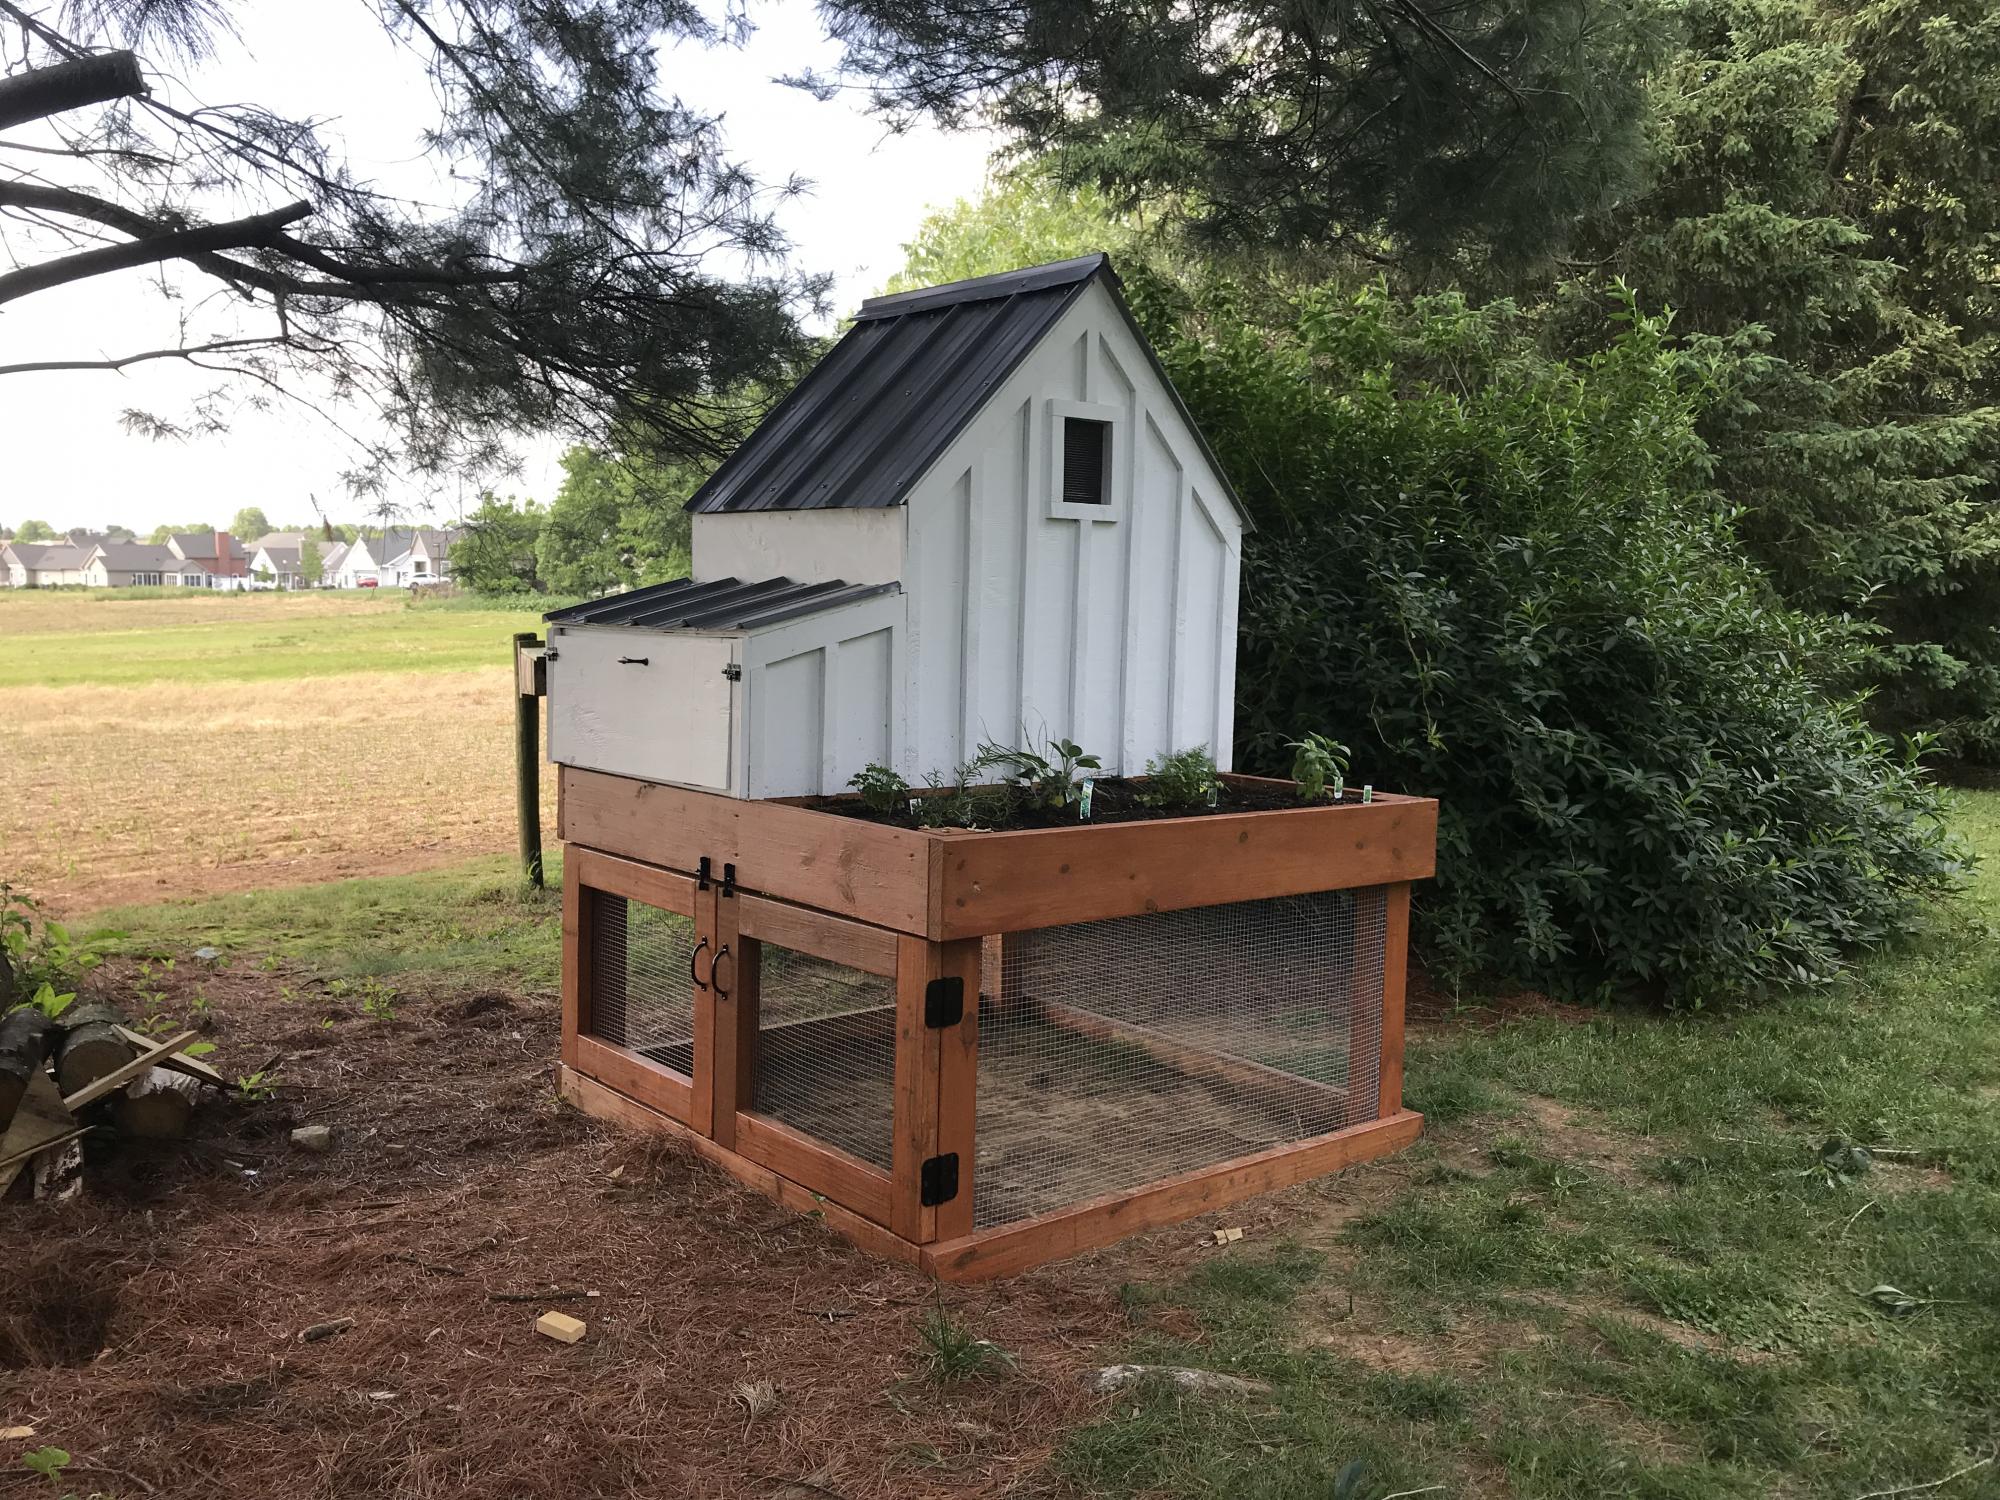
Small Chicken Coop with Planter
Great plans! Fun project
Built from Plan(s)
Estimated Time Investment
Weekend Project (10-20 Hours)
Recommended Skill Level
Advanced
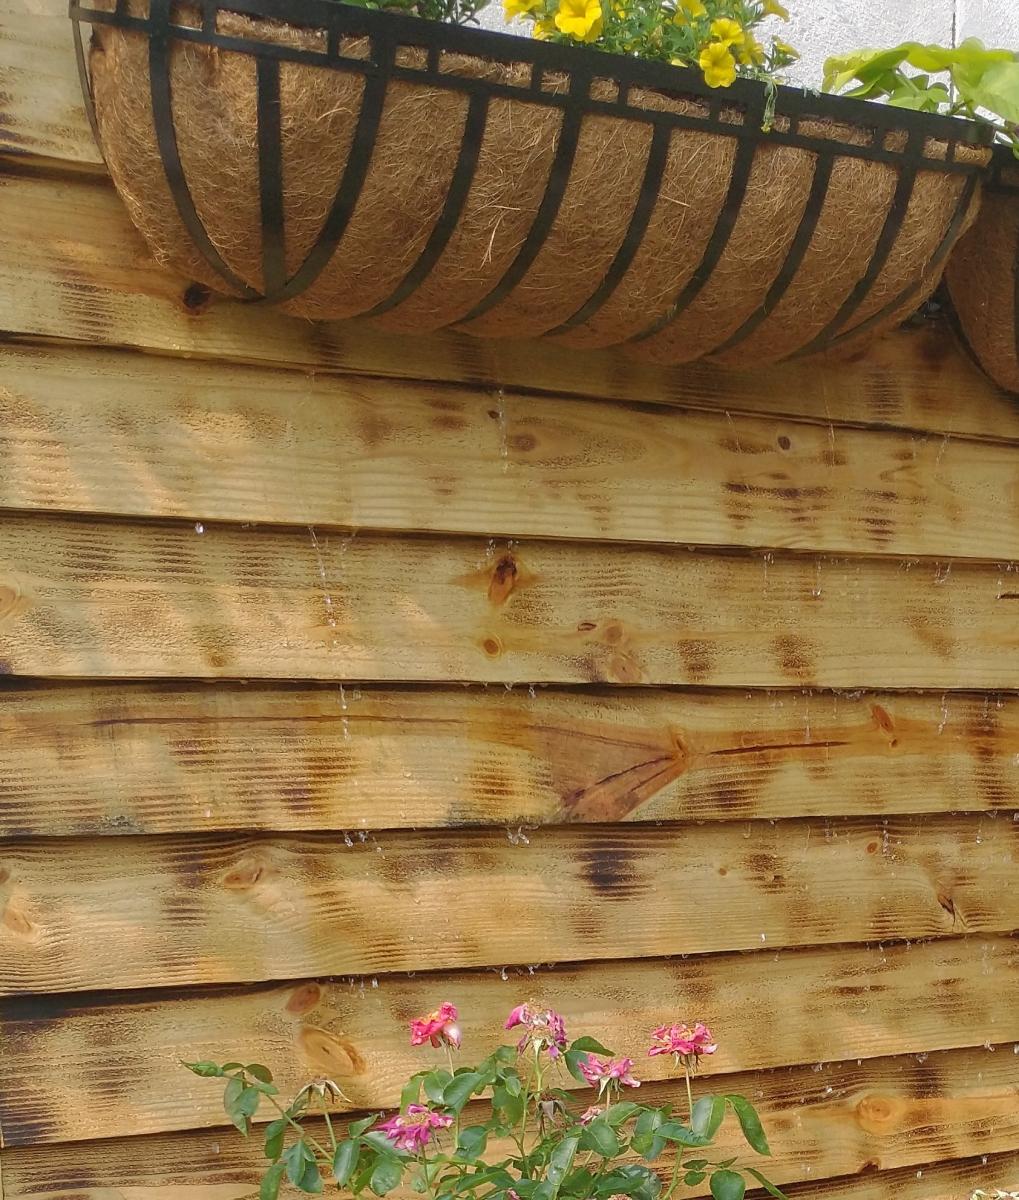
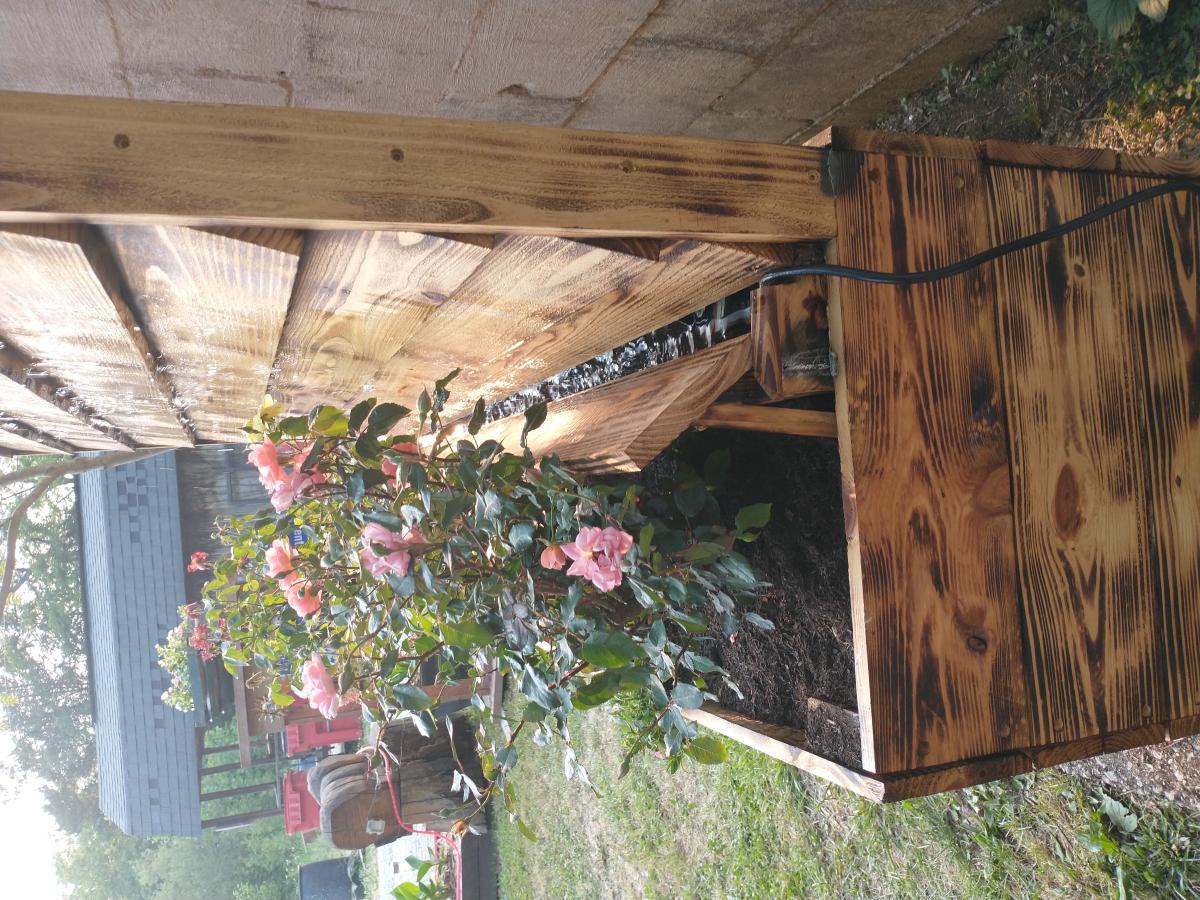
Great plans! Fun project
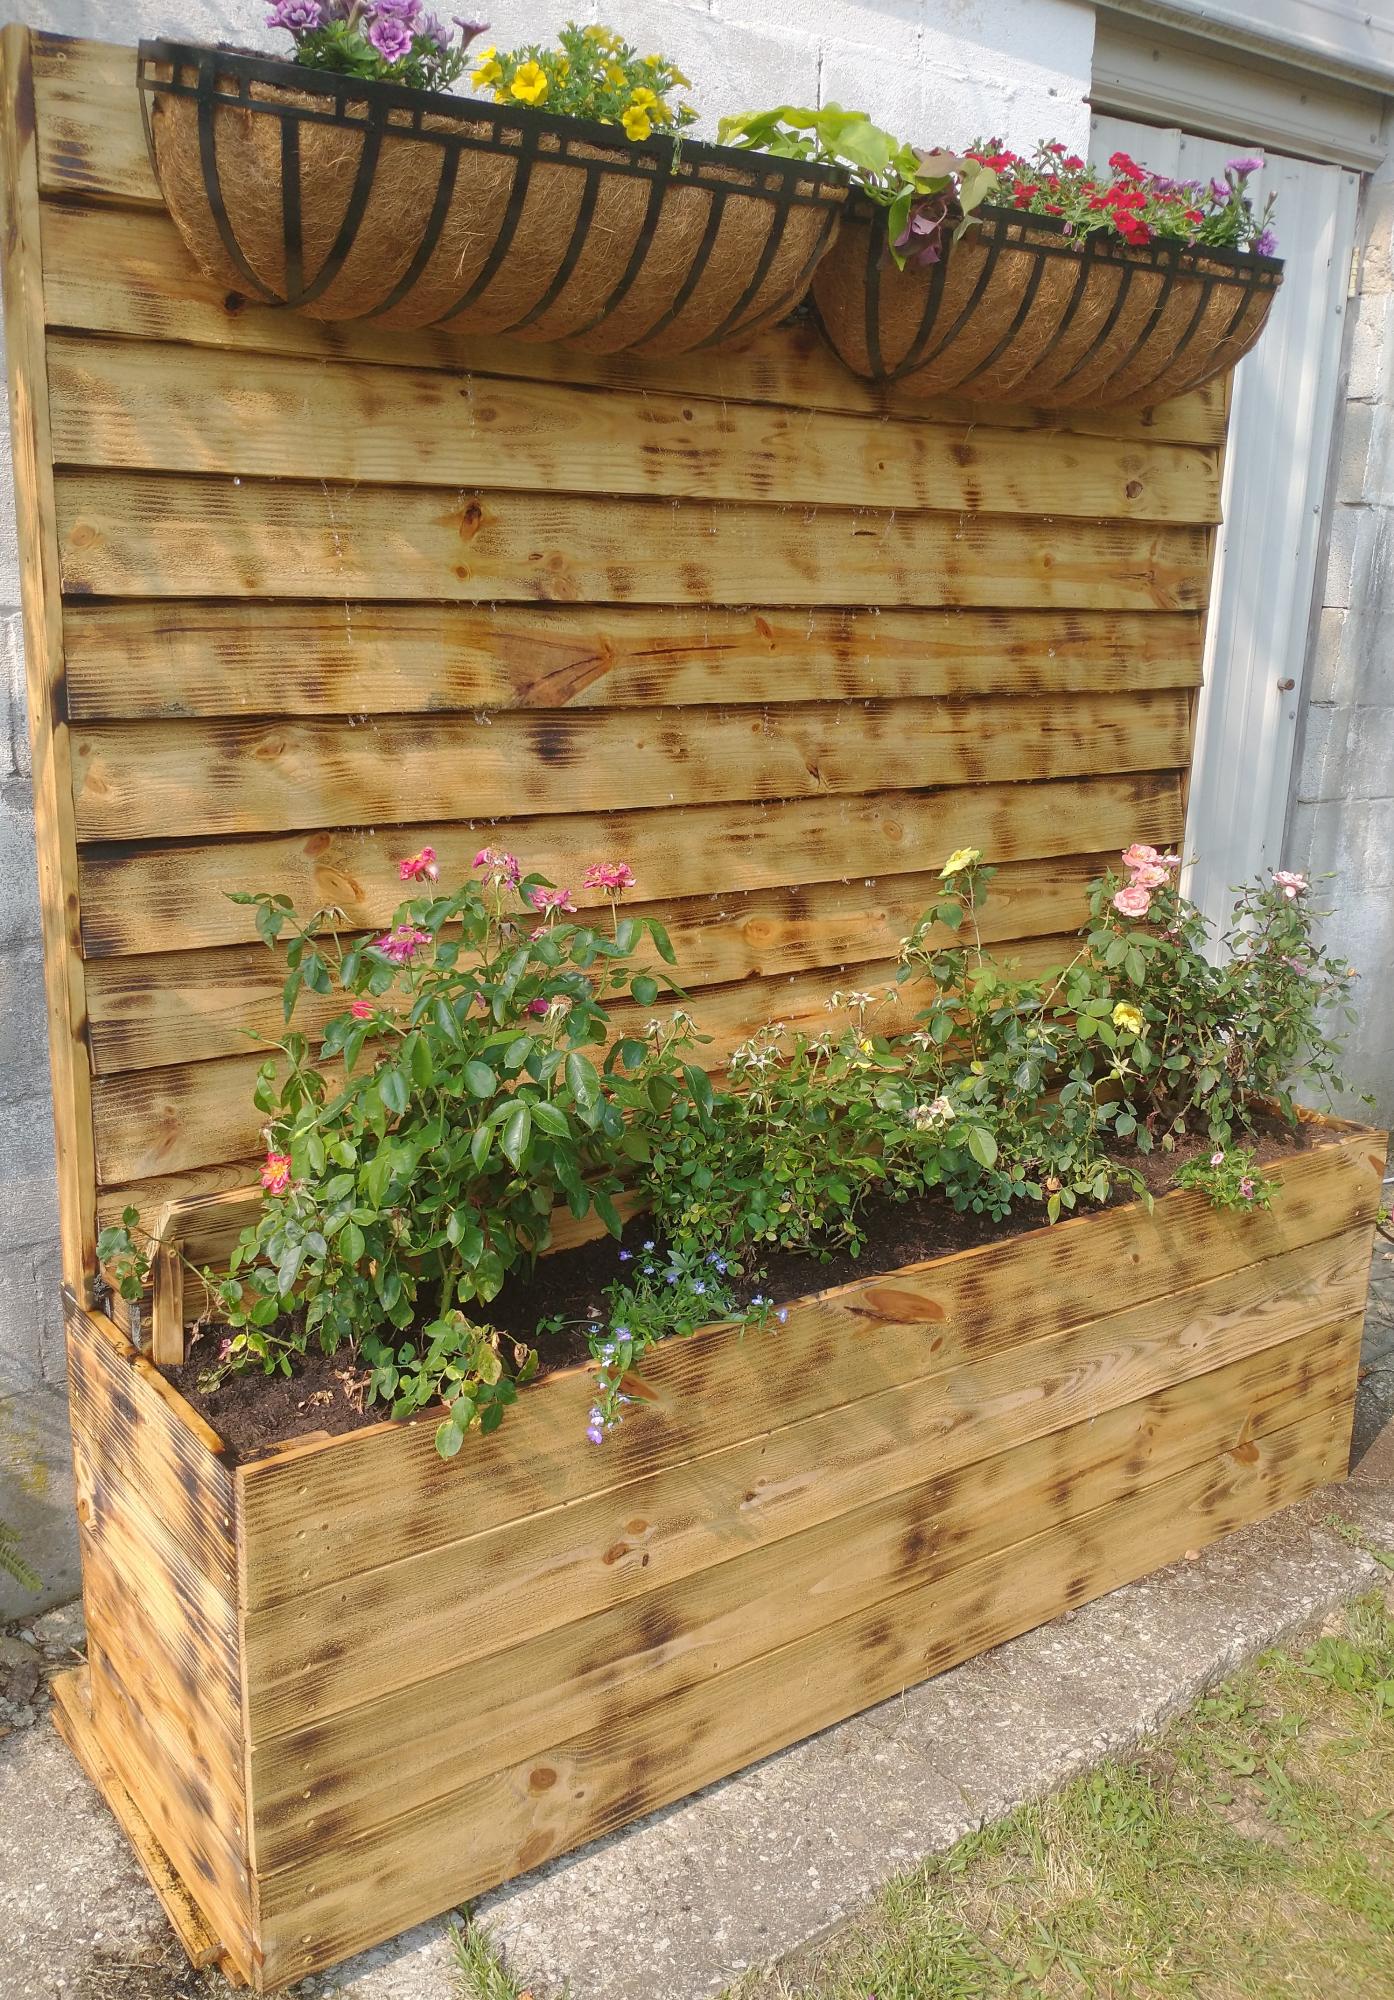
It's a take off of your privacy fence planter. But I added water to make it a water wall also.
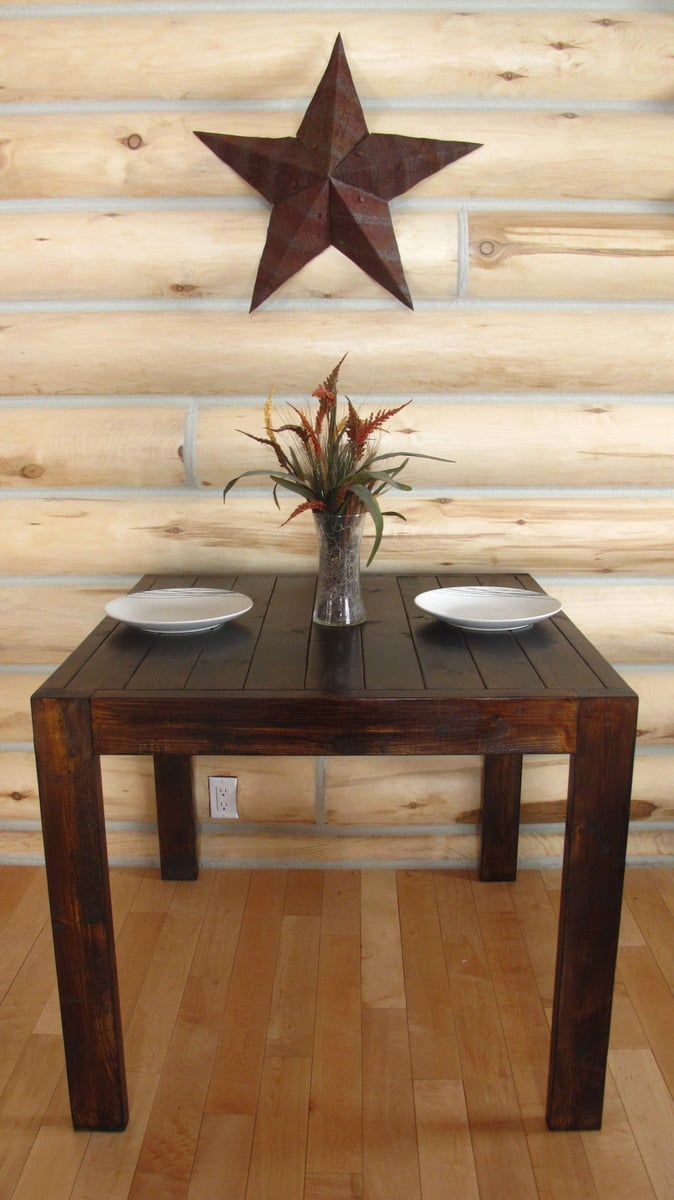
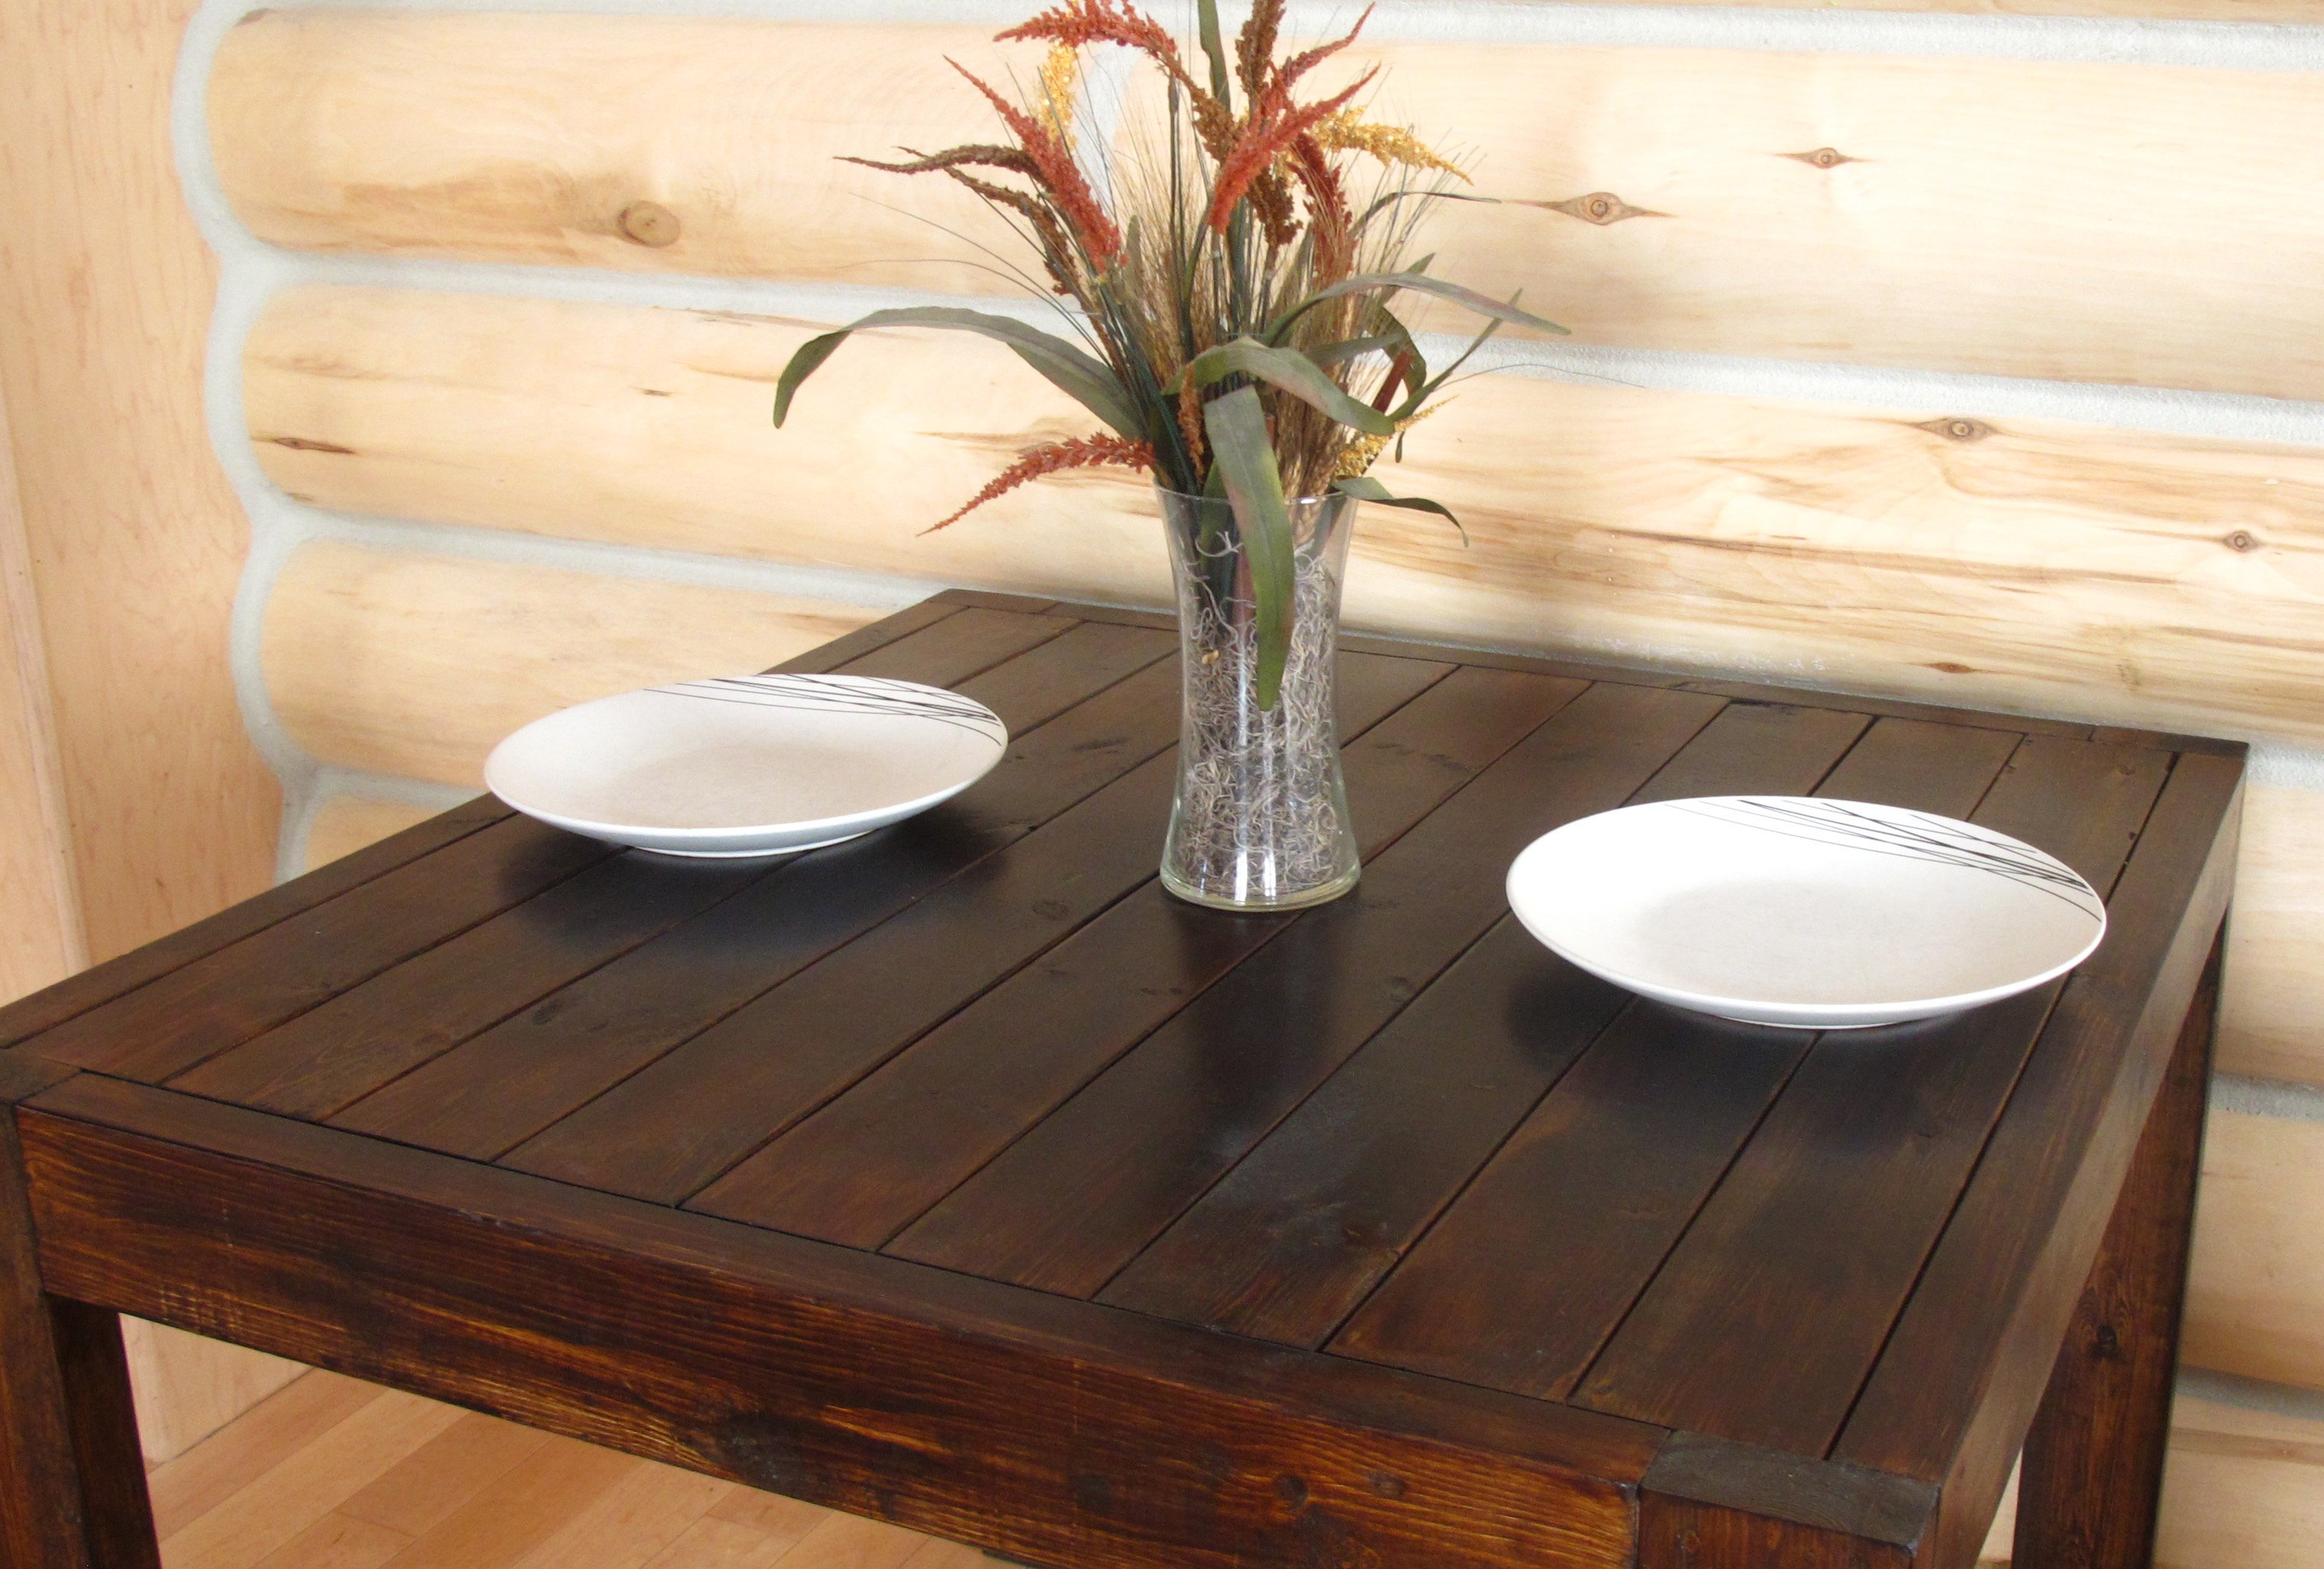
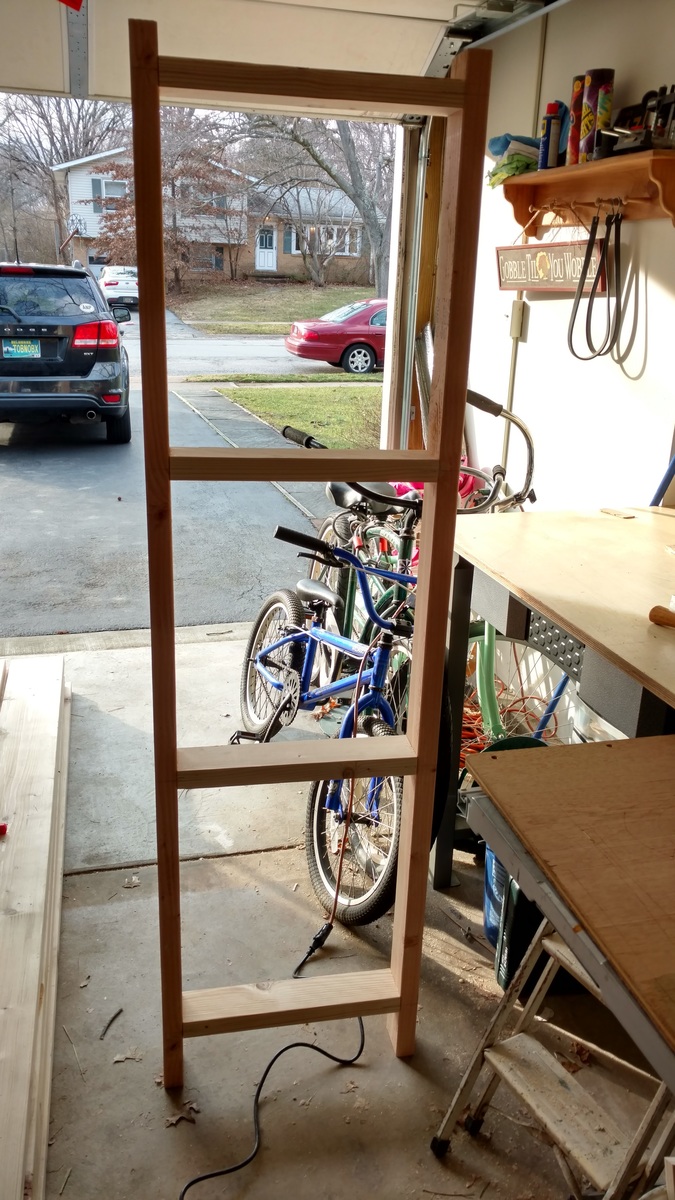
Square Dining Room Table
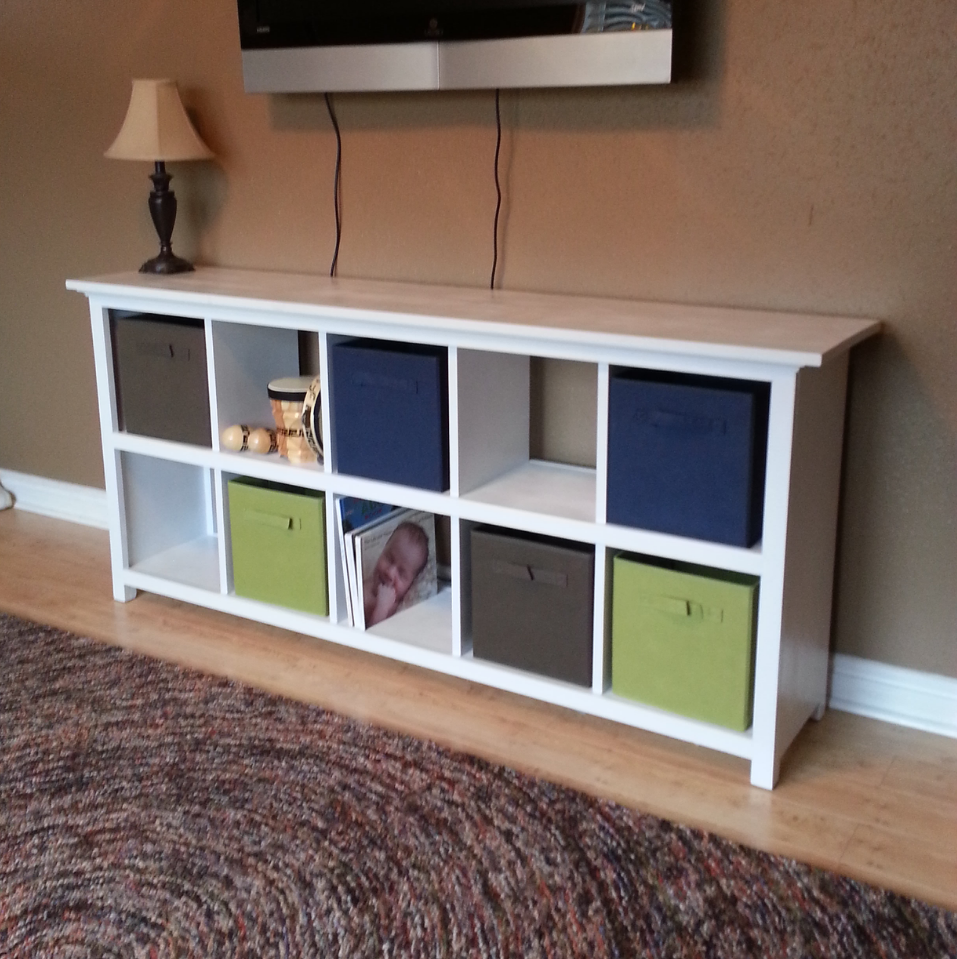
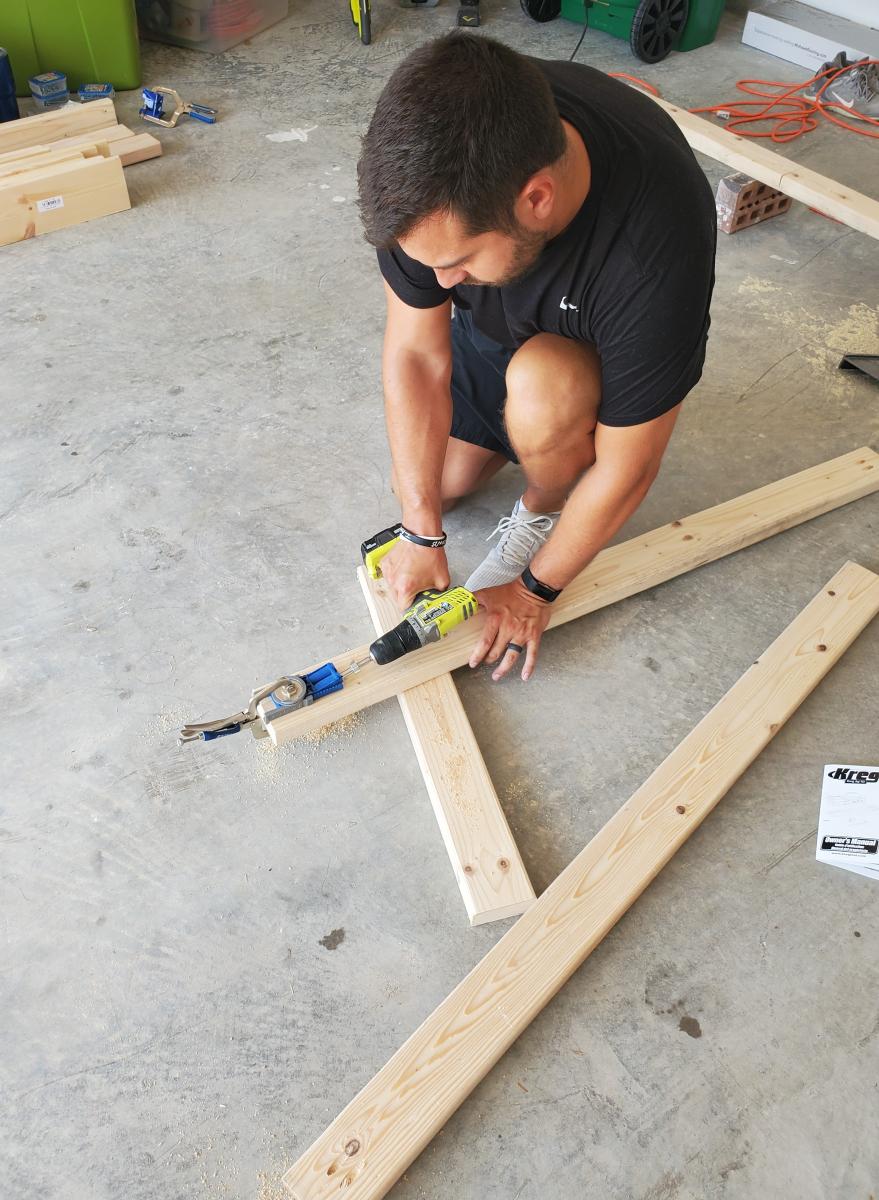
Expanded the 6 cube shelf to 10 cubes, beefed up the feet a little and fancied up the top to more closely match the picture in the plan page. Just joined a couple 1x8's and cut to length for the top.
Used the Kreg Jig to make the shelf box and face frames - biscuit joiner for top.
Wed, 11/26/2014 - 05:32
Hi John- this is exactly what I'm looking for- did you by any chance save your modification measurements and cut list? Also- I'm considering putting a 50 inch tv on the unit- would you recommend additional support? Thanks for any help.

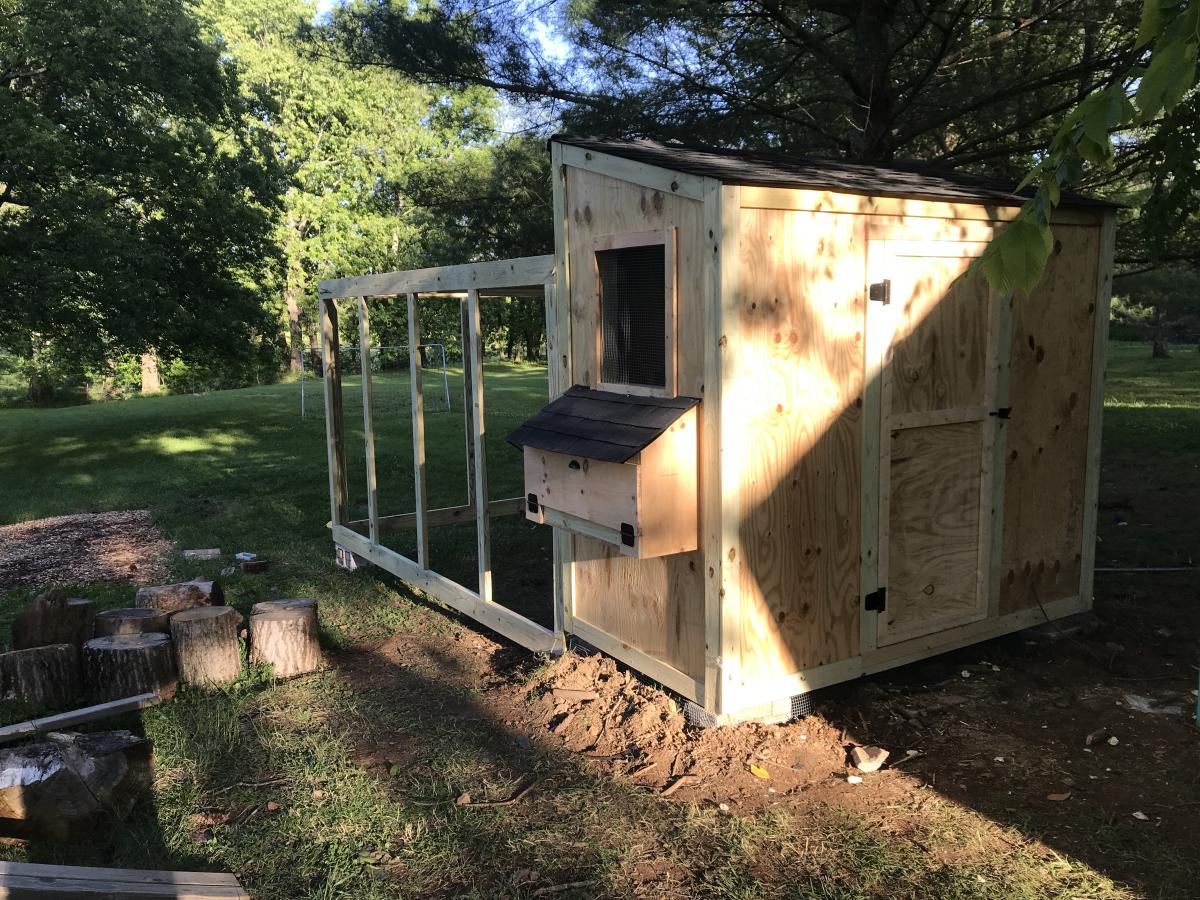
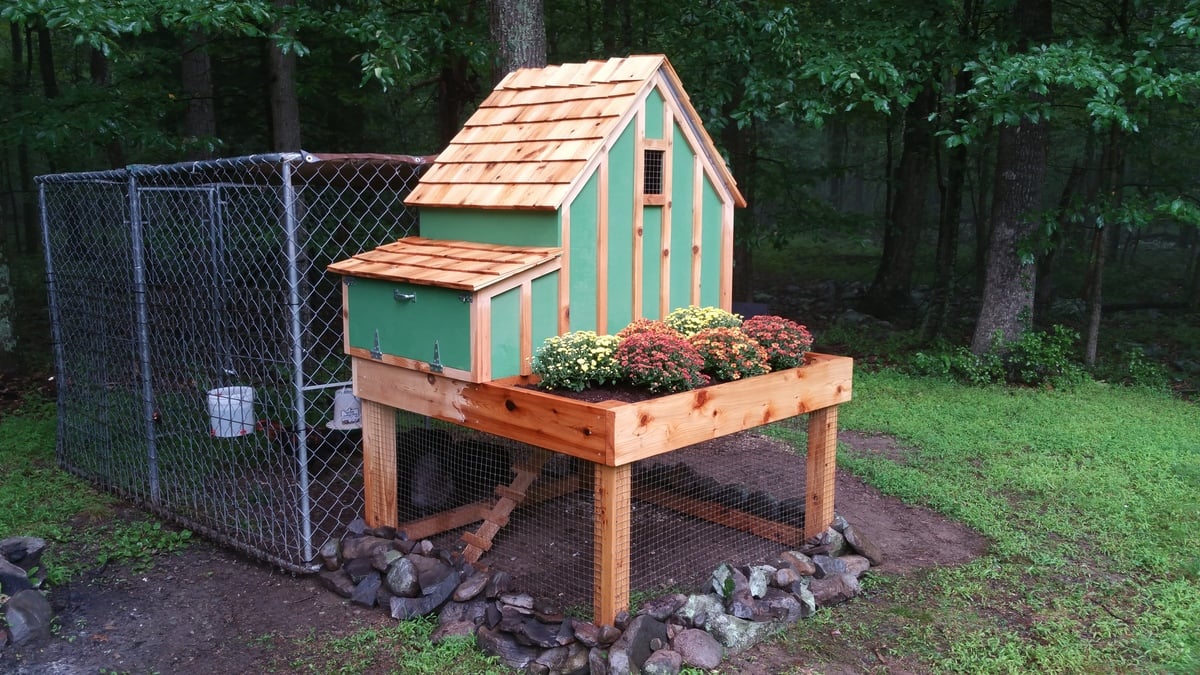
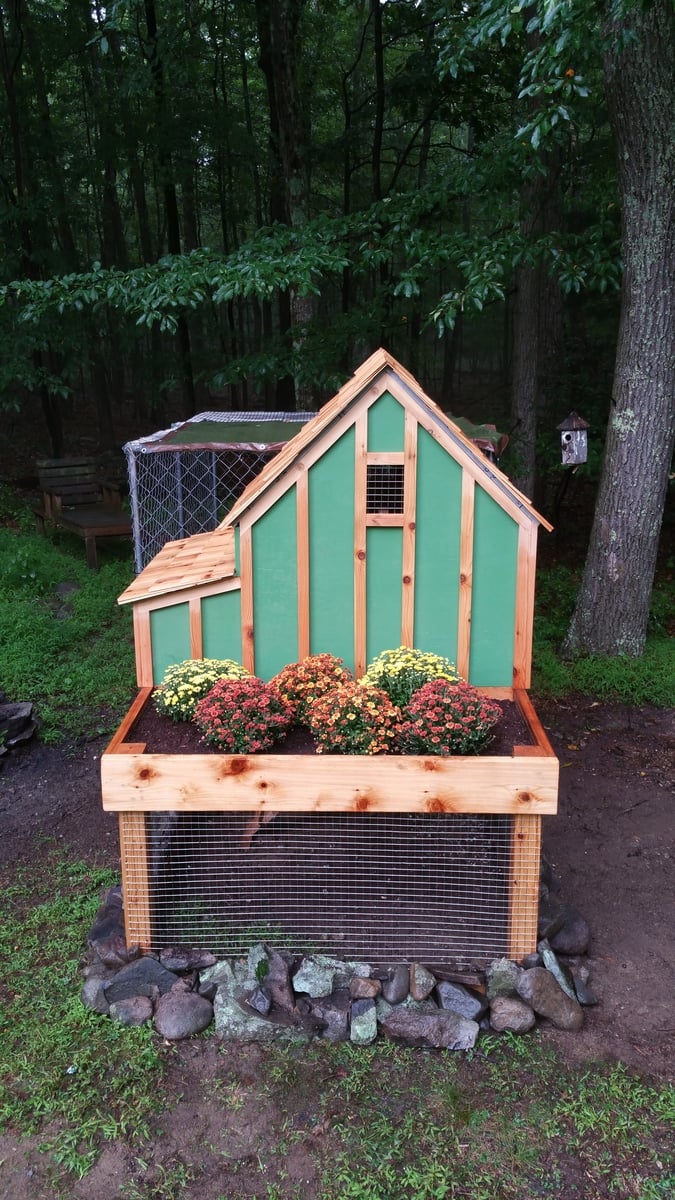
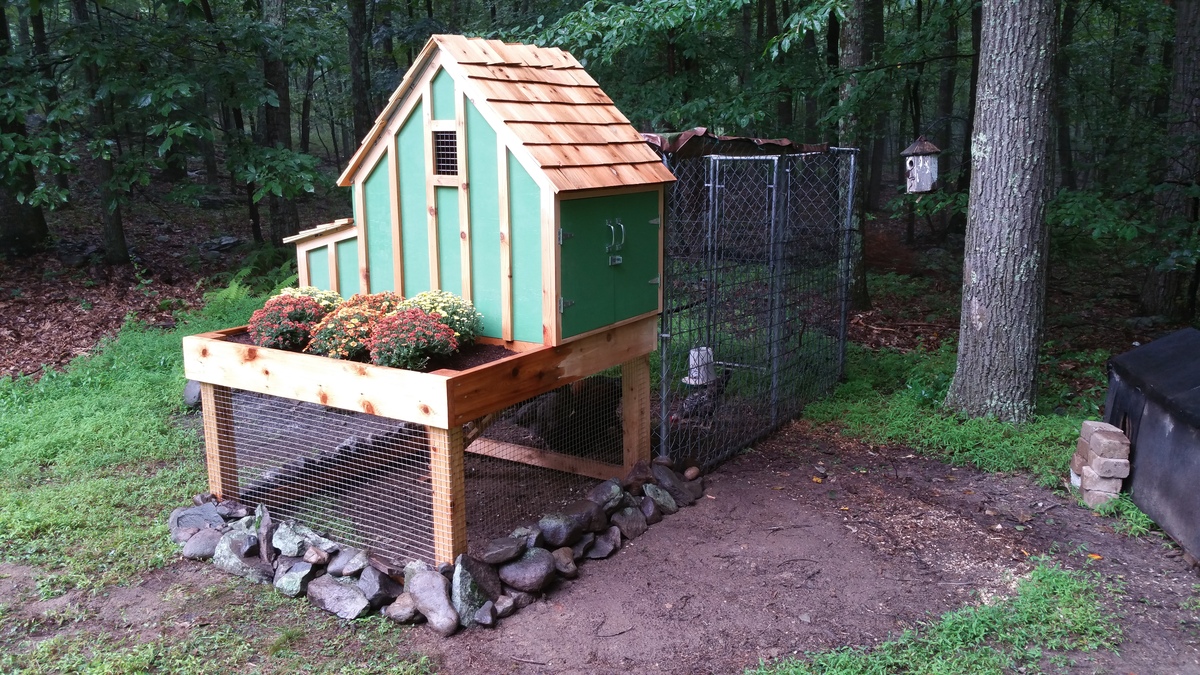
I had such a fun time on this shed coop/run build! My wife and I have 5 children and it was fun involving them in building everything about this coop and run. They have a wonderful sense of accomplishment in looking at what they helped build.
A few notes, while this what a fairly straightforward build, there are a lot of little intricacies to be aware of. Such as:
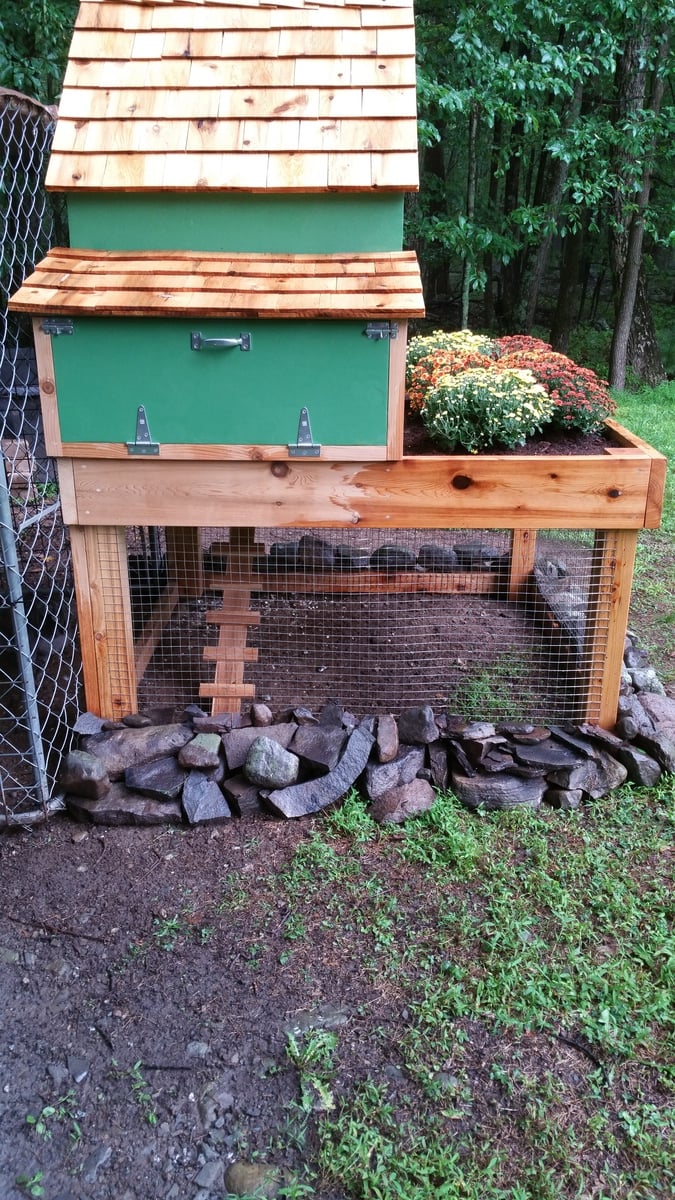
• Make sure your chicken coop is about a foot off the ground. It's best to do that so critters such as rats and snakes don't make their home under the shed and potentially eat their way through the floor.
• It is highly advisable to dig a trench about a foot to a foot and a half deep around the coop and the run and attach chicken cage fencing from the bottom of the coop/run into the trench, and then taper the cage fencing outward. This will prohibit critters such as raccoons from trying to dig under the coop.
• When you attach the poultry netting to the outside of the chicken run, staple one side really well, then move to the other side and pull the netting fairly hard to make the netting as tight as possible. (Also, be careful when putting the netting across the top of the run to not fall off the ladder as I did and dangle there until one of your kids comes to help you! Ha! :D )
Thank you, Ana, for posting these plans! We are so excited to get our little chickies out into their new home as soon as their feathers come in!
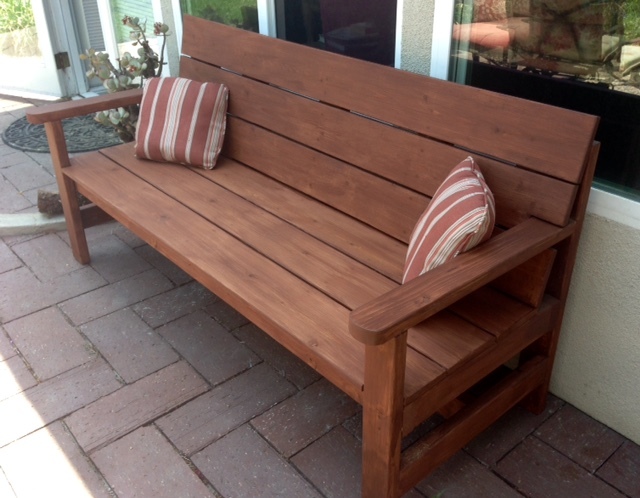
Great plans! I modified the bench by adding a slanted back (which enabled me to put the slats closer together), extending and curving the front of the arms and extended the seat to the outside of the legs.

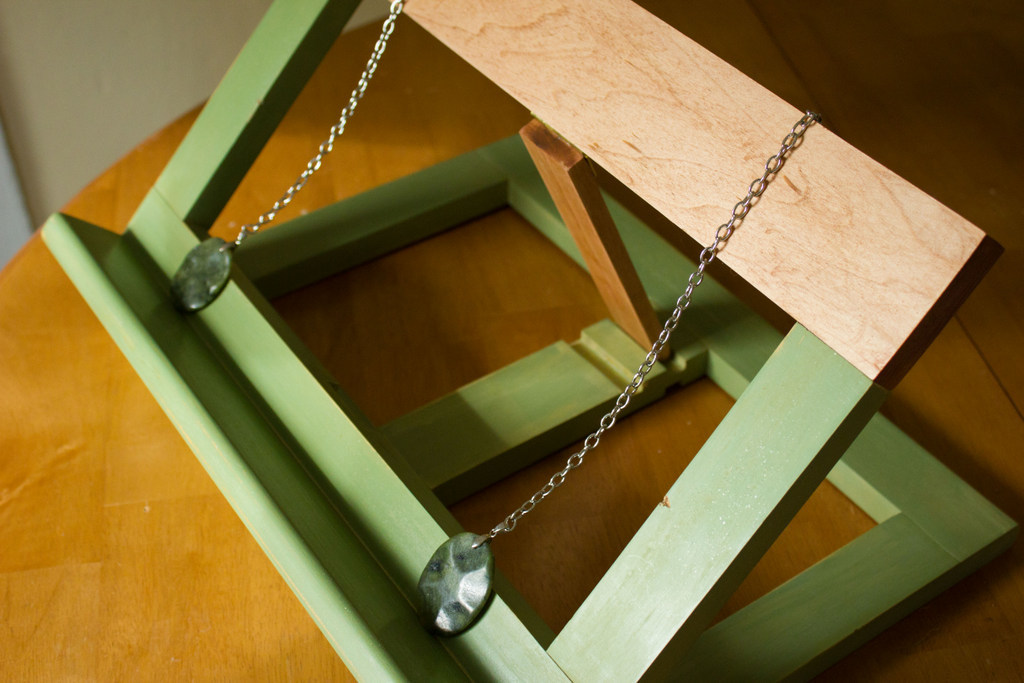
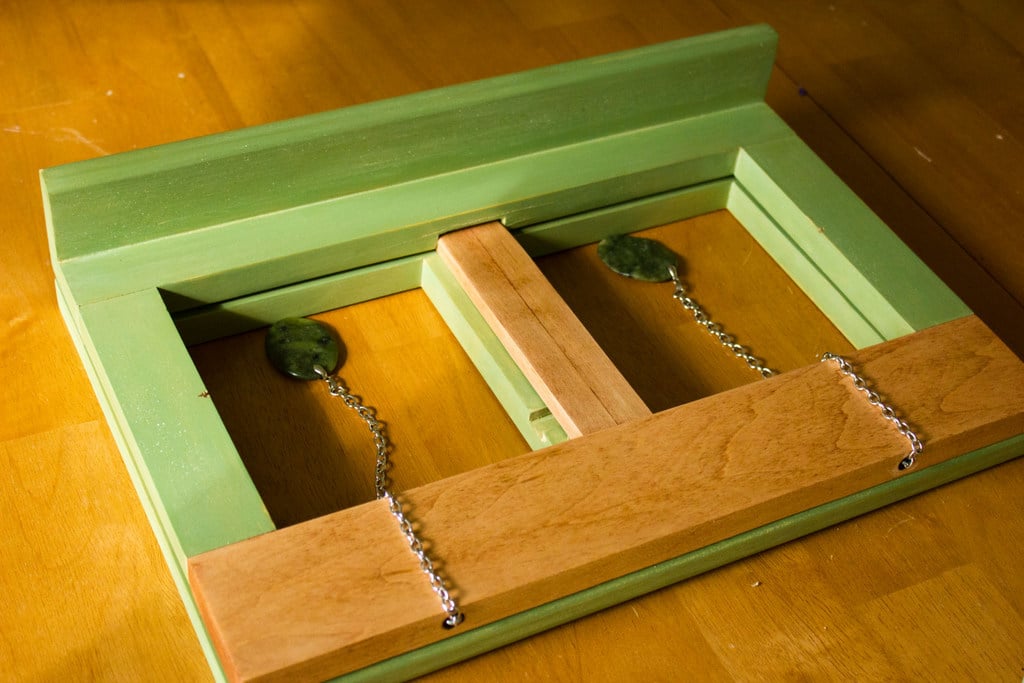
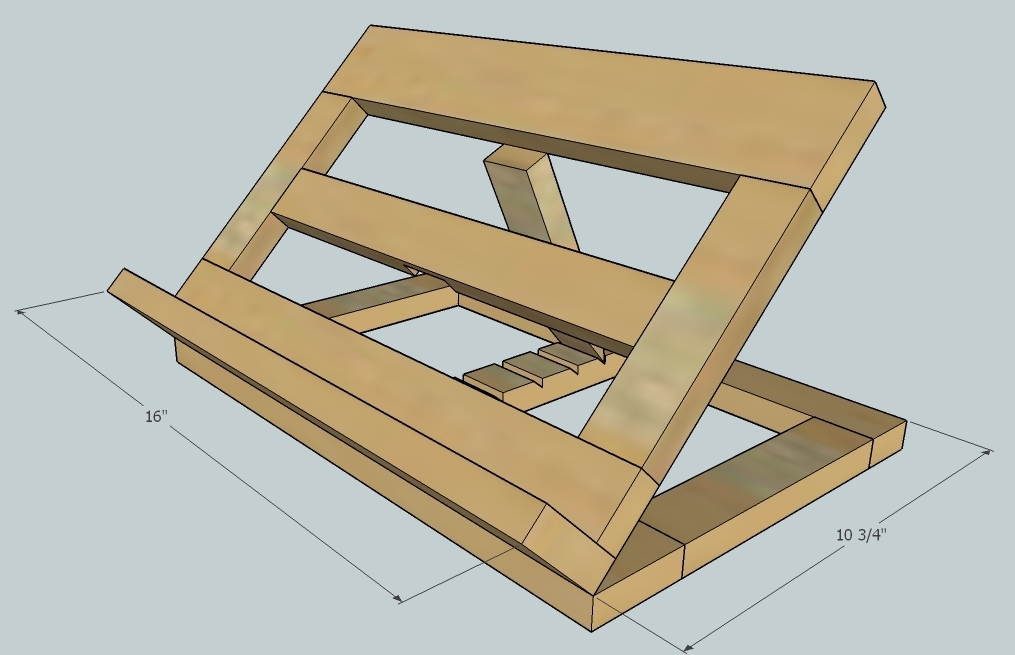
This was a project undertaken to facilitate my current pursuit of learning how to cook, but I think it will serve me well as I study, too, holding my textbooks up. It also let me experiment a little with staining and with using milk paint (which has NO VOCs but is kinda weird to work with). And it let me put to use some scrap wood that I think I was unconsciously saving for something special.
Because I had a scrap pile, screws, a few hinges, and the finishing products, this project was Almost free...I had to buy a narrow hinge ($1.50? I think?), and I chose to buy some pretty page weights ($3 including both pendants and the chain). So...not too bad, right? For a solid book stand that has meaningful beauty to me?
Ok, so this is all scrap wood. The stained pieces are maple leftovers from my cabinet project, and the rest is a mix of pine and poplar. See the dimensions in the last photo. The paint is Miss Mustard Seed Milk Paint in Lucketts Green, and the stain is Red Chestnut oil-based stain by Minwax. I finished the whole thing with one coat of wax buffed to a soft sheen (my new favorite finish).
I used a miter saw for my cuts and a router for the kickstand grooves, but really a regular circular saw would've worked just as well (or better, for the grooves). It took me several days to finish this project, but there's no reason it should take (someone other than me) more than an afternoon.


I am new to this. I used your plan but reduced the lenght by 24 to make a 2 seat Garden Bench. I used softwood and painted with this outdoor paint. Thanks for inspiration and plans. I am located in Victoria, British Columbia, Canada.

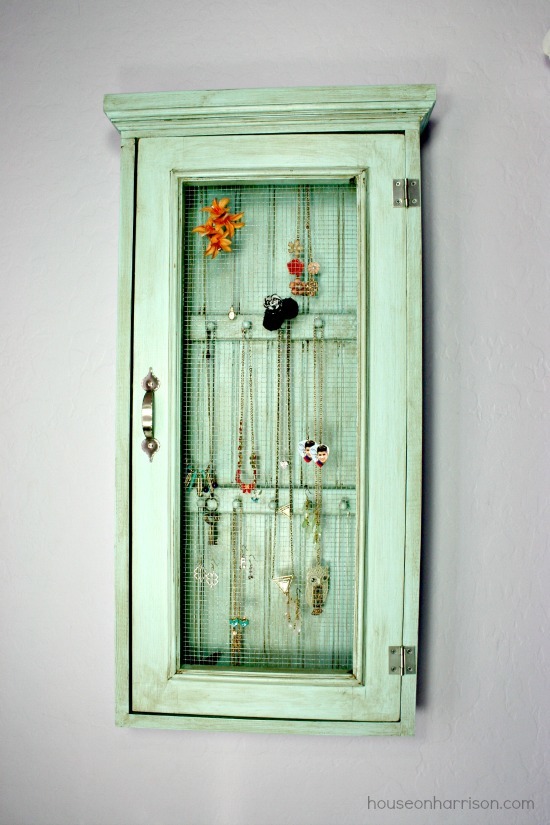
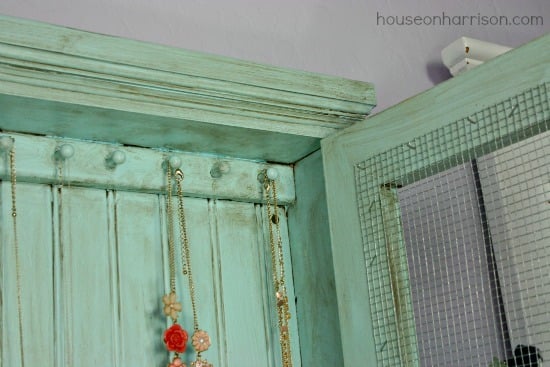
I made this awesome jewelry cabinet for my teenage daughter's room. It holds all her jewelry and then some, and it keeps it looking nice and organized. I followed the Wall Jewelry Cabinet plans, and made just a few minor modifications to better suit the style of my daughter's room. Plans were super easy to follow and this only took a few hours to build.
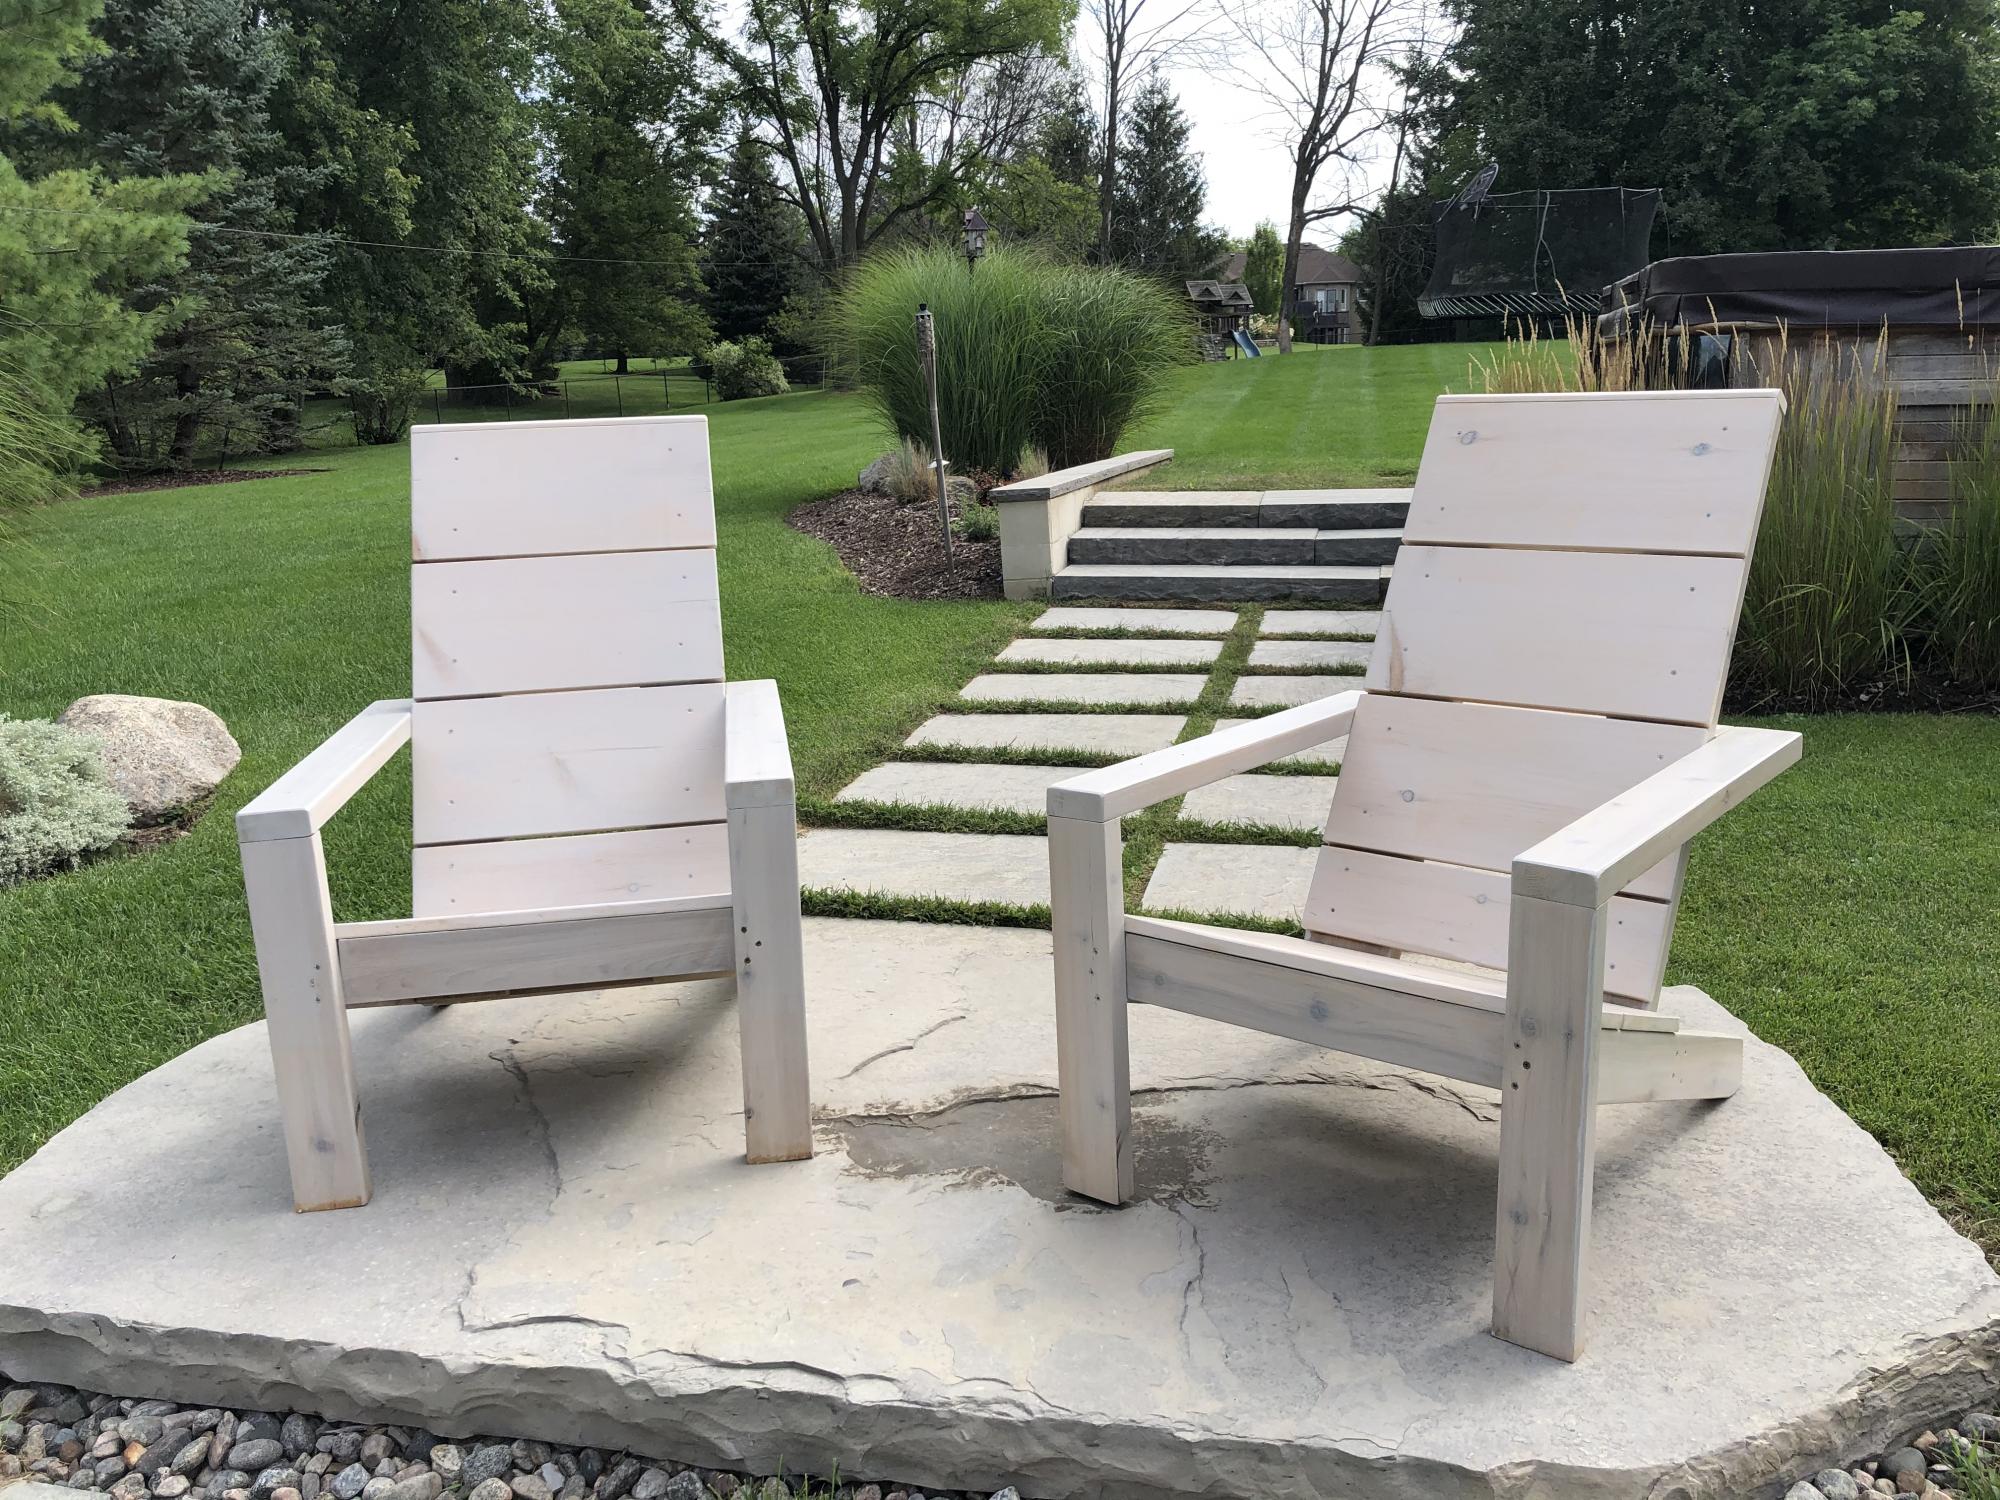
I finally finished my DIY Modern Adirondack Chairs! Frame made with 2x4 cedar lumber and seat and backs with 1x10 pine planks. Stained with Benjamin Moore Aborcoat silver grey semi-transparent stain with a clear coat. Used a free diy plan by Ana White with some slight modifications to make the chair back higher. Cost was a bit higher than expected but lumber has gotten more expensive during the Covid time.
Thanks Ana for the design and the YouTube video. I watched it at least 20 times!
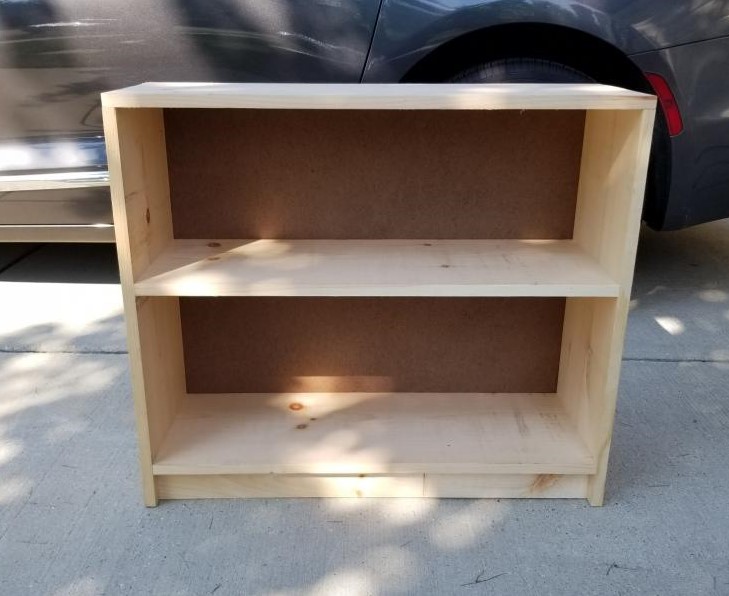
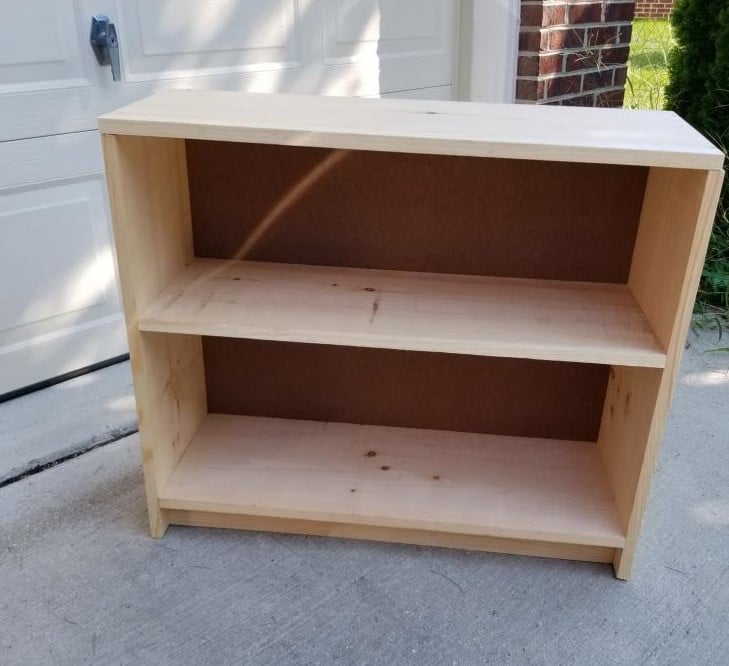
2 bookcases for my family, storage and organization. Left raw for them to customize. Current vision is purple and pink or maybe an ombre stain like we saw on Good Bones. Hopefully I can add update of final decision.
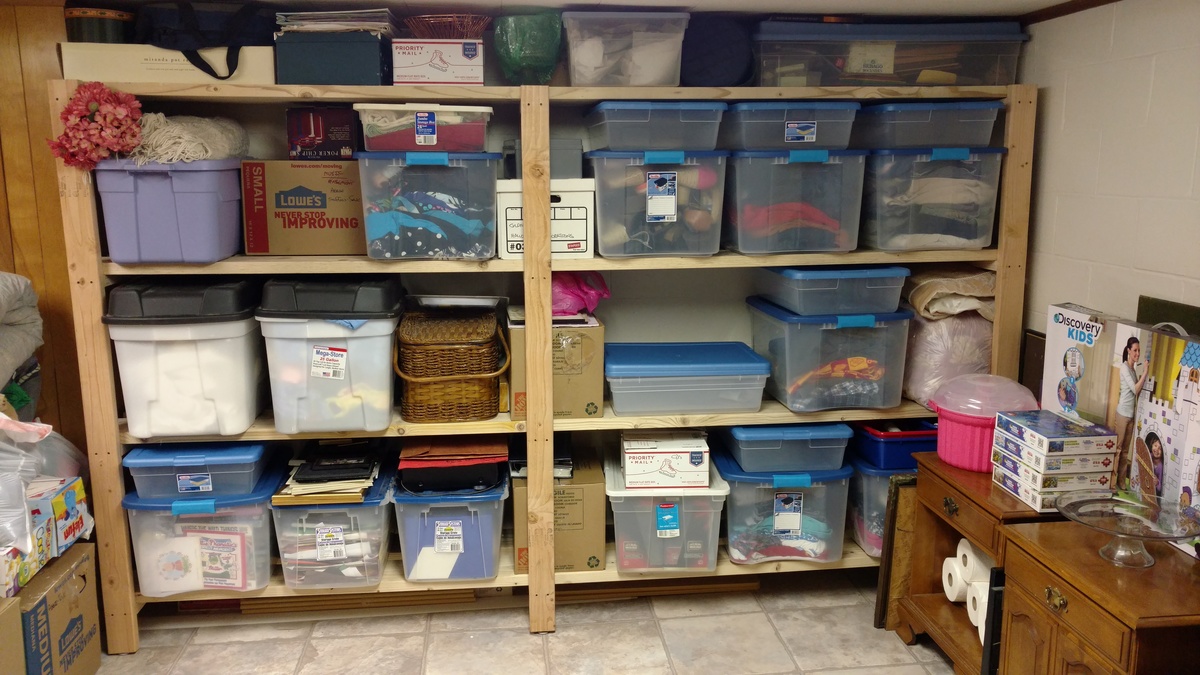
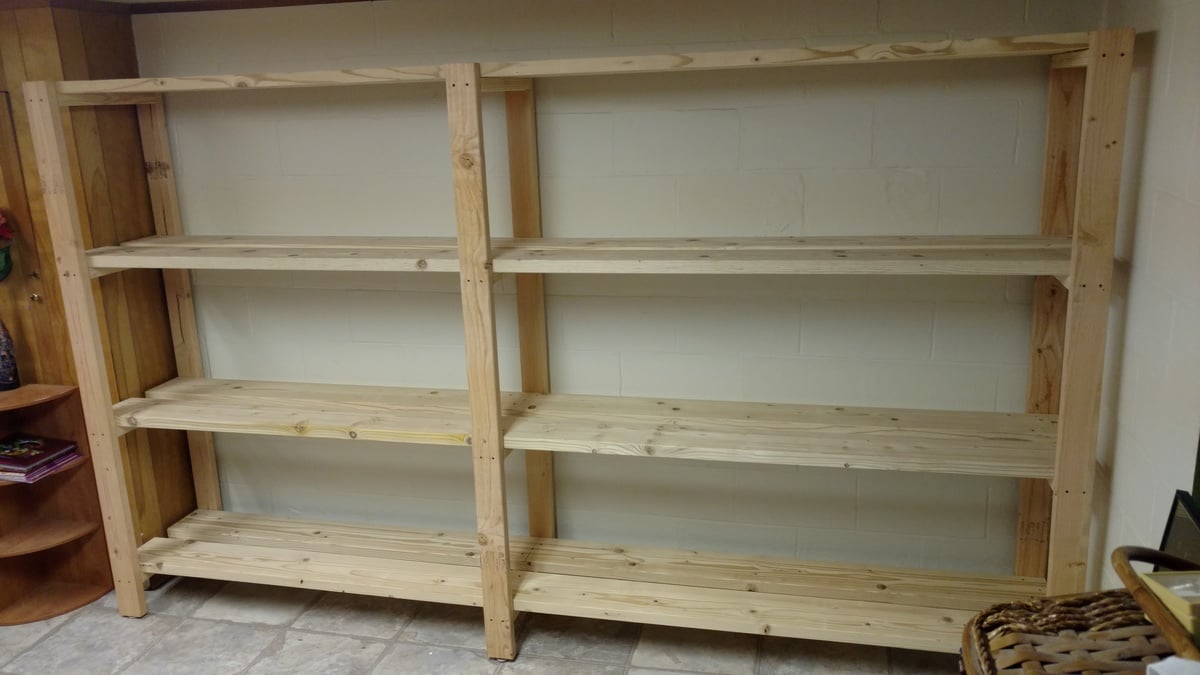
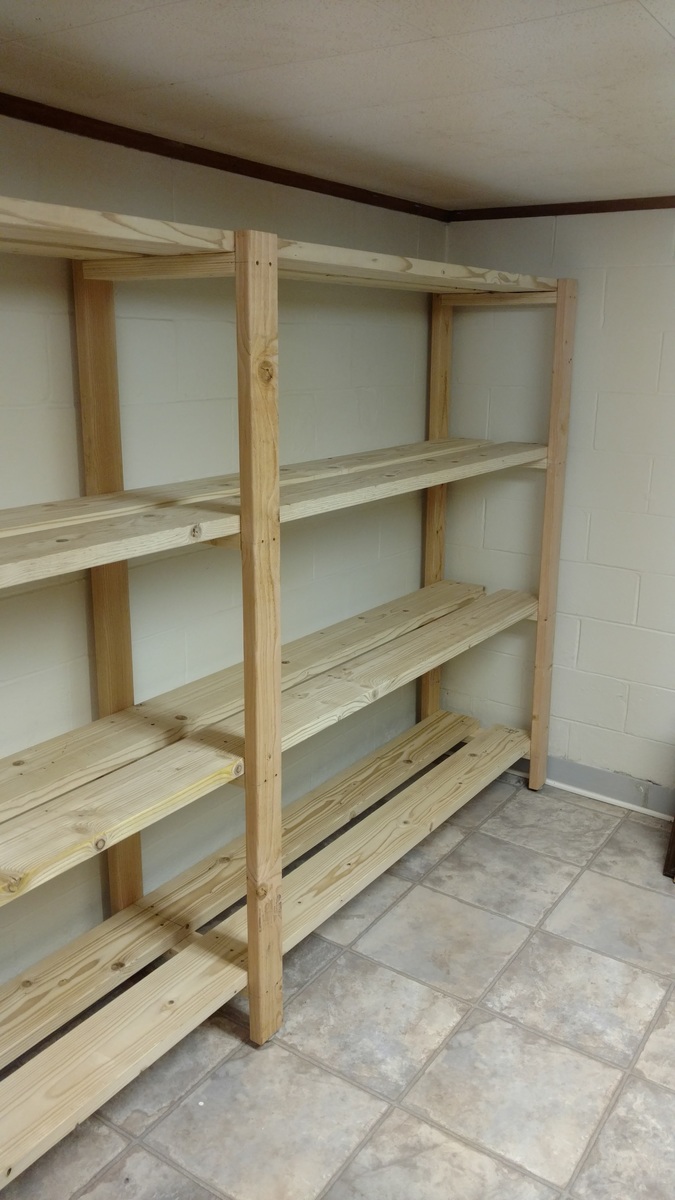
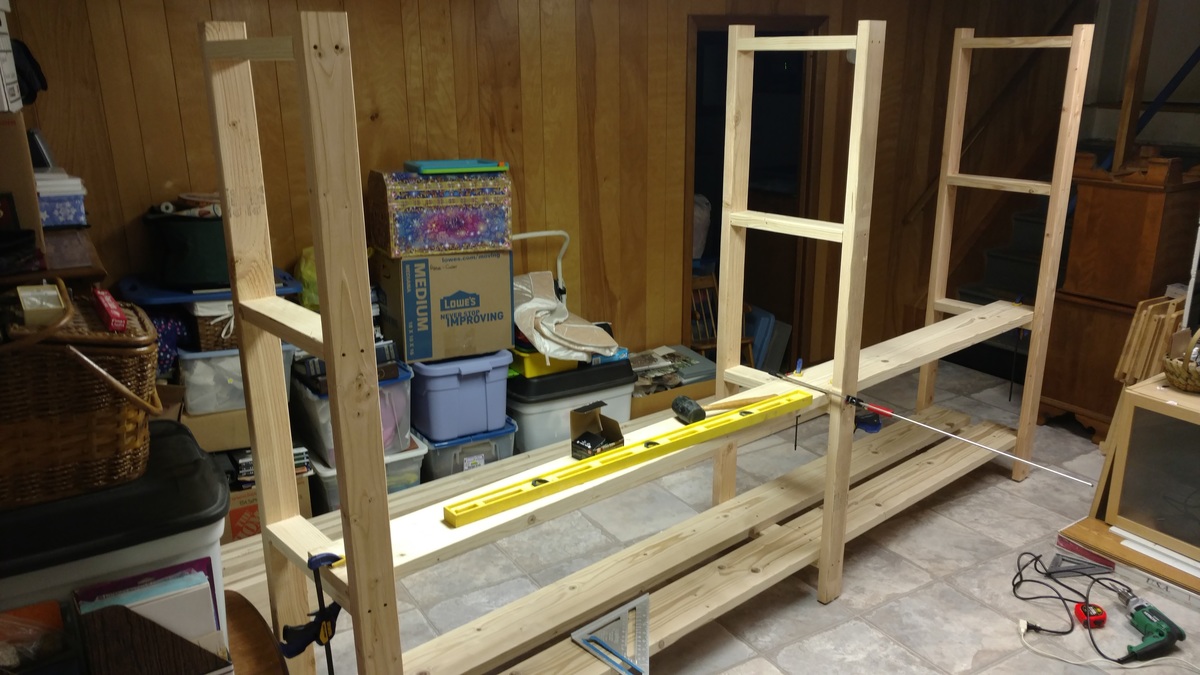
Time to get organized in 2017....and what better way than with some custom shelving. This was not too bad of a project to complete. It only took about 6-8 hours to cut, frame, and assemble everything together (thanks to an interruption or two). 'Twas nice to have a project for once that I didn't have to care about finishing the project with wood filler, sanding, painting. I am sure my wife thanks me more as I would have been another week getting things just right!
A few changes that I made from the original plans:
- used 2x8 for the shelving runs as I only was dealing with a 10ft run and was a few bucks cheaper to buy 8 boards vs 16 boards. Plus less cuts!!!
-installed adjustable furniture feet in the supports to deal with sloping basement floor. Unexpected side effect was it was easier to slide the unit around in the basement as I assembled it.
Outside of those changes I remained faithful to the original design. I didn't bother filling the screw holes as we will be hiding the shelving unit with a curtain once we turn the room into a TV/Office area.
Also as it wasn't 100% clear from the original plans, but the height measurements for the shelf supports are to center... not sure why it didn't register with me right away... but just in case anyone else didn't realize that as well.
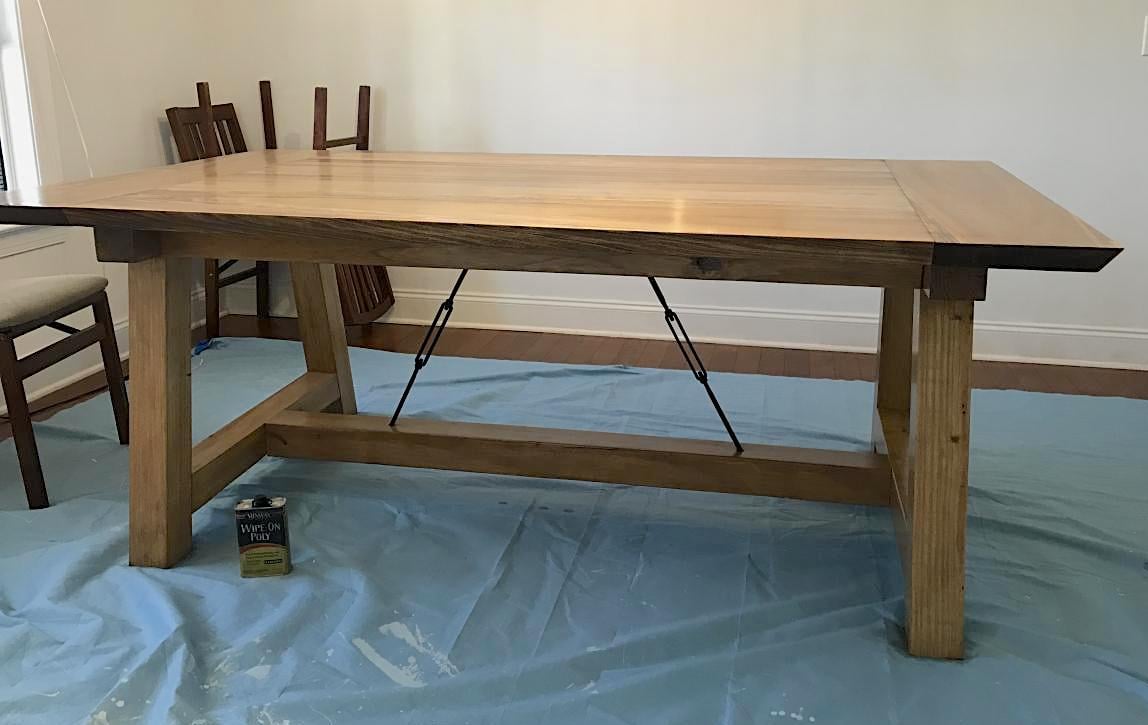
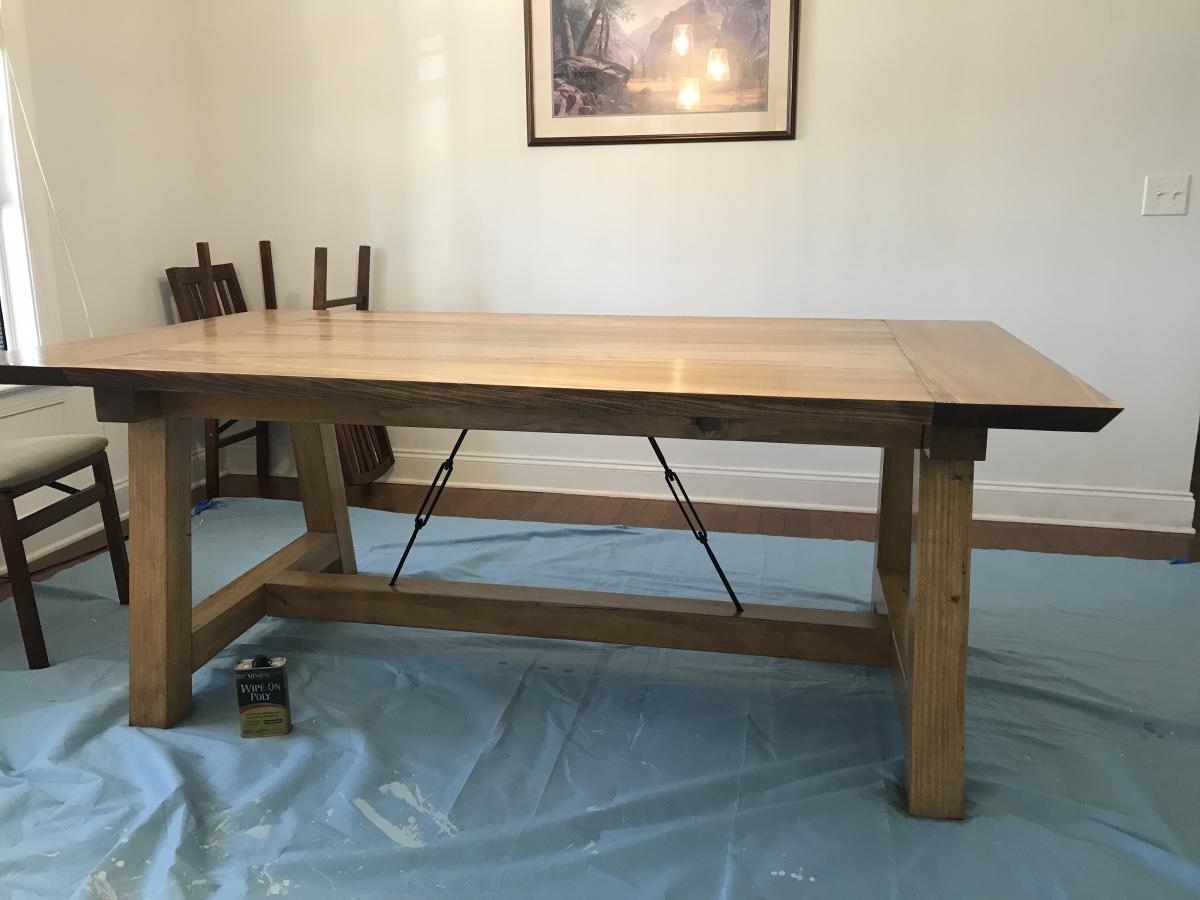
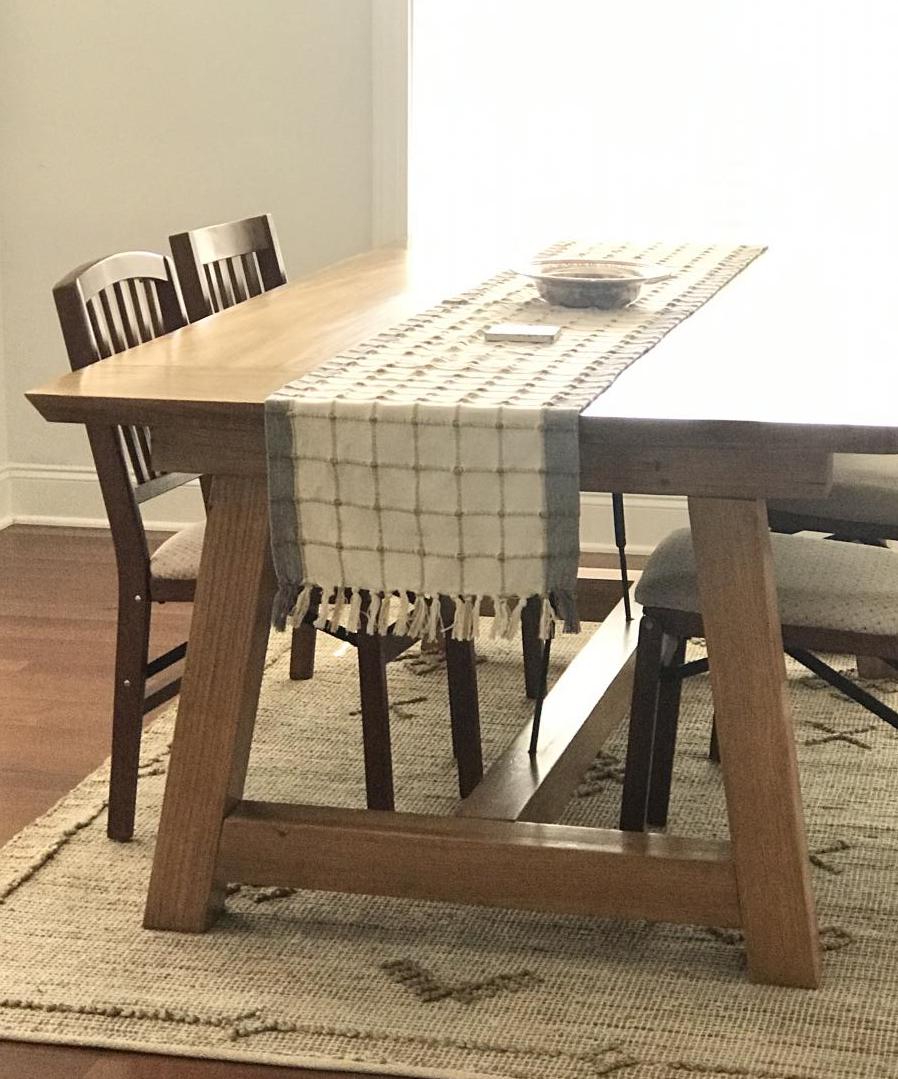
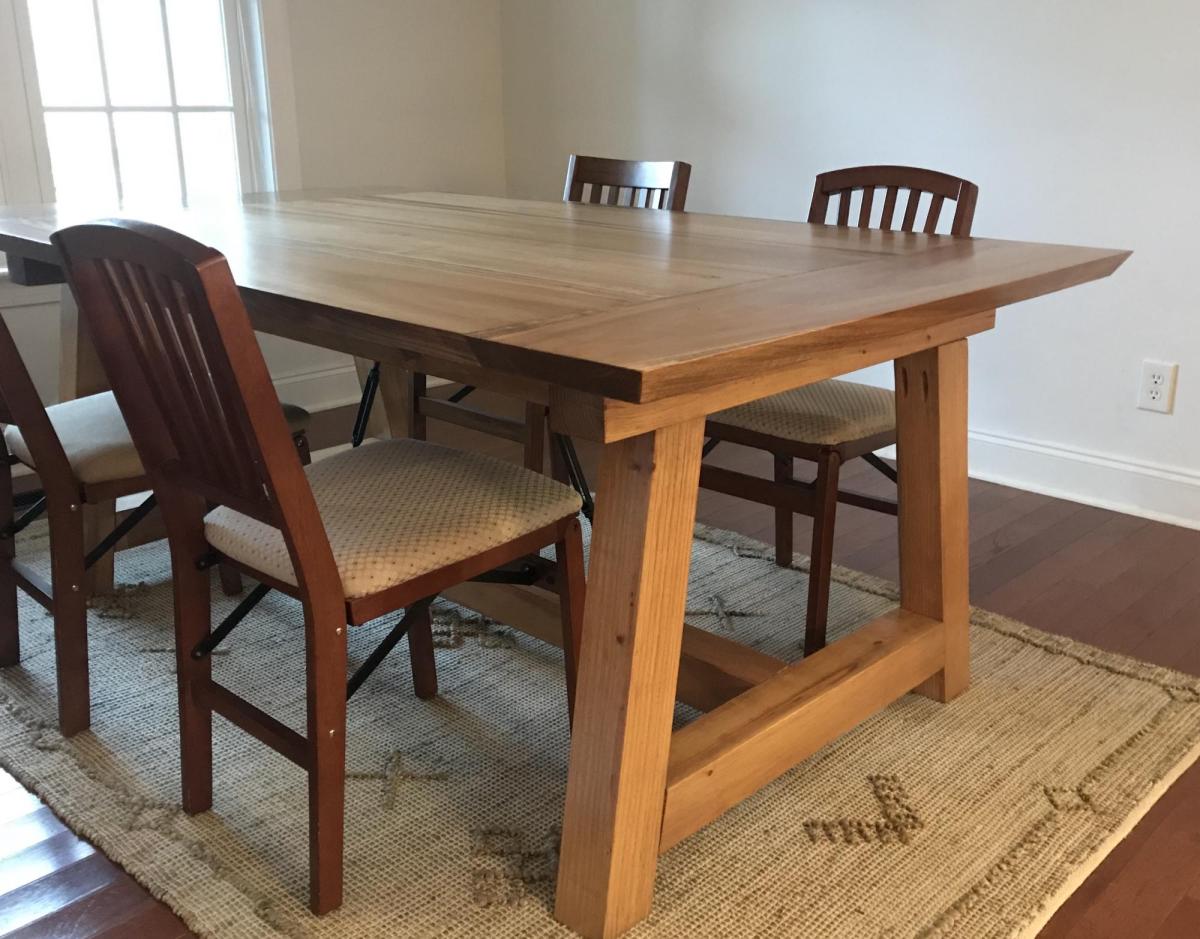
My hubby and I used the tressle table plans to make this awesome table. We changed it up, adding the turnbuckles like a Pottery Barn table that we wanted. I think this turned out way better!
We used yellow pine for the lower portion and poplar for the top.
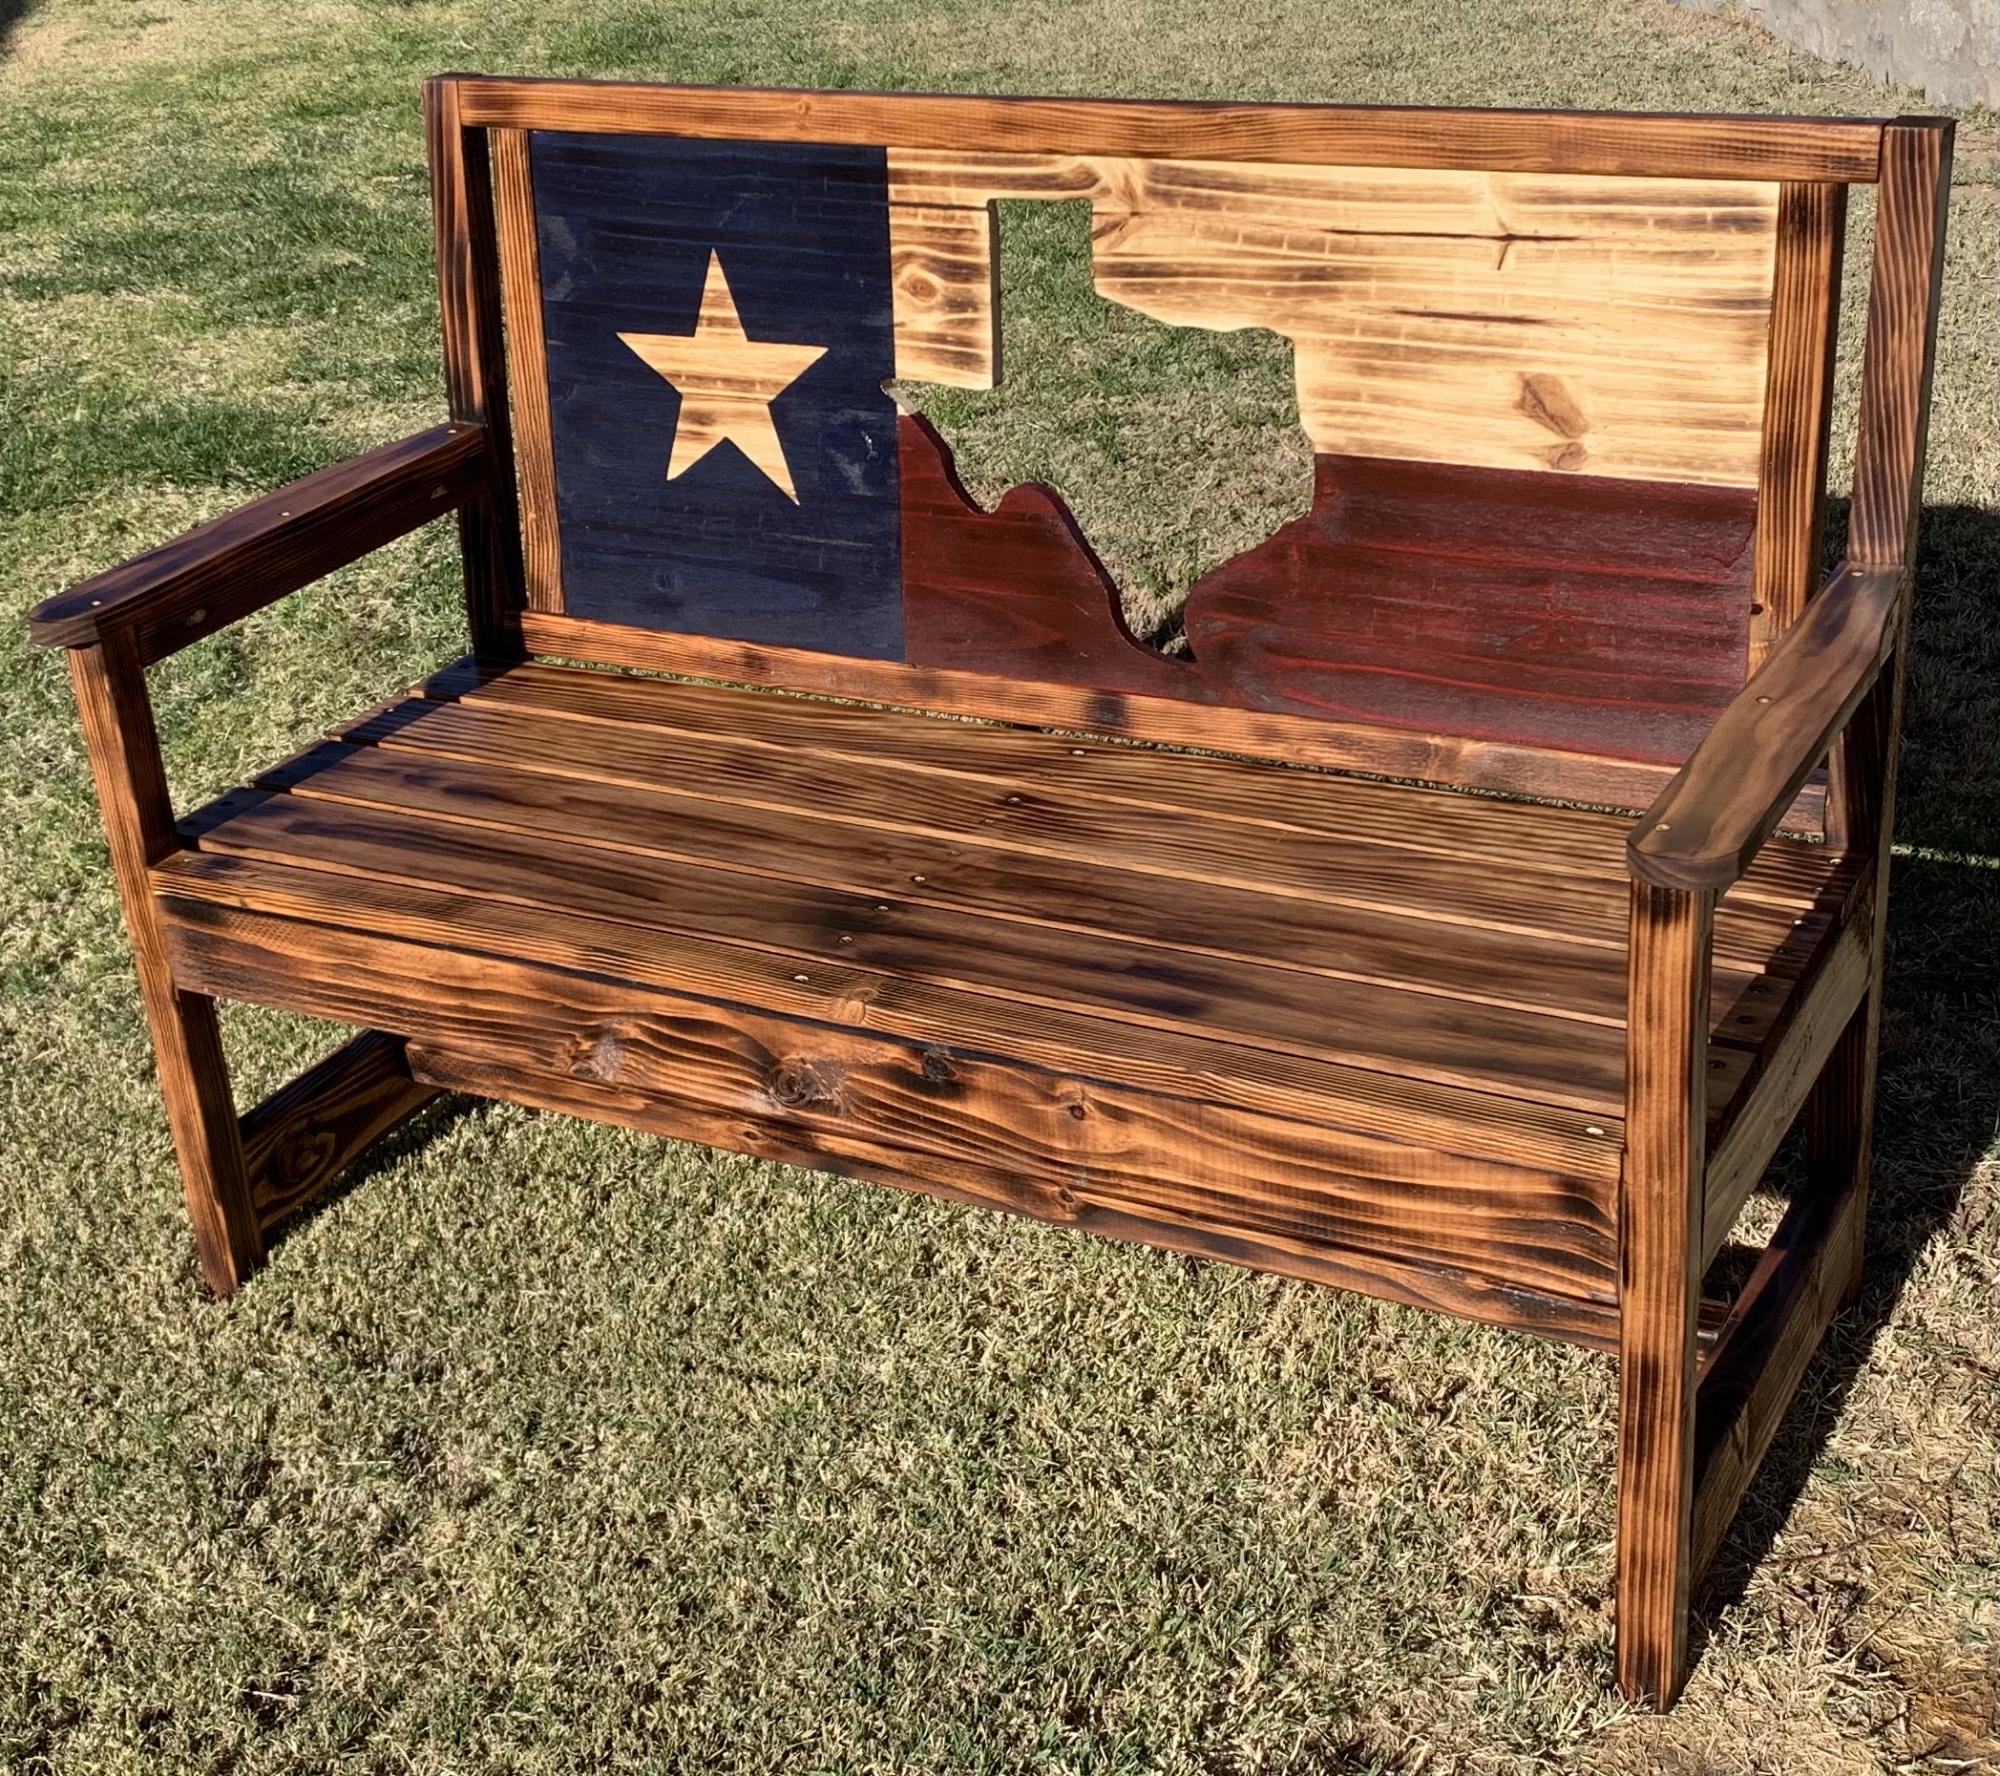
Modified the woven back bench plans to make this Texas Flag Bench. 48 inches wide.
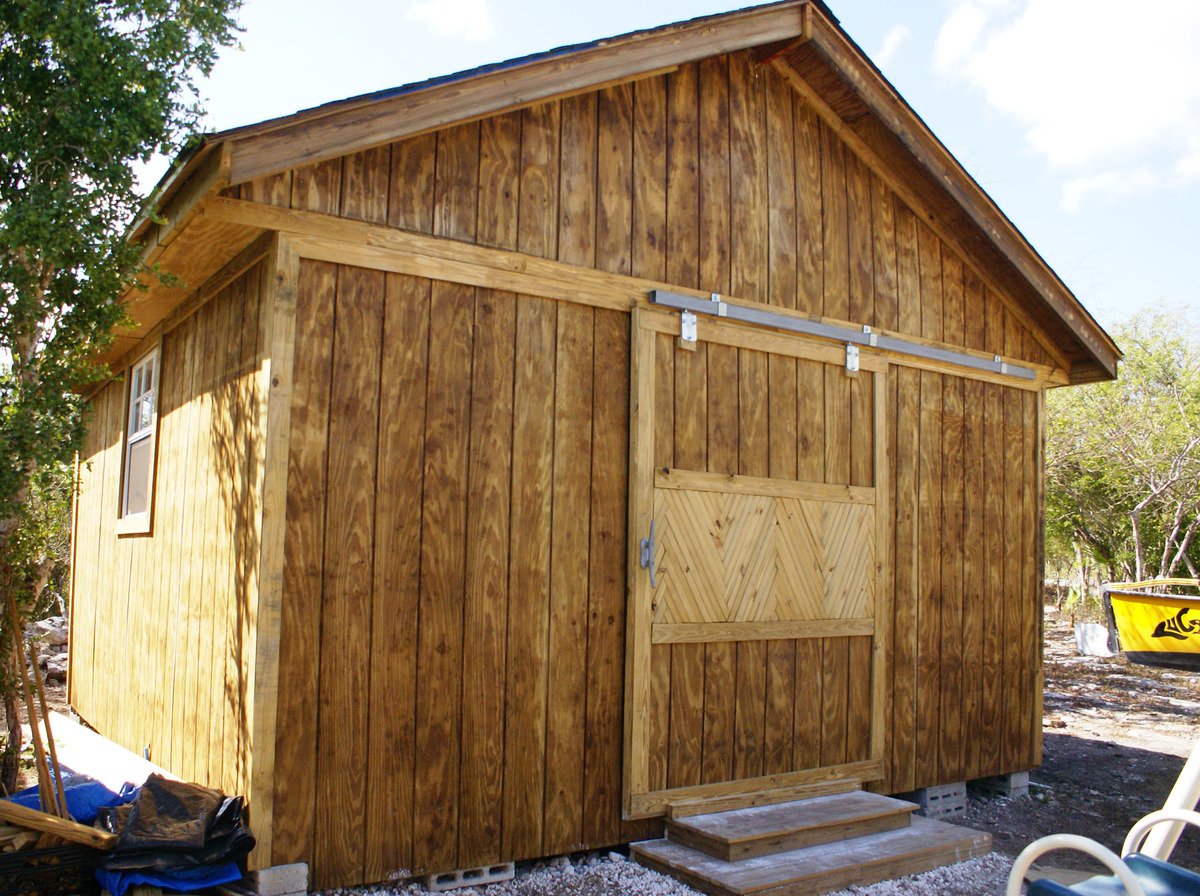
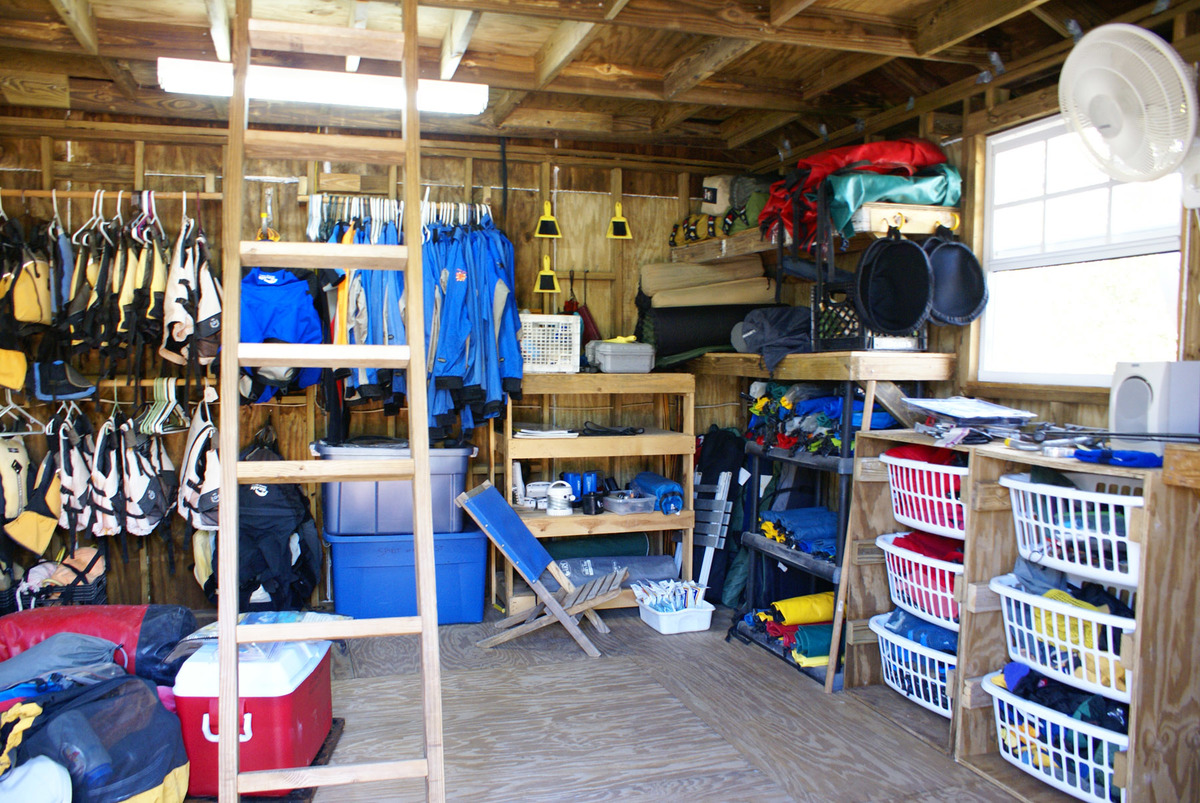
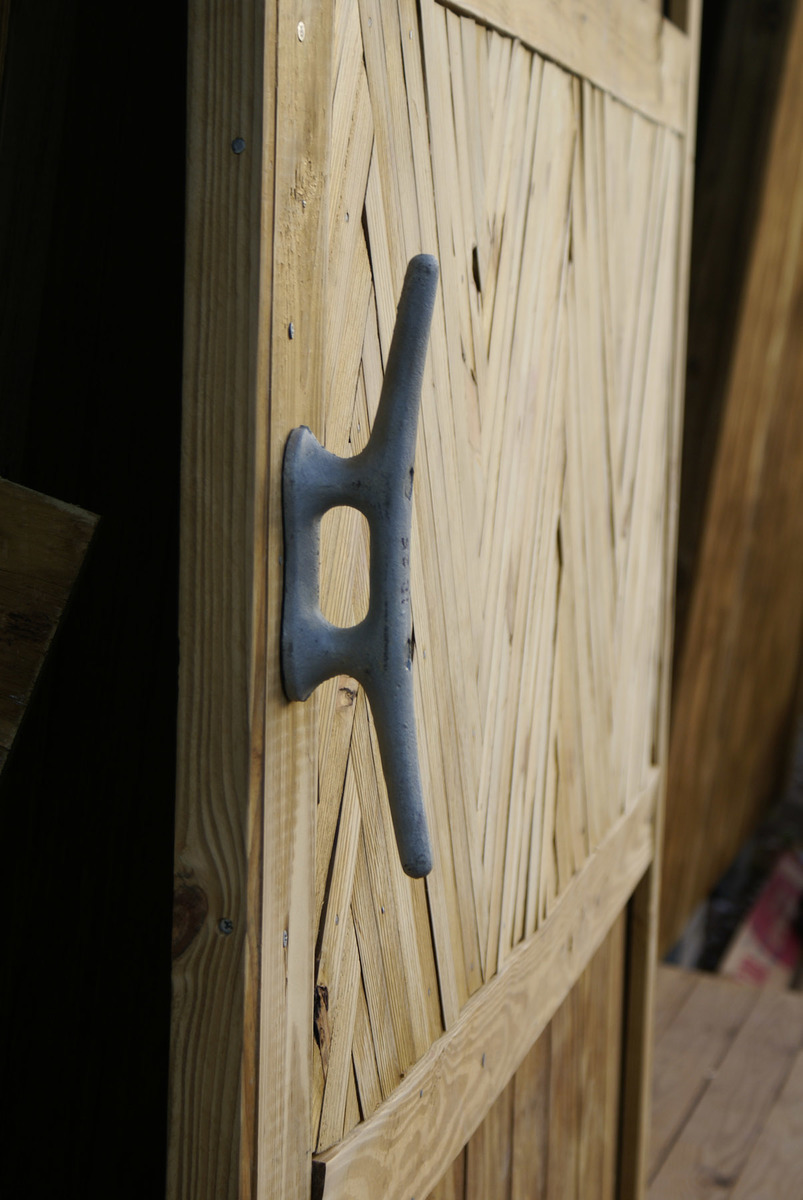
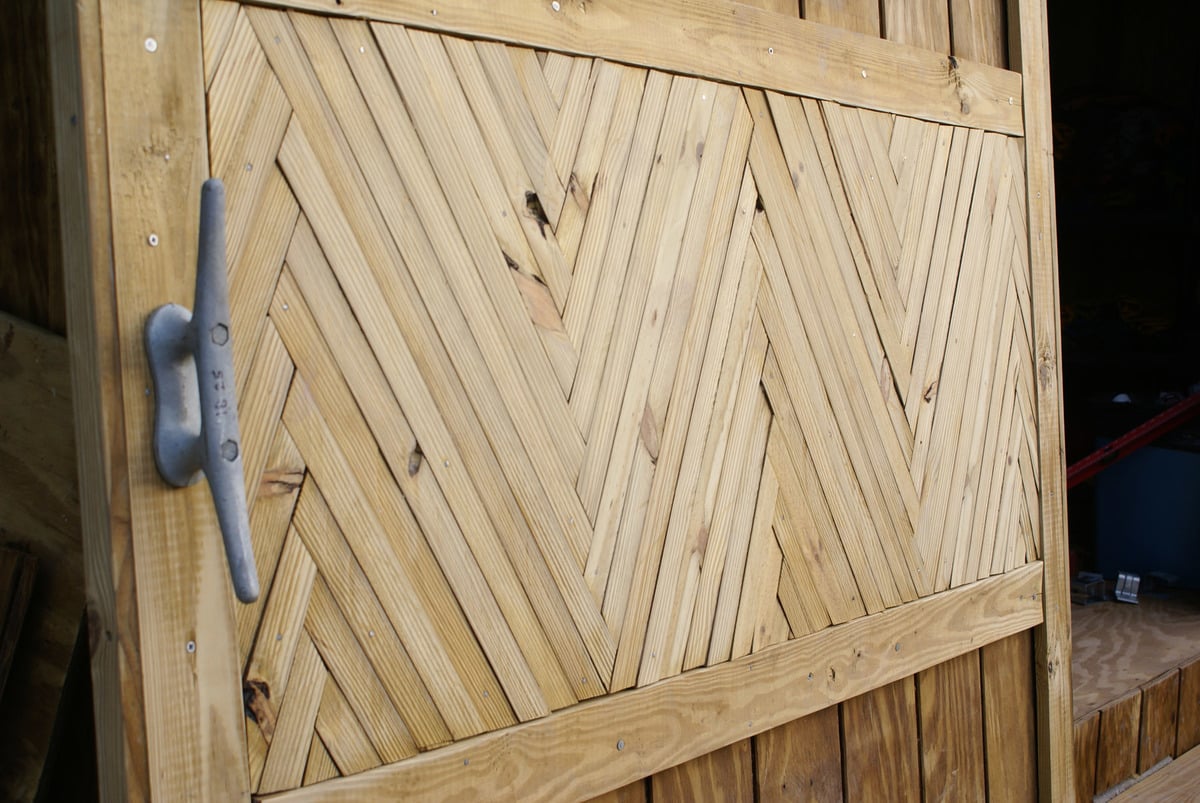
Thanks to the tips and tricks we picked up from Ana here, we were able to build our very own storage shed. We use it for storing our kayaking, sailing and camping gear for our company down here in the Bahamas (which is still a bit unorganized in the photo). It works so much better than what we had before in multiple kit sheds. We even have a loft up top for extra storage, electricity in there with a fan, fridge and lights... MAJOR UPGRADE :) We still need to paint it and finish a few things, but we are very thankful to have it up and being used.
My favorite thing is the door handle (a boat cleat) sliding barn door and the herringbone design for 'eye candy' :)
Thanks go out to Ana and her wonderful site! I would have never attempted this without the foundation I built here!

Sun, 04/14/2013 - 20:37
What did you use to make the sliding door? Can you upload pics? I really want to make one for my bathroom but all the hardware I find is really expensive.

In reply to Sliding door by jbayer80
Mon, 04/15/2013 - 11:29
I've read on some blogs people have found theirs at Lowes or Tractor Supply.
Mon, 04/15/2013 - 06:05
We built the door out of some T1-11 Siding, 1x4's and various scrap pieces. The hardware we used is this Stanley set here: http://www.stanleyhardware.com/default.asp?CATEGORY=HDW+BARN+BOX+TRACK&… Then we bought the steel track separately. This door is super heavy, but it rolls like a charm on the track. Does this help any? Good luck!
Mon, 04/15/2013 - 11:42
And they work perfectly for our camping gear and kayaking gear too :)
Sun, 05/05/2013 - 13:58
Not really any plans that would help. We just drew some rough sketches up some paper and kind of went from there. Between Ana's site here and this book: http://www.amazon.co.uk/Building-Shed-Build-Like-Pro/dp/1561586196 we just pieced things together with the space and money we had. The book just helped me a lot to plan it out, and then all of the building techniques Ana has taught me on here came in handy. It's a group effort :) Hope this helps!
I have more pictures, but I've hit the limit...
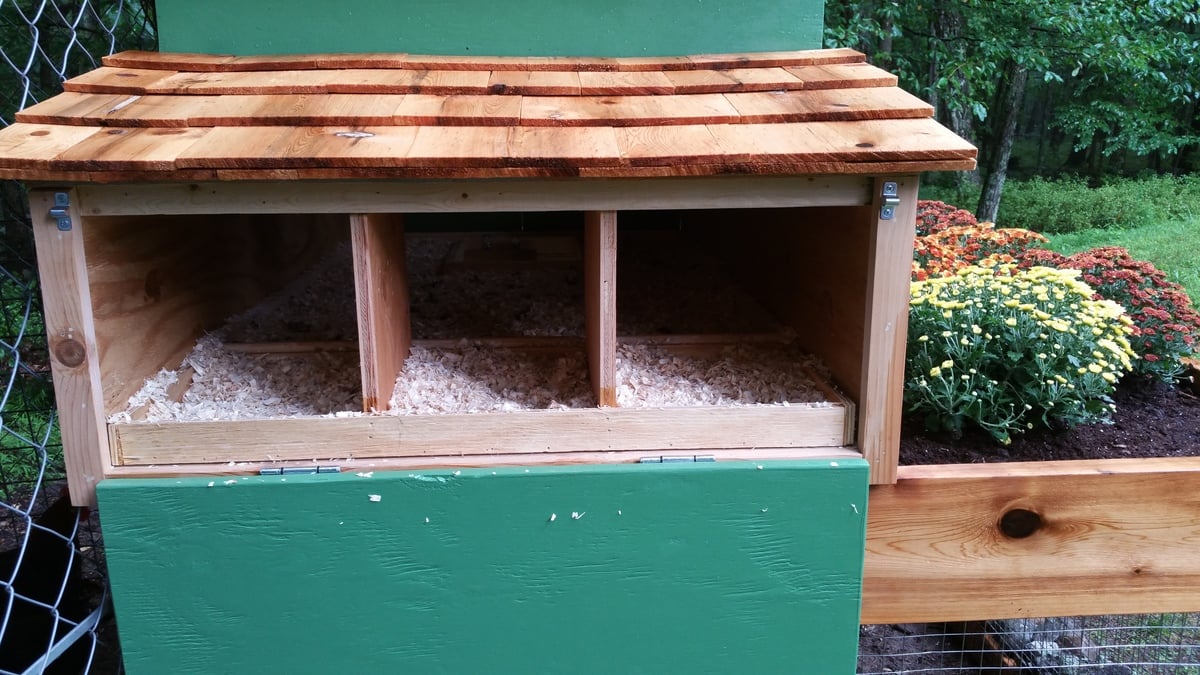
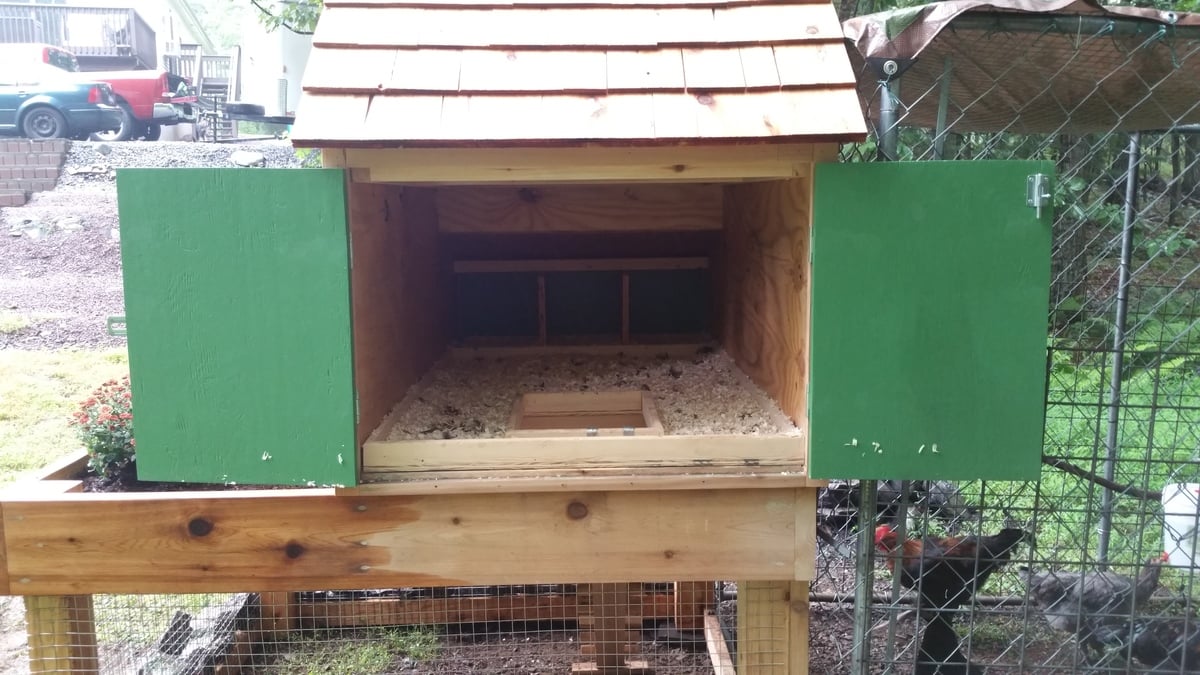
The coop is 100% cedar except for the plywood sides/doors.
Fun to build.
The plans are great, but not prefect. Make sure you measure everything out before cutting. I had several problems with errors in the plans. Use them as a guide, and like I said, measure before making cuts.
This project could be done in a weekend, but I ended up putting a lot of time into it. Close to 4 weeks from start to end, probably 3 full time days, and a few hours here and there on odd days. It just depends how anal you are I guess, haha! The finished product speaks for it self.
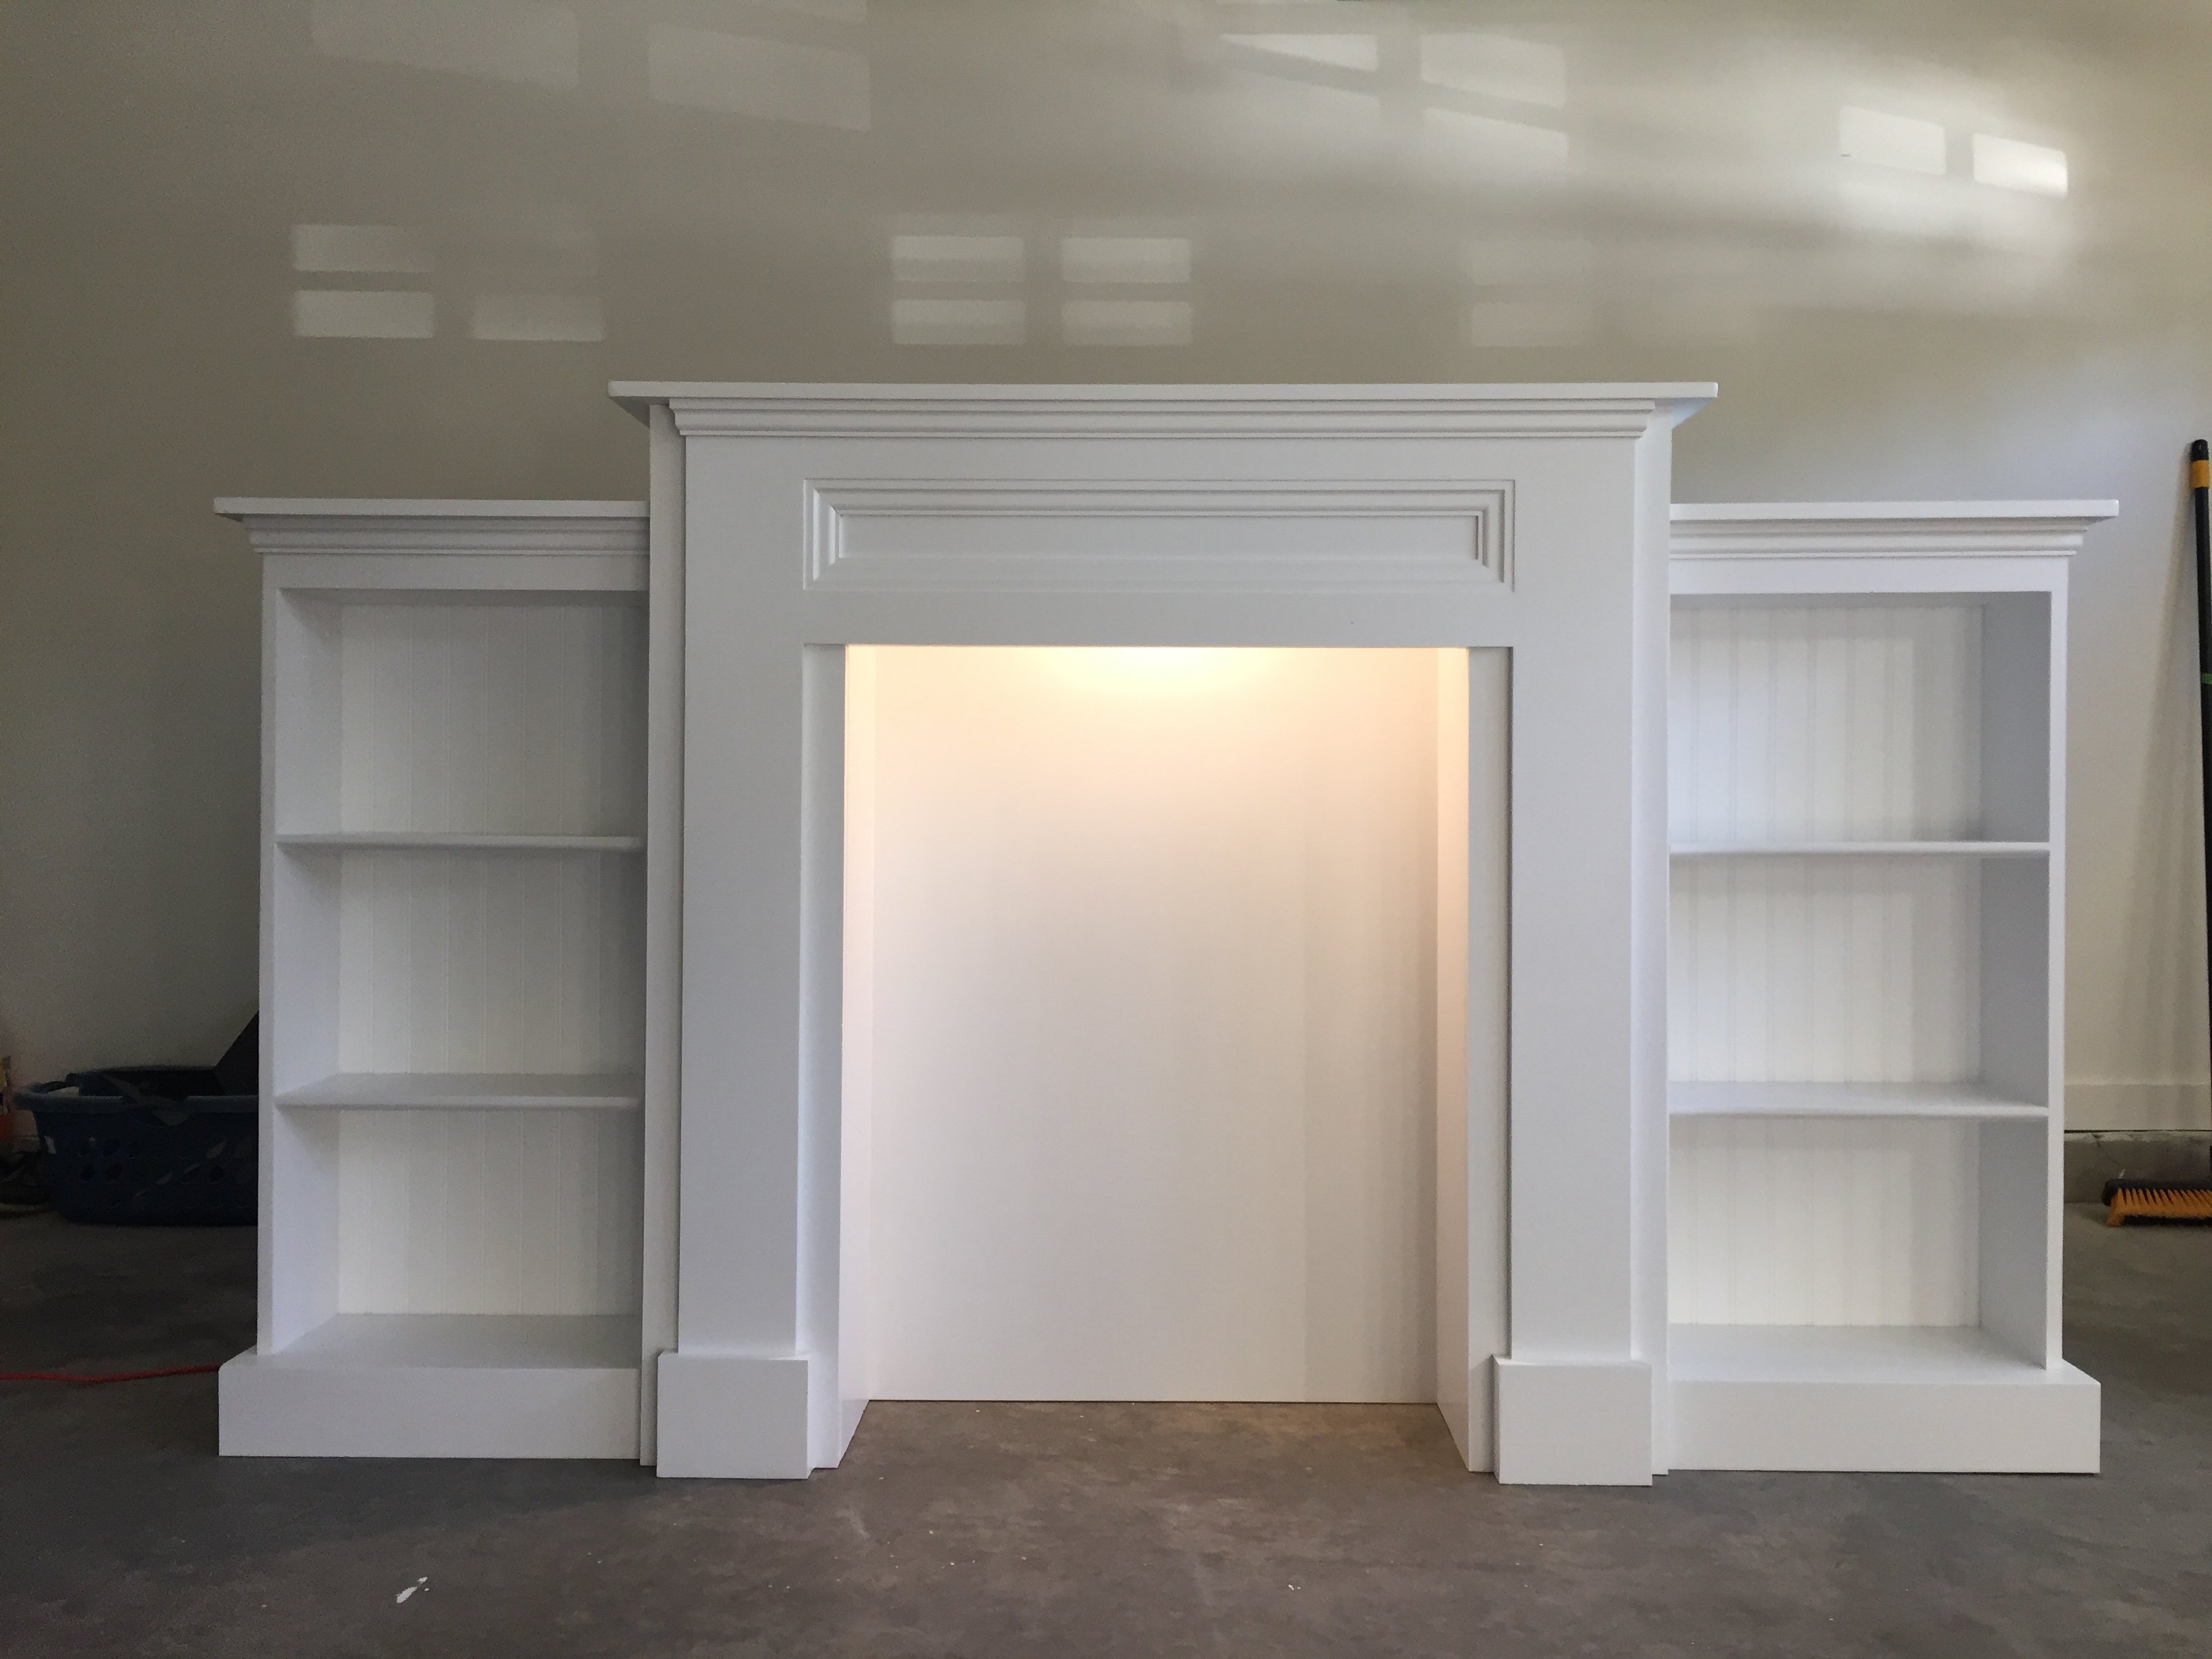
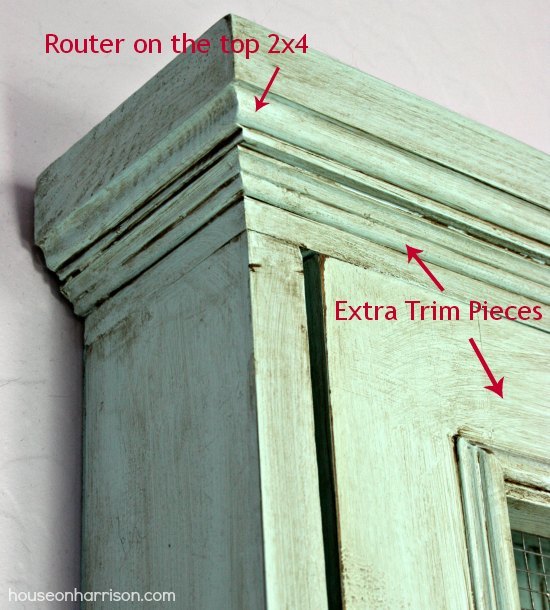
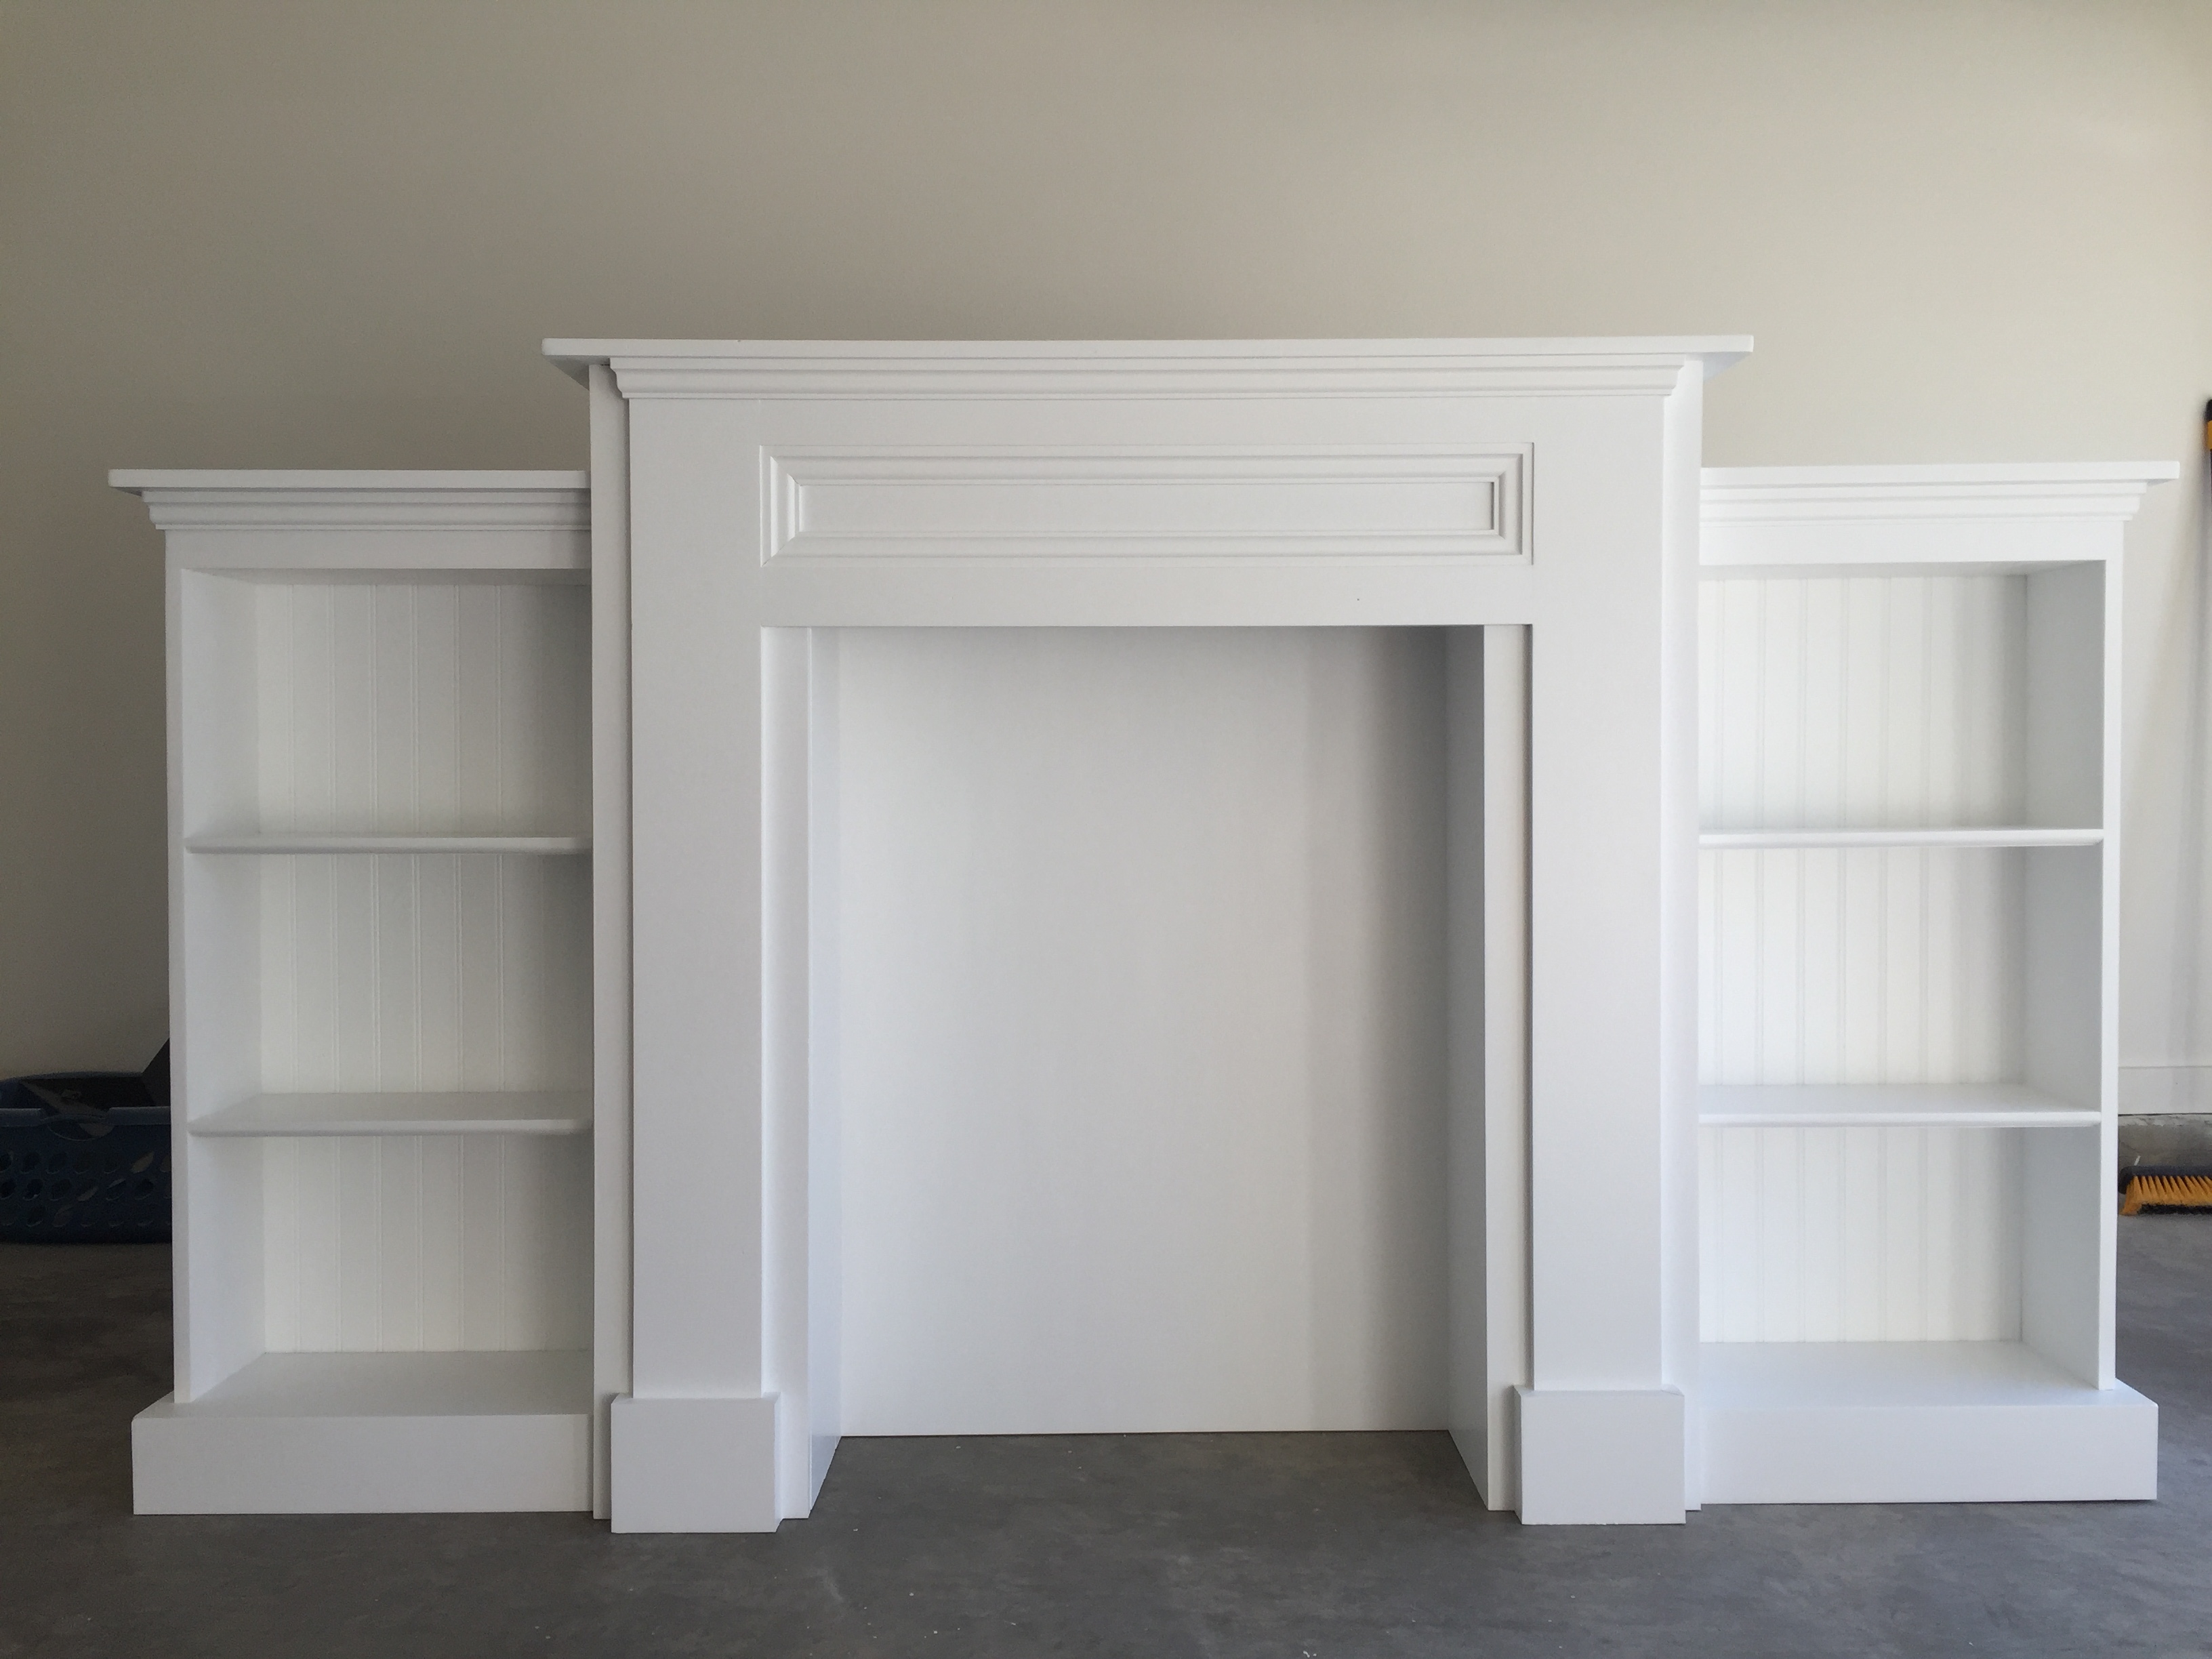
Made from the modified Mimi's Faux Mantle design from another brag post.
Tue, 12/19/2017 - 22:01
Are you able to tell me how wide this is from the end of one bookcase to the other? I'm trying to find out if it will fit in my living room. Thanks!
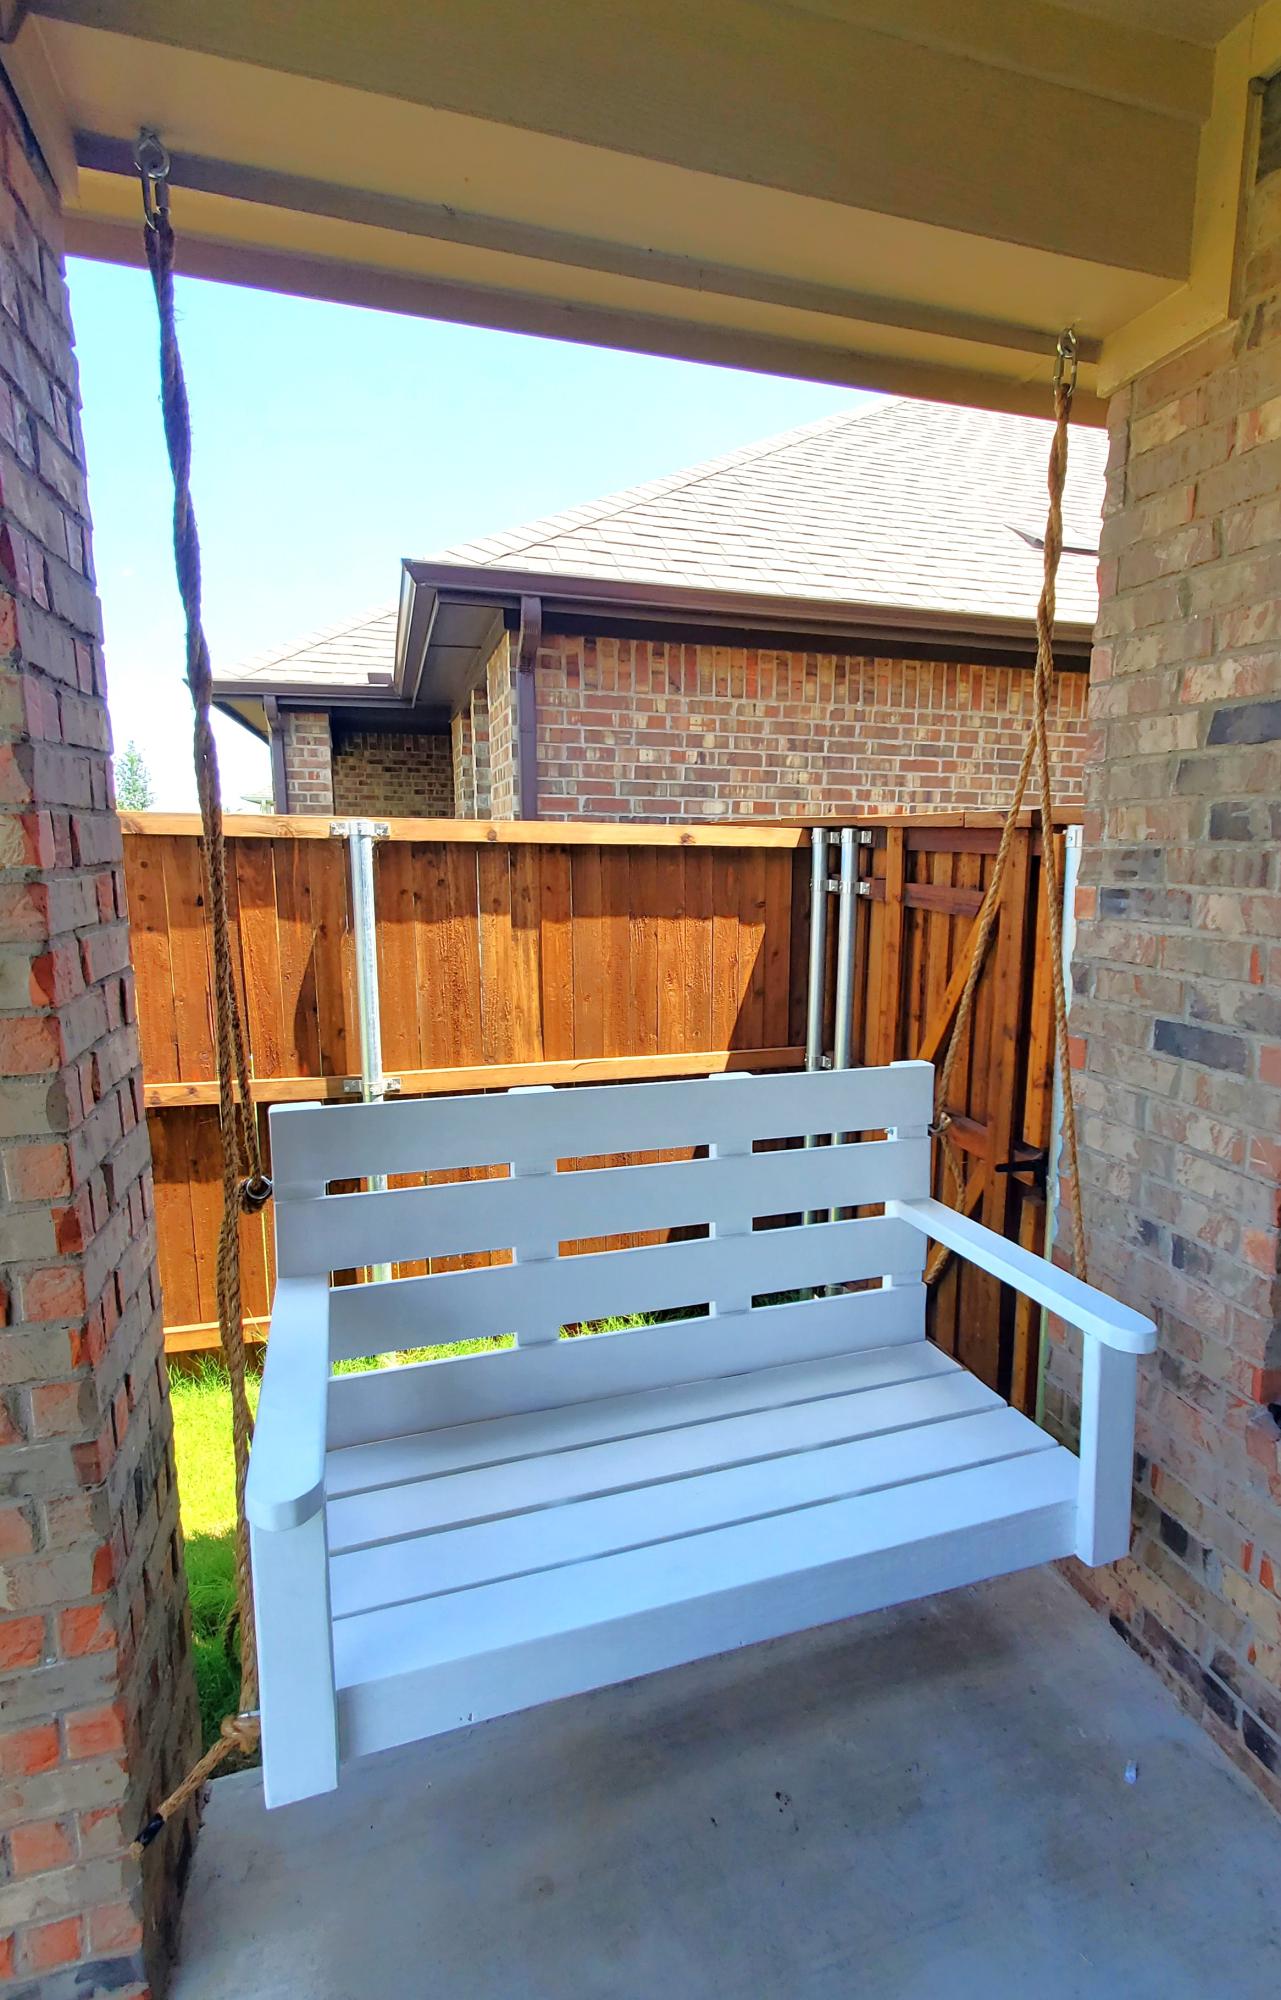
Made the large porch swing and changed length to fit into porch space. Used rope to hang for more rustic look.
Note - next time will possibly used 2x6 for arm rest to allow for drink holder hole and possibly on framing instead of 2x4s. DIL and new grandson love it.
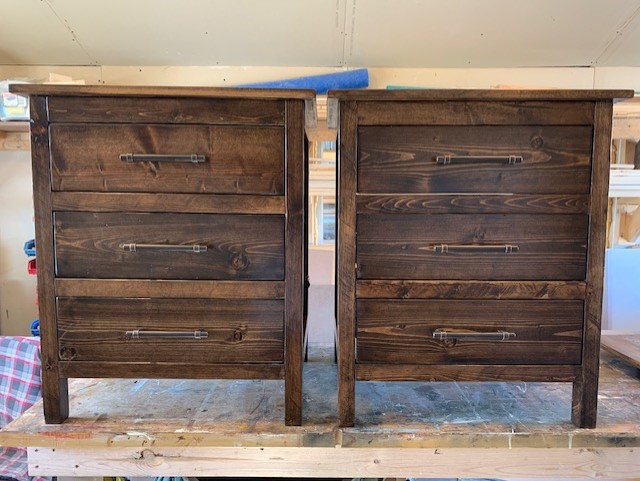
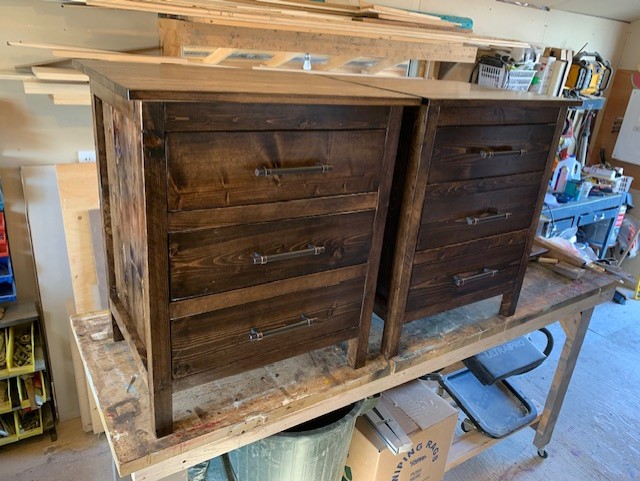
Made these rustic style bedside tables for my master bedroom. I used the Reclaimed Wood Bedside Tables plan, but modified it to make it a little wider- to 24" top width. I wished the plan had exact plans for the drawers, but I made do without them, and all in all, they turned out fantastic! I used pretty heavy duty 100 lb drawer slides, and used 1x6's for the entire drawer square (backer board for the bottoms). I wanted the slides to be able to handle the extra weight, plus all my books etc that will fill the drawers. I used standard spruce/pine from the store, but ripped my own 2x2's and 1x2's from 2x4's and 1x4's. I liked the crosscut look to stay, so I only sanded them minimally. The hardest part was putting on the top from underneath, as I didn't want my tops to have the nail holes in them, but my trusty brad-nailer came to my rescue!
It was a good day or two project by the time I got them built, stained (with Minwax Espresso), and sealed with (Minwax Poly-Acrylic).
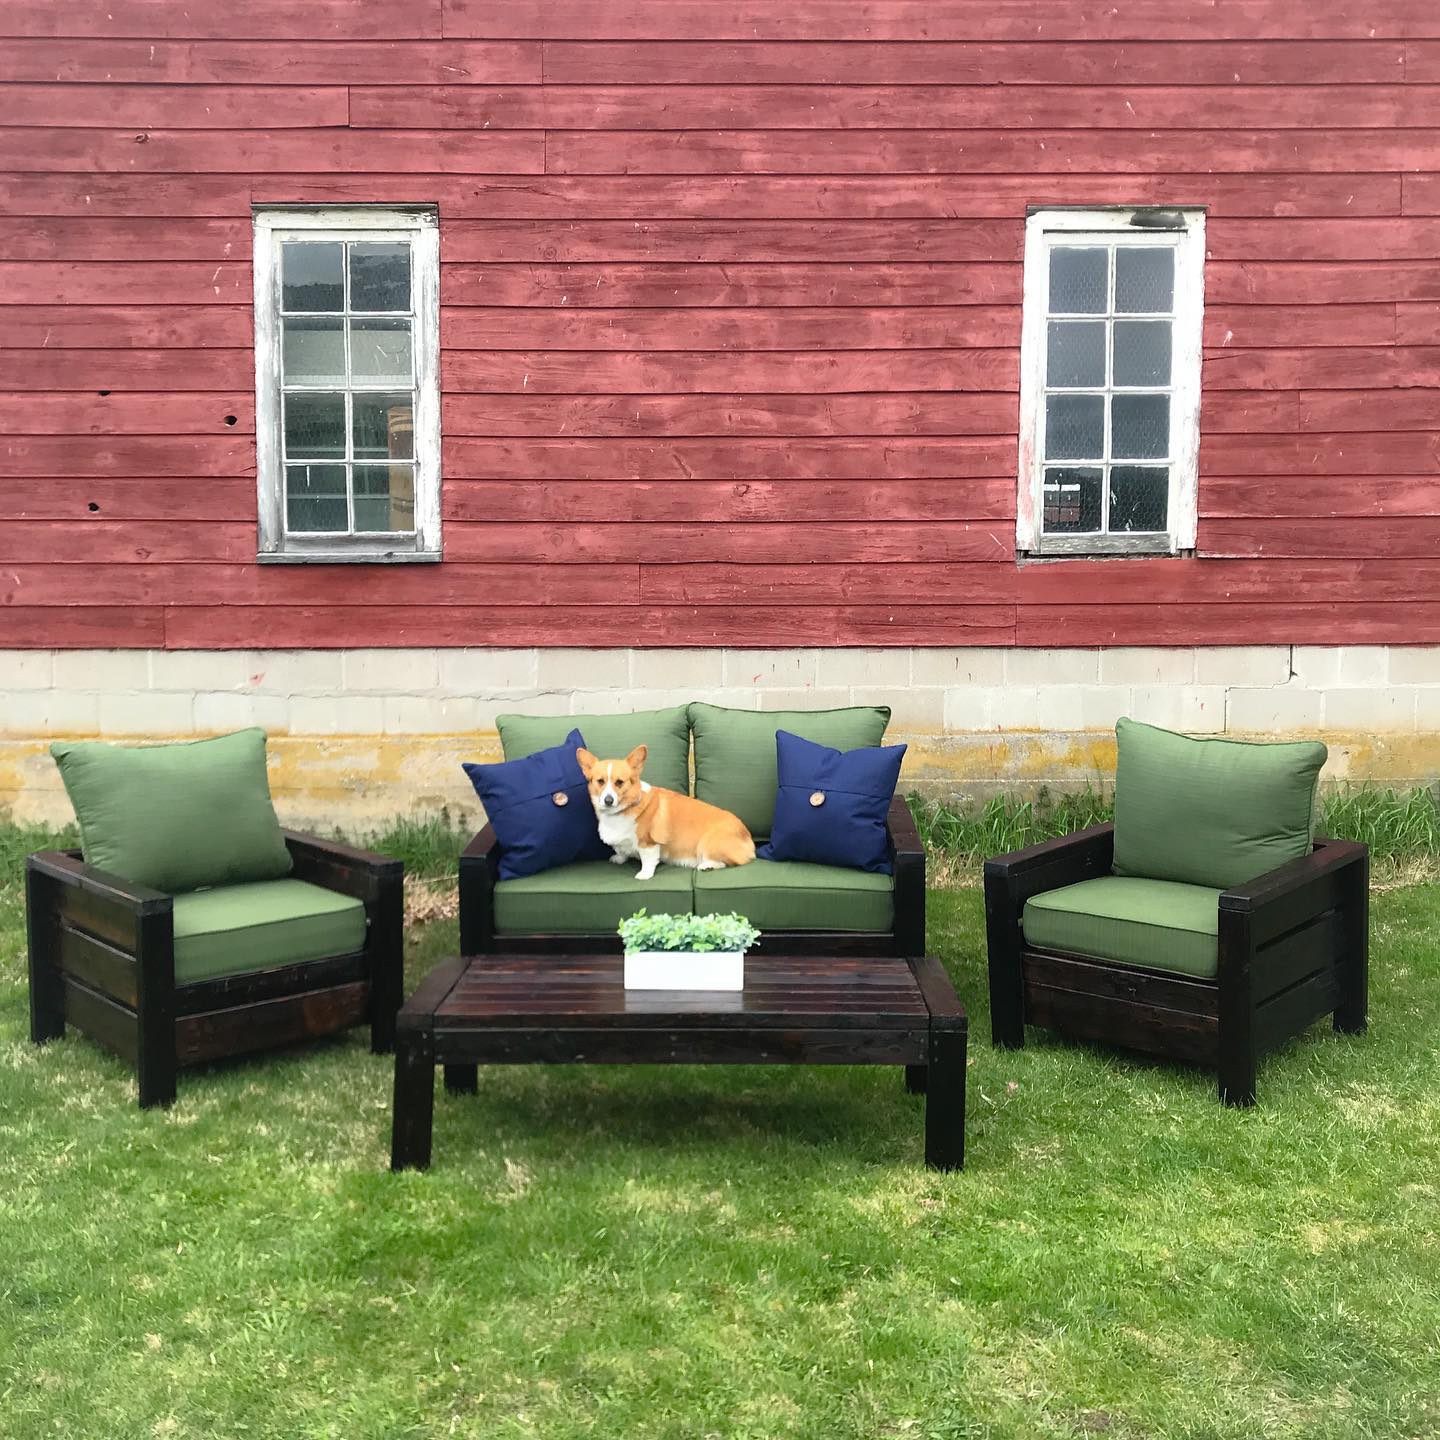
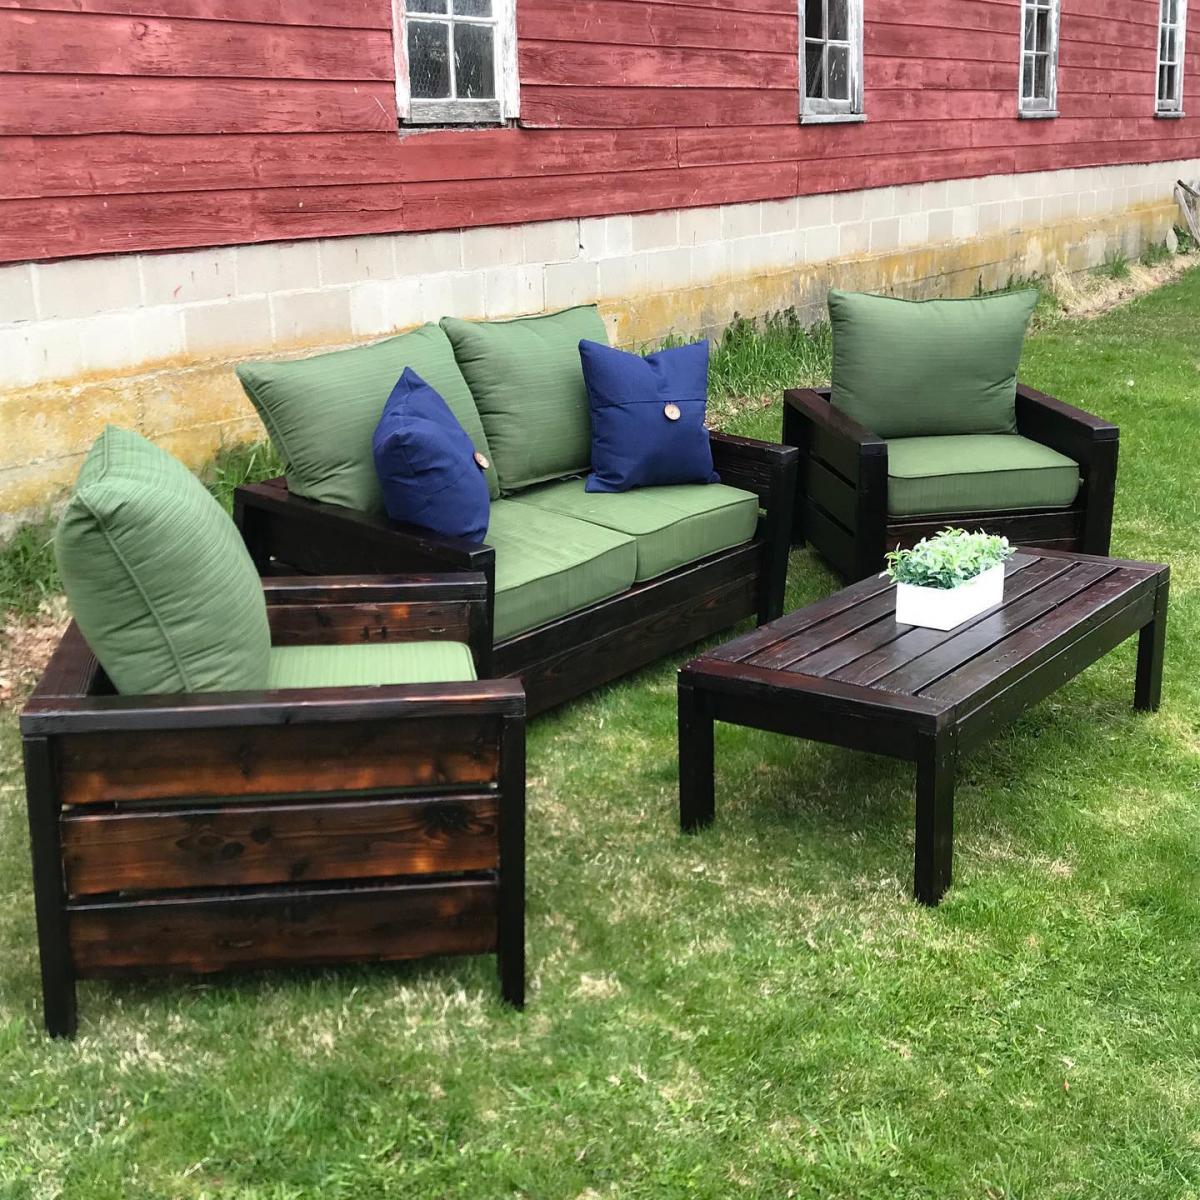
I took this opportunity while quarantined to make this set. I think it came out really beautifully!

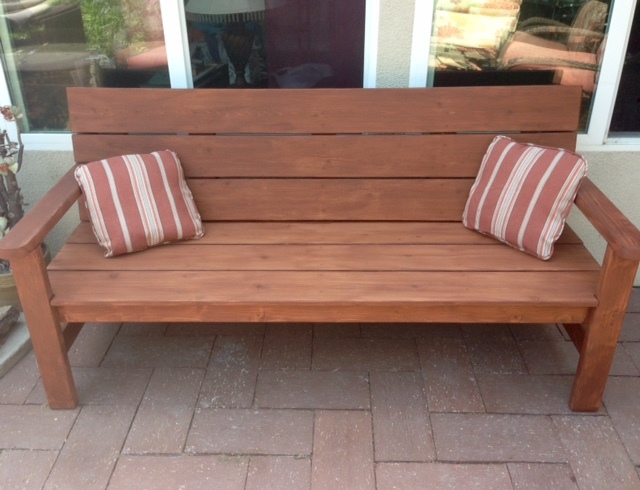
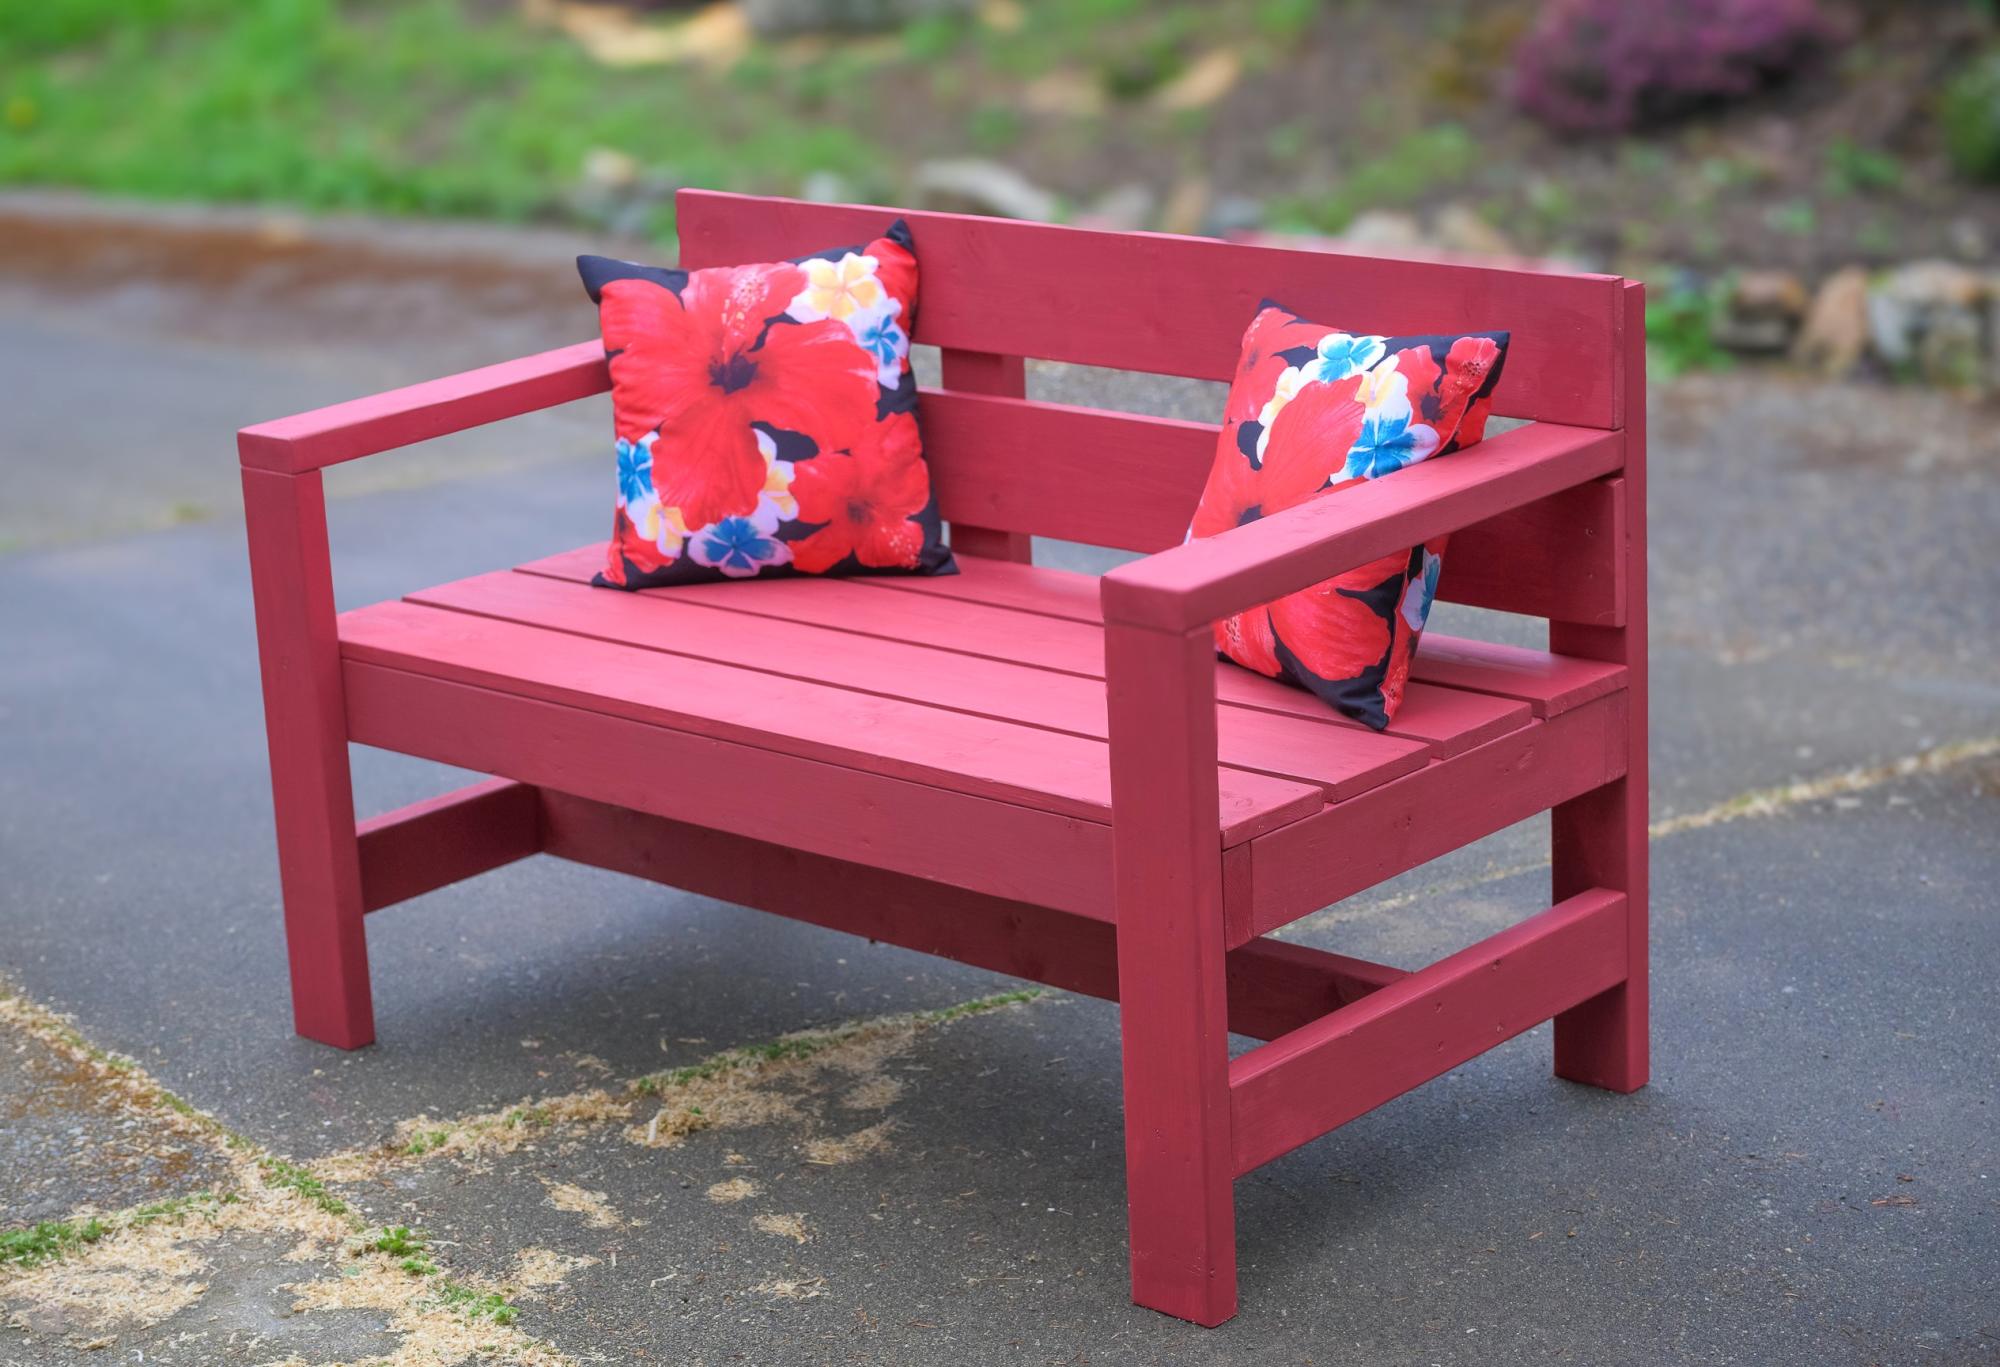
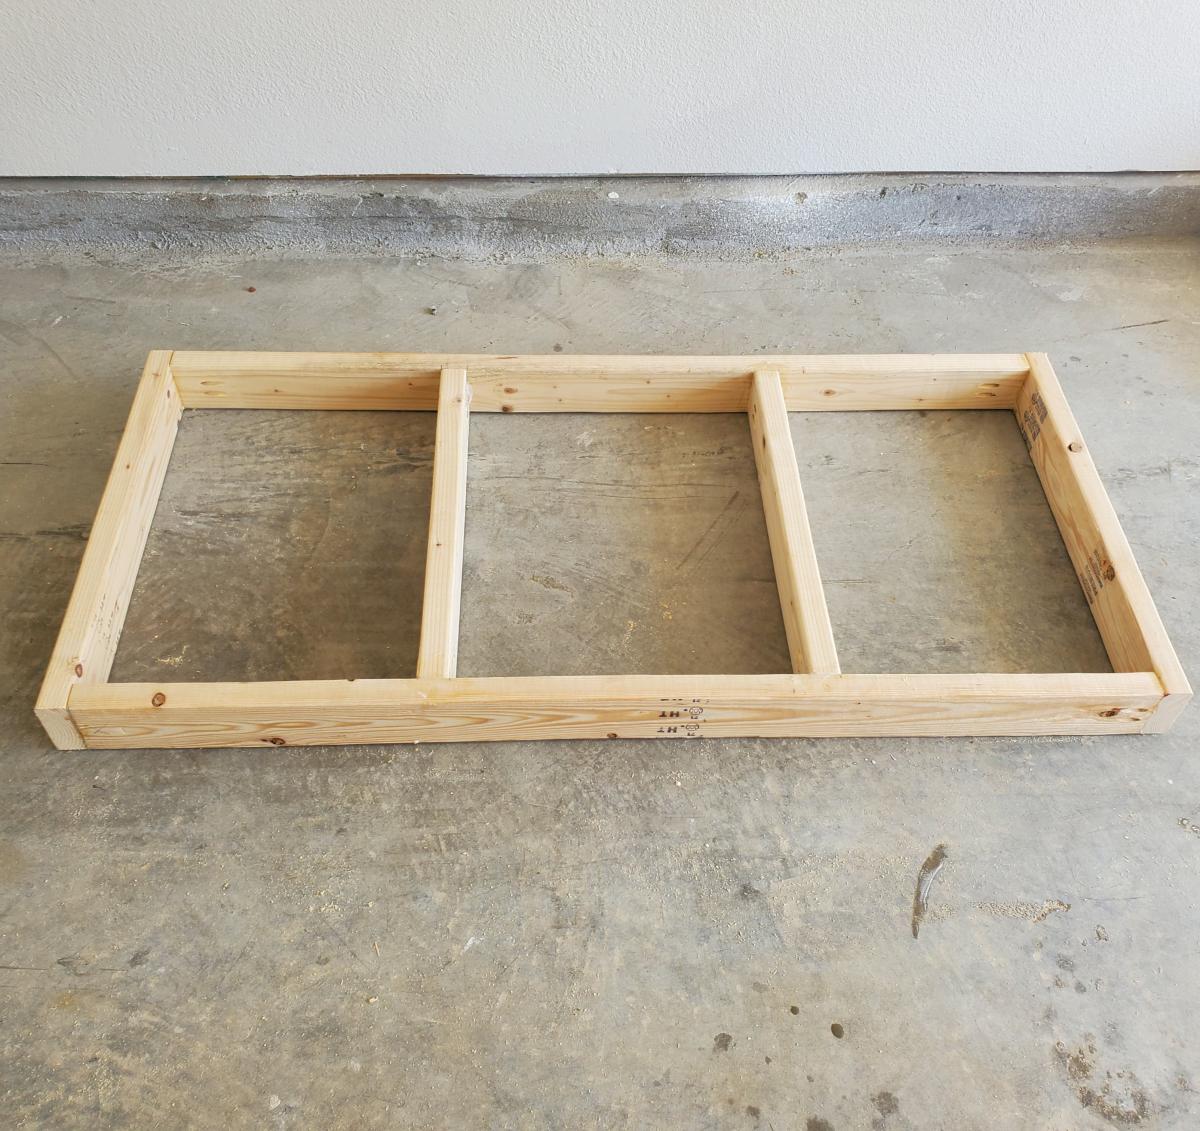
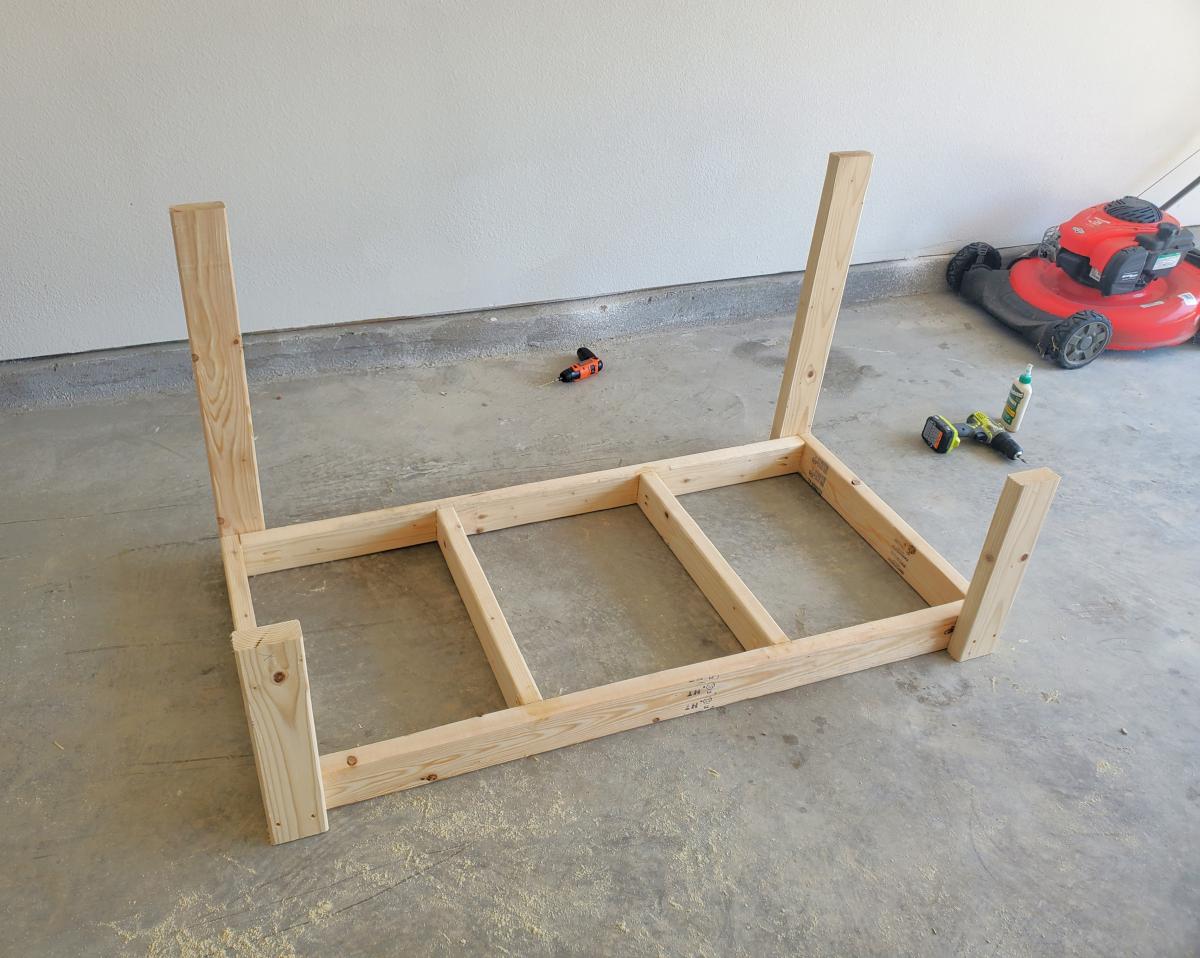
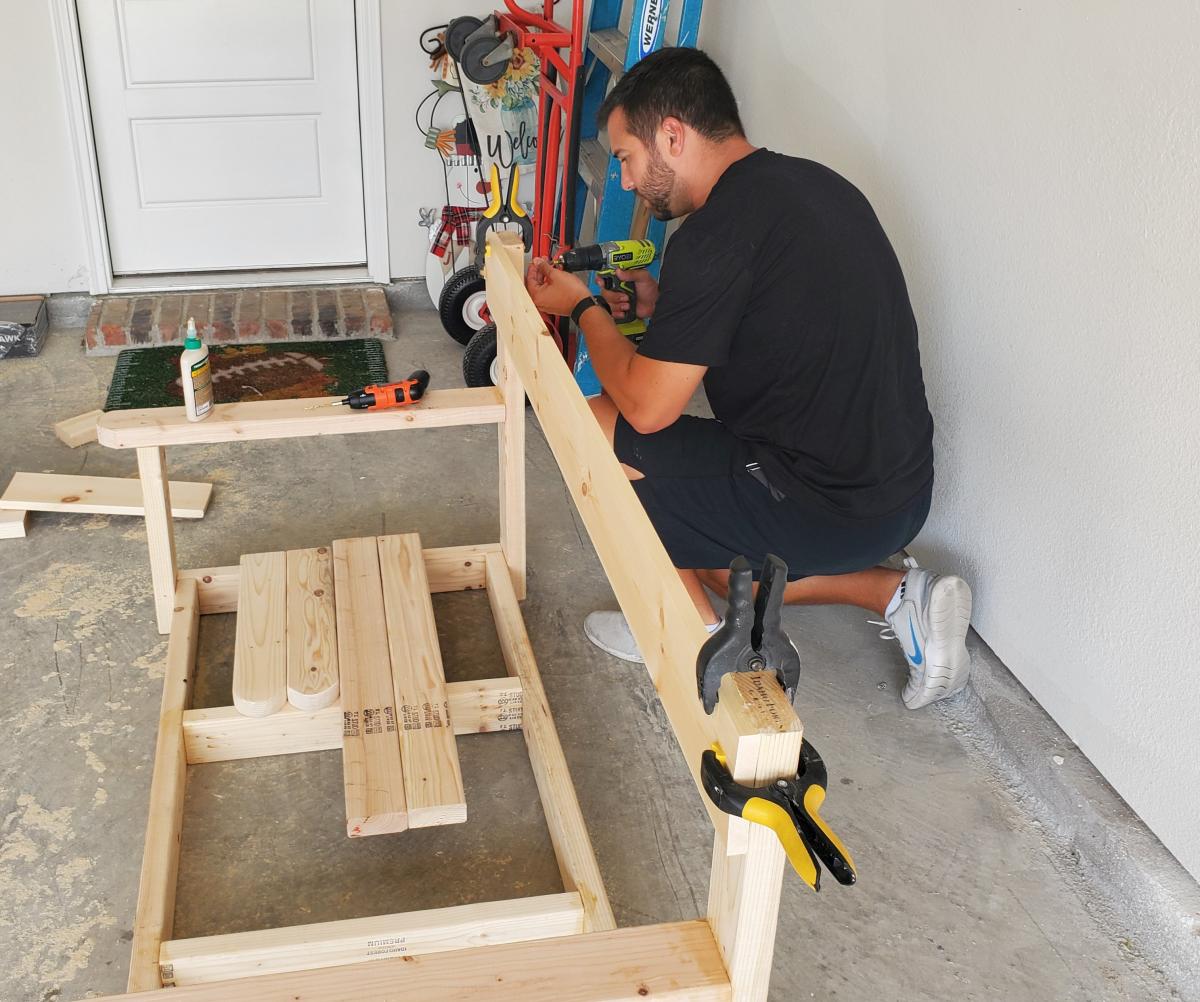
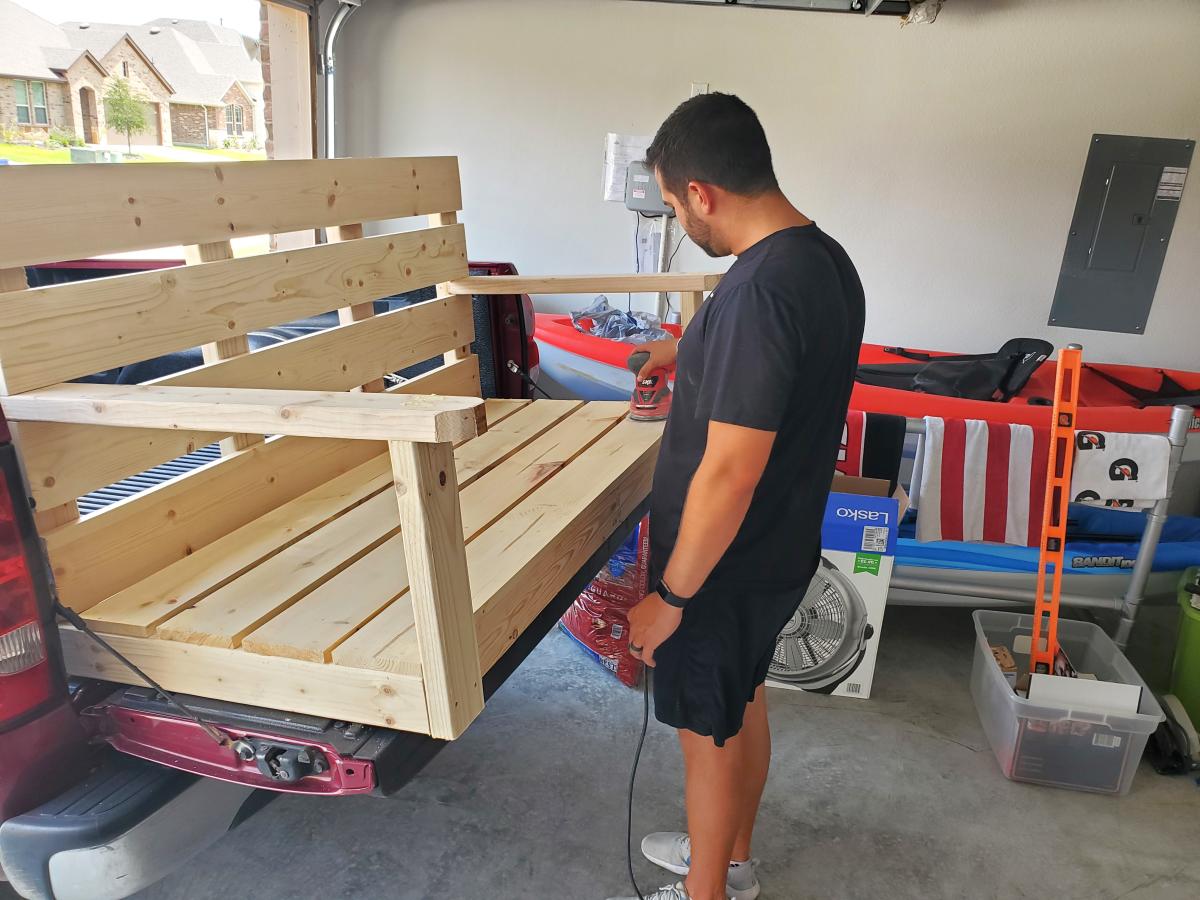
I built this for my wife for an anniversary present. She had wanted a garden bench for some time but the ones that she wanted were between $500-$700 which is ridiculous for this type of bench. So, I did a search on here for garden benches but there weren't really any plans for them and the few brag plans were not really the type of bench I was looking for. I printed off a few pictures of benches that I liked and got to work. The front and back legs a 2x6 and a 1x6 glued together and then cut to be straight. I wanted something thicker then just a plain old 2x6. If I had to do this again though, I would have just glued 3 1X6's together. The reason being, is that 1x6's usually do not have a rounded edge and a 2X6 does. So needless to say when you glue them together you have a nice little gap on either side. Without a table saw to take this off, its pretty difficult to get a straight cut. But I ended up getting it right after sweating for a few hours in the garage. The bench stands 36 inches high, 48inches wide and about 18 inches deep. The seat height is right at 18in also.
In the unfinished pictures I actually had the depth being 24 inches. After sitting on it though it was just way to deep. So I pulled it apart, made the adjustments and its now much more comfortable to sit in.
If anyone has any questions or wants more details feel free to drop me a line!
Thanks!


Fri, 06/19/2015 - 13:32
Yes I think thats what they came out to be. yes the cross pieces are 2x4 and the slats are 1x4's

In reply to back legs by smz1919
Fri, 06/19/2015 - 13:34
I glued a 2x6 and a 1x6 together to get the thickness. Now that i have a table saw and a jointer this entire process would have been much easier but after getting it to look like one solid piece i just outlined the slant i wanted and cut it using a jig saw.
Fri, 06/19/2015 - 20:17
So the back slats are just glued in place right? I wonder if it would be easier to use a biscuit joiner or not
Sun, 10/23/2016 - 17:46
Wed, 05/26/2021 - 08:32
Hi Nathan
Love the look of the bench. Would you have a list of material requirements. I intend to make a bench like this and would like to know the measurements of the top back spar (the shaped one).
Here in the Uk our timber yards do not always supply the same cuts as the US so I need to have some idea of the pieces I need
Many thanks


Comments
Ana White
Sat, 05/25/2019 - 19:34
Farmhouse Chicken Coop
Your chicken coop is beautiful! I love the farmhouse feel of it! Thank you so much for sharing a picture! Ana