Community Brag Posts

Kitchen Island

Submitted by lbrown on Sun, 12/11/2011 - 19:52

I made this kitchen island for my mom last year by repurposing two cabinets and building a bookcase for the back.

For details: http://www.homeandawaywithlisa.com/blog/2011/11/28/kitchen-island-for-m…

Estimated Cost
$200
Estimated Time Investment
Weekend Project (10-20 Hours)
Finish Used
I used white paint for the finish
Recommended Skill Level
Intermediate

Comments

Floating Shelves Shoe Storage

Submitted by Anonymous (not verified) on Wed, 01/20/2016 - 18:43

I needed a way to get my shoes off of the floor, but wanted to store my shoes in a way that was easy to see and easier to retrive.  As you can see I have VERY limited space.  I found Ana's plans for floating shelves and ran with it, adapting it to fit my need.  After this picture was taken, I have added a piece of lauan to each shelf to complete project.  Hopefully someone can take this idea and adapt it to your needs as well!

Built from Plan(s)
Estimated Cost
Maybe $20 - $30
Estimated Time Investment
Day Project (6-9 Hours)
Finish Used
None - I like how wood looks
Recommended Skill Level
Beginner

Toy Storage

Submitted by hoffer5353 on Sat, 01/07/2012 - 19:30

After our basement remodel I decided we needed some storage for our growing collection of of toys.
This project went together much more quickly than I expected. I am so happy with the results.

Built from Plan(s)
Estimated Time Investment
Day Project (6-9 Hours)
Finish Used
valspar, interior semi-gloss
Recommended Skill Level
Intermediate

Comments

Vmc107

Fri, 07/19/2013 - 07:05

hi! Ive been looking for something like this for toy storage in my living room. Were you able to post the plans to make something like this?

Restoration Hardware inspired Maison bed tutorial and finish. Starting with Ana's platform base.

I have wanted a Restoration Hardware bed for so long. Now I have "one" but for way less and we did it all ourselves. starting with Ana's platform bed plans we build on it and walk through the process and even the custom 3 part finish. for a full tutorial please see my blog. http://imperfectlyimaginable.blogspot.com/2013/11/restoration-hardware-…

would love to hear from you and see any projects that are completed.

Estimated Cost
under 400 I think the lumber cost me 175 or so
Finish Used
custom 3 step finish please see blog for tutorial
Recommended Skill Level
Beginner

Pool supplies storage shed

Submitted by Anonymous (not verified) on Sun, 06/25/2023 - 18:50

I was looking for a shed to keep pool towels and other deck and pool items. This shed hit every feature I was looking
for. My husband loved the plans. He's always saying he can build anything with a measured drawing and a
cut list. The only thing we changed was the roofing material. we were given some metal roofing by a friend.

Built from Plan(s)

Comments

Downsized Fancy X Farmhouse Table

Submitted by Anonymous (not verified) on Fri, 10/11/2019 - 10:25

This table was modified because my dining room is really small. So the table is 71"long x 35" wide. This was actually my second attempt on the table top. The first attempt I only used kreg screws and no glue. To say that it warped is an understatement. This second attempt I used kreg screws and biscuits. For the breadboards I tried something new and used Rocklers Beadlock system. I also used Z- clips to mount it to the base so that as the wood expands and contracts it will hopefully not warp. So far it's remaining pretty flat.

Built from Plan(s)
Estimated Time Investment
Week Long Project (20 Hours or More)
Finish Used
General Finishes Graystone, General Finishes Lamp Black Milk Paint, General Finishes Flat out Flat Topcoat
Recommended Skill Level
Intermediate

Comments

Saw Horse Leg Desk

Submitted by Anonymous (not verified) on Mon, 10/28/2019 - 16:33

This was a nice easy project that i built for my son for his christmas present! A few pieces of lumber, a blow torch and clear coat.....Done. I recomment this for a starter project!!

Built from Plan(s)
Estimated Cost
$60
Estimated Time Investment
Day Project (6-9 Hours)
Recommended Skill Level
Starter Project

Vinyl Record Storage Cabinet

My record obsession was growing rapidly so I needed a solution to store my collection and I wanted some room for growth. I wanted a setup where you could flip through the records like at the record shops. It's often difficult to read the artists and album names when you can only see the spines of the album covers. I decided to make a cabinet with 9 drawers which holds approximately 540 records (60 records per drawer). More details and photos on my blog: http://www.woodworkingfourdummies.com/blog/vinyl-record-storage Cheers, Ian

Estimated Cost
Aprox $400 Canadian
Estimated Time Investment
Week Long Project (20 Hours or More)
Finish Used
Cabot Grey Stain, Polyurethane
Recommended Skill Level
Intermediate

DIY Outdoor Furniture Set

Submitted by Anonymous (not verified) on Fri, 08/04/2023 - 11:32

Loving this furniture! We modified it slightly by raising the height of the couches. Added some height and a slight tilt in the back. The chairs are super comfortable as the plans are done. We used 6” 25x25 cushions. We plan on staining soon.

Jaime Sallis


Seasonal And Holiday

Twin Raised Planter Boxes

Submitted by dave92082 on Sun, 04/29/2012 - 18:46

This is a build of the Raised Planter Box design by Tracy. While it is a fairly simple plan, I would still call it intermediate. One thing to note is that the bottom Cross Supports are listed in her plan as 46" when they need to be 47 1/2 to match the side panels. You can see in the picture above, I laid the incorrectly cut piece on top of the correct one that is screwed in.

Estimated Cost
Around $50 each ( a little less not counting hardware)
Estimated Time Investment
Day Project (6-9 Hours)
Finish Used
Going to prime and paint soon.
Recommended Skill Level
Intermediate

Comments

tracysmith

Sun, 04/29/2012 - 20:34

Thanks Dave for posting the pictures.. I see what you did differently from my plans and I think the way you did it was MUCH better. Congrats on the build, they look great!!! I'm going to rearrange my plans to make the changes and post the correct measurements to reflect that.

Shoe Basket Tower

Submitted by Anonymous (not verified) on Sun, 10/15/2023 - 18:47

Our shoes have always been a very messy area that we couldn't keep clean with not much of an entry area. I saw your laundry basket tower and thought it might work for our shoes. We're very happy with how it's helping to keep us organized!

Crystal

Upper Cabinet Awesomeness

Submitted by romanweel on Fri, 04/04/2014 - 15:01

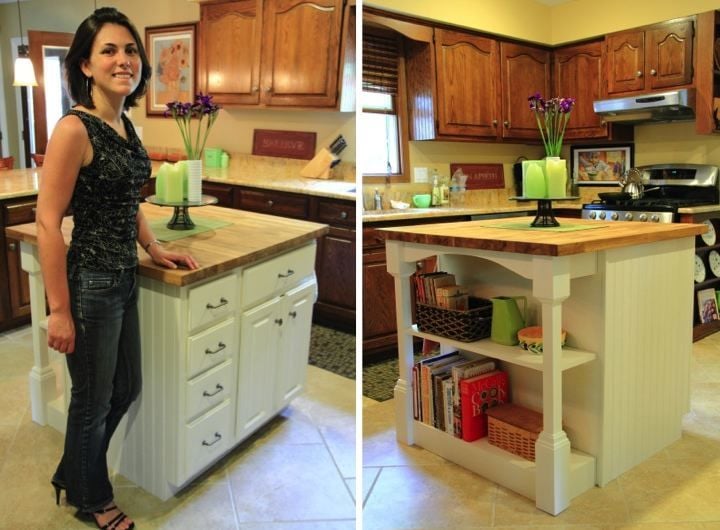
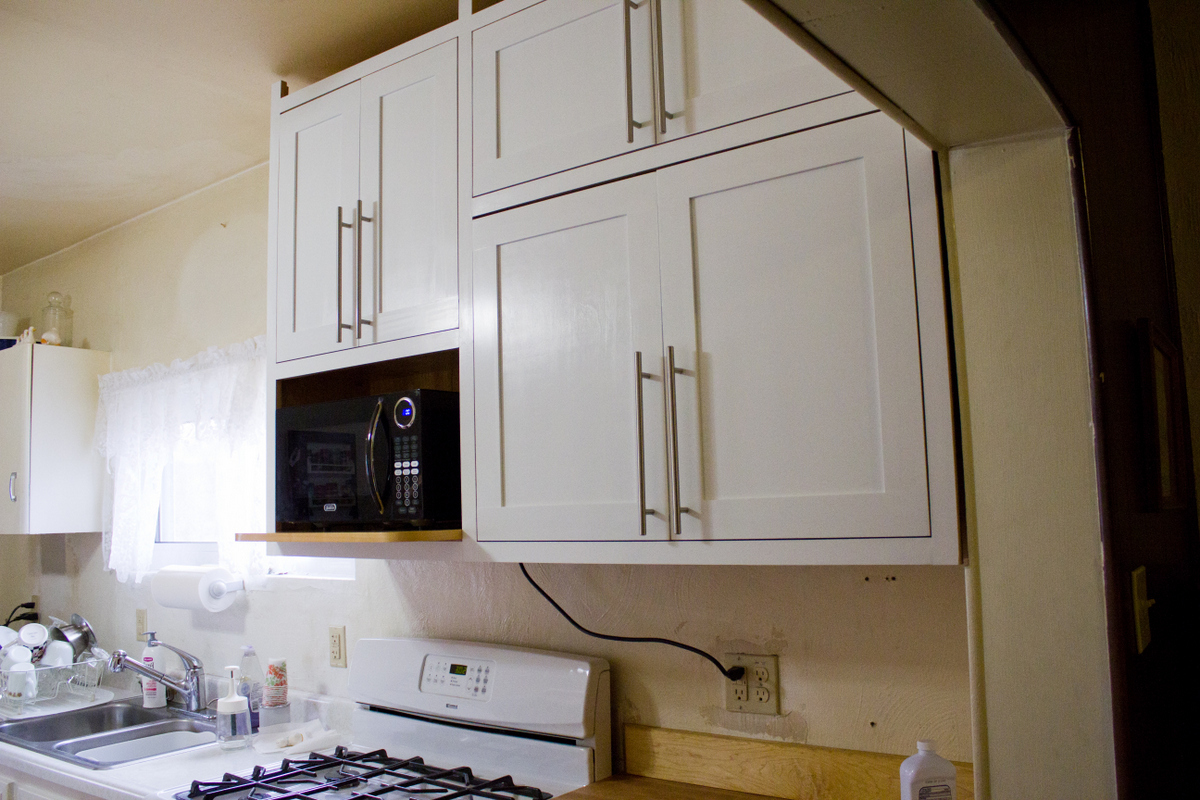
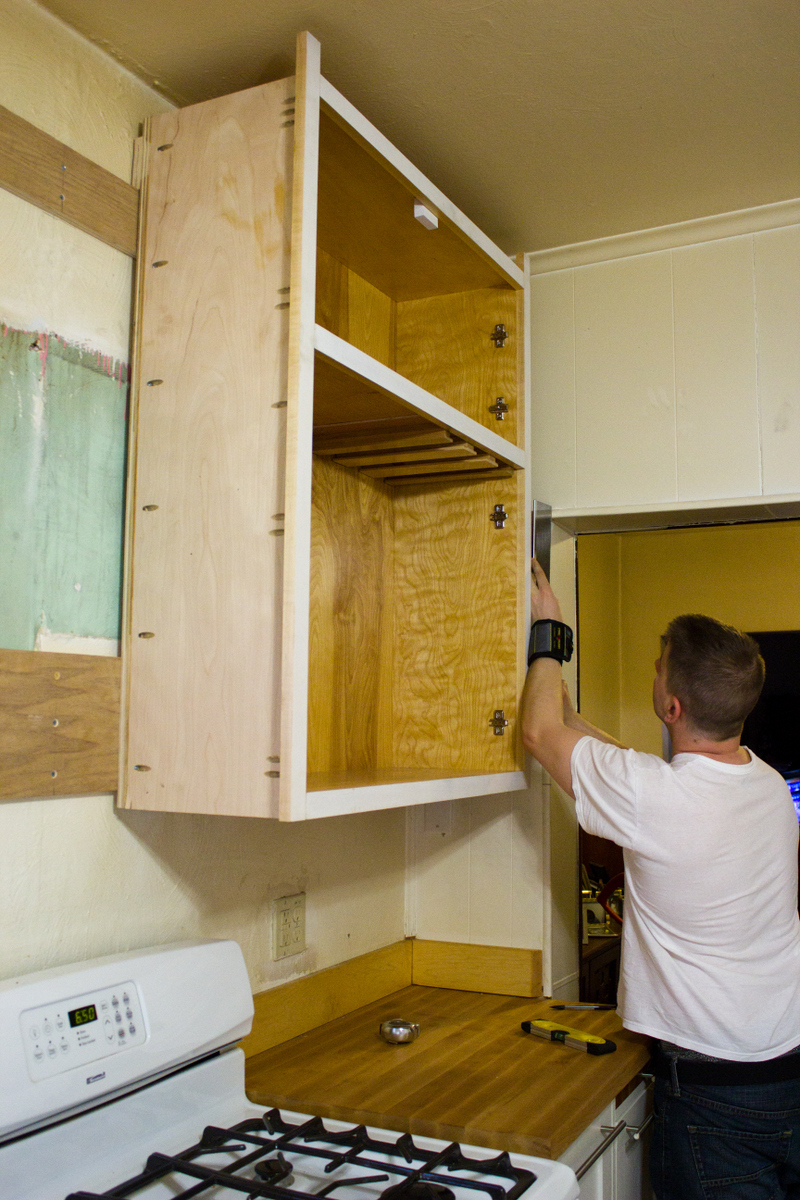
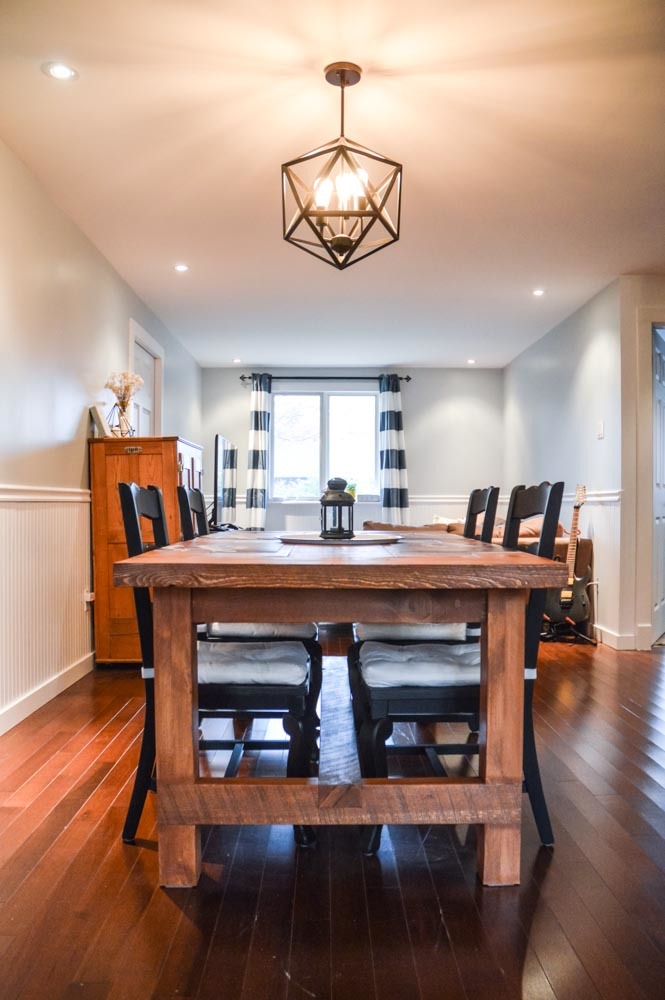
This is the sequel to my first kitchen cabinet build, the awesome base unit to the right of the stove. It's another custom design to fit the space (and replace some horribly inefficient metal cabinets that, while cute, really looked like they belonged in a different kitchen). And my first time working with maple and edge banding! Thank you, thank you, no applause please. I'm calling this project "intermediate" skill only because I chose to router the doors and install cup hinges. Otherwise, they're just big boxes on the wall, for real.

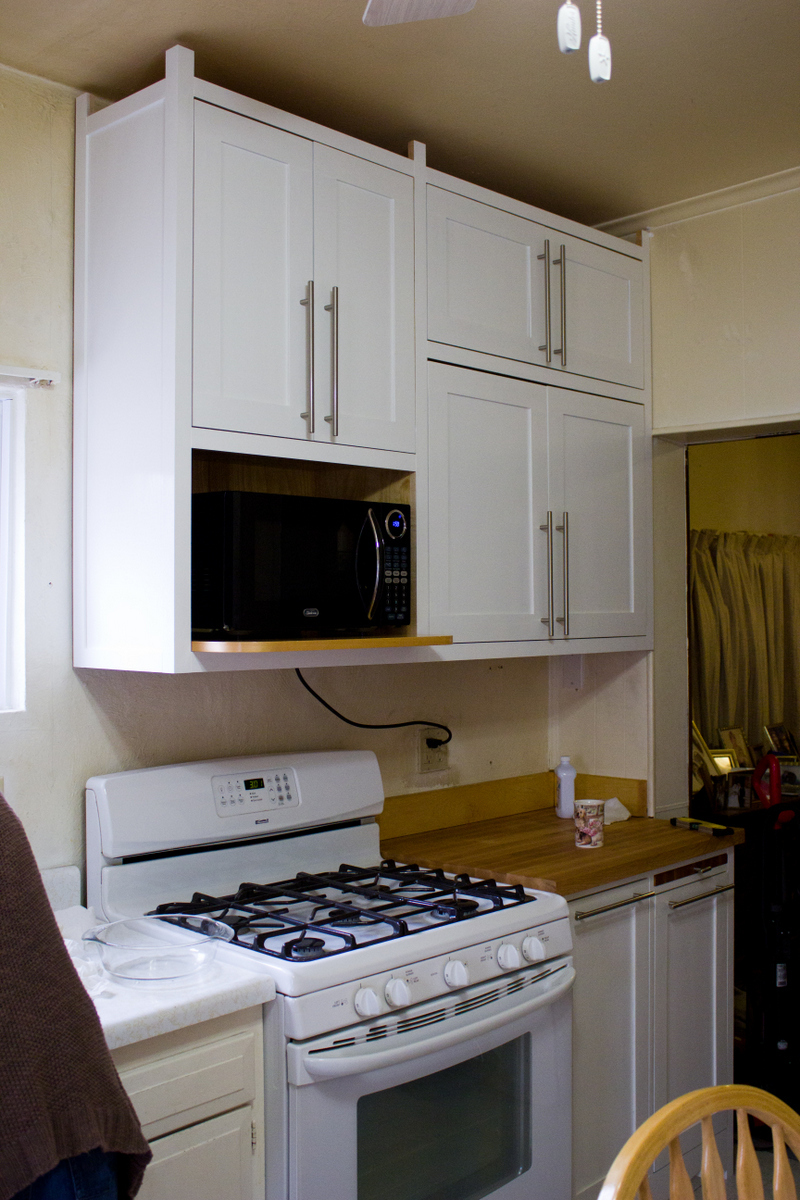
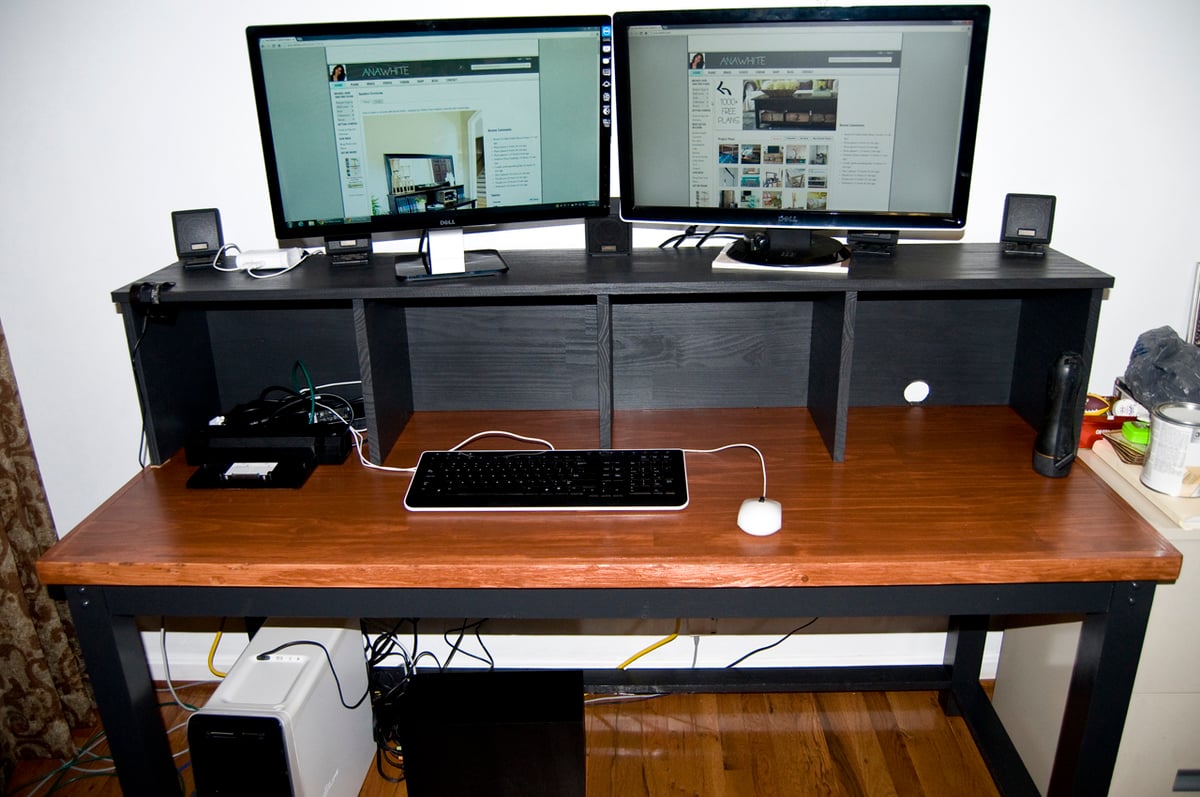
The carcasses, shelves, and door panels are all Purebond plywood. The face and door frames are 1x2 and 1x3 maple. The french cleat used to hang the two pieces is also plywood (more on my blog about that). Unfortunately, I don't know enough about wiring to add/move that outlet so that the microwave cord could be hidden...but at least the microwave itself is off the counter! It doesn't have to be perfect to be beautiful.

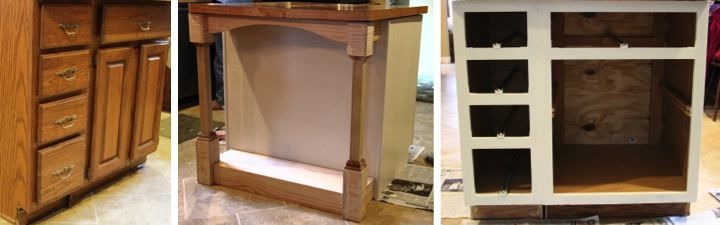
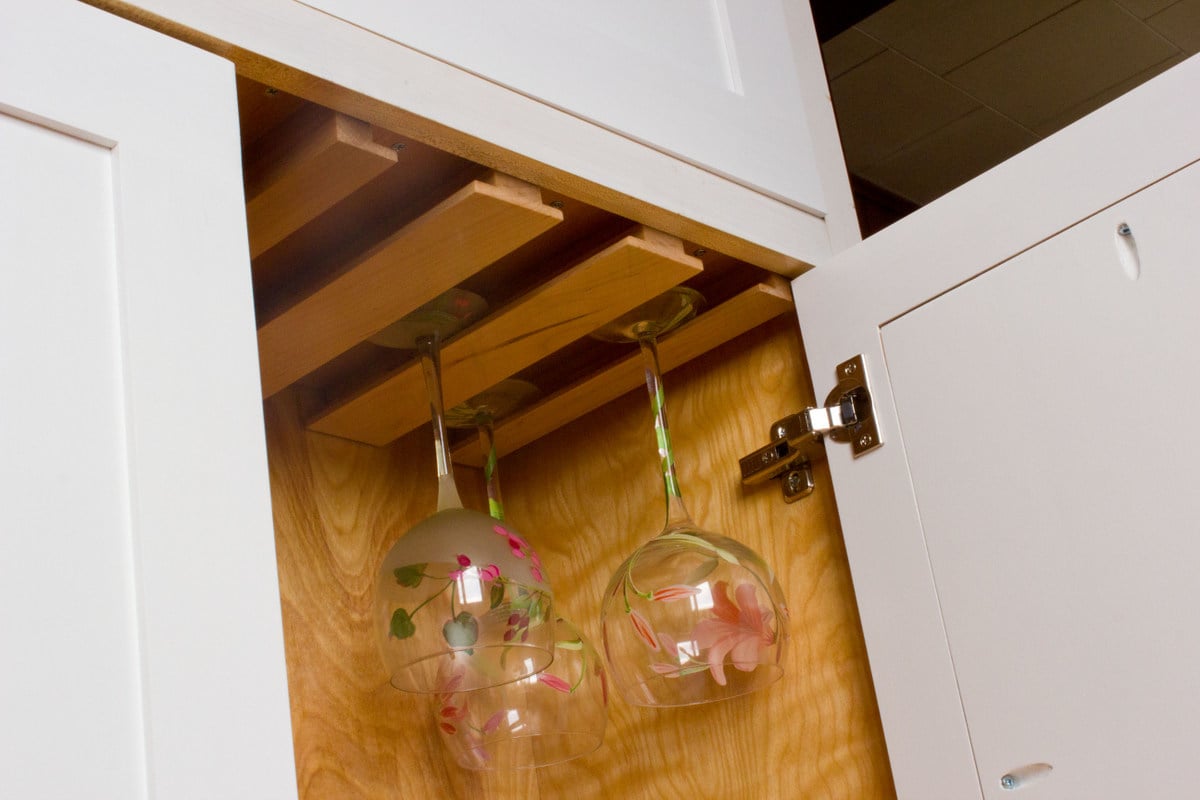
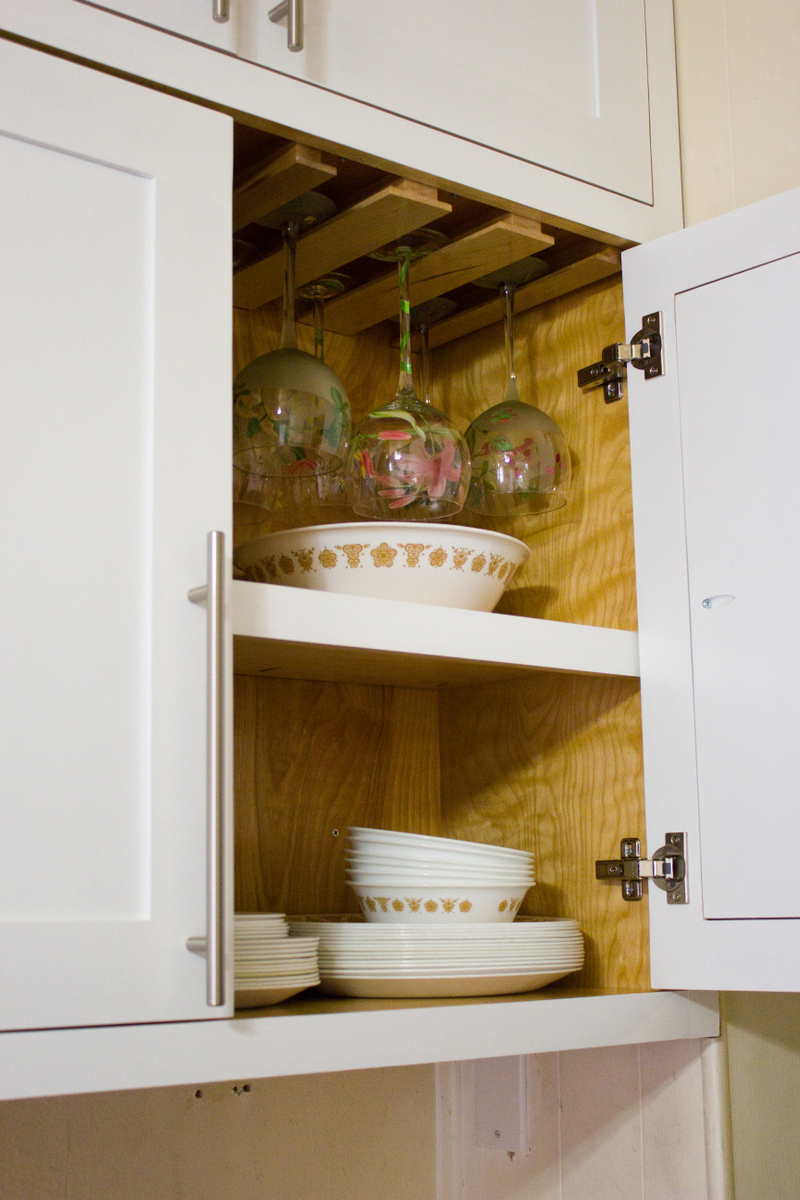
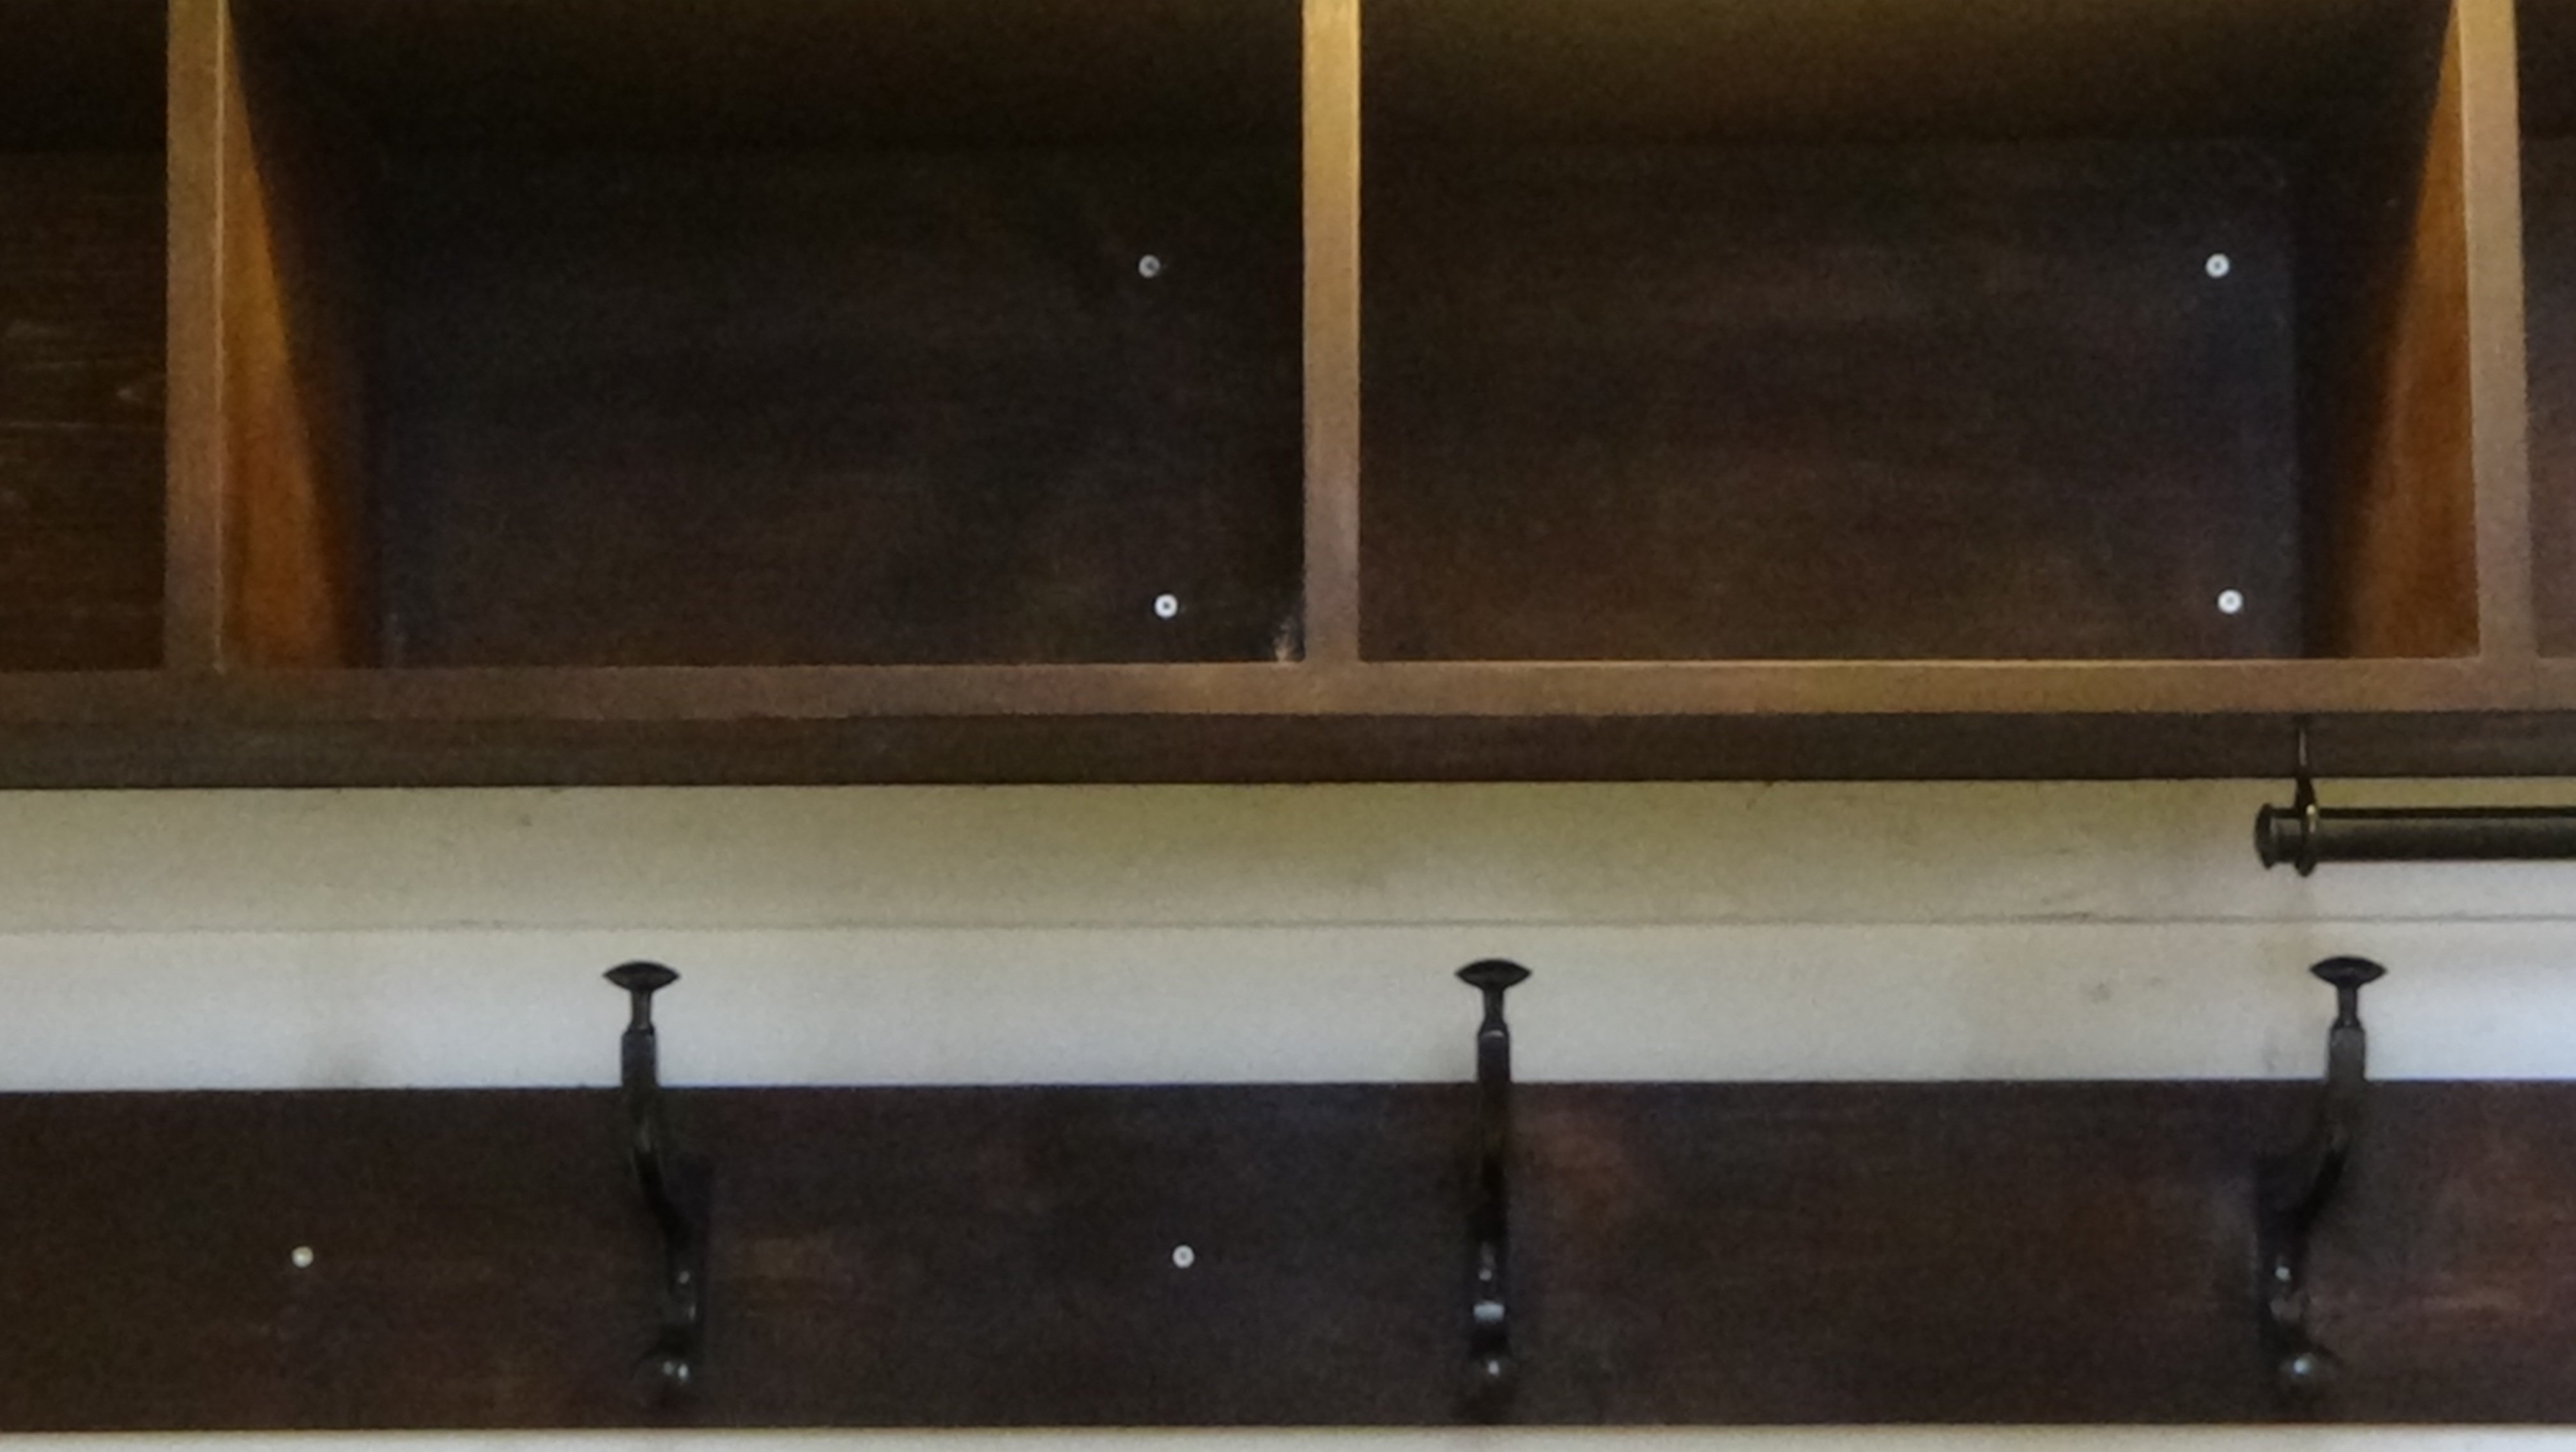
The wineglass storage is a sort-of take-off on a few other plans on here and some pieces I saw down in Amish country. It's a little rough-looking outside of the cabinet into which it is installed because I didn't design that element very elegantly. Plus I kept changing things on myself mid-stream.

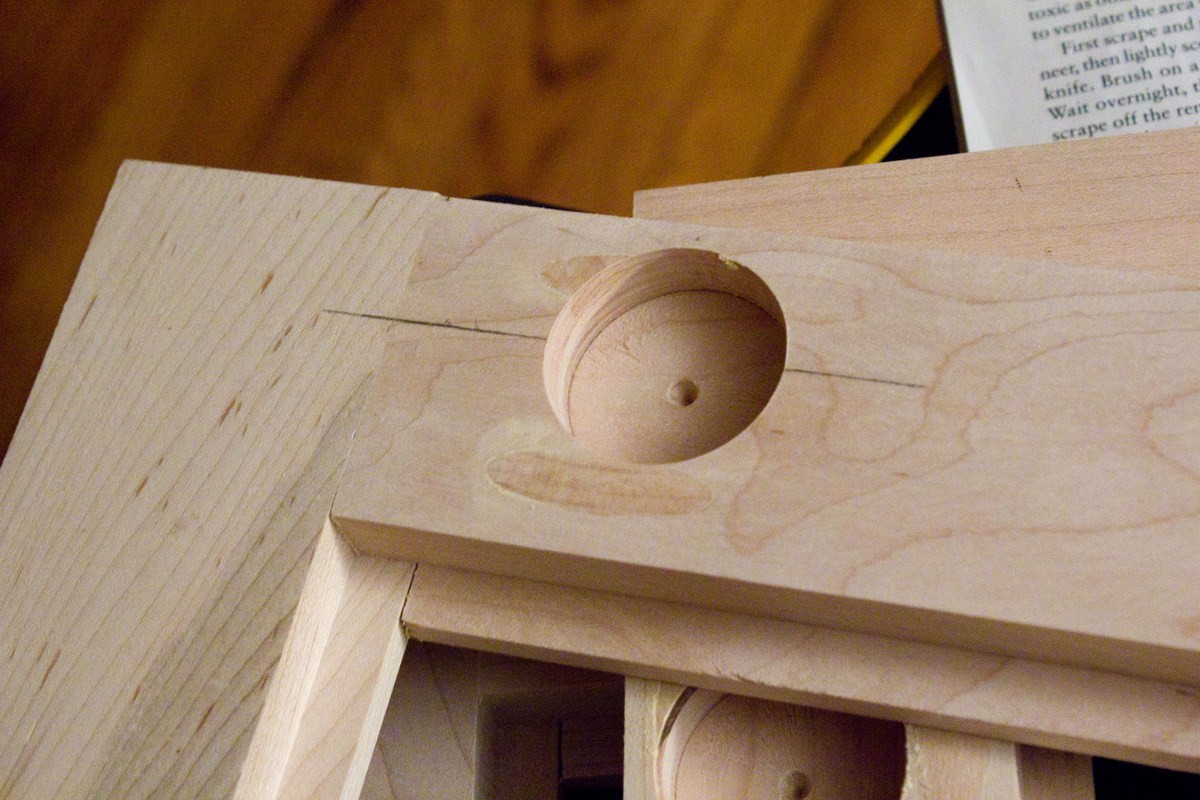
The concealed cup hinges...were totally intimidating. And at first I bought into all the hype about "you HAVE to use a drill press or you'll RUIN your doors", but in the end I just eyeballed it with a plain old forstner bit, and all 6 doors turned out fine! Plus, I got to use Blumotion hinges...you physically cannot slam these doors!!

I'm super proud of this project, and my mother-in-law (in whose kitchen they reside) is thrilled. Btw, the crown moulding is not yet installed, which is why the trim pieces up top look so funny.

Estimated Time Investment
Week Long Project (20 Hours or More)
Finish Used
Sherwin Williams ProClassic Interior Acrylic Latex Enamel, plain old white
Polyurethane on the shelves (which in retrospect should have used polycrylic...they turned out a little yellow, which is unfortunate)
Recommended Skill Level
Intermediate

Comments

Better Than I Hoped!

Been working from home for the past two months due to the health crisis. To stop from going crazy from being at home with my wife and four kids, I decided up pick up a hobby - here's where my homie Ana enters! I didn't want the sectional for my patio, but certainly the couch, chairs and table. The only mistakes had were my own (using wood putty, not sanding it well), but the plans were spot on. The only real issue I ran into was the cedar wood I used wasn't 1.5 x 3.5, but 1.75 x 3.5. This caused me to make additional cuts were I otherwise would not have needed it. Other than that, just remember to make the longest cuts first... I ended up needing to buy about five additional boards because it.

Estimated Cost
$350 (I used cedar, which is much more expensive)
Estimated Time Investment
Day Project (6-9 Hours)
Finish Used
Minwax Spar Urethane, clear
Recommended Skill Level
Beginner
Seasonal And Holiday

DIY Garden Box with Trellis

Submitted by JenFarrell on Mon, 06/30/2014 - 07:13

We wanted a small garden to fit on the back patio stones and this plan fit well. We reduced the height because we have 3 small children to "help" water the plants. The trellis was hoping that we could extend the amount of produce we could grow. They're very heavy, sturdy and straightforward to build. Thanks very much!!

Estimated Cost
$120
Estimated Time Investment
Weekend Project (10-20 Hours)
Recommended Skill Level
Beginner

Rustic Dining Table - In love with my table!

Submitted by Anonymous (not verified) on Sun, 10/23/2016 - 05:46

I had shown this plan earlier on to my bf, telling it I really like it and it would be so much cheaper to make our future rustic dining table on our own instead of buying it. He seemed reluctant.... And then, 2 months later, I come back from my parent's house in the evening to find that he has built me my rustic dining table just as I had wished! 

Estimated Time Investment
Week Long Project (20 Hours or More)
Finish Used
Saman Cognac and Sesame + Saman hybrid varnish in Satin
Recommended Skill Level
Intermediate

Comments

Mudroom

Submitted by Taa-daa on Tue, 11/01/2016 - 13:22

My front closet was transformed into a mudroom. Hidden storage is a genious idea. Thank you Ana!!! It wasn't easy though.

Estimated Cost
a bit less than 150$
Estimated Time Investment
Week Long Project (20 Hours or More)
Finish Used
Dark walnut
Recommended Skill Level
Intermediate

New Computer Desk - From Seaten Console

Submitted by DIYER_MD on Sat, 09/06/2014 - 18:10

I used the Seaten Console Plan as the basis for this project.  I made the legs longer to raise the desk up to the height of a computer desk.  I also added extra sections to the top to proved extra storage areas for books, etc.

Built from Plan(s)
Estimated Cost
$150.00
Estimated Time Investment
Weekend Project (10-20 Hours)
Finish Used
Olympic One Black Paint with Stained Top (Rustoleum)
Recommended Skill Level
Intermediate

Comments

booksnotbombs

Sat, 09/06/2014 - 18:30

Did you build this to be the height of a standing desk? It looks great either way! I am looking for a good plan to modify. I like the staging of Ana's website on the monitors. :)

DIYER_MD

Sun, 09/07/2014 - 08:26

No, it is still a regular height desk.  The legs are actually 28 1/4 inches.  This makes the desk right at 29 inches.  I set the monitors up on the top because I like them a little higher and it frees up the desk space.  It makes them comfortable viewing for me.  I appreciate your nice comments.  If you want a nice but simple desk, this is the perfect plan.  I started building this one right after I saw it on the site.

Back