Community Brag Posts

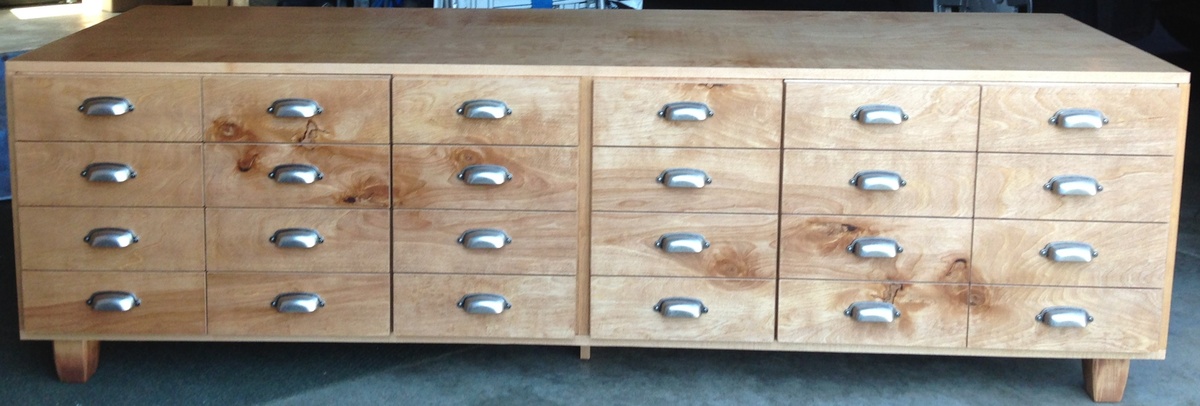
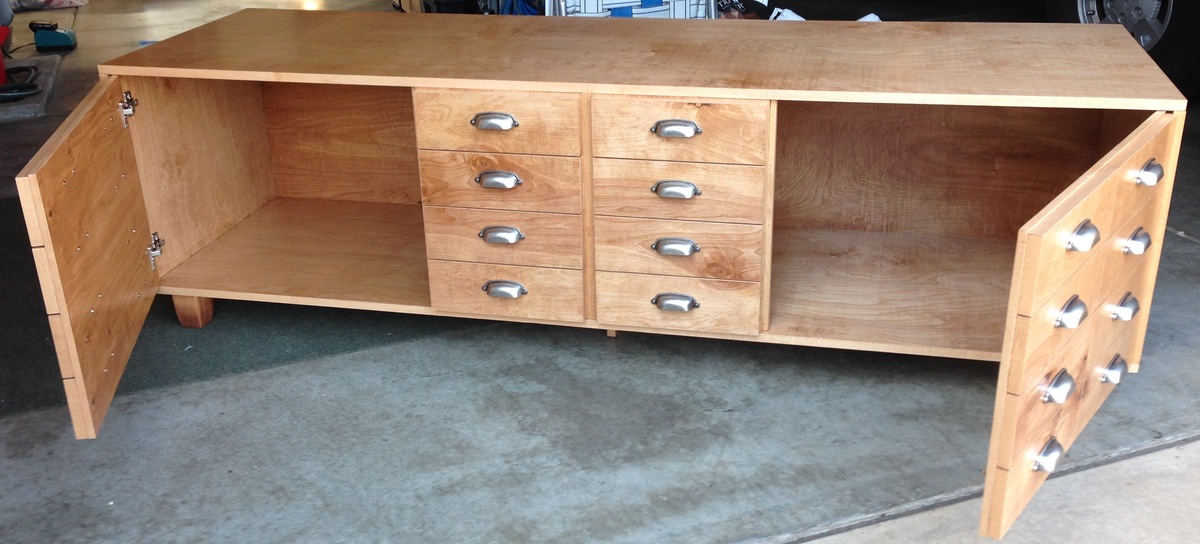
Cabinet with storage

Submitted by MEdwards on Thu, 04/17/2014 - 09:03

A friend of mine pinned this on Pinterest and gave me the dimensions she wanted. The wood I used is Birch. The cabinet she pinned is actually a cabinet full of drawers. She wanted the same look, but doors instead, for storage.

Estimated Cost
$250
Estimated Time Investment
Week Long Project (20 Hours or More)
Finish Used
Cherry stain and clear semi-gloss Polyeurethane
Recommended Skill Level
Advanced

Shirley Modified

Submitted by Kiely54 on Tue, 04/29/2014 - 08:33

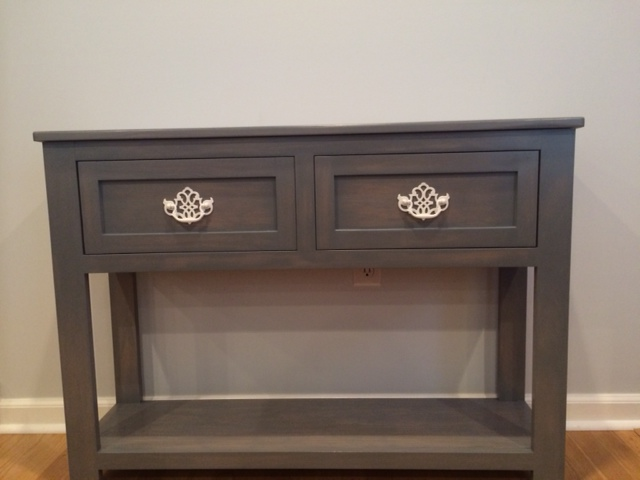
My husband and I built this together. Well, I helped! It was my first time using power tools. I'm the one who designs and picks out themes/colors and he does the manual labor but I wanted to learn a few things this time.
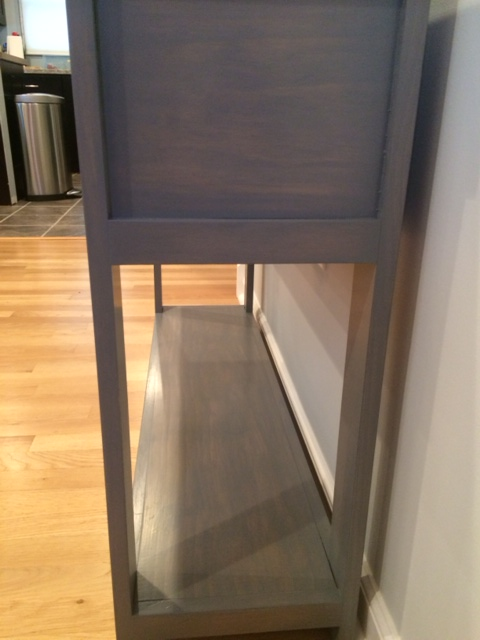
We modified the Shirley Console table and combined a few features from some of the other console tables. As you can see we modified the front of the drawers. We wanted the table to match our decor but also wanted some of the wood to show. I said, "I wish they made gray stain!" Miniwax does! This was our first experience. It was challenging because it dries so quickly and you are threatened with an uneven look but we love the way it turned out. We also bought pine instead of plywood so i cost a bit more but it was worth it! It also took us a bit longer because this was our first project and we modified the measurements to fit our entryway.
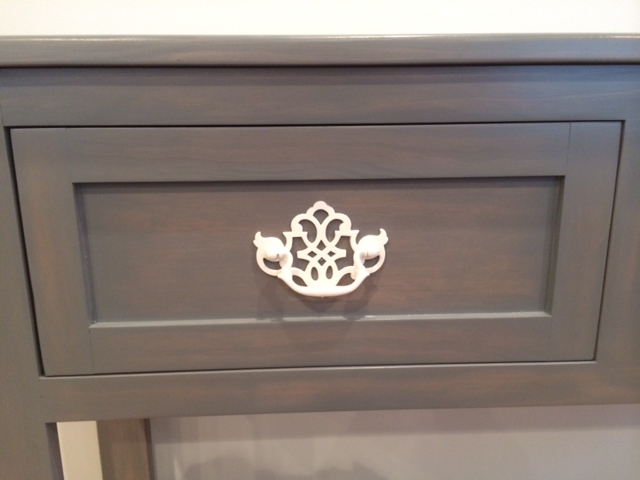
I chose these drawer pulls to match my gray and white damask curtains that hang nearby. I purchased them in brushed nickel from Home Depot for ~$3 each and spray painted them white. When I told people what I was doing I got negative feedback but I think they turned out great! Now to decorate it and make a matching entertainment center!
Also the Kreg Jig was a HUGE help...it really makes the piece look professionally made!! Thanks ana-white.com!!

Built from Plan(s)
Estimated Cost
$150
Estimated Time Investment
Week Long Project (20 Hours or More)
Finish Used
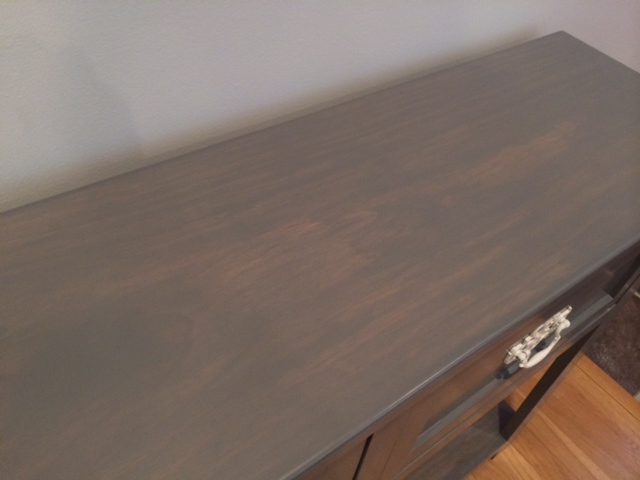
Minwax Water based stain in Slate. We chose this because our living room has a lot of gray but also slate and blue mixed in and we thought this shade might be slightly blue tinted but it is not. It is a true, cool-toned gray.
It has 3 coats of stain each left on for 5 minutes and then wiped off with a clean rag. We lightly sanded between each coat and then applied 3 coats of satin polycrylic clear finish, sanding between those coats as well. We prefer the satin look which matches our hardwood floor that we sanded down to the original wood and applied a satin clear coat as well.
My husband did all of the staining and it is very time consuming especially with the water based stain because it dries so quickly you really have to move fast. An oil or gel based stain would be easier but we were not fond of any gray colors offered in either of those. My husband is requesting I stain the entertainment center that we plan on making otherwise it will be painted!
Recommended Skill Level
Beginner

Comments

freefromburdens

Tue, 04/29/2014 - 08:44

That looks great. I understand getting negative feedback. Most people think you have to have special training to build. I used to be skeptical until I began building. I hope your build let them know they can do it also. Keep it up...

justindalby

Tue, 10/14/2014 - 09:35

I love your modified version.  I am going to build this as well.  I absolutely love the modification that you made on the drawer faces.  Can you provide any instructions/hints to help me achieve the same look on the drawer faces?  Thanks!

Kiely54

Thu, 10/30/2014 - 15:32

I know that some of the wood measurements were not available at our local hardware store, which resulted in the sides being "trimmed out," so we decided to make the drawers match. We built the drawers like the plan, except we subtracted 1/4" from the depth of the drawers. We made the drawers (minus the trim pieces), slid them in the table, and while in place, nailed 1-1/2" x 1/4" trim pieces around the perimeter of the drawer faces using a finishing nail gun. This made the trim pieces flush with the face of the table. 

Not sure if that made sense or not...I'm not good at explaining things in writing. If it doesn't, just let me know and I'll try again. And thanks for the compliment on the table!

justindalby

Wed, 01/20/2016 - 08:59

Thanks for your feedback on my post a while ago.  I finally build this piece and are absolutely happy with it.  We used your technique for the drawer faces, and my wife was so obssessed with your drawer pulls, that she tracked them down and special ordered them from our local Menards.  I have uploaded a Brag and gave you credit for the idea.  Thanks for the inspiration!

$12.00 Cedar Fence Picket Planter

I followed the plans exactly. The only difference is I used my Ryobi Airstrike brad nailer instead of stapler. Lowes was slightly higher in price than the $10.00 on Ana's post but at $11.97 it wasn't too far off!

Estimated Cost
11.97
Estimated Time Investment
An Hour or Two (0-2 Hours)
Finish Used
No finish
Recommended Skill Level
Starter Project

Narrow Sewing Table

Submitted by WeezyWorks on Tue, 09/11/2012 - 18:06

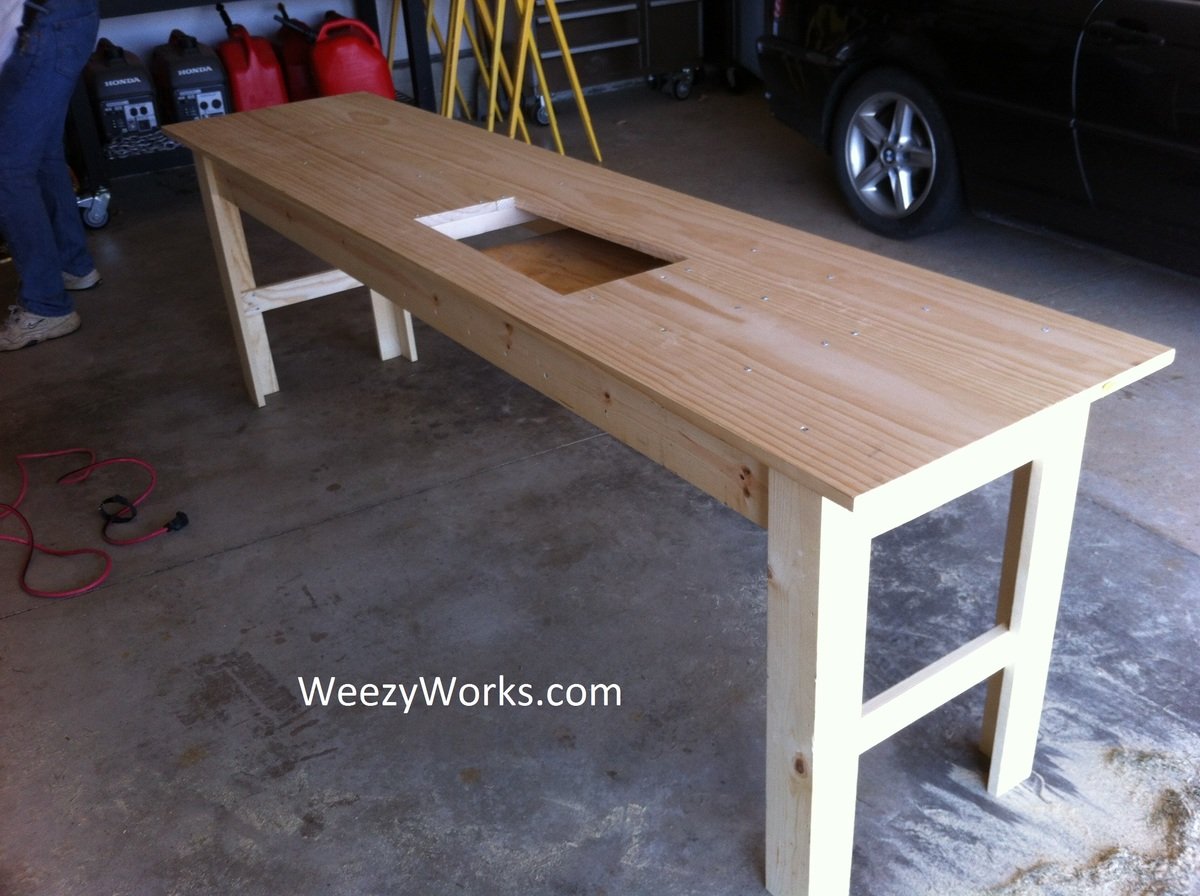
Ive been looking for a sewing table to fit my space. but found none for less than $500 and they were quite small. I found a post at quiltedcupcake.com that linked me to another blog, linking me here. I modified the plan to be about 2 feet wide and cut a hole to fit my sewing machine. There is a support in the bottom to hold my machine level with the tabletop. When I make this in the future, I will splurge on a fine hardwood. This plan was easy to build and looks great! Just what I was looking for :D

Estimated Cost
$125
Estimated Time Investment
Weekend Project (10-20 Hours)
Finish Used
Dark stain and satin polyurethane
Recommended Skill Level
Beginner

Comments

tommirhea

Fri, 09/14/2012 - 09:45

I'm jealous of your organization! I've had a folding table for my sewing table since I started sewing :(

tommirhea

Sun, 09/16/2012 - 10:11

Now, I've just got to make it! I love to free motion quilt and that would make it easier. With each baby I've had my quilting space has diminished (of course it's worth it) but now I think I will reclaim some space ;)

Shoe Dresser

I had this space in my mudroom that was a perfect spot to make a custom shoe dresser. I adjusted the plans I found on this website to custom make storage for shoes. Now this weird little space is functional.

Built from Plan(s)
Estimated Cost
80
Estimated Time Investment
Day Project (6-9 Hours)
Finish Used
Rustoleum chalk paint Serenity Blue, classic grey and special walnut Minwax
Recommended Skill Level
Intermediate

Comments

Beer carriers

Submitted by Anonymous (not verified) on Thu, 04/20/2017 - 15:23

I love the vintage look with old license plates.  @theshopbycecilia

theShop-woodwork and design

Estimated Time Investment
An Hour or Two (0-2 Hours)
Recommended Skill Level
Starter Project

Kitty Outhouse

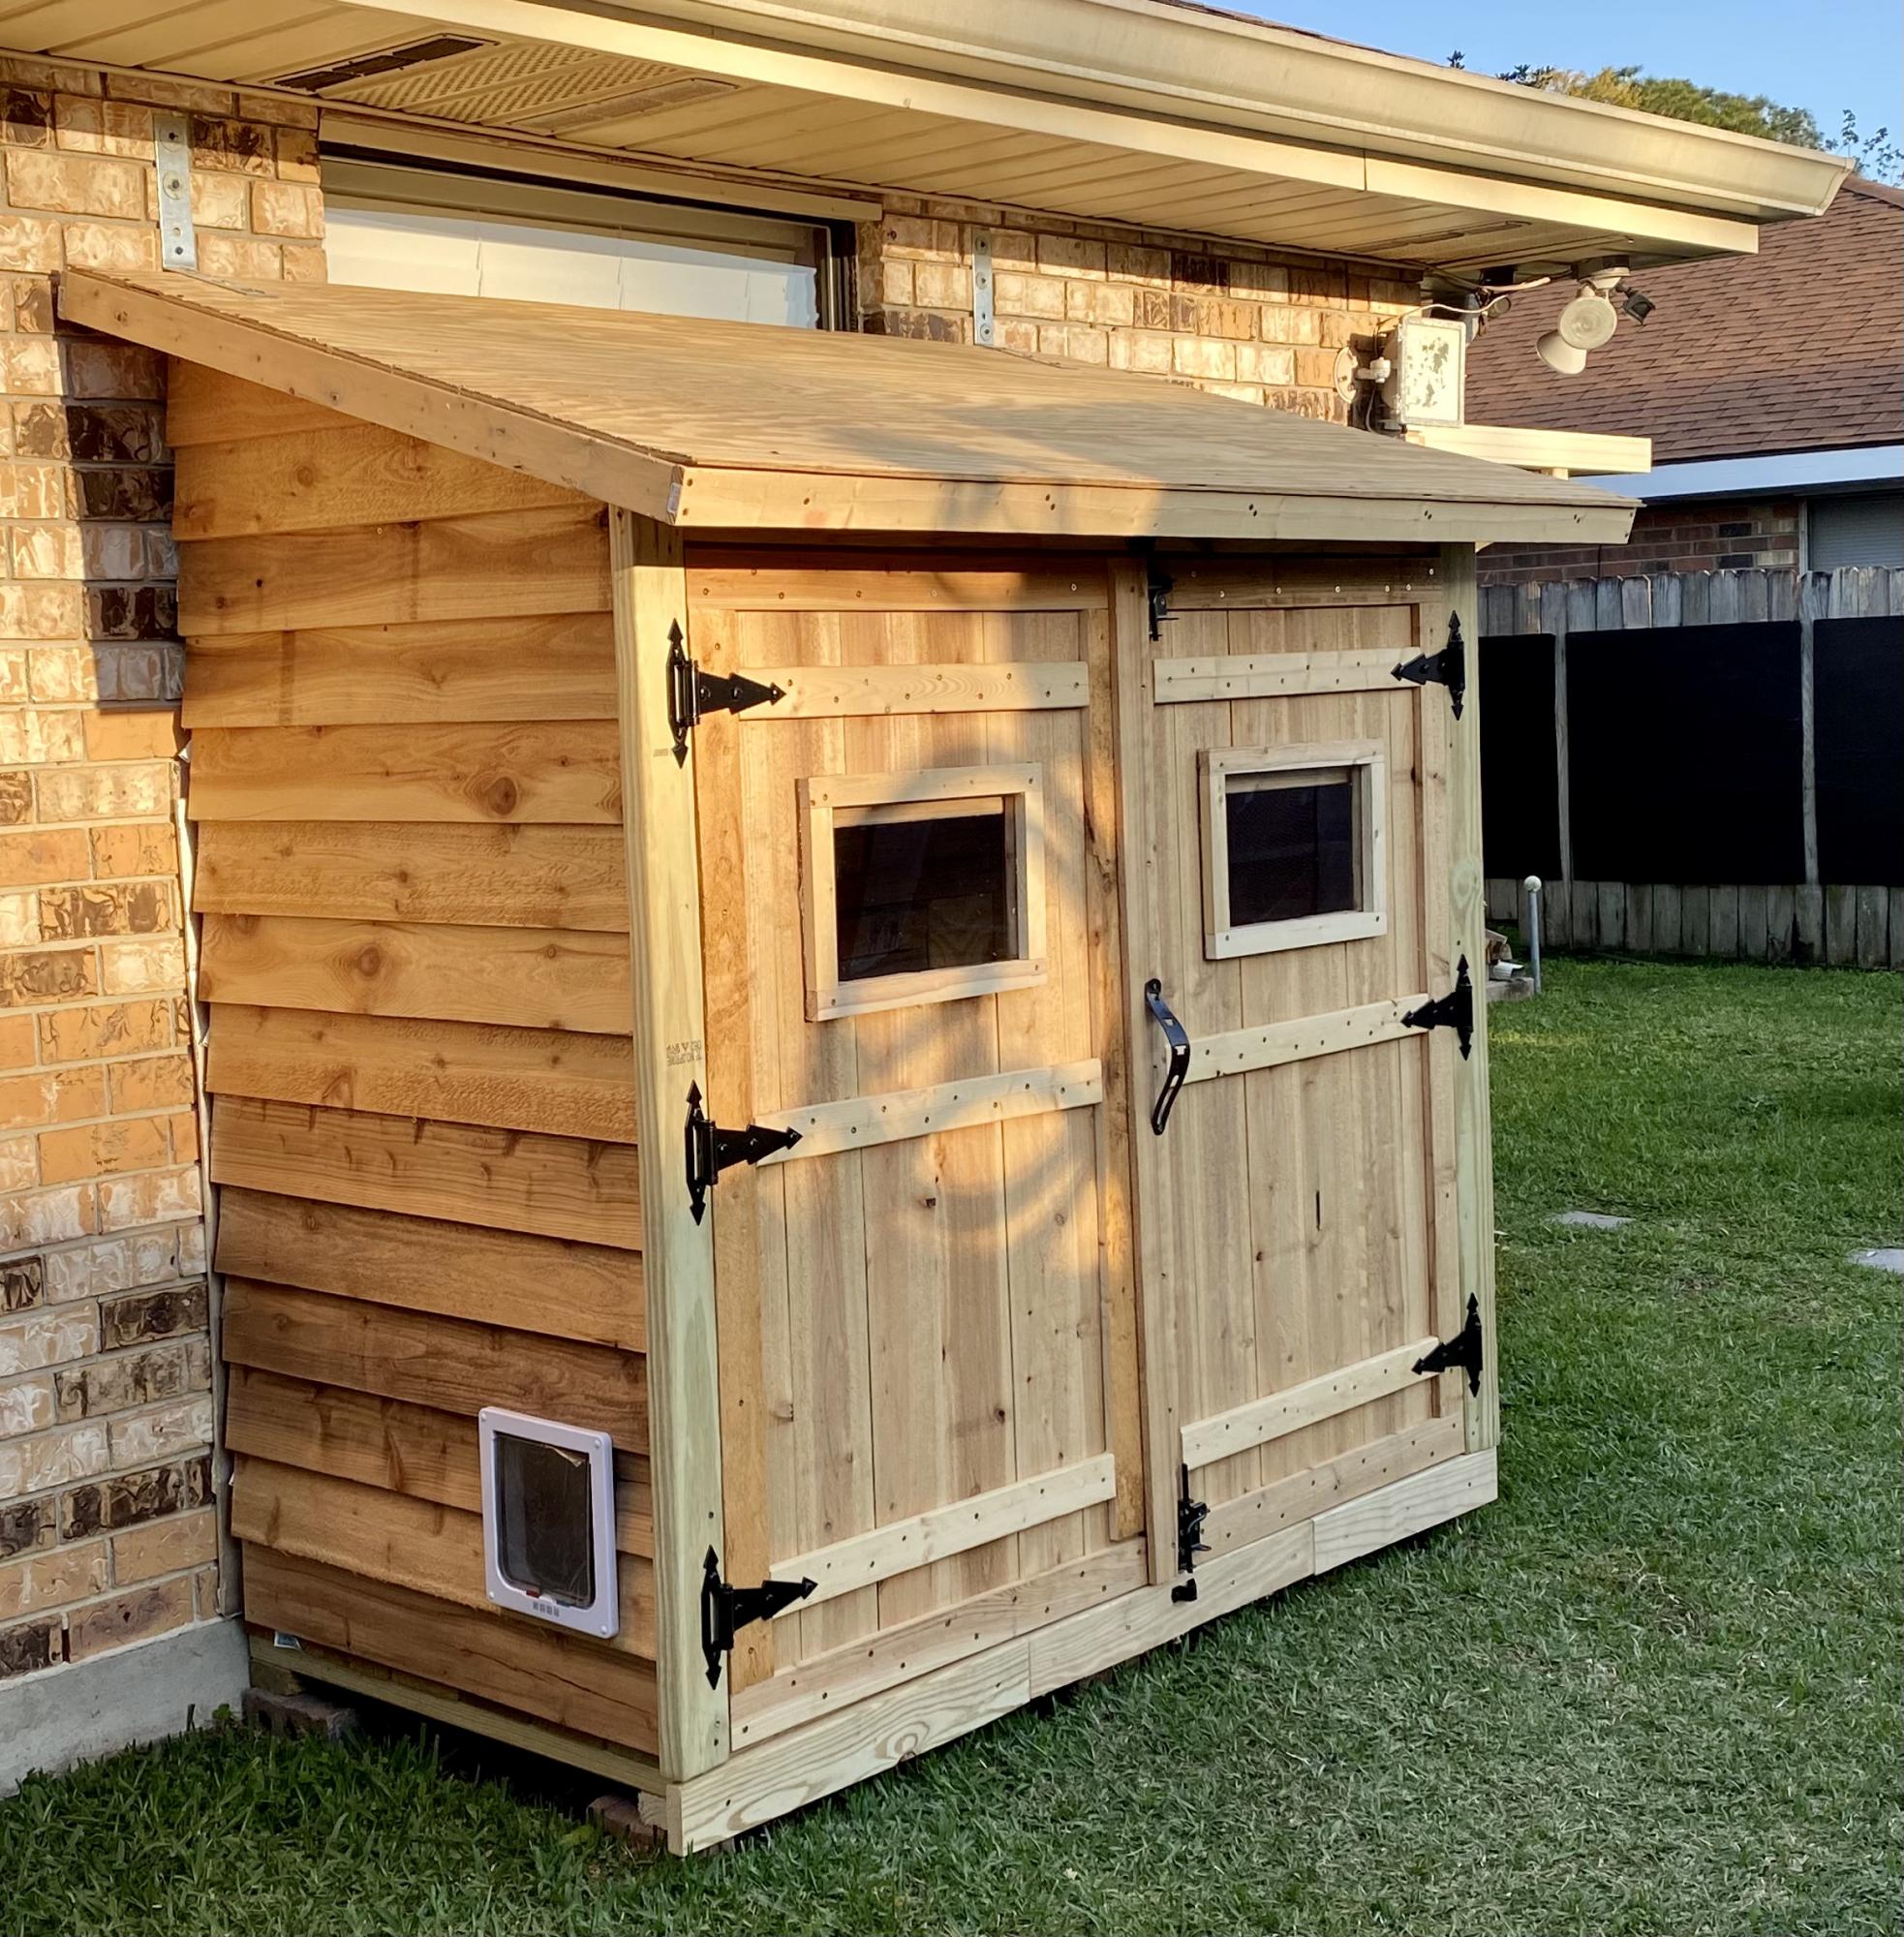
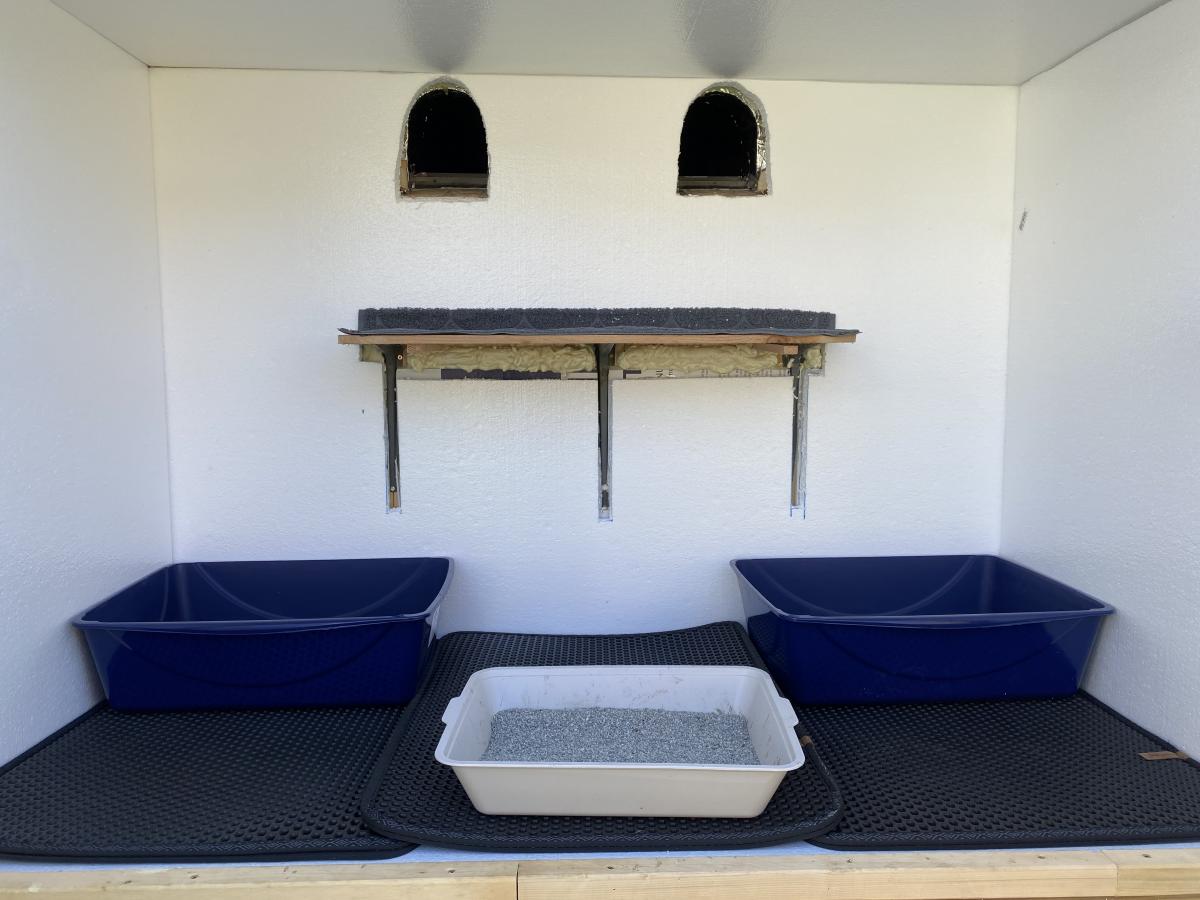
My first Ana White project. Built Ana’s awesome small cedar shed as an outhouse for our many cats. The have access to it from inside the house. Great way to keep litter boxes and the mess out of the house. It is stand alone, and attached to the house, in front of a bedroom window. There are two ‘entrances’ as well as two, one-way, escape hatches, if a cat in the outhouse is interrupted by another cat (I.e. a male cat comes in and the female feels trapped) they can exit to the outside (one way so no critters can come inside!). Ana has easy to build plans, great site! I plan on making the square table just posted today for my newly refurbished deck. Keep in mind, my estimated costs and time reflect a LOT of additional features on the inside. The shed itself, very easy, simple, inexpensive. Very little waste with Ana’s projects as well.

Built from Plan(s)
Estimated Cost
$500
Estimated Time Investment
Week Long Project (20 Hours or More)
Finish Used
No finish, at least not yet.
Recommended Skill Level
Intermediate

Comments

Added a board for higher beds

Submitted by Anonymous (not verified) on Fri, 05/26/2017 - 13:09

I added a board on the height of the beds to make it easier for an older person (me!). The plan came together beautifully, and I did all the work myself.

Built from Plan(s)
Estimated Time Investment
Weekend Project (10-20 Hours)
Recommended Skill Level
Beginner
Seasonal And Holiday

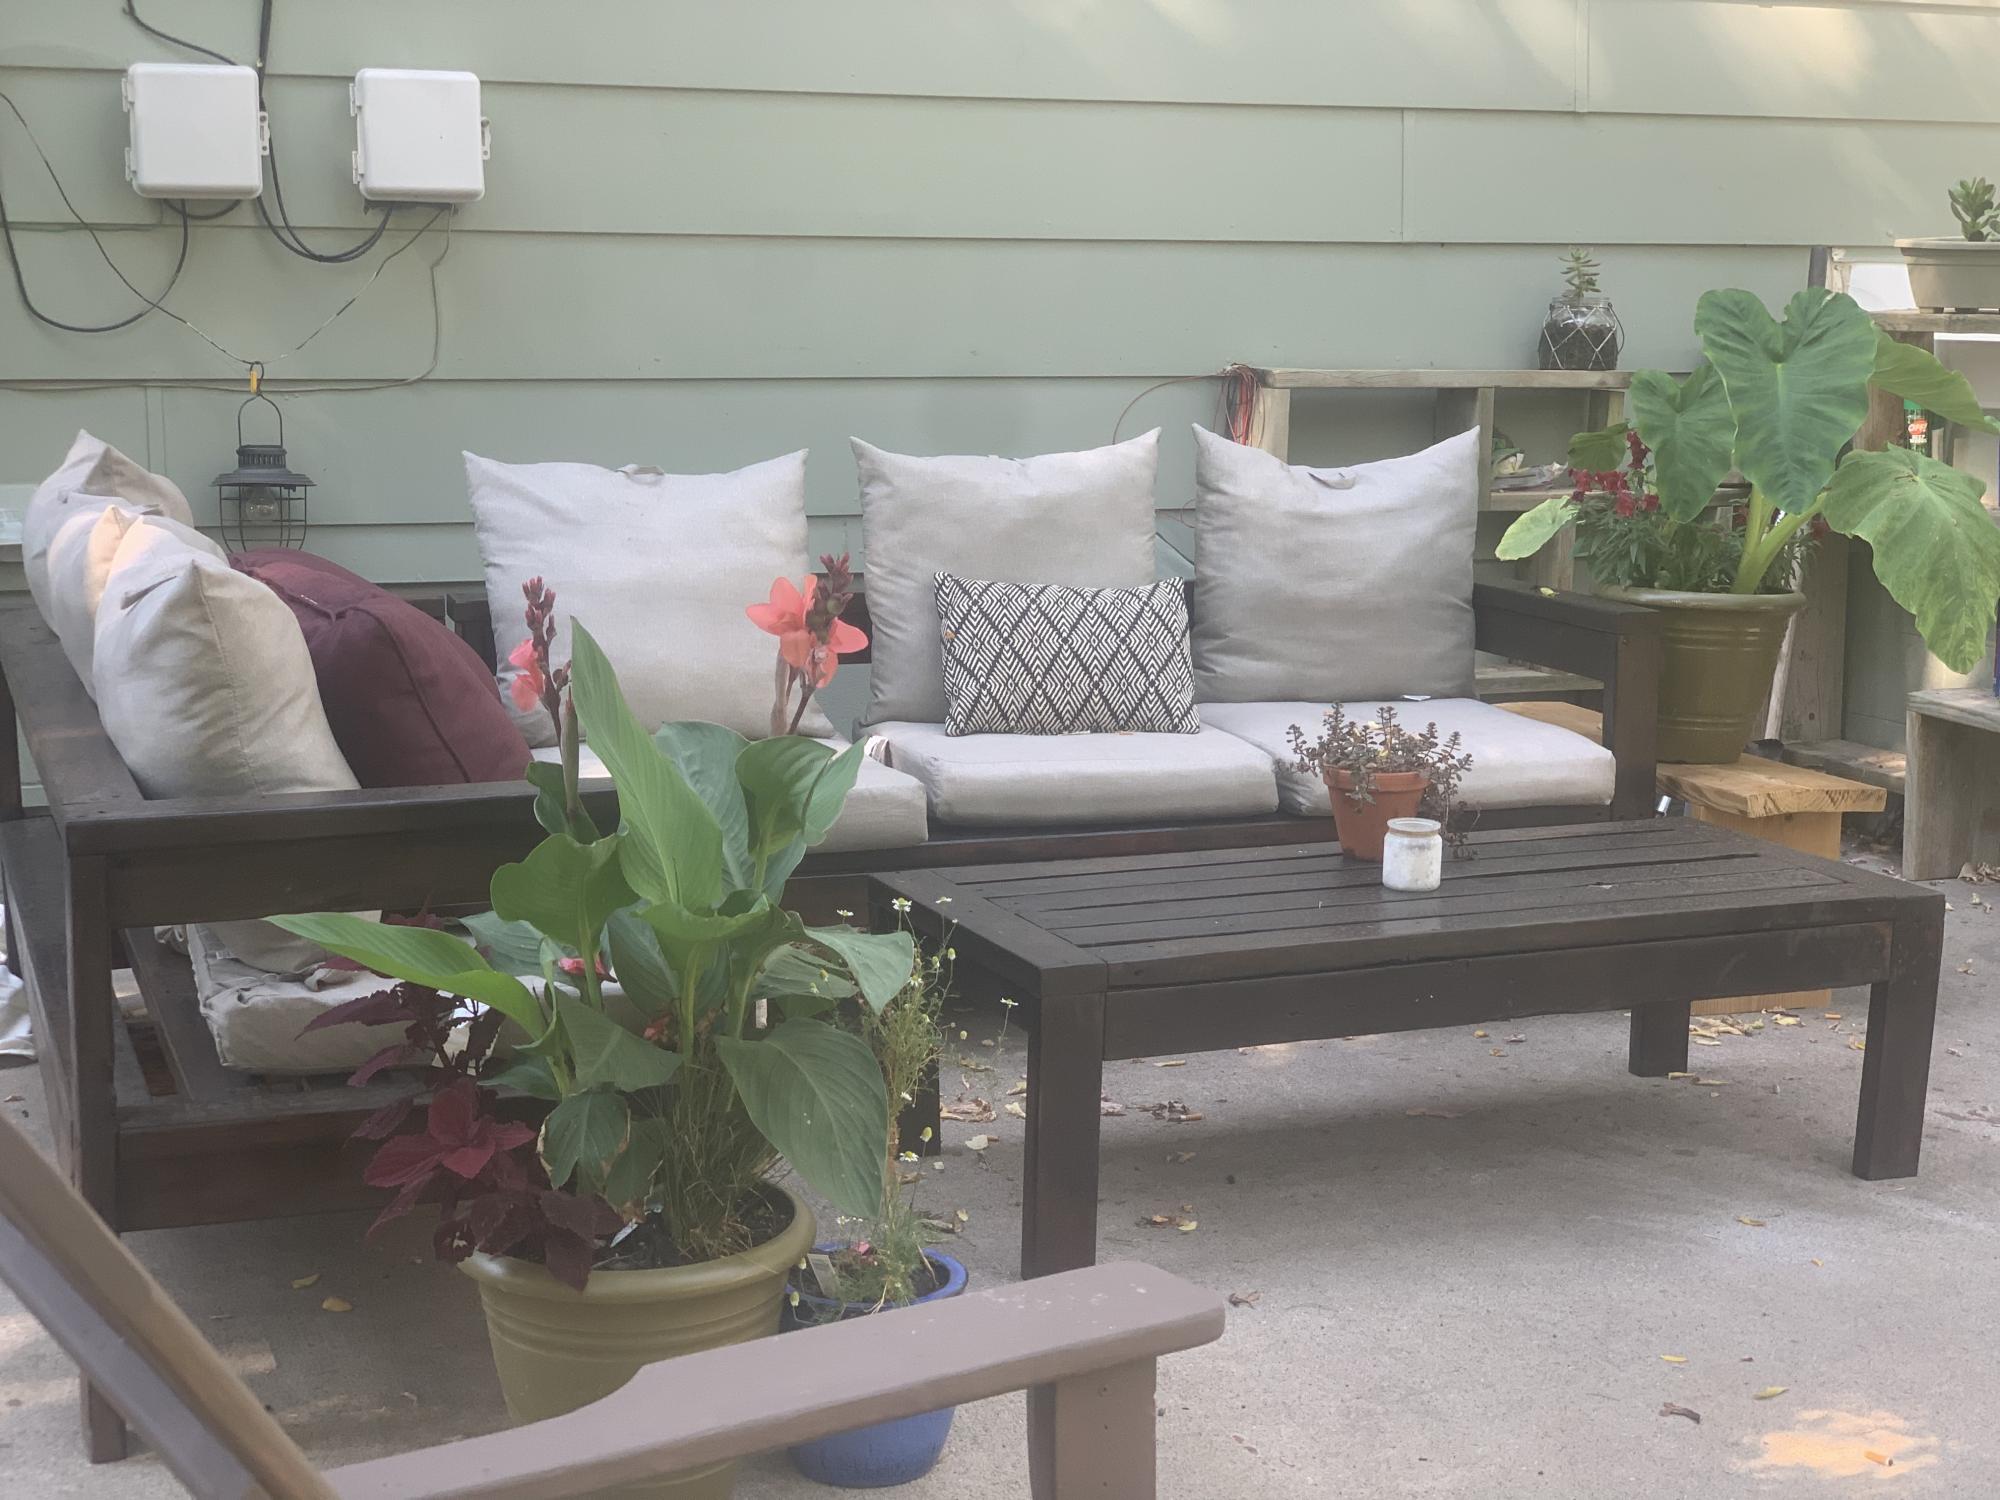
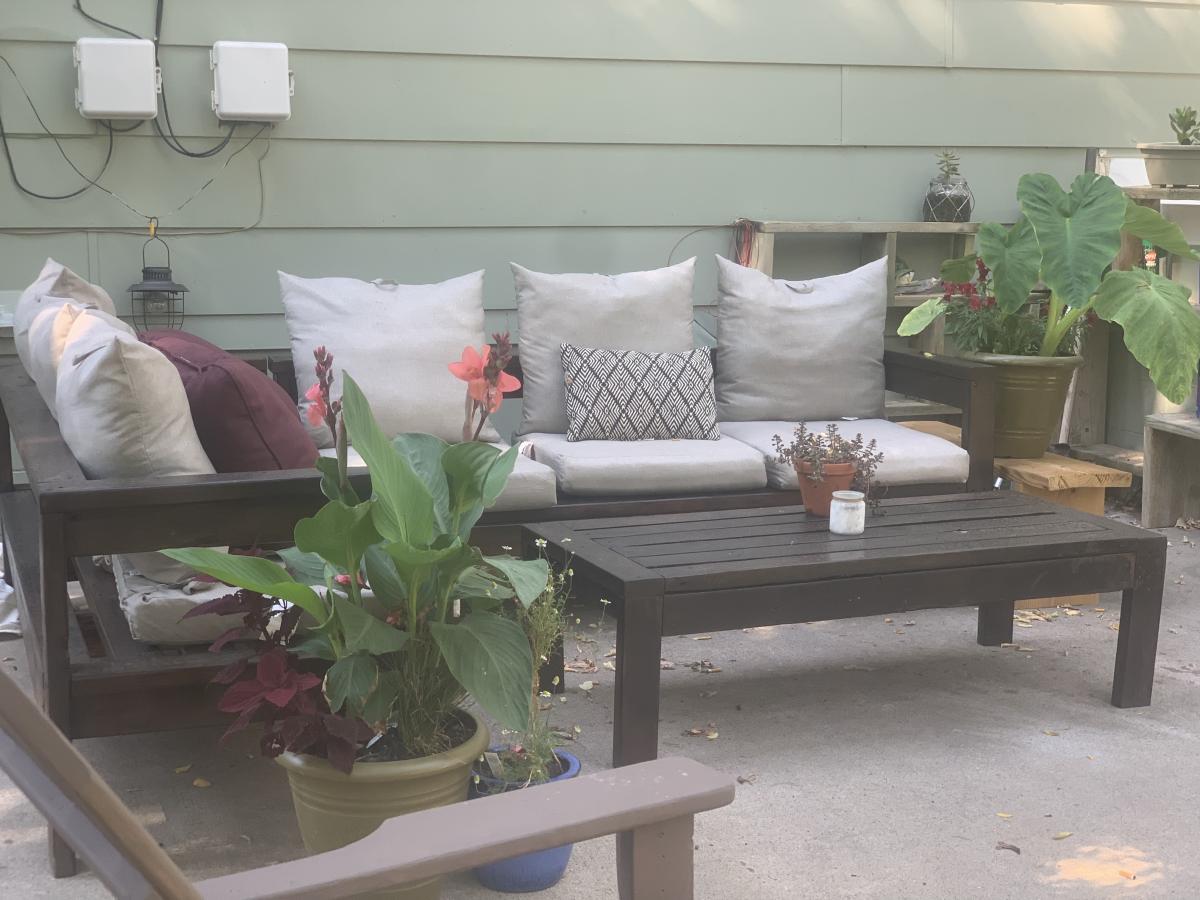
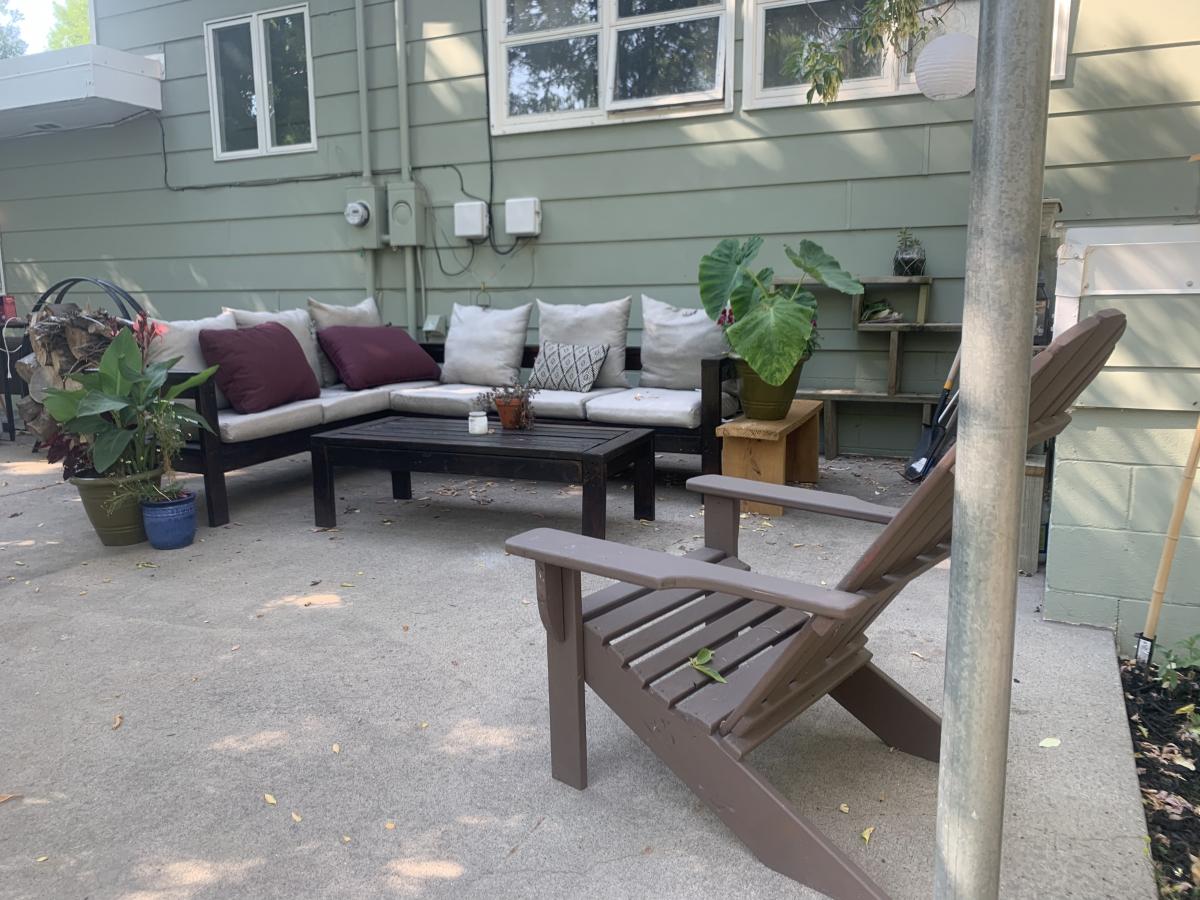
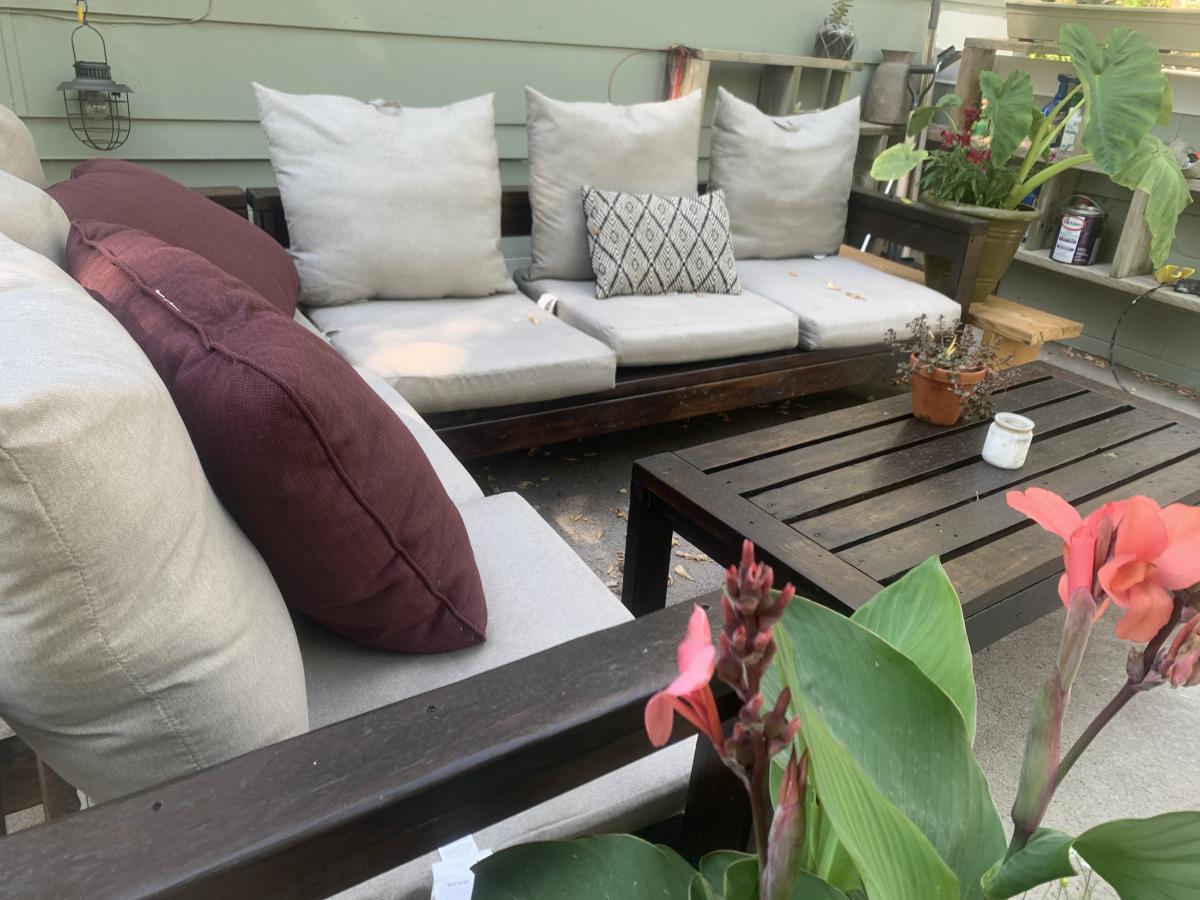
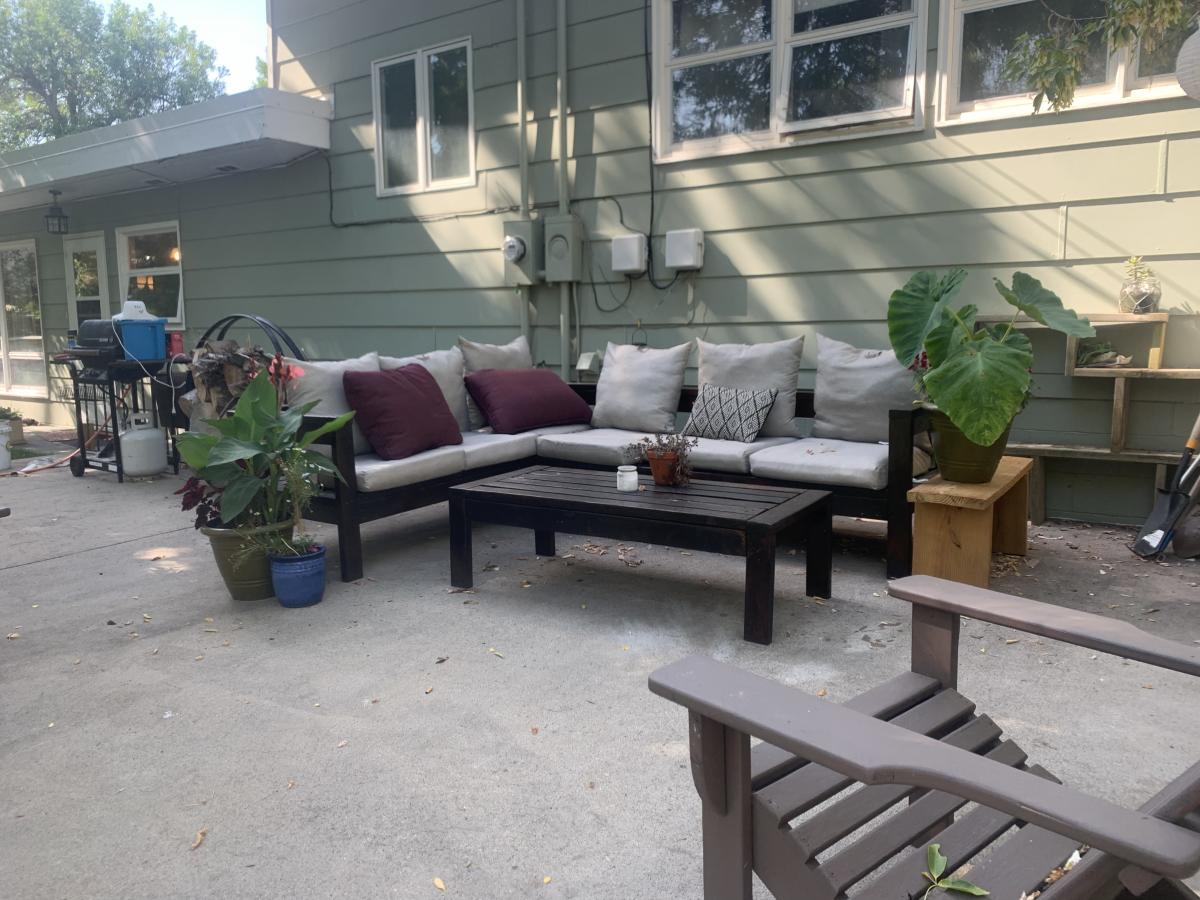
Scrap twisted stud outdoor sectional and table

Submitted by kaciejo on Wed, 09/15/2021 - 10:17

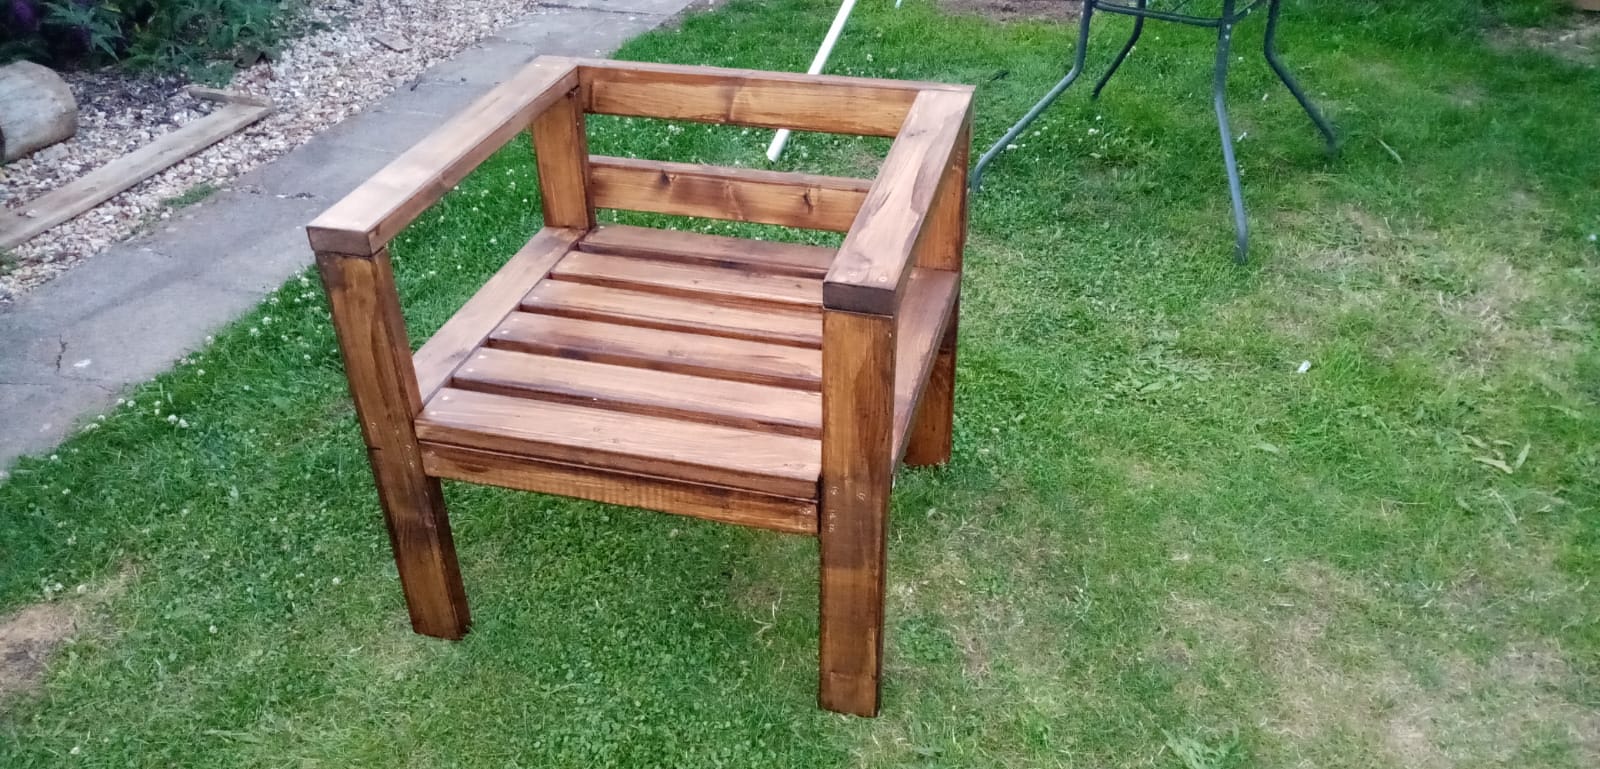
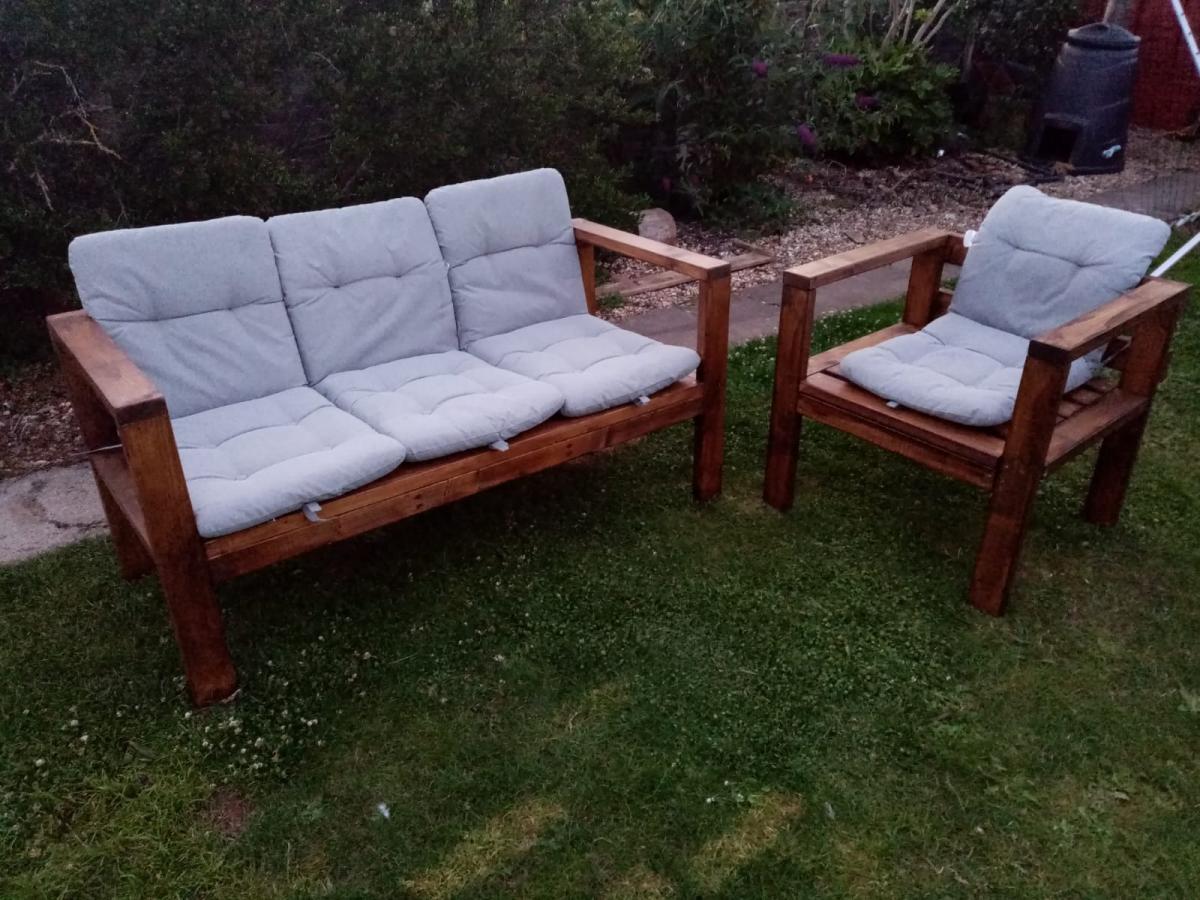
What to do with leftover twisted wood? Utilitarian single moms I straightenand make the outdoor sectional and table. Been wonderful.

Comments

Rustic Bench as Wedding Guestbook

Having already built a rustic bench to go with my Farmhouse Table, I knew it would be the perfect guest "book" bench for my wedding. For only $15 (I had the lumber for the top on hand), and the help of all my bridesmaids during my bachelorette weekend, we built this bench in just about an hour. Everybody had a hand in it, which makes it even more meaningful. It sits at the foot of the Farmhouse Bed my husband and I built from reclaimed barnwood from my father. I love that we have something so hand-made and sentimental to commemorate our wedding celebration. It makes me smile every time I look at it!

Estimated Cost
$15
Estimated Time Investment
An Hour or Two (0-2 Hours)
Finish Used
I sanded the entire bench with 80,150,200. I primed the entire bench (including the underside, just to cover all my bases) then painted 2 coats of semi gloss white, sanding with 200 between coats. To make the center design, I printed out my art onto computer paper, covered the back with graphite (just scribbling with a pencil) then taped it to my bench. Trace the outline of your art with a pencil and a firm hand. When you remove the paper, you'll see the outline of your design. I traced it with silver paint pen, then filled it in. After I had all my signatures I sealed the top with two coats of Mod Podge (but polycrylic would probably work too).
Recommended Skill Level
Starter Project

Pergola (attached directly to the house)

Submitted by dwm22 on Thu, 05/23/2013 - 17:34

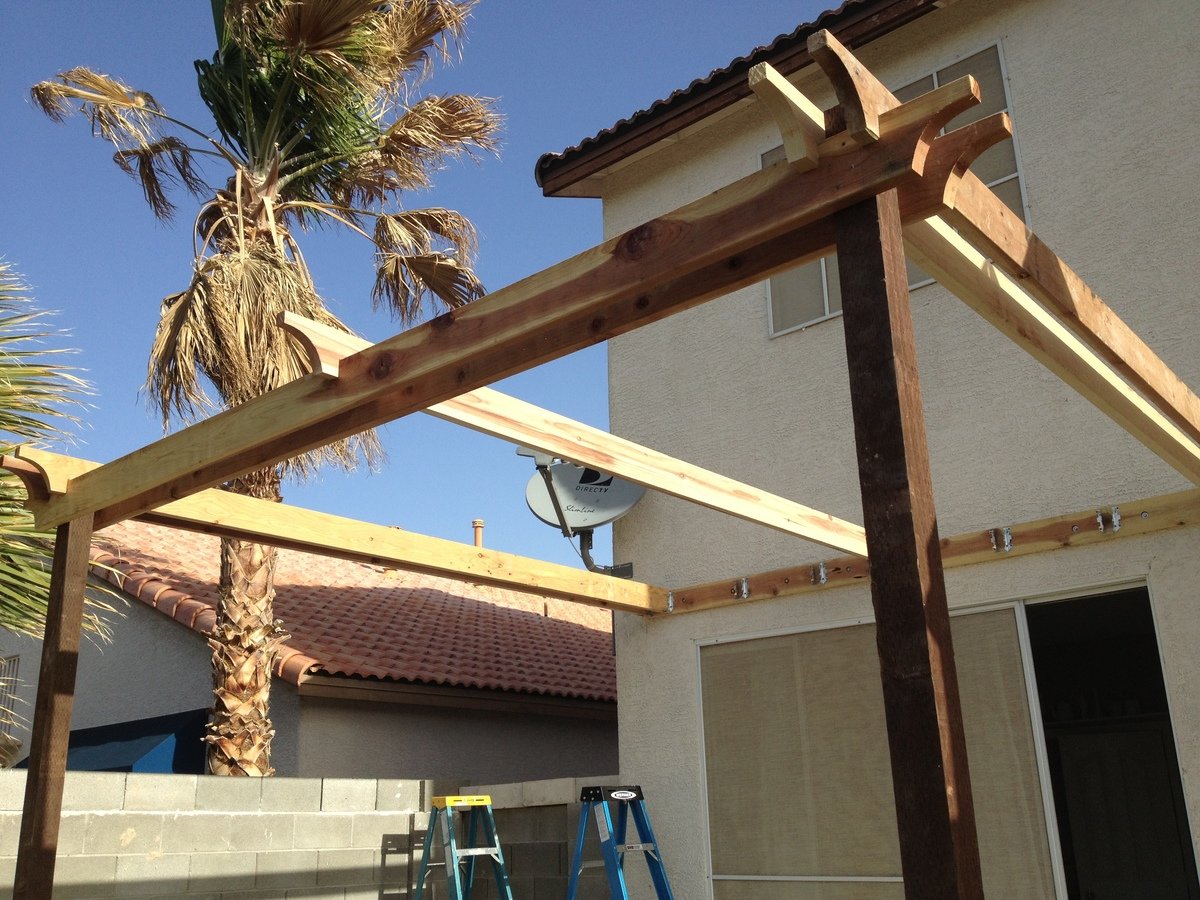
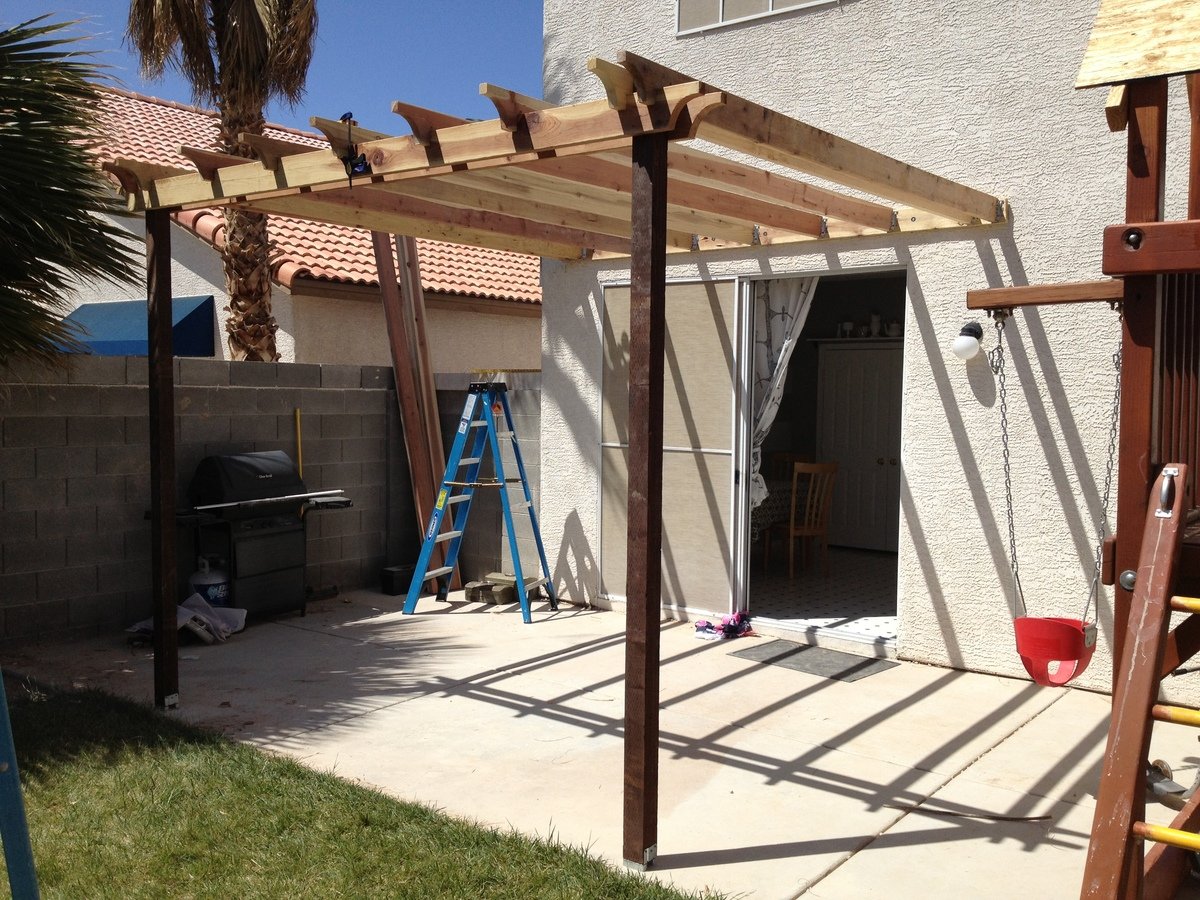
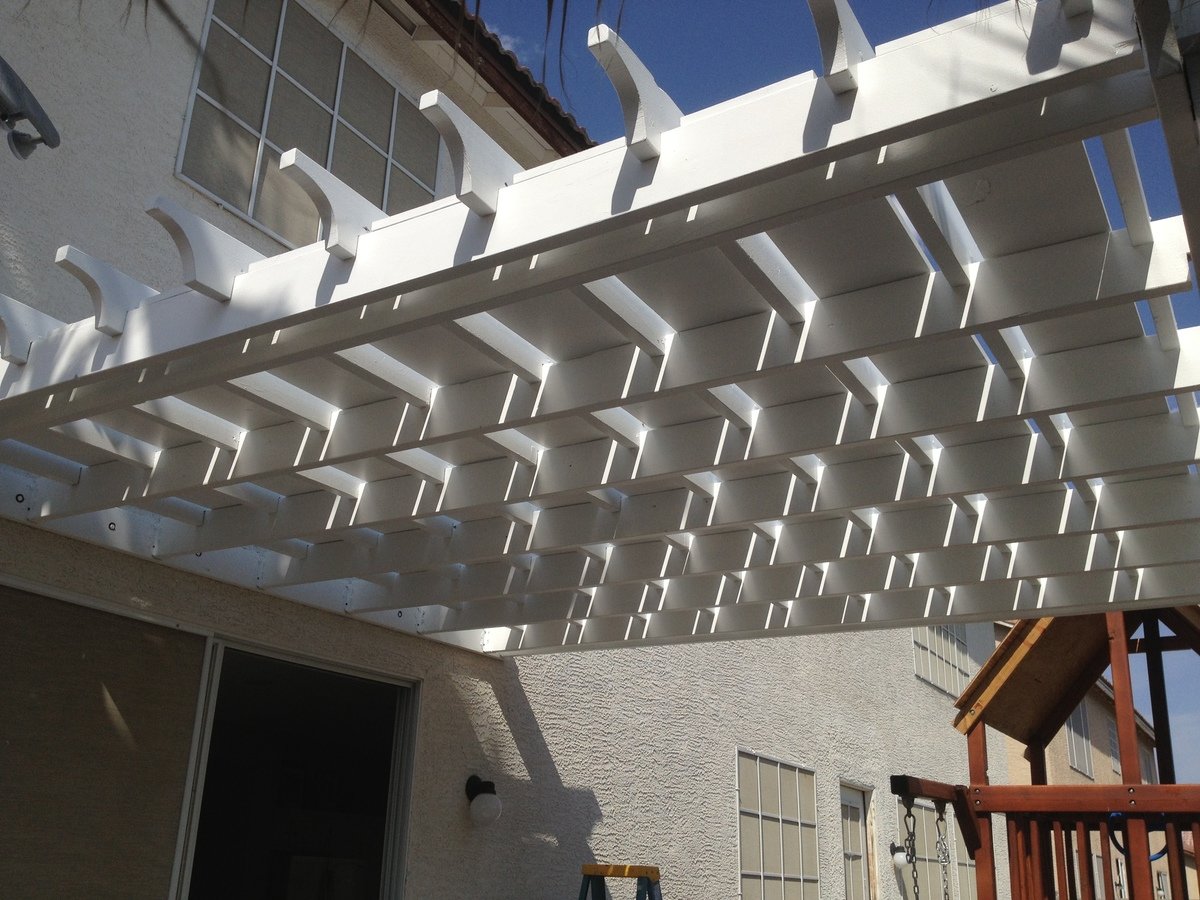
Instead of building a free-standing, 4-poster Pergola, I attached one side directly to the house. There are various Pergola design types and shapes. Simply Google for "pergola" images and decide which design you like best, or combine design ideas together (as I did).

Couple things to consider:
A: Is your Pergola more for decorative purposes or actual shade?
My design was more for actual shade (but with a decorative design), which is why I added the 1in x 12in x 12ft Pine boards between the cross beams at the very end (last picture). If your design is more for decorative purposes, you can space out your support beams and cross beams wider (using less wood and money).

You can also choose to use 2x4s as your support beams with 2x2 cross beams on top (essentially furring strips) either close together or spaced farther apart. This would also reduce the overall cost of your Pergola and make it much lighter as well. I chose to use all 2x6s for both support beams and cross beams.

B: What path does the sun follow across the sky over your Pergola?
If the sun passes directly over your Pergola and you want a lot of shade, you'll obviously need to consider this in your design (i.e., more cross beams that are close together).

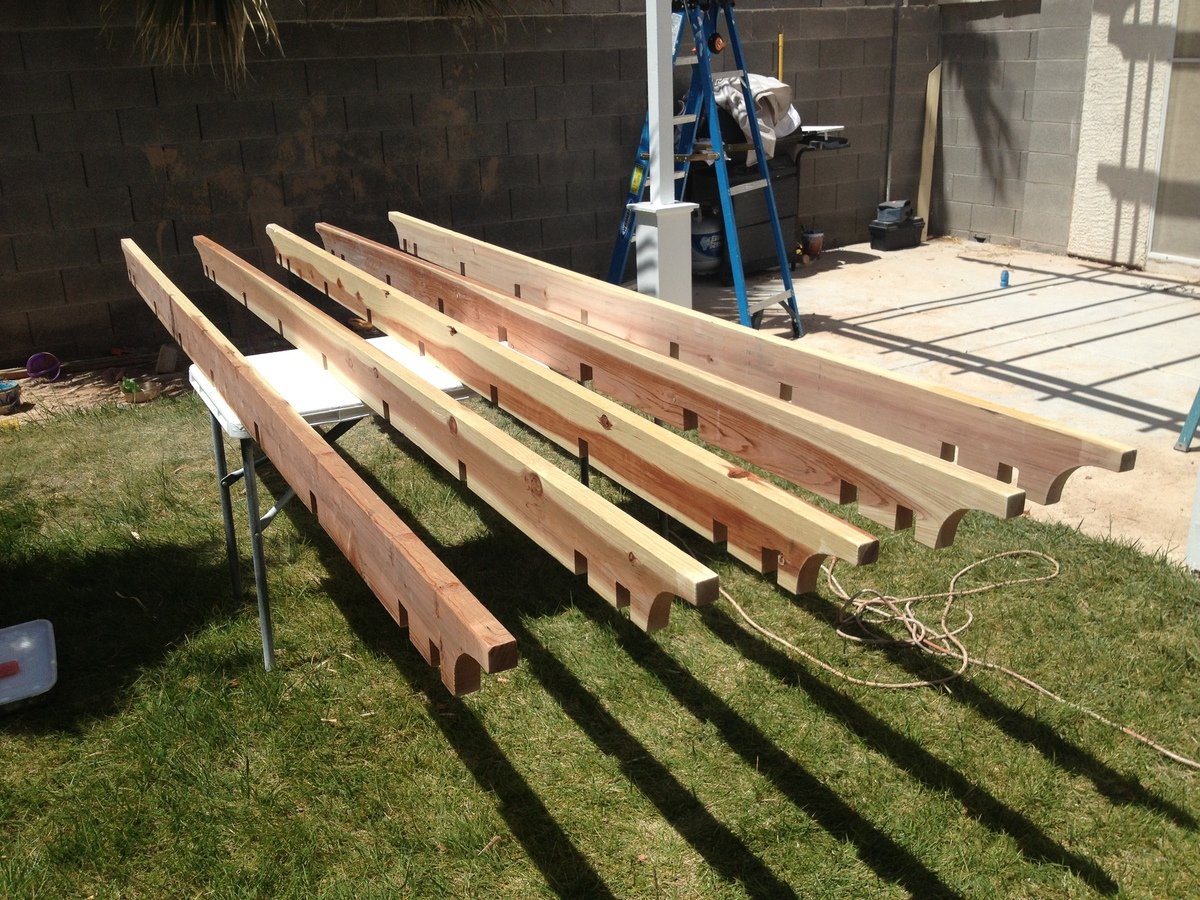
C: Do you want your support beams and cross beams to inter-lock (by cutting square notches and assembling them like linking logs), or simply stacked on top of each other? (Again, Googling for Pergola images will help you see the differences in designs.)

I chose to interlock all of my beams by cutting notches and fitting them together. Obviously more time consuming to measure each notch, cut, and chisel them but the stability of inter-locking beams should hold up a little better in the strong winds of Las Vegas.

HOW TO (abbreviated)

Overall Pergola Dimensions: 10ft Height, 12x12ft

Tip: Paint or stain all your wood prior to assembly. Much easier. You can always touch-up scuffs and scrapes after it's built.

1. 2x6x12 installed directly onto the house (thru the stucco into the studs) using 3/8in. x 5in. lag screws. (Tip: Seal the top edge of the 2x6x12 that's against the stucco so water doesn't run behind it and down into the lag screw holes.)
2. Install the 2x6 Double Shear Hangers (as many as you need for your design)
3. 4x4 post anchors secured directly into the cement patio using Tapcon 3/16 in. x 2-3/4 in.cement anchor screws.
4. 4x4x10ft posts screwed on top of the anchors. Ensure level on all sides (use a partner to help hold the posts).
5. Attach the front and side 2x6 beams to the 2 posts (again, use a partner to help hold posts while you're up on the ladder screwing your beams to the posts)
6. Attach the remaining 2x6 support beams.
7. Attach the 2x6 cross beams on top (whether you inter-lock them by cutting notches or simply resting them on top, be sure to toe-nail screw them in with 2in exterior screws).
8. Lay 1x12x12ft pine boards on top in between the cross beams and secure with 2in exterior wood screws.
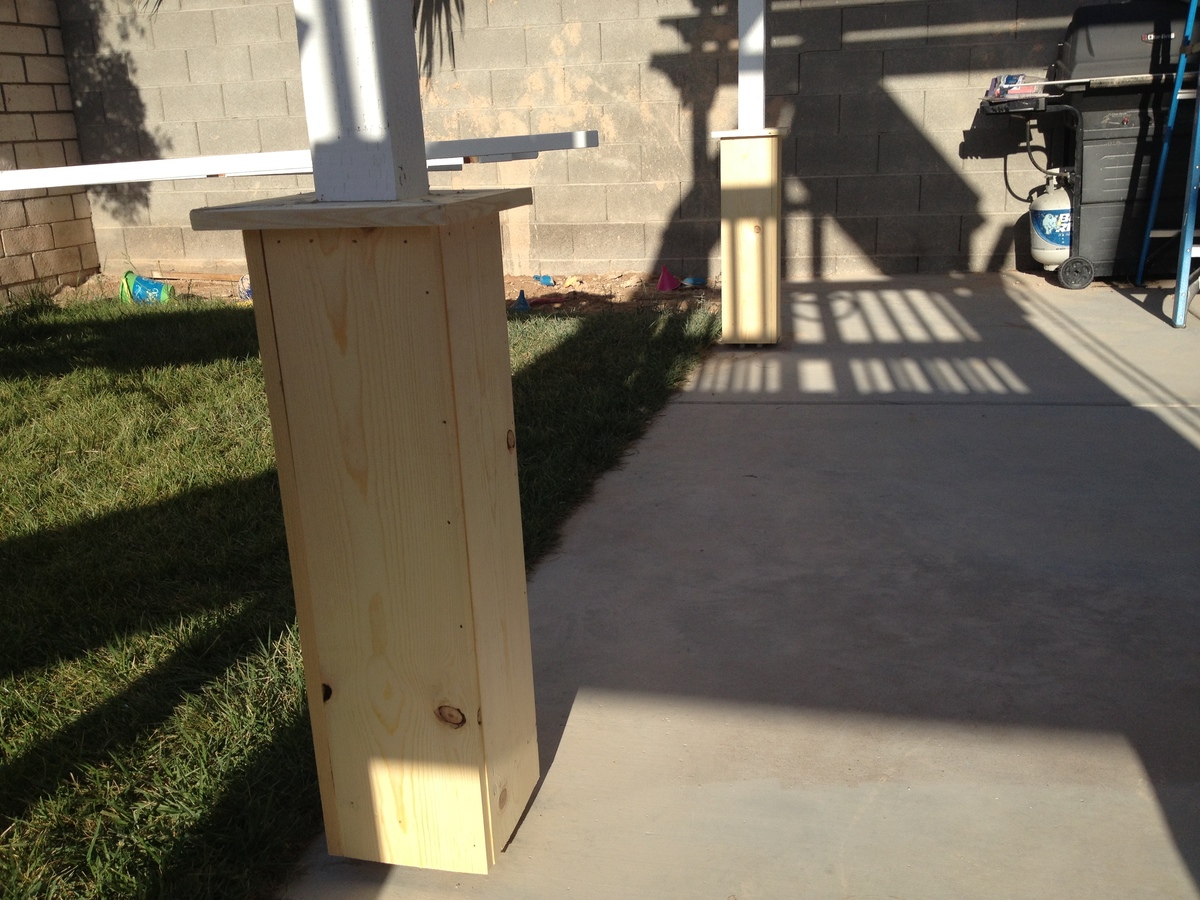
9. Construct the post bases ("sleeves" or "leggings") which greatly adds to the look, as outlined in the "Weatherly Pergola" plans.
10. Touch-up paint / stain any areas you need.
Built from Plan(s)
Estimated Cost
800
Estimated Time Investment
Week Long Project (20 Hours or More)
Finish Used
BEHR Premium Plus Ultra - Ultra Pure White Satin Acrylic Exterior Paint (2 coats applied with roller)
Recommended Skill Level
Intermediate

Comments

bullitt453

Tue, 05/28/2013 - 07:29

Great work and very detailed post. I plan to build something similar for my parents once they are done with their renovation.

Chicken coop and run

Submitted by Anonymous (not verified) on Tue, 10/05/2021 - 11:01

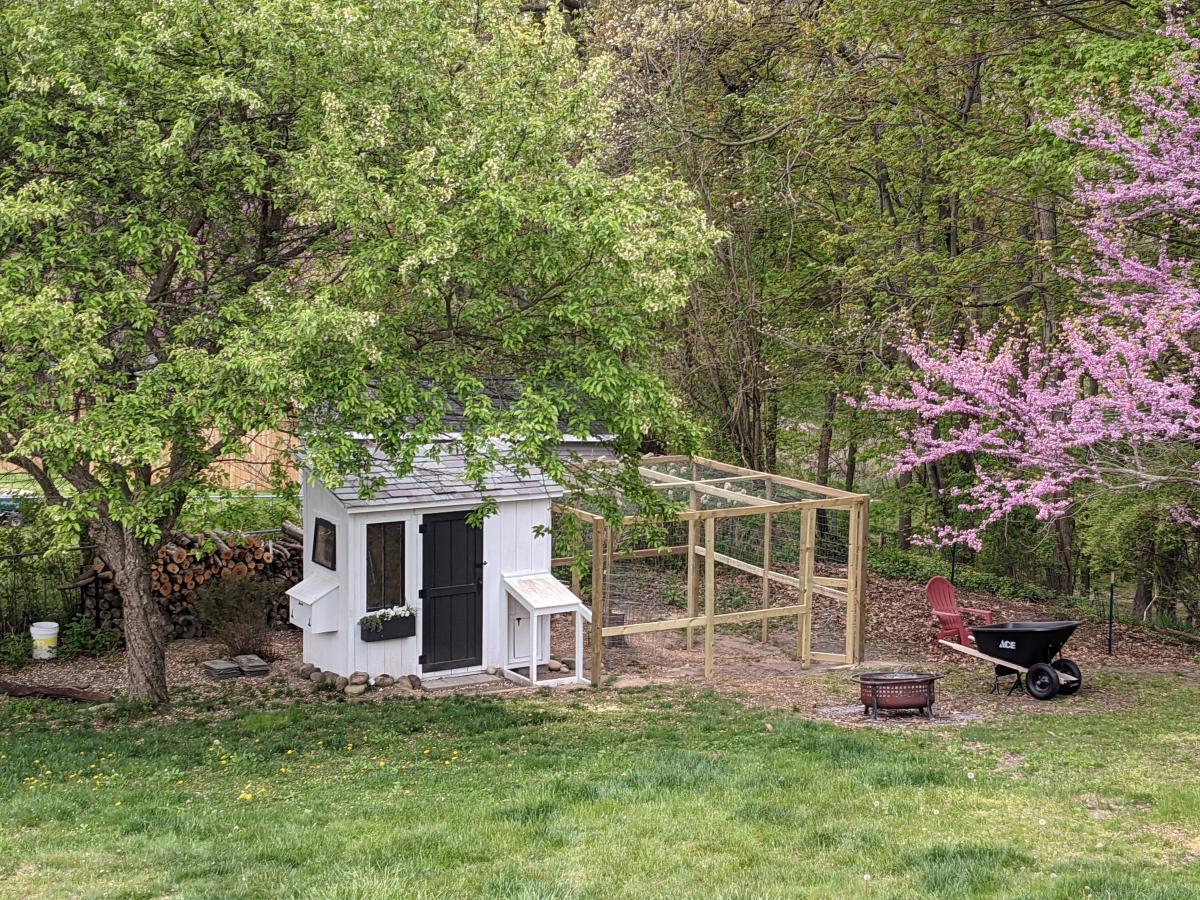
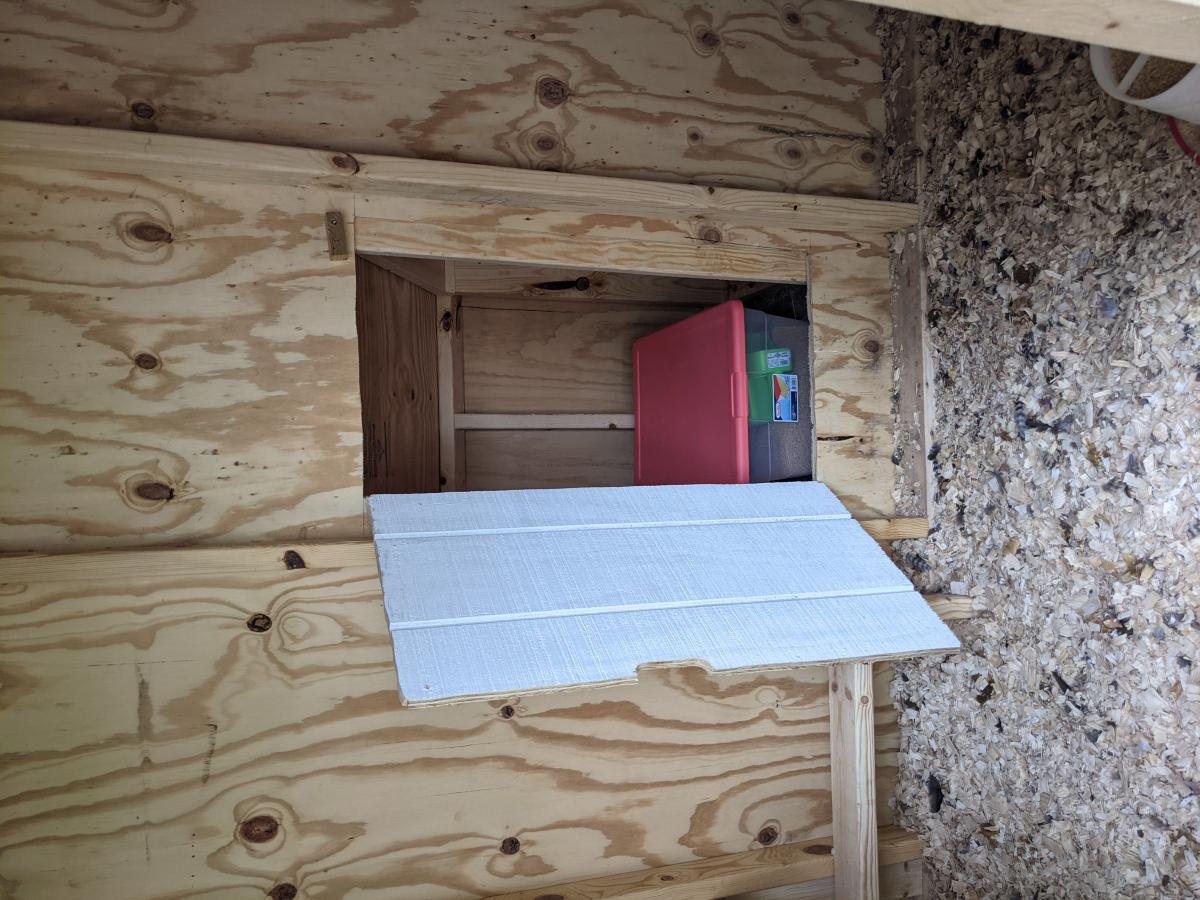
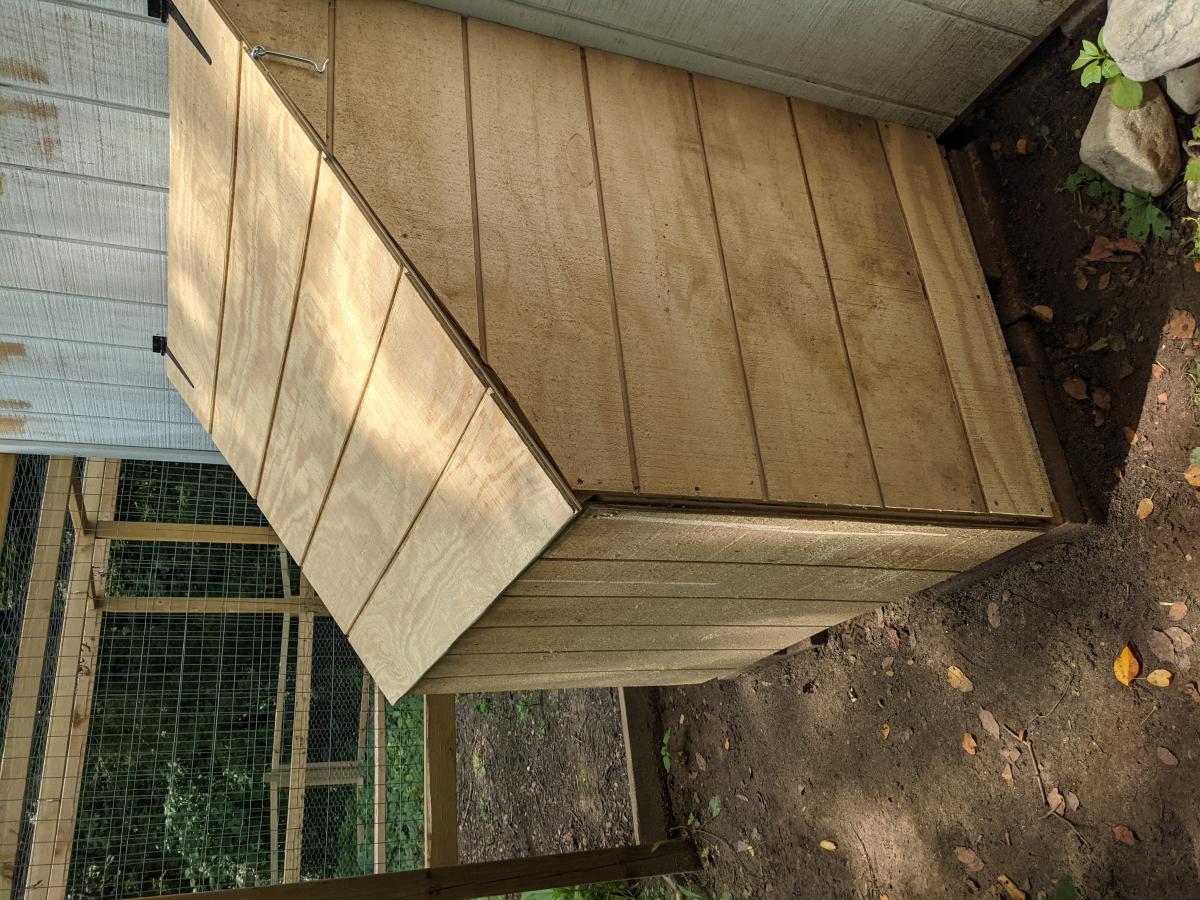
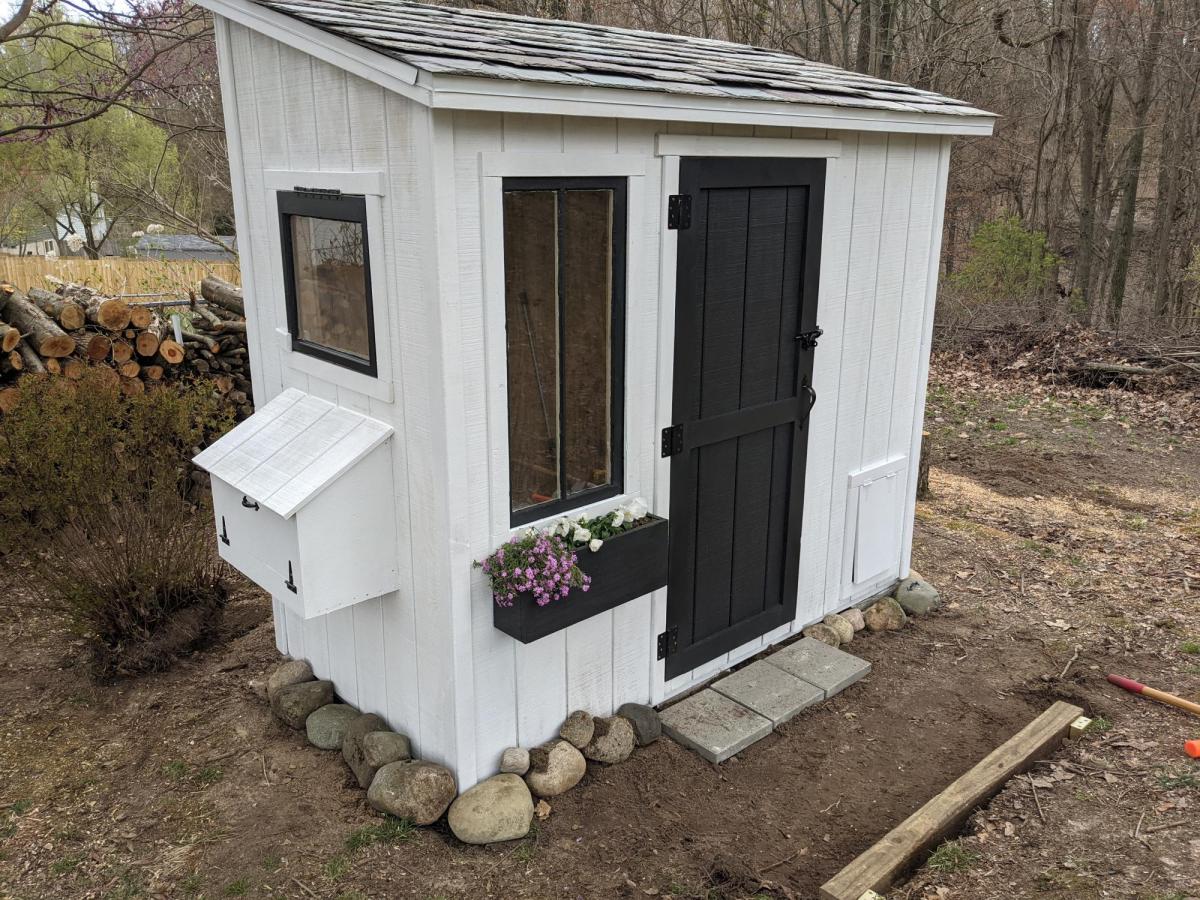
I followed the Shed Coop Plans to make this chicken coop and designed my own run. Because I wanted to view the chickens coming in and out of the coop, I moved the chicken door to the front and built a little covered area to shelter the coop door so I did not have to have the entire run extend over the front. I also made the access to the layer boxes be accessible from the front rather than the top so that my kids could more easily access the egg boxes. I thought these were great plans to follow and easy to adapt to fit what I wanted in a coop. I also ended up adding a lean-to storage on the back with an inside access so I could easily refill their feed.

Built from Plan(s)

Comments

Seasonal And Holiday

Drop-Down Door Hutch Desk

Submitted by danicarby on Thu, 05/14/2015 - 13:47

I designed this desk from another desk I built. With this one, I wanted the overall foot-print smaller but still something that was able to organize all our office stuff and be able to close everything to keep it clutter-free. We have a small apartment, and although this desk is about the size of an up-right piano, it works perfectly into our living space!

I made it out of raw hardwood (Ash) and because I knew just the wood alone would make this desk heavy/bulky to move I made the top hutch removable. It's held in place by wood pegs (dominos). All the shelves are adjustable and the drawers are full-extension (something I've never had - wahoo)! The drop-down door is help up by 2 pull-out boards on each side (my first desk had chains). I spend a lot of money on this desk because I knew it was a chance in a lifetime to make and wanted it to be perfect and something that would last generations.

I built the main carcass off of plans/measurements I designed, but then all the insides, drawers, shelves, doors, etc where made as I built (because just a millimeter difference in building changes everything)!

If you want more pictures/descriptions of the building process I wrote about it in a 4-part series on my blog.

Estimated Cost
$1,000 for all wood & supplies
Estimated Time Investment
Week Long Project (20 Hours or More)
Finish Used
To achieve the ash gray color I used "General Finishes" brand water-based stains (equal mixtures of Walnut, Antique Oak & Whitewash) with 1/2 ratio of Pre-Stain Conditioner (bought from Woodcraft). I did 2-3 coats stain, lightly sanded and sprayed 2 coats of Ceramithane clearcoat using HVLP sprayer (sanding with 550 grit paper in between).
Recommended Skill Level
Intermediate

Comments

Miter Saw Cart

Submitted by Nermell on Wed, 07/31/2013 - 16:51

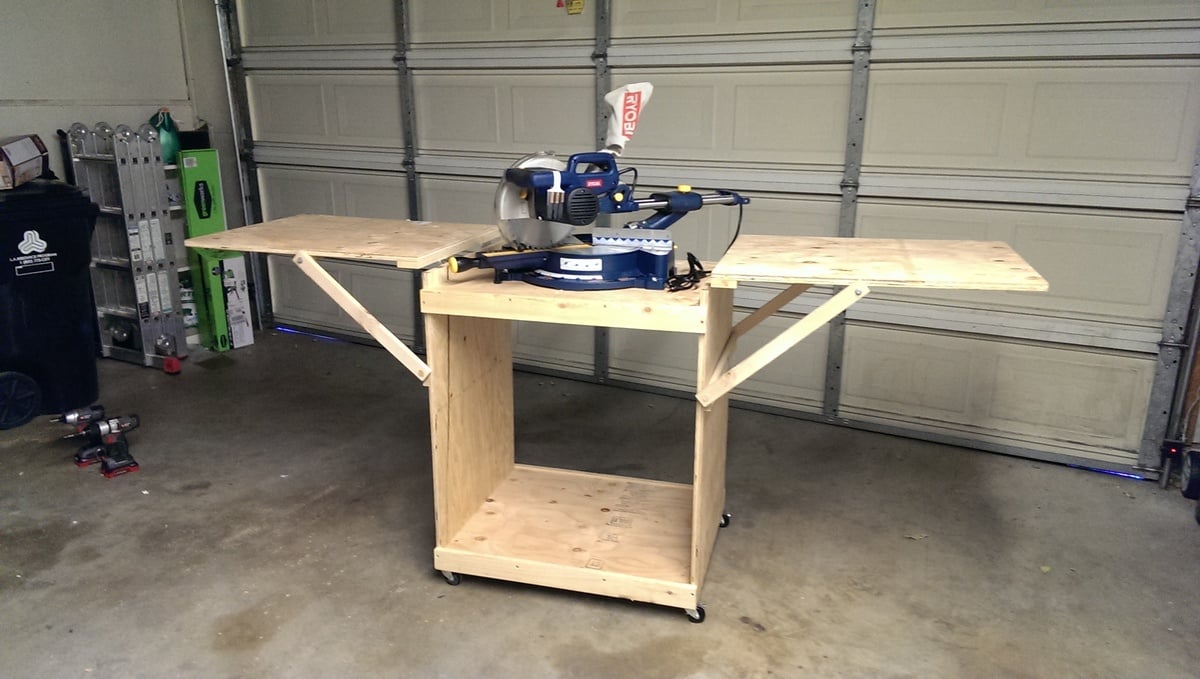
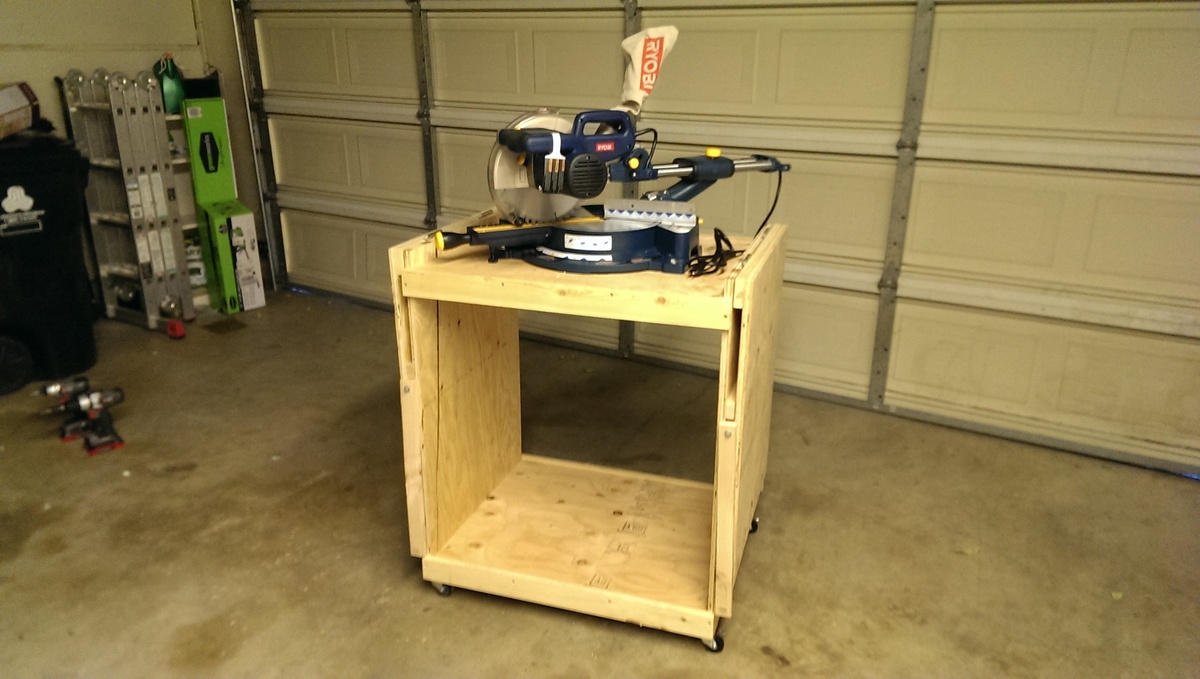
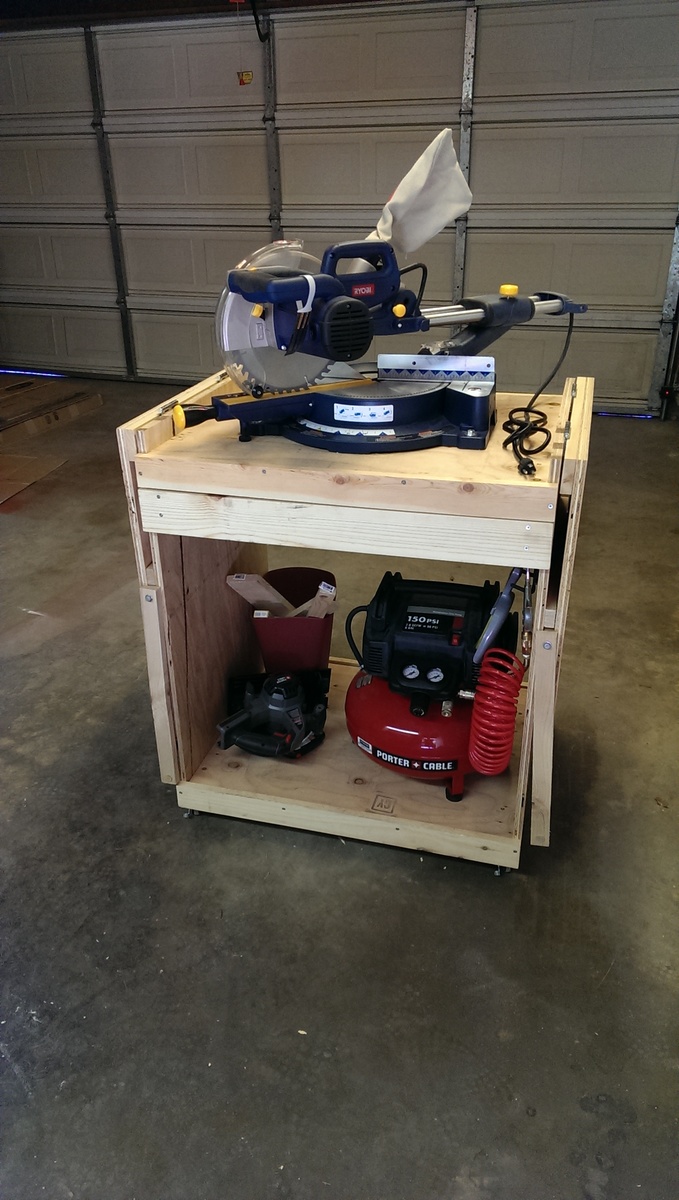
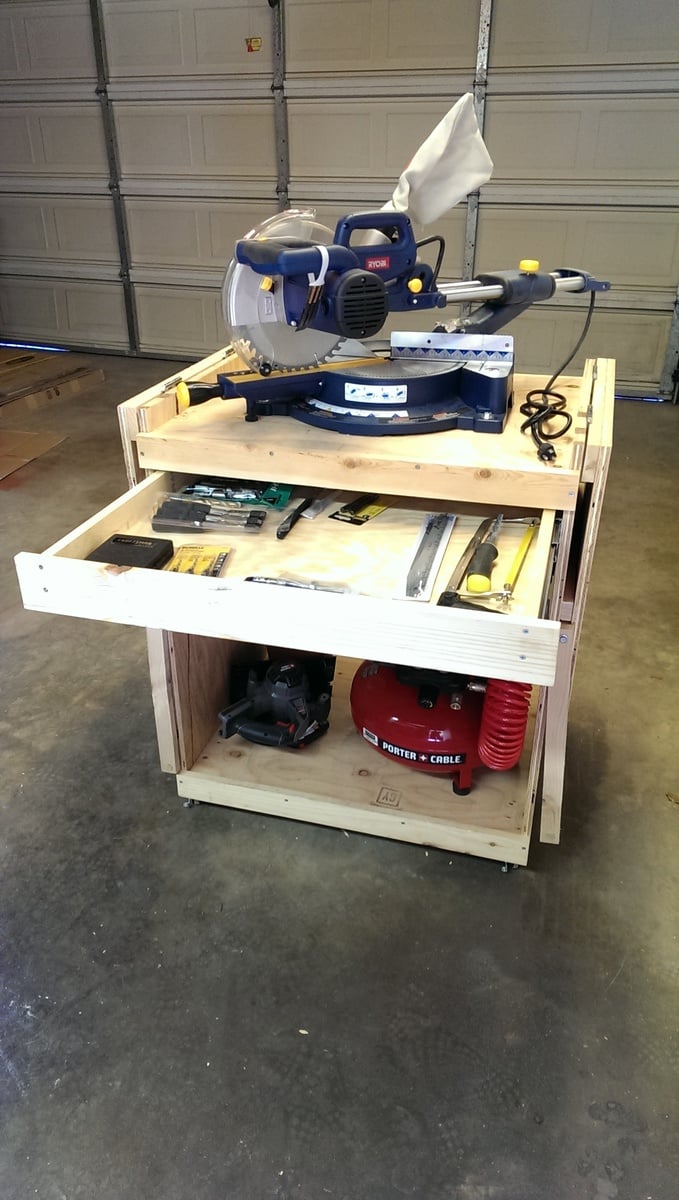
As a complete beginner in wood working (unless you count a year of woodshop over a decade ago), I decided that building a cart for the miter saw I just bought would be a great first project. So what did I do with that brand new miter saw? I left it in the box and made all of the cuts with a circular saw. Not sure what I was thinking there...

I mostly followed the excellent plan provided here but used wooden arms to prop up the wings in order to save on cost. I got the idea from the folding sling chair plan. It took quite a few screw ups and adjustments of the lower support bar before getting one of the wings level but I got it eventually.

Update 8/20/13: The miter saw has been a joy to use with the cart and the big flip up wings provide a ton of really convenient work space in addition to stabilizing 8 ft boards for cutting. I added a sliding drawer and some utility hooks for additional storage.

Built from Plan(s)
Estimated Cost
$70-80
Estimated Time Investment
Weekend Project (10-20 Hours)
Finish Used
none
Recommended Skill Level
Starter Project

Comments

davidmauer15

Thu, 08/01/2013 - 08:10

I originally just had a 2x2 and two blocks to hold up the wings on the cart. They kept falling out, so I replaced them with hinged arms, which were a pain to fit and install, but they work well. Your approach has the same advantage of hinging the support arms: the wood can't fall out and it looks way simpler to install than my system.

One hint if you try Nermell's approach: Flip the cart upside down when you fit and install the support arms. I did all kinds of complex sketches and measurements, then realized it was just faster to lean the support bracket at roughly 45 degrees, then I installed the two block (one on the side, one on the wing) to hold the bracket in place. Flip the cart over, and your wing will sit at a perfect 90 degrees to the sides of the miter saw cart.

Cedar deck box

Submitted by JMG on Wed, 07/06/2022 - 19:47

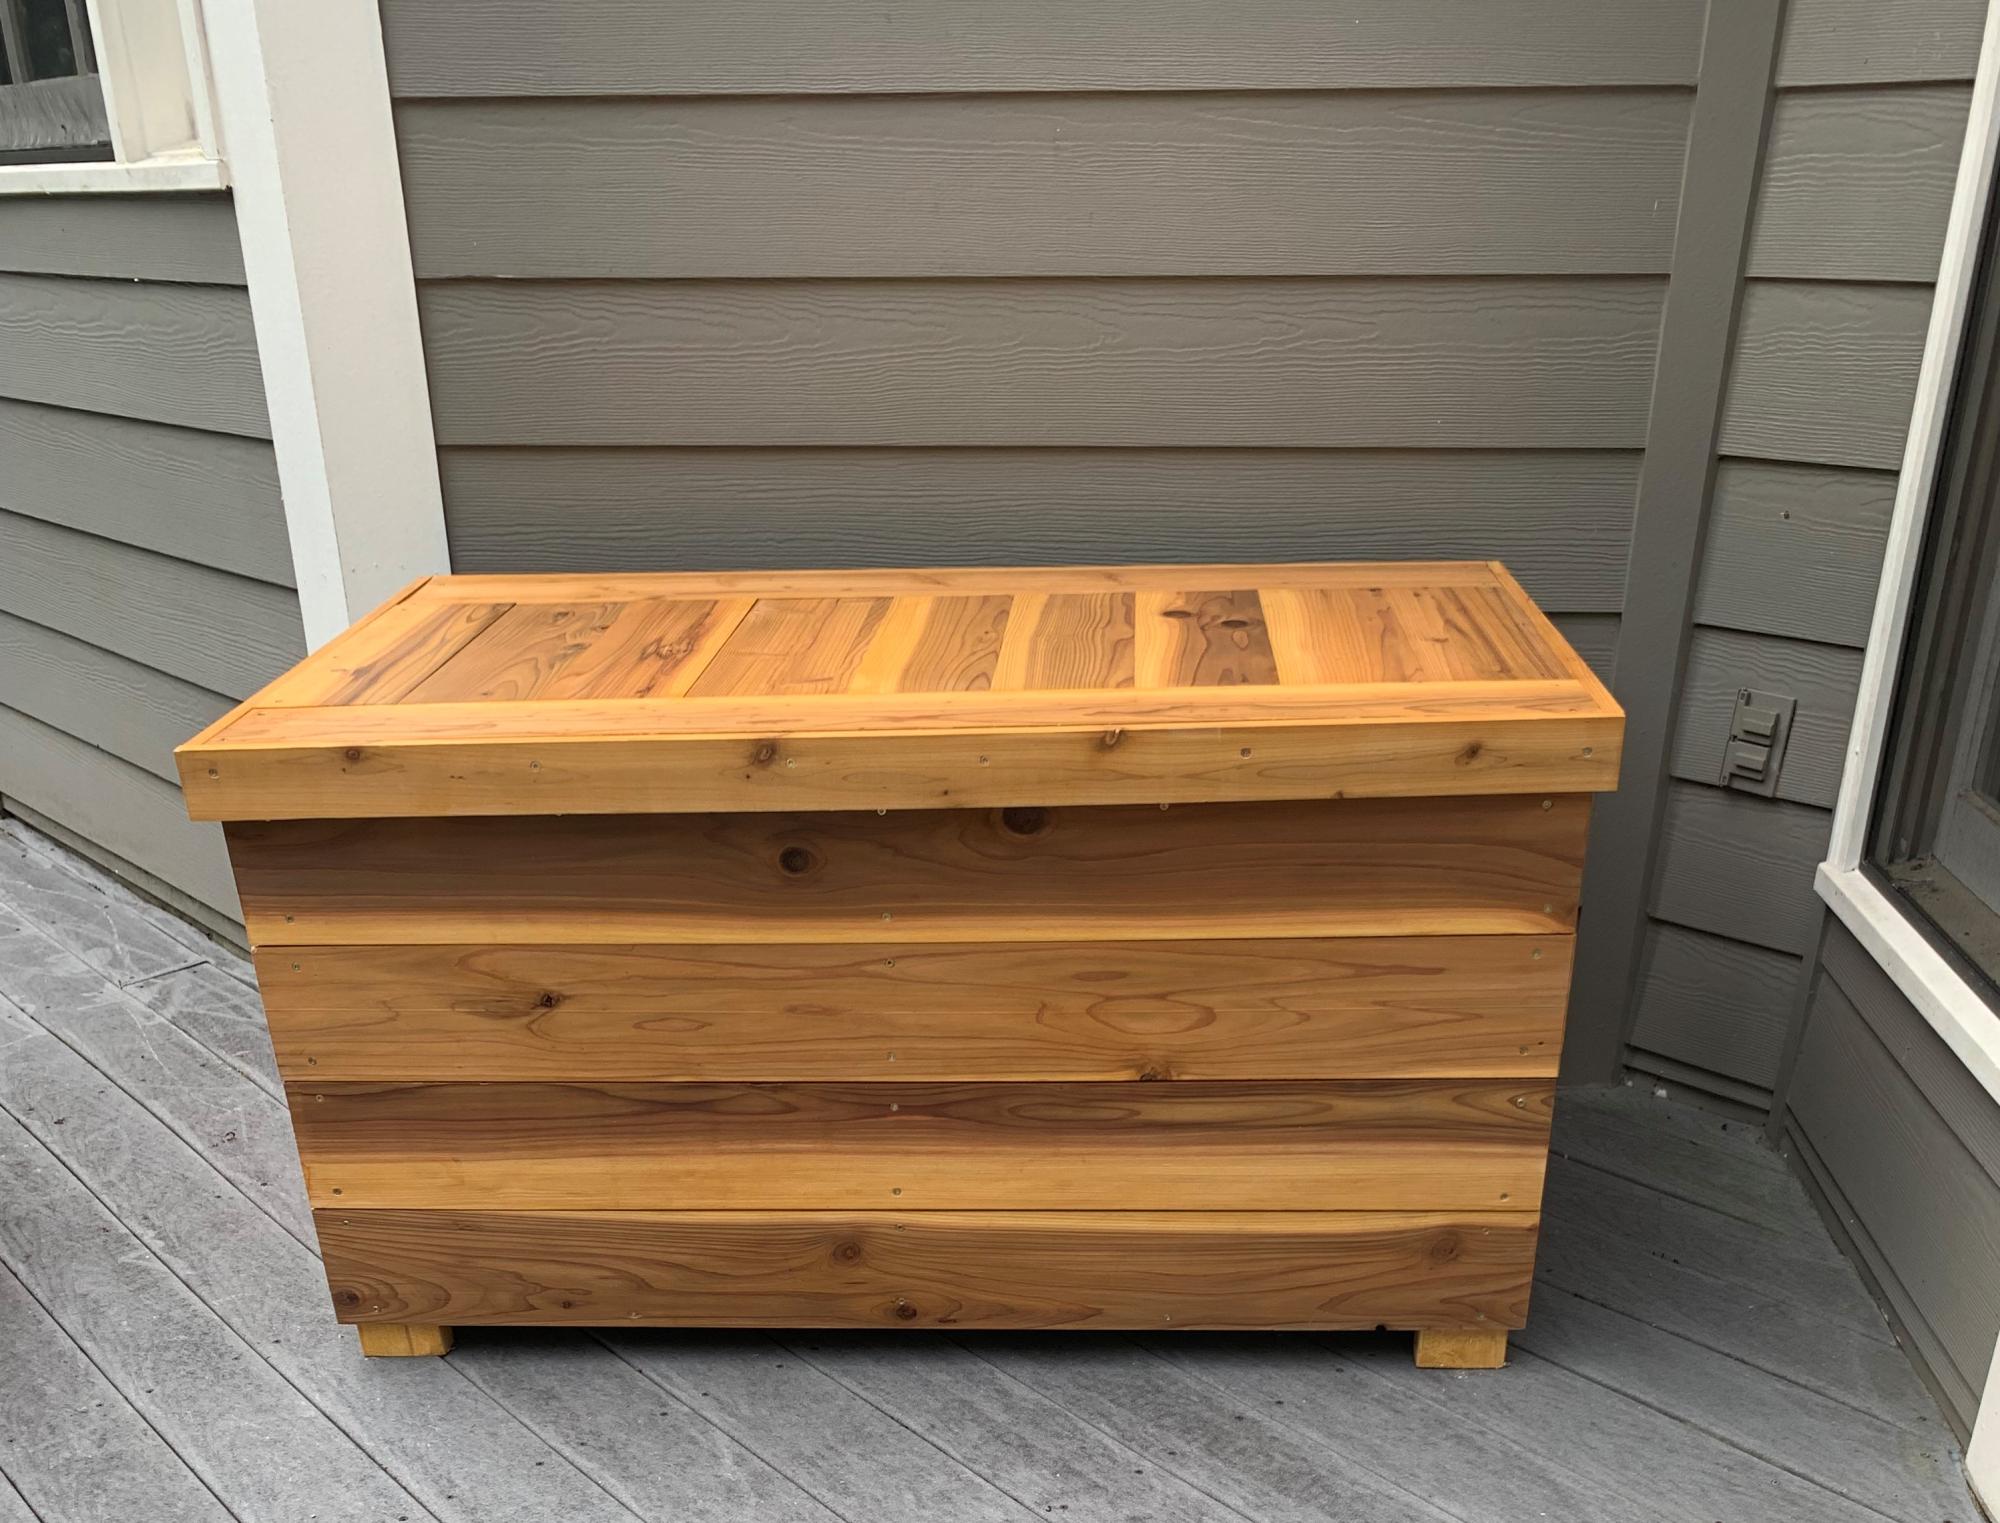
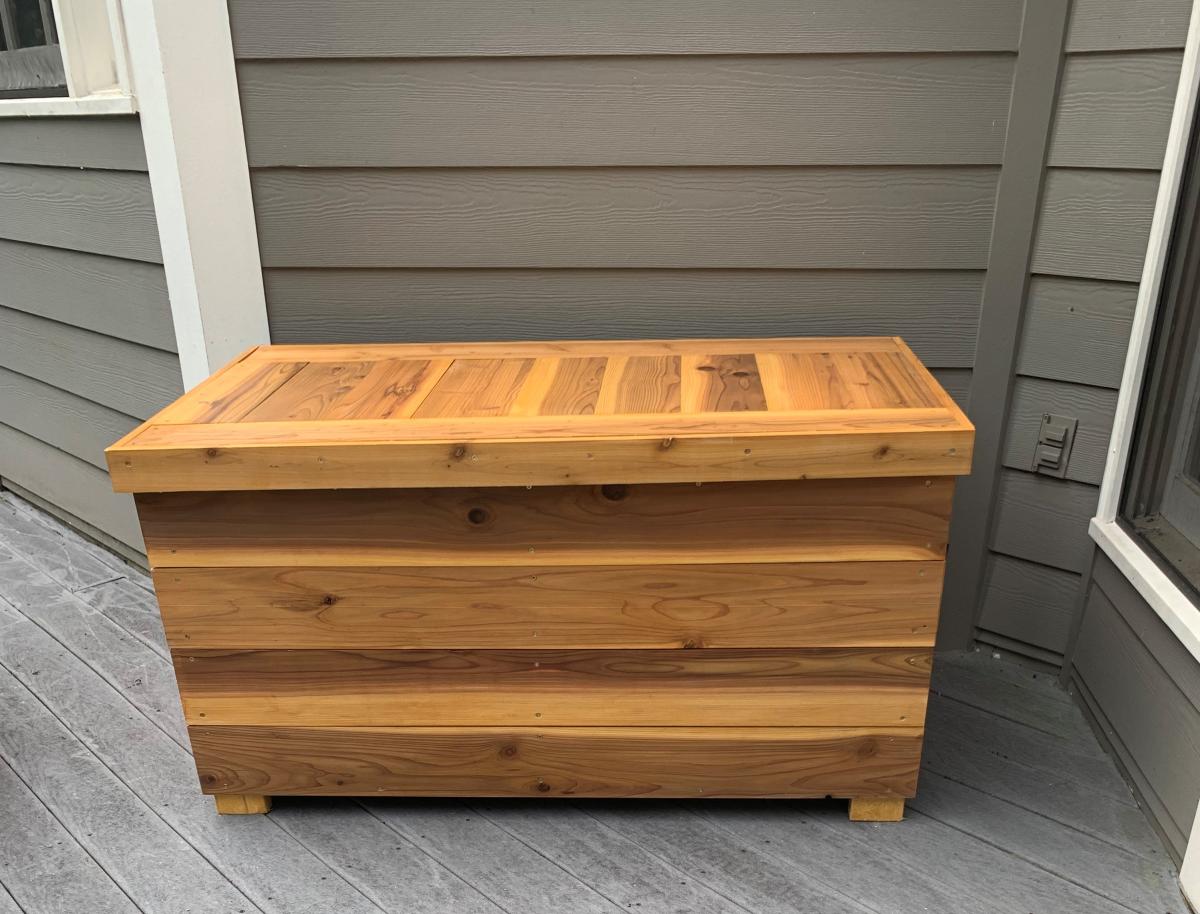
I had to modify these plans to use what I had on hand. I used left over cedar fence pickets (planed down and sealed) and adjusted the size to fit all my outdoor cushions. Overall dimensions are 49" wide x 28" deep x 26" high. I also used 2x4's instead of 2x2's because that is what I had in my shop. I added 1x3's around the top to fit snugly instead of using hinges (again trying to use what I had on hand). We get A LOT of rain in the summer so hopefully the cushions will stay dry. I also added some screen left over from the screened in porch to the bottom before adding the "floor" to keep bugs out. I just stapled it to the frame before adding the floor boards. I did add a piece of treated 1/4" plywood under the top in hopes of keeping the rain out.

Built from Plan(s)

Comments

Farm benches

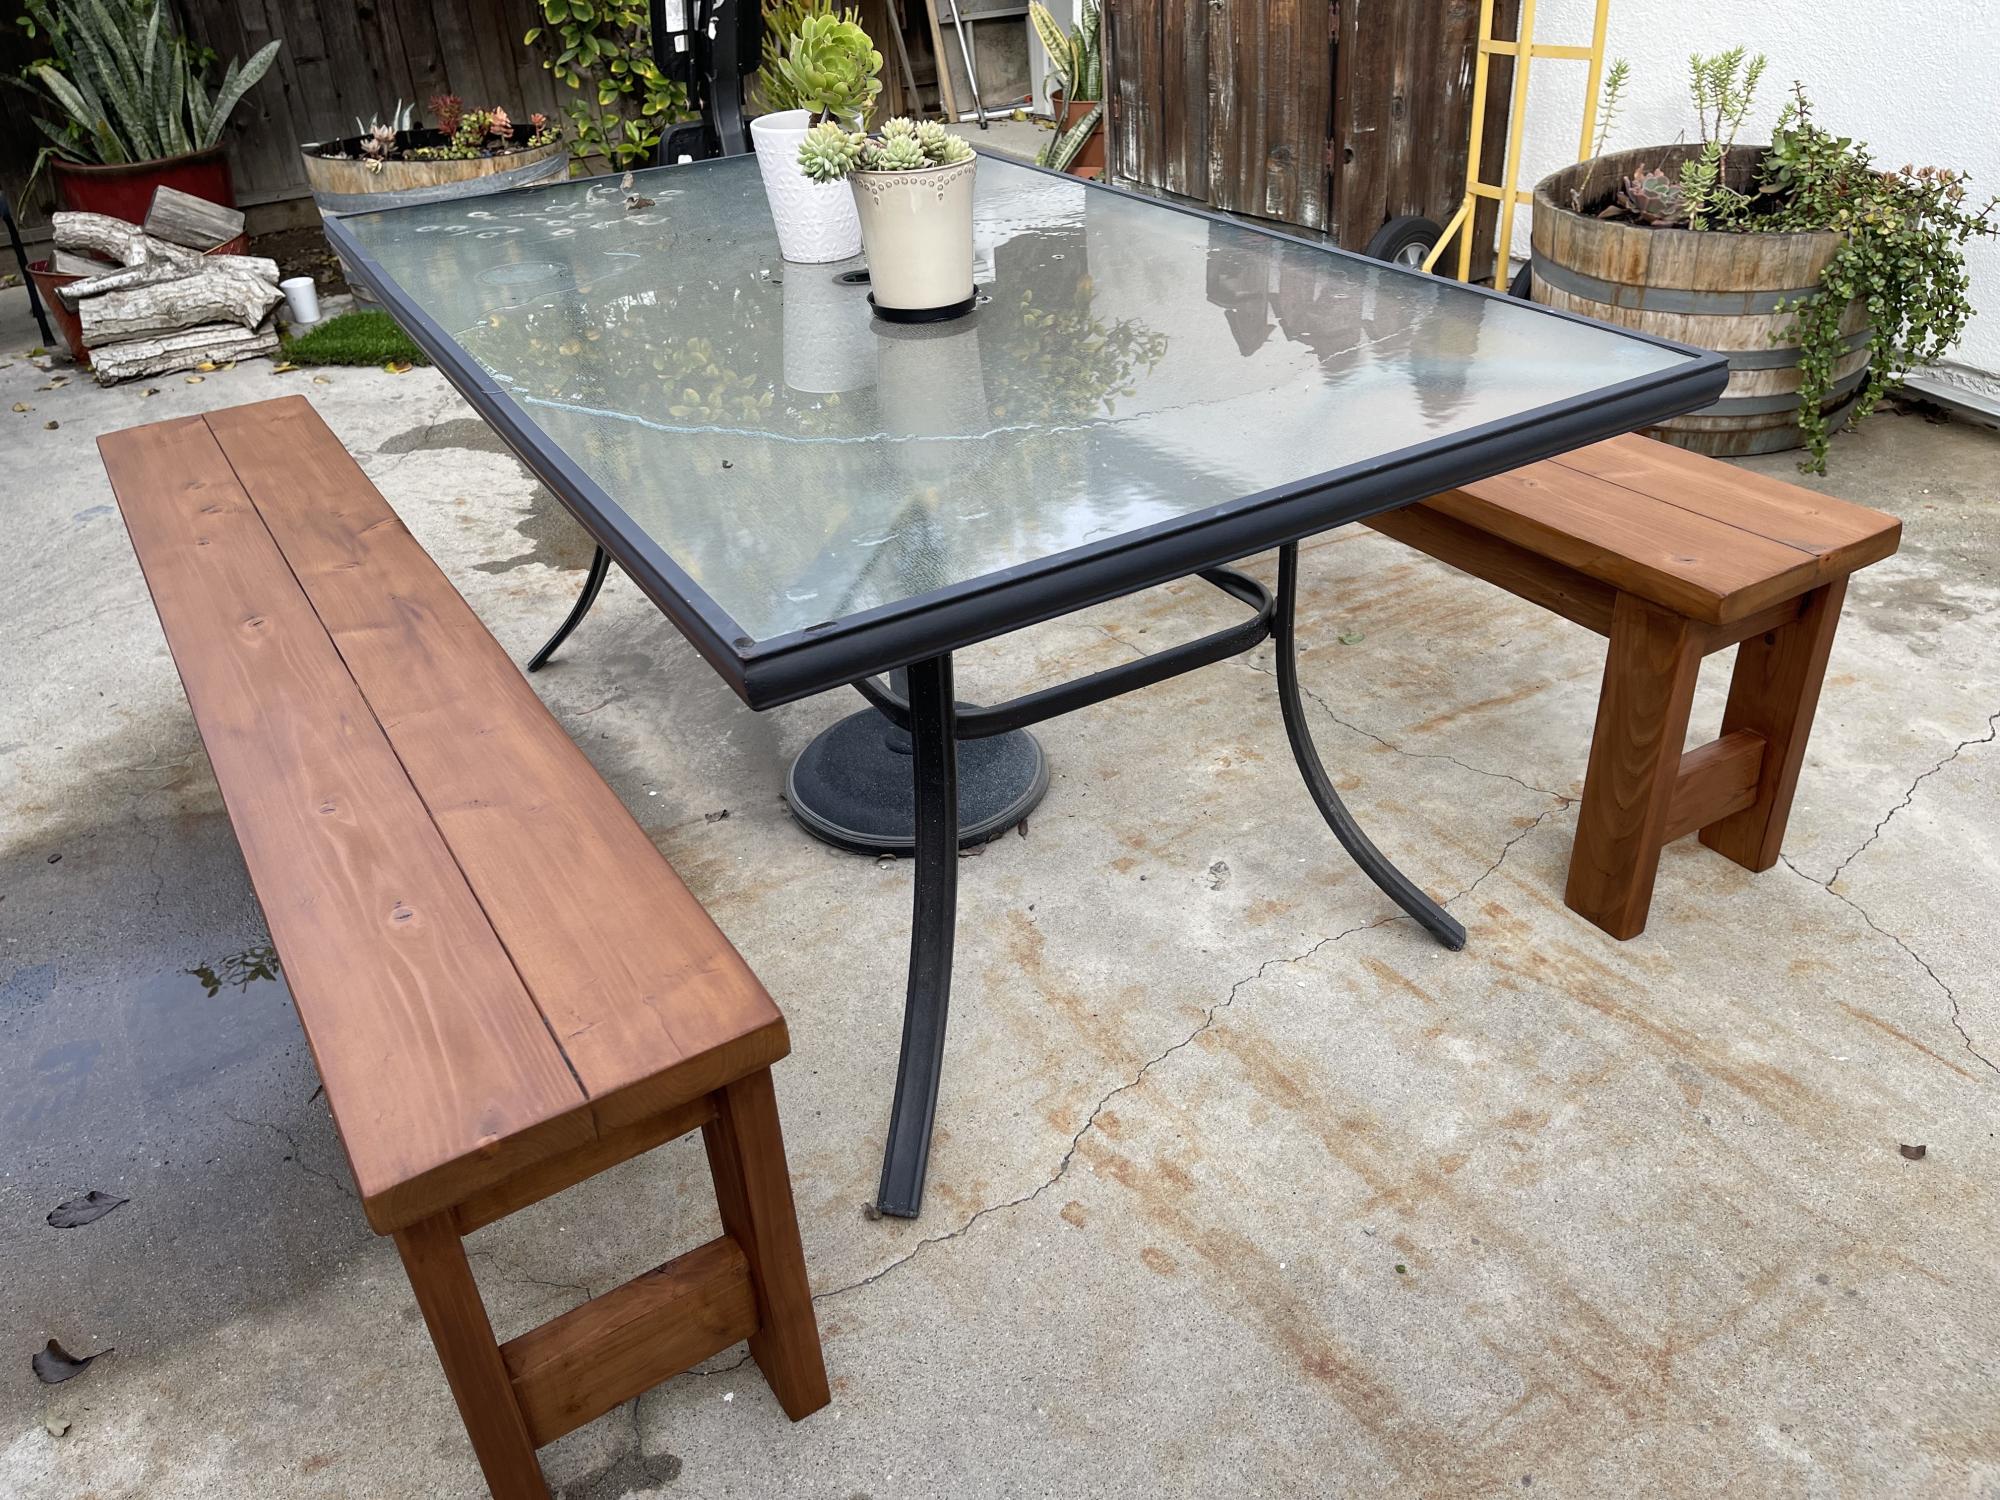
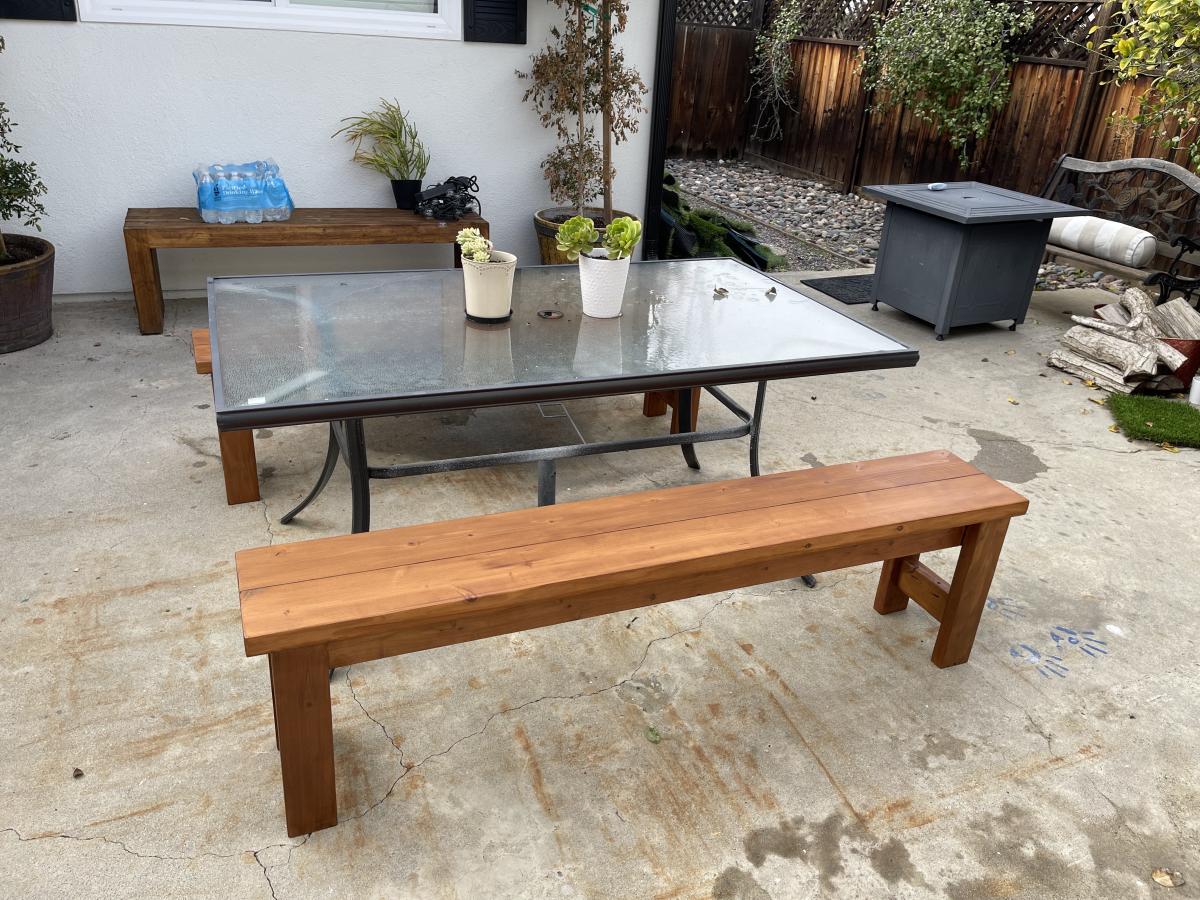
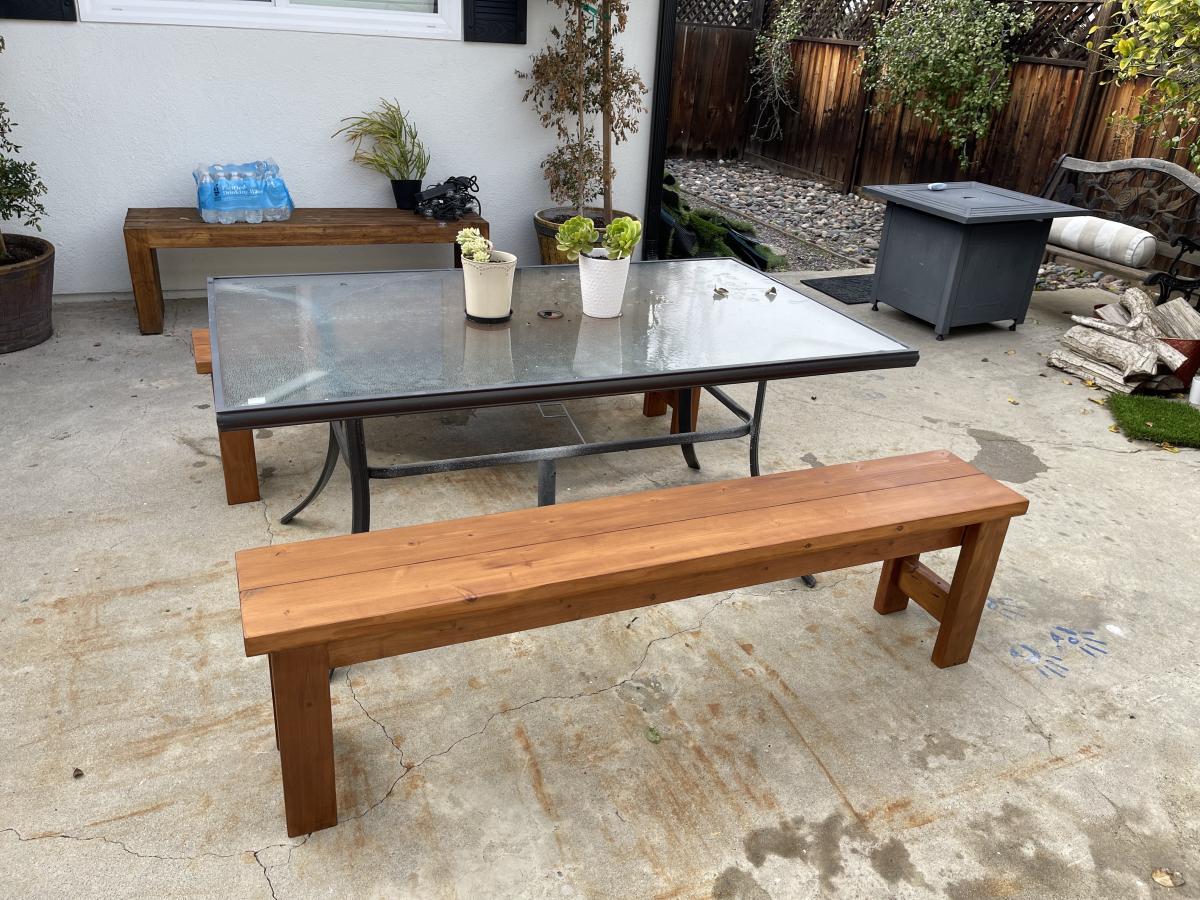
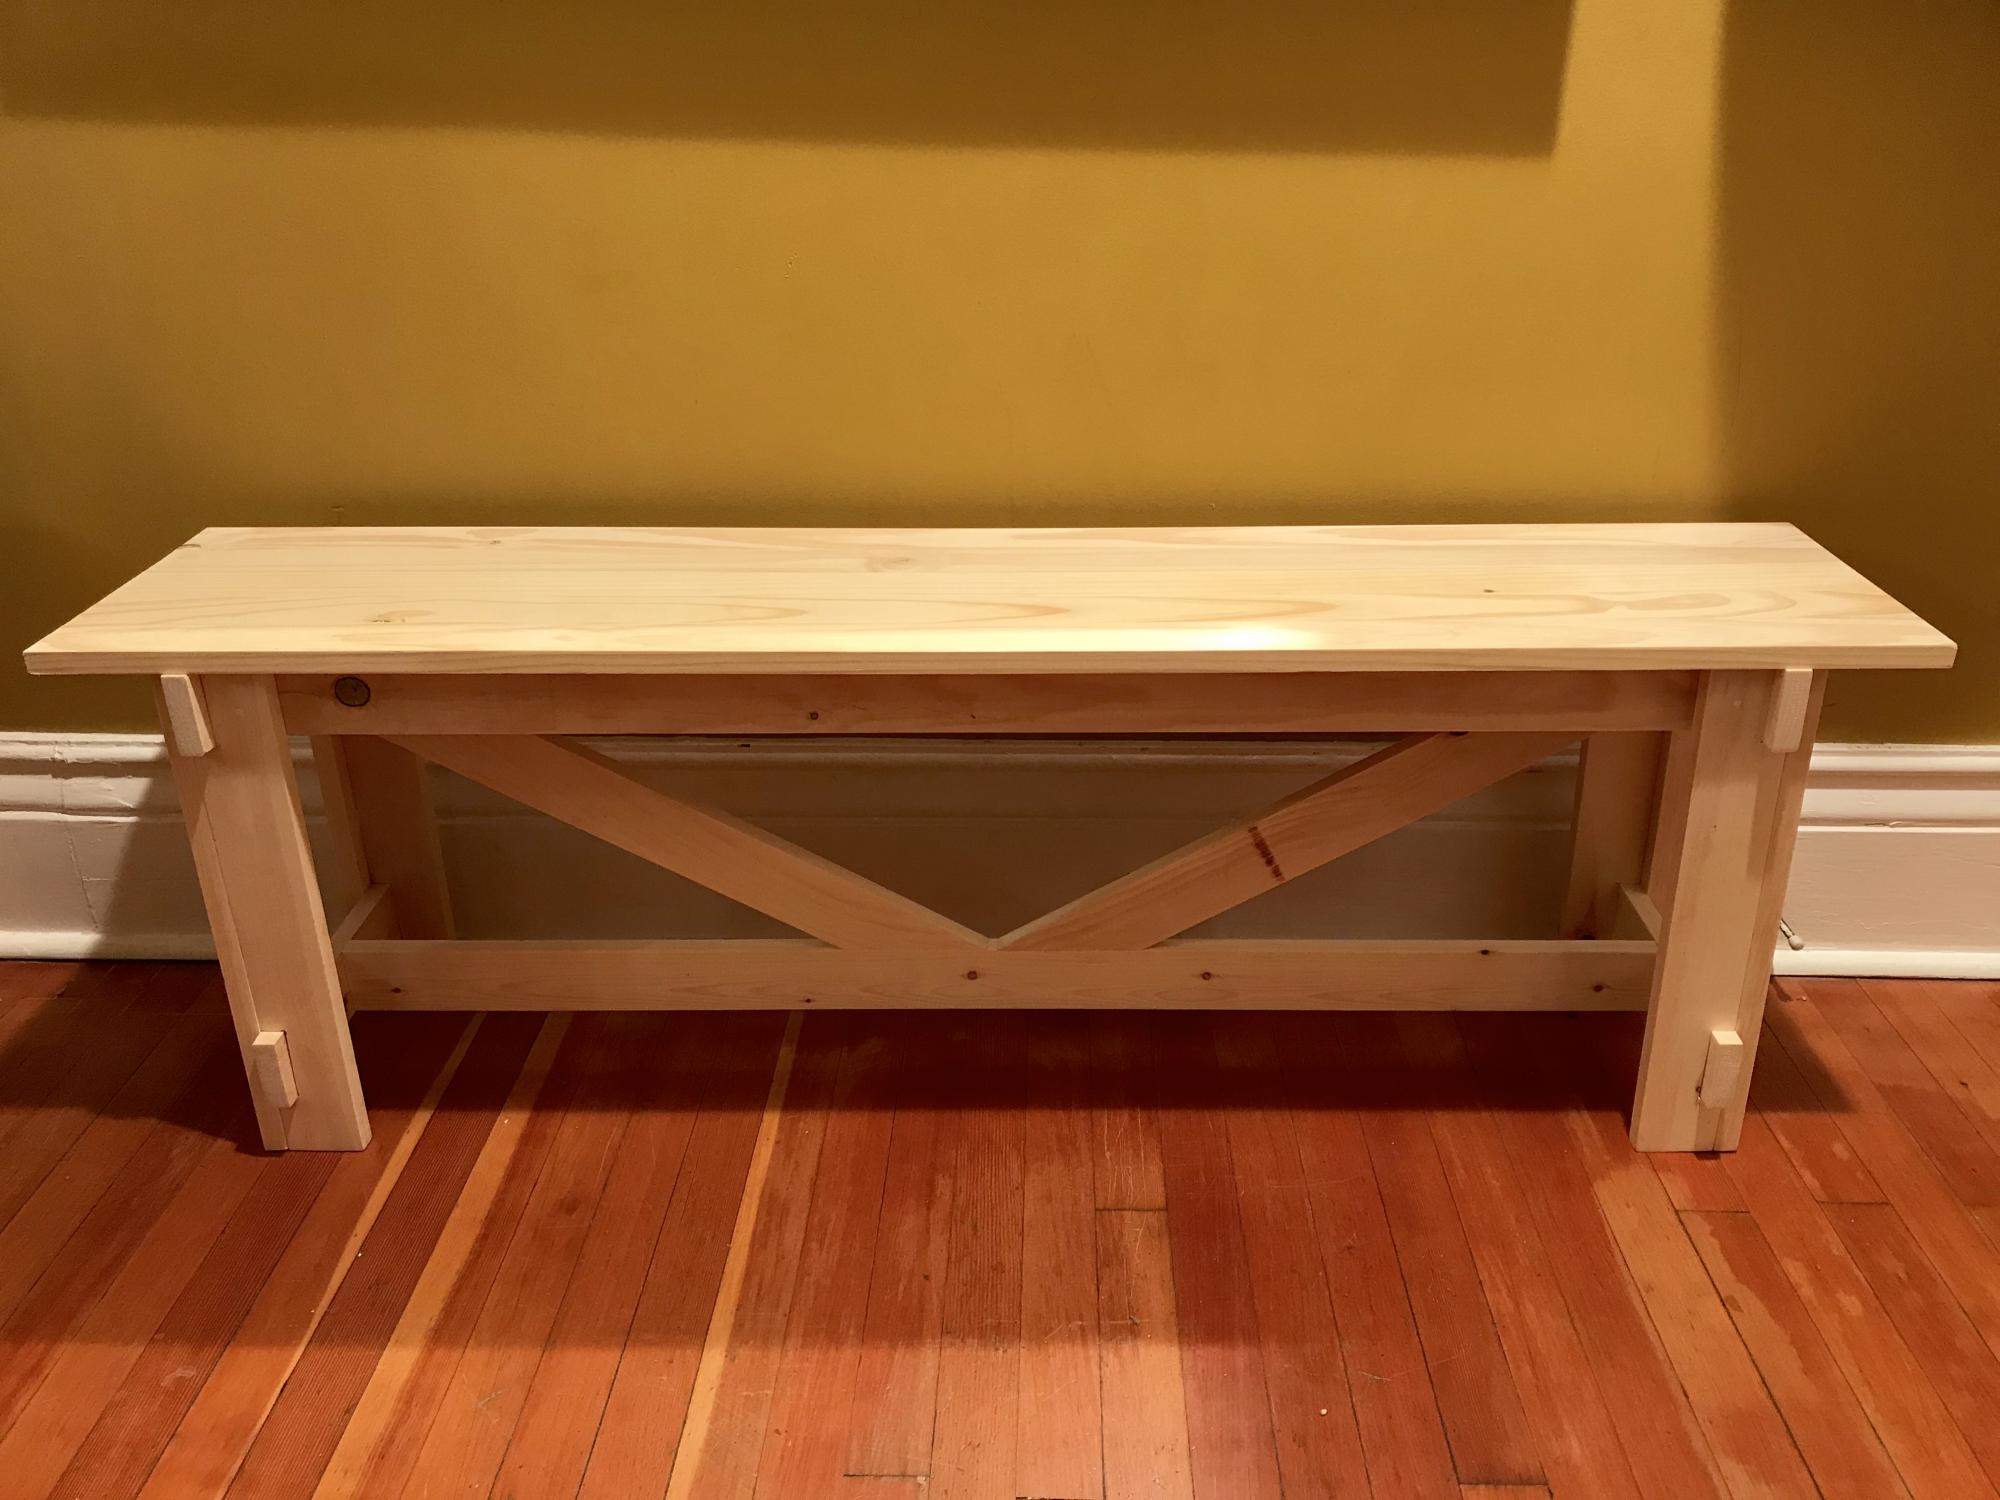
A set of beautiful farm benches for our outdoor table. I built these beauties with redwood wood using only pocket holes to avoid exposing any screws. The only place where I had to use pocket holes plugs was in the leg stretchers to avoid seeing the pocket holes.
I applied pre-stain wood conditioner and then stained them using Dark Brown transparent stain. I wanted the wood grain to be visible through the stain and this allowed me to do just that.

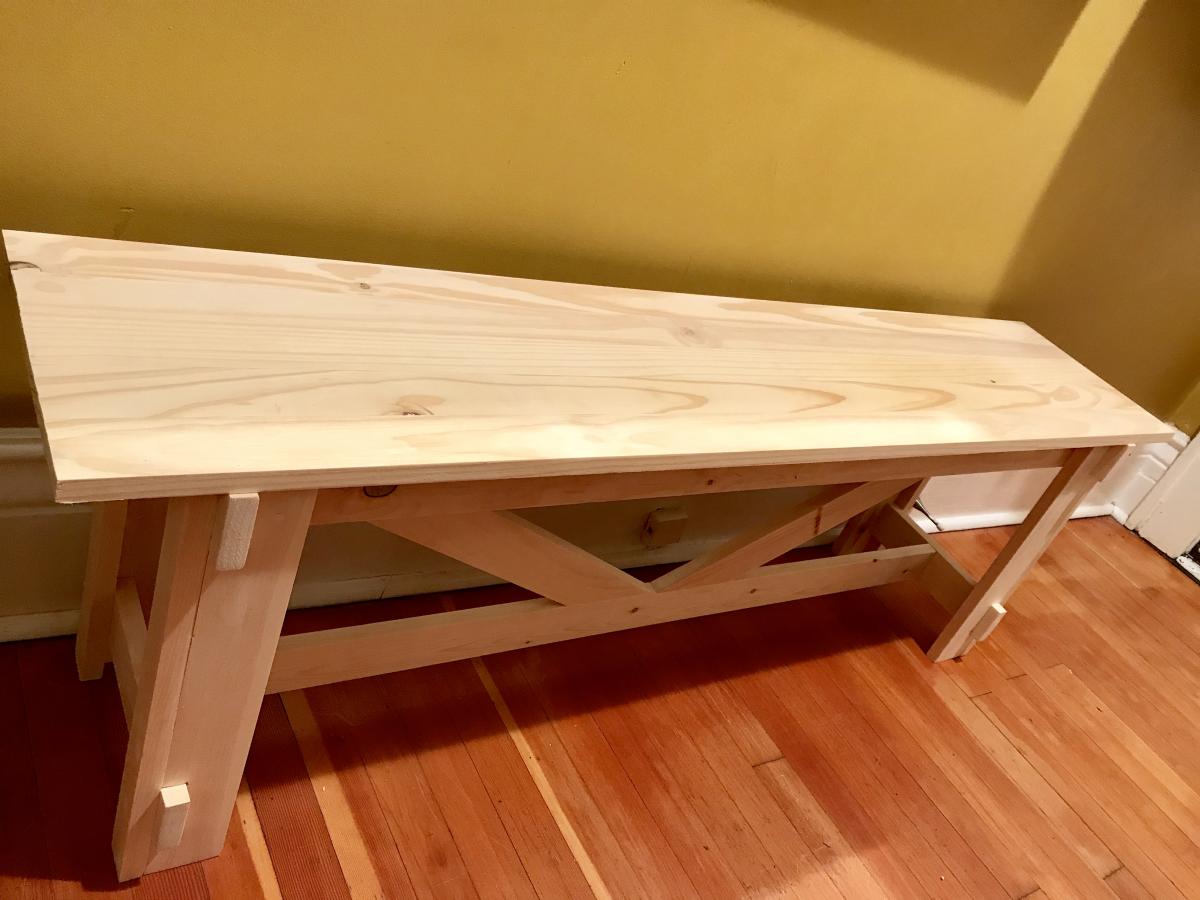
Bench with cross bracing

Submitted by Anonymous (not verified) on Mon, 09/23/2019 - 17:48

My friend asked me to make two benches for her dining room table. She mentioned the plans from your website. I followed your plans/ instructions.
She loves them!.
Thank you & big hello from Canada.

Estimated Cost
$60
Estimated Time Investment
Weekend Project (10-20 Hours)
Finish Used
Paint
Recommended Skill Level
Beginner

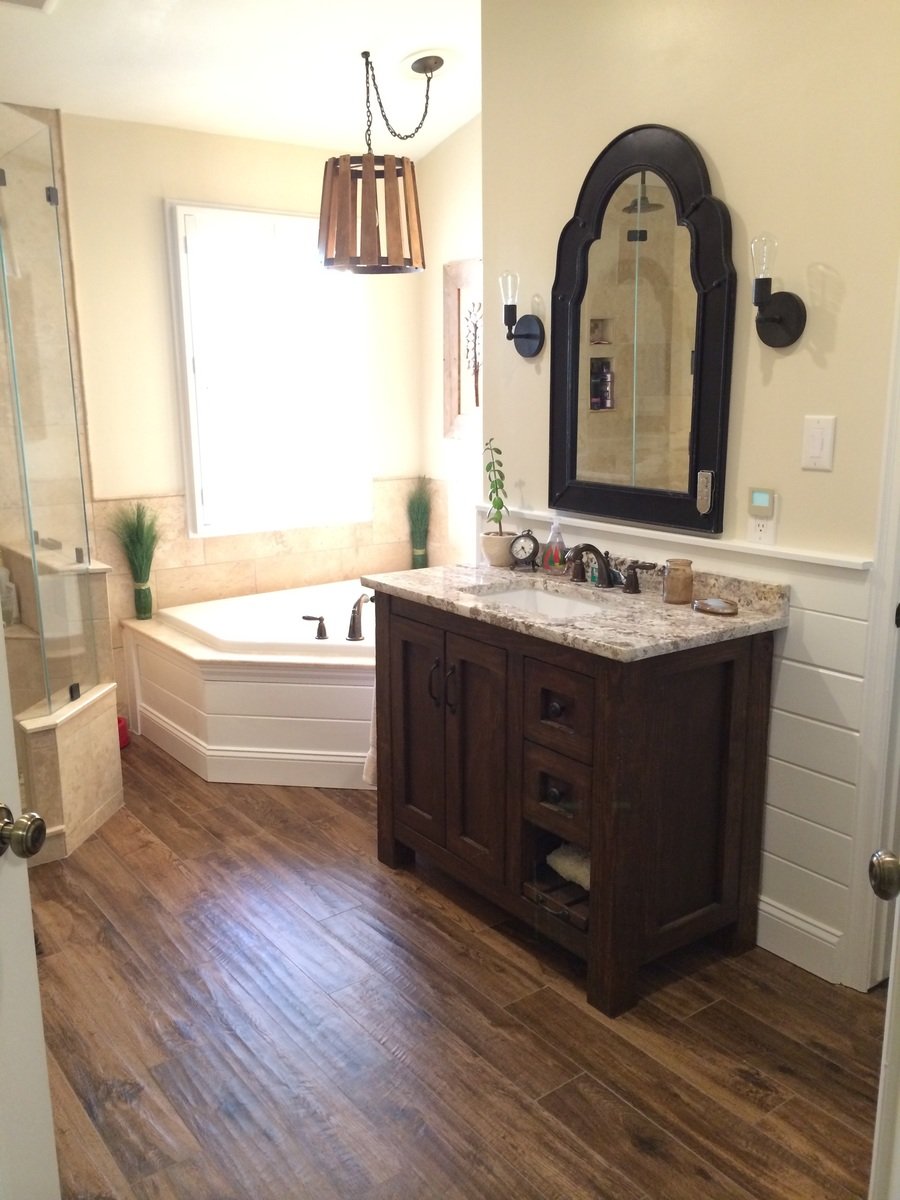
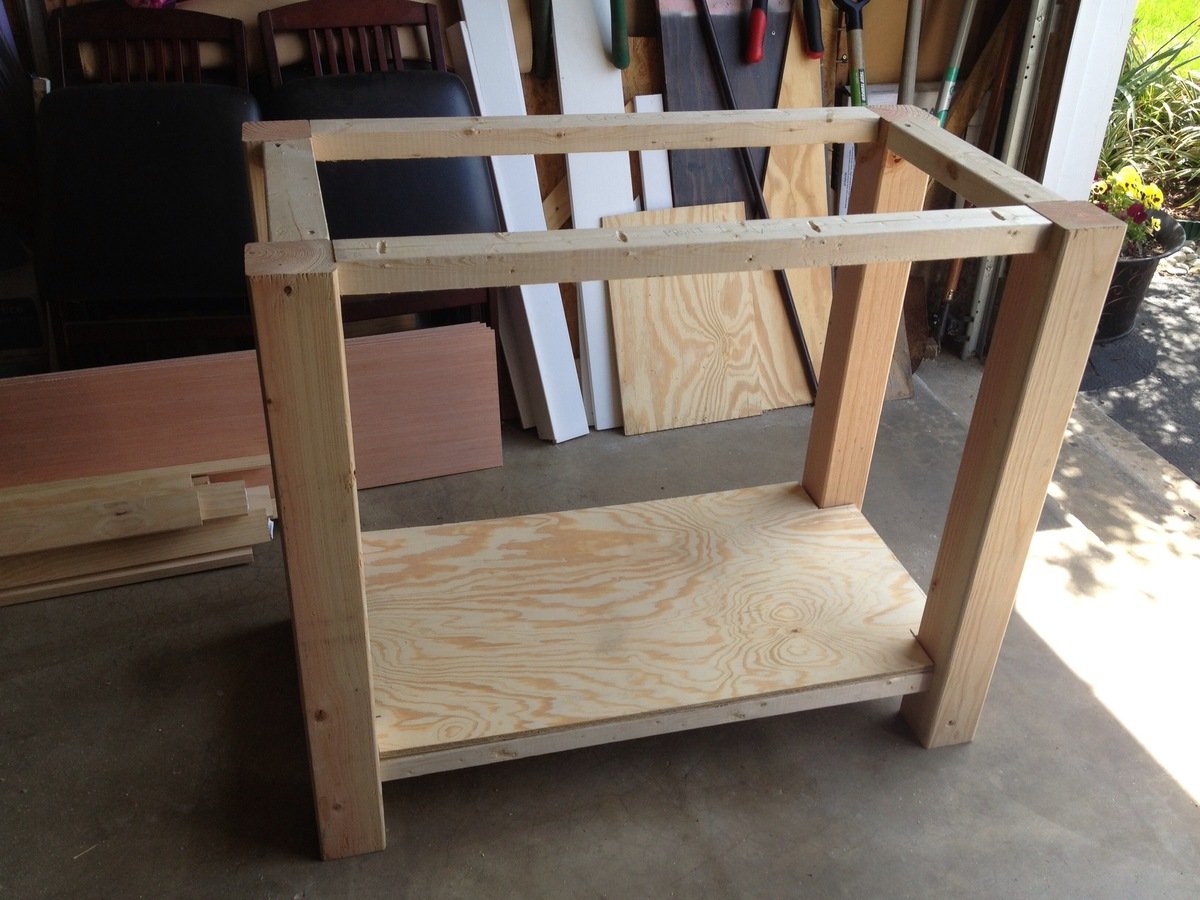
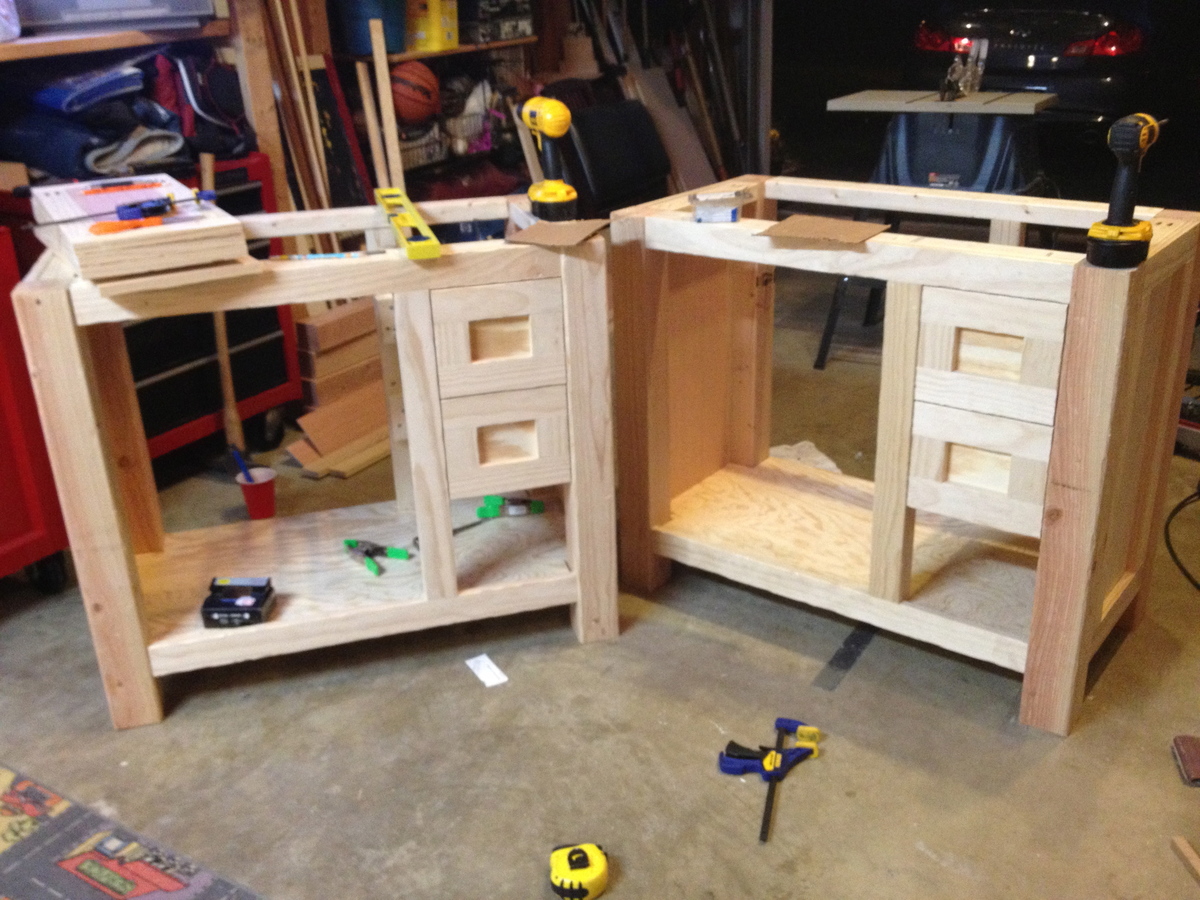
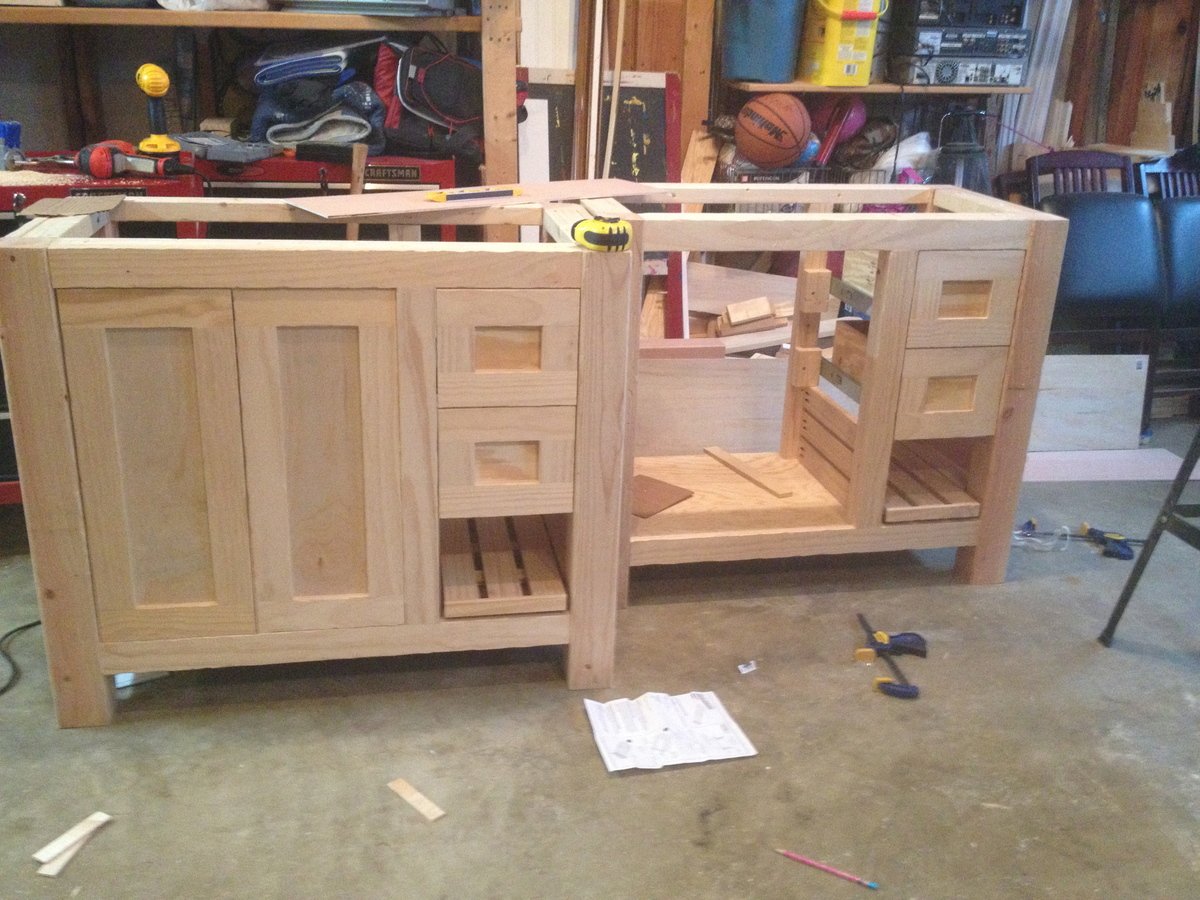
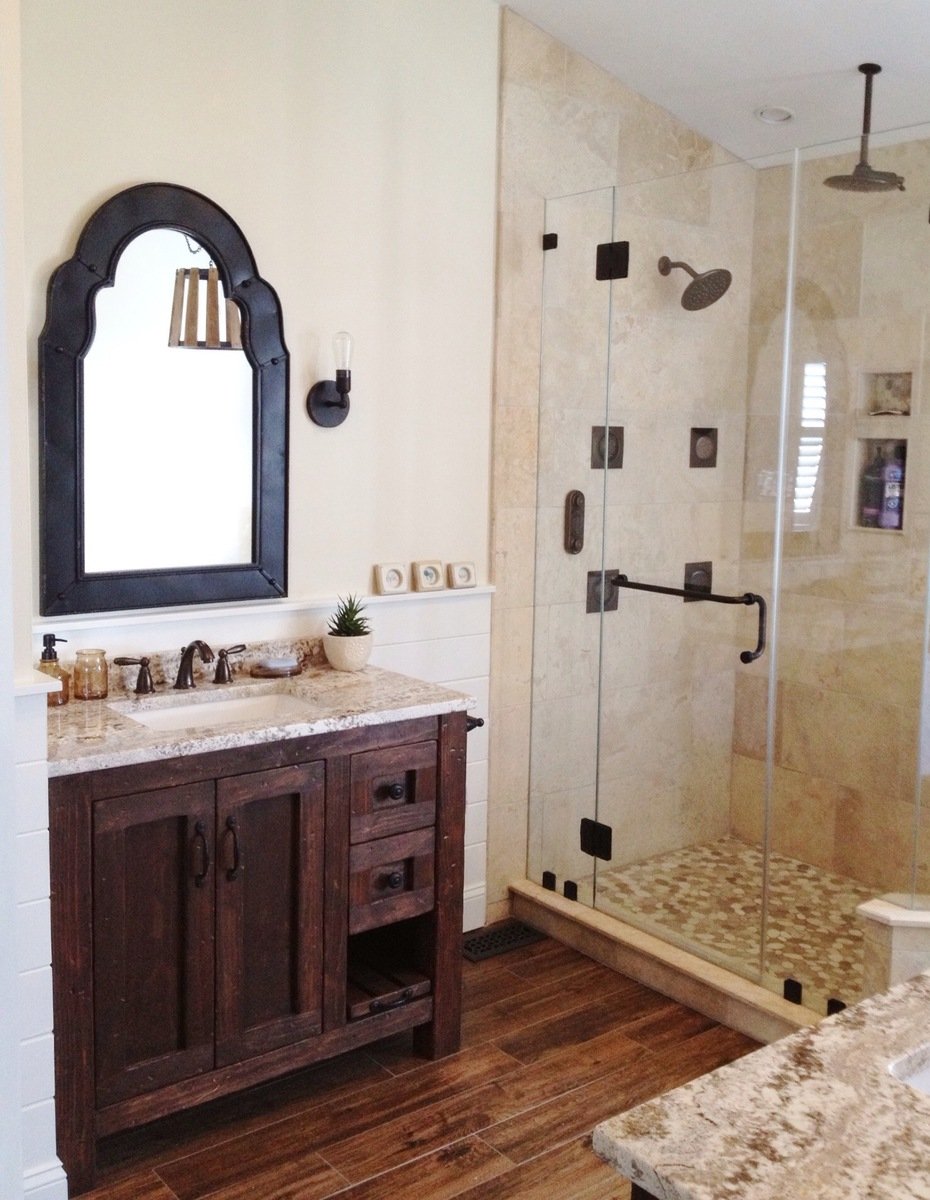
Bathroom Vanities

Submitted by kdins31 on Sat, 01/04/2014 - 13:09

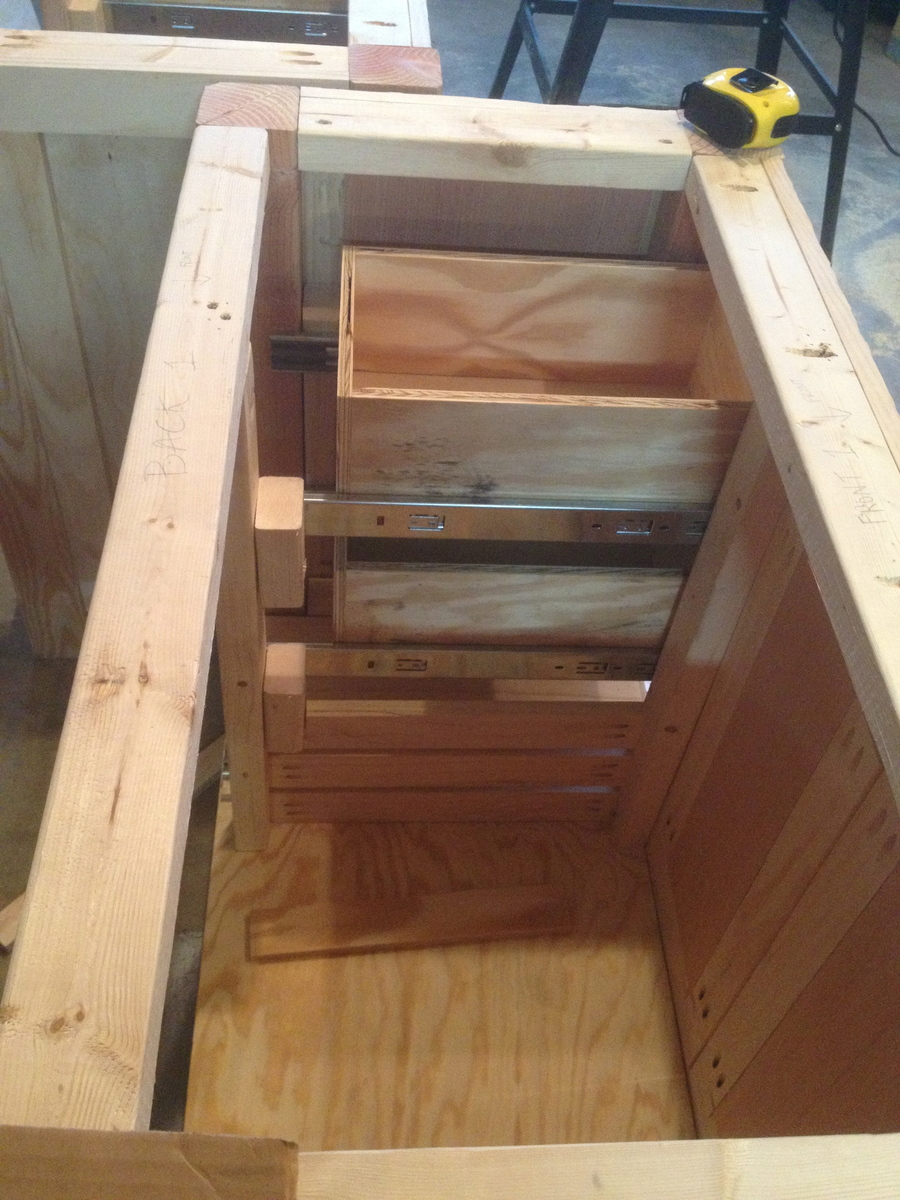
Rather than burning a few thousand on vanities for my bathroom remodel I decided to build them instead. The bottom shelf on the right slides out for a footstool so the kids can reach the sink.

Estimated Cost
Wood was cheap, the granite and sink were not, though I was able to save by getting remnant slab from granite shop.
Estimated Time Investment
Weekend Project (10-20 Hours)
Recommended Skill Level
Intermediate

Comments

Joni

Sun, 01/05/2014 - 20:55

These are so beautiful -- they really look like high-end rustic pieces. The slide-out footstool is genius. The distressing is fantastic. I really love your pebble art as well.
Would you mind sharing the stain color?

Back