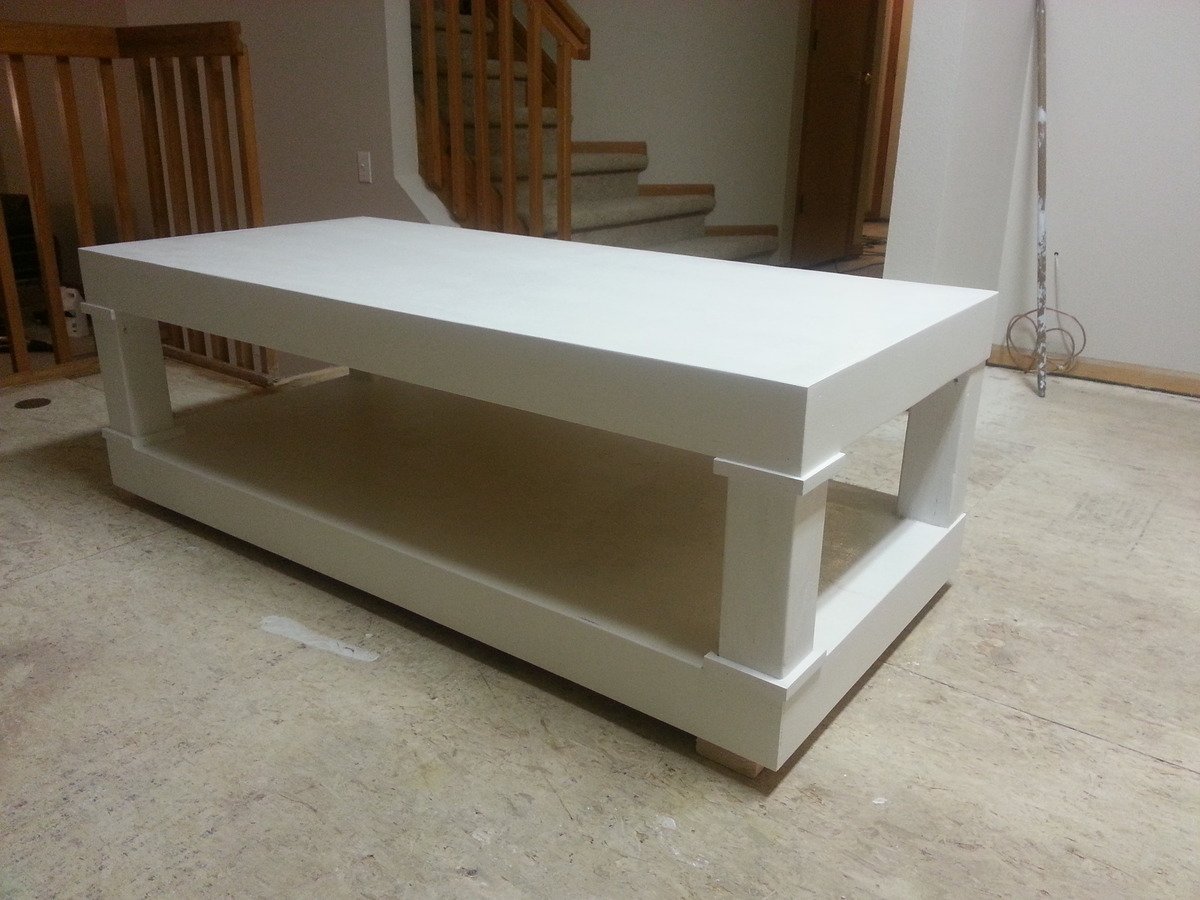
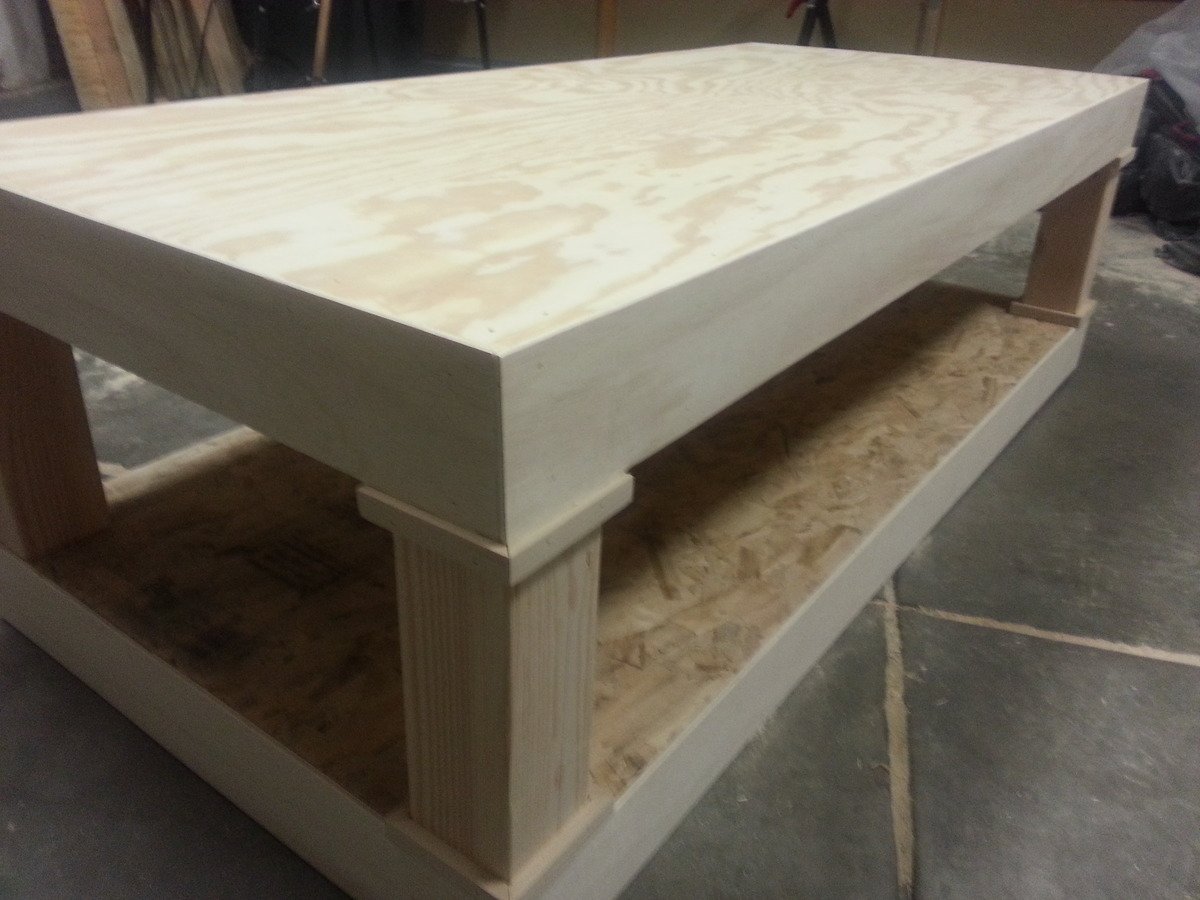
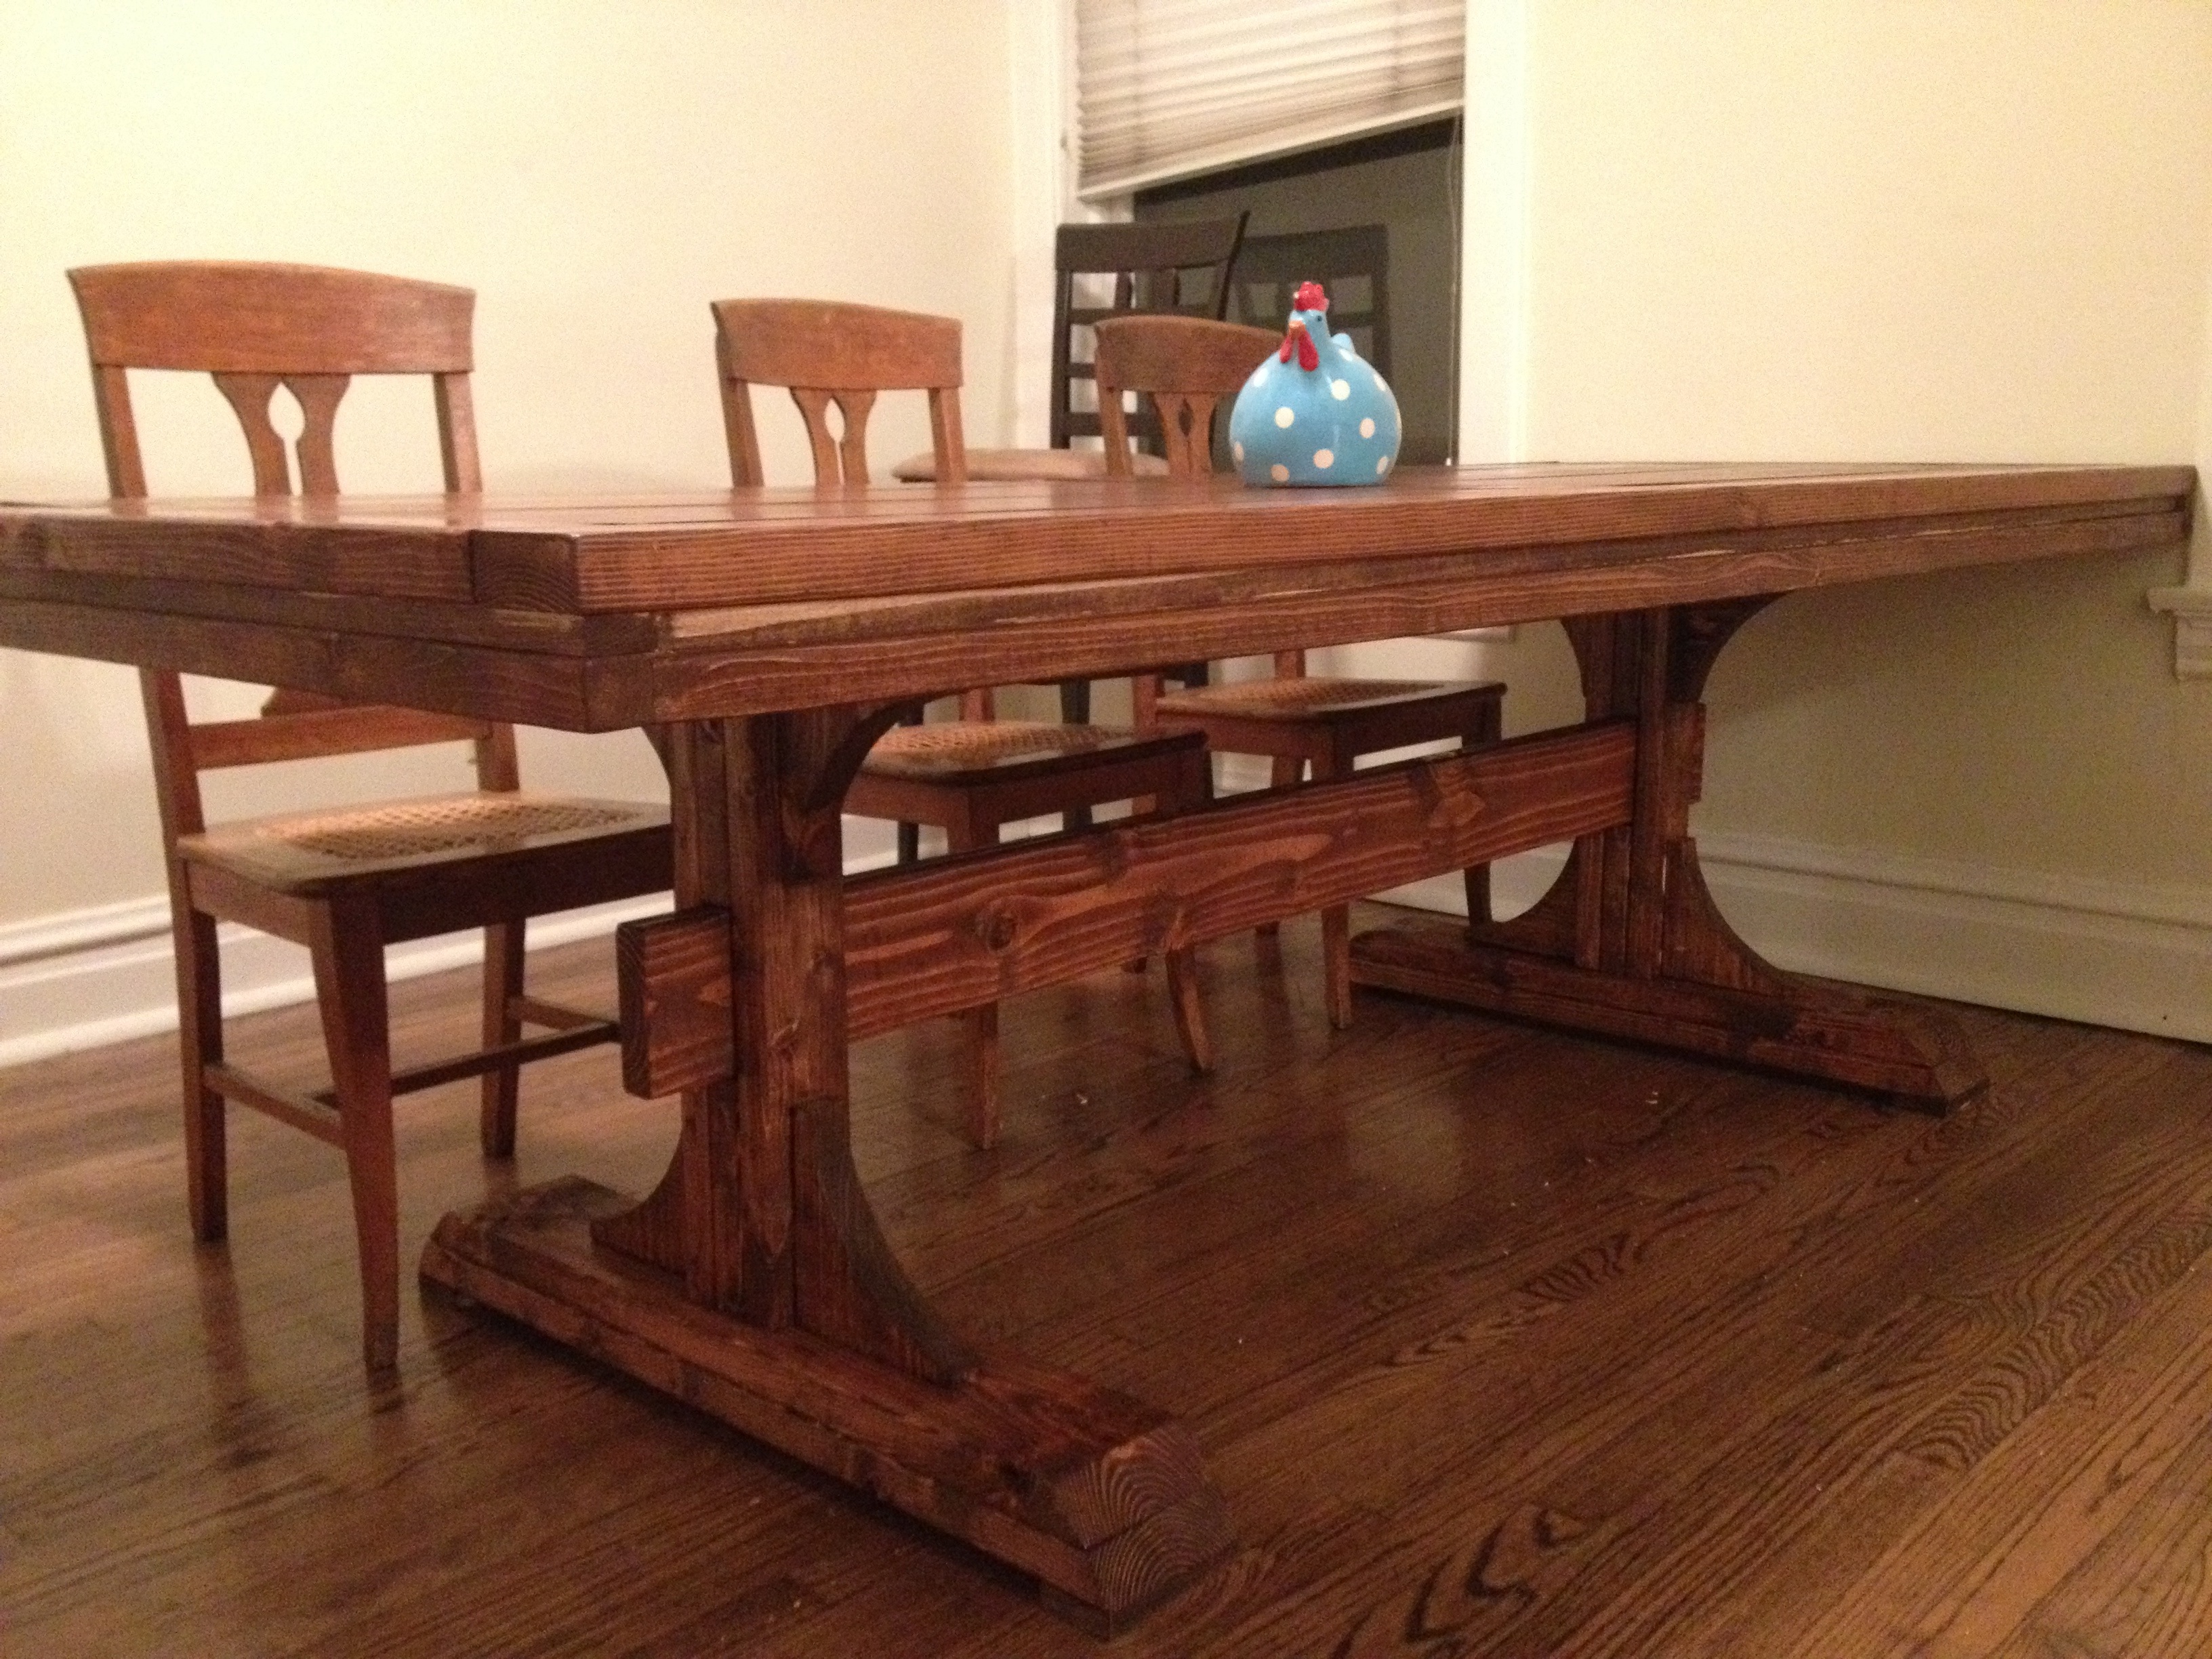
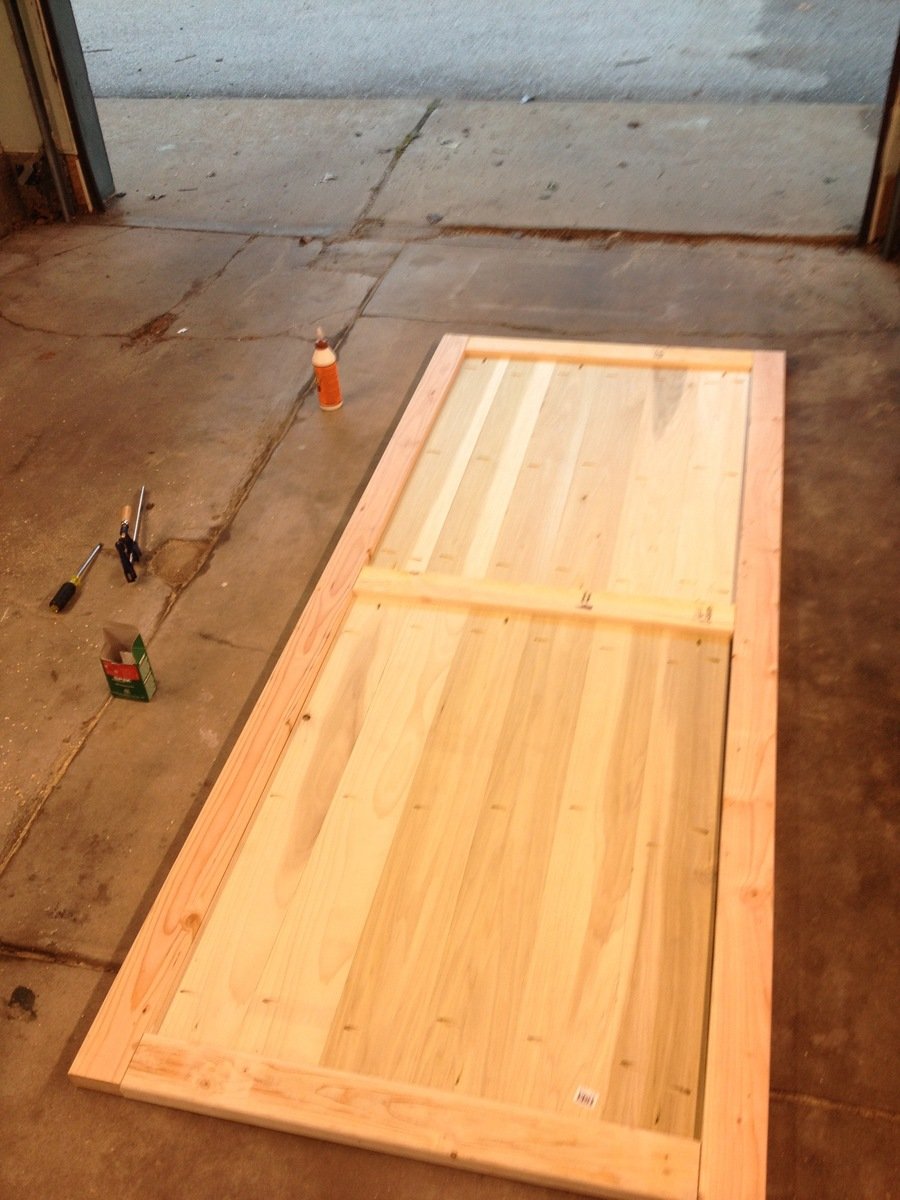
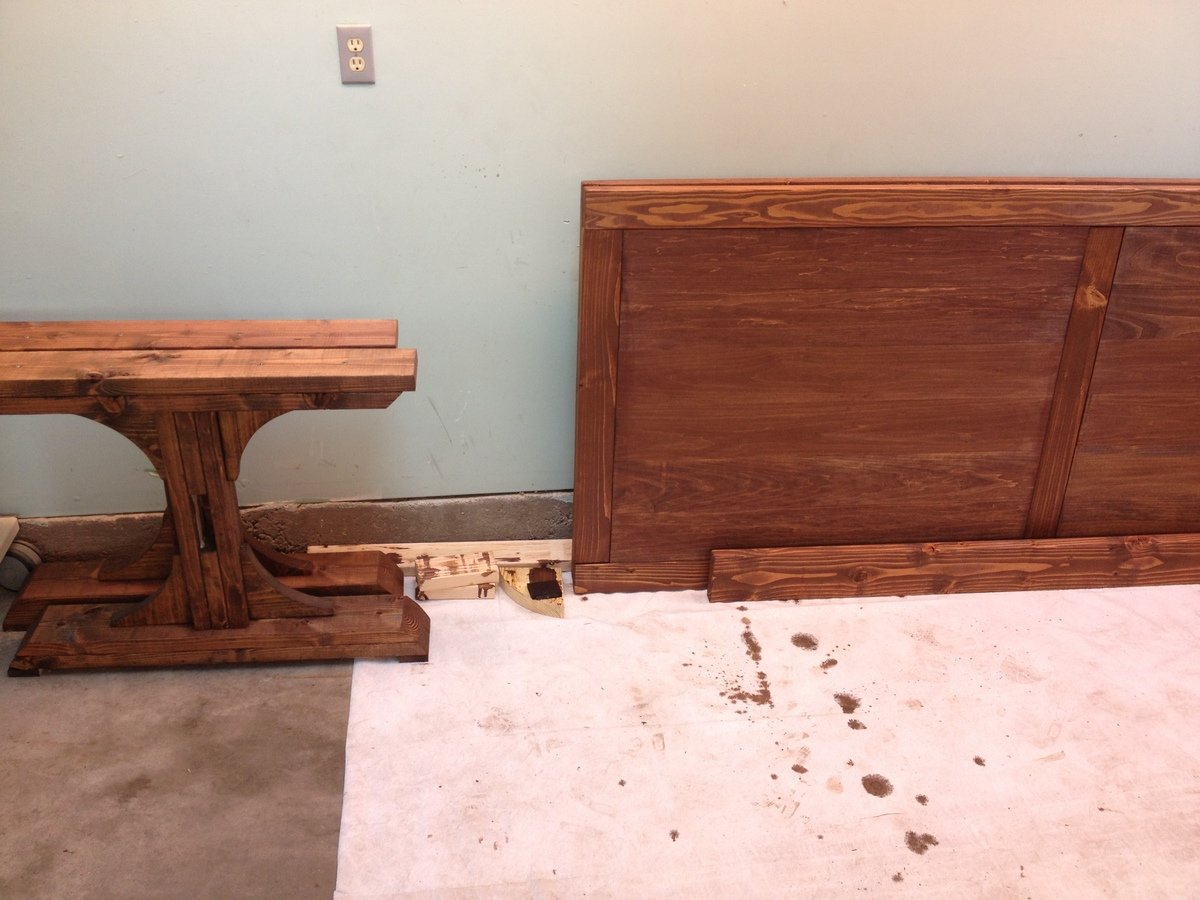
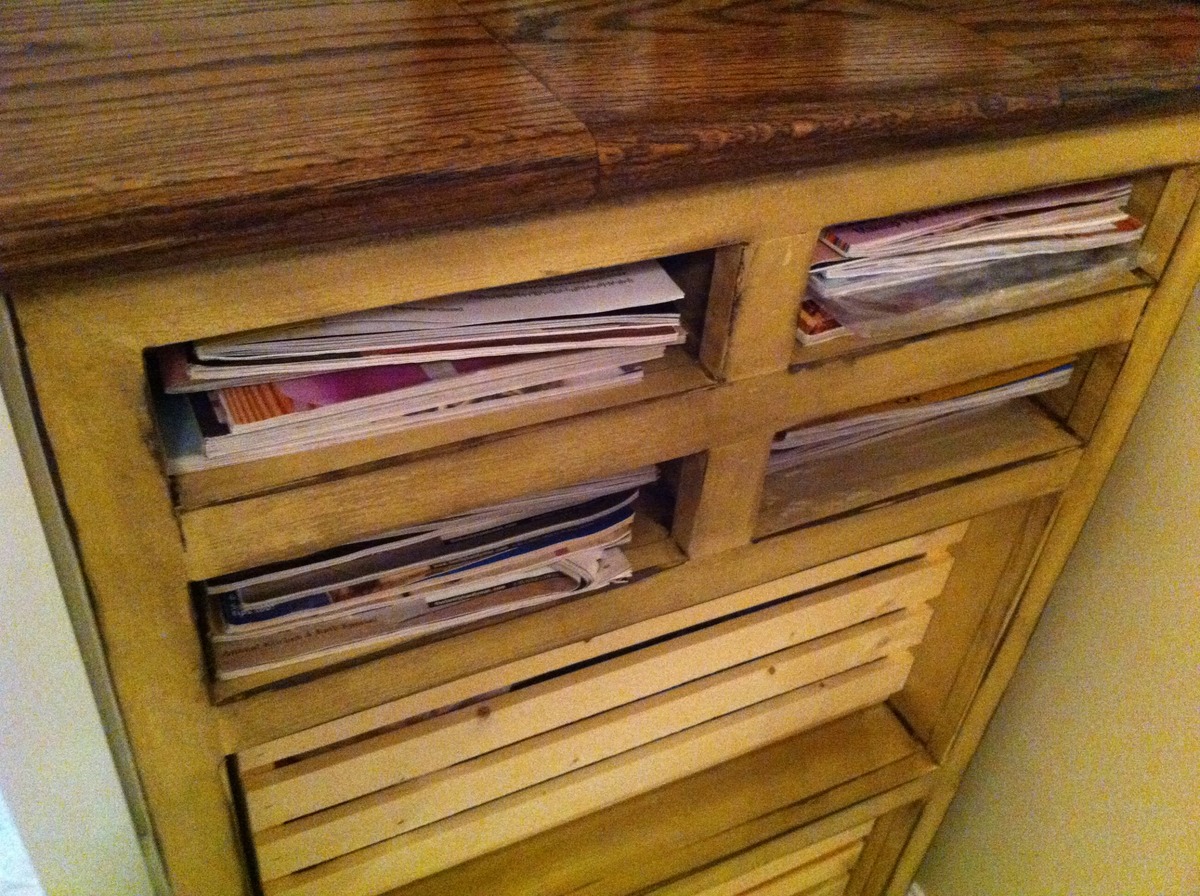
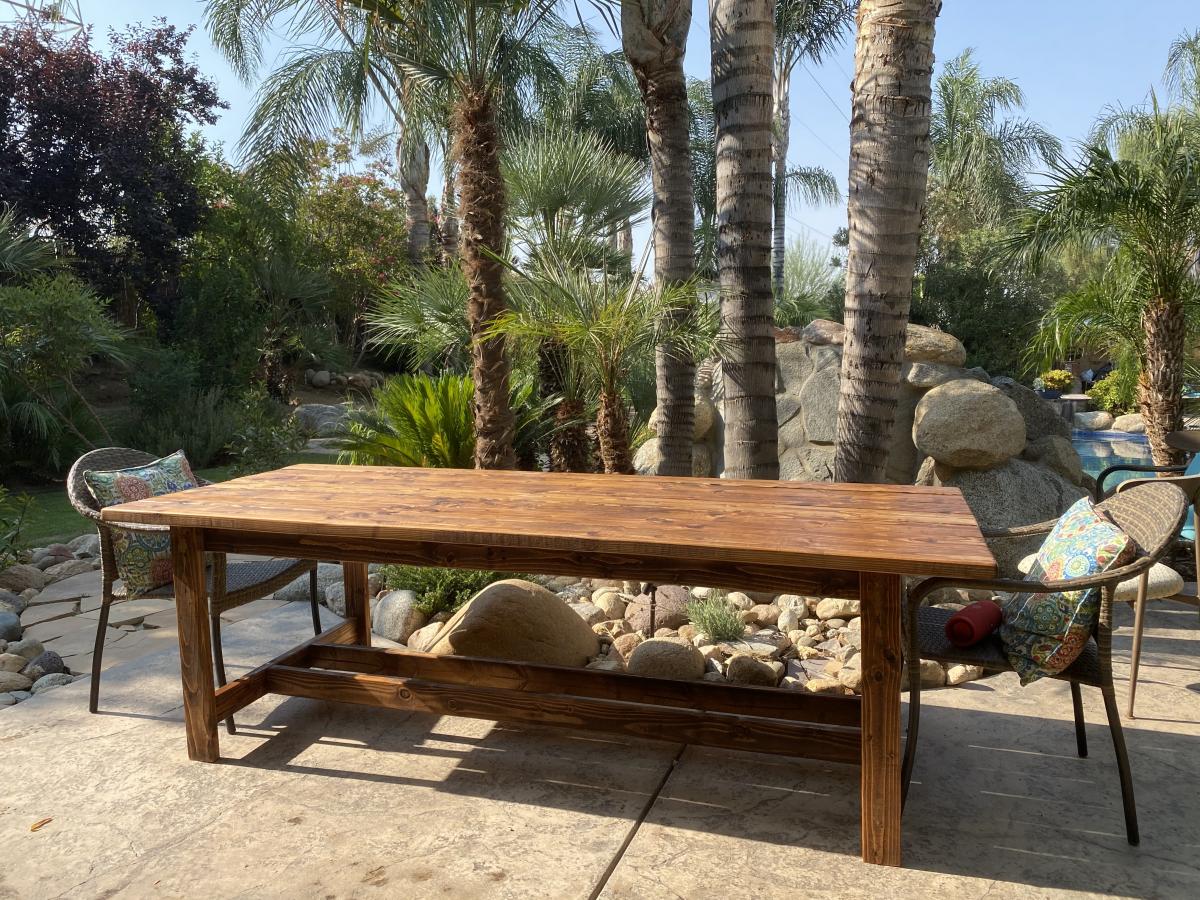
Community Brag Posts

Farmhouse Table

Submitted by Anonymous (not verified) on Fri, 09/04/2020 - 18:52

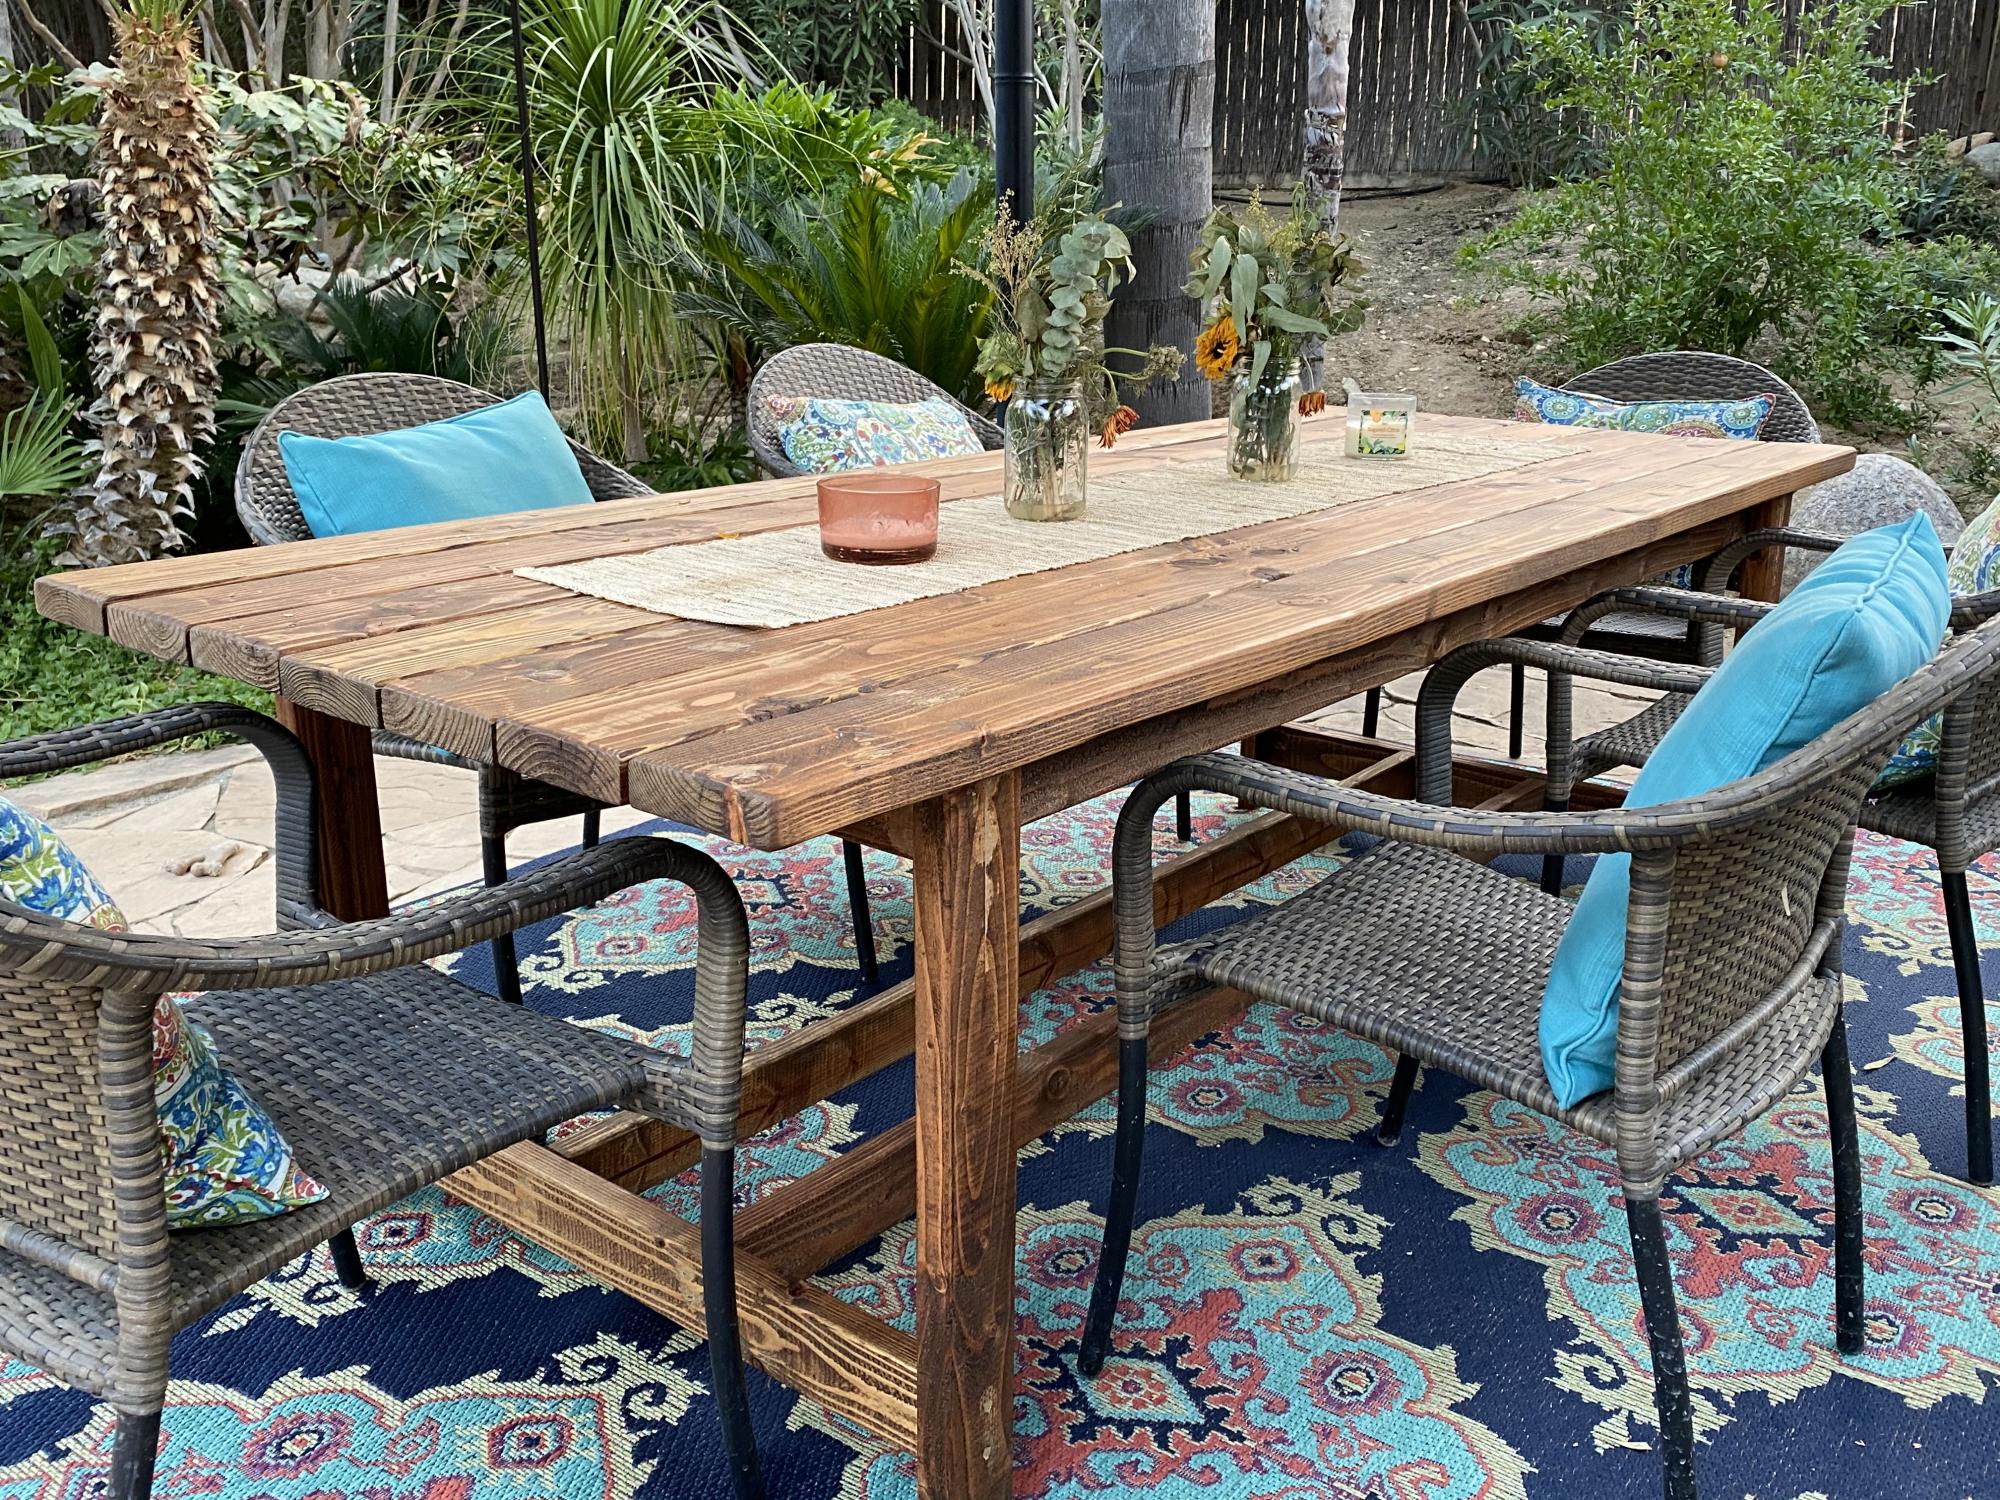
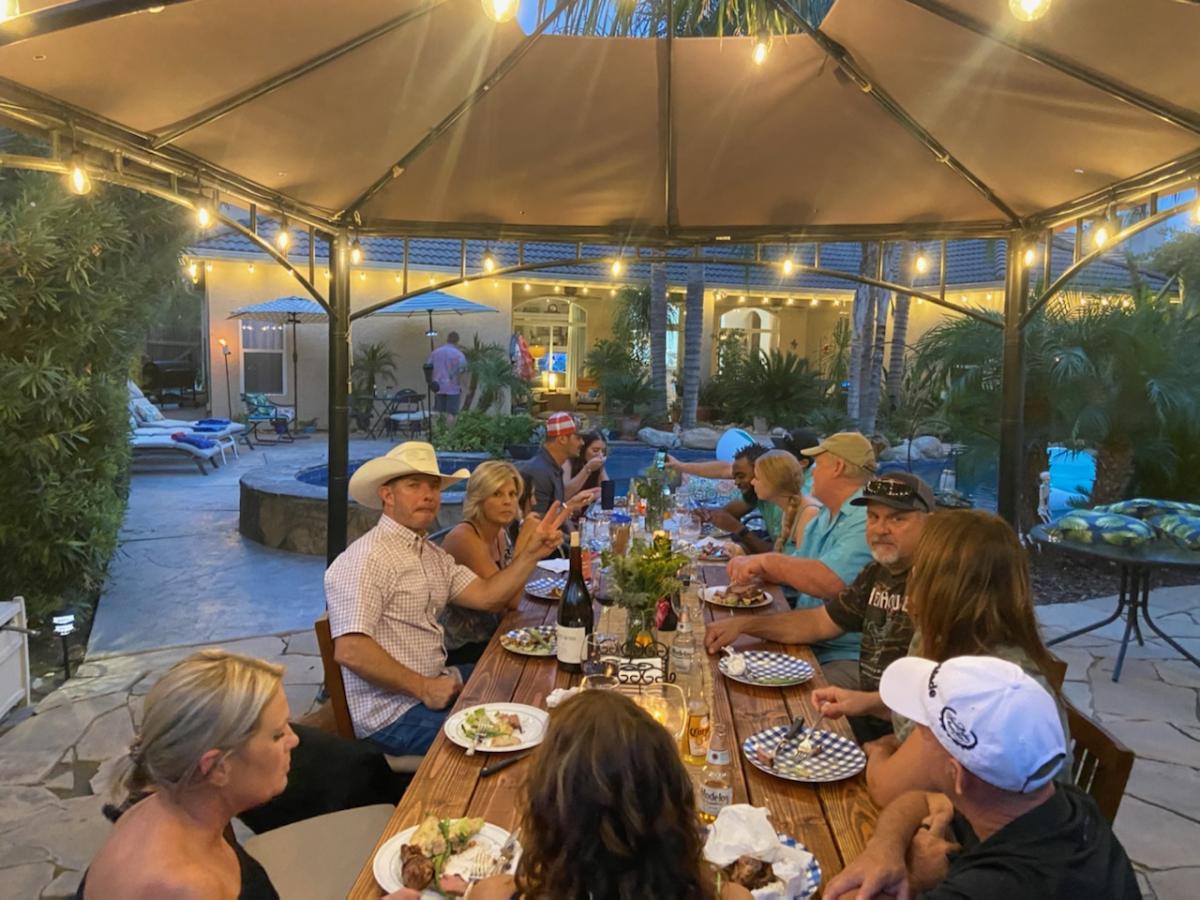
Thanks for sharing this project. I made a few adaptations knowing my friends, family, and monkey grandkids would be climbing all over the table. Everyone loved the table and we have broken it in with a great party.
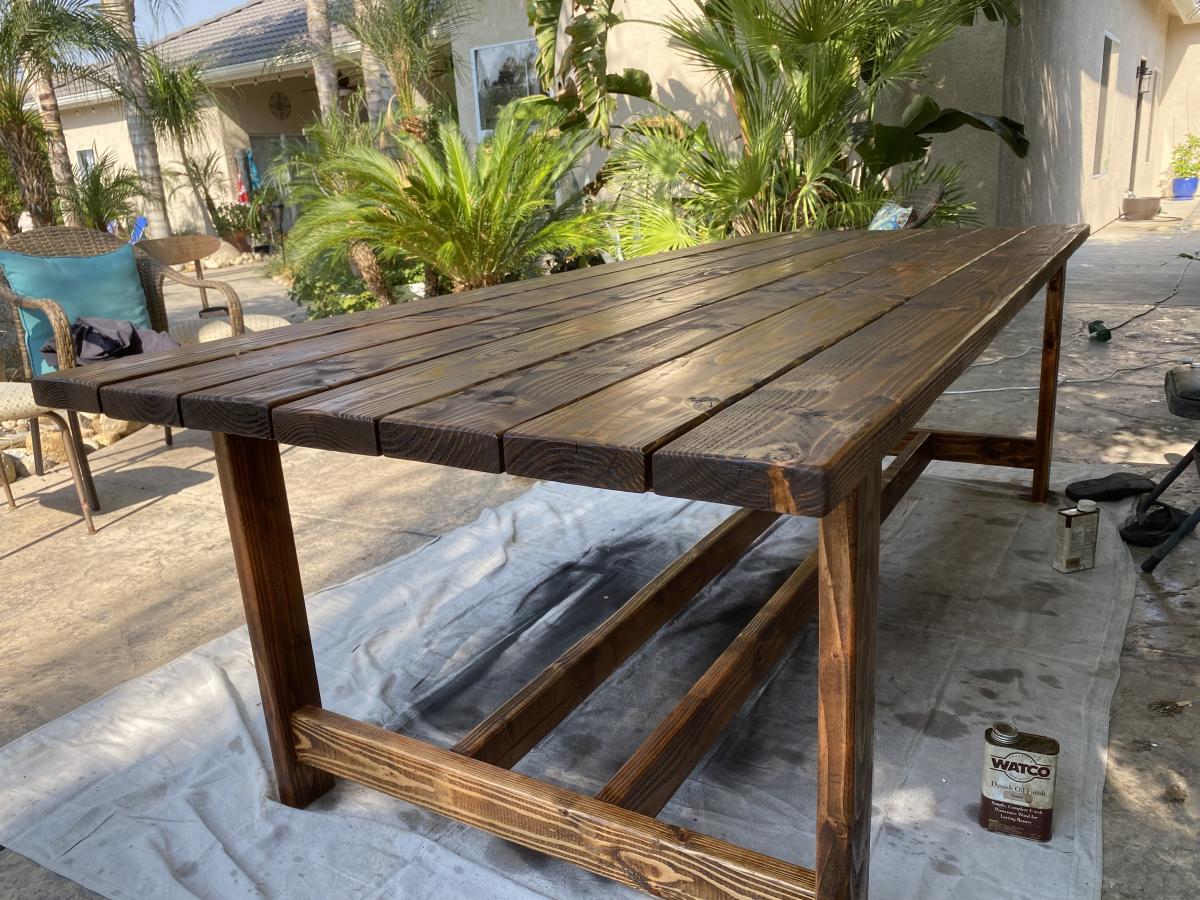
Changes:
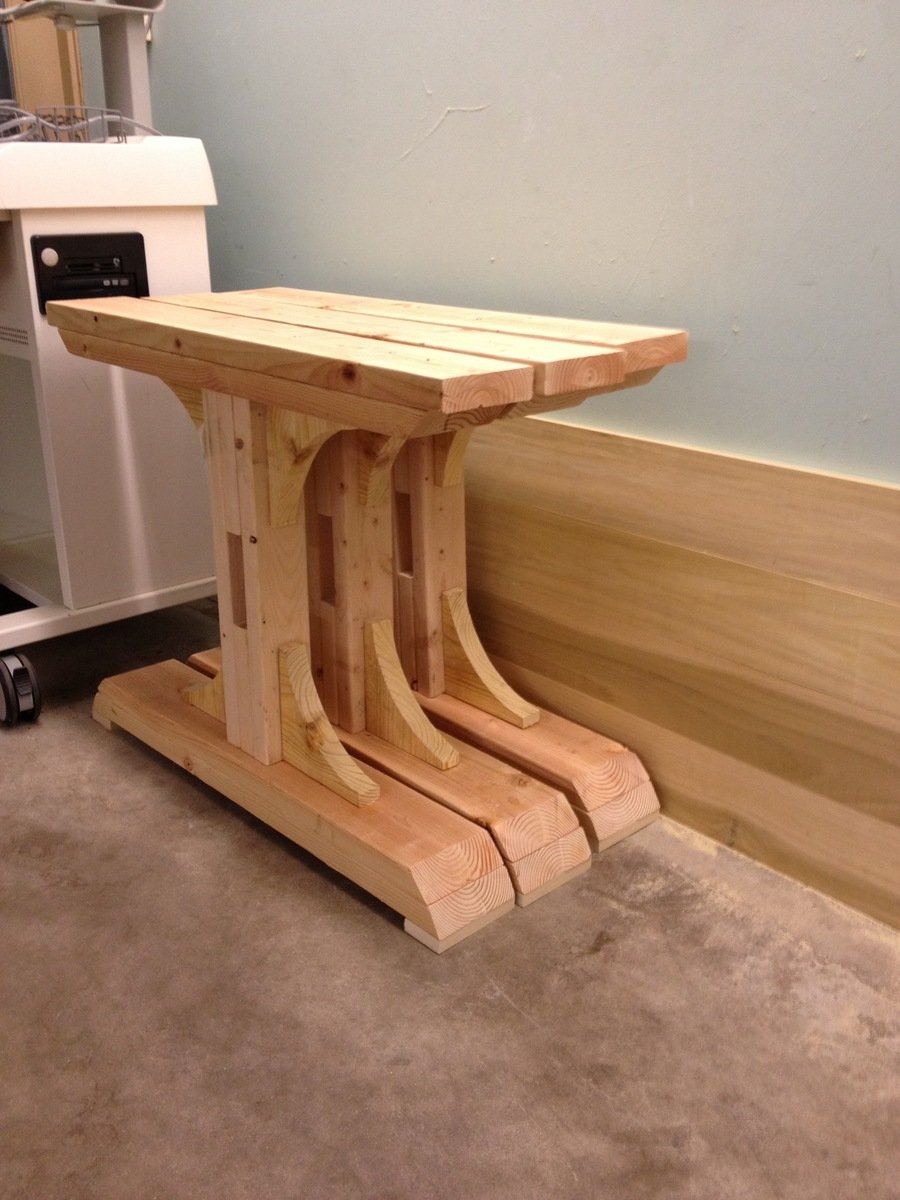
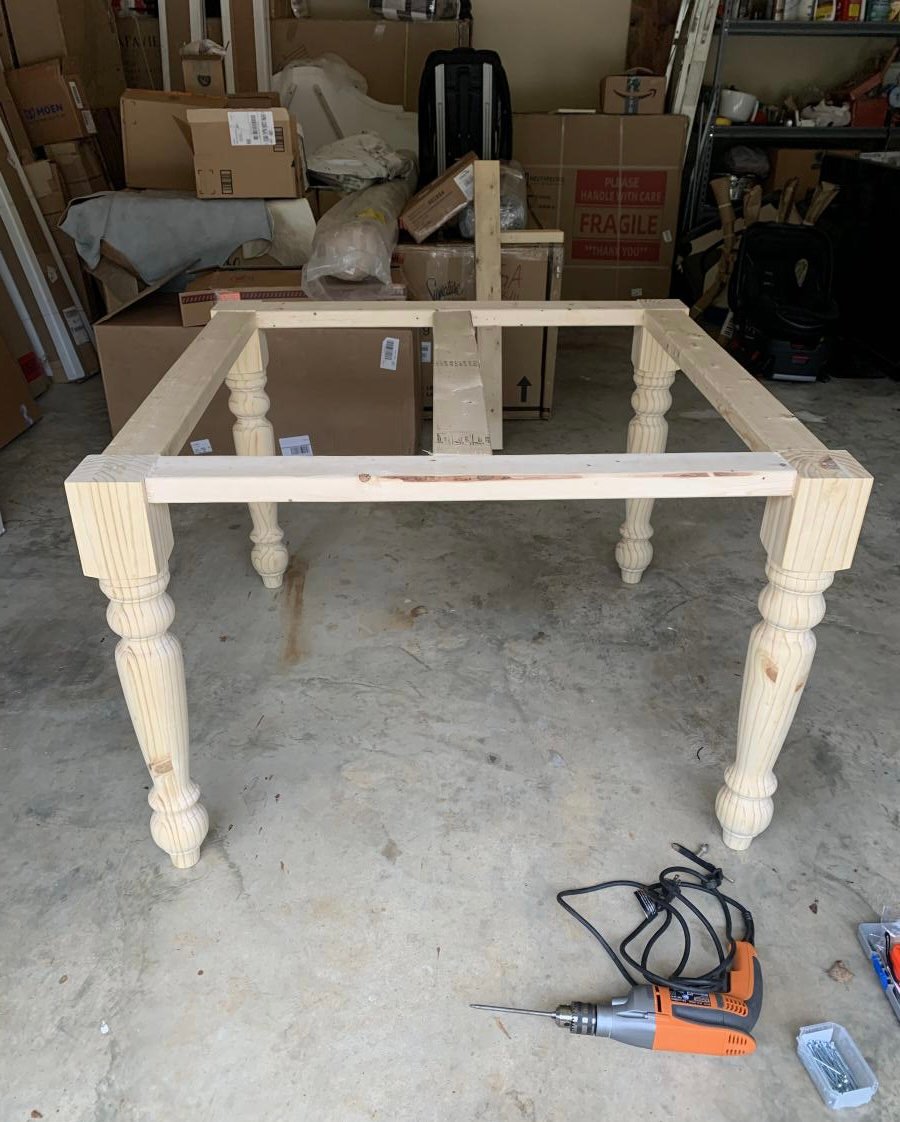
I added a second bottom stretcher that also serves as a footrest and ran them between the bottom legs rather than on top.
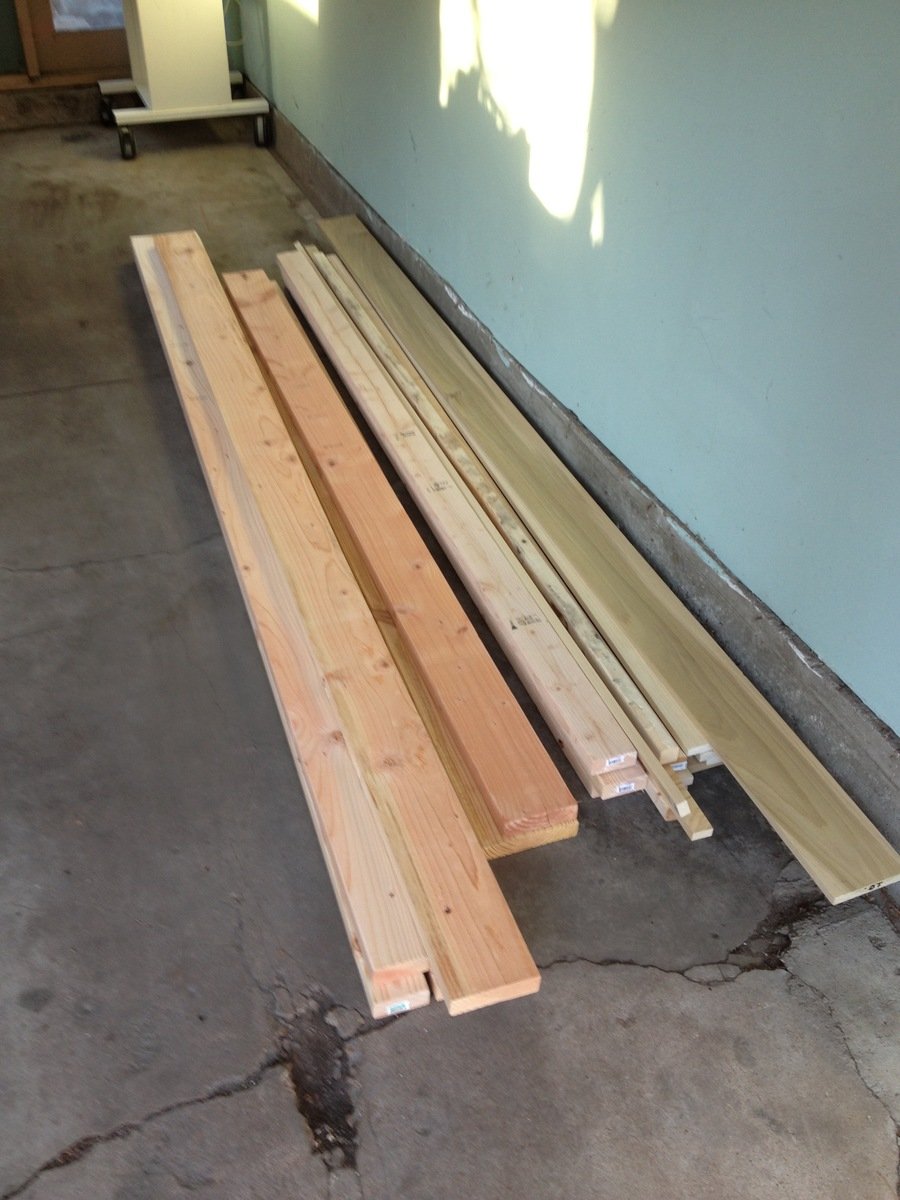
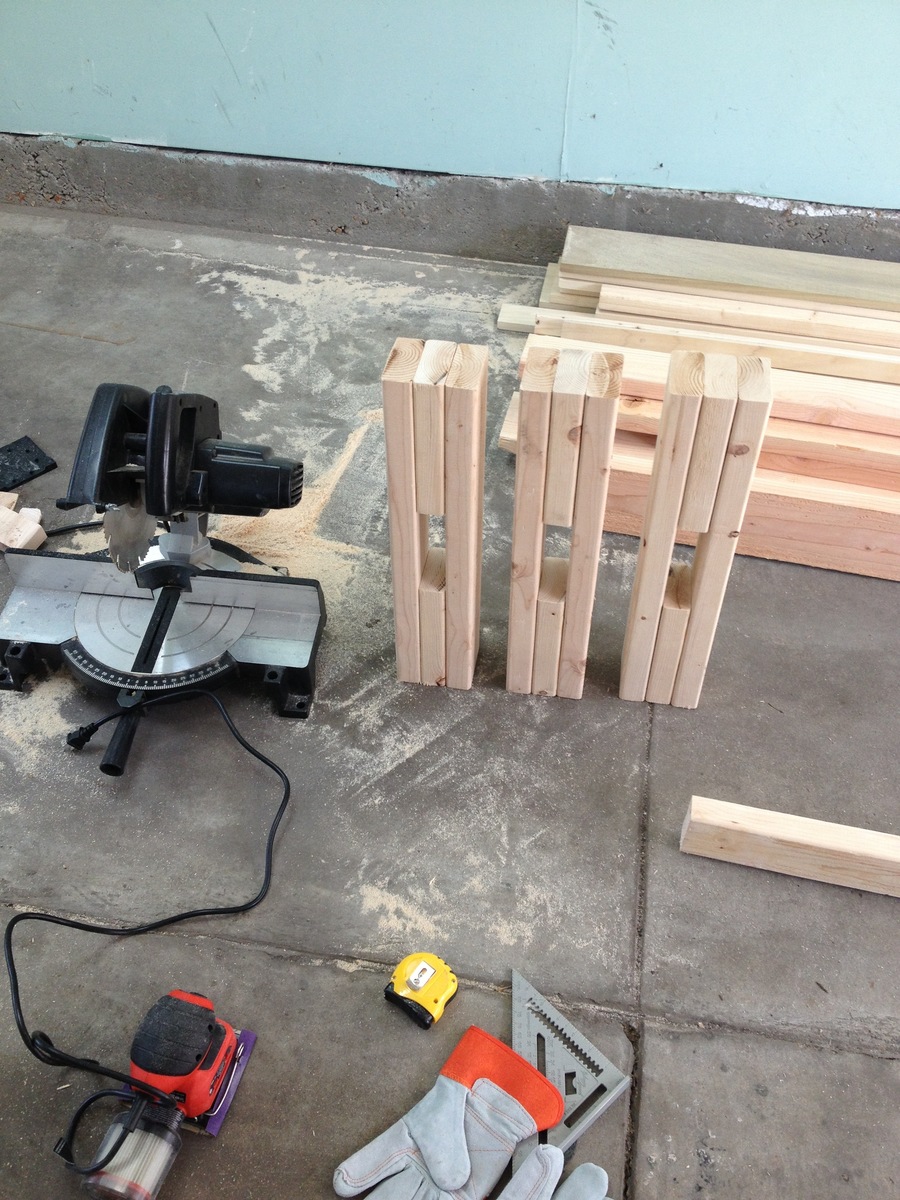
I added on 2x6 to the table width which required changing the leg dimensions.
I also ran an extra 2x4 middle support brace.

Results:
This table is a tank! Thanks!
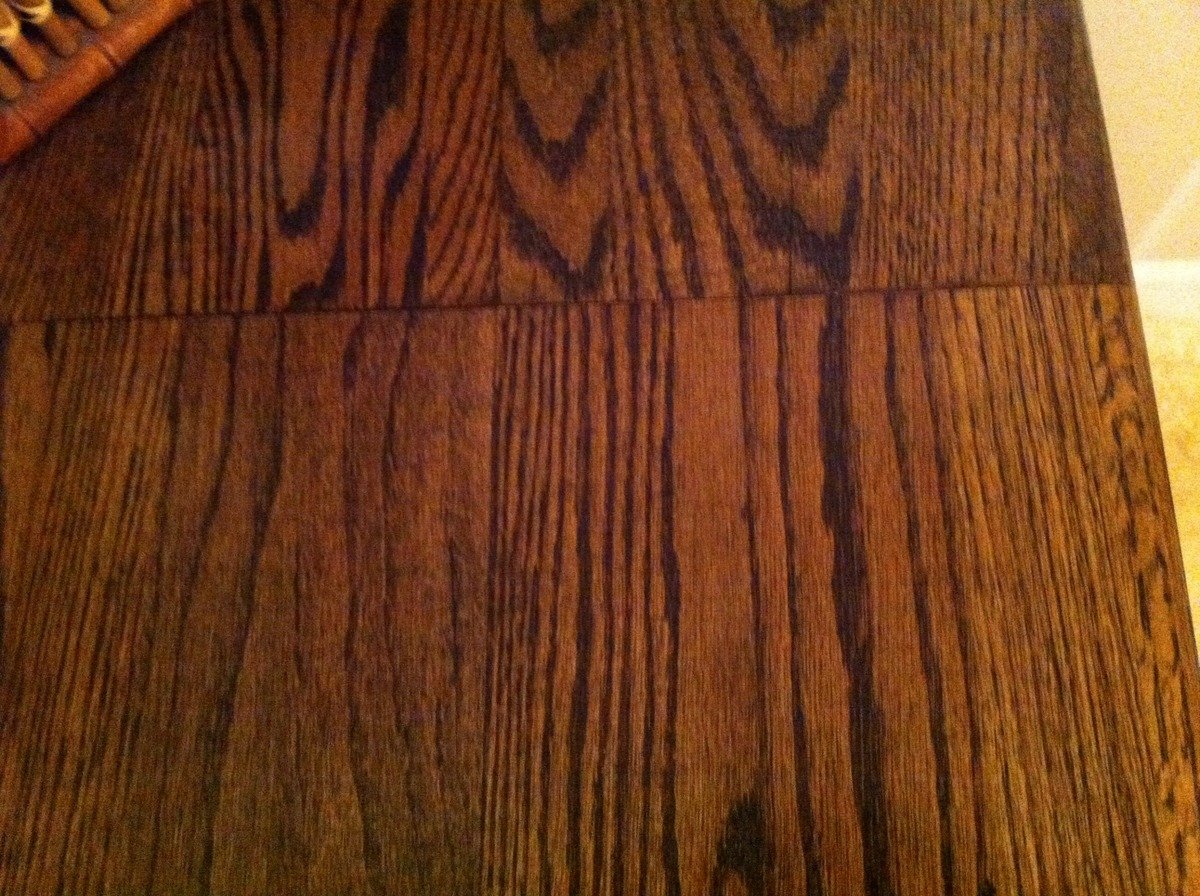
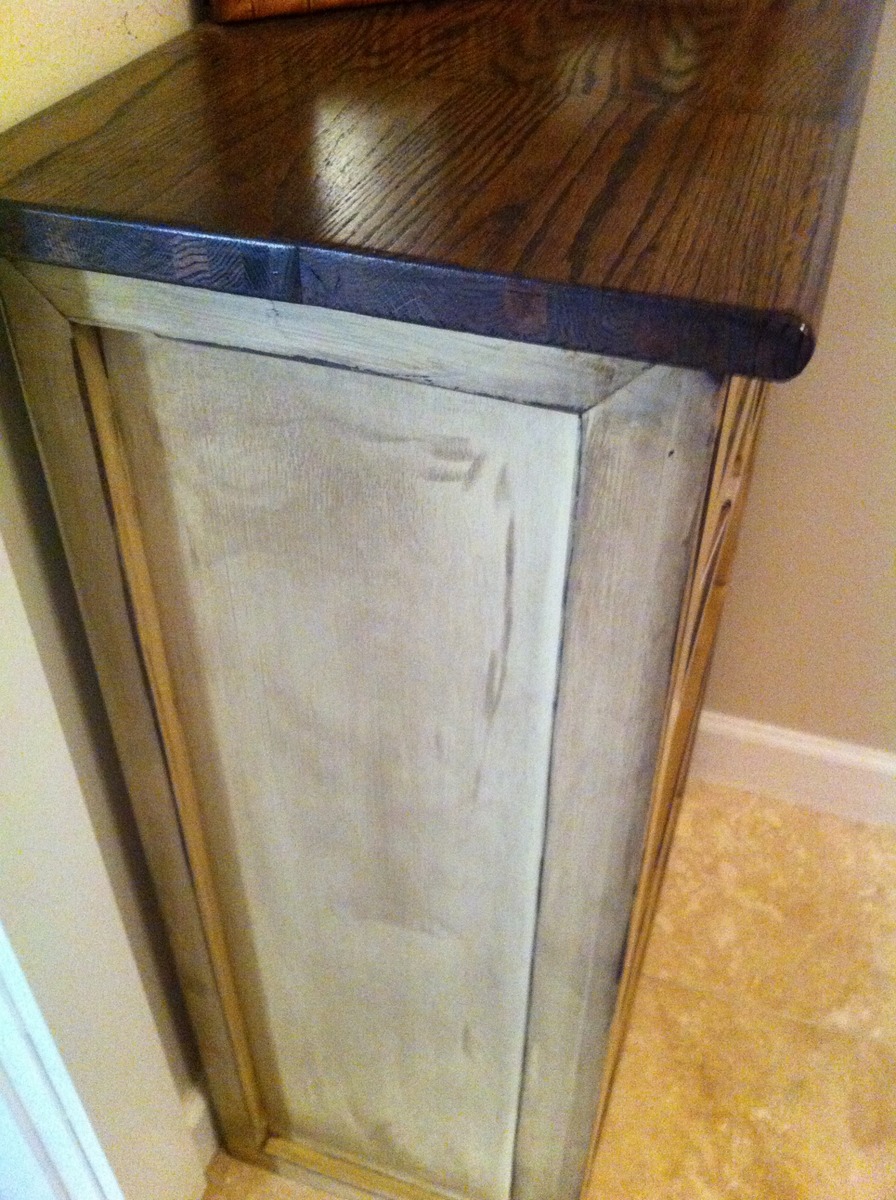
I used the Danish Oil and the Thompsons to seal.

Now I am ready for another project.

Thanks Ana!

The Martin's

Estimated Cost
$75.00
Estimated Time Investment
Weekend Project (10-20 Hours)
Finish Used
Danish Oil (Natural) and Thompsons (Natural)
Recommended Skill Level
Beginner

Small Cedar Shed

Submitted by Honeyb65 on Sat, 09/26/2020 - 10:23

I built this using Ana's Small Cedar Shed plans. It was a fun and surprisingly easy build!

Estimated Cost
$250
Estimated Time Investment
Week Long Project (20 Hours or More)
Finish Used
I burnt the pine (shou sugi ban technique) and finished the whole exterior with Cabot Stain semi transparent finish in ochre.
Recommended Skill Level
Intermediate

Comments

2x4 (and 2x6) Modern Adirondack Chair

Submitted by HR Dad on Mon, 12/28/2020 - 15:43

Been wanting to make some Adirondack chairs for years; have about 10 different plans saved that one day I could get to. These 2x4 modern plans made getting them done quickly possible due to simplicity of the cut list and cheap cost of materials. The only real change I made was to use 2x6 for the arms; I cut a taper along outside edge and increased the length of the arms by about an inch and a half to overhang the front legs a bit. Since I just used basic framing lumber, I milled all of the boards first with table saw and planer to make square consistent edges. And, I chose to use pocket screws in as many joints as I could so I wouldn't have screw holes on any visible faces. Add in a lucky find at the big box store paint return; scored this blue exterior paint for $2.00 a quart, and my weekend project turned out pretty good. Now I've got two neighbors that want 'em.

Estimated Time Investment
Weekend Project (10-20 Hours)
Finish Used
1 qrt Glidden Exterior Semi-Gloss; got it so cheap, I used the whole quart. Multiple coats.
Recommended Skill Level
Beginner

Classic Bunk Beds Re-Imagined With Stairs

Submitted by edeboode on Mon, 04/03/2017 - 07:57

I modified the plans for the Classic Bunk beds by making them 74" tall instead of 63" and added a fourth slat all the way around to add more protection from potential falls.  I created one opening in the front for my youngest to get into the bottom bunk, and built slats about 2/3's across the front to act as a gaurd rail. I created another opening on the side for my oldest to get into the top bunk with stairs instead of ladders to again prevent falls.  I had to modify the Sweet Pea stairs to accomodate for the extra height in the bunk beds, simplified the railings, and I created each cubby to be big enough to use cloth storage totes that were 11x11x11.  Sanded the whole bed and stairs so the corners and edges were all rounded and smooth, and put two coats of white Deck and Porch paint to stand up to the the boys running up and down.  I used brackets to secure the stairs to the bed, and sixteen 3" bolts to bind the bed together.  Precut and drilled 17 slats for each bed seperated them 2" apart.  Spent a few hours every night during the week measuring, cutting, glueing, drilling and assembling the bed and stairs.  Spent an entire weekend sanding and painting.  Very happy with the way these beds turned out.  Overall cost of the project including the paint was around $400.  

Estimated Cost
$400
Estimated Time Investment
Week Long Project (20 Hours or More)
Finish Used
Porch and Deck Paint
Recommended Skill Level
Beginner

Comments

Potting Bench Project

Submitted by Anonymous (not verified) on Wed, 04/14/2021 - 10:50

Fun project indeed! Just make sure its all square every step of the way.
Thanks, I look forward to perusing some more projects!!

Estimated Cost
$50
Estimated Time Investment
Day Project (6-9 Hours)
Finish Used
Thompson's Clear Wood Sealer, two coats
Recommended Skill Level
Beginner

Comments

Cedar Fence Picket Raised Garden Beds

I made these for my 81 year-old Grandma, and I will be making some for my own front yard soon. I followed the plans and ripped the fence boards instead of buying the optional 1x2s. My awesome dad showed me how to use the table saw, but the rest I did all by myself! We decided to leave them unfinished for a natural look. It took me about 7 hours total broken up to make all three, but this is my first project and I was slow. Thanks Ana, for inspiring this working Mom to pick up a hammer and get stuff done!

Estimated Cost
$13 per bed in fence boards
Estimated Time Investment
Afternoon Project (3-6 Hours)
Finish Used
Left unfinished
Recommended Skill Level
Beginner
Seasonal And Holiday

Washer and Dryer Pedestal

This thing is awesome! The access to my crawlspace was conveniently put under the dryer, but with both the washer and dryer on the pedestal I can slide it forward by myself if I need to get into the crawlspace. Bonus! I couldn't find any basecap so I used a plain old piece of trim. I also had some 1/8 inch plywood that I ripped to trim the front and sides. Very happy with how it turned out.

Estimated Cost
50 (but I had spare OSB for the bottom, so I only bought 1 4x8)
Estimated Time Investment
An Hour or Two (0-2 Hours)
Finish Used
Sealed with Kilz and then Painted with Valspar white.
Recommended Skill Level
Beginner

Double Pedestal Farmhouse Table (8 feet)

Built from the Triple Pedestal Farmhouse Table plans. Had to size down the plans a little bit to fit into my dining room. Created three pedestal legs but only ended up using two on the final table. Took about 16 hours from start to finish. All of the wood is pine except for the top, which is Poplar. Made a couple of mistakes along the way but am very happy with the way everything turned out. Feel free to ask questions and I will do my best to answer them. Happy Building!

Built from Plan(s)
Estimated Cost
$175
Estimated Time Investment
Weekend Project (10-20 Hours)
Finish Used
English Chestnut. Stained once and waited 7 minutes to wipe off. Two coats of Clear Satin Polyurethane.
Recommended Skill Level
Intermediate

Comments

Wide Short Pine 1x12 Bookshelf

Submitted by ariela on Wed, 03/09/2011 - 03:15

This was my first project ever, and while there are a few things I could have done better (don't judge the imperfections!) the shelves still came out beautifully. I followed Ana's plan exactly, painting the backboard a charcoal grey before attaching, and the shelves themselves white with light lemon yellow on the inside-sides. If I were to make these again, I would want to sand the shelves down more and use a higher gloss paint or sealer. The matte finish is more difficult to clean when it gets dusty, which happens pretty quickly!

Built from Plan(s)
Estimated Time Investment
Afternoon Project (3-6 Hours)
Recommended Skill Level
Starter Project

72” round dining table

Submitted by Anonymous (not verified) on Mon, 10/04/2021 - 13:52

I wanted a 72” round dining’s table for my new home and found your video online. It was not easy to cut a circle, but it was easier than I thought it would be! I’m so happy with the finished product. I used turned legs with a square base instead of the pedestal shown. Have had so many compliments already and it looks fantastic in the space.

Comments

Chicken Run with Turkey House

Submitted by vendo on Wed, 10/13/2021 - 10:03

My daughter helped me build this enclosure. We used Ana's chicken run plan, but just made it taller so we could walk in easily. We added an overhang to store food and pellets under, for the supports we used Ana's easy shelves angle support plan, and finally we used the playhouse base plan for the base of turkeys house. All plans used are linked below. We ran the chicken wire out under the structure and still need to bring in some large rocks or pavers, but so far no issues with predators. Turkey was getting too big to fit in the smaller coop, so we decided to have fun with his house and used cedar fence pickets and some treated 2x4's, built a box and jig sawed the shape of a turkey. As you can see in the first photo the ladder for turkey wasn't big enough, all the other chickens were in his house, lol. So I beefed up the ladder and he happily can put himself up at night now:) Overall a super successful project, I wasn't sure what to do with the top and just at that point, the neighbor walked over and offered the metal, talk about a huge win and the perfect solution! We attached the run to the previous smaller structure and now they have so much more room and are laying like crazy:) Finally, I think this would make a great dog kennel as well...

Garden Trellis

Submitted by mtairymd on Tue, 05/12/2015 - 17:38

Video of the Build:
https://www.youtube.com/watch?v=xH3ABM3X3uE

Build Instructions:
http://www.instructables.com/id/Garden-Trellis/

This adjustable garden trellis for cucumber/pea/bean vines is a quick project for the vegetable garden. The trellis gets the vines off the ground and is more productive in less space. No giant rotting cucumbers to find three weeks after the rest have matured. It is made from small lumber and twine. Paint is optional but gives a nice pop of color. Just in time for the rapid growth of summer!

Estimated Cost
$10
Estimated Time Investment
Afternoon Project (3-6 Hours)
Finish Used
Paint
Recommended Skill Level
Starter Project

Drop-Down Door Hutch Desk

Submitted by danicarby on Thu, 05/14/2015 - 13:47

I designed this desk from another desk I built. With this one, I wanted the overall foot-print smaller but still something that was able to organize all our office stuff and be able to close everything to keep it clutter-free. We have a small apartment, and although this desk is about the size of an up-right piano, it works perfectly into our living space!

I made it out of raw hardwood (Ash) and because I knew just the wood alone would make this desk heavy/bulky to move I made the top hutch removable. It's held in place by wood pegs (dominos). All the shelves are adjustable and the drawers are full-extension (something I've never had - wahoo)! The drop-down door is help up by 2 pull-out boards on each side (my first desk had chains). I spend a lot of money on this desk because I knew it was a chance in a lifetime to make and wanted it to be perfect and something that would last generations.

I built the main carcass off of plans/measurements I designed, but then all the insides, drawers, shelves, doors, etc where made as I built (because just a millimeter difference in building changes everything)!

If you want more pictures/descriptions of the building process I wrote about it in a 4-part series on my blog.

Estimated Cost
$1,000 for all wood & supplies
Estimated Time Investment
Week Long Project (20 Hours or More)
Finish Used
To achieve the ash gray color I used "General Finishes" brand water-based stains (equal mixtures of Walnut, Antique Oak & Whitewash) with 1/2 ratio of Pre-Stain Conditioner (bought from Woodcraft). I did 2-3 coats stain, lightly sanded and sprayed 2 coats of Ceramithane clearcoat using HVLP sprayer (sanding with 550 grit paper in between).
Recommended Skill Level
Intermediate

Comments

Ice cream cart

Submitted by Markb25 on Mon, 11/22/2021 - 23:52

A friend wanted a tatty old chest freezer turning into a traditional looking ice cream cart for her business. The freezer itself was way to heavy and not really fit for purpose but, after a week of tinkering about with a couple of design changes here and there to accommodate the weight, I don't think I've done too bad a job.

The internal frame is Nordic fir, half lapped at the joints and secured in place with 38mm oak dowels, the cladding is 6mm birch ply finished with paint from the French chic Al fresco range, the writing proved a little challenging on the the eyes and my hands aren't as steady as they used to be but she's happy.

Comments

Simple Pallet Storage Crate on wheels

Pallet Crate on Wheels
I had some leftover pallet boards and wanted something for storage to put under my new pallet sofa table and found this plan on Ana whites plans. I changed it up a bit with the side of the crate being different only because I had to use what I already had on hand....if you want to read more and see how I built it, come check it out at my website...http://www.mysimplehomelife.com/2011/04/pallet-crate-on-wheels.html
Built from Plan(s)
Estimated Time Investment
An Hour or Two (0-2 Hours)
Finish Used
I did not use a finish, just chalkboard paint for the stencil. I wanted to keep it rustic.
Recommended Skill Level
Beginner

Mudroom/garage storage

Submitted by Anonymous (not verified) on Fri, 12/31/2021 - 07:39

Thanks for the inspiration to add great storage to my garage.
Just downsized into a much smaller house after 20 years and I lost my mudroom area.
This mudroom/garage locker bench and hutch is a great looking unit!
Looking forward to seeing more on your site.
Thank you!
Mike

Comments

30inch Simple Stool

I'm doing a lot of projects in the shop this summer (starting with planing 240 fence pickts :S) and so I decided that this stool would be an excellent edition (better than plastic chairs) to the shop.

I increased the length of the legs to 30 inches (from the plan length of 23) and its quite solid with the increase.

I don't have a miter saw, so I did this with my table saw and the outcome was very good. Be sure you use a square to make sure your miter gauge is calibrated before making the cuts.

I used 1x2 and 2x2 (2) furring strips from orange that cost $3.12 and $1.47 respectively. I had some 1x12 scraps around and trimmed one down a bit and glued/screwed 1x2s on either side to make it wide enough.

I didn't fill the holes because filler is a bit pricey for the shop stool.

I think I'll make a round top for it eventually, but for now it does just fine.

Built from Plan(s)
Estimated Cost
$6.50
Estimated Time Investment
An Hour or Two (0-2 Hours)
Finish Used
Two coats of an interior paint I had in the closet.
Recommended Skill Level
Beginner

Comments

Grace's Bookshelves (Just One)

Submitted by aclayton on Sat, 07/09/2011 - 12:43

I just made one of the shelves instead of two like the plan calls for. It's painted a dark brown to match the bunk bed that I previously made for my girls. Mine was a little more expensive because I used 1x12's instead of plywood.

Built from Plan(s)
Estimated Cost
$50
Estimated Time Investment
Weekend Project (10-20 Hours)
Finish Used
1 Coat of Primer
2 Coats of Valspar "Barista"
1 Coat of Poly
Recommended Skill Level
Beginner

Comments

Debbie (not verified)

Mon, 07/11/2011 - 19:14

You did a beautiful job! Where did you get your pretty pink storage bins? I've been looking for some like them for my granddaughter's room.

Bathroom Storage Cabinet

I built this cabinet to store magazines and diapers (towels when the time comes) in the small 1/2 bath.

The top was made with left over oak pieces from when I ripped out the carpet and 2x12 stairs and replaced with oak treads.

Estimated Cost
$20 (already had the treads)
Estimated Time Investment
An Hour or Two (0-2 Hours)
Finish Used
jacobean stain on top, pale sandy beige paint with jacobean stain used as glaze on body.
Recommended Skill Level
Beginner

Comments

Debi G

Wed, 07/27/2011 - 11:15

I just created something similar. The way the top and body coordinate, and how the top cubbies are sized make this a stand-out.
Something similar would work for my classroom, too.

Outdoor Tables and More - Thank You

Submitted by rhogle2000 on Thu, 08/04/2022 - 09:04

Thank you the inspiration!
I'm a retiree and beginner woodworker, through your videos I used leftover lumber and Trex decking from new deck to make two side tables, coffee table, and a bench.
Thank you so very much!

Built from Plan(s)

Comments