Countertop Farm Fresh Egg Stand
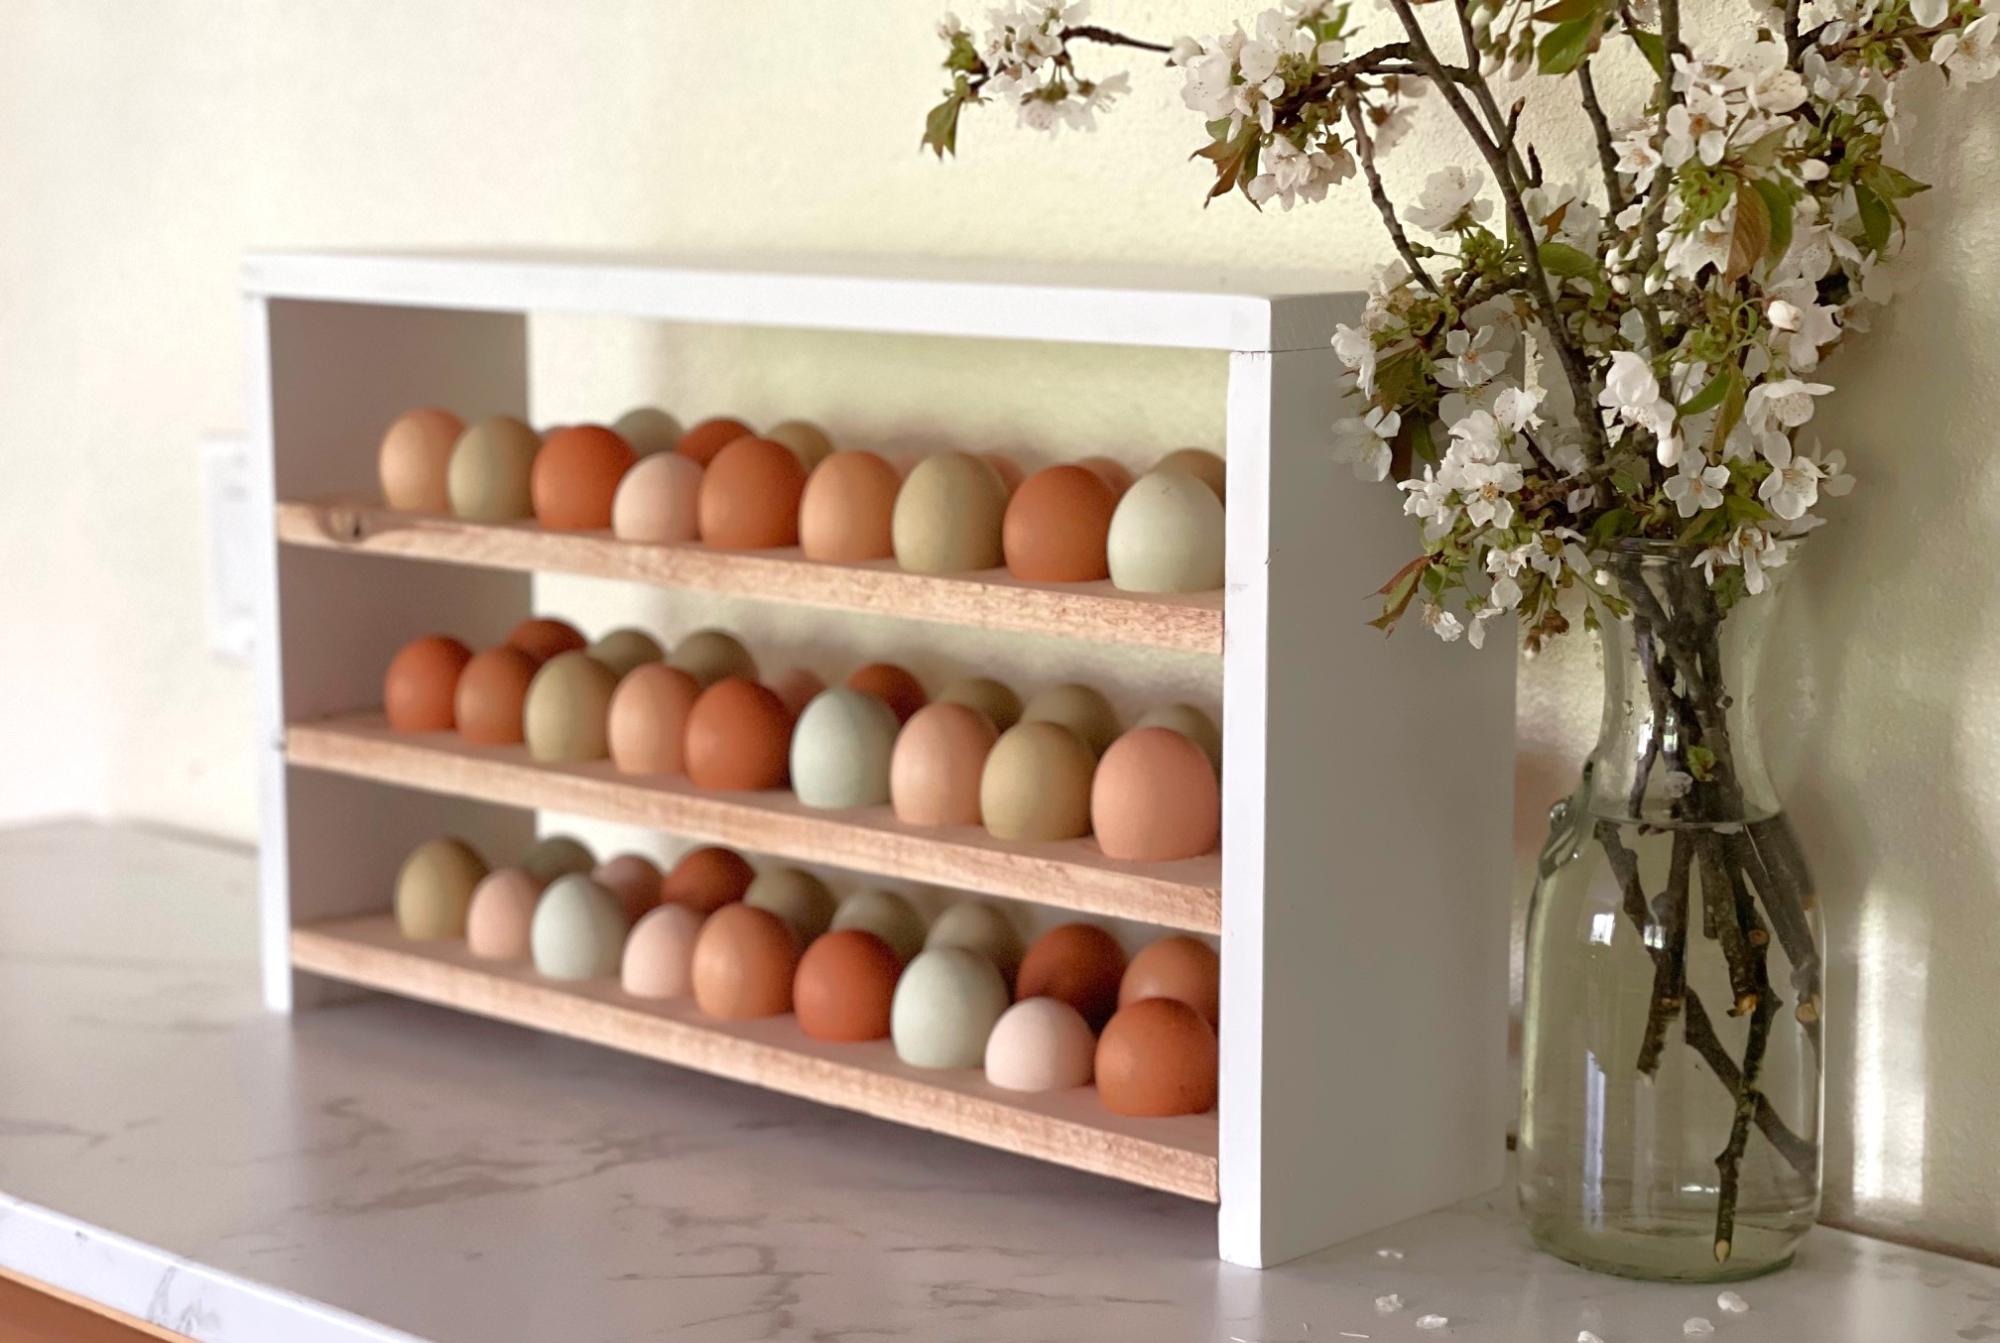
I used Ana's plans with modifications to hold 4 and a half dozen eggs. I love that it can sit on my counter and display those beautiful farm fresh eggs!
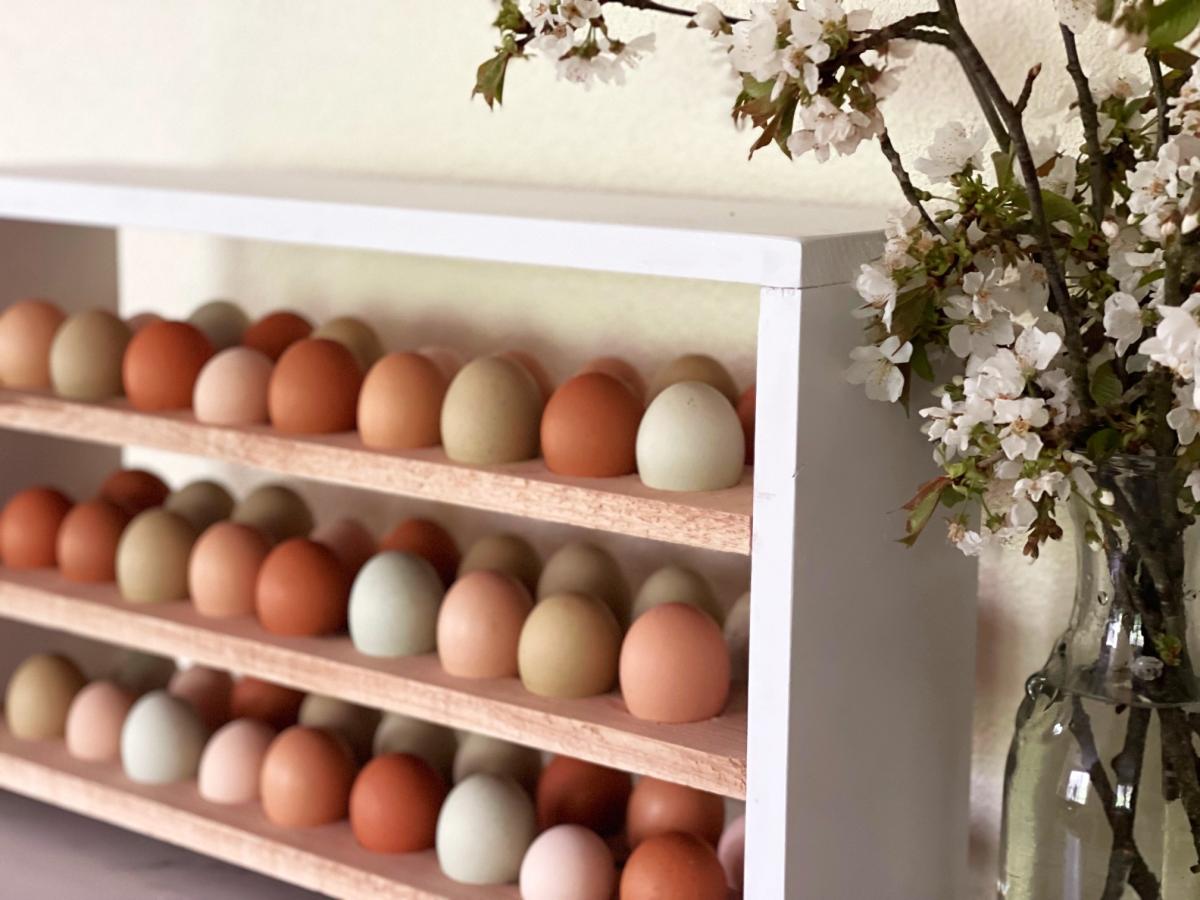
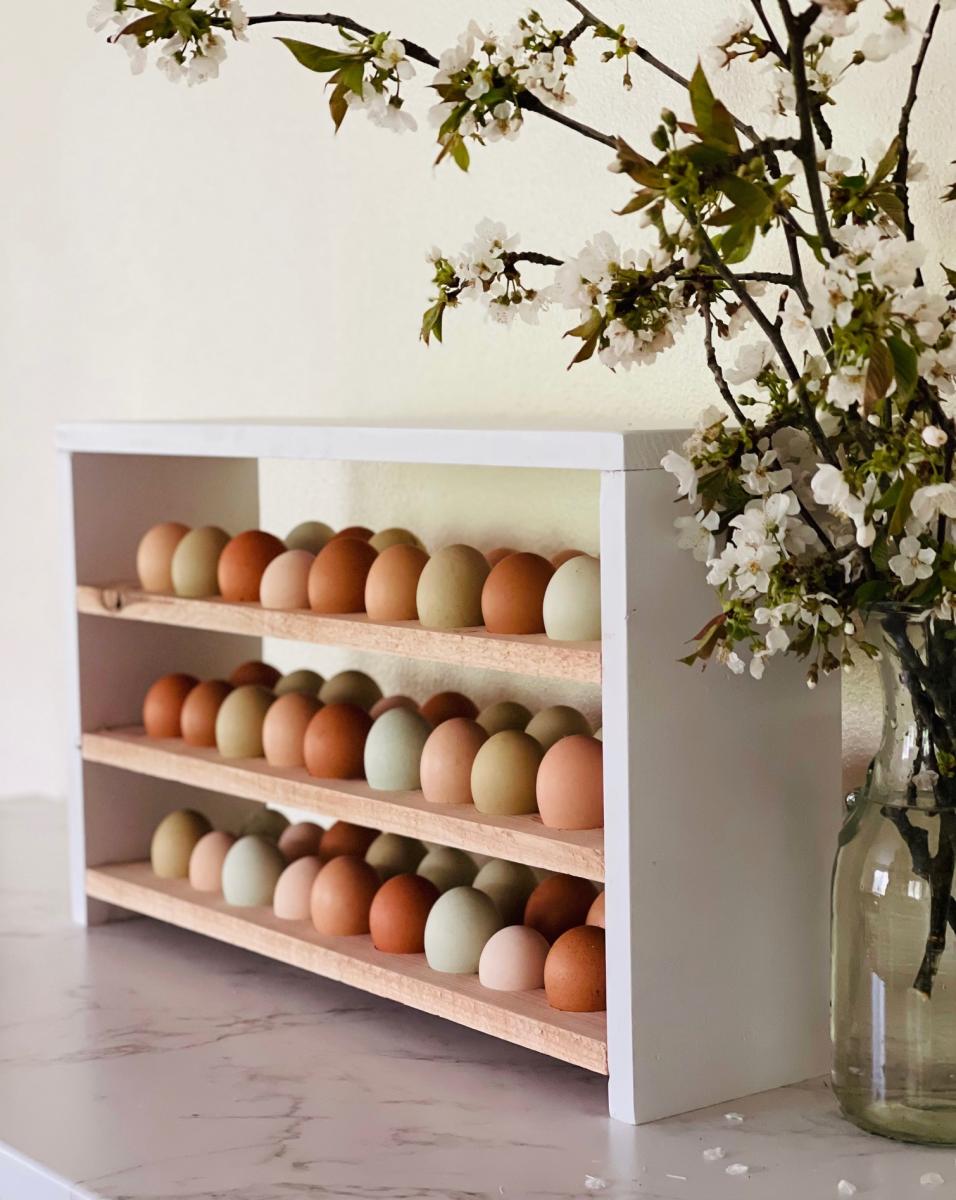

I used Ana's plans with modifications to hold 4 and a half dozen eggs. I love that it can sit on my counter and display those beautiful farm fresh eggs!


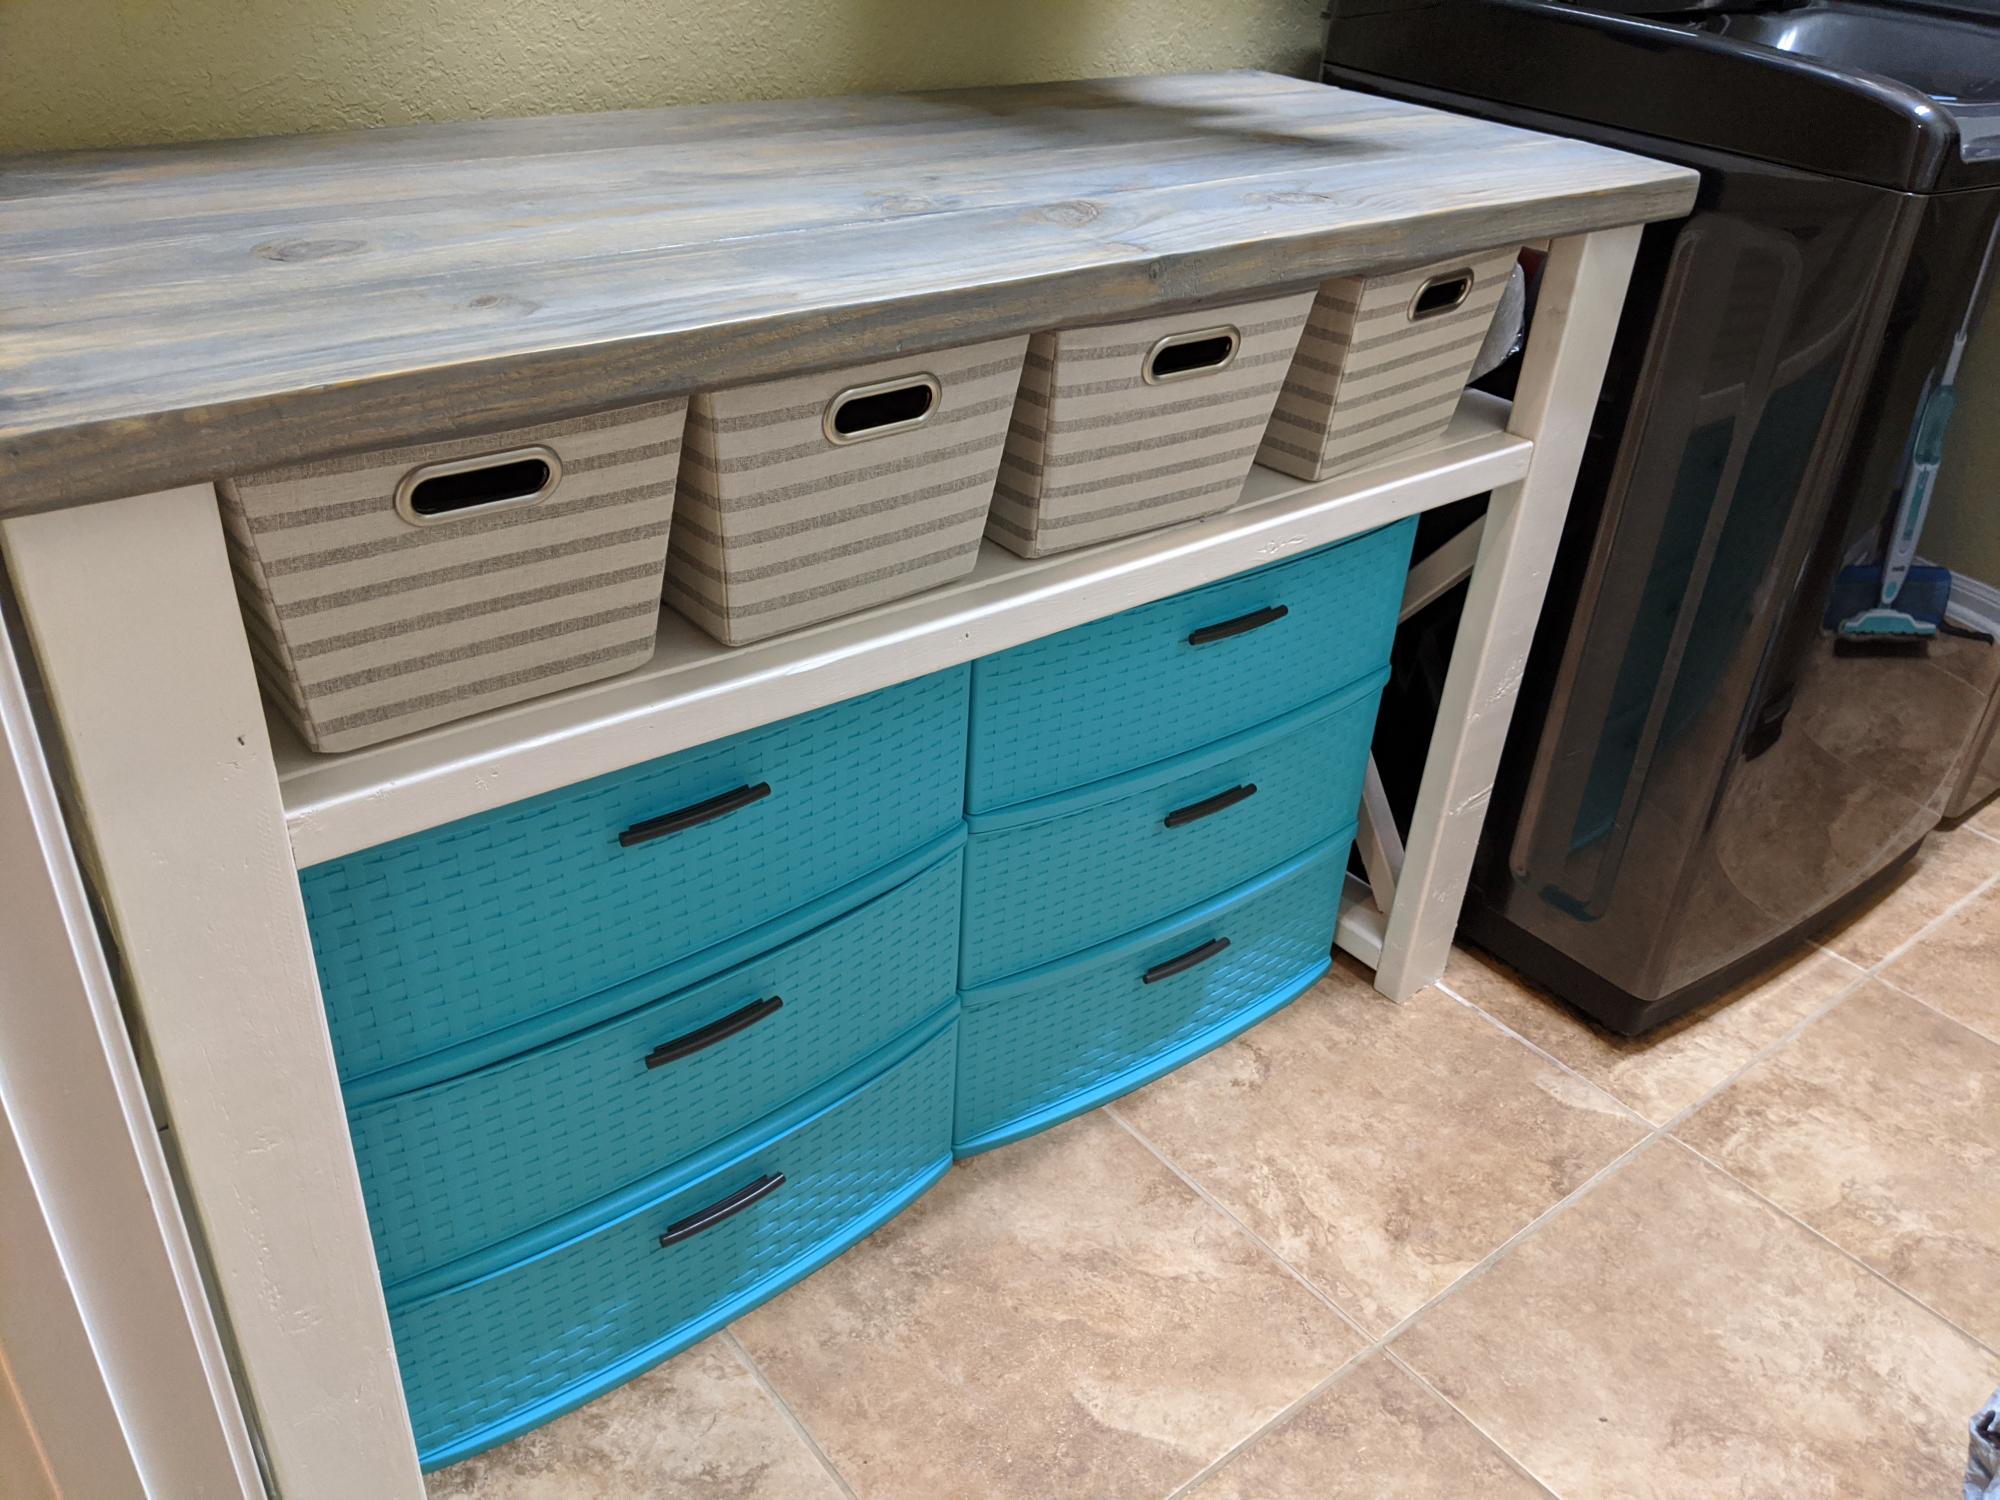
I modified the plans for the farmhouse console table to create a laundry room table. I changed the shelf height and used 2x4s running the entire length for the shelf.
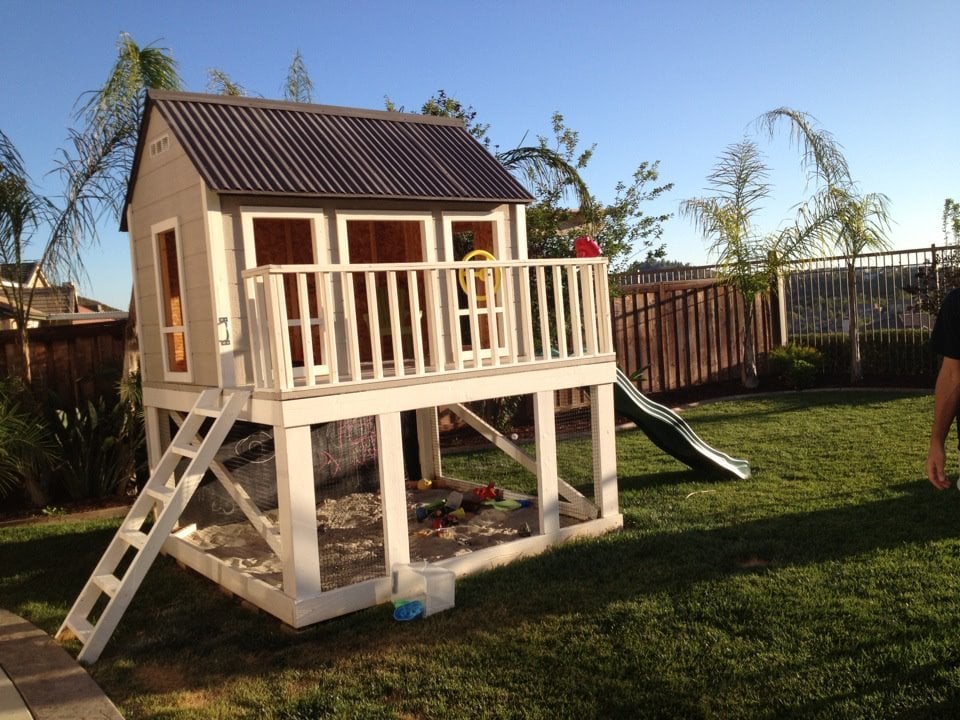
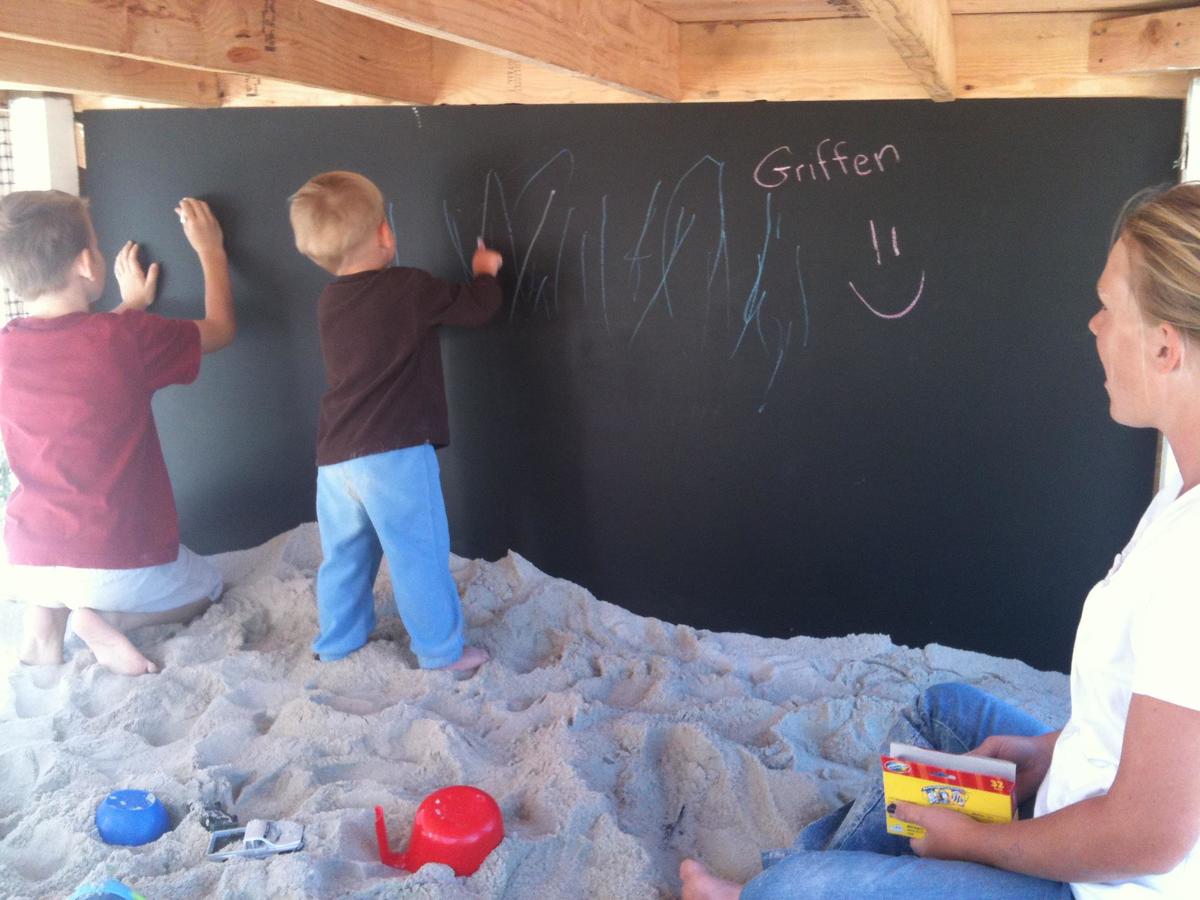
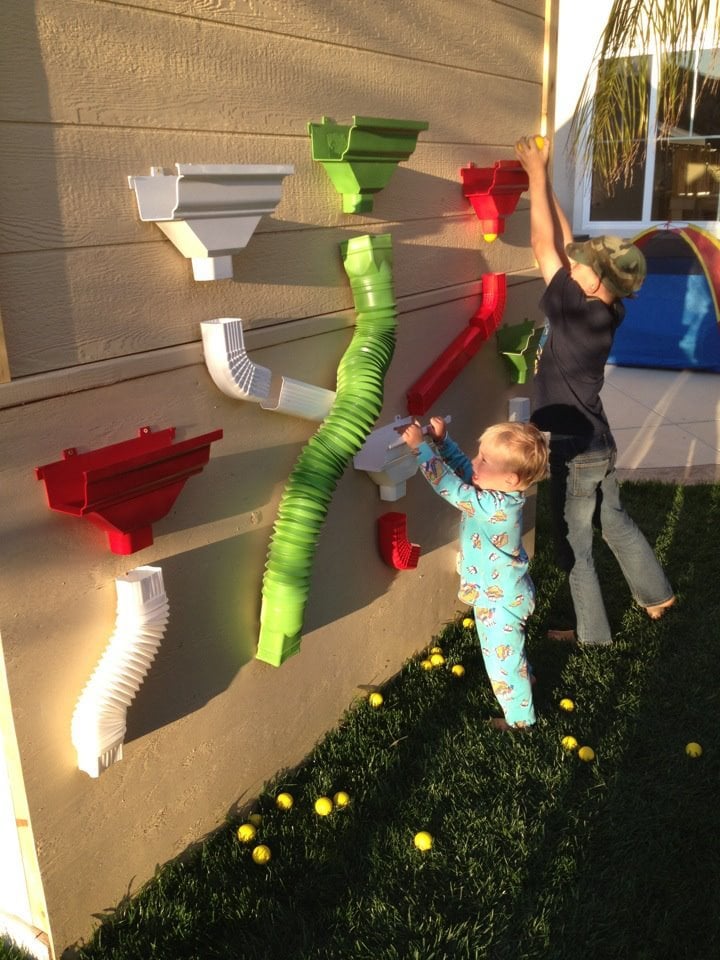
This was so much fun to do! Very easy and I added some personal touches. I made the lower level an enclosed sandbox area with a chalk board on the back wall. On the outside of the back wall, I added a "ball wall" that my kids love. I enclosed the bottom sandbox with plastic "chicken wire" to keep the cats out. :)
Thu, 11/22/2012 - 13:05
This is an awesome build. love the colours too, could you share them with us, including the roof colour. Thanku
Thu, 11/22/2012 - 15:34
Thanks! Glad you like it!
The paint was from Dunn Edwards: Roof was "Louisiana Mud", playhouse walls were "Drifting" and then the white was a snow white from Lowe's.
The slide and accessories were also from Lowe's.
Tue, 04/15/2014 - 09:35
I LOVE this! This is exactly what I'd like to build. Do you have plans you can share with us? I think I'd also like to add a couple of swings on one of the sides too. Thanks so much!
In reply to Love this! by m7hennen
Sun, 04/27/2014 - 08:39
I know I messed with the dimensions a bit but I don't remember exactly. I made the playhouse larger (deeper and taller than original plans) . I also cut the roof line on the deck side for more room. I put aluminum over the wood on the roof and then painted. The Ball Wall was made out of plastic gutter pieces that I painted and we used practice rubber golf balls to throw into them. I hope that helps! We sold that house, so I can't go out and measure it :)
In reply to Plans for Playhouse by Dawnybb
Thu, 05/28/2020 - 15:32
You may not get this as this is an old post. Did you dig post holes? I have older kids and I am thinking about building a plan like this but at a 6ft height. Wondered how much it moves around when there are a bunch of kids on there. The house I will build is also 6 ft heigh.
This was my first furniture project and only my 2nd woodworking project, the previous one a cubby house over 20 years ago, so I was a bit nervous. I did lots of planning, research and designing before the first cut. I incorporated ideas from Ana projects as well as from other sites and learned how to use a drop saw, various sanders and the pocket hole jig.
We wanted a tall table because when sitting a a regular height table the view is blocked by the deck railing.
I decided to make it out of hardwood for durability in the Australian outdoors and also because we get sea air where we are. The hardwood (Blackbutt) was challenging to work with - extremely heavy and difficult to drill into, but the finished product is SO solid and will outlive us all. Due to the weight and density of the timber I overengineered as far as joining went, using more pocket holes than usual.
I saw the idea of the built in ice troughs years ago and was keen to incorporate them into my table. I also made the legs detachable so that the table top could be moved out onto the deck once it was finished and the legs added in situ. Once it was set up my husband put big screws into the legs just in case but it would really take an earthquake to move this thing.
I managed to build it over 3 weekends and finished it just in time for our family Christmas party but it only had 1 coat of stain on it at that stage. I finished it off later and we also decided that the ice trough covers would look good in a contrasting colour so did them in charcoal. If I made it again it would be a much quicker project as there was alot of 'firsts' and learning along the way.
The dimensions are:
2660mm long (about 8' 9")
1150mm wide (about 3' 9.5")
1165mm high (about 3' 10")
The legs are solid - 140 x 140mm (5.5")
It seats 10 - 12 comfortably and 14 at a squeeze.
We got the bar stools 2nd hand for an absolute steal - 12 for $200! They are handmade hardwood too and look great.
The timber was quite expensive but I was able to use the work account so got it at trade price. This would be a very expensive table to buy but all up it cost us about AU$1100.
This project was not exactly easy but I would class myself as a novice. With the right planning and preparation (plus stubbornness) anyone could do this :-)
In reply to A Piece of Art! by Ana White Admin
Sat, 01/28/2017 - 16:12
Thank you so much :-)
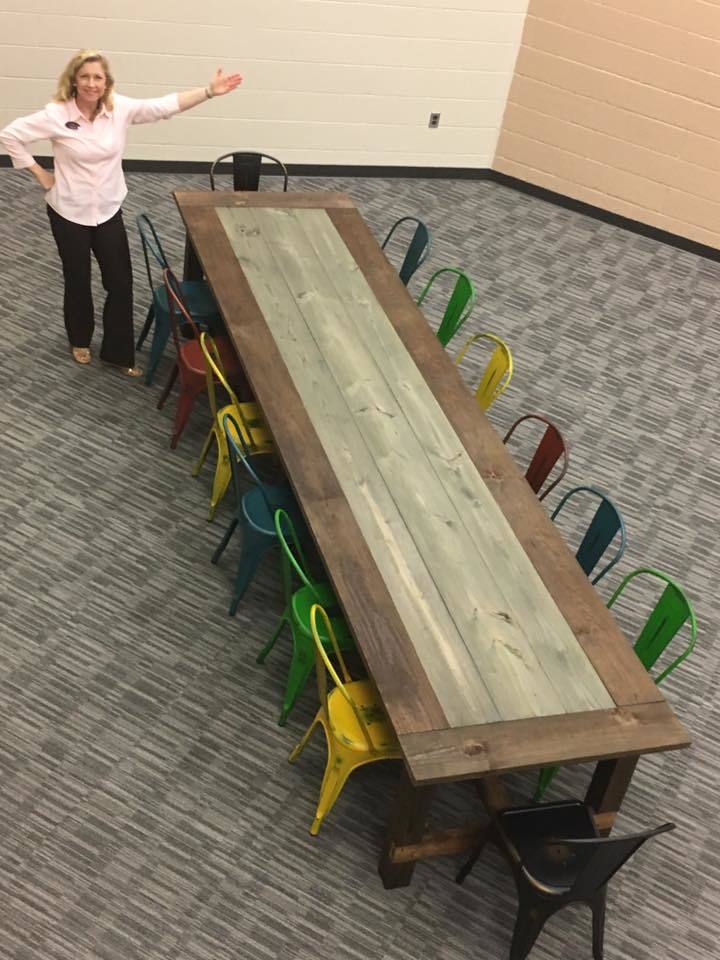
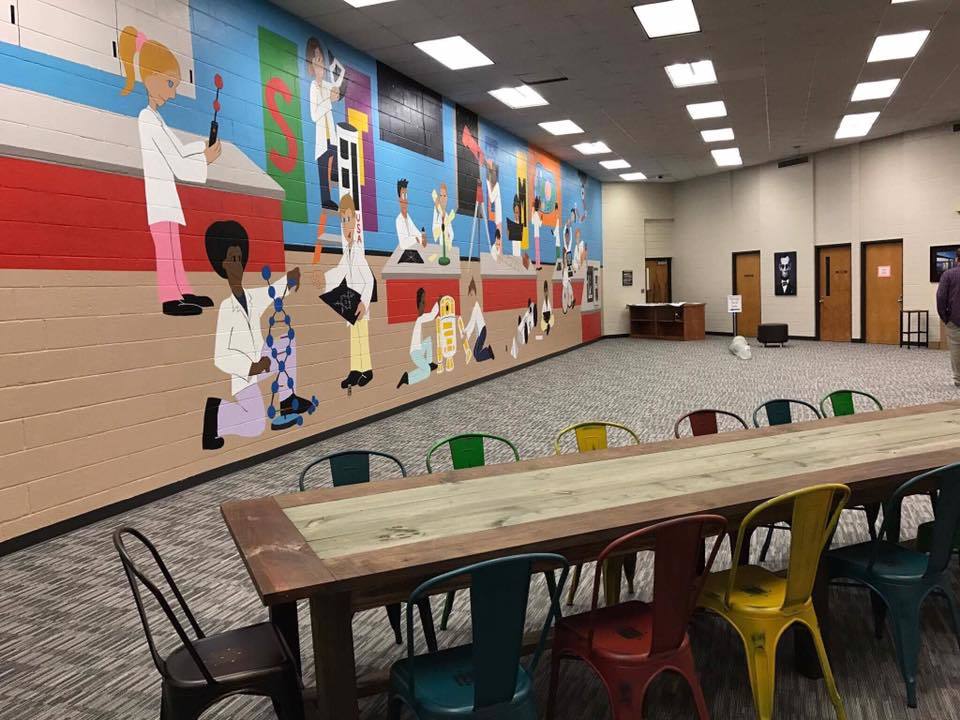
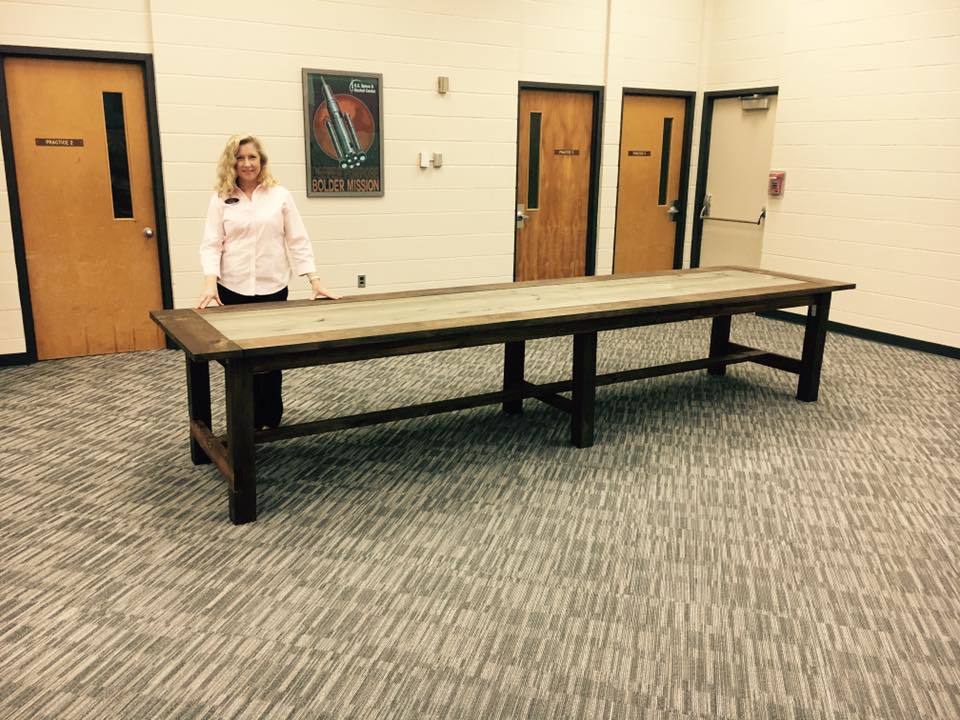
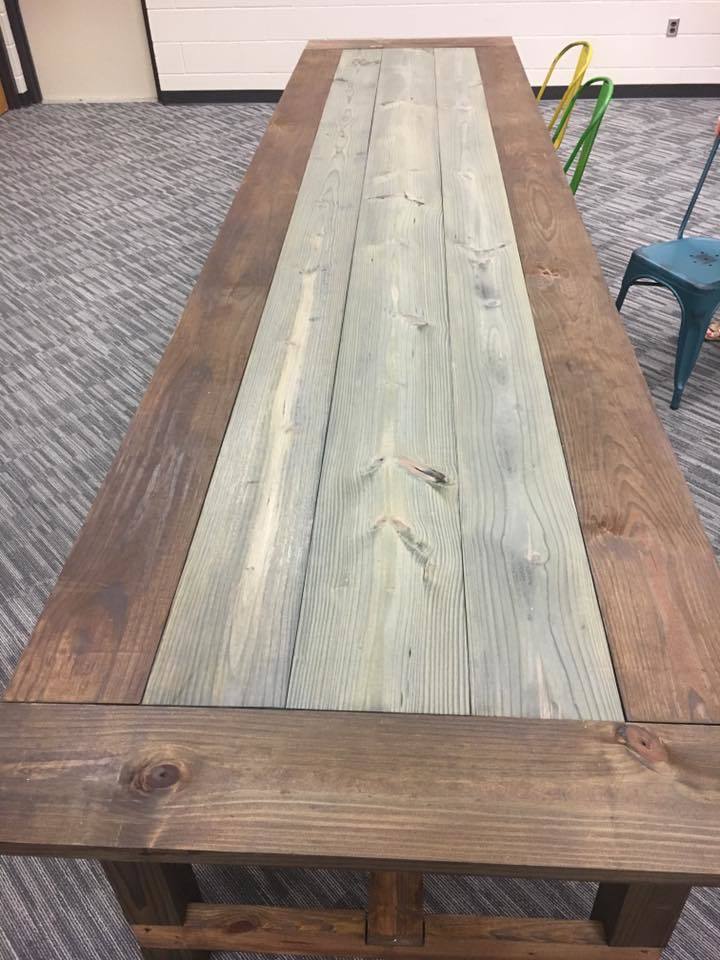
I am not a carpenter, I do not even have a tape measure. I got tasked by my leadership dothan class to build a farmhouse table for the academic dream room which is part of the Bright Key Program. Which is being renovated at Honeysuckle Middle School. Found your plans and got inspired. One glitch they wanted this table to be able to sit fourteen chairs. So I had to make a few adjustments like increasing the main boards to twelve foot. Because of your plans, many urban middle schoolers will have a place to get tutored considering cafeteria tables are so expensive. I am a believer of your plans. The positive feedback I received was well worth my time and would not of been a sucess without your plans. I did mine with pocket holes as well.
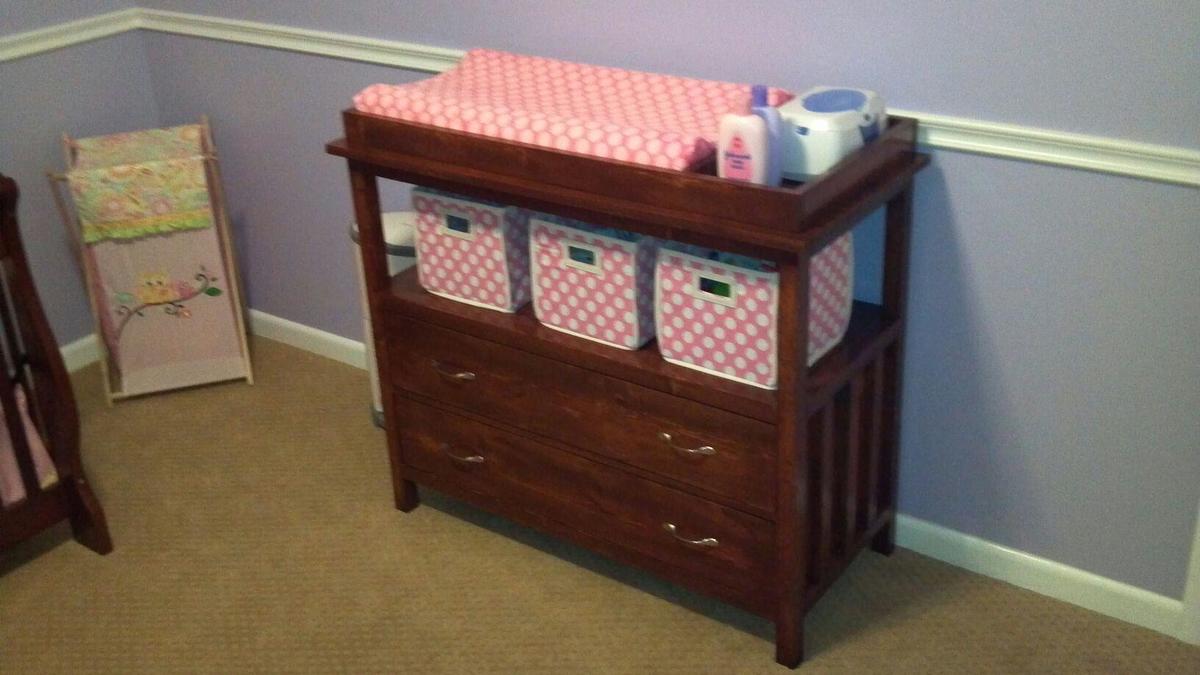
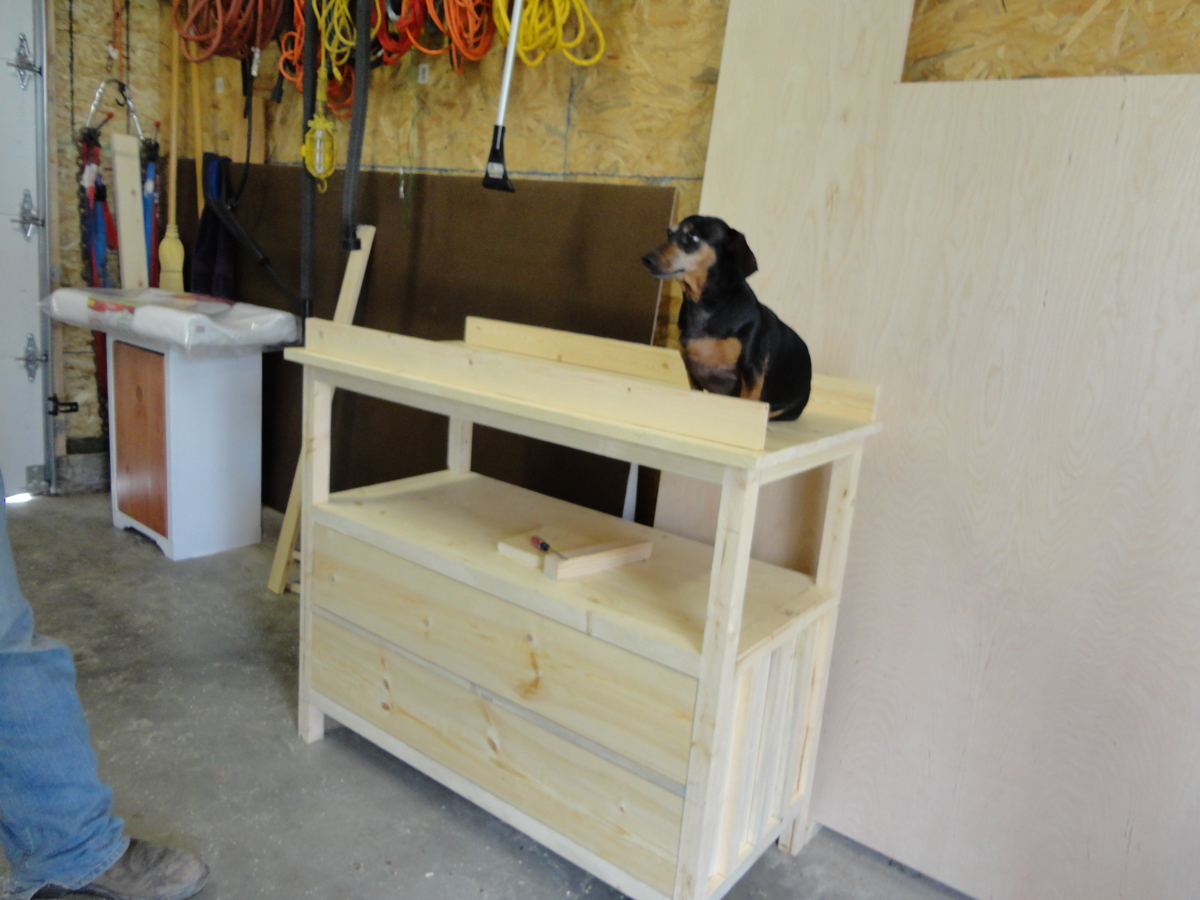
When my wife and I found out we were expecting our first child, I knew I wanted to build as much as I could for the nursery. This is how I ran into Ana White's website. Since then, I have built several pieces of furniture all inspired from Ana's designs. It had been over 10 years since I had done any kind of woodworking and I'm finding myself enjoying it now more than ever.
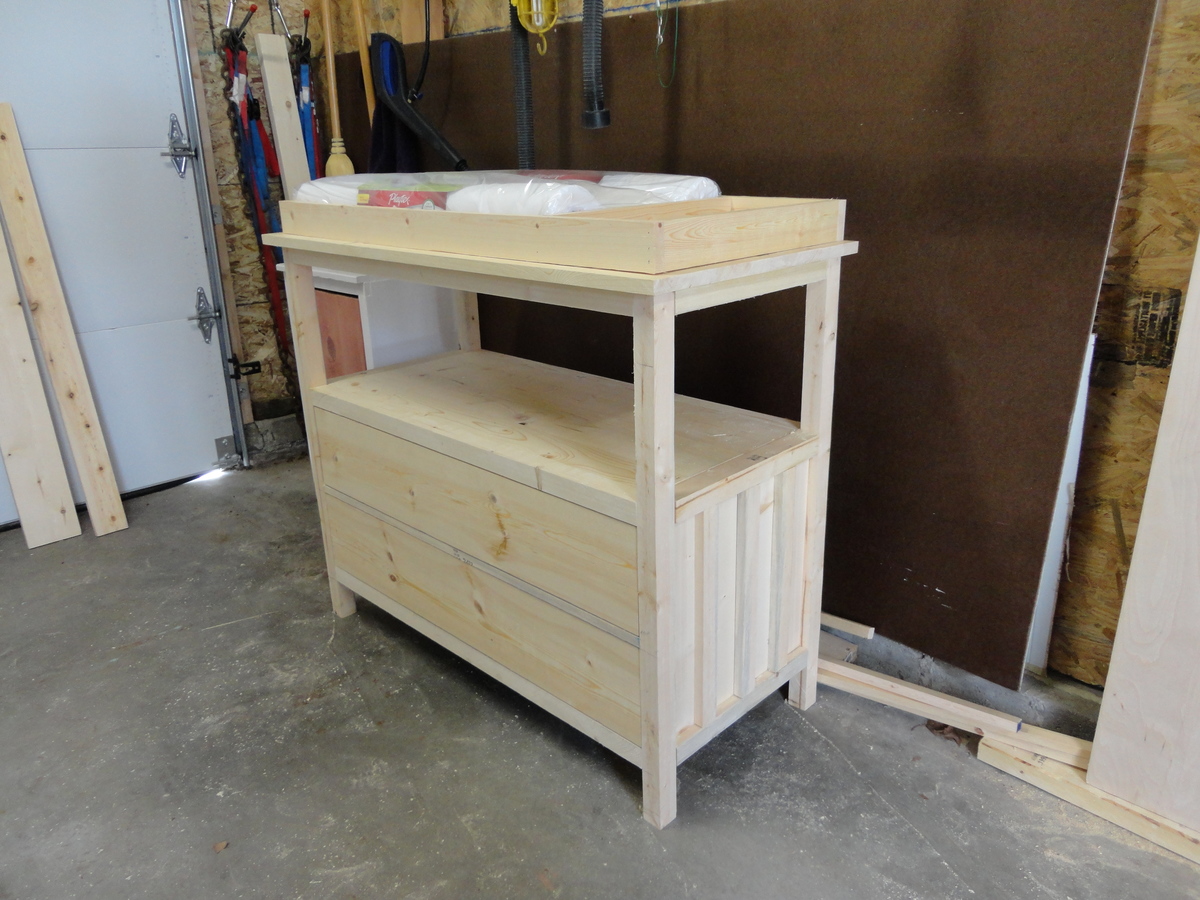
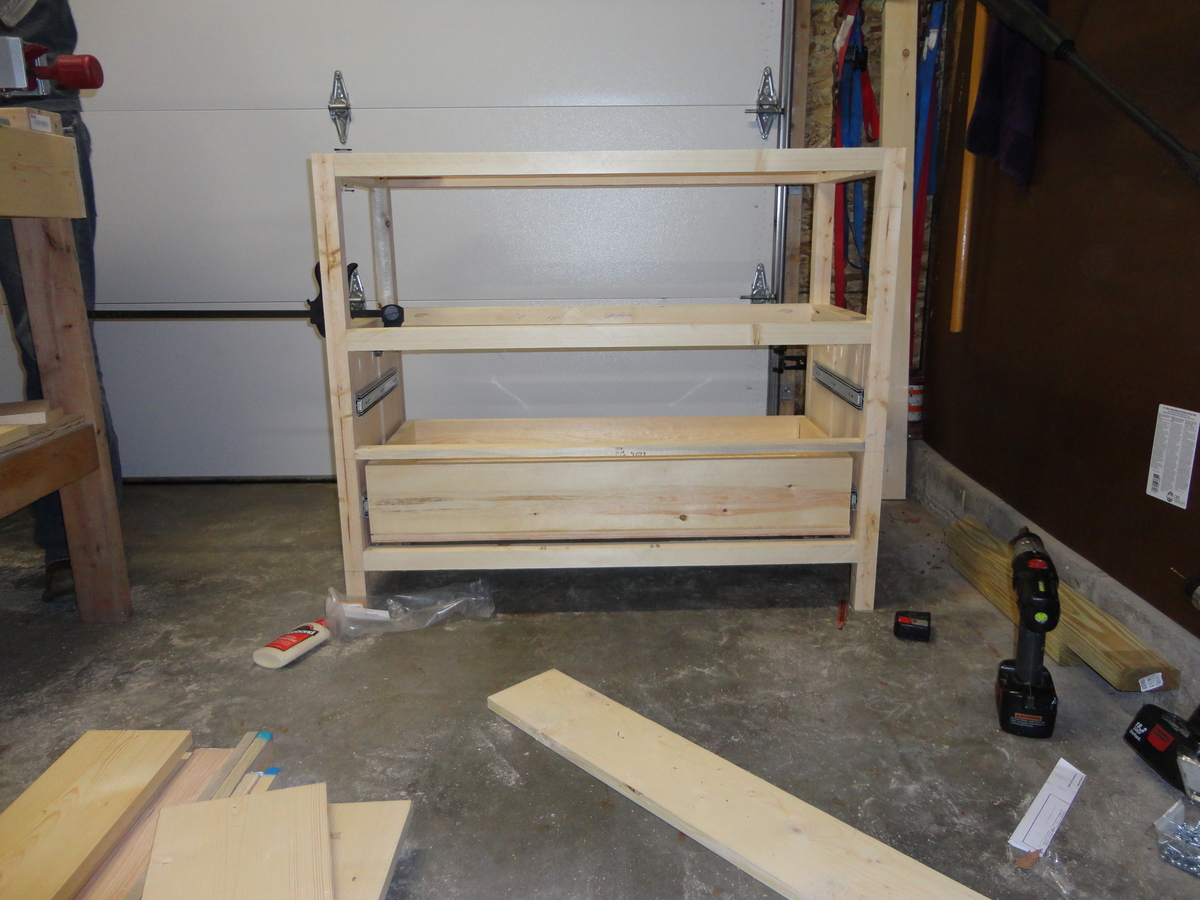
For our changing table, I used the idea of Ana's Small Dresser, and chose to put the shelf on top, we figured it would be more useful to have bins located on top for lotions, diapers, etc We had a great time building this changing table, and it is very rewarding to see the finished product. Thanks Ana for all of the great ideas and plans!!!
Sat, 12/21/2013 - 20:02
I'm determined to build as much as our future child's furniture as possible, and I am very much inspired by this build. Really love the drawers you placed on this piece- they look great!
Wed, 04/23/2014 - 04:17
This is beautiful! I am going to make this for my daughter as she is going to have my first grand baby. Could you tell me the over all height is and the drawer and shelf heights are?
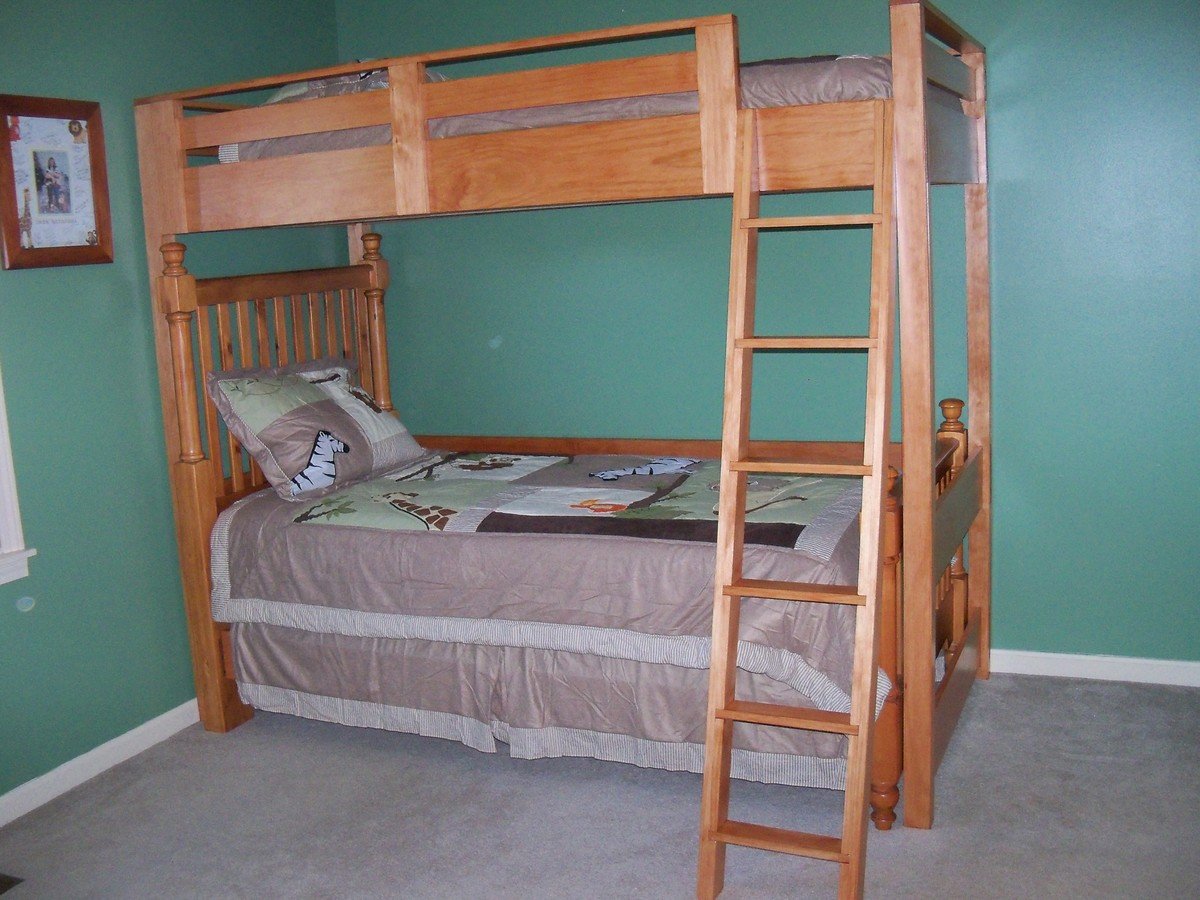
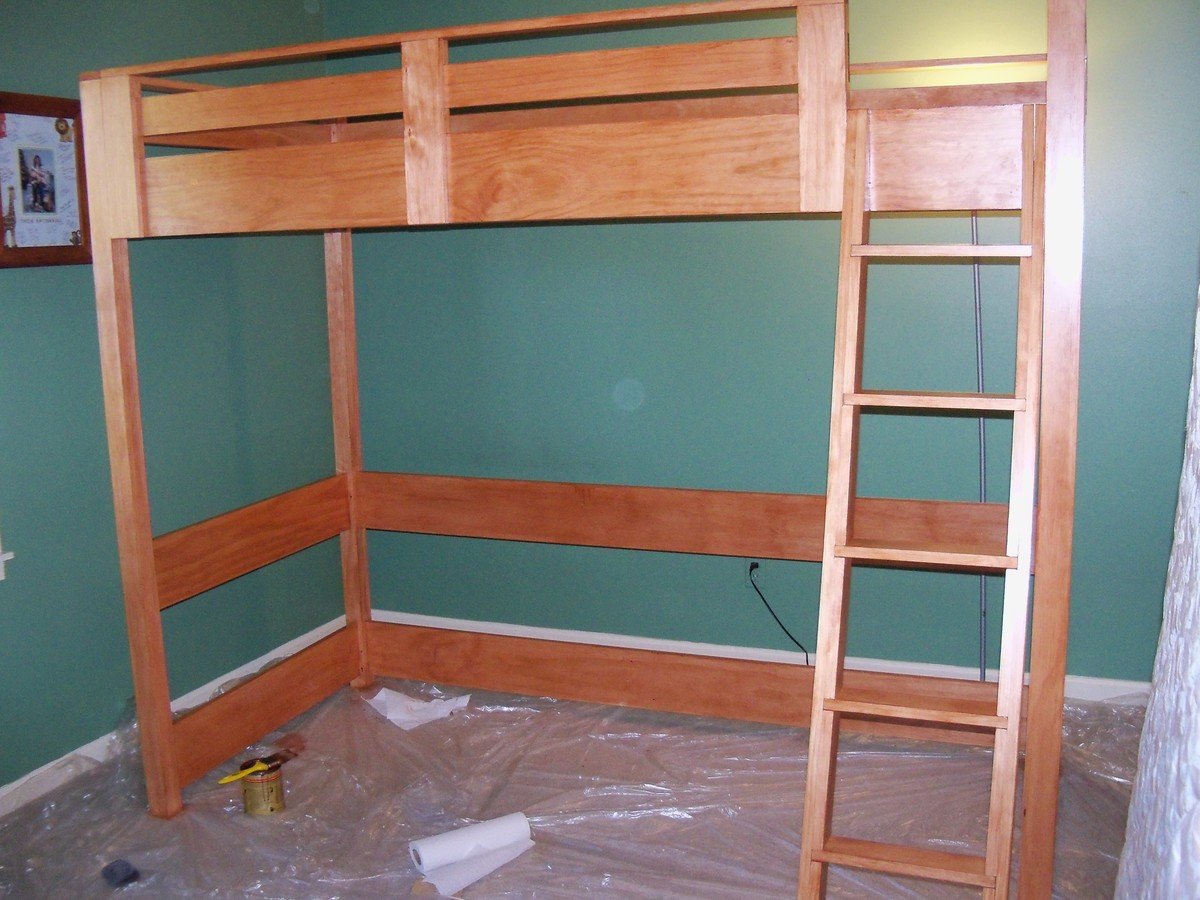
We adapted the loft bed plans so we could put our sons' current twin bed underneath it to make "bunk" beds for our boys. It turned out perfectly! The loft is very sturdy, even with 2 adults and a child on the top bed.
We made it taller and longer, and added an additional row of 1x8s to increase stability.
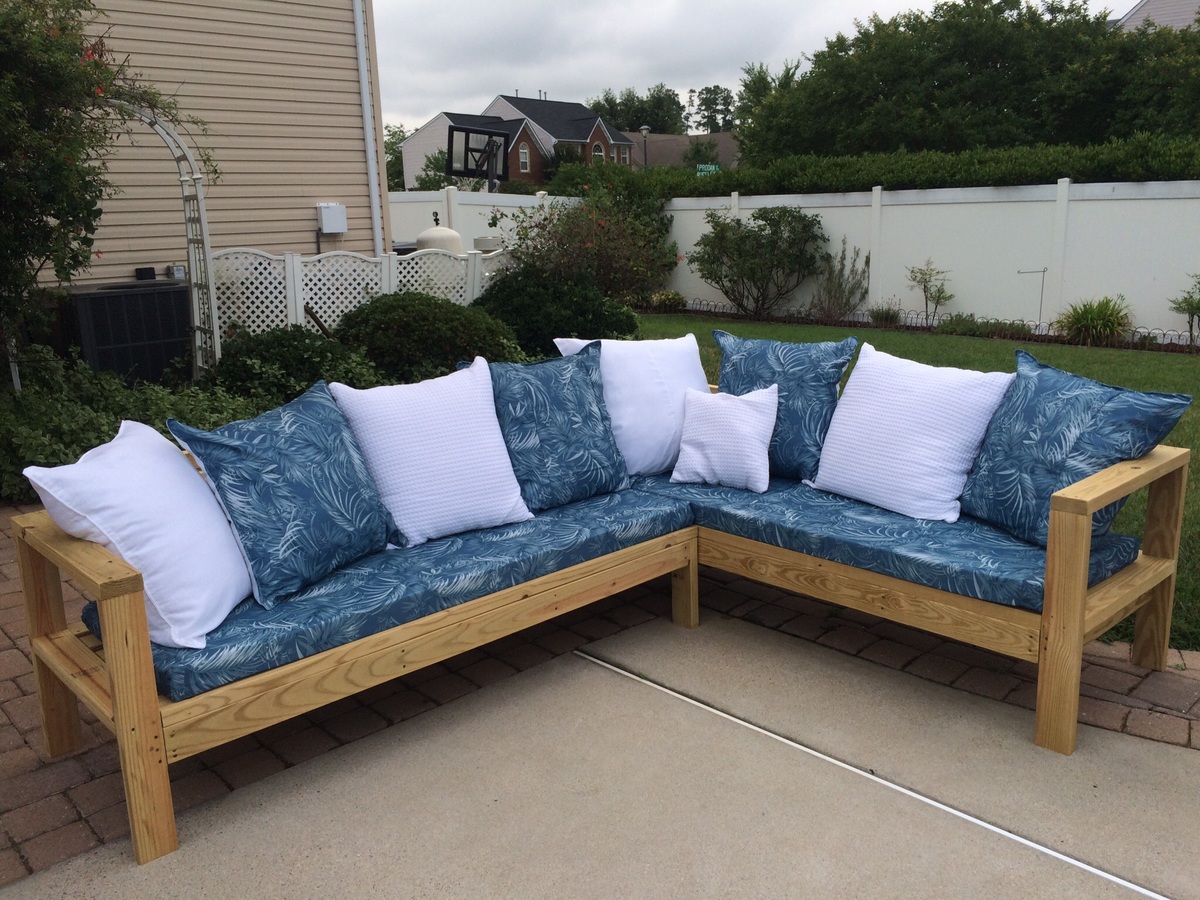
I made the cushions and pillows myself using shower curtains as a cheap and water-resistant fabric alternative. I also ordered the foam and pillow forms on-line. This was a great Father's Day project completed with help from my son and husband. Great plans!
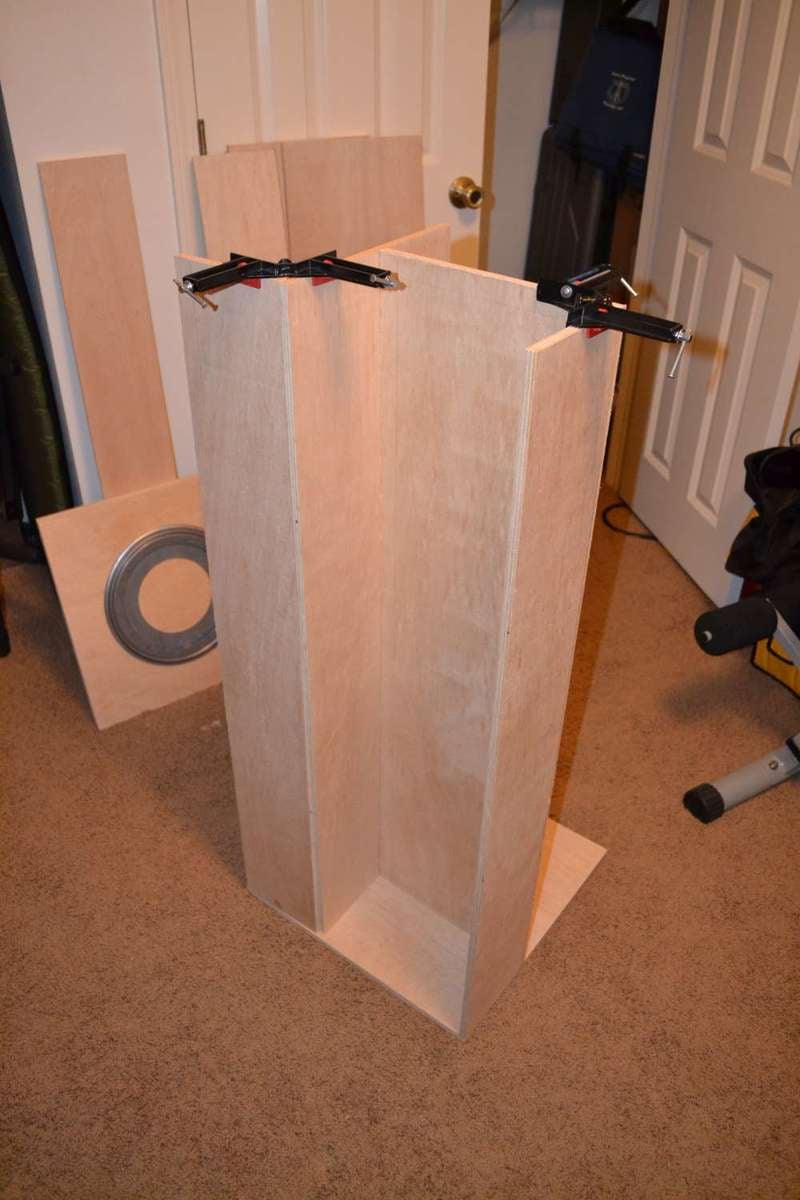
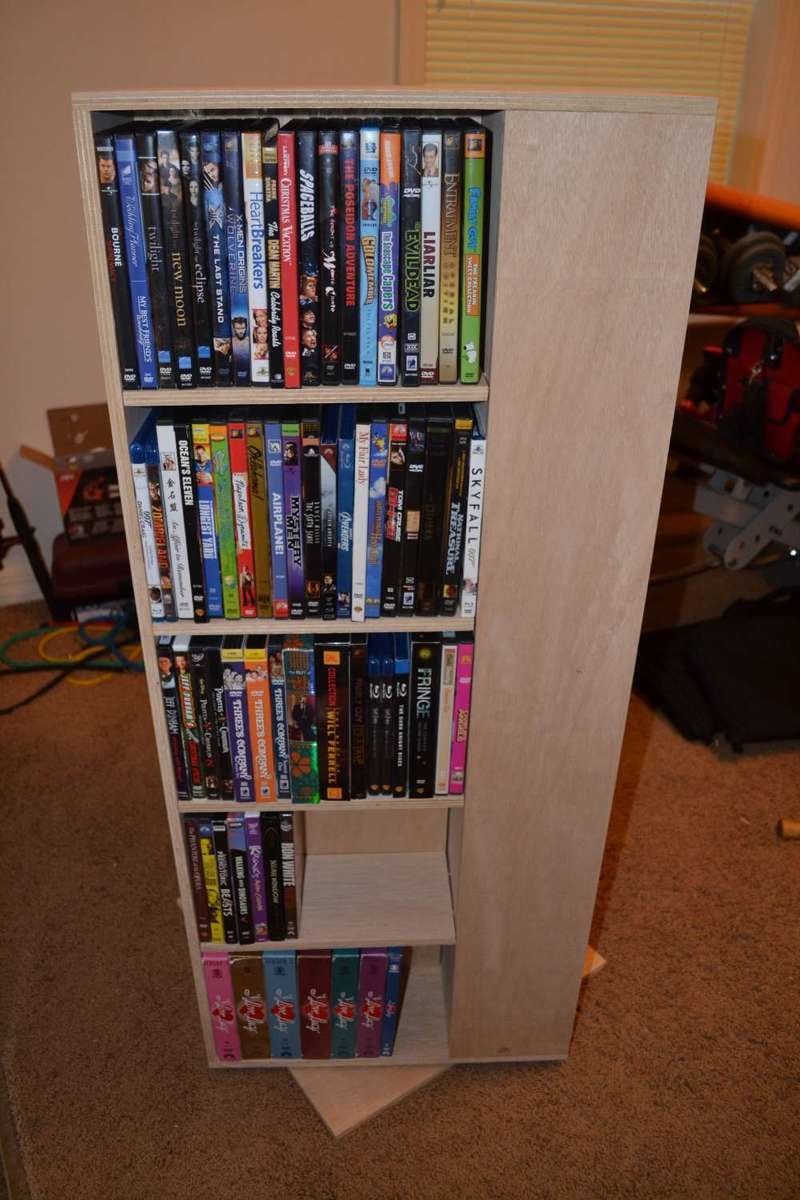
I was looking online for a spinning DVD rack to buy when I stumbled across a picture of a custom built rack. I decided to give it a try and this is the result. This is the first project I've done outside of basic shelves and it was a great learning experience. The overall fit and finish isn't quite where I'd like it to be but overall I think it turned out pretty well. I was able to find a 12" lazy Susan at a hardware store that supports over 300lbs and worked perfectly for this project.
I used pocket holes for the shelves, finishing nails for the top and screws for the bottom and lazy Susan. I also used pocket holes to attach the shelf backs and hid them behind the shelves. One thing I definitely won't use next time is spray paint/enamel. The finish isn't nearly as nice as I wanted and it cost far more than I was expecting.
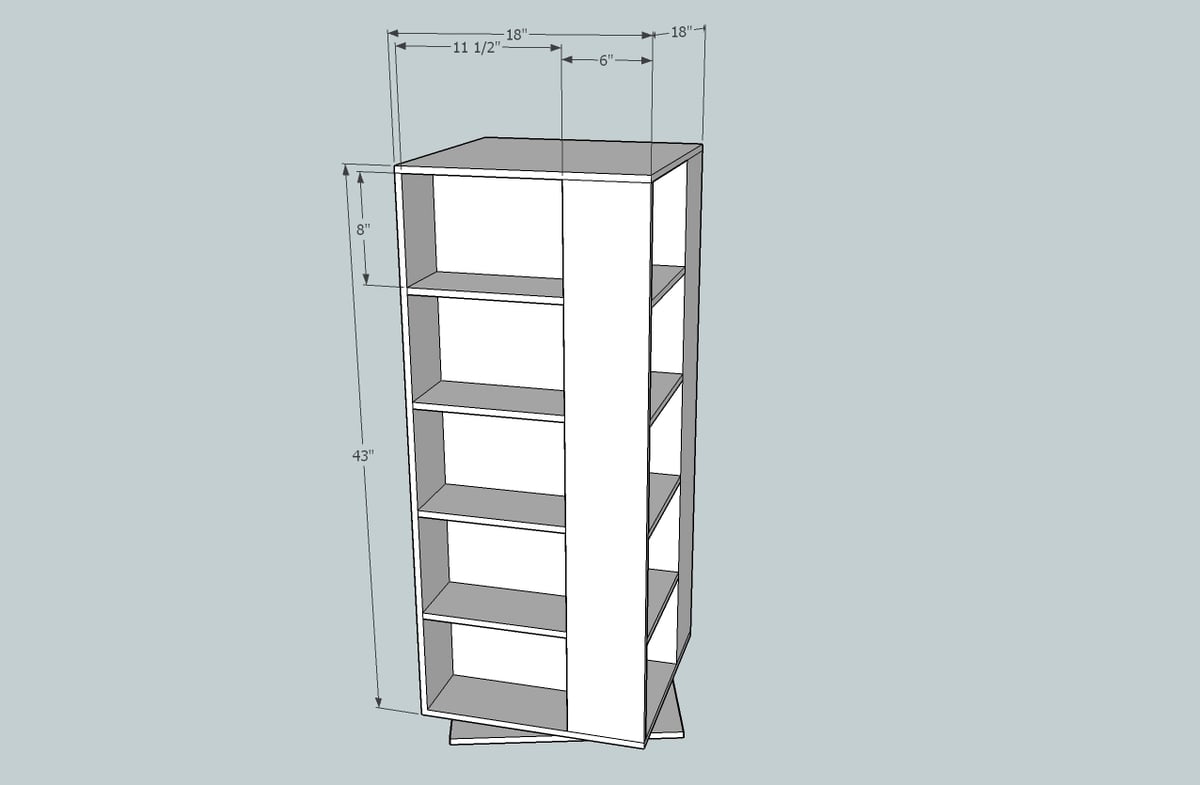
This is also my first time using SketchUp and I'm really impressed with it. I've uploaded a copy of the plans.
Criticism and suggestions are appreciated.
-Dan
Sun, 07/14/2013 - 11:35
I like this spinning DVD unit! Coincidentally, I just finished using spray enamel to redo some cupboard door handles. It's horrible stuff! I ended up sanding it off, and doing it over in flat black. I roughed up the edges with 180 grit to antique them a bit. Looks much better!
Sun, 02/12/2023 - 01:19
Can I get a design drawing for this piece?
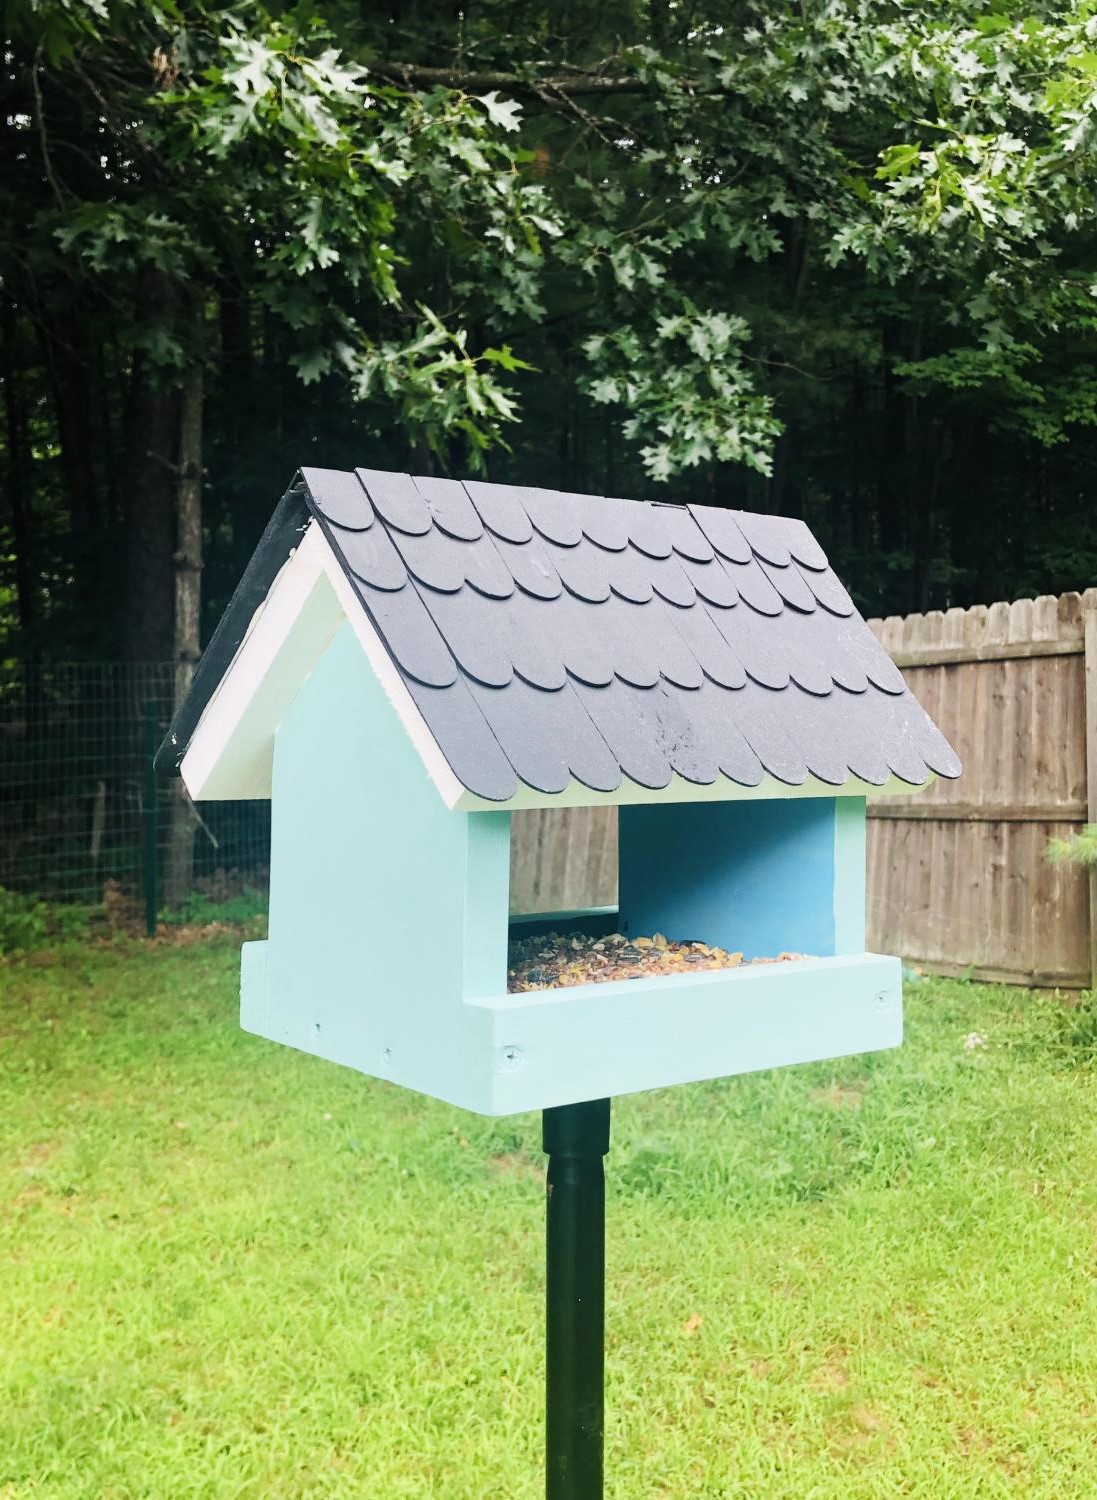
Took some liberties on this one. Used paint stirrer sticks for the roof.
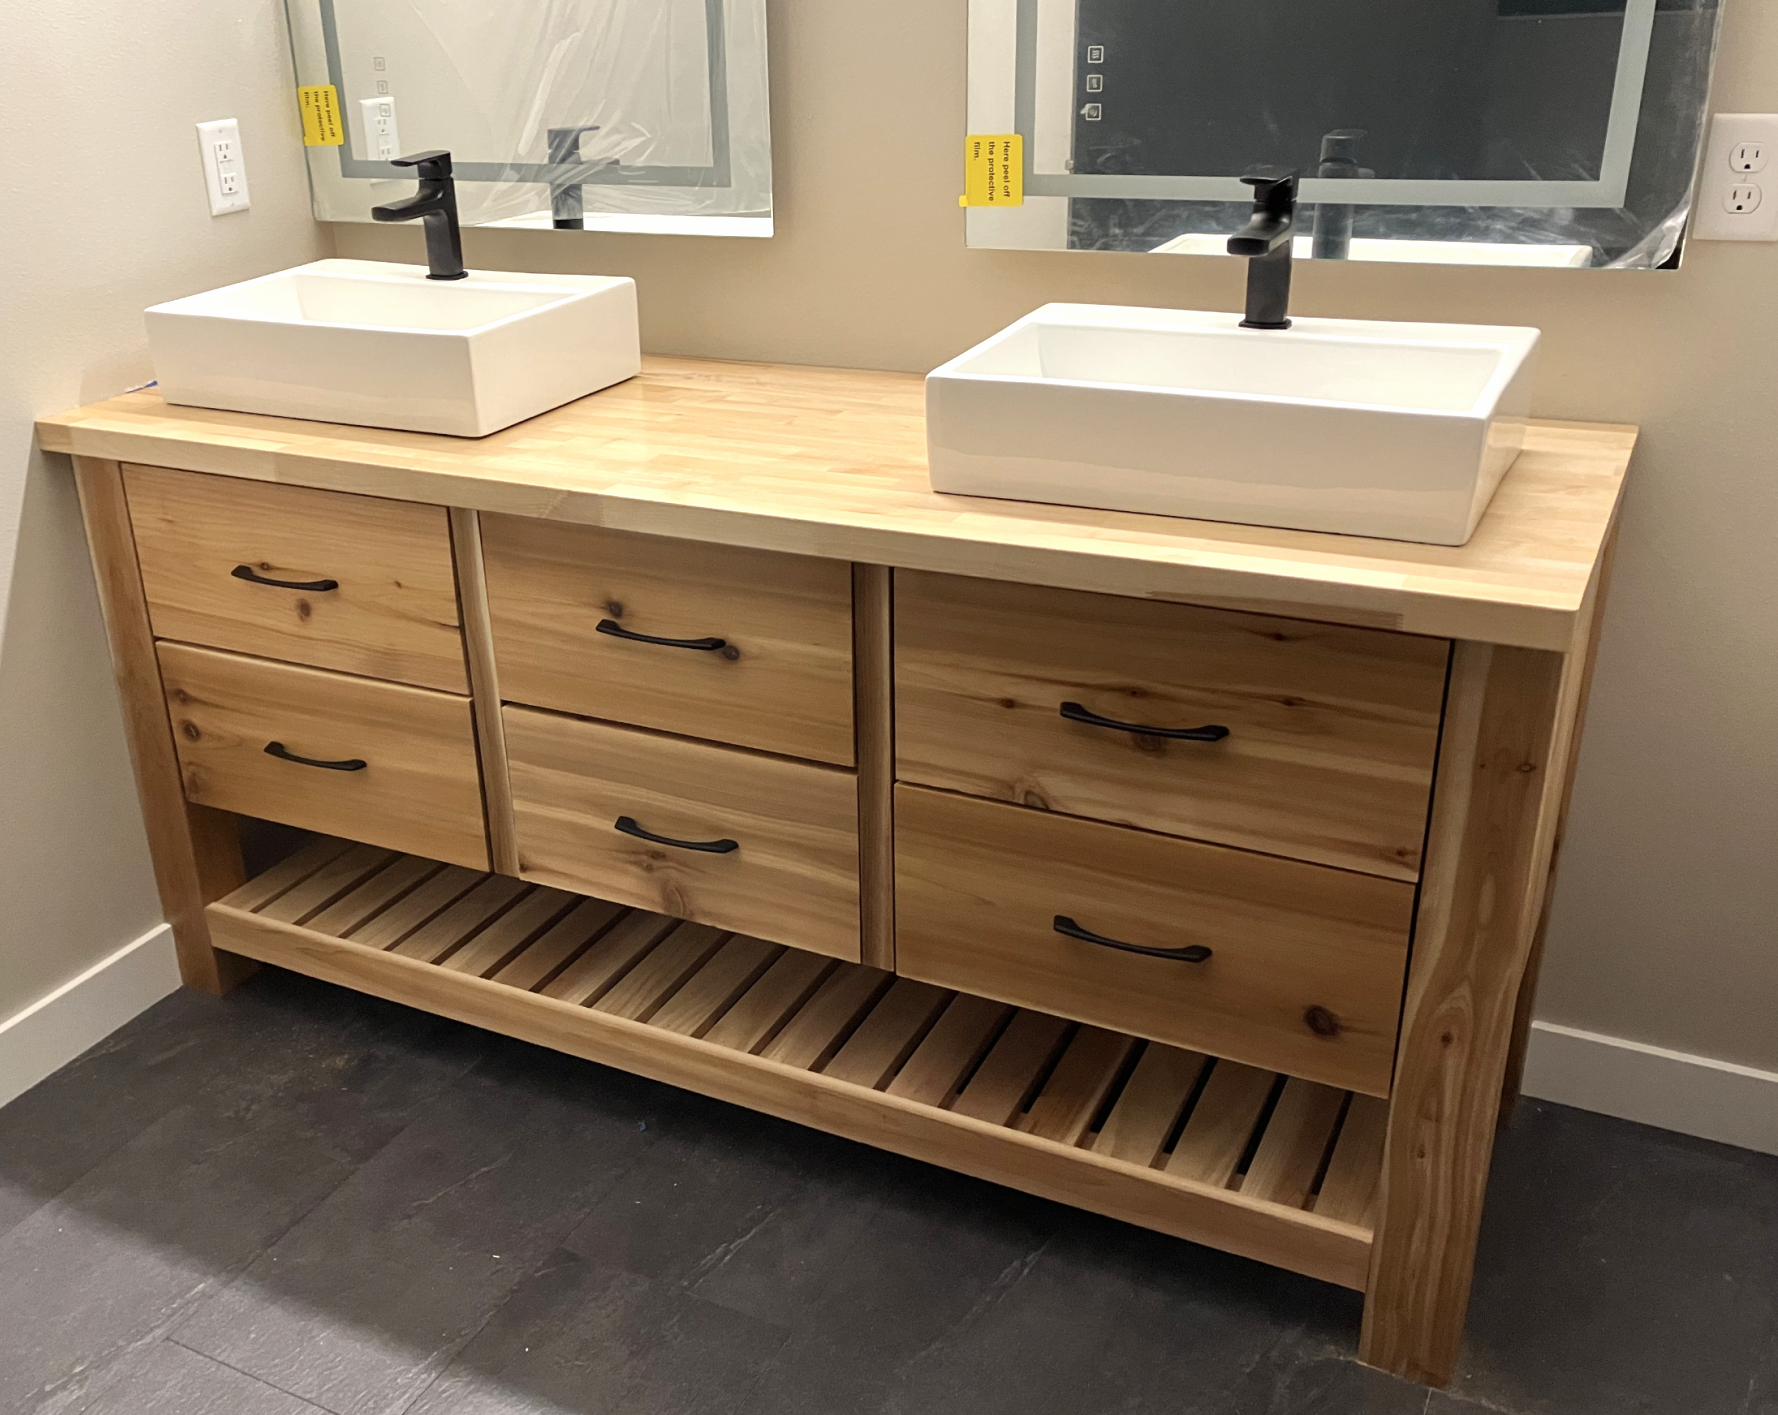
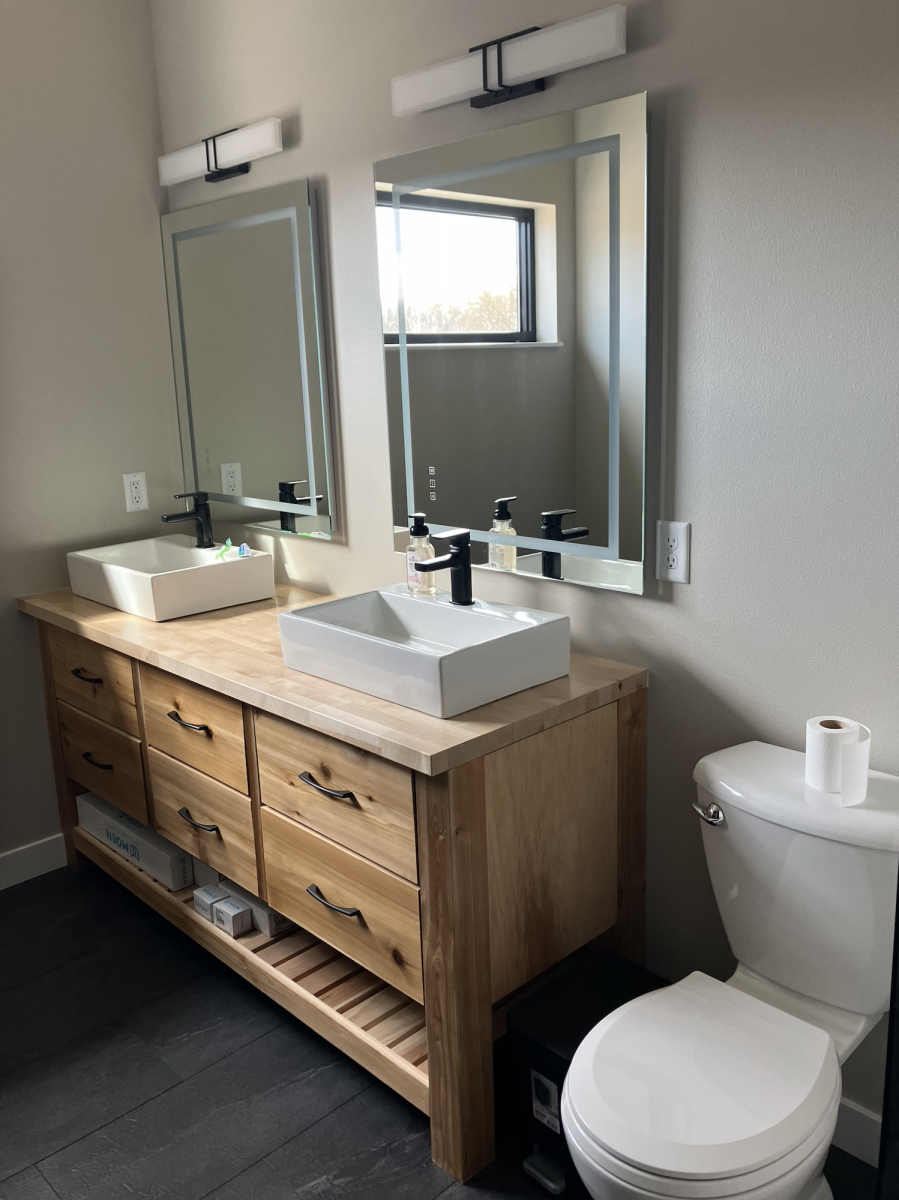
After looking at some terribly overpriced particle board vanities, I found the lovely Rustic Farmhouse Double Bath Vanity plans and decided to go for it. I think this vanity turned out much better than anything I could have bought with the same amount of money, and it will last much longer too!! Thanks Ana!!
Thu, 05/04/2023 - 10:26
Absolutely stunning, thank you for sharing your beautiful createion!
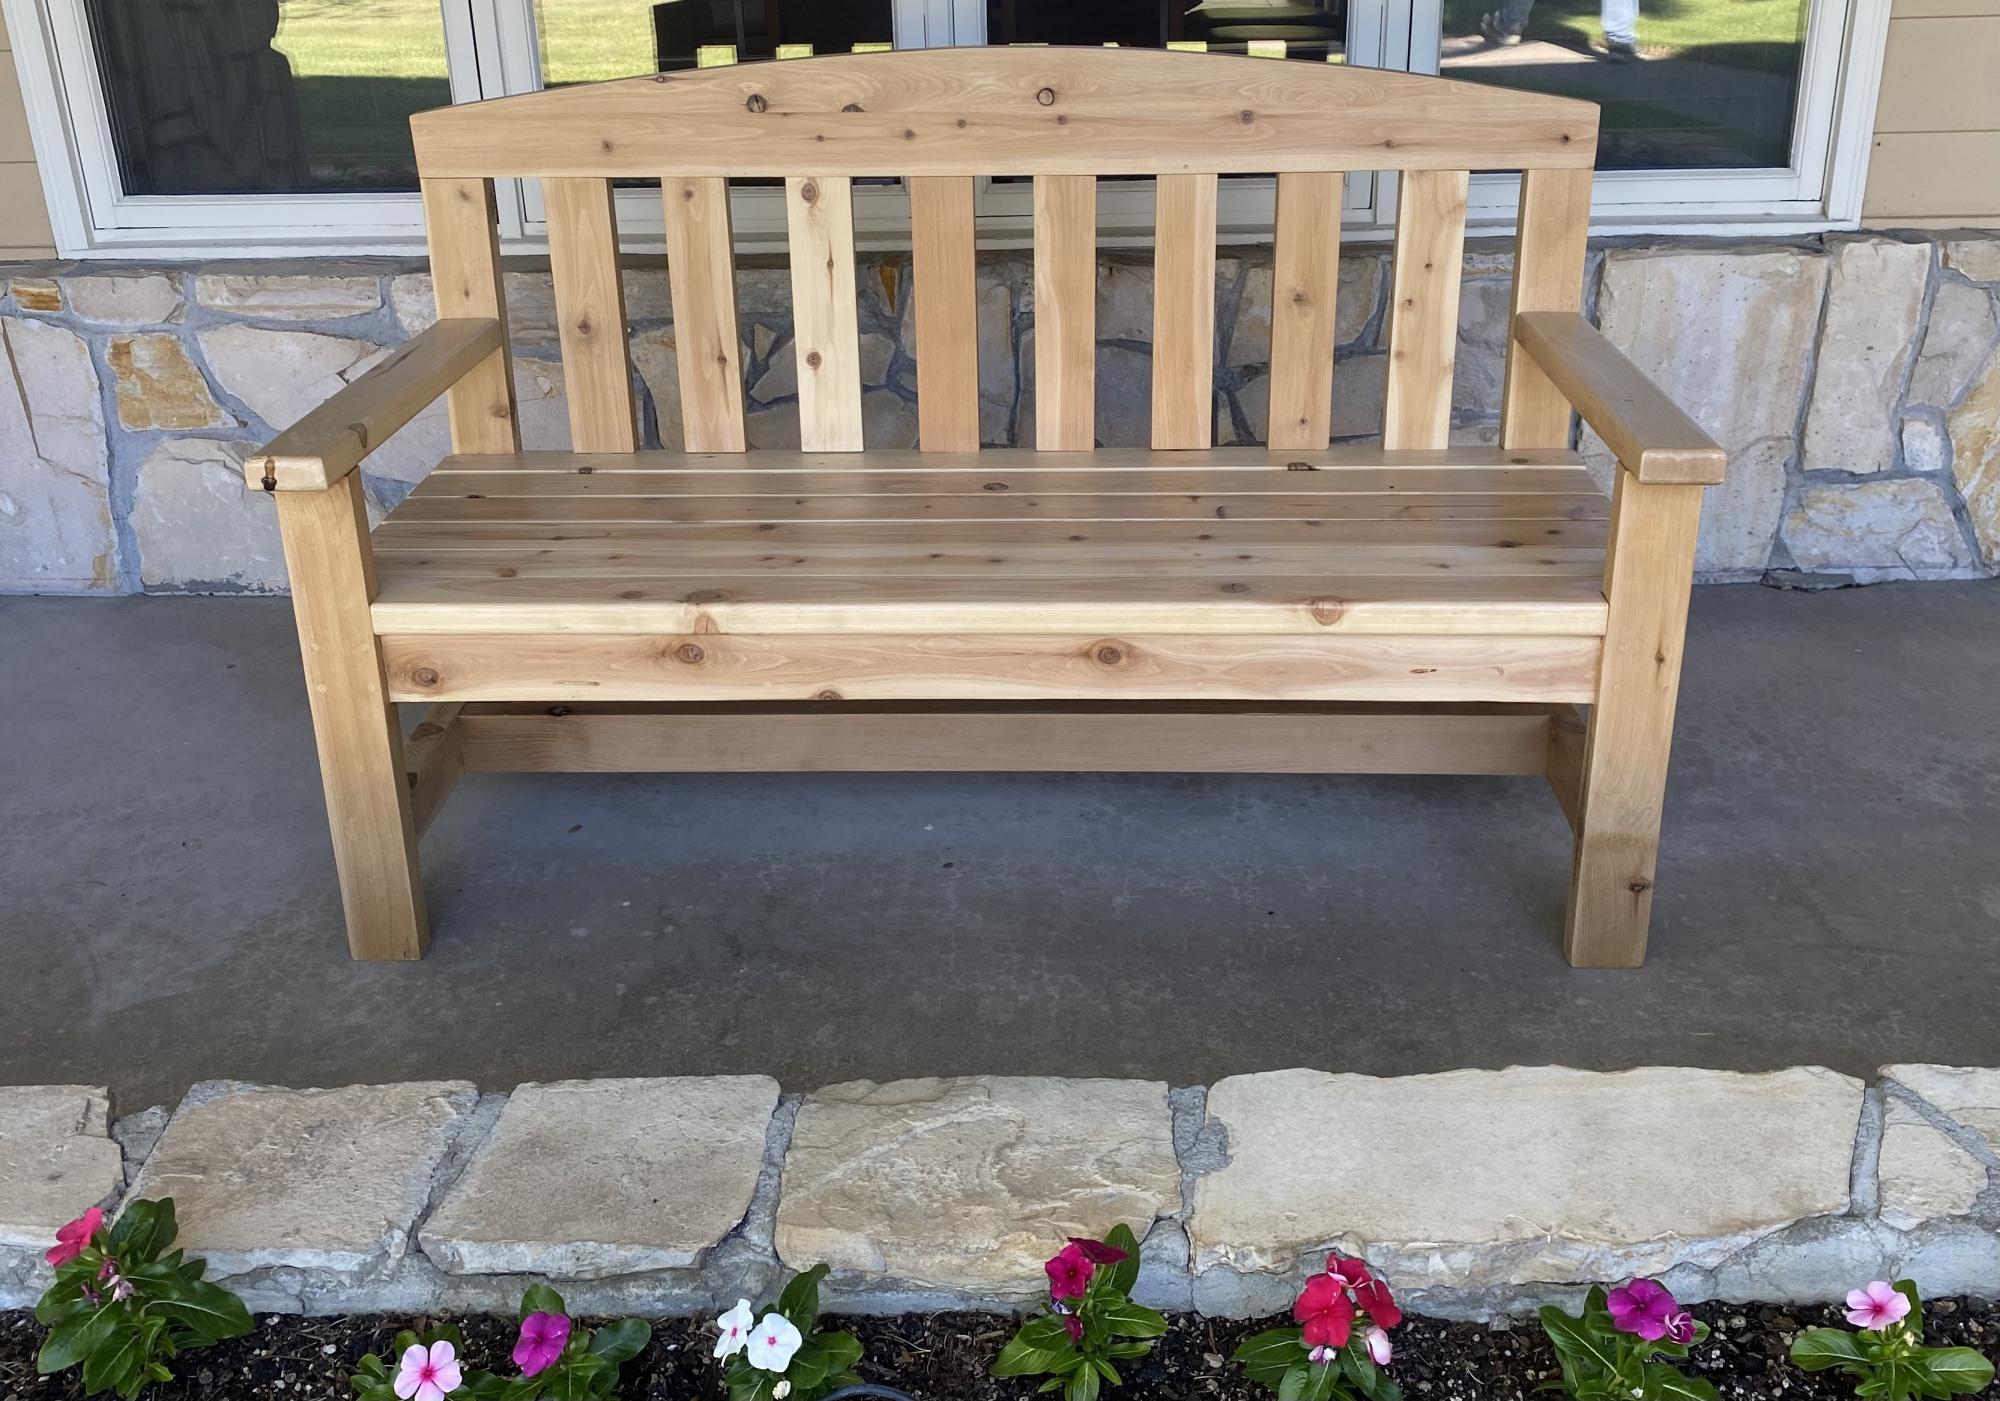
I took a woodworking course through the community college and built this cedar bench for my front porch. I learned so much throughout this process and am proud of how it came out. I am now building up my own arsenal of tools and supplies. I can’t wait to choose my next project!
Plans from myoutdoorplans.com/2x4benchplans
Mon, 06/19/2023 - 17:39
Such a great first project, thank you for sharing. Can't wait to see your next project!
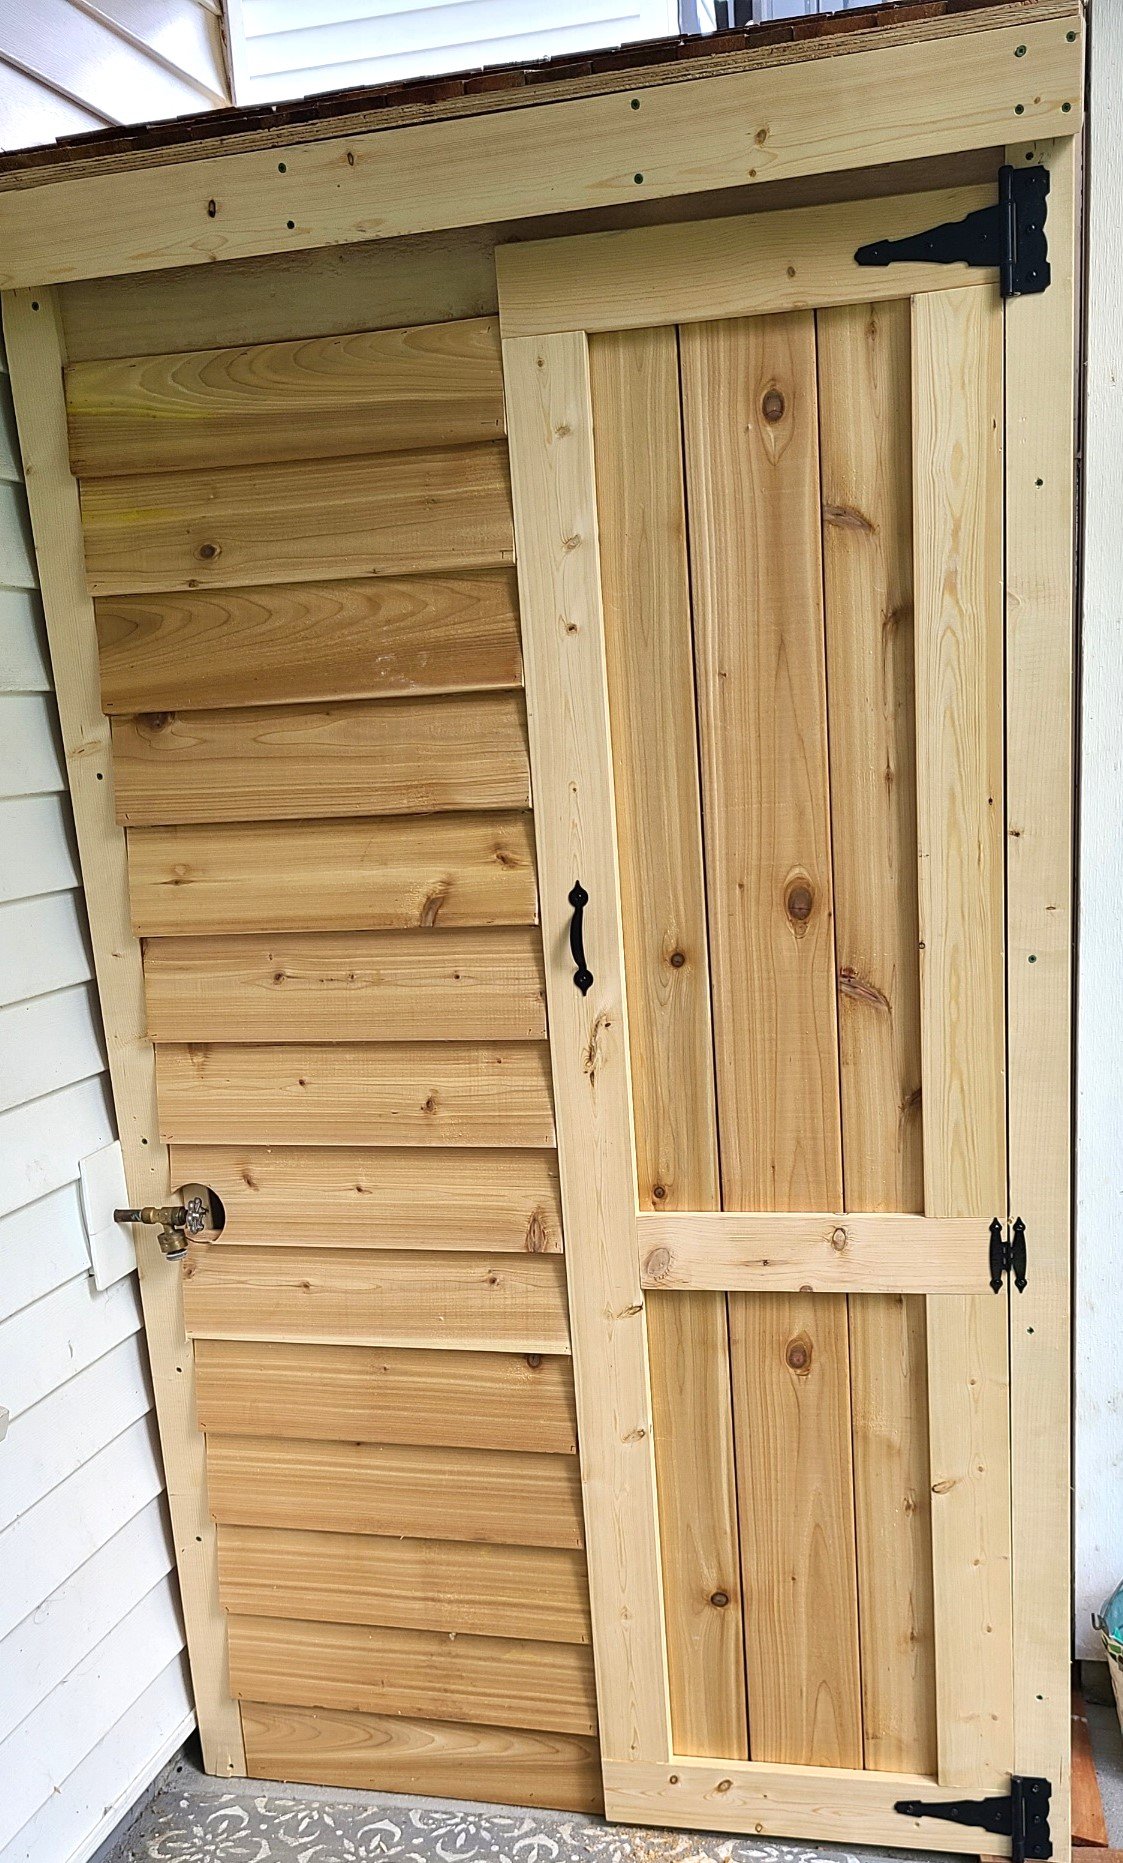
Loved this build had to make it smaller but wow.
Paula
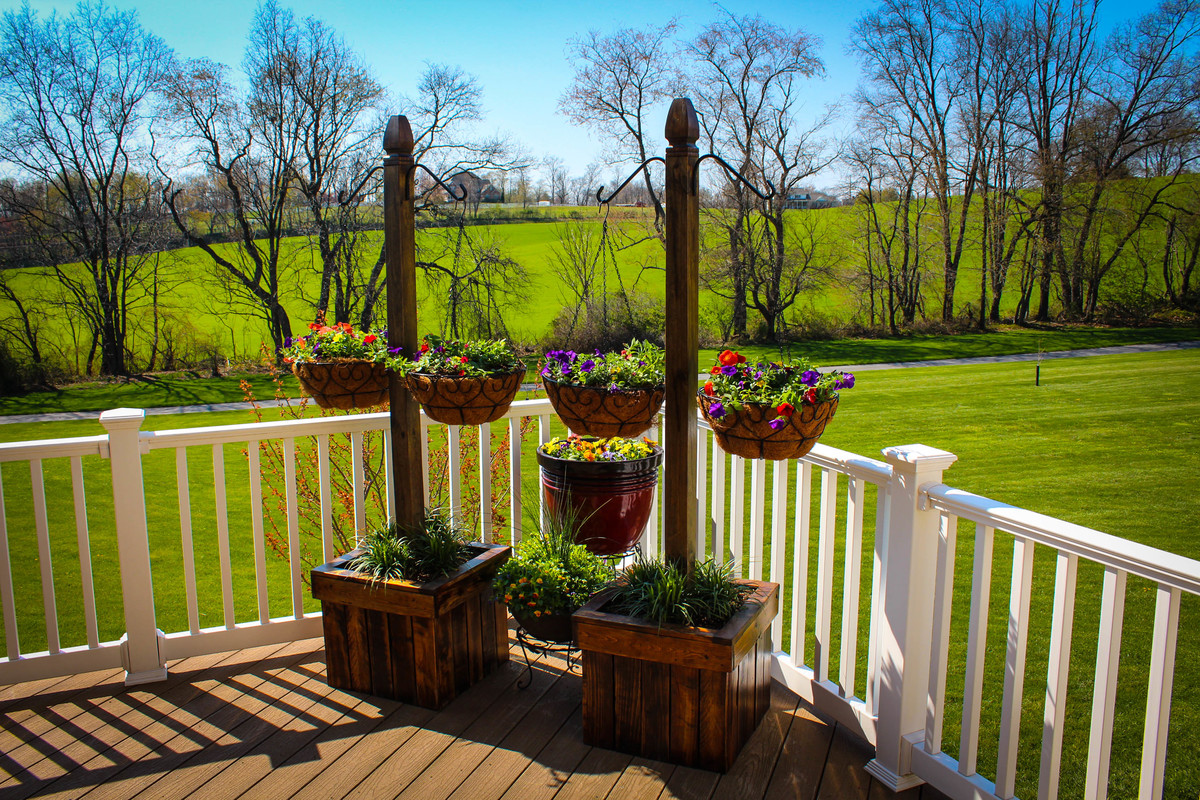
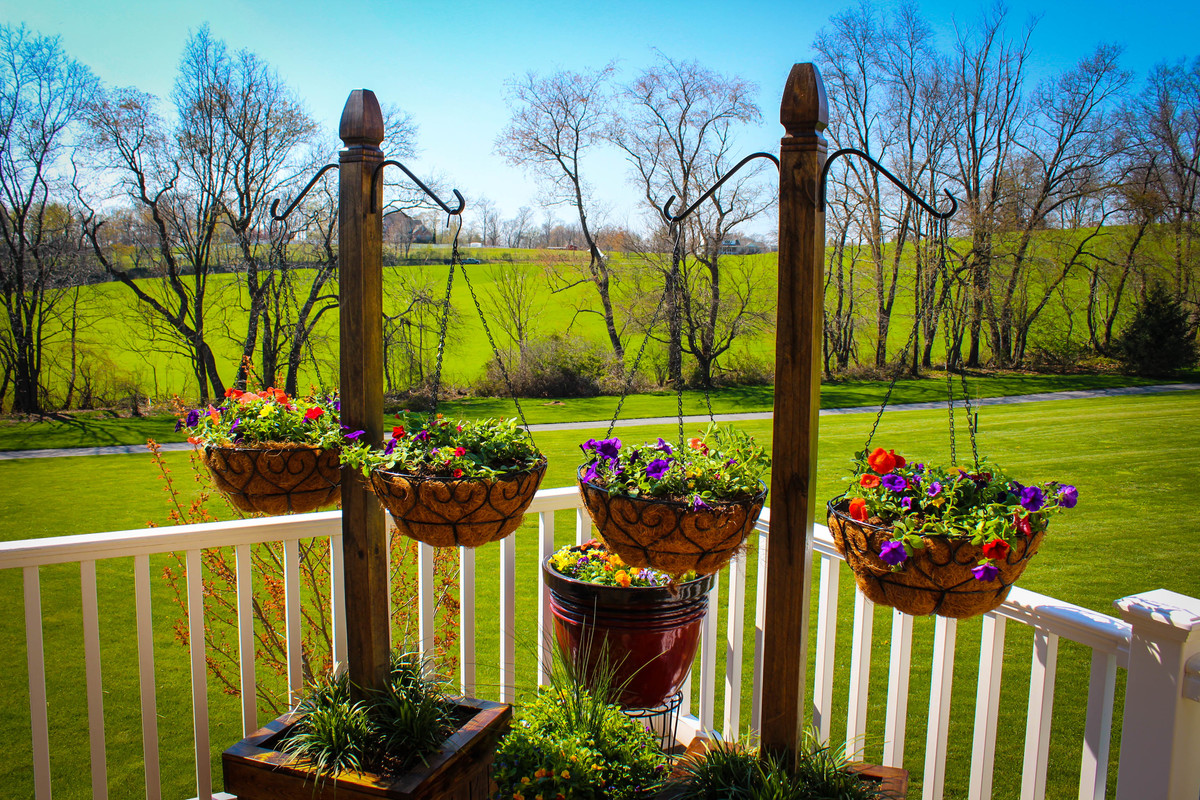
More Info / Build Instructions:
http://www.instructables.com/id/Hanging-Basket-Column/
This project is an expansion from my project (Pallet Planter Box) posted 2+ years ago. The pallet planters are holding up great but the finish was looking dull after a couple of years in the sun. I decided to refinish them with a darker walnut stain (vs. original red oak). At the same time, I thought it would be a good time to upgrade the planters. To provide flowers for the deck, my wife had been talking about a hanging basket column that could be placed in the ground or in pots. We found something we liked in a catalog; but to me, the price of $86 per column seemed pretty high for something so simple. So, I created this very simple project from 4x4 lumber, end caps, base plates and hangers. I made it a little more complicated by cutting down the 4x4s to match the decorative end cap dimensions but that isn’t really necessary. We are very happy with the results and the cost; it was less than $20/post to make. Now we have hanging baskets and the planters to provide seasonal flowers

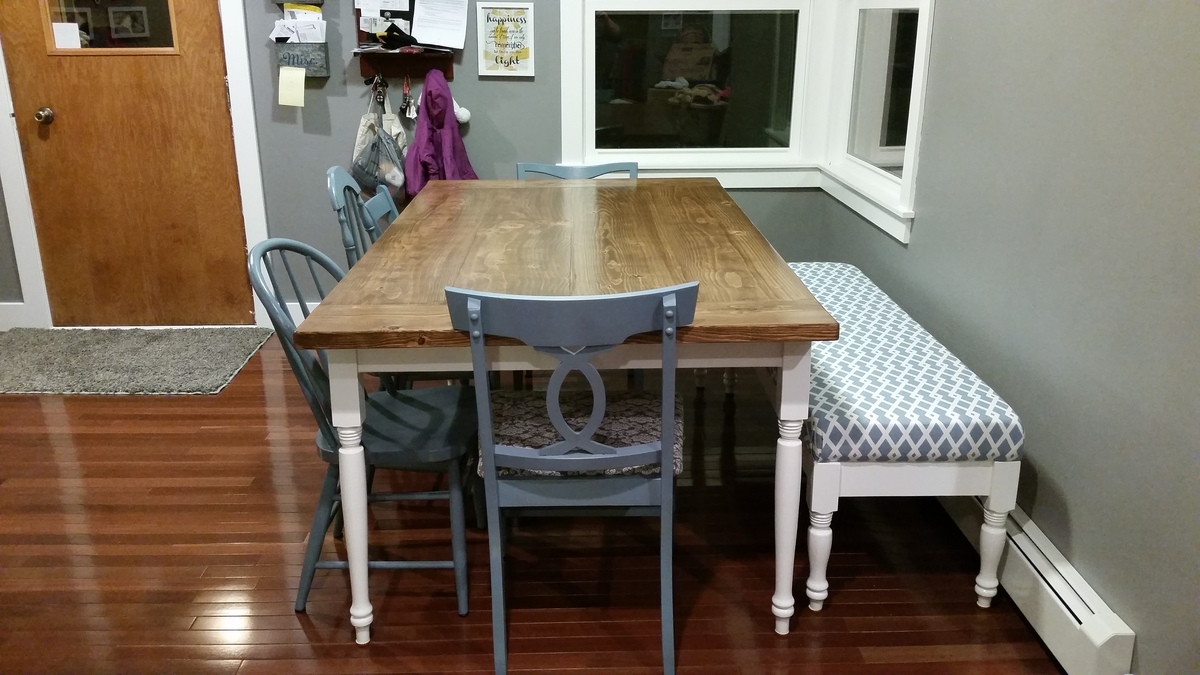
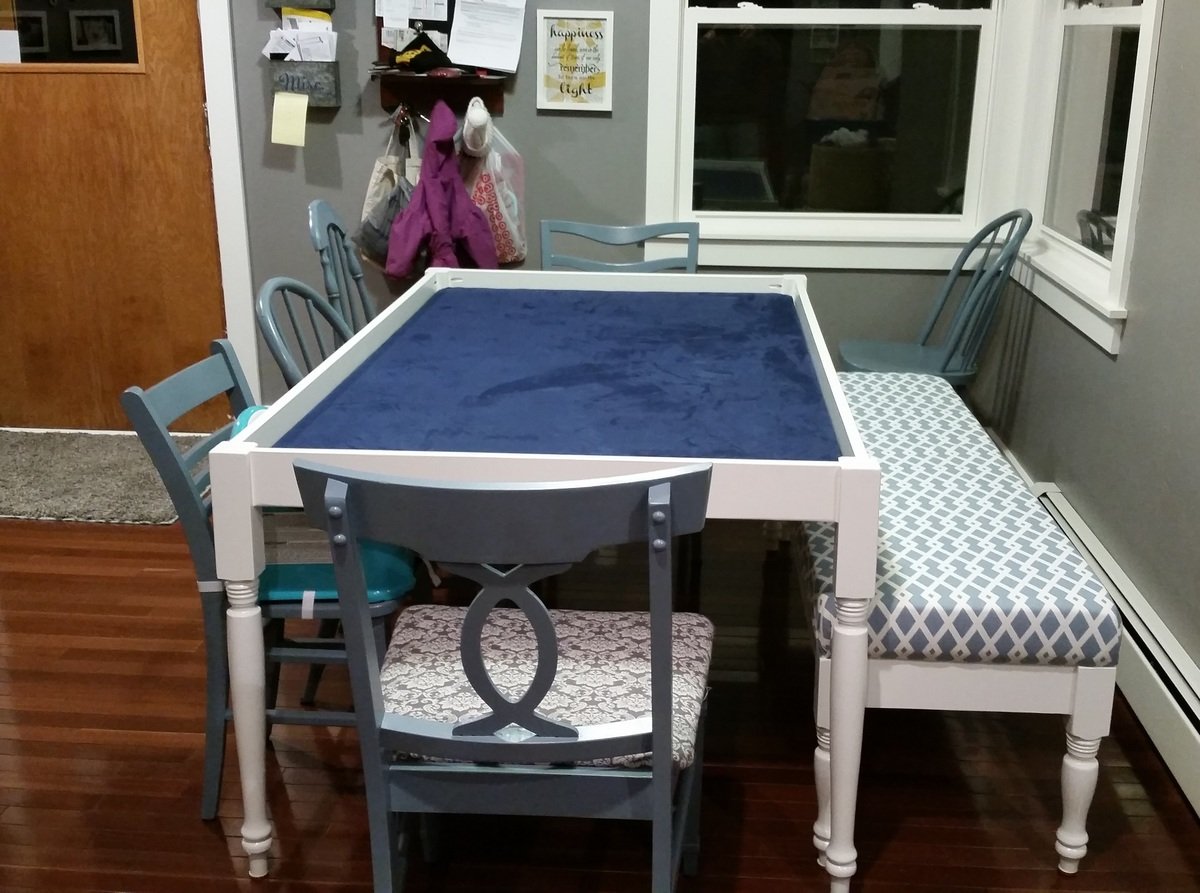
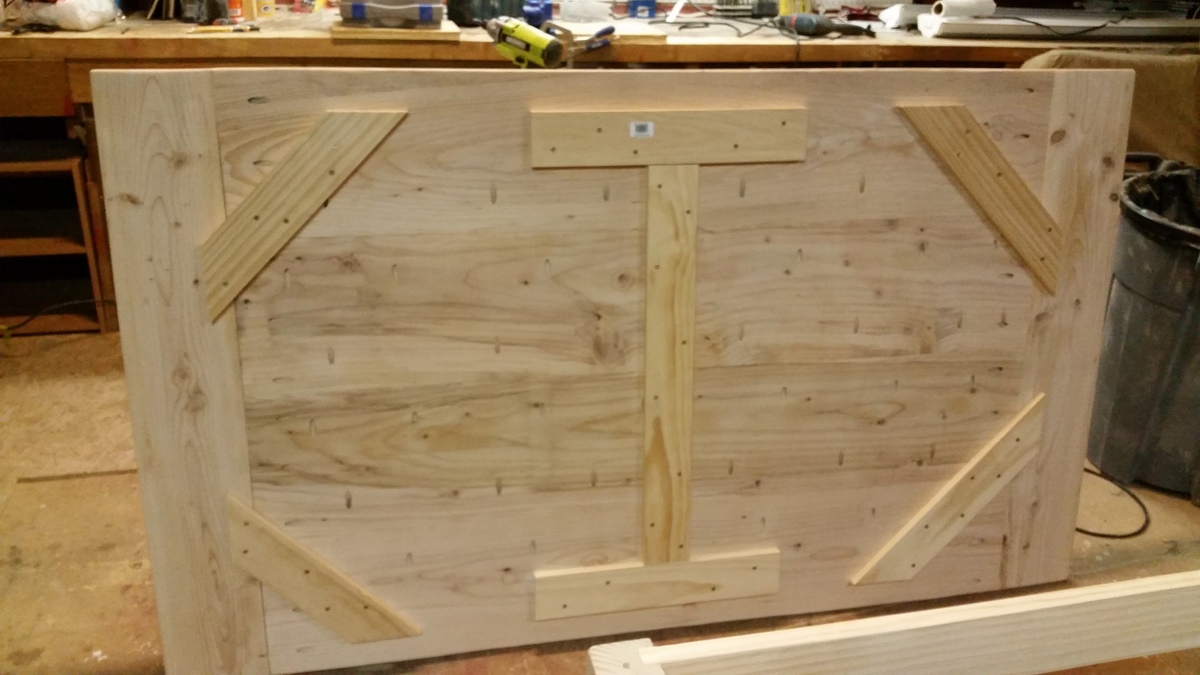
My wife and I were looking for a new dining table, the one we had was a bar height which worked well for our daughters high chair, but she was going to be transitioning to a booster seat . We shopped around and had sticker shock at the cost of a dining room set. We enjoy playing board games and I had been looking into possible buying a board gaming table, but those more expensive and some had long lead times as well. I tossed out the idea that I could make our table and my wife agreed but gave me a deadline. I had built a few smaller pieces before but nothing like this. I based my plans off the farmhouse table for the top and used store bought legs. The top needed to be sturdy since it is not attached to the base, I did add blocking on the back so the top doesn’t move around and it is heavy enough that it doesn’t flip up if you lean on it. I moved the typical supports down to the bottom of the side rails and added a ¾” piece of MDF that I had for the gaming top. We used spray adhesive to attach some batting and used blue suede for the gaming surface since we are fans of Doctor Who. I added handles to the top on the inside to help when it is moved off the table for gaming. I built the bench too and made it so we could slide it under the table to save on space when we did not need it. The other chairs are hand me downs and Salvation Army finds that we spray painted. The only addition that I have to make is to build some sort of cup holders.

Tue, 04/26/2016 - 19:43
this is awesome! I hope to build a board game coffee table. I love your idea of the table top.
In reply to this is awesome! I hope to by handmadewithash
Tue, 05/03/2016 - 08:59
I like your Star Wars marquee, I might have to clear some wall space for that.
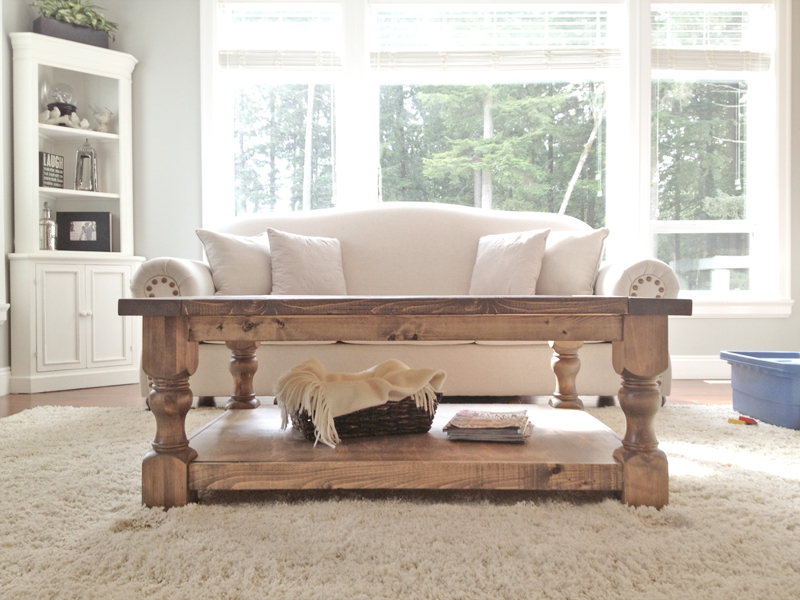
Loved this Coffee Table and wanted to suprise the wife for christmas, so being my first project I got started! had no idea what I was doing but they were great instructions, and the KREG JIG is AMAZING. altered the plans a bit to make it a rectangular coffee table (added 12 inches) instead of square to fit our living room better. Now to tackle the next project!
Wed, 03/19/2014 - 07:39
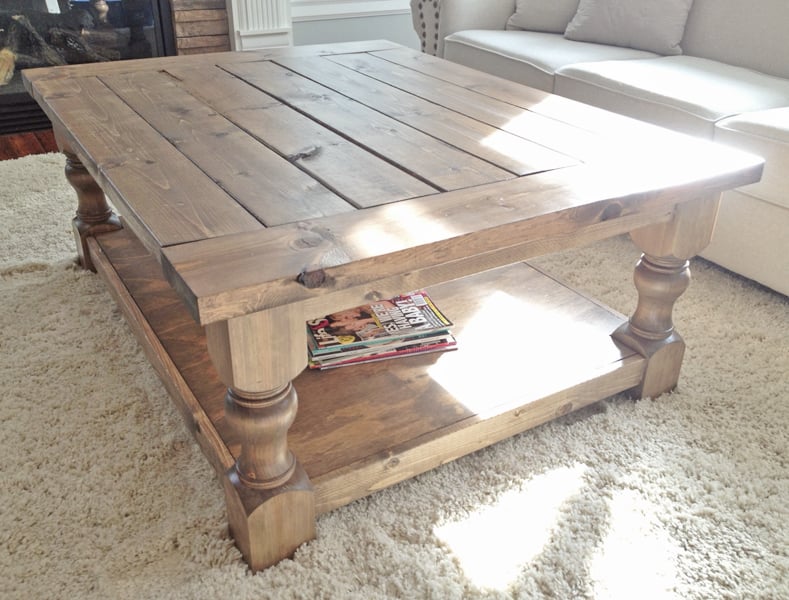
I absolutely LOVE the finish on this, thank for sharing!!! For the estimated cost you put $100, is that without including the cost of the turned legs? Did you get the legs through Osborne? I think I NEED to make this coffee table and use that finish!
In reply to I absolutely LOVE the finish by MichelleC
Wed, 03/19/2014 - 09:02
Now that you brought it to my attention you are absolutely right, I completely forgot about the cost of the legs. including the cost of those, it does come to $200 dollars, ill change that. I also did get the legs from Osbourne. As for the finish yes do it! I am really happy with how it turned out :) thanks again and let me know when your coffee table is done so i can check it out!
Cheers,
Justin
Wed, 03/19/2014 - 09:55
if you dont mind me asking, in what order did you apply the stains?
In reply to if you dont mind me asking, by 2nervous2build
Wed, 03/19/2014 - 11:47
not at all! here is a link as to what I followed.
http://ana-white.com/2013/05/vintage-graybrown-stain-pine
Ana shows exactly what to do :) mine didnt turn out as dark as her project, but am still lovin the table none the less. :)
Cheers,
Justin
Wed, 03/19/2014 - 09:55
if you dont mind me asking, in what order did you apply the stains?
Sat, 04/26/2014 - 17:54
Wow, congrats on your first build! It turned out amazing! And that finish? OMGosh, so incredibly beautiful! I love it! Thanks for sharing!
Tue, 05/20/2014 - 13:32
Thank you Jen for checking out the coffee table! thanks for the compliment as well!
Tue, 05/20/2014 - 13:32
Thank you Jen for checking out the coffee table! thanks for the compliment as well!
In reply to AWESOME 1st Build by RE
Fri, 01/02/2015 - 09:48
Thank you!
Cheers,
Justin
Fri, 01/02/2015 - 09:47
Sorry for such a late response! incase you still needed to know, I made a typo and I did mean special walnut.
Thanks!
Cheers,
Justin
Fri, 07/17/2015 - 12:59
Being as yours is much lighter (and i like it more than the darker). Did you use the wood conditioner and how long did you leave the stain on for? it almost looks like once it was on you were wiping it off. Love it well done :)
Also, do any of you guys use the paste wax when finished? I was thinking about following the stain with some poly to seal it. any suggestions?
Wed, 08/19/2015 - 09:47
An excellent finished project. Did you use 2x6 for the top as your wood looks a tad thinner?
Wed, 08/19/2015 - 09:47
An excellent finished project. Did you use 2x6 for the top as your wood looks a tad thinner?
Wed, 08/19/2015 - 13:58
Can you tell which legs and size you used from osborne?
Project looks amazing!

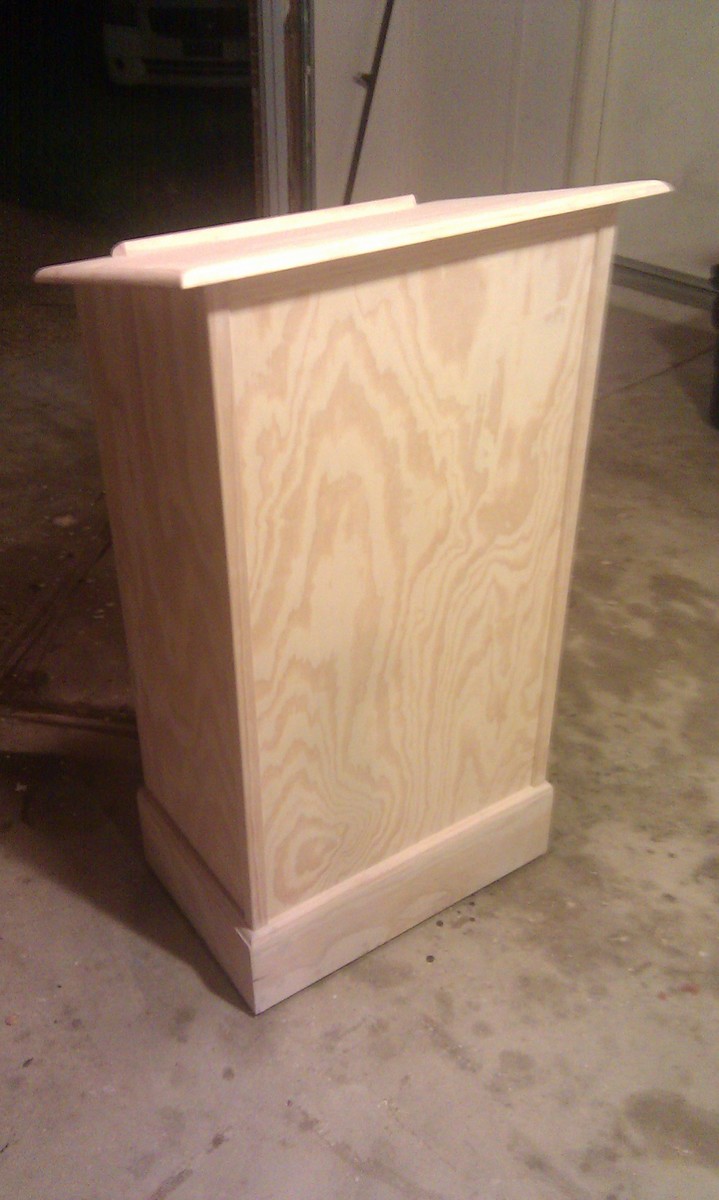
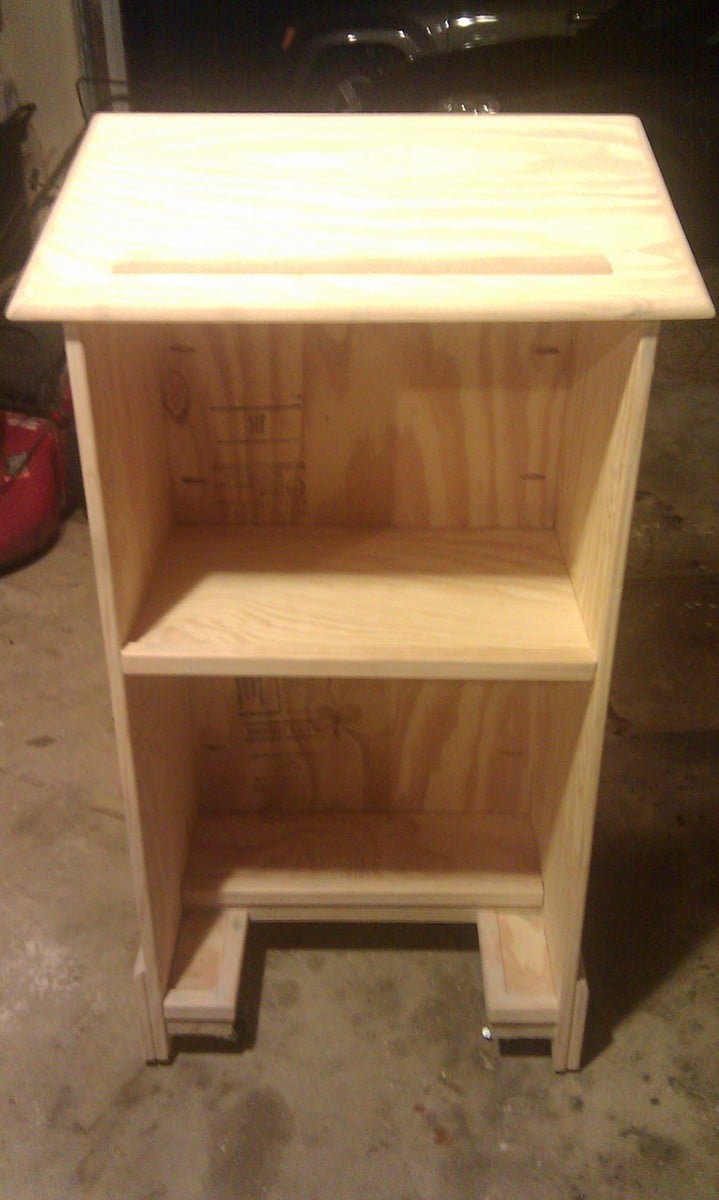
This is my first try at building furniture. I've built larger things in the past like decks and a fort for my nephews, but never furniture. Even though I used the plans to build the main box, I did change up the bottom and added some new stuff. I added wheels to the bottom my wife could easily move it around her classroom. I didn't want to put a square base on it because I thought it might hit her ankles when she was standing close to it. So I sort-of notched it out to give an opening for her feet and I used some scraps to create a short shelf at the bottom. I also added more trim that the plans call for. I cut strips of the pine plywood for the base molding and topped it with quarter round. I used corner trim for the front corners, the self inside and the bottom notched shelf. I also used screen trim for the back of it. I think it came out nice and I've very pleased with it. I used 2 coats of Minwax PolyShades American Chestnut on it.


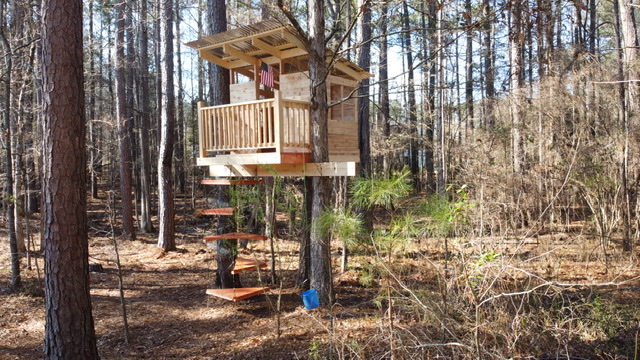
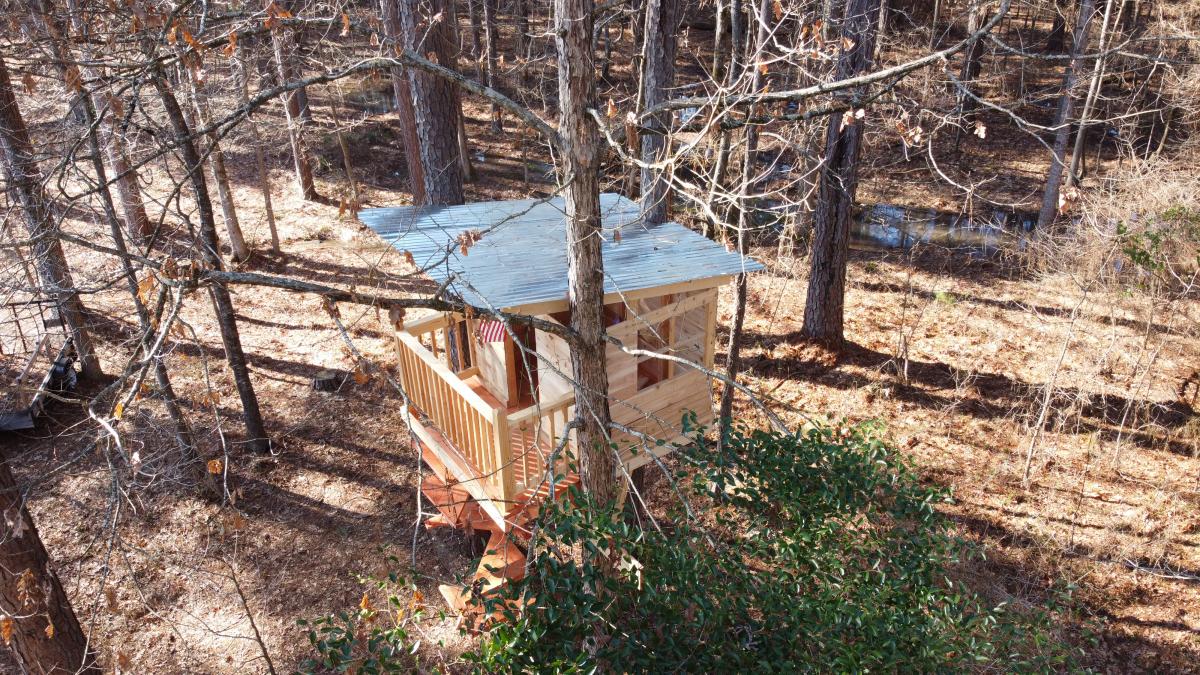
I modified the modern tree house plan and added some safety features for young kids. I did a spiral up ladder enclosed with a mesh net so they can’t fall very far. I also added more siding and put cross bracing in window wells to limit opening size. Finally, a full porch style railing and the main support beams are pinned at one end and have a self designed treehouse sliding bracket to allow for tree movement in the wind.
Wed, 11/18/2020 - 11:16
Absolutely love all the features you added! Thanks for sharing:)
Sat, 10/30/2021 - 07:09
Hi! I know this post was forever ago, but this is exactly how I want the treehouse to be for the my kids! I am trying to see if there was anyway you could show me how you did the modifications! I’d be forever grateful!
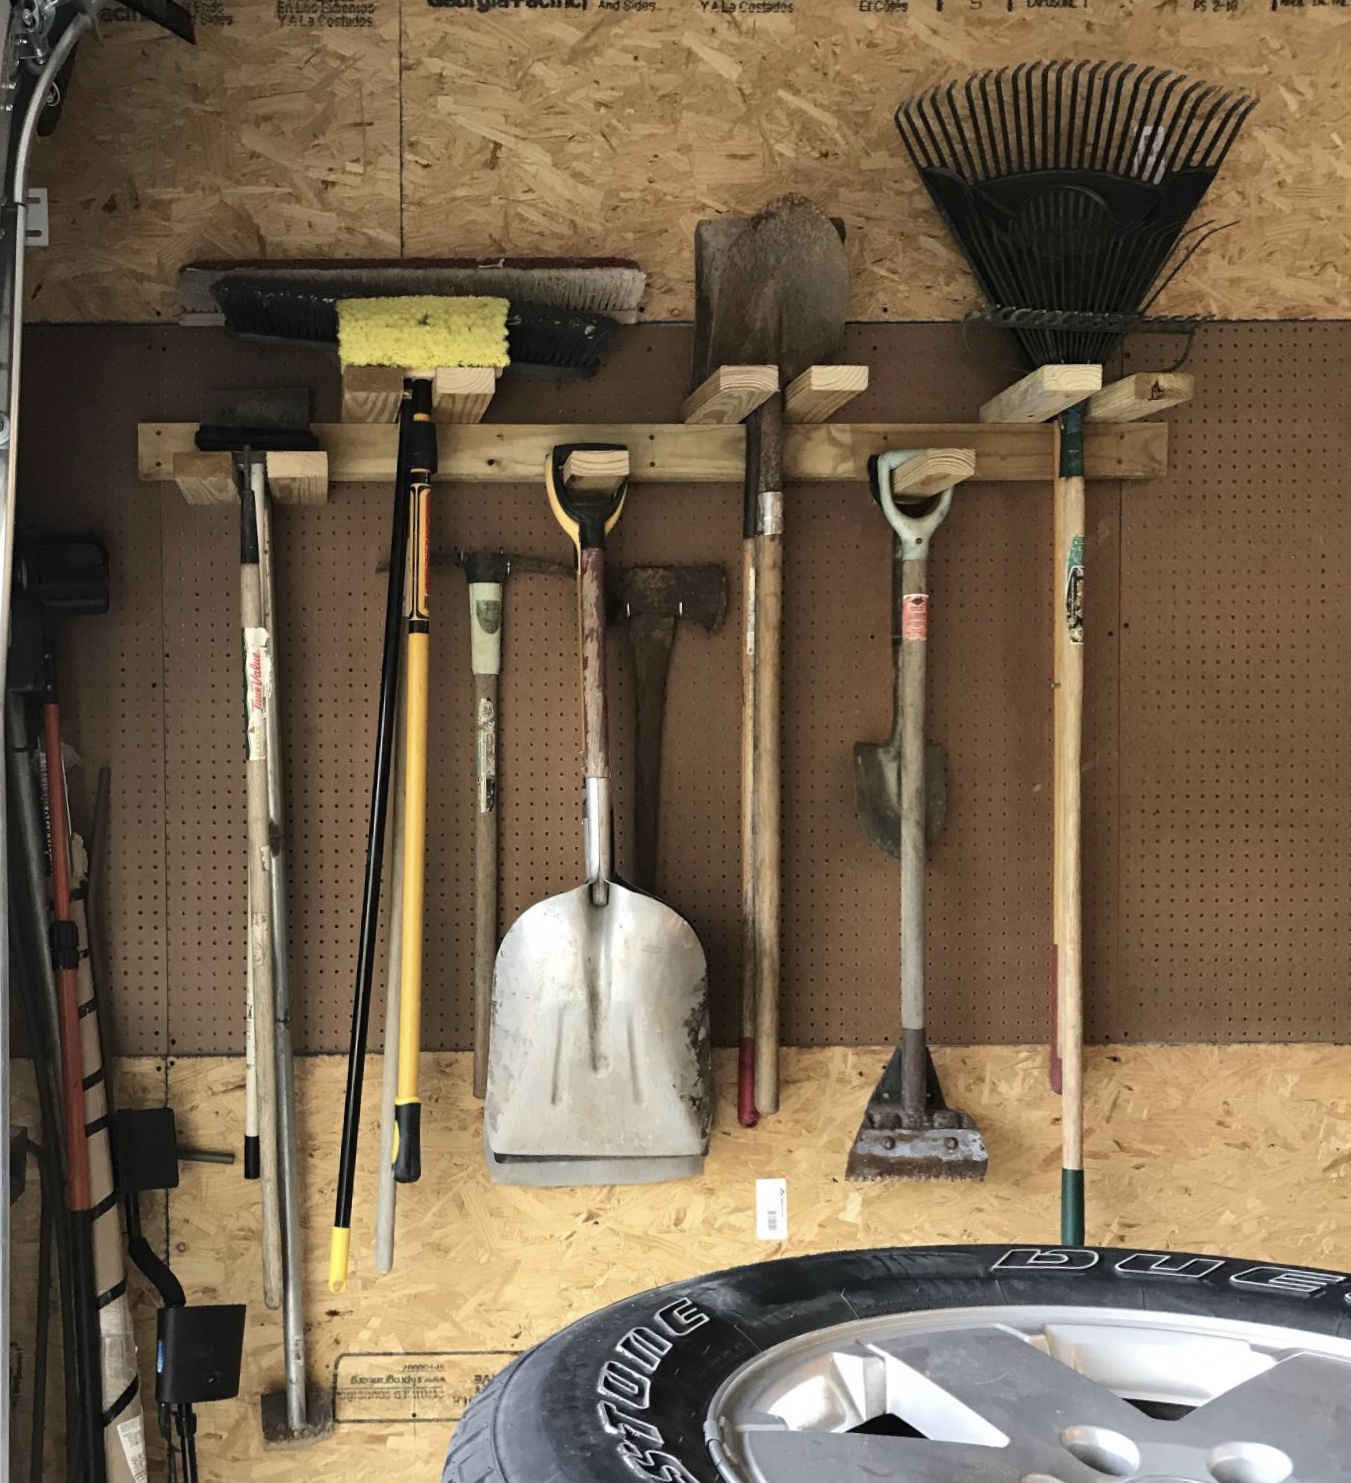
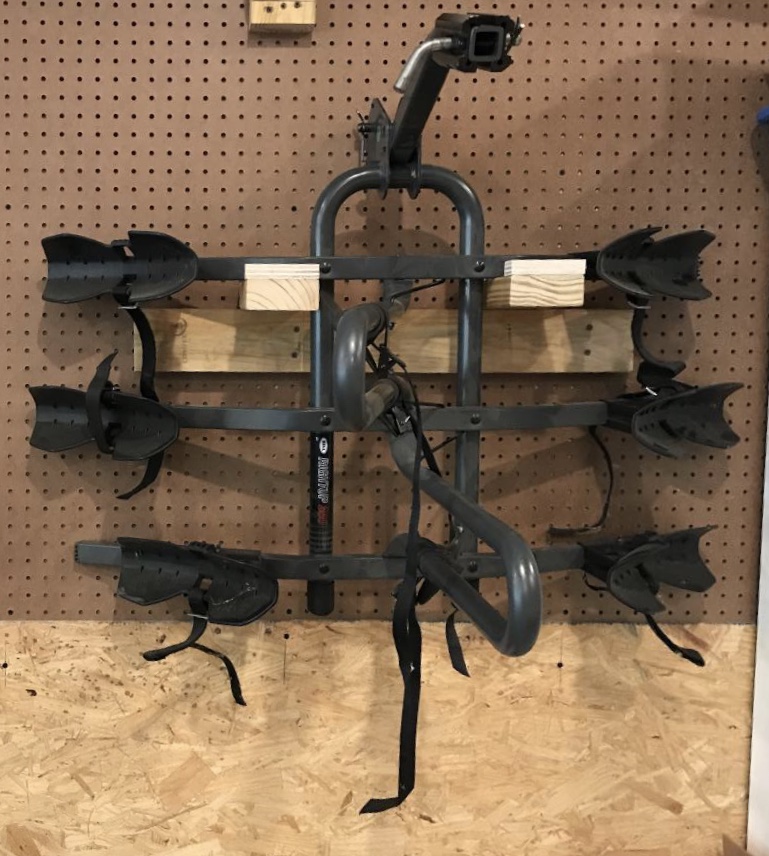
I’m very happy with my tool organizer. I also used the tool organizer idea for bracket to hang our bicycle rack. We love the way it all came out. Thank you so much for sharing!
We run a fence company. The best thing about this project is that it cost me $0!! I used 2X4 cutoffs that we were going to trash!

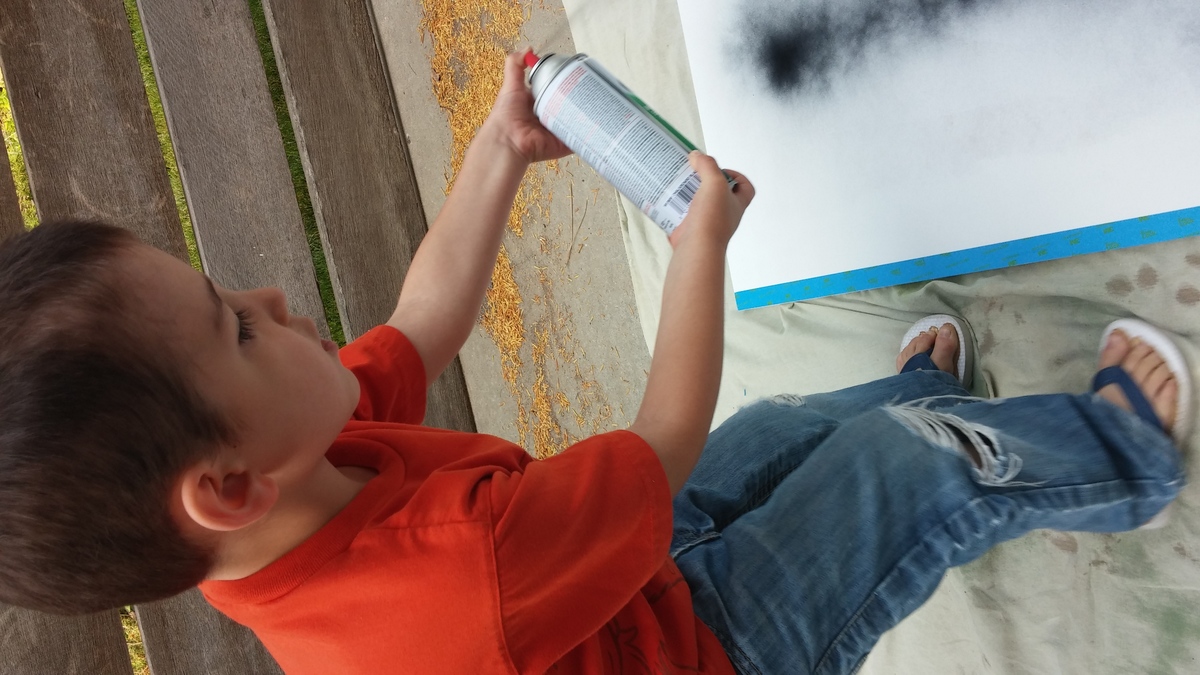
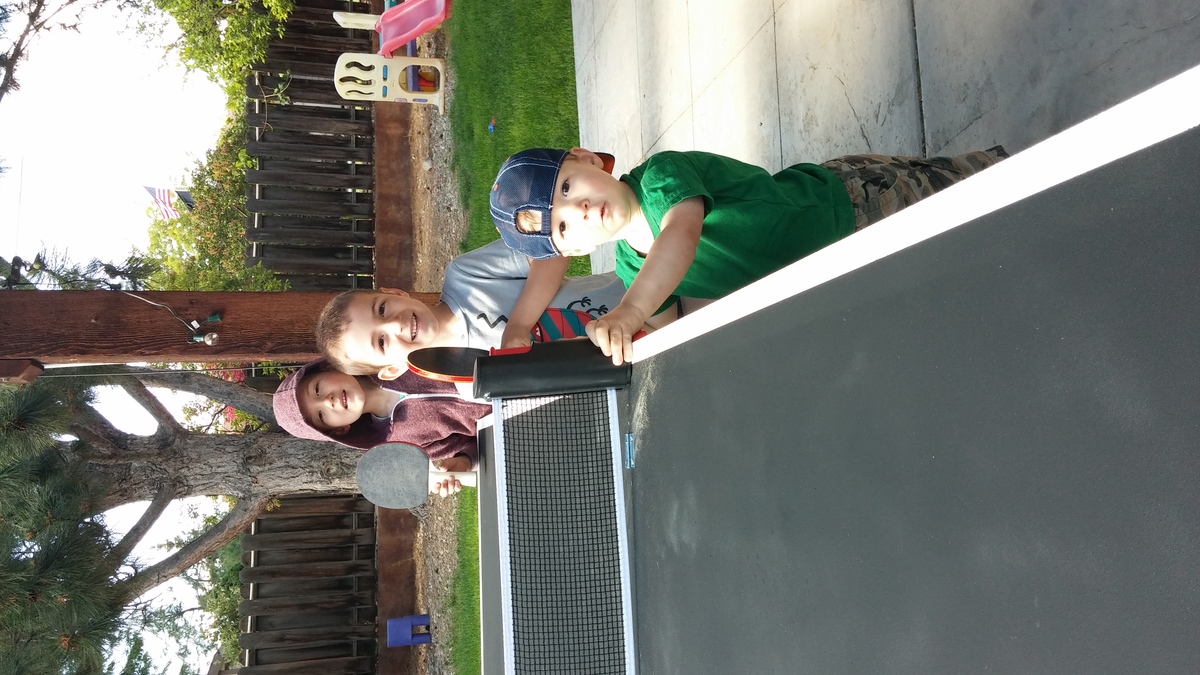
With Father's Day rolling in, my sons and I needed a gift, stat! My husband thinks that Table Tennis is the quintessential father-son activity, so that was an obvious choice.
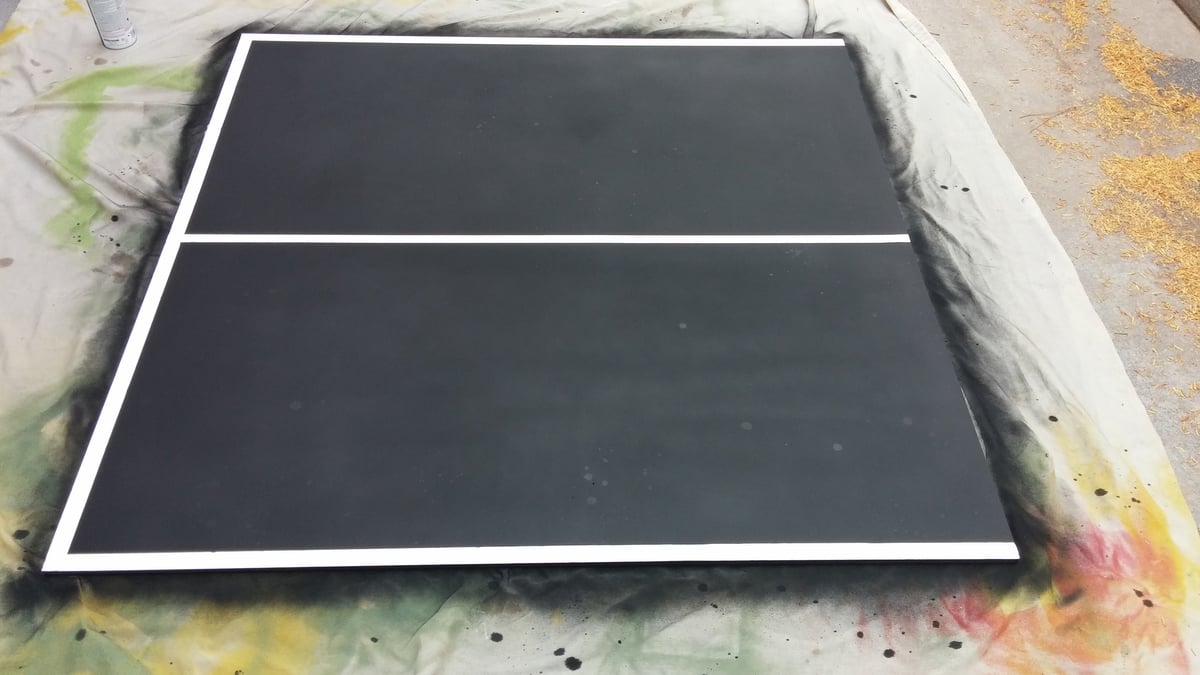
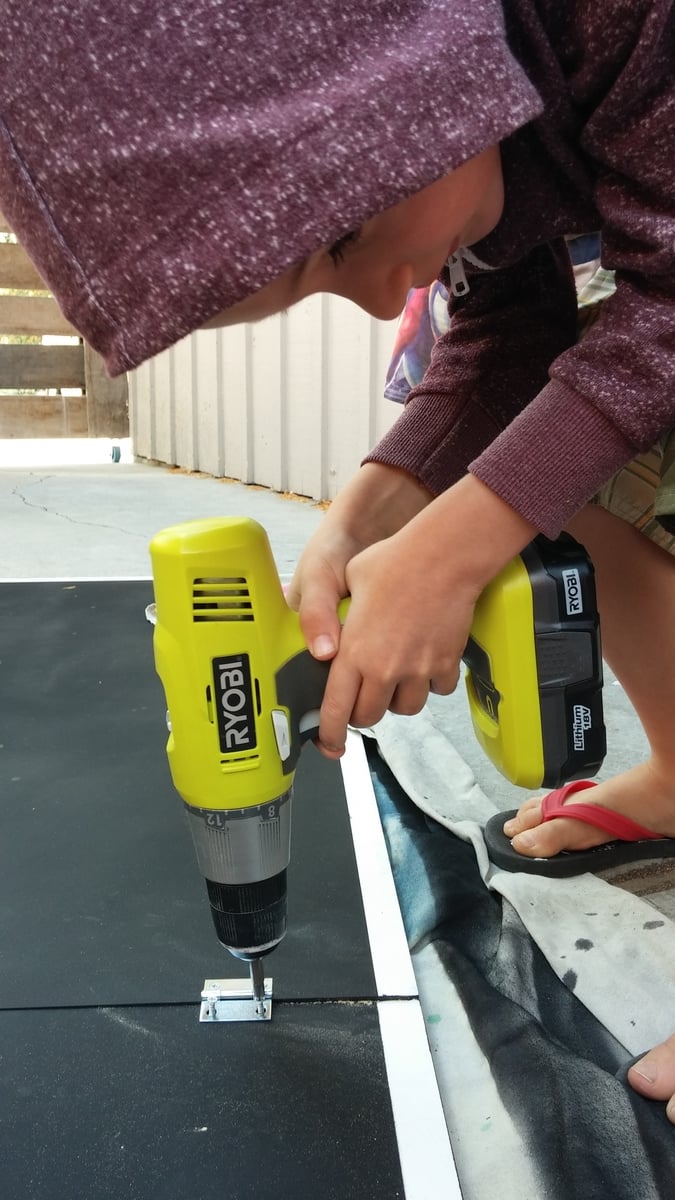
We needed something easy to make, easy to store, and budget friendly. With a 6, 4, and 2 year old helping out, I made a foldable mdf ping pong table that could easily be placed on our picnic table outside.
We had home depot cut the mdf in half, primed it, taped off some lines, spray painted it with chalkboard paint (bonus, you can keep score!), and screwed 4 small hinges to attach the 2 halves. We added a removable table tennis net, some paddles and balls, and have played nearly every day!
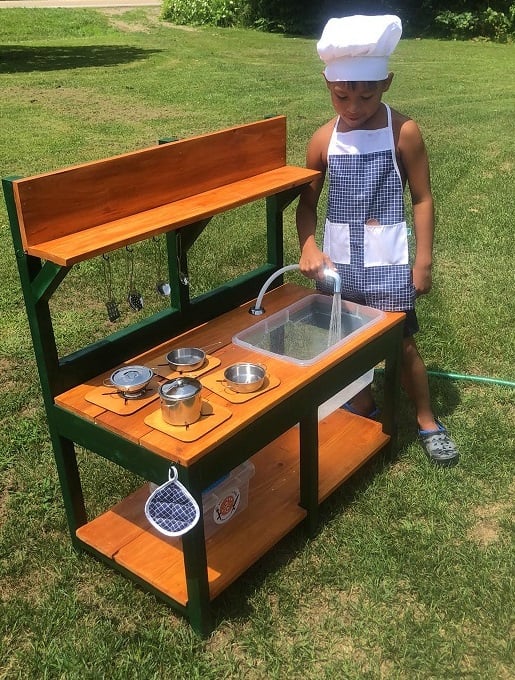
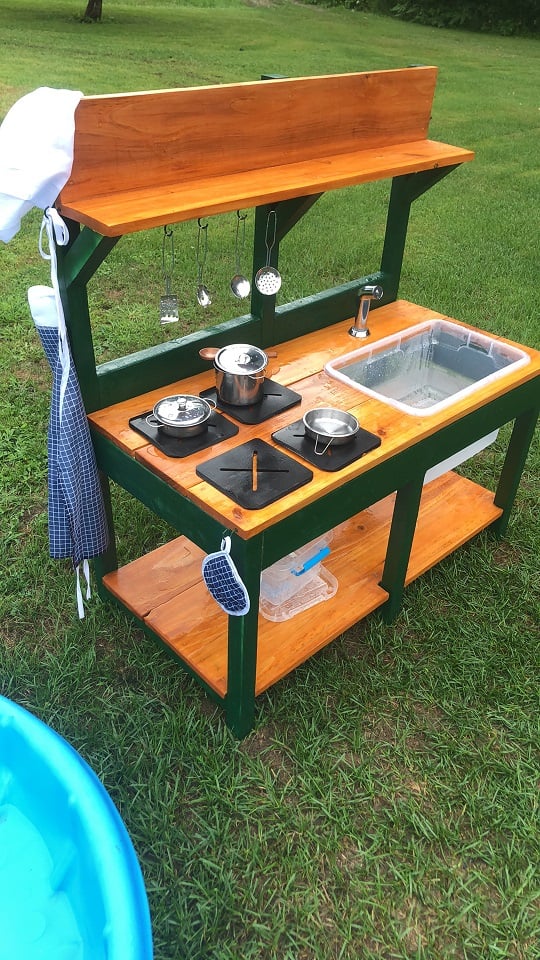
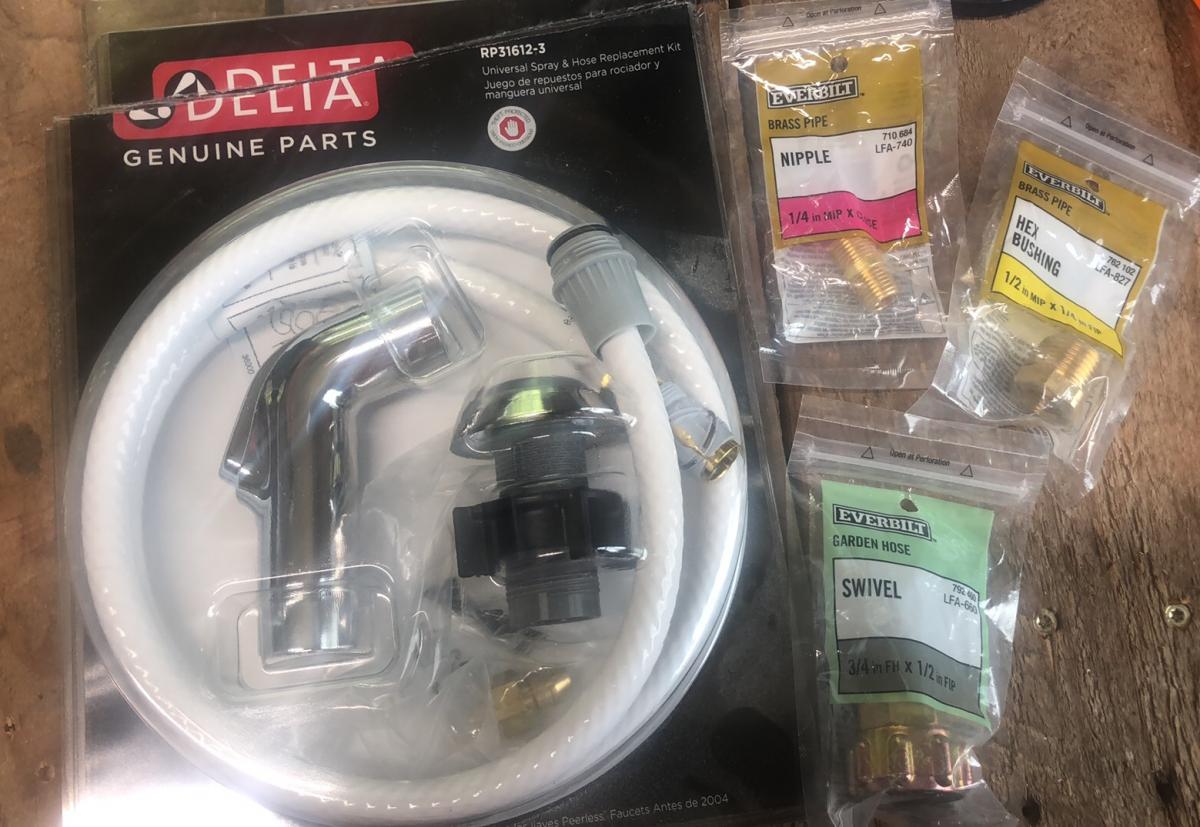
This was my first build, like ever. I am very proud! Props given to my hubby who is a carpenter by trade. I went back and forth on stains and paint colors at home depot. He didn't rush me and was awesome the entire time! He actually picked up the supplies, and is now a fan of the self tap screws! He thought he knew where everything in home depot was, but he had to ask to find those LOL. He wanted to use his new nail gun, but I wanted to follow the plans. The plans are awesome! We decided not to add an oven door just yet. Likely will soon. (Avoiding pinched fingers for now) I also have the knobs for the front, but it was hot and since I had only just stained them, they needed time to dry and second coat yet. (I kind of forgot about them once I finished them with my new dremel) We purchased the hose kit from the kitchen section at home depot. It came with everything, I searched market place and even posted asking if anyone had a used one for sale. No luck. This was $20 and came with everything, the guys at home depot showed me what adapters to get to ensure that it would hook up to our garden hose, and we grabbed those too and they worked perfectly! I messed up cutting one of the angles for the shelf the wrong way, but there was enough scraps for my husband to help me fix it. It was a fun build, and so rewarding to see our kids playing with it! I used my dremel 4300 and it wasn't powerful enough for the thicker wood, so my stove tops are thinner, but he actually enjoys setting them up and spraying them off the table with his hose! I painted the brass hooks green when we were painting the kitchen so they would match. The pots and pans came with the little tote and the apron chef hat and pot holder. It was a perfect finishing touch. *Edit to add photos kitchen hose kit from home depot, reading comments, others had a hard time finding adapters. I suggest taking what you have with you to home depot so they can show you what adapters you need. We needed three because we have a quick attachment on the end of our garden hose, (for our sprayer) now little mans mud kitchen can be connected and disconnected easily!
