Outdoor Sectional
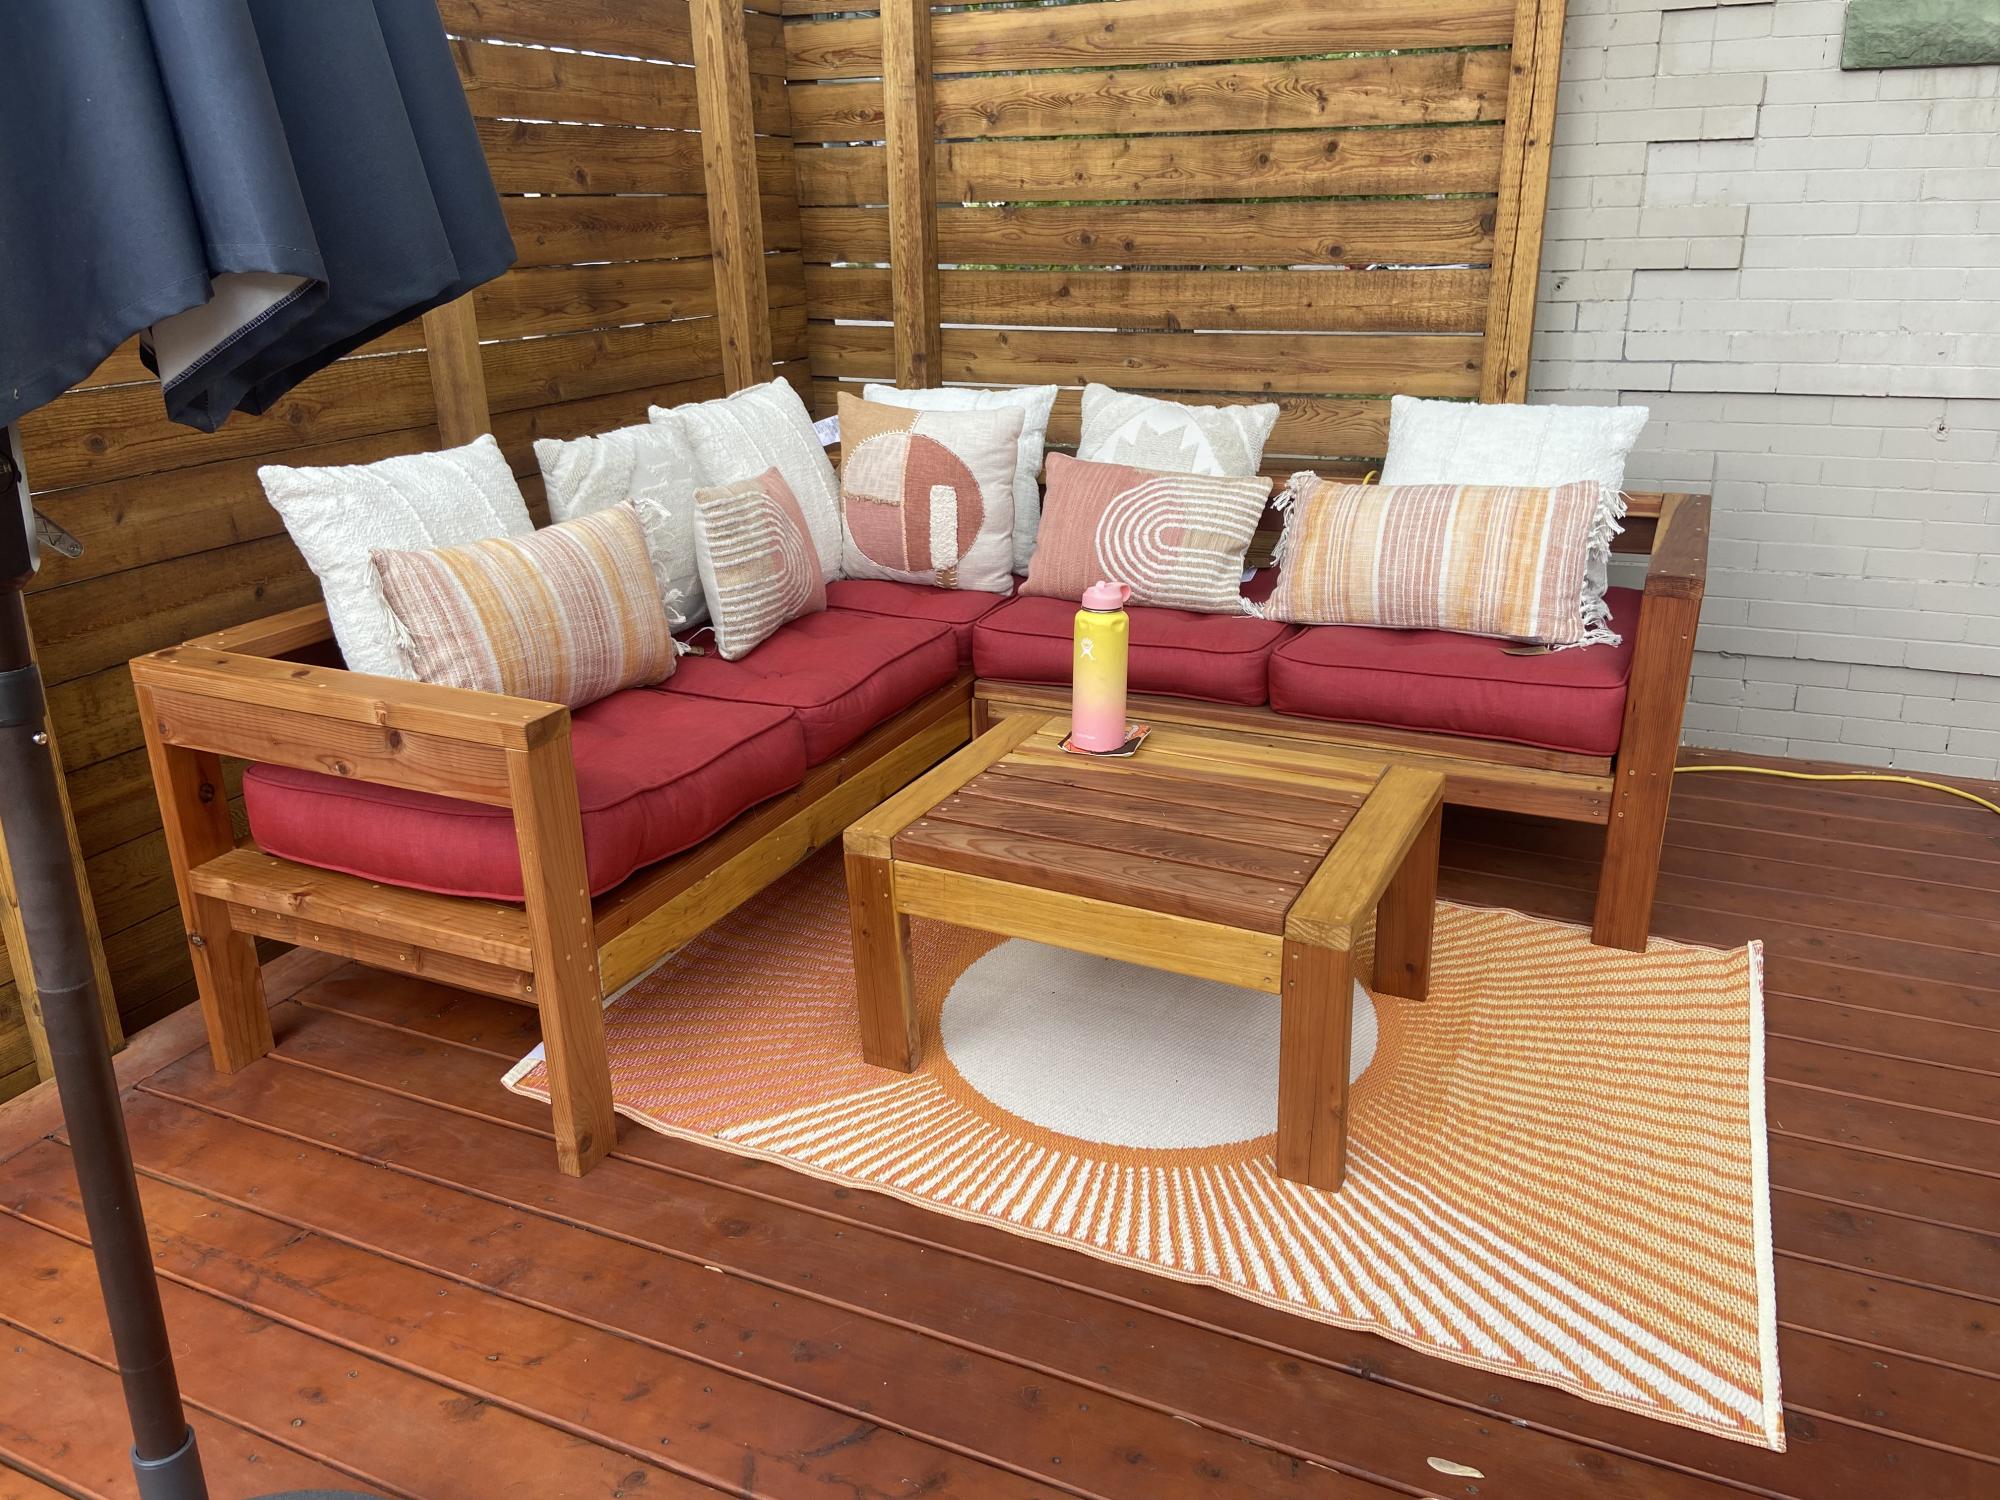
I built the two piece sectional + table and adjusted the sizing so the lengths of the sectionals pieces are the same.
Turned out amazing. So much fun building this and I can’t wait for my next project!
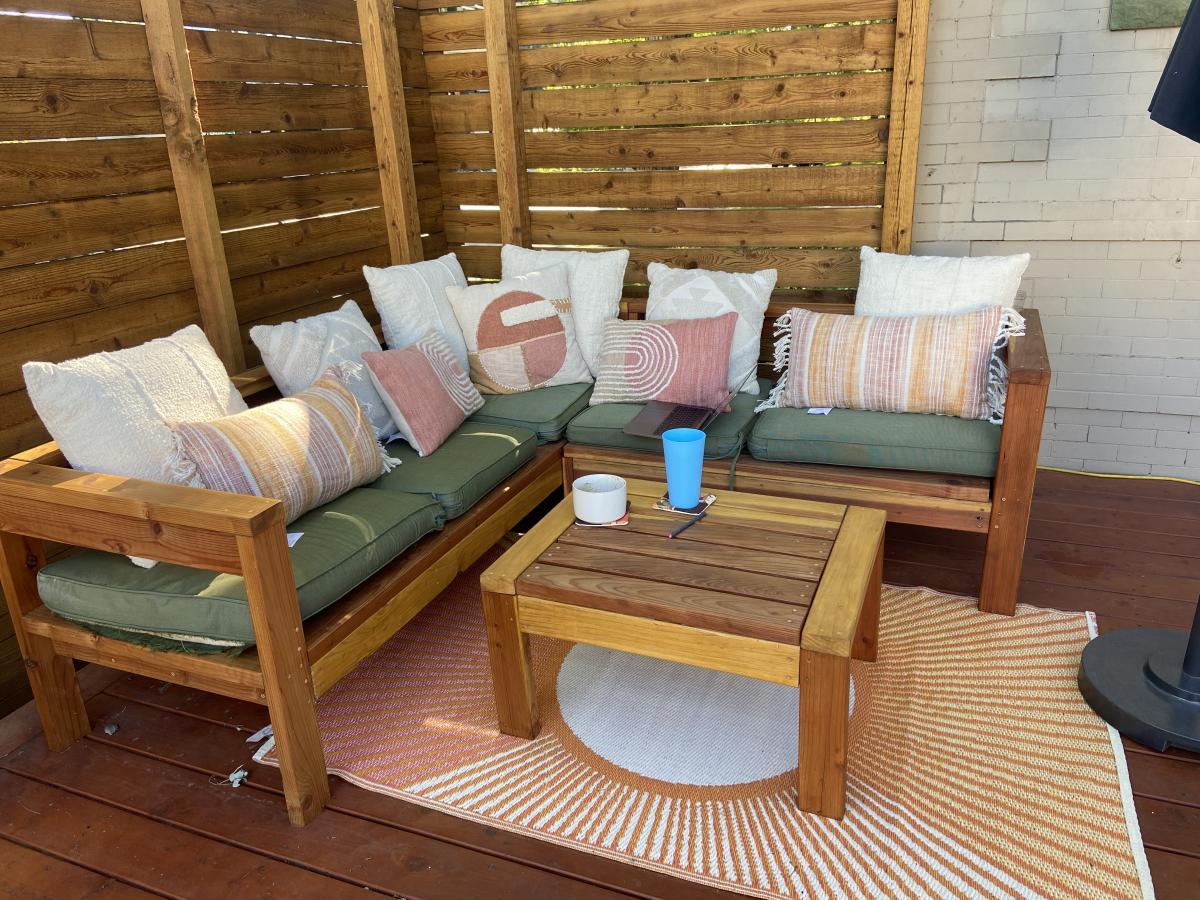
Built from Plan(s)
I built the two piece sectional + table and adjusted the sizing so the lengths of the sectionals pieces are the same.
Turned out amazing. So much fun building this and I can’t wait for my next project!
Built this from the plans and customized so it was a finer finish. No pocket holes, went with dowels and glue. Some screws in base for added strength.
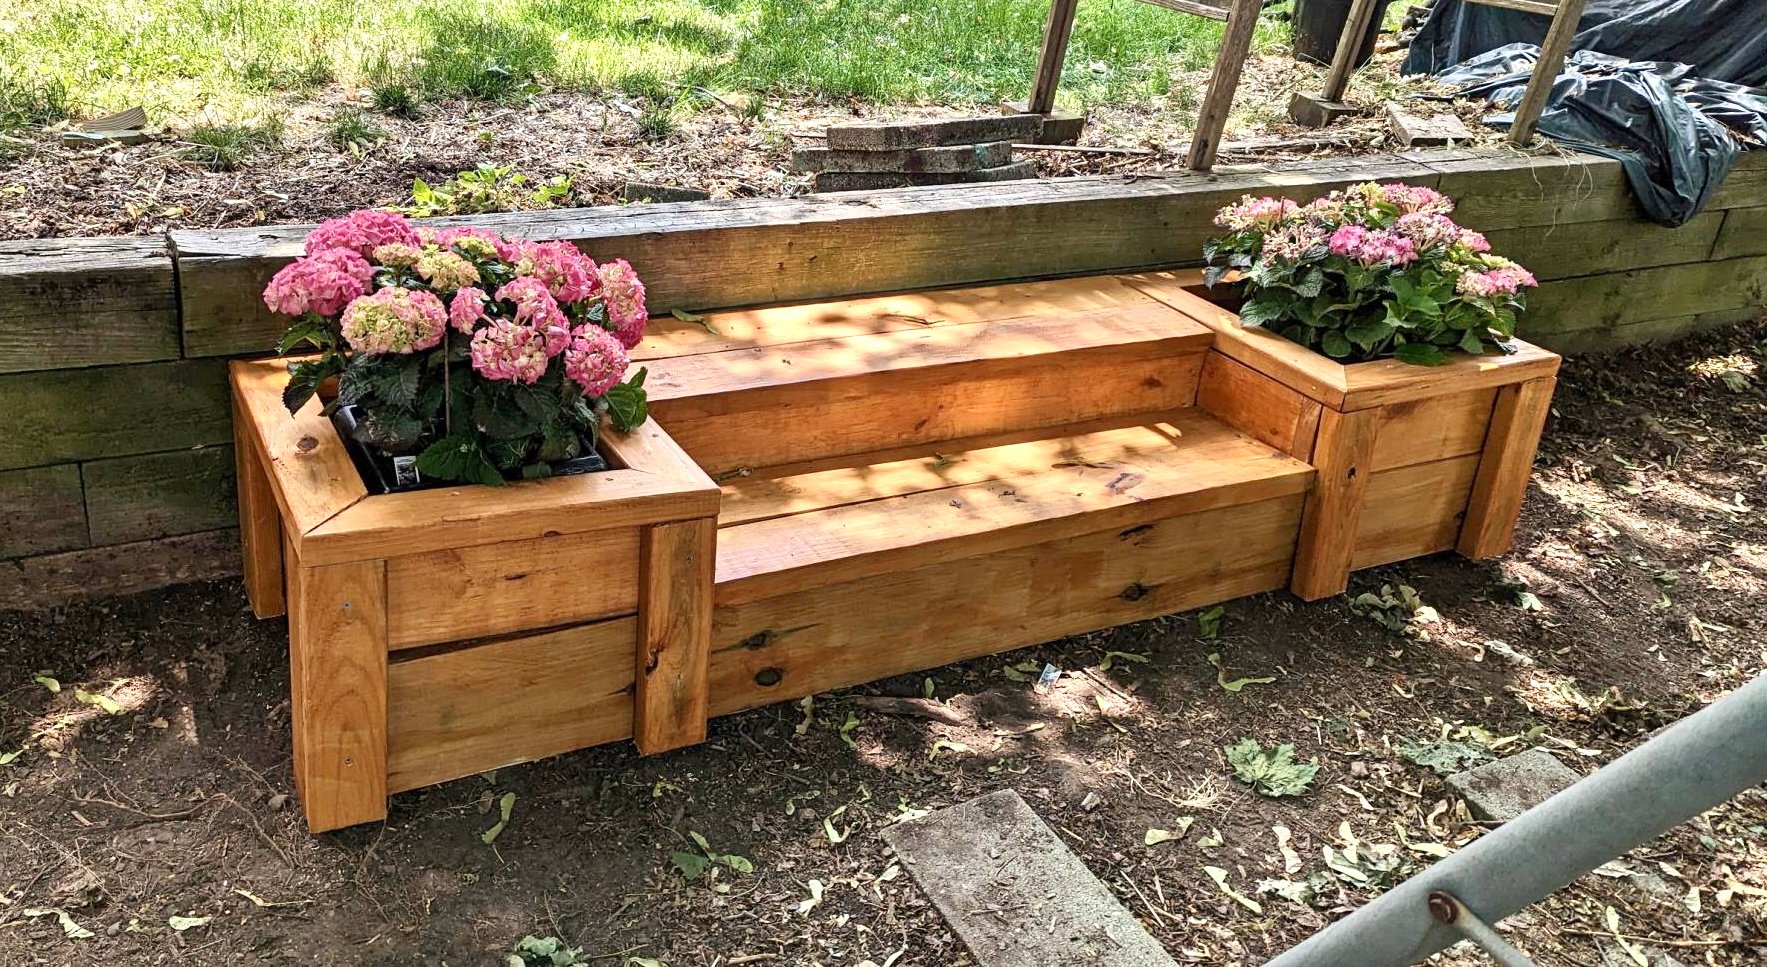
When my husband left he left behind an entire tier of our yard that he'd used to throw sticks, branches, clippings, dead plants, you name it for years. I cleared the mess last spring and am excited to make it beautiful this season!
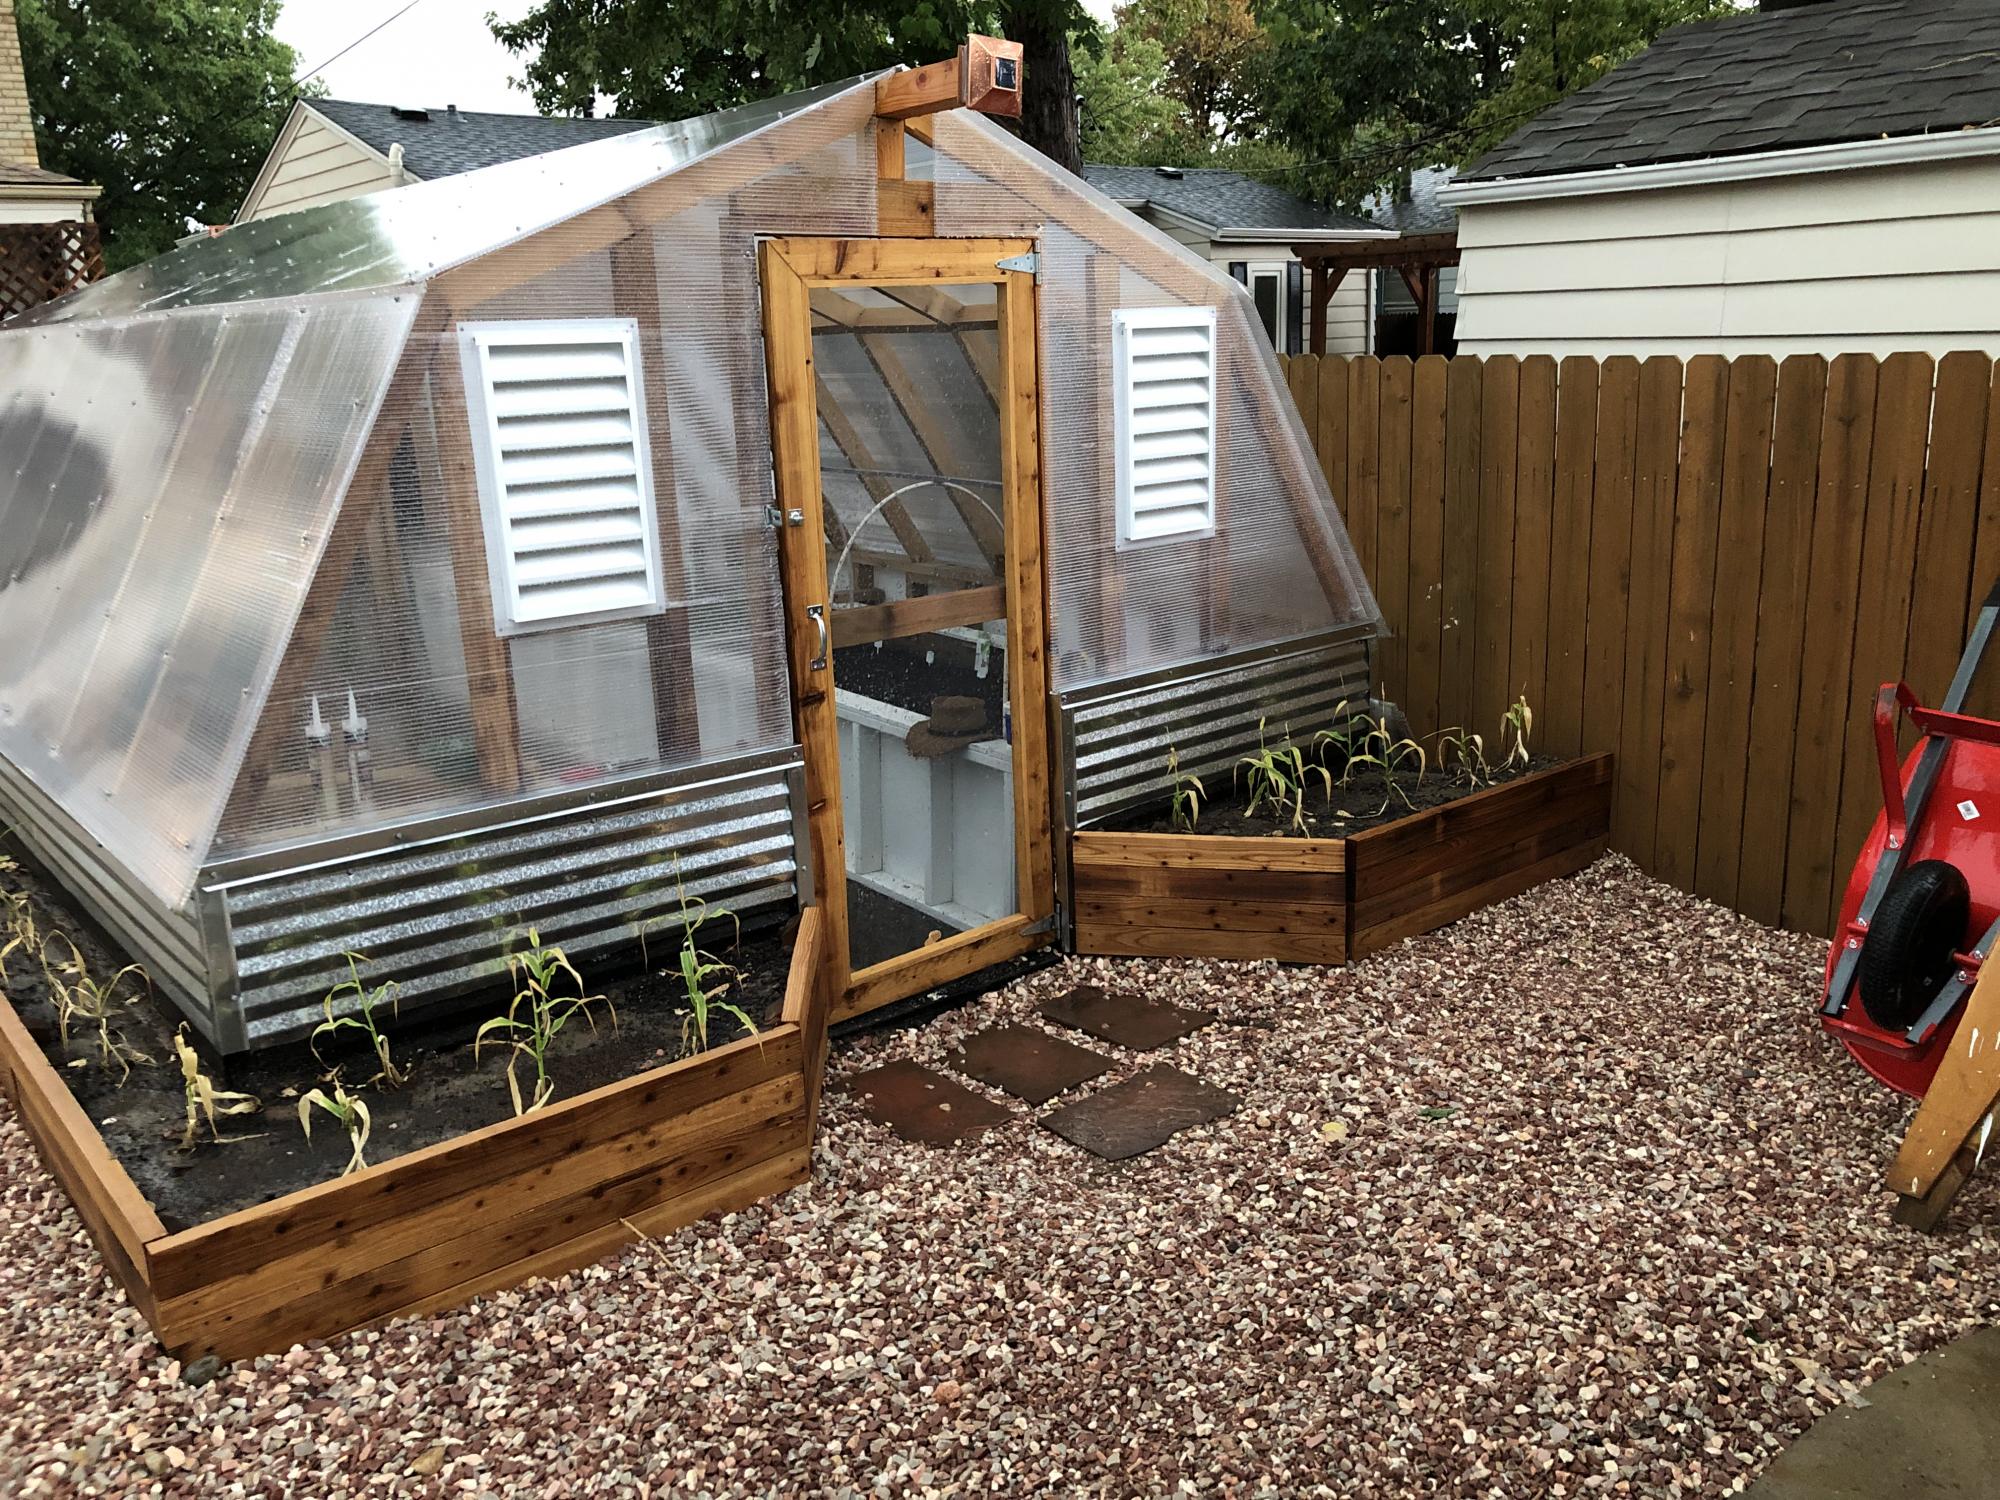
My Annawhite design with geothermal improvements. It will also have a 1000 gallon Aquaponics system inside!
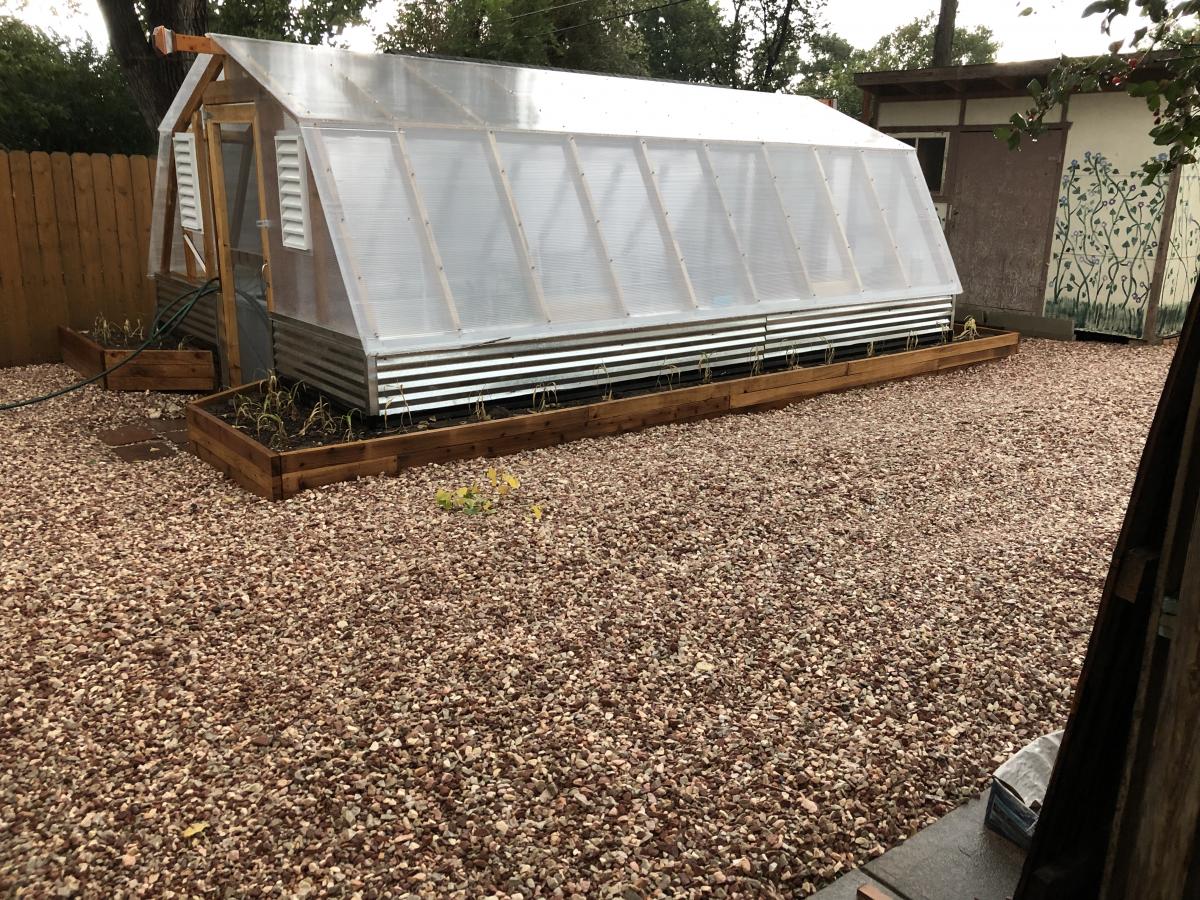
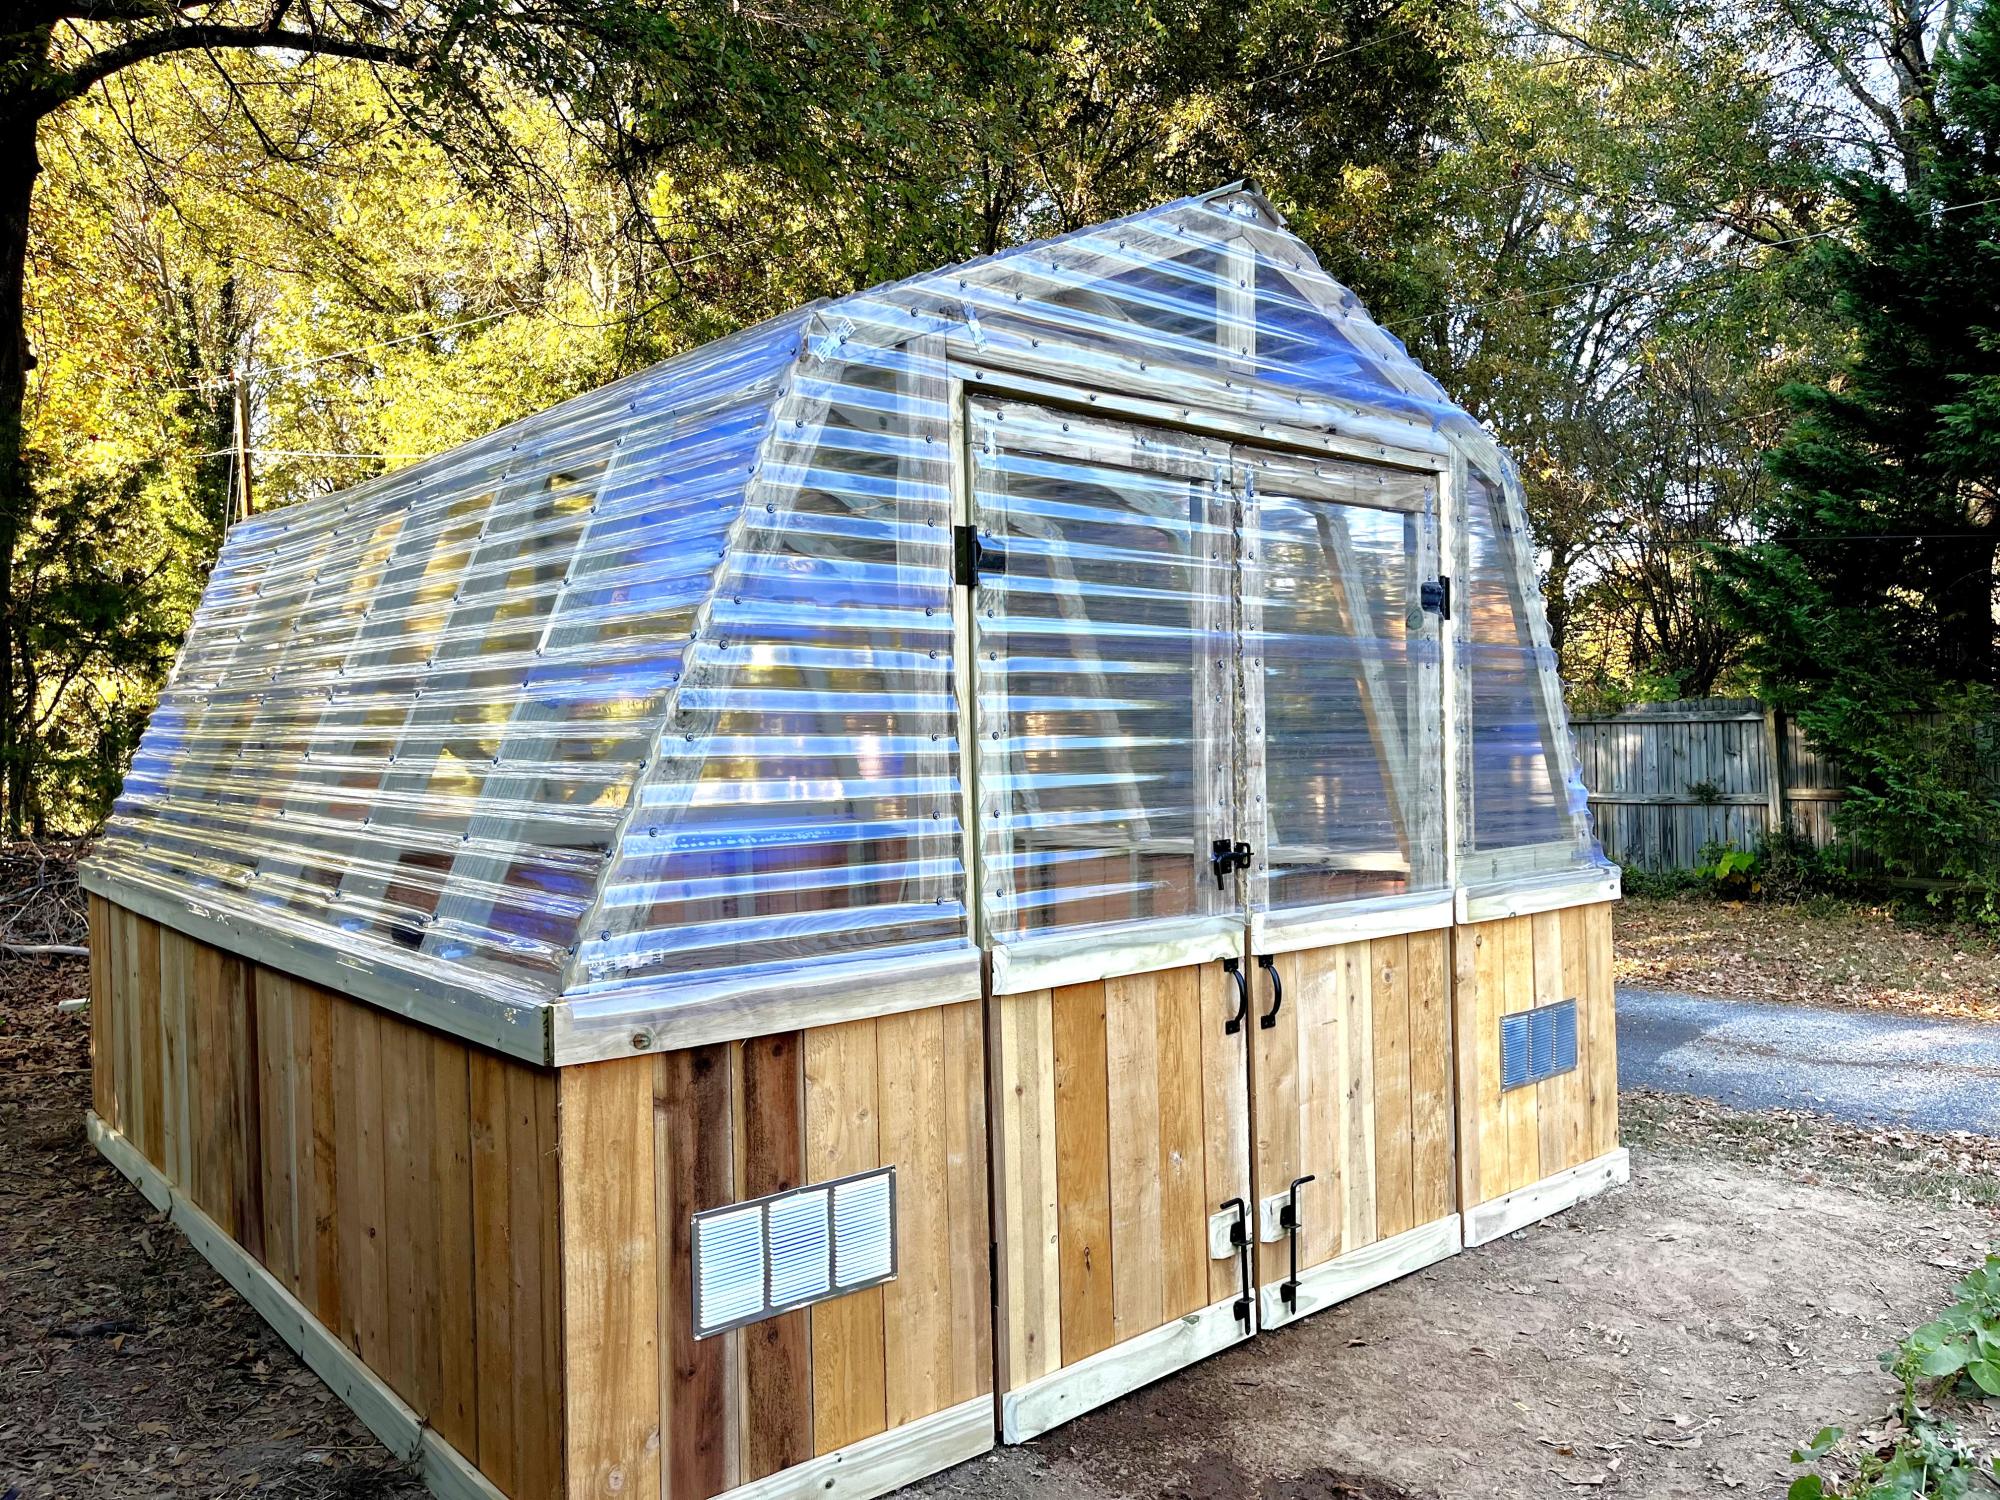
I loved this plan so much but I really wanted double doors so we made a few modifications to fit them. Can’t wait to build out the interior and start growing! Thank you for the amazing plans!
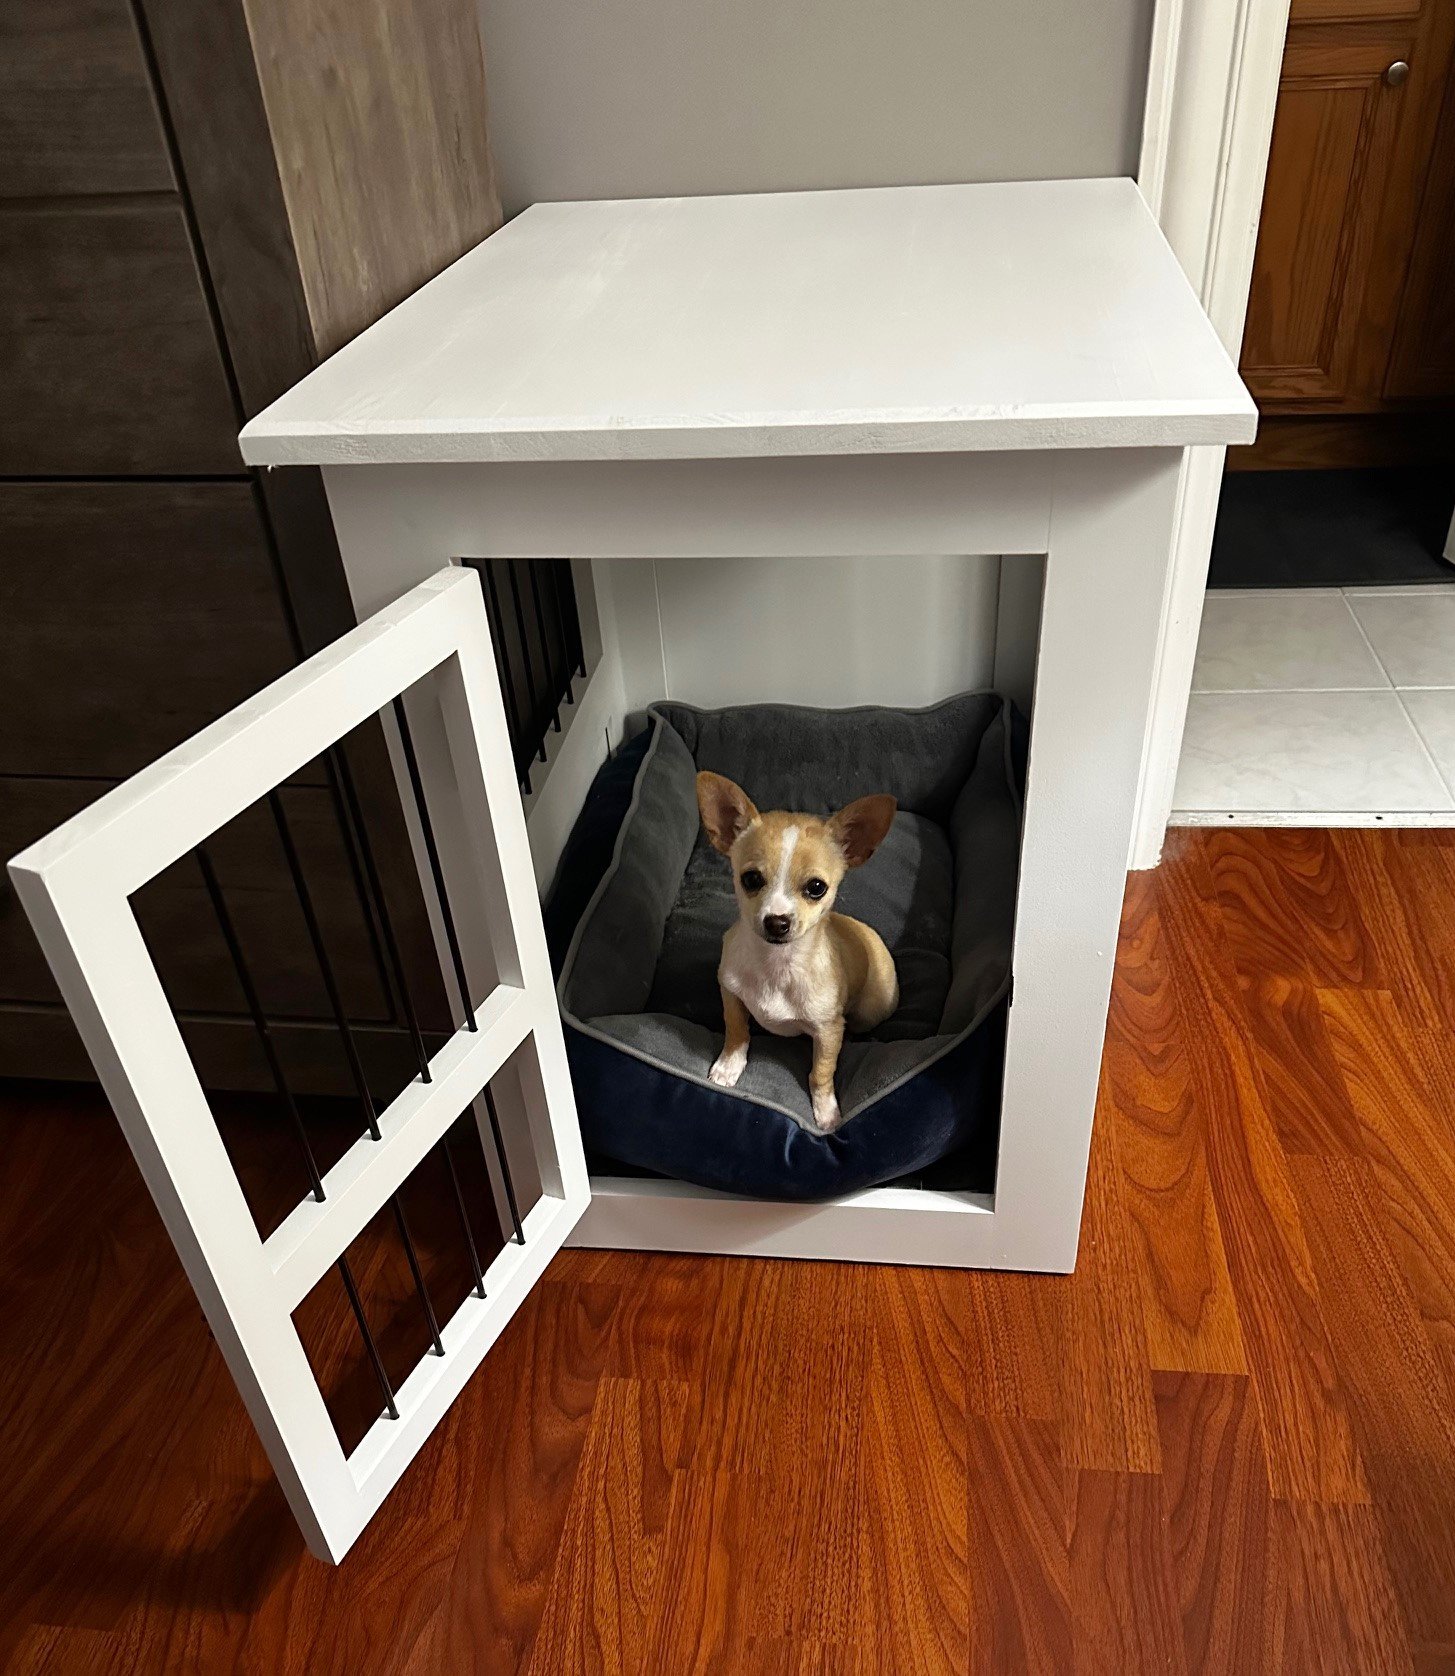
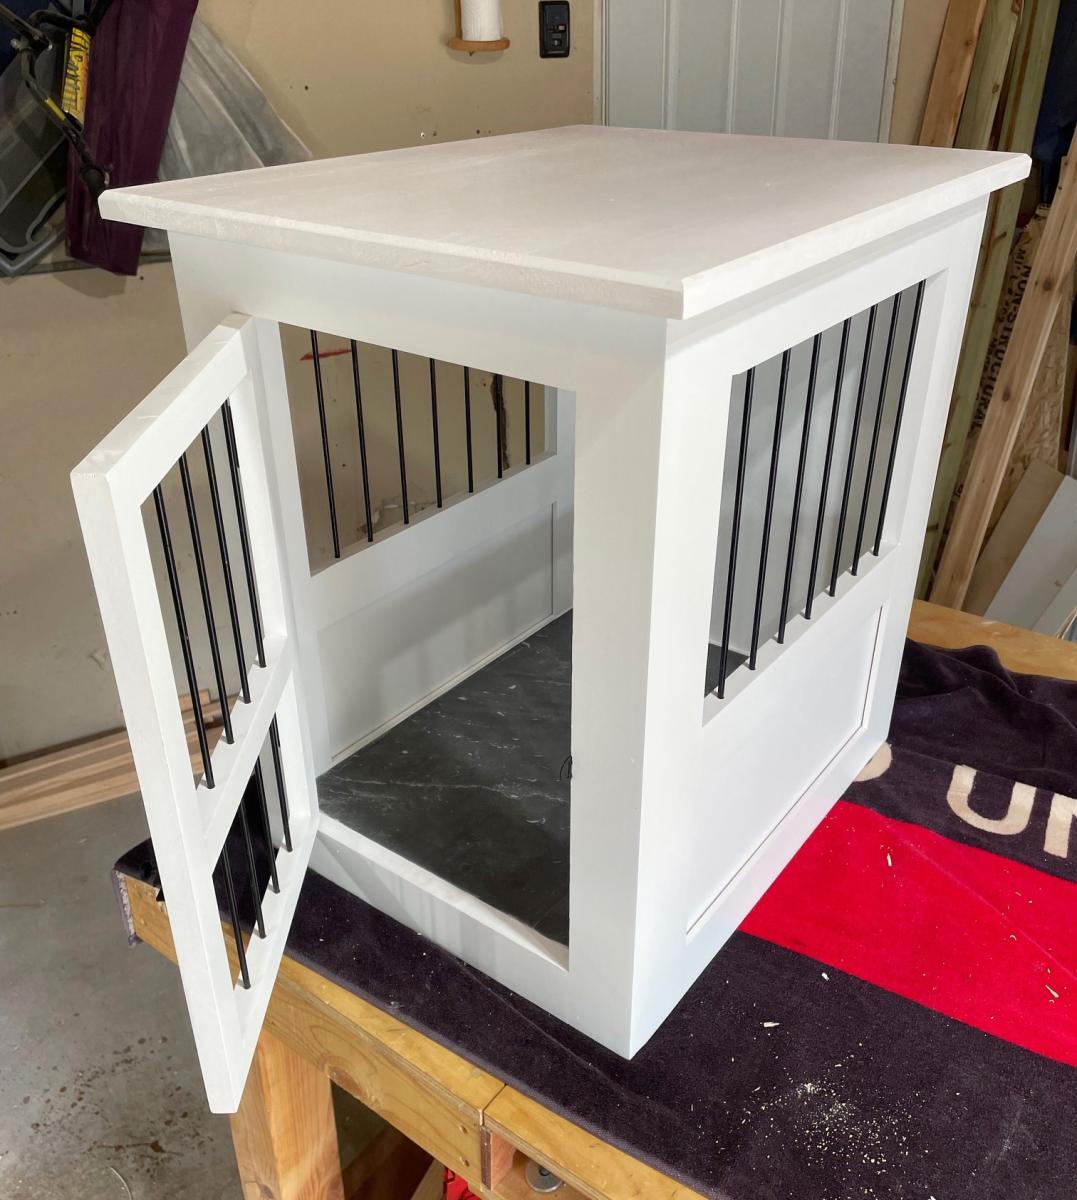
Built from Ana's Dog Crate End Table plans. Used steel rods instead of wood slats.
This is my first project, I’m soooo happy with how it turned out!


Wed, 05/27/2020 - 11:16
Looks awesome!!! Thank you so much for sharing photos!
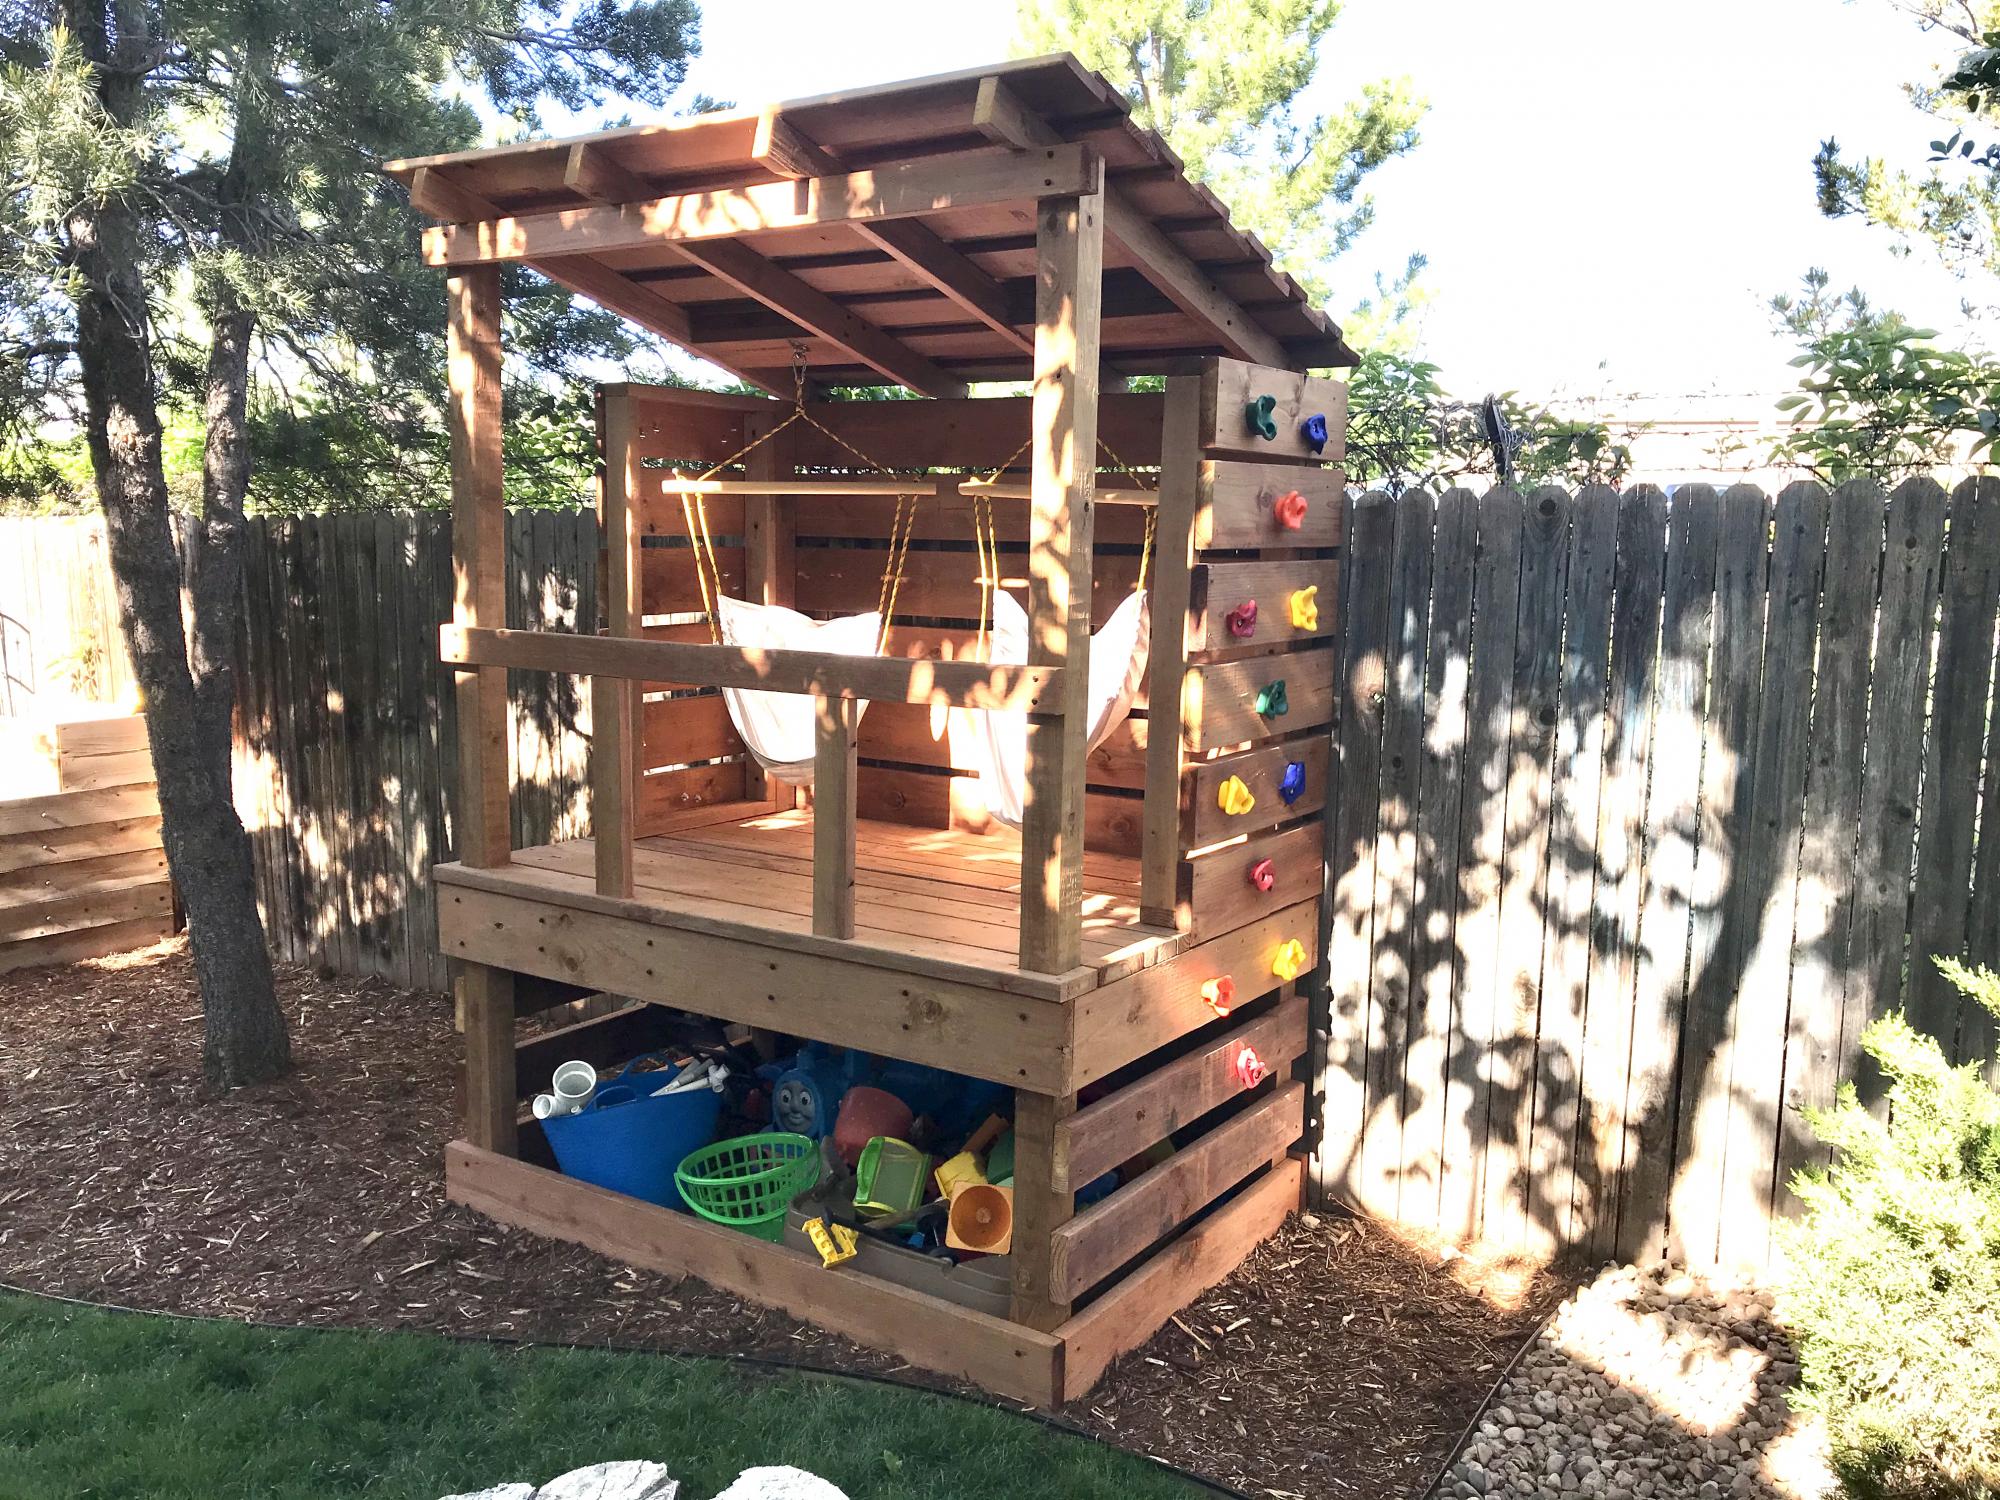
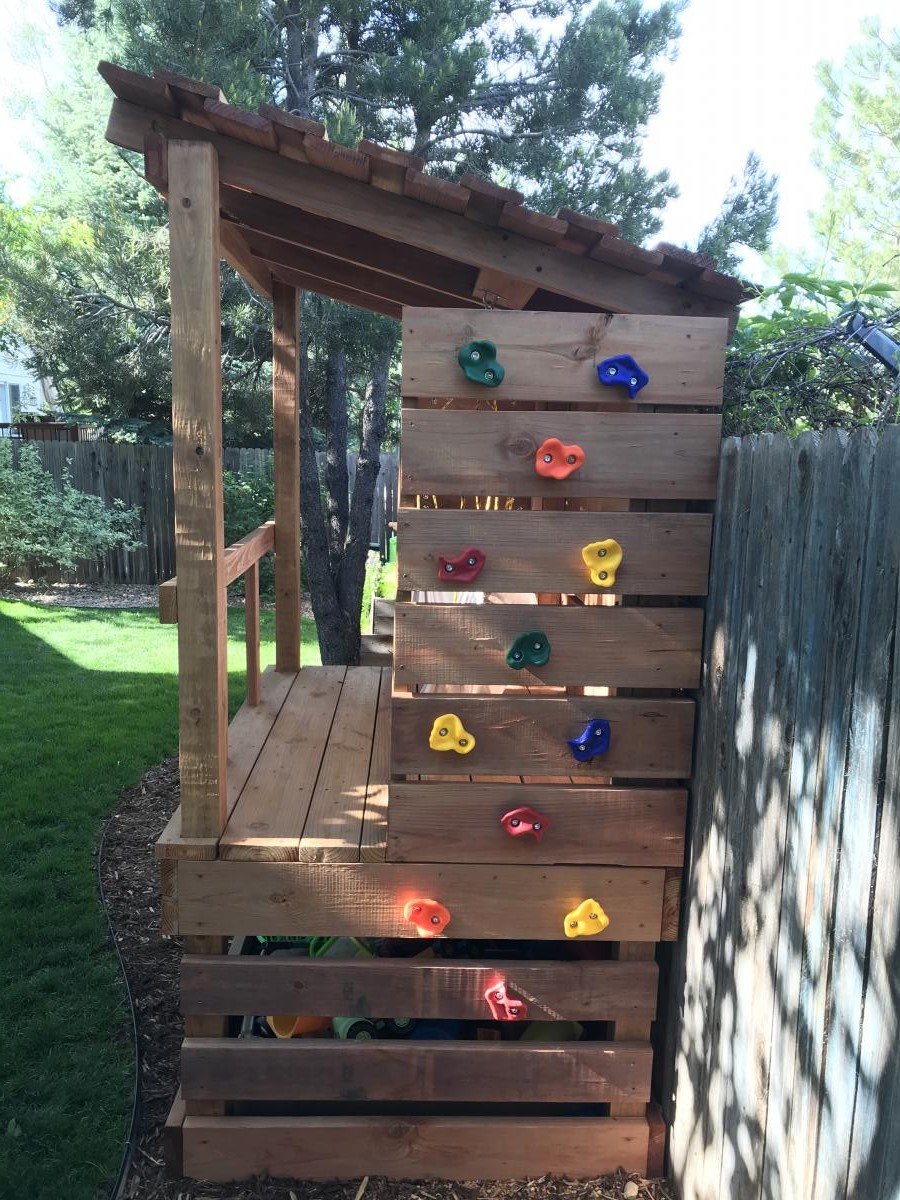
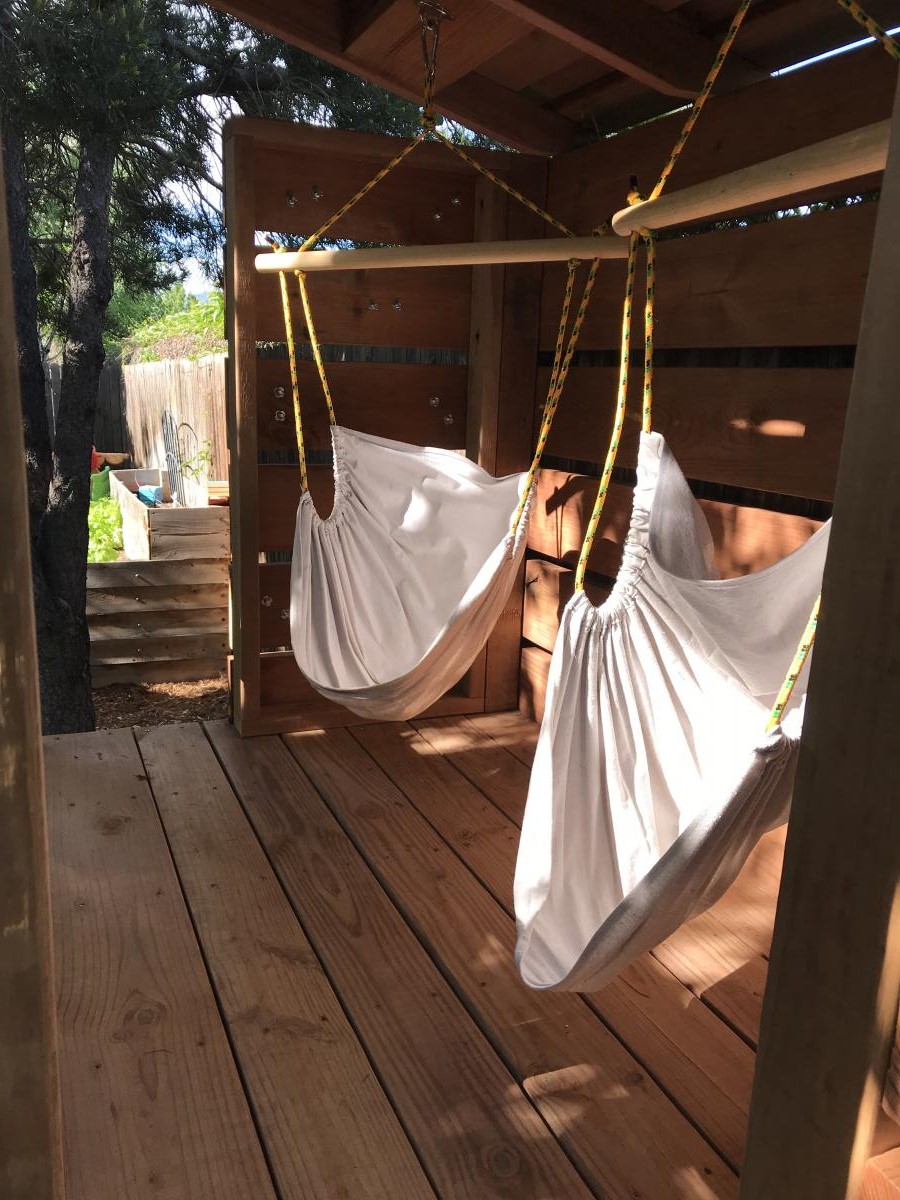
Built a fort for the boys with two climbing walls, a spot for their toys, and added some hammock swings

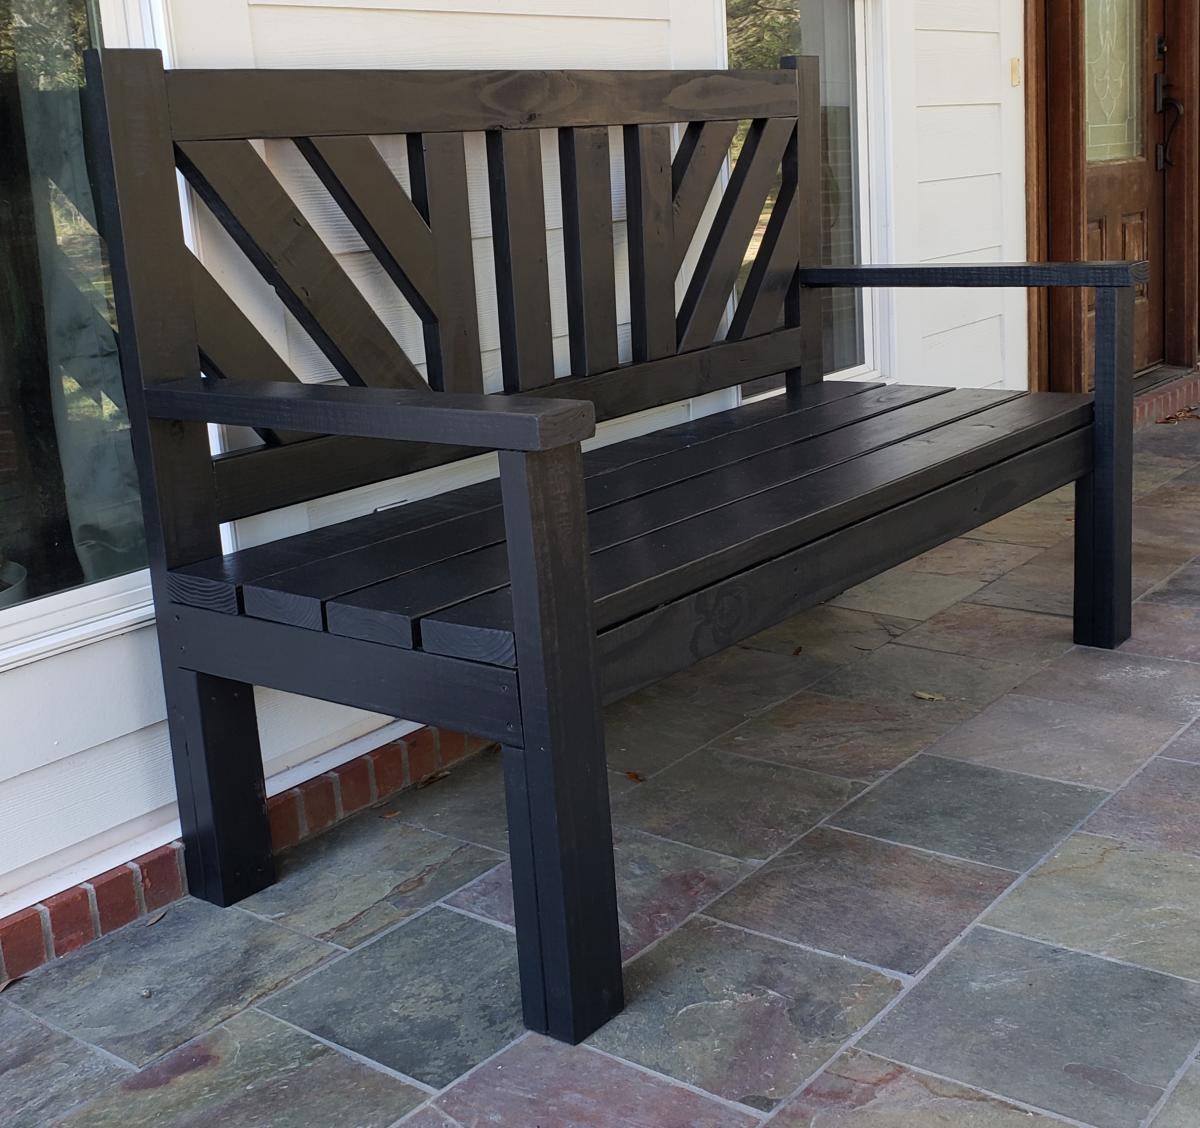
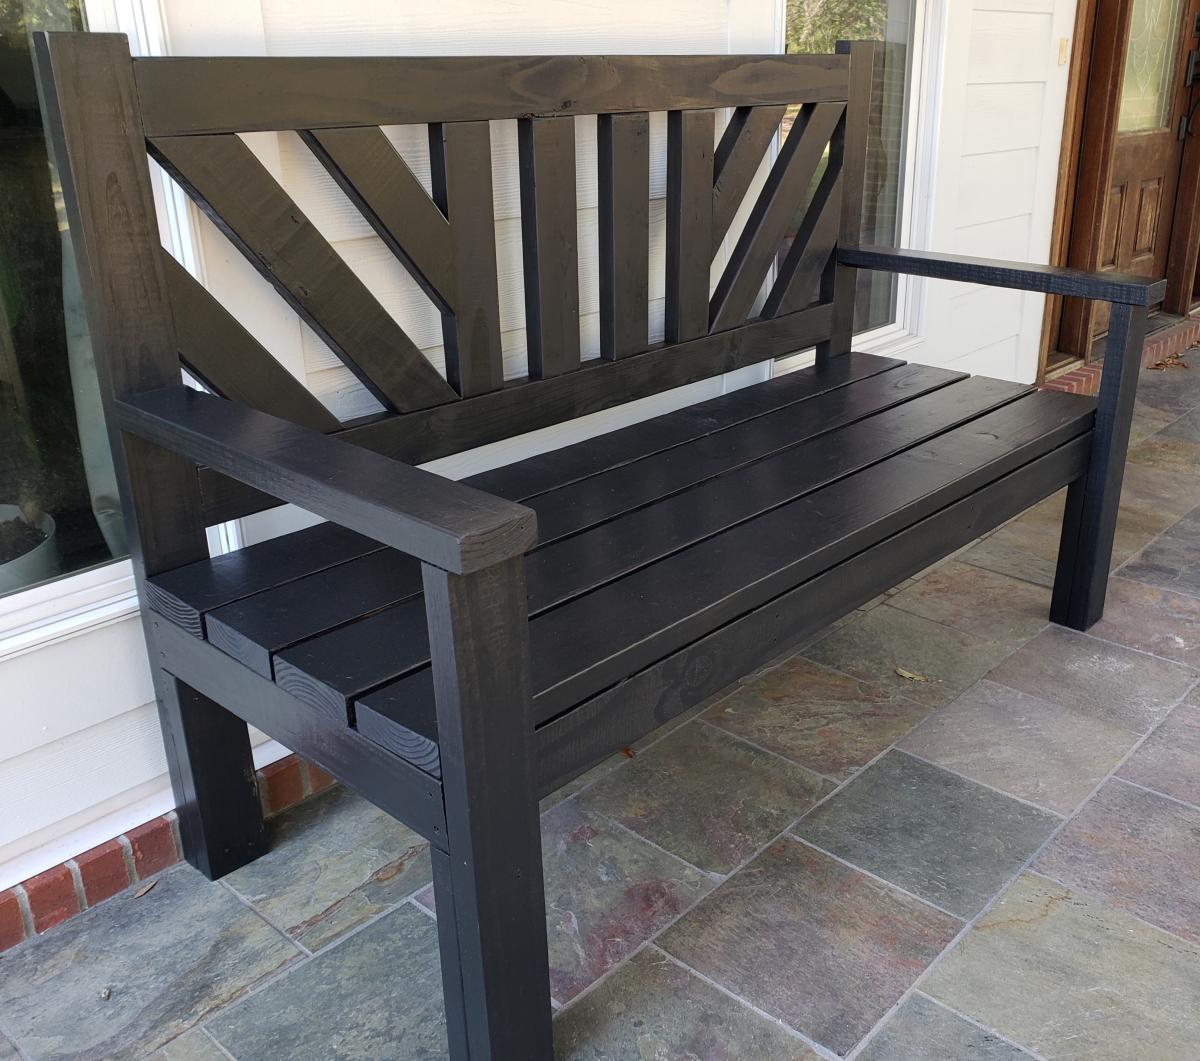
I built this for my wife for an anniversary present. She had wanted a garden bench for some time but the ones that she wanted were between $500-$700 which is ridiculous for this type of bench. So, I did a search on here for garden benches but there weren't really any plans for them and the few brag plans were not really the type of bench I was looking for. I printed off a few pictures of benches that I liked and got to work. The front and back legs a 2x6 and a 1x6 glued together and then cut to be straight. I wanted something thicker then just a plain old 2x6. If I had to do this again though, I would have just glued 3 1X6's together. The reason being, is that 1x6's usually do not have a rounded edge and a 2X6 does. So needless to say when you glue them together you have a nice little gap on either side. Without a table saw to take this off, its pretty difficult to get a straight cut. But I ended up getting it right after sweating for a few hours in the garage. The bench stands 36 inches high, 48inches wide and about 18 inches deep. The seat height is right at 18in also.
In the unfinished pictures I actually had the depth being 24 inches. After sitting on it though it was just way to deep. So I pulled it apart, made the adjustments and its now much more comfortable to sit in.
If anyone has any questions or wants more details feel free to drop me a line!
Thanks!


Fri, 06/19/2015 - 13:32
Yes I think thats what they came out to be. yes the cross pieces are 2x4 and the slats are 1x4's

In reply to back legs by smz1919
Fri, 06/19/2015 - 13:34
I glued a 2x6 and a 1x6 together to get the thickness. Now that i have a table saw and a jointer this entire process would have been much easier but after getting it to look like one solid piece i just outlined the slant i wanted and cut it using a jig saw.
Fri, 06/19/2015 - 20:17
So the back slats are just glued in place right? I wonder if it would be easier to use a biscuit joiner or not
Sun, 10/23/2016 - 17:46
Wed, 05/26/2021 - 08:32
Hi Nathan
Love the look of the bench. Would you have a list of material requirements. I intend to make a bench like this and would like to know the measurements of the top back spar (the shaped one).
Here in the Uk our timber yards do not always supply the same cuts as the US so I need to have some idea of the pieces I need
Many thanks
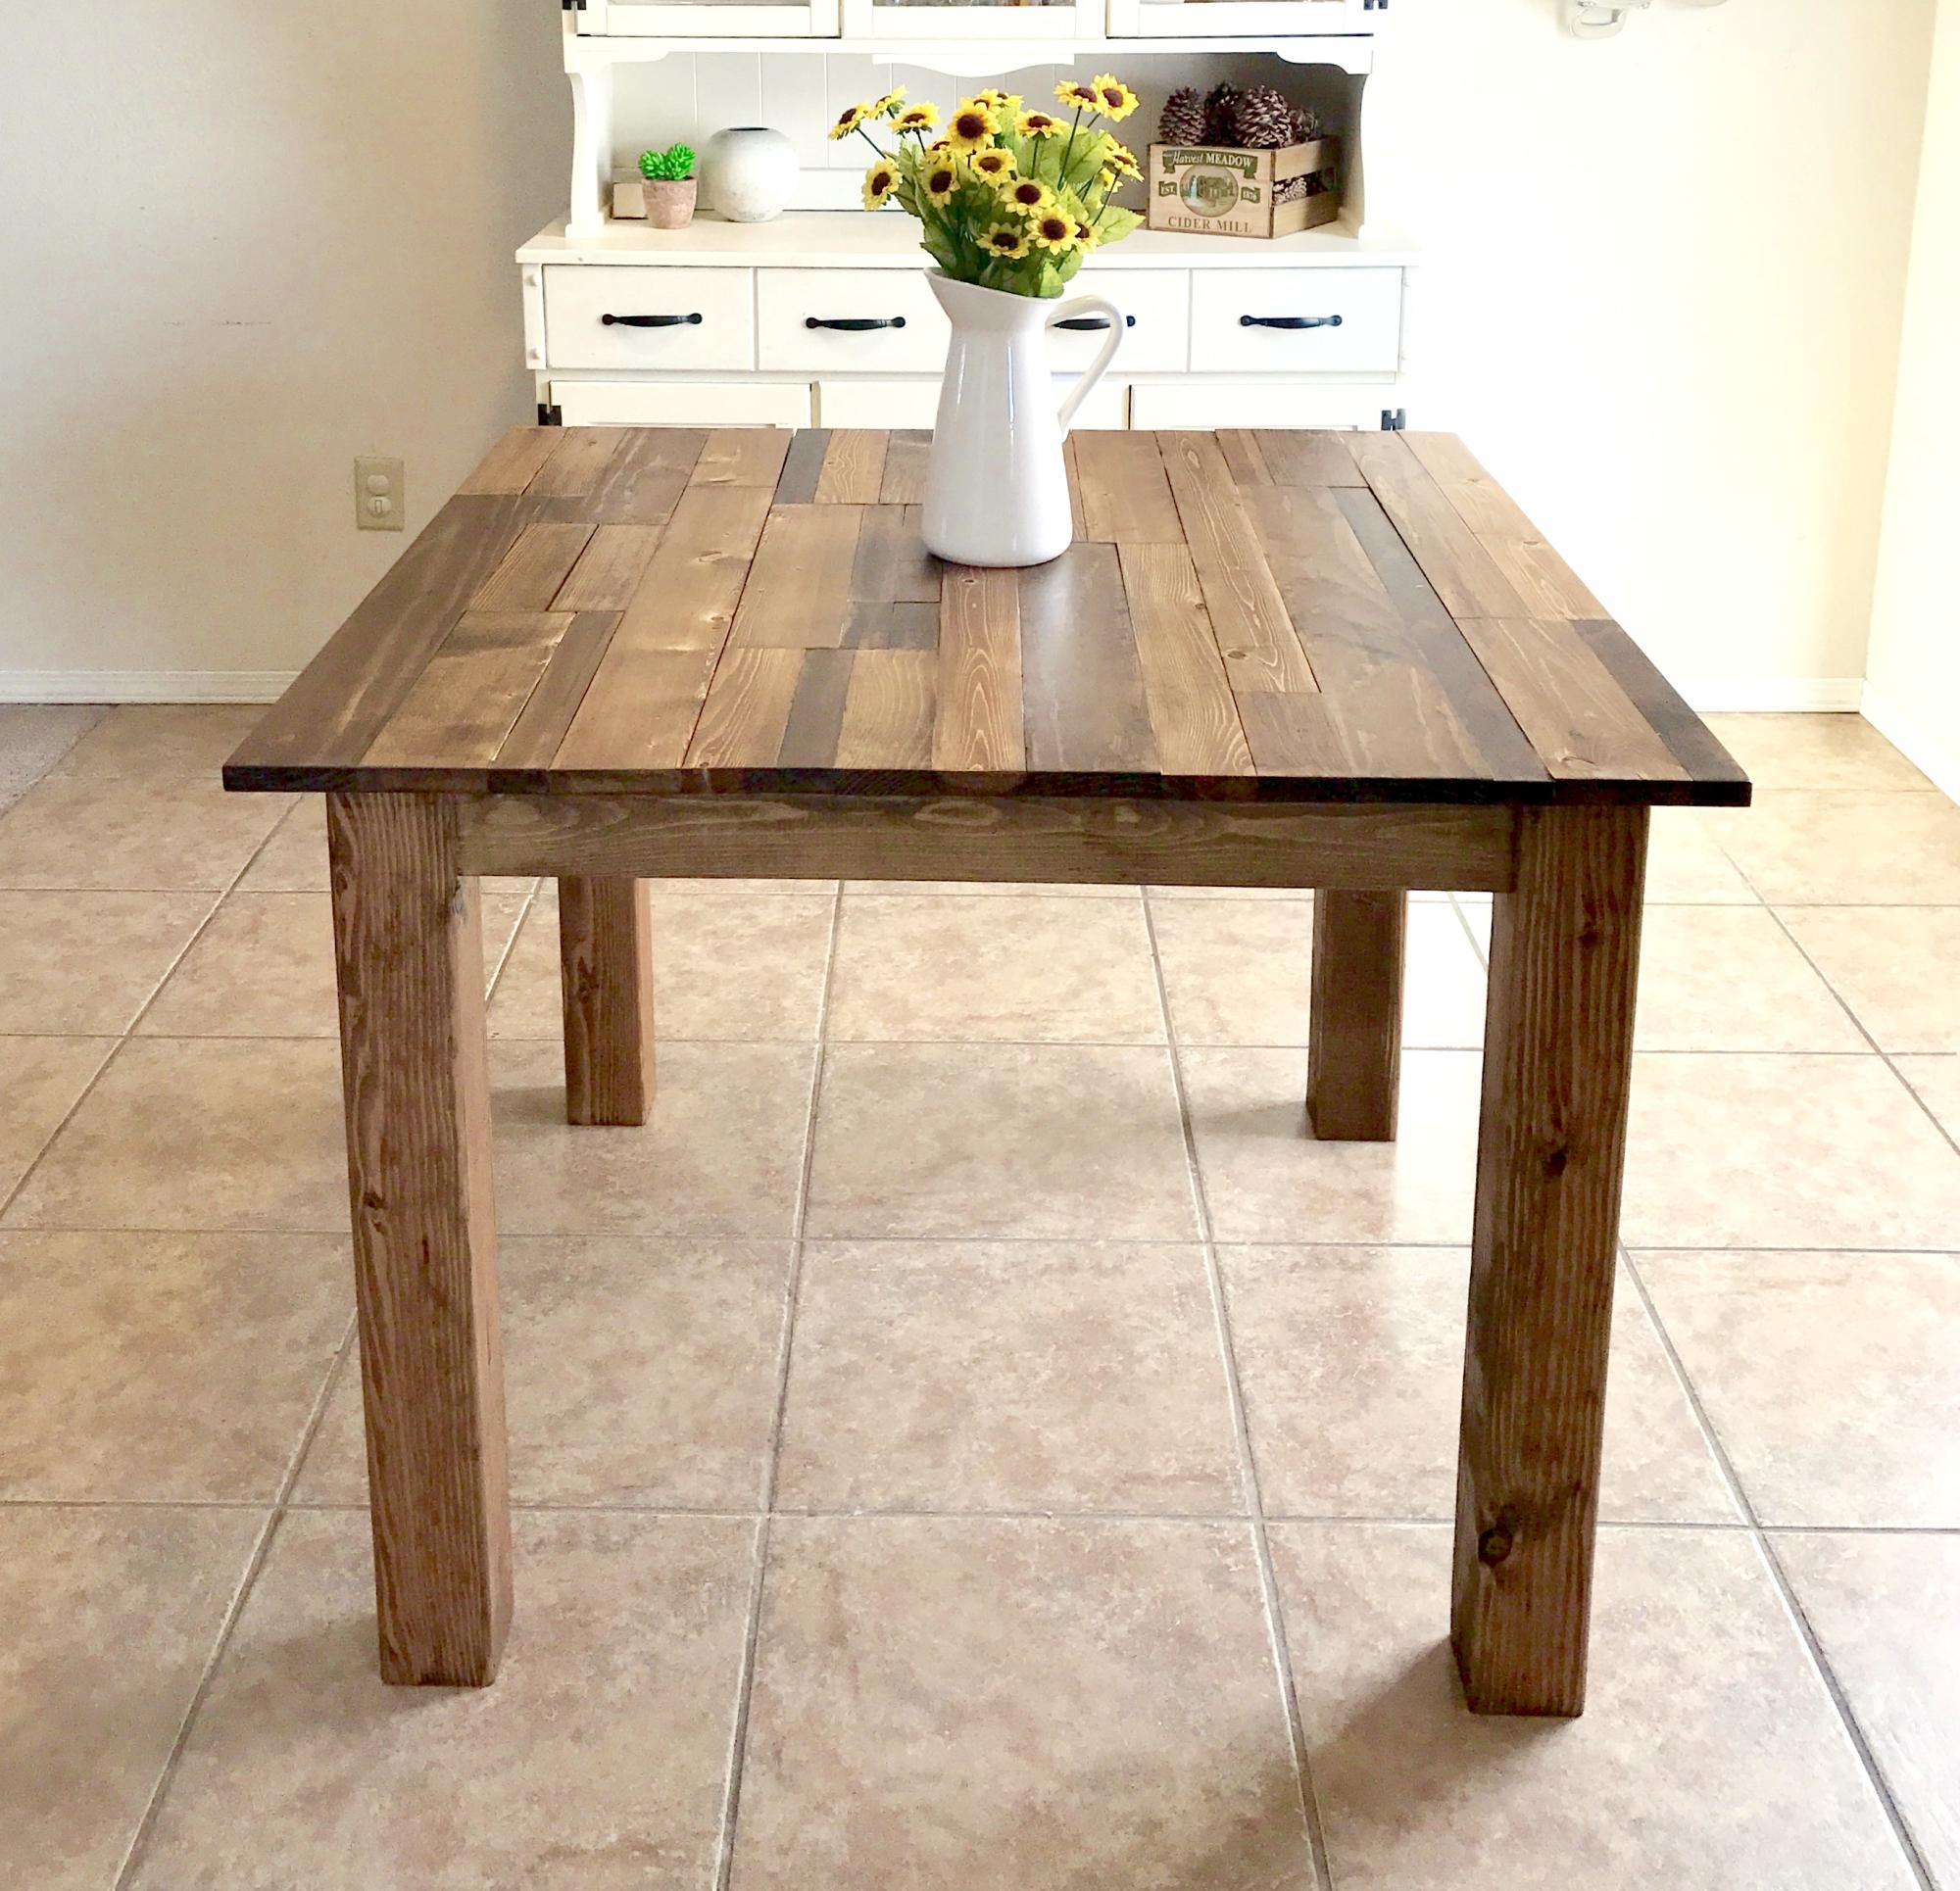
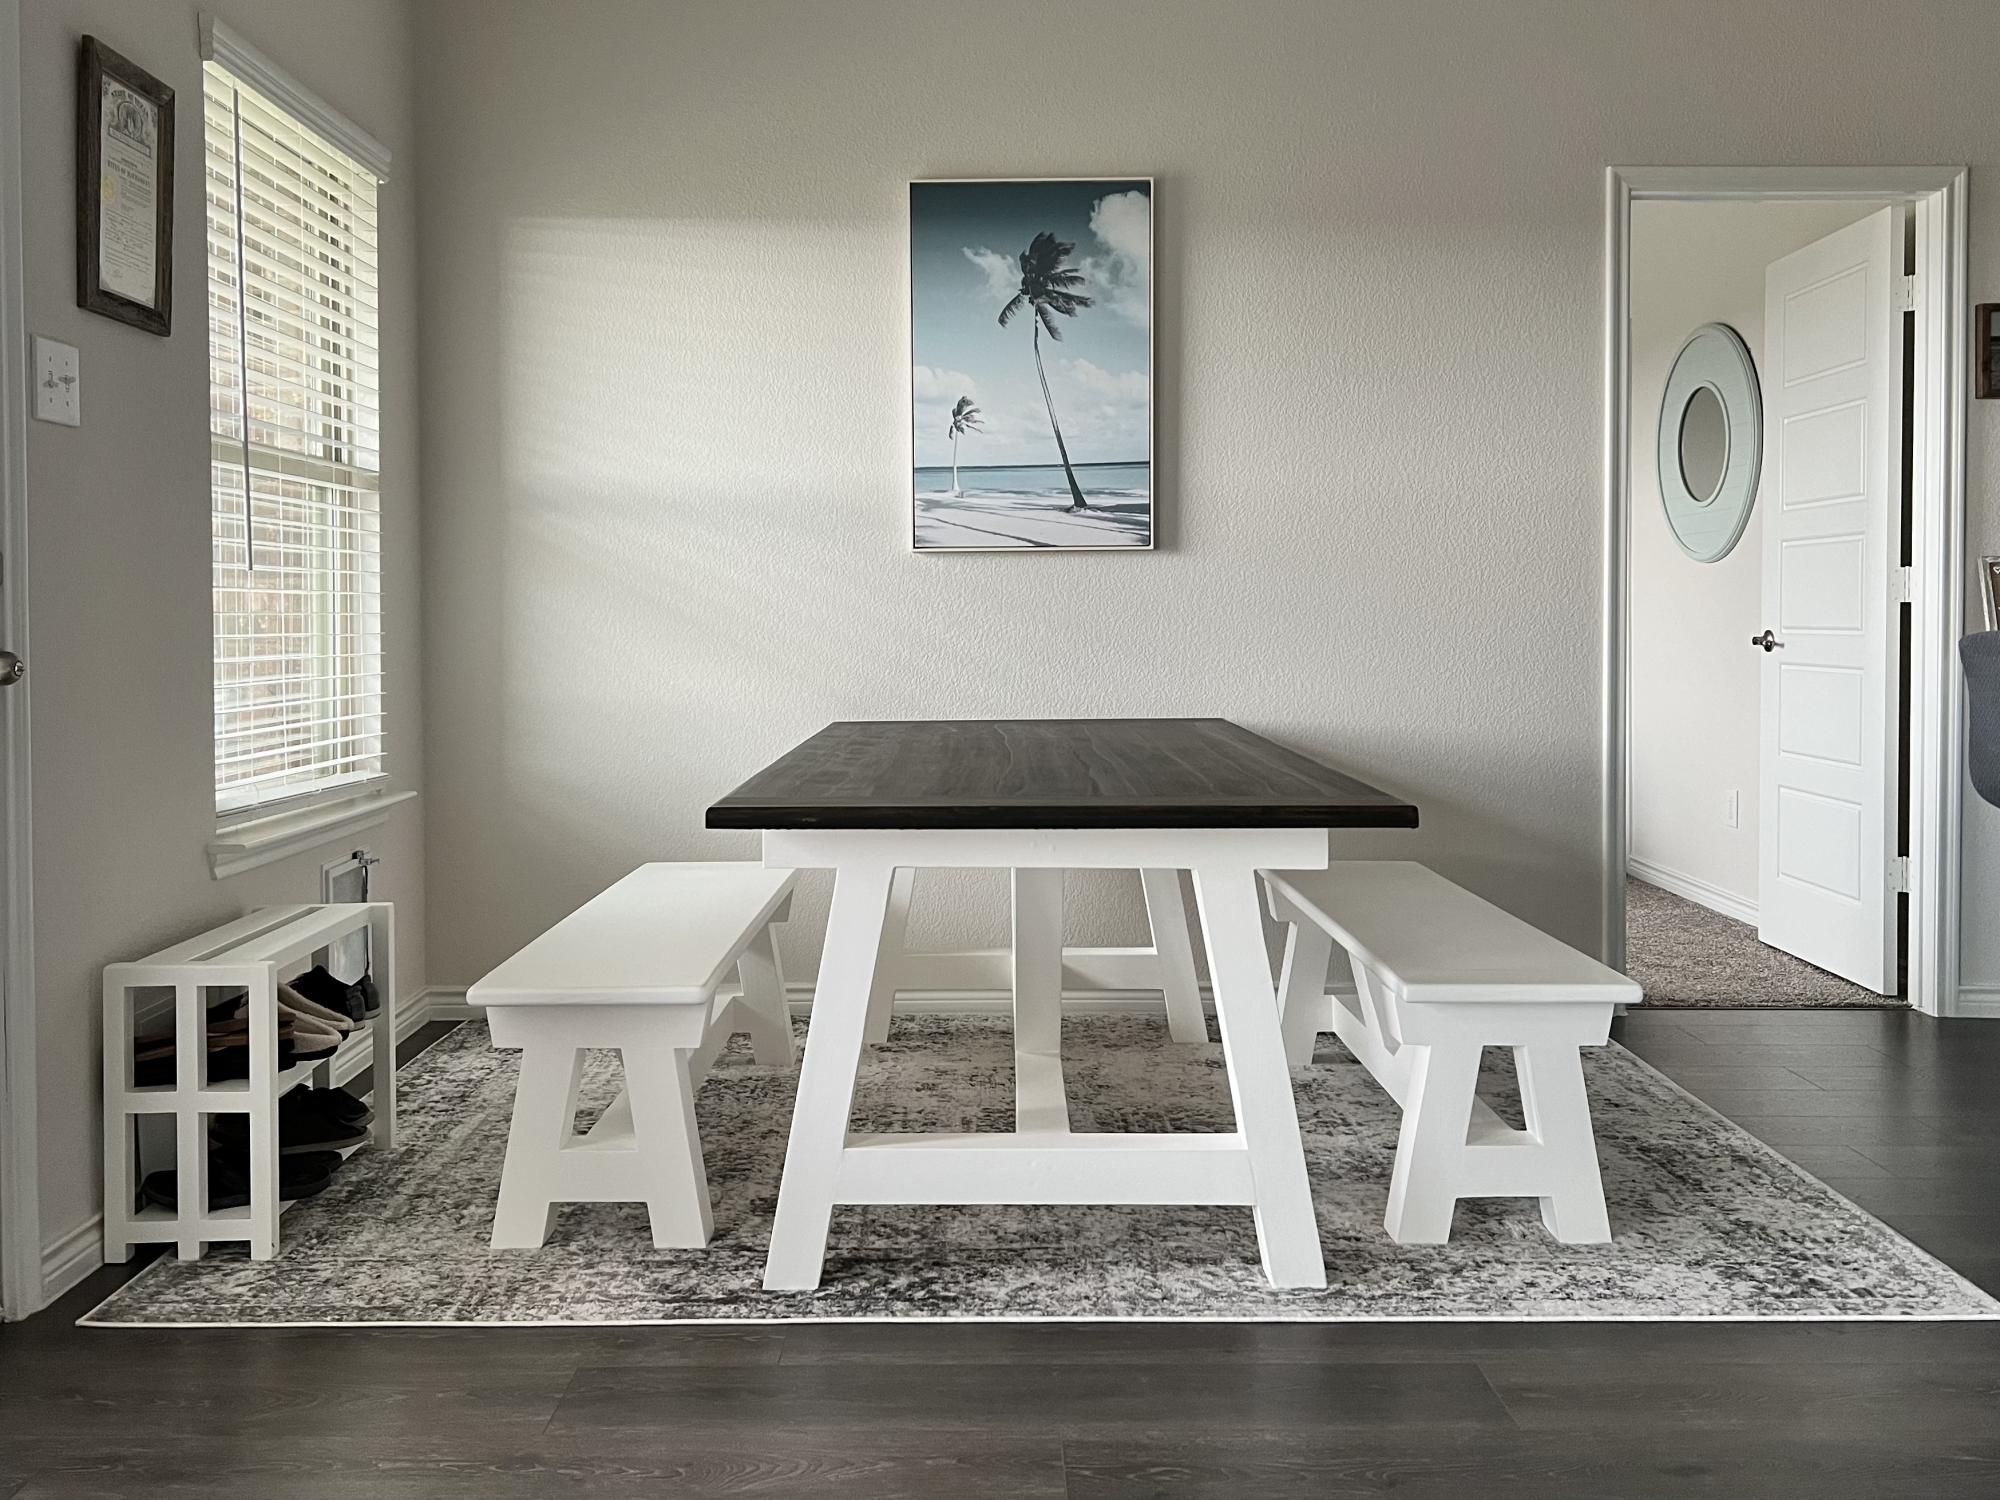
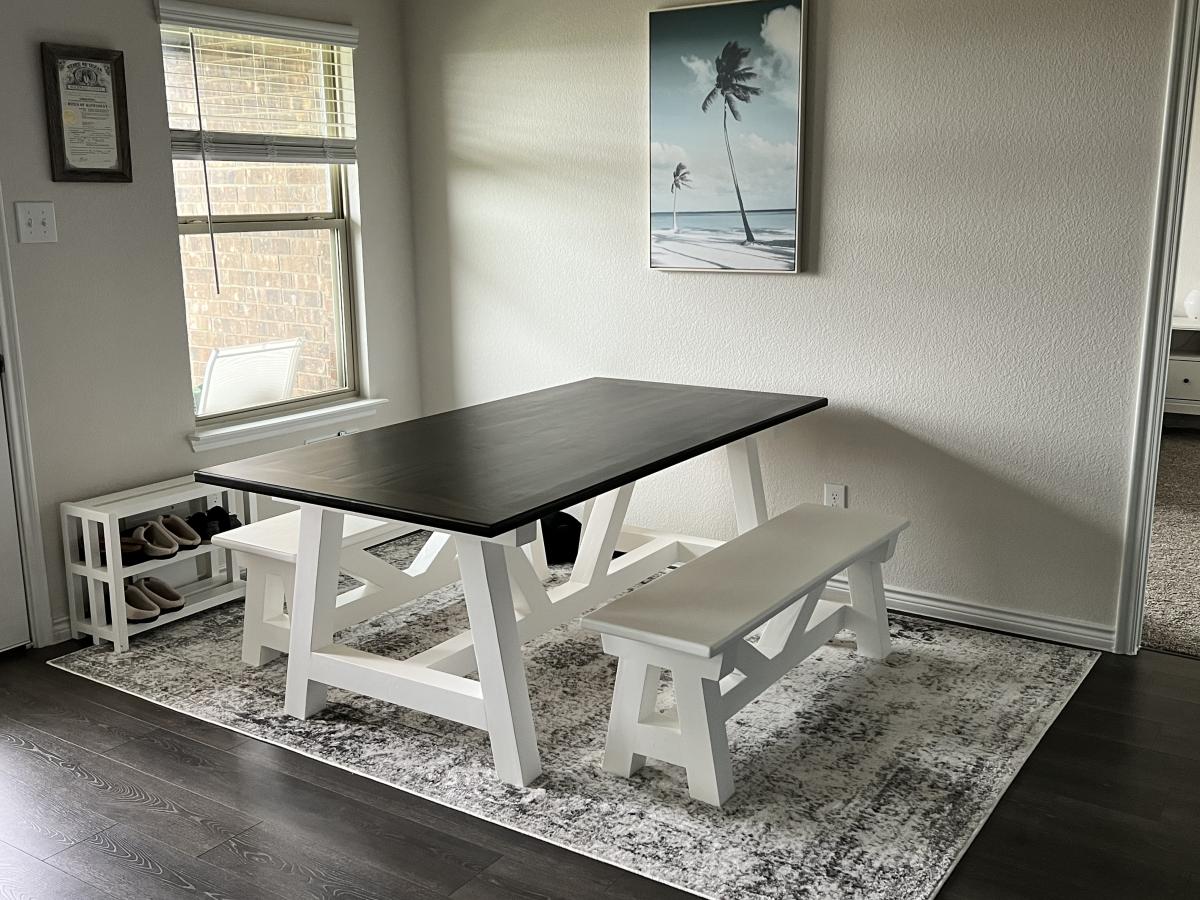
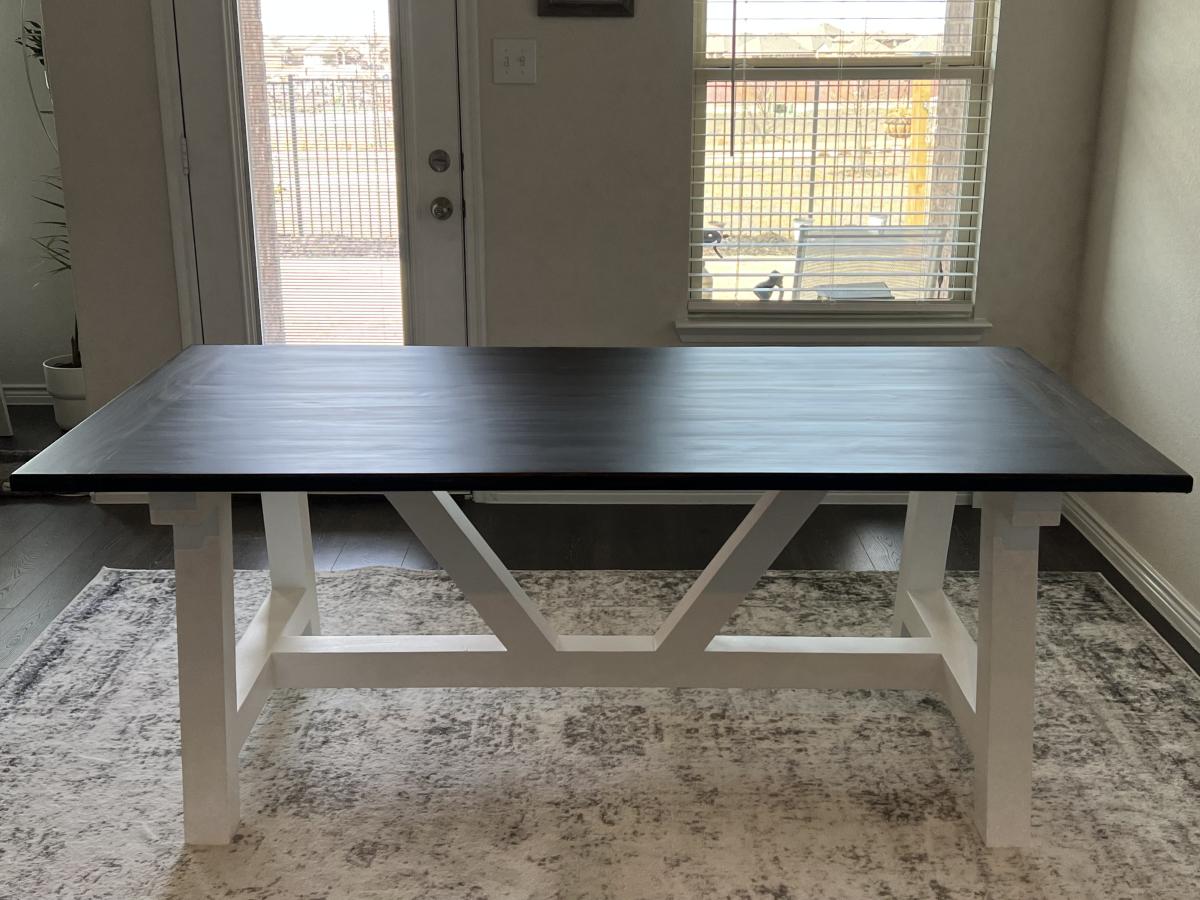
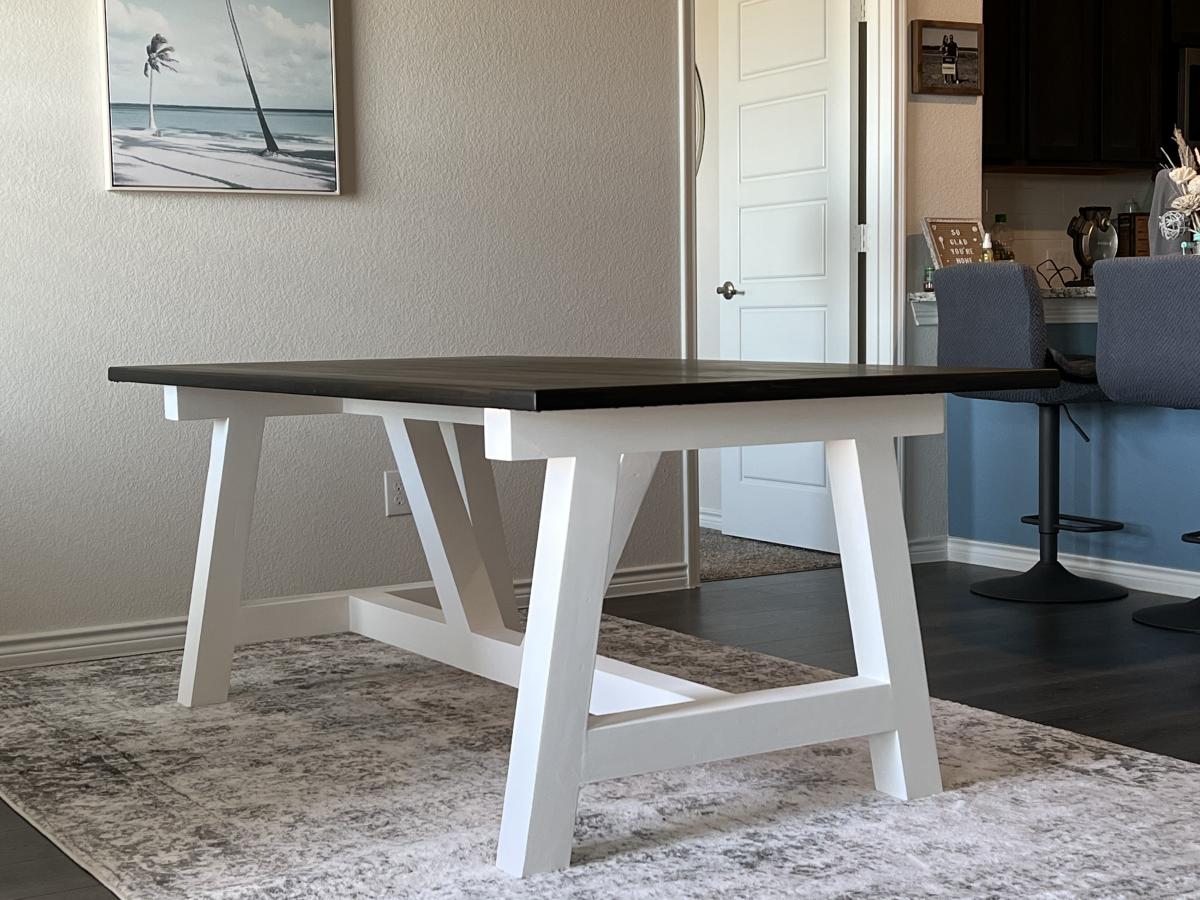
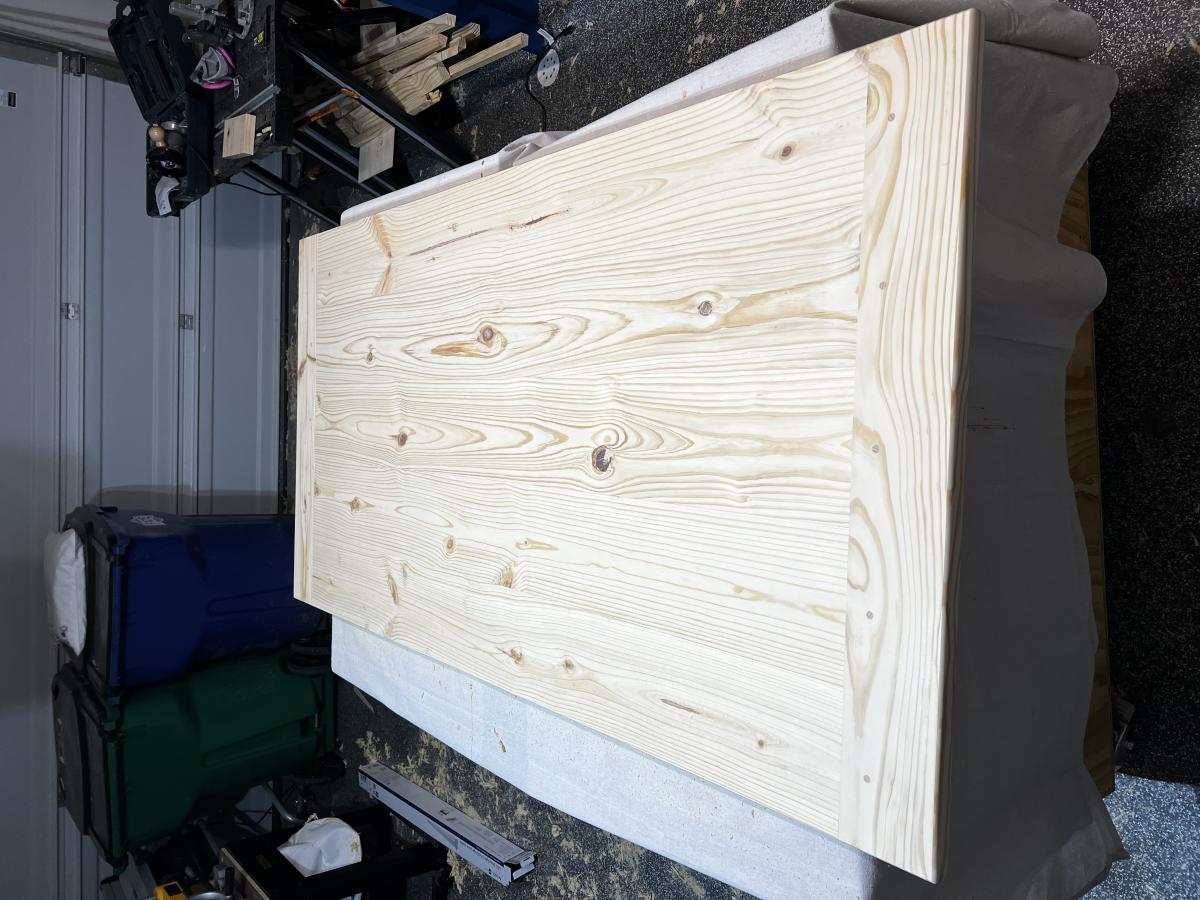
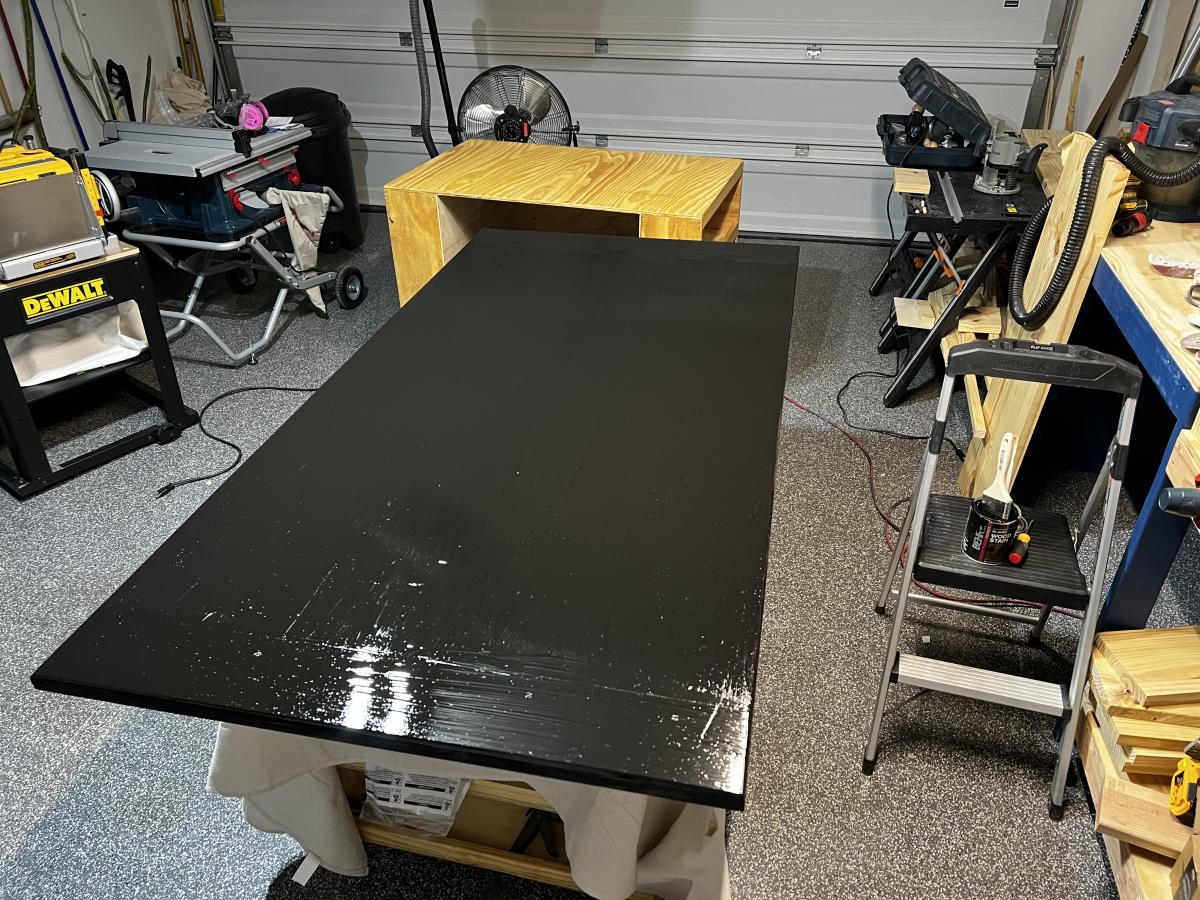
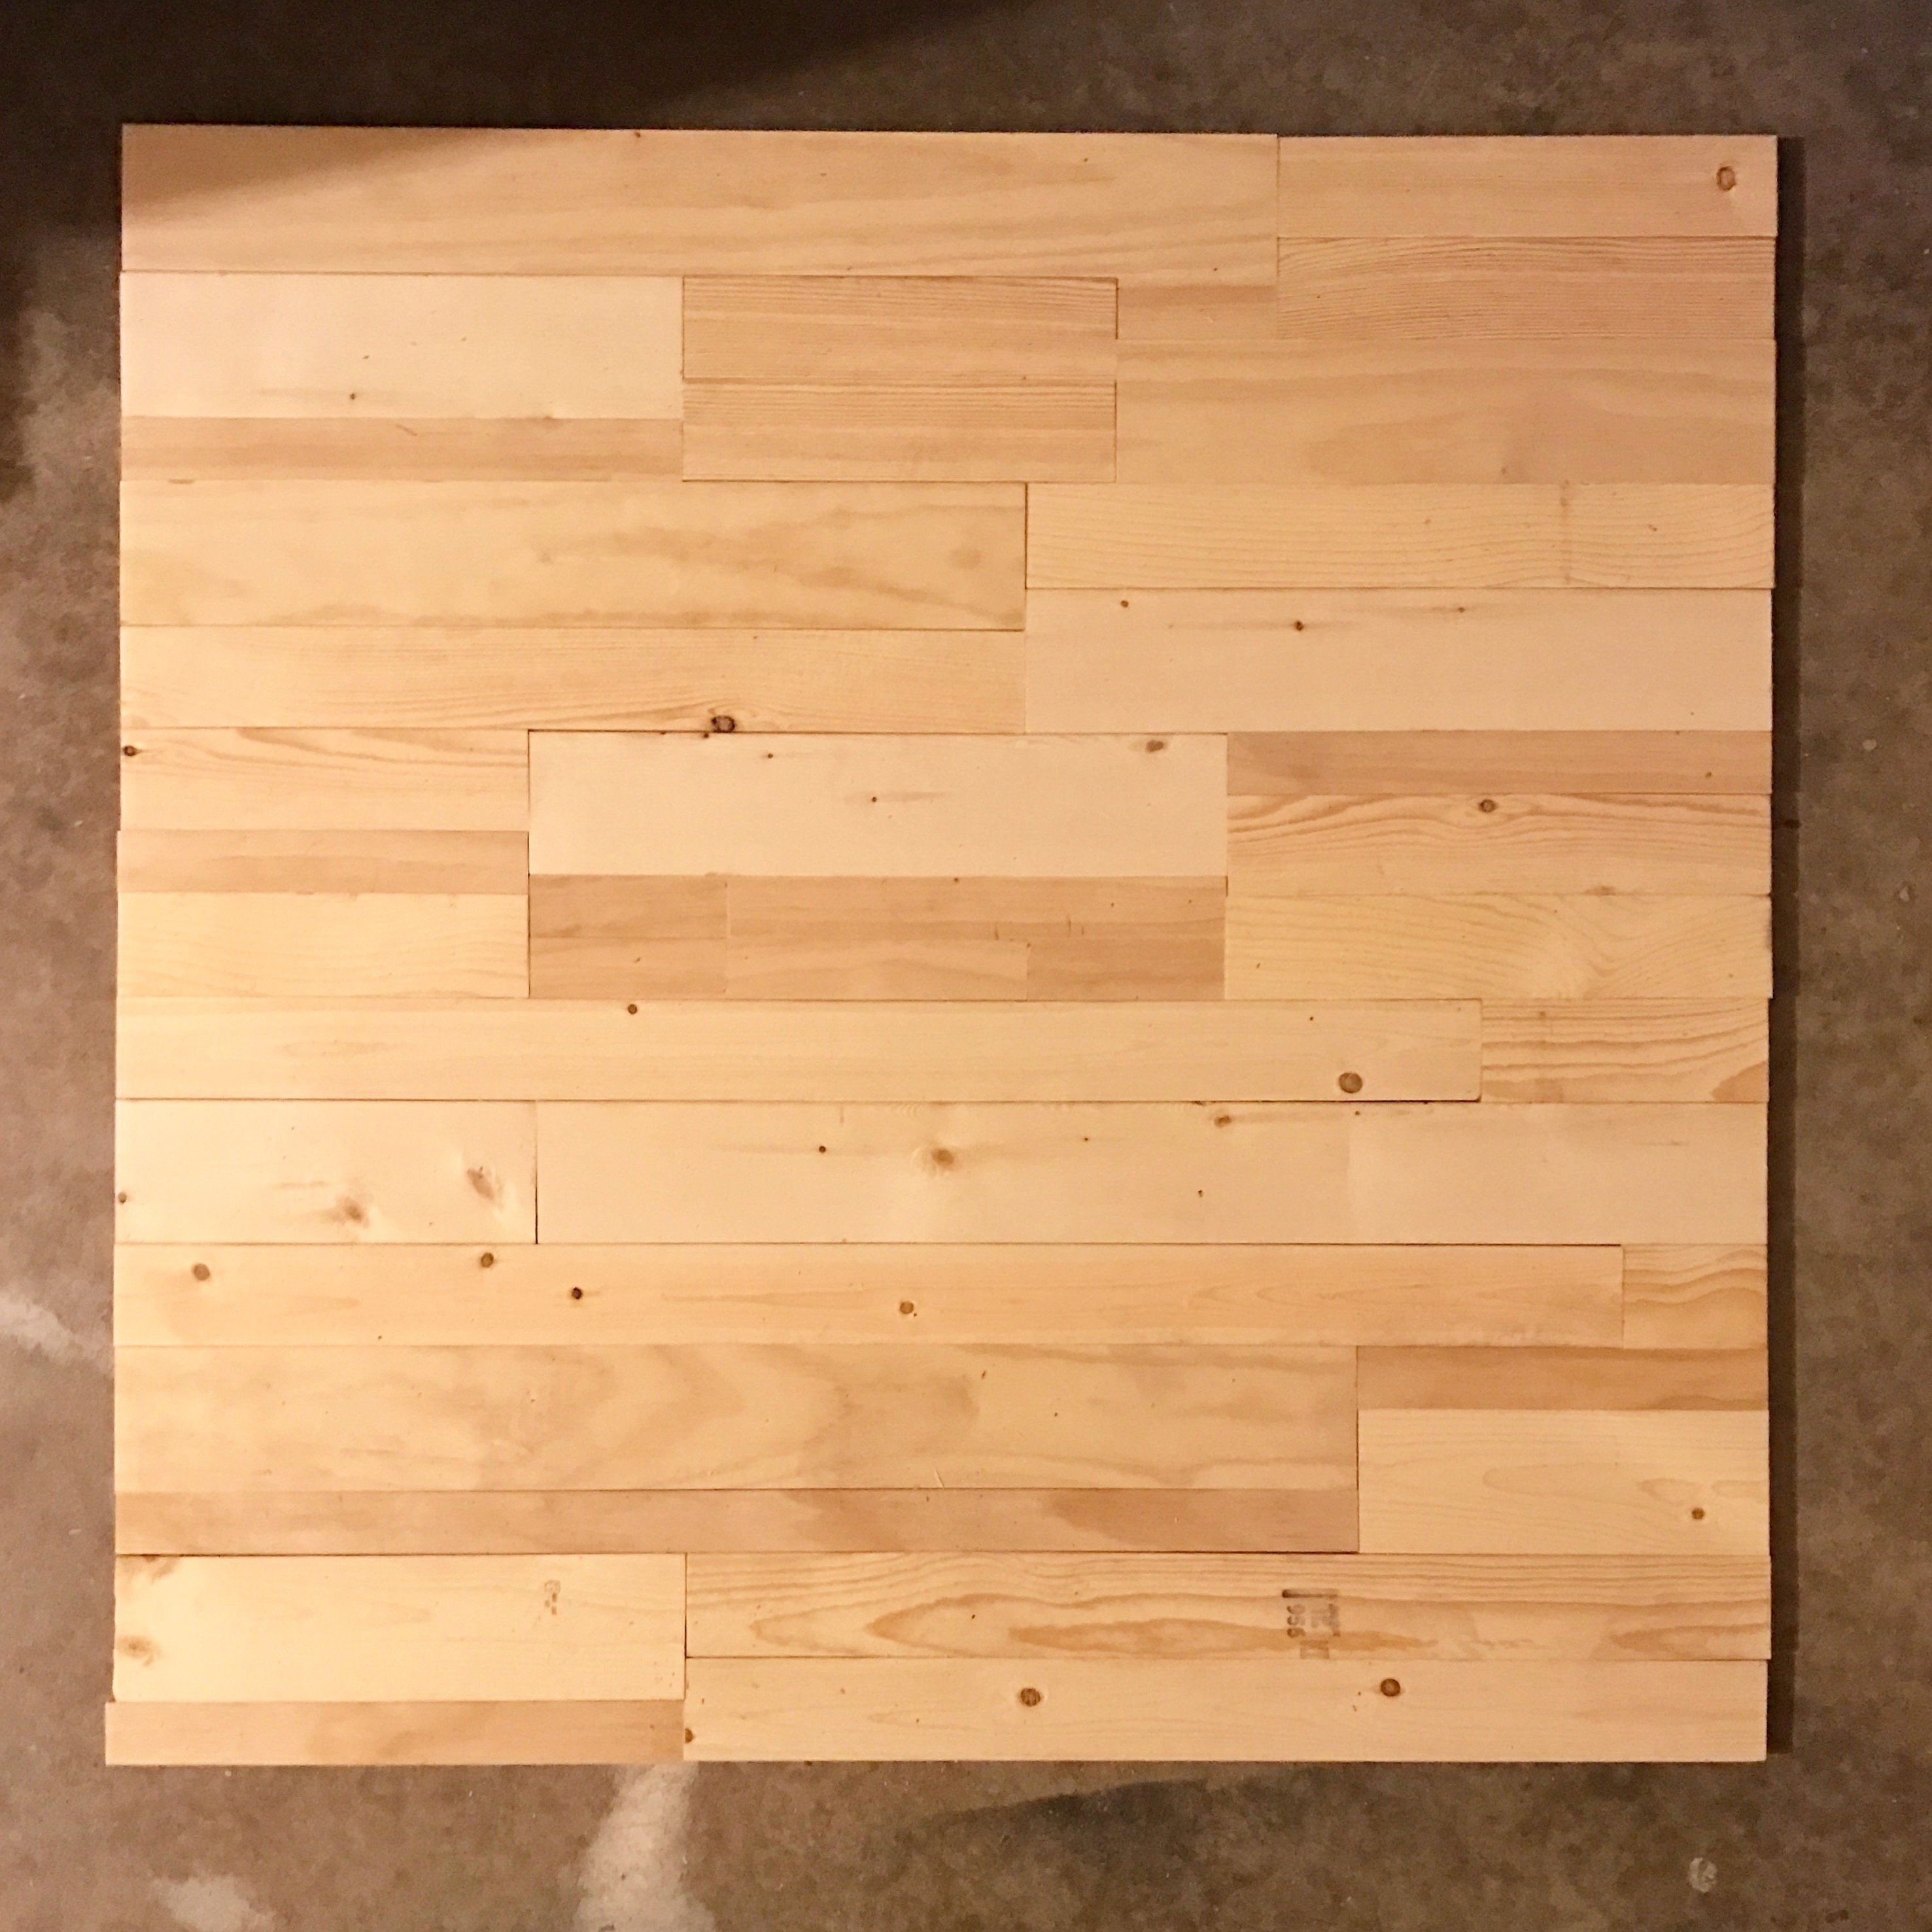
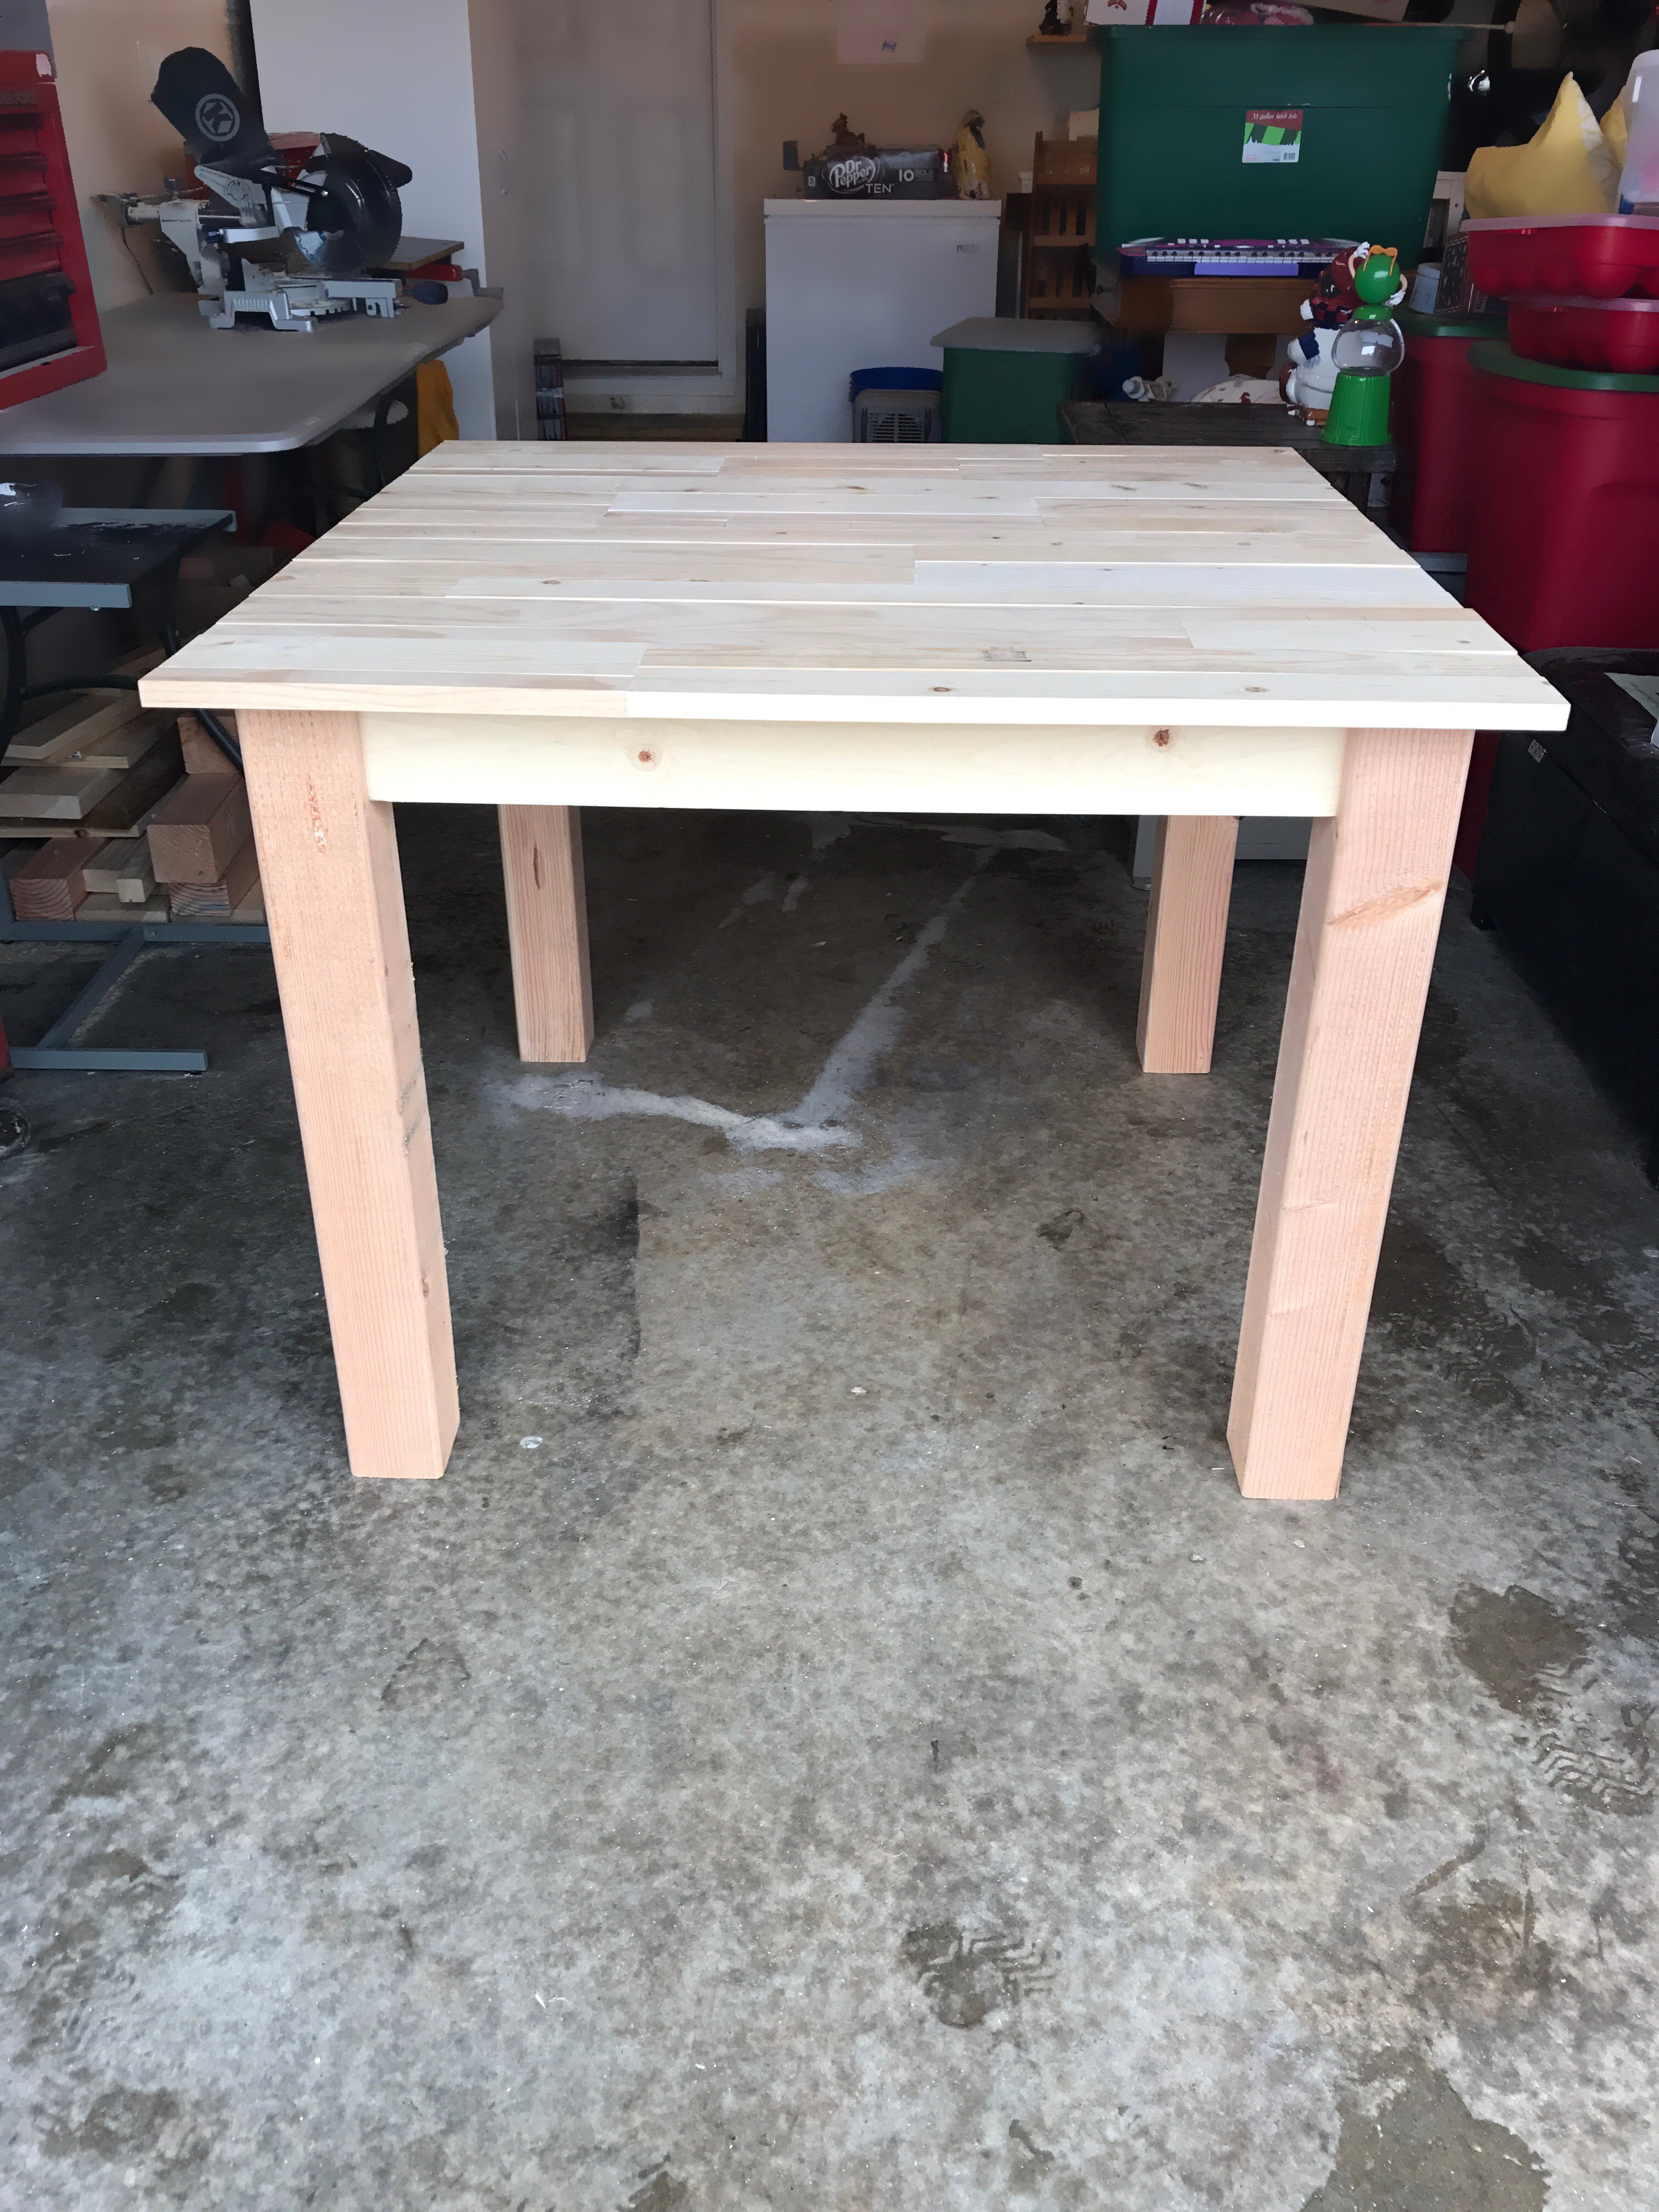
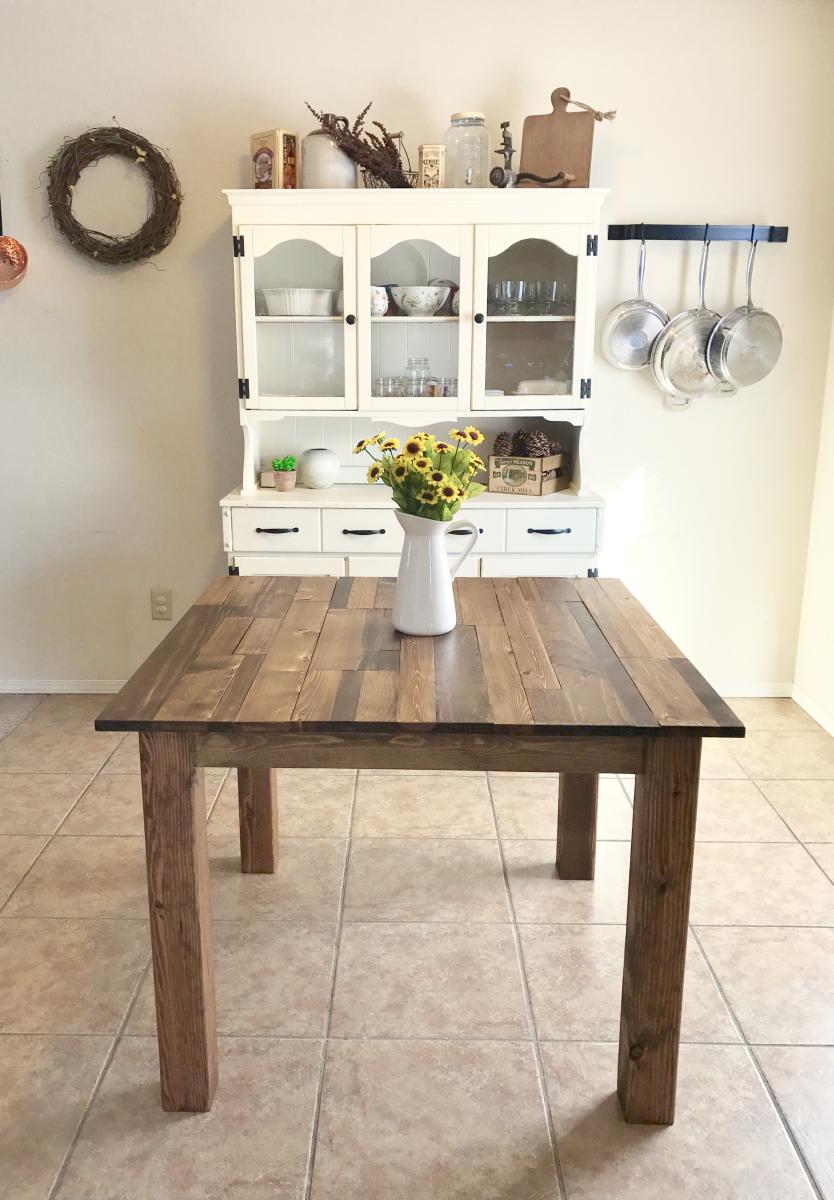
I built this table for a friend who wanted a rustic, plank-top kitchen table. She wanted a square table with 4x4 legs. Since I don't have clamps, I used pocket holes and wood glue for the table top. Also, I only have a 7&1/4" miter saw, which means the 4x4s were too thick to cut. So I made one cut in the legs, then flipped them and made another. It worked! :) I sanded down the sides of the table top with 80 grit. They needed to be evened up since some of the planks were a little longer than others. I back braced underneathe the top with (3) 1x3s. Then, I sanded all over with 120, vacuumed, then wiped it down with a damp towel. Fun build!!
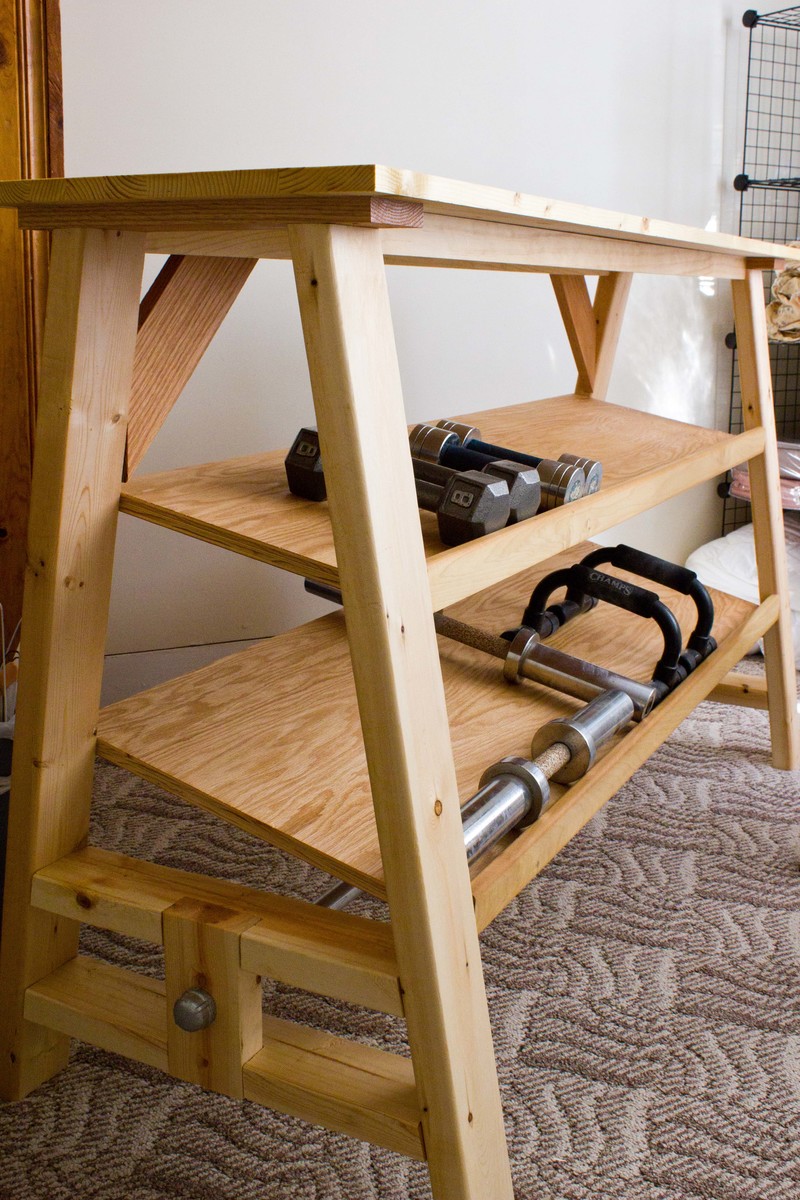
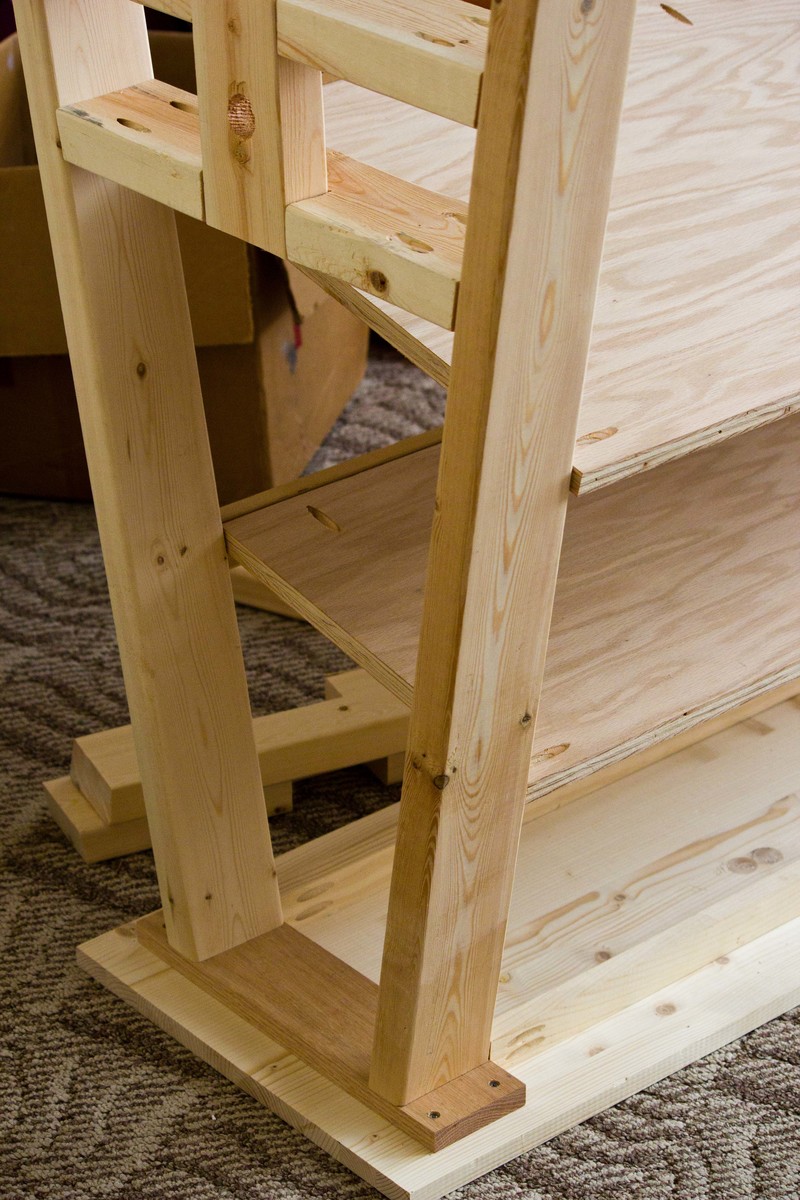
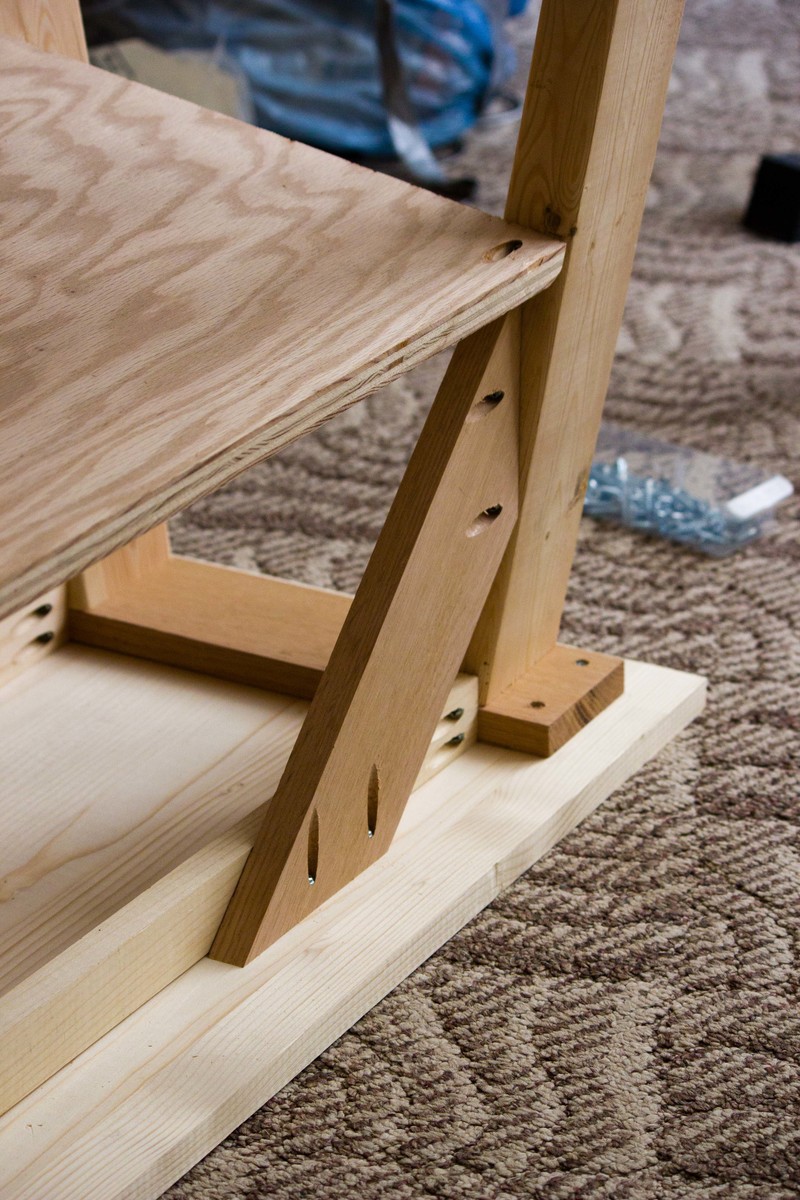
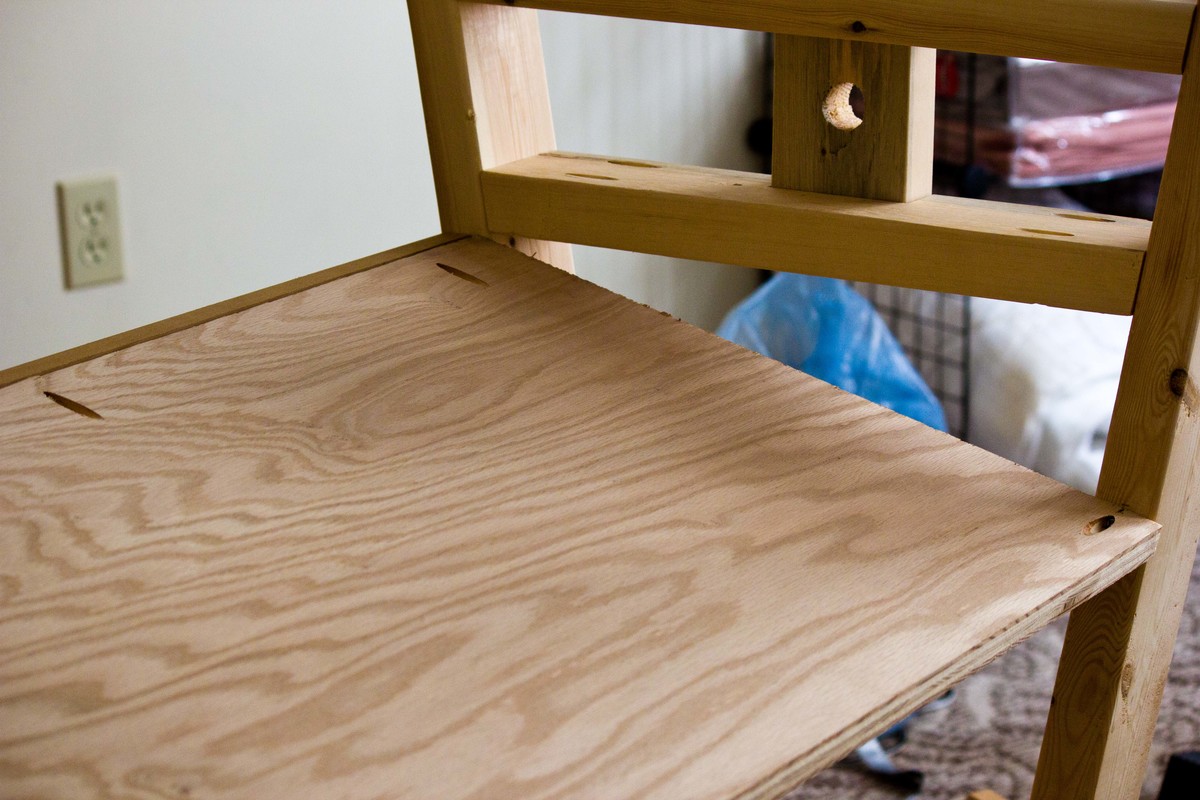
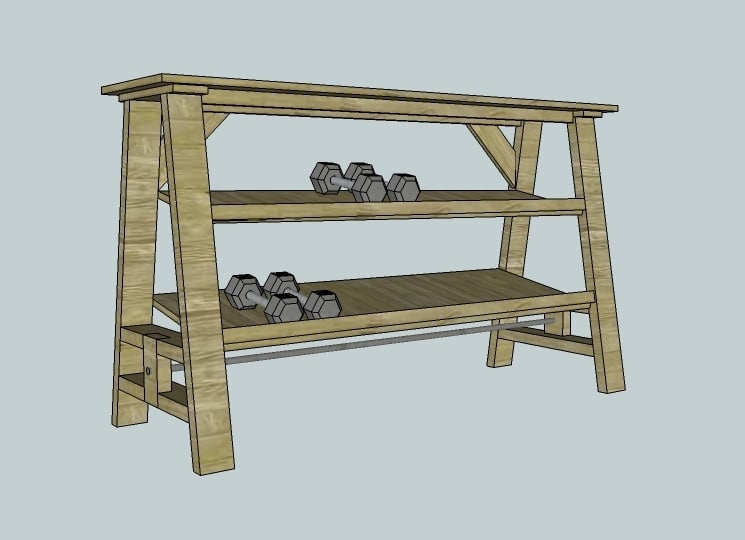
This table filled two needs at once for us: we needed a dumbbell or free-weight rack ($50 and up retail), and we needed some kind of desk-like surface for our home gym area that could withstand us two jump-roping fiends (um, maybe that's just my husband). Basically, it needed to be able to hold a lot (a Lot) of heavy metal stuff and take a beating while NOT Falling Over. The trestle desk was my biggest inspiration, and I guess I just stole the metal stretcher idea from that Pottery Barn dining table. It doesn't even really seem to need the metal stretcher, though...this table is beyond-my-wildest-dreams sturdy, even though it is standard counter height. The metal bar was about $17, so that's a big savings, if you leave it out. You MUST use a compound miter saw for this project. OR...you must be flexible about working with irregular cuts and joints. Also, I'm not sure I'd attempt butt-jointed 2x4's without pocket holes (or biscuit joints, I guess?), but that might just be me. I think this project could have taken only a single day if I hadn't screwed up just about every step of the way. I'm not the only one, right? You can read about a lot of those lovely embarrassments on my blog :) If you'd like the SketchUp model, it is available in the 3D Warehouse as "Dumbbell Table".
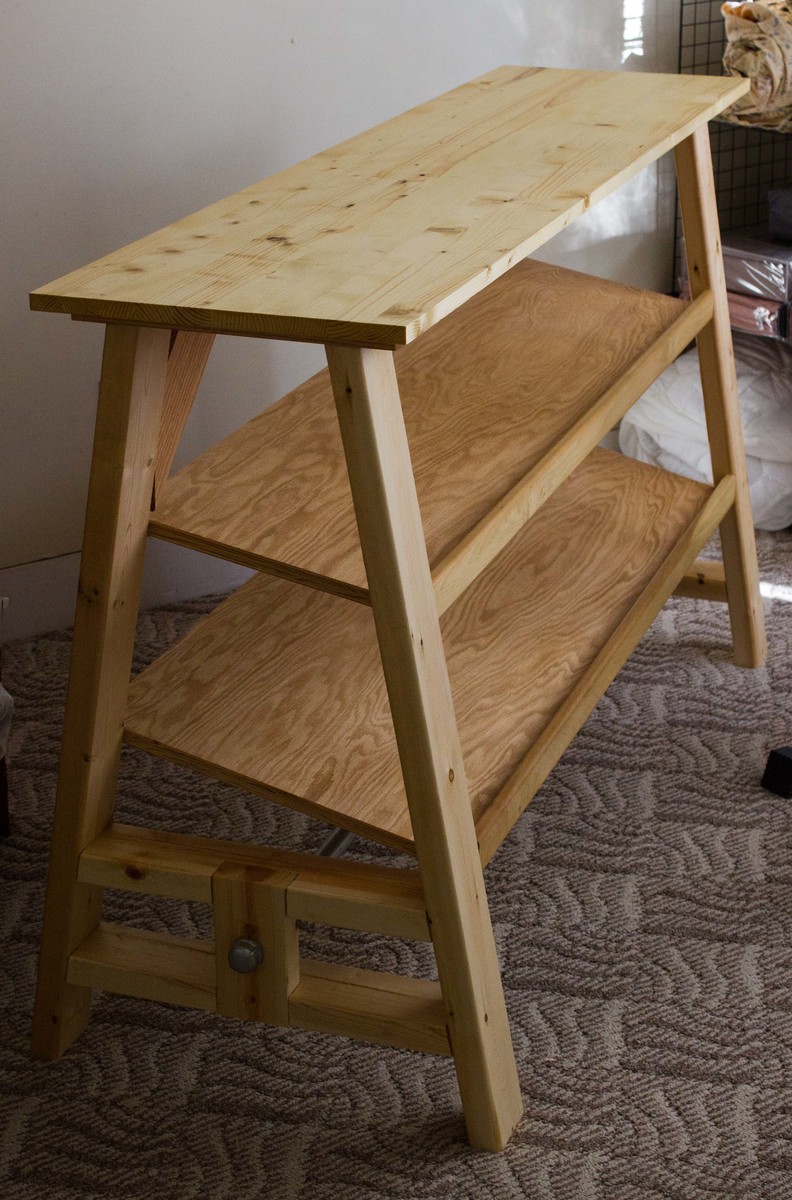
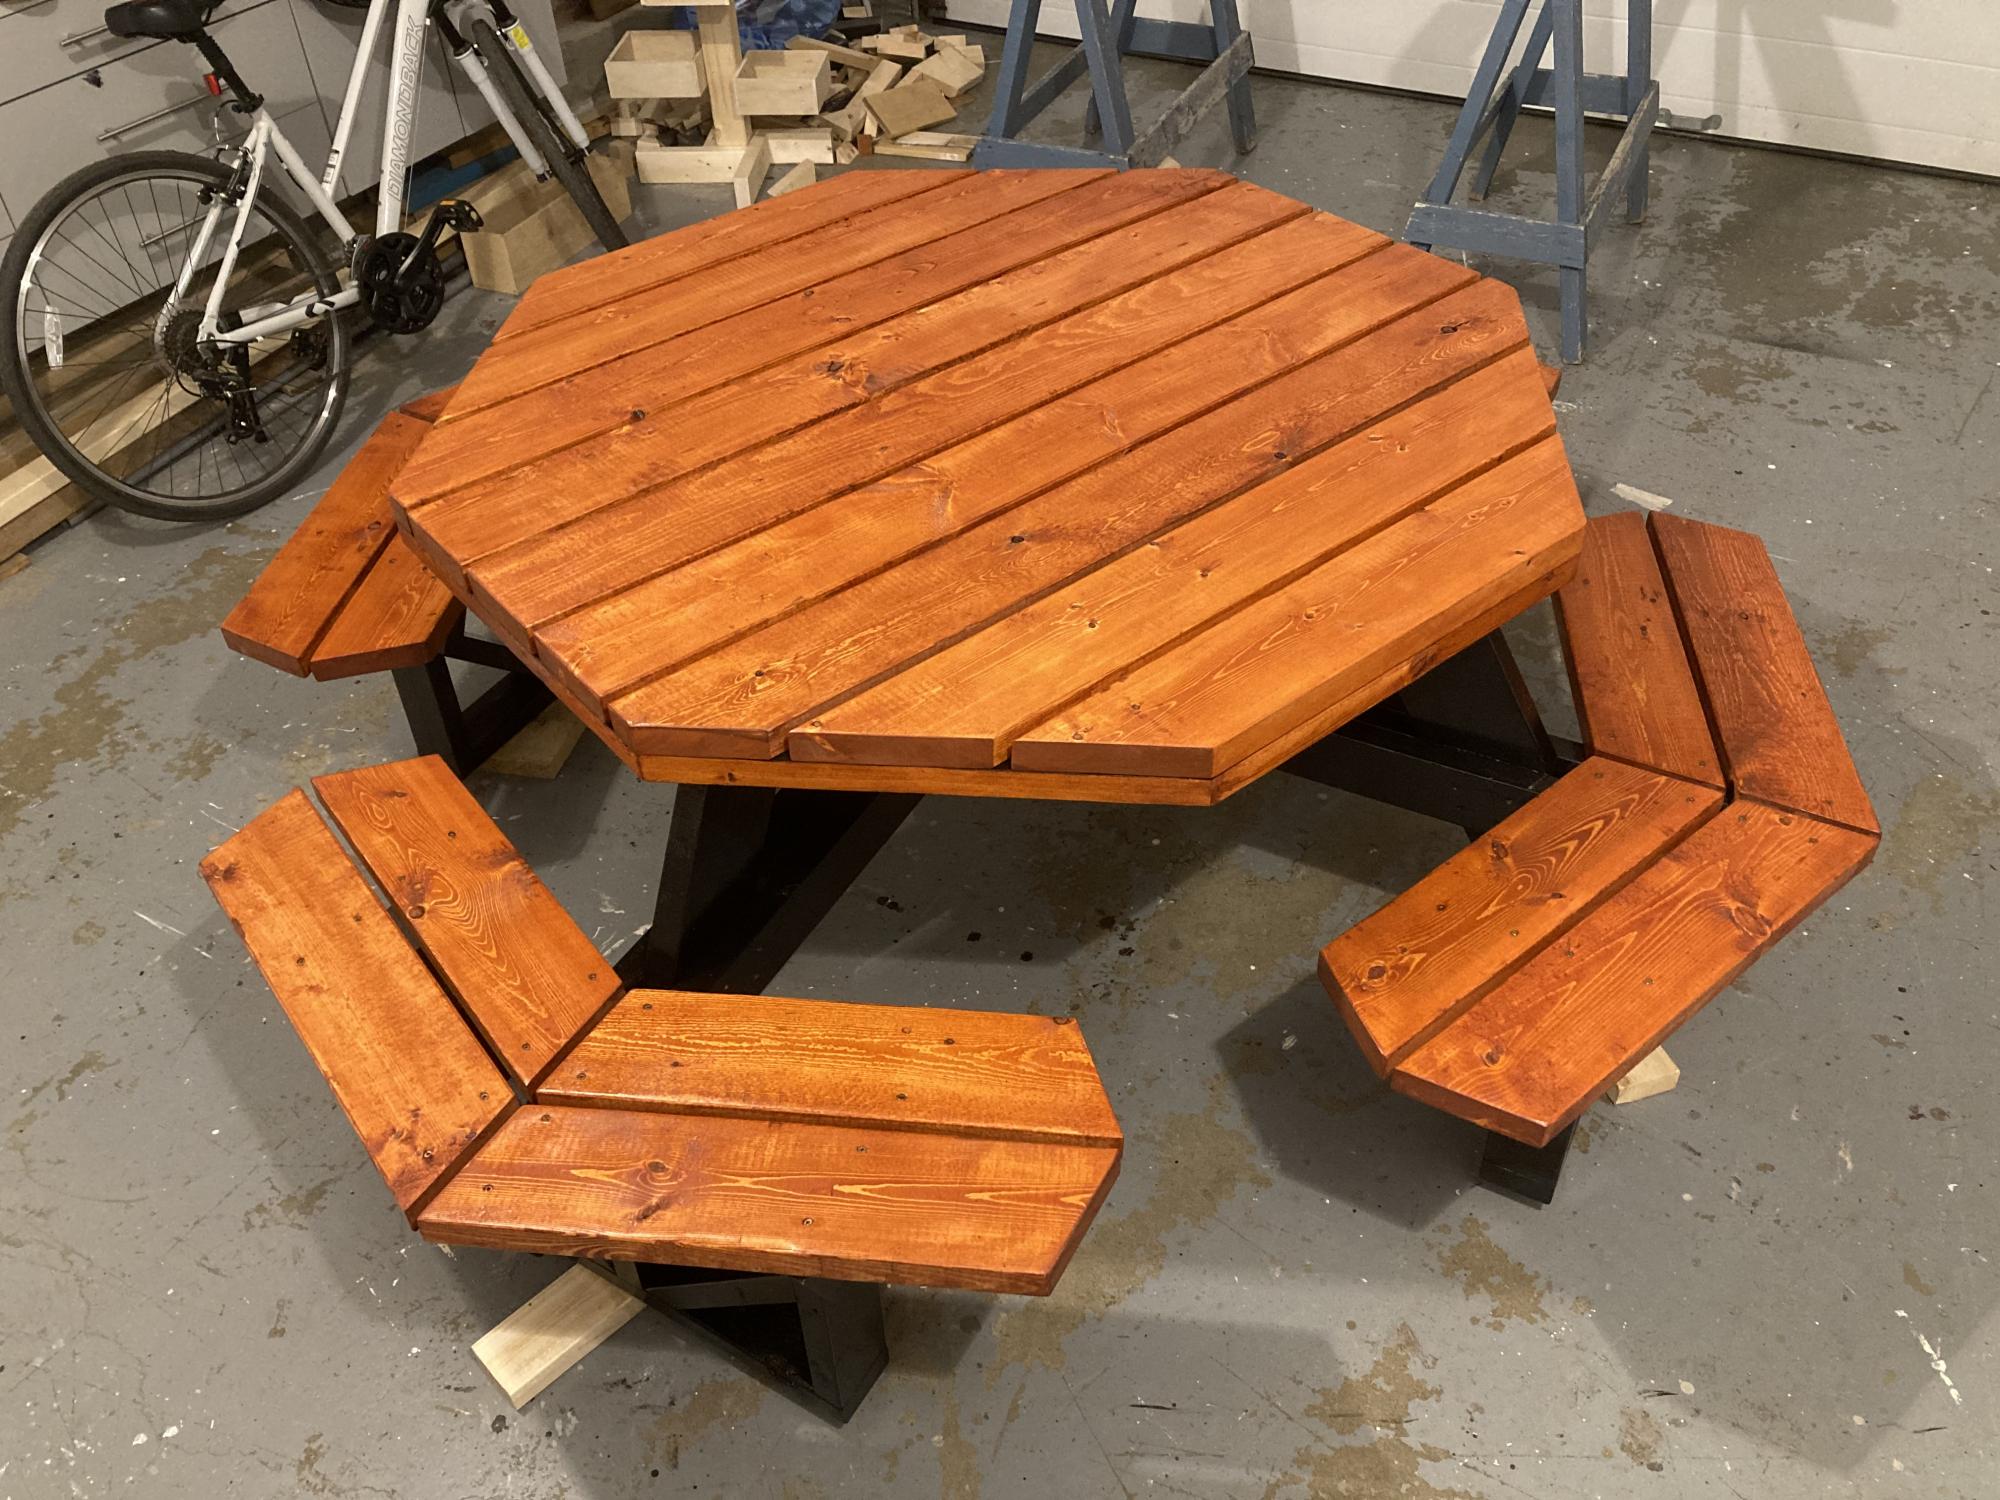
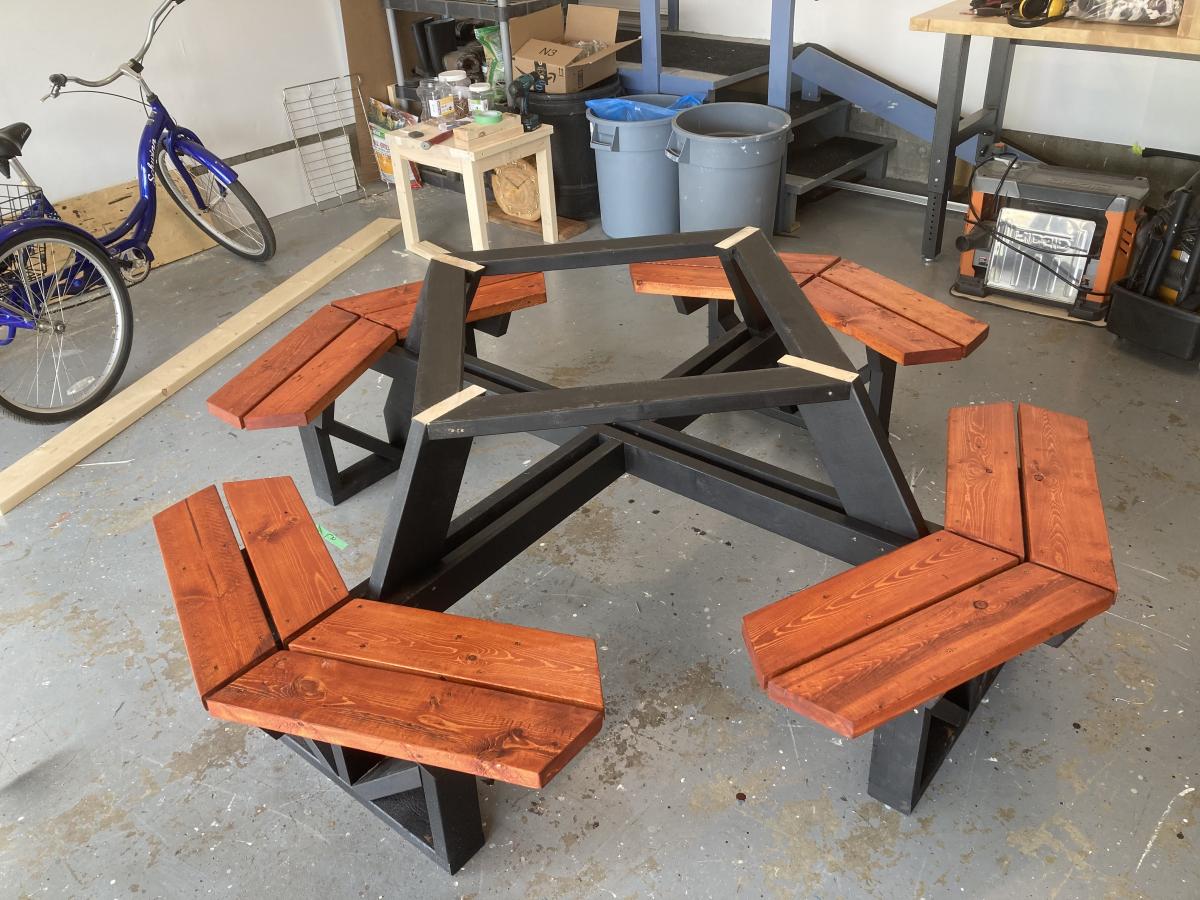
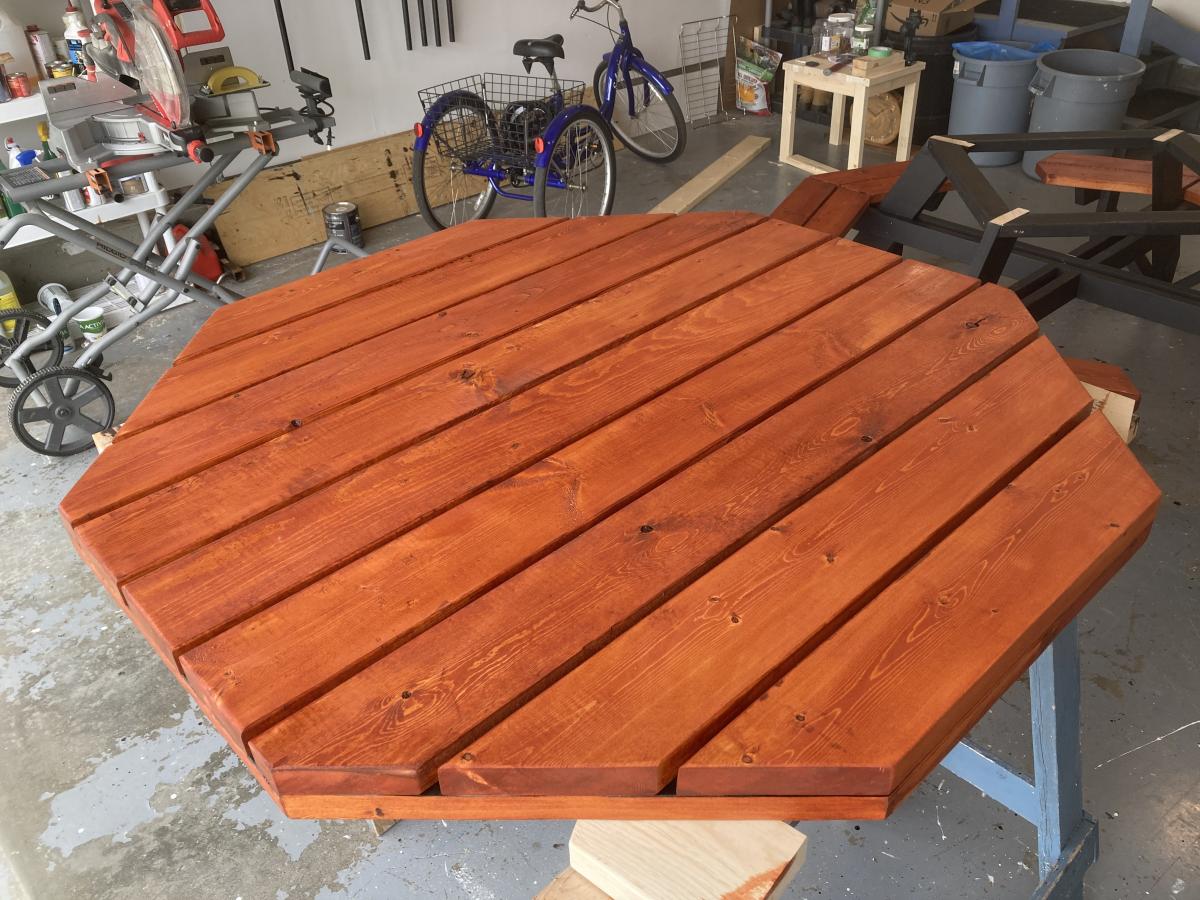
To say this was a complicated build is an understatement. Lots of pieces, lots of different angles and lots of screwing it together. It was really tough to keep everything perfectly square but in the end it turned out well. It is a very heavy table. I want to get it outside on a sunny day for some photos.
Sat, 05/29/2021 - 10:33
A picnic table that will last! Love your finish choices, thank you for sharing:)
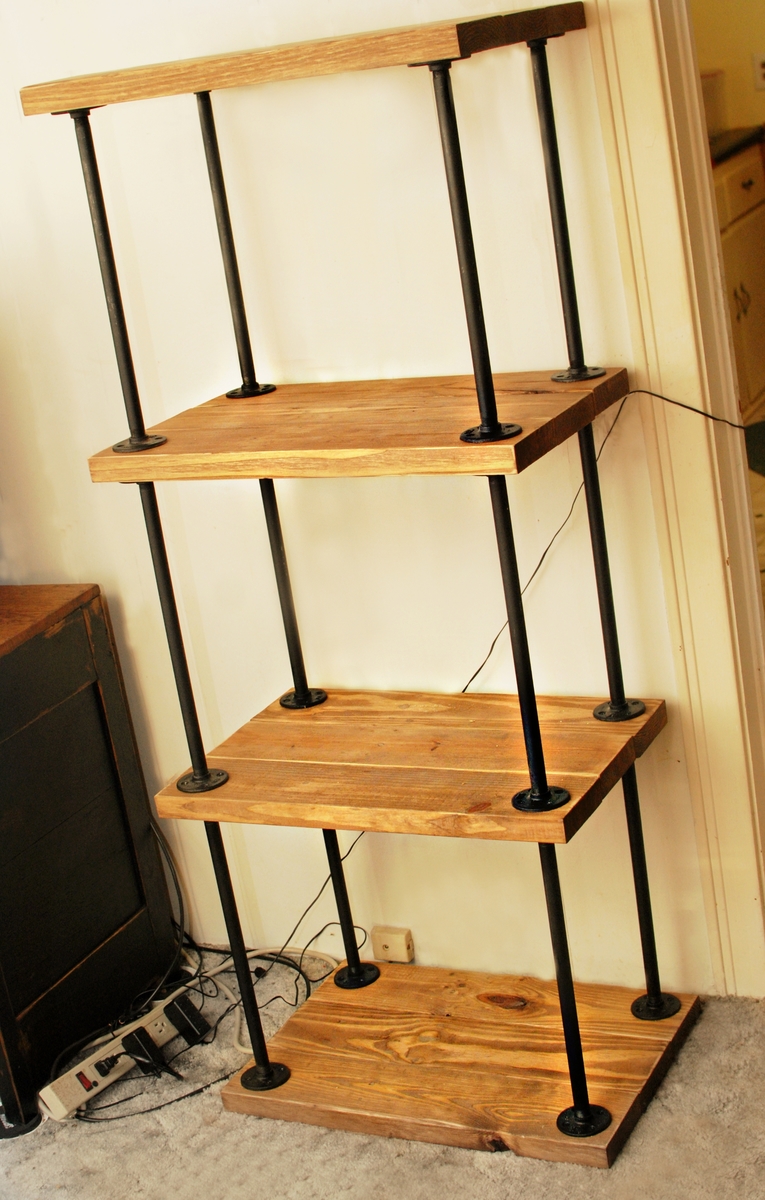
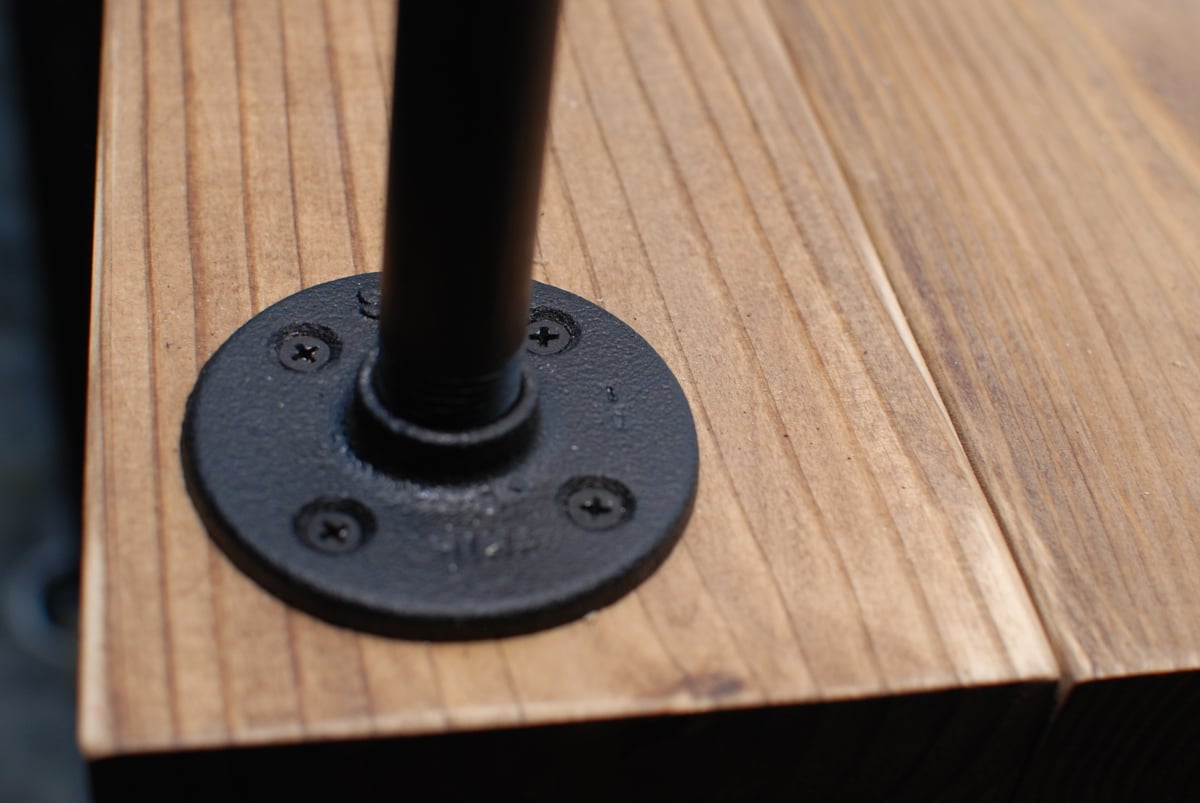
1/2 ' x 18" black pipe was used along with 1/2 ' flanges. The wood was re-purposed 2x6' pine lumber that had been used for pallets, that would have been thrown away. The boards were joined with a Kreg Jig, It will house my stereo components.

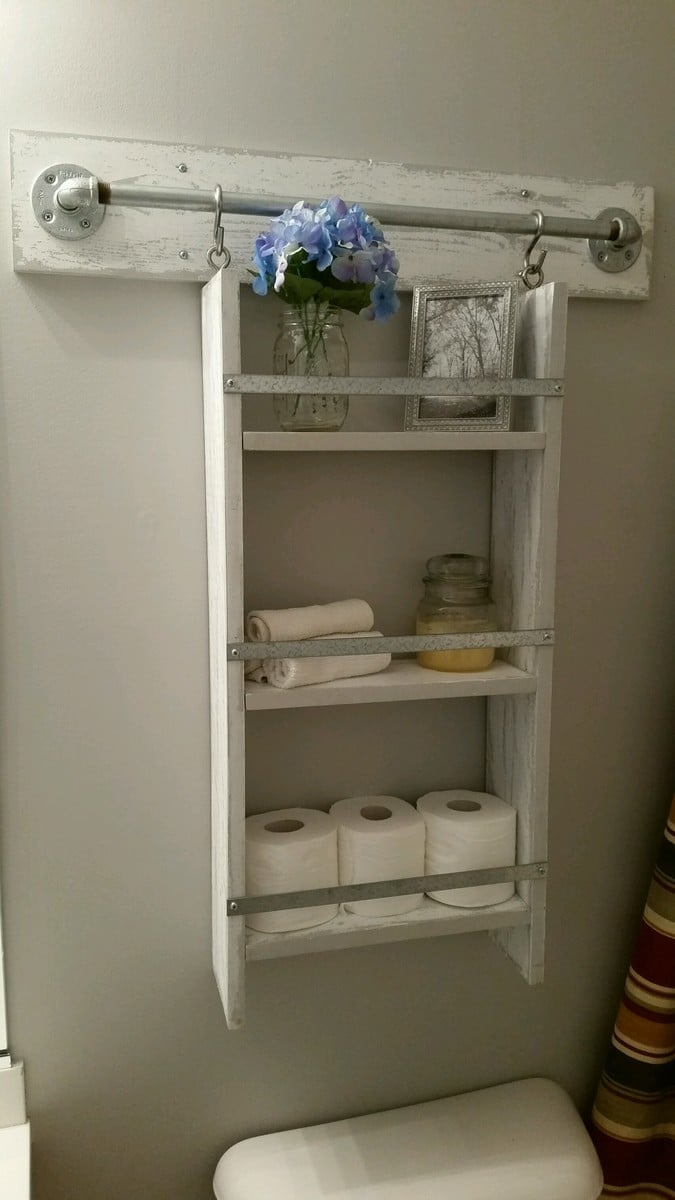
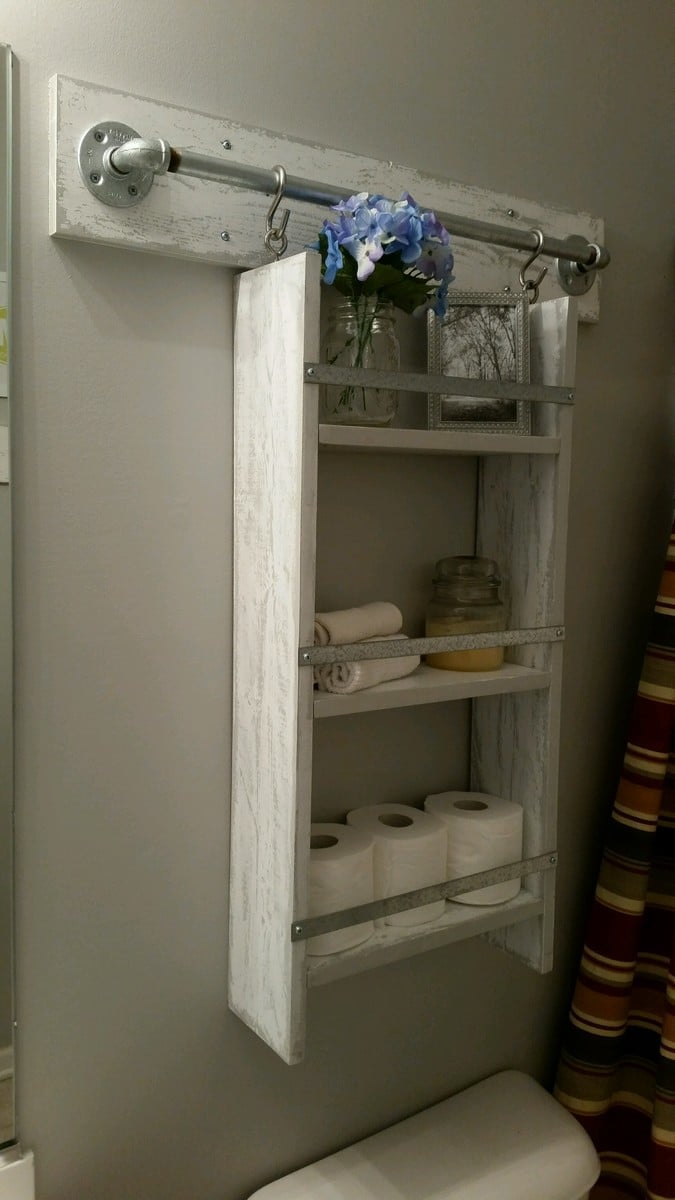
This was a very fun project to build. I pretty much followed the directions that were posted, but I used 1x6's instead of 1x4's because I wanted more storage space on the shelves. I also used 1/2" iron piping instead of 3/4" and am happy with how it turned out. Since the guest bathroom is gray, we didn't want to stain the wood and chose to do an easy to do "weathered" (directions below) look. Now all we need to do is replace the ugly shower curtain!
Wed, 03/30/2016 - 06:41
Love the weathered/distressed look you did. Can you share your technique for the paint job?
Sun, 10/30/2016 - 19:55
Love this! What is the length of the iron pipe and also the board that's mounted to the wall? Do you remember what color gray you used?
Tue, 02/07/2017 - 21:31
What is the measurements for the metal pipe and also the board itsbibe.
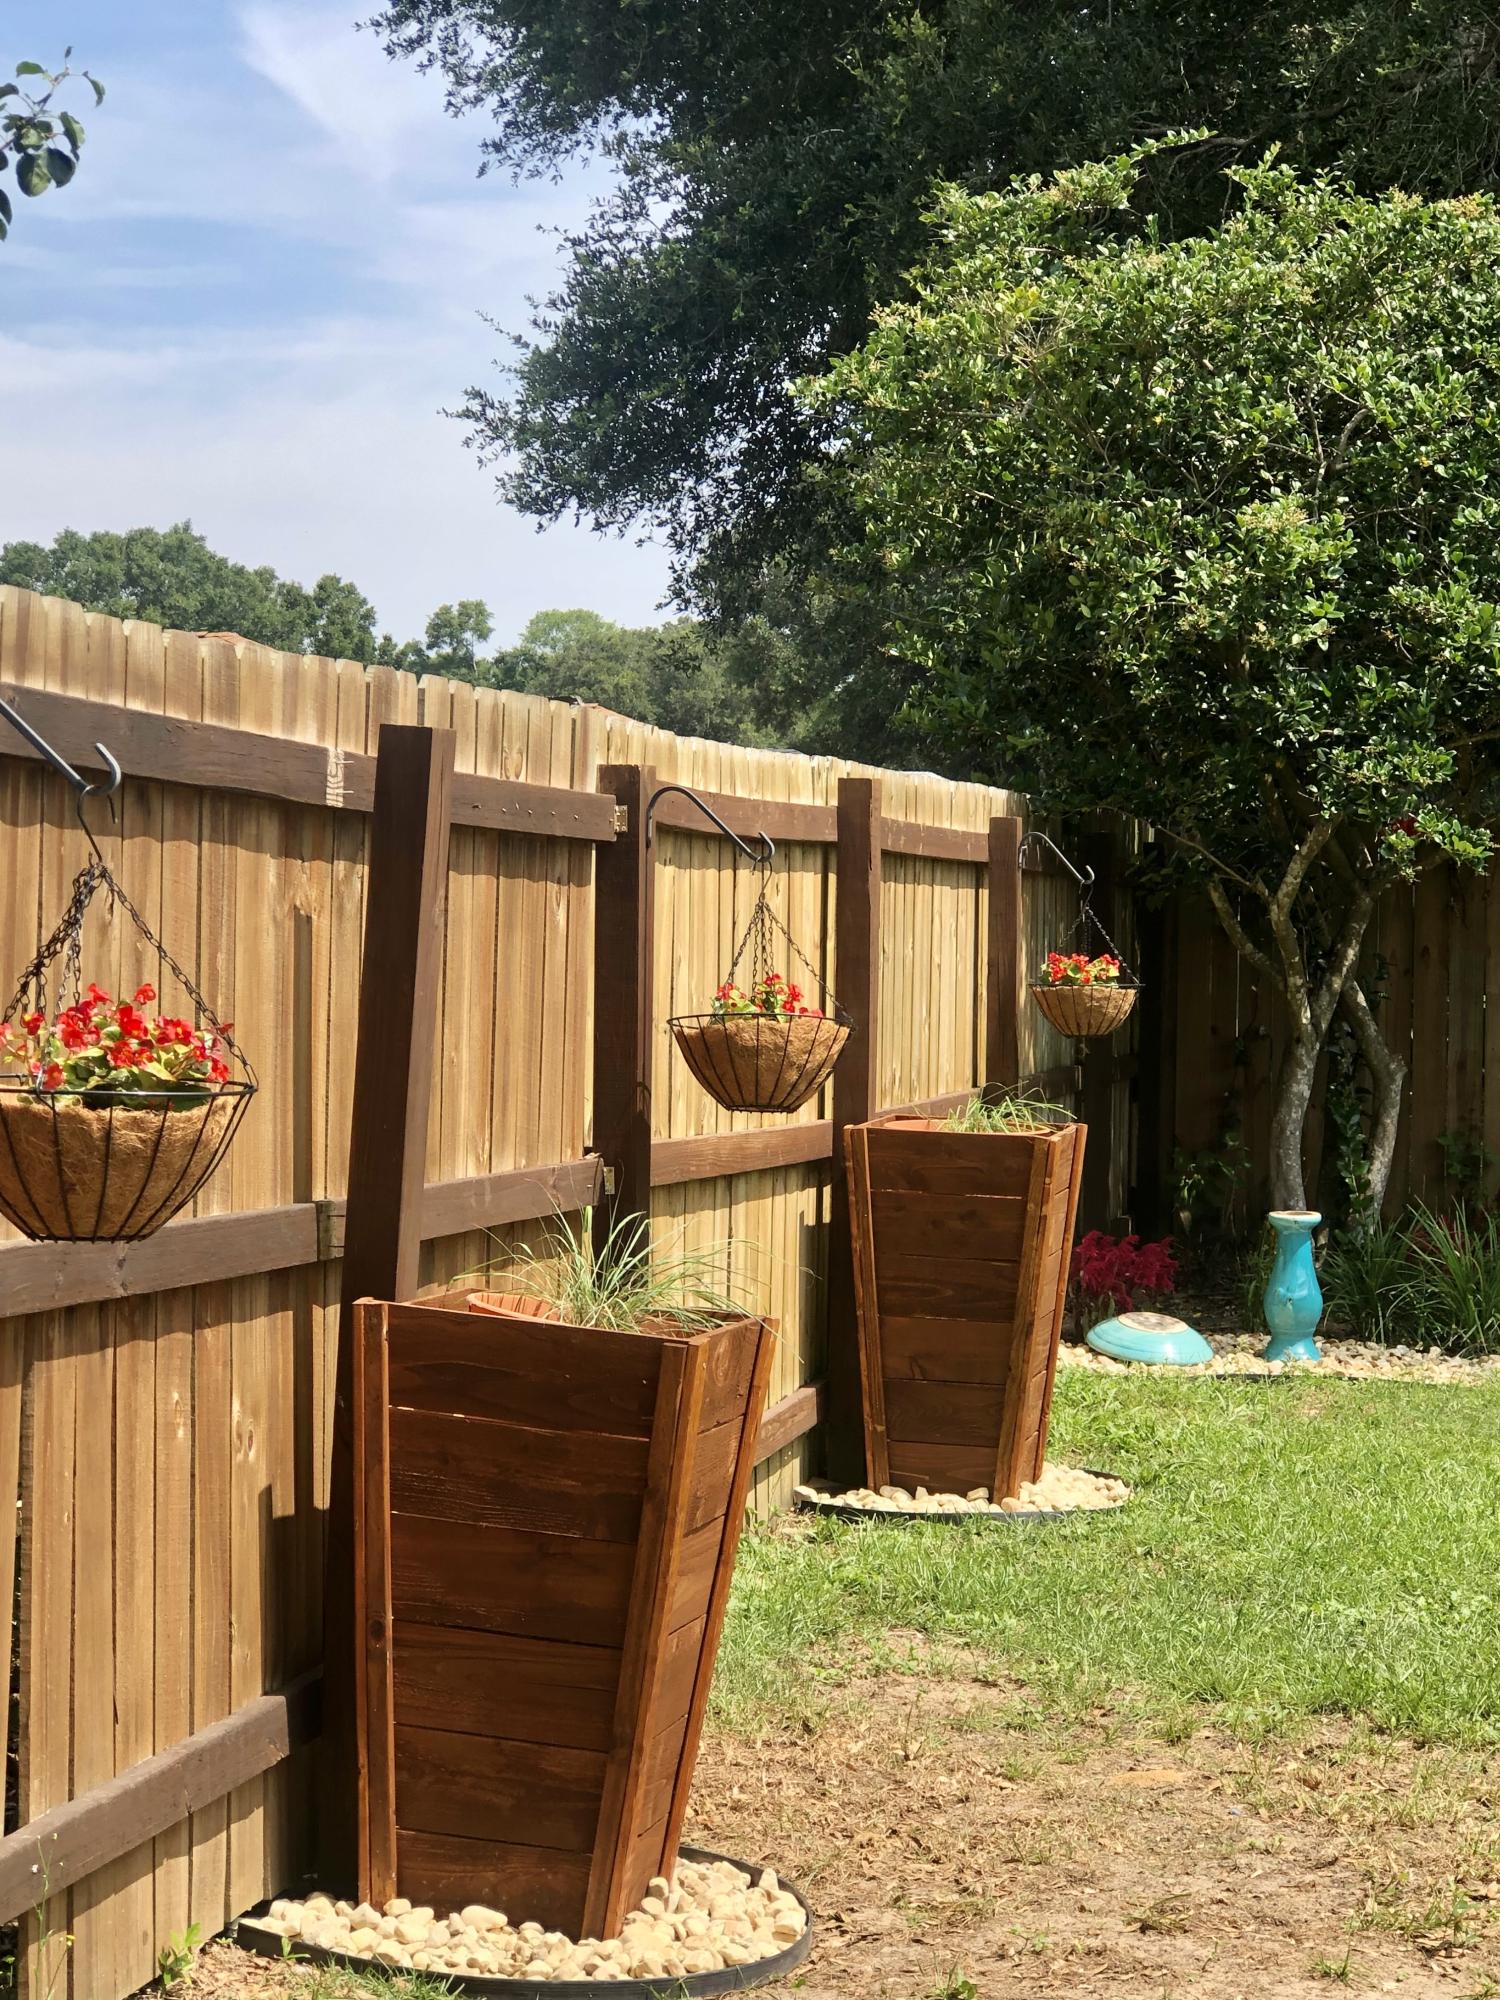
32” wood planters with false bottom
Jenna
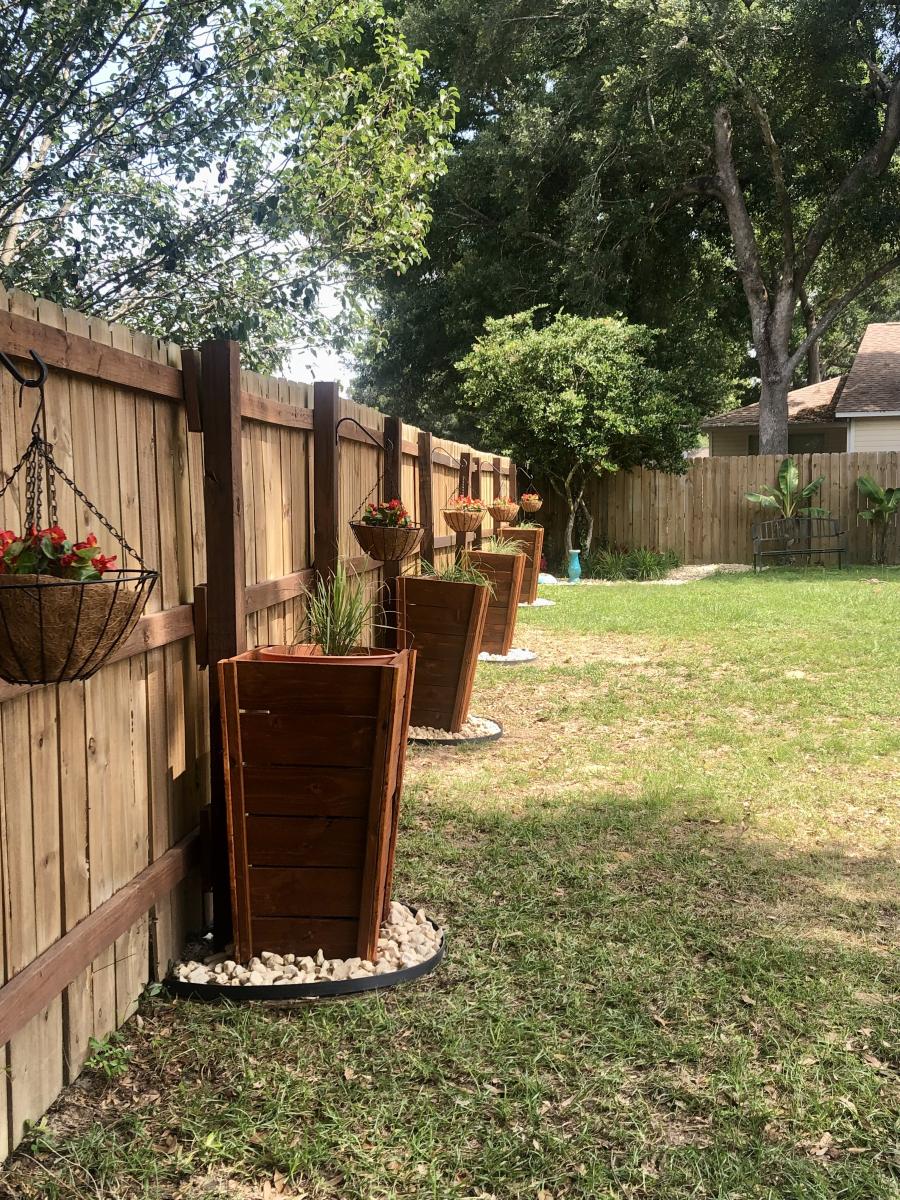
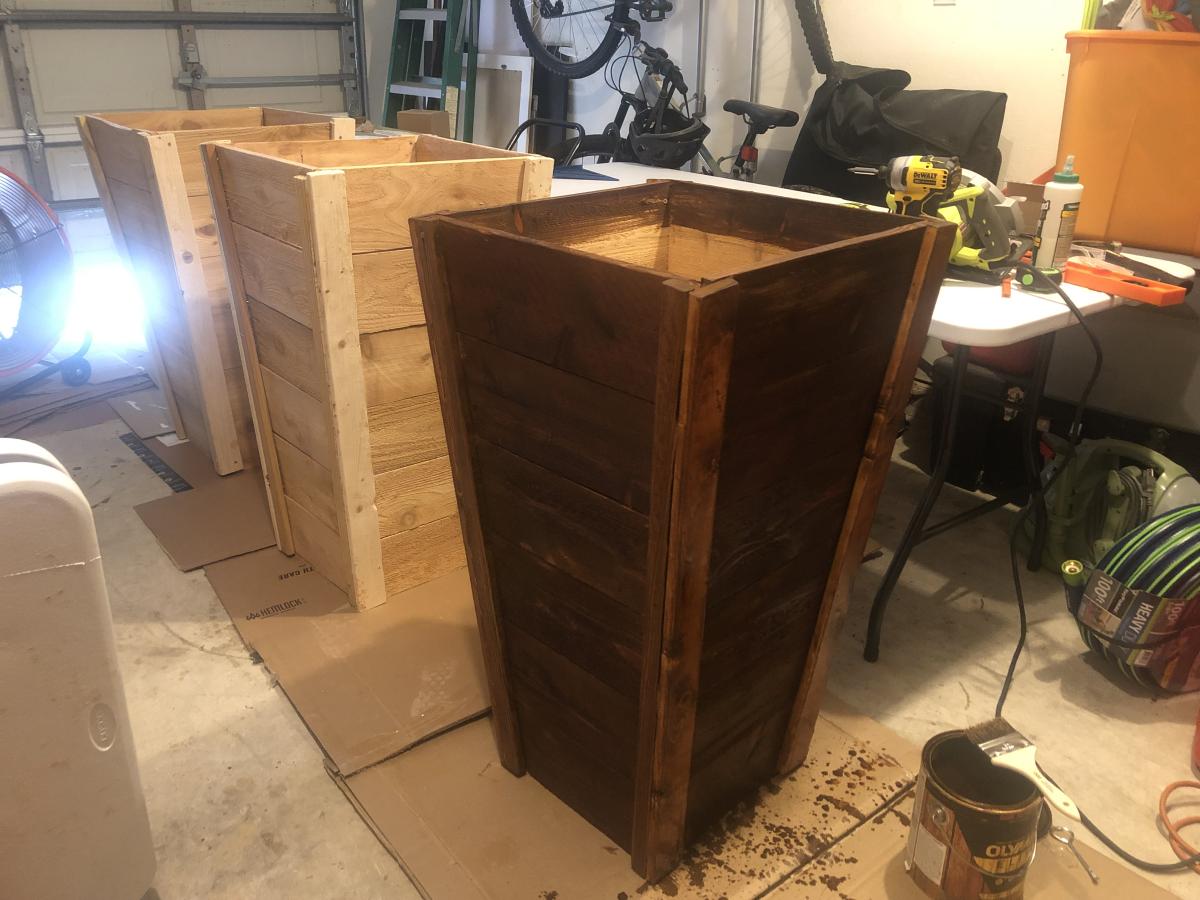
I used untreated pine for this project and painted with benjamin moore exterior paint.
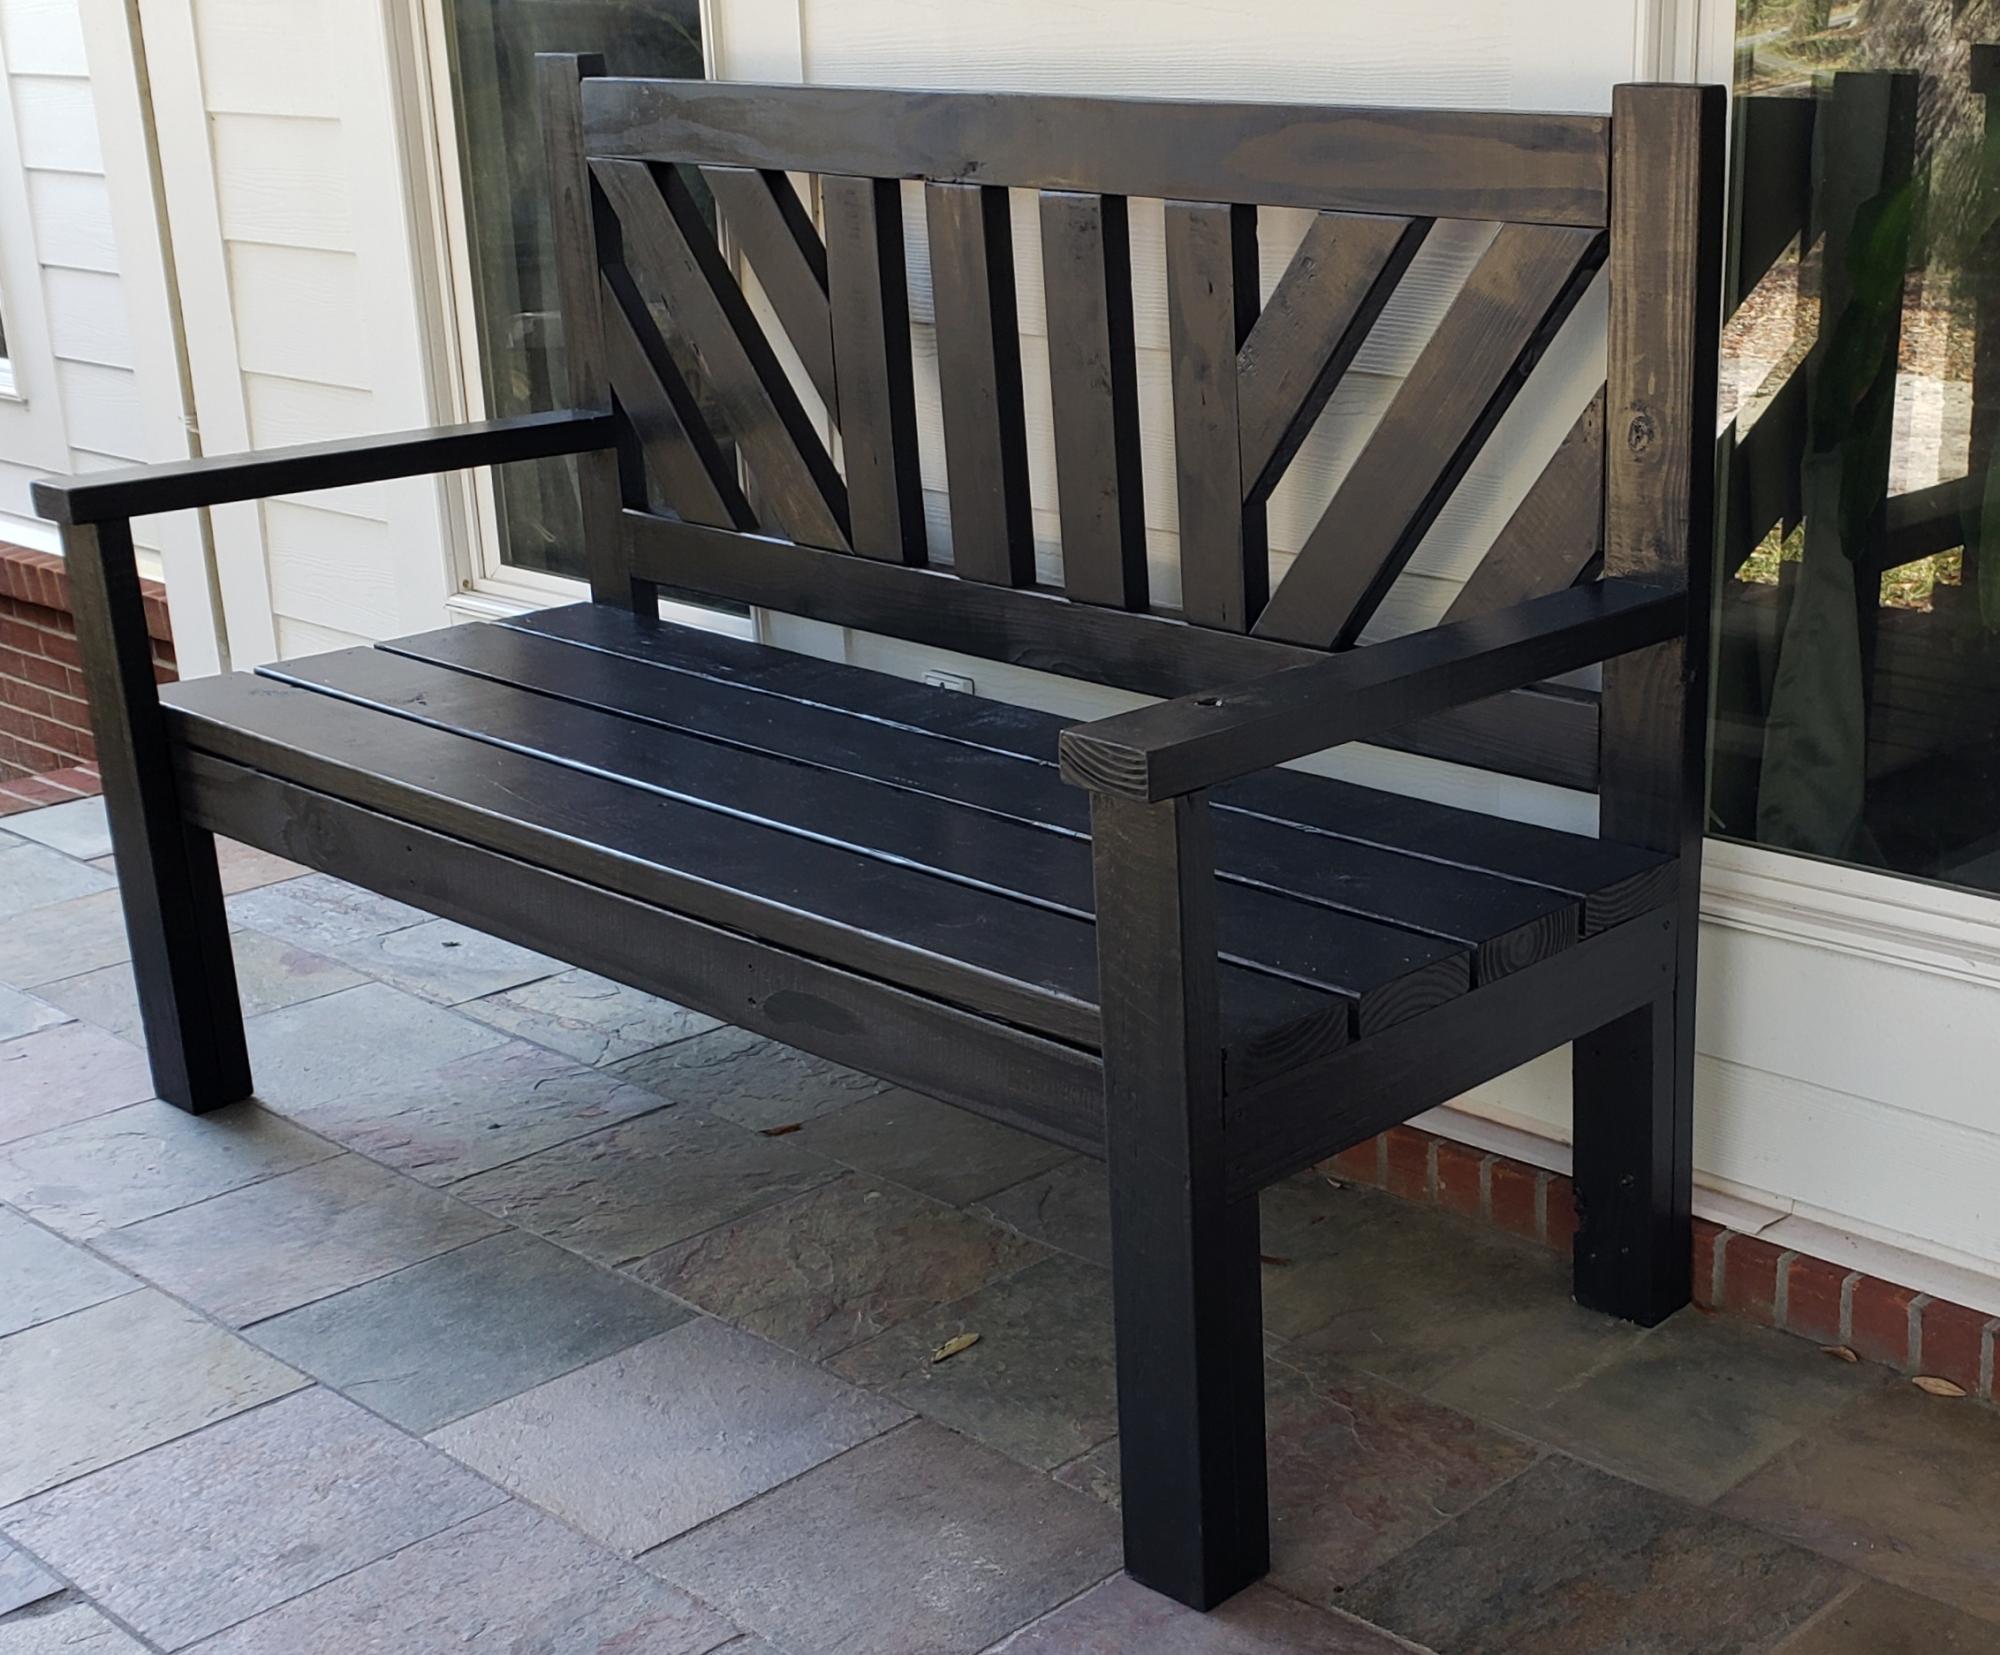
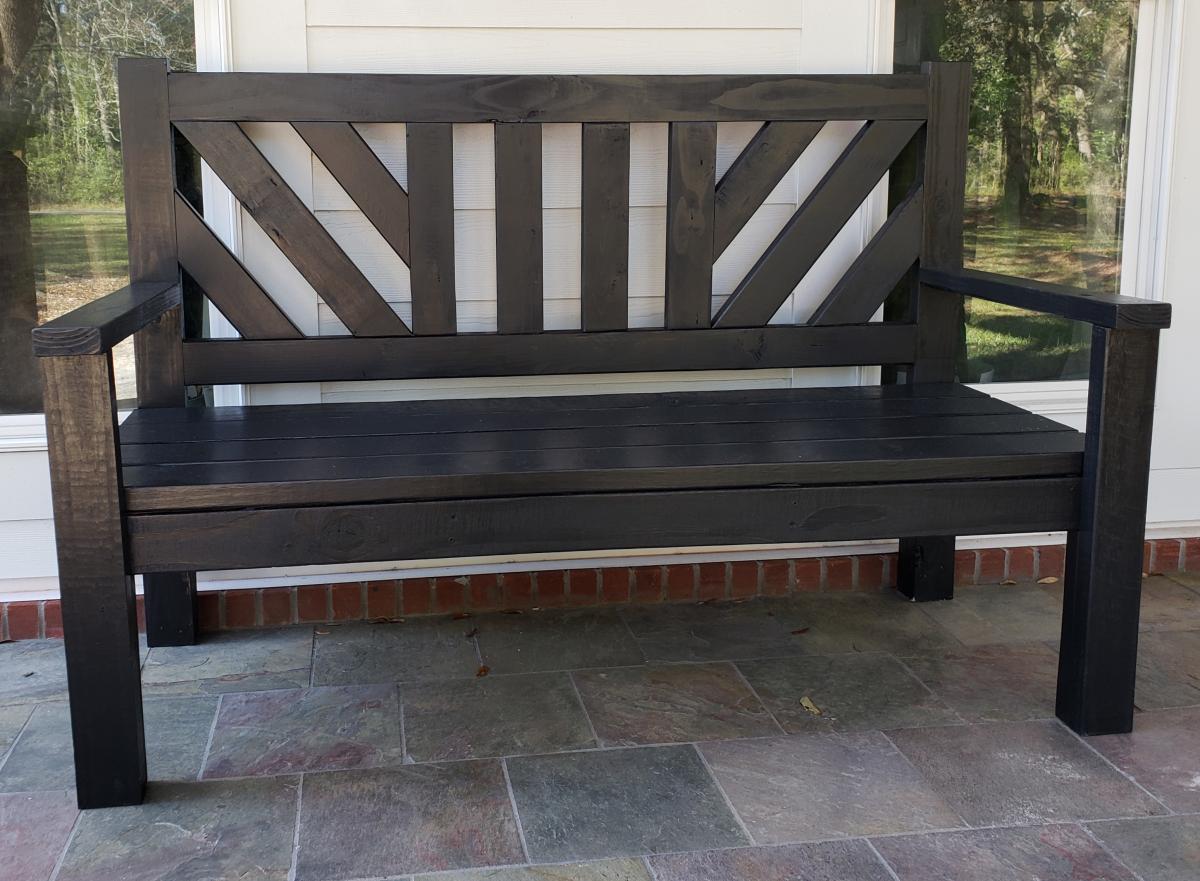
I modified the back a little and I love how it turned out. I also added an extra brace against the back of each leg that fits under the seat for more support.
Very easy to build. I love the plan.
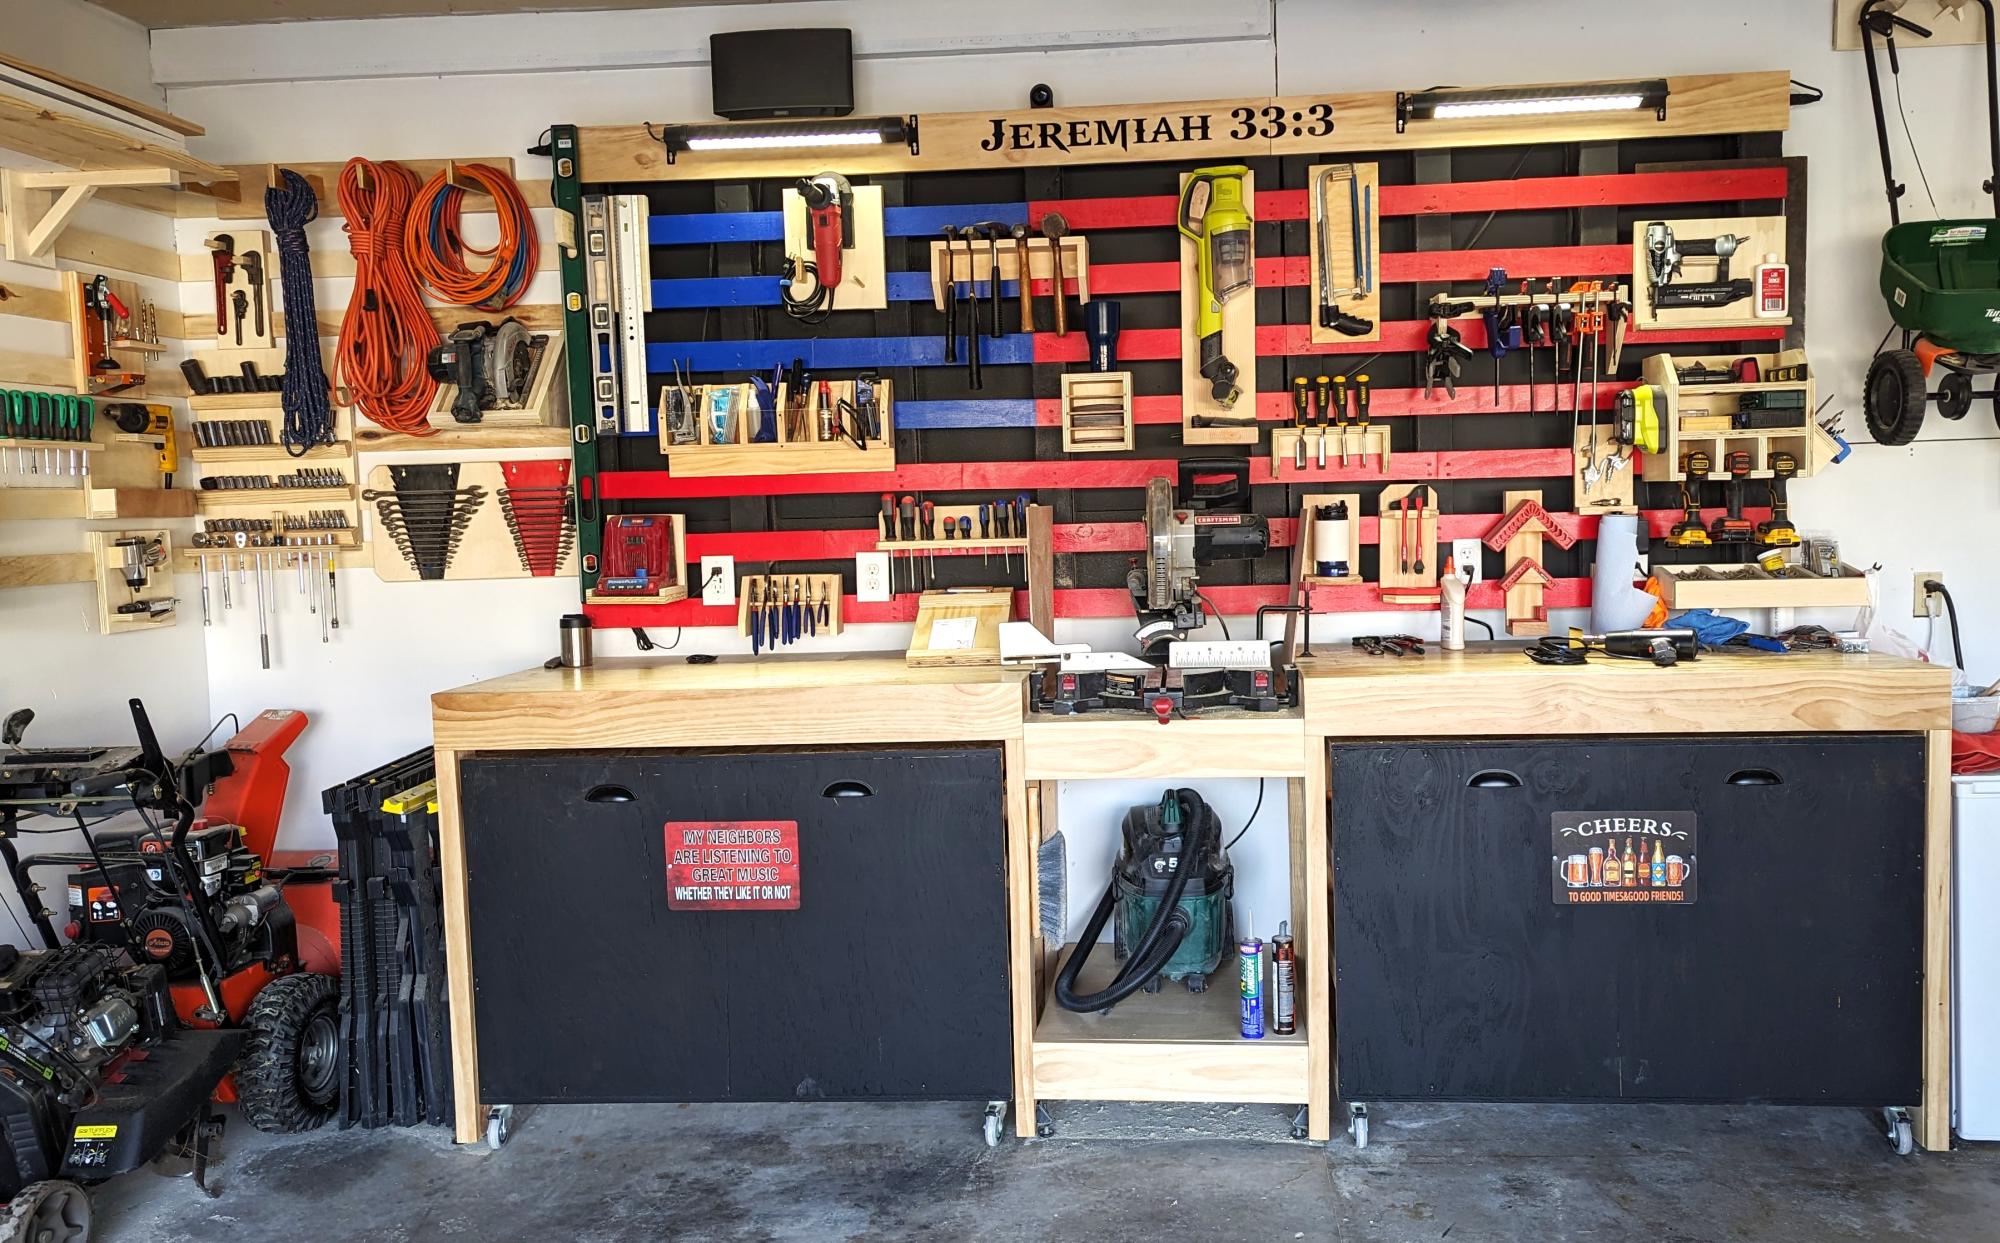
My garage needed an overhaul and I wanted to start a hobby in woodworking.
I found my way to Ana's website and found some of the best ideas and decided to try my attempt at building the Ultimate Roll Away Workbench with Miter Saw Stand.
This helped inspire me to augment my garage and build that workbench and new french cleat wall.
Thank you Ana for having such an awesome website and offering up ideas for free!!

I made this bed for my 6 year old daughter. I loved Anna's Loft Bed plans, but she wanted a bigger play area underneath. So I modified the twin loft bed plans to fit a queen mattress. I also added extra supports for the mattress, and I used PureBond plywood on top of the supports for the mattress to sit on.
That's the Farmhouse Toddler Bed underneath. My younger daughter inherited her big sister's twin bed, so the toddler bed was put to use in the new "playhouse."

Wed, 02/09/2022 - 15:31
We’ve been looking for exactly this!! Can you share your modified plans and the list of lumber and supplies needed?
Sun, 09/02/2012 - 12:45
I think it's great that you modified it to a queen! I live a studio and NEED something like this. Could you share the modifications? It looks beautiful = )
Sun, 09/02/2012 - 20:58
The changes I made were:
End planks cut to 63"
Top back guard and front and back rails cut to 87"
The top guard rails on ends cut to 66"
I measured for the mattress supports and the front guard rail after the rest was completed.
You should also measure for the bookcases after the rest is completed, but each of mine wound up being about 31" wide.
Everything else was pretty much the same.
Hope that helps.
Thu, 11/01/2012 - 08:24
This is wonderful - I've been looking to make something like this for an urban efficiency (adult) apartment! Thanks so much for sharing your modifications!
Mon, 07/29/2013 - 14:08
Will the height of the bed allow for adults to stand under it? If not what modifications should be made to make the height fit a standing adult? (the highest being 6'1" male) Thanks! =D
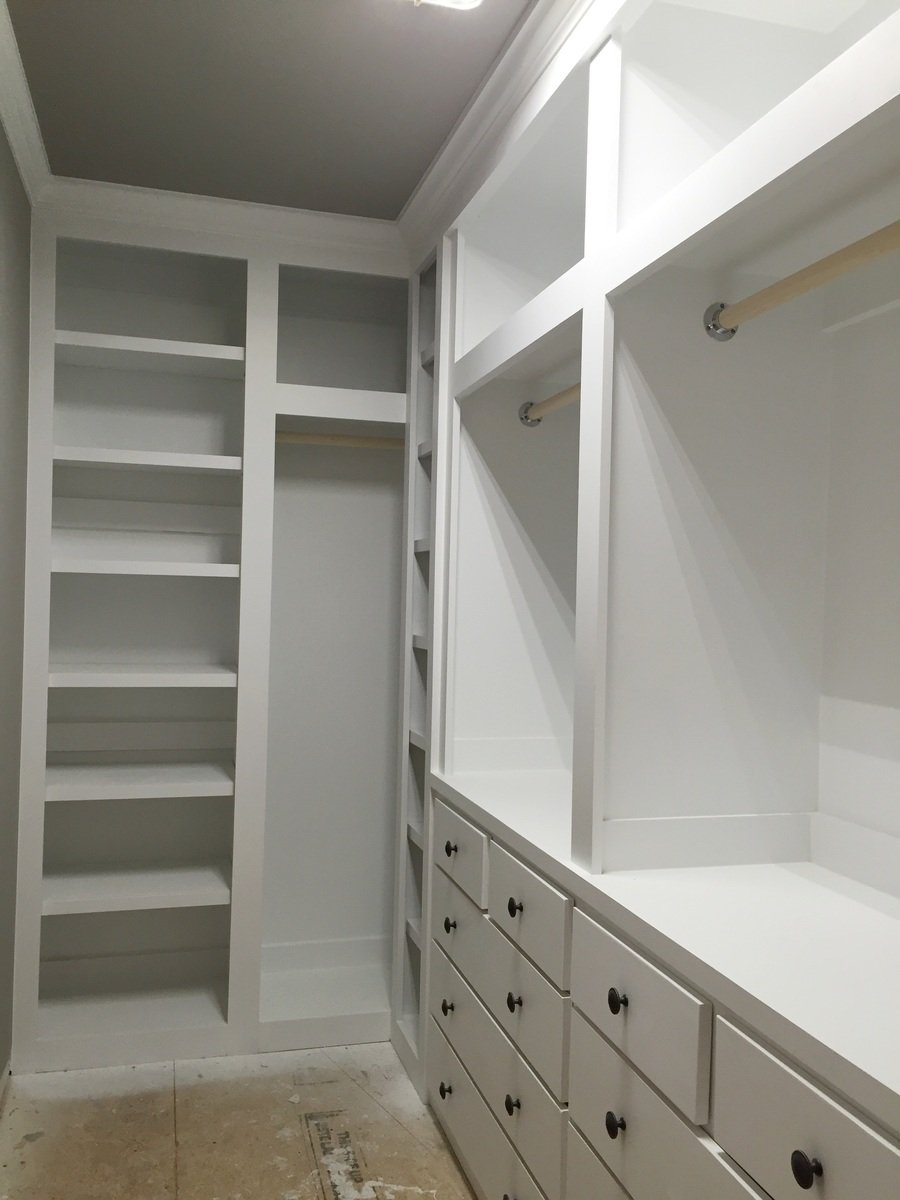
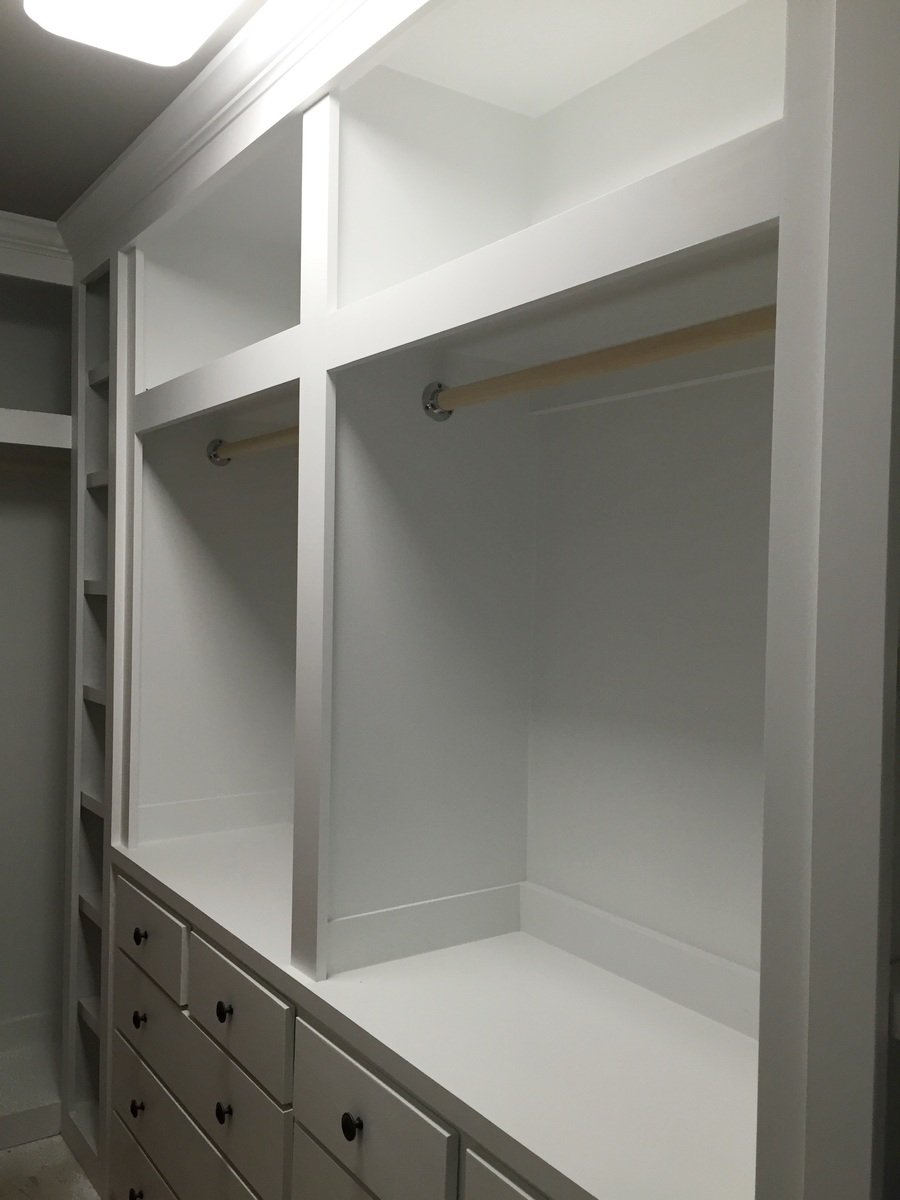
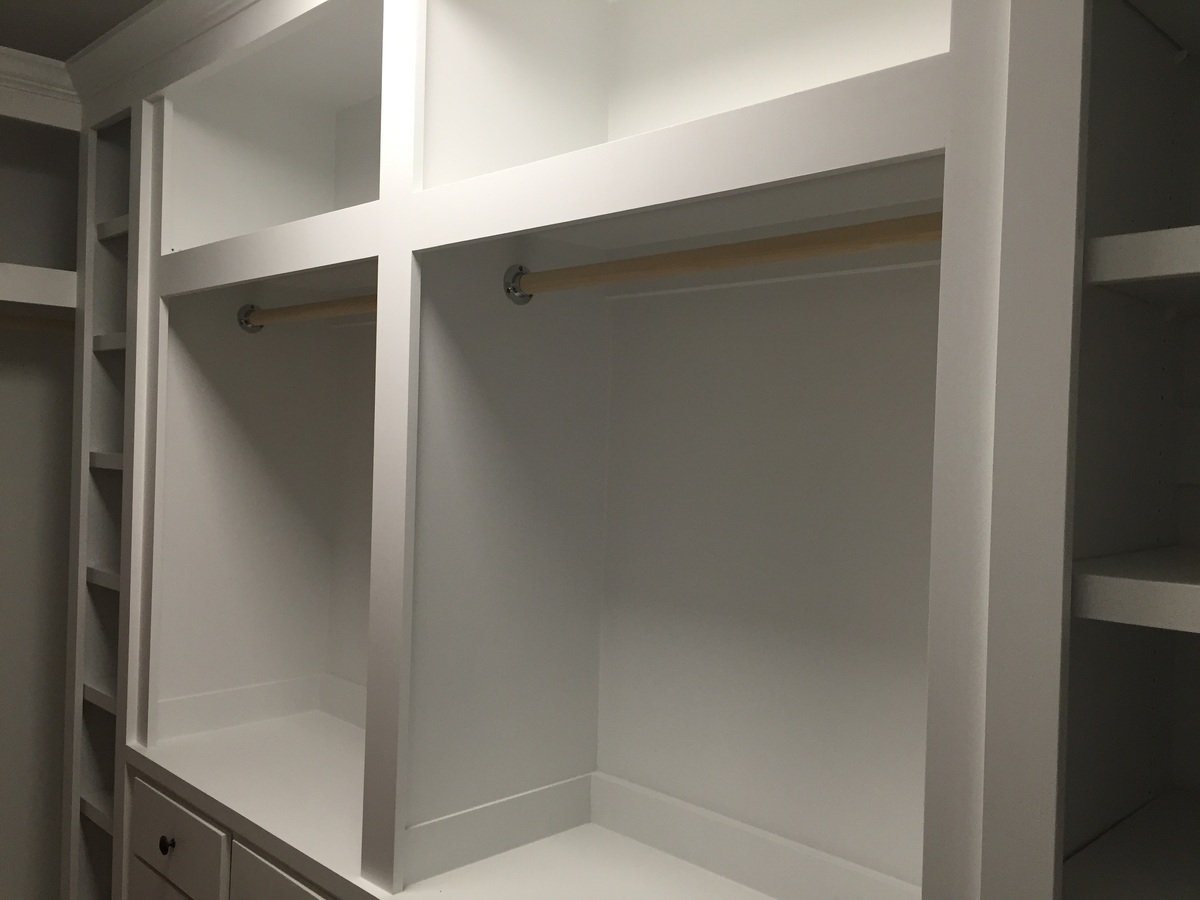
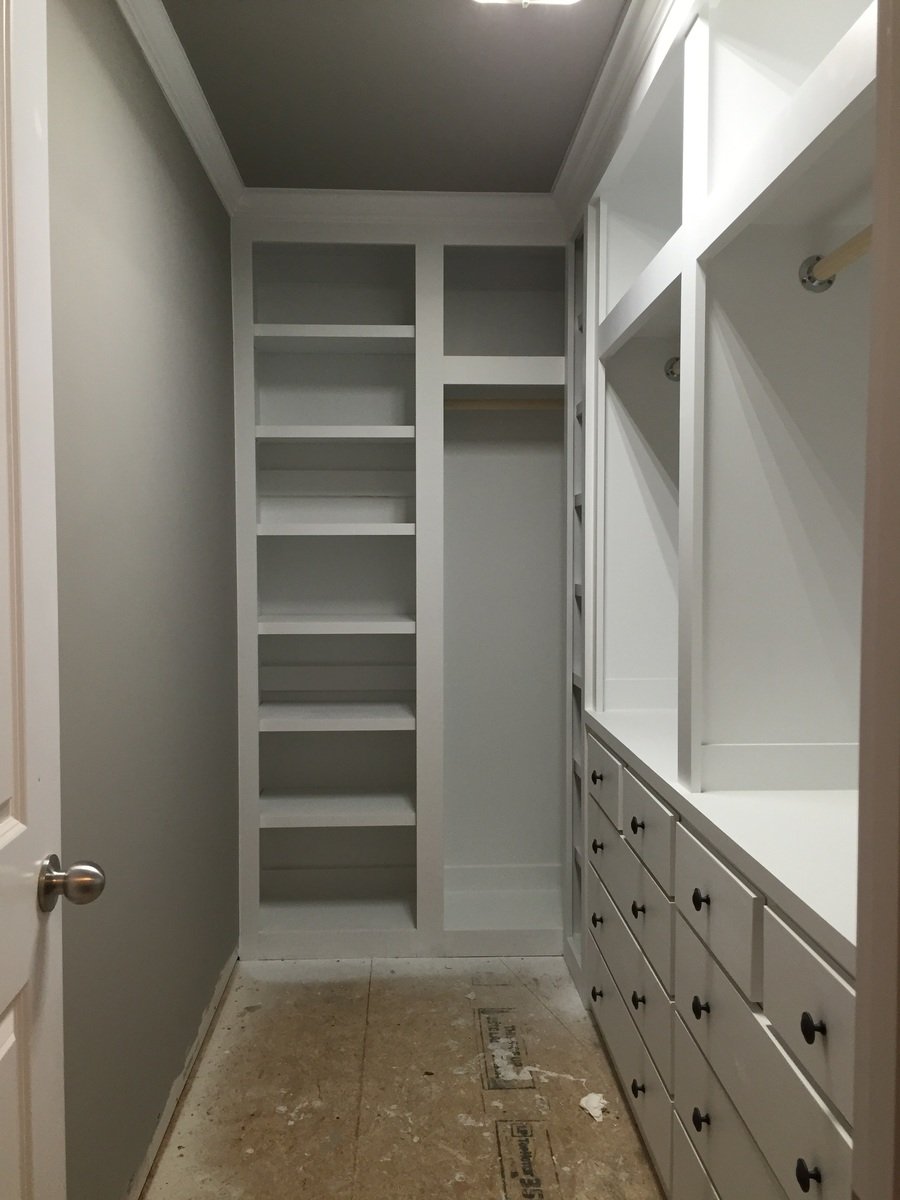
Built in closet to replace builder grade wire wracking. Closet is approximately 11 feet by 5 feet. consists of two shoe racks with 7 shelves each. 6 large drawers and 4 small drawers. Two hanger sections with storage above them. End wall has hanger for longer items and storage above and a cabinet with shelves.
Yet to finish the floor.


Modified with a high back and modern adirondack arms.
The base of the chair is built exactly to the plan except that the arms are done in a modern adirondack style.
The back was made independently to fit inside the base and then attached to the plan base.
Very comfortable but very heavy chair even without the modified back.
Not stained yet obviously.
Cushions are hard to find I think I would make it slightly smaller next time and maybe even find the cushions first and alter the plan to fit.


Tue, 06/09/2020 - 09:11
Stained with Saman: Urban Grey mixed with some left over brown 4:1 and now has a companion side table
Wed, 06/24/2020 - 07:33
Do you have the plans for the table you built? Im a brand ne beginner. I am trying the modern outdoor chairs and live this table with them.
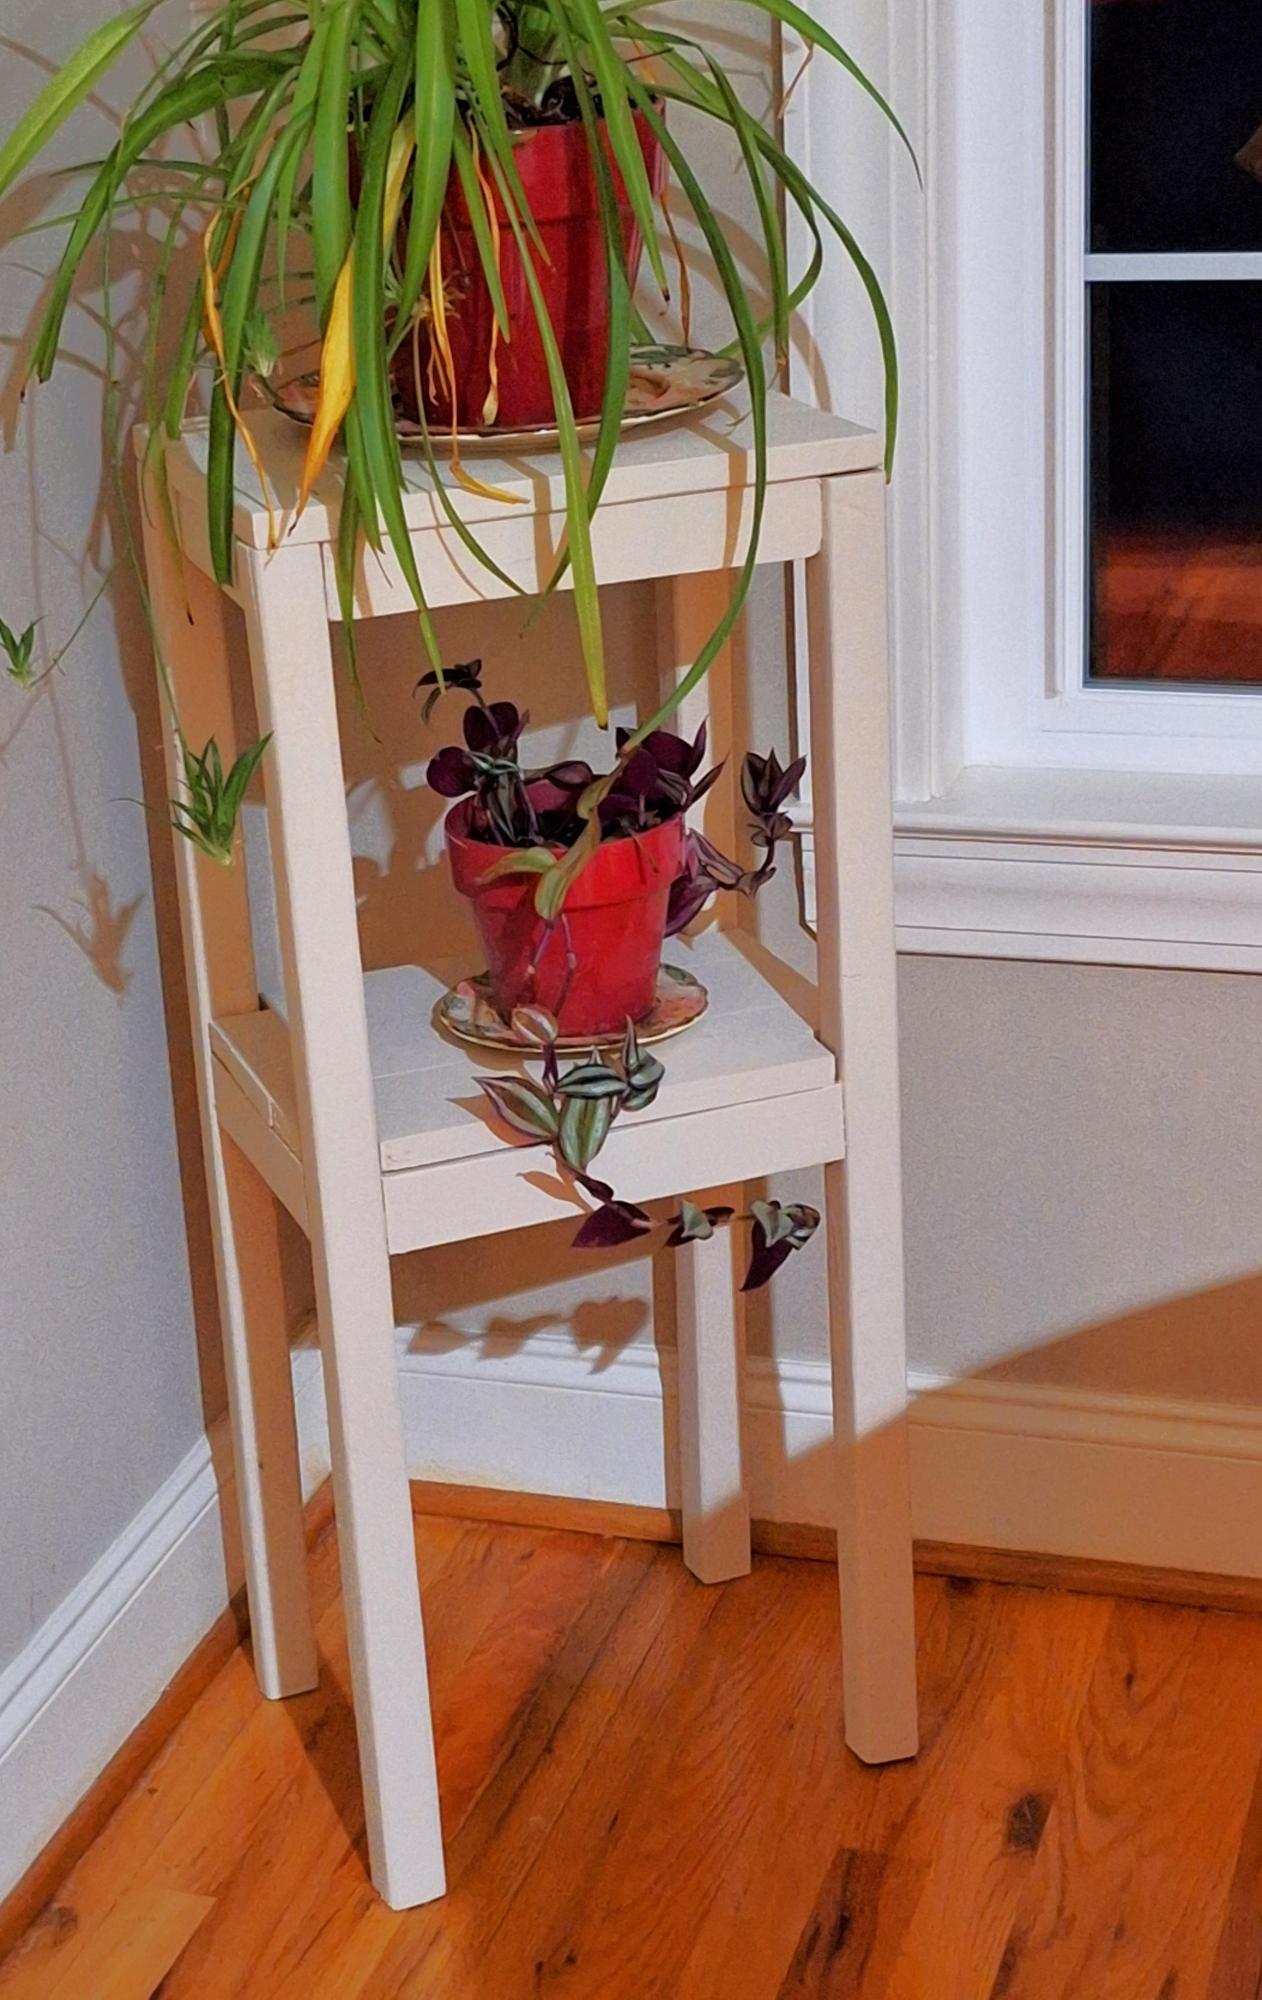
This is a revised kids table plan. I needed a plant stand. It is 36 inches tall and the top is made from 1 × 4's. The top is about 11 x 14. What did I learn from this?. The top is so small it was hard getting the kreg dill bit in to screw in the Kreg screws. I should have thought of that. Also learned that you dont get a tight fit if you have to take out the screws. 2nd time they dont grab and hold as tight. Overall I'm happy the way it turned out. But lots of room to improve.
Barb Runquist

Comments
Ana White Admin
Wed, 06/08/2022 - 14:01
AWESOME!
Thank you for sharing, it looks amazing!