Community Brag Posts

Queen shim bed
Queen bed with shim head and foot boards
Built from Plan(s)
Estimated Cost
$80-100
Estimated Time Investment
Weekend Project (10-20 Hours)
Recommended Skill Level
Intermediate
Comments

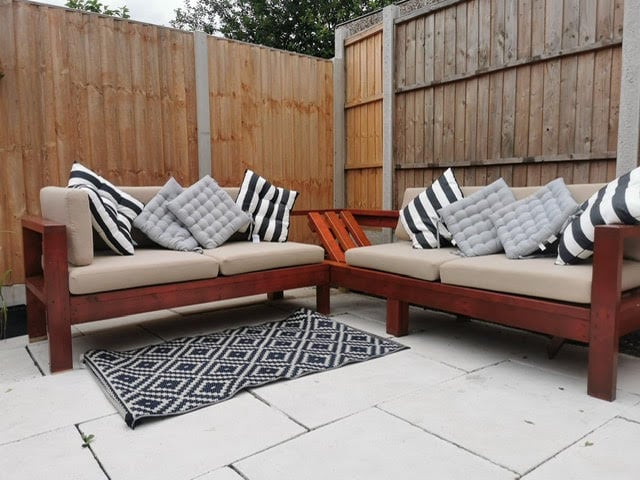
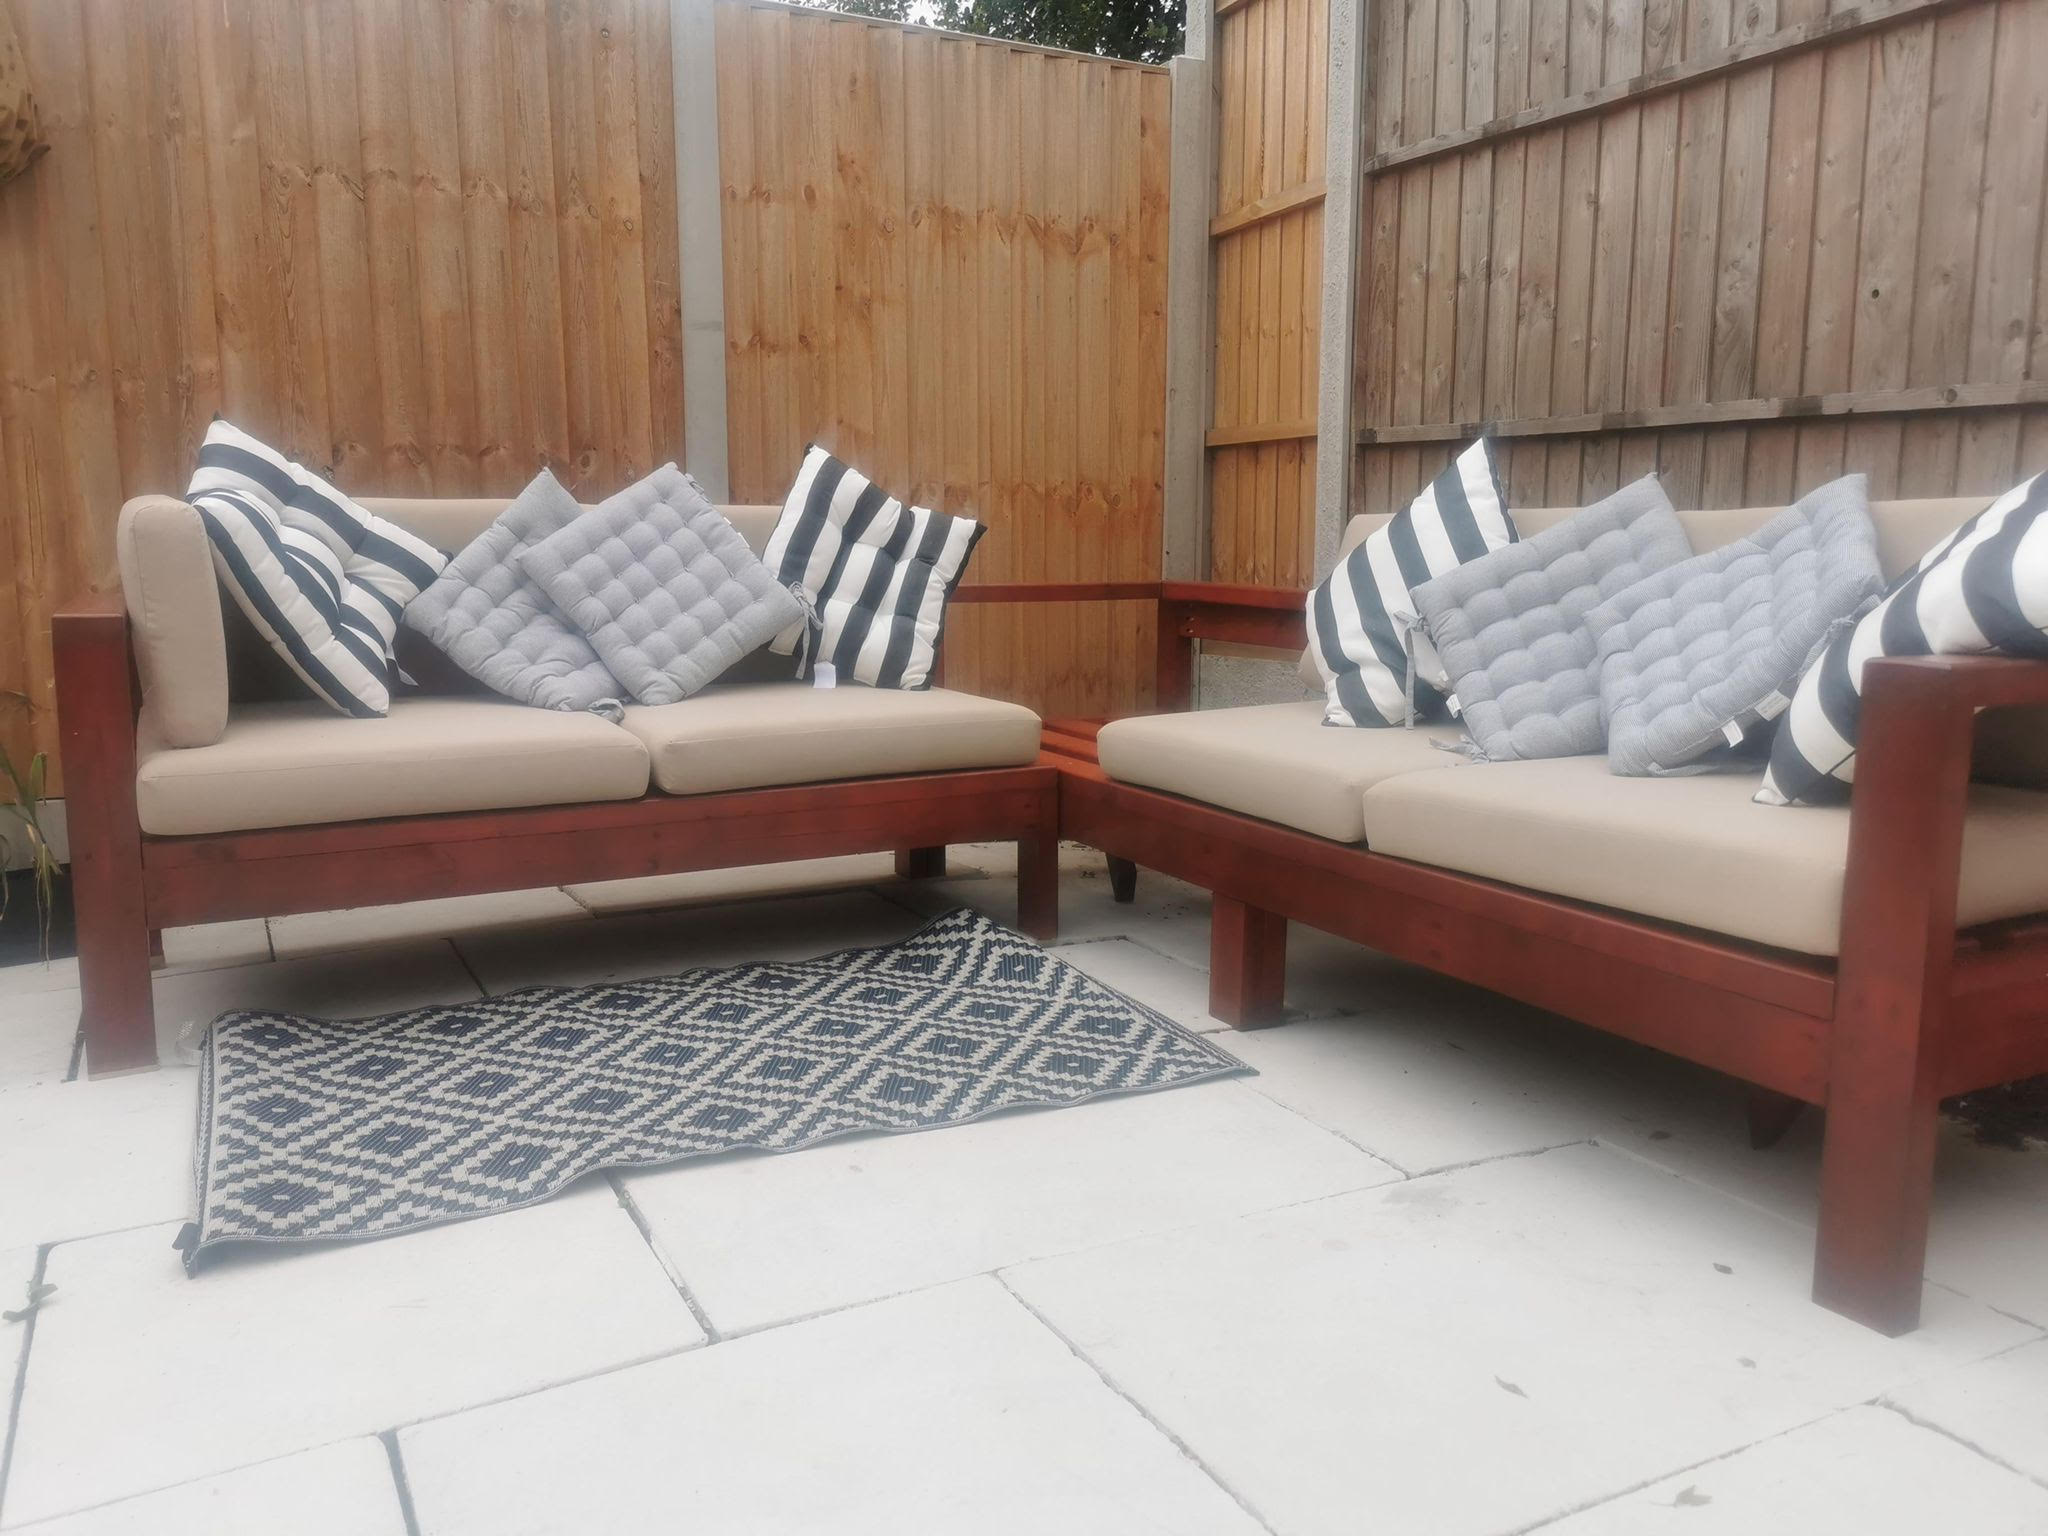
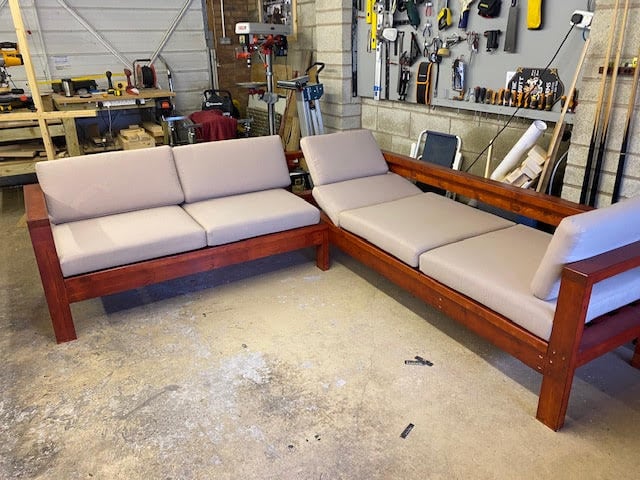
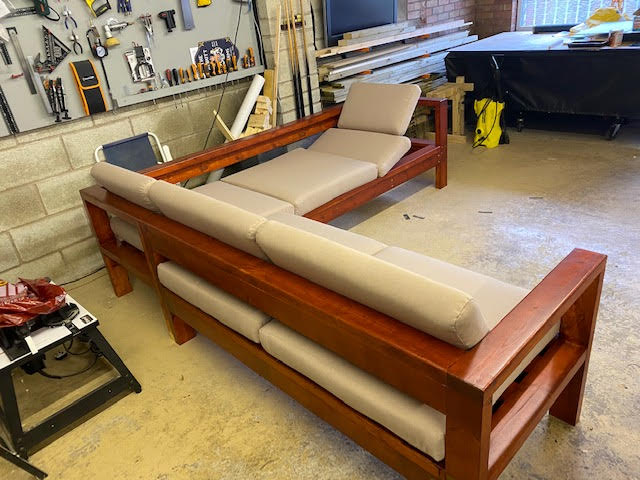
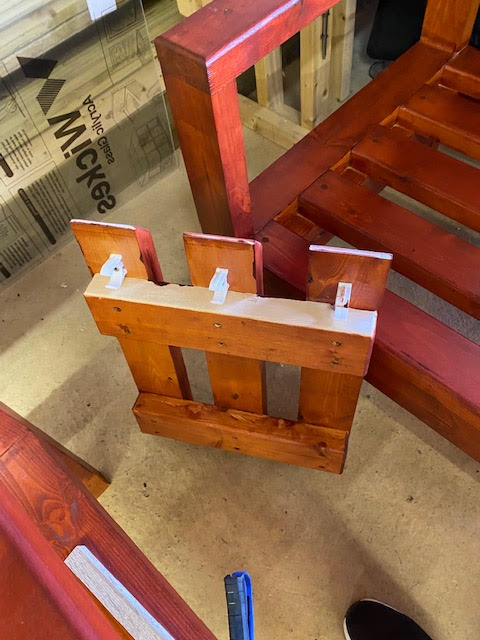
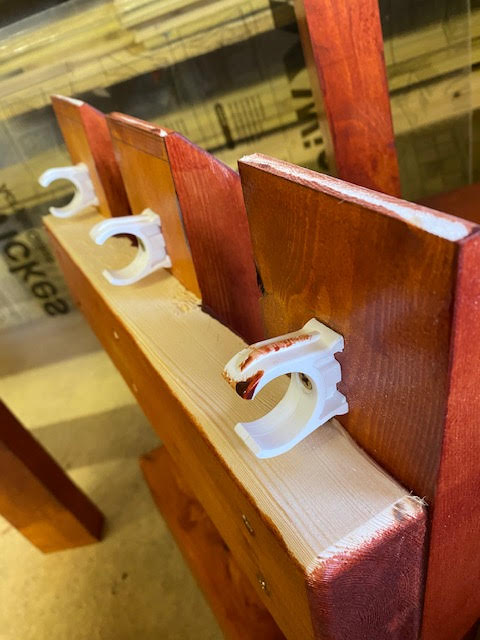
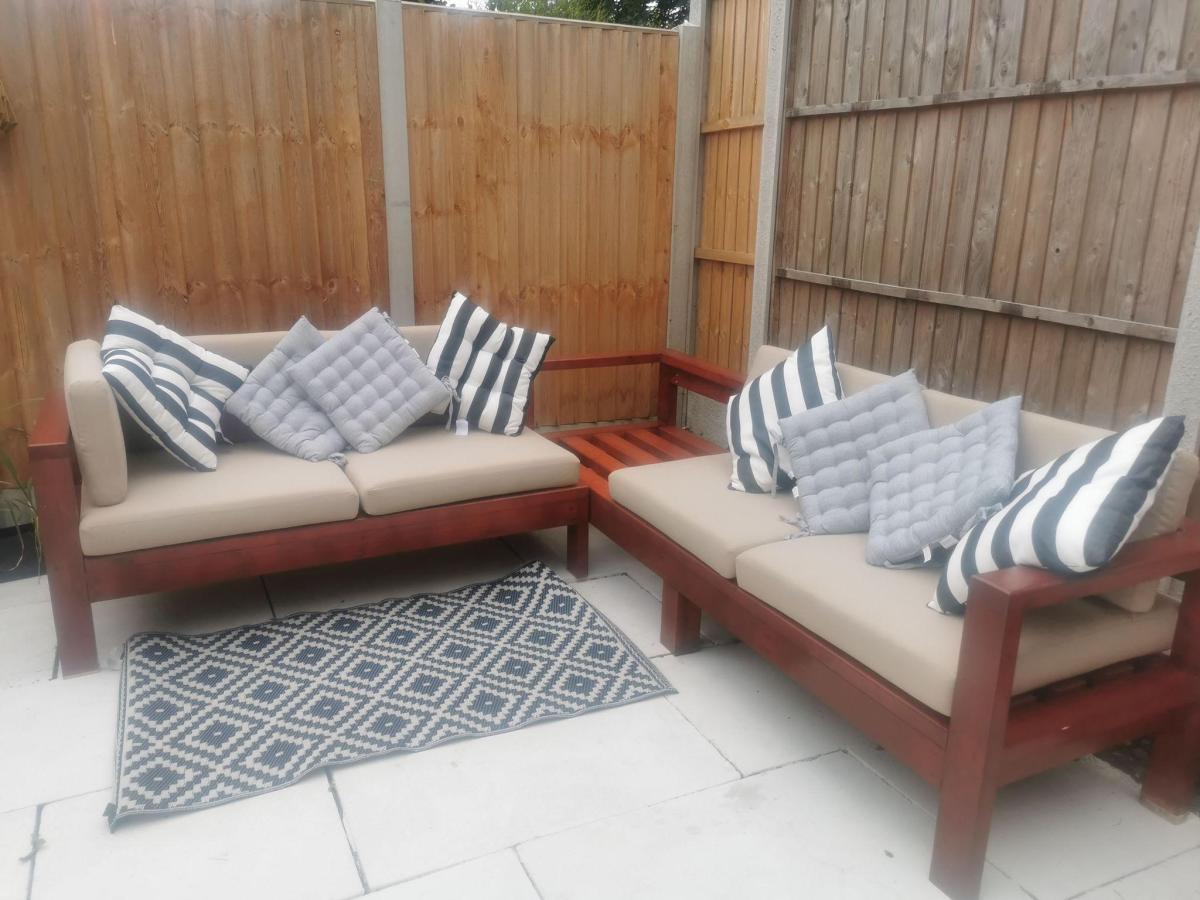
Lounger Sofa by Mark
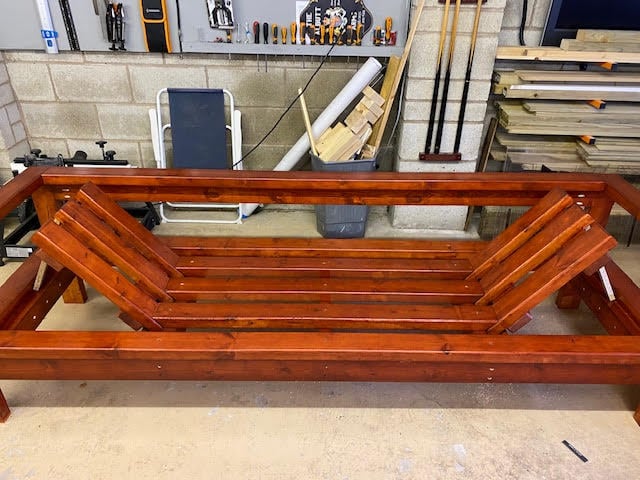
Just wanted to share the results of the sectional I built with your plans.
I’m new to woodwork, newly retired, built these for my daughters, with a twist, she wanted a lounger sofa, hope you like.
Built from Plan(s)
Comments
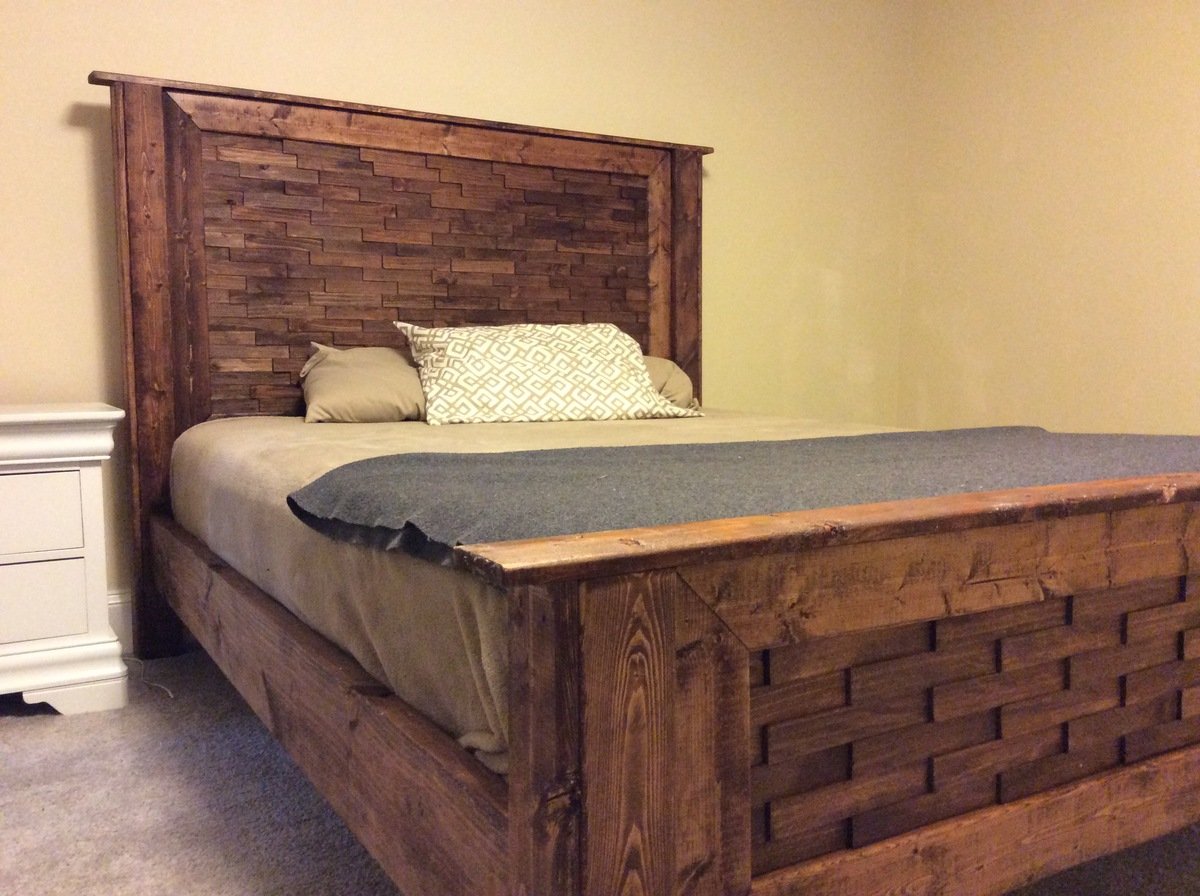
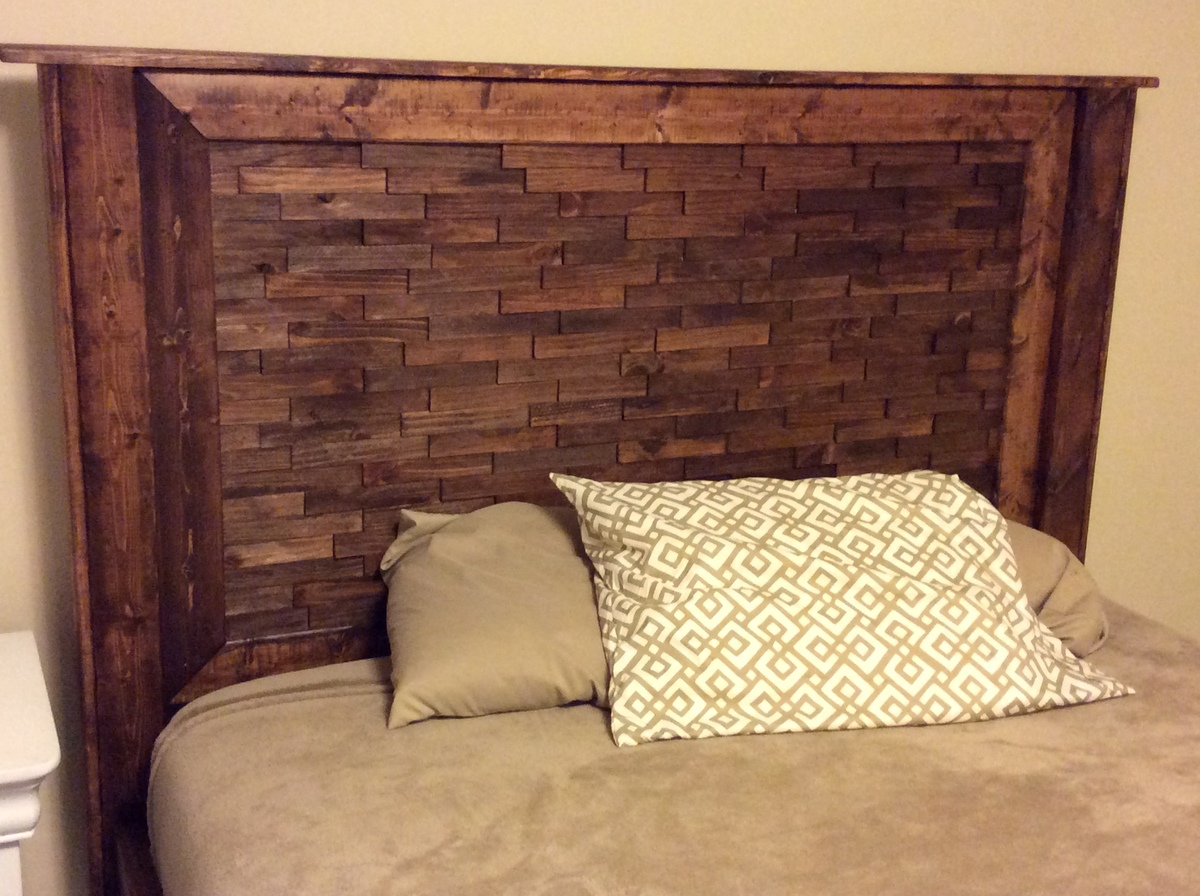
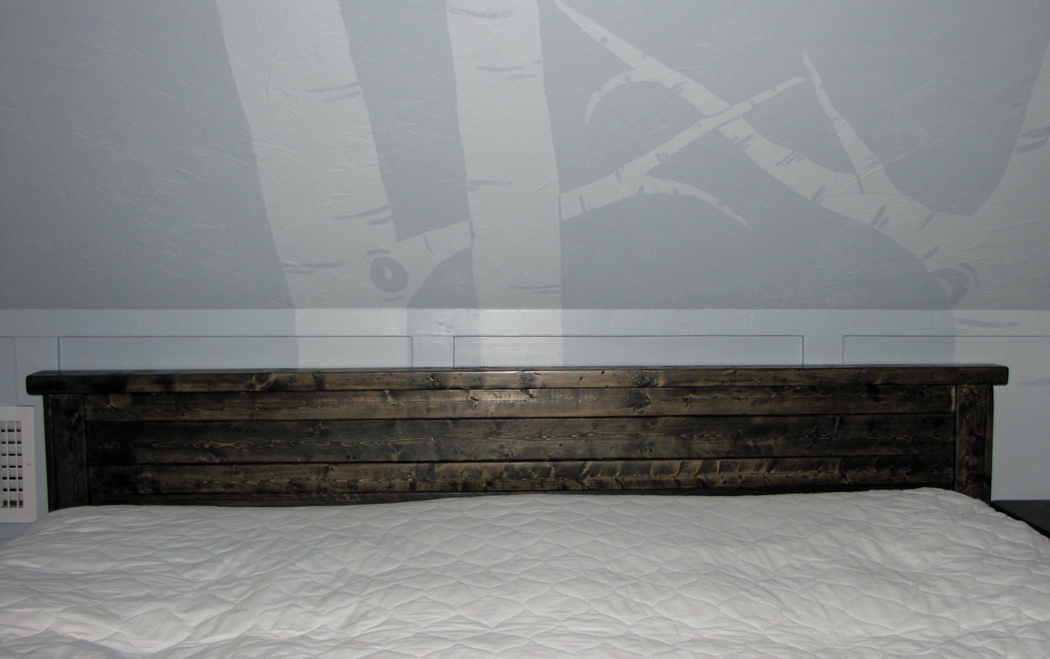
Furring strips for a headboard
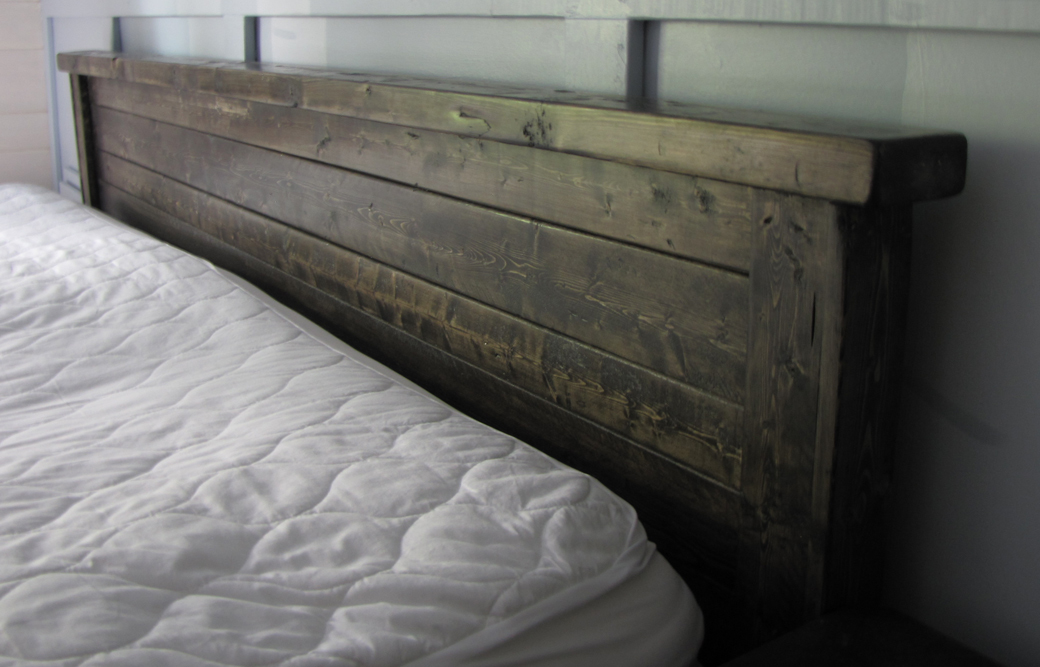
I loved that I used strapping, or furring strips, for this bead. The topper wood is a 2X4, but every other 8" piece of wood cost between $1.25 and $1.99 each. Yeah! Of course, for that price, you have to know you will be sanding the heck out of it. We had a metal frame for this bed but I wanted a headboard. Because it was going against a wall with a 45 degree angle, I had to make it a lot shorter than I wanted. I made it just tall enough so both pillows, when stacked on top of each other, did not fall off the back. I just love it.
Built from Plan(s)
Estimated Cost
$25
Estimated Time Investment
An Hour or Two (0-2 Hours)
Finish Used
I think I used Minwax Ebony stain. Just one coat was enough as I wanted the wood grains to come through. Then I finished it off with my favorite closer, the Finishing Paste. One swipe and it feels great.
Recommended Skill Level
Starter Project
Comments
Fri, 04/13/2012 - 15:33
Finishing Paste
I am intrigued by this finishing paste you speak of. Could you tell me more?

Wed, 04/25/2012 - 17:51
Johnson Paste Wax
If you can't find the minwax that debandtom25 used, you can also get a nice paste wax from Johnson Wax. I know that's what's on my finishing shelf, and like deb, I love it.
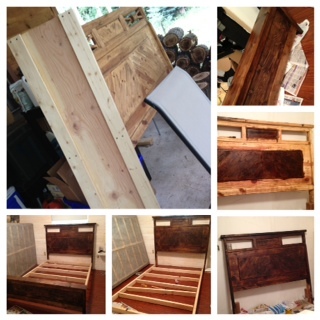
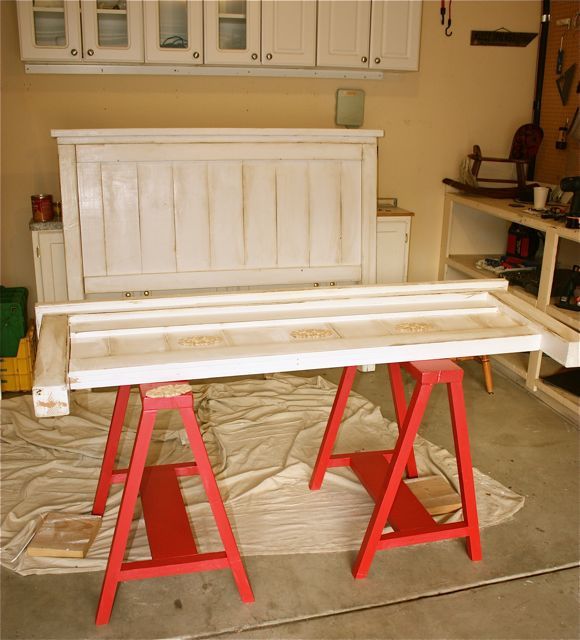
Bed Frame
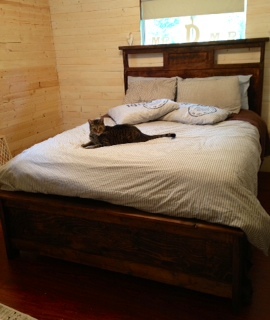
We haven't had bed frame since we moved from Florida and as we now have our own home, it was time to get one. My friend gave me headboard they had no use, so I just had to build rest of a frame.
Notice that we are middle of the hole house renovation so we have no trims, walls are lacking paint etc :) I still need to make night stands and closet for us :) Let see how they come out.
Follow our projects and life middle of the mountains in my blog :)
Built from Plan(s)
Estimated Cost
40$
Estimated Time Investment
Weekend Project (10-20 Hours)
Finish Used
I used dark walnut stain, but only one layer.
Recommended Skill Level
Intermediate
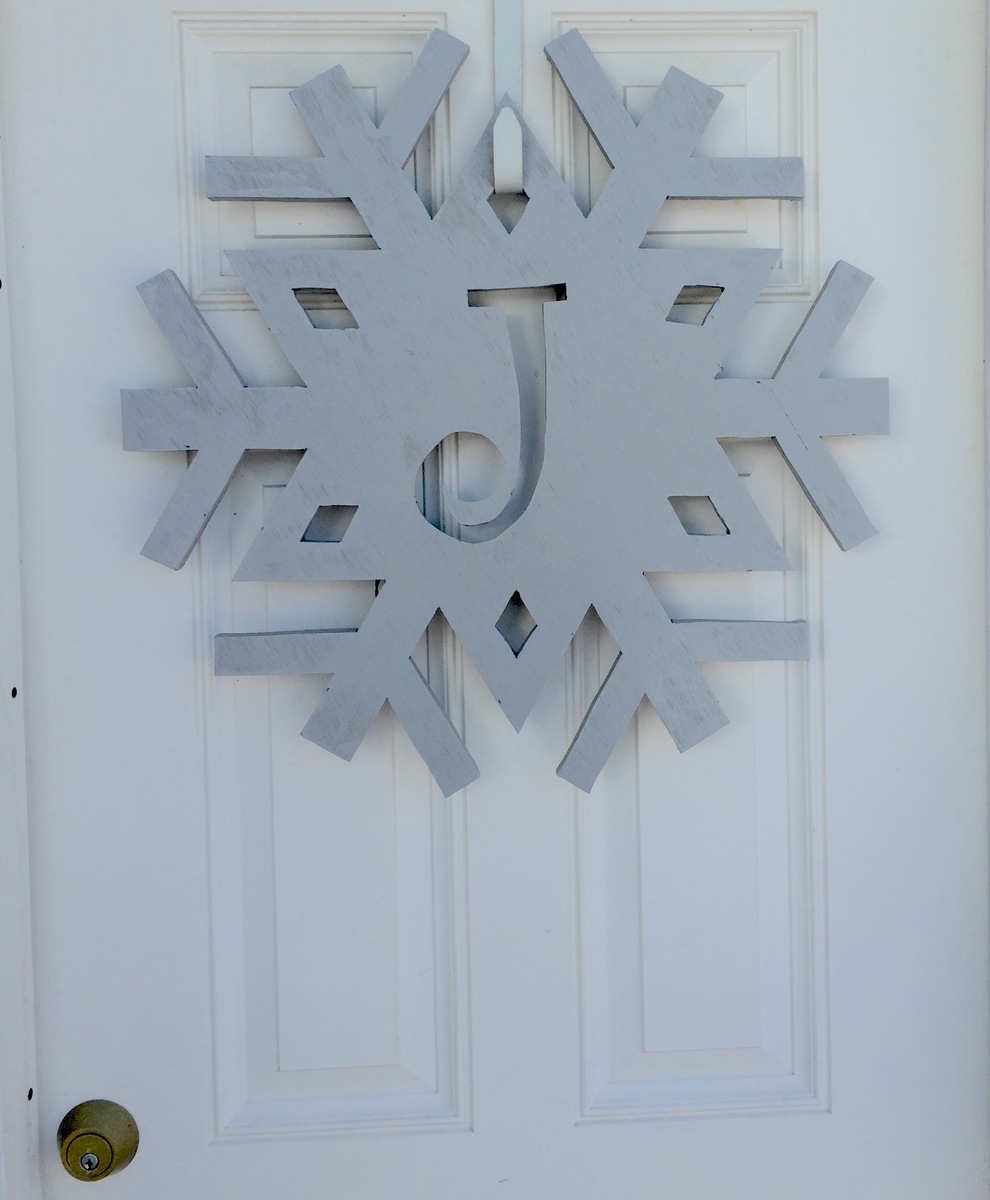
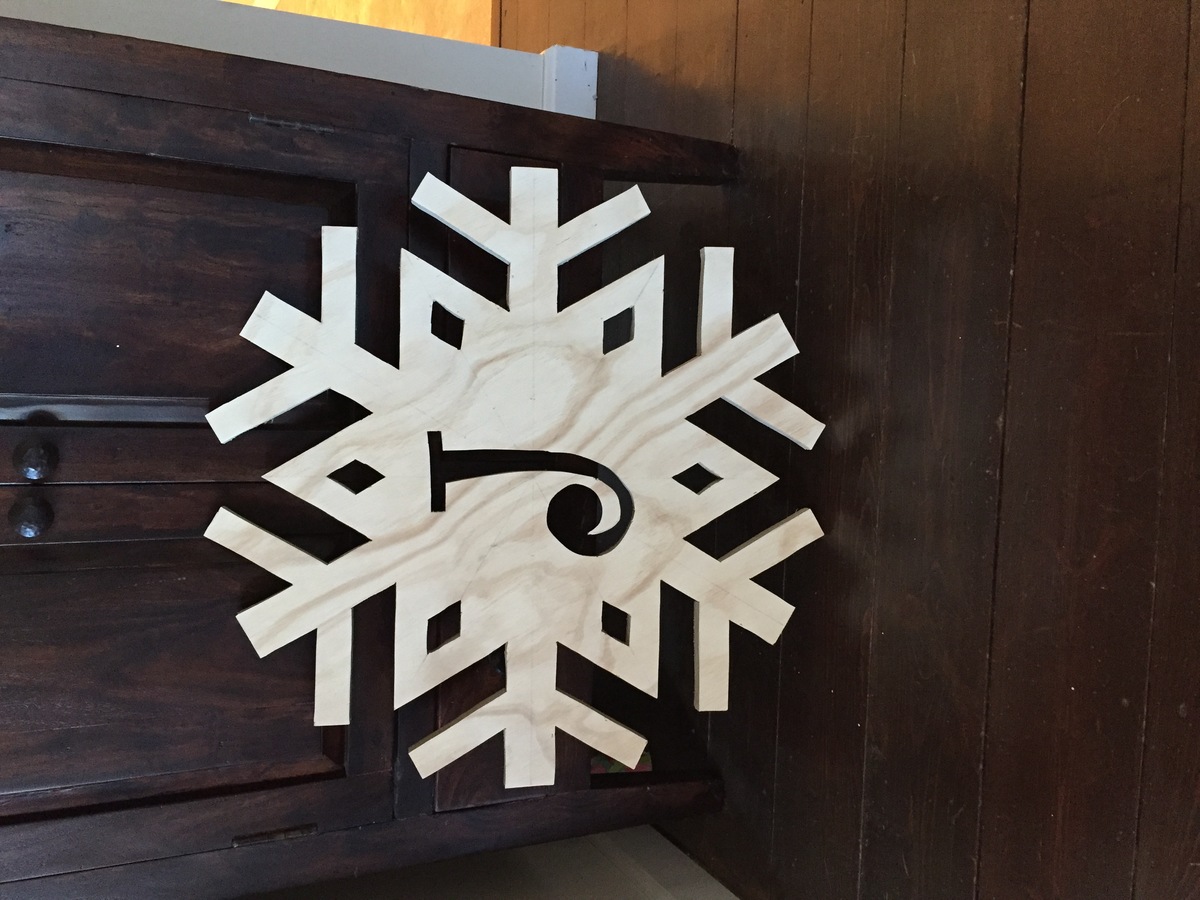
Snowflake

Followed the plans for the Easy monogram snowflake, painted it with pewter gray, and added a set of battery powered led lights to the back. Thanks for the plans Ana fun build and now everyone wants one.
Built from Plan(s)
Estimated Cost
$30
Estimated Time Investment
An Hour or Two (0-2 Hours)
Finish Used
Oil based paint. Pewter gray
Recommended Skill Level
Beginner
Comments
Mon, 11/23/2015 - 07:21
Love the backlight!
What a great idea! How are you hanging this? It looks like it is floating.
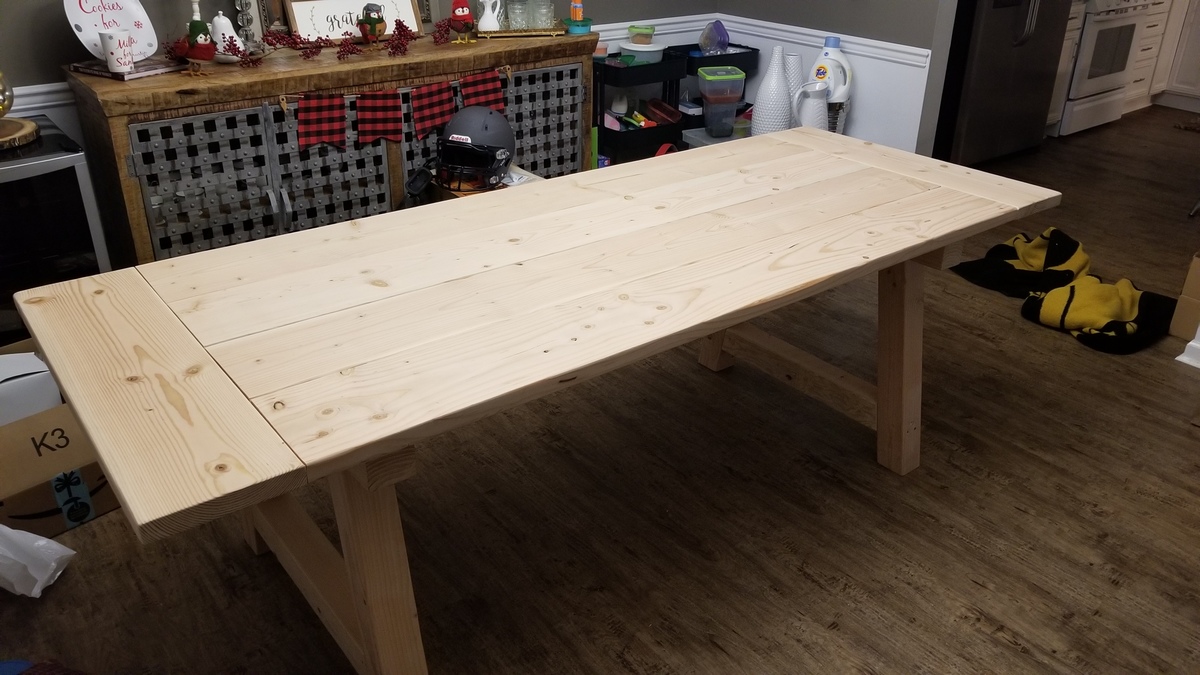
Rustic farmhouse table - 30"
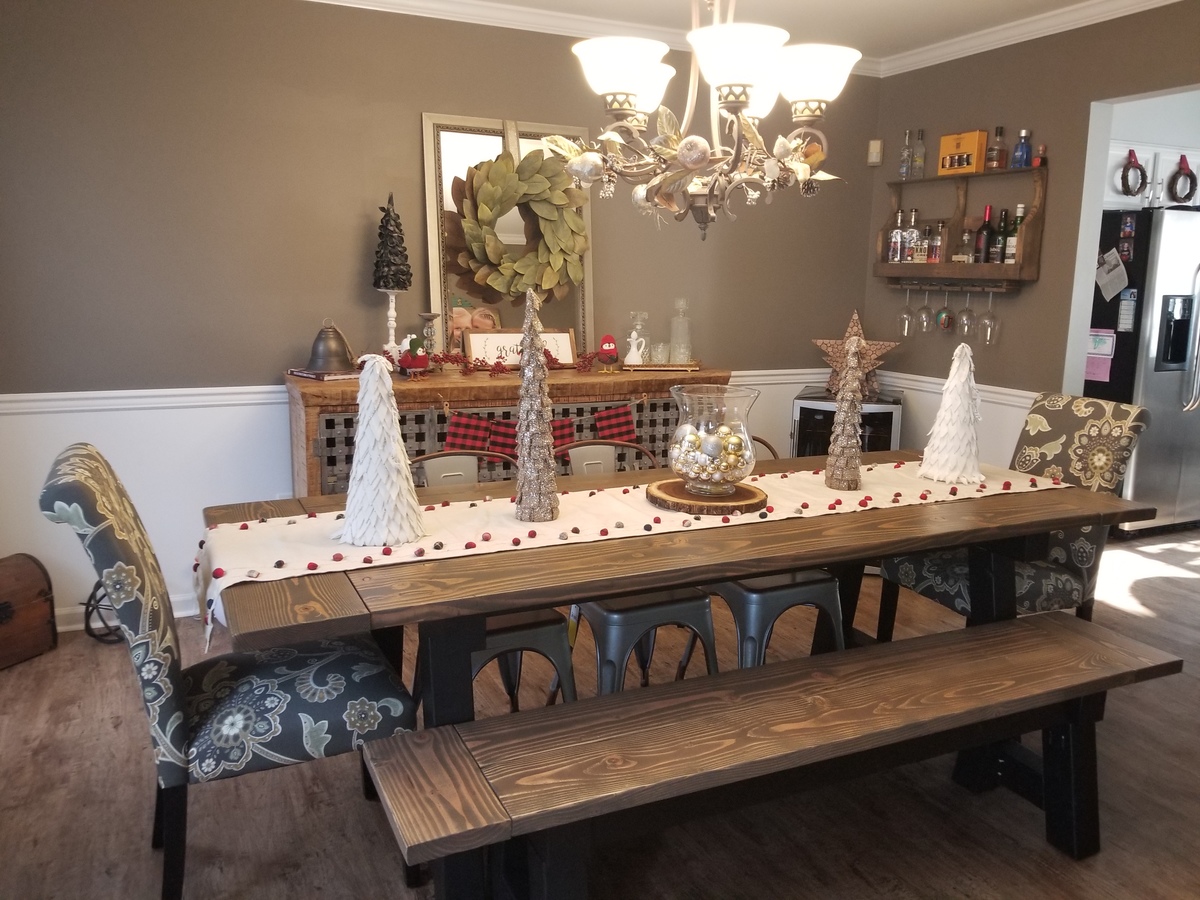
Great project for my first attempt at building a farmhouse table. I adjusted the base to allow a chair to slide in at both ends. Braced breadboards on each end with (3) 2x4. Very strong and sturdy. Decided not to use the lower base support to see how it held up and has been extremely stable. My wife liked the open look so that's all I needed to hear. Excellent plans, had fun and came out better than I anticipated!
Built from Plan(s)
Estimated Cost
$250 ish
Estimated Time Investment
Weekend Project (10-20 Hours)
Finish Used
Stained, 3 layers of oil based semigloss polyurethane (sanded between coats, then 2 layers of water based matte finish. (Looked too shiny with semigloss for our taste)
Recommended Skill Level
Intermediate
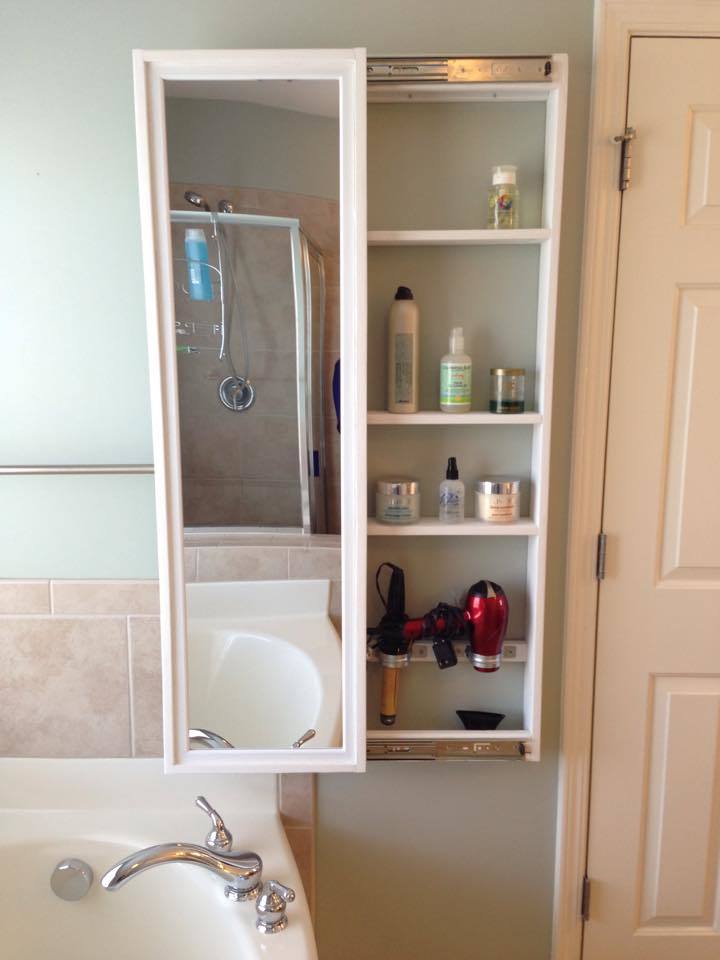
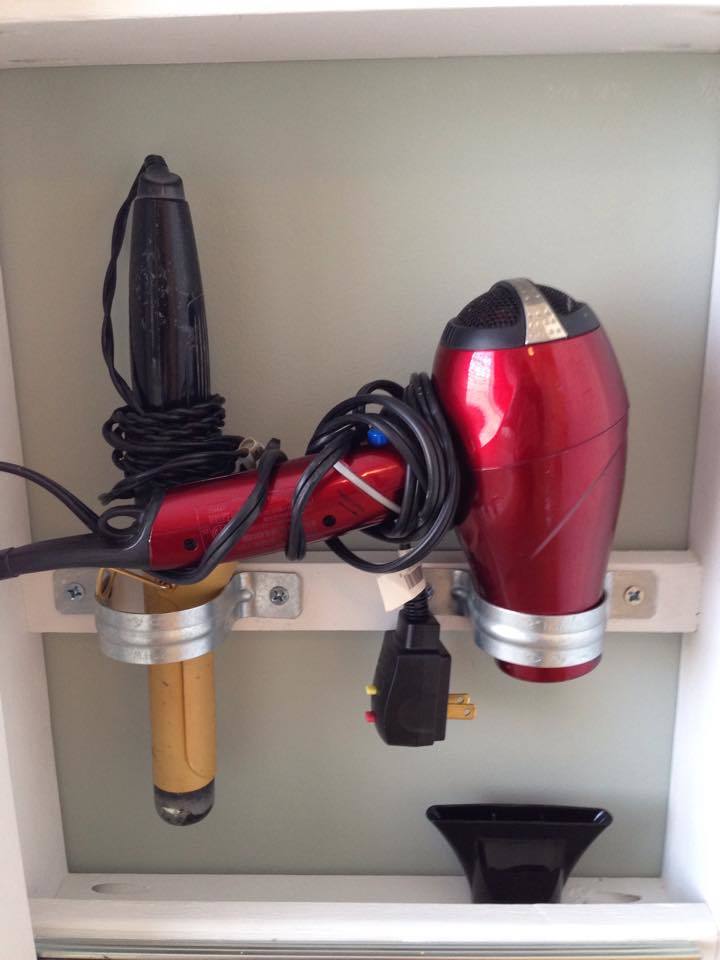
Built-in Floating Shelves
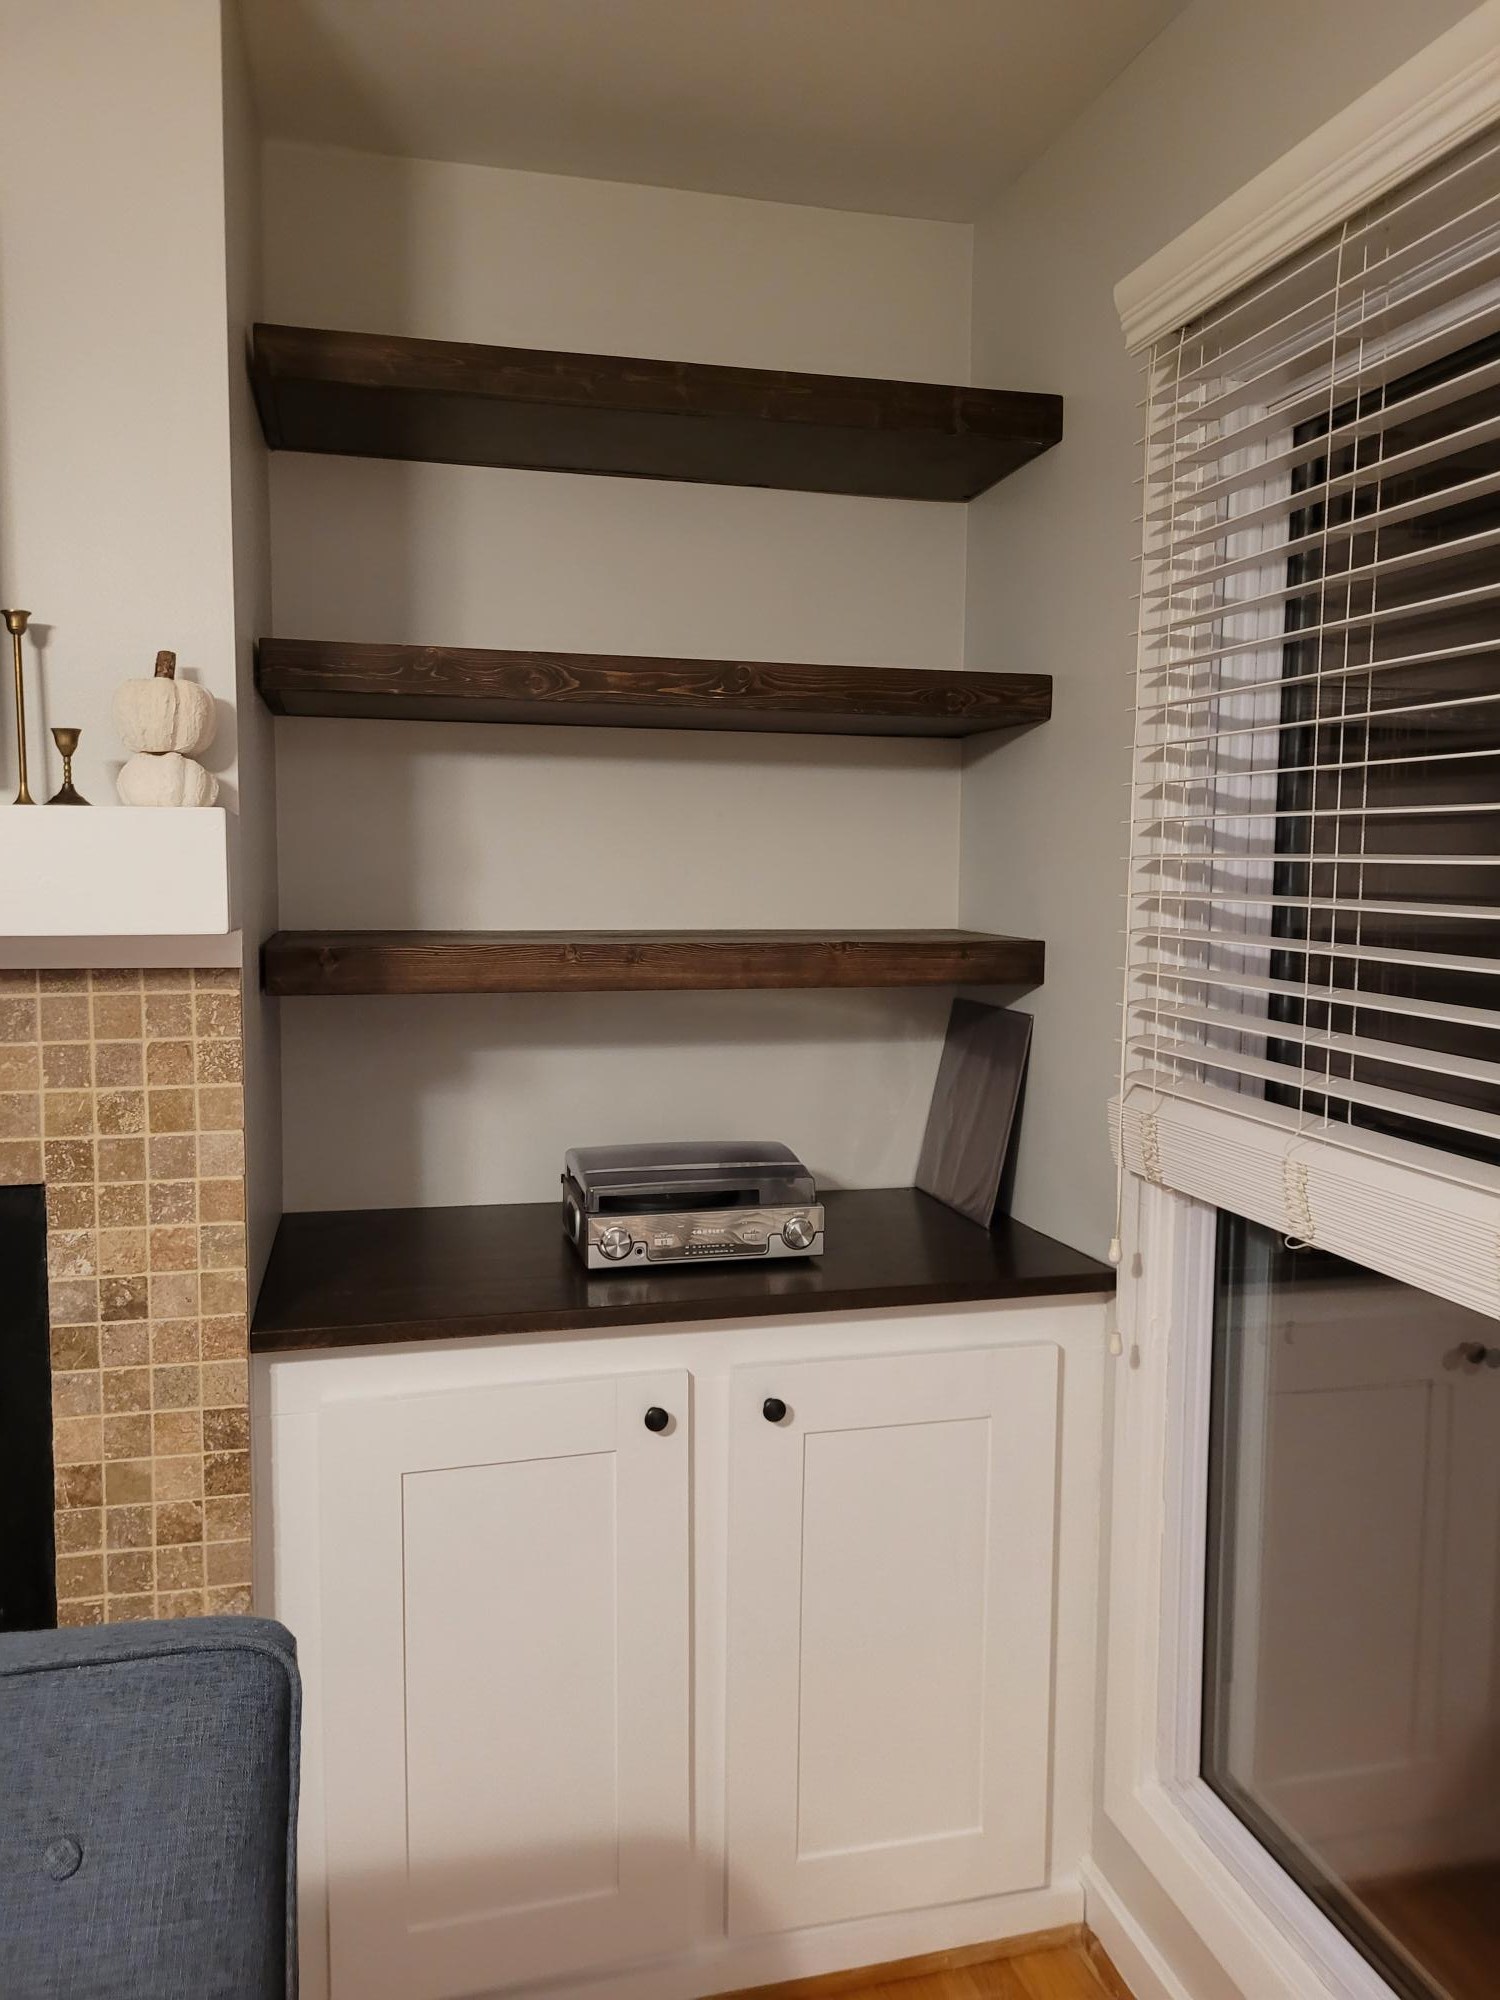
Built-in floating shelves!
by Lisa
Built from Plan(s)
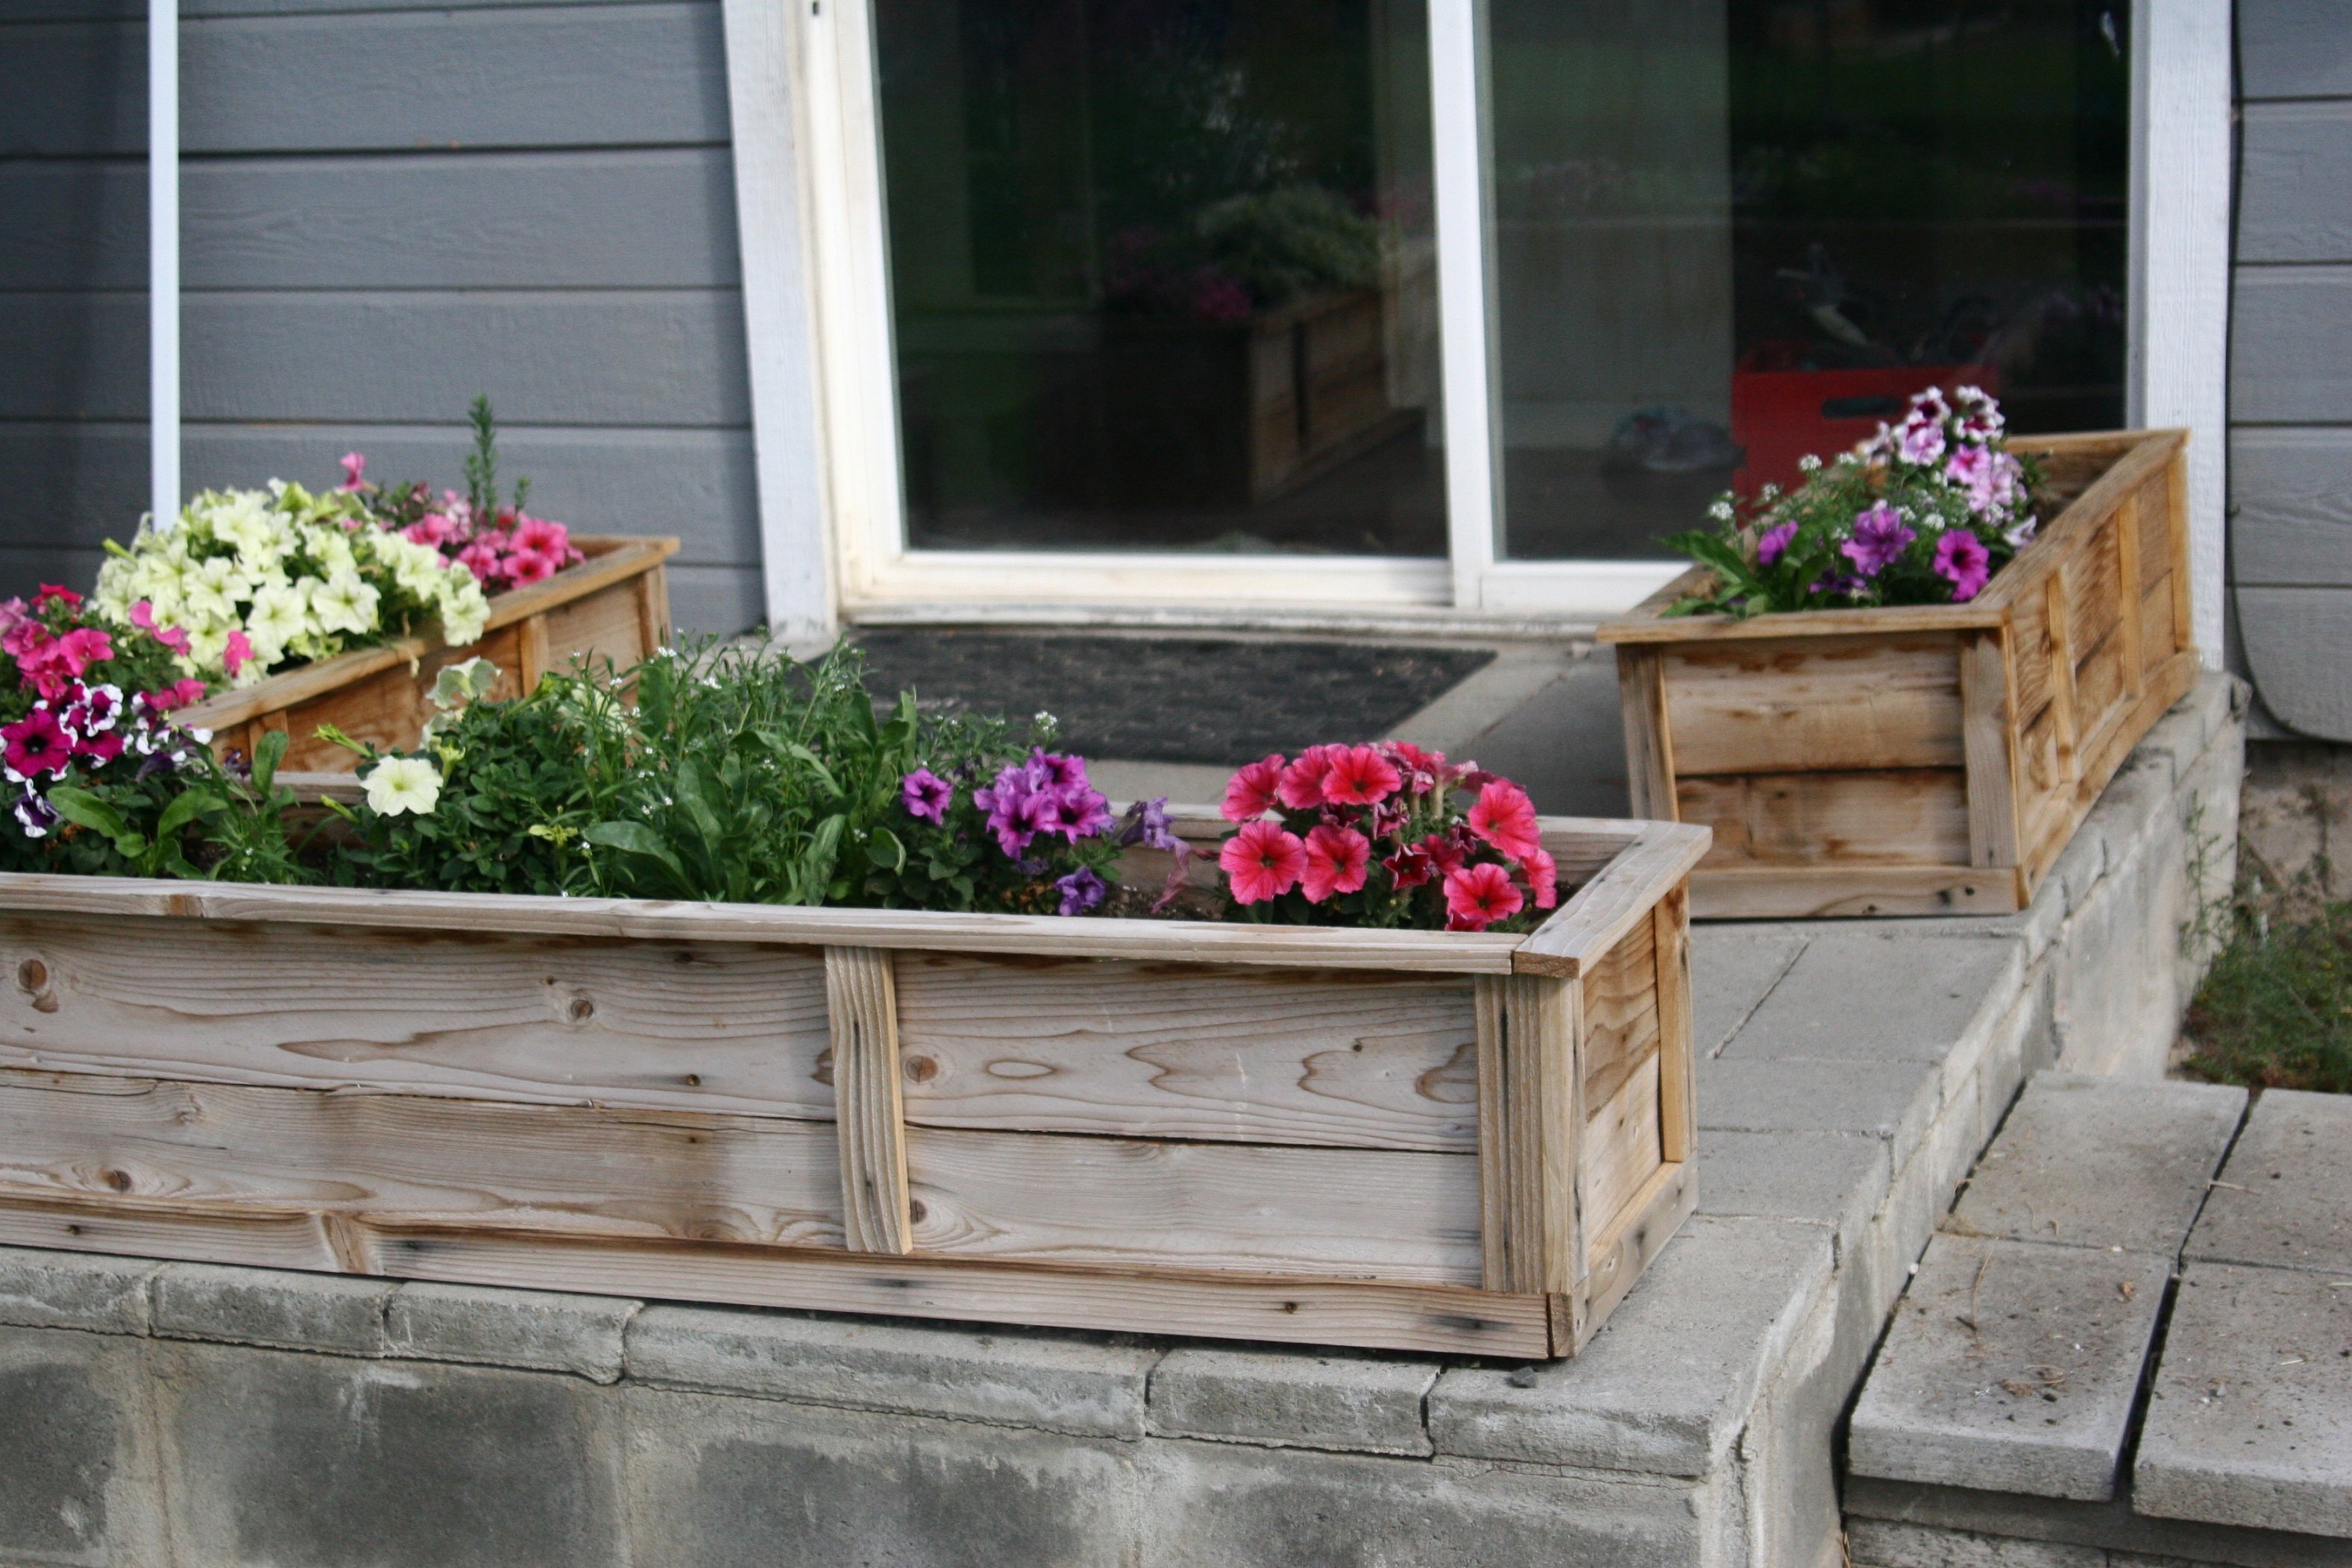
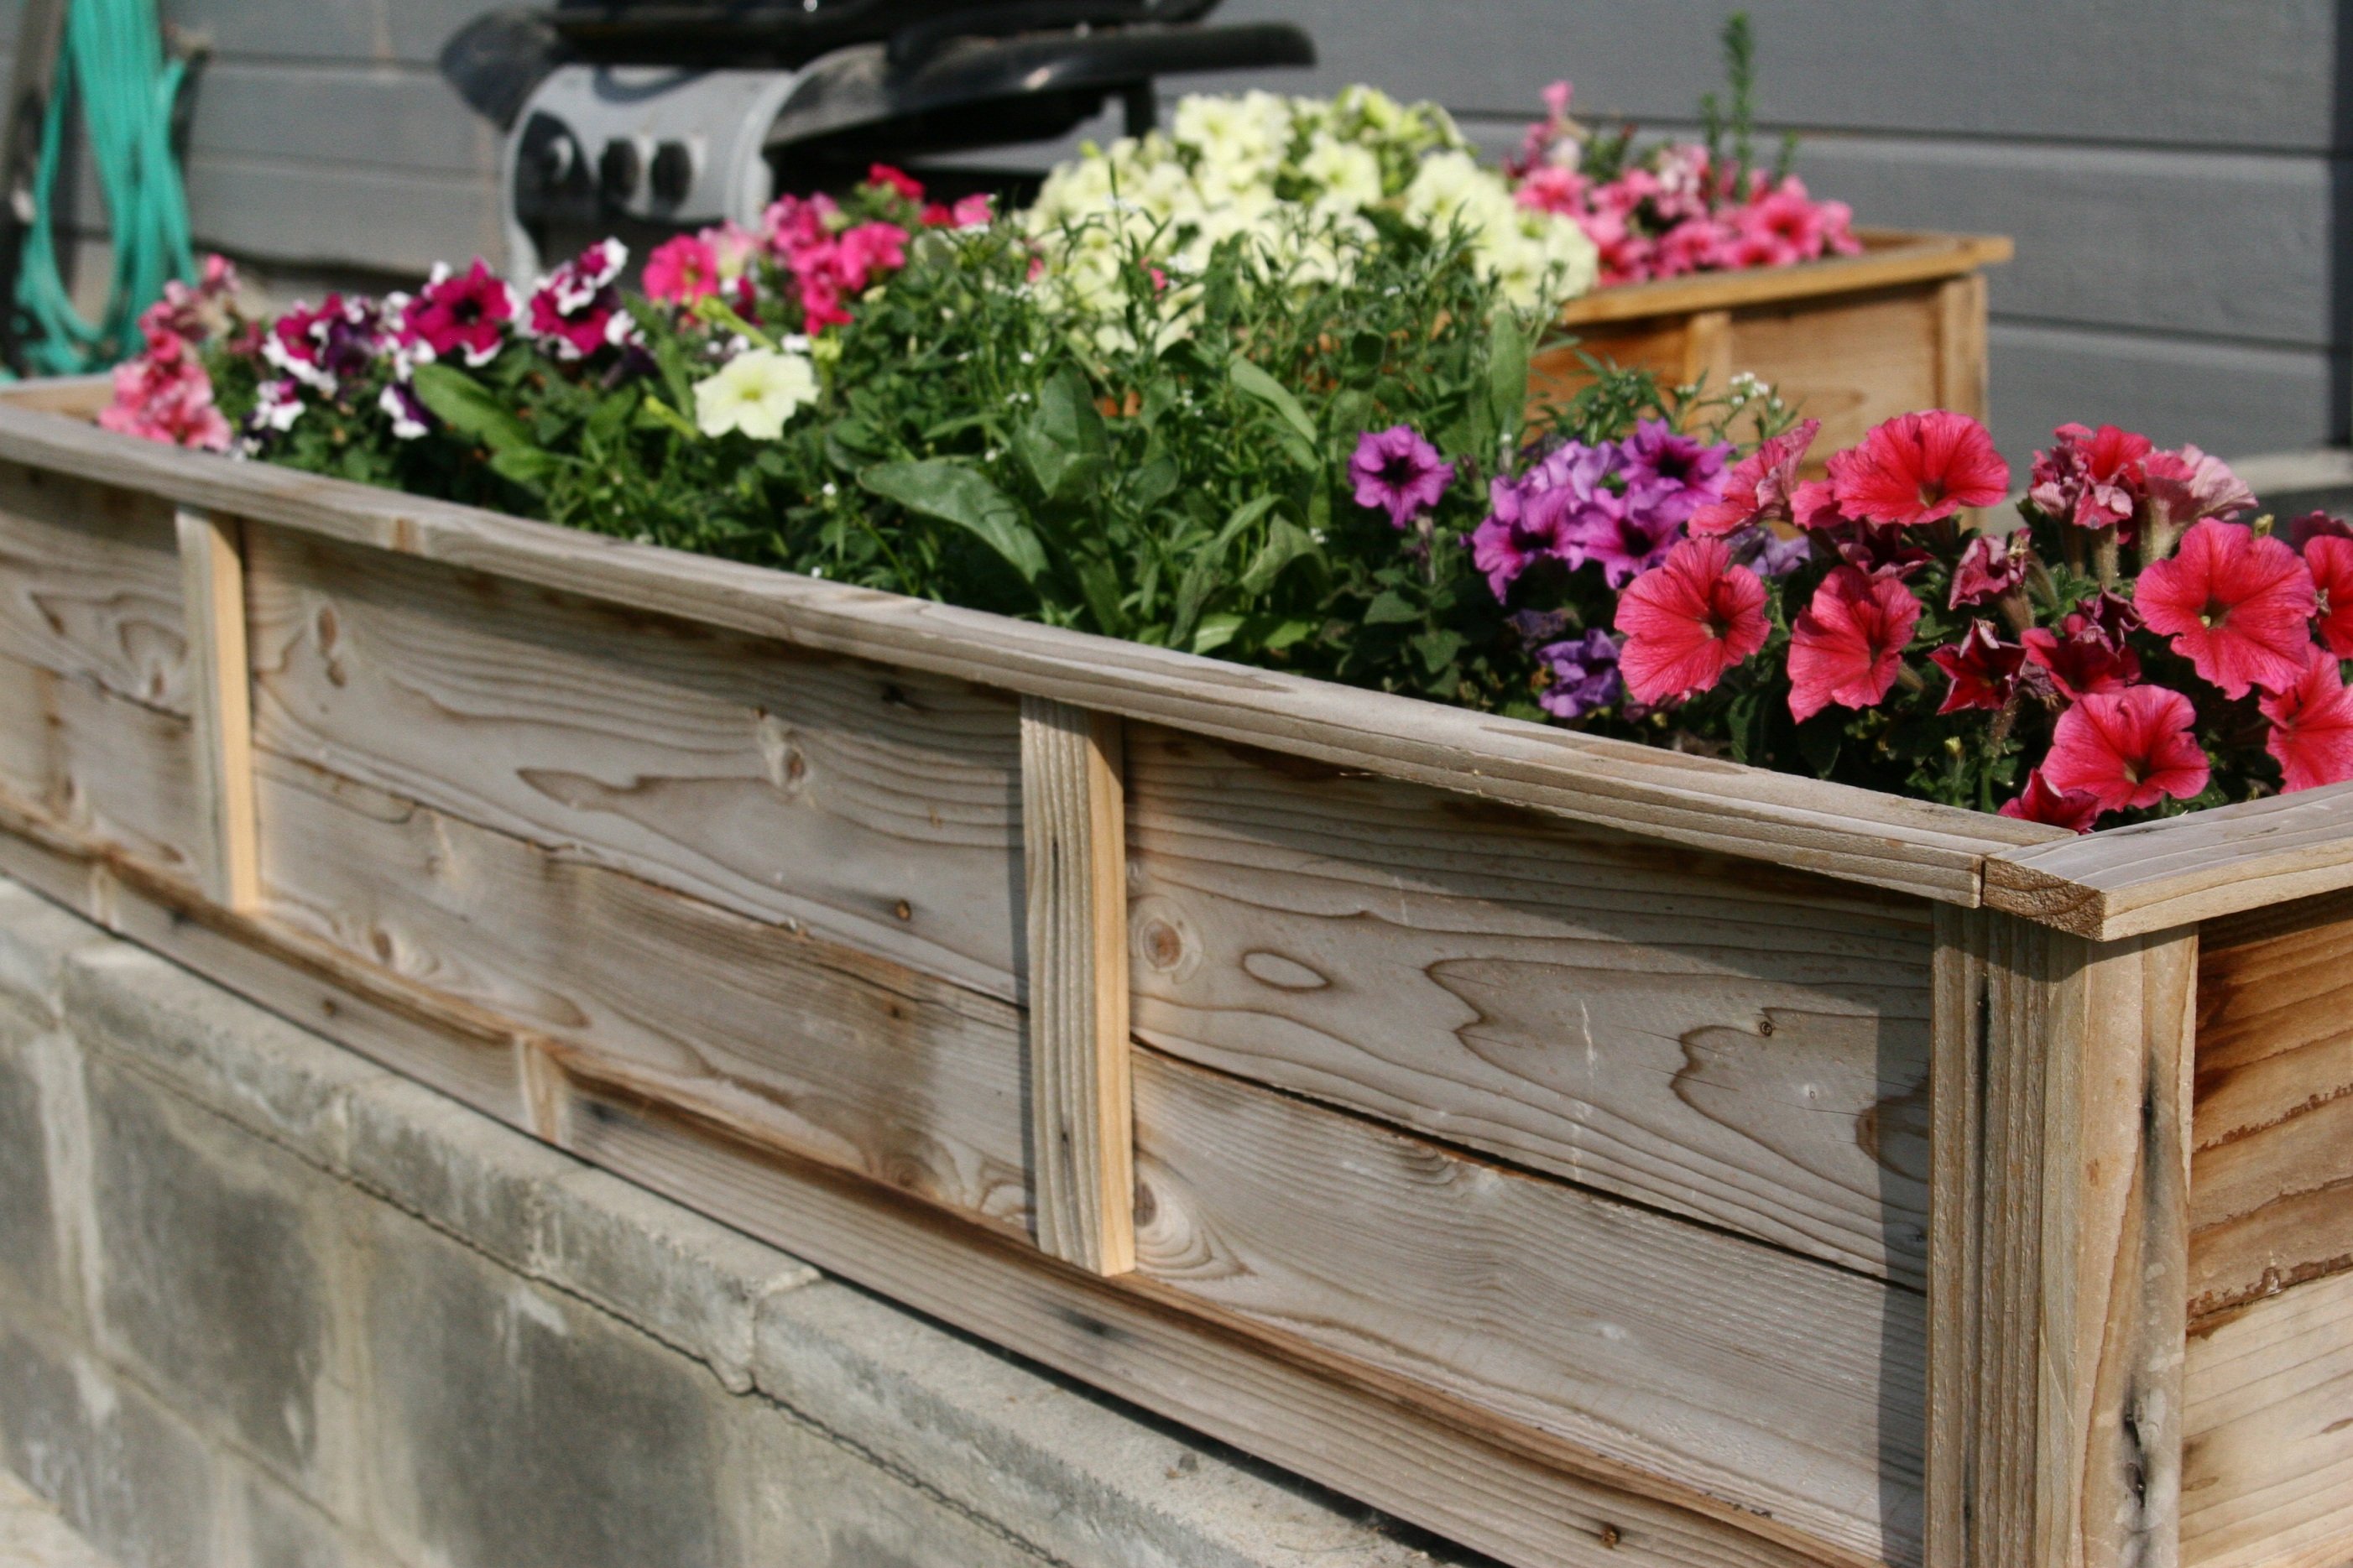
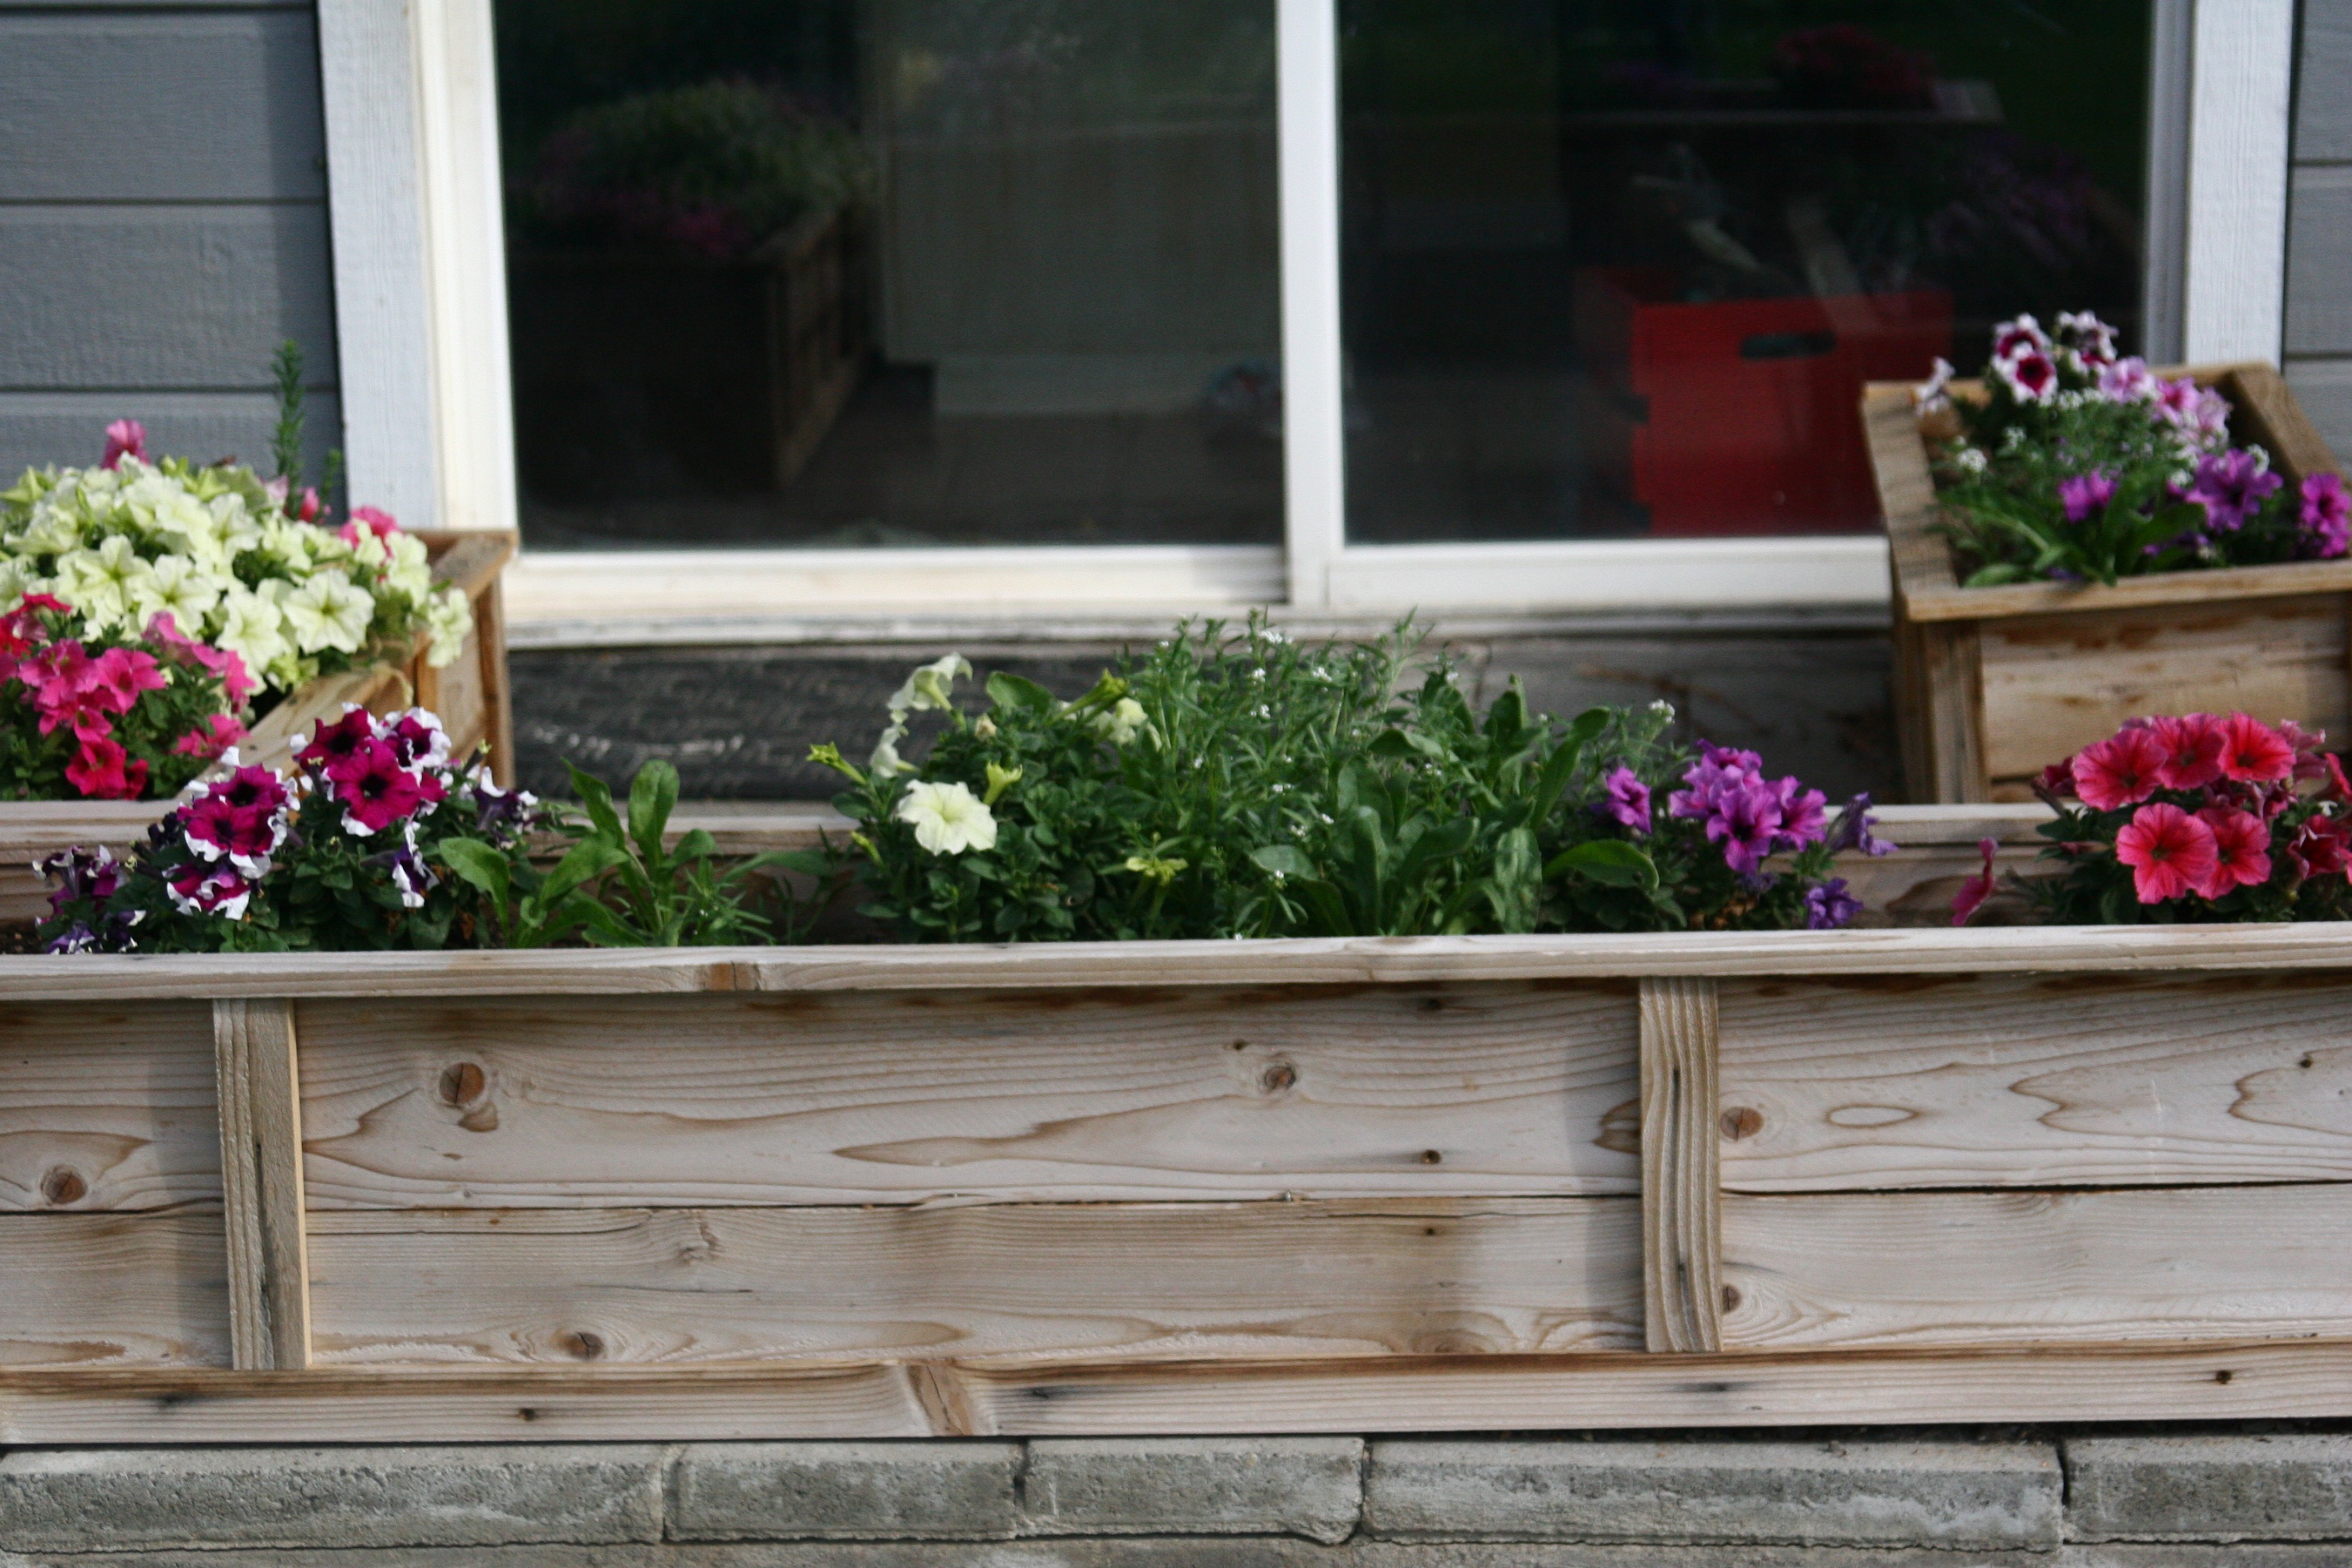
Raised flower planter beds
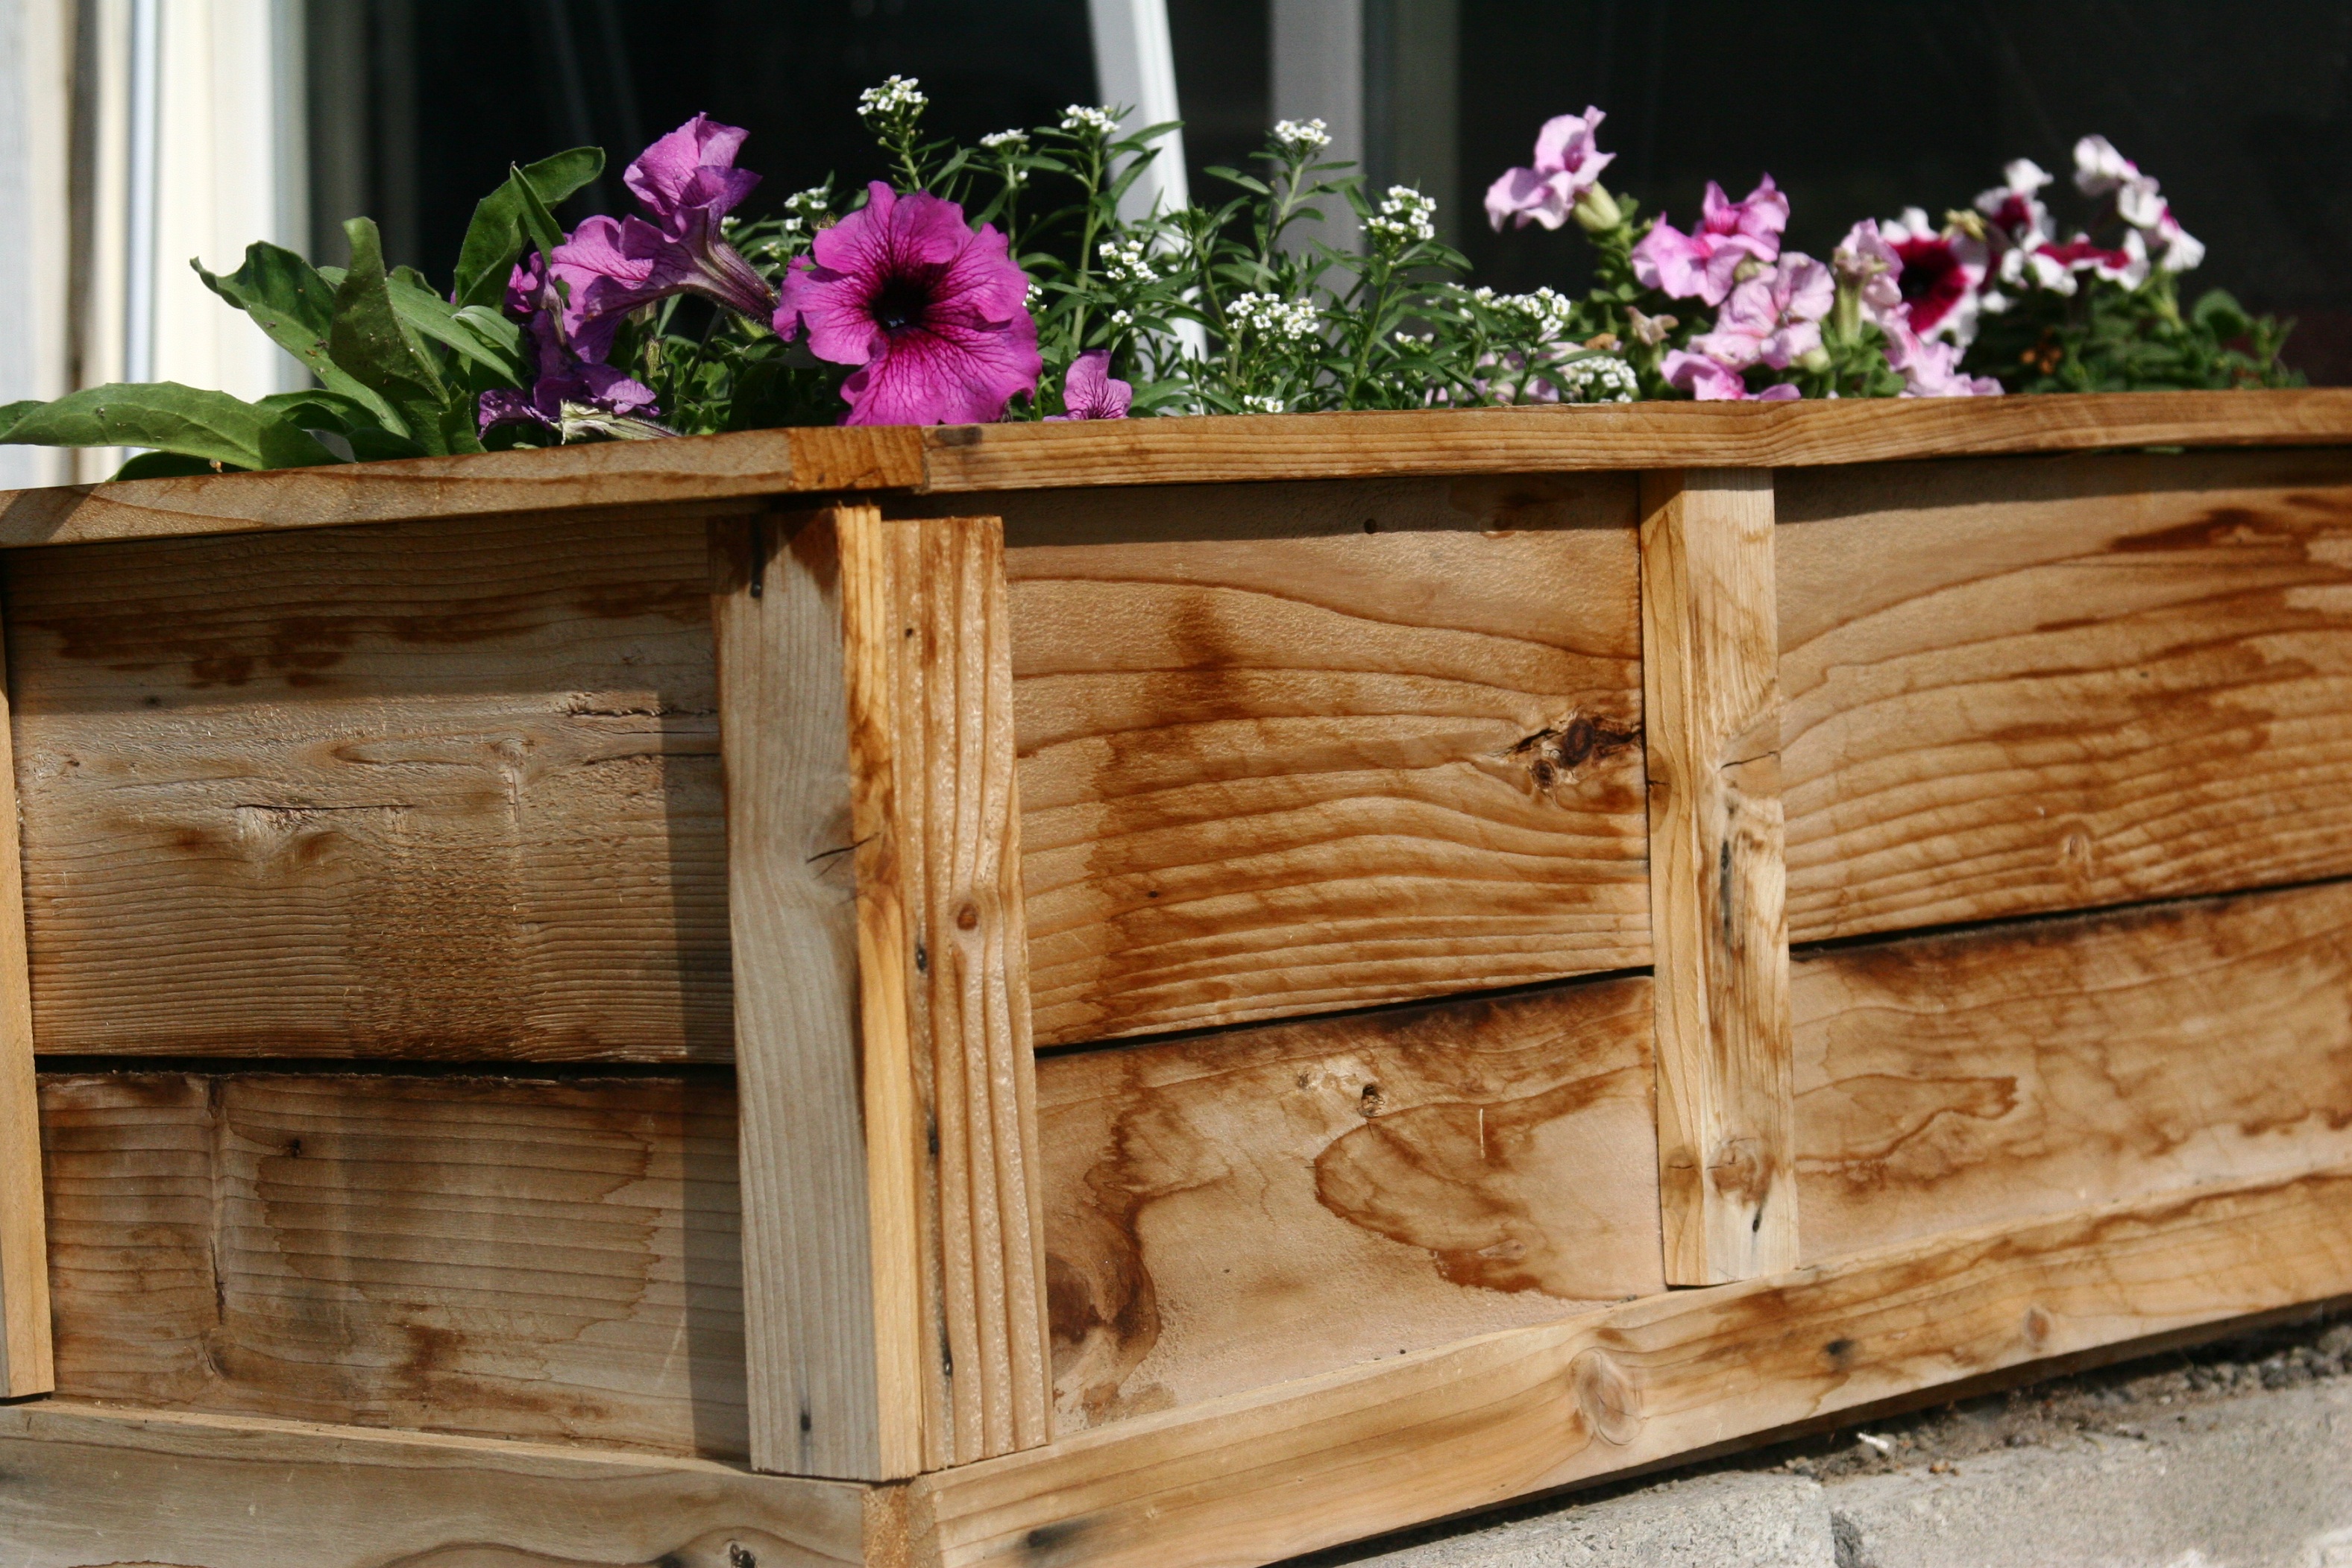
We bought a house with a death trap for a back step. Until we get to re-doing the entire back patio area I needed a temporary solution to keeping the kids from toddling off the back 'ledge'. I modified Ana's plans to make a nice border around the step so kids can't fall off when they are coming and going from the backyard. We had left over cedar fence slats from when we did our fence last spring...PERFECT and FREE!!!!!
Built from Plan(s)
Estimated Cost
Free!!!!
Estimated Time Investment
An Hour or Two (0-2 Hours)
Recommended Skill Level
Beginner
Comments
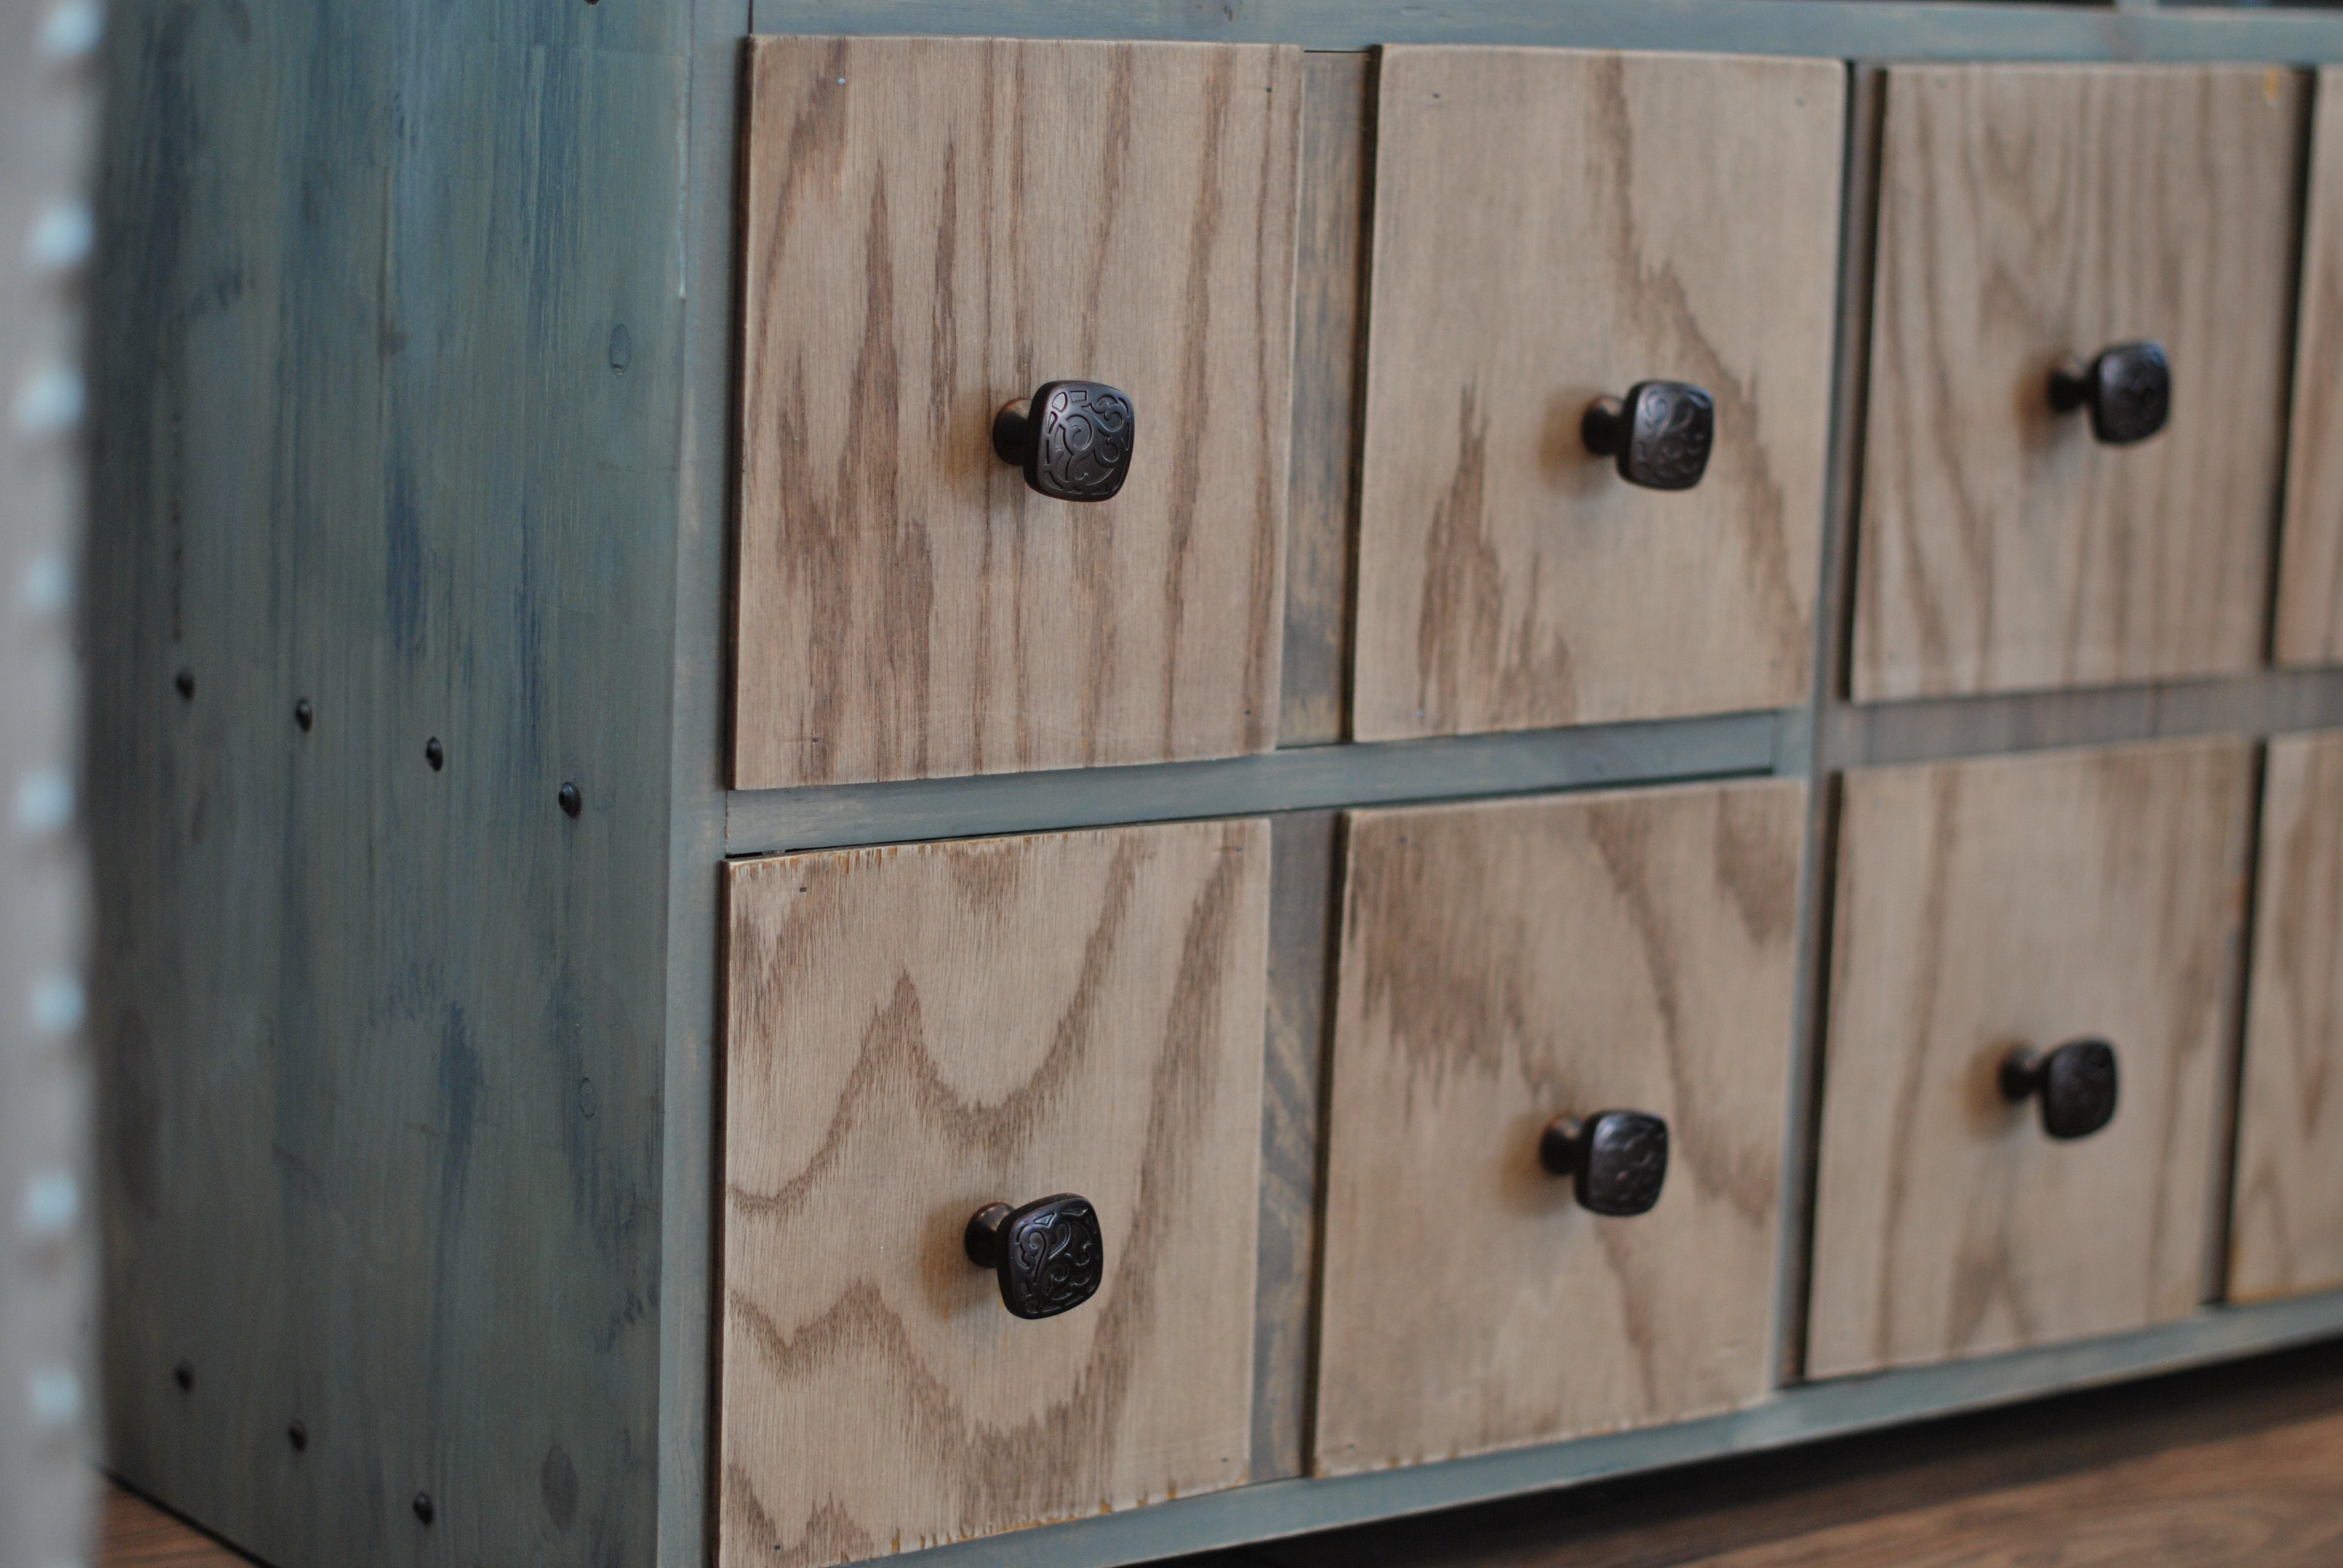
Apothecary Media Console
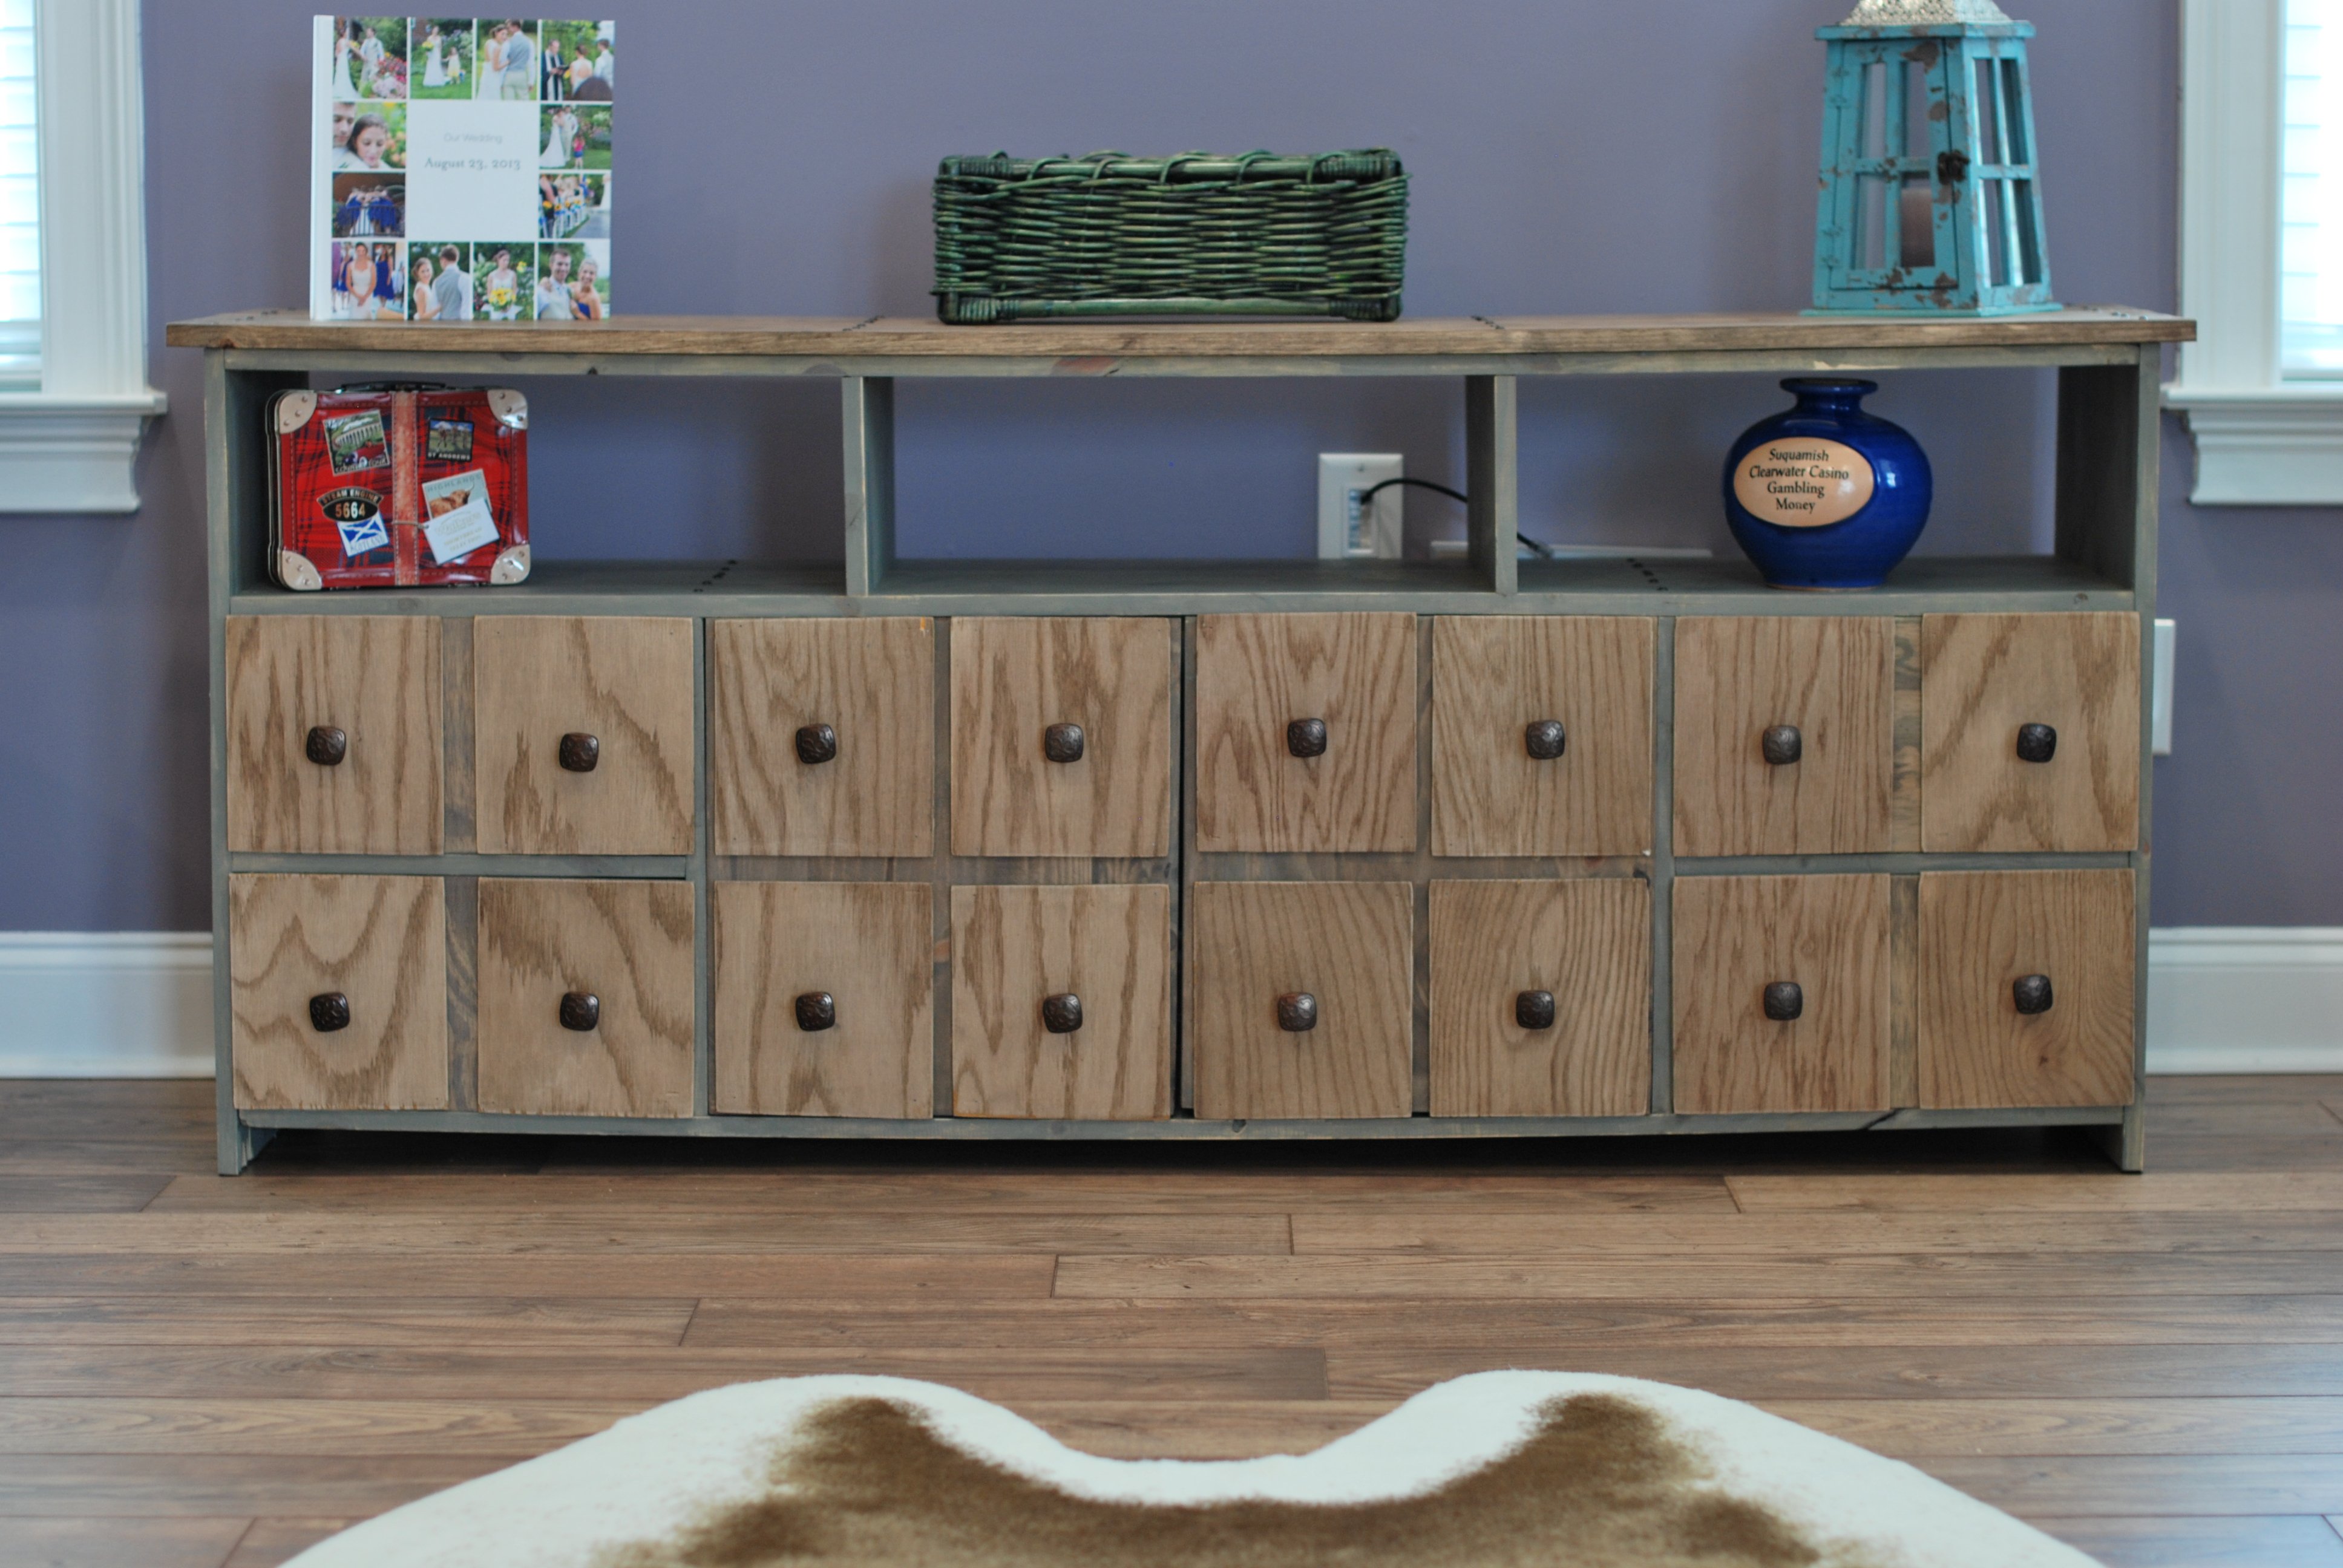
This project was made from Ana White's apothecary media console plan. The finish is Minwax Special Walnut on the drawers and top. On the sides is a finish technique I found on thehouseofsmiths.com - Faux Barn Wood Painting Tutorial.
Built from Plan(s)
Estimated Time Investment
Weekend Project (10-20 Hours)
Finish Used
I used an Olympic Brand Weathered Barnwood stain first. Then I used a shade of light grey, dark grey, and black paints (all Valspar brand) that I bought at Lowe's. I used one color at a time - and used a dry brush technique to put each color on. Then I did a quick sanding and after I wiped it down, another coat of the weathered barnwood Olympic stain. One more sanding and it was done!
Recommended Skill Level
Intermediate
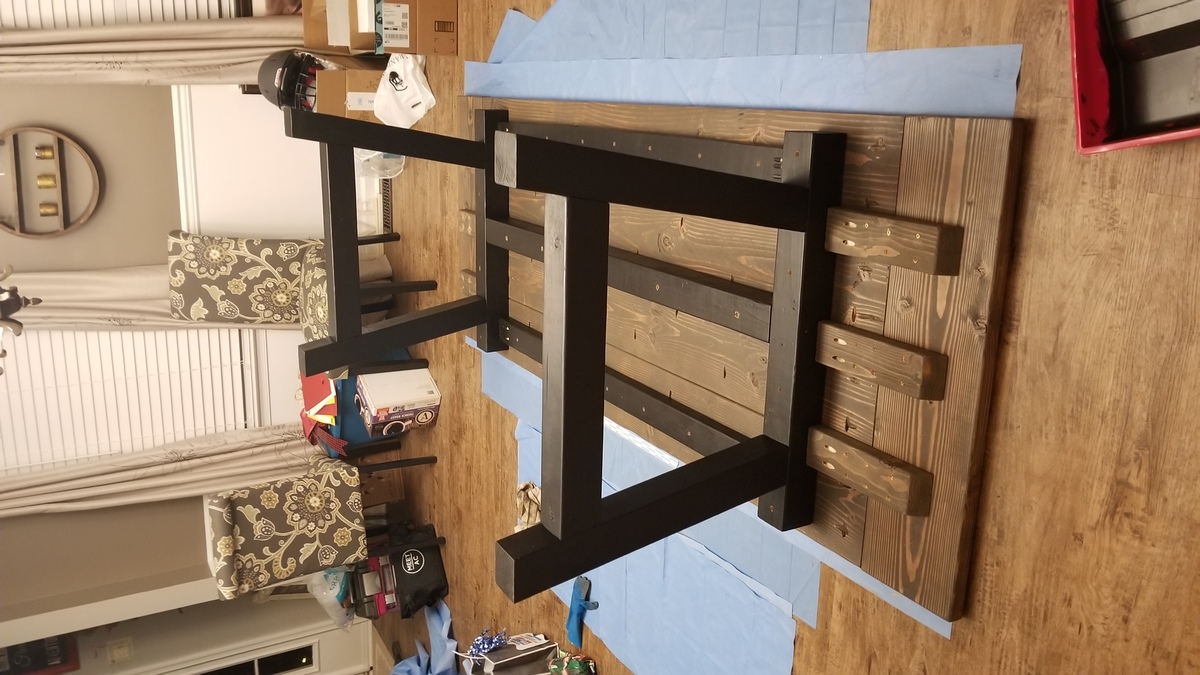
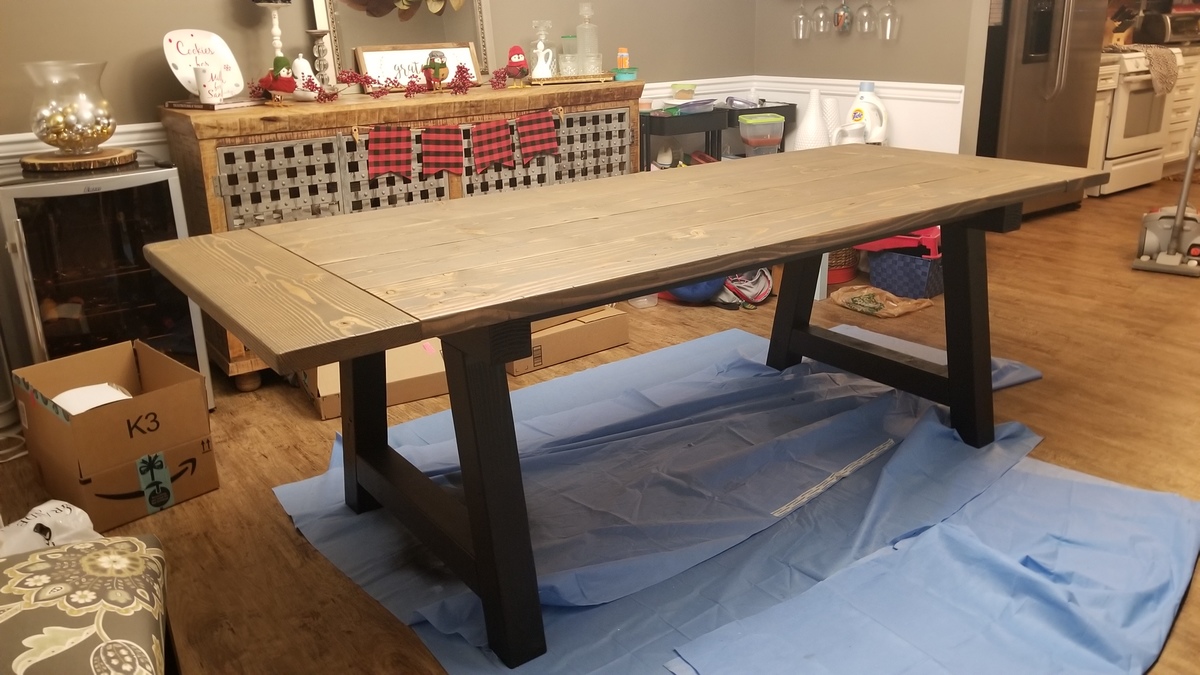
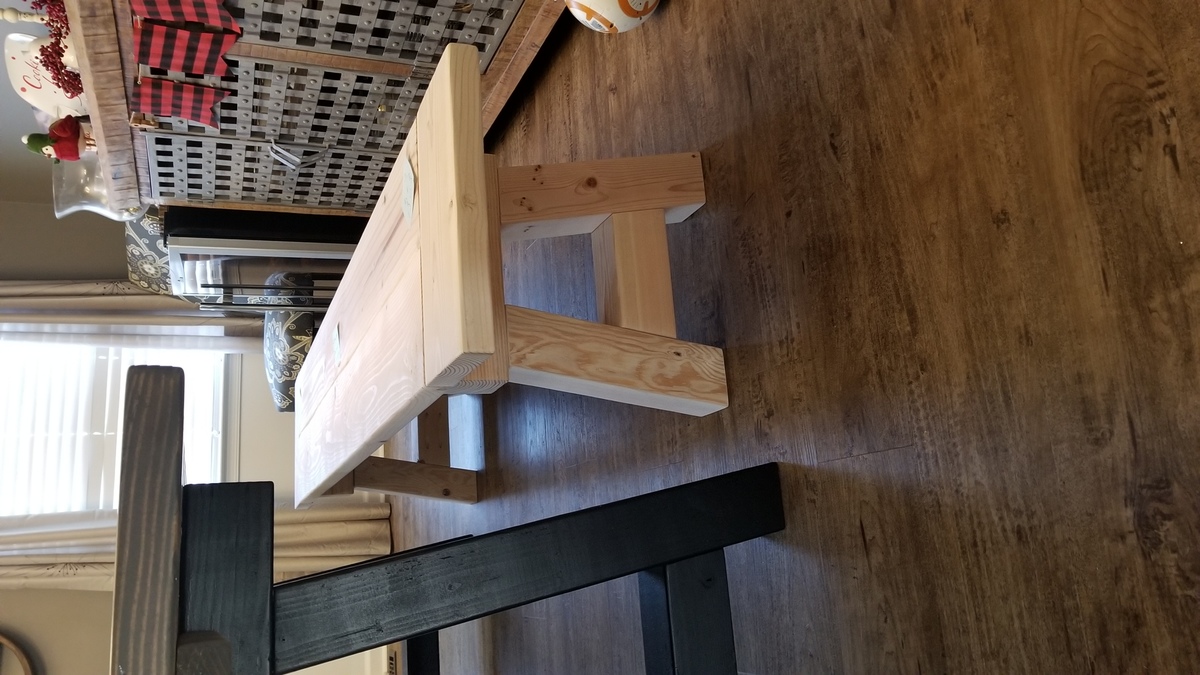
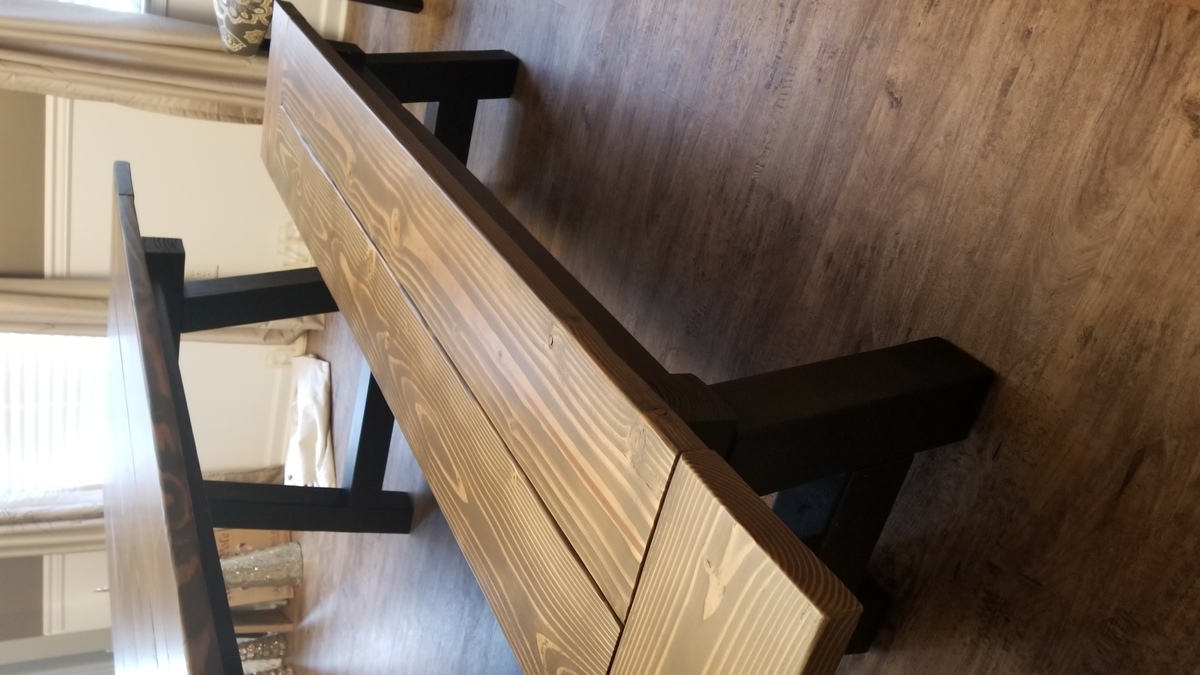
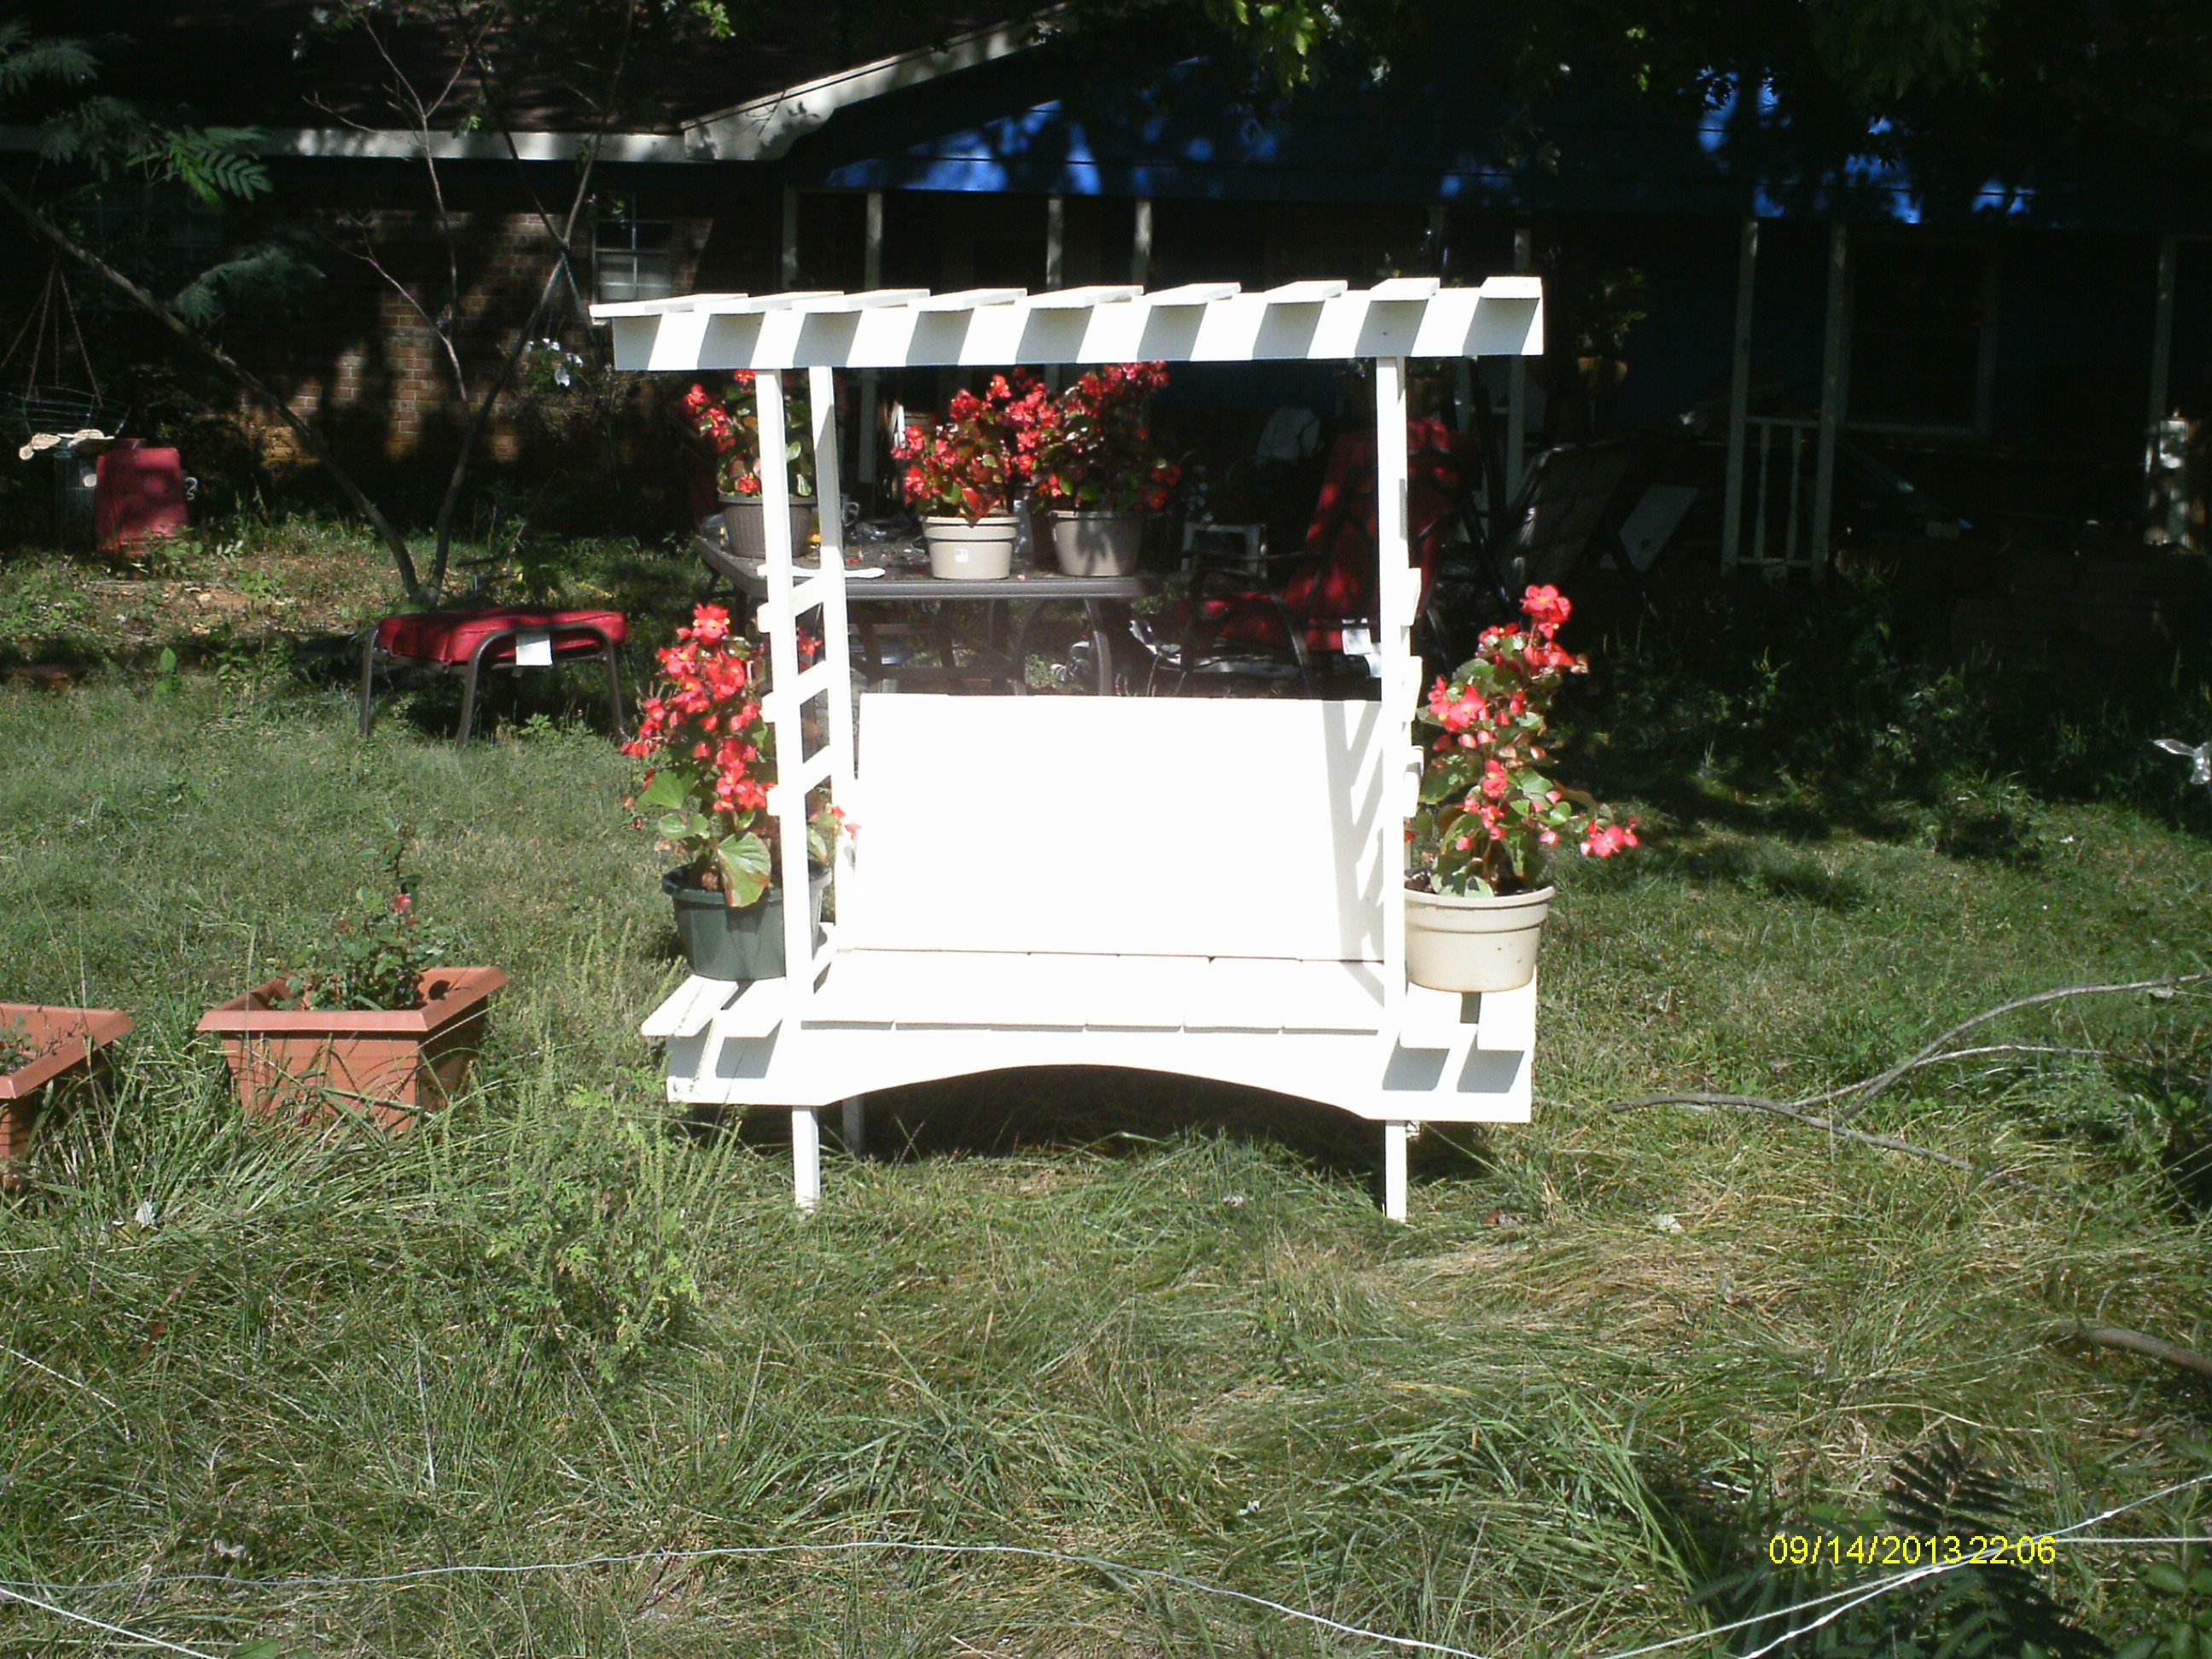
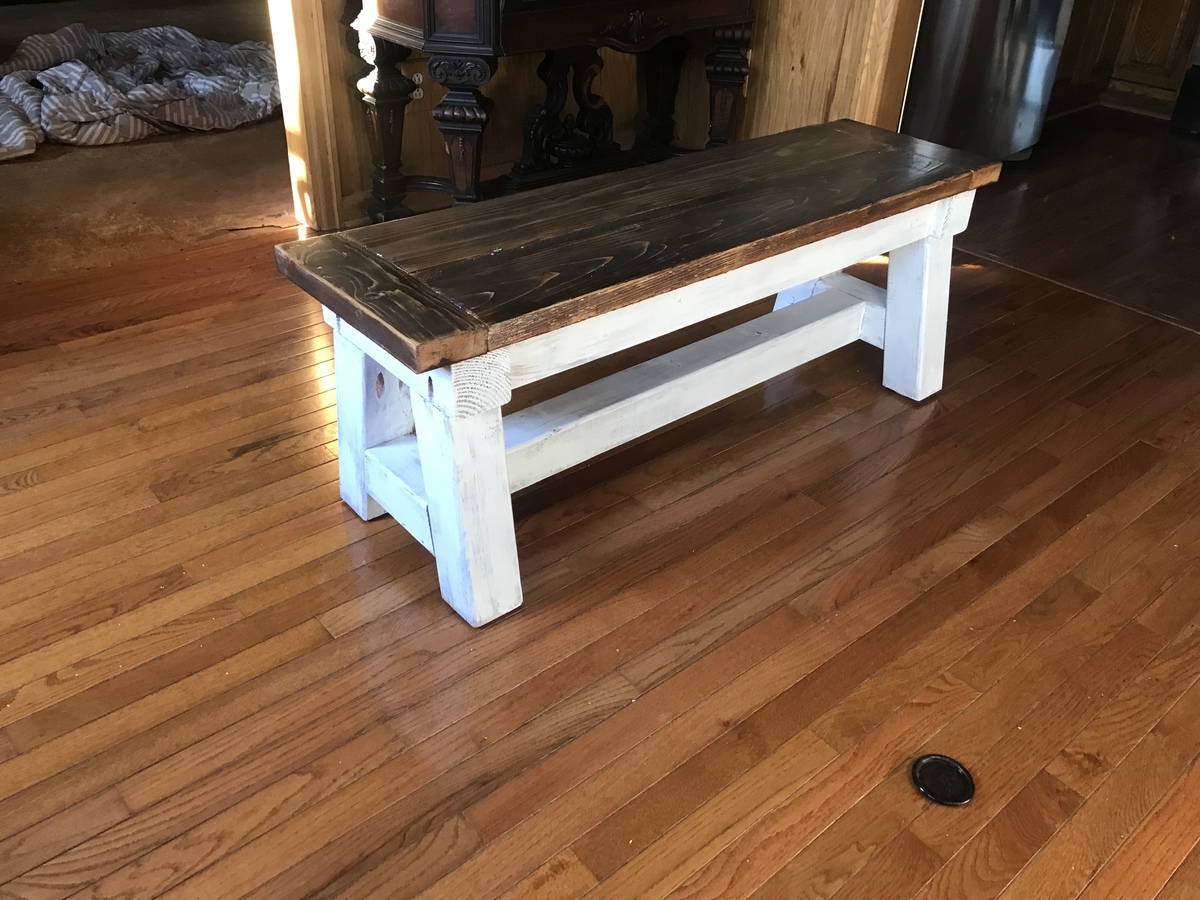
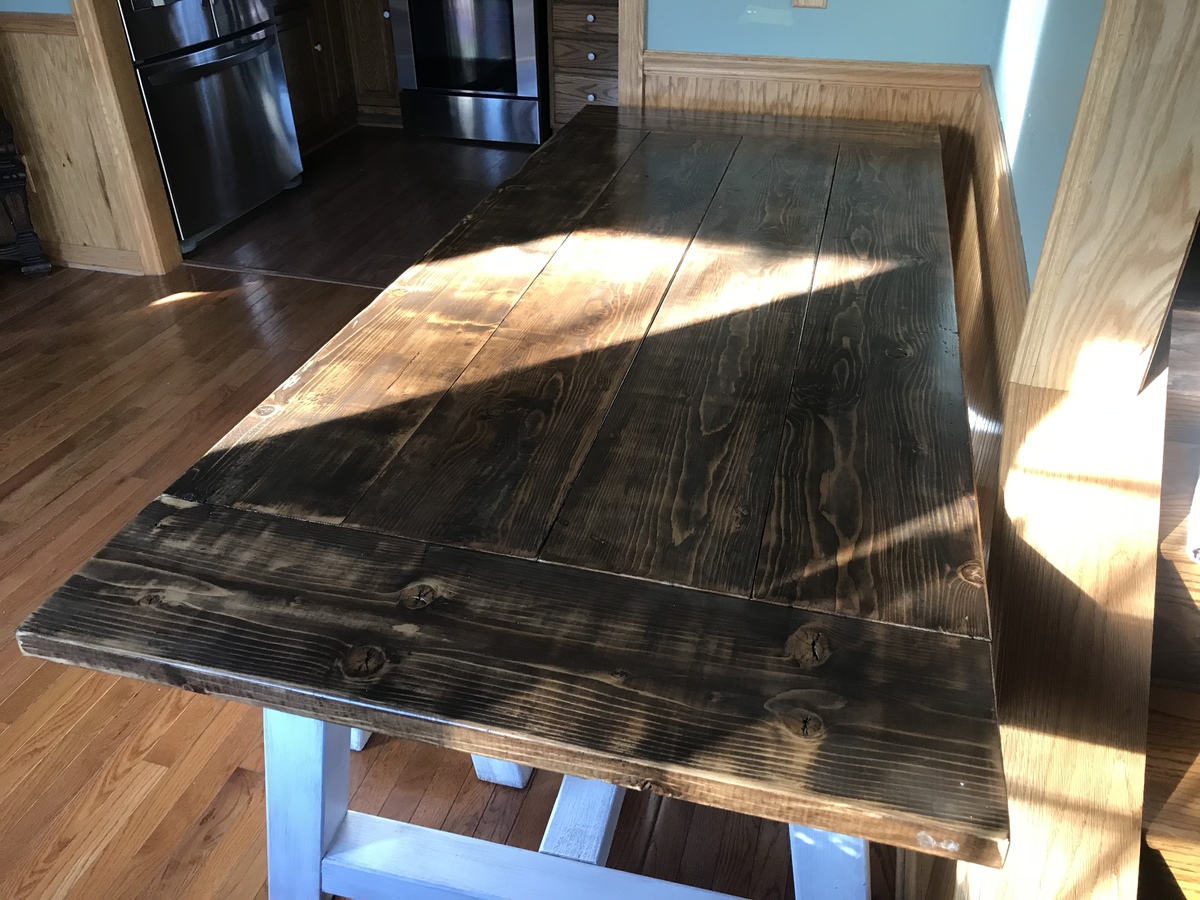
Beam Table with benches
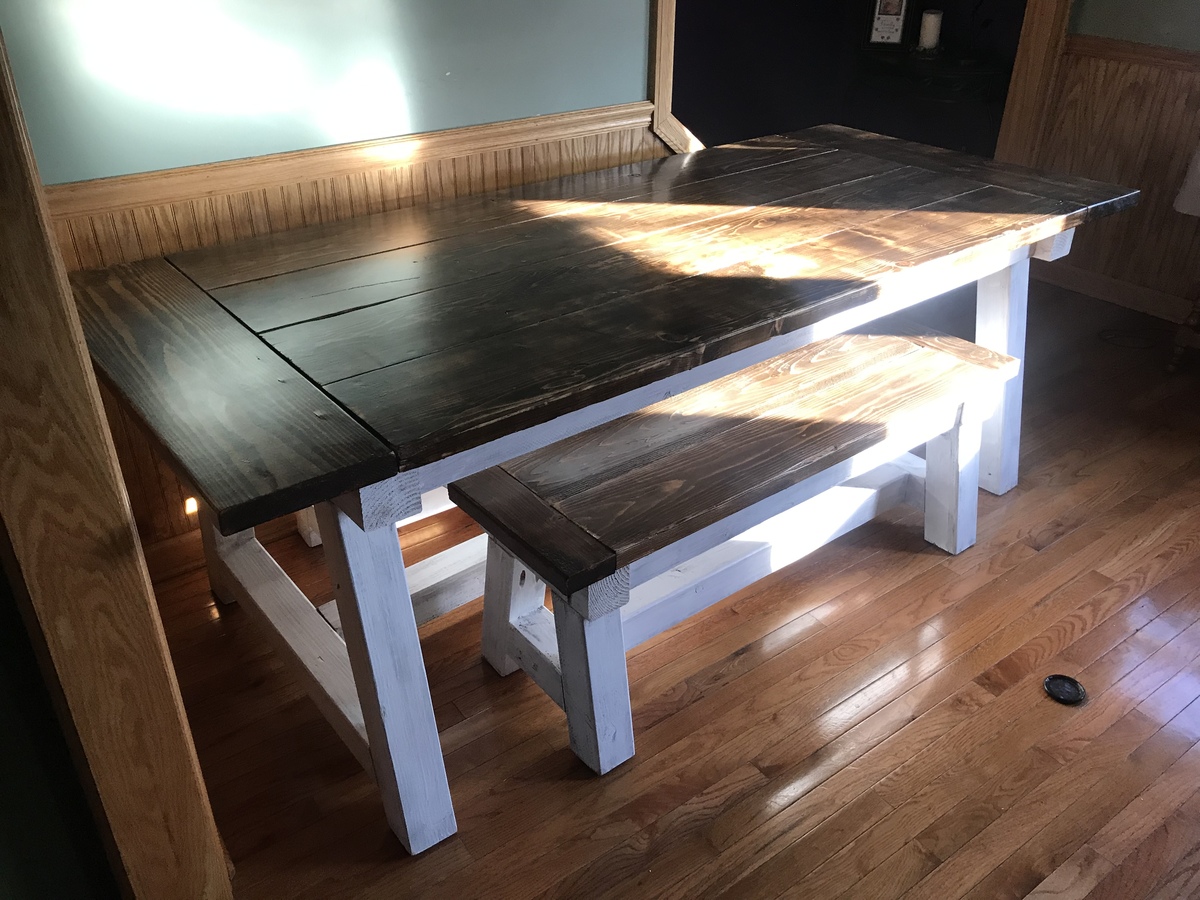
Anna White Beam Table with Benches
This was a fun build. I used the HD Kreg Jig for the 4x4 beams and a standard Kreg Jig for the table. The bases were done with a white wash finish and the tops done with a few different stains to give it more of a barn look

Built from Plan(s)
Estimated Cost
$200
Estimated Time Investment
Week Long Project (20 Hours or More)
Recommended Skill Level
Intermediate
Fence Slat Interior Barn Door

Using 6’ fence slats. Planed until smooth then assembled to fill opening. Finished with beeswax and mineral oil with additional hanging hardware, handle and floor roller.
Comments
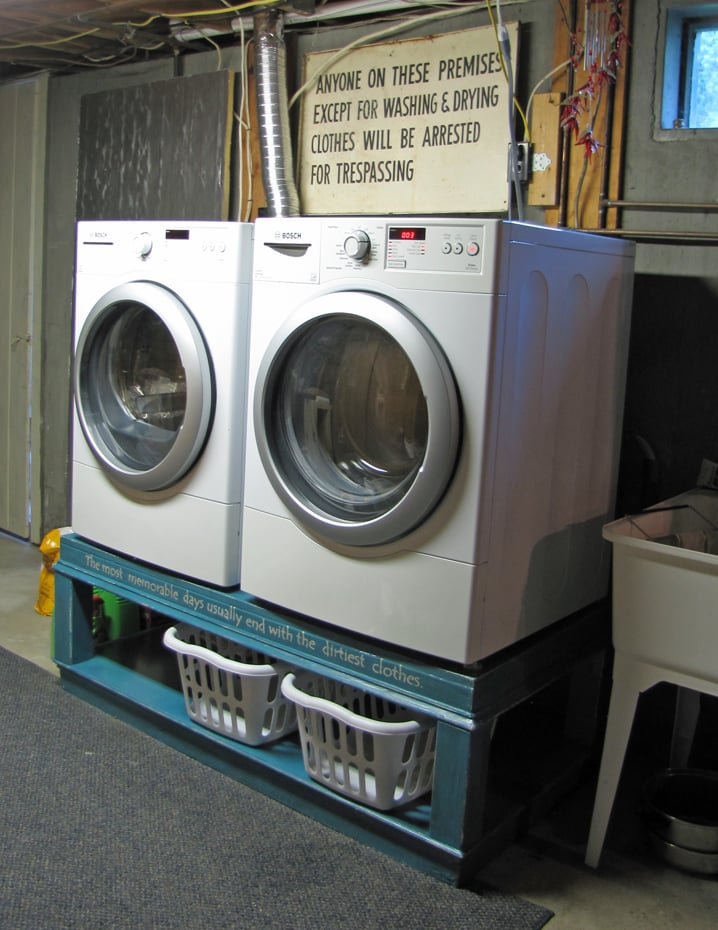
Our "Stop Breaking Our Back" washer and dryer pedestals
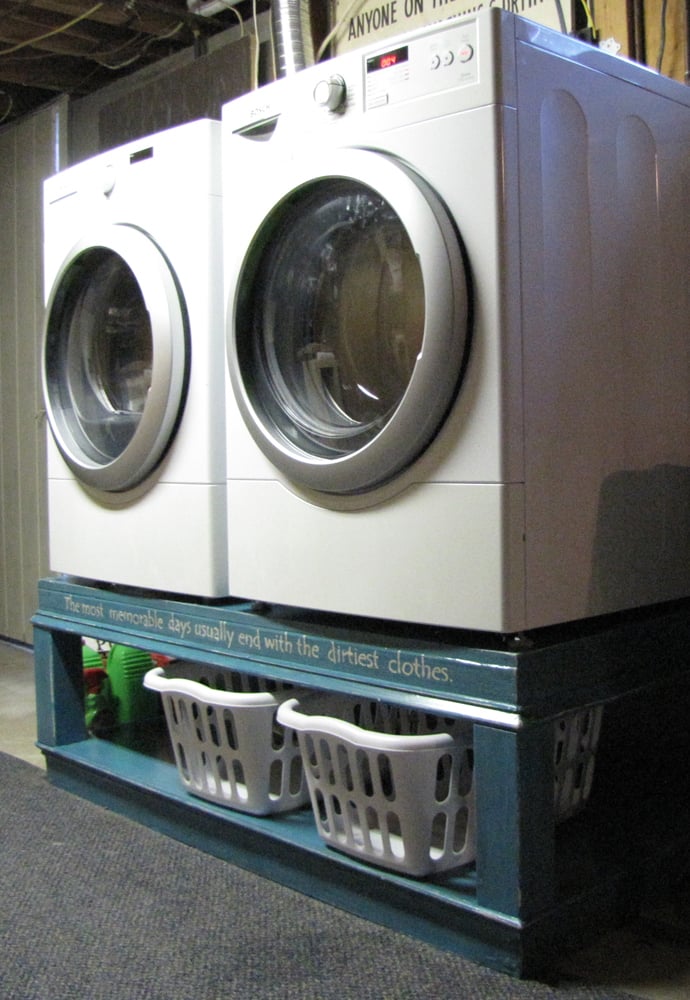
The husband kept complaining that the washer and dryer were too low without pedestals. Well, no problem! I've got plans from Ana's site.
I measured to fit our machines and followed the plans. But somewhere along the way I screwed up. I think it might have been how I attached the legs with the "L" brackets. My legs were sitting away from the base, not flush with it. Anyhow, the way to correct my mistake was to attach the moulding along the sides, front and back of the base, not around the legs. But I don't mind the way it looks. Just an FYI: there was a lot of waste with the sheets of MDF, but that's not a problem because I'm using it in another project as I write. :)
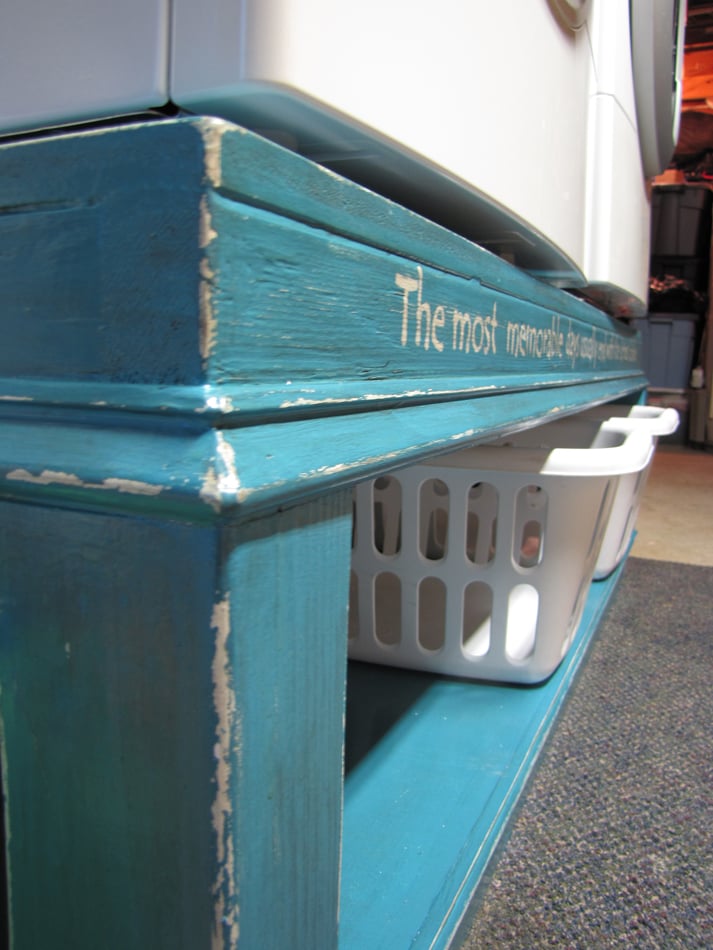
First, I put on two coats of primer. Then I decided I wanted a splash of turquoise in the basement, so I mixed a blue and yellow paint until I got the color I desired. After a few coats of paint, I distressed and then decided to tone down the color a bit with a Valspar glaze. I put on two coats of poly, hoping that would be enough to withstand the inevitable water on the pedestal. I thought the piece was screaming for a quote, so I painted "The most memorable days usually end with the dirtiest clothes."
And you think with the new height he'd help me with laundry a bit more? Yeah, I think not.

Estimated Cost
$70
Estimated Time Investment
Afternoon Project (3-6 Hours)
Finish Used
Mixed a blue and yellow paint to get the turquoise. Put two coats of paint on over the primer. For the first time I thought I would try distressing with candle wax. I rubbed the candle down the edges of the wood and gently brushed away any wax crumbs. Then I painted over it. When it was time for distressing, I gently rubbed the sandpaper over the edges and the paint easily came off. Definitely looks different than distressing with just sanding. Finished up with a little glaze then 2 coats of polyurethane.
Recommended Skill Level
Beginner
Comments
Tue, 08/30/2011 - 18:58
Looks great!
I love the color! I'm usually not a fan of quotes on furniture but this is really cute and it fits perfectly! Great job!
Sat, 09/10/2011 - 17:44
Very snappy!
What a great idea, and I love the color choice! We have front loaders and bought the drawers for the bottom. While they are decent storage, they tend to travel open at times. This has so much more personality and adds a real built in look to the laundry area. I'm sure you saved quite a bit doing it this way over drawers. How is it holding up to the moisture and vibration of a the washers? Keep those great ideas coming.

In reply to Very snappy! by BethG (not verified)
Tue, 09/20/2011 - 18:38
No issues
I've been waiting for my machines to "walk off", but the pedestal is holding up well. I made sure to add poly to help protect it from the moisture. So far, so good.
Mon, 10/10/2011 - 18:43
I love the way the moulding
I love the way the moulding goes all the way around. Love the color and the quotes!
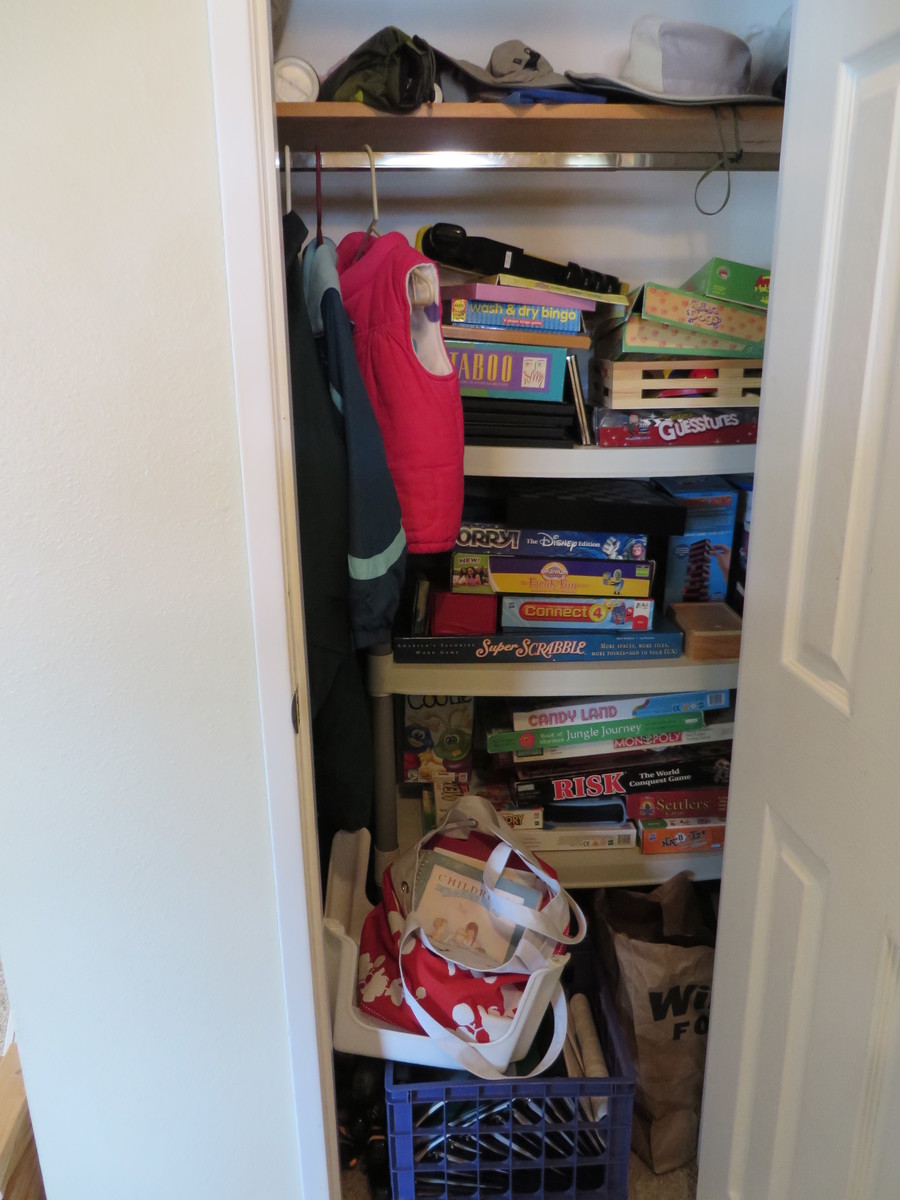
Closet shelves

I needed to use my small coat closet more efficiently (observe the disaster in the before picture!), so I installed built-in shelves along a side wall for all our board games. Not a plan really, but just a simple solution. Measure the height you want your shelves to be, install a 1X3 at that height on either side wall, making sure they are level and secured to studs or anchored (Mine are 1 foot apart up to 5 feet). Then install plywood or solid wood shelves across the supports. Screw in to secure and you've got functional, inexpensive shelving, built to fit your unique space.
Estimated Cost
Scraps or the cost of 1 sheet plywood and 1 1X3 or 1X4.
Estimated Time Investment
An Hour or Two (0-2 Hours)
Finish Used
It's all just bare wood.
Recommended Skill Level
Beginner
Clara table and chairs with chalkboard and cubbie
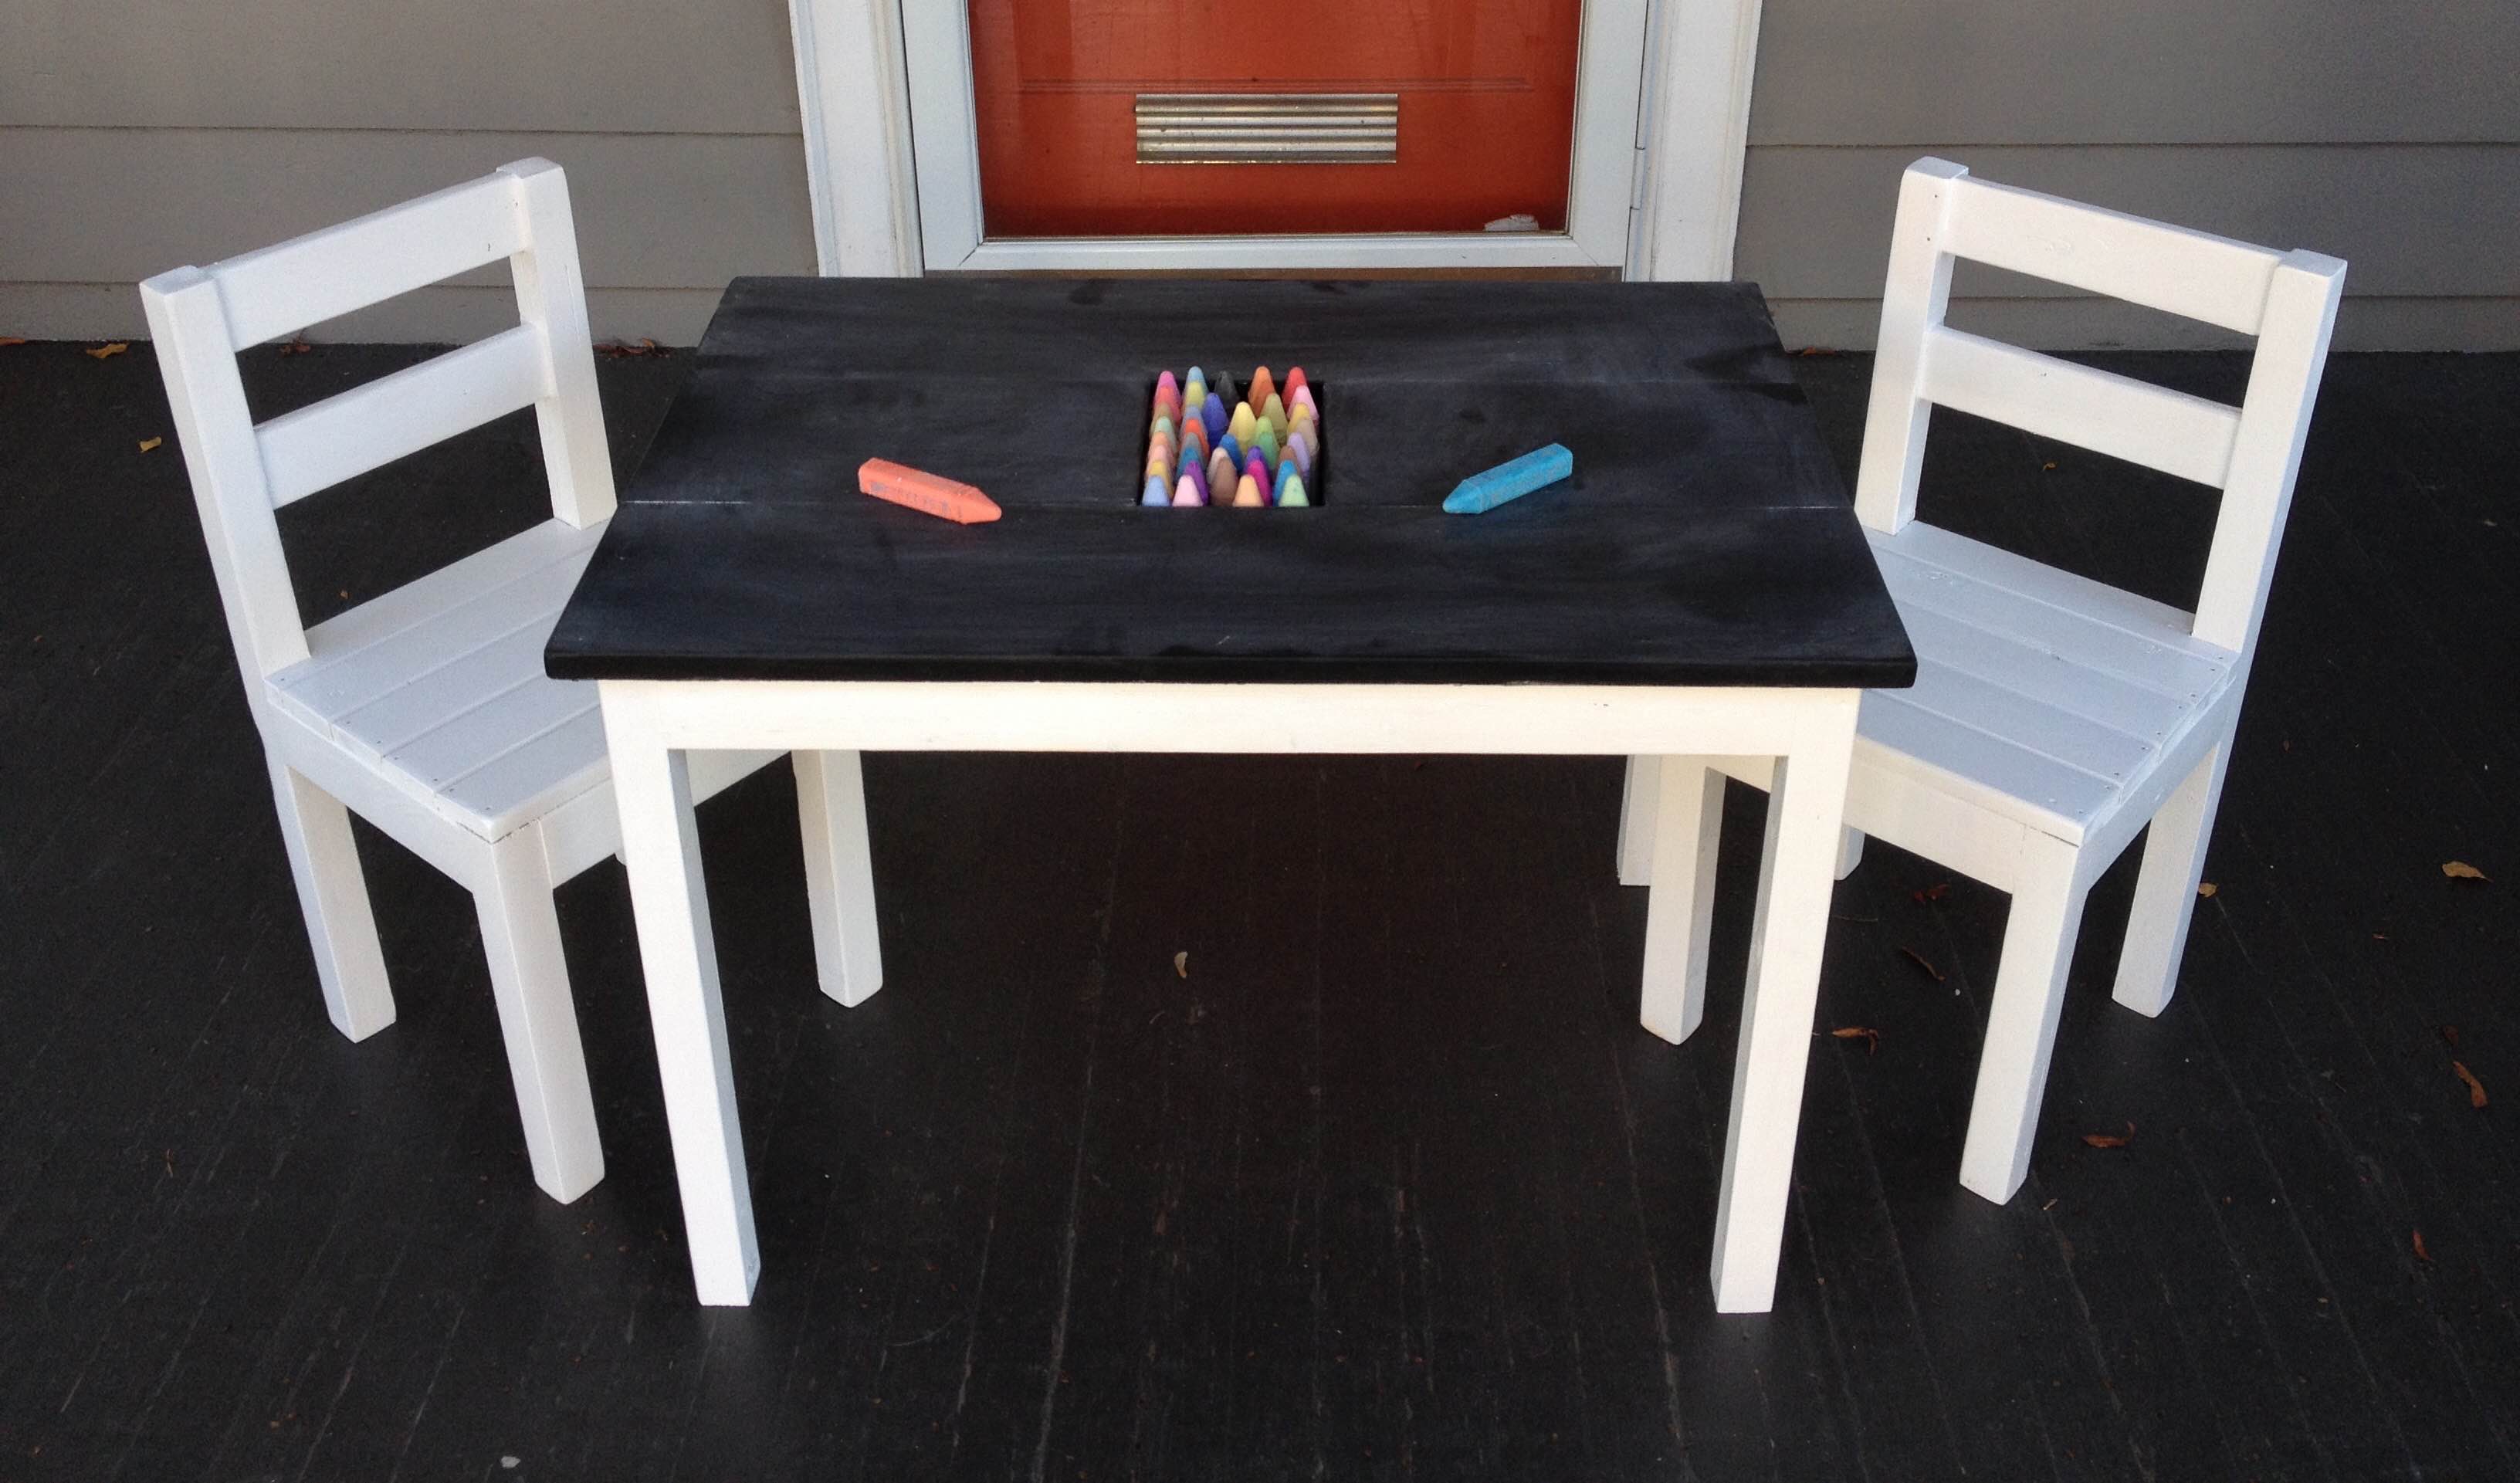
I made a few changes to the chairs and the table plans. Most notable, I added a storage box for chalk for the chalkboard table top. The build was incredibly easy. You could assemble the table and chairs in just a few hours.
Built from Plan(s)
Estimated Cost
$35
Estimated Time Investment
Afternoon Project (3-6 Hours)
Finish Used
Rust-Oleum Chalkboard paint. Two coats and some touch up.
Recommended Skill Level
Beginner
Keurig holder
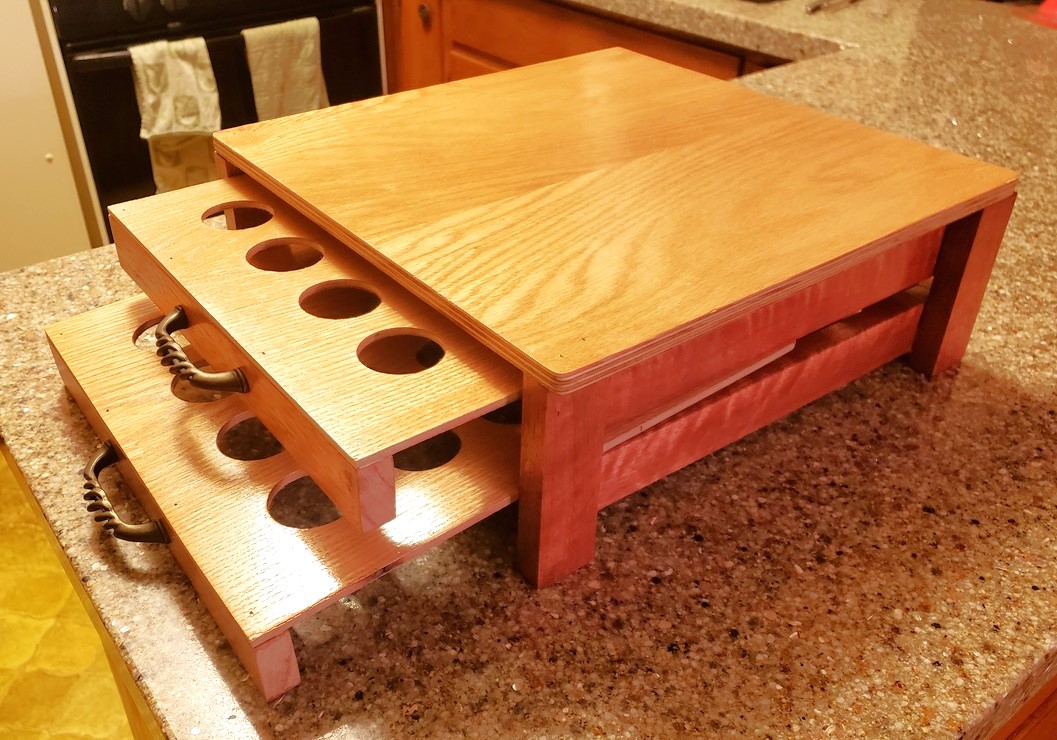
First project. Was a blast and turned out great. Mahagany strips with oak top.
Built from Plan(s)
Estimated Cost
$25
Estimated Time Investment
Weekend Project (10-20 Hours)
Finish Used
Poly
Recommended Skill Level
Beginner
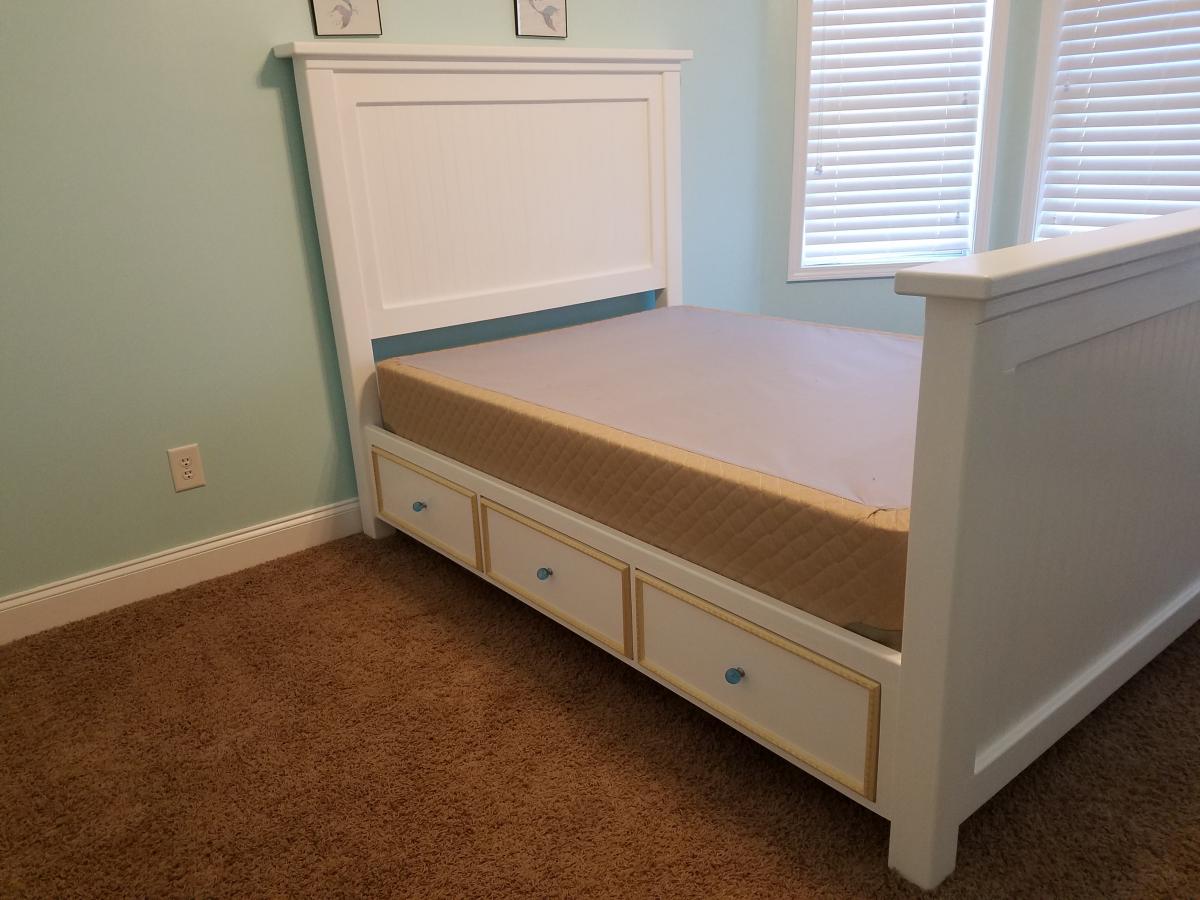
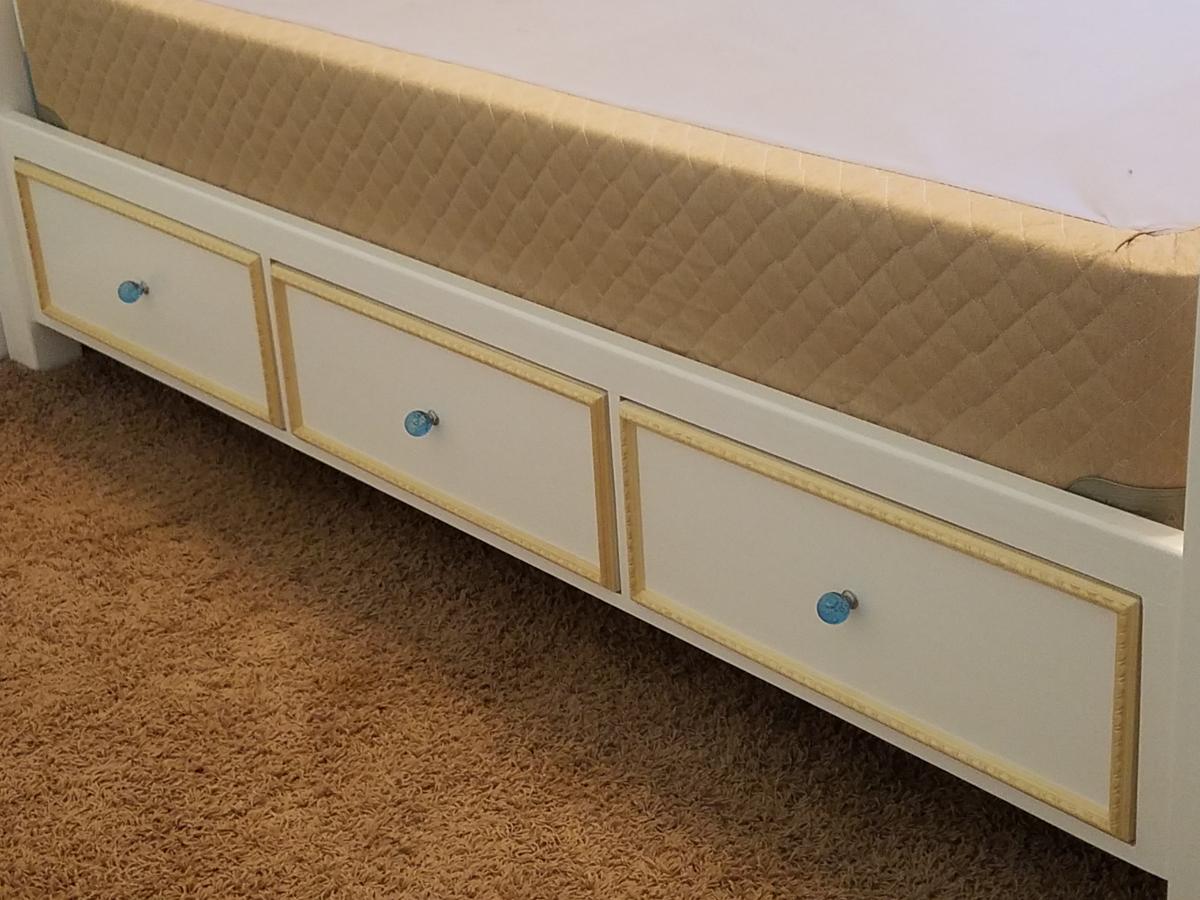
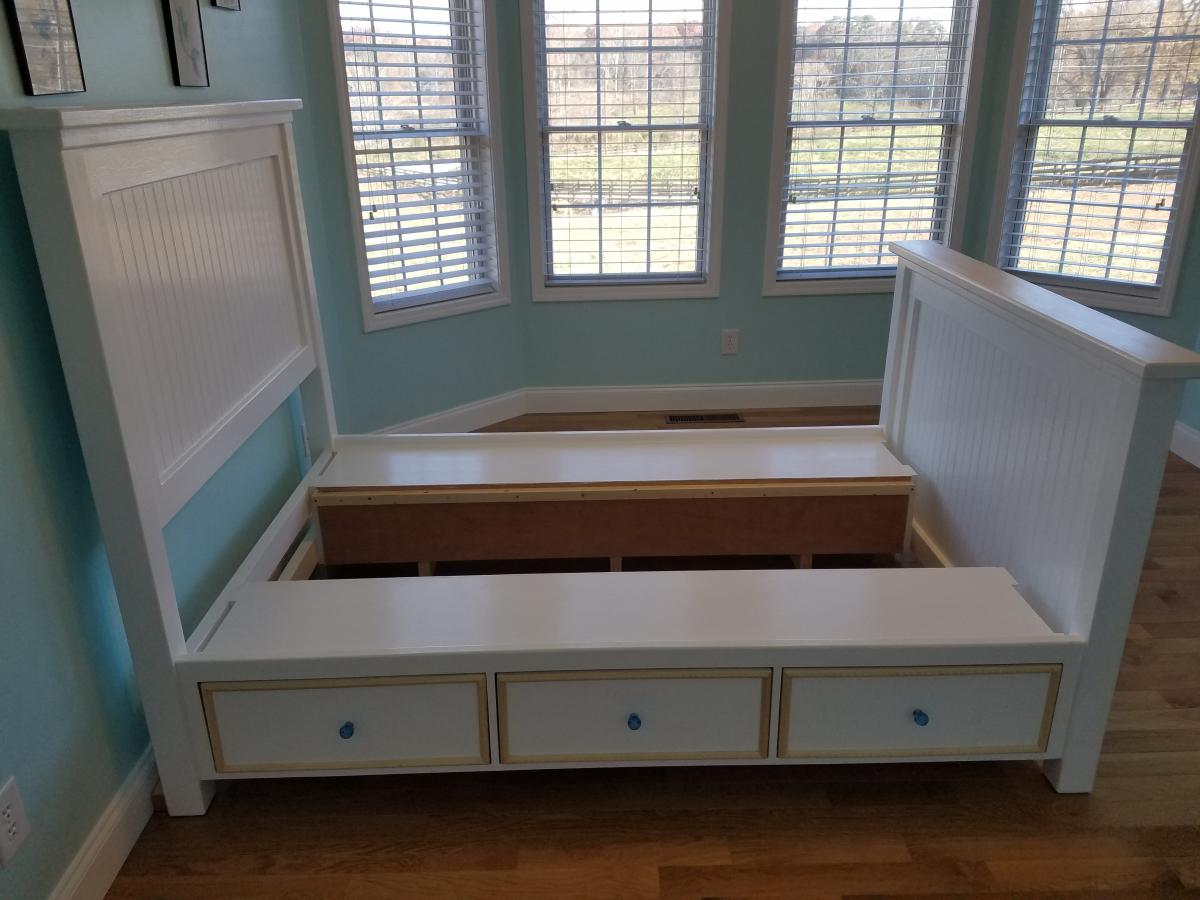
Farm House Full Bed with Drawers
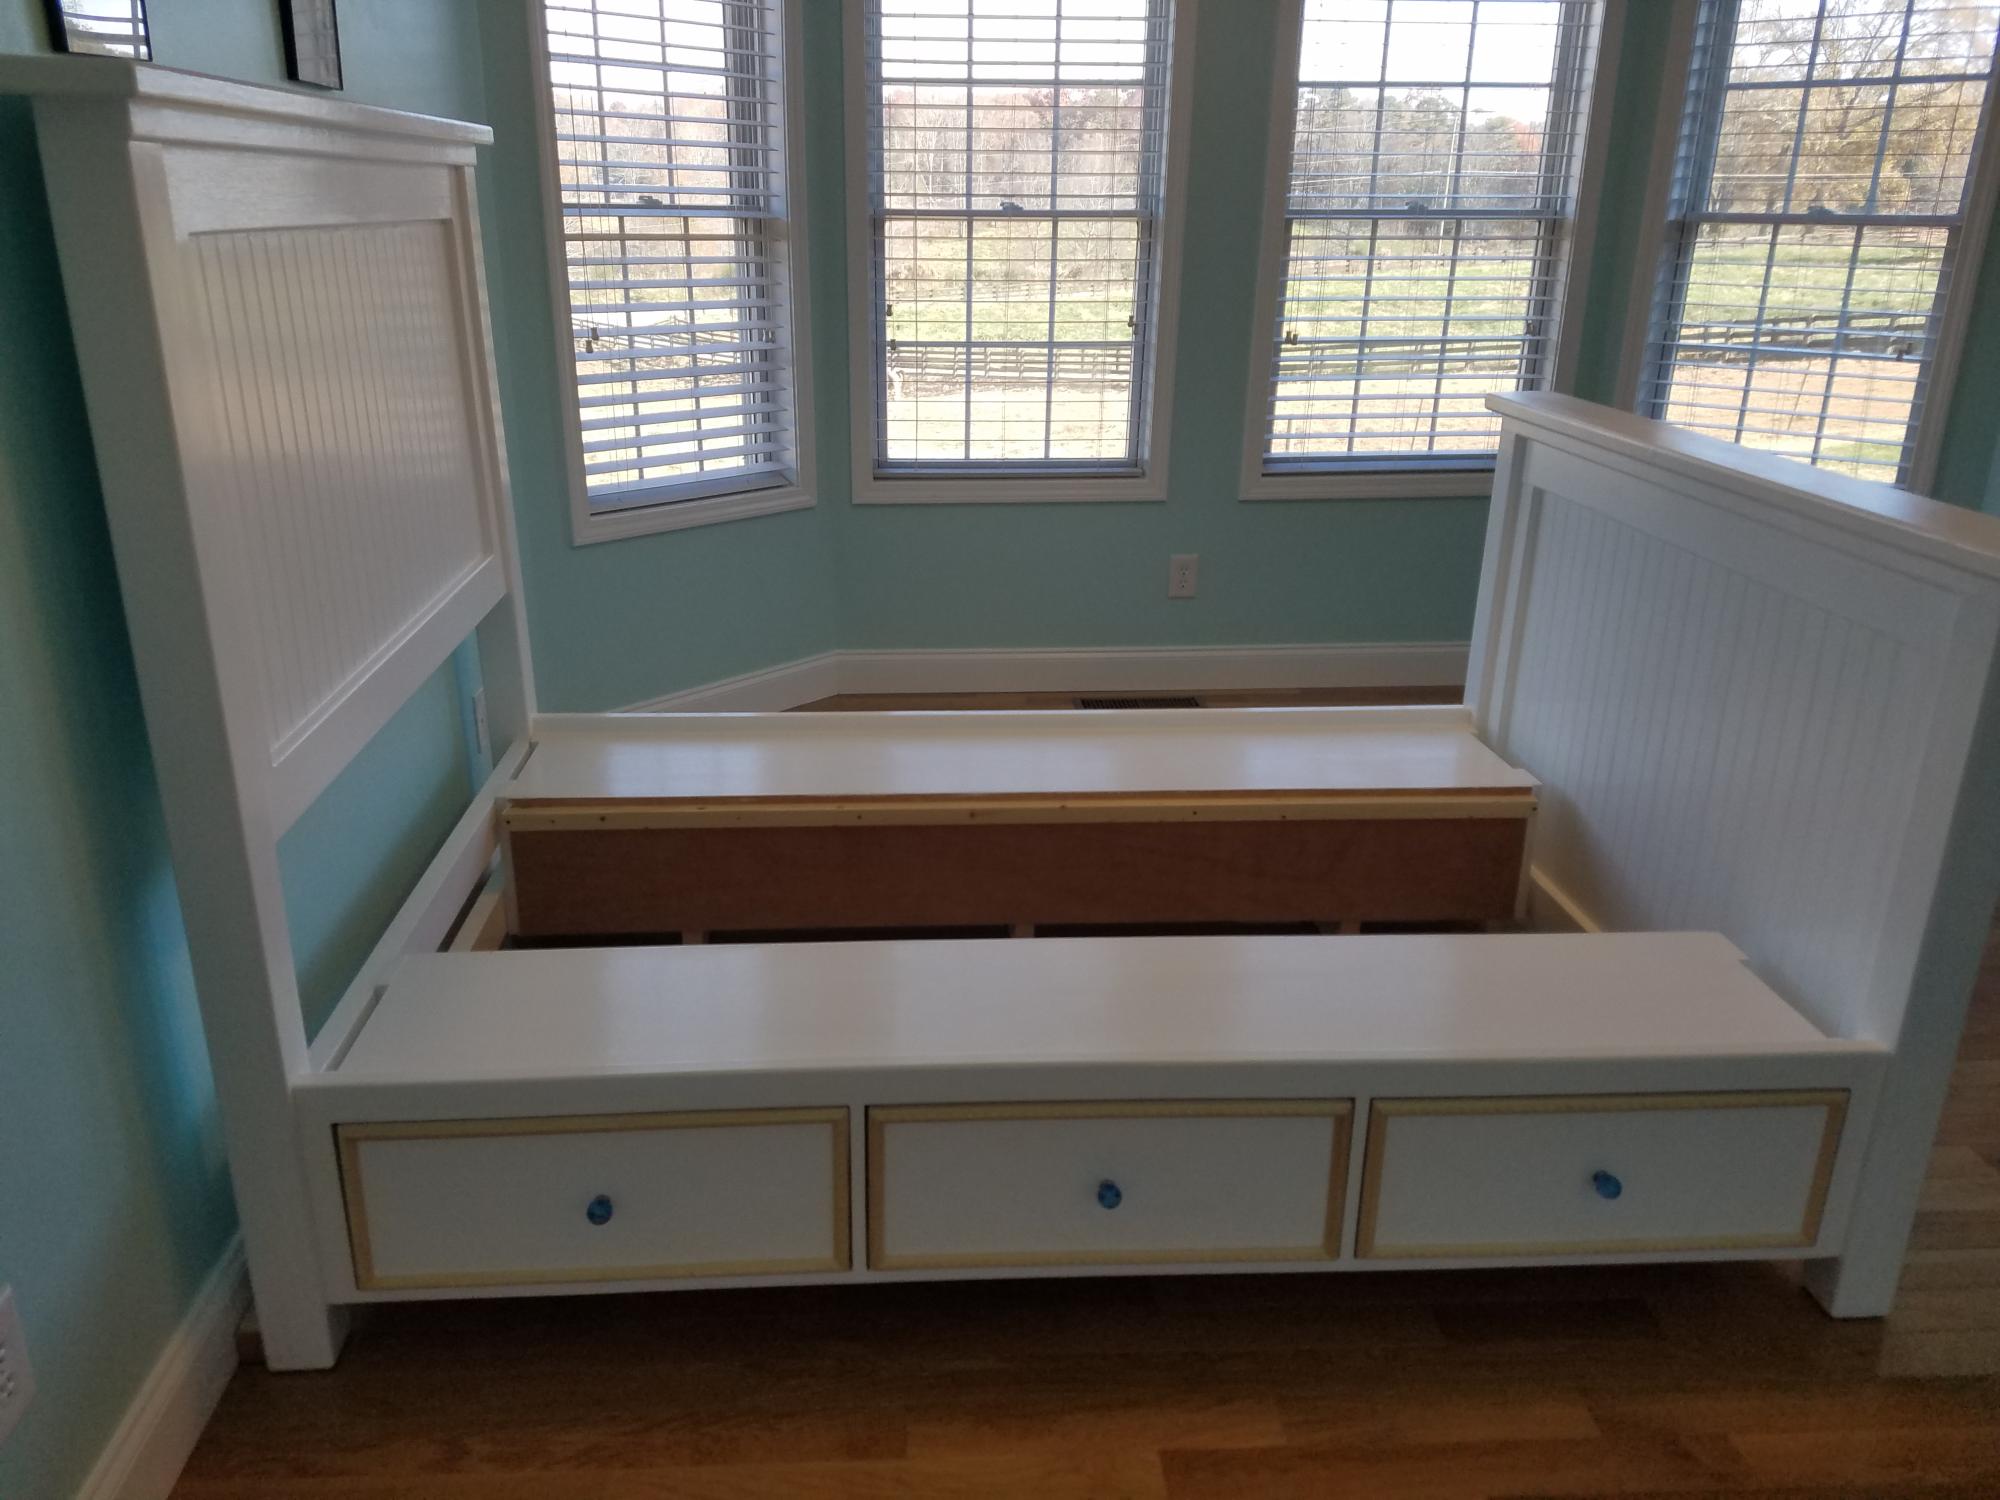
I built two beds one for each of my daughters using the Farm House Storage Bed with Drawers. The plans were very detailed and extremely helpful. I modified the plan to utilize a box spring and mattress set since the girls already had a full mattress set. This was my first piece of furniture to build so it did take a few weeks to complete. I added the trim molding around the drawers to add a little custom work to it. The original plan had the foot board below the mattress and I wanted it to be above the mattress and I extended the boxed to allow foe a comforter to be tucked down the bed. I placed purple knobs and blue knobs on the other bed to give the girls their favorite color to add to the bed. I used a semi gloss Sherwin William's interior paint on the beds to make it easy to clean. The girls love the beds and when we have company over they are amazed how the beds look and most end up taking naps on the beds. I spent $450.00 total per bed, which also included the knobs and the full extension / easy drawer slides.
Built from Plan(s)
Comments
Fri, 11/18/2022 - 08:19
Very pretty!
Love all the added details, very well done, thank you for sharing!
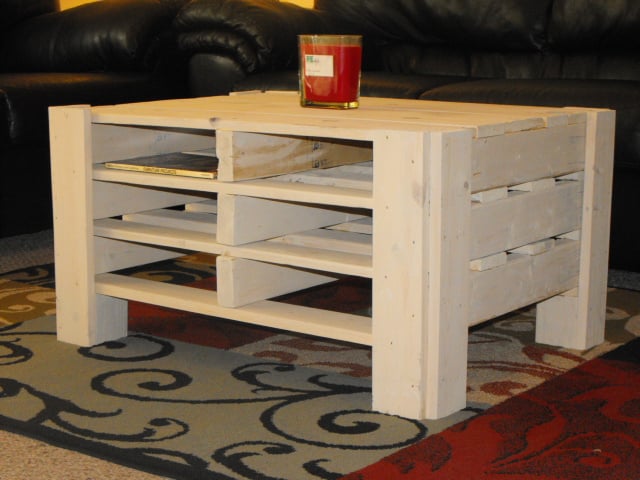
Pallet Coffee Table
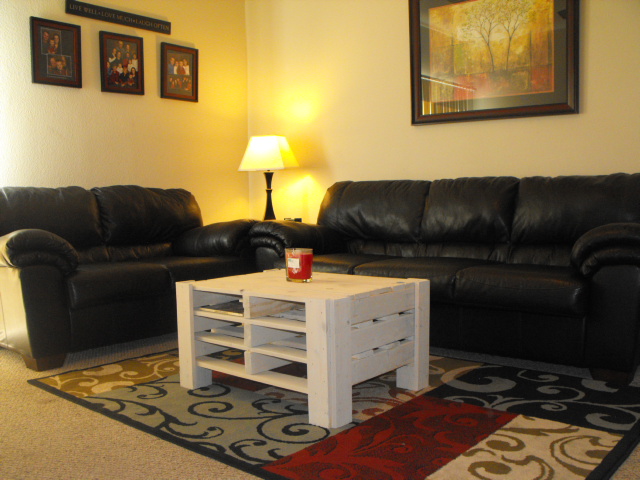
I seen the plans for a coffee table made out of pallets submitted by Aud builder and just had to try it. The company where I work has tons of pallets so it really didn't cost me anything. I added an additional pallet and left the casters off. In place of the casters I put 4, 4" 4x4's at the corners and then used 1x4 at each of the corners to connect the whole thing. Then I did the white wash on it. I loved the color and had a lot of fun putting it together.
Built from Plan(s)
Estimated Cost
$8.00
Estimated Time Investment
Afternoon Project (3-6 Hours)
Finish Used
watered down white paint
Recommended Skill Level
Beginner
Comments

Sun, 09/04/2011 - 16:25
Very Cool!
I love how this turned out! Super clever storage using the pallets, perfect for books.
Fri, 09/09/2011 - 12:53
Thank you!
Thank you birdsandsoap! It looks great in my living room. Too bad I built it for my neice who just married. She loved it too :-)
Sat, 01/14/2012 - 18:37
adapt for shoe storage
This is so cool. Love it. Dont need a coffee table but this made me think it could work for shoe storage with different dimensions.

The perfect sewing table!
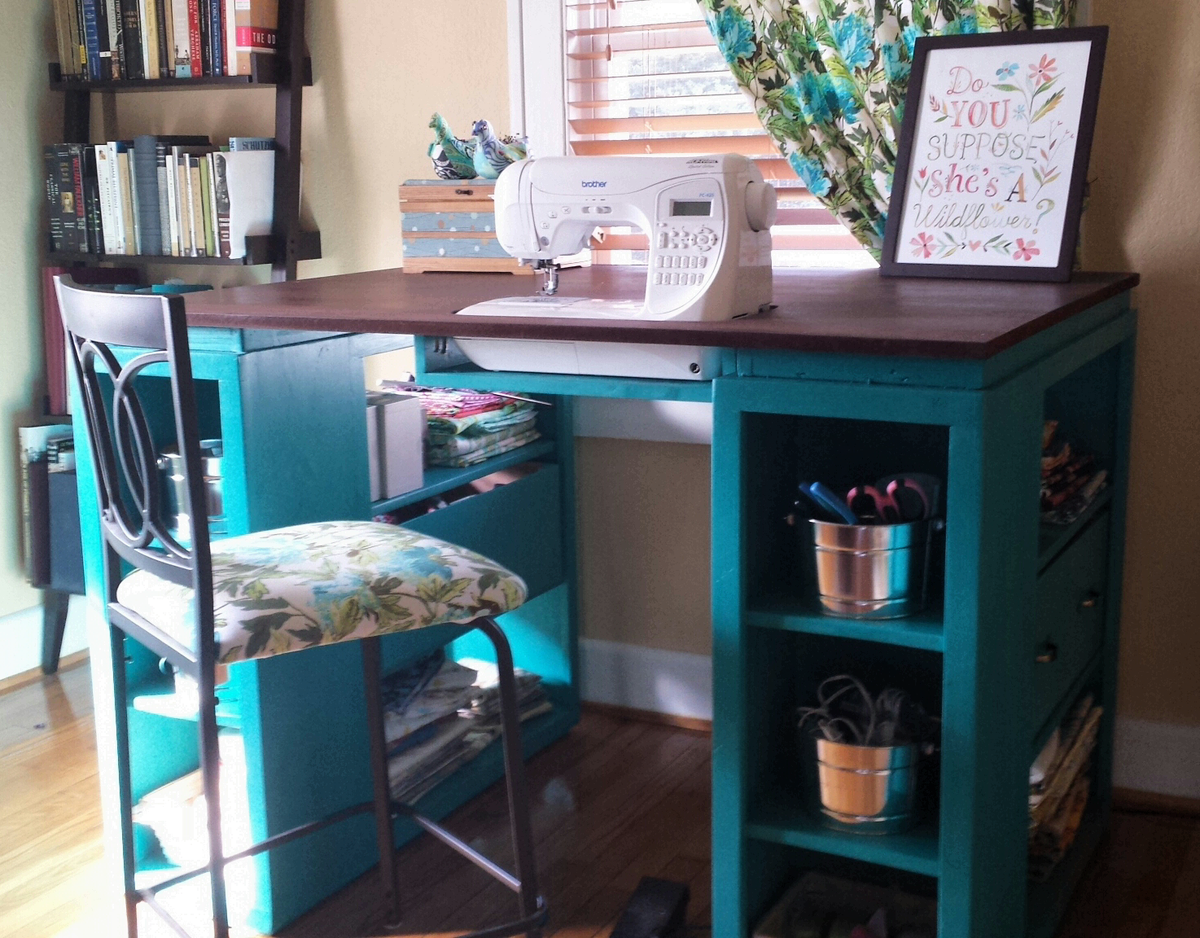
I have been looking at sewing furniture for years, but the prices always made my jaw drop. I have a small craft room, so I needed a table that could also triple as a cutting table and fabric storage. Thank you so much to Ana White for this plan! I built exactly to the plan in The Handbuilt Home, and it's the PERFECT size.
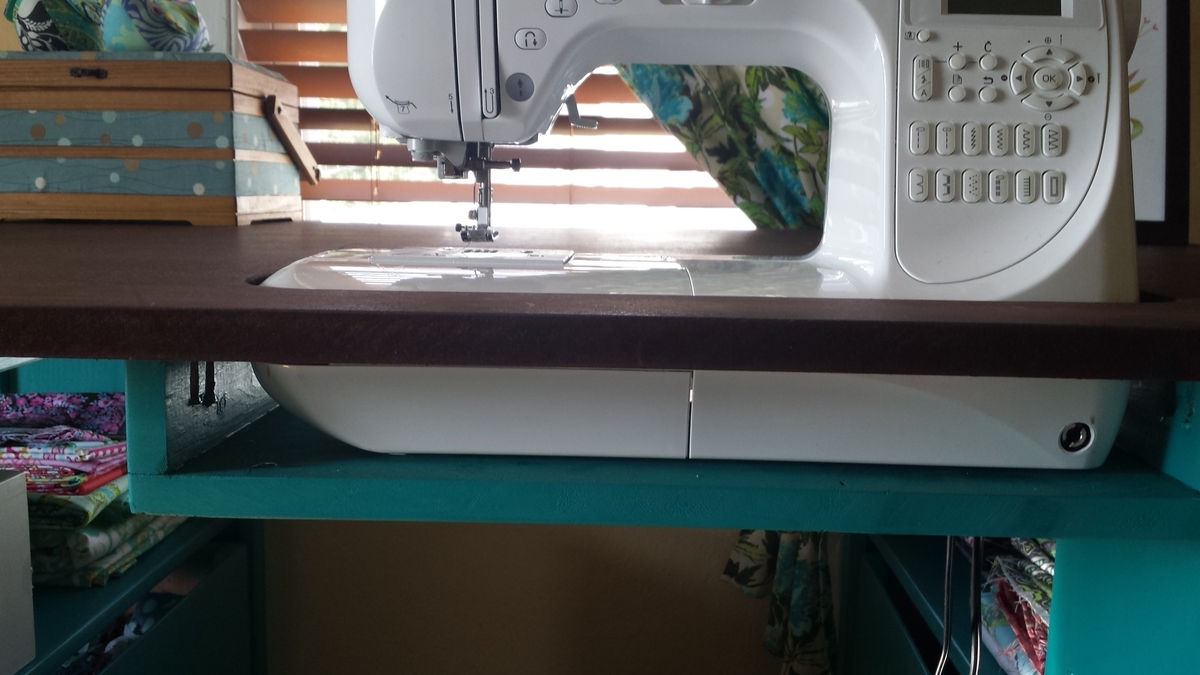
So the sewing machine can sit flush with the top, making working on big sewing projects way easier, I traced the outline of my machine on the MDF and cut it out with a jig saw. Then I built a small shelf using a 1x12 scrap and 2 1x3 scraps. Putting the 1x3s on top of the 1x12 made the shelf 3.75 inches deep, which is exactly the depth I needed. I attached it to the underside of the tabetop using a pockethole jig and screws.
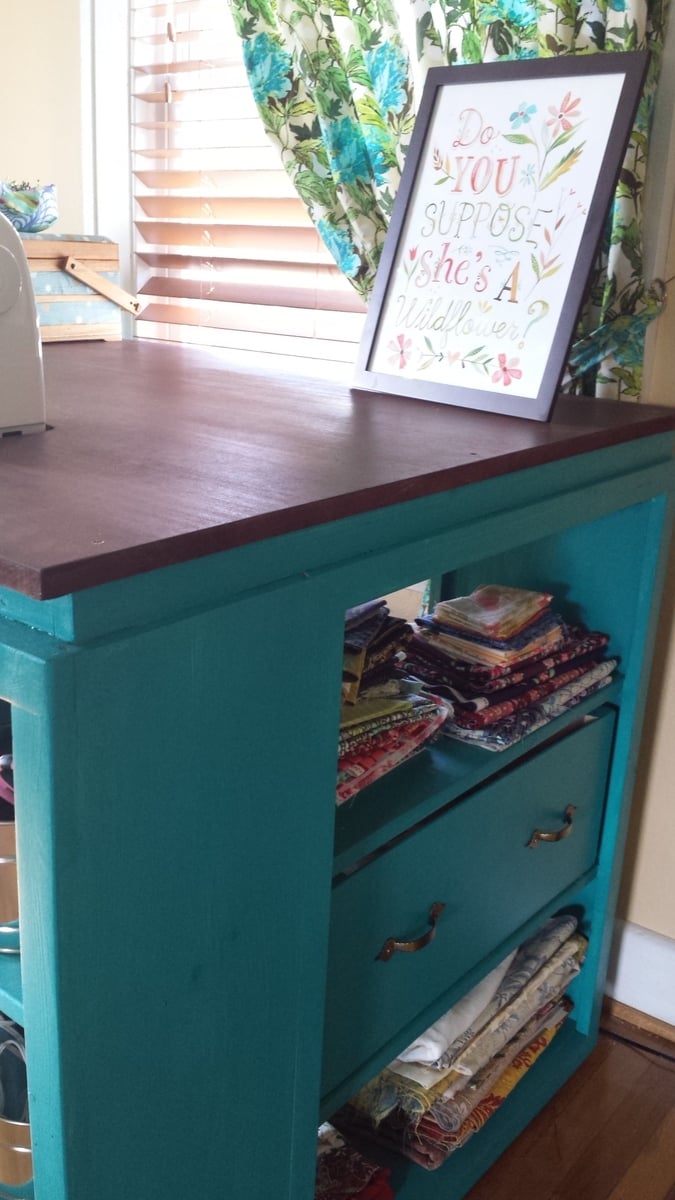
I built 2 boxes using 1/4 inch plywood, and installed drawer pulls on them, giving the illusion that the table has 2 drawers built in. This is where I keep my ugly stuff--interfacing and fabric scraps.
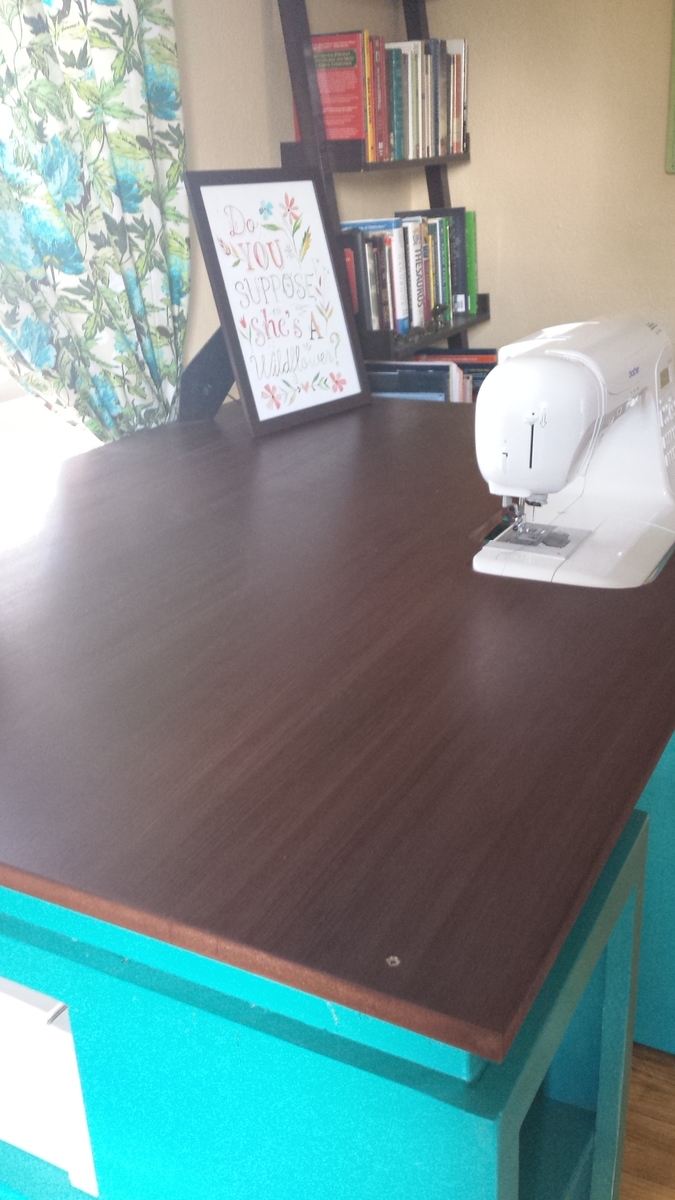
I got the color scheme for the table from the entryway console plan in The Handbuilt Home. In order to make the MDF top look like it had a wood grain, I applied mahogany gel stain with an old washcloth in very thick strokes that spanned the length of the tabletop. It soaked in and lost the "grain" look in some places, but the majority still looks like wood. I did have to apply several coats of polyurathane over the stain; the MDF has a prickly texture that grabs fabric and makes it hard to feed through the sewing machine.
My only complaint is that I didn't quite think through the fact that seating is bar height and I'm 5'7". It's a little difficult to reach my sewing machine pedal. I may build a small stool for the pedal to sit on so I don't have to half sit/stand to sew.
This is the first woodworking project I've done alone from start to finish: from going to Lowe's and picking out the wood, to cutting the wood with a circular saw, assembly, and finishing. (My fiance did carry it up the stairs for me. :) )
I'm so in love with this table! And now to finish the quilt I started 6 months ago....
Built from Plan(s)
Estimated Time Investment
Week Long Project (20 Hours or More)
Finish Used
I used 2 coats of Valspar Signature paint in Laguna Beach, and Minwax mahogany gel stain on the MDF tabletop.
Recommended Skill Level
Intermediate
Comments

Mon, 09/23/2013 - 07:40
Beautiful!
I really like your colors! And that drawer idea is so clever! Nice work!
Val
artsybuildinglady
Mon, 09/23/2013 - 15:22
Great Work!
I love this idea!! I too have wanted a sewing table for a long time but the prices of them take my breath away. I may have to make myself one! Thanks for the inspiration!!
Marshall's Dresser / Changing Table
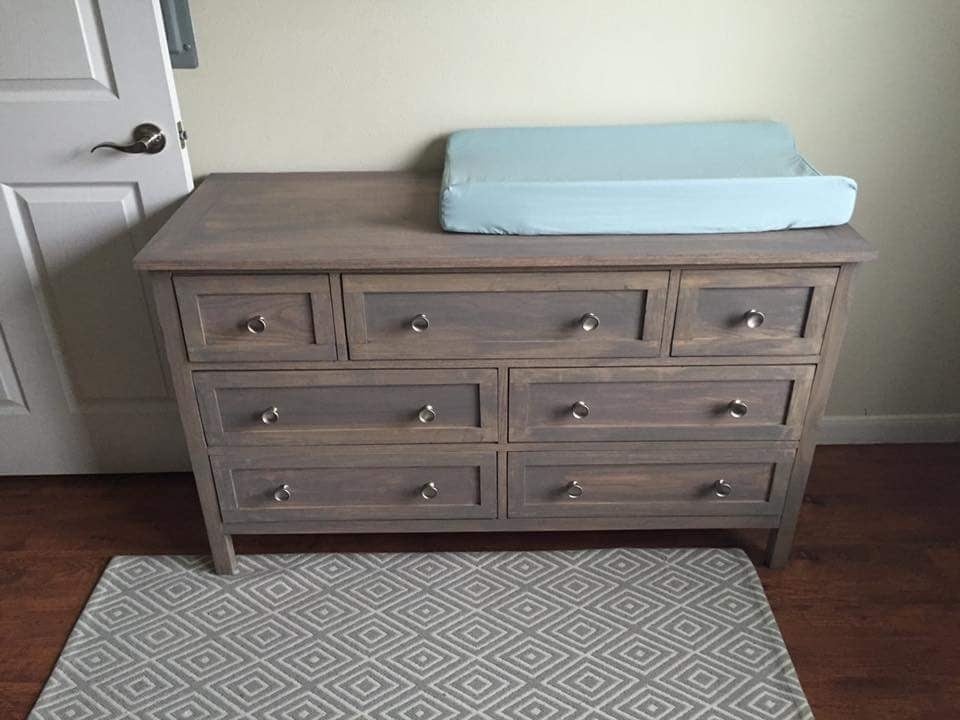
Delivered the nursury Furniture and have a ver satisfied daughter preparing to bring our Grandchild into the world. From Ariel "My sweet baby boy has the most beautiful nursery I've ever seen! I am so thankful for my father who hand built this furniture. It is definitely made with love and it's everything I dreamed of. I'm also thankful for my husband and brother in law who set up this entire nursery for me this morning. Thank you" For this project built with a lot of love, I give a lot of credit to Ed and his very well written plans. http://www.edhart.me/2015/05/how-to-build-a-kendal-extra-wide-dresser/ I followed the plans from Ana-White with Ed's varriations almost exactly except I added Blum undermount glides. This item may 300 pounds but it is well built. #anawhite
Built from Plan(s)
Estimated Cost
Blum glides and assorted hardwood drove this project cost up. However this project is better than the item that I was asked to build at a retailer with a price tag of $1,200. My cost was about $500. #anawhite
Estimated Time Investment
Week Long Project (20 Hours or More)
Finish Used
Sherwin Williams Custom Stain.
Recommended Skill Level
Intermediate
Comments
Thu, 02/22/2018 - 07:23
How did you get the middle
How did you get the middle drawer to be bigger and the sides smaller?
Fri, 06/08/2018 - 13:04
Thanks for the mention!
Your dresser looks fantastic! I really like the stain you used on it.
Ed
Comments
Ana White Admin
Wed, 11/18/2015 - 12:15
Great Job!
Jsut perfect for your space, thanks for sharing!
Ana White Admin
Wed, 11/18/2015 - 12:15
Great Job!
Jsut perfect for your space, thanks for sharing!