DIY Greenhouse
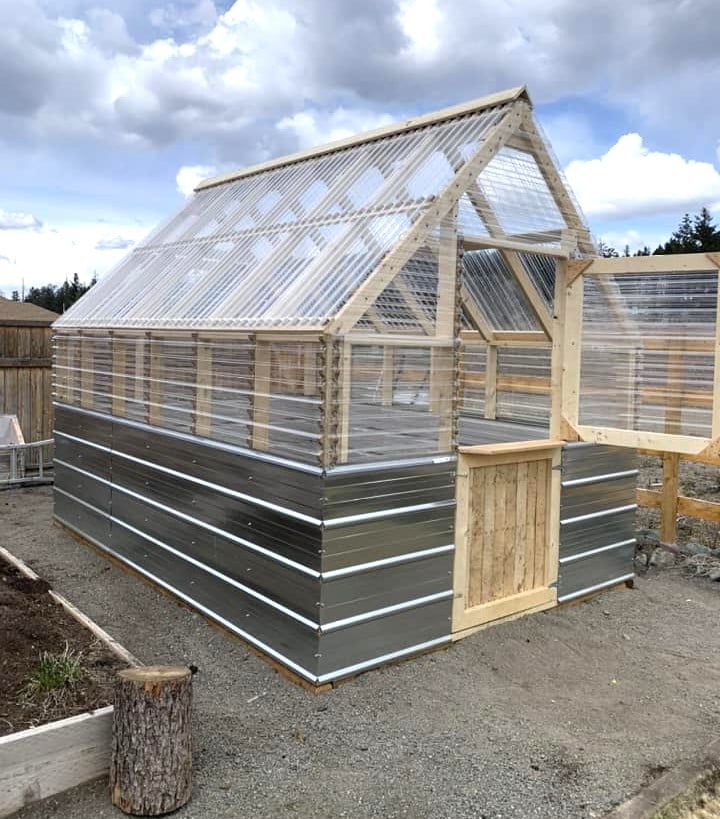
DIY Greenhouse by Trenton Kirby on Facebook!
Built from Plan(s)
DIY Greenhouse by Trenton Kirby on Facebook!
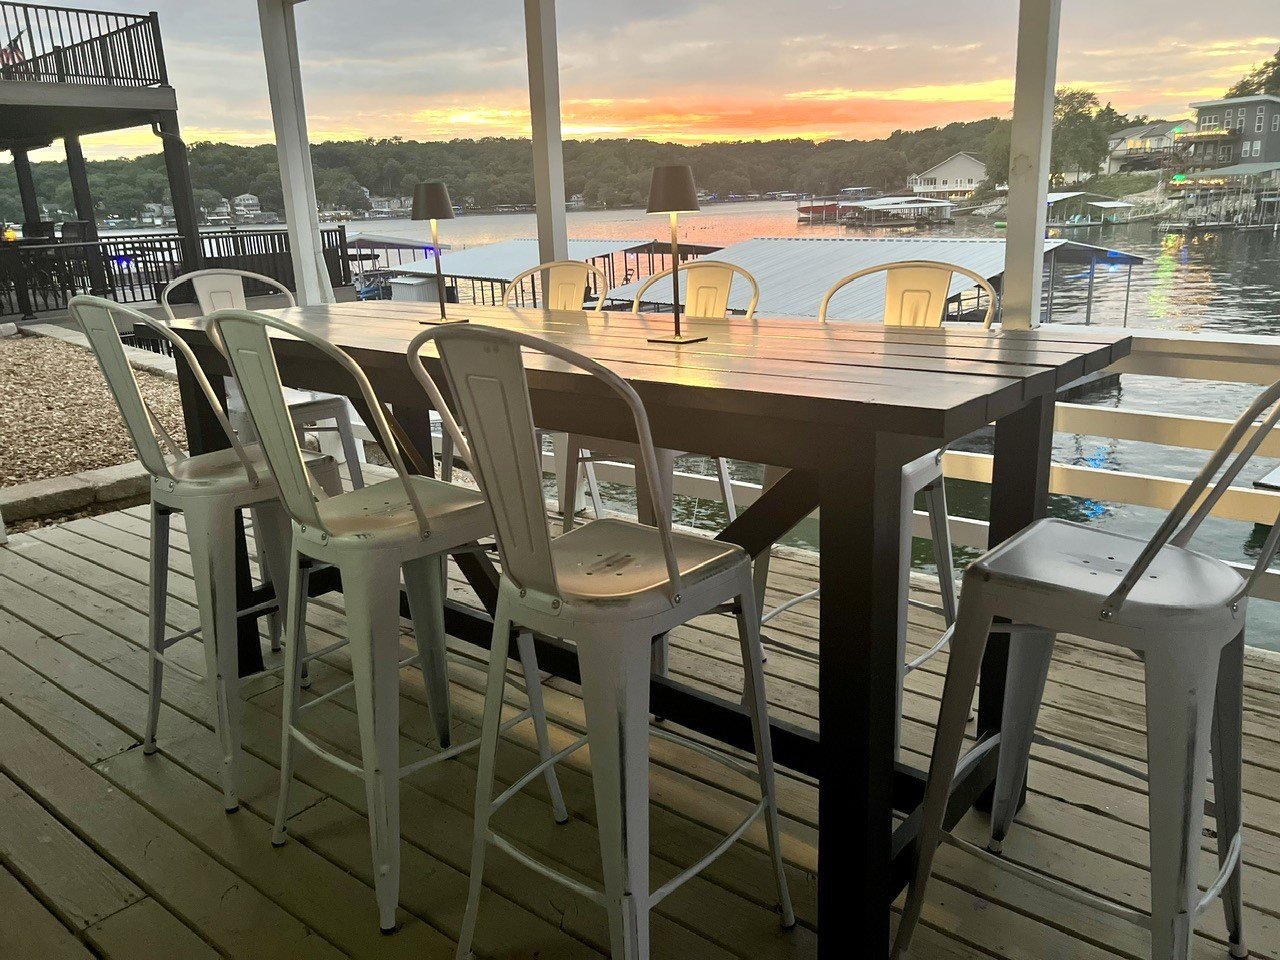
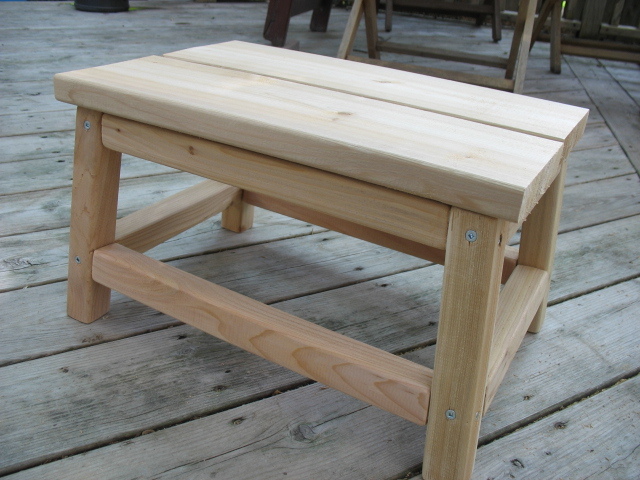
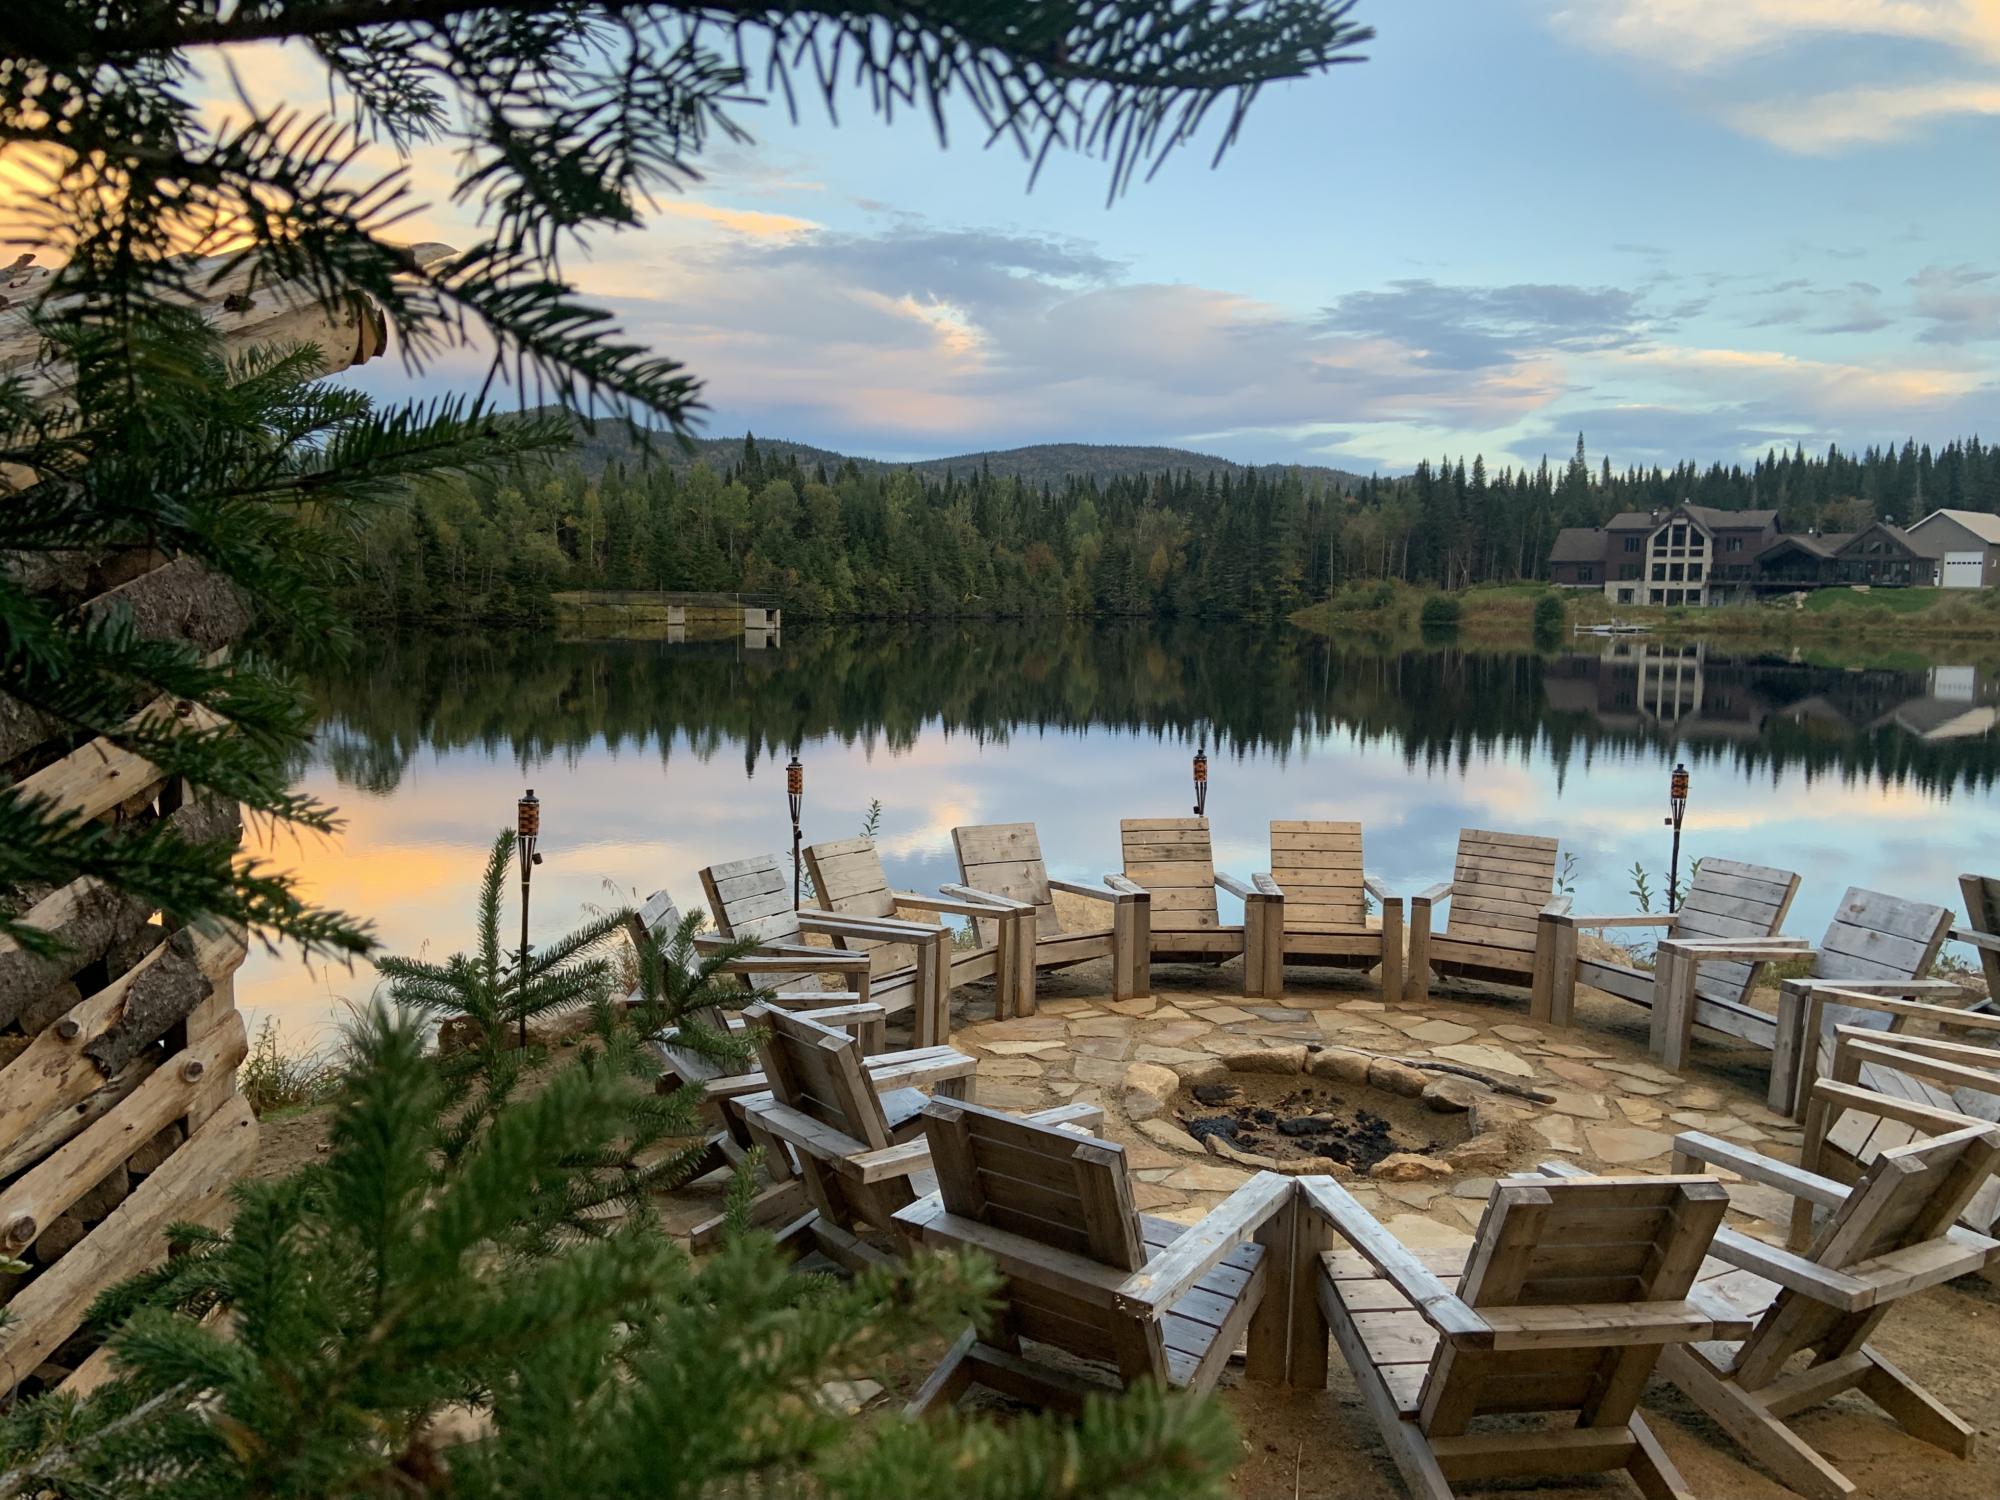
We had this unused lower deck and this bar height table was the perfect addition. We have place now to hang when too hot or it’s raining. My husband and I built it in one weekend and your plans where great.
Julie Moran


Sun, 08/27/2023 - 12:48
Love this view and what a gorgeous table to go with it! Thanks for sharing.
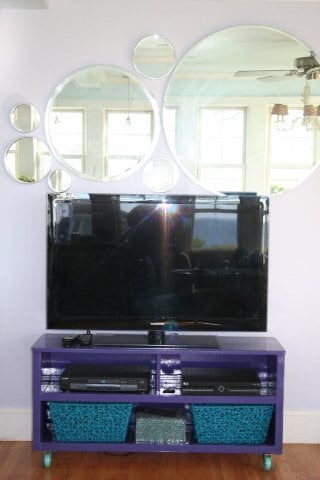
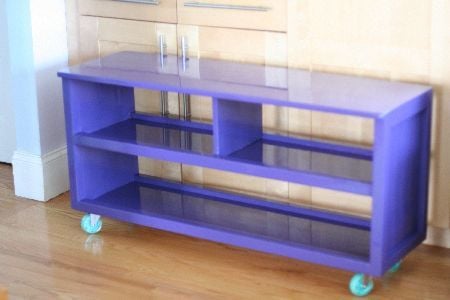
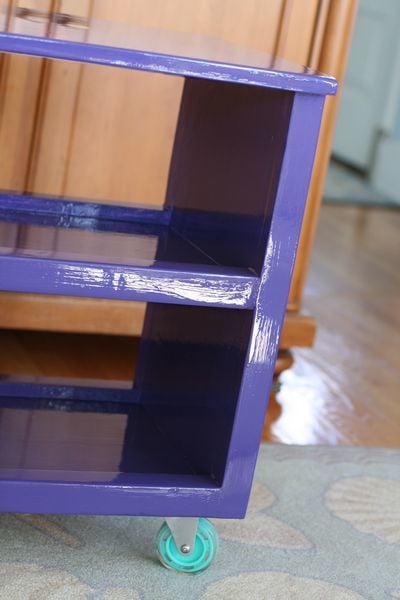
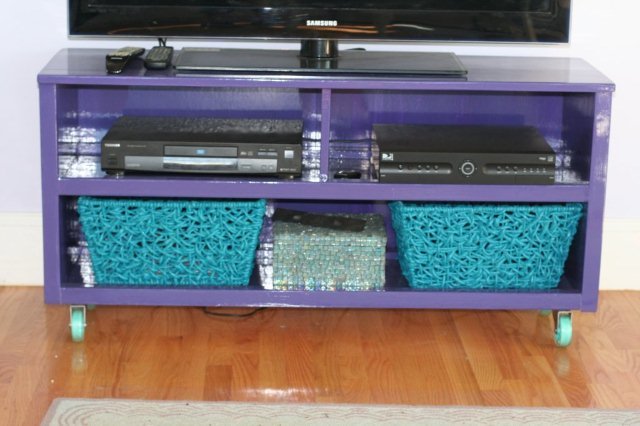
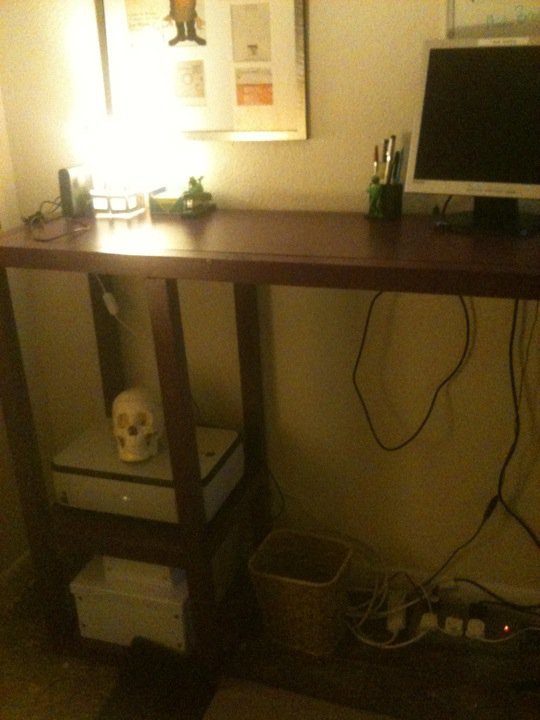
What a fun project. Based on Ana White's Media Console that was very close to what I wanted. I changed up the size to work in my room. I needed a shorter length to fit the space I had. I did not use the doors or drawers. For my first project they intimidated me a bit. I also needed access to the TV box.
I subtracted for the legs so they ended flush with the bottom of the console and used some fun wheels to be able to move it around. Finally, I did not like seeing all of the cords behind it so I added a back with cutout for the cords and painted it the same color as the console.
As it was built "on the fly" I did not keep detailed measurements to share. Can't wait to pick out my next project! Thanks Ana for all you do.
This took a lot of time and money but I like the way it looks. We have 4 kitchen cabinets and one drawer and no room for more so storage is tight.
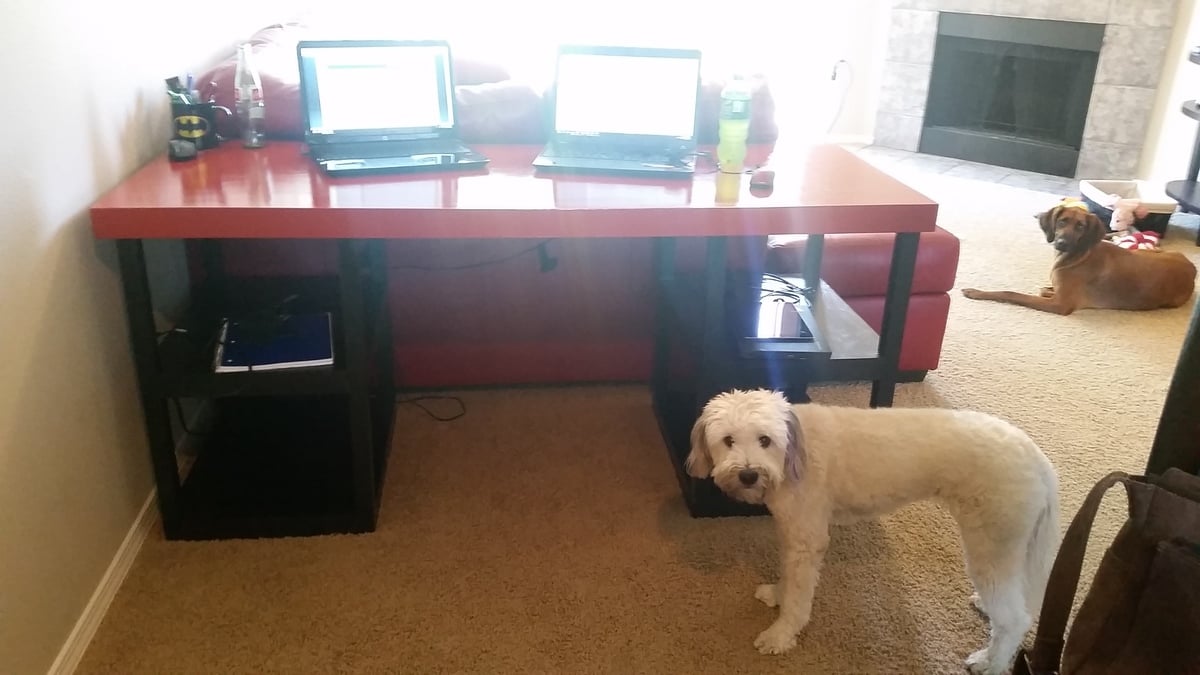
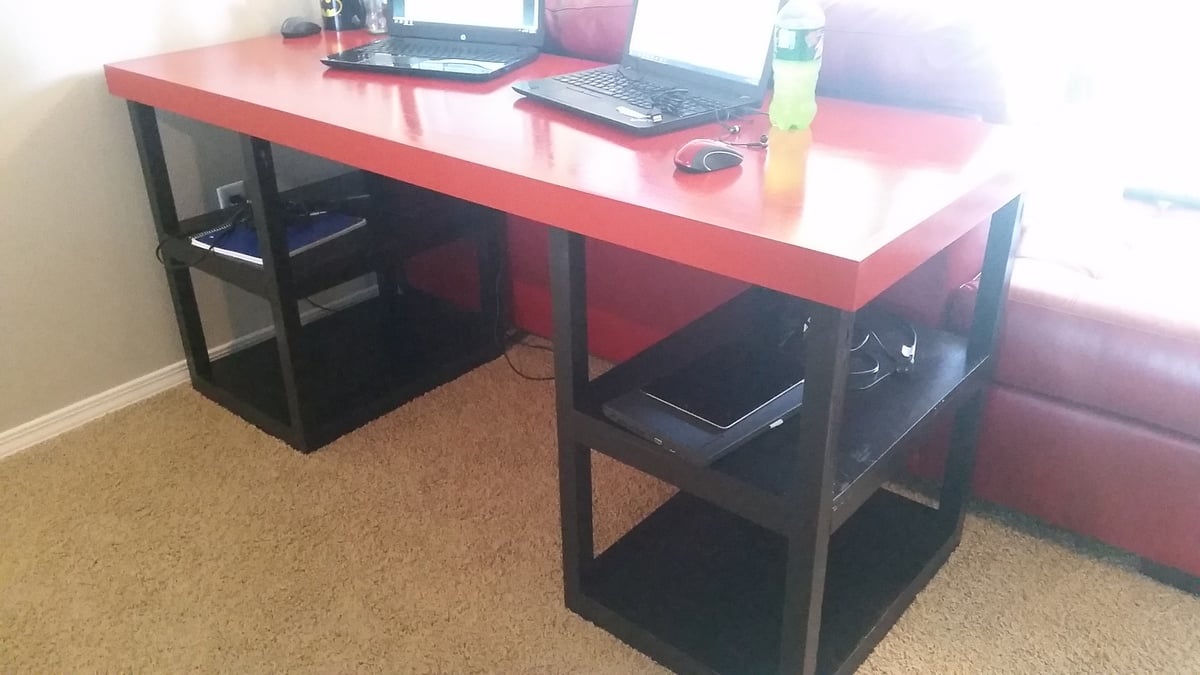
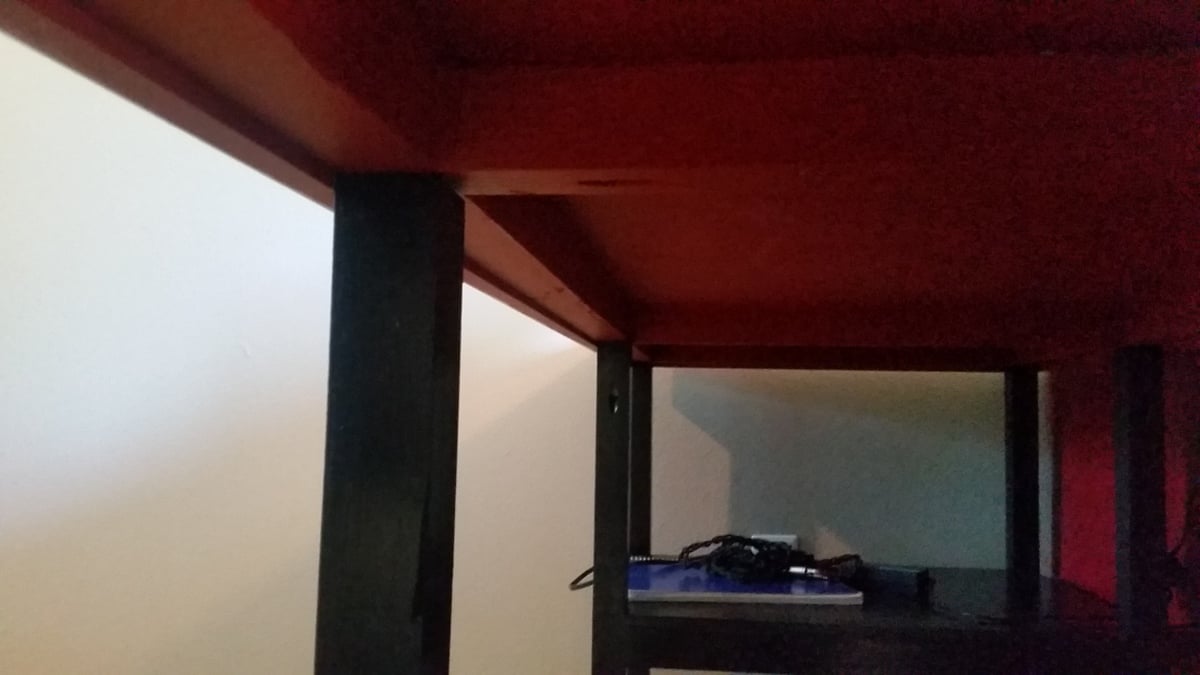
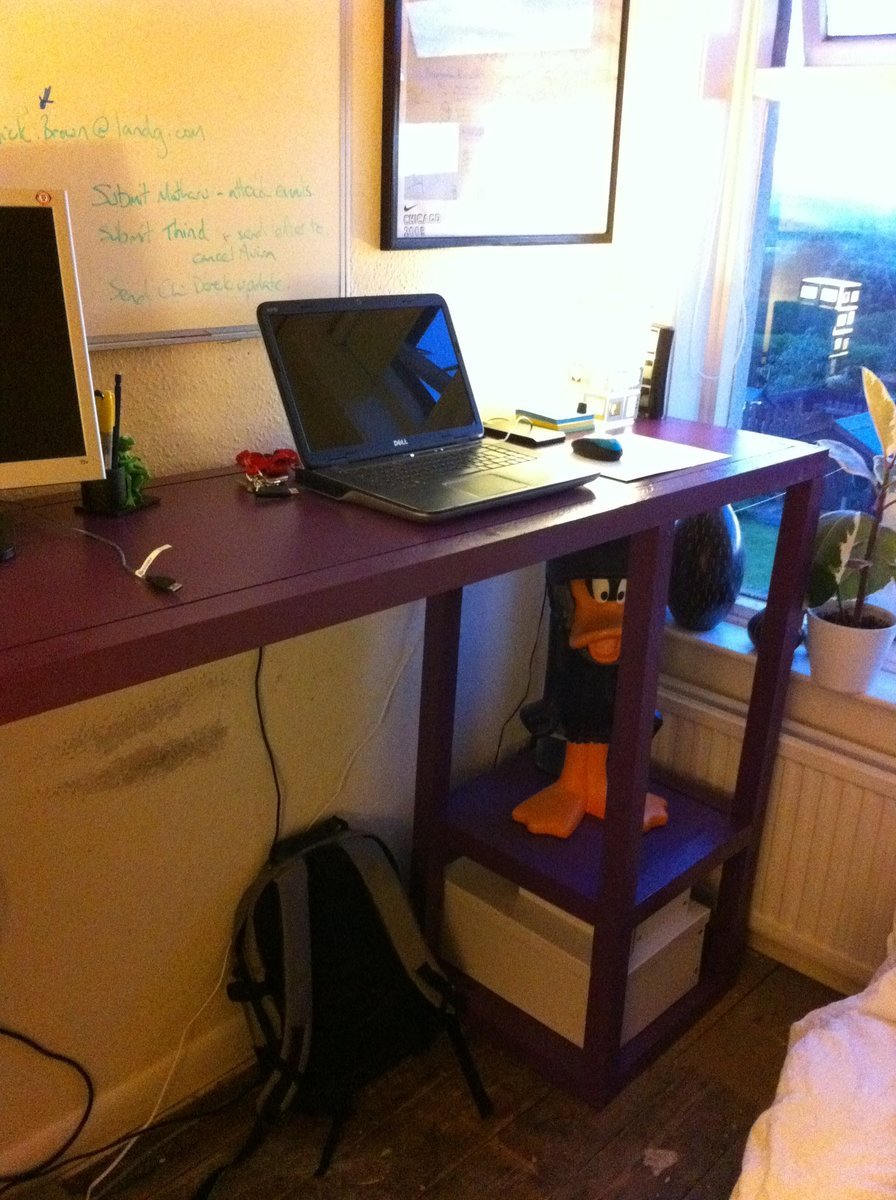
This was a great / simple plan that mostly fitted my needs. i made a few modifications;
1. wider 'human' well - extended the width by 6"
2. Deeper desktop - Extended to 24"
3. 2.5x.75" trim piece around table top - simple MDF
4. plywood on top of 2x2 frames - for all shelves and table top.
(the dimensional modifications required 2 additional 2x2 @8')
I like a larger leg well to shift around in on those long days, so i extended the width by 6" all applied to the foot well. I was still able to use only 1 8x4 piece of .75" sanded plywood. I use 2 computers and a second monitor on one, so I deepened the desktop from 18 to 24" to accomidate my technology. This then required an adjustment to all 15" 2x2s used on the sides, and the shelve stretchers. I prefered to use a Plywood on top of frame method for all shelves and tabletop, for stregnth and asthetics. This required me to make a notch into all 4 corners of each shelf. To accomplish, be sure to start with a squared piece of plywood cut to dimensions, and measure the from the insides of the cutouts for precise fit. The under shelf frames were still affixed with pocket hole screws, the tops of each were screwed to the frame with 2" wood screws (pre drilled) and smoothed over with wood filler. the top received the same, 2x2 frame around the perimiter, along with two additional 21" supports (at the same location as the inner legs from the towers). The top was the affixed with 2" wood screws, and smoothed with wood filler.
For asthetic purposes, I put in a 2.5x.75" trim piece around the top (to hide the frame/plywood seam) This actually worked out great!! It is mounted flush with the plywood top , 2" wood screws about every 12 inches and a healthy amount of wood glue. (be careful, these come pre-faced with a layer of white.. something.. this does not make a good glueing surface. Sand down before glueing to the tabletop.). Screws were countersunk, add wood filler to smooth. the best part of the trim is that it extendes .25" below the wood frame (1.5" frame, with .75" plywood on top = 2.25" total thickness). this allows allowed me to not screw the towers into the top. The legs fit in underneath the top, butted to the top's frame, and the recess created by the trim holds them in place! This will make for super simple moving should I need to relocate my desk; just lift off the top, and it's in 3 pieces!! this step adds a bit of work and $ (really not too much, 3 2.5"x.75" MDF trim pieces adds an additionan $12, and mounting only took an additional 20 minutes.)
I finished with a two tone top quality paint job, two coats of primer, 2 coats of paint, 2 coats of Polyurathane (3 on the tabletop).
All in all, it worked fantastically!!! it is incredibally sturdy. The plans are simple to follow, and easy to modify, just do the math, and draw it out..
Thank You Ana!
-MikeG.
(ps. the white one is Winnie, the Brown is Henry).
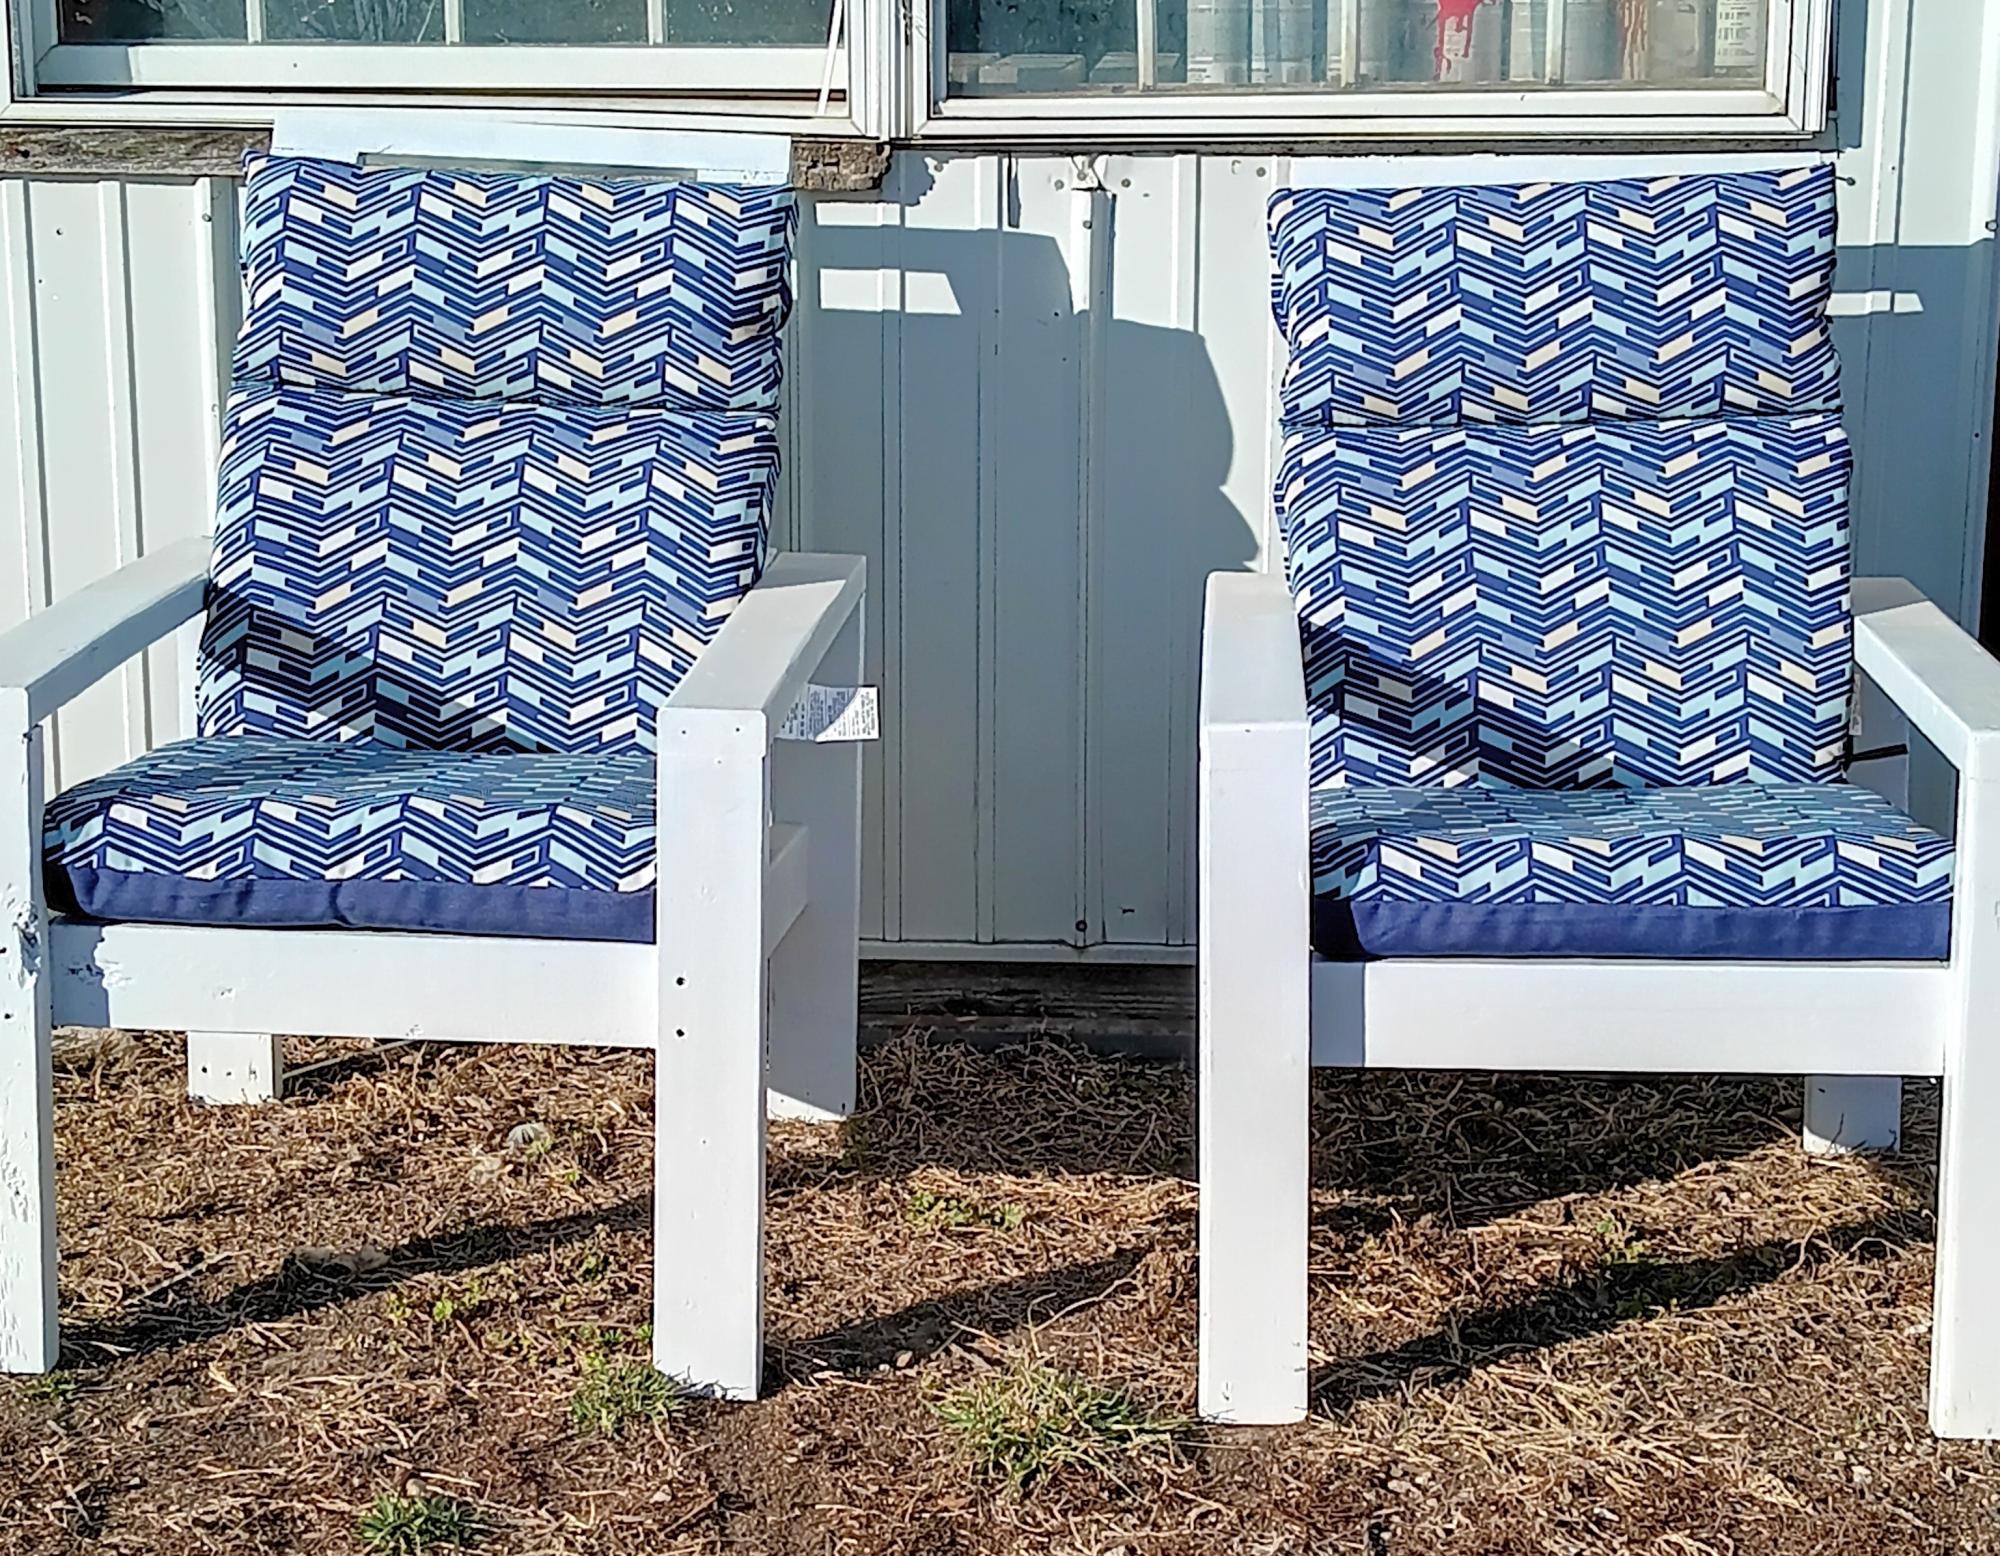
Thanks to your clear plans it was easy to make these two chairs from scrap 2x4s. Found the cushions at Lowe's. I'm a grandfather with eight grandchildren live in Iowa.
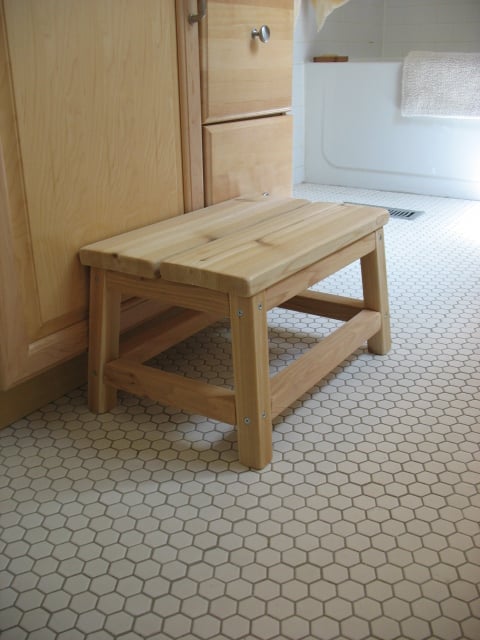
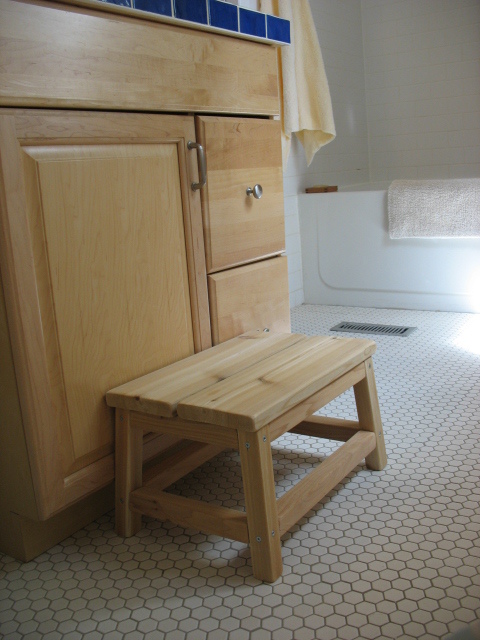
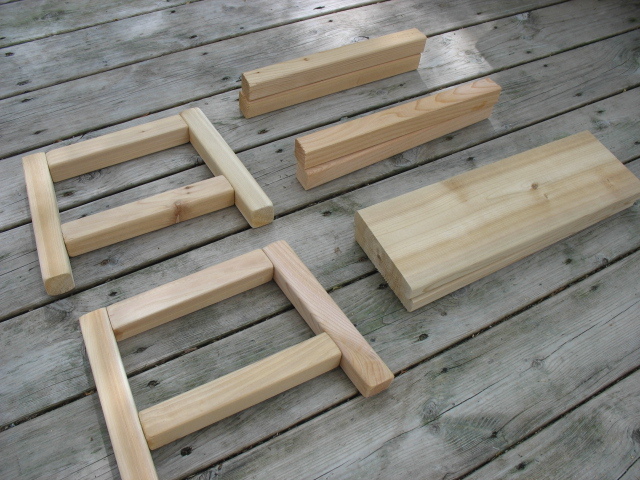
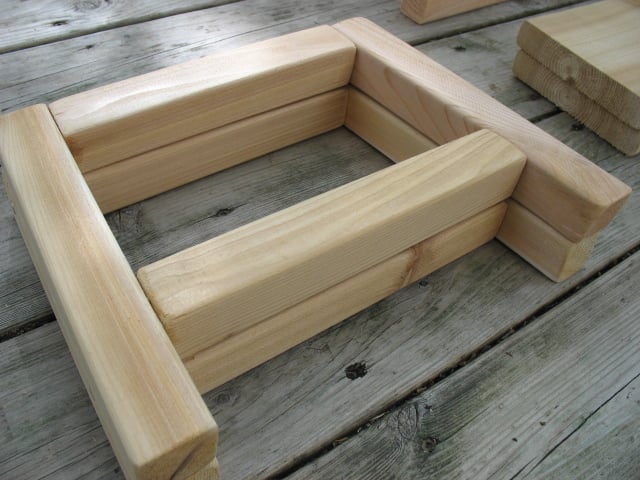
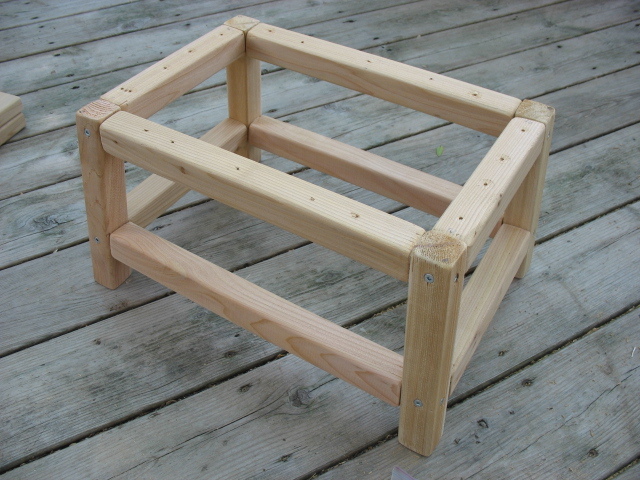
After searching the town high and low for a 10" high wooden stool, I decided to make one. Ana had the perfect stool pattern to modify for our needs - A little shorter, a little wider.....et Voila!
It's the perfect height for little ones to reach the taps in the bathroom, as well as helping out in the kitchen from time to time. And, the cedar smells wonderful.
Finished height: 10"
Top measures: 11.25" x 16.5" (2 boards, cut 16.5" long + a space in the middle)
Footprint: 12.375" x 17.375"
I also lined up the rails (instead of staggering them), similar to the Harriet Higher Chair plans. The joint will be weaker, but I prefer the cleaner lines on such a short step stool.
Thanks Ana for the great plans!
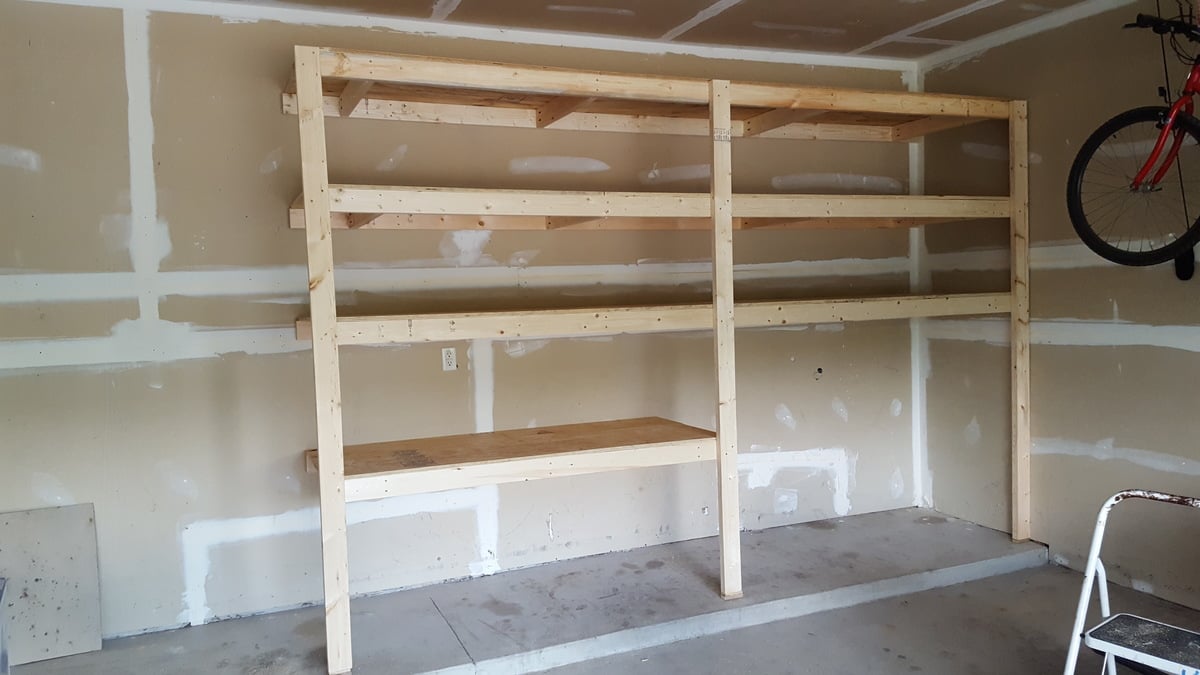
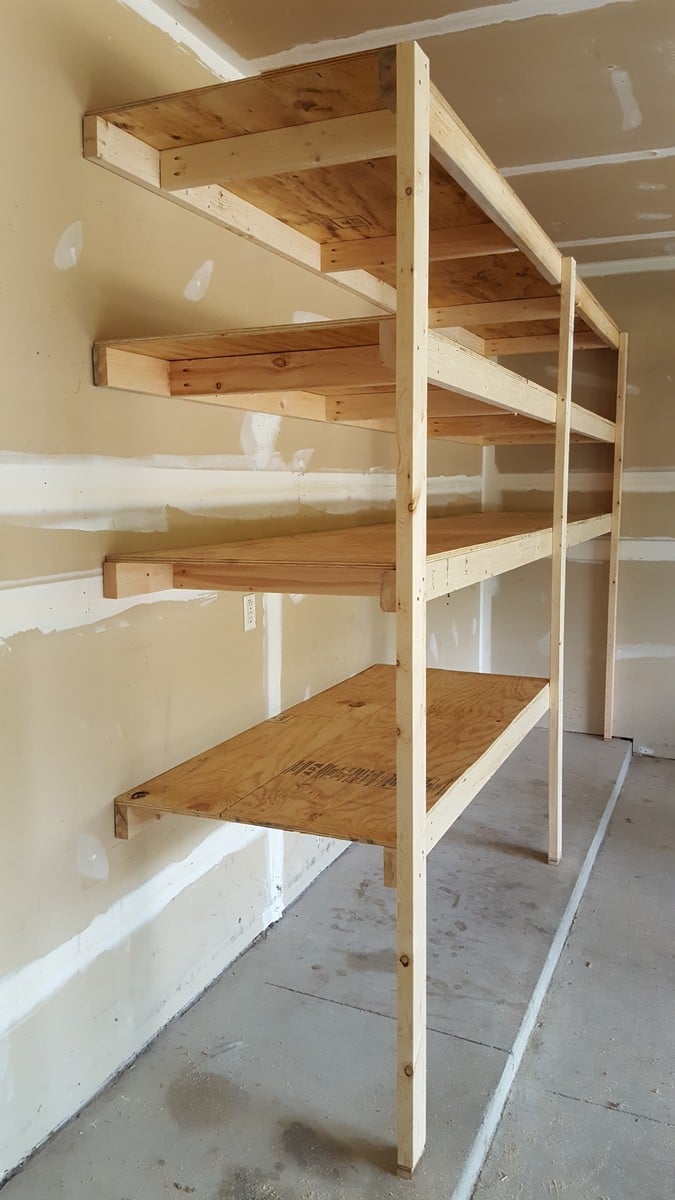
I am loving my new garage shelves. They were my first woodworking project and very easy to do! I left the bottom right side open to fit my outdoor table and chairs in the winter (I live in Michigan). I also used thicker plywood than plan because my shelves are a bit deeper.
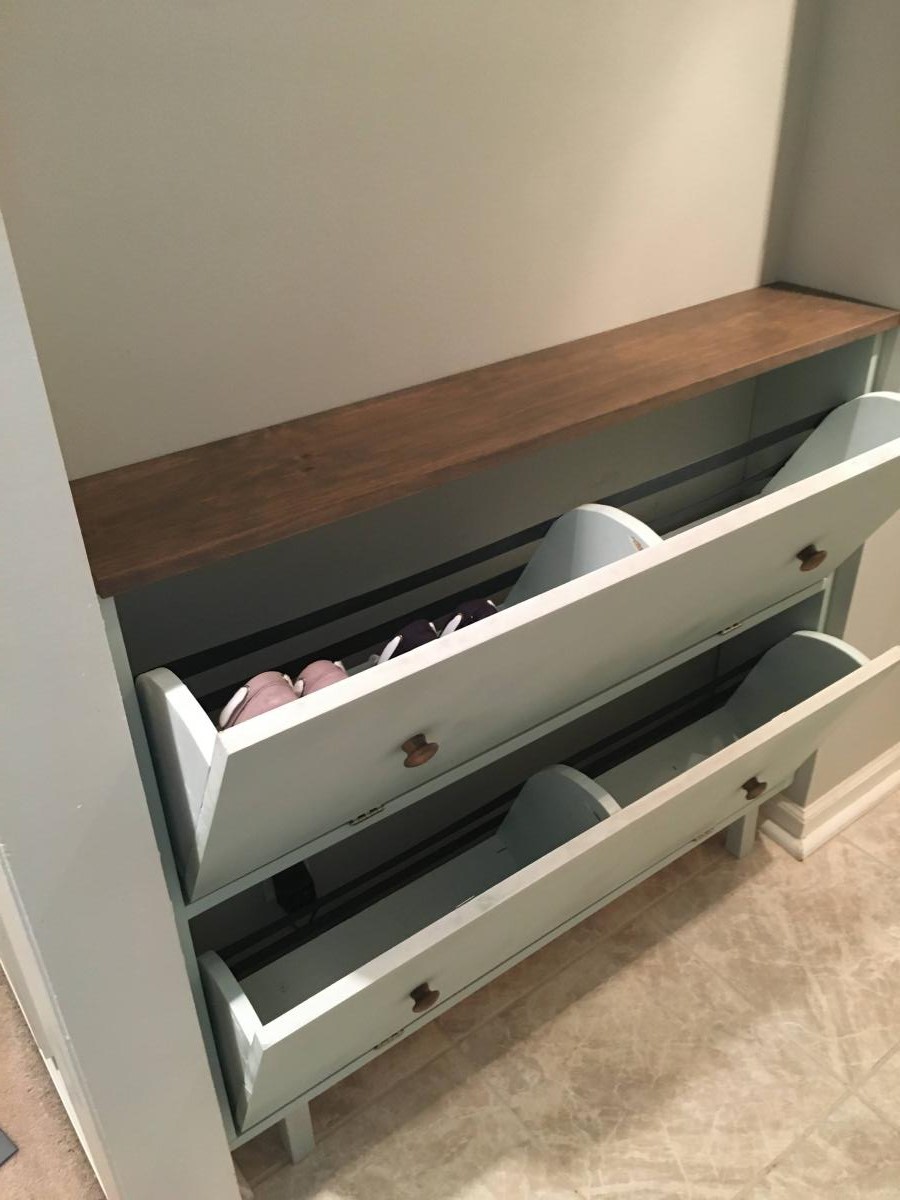
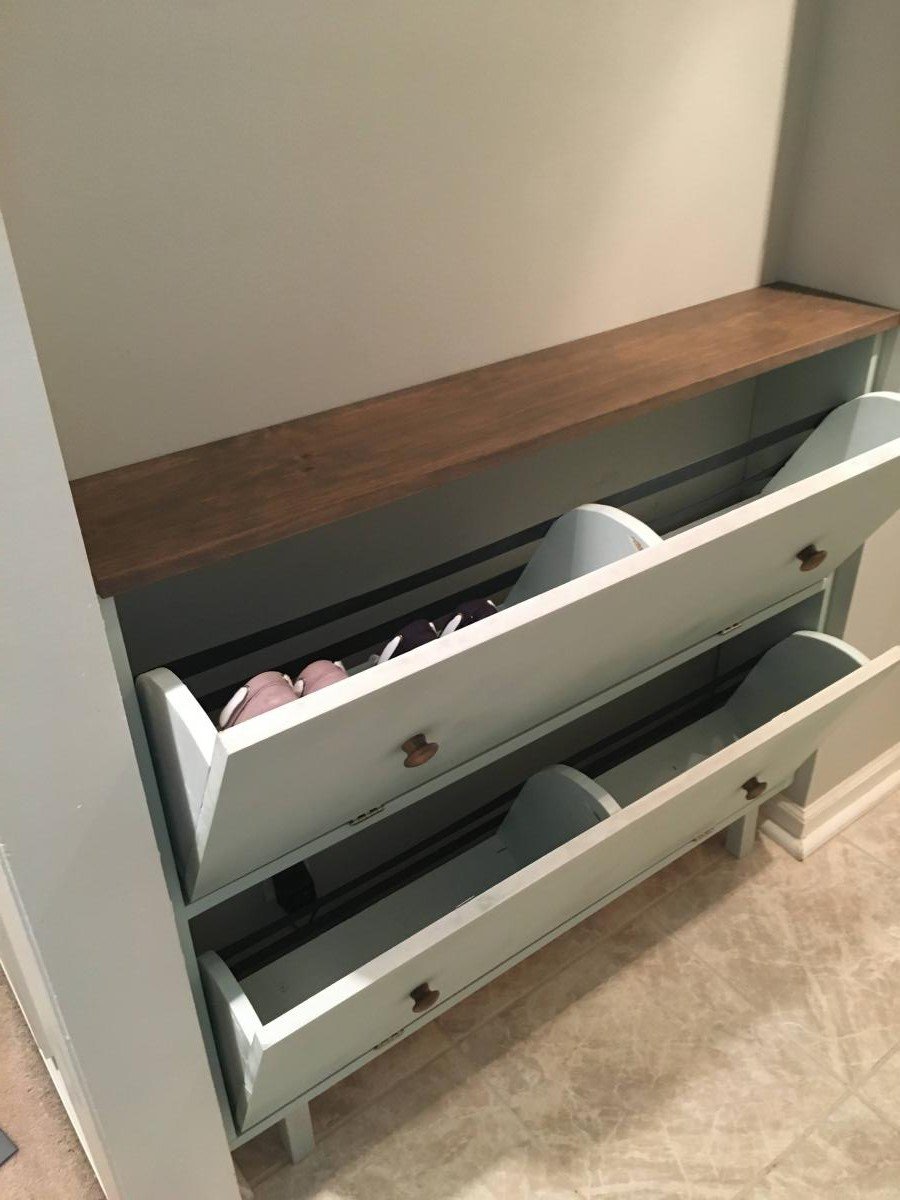
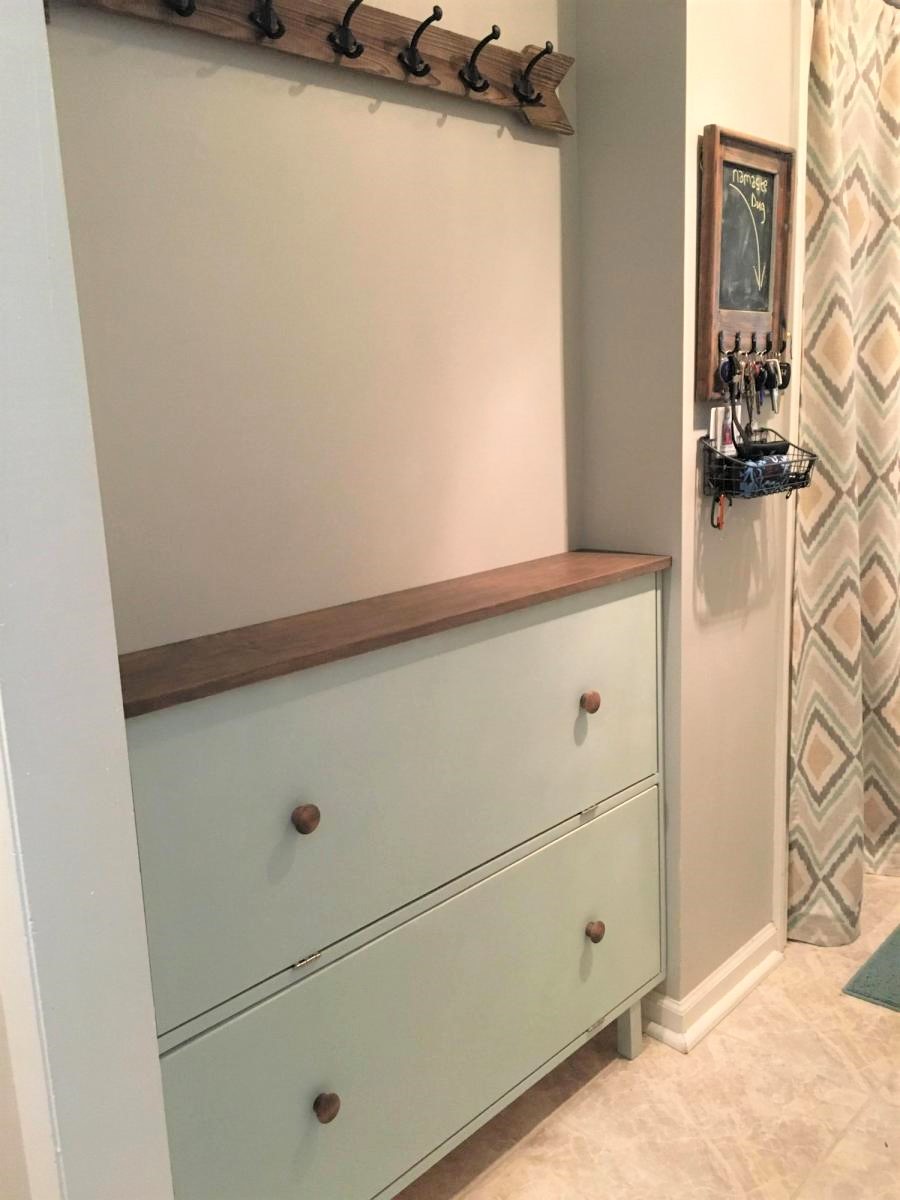
I had this space in my mudroom that was a perfect spot to make a custom shoe dresser. I adjusted the plans I found on this website to custom make storage for shoes. Now this weird little space is functional.
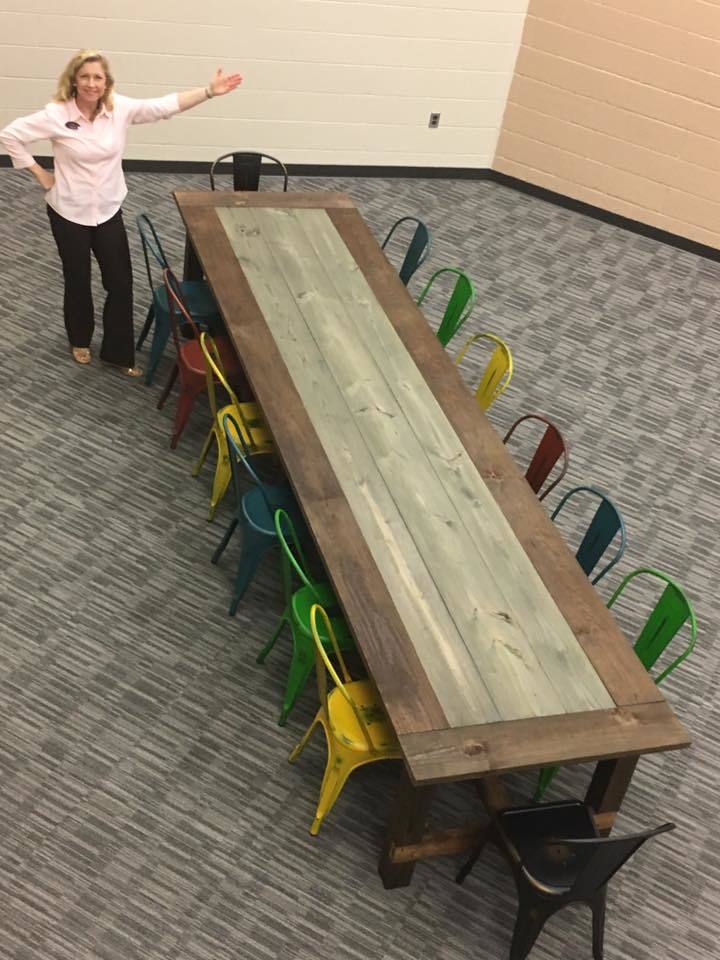
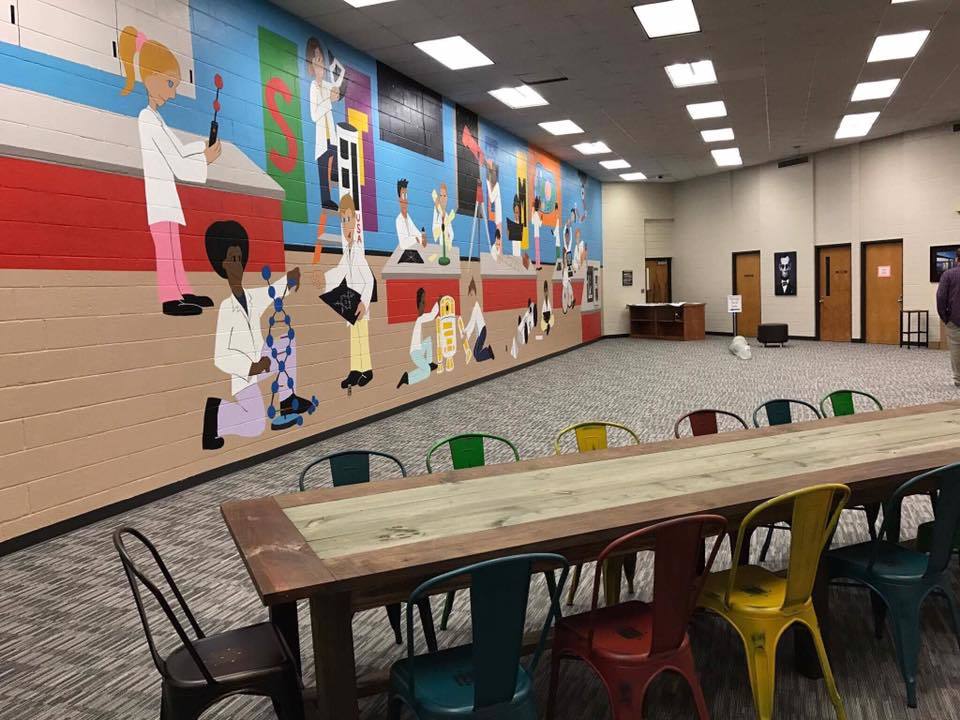
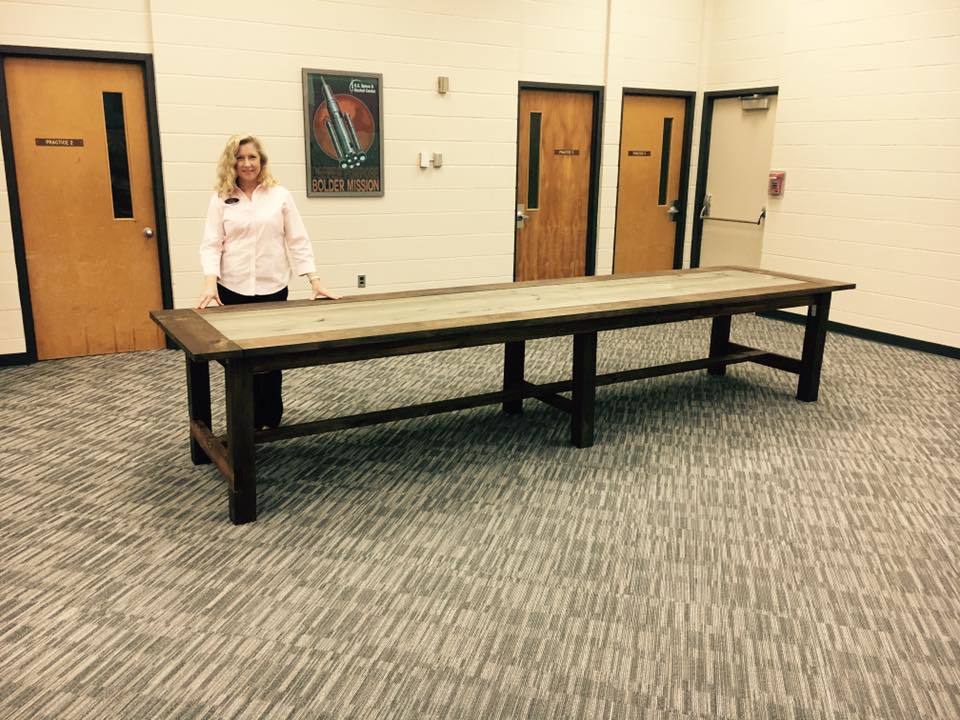
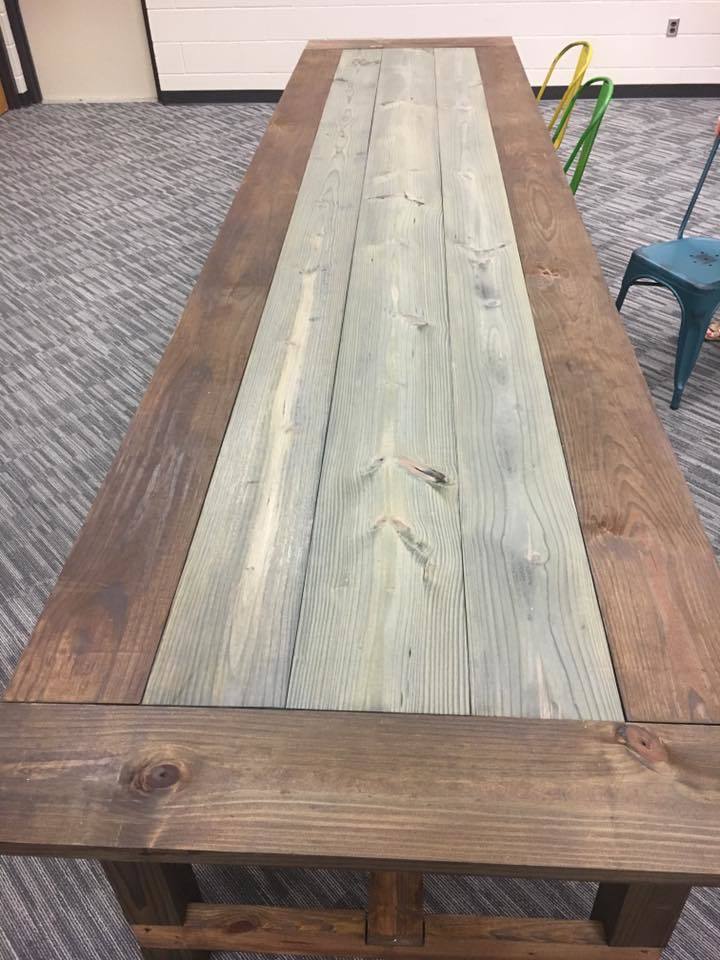
I am not a carpenter, I do not even have a tape measure. I got tasked by my leadership dothan class to build a farmhouse table for the academic dream room which is part of the Bright Key Program. Which is being renovated at Honeysuckle Middle School. Found your plans and got inspired. One glitch they wanted this table to be able to sit fourteen chairs. So I had to make a few adjustments like increasing the main boards to twelve foot. Because of your plans, many urban middle schoolers will have a place to get tutored considering cafeteria tables are so expensive. I am a believer of your plans. The positive feedback I received was well worth my time and would not of been a sucess without your plans. I did mine with pocket holes as well.
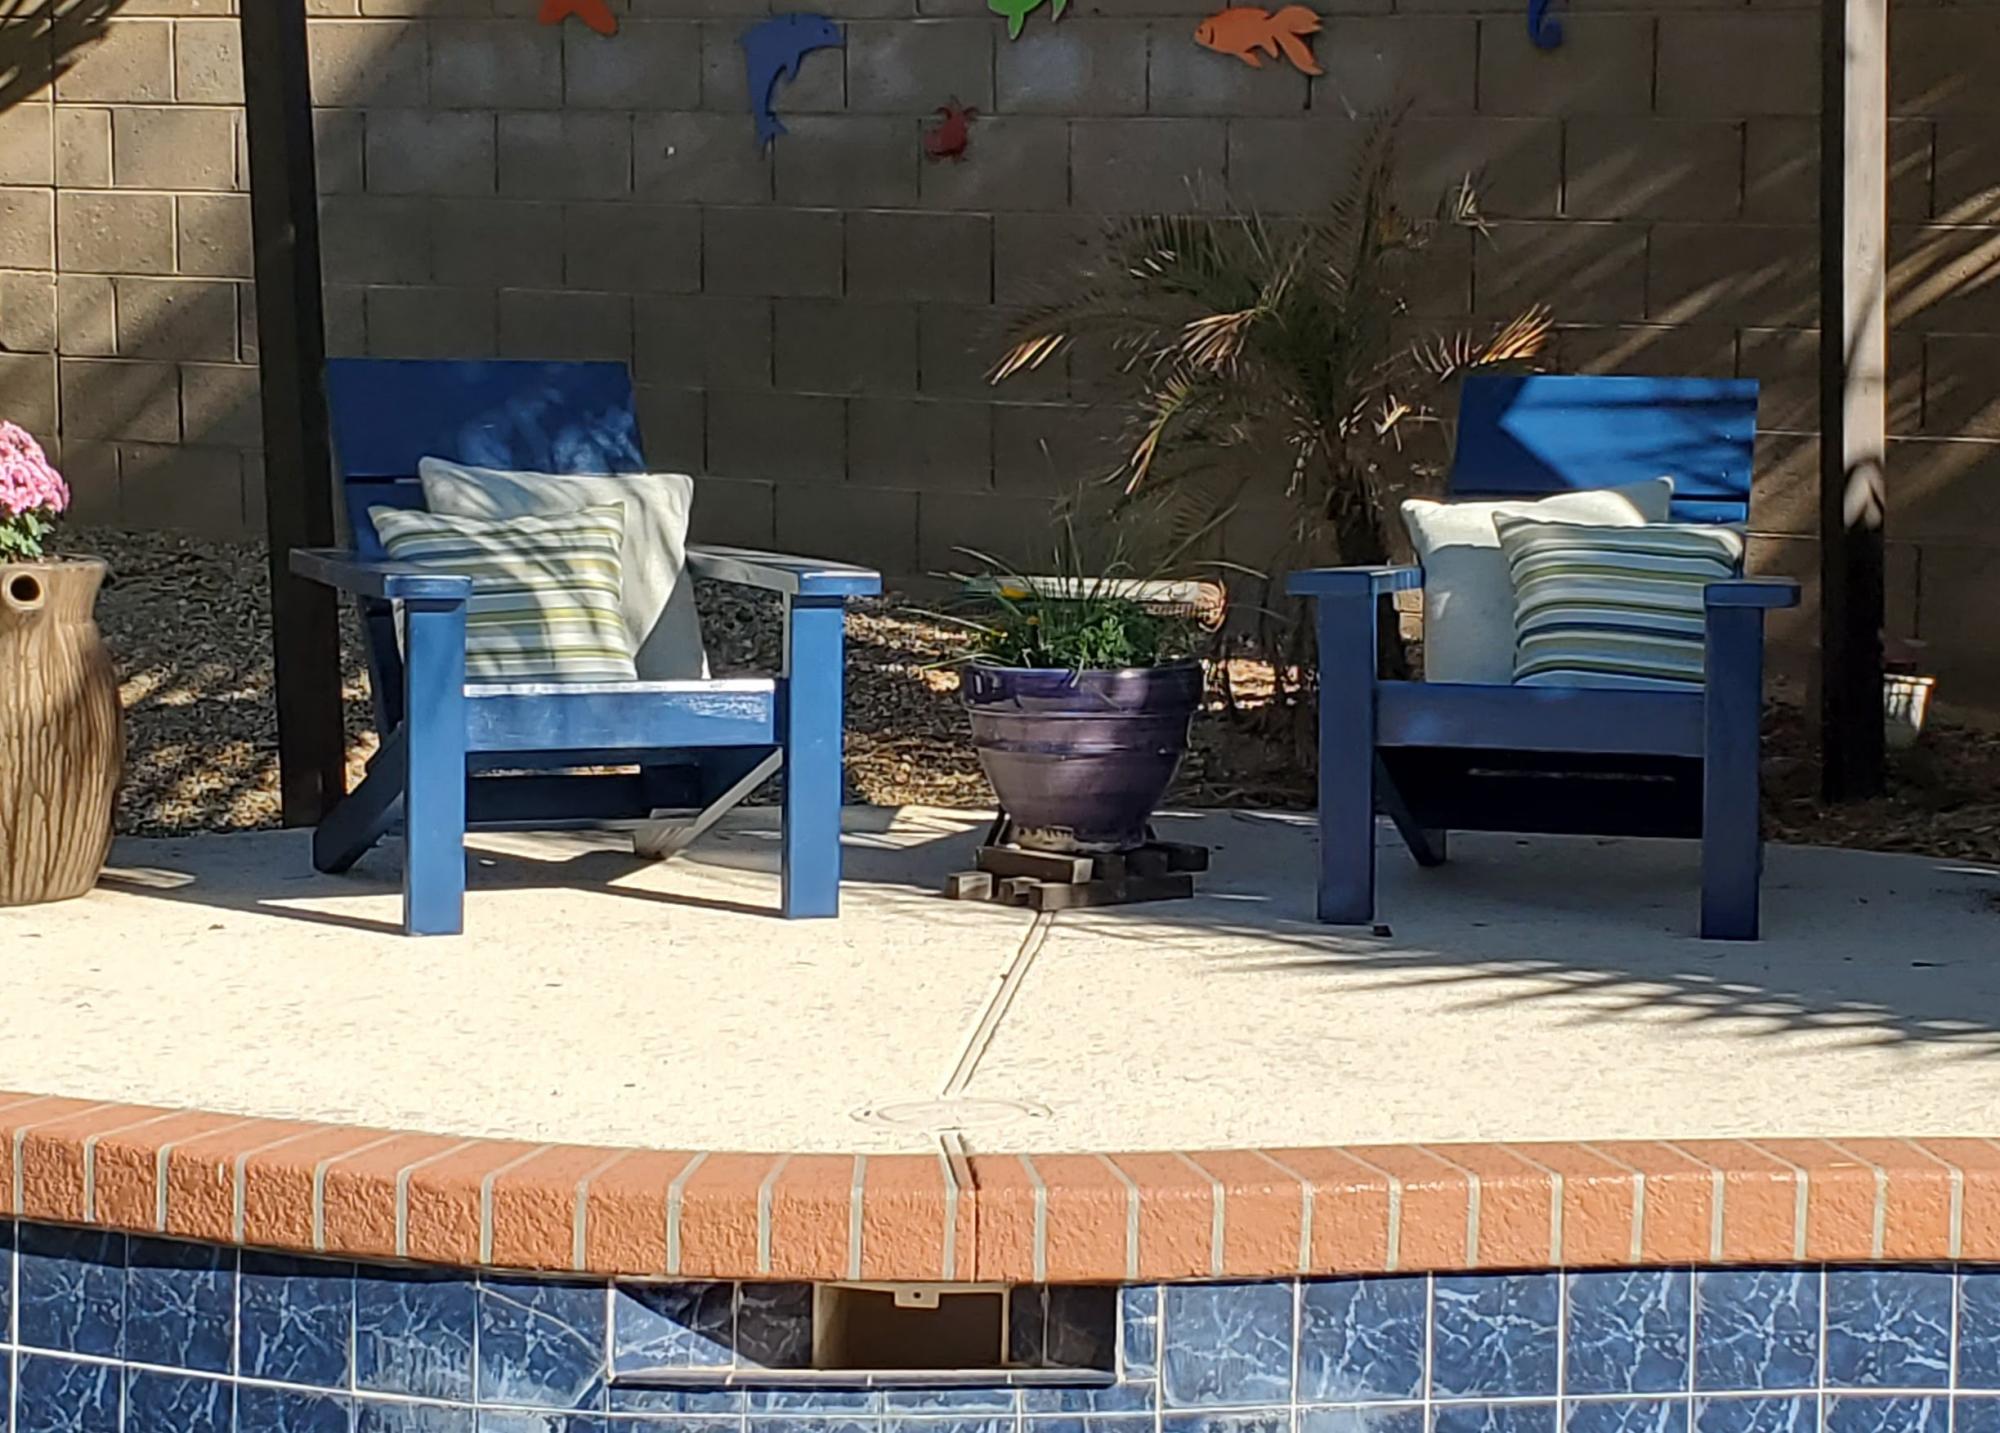
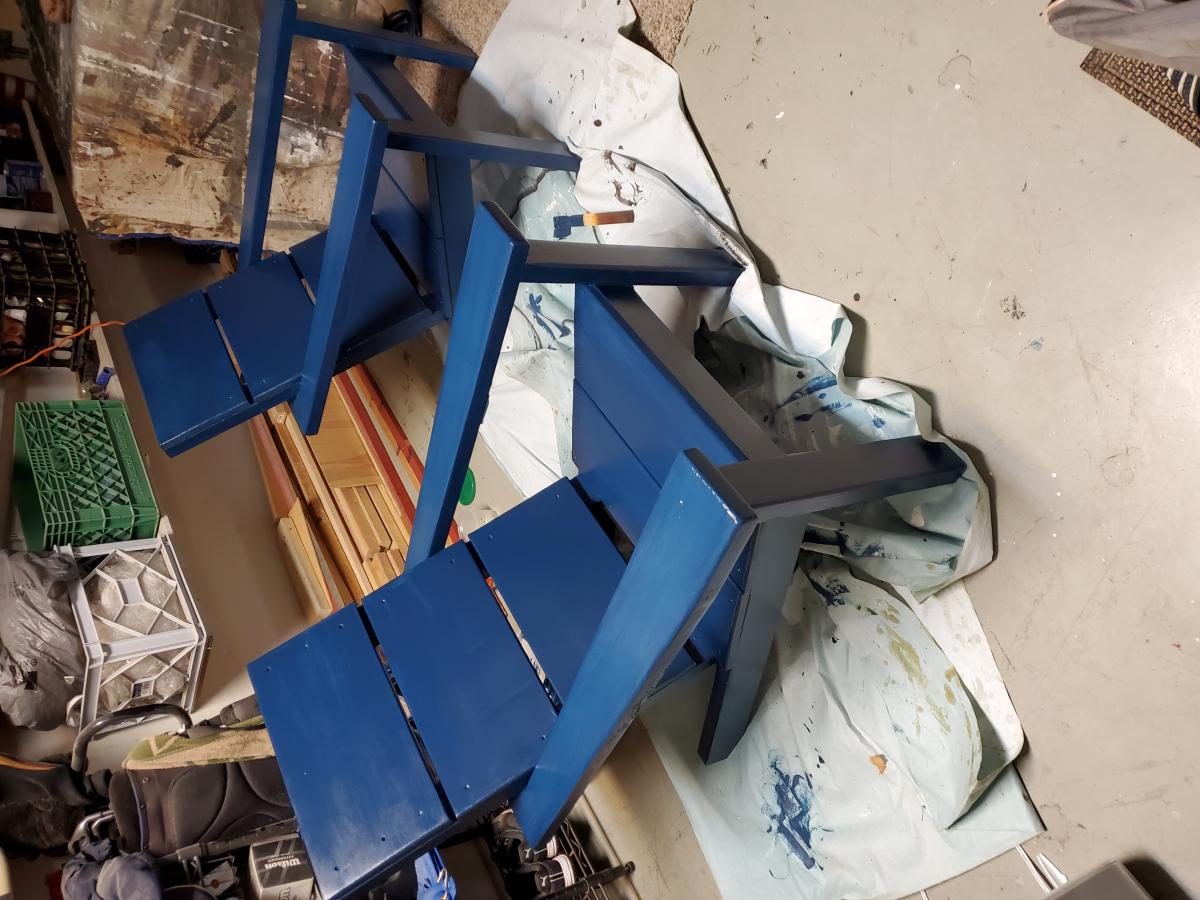
Been wanting to make some Adirondack chairs for years; have about 10 different plans saved that one day I could get to. These 2x4 modern plans made getting them done quickly possible due to simplicity of the cut list and cheap cost of materials. The only real change I made was to use 2x6 for the arms; I cut a taper along outside edge and increased the length of the arms by about an inch and a half to overhang the front legs a bit. Since I just used basic framing lumber, I milled all of the boards first with table saw and planer to make square consistent edges. And, I chose to use pocket screws in as many joints as I could so I wouldn't have screw holes on any visible faces. Add in a lucky find at the big box store paint return; scored this blue exterior paint for $2.00 a quart, and my weekend project turned out pretty good. Now I've got two neighbors that want 'em.
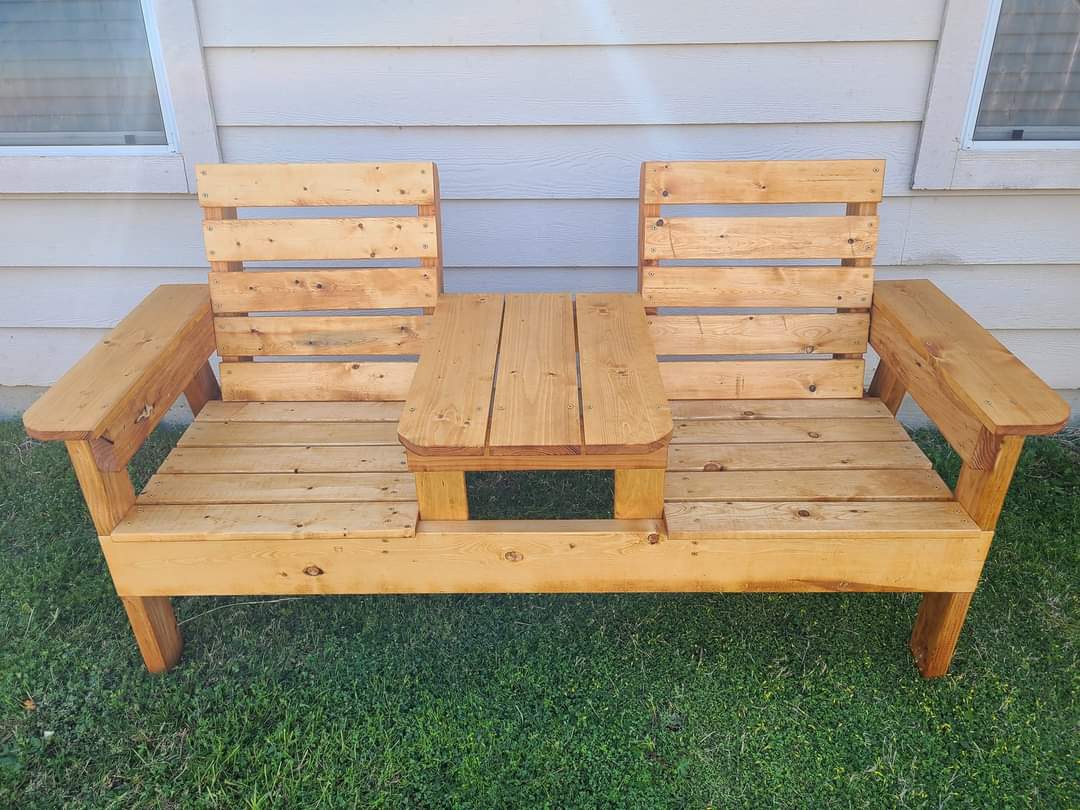
Great bench

We did it in MDF as suggested, used piano hinges, and changed the height to 36" because I'm used to work at counter height and wanted a larger surface, plus I don't mind sewing sitting on my stool. We had the store cut all the pieces, but this table is very heavy using this material. We also made the legs at 4" considering the weight. The only disadvantage of making it 36" high is that the legs will stick out once folded, unless you have the room and adjust the depth at 36" as well. I overlooked that detail but in the end, I don't mind since this table is stored away out of the view when not used. It did soak up a lot of paint... Already used it and it's great to have my space ready to use roll away, not having to clear the counter or dining table to work.

Tue, 01/28/2014 - 05:11
Do you happen to have the new measurement layout for what you did????!!
I was trying to work it out, but math isn't my strongest suit!
Also-- did you consider making it wider so the legs wouldn't stick out??
(I am planning for plywood instead of mdf)
thanks!
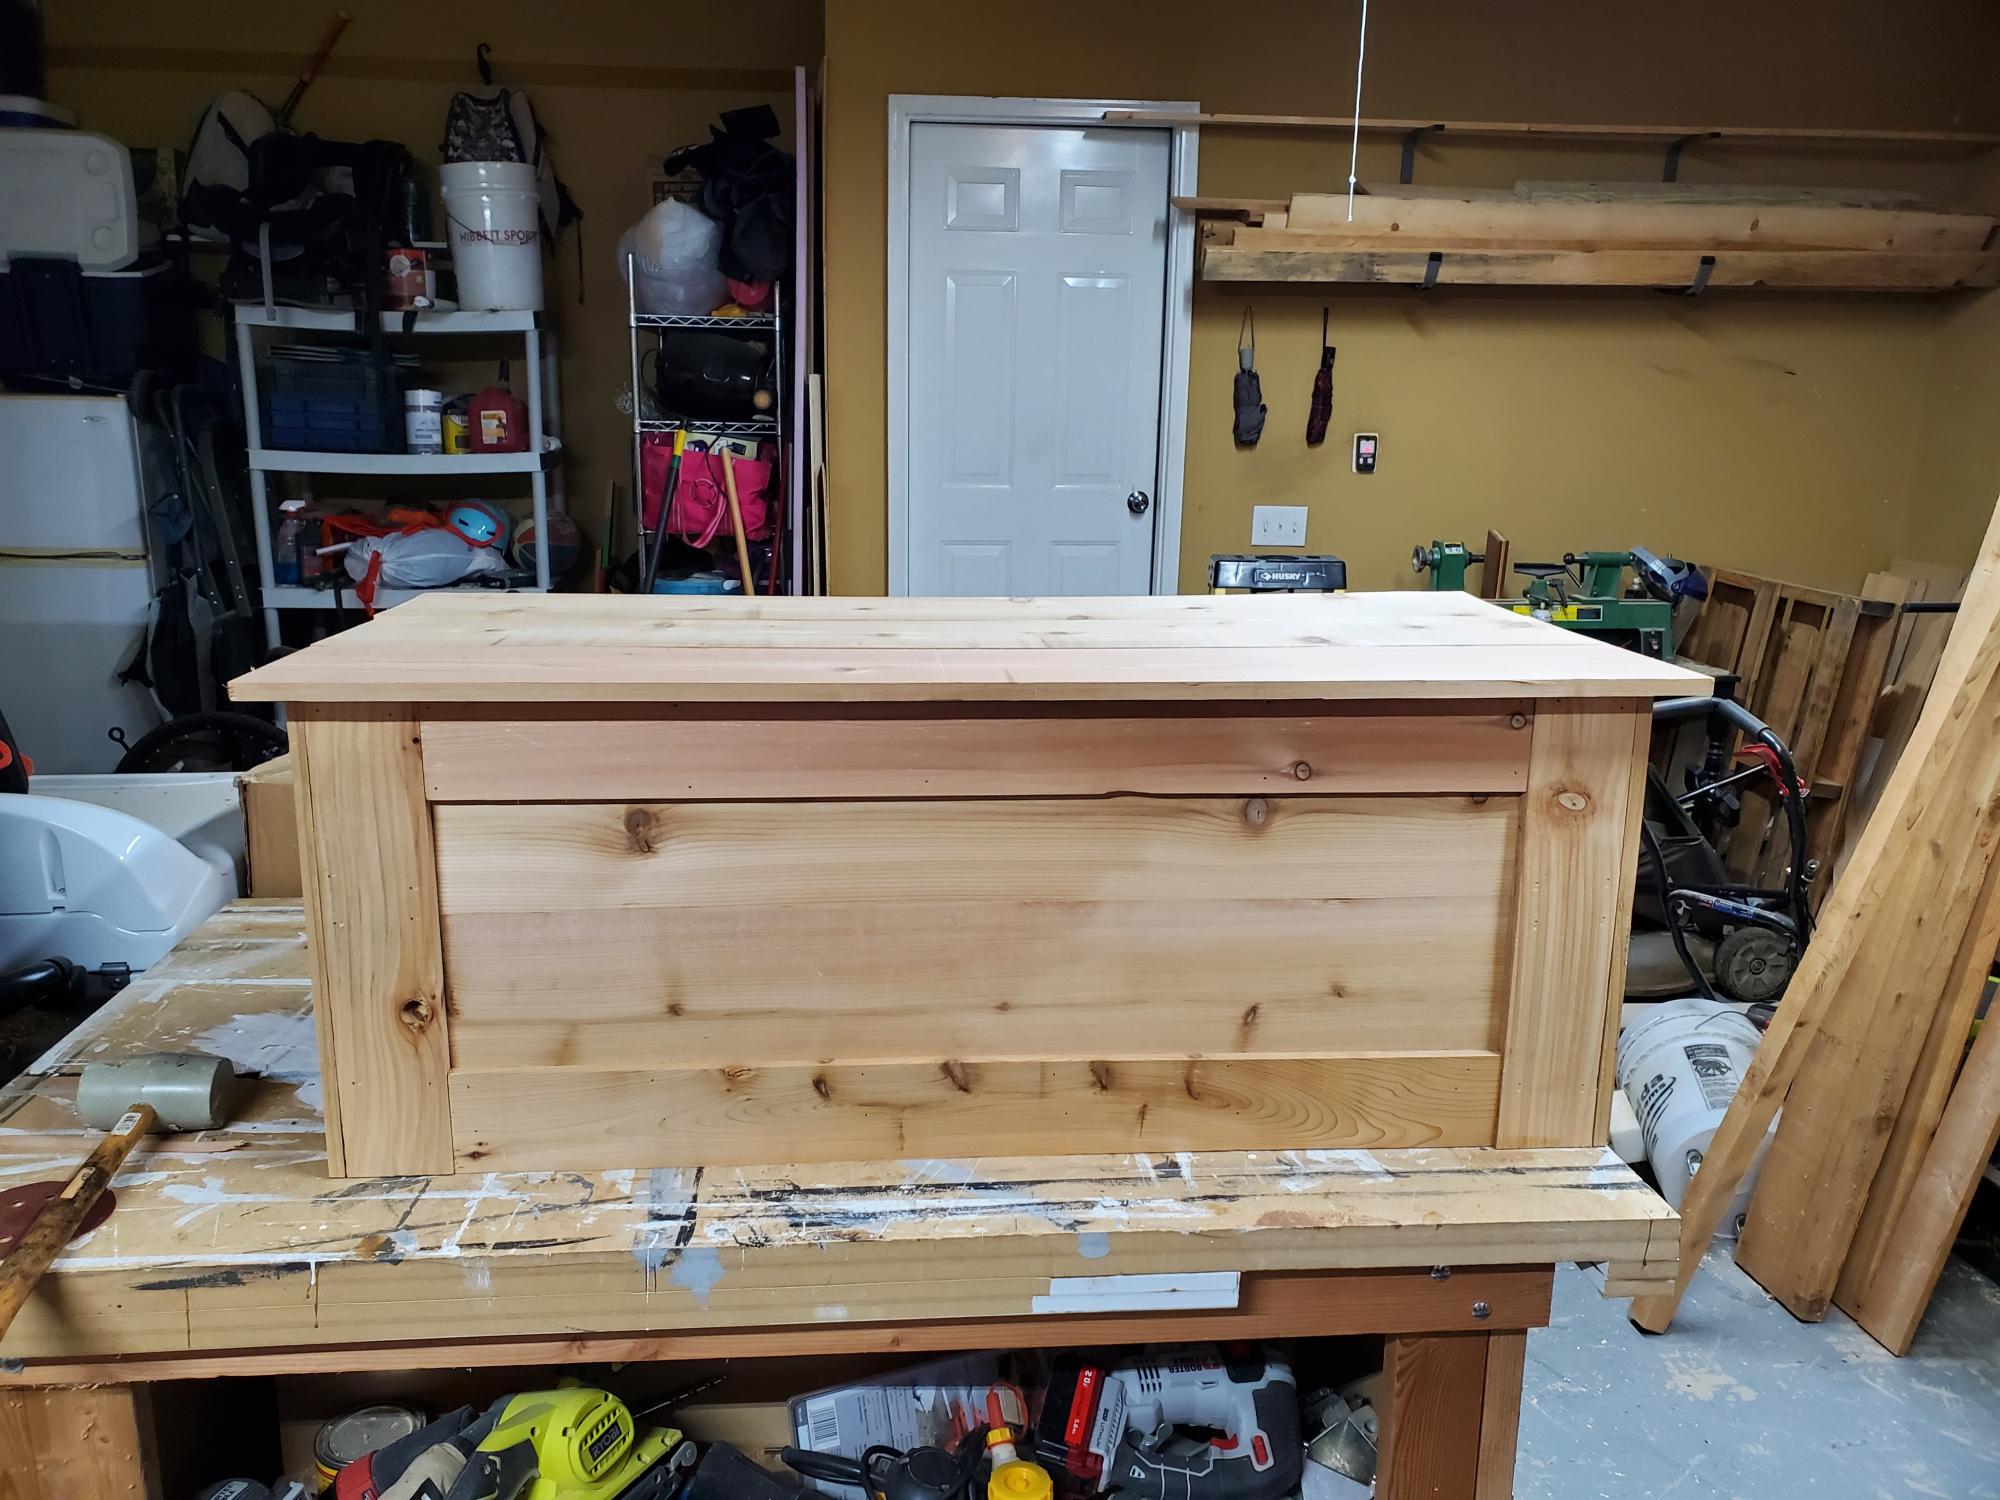
one of my first ana white plans was a cedar outdoor table and chairs that I was never 100% happy with but never the less lasted ten years before yesterday when I decided to undo all the screws (I didn't use glue on this one and it wasn't a kreg project - probably why I wasn't happy with it!).
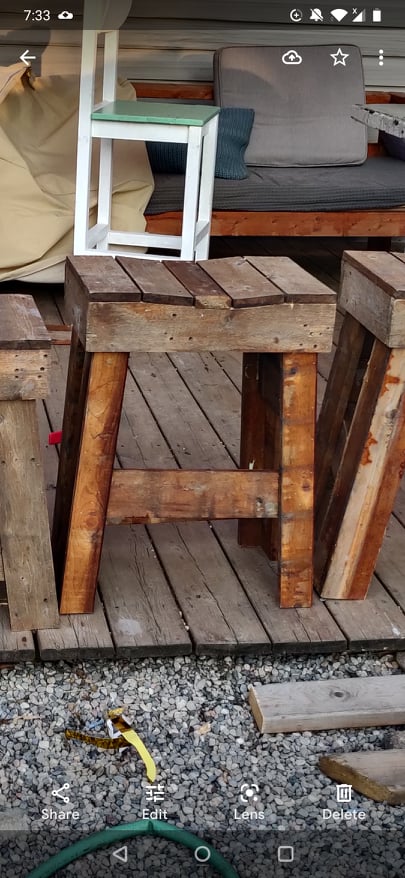
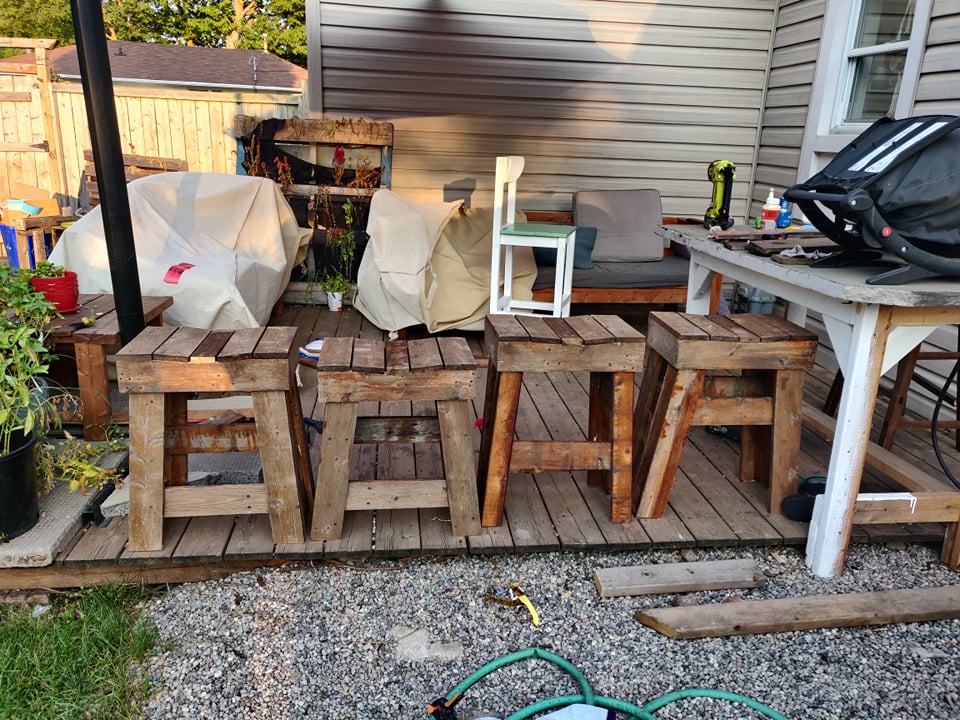
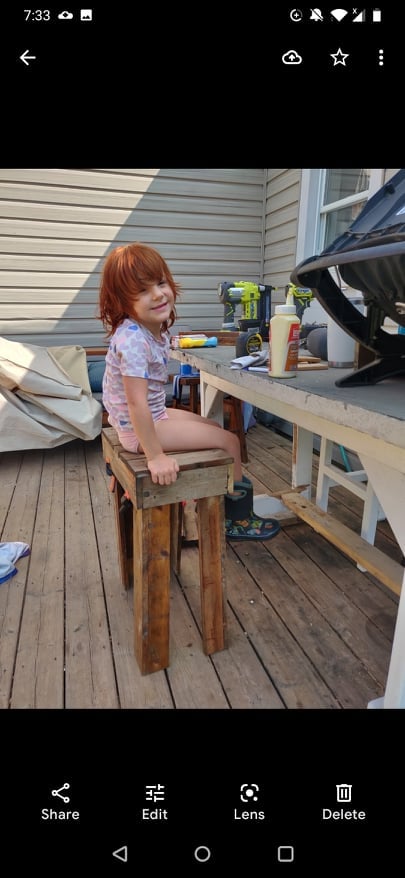
I transformed those simple benches and table into four stools (varying heights for various members of the family) as well as a cedar planter. So the wood was 100% from the previous project so there is a lot of variance in the stain.
I sort of merged the adirondack stool and the farmhouse counter stool patterns as I didn't do both a bevel and a mitre cut I just a 5 degree mitre for the legs.
I used 1x3 and 1x4 for the legs and joined them together to make an L (I saw this on another brag post on the site) because I wanted to reuse the wood that I had leftover from the bench.
I put together the entire project using glues and brad nails but I will be adding some extra screws for longevity.
for the top, I took a 1x4 and traced a slight angle out of the top based on that of another stool I had and cut it out with a jig saw, to make the seat a bit more comfortable than the flat seat on the farmhouse stools. They are very comfortable and this was such an easy mod!
We have a contemporary house on a lake and the standard Adirondack chairs were not fitting in this setup. However, Anna’s modern Adirondack chair plan was just perfect for what we were looking for. The chairs are comfortable and the result is amazing! Thanks!!
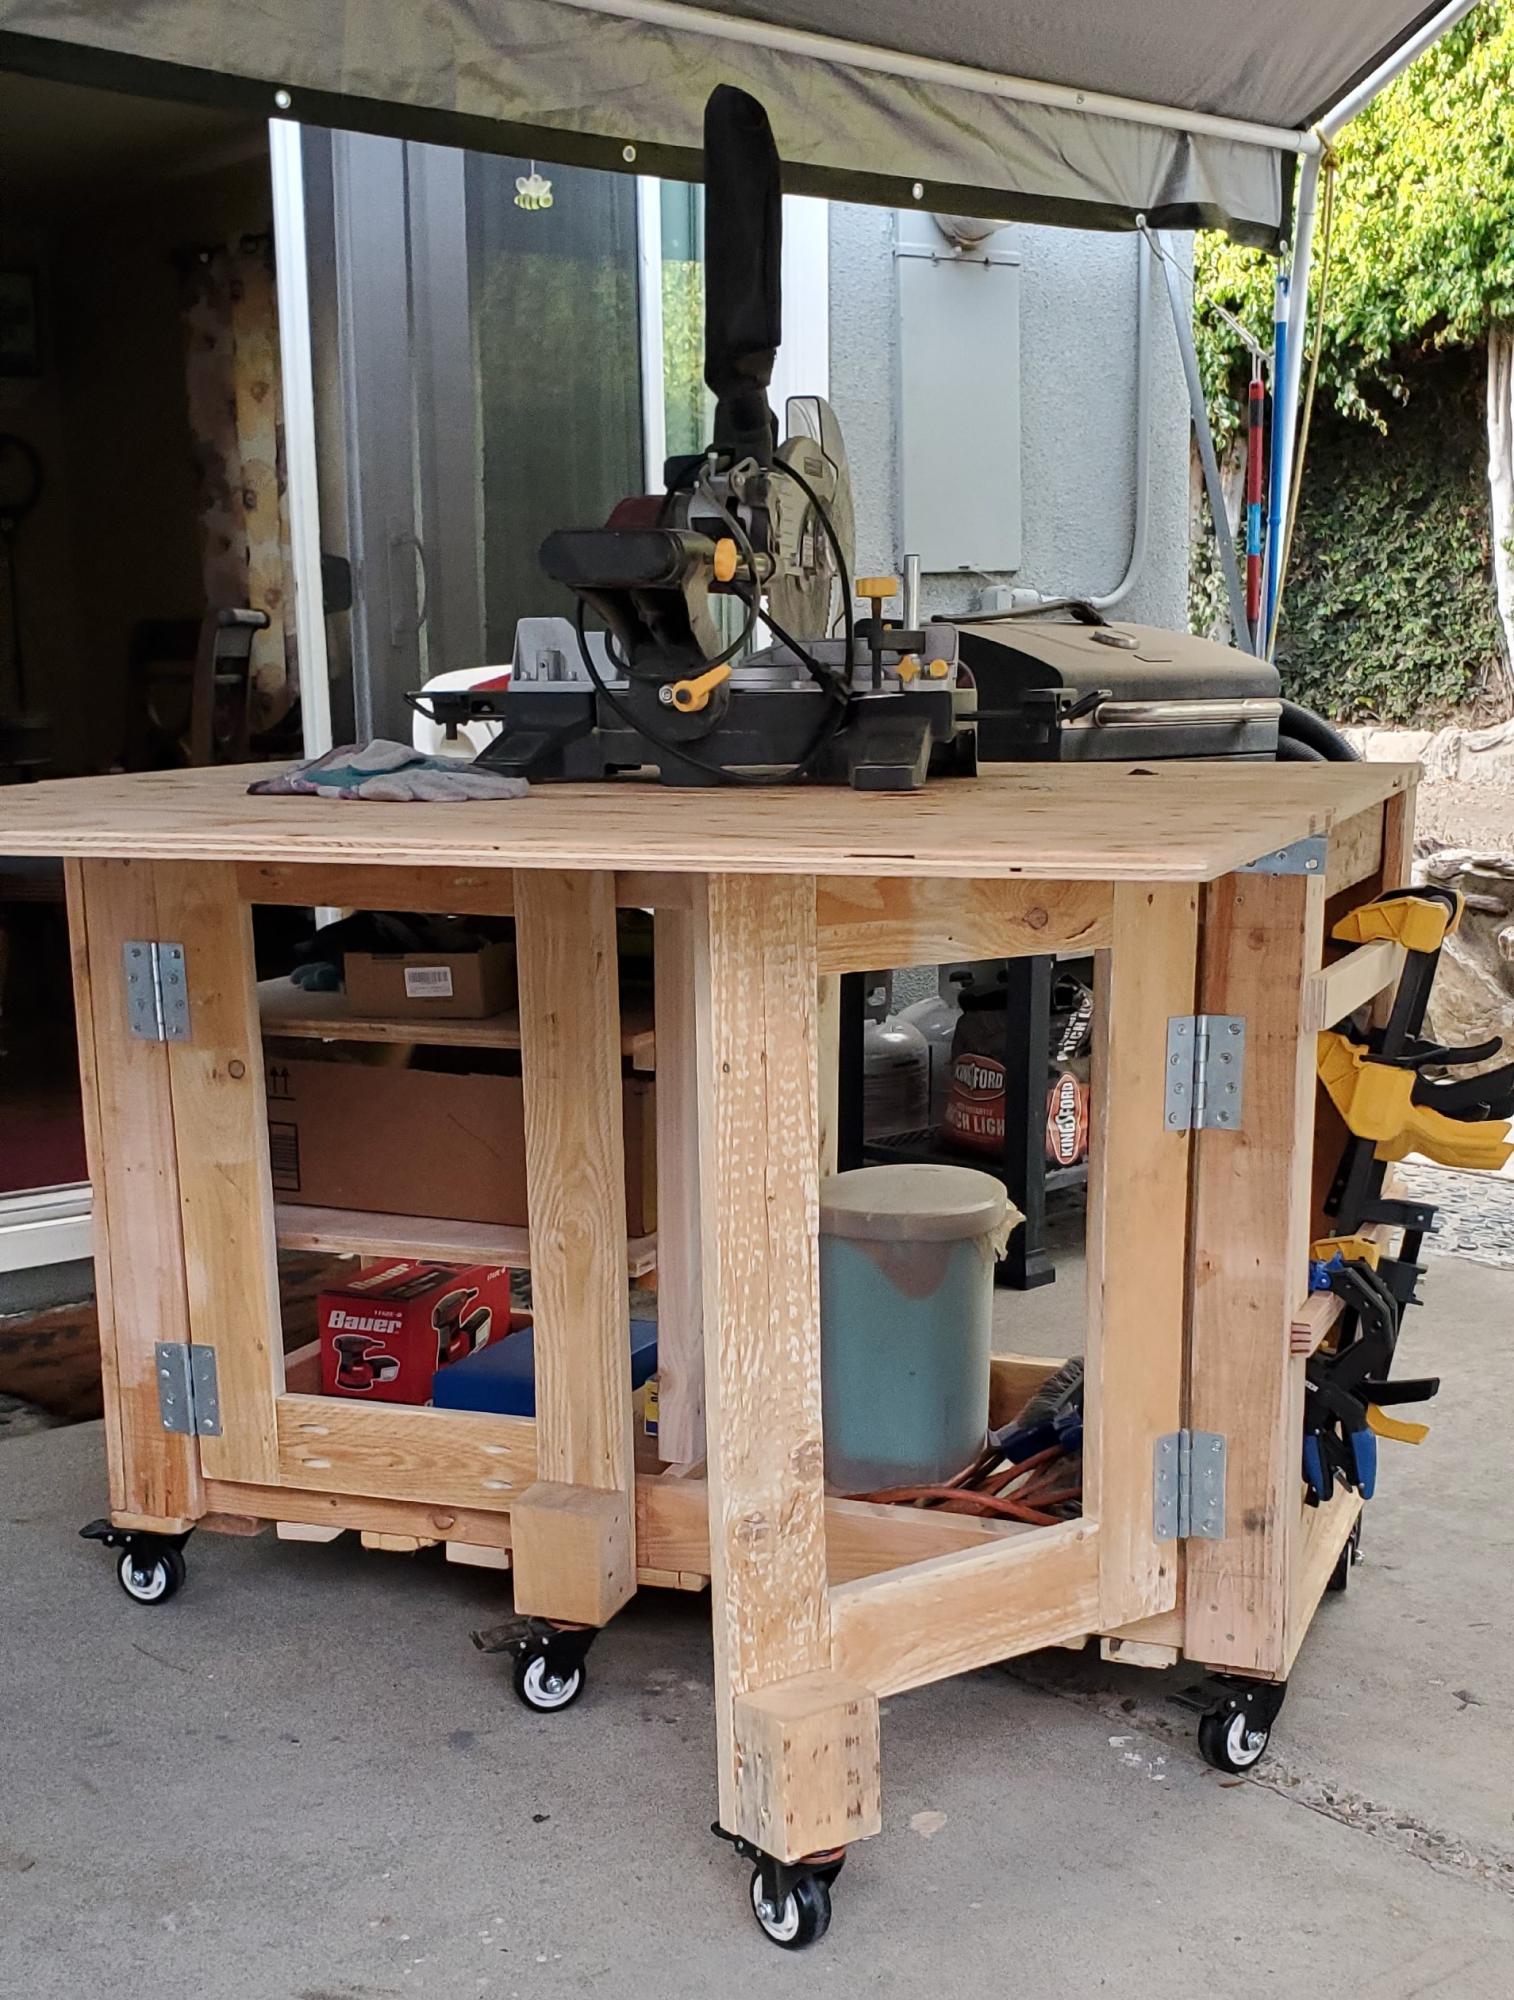
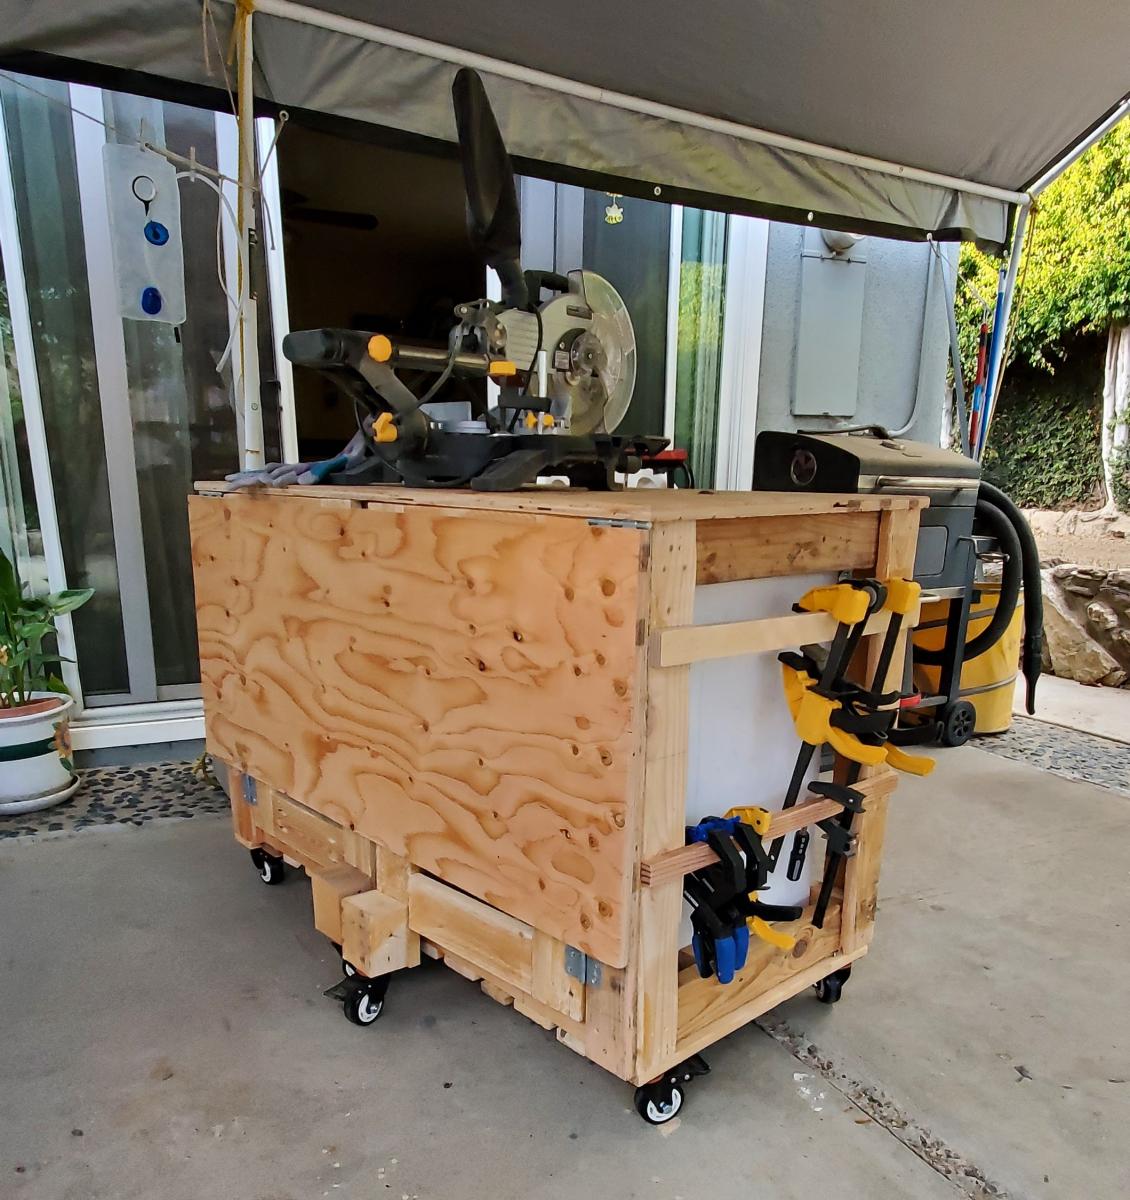
I'm a beginner DIYer and I knew one day I was going to have to make a workbench. I made mine 24x48 so I wanted a little more support to hold up the drop down leaf. I searched your site and found another plan with these gatelegs and knew this is what I wanted. I love the way it came out. What do you think?
I created this from rough cut cedar I glued everything together and finished it off with brad nails and brass hinges. Then I added a poly gloss on the outside.
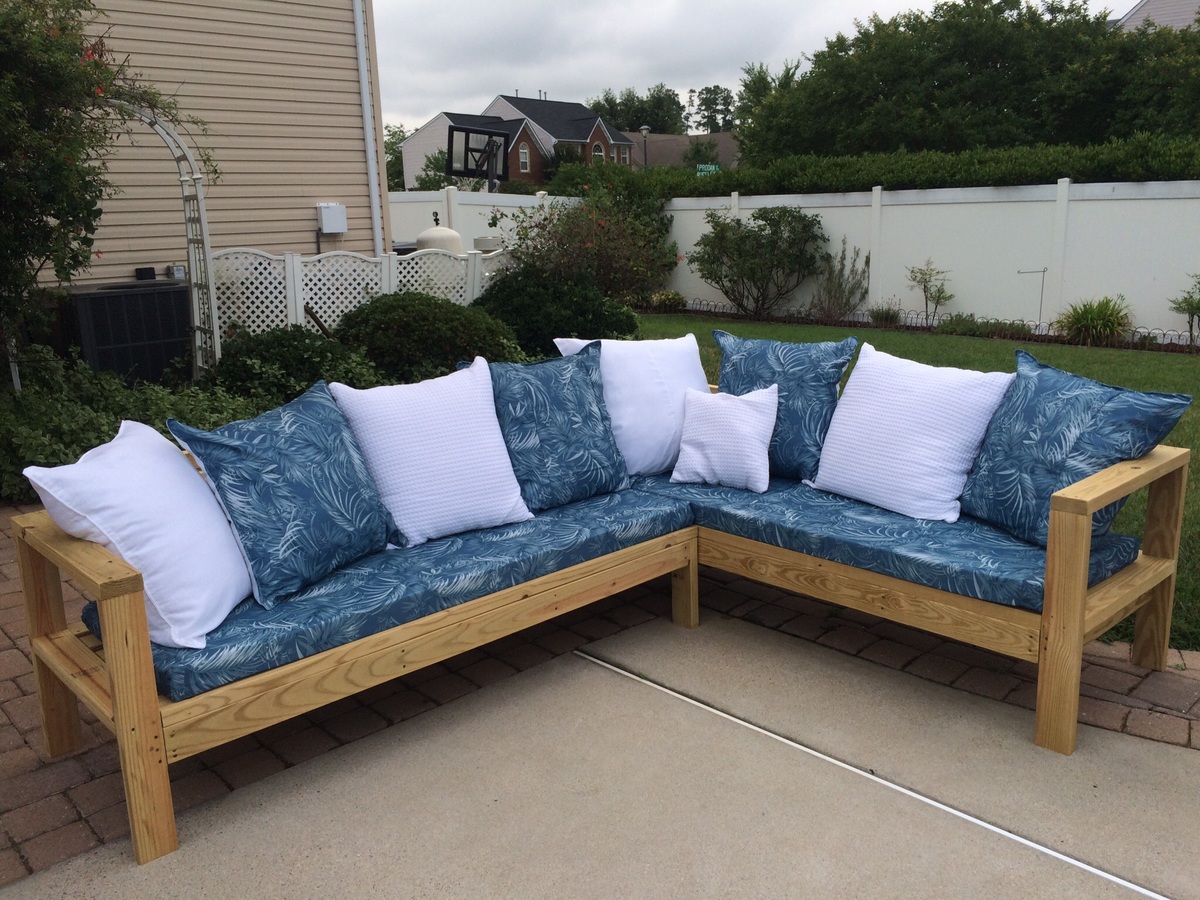
I made the cushions and pillows myself using shower curtains as a cheap and water-resistant fabric alternative. I also ordered the foam and pillow forms on-line. This was a great Father's Day project completed with help from my son and husband. Great plans!
This was my first project. I made it tall so we could work standing, and made it longer so that two of us could work at the same time. The top of the bench was made from 1" MDF to ensure that it wouldn't sag with the extra length.
I meant to put in an extra shelf on each side, but I forgot to get the extra cuts done at the hardware store (oops).It's hard to find a pocket hole jig in the UK, so I opted for a combination of countersunk screws and dowels.
Thanks for the plans, Ana!
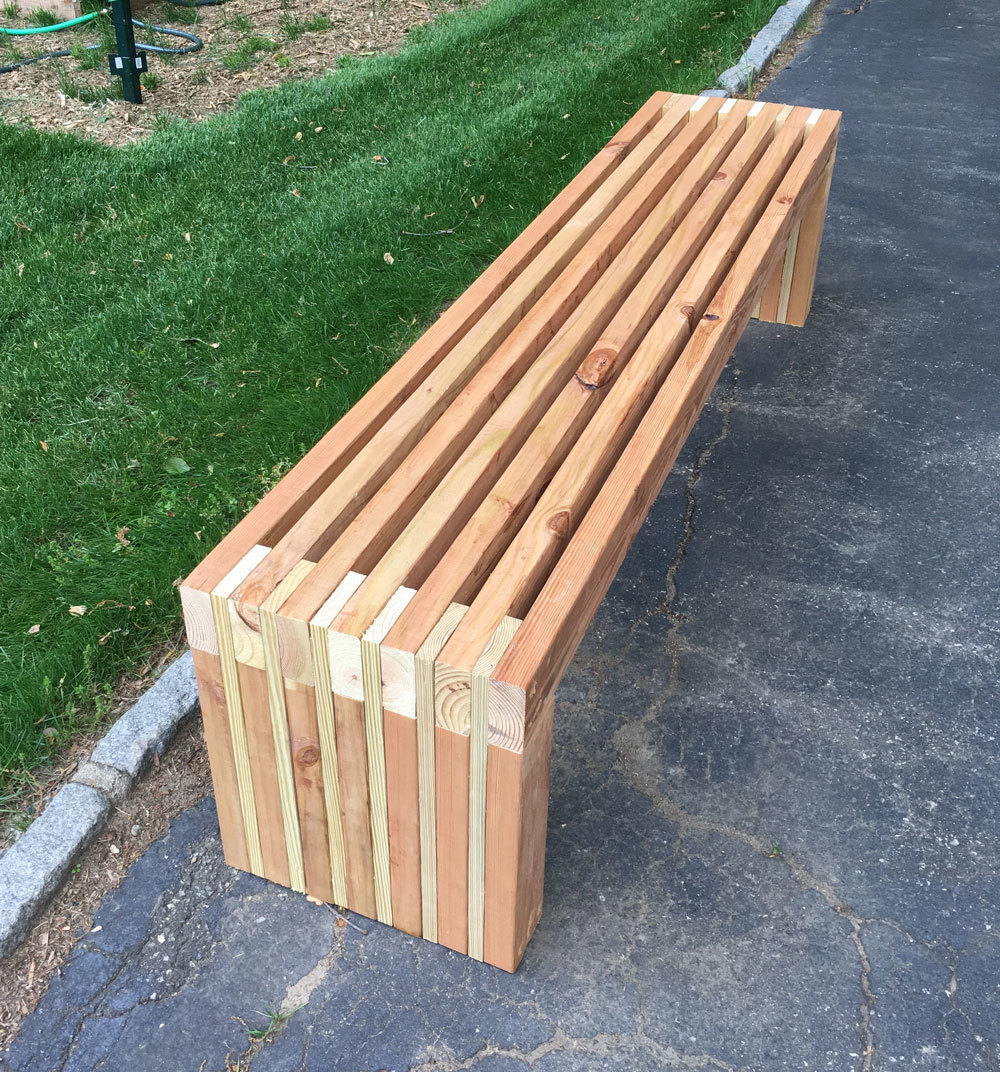
This was such a fun and easy project to do. The bench is super sturdy and I stained it with ready seal in the color redwood.