Community Brag Posts

DIY Cedar Bird Feeder

Submitted by JamieLynn on Fri, 07/19/2019 - 12:48

Took some liberties on this one. Used paint stirrer sticks for the roof.

Built from Plan(s)
Estimated Cost
Used all scraps and paint that I had laying around
Estimated Time Investment
An Hour or Two (0-2 Hours)
Finish Used
Random paints
Recommended Skill Level
Starter Project
Seasonal And Holiday

Firewood Storage

Submitted by Anonymous (not verified) on Mon, 08/05/2019 - 06:19

We took our boys’ swing set apart because it was old and rickety. I build this woodshed out of the parts! I still have to stain or paint it but I thought it was super cute!

Comments

DIY Benchwright Table and Bench

My husband says I have impeccable timing with all of my projects – I say there’s never a bad time to start a project! Case in point – my farmhouse table. I was five months pregnant visiting my parents in Idaho (I live in Arizona) and I decided that it was a good time to finally build the table I had talked of for two years. There’s no time like the present, right? My dad questioned my ability to get the table back to AZ safely, but I threw caution to the wind and would figure it out later! I built the table and matching bench out of hard maple and followed plans based on the Pottery Barn Benchwright series. I had never worked with hardwood before and there was definitely a learning curve. Luckily my dad had some experience with hardwood and he was able to lead me in the right direction. I pieced together the table top and bench top, and then assembled the legs, but kept them unattached from the table top. I built a wooden frame to transport the table to Arizona and attached it to the top of my car. In the heat of an Arizona summer, I proceeded to finish the table by staining it with an espresso stain from Minwax and then attaching the legs. Finishing projects like this always take more time than I anticipate and this table was no exception. After days and days of staining and days and days of drying, I sealed it with a wipe on poly. I lost count of how many coats I applied, but I know it was more than 15. Yes, 15. Wiping it on doesn’t apply a thick layer, so I did a lot of layers. I had to protect it from my 4 kids! I finished just a few weeks before I had the baby. Timing is everything. :) To see more details on the project check out my blog at lifewithfingerprints.com

Estimated Cost
$600
Estimated Time Investment
Week Long Project (20 Hours or More)
Finish Used
Minwax espresso stain with satin wipe-on poly
Recommended Skill Level
Advanced

Comments

Seasonal And Holiday

Thank you!

Submitted by Anonymous (not verified) on Sat, 02/06/2016 - 17:12

Thank you for the plans!  Love the shelves! 

Estimated Cost
$150
Estimated Time Investment
An Hour or Two (0-2 Hours)
Recommended Skill Level
Starter Project

American Girl Doll Couch

Submitted by mybartmart on Thu, 12/05/2013 - 00:51

My friend's daughter's both love American Girl Dolls. I have made them the bunk beds and the Farmhouse bed. But they really wanted a couch. I made them one using some of the elements from the Farmhouse Bed. I used a blue paint with a pickling whitewash stain on top.

I did have a hard time getting a good photo of the finished project.

Estimated Time Investment
An Hour or Two (0-2 Hours)
Finish Used
Blue wall paint, left over with Pickling white wash stain on top
Recommended Skill Level
Beginner

Cat Scratcher Gym

Submitted by homedogas on Thu, 10/10/2019 - 03:44

This project started with the need of a cat scratcher and evolved to this! :D

Buying one was out of the question cause they are too small and too expensive.

Even the dog loves it!

I dont have any plans because it was made to fit that specific wall and its pretty basic but if you have any question about it I will gladly answer. 

Estimated Cost
90
Estimated Time Investment
Day Project (6-9 Hours)
Finish Used
Vieux Chêne
Recommended Skill Level
Beginner

My Outdoor Bar Table

Submitted by schackjw on Mon, 06/01/2020 - 09:46

This is my first project, based on your outdoor bar table plan. Great design. I changed the top a little, still needs a little work.

Built from Plan(s)
Estimated Cost
$150
Estimated Time Investment
Weekend Project (10-20 Hours)
Finish Used
Painted with the Limousine Black in the plans.
Recommended Skill Level
Beginner

Rustic X Kitchen Island with 4x4 Legs

Submitted by Rich2727 on Fri, 06/20/2014 - 10:52

In order to make this island a little beafier I used 4x4 wood for the X as well as the the top and bottom braces. Top is made up of glued up 1x3 maple wood. It looked really good raw, but decided to stain it to give a more uniform look. I bought the rustic handles and the bottle opener on Amazon.com. I used lag bolts and washers for the finishing accents...similar to the pottery barn island. Painted them with Rustoleum oil bronzed paint and then dabbed it with a paper towel to give it a rougher finish to it and then sprayed the casters as well. This was a fun project and are getting a lot of use out of it. Thanks goes to Anna for the plans and inspiration for this island. Rich

Built from Plan(s)
Estimated Cost
$300
Estimated Time Investment
Week Long Project (20 Hours or More)
Recommended Skill Level
Intermediate

Comments

Mriddle

Fri, 06/20/2014 - 11:44

i keep debating if i should do this, you did a great job. i like the 4x4 sides.

Susan Hubbard

Sun, 06/22/2014 - 08:25

Rich, I love the changes you made with the 4x4's. You made a gorgeous piece of furniture! Can you share with me where/how you attached the drawer/shelf sides? I'd like to follow how you made this, but can't tell from the pictures. On the original they look inset from the 2x4's, but your space is taken up by 4x4's. Would you mind sharing??? Thanks!

Rich2727

Mon, 06/23/2014 - 16:36

So, I ripped the 4x4 cross pieces down by 1/2" so that the side panels would rest inside the rectangle and flush with the 4x4 frame and up against the X.

Did that make sense?

Susan Hubbard

Mon, 06/23/2014 - 18:28

That's what I thought, but I wanted to make sure. I'm going to make one similar to yours :)

Susan Hubbard

Mon, 06/23/2014 - 18:28

That's what I thought, but I wanted to make sure. I'm going to make one similar to yours :)

Wall organizer

Submitted by Taa-daa on Thu, 09/29/2016 - 12:33

This organizer is perfect for an entry way! Hooks are at the hight of my toddler so he might learn one day to keep his coat of the floor. Few things are different from Ana's . I do not own a tool to make pocket holes so I had to improvise a bit and I used an old yoga mat instead of pin board. Thank you for this one!

Estimated Time Investment
Afternoon Project (3-6 Hours)
Finish Used
Mat white paint
Recommended Skill Level
Beginner

Rustic Breakfast Bar

I built this bar for my mom to use i her dining room. I altered the plans for the X Style Desk to build this at bar height. This was my first time distressing anything and was pleased with the outcome. i used one coat of Minwax Dark Walnut stain and two coats of Minwax clear satin finish. White shellac Based primer, brown egg shell paint and Green egg shell paint for the base and sanded for the distressed look. I used dimensional pine lumber from the home center to build this with.

Built from Plan(s)
Estimated Cost
$200
Estimated Time Investment
Weekend Project (10-20 Hours)
Finish Used
Minwax Dark Walnut stain and Clear satin Poly. White shellac Based primer, brown egg shell paint and Green egg shell paint for the base and sanded for the distressed look.
Recommended Skill Level
Beginner

The Traditional Wood Toddler Bed

Submitted by jputz2014 on Fri, 08/01/2014 - 05:39

This is The Traditional Wood Toddler Bed. Built straight from the plans. Worked out great and my daughter loved it!

Built from Plan(s)
Estimated Time Investment
Afternoon Project (3-6 Hours)
Finish Used
Unfinished for now. Daughter cant decide on a color.
Recommended Skill Level
Beginner

Drop leaf round storage table

This table is perfect for our screened in porch at the lake house. Everyone seems to gather there so we have rockers and casual seating. When we want to eat out there we just open the table and move it to the center.

Built from Plan(s)
Estimated Cost
75.00
Estimated Time Investment
Afternoon Project (3-6 Hours)
Recommended Skill Level
Beginner

Comments

Jake

Thu, 11/29/2012 - 04:22

NCLimo...you do really excellent work. I shy away from curves because my jig saw has a mind and GPS of its own. And to build this table in an afternoon is amazing. I would probably take several days. Keep the projects coming and offer any advice you can throw my way.

Modern Outdoor Chairs (modified for 24in cushions)

Submitted by Anonymous (not verified) on Wed, 11/25/2020 - 18:25

I built two of Ana's "Modern Outdoor Chairs" and adjusted the plans to accommodate 24" in cushions. We're pleased with how they turned out and have gotten great use out of them. Thanks for the plans, Ana!

Estimated Cost
~$60 per chair (not including the cushions)
Estimated Time Investment
Weekend Project (10-20 Hours)
Finish Used
I used the exact finish that Ana recommended.
Recommended Skill Level
Starter Project
Seasonal And Holiday

Modified Octagon Picnic Table

I built the octagon picnic table, and modified in a couple of ways.

1) Due to project deadline (Christmas) (and cost) I opted for composite decking for a finished top and bench, and pressure-treated 2x framing stock. Builder beware! Composite decking can be 5 1/4" wide, which impacts the spacing between the pieces, which means re-calculating most of the table-top pieces. Also, I added lateral structure underneath the benches (more weight!)

2) I really wanted that hole in the center, and hope that my solution (which slightly weakens the overall structural integrity) withstands the test of time.

Built from Plan(s)
Estimated Cost
350
Estimated Time Investment
Weekend Project (10-20 Hours)
Recommended Skill Level
Advanced

Cedar Chest

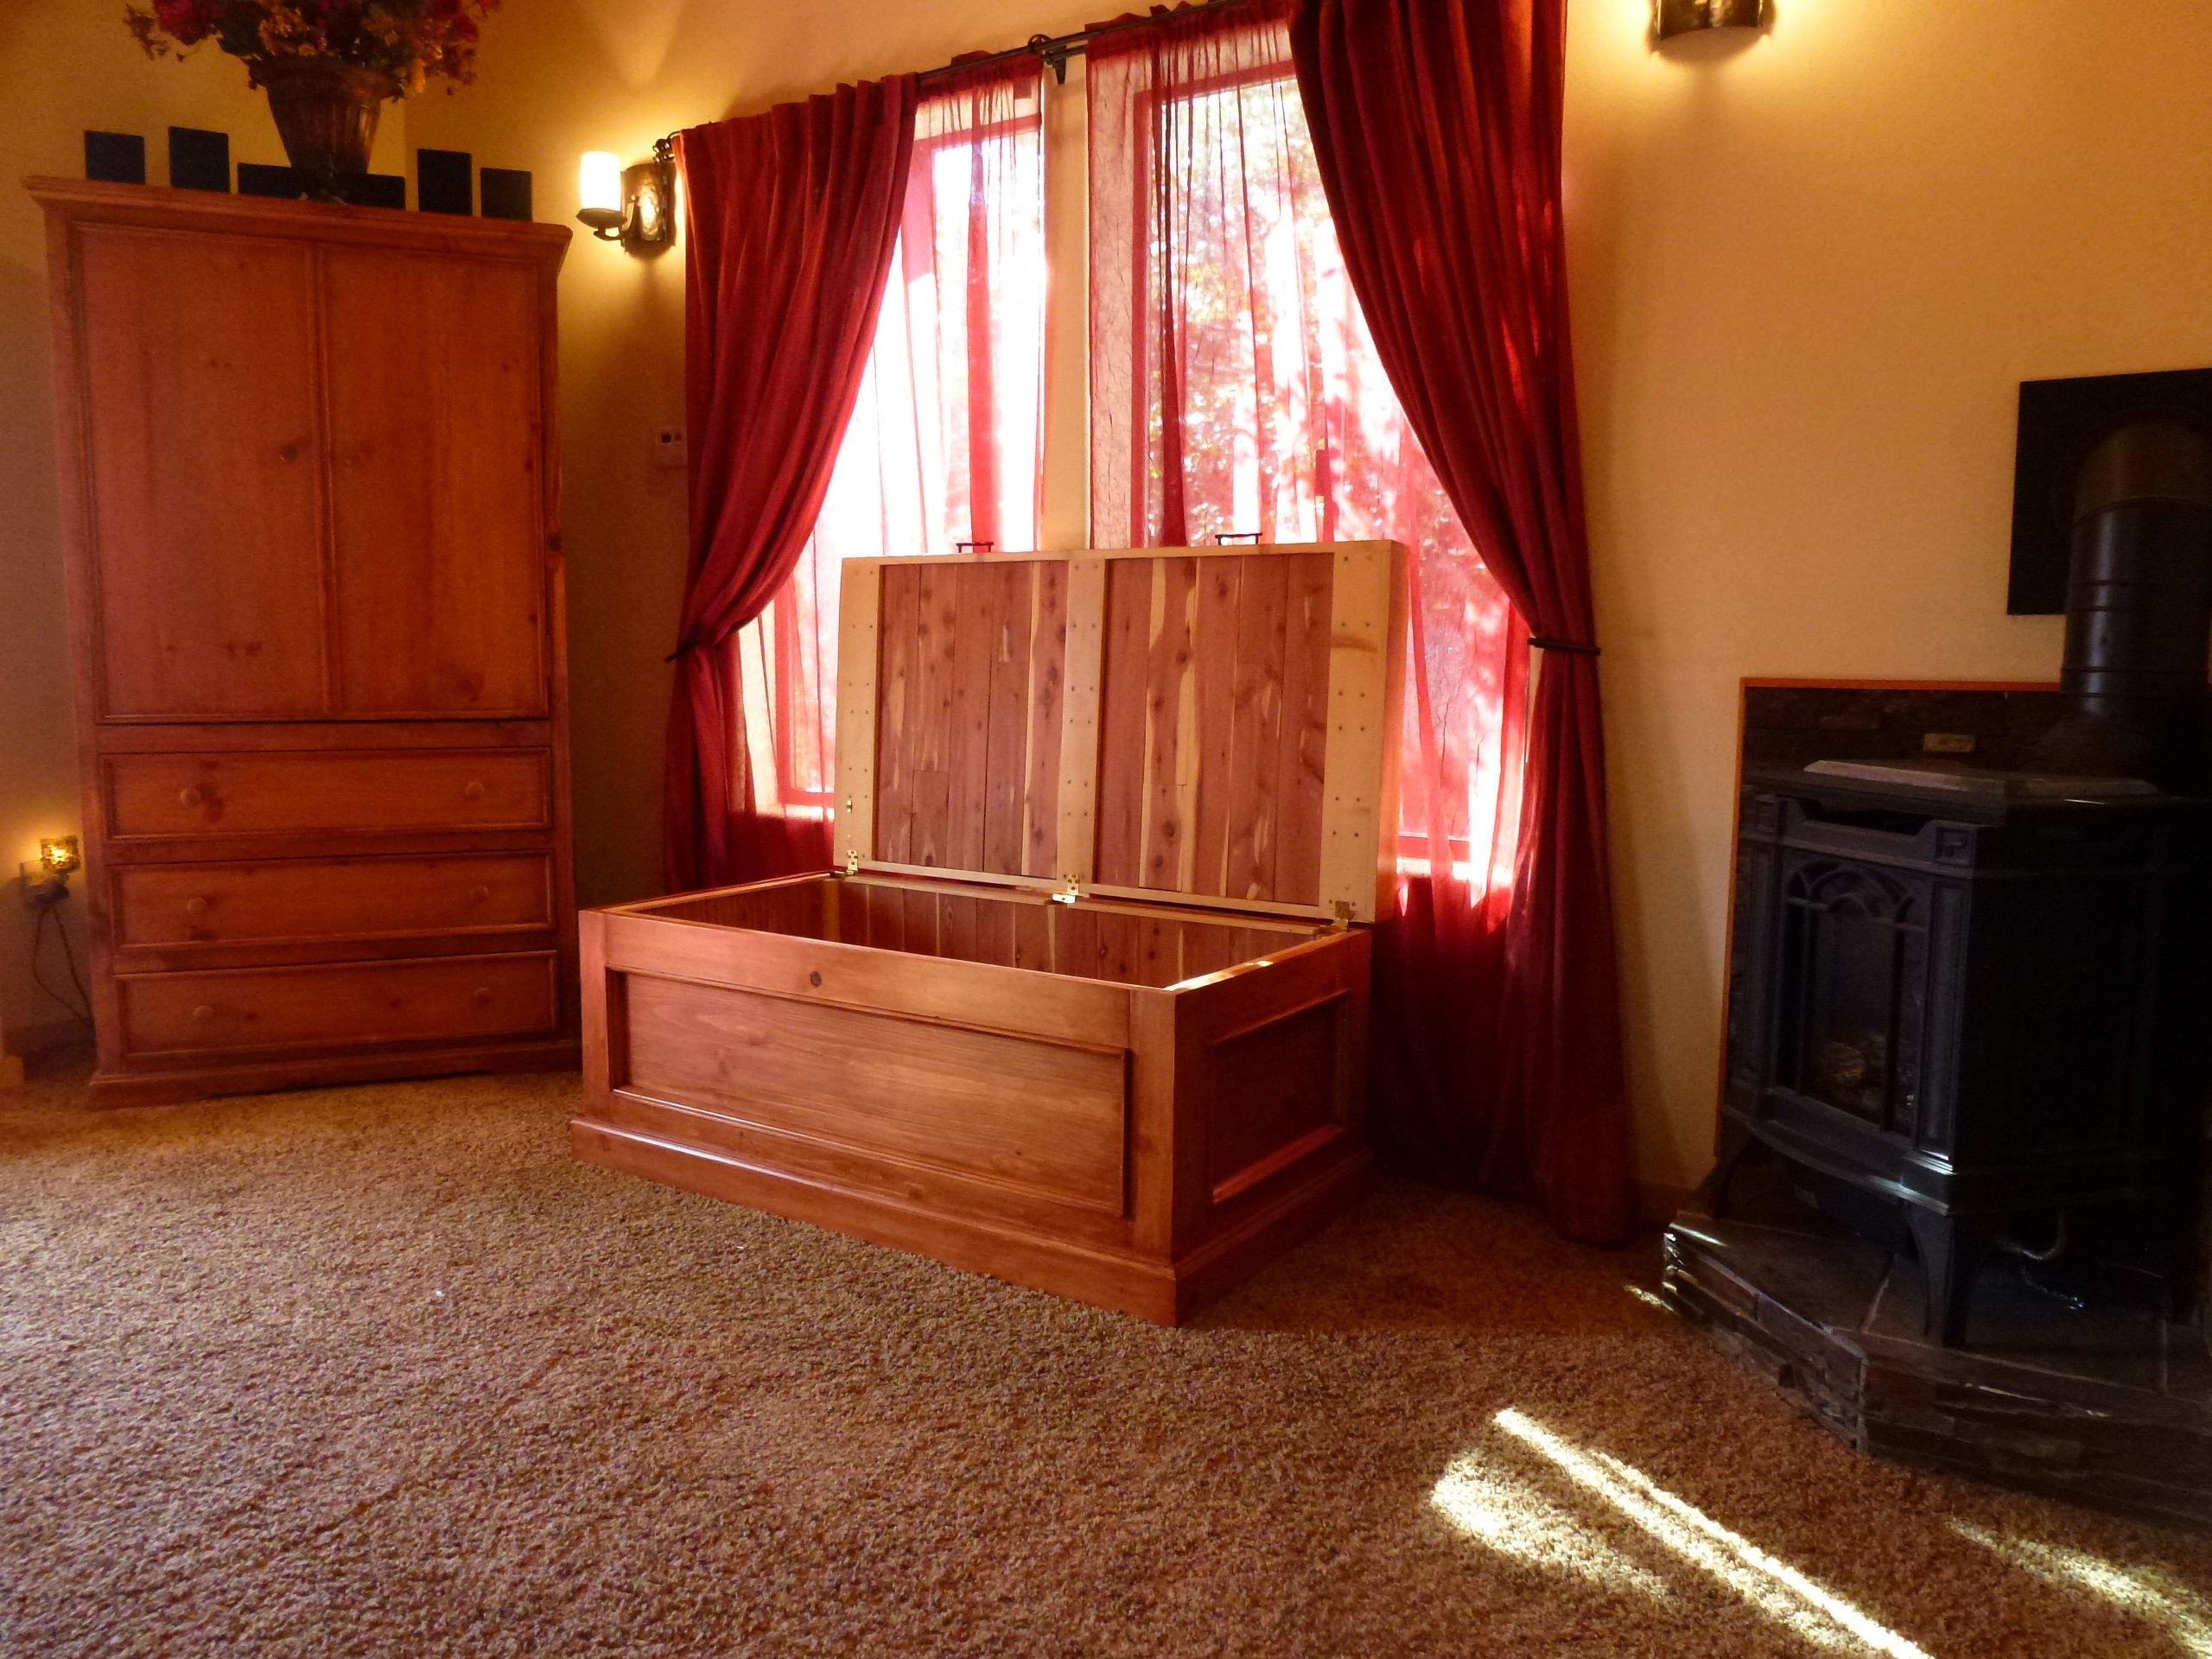
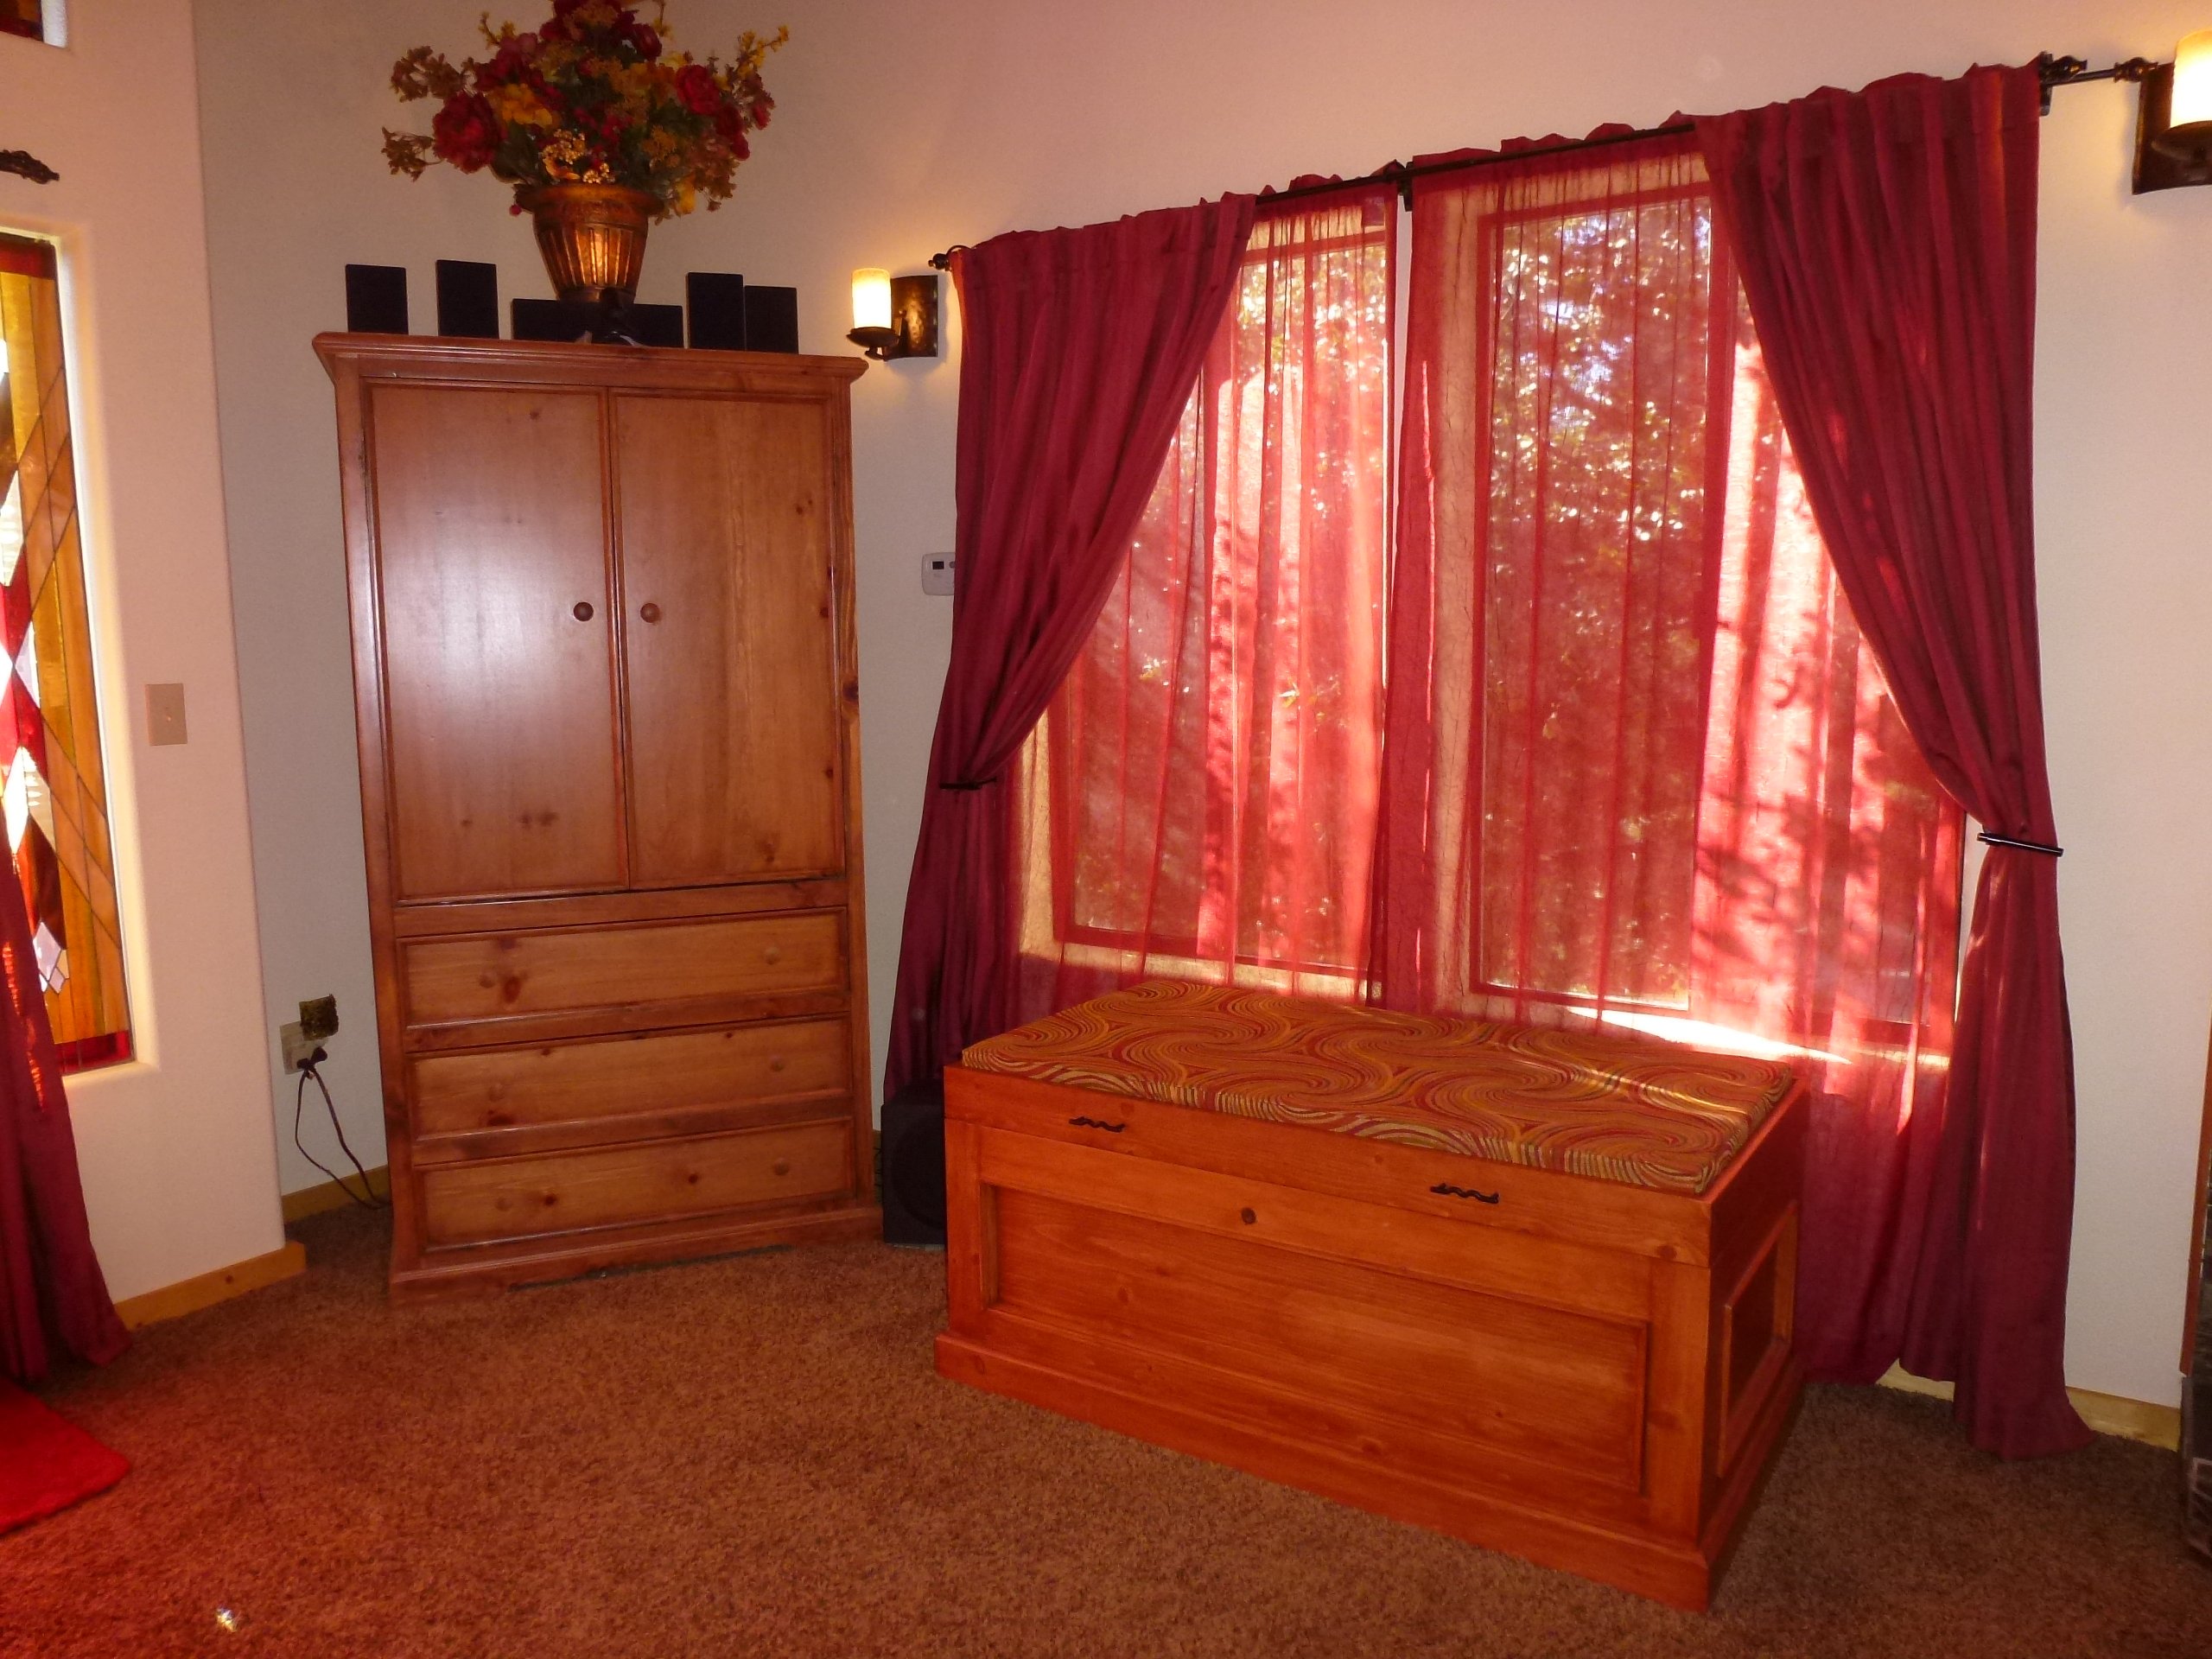
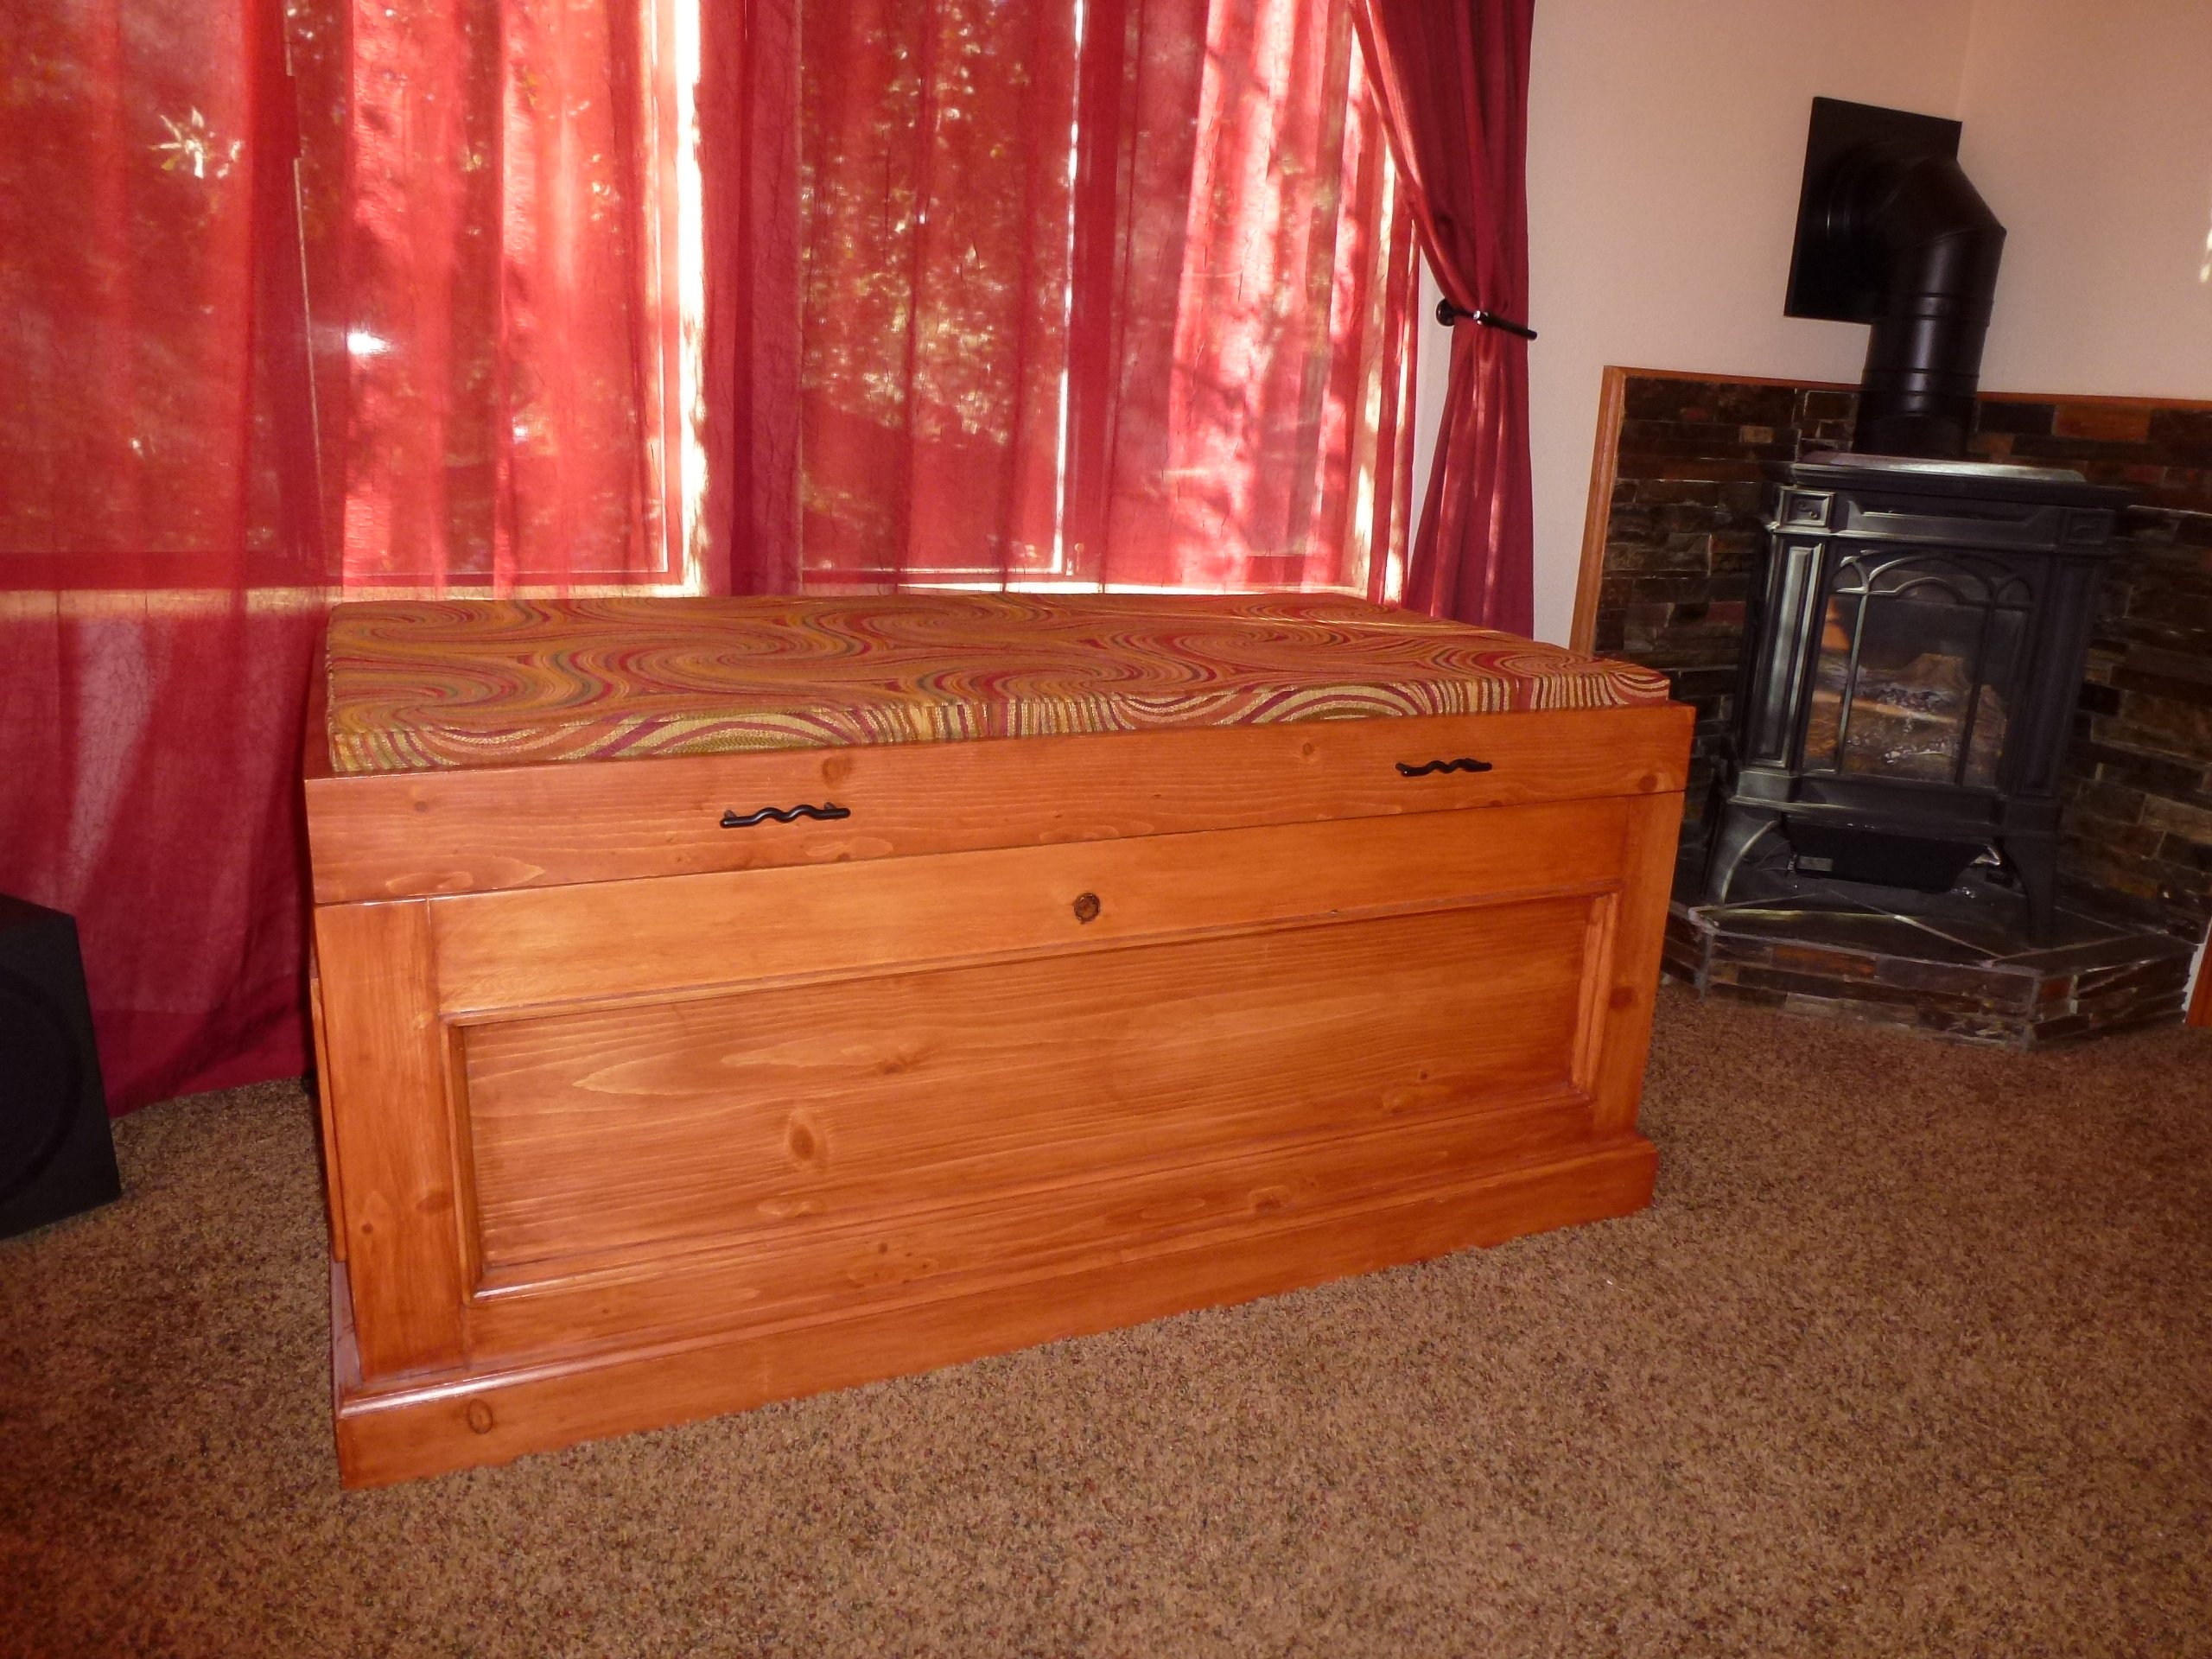
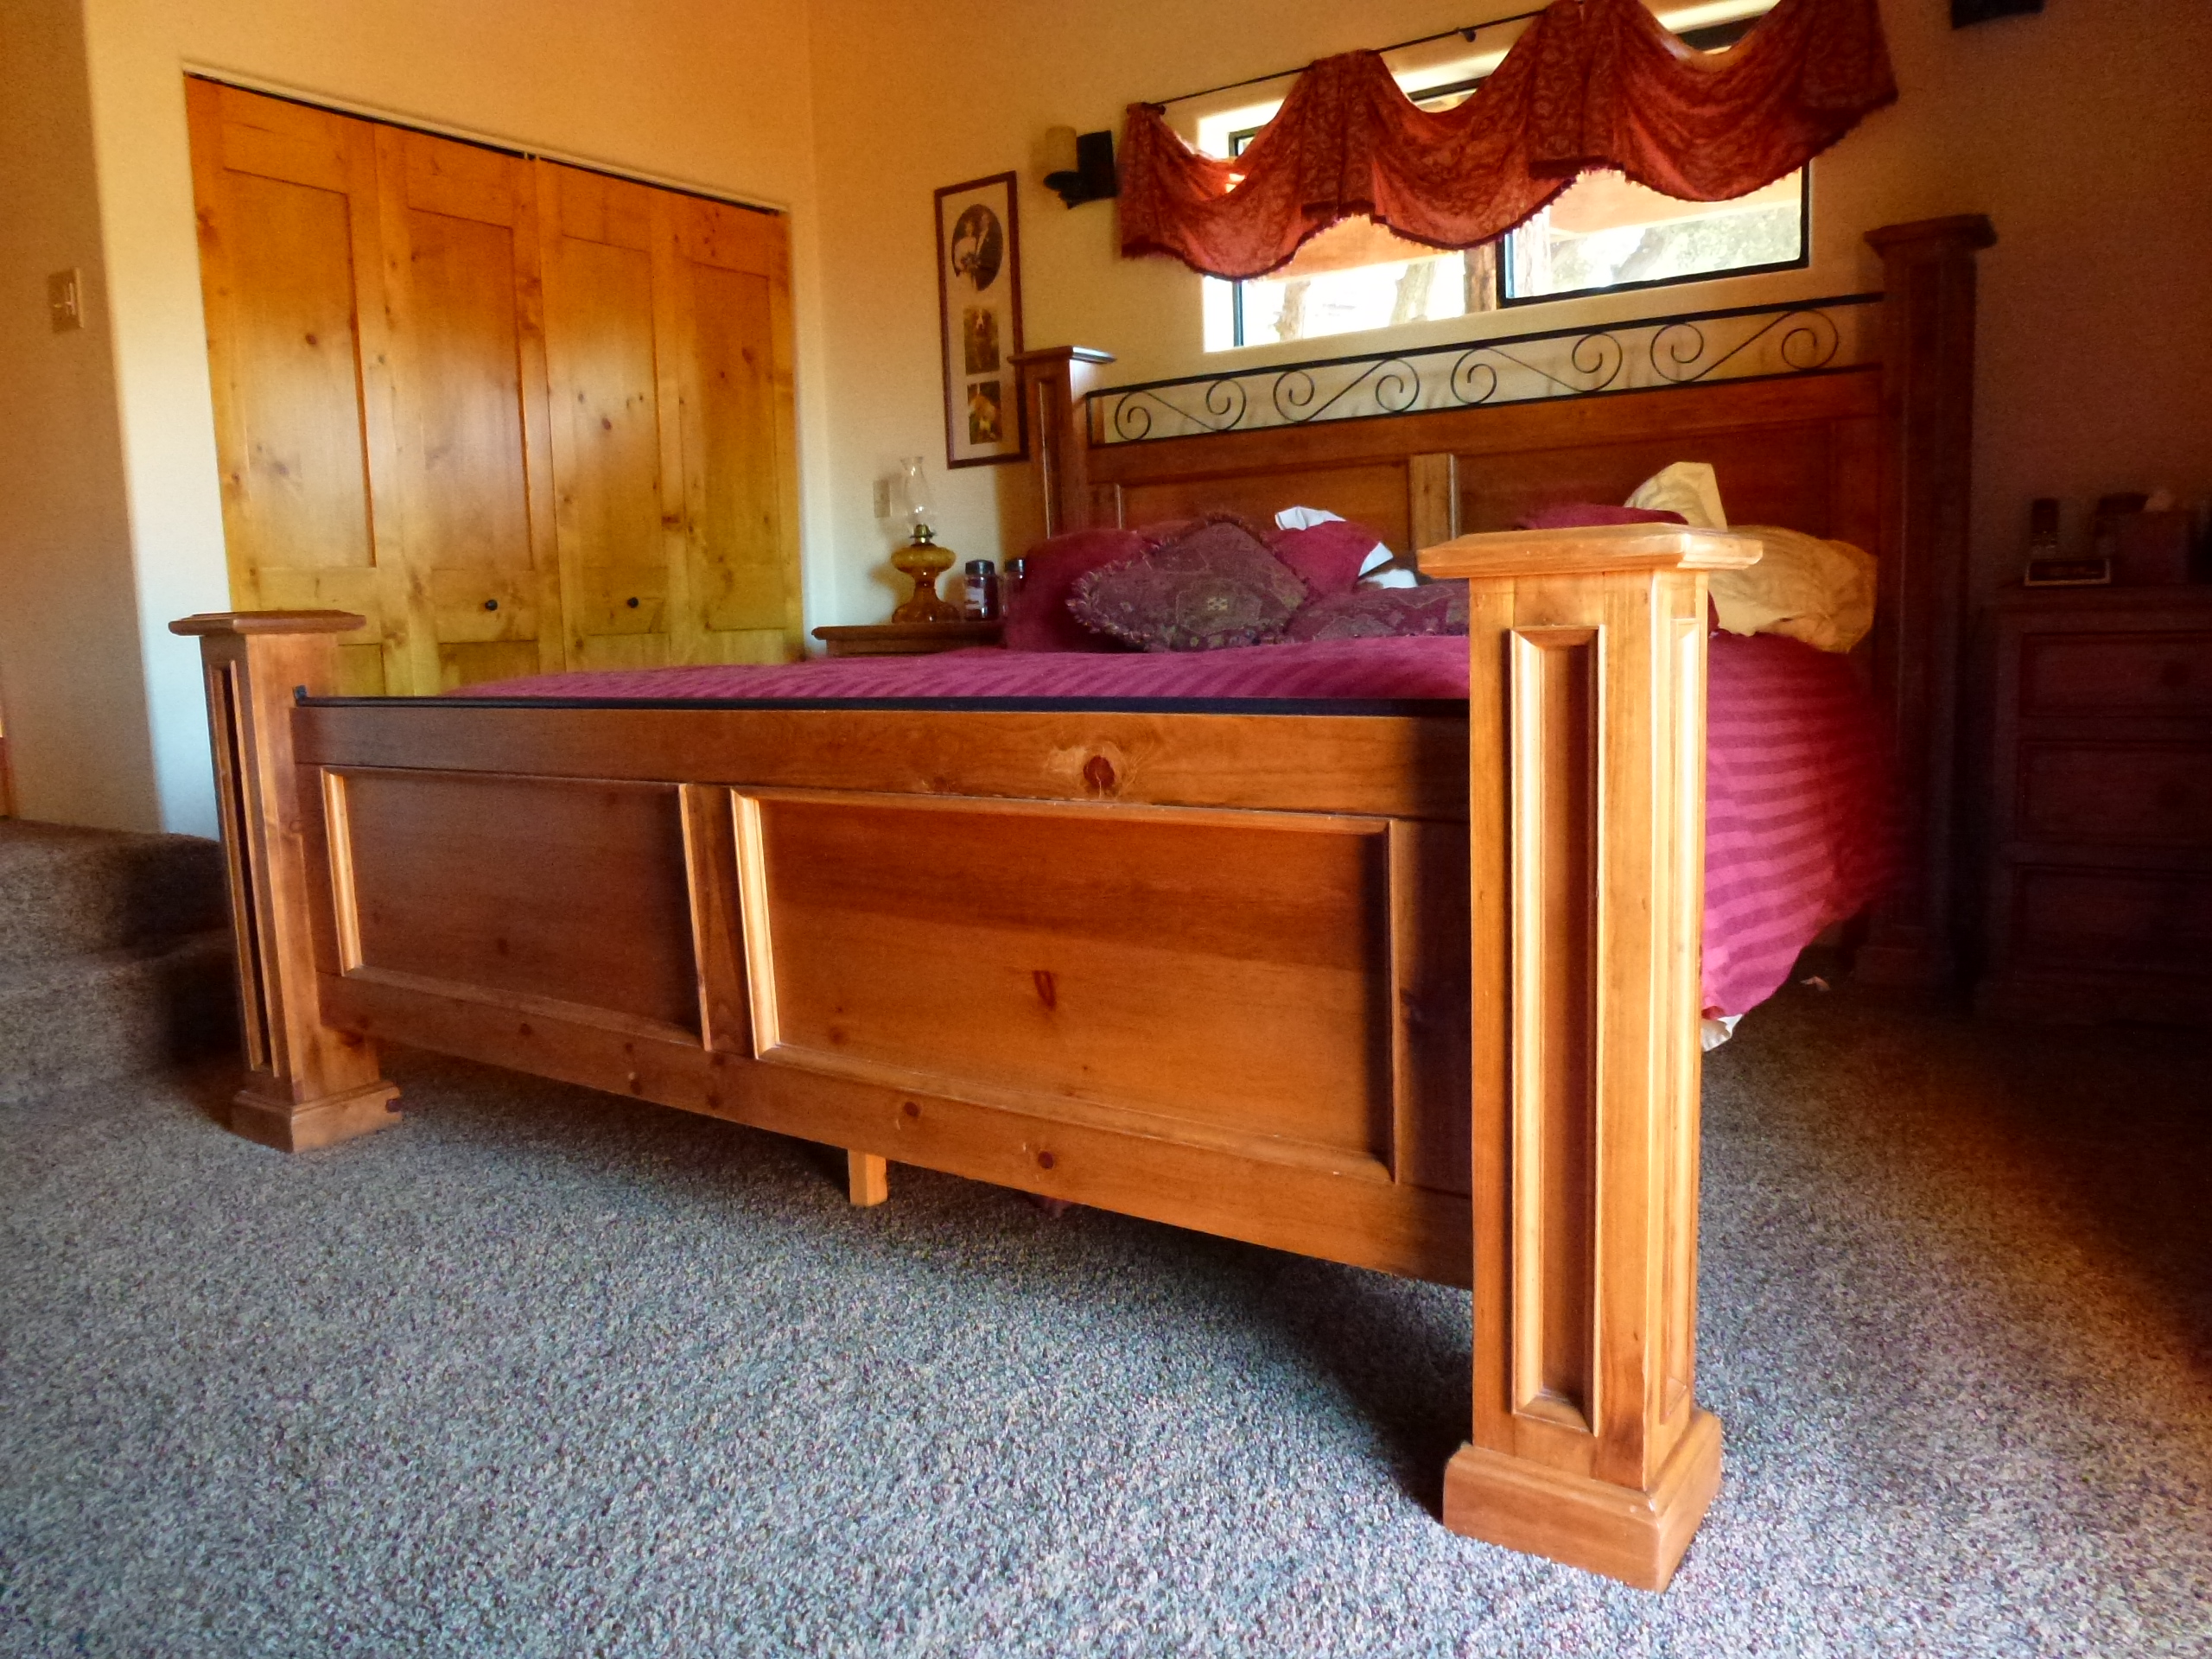
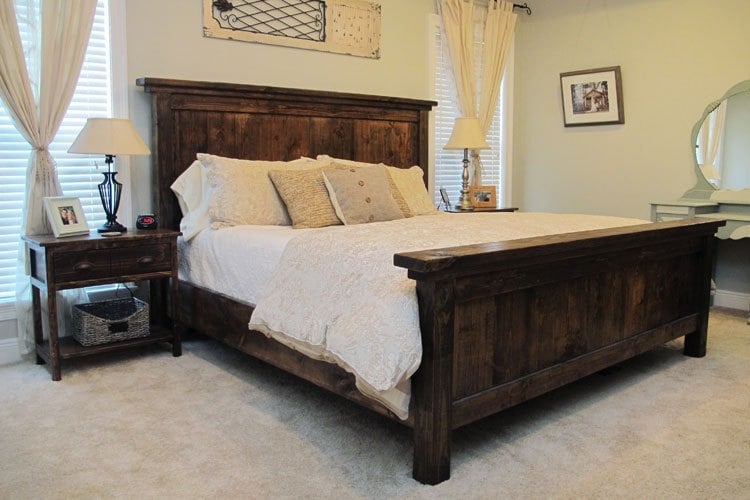
We have considered buying a cedar-lined chest to store blankets, towels, etc. for many years.  However, we couldn’t find one that came close to matching the Knotty Pine bedroom set that we had in our master suite. 

Hence, our design criteria was quite simple; match the bedroom set and have a chest sturdy enough to support our Beagles as they peer at the squirrels outside the window.

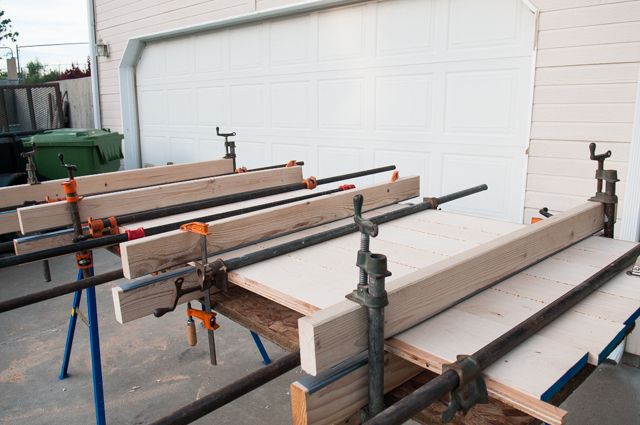
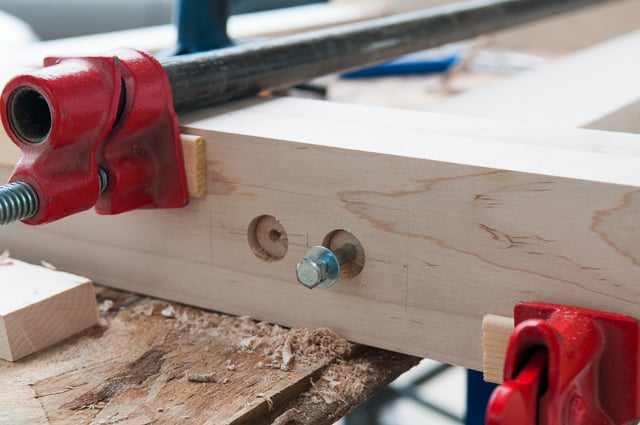
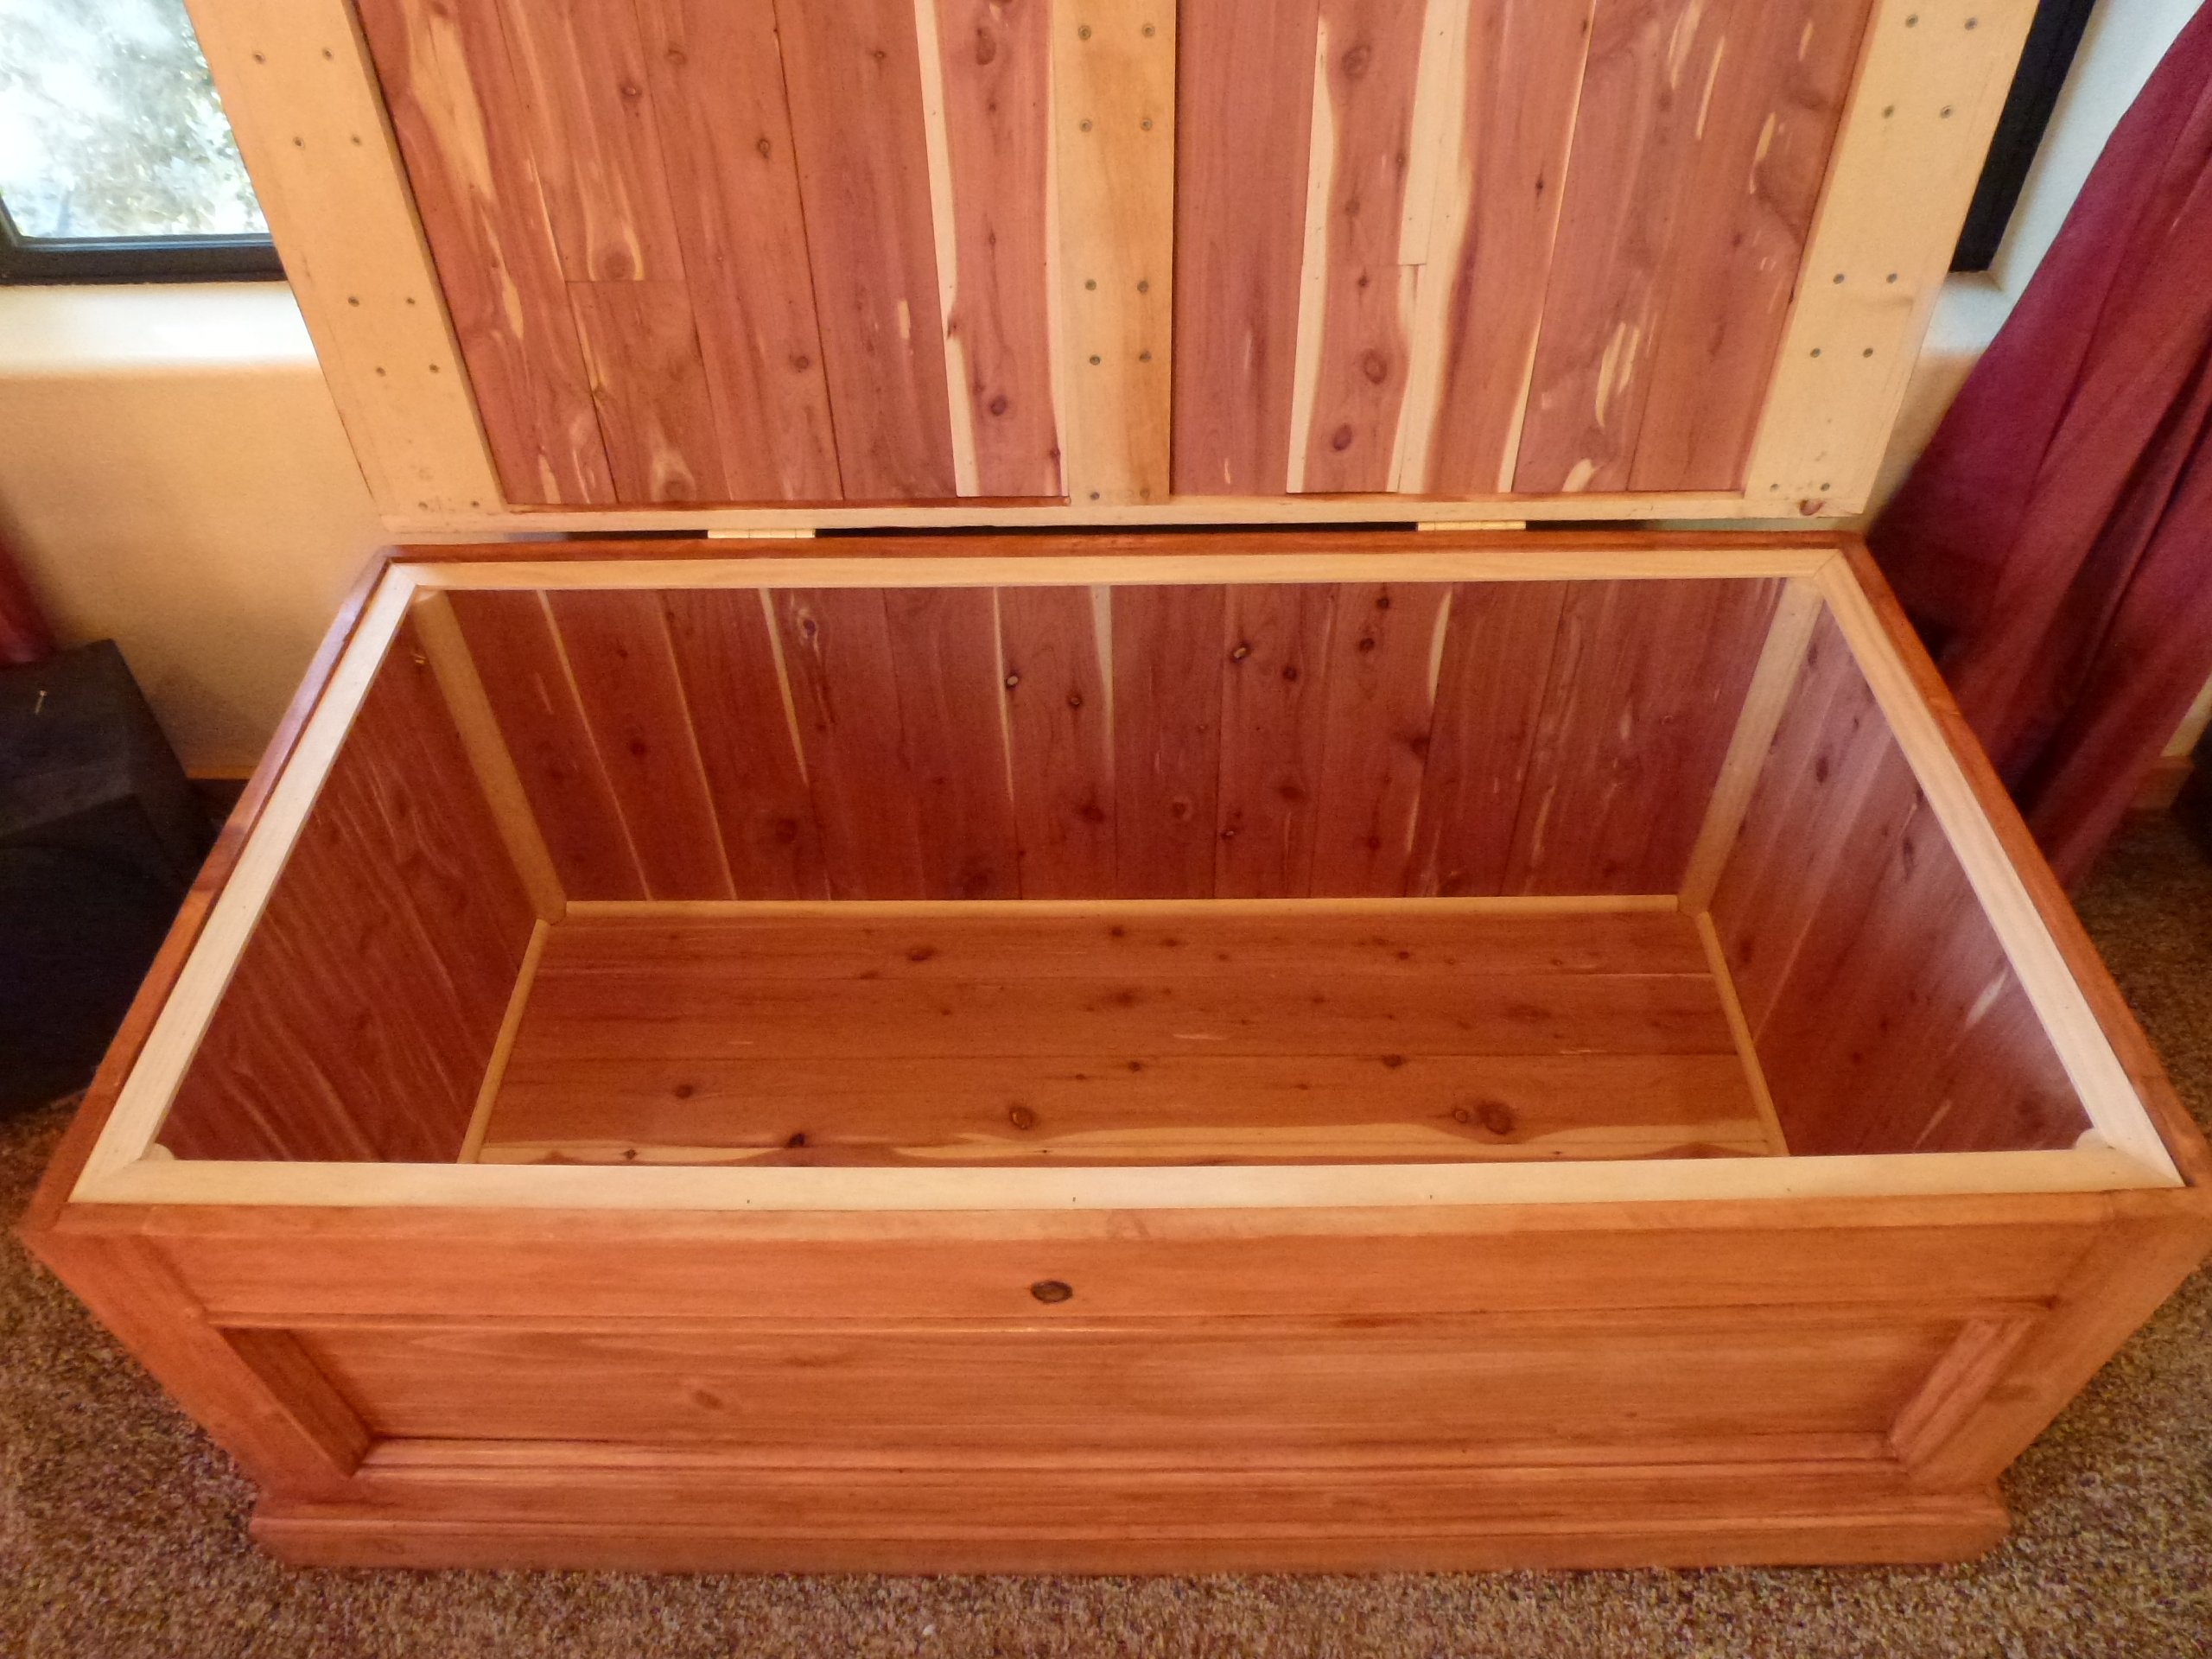
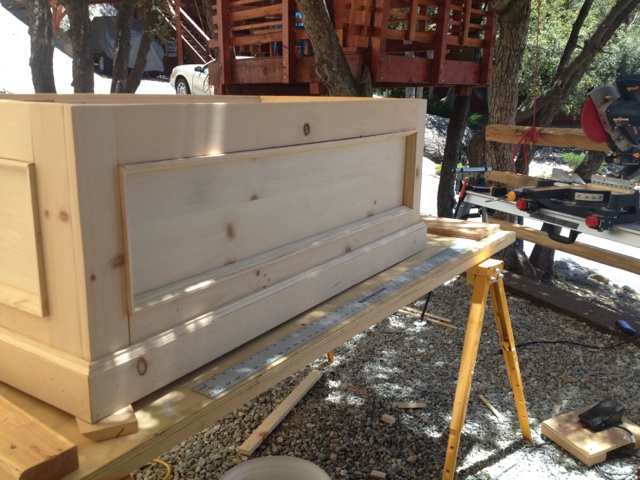
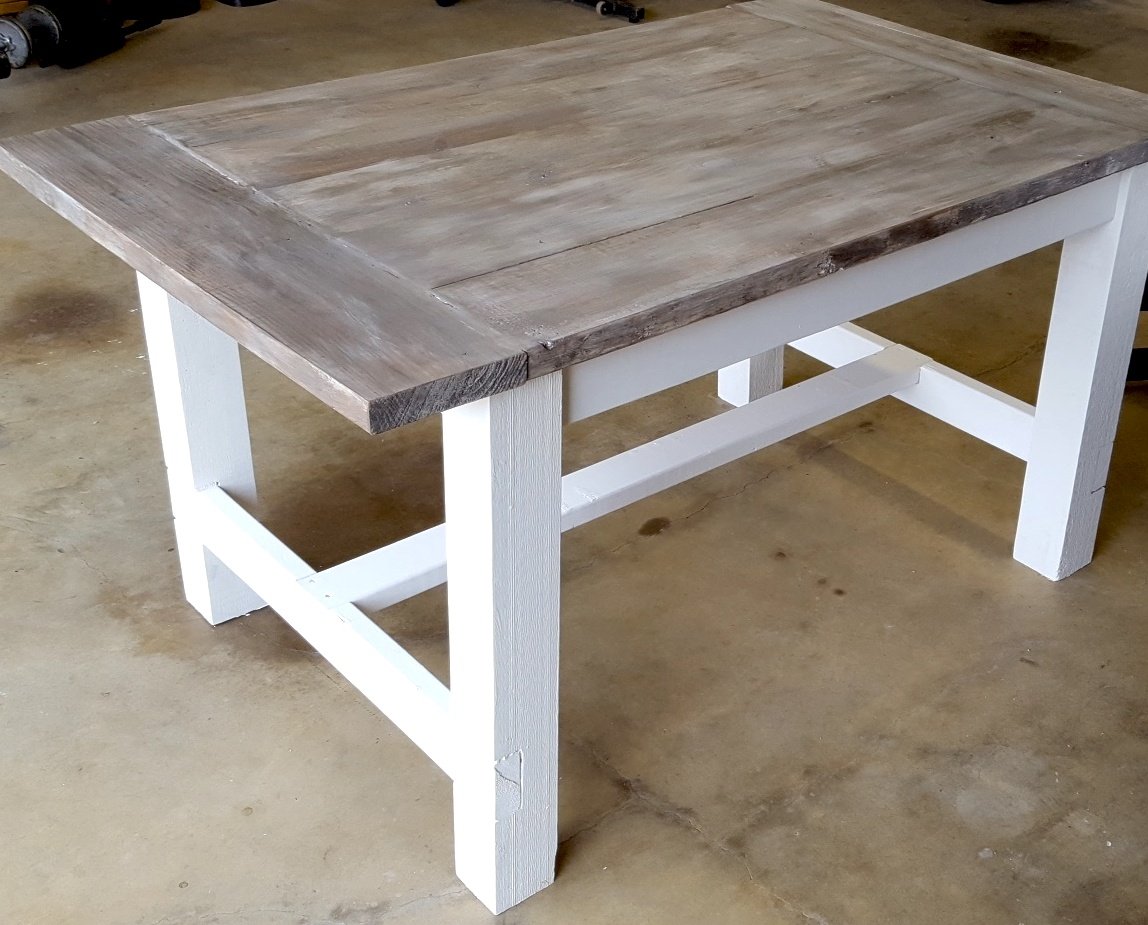
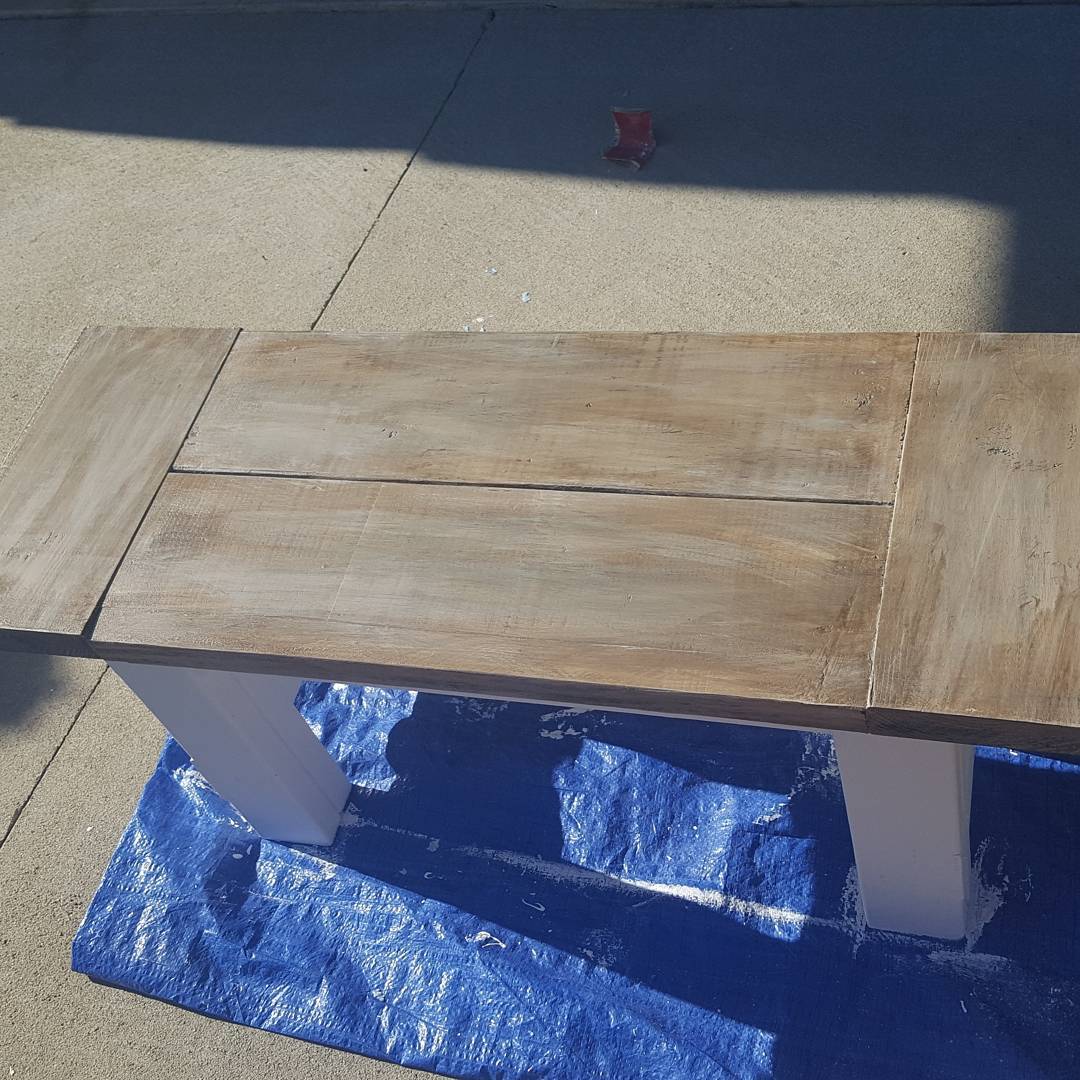
We used plans / ideas from several different chest designs which were readily available on the internet.  Most of those plans were using hard woods such as oak.  Those plans called for a hard wood framing with ¼” oak plywood for the panels.  Since we needed to use Knotty Pine to match the bedroom set, we used 1” Knotty Pine for framing and Knotty Pine ¾ ply w/ Kreg Screws and copious glue to strengthen the construct.  We finished it off with locally available 3/8” cedar T.G. planks.  It is very heavy and very strong!  This project was done entirely w/ Kreg Screws and no router rabbeting for the panels.

We learned the following while doing this project:

·      When using soft woods, always put the power sander on the wood before you start the sander.  Otherwise, you can get scratching / sander burns that don’t present themselves until staining begins.

·      While very strong, ¾” plywood is very heavy!

·      When using plywood, it is recommended that you stain both the visible and non-visible sides of each piece where glue is not to be applied.  Otherwise the chance for delaminating increases dramatically.

60 hours work and $350 to build.   

Estimated Cost
$350.00
Estimated Time Investment
Week Long Project (20 Hours or More)
Finish Used
Minwax stain and hand-rubbed varnish.
Recommended Skill Level
Intermediate

Comments

Farmhouse table and bench - white base with stained top

Submitted by Anonymous (not verified) on Mon, 05/15/2017 - 19:36

We went off the Farmhouse table and bench design but had to customize the length of the table and bench so that it fit in our kitchen space. The table was our first ever project and we made a few mistakes but learned from them and built the bench and are hoping to move up to the Farmhouse bed and then the fullstorage bed. 

Estimated Time Investment
Afternoon Project (3-6 Hours)
Finish Used
Used everlasting in chalk paint for bottom and top then brushed blue over the top let dry then stained the top with minwax dark walnut and wiped off. Applied a few layers until desired look. Dry brushed more blue and white in between stain layers then used polycrylic semi gloss finish
Recommended Skill Level
Starter Project

DIY Farmhouse Bed

We built this Farmhouse Bed in 1 weekend for less than $200!

Estimated Cost
Less than $200
Estimated Time Investment
Weekend Project (10-20 Hours)
Finish Used
Rustoleum Dark Walnut Stain applied with a brush and immediately wiped off using a lent-free cloth. Sealed with Minwax Satin Spar Urethane.
Recommended Skill Level
Beginner

Comments