New Garden Tool Hanger
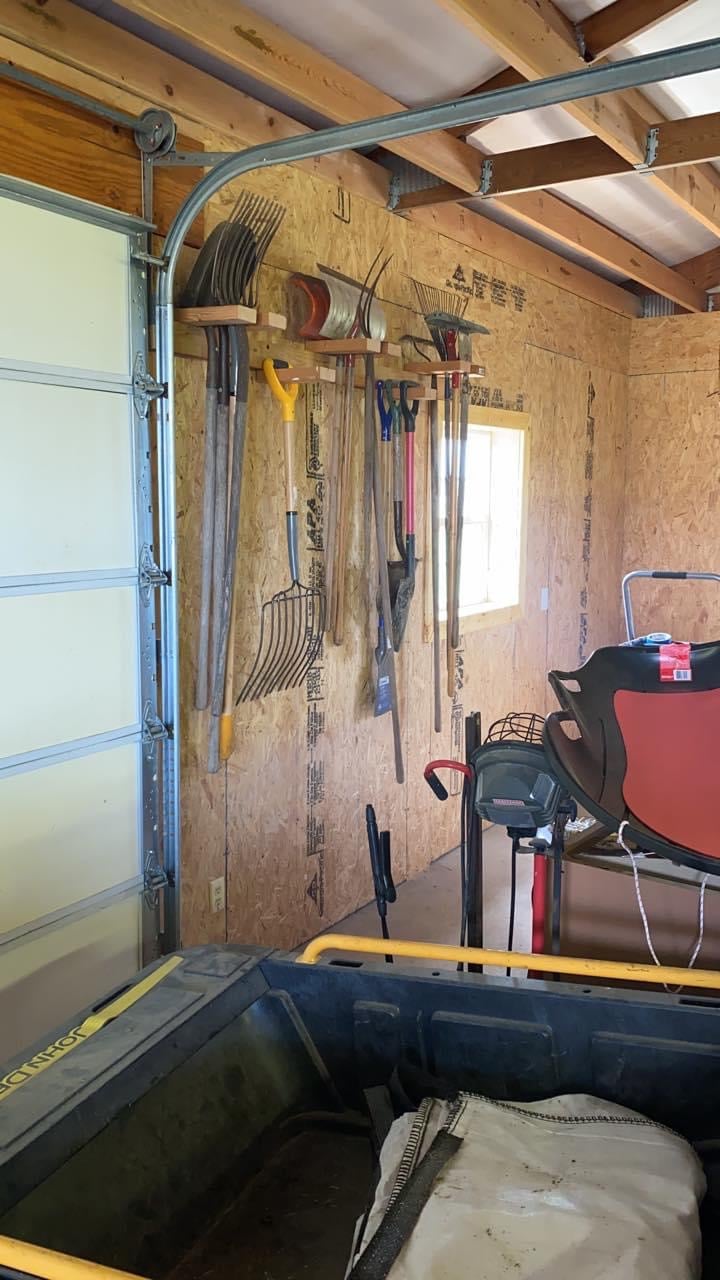
Had all my tools leaning up in the corner of my shed until I saw your post. Thanks
Built from Plan(s)
Had all my tools leaning up in the corner of my shed until I saw your post. Thanks

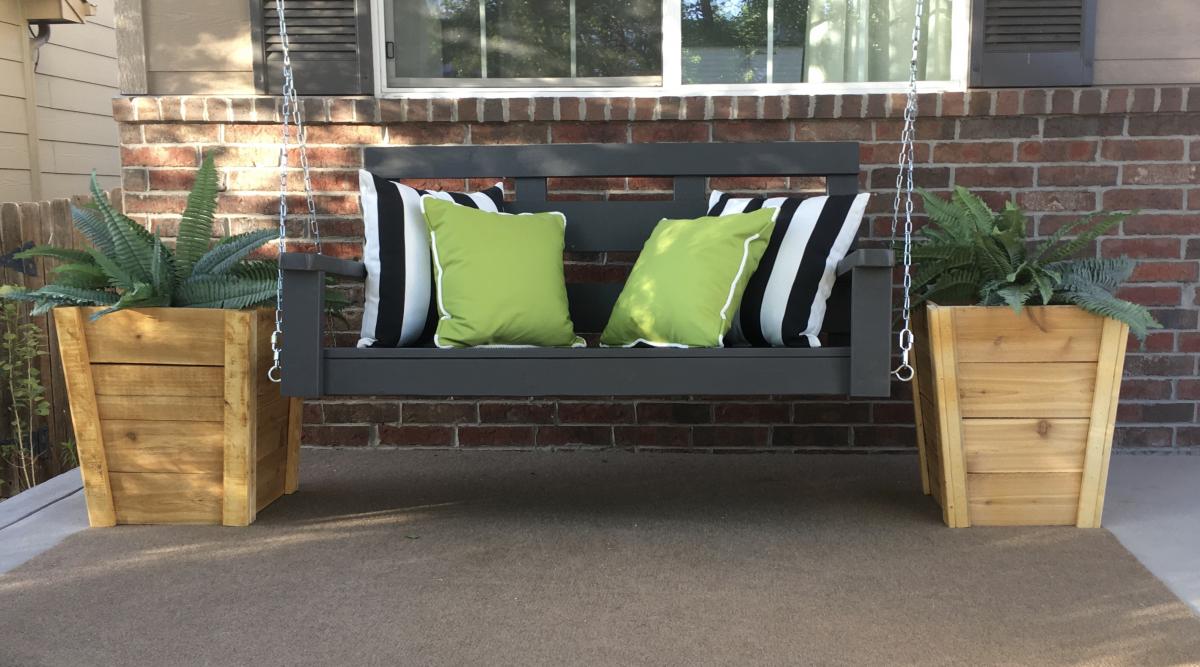
Made the swing and two sets of planters since we were on stay Home orders. I’d never done anything like this...ever! My husband helped me hang the swing. We love, love the results. (Now to make a seat cushion😆) I couldn’t tag the plans for the modern square planter boxes. They are huge and I can hardly wait until Christmas to put trees in all four!

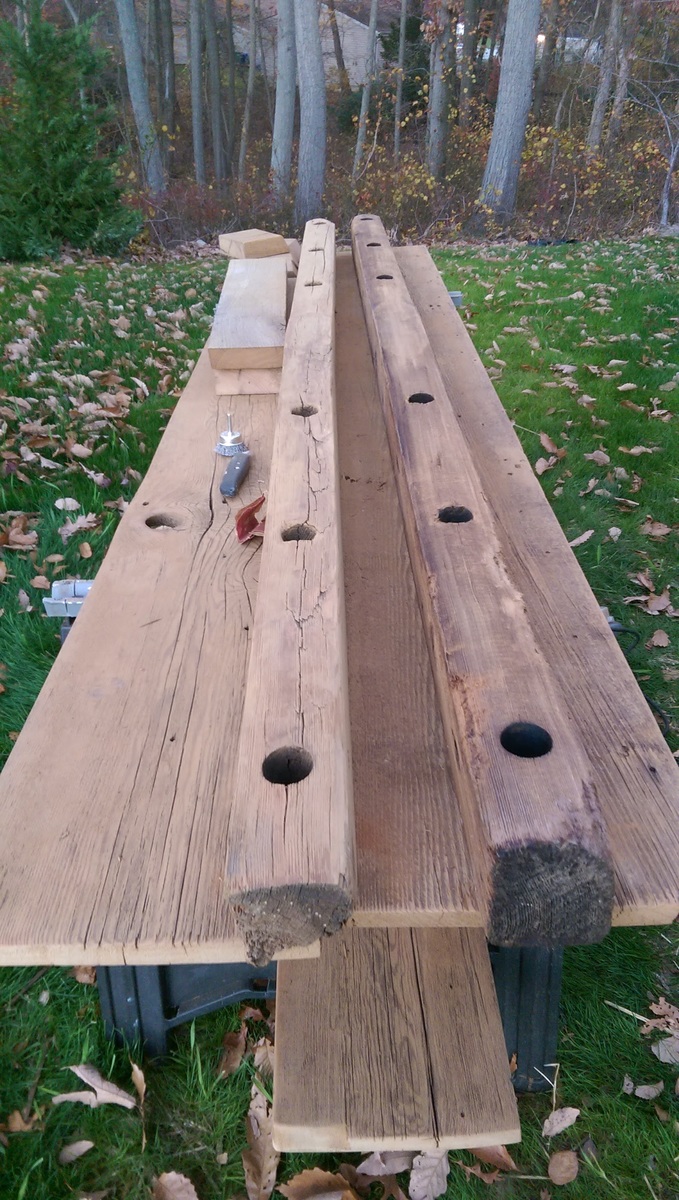
I was lucky enough to know someone who's property had 4 barns that were on the virge of falling over.
I removed wood from the barns I needed, some wood was just inside the barns. The thick pieces with holes going around the table were actually old telephone poles (horizontal section).
The plans were straight forward, but prepping, cleaning, sanding the wood from an old barn was the most time consuming. Also hardly anything was straight or square!
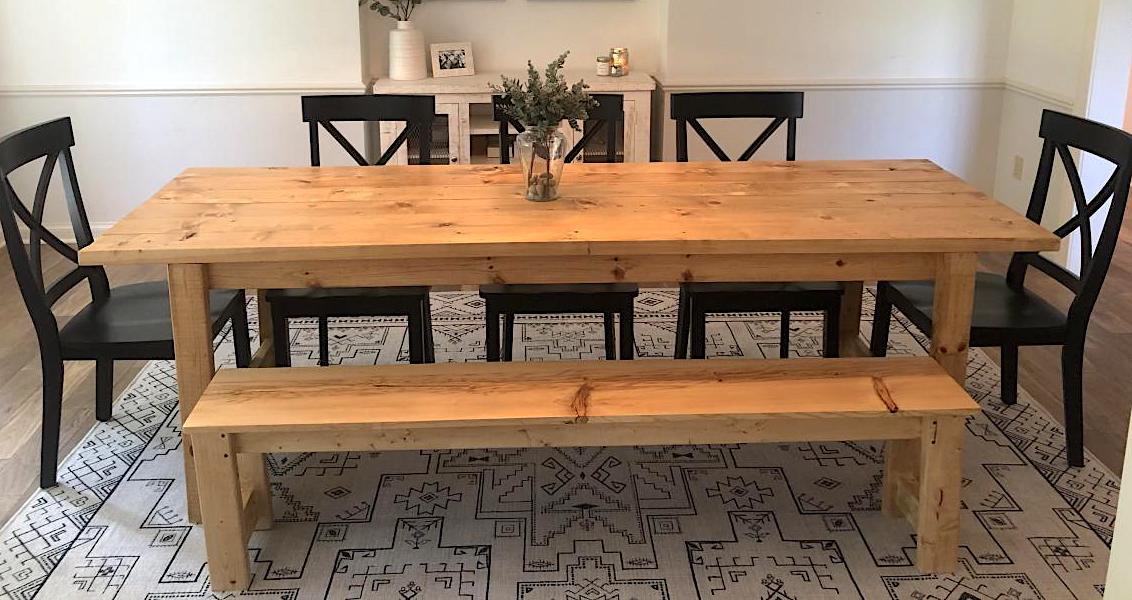
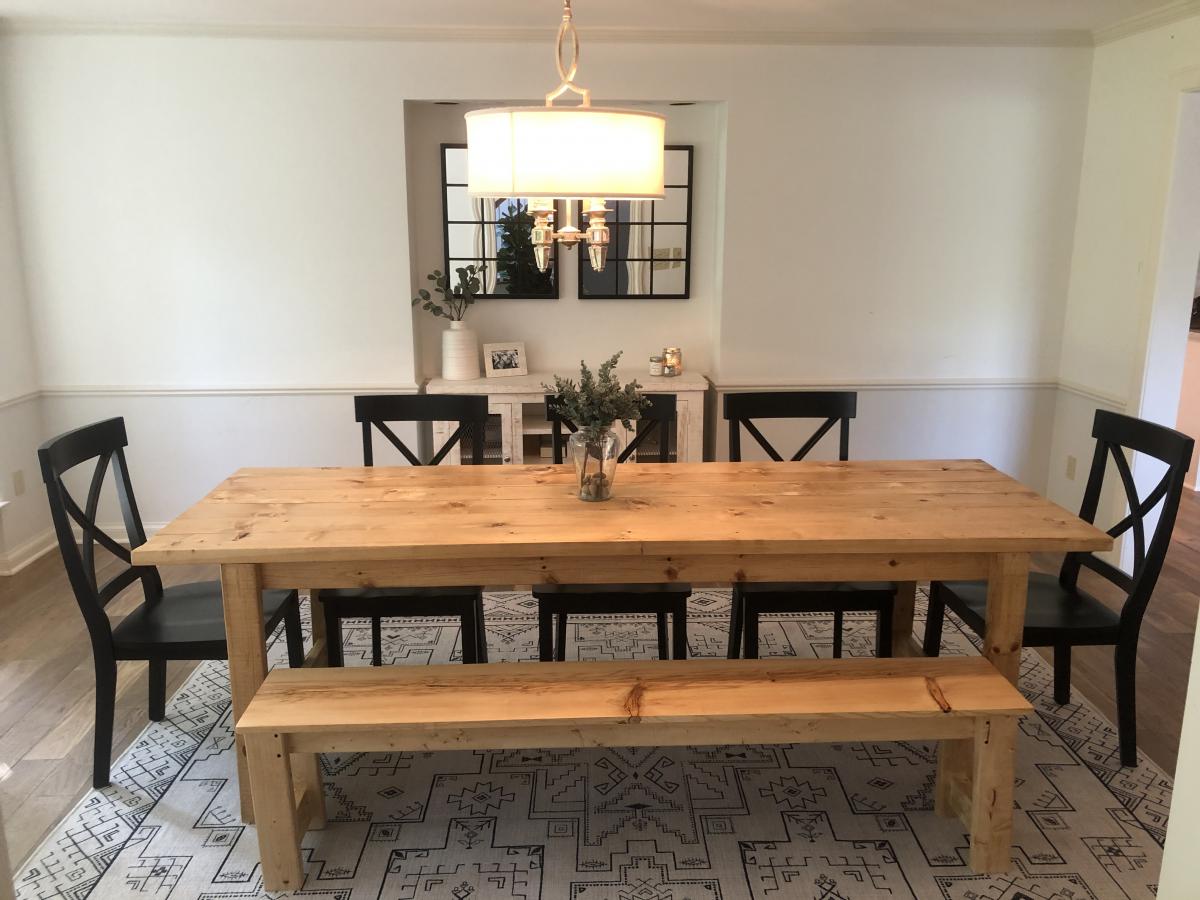
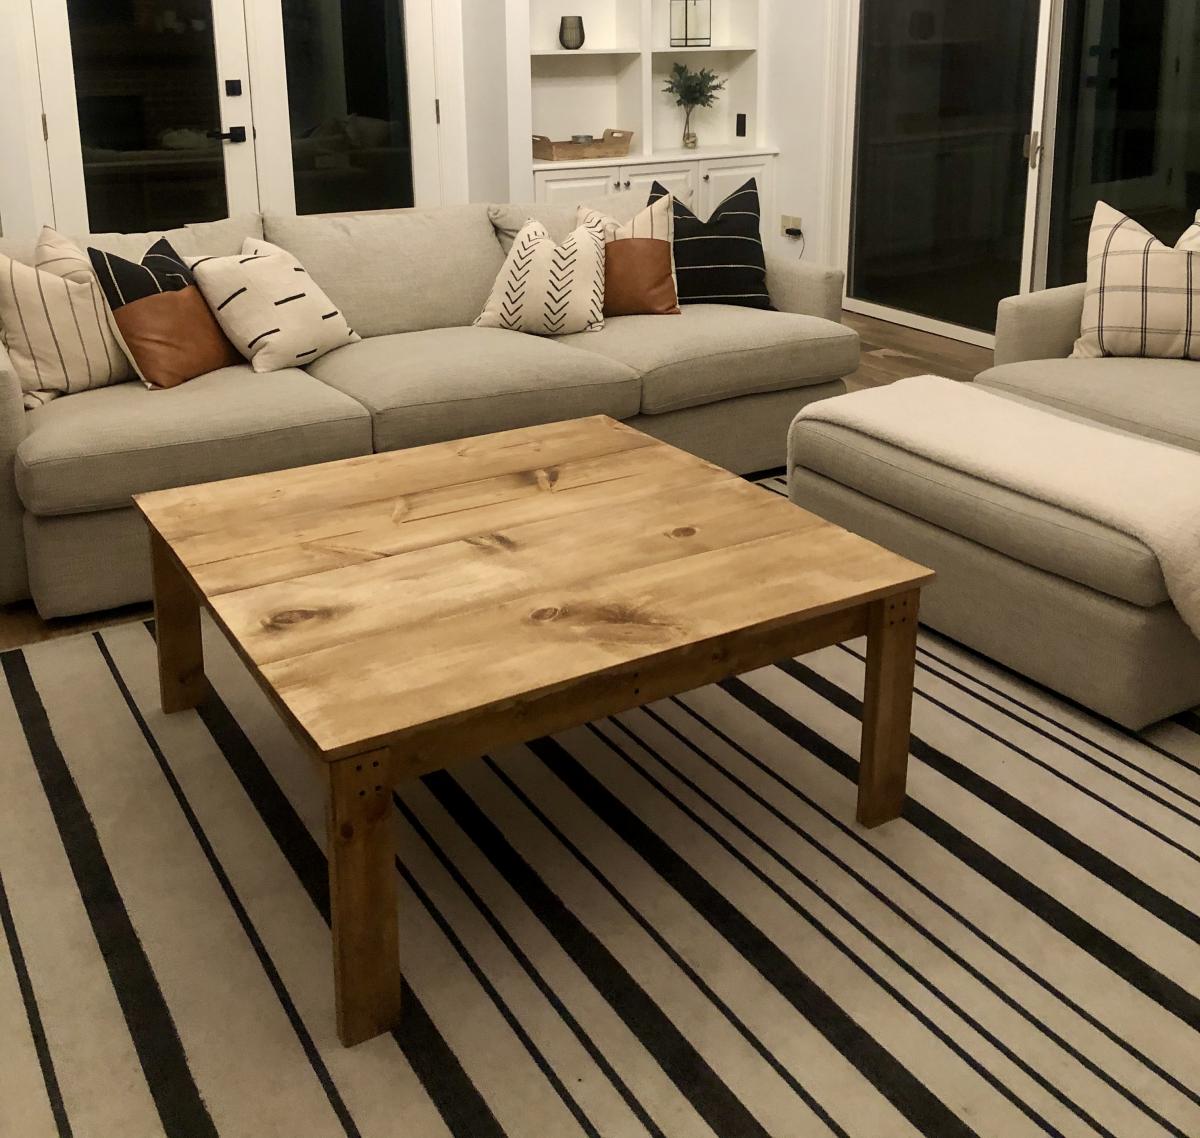
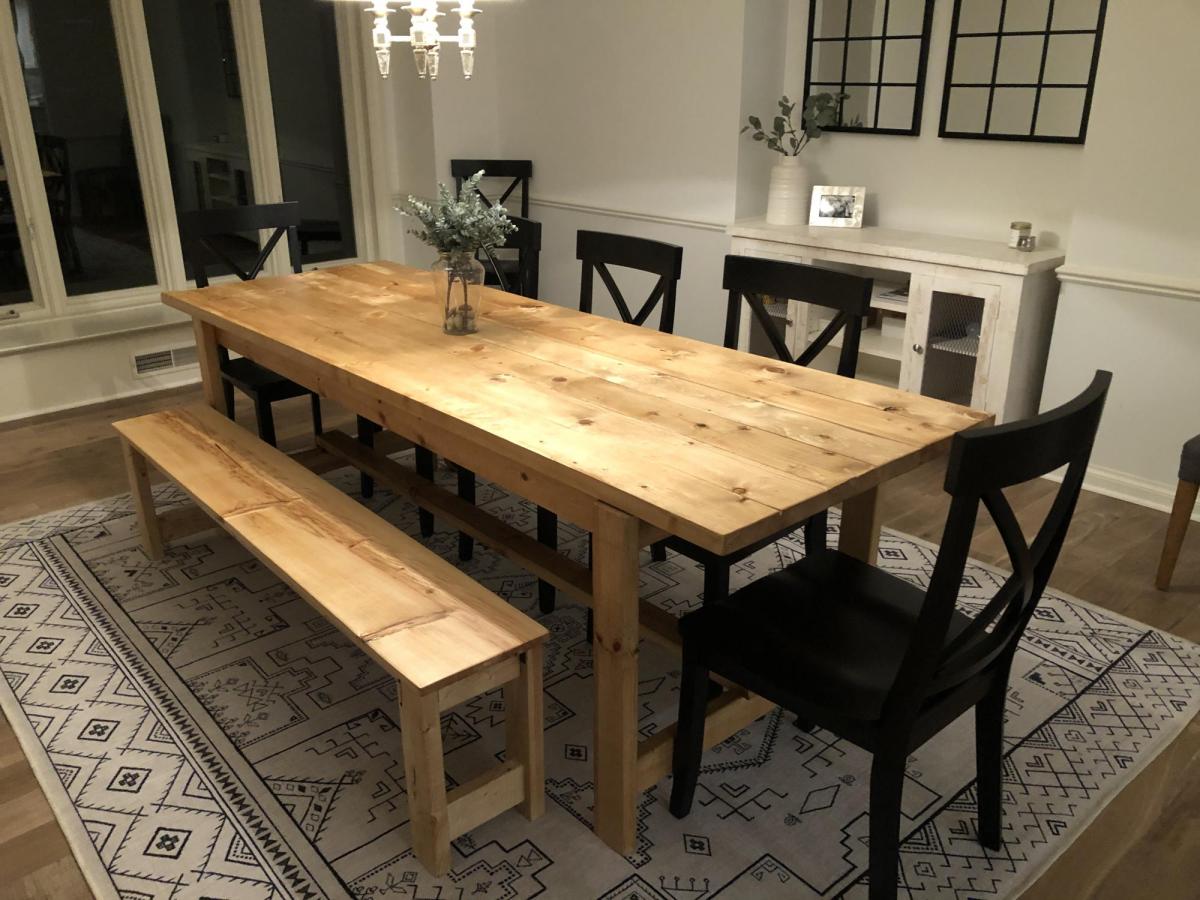
Love this! The farm house table and bench (1st photo) were my first 2 wood project ever. They came out great so I decided to make a coffee table using modified dimensions (2nd photo) and used poplar for the table top instead of pine. Poplar took to the stain I used really well. The farm table is Danish Oil, Light Walnut and the coffee table is in Danish Oil Dark walnut. I used wipe on Poly to finish both tables and I used matte black wood screws for an accent on the base of the coffee table. Everything else was assembled with a compact circular saw and pocket holes w/ a Kreg Jig. Thanks for the plans!
Mon, 10/19/2020 - 23:48
Ana white is a superb personality. She is doing a superb job in the agricultural field. I want to know more about the farmhouse table but now it's easier to finish the assignment at https://ifpnews.com/how-to-finish-your-dissertation-during-lockdown and get all the help about. Even I am more interested in vertical farming. Please guide me in this regard.
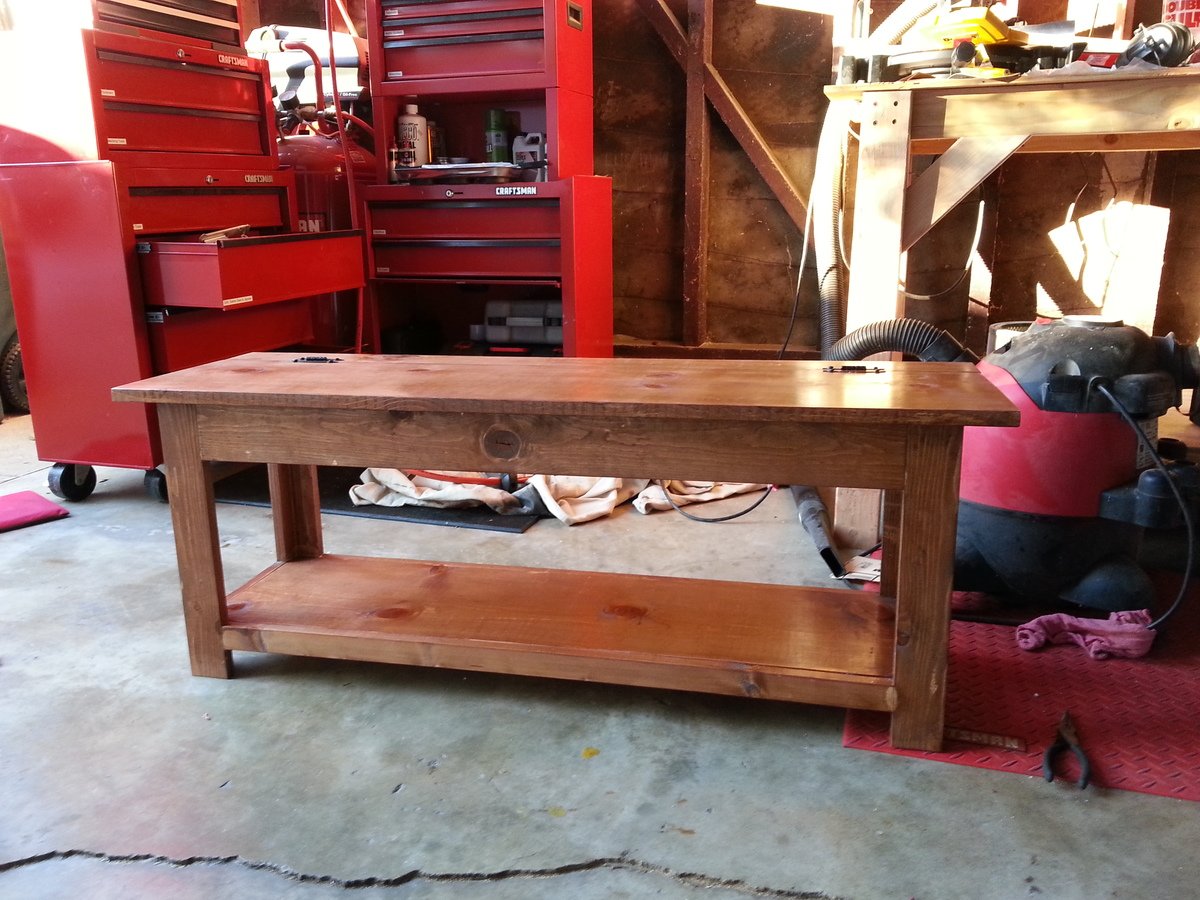
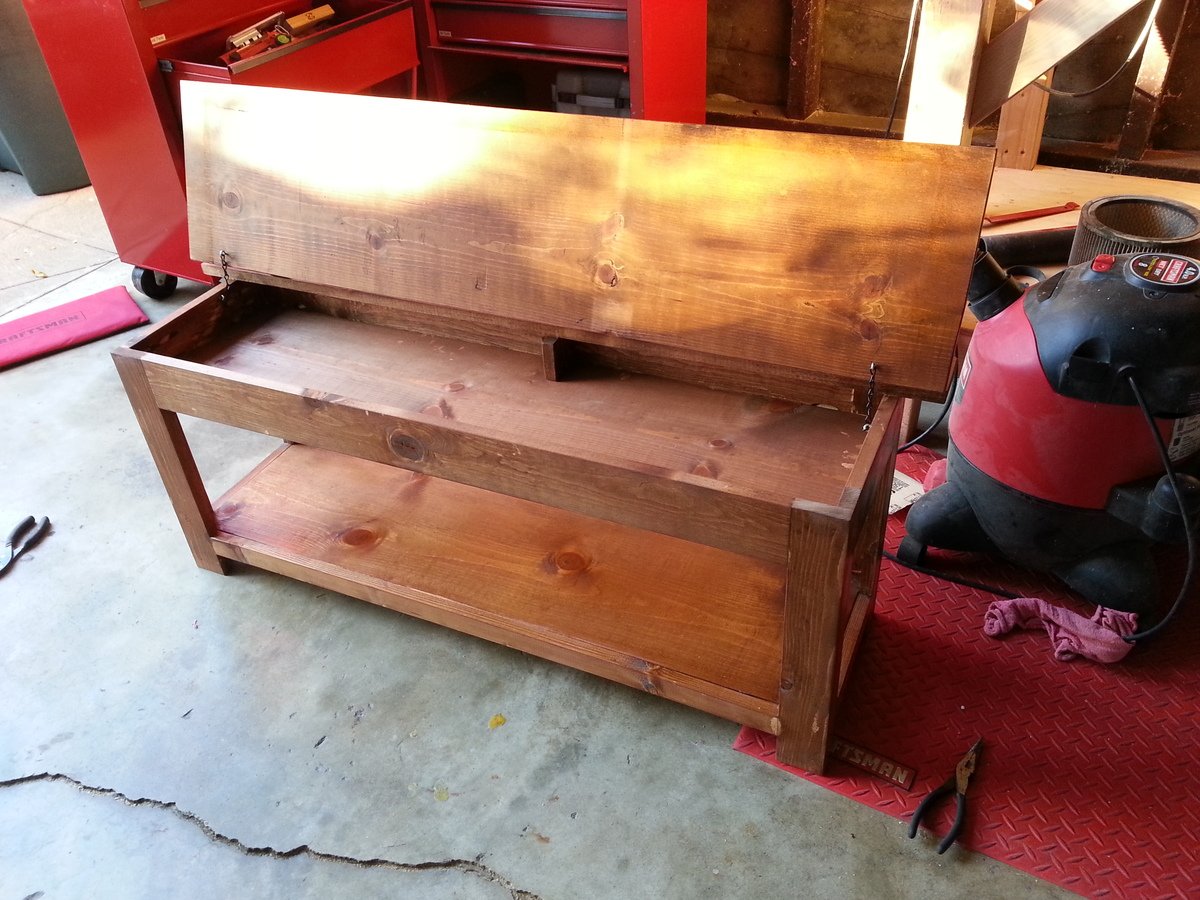
This bench works great as a piano bench with storage inside for all of the sheet music. I added one little 4x4x.75 piece of wood inside in the middle because I found that the 1x12 seat would flex in the center but after adding that piece of wood it was solid. I also added eye hooks and chain for the top so that it does not flip all the way backwards.
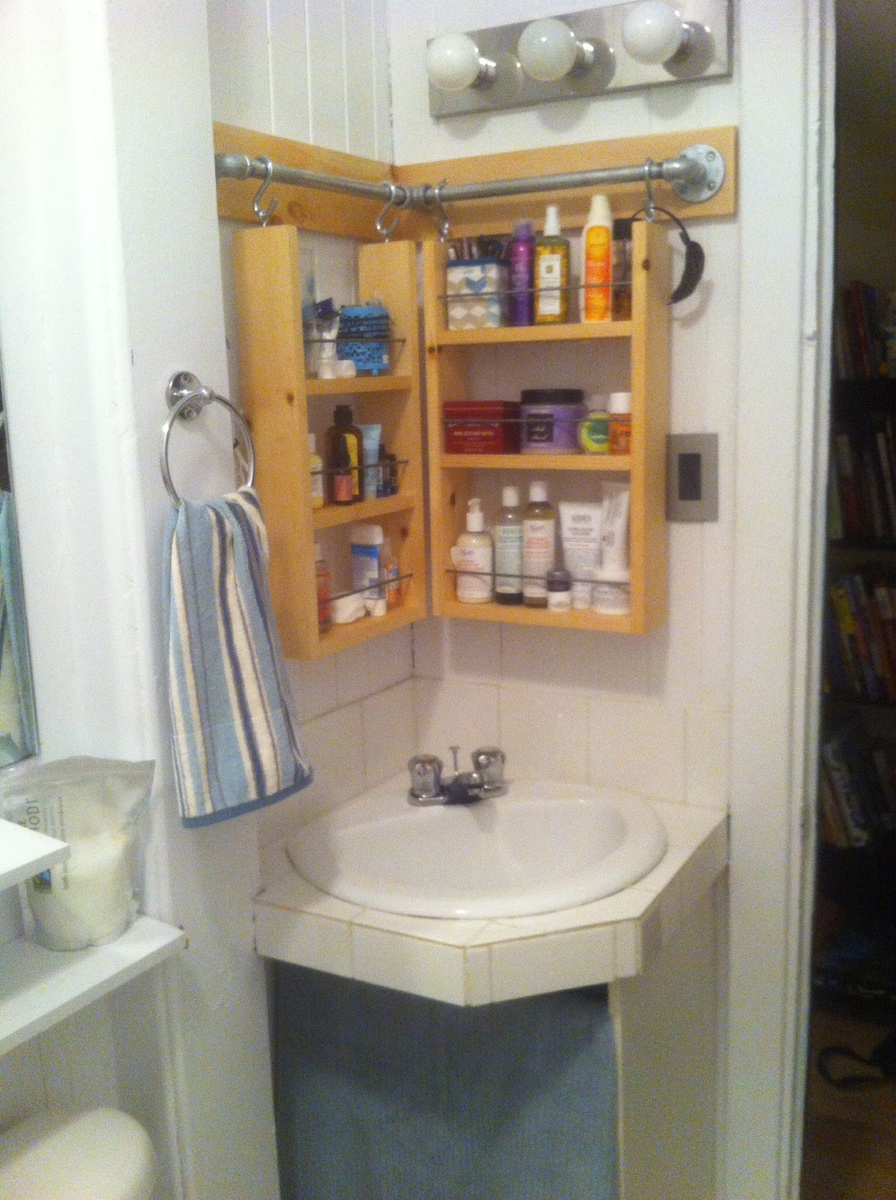
This project was not as simple as I expected! For this little bathroom, the mirror is offset, leaving lots of wasted space above the sink so my friend asked me to build some storage. I thought this would be a great solution that could maybe move with her later on, and it turned out pretty well. My two problems were 1- I had to cut the steel pipe to fit the space and 2- my hardware store did not sell S-hooks that would fit over the steel bar. I used 1/2 in steel bar, so I cut it with my Dremel rotary cutting wheel. It was a bit slow but it worked and once I cut halfway, I could just bend the pipe to break it at the cut. The two cut ends are not threaded so I had them each end into one side of a 3/4 T fitting. For the S-hooks, I bought ones that were about the right size, then bent them open wider using a large screwdriver and a crow bar as a wedge. Two large screwdrivers might work as well. Instead of the straps, I used a thin steel bar, drilled through one side. I am happy with how it turned out, took about an afternoon not including all the time thinking it out! Finished with butcher block oil.
Love how this turned out!! Thank you thank you Ana!! Plans were great, I think we got it done for just about $250!
Thanks again!
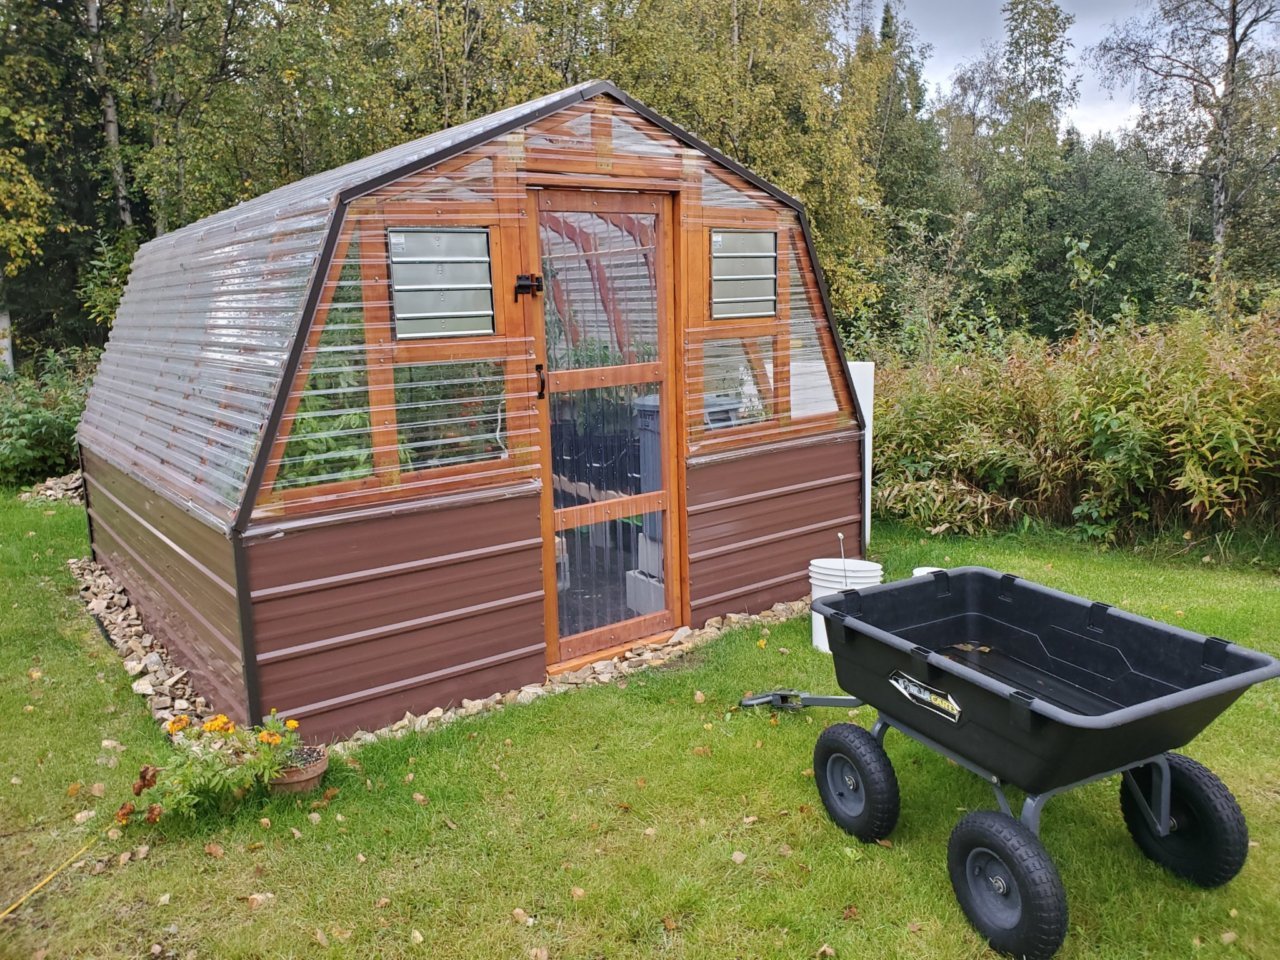
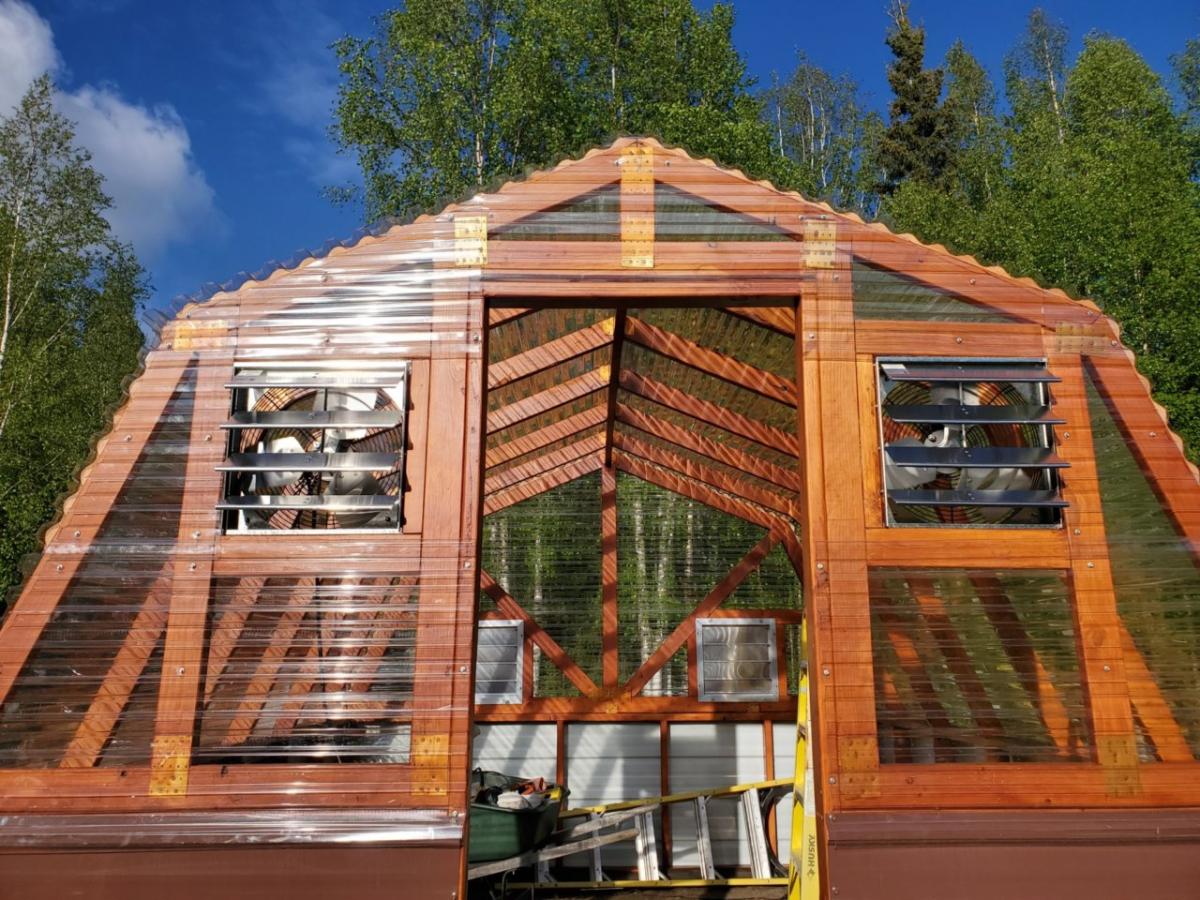
It was truly great for us to find a greenhouse design from a fellow Interior Alaskan blogger. We kept coming back to this design, enough times to where we decided to actually build it.
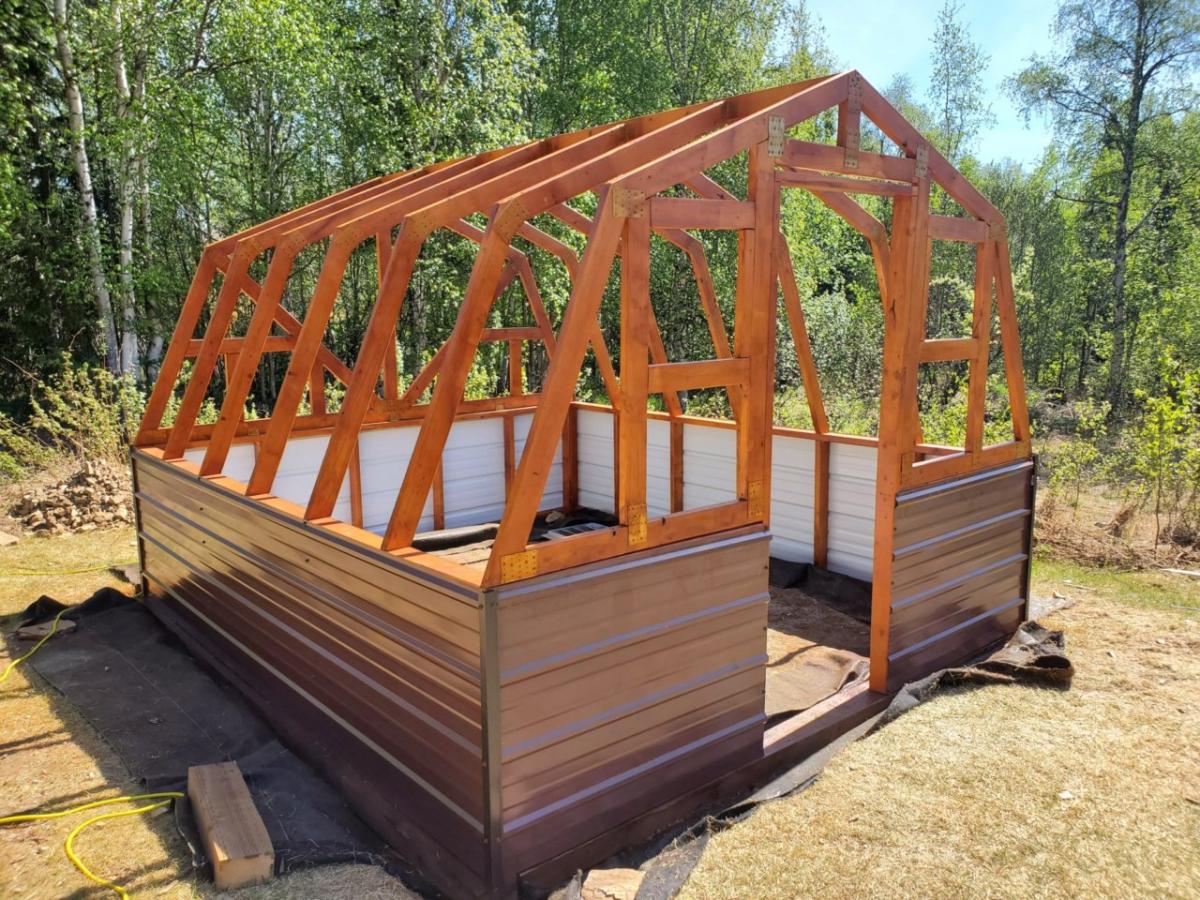
We would be the first to admit that tackling a gambrel style building was slightly intimidating and not what we had in mind for our very first self-built building! But, we faithfully followed the cut lists and directions. It turned out beautifully! If you're in the same boat, have confidence that you can build this too!
We love the options available for making it your own. We decided to stain the greenhouse lumber of ours to match our cedar sided home. We also built a semi frost-resistant foundation, since we're a little north of Ana at 65 degrees and sometimes experience frost heaving. We also added full climate controls to ours, adding both fans and louvers that keep our greenhouse at perfect temperatures.
The performance has been great! Building this greenhouse has been the single greatest thing we have done in our years of subarctic gardening. We might even consider building a second greenhouse down the road. No matter how big your greenhouse is, it's never quite enough!
Thanks for the great plans, Ana! We appreciate your work!

My dog loves to people watch all day while I'm at work and she needed a new bed so I took the plans for the lower platform and modified them so it would stand alone. Took the platform and put it on the bottom so that her bed would sit inside instead of on top where she could more easily fall off.
I tried building without PH screws at first and all I ended up with was a lot of cracked and wasted lumber. Got the PH jig and finished the whole build myself in 2 hours. Sanding, staining, and sealing tomorrow but I'm just so excited about it I had to post now!
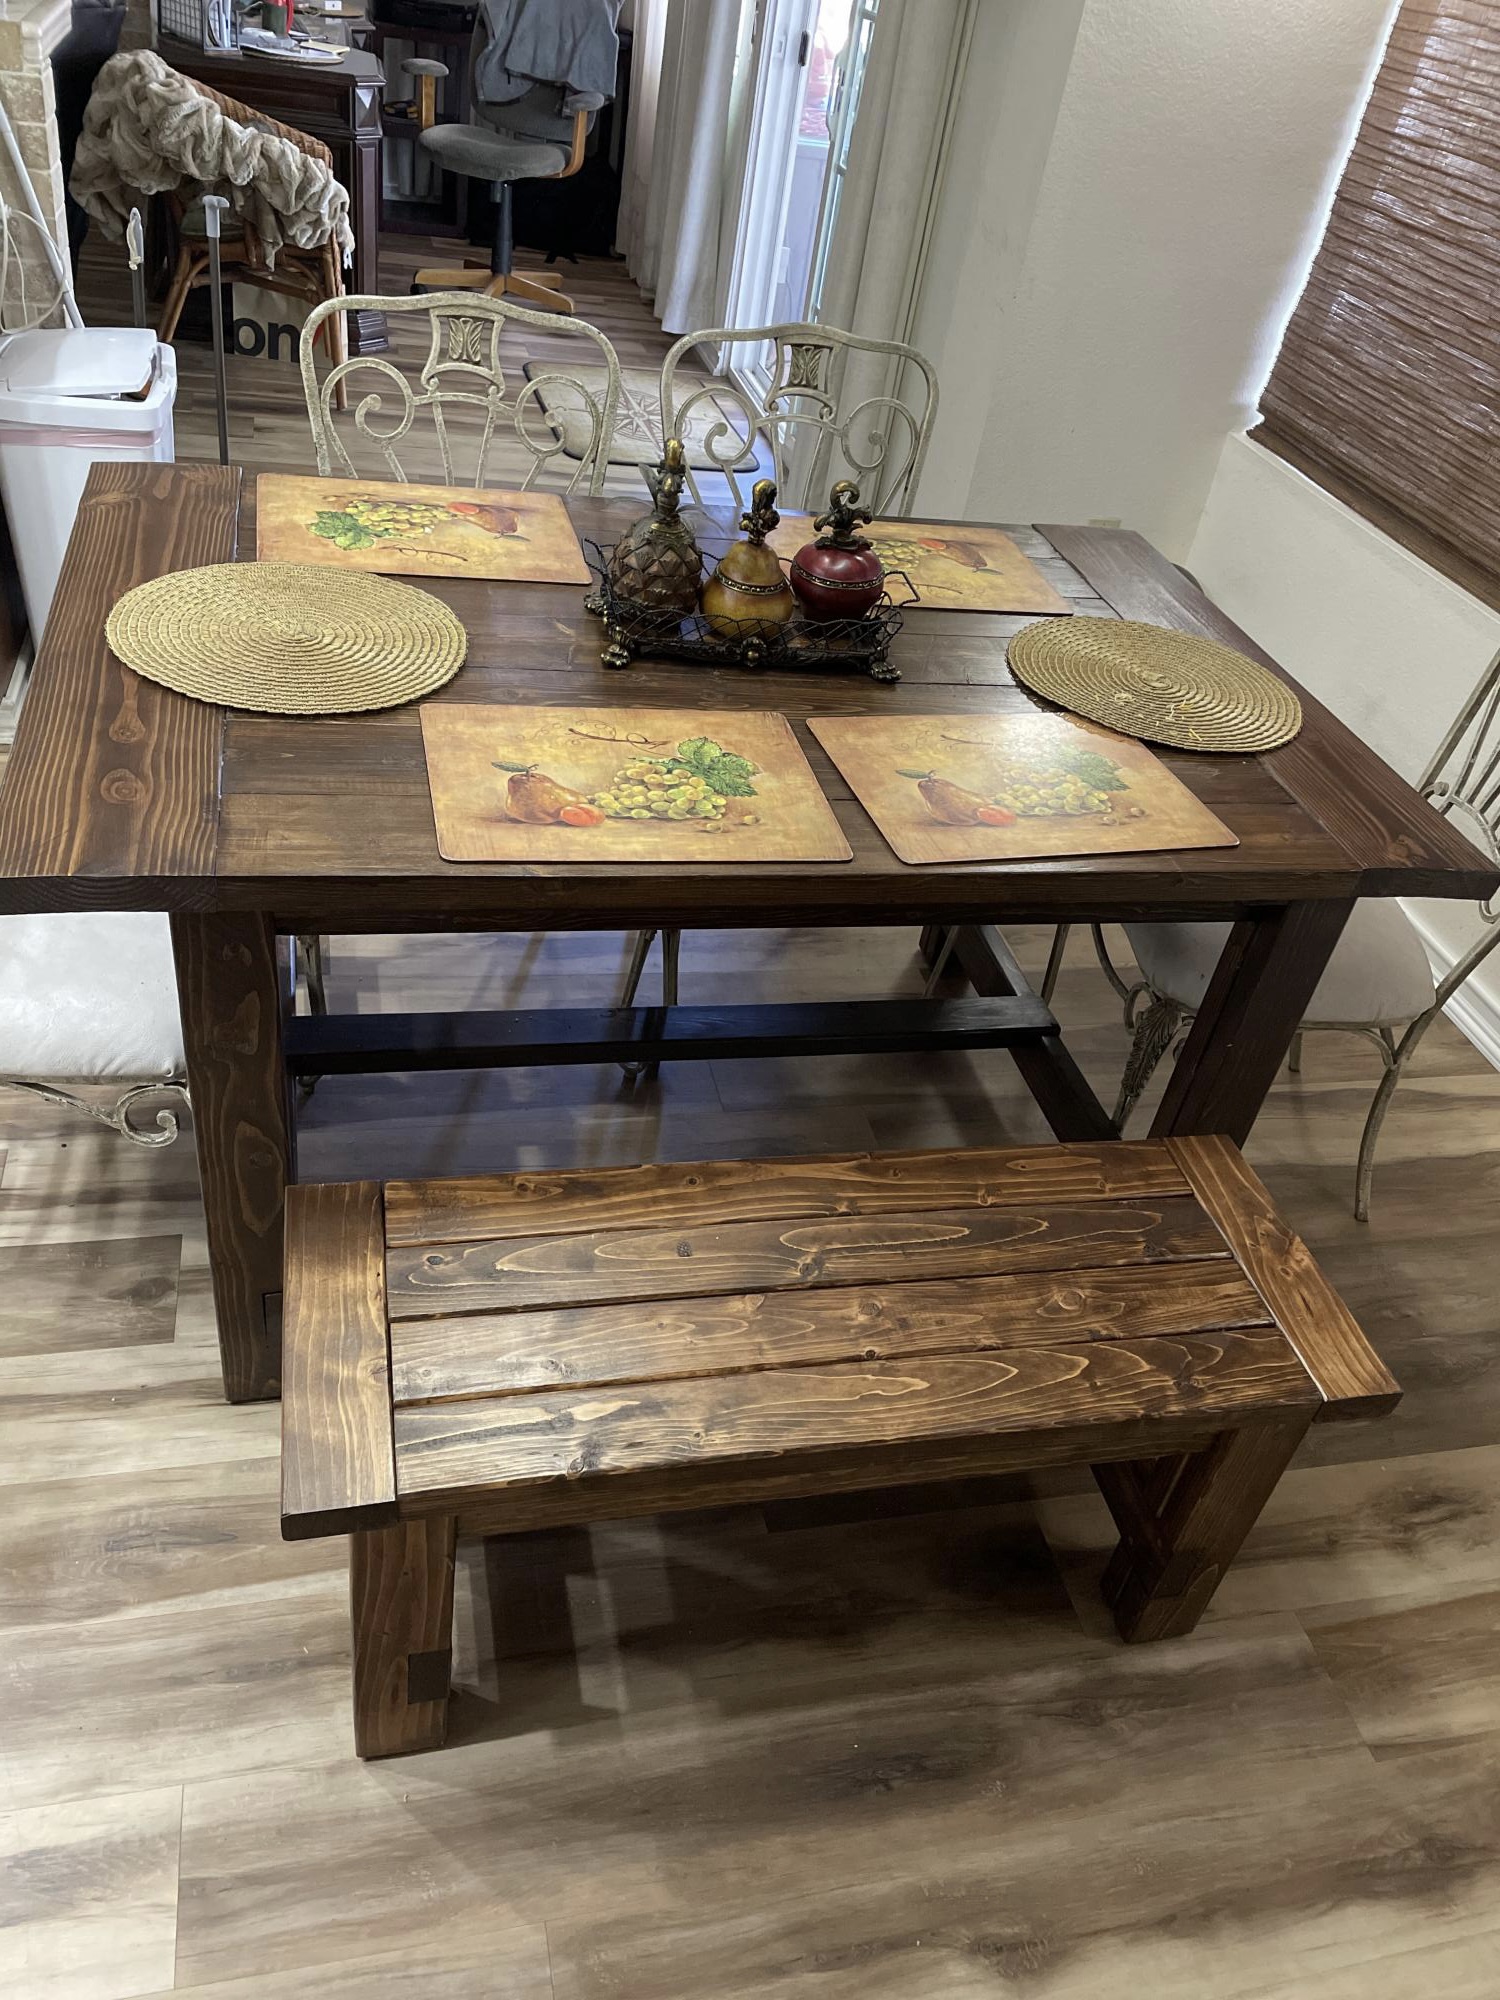
I used a few pocket holes and cut it down to 5 ft long(I have a smaller kitchen). The plans made it real easy to do so. The bench was also cut down.
Tue, 10/05/2021 - 09:12
Perfect solution for a smaller dining area, love it! Thank you for sharing:)
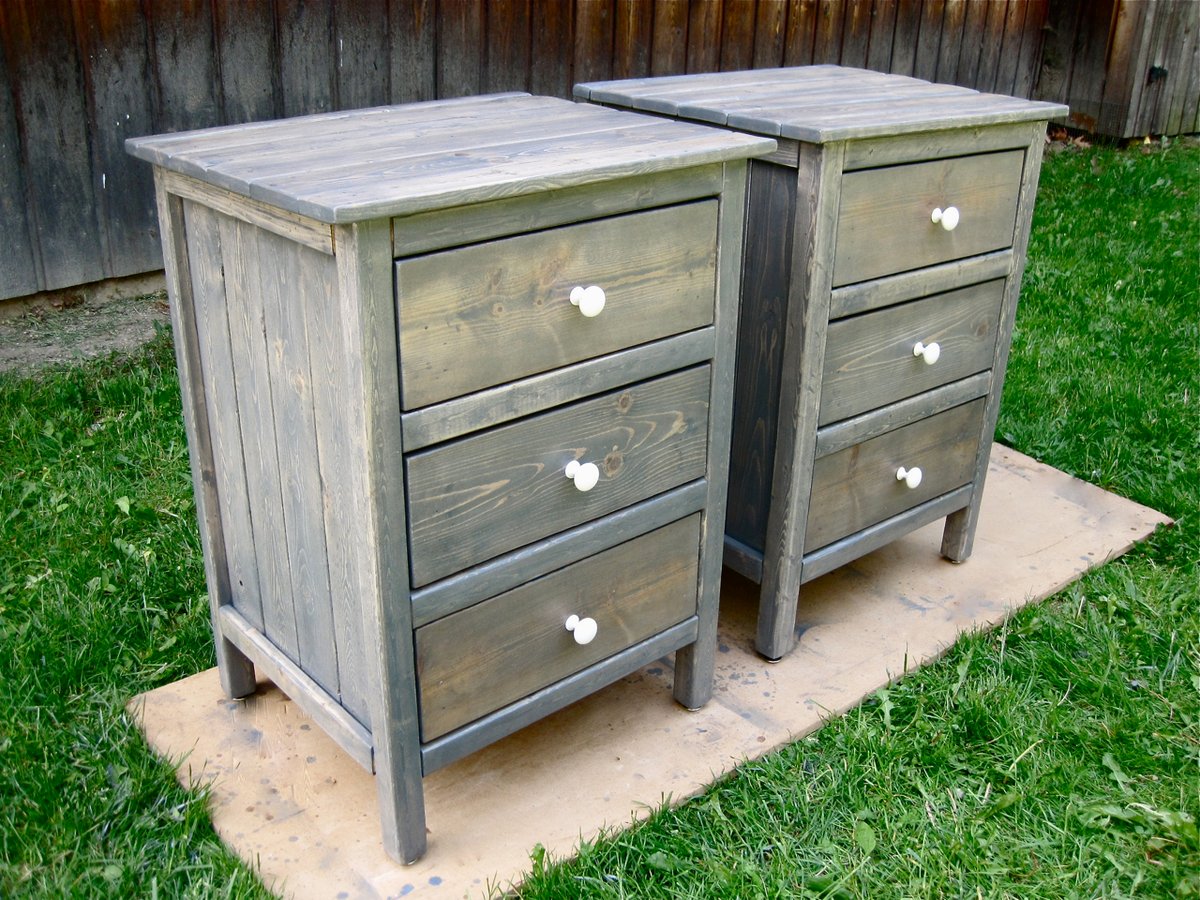
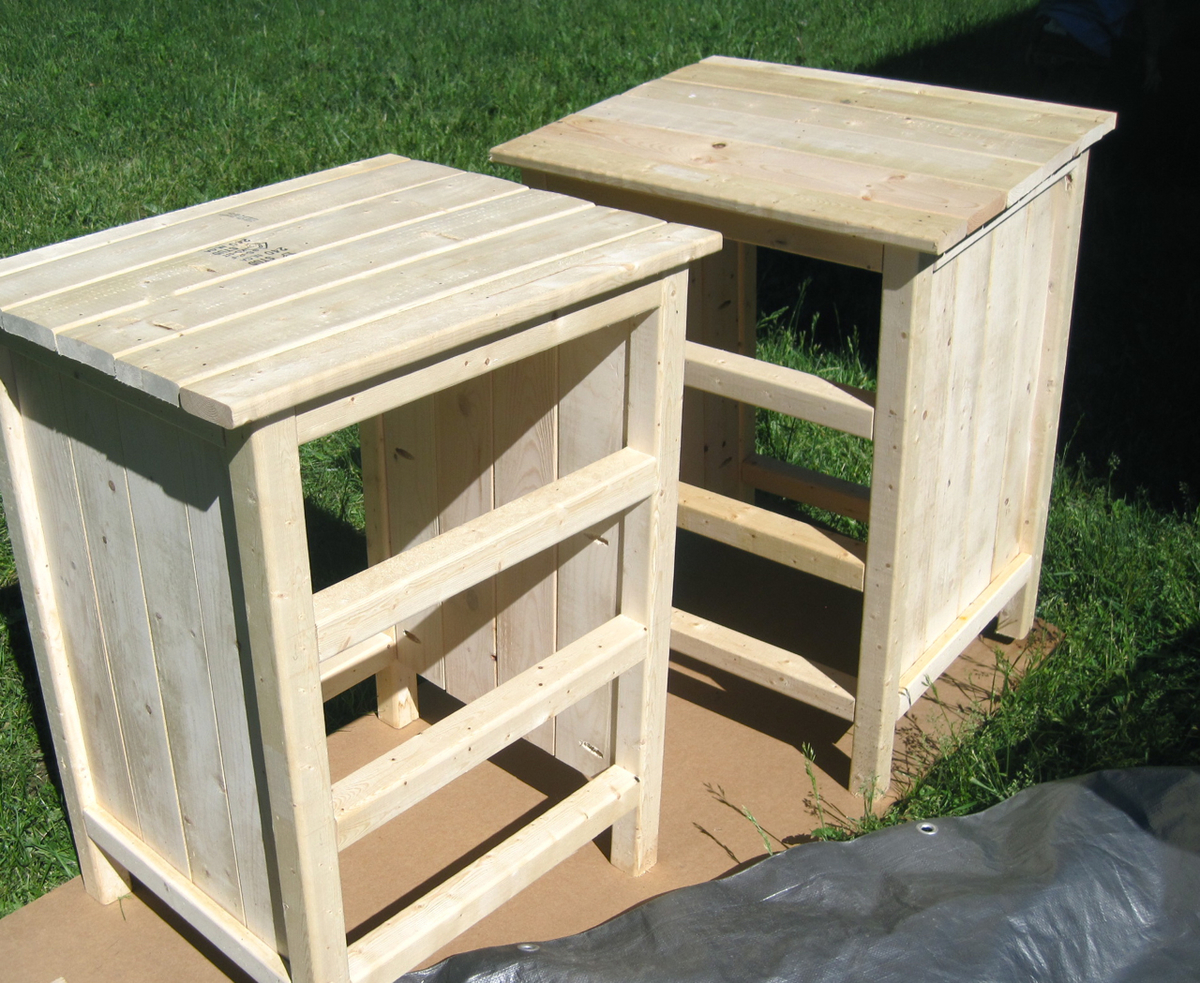
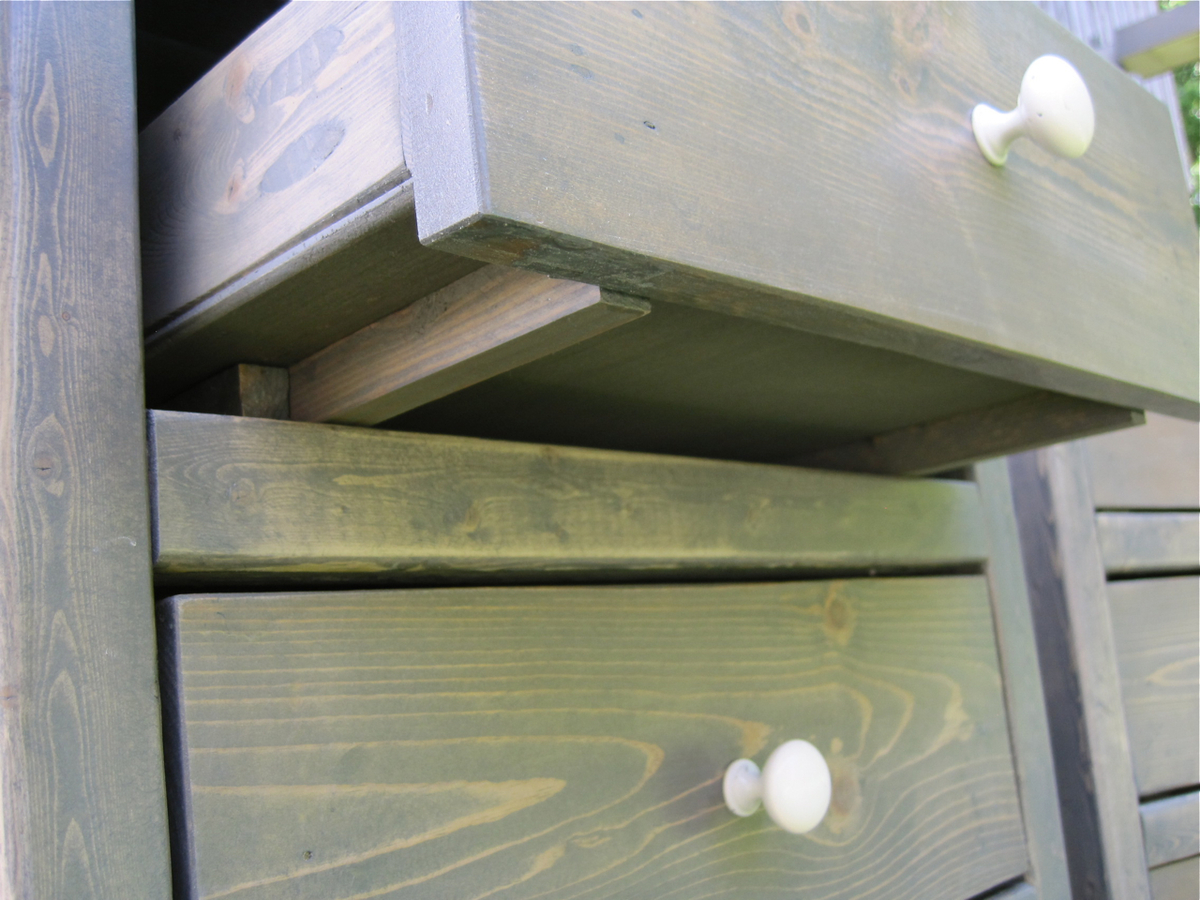
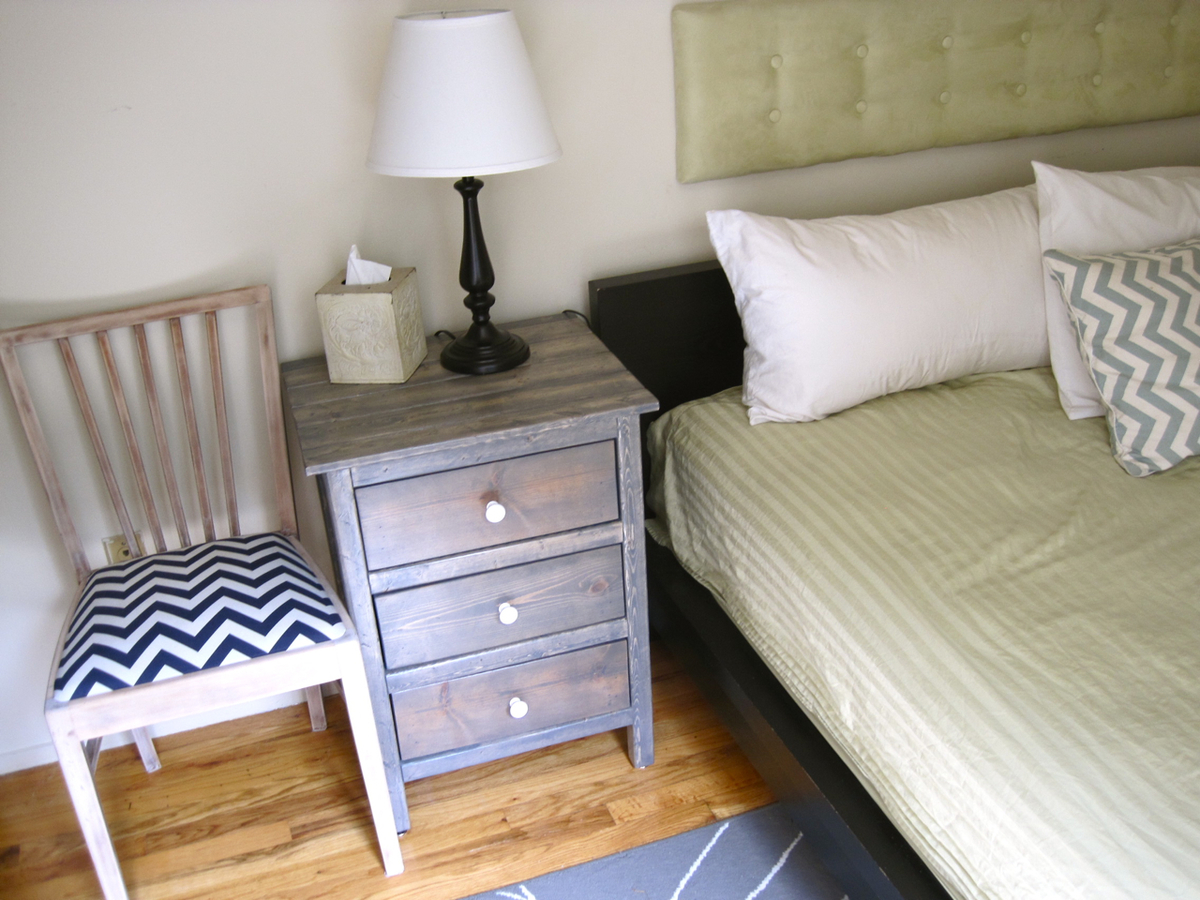
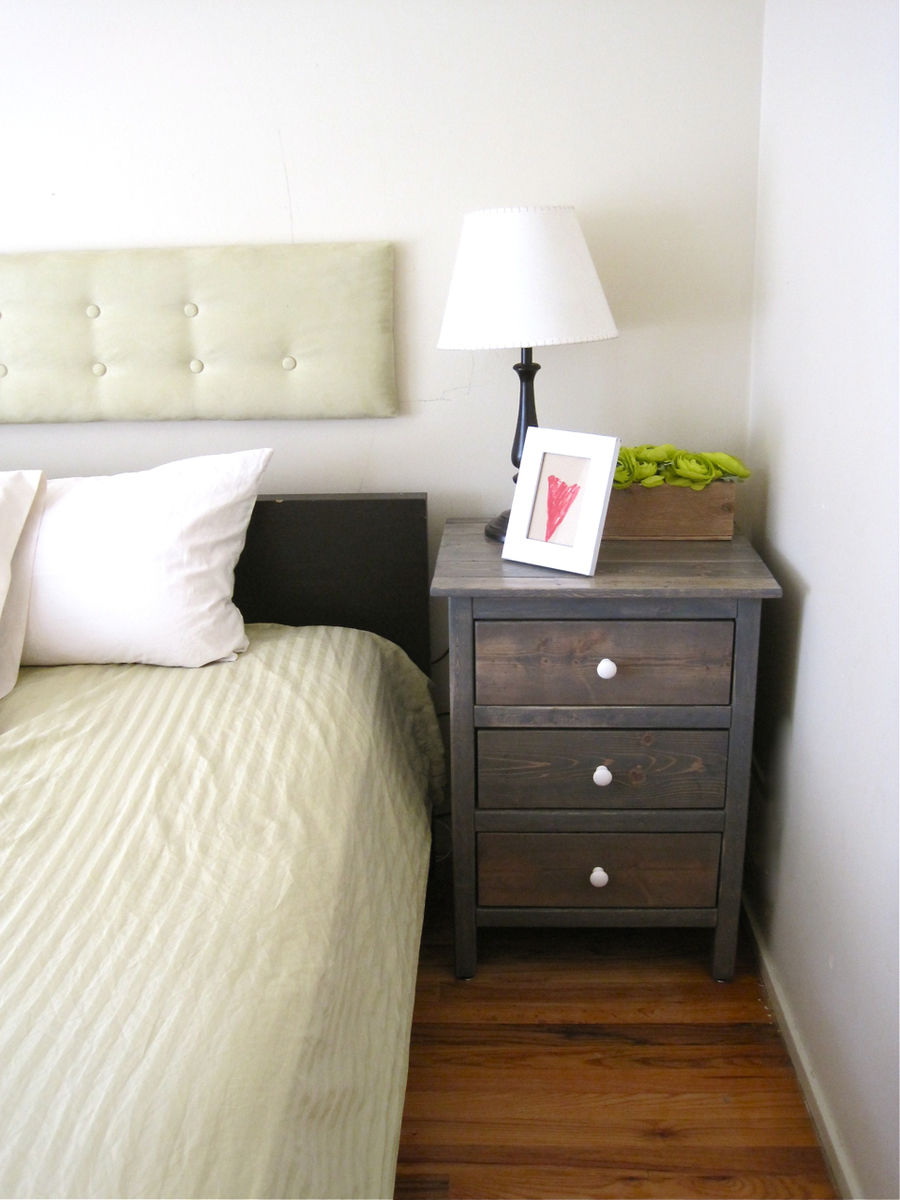
I followed the plans almost exact except I used wire finish nails to attach the top boards and drawer faces (with glue) to give it a handmade-rustic look. I also didn't use the euro metal drawer slides but instead ripped my own out of 3/4-inch thick pieces of wood by 16" long and attached them under the drawers and on top of the front/back stretchers (I had to add back stretchers for the top 2-drawers since they weren't in the plan). I also added adjustable metal slides to the legs to give it a nicer look.
Fri, 10/03/2014 - 09:34
What is the original plan name with demensions for these night stands?
Thank you.
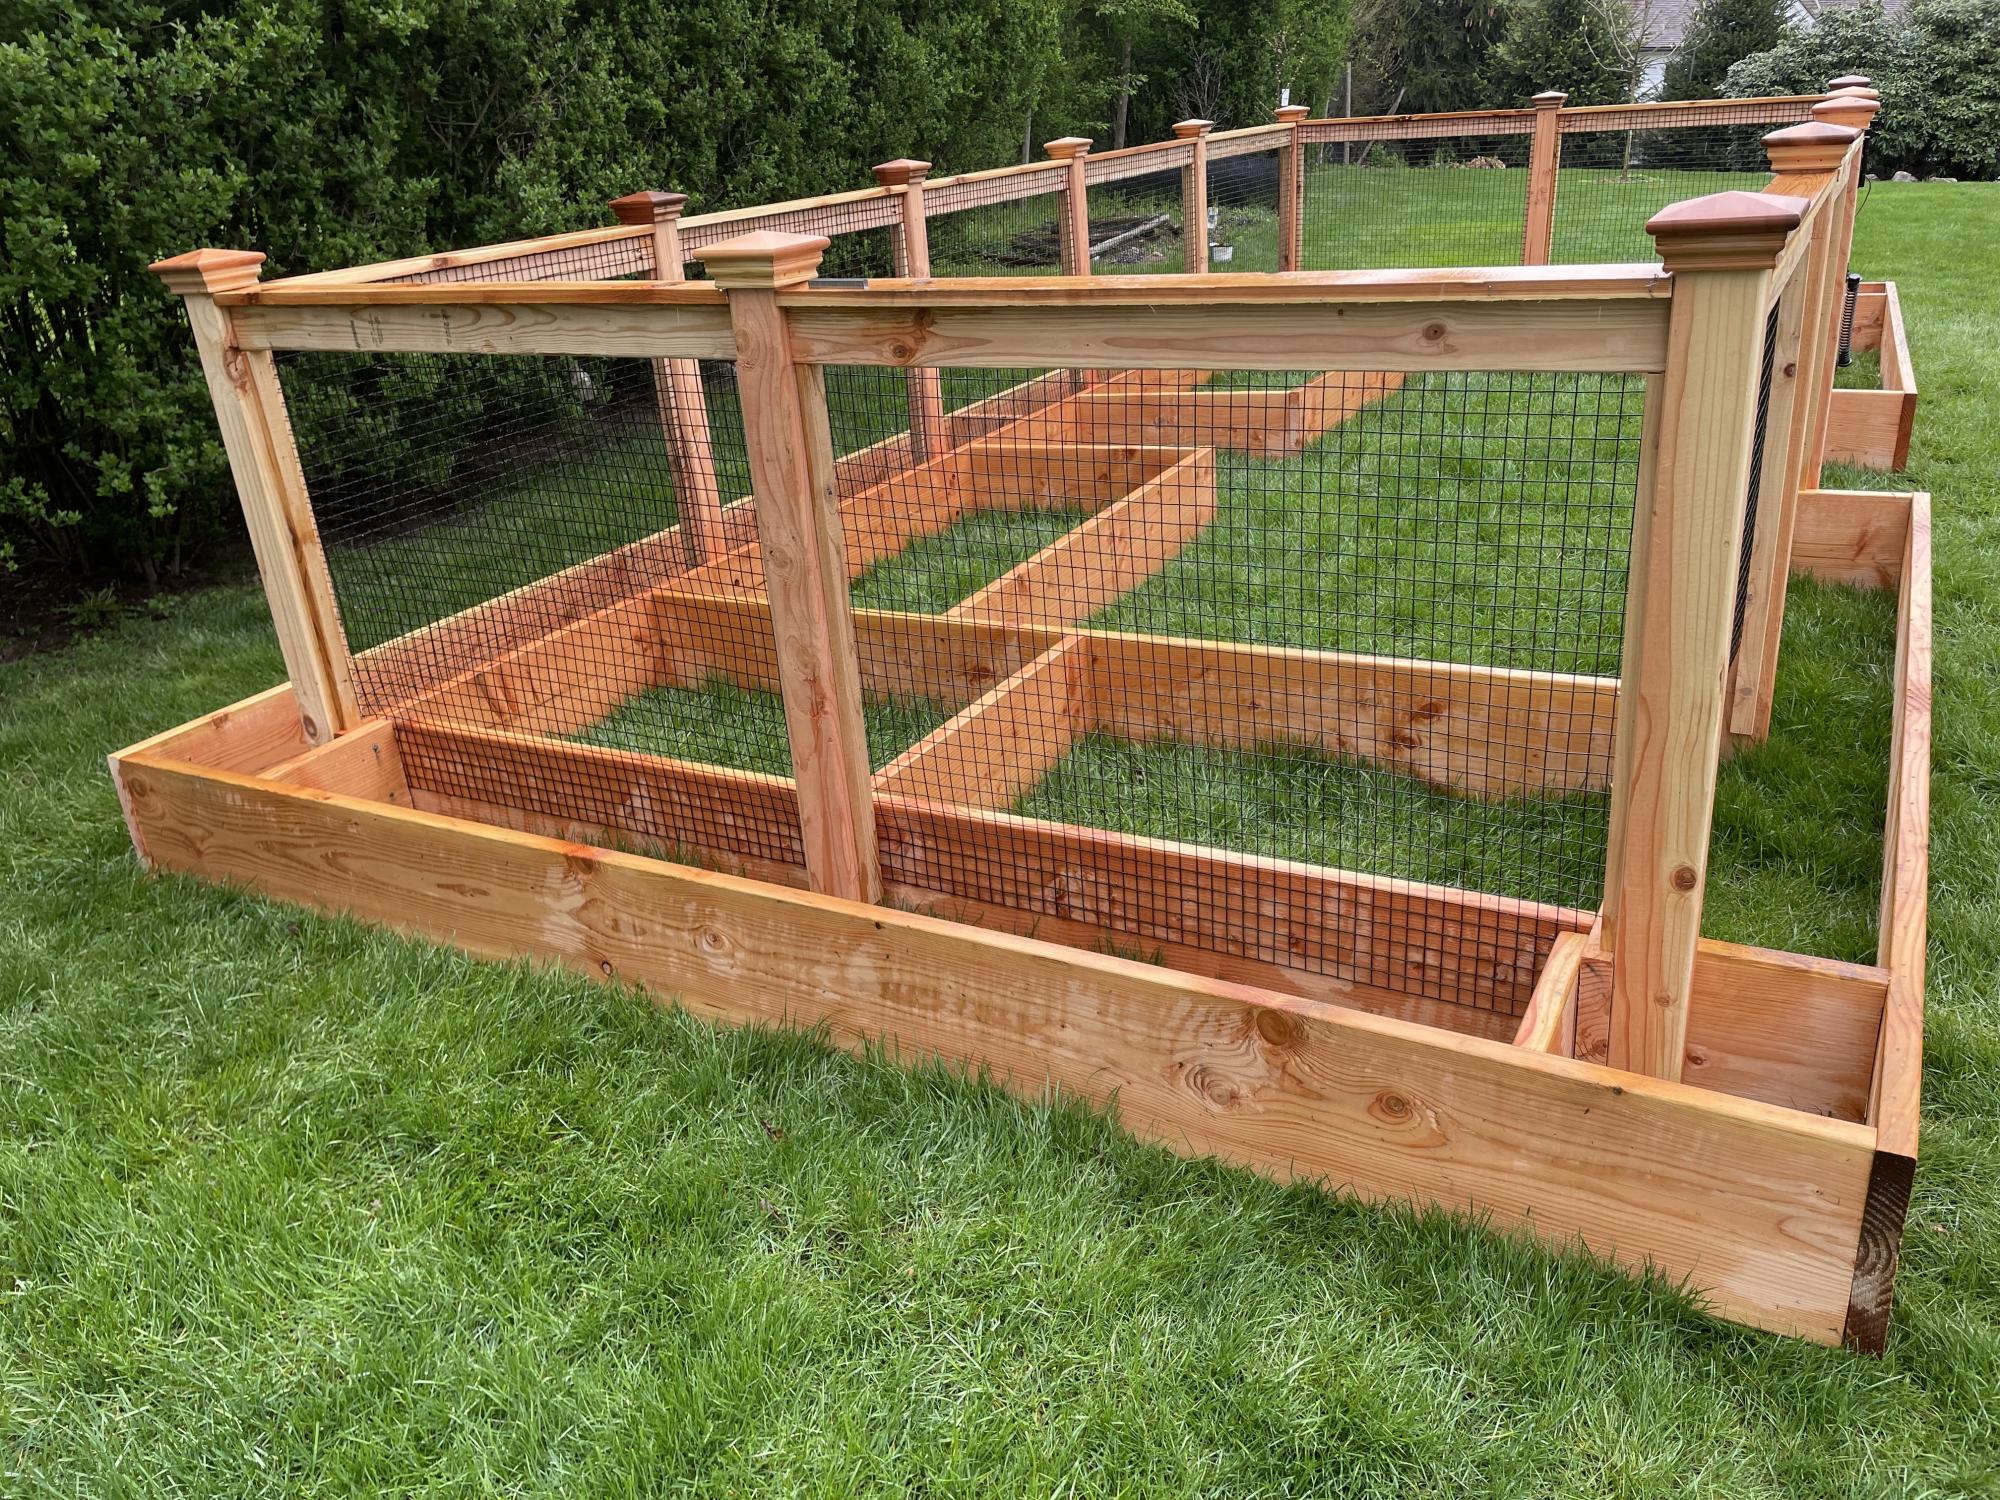
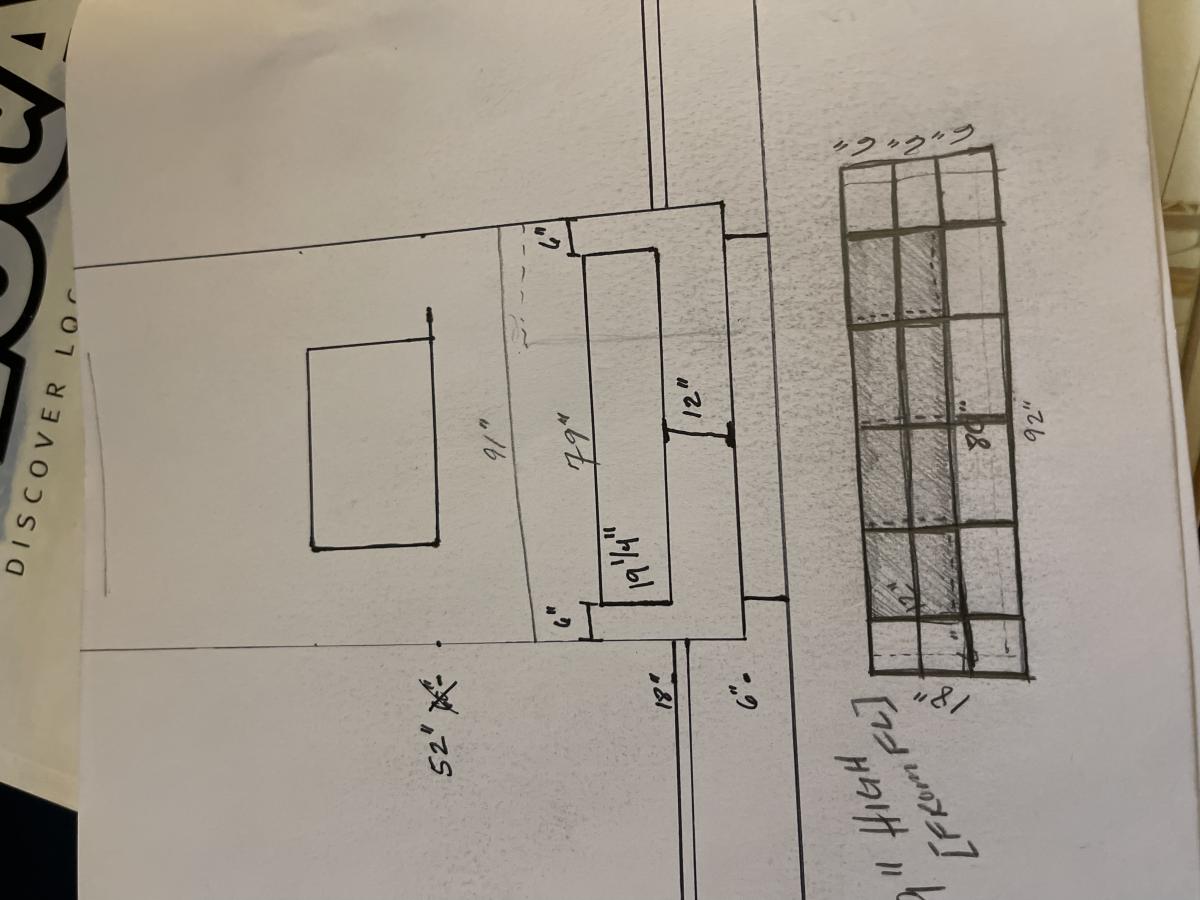
A vegetable garden with an outside ring to plant marigolds to keep deer away.


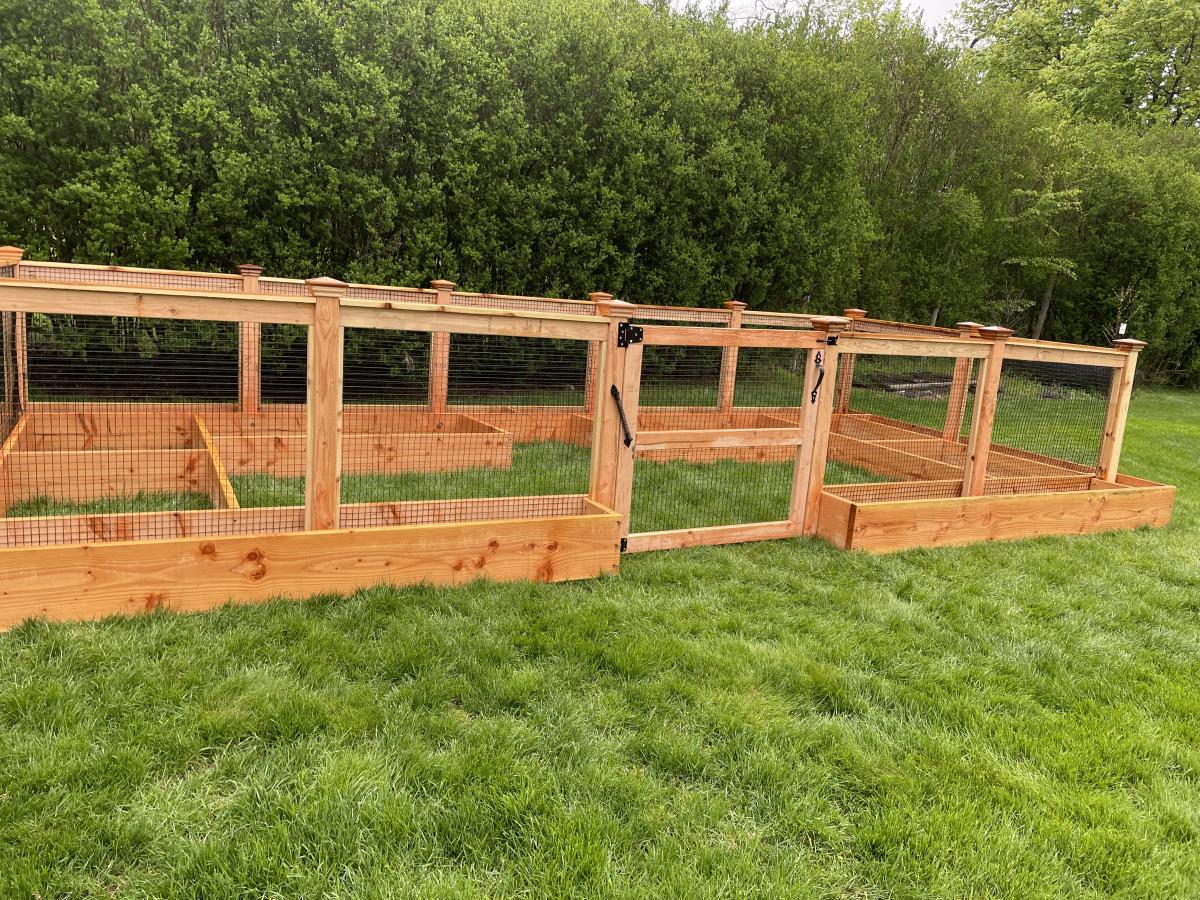
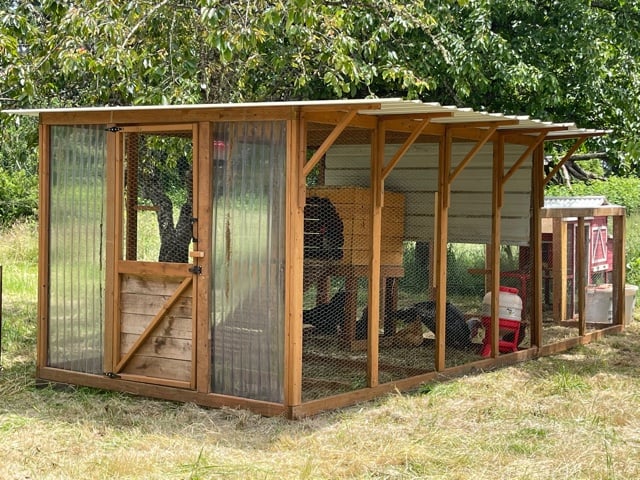
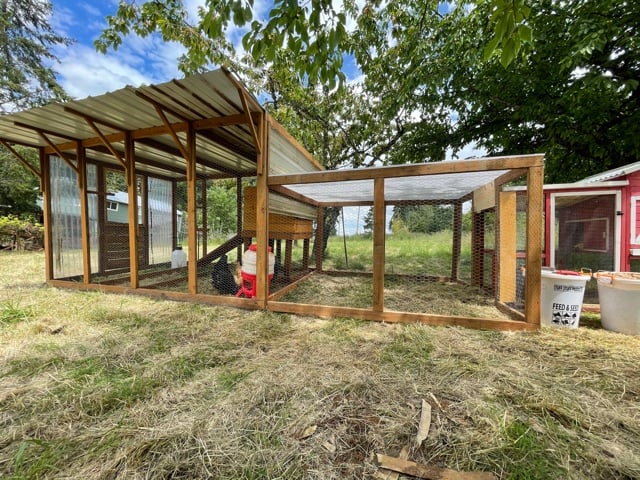
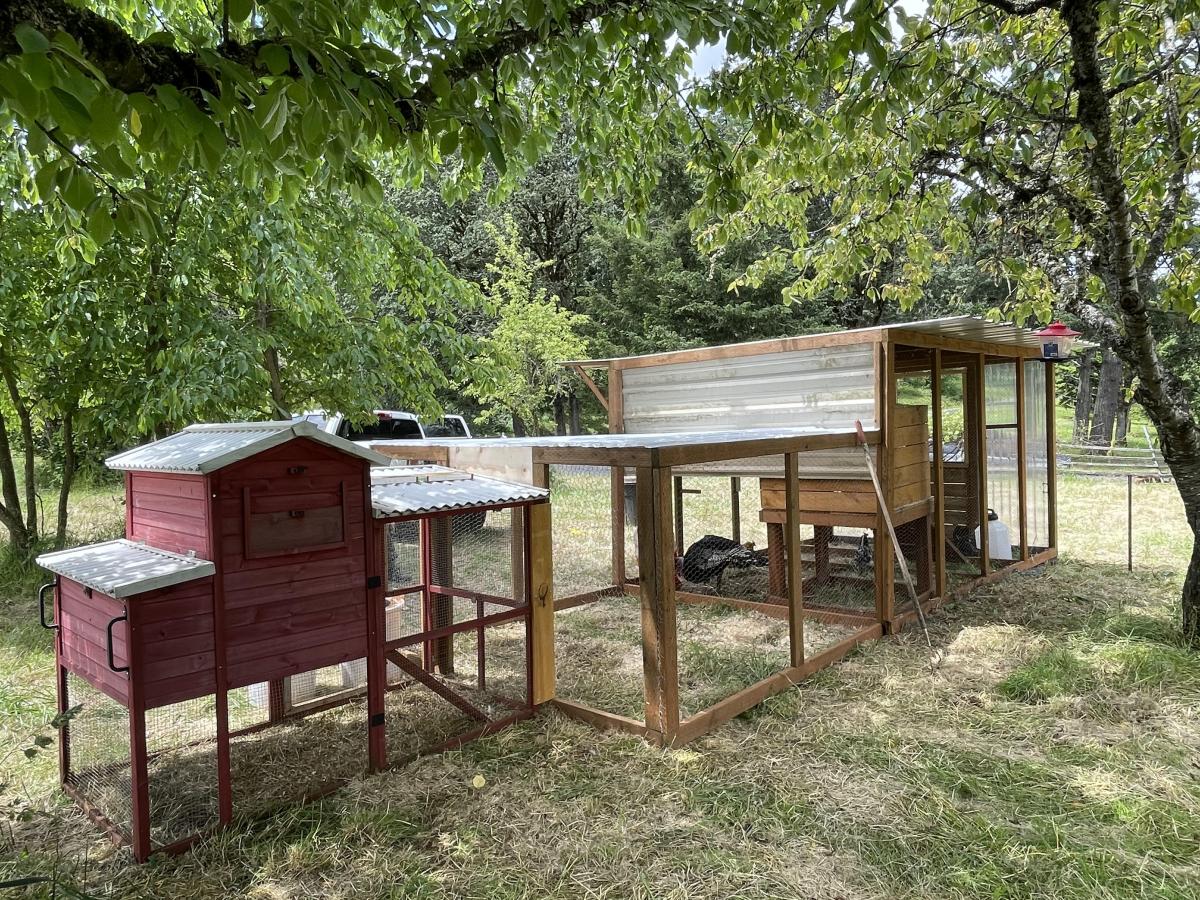
I had to move our original coop to another property, so decided to do a little upgrade. We used Ana's Chicken Run plan for both of the large sections and just added a roof. We attached the run to a small red coop that we purchased. Ana's plans are great for modifying for any size, as you can see the main tall portion is from her run plan just built taller and we added a door to the front.
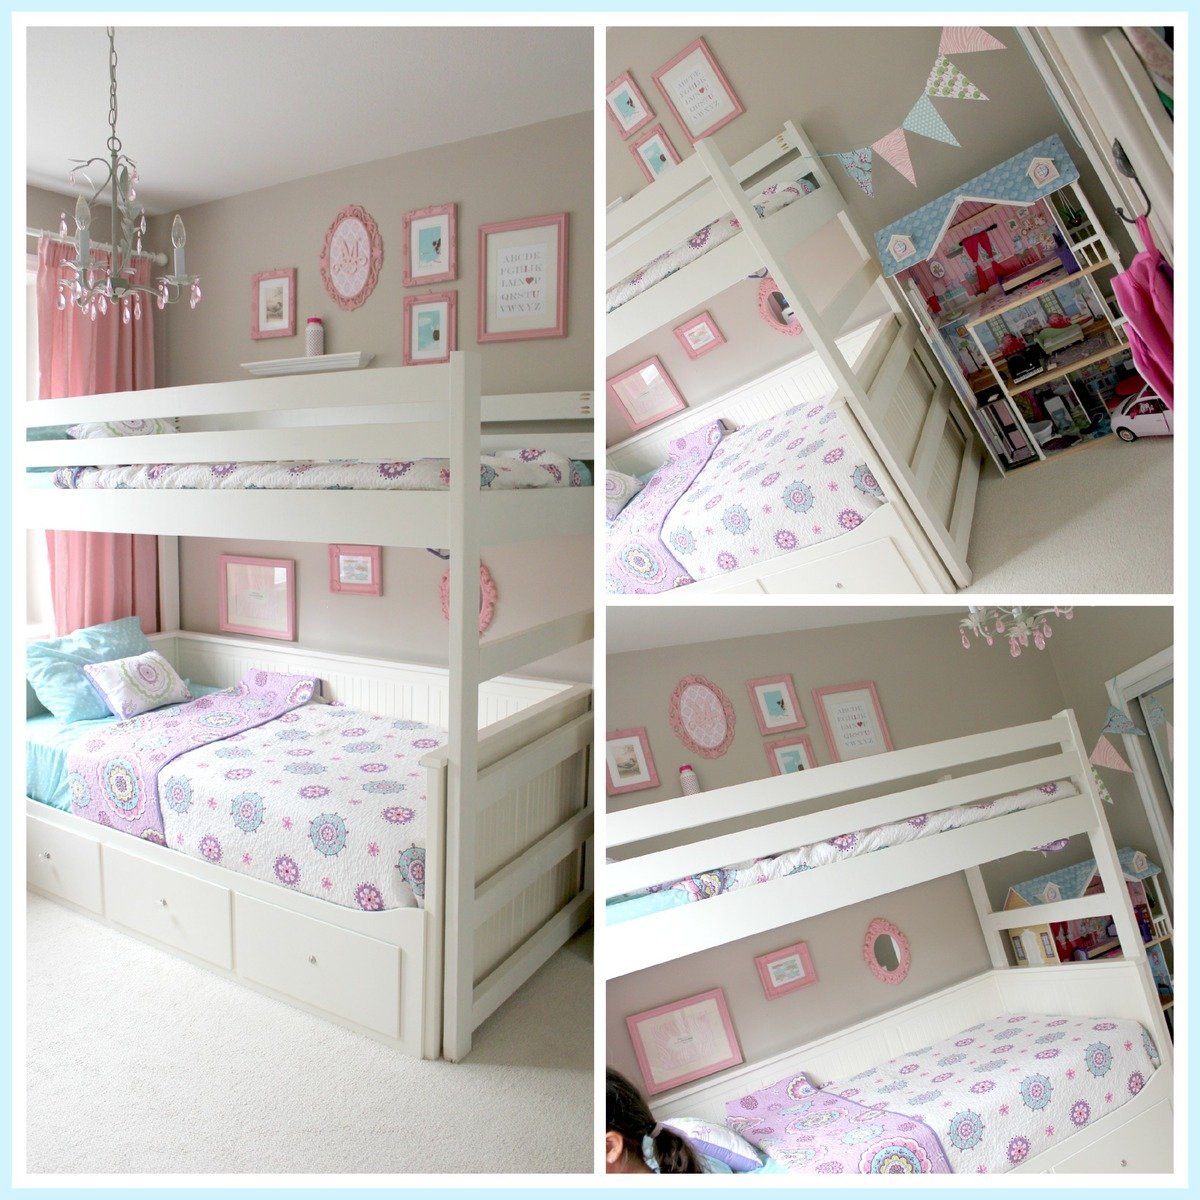
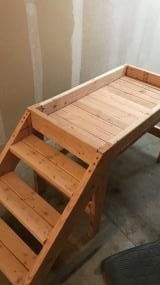
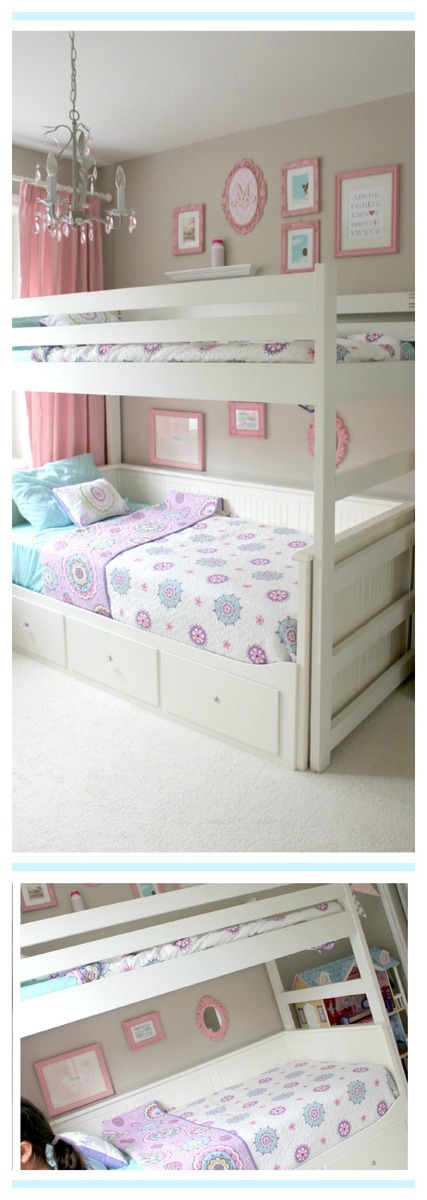
I liked the simple design of the camp loft bed, so I took the plan and modified it to fit over top of our existing Ikea daybed. I adjusted the width of the loft bed and made it a little taller, so that I could sit on the bottom bed and read to the kids with out hitting my head on the loft bed all the time.
I built the ladder into the side of the loft bed so that it wouldn't interfere with the drawers on the front of the daybed. This worked out well, as it also gives the girls more room to play!
This build is super easy, but I have to say that I don't like working with 2x4s. They are so rough....I spent a lot of time sanding and filling, and it's still not perfect. But I'm ok with it ;) I may add another cross support because it is a bit wobbly (probably b/c I made it taller).
The finish is a color matched 'All surface enamel' from Sherwin Williams.
Wed, 08/04/2021 - 06:38
Hello Millhouse. I love the loft bed you created. I have the exact hemnes daybed for my daughter and I beg to build the same loft bed. Do you have the exact modified plan you used with the measurements that fit the bottom bed? This would be super helpful!! Thanks in advance!
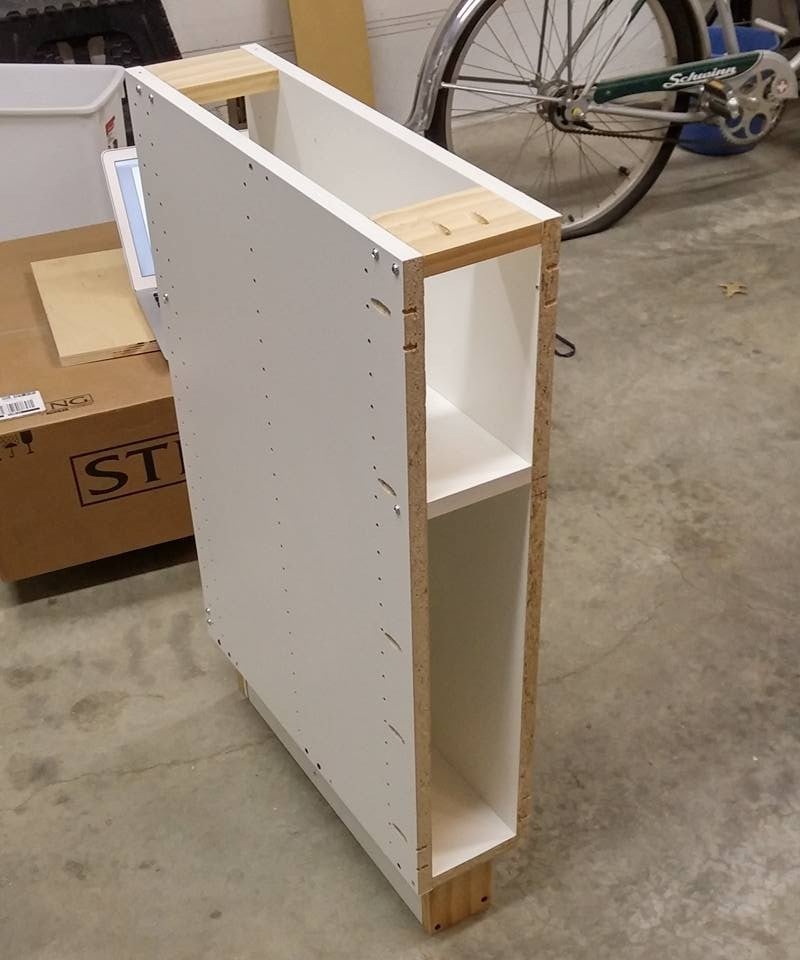
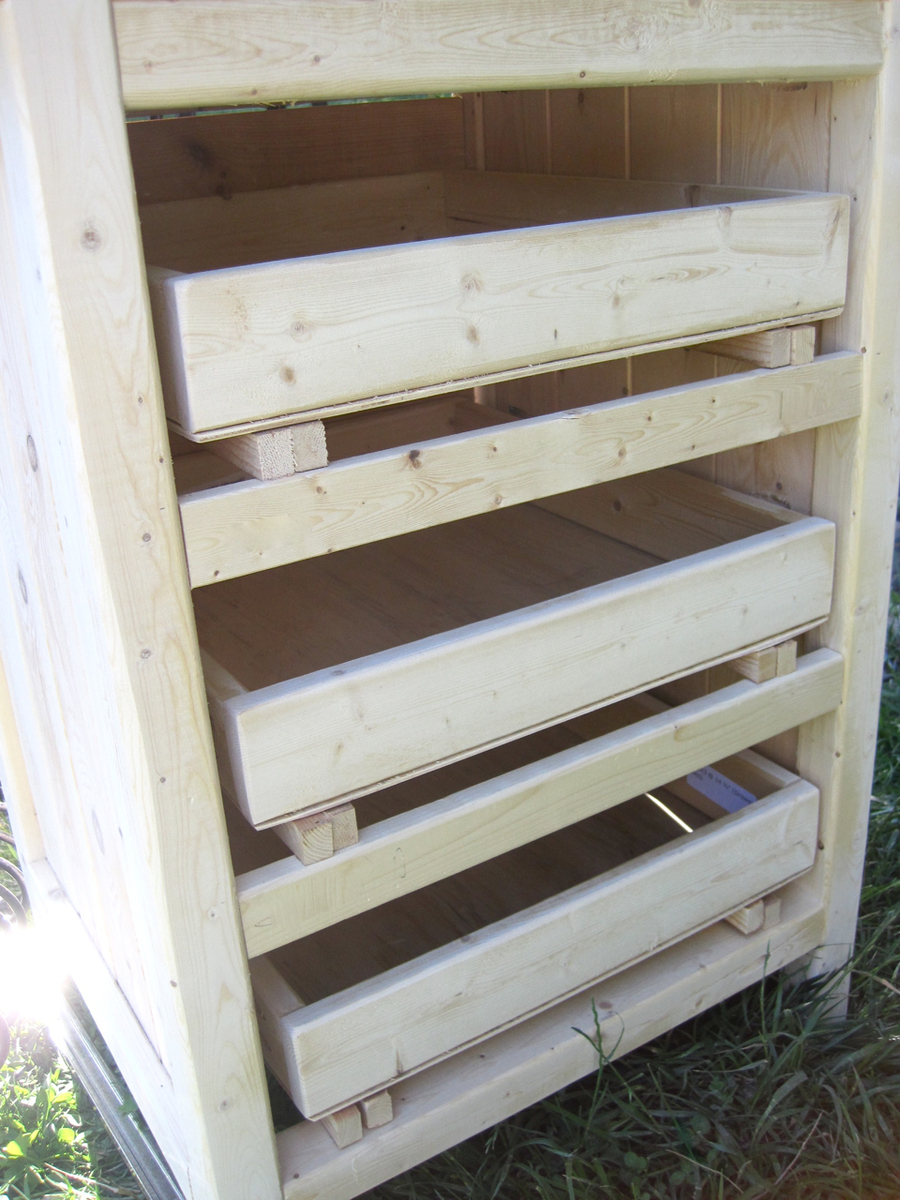
I'm happy to share with everyone my IKEA hack 6" tray cabinet.
I found a 24" cabinet box in IKEA's As-Is section and took it home for half price ($23)! I would have preferred plywood, but my table saw is a little small and cutting large sheets of plywood is a little scary. When I deconstructed the cabinet, it sustained some damage (as its particleboard), so if you try this at home, be careful! I ended up changing the depth to 22" in order to cut off the damaged piece, but that shouldnt be noticeable with average trays and cutting boards.
I used Ana's 6" tray cabinet plan and modified the dimensions a little for my planned space. It still needs the back, face frame and door (which will be a replacement drawer front from the cabinet manufacturer). I plan on building the face frame at the time the cabinets are installed, since this will go in between the 36" corner easy-reach and the 36" sink base. Once its done, I'll post updated pics!

Thank you! You've helped me look like a true carpenter who knows what he's doing! My whole family is impressed with my woodwork lately, and now I'm addicted. I've done your seesaw, bar table and stools plus the treehouse in 2 weeks. Thank you for sharing your plans!


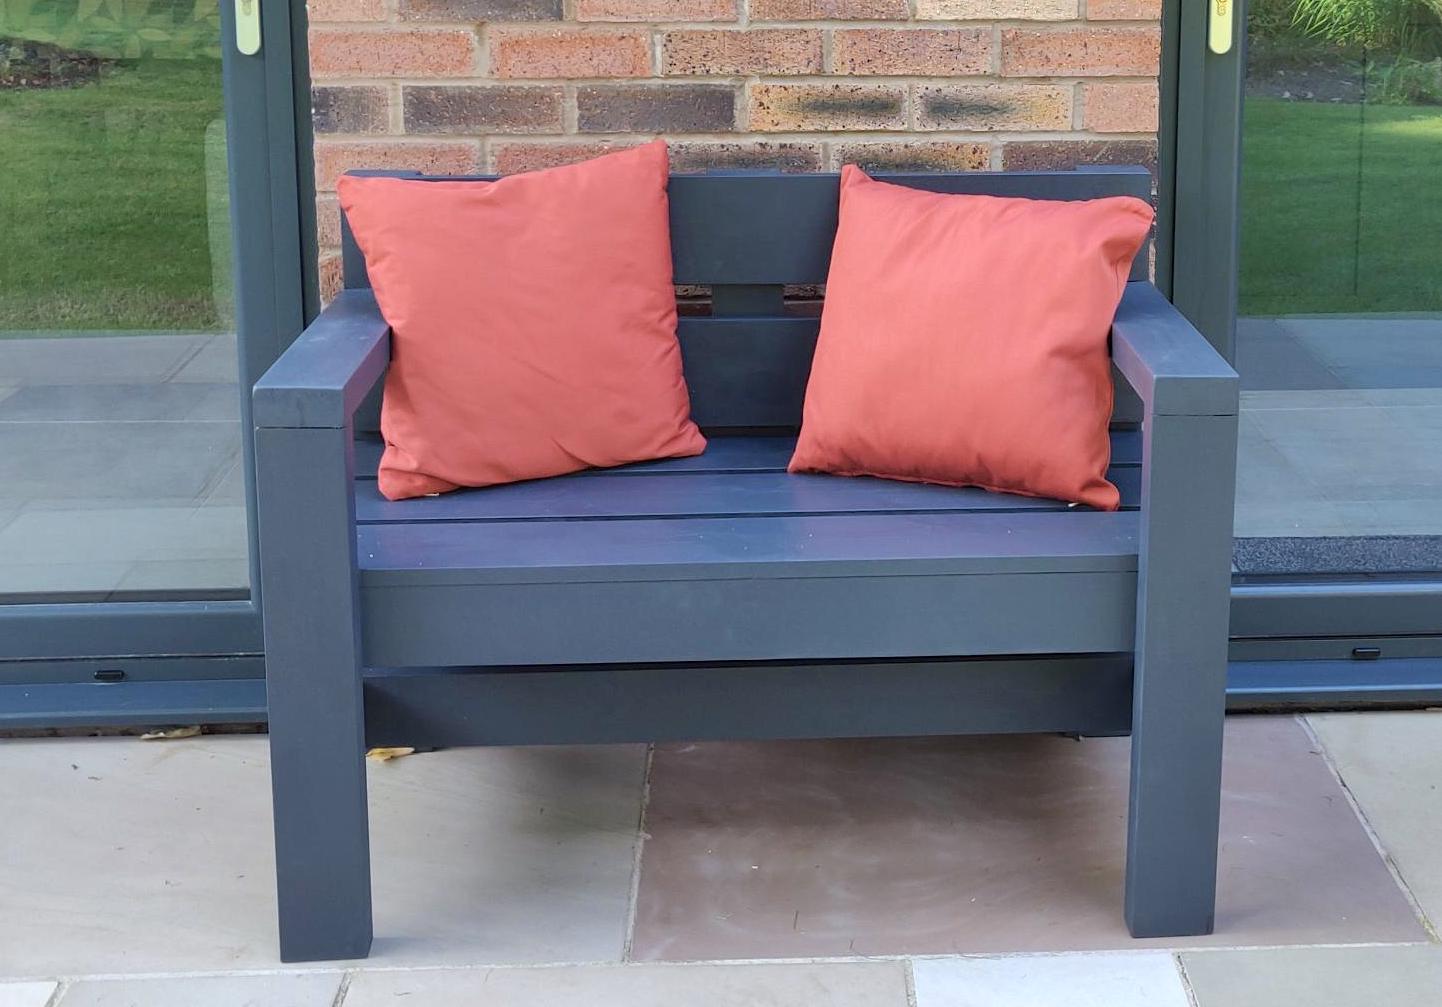
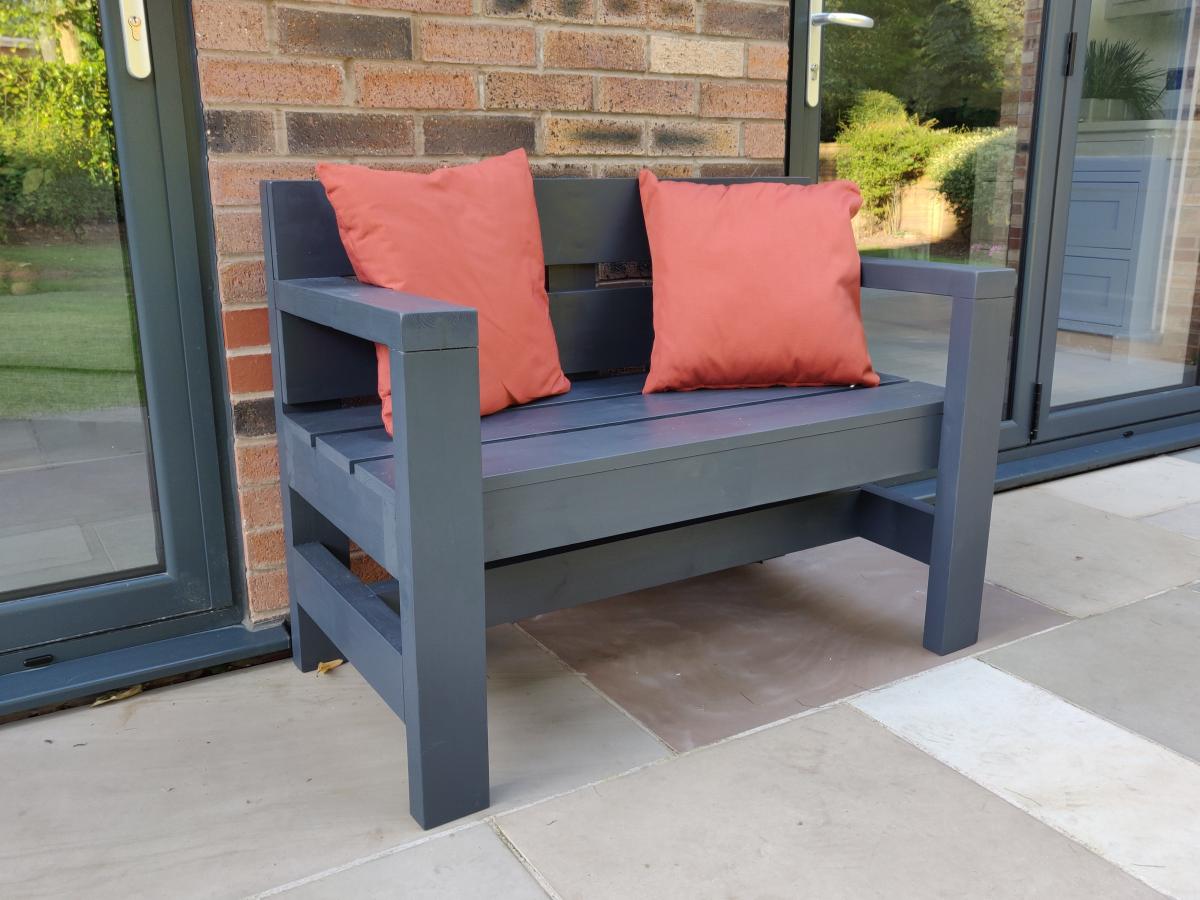
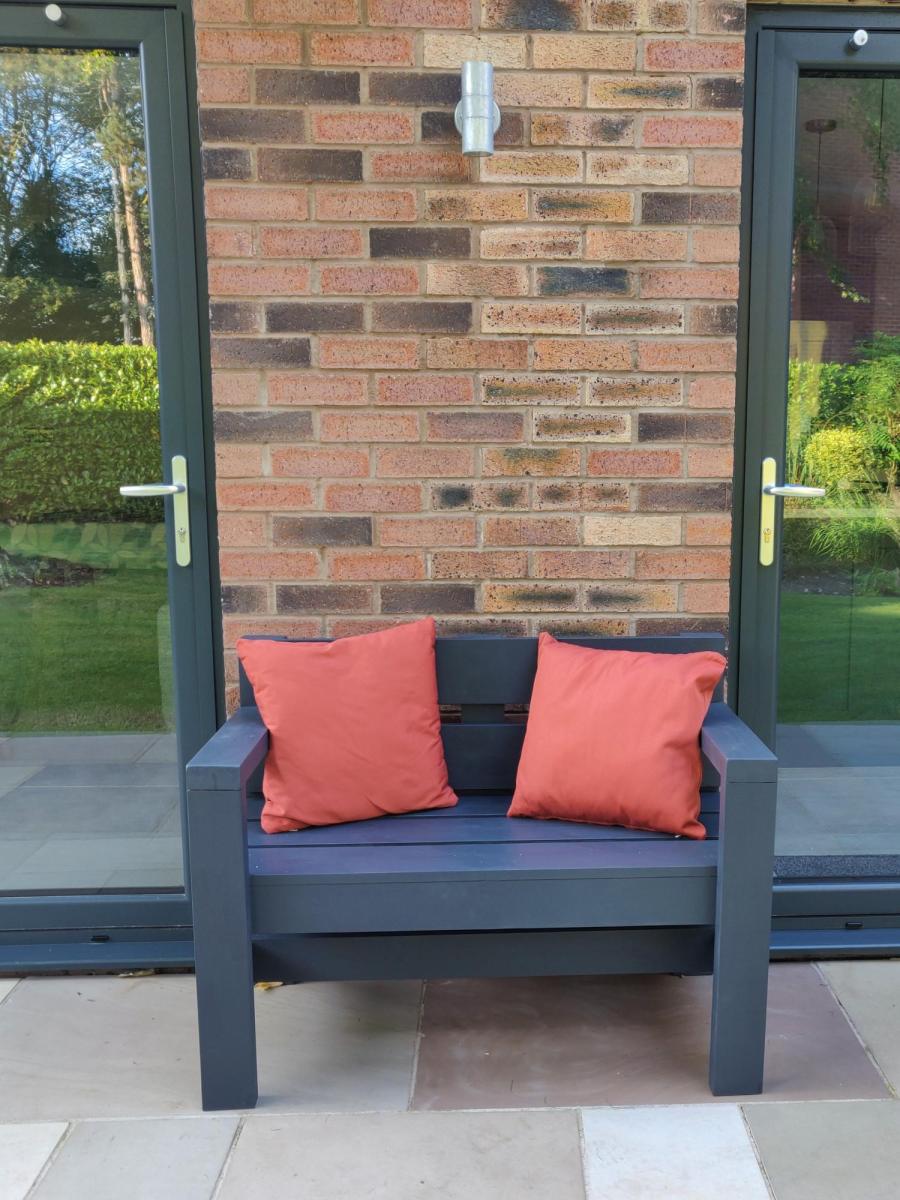
I needed a replacement outdoor bench to fit a small space between two door openings. Reduced the length of the Modern Park Bench to about 44". Also reduced the depth by removing one of the seat planks to retain a sense of proportion.
Had some issues with some of my 2x4s being a bit twisted which impacted the overall build quality but I'm happy with the end result considering the price/time invested.
Tip: spend some time in the lumber yard picking out your own wood - I wish I had.
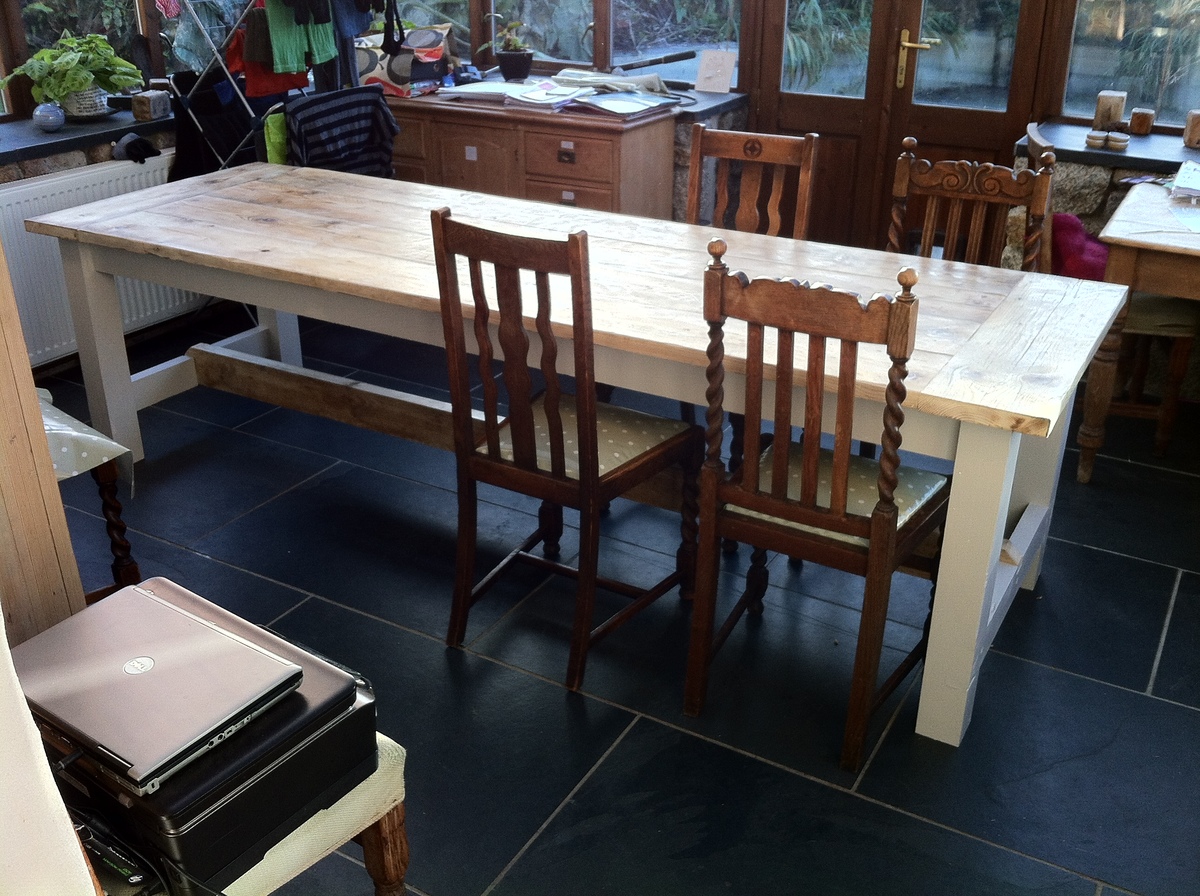
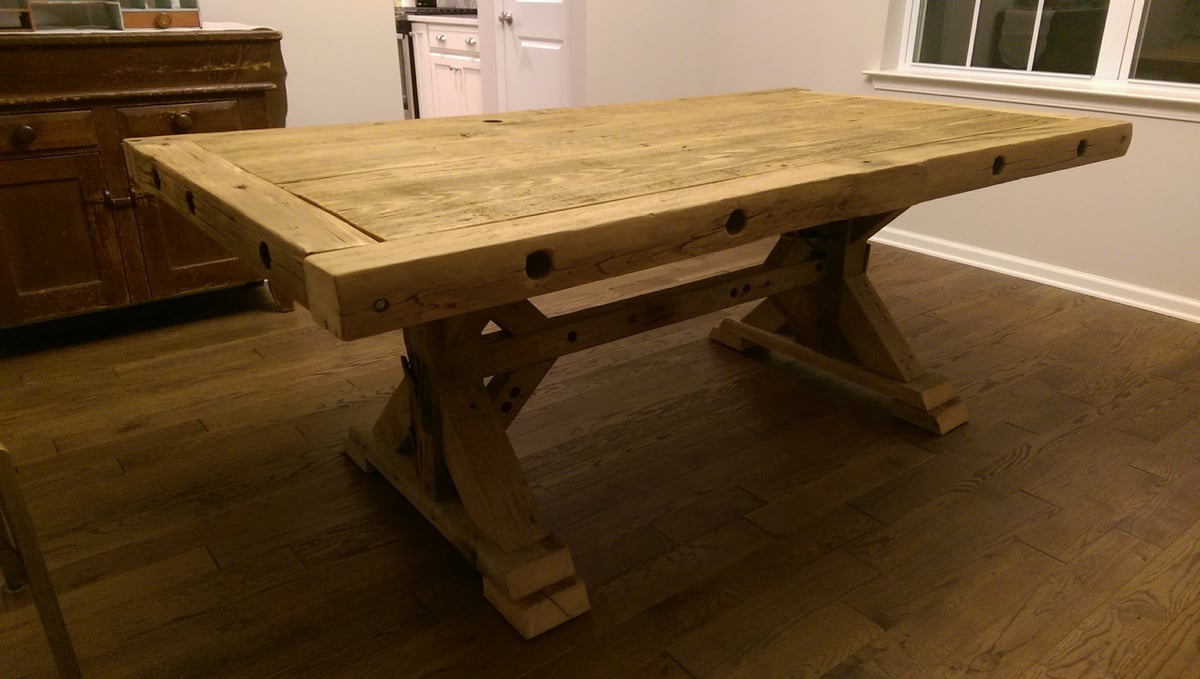
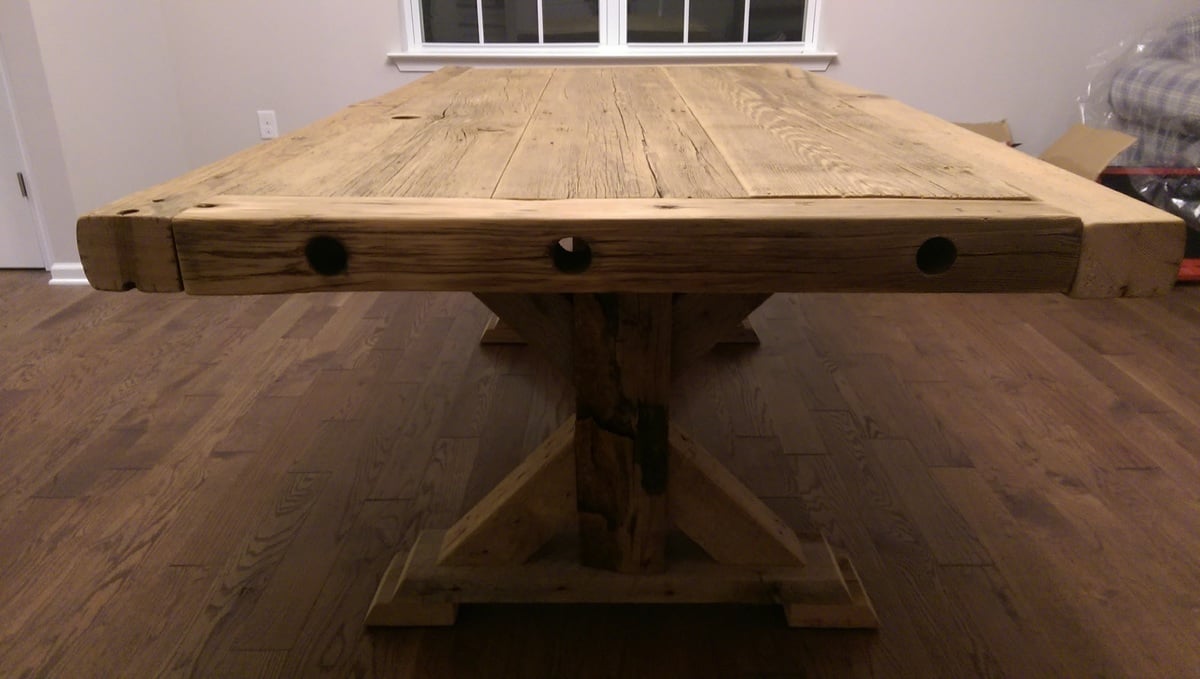
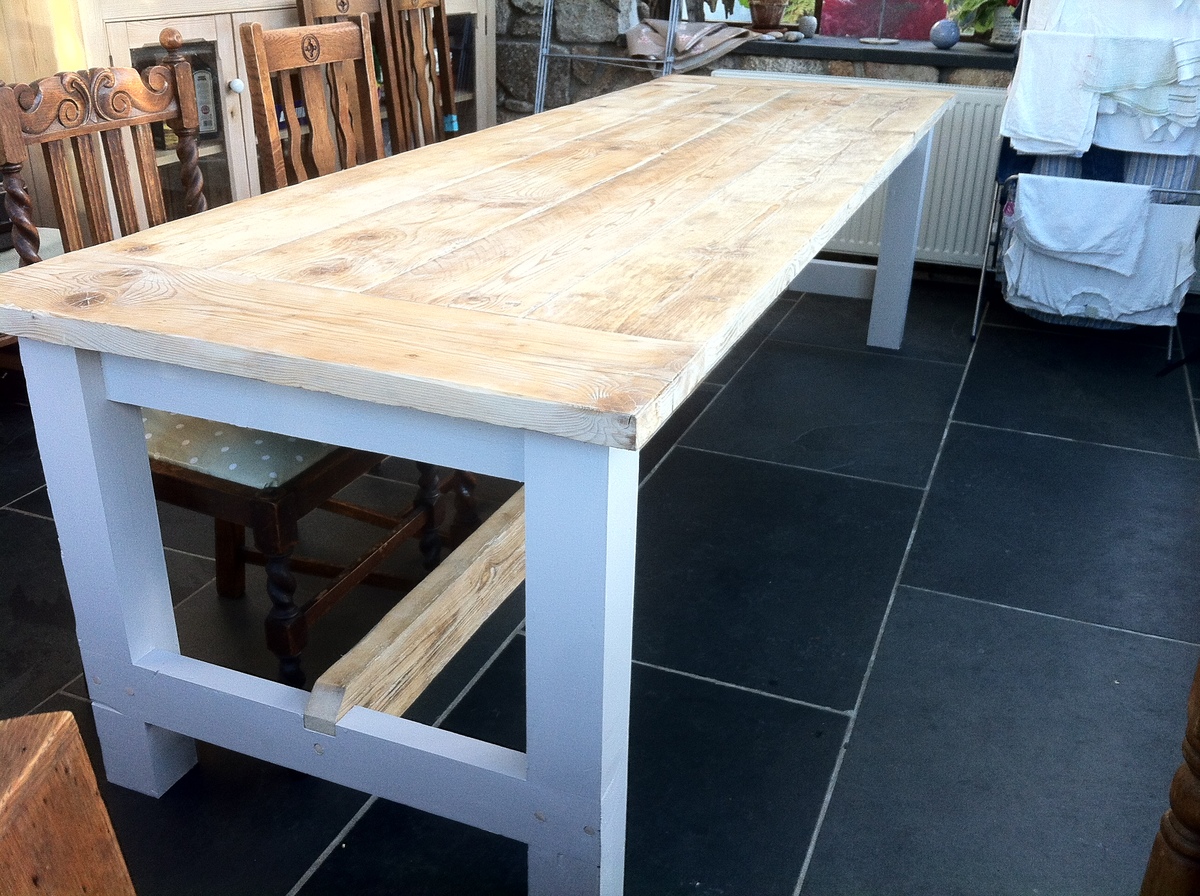
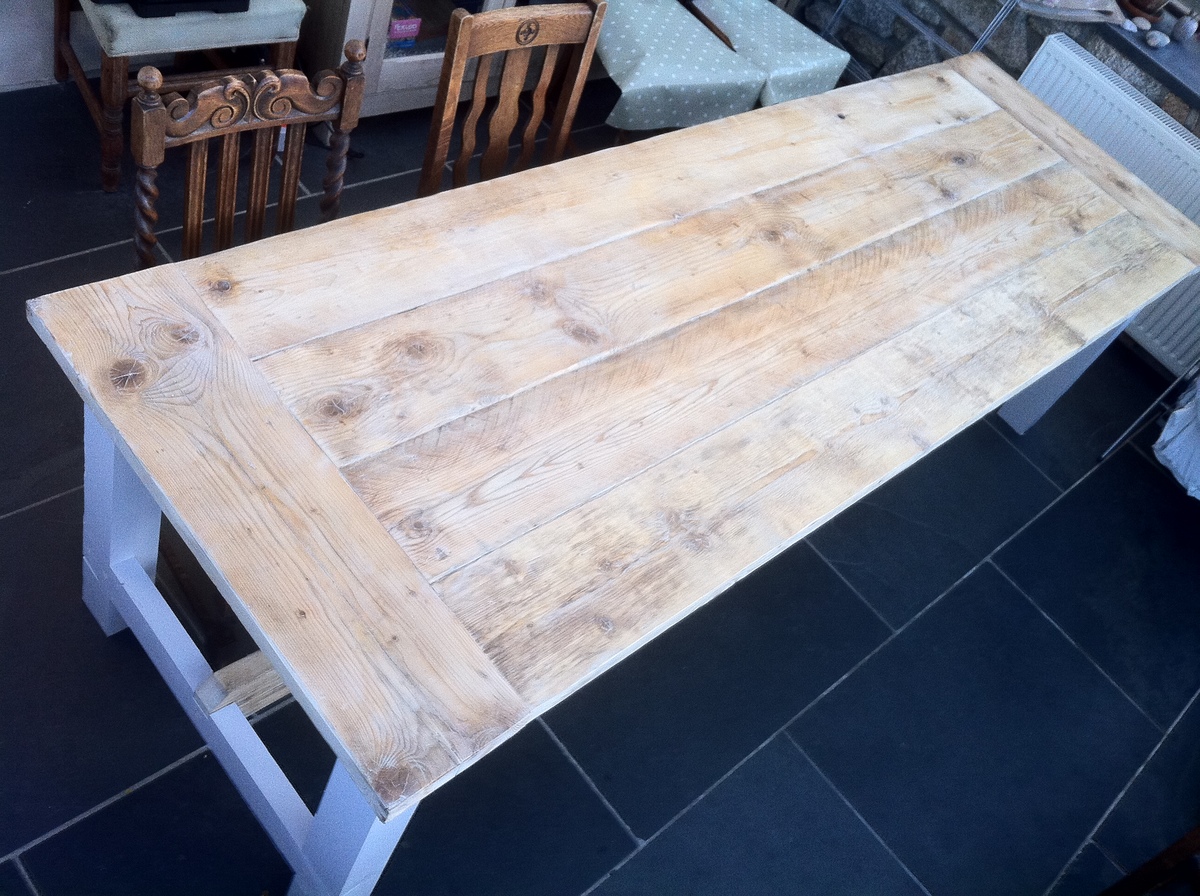
wanted a big table for christmas, this is over 8 foot, and we couldn't afford a table like that so having seen the site thought i'd try and build one. thanks for the plans absolutely great
first project, no real woodwork experience but competent diy-er
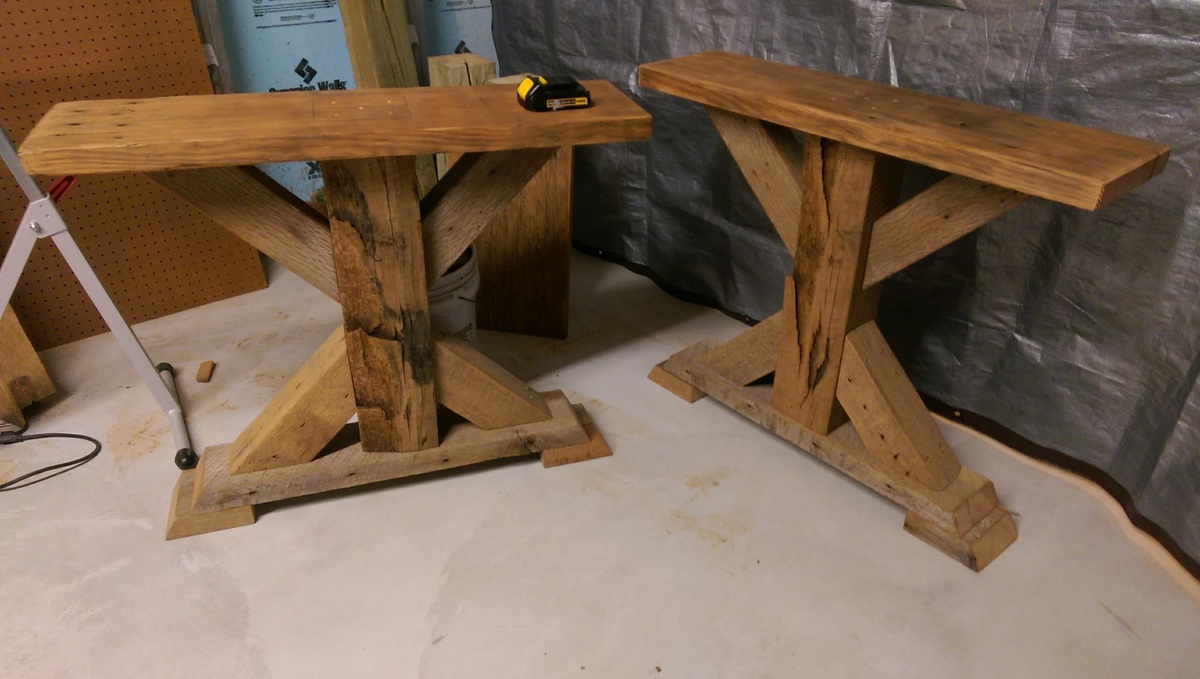
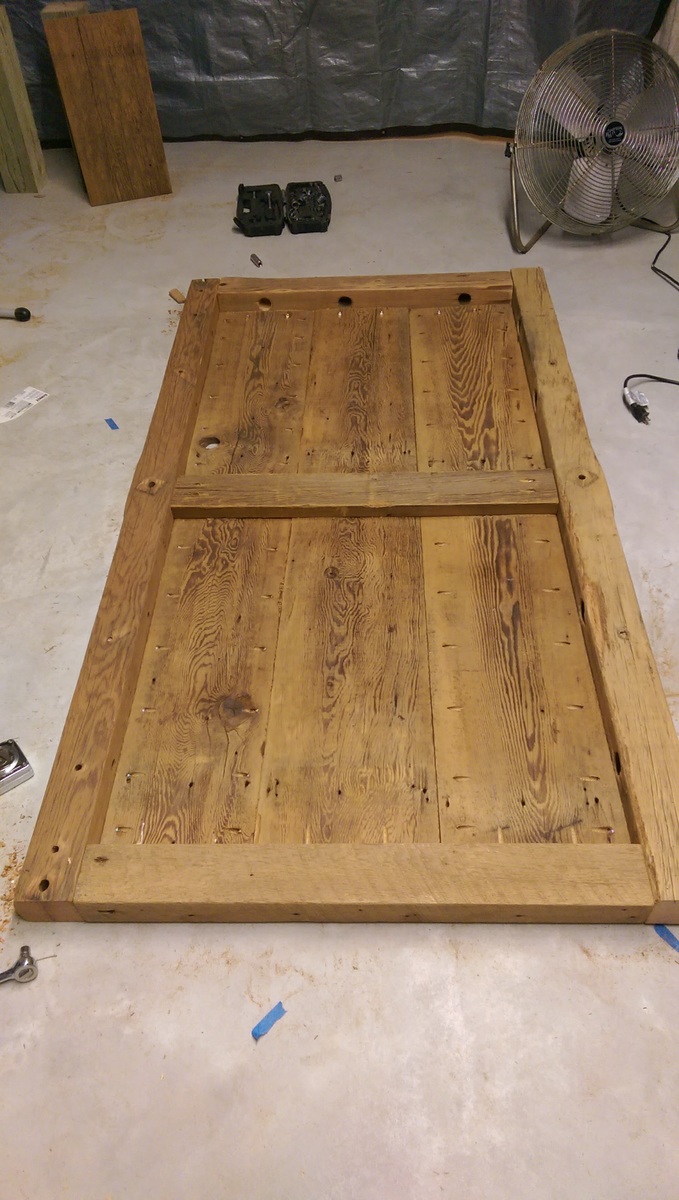
made mainly out of reclaimed wood, the top and side apron are made of old scaffold boards and the main brace a chunk of wood form my neighbours shed.
i did have to buy some 2x4s for the legs and the cross braces
sides painted and the top waxed, looks a bit patchy in the photos but the finish is good.
all in all cost about £70
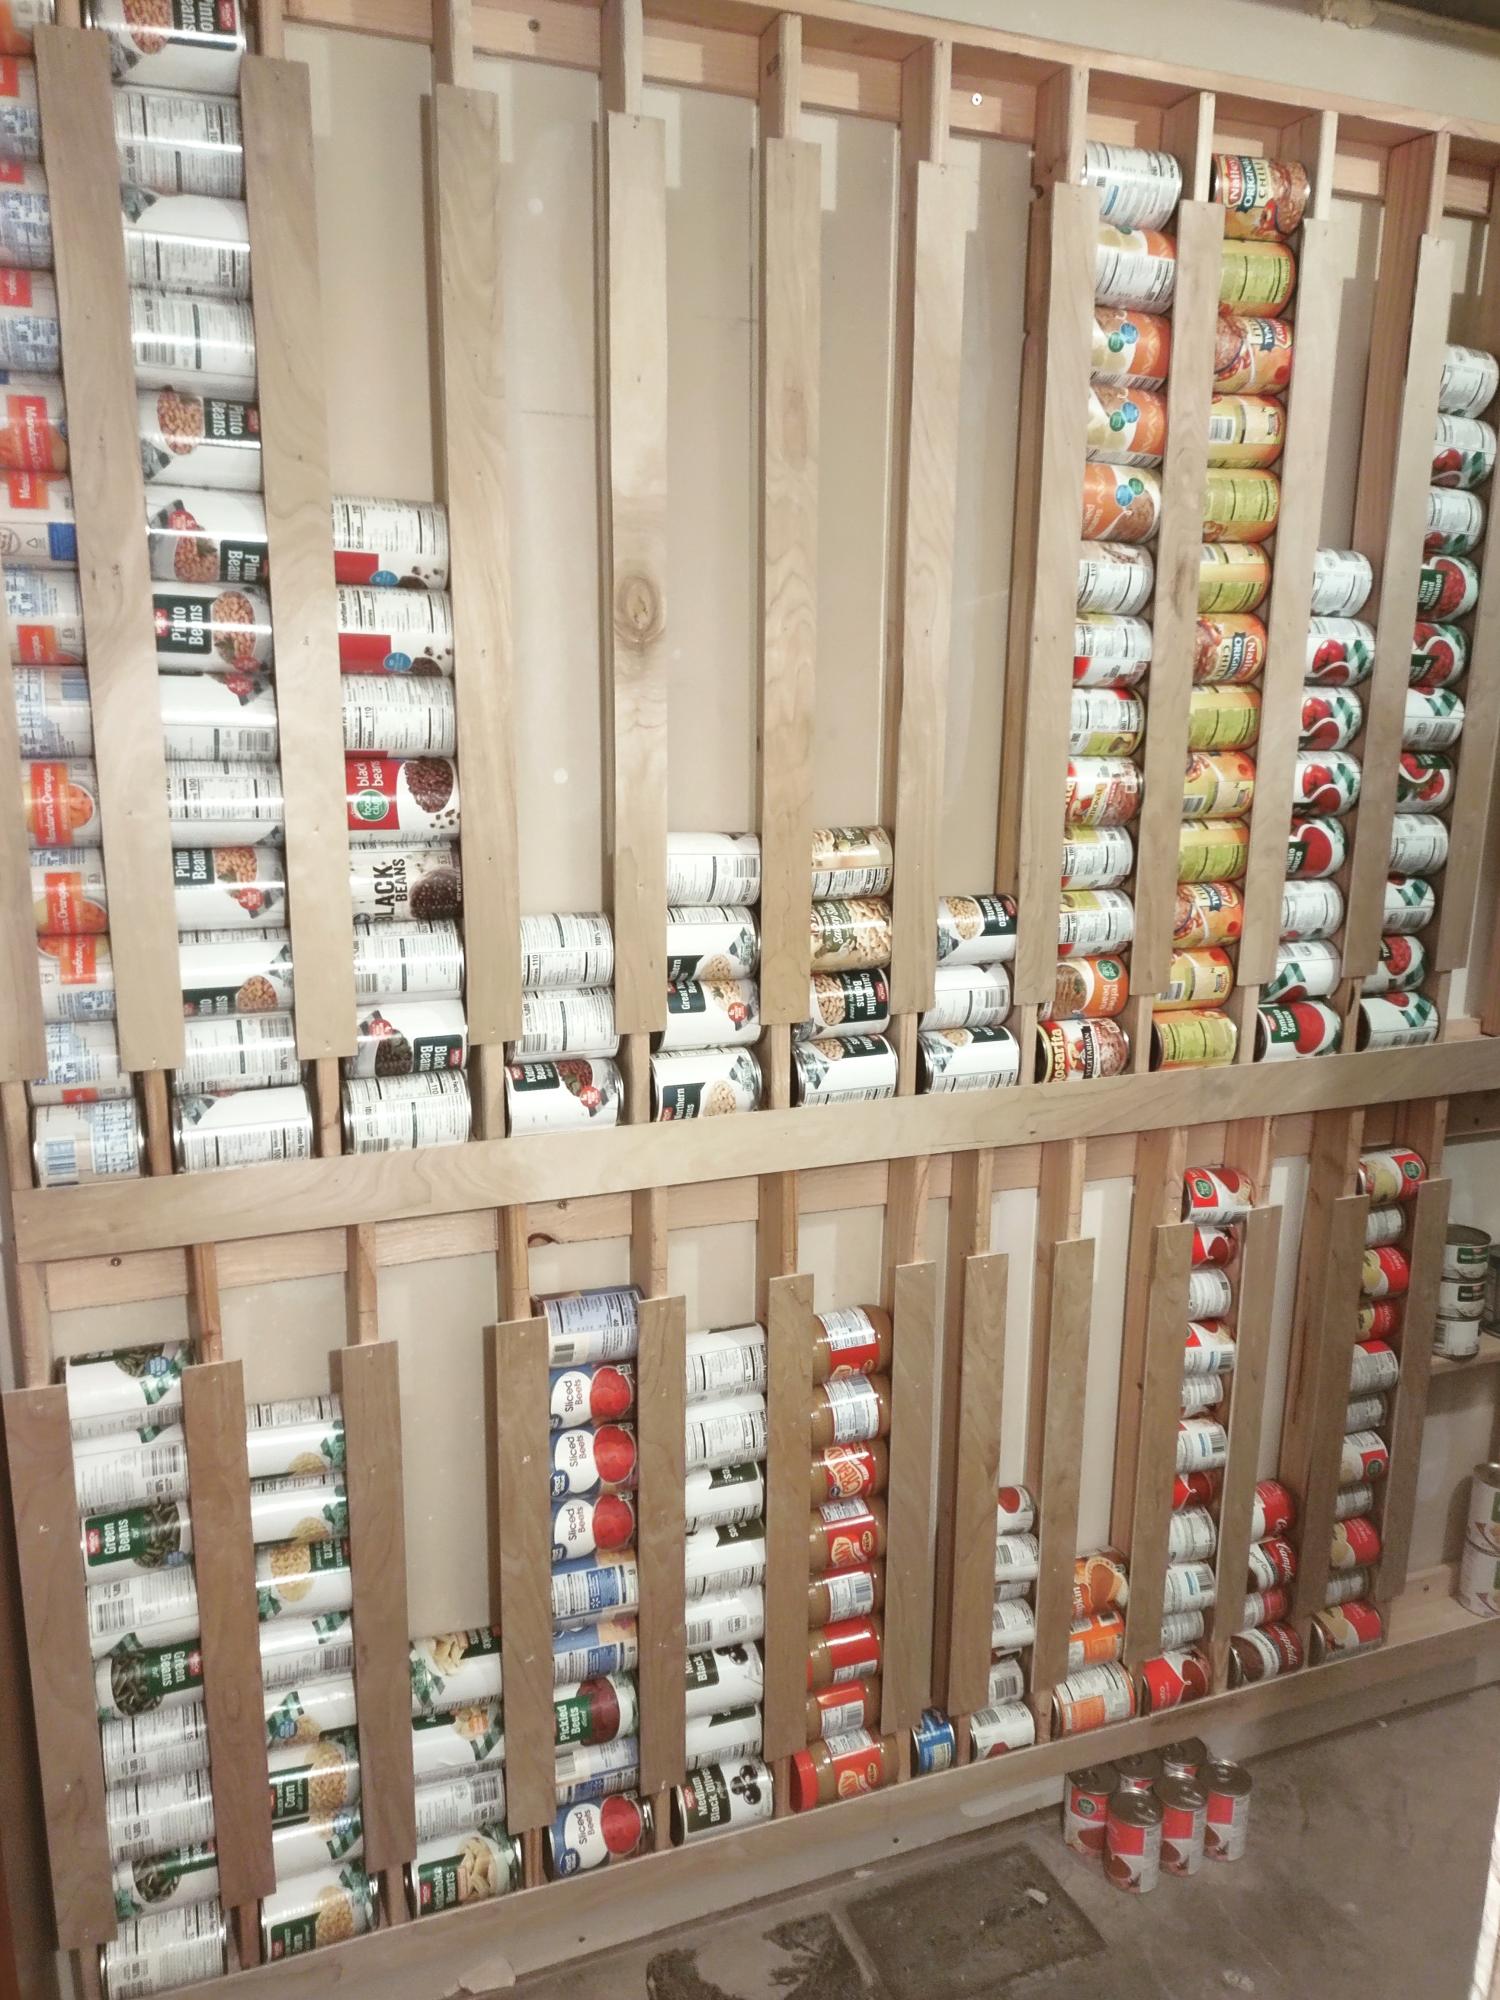
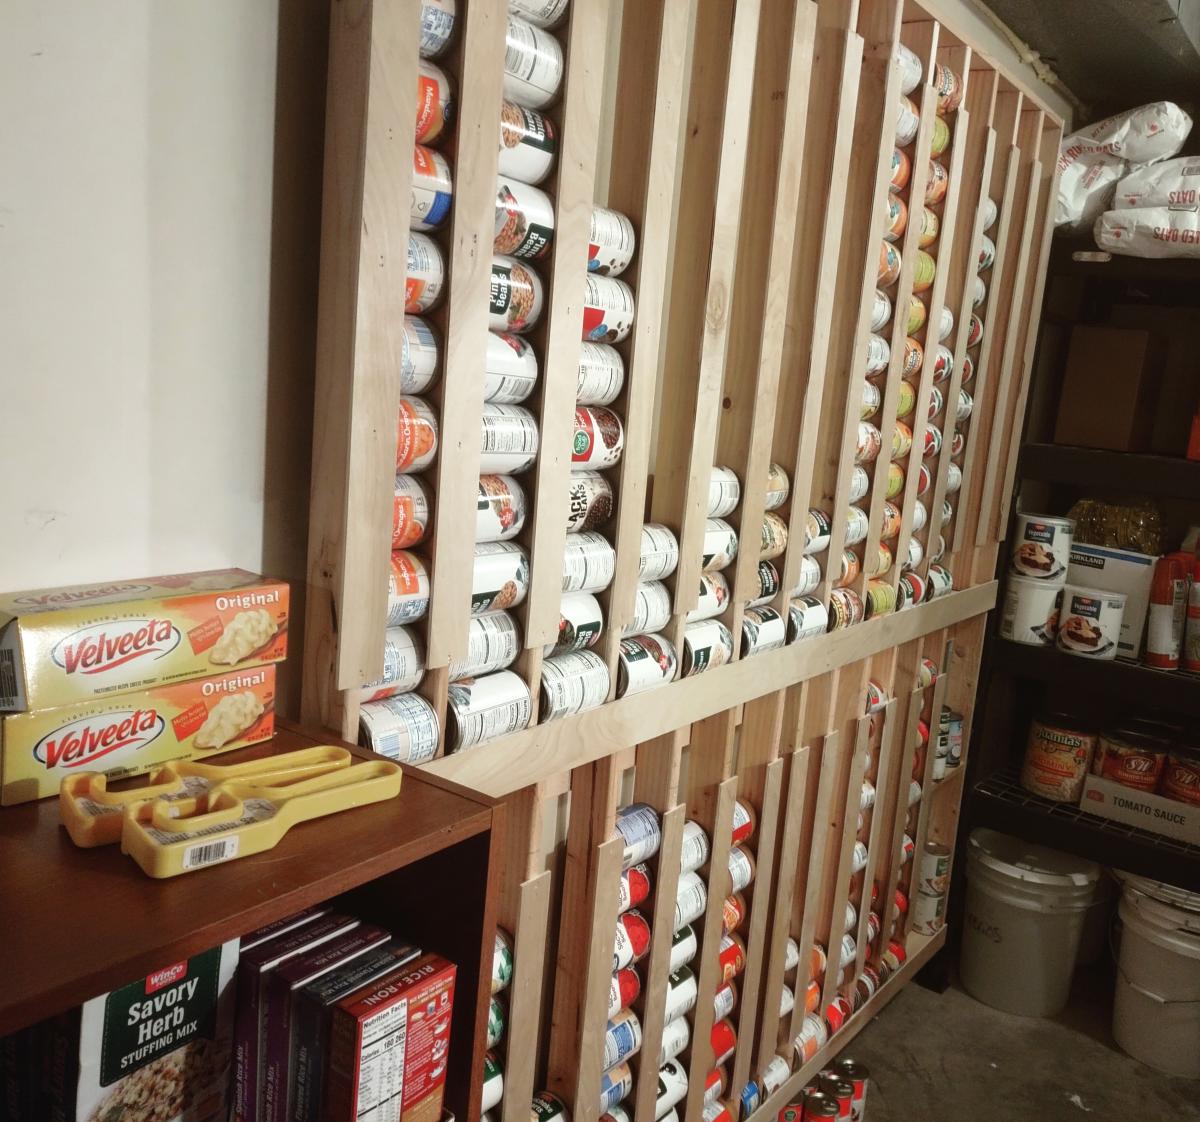
We love our new can storage!
Shayla Shumaker
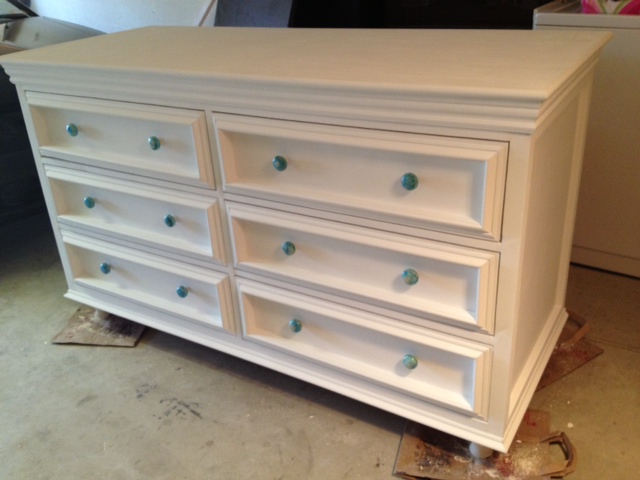
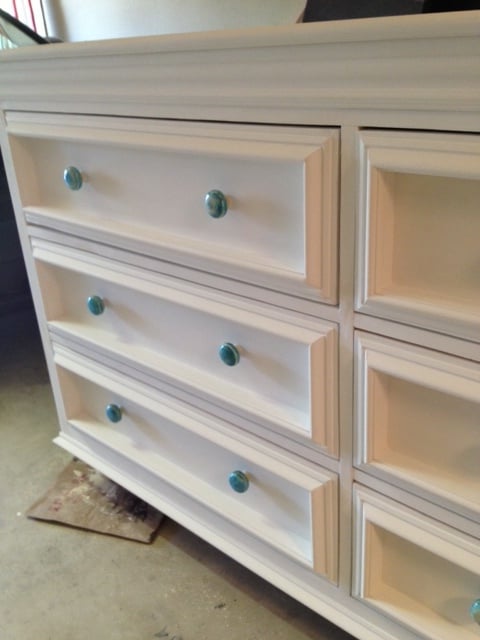
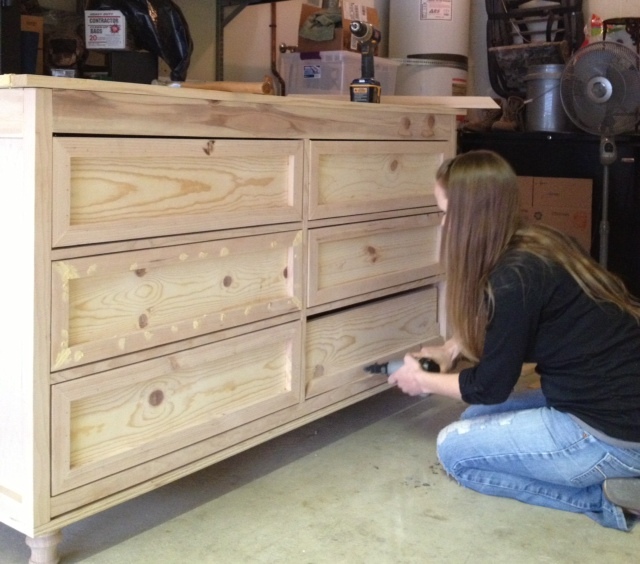
Similar to a previous poster, I was inspired to build this project to use as a combo dresser/changing table for our first child's nursery. It took quite a few days worth of work (spread out over a couple of months altogether) but I finally finished the bulk of the work a few days before entering the third trimester of pregnancy, phew! I think we'll enjoy this piece for years to come, thanks Shane and Ana for the plans! (Please excuse the poor lighting and ugly garage, we haven't set up the nursery yet so the dresser may be living in the garage until we do!)
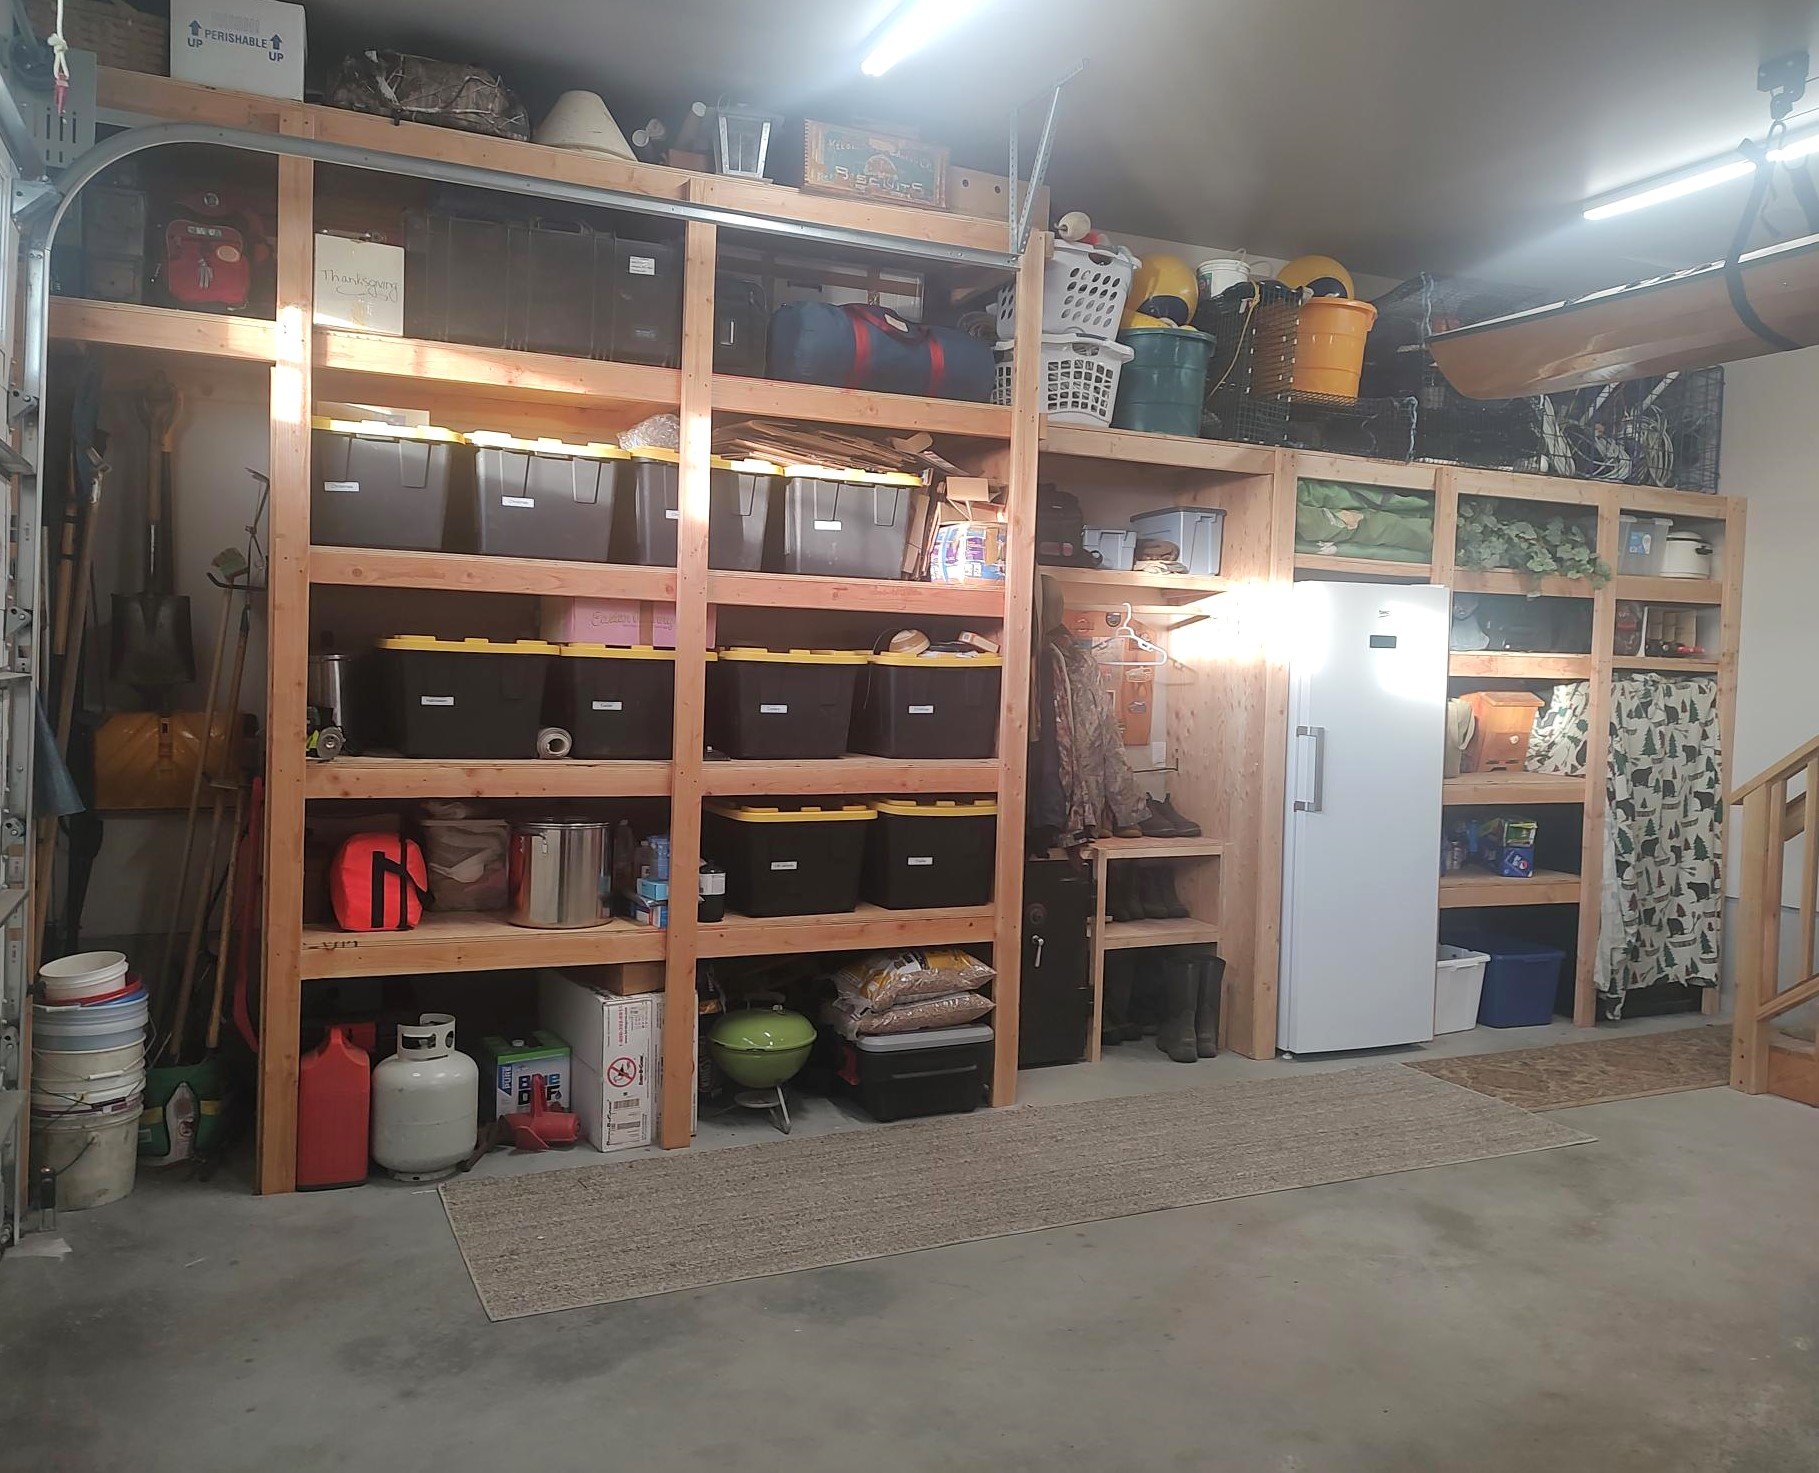
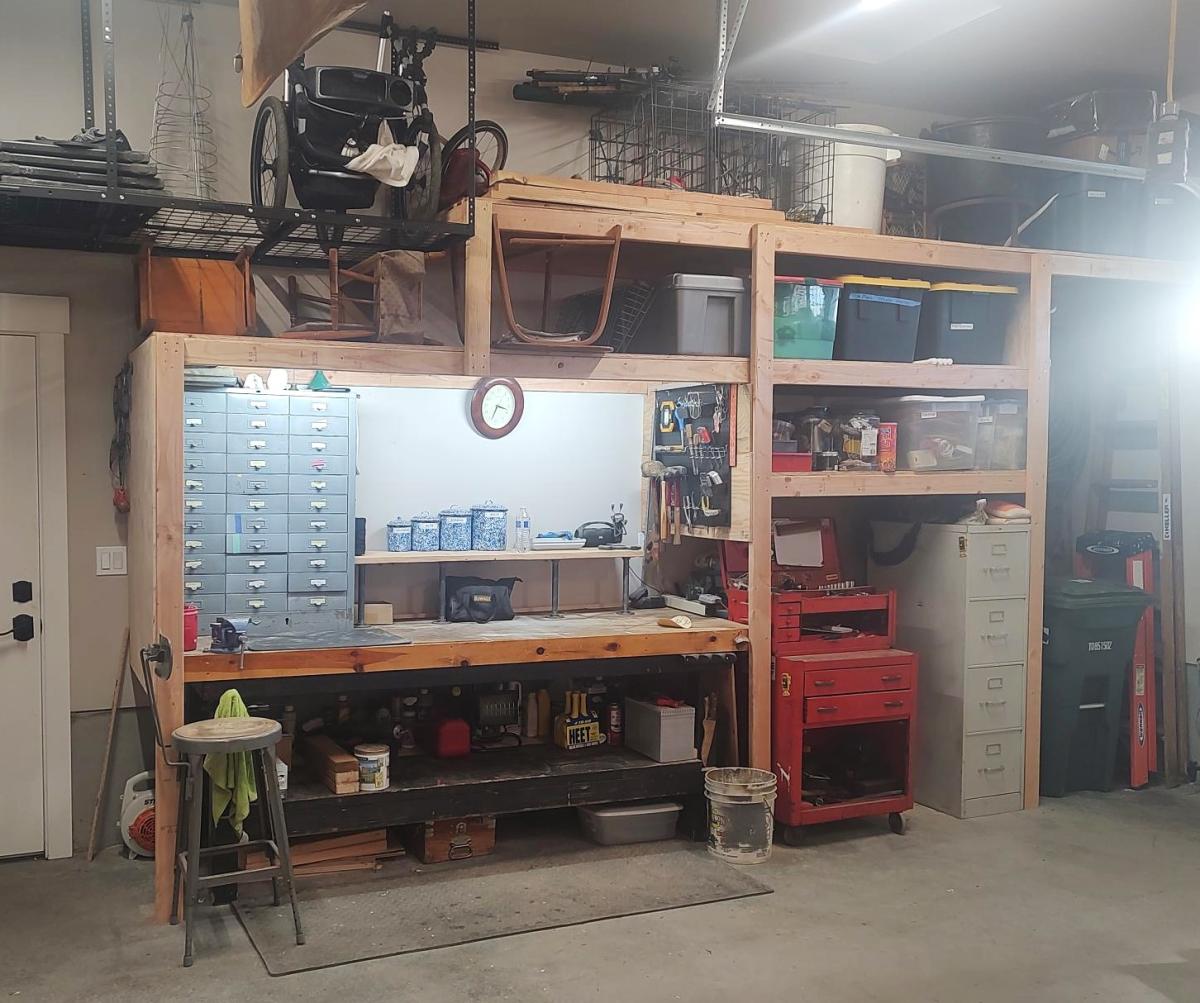
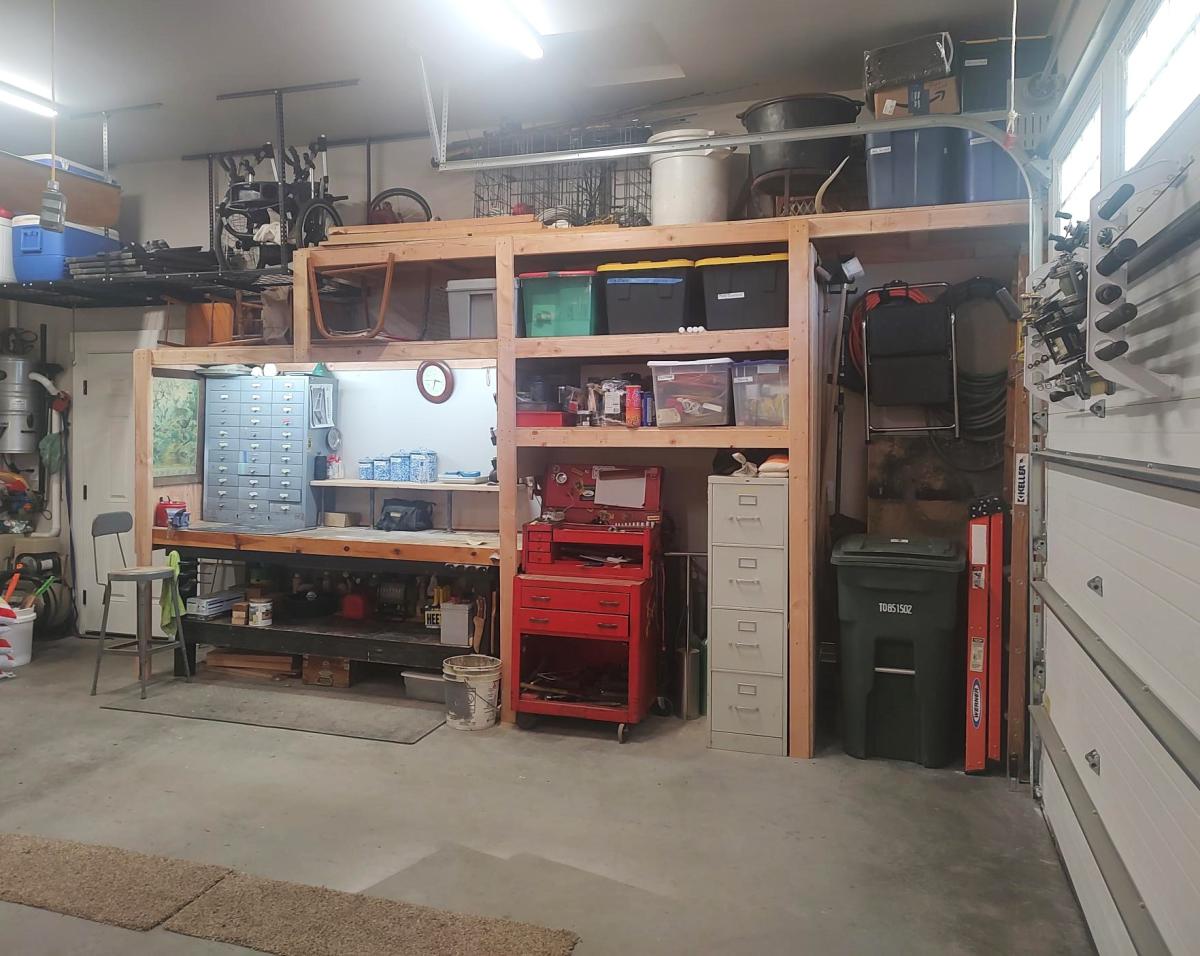
I just finished shelves on both sides of my garage using your video. I built a coat rack and boot rack. I also made space for tall items like tools and ladders near the garage door. I had to also build in a gun safe, freezer and my work bench. Everything came together and now I have everything in bins on shelves.
Gary Hoffman