Community Brag Posts

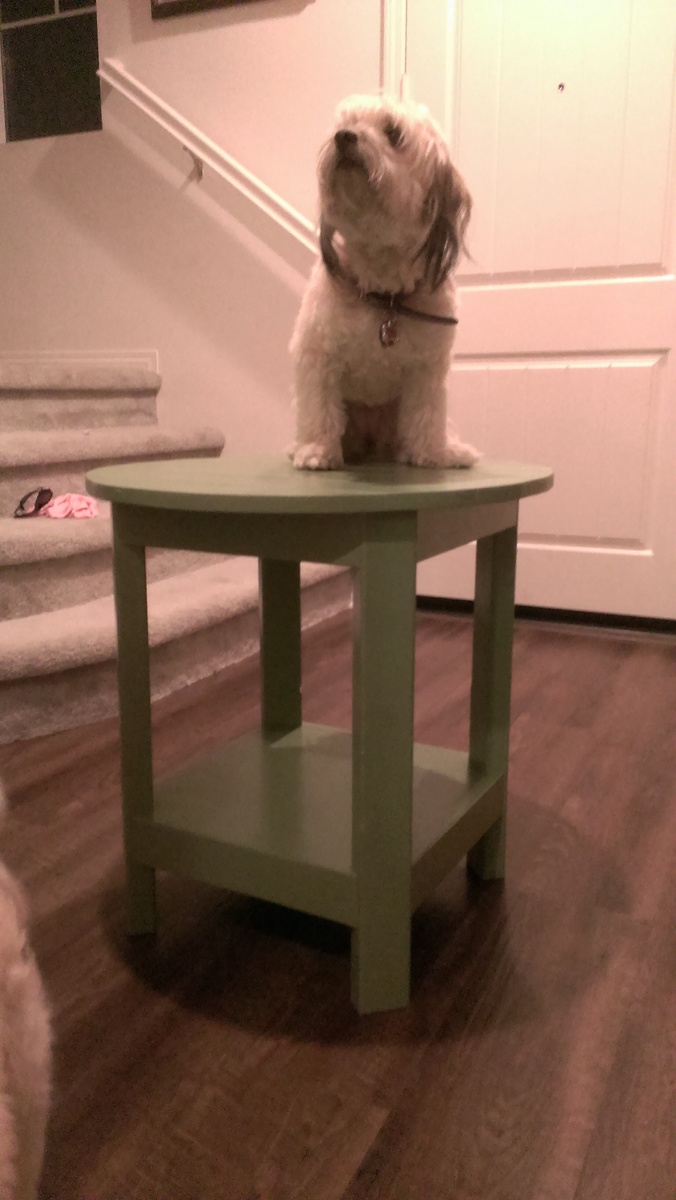
Benchright Round End Tables

Submitted by DWL on Sat, 08/30/2014 - 21:06

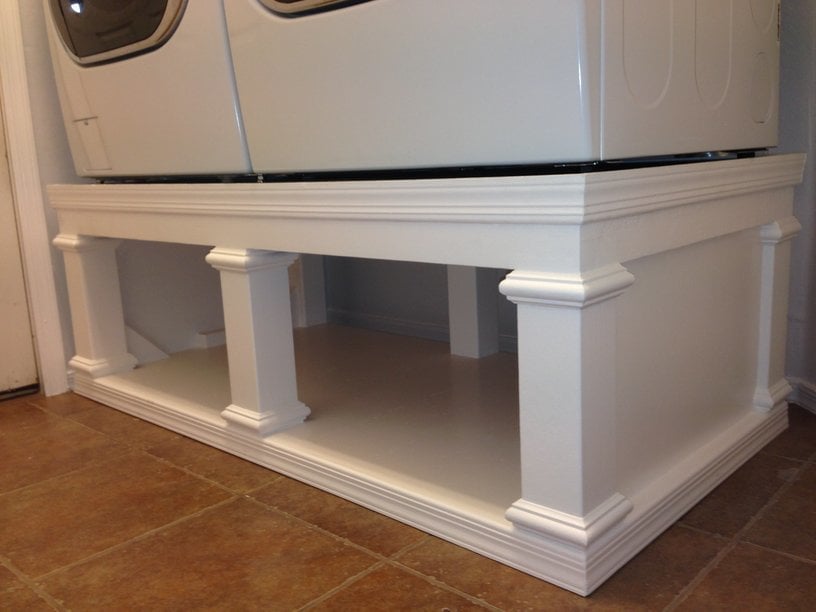
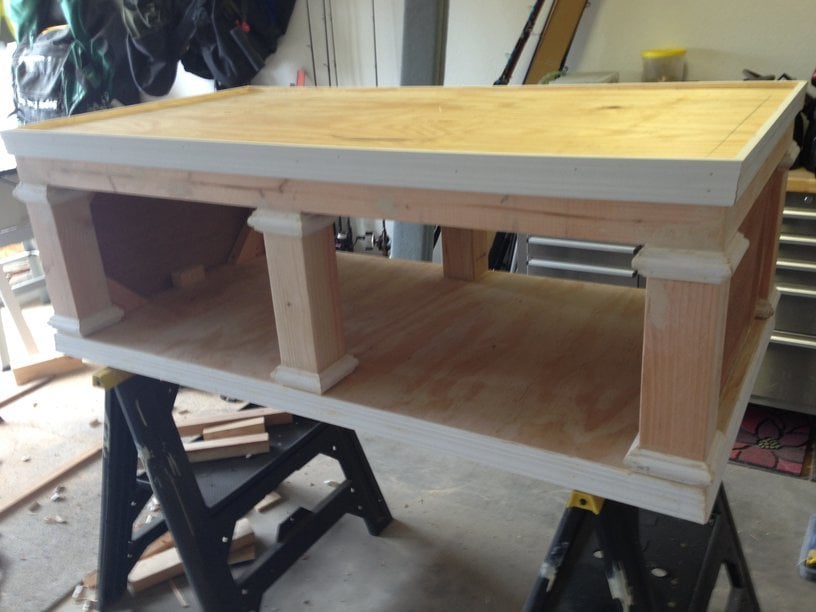
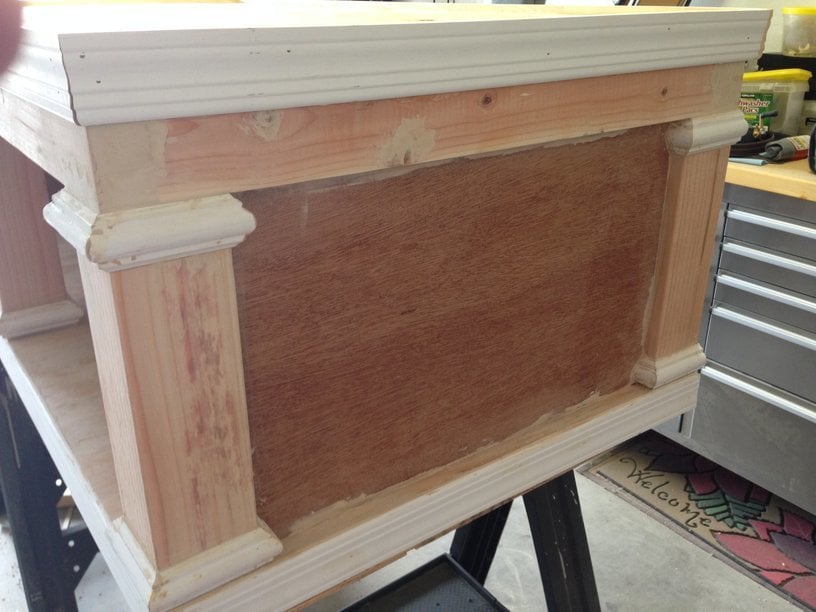
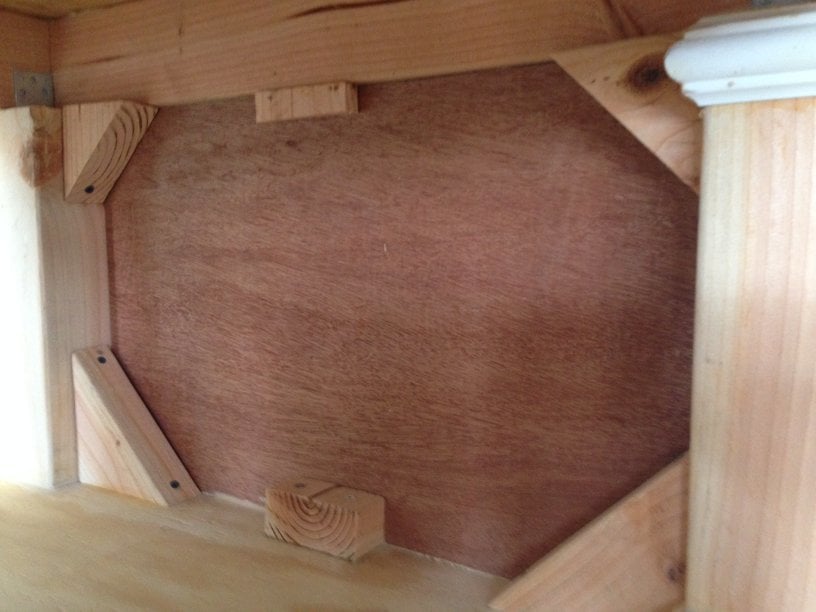
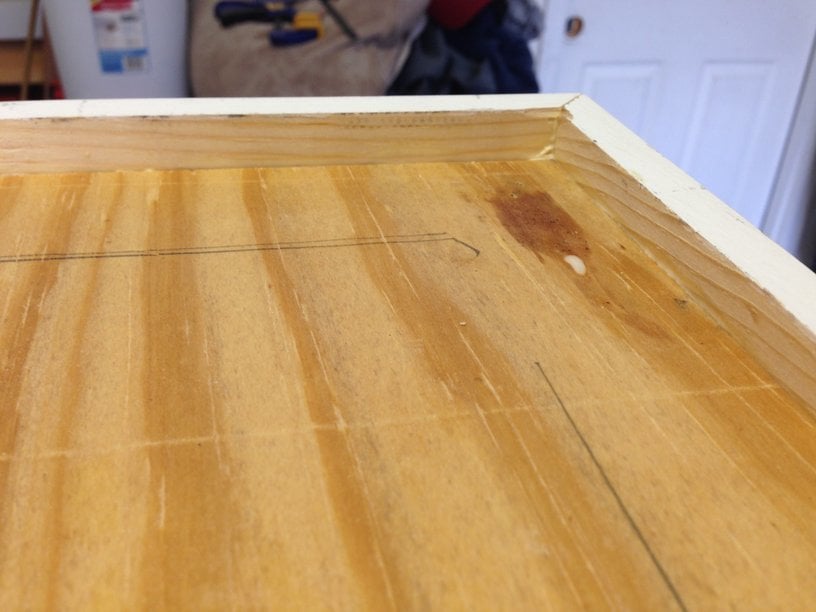
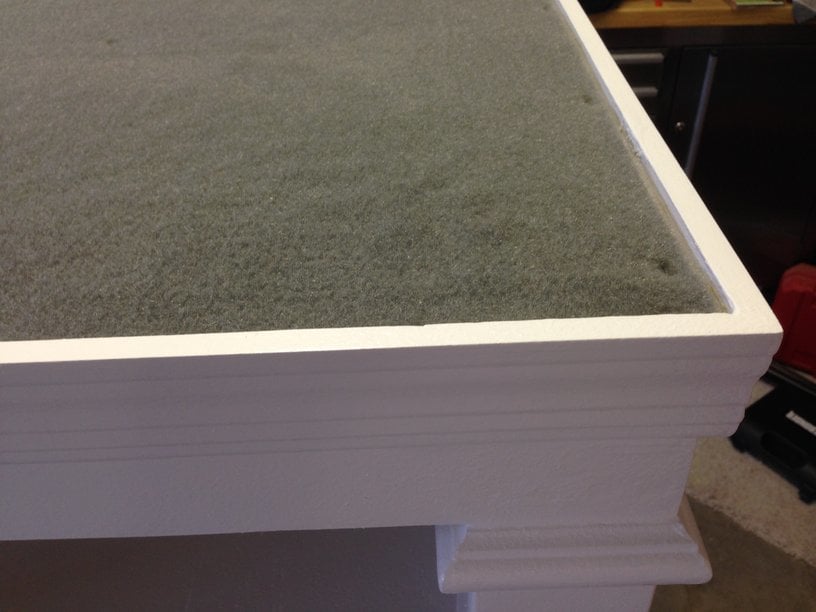
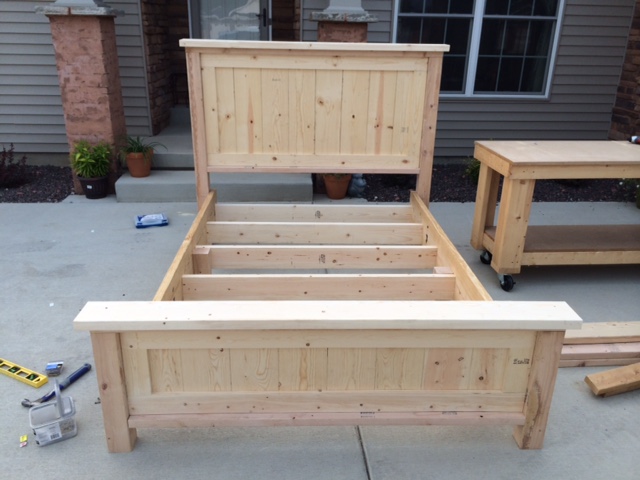
This project was a challenge because of the instructions regarding the "recommended" pocket holes for the aprons. I soon realized you can't put a 3/4 pocket hole on a 45 degree mitred edge, and when I adjusted the depth of the pocket hole, I could not for the life of me screw it into the legs without the apron getting sucked past the edge of the legs. I ended up putting the pocket screws on the outside which I know is a major faux pas for wood workers, but because I used Kreg wood plugs and painted it, you can't see the little ovals where the screws are.

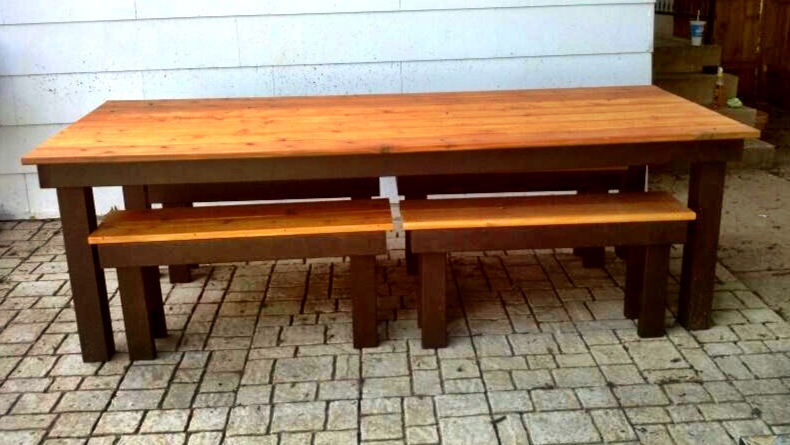
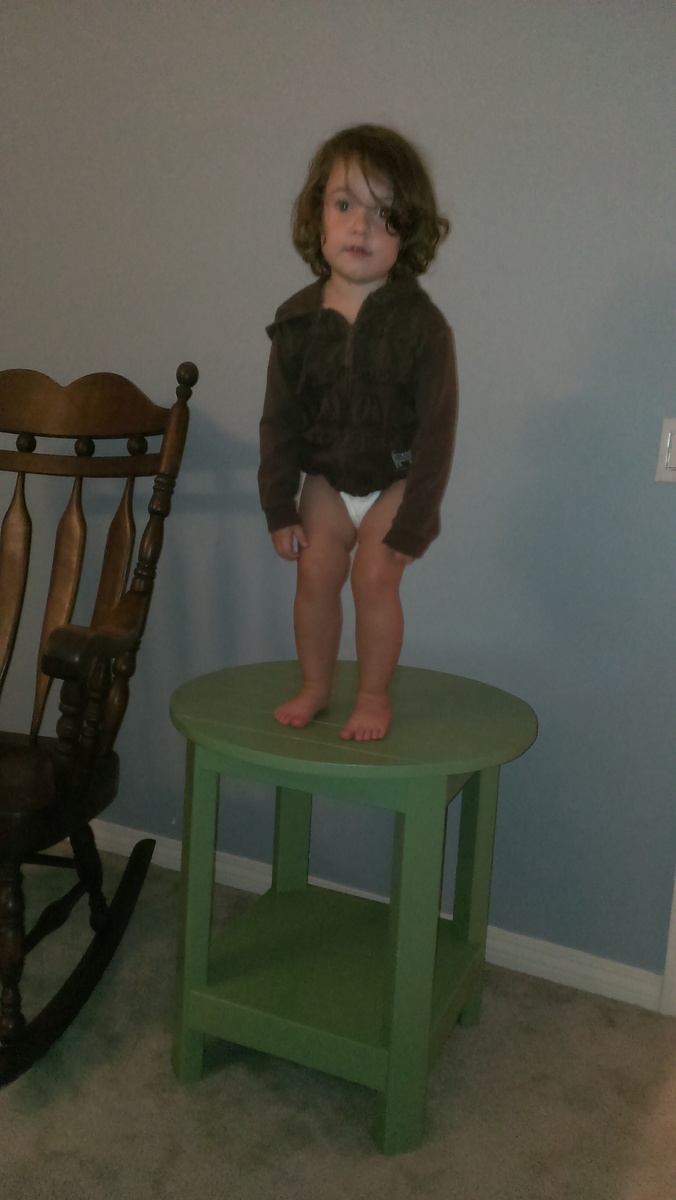
The photos are just for scale. The little girl is a big 2 1/2 year old, and the dog is not a St. Bernard.

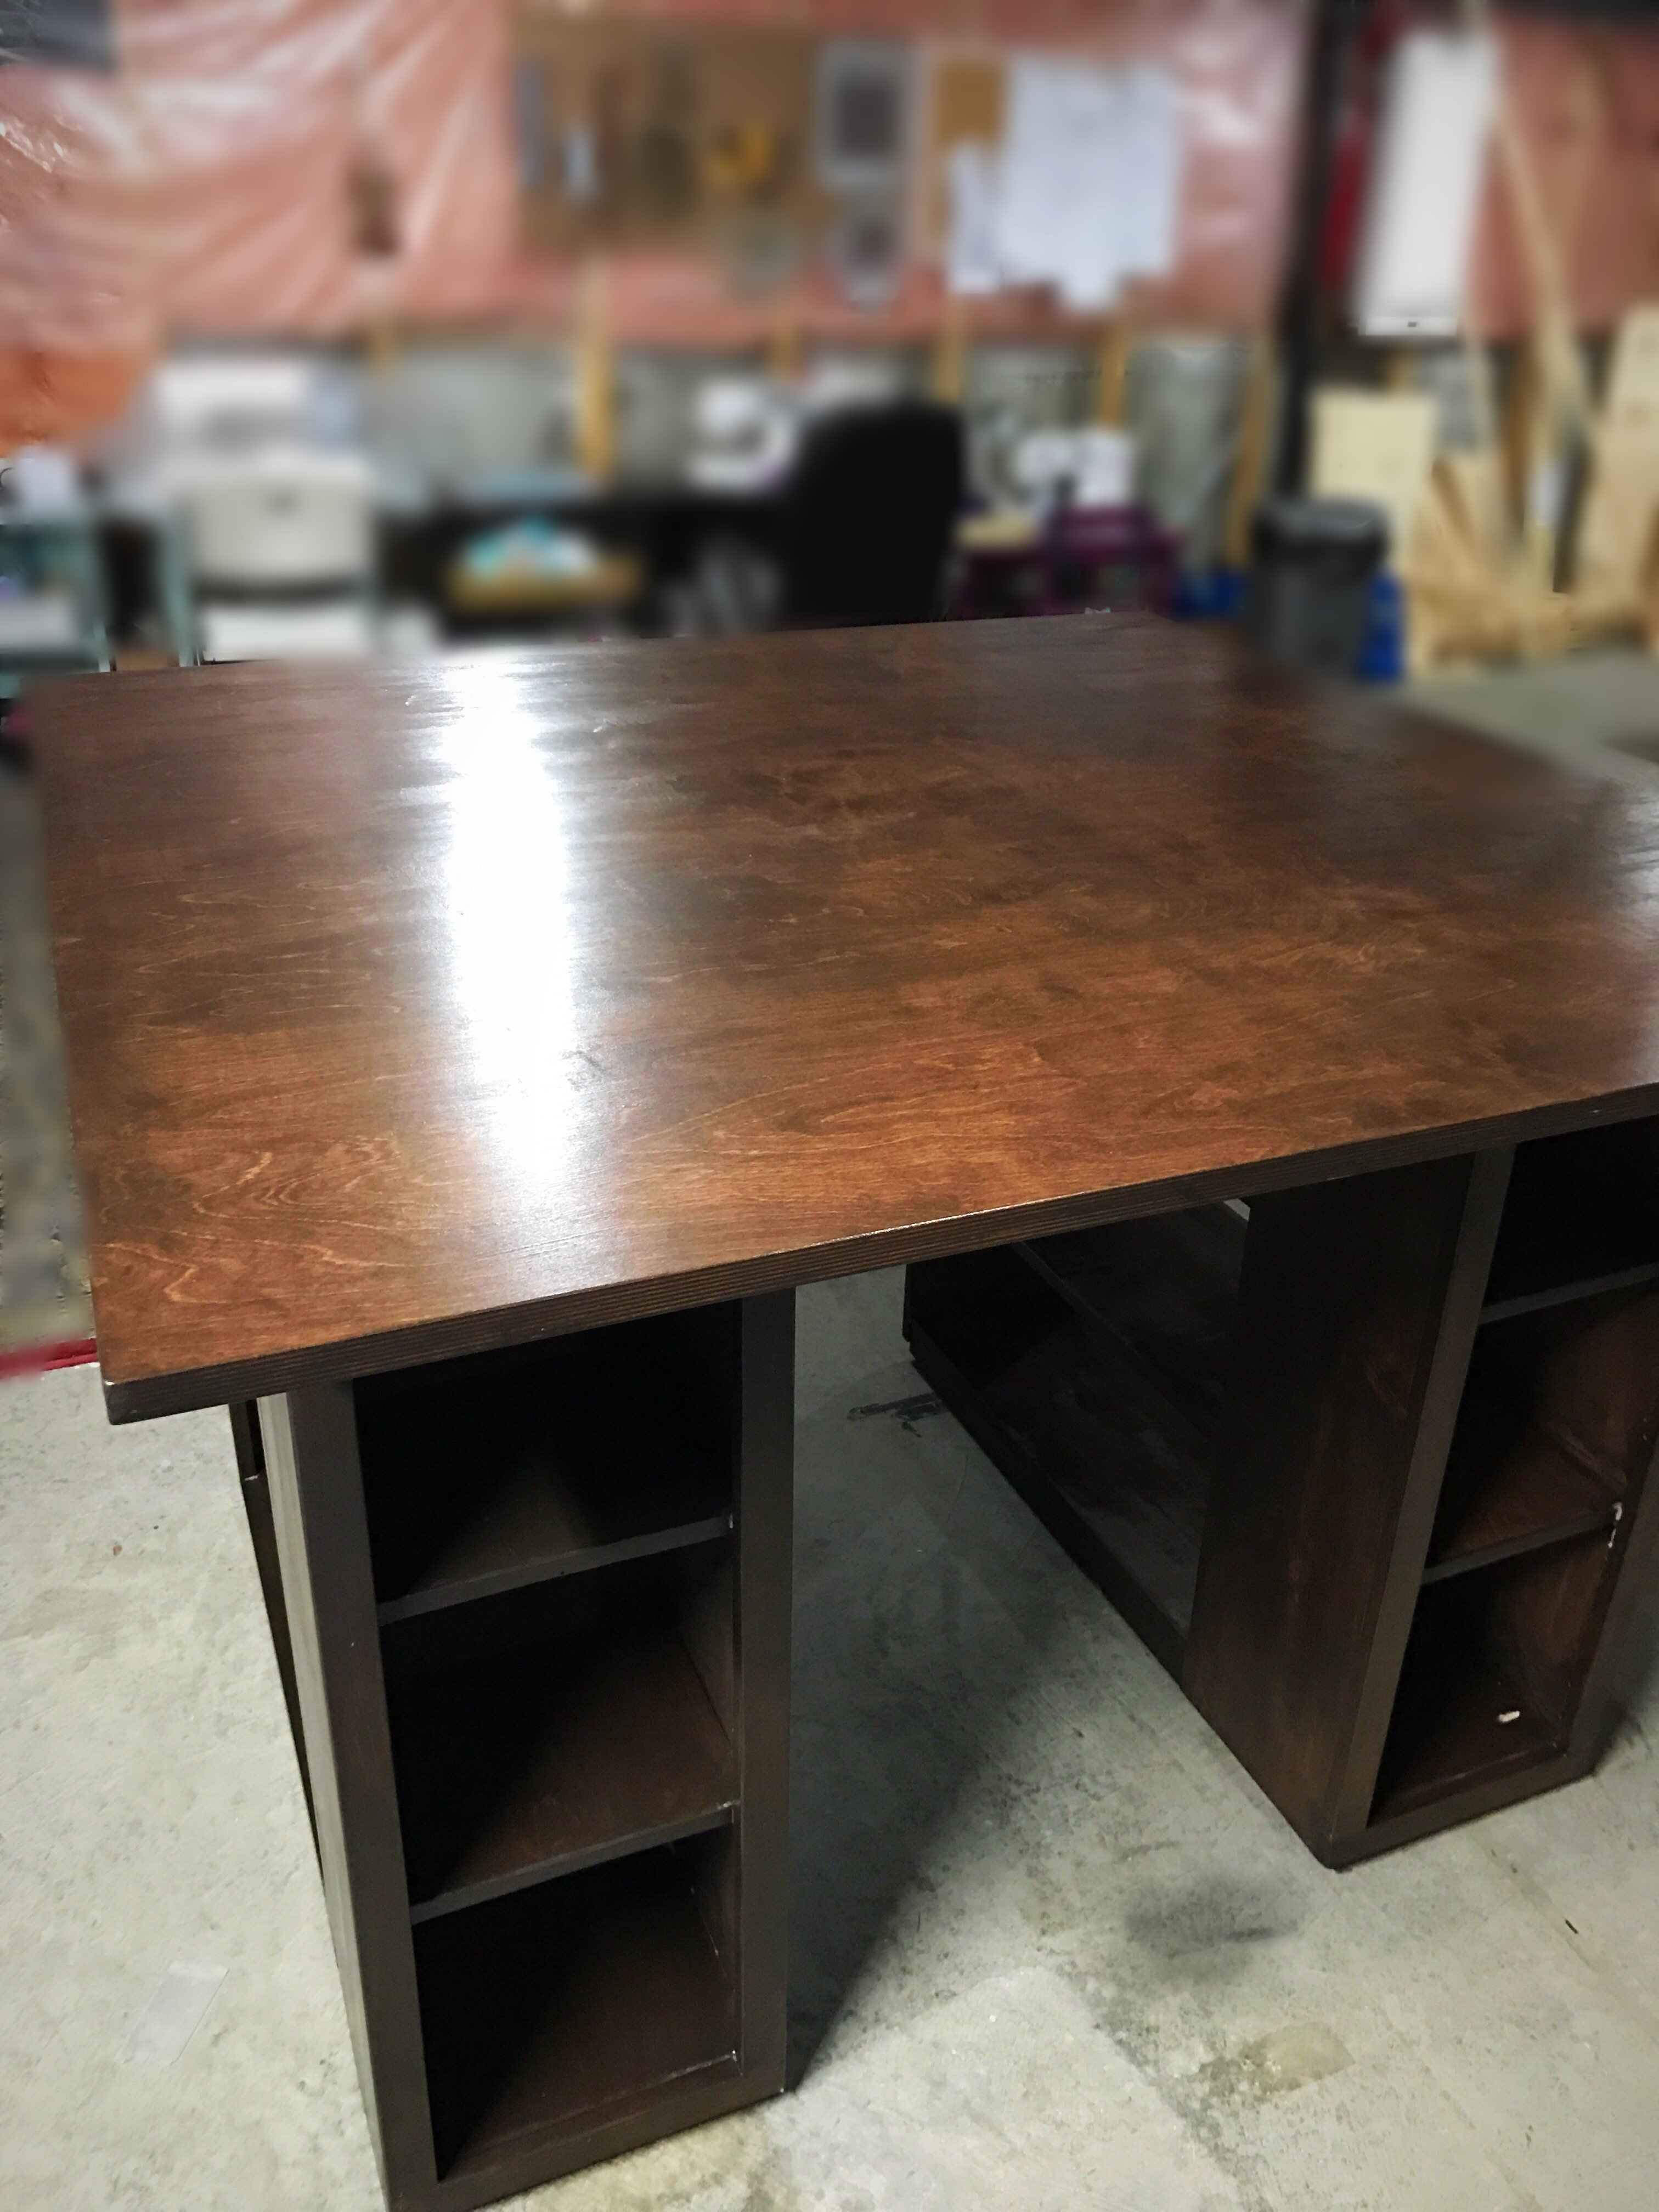
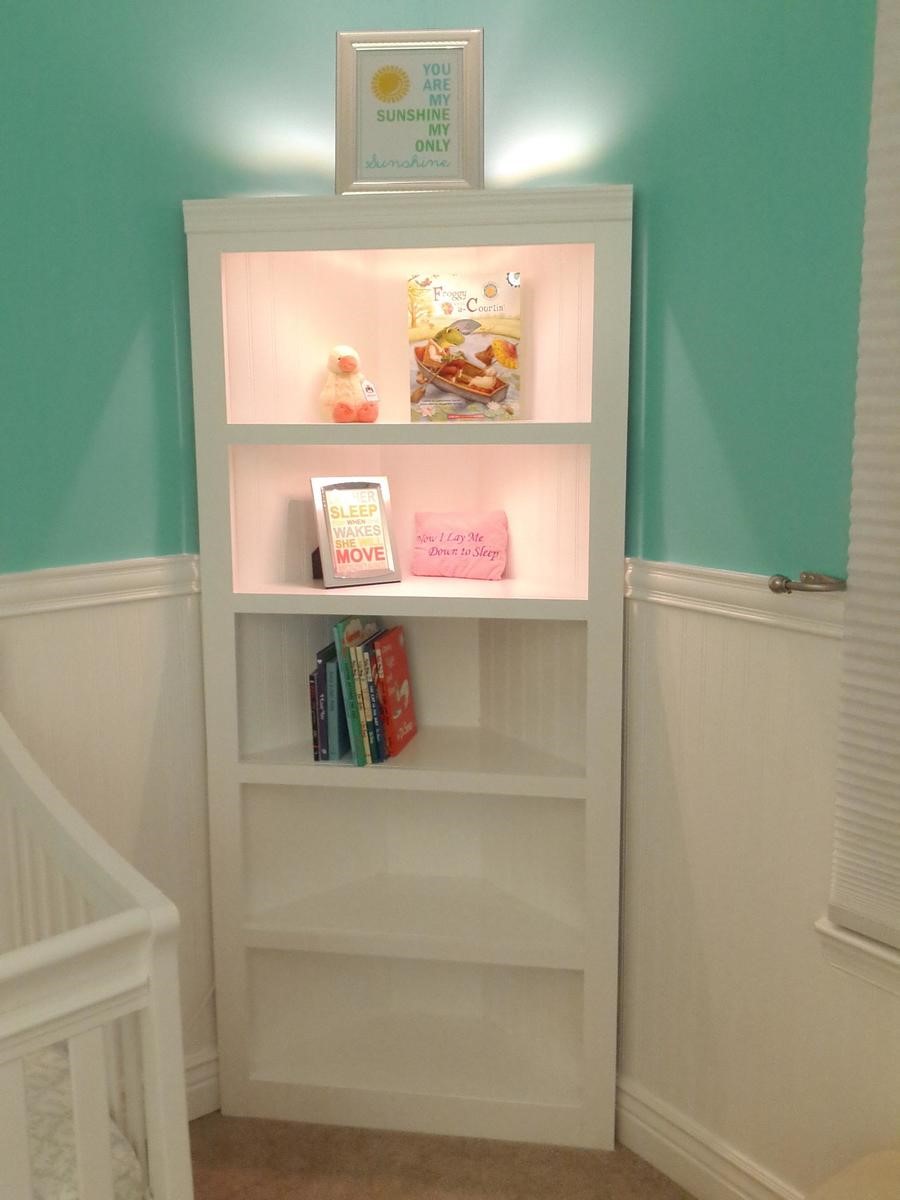
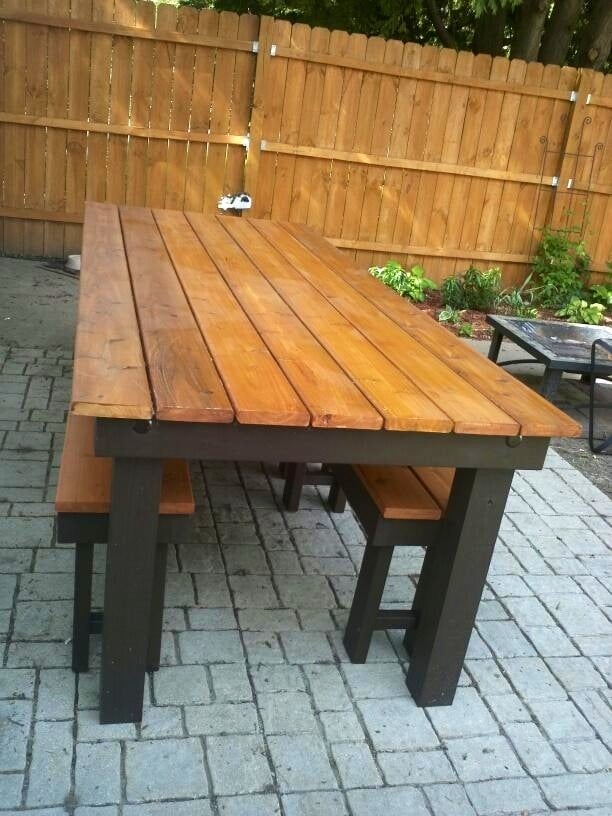
We love the table and it works great for baby brother's room.

Thank you Ana for another great project!

Built from Plan(s)
Estimated Cost
$50
Estimated Time Investment
Day Project (6-9 Hours)
Finish Used
Gripper primer and Semi-gloss paint
Recommended Skill Level
Beginner

Rustic x hall tree

Submitted by Takoravi on Mon, 10/05/2020 - 08:50

first furniture build from scratch. A few minor differences. I decided to distress by staining entire piece with minwax espresso stain, then painting over with white chalk paint and sanding through. Decided to leave bench and to molding stained for effect. Love the piece and so does my wife.

Built from Plan(s)

Comments

Fancy X Farmhouse Table

Submitted by Hartke22 on Mon, 10/12/2020 - 22:33

Just a few of our Fancy X farmhouse tables. Along the way, we where able to put our own spin on the original plans by Ana White.

Estimated Cost
100
Estimated Time Investment
Weekend Project (10-20 Hours)
Finish Used
Minwax Dark Walnut
Minwax Satin clear Polly

Comments

Indoor Playground Set

Submitted by Anonymous (not verified) on Fri, 02/10/2017 - 11:56

This playroom set was inspired by the plans you posted.  I was forced to make some significant modifications due to the fact that our bonus/playroom has angled ceilings.  We have a rock climbing wall, ladder, crawl tunnel with windows, trapeze bar, monkey bars, miniature baskeball goal and a slide.  My boys are 6, 3 and 19 months and they love it!  Thanks for the inspiration.


Jim and Caroline Sparrow

Estimated Cost
$1250
Estimated Time Investment
Week Long Project (20 Hours or More)
Finish Used
Behr Paint on bottom and Minwax Stain on top
Recommended Skill Level
Advanced

Comments

Ryan's Washer/Dryer Pedestal

Submitted by zoolander on Fri, 12/05/2014 - 17:25

I loved this design.  I couldn't believe that they wanted to charge me almost $600 for the pedestals for the washer/dryer set that I bought on black friday, so I decided to give this project a go.  I basically used the same construction plans from Sausha's project, but I dressed mine up a bit.  First, I chose a bit larger trim for the tops and bottoms of the posts.  Then, I bought some 2" baseboards and did the top and bottom with baseboards.  On the bottom, I had to use my tablesaw to trim off about 1/2" because I used 1x1" boards on the bottom so that I could have more space for baskets.  Then, on the top, I inverted the baseboard and allowed it to overlap a bit so that if it were to vibrate, the washer/dryer could not fall off the edge.  I also added some fabric on the top (stuff that I use to cover the bunk boards on my boat trailer...kind of like a very thick and durable felt material) to cut down on vibration and also keep the units in place.  Finally, I added sides by using wedge trusses on the inside of my side posts and then I put a 1/8" piece of plywood over top and nailed/glued it to the trusses.

It turned out great.  Thanks for the plans Sausha!

Estimated Cost
$125
Estimated Time Investment
Weekend Project (10-20 Hours)
Finish Used
paint
Recommended Skill Level
Intermediate

Comments

Zlk200

Mon, 12/21/2015 - 17:38

Did you use sanded plywood? Did you use any veneers for the exposed 2x4's to get a smooth finish or did you paint right on it?

lastly, what is the name of the trim you put on the 4x4s? I've hard a hard time finding it. Thank you!

In reply to by Zlk200

zoolander

Wed, 06/29/2016 - 13:59

Sorry for the super delayed response.  I didn't realize this question was here.  I did not plane anything.  I did sand the surfaces a bit, but I didn't get too crazy.  I put 3 thick coats of paint on it which made it pretty smooth.  If you look very closely in person, you can still see a bit of wood grain, but it is only noticable if you really get down and look.  I did use a lot of wood putty to fill all of the gaps and crevaces and then I sanded those parts pretty well.  


With regard to the trim, the top literally just standard baseboard material turned upside down, and then the little trim on the tops and bottoms of the 4x4s is just another standard strip of moulding that I got from Lowes.  I think they call it "Chair Rail" moulding.  Its the stuff that you put down if you are doing some sort of paint separation or wainscoting.

http://www.lowes.com/pd/1-625-in-x-12-ft-Mdf-Chair-Rail/3403018

I used woodglue on all of the moulding and tacked it on with a nail gun.  Then I filled all of the nail holes with wood putty and also use the putty to fill gaps where the corners came together to make that look smooth.

I hope that helps...you are probably already done with your project by now, but I figured that I would answer anyway.  :)

Sewing table

Submitted by Anonymous (not verified) on Mon, 03/13/2017 - 17:19

Sewing table with a square top variation 

Estimated Cost
$250.00
Estimated Time Investment
Weekend Project (10-20 Hours)
Recommended Skill Level
Intermediate

Chicken coop

Submitted by Anonymous (not verified) on Tue, 03/09/2021 - 07:44

This is a coop I built from plans on the site. I modified by covering the ply with old cedar boards and used tin for a more rustic look. I opted not to add the planter just covered it with wire.
Love your plans! So easy to follow!

Estimated Cost
Since I used recycled materials the overall cost was about $50
Estimated Time Investment
Weekend Project (10-20 Hours)
Finish Used
I just did the outside like a jigsaw puzzle. Cutting to fit as I went. Be sure to use nails or staples that do not protrude the inside when attaching siding.
Recommended Skill Level
Intermediate

Loving These Shelves

Submitted by woody311 on Thu, 01/15/2015 - 18:51

I changed the plans a little bit to add on the extra shelf on top as well as making the shelves an inch narrower than the plans. The project was actually pretty easy and really only took me about a days worth of work.

Estimated Cost
$160
Estimated Time Investment
Day Project (6-9 Hours)
Finish Used
None
Recommended Skill Level
Beginner

Comments

Outdoor 2x4 sectional sofa

First wood project, thanks for the great plans Ana! I made the bottom cushions using 3" thick firm foam, 2" thick memory foam, and 1" thick batting (purchased in bulk and then cut to size), and covered them with outdoor fabric. The back cushions are 4" thick soft foam. I added easily removable/washable drop cloth covers on top of all the cushions. I don't have a finish on the clear redwood, but might add a clear coat to protect it. The memory foam makes this sofa very luxerious!

Estimated Cost
$1800
Estimated Time Investment
Weekend Project (10-20 Hours)
Finish Used
None
Recommended Skill Level
Intermediate

Craft Closet

When I was given a stack of MDF sheets from a friend, I knew this was the desk I wanted to build with it first! We recently moved into my husband's grandmother's house, and have been making some improvements. We took out the dark old built in, and I replaced it with three 4' long gallery shelves, and the Parson's Desk modified to 4' long. It fits perfectly in my space, and looks so chic and modern against our teal walls. It's the perfect craft nook and workspace! I added a mason jar pendant light I DIY'd from the IKEA bulb kit, and also sewed a reversible runner to match my handmade duvet cover. The fabric is Deer Valley, from Free Spirit. I also had the glass top from the original desk cut down at Lowe's for free, and it's a perfect fit.

Estimated Cost
$30 for ledges, $30 for desk
Estimated Time Investment
Day Project (6-9 Hours)
Finish Used
I sanded the 2x2's with 150, then followed up with three coats of semi gloss white paint, sanding with 220 in between coats.
Recommended Skill Level
Intermediate

Corner Shelf for Nursery

Submitted by wojo1 on Thu, 05/16/2013 - 07:21

Super Easy.. I like it better without the doors. Recommend getting a KREG Jig. I have the Jr and it was perfect for this project.

Built from Plan(s)
Estimated Cost
$130
Estimated Time Investment
Afternoon Project (3-6 Hours)
Recommended Skill Level
Beginner

Comments

DIY Learning Tower / Kitchen Helper

Our little one may be happily playing independently but the second I go to make dinner she demands to be held and refuses to be put down, making cooking impossible. To help keep her occupied but still involved I've been eyeing a learning tower / kitchen helper on Amazon for months now, but at $200 it just wasn't in our budget. My sister-in-law had made a learning tower from a plan by Ana White and suggested I try to make one too. I was unsure at first, I've never made anything more complicated than a birdhouse, but I decided to give it a go!

Please see my blog post for additional photos and lessons learned during this project.

Built from Plan(s)

A bathroom cabinet for all that stuff!

Overall measurements: 24x40. I followed the same basic steps as the nursery armoire, but on a much smaller scale and with a 1x3 added to the back for hanging the cabinet on the wall. I sketched this out on my own and built it to fit above the toilet in my girls' bathroom.

For the first time, I used my table saw to route a space for the 1/8" MDF cabinet backing and drawer bottoms. I will probably use the same method again, but the MDF has to be absolutely square for it to work.

Also a first for me, I used a shelving jig to drill perfectly spaced shelf pin holes on the inside of the cabinet. I love the jig and the accompanying drill bit (from Woodcraft -- orange and blue do not carry it) and I'm looking forward to using it a lot more in the future.

The white latex paint finish is covered in Krylon "crystal clear" spray, which is (sadly) not actually crystal clear. I really like its durability and ease of application (re-coat after only one minute!), but will only use it on darker colored projects in the future. I'll have to sand, paint again, and recoat with my old standby, Minwax Polycrylic, to get rid of the yellow tones in the "crystal clear" Krylon spray.

Built from Plan(s)
Estimated Cost
$125
Estimated Time Investment
Weekend Project (10-20 Hours)
Finish Used
Spray primer followed by Sherwin-Williams ProClassic semi-gloss white (which I applied in several thinned coats). Krylon not-so "crystal clear" topcoat.
Recommended Skill Level
Beginner

Farmhouse Bunkbeds with Stairs

Submitted by Yodannos on Sun, 06/09/2013 - 13:19

We have a rental unit and decided to fill one room with 2 sets of bunk beds. One is a twin over a full. The other is a full over full. Due to a duct running through one corner, and limited amount of space, I decided to build a set of stairs on the 17" gap. I used the simple bunk bed plans, but modified it to the style of the farmhouse. Also, I changed several of the heights of the foot/head boards. The full over full will have a ladder coming off the end and is in progress.

Estimated Cost
$450
Estimated Time Investment
Week Long Project (20 Hours or More)
Finish Used
Minwax Ebony Stain. Satin Polyeurethene.
Recommended Skill Level
Intermediate

Farmhouse Queen Bed and Headboard

Thank You Ana-White for the amazing plans for this beautiful farmhouse queen bed! Not bad for the first try!

Built from Plan(s)
Estimated Cost
$150
Estimated Time Investment
Weekend Project (10-20 Hours)
Recommended Skill Level
Beginner

Comments

Modified rustic table and benches

Submitted by dkarinen on Sun, 06/16/2013 - 21:09

We built this table for my brother and new wife's wedding present. We modified it to use as an outdoor dining set. Instead of using the 1x10 for the tabletop we used 2x6's and for the legs we used 4x4's. We attached the top boards with a Camo fastening system we used last year on our deck (works great to conceal the screws). I stained the frame in Behr Cordovan Brown and the top boards in Behr Cedar Naturaltone. It was our first attempt at building a table and I think it turned out great, only problem was giving it away!

Built from Plan(s)
Estimated Cost
$300
Estimated Time Investment
Week Long Project (20 Hours or More)
Finish Used
Behr cordovan brown stain and Behr natural cedartone
Recommended Skill Level
Beginner

Comments

storchinsky

Mon, 06/17/2013 - 10:57

Very nice! I'd been considering this plan for my outdoor table, but my husband liked the modern farm table better. Same idea--I am leaving gaps to allow the water to drain. Love the two-tone finish! It's amazing what you can do with plain old 2 x 6s!

Convertible picnic table

Submitted by ClemTanya on Tue, 06/18/2013 - 19:43

I built this table with the dimensions described in the original plans, but made a slight modification by using my Kreg Jig to add pocket holes for attaching the tabletop and seat boards from below rather than drilling down through the top. I'm never really happy with the way a finish comes out after using wood filler, plus not having to fill holes saves a step in the finishing process (which is the really arduous part of the job for me). I also like the sturdiness of the Kreg joints.
This was my first project using the Kreg Jig in an application that didn't have the location for the pocket holes specified, so for the first bench I followed right along with the plans and just detached the drill guide and clamped it to my project to drill the pocket holes as I went along. For the second bench I was familiar with where all the holes should be drilled, so I was able to quickly mark off the location and pre-drill all the pieces assembly line fashion. The second one practically flew together.
If you want to use this method, you will be drilling your pocket holes in the boards labeled "seat support" and "tabletop support" (there are 2 of each of these pieces for each bench/half table). You can mark the position of the tabletop boards on the tabletop supports and drill your pair of pocket holes to correspond roughly to the center of where each board will be (so 6 holes in each of the 2 pieces labeled tabletop support for each bench). Nearly the same process for the seat supports, but remember that the holes to attach the outermost seat board won't be centered because of the location of the front leg. I chose to add a couple of pocket holes through the front leg board as well for extra sturdiness in case it gets picked up by that outermost seat board when the bench/table is getting moved. I have included a picture of the pre-drilled pocket holes to help clarify the above directions.
The build itself can definitely be classified as a beginner project and easily manageable by one lady (although it would be really nice to have a buddy to help move the finished bench...I had to take the tabletop back off mine to move it from my "workshop" (carport) around to my patio). In terms of time, the build for both benches could easily be completed in an afternoon; I ranked it as a weekend project because of the finish. The tabletop and seat boards each have 4 coats of an exterior semigloss paint and I custom blended the colors so that each board gets progressively darker as you go down the bench. I was inspired by the ocean, with the water getting darker as you go deeper and deeper. As you can see from my photos, I rushed headlong into the first bench and put it together unfinished (I was more concerned about figuring out the placement of the pocket holes than the finish.) For the second one I pre-drilled my pocket holes, then put on 2 coats of base coat and 1 coat of color (on seat and tabletop boards) before assembly, saving only the finish coat on the colored boards and touchups on the white boards for after assembly. I definitely recommend the second method.
I worked on the project over a couple of weekends and evenings because of weather and time constraints, but under the right conditions it could be completed in a weekend or even maybe a long day (especially with a second painter and in good paint drying weather). I'm really happy with the final product and I've already been enjoying the comfy bench seat for reading.

Estimated Cost
$100 (including finish)
Estimated Time Investment
Weekend Project (10-20 Hours)
Finish Used
Exterior semigloss paint: 2 coats of self priming base coat (Valspar Duramax) and an additional 2 coats of color that I custom mixed into 6 shades on the bench seats and tabletops. The darkest shade on the outermost seat board is called Monterrey Bay Teal from Valspar. I mixed the five additional colors with white in 15% by volume increments. (If you want to get really, really specific, I started with a quart of the teal and made 100 grams of each of the 5 blended colors and this was almost the perfect amount to put 2 thick coats of color on all sides of each of the seat/tabletop boards.)
Recommended Skill Level
Beginner

Comments

Playhouse in-progress

Submitted by DoctorEw on Mon, 05/02/2011 - 06:49

Due to rain (and horrible ability) this project has been taking a LONG time it seems. =) We had one of those "cheap" playsets from one of the warehouse clubs that would scare me to death anytime my girls got to swinging on it. So... we knocked it down and I took some liberty with the details from Ana's playset plans.

Estimated Cost
~$600 so far (concrete, wood, fasteners, shingles, etc..)
Finish Used
Will paint
Recommended Skill Level
Intermediate

Recycle/garbage center

Submitted by YeenYus on Wed, 07/24/2013 - 08:50

We just moved in to a newly built house, so it was important for everything to have a place. I don't like the garbage can to be under the sink, and my wife doesn't like the can just out on the floor...too many missed hook shots with the coffee filters I guess! This cabinet solves many kitchen problems all at once. An attractive cabinet that hides garbage and recycle, yet is easy to get in and out of. The railroad spike handles are something we sell on Etsy, as well as knobs and shelves. The shop name is YeenYus.

Estimated Time Investment
Weekend Project (10-20 Hours)
Finish Used
Stain, paint
Recommended Skill Level
Intermediate

Comments

Ecspronk

Wed, 07/24/2013 - 20:44

I was wondering if you had a price estimate on how much the supplies cost you along with some measurements. I am looking to build a double one like this. More details would be awesome. Thank you

In reply to by Ecspronk

YeenYus

Wed, 07/24/2013 - 21:15

Yeah, I kind of built this on the run with nothing but the space it had to fit into. But it is 34" wide 32" deep and 24" high. I needed it to fit under the window and used the Home Depot garbage bins as the starting point.

I build a lot of stuff...and this was a tough one. The frame is 2x4's with pine facing and bead board. 4 hinges, stain and paint...less than $100.

I'd love to work with you on this if you want. The hard part was engineering the bins falling forward equally and not binding up. The back of the bin actually hits the counter top perfectly now. But you can see that I had to put an extra 1" under the top for it to hit something.

It' gonna take some work but this thing looks and works so smoothly. You can do it...I can help!

momaimp

Thu, 05/08/2014 - 06:07

Would you be able to post a sketch of this project? I assume there are three boxes - the main cabinet and the two tilt-out boxes, but I would appreciate seeing a breakdown of the parts. Thanks!

momaimp

Thu, 05/08/2014 - 06:07

Would you be able to post a sketch of this project? I assume there are three boxes - the main cabinet and the two tilt-out boxes, but I would appreciate seeing a breakdown of the parts. Thanks!

Jsanderson

Wed, 09/23/2015 - 06:32

Is there a way I can get plans for this? I tried to sign up on site but can't locate

Twin Farmhouse Beds

Submitted by lmshaffer on Thu, 10/08/2015 - 09:05

We made the headboards 7" shorter because the collage wall was already on the wall. Also, we used plywood instead of slats for support for the mattresses. Oh, and we had to trim the side rails to 75". Overall, it was a quick and simple project!

Built from Plan(s)
Estimated Cost
$150 each
Estimated Time Investment
Weekend Project (10-20 Hours)
Finish Used
white acrylic paint applied with a cantankerous paint sprayer
Recommended Skill Level
Intermediate