Community Brag Posts

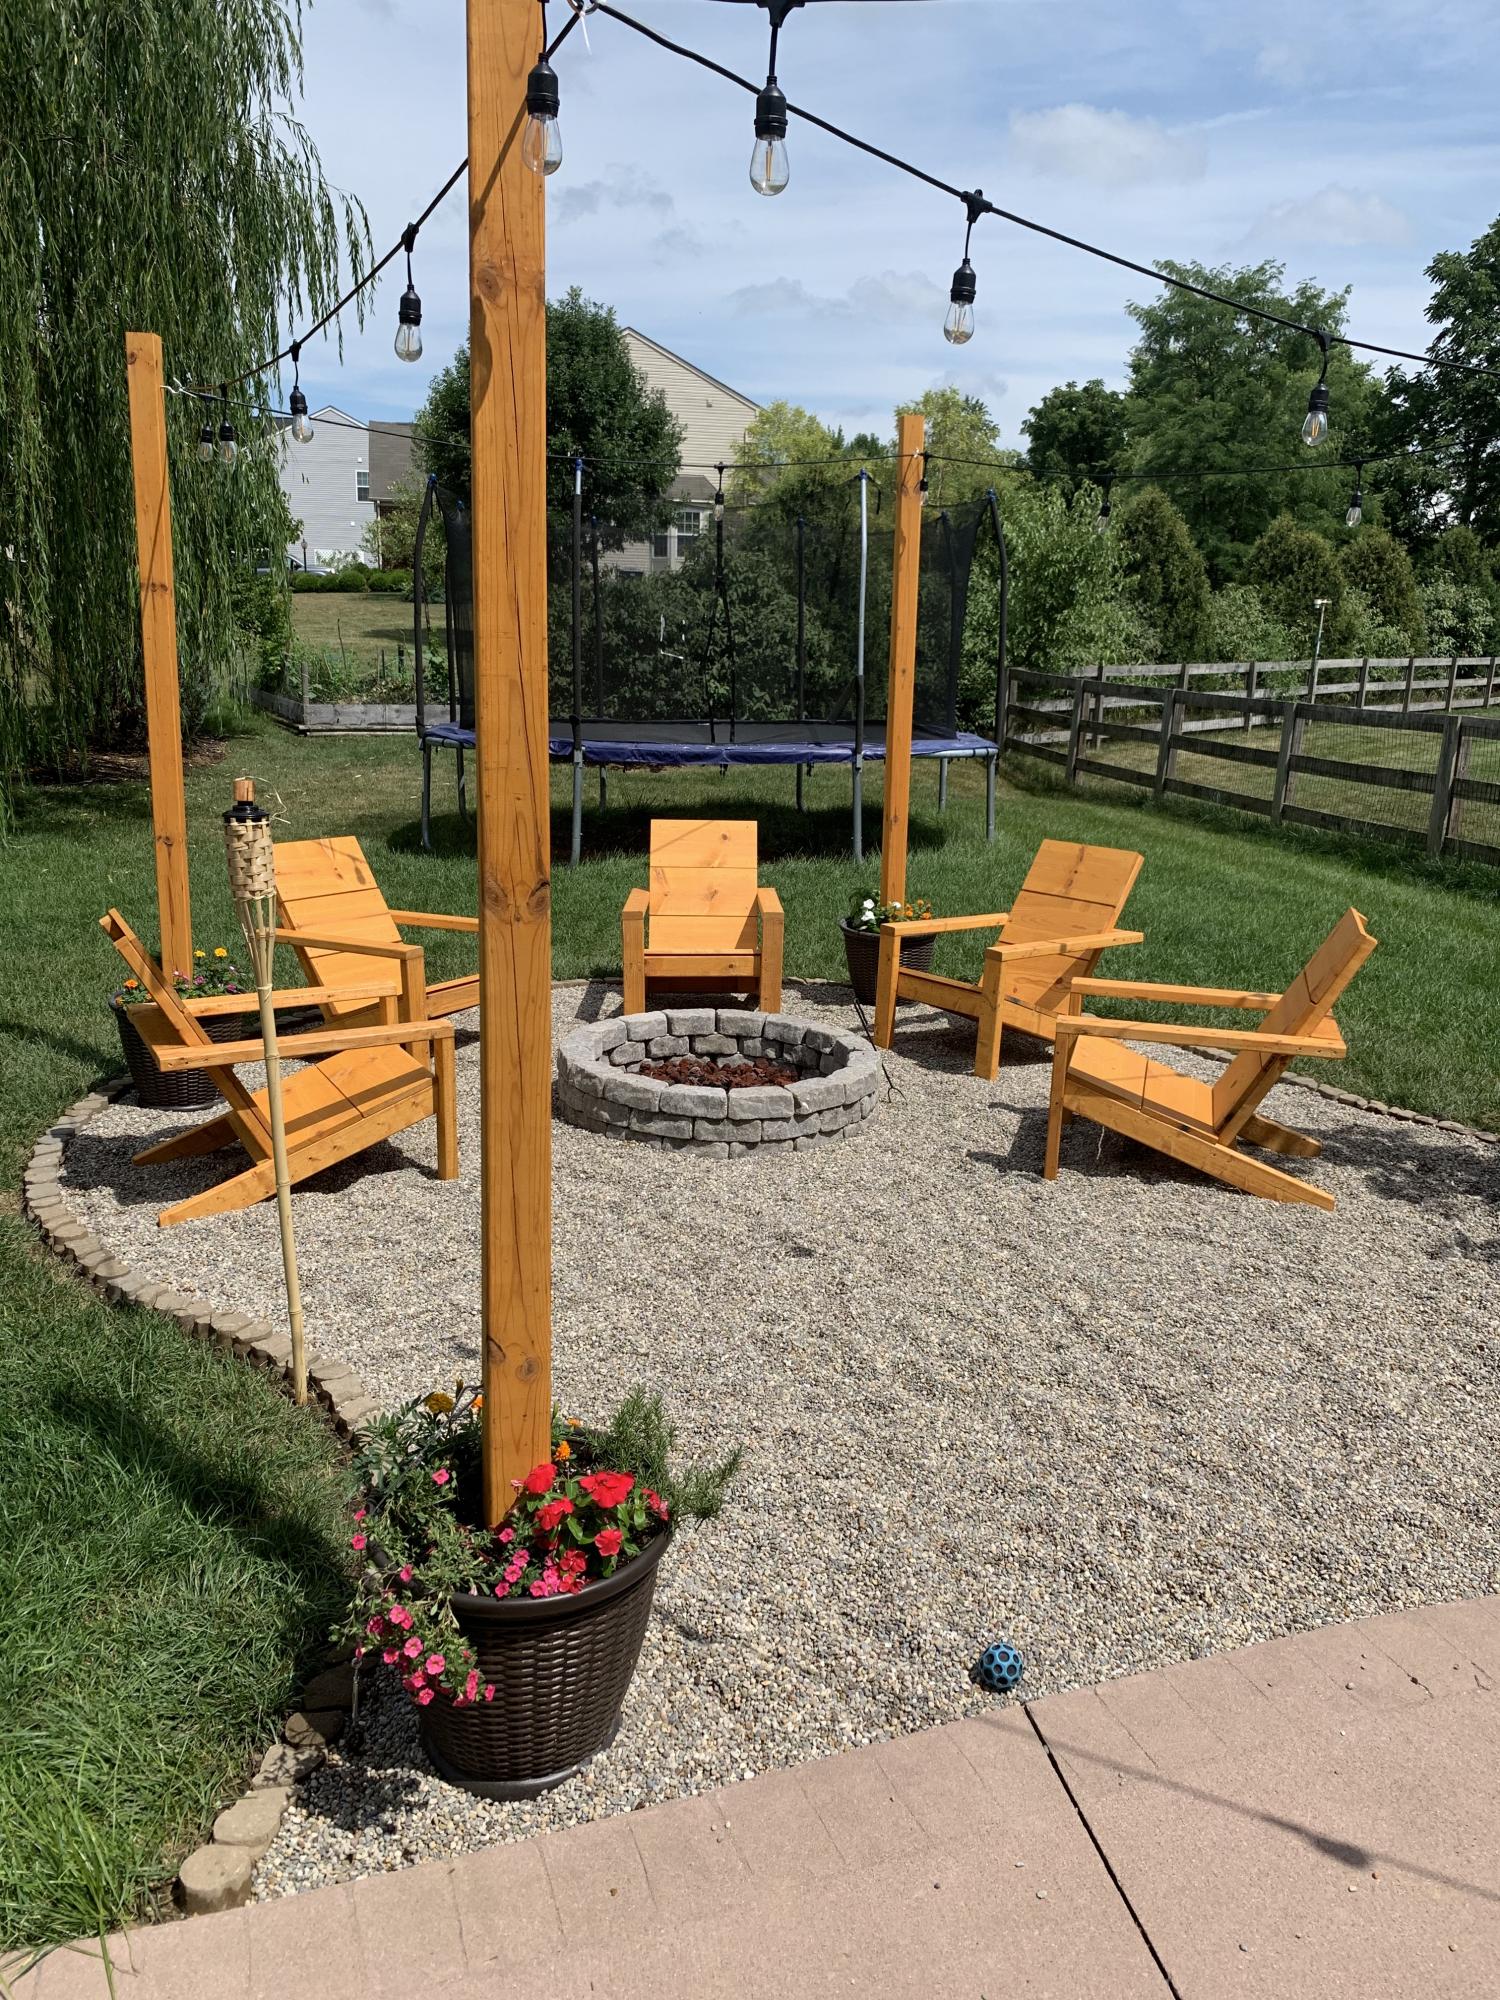
Adirondack Chairs for new Fire Pit area

Submitted by TonyLiddic on Thu, 08/06/2020 - 09:58

We've been talking about adding a fire pit and seating area for awhile. Our oldest daughter's graduation party combined with extra available time due to Corona presented a perfect opportunity to try something new. I've never built anything like this and have very limited experience with woodworking but I came across these chair plans when searching for chairs to buy. Not too bad for a first project! Started digging up sod about a month before the Grad Party. Worked on it a couple hours a day and maybe 3 full weekend days. Came out great and is a wonderful addition to our backyard.

Estimated Cost
$900
Estimated Time Investment
Week Long Project (20 Hours or More)
Finish Used
1 thin coat of Thompson Timber Oil (Cedar Semi-Transparent) applied before assembling each chair. Used about 2/3 gallon for all 5 chairs and light posts.

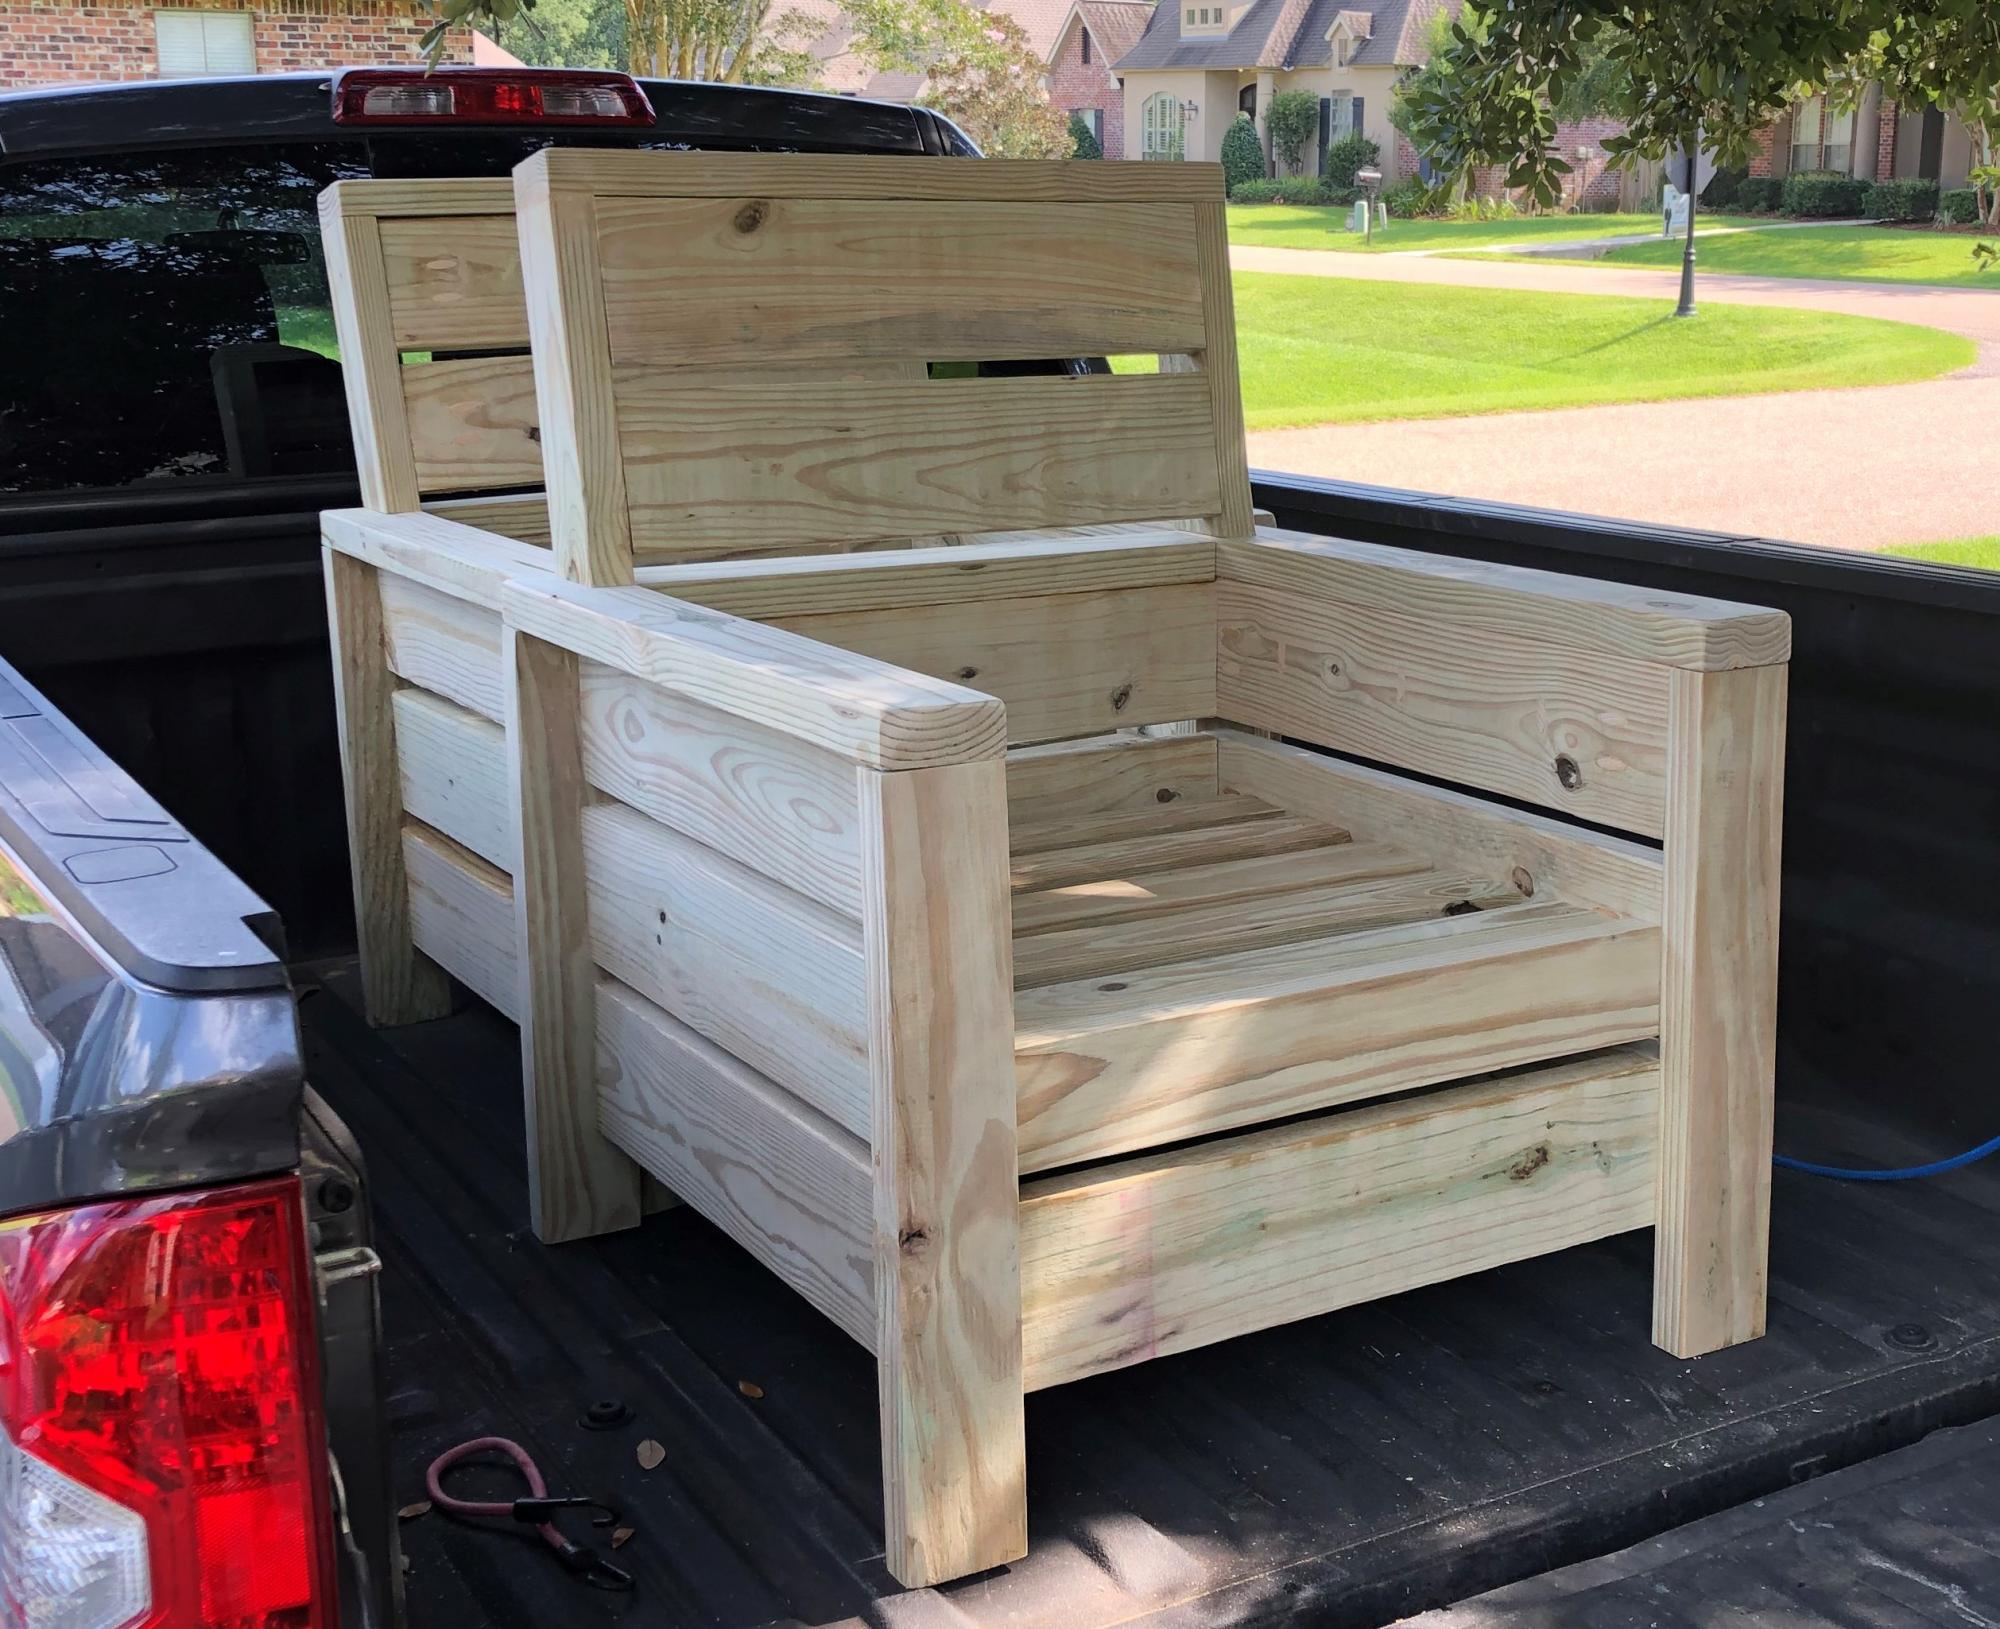
Modern Outdoor Chair with Backrest

Submitted by PoppaZotch on Mon, 08/17/2020 - 11:53

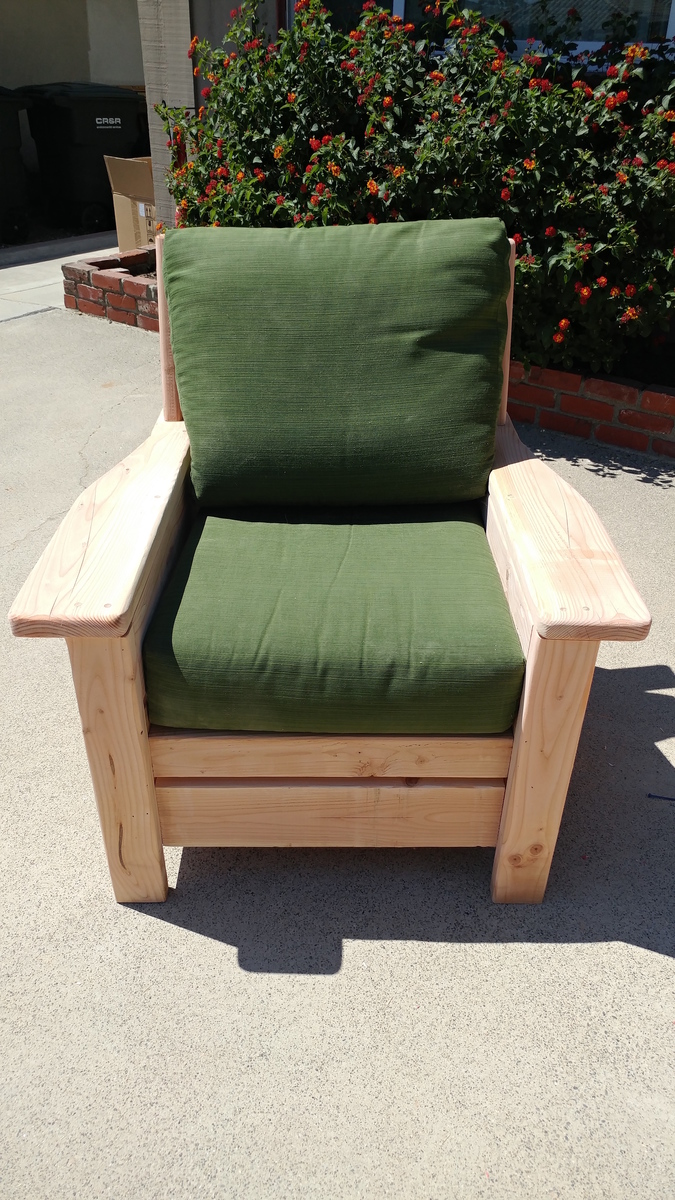
Per request of my wife, I opted to add a backrest to the chair. I feel as though my backrest design keeps with the style of the original build. I accomplished this by cutting the 2x4 vertical arms of the backrest at 13 inches with a 10 deg miter cut at the base. This allows you to keep with the 3/4" on the 2x6 backrest slats. I finished it off with a 2x4 top plate. I'd also note that I made slight modifications to the plans to accommodate 24" cushions.

Estimated Cost
$100
Estimated Time Investment
Afternoon Project (3-6 Hours)
Finish Used
sanded to a 220 grit
Recommended Skill Level
Intermediate

Basement Storage

Submitted by Anonymous (not verified) on Tue, 12/27/2016 - 11:44

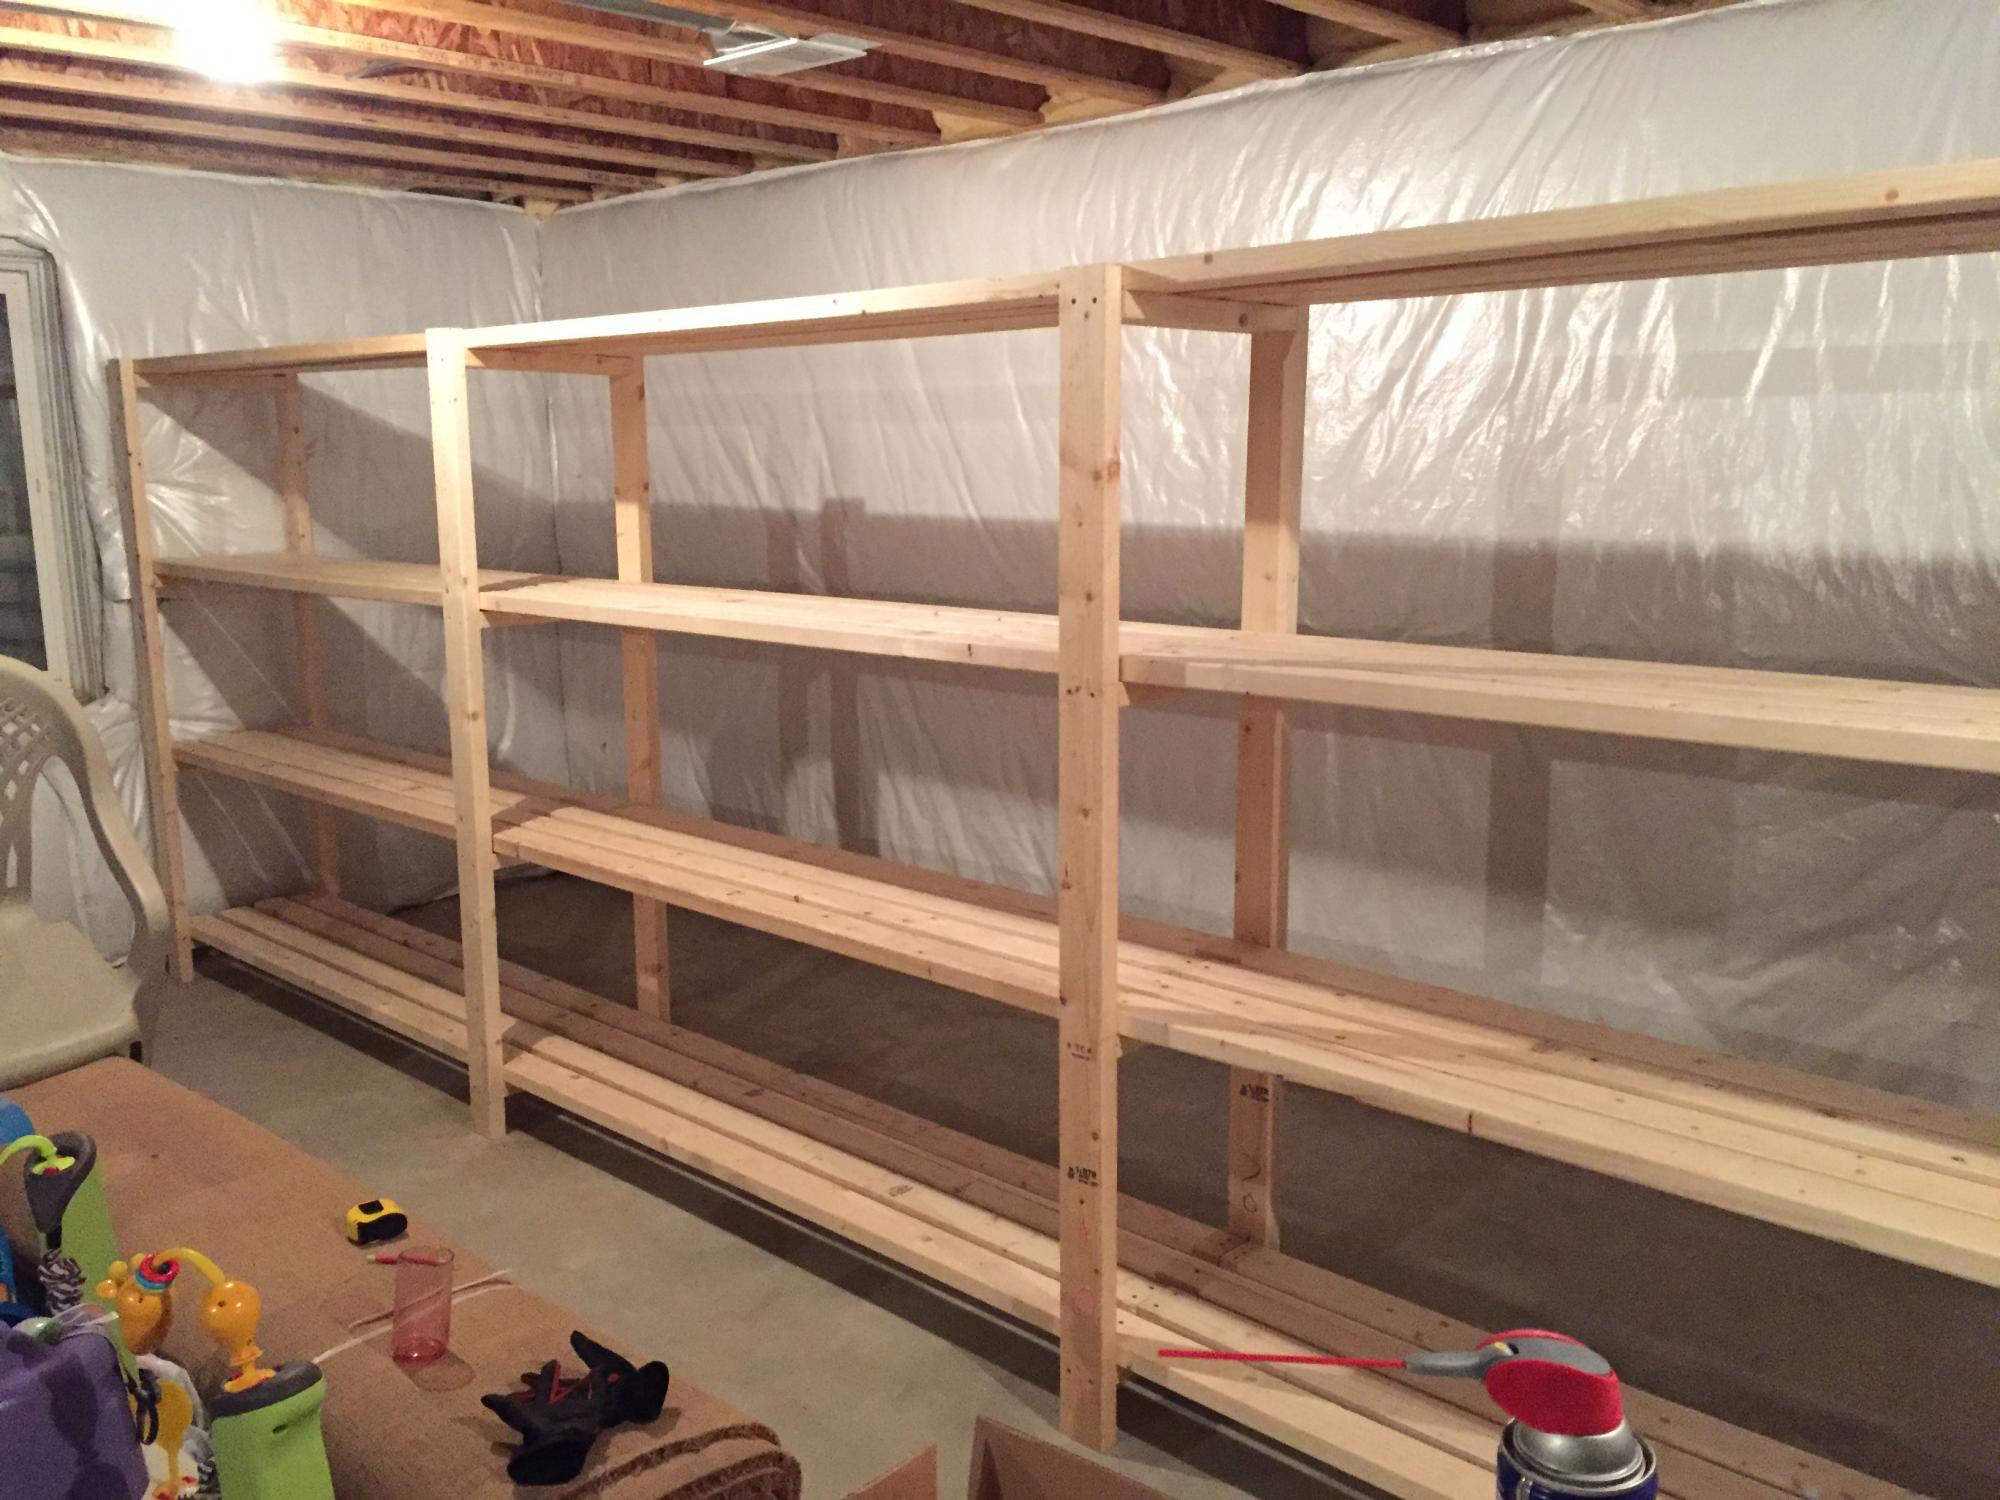
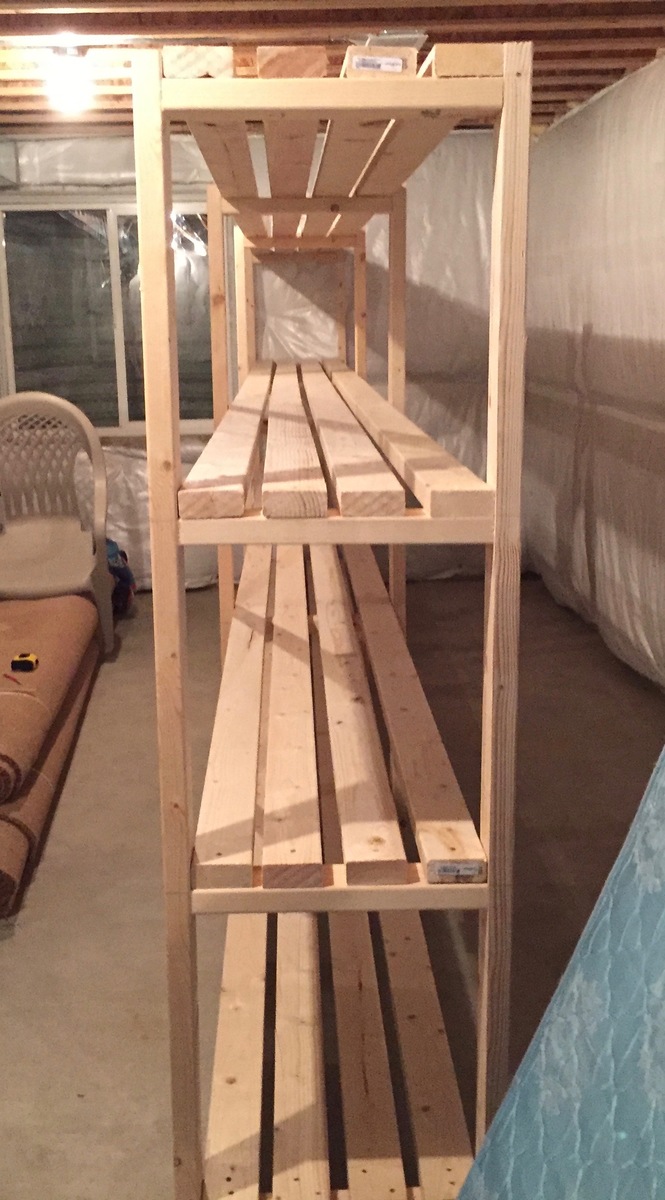
Thanks for the instructions! Here's my version. I haven't built much of anything before, but I needed it in my basement to handle kids' stuff. My version is 18 feet long. I combined a 12-foot and 6-foot 2x4 to get that length, which meant less cutting, which I had done at Lowe's (for free). I used the 6-foot 2x4s throughout the shelf to ensure it was strong (in other words, I didn't want a 12-foot "section" and a weaker 6-foot "section" added on).


I was able to get everything in my car but the ride home was slow. I also had to use my egress window to get the 12-foot boards in the basement.


Total cost for me was about $170 including a couple boxes of screws and wood glue. I could've easily spent double the cost on store-bought shelving. Thanks for the plans!

Estimated Cost
$170
Estimated Time Investment
Day Project (6-9 Hours)
Finish Used
None
Recommended Skill Level
Starter Project

Barn Door Console

Submitted by Anonymous (not verified) on Mon, 01/23/2017 - 19:01

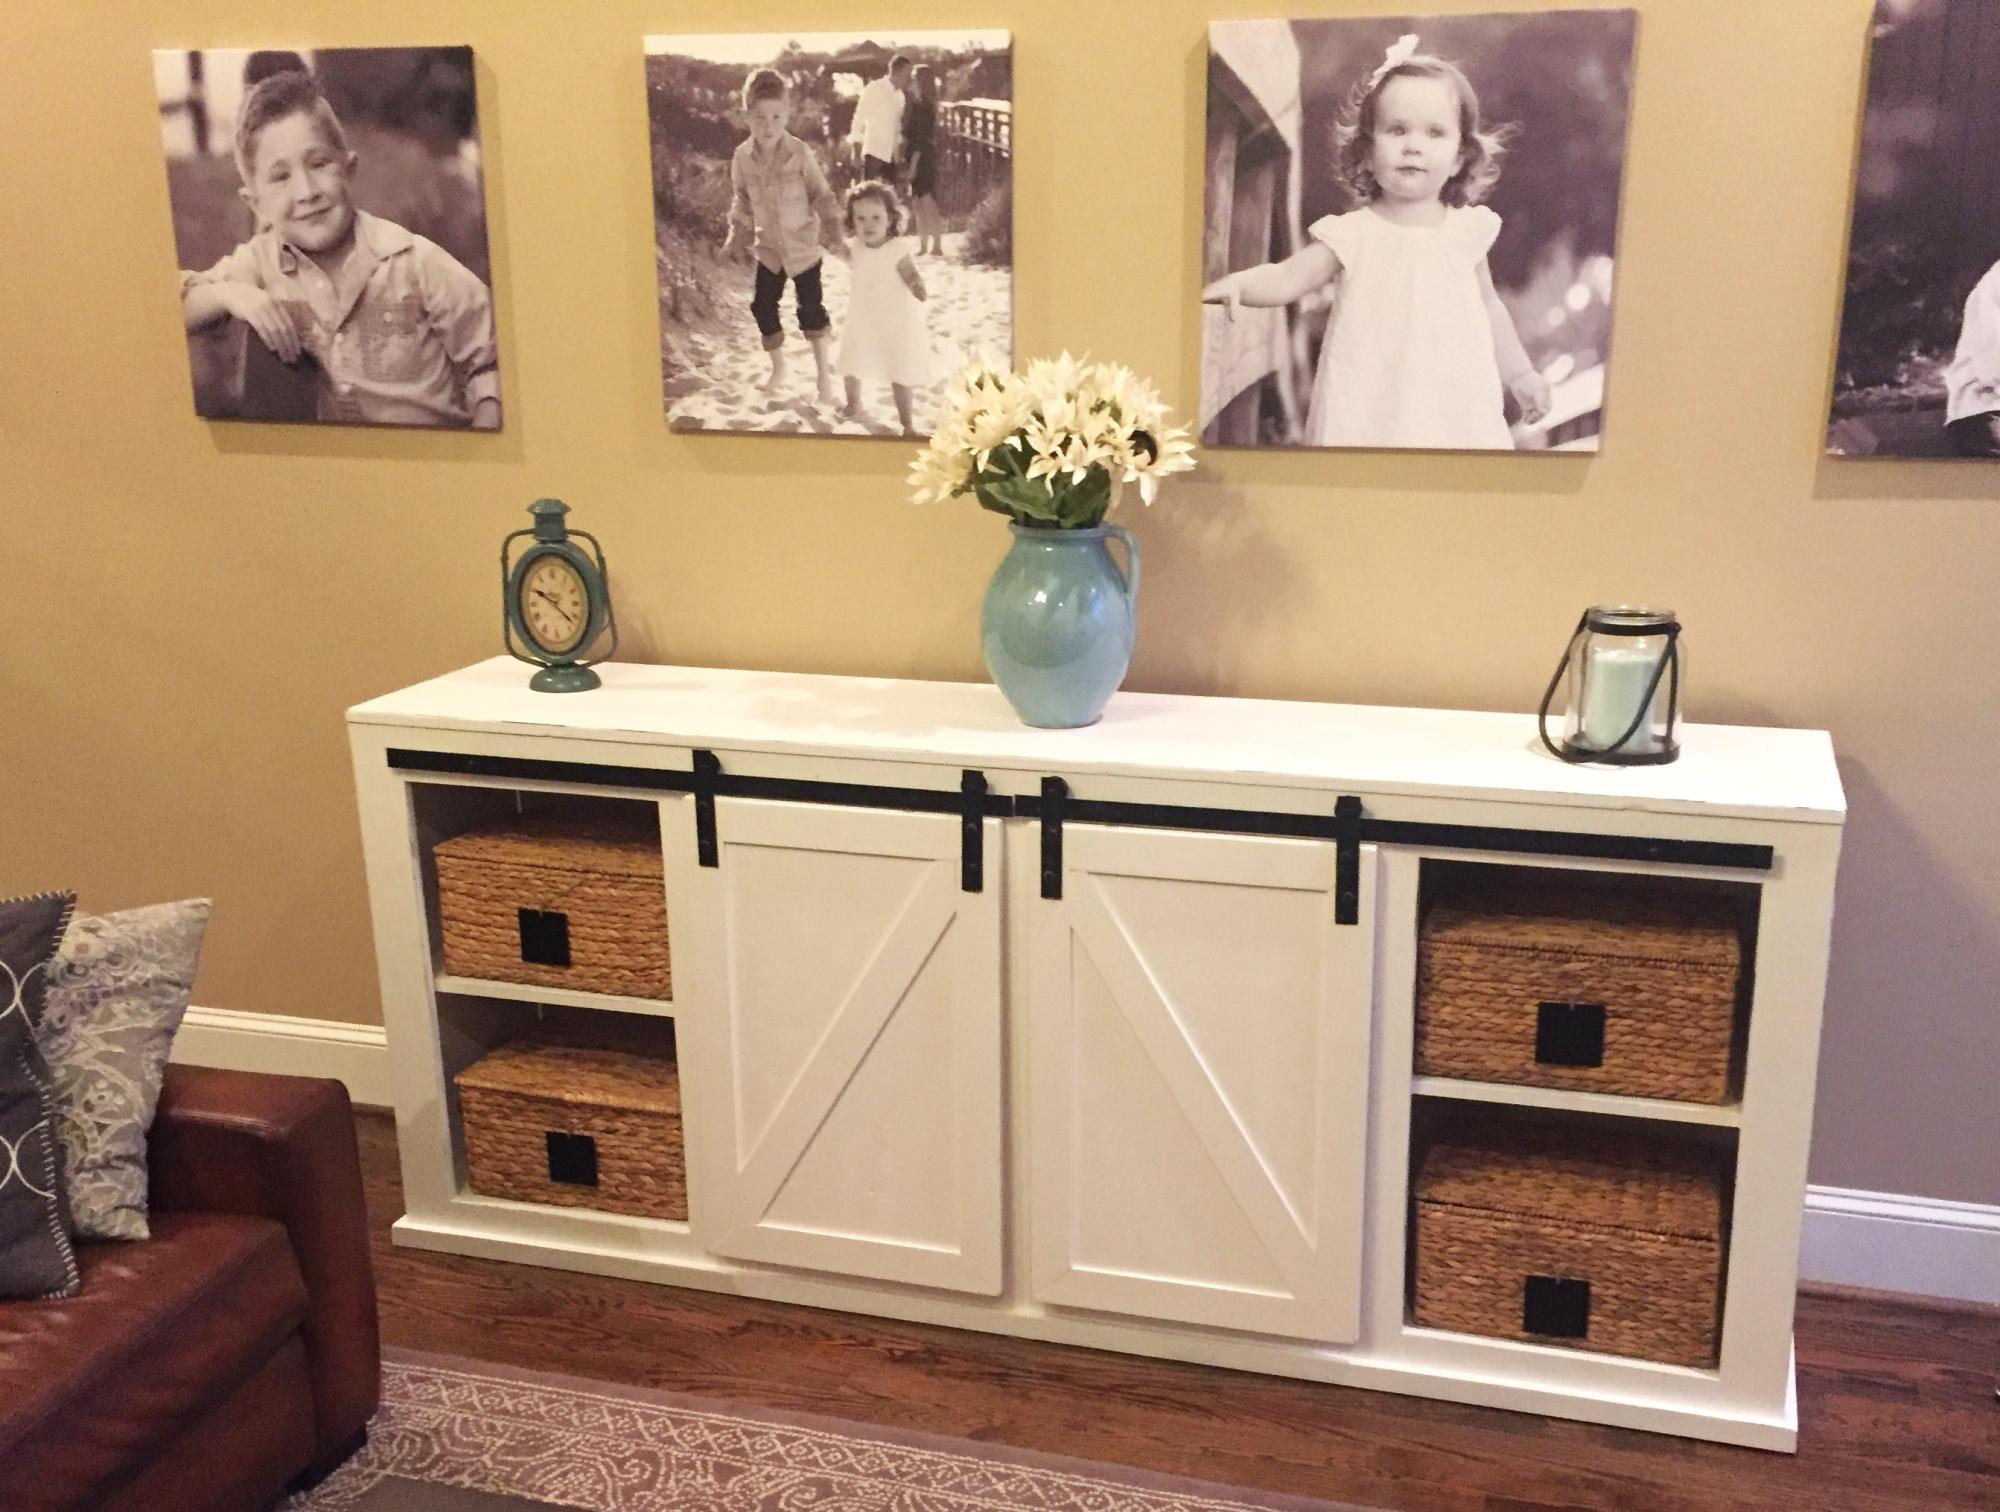
made from poplar and pine.  Painted with a coat of black paint then painted with 3 coats of valspar furniture paint in white.  I then sanded all the edges to bring the black thru.  The hardware is made from a metal bar and wheels made with pulleys from home depot.  I even weaved the baskets myself! 


Just kidding about that last part.

Built from Plan(s)
Estimated Cost
275-300
Estimated Time Investment
Day Project (6-9 Hours)
Finish Used
valspar furniture paint
Recommended Skill Level
Beginner

Comments

Love our new greenhouse!

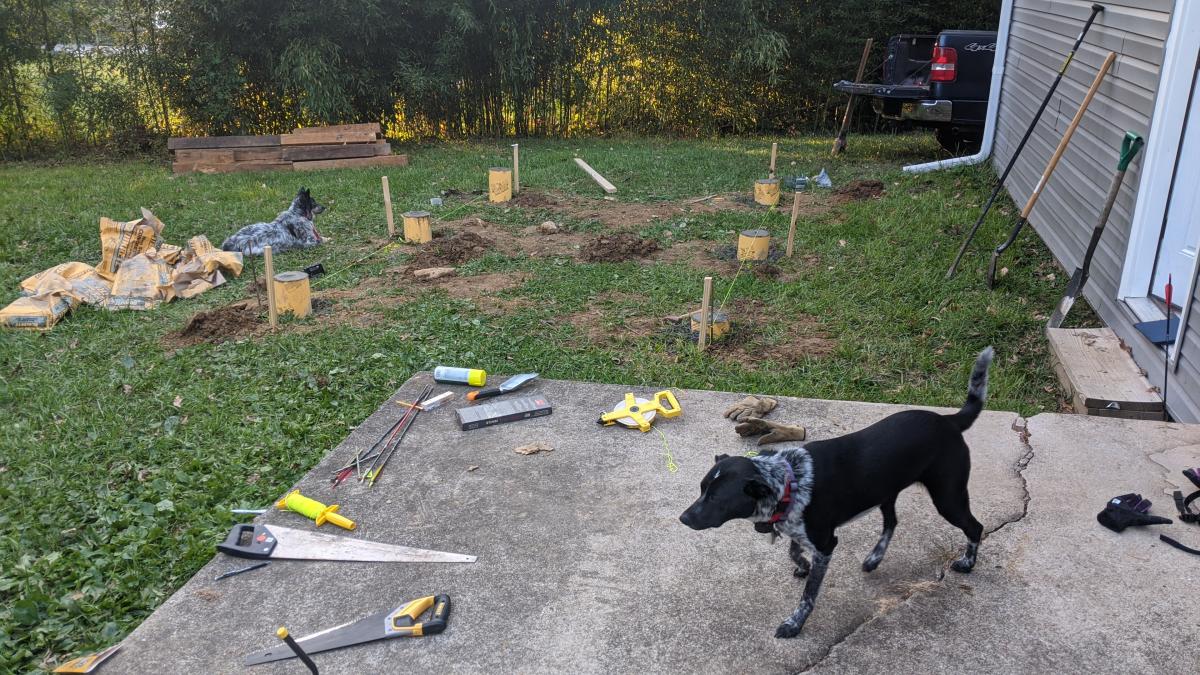
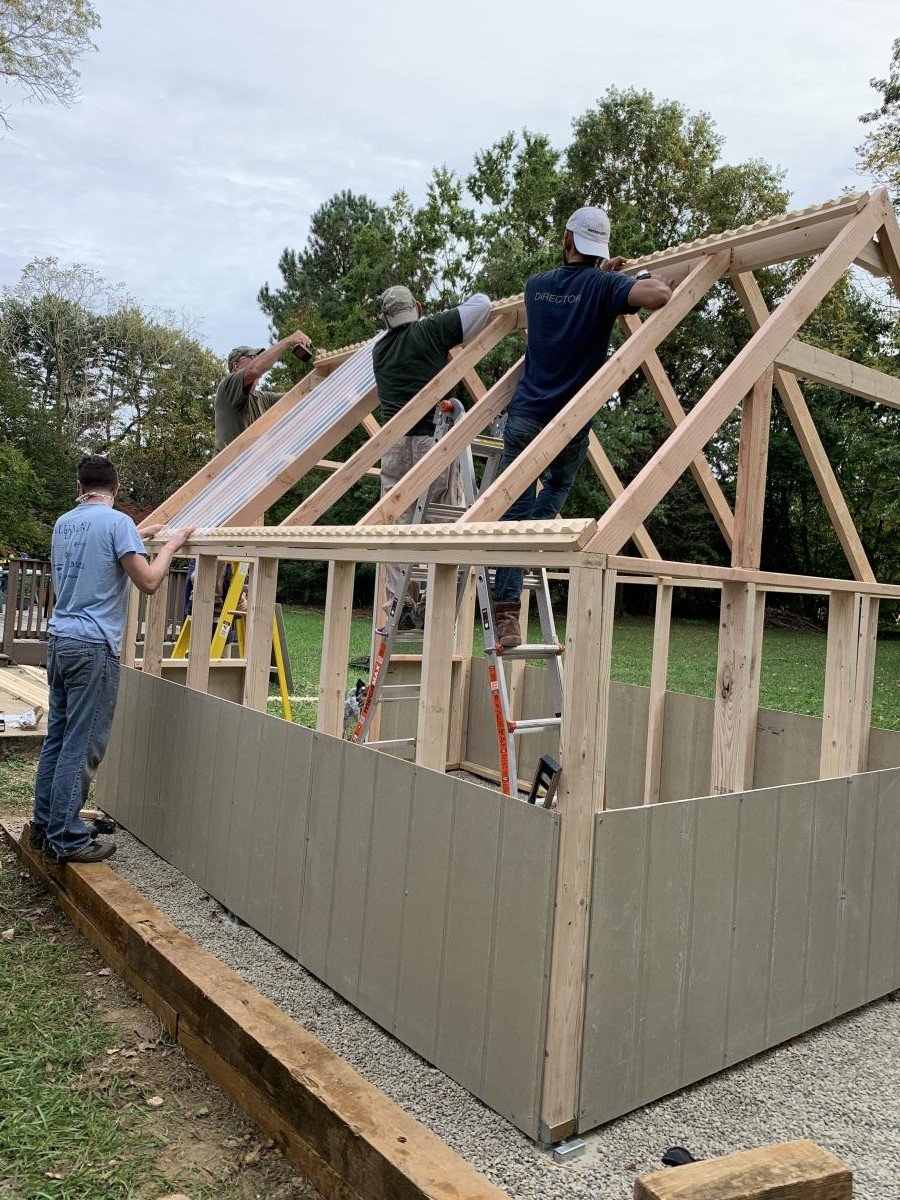
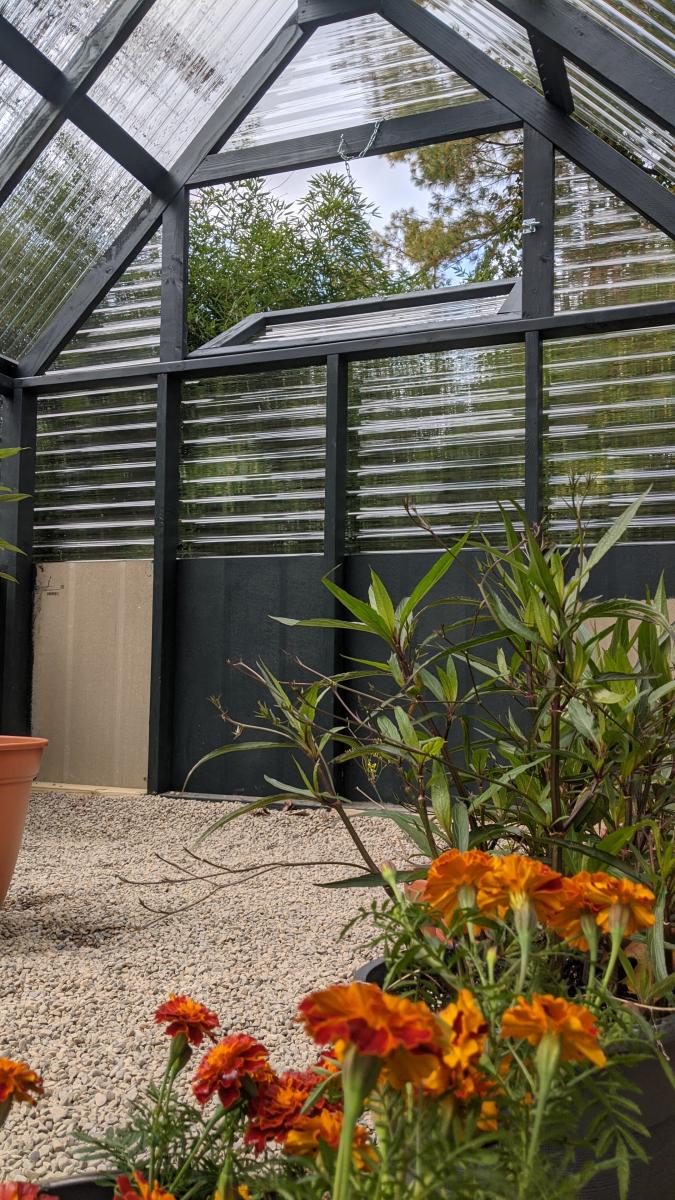
With the help of friends and family, we managed to build this greenhouse rather easily. We had to start with the foundation since the spot we chose was not an even grade. We did this by filling sono tubes with cement and leveling each off so the greenhouse would have a solid place to sit. We then built out a frame around the outside of the cement tubes with some reclaimed 6x6's. After that, we filled the space with 5 tons of river rock and then got to work! After the foundation was ready putting the rest of the house together was a piece of cake. The frame was so easy to put together. We had a few minor kinks to work out here and there, I won't say this house came out 100% perfectly, BUT I am so happy with the end results. We chose to paint it a deep green color as a final touch. So far we just moved a few potted plants from our deck to the greenhouse for the winter. It has been working very well to keep the plants cozy during the colder days we've had. Eventually, I plan to build a potting station, shelving, and most likely a garden bed for winter harvests.

Built from Plan(s)
Estimated Cost
$2000
Estimated Time Investment
Weekend Project (10-20 Hours)
Recommended Skill Level
Intermediate

Comments

Ana White Admin

Mon, 11/09/2020 - 09:52

The foundation looks great the greenhouse looks amazing! I'm sure fun was had building it too:) Thanks for sharing.

Seasonal And Holiday

American Girl Doll House-tweeked

Submitted by Anonymous (not verified) on Thu, 11/19/2020 - 21:09

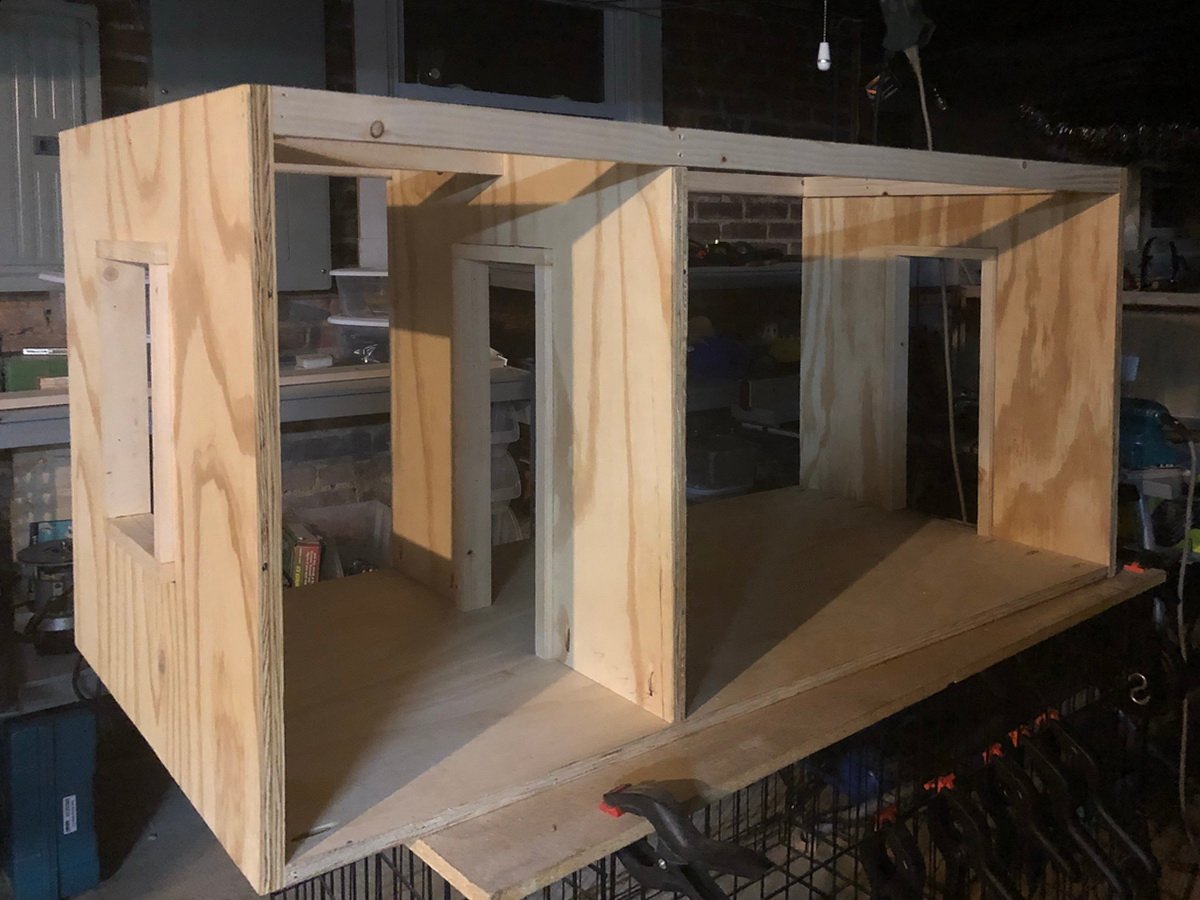
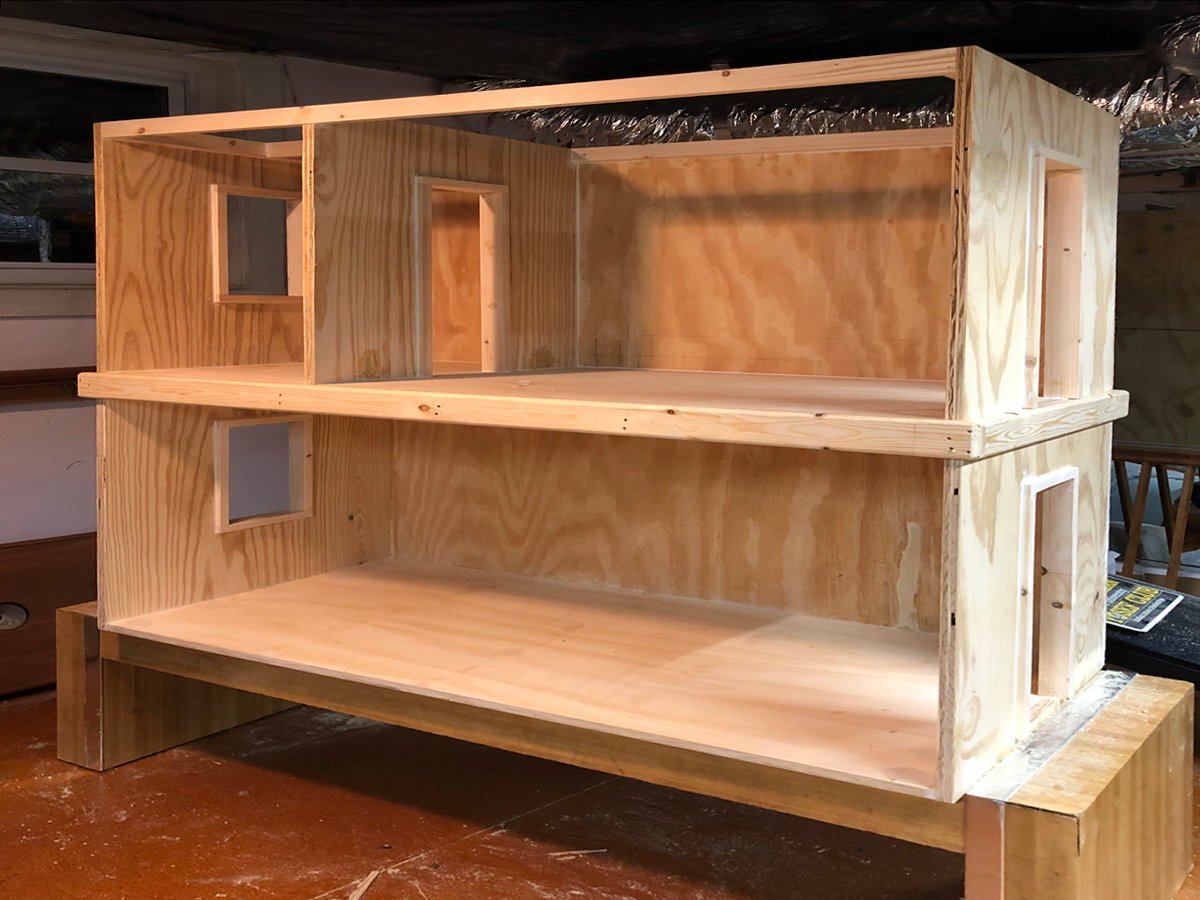
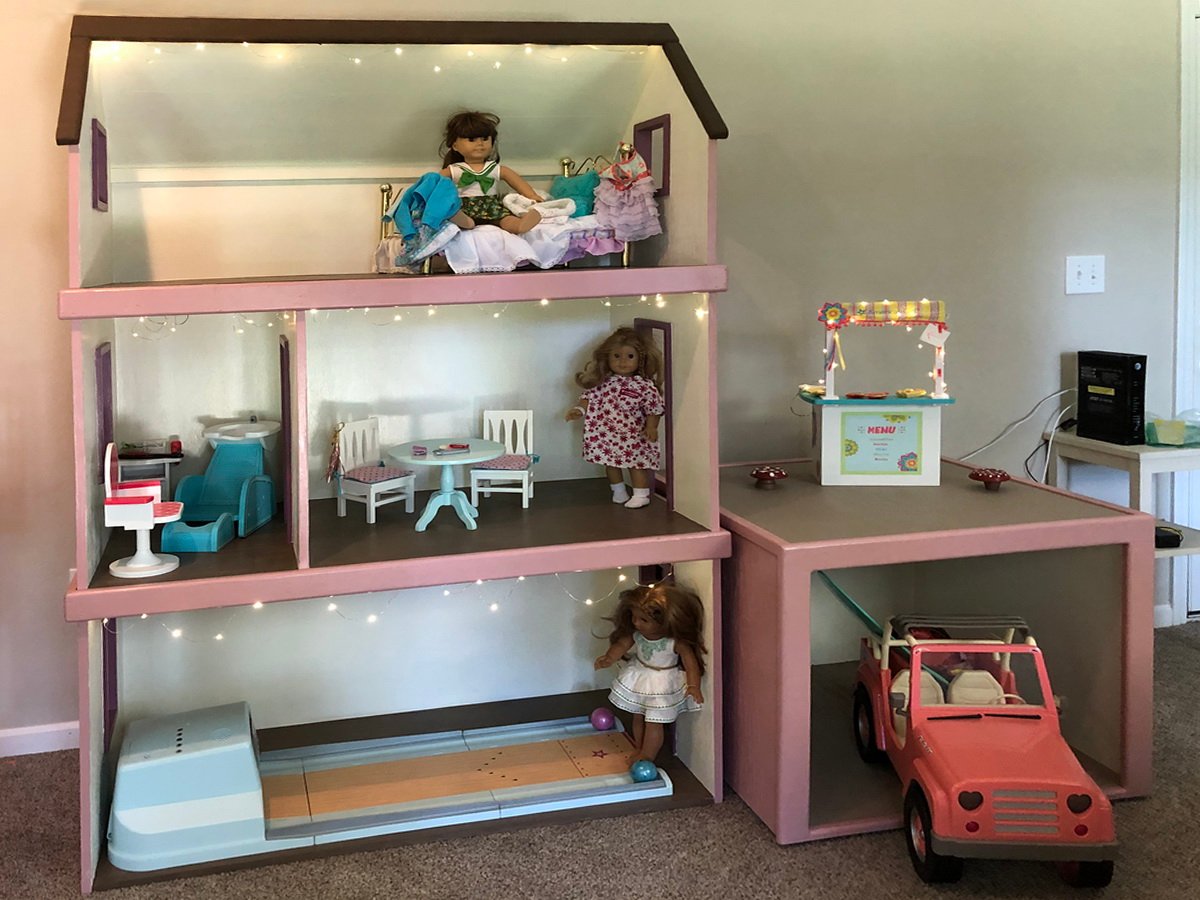
I loved the AG Doll House plans you designed and when my granddaughters asked me to make one for them.... how could I resist. Unfortunately my 7' basement ceiling and steps created a challenge. As a 72 year old female, there was no way I could man-handle a 6' x 4' x 2' - 3/4" plywood project in addition to the challenges of my work space. I was not going to disappoint my granddaughters so I had to come up with a plan. Instead of making the doll house in one piece, I decided to make it as 3 individual boxes (the floors) and stack them on top of each other. Not only would I be able to handle them mostly by myself, but I would be able to work around the low ceiling and transport them up the steps. With only a few modifications to the original plans, I believe I came up with a workable solution.

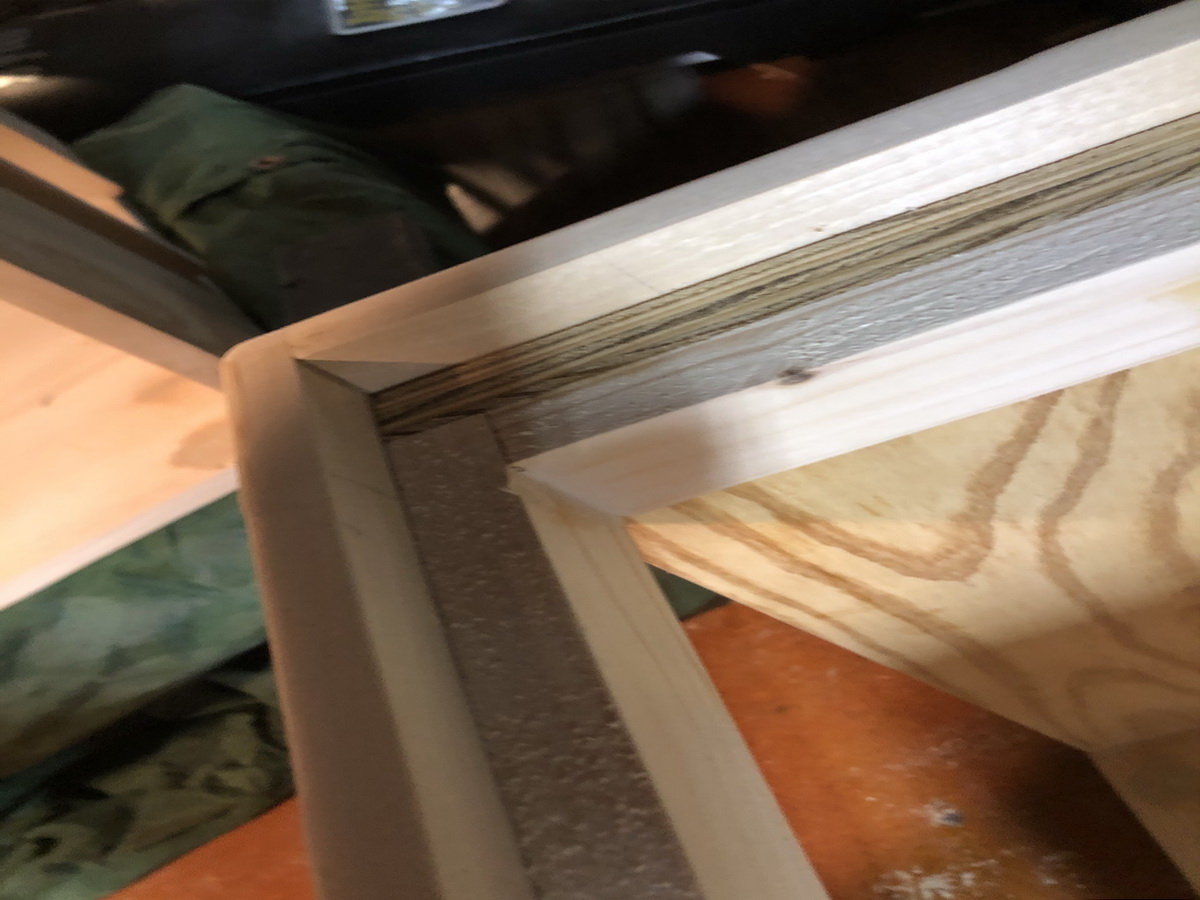
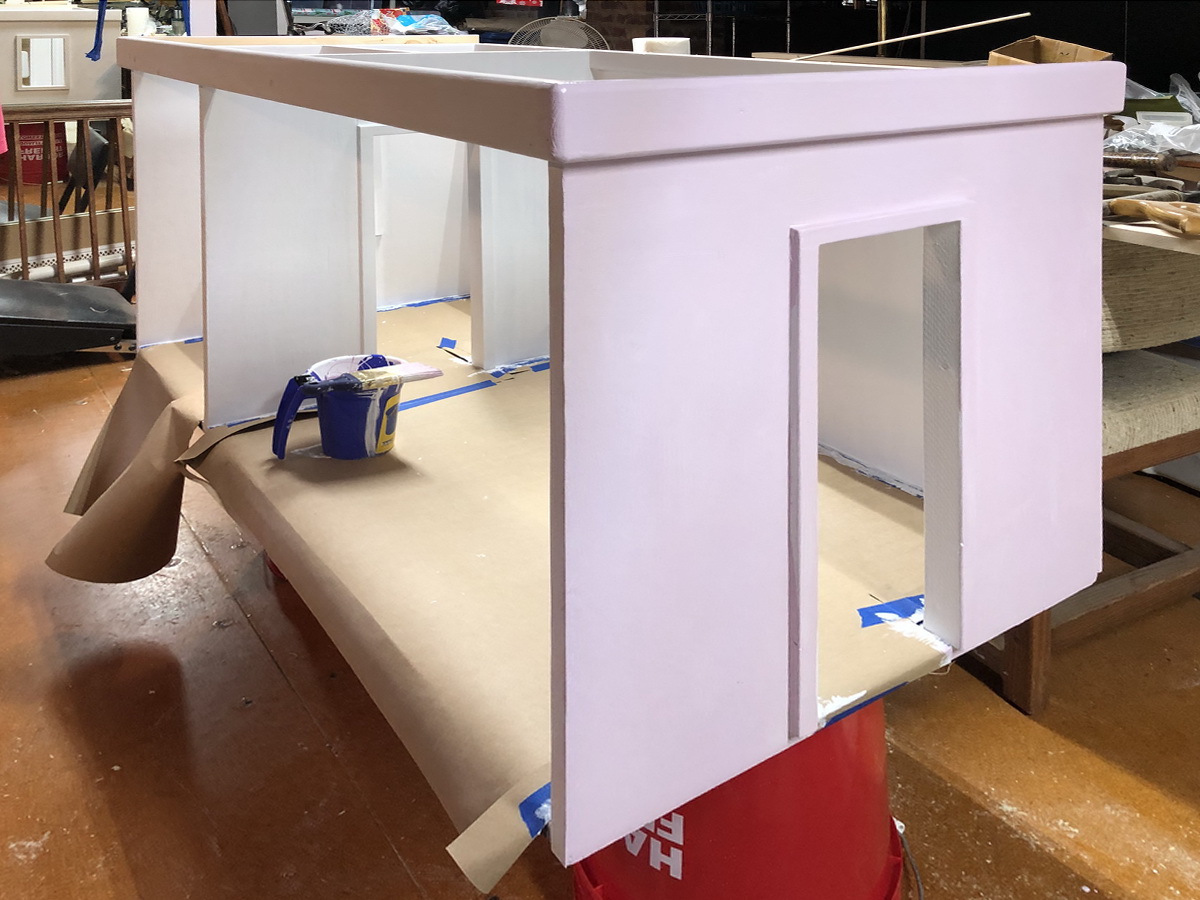
Instead of the sides resting on top of the doll house floor, I extended the sides 3/4" longer to run past the floor for more stability. I also used 1x 2s to frame the inside at the top of each unit for more support and to help in keeping the box square. This may not have been necessary, but I just wanted to make sure it would be sturdy. The main change to the original plan was to add 1" x 3" routed trim to the outside top of each box having it extend 3/4" above the sides. This created a pocket that allowed the next floor to nestle in place and protect it from sliding off in case any little ones decided to climb on it. I also made a 2 car (30" x 30" x 24") detached garage for the AG vehicles. I did fill the holes, plugs, and errors with wood putty, sand numerous times, prime and paint. It was a real help to add some of the paint to the primer because plywood really soaks it up. I think this kept us from having to paint a 3rd coat. The floor was painted a med dark brown, but wiped with the grain before it dried to give a wood grain look.

I finished it in time for the birthday party even though it took 3 vehicles to transport it to the destination. It was a joy to see their faces when it was unveiled and to watch them climb on it of course.
Estimated Cost
$200 (+/-)
Estimated Time Investment
Week Long Project (20 Hours or More)
Finish Used
PPG Acri-Shield (Exterior Semi-Gloss 100% Acrylic Paint and Primer in one.
Recommended Skill Level
Beginner

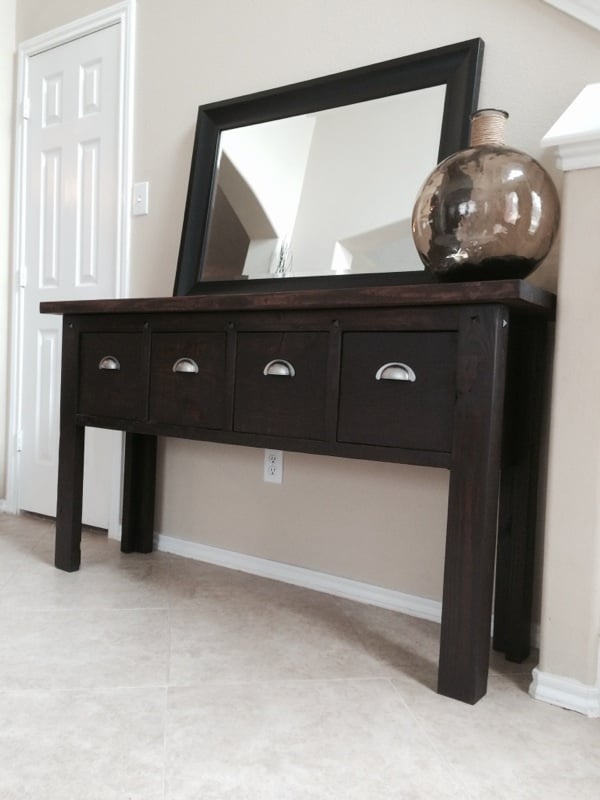
Balin Console Table

My husband built this in his spare time and I stained it, makes a great addition to my foyer!


Built from Plan(s)
Estimated Cost
About $150
Estimated Time Investment
Week Long Project (20 Hours or More)
Finish Used
General Finishes Java, applied wood conditioner 15 minutes before staining. One coat of stain on table top and 3 on bottom. This gel stain really does a better job on pine than other stains.
Recommended Skill Level
Beginner

Comments

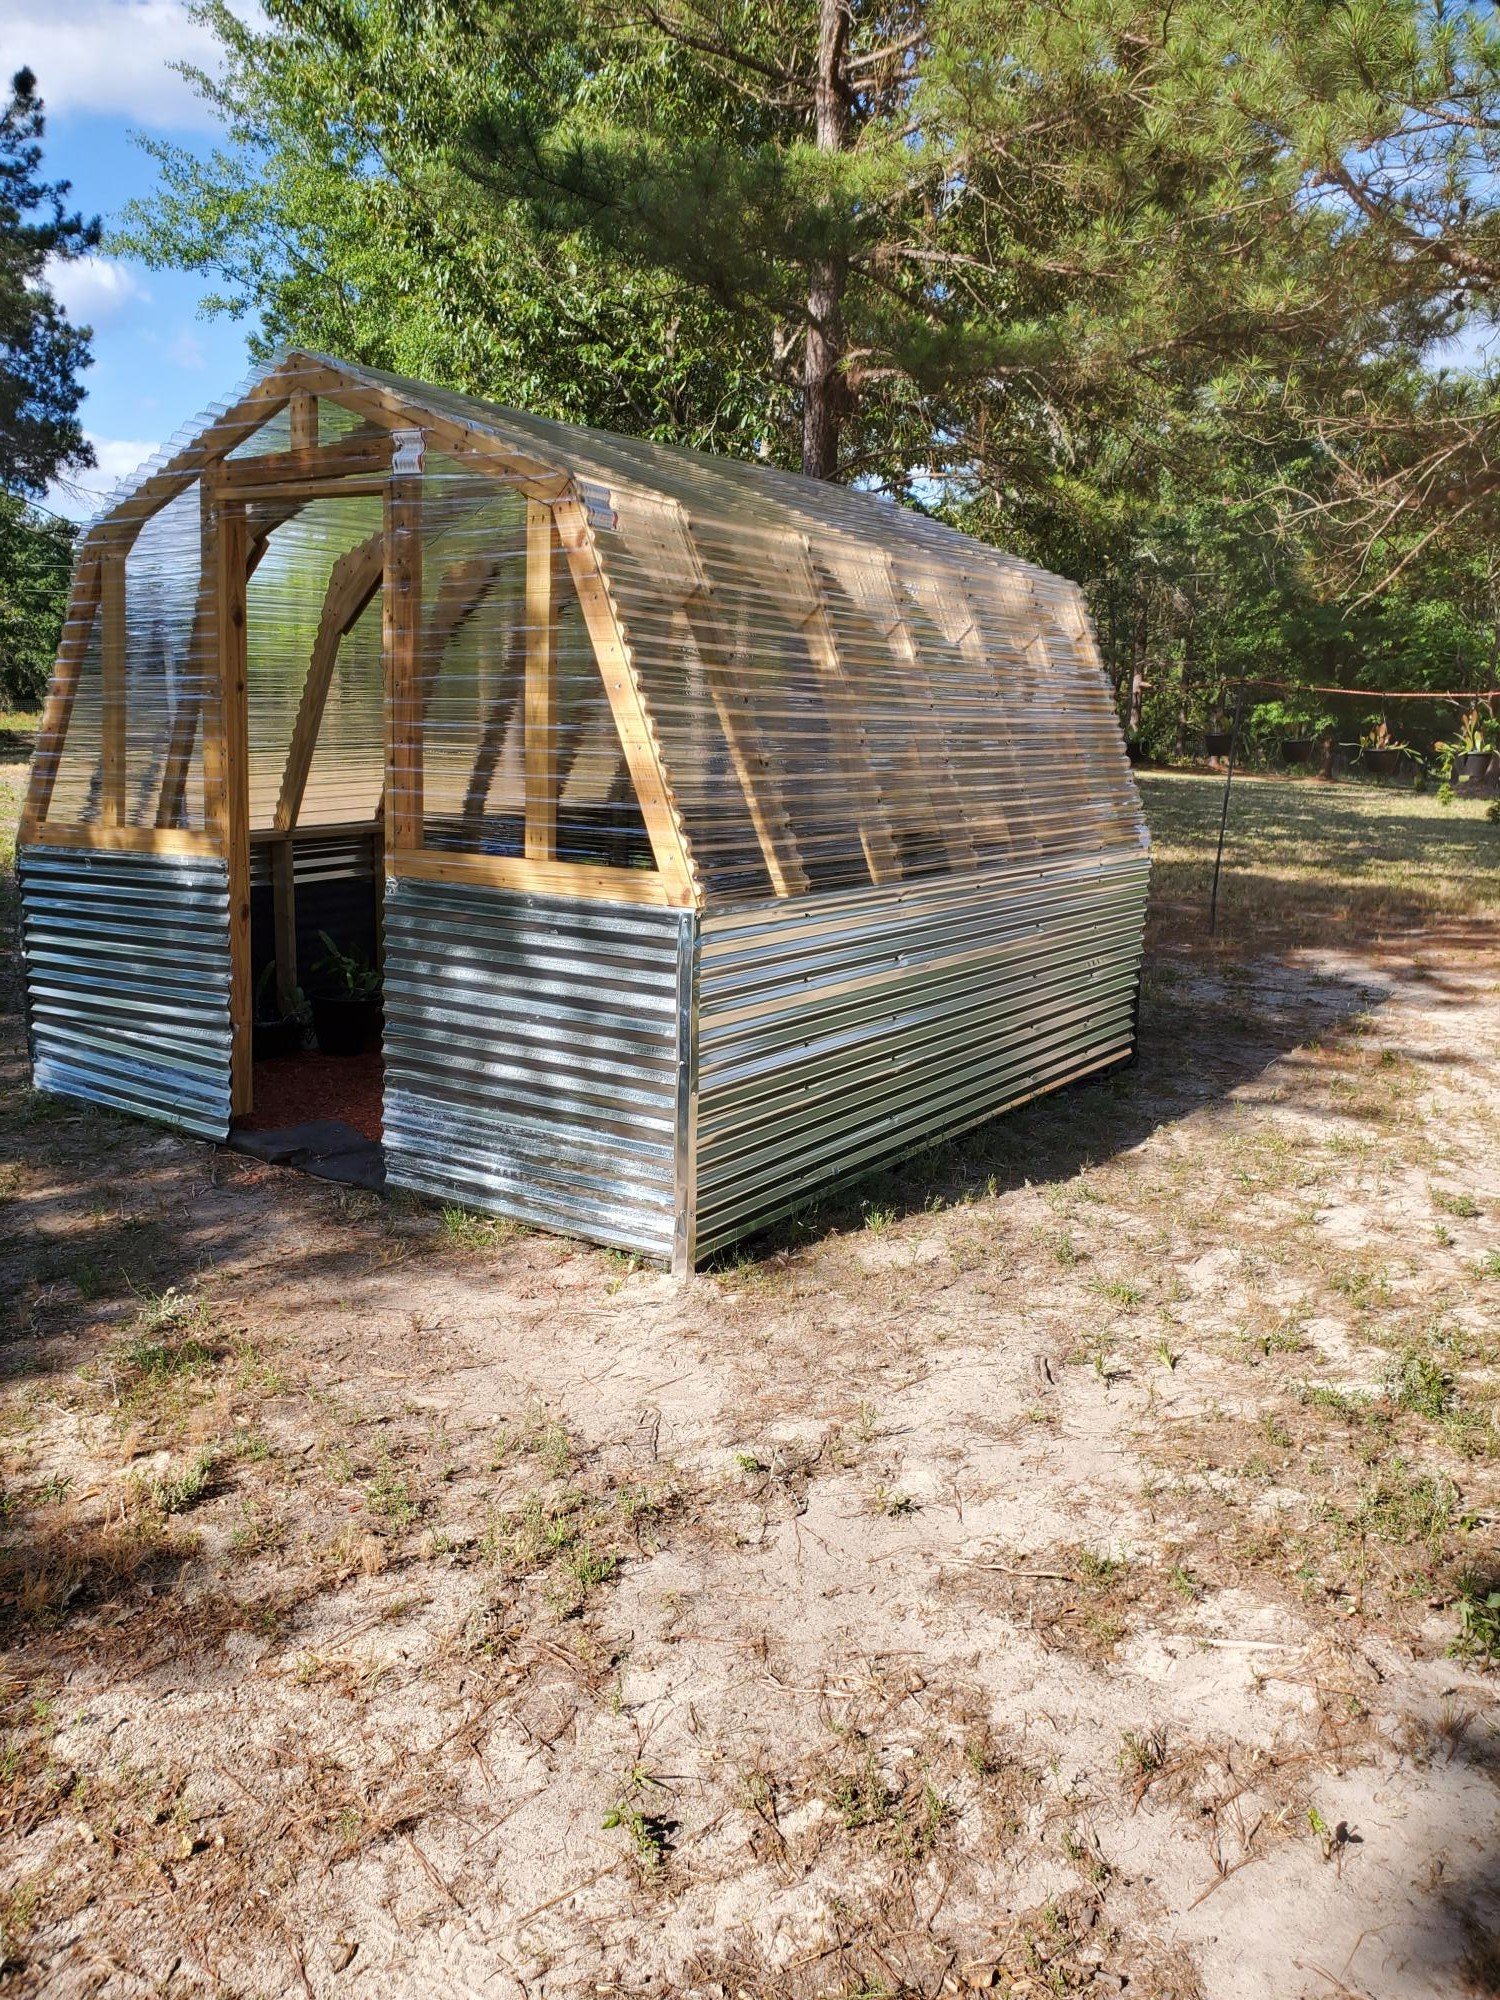
DIY Greenhouse

Submitted by aww92 on Mon, 05/31/2021 - 17:42

i followed the instructions for the DIY Greenhouse and even though there are a few warts and freckles neither the wife nor the flowers are complaining

Built from Plan(s)
Estimated Cost
$1200.00
Estimated Time Investment
Week Long Project (20 Hours or More)

Comments

2 x 4 Garage Shelves Built into Basement Storage!

Hello Everyone! This is my FIRST brag post here on Ana-White.com - but not the first project that we've built from her awesome plans. :) 

We have an unfinished basement that desperately needed some shelving because 1. It's our workshop in the Winter and 2. We don't have an official 'storage' room in the basement of our split level home. When I saw these plans I immediately thought they could be modified to fit our space and get my stuff off the floor! 

I modified the plans just enough to fit our space. After reading through them completely, I realized for an 8 ft wide space (beside the stairs) I only needed three supports for the shelves. Easy! The only trick was fitting the shelf into the space AFTER installing the shelves. Because I had walls on two sides (unlike the tutorial) I couldn't do the shelves as the last step. 

I LOVE how these turned out! They are a strong as a ladder (we tested them... :)) and they hold everything I need them to, and a little bit more. It's a definite improvement on my previously messy, cluttered, saw-dust covered space ... :) 

Estimated Cost
Our space was 8ft tall by 8ft wide, so we ended up purchasing about $60 worth of 2x4s to complete the project. We also used 2.5" screws, which are around $4 per box of 75.
Estimated Time Investment
Afternoon Project (3-6 Hours)
Finish Used
None - we left the wood bare and natural because it's just for storage - not for looks. :)
Recommended Skill Level
Beginner

PB Inspired Queen Storage Bed

 A local South Floridian found me through Pine+Main. She needed two beds for her older kids. Client hired me to build two queen size storage beds based on the Sumatra Storage Beds from Pottery Barn. These beds took over eight weeks to build. My first time making drawers boy was that a challenge. I installed full extension drawer glides to access all the content in the drawers. Bed comes together in 3 pieces. It is stained Varathane's Dark Walnut. And the top coat is the Rust-Oleum Triple Thick Polyurethane in a matte finish. Built with Purebond plywood. These beds are super heavy and super strong.  

Estimated Cost
$900
Estimated Time Investment
Week Long Project (20 Hours or More)
Finish Used
Varathane Dark Walnut and Rust-oleum Triple Thick Poly
Recommended Skill Level
Intermediate

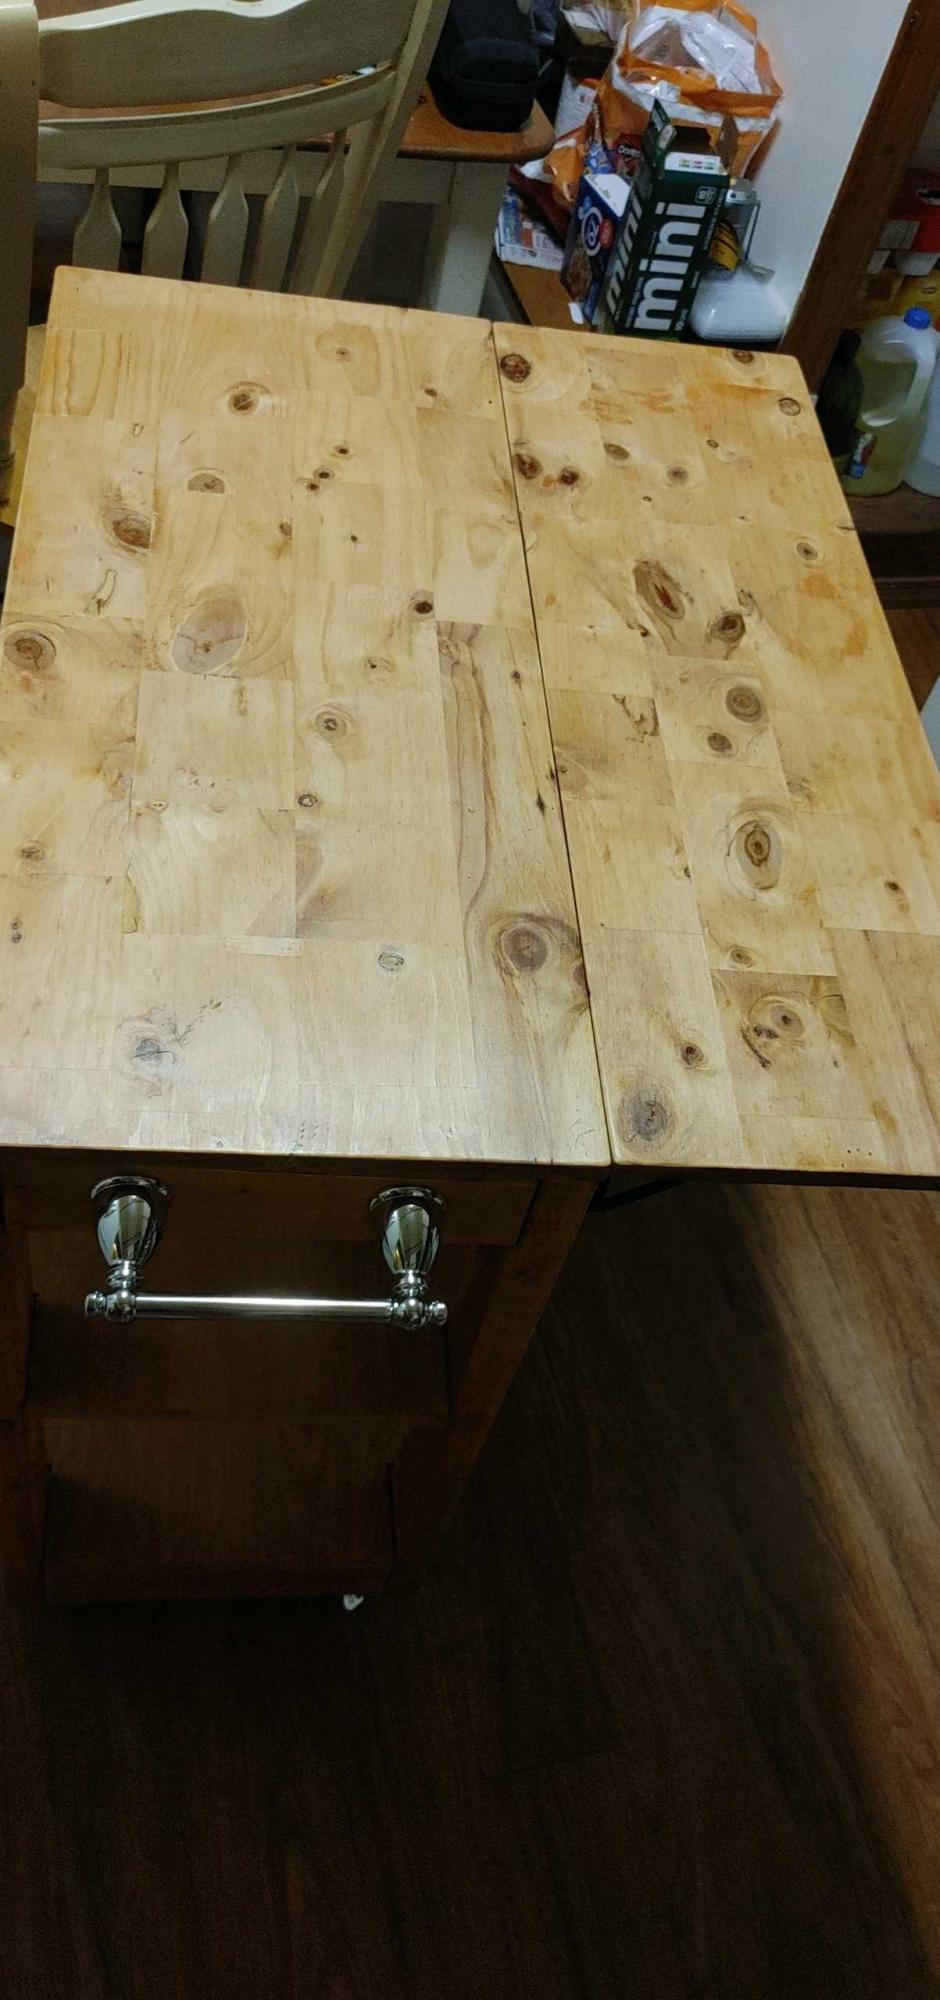
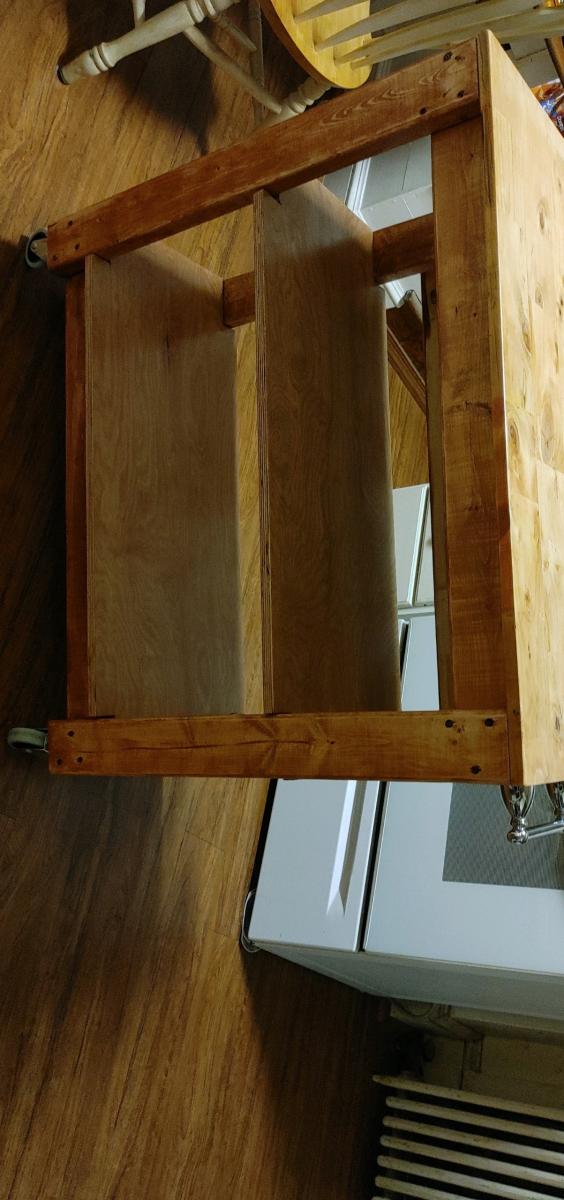
Rolling Kitchen Cart

Submitted by Anonymous (not verified) on Fri, 08/13/2021 - 16:17

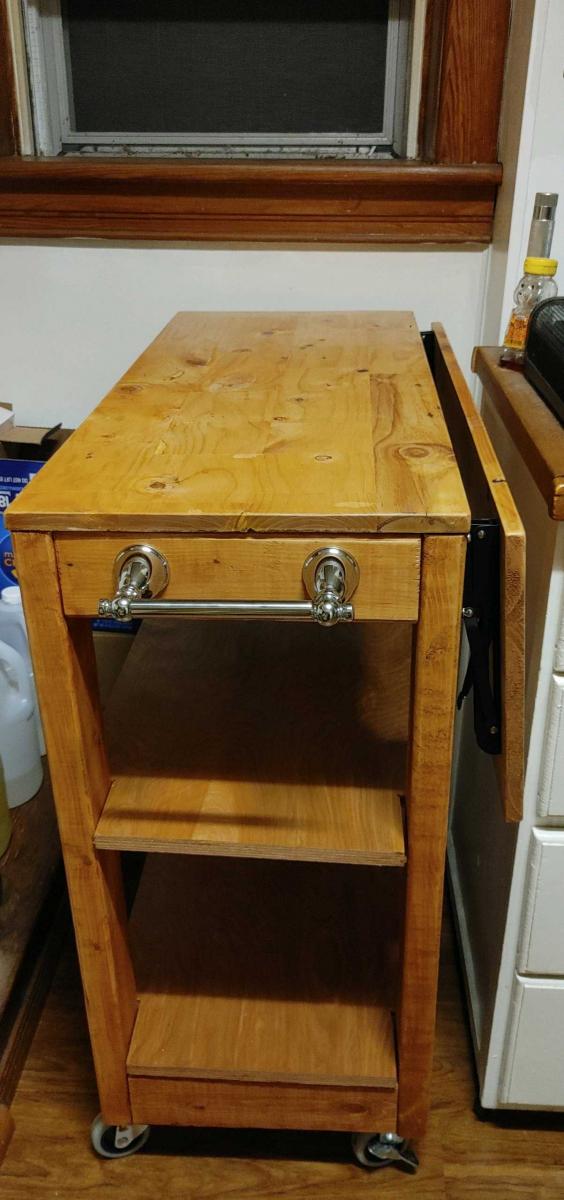
Lots of fun but, make sure the base frame is fully square. This is such a joy to look at in the kitchen and we're already looking forward to using the additional space come the holidays and the extra cooking and baking planned.

Estimated Cost
$70
Estimated Time Investment
Weekend Project (10-20 Hours)
Finish Used
Additional counter and storage space in the kitchen. The drop down top opens up to give a large working surface. The shelves and wheels make it easy for rolling between rooms for clearing the table after a large meal without making multiple trips. We used a cherry gel stain.
Recommended Skill Level
Intermediate

Comments

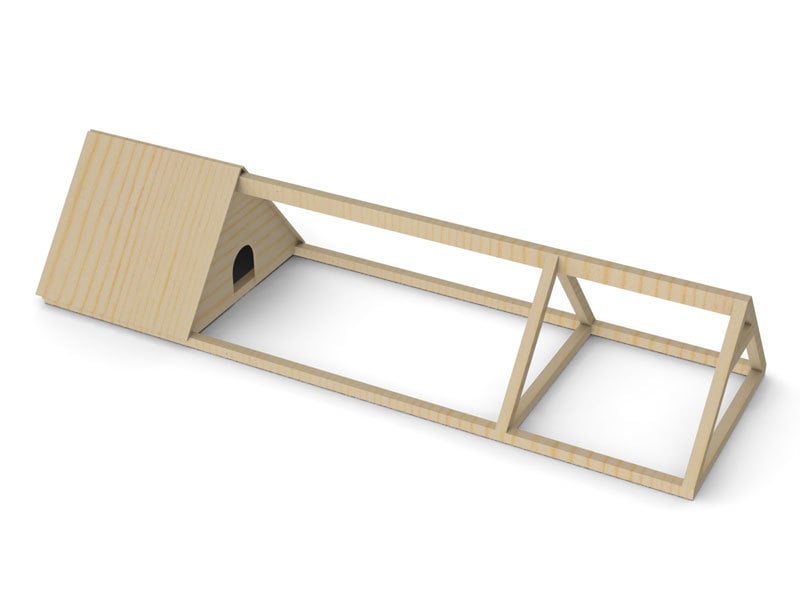
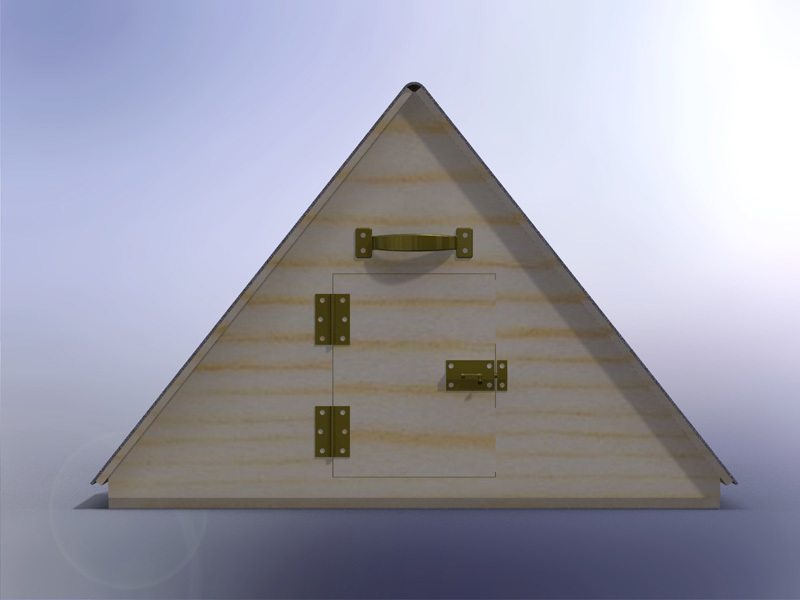
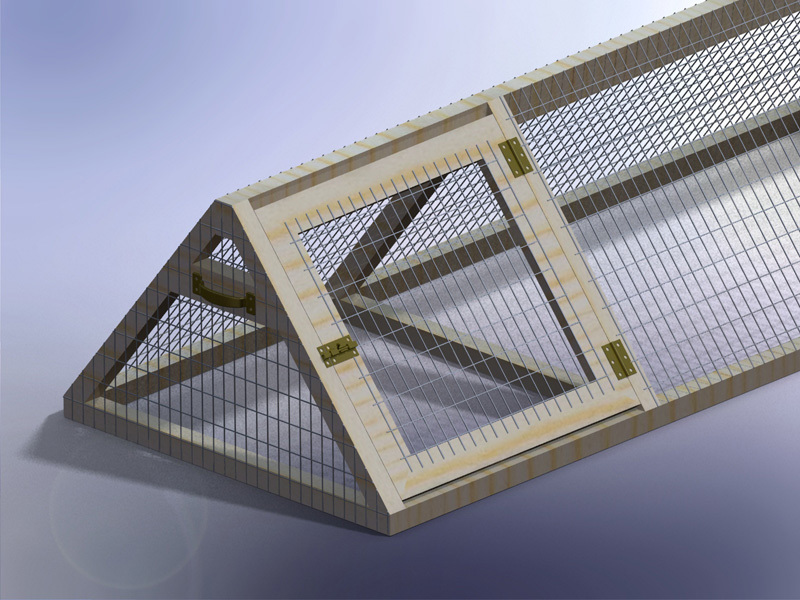
Triangular Rabbit Hutch

Submitted by Medeek on Fri, 05/03/2013 - 18:14

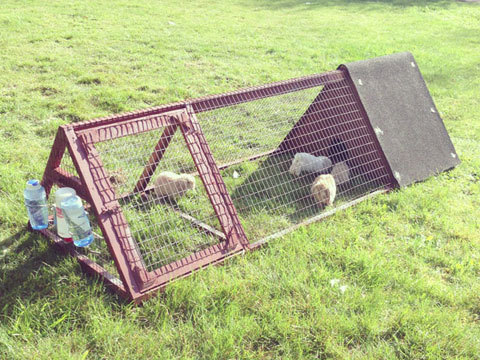
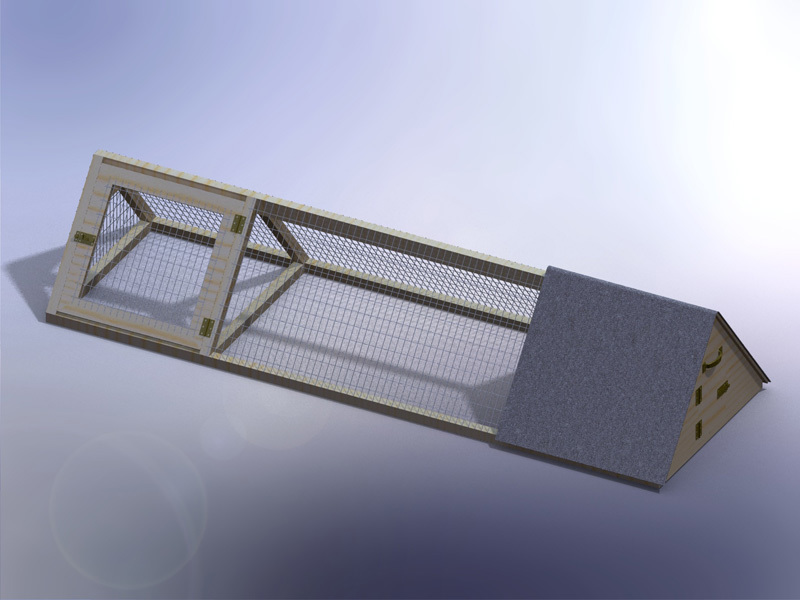
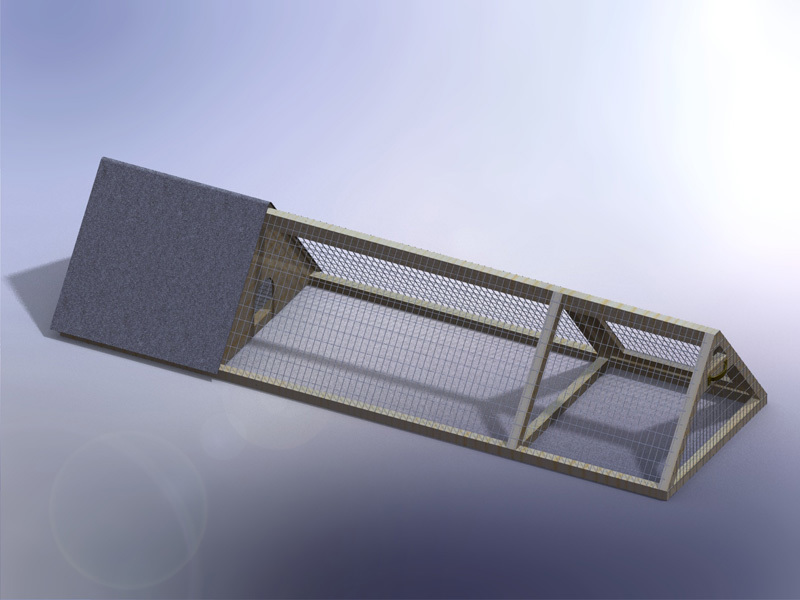
This is a rabbit hutch I created for my kids 5 rabbits. The thing that makes this hutch really nice is if you have a large lawn you can just move the hutch a little bit every day and the lawn gets mowed, fertilized and you don't have to worry about cleaning up all the rabbit droppings. I also mounted a rabbit feeder on the inside of the house door to keep the food dry, which has worked really well.

Here is a short blog of all the steps in its construction:
http://design.medeek.com/gallery/RH3080_COPALIS_2013/RH3080_COPALIS_201…

Estimated Cost
150
Estimated Time Investment
Day Project (6-9 Hours)
Finish Used
Exterior Paint brush or spray. Choose your color.
Recommended Skill Level
Beginner

Comments

Medeek

Sun, 05/05/2013 - 01:52

I apologize I haven't got the completed planset up for this project yet but I will try to get it up in the next couple of weeks as well as a very complete materials list. You will need to go to a farm/feed store to get the correct 1"x2" wire and 1/2"x1" wire for the floor. Do not go to Home Depot and use the cow wire they have or the hardware cloth for the floor, neither of which are the correct choice. Home Depot has the lumber but not the wire. If you have any questions or even improvements to my design I would be interested in hearing from you.

Medeek

Sun, 09/13/2015 - 19:18

Finally got around to uploading the plans.  I still need to create a material list for this plan but the basics are there now.   We've had rabbits in it for about a year but recently we've tried some guinea pigs and it works great for that as well.  The guinea pigs can pretty much live off just the grass and dandelions but you do need to move it daily to give them plenty to eat.

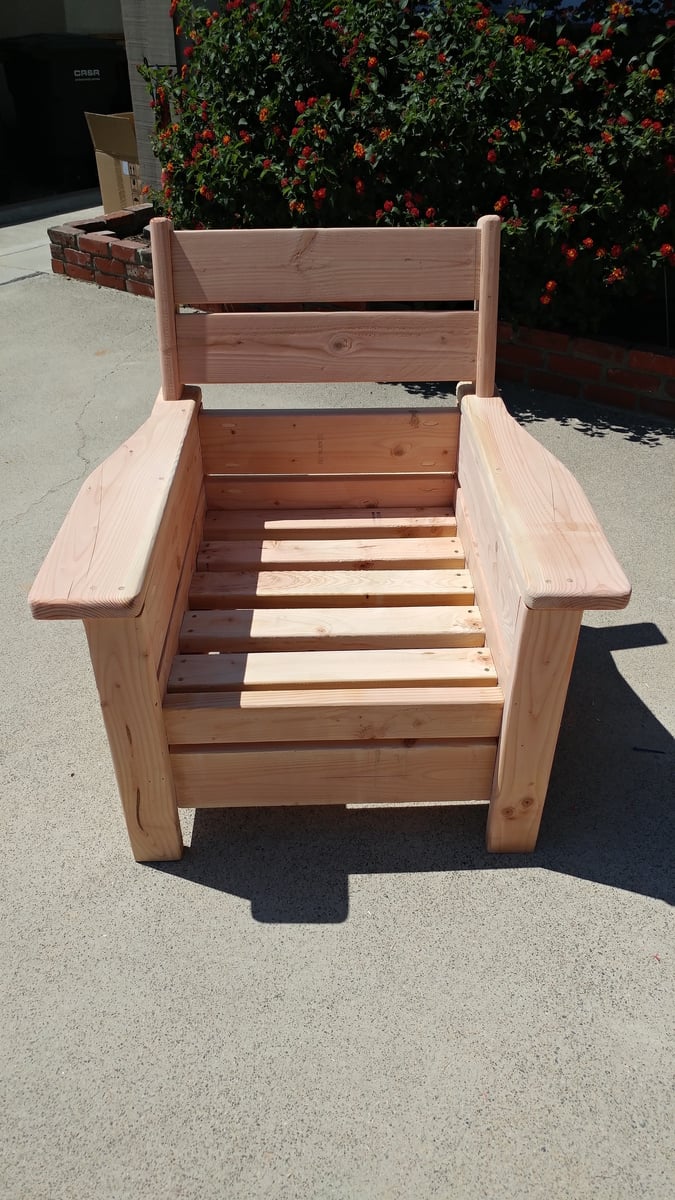
Modern Outdoor Chair with a twist

Submitted by Anonymous (not verified) on Wed, 07/05/2017 - 16:05

Taken from the Modern Outdoor chair project and added a back. Then decided that I love the andorak style chair arms and thus the Andrmodern chair was born.. 

Estimated Cost
$35.00
Estimated Time Investment
Afternoon Project (3-6 Hours)
Finish Used
Will use the Behr two in one
Recommended Skill Level
Beginner

Comments

jkess44

Tue, 06/09/2020 - 13:36

Wow! I really like this look, Im sure its very comfortable. Do you have plans to share? I am very much a beginner and need guidance, lol.

Outdoor Patio Deck Chairs

Submitted by nlindauer on Tue, 05/24/2011 - 06:42

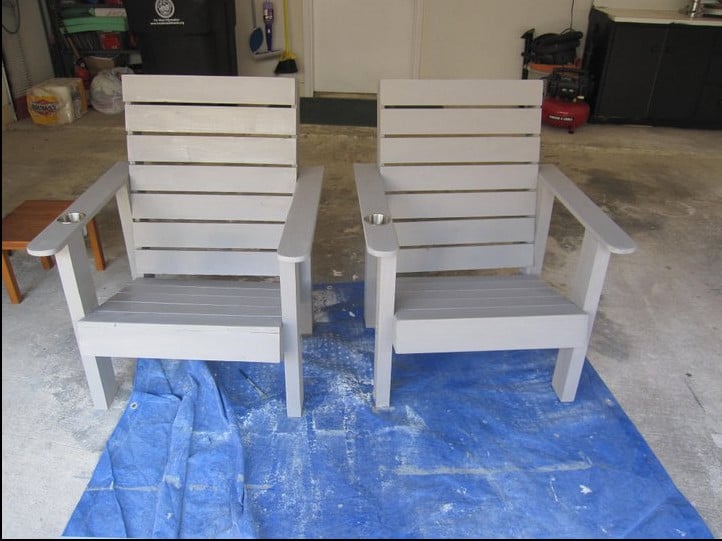
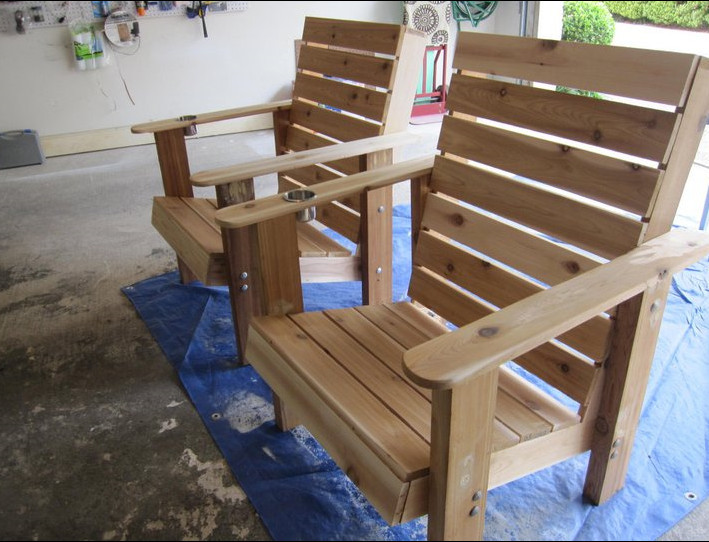
Made these chairs from plans found on the Kerig Jig website. I added the cup holders for convenience and lowered the seats by 2 inches to account for our short legs. Chairs were stained with an outdoor fence treatment that was tinted with a light grey color.

Estimated Time Investment
Day Project (6-9 Hours)
Finish Used
Olympic Maximum Solid - Grey Base
Recommended Skill Level
Beginner

Garden bench - Adirondack style

Hi Ana!  Thank you so much for creating all these wonderful woodworking plans.  My wife and I wanted a garden bench, and I thought it would be so much more fun to make one than to buy one, so voila!   Couldn't have done it without your plans.  I made a couple modifications to make it more "Adirondack" style, with the paisley-shaped armrests and curved backpiece.  Great plans, thrilled with how easy they were to follow and how well the bench came out! 

Thanks - 
Bruce 

Built from Plan(s)
Estimated Cost
$100
Estimated Time Investment
Weekend Project (10-20 Hours)
Finish Used
Spar urethane
Recommended Skill Level
Intermediate

Comments

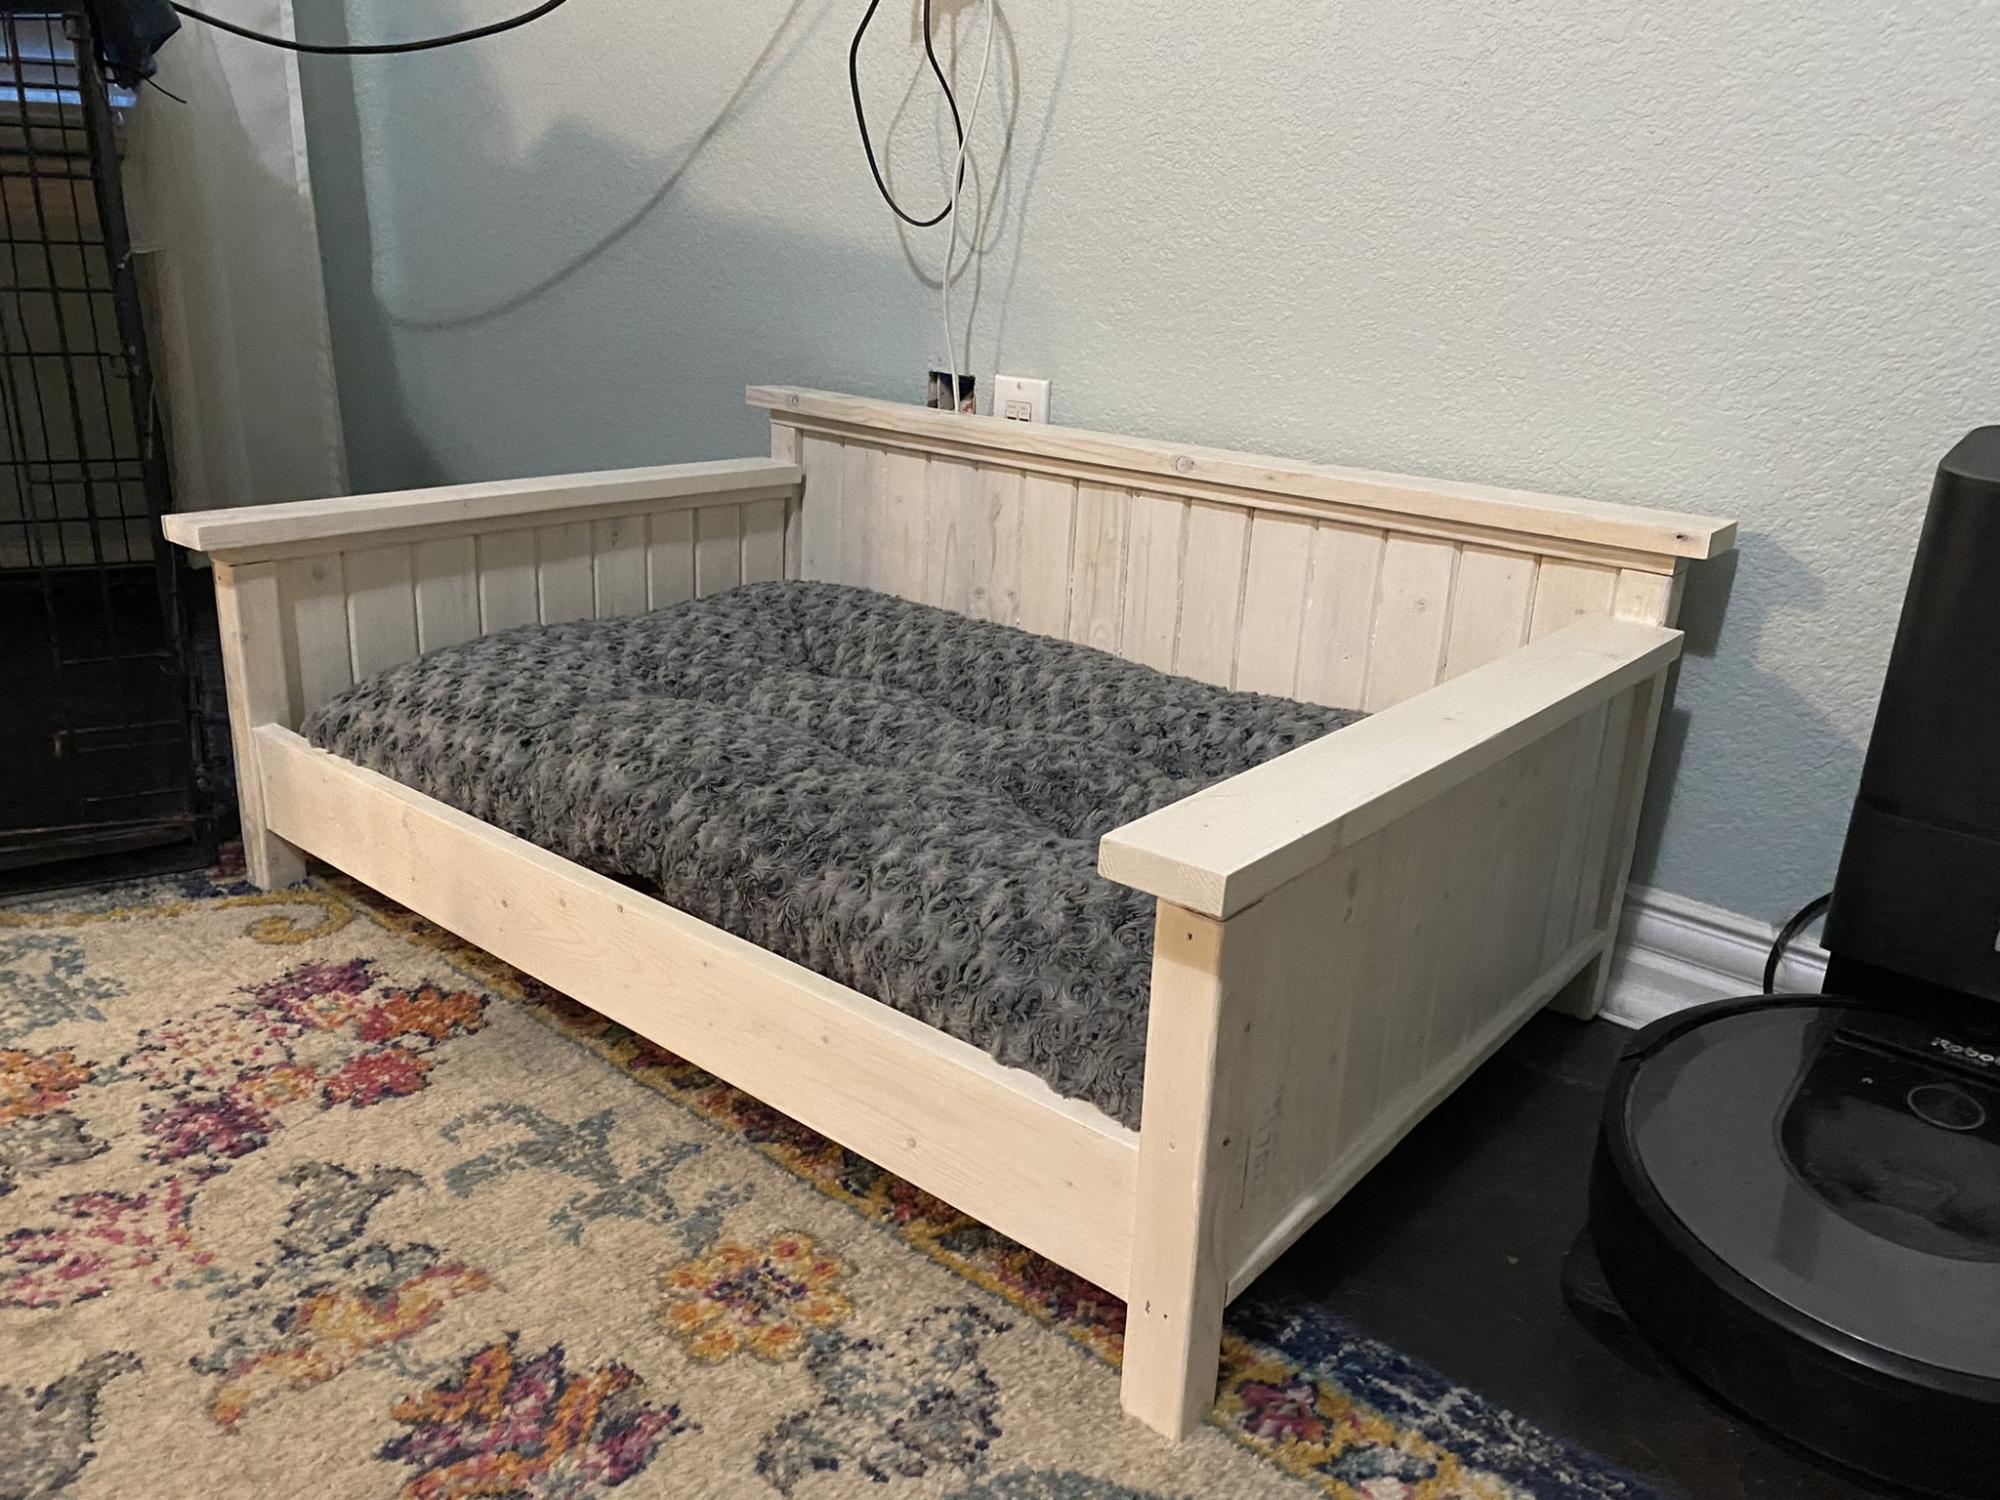
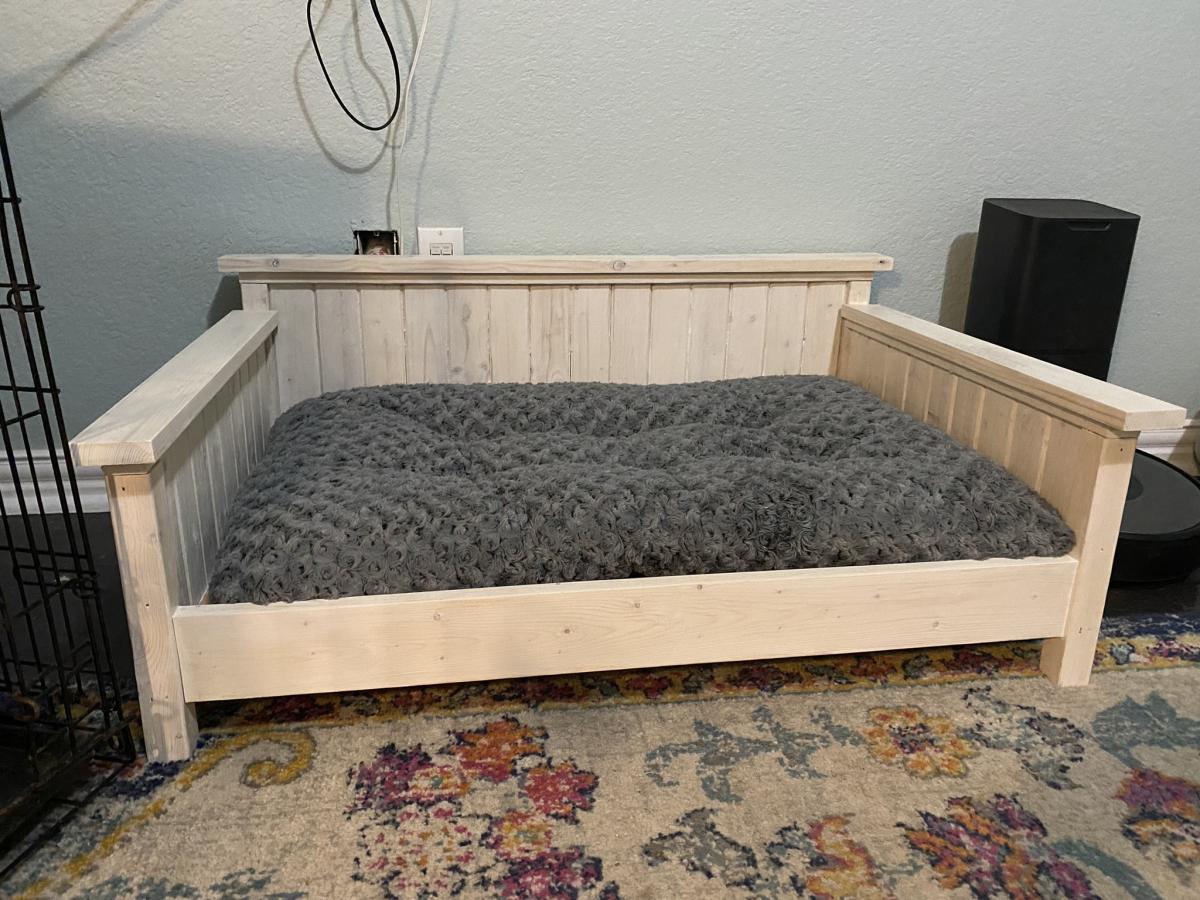
Farmhouse Doggie Daybed

Submitted by jkjackson on Sun, 04/24/2022 - 18:42

This was adapted from the Farmhouse bed plans to match our king size farmhouse bed.

Comments

clubhouse loft

Submitted by oterojaime on Mon, 10/26/2015 - 05:26

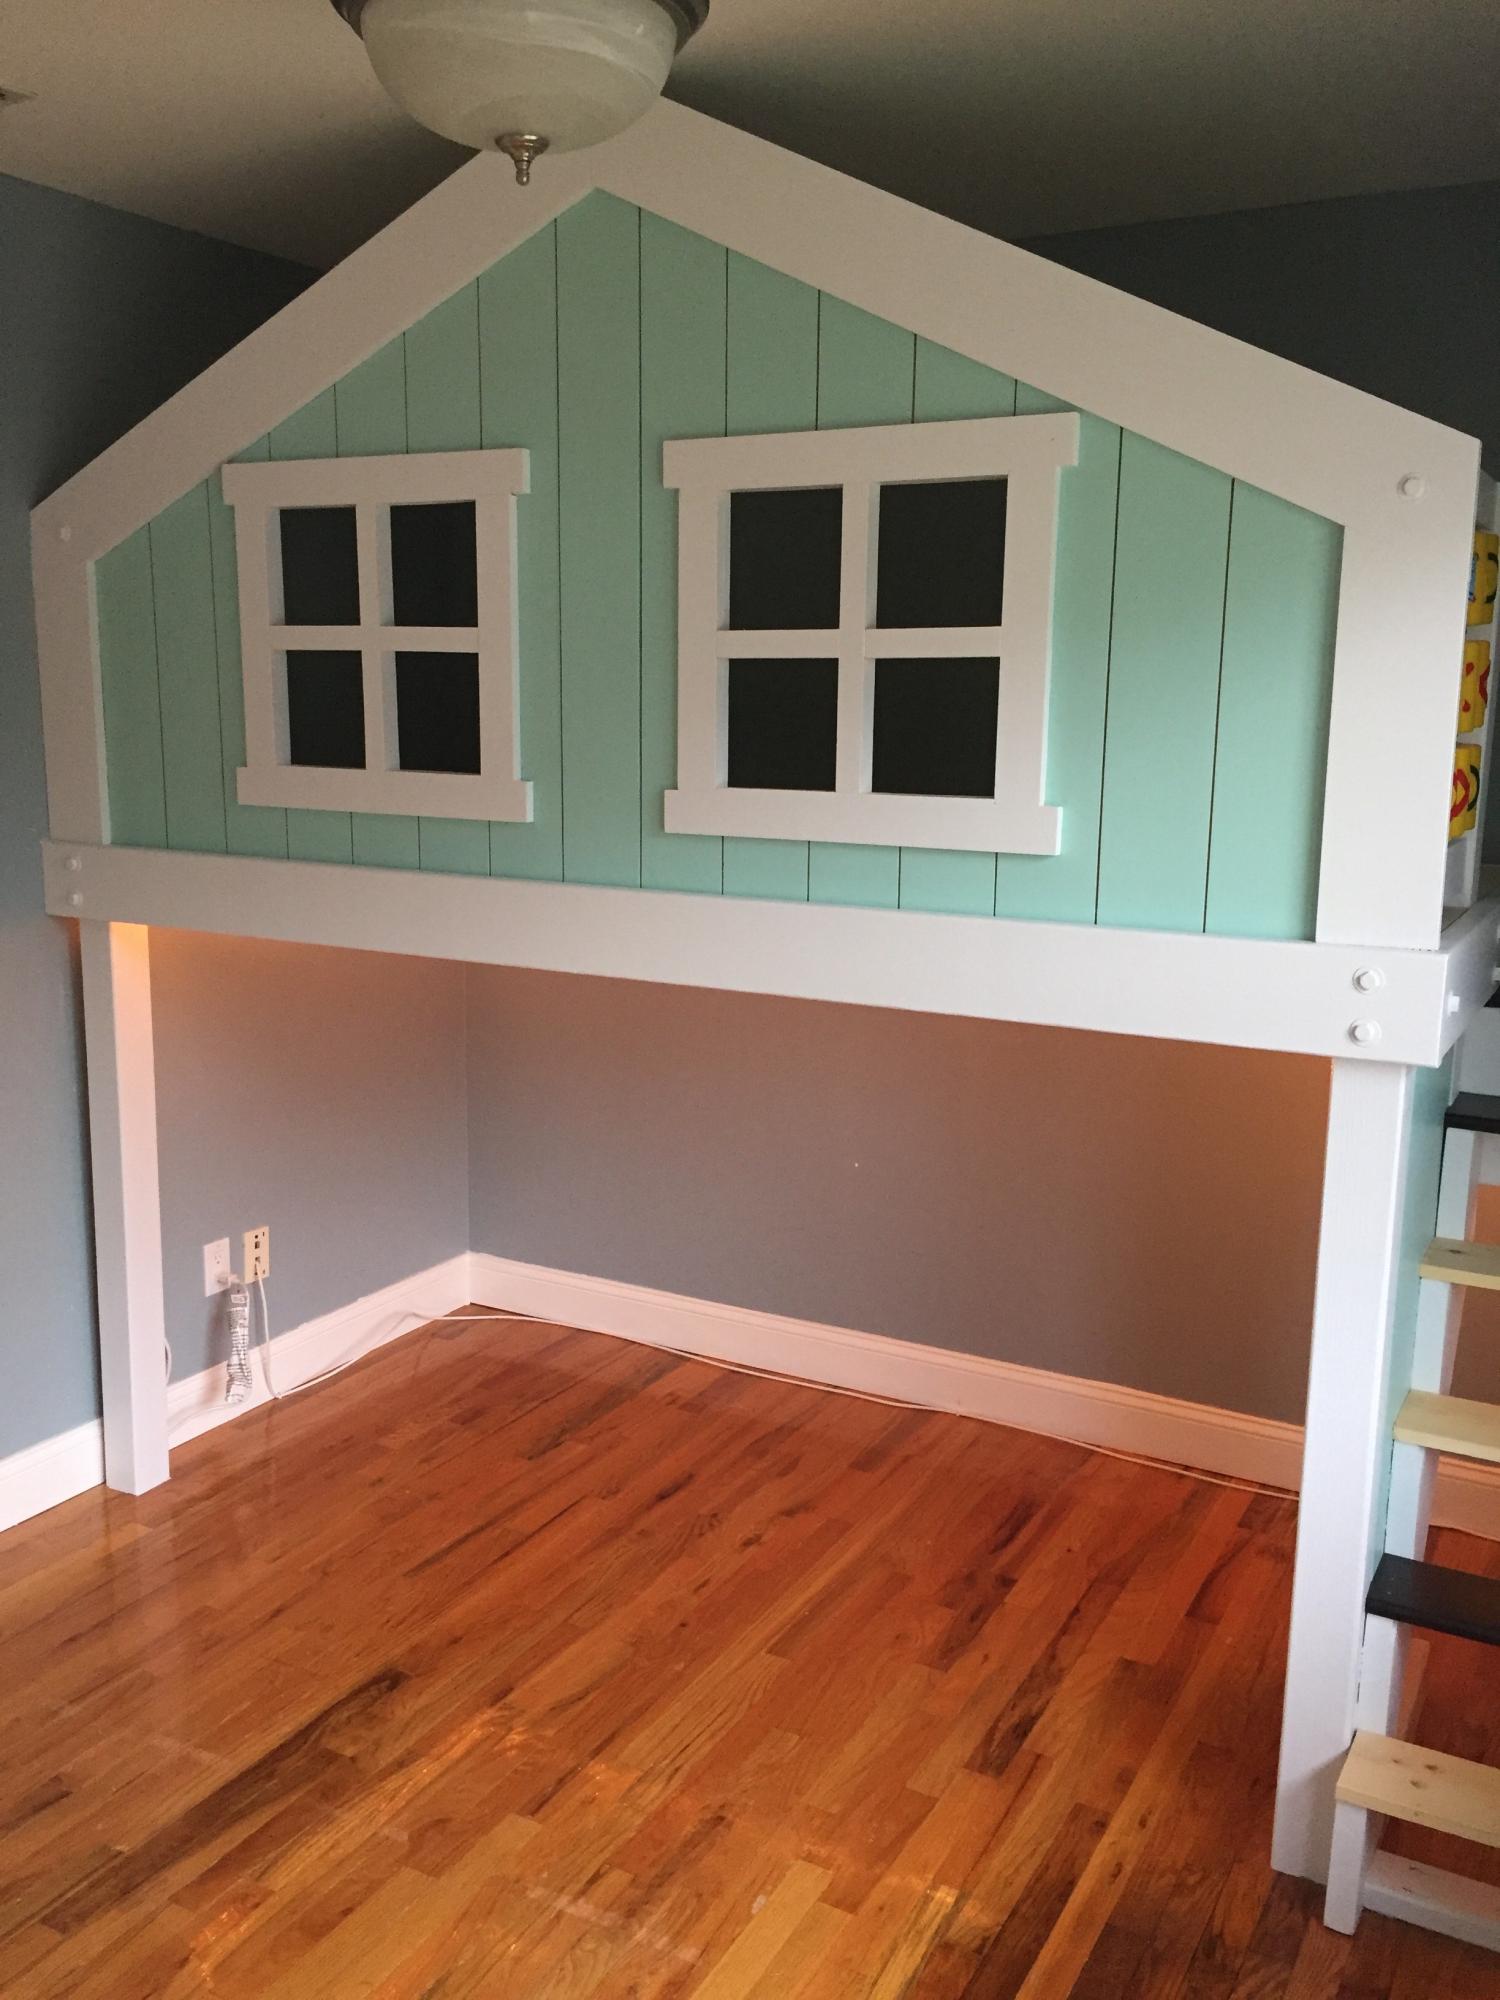
This is just a loft I made for my kids. I didn't want to spend over $1500 at PBK for a twin bed size bunk bed. the size is 4x8 enough for them to have fun.

Built from Plan(s)
Estimated Cost
350
Estimated Time Investment
Week Long Project (20 Hours or More)
Recommended Skill Level
Intermediate

Butternut Coffee Table

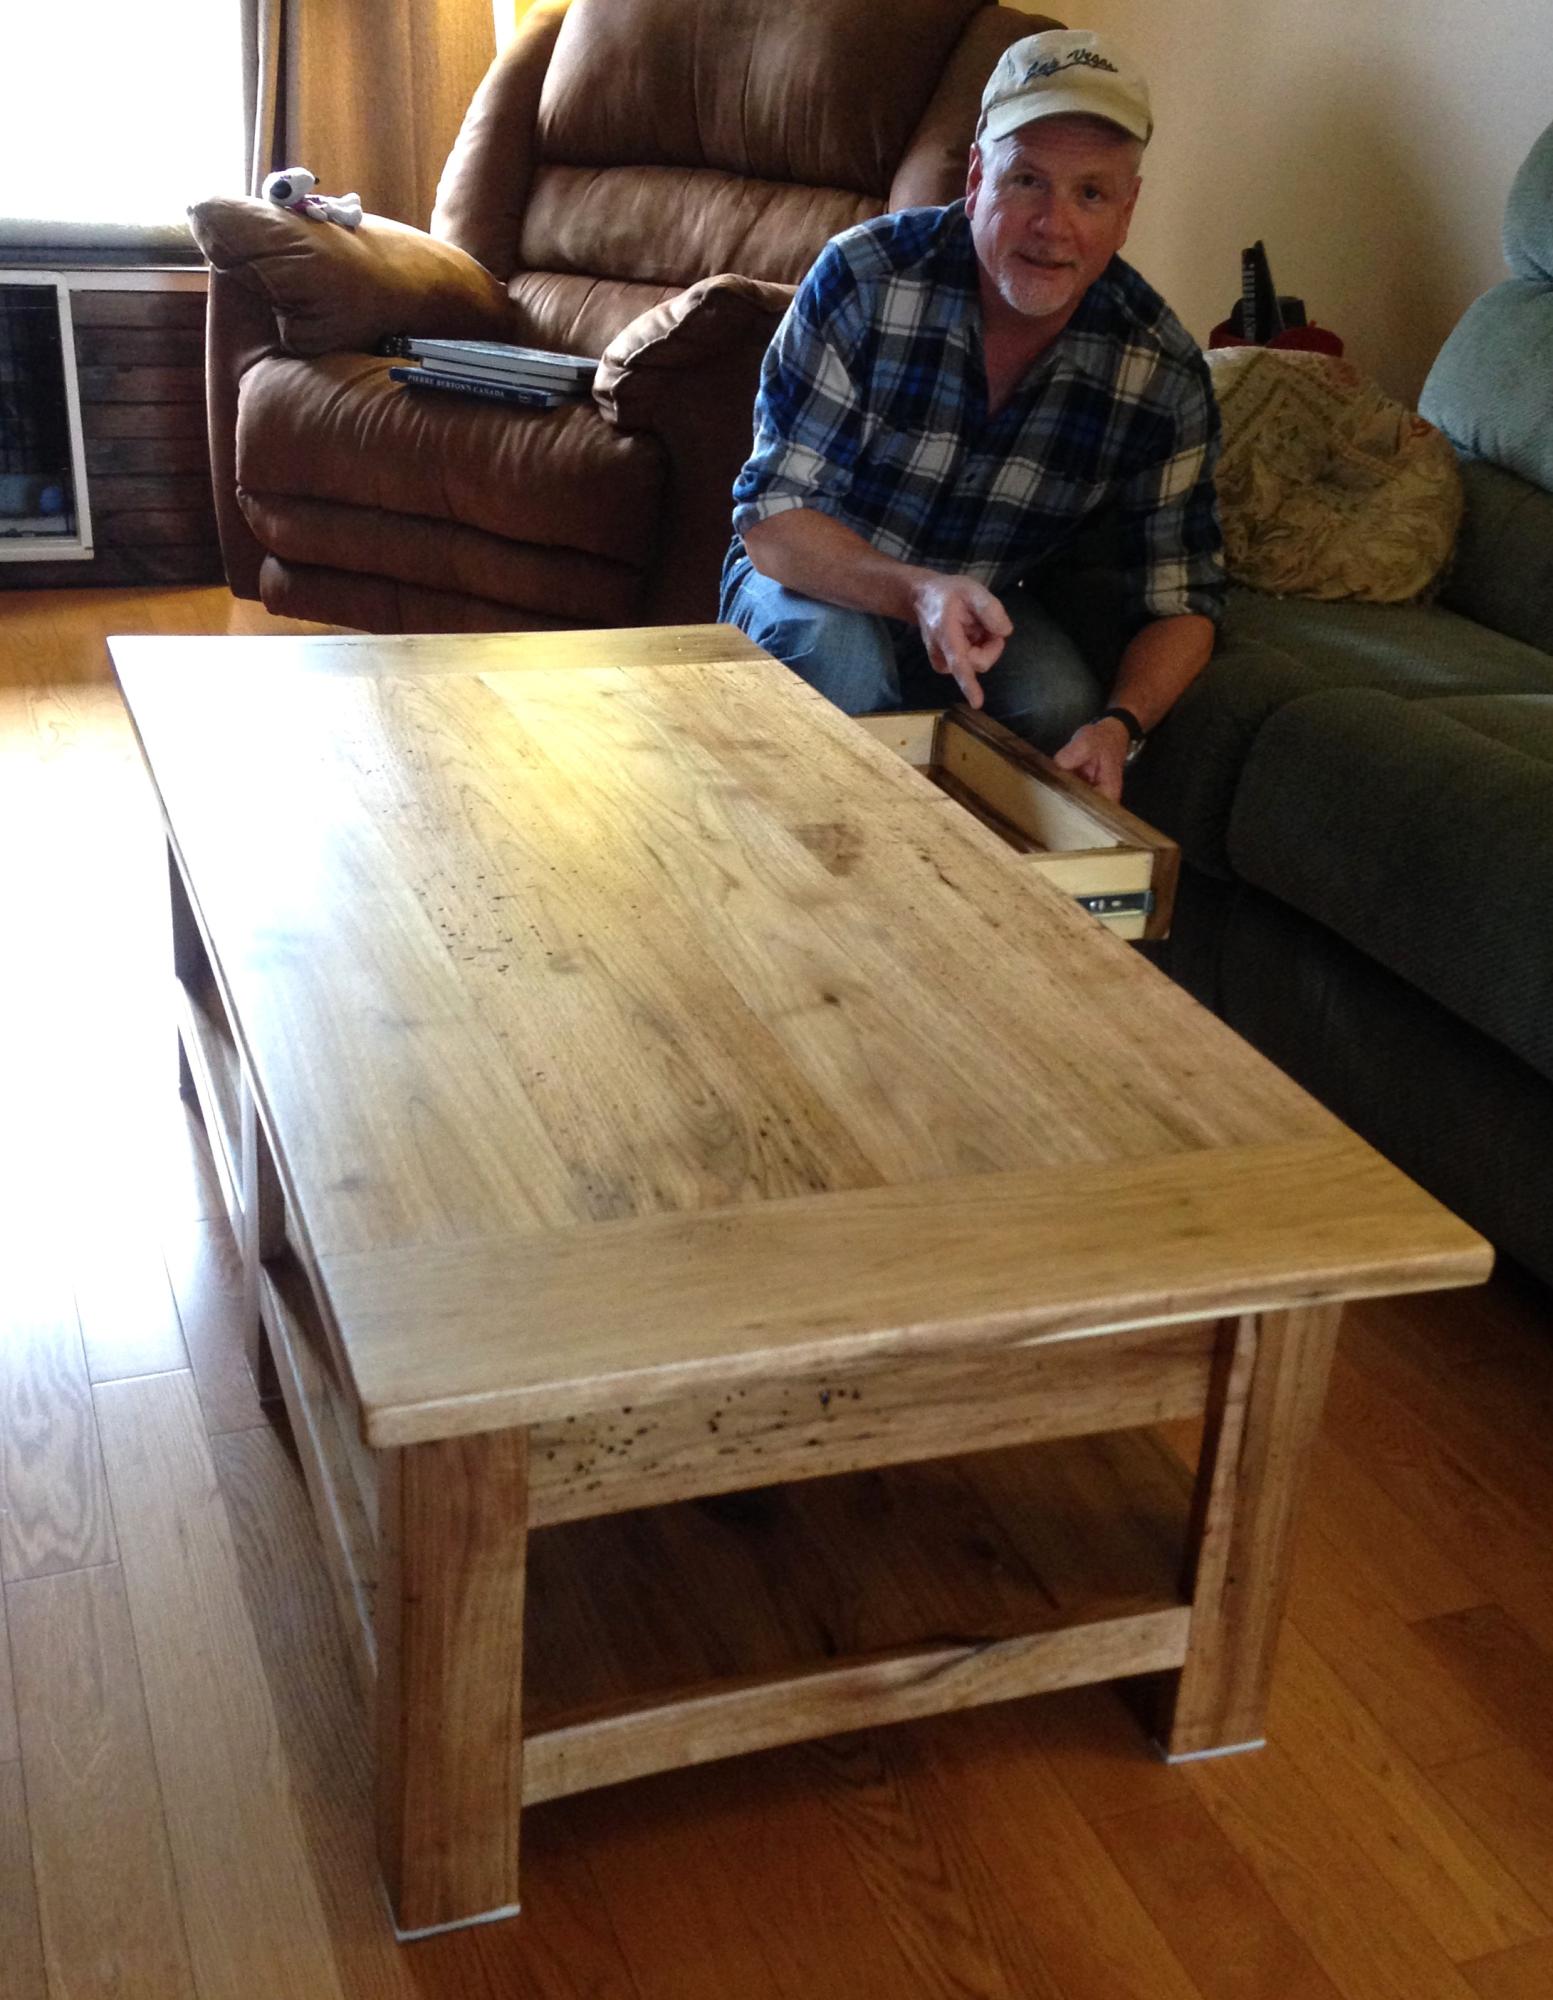
Submitted by jsliter on Sat, 11/14/2015 - 08:49

I built this table out of really rough old lumber from our family farm.  Lots of sanding and a real rustic look.  Thanks for the plans!  I love it!

Estimated Cost
$100
Estimated Time Investment
Week Long Project (20 Hours or More)
Finish Used
Oil finish - after drying, used three coats of Clearcoat - satin.
Recommended Skill Level
Beginner

DIY Potting Bench

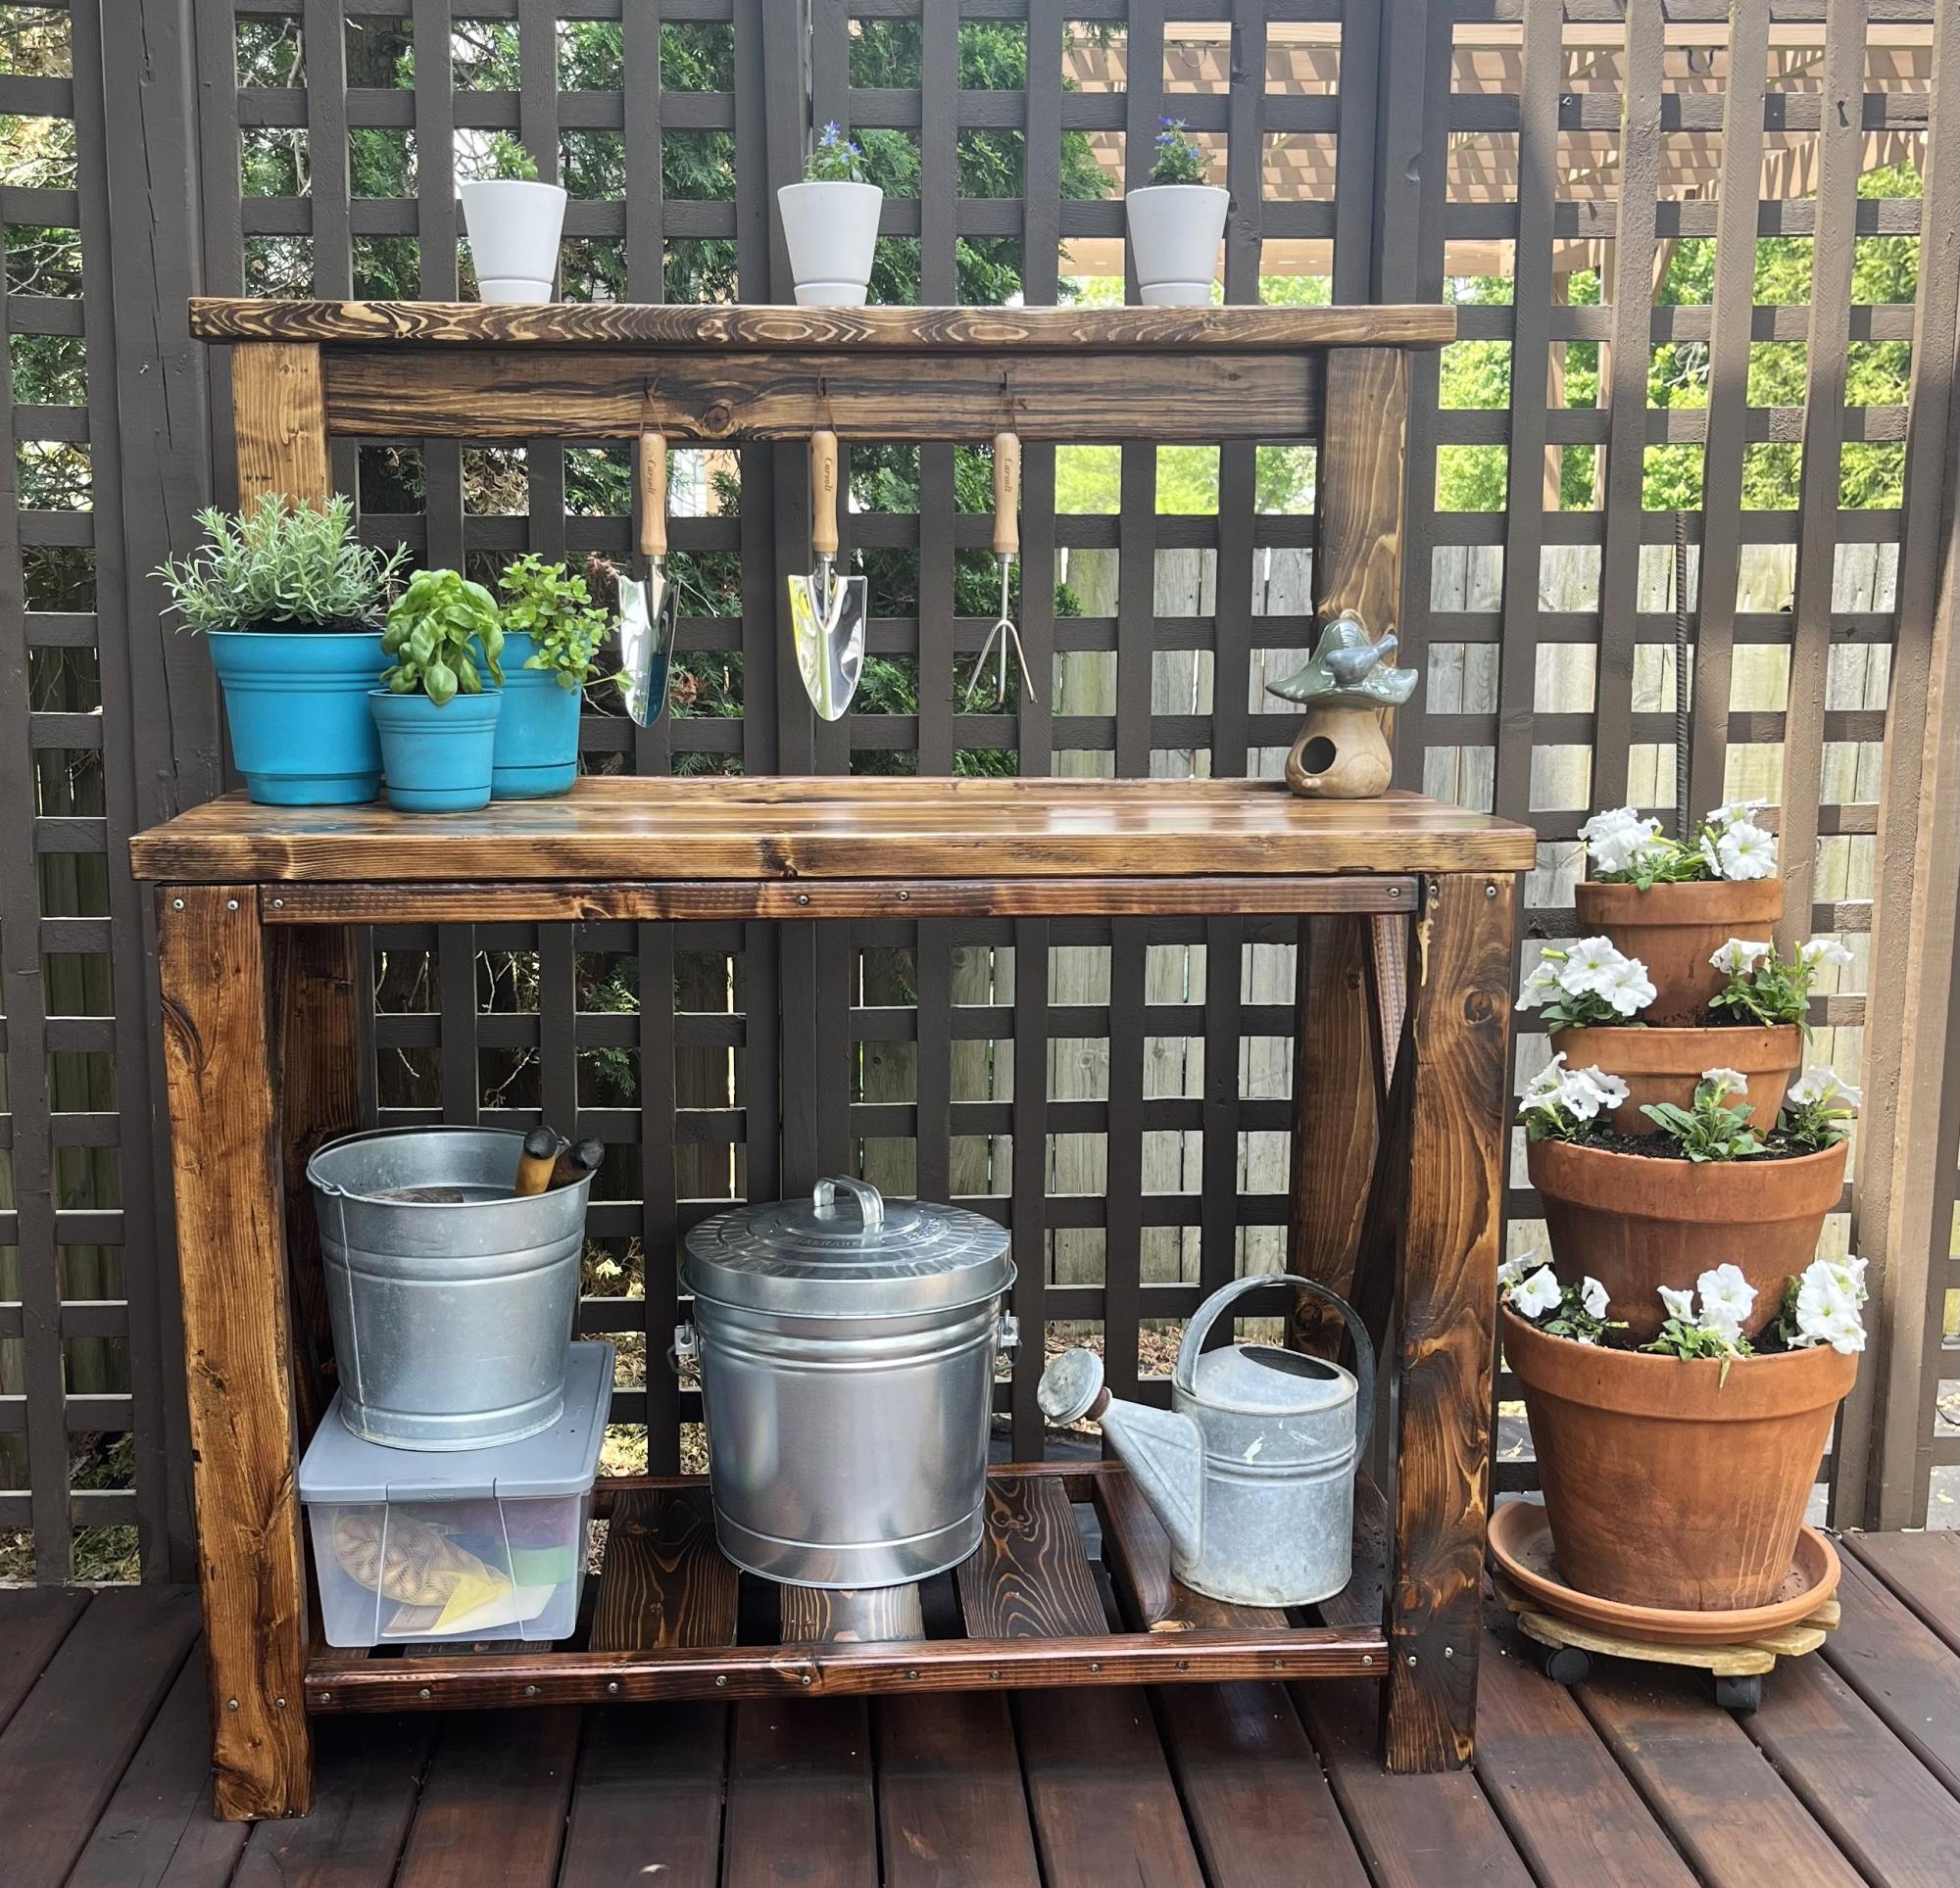
Submitted by Anonymous (not verified) on Sun, 07/02/2023 - 11:37

Such an easy build with a little woodworking experience. I am in love with this project and am so excited to have done it myself!

Amy

Built from Plan(s)

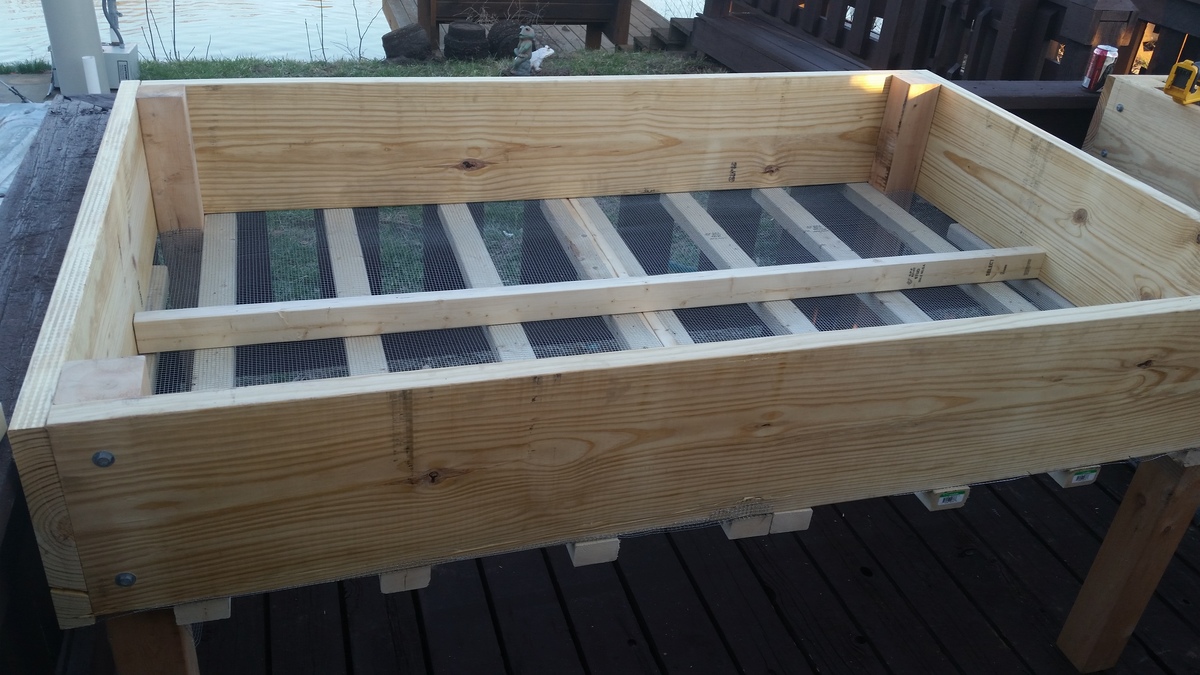
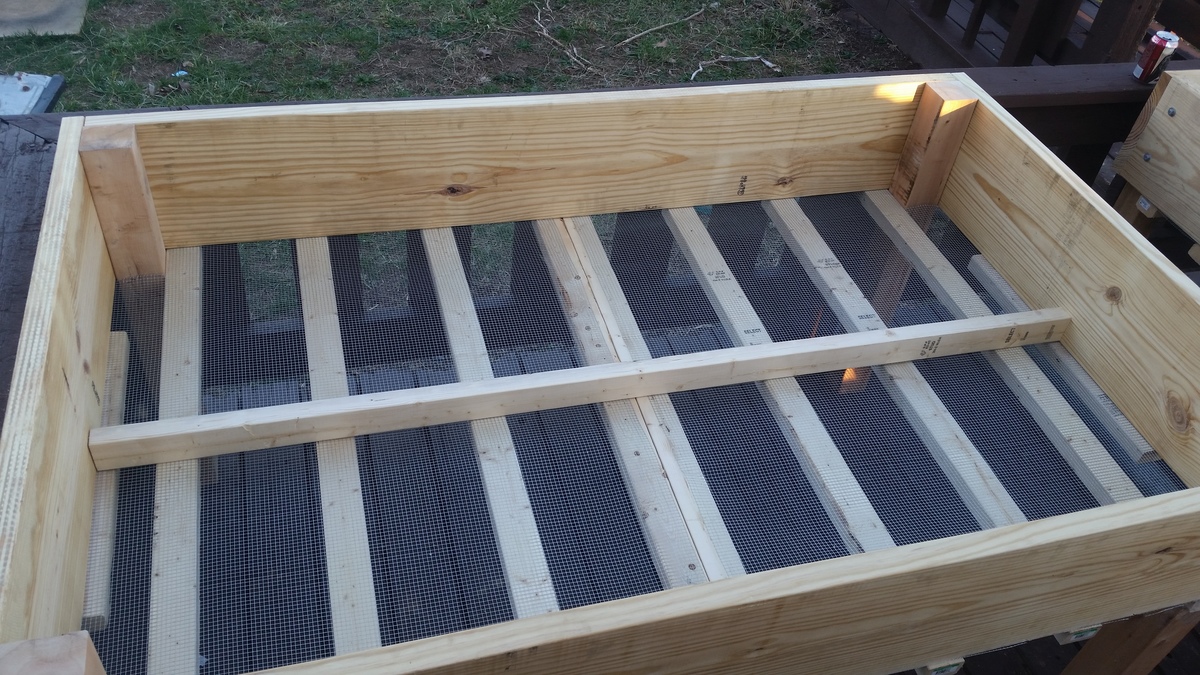
counter raised beds

2 - 2x12x8

2 - 2x3x8

2 - 4x4x8 (cedar, fur is cheaper and will work fine also)

16 - 5/16x4 lag screws 

16 - 5/16 washers

3x10 feet 1/4 hardware wire

20 - 3inch wood screws (outdoor rated, deck screws or the like) 

you will have left overs if you buy extra lags you can make some other boxes depending on how high you want these, or set them on ground without legs. and use the wood screws 

Estimated Cost
$75
Estimated Time Investment
An Hour or Two (0-2 Hours)
Finish Used
no finish
Recommended Skill Level
Beginner

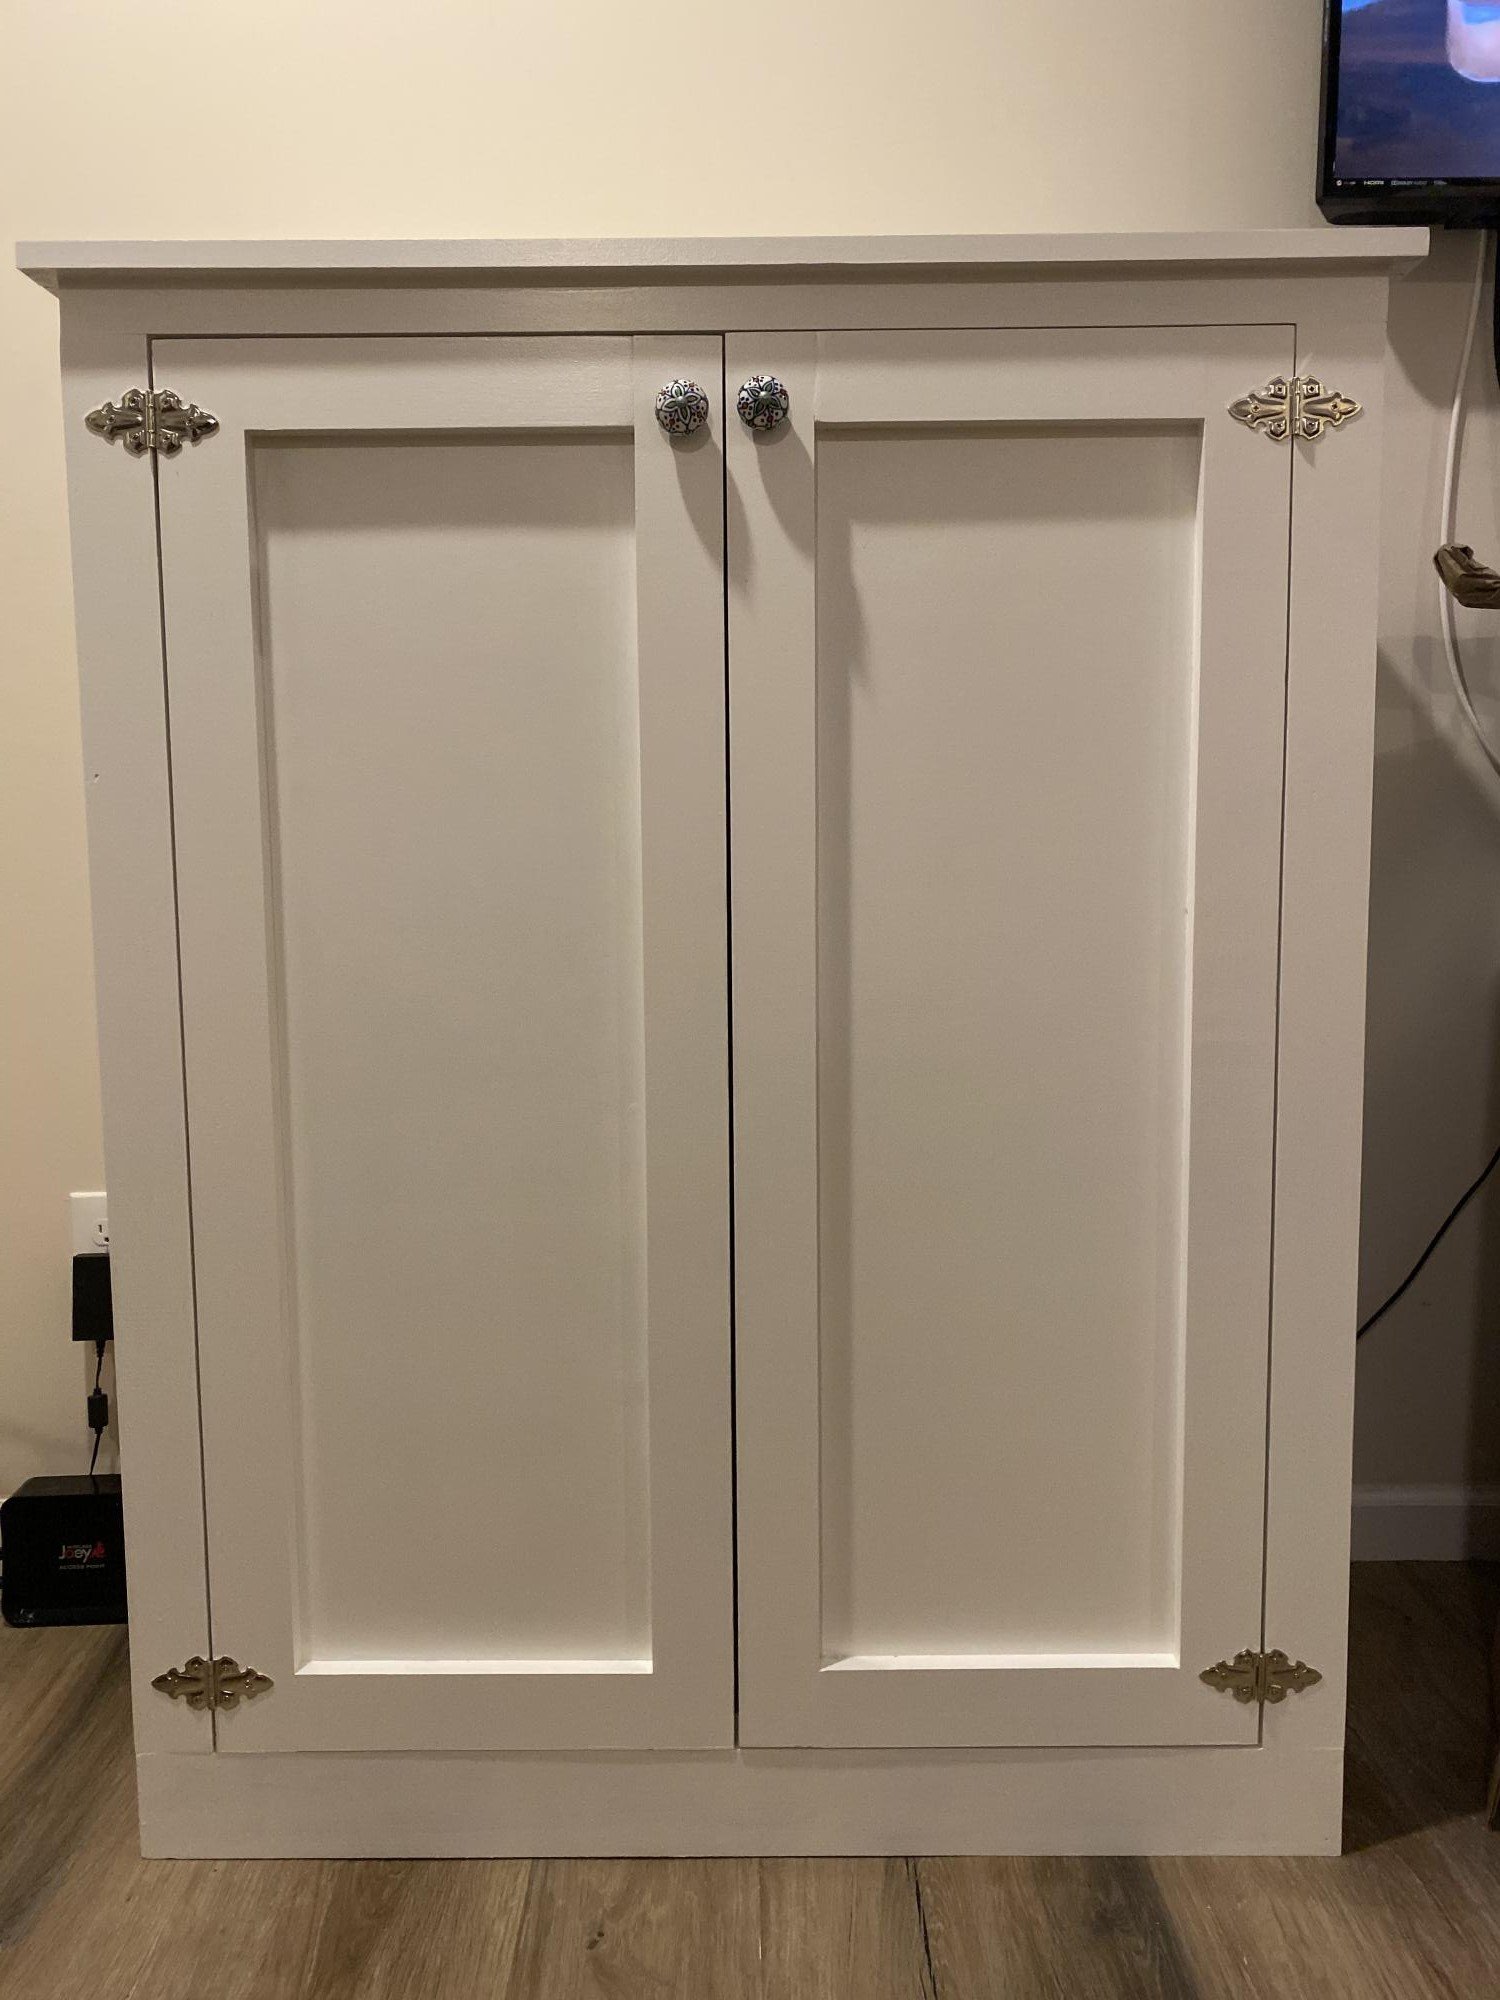
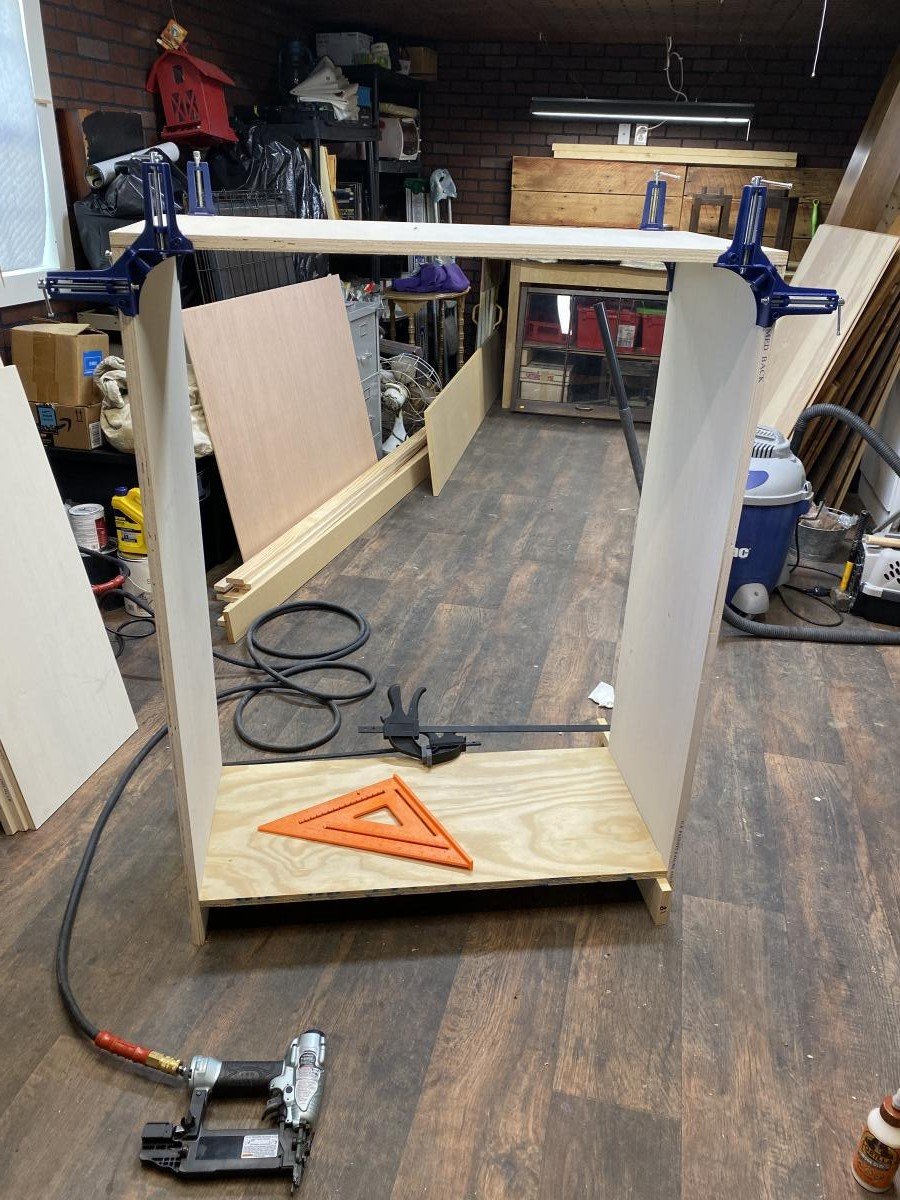
Storage cabinets

We needed extra storage in the living room and I didn’t want to pay mega bucks for our cabinet guy to make something I thought I could do. 
Its four ft tall, 3 ft long and 16 inches deep. I added 1x3’s to the sides and 1x4’s to the bottom.
I bought the Kreg shelf pin jig and it was super easy to use. Plan to use it again on a bigger project. 
Next is a fireplace and TV surround. 

Thanks Ana for the easy to follow plans!
 

Estimated Cost
$250-300. for both cabinets
Estimated Time Investment
Week Long Project (20 Hours or More)
Finish Used
Valspar cabinet paint in cream delight, applied with a sponge roller, 3 coats and sanded in between each coat. Knobs from Hobby Lobby and hinges from Hardware Source.
Recommended Skill Level
Intermediate