Community Brag Posts

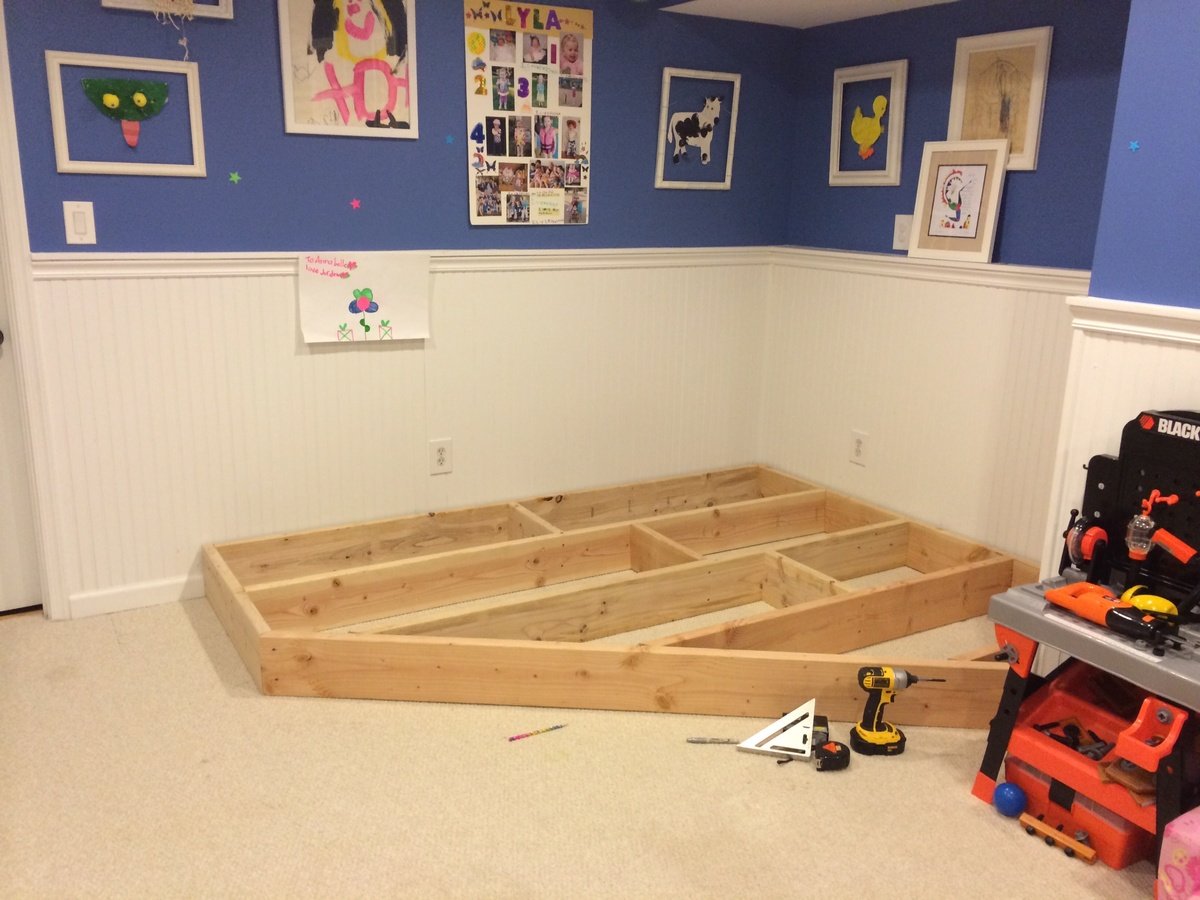
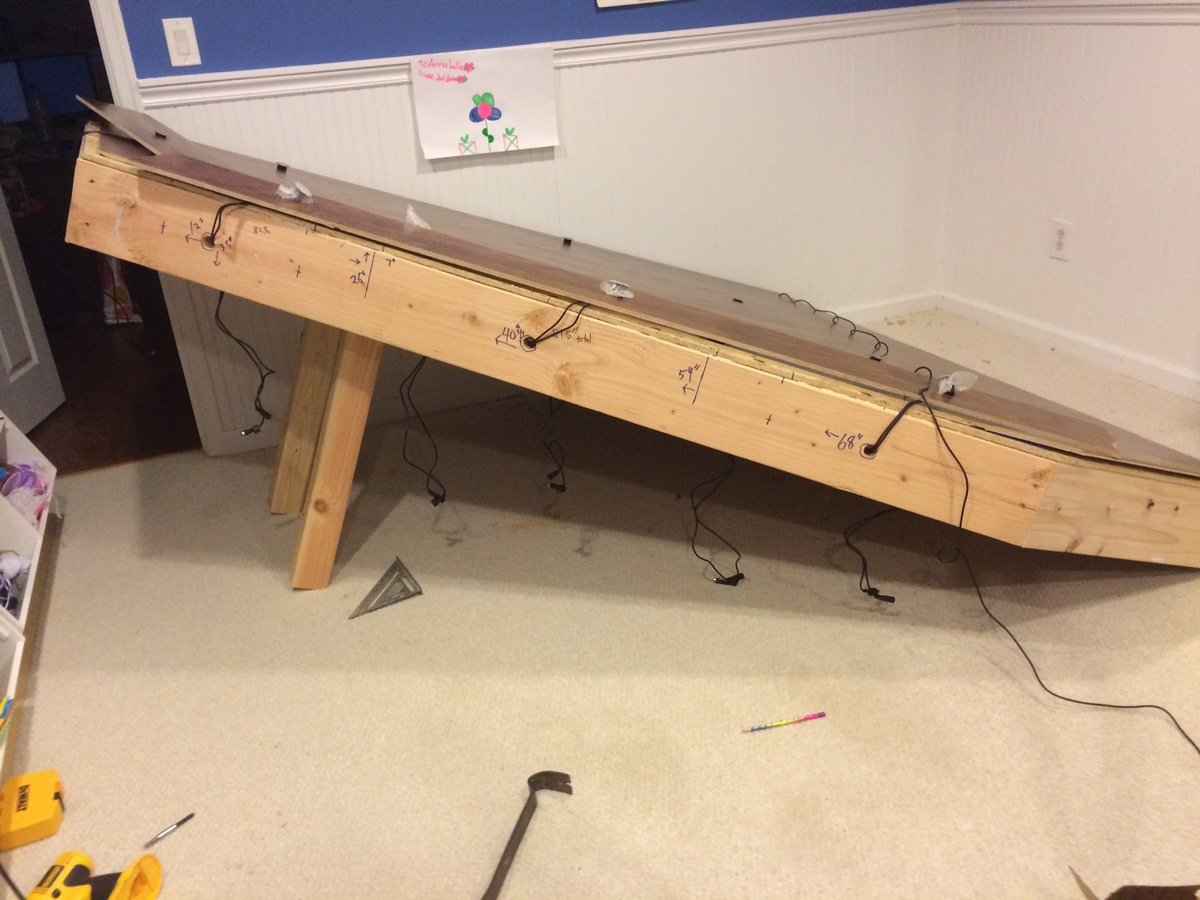
My first Chunky Build

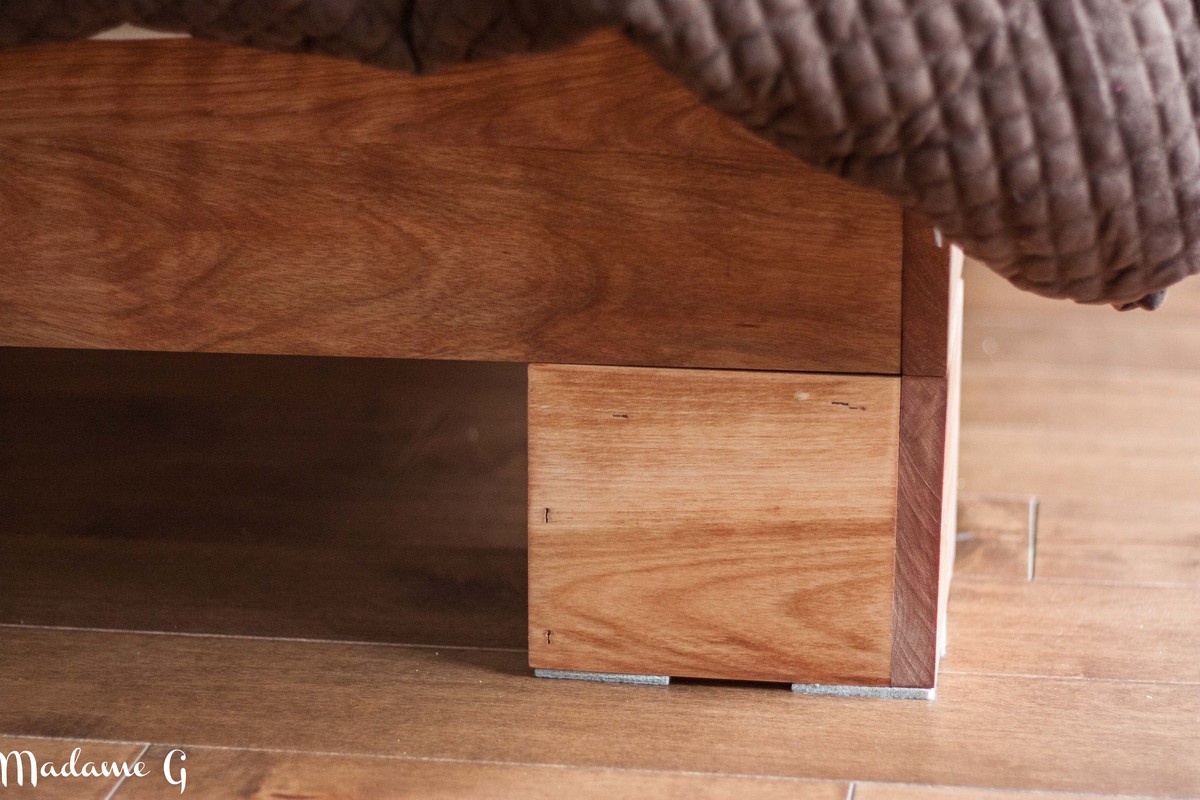
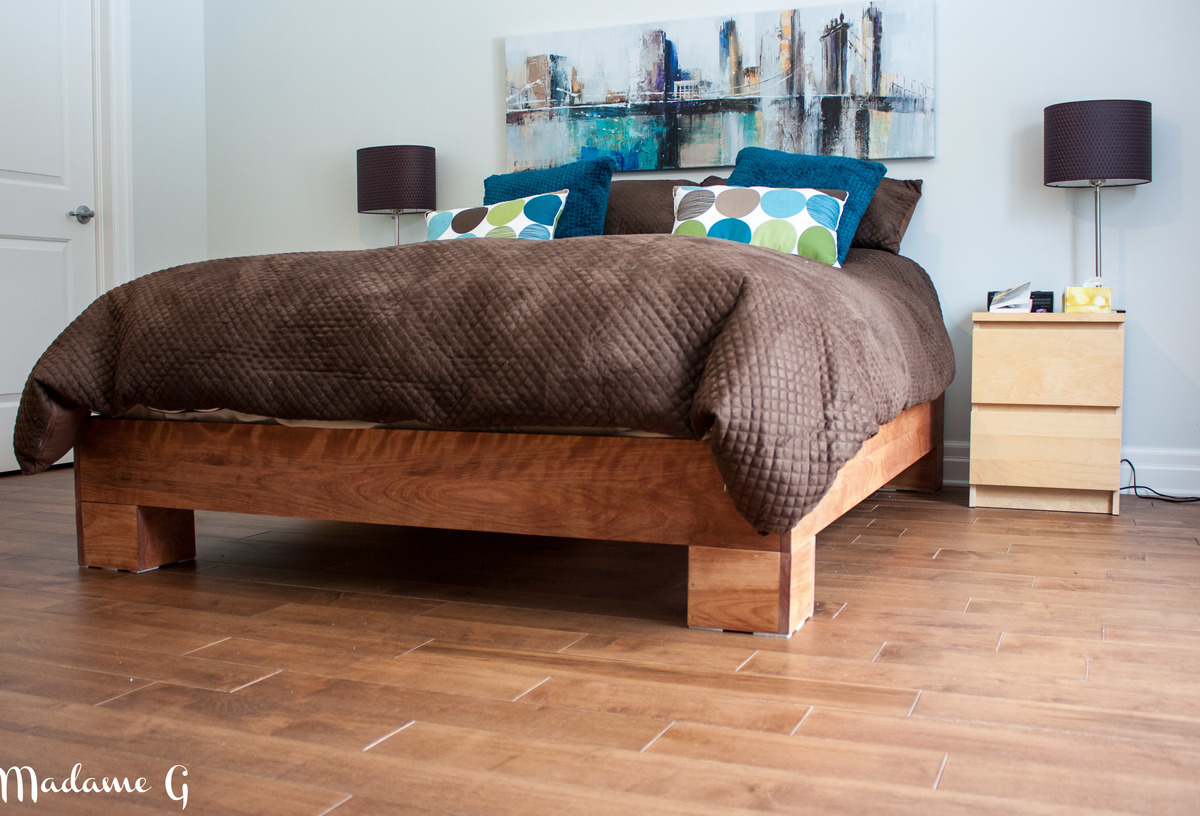
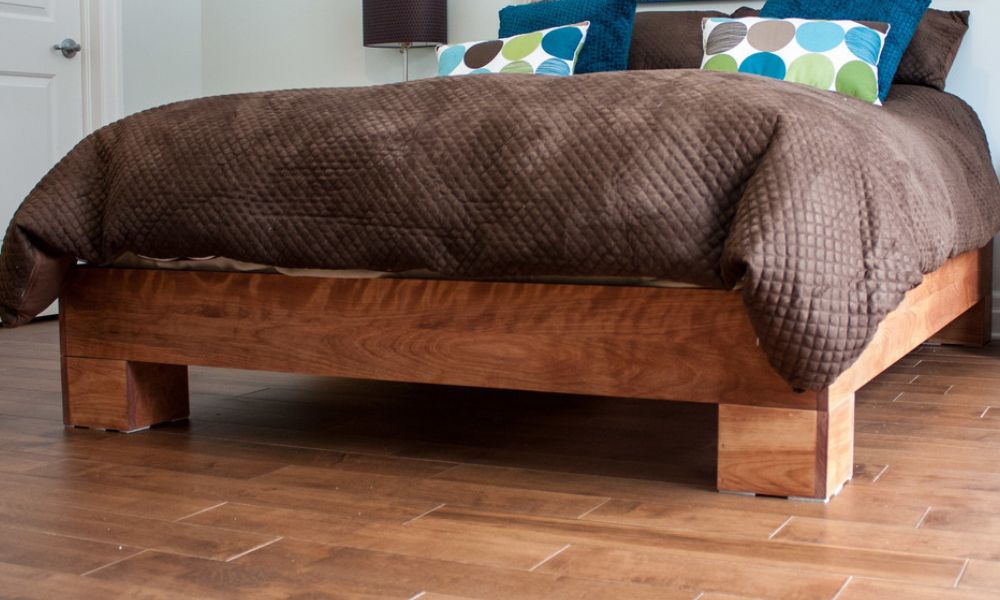
This is my first build and im really proud of it. We needed a new platform bed to fit our new matress! Yeah! a queen size bed! I discovered ana's blog and i got really inspired by all the projects in the blog! For the construction, i used birch for the showing parts, pine for side rails and center support and spruce for the slats. Actually, i haved cut de sides and builded the legs then i oiled evething before assembling. I used my Kreg Jig r3 to join the sides and i used a corner metal bracket to join the legs to the sides! Everything is attached from the inside, so no filler needed! I also decided to use 1x6 for the legs to get a taller bed. If you want your matress lower in the frame use 2x4 instead of 2x6 for the center support. Adjust de side rails to fit with the 2x4. Can't wait to build something new! FYI: I know my english is bad but its not my first language!Im french canadian!

Estimated Cost
250$ finishing oil included
Estimated Time Investment
Weekend Project (10-20 Hours)
Finish Used
Deftoil Danish oil finish color fruitwood
Recommended Skill Level
Beginner

Comments

Playroom Stage!

Submitted by kdins31 on Thu, 01/02/2014 - 09:48

I had a perfect corner in our playroom that was reserved mostly for clutter and always wanted to do something fun with it. The base is made with 2x8"s topped with Handscraped Hickory laminate flooring. Bored holes into the floor and installed 1" diameter color-changing LED decklights. Added theatre-style tracklights, disco ball and other dance floor lighting for extra effect. Of course the stage wouldn't be complete without wireless microphones for karaoke and mic stands hooked up to a small amp and speakers in the ceiling. I made the shelving on the right side with 1/2" black pipe and used leftover 2x12" shelves from an old garage shelving install from 7 years ago! The kids were ecstatic on Christmas morning for the reveal!

Estimated Cost
$125-150 for wood, flooring and moldings. Black pipe is very inexpensive.
Estimated Time Investment
Weekend Project (10-20 Hours)
Finish Used
Send me message if you'd like to know which products I used, e.g. mics, speakers, lights, etc.
Recommended Skill Level
Intermediate

Comments

Garofola2013

Wed, 04/16/2014 - 11:53

I would like to know which products you used...e.g. mics, speakers, lights, etc. We want to do this is in our basement =)

THANKS!

Snix26

Sun, 07/27/2014 - 15:52

This is great! I was just wondering what your dimensions were? I've been looking for something like this to do for my niece but have been struggling to find a plan and figure it out myself LOL.

kdins31

Tue, 08/05/2014 - 05:58

Hello, the back wall is 8' and side wall is 6.5'. The stage comes out about 2.5' on each side then the front is around 7'.

Hope that helps, good luck!

atilley

Tue, 11/18/2014 - 19:37


Great job!! can you tell me where you got the microphones and mic stands for this?


dmbphoenix

Sun, 04/10/2016 - 14:44

Actually, I was wondering ,what lights did you use? I'm working on a very similar project and was curious to the lights your used please.

Mls4460

Wed, 11/13/2019 - 09:53

Do you have the actual plans to build this?

I would love to copy this idea for my 4 year old!

Outdoor Canopy Daybed - First Project!

Submitted by Anonymous (not verified) on Fri, 07/28/2023 - 14:16

This was the first time I ever built anything - before this is hardly used a drill. It was big for a first build, and I did it entirely alone aside from a few text messages with questions. I added a couple little end tables to it for a book and a drink, and it’s now my favourite outside summer spot.

Facebook user @robyn.marie.3572

Built from Plan(s)

Jim's Corner Cupboard

Submitted by jimmyray7 on Fri, 04/22/2016 - 13:05

This was my first large build, and it went fairly well. A few little issues here and there, but I'm the only one who will notice most of them.

Built from Plan(s)
Finish Used
White Latex paint finished with Minwax Polycrylic (spray paint can - not recommended. Next time I'll brush or wipe on the poly).
Recommended Skill Level
Beginner

Shiplap Fireplace

Submitted by Anonymous (not verified) on Fri, 09/22/2023 - 08:13

So excited for my new living room space thank you for your great tips!

Kandis white DeCarlo

Comments

Bunk Beds with Trundle Bed for American Girl

Submitted by Klabadie on Sat, 02/22/2020 - 14:53

Followed Ana White's Doll Bunk Beds for American Girl and added a Trundle Bed using a few small modifications. Ana's plans were easy to follow and I was able to complete this in an afternoon. 

Estimated Cost
Free - used scrap materials
Estimated Time Investment
An Hour or Two (0-2 Hours)
Finish Used
Rustoleum Aged Gray Chalk Paint
Recommended Skill Level
Beginner

Kiddo Closet Organizer

Submitted by craw4dz on Thu, 02/27/2020 - 11:51

My daughter's closet was a nightmare and helter-skelter with a lot of wasted space after we moved into our house.  So I decided one day I was done with the mess and built this to suit her needs.  I used 3/4 plywood, closet rods cut to size, and adjustable shelving.  When she's bigger, I can pull the shelves out if needed for taller closet hanging but for now this works pretty good.  She's kept it pretty clean 3 years later. 

Built from Plan(s)
Estimated Cost
$65
Estimated Time Investment
Day Project (6-9 Hours)
Finish Used
Basic white paint
Recommended Skill Level
Beginner

Laundry Dresser foling area and hanging shelf

Submitted by sandrabees on Tue, 06/19/2012 - 13:15

more details on my blog. I built 2 of the laundry dressers. adjusted the placement of my baskets due to restrictions in the overall height of my unit (I have a ironing board cabinet built into 1 wall that I still wanted to be able to open and use :) I used MDF, but it was a bear to work with and next time I would spend the extra $$ on birch. i painte the bottom in a semi gloss. and plan to add the doors (which will have a beadboard backing) they will be painted white with a dark walnut glaze. The top and shelf /brackets are all done in a distressed finish with ebony and mahogany stain mixed then 2 coats of poly very sturdy even filled!

Built from Plan(s)
Estimated Cost
$140
Estimated Time Investment
Weekend Project (10-20 Hours)
Finish Used
white semi gloss paint, (will be glazing with dark walnut as well),
Recommended Skill Level
Beginner

Comments

Sherice

Tue, 07/15/2014 - 20:27

Very cool rendition of the original plans. I like the folding area, awesome job!

thewife

Fri, 06/26/2015 - 00:00

I have been wanting to make the laundry basket dresser but am holding off because we are moving. What color did you us on the walls, I love it.

2x4 Outdoor Sectional with Matching Ottomans, Chairs & Table

Submitted by cqueiruga on Fri, 06/12/2020 - 21:01

We were looking for outdoor furniture for our deck, and for the size and amount we needed it would have cost us at least $2000. We really like the idea of having an outdoor sectional that we can also use for dining, and we had trouble finding a set we liked. We found Ana's plans for the 2x4 Outdoor Sectional, and i loved the look. After seeing what others have done with the plans, I thought I would be able to modify it to get everything we needed for much less cost than buying a set.

We ended up extending the size of the 2x4 outdoor sofa by one 24" section, for a total length of 96". I then used the same design to make two outdoor chairs, just reduced the length to 24". I modified the 2x4 outdoor coffee table plans to create two ottoman's that can be moved around to make the seating more lounge style Finally, I modified the coffee table plans to make a 5 foot outdoor dining table. All in all, it took about a week and I couldn't be happier with how it turned out!

Estimated Cost
$800 ($200 for wood, $600 for cushions)
Estimated Time Investment
Week Long Project (20 Hours or More)
Finish Used
Valspar Semi-Transparent Antique Oak Stain
Recommended Skill Level
Beginner

Comments

jwood4

Mon, 08/02/2021 - 09:44

Looks amazing! What method did you use (pocket holes, dowels, deck screws, etc) to join the visible portions like the arms?

Simple Outhouse

Submitted by Anonymous (not verified) on Thu, 06/18/2020 - 13:45

We used the plans from the Simple Outhouse to make a space to hold our porta potty. The door is a repurposed barn door and I think it looks amazing! These plans were perfect for us as we were able to build it in panels and reassemble on our property by the lake. Some screened windows to allow for ventilation and light were the finishing touches. Thanks Anna for the simple to follow plans!

Built from Plan(s)
Estimated Cost
$200 Canadian
Estimated Time Investment
Weekend Project (10-20 Hours)
Finish Used
We used pressure treated wood for the base and deck. For inside, we repurposed some scraps of composite decking. Painted with exterior latex "driftwood".

Corner computer cabinet

Submitted by Anonymous (not verified) on Thu, 09/22/2016 - 11:23

Flip down tray added for computer keyboard.

Built from Plan(s)
Recommended Skill Level
Beginner

Comments

hidden powder station dresser

We did some small edit to the original plan. Putting six large drawers and only one chair which was moved to the center. We also extended the chair legs the full length of the cabinet. The outer legs are 2x2s instead of 2 1x2s since no chairs were placed there.

Built from Plan(s)
Estimated Cost
400
Estimated Time Investment
Week Long Project (20 Hours or More)
Finish Used
minwax early american on everything and then red oak stain on all except the drawer fronts and the red oak chair legs. Finished with an oil-based satin polyurethane.
Recommended Skill Level
Intermediate

Cedar Planter for Pole Beans

Submitted by swhitead on Mon, 07/20/2020 - 10:41

Increased width of box to 46" by using 8 fence boards instead of 3. put base at 12" down, lined box with landscaping fabric to hold dirt. Created trellis with 1x2 boards with 10" long corner braces, spaced screws 6" apart around edges and weaved cotton thread to create the trellis. Used 12" scraps of 2x2 to create a "slot" inside the center of the planter to support the trellis. Added container mix and green pole beans started in egg cartons earlier in the spring.

Built from Plan(s)
Estimated Cost
$35
Estimated Time Investment
Day Project (6-9 Hours)
Finish Used
None
Recommended Skill Level
Intermediate
Seasonal And Holiday

Very easy garage shelving

Submitted by Anonymous (not verified) on Sat, 11/05/2016 - 23:22

Wanted some easy storage shelving that didn't break the bank.  These were perfect!  $79 is what it cost for ours (which includes the $20 Kreg Jig).  Lumber was only $58.68 and I bought and extra 8 foot 2x4, so it could have been slightly cheaper!  

Estimated Cost
$60 for lumber
Estimated Time Investment
Afternoon Project (3-6 Hours)
Finish Used
Boxes, Totes, camping equiptment
Recommended Skill Level
Beginner

A More Traditional Modern Craft Table

Submitted by Anonymous (not verified) on Thu, 01/26/2017 - 18:37

This is my more traditional take on the modern craft table (I guess that means it isn't technically "modern"!).  We call it the "Lego Table" at our house.  I doubled up the ends like others have so that my two daughters can have their own sides.  My wife asked that the there be backs on the side shelves so that items aren't pushed off.   I also added trim around the tabletop and molding to give it a bit more traditional appearance.  Finally, I made the shelves adjustable.  

Built from Plan(s)
Estimated Time Investment
Week Long Project (20 Hours or More)
Recommended Skill Level
Intermediate

Nesting Grill Station

I was tired of seeing my propane bottle on the porch and this project was a perfect blending of camouflaged storage with lots of potential countertop workspace. My grill station is smaller and shorter than the original plans to better fit our family size and the porch space we have available. My husband has a bandsaw mill. When he was milling boards this fall, I asked for some 1/2" thick planks just for this project. I also had the knobs and wheels leftover from past salvaging work. I have been trying my best to use up "stock on hand" during this pandemic. Though I spent some time sanding the rough cut lumber, it still absorbed lots of stain. I wanted two tones of color, so that's good, but I still had to mix two stains together to have enough for the lighter parts.

Now we are looking forward to some cold weather BBQ meals!

Estimated Cost
$10 for screws, all else salvaged.
Estimated Time Investment
Weekend Project (10-20 Hours)
Finish Used
I stained the wood before joining it together so the two shades of stain wouldn't run together. For the darker parts I used Minwax Red Mahogany. On the lighter parts I mixed Minwax Early American with Natural (because I was running out). After staining I put the table together and finished it with Minwax Polycrylic, until that ran out, then Bona Mega satin floor finish. I put three coats of finish, sanding between coats.
Recommended Skill Level
Intermediate

Comments

mamasue72

Tue, 07/04/2023 - 08:38

Love this size. My deck is small so this is perfect. Thank you for posting the brag😊👌

13 ft Community Farm Table with extended Trestle base

Submitted by Anonymous (not verified) on Tue, 02/21/2017 - 18:43

Began with supplied DIY plans from the www.ana-white.com and slightly modified them based on the length and width of the table. Table now resides in Haddon Twp, NJ as a community farm table for a small local business. The plans provide the foundation and cut list and depending on your experience, comfort level, and tools it is fairly simply to elaborate, expand, and modify.

Built from Plan(s)
Estimated Cost
Base cost $250 - materials, hardware, paint, finish, sandpaper
Estimated Time Investment
Weekend Project (10-20 Hours)
Finish Used
gloss black and clear poly seal
Recommended Skill Level
Intermediate
Back