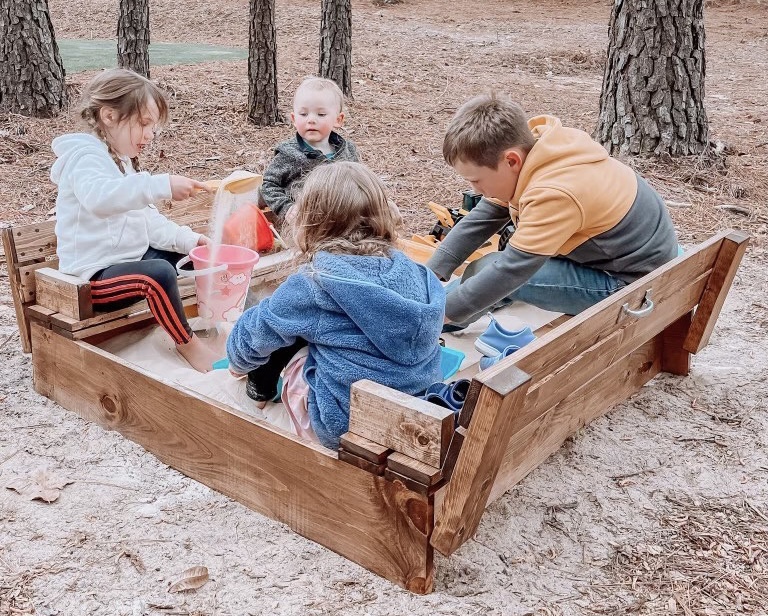
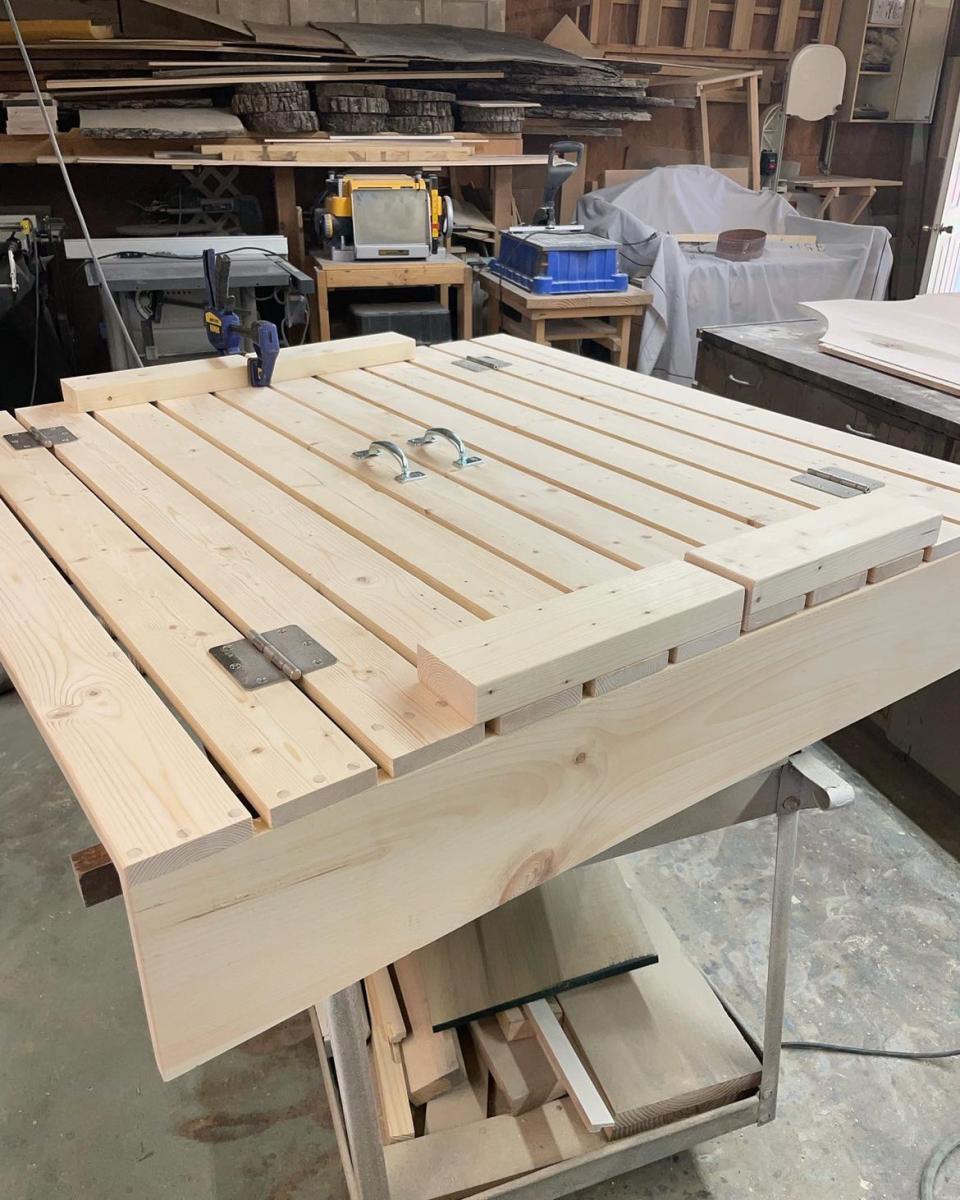
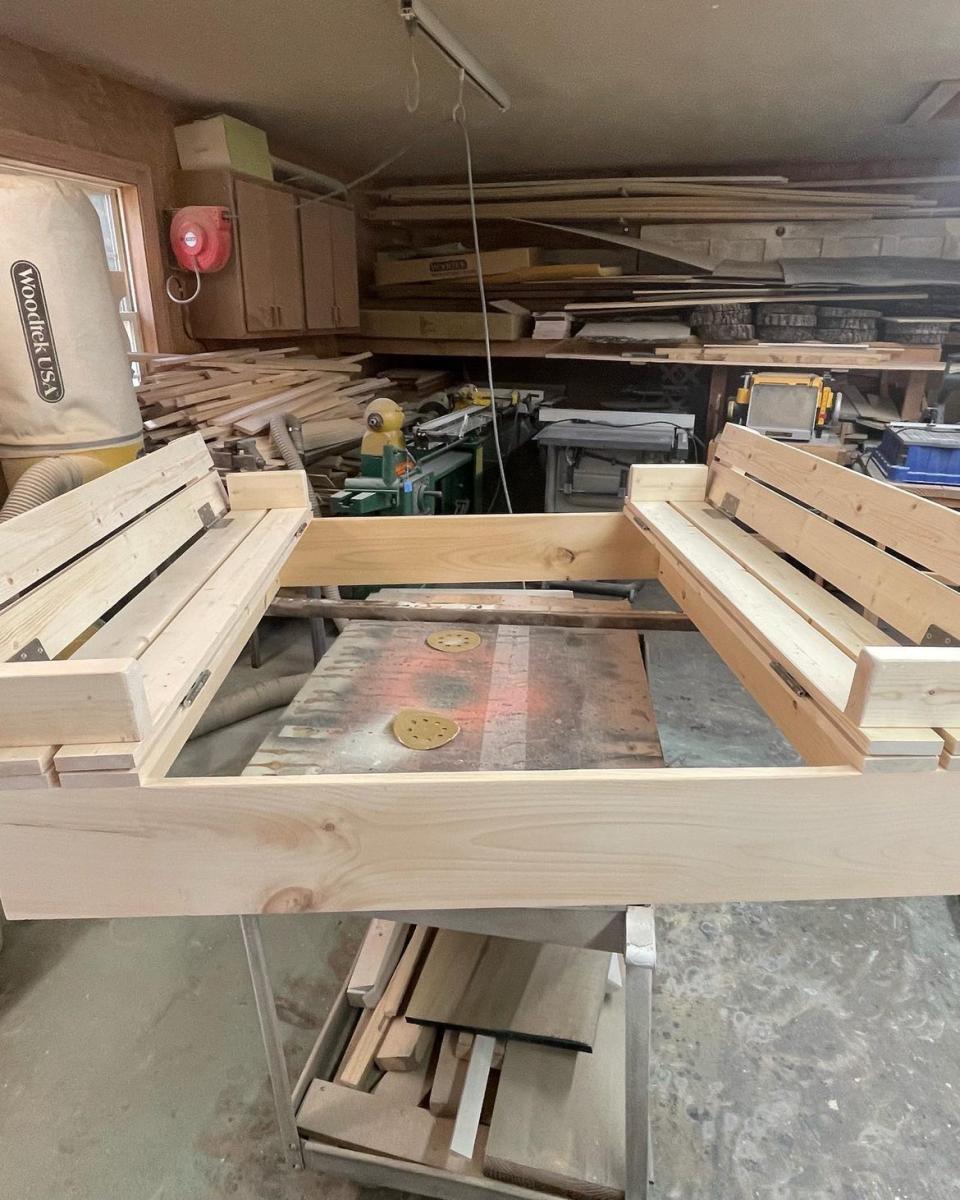
Chicken Coop
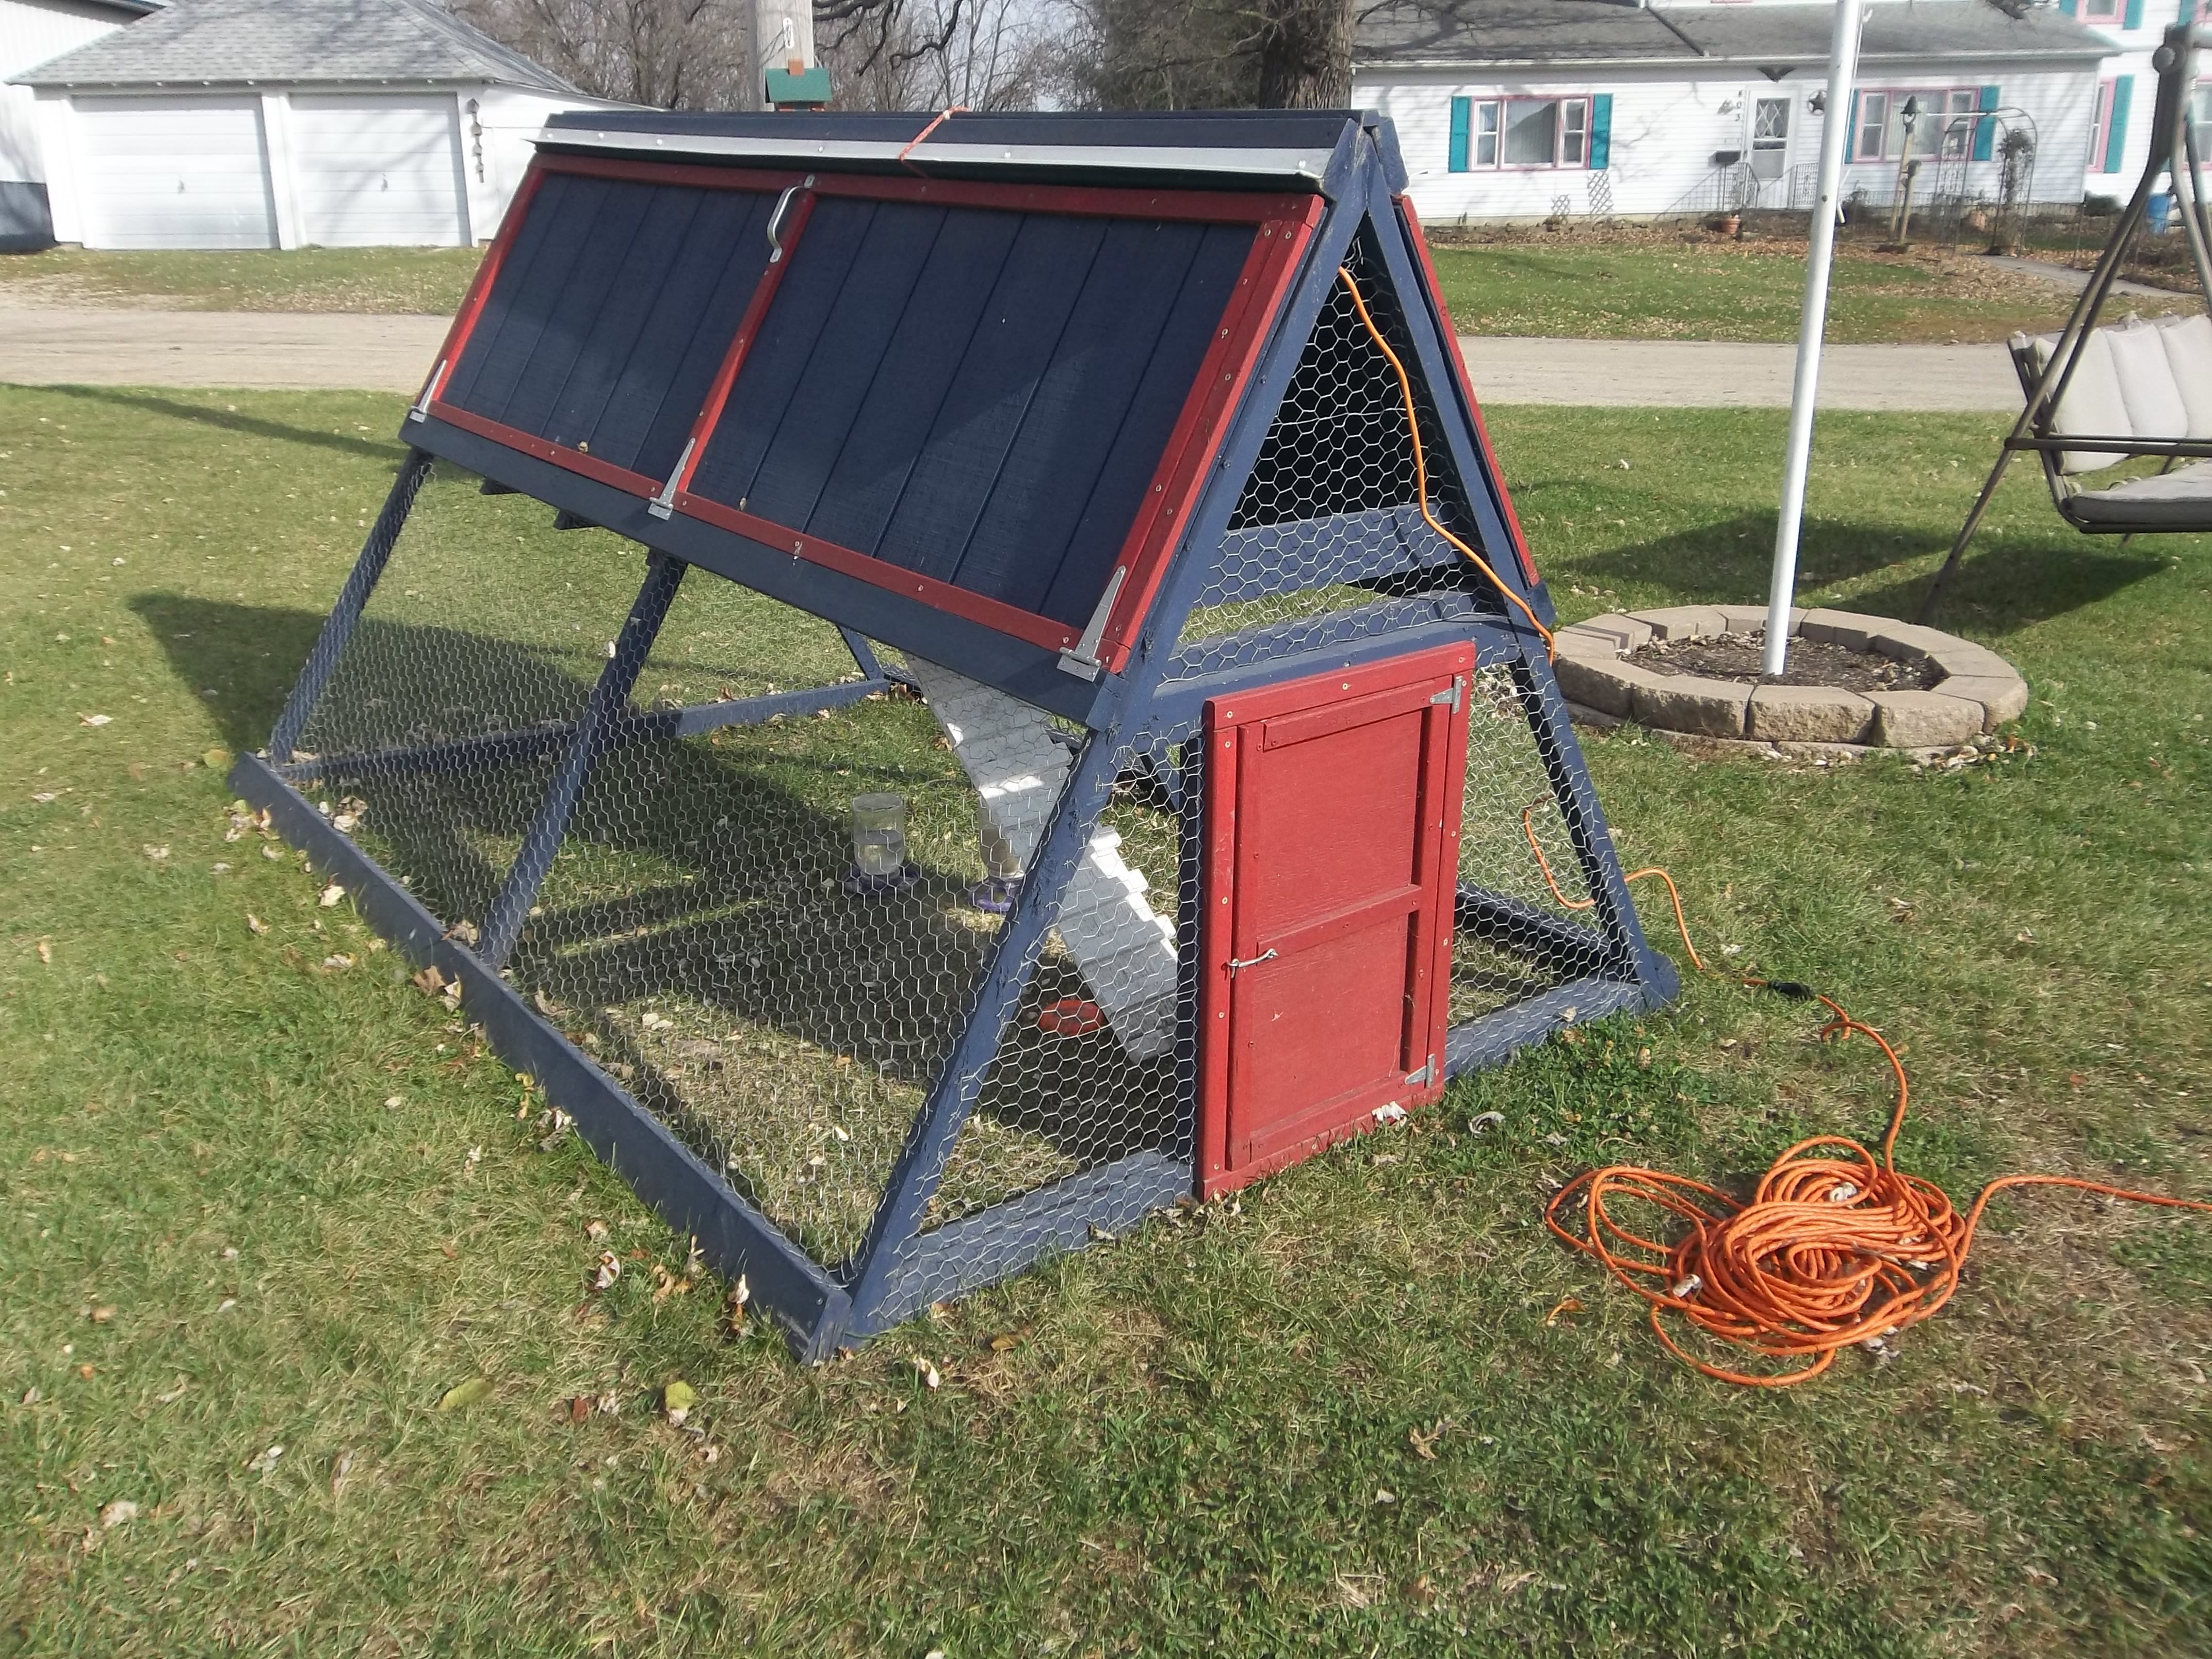
My husband used your plans to make this for our pet chicken that we hatched in a homemade incubator. I painted it though!!!
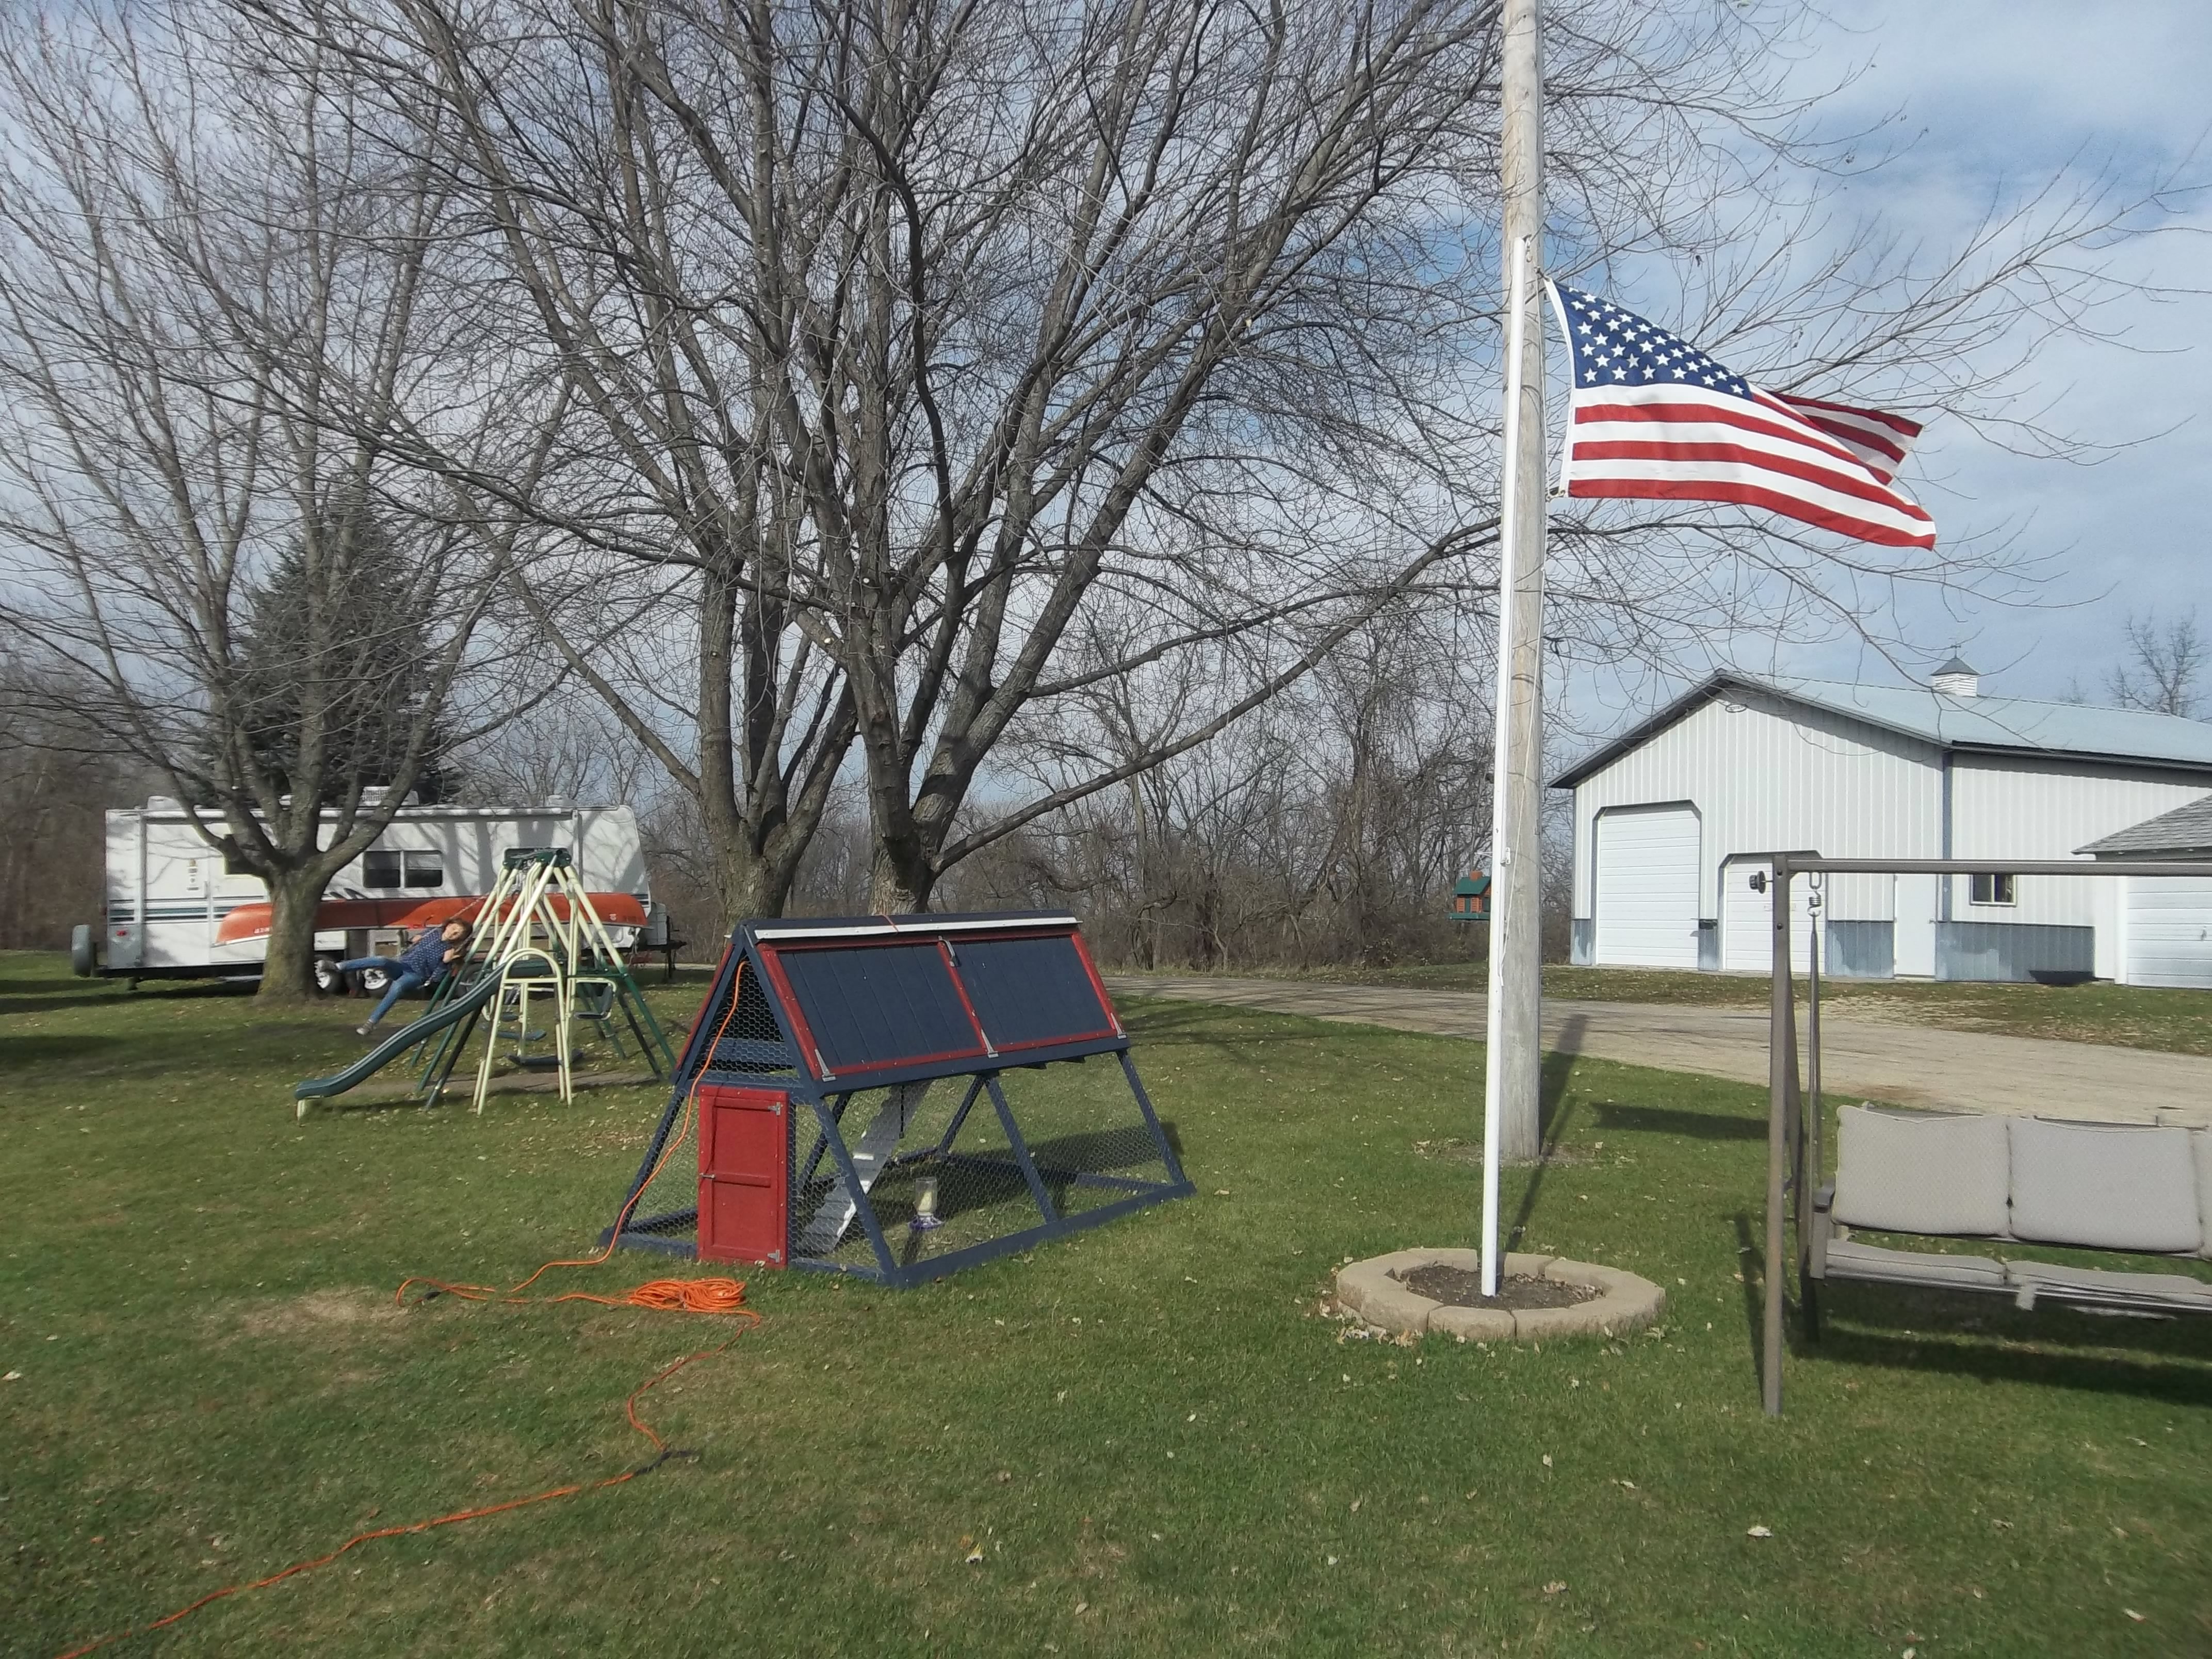
Built from Plan(s)
Recommended Skill Level
Intermediate
My husband used your plans to make this for our pet chicken that we hatched in a homemade incubator. I painted it though!!!
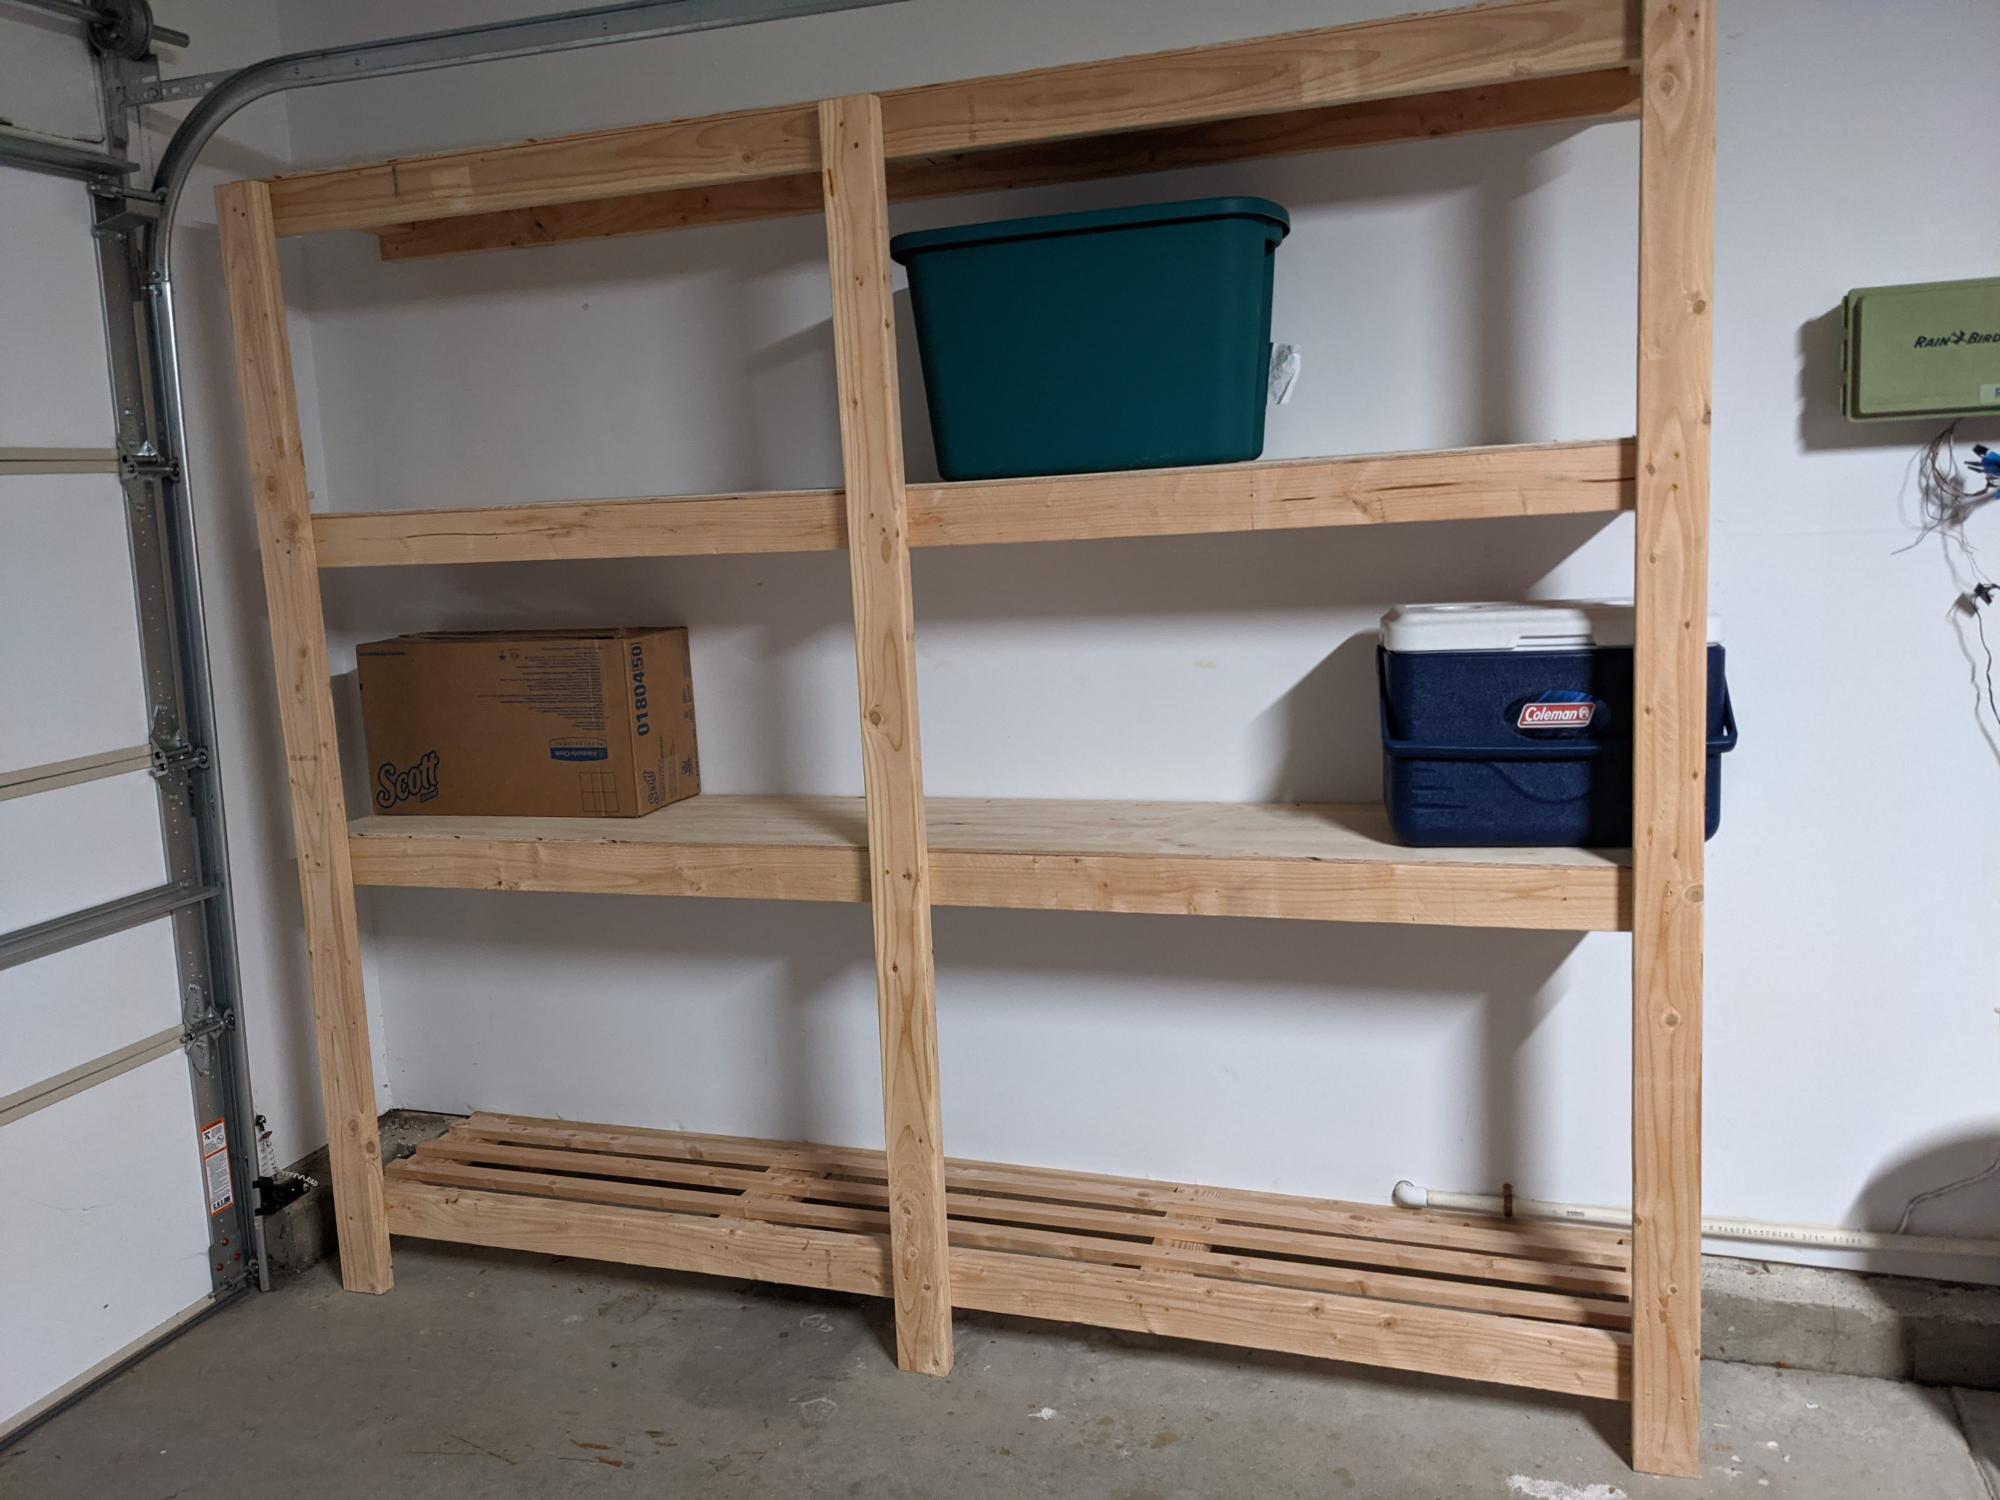
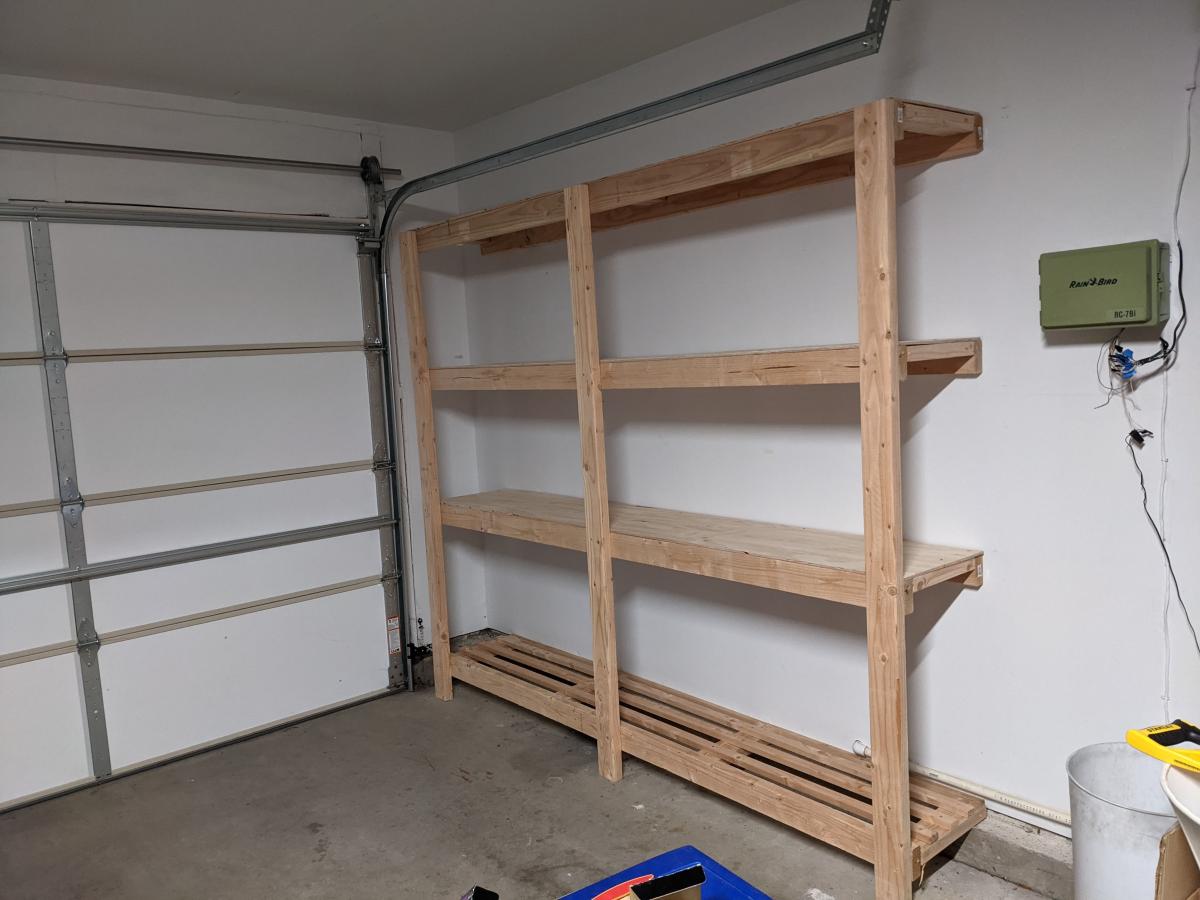
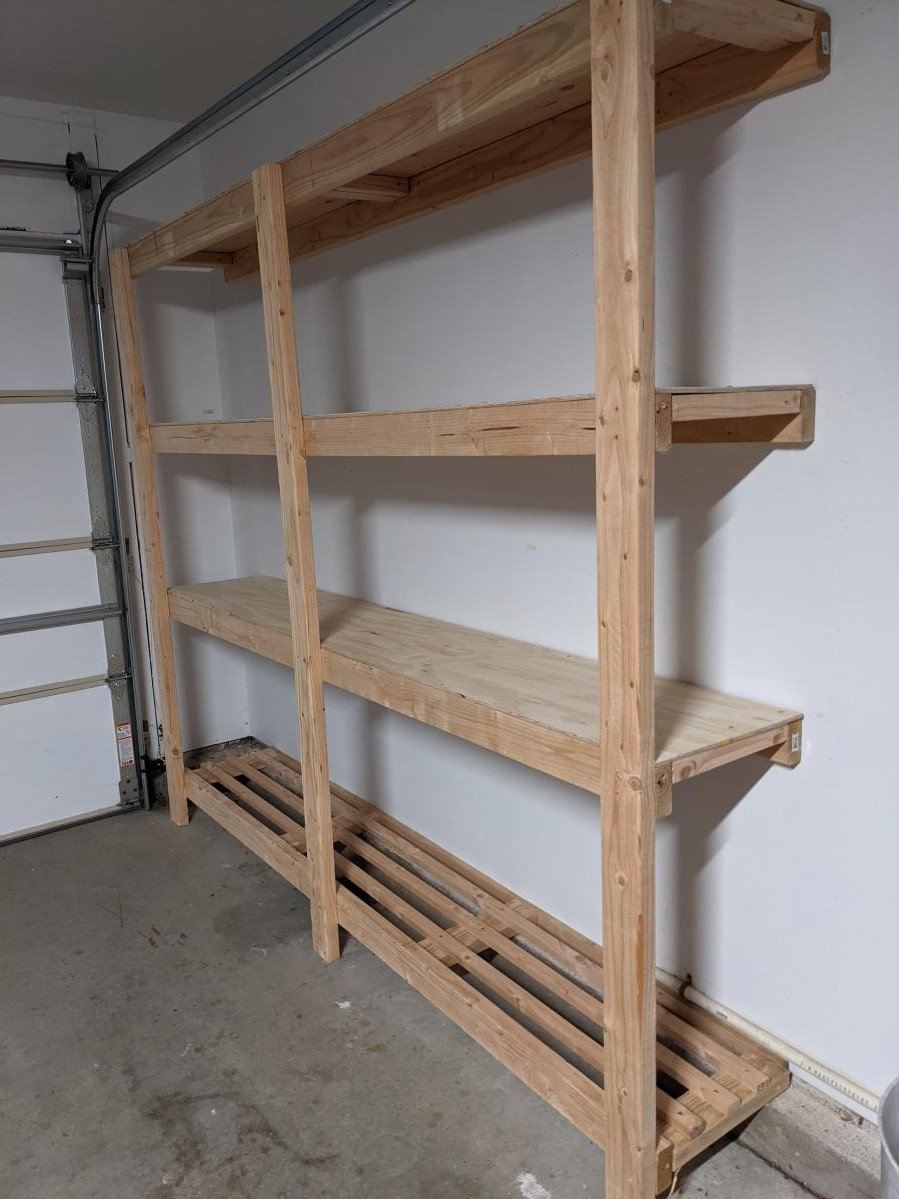
I just made this shelf using 2x4s 8 ft long wood. It is very strong and looks great. My garage size required the shelf to be max 16 in deep, so I used a 1 plywood sheet divided by 3 equal parts for the upper 3 shelfs. Since I made a 4th shelf, I used 3 1x2s for the 4th bottom shelf instead of a new plywood sheet and avoided having extra 2/3 of the sheet around and also saved like 30$ since the 2x1s were only 2$ea. That touch makes it look a bit stylish too so a win win. If you do that, here's a tip: use the outer 2x4s as rails - make sure that the cleats on the lower shelf are placed a bit lower ~ 1in. In such way, you can place the three 1x2 rails at the same level as the outer 2x4s and this you end up having 5 rails total in the shelf. Do use the wooden screws with star head if you can, they were muuuuuch easier to use compared with the regular ones. Note, this shelf is very strong, probably too strong for my needs. For a 8ft long, and my storage needs (camping, Christmas stuff, other lighter things), I'd probably use 2x2s instead of 2x4s. That would save costs, specially since wood isn't cheap these days( I spent ~$150 in materials Jan 2022).
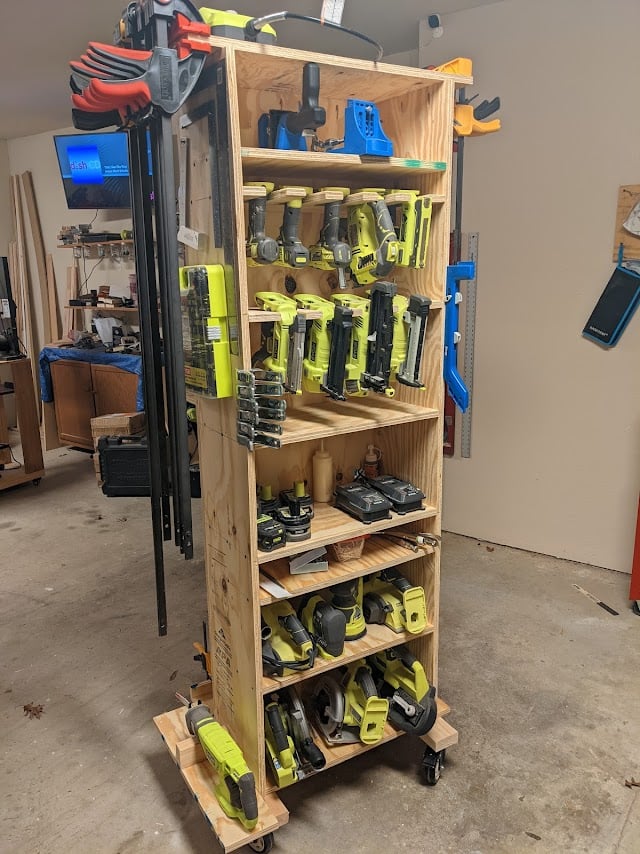
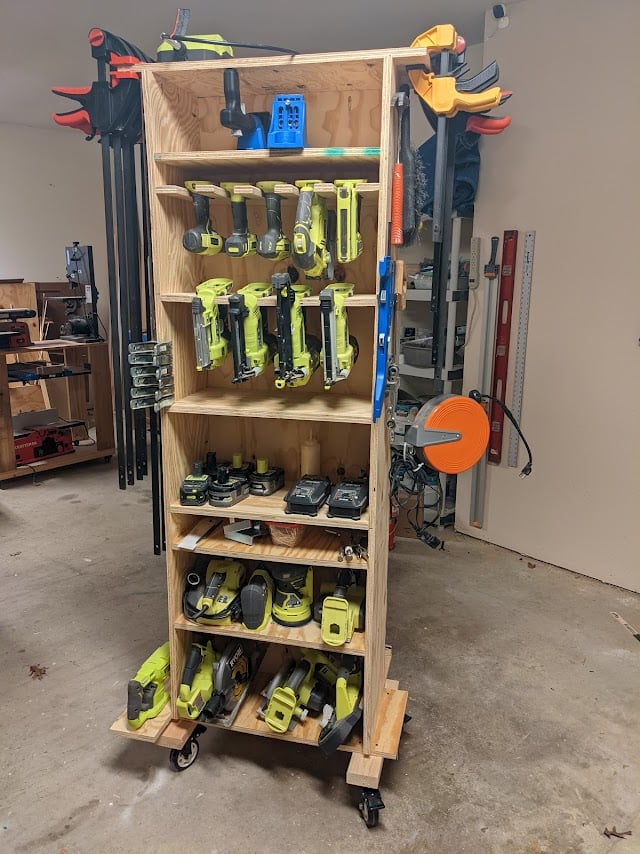
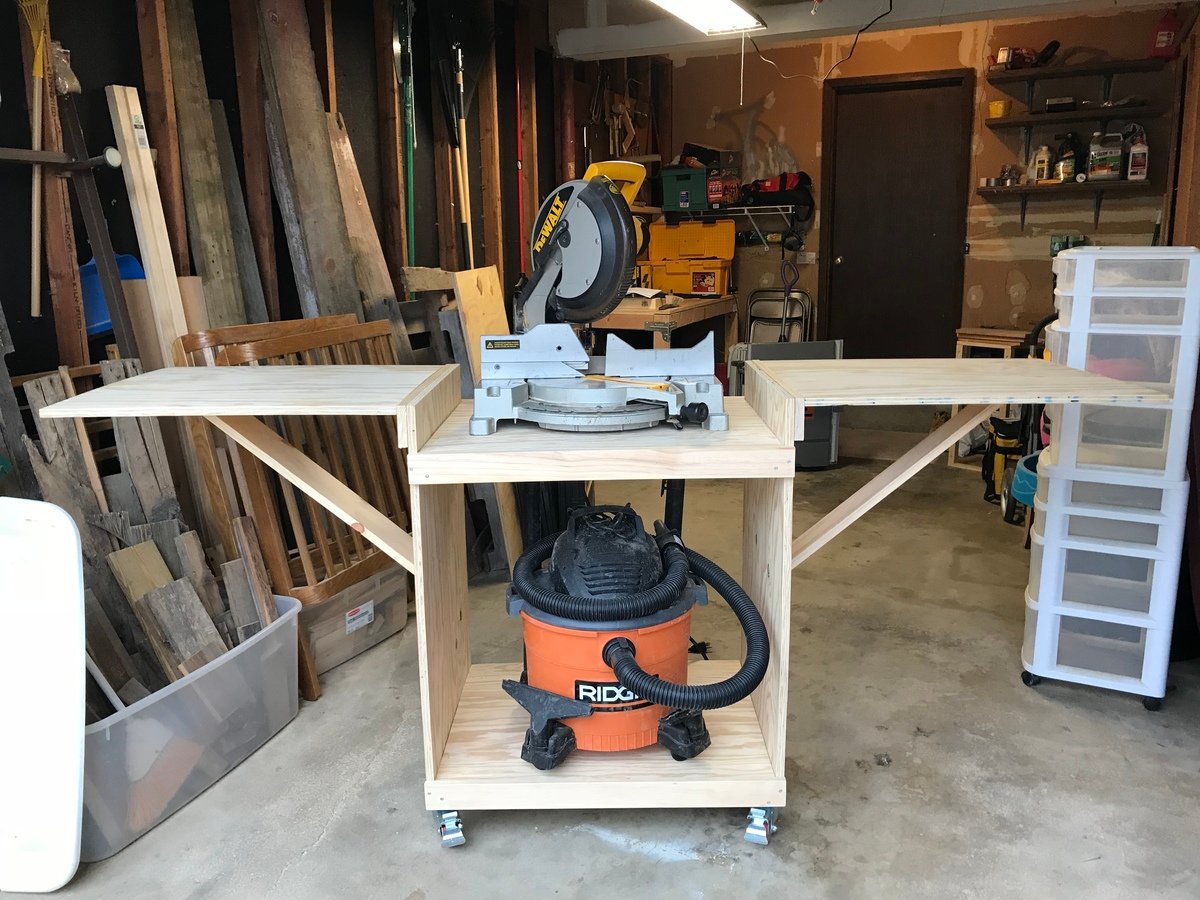
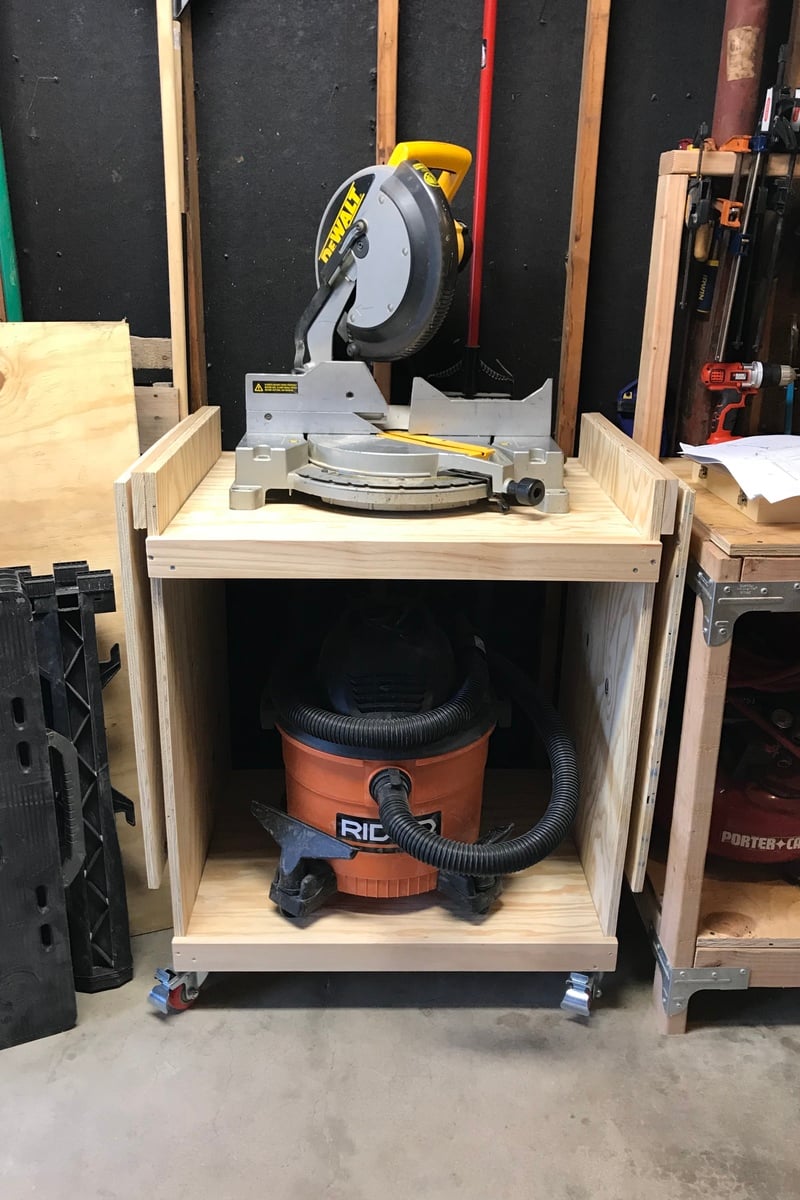
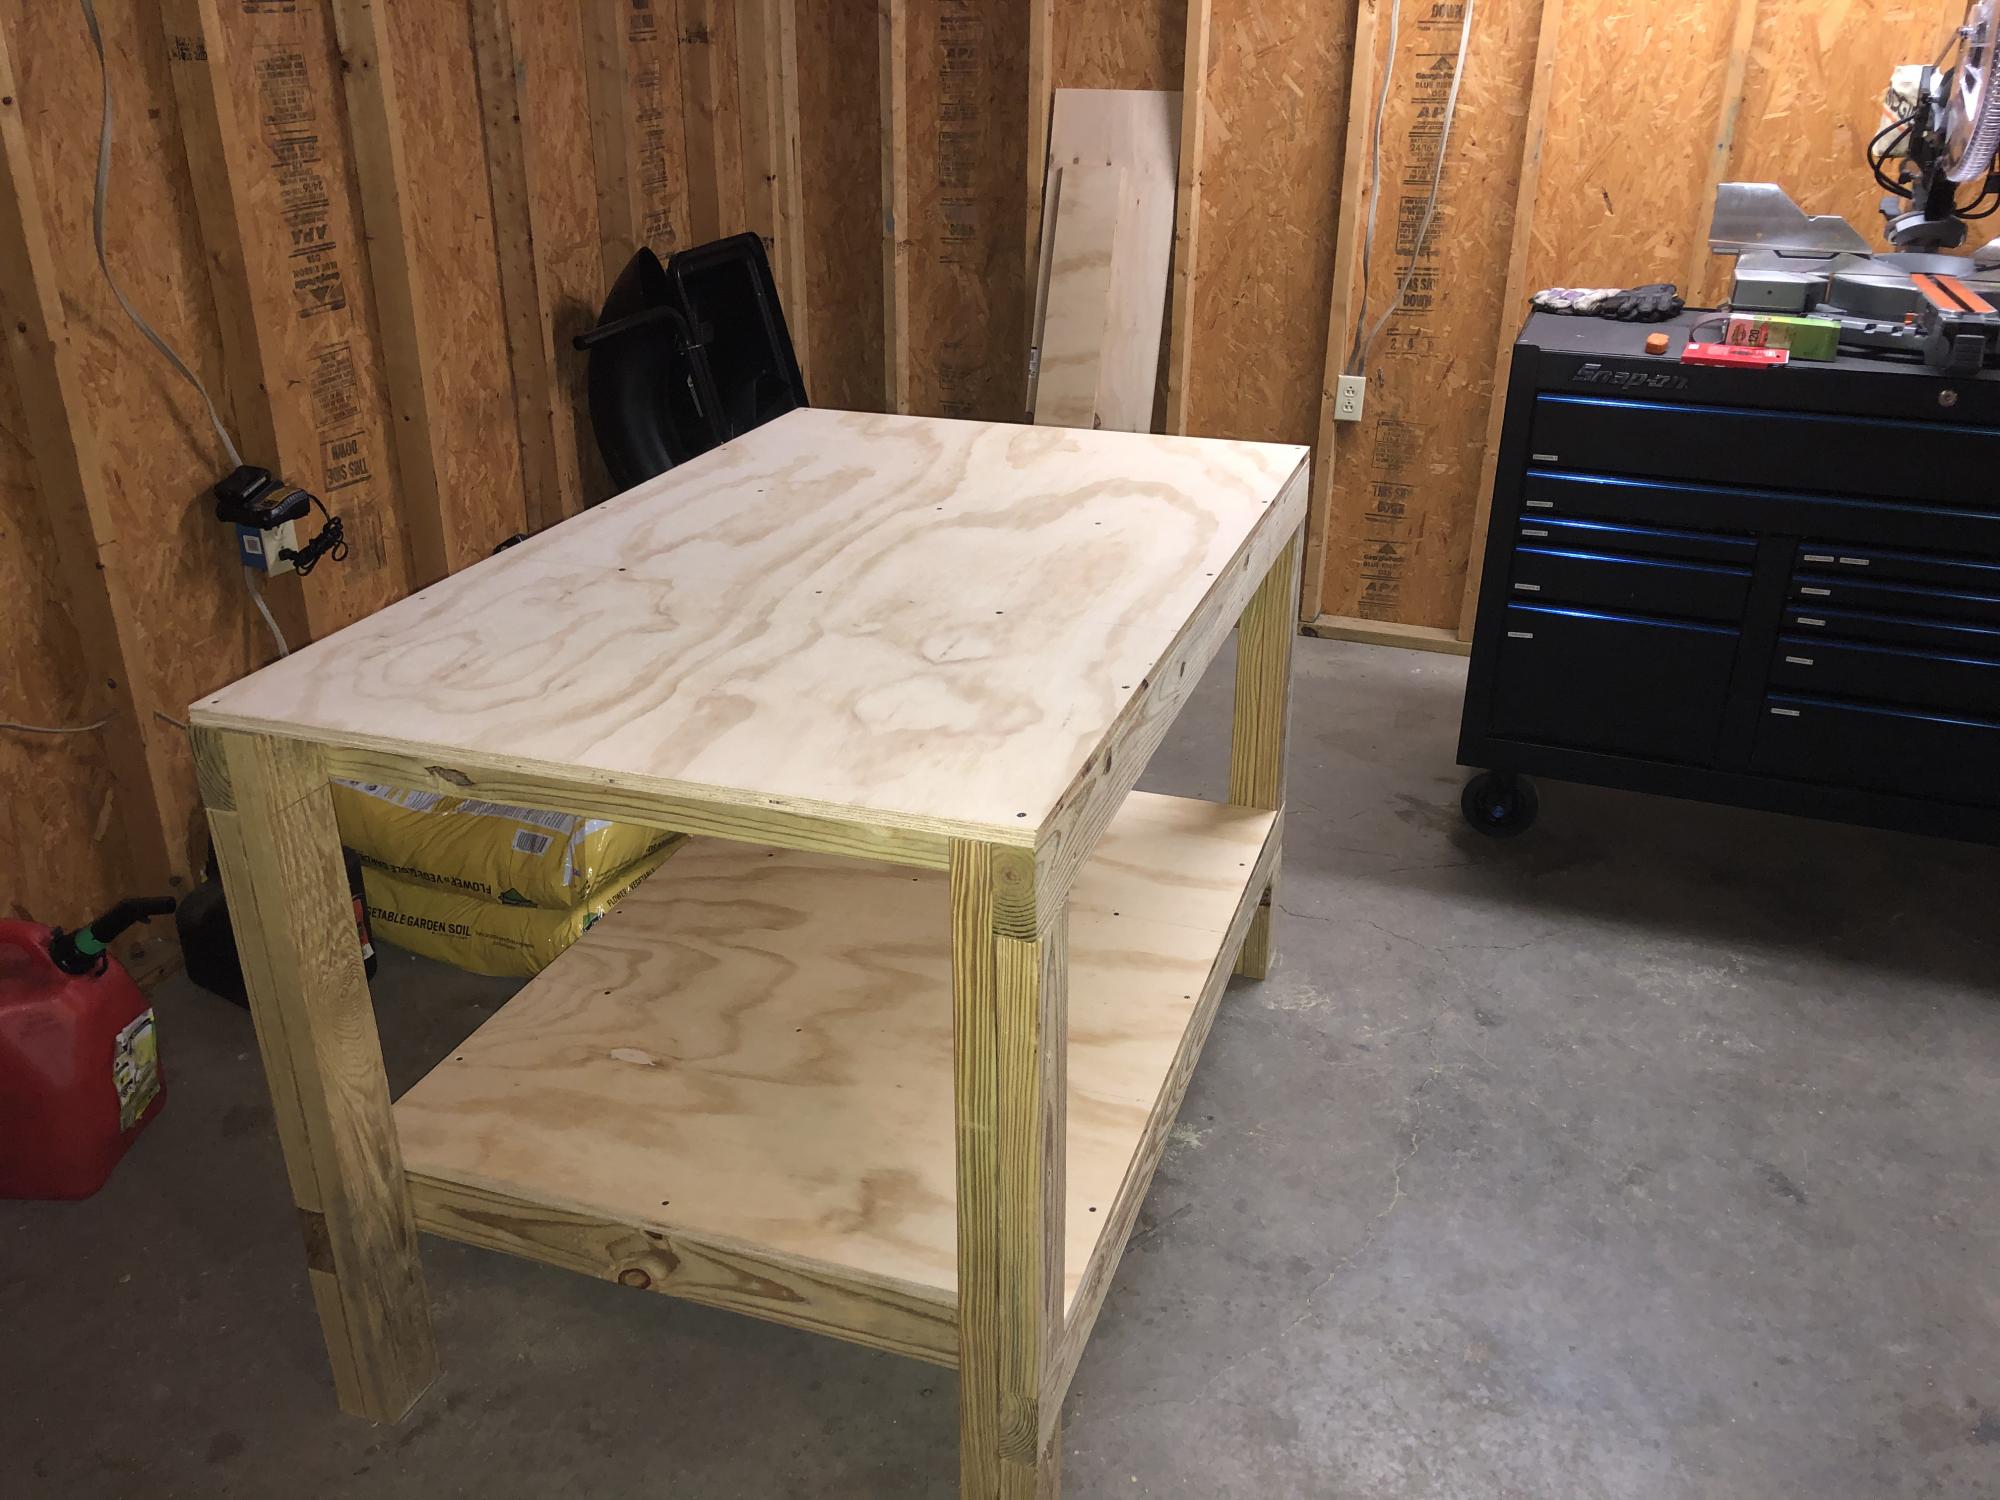
I repurpose furniture as a hobby and I got tired of having my tools hanging on a wall on the other side of the garage so I bult this rolling tool caddy. It is made out of 3/4" plywood, a couple of 2x4's and some heavy-duty casters. I built one about 3 years ago and realized that there were some things I wanted to do differently so I sold it and bult this one. My wife gave me a subscription to SketchUp and I had fun drawing it up and tweaking it. I left an over hang of 3" on both sides so I could store my clamps. I also attached an electrical cord reel on the right side and reversed the ends so the male end can plug into the wall and I can roll the unit across the room allowing me to be able to charge my batteries. The back side has a 44 drawer storage organizer and also a few shelves for additional tools like a router and a multi-tool. I'm not nearly the craftsman many of you are and I'm sure you could do a much better job. I didn't build it to look pretty but to be functional and it works for me.
Fri, 01/21/2022 - 08:28
This is EXACTLY what my husband needs!! Are you willing to share your plans so I can build it for him?
Fri, 01/21/2022 - 09:16
I really like this idea. I have my tools hung up neat all around the garage, but I keep walking back and forth for tools and batteries. It would be great to roll this over to a project and have everything you need right there. Nice work. I will modify one for my needs.

Fri, 01/21/2022 - 10:06
there are some very thoughtful features on this, notably the wings at the top and the bottom for clamps and extra tools and the different shelf heights. Well done! I'm going to build one just like it and a power strip for battery storage.
Fri, 01/21/2022 - 11:25
This is awesome - great job.
please post plans!
Fri, 01/21/2022 - 14:21
Very cool!!! I would appreciate it if you would share your plans…so that I could attempt to make me one.
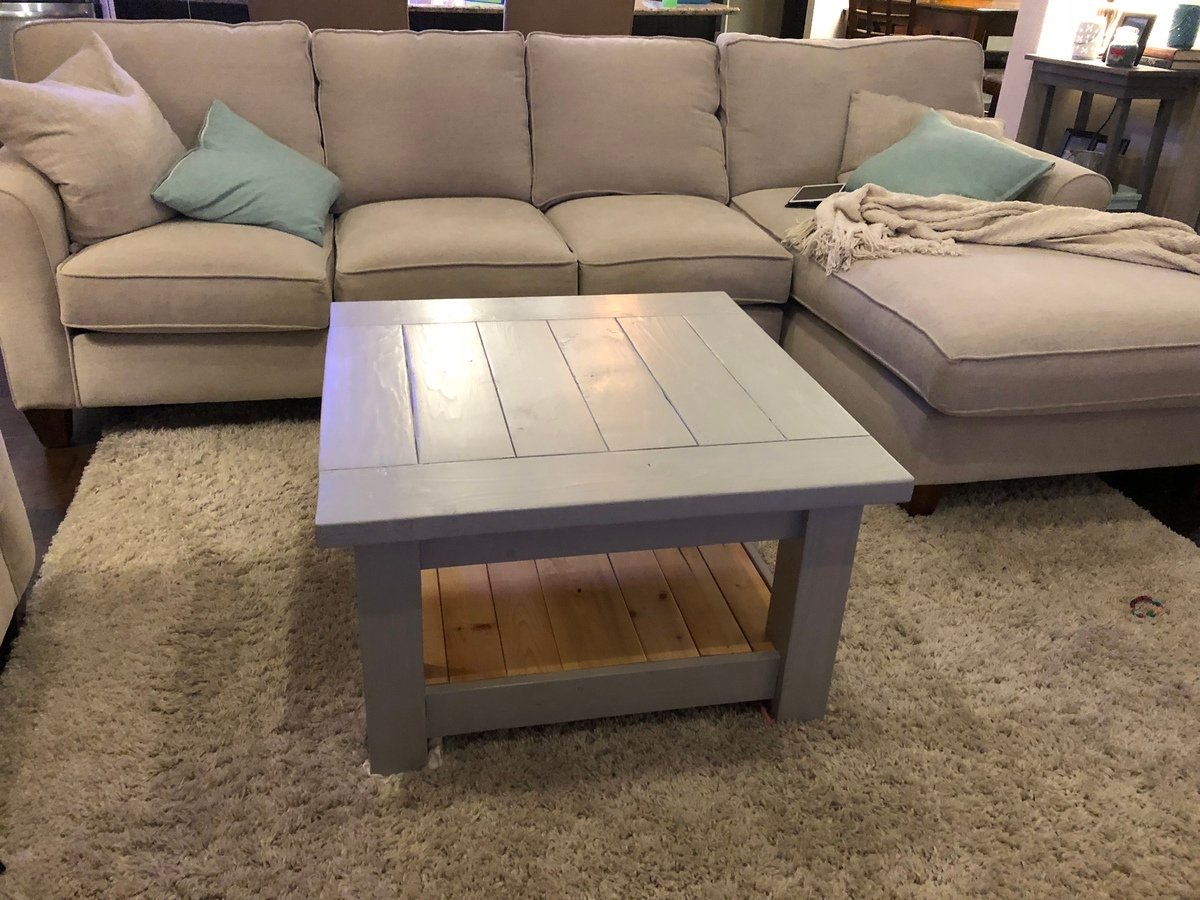
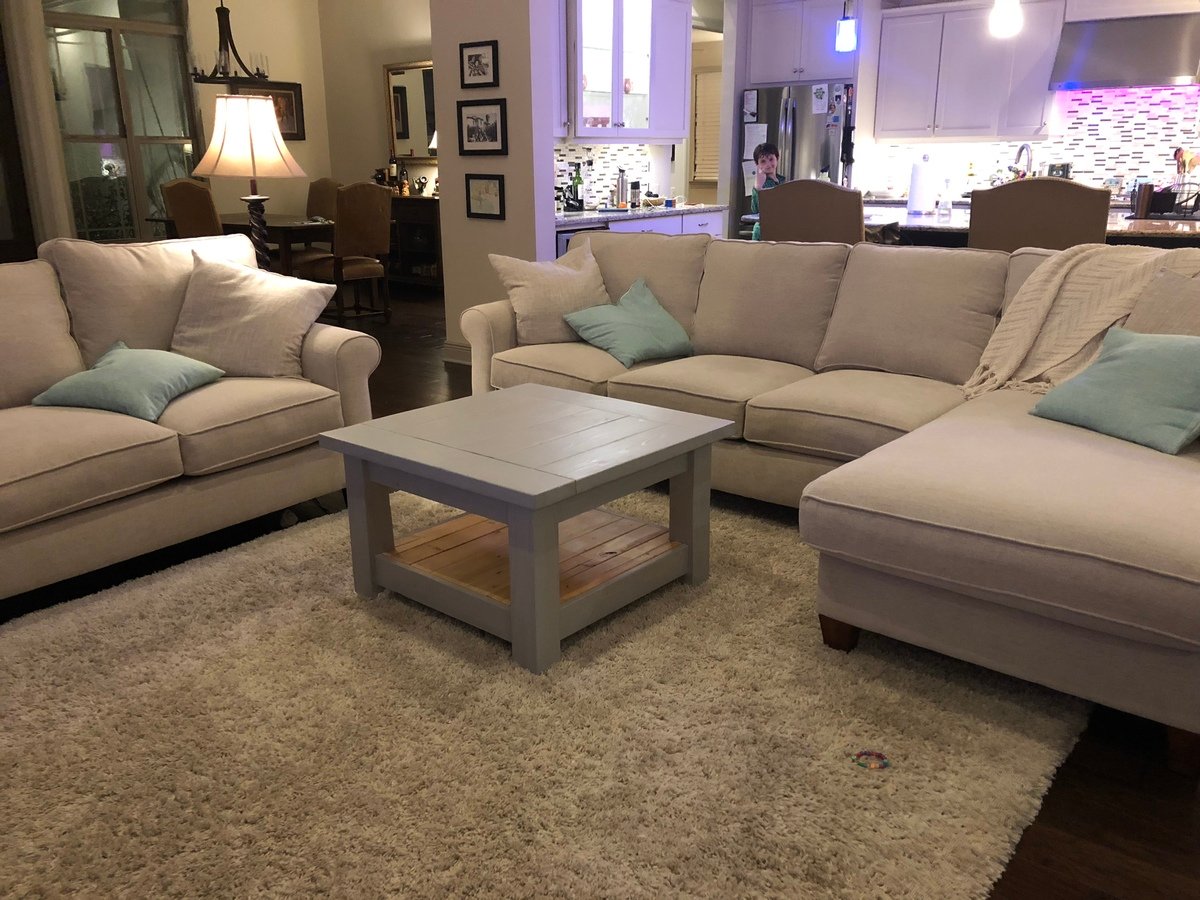
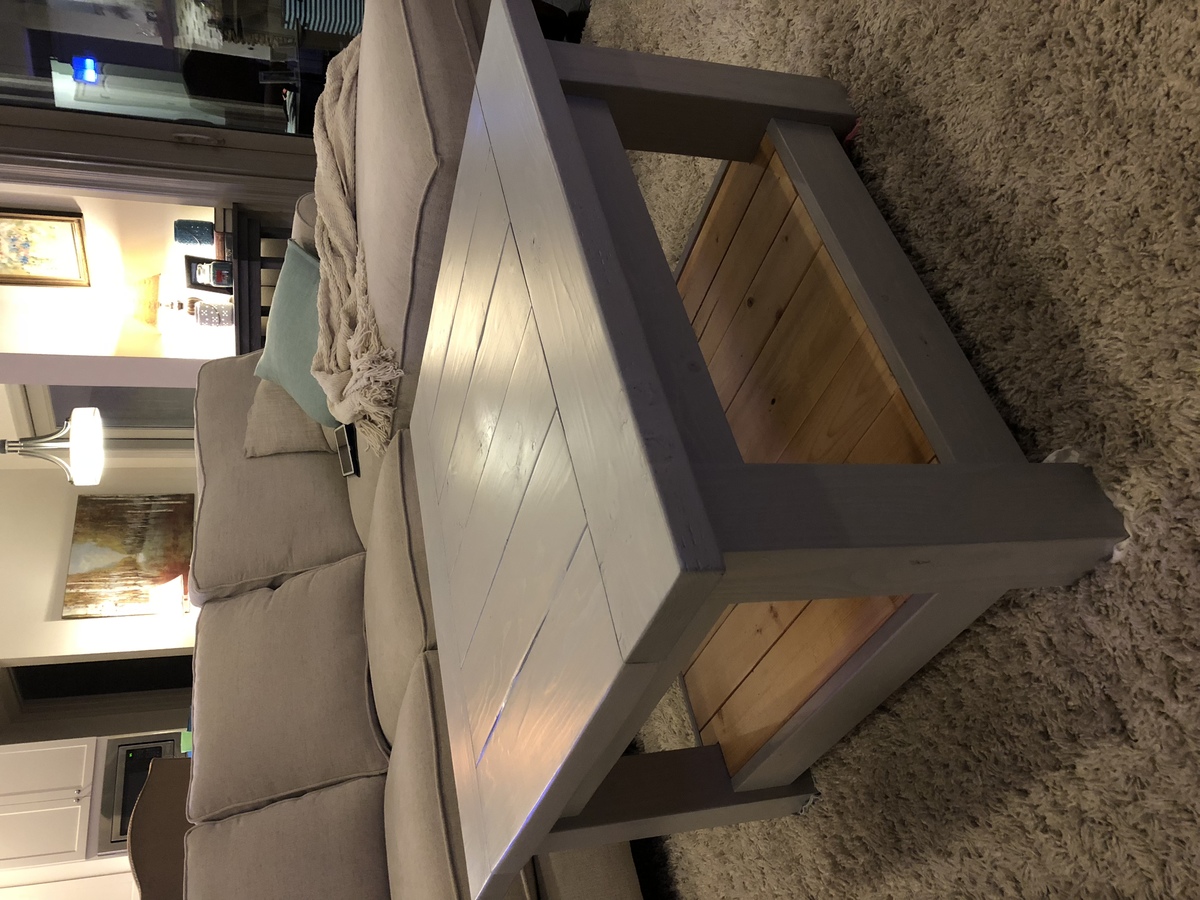
It was time to replace our 12 year old rectangular coffee table. I used the corona coffee table plans with a few modifications.
I love having this new addition! Freed up space in my small shop and now it’s more functional and organized. I followed the plans with modifications in the leaves using scrap 1x’s (which I may decide later to change to 2x4s but I had 1x’s on hand) instead of the brackets and then the extra 1x’s holding on the leaves so they would fall flat to the sides. Love it!
See more photos and details here https://instagram.com/tom_morgan_nc?igshid=YmMyMTA2M2Y=

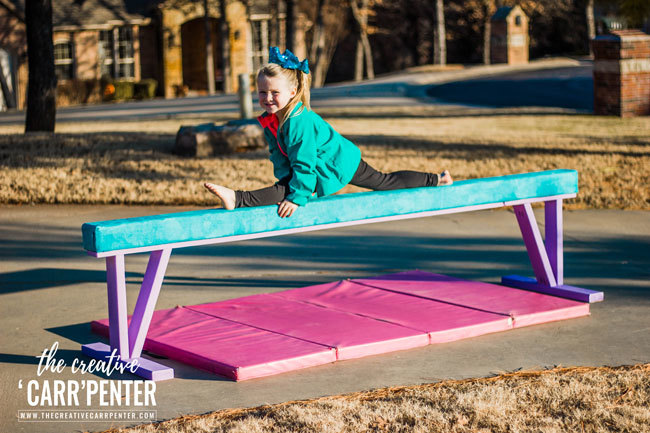
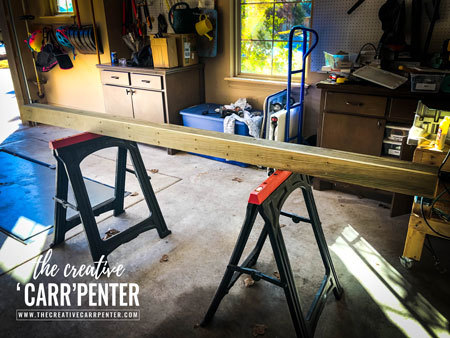
From watching Olympic gymnast Simone Biles on the television to running, flipping and twirling all around our living room — my girls LOVE everything gymnastics. Both girls began competing with a local gymnastics club. Now that my oldest has moved up and is pretty serious about practicing her beam handstands and dismounts, she begged me to build a raised balance beam with suede covering so it would have a similar feel to her beam at the gym.
If you can relate to this, or even if you have a new gymnast (like my youngest in the pic above) wanting to improve their skills at home, then this comprehensive tutorial on how to build a raised balance beam is for you.
Full plans available on my blog The Creative 'Carr'penter. You can also find and pin this tutorial on Pinterest here.


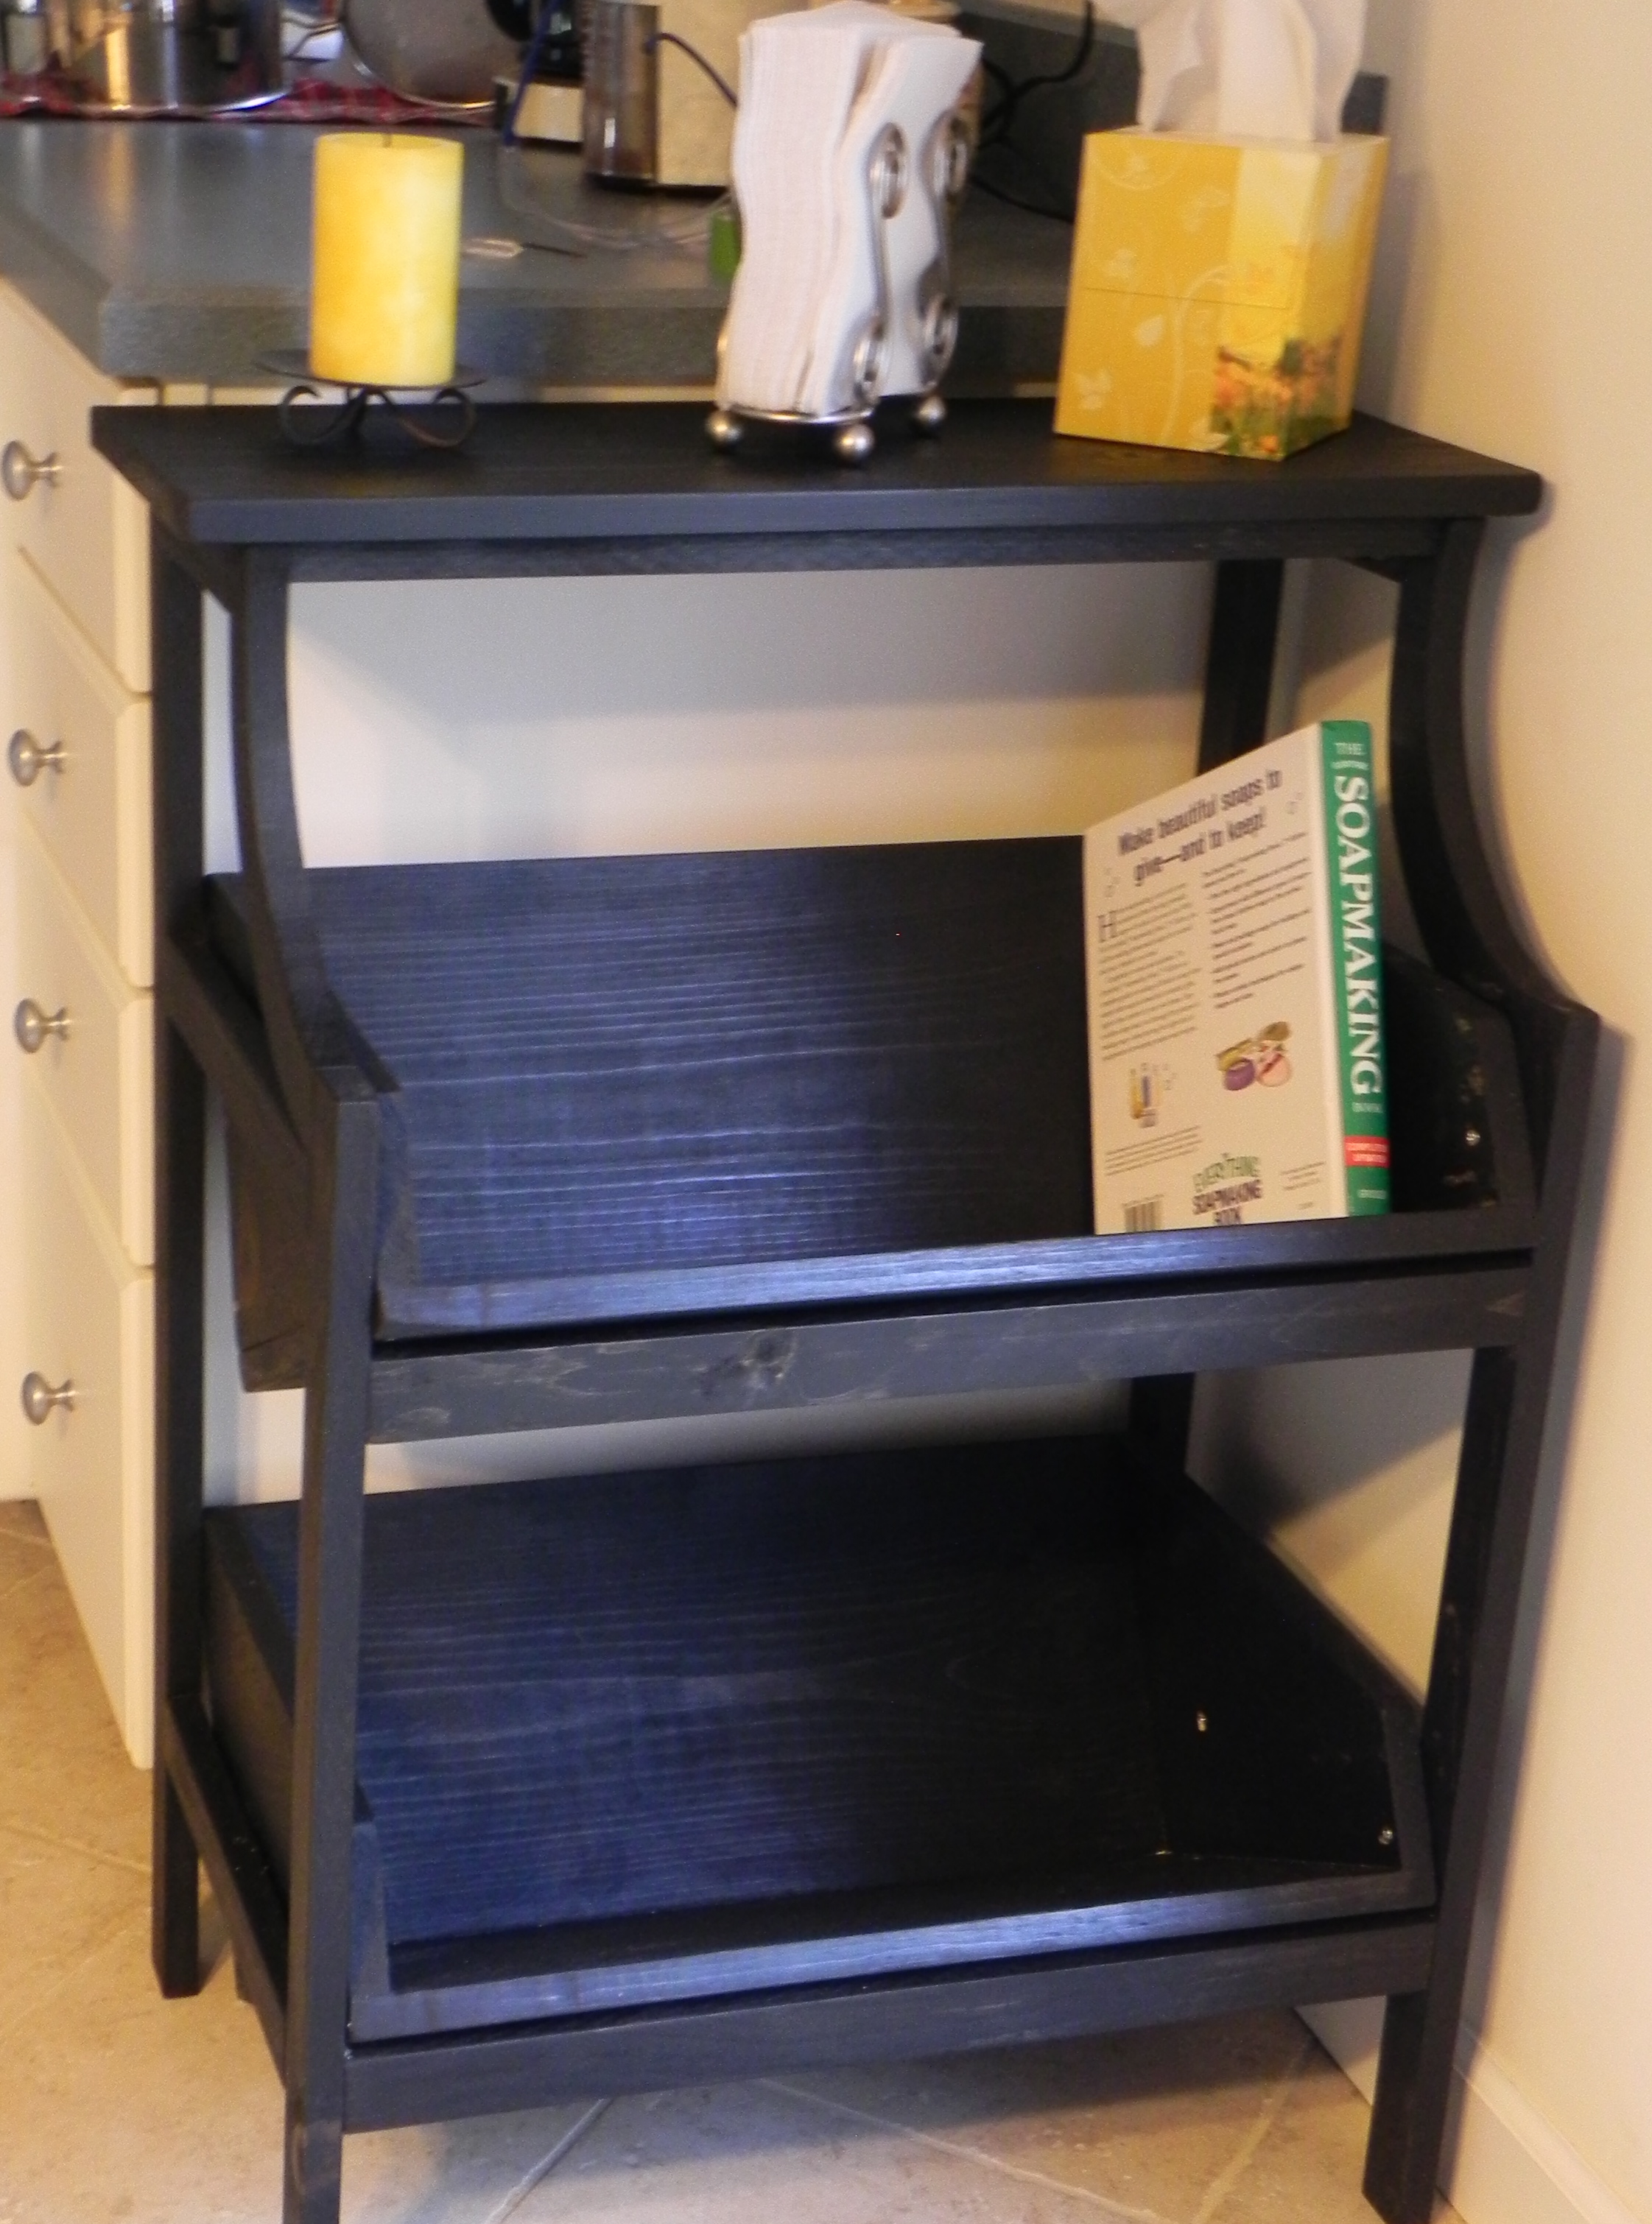
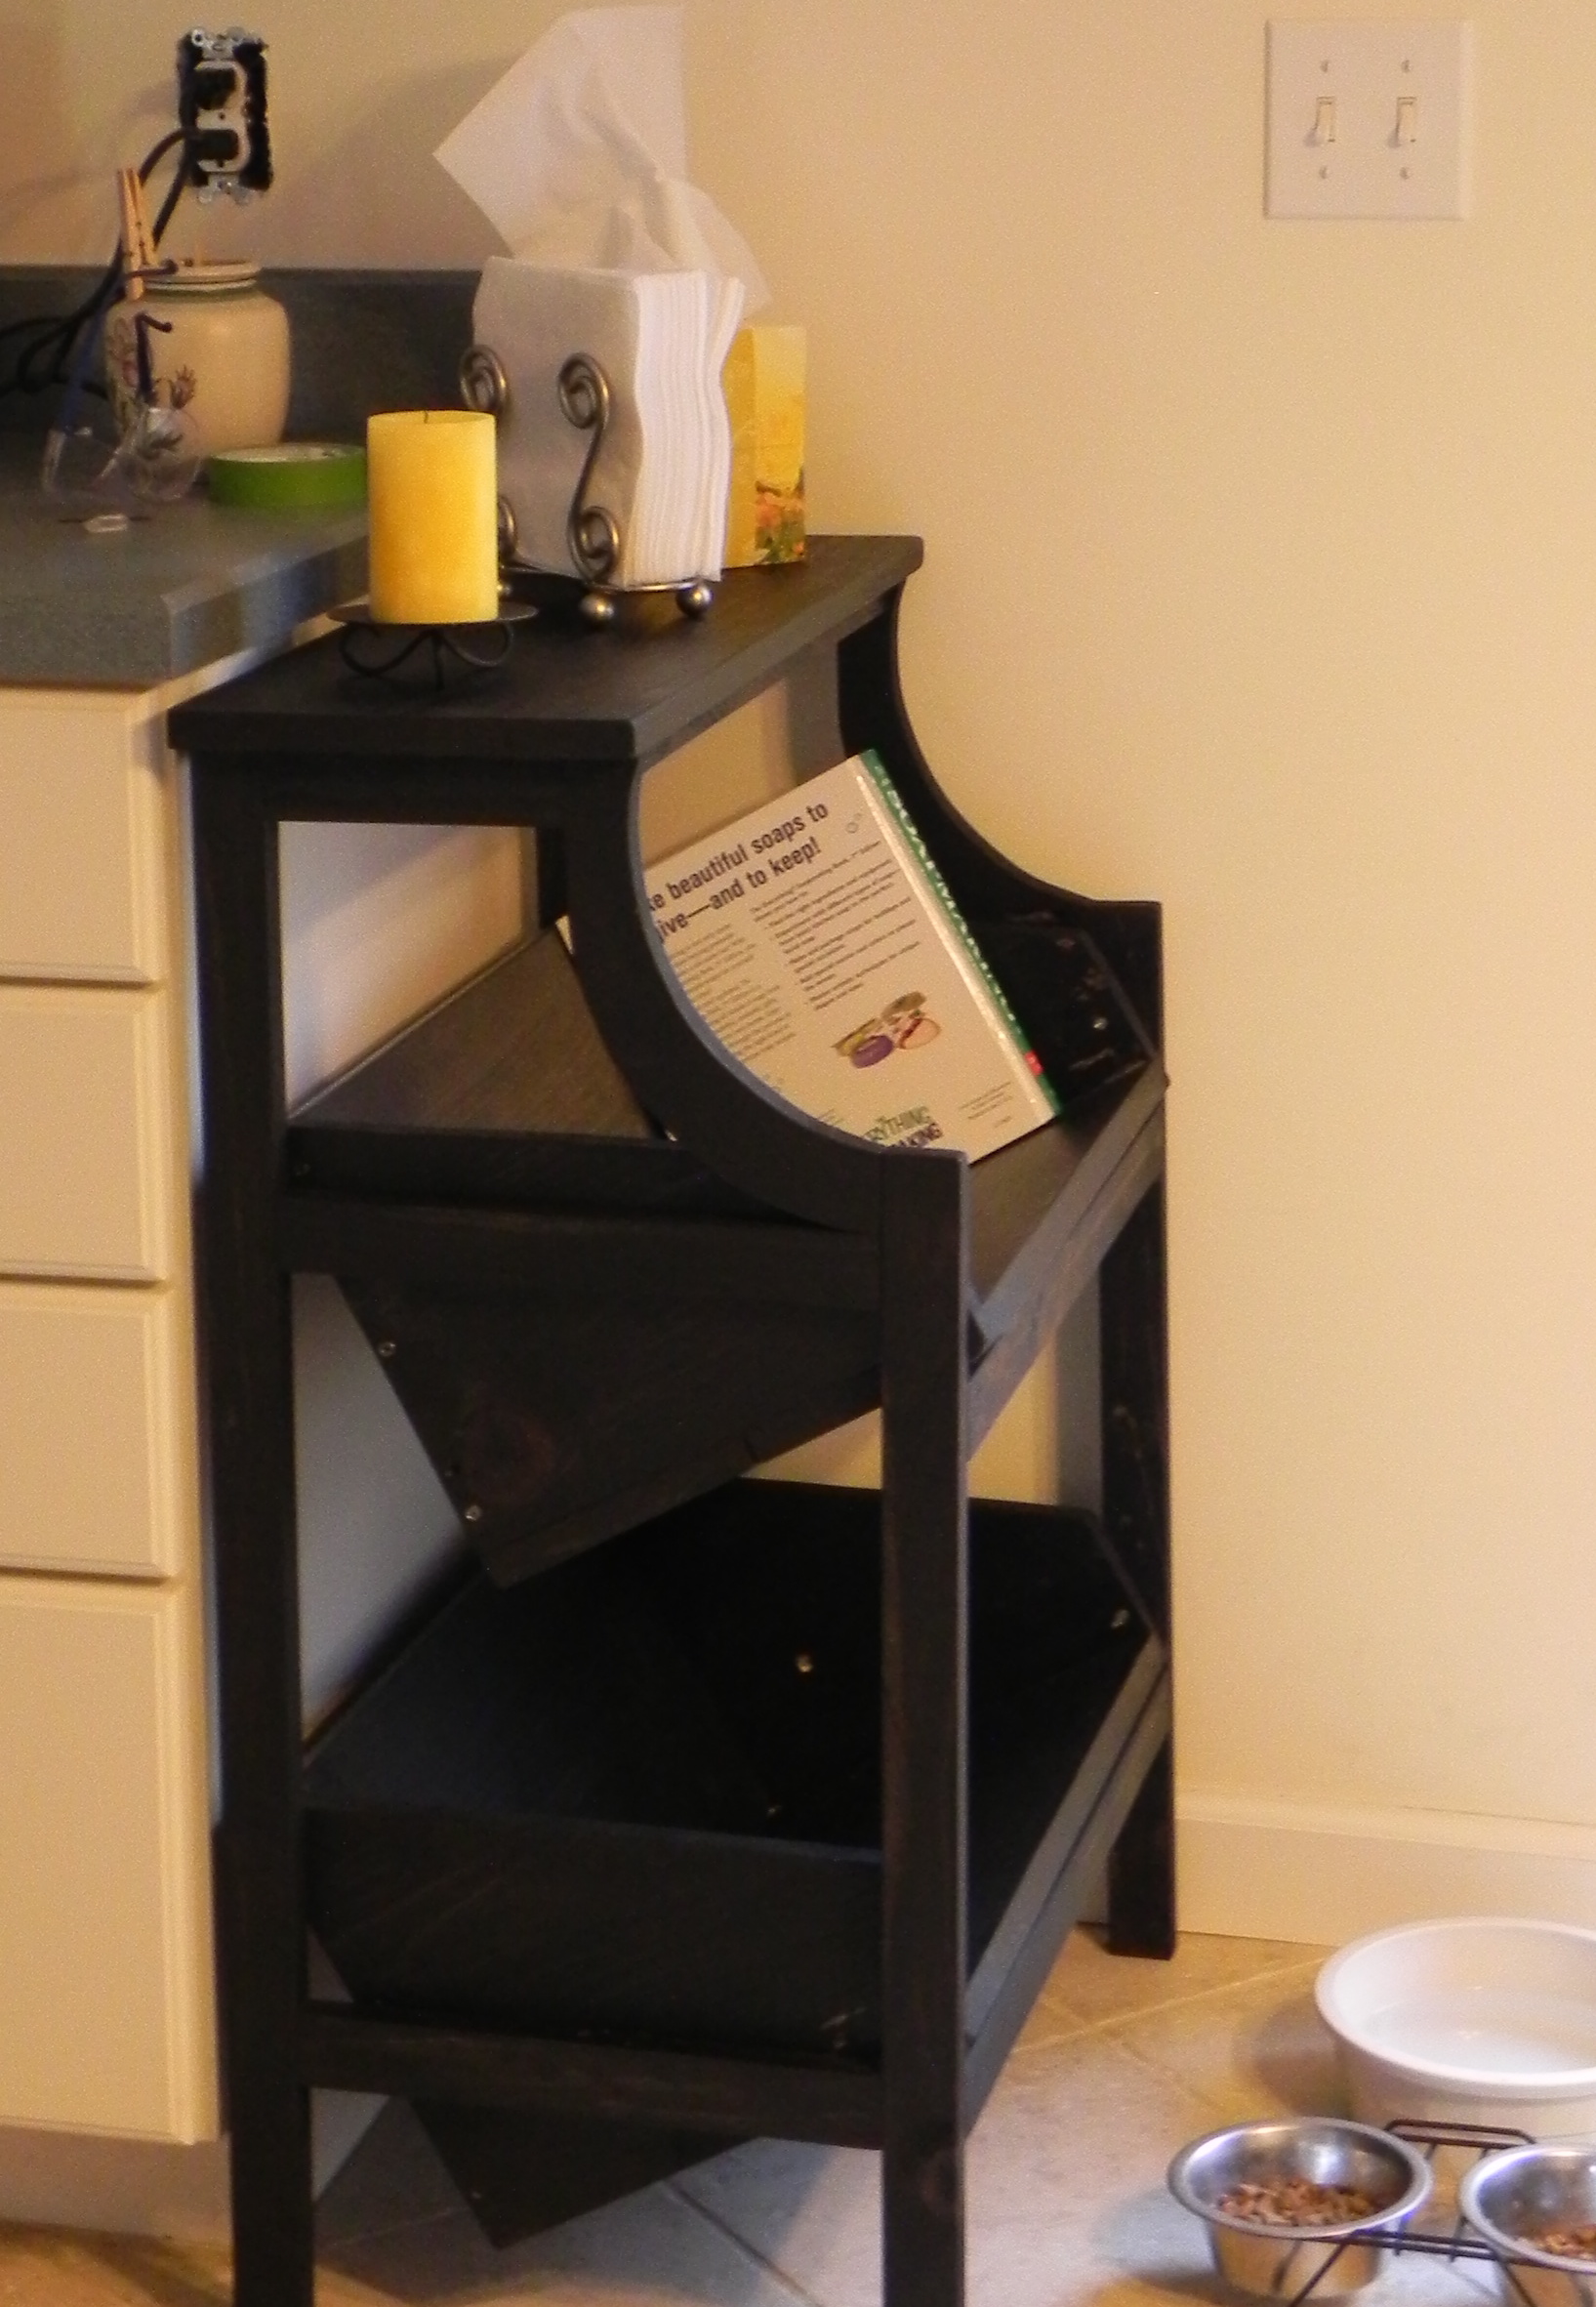
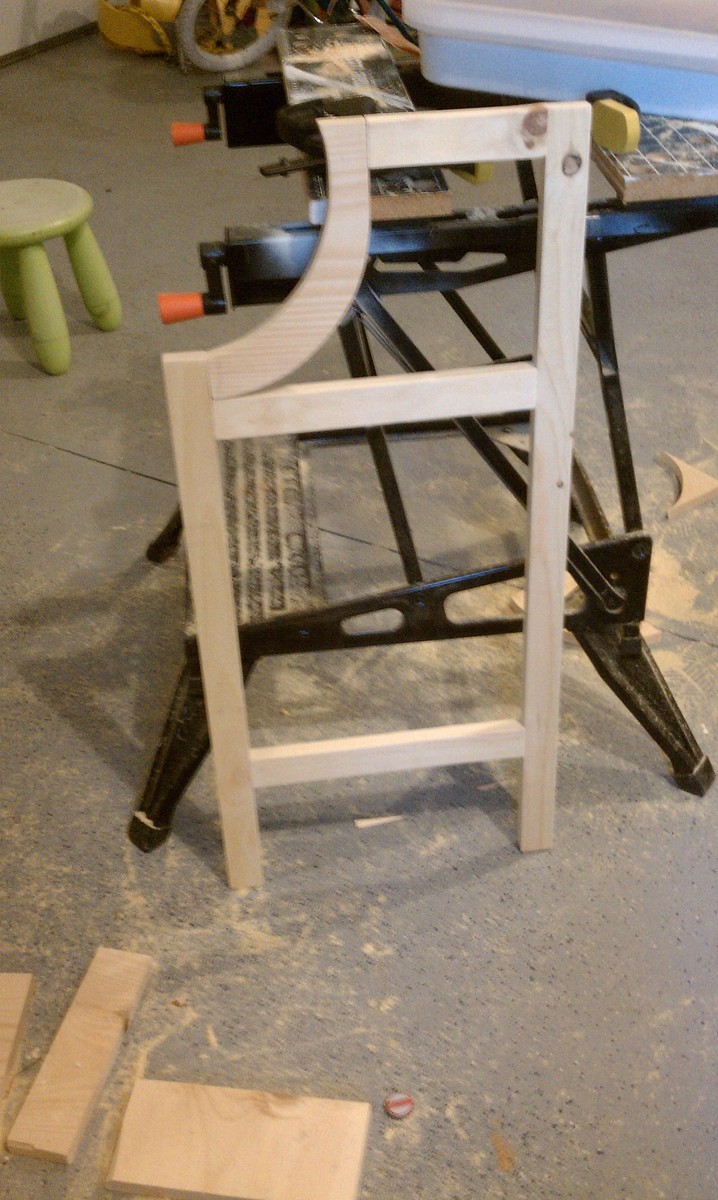
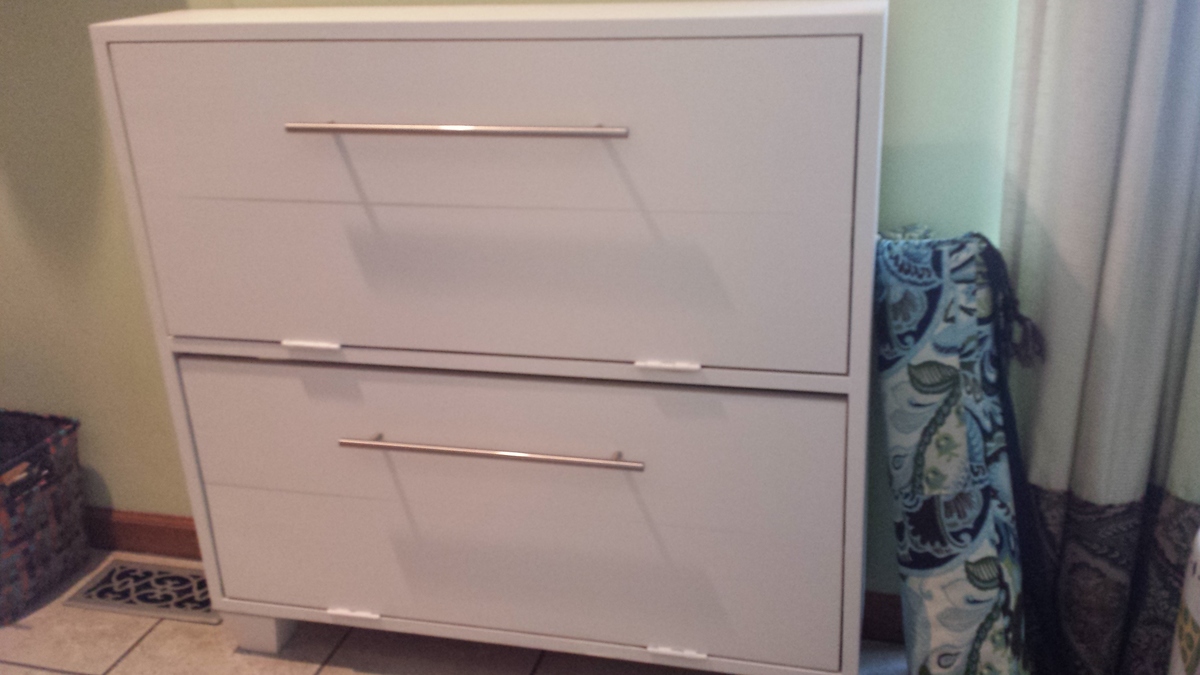
A bookshelf to help with the everyday clutter in our kitchen.
Sat, 11/05/2011 - 12:07
Glad to see someone build this plan--have been considering it, but wanted to see a finished photo. Thanks!
Sun, 05/26/2013 - 11:04
The plan shows a total width of 39" but that's a bit too much for me (I'm mostly just wanting to store reference books next to my desk and don't need that much space). I like the proportions on your build, can you say how wide it is? (I'm assuming it's not 39", unless you have some massive countertops!)
Thanks.

Fri, 06/21/2019 - 13:44
Love this in the kitchen! Great job! So glad you sent in a brag post! Thank you!
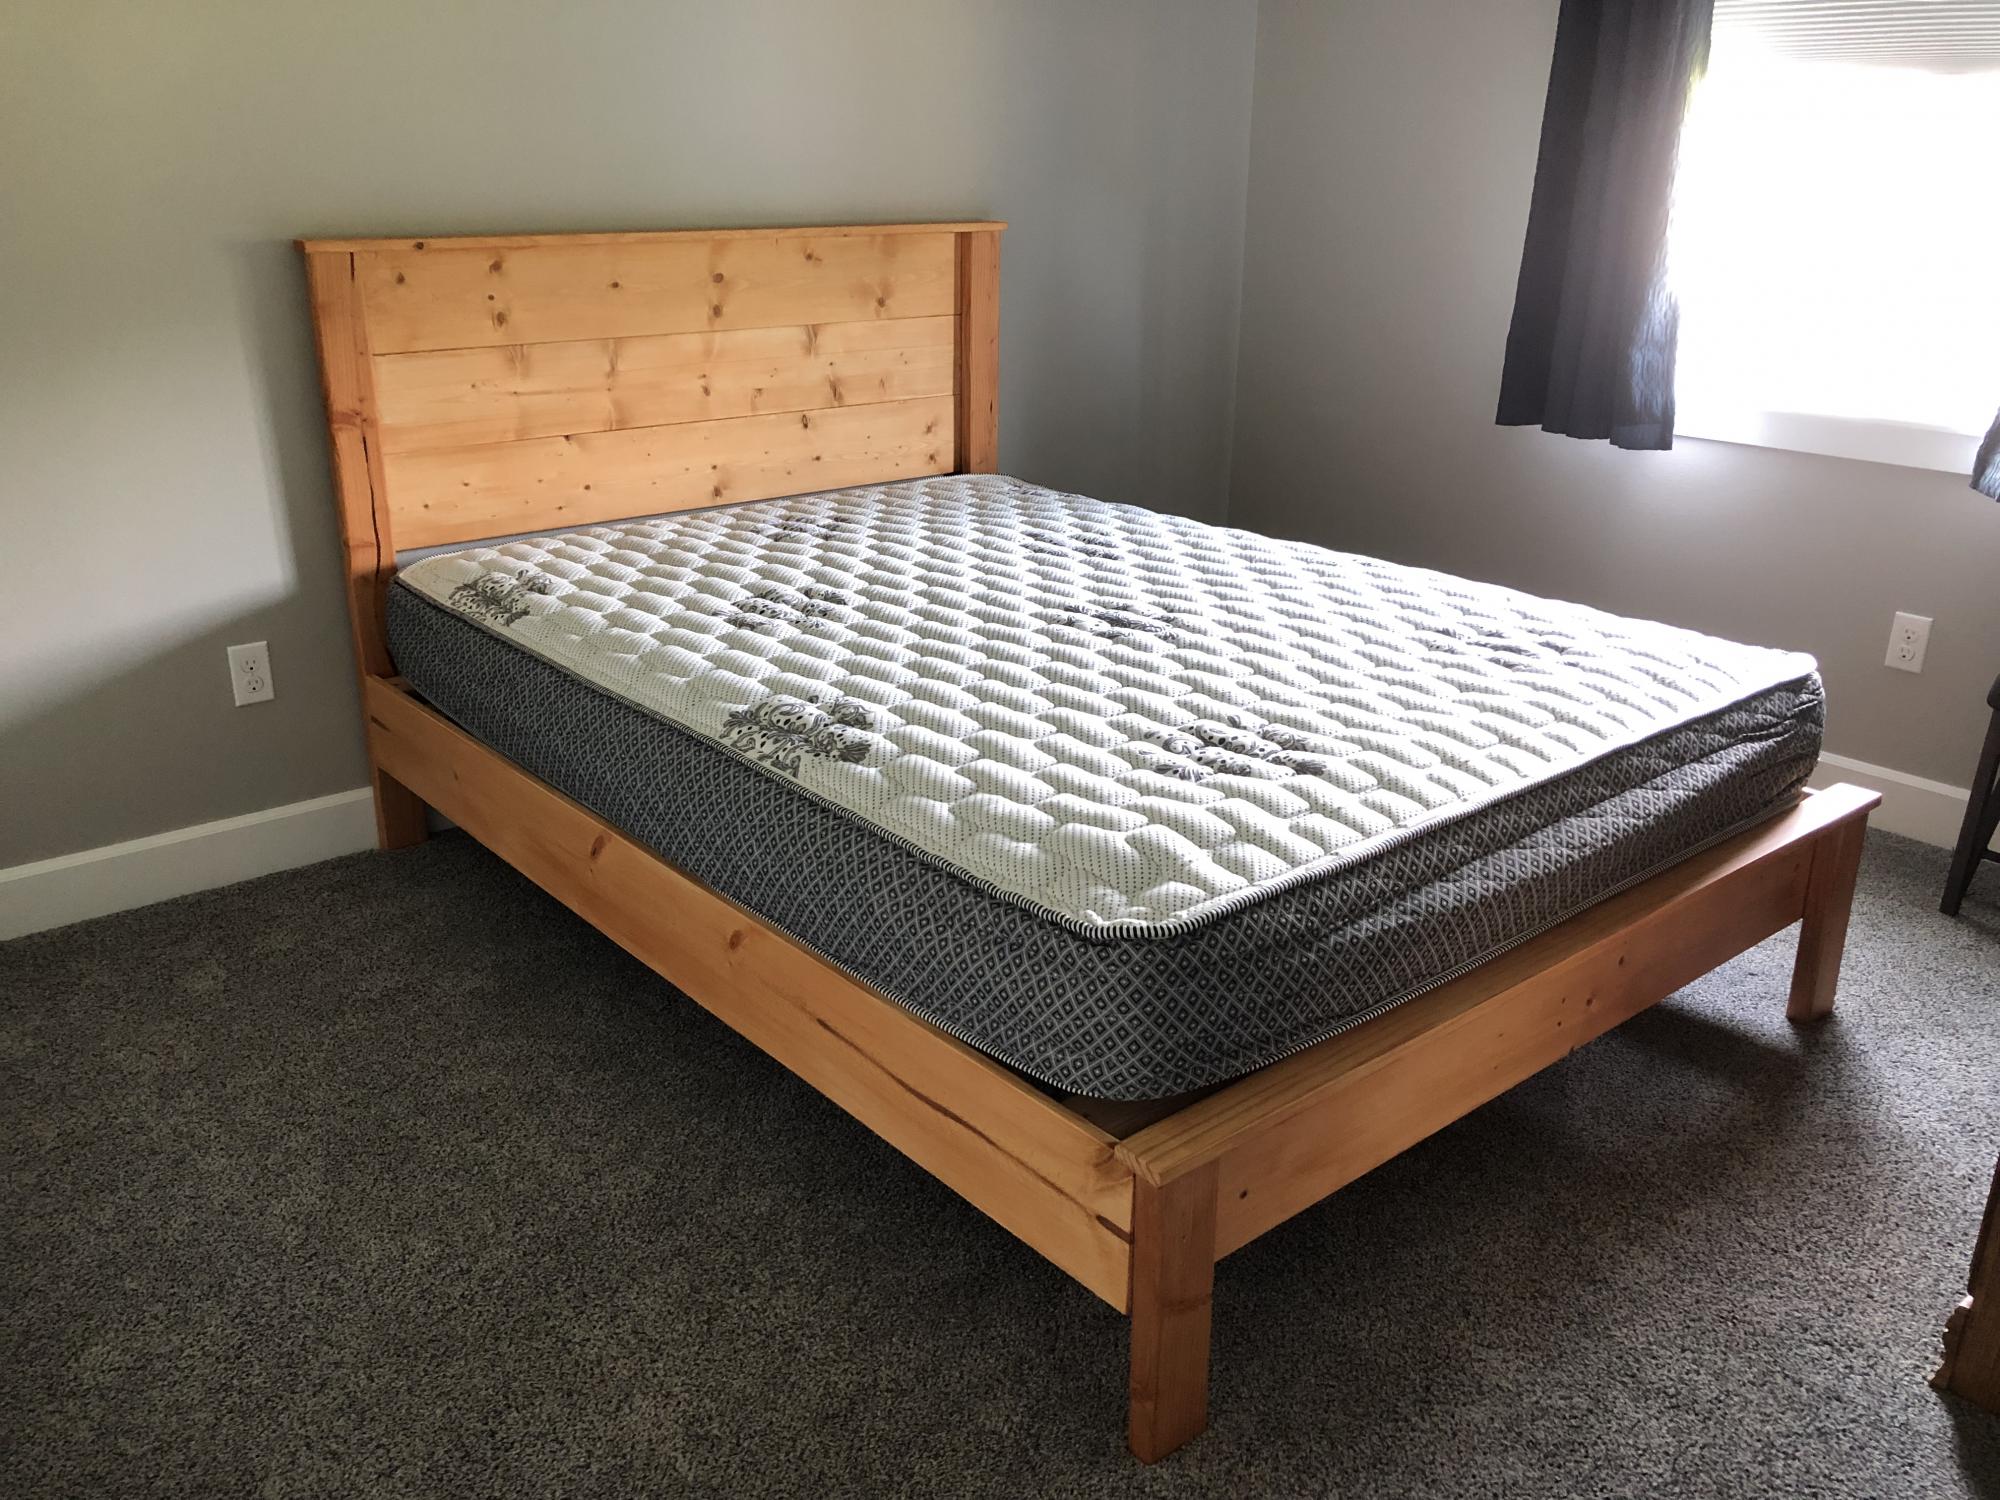
We looked for a simple plan for a bed and found this one on Ana’s site. Easy to build in a weekend.
Mon, 06/03/2019 - 11:35
Thank you so much for sharing a photo! I've been looking forward to seeing how the bed turns out! Great job!
my first project!
Sat, 04/22/2023 - 09:53
Thank you for sharing, you did an amazing job! Can't wait to see your next project.:)
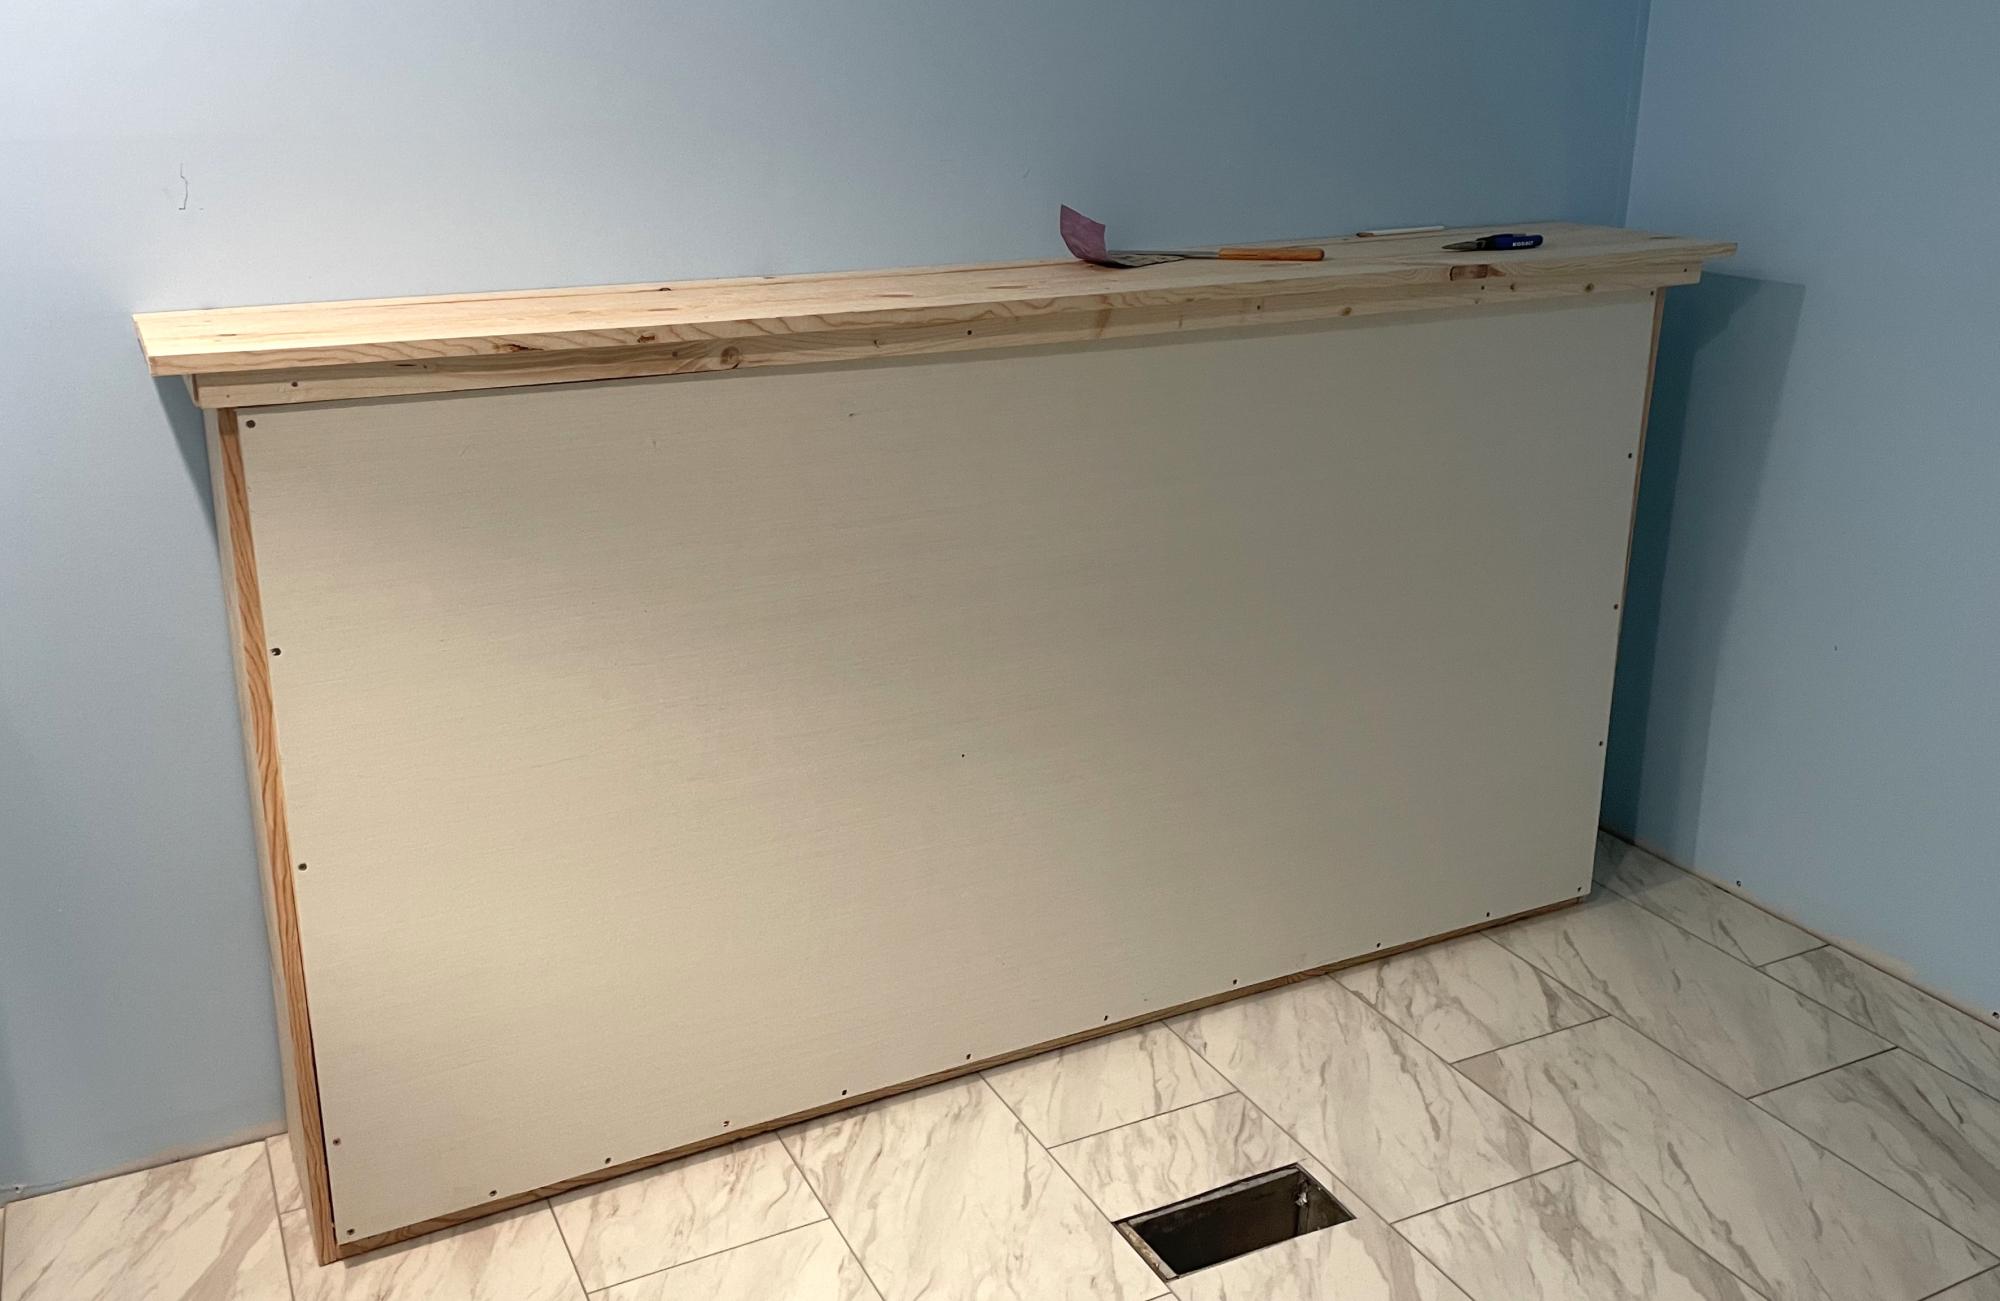
We are remodeling our 3 bedroom house into a 4 bedroom. In doing so, my youngest is getting the smaller room. We decided to go with a Murphy bed to allow more play time space. I do not particularly like the fact that this bed doesn’t sit off the ground but overall love the simplicity of making it. We turned it horizontal and just love the overall product. I can mot wait to make something else from this site!
Tams
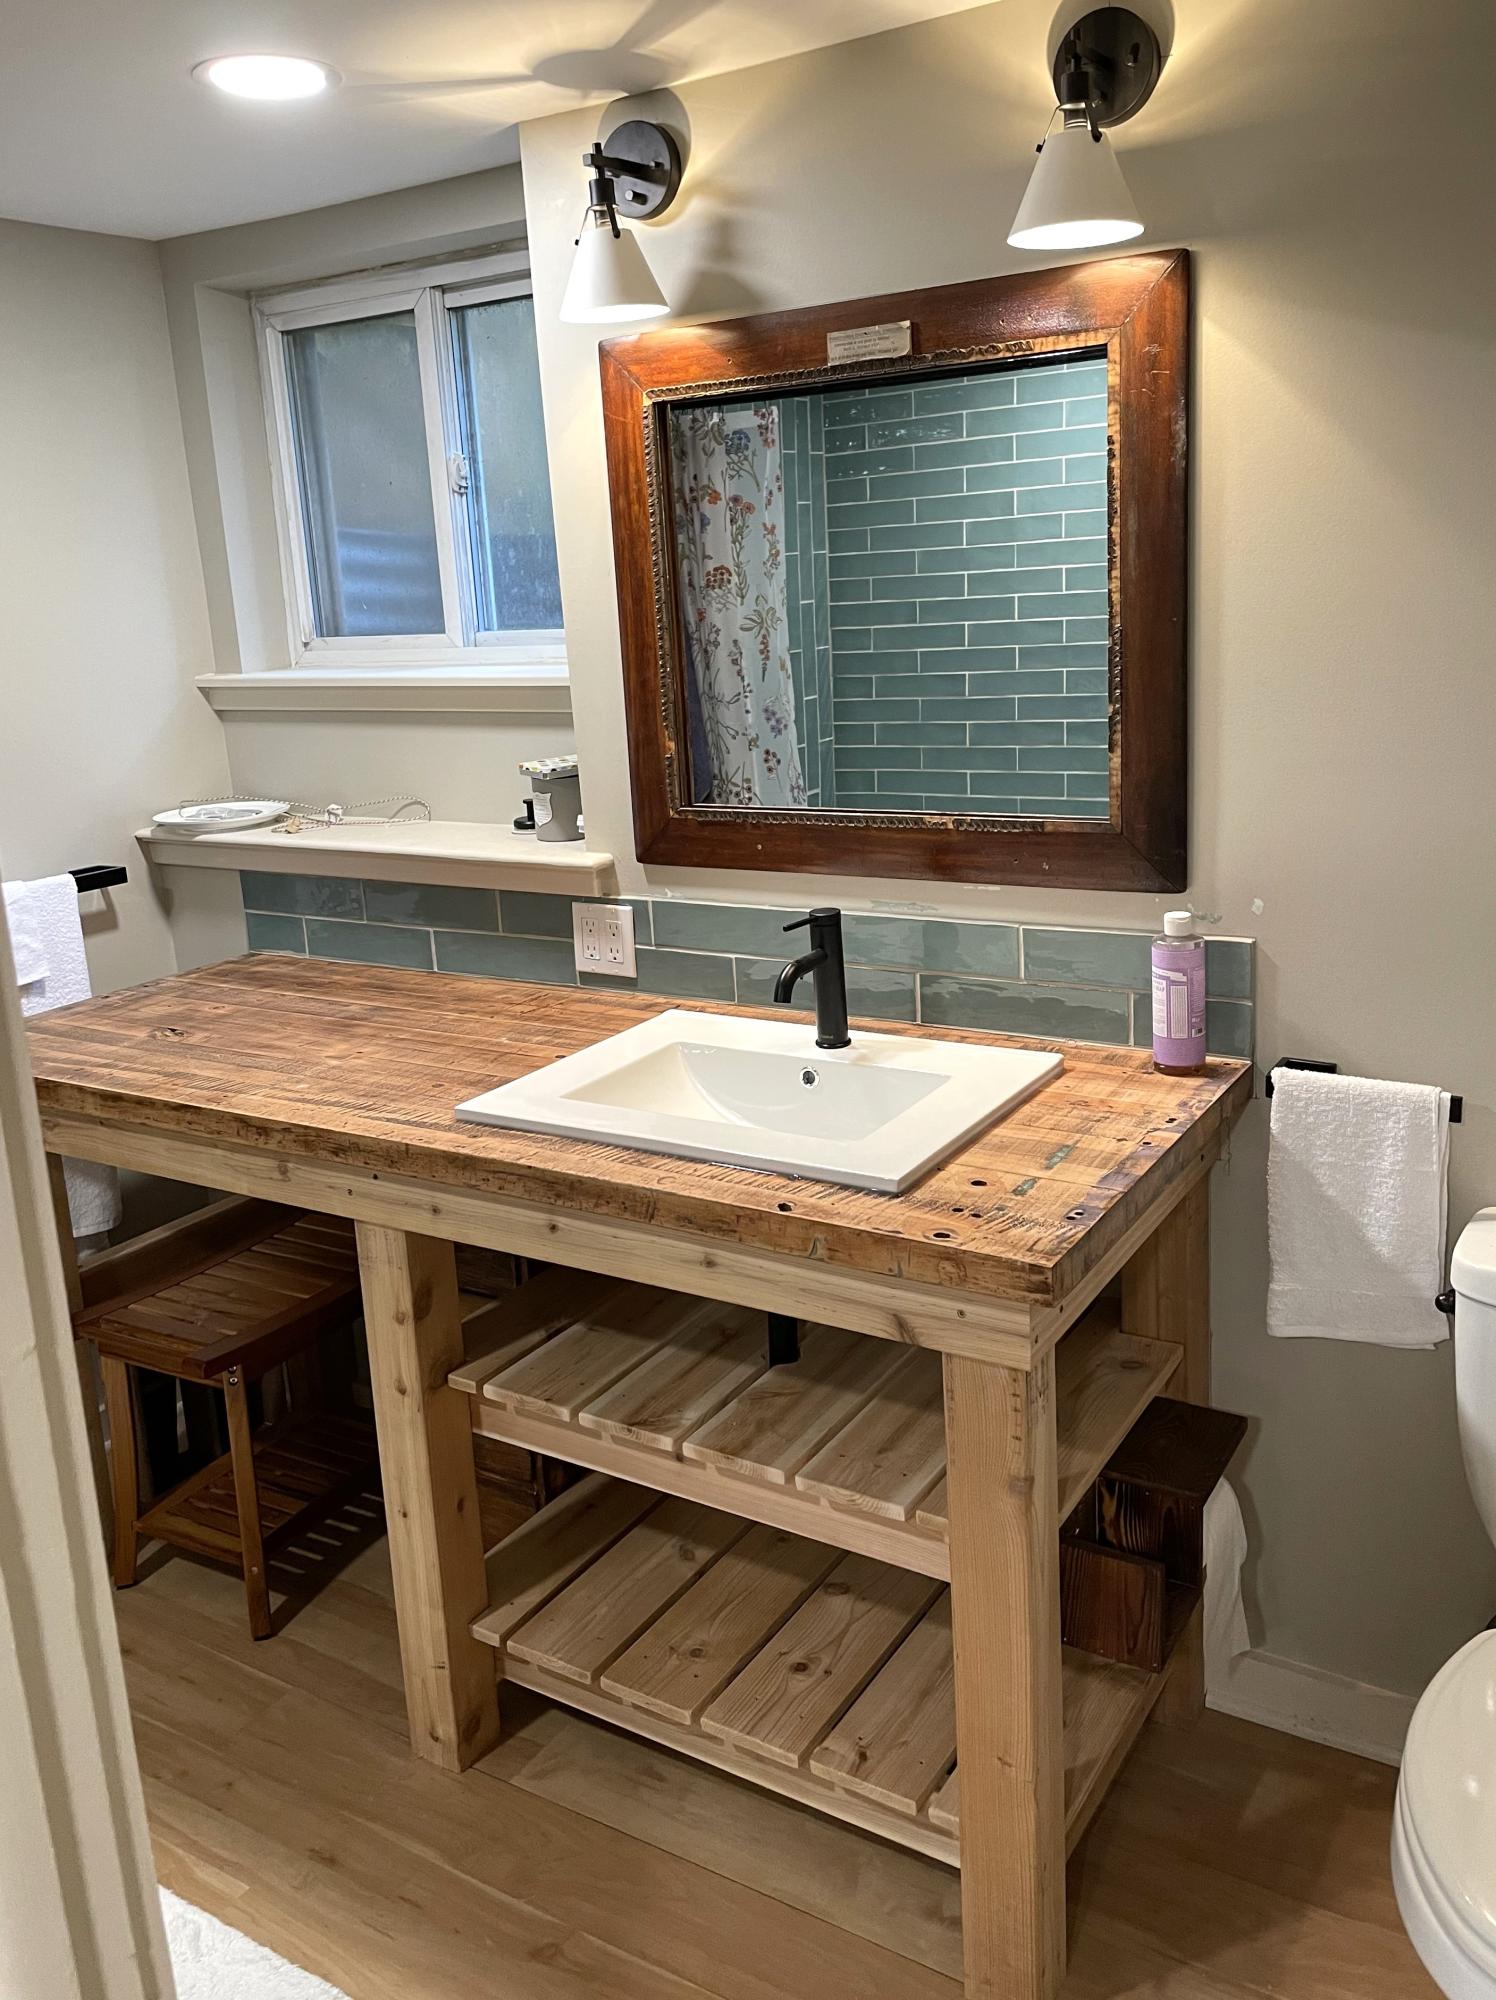
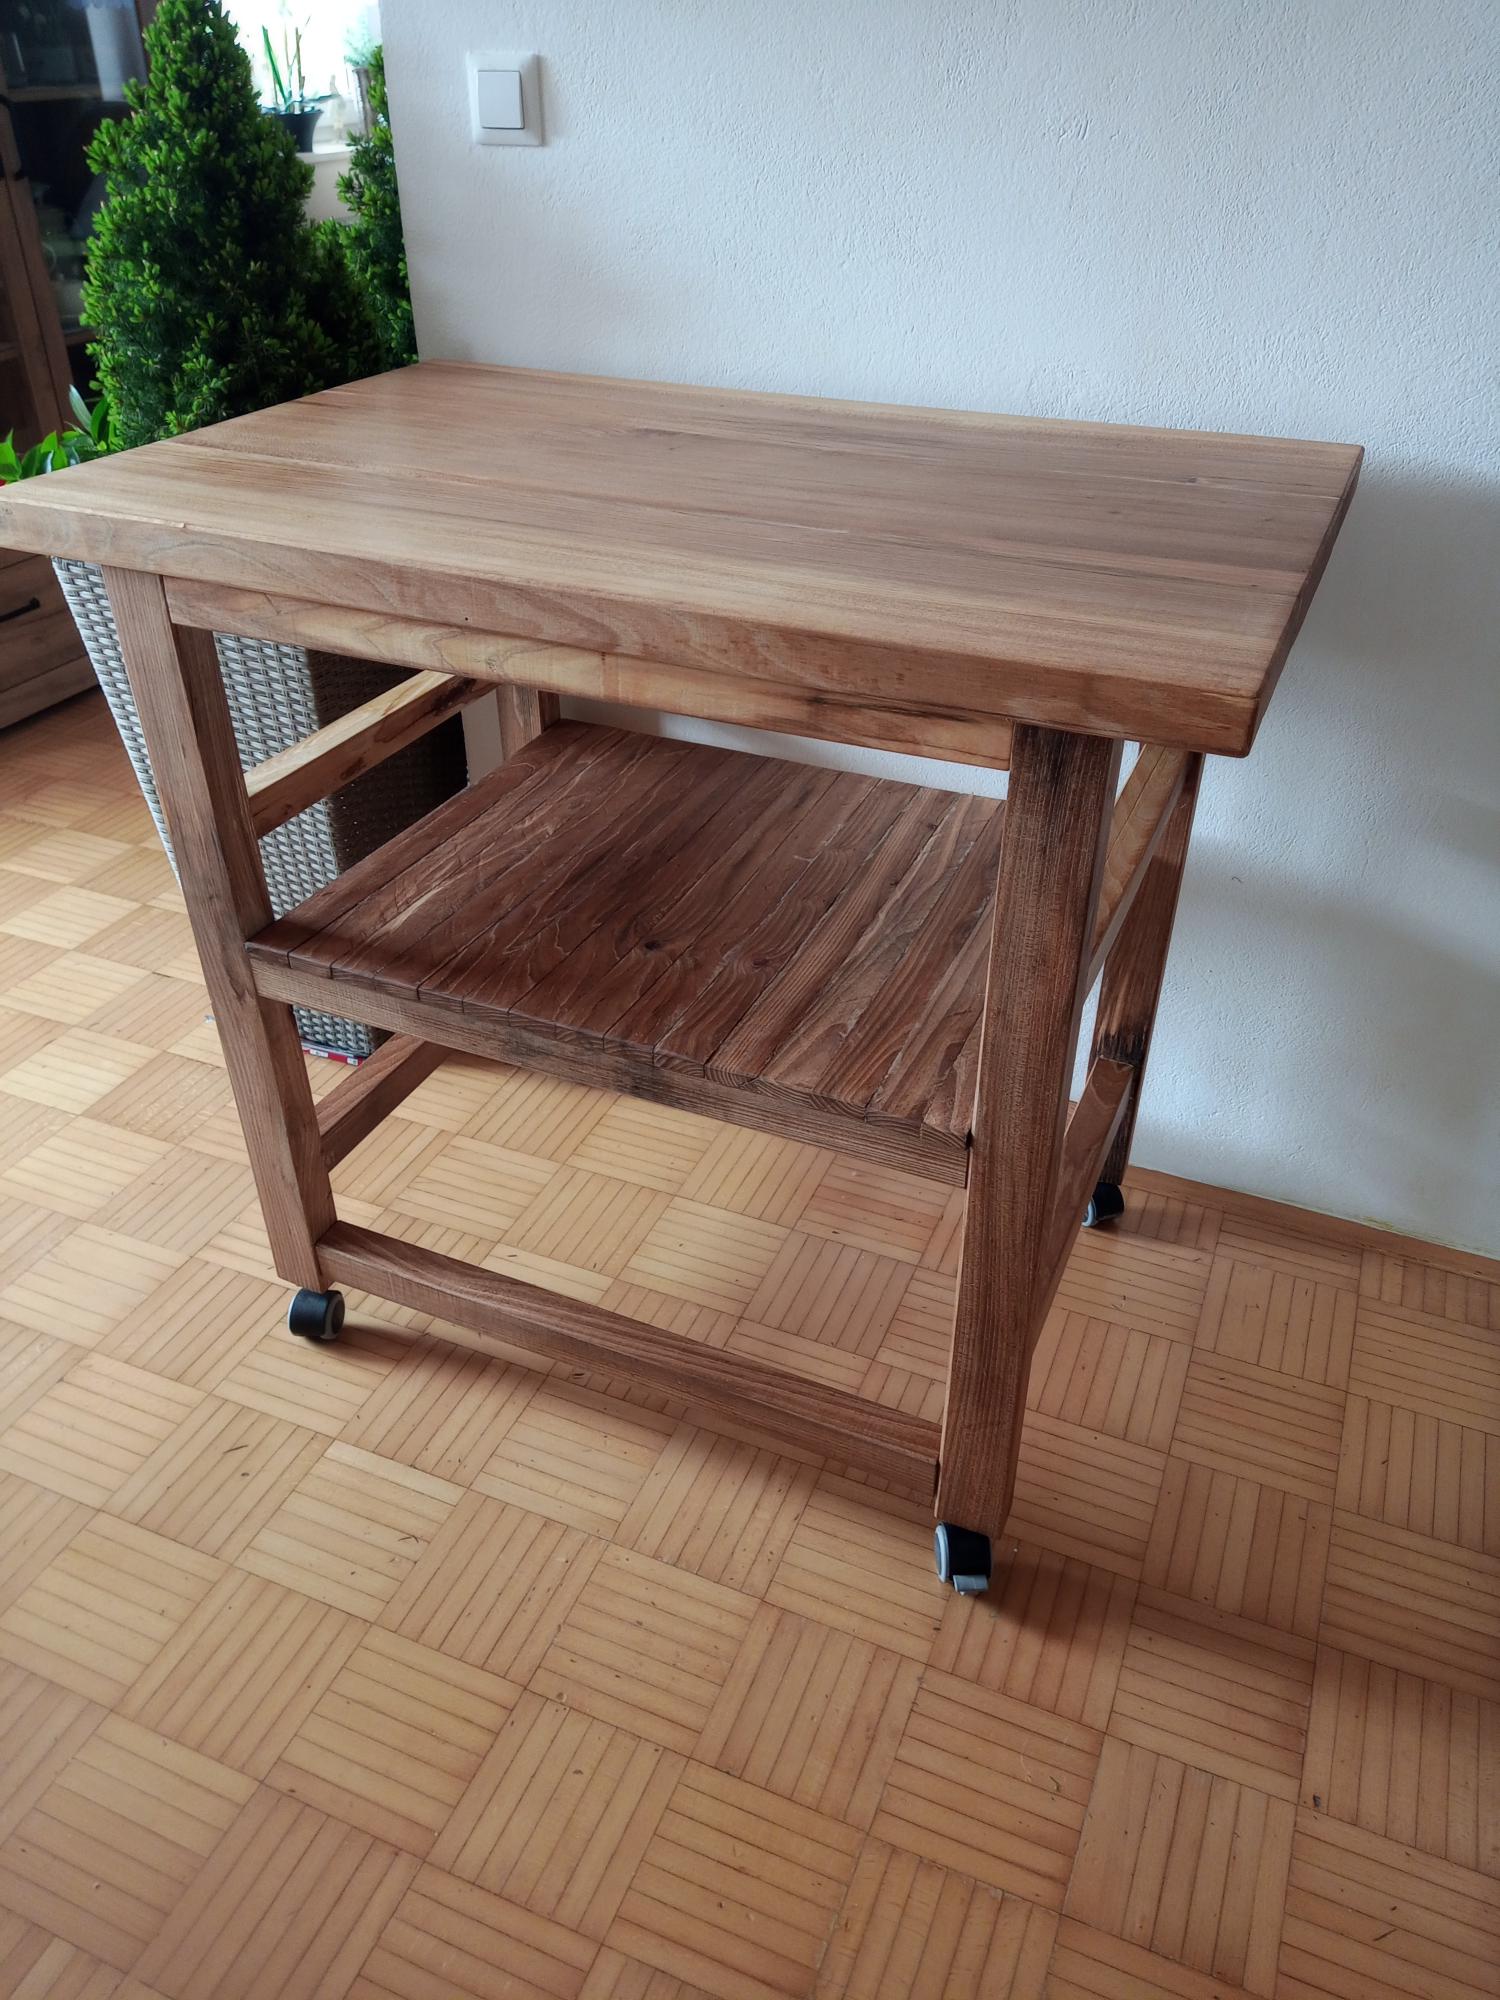
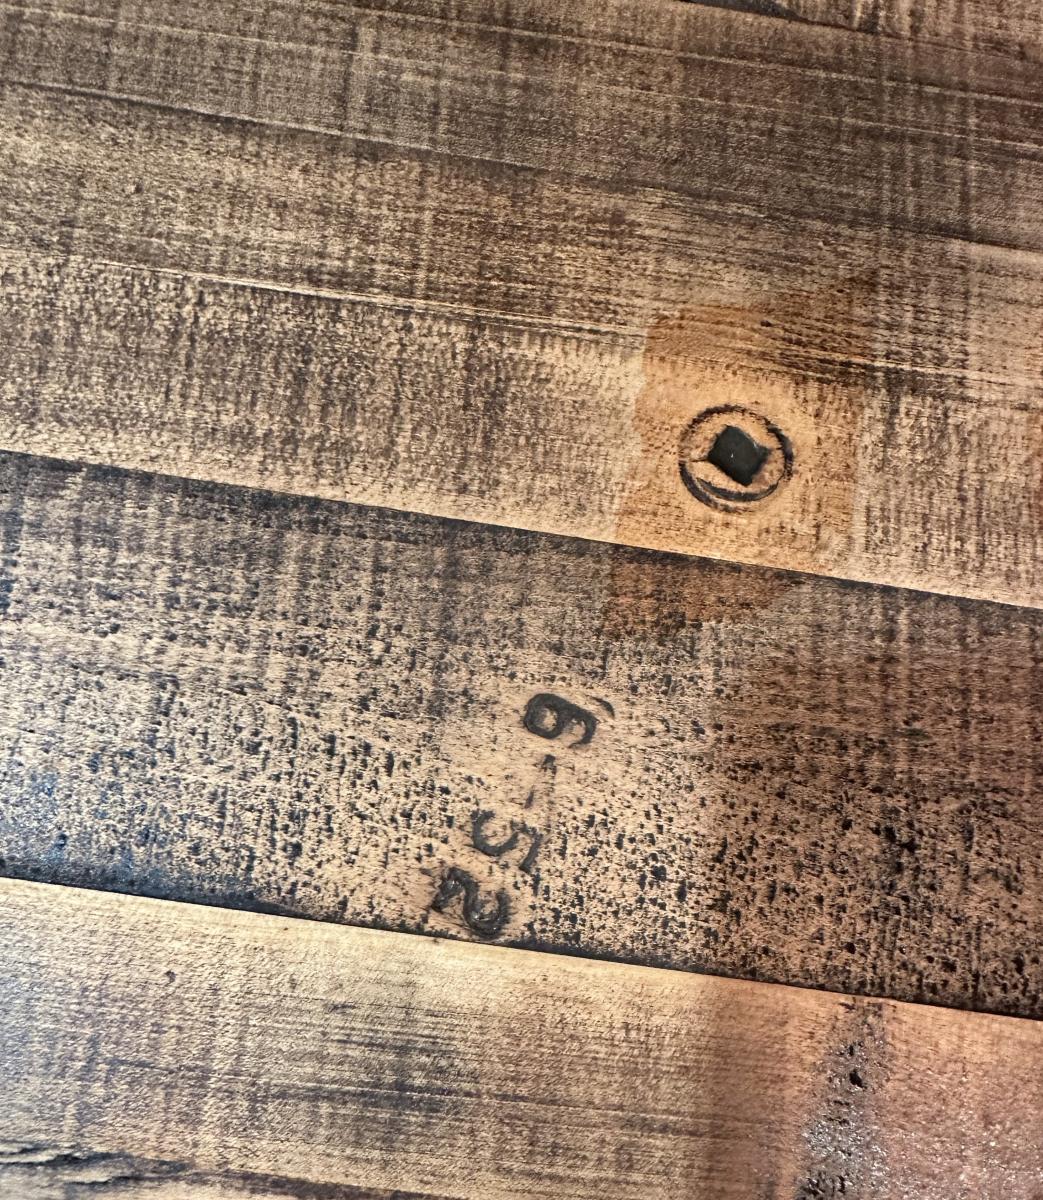
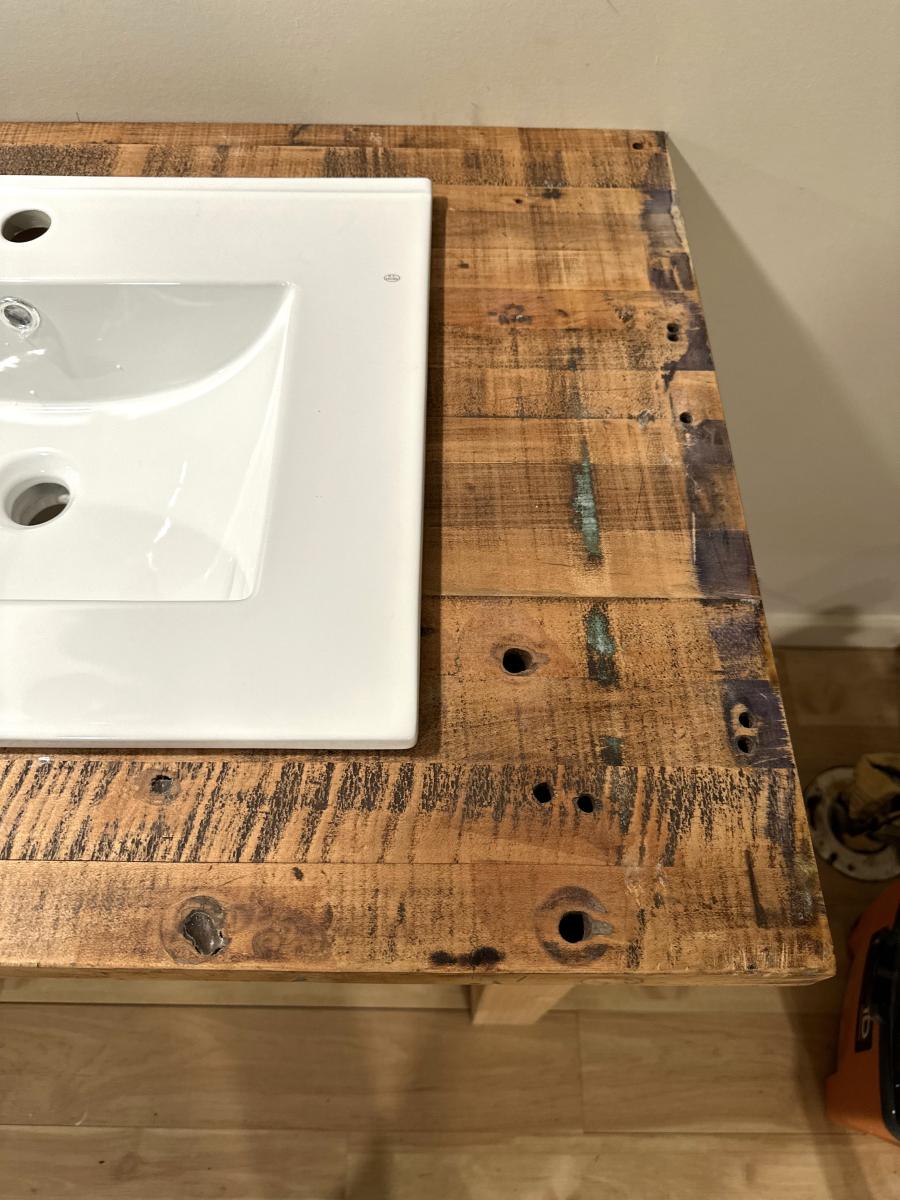
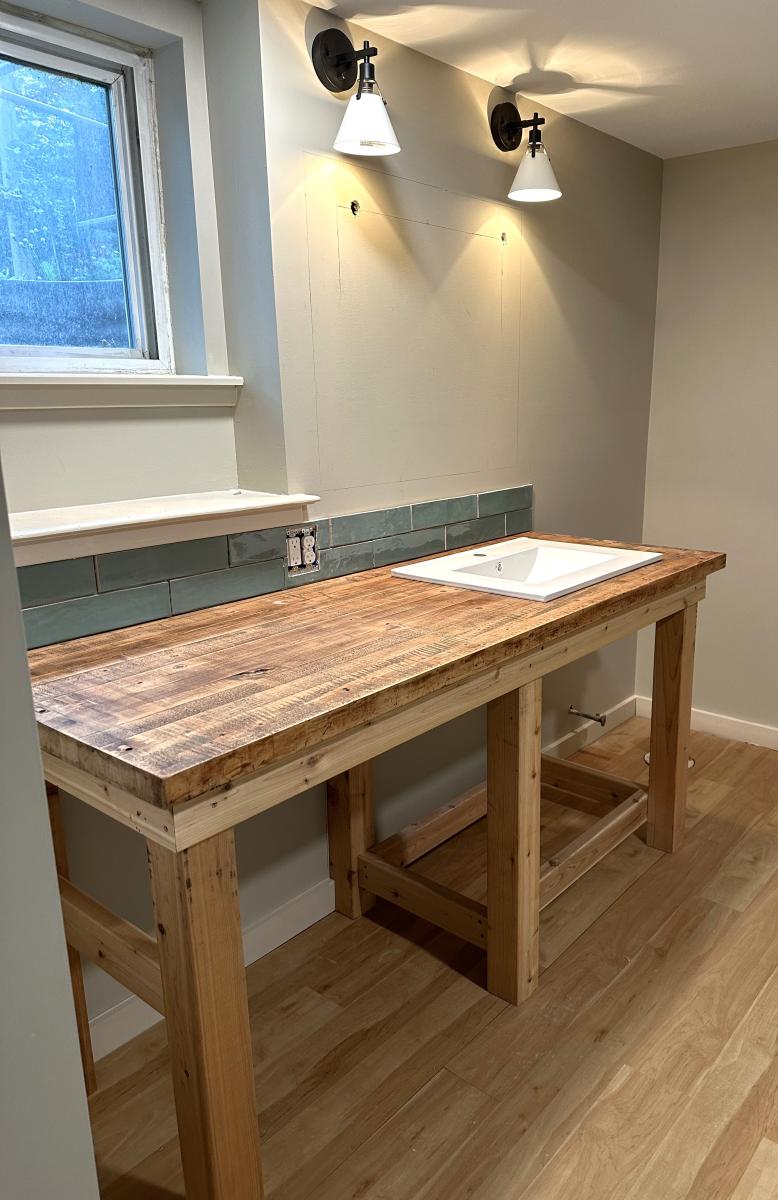
Use the general idea of the kitchen island plans. I had an old butcher block work table top from June 1952. I wanted to cut it down and make a bathroom vanity. We used cedar legs for the posts and shelves.
Kristi
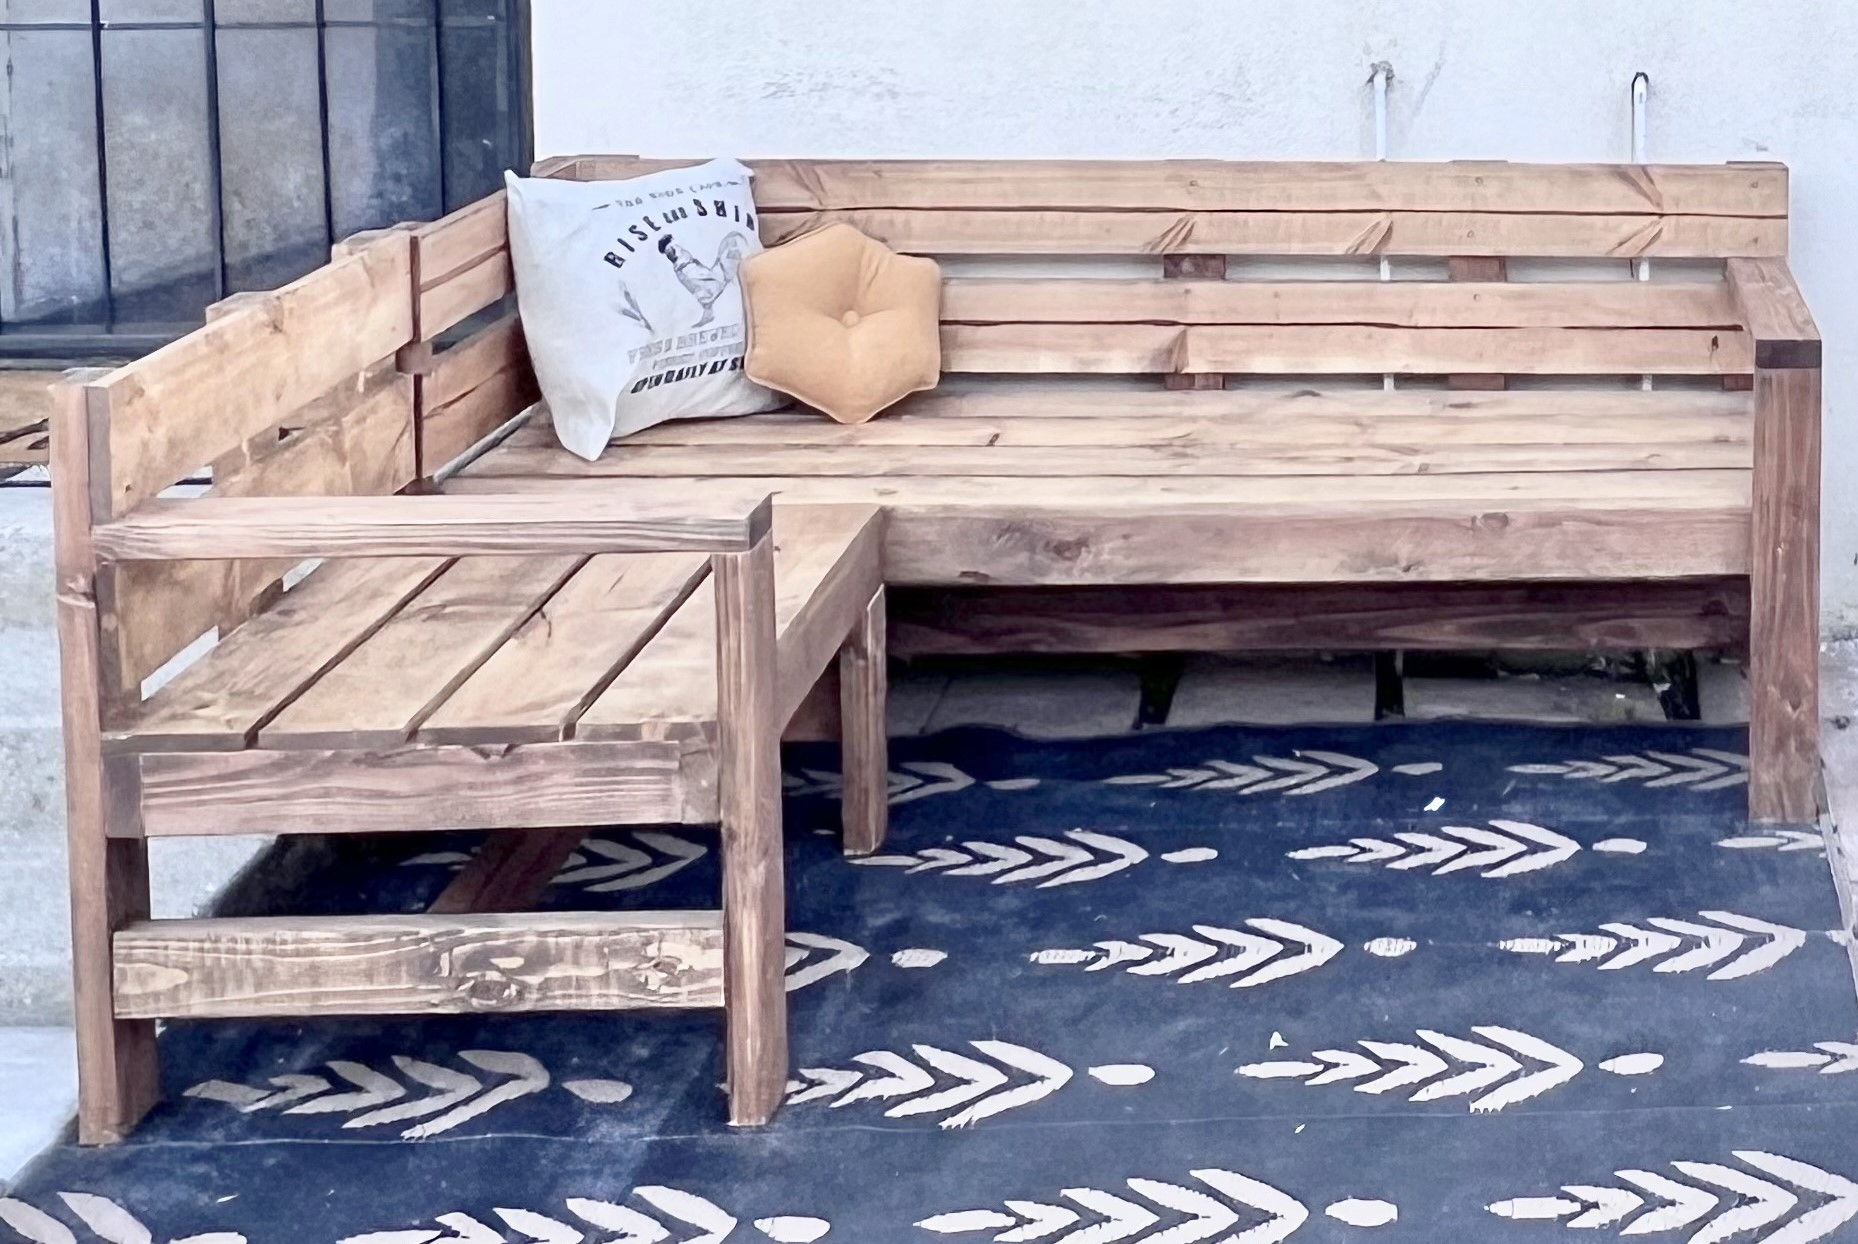
Modified to make an L shaped bench . Absolutely love it! Thank you!
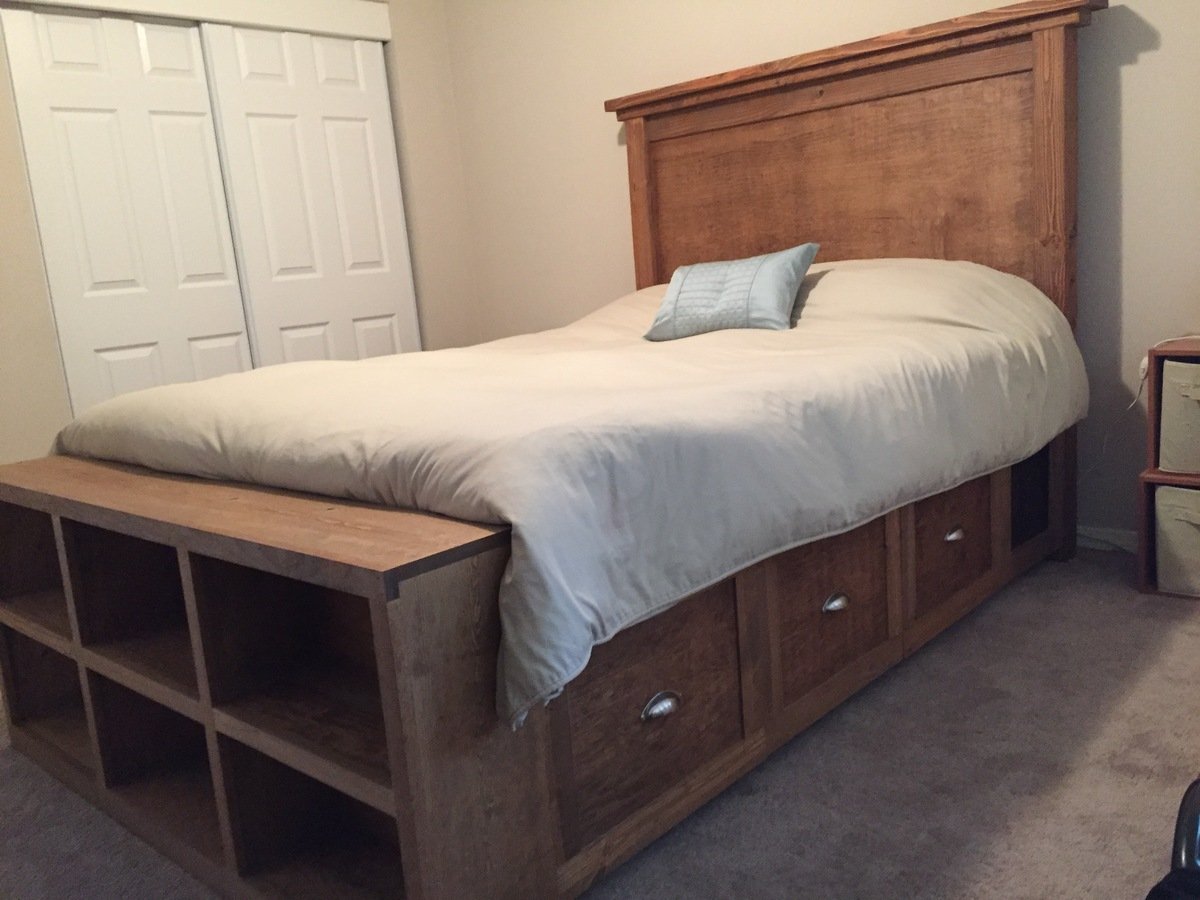
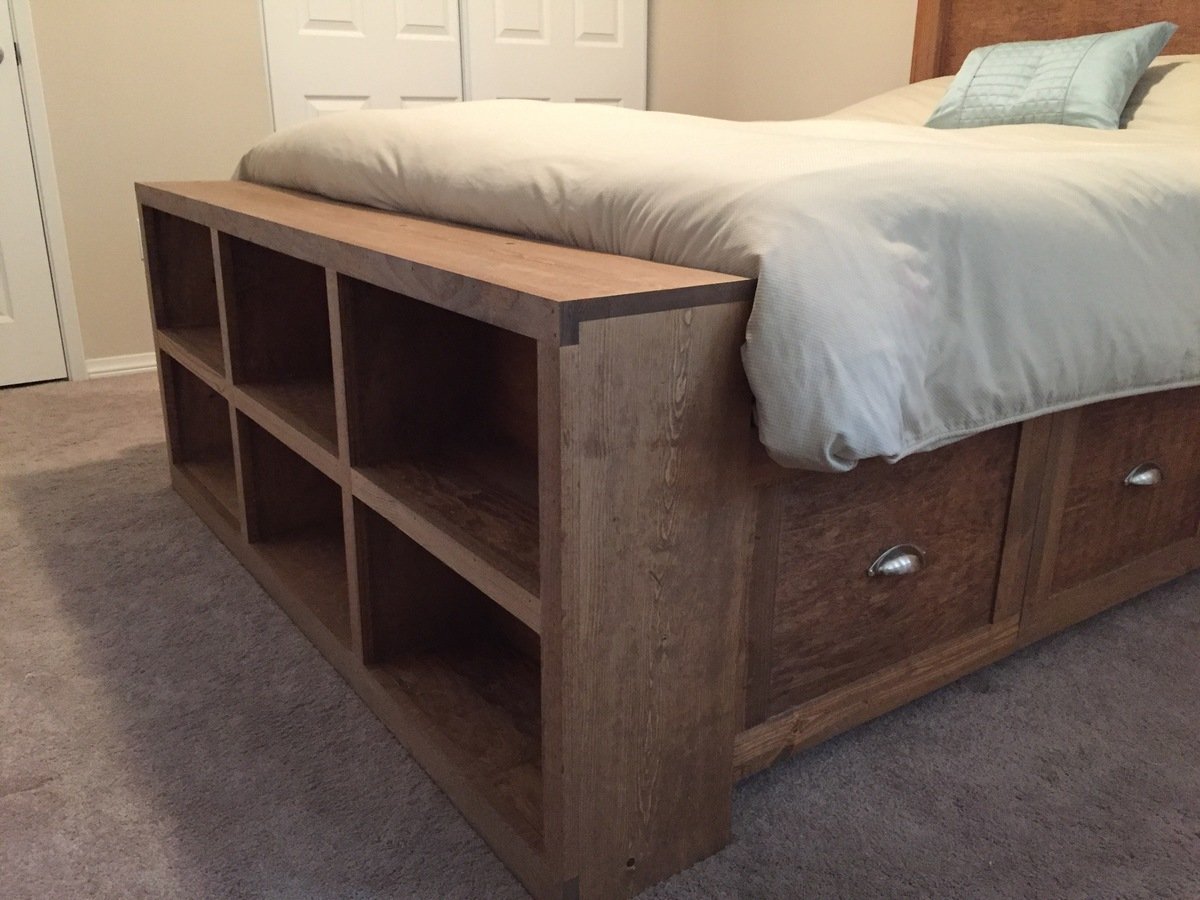
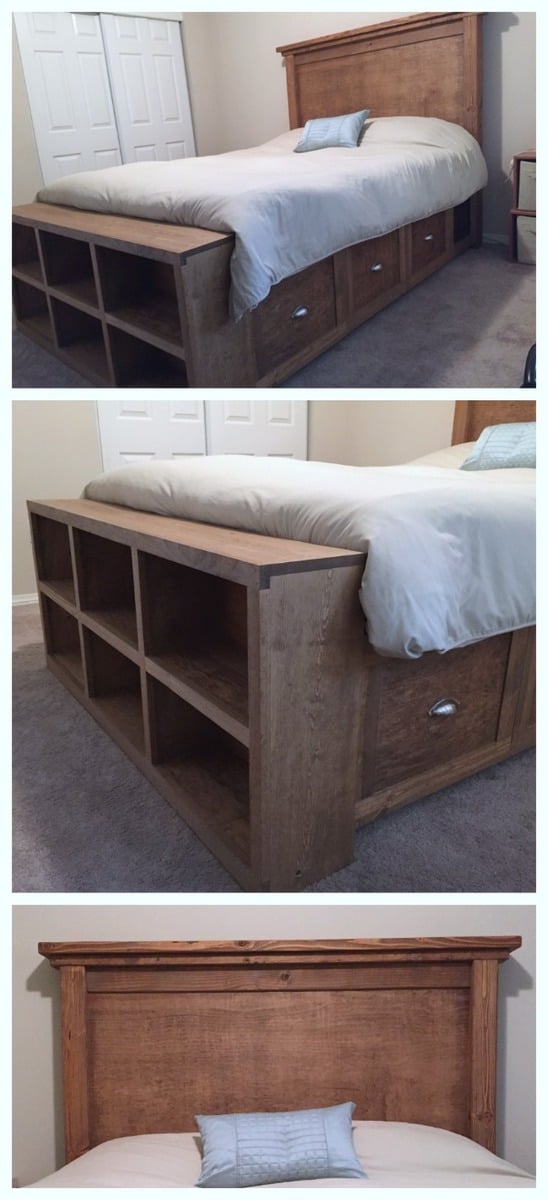
I altered the plans just a bit so that I could make use of the drawer closest to the headboard, while using bedside tables as well (not the ugly ones in the pictures, but some that only exist in my mind as of now). With the plan as is, I didn't think that first drawer would be able to open if you have a nightstand. So I left about a 17" gap that can be used as an open shelf for storage, and still had room for 3 drawers. I also wanted to include a bookshelf as the footboard to make it multifunctional. We have a ton of books and no place to store them (fear not, a large bookshelf/media center is coming soon!) I also altered the top of the headboard just a bit to give it more texture and visual appeal (hopefully, but beauty is in the eye of the beholder so I've been told). Lastly, I did not put the 1/4" plywood backing on the drawer carcasses. They were pretty sturdy as is, and only got more sturdy as they were attached to the headboard and footboard; I'm not worried about racking at all. Leaving the back off also allows me to pull the drawers out and access some hidden storage in between the two drawer carcasses.
I wanted a simple finish, so I rubbed it with dark walnut Danish oil. Super simple finish and I think it'll hold up as the bed is not like a desk that needs poly or something.


Sun, 08/28/2016 - 19:50
This bed turned out amazing. I love the modifications and agree the first drawer will be more usable.
Thu, 05/28/2020 - 06:11
Could you please tell me how you attached the footboard on this one? I thought about using some bolts and counter sinking them from inside the self. How did you do it?
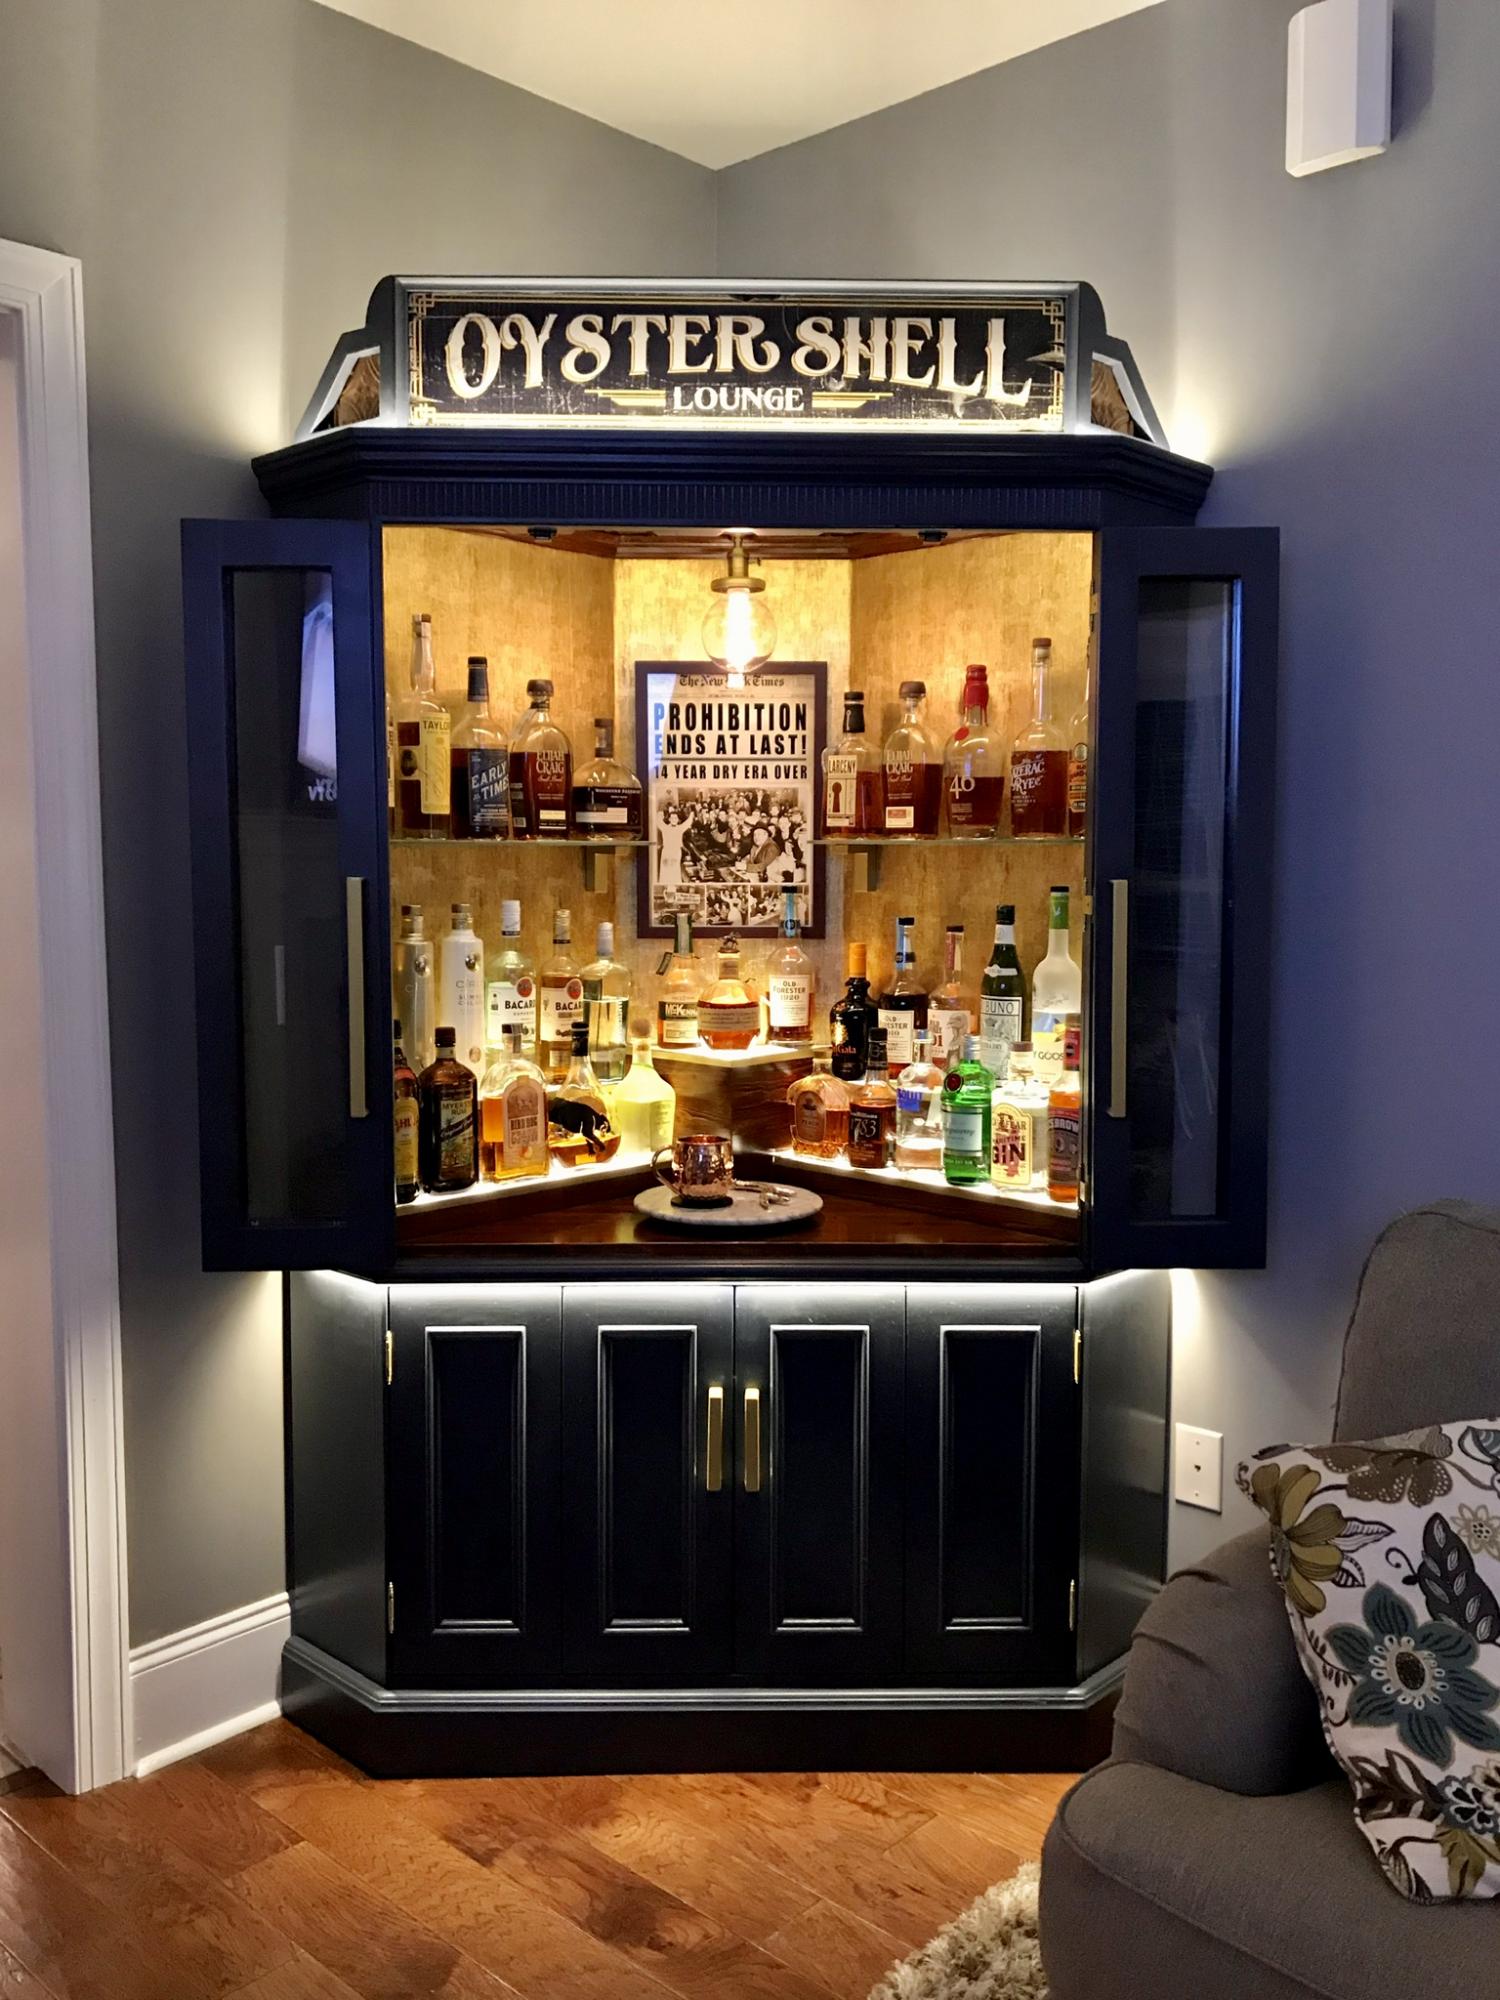
I bought this tv corner cabinet for $40. I spent many hours turning into my perfect bar cabinet. I built a custom lighted liquor display. I have posted photos of the transformation.
Thu, 03/18/2021 - 00:07
Wow that beautiful do you have directions on what you did?
Tue, 07/06/2021 - 19:04
So this is not your project? Because there isn't much information or a before and after picture. This gave me an idea for our home.
Sun, 08/15/2021 - 18:34
Yes, this is my project. What would you like to know?
Wed, 12/29/2021 - 06:41
This looks beautiful and authentic at the same time. Love how it gives me a theatre vibe! cabinet makers mornington

8’ by 12’ shed with extra 15” of height. Thanks for the plans!
Made tis twice. First one was a mess, Bought more wood and started over aware of problem areas and built more carefully second time.
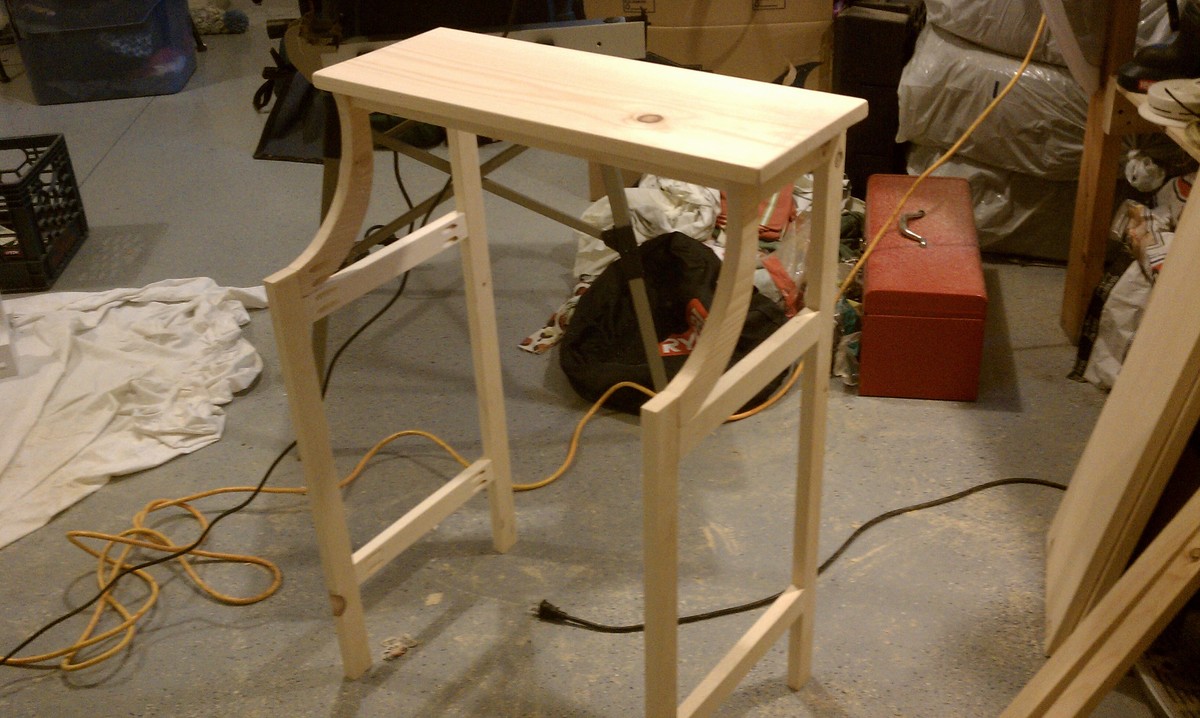
Wasn’t too awful bad. The cuts were basic and easy to duplicate. I would recommend having some clamps to hold the supports in place while you try to screw them together. Otherwise, this table is pretty heavy duty and a lot bigger than I thought it would be. I sprung for a more durable and harder wood top, oak so the cost was about $25 more.

Shortened the legs to 17" and used 1x2s on the shelf because that's what we had on hand. Sealed with Thompson's aerosol clear waterseal.

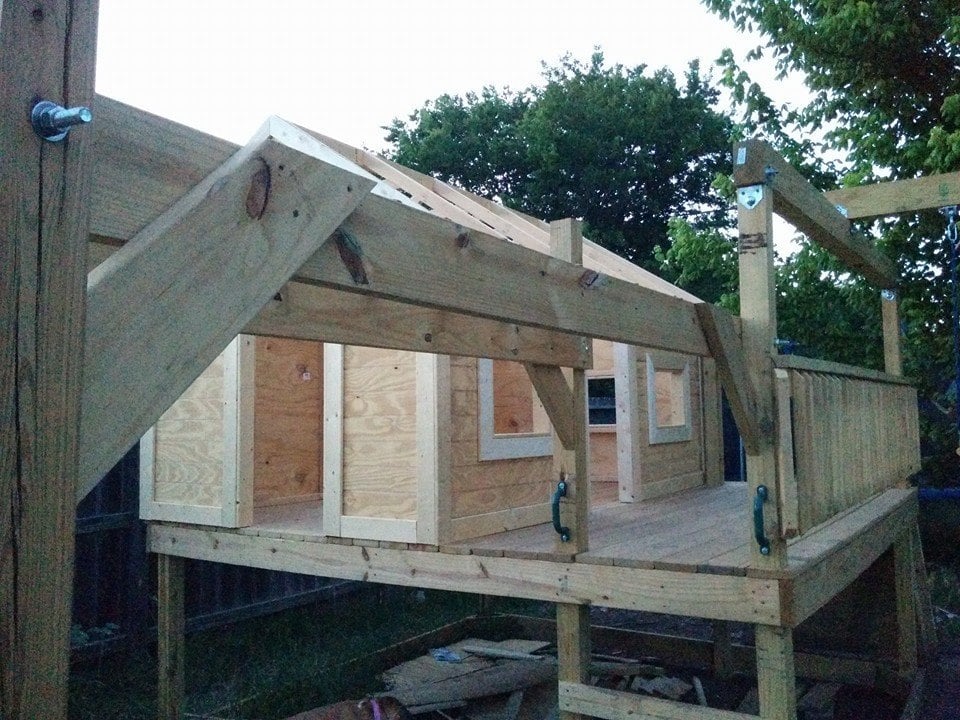
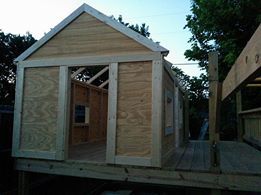
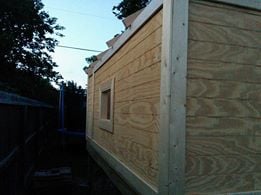
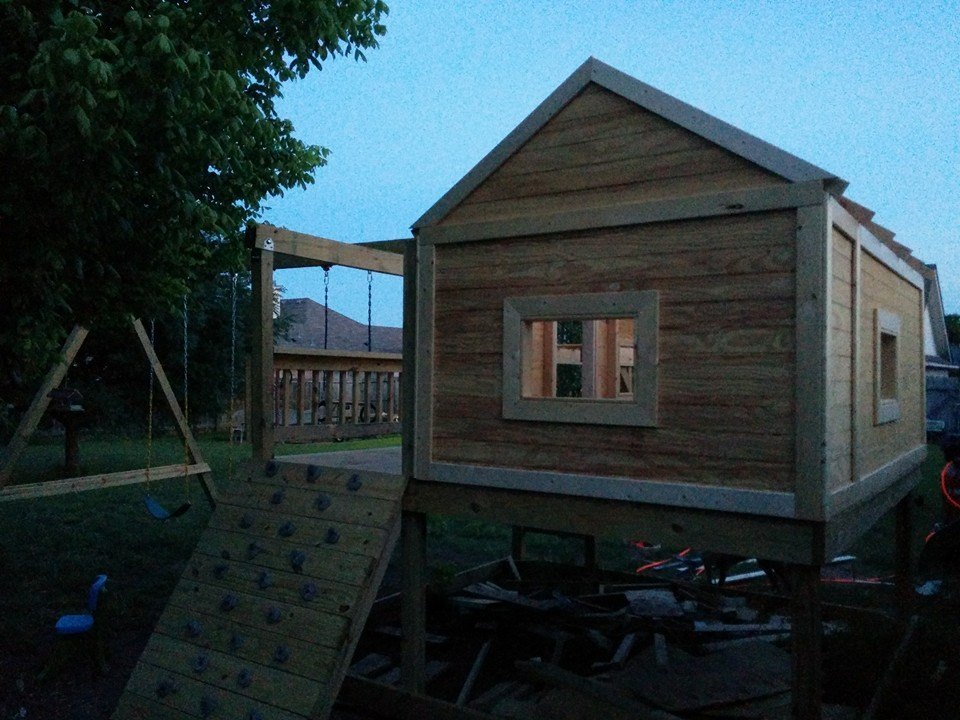
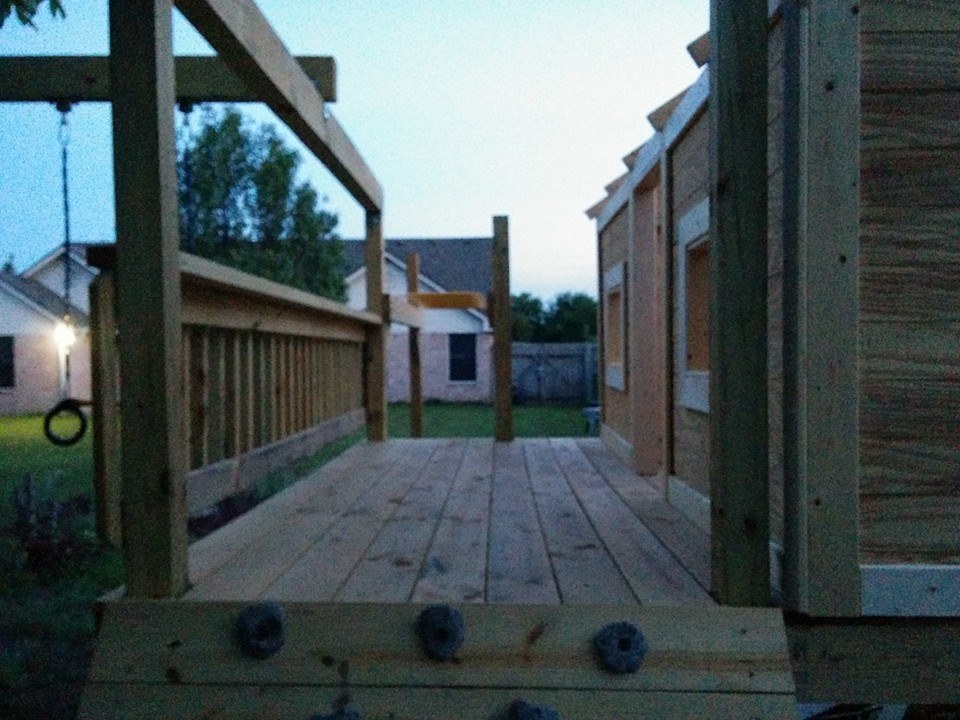
Built using the plans as a starting point and built it bigger than the plans called for.. The deck is 10x10 and the playhouse is 6x10. I used pressure treated lumber for everything but the playhouse. I still need to paint the house and stain the deck, then put the roof on.. if it would stop raining.. Once i'm done staining the deck I can put the slide back on also. ''
Swings, monkey bars, and rings / trapeze was ordered from Amazon.
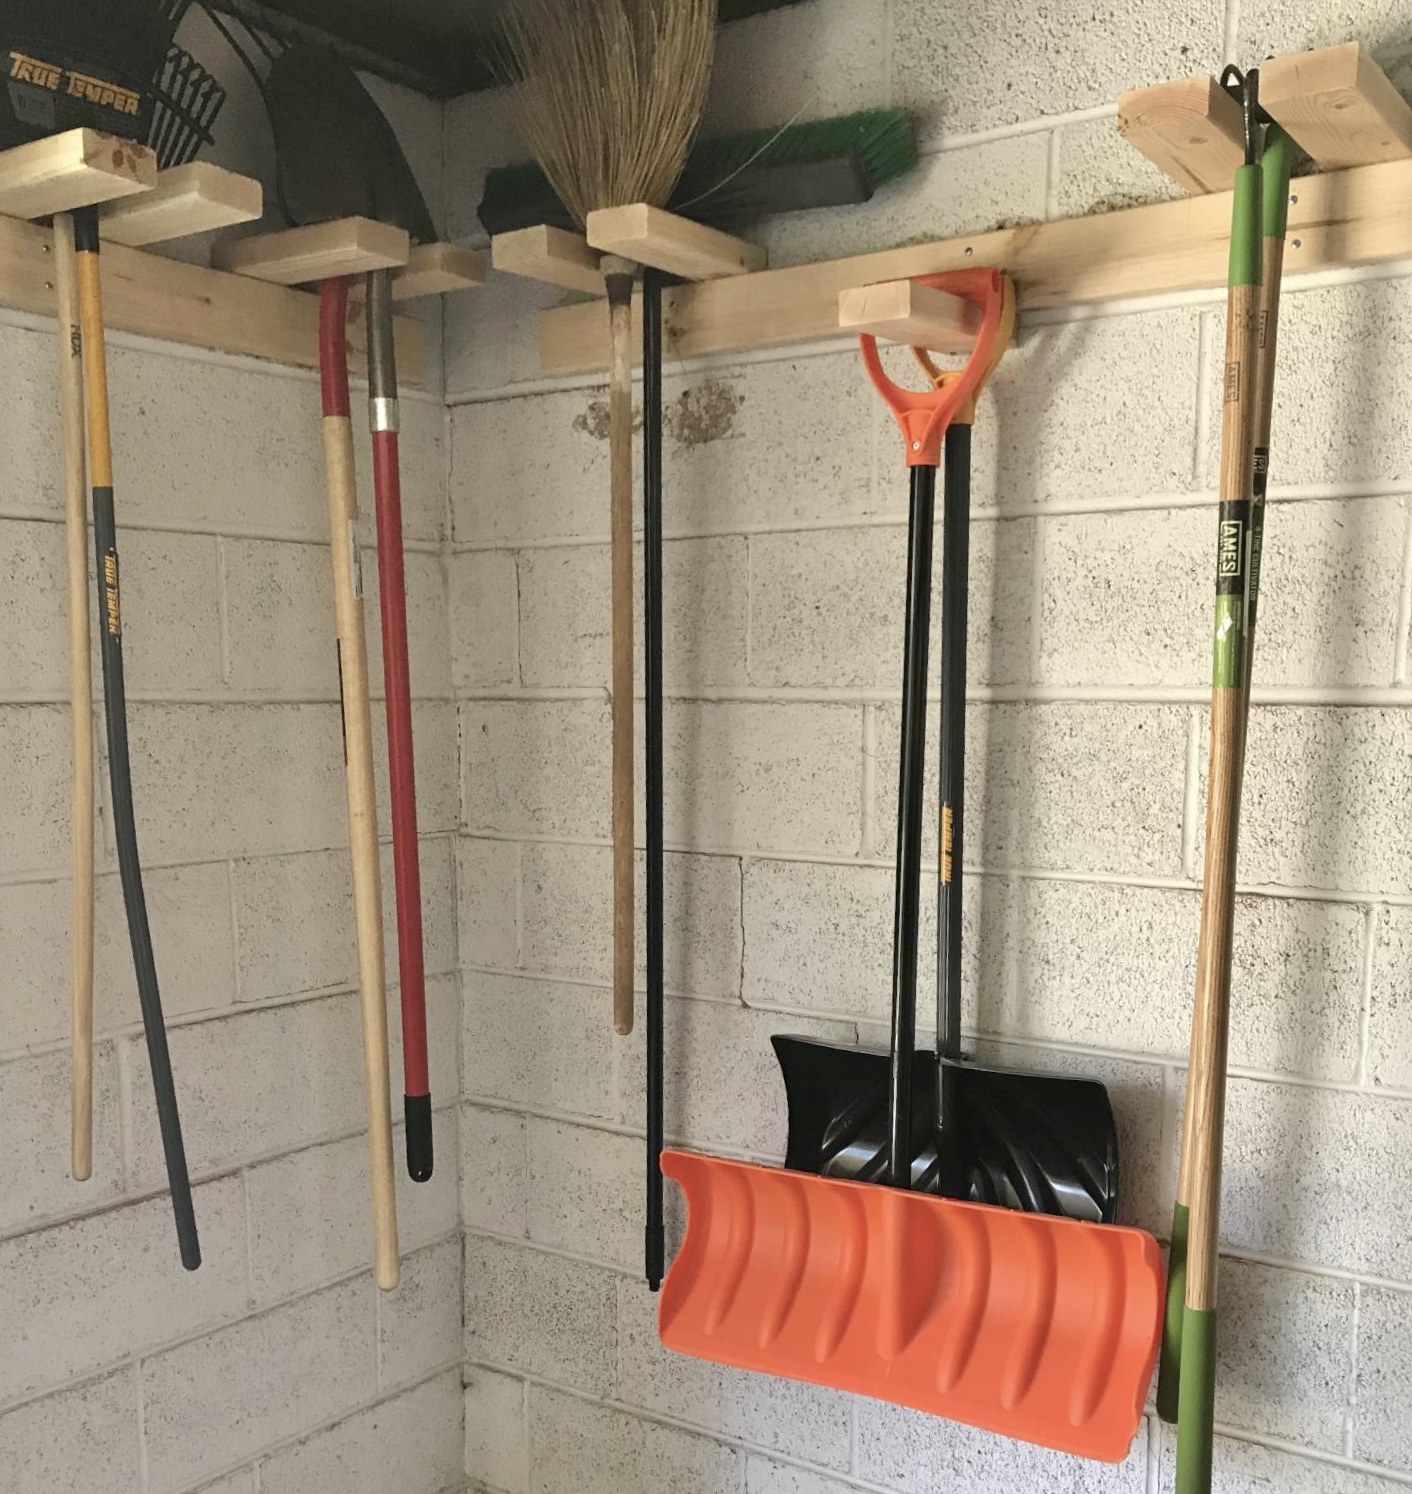
This was super easy to do. Thank you for the inspiration and sharing the plan.
