Community Brag Posts

Bench

Submitted by Anonymous (not verified) on Mon, 06/05/2017 - 13:31

Great bench

Estimated Cost
$100
Estimated Time Investment
Day Project (6-9 Hours)
Recommended Skill Level
Beginner

Square Picnic Table

Submitted by frmoody on Tue, 08/10/2021 - 07:05

Enjoyed this project although with the price of lumber it was a little expensive to build. The only modification I made was to put a cross brace in the centre of the table top. That allowed me to attach the top boards a little more securely as some of them were a little bowed. I'll add a better photograph once I get it out of my garage and on to the back deck. It is a little heavy.

Built from Plan(s)
Estimated Cost
$240
Estimated Time Investment
Weekend Project (10-20 Hours)
Finish Used
I stained the dark part of the table with Behr water based English Chestnut and the seat and top with Minwax Ipswich Pine followed by four coats of Varathane Exterior Gloss.
Recommended Skill Level
Intermediate

Comments

King Size Farmhouse with mods

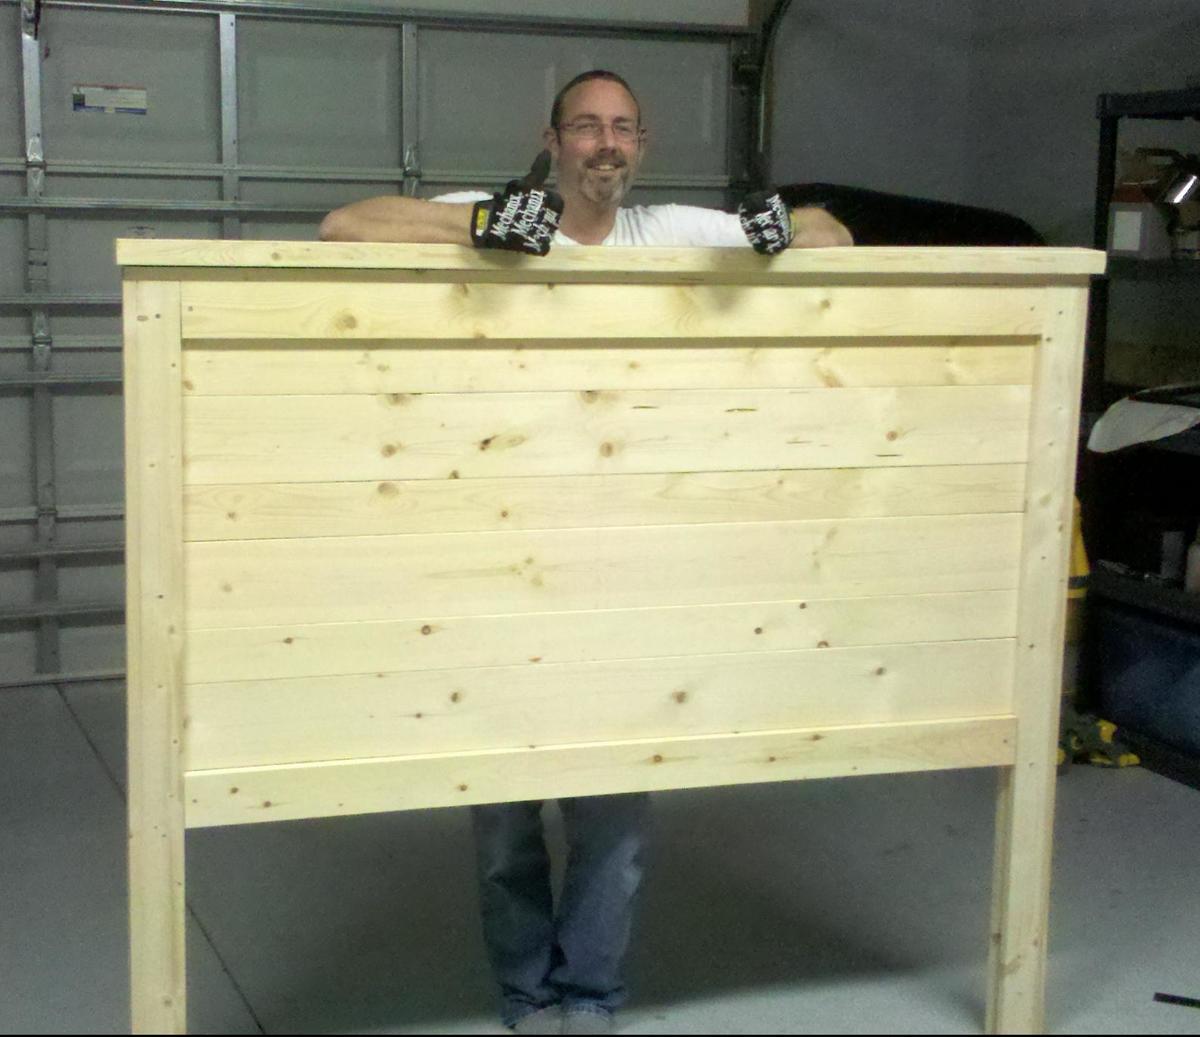
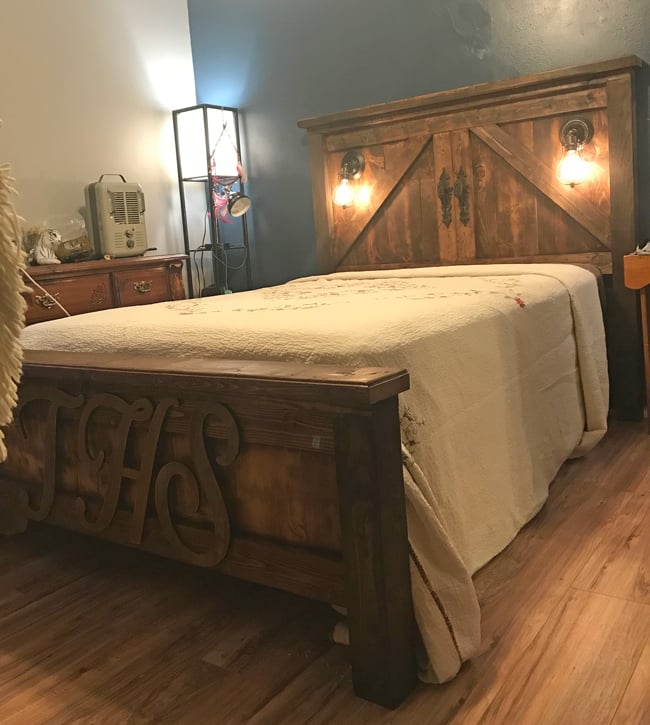
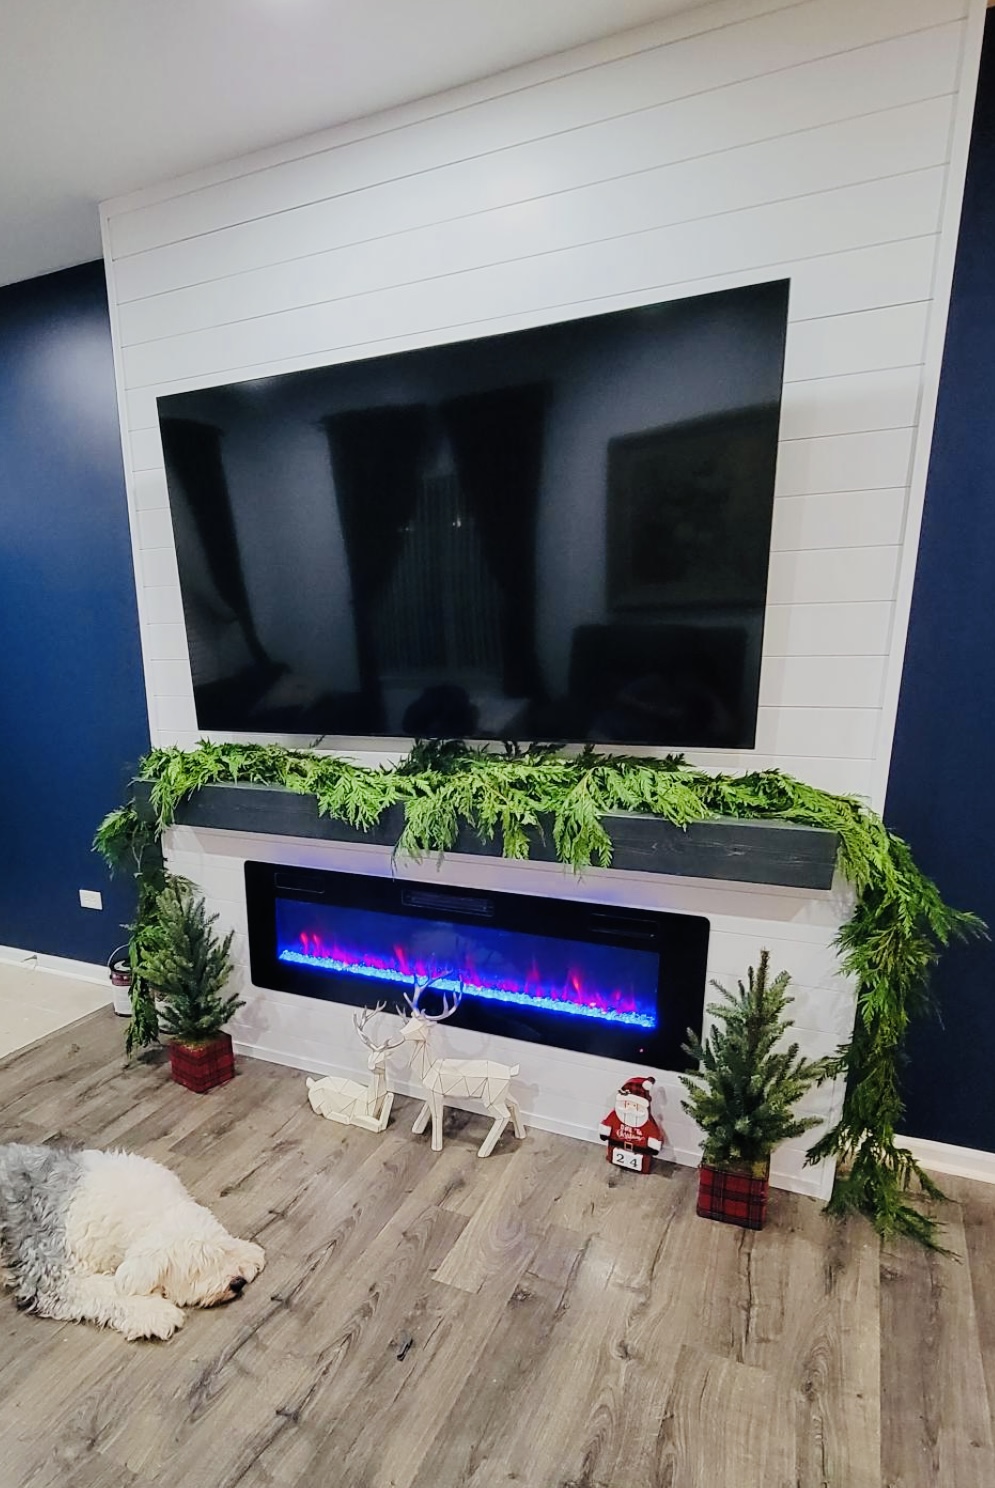
As our very first project we decided to go big or go home as the expression goes lol and it turned out great.

Let's start first with the list of mods that we did.

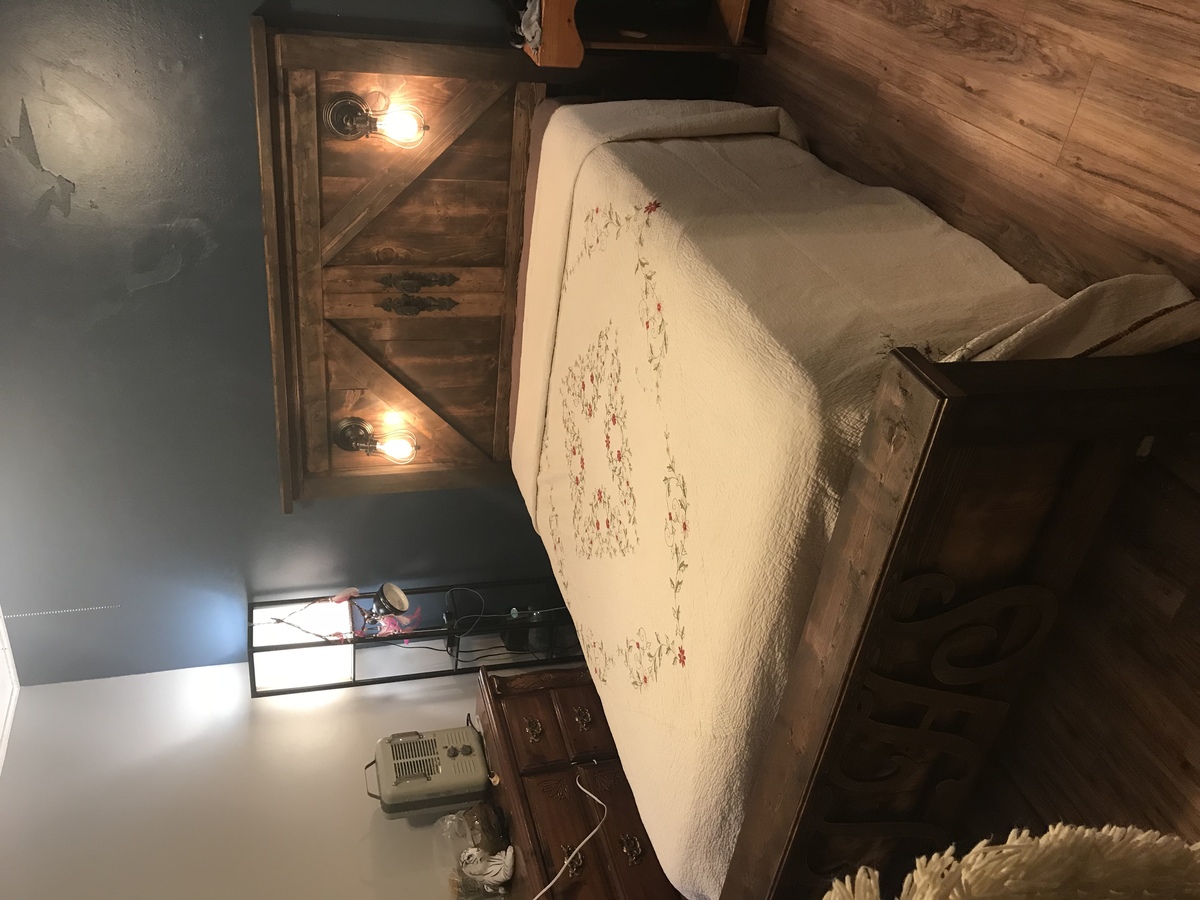
1. We wanted the bed to be higher. A lot higher. Gives more room for storage under the bed also. Plus we like high beds and it serves to keep 2 out of our 3 dogs off completely since they can't reach anymore \o/

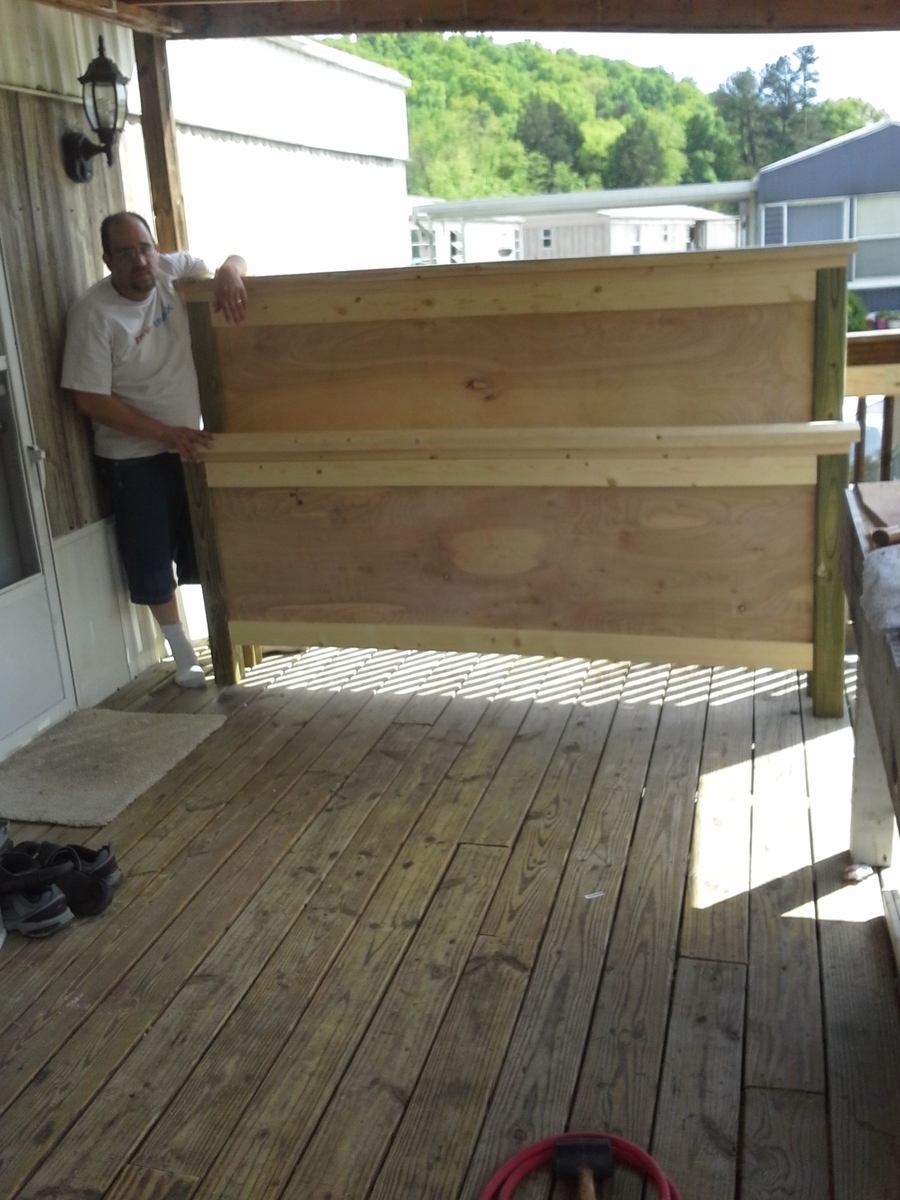
2. We raised the footboard up 12" in height. So everything on the footboard height we just added 12" to which was really simple to do.

3. We added side rails, and despite the fact I thought wife was crazy she wanted 2 x 12 used for this. 12" wide so that it would look a lot better plus cover the the box spring and help hold mattress into place. We couldn't find a reasonable sized board that wasn't pressure treated so ended up getting a 2x12 that was 16 feet long, and just had it cut down to 7' long pieces at the store.

4. We swapped out the paneled look on the headboard and footboard with sheets of hardwood plywood. If your not adjusting the footboard as much as we did you could get away with a single sheet but we went so much higher that we had to use 2 sheet and have a lot of leftover wood.

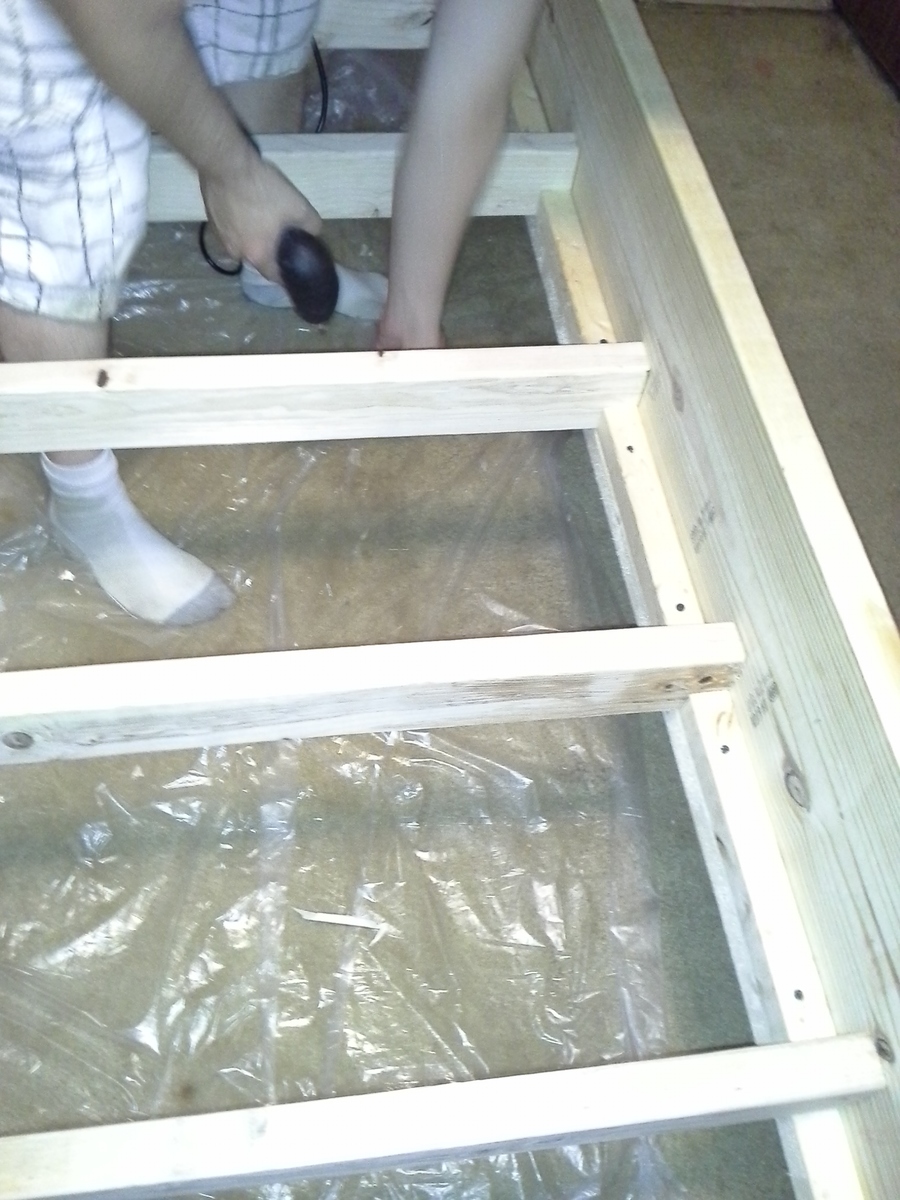
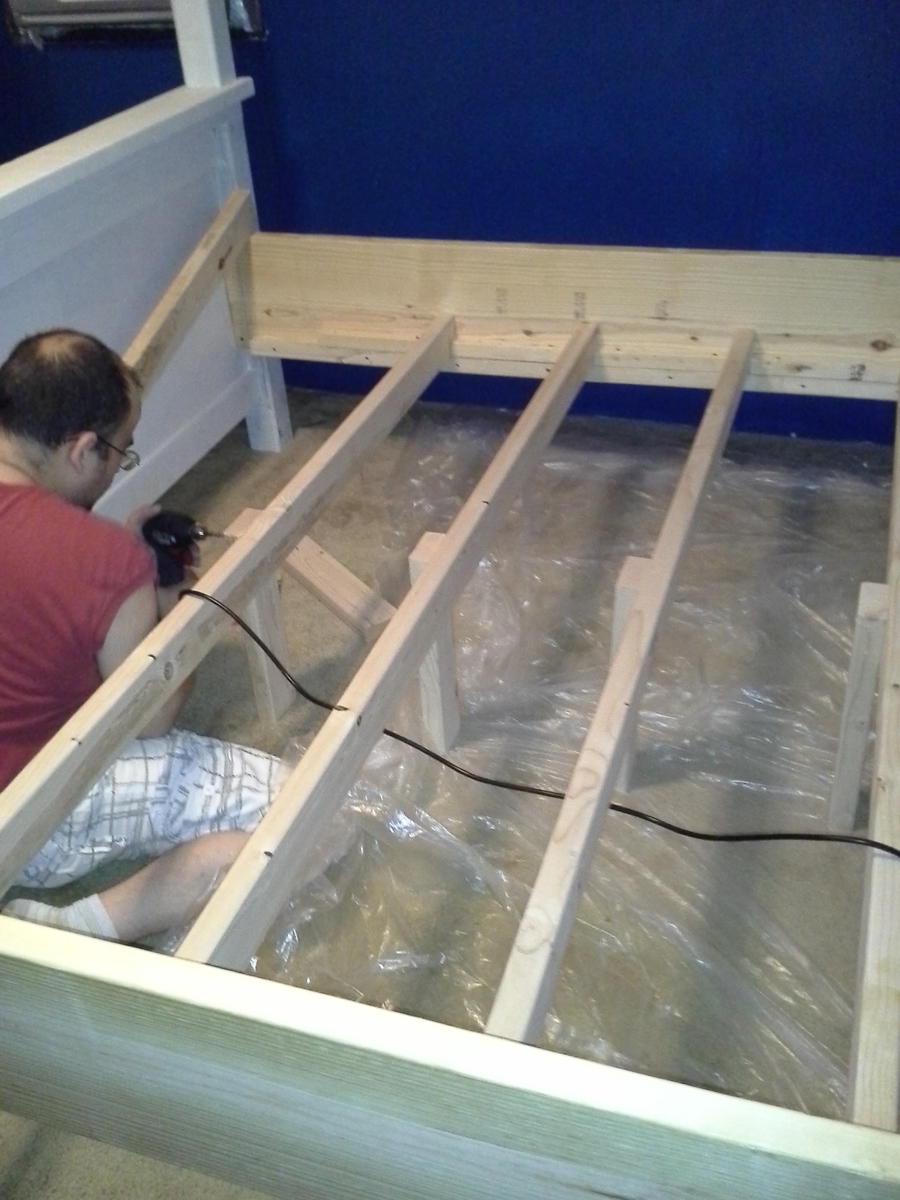
5. We did slats to support the mattress and boxspring and added small legs to them also. We just added furring strips ($1.82ish) to both side rails on the very bottom so they would be flush. Used wood glue and 3" screws to hold them onto the side rail using clamps and made sure they were thoroughly secured. From there, we just measured across and cut 2x4's to fit and slide them into place. We used the extra parts of the 2x4's to make legs that we put into the center of the boards also to help give a bit of extra support. Plus, to ensure stuff doesn't move around at all, we added an extra furring strip cut into pieces that we used to help hold the 2x4 supports into place. Only took 1 of those to do that and works out great.

Some tips:

Now, we had issues locating 4x4's at the local big box retail hardware stores. The only options there were pressure treated (ok for our usage) but if your wanting to stain the bed would need to use an actual lumber store which could get them, but the cost was approx $3 more each and had to wait for them to come in. We opted to use pressure treated since they were already available, we were planning to paint so the look difference wouldn't matter, plus we have 2 male dogs who are being difficult about marking so the pressure treated aspect helps protect against them. -.-

As for the side rails. We looked through tons of posts and saw very little about this. What we did was attach the side rails onto the insides of the 4x4's. For the footboard end there is just under 2" of space or so that you can connect to, and of course on the headboard side you have the entire area to work with. Worked out great. We initially attached them using 2 3" screws to get them into place and make sure everything was level and squared and after that was all done added in some beefy 4" bolts that we predrilled holes for a bit to make it easier to get them in.

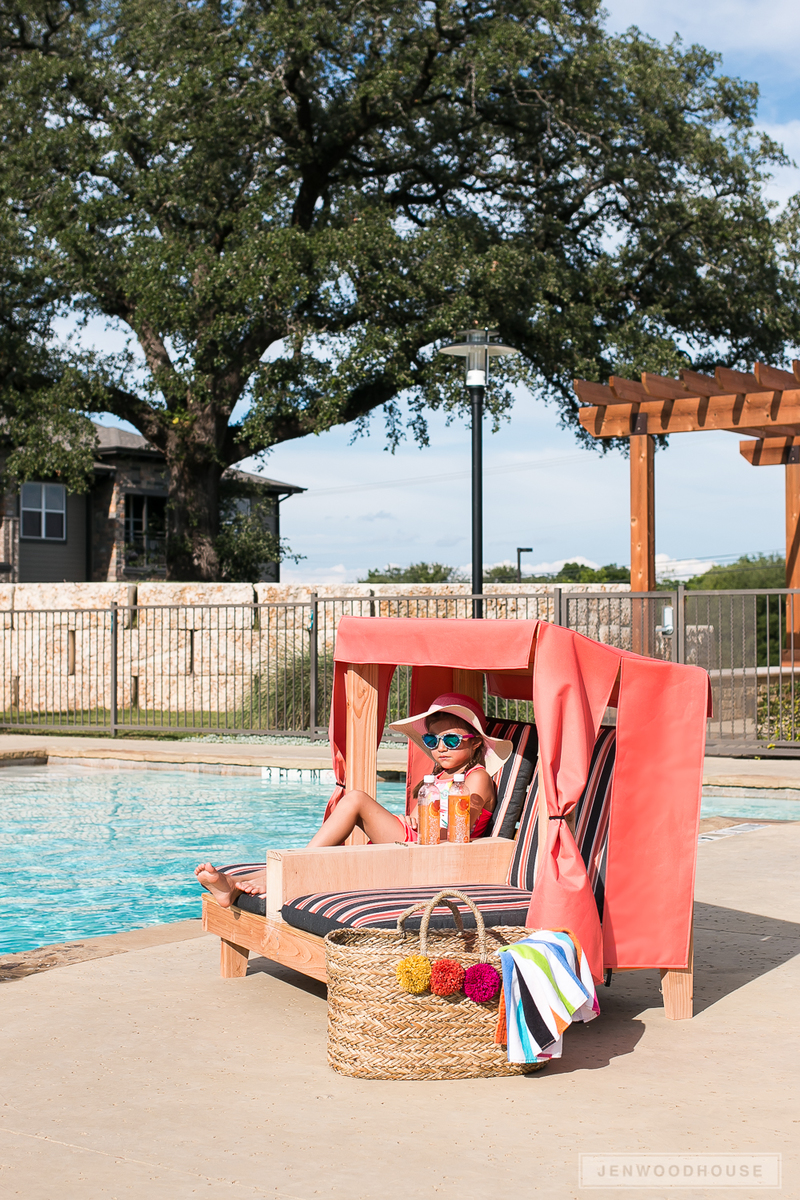
While we were building the bed, we went ahead and did the canopy at the same time. So we just added on a few screws, 4 corner brackets, 4 hanger bolts and then the 4 2x4's. Was approximately an extra $25 or so to do and was really quick. We were planning to do the canopy to start with anyways so bought 4 of the 4x4's and ended up with very little scrap after it was all over and done with.

Total costs all said and done including the paint was just around $300 or so. However, again if your not wanting to completely change the height of your footboard could be cut by approx $50 (cost of extra sheet of hardwood plywood).

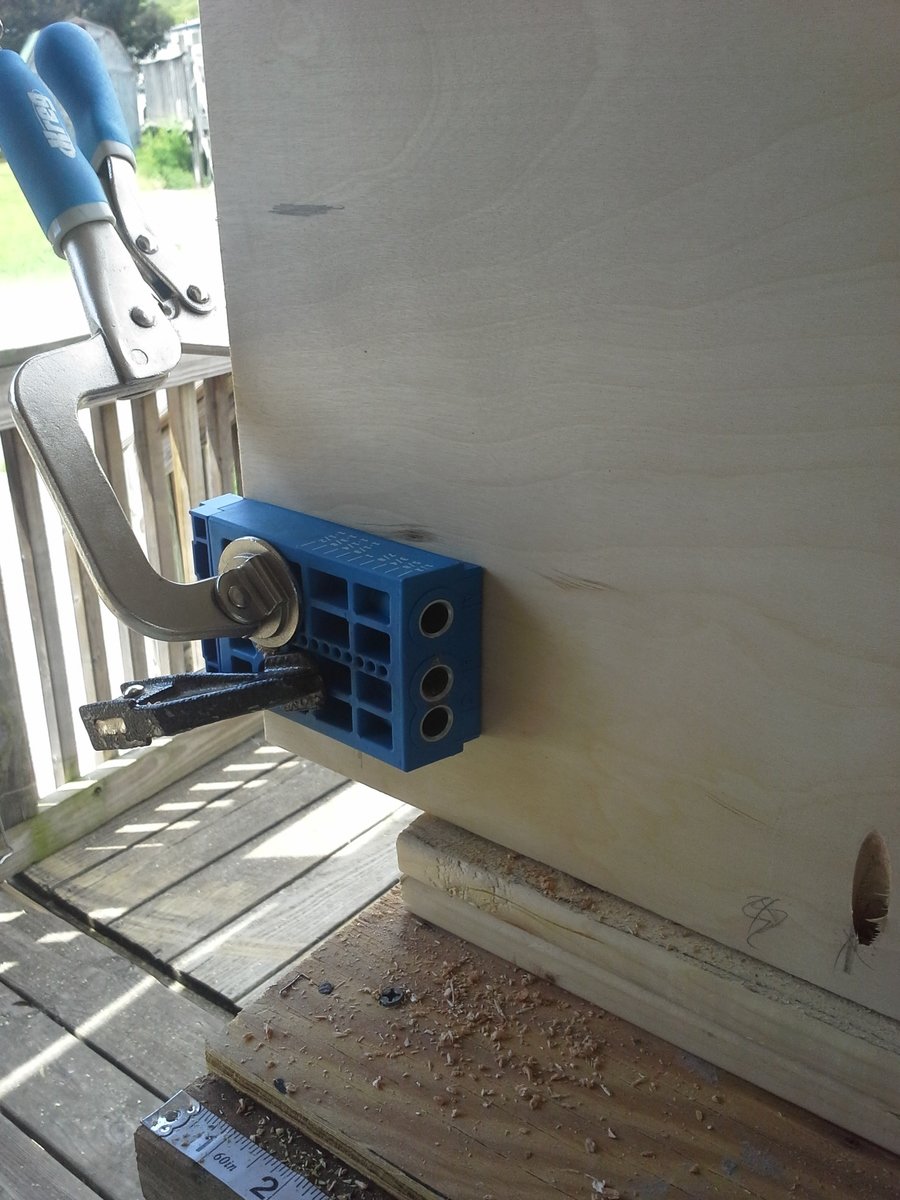
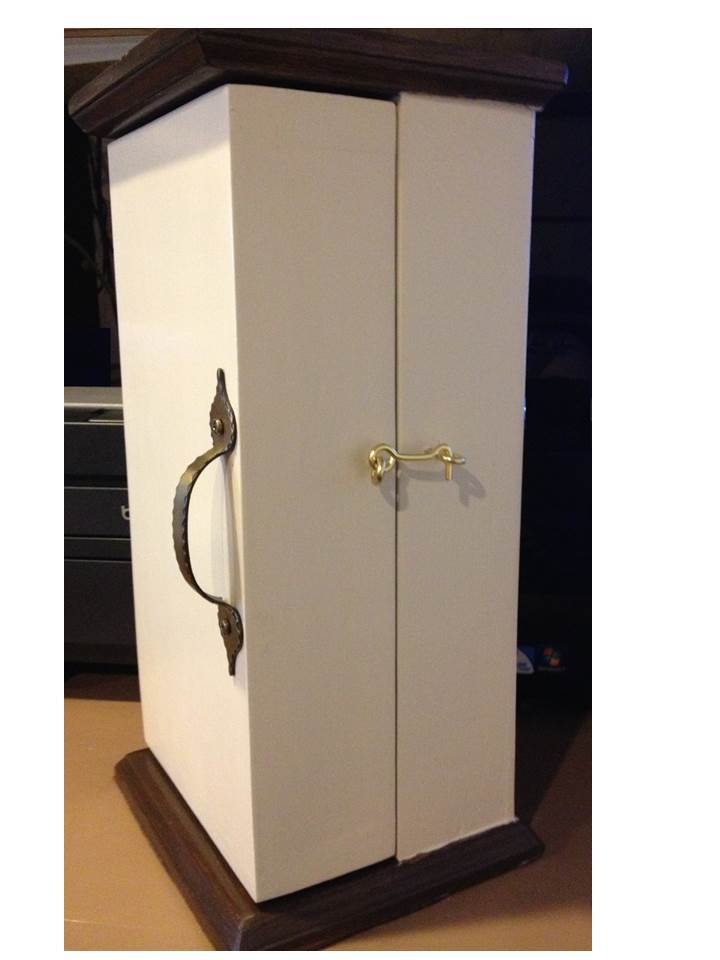
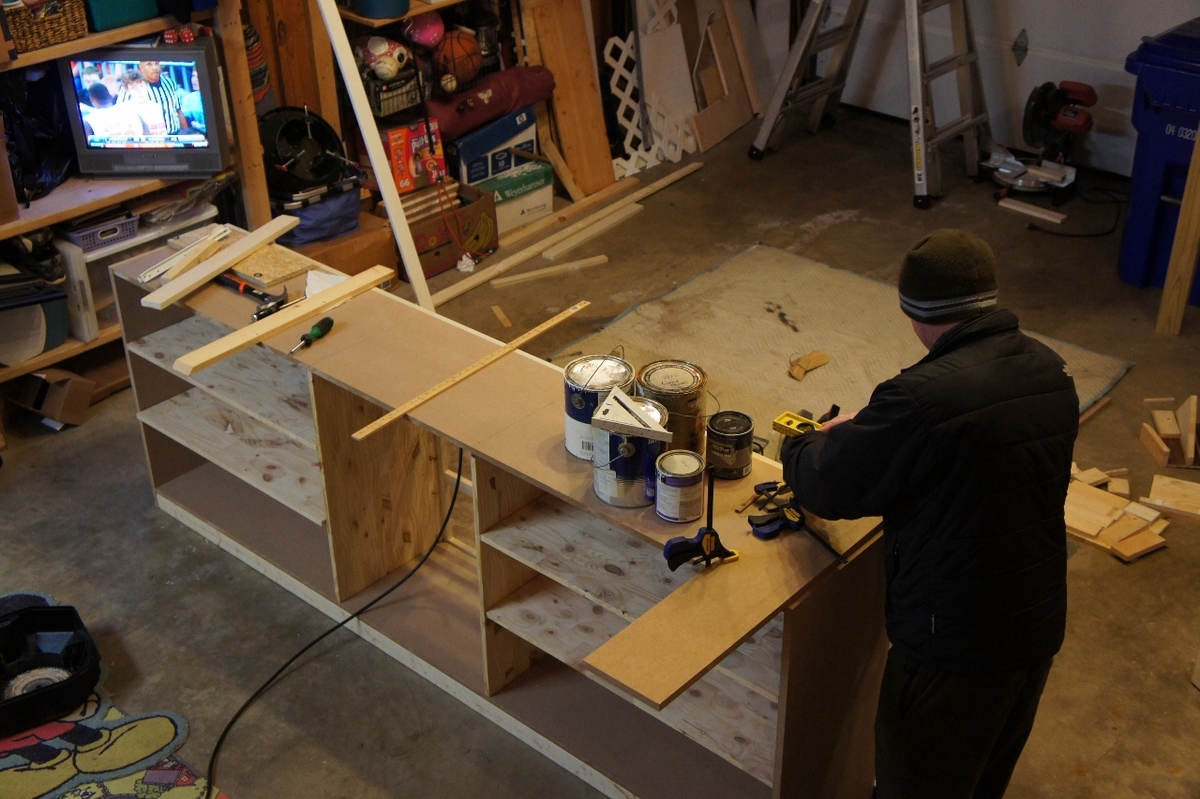
We added a pic to show how we did the pocket holes for the hardwood plywood on the sides. Since the directions themselves call for just the 1x8's to be used figured this might help some. The kreg mounted to the workbench helps loads for the top, but not so much for the sides since we were building on our covered deck and couldn't just turn it straight up on it's side.

Final piece of advice, we debated for a long time between the Harbor Freight pocket hole jig and the Kreg version. Ended up going with the Kreg Master Kit and got a great deal on it ($111 or so plus tax) so saved a bundle there which helped. HF sends out 20% off 1 item coupons all the time, we took that to Lowe's and used it for the Kreg jig set without any problems. So would definitely recommend this if your considering and trying to decide which to buy. Cost differences between them is huge, and if your scraping it can be a great way to get the costs a lot lower.

Also, seriously, seriously, seriously, get a nail gun and air compressor. Don't nail stuff in yourself. It saves a huge amount of time. We picked up an air compressor for $150 that works awesome and has great CFM and found some great air tools off CraigsList that cut the costs for a nailer down to just $10 and gives tools to use on plenty of other projects so was a really great investment for the time it saves. Definitely beats nailing by hand with a normal hammer.

Final advice, if your painting check the weather. We had problems with the primer drying to start with since we had primed the pieces outside and left them on the deck to dry and it started pouring something awful. So the pieces had to be brought inside to finish priming and fix the parts that were messed up by the rain coming in on them. Without this complication a single coat of primer might have worked but not sure. Overall still looks great though and quite happy with the results.

As for the paint, took less than 1/2 a gallon to do all 3 coats and still have enough left over to repaint the rest of the bedroom furniture to match. Hopefully this gives enough information to help anyone looking to change things up. We were really nervous about it to start with since we were shifting so much from the original plans but it came out great and my wife loves it so I'm definitely a happy guy.

We brought all of the wood home by carefully packing it all into our lil 4 door Saturn. Yes it was a super tight fit, but it was possible. We didn't have access to a truck, and none of our local stores had a truck that was available to rent. So you shouldn't stress out if you can't get your hands on a truck it's still possible to get everything home you need to do this project. Just get as many of the huge pieces cut as possible at the store.

Estimated Cost
$300 but could be cut significantly
Estimated Time Investment
Weekend Project (10-20 Hours)
Finish Used
Killz 2 Primer (2 coats to cover thoroughly) and then painted using Olympic Gloss (3 coats to make it super nice)
Recommended Skill Level
Beginner

Farmhouse Queen Headboard (Pine)

For our guest room redesign, Brian and I made the Farmhouse headboard in pine. It took less than an hour to cut all the boards and begin assembly. We stained the headboard in a dark walnut. For less than $100, I got EXACTLY what I wanted!

Built from Plan(s)
Estimated Time Investment
An Hour or Two (0-2 Hours)
Finish Used
Dark walnut stain from Minwax:
http://www.minwax.com/products/color-guide/#
Recommended Skill Level
Starter Project

Necklace Armoire

Submitted by JoanneS on Sat, 05/11/2013 - 18:47

Necklace Armoire - a mother's day gift for Mom. I made this to go with the Fancy Jewelry box that I did for her for Christmas. Based on the Wall Jewelry Cabinet plan. This piece is made to stand like a narrow tower, and it opens up like a book. There are hooks inside, on both sides. I placed the hinges on the left, because Mom is left-handed. Dimensions are 6 1/2" wide, 14 1/2" tall, and 6 1/2" deep. Top & bottom are 1x6, box and door sides are 1x3, and door front and back are 1/4" birch plywood. The inside is lined with felt. The wood, stain and paint were already on hand, I just needed the felt and hardware. The build was very easy. The finishing took longest because it has both stain and paint, with added felt and hardware. On the right side I used some hooks re-purposed from an old jewelry box, and on the left side are 3/4" brass shoulder hooks from Lowes. Hooks are attached to some 3/8" craft board, which was stained and glued in place. I got to use my newest tool (23 gage headless pin nailer) for attaching the trim (very neat - it really was just a pin-size hole to fill). The front closes with a brass hook and eye. I sure hope she likes it! :) Happy Mother's Day!

Estimated Cost
$16
Estimated Time Investment
Day Project (6-9 Hours)
Finish Used
The top and bottom are stained with Minwax Express Color in Walnut. The box paint color is cream, mixed with some of the Walnut stain, to make it match the color of her existing pieces. Top coated with 2 coats of Minwax clear Polycrylic in satin. Antique brass surface cabinet hinges and handle are from Lowes.
Recommended Skill Level
Beginner

Comments

JoanneS

Wed, 07/10/2013 - 02:27

Thanks so much for the nice comment! Just finished another project, for Mom's birthday this Friday. :)

Patio Table w/Built in Beer/Wine Cooler

Submitted by RoyBoy on Sat, 05/18/2013 - 06:58

After seeing the patio table with beer/wine cooler, I wanted to build this for my brother and wife who recently bought a house. I asked them if they were interested and of course they said yes. I modified the original plans by adding a 2x4 on each side of the cooler to make the table wider. I also made the legs out of 4x4 vs the 2x4s that were originally called for. I used redwood and then stained it and used a varnish for the final coating. I probably wouldn't use the varnish again for an outdoor table, because it looks like it should be an indoor table vs outdoor. Overall, I'm pleased with the results and the best part about it, I get to enjoy it every time I go over for a BBQ.

Estimated Cost
$225-250
Estimated Time Investment
Week Long Project (20 Hours or More)
Finish Used
Olympic Redwood Naturaltone Toner Exterior Stain
Cabot Spar Varnish Semi-Gloss
Recommended Skill Level
Beginner

Comments

Msharp1211

Wed, 07/03/2013 - 13:04

Awesome table, do you happen to have the measurements you used. I'd like to make the same table but I need the lumber yard to make the cuts.

Barn Door Farmhouse Bed

I built this bed for my daughter and we decided to build a farmhouse bed but it didn’t stop there.. We added a barn door feel complete with handles and then we bought some vintage wall sconces and turned them into lights for the headboard. 

Built from Plan(s)
Estimated Cost
$115
Estimated Time Investment
Weekend Project (10-20 Hours)
Finish Used
Dark Walnut Stain
Recommended Skill Level
Beginner

Kids Outdoor Double Lounge Chair

Hi friends!
 

Jen Woodhouse here, sharing this adorable summer project with you! I'm in the mood for all things outdoor, so I thought I'd share this build I created last year. This Kids Outdoor Double Lounge Chair made my kiddos so happy. They spend a ton of time at the pool and this Lounge Chair offers them a little bit of shade, and cup holders too for their drinks! 


Be sure to tag me @jenwoodhouse if you share photos of your build on social media.

You can get all the details and the plans for this build on JenWoodhouse.com!


Estimated Cost
$155 including cushions and canopy.
Estimated Time Investment
Day Project (6-9 Hours)
Finish Used
Exterior-grade polyurethane
Recommended Skill Level
Beginner

Toddler's Green Step Stool

Submitted by amccoid on Sun, 07/03/2011 - 09:35

The Vintage Step Stool in green. I made this for my 2 year old so she can climb into her big girl bed :-) The color is the same as her walls and her name sign above the bed.

Built from Plan(s)
Estimated Cost
Free using scraps on hand
Estimated Time Investment
An Hour or Two (0-2 Hours)
Recommended Skill Level
Starter Project

Closet build

So thankful for the plans to build the closet shelves. They were key to our building out our new walk-in closet.  Love it and this site!  Onward to the next project! 

Built from Plan(s)
Estimated Cost
About 200 because we built 2 and includes paint and additional wood for shelves and rods.
Estimated Time Investment
Weekend Project (10-20 Hours)
Finish Used
Trim (semi gloss) paint.
Recommended Skill Level
Intermediate

Jewelry/Makeup Storage Cabinet

Thank you Anna for providing the template plans for this project. My wife had a mirror leaning on the wall in our bedroom that rarely got used and jewelry all over the dresser. So thanks to you I was able to turn this cheap mirror into useful storage and organize her jewelry.  Thanks! 

Estimated Cost
$80
Estimated Time Investment
Weekend Project (10-20 Hours)
Finish Used
Glossy spray paint
Recommended Skill Level
Beginner

Comments

Ana White

Wed, 10/07/2015 - 10:18

Thank you for building!!!  Your post just made my day, I'm so happy to see your build! I love the customization with the jewerly holders too!  Thank you so much for sharing!

Garden Bench

Submitted by JMG on Wed, 07/06/2022 - 19:32

Combined several different plans from several different sites, but my mother in law is a master gardener who loves birds and wanted a new bench for her garden. I used 1x4's on the seat slats (instead of 2x4's- added an extra support in frame), made the seat a bit deeper, and I modified the arms to allow somewhere to rest a glass of her southern sweet tea. :) All made from box store non PT lumber and sealed for outdoors. The ideas for the "pickets" on the back and birdhouse came from "MyOutdoorPlans.com"- want to give credit where credit is due.

Built from Plan(s)

Comments

High chair

Submitted by Anonymous (not verified) on Sun, 10/28/2018 - 21:34

Thanks so much for the plans. Built it for my visiting nephew. Had a hard time with wood splitting, definitely predrill once you have the pocket holes lined up. I finished with food grade mineral oil, may go over it with beeswax.

Built from Plan(s)
Estimated Cost
$15
Estimated Time Investment
Afternoon Project (3-6 Hours)
Finish Used
Mineral oil
Recommended Skill Level
Beginner

Dining Room Buffet Cabinet

Submitted by kdins31 on Sat, 08/13/2011 - 11:26

I scoured the web unsuccessfully for months trying to find a cabinet big enough to store everything we needed to store. I wanted something huge and bright and simple, and so I decided to just build away. It's 8'4" long, 18" deep and 36" tall. Topped with a slab of Giallo Napoleon granite and painted a nice plain white. Took me only a few nights to build and paint, thanks to my power nailer and power paint sprayer. Thanks to a great deal on a remnant granite slab, this was just about $400 total start to finish. I winged the entire plan and didn't really use any plans in particular, though I have gathered many great ideas and tips from this site.

Built from Plan(s)
Estimated Cost
$450-500
Estimated Time Investment
Weekend Project (10-20 Hours)
Finish Used
Satin white, nothing special!
Recommended Skill Level
Intermediate

Comments

shanestric

Sat, 08/13/2011 - 14:51

Wow - looks great! You would think it was done by a pro! You should be very proud of your finished product.

Shiplap Fireplace

Submitted by Anonymous (not verified) on Tue, 12/20/2022 - 19:10

We did the Easiest Shiplap Fireplace in a weekend, thanks to Ana’s plans. I convinced my husband to help me build this by upgrading to a 65” tv and adjusting the dimensions. We also built a shelf behind the tv to hold our receiver and Xbox that is hidden when the tv is in place. Ana’s tutorial was amazingly and gave us the confidence to finally build something that’s been on our list for 2 years!

Comments

Rustic X Farmhouse Coffee Table with Storage

Submitted by Anonymous (not verified) on Sun, 02/05/2023 - 08:54

This project was made from reclaimed wood from my office where they had built a temporary safety railing out of 2x4s and 2x6s. I added a compartment for storage. The top is stained in a classic grey. I painted the body in black followed by white. I then sanded the body to allow the black to bleed through for a distressed look.

Comments

Farmhouse Toy Box

Submitted by Anonymous (not verified) on Thu, 03/21/2019 - 11:28

Picture of my own version of the Ana White Design linked here
http://www.ana-white.com/2017/01/DIY_furniture/farmhouse-style-toy-box-…

Added Gas Shocks from Amazon 100N/18lbs.

Estimated Time Investment
Week Long Project (20 Hours or More)
Finish Used
White Paint
Minwax Espresso
Minwax Red Mahogany
Recommended Skill Level
Intermediate

Laundry Sorter

My laudry never looked so good!  I love these plans from shanty2chic and anawhite.  I spent a few days in the garage building, and now, my laundry can be hidden away in any room of my house.  


Thanks shanty2chic and anawhite for your excellent plans. 

http://www.shanty-2-chic.com/2014/08/diy-laundry-basket-dresser.html

http://www.ana-white.com/2011/04/wood-tilt-out-trash-or-recycling-cabin…

Estimated Cost
$200
Estimated Time Investment
Weekend Project (10-20 Hours)
Finish Used
Mix of paint and stain to create whitewashed look.
Recommended Skill Level
Intermediate