Community Brag Posts

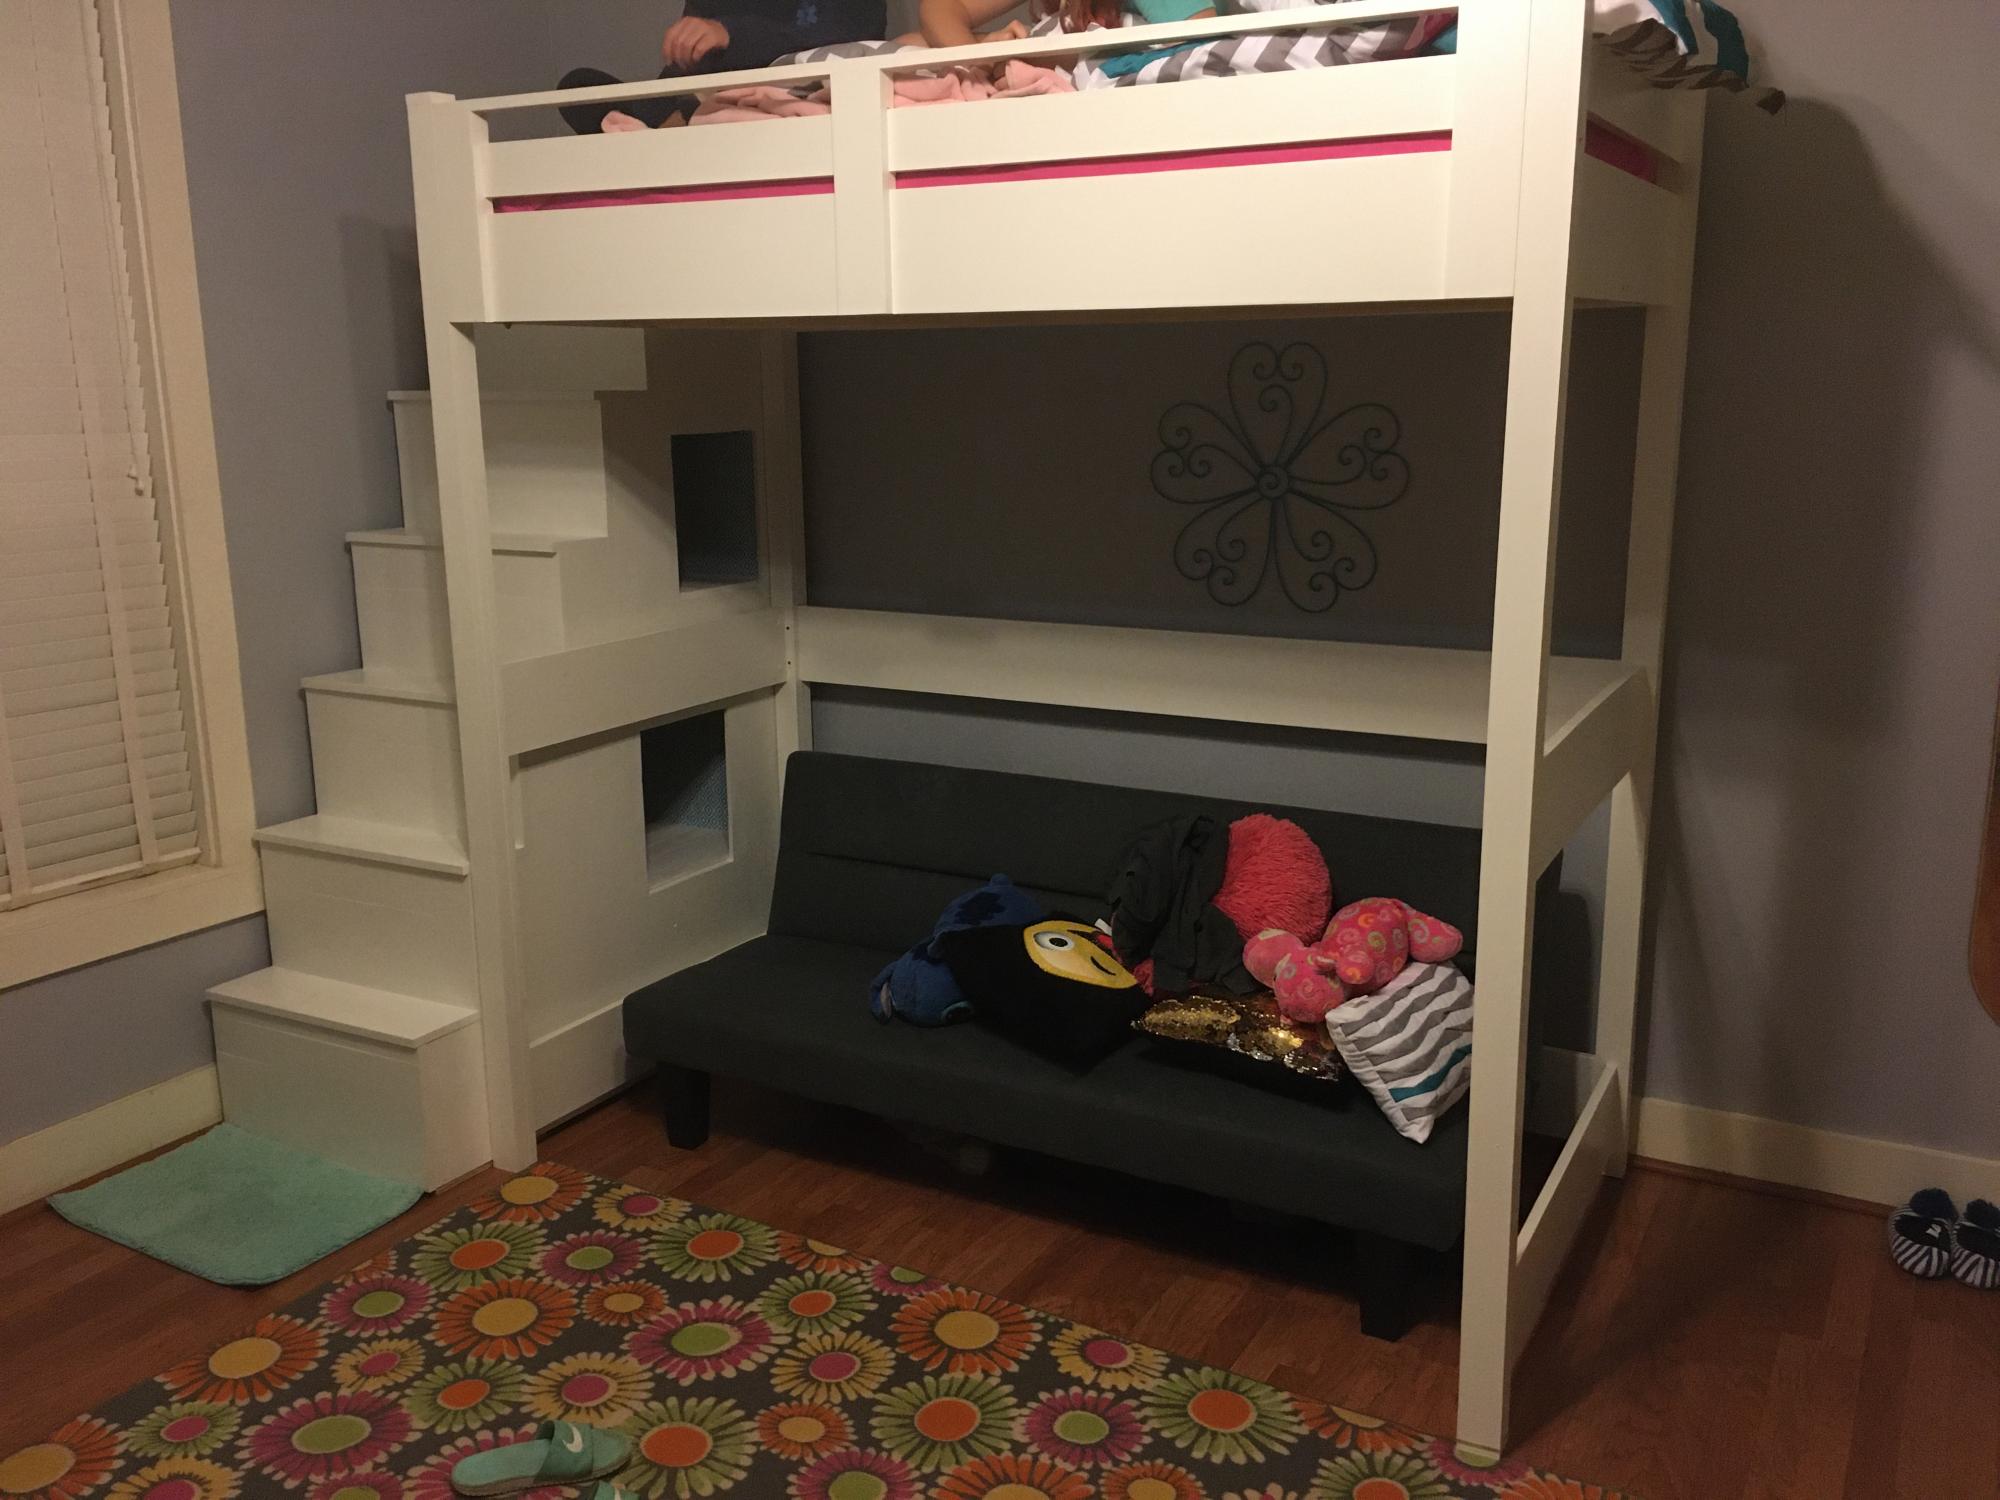
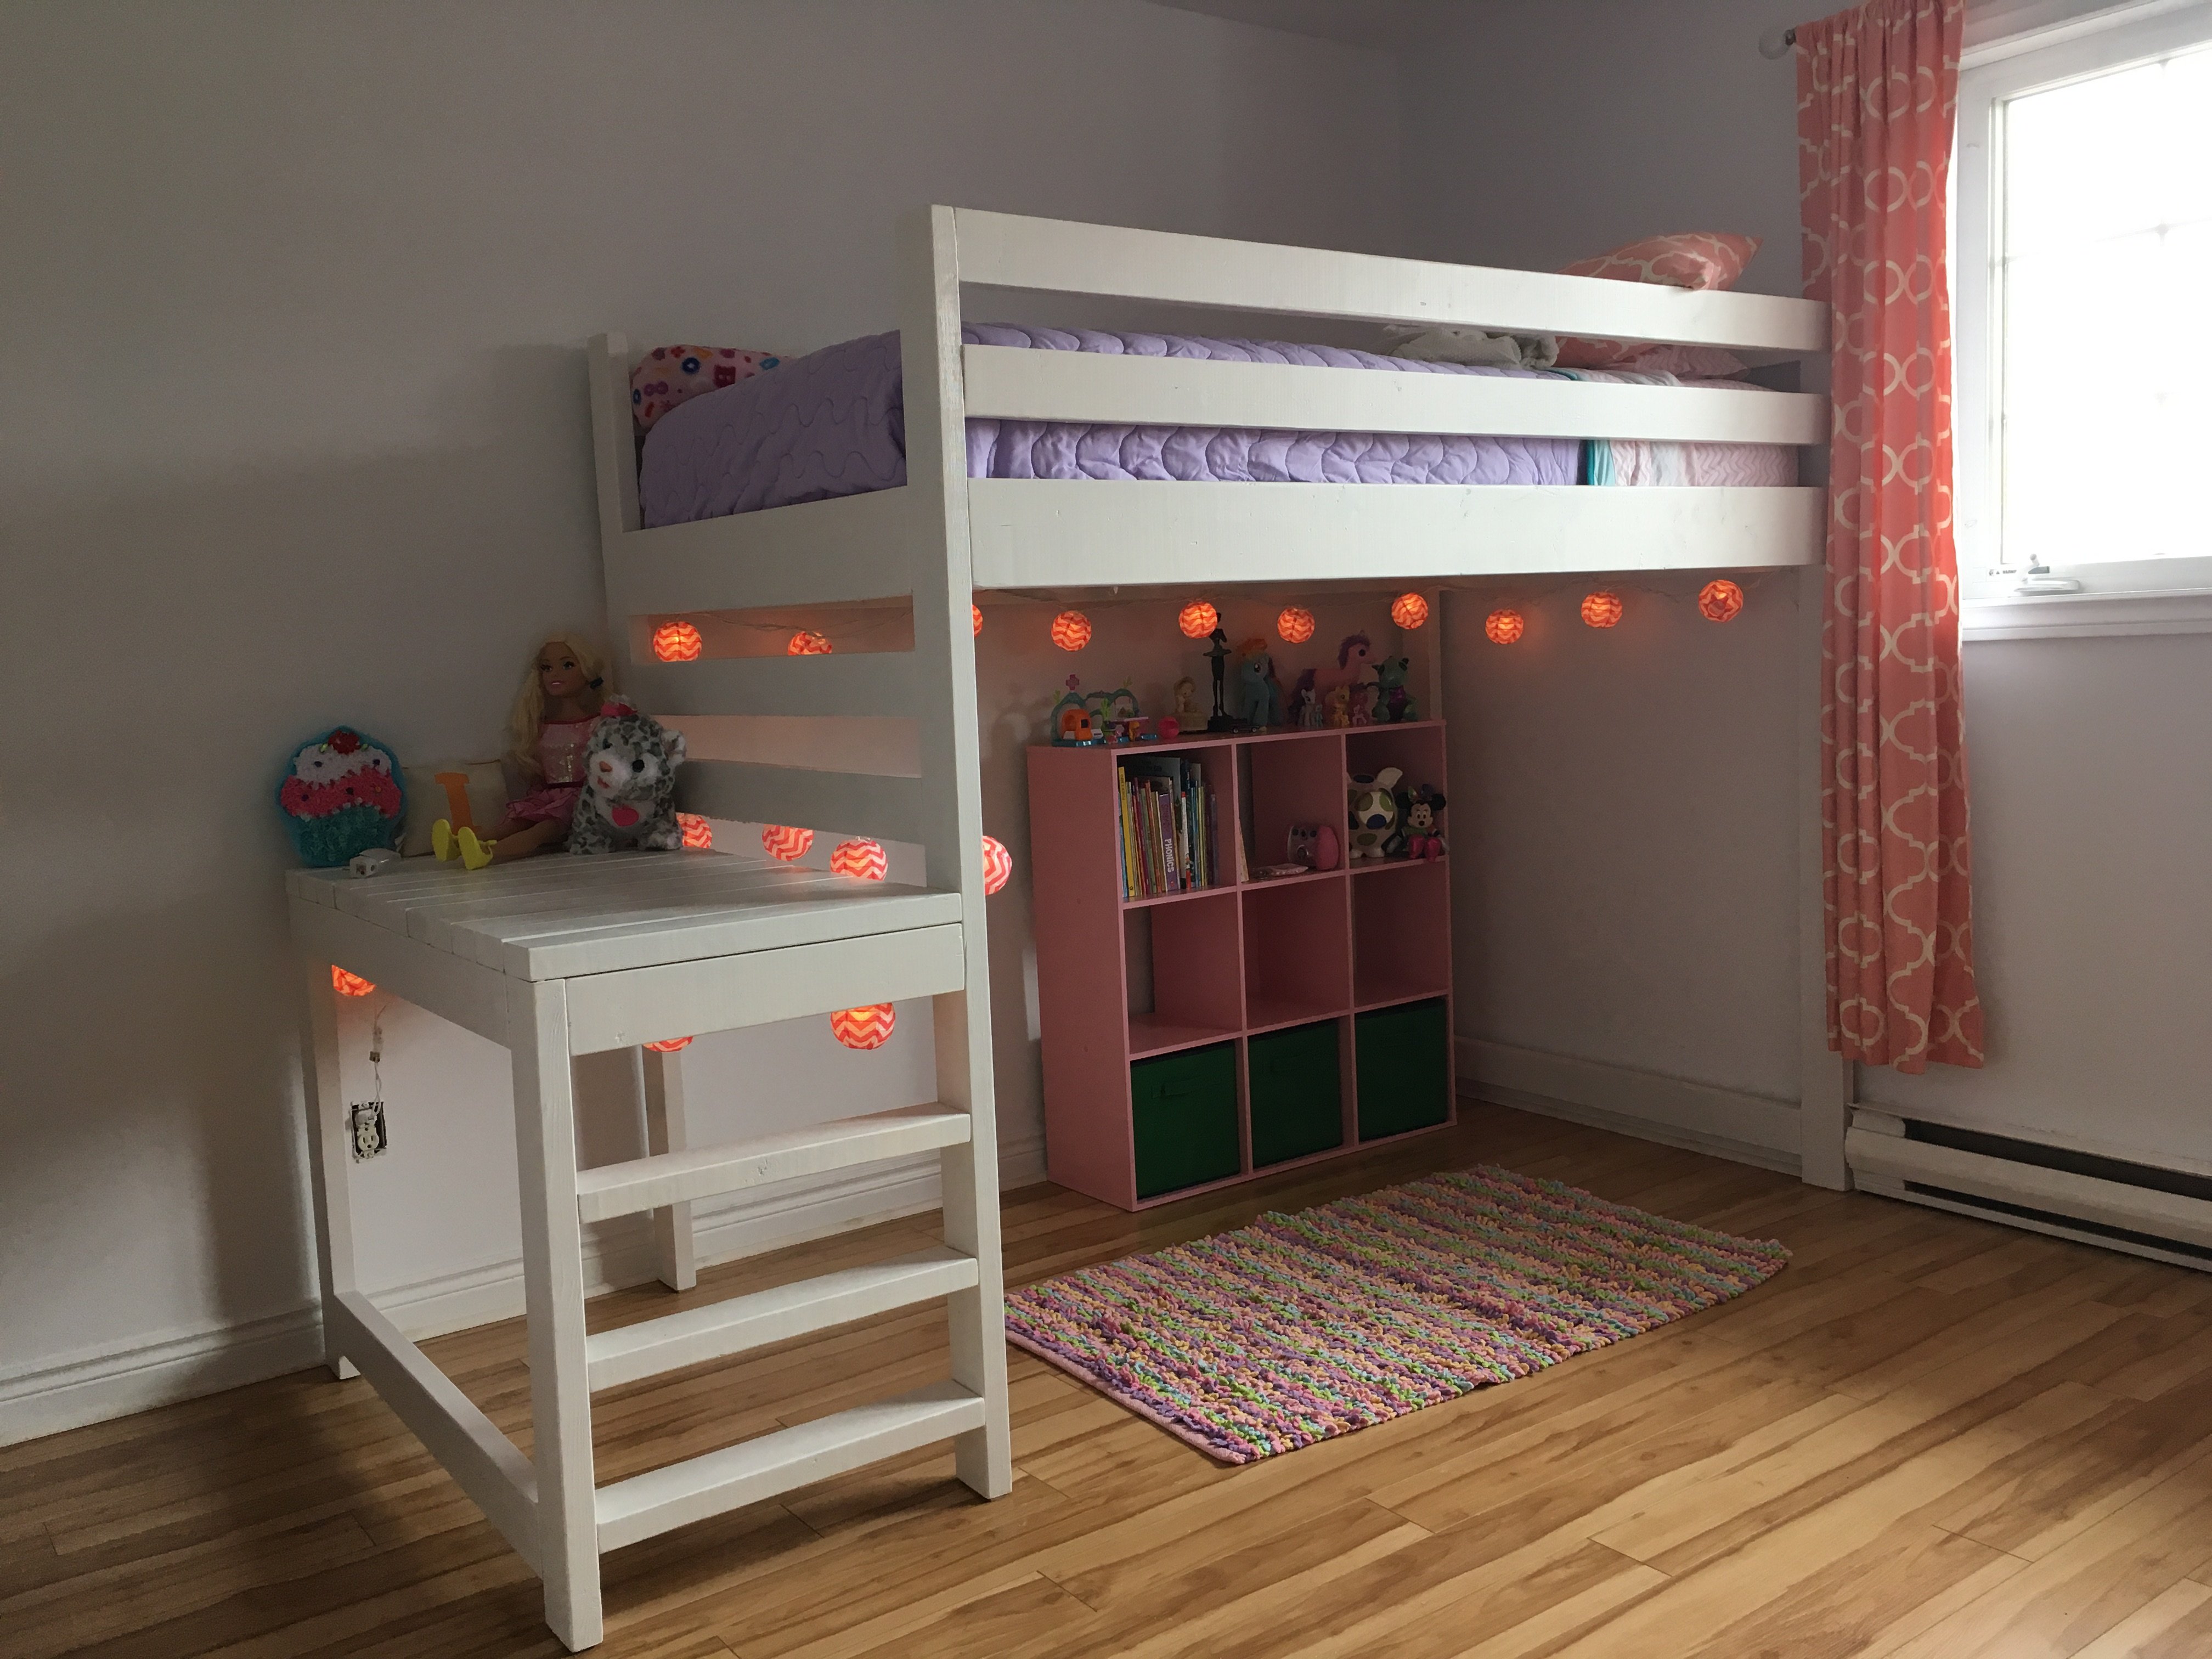
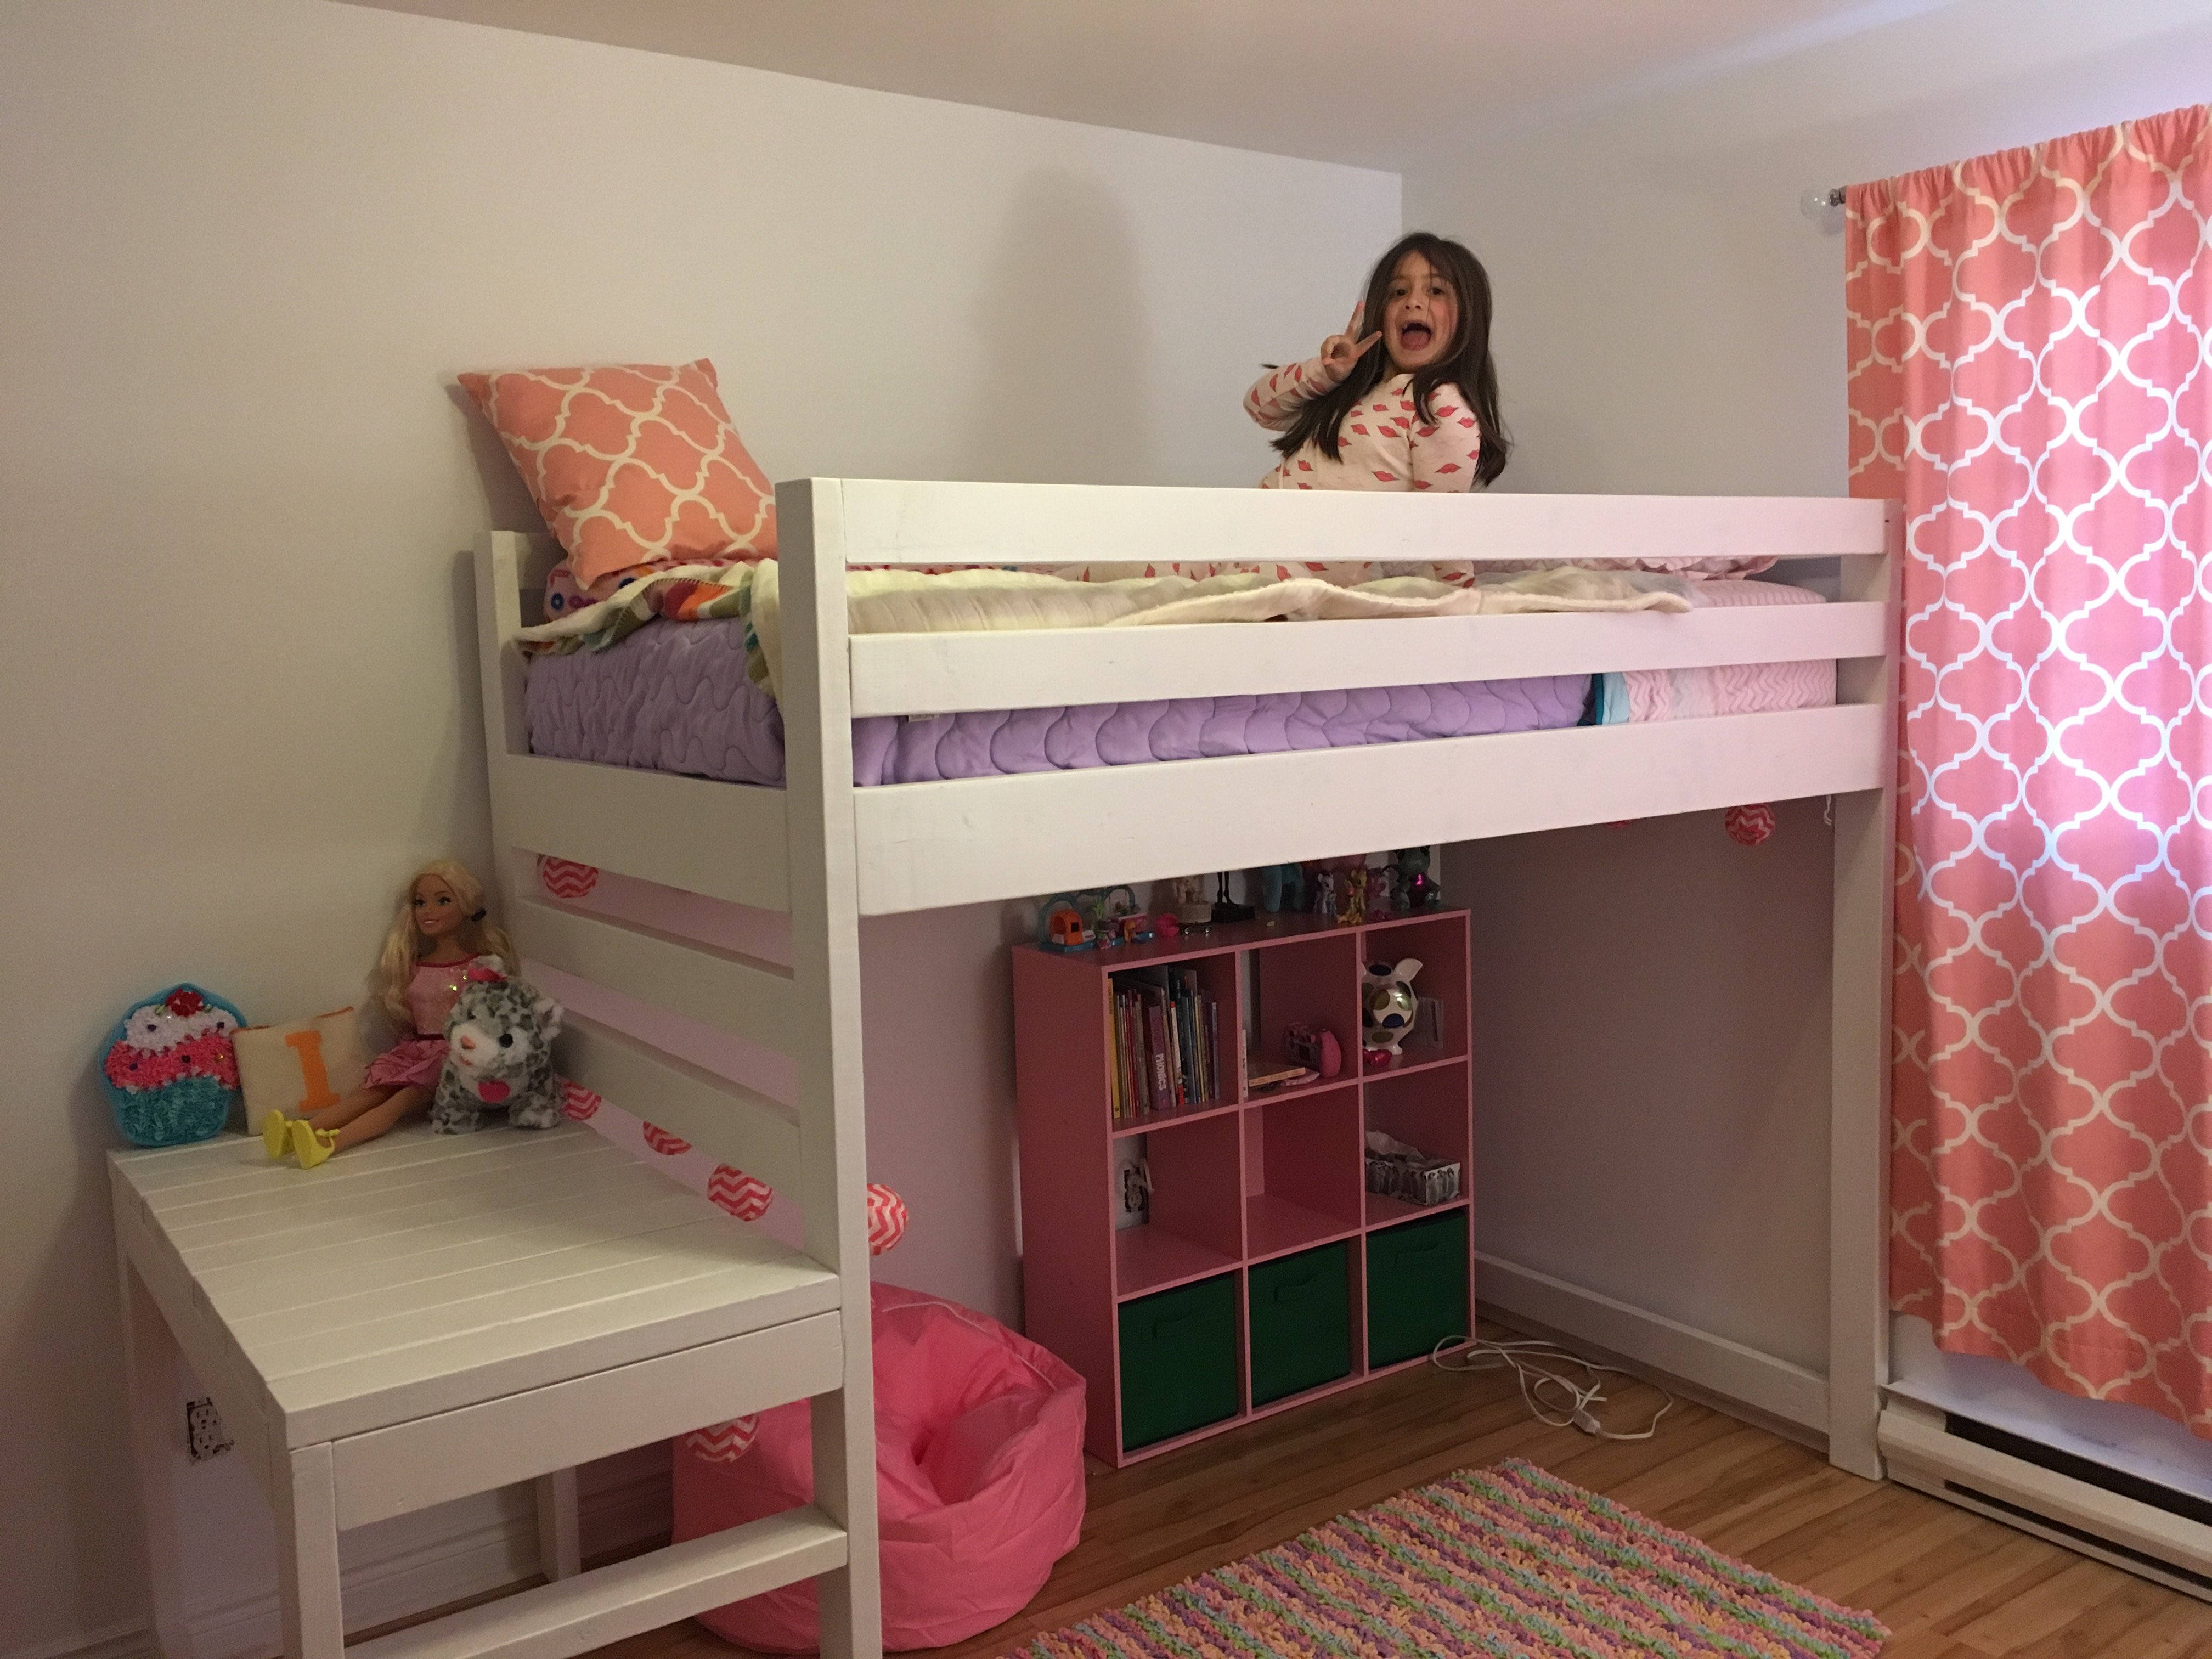
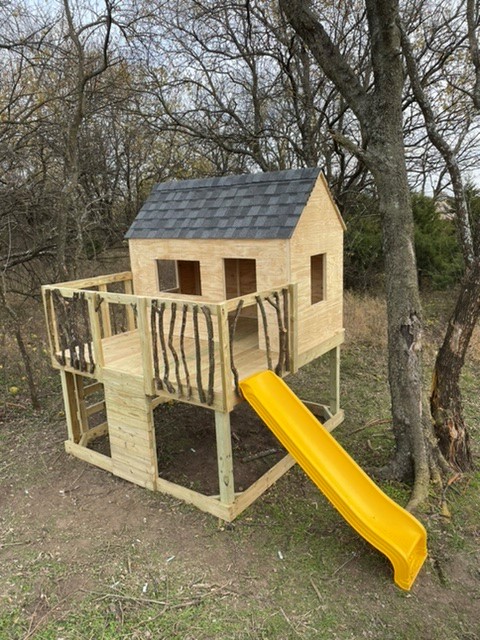
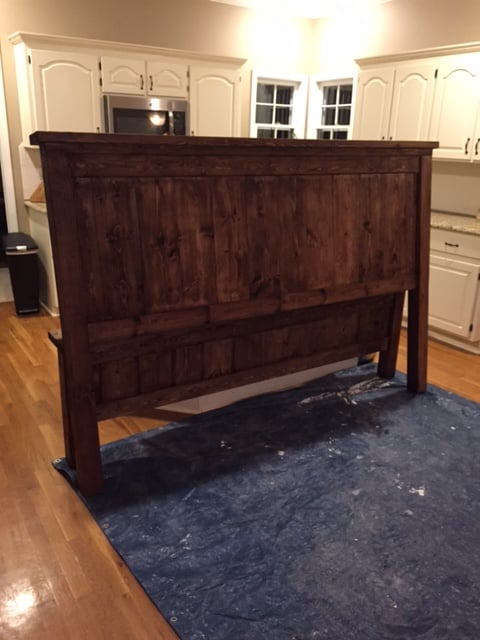
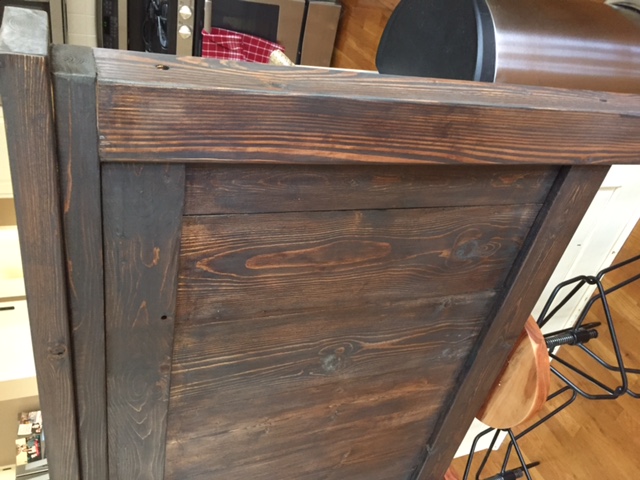
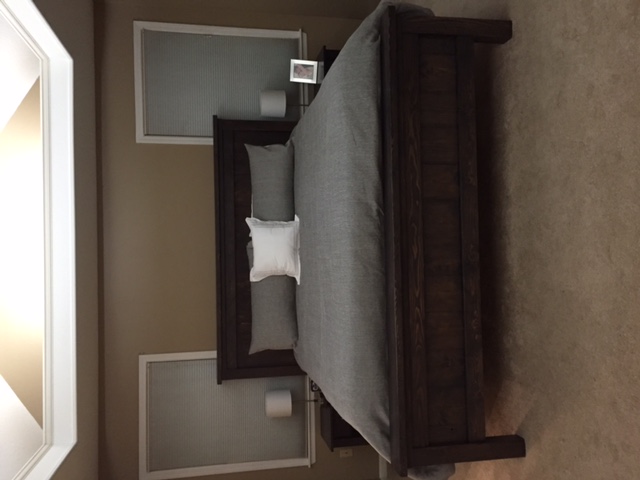
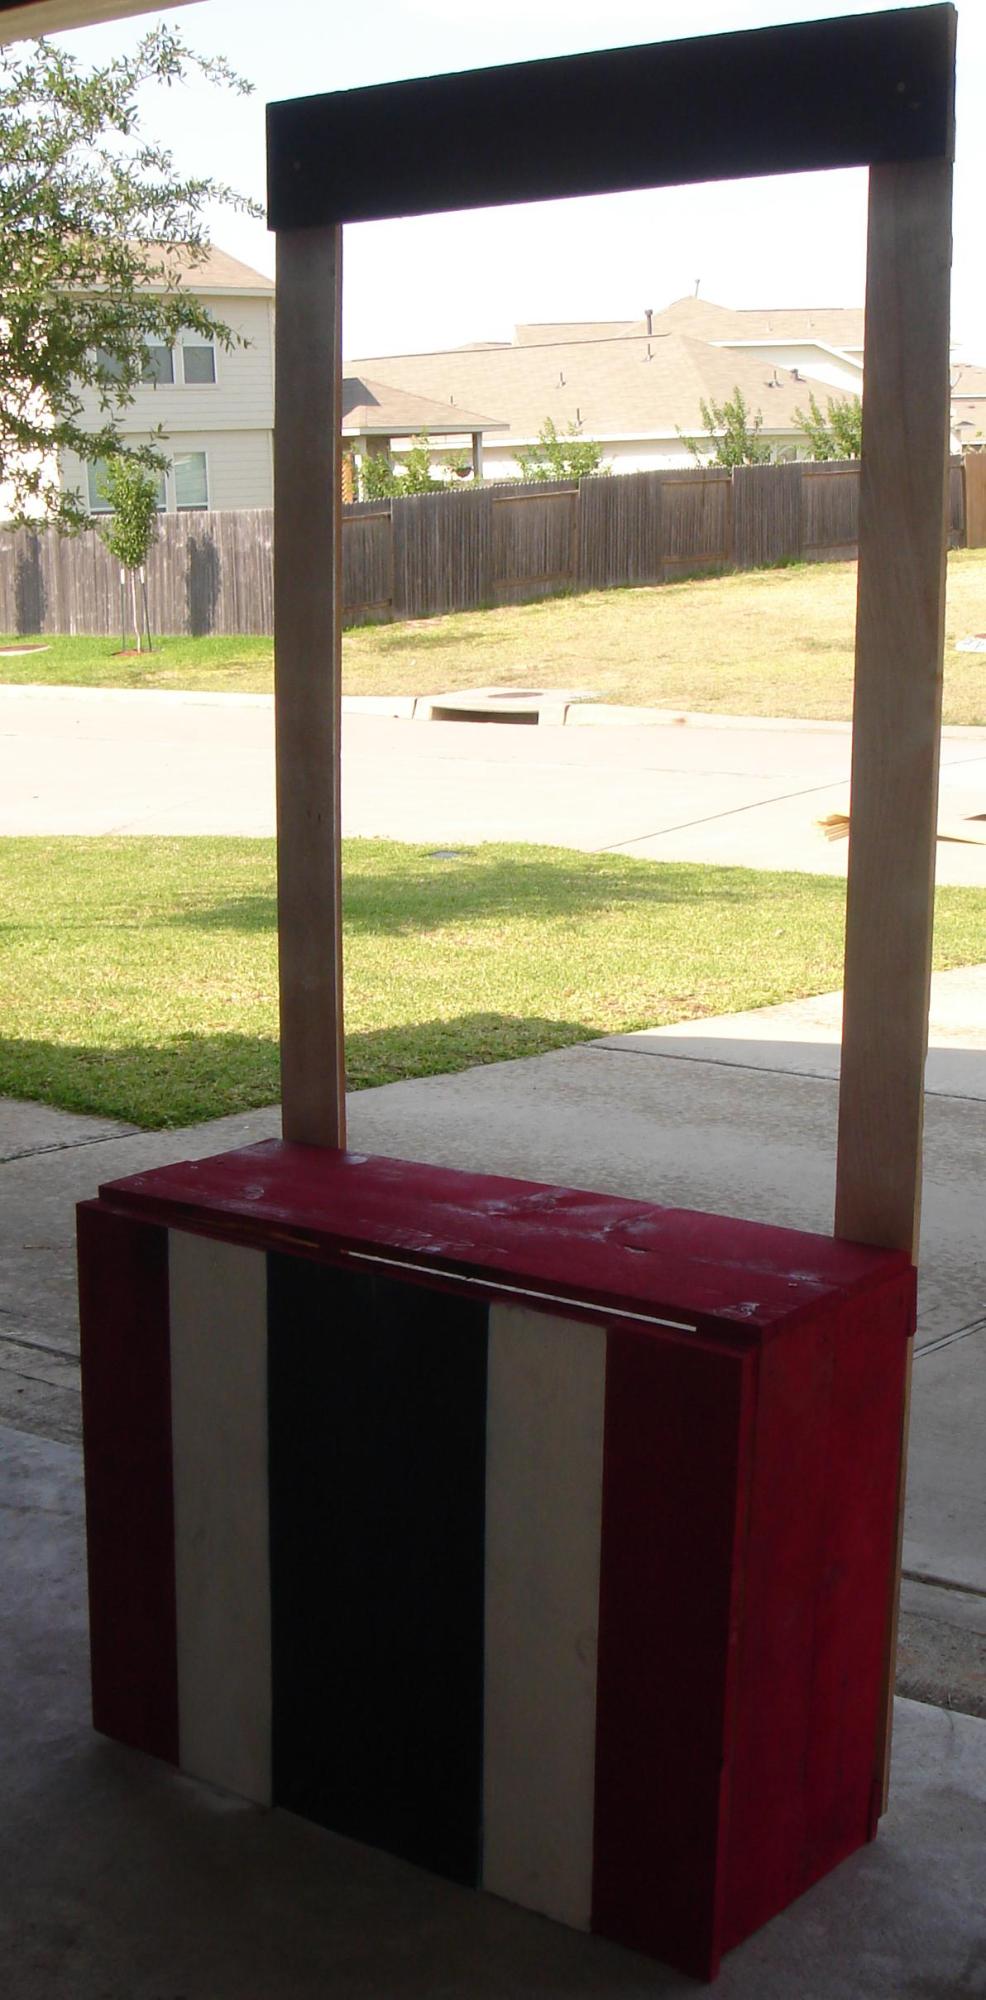
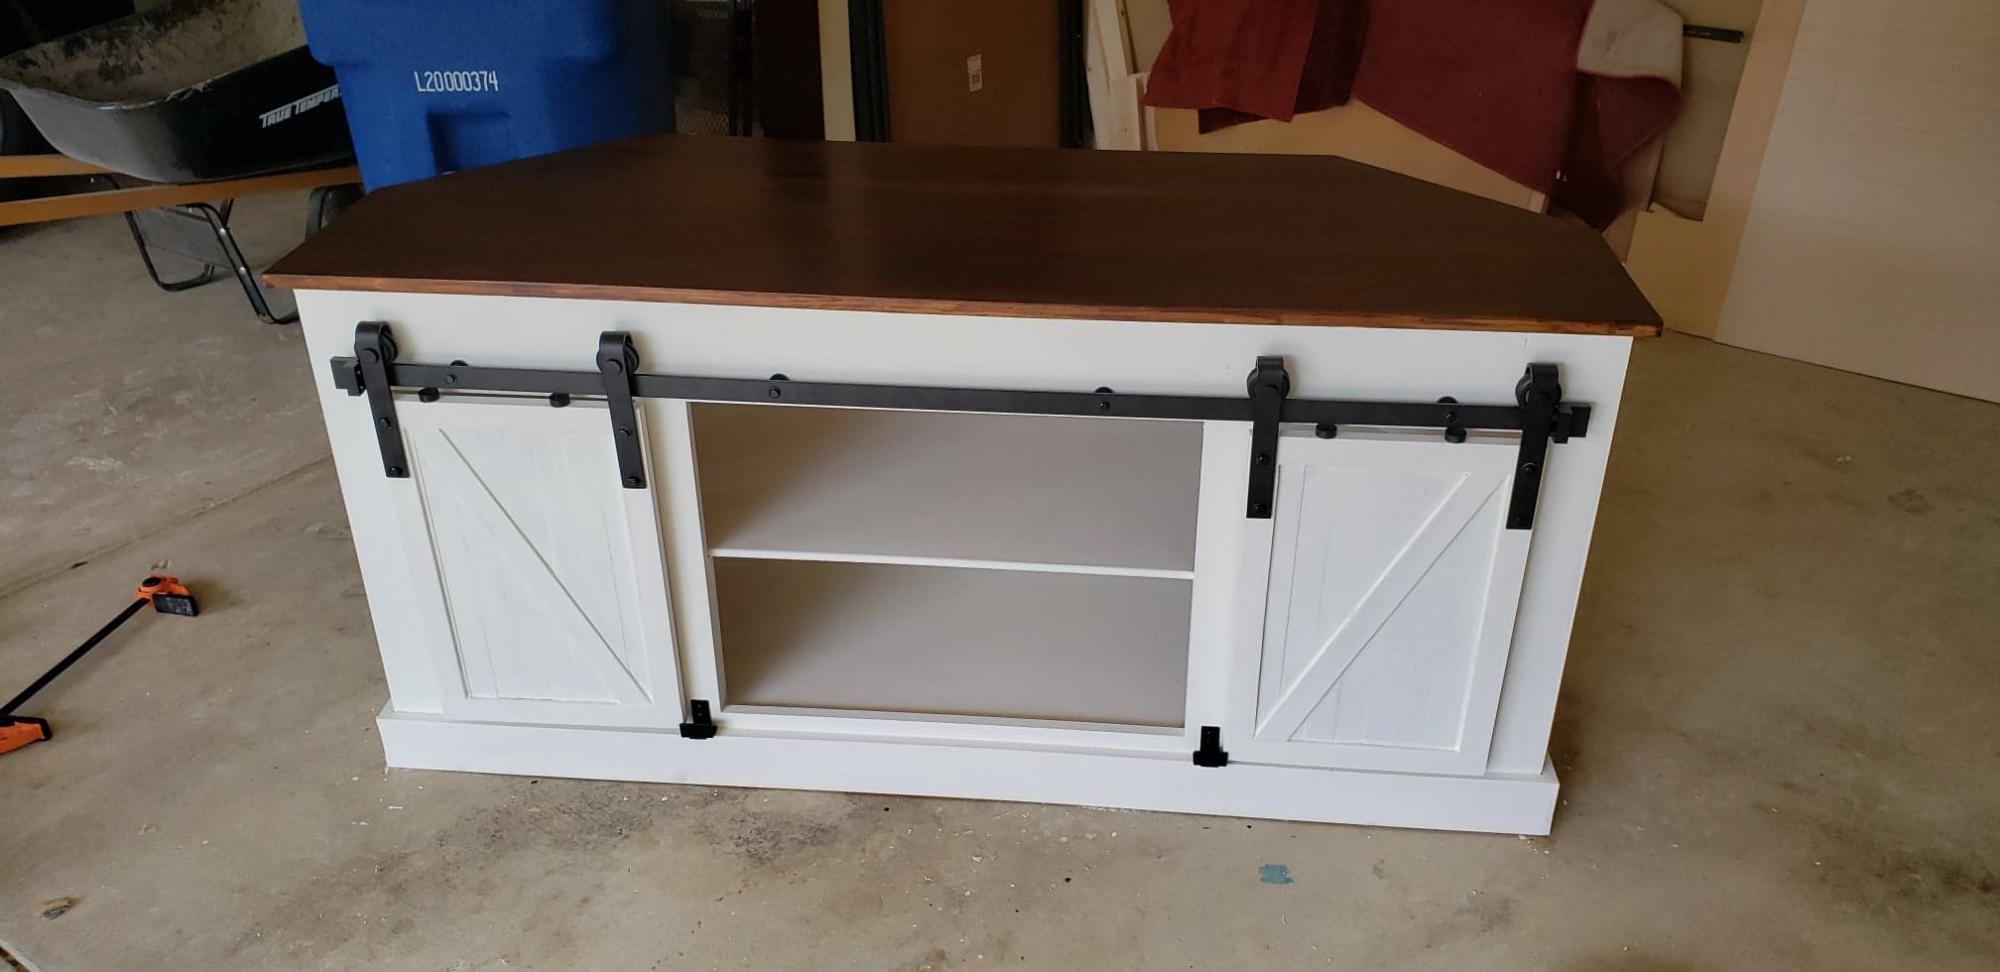
Playhouse for Christmas...almost done!

Submitted by lprollins on Sun, 11/25/2012 - 14:57

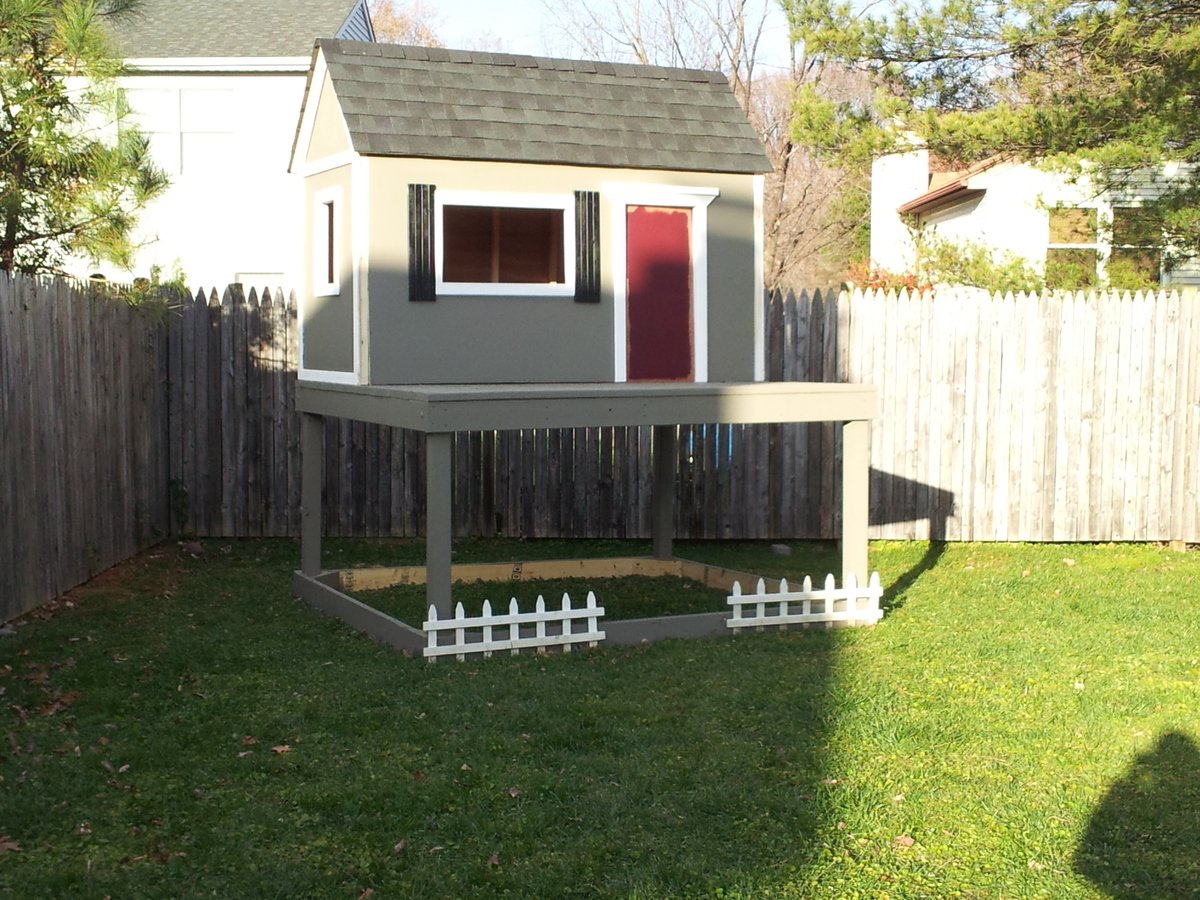
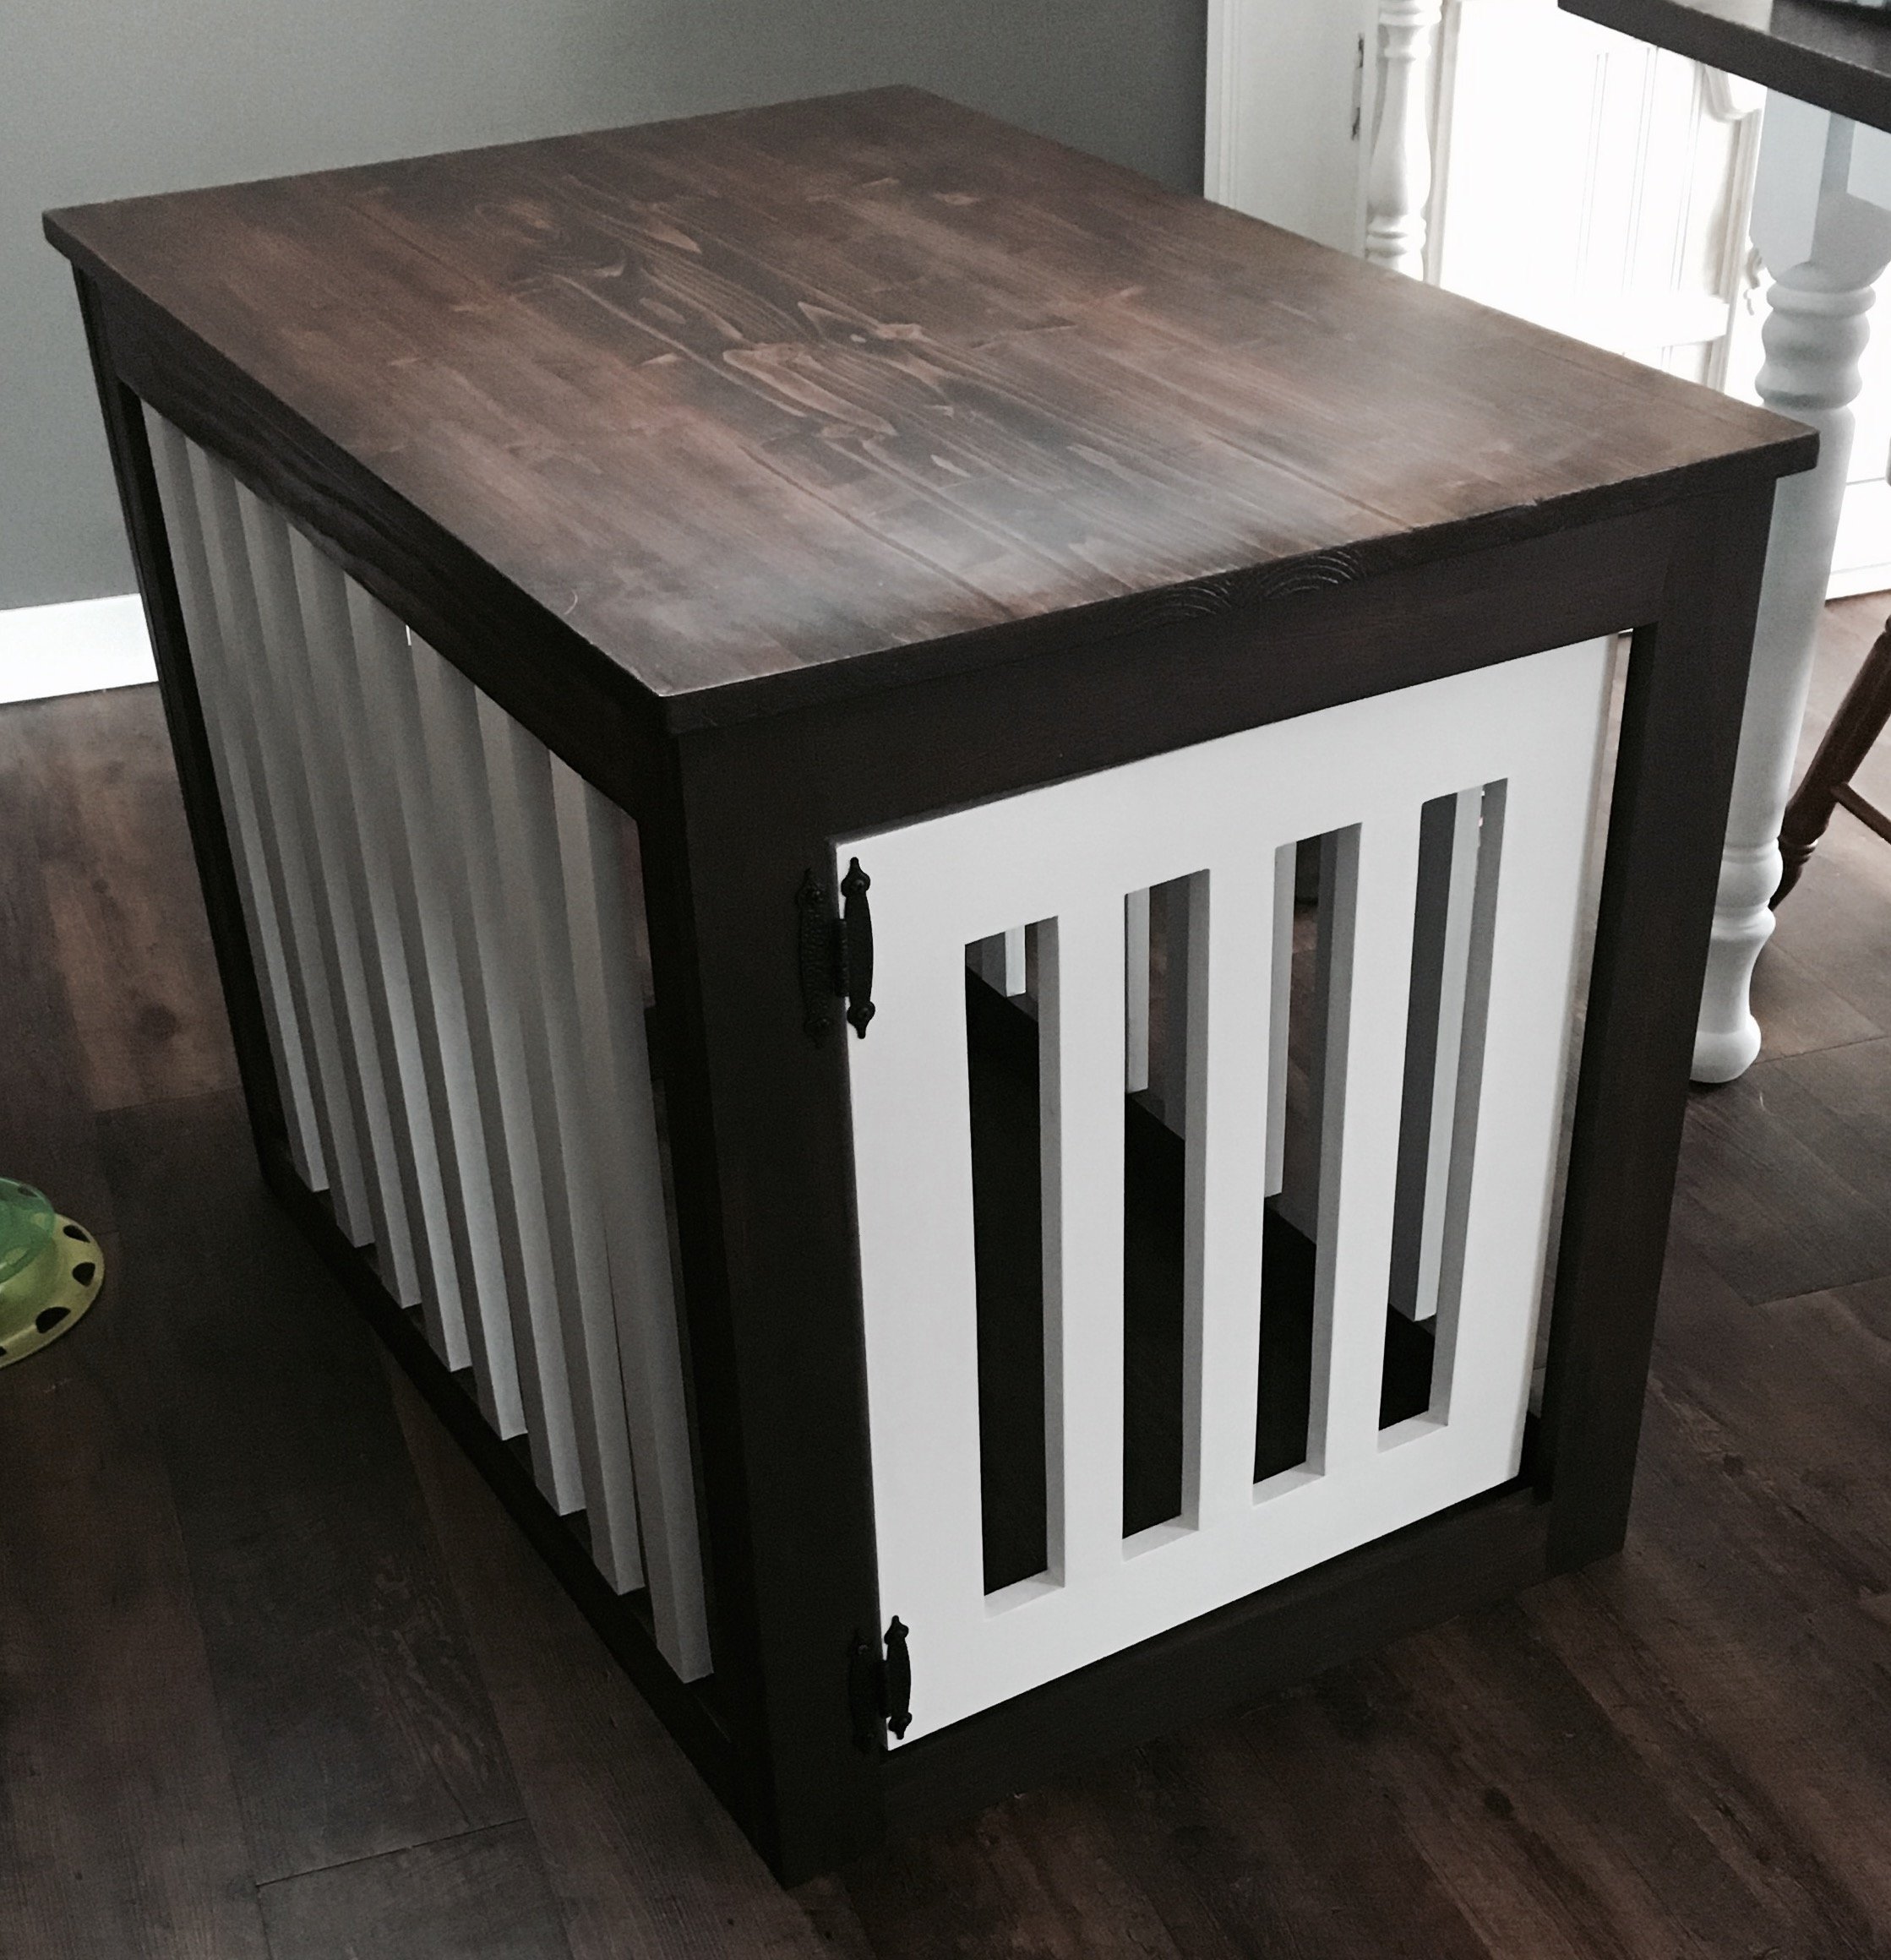
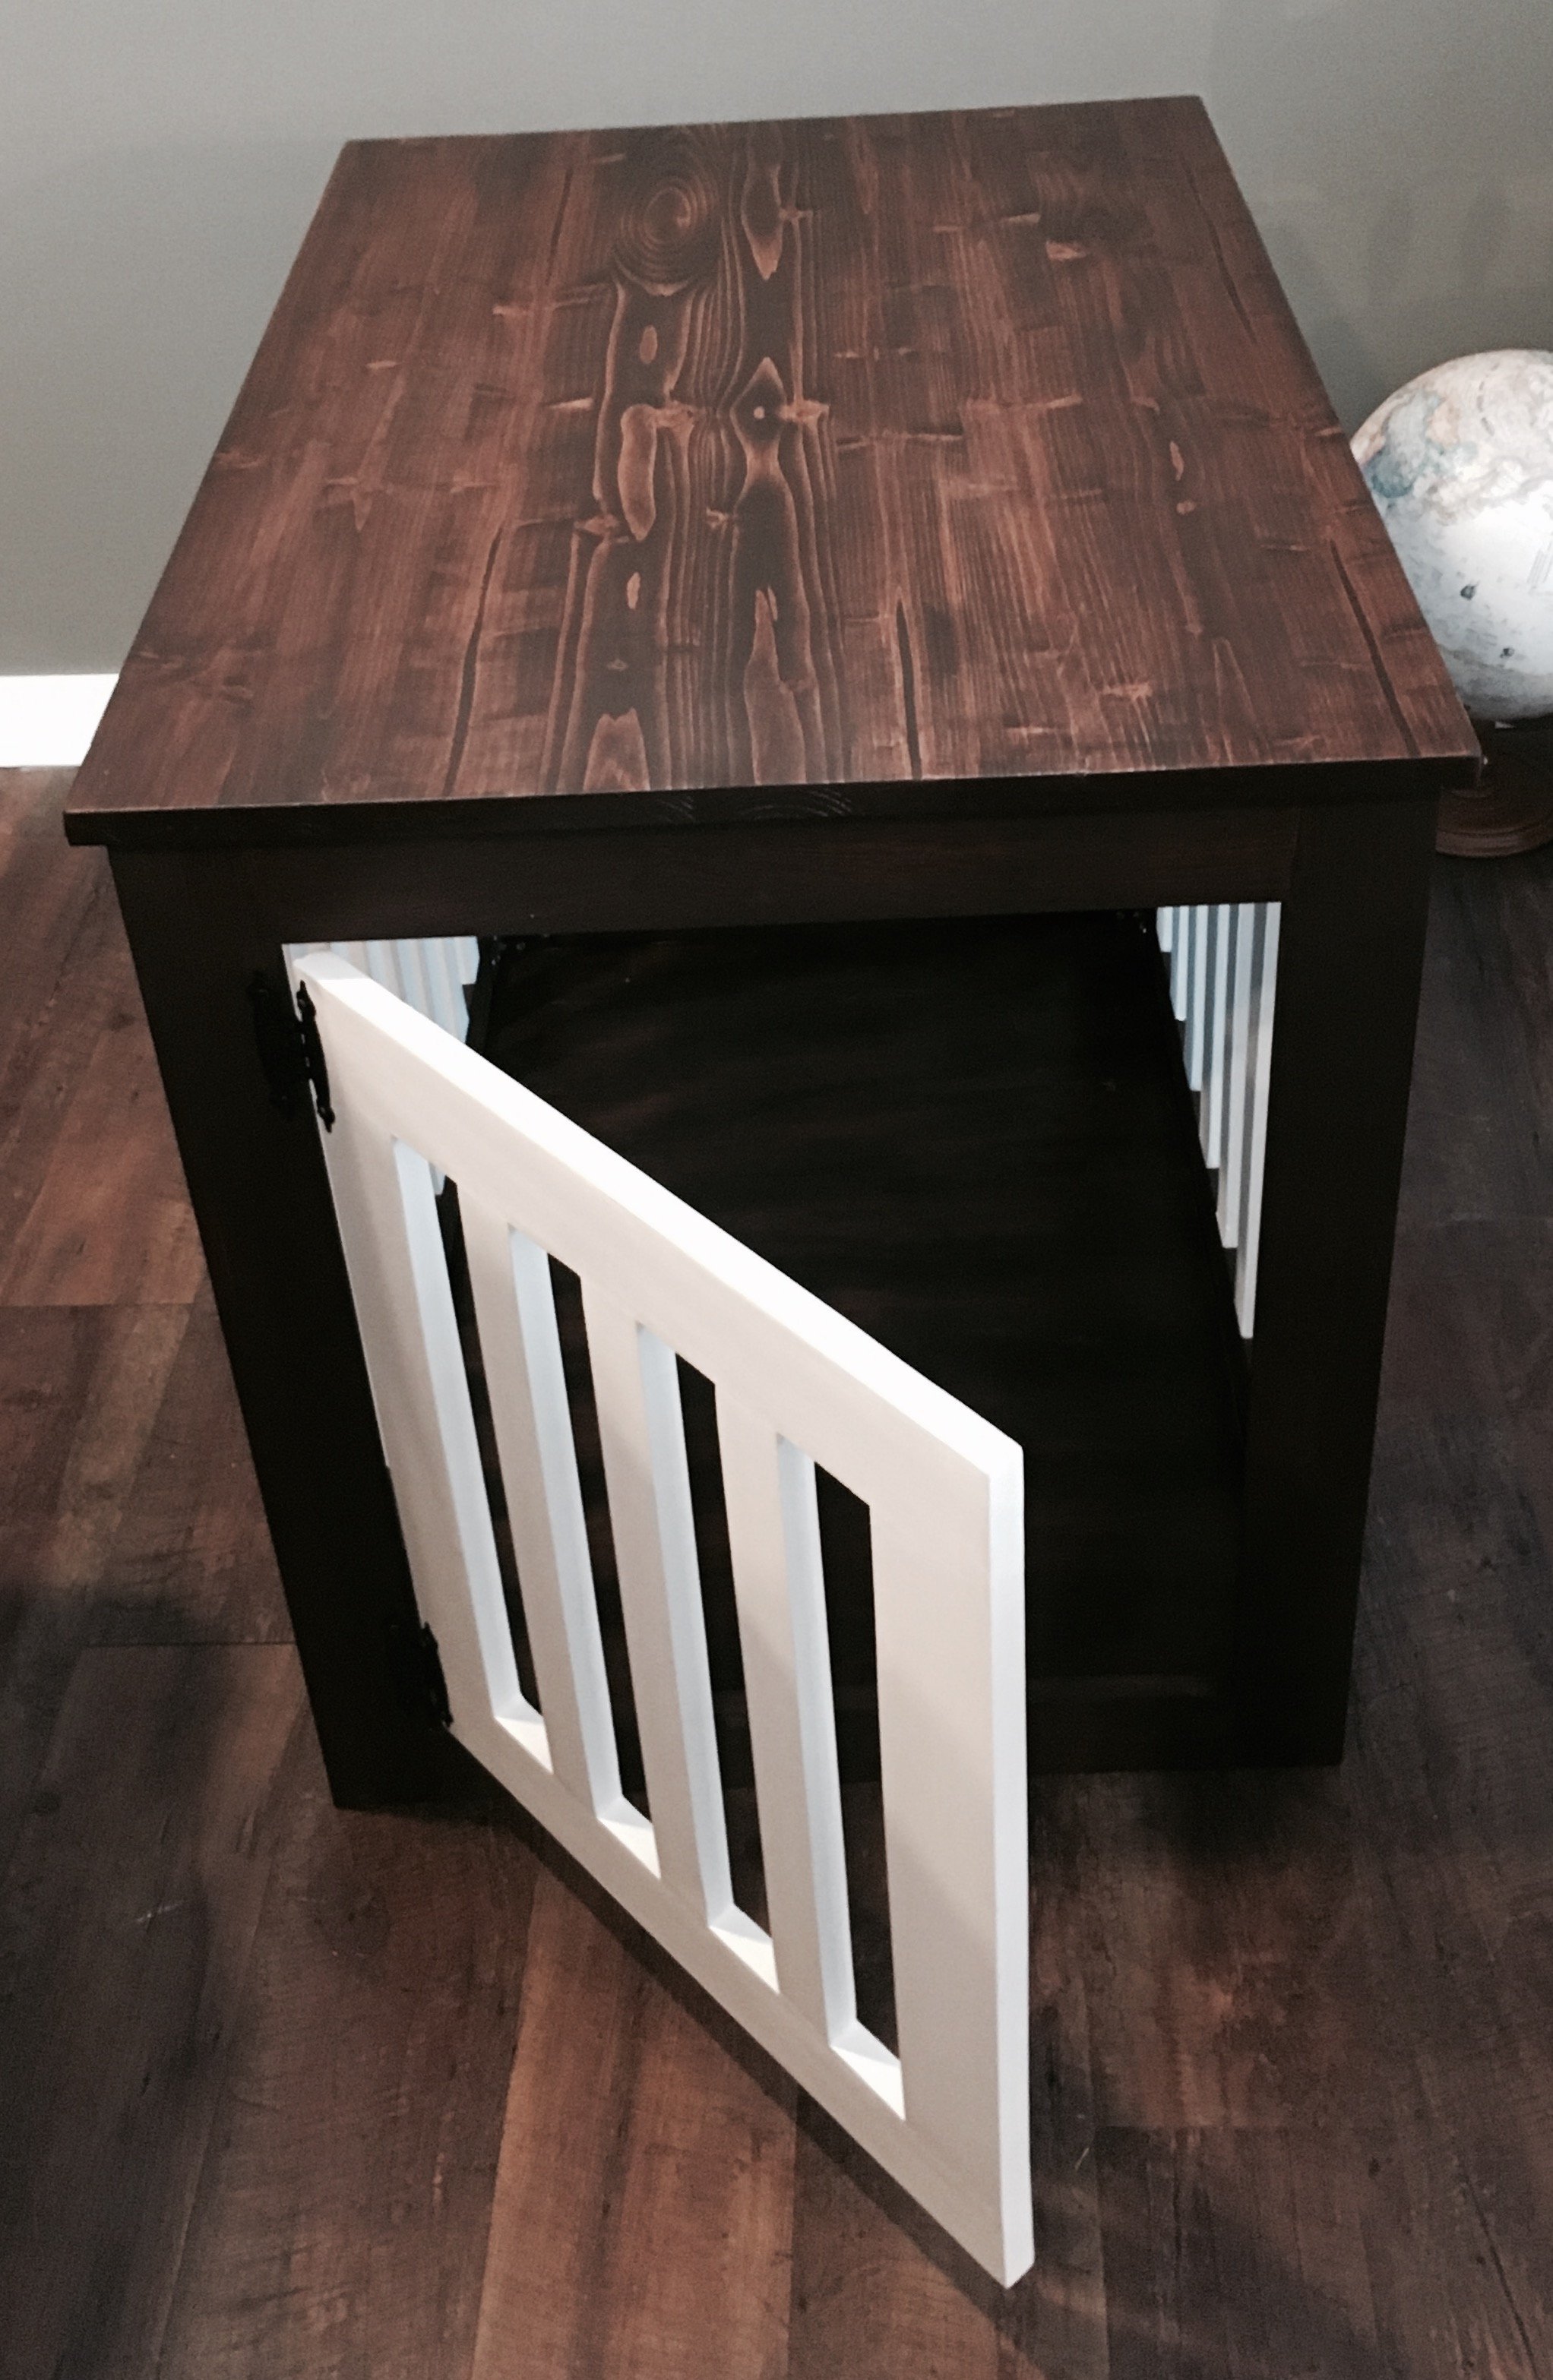
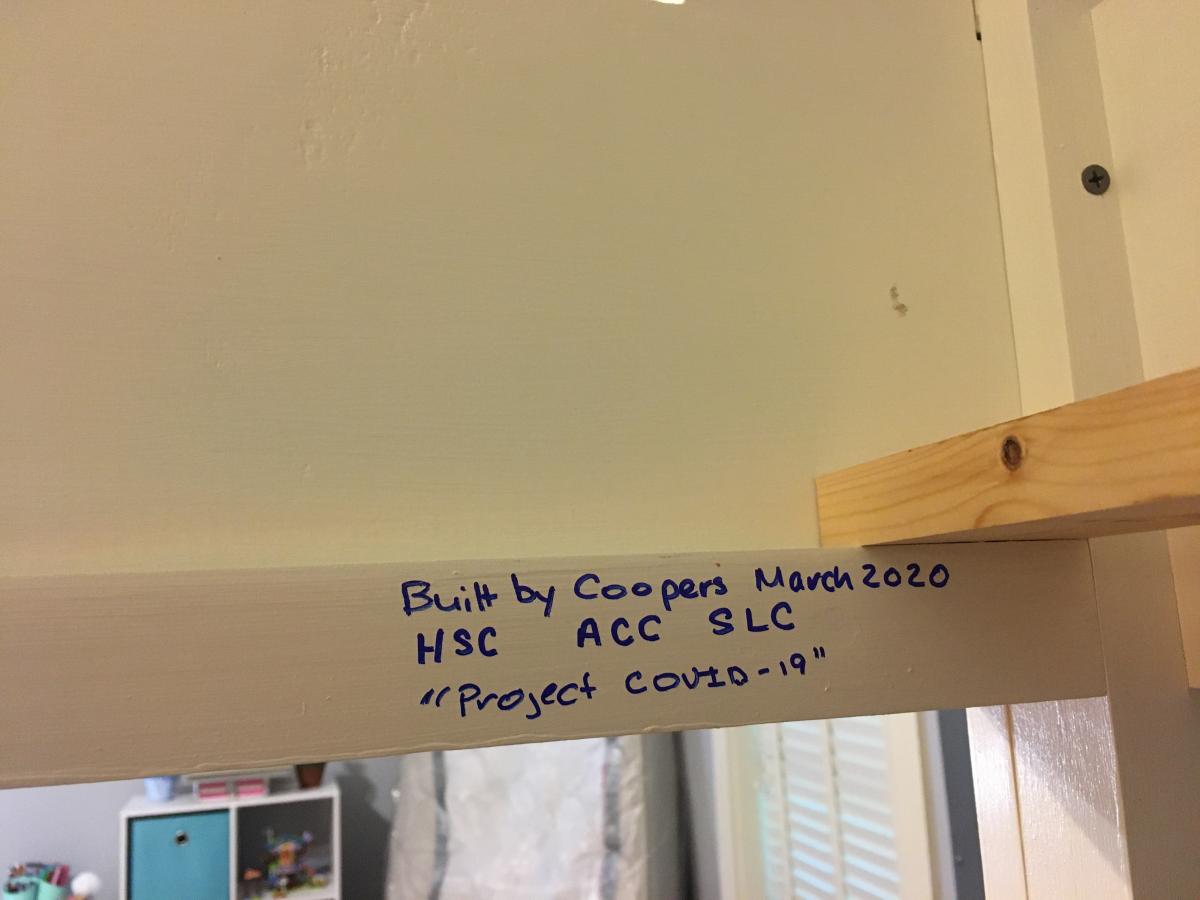
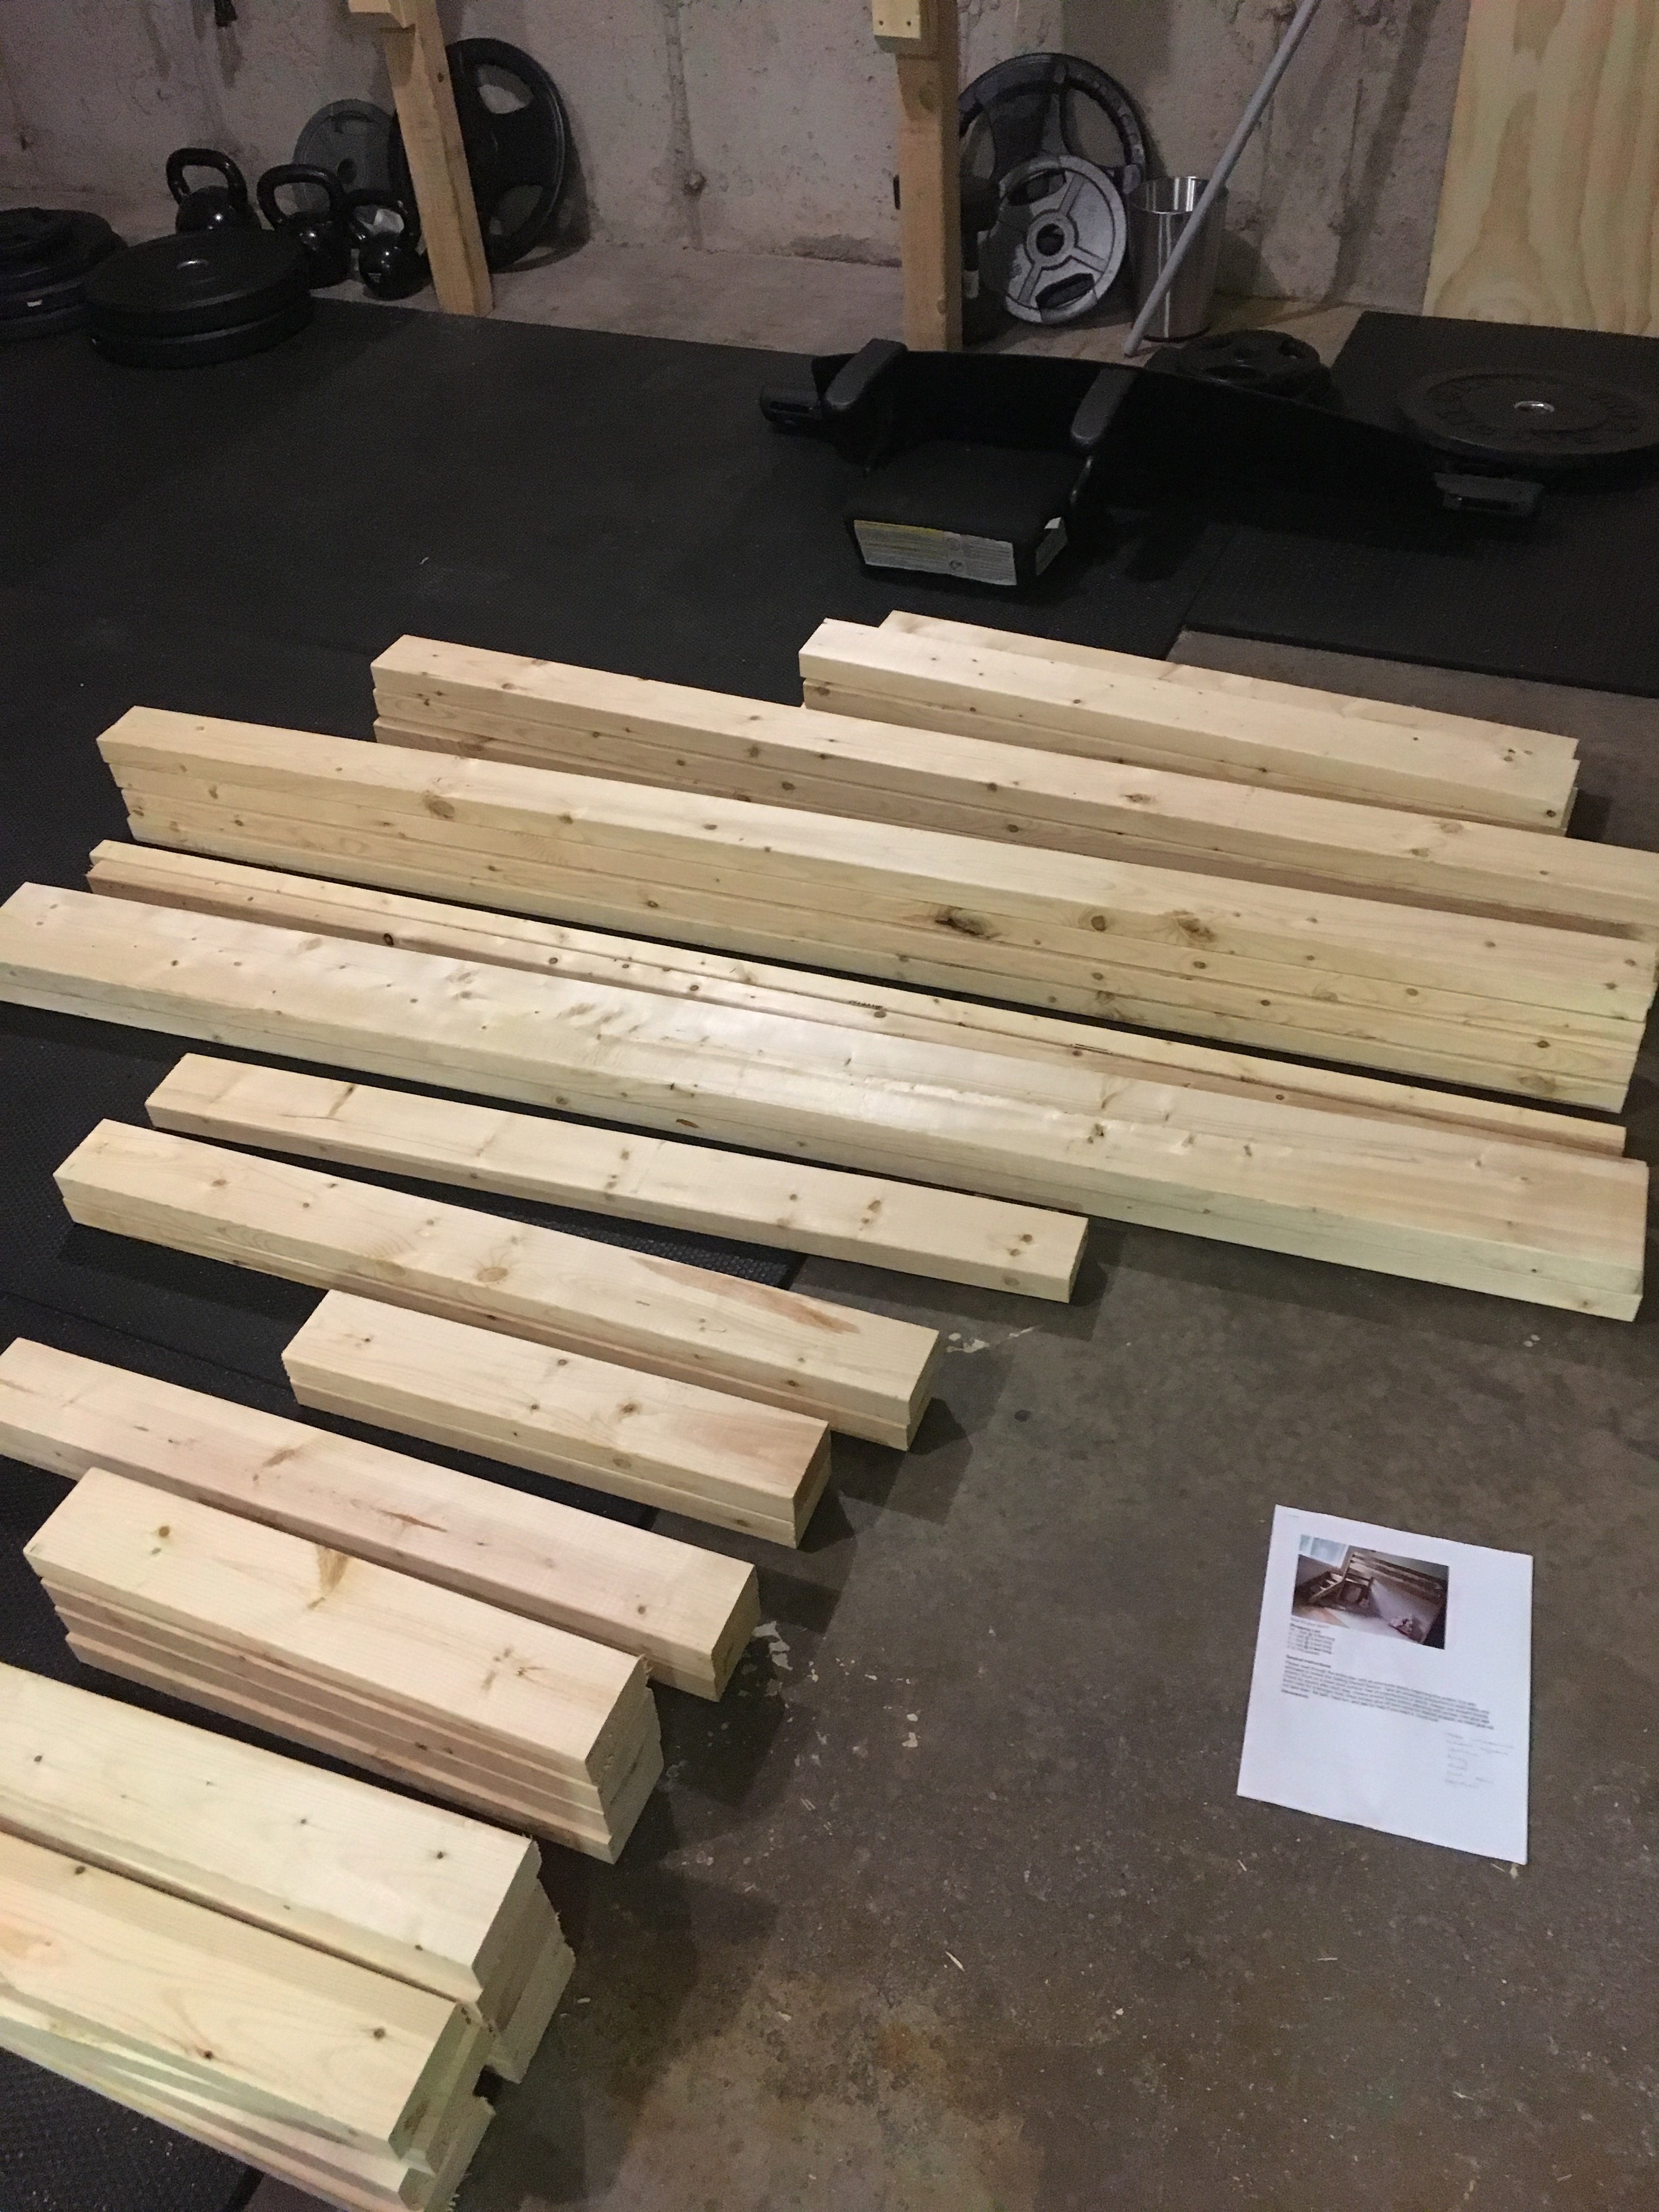
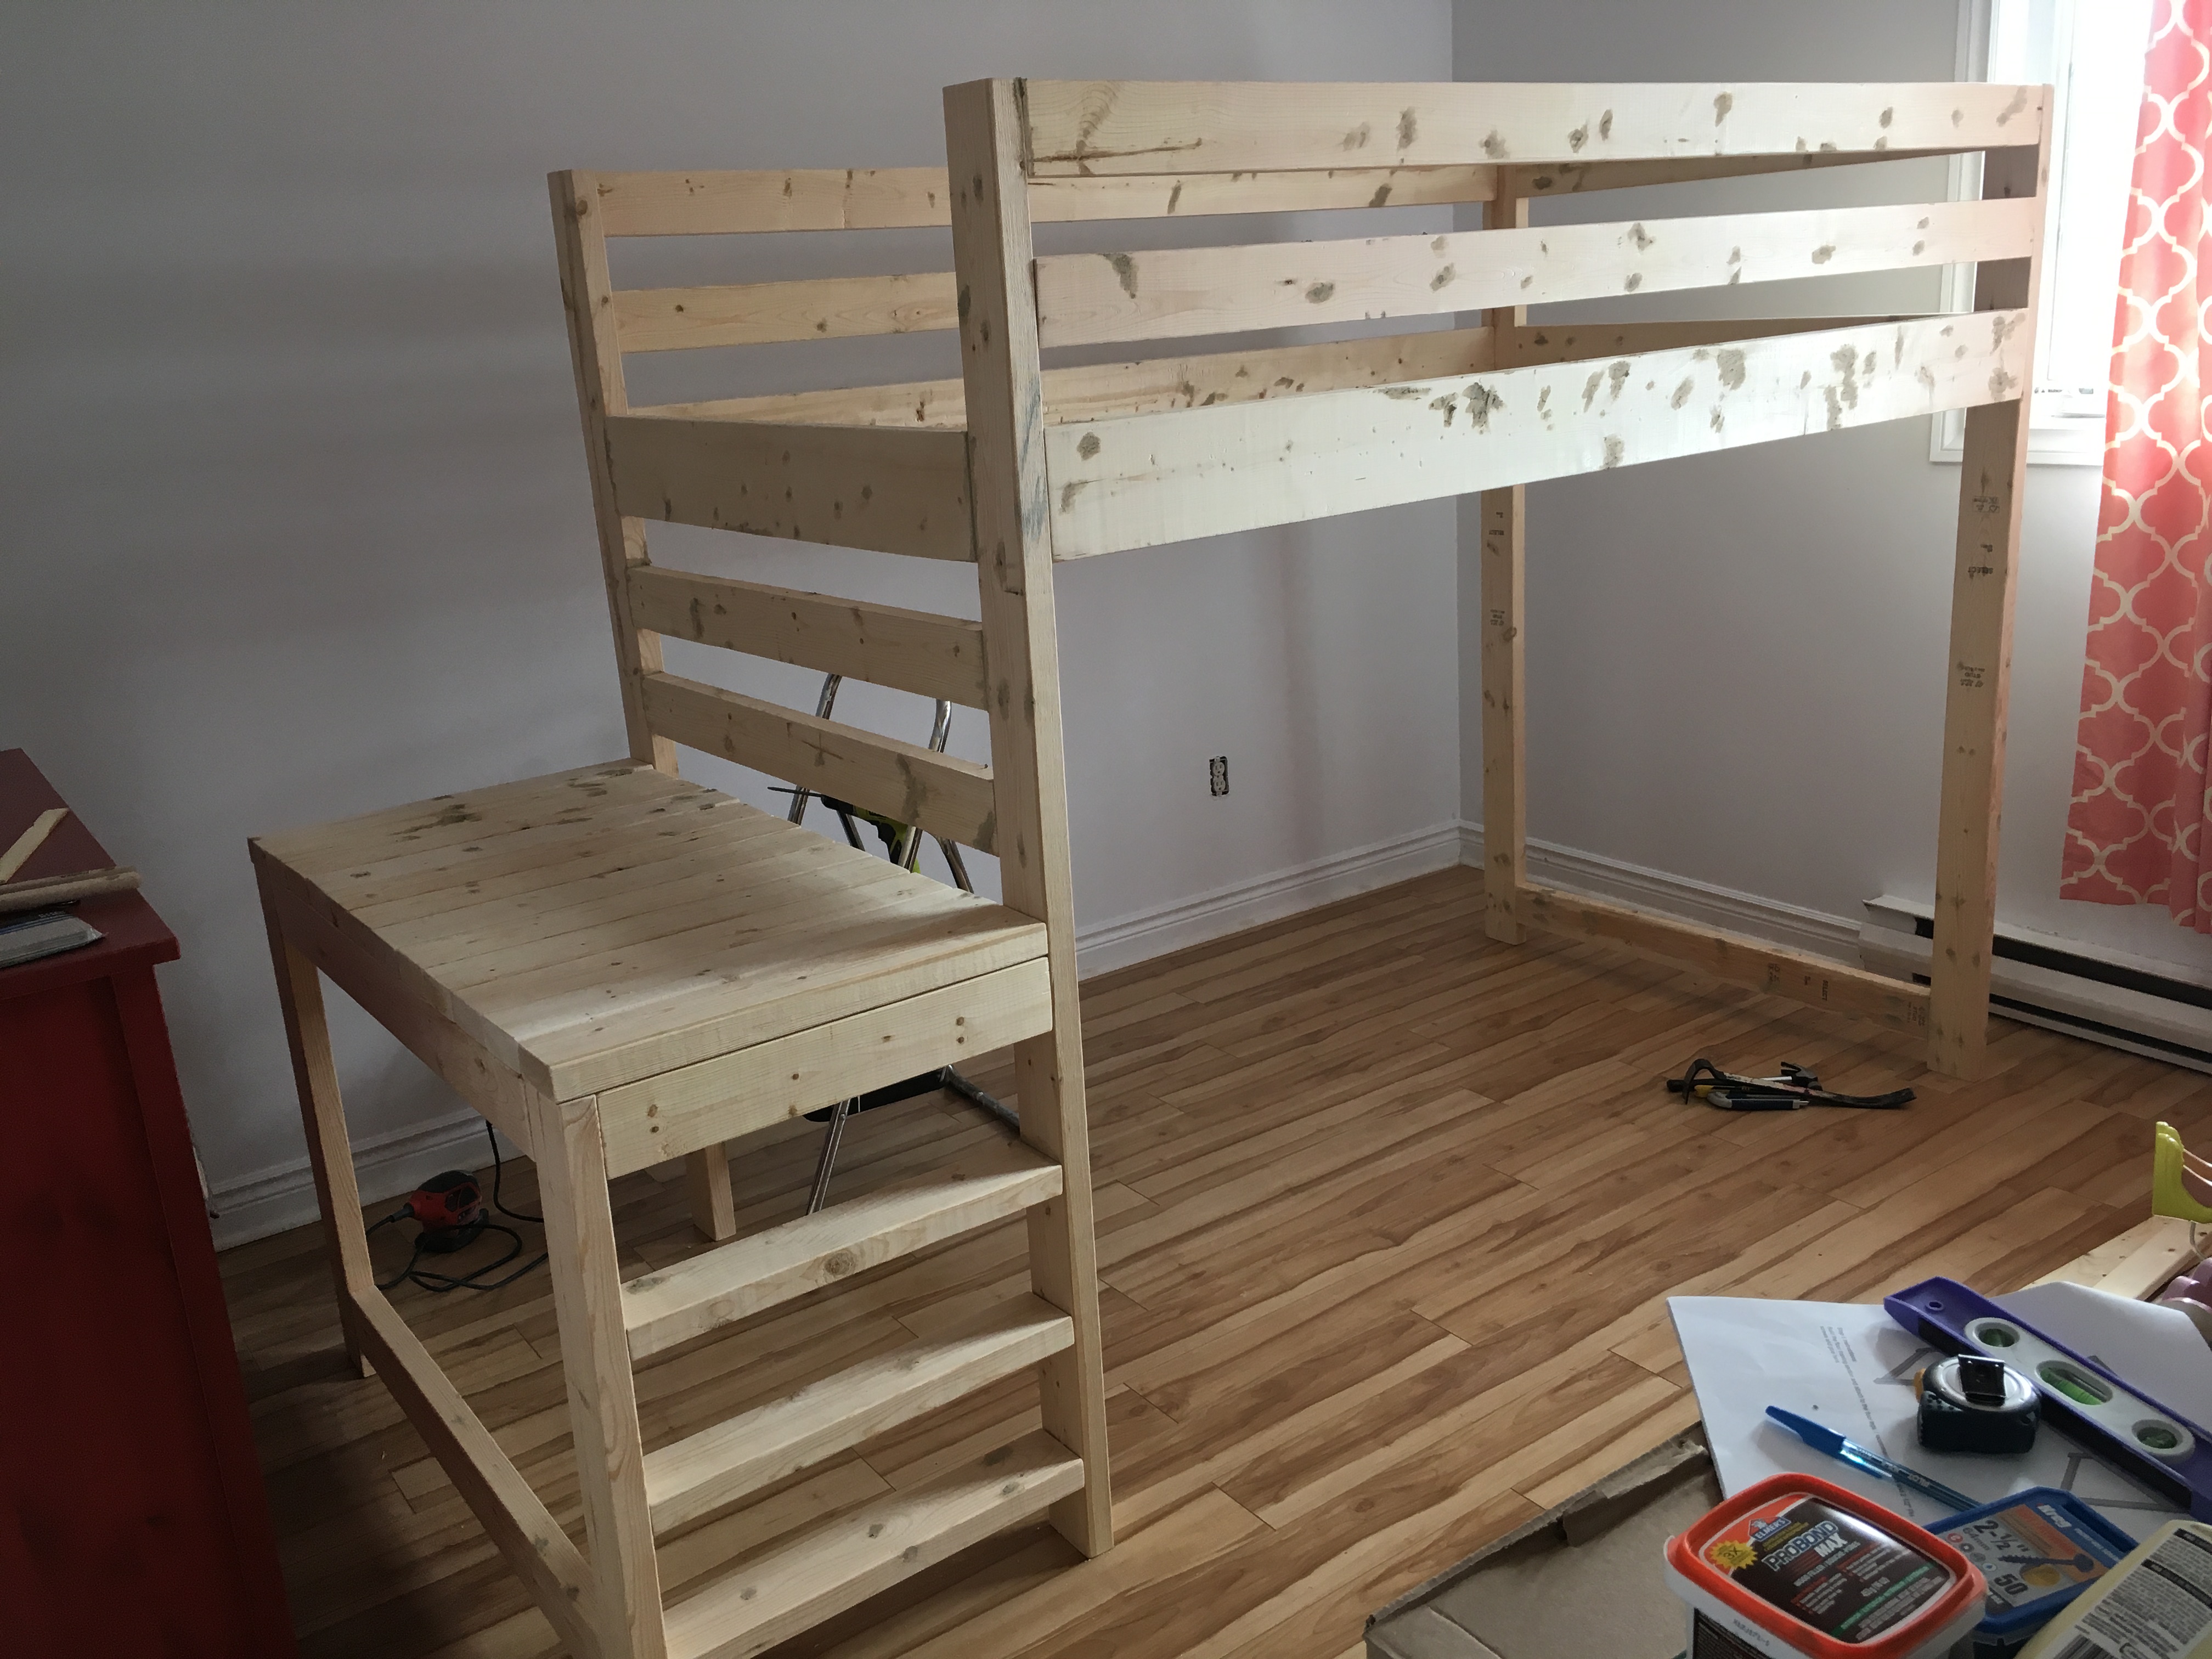
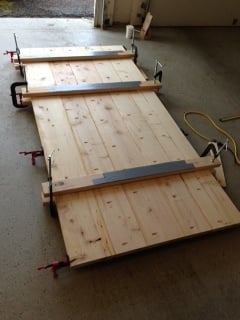
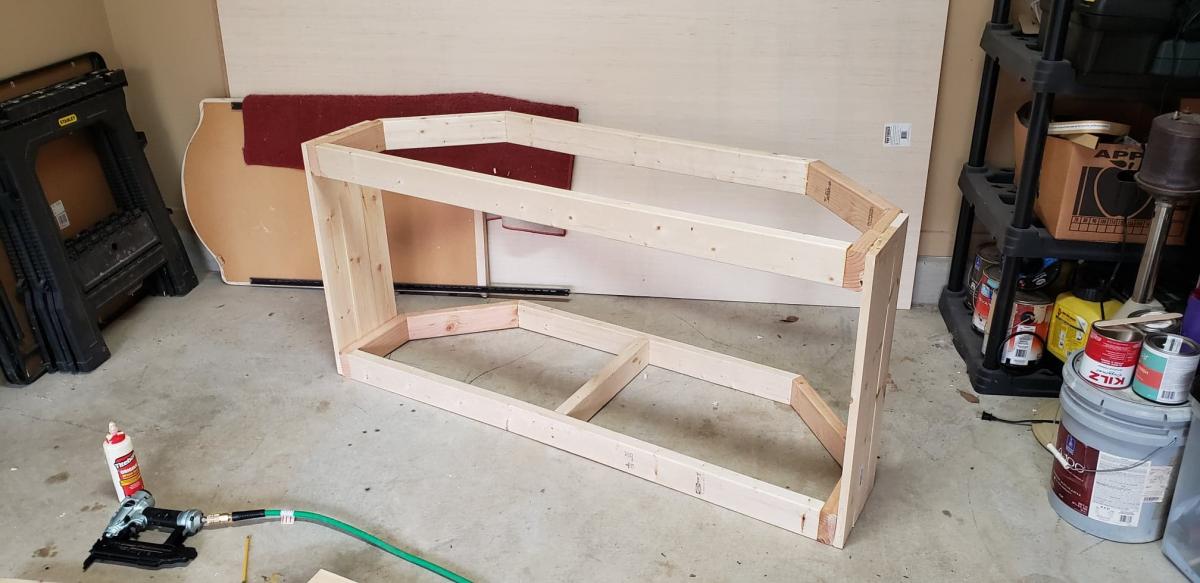
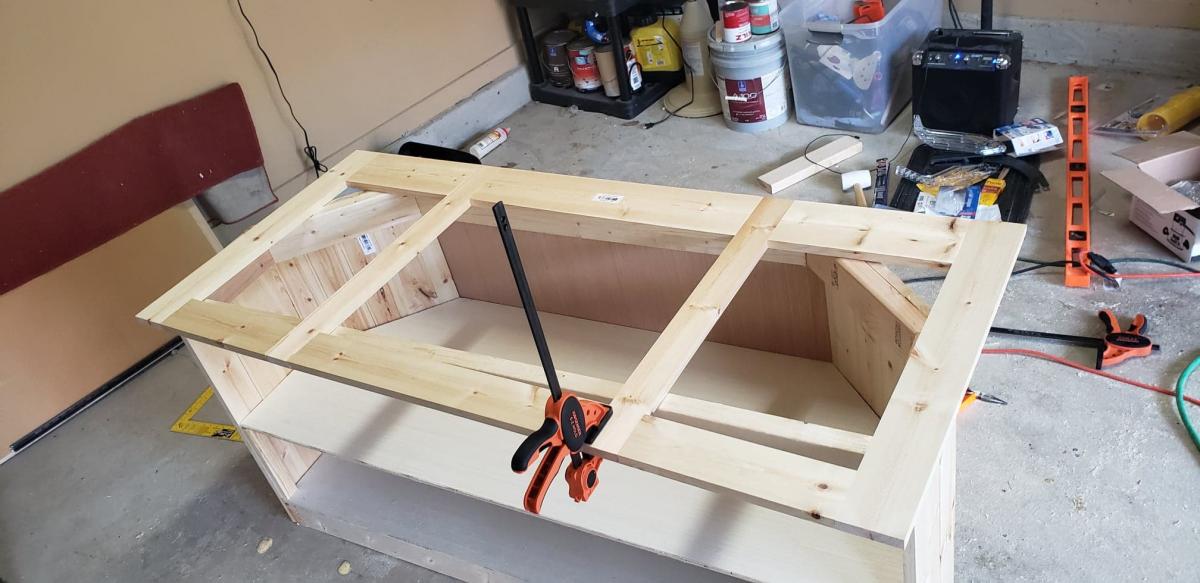
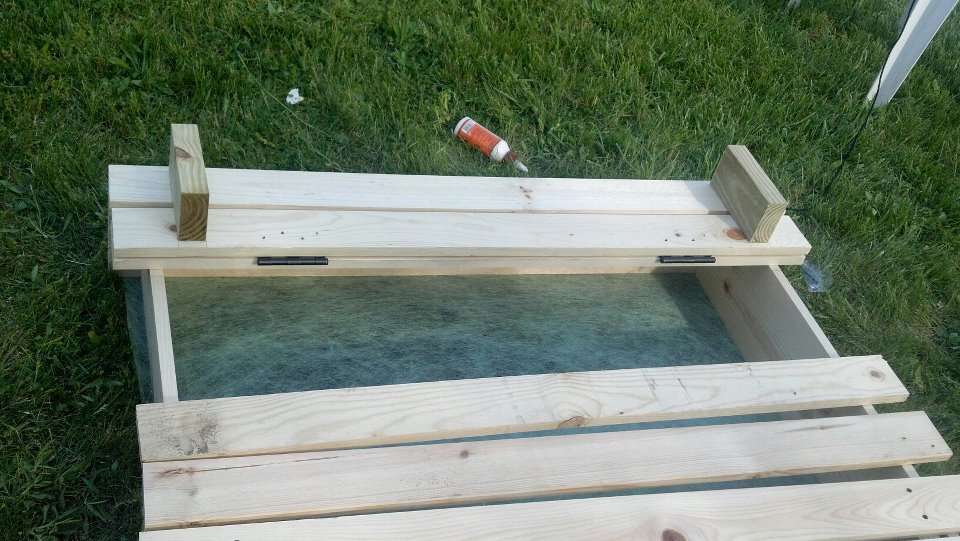
My husband and I used our Thanksgiving break to build this playhouse and deck, using Ana's plans. We are NOT builders...this is very doable for beginners with the right tools. Read the plans thoroughly before starting. Total cost (including all lumber, hardware, and paint) was under $600.

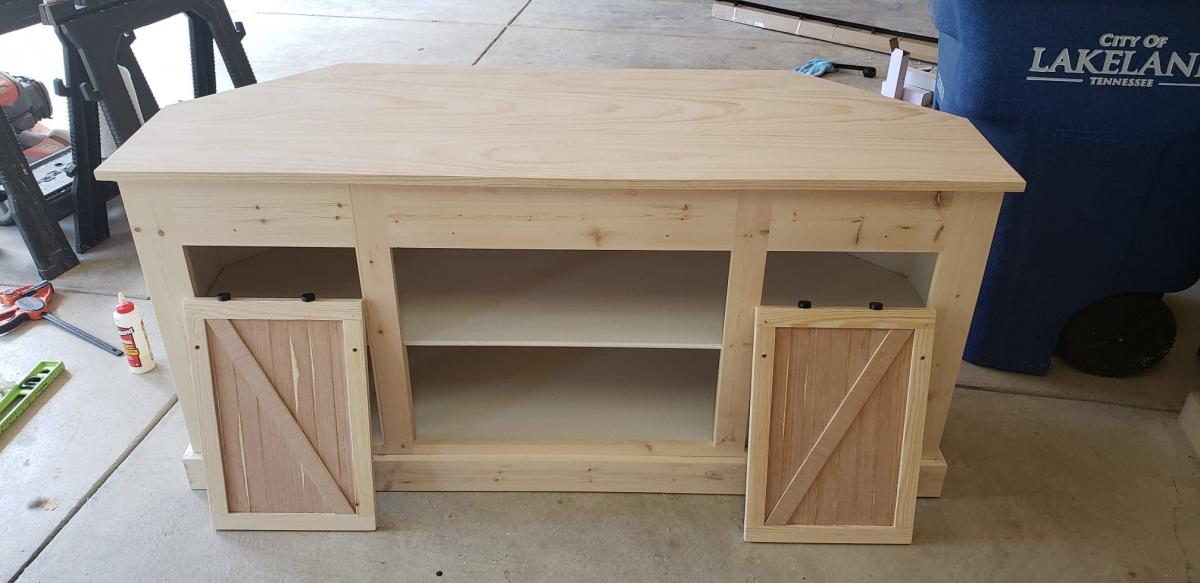
We still have door and house trim to complete, a little painting, and a handrail/ladder.

Santa may bring a slide and some other fun accessories!

Thanks Ana!!!!!

Estimated Cost
$600
Estimated Time Investment
Week Long Project (20 Hours or More)
Recommended Skill Level
Beginner

Wood dog crate end table

Submitted by Anonymous (not verified) on Sun, 03/12/2017 - 17:11

Really fun build! I changed the plans a bit and made the spindles go all the way to the bottom. Made it more open for the dog. Took a while to finish since I would tinker when I had the extra time! Turned out great with the two tone, stained from and top with white spindles and door. Thanks for the plans!

Built from Plan(s)
Estimated Cost
$50-$80
Estimated Time Investment
Week Long Project (20 Hours or More)
Recommended Skill Level
Intermediate

Loft bed

Submitted by scooper812 on Fri, 01/08/2021 - 23:52

My daughter had been asking for a loft bed that she could place a futon under. This plan was exactly what I needed! I made the bed taller so she would be able to stand under it (we have 10’ ceilings - old house). And, I replaced the ladder with a staircase with built-in cubbies.

This was our first project of 2020 and we started it during the first part of the quarantine, so it got named “Project COVID-19.”

Built from Plan(s)
Estimated Cost
$200
Estimated Time Investment
Week Long Project (20 Hours or More)
Finish Used
White latex paint
Recommended Skill Level
Intermediate

Comments

Ana's Loft bed w/o the stairs

Submitted by Anonymous (not verified) on Tue, 04/18/2017 - 12:38

I fell in love with the loft bed but thought the stairs stuck out too far for my daughter's room so I revampd the plan just a bit to add three 'stairs' in the platform rather than the standard stairs in the plan.

I got started on the project on a Friday night, got my cuts made, my pocket holes drilled and pieces sanded for an early start Saturday morning, everything went together like a dream - though it would have gone MUCH faster if I had had a second set of hands; I had to balance all of the long peices on other peices to try and get them attached and it took much longer than it had too! 

It was all together, the holes filled and first coat of primer on by Saturday afternoon - I used Zinsser primer so the knot's did not bleed through. Sunday morning I was painting and it was in place and decorated by Sunday night!

Great, easy to follow plans (as always) Ana - thank you, I have one VERY happy daughter!

Estimated Cost
Approx $150
Estimated Time Investment
Weekend Project (10-20 Hours)
Finish Used
paint
Recommended Skill Level
Beginner

Farmhouse Bench

With lots of leftover wood from previous projects (farmhouse table and sideboard), I decided it was time to start another project. (I did head out to Lowes to get a piece of 4x4 for the legs...they only had Cedar. My friend found some Fir at Home Depot for a buck more).

Found the plans for the Farmhouse Bench, looked at other brag posts and their suggestions...then got to work!

Cutting the pieces was fast and relatively easy. Predrilling the pocket holes also went quick. Putting the pieces together was also very fast (though I did have to add extra pocket holes here-and-there so that the legs and two end-aprons were more sturdy).

Sanded the piece, then added a coat of Rustoleum Dark Walnut Stain, and then a couple coats of Deft Satin varnish.

Estimated Cost
$20 (for extra lumber and materials). Already had leftover lumber from previous projects.
Estimated Time Investment
Day Project (6-9 Hours)
Finish Used
Rustoleum Dark Walnut
Deft Satin Clear
Recommended Skill Level
Starter Project

3 Tier Planter

Submitted by ranlim on Thu, 05/18/2017 - 21:24

Love this planter. Used quality pine. Perfect size for the balcony! I use it for fresh herbs... i have have other people wanting one too!

Estimated Cost
17
Estimated Time Investment
An Hour or Two (0-2 Hours)
Finish Used
Special walnut
Recommended Skill Level
Beginner

Double Pedestal Table (Modified from Triple Pedestal and Farmhouse Table Plans)

This was my first build and I had a blast! Let me say at the outset that if I can build this table with limited tools and expertise, then so can you! What I lack in know-how, I made up for by not being afraid to try something new. If you do the same, you can sure build this table. This table combines Ana's Triple Pedestal Dining Room Table (pedestals from this plan) and her Farmhouse Table (tabletop modified from this plan). Because Ana's plans are so great and thorough, I will only make note of a few key areas where I either tried something different or where I recommend paying extra close attention. First, on the tabletop, I reduced the length to 90 inches to accommodate our space, and therefore eliminated the center pedestal. As you can see, I alternated 2x10's and 2x8's. I also eliminated the breadboards simply because my wife and I preferred the rustic plank style. I also moved the pedestals in to allow a full 15 inches for a chair to slide underneath. When constructing the tabletop, I used both glue (clamped) and pocket holes on the underside. Don't overdo the glue, as it will tend to drip down (which is the top of the table...I had some drip issues). I also strongly recommend buying/borrowing clamps to keep the top flush or making them from 2x4's as I did. I worked hard on this part, and I'm glad that I did. It was still hard to keep it flush. On the pedestals, I used slightly bulkier decorative pieces (I started the arcs 1.25" from the edge on both ends of the arc). I also attached the top plank directly to the underside of the tabletop rather than to the top of the pedestal in order to both bolster the tabletop and to more easily attach the pedestals precisely where I wanted them. Finally, I drilled shallow flat-bottom holes and used wood bolts to fasten both the pedestals and the crossbeam. This created a nice-looking, low-profile fastener that still enables disassembly should we ever need to move the table (it is HEAVY fully assembled!). The finish is two coats of Minwax Ebony Wood Finish (pre-treated with Minwax Wood Conditioner) and three coats of Minwax Fast-Drying Polyurethane (two coats on pedestals). Thank you, Ana, for the inspiration! Our family has a new table because of it! Thanks to all of you for sharing in our excitement, and I'm happy to share dimensions/details/etc should it be helpful to anyone.

Built from Plan(s)
Estimated Cost
$200
Estimated Time Investment
Week Long Project (20 Hours or More)
Finish Used
Minwax Ebony Wood Finish - 2 coats (pre-treated with Minwax Wood Conditioner); Minwax Polyurethane Satin Clear Coat - 3 coats on tabletop, 2 coats elsewhere
Recommended Skill Level
Intermediate

Comments

Lady Goats

Wed, 05/01/2013 - 12:56

I love what you did with the "arcs" (gotta be careful with words synonymous with this - the word "arches" makes me cringe since I had to rip arches out of nearly all the doorways in my house ;-))! Not sure that I'll ever get around to using this idea, but I must say that I love it!

Pabs

Thu, 07/18/2013 - 05:17

Beautifully done, I like the modifications. Could you please share the dimensions and any detail info please…much appreciated.

NoviceBuilder

Mon, 08/19/2013 - 10:41

Thanks for the kind words. I think I included all of the measurements that differed from the two plans used, but is there a specific measurement(s) that you are looking for? If so, I'd be happy to provide it. Good luck!

Price0909

Sun, 03/09/2014 - 17:23

Could you give me some sizes on the bottom posts? Cuts of 2x4's for the posts etc..
How far apart did you mount the 2 pedestals? We will be putting it in front of a corner bench.
Thanks

NoviceBuilder

Sun, 03/09/2014 - 18:47

The uprights for the pedestals are 22". When you add in the tabletop, the four lateral pieces, and the feet, the table is 30 1/4" tall. As for the spacing of the pedestals, I chose to allow 15" from each end for the chairs to slide all the way under. But it's plenty stable and you really have plenty of freedom here, depending on how many chairs you want to use and how long your table will be.

Simple Outdoor Dining Table - Kreg Jig Version

Submitted by mstephe7 on Mon, 09/18/2017 - 10:57

I followed the plans to the dining table with the suggested 1/4" spacing and extra slat so that this table will match the bench I will be making next.  I used the kreg jig for everything so that there are no visible screws.  This table is relatively simple to assemble and seems sturdy yet not too heavy.

Built from Plan(s)
Estimated Time Investment
Weekend Project (10-20 Hours)
Finish Used
Semi-transparent deck stain
Recommended Skill Level
Intermediate

Church Pulpit

Submitted by BBLinda on Sat, 06/08/2013 - 10:34

A good friend of mine, a pastor of a local church, asked me to build a pulpit for their recently finished church up in the countryside of Grenada. She showed me a picture of what she had in mind and based on that, I drew my own plan in SketchUp, and then built it out of Yellow Pine boards and Plywood.

Note to the dimensions:
After I drew the plan, and just when I was at the lumberyard to have the plywood and boards cut, I thought I might have had it estimated not wide enough, so I decided on the spot to make it 2" wider and the top panel 2" wider and deeper too. So if you'd like to build based on my plans, please consider if it's wide enough for your purposes.

This is what I used (corrected measurements here):

2x 2x8 26" long YP Boards (Base)
1x 18 1/2" x 6 1/2" Plywood (Base Support Panel)
1x 26" x 16" Plywood (Top)
1x 18 1/2" x 9" Plywood (Shelf Panel)
2x 45" x 9 1/2" Plywood (Side Panels ) - these are cut angled, see plans
1x 44 1/2" Wood Moulding (for the "stopper" on the top panel, and the "back" of the top shelf.

Estimated Cost
~ US$ 115 (material is very expensive here on the island, and I guess you could build it for about half or 2/3 of this in the USA)
Estimated Time Investment
Weekend Project (10-20 Hours)
Finish Used
MINWAX Polyshades / American Chestnut Satin (375)
Recommended Skill Level
Beginner

Gardener's ladder shelf

I built this for my sister-in-law who loves growing vegetables and herb - in her small apartment porch. She wanted something that she can put her plant pots (and she has so many of them!), so I modified the Painter's Ladder Shelf by:
1. Made the shelves with slats, with added support underneath
2. Beefed up the legs with 2X3s instead of 1X2s.

Dad helped with angled cuts and other things, and borrowing his workshop, this was a breeze to build.

Estimated Cost
$50
Estimated Time Investment
Afternoon Project (3-6 Hours)
Finish Used
Flat paint in "Soothing Lavender", since it's her favourite colour.
Recommended Skill Level
Beginner

Farmhouse King size bed frame

Submitted by Anonymous (not verified) on Wed, 01/19/2022 - 08:00

Found the plans on your site for Farmhouse bed frame, thank you!

Made a spectacular Christmas gift for Hubby!
I ended up buying a few more pieces of 1x6 as I opted not to waste the 4x4 posts, and added 14” height to the headboard and 7” height to the footboard.

I actually forgot about my lights on the wall, so what to do? Drilled holes in the headboard and wired them through! Love opportunity solving! 😂👍🏼

I should’ve moved the Hopechest for the photo, but you get the idea. Next project, matching side tables!

Comments

My First Project: Spinning DVD Rack

Submitted by Dan Y. on Sat, 07/13/2013 - 20:19

I was looking online for a spinning DVD rack to buy when I stumbled across a picture of a custom built rack. I decided to give it a try and this is the result. This is the first project I've done outside of basic shelves and it was a great learning experience. The overall fit and finish isn't quite where I'd like it to be but overall I think it turned out pretty well. I was able to find a 12" lazy Susan at a hardware store that supports over 300lbs and worked perfectly for this project.

I used pocket holes for the shelves, finishing nails for the top and screws for the bottom and lazy Susan. I also used pocket holes to attach the shelf backs and hid them behind the shelves. One thing I definitely won't use next time is spray paint/enamel. The finish isn't nearly as nice as I wanted and it cost far more than I was expecting.

This is also my first time using SketchUp and I'm really impressed with it. I've uploaded a copy of the plans.

Criticism and suggestions are appreciated.

-Dan

Estimated Cost
$170
Estimated Time Investment
Weekend Project (10-20 Hours)
Finish Used
Rust-Oleum Universal Satin Spray Paint - Espresso Brown
Rust-Oleum Crystal Clear Enamel
Recommended Skill Level
Starter Project

Comments

Val Manchuk

Sun, 07/14/2013 - 11:35

I like this spinning DVD unit! Coincidentally, I just finished using spray enamel to redo some cupboard door handles. It's horrible stuff! I ended up sanding it off, and doing it over in flat black. I roughed up the edges with 180 grit to antique them a bit. Looks much better!

My First Project!

My husband and I just moved from an apartment to a house, the first place we've ever lived with a dining room! I knew I wanted to build a really special table for us and I LOVED this plan. It seemed straightforward enough, and my stepdad had all the tools in his workshop. So my stepdad, mom, and I built the table over the course of a weekend. It was SO fun and it looks perfect in our first little house!

Estimated Cost
It cost me about $100 to buy all the lumber, screws, turnbuckles and hardware, stain and polyurethane. I didn't have any of those things on hand before starting. If I had, it would have been less! I also didn't have to purchase any tools.
Estimated Time Investment
Weekend Project (10-20 Hours)
Finish Used
Wood was finished with Varathane Light Walnut wood stain and 4 coats (on the top) of Varathane Water-Based Polyurethane.
Recommended Skill Level
Beginner

Garage shelves

Submitted by Joy on Sat, 09/08/2018 - 18:12

Designed to store 56 qt clear sterilite totes. Spaced 17” apart and used 5 2x4s so 23” deep. We have a lip of our foundation that sticks out so we had to adjust for the difference in leg heights. 

Estimated Cost
Lumber was $8.25 per board (2x4x16) and we used 32. 3 boxes of screws. 2 1/2 for the frame, 2” for screwing down the shelves and 3 1/2 to screw into the wall studs.
Estimated Time Investment
Afternoon Project (3-6 Hours)
Finish Used
None
Recommended Skill Level
Beginner

Garage / Basement Shelving + Bonus Wine/Liquor Under Stairs Storage

Submitted by MJC2DIY on Wed, 10/12/2022 - 21:35

Using the guidelines for the “BEST DIY Garage Shelves (Attached to Walls), I added this to our unfinished basement area for additional storage. I plan to replicate it in our actual garage as well and build the freestanding shelves also!

As a bonus, I used this plan as inspiration and built directly beside it, which is an unused space under stairs, a wine/liquor storage shelving replacing the plywood with cut 2x4s for added weight capacity/stability.

Couldn’t have been easier!

Comments

MJC2DIY

Wed, 10/19/2022 - 09:14

Thank you!! I am so thankful for Ana White and team! These projects are helping me build a lot of confidence to continue endeavoring more challenging projects each step of the way :-)

Mud Room - Inspired by Braden Entryway Collection

Submitted by flicker237 on Thu, 10/13/2011 - 09:19

We had a small mud room off our back door that was in need of serious help! We started from scratch in this room - framing, drywall, floor, molding, etc. To complete the room, we modified the Braden Entryway Hutch and shoe bench plans to fit the dimensions of our space, and add a third cubby. It has worked wonderfully!

Estimated Time Investment
Weekend Project (10-20 Hours)
Finish Used
White paint (2 coats)
Recommended Skill Level
Beginner

Comments

Farmhouse King Bed

Submitted by gahan22 on Tue, 02/02/2016 - 10:36

This was our first ana white build. Bed build took one Saturday - to finish up took another week or so working nights - most of our time spent on getting the color we wanted and sanding and finishing. Building the 2x4 frame took more time than anticipated as well. We are super happy with how it turned out.

Estimated Cost
$250 for lumber, stain and lumber for bed frame. We used lag screws on the side and 2x4 hangers for the frame which increased costs.
Estimated Time Investment
Week Long Project (20 Hours or More)
Finish Used
Stain is two coats minwax dark mahogany plus classic grey over the top - wiped off and finished with minwax satin poly.
Recommended Skill Level
Starter Project

$15 Cedar Lemonade Stand!

My kid-o's love to sell lemonade. So, we made a trip to the local hardware store. Because I am terrified to use my husbands electric saw, any wood we purchased would have to be cut with a hack saw and a miter box. And since the stand is to be stored in the backyard, we opted to build it from cedar. We ended up purchasing 8 fence pickets for about $15 total. This was also to be a great way for my kids to apply the some of the knowledge they have picked up this year, our first year of homeschooling. My children, ages 7 and 9, measured all of the boards that needed to be cut. It turned out GREAT! We already had some extra boards, spray paint and screws on hand; so, the grand total was $15.00 for the entire project!

Built from Plan(s)

Grandy Barn Door Corner TV Stand

Submitted by Anonymous (not verified) on Wed, 01/08/2020 - 12:46

I couldn't find any corner TV stands with the barndoor style that were big enough, so I decided to design and make my own using the Grandy buffet design.

Built from Plan(s)
Estimated Cost
200-300
Estimated Time Investment
Week Long Project (20 Hours or More)
Finish Used
Minwax Polyshades Satin
Wax paint
Recommended Skill Level
Beginner

Comments

COVERED SANDBOX WITH BUILT IN SEATS

Once we hade the frame of it built, we stapled landscaping fabric and chicken wire to the bottom to keep weeds and moles/gophers from coming up through the bottom.

Other than that... We followed the plans as given.

The kids LOVE it!

Built from Plan(s)
Estimated Cost
$80.00
Estimated Time Investment
Afternoon Project (3-6 Hours)
Recommended Skill Level
Starter Project