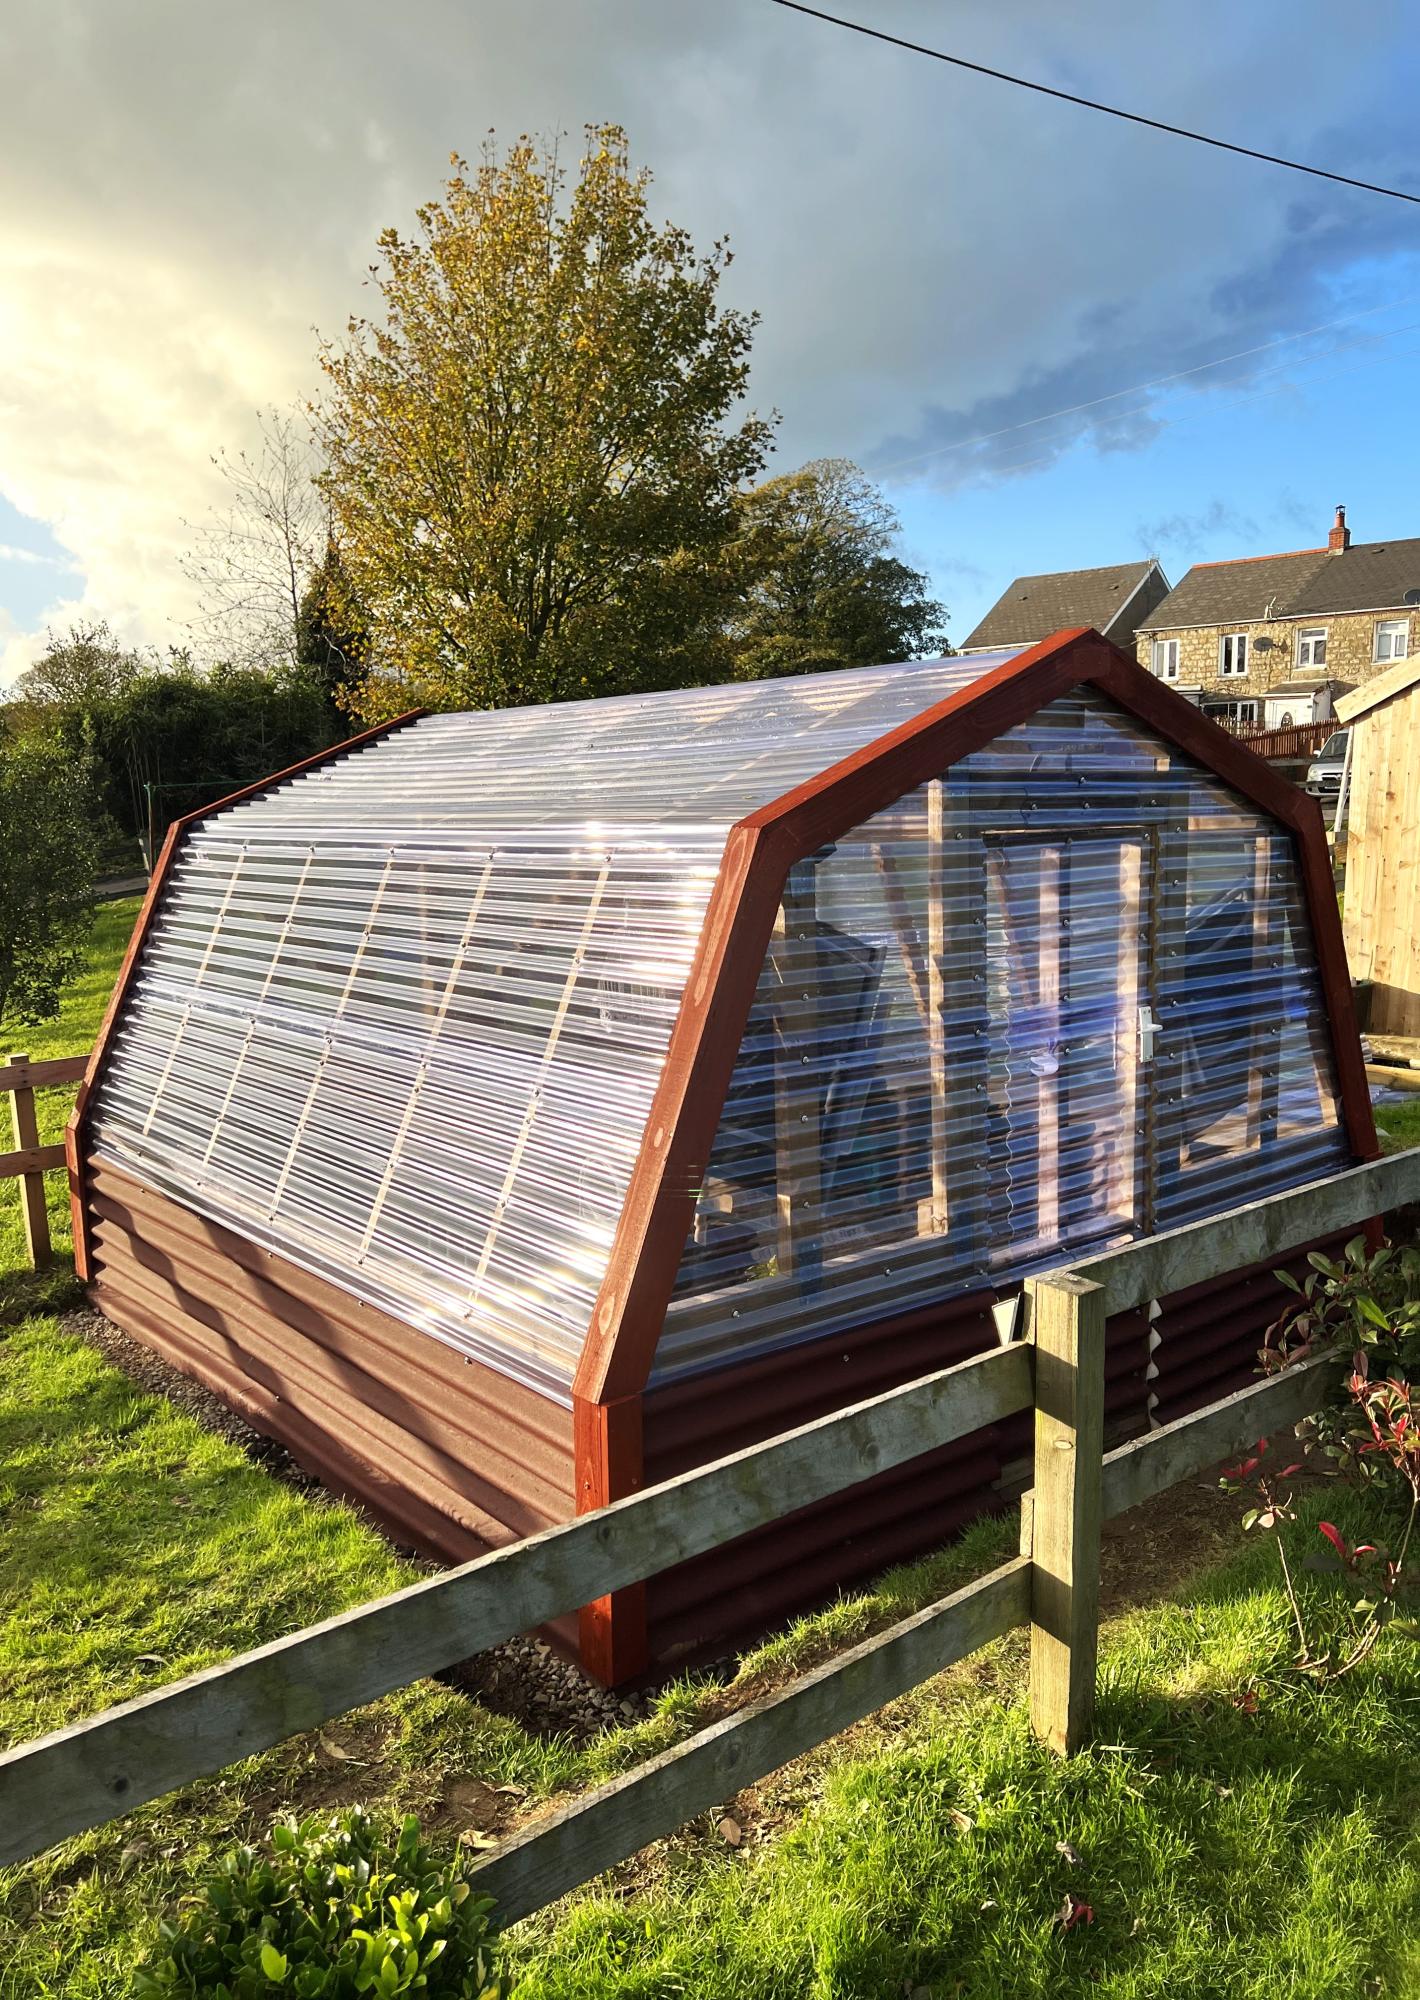
DIY Greenhouse and Outdoor Chair Built with Leftover Wood
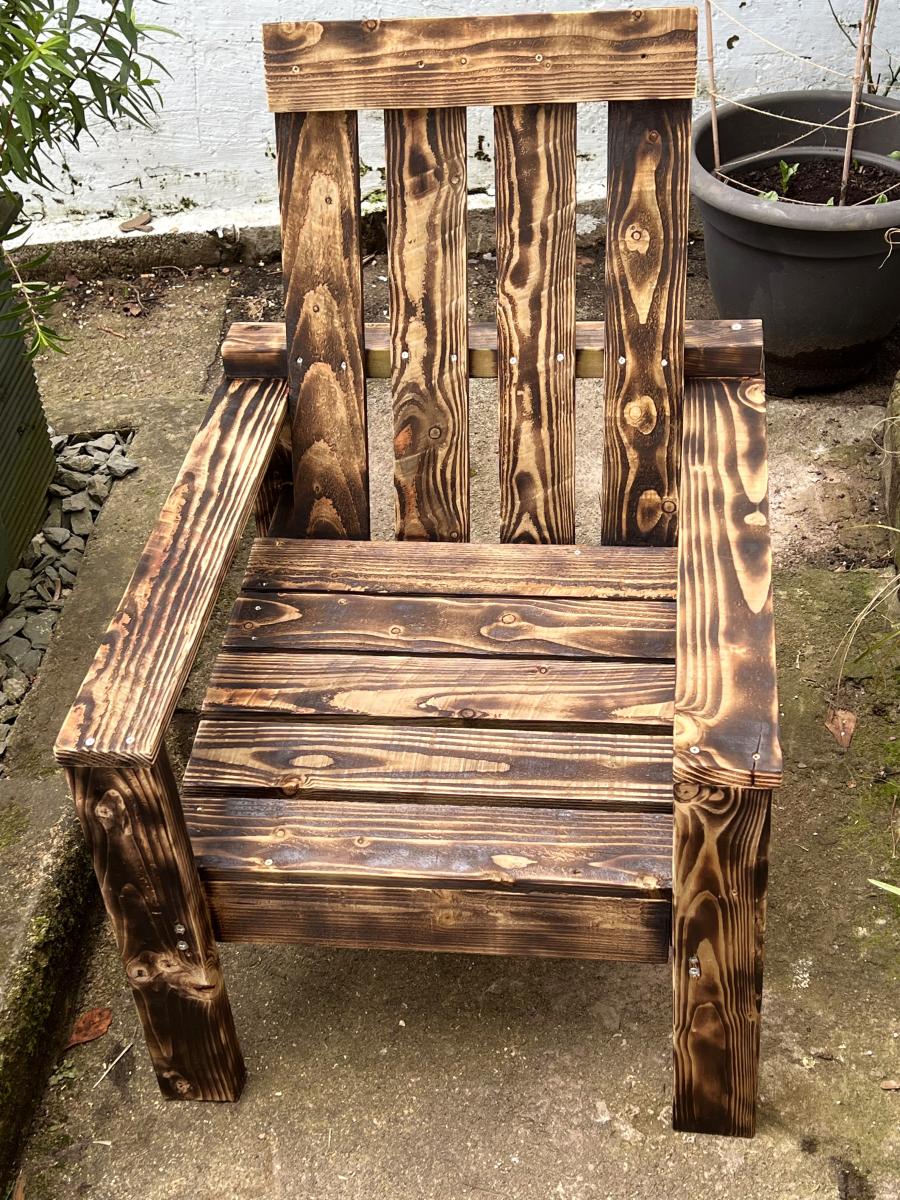
Made to the basic design for the outside patio chair. With a few modifications due to utilizing all the scrap wood from the greenhouse.
Welshsmoker
Built from Plan(s)
Made to the basic design for the outside patio chair. With a few modifications due to utilizing all the scrap wood from the greenhouse.
Welshsmoker
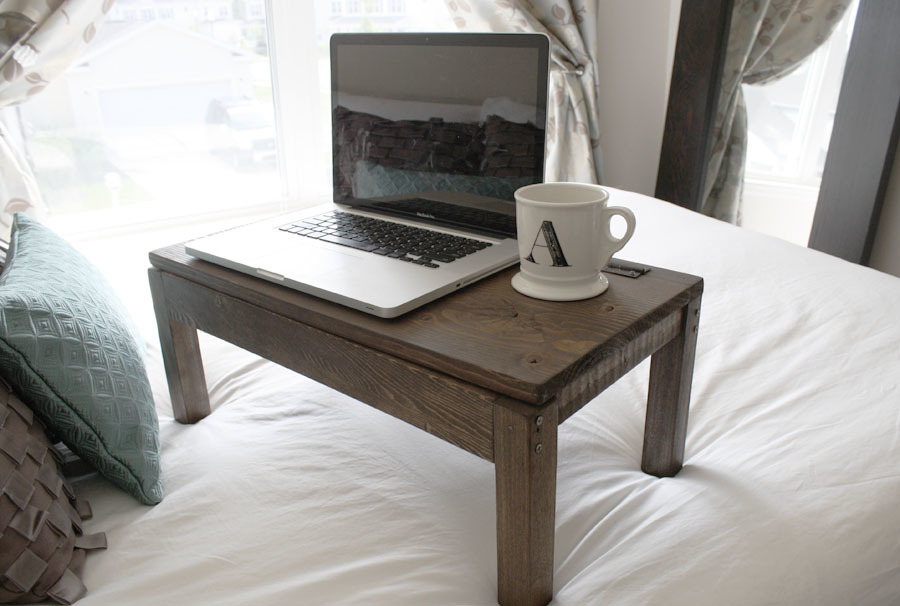
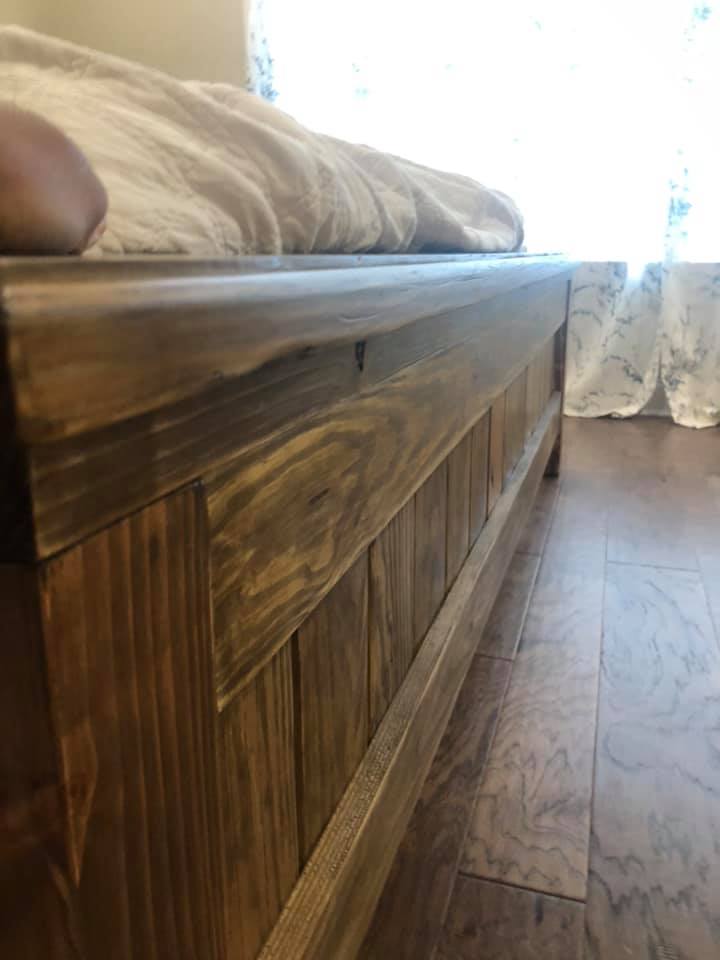
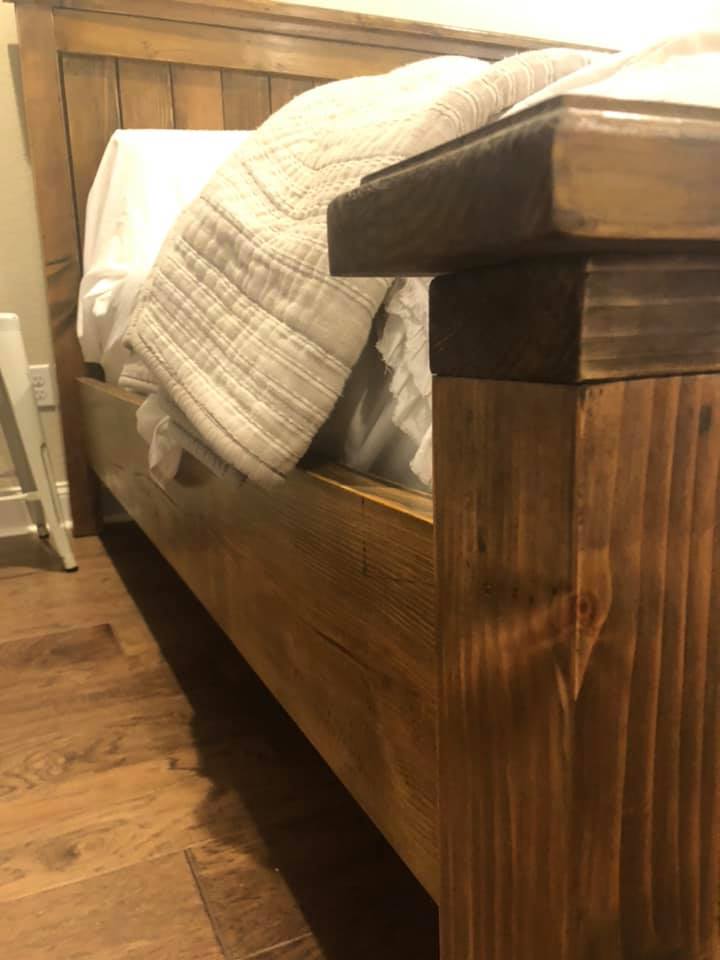
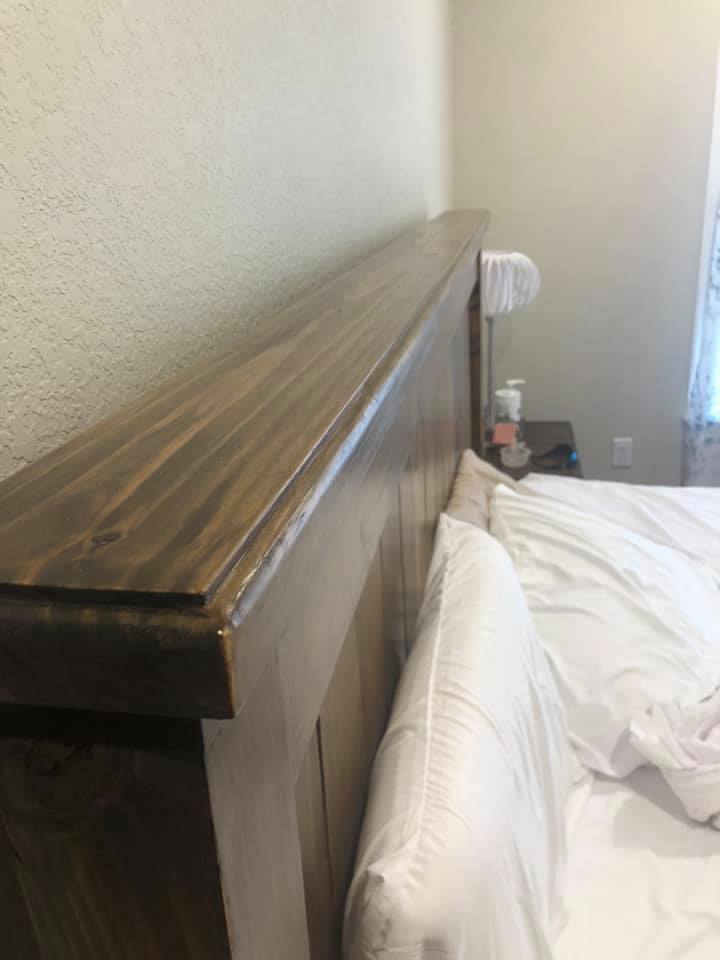
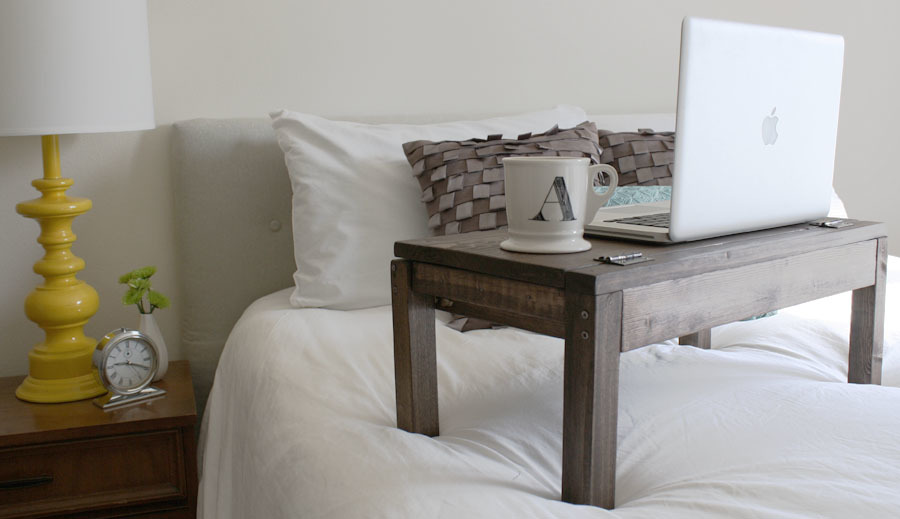
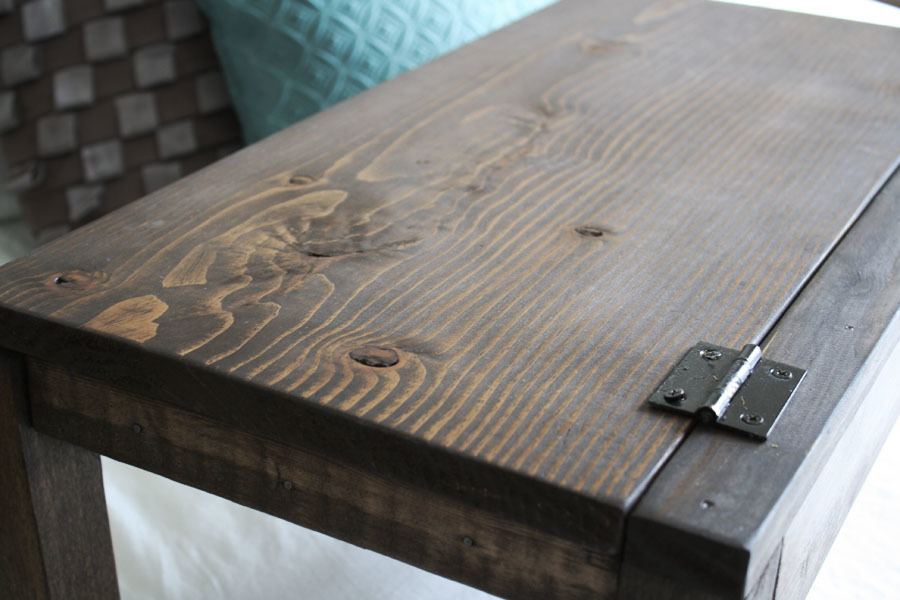
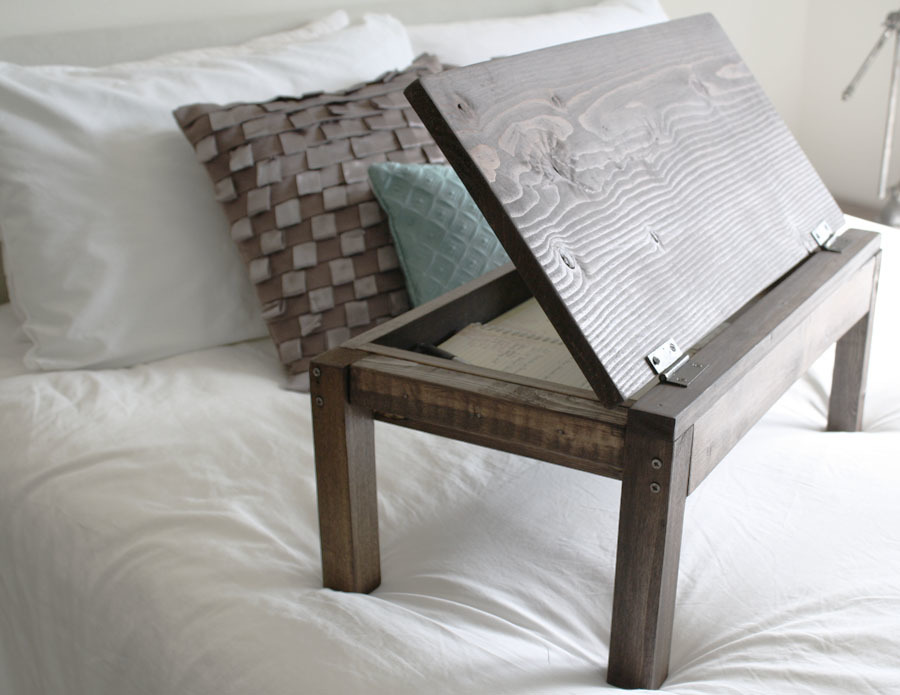
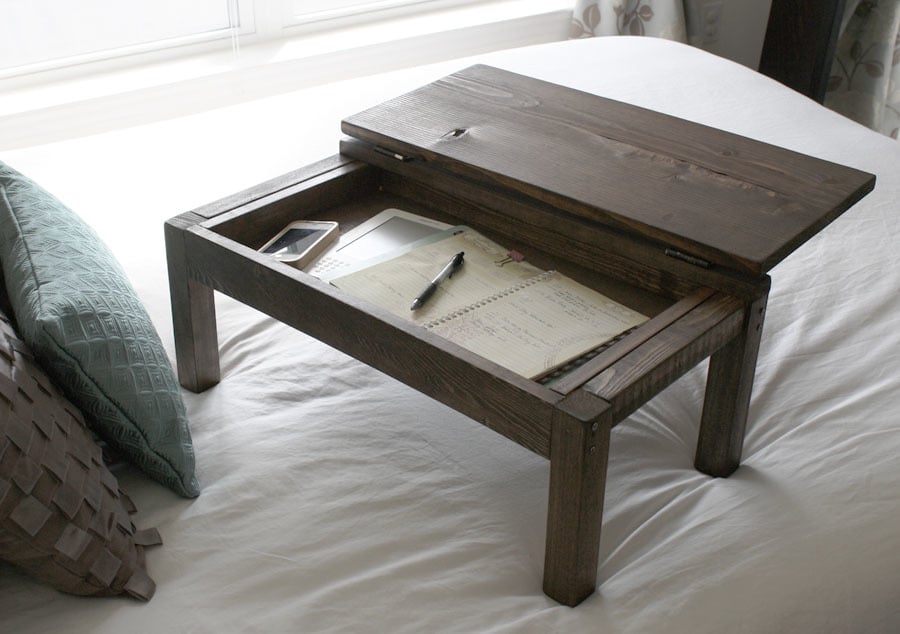
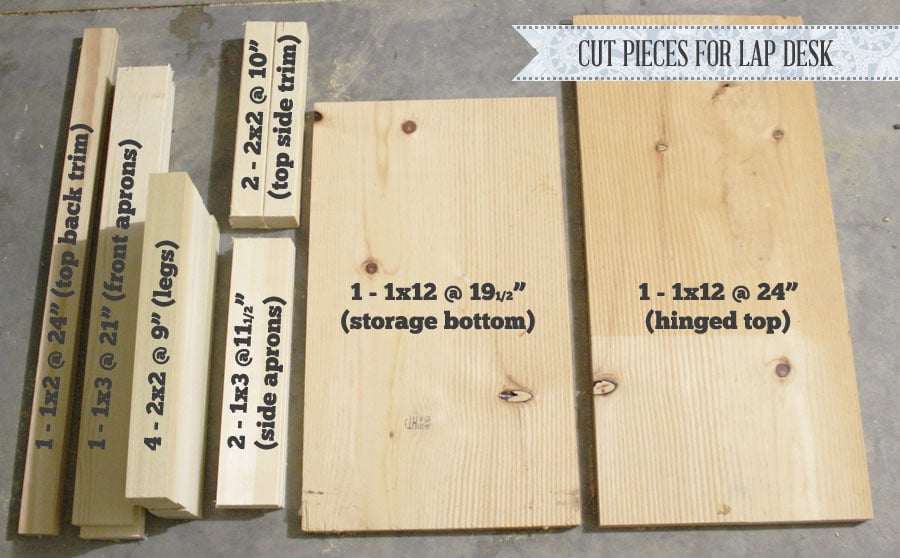
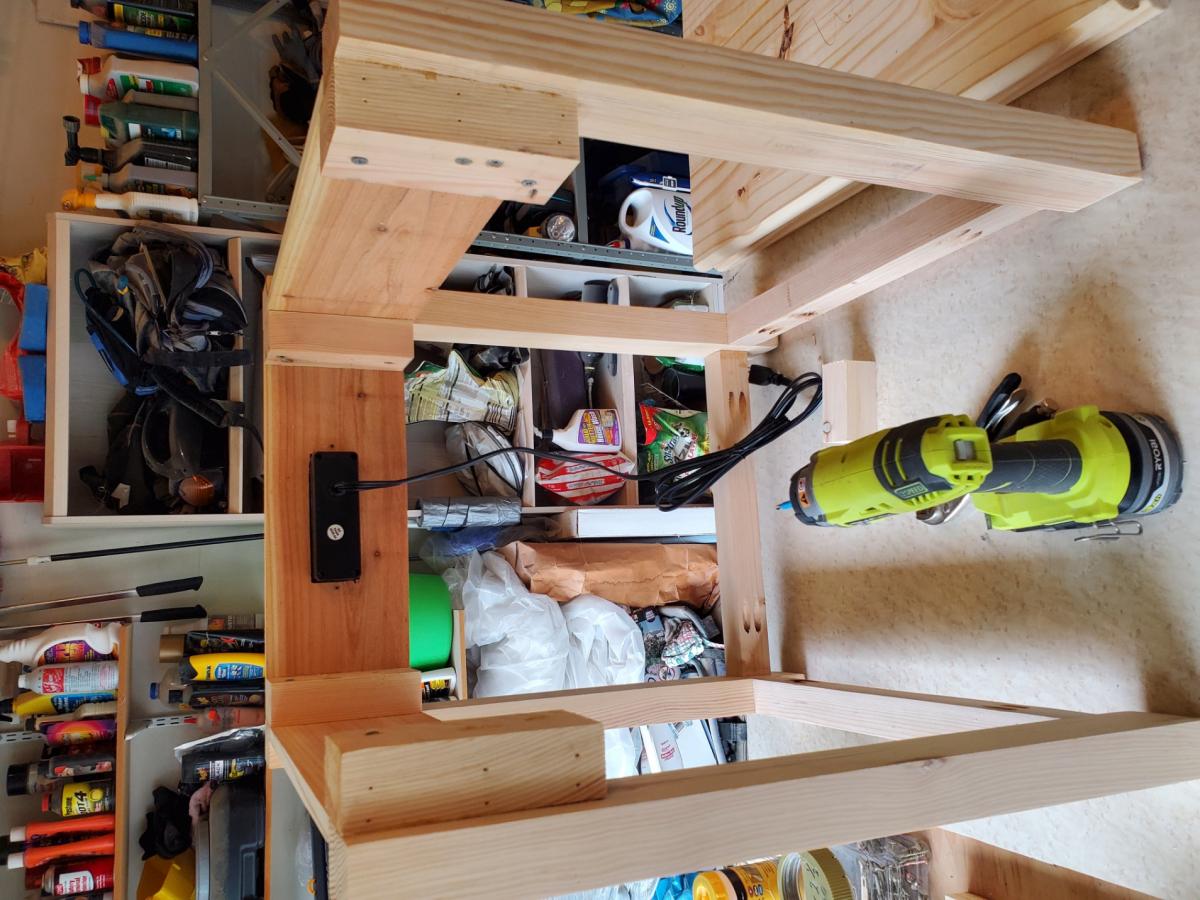
This was a really quick and easy build. I built it with two bucks and two hours with some scrap wood I had laying around. The only thing I bought was a package of 2 standard hinges ($2). Also, I deviated from the plan a little by not including the lower storage compartments (didn't want it to get too heavy), making the legs 4" shorter (so it's more comfortable to use in bed), and not building the storage dividers under the flip-top lid. Check out more info by clicking my blog link!
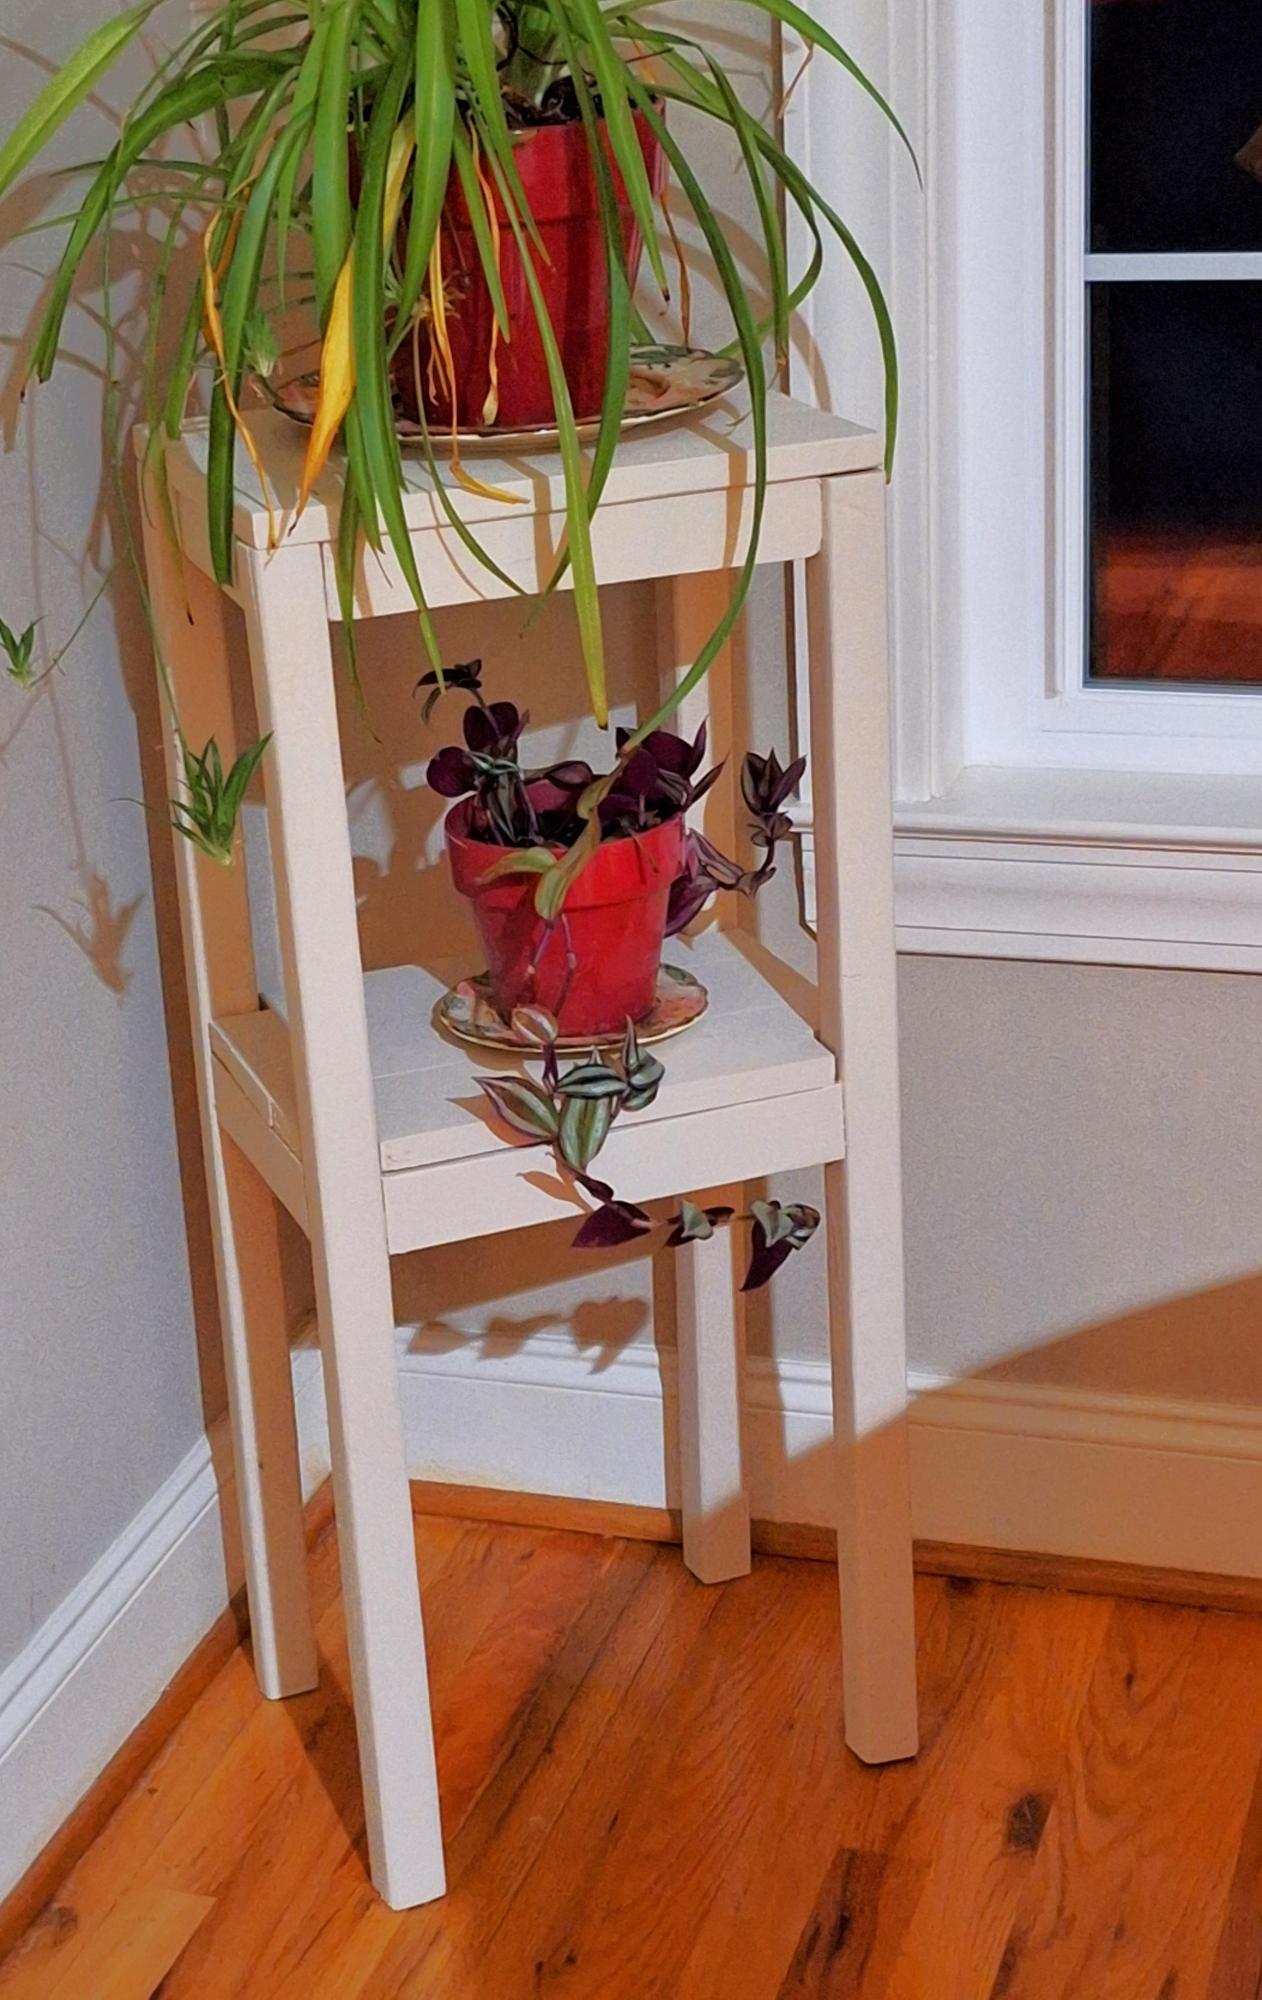
This is a revised kids table plan. I needed a plant stand. It is 36 inches tall and the top is made from 1 × 4's. The top is about 11 x 14. What did I learn from this?. The top is so small it was hard getting the kreg dill bit in to screw in the Kreg screws. I should have thought of that. Also learned that you dont get a tight fit if you have to take out the screws. 2nd time they dont grab and hold as tight. Overall I'm happy the way it turned out. But lots of room to improve.
Barb Runquist
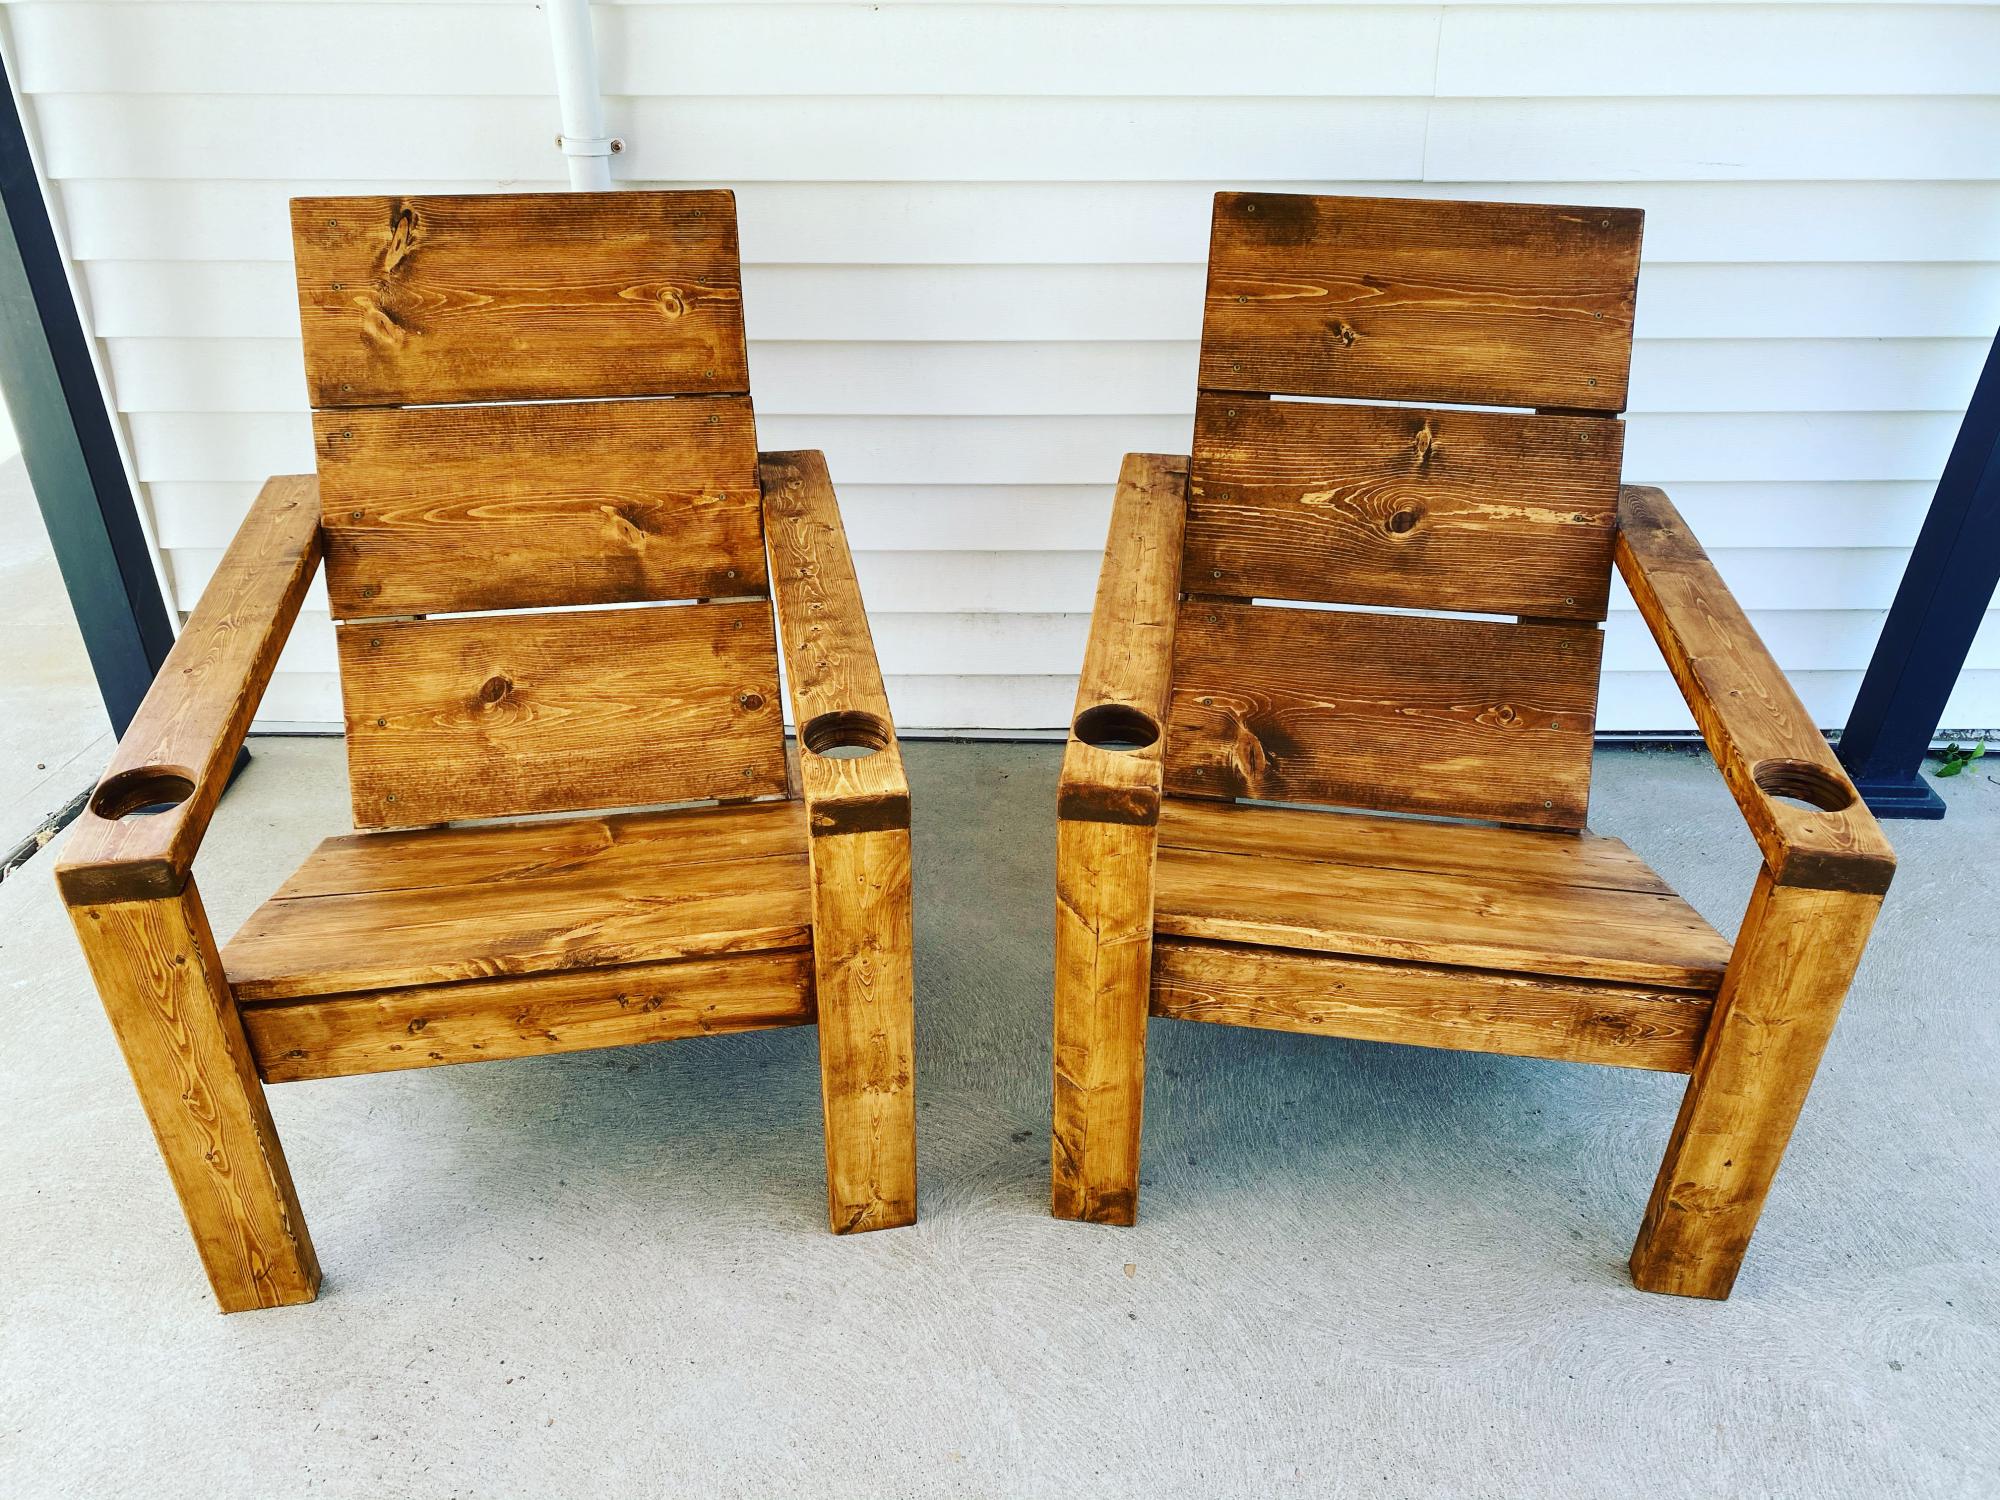
Modern Adirondack chairs with added cup holder holes. Will be adding cup holder inserts as well.
Used your plan as a start and improvised from there. Thanks

This was my first project. It was relatively easy but I did make some mistakes that are now design features


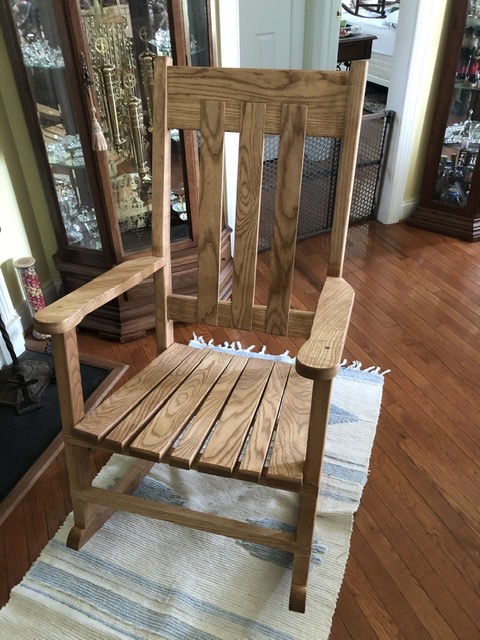
Getting ready for retirement, so I thought I needed a rocking chair.
No plans, just built what looked and felt right.
Thu, 03/18/2021 - 01:27
Lovely chair. Nice proportions. Would like to copy it. Have you got any plans, sketches, or dimensions to share?
Fri, 02/10/2023 - 13:10
Love this rocking chair! Do you have any dimensions or plans. I would live to take this project on. Thank you.
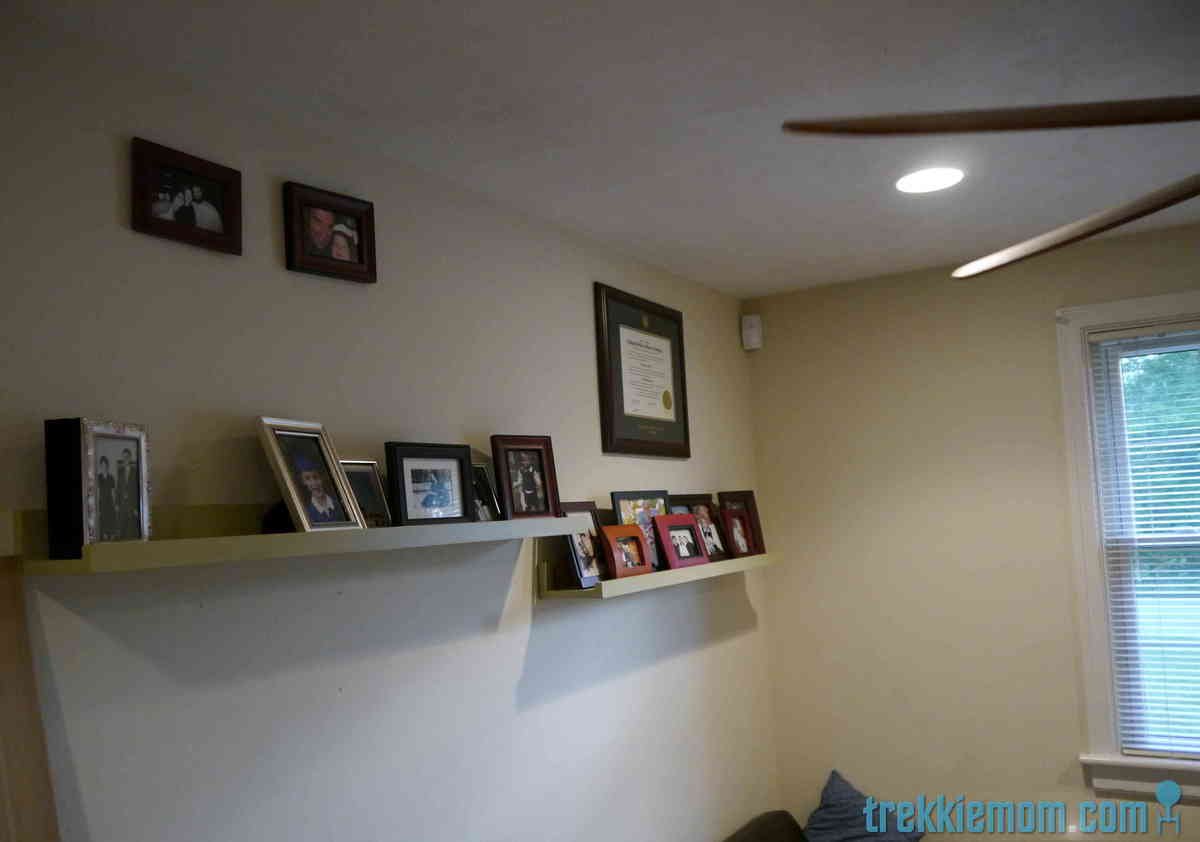
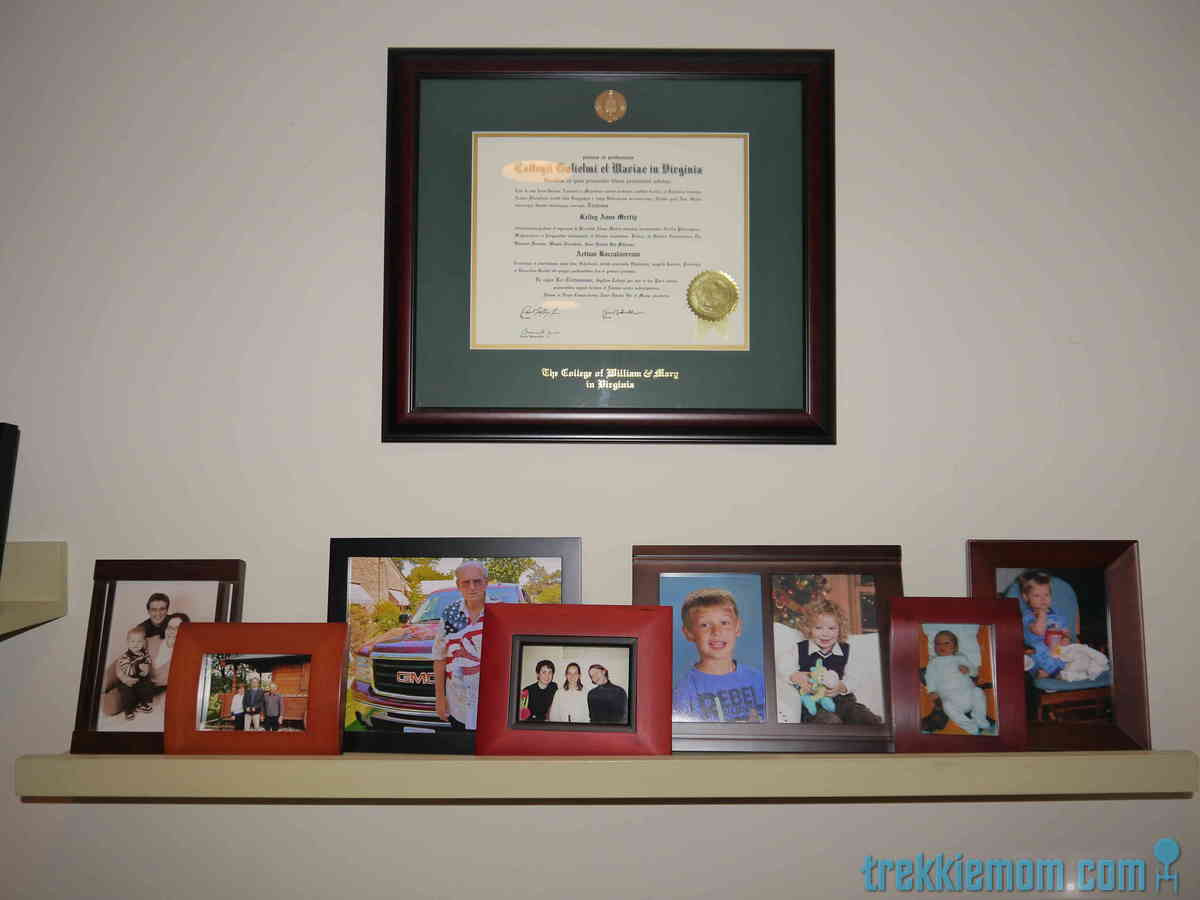
About 2 years ago when we were redoing our kitchen, I made these ledge shelves inspired by Ana White's $10 Ledges. I originally wanted to use them as storage for spices and our olive oil, but once our vent hood was installed, there just wasn't room for them, at least not as I had originally intended. Since mine are made of yellow pine (harder wood) and I used a 1 x 6 for my platform instead of a 1 x 4, my ledges cost more than $10.


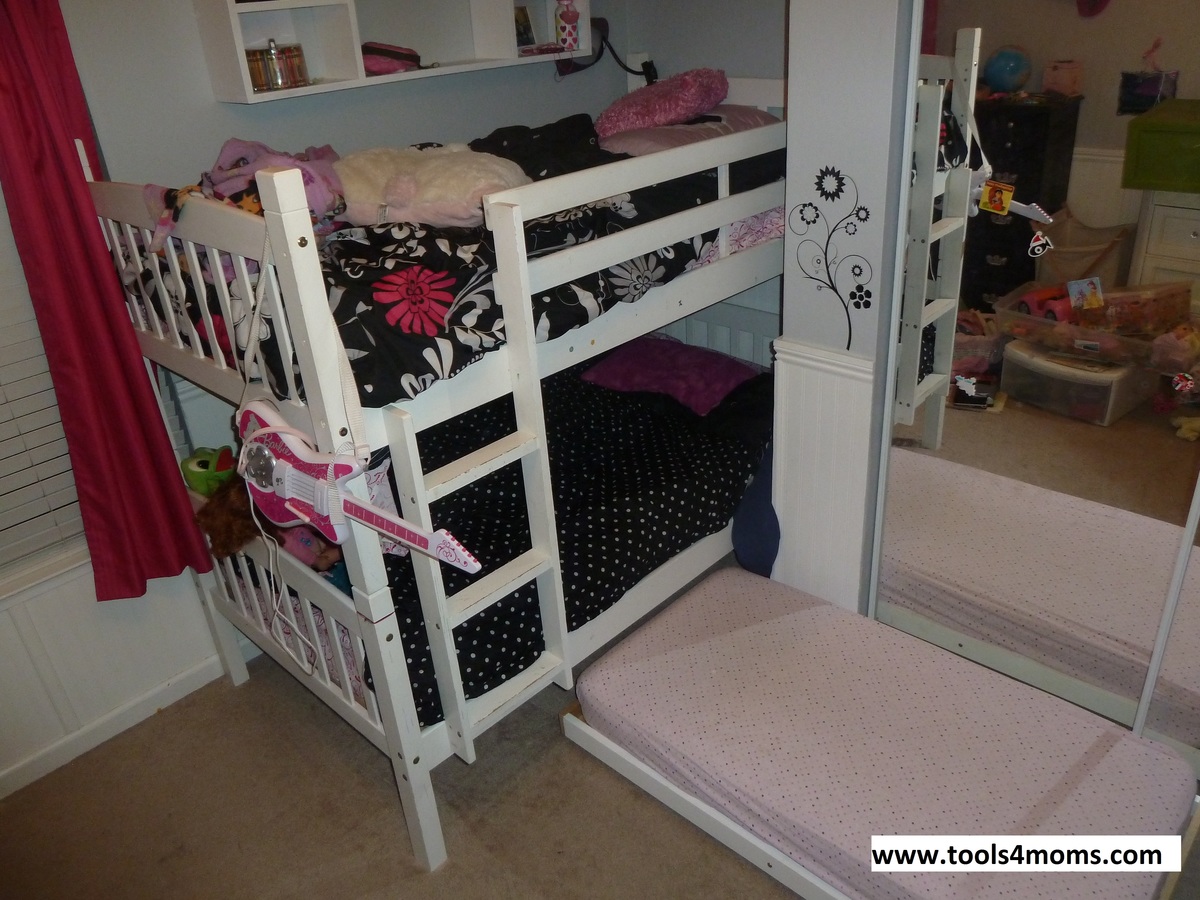
I used and existing toddler bed frame and repurposed it as a trundle bed so we could add a 3rd bed into our kids small bedroom. You can easily make the bed frame too.
Check out my blog post with steps on how to turn a toddler bed into a trundle. Great space saver and it's much easier to pull out from under the bed on the carpet (and easier than a full size trundle).


I created this desk using the Fancy X Desk plans, but I used a project panel for top.
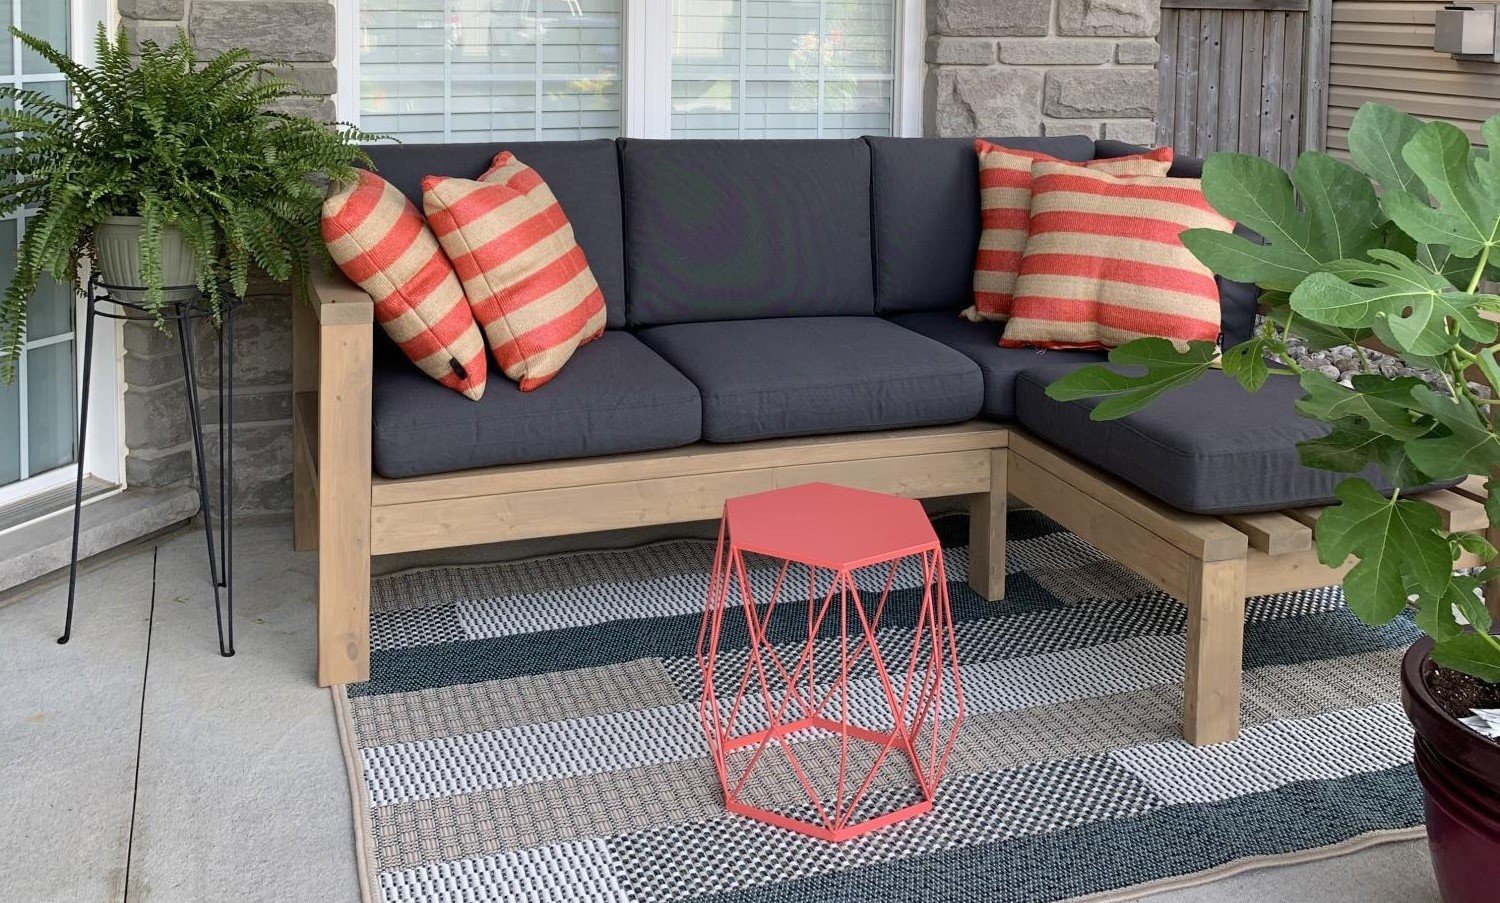
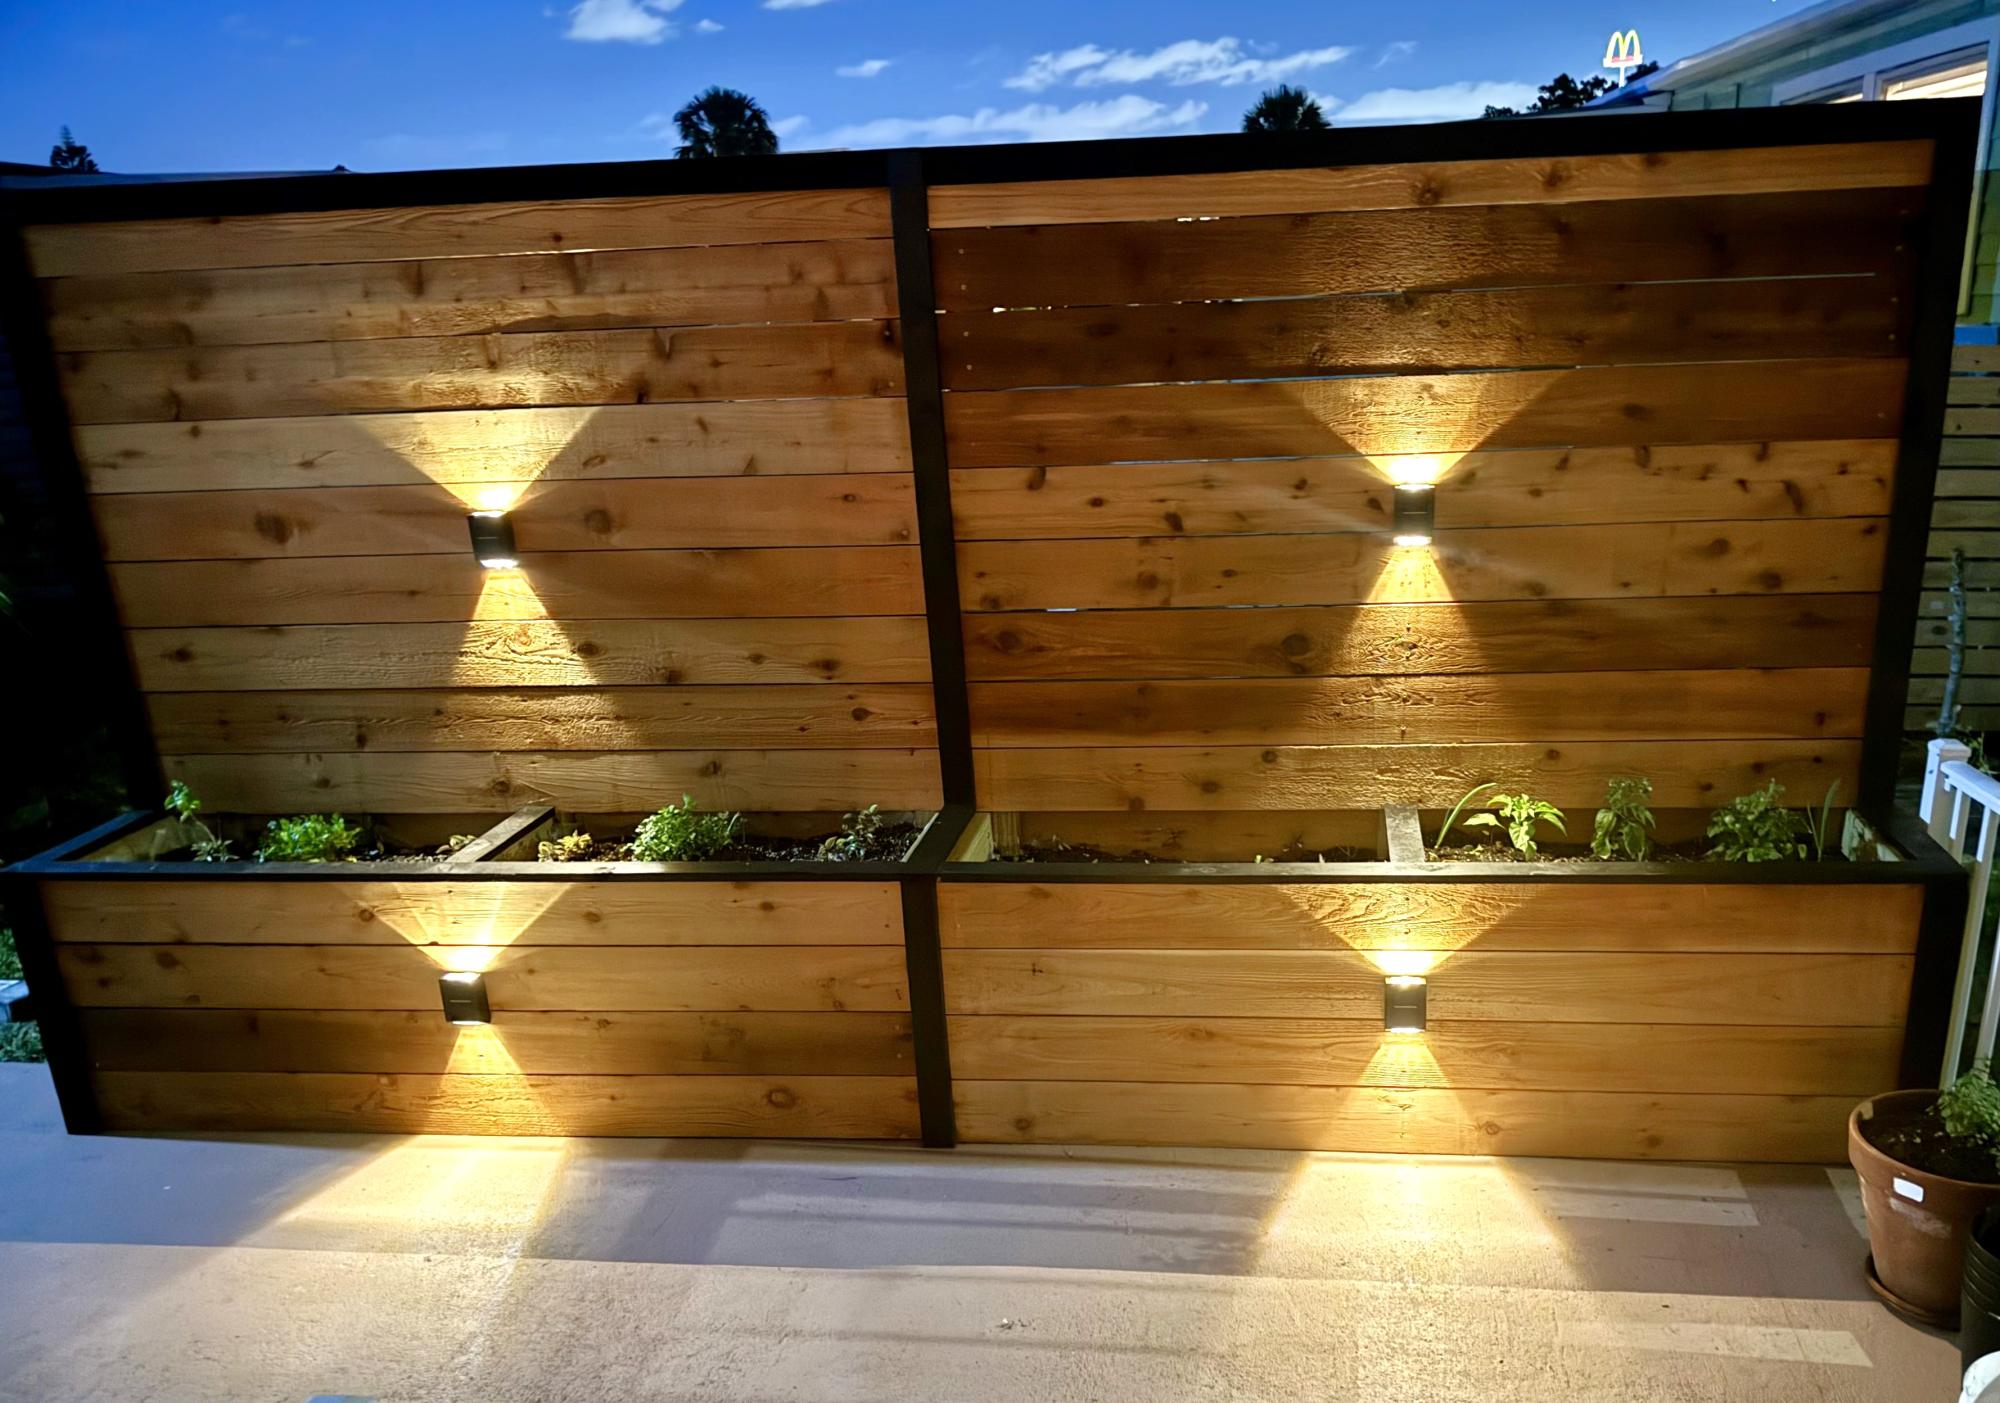
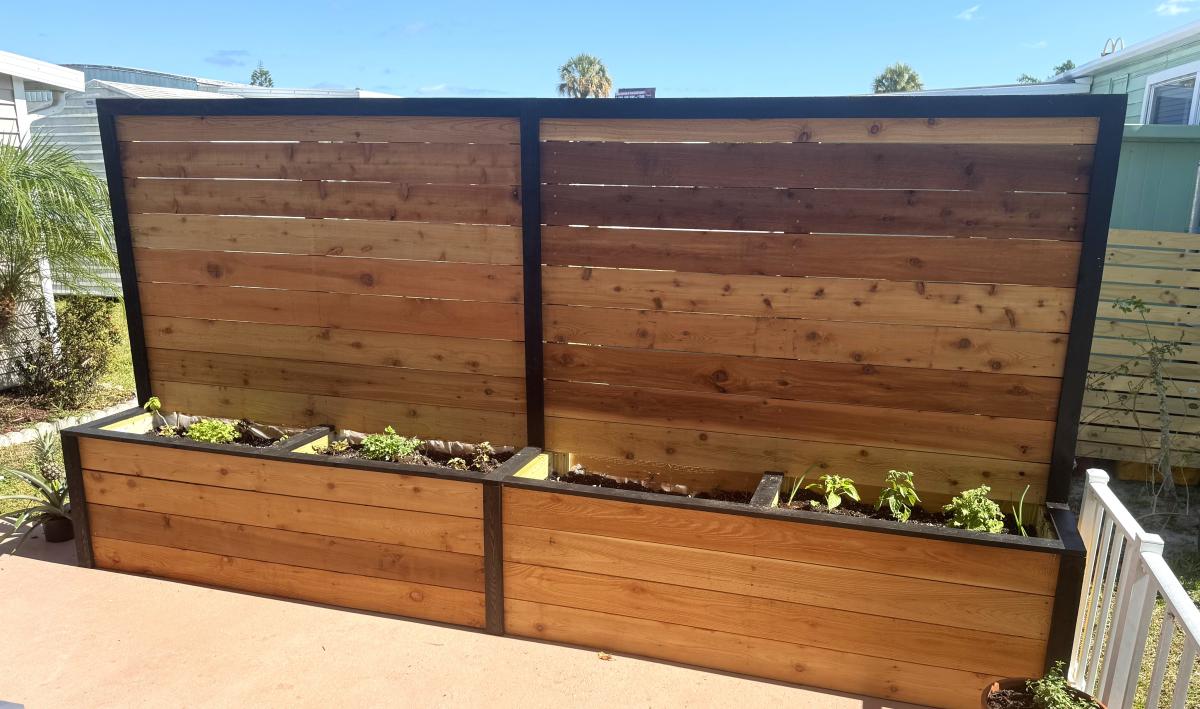
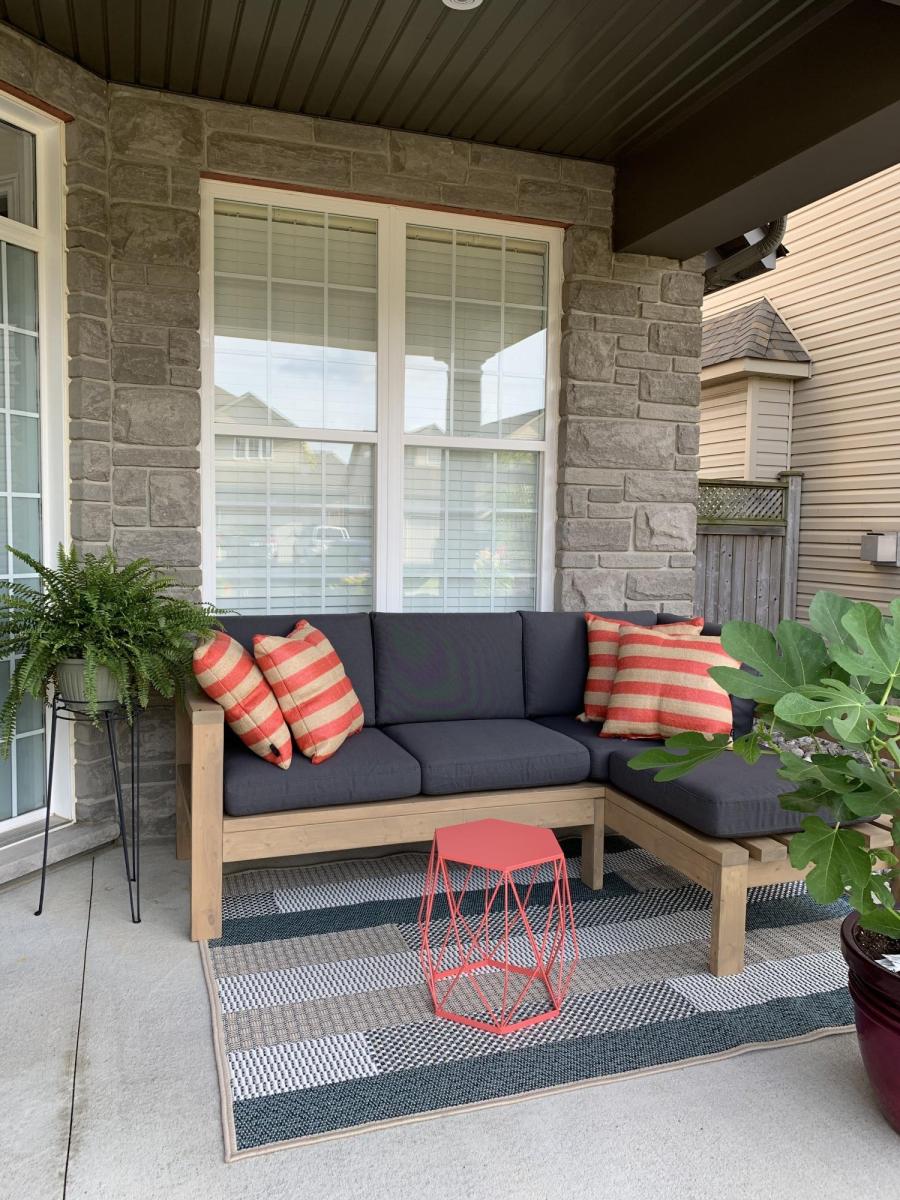
This project was quite easy and did not require many tools. The plan allowed me to adjust the measurements easily so it could fit in that space. I used regular 2x4’s and treated the wood with Mountain Ash colour in a semi-transparent stain from Sherwin Williams, I just love the colour! I build 2 - 2 seaters exactly the same. The one side has no arm, as I wanted it to look like a lounge chair. I love to sit in the corner and stretch my legs 😊. I bought the cushion covers from IKEA, and got good quality foam.

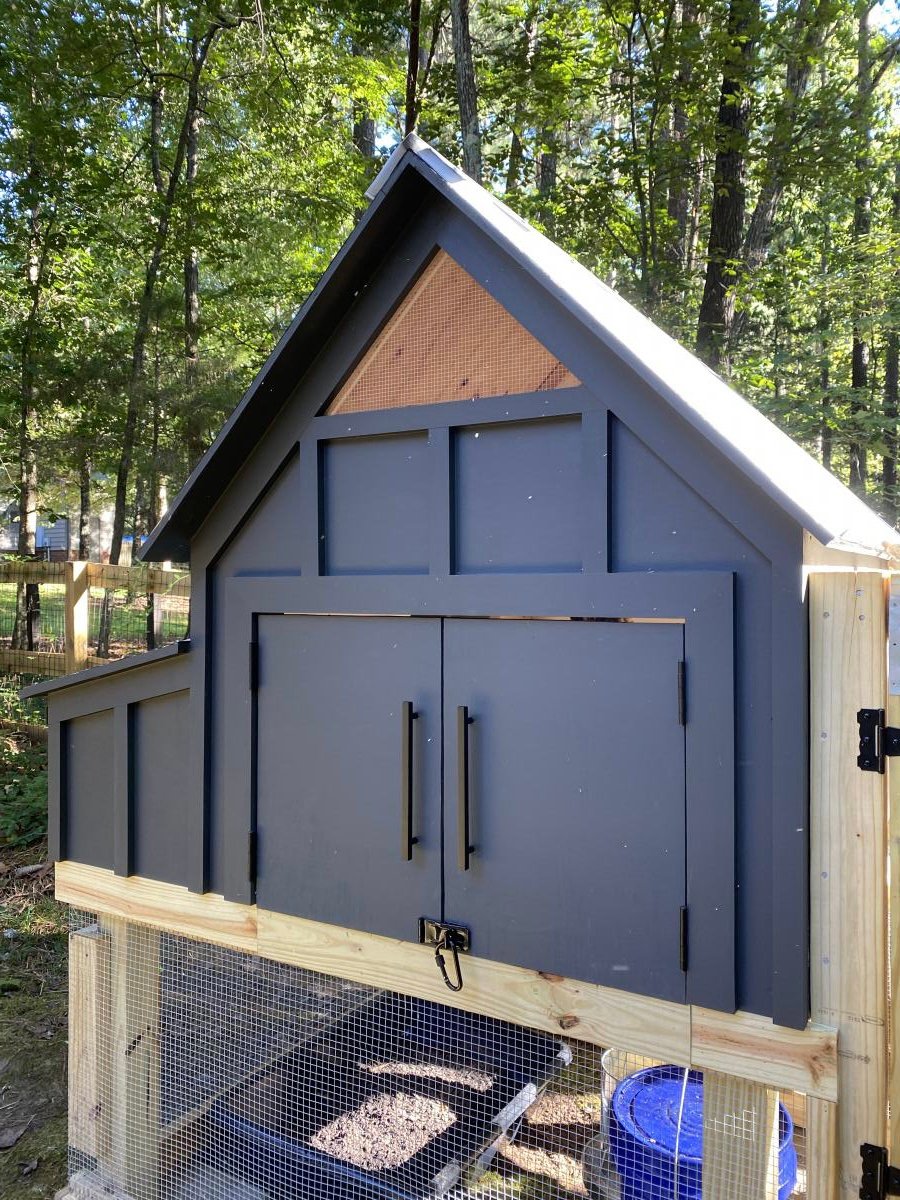
We took some creative liberties on the Williams Sonoma inspired coop posted here. Because we don’t get a whole ton of sun in our backyard, we eliminated the herb garden planter and instead built a longer run. We also made the coop a bit wider to accommodate for the inevitable chicken math. And, you’ll notice the vent both shaped differently and is a bit higher. This was to increase air flow, avoid the dreaded draft, and to lend a more Scandinavian vibe. We also decided to place the chicken exit on the outside wall to allow for more living space under the coop itself. The project took about a month to complete, dedicated to only working weekends. And, it was very much over budget! Who knew wood is so expensive?! But overall, the outcome was even better than I expected. The chickens love it and I don’t mind looking at it!
P.S. this was a pretty advanced project. The fractions alone had me yelling “uncle!” Thankfully my husband is pretty handy, and my father-in-law (career in the construction industry) had a few pointers, so they took the lead in executing. I chose the paint colors and suggested the deviations from the original blue print. ;-)

Wed, 11/18/2020 - 12:55
Thank you! Yes, I suppose everyone is wanting wood for home improvement projects now that we're not leaving the house! Also, I didn't mean to post a picture of my son and his friends. Am I able to delete?
Thu, 01/14/2021 - 07:43
does this roof have the same angle as the 'Small Chicken Coop with Plans'? It seems to be 'less steep'. Wanting to start this project next weekend and trying to get my mind wrapped around everything!. Thanks.
Wed, 03/16/2022 - 09:53
Do you have a run side photo? I am thinking about adding more run onto mine.....
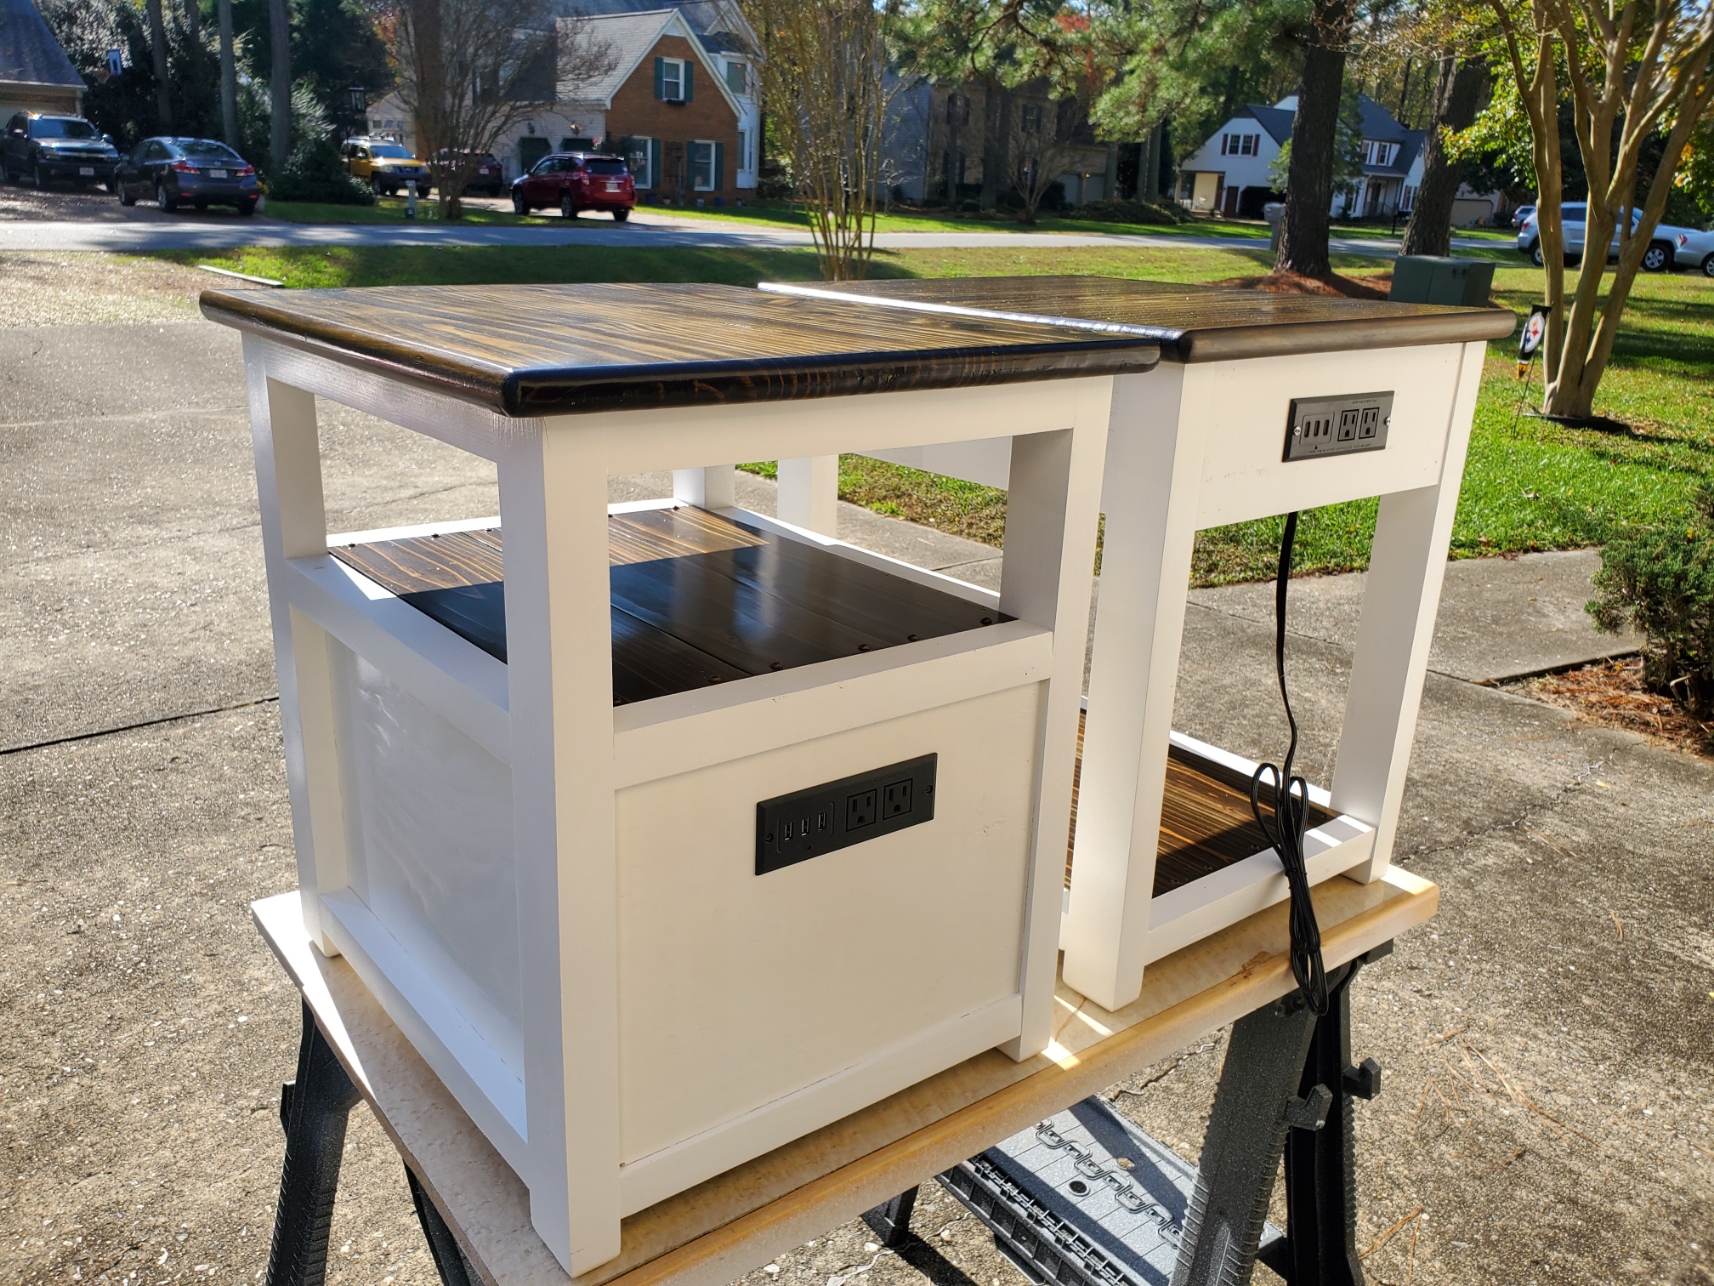
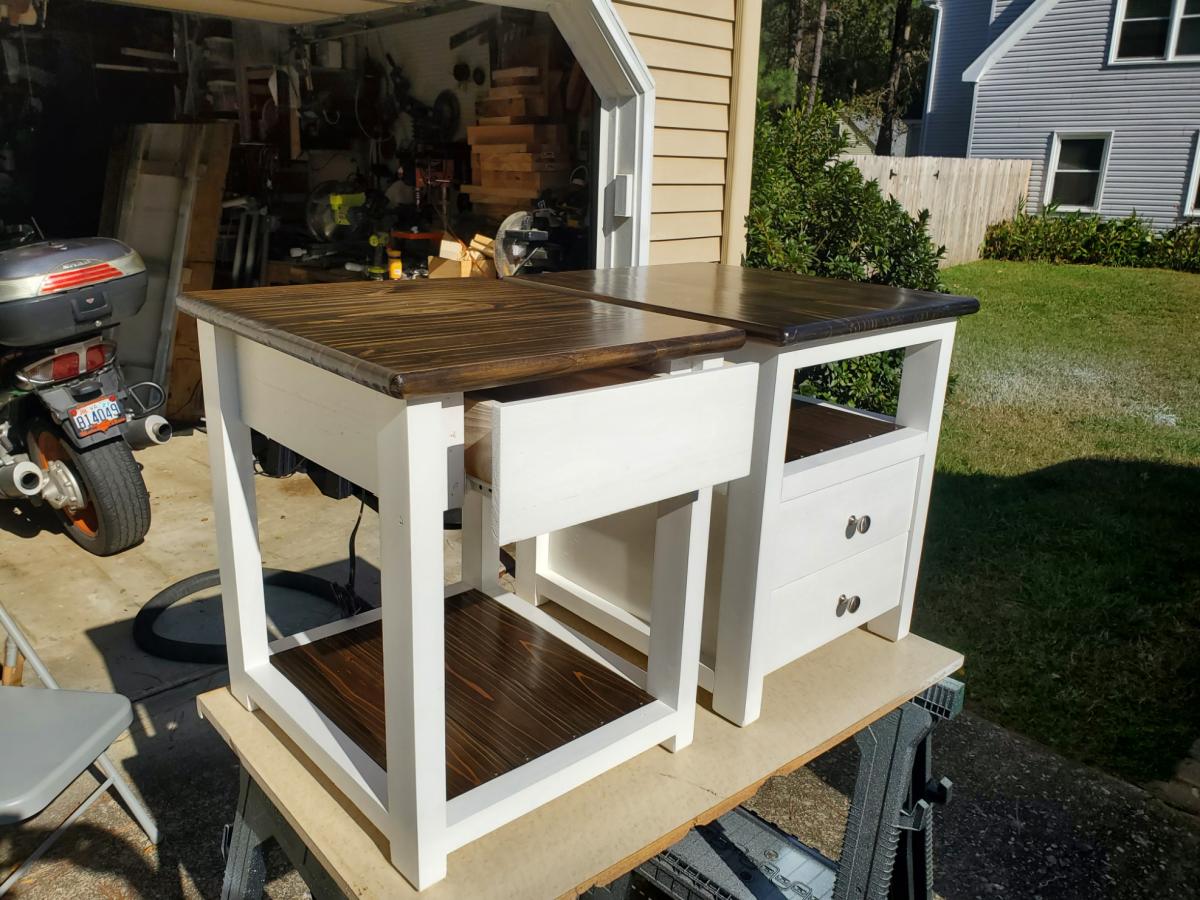
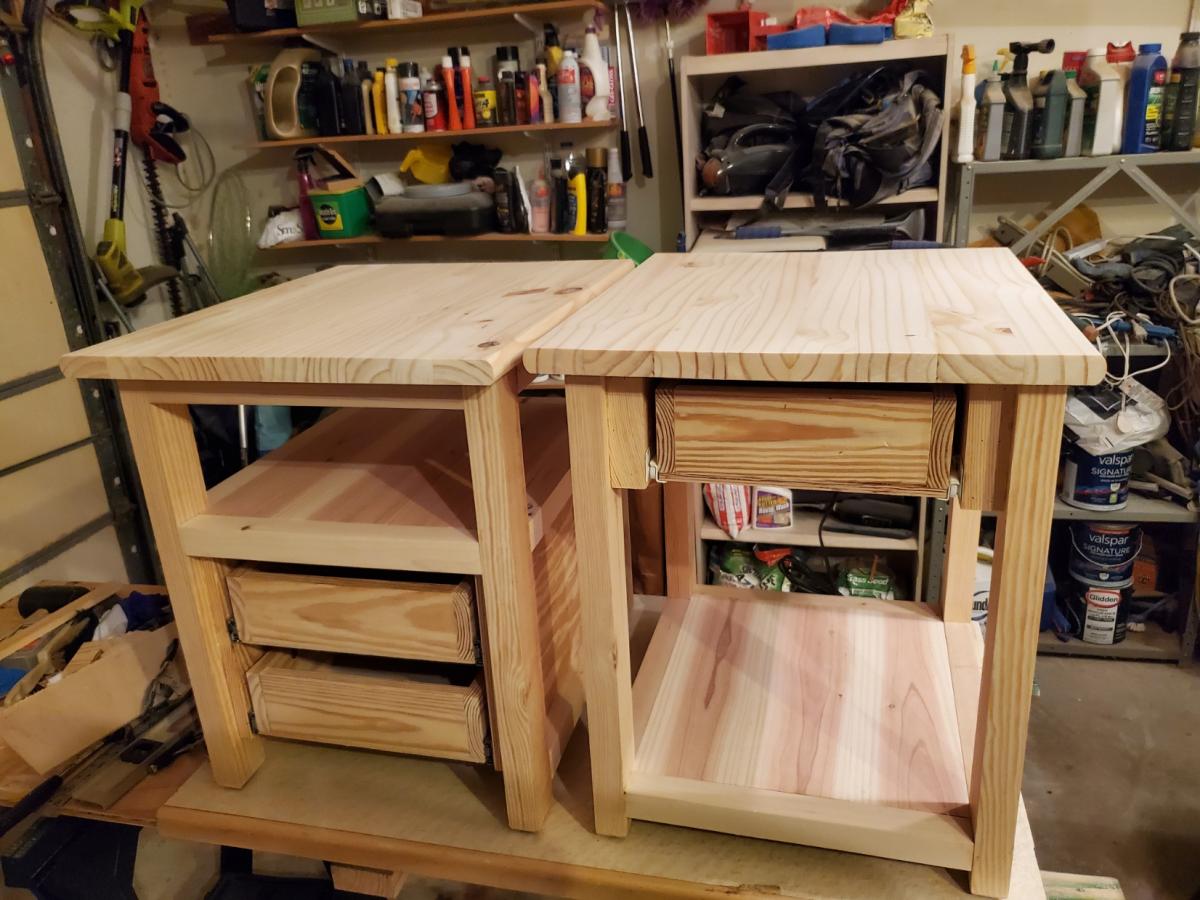
Built these two end tables from Ana's nightstand plans. Modified to add a shelf and drawers. I used stair treads to make the tops which give a nice thickness and strength. The shelves are cedar fence pickets. Shelf and tops are stained Jacobean with a semi gloss poly finish. Had to watch Ana's videos several times to get the build right, but spent much more time on the finish than the build. Added electric extension/usb outlet. Really happy with the project. THANKS Ana!

Sun, 11/15/2020 - 16:28
Project for my son. End tables with one and 2 drawers. Shelf and tops stained with poly, frames and drawer primed and painted. Tops made from Stair treads. they are 12" edge glued so just had to trim down and glue together. comes with one bullnose, rounded off the other sides with a 1/2inch roundover router bit.
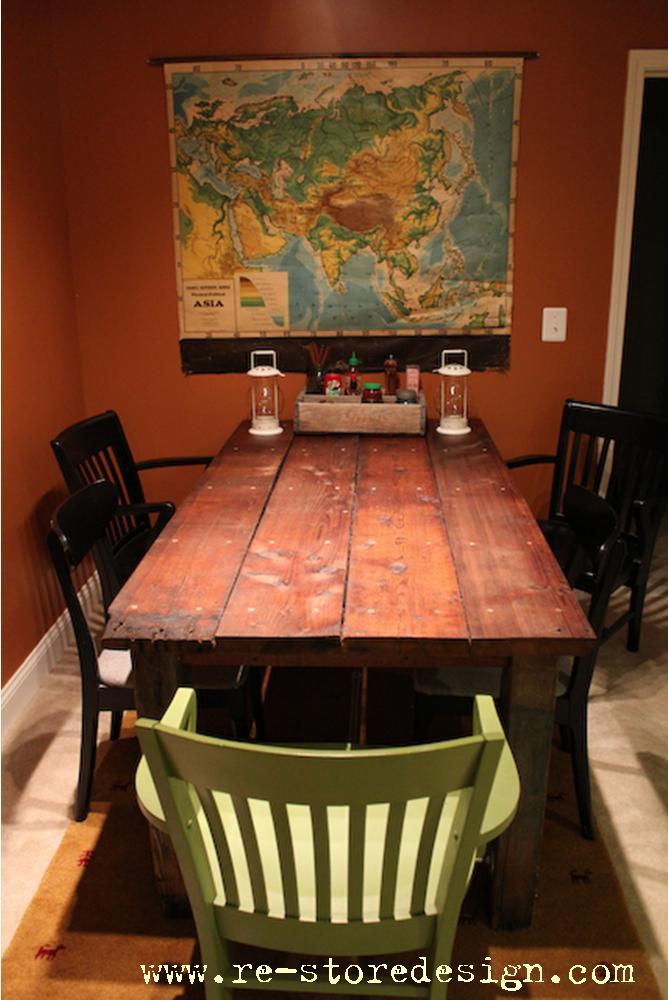
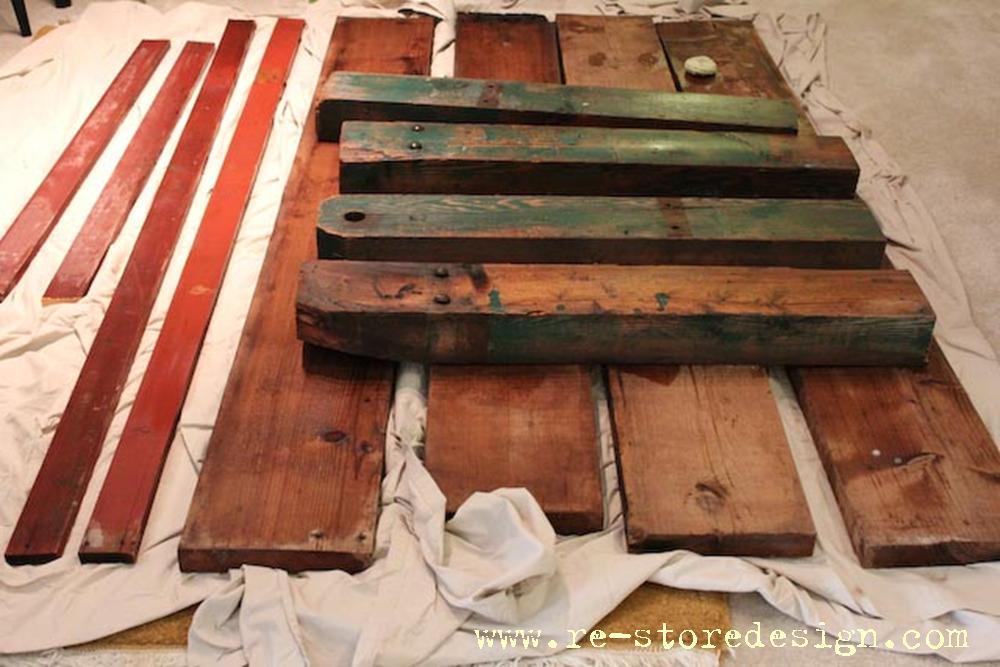
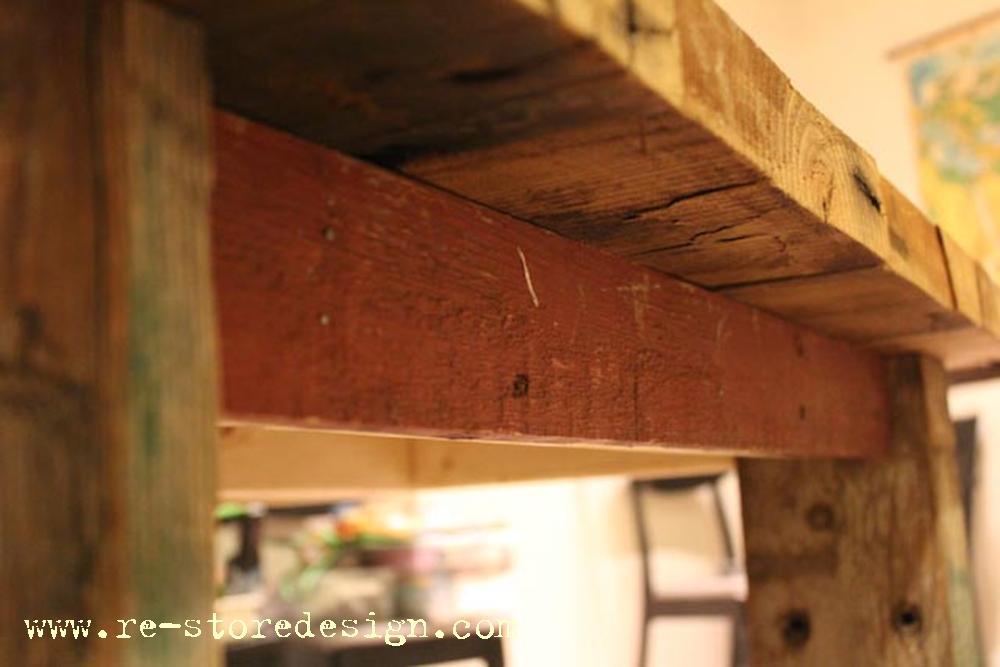
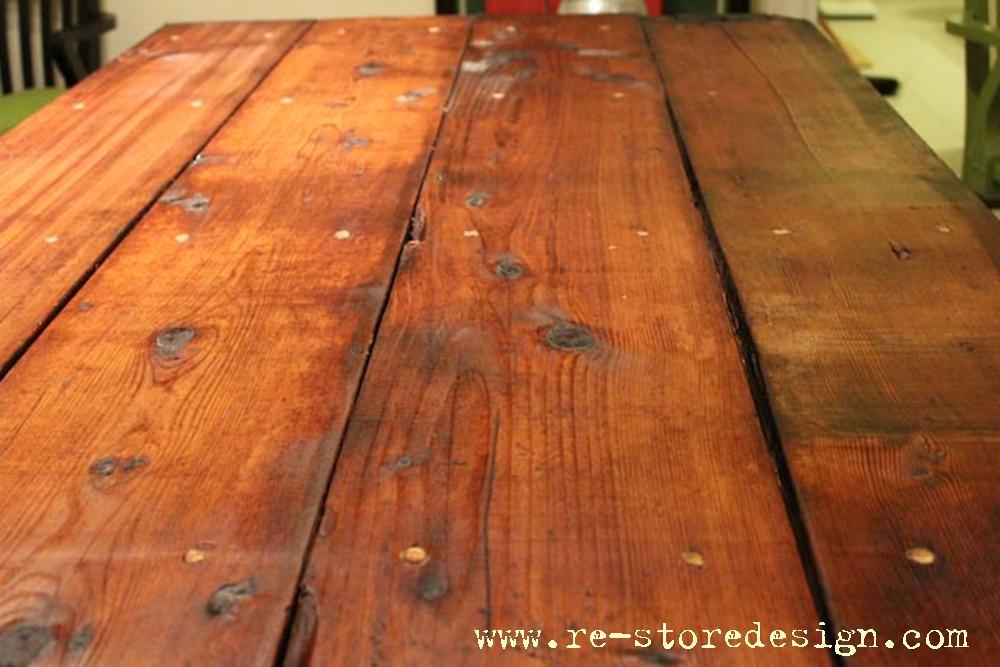
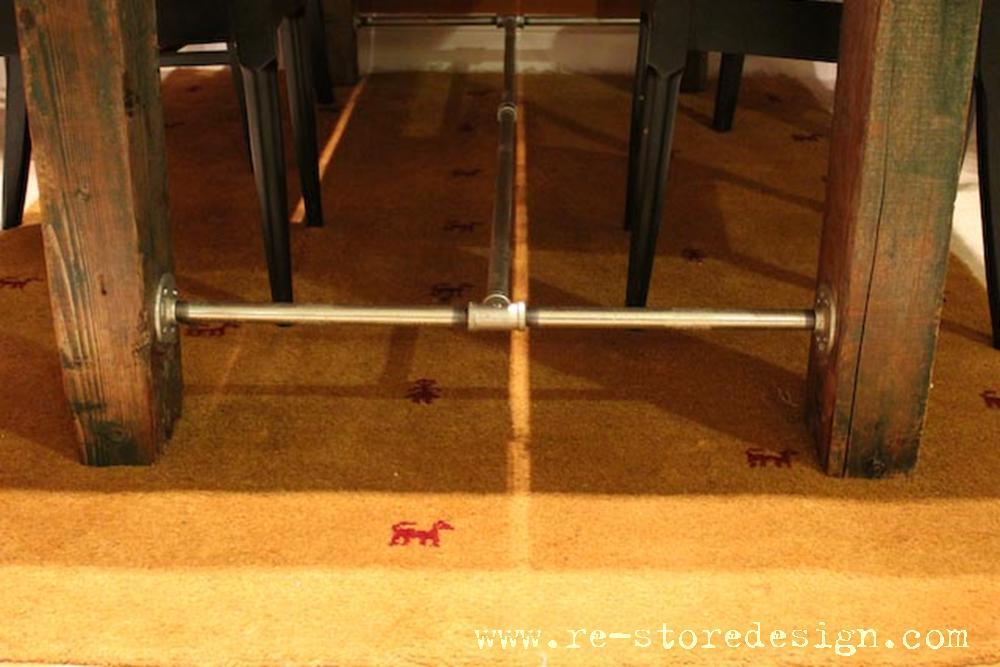
We recently moved from our small Minneapolis Bungalow to an apartment in Maryland. It was the prefect opportunity to build the Farmhouse Table plans I had been admiring. When we went to my parents farm in North Dakota for Thanksgiving we spent a couple hours digging through the barn to find old barn wood for the project. The wood then made the 1,400 mile trek to our new apartment in Rockville. Yes, you read that correctly…the table was built in our carpeted apartment! No excuses people…you can make this table in your apartment! If you do not have access to a saw your local big box home improvement store can make the cuts for you. If you go that route the cut list Ana has will come in very handy!
I do a fair amount of woodworking, so I was able to complete the project in one day. If this is your first project I would allow a weekend to finish it.
Wed, 01/16/2013 - 02:25
wow this is stunning, you must be thrilled with the end result!!

I built this desk relatively quickly and it required very few tools. I discovered quickly how difficult it is to cut 2x4's with a handsaw so I would recommend having a circular saw or having them cut the wood at the store but it can be done. I did use a kreg jig for connecting everything and that is what made it so easy.
I painted the bottom half and then stained the top. I think it turned out beautifully. I also added some metal to the edges not for strength but for style. This desk is VERY sturdy and I really like the massive amounts of space.

Table came out great. I still have to throw the hardware on but couldn't wait to get it inside. I used an Espresso stain for the shelves and legs and an Ebony stain for the 2x2 trim and X's.
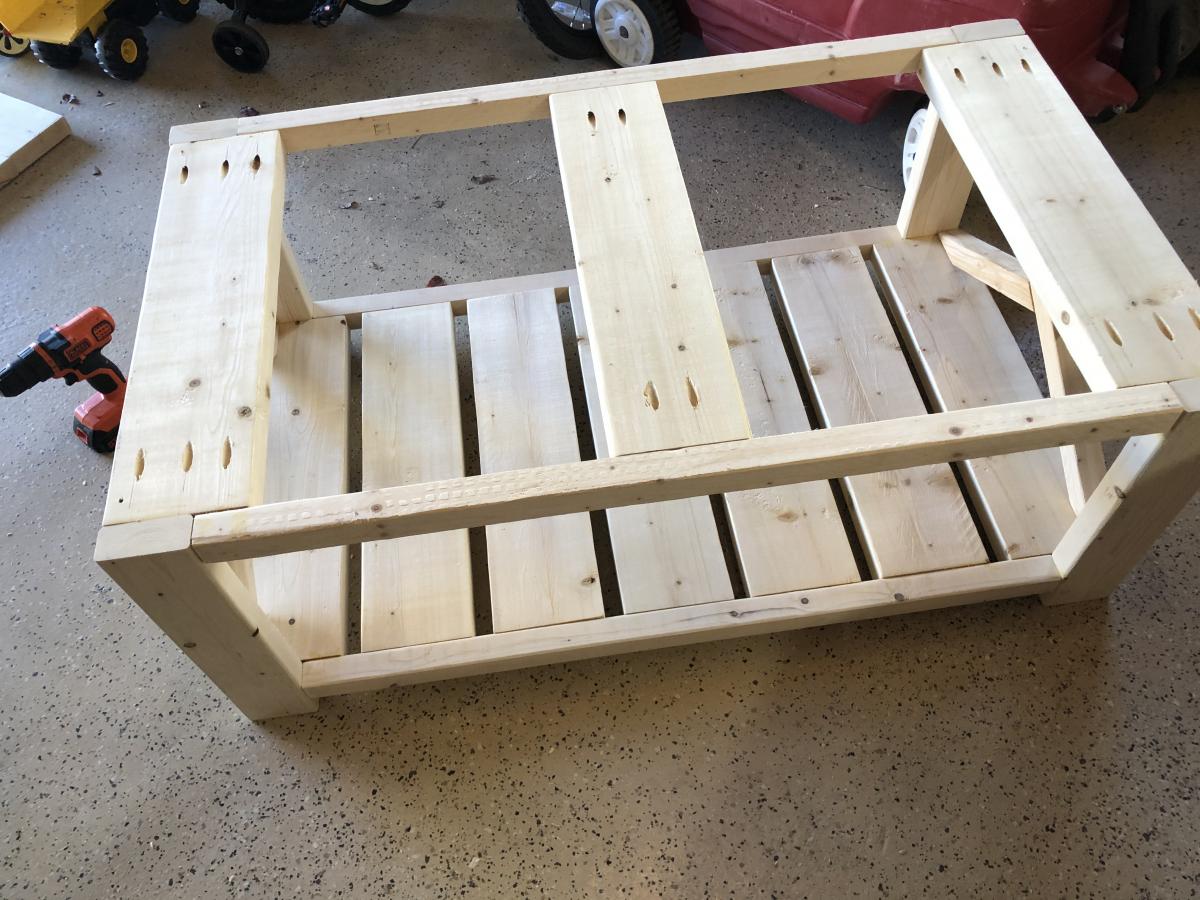
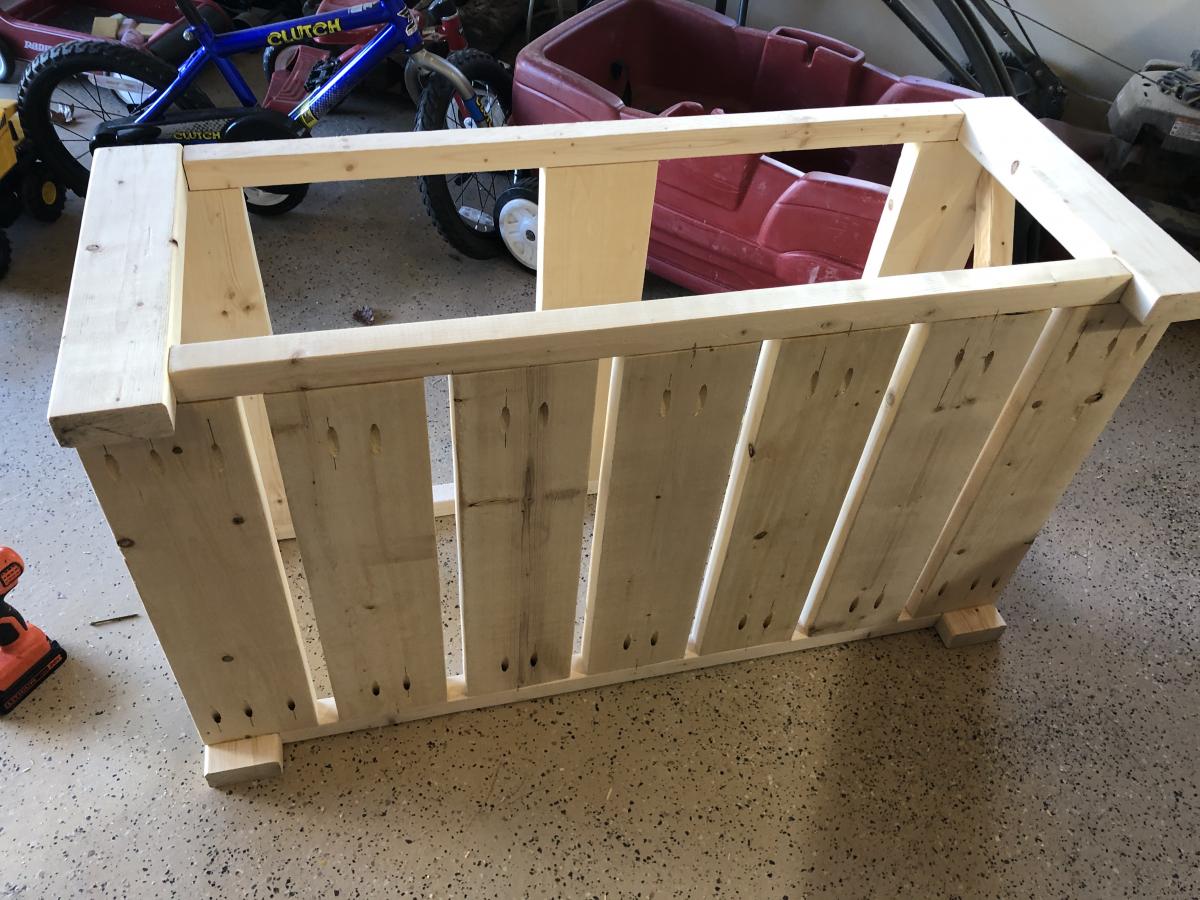
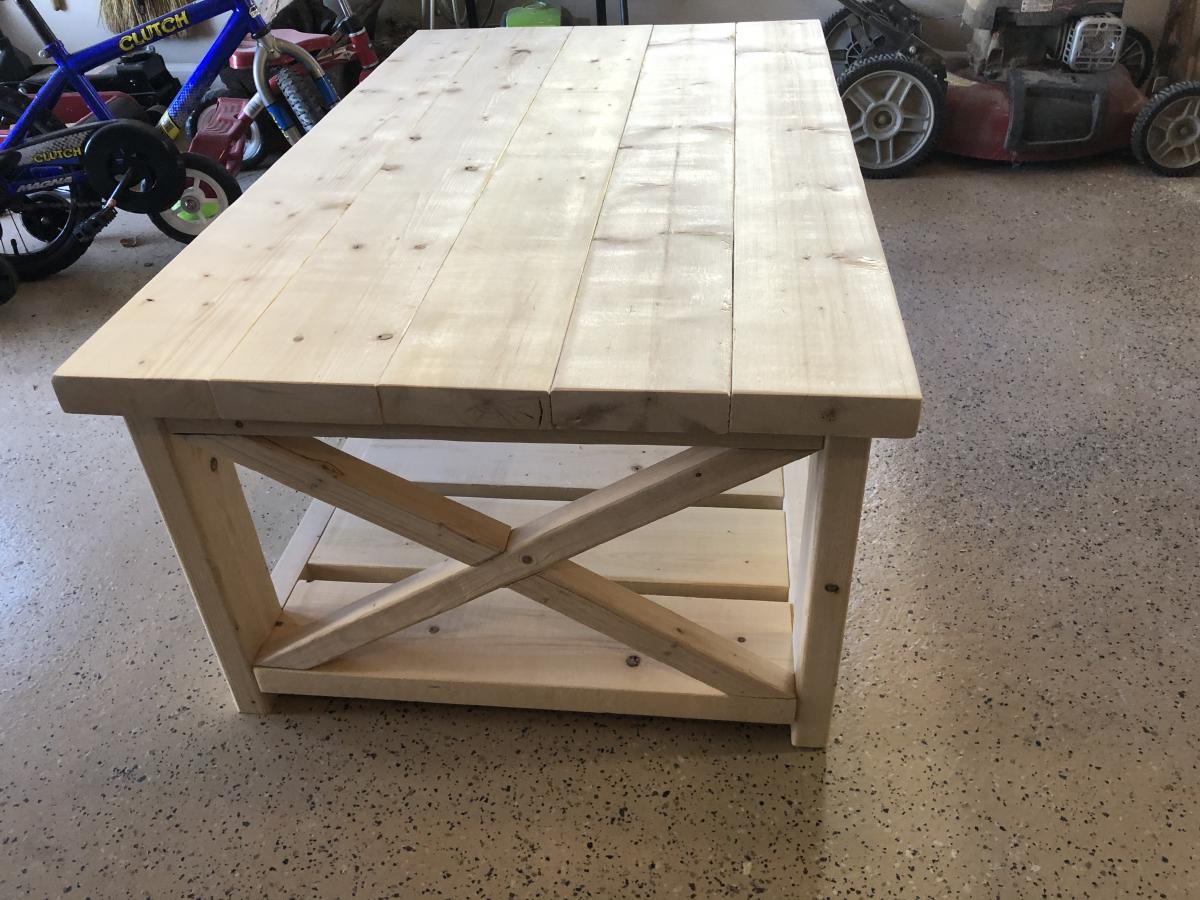
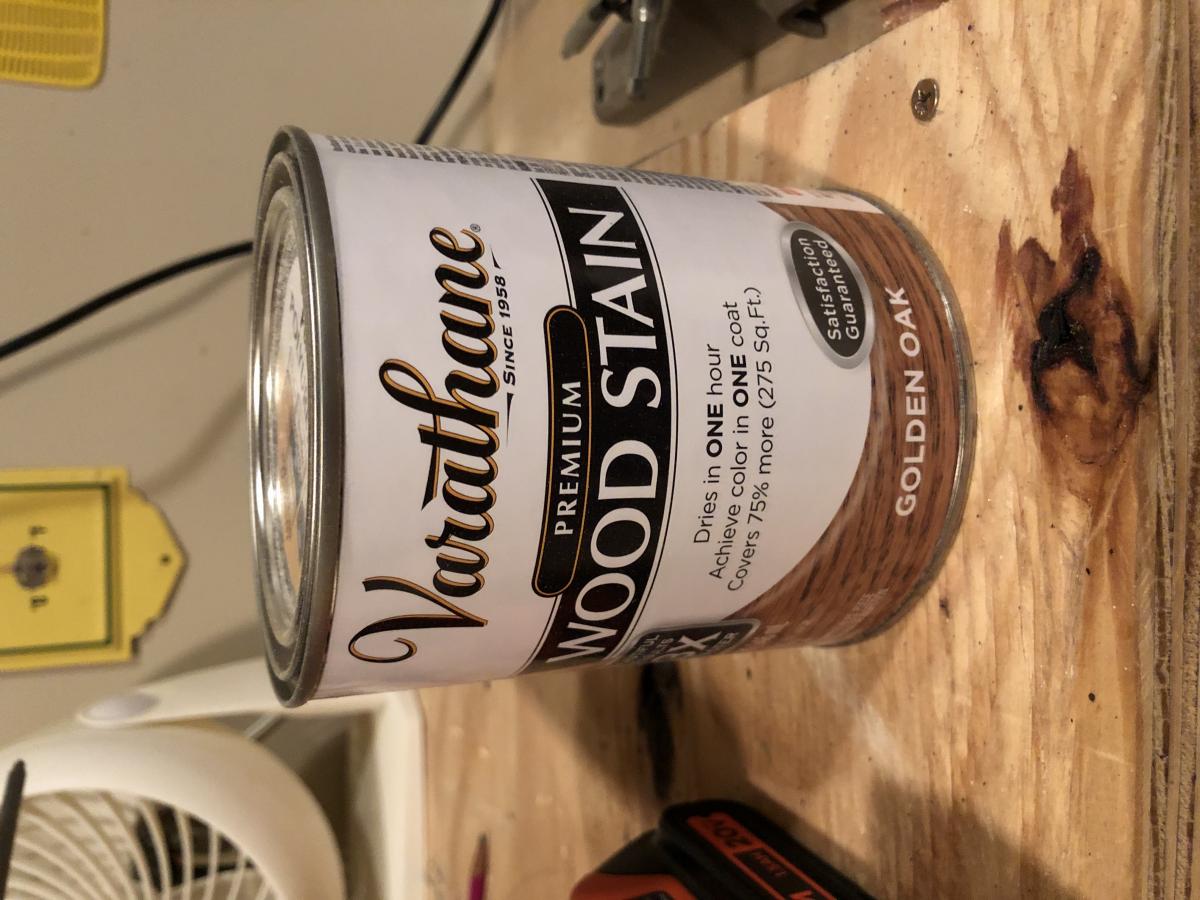
I built the Rustic X Farmhouse Coffee table this weekend. I want to thank Ana for the inspiration. She makes beautiful furniture. I did modify this table just a bit. I used pocket hole screws around the entire table as I didn't want the exposed holes nor did I want to have to use wood filler on them all. It really makes the look seamless. I also wanted a slightly wider table, so I added an additional board to the top. I kept the length and height the same. I also added 2 coats of a clear satin Polyurethane to the top to help protect it against water or heat stains from cups. I used the same Golden Oak Varathane stain. The clear satin poly just slightly darkens the stain on the table top and makes it just a bit shiny. But not too much difference to need to poly the entire table.
This project took about 8-10 total hours to build over the course of 3 days if you don't count the wait time. With lumber prices what they currently are, it cost about $50-60 in lumber. I also didn't have the stain and had to stock up on screws and glue.
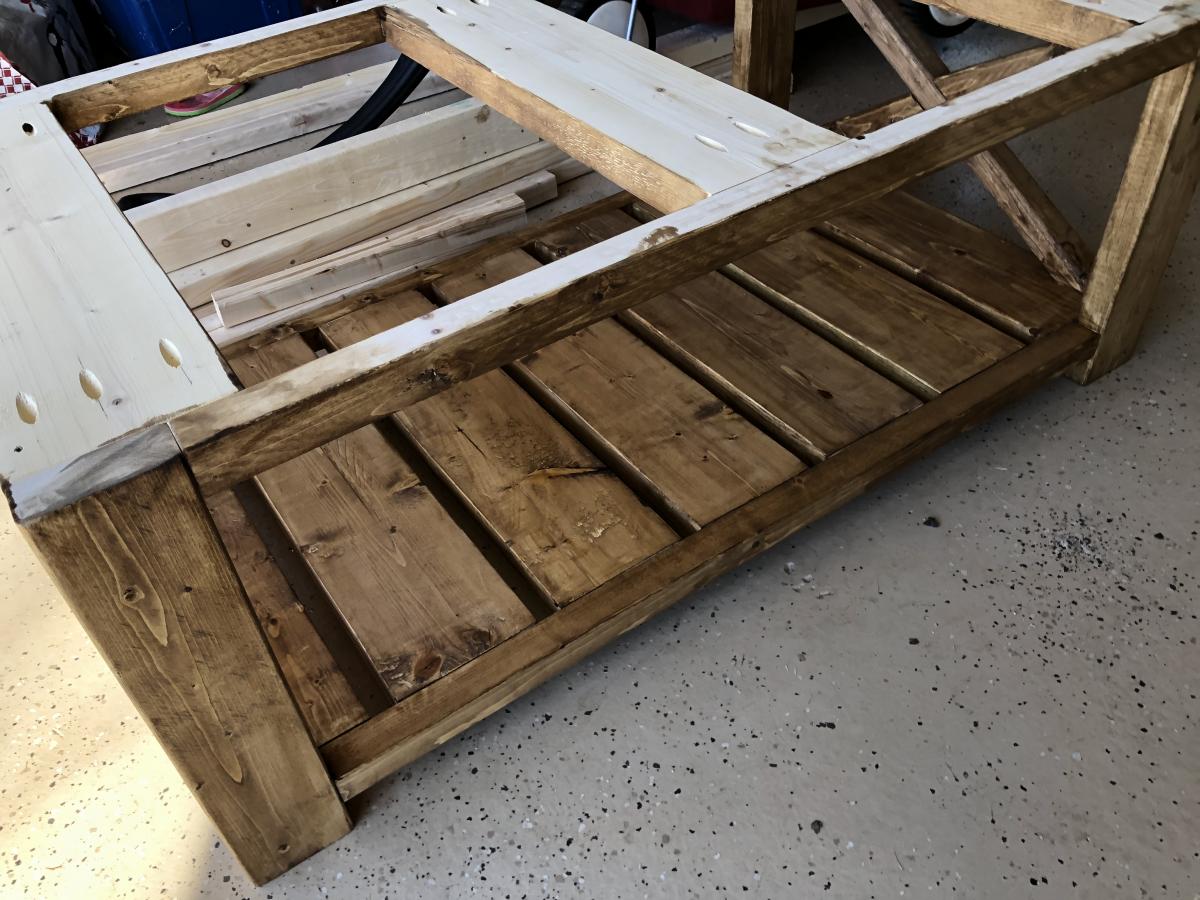
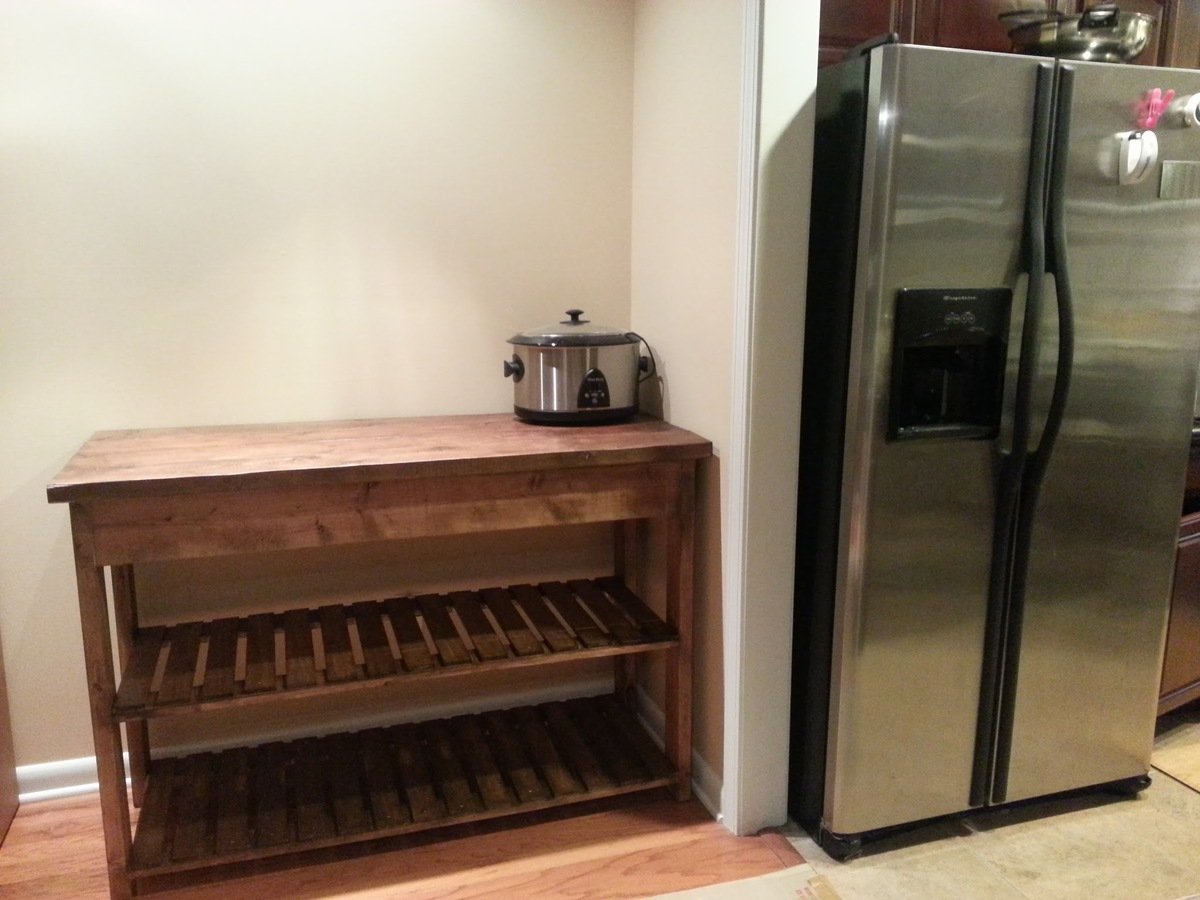
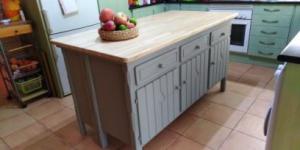
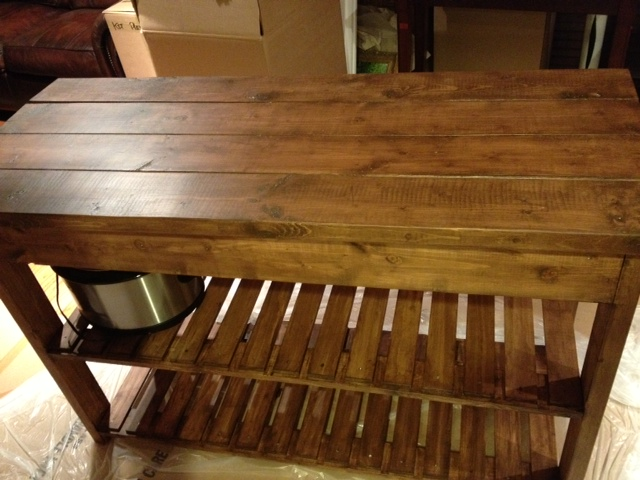
This is my first build ever! Since we recently moved into a place with little kitchen space, I thought this island would be perfect for extra storage we needed. I modified it from 5 2x6 on top, to 4 2x6 so it would fit in the corner we wanted it in. So the overall dimensions were 54" wide x 22" deep x 36" tall. I also changed the 1x2s that make the shelves to 3x5/8 boards, 15 per shelf, with approxinnately 1 inch between each. I predrilled countersink holes and screwed them on using 3/4" wood screws. The stain is a walnut colored water based stain, and I coated the top surfaces with a matte finish poly.
Wed, 01/16/2013 - 06:03
Beautiful! Can't believe it is your first build!
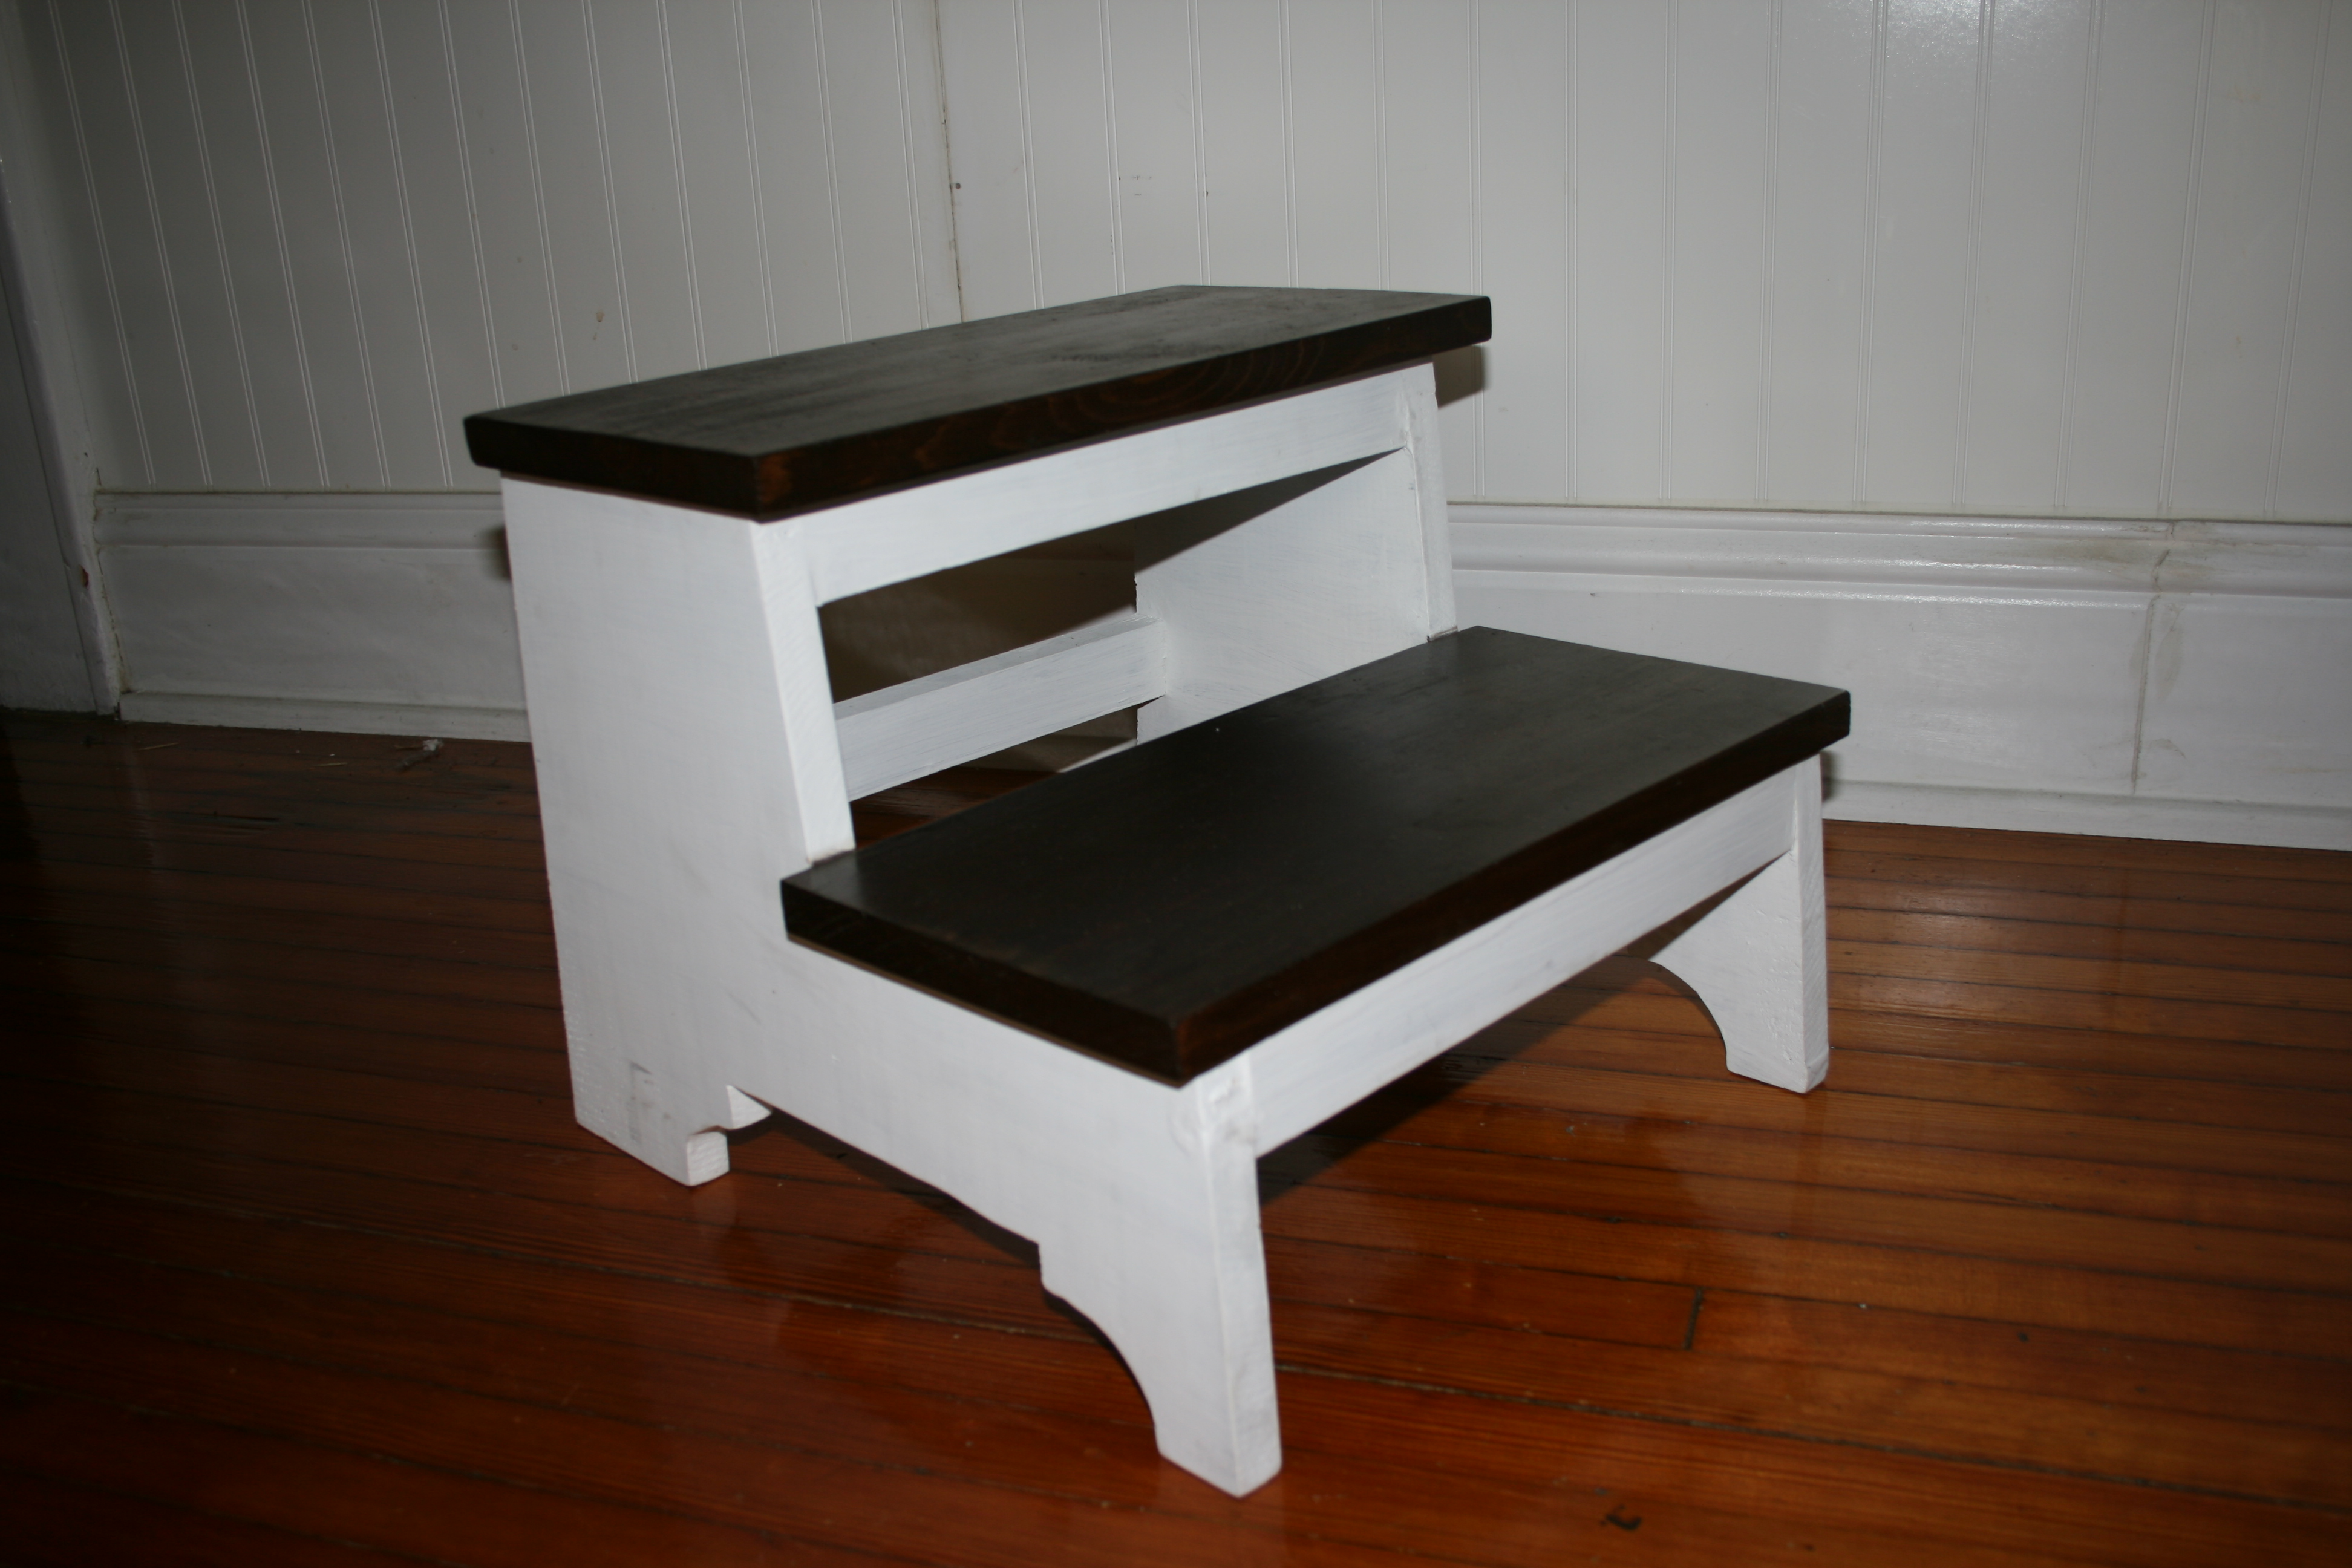
I am so thankful, Ana, for your website. I would have never attempted this without such detailed plans and instructions. This is the first thing I have ever built. I even had to watch your video on how to use a Kreg Jig, but I was able to build a solid piece with absolutely no prior knowledge in woodworking using your site! My grandson absolutely LOVES the step stool. His new favorite past time is to play at the sink since he can now reach it.  I will be building more as we are in the process of building a house. I keep telling the men in my life that they are going to build the kitchen cabinets. They keep telling me no. While my skillset is not yet to the point I am capable of building my kitchen cabinets, with such a wonderful site available I feel confident to get there. Thanks again!!!!!
Jo Lynn
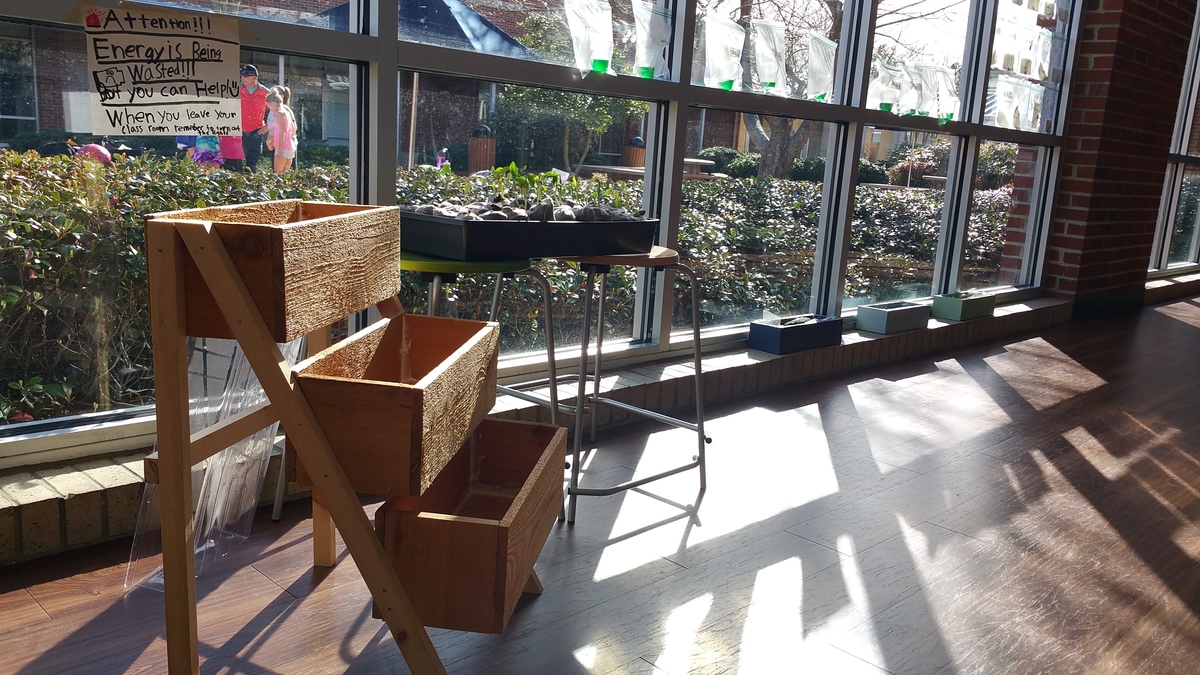
After doing some string art with the Kindergarteners in my class, the were anxious to pound some nails in "all the way." I remembered seeing this plan before on Ana's website, and earlier in the week our science teacher had been talking to the Kindergarteners about how the seeds they had planted were starting to get too big for their containers. The students themselves suggested a bigger box to put them in, and just like that... our next project was born!
The students did every part of this build, except for the cutting of the boards. They loved it, and couldn't believe how quickly they put it together. Here are a couple of tweets to show these little #elemakers at work!
https://twitter.com/JimTiffinJr/status/830163344057327617
https://twitter.com/JimTiffinJr/status/830164086847655936
https://twitter.com/JimTiffinJr/status/830164527304077313
Thanks for sharing some very simple projects and plans that even the littlest of builders can do!
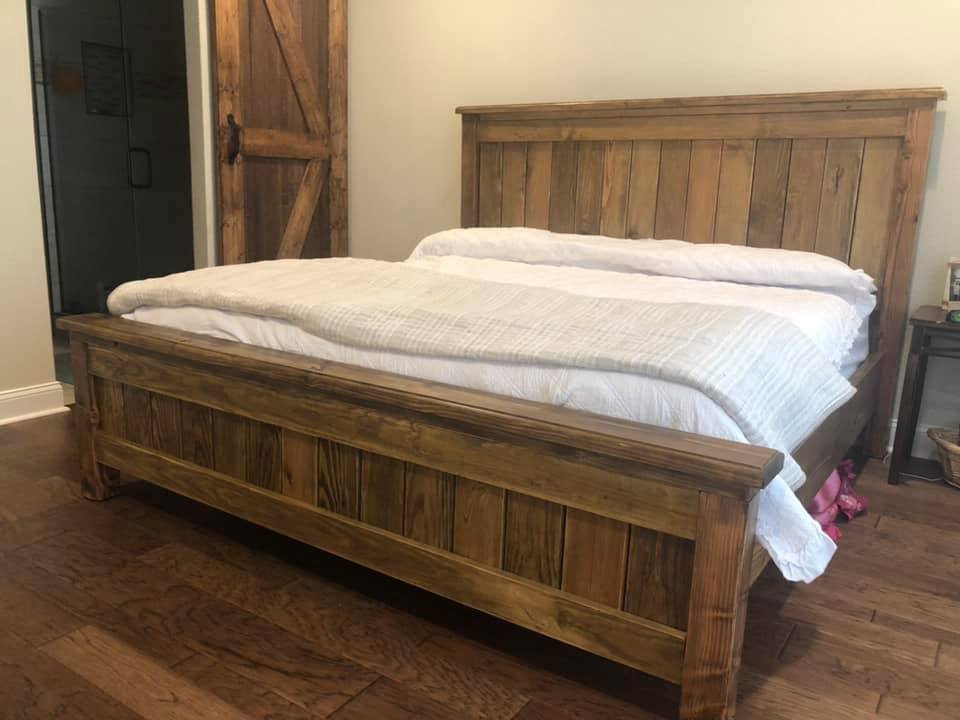
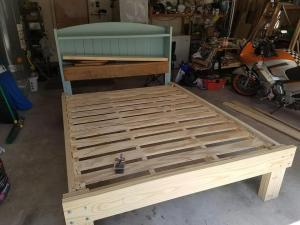
I just love how this bed turned out. Now I have plenty of space and those 3 kiddos can't boot me out.