Community Brag Posts
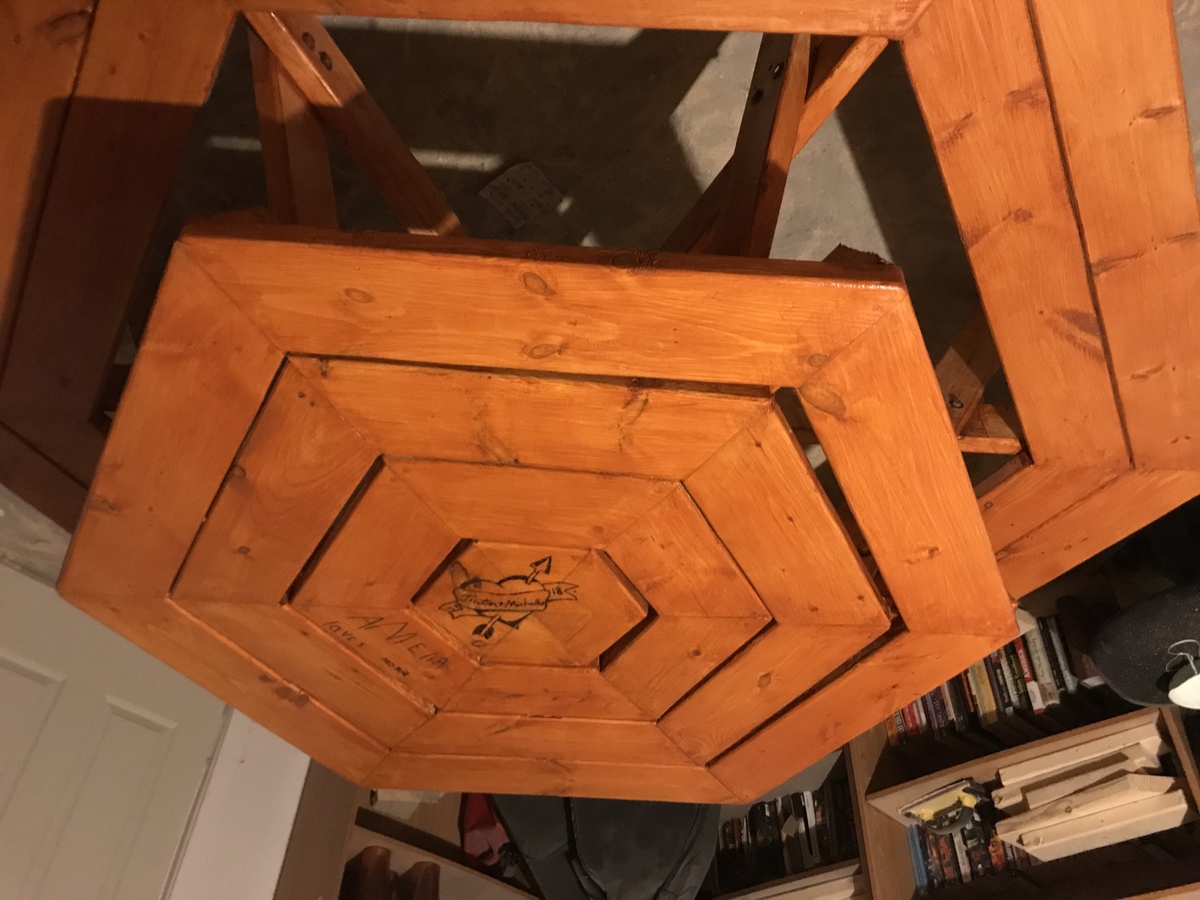
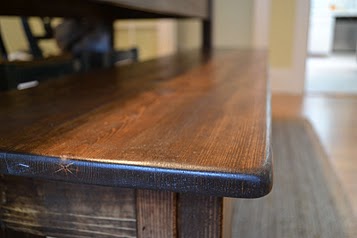
Awesome table.
Made for my wife for a Christmas present. Awesome project.
Built from Plan(s)
Estimated Time Investment
Day Project (6-9 Hours)
Recommended Skill Level
Intermediate
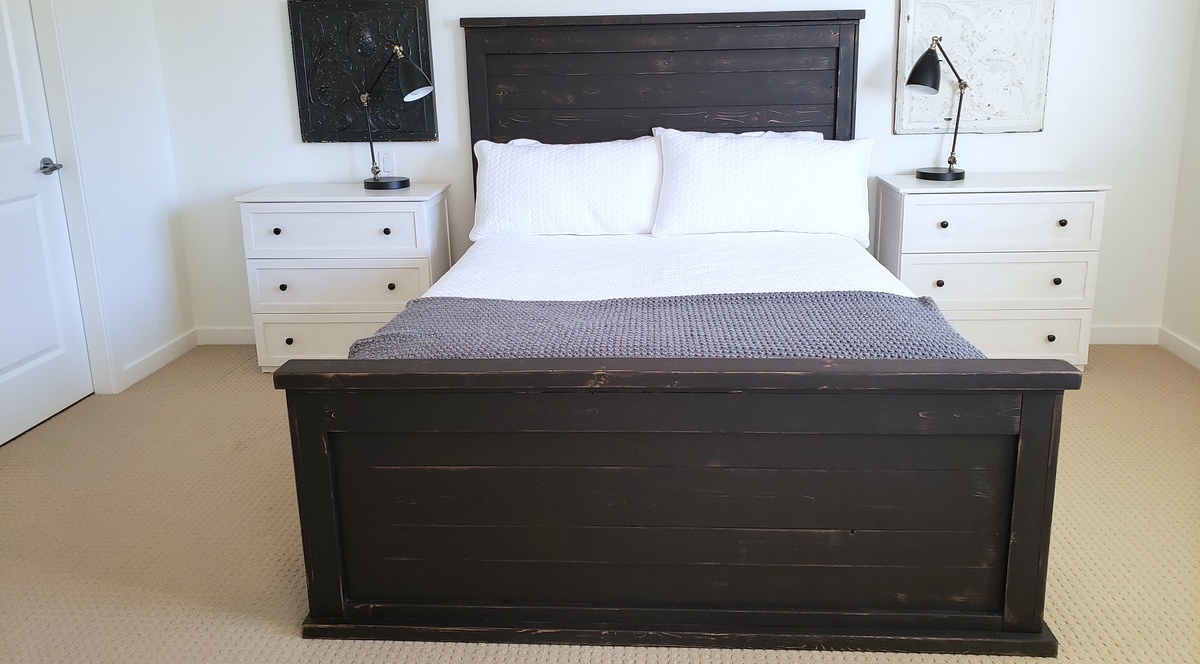
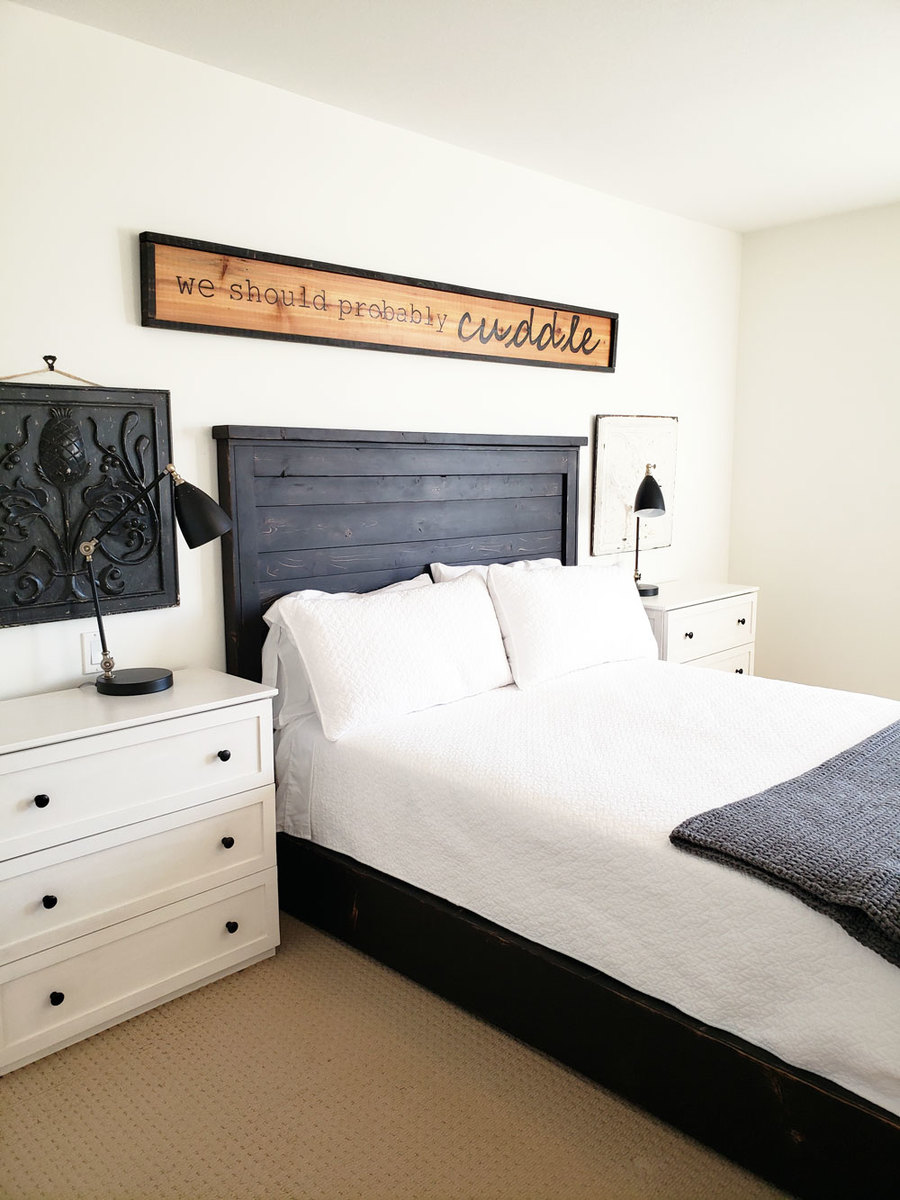
King Size Farmhouse bed
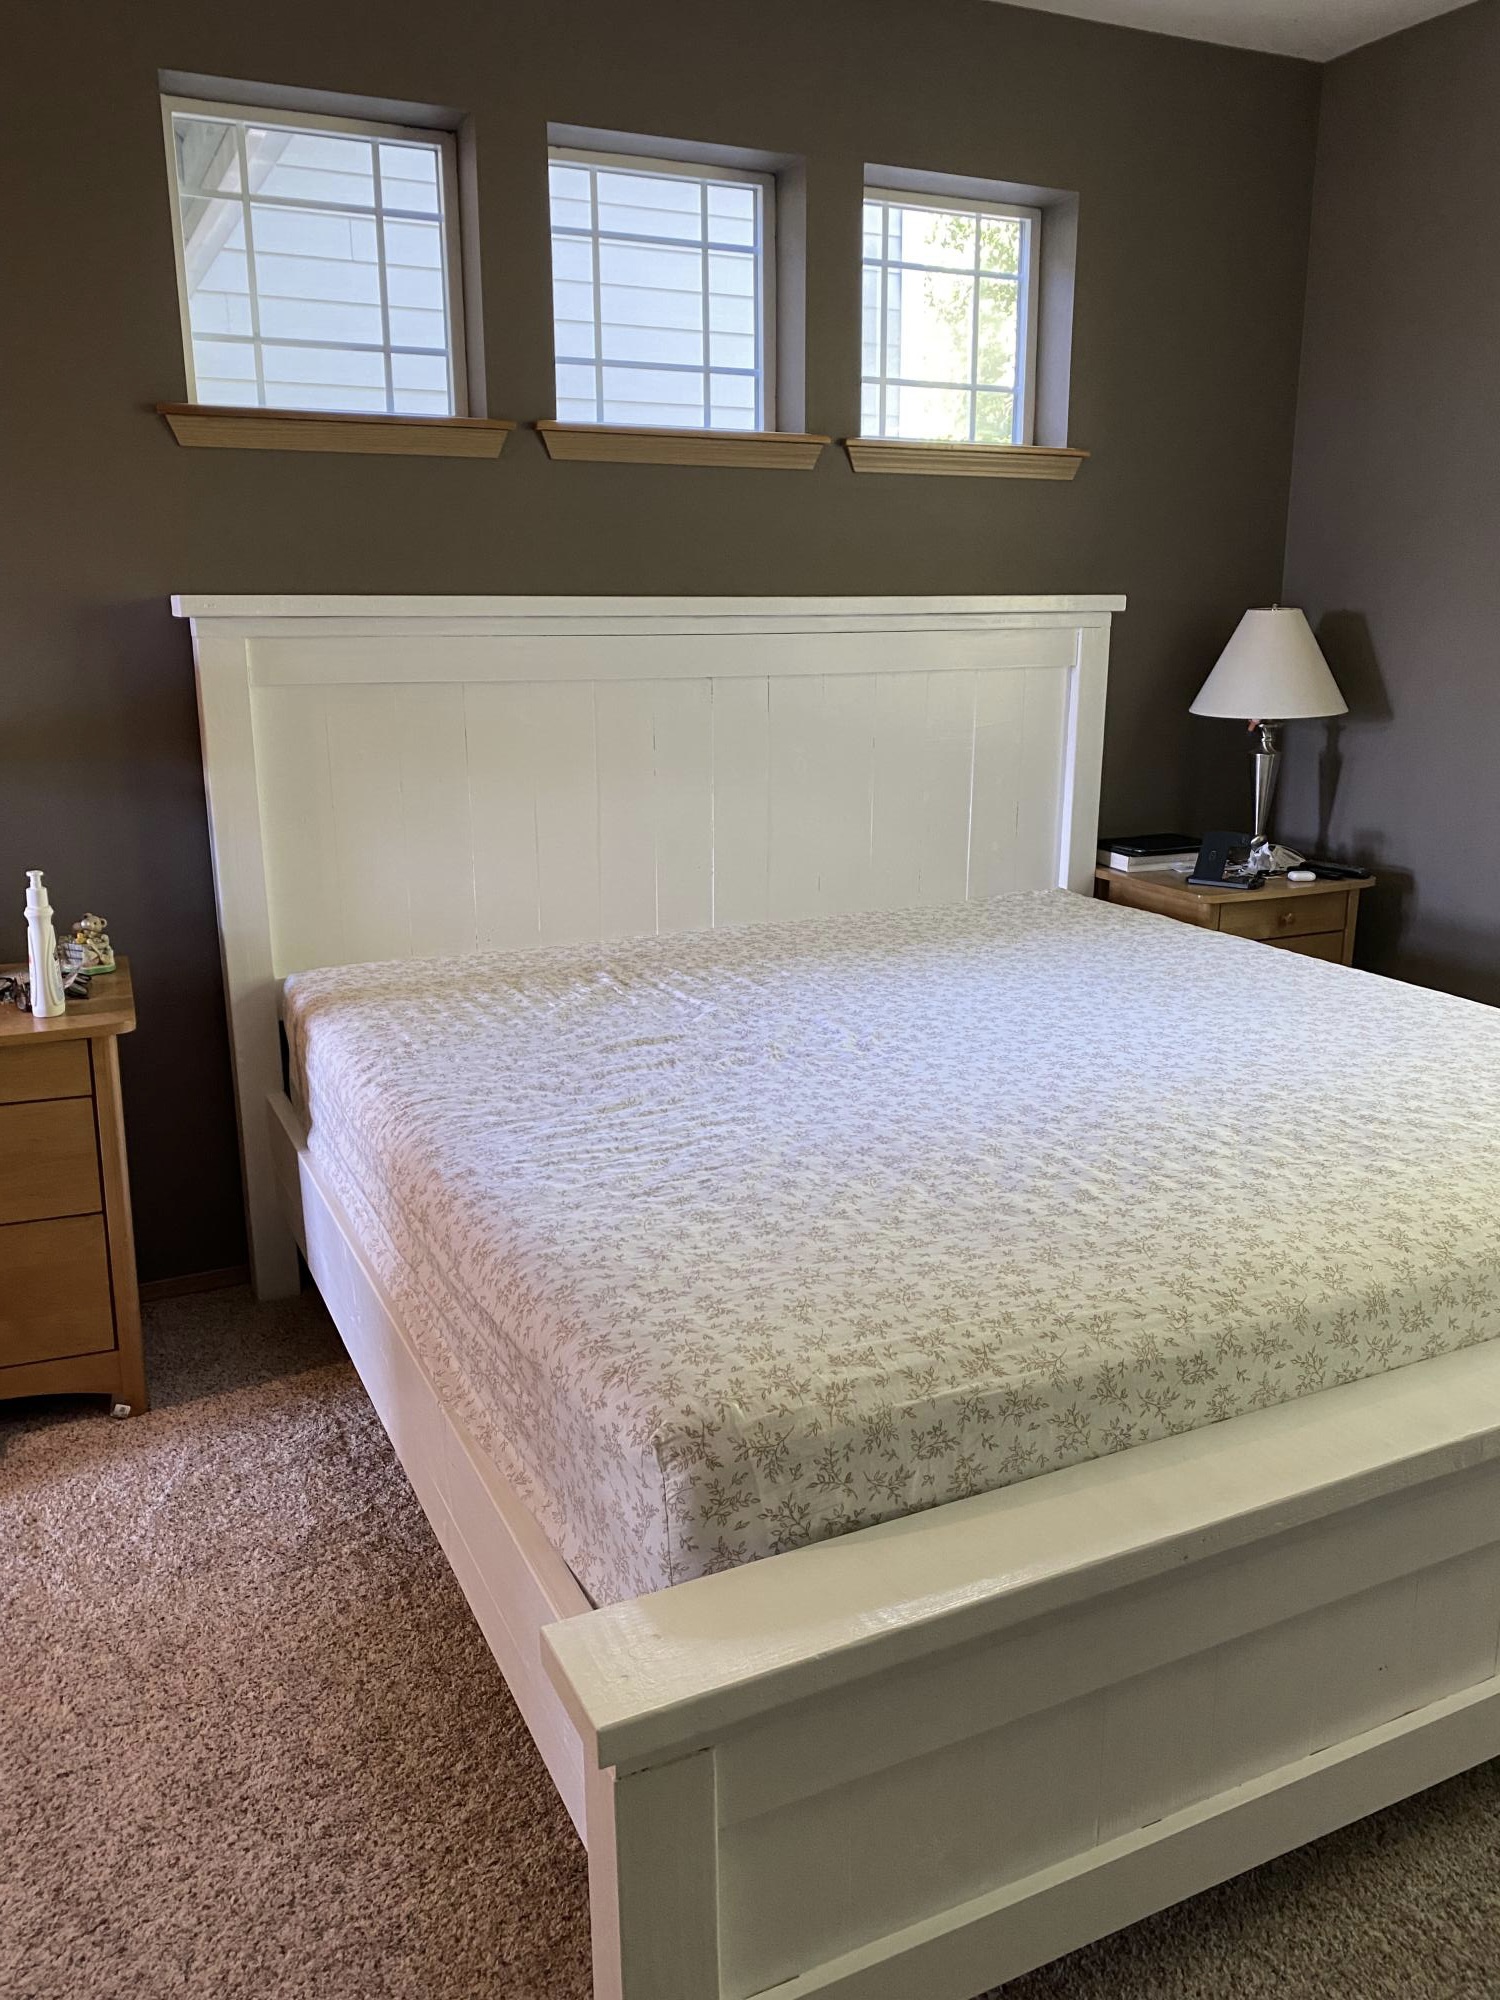
I love the plan for the King Farmhouse bed. I built it and made a couple of changes that just made it easier to move. I did not want to screw the middle support legs through the footboard and just happened to have six fence brackets in my fastener box, we just moved in a month before this build. I put the fence brackets on the front of the side rail cleats and added a 2x4 that went into those brackets. Then I added fence brackets to the front 2x4 and the back 2x4 that would receive the leg support boards. I also added supports made from two 3" cuts of the scrap 2x2 for the back of the side rails on the headboard legs. This modest support was just to help put it back together in the bedroom. We plan on moving again in a few years and I want the bed to last through many years so I thought this was a good idea. The bed is sturdy and I love it. Thank you for another fantastic plan Ana!


Built from Plan(s)
Comments
Sun, 09/04/2022 - 12:54
Wonderful!
Gorgeous bed and it should last many years! Thank you for sharing.
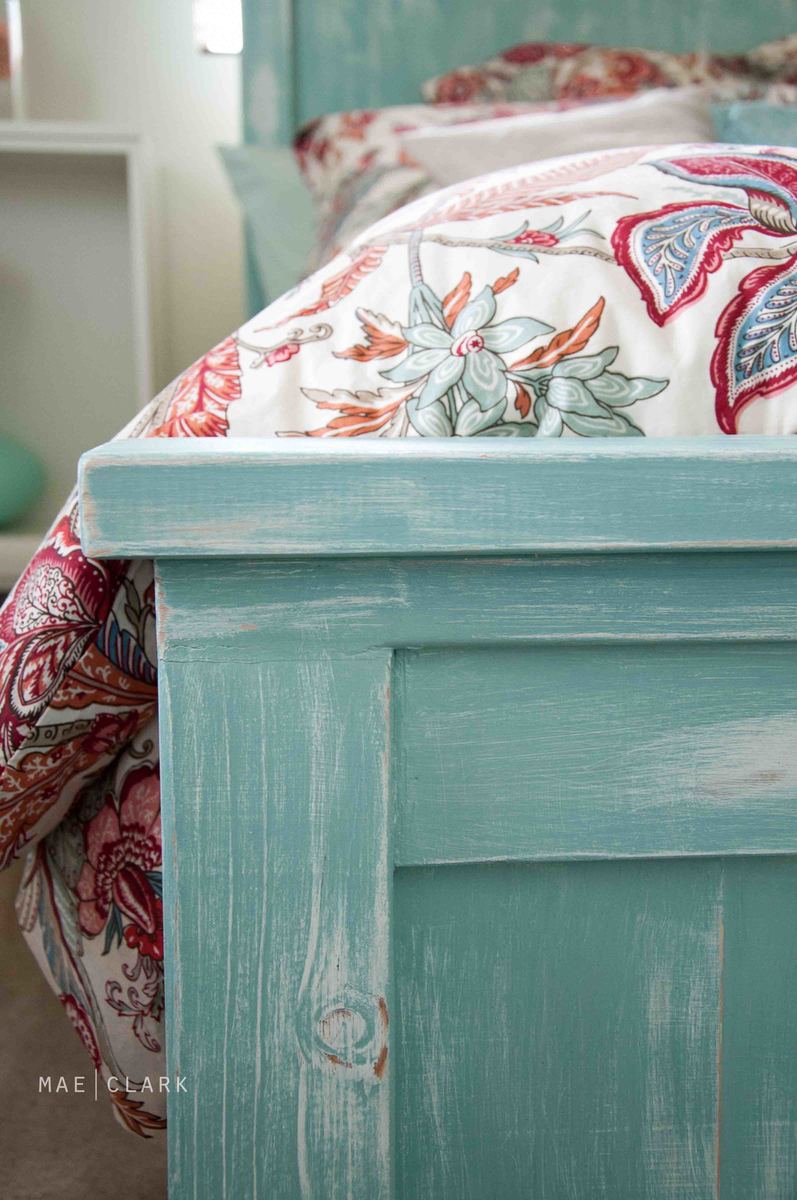
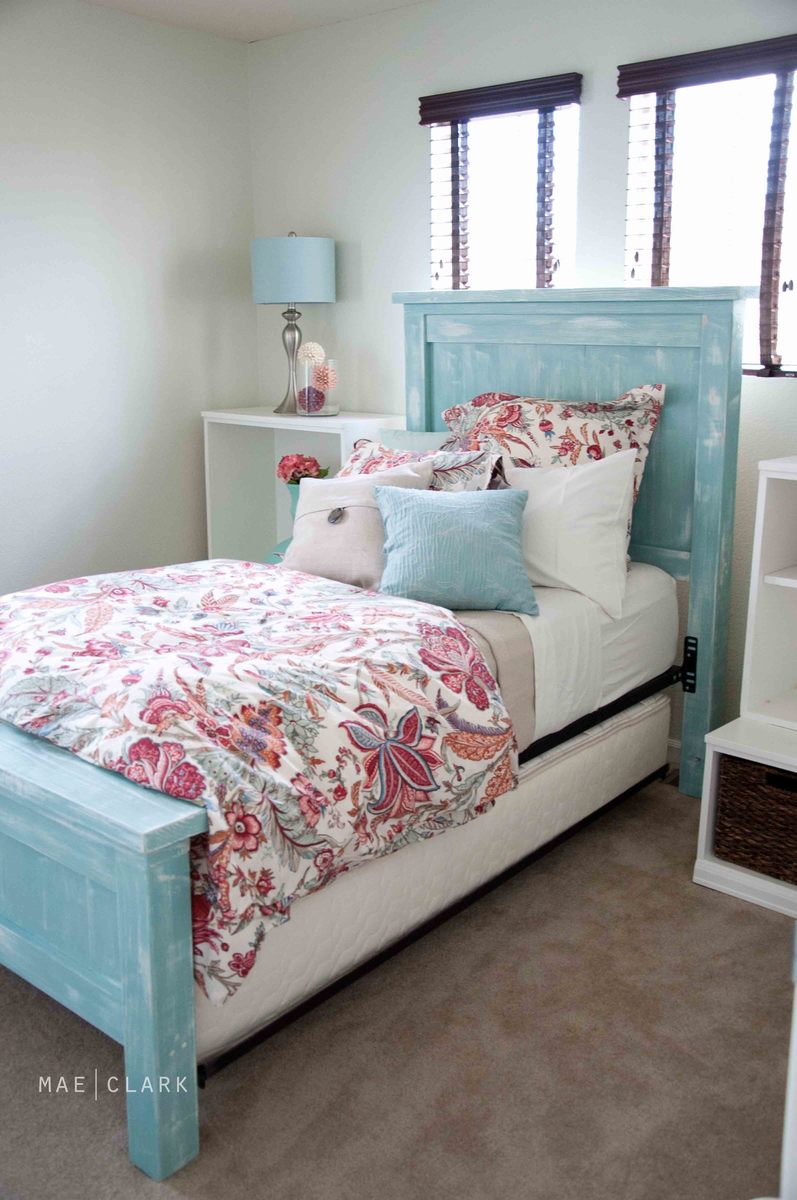
Twin Farmhouse Bed - A Beachy-ish Version

I decided to start on the project of converting my daybed to a twin farmhouse bed five days before I had a house full of company - genius! The hardest part was finding the 4x4 posts at the Blue store and deciding what length of screws to use. It's hard to say how much time I spent on it, as I was finishing up 46 other projects during the same time, but I would guess the build took about ten hours, and the finishing maybe three? This finish really is one of the easiest I've done to date. A quick coat of white/cream semigloss, another quick coat of turquoise semigloss, an hour of light sanding and wa-lah! I apologize for the poor photo quality - I borrowed a friend's camera lens to get wide-angle shots in my teeny guest room and the lens apparently wasn't made for my camera - whoops!


Built from Plan(s)
Estimated Cost
$150
Estimated Time Investment
Weekend Project (10-20 Hours)
Finish Used
I believe the white was Mascarpone by Benjamin Moore and Palladian Blue by Benjamin Moore. A single light coat of each, then distressed lightly with a sanding block. I didn't use a sealer, but that may change if I decide the raw finish isn't good enough. It seems to be great right now!
Recommended Skill Level
Beginner
Comments
Sun, 08/14/2011 - 08:57
Love the finish!
I absolutely LOVE the finish! Once I figure out which of Anna's beds I want to build, I will try to copy your fabulous finishing job. Thanks for sharing.
Sun, 08/14/2011 - 16:30
Beautiful!
I love the beachy look. You did an amazing job. I have a day bed that I hate and I'm thinking this is a perfect solution. Thanks fir the inspiration.
Mon, 08/15/2011 - 05:36
This bed is GORGEOUS! Great
This bed is GORGEOUS! Great Job! I think I need to get building and make 2 for my little girls :-)
Mon, 08/15/2011 - 08:41
I love the finish! I'm making
I love the finish! I'm making one of Ana's beds for my daughter and may copy your finish technique, but use a pink (her favorite color) instead of blue.
I also noticed that you used the bedframe for the siderails instead of making them. Did you just screw them in to the posts?
In reply to I love the finish! I'm making by Miasmom (not verified)
Mon, 08/15/2011 - 19:25
Thanks! I just used the
Thanks! I just used the hardware that was used to screw the daybed into the original posts to attach it to the farmhouse headboard and footboard. Pretty easy! I plan to fashion a coordinating bedskirt to hide the trundle underneath.
In reply to bedding by designdoctor
Tue, 08/16/2011 - 19:52
Yup, Pottery Barn. The
Yup, Pottery Barn. The Deirdre Organic duvet and sham.
Mon, 11/21/2011 - 15:03
About your trundle
I was curious to know what your mattress is on for the trundle? I will be attempting the same thing, but was going to put the mattress in a wooden box on castors. Yours looks more friendly! Thanks for your time. Excellent job.
Trish
Fri, 02/10/2012 - 09:01
Primer and Top Coat??
Hey Amanda... this is beautiful. I'm hoping to try this type of finish on a bed I am working on now. How does it seem to be holding up without a sealer? You didn't use any primer, correct?? Thanks. Really beautiful work.
Sat, 02/18/2012 - 07:29
Paint Color
I love the color so I went to the paint store bought palladian blue) by Benjamin Moore but it sure didn't look your color. It was more of a weathered gray look. Which was nice too but definitely not the same. Are you sure that you used palladian blue?
Mon, 04/23/2012 - 11:50
My Favorite!
Absolutely beautiful, and such an inspiration. I think the color is stunning, and the weathered look you created is just perfect. It goes so well with the bedding too. I would love to have the exact same thing in my own house!
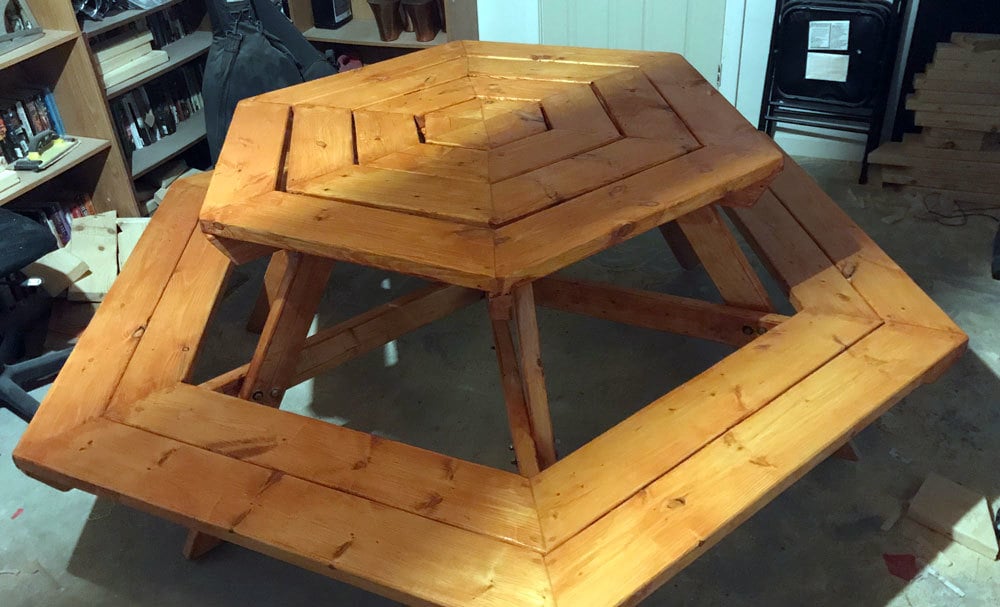
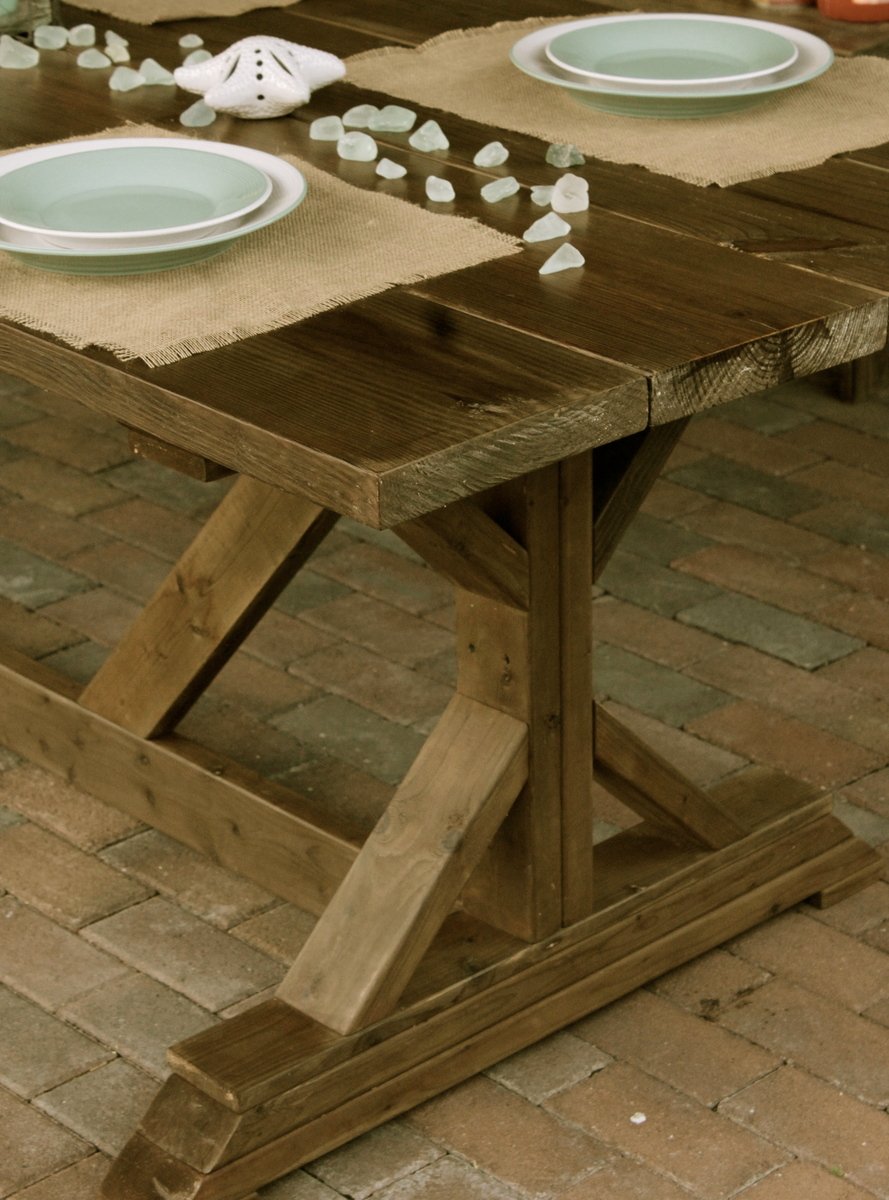
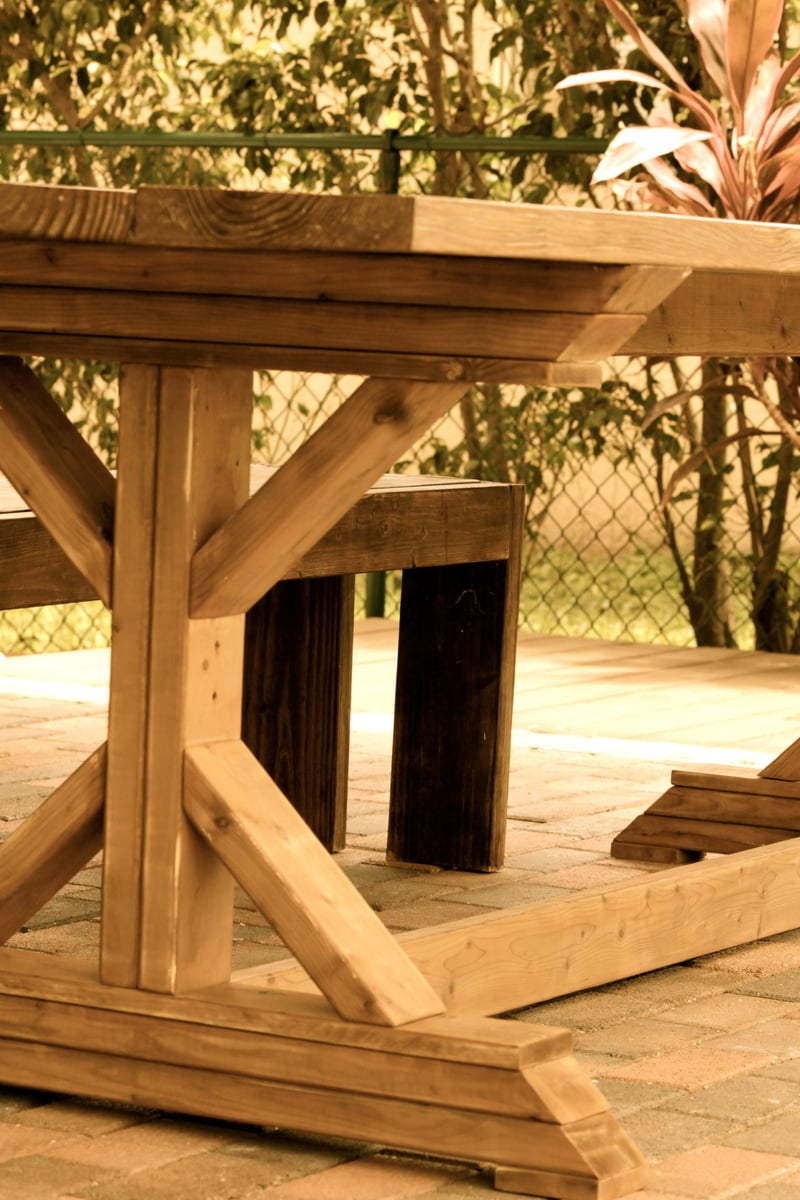
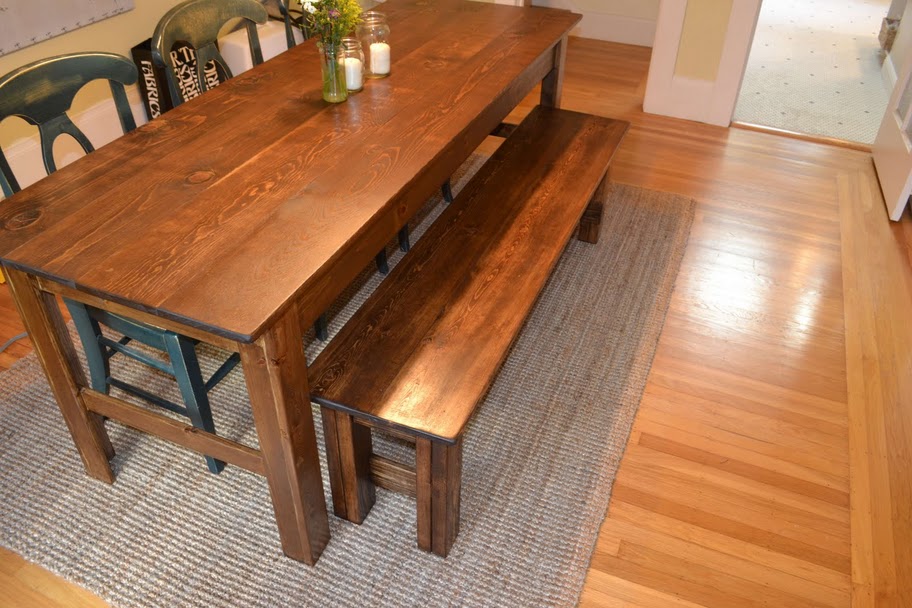
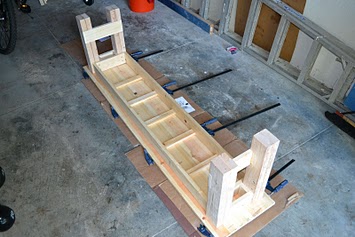
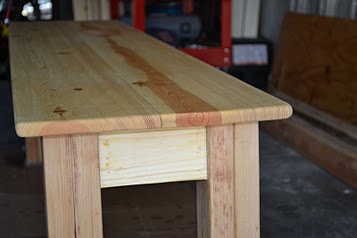
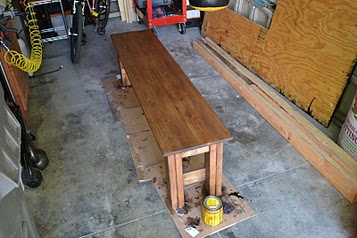
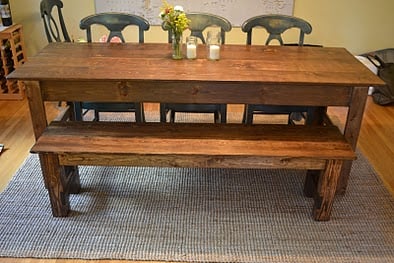
X Dining Table
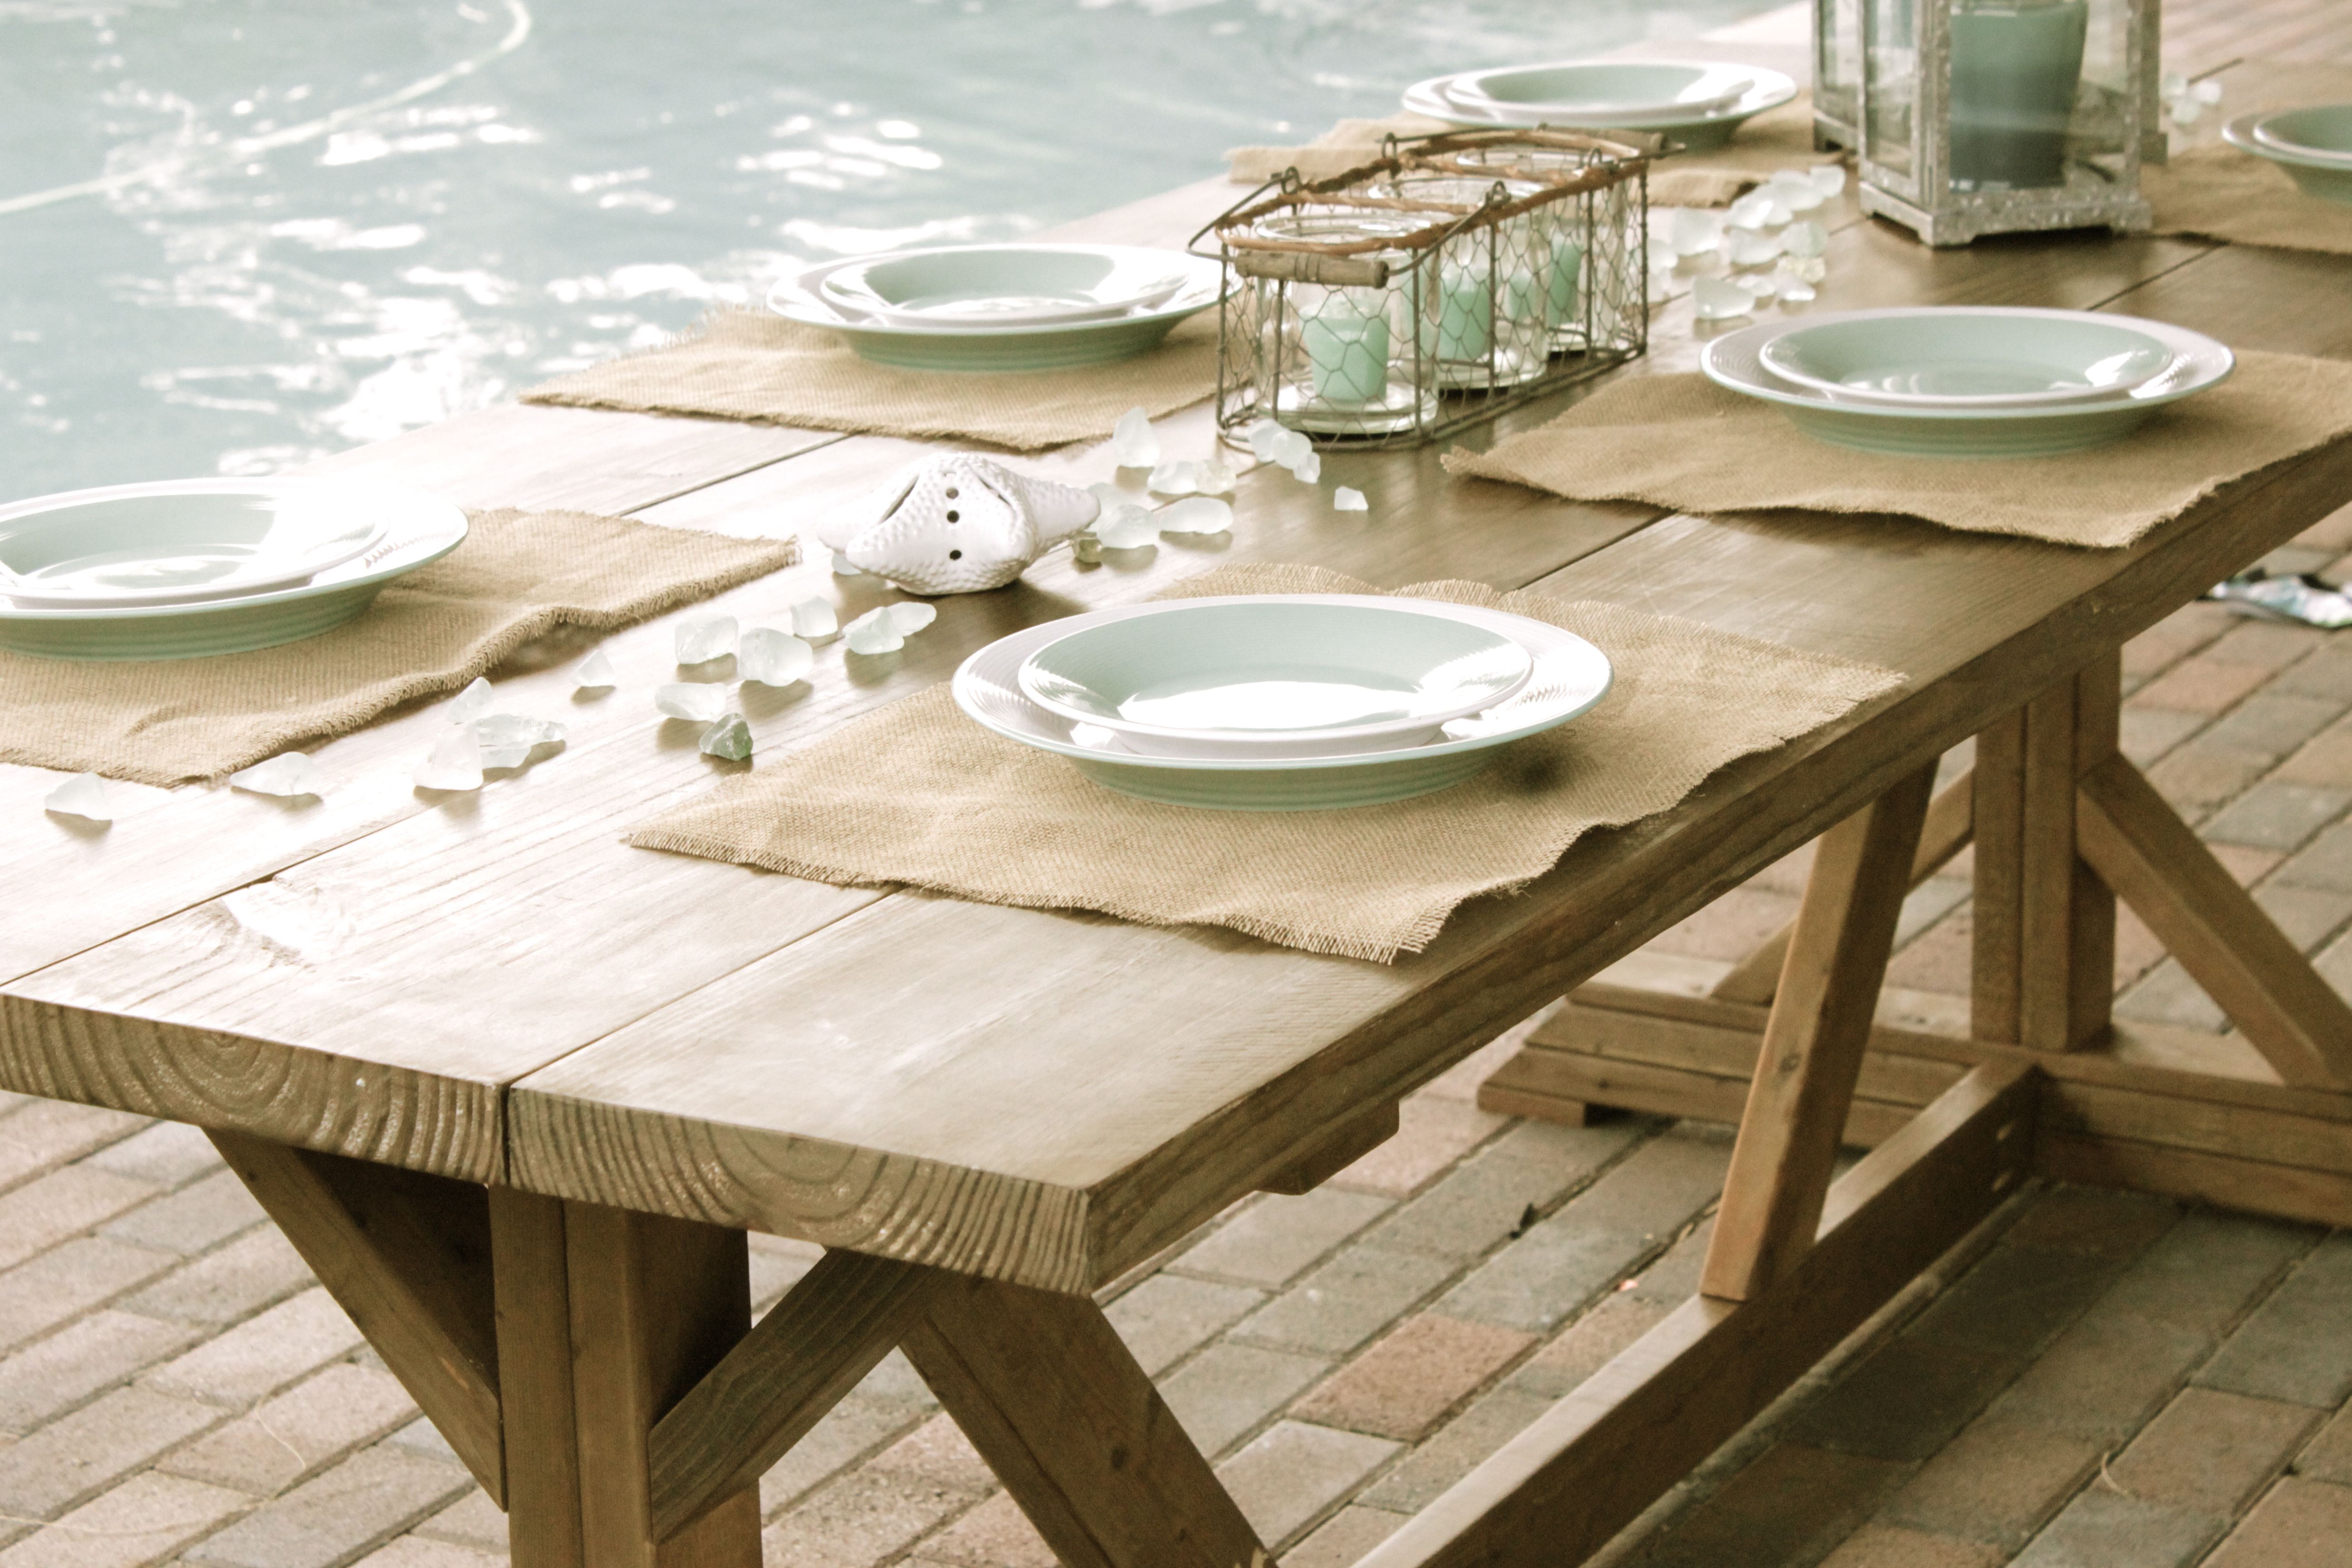
I built this table a year ago just never got the chance to post pics. It was an easy build.
Built from Plan(s)
Estimated Time Investment
Weekend Project (10-20 Hours)
Finish Used
It's been so long I cant even remember exactly :/ but I believe I started with the vinegar steel wool mixture.
Recommended Skill Level
Beginner
Comments

Sat, 09/07/2013 - 17:16
Beautiful!
Your table looks beautiful! Love the finish, and the way you arranged and photographed it is wonderful, great job!
Adirondack Chairs for our Fire pit
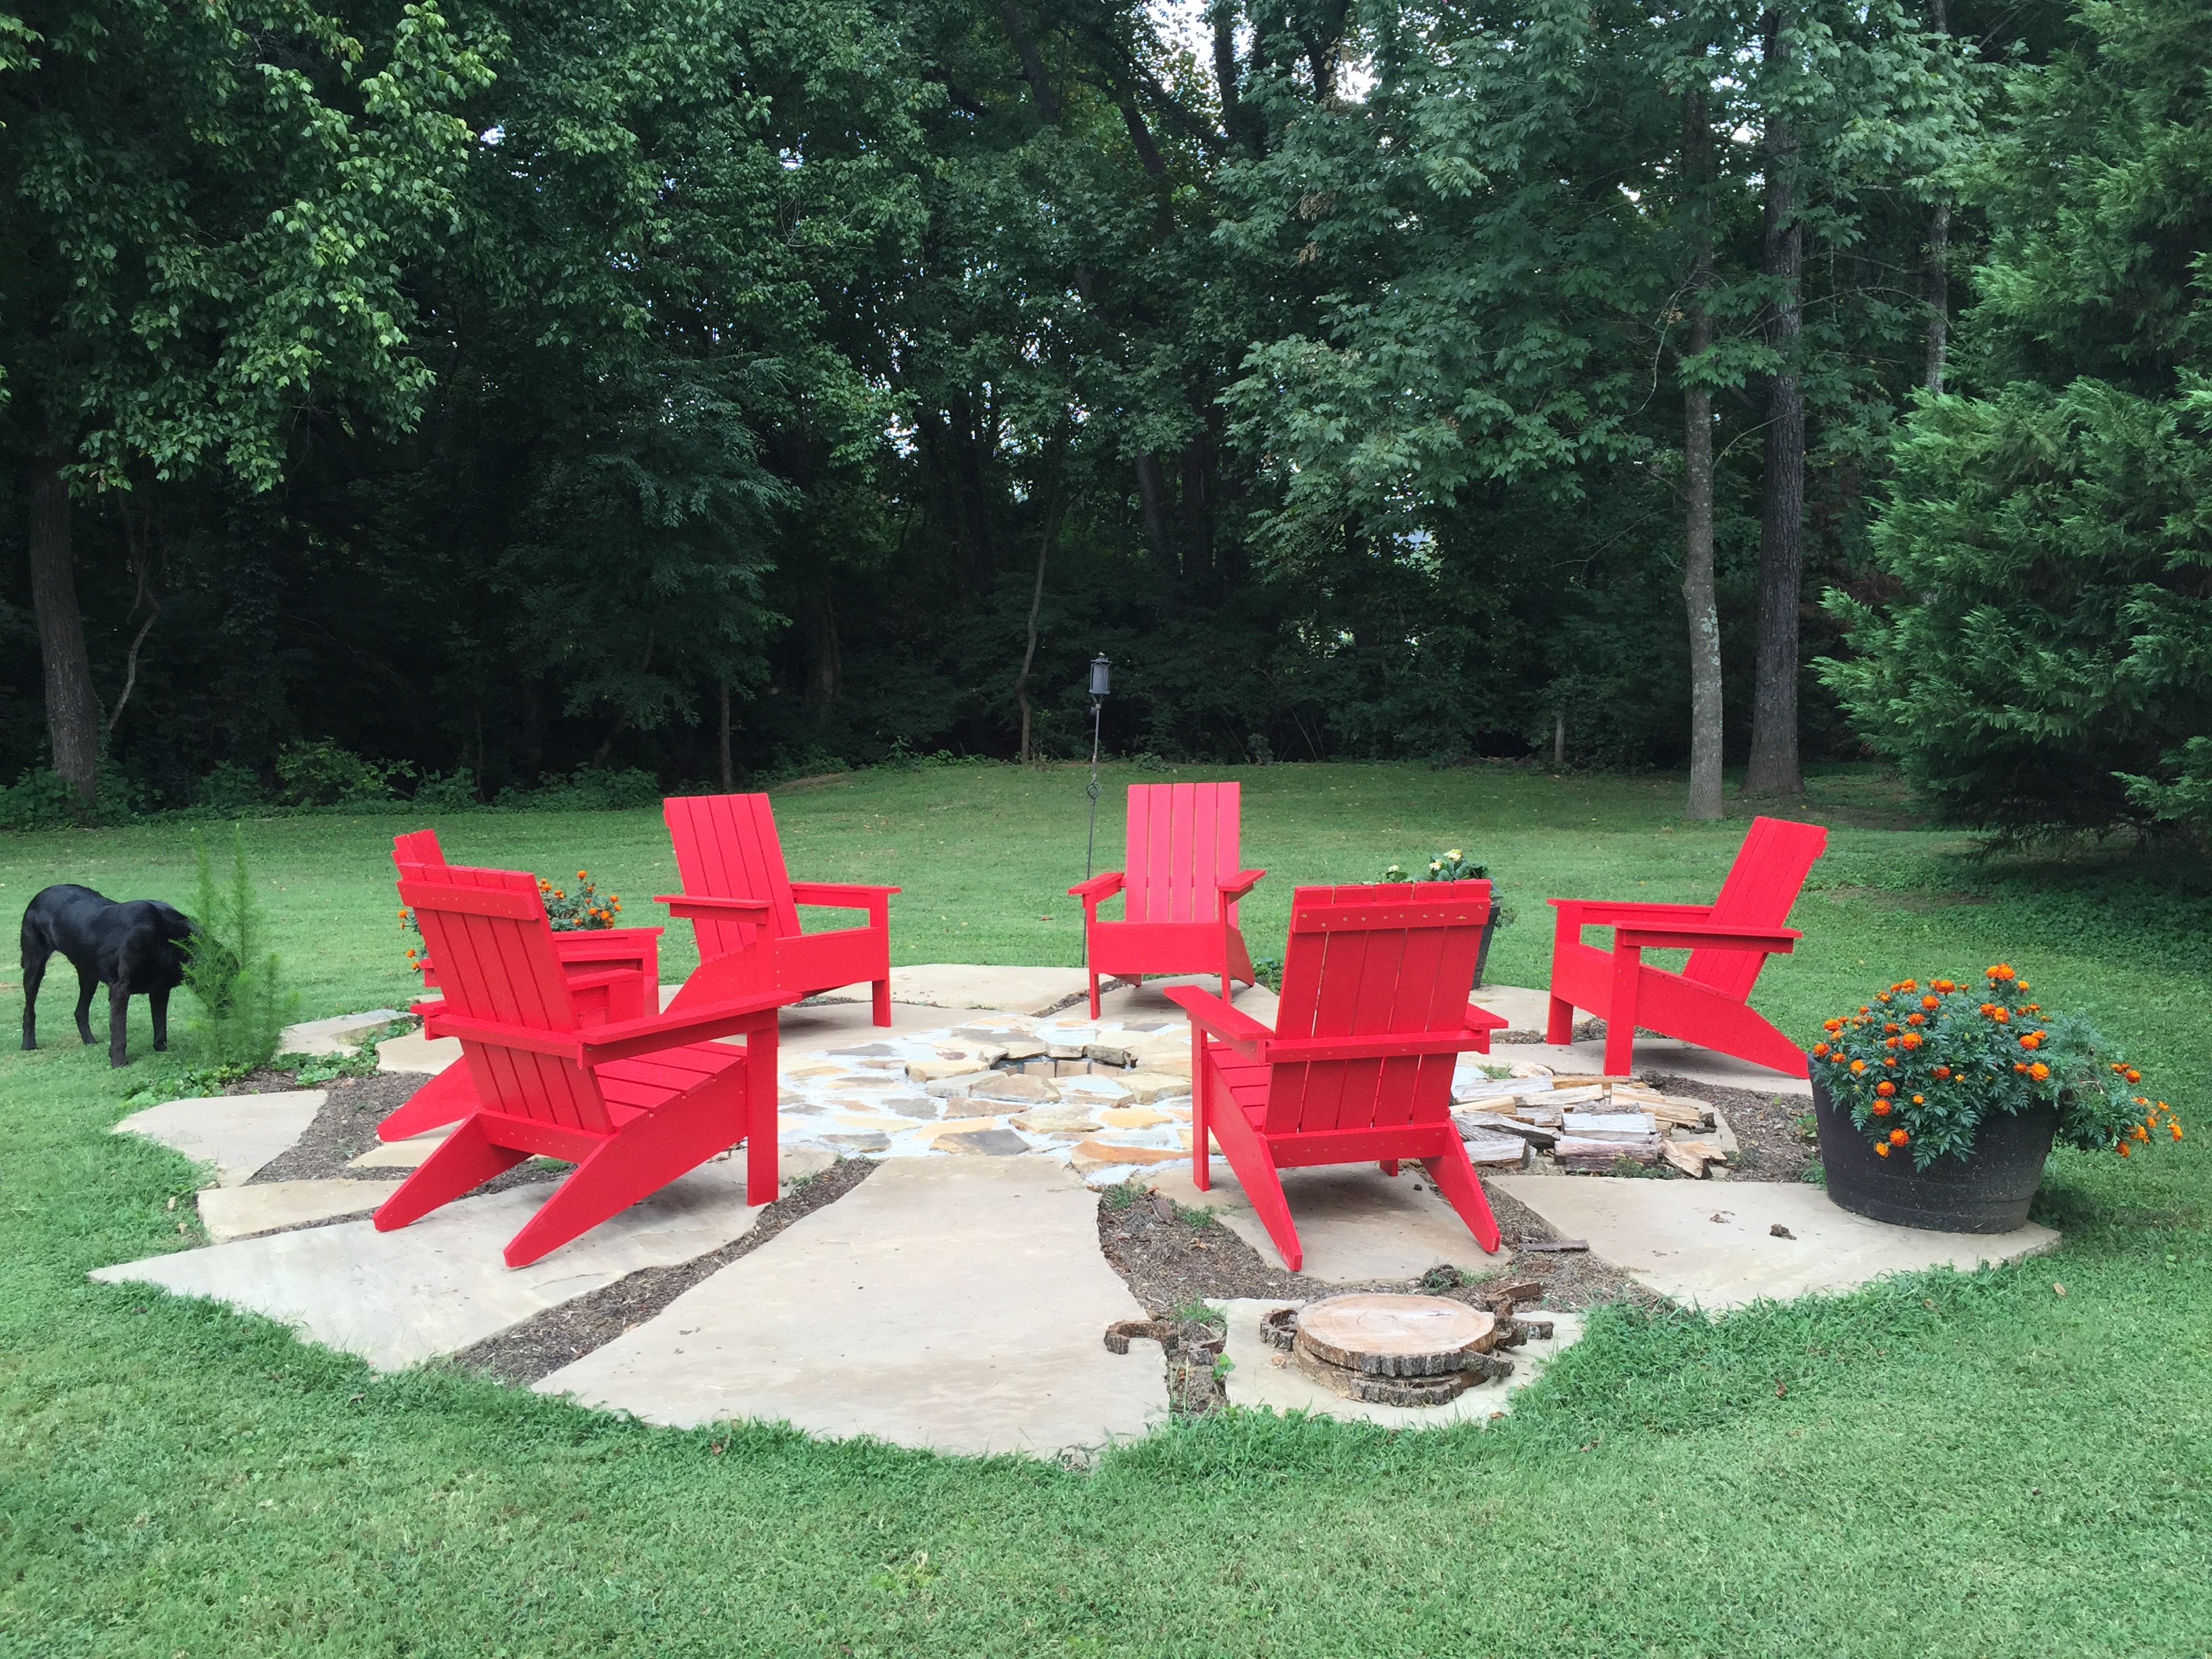
We had recenty been to Jasper National Park in the Canadian Rockies and saw beautiful red adirondack chairs out on many of the trails, so we built these to remind us of a great family vacation.
Built from Plan(s)
Estimated Cost
$100 Each
Estimated Time Investment
Afternoon Project (3-6 Hours)
Finish Used
Behr Outdoor paint
Recommended Skill Level
Intermediate
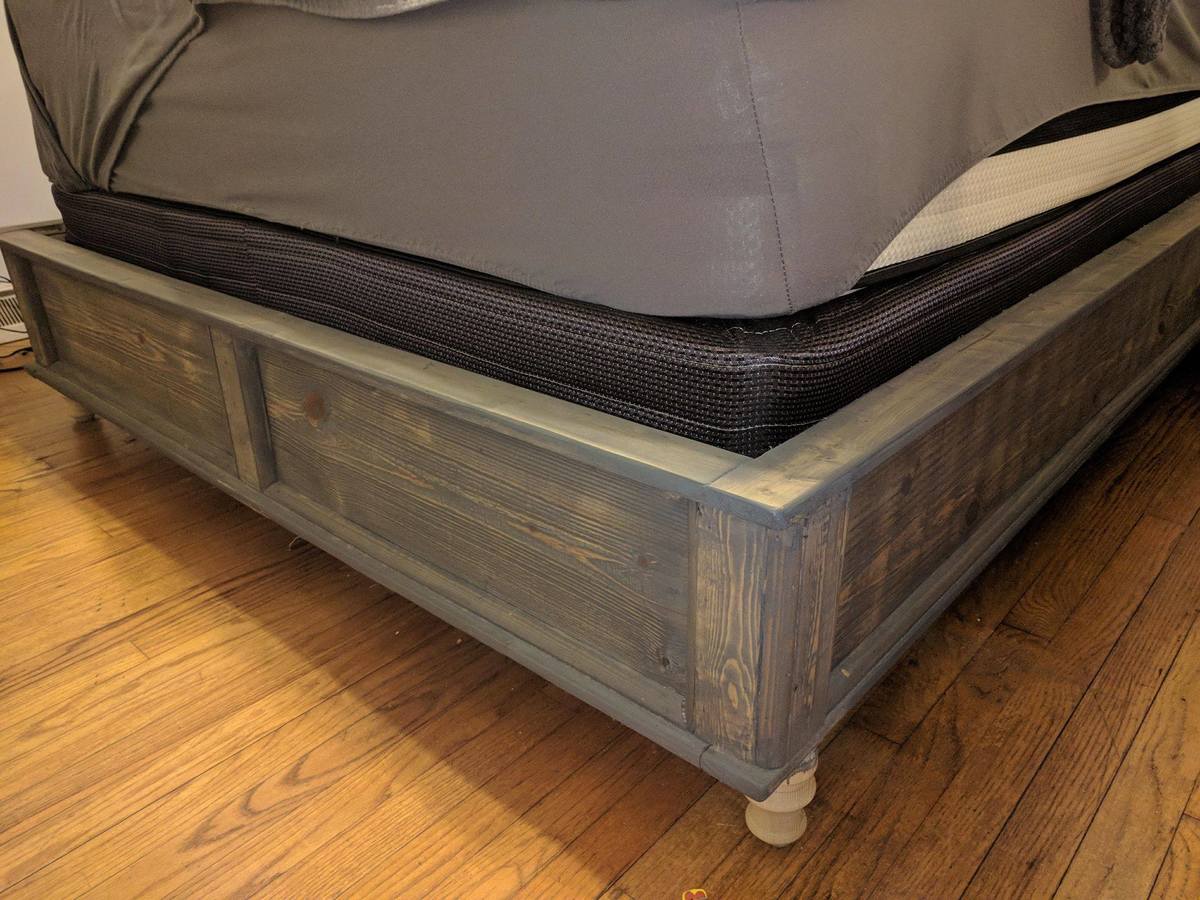
Reclaimed wood headboard + footboard
At 43, I feel like I finally have the bedroom I have wanted for many years. Lots of thought on creating a bed, but this is the first time it's come to fruition.
Built from Plan(s)
Estimated Cost
$100-150, including the wax to finish the bed off. Lumber seems to cost more in Canada! Plus, I added in a footboard and rails.
Estimated Time Investment
Day Project (6-9 Hours)
Finish Used
Black paint, sanded down and then Country Chic Antique Wax applied on top.
Recommended Skill Level
Beginner
Comments

Wed, 01/02/2019 - 12:26
Wow, this is absolutely
Wow, this is absolutely gorgeous! I love the finish color, what is it? It is beautiful! Thank you so much for bragging!
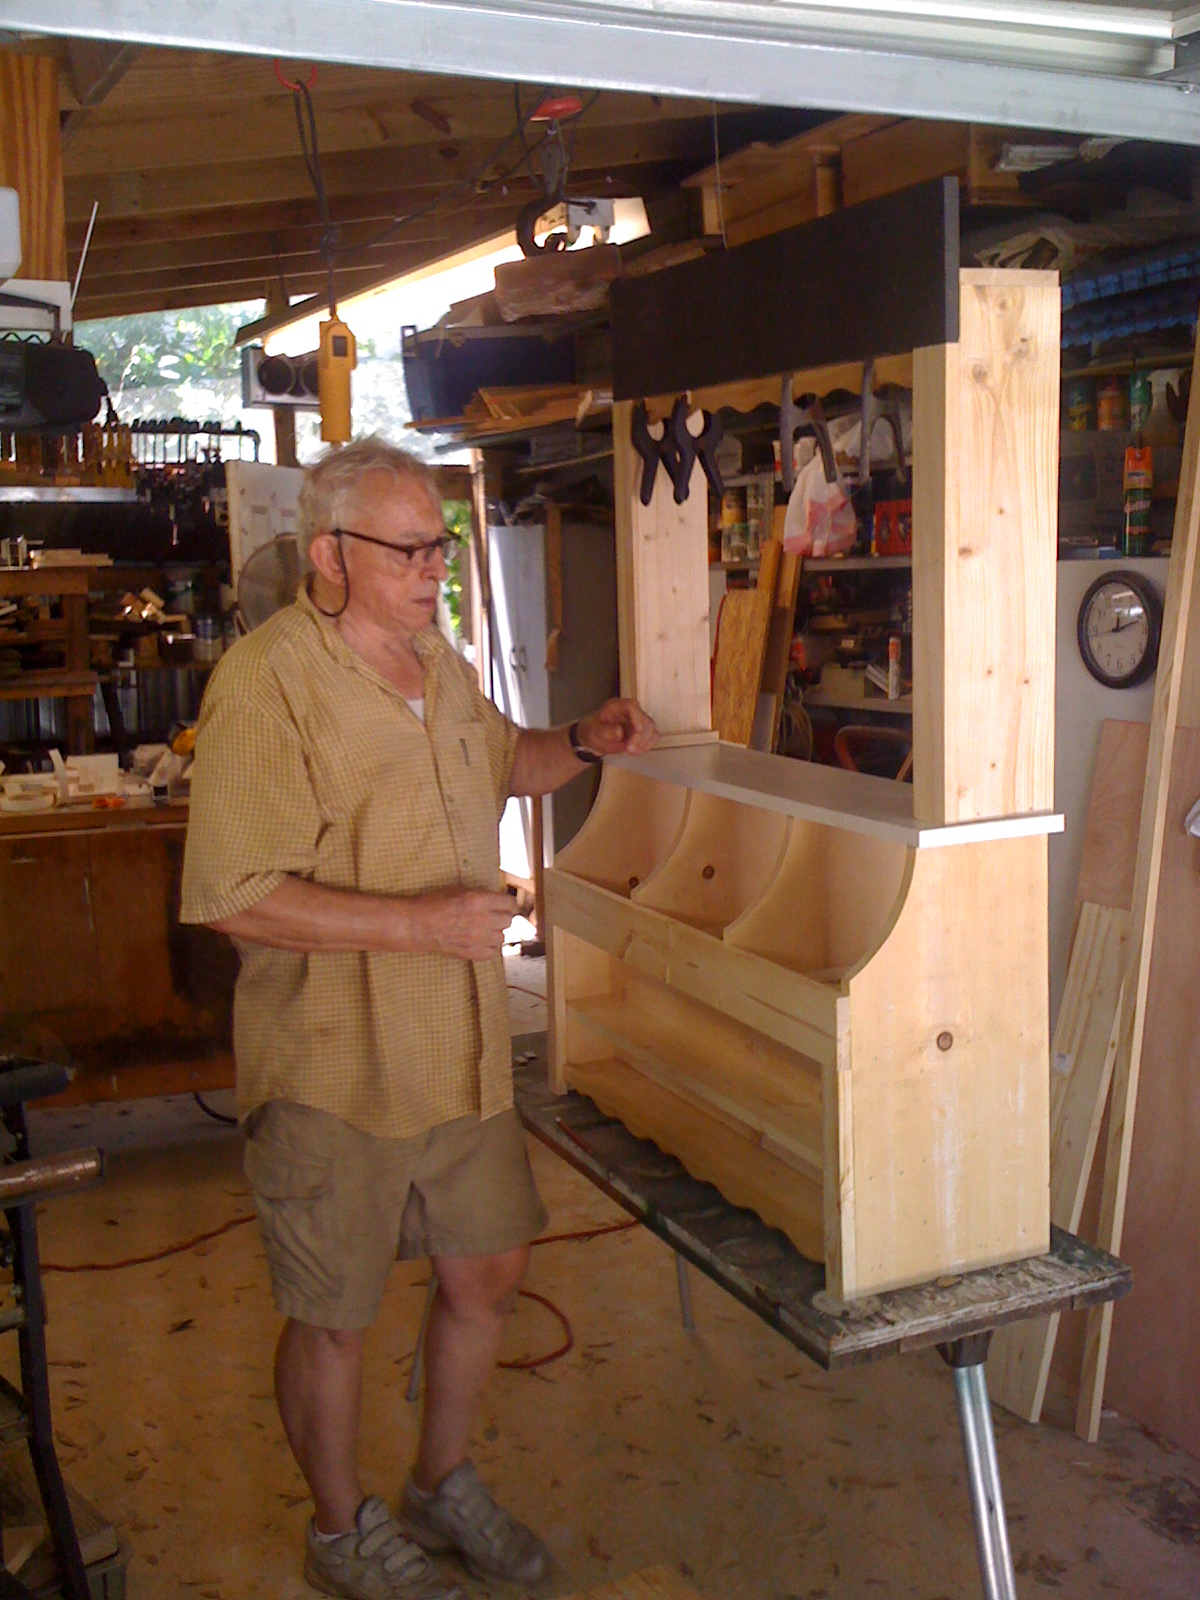
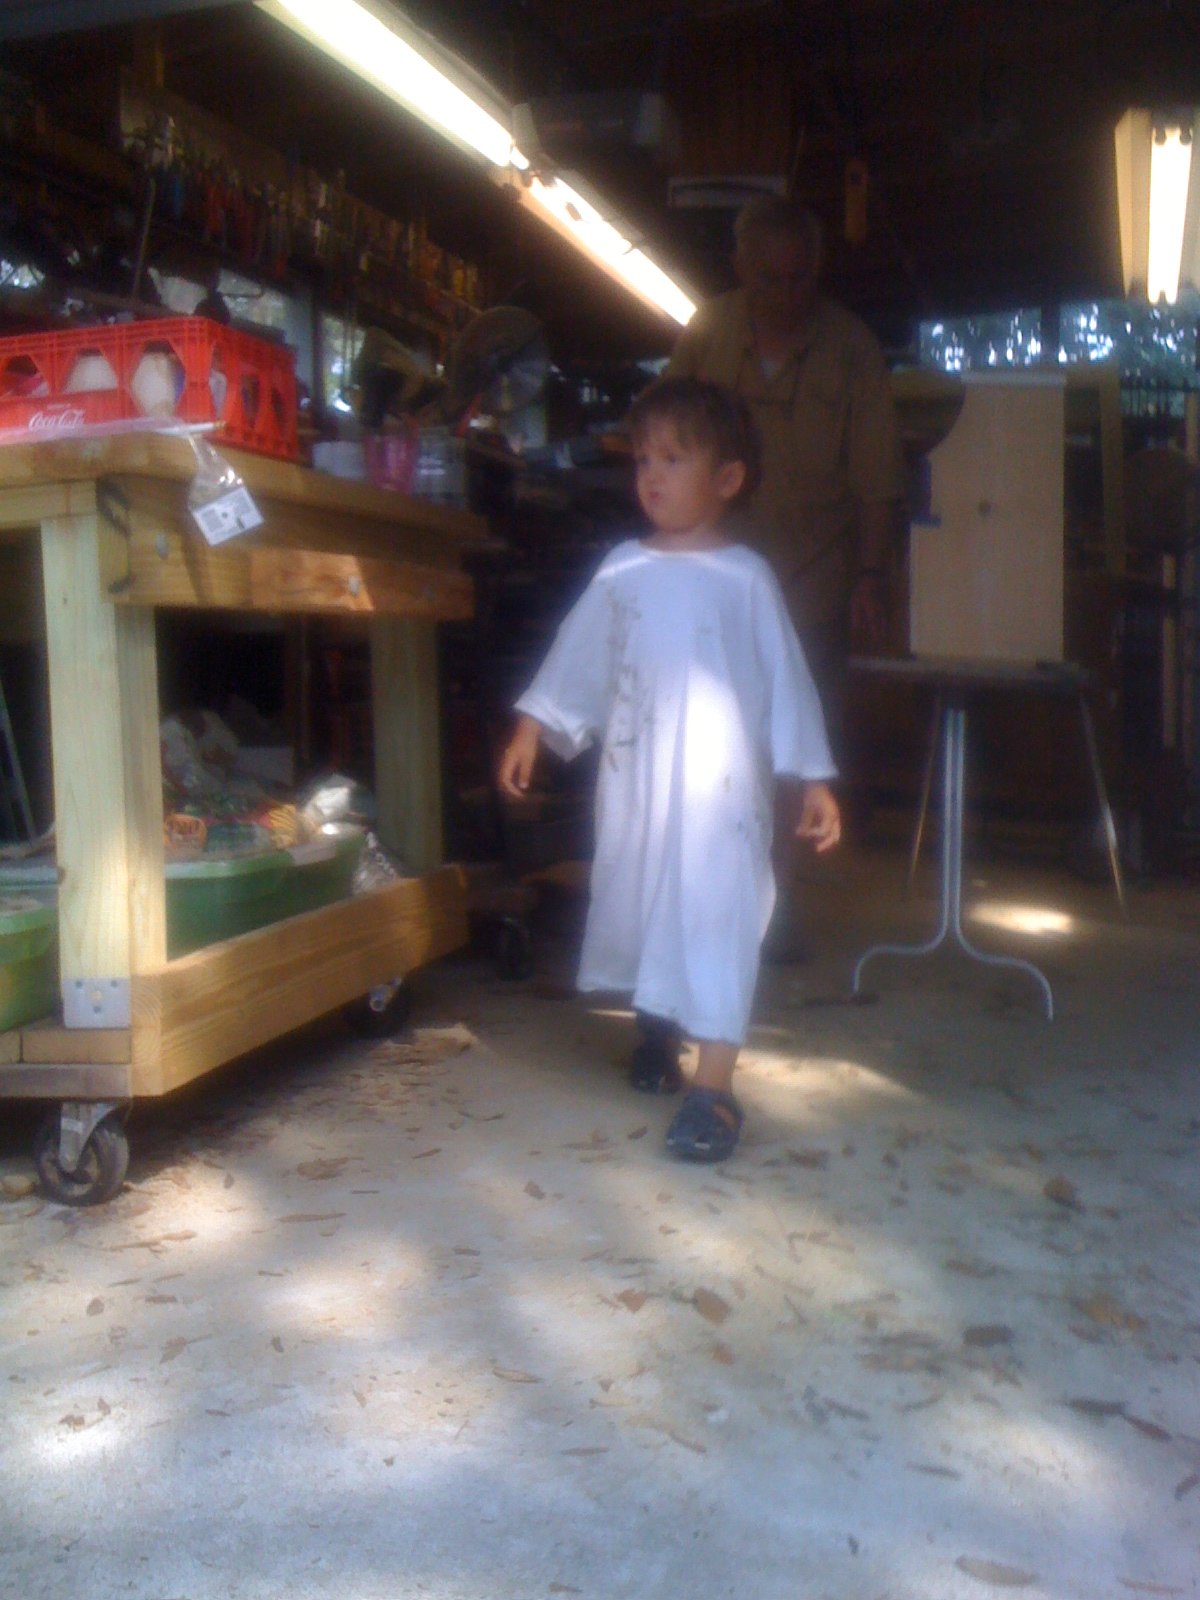
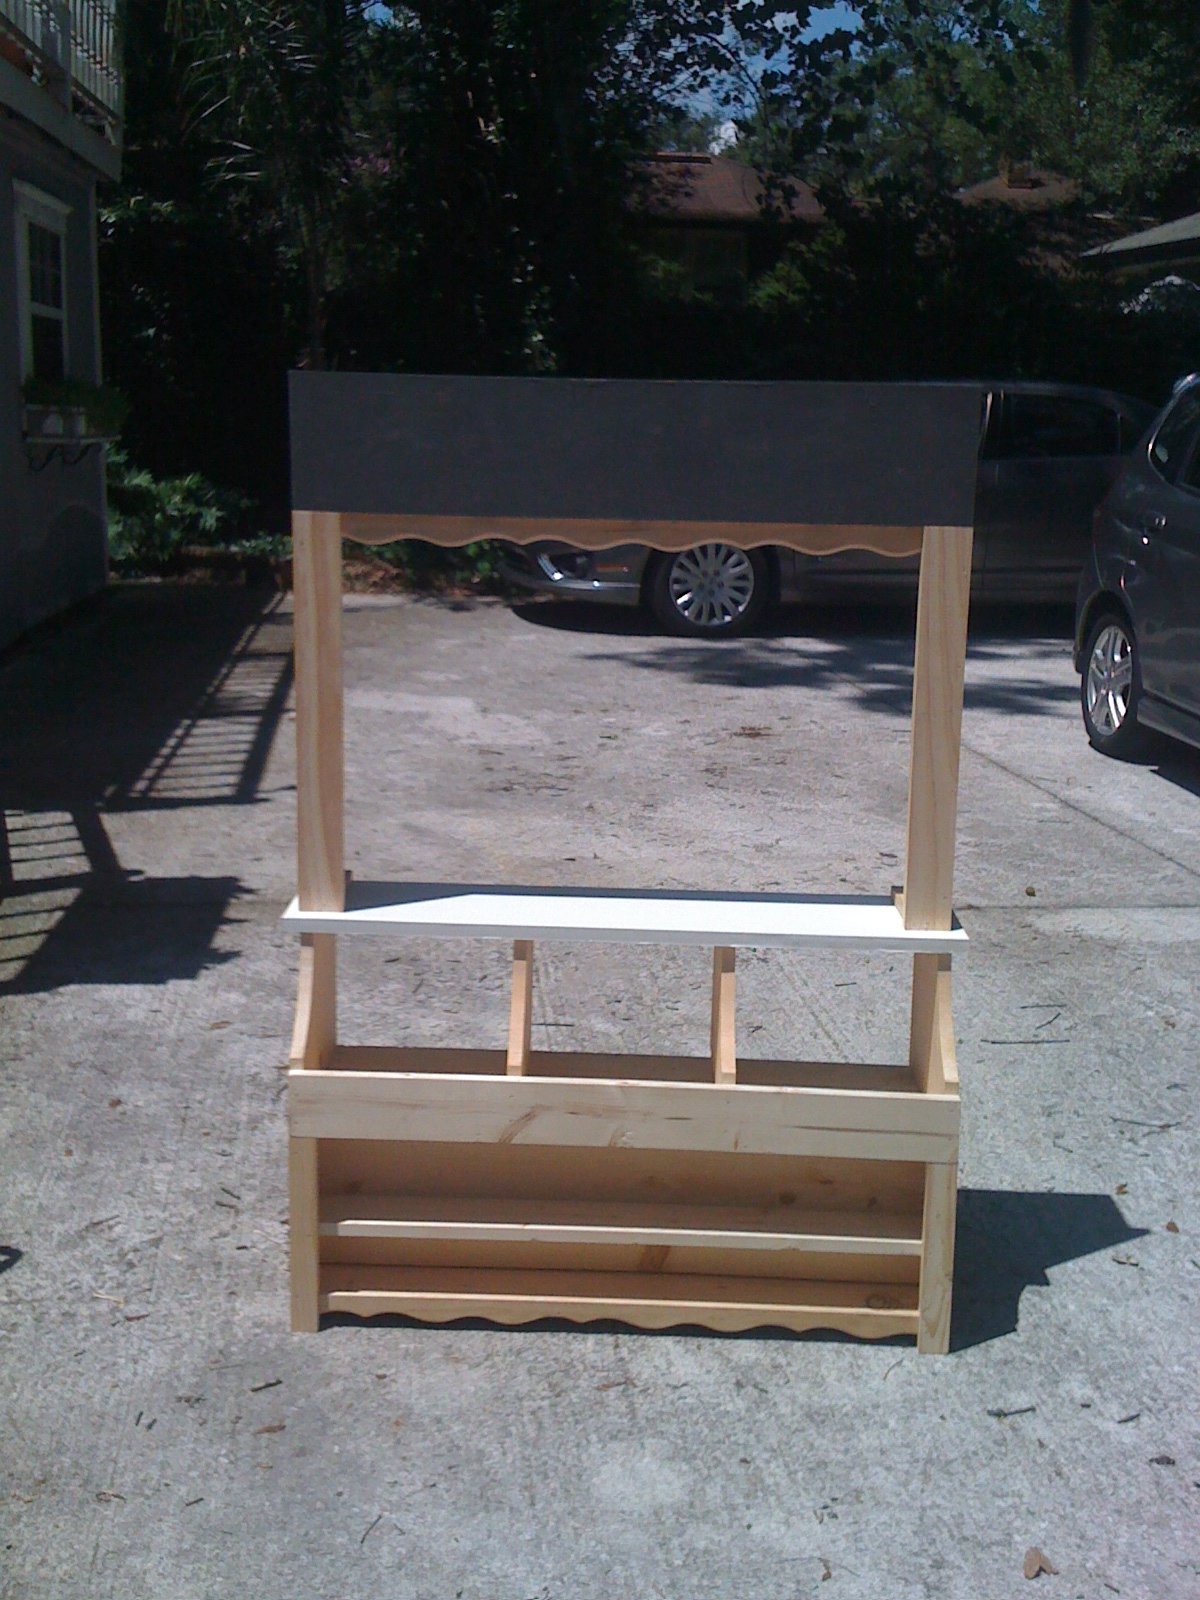
Michael's Bug Bakery
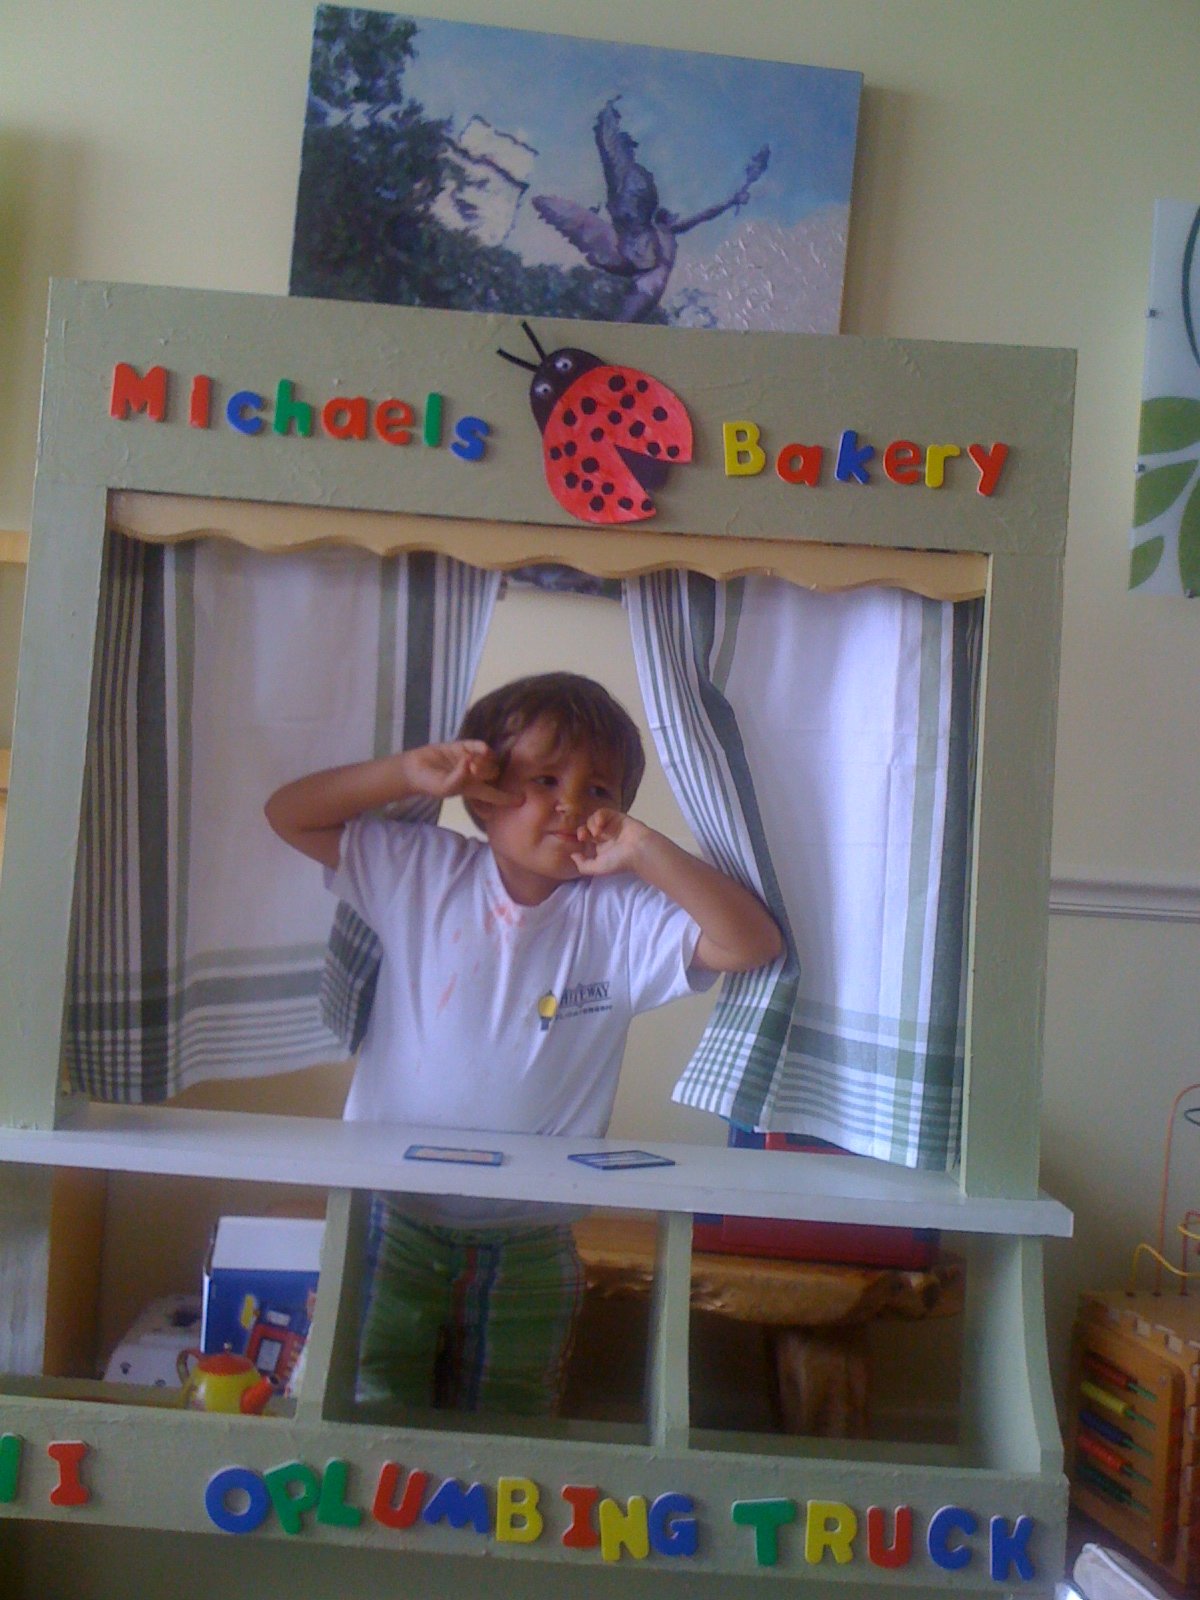
We let my son choose whether he wanted a modern store bought play market or whether he wanted help Mommy and Padre (my dad) build one for his 3rd birthday present. We used magnetic primer so he can change the name whenever he wants and added some trim and some tea towel curtains! He loves it!
Built from Plan(s)
Estimated Time Investment
Day Project (6-9 Hours)
Recommended Skill Level
Intermediate
Comments
Storage Bench
Burnt the wood with a torch before staining and used really cheapo pine.
Built from Plan(s)
Estimated Time Investment
Afternoon Project (3-6 Hours)
Finish Used
Varathane Red Mohagony followed by Boiled Linseed Oil.
Recommended Skill Level
Beginner
Wooden Star
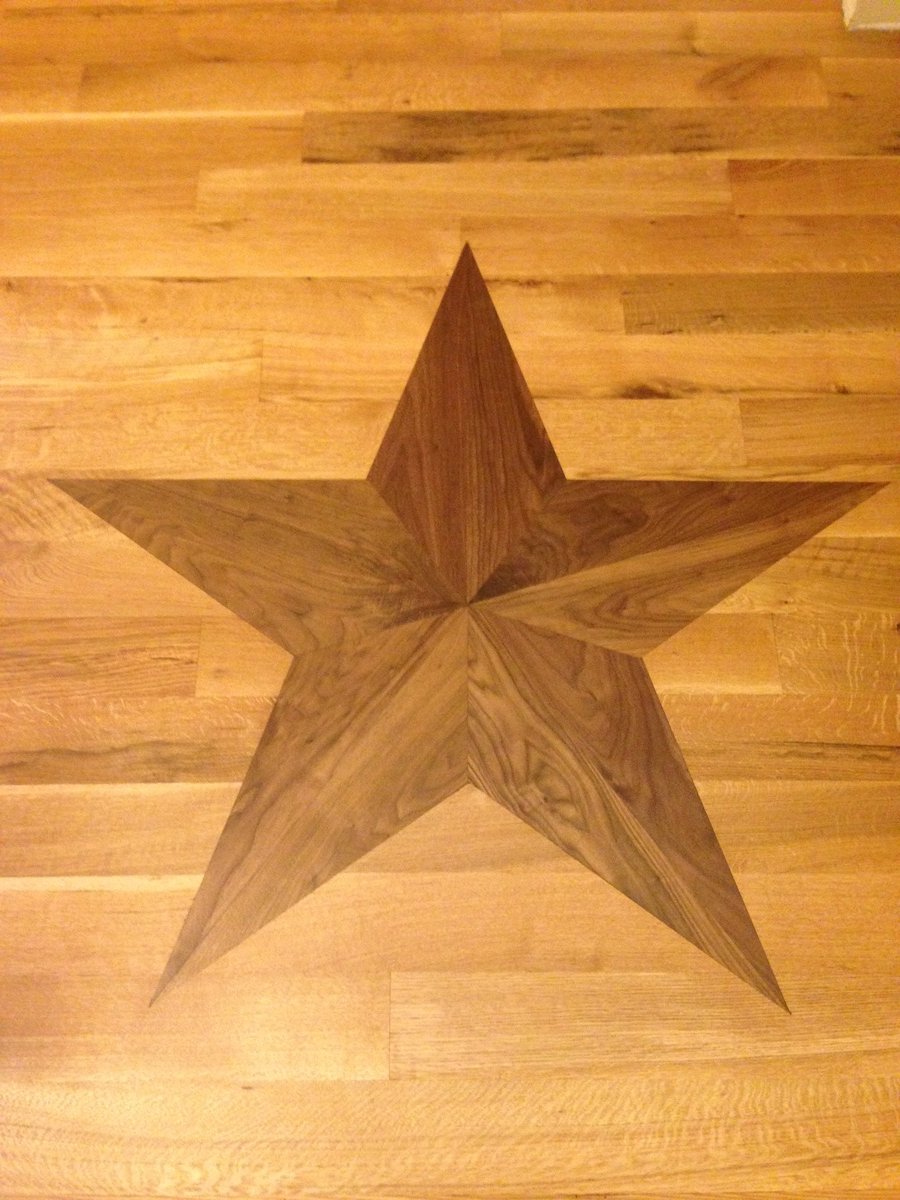
Used a compass to make my star as I wanted the points to be a little taller. 10 pieces of 8" walnut was used. And I used a table saw sled to cut the pieces.
Built from Plan(s)
Estimated Time Investment
Afternoon Project (3-6 Hours)
Finish Used
Pallmann Magic Oil
Recommended Skill Level
Intermediate
Added some trim and everyone thinks it cost $1000
First piece of furniture every built. I added some quarter round and 1x4 blocks. Finished with a grey stain and paste wax. Everyone asks me is where did I buy it and how did I afford it.
Built from Plan(s)
Estimated Cost
$250
Estimated Time Investment
Weekend Project (10-20 Hours)
Finish Used
Minwax classic grey and Johnsons paste wax
Recommended Skill Level
Starter Project
Front Entry
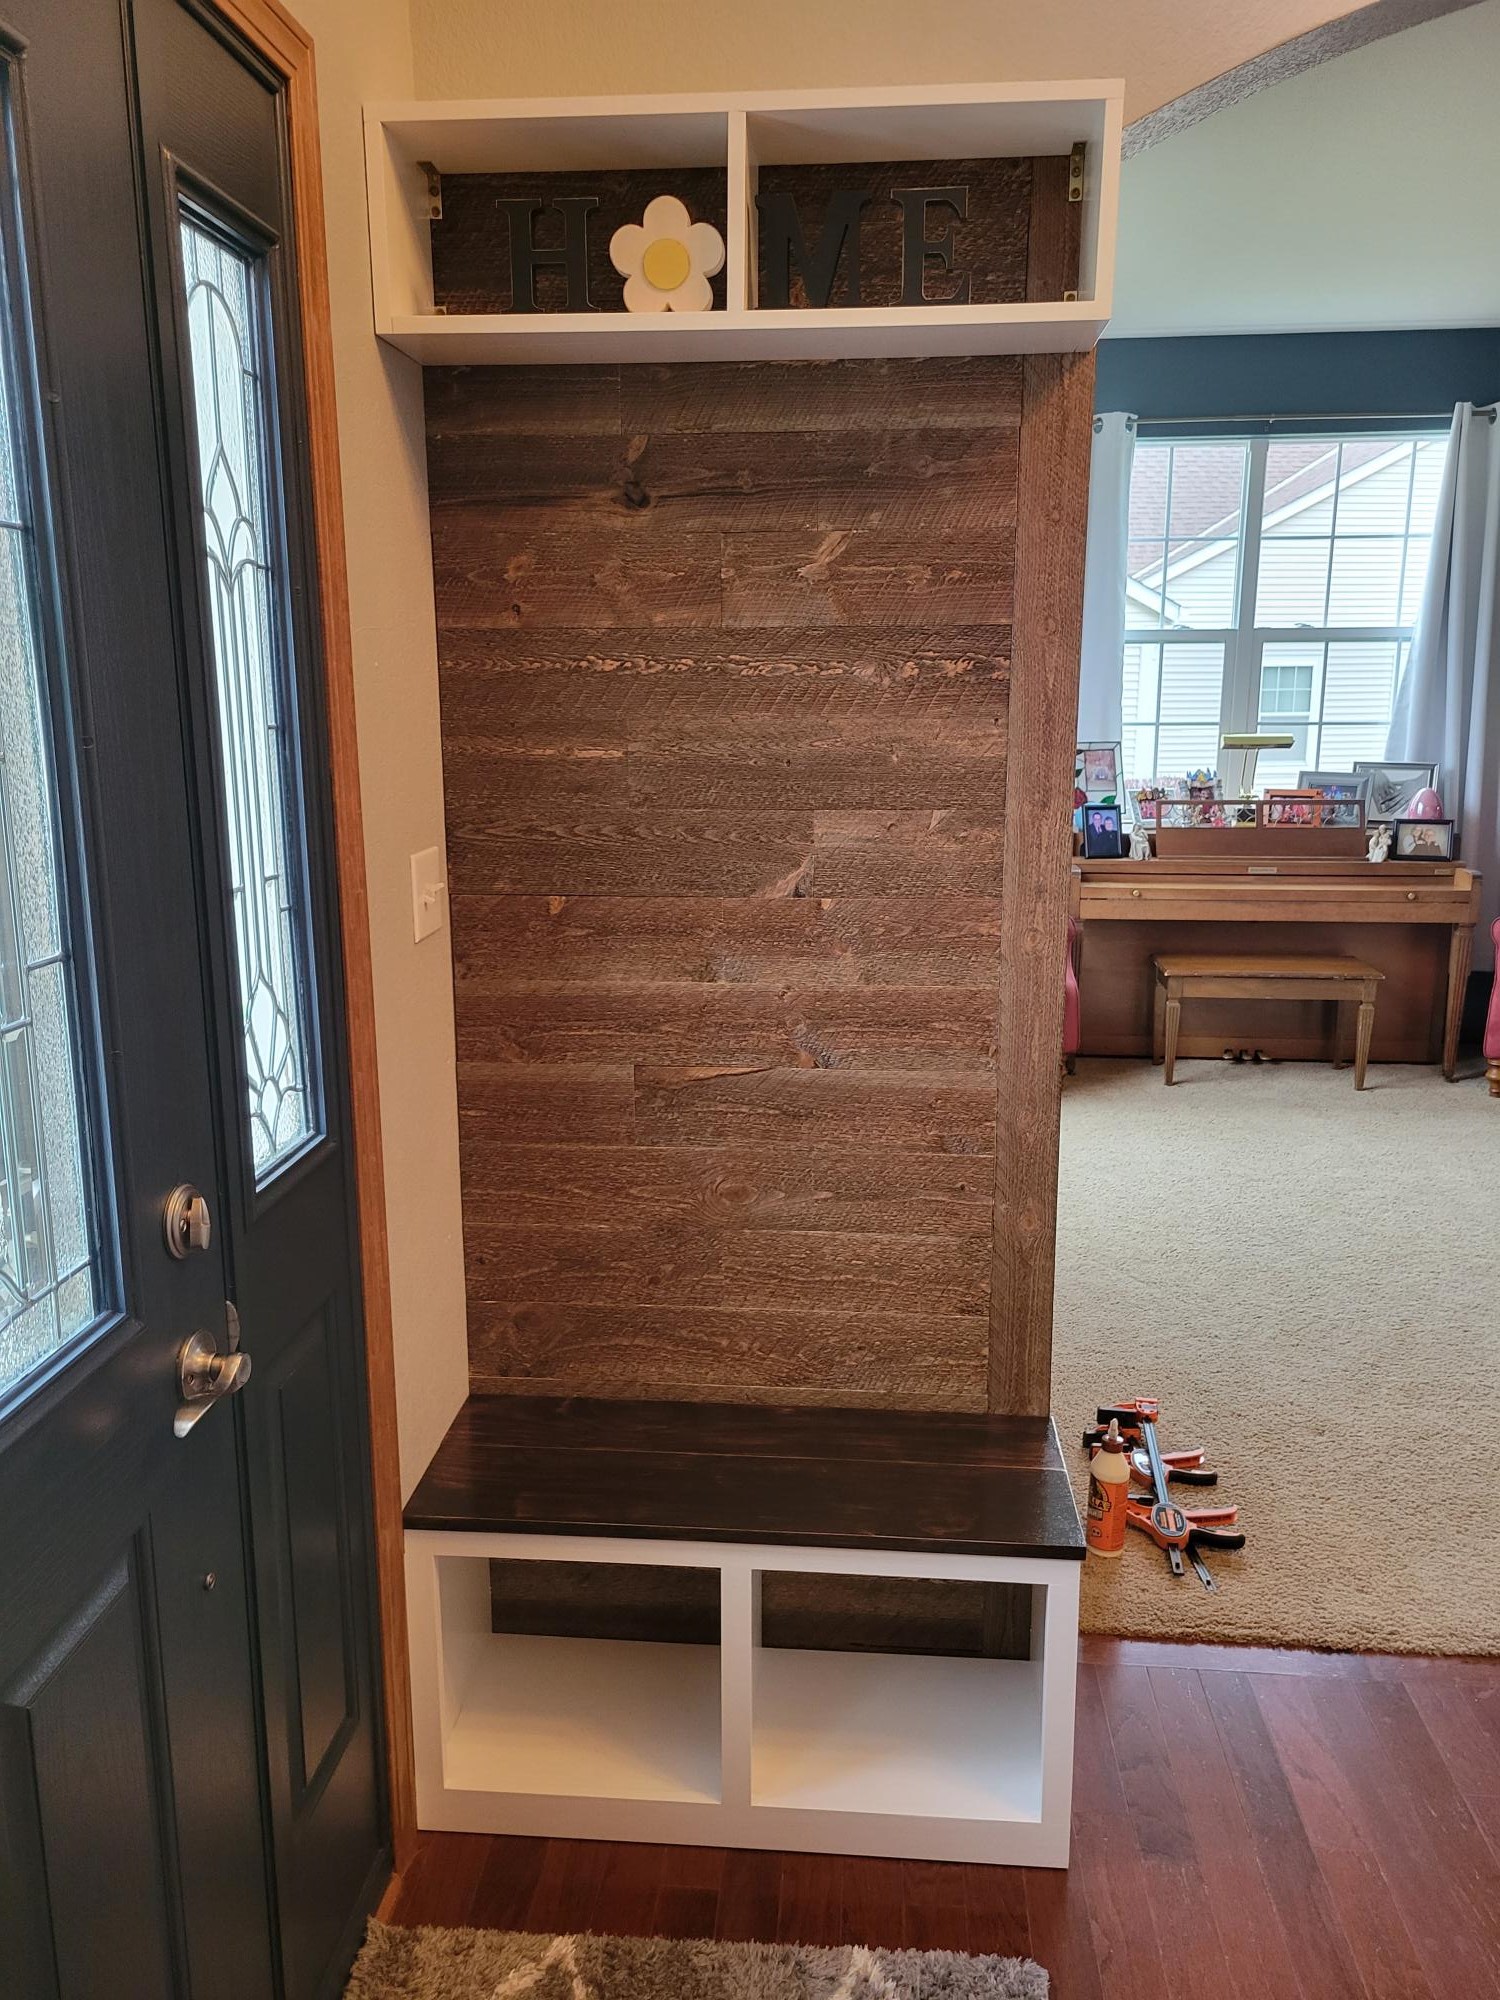
Sitting bench with shoe cubbie underneath. Barn boards for backing and shelving above.
Comments
my IKEA knock-off Expedit 4-cube bookcase
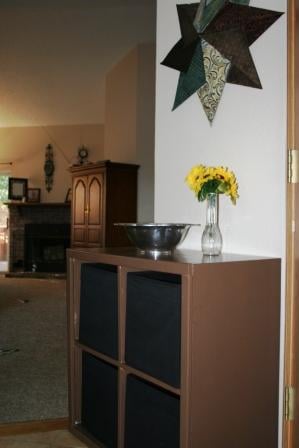
I had been eying the IKEA Expedit 4-cube bookcase and figured I could build it for cheaper and have lots of leftover plywood for some other projects. I was right!
Estimated Cost
$40 (but left enough wood to build a console table and flat bookcases)
Estimated Time Investment
Day Project (6-9 Hours)
Finish Used
2 coats of Valspar chocolate brown, eggshell
1 coat of Minwax Polyurethane, satin
1 coat of Minwax Polyurethane, satin
Recommended Skill Level
Intermediate
Corner Cupboard
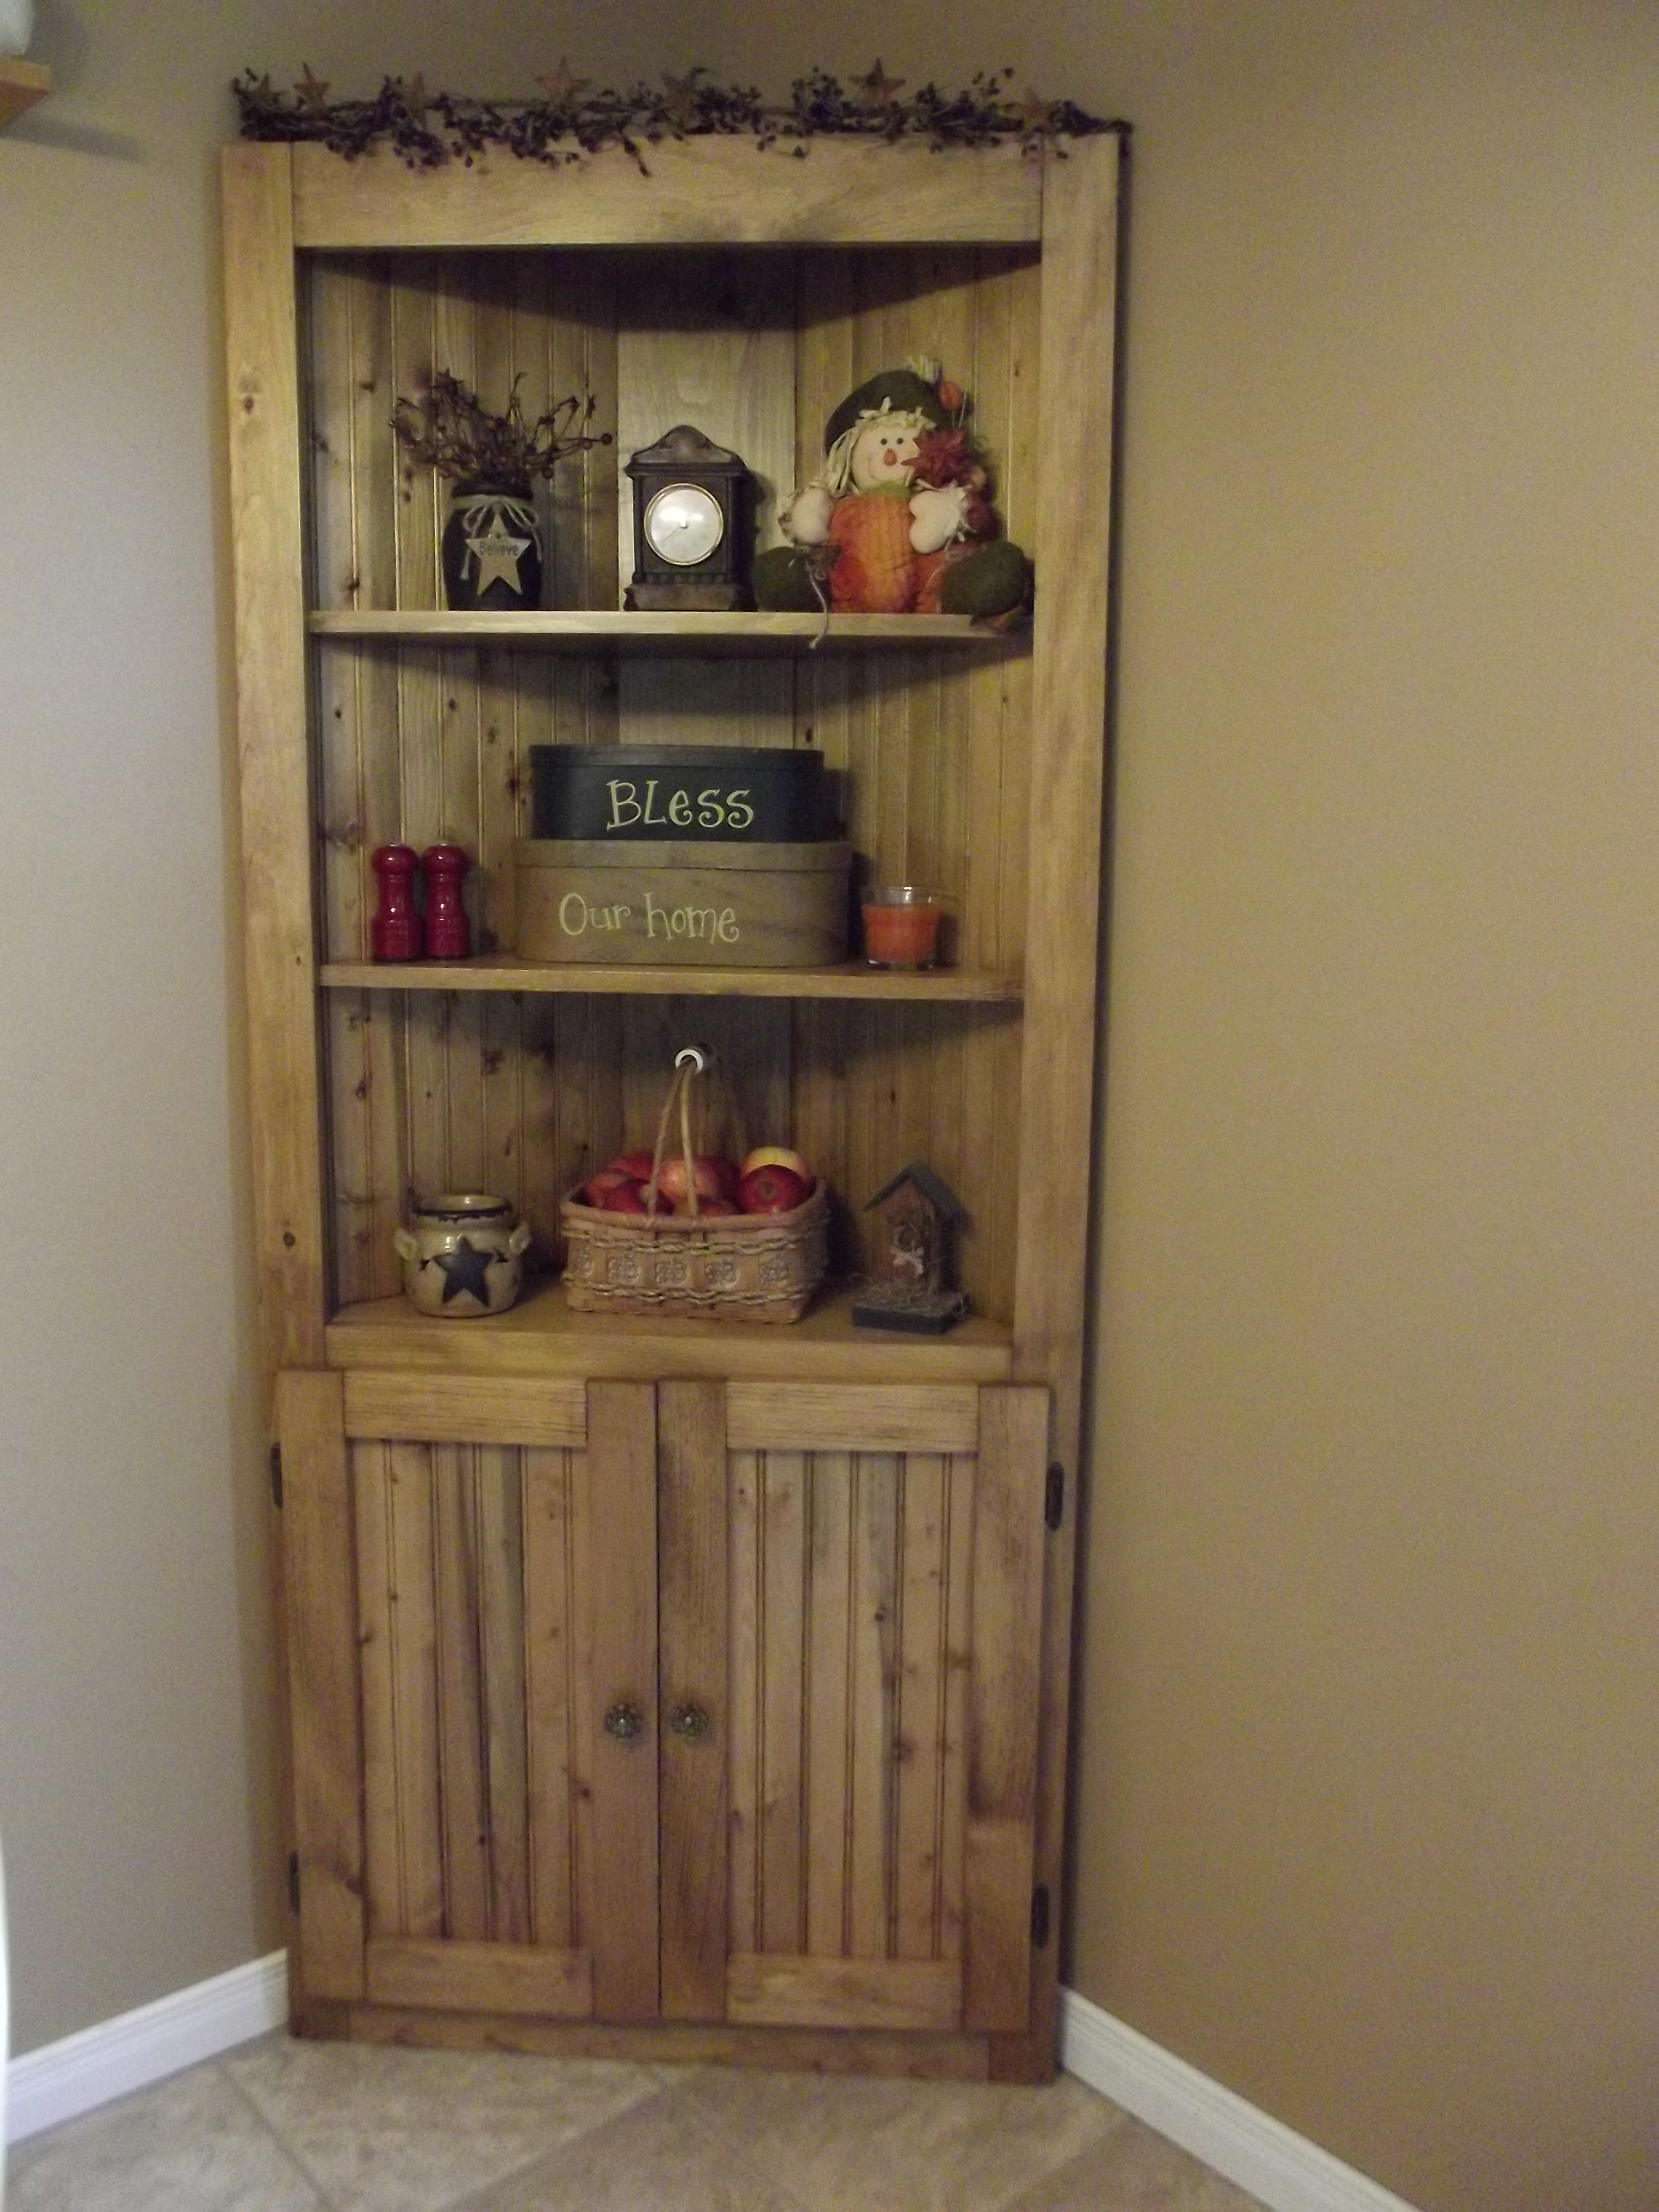
I've been looking for a corner unit for my kitchen for a couple of years, but couldn't find anything that I liked that fit my budget. This corner cupboard was exactly what I've been looking for. My husband and I built this together and I've definately discovered a new hobby!
Built from Plan(s)
Estimated Cost
$140
Estimated Time Investment
Weekend Project (10-20 Hours)
Finish Used
Minwax Stain in Early American and 3 coats of Minwax Water Based Oil-Modified Polyurethane (Satin).
Recommended Skill Level
Intermediate
Comments

Sat, 09/14/2013 - 23:27
This looks fantastic! Great
This looks fantastic! Great job and the color looks great!
Mon, 09/16/2013 - 15:04
Featured Brag Post
Feature Brag Post Notification
Just wanted to tell you thank you for contributing to the site. Your build was selected to be featured as the brag post today on our facebook page. If you wish to check it out here's the link https://www.facebook.com/knockoffwood
Great job, keep up the good work!
Tue, 09/17/2013 - 06:40
Thank you!
Thank you for choosing my corner cupboard as your featured brag post! I was so excited to see it on your facebook page last night :) I enjoy this website so much and can't thank you enough for sharing all these free and easy to follow plans! I love that reader's can share their builds and give tips and advice! Thank you for inspiring me to be creative!
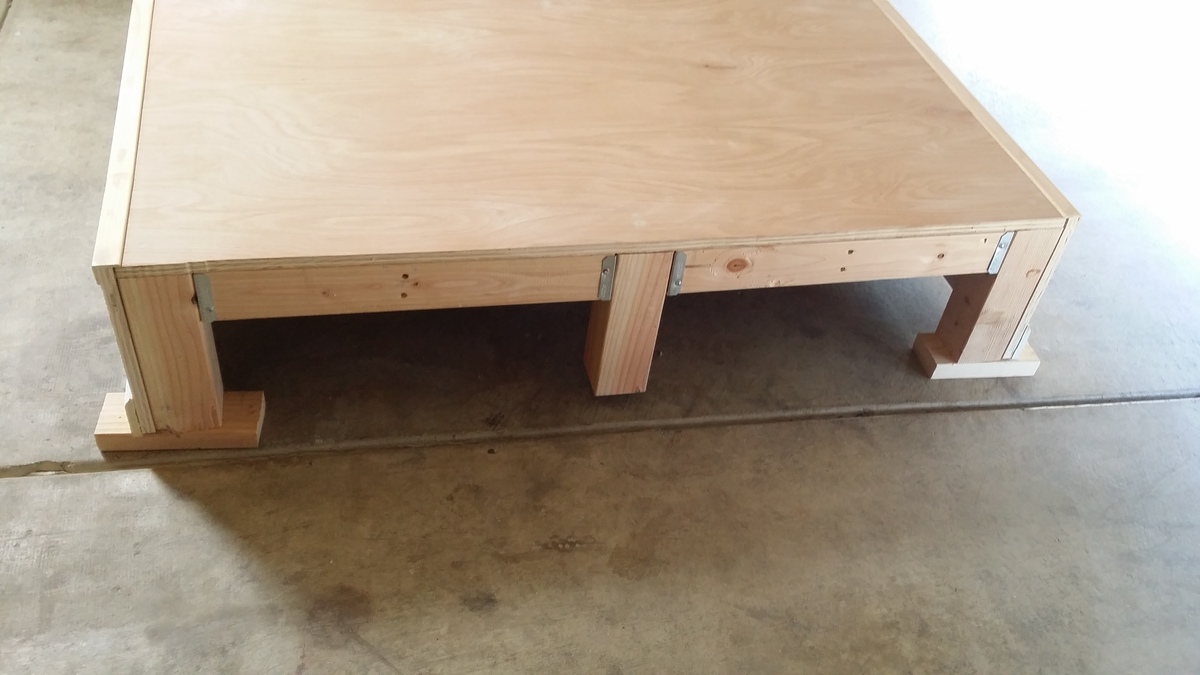
Elijah's Washer & Dryer Pedestal
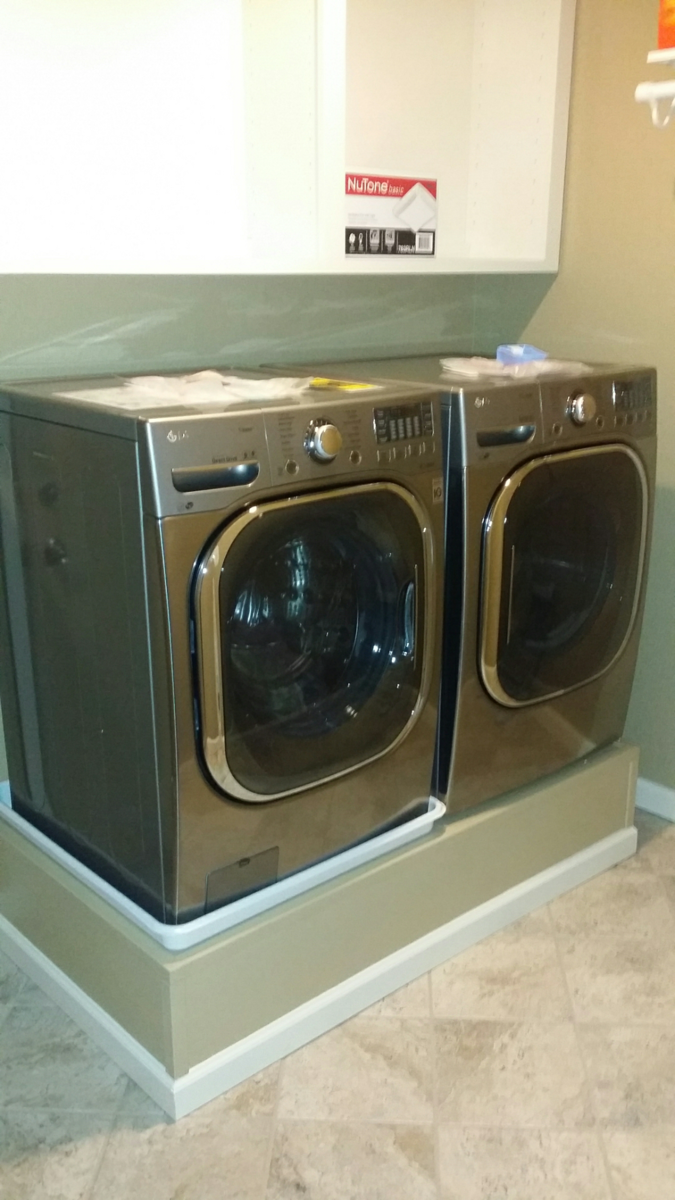
I got this Idea from Sausha's washer dryer pedestal post. Before then i didnt know people even built pedestals for their washer and dryer. Just purchased new front load washer and dryer and they wanted 250 bucks extra for each pedestal. That is 500 bucks and is absolutely rediculous. So i opted out of those and thought to myself maybe I can build something instead. So I began my search online and stumbled across this post which seems to be the most popular pedestal build on the web. I think sausha's build is fantastic and absolutely beautiful though I went another way with mine.
I tend to like to overbuild things. Especially in this case, seeing as the washer weighs a beastly 200 pounds by itself. I figured with clothes and water it would be about 235 pounds just for the washer. I noticed that with the aluminum drawer pedestals that you can purchse with the washer and dryer the support is only where the legs from the washer and dryer will sit. That was all I needed to get on my way. Purchased some regular old douglas fir 2x4's, 4x4's, and a 4'x8' sheet of 3/4 inch plywood. I opted to use fence post brackets to tie everything together because I didnt feel like driller pocket holes in each 2x4 when you were not going to see them once its all said and done. The fence brackets are not structural so they lack ridgidity untill you tie everything together with the legs, slats, and top. Cut the top from the 3/4 plywood sheet and used the left over plywood to cover the front and the sides. I left the back open as it is not seen anyway.
Total size of the pedestal is 56" wide x 31" deep x 12 3/4 inches tall, but you can build it as wide, deep or as tall as you need it. When i was done putting it together. I tested it by jumping up and down on it and I weigh 230 pounds. So this thing is quite strong. I finished it up by covering the edges where the plywood meet with Edge moulding and the bottom with baseboard to match my laundry room. I used Behr premium plus ultra paint on most of it and, behr alkyd paint for the baseboards. Gave the top a couple coats of General Finishes High Performance Polyurethane. Which isnt neccessary but I opted to do so because of the weight of the washer and dryer and the General Finishes High performance dries harder than most other polys that I have used. I only used it on the top though.
Taking into account that I used the paint and baseboards left over from renovating my laundry room. This project cost about 150 bucks. 200 if you have to purchase the paint and moulding. Quite easy to do and though I made the cutes I needed with my table saw. This can be done with a circular saw and a drill. No exotic tools are needed. Will post finished pictures when my washing machine and dryer are delivered on friday and they are sitting on top of the pedestal.

Built from Plan(s)
Estimated Cost
150 give or take a few bucks.
Estimated Time Investment
Day Project (6-9 Hours)
Finish Used
Paint
Polyurethane
Polyurethane
Recommended Skill Level
Beginner
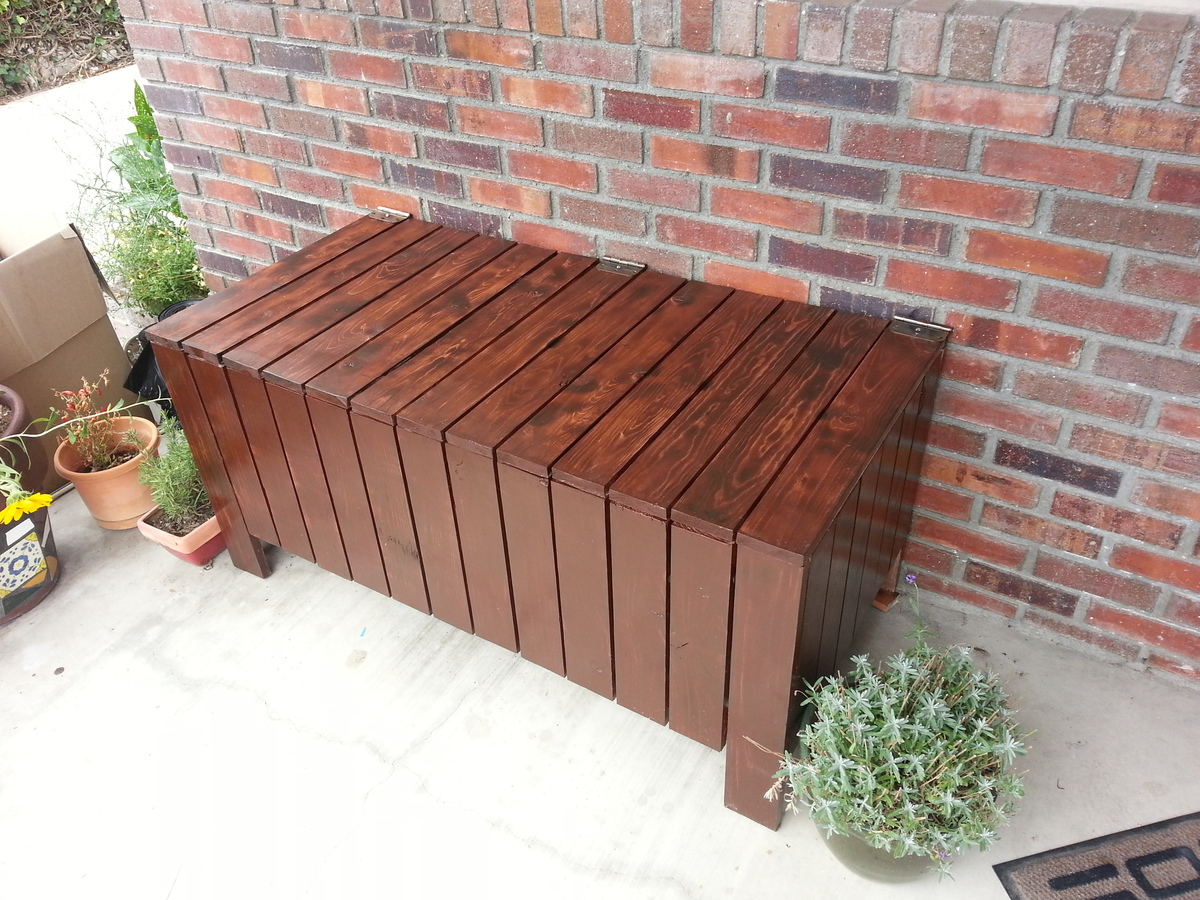
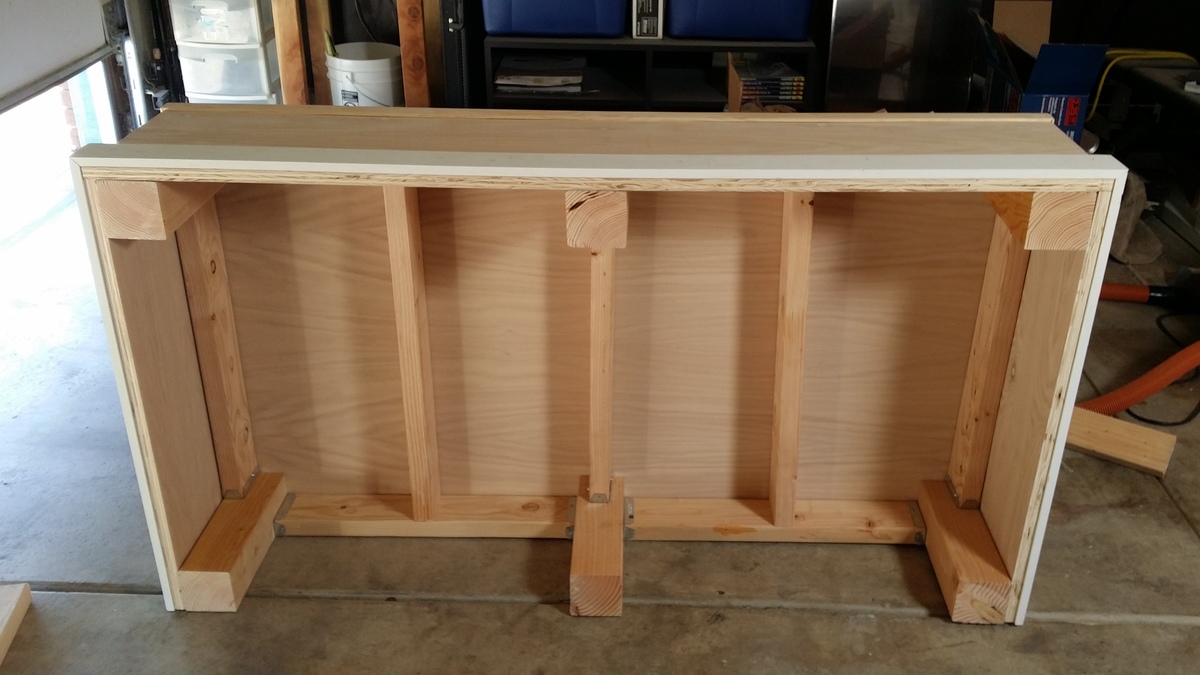
Poplar toy chest
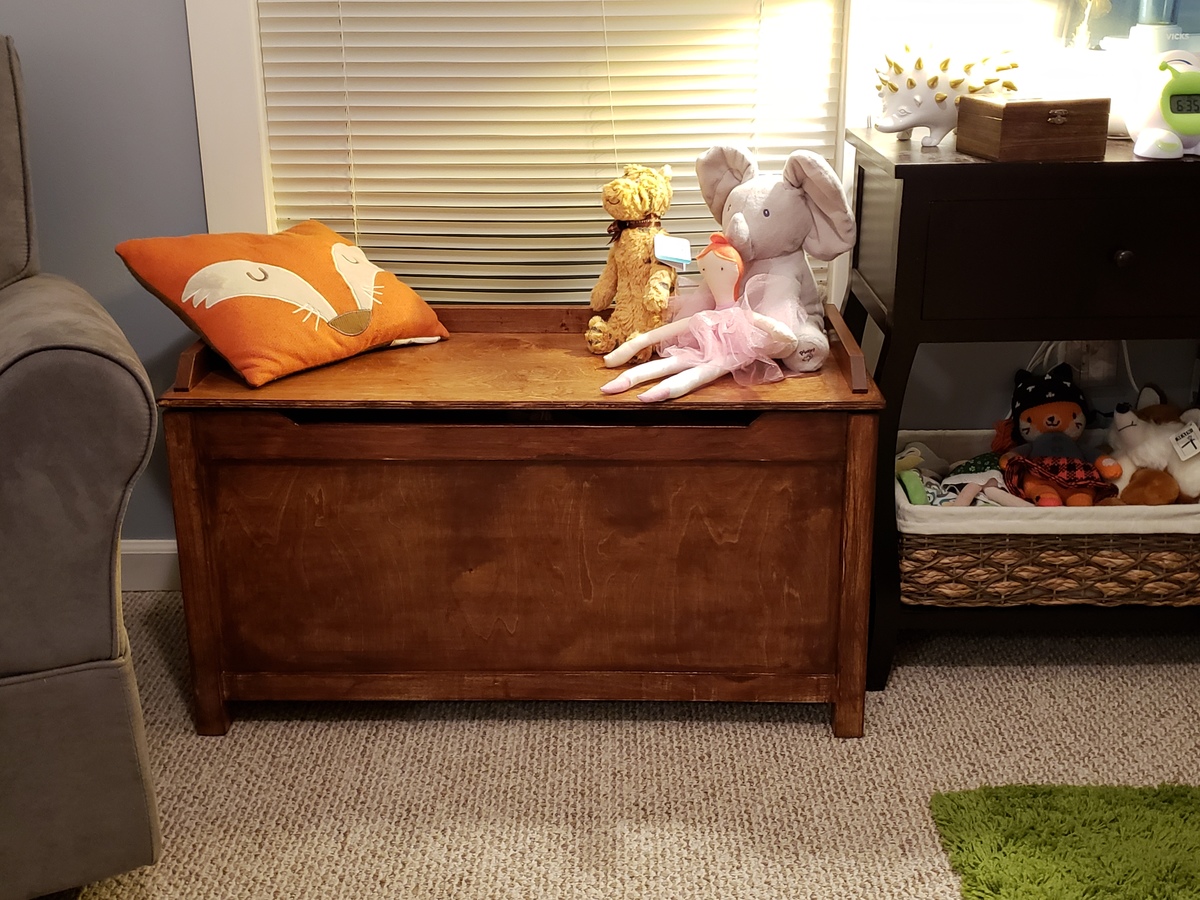
Toy chest for our daughter.
Comments
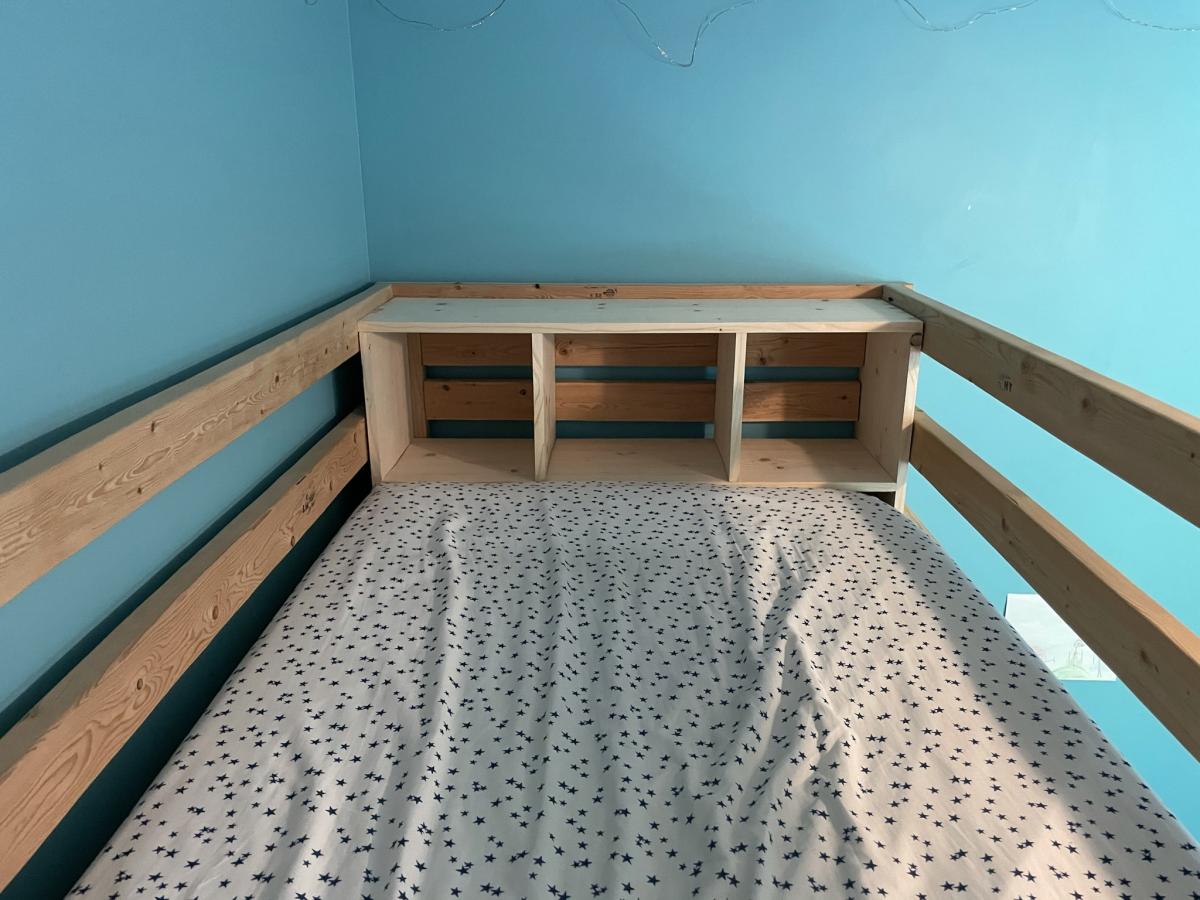
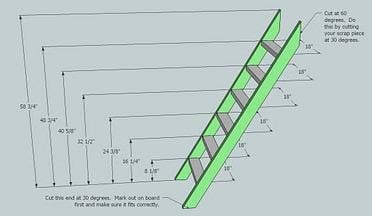
Loft bed
I used the Camp Loft Bed plans and adapted the stairs to have storage and a place for laundry (from another plan from Ana White). I also added a small bookshelf to one end. They wanted the bed to extend to the full width of the wall. The bookshelf helps hold the mattress in place and also gives great storage for books and stuffed animals. I wish I had a pic of the bed completely painted, but as you can see, my granddaughter moved her stuff in immediately! She was so excited to sleep up there. (It has since been completely painted.)
Built from Plan(s)
Comments
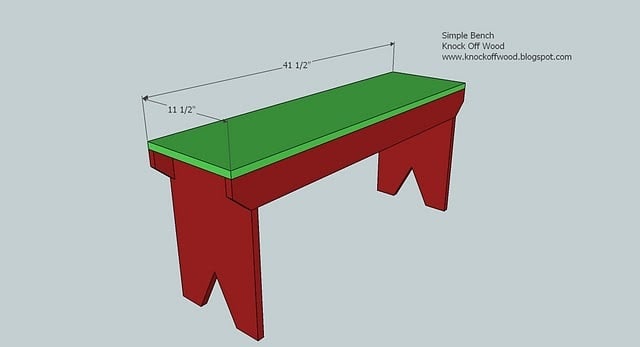
Farmhouse Bench - fox.and.hammer
I made a few changes to the Farmhouse Bench plans as I wanted to match the design of the table. Most notably, I lengthened the seat boards to replace the breadboard end caps. This made my total length 67″, the perfect size to fit under the table if needed. The width was changed to 15″ and the height remained 18″.
Estimated Cost
$100
Estimated Time Investment
Weekend Project (10-20 Hours)
Finish Used
Minwax Special Walnut stain with Minwax Wipe-On Poly finish.
Recommended Skill Level
Intermediate
Comments
In reply to finish by suze (not verified)
Wed, 08/08/2012 - 13:31
Pre-stain conditioner
I did. Being that it was cheap pine, I used Minwax pre-stain conditioner as directed on the label.
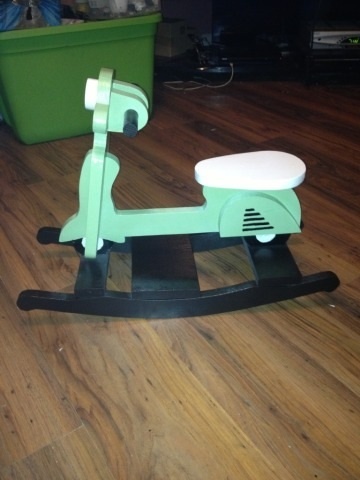
My creation
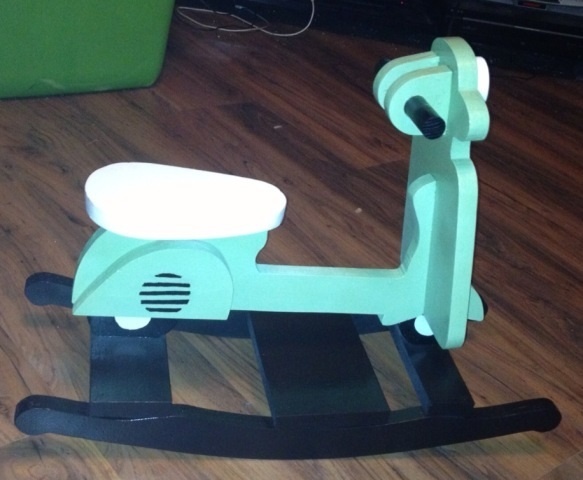
I've built 6 of these so far. They are fun to build. The # 1 request is for one that is bigger so I'm working on that next. A couple of things I changed iS the dowel rod from 1/2" to 7/8" and the body I thought wasn't rigid enough being cut from 1"x 10"x 10' and there wasn't sufficient room for screws and glue so I'm now using 2"x10"x10" it's working a lot better and is a lot more sturdy and easier to assemble. Another thing I have done is once assembled the the plans is I transcribed them to rigid cardboard so can use them over and over cuts the time down considerably. I'll post more pictures soon. I have named mine Lil' Moto


Built from Plan(s)
Estimated Cost
$12
Estimated Time Investment
Week Long Project (20 Hours or More)
Finish Used
I don't have a set plan for painting or a specialized finish. I just use what I have on hand or goto my local habitat for humanity repurpose store and pick up paint and stain for next to nothing. Also if you want a specialized color just go to Lowe's or Home Depot and pick out the cold you are looking for and just get sample jar for a couple of bucks it's enough to paint the whole ( at least it has been for me)
Recommended Skill Level
Beginner
Comments
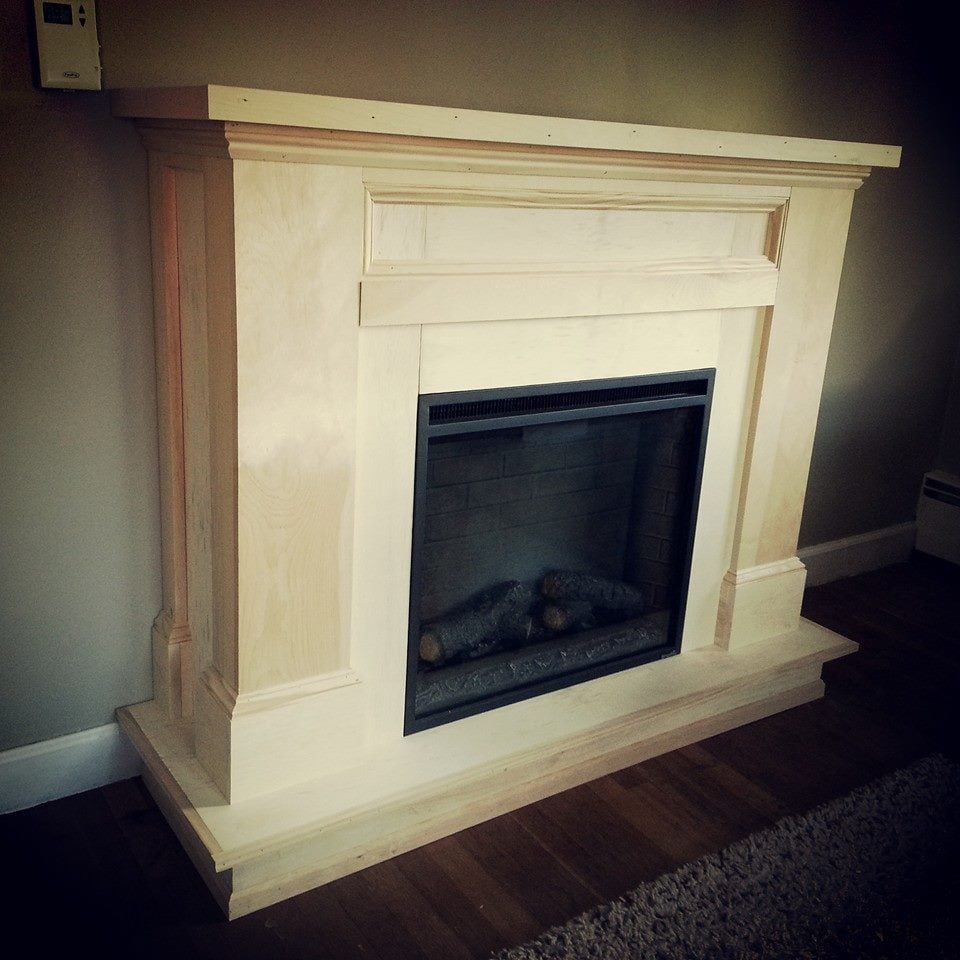
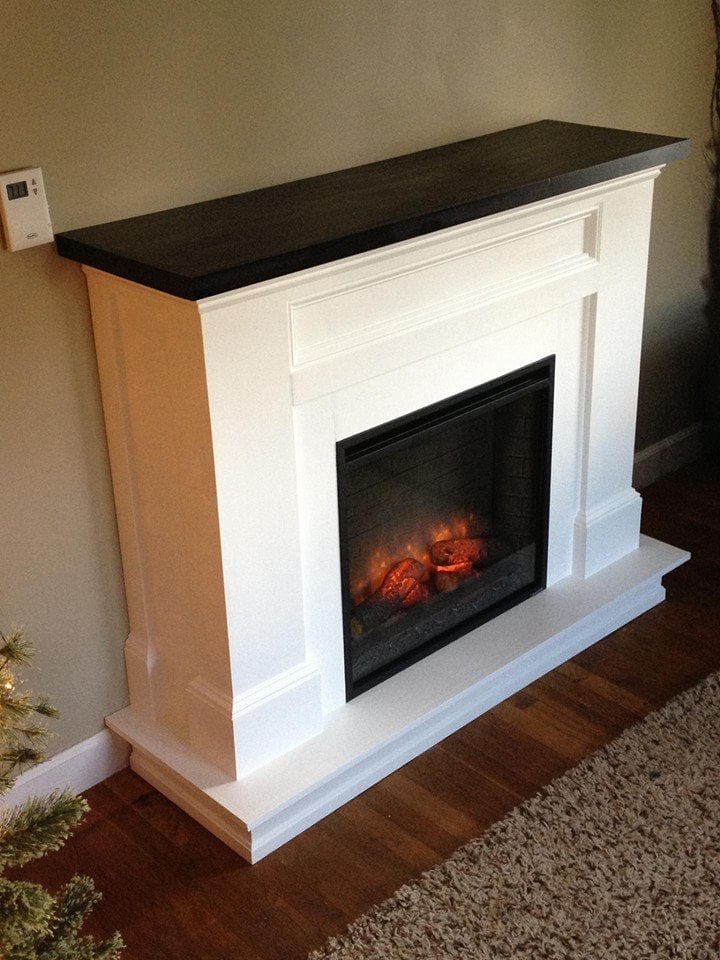
Fireplace

I really loved the design of Mimi's Faux Mantle. But the wife wanted an electric fireplace for the living room, so after shopping around for them and not finding any that we liked. I suggested we use the Mimi's Faux Mantle design and custom it to fit an electric firebox. We order and firebox then followed the plans pretty close as you. Then finished it in a pure white with an espresso stain. This was our second wood project and had a great time working together on this project. We can't believe how it came out and are already planning more projects.

Built from Plan(s)
Estimated Time Investment
Weekend Project (10-20 Hours)
Finish Used
Pure white with an espresso stain
Recommended Skill Level
Beginner
Comments
Sun, 11/22/2015 - 14:49
Well done!
This is exactly what I'm looking to build! Can you give more detail? Maybe point me to the electric fireplace that you used?
Mon, 11/23/2015 - 13:29
thanks
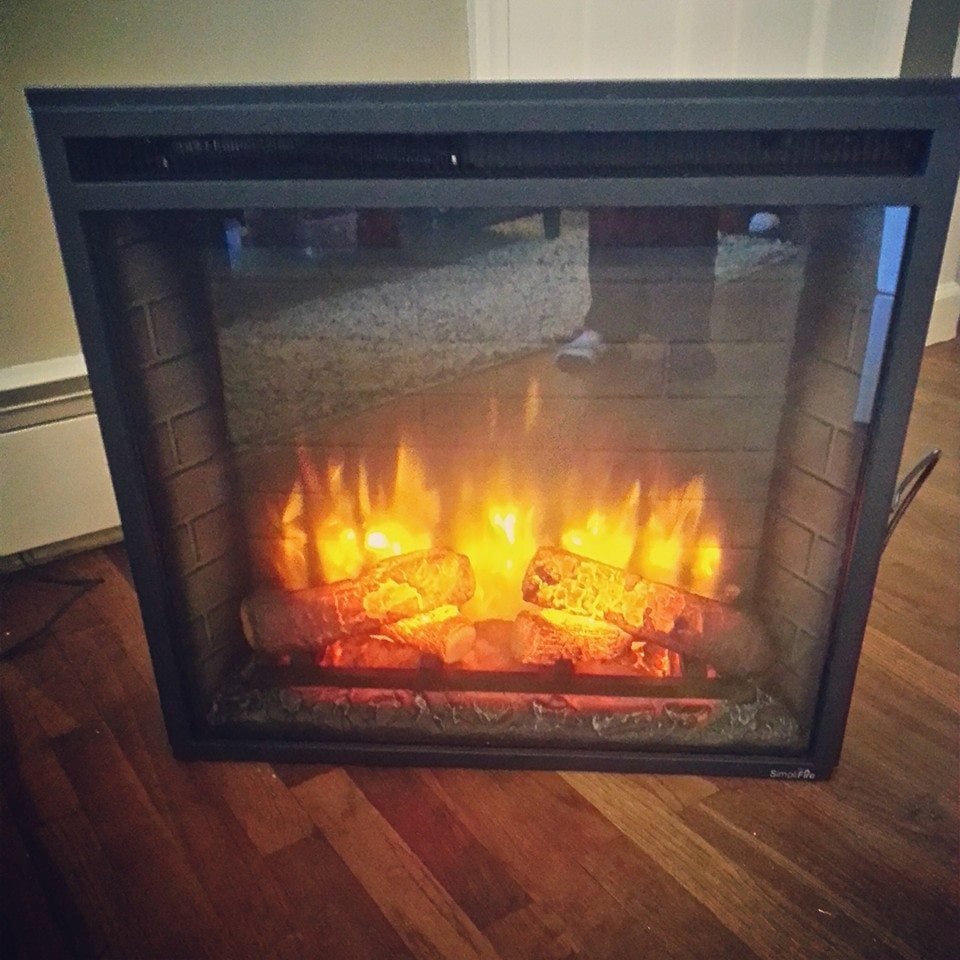
thanks, The electric fireplace insert I bought was a 26 inch SimpliFire insert from HEAT & GLO. I ordered from a local vendor and it took a few weeks to get. They had two sizes and based on the space and the plans I went with the 26in. I really liked the look of Mimi's Faux Mantle, so I used those plans but had to change them just a little. First I had to build the opening around the insert and then add sides. I didn't need to but I added a bottom mantle to make it feel like a really fire place.Oh I also made the top mantel a little more bigger than the plans. I hope this helps and good luck on building yours. If you need any more info just let me know.
Seasonal And Holiday
X coffee table
Ran on the wood through planer to get rid of that rounded edge stud look on the wood. Fun little project.
Estimated Cost
$55
Estimated Time Investment
Afternoon Project (3-6 Hours)
Finish Used
Behr white veil base with gray paint brushed to distress on base. Miniwax jacobean with semi gloss waterbase on top
Recommended Skill Level
Intermediate
Comments
Shybutblunt
Thu, 10/29/2015 - 16:24
Love it
Love it
handmadewithash
Fri, 10/30/2015 - 20:13
I love this bed. (It's
I love this bed. (It's definitely on my to build list.)