Rustic X Console table
Modified the console table by height (approx 39"), length (approx 40"), and eliminated the middle shelf. I can't put an accurate $ estimate since I bought wood for three projects and this was one of them.
This table and bench combo was a fun project to complete and was not very difficult (hardest part was picking out straight boards at the lumber yard). The table was stained with weathered oak stain and finished with satin polycrylic. The chairs were purchased, I am not skilled enough to build those!
Thanks again to Ana for the instructions. It turned out great!
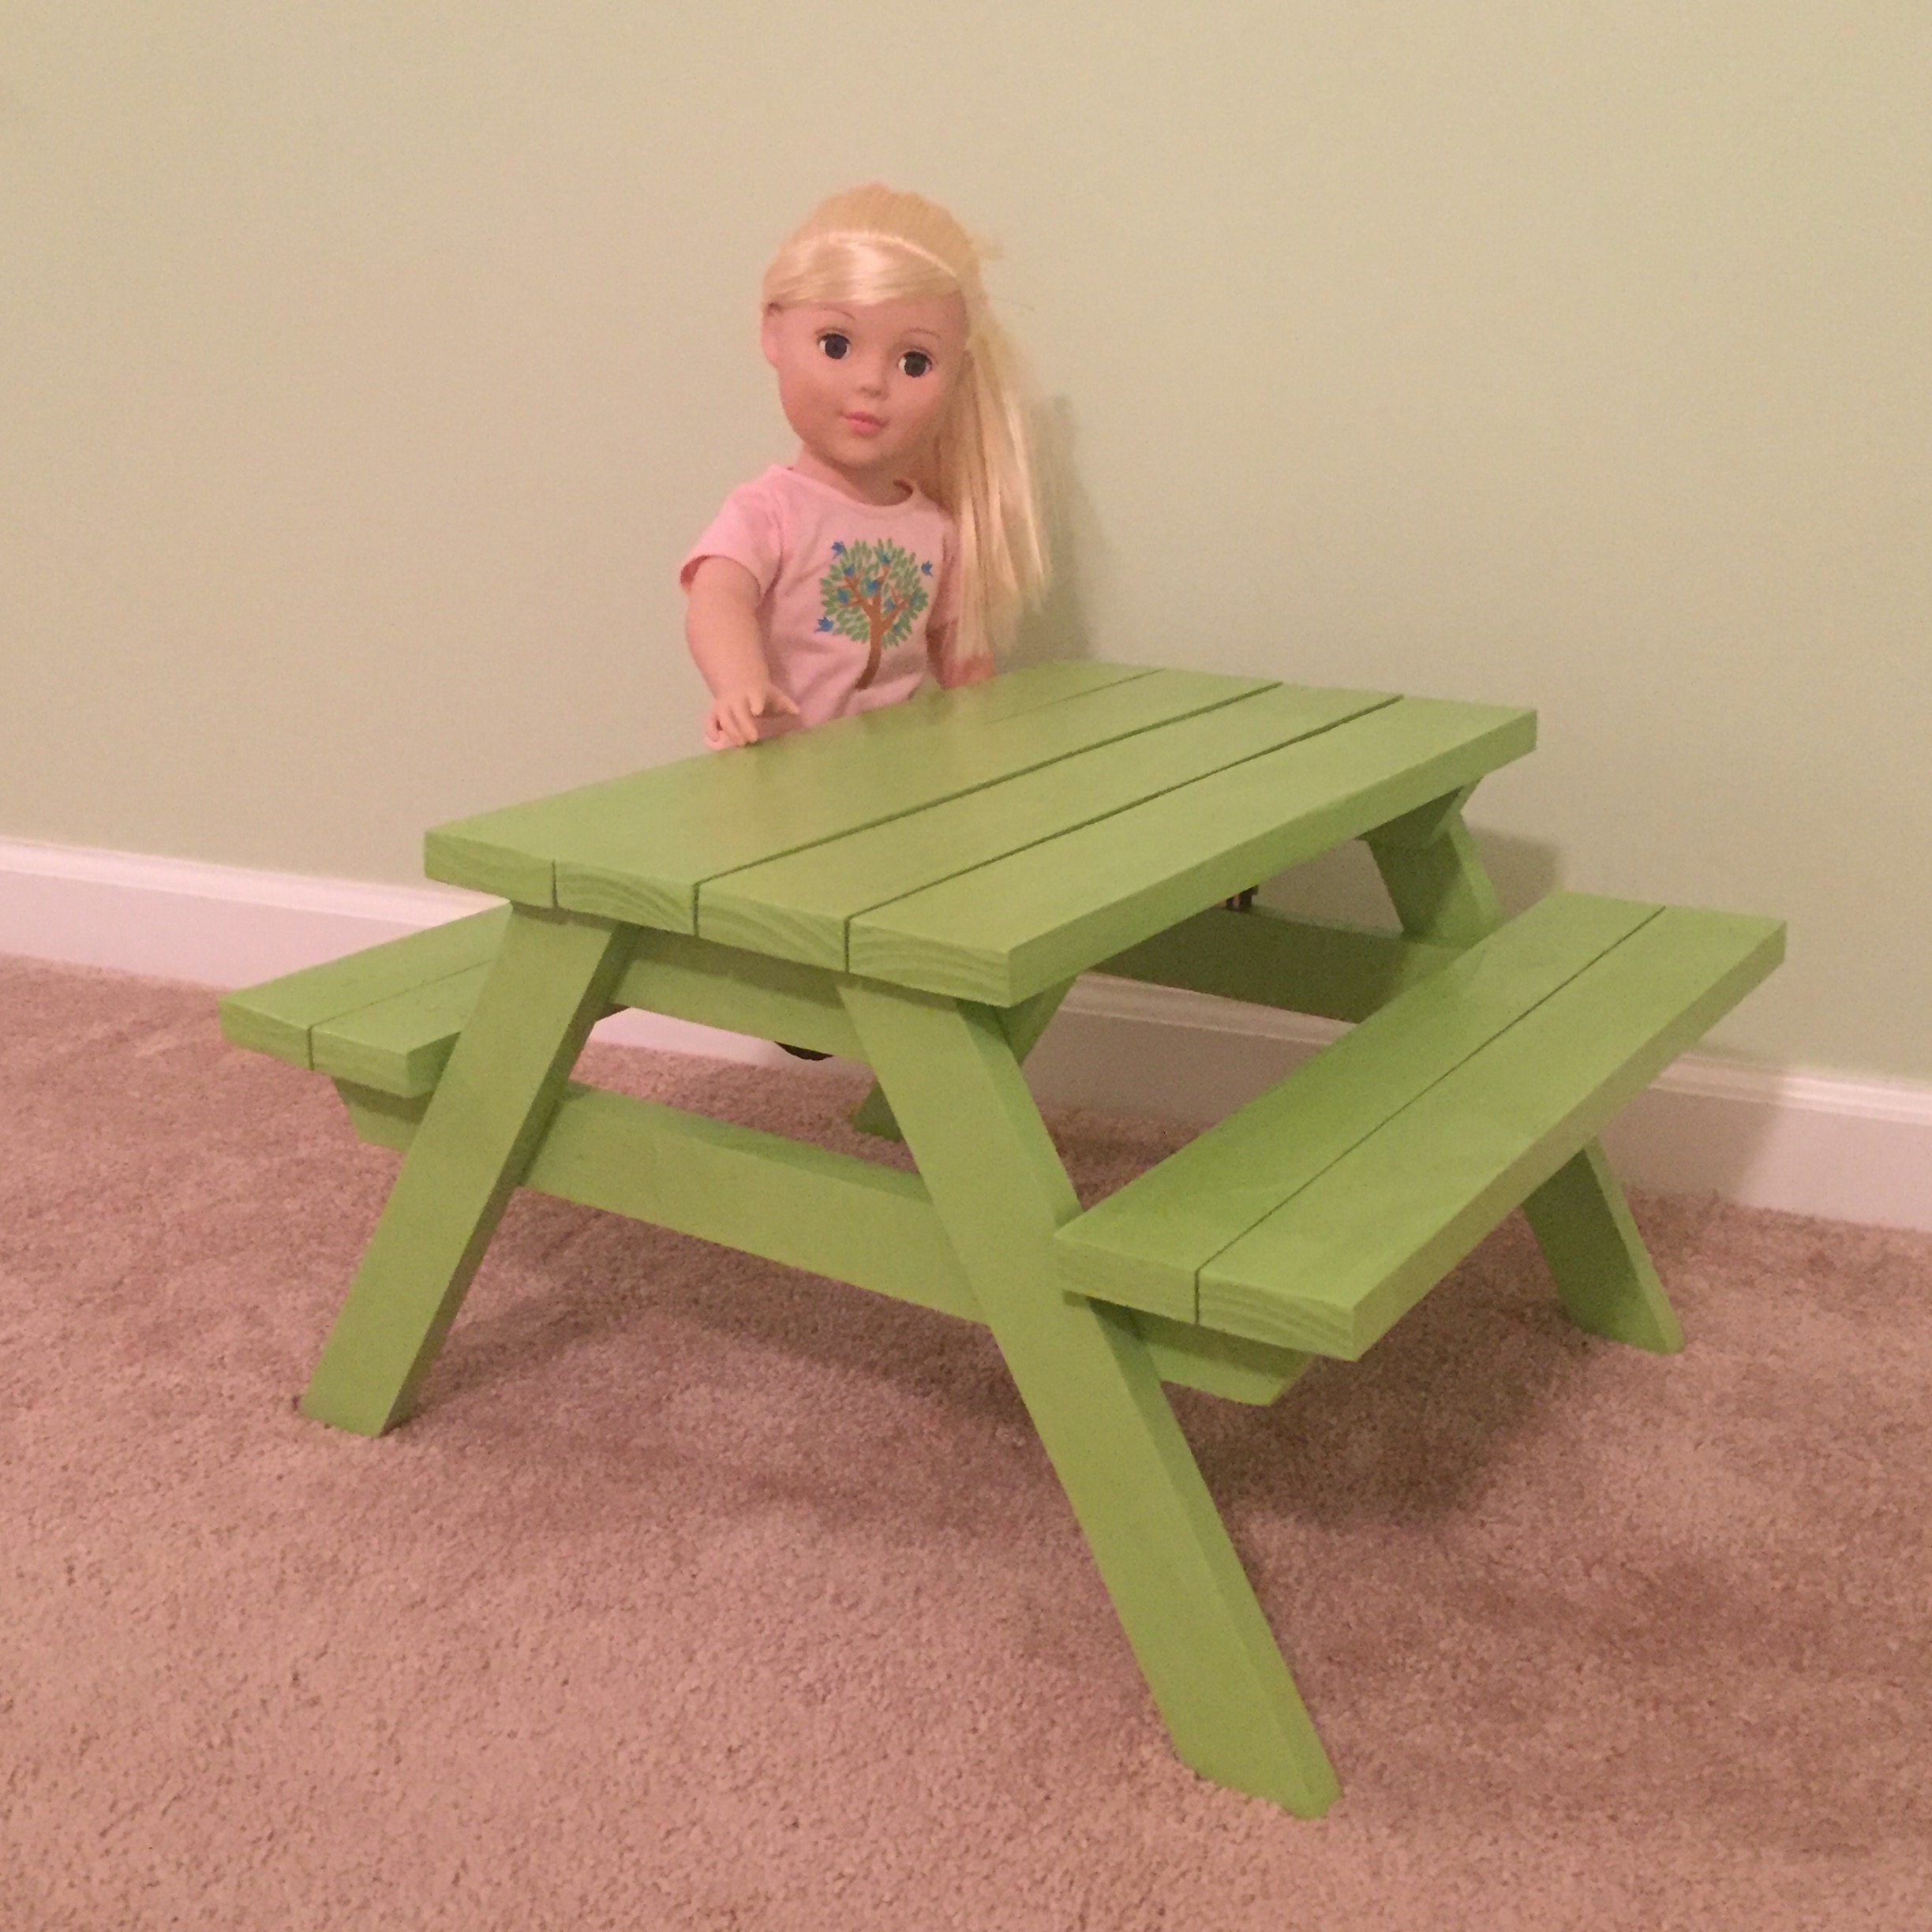
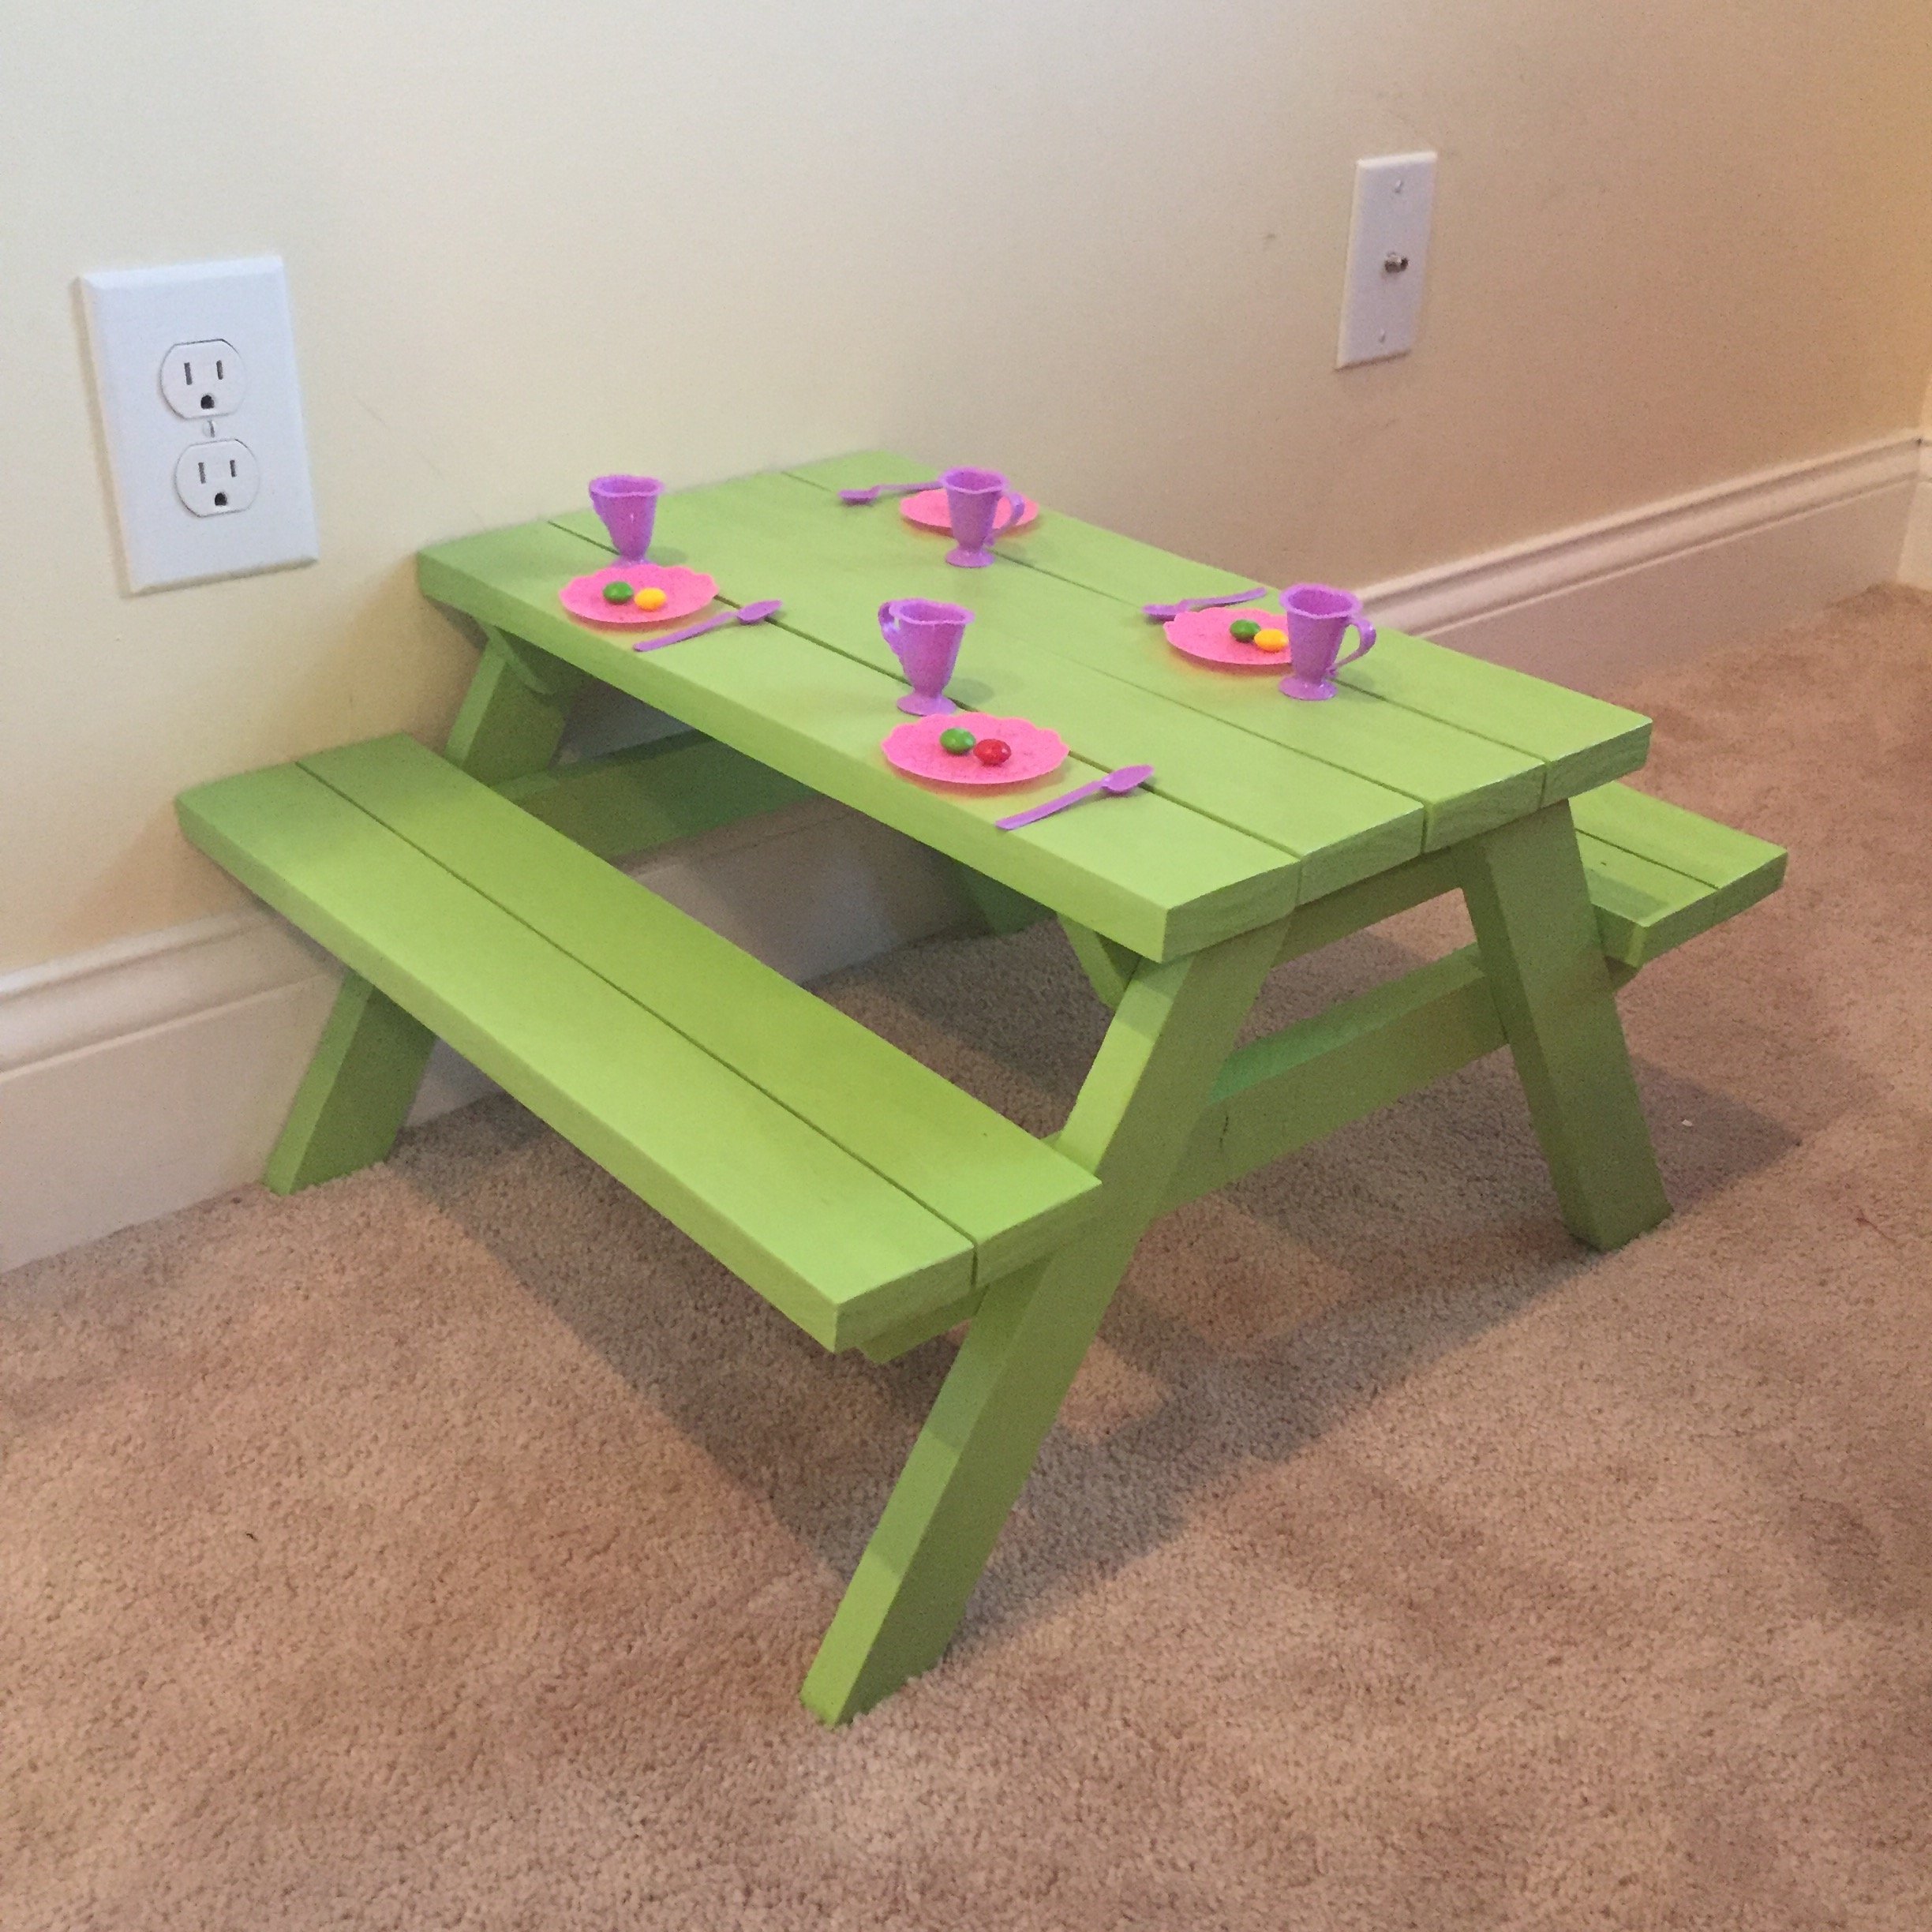
This is my scaled down version of the preschool picnic table, made for an 18 inch doll. I used scrapwood that someone was throwing away and supplies left over from other projects, so it didn't cost anything but time. My girls have really enjoyed it. Here are the measurements:
Cut List:
4 – 1×3 @ 17-3/4″ (Tabletop pieces)
1- 1×4 @ 9-3/4″, then cut in half using a table saw to equal 2 pieces (Supports directly beneath tabletop pieces) The longest measurement is 9 ¾”, with the ends cut at a 30 degree angle back to 7 3/4″.
2-1×4 @ 12-7/8”, then cut in half using a table saw to equal 4 pieces (Legs) (angle each end to 30 degrees as shown in preschool table plans)
1 – 1×4 @ 19″, then cut in half using a table saw to equal 2 pieces (Supports directly beneath seat boards) (angle ends to 30 degrees as shown in preschool table plans)
4 – 1×3 @ 17 3/4″ (Seat boards) I ran these 1 x 3’s through my table saw to make them 2” wide.
*When attaching the legs, secure them to the supports below the tabletop pieces so that the bottom of the legs will measure 19 5/8” from lateral edge to lateral edge when resting on the ground. In the preschool picnic table plans, this measurement is shown as 33”.
This was my first ana white project. I didn't take great photos. I also modified the bunk a bit for small children. I added a bunk right on the floor and made the legs slightly longer so that there was some headroom. After the kids grew a little, we switched it back to just the clubhouse with some room underneath for storage/playing. First time using pocket holes too.
I wanted to make a China Cabinet and I couldn't find a plan for one on Ana's so I used the Ayla Cabinet plan and I just made it bigger. This cabinet is 46 inches wide x 17 1/2 inches deep x 64 inches tall. I also added 4 glass doors and one large drawer in the middle. I added the bottom shelf and baskets because I felt the cabinet legs would be more secure with this option. The reason there are 4 cabinet drawers is because I added a middle shelf and a center support. I did not take into consideration the doors being inset when I added the middle support so I had to make 4 doors so that they would be inset. I also added crown molding to the top of the project. I'm not sure you can see but I also carved a Fleur de lis and scrolls onto the drawer.
This took me about 2 weeks to complete....and a lot of tears but it is complete and I am very pleased.
In reply to wow by Patrick Hosey (not verified)
Sun, 12/23/2012 - 04:42
I got them at home depot. they are stair spindles, very cheap 5.00 each. I cut each one at a pleasing location on the spindle and the length I wanted then I used a double ended screw and screwed them into the leg and to the cabinet, I also used glue to make sure they were secure. I decided the legs were not safe without the bottom shelf because this piece is so large and heavy, so this is the reason there is a bottom shelf.
Sun, 01/10/2021 - 21:03
Janettx ... you did a GREAT job!! I've got this project planned for the spring . We're having our annual church auction and I know it will sell high! I was considering buying furniture anchors since it will be for a child and I want to make sure it won't tip over. Did you have any issues with the project being top heavy??
made this farmhouse table 30in tall 4ft long and 26in wide,
I wrote a blog entry about this project that you can find at:
https://1thing1week.com/2017/01/09/airplane-shelf-for-a-nursery/
This shelf is great for beginners, easy to assemble and very inexpensive! I had a blast making it. I made it for my expected son's airplane themed nursery.
I started learning woodworking several weeks ago and came across your video and plans for the Farmhouse Counter Stool. It was easy to follow, and I love how it turned out! I made one first as a test, and I think I'll make three more. Thanks Ana!
Fri, 09/25/2020 - 14:57
Welcome to the woodworking community, it looks fantastic! Thank you for sharing:)
I started with Ana's "Mom's Train Table" design and added a bit of western design to it. I also added two drawers instead of the empty space to store the train set and other toys to be played with on it when the coffee table top is on. The train table top is also loose in the space, so it can be swapped out or flipped over for another design, farm, train, city, racetrack, etc.
I used and existing toddler bed frame and repurposed it as a trundle bed so we could add a 3rd bed into our kids small bedroom. You can easily make the bed frame too.
Check out my blog post with steps on how to turn a toddler bed into a trundle. Great space saver and it's much easier to pull out from under the bed on the carpet (and easier than a full size trundle).
I was eager to start this project and was super stoked with how it turned out. Can't wait for more inspiration to continue building beautiful furniture. Thanks
This was my first project I have every really made following plans and really the second project with wood. It was really fun and the only thing I would say was that I would have sanded all the parts before putting them together. I did that for the foot board and it made the process much easier in the end. This took me around 7 hours from start to finish.
Tue, 09/29/2020 - 17:07
Looks great, and all those little tips and tricks are very helpful!
Emerson with extra trim and fancy feet. Also added a closet dowel and overhang. Built at 36 weeks for our baby Collin.
I used the plans for the base but made the table 10 feet long. Came out GREAT!
This was a easy build and lots of fun to build! I pretty much followed the plans for this piece. The only thing I didn't add were the wheels on the bottom of the legs. Because I was using this mainly as a TV stand, I wanted it to not be moved. In the future if the TV goes up on the wall, I'll add the legs. Thanks for the plans!
This was my first project. It was fairly easy and has sparked a new interest in building my own furniture going forward. I decided to have my doors hinged instead of sliding, but overall had a lot of fun and love the results!! It turned out great!! Thanks Ana!!
A few months ago I noticed two 2 X 10 X 10s in the damaged wood pile at Home Depot so I snagged them. I am a veteran so I get 10% off on top of the 70% off. The rest of the wood and even the screws and paint were from other projects. Thanks for the awesome, free plans. They are comfy for me at 5'8". Whoop whoop!!
Sat, 10/10/2020 - 11:12
Thank you for your service, I am happy to hear you are enjoying them!