Community Brag Posts

Cedar Raised Garden Beds - 3 Tiers

Steps:

1) Cut the boards to the specs below or adjust to your space

2) Kreg Jig the cut boards along each of the sides (length wise and on the ends) for attaching and making a box.  

3) Make 3 separate boxes, don't assemble until you move to location.  I used 4x4 cedar posts in the corners of the base box to add stability.  I used 2x2 pine in the front corners of boxes 2 and 3 for stability.  Install these after the dirt has been added so you can hammer in as a stake, attach with screws on front and sides.  I created 2 stakes for boxes 2 and 3 and added to the front to prevent bowing when the dirt is added.

Box Dimensions:

1) (base) 70.5" L x 46 W x 4 cedar boards high

2) 70.5" L x 32 W x 2 cedar boards high

3) 70.5" L x 16 W x 2 cedar boards high

Estimated Time Investment
Day Project (6-9 Hours)
Recommended Skill Level
Beginner

My corner desk

Submitted by chach2667 on Wed, 11/03/2021 - 04:02

I wanted to convert my craft shed to my office after I accepted a new job and would be working from home full time. My shed is only 10x8, so I needed something smallish and functional. I modified the plans slightly and I did make a few mistakes. In the end, I think it turned out great for a 50 something grandma who likes to work with her hands!

Built from Plan(s)

Comments

Full Storage Bed

I built the Full Storage Bed using Ana's plans!  It was very easy and I love the storage space!  You can see it and my modifications at our blog http://www.shanty-2-chic.com/2011/03/crates-for-storage-bed.html

Built from Plan(s)
Estimated Cost
$120
Estimated Time Investment
Day Project (6-9 Hours)
Finish Used
Minwax Dark Walnut stain and Minwax Polycrylic Gloss
Recommended Skill Level
Intermediate

Work Bench

Submitted by Anonymous (not verified) on Sun, 12/26/2021 - 20:58

Had to tweak the pony wall plans a bit because the garage floor had a 2” x 3 1:2” cement retainer. I also wanted to incorporate an end cabinet I already had, so I shortened up the base to 69” and tied it together with the top.

Built from Plan(s)

Comments

Bottle Cap Tray

Submitted by Jann Antos on Wed, 07/03/2013 - 18:29

How to build a Bottle Cap Tray AND what NOT to do.

These Bottle Cap Trays are sold for 45+ Bucks online. I spend maybe 15$ on it.

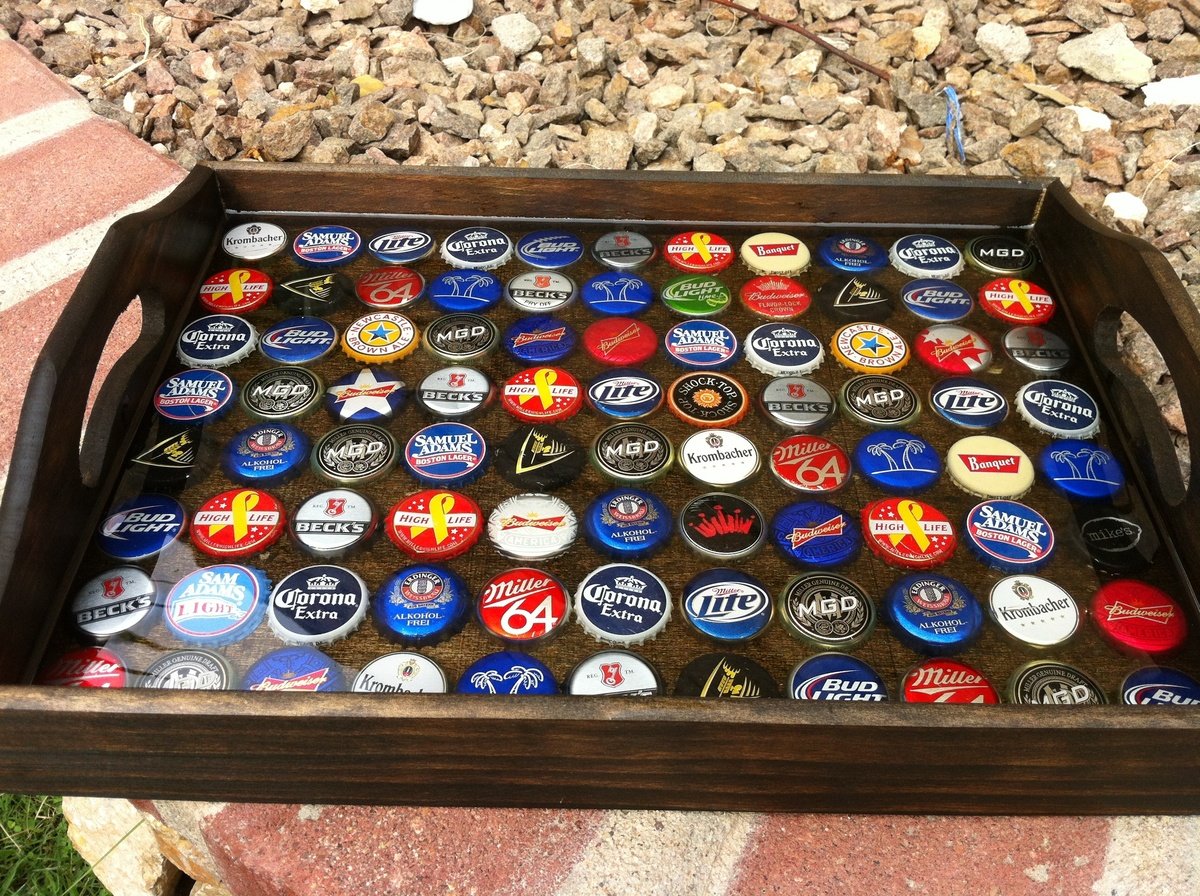
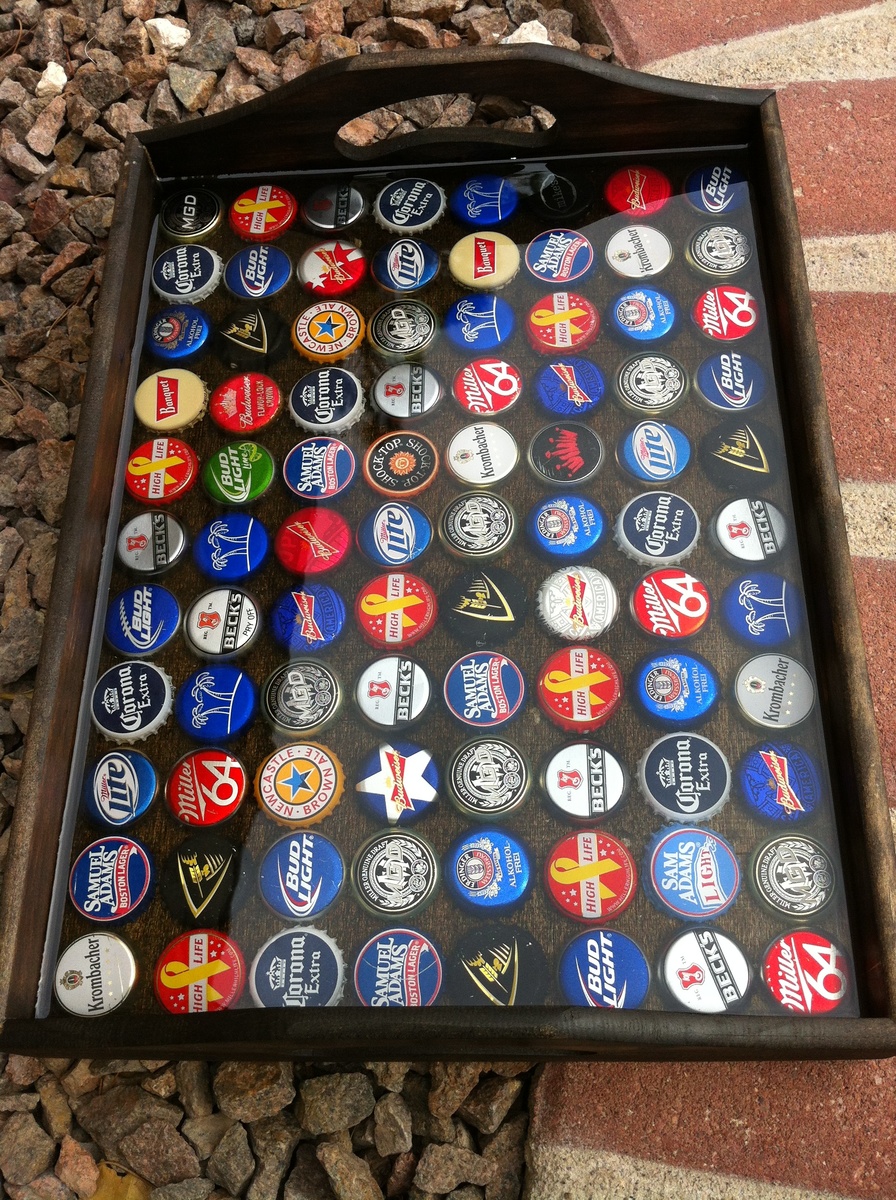
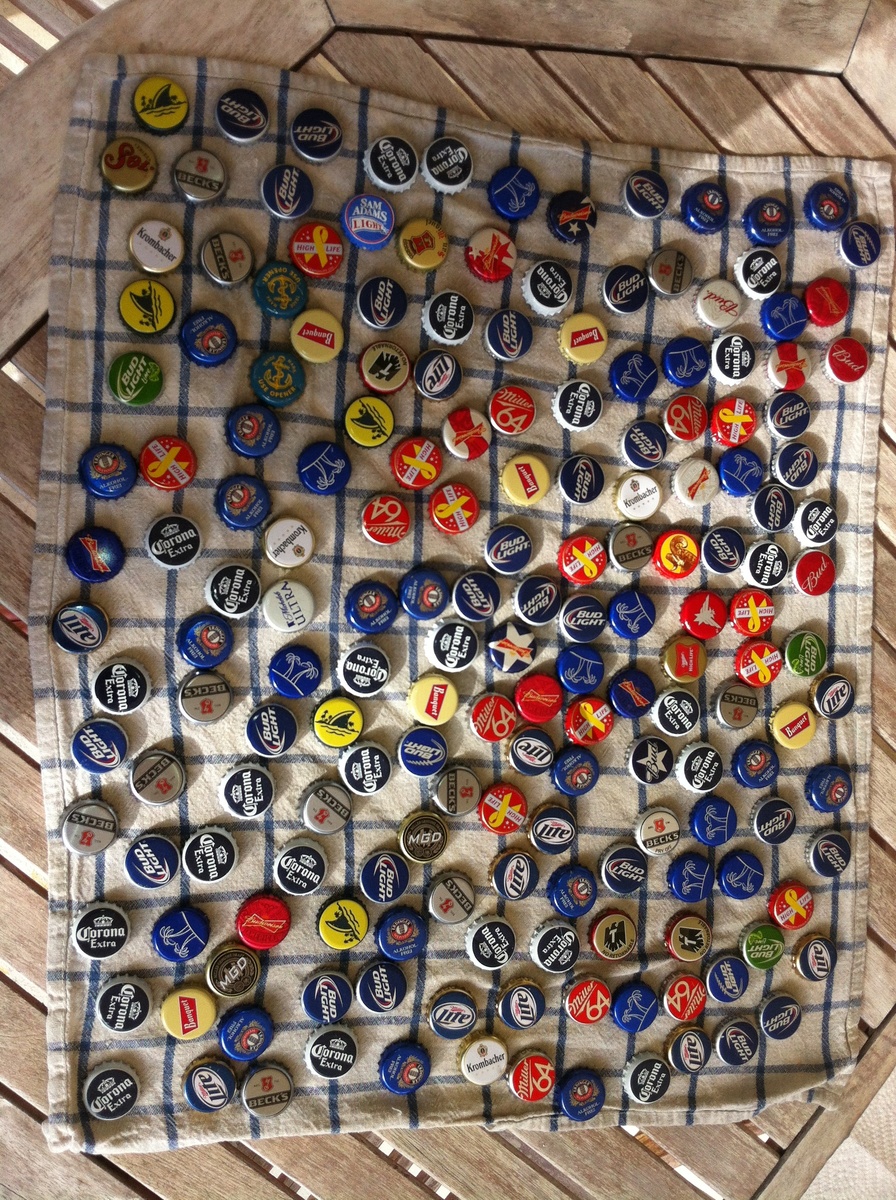
You need a lot of Friends drinking a lot of different Beers... For this tray i needed 88 Caps. I also asked Bartenders and Co-Workers to collect Caps. As more colorfull you get as better. Twist off Caps are the best behause they do not have dents.

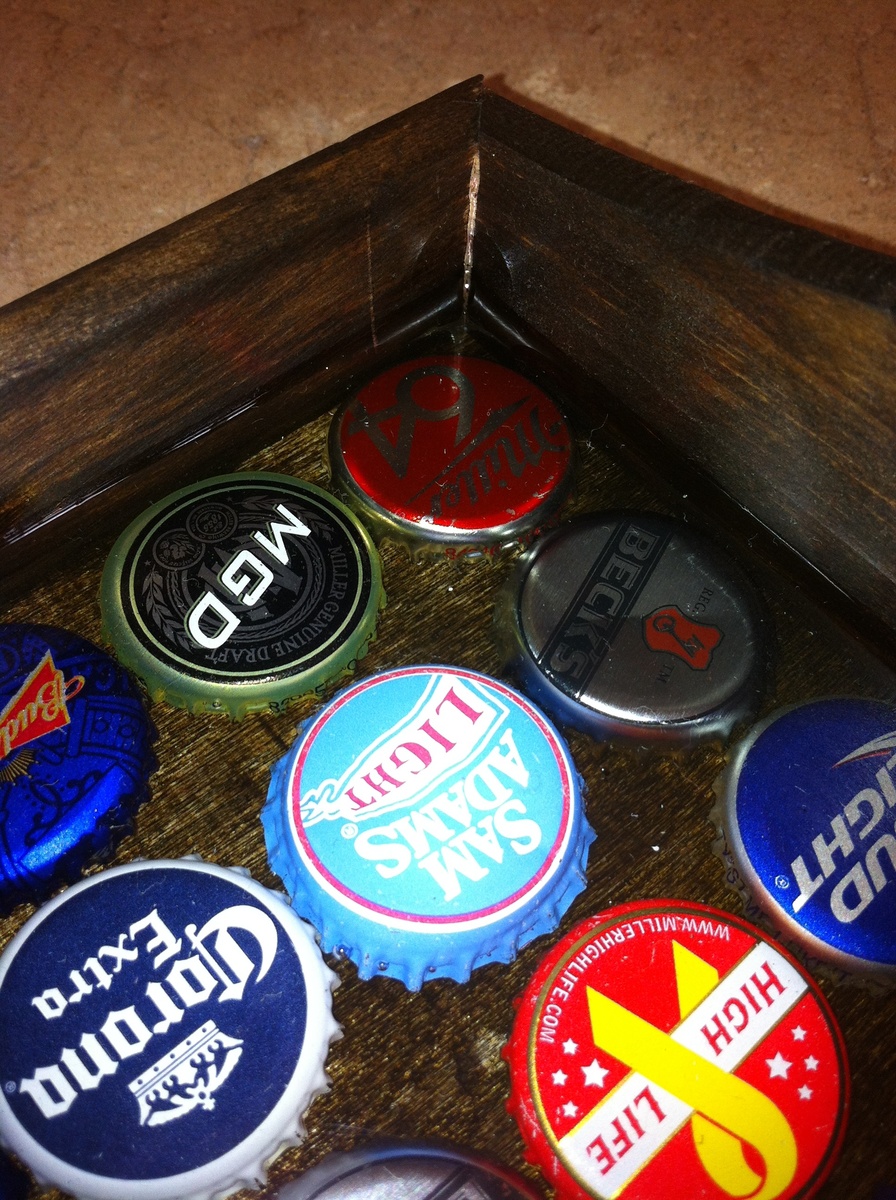
I bought the Tray at Hobby Lobby for 3.99$ (you can also build one from a Plan from this Side) and after sanding with 220Grid i stained it to fit my Home Bar. After lay out the "Design" i removed them all and lay them in the back of the now empty tray.

2 Ways to glue the Caps to the Board:

1. Hot Glue (be carefull the Caps get very Hot)
2. I poured just a small amount of the Epoxy in there and pushed the Caps into the Ressin...

How to mix Ressin...

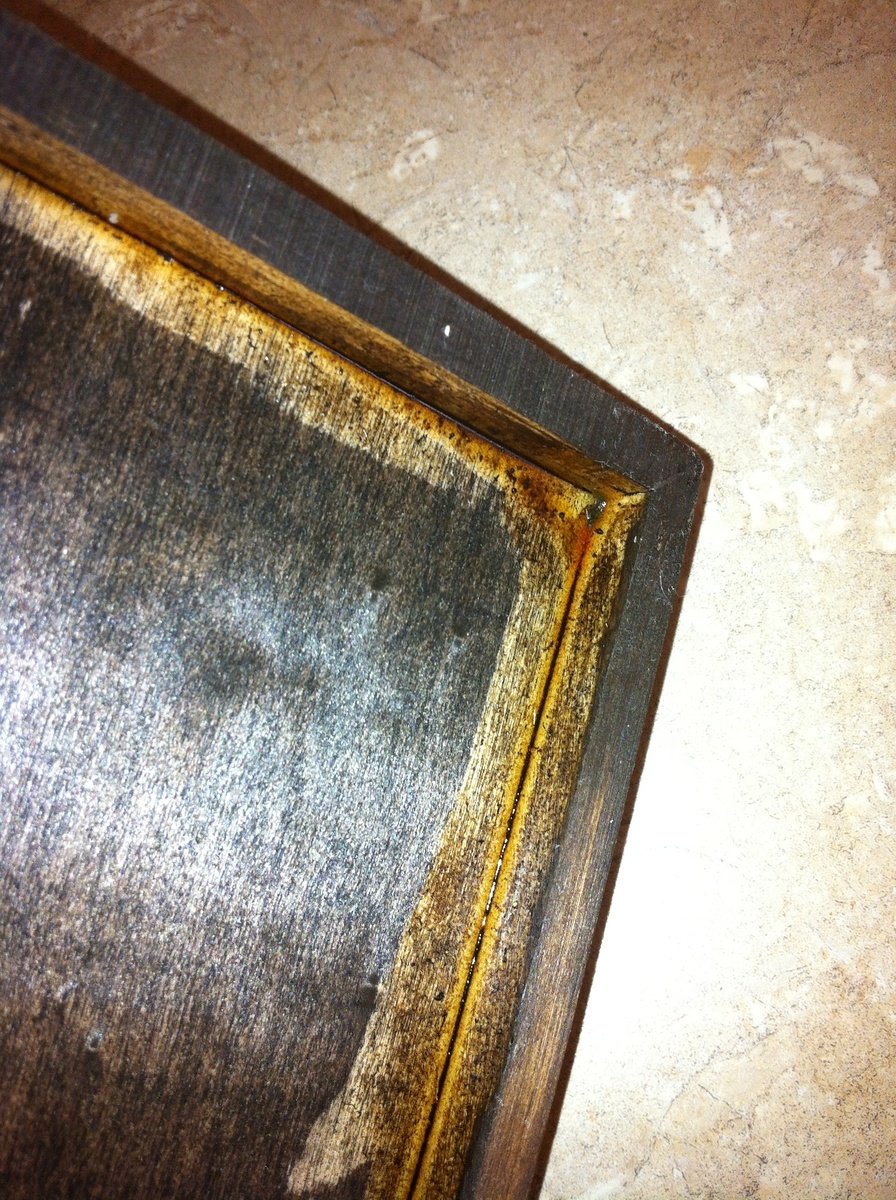
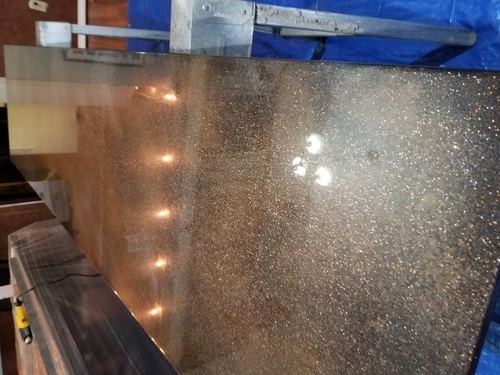
Read the Manuall!!! The first 2 Trays i poured to much and then it gets very very hot and ruin everything (see second last Picture). 2nd Glue the board to the Walls, if the Ressin runs out of the Tablet it is also a great mess!

I Used 2 small cups messured it and Mixed it in the Red Solo Cup...

Put the Tablet on an even surface (protect it) and pour a small amount into the tray... Level it and then put the Caps in there and use a torch to get rid of the Air Bubbles. I needed 3 layers to Cover all Caps. Keep it Dustfree during curing - very important .

I let it cure for 12 Hours bevor the next layer was applied. Total Curie after 72 Hours...

Sorry for Bad English - i am German...

Hope that helps to build your own Bottle Cap Tray...

And made it as colorfull as possible. I aranged them to face One Side but you also can turn them happy around.

Thanks for comments and Reading

Jann

Estimated Cost
15$
Estimated Time Investment
Weekend Project (10-20 Hours)
Finish Used
Minwax Espresso Stain
Polyurethane
Shellac
Recommended Skill Level
Starter Project

Using Ana White’s Garage Cabinet Plans

Submitted by Anonymous (not verified) on Wed, 04/20/2022 - 09:23

Thank you so much for the two videos we watched of you and your husband explaining and demonstrating how to build garage shelves. We used your plans as a guide. We chose to add shaker style doors to create cabinet shelves. We absolutely love them. We are not handy as you can see we had a living room lamp for a work light and a lifetime table as a work bench. Thank you!
The Paulsons

Comments

House Number Planter

Submitted by Bradnag on Fri, 06/22/2018 - 09:46

Easy beginner project. I had a spare pressure-treated picket on hand, so I used it instead of cedar. We're repainting our house this summer, so I stained the wood to match our eventual new house color.

Estimated Cost
$25
Estimated Time Investment
An Hour or Two (0-2 Hours)
Finish Used
Minwax Water-based stain
Recommended Skill Level
Starter Project

Kitchen Island

The plans were easy to follow. I modified my island to fit my space and cut it down to 44 inches in length.

Built from Plan(s)
Estimated Cost
The entire project cost $47.00.
Estimated Time Investment
Day Project (6-9 Hours)
Finish Used
I stained the top and shelves with Watco Danish Oil in dark walnut and then used a satin finish varathane for only the top to protect it from spills, etc. The sides and legs were painted with an interior latex paint called "Sandbar" from Home Hardware.
Recommended Skill Level
Beginner

Comments

Emily Jo (not verified)

Mon, 10/31/2011 - 15:33

Your island is gorgeous, and I love the modification you made to the original plans on the shelving support! I would like to know what size the boards are that you used so that I can duplicate. Thank you!

Lisa Tamaye (not verified)

Sun, 02/05/2012 - 18:10

This is great! ANyone know how I could extend one side in order to put stools for an eating area?
Would love to do that!

Alice (not verified)

Tue, 02/07/2012 - 19:43

I would think it would be basically the same build, just add brackets to support the extra wood.

Guest (not verified)

Mon, 03/05/2012 - 15:20

I want to make this Kitchen Island but if can't find the Supply List. Would you mind posting it or emailing me please! This will work perfect in my Kitchen

Katia57

Mon, 03/05/2012 - 17:46

Wow! Just a wonderfully simple project! I can figure it out by looking at it. I have a piece of Rock Maple Counter Top 24"x6'that needs legs. I'll probably use 4x4' for legs, six of them. But the shelves will be just like this. Thank you!

Katia57

Mon, 03/05/2012 - 17:50

Wow! Just a wonderfully simple project! I can figure it out by looking at it. I have a piece of Rock Maple Counter Top, 24in.x6ft., that needs legs. I'll probably use 4x4s for legs, six of them. But the shelves will be just like this. Thank you!

Guest (not verified)

Wed, 04/04/2012 - 11:58

Just click on the link for the instructions. It's under the heading 'About This Project' titled as 'From Plan: Easy Kitchen Island Plans'.

Click where it says 'Easy Kitchen Island Plans'. When you hover your cursor over the words, you will see that is a hyperlink.

Lindsey Adams (not verified)

Sun, 05/20/2012 - 06:48

I love your island and I also have a small kitchen...would you happen to know the sizes of the boards you used? Thanks

??? (not verified)

Wed, 07/25/2012 - 14:31

Yours looks so different and so much better then the one that show how to make it, how did you do it? I really would love to build it but have no idea how...
Thanks so much!

CBsMama (not verified)

Wed, 08/15/2012 - 13:08

This island is perfect. I love the shelves and the size. Any chance you could send me the dimensions of this island and details on how you did the shelves? Great job!

lizzy1299

Mon, 02/04/2013 - 15:03

I'm SO glad I stumbled acrossed your website! I LOVE that island and getting ready to get all the stuff to make it. Did you use the Kreg Jig thing the original person used...? If not, how did you cover the screw heads?

Thanks!

ameliam

Wed, 12/31/2014 - 07:37

Hi, this is my first time building anything. I really like the modification made to the original plans. I like the legs facing the other way. I can't figure out how to modify the cuts on the sides and front and back supports for the top to adjust for turning the legs the other way. Are there modified plans. LOL I need instructions, I’m not quite there yet on doing it myself. Thank you

djbeenie

Wed, 02/04/2015 - 15:03

How did you mount the 1 x2s since its on the side of the 1 x 4s. Did you tac them in. I really like the way that looks. Thanks!

MBuckson

Mon, 03/16/2015 - 08:00

Amazing island! I am in the middle of building this and looking ahead to the finishing aspect of it and I have a question: What tool did you use to apply the oil on the counter top? A cloth or a certain type of brush?

wiri0302

Sat, 06/06/2015 - 18:33

Hello, i love this island but maybe i missed it. What kind of wood is everyone using? Frosting said $47 but that could only be for pine right? Are people using pine to build this? I would like it to look just like the picture. Any help would be appreciated! thanks!

Fancy X Desk

Submitted by gsligh on Tue, 08/20/2013 - 09:46

I modified the plan by using a hardwood plywood 4X8 sheet cut down to a 72" by 28" size. I put hardwood trim around the edges for a smooth appearance. I stained the top with a Minwax poly shield oak finish and painted the base using a glossy enamel paint "Inkwell" from Sherwin Williams. The seamless top makes for a better writing surface.

Built from Plan(s)
Estimated Cost
$120
Estimated Time Investment
Week Long Project (20 Hours or More)
Finish Used
Miniwax oak polyshield and enamel paint "Inkwell" from Sherwin Williams. Using enamel paints makes the project take longer because of drying times in between coats.
Recommended Skill Level
Beginner

Kitchen Cabinets with Countertops

Submitted by cmanmgm007 on Sun, 11/25/2018 - 08:17

I would like to thank www.stonecoatcountertops.com for the ideas on the countertops, 

first off I used 3/4 MDF for this project, Ana White's momplex cabinet plans and just extended the plans to the size i needed, i created the doors out of MDF cut to size and used a router to create the design on the edge and the countertops are made with MDF, expoxy,spray paint, and metallic powder in 91% alcohol. this plan was so eazy, and my kids had a blast doing it, Thanks Ana for the cabinet plans

Estimated Cost
MDF $26 per Sheet- 2 sheets
Epoxy $95gal
spray paint
metallic powder $30

Finish Used
Leftover paints i mixed together together the color.
Recommended Skill Level
Intermediate

Narrow planked bedside tables

Submitted by Anonymous (not verified) on Sun, 09/11/2022 - 08:43

I made these, then had to re-make them once I realized they were just too wide for our narrow bedroom. Each shelf is now three slats wide, not four. Modifications were easy: cut cross supports to 10 1/2” (not 14) and tabletop planks to 15”.

Thanks for the plans! Simple enough and stylish. -Katie

Comments

Fancy X-Brace Farmhouse Table and Bench

Submitted by Anonymous (not verified) on Mon, 09/26/2022 - 12:53

My employer asked for an "upscale farmhouse table" to act as a feature in our new training facility. After perusing designs online, I found this one and decided to upgrade it just a bit for the stated purpose.
Made entirely of white oak (over $1600 worth!) purchased as 4/4 and 5/4 stock, I milled all the lumber to spec in our shop. As it was to be 10' in length, and I was unable to acquire acceptable wide stock for the tabletop in that length, I went with breadboard ends, which also seems to have served to upgrade the appearance over "picnic table" to elegant showpiece. All joinery is invisible, using mostly dowels and glue where joints had to be hidden.
Final treatment was with tung oil, and it took up residence in its permanent home last week. I had to assemble it on-site, as there is NO way to move a table of this size in and out of the building. It's there to stay.

As my lumber wasn't exactly spec-size (1X4, 2X10, etc), I had to do the math and make some adjustments to achieve spec height, but the final product is a rousing success.

Thank you for the inspiration.

Comments

Beadboard Cabinet

Submitted by jamie_C on Sun, 08/28/2011 - 20:26

Since we don't have a garage or any really good place to keep our tools, they end up all over the house while we're working on a project. So, we decided to build a cabinet that would look nice in our house, and also house our tools. We chose the armoire plan because it has plenty of space.

This project took us forever, so it's hard to really estimate the actual working time. We began working on it back in June, then we were evacuated because of a forest fire.... By the time we got back into our house and we were organized again it was the end of July.... and now finally the end of August it's finished. It took us a while, but it's a great addition to our house!

We modified this cabinet by using 1/4 inch beadboard backed with 1/4 plywood for the doors. We also modified the size of the armoire to make it deeper.

Built from Plan(s)
Estimated Cost
$125 approximately?
Estimated Time Investment
Weekend Project (10-20 Hours)
Finish Used
Sanded, then painted the outside with a quart of "creamed coffee" oops paint, and painted the inside with a sage green paint from Habitat for Humanity Restore.
Recommended Skill Level
Beginner

Comments

Rustic X coffee table with Minwax Classic Gray stain

Submitted by cariaw123 on Thu, 11/21/2013 - 07:54

This project was quick and painless. I recommend for a beginners project (but expect to get frustrated over building the x's into the side though). I stained our table with the Minwax Classic Gray stain and used the Minwax water-based polyurethane to seal it. I realize that the stain is difficult to see but it is a beautiful stain that has turned into my go-to stain. The stain is not too gray and you can see the natural color of the wood through it. The photo gives the impression a glossy finish. In reality, it is more matte.

Built from Plan(s)
Estimated Cost
$80-90
Estimated Time Investment
Afternoon Project (3-6 Hours)
Finish Used
Minwax Classic Gray stain with Minwax Water-based Polyurethane.
NOTE:The stain goes on pine and whitewood VERY differently. The pine pieces come out very dark with the stain being brushed on and immediately wiped off. For the whitewood, you can leave it on for 10 minutes and it'll reach a threshold for the amount of stain it will accept. I just sanded the darker pieces down a little bit to match the lighter pieces. (Does that make sense?)
Recommended Skill Level
Beginner

Laundry Station

Submitted by docfin02 on Sun, 01/22/2012 - 19:14

My original plan was for a laundry cart or stand for laundry baskets. I ended up building one that is pretty big for 4 baskets, a shelf on top, and elevated 10" on the bottom for our Roomba vacuum to be stored.

Built from Plan(s)
Estimated Cost
$80 + paint
Estimated Time Investment
Afternoon Project (3-6 Hours)
Recommended Skill Level
Intermediate

Comments

4X4 Truss Beam Table

This was my first project. It's not perfect, but I love the way it turned out! The original plans were too large for my dining room, so I altered the plans to make it a 5-foot table. I actually ended up making it a little bit wider as well by adding an additional 2X10 to the table top to make the table look more proportional. The wider table top has made it perfect for family-style meals! For the finish, I did one layer of Rustoleum American Walnut stain applied with a foam brush and wiped off with a clean cloth after one minute. After the first layer of stain, I sanded the table with a very fine paper and then did two layers of Rustoleum Dark Walnut applied with a foam brush and wiped off with a clean cloth after only a few seconds of setting. Finally, I did three layers of Rustoleum Matte Finish polyurethane.

Estimated Cost
$120
Estimated Time Investment
Weekend Project (10-20 Hours)
Recommended Skill Level
Beginner

Comments

daydra

Tue, 03/06/2018 - 19:15

Your table is beautiful!!! You done a stunning job on it!!! This is the same size that I need for my table but I'm having a hard time figuring out the measurements for the legs and the length of the benches I need!!! My table needs to be 60"x32" would you mind helping me with the measurements of your bench and also of your legs on the table?? I plan to make the table legs the same height as hers but need to make the top board and middle brace to match the 60" top!!

Full Length Mirror

Submitted by AndyH on Fri, 03/04/2016 - 18:03

A $10 Mirror framed out with some 1 by 2, 1 by 3 and 1 by 4.

Stained black and then 2 coats of white paint sanding after each to give a rustic/antique look.

Estimated Cost
$35
Estimated Time Investment
Day Project (6-9 Hours)
Finish Used
Stained in black and then two coats of white paint sanded between coats to give antique finish.
Recommended Skill Level
Beginner

Special Family Bench

Submitted by Anonymous (not verified) on Wed, 08/30/2023 - 09:52

Made my wife a Ana White DIY porch bench for our 10 year wedding anniversary. Had a custom plaque made: Sarah’s Bench.

Looks beauty on our front porch.

Jesse Micak, Ontario, Canada 

Built from Plan(s)

Comments

Sandbox with benches

Submitted by h.abbott on Tue, 04/10/2012 - 05:43

I knew I needed a sandbox for my toddler, and saw the original on pinterest. I was so happy when I came here looking for designs and saw that someone had created a plan for this. I think I'm more excited about it than my little guy is.

The plan was easy to follow, and it went together quickly. Thank you very much for these plans

Built from Plan(s)
Estimated Cost
$50
Estimated Time Investment
Afternoon Project (3-6 Hours)
Finish Used
Exterior paint in light blue.
Recommended Skill Level
Starter Project

Comments

hippyengineer (not verified)

Tue, 10/16/2012 - 19:32

You rock Ana! Your plans are some of the best quick builds with lots of features. I built this sand box in two hours and my son is having the best time. This is a Texas winter replacement for the beach and the backyard pool.

edkeogh

Mon, 05/23/2016 - 19:44

So I just started making this box and it's truly an awesome design but I couldn't get 1x8 lumber instead I got 2x8... For the box base, will this make an difference in the mechanics of the seat and back opening..and the overall size of the box is 1.5" longer at 49" instead of the 47" the plans detail.. I was hoping that it won't but I think it might interfere with the 2x4 support the seat back..

I right in the middle of this project so I need to get on with it as it's nice tomorrow..

THANK YOU
ED