Community Brag Posts

My First Project: Spinning DVD Rack

Submitted by Dan Y. on Sat, 07/13/2013 - 20:19

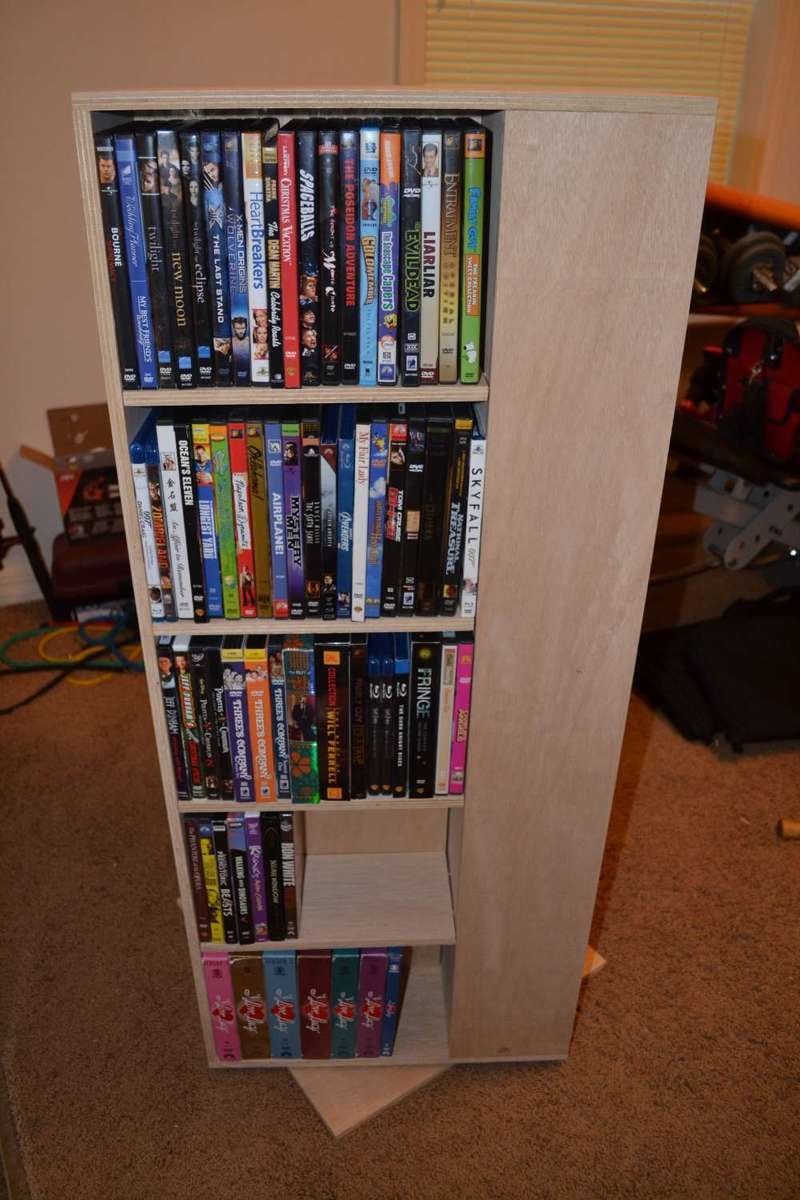
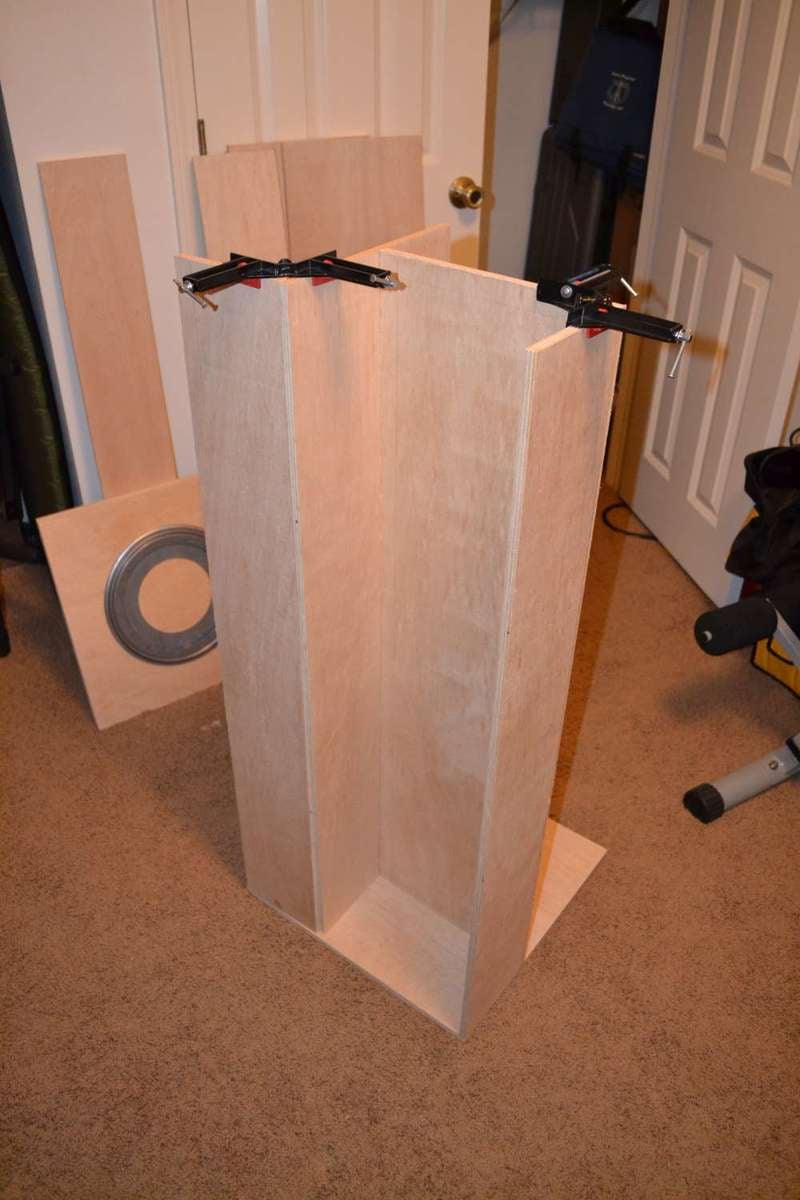
I was looking online for a spinning DVD rack to buy when I stumbled across a picture of a custom built rack. I decided to give it a try and this is the result. This is the first project I've done outside of basic shelves and it was a great learning experience. The overall fit and finish isn't quite where I'd like it to be but overall I think it turned out pretty well. I was able to find a 12" lazy Susan at a hardware store that supports over 300lbs and worked perfectly for this project.

I used pocket holes for the shelves, finishing nails for the top and screws for the bottom and lazy Susan. I also used pocket holes to attach the shelf backs and hid them behind the shelves. One thing I definitely won't use next time is spray paint/enamel. The finish isn't nearly as nice as I wanted and it cost far more than I was expecting.

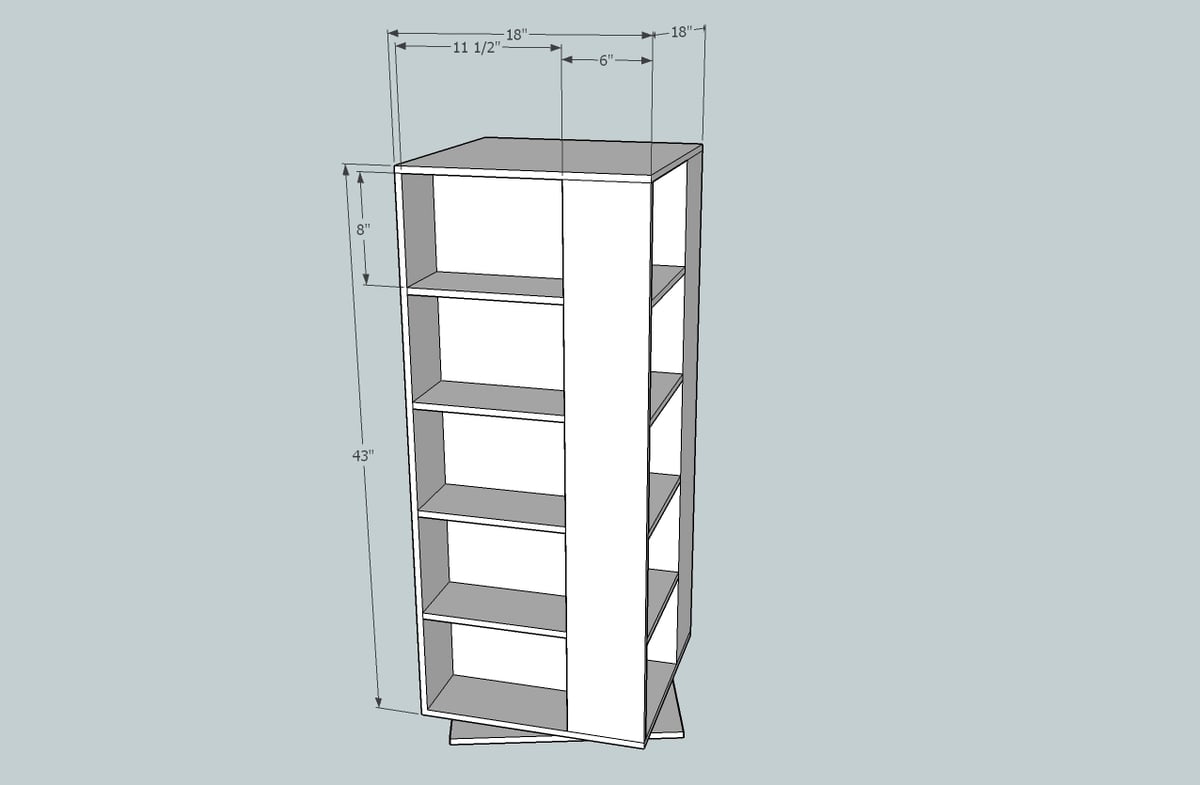
This is also my first time using SketchUp and I'm really impressed with it. I've uploaded a copy of the plans.

Criticism and suggestions are appreciated.

-Dan

Estimated Cost
$170
Estimated Time Investment
Weekend Project (10-20 Hours)
Finish Used
Rust-Oleum Universal Satin Spray Paint - Espresso Brown
Rust-Oleum Crystal Clear Enamel
Recommended Skill Level
Starter Project

Comments

Val Manchuk

Sun, 07/14/2013 - 11:35

I like this spinning DVD unit! Coincidentally, I just finished using spray enamel to redo some cupboard door handles. It's horrible stuff! I ended up sanding it off, and doing it over in flat black. I roughed up the edges with 180 grit to antique them a bit. Looks much better!

DIY Bathroom Vanities

Submitted by Anonymous (not verified) on Sun, 04/24/2022 - 11:18

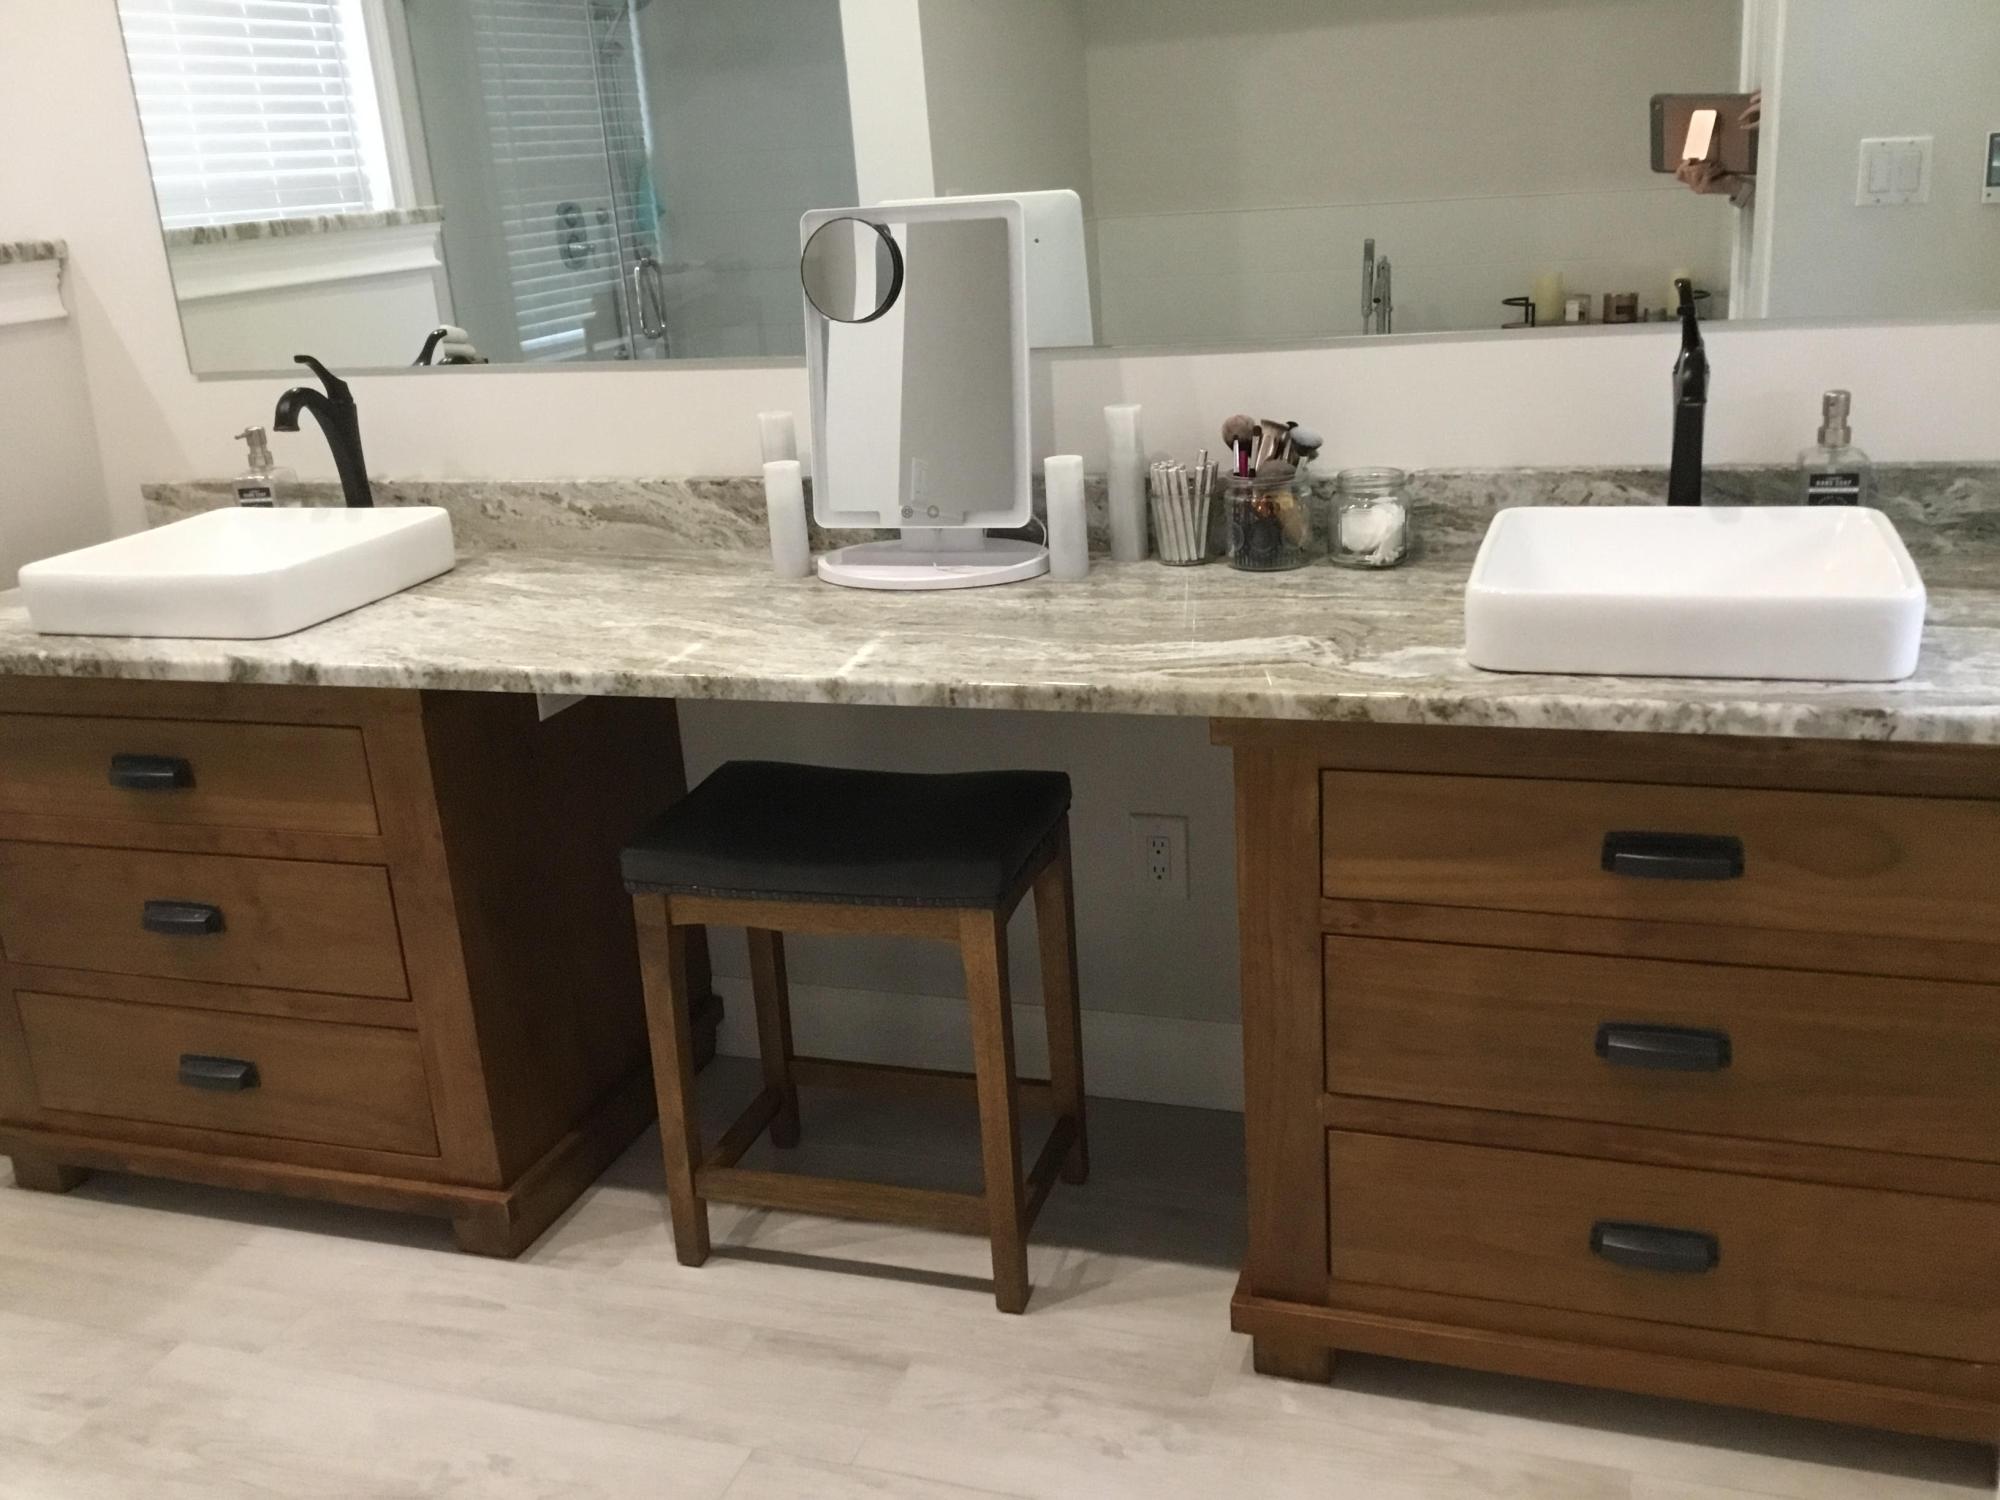
Perfect vanities! When I couldn’t find exactly what I was looking for, I searched online for vanity plans and thankfully your site and these vanities popped up. I love all the storage with these, so much better than ANYTHING pre built we looked at online. We had seen vanities that I was going to settle for but they were around $3,000, and I didn’t love them, so my husband said he could build something and this was the result using your plans. I am so thankful and the whole project was a fraction of the cost! I stained them with a vinegar and steel wool stain with poly over it. I couldn’t be more grateful for you and your generosity of plan sharing. Thank you!

Built from Plan(s)

Comments

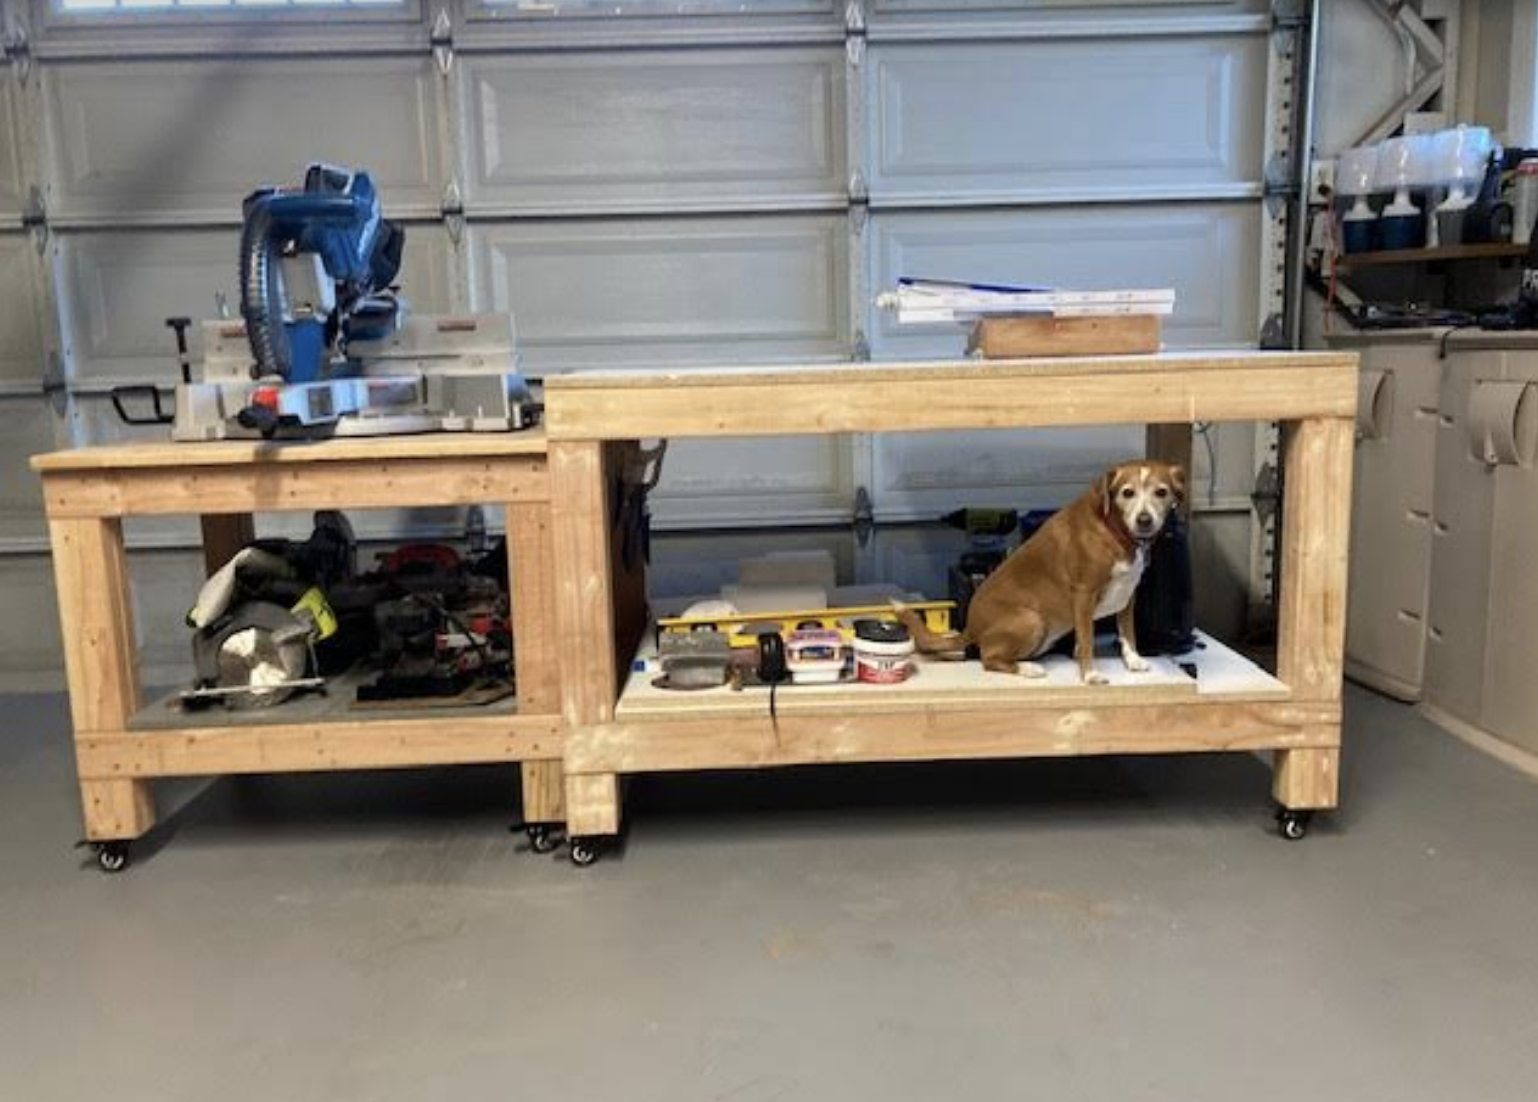
Two Sizes from One Set of Plans

Submitted by Anonymous (not verified) on Wed, 08/10/2022 - 19:45

We followed Ana's plans for the large project bench. We altered the plans to make a bench for our compound miter saw with the saw platform level with the project bench.

Built from Plan(s)

Comments

Shiplap Fireplace

Submitted by Anonymous (not verified) on Tue, 12/20/2022 - 19:10

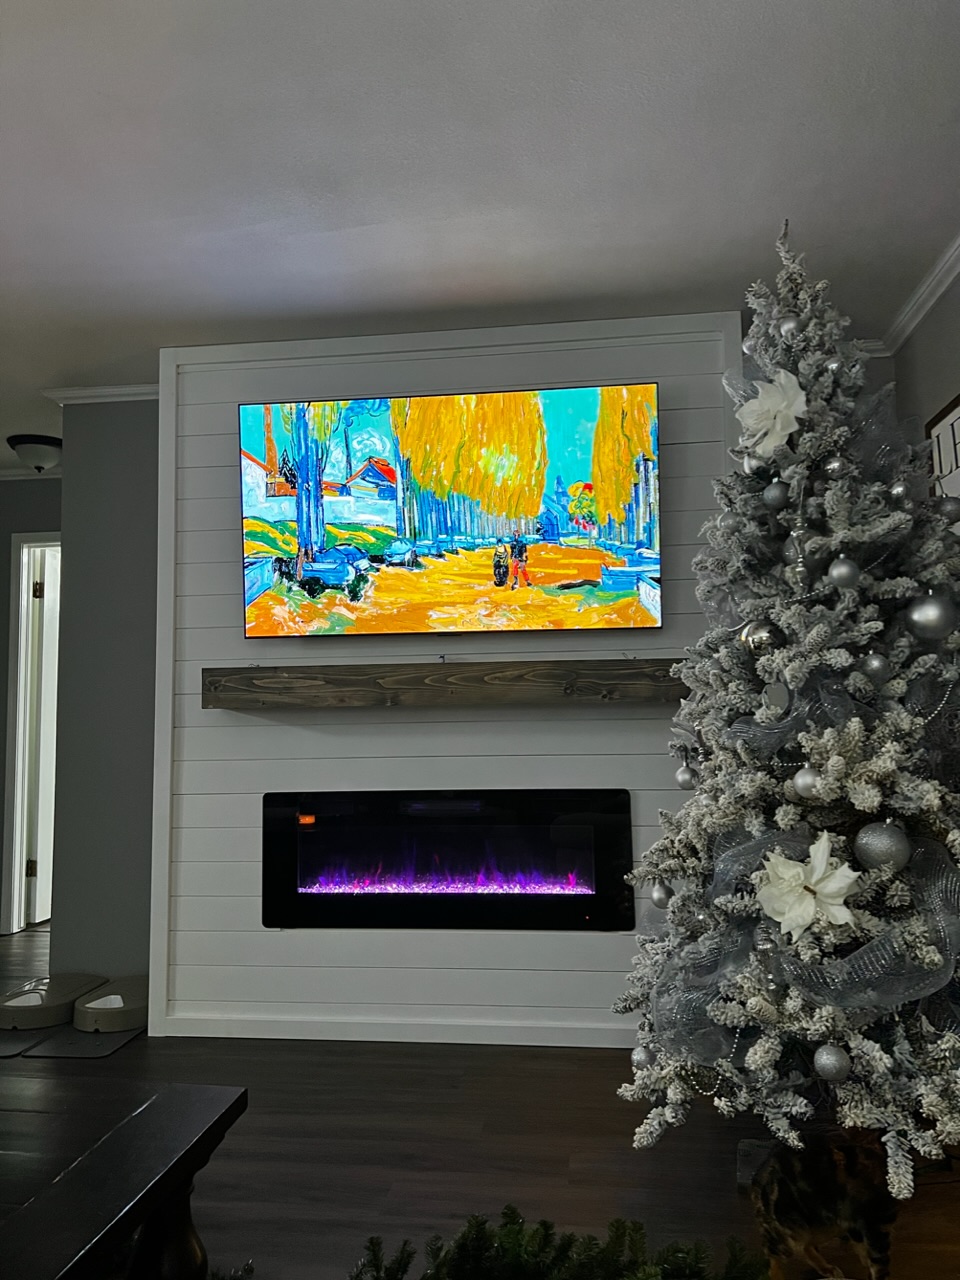
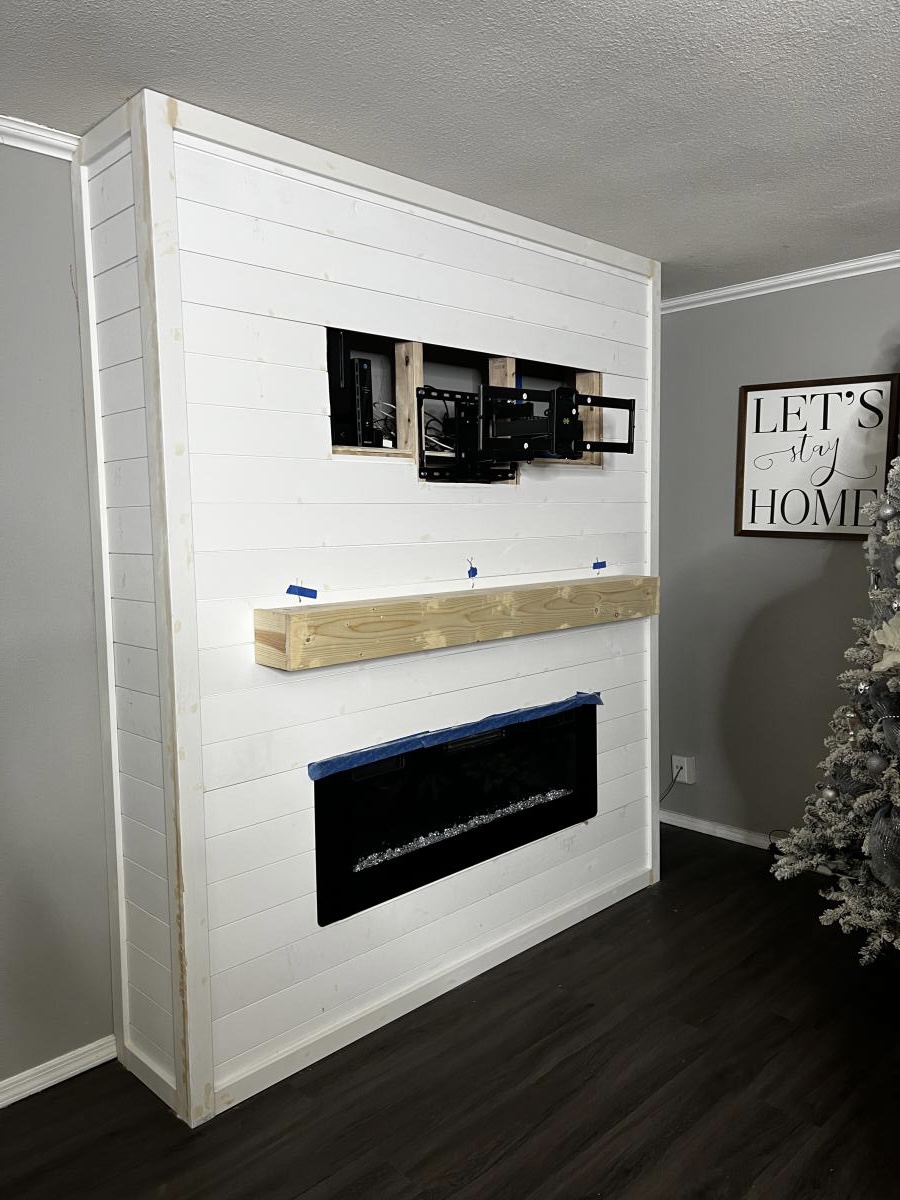
We did the Easiest Shiplap Fireplace in a weekend, thanks to Ana’s plans. I convinced my husband to help me build this by upgrading to a 65” tv and adjusting the dimensions. We also built a shelf behind the tv to hold our receiver and Xbox that is hidden when the tv is in place. Ana’s tutorial was amazingly and gave us the confidence to finally build something that’s been on our list for 2 years!

Comments

DIY Bailey Dog Chair for Dogs with Megaesophagus

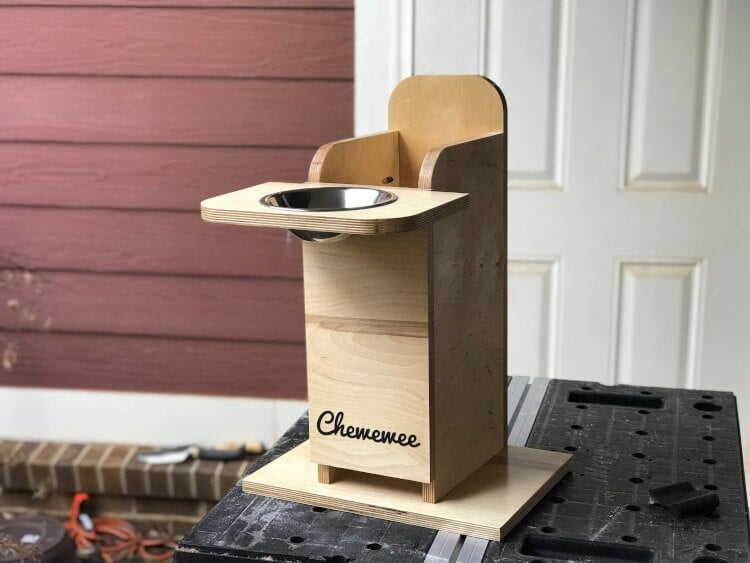
Hello everyone, today I’m sharing details on something I built recently: a Bailey Chair for dogs suffering from Megaesophagus.

Dogs with megaesophagus have an enlarged esophagus. This makes swallowing food difficult. Eating while in an upright position helps and the task of keeping the dog vertical is easier when the dog is sitting in a Bailey chair.

This blog post is less of a detailed how to and more of showing in progress photos. Adam, over at Lazy Guy DIY, has put together a great tutorial on how to build the Bailey Dog Chair. I followed his instructions with very few modifications.

CLICK HERE to read my build details and see more photos!

Estimated Time Investment
Afternoon Project (3-6 Hours)
Finish Used
clear spray
Recommended Skill Level
Beginner

Trofast Toy Storage Solution

Submitted by CassieD on Fri, 09/30/2011 - 17:27

I had been asked a few times for these plans, but as someone else posted a similar one, I'll just stick to a blog post for now and describe my differences. I made this shelving unit January 2010, just after I found out of I was pregnant with my third child, and it's been a lifesaver since then. I desperately needed a toy storage solution (and purging), as shown in the 'eek' kids closet below. I didn't like the shape of triangular Ikea ones, as they spanned more floor space than I cared to give up. Plus, I wanted a place to put *almost* all of my kids toys, so I wanted it to be tall. I'm so glad we did, since we've moved twice (also, 'eek') since than, and it's made packing and unpacking the kids toys super (SUPER) easy. At first, I was afraid that the kids would go crazy and just tear down every bin at once, but it hasn't happened yet. Unlike the other plan that was posted, I used white sliders that ikea sold. I'm not sure if they still sell, as I don't see them online. It cost an additional $24 (they were $1/2), but seemed worth the extra money. I didn't have a router and wasn't particularly confident with our table saw skills. Plus the Ikea version had some really thin areas that made me nervous that it would break easily. I tried to keep it easy and just had to line up and screw the sliders in. Now that I'm a little more confident with a table saw, I'd give the router style a-go. I used two sheets of cabinet grade plywood, each costing about $30. I ripped down some pine boards to cover the front edges, which made the unit look loads nicer. However, I wish I would have used maple, instead of pine as they got dented almost immediately. Not a big deal though. The three shelves were sort of an afterthought, but turned out to be great for puzzles and other type toys. I didn't use backing or cross supports initially, but put some in after we moved. You can see them in the last picture below. The heater in our temporary house caused the slightly-bent sides to become very bent sides. That caused the drawers would spontaneously fall out, which was always quite the shock and disappointment. I put in some supports in the back, which I wish I did initially as it would have made manufacturing easier. Also, If I were to go back, I would put one cross support in the front-middle, as the boards are so tall, it needs something to help maintain the shape in the front. I've found that even in a perfect fitting slider, really heavy buckets would bend just enough to flex out of them to crash... so don't plan on filling one of the large buckets with matchbox cars and sticking it on the top. Regardless, we've learned our lessons, made it work better, and has been a huge success in our house for a while now.

Estimated Time Investment
Weekend Project (10-20 Hours)
Recommended Skill Level
Intermediate

Comments

Supermom77 (not verified)

Sat, 10/01/2011 - 14:22

Great work. Love the colors. Do you have directions on training the kids to put the toys back?

In reply to by Supermom77 (not verified)

CassieD

Tue, 10/04/2011 - 19:42

Haha, I guess a little. Picking up when they aren't motivated is an ongoing battle. However, I did find having a specific place to put items with labels helped a lot, albeit with screaming. Actually the labels would probably be the best motivation of all of it.

The ideal is to have the kids only play with one bin at the time, but with more than one kid, that theory very quickly gets muddled... One child wants to play with one toy and one wants play with another, then "lego houses can't be broken down" and "polly pocket is using those blocks for the house" and so on. So it's more of a end-of-the-day(week/month/year haha) pick-up routine.

However, there seems to be a light at the end of the tunnel. My oldest (almost 6) seems to have caught on that the faster she picks up, the sooner she can move onto other activities besides playing (coloring, playdough, etc.), and is starting to pick up as soon as she's done without us even asking. I think getting an allowance has also helped with that.

That was way more than I thought I was going to comment, but I guess it goes to show you should never ask a Mom her opinion on something, unless your ready for a lecture :)

birdsandsoap

Thu, 10/13/2011 - 21:44

I love that your labels have pictures on them! I thought I should have done that way back when since my children are too young to read. Easy to find and easy to put away. Good job, Mom!

Overhead Garage Storage

This project was born out of desperation for some way to organize our garage. It is not difficult to build, and it went pretty quickly with two of us. It probably didn't take more than four hours tops for each section. I've seen the prices for garage storage components and some of them are staggering! We have removed a tall chrome shelf, and moved a ton of stuff onto these shelves, creating a hundred square feet of floor space! And for only $25! Come on over and check it out on my blog! Val

Estimated Cost
$25 per 8 foot section
Estimated Time Investment
Afternoon Project (3-6 Hours)
Finish Used
Whatever white paint we had left over from various projects.
Recommended Skill Level
Beginner

Comments

Little Kids Picnic Table with Umbrella

Submitted by Handy Andy on Tue, 04/04/2023 - 11:35

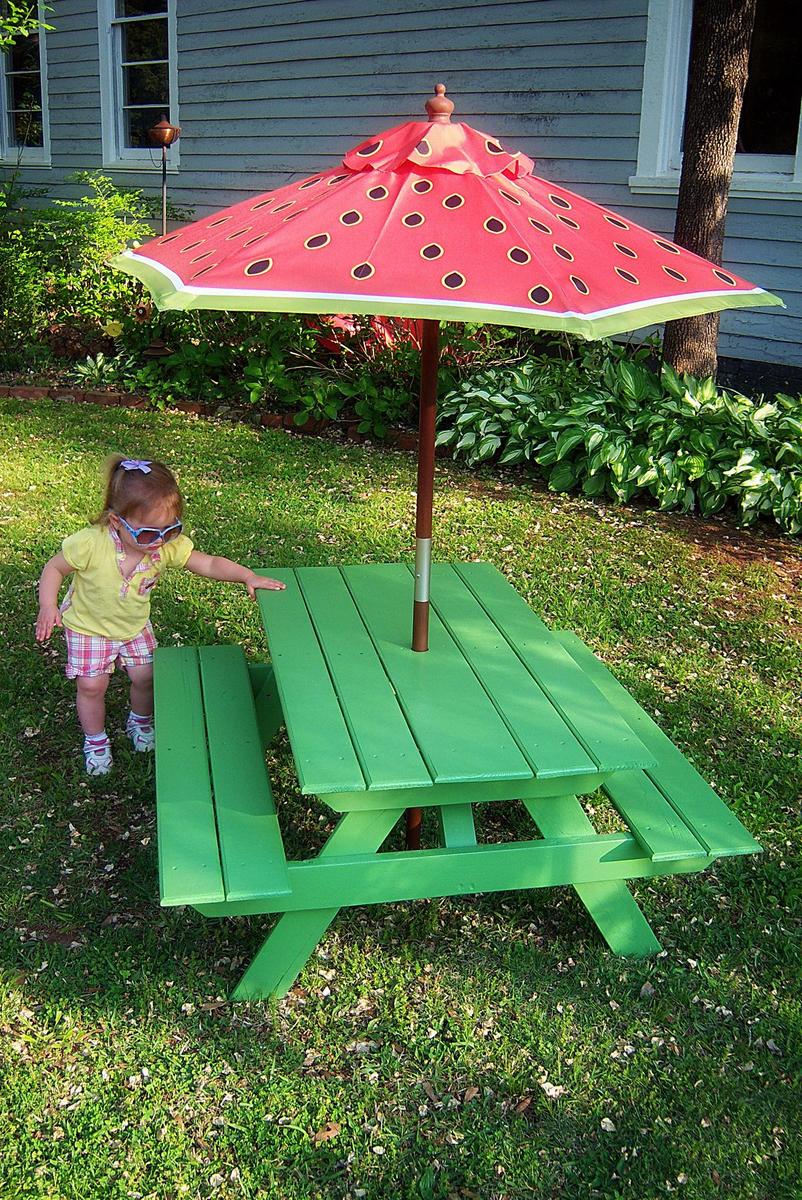
My daughter was given this umbrella at Christmas, but needed a table to go with it.  Ana's plans for the preschool sized picnic table worked perfectly.  I built it using one standard sized shipping pallet and even got to try out my new router!  Thanks Ana!

Built from Plan(s)

Comments

Farmhouse King Bed

Submitted by gahan22 on Tue, 02/02/2016 - 10:36

This was our first ana white build. Bed build took one Saturday - to finish up took another week or so working nights - most of our time spent on getting the color we wanted and sanding and finishing. Building the 2x4 frame took more time than anticipated as well. We are super happy with how it turned out.

Estimated Cost
$250 for lumber, stain and lumber for bed frame. We used lag screws on the side and 2x4 hangers for the frame which increased costs.
Estimated Time Investment
Week Long Project (20 Hours or More)
Finish Used
Stain is two coats minwax dark mahogany plus classic grey over the top - wiped off and finished with minwax satin poly.
Recommended Skill Level
Starter Project

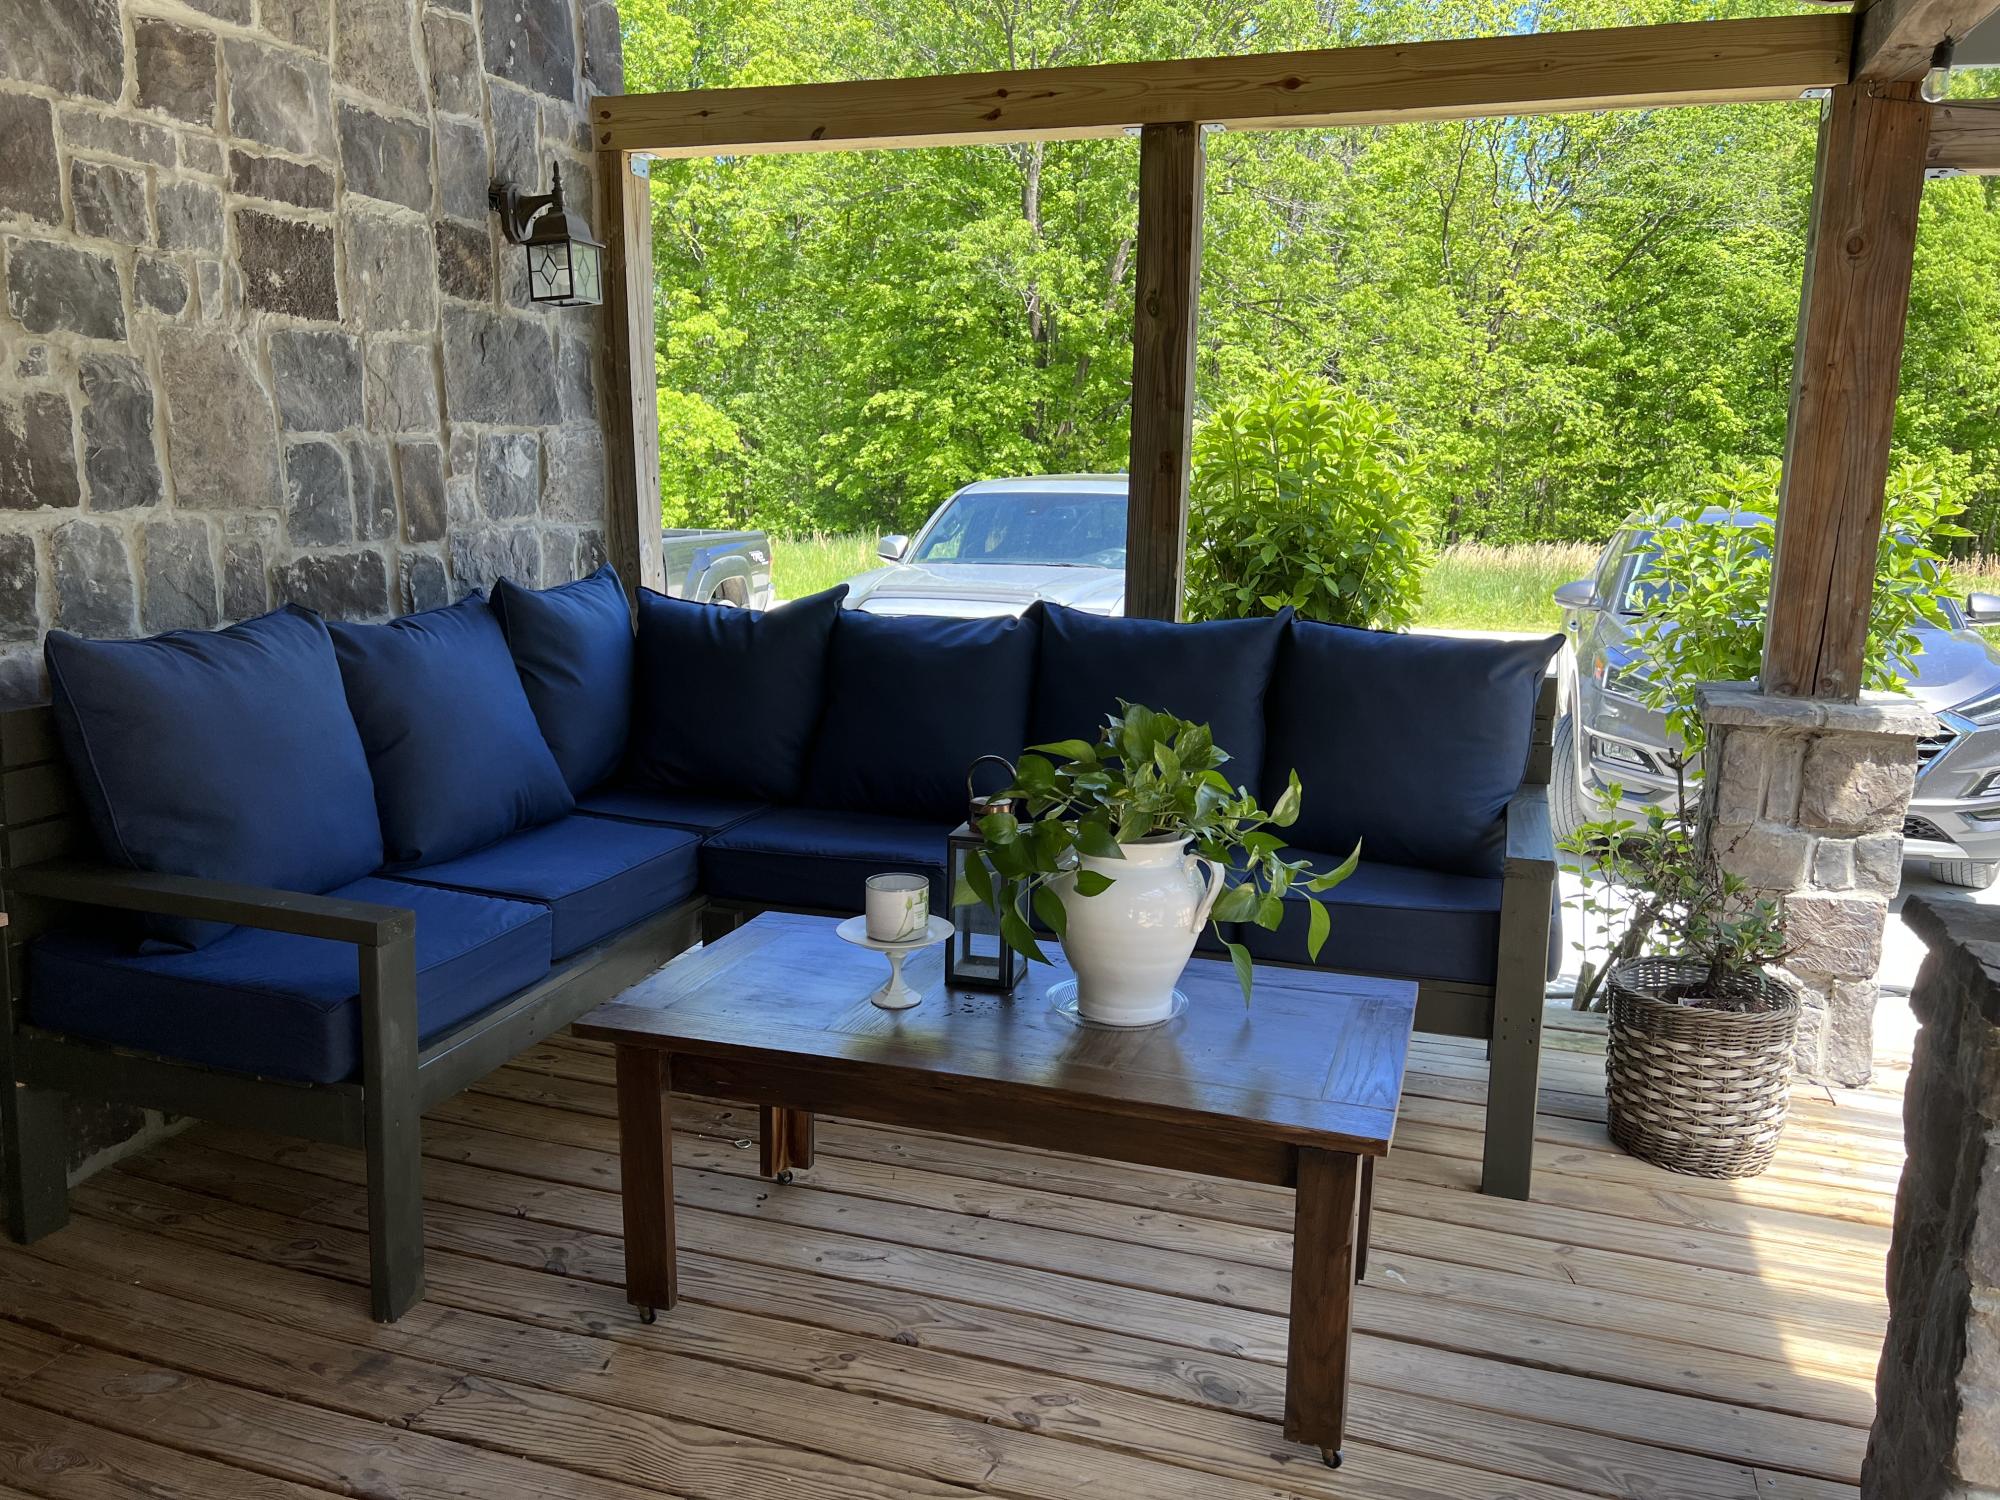
2x4 Sectional

Submitted by Anonymous (not verified) on Wed, 05/03/2023 - 12:04

My husband whipped this up in one day using Ana’s plan. This is my new favorite spot to relax.

Comments

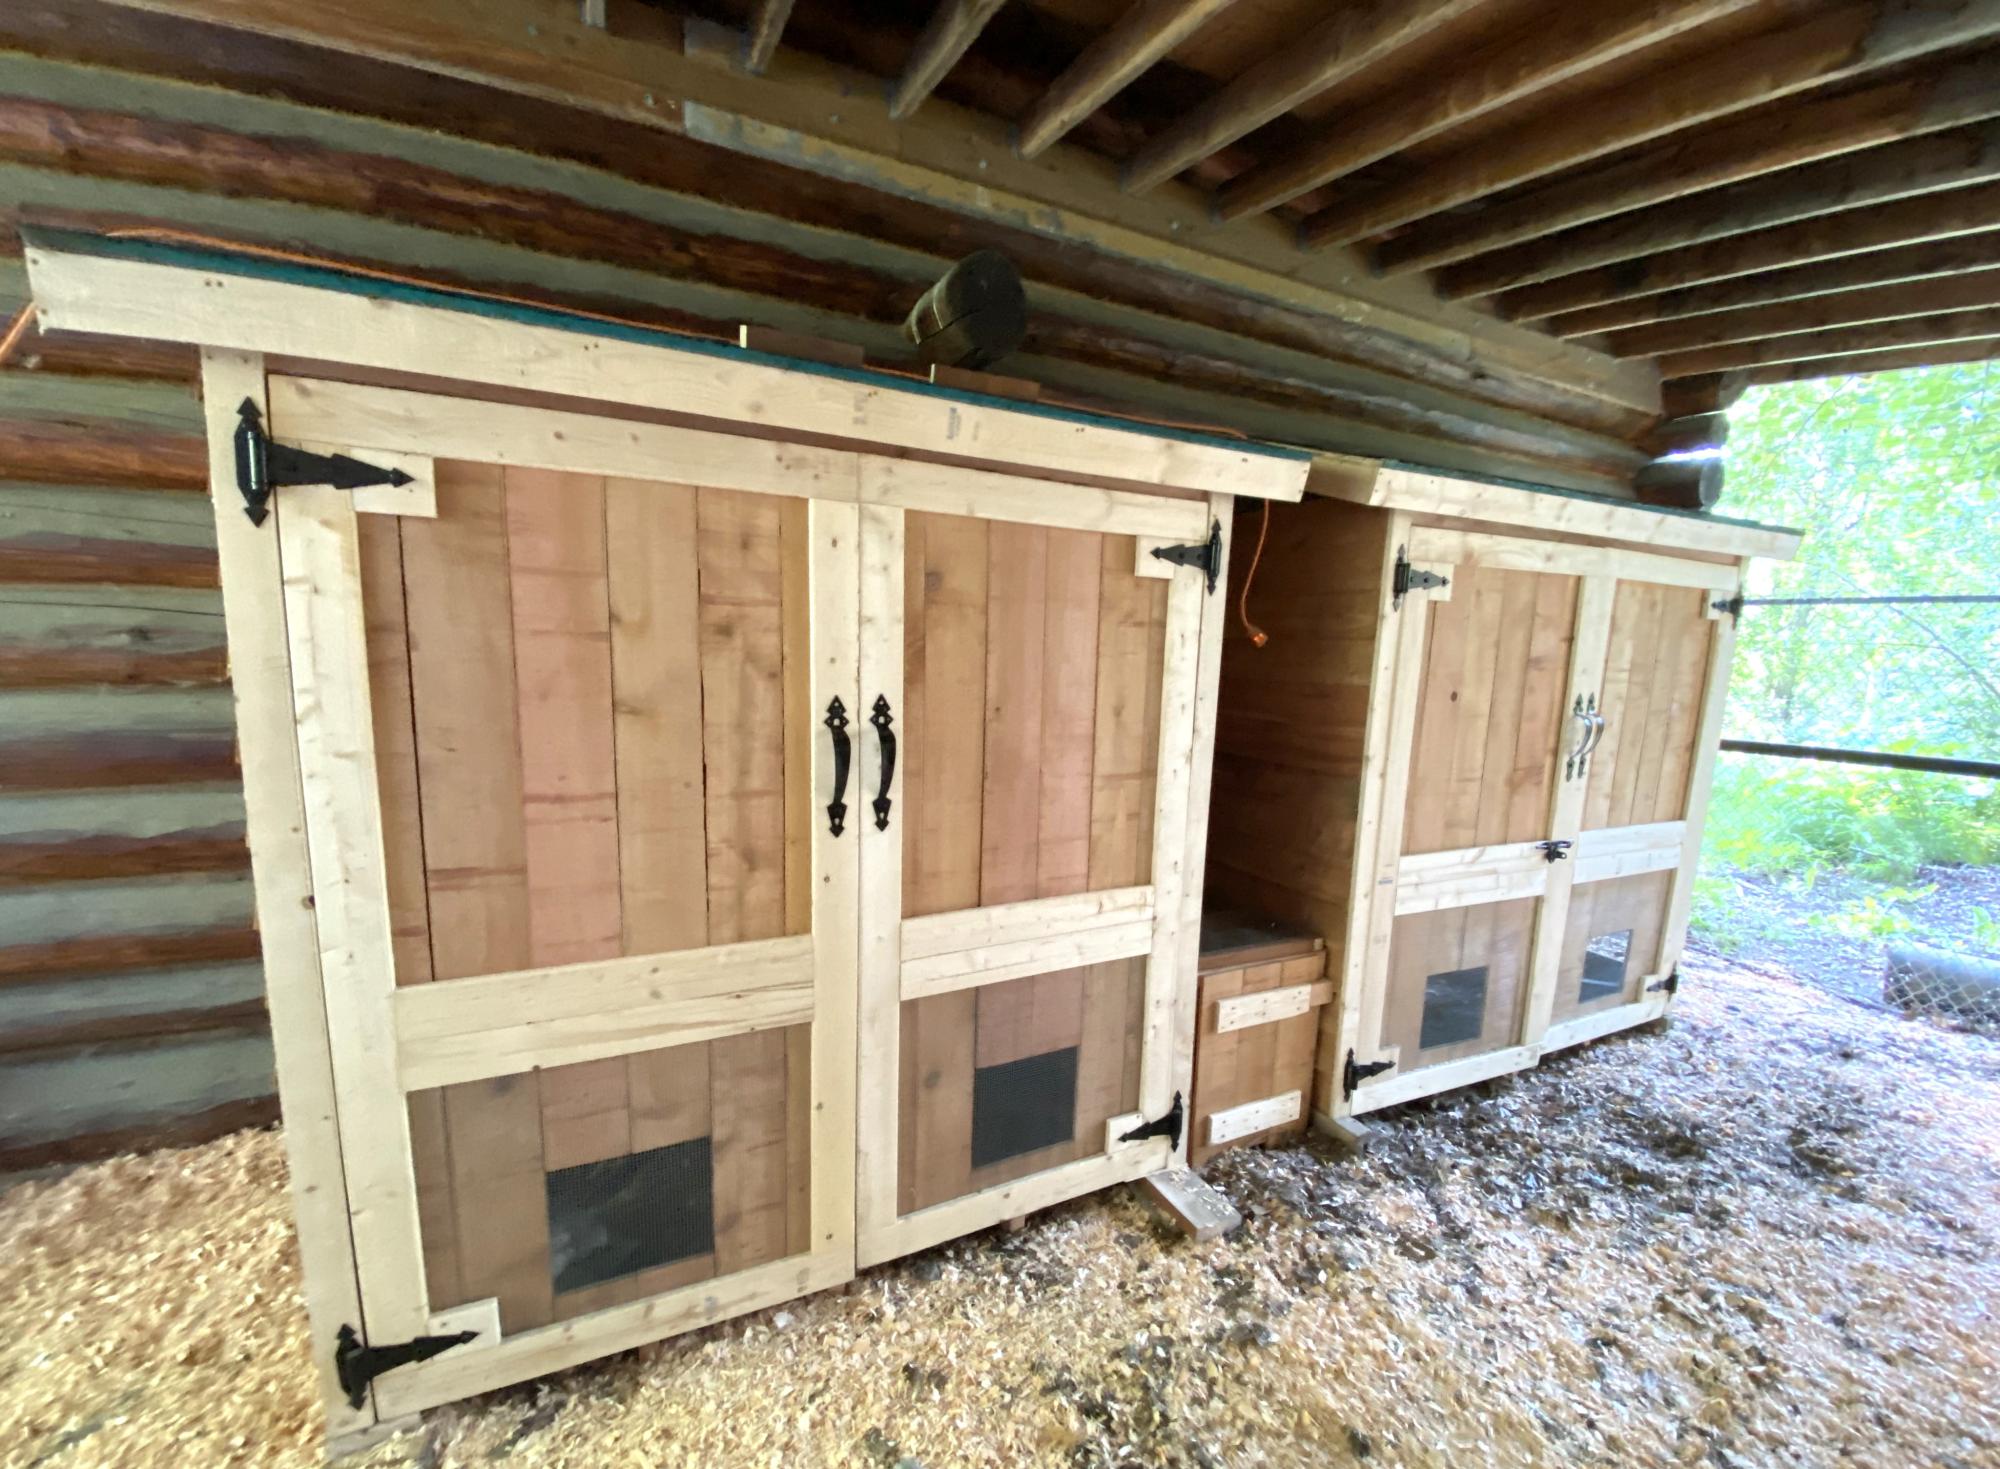
Double Shed Coop

Submitted by Anonymous (not verified) on Sat, 08/05/2023 - 09:31

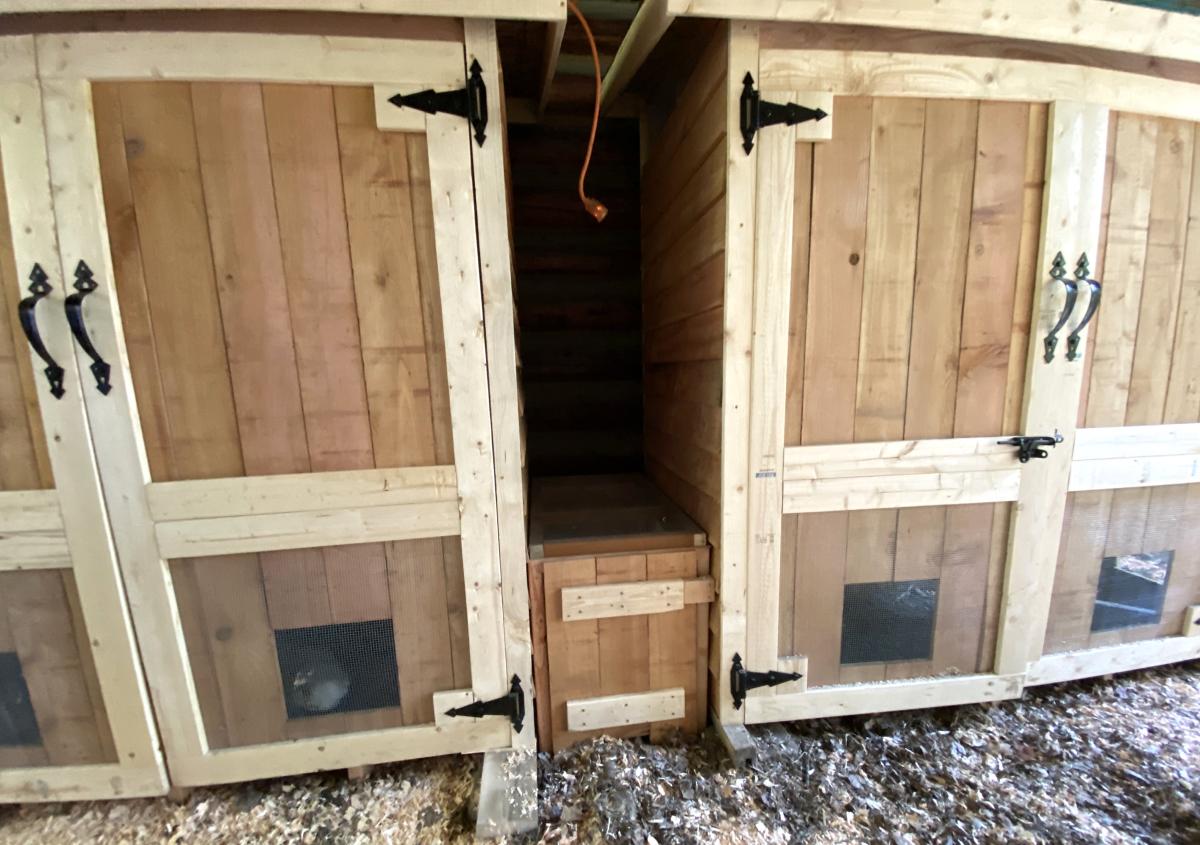
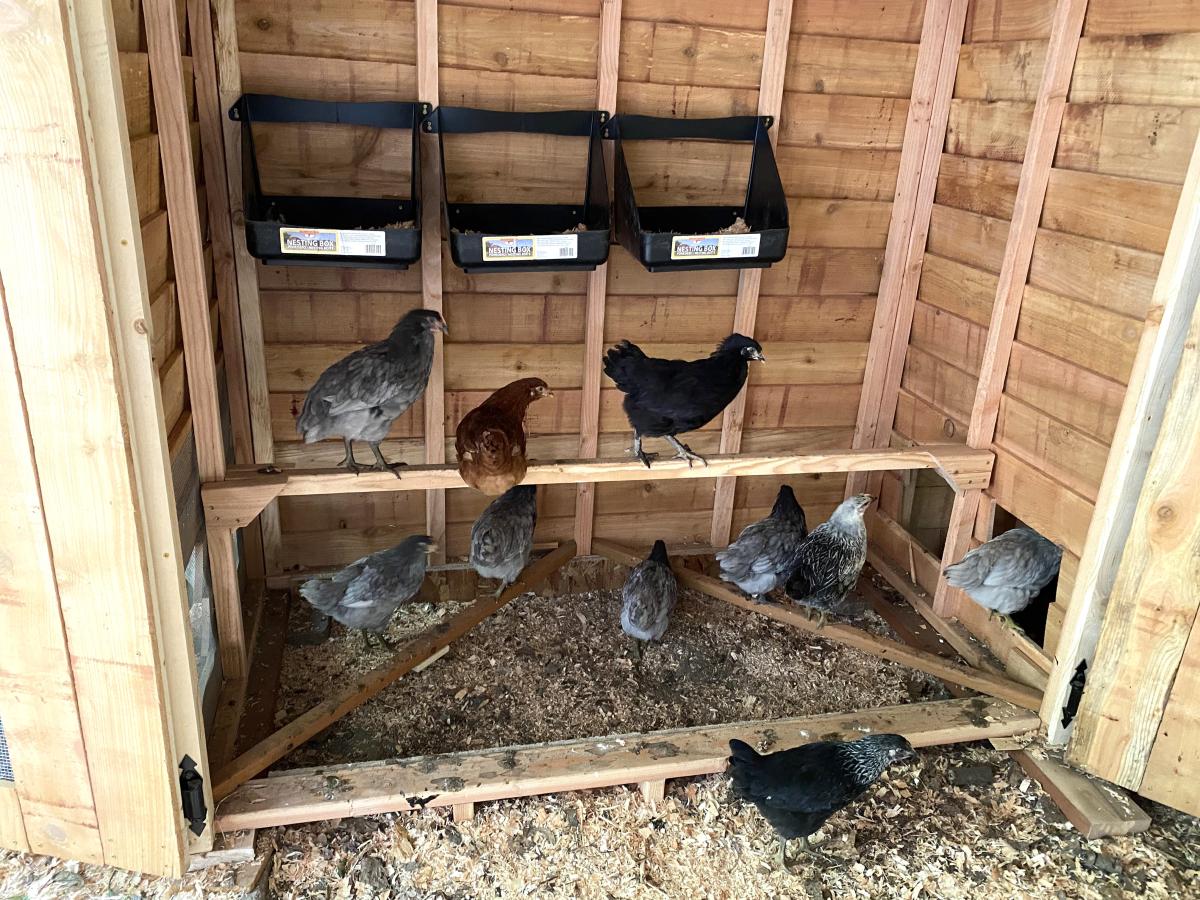
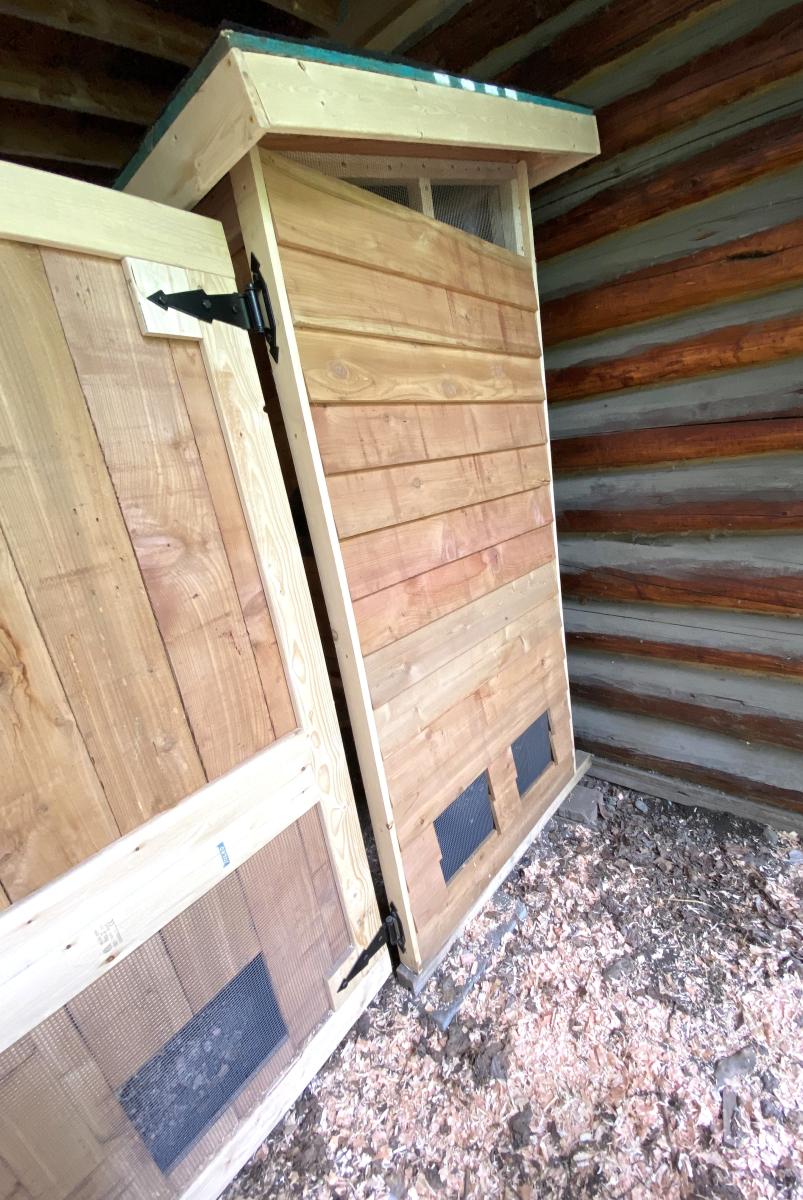
Our family decided to raise chickens but needed a place to keep them safe at night. We used your shed plan and adapted it to create necessary venting for the chicks.

Since we had 16 chickens we knew one coop would not be enough space so we built two. We created a vented tunnel between the two coops so the hens could go back and forth between them as they wished while still being protected. The girls are very happy in their new space!

Thank you for your great plans.

Holly

Built from Plan(s)

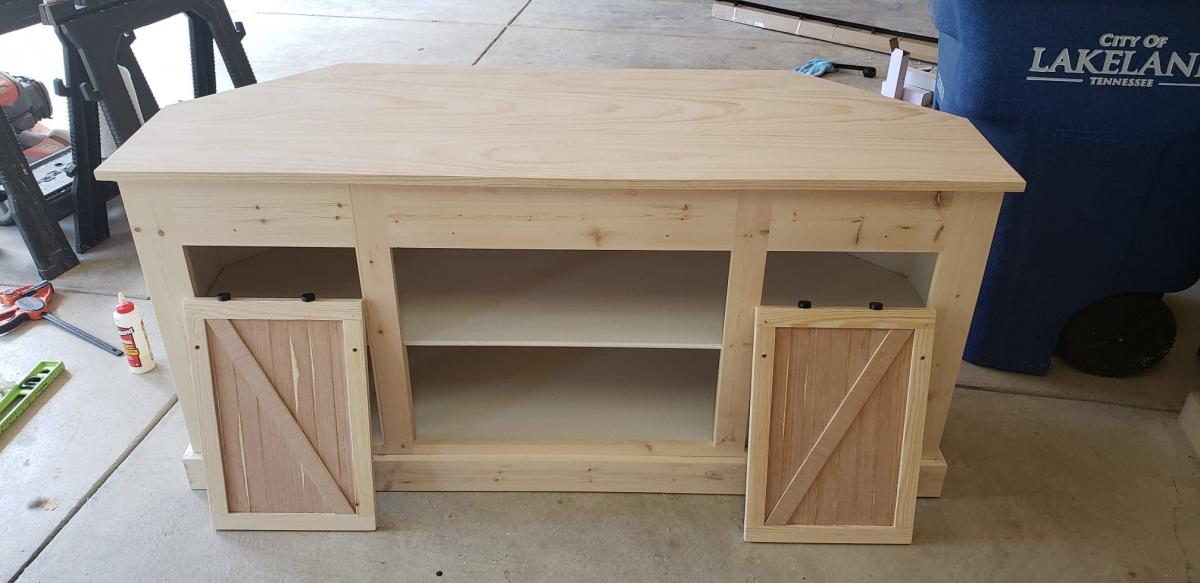
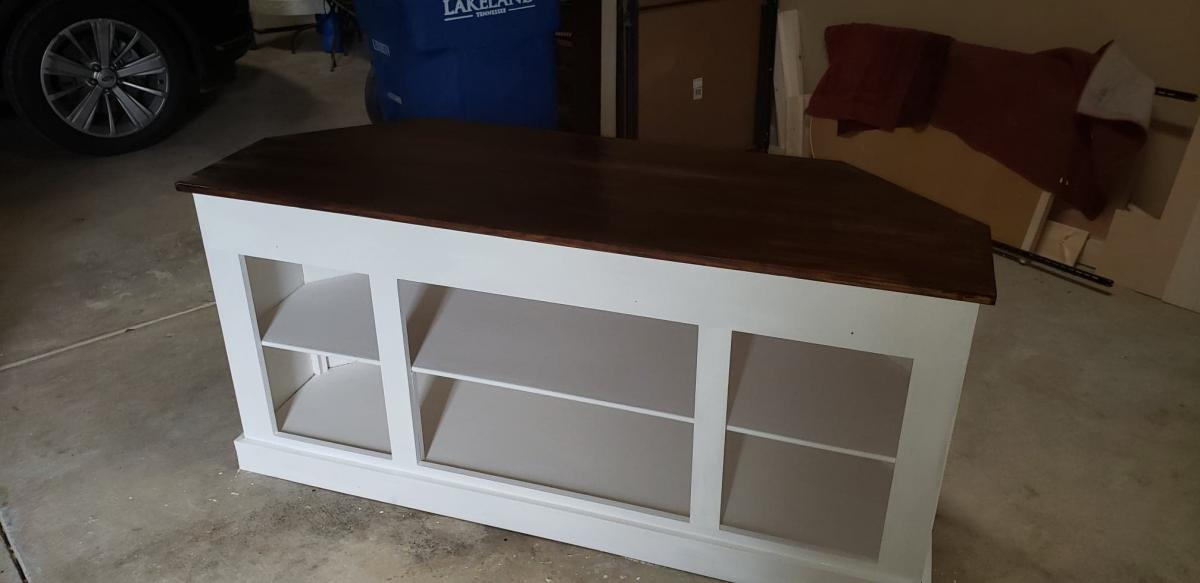
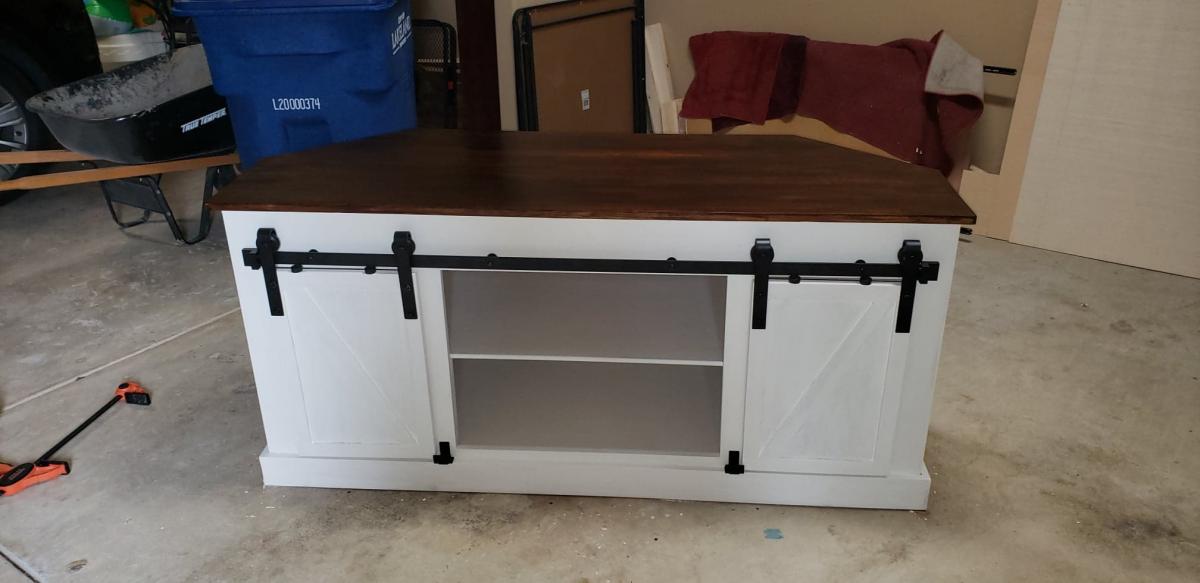
Grandy Barn Door Corner TV Stand

Submitted by Anonymous (not verified) on Wed, 01/08/2020 - 12:46

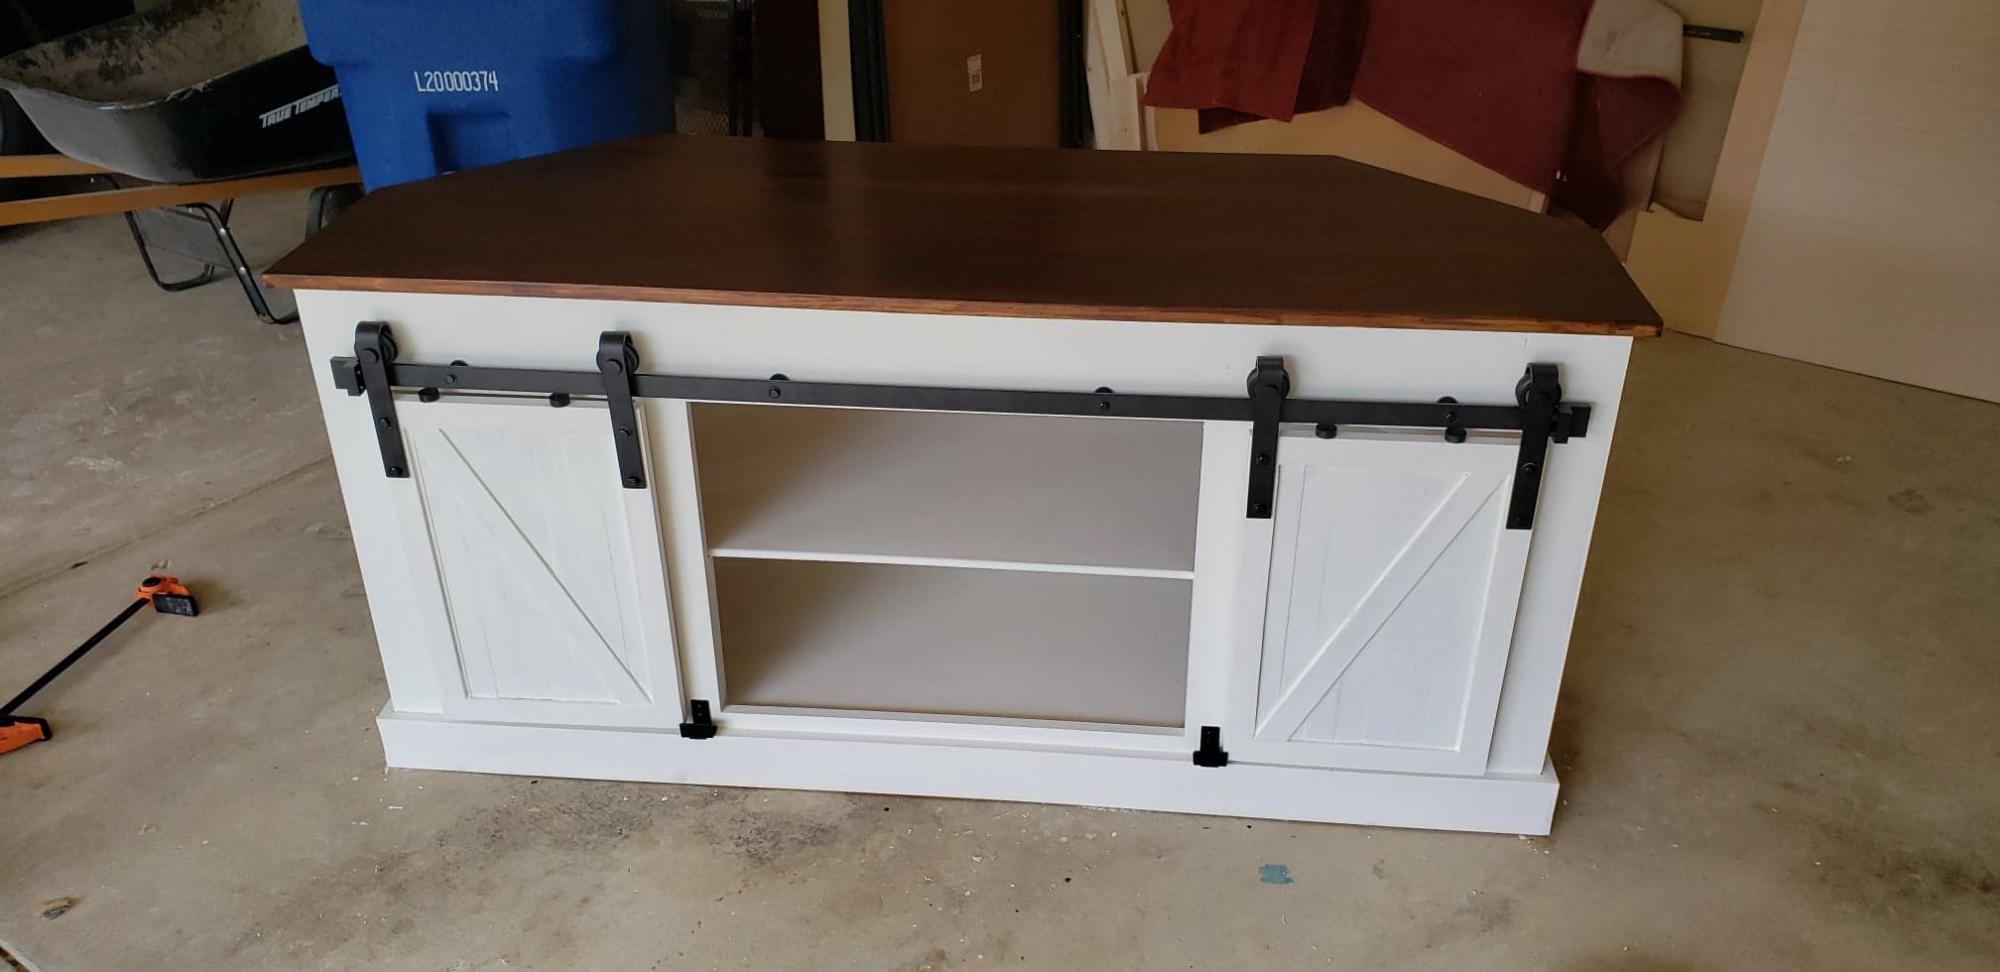
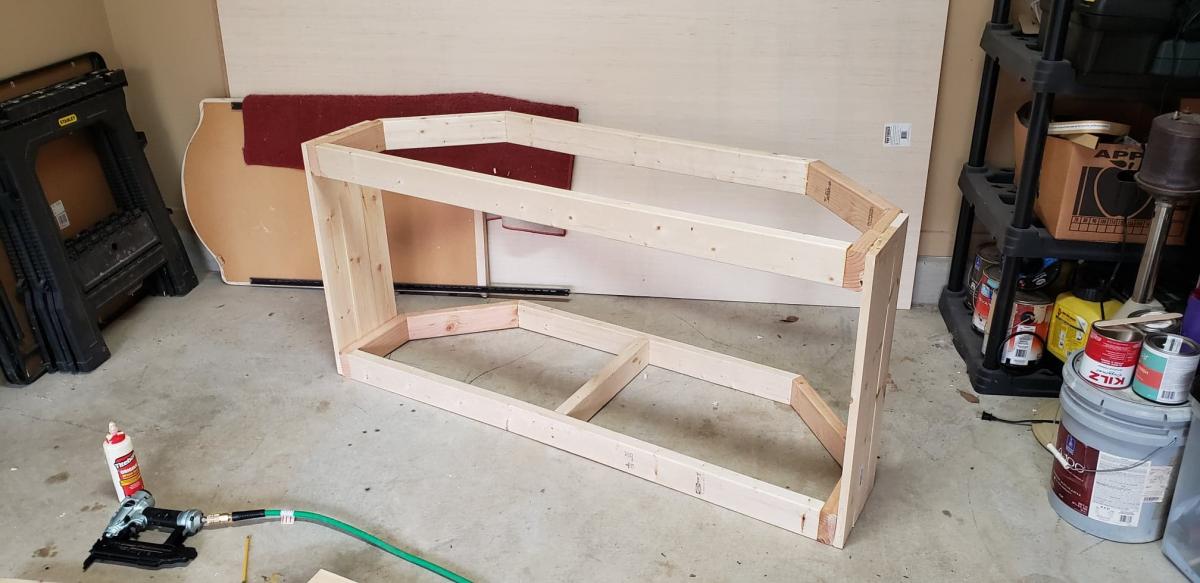
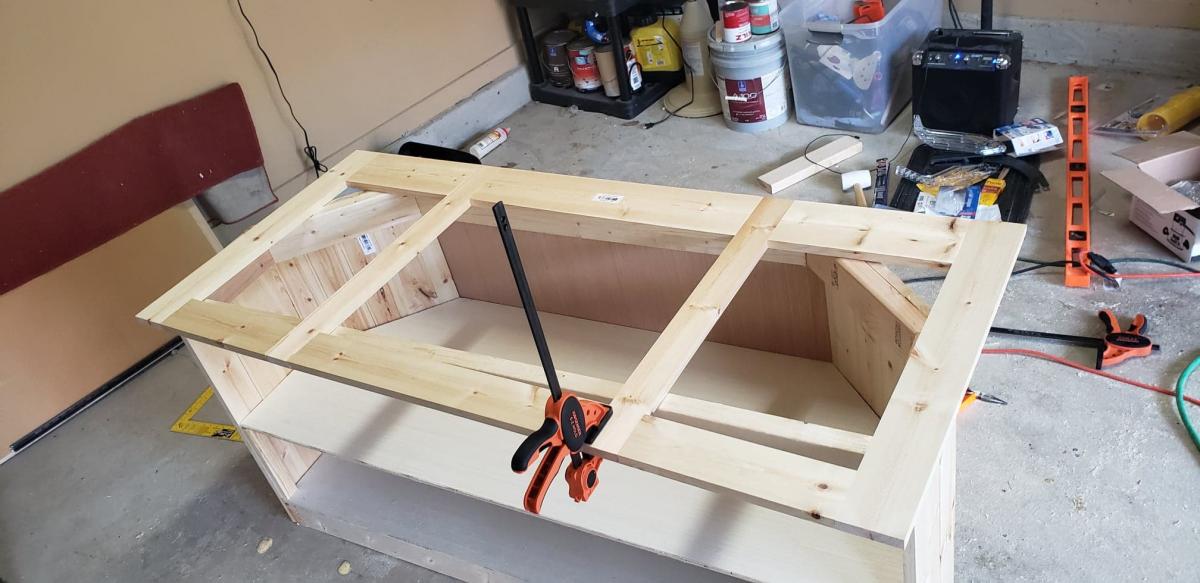
I couldn't find any corner TV stands with the barndoor style that were big enough, so I decided to design and make my own using the Grandy buffet design.

Built from Plan(s)
Estimated Cost
200-300
Estimated Time Investment
Week Long Project (20 Hours or More)
Finish Used
Minwax Polyshades Satin
Wax paint
Recommended Skill Level
Beginner

Comments

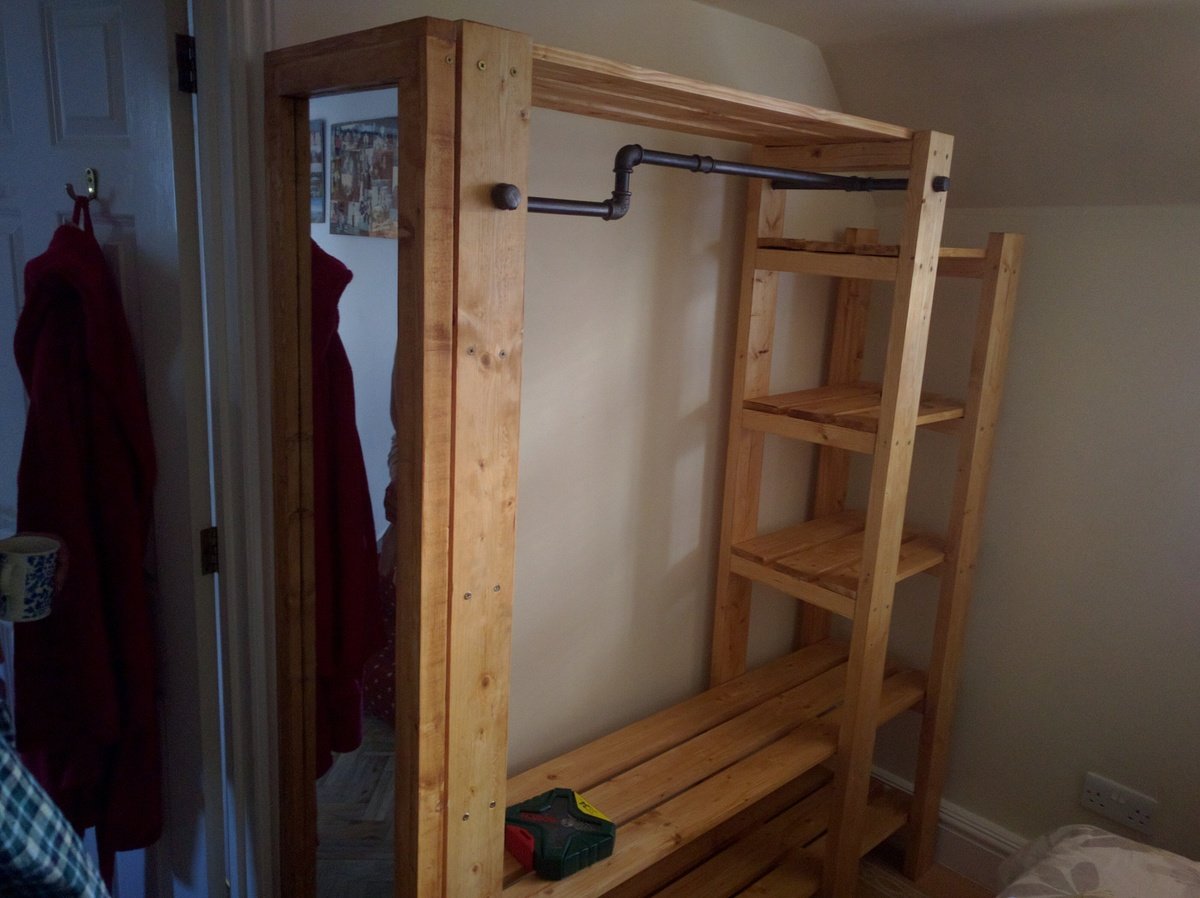
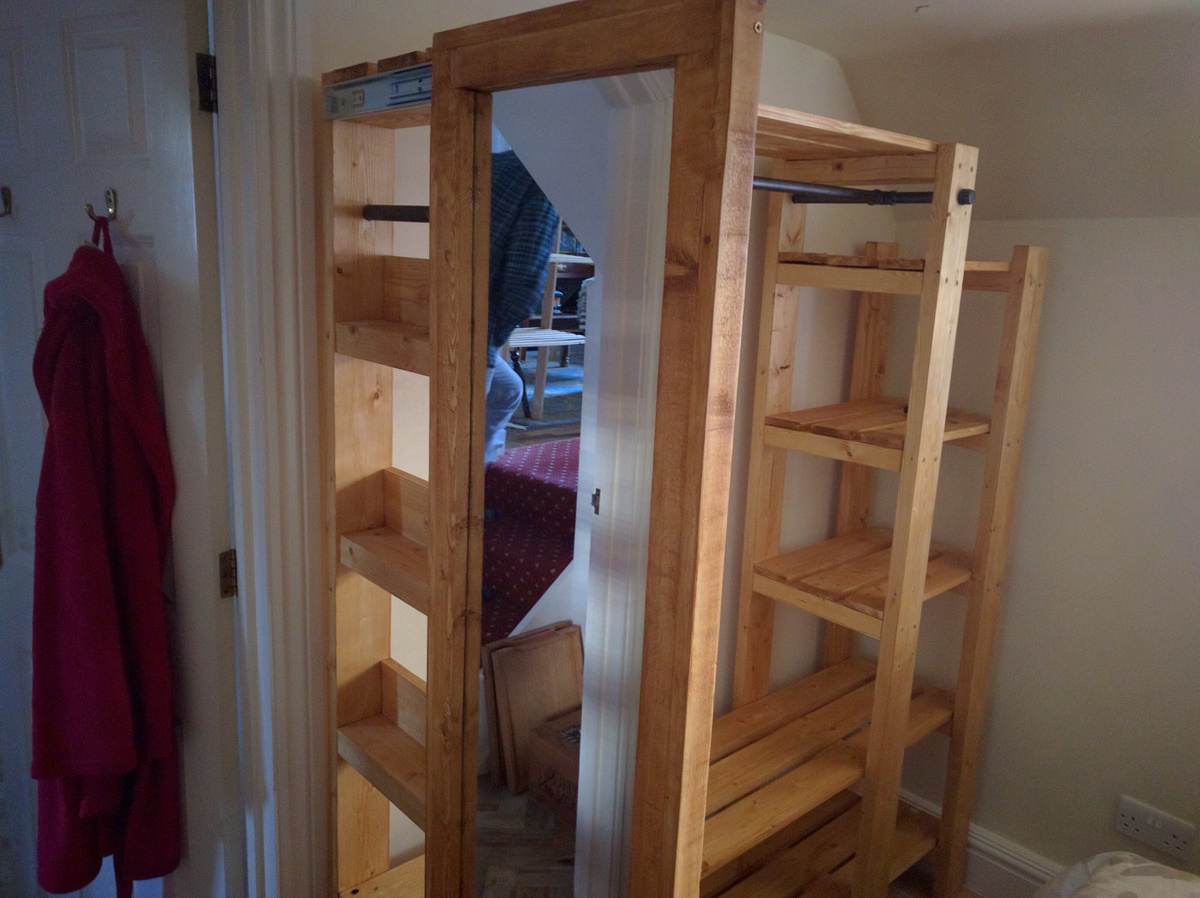
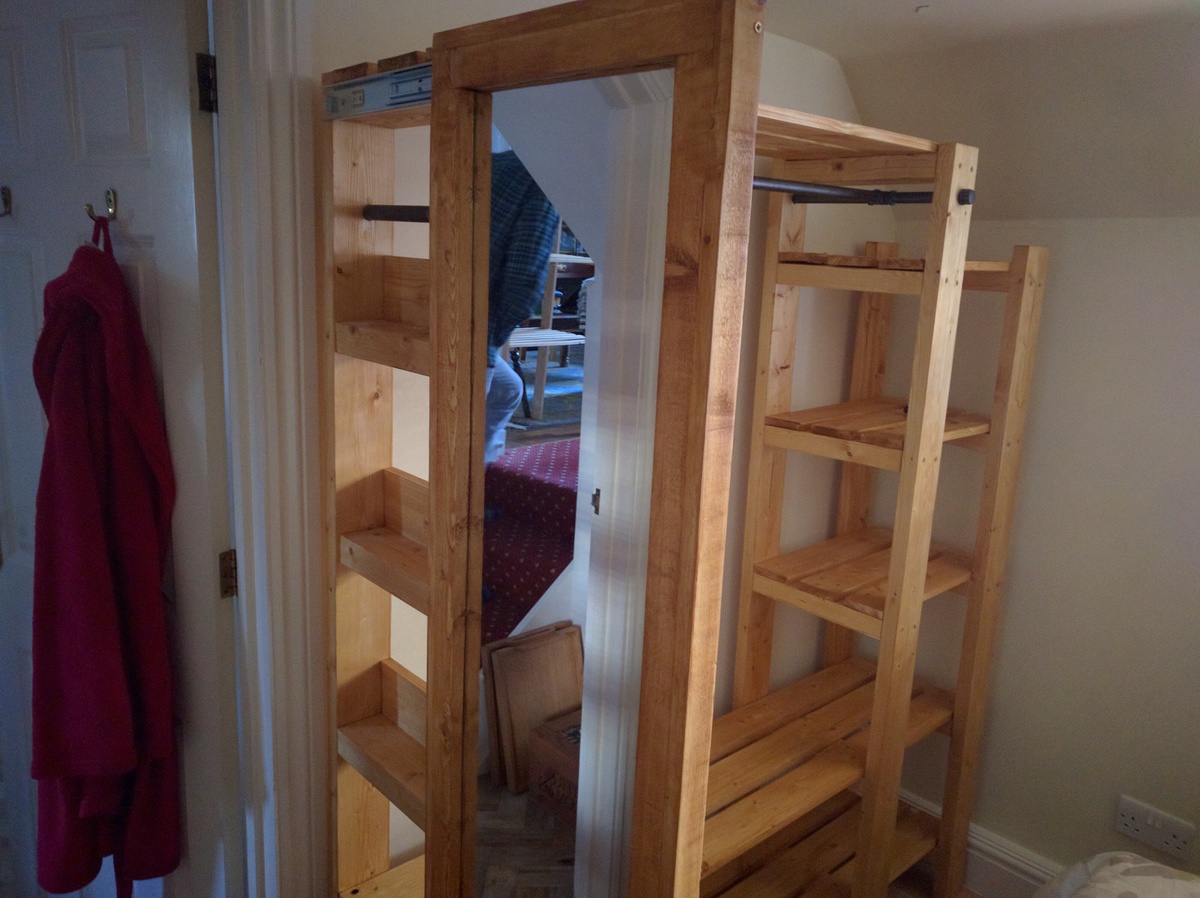
Two Ana-White designs - open wardrobe with sliding mirror cabinet

Submitted by Anonymous (not verified) on Mon, 04/25/2016 - 04:43

Inspired by both Ana's Industrial Closet design and the Sliding Mirror Cabinet.

Making maximum use out of a small space, bought a mirror from Ikea and removed it from the existing frame, everything made in virgin wood from DIY store. Two tier clothes rail to separate big coats from other clothes, two height shelf system to accomodate sloped ceiling. A lot of fun to make!

Estimated Cost
£120
Estimated Time Investment
Weekend Project (10-20 Hours)
Finish Used
Antique Pine Rustoleum varnish
Recommended Skill Level
Beginner

Comments

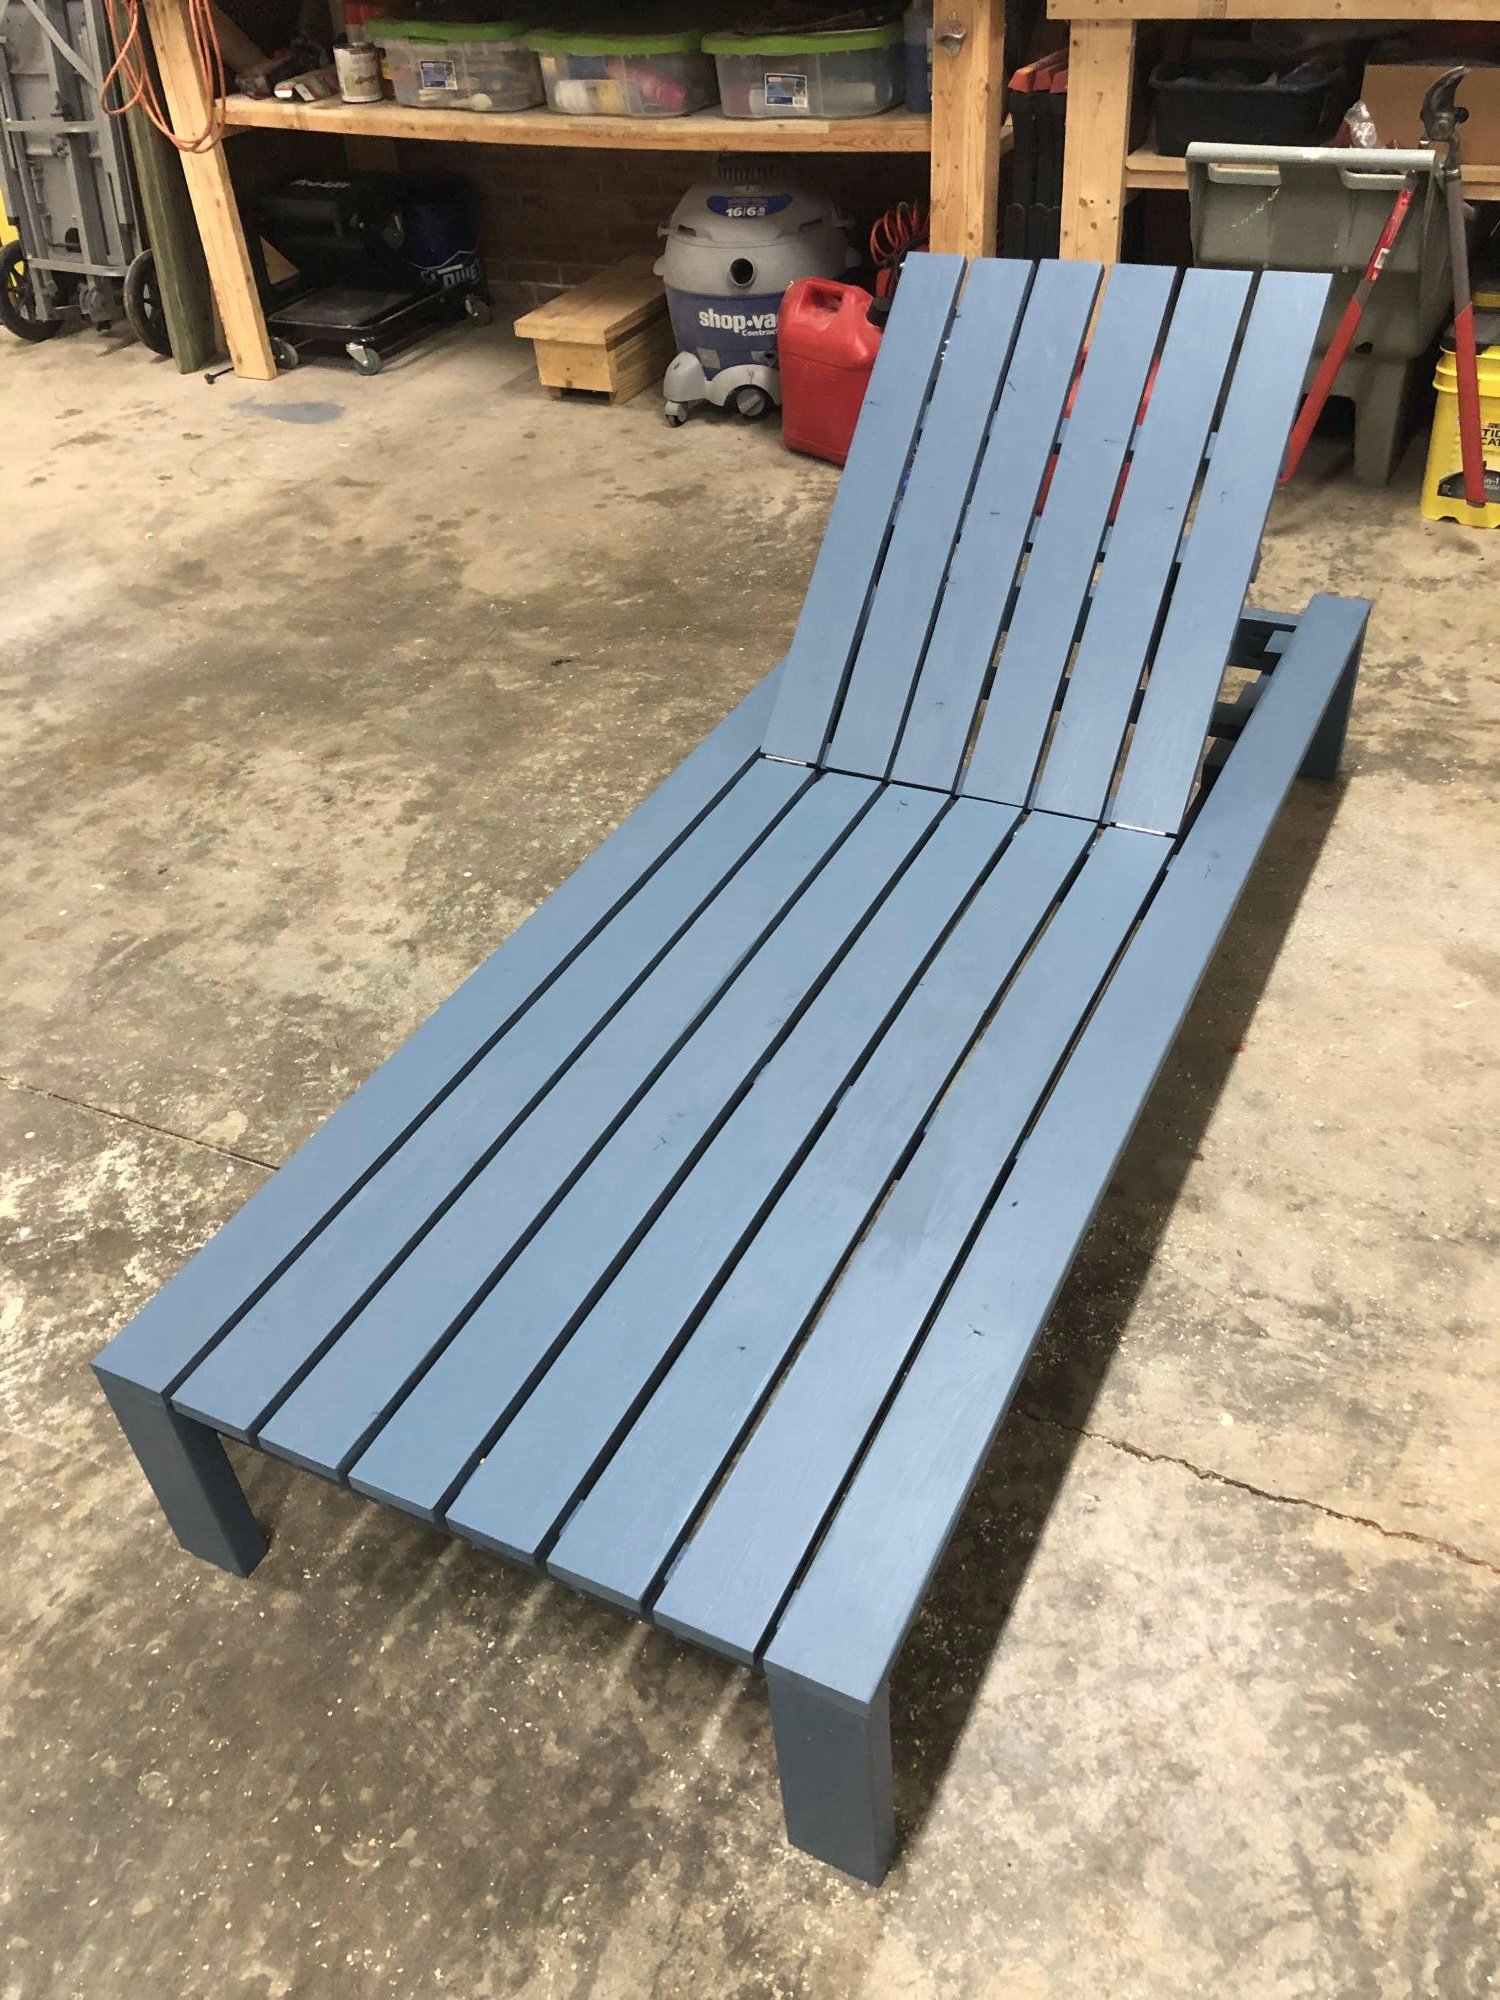
Pottery Barn Inspired Chaise Lounger

Submitted by gtd869 on Wed, 04/15/2020 - 20:34

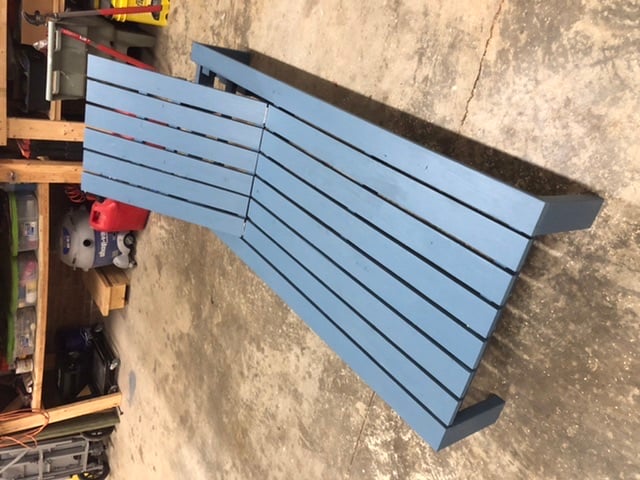
I followed Ana’s Modern Chaise build. The number of 2x4’s specified in the instructions is incorrect. You need 3 not 2. Other than that, a great plan.

Comments

Mimi's (Free!) Storage Bench

Submitted by leamboyd on Tue, 05/29/2012 - 19:37

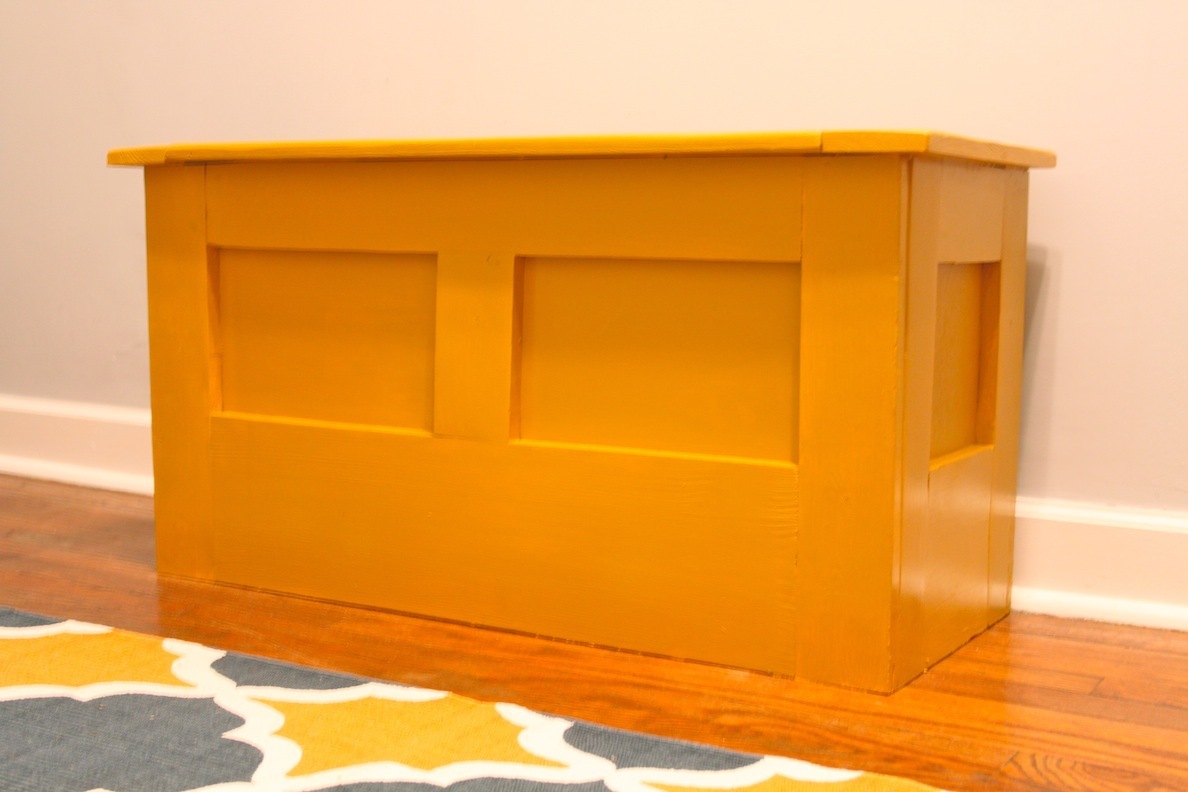
I've been looking for a bench for our hallway for months and have yet to find one I love, but I did fall in love with Mimi's Storage Bench and Hall Tree.

I was determined to make this bench for free. My husband scavenged construction sites for salvage and brought me home quite a bit of scrap. Once I had a nice assortment of boards, I began the job of making them fit the specs. This was much more time consuming than purchasing boards that were the right size to start with. I got quite familiar with the planer (I had to plane down 2x's to 1x's) and even faced the terrifying table saw to rip a few boards down to size.

The lid was made from an old shelf and the inside panels are an old painting from art school--on masonite--that I finally brought myself to part (with). I already had the paint left over from a table I made over, so that was also free!

It didn't take much convincing to get my husband to pick up a pockethole jig. He's been wanting one himself. It was actually a lot more fun and much easier to use than I expected.

Overall, I'm very pleased with the way it turned out. It's made out of some pretty rough wood, so there are a few holes I'll go back and fill in the future--or maybe not. There are also some rough spots and less-than-true boards, but not bad for a free piece of furniture.

This was my first big woodworking project. It was a lot of fun and I gained a lot of knowledge and confidence that I'll use to build more ambitious projects in the future. I think woodworking is actually easier than sewing because boards generally don't stretch, shift, snag, and unravel while you're working.

I plan to scale this plan down, add some safety hinges, and notch the board under the front of the lid to make a bench/toy box for my little girl's room.

Built from Plan(s)
Estimated Cost
0.00
Estimated Time Investment
Weekend Project (10-20 Hours)
Finish Used
Sherwin Williams Enamel in "Cut The Mustard."
Recommended Skill Level
Intermediate

Comments

brookifer86

Tue, 05/29/2012 - 19:45

While I love the bench (great job!) that rug is just fantastic! Do you mind sharing where it's from?

leamboyd

Tue, 05/29/2012 - 20:04

Thanks. The rug is from T.J. Maxx. The brand is Zalya. Downside: It can't be washed. The dyes on a similar rug I had bled all over and ruined it. It'll be nice while it lasts. :)

Raised Bed Garden Enclosure

Submitted by Anonymous (not verified) on Tue, 06/21/2016 - 08:07

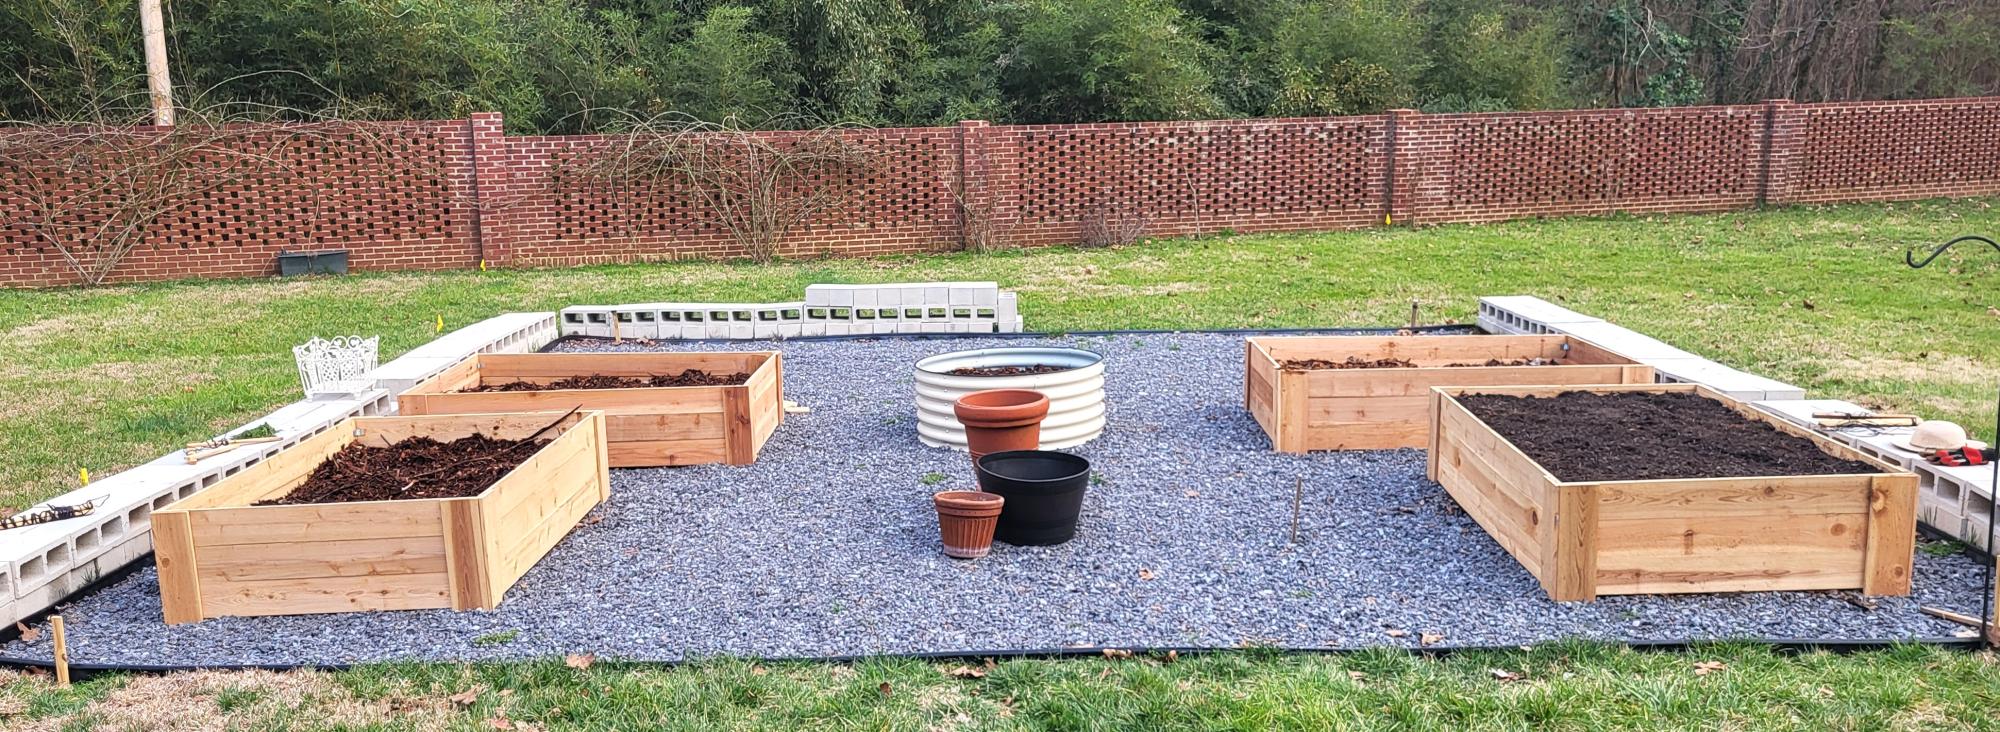
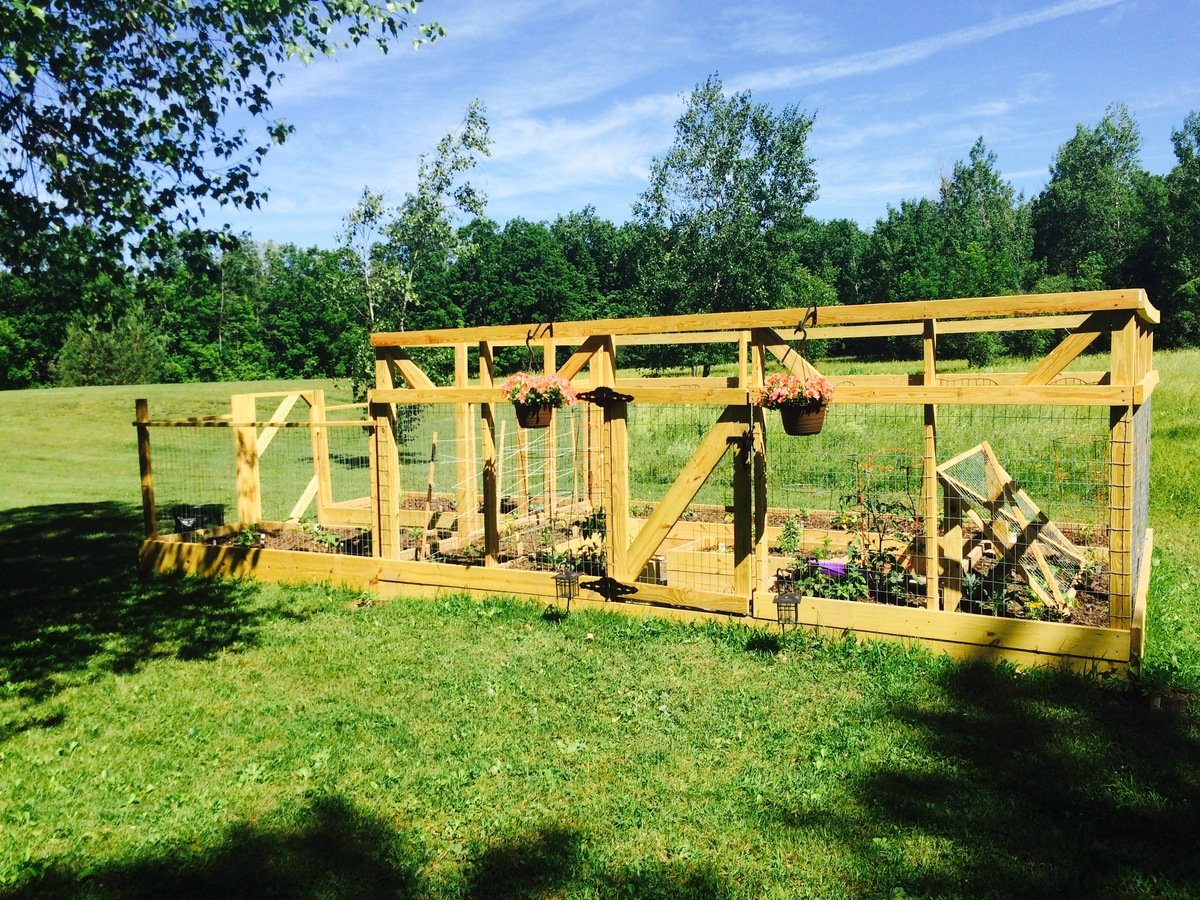
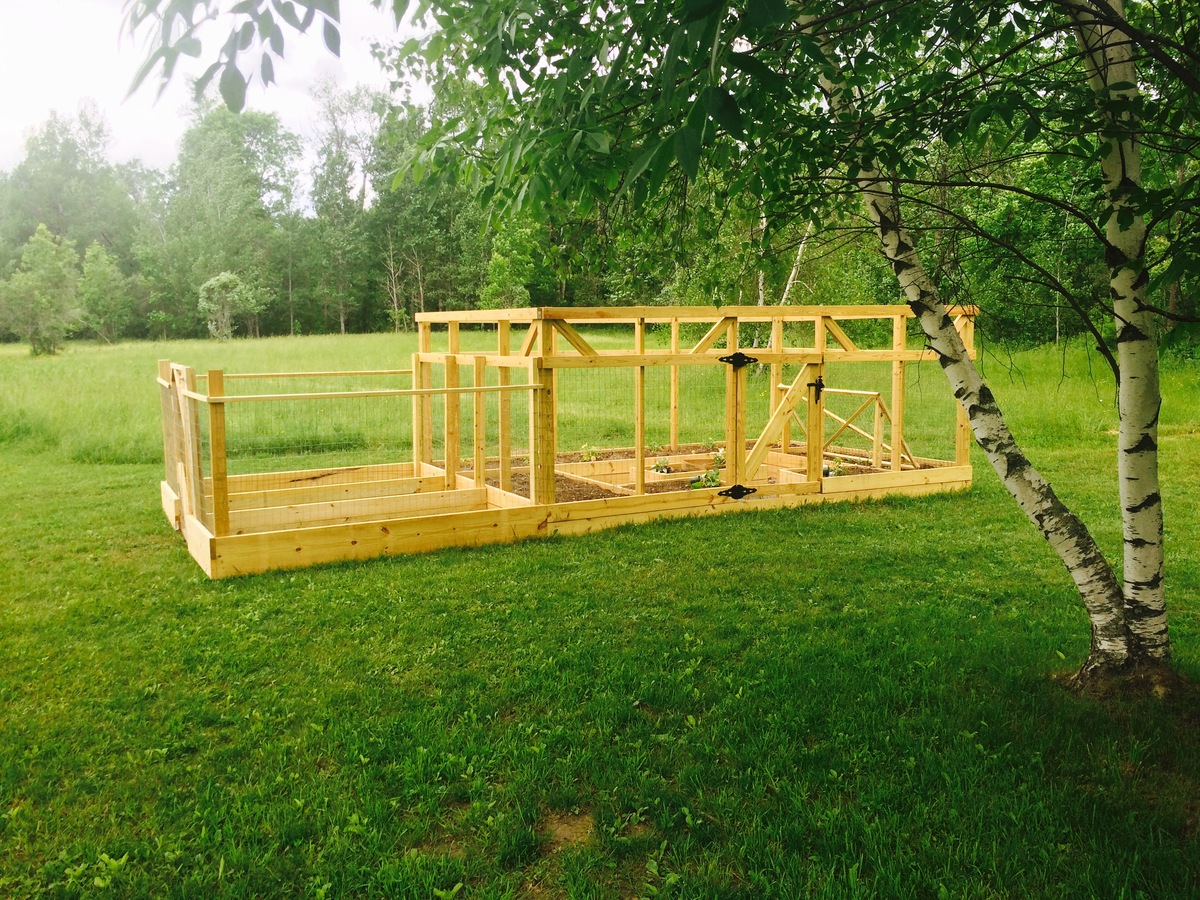
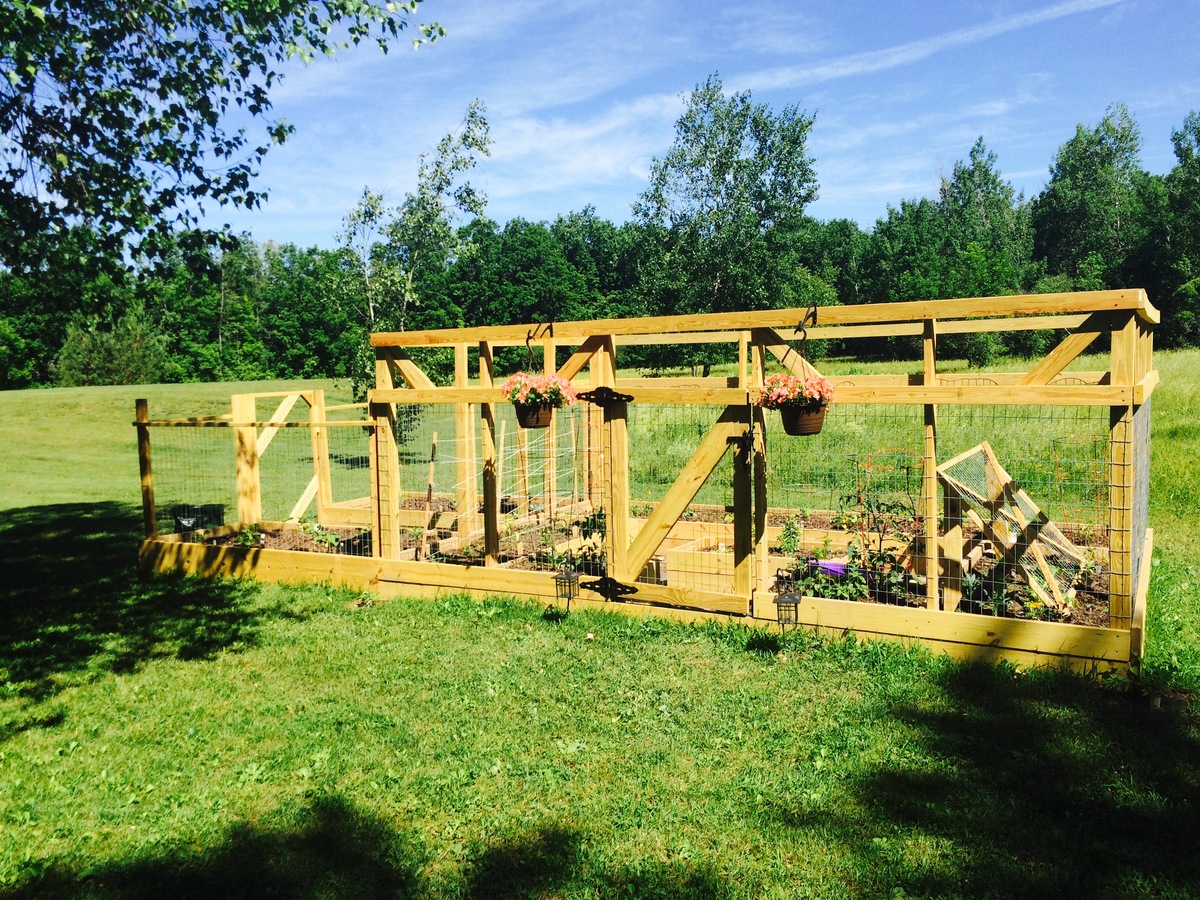
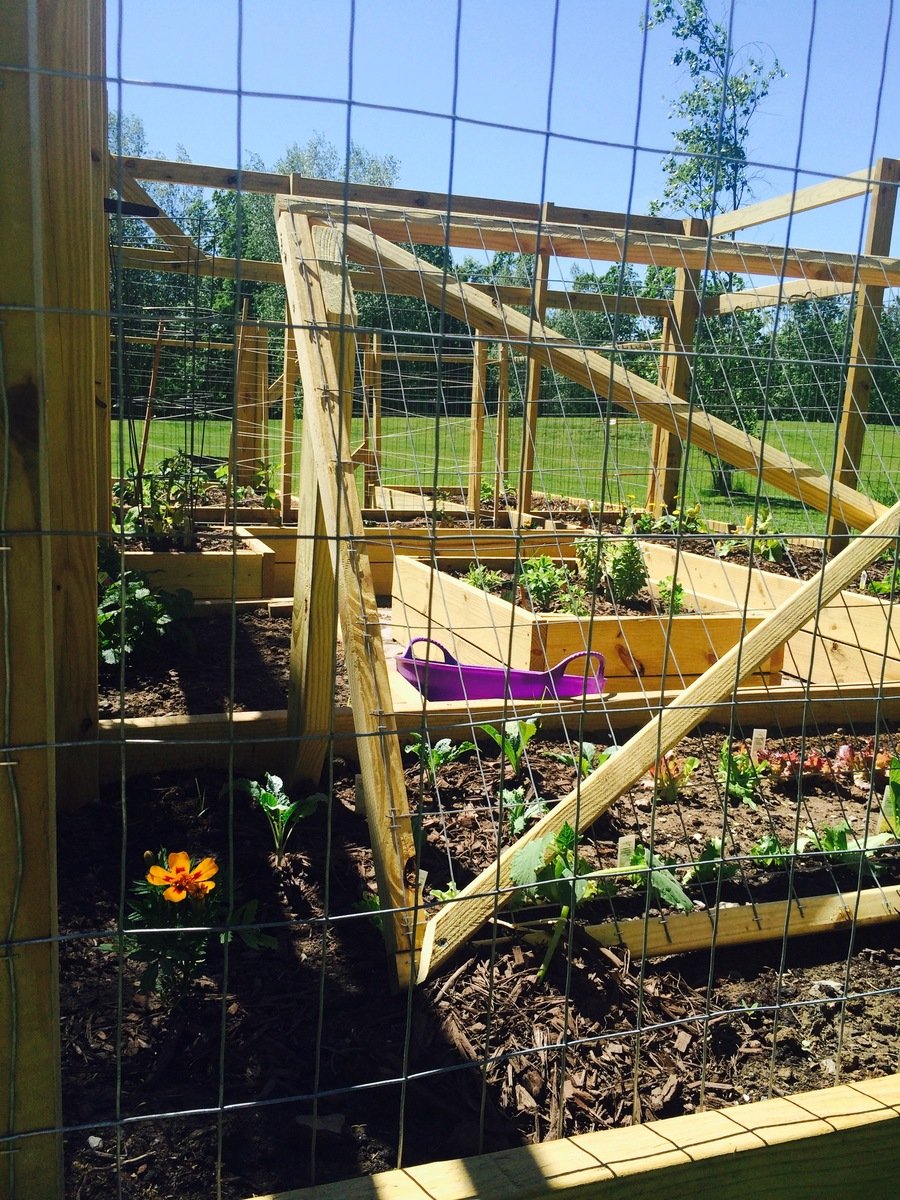
With lots of deer, rabbits, coyotes, and the occasional bear, garden enclosures are a must in our area (although I am not sure they will really help if a bear decides they're interested in our food). As our old garden enclosure was falling down due to the high winds and a quite a few winters in upstate New York, my mom found a horseshoe shaped garden with rasied beds that she loved. So, after searching around for a good plan, I found Ana White's collaboration with Home Depot for this enclosure.

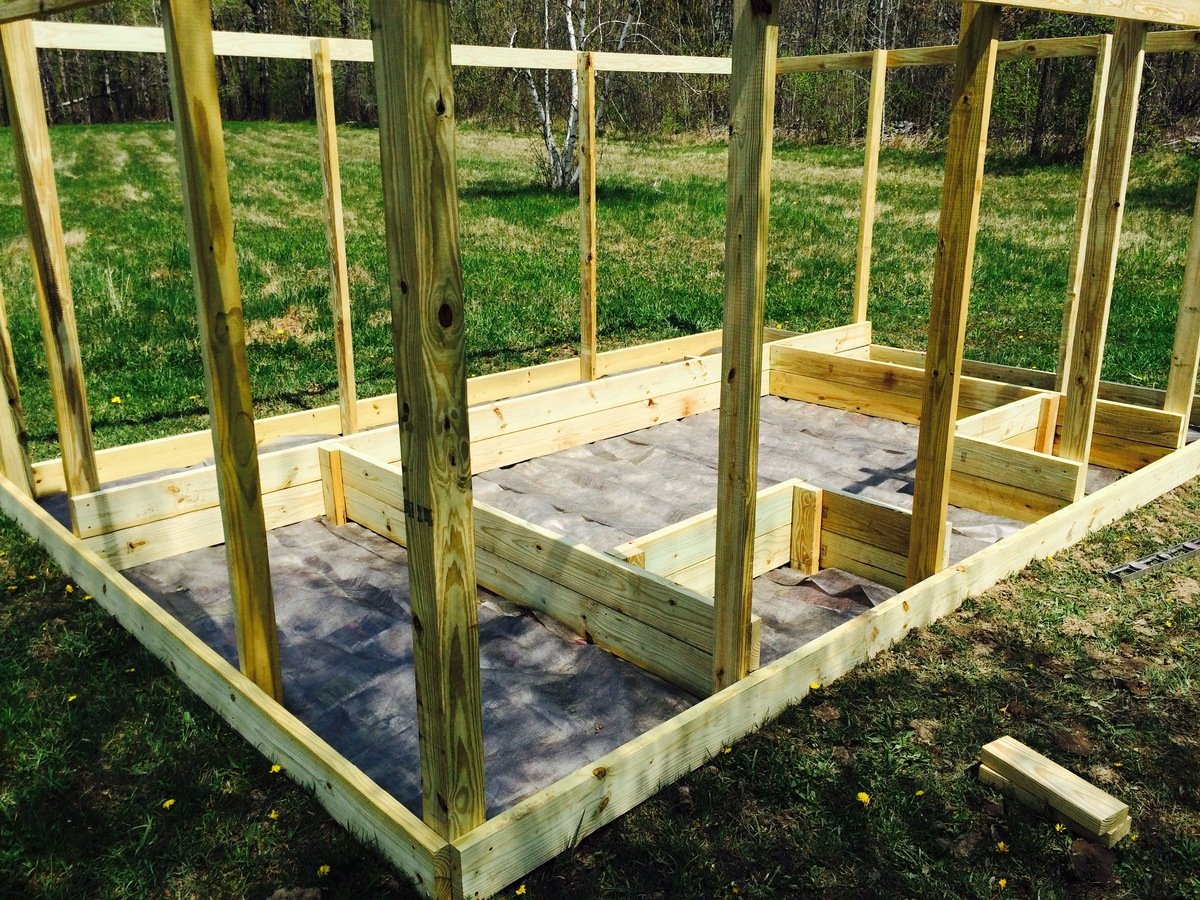
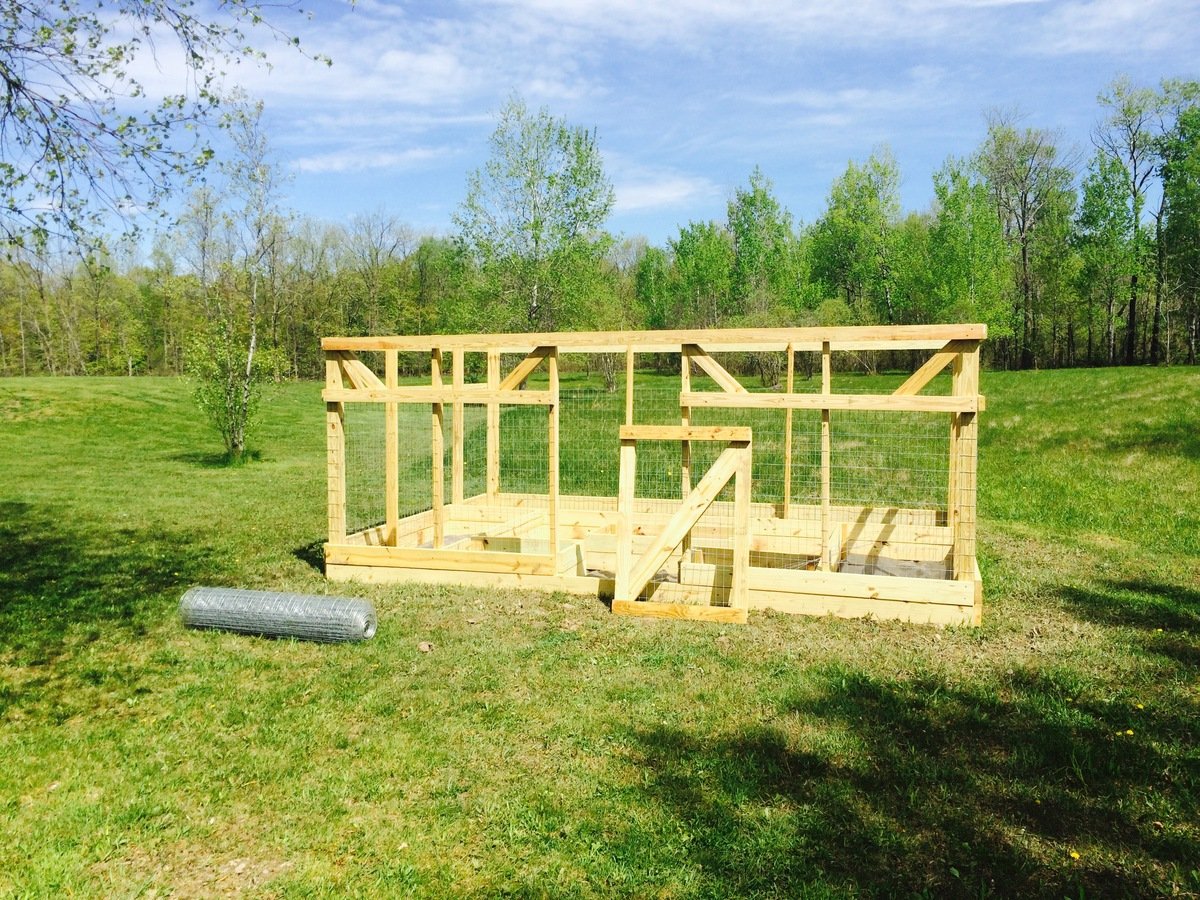
While the original plan was far too small for our needs, I was able to expand the length of the enclosure creating enough room to add two small beds on either side of the door and a center bed, which is perfect for herbs. The build was not difficult as I was able to do most of it by myself (with the exception of contructing the frame and attaching the door) and I am sure this would go much quicker with an extra set of hands. As I did not have a large chunk of time to devote to this project, it did take me quite some time stretched over a few weeks. Nonetheless, I am very happy with how it turned out.

After construction, my family got a little garden happy and decided we wanted to plant even more vegetables than we had originally planned. So, we created a much simpler but nonetheless less pest-proof enclosure for two more beds to the left of our original project (shown in the photos).

Although this was an expensive project (exact price is unkown), it is quite sturdy and we expect it to last a long time and provide lots of vegetables. We added some hanging baskets for decoration and decided next year we will add some morning glories around the outside corners for some extra shade during the afternoons. Some minor alterations also included a latch that allows us to open and close the door from both sides, we actually picked up a gate latch kit for this part of the project, and using welded wire fencing instead of chicken wire. While the welded wire added to the cost, it will hold up better to the wind and snow and is still protective enough to keep out our main predators.

Thanks so much for the plans Ana! In the begining, our neighbors joked we were building a guest house :). I have included some photos from throughout the build as well.
Built from Plan(s)
Estimated Cost
~$500?, we had to make some adjustments in size and swap out some materials due to the high winds we get, so this could probably be done for cheaper. The cost is also a guess as I am not completely sure what the total came to after many trips to the store. Nonetheless, our garden is twice the size of the enclosure kits Home Depot and other stores sell for what I predict to be more than twice the cost.
Estimated Time Investment
Week Long Project (20 Hours or More)
Finish Used
Unfinished
Recommended Skill Level
Beginner

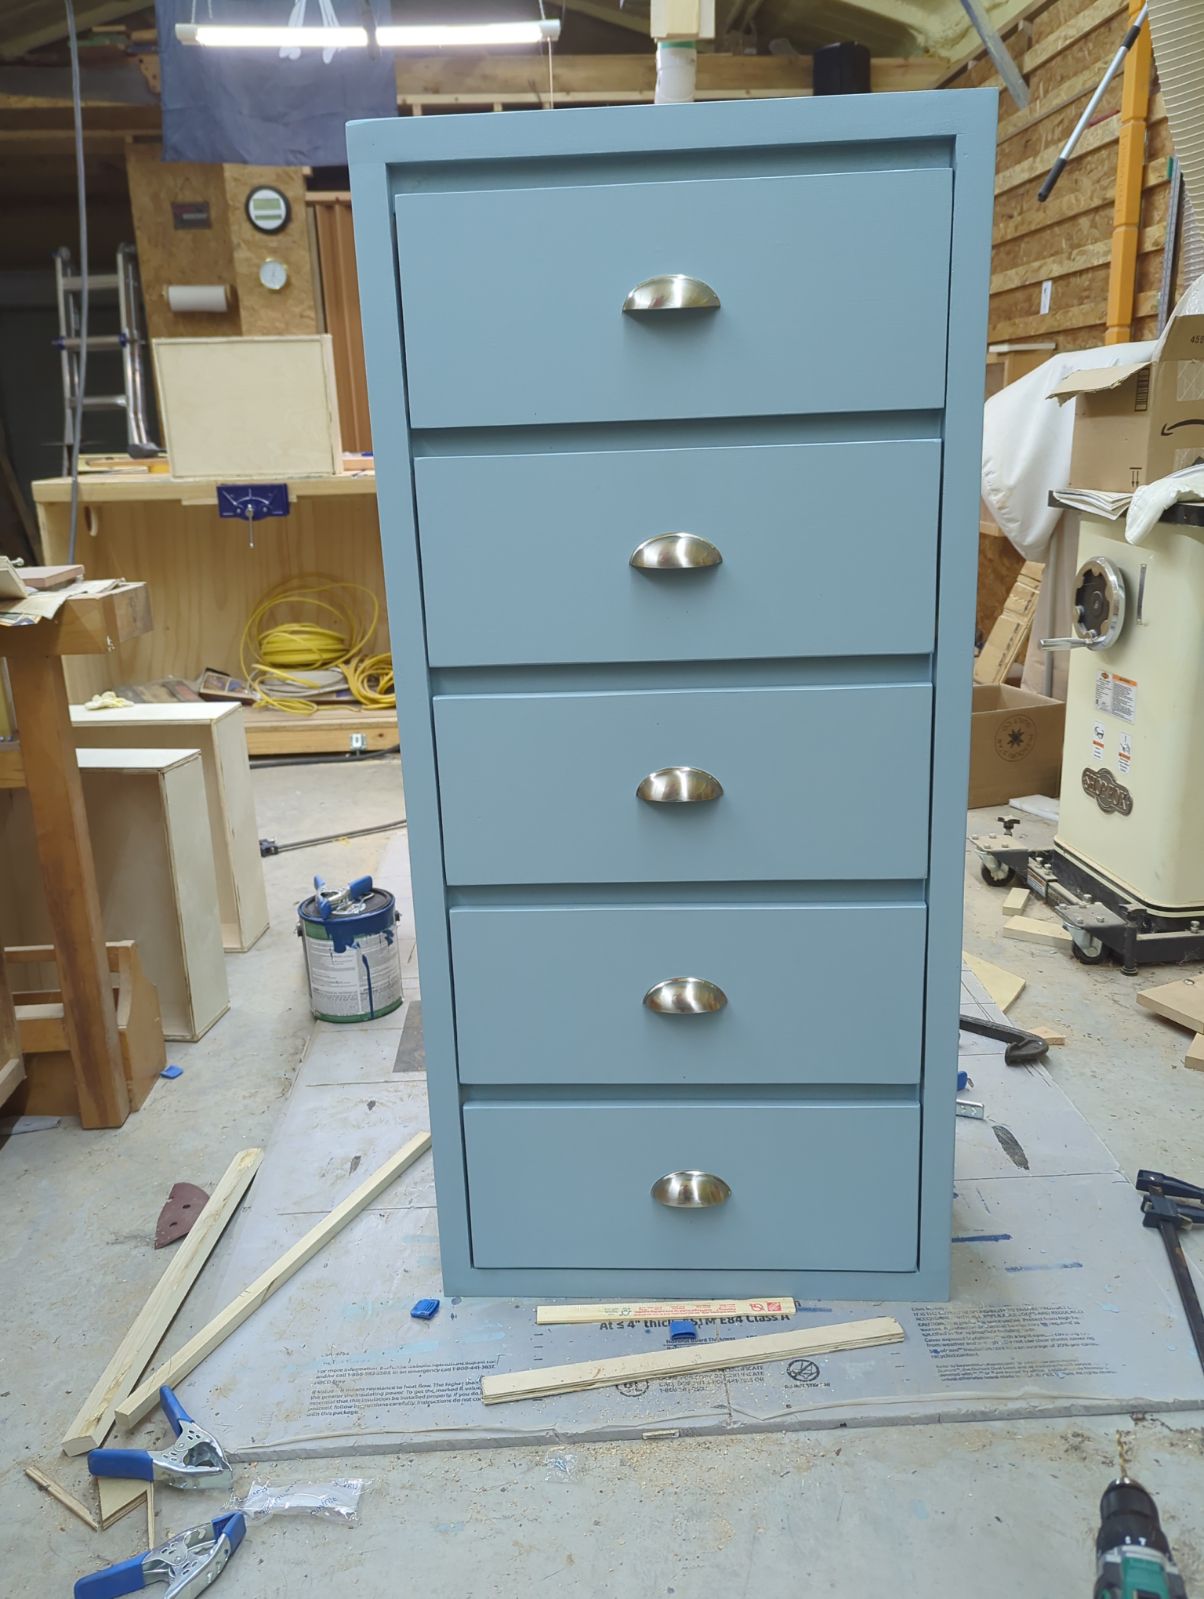
Tall Dresser

Submitted by Anonymous (not verified) on Wed, 12/13/2023 - 16:41

A Christmas gift for my G- kid!!!!

Built from Plan(s)

Comments

Playhouse

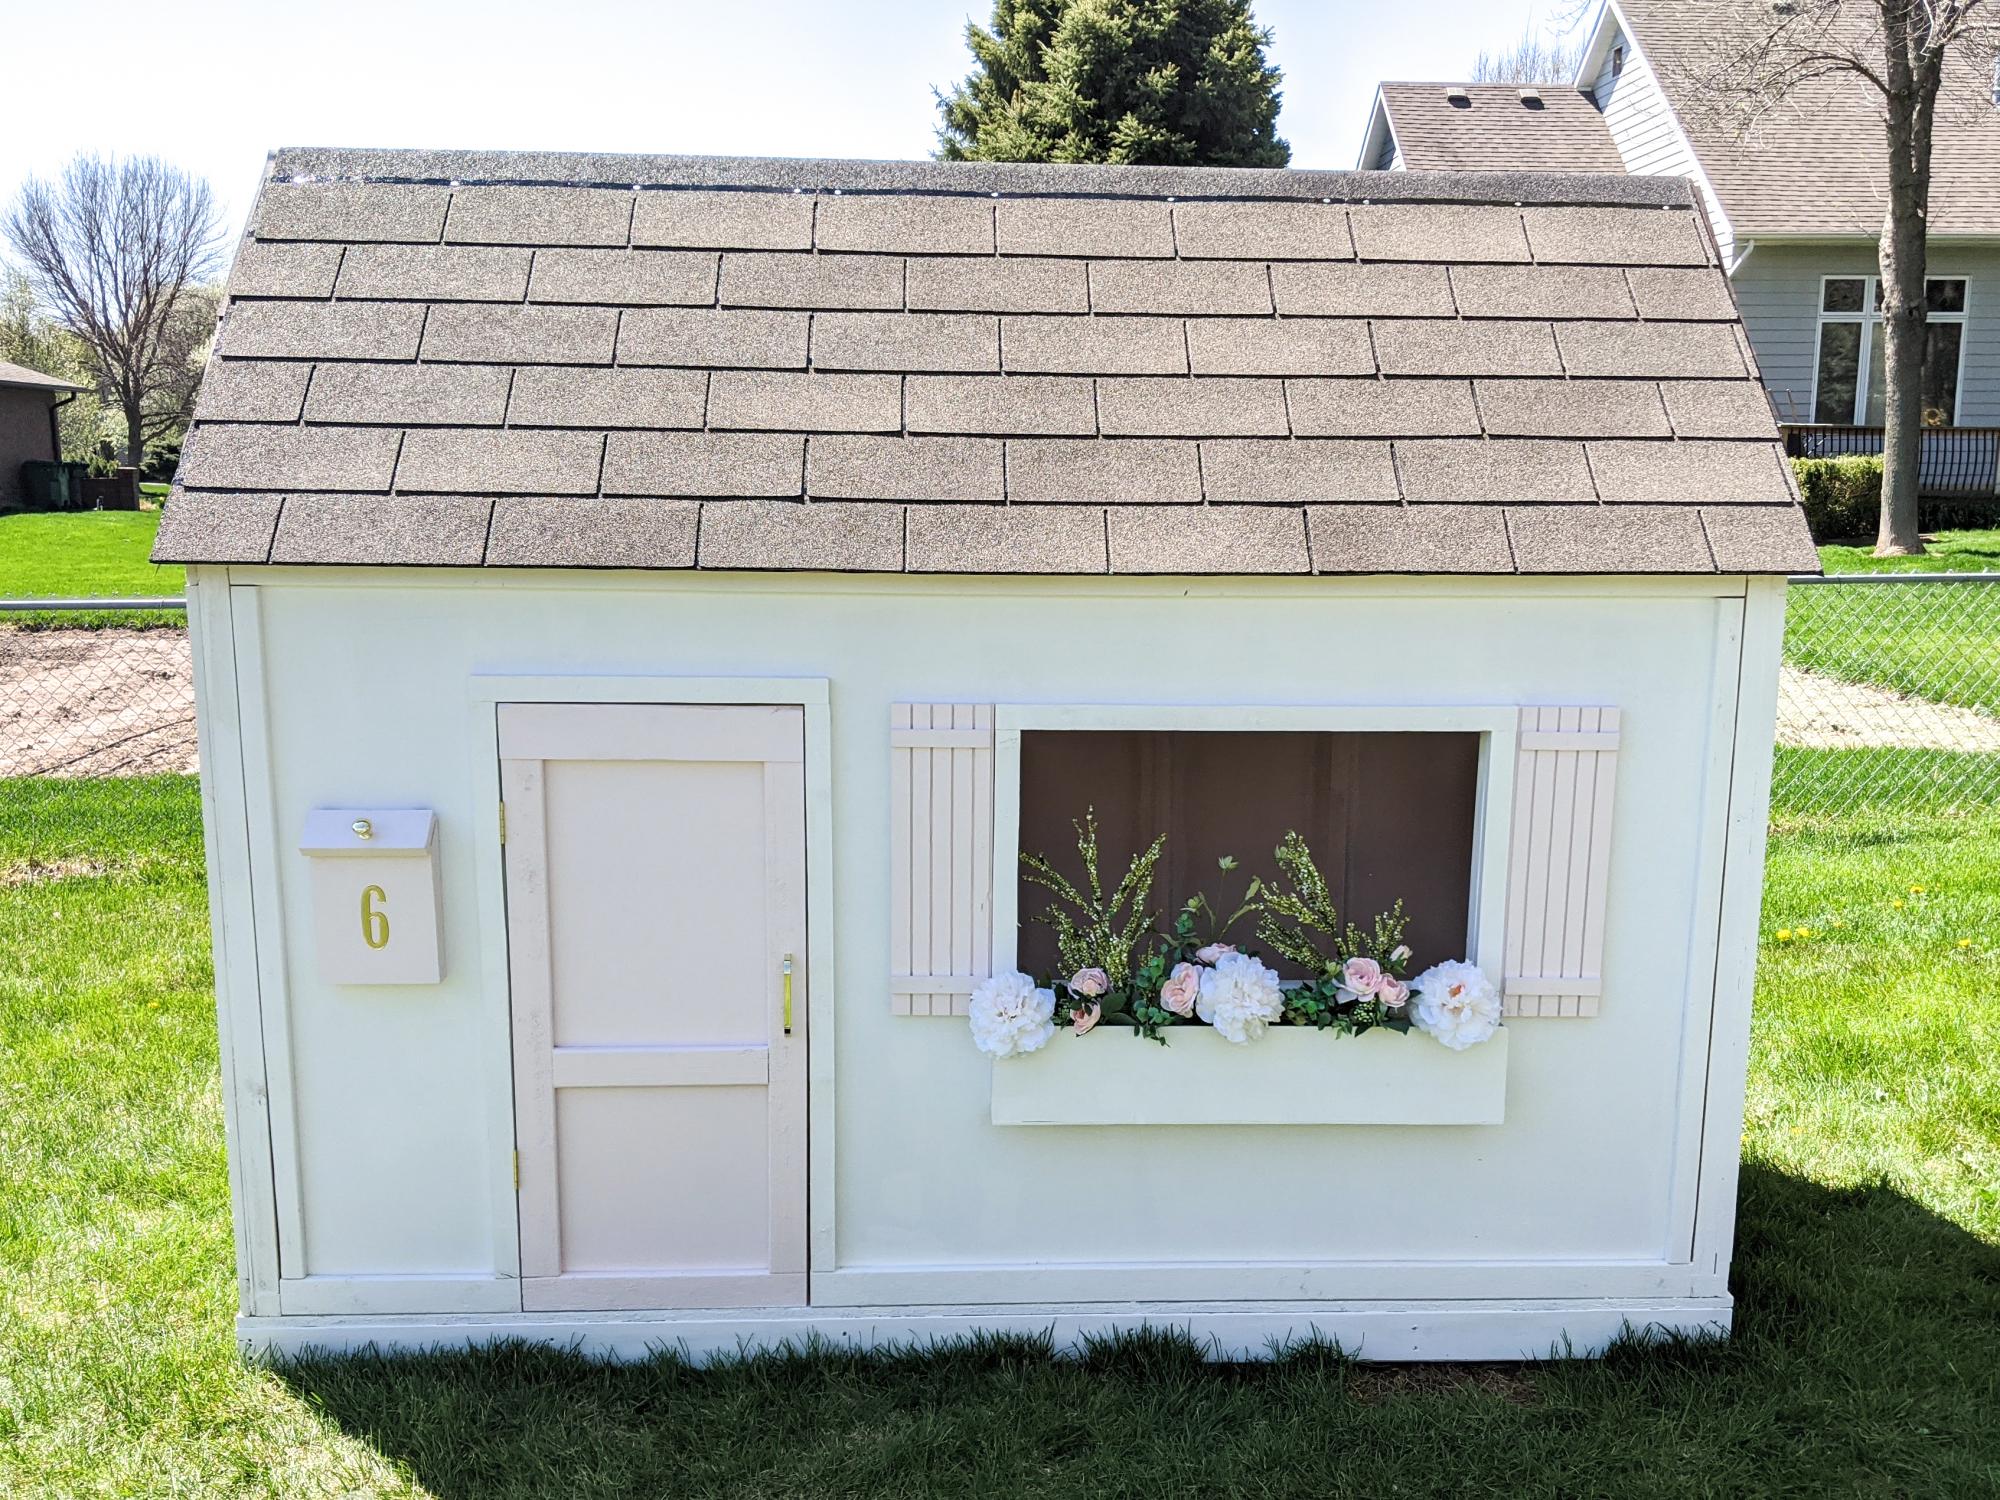
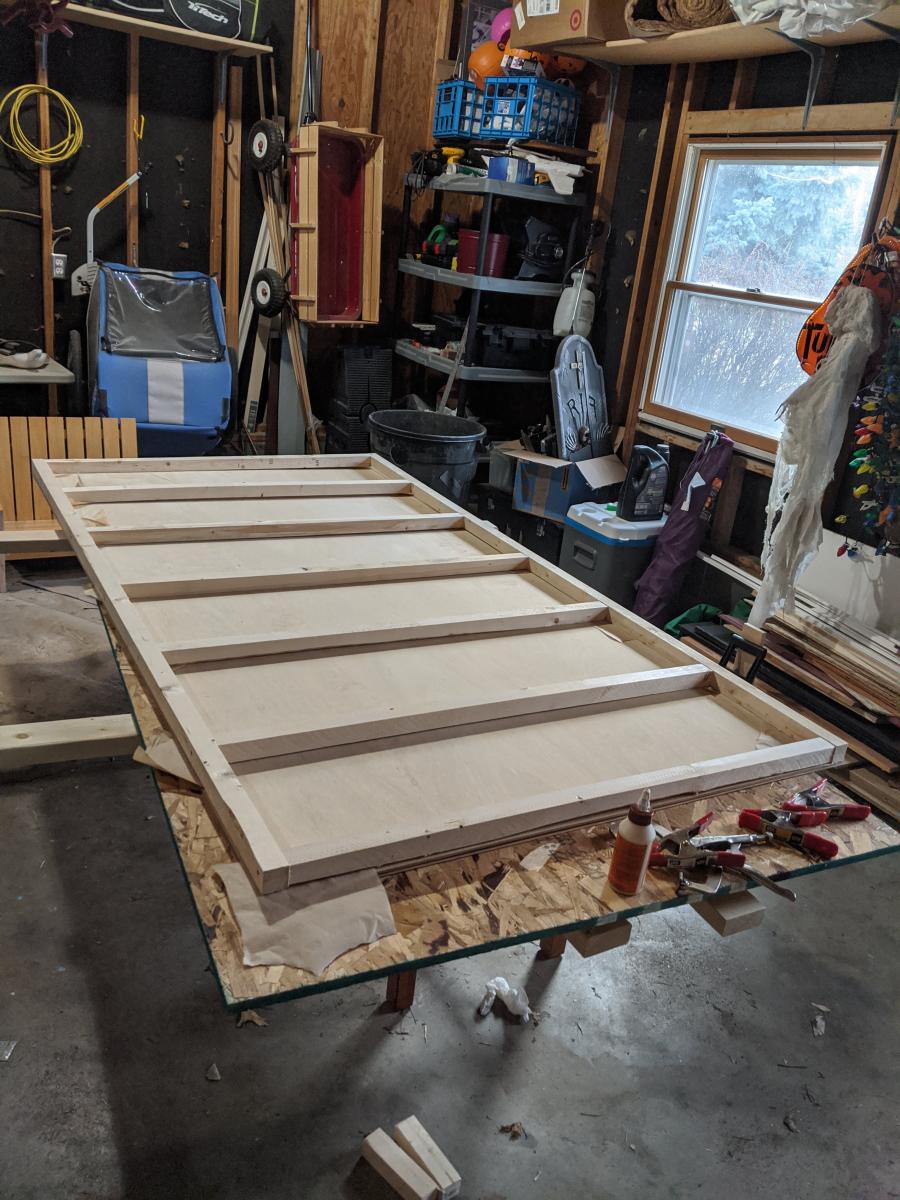
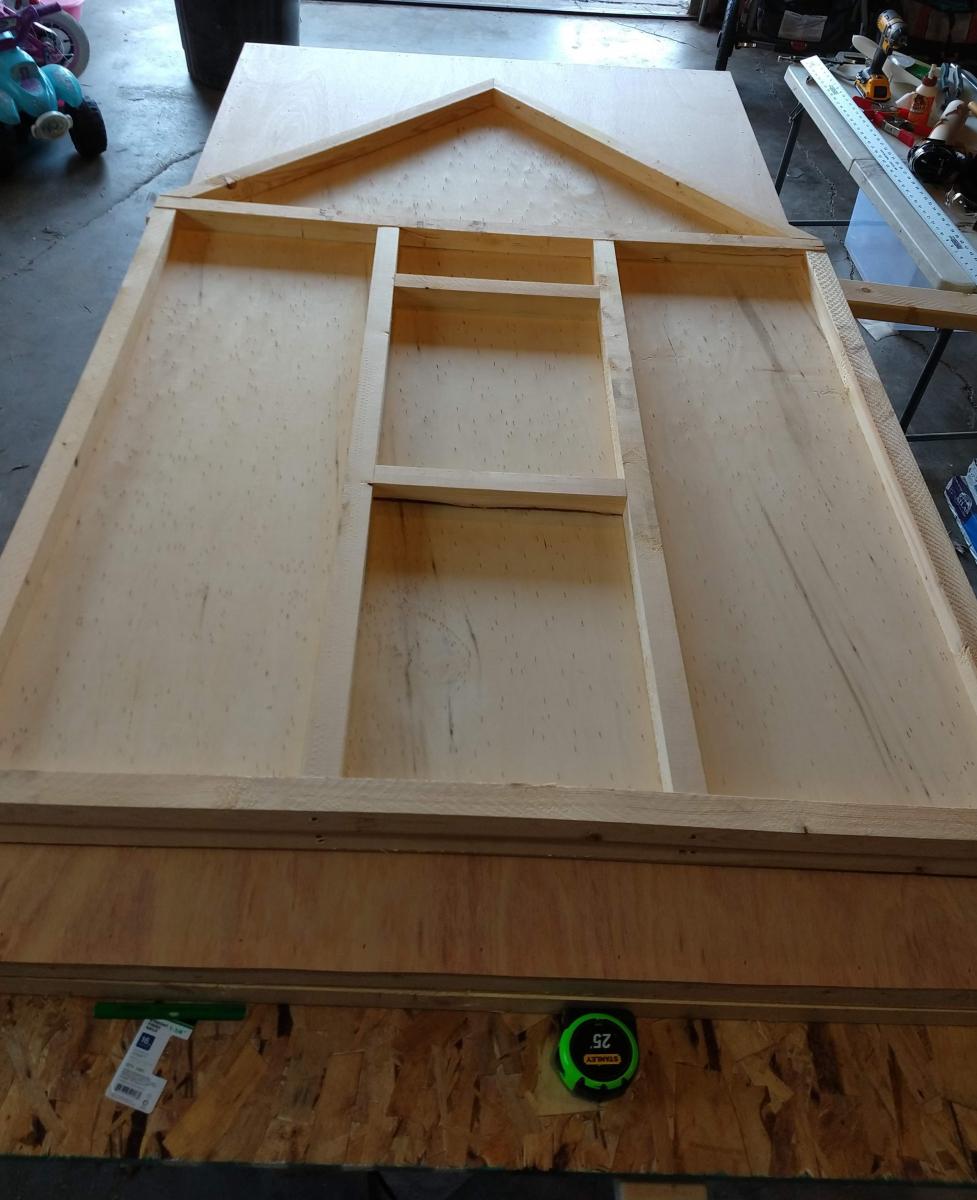
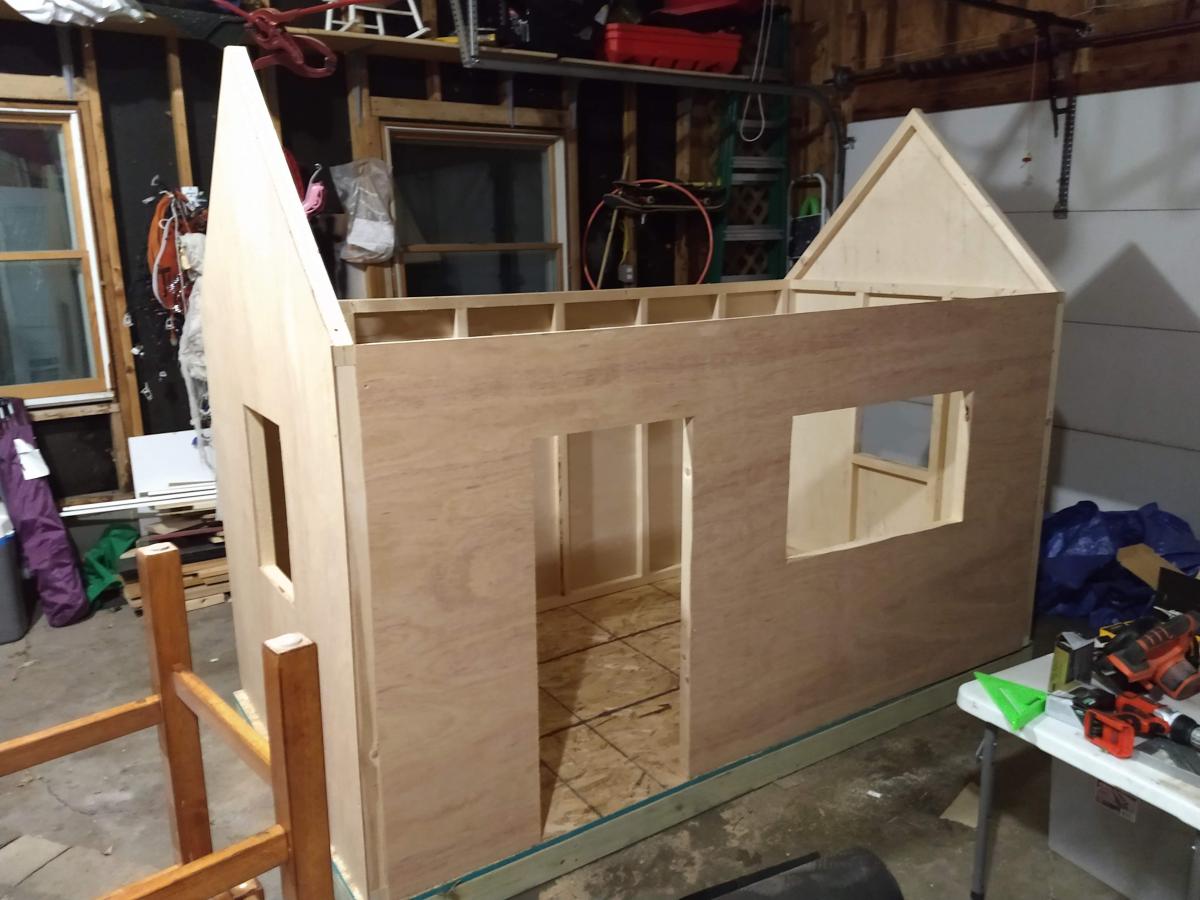
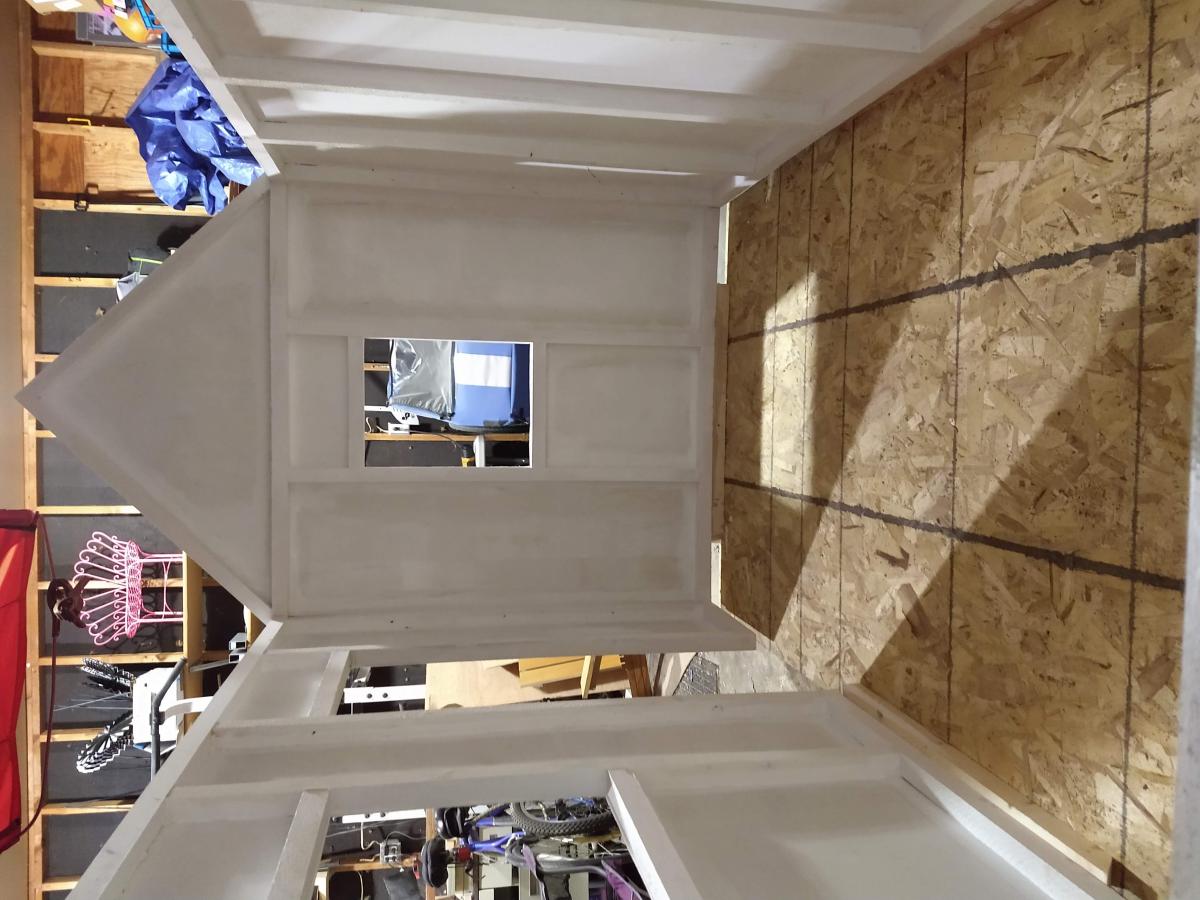
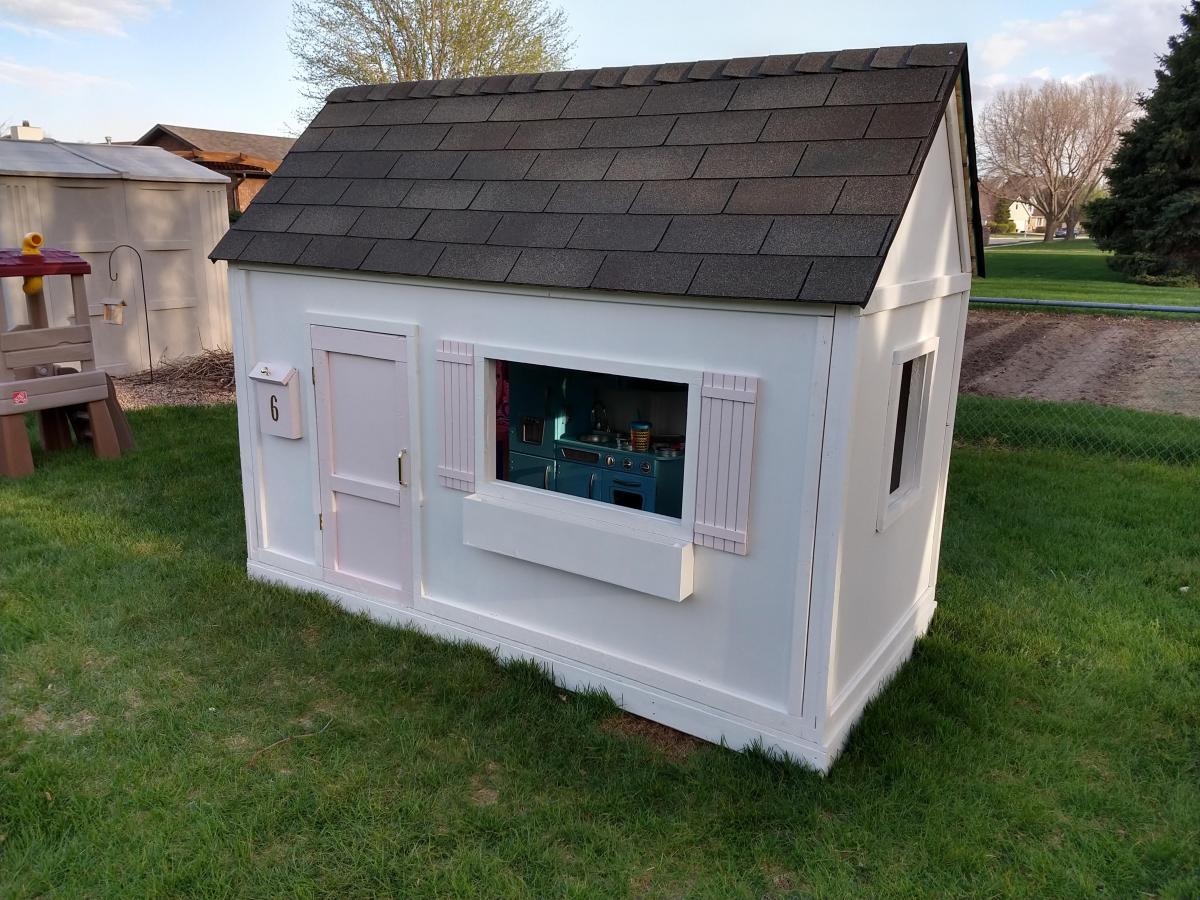
We built this playhouse for our daughter's 6th birthday. She absolutely loves it! We were looking at purchasing one, but they were way out of our budget. Ana saved the day with these plans :).

Estimated Cost
$320.00
Estimated Time Investment
Weekend Project (10-20 Hours)
Finish Used
We painted the house with white Pittsburg Ultra Exterior Latex paint. The mailbox, door and shutters were all painted with Pink Viburnum Sherwin Williams Satin Exterior paint.
Recommended Skill Level
Intermediate
Seasonal And Holiday
Back