Community Brag Posts

My Daughters Playhouse- My First Project

Submitted by SheilaS on Sun, 10/09/2011 - 08:32

My 2 year old daughter played in a playhouse at a farm and was just amazed by the "little house" every time we would see them at the store or driving down the road she would just scream "mom, its a little house, little house!" I knew I wanted to get her one and started to search. Couldn't believe the price of playhouse kits so I figured I could build it. This playhouse took about 2 weeks to finish but I only worked on it a couple of hours at a time just a couple times a week. Total cost for me for just the playhouse not including paint was $343.90. Thanks Ana for posting the plans and showing everyone that anyone can build!

Estimated Cost
$344.90
Estimated Time Investment
Weekend Project (10-20 Hours)
Recommended Skill Level
Beginner

Outdoor Sectional

Submitted by ghozt21 on Mon, 05/27/2019 - 16:54

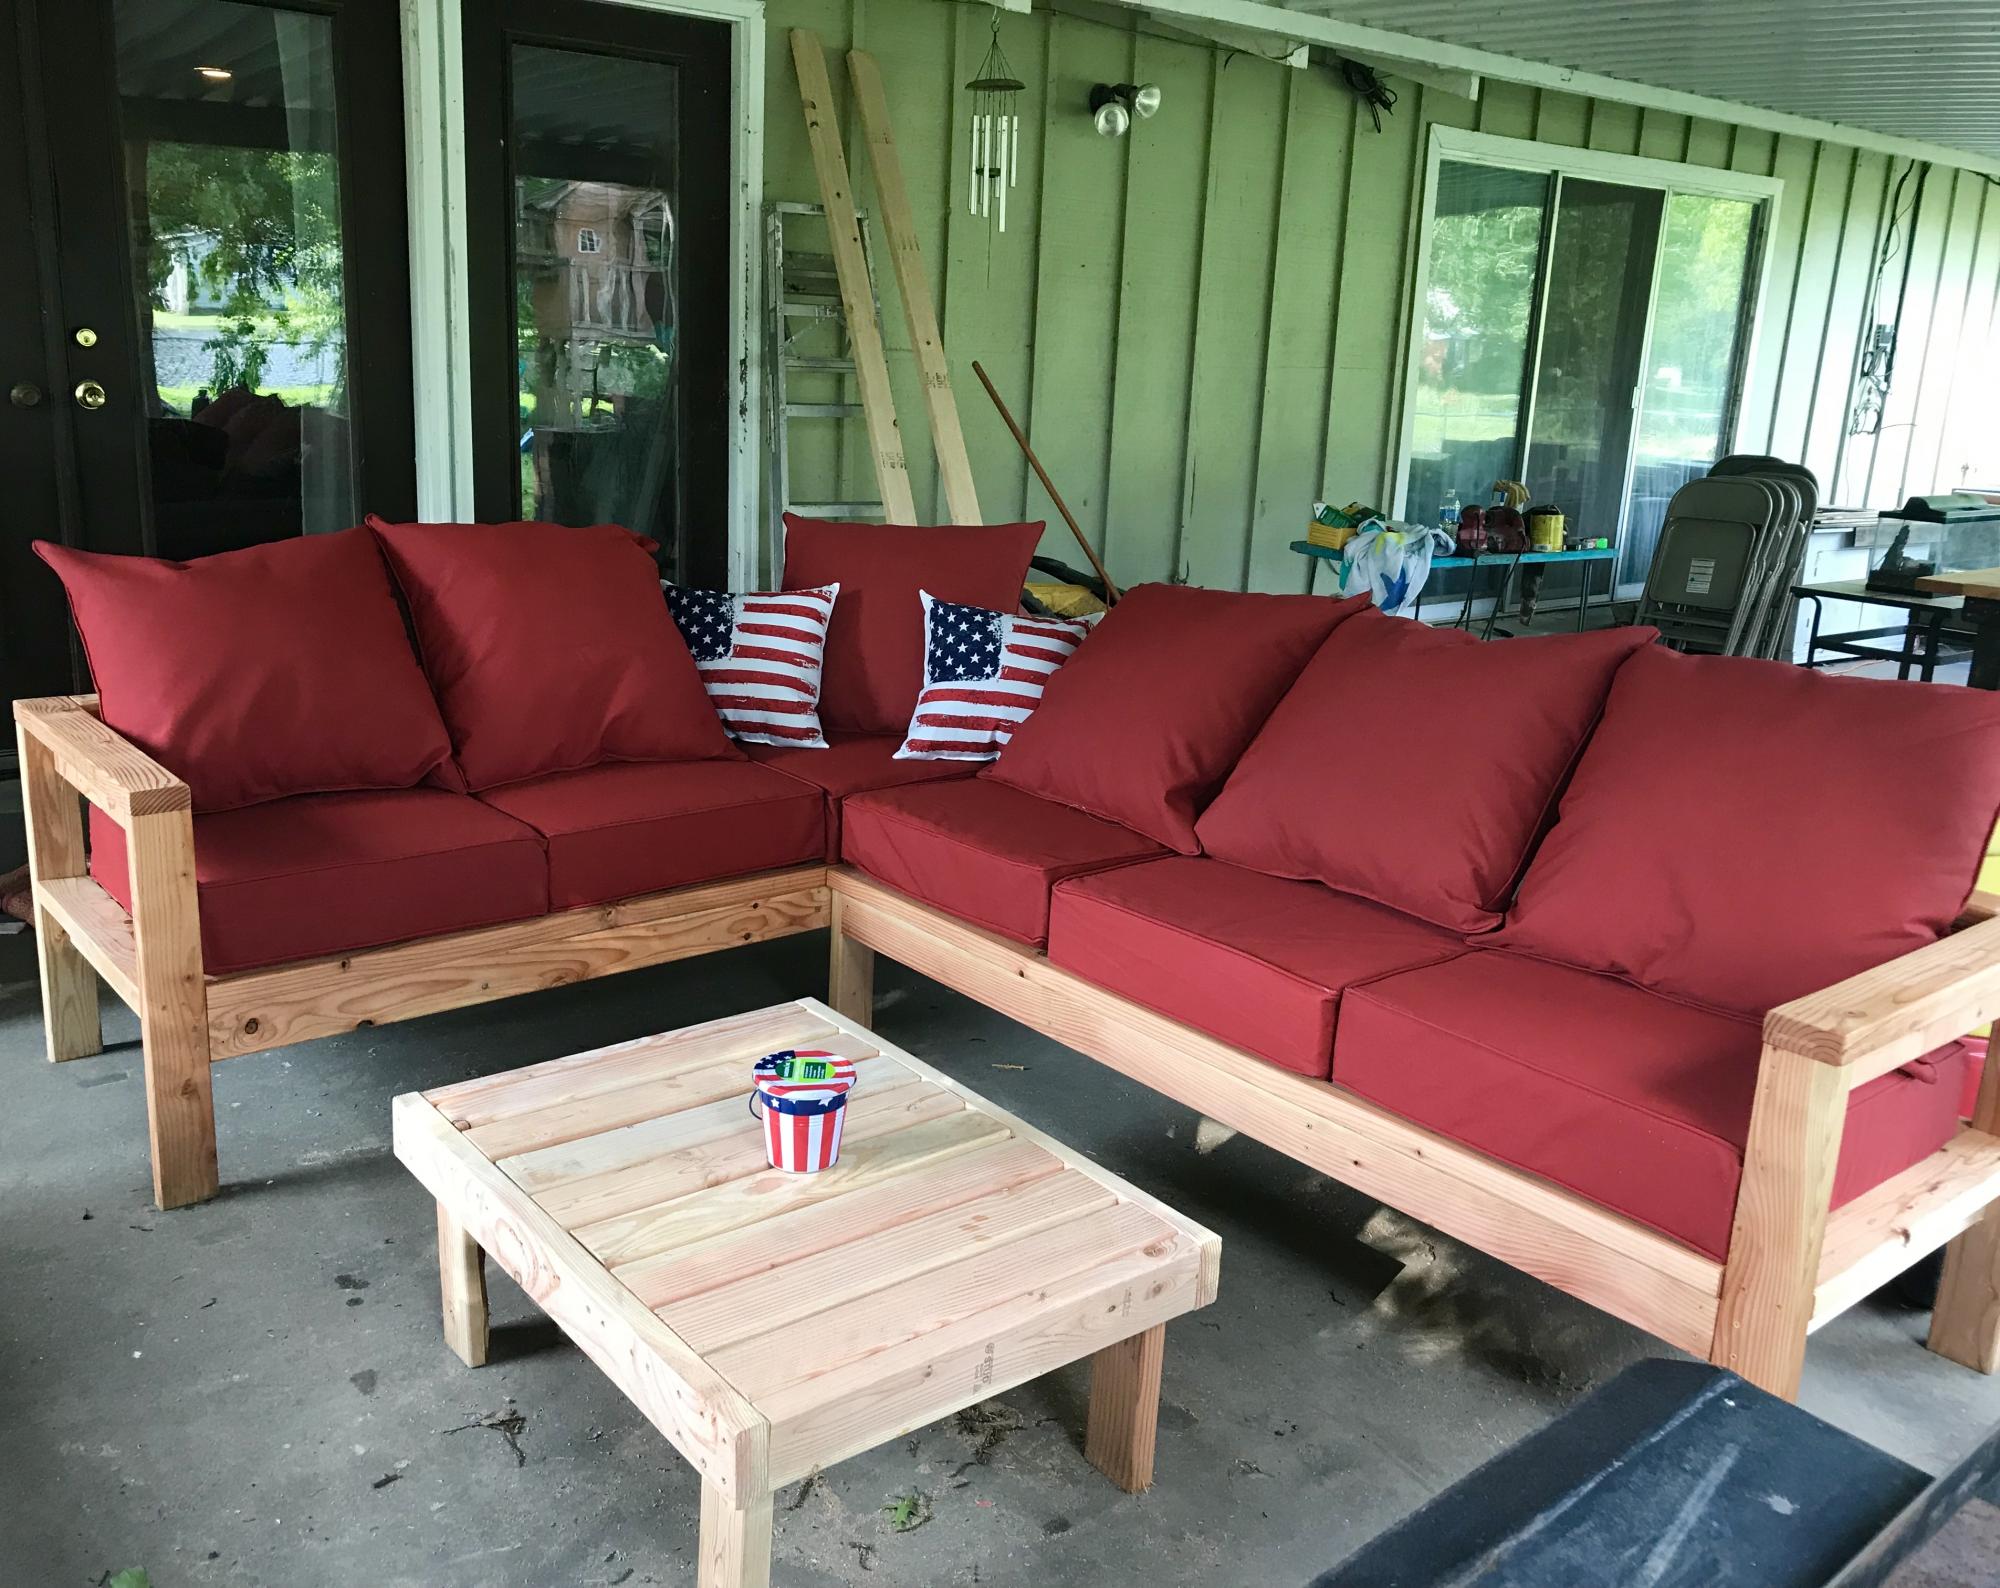
I followed the plans as written,  It took me about 6 hours and that includes sanding and staining. Very simple yet offers a very wow finish.  I think in total we spent about $300 for all supplies including cushions which was the most expensive part. I just finished it off with Teak Oil and an Americana theme for our covered patio.  We love it.  

Estimated Cost
$300
Estimated Time Investment
Day Project (6-9 Hours)
Finish Used
Teak oil
Recommended Skill Level
Beginner

Fancy Jewelry Box

Submitted by dland41961 on Fri, 05/05/2023 - 07:59

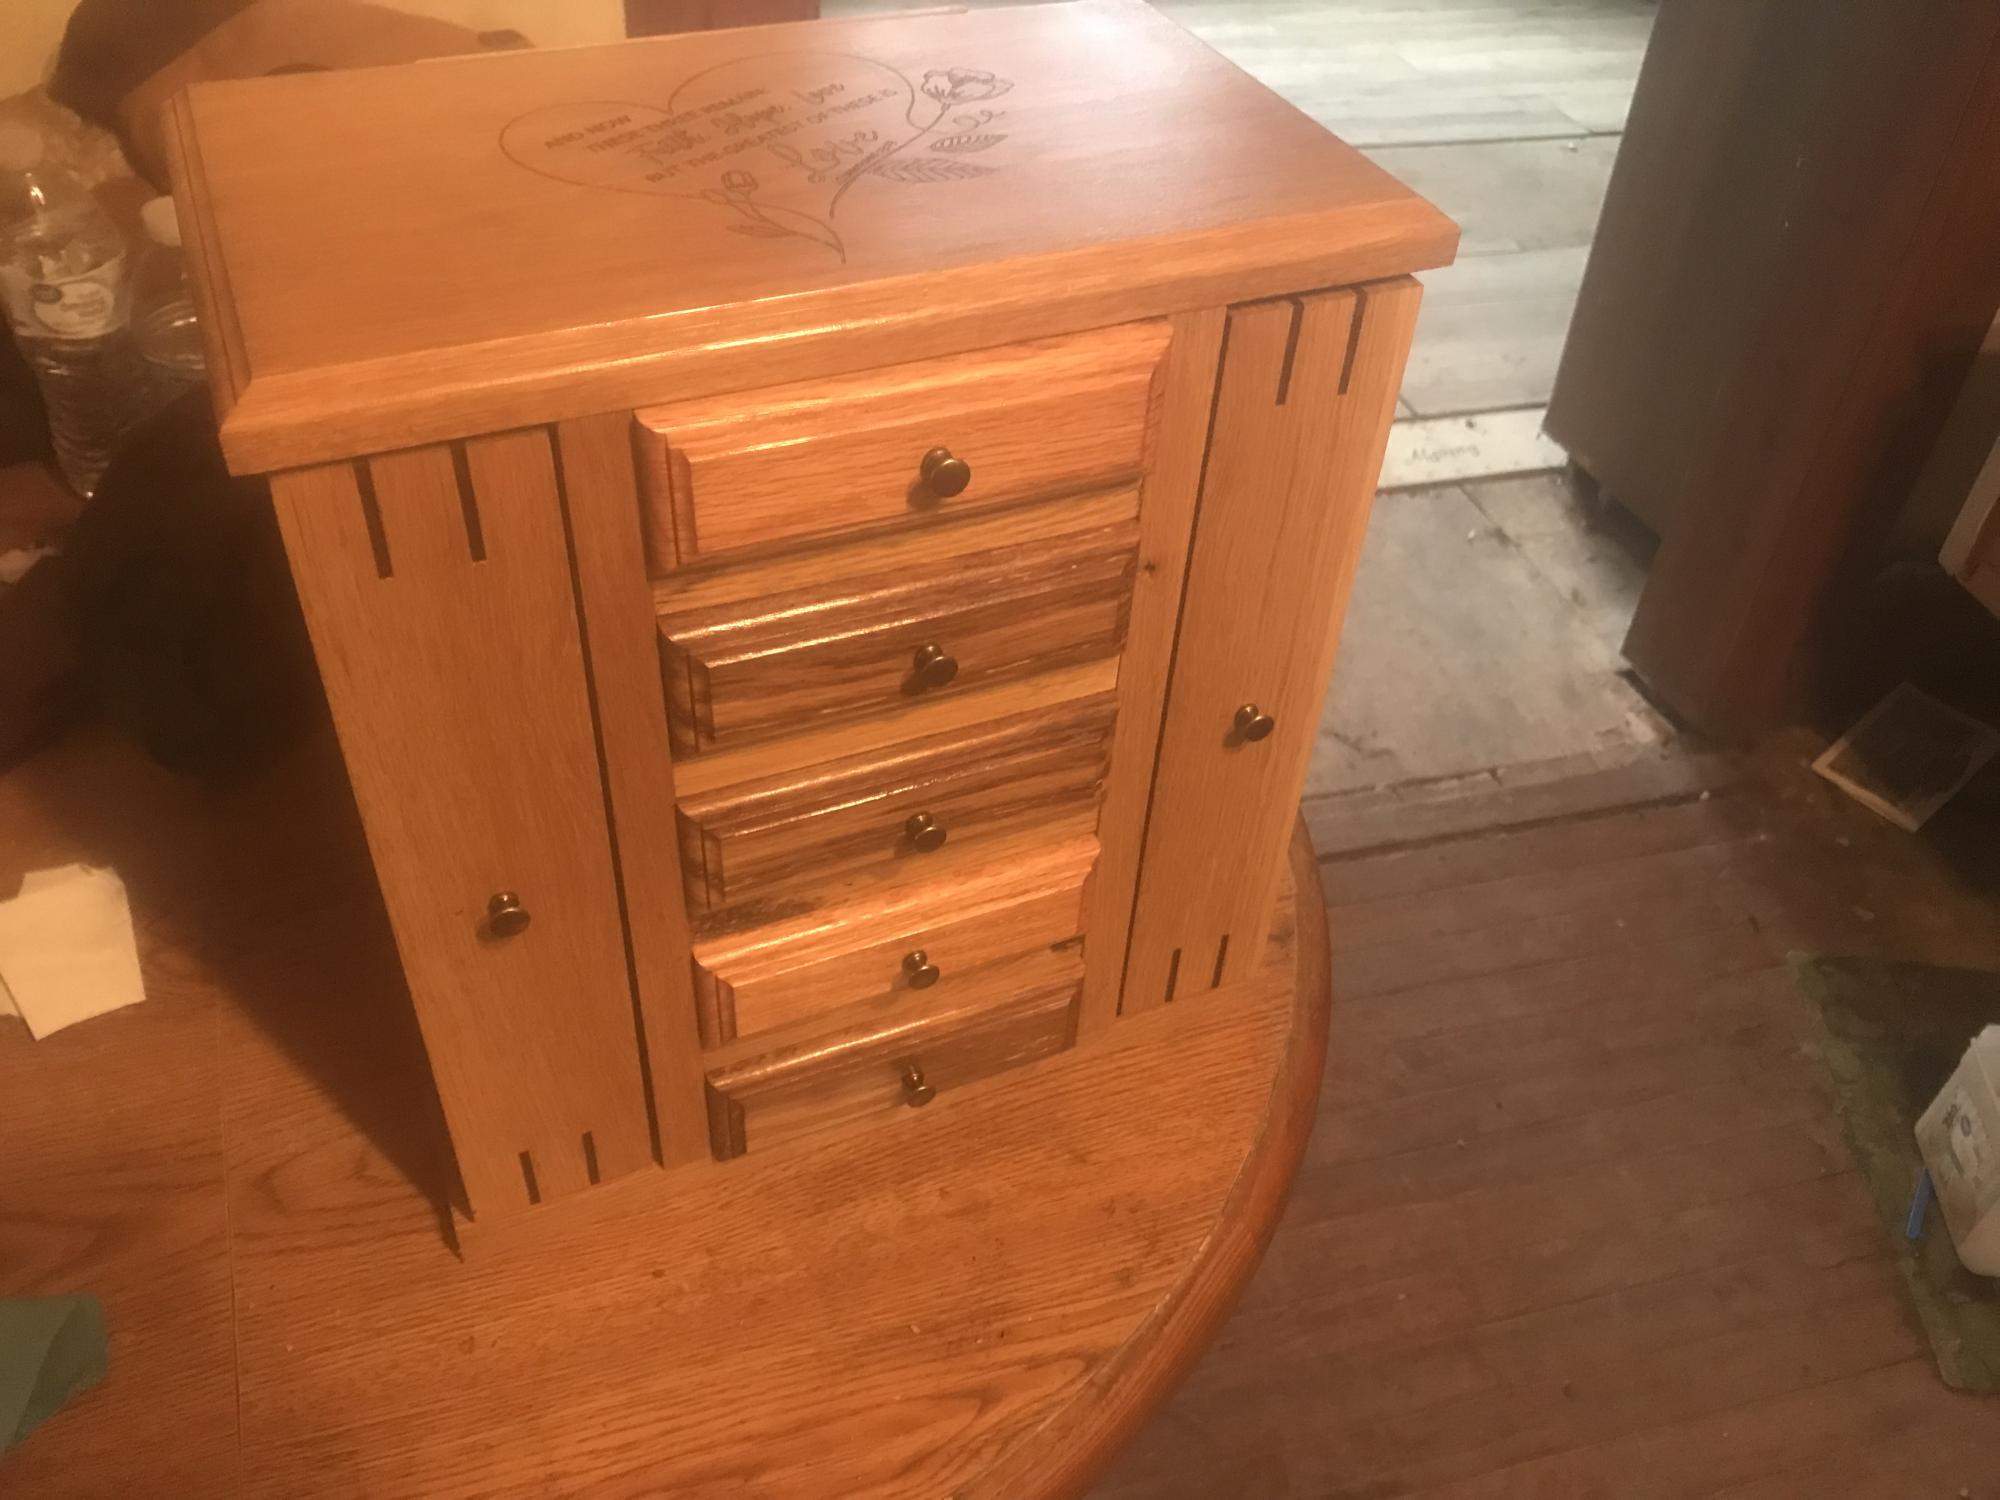
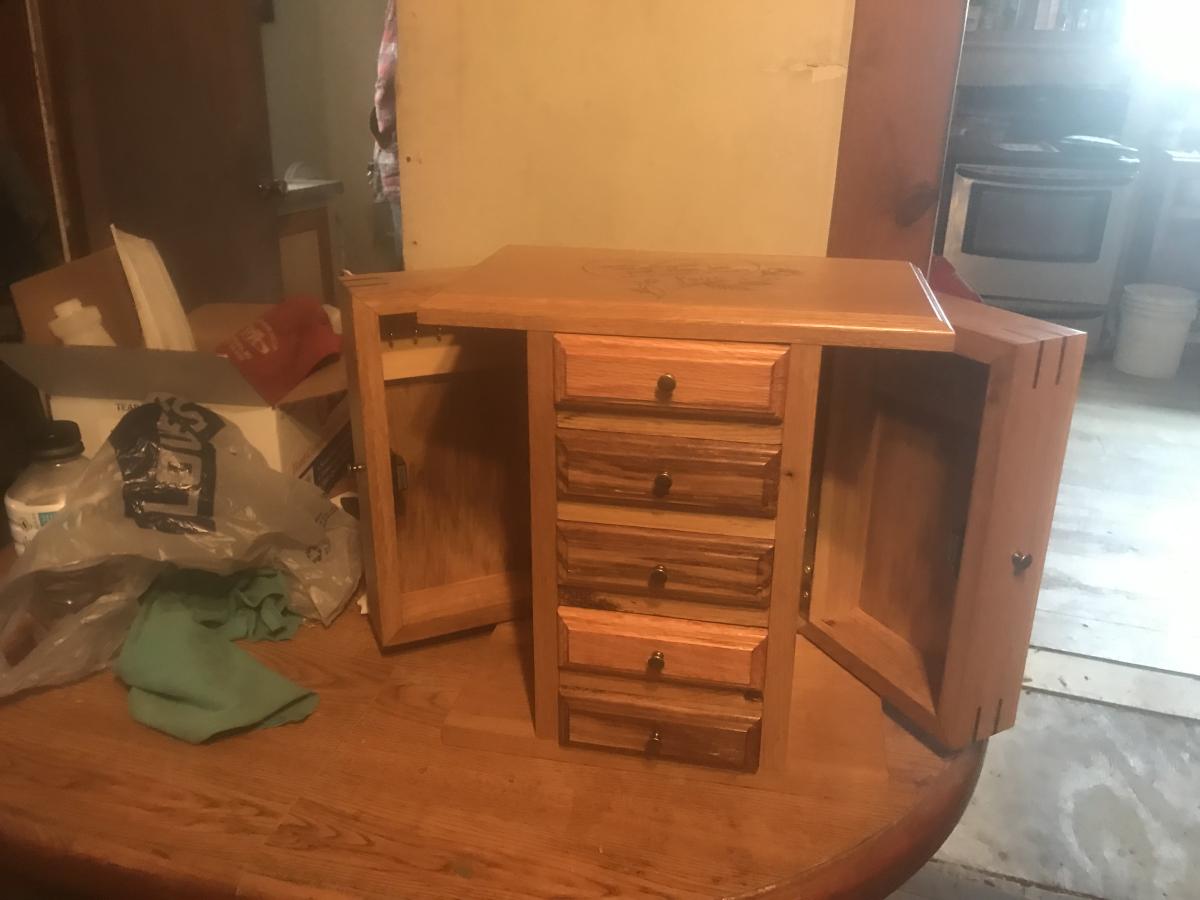
Fancy Jewelry Box it came out very nice. Made with white oak.

Built from Plan(s)

Comments

Storage Day Bed

Submitted by SophieW on Thu, 01/05/2012 - 07:34

My first project using Ana's plans. Quite a learning experience with a few rookie mistakes but all in all I think it turned out pretty ok.

I followed the plans to the T. Trusted my lumber yard to make most of the cuts since I was not really equipped and that was a HUGE MISTAKE. So I went out, bought some tools, recut some boards and whatever mistakes I made, at least they were mine.

I followed other people advice on this site and added some casters under the boxes after I screwed them together. Makes it a lot easier to move around.

Thank you Ana - your website is truly inspiring.

Built from Plan(s)
Estimated Time Investment
Weekend Project (10-20 Hours)
Recommended Skill Level
Starter Project

Comments

SophieW

Fri, 01/06/2012 - 07:35

Thank you:) I ordered the mattress online - Futon mattress - can't remember where from though... But for $118 I'm REALLY happy with it!

DIY Salvaged Mudroom setup inspired by the Fancy Hall Tree

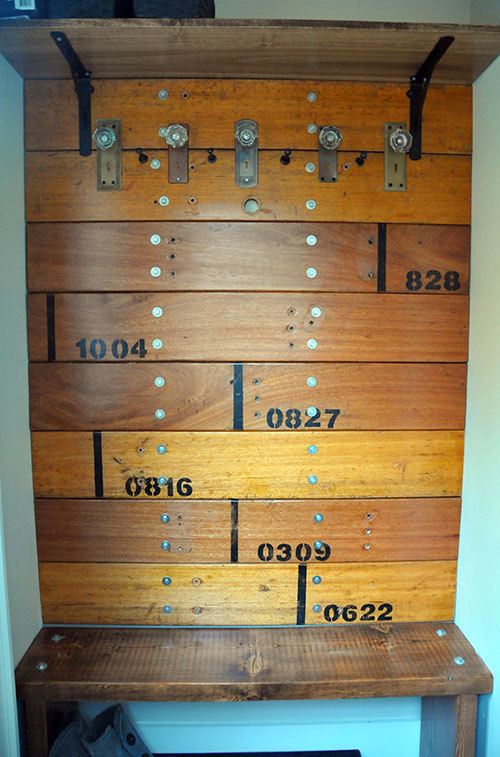
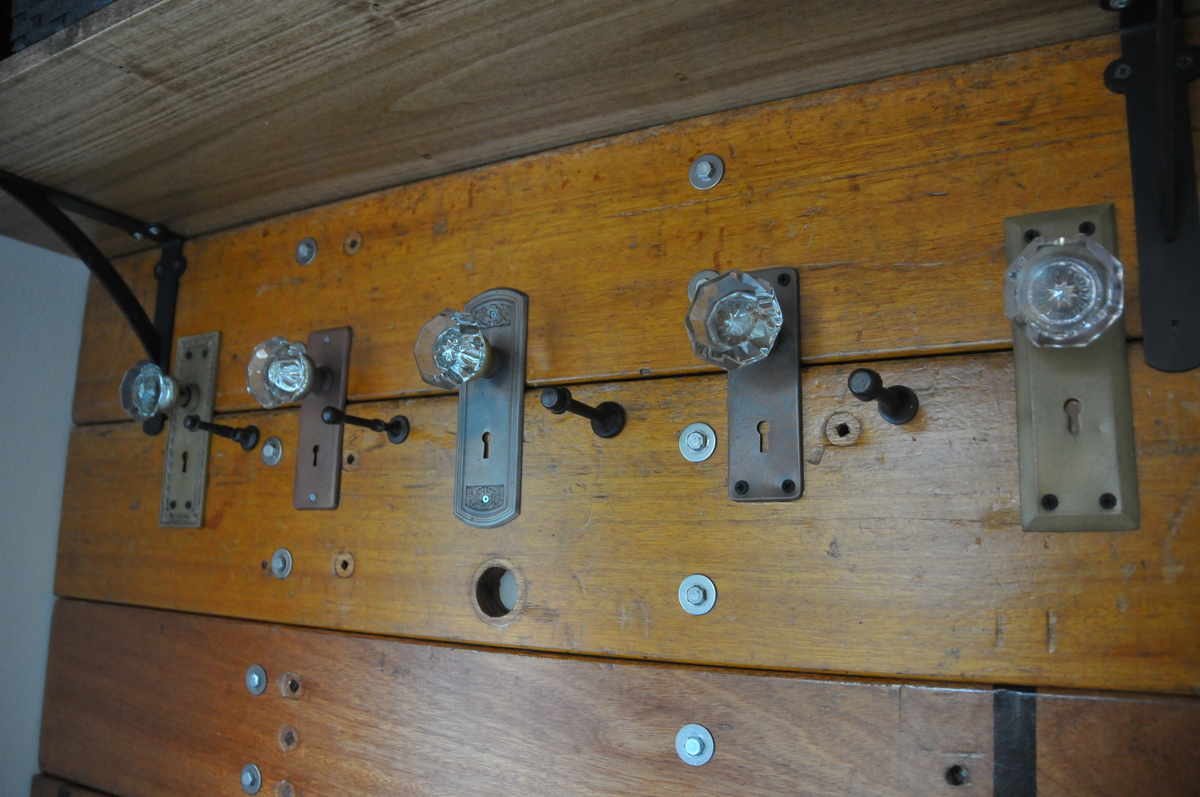
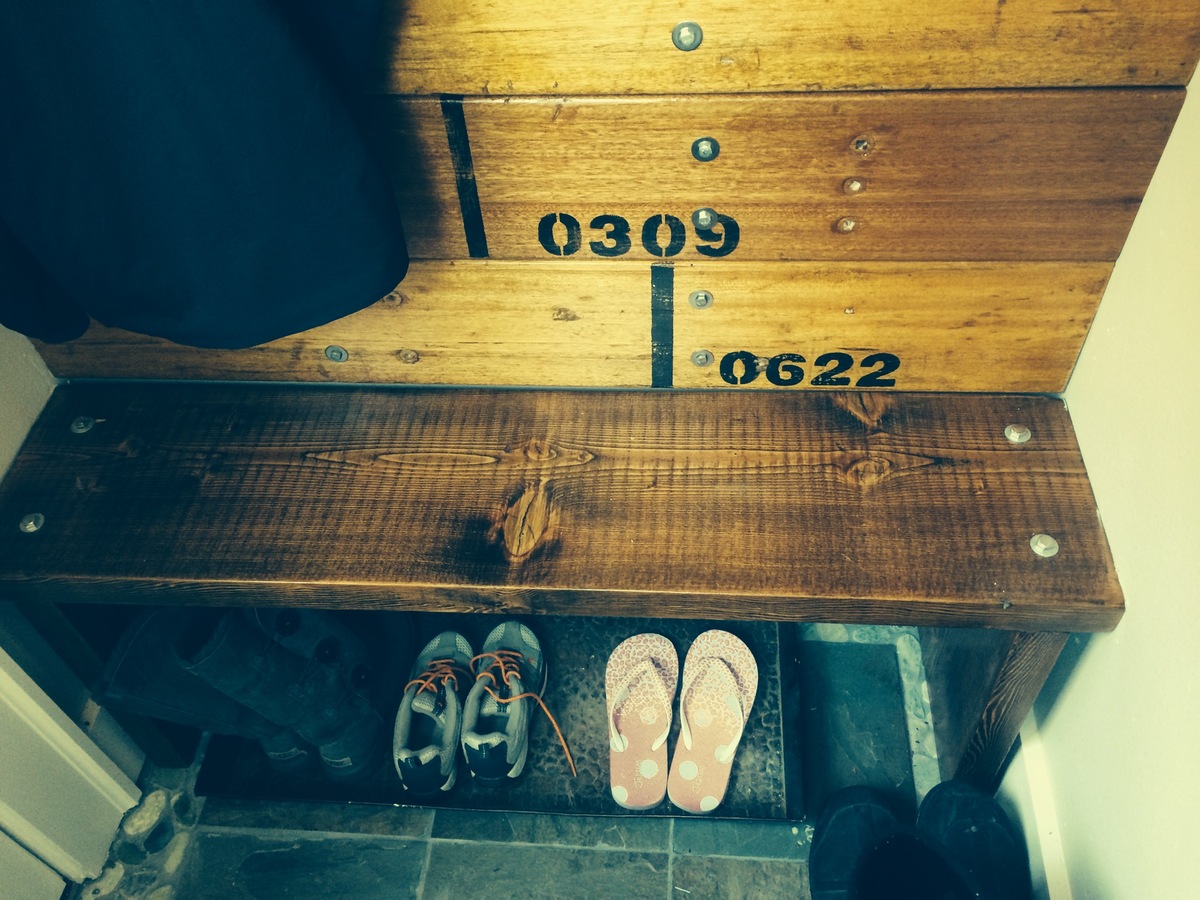
I was inspired by the fancy hall tree project, but what I made is a total modification/inspired by with salvaged materials, I loved the idea of having wood backing for the mudroom bench and hooks. I had some leftover vintage door knobs from our interior refurbish, so kept them raw metal (sandblasted the metal and clear coated it with polyurethane to keep from rusting). I found some amazing old mahogany bleacher boards from a local high school and a great slab of fir for the bench. I've been building several of Ana's plans and using some of the projects for inspiration when working with salvaged materials ;)

Built from Plan(s)
Estimated Cost
$175
Estimated Time Investment
Weekend Project (10-20 Hours)
Finish Used
used dark walnut stain on the bench, and on the wall/bleacher boards, I stenciled on numbers to look like "seat" numbers, finished all of it with 3 coats of water based polycrylic in semi gloss
Recommended Skill Level
Beginner

Narrow Farmhouse Table - first build EVER :)

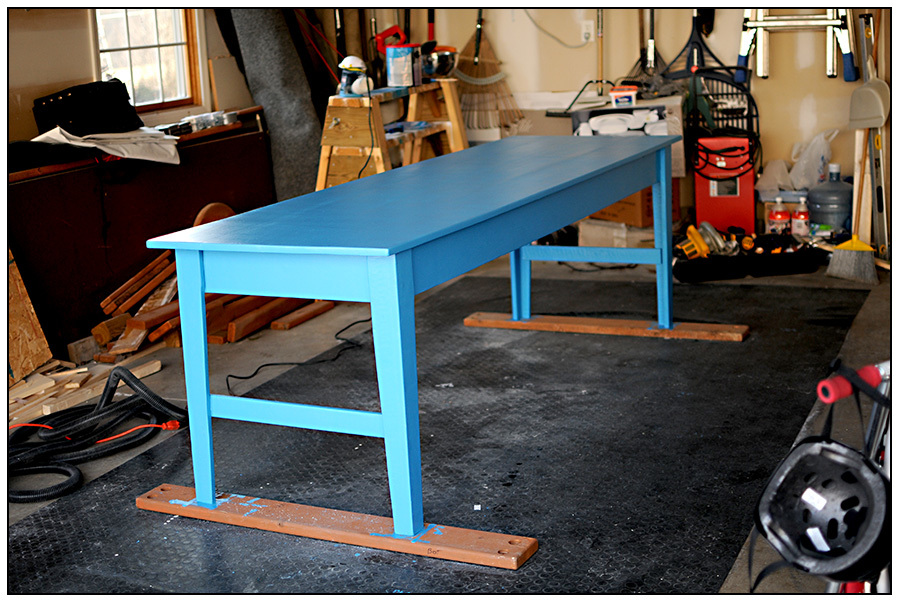
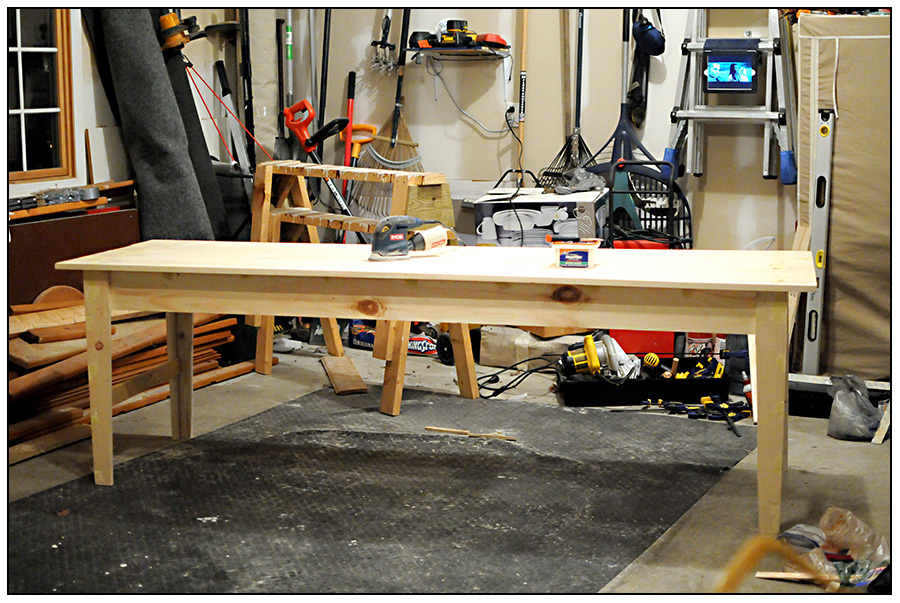
I built something!! I really want to build a bed for my son, but wanted something a little simpler for my first project. This table came together very easily. I can't wait for my craft room to be done and get all my sewing machines set up on it - Thanks so much for your site, Ana!

Built from Plan(s)
Estimated Time Investment
Weekend Project (10-20 Hours)
Finish Used
primer/paint/spray polyurethane
Recommended Skill Level
Starter Project

Comments

How to Build a Fireplace Mantel and Surround

Submitted by MillerMade on Thu, 03/24/2016 - 09:05

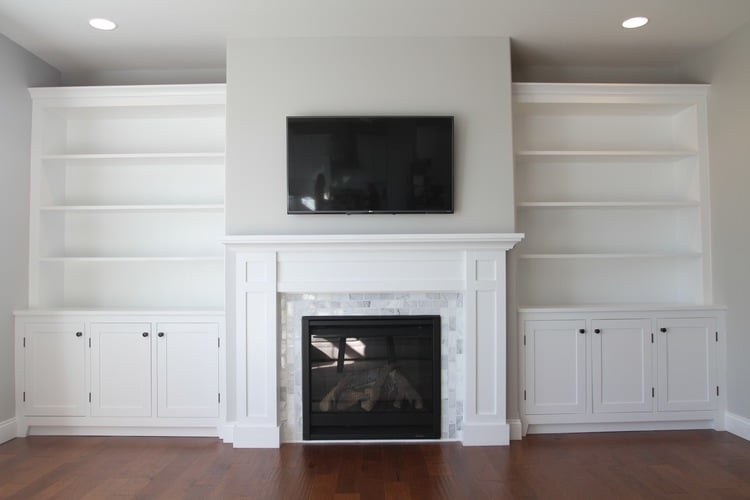
The Custom Built-ins started out with lots of research, and like many DIY project we looked to Pinterest and Houzz for inspiration. A lot of love and time went into this project. I can't stress enough how important research is. This process is often over looked because DIYers just want to get to the building process as quickly as possible, but trust me when I say doing solid research will save you a lot of stress and time when it comes to building.


Estimated Cost
$4,000-$6,000
Estimated Time Investment
Week Long Project (20 Hours or More)
Finish Used
White Paint
Recommended Skill Level
Advanced

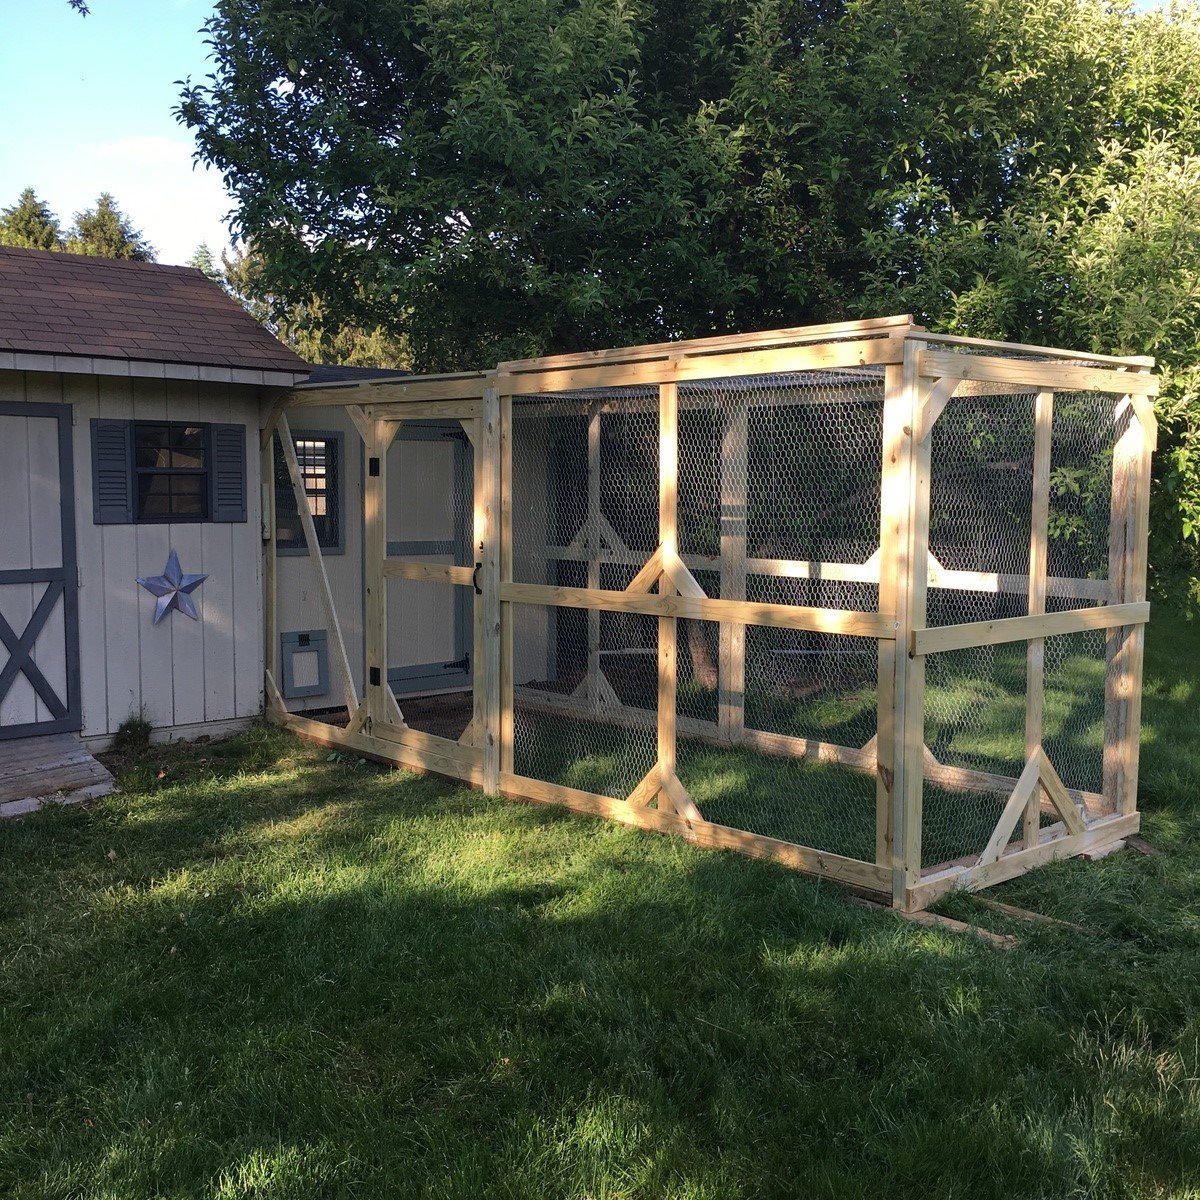
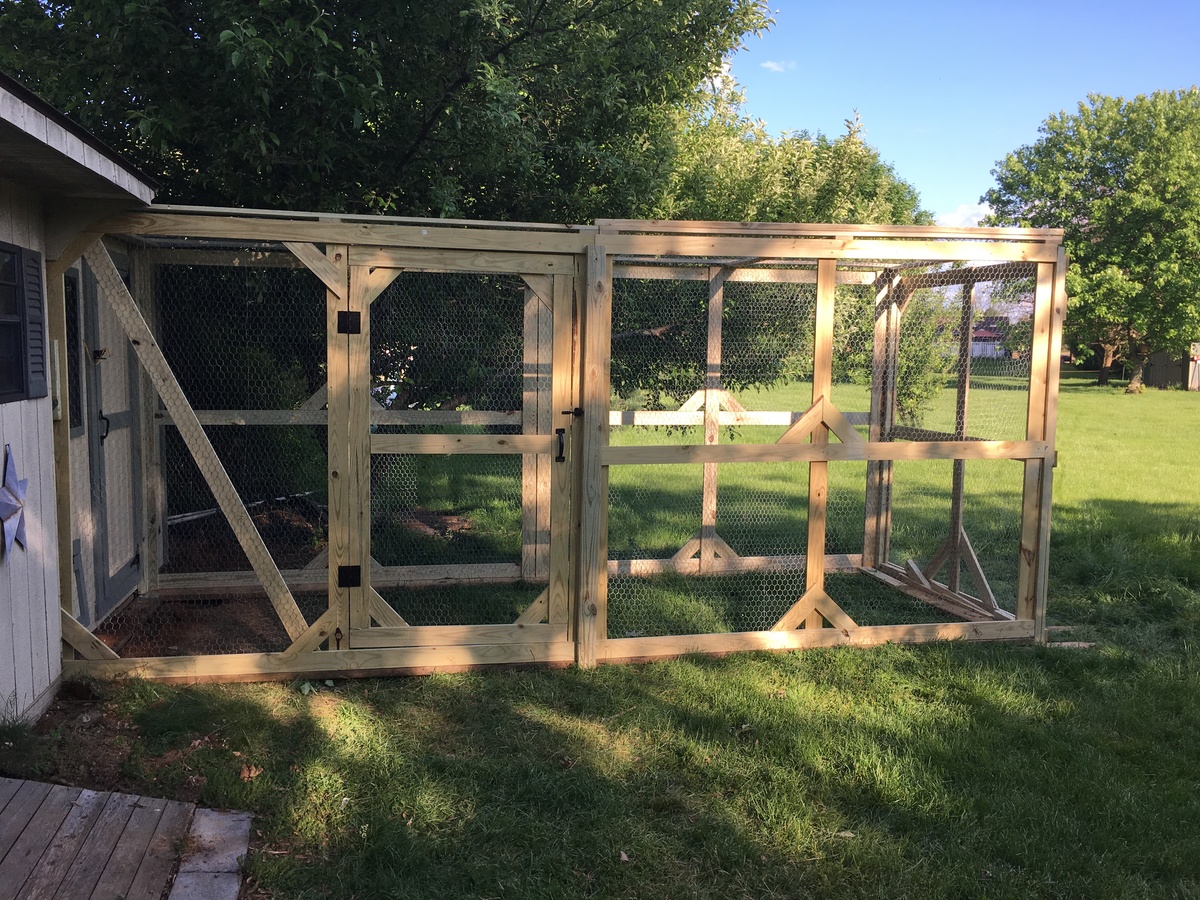
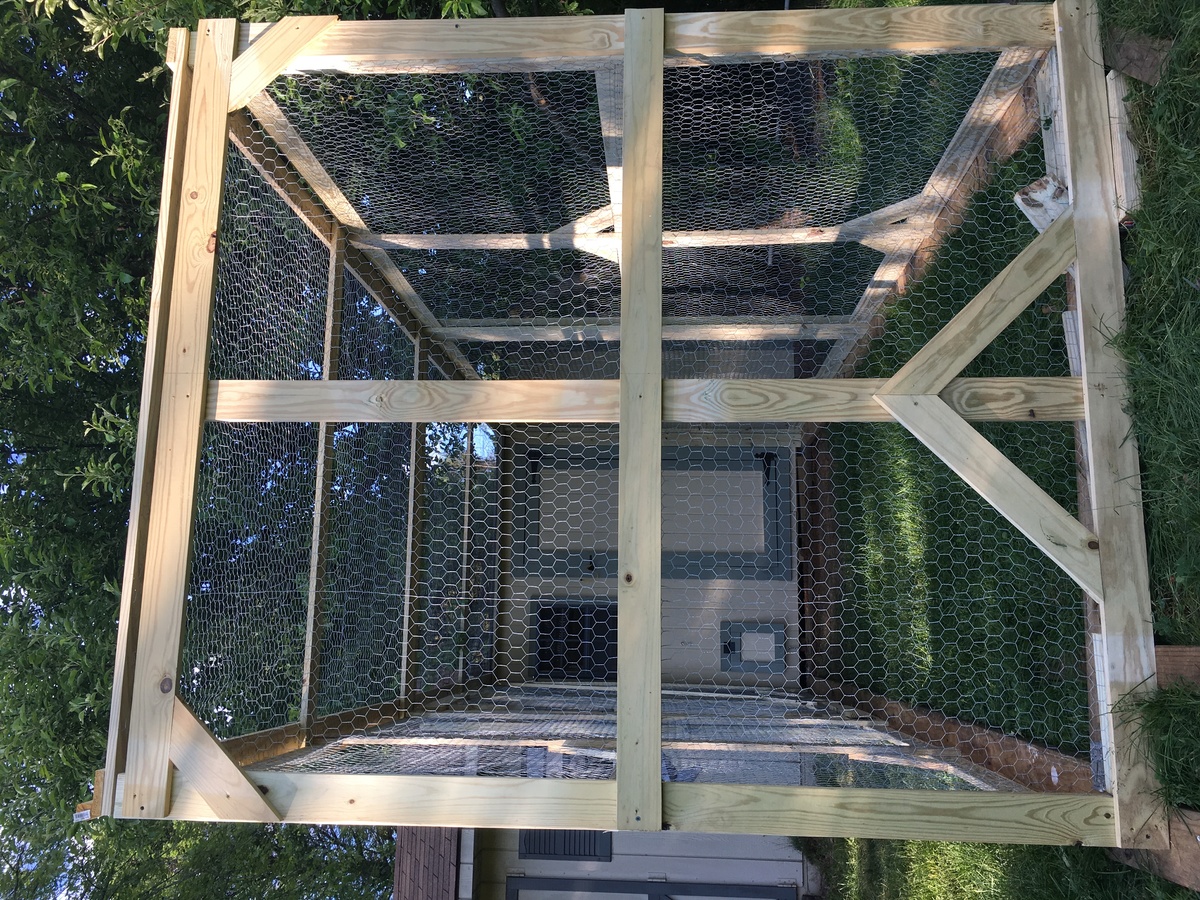
Chicken run

Submitted by Anonymous (not verified) on Thu, 05/19/2016 - 19:28

Or use the same plans with the exception of I extended the height so I could actually walk into the run fairly simple to assemble I would strongly recommend an air compressor staple gun or you'll end up with four arms like Popeye

Built from Plan(s)
Estimated Cost
$250-$300
Estimated Time Investment
Weekend Project (10-20 Hours)
Recommended Skill Level
Beginner

2x4 Outdoor Sectional with Matching Chairs, Ottomans and Table

Submitted by Anonymous (not verified) on Fri, 06/12/2020 - 20:51

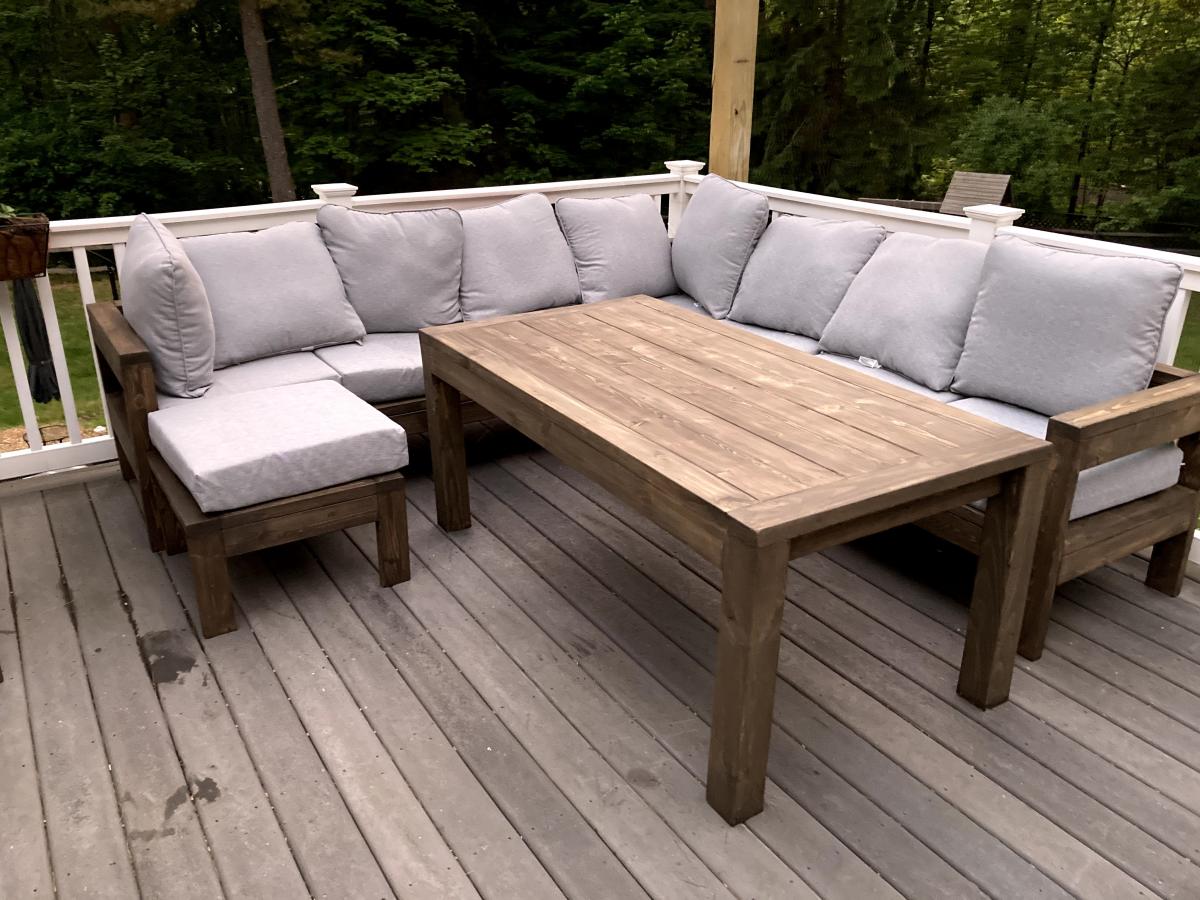
We were looking for outdoor furniture for our deck, and for the size and amount we needed it would have cost us at least $2000. We really like the idea of having an outdoor sectional that we can also use for dining, and we had trouble finding a set we liked. We found Ana's plans for the 2x4 Outdoor Sectional, and i loved the look. After seeing what others have done with the plans, I thought I would be able to modify it to get everything we needed for much less cost than buying a set.

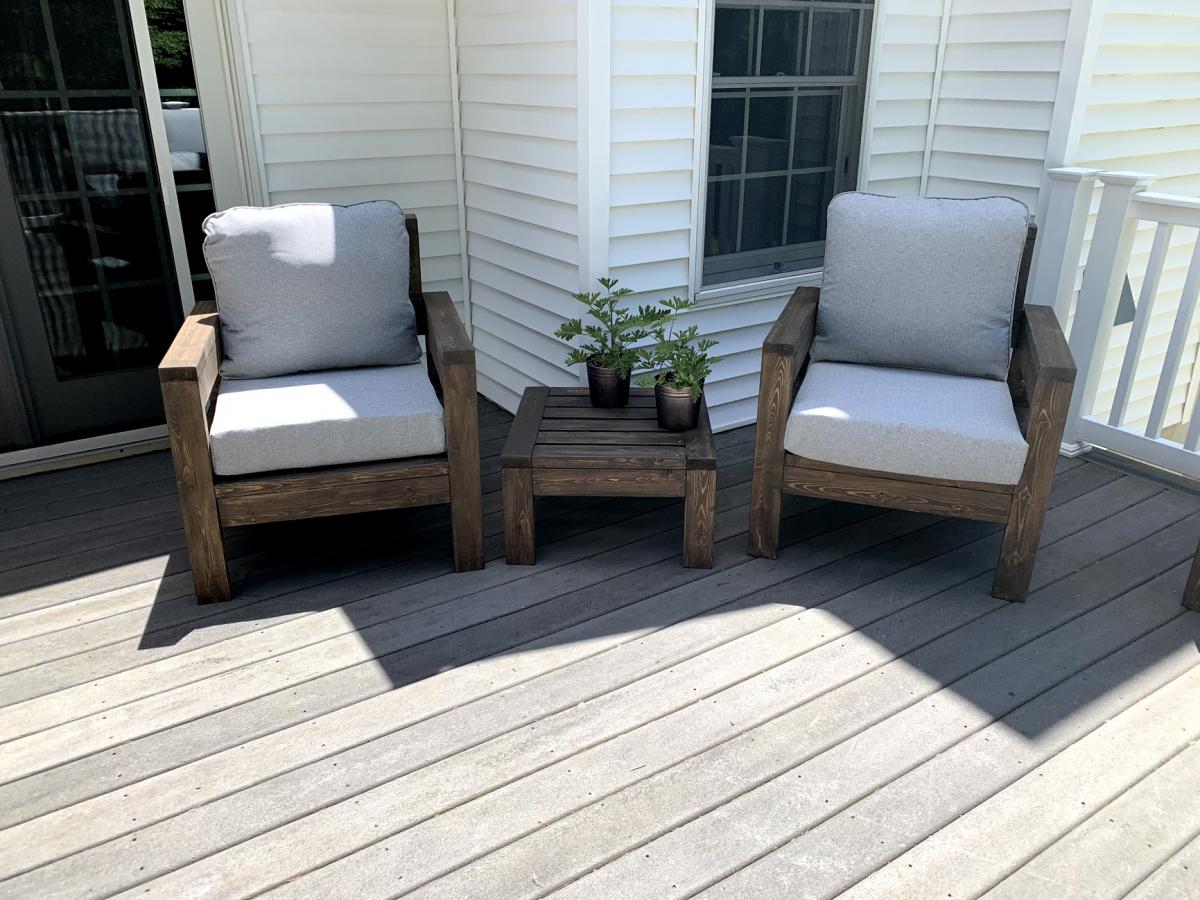
We ended up extending the size of the 2x4 outdoor sofa by one 24" section, for a total length of 96". I then used the same design to make two outdoor chairs, just reduced the length to 24". I modified the 2x4 outdoor coffee table plans to create two ottoman's that can be moved around to make the seating more lounge style Finally, I modified the coffee table plans to make a 5 foot outdoor dining table. All in all, it took about a week and I couldn't be happier with how it turned out!

Estimated Cost
$800 Total ($200 for the wood, $600 for the cushions)
Estimated Time Investment
Week Long Project (20 Hours or More)
Finish Used
Valspar Semi-Transparent Antique Oak Stain
Recommended Skill Level
Beginner

Workbench

Submitted by Ulrike on Sun, 06/21/2020 - 09:37

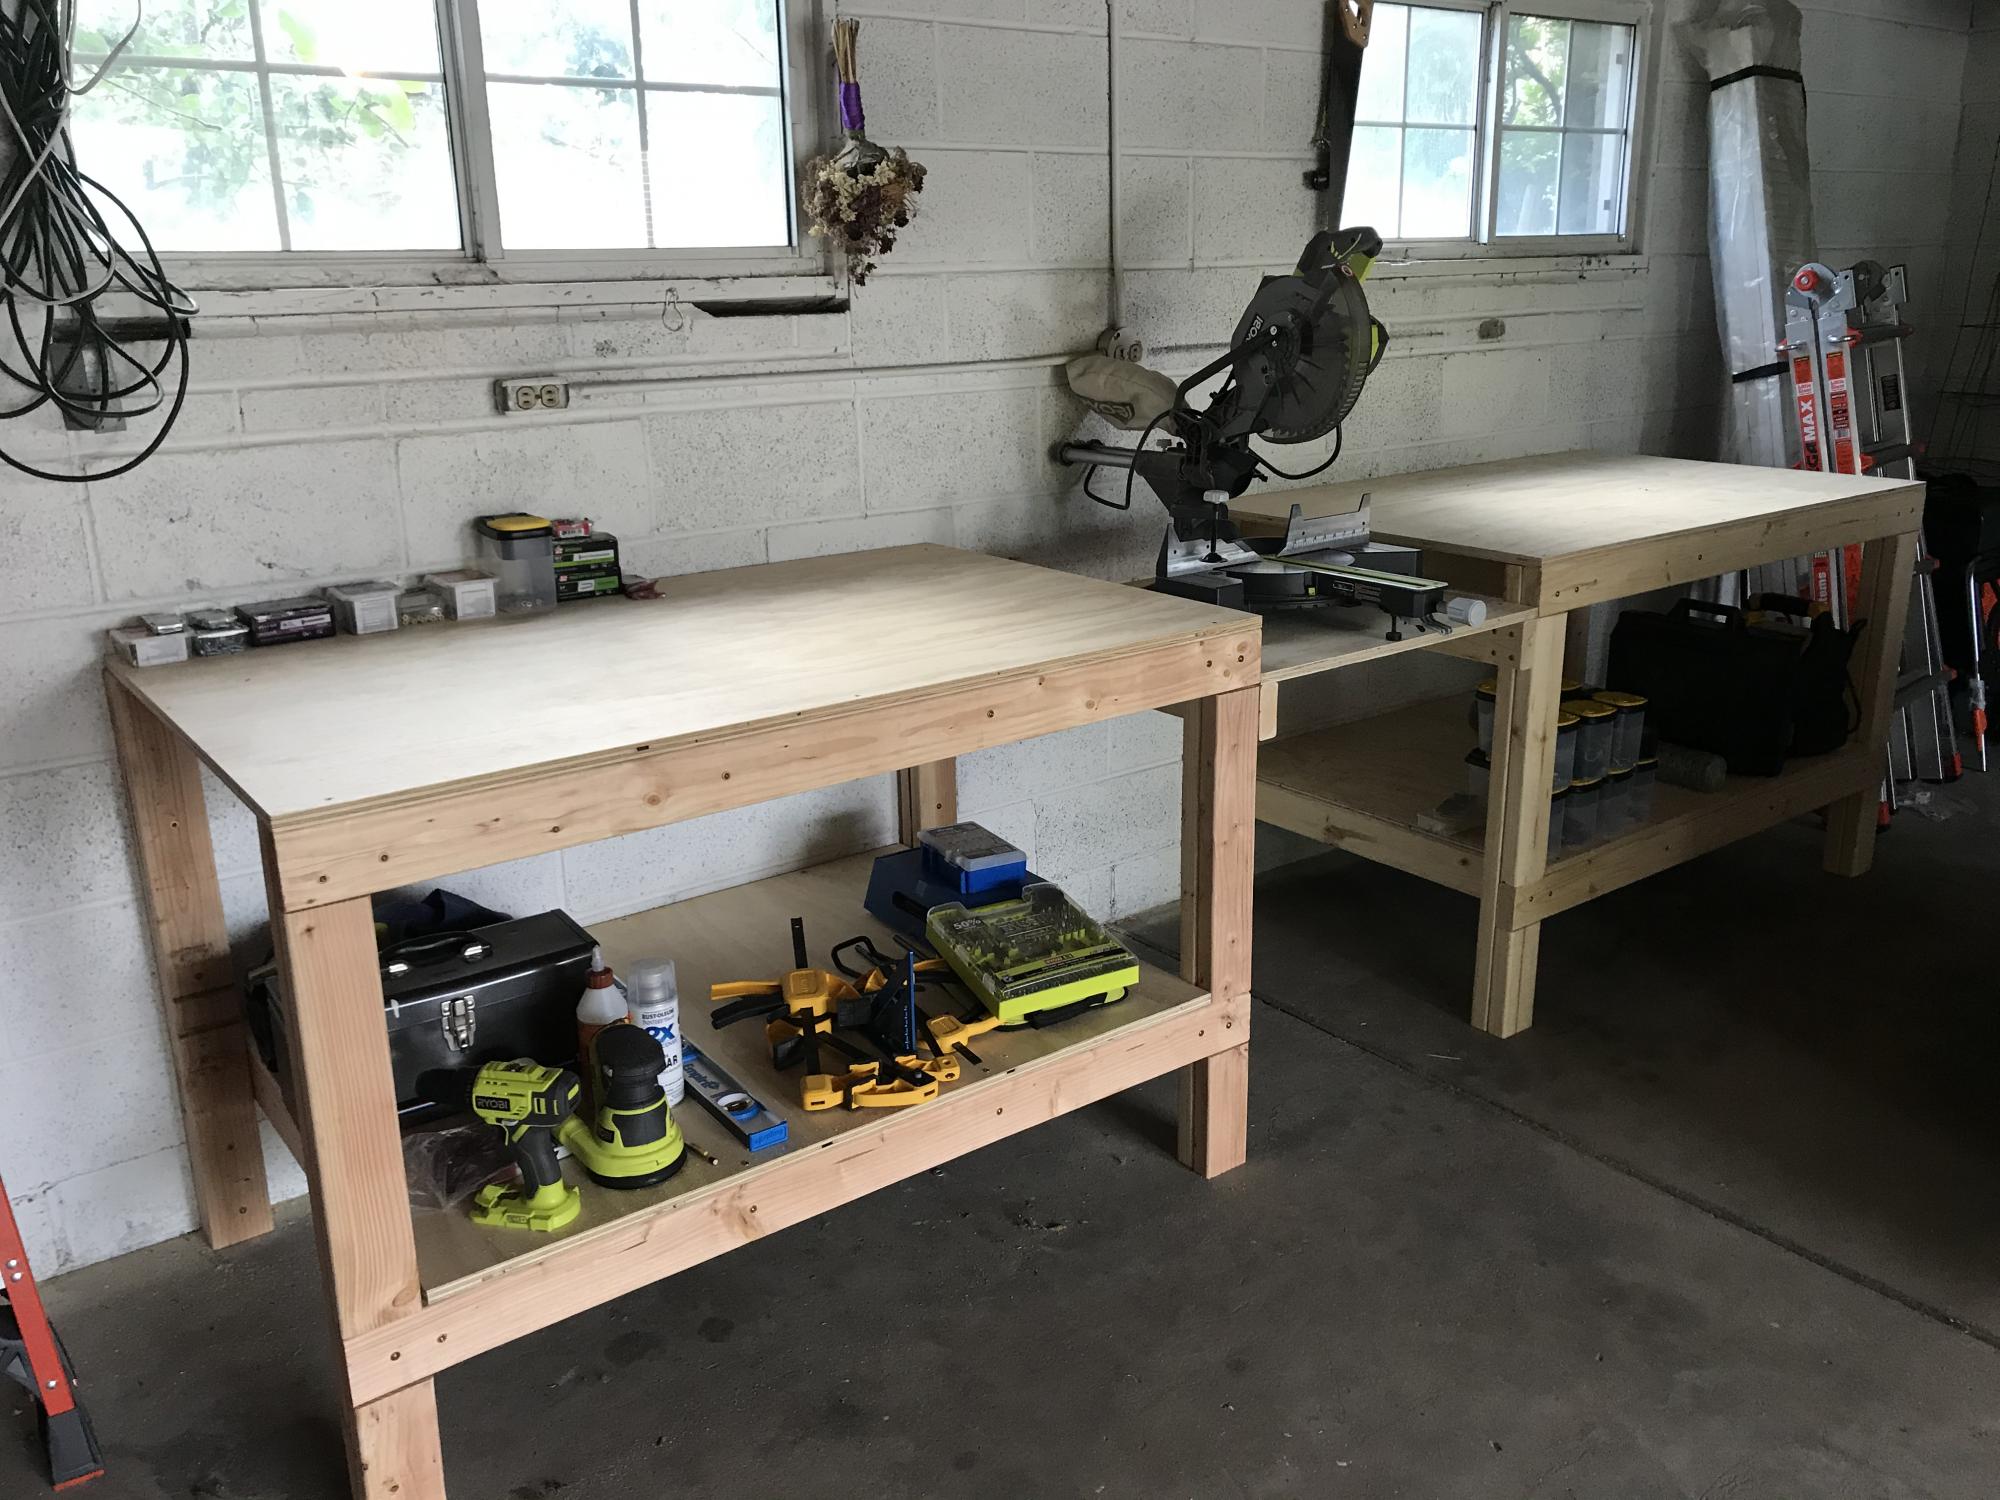
Built 2 of the workbenches for our garage. The plans made assembly very easy and quick. We had Home Depot cut the plywood to size.

Estimated Time Investment
Afternoon Project (3-6 Hours)

Comments

Sandpit with built in seats and lid - metric

Submitted by mrs_dt on Tue, 07/08/2014 - 01:49

This was our first build from this website and we are so pleased! Having seen very involved plans on an Australian website for a similar sandpit, I was so pleased to come across this version, with its far simpler design!
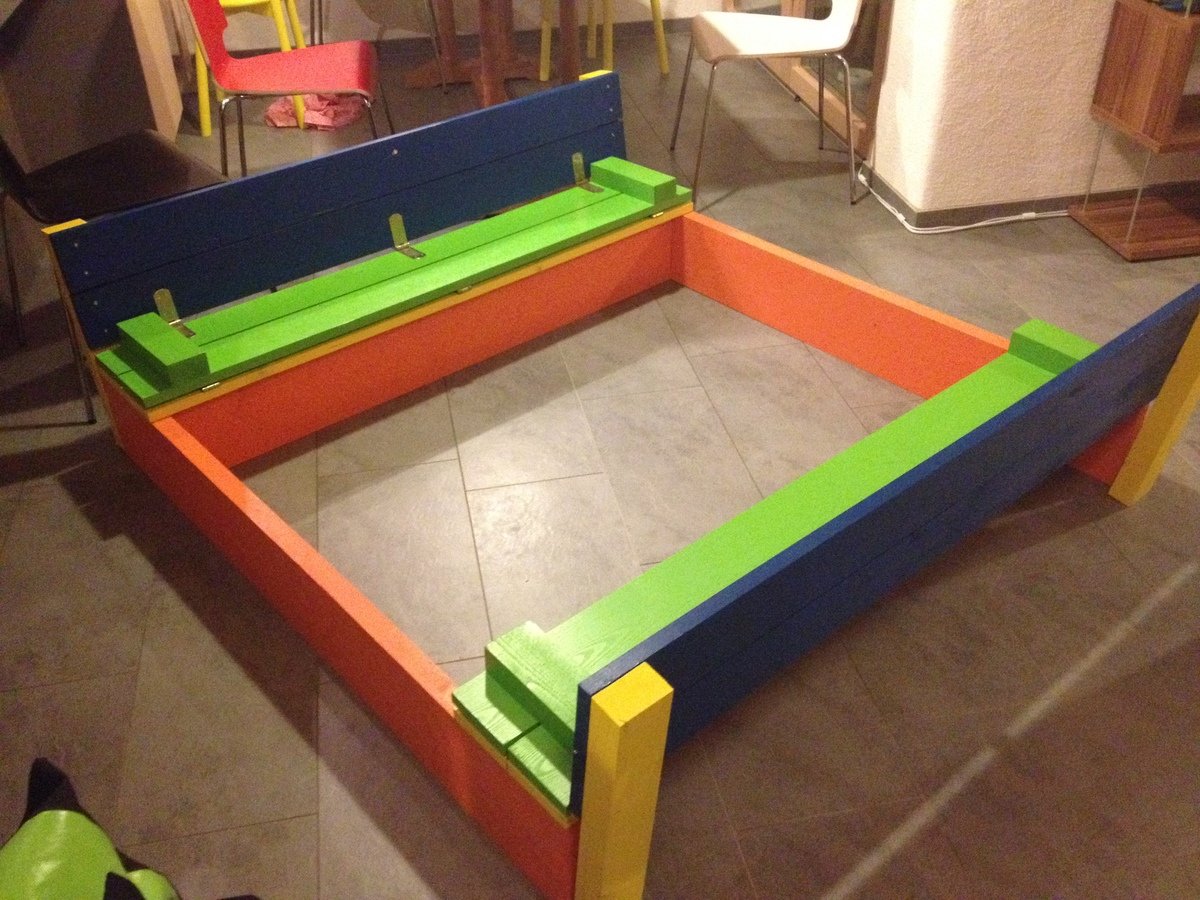
We wanted a slightly bigger sandpit, so I needed to do some modifications, and while I was enlarging it, I also converted to metric sizes, and designed specifically for the timber I knew I could buy locally (very obscure and inconsistent seeming German sizes). So the end result is a 1.5x1.5m sandpit, that has so far had 6 kids playing happily in it at once!
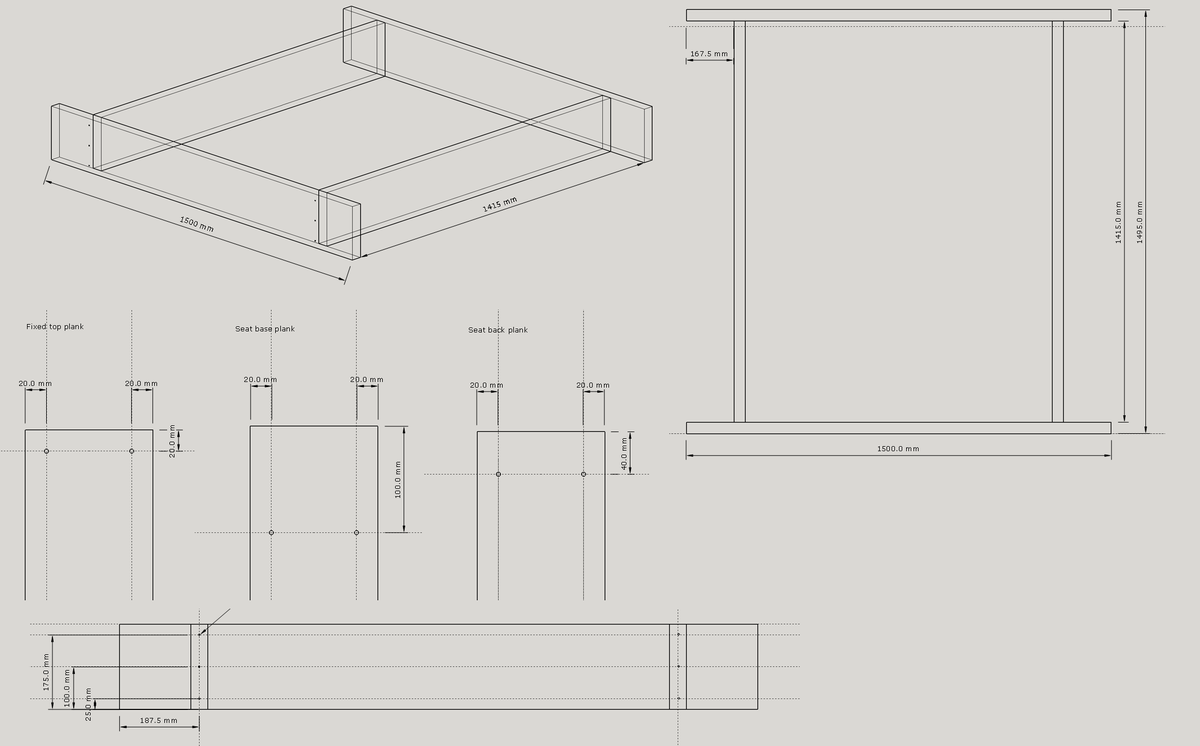
I've put in the drawings I used, and the cutting list for larger sizes in case anyone else is working in metric, or wants a bigger size!
Our other modification was to offset the shorter sections of the base to run along the front plank of the bench seat - there were two main benefits for this - we need a lot less sand, as there is none wasted under the seat, and the seat is supported and can't bow downwards!
The dimensions and layout we used are in the images.

Supplies

Timber
2 - 200 x 40 x 3000mm
6 - 120 x 24 x 3000mm
1 - 80 x 50 x 3000mm

Hinges
12 - 140mm long (the original design had 8, we went with three per edge to allow for the extra width)

Self tapping decking screws
18 - 5 x 80
48 - 5 x 50
96 - 3 x 20 (or enough for your hinges, depending on the design)

Paint
3 - 375ml PU Acrylic Paint, suitable for exterior use (top planks and seat supports)
1 - 750ml PU Acrylic Paint, suitable for exterior use (base)

Weed matting and staple gun

Sand
I calculated I would need 20 x 25kg bags - in the end we needed 11 - don't ask me where we went so wrong!

Cutting list

2 - 200 x 40 x 1500 (long sides of base)
2 - 200 x 40 x 1415 (short sides of base)

12 - 120 x 24 x 1495 (top slats - just under half a plank, to allow for waste)

4 - 80 x 50 x 245 (armrests / seat braces)
4 - 80 x 50 x 495 (back supports of seats)

I gladly paid 5 Euro for the wood to be cut in Hornbach - it should have been more than this, but the guy was generous!

12 hinges (the original design had 8, we went with three per edge to allow for the extra width)

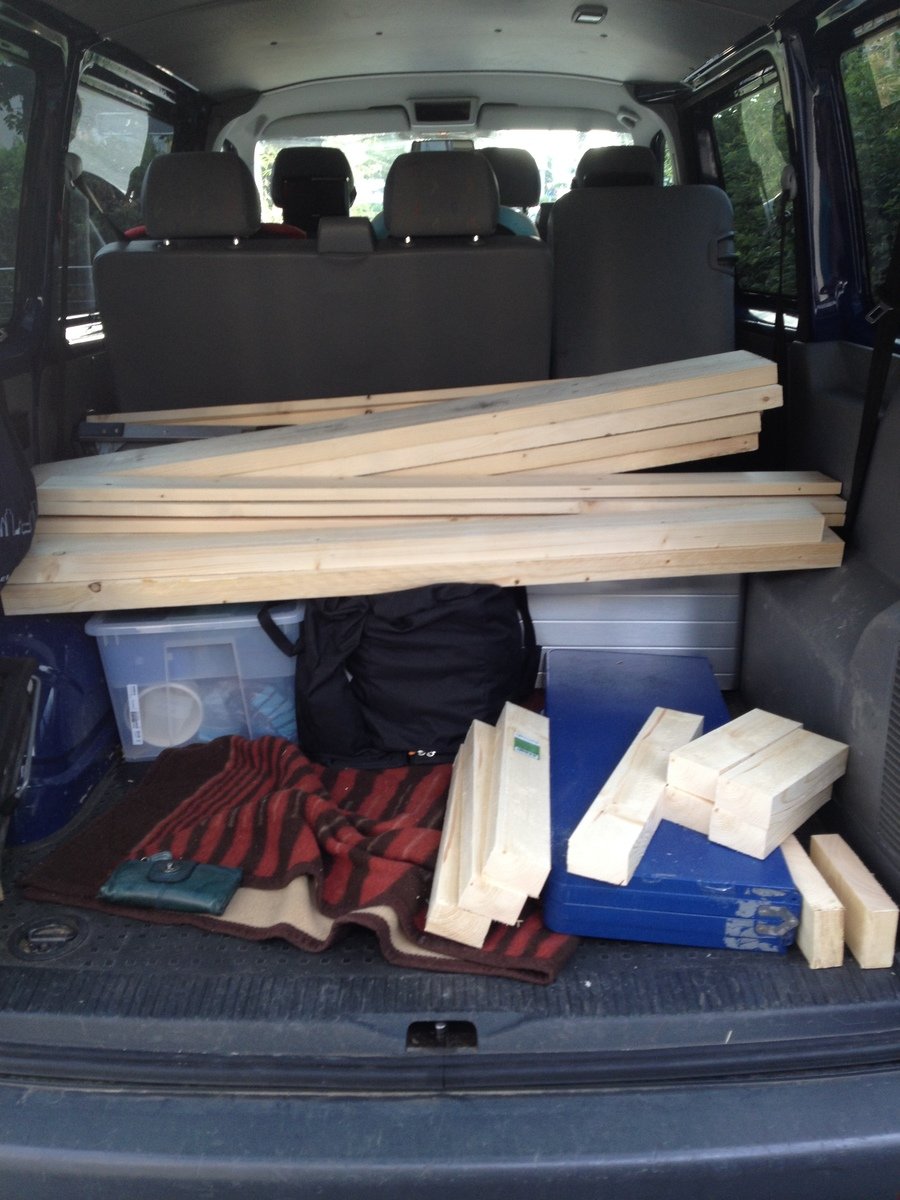
On Sunday we had the idea, on Monday I drew up the plans, on Tuesday I went shopping! Once all our wood was home safely, we sanded it down - most edges weren't badly finished, but there were a few splinters that needed getting rid of!
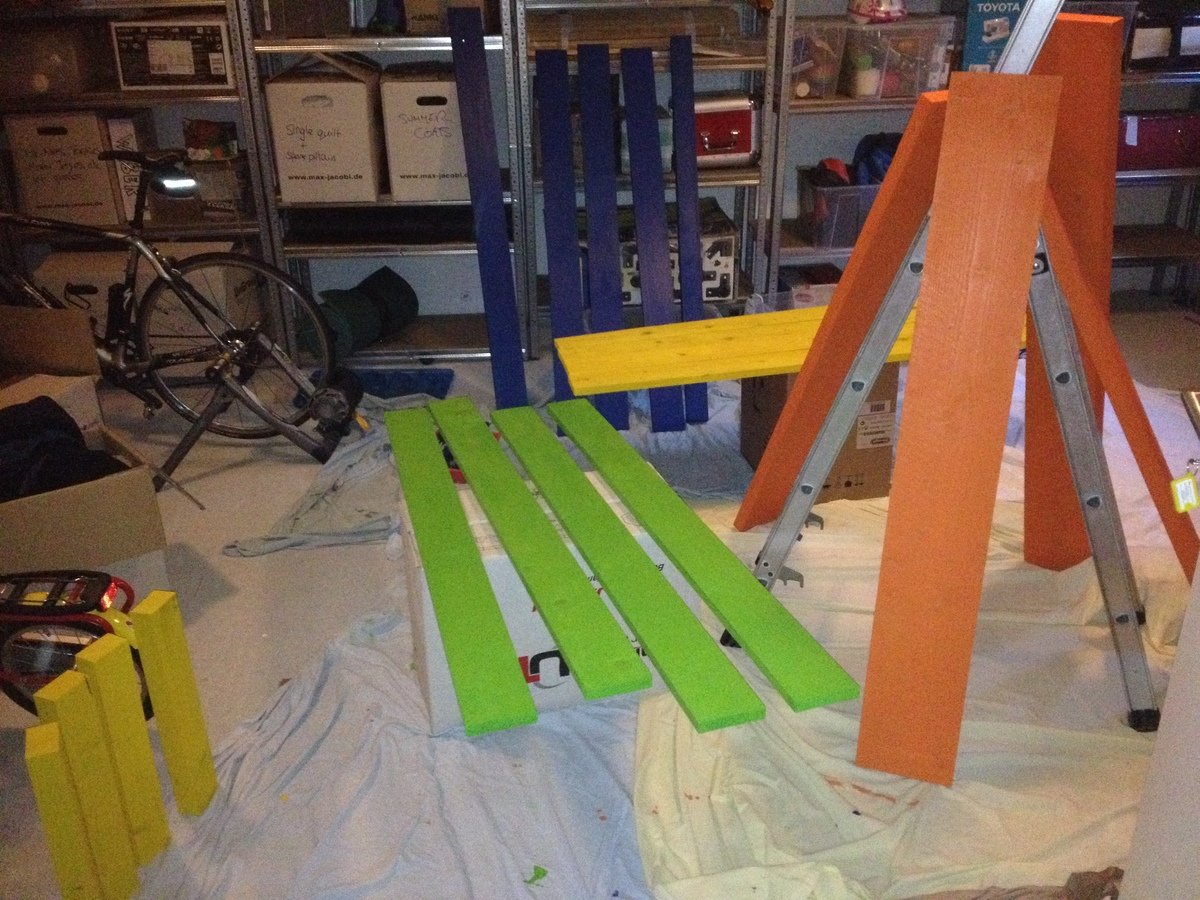
The next two nights Mr W gallantly set to work with the paint brush. After two nights, the wood all had two good coats of paint and we were ready to start assembling on Friday.
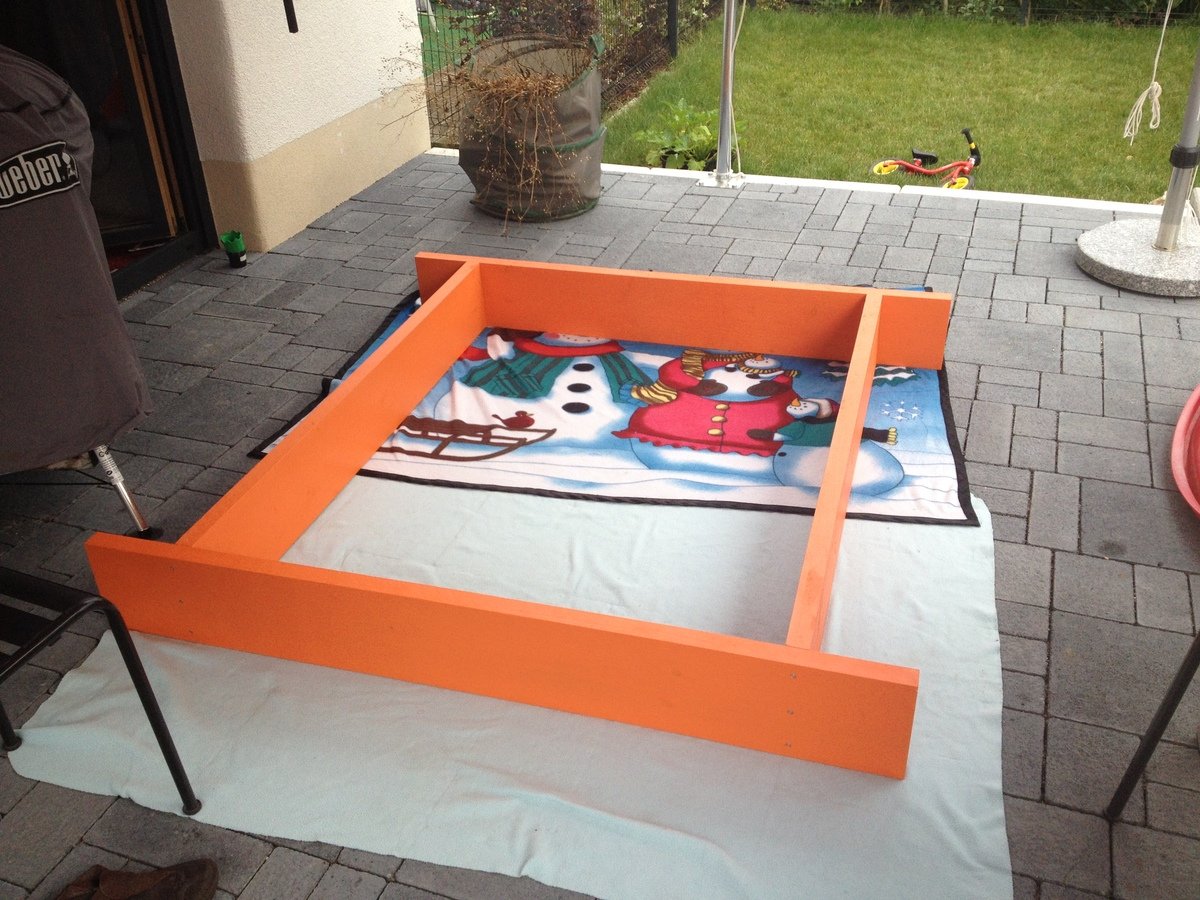
I pre-drilled the base of the bench before the second coat of paint - three holes for each butt joint - with some careful measuring this made screwing the base together really easy!
The top planks were also pre drilled, but there unfortunately my tiredness made me make mistakes, and some had to be re-drilled! Spacing the planks out took a lot of time, but I am glad I made the effort. I used cereal box, and experimented with different numbers of layers - I knew I wanted a theoretical 5.4mm gap, but it took some time to get the right number of layers of carefully creased and concertinaed card!

Having got our spacing wedge sorted, we screwed the blue planks in place at either end of the base. We then assembled the green seat section, and the blue/yellow back rest. Following a tip from the comments section, we added the hinge to the seat/back combo first, as this ends up being on the underside. Once those two hinged sections were made, they were then laid in place on the base (card wedge spacers in place) and then the final hinges added. The final assembly took about 5 hours - but this was partly because we started outside, then had to move everything inside when a huge thunderstorm rolled in!

The next morning we got busy with the staple gun and tacked weed matting over the base, then it was hauled in to position and filled up! For us getting this done and dusted was important, otherwise it could have dragged on a lot, but we are terribly proud that it was done in less than a week from being fist conceived!
I hope the metric/enlarged plans are of use to someone else too. One other idea we had, which we didn't get round to building in, was a support bar to be fitted when you close the pit, so the kids can play on top as a stage when it is not being used for a sandpit!

Built from Plan(s)
Estimated Cost
150 EUR
Estimated Time Investment
Weekend Project (10-20 Hours)
Finish Used
Painted with two coats of Polyurethane Acrylic paint
Recommended Skill Level
Beginner

Pottery Barn Style - Full Size Headboard

Submitted by Oshynlover on Thu, 10/13/2016 - 03:21

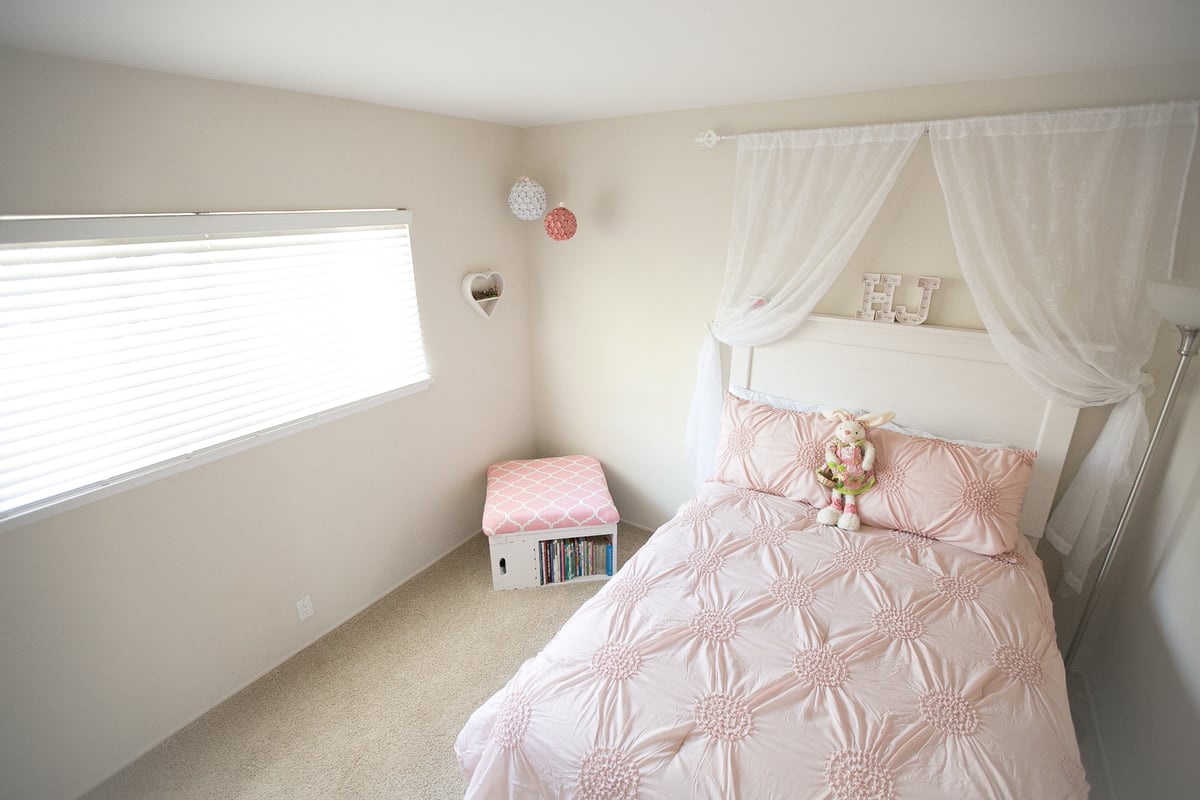
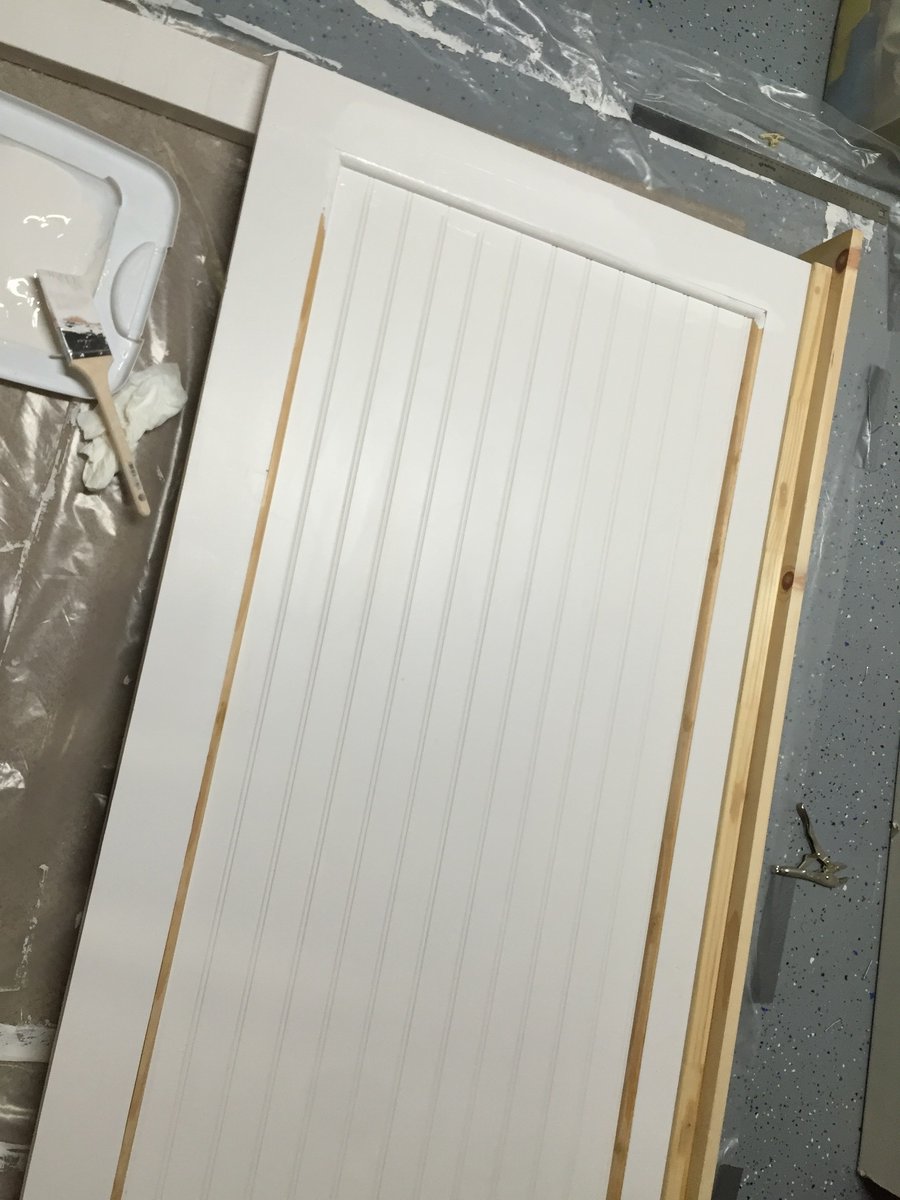
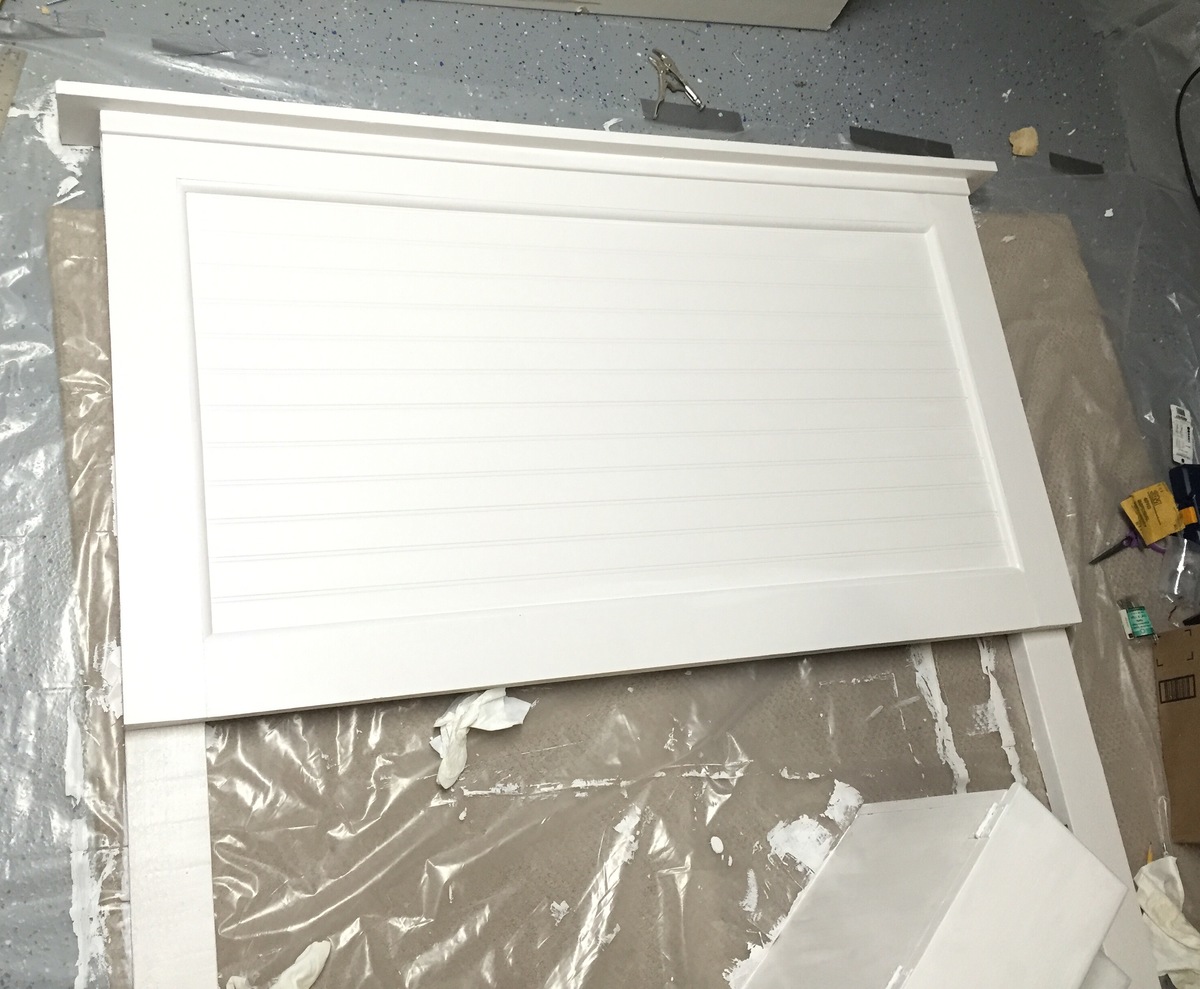
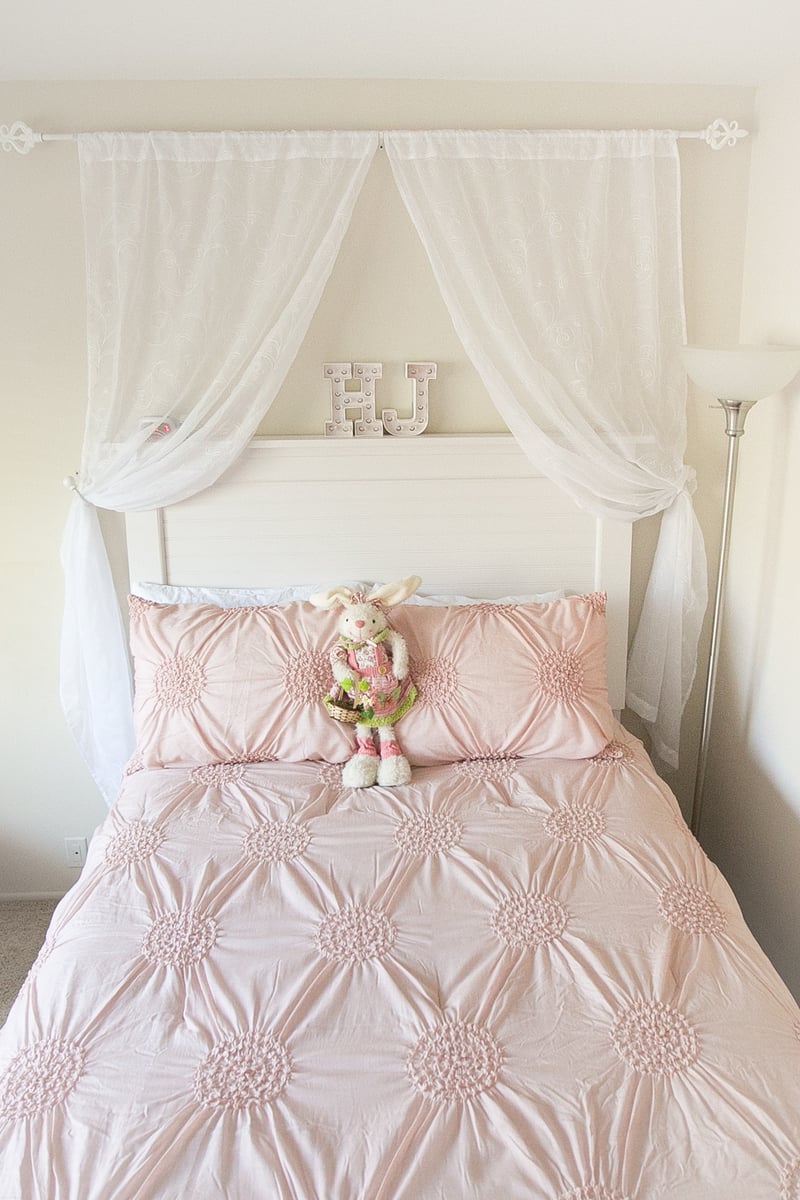
My very first big project!  My 6 year old daughter was in need of a new bed and a room makeover so I decided to build her a headboard which then turned into a whole new room!!! 


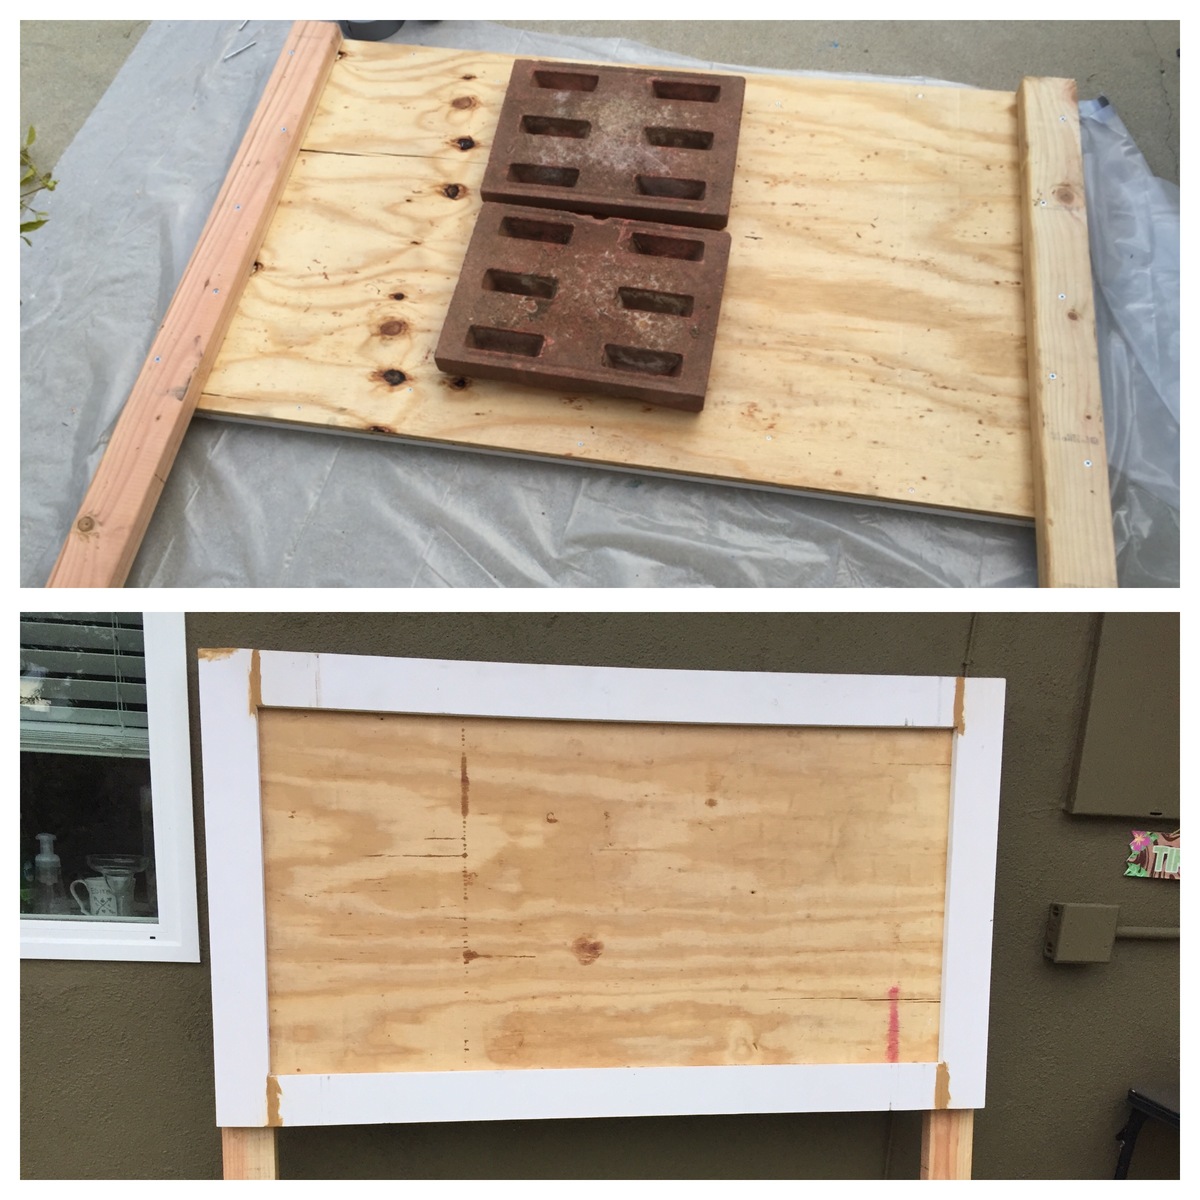
I really wanted it to it to have some dimension to it so I added some moldings and a mini shelf to the top of it.  I basically just designed it myself, based on what some of the $1000+ pottery barn ones look like and spent hours at the hardware store finding the perfect moldings.  


For the main backboard I used plywood, however to keep it light I used a sheet of molding and added a round edge to make it seamless.  


My my daughter was so excited Mommy built her whole room. 

Estimated Cost
$150 The Moldings added cost but can be made for less than $100 without it. But why would you??? It looks SO much better!!
Estimated Time Investment
Day Project (6-9 Hours)
Finish Used
Behr Semi Gloss
Recommended Skill Level
Beginner

Comments

Argie Bedside Table (Nightstand)

Submitted by thehallway on Sat, 10/27/2012 - 07:56

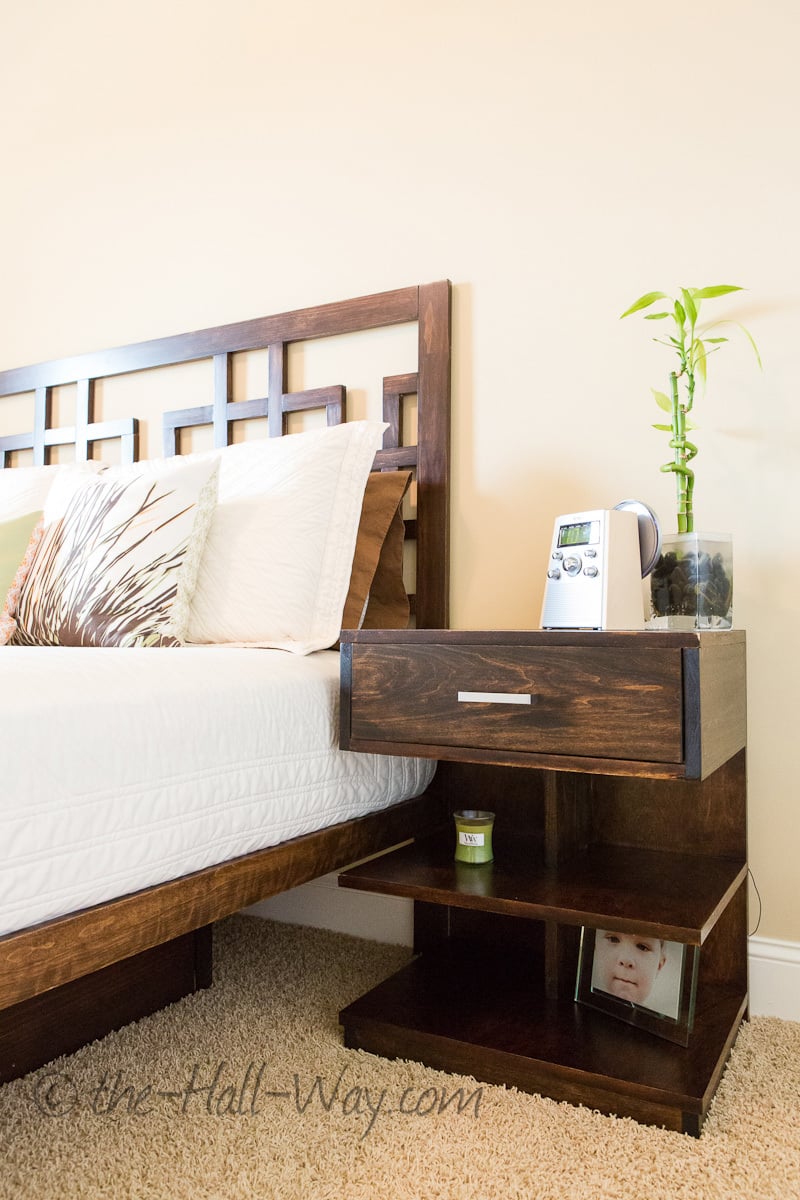
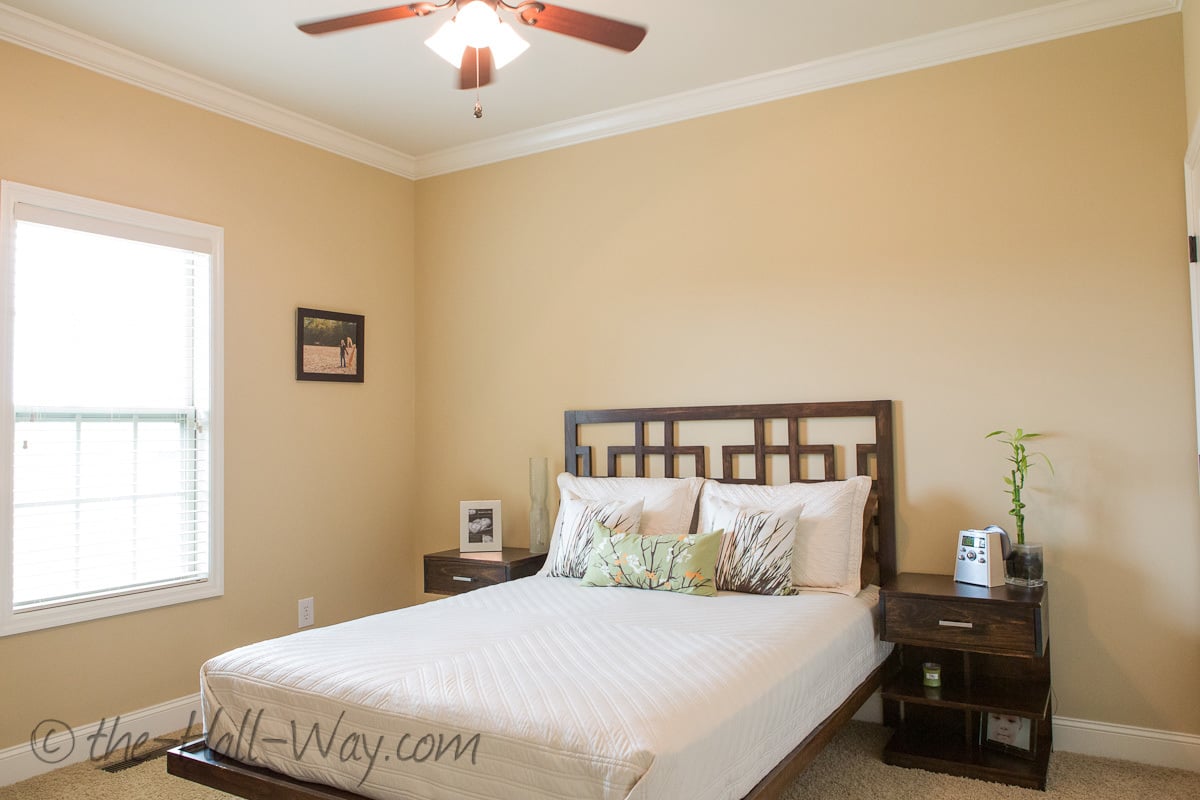
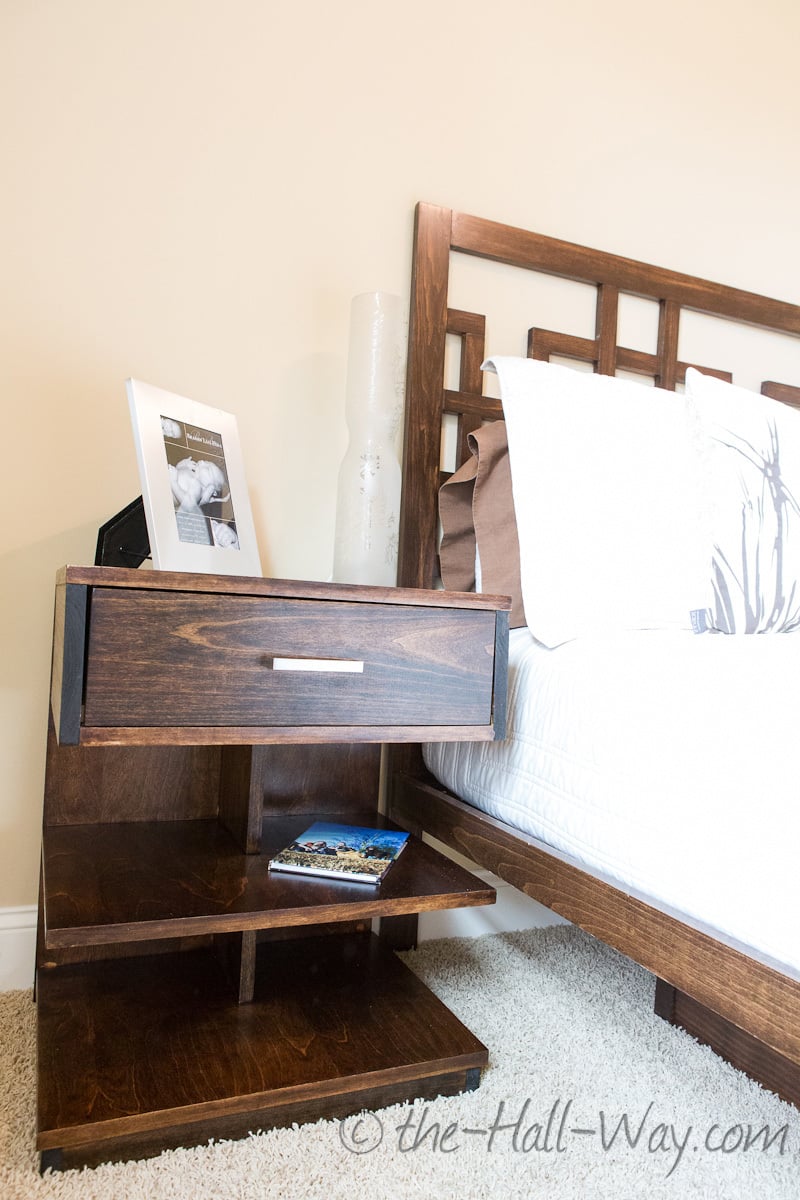
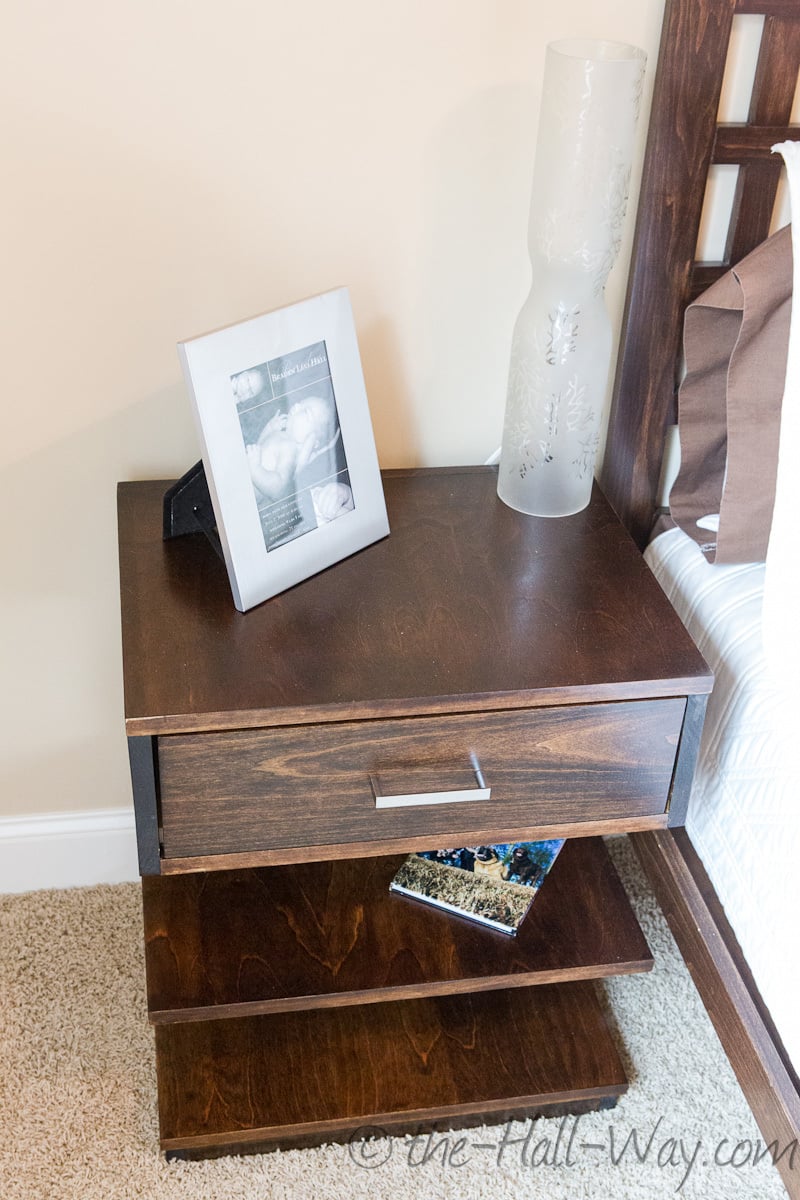
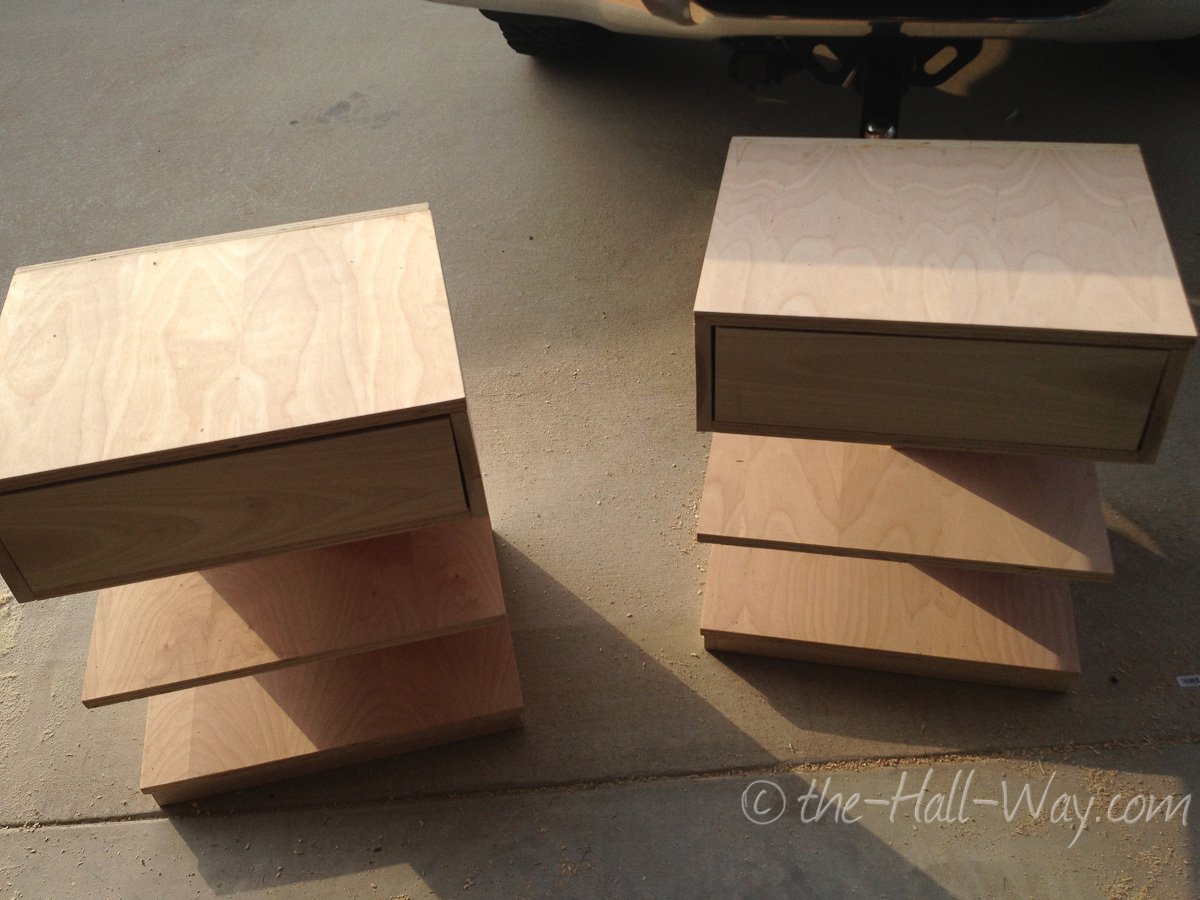
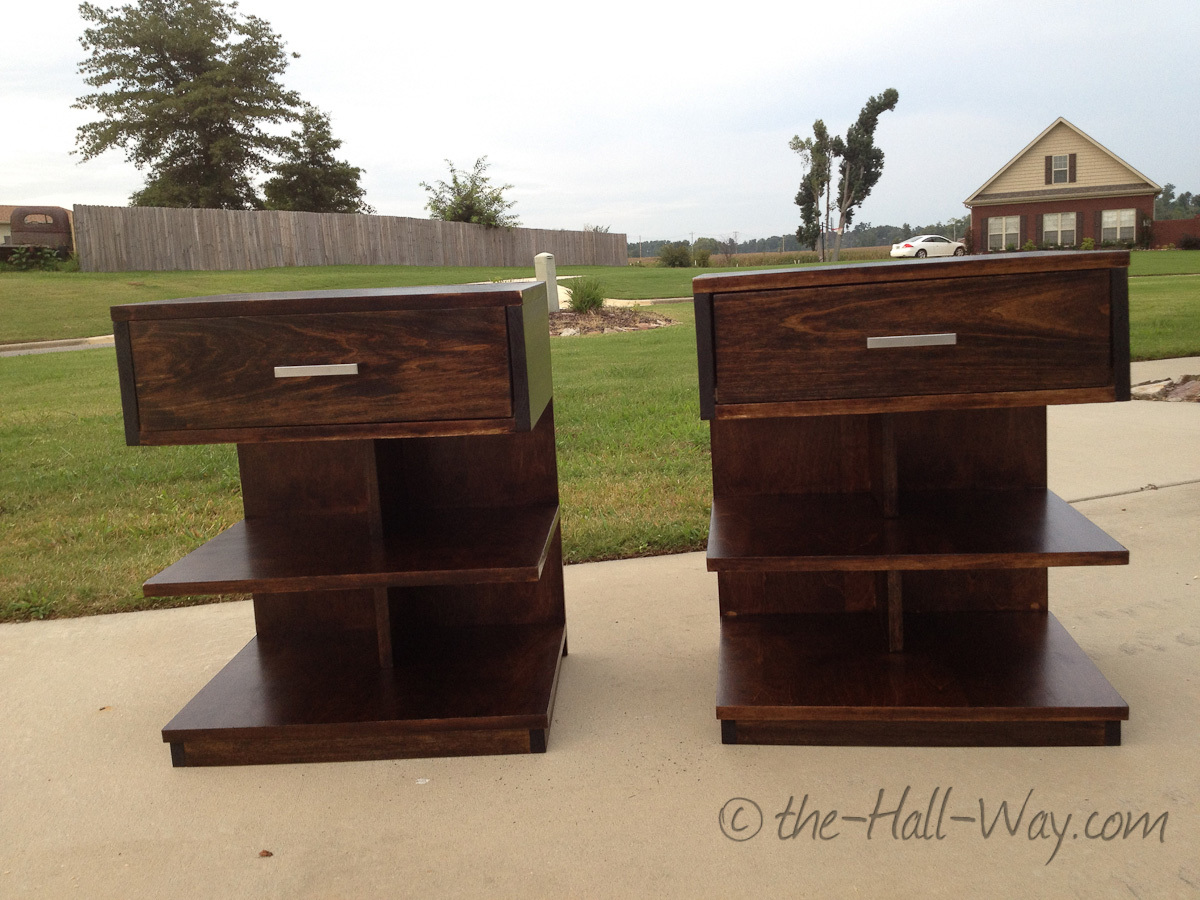
I built this bed for the guest room at our previous house. The room was small, so I made floating shelves for the nightstands to save space. We have since moved and are now renting, so we didn't want to put holes in the walls to hang the shelves. I took the opportunity to build these nightstands instead. The original design was a little too tall and wide, so I reduced those dimensions by 3". This was my first time building drawers, but they went together surprisingly well. I had used a combination of stain on the bed and was worried about matching it, but 2 coats of Minwax Dark Walnut ended up being a pretty close match.

Built from Plan(s)
Estimated Cost
$75
Estimated Time Investment
Day Project (6-9 Hours)
Finish Used
2 coats of Minwax Dark Walnut & Poly
Recommended Skill Level
Intermediate

Comments

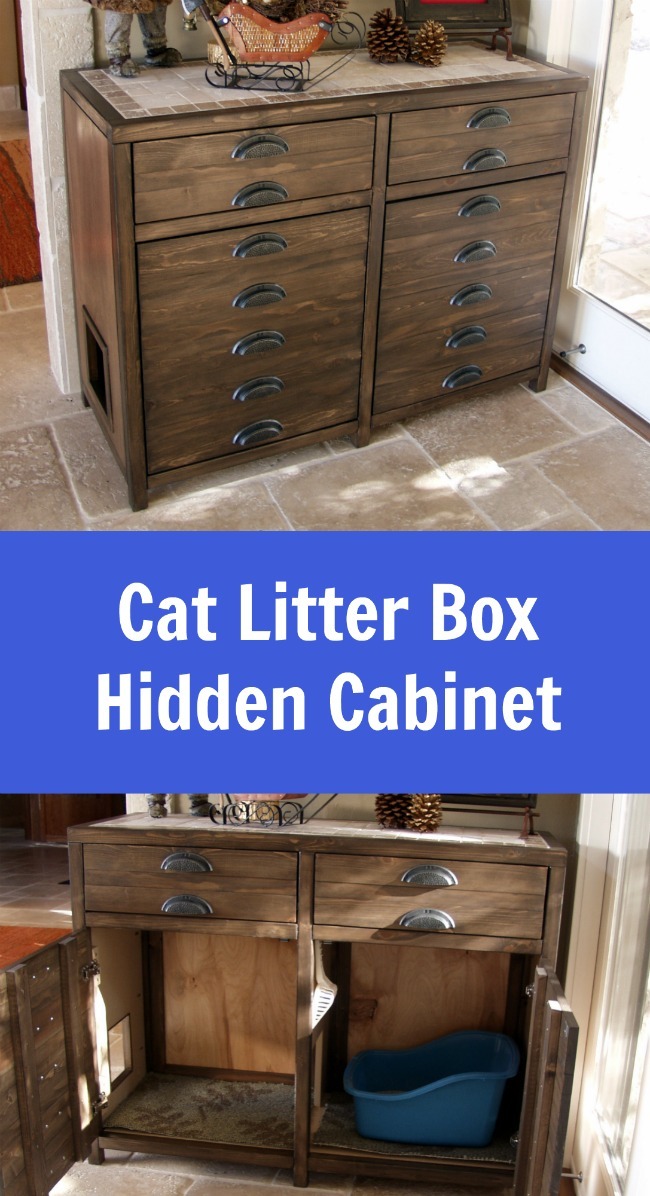
Printer's Console or Sneaky Litterbox Cabinet? Cat Litter Box Cabinet

Submitted by Joni on Sun, 11/25/2012 - 08:12

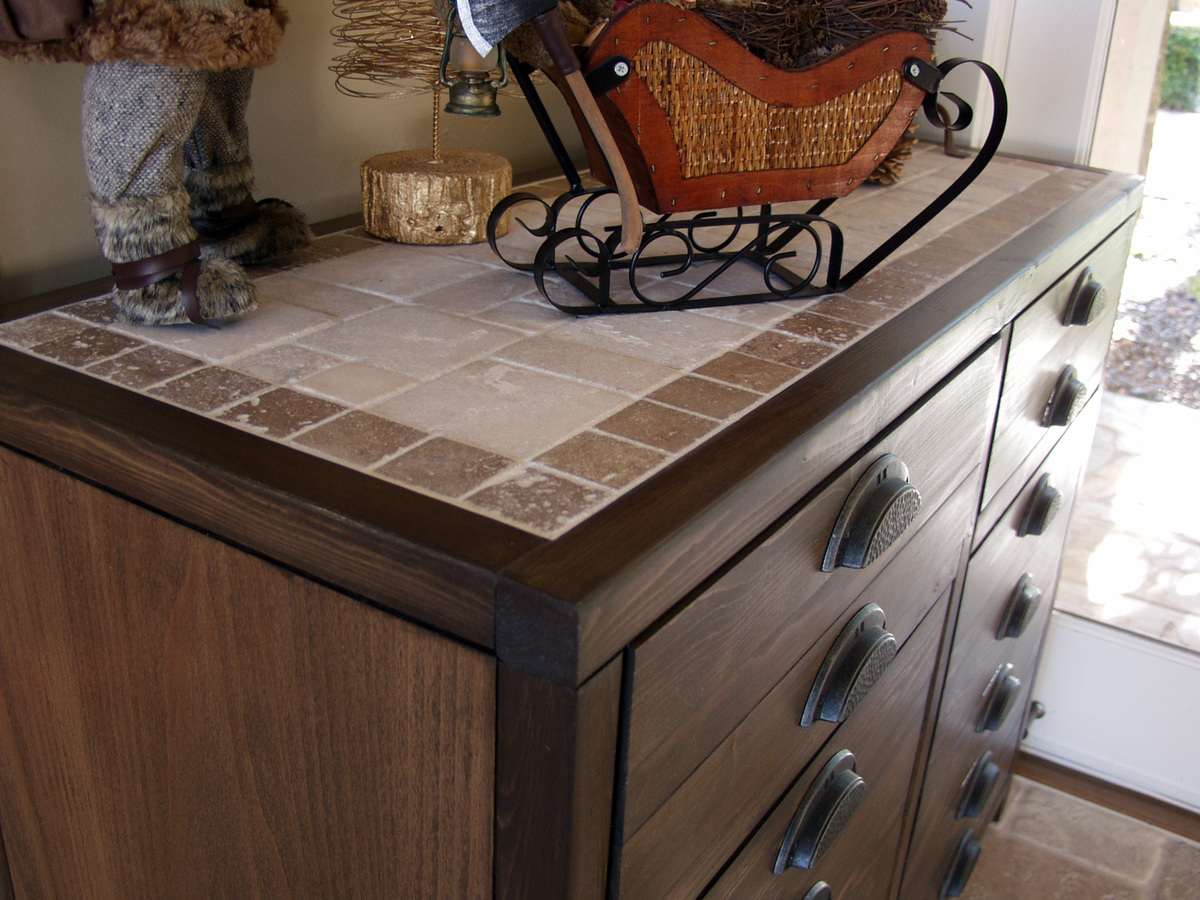
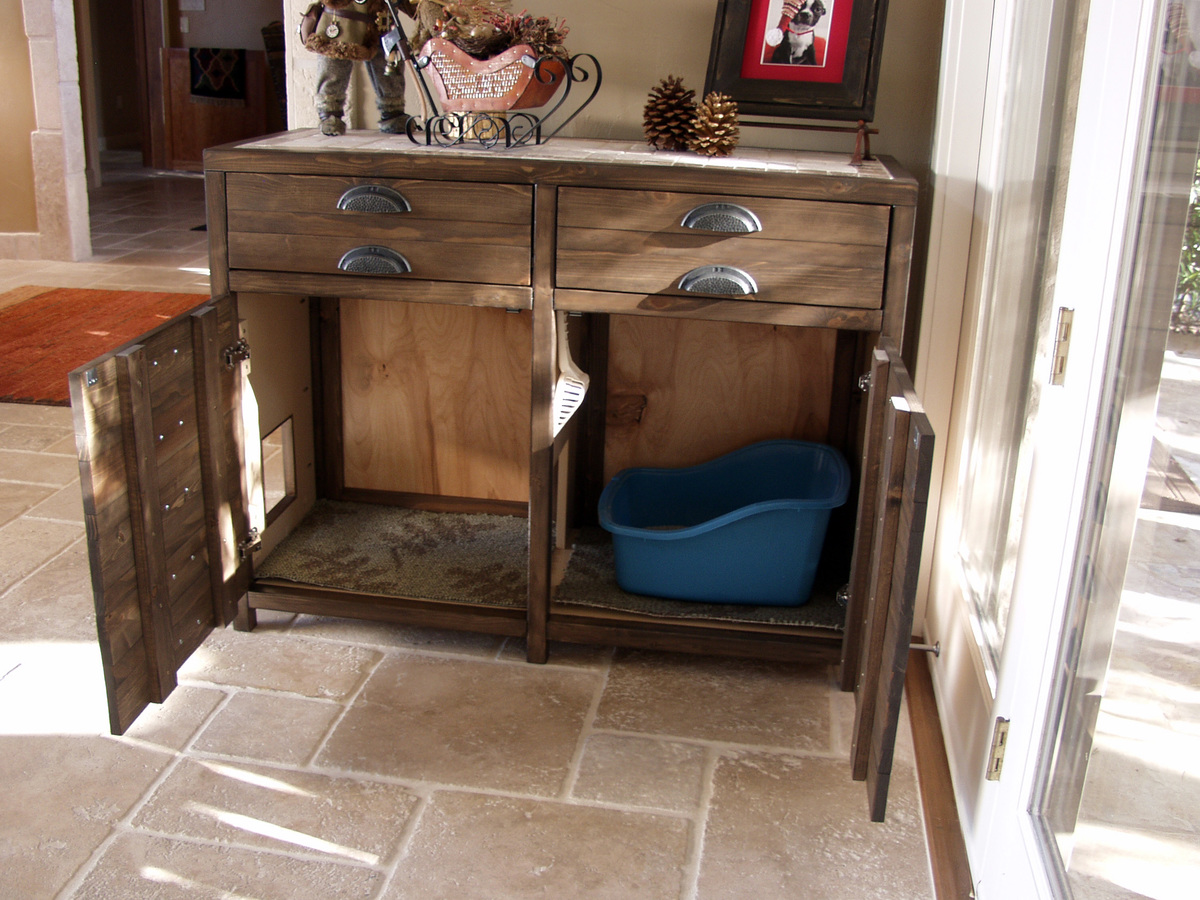
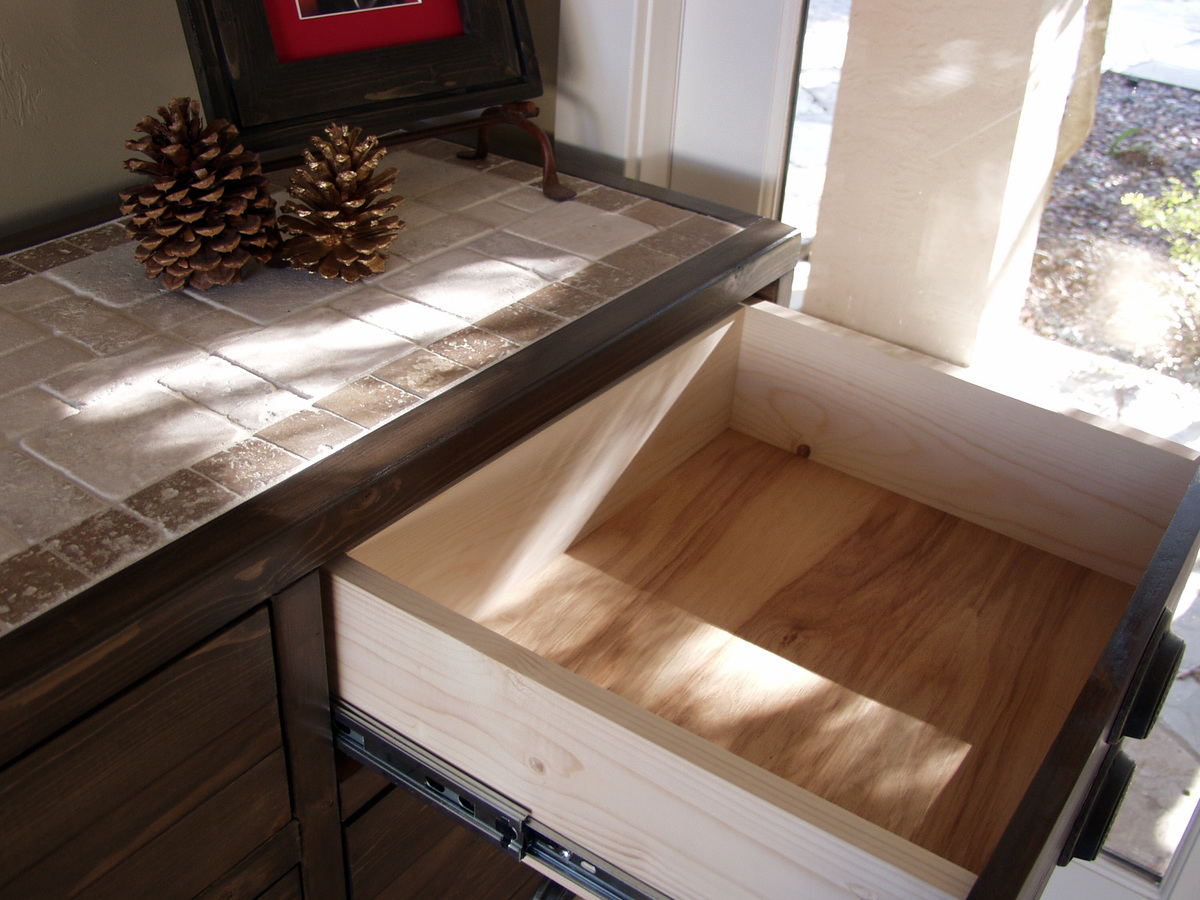
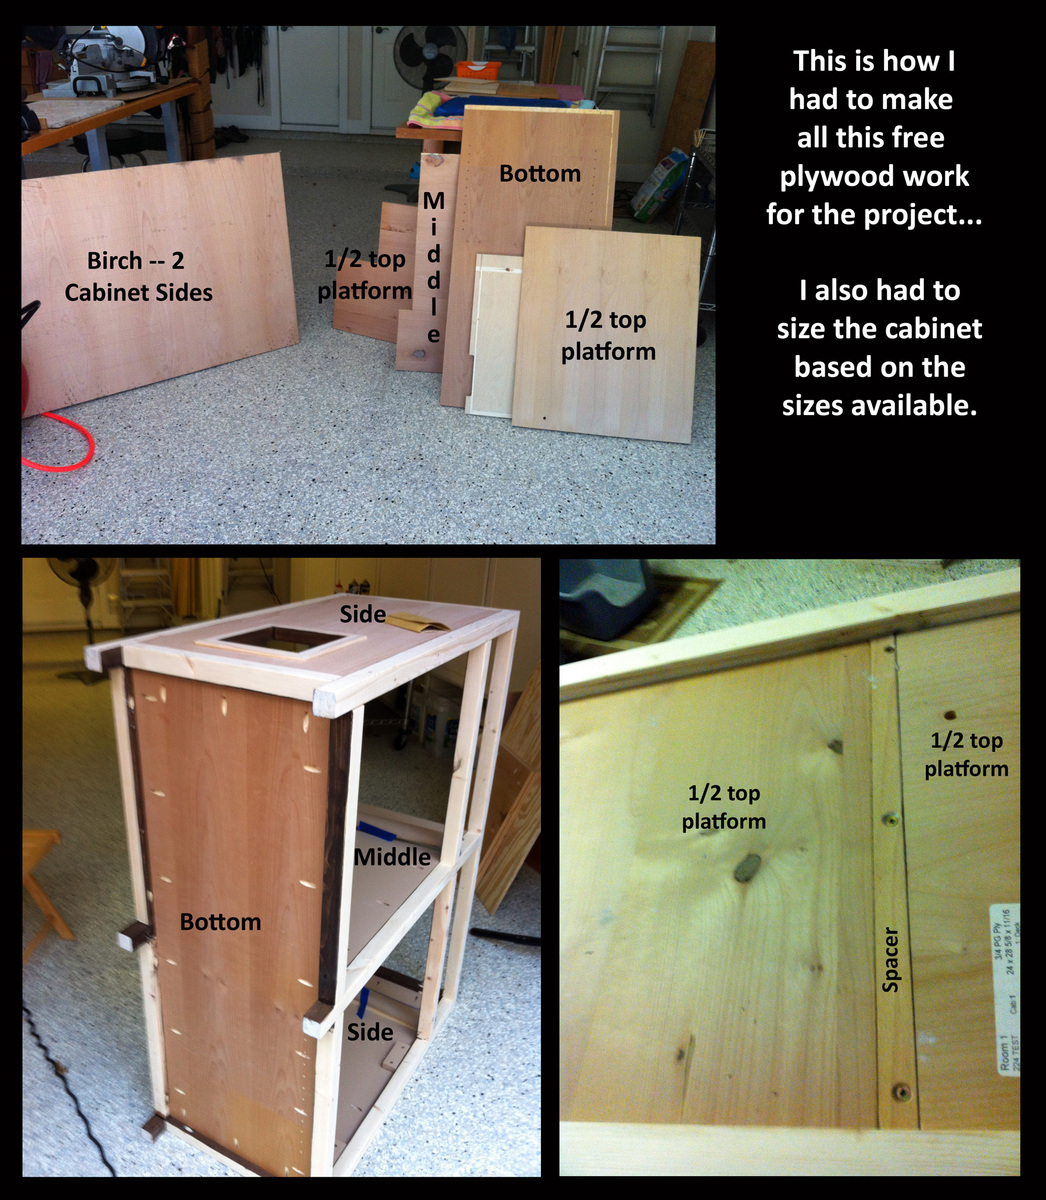
I had been wanting to build something to hide the litterbox for a long time. When I saw the Printer's Console plan, I knew this was the perfect plan for a cat litter box furniture. I loved that Jen Woodhouse's version was completely modified to her bar plan, so I thought I could modify for my litterbox idea. I modified the plans on size, as I was trying to use a bunch of mis-matched plywood. I also modified it to include a cat door, a cat passageway on interior panel, a vent on the back behind one of the drawers, and the stone top. I built a frame on the back to house the backing as an inset piece, as I didn't want it to be seen at all. I learned a very important lesson during this build. Not all 1x3s are created equal. Once I got my doors assembled, they were too big for the opening. I couldn't shave off the tiny amount needed, and couldn't make anything work short of starting over with 1x4s, sawing off a small amount, and cutting down the # of "drawers" (and handles). I wanted the inside to be fully finished (because cat pee on raw wood would not be good!). I had to finish certain "planes" prior to putting the thing together. I used kitchen and bath paint on the inside floor and sides for easy cleanup. The stone was carryover from construction on our house 12 years ago. The handles were an amazing deal @ $1.81/each .


Built from Plan(s)
Estimated Time Investment
Week Long Project (20 Hours or More)
Finish Used
Minwax Wood Conditioner, followed by a mix of American Walnut & Onyx Minwax water-based Stain. 3 Coats of Old Village Gel Varnish. On inside, I used a kitchen/bath paint.
Recommended Skill Level
Intermediate

Comments

blueskiesinNM

Mon, 06/17/2013 - 12:23

Love your use of the buffet. Our family has discussed making a piece of furniture like this for our smaller dog. Nice to see someone has done it! Our big dog has scheduled feedings but our little dog would prefer to be a free feeder. Poor thing chokes down his food in our pantry listening to our big dog breathing under the door waiting for him to finish. When he is done we open the door and the Big, greedy dog bolts in looking for left overs. A family member has to wait patiently for the little dog to finish so he can escape the pantry. I really don't want a doggy door in my pretty swinging bi-fold doors to my pantry which is also access to our kitchen.That would be a pain to have to keep closed all day. But this buffet idea is super cute! Thanks for the inspiration.

wayneled

Fri, 01/09/2015 - 22:01

I know this is an old post, but I'll ask anyway

I love this piece and am in the planning stages for ours. Thank you for sharing!

I am Wondering how you went about the table top. Did you install a 3/4 ply on top but not flush, allowing room for mortar and tile? If so how much room did you allow for the tile/mortar? 1/2 inch? How did you keep the surface of the tile level and uniform? Lastly, did you seal the tile with anything when you finished?

Aesthetically, the tile top really sets this piece off and I really want to make my own.

Thanks

Seasonal And Holiday

buffet/sideboard with expanded metal

Submitted by lworthy on Tue, 02/21/2017 - 14:40

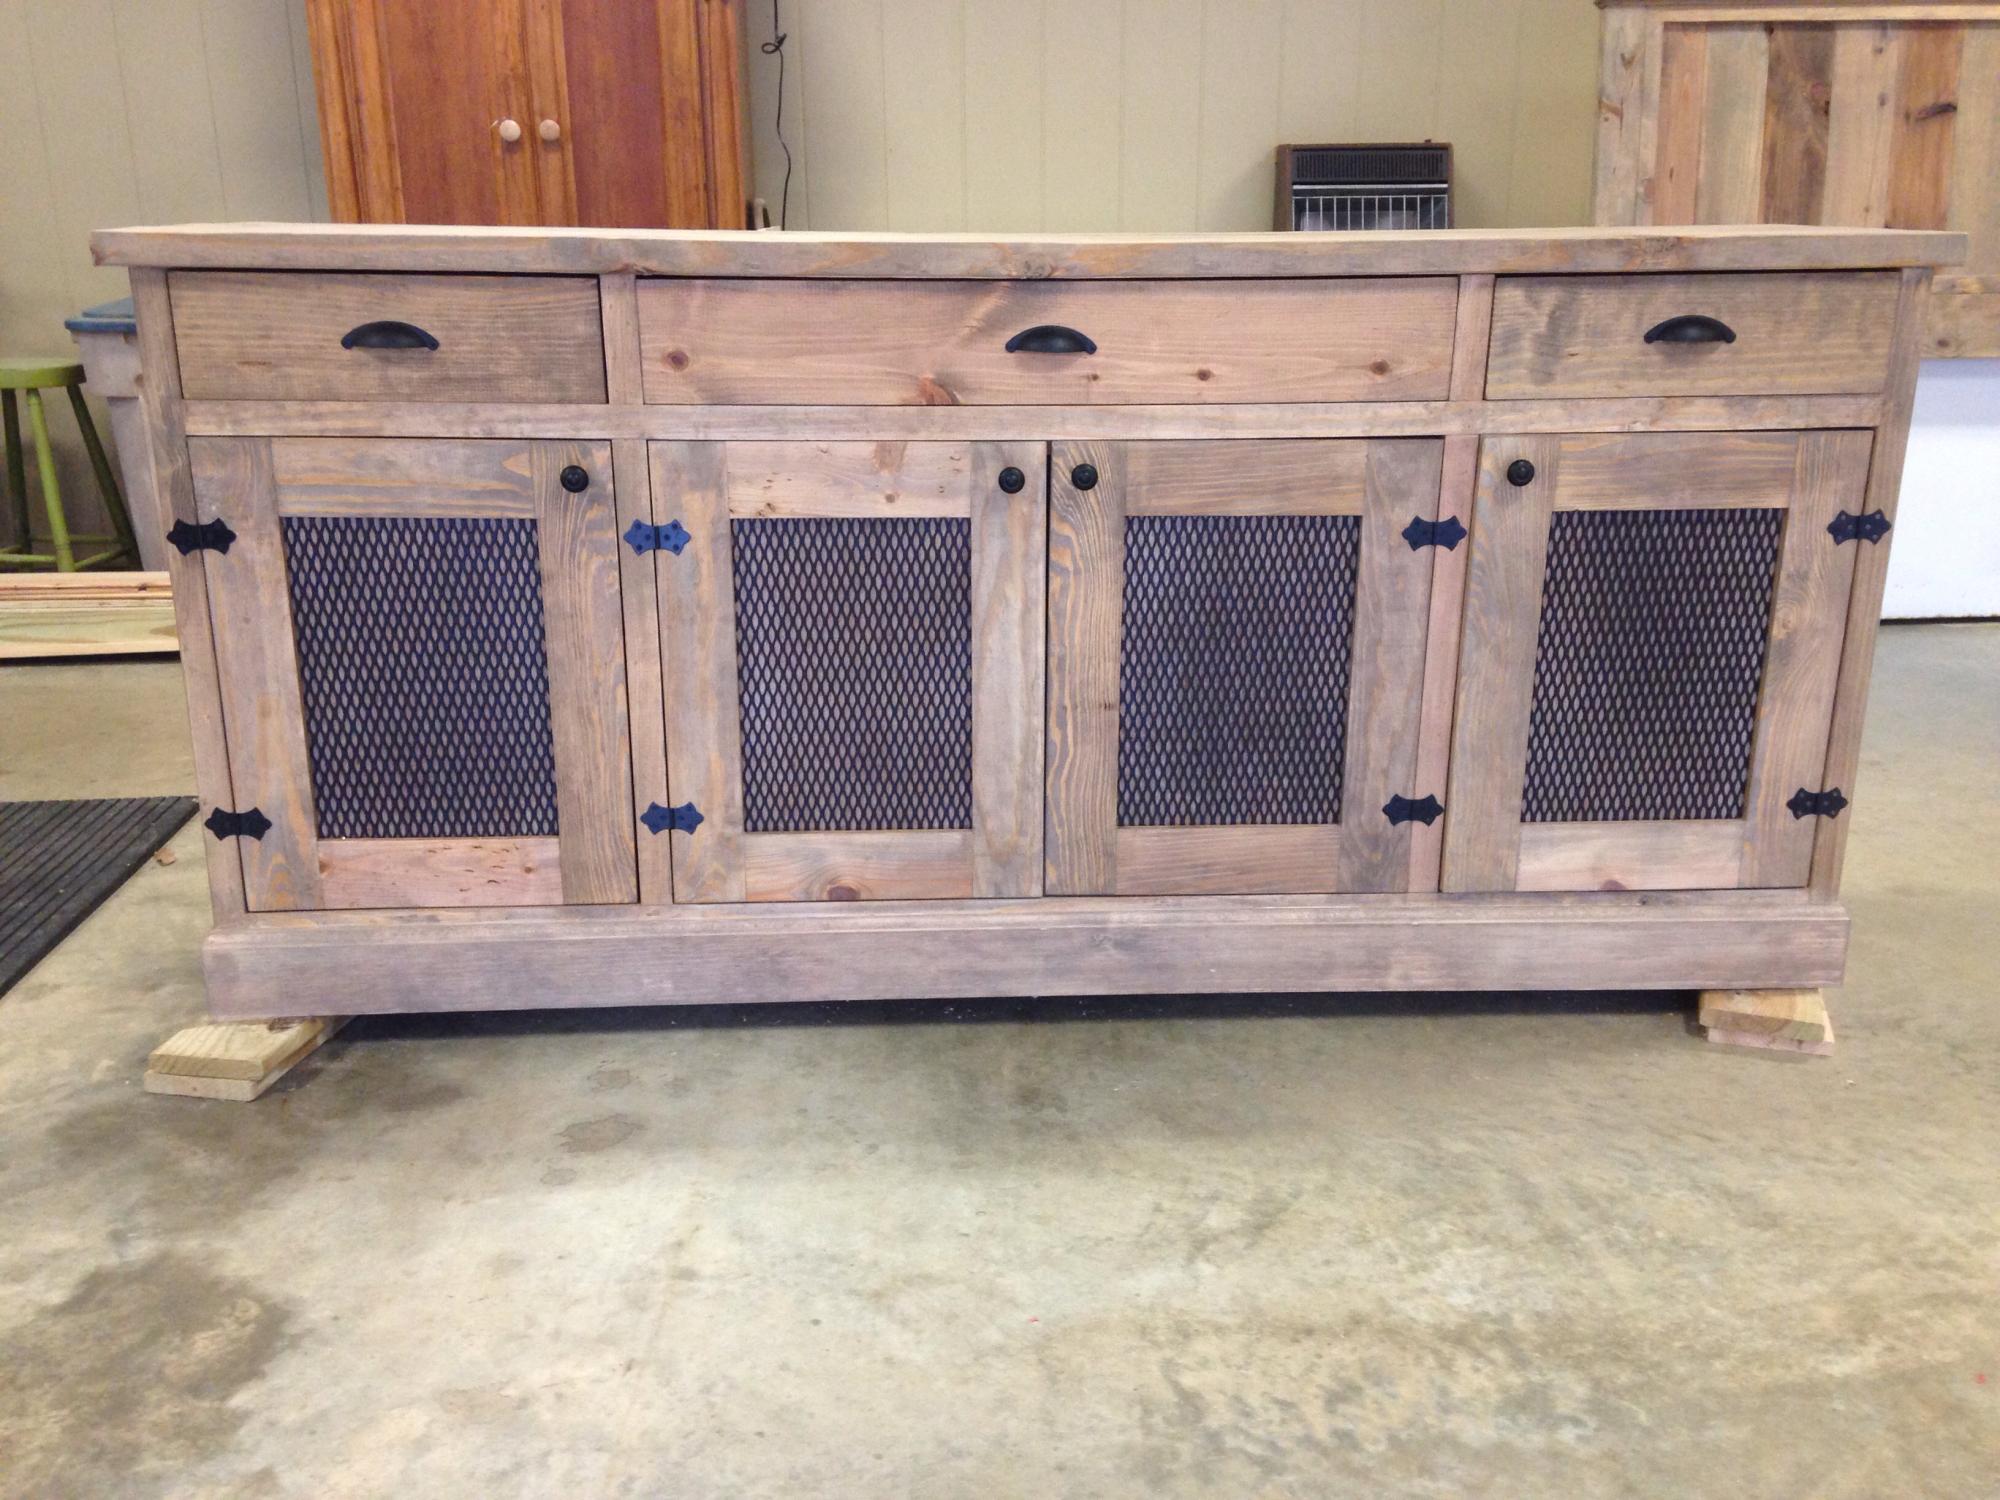
I really loved this plan of Ana's so I decided to build it for myself. I love the stain color on the one Mid Atlantic Rustic built and they were so kind to tell me the color and it turned out perfect! I will say if I ever built another I will make some adjustments with the doors and drawers and have them sitting on the outside of the facing. Those things were the devil for me!! I have only been building on my own for 6 months, so it was tricky for me. THE PIECE IS HUGE!!! I also added 2  2x4 supports under the bottom,
Happy Building

Built from Plan(s)
Estimated Time Investment
Weekend Project (10-20 Hours)
Finish Used
Minwax stain 2 step process
Recommended Skill Level
Intermediate

Comments

Front porch planters

Submitted by Anonymous (not verified) on Thu, 01/07/2021 - 20:21

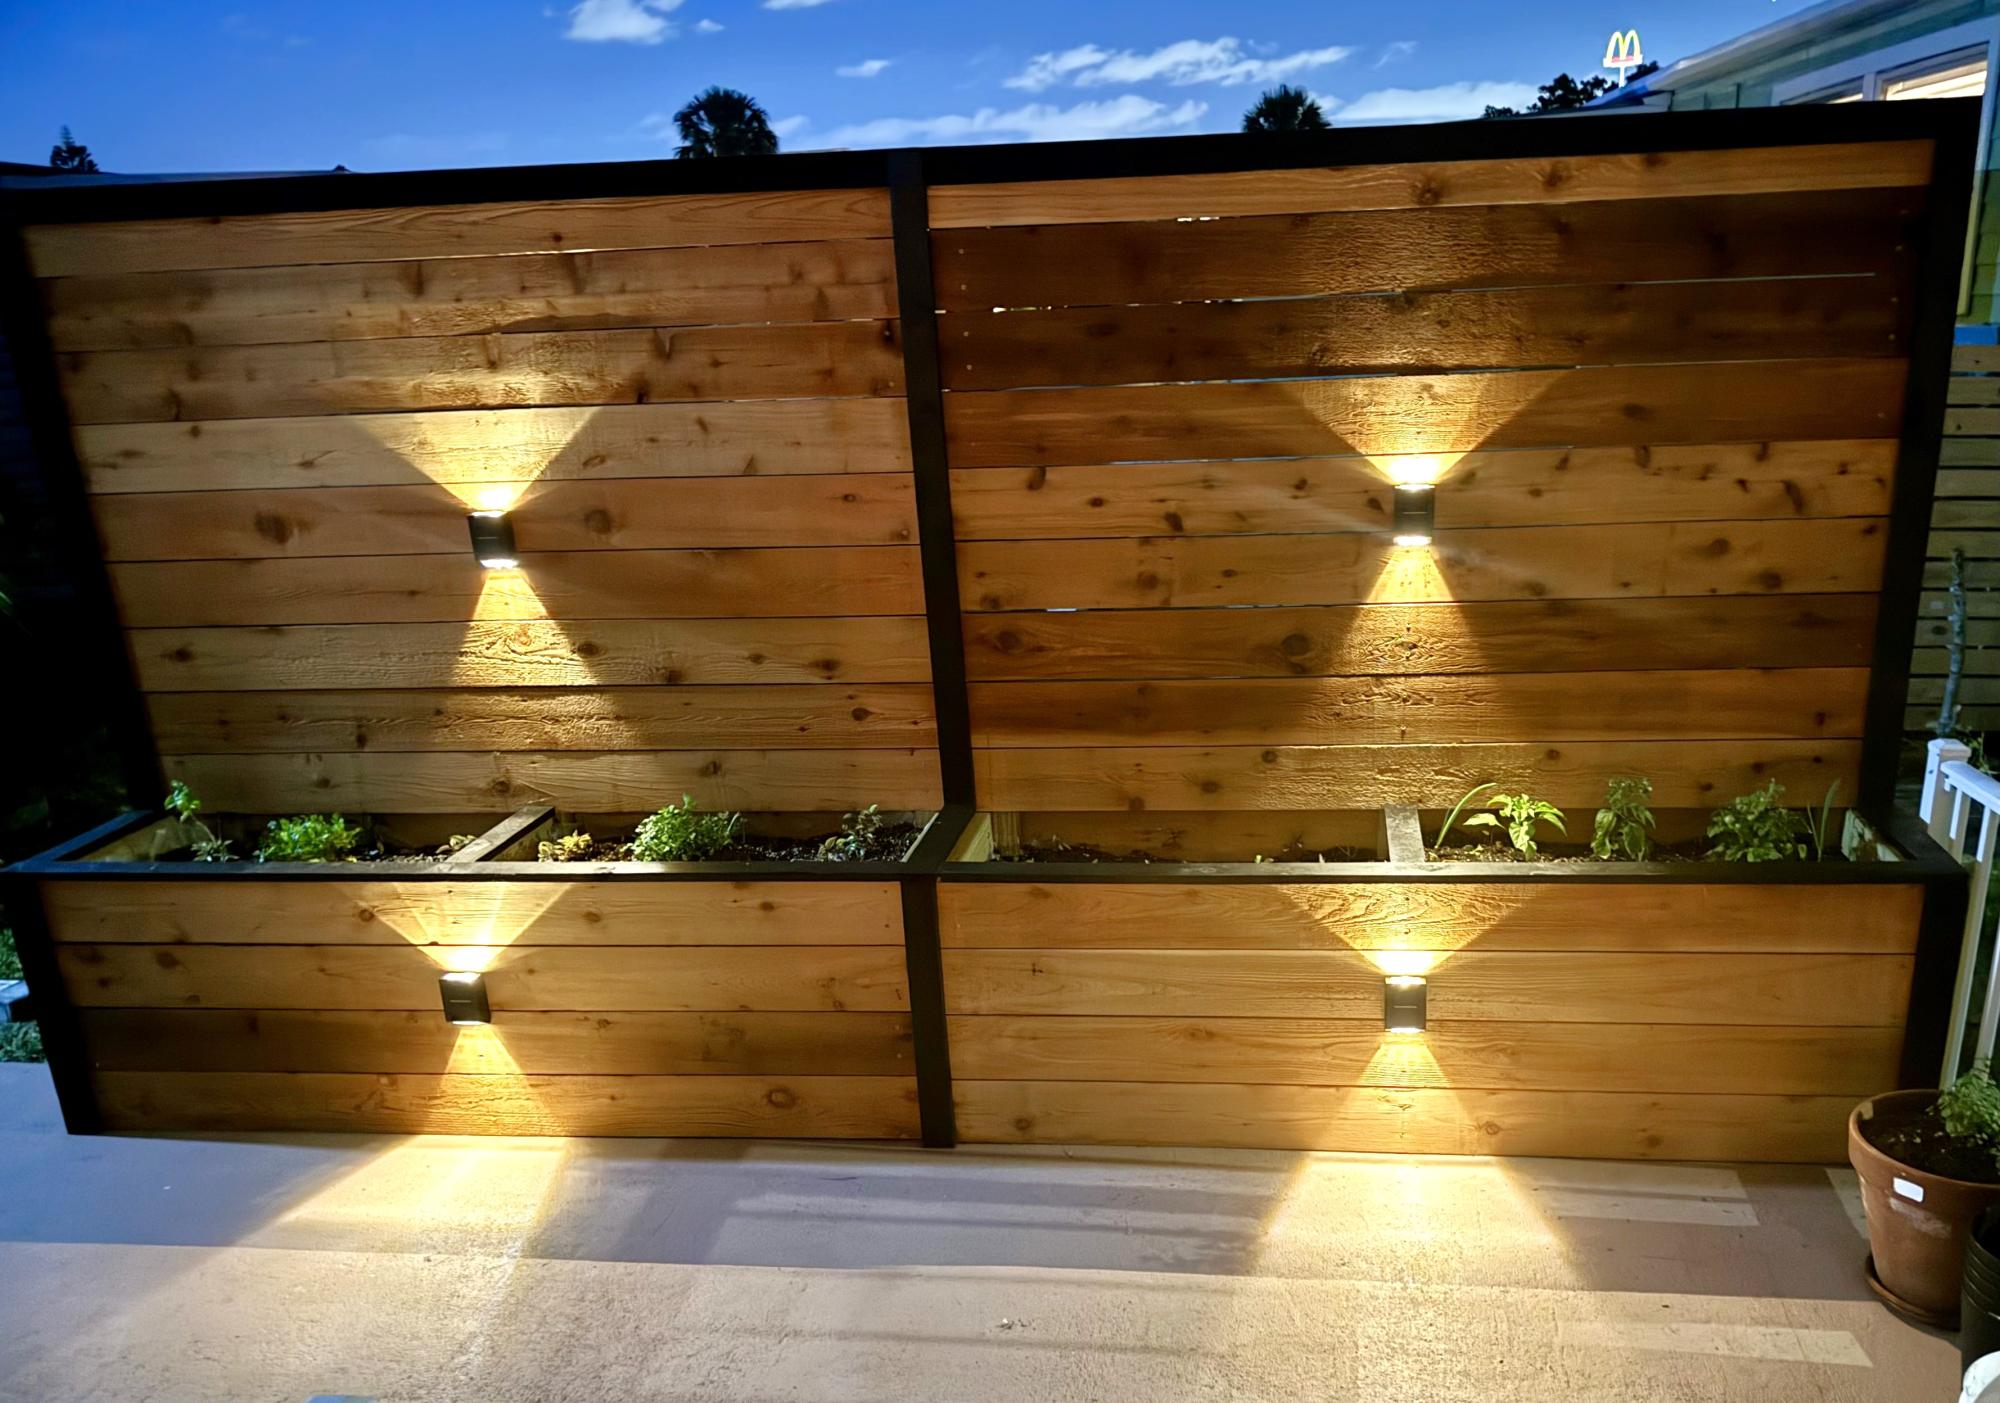
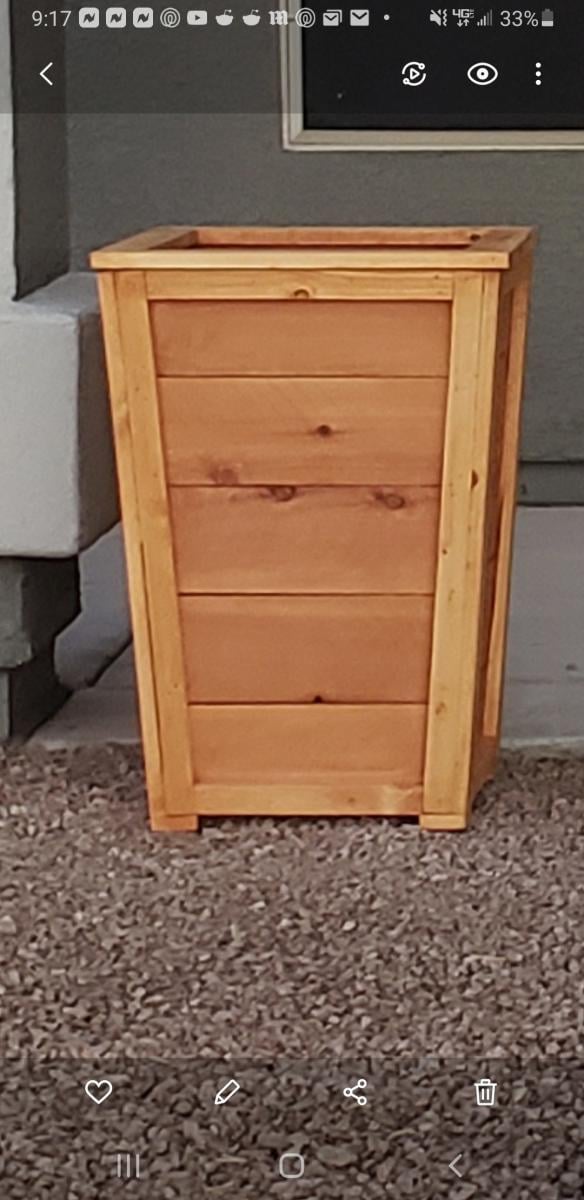
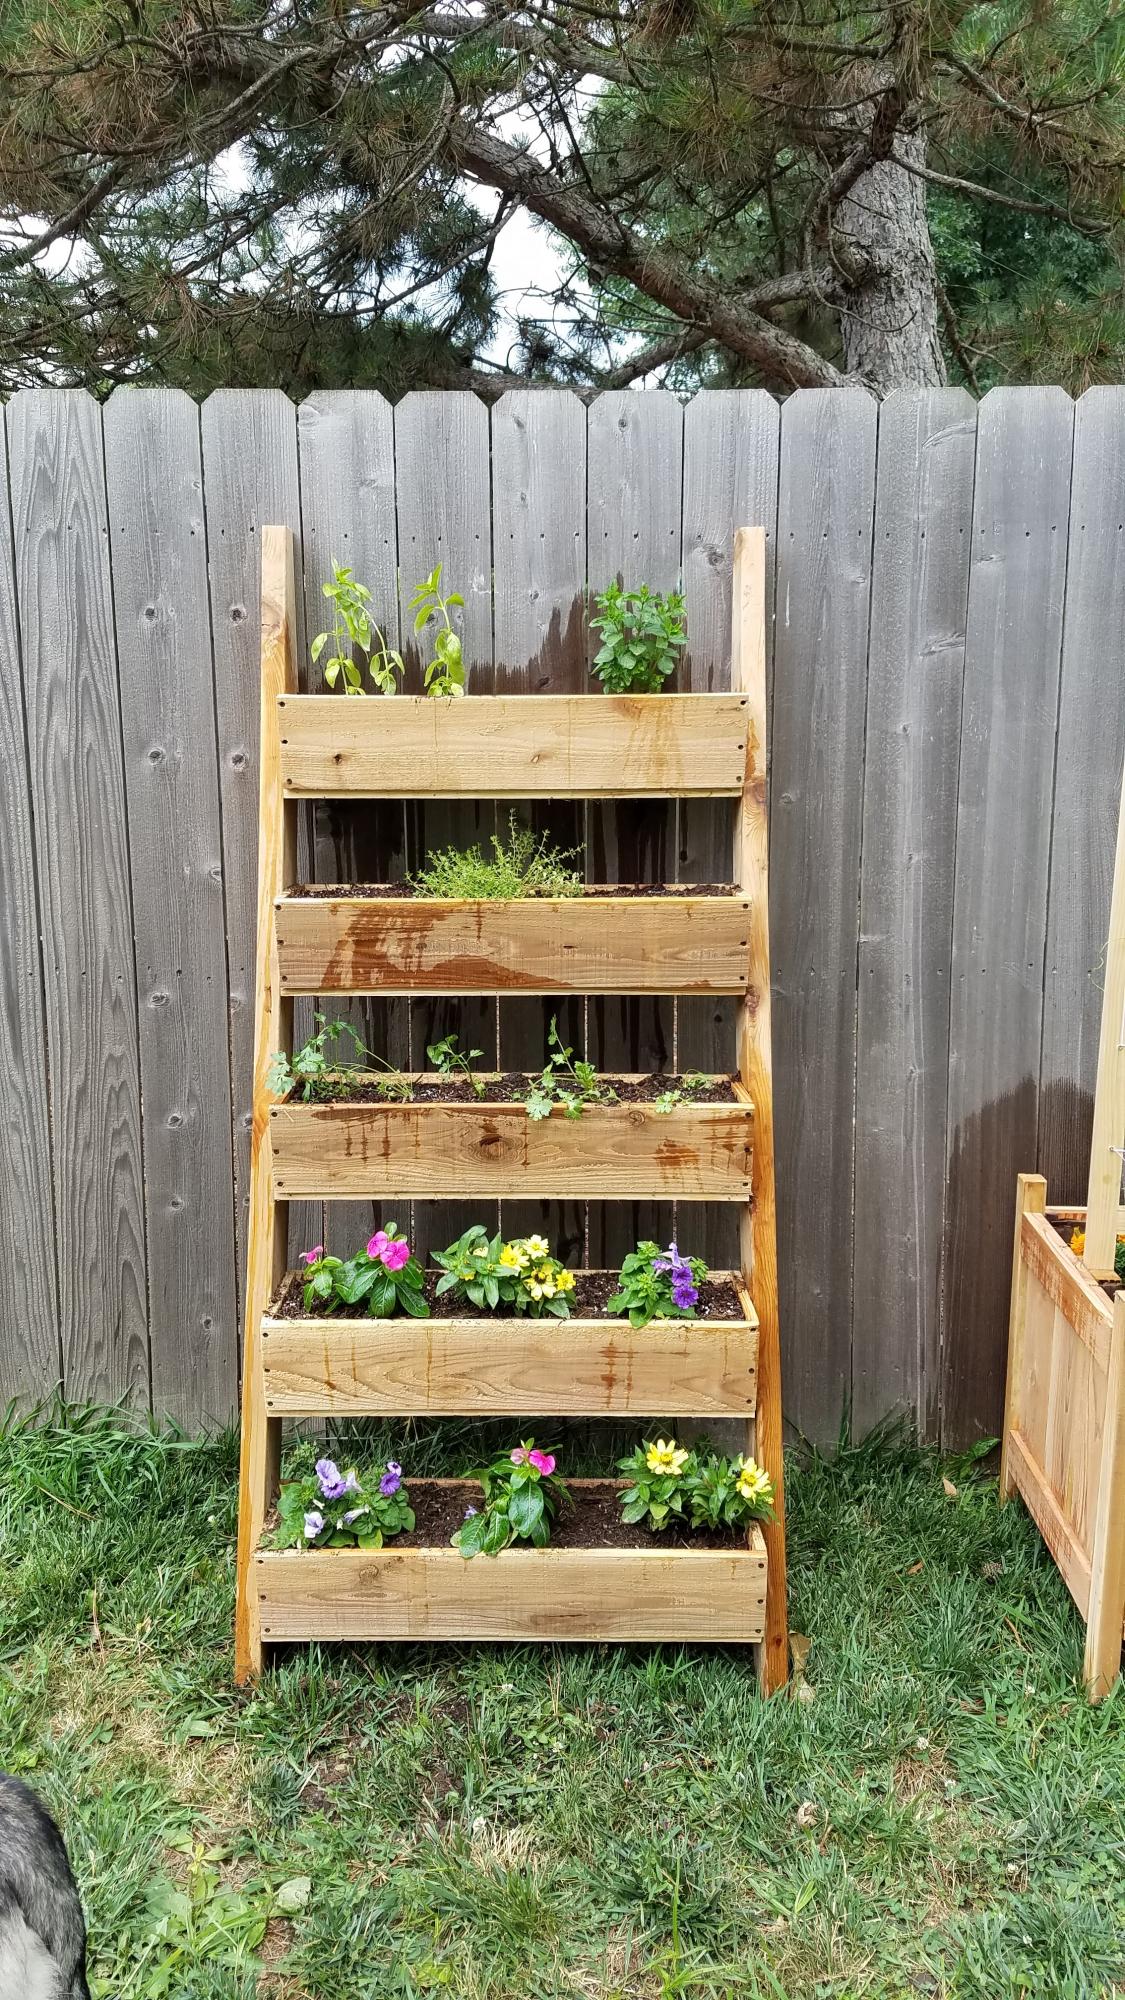
Followed your plan but added extra 1 x 2 trim to the sides, feet made from 1 × 3 and 1x 3 trim around the top

Built from Plan(s)
Estimated Cost
$35 per planter
Estimated Time Investment
Afternoon Project (3-6 Hours)
Finish Used
Cedar Naturaltone Behr Waterproofing Wood Finish
Recommended Skill Level
Intermediate

Comments

Seasonal And Holiday

Modern Toy Box

Submitted by Anonymous (not verified) on Sun, 03/19/2017 - 14:32

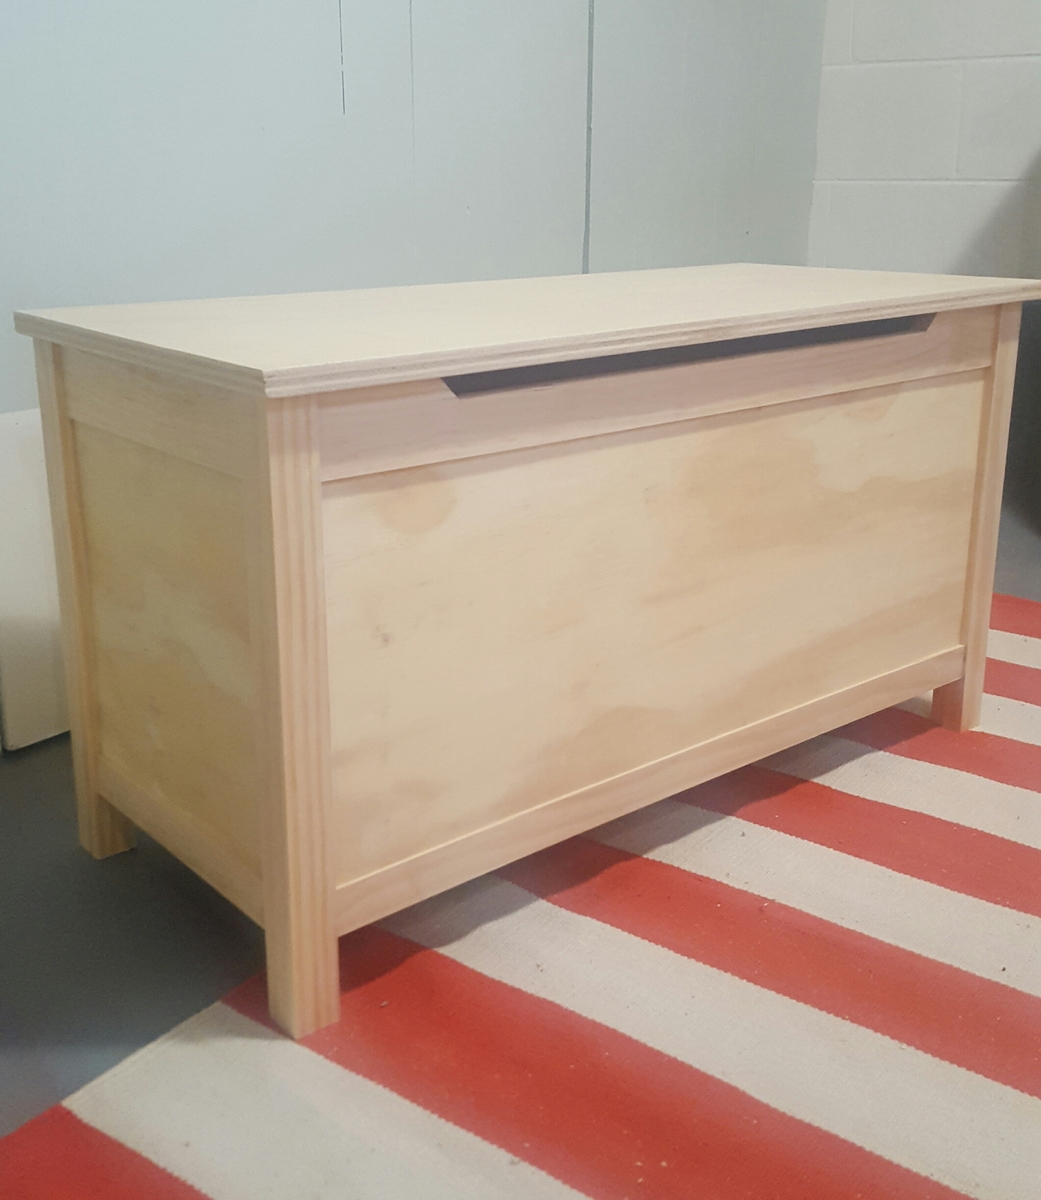
I had a wonderful time making this toy box and learning new techniques. Having access to a table saw really made this project turn out awesome. I was able to get 1/4" shims made that allowed for easy, precise offsets. The family just loved it!

Built from Plan(s)
Estimated Cost
$100
Estimated Time Investment
Weekend Project (10-20 Hours)
Finish Used
ProClassic white paint
Recommended Skill Level
Intermediate

Modified for double hanging

Submitted by Anonymous (not verified) on Tue, 04/04/2017 - 14:50

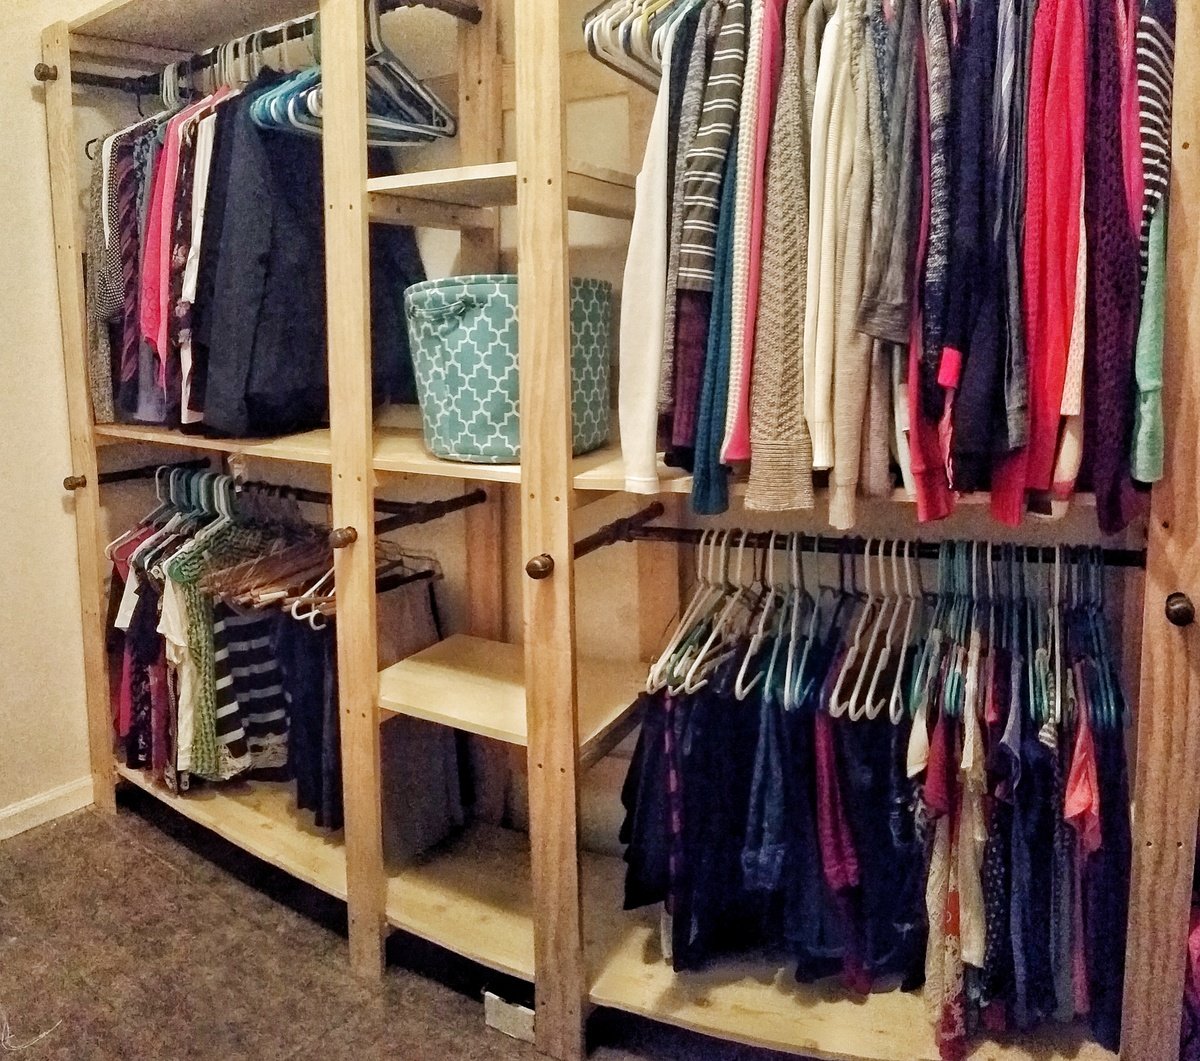
I used 8 ft precut boards for shelves and modified the design so there was enough room for two racks on each side. In addition I screwed 1x4 to the studs to secure the shelving to the wall.  I have a 5 year old climber so it was best to be proactive and secure it. It was easy project took about 4 hours to complete.  I plan to paint the vertical boards a medium gray and stain the shelves a dark coffee color. 

Built from Plan(s)
Estimated Cost
$350
Estimated Time Investment
Afternoon Project (3-6 Hours)
Recommended Skill Level
Beginner
Back