Built-in Desk with Dog Kennel
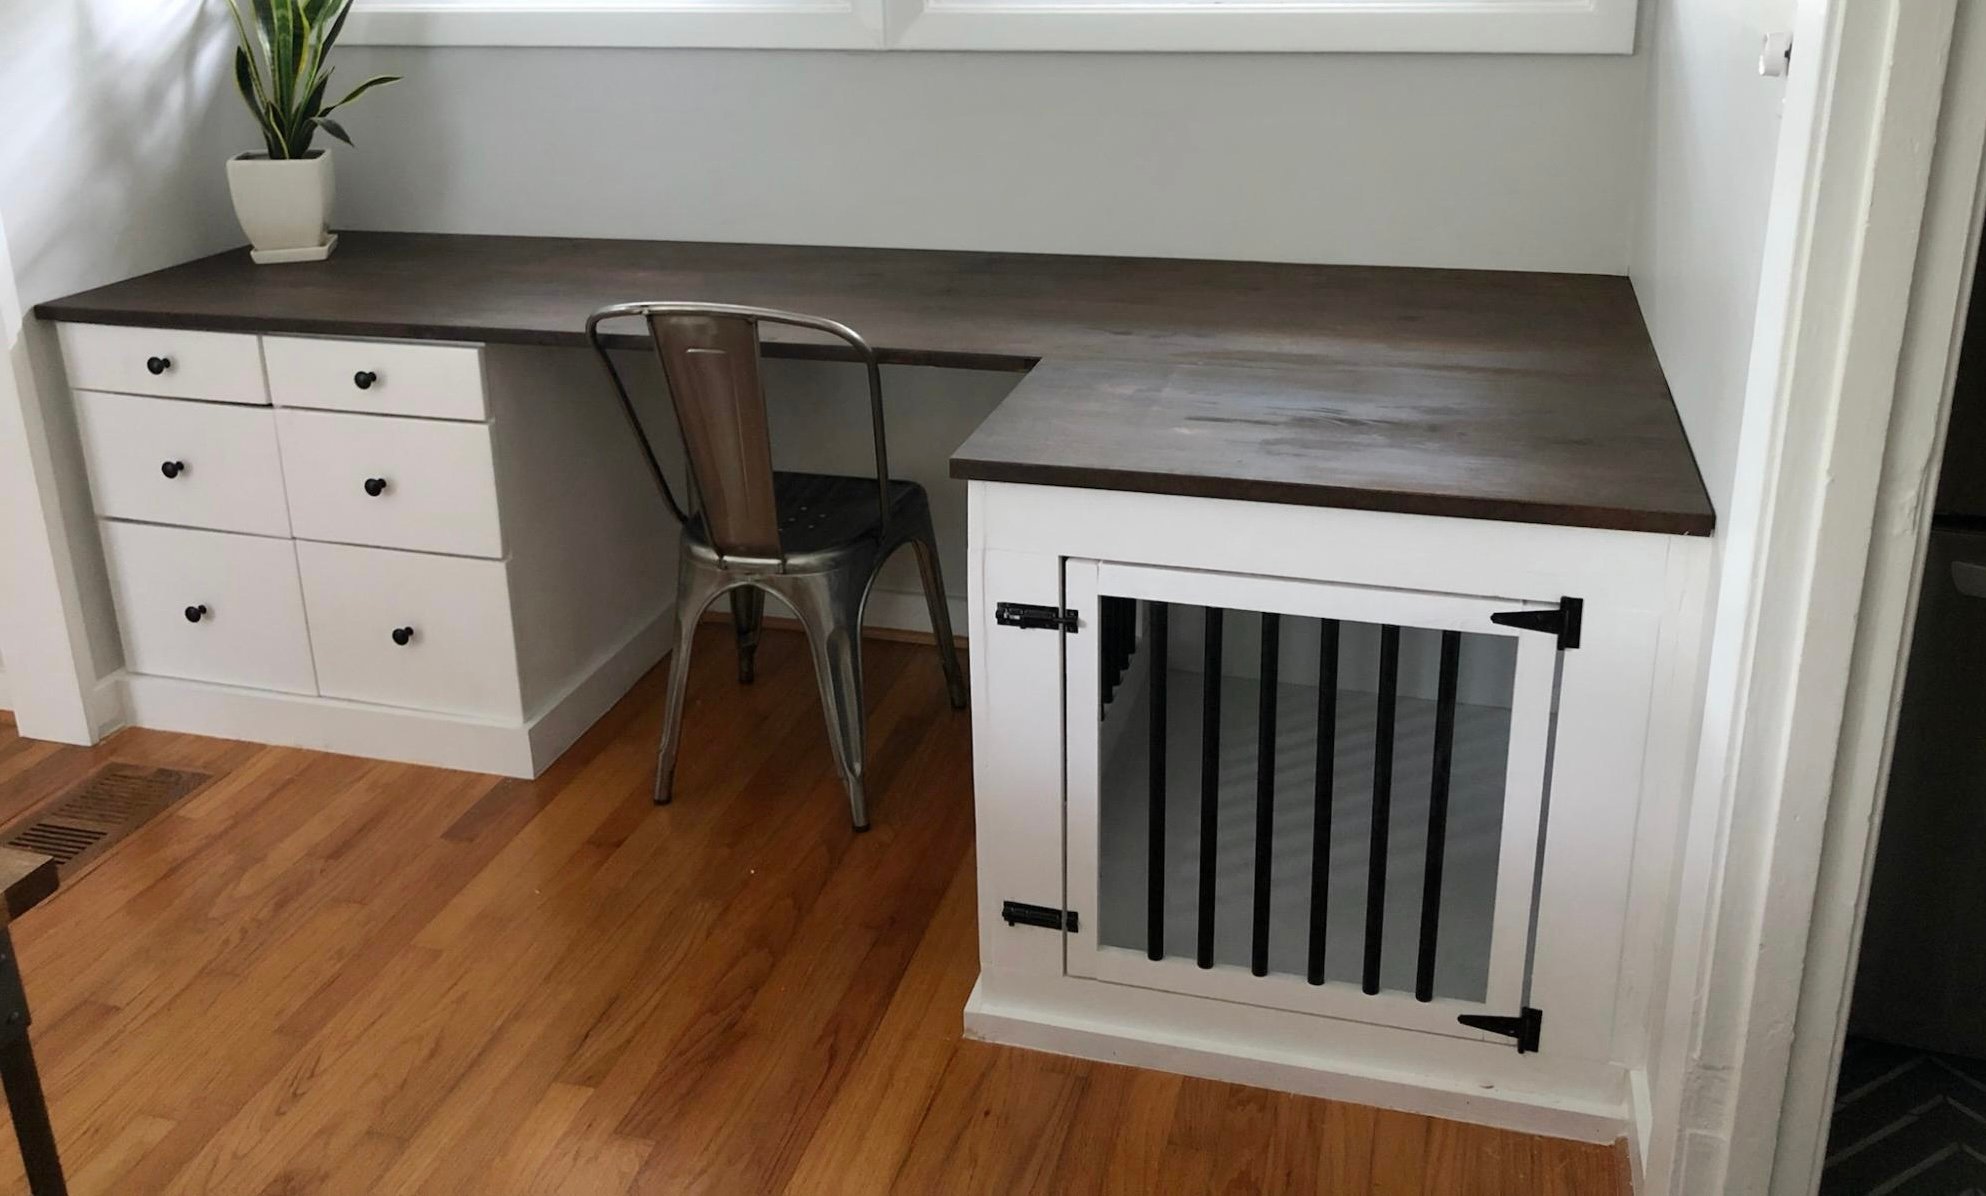
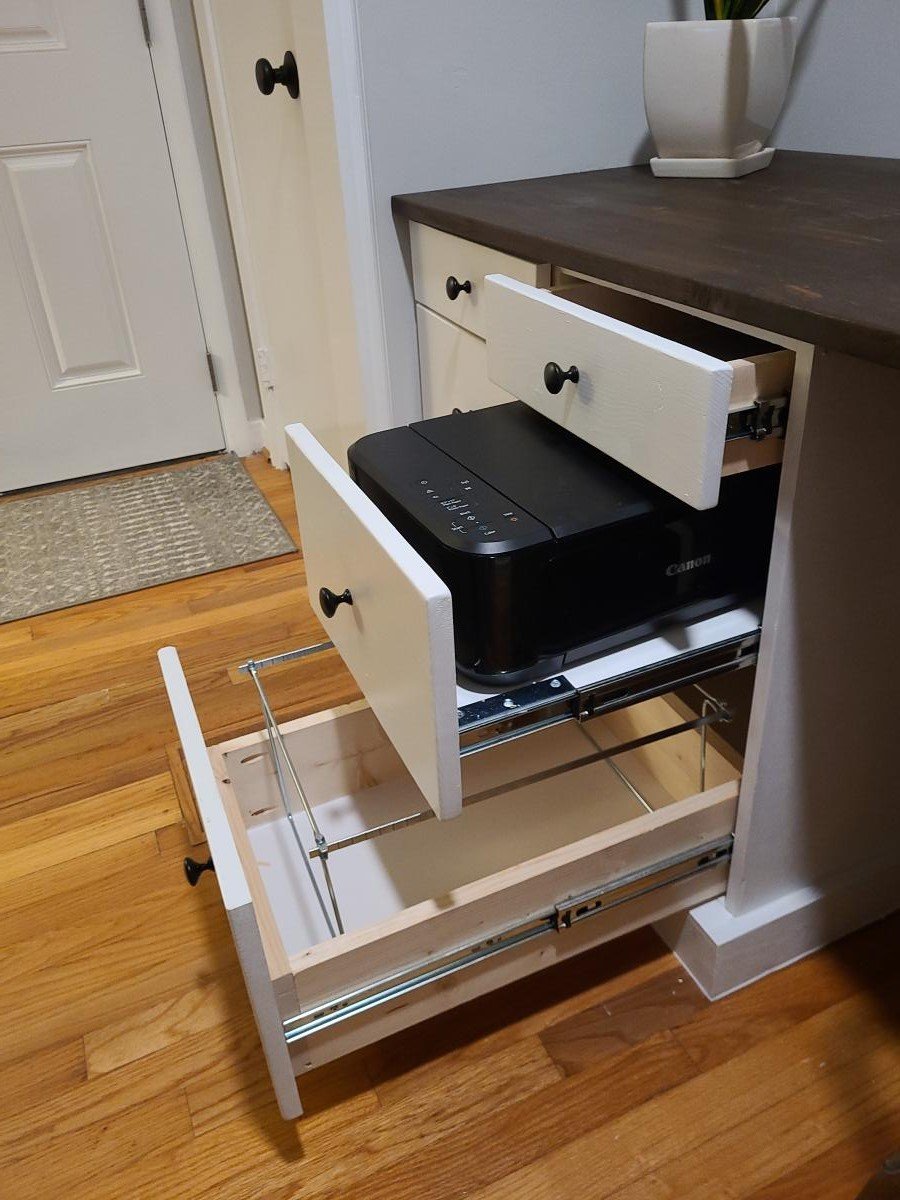
Built in desk with dog kennel complete with slide out printer drawer!
by Lisa
Built from Plan(s)
Built in desk with dog kennel complete with slide out printer drawer!
by Lisa
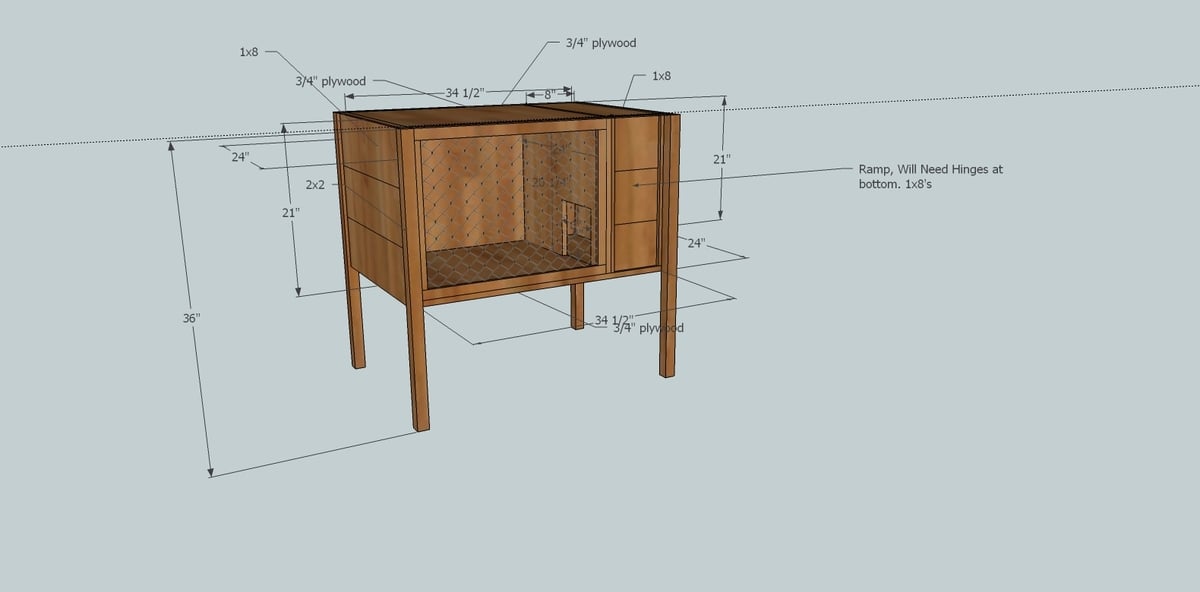
I have a pet ferret that has little room to run around. So I seen this rabbit/ferret cage at the pet store. It was about $150 or so. So I took a pic of it on my phone, and found the Google Sketch app, and watched some videos, and now I have plans for the cage. Some 2x2's, 1x8's, plywood, chicken wire, and some locks and hinges for the ramp an lid.... Still tweaking it, but hopefully it will work out.
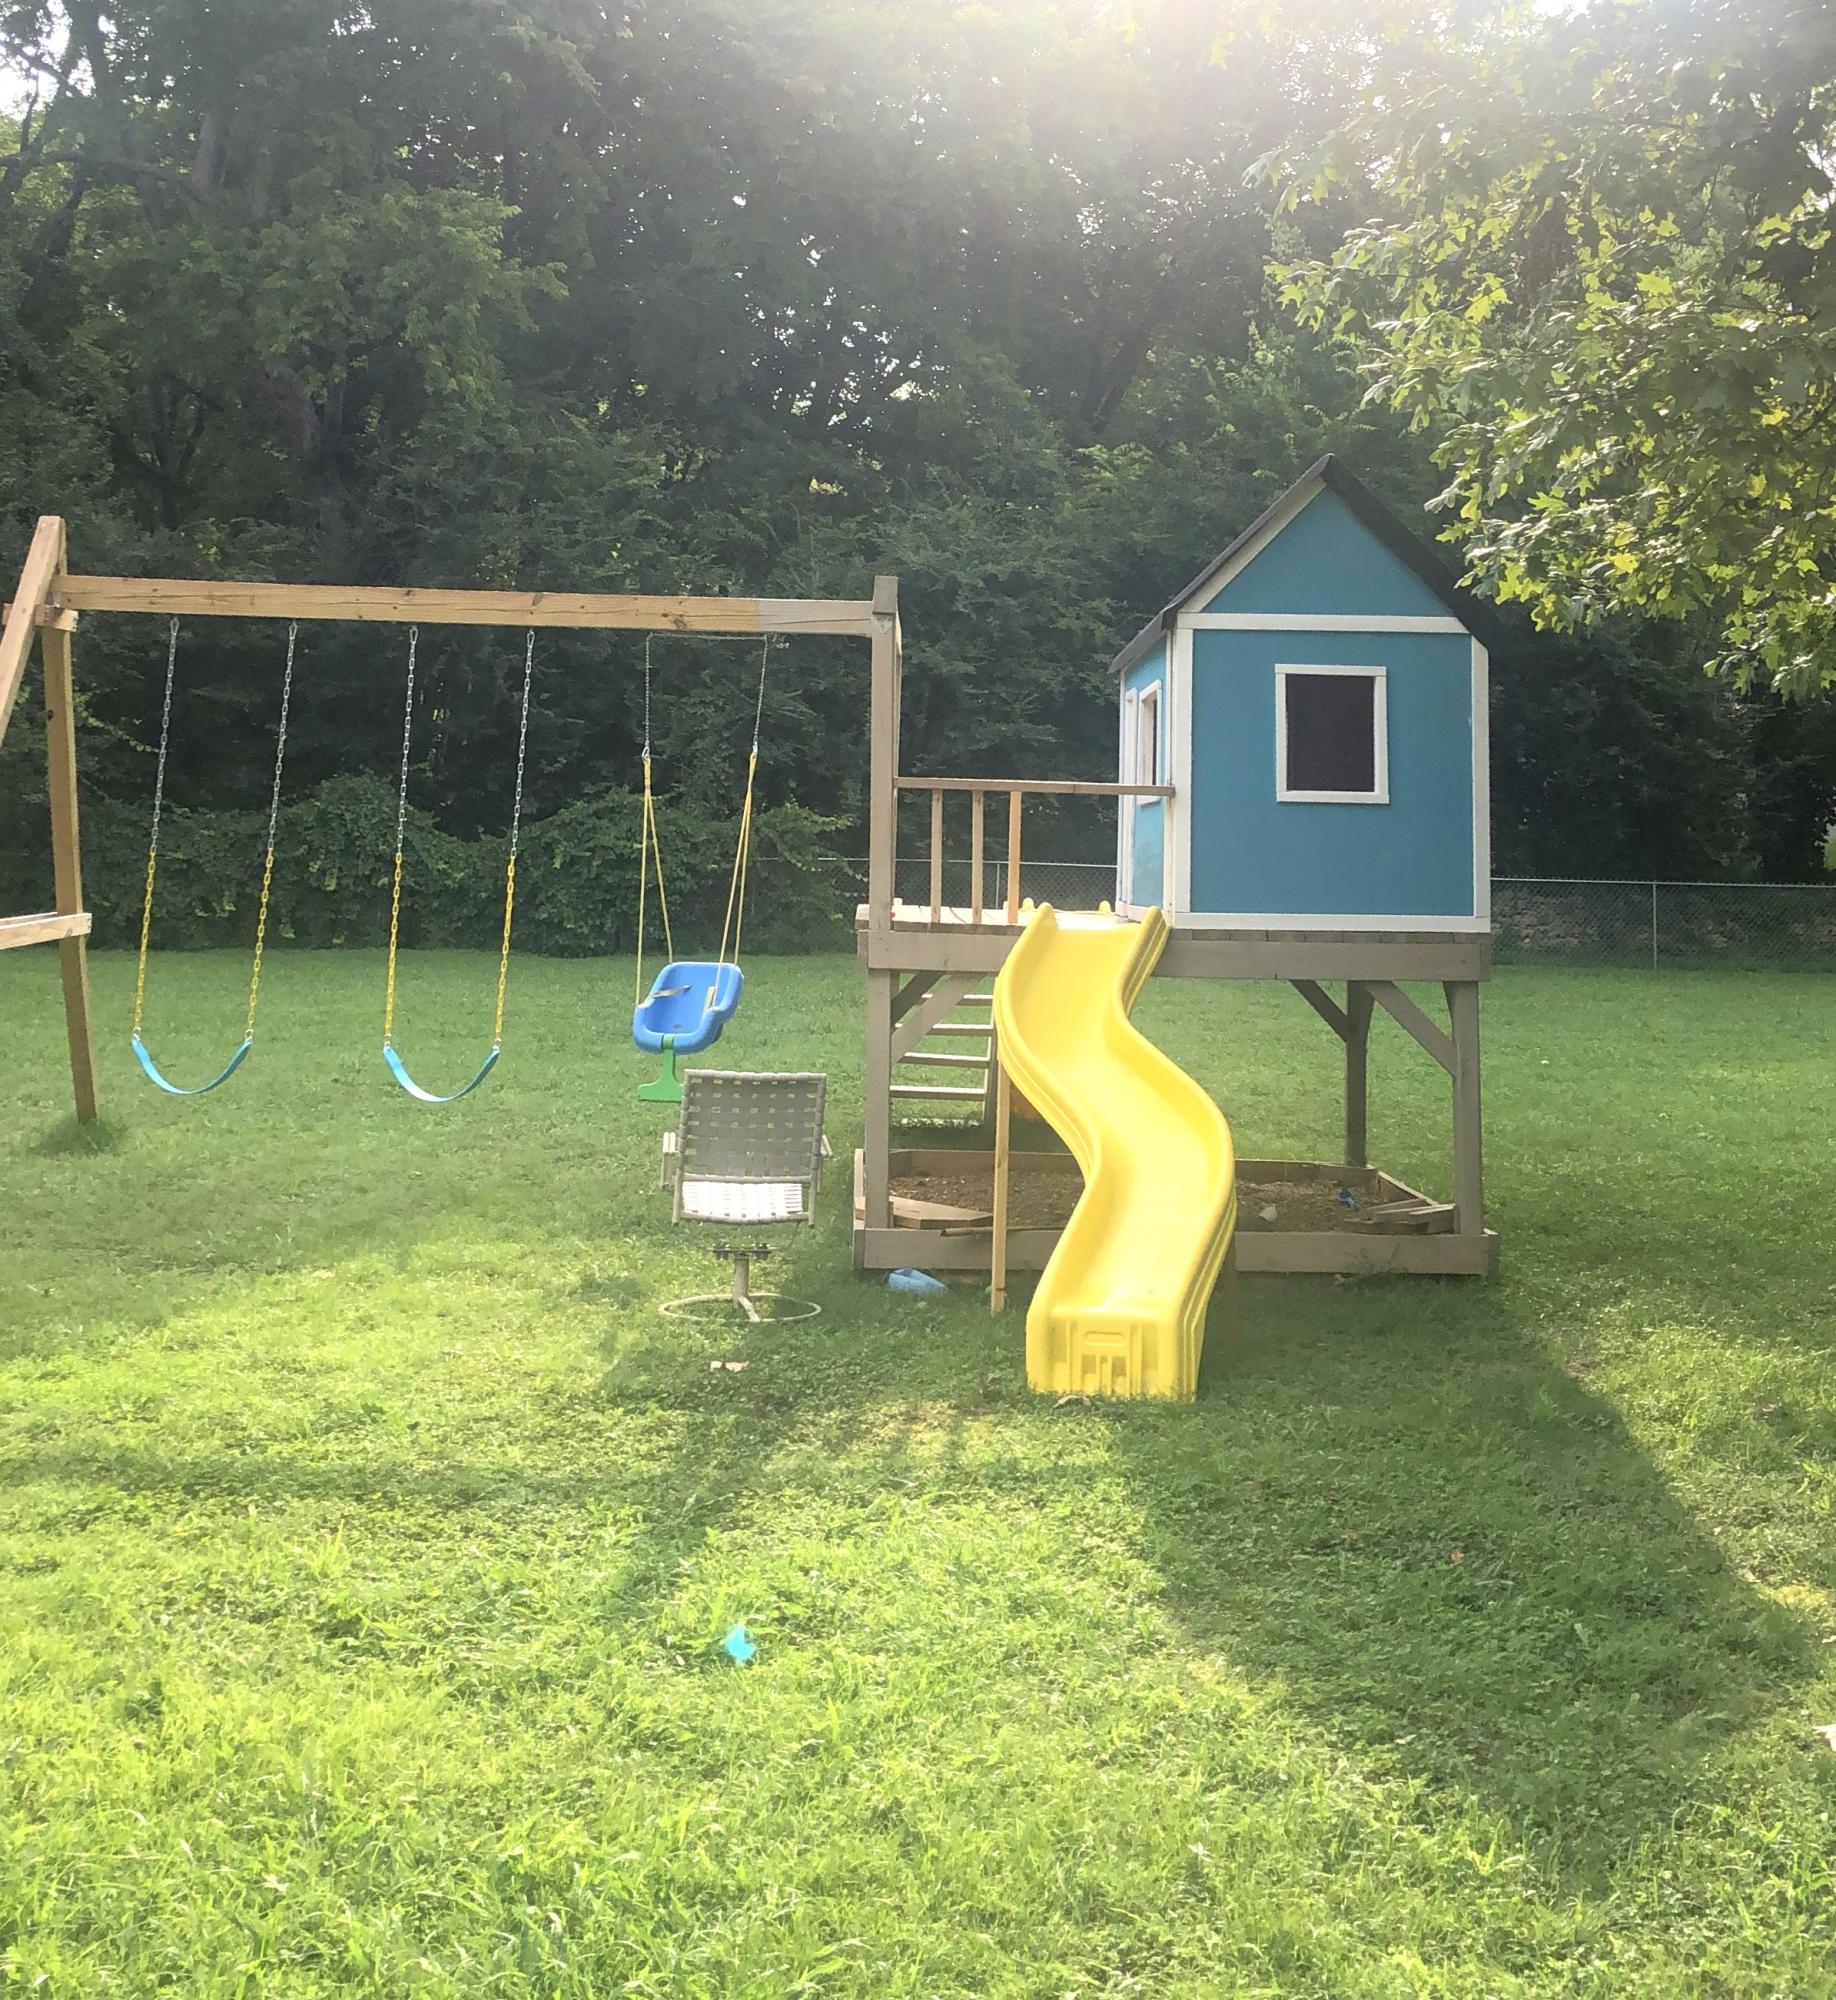
The one toy that we could not live without! Started this as a 2020 covid project and play on it everyday.
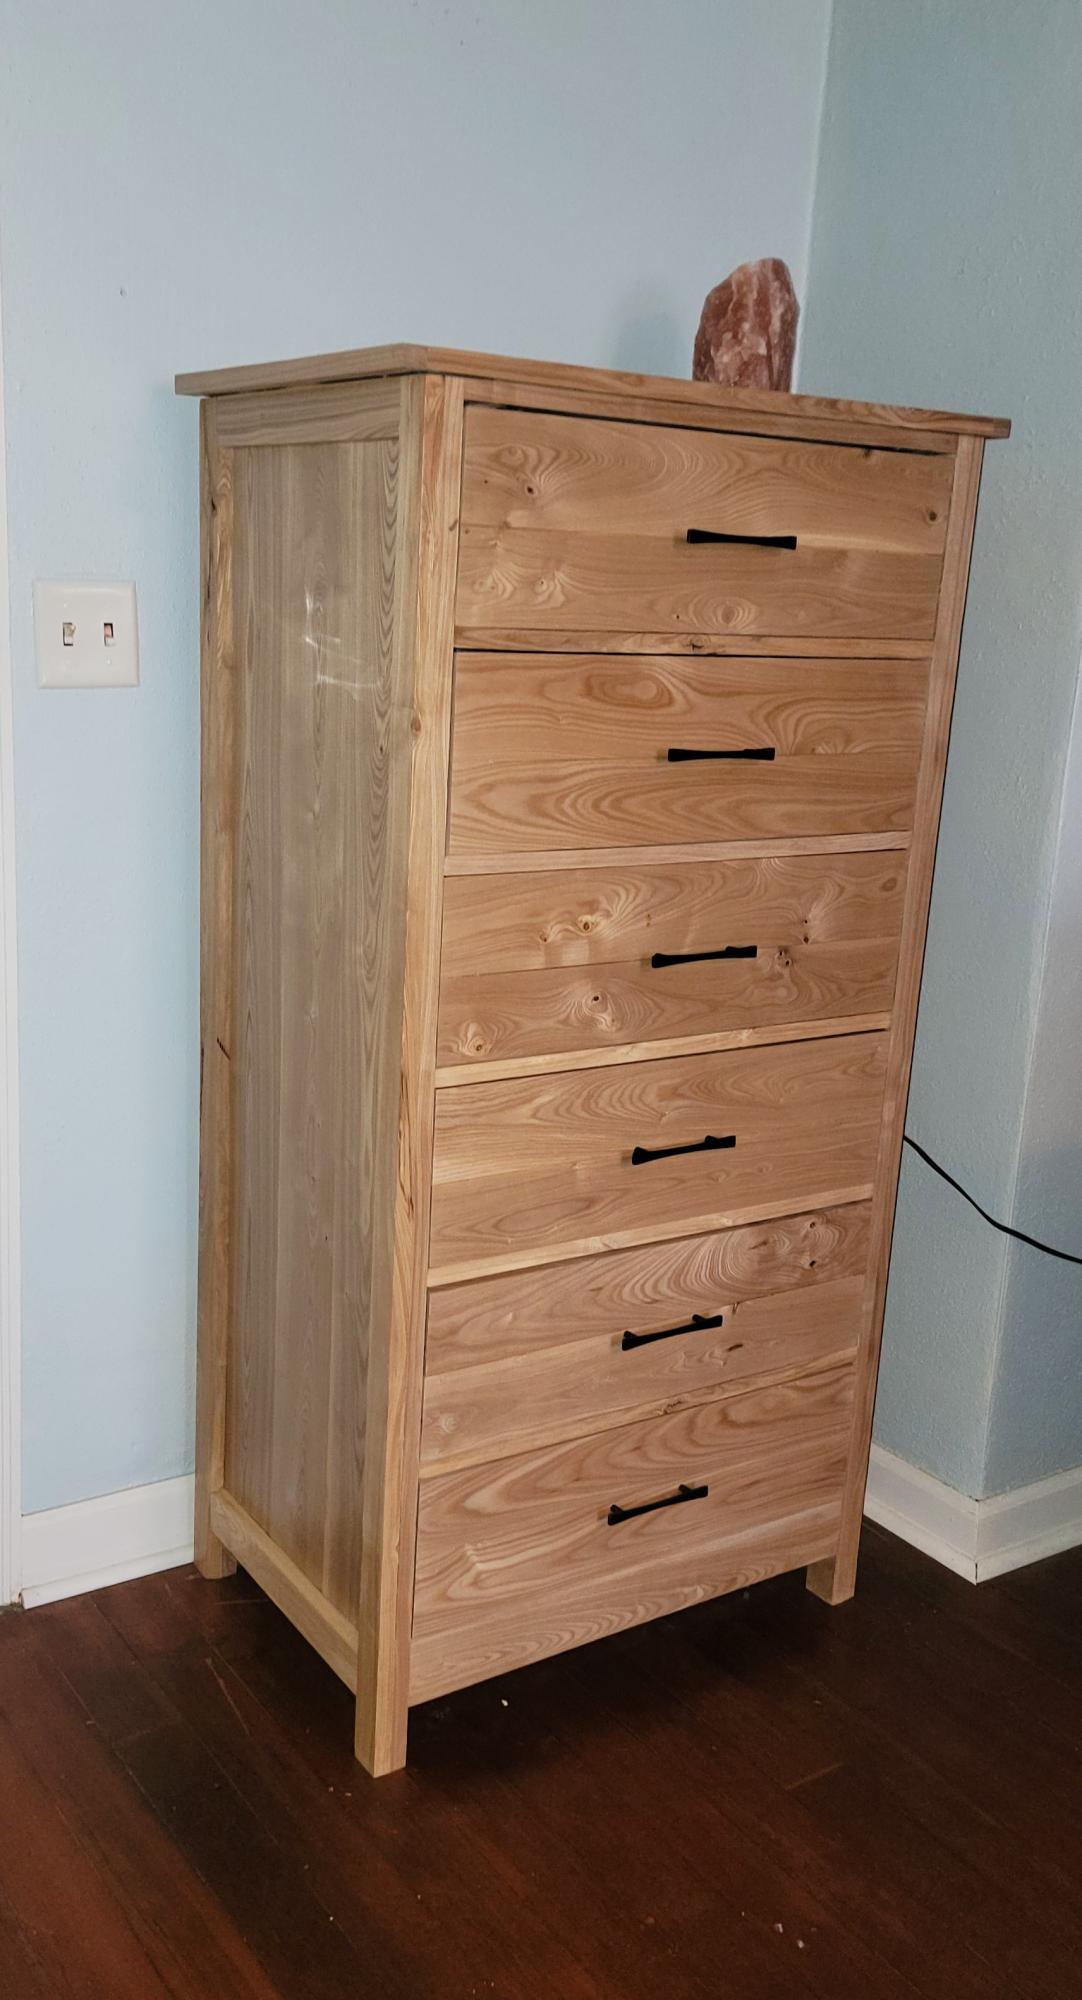
Simple dresser plans modified to use 6 drawers. Made with Ash wood and clear poly to finish.
Lori Tabor
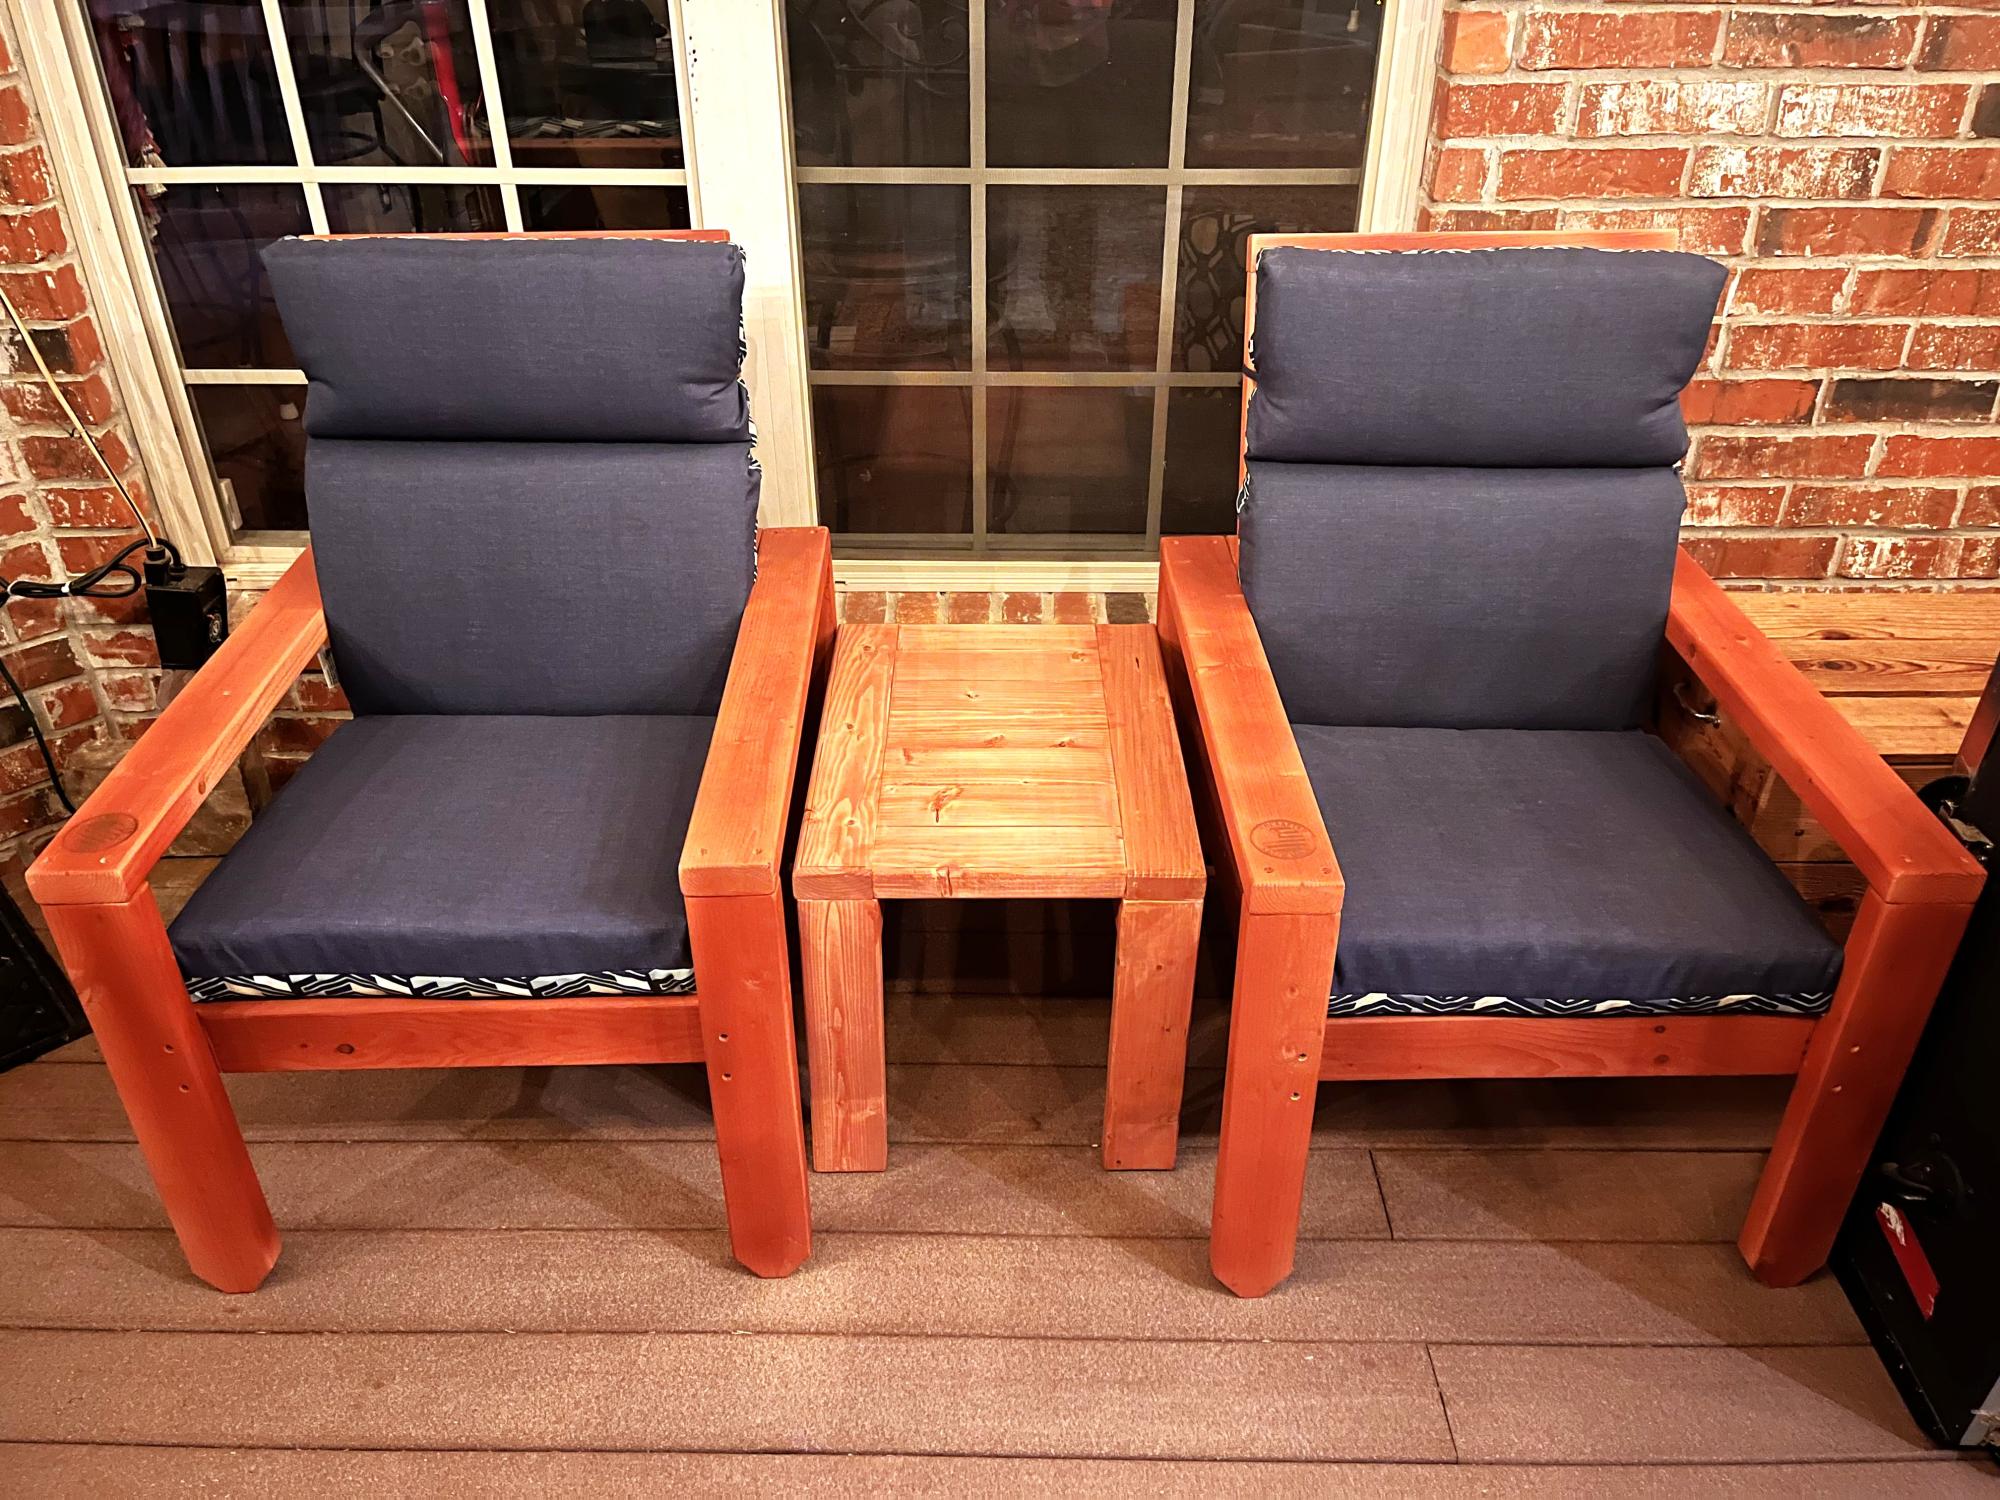
Posted the chairs recently. Here they are with the side table. Side table used 100% pocket holes.
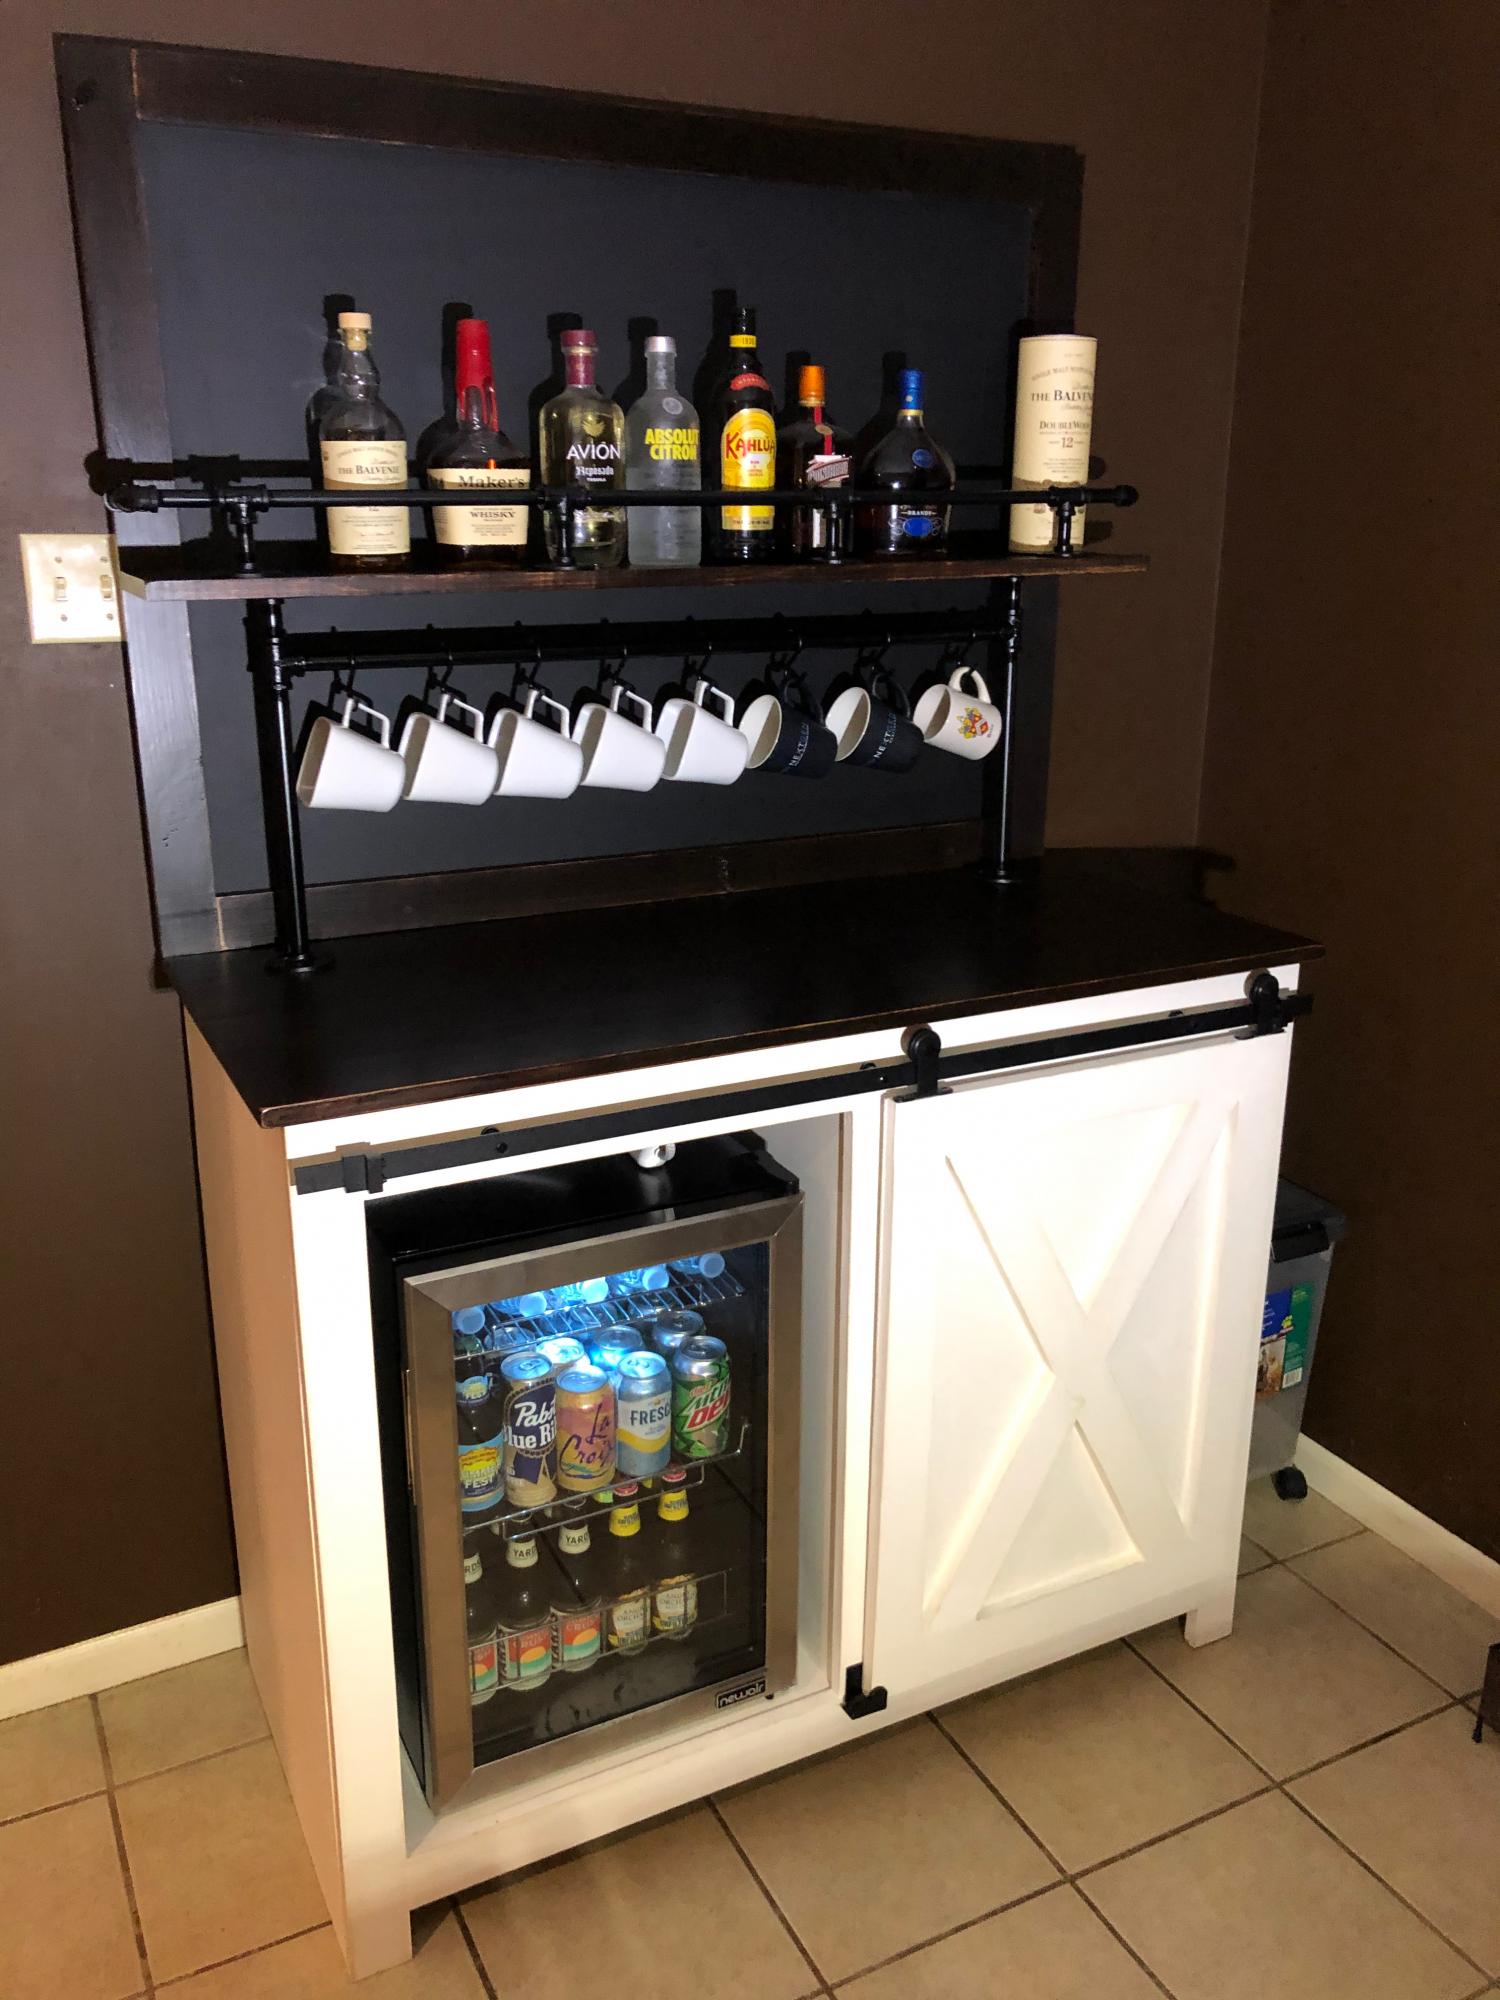
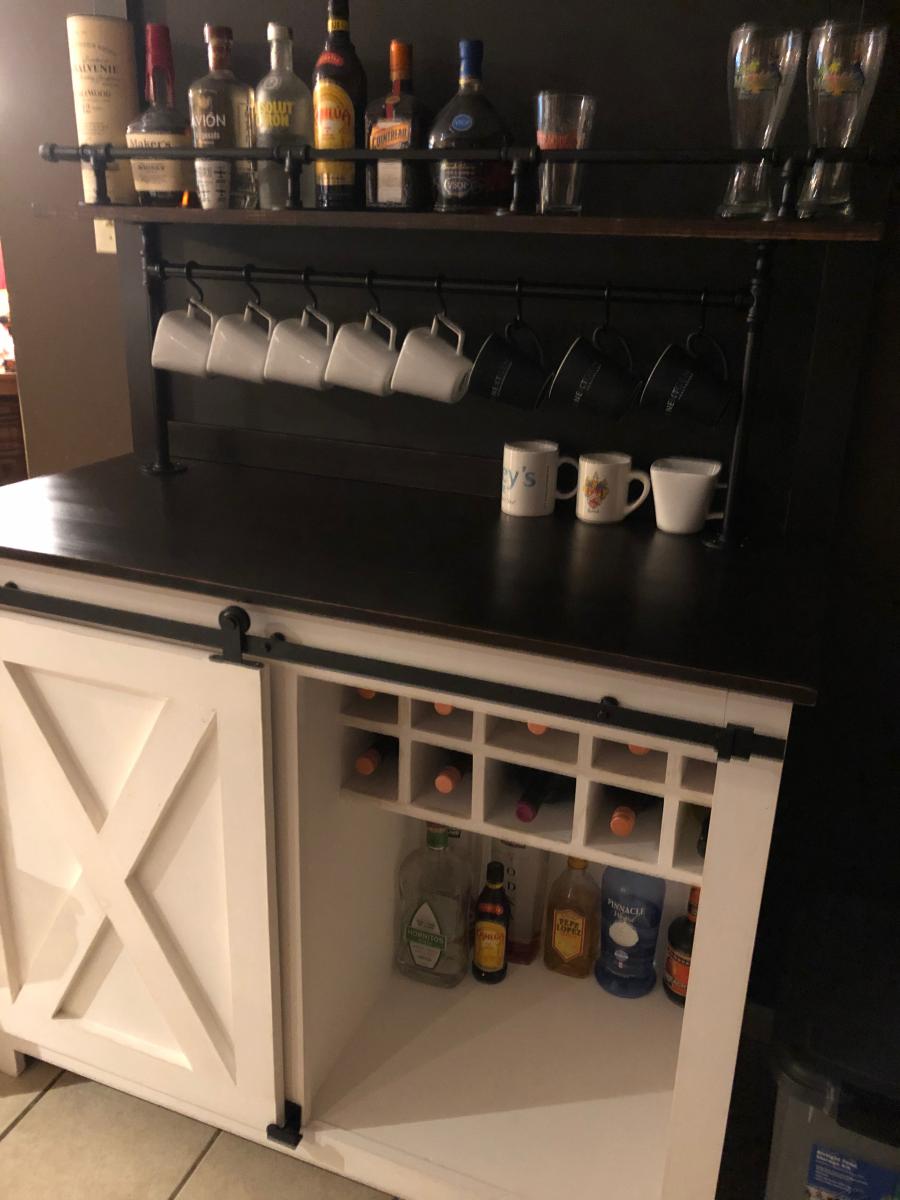
After seeing this same cabinet on Etsy for $2000+ I decided to try building my own. This was built using Ana's plans for the Barn Door Cabinet with Mini Fridge and Microwave. On top of the cabinet is a custom chalkboard which I anchored to the back of the cabinet. Attached to the chalkboard is a shelf for liquor. The rail is made from 3/8" black iron pipe from Home Depot & Amazon. Unfortunately, my Home Depot did not have nipples larger than 6 inches so we had to source 12" from Amazon. The fittings and shorter nipples came from Home Depot. The supports for the shelf and coffee mug rack are made using 1/2" black iron pipe and fittings which were 100% sourced from Home Depot. The finish for the borders of the chalkboard and cabinet top were stained using Varathane Stain + Poly. The color is called "Mission Oak" and it is a satin finish. The hardware for the barn door was purchased from Amazon.
NOTE: If you decide to build a similar version of this I'd consider leaving at least 33.5" on the inside where the refrigerator sits so you can fit a 120-can refrigerator instead. Most are 33.5" tall. I prefer to drink beer from a bottle and the space in a 2.2 cu. ft goes quick when bottles are placed inside.
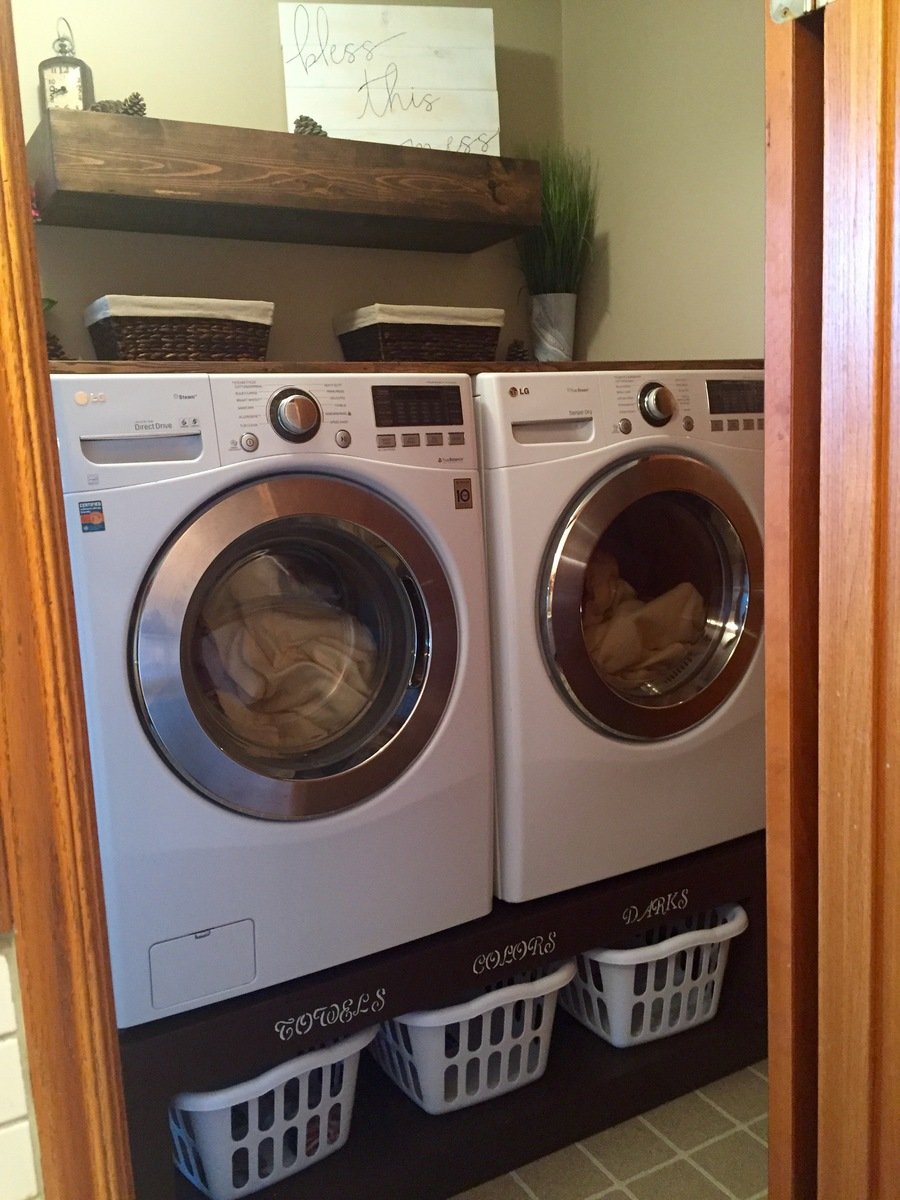
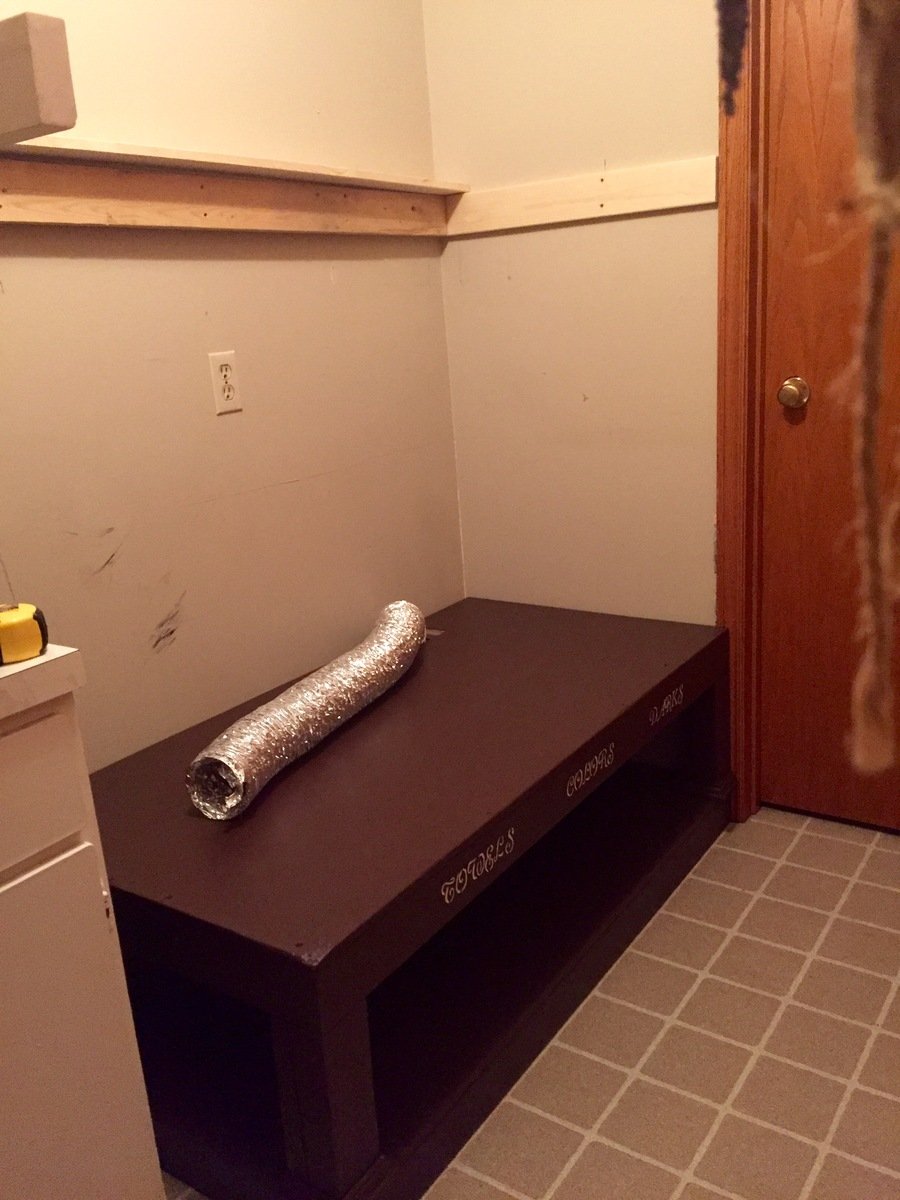
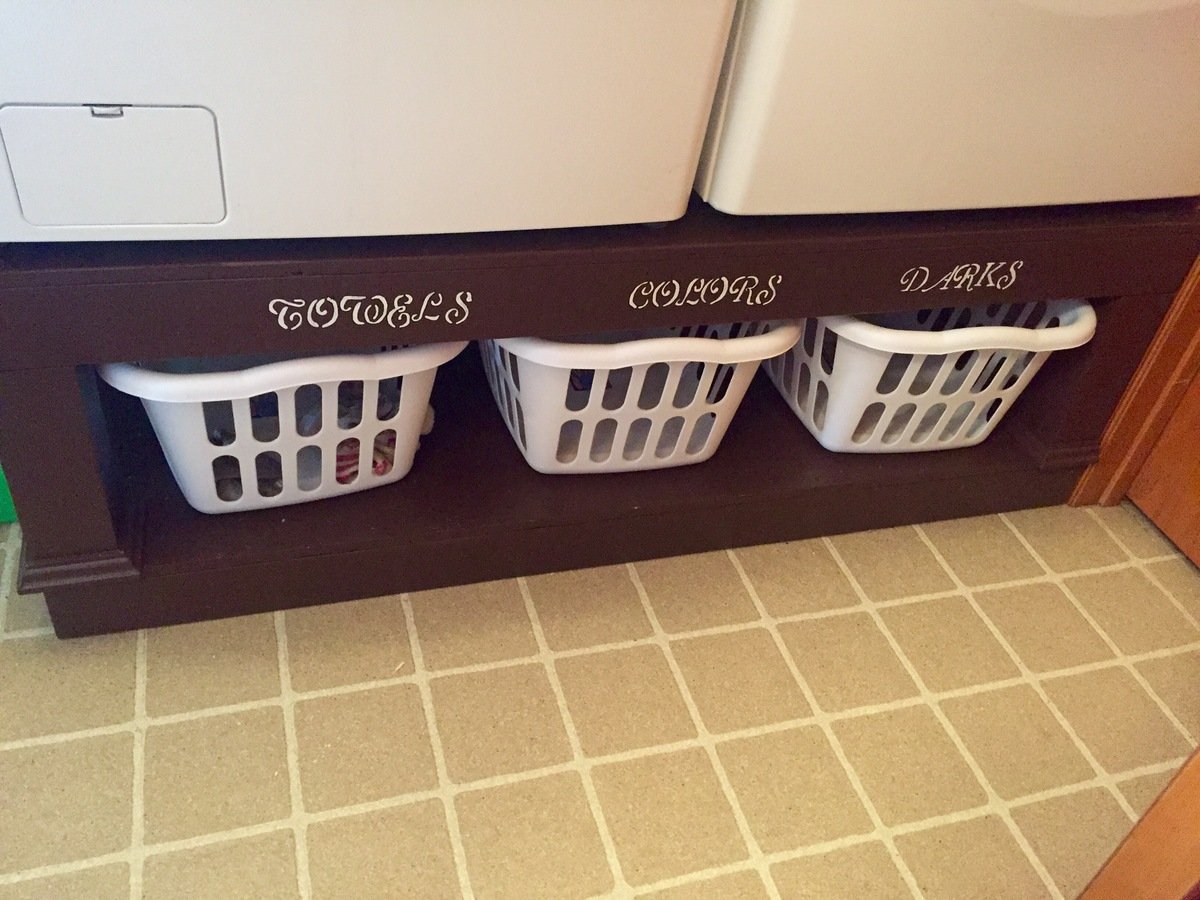
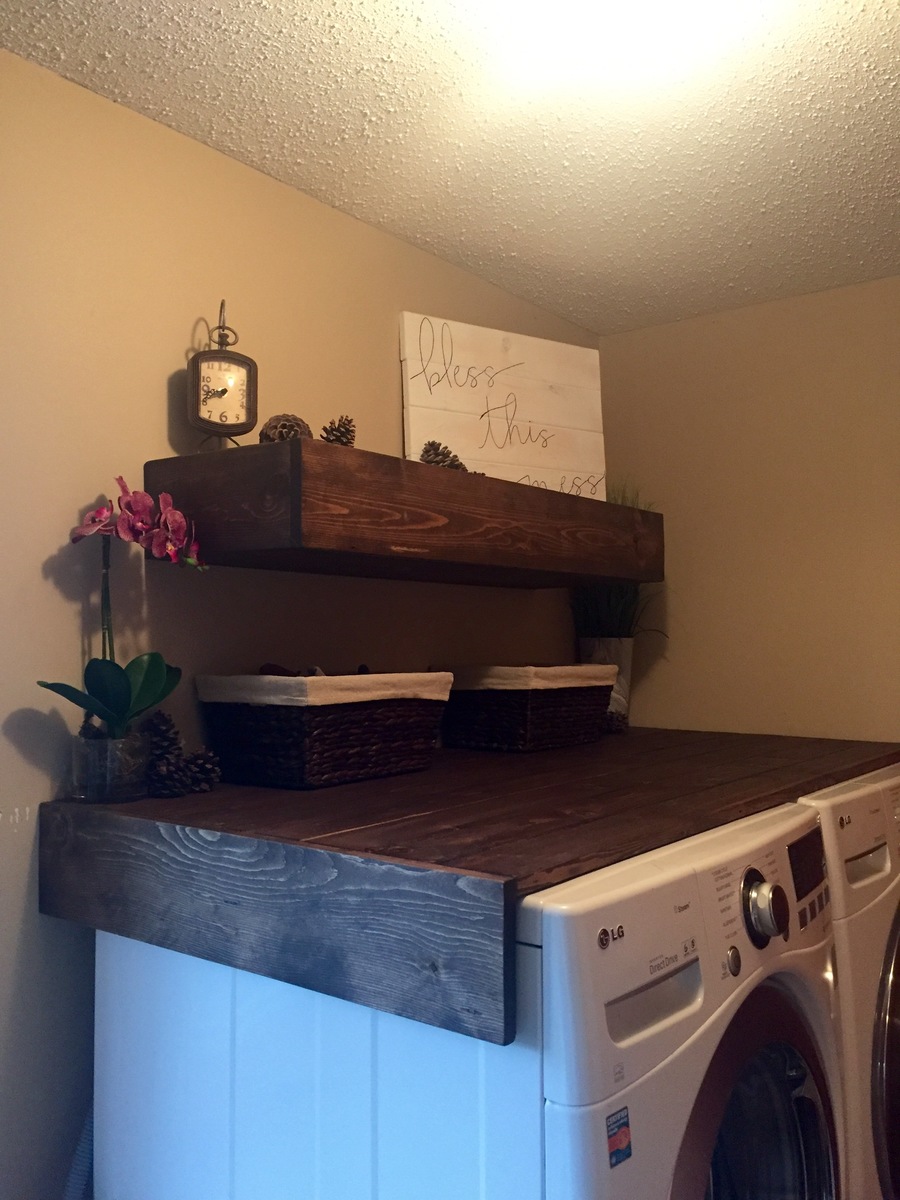
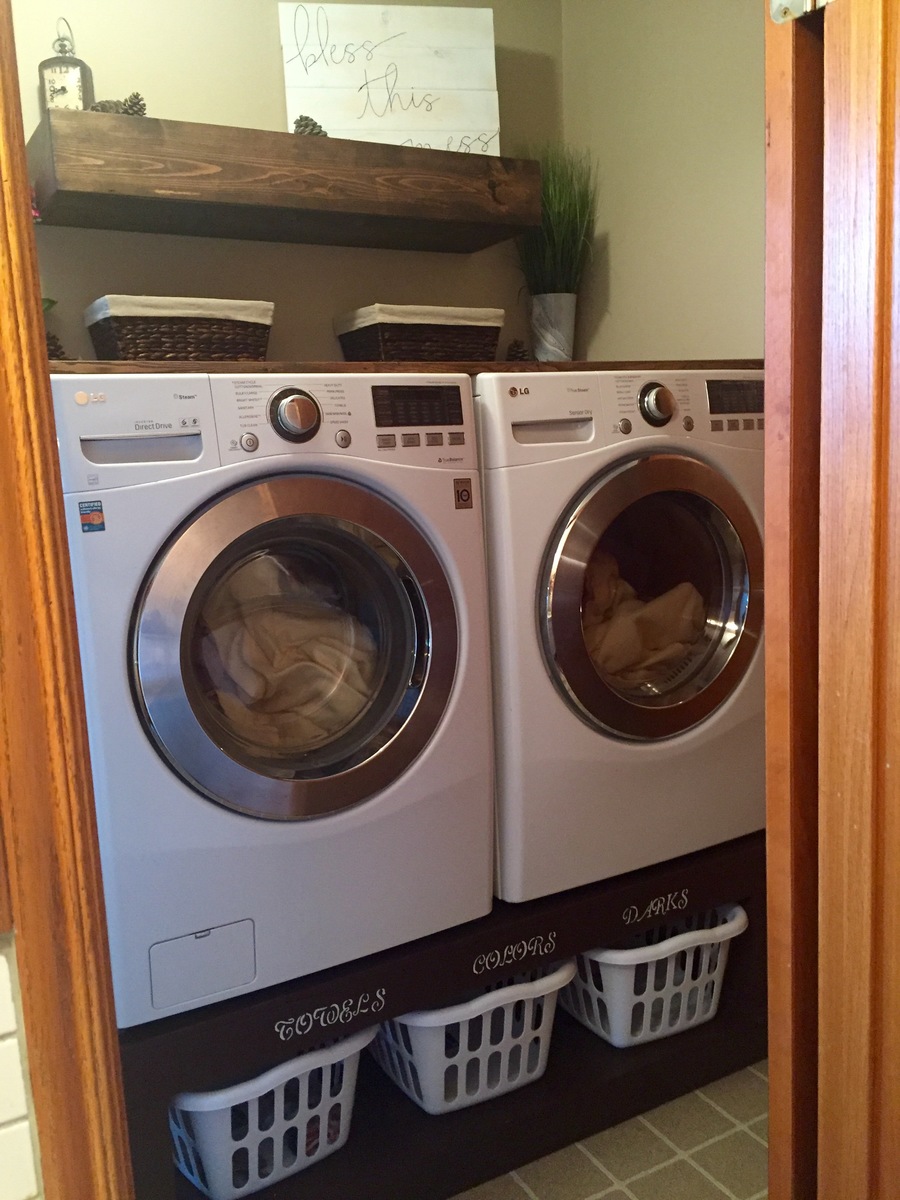
Found these awesome plans from Ana's site here and thought I could definitley make that! My mother needed a new laundry room makeover so it was the perfect opportunity. I made my stand only 56" long to fit perfectly into the spot. Which still allowed enough room for washer and dryer to be on there and enough room if they shook a little. I had to adjust my plans as I wanted it to fit snug against the wall but needed to allow for the dryer hose to connect to wall so I cut out a 4.5"x 5" spot on both the bottom and top platforms to allow for hose and cord to plug in. I put in extra supports going vertically and horizontally to replace the strength for the holes being cut. The result was perfect!
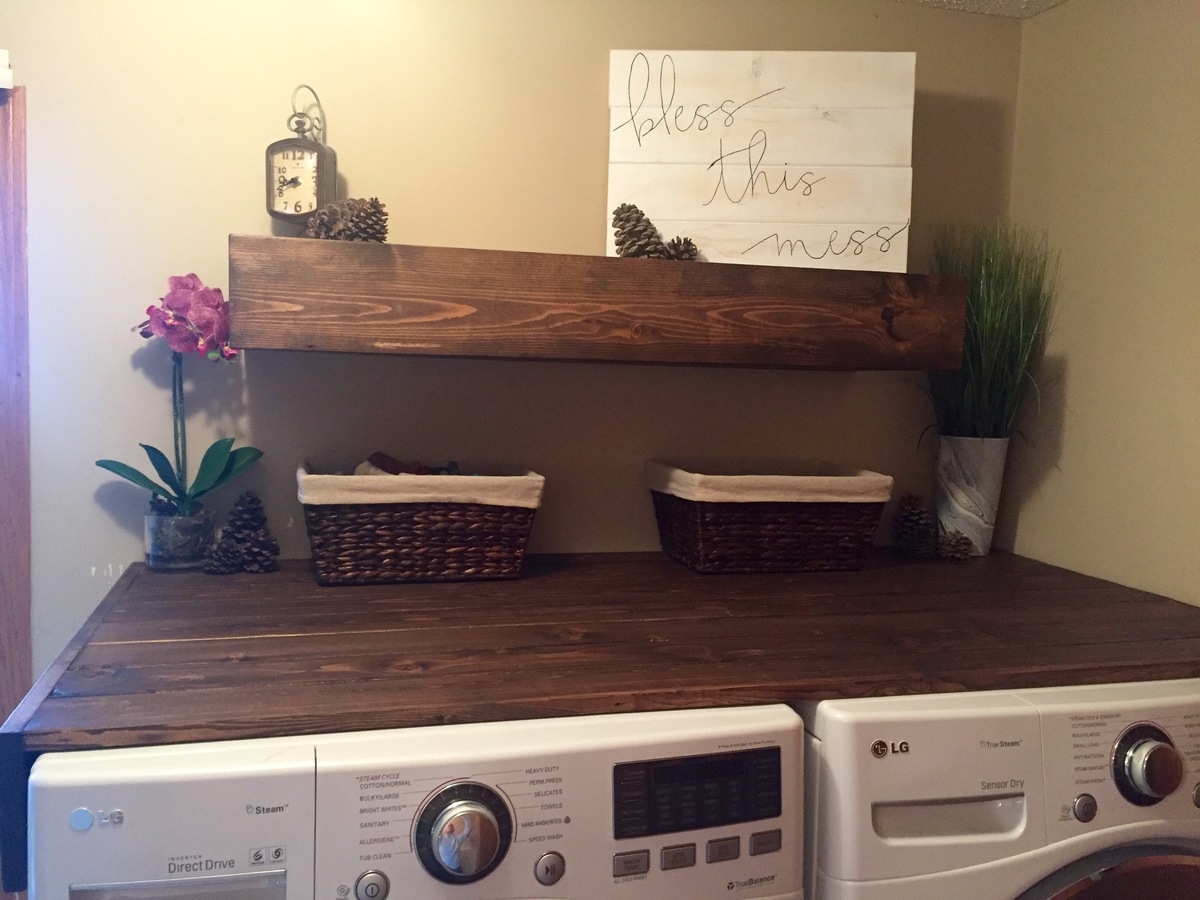
I got creative and added a floating rustic tabletop to the washer and dryer to make the space useful and also added a floating shelf above that. Both stained in a dark walnut.
Happy builder right here!!!
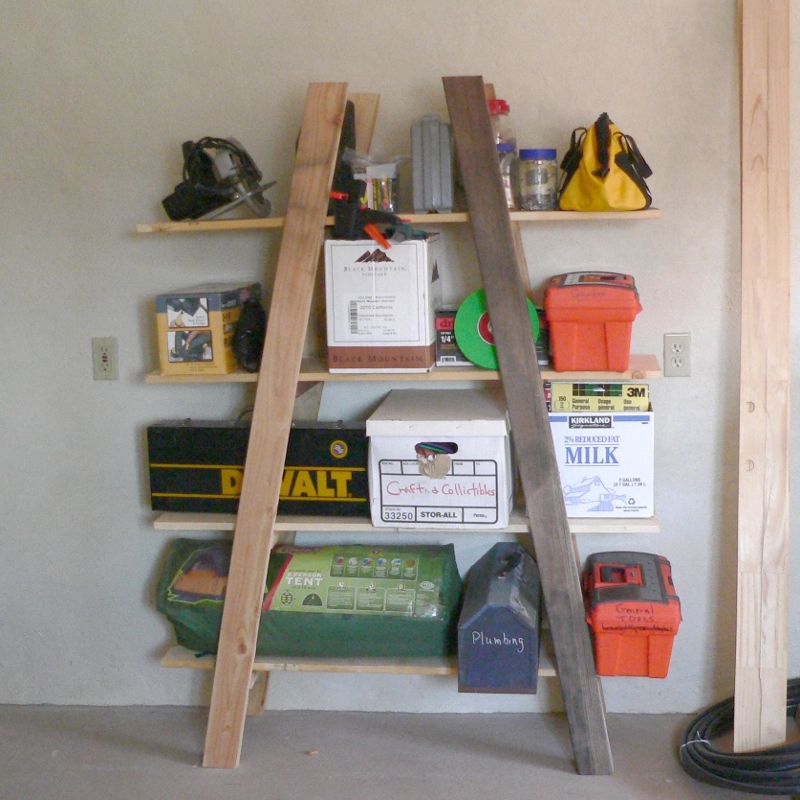
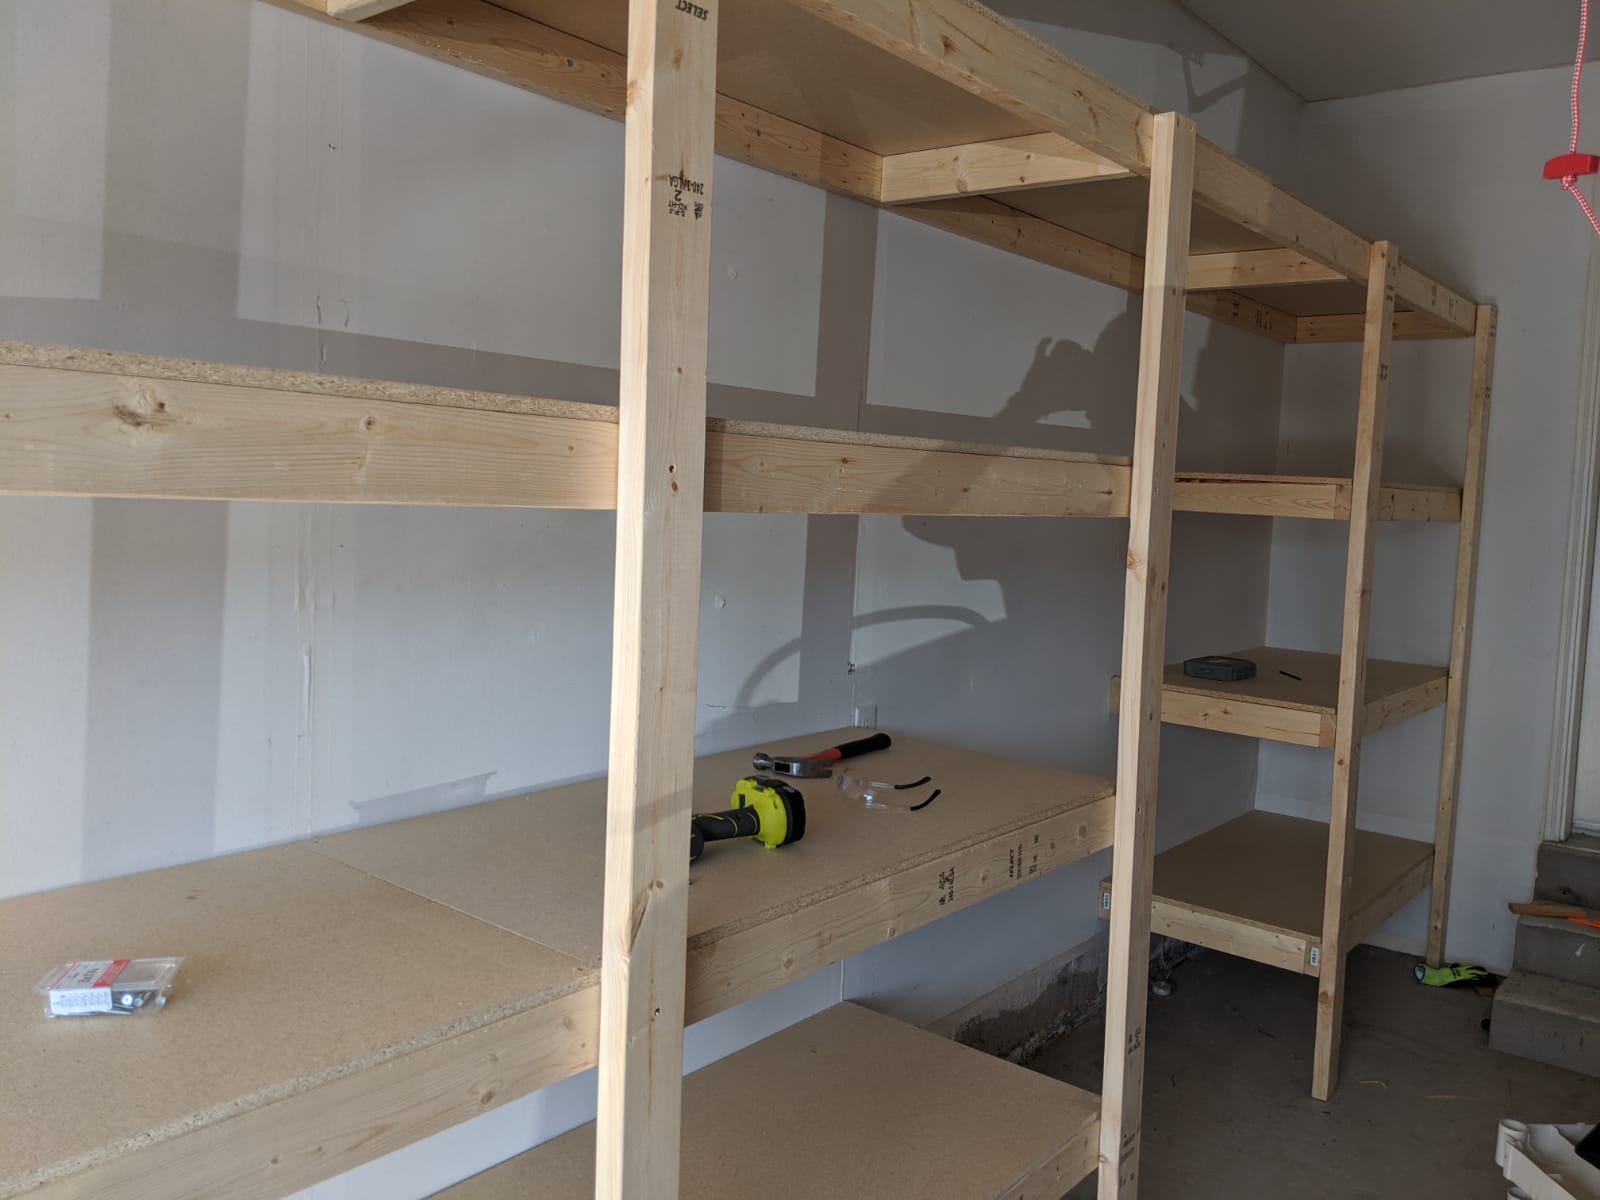
Made of old fence rail (the dark pieces) and cheap 2x4s and 1x12s .
This is not as stable as I hoped, but for an afternoon's project that got all those tools off the workshop floor, it's not bad. I will add a diagonal brace at the back later. Much later.
NOTE: My engineer friend notes that 2 braces at the rear, below the bottom shelf and below the top shelf, would minimize side-to-side wobbling, and 2 braces front to back, both under the bottom shelf, would minimize the front-to-back wobbling, They could be a scrap of plywood, a 1x6 or wider scrap. Just nail them in two or more places on each of the ladders and they make the structure more rigid. Screw them in if you want a shelf unit you can disassemble.
TIPS:
If you are using pockethole screws, start the screws in all the holes before you put the crosspieces on. Stop when you see the tip of the screw come through the first piece.
Clamp scrap 2x4 to the uprights to hold the crosspieces in place as you drill.
To get the shelves in place, lean the ladders against each other and attach the bottom and top boards on one side. Than pull the other ladder out as far as it needs to go and screw that side of the shelves in place.
Don't try this without clamps.
It could have been cheaper if I had used all reclaimed fence 2x4s, and if my errand runner had bought cheaper 1x12s. He bought top-grade when #2 would have worked for half the price,
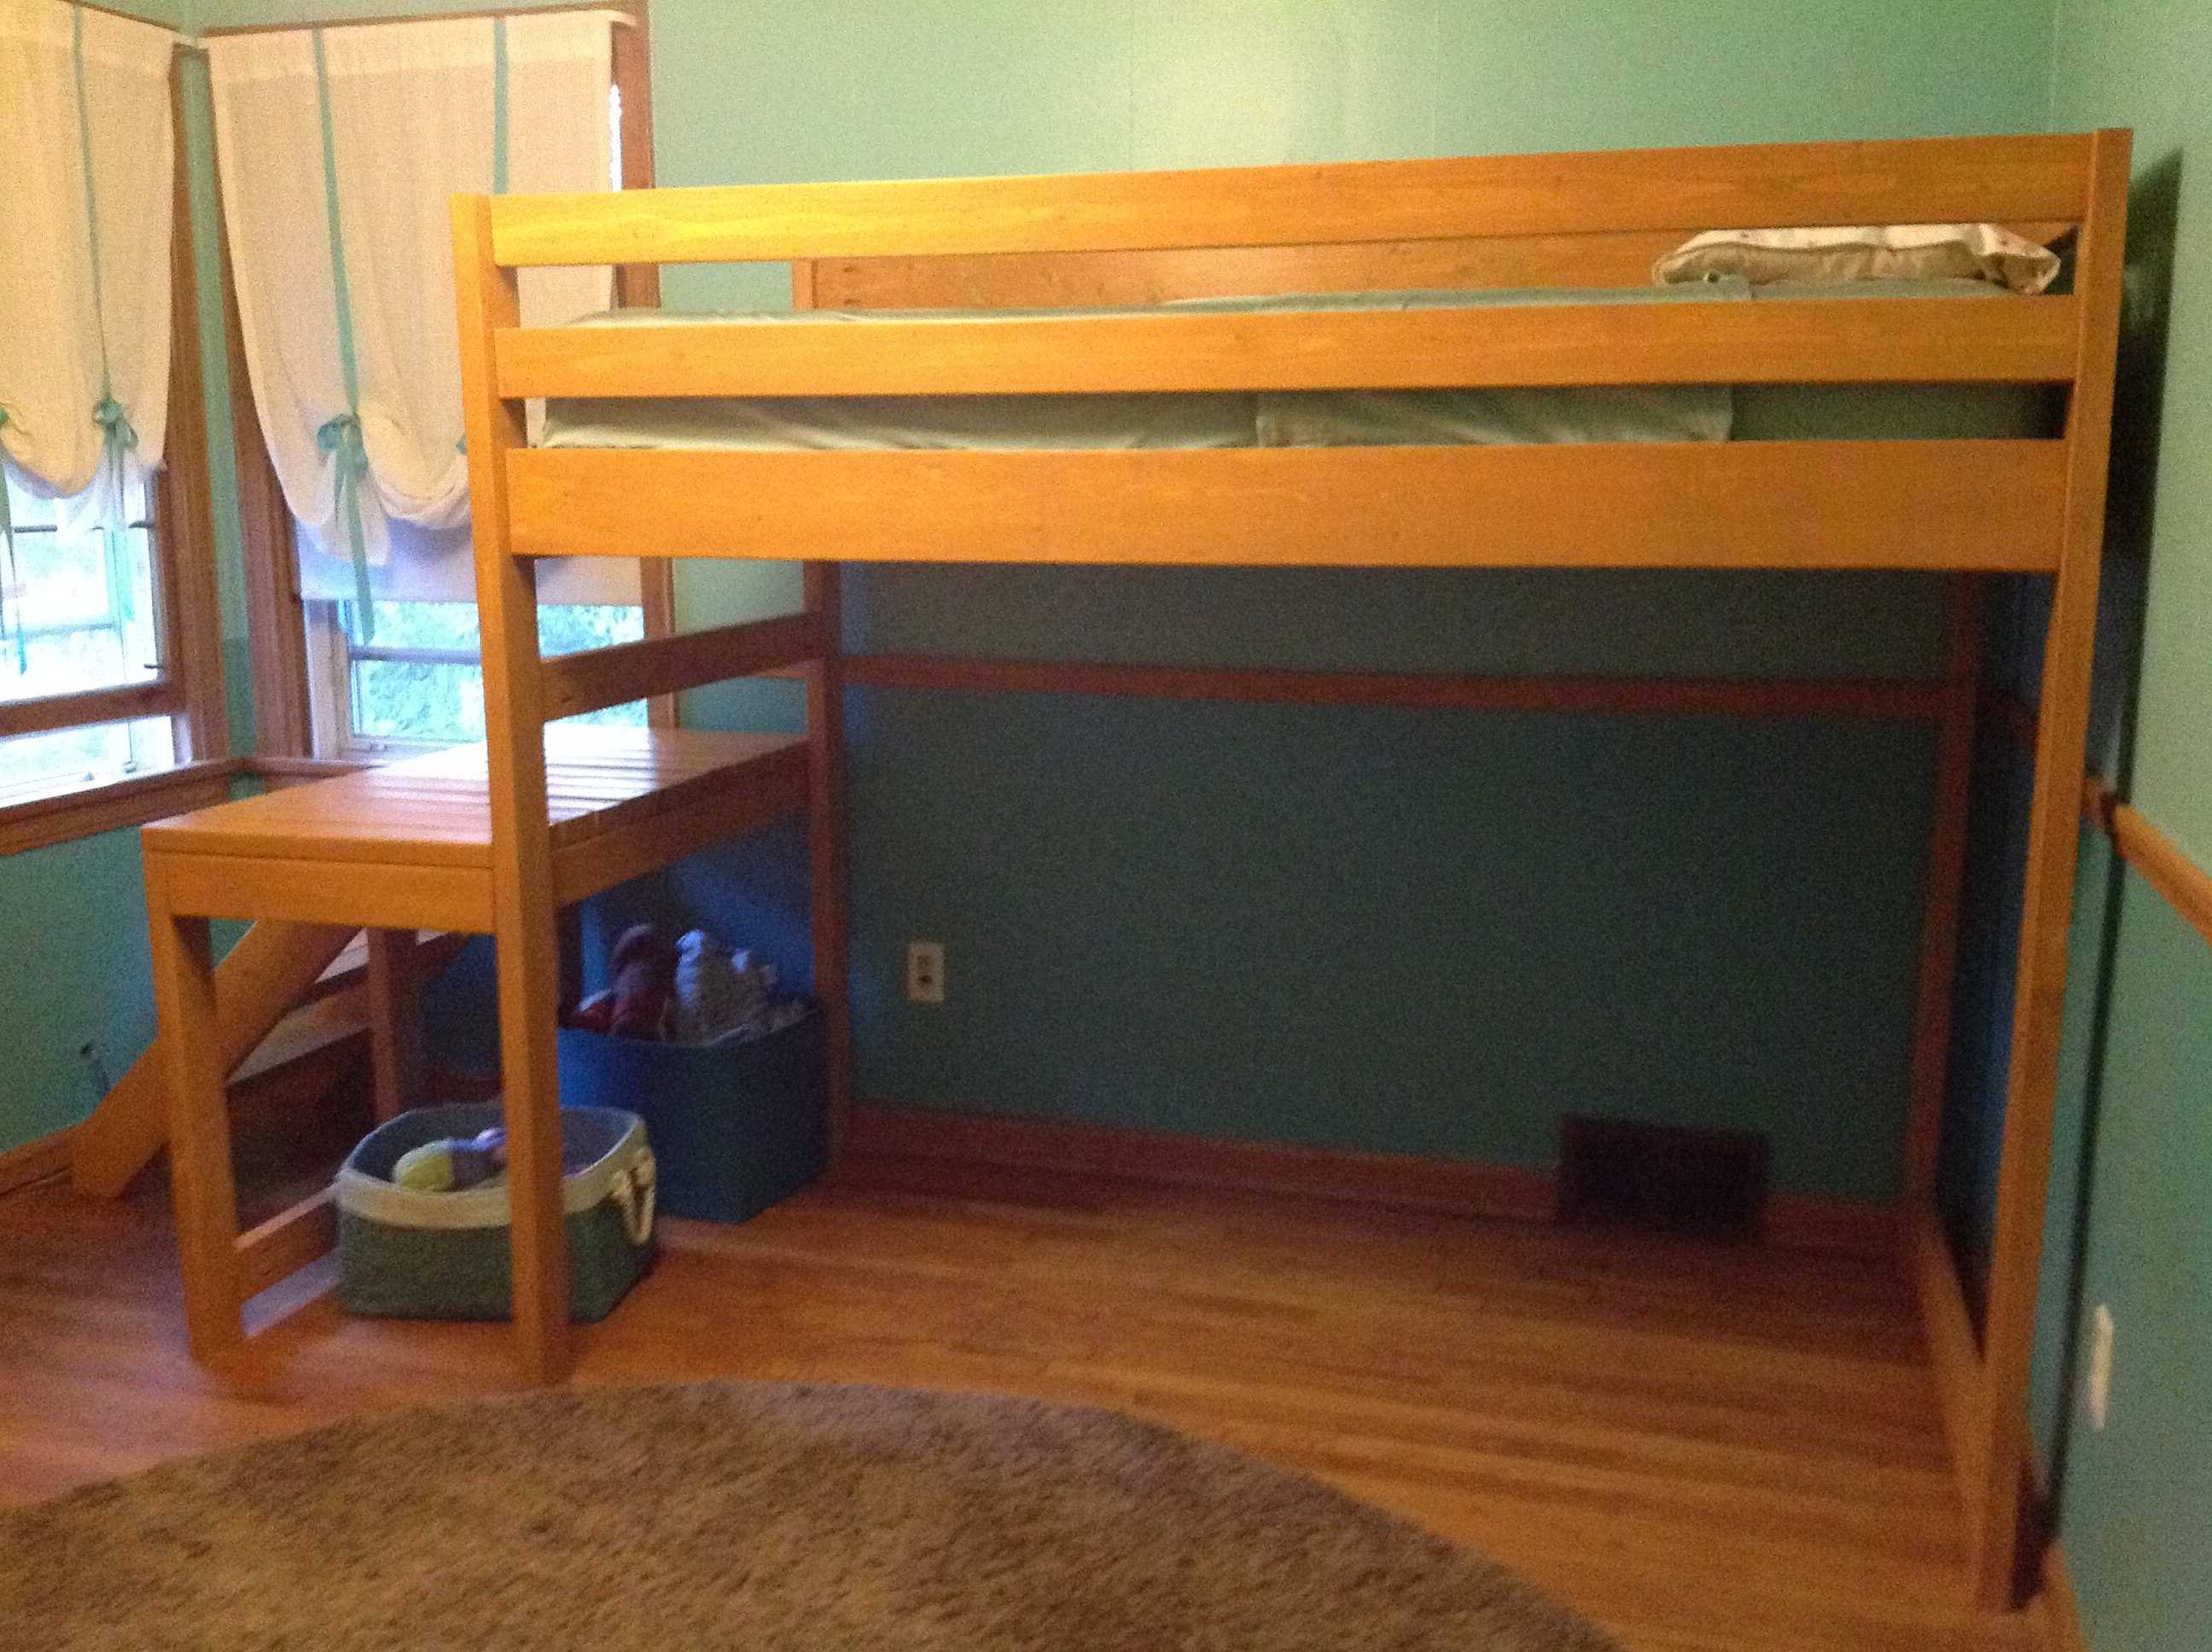
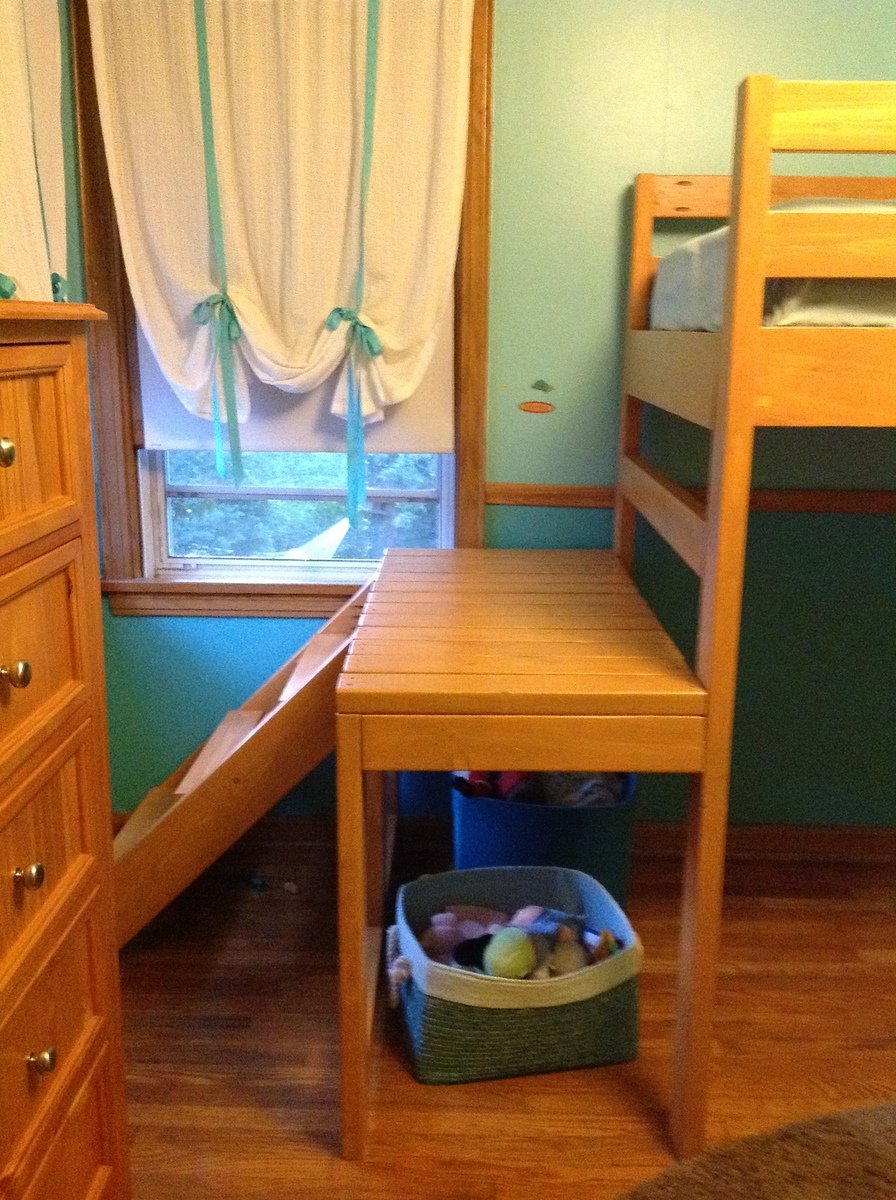
I finally decided I was going to make the fort bed for my daughter and was about to print off the materials list to take to the lumber yard and the junior height camp loft was front and center on the webpage. Though significantly more bed, it looked perfect my little girl. We really wanted her bed high enough to avoid the only heating vent in the room and didn't want to lose the floor space for play, this seemed to be an ideal fit. When I finally put the bed together I realized that keeping the staircase as in the original plans resulted in a bowling alley sort of space left over. It was awkward and really shrunk the room as the 'alley' wasn't usable for much of anything. I played around a little bit and my husband and I decided that we would put it on the side. It fit perfectly to the wall and was much more space efficient for the room. I am a little nervous about the new openness of the deck portion, but both kids have found it a fun place to read and pretend fish. It was my first project of this size and I did everything until the final assembly by myself and I am so glad to have done it. It took more time than I imagined, but again I am a true novice.
I really wanted it stained so that it would camouflage the wear a little better, but I had a great deal of trouble finding a low VOC stain in my town. I used the lowest I could find and a low VOC water based poly. It matches her dressers and trim nearly perfectly. Her older brother likes the bed so much that nearly everyday he tries to convince her that she wants to switch beds with him.
Tue, 08/28/2012 - 11:28
I love your bed so much! And I love the idea of having the stairs on the side like that. :)
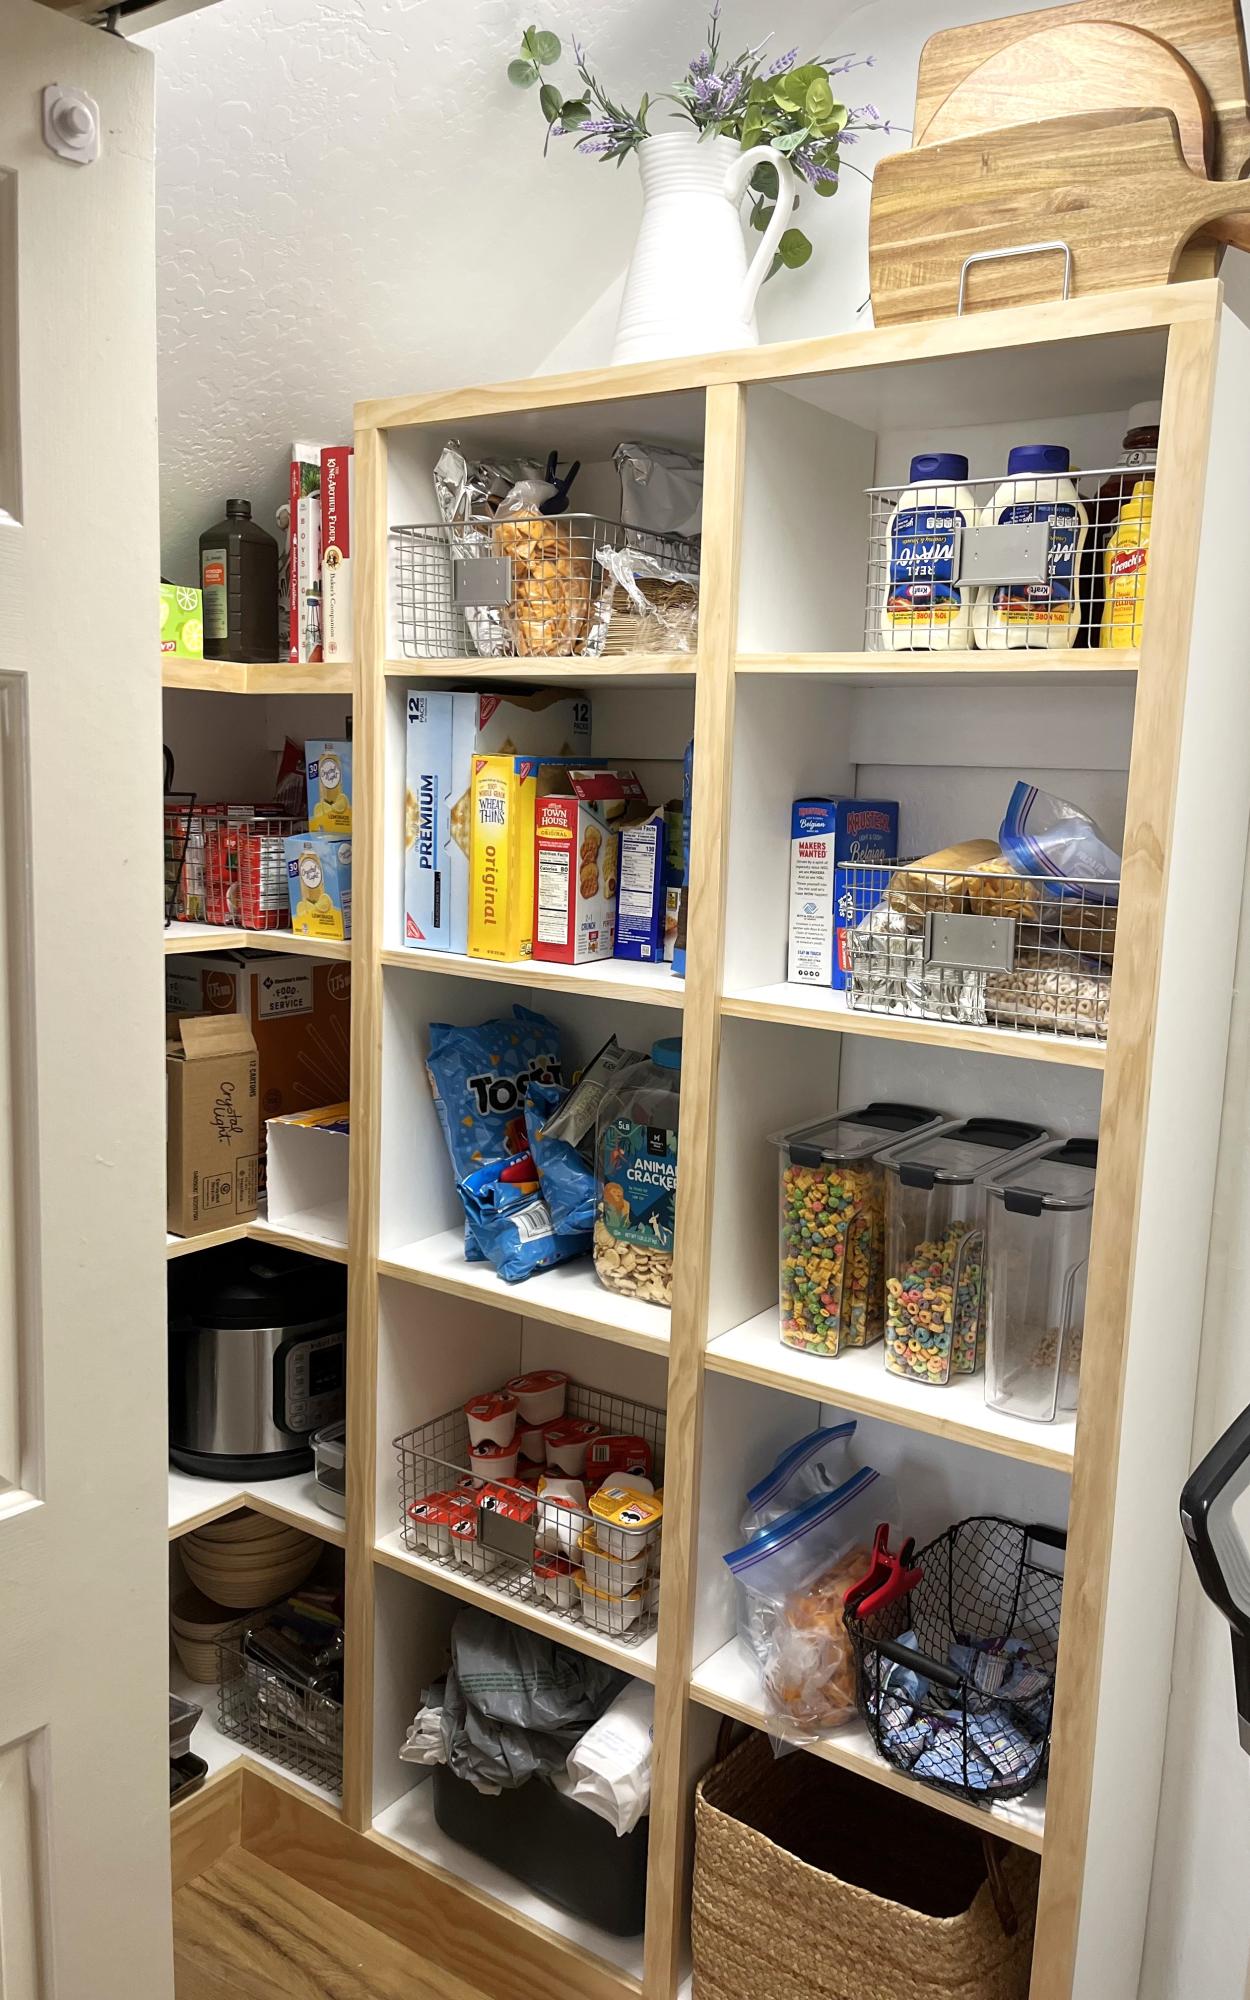
We have a small pantry as well, so we used the shelving featured on your website to help!
I absolutely love it. They’re not as beautiful as yours but I’m happy with what I made :)
Alison
Garage Shelf inspired from Ana's Ryobi workshop design
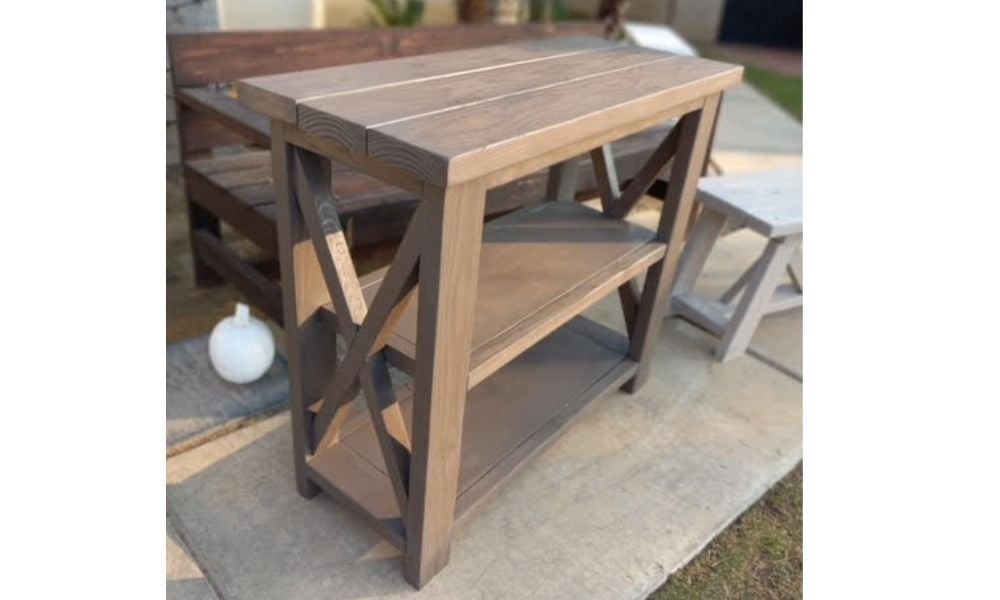
Single wide rustic x console table build
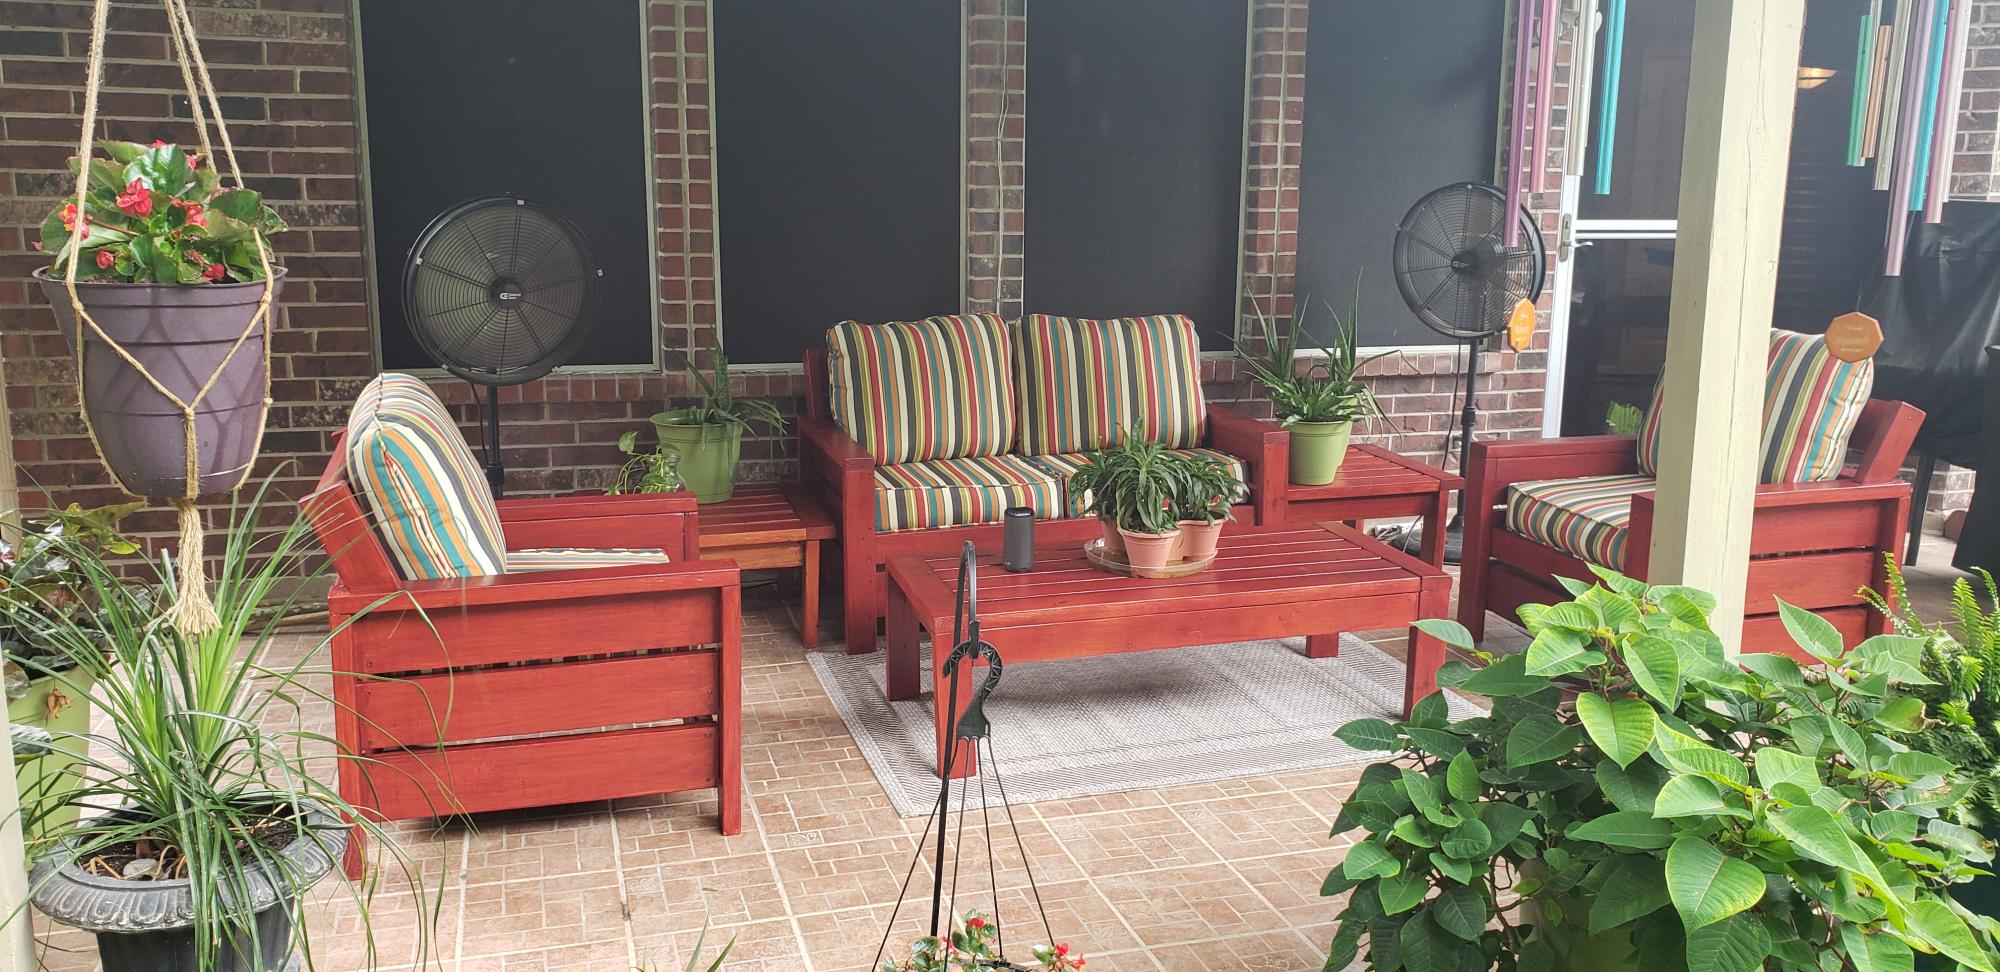
This was my very first build project! Ana White you are AWESOME. Each plan was so easy to follow. I added the headrest based on a version I found in the brag posts. It really does ensure that the back cushions stay in place!!!! Love it!!!!
Sat, 08/15/2020 - 19:22
Thanks. These have been the best alternate plans yet. I was looking for a headrest option as well, wasn't sure they looked as good, but this interpretations is beautiful. i will be copying it for my furniture.

In reply to nicely done by goose71
Mon, 01/10/2022 - 09:52
Would love to see our altered plan that covers the backrest!
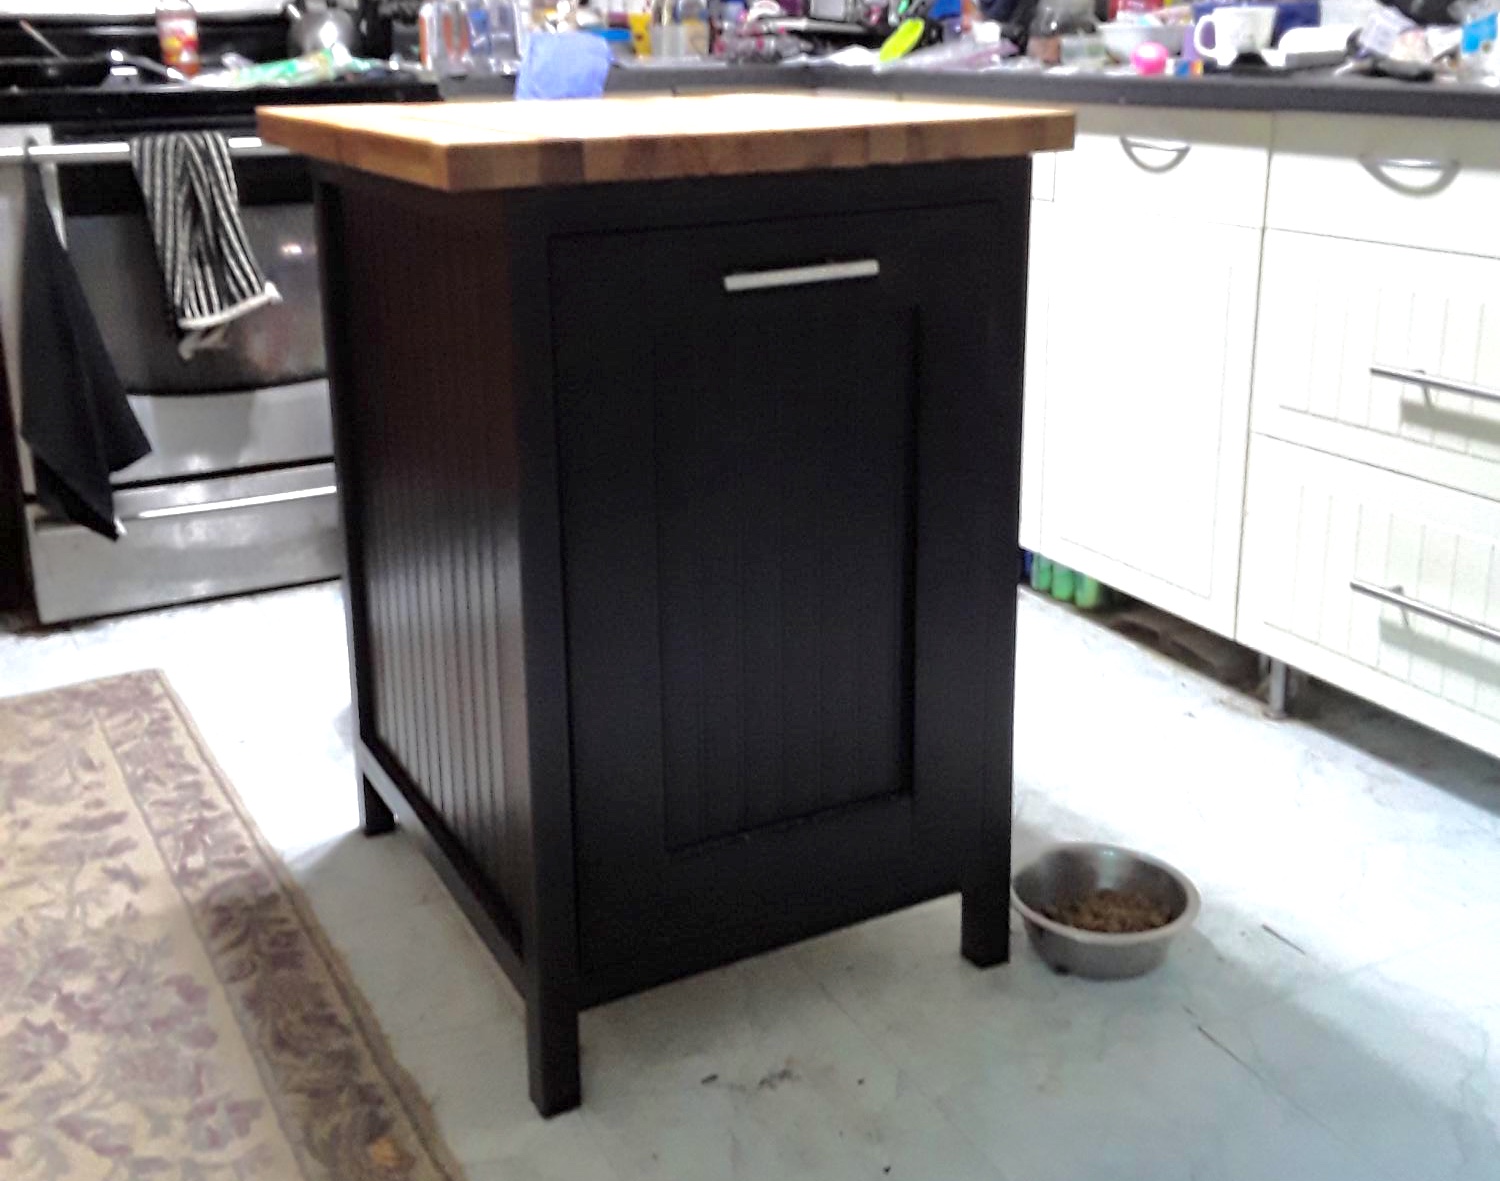
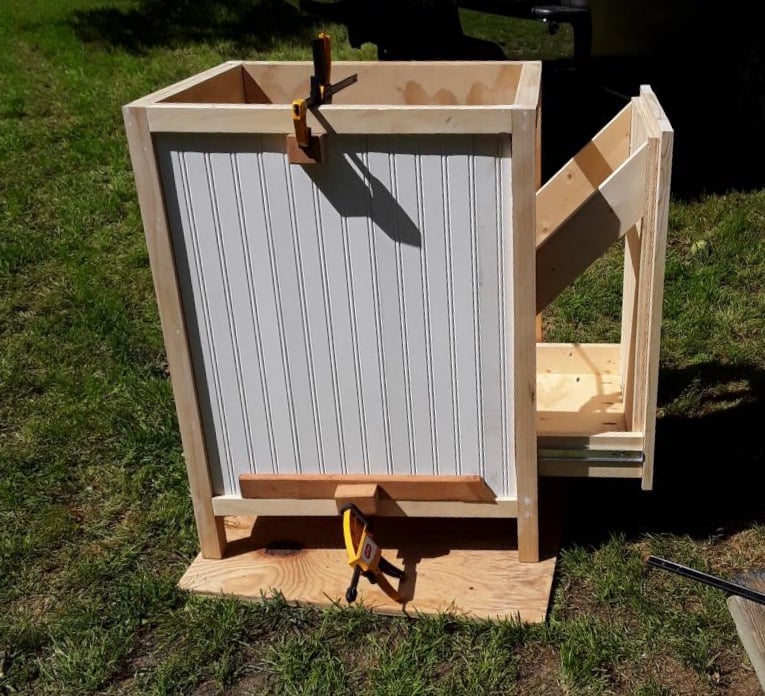
This was a mommy do during work furlough. Wasn't too hard. I have minimal experience with saws, but with hubby help, we got it done. Some of the instructions didn't make sense, but but we were able to figure them out or change them to work. I used bead board on the front and sides that we added over the existing sides. I used a manufactured butcher block that had to be cut down. Looks great and now my trashcans don't walk around the kitchen when the dogs play. The downside, the dog bowls slide under the island. If you have to cut down butcher block, make sure you have the proper blade.
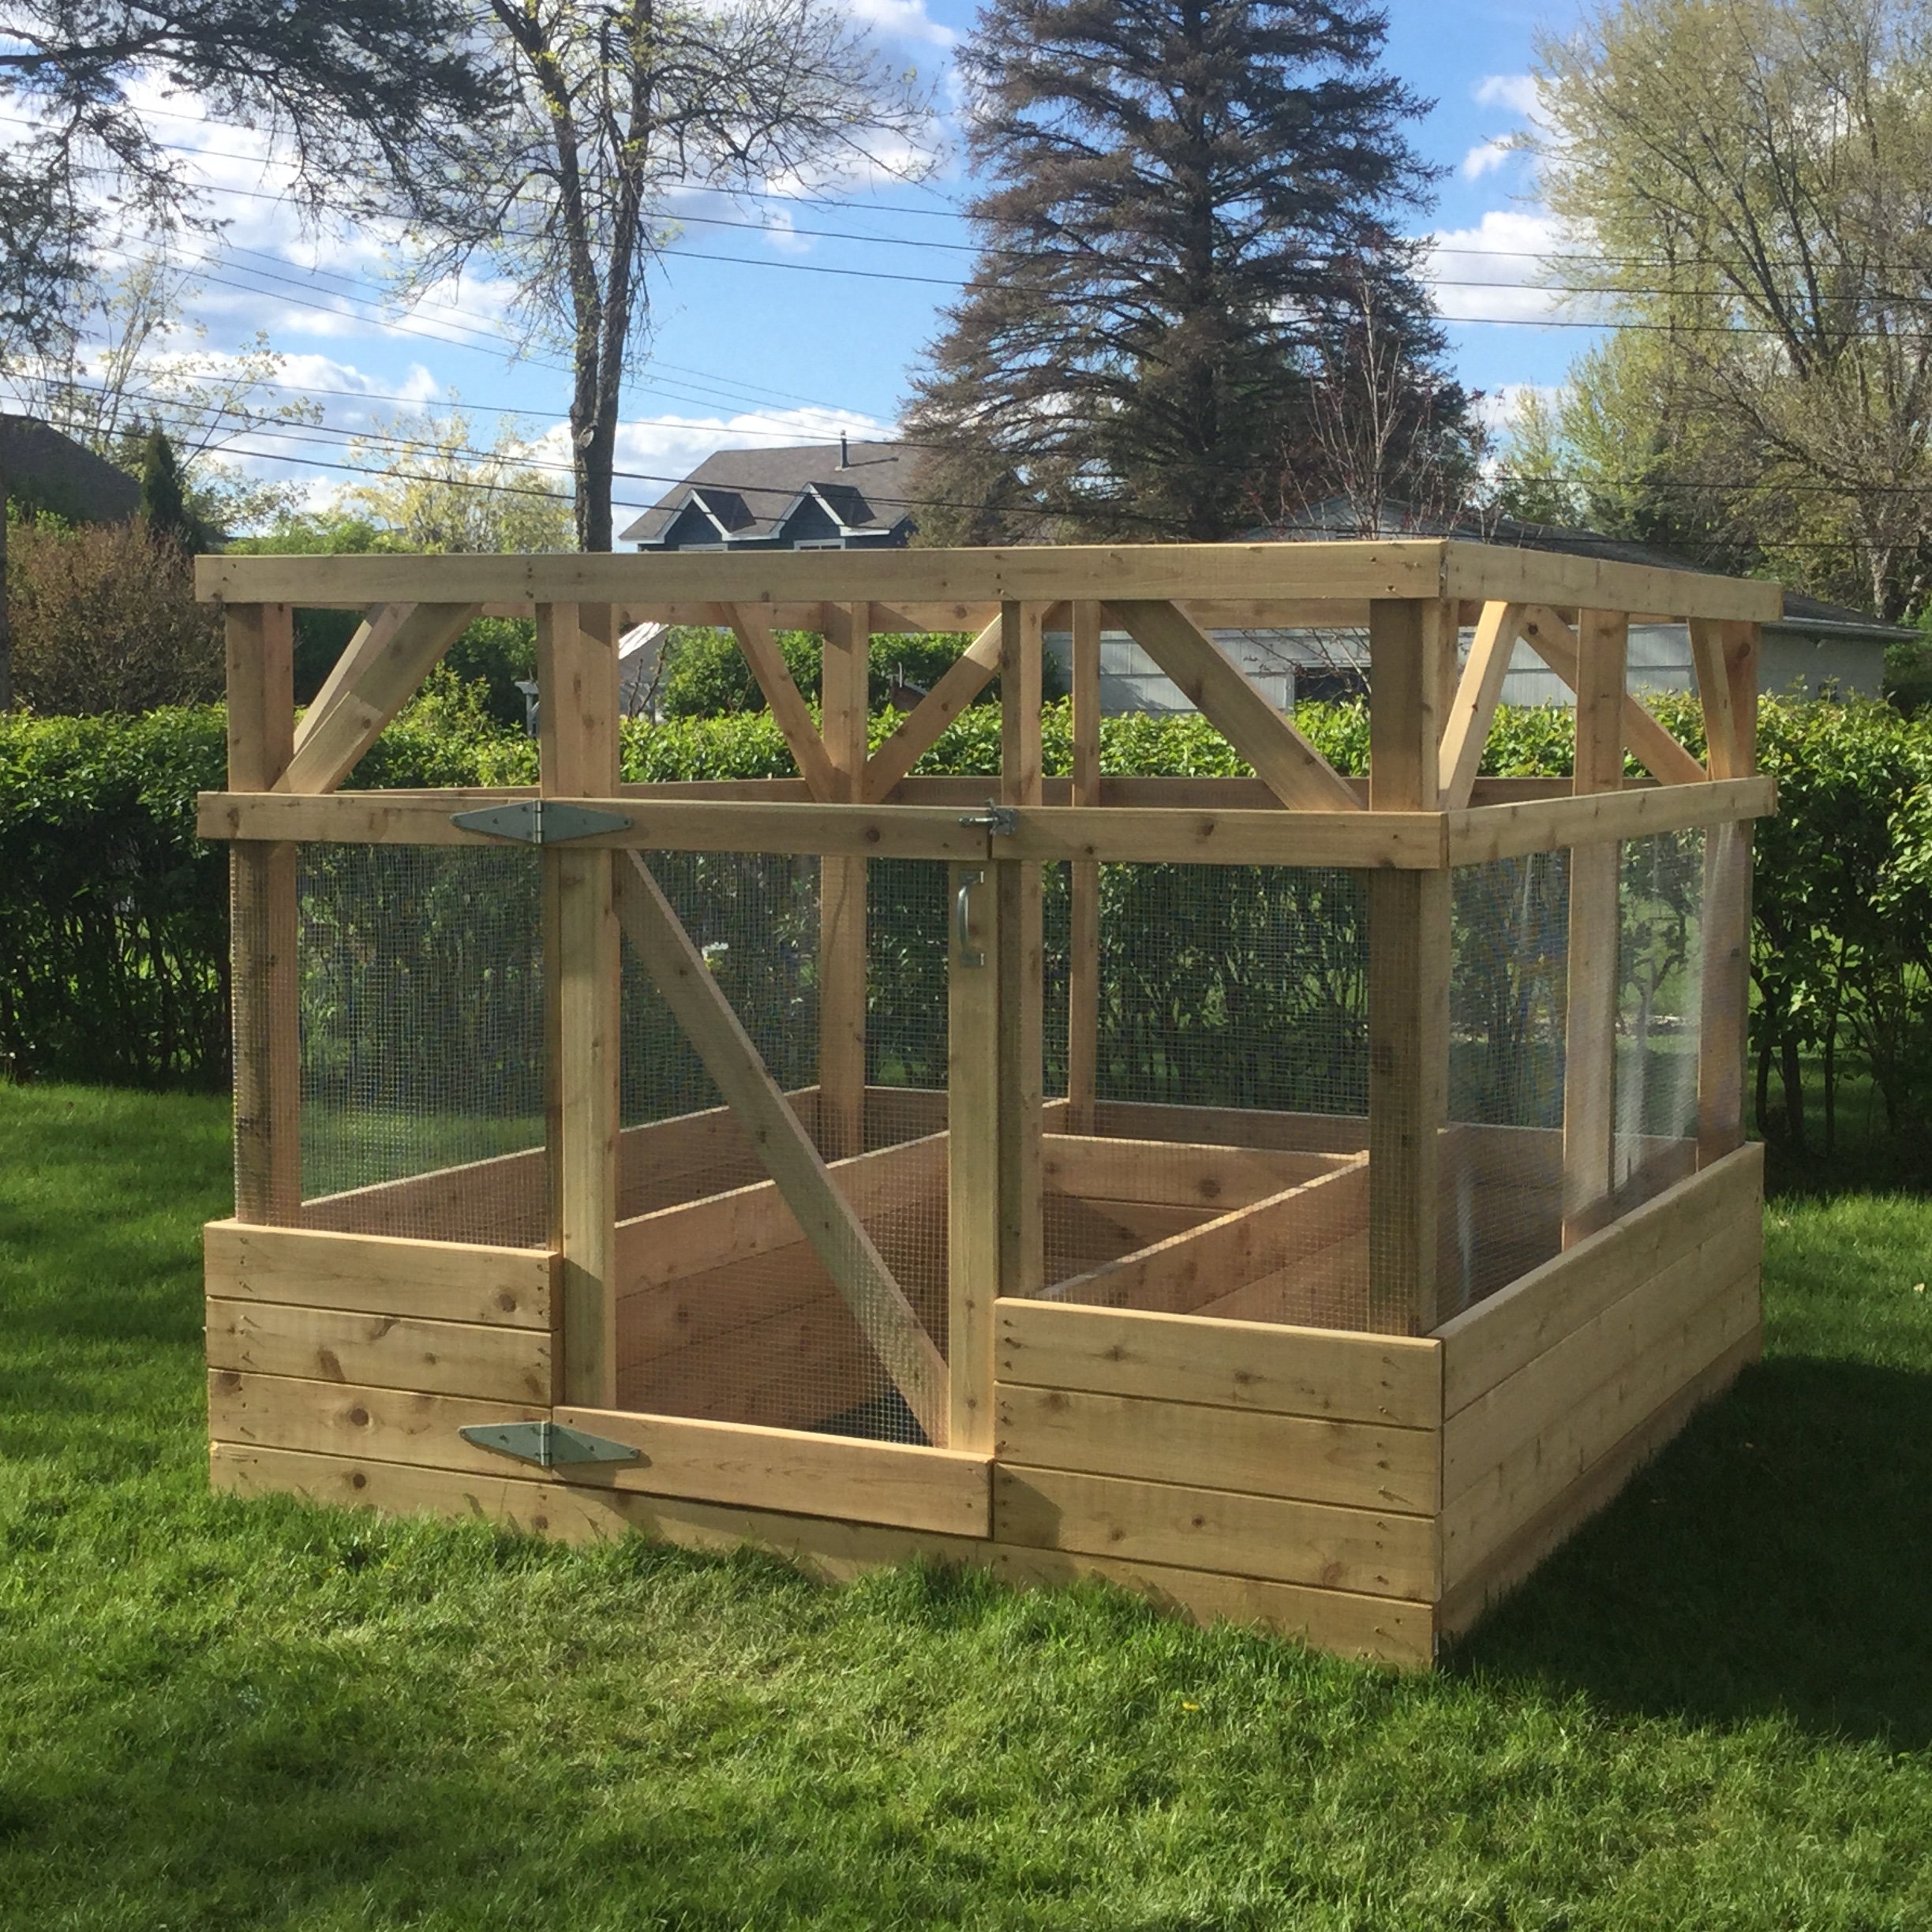
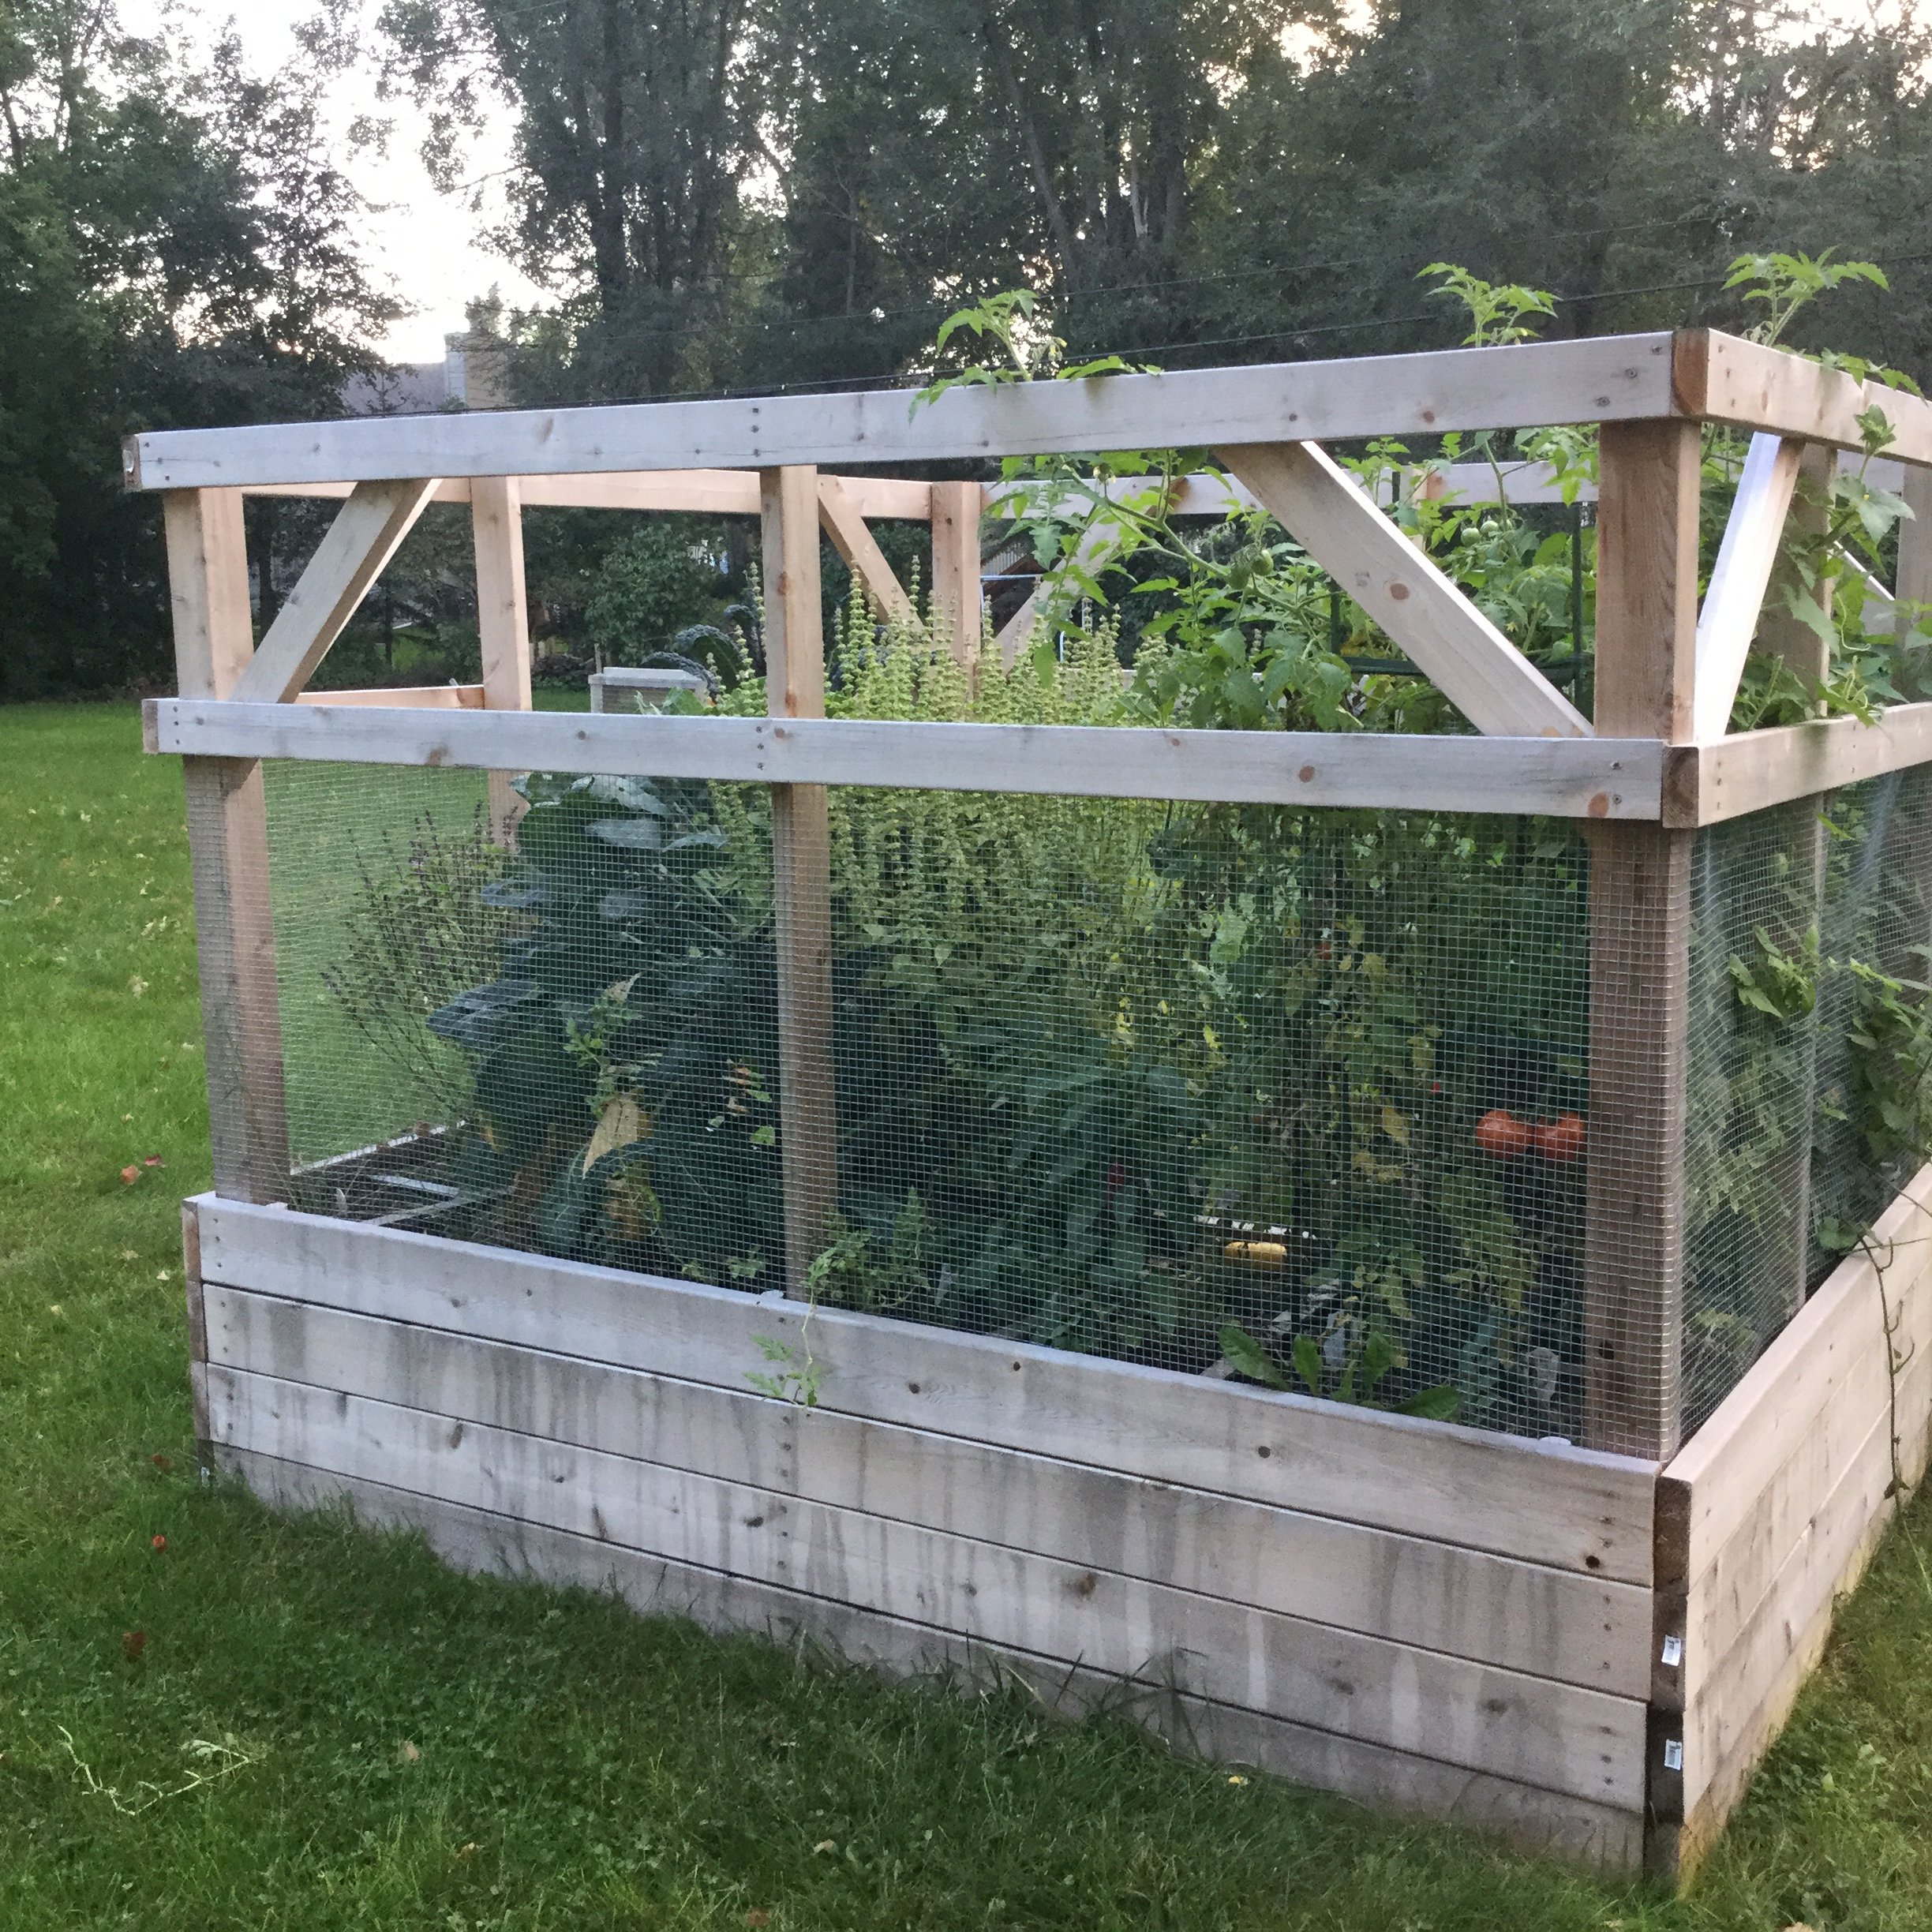
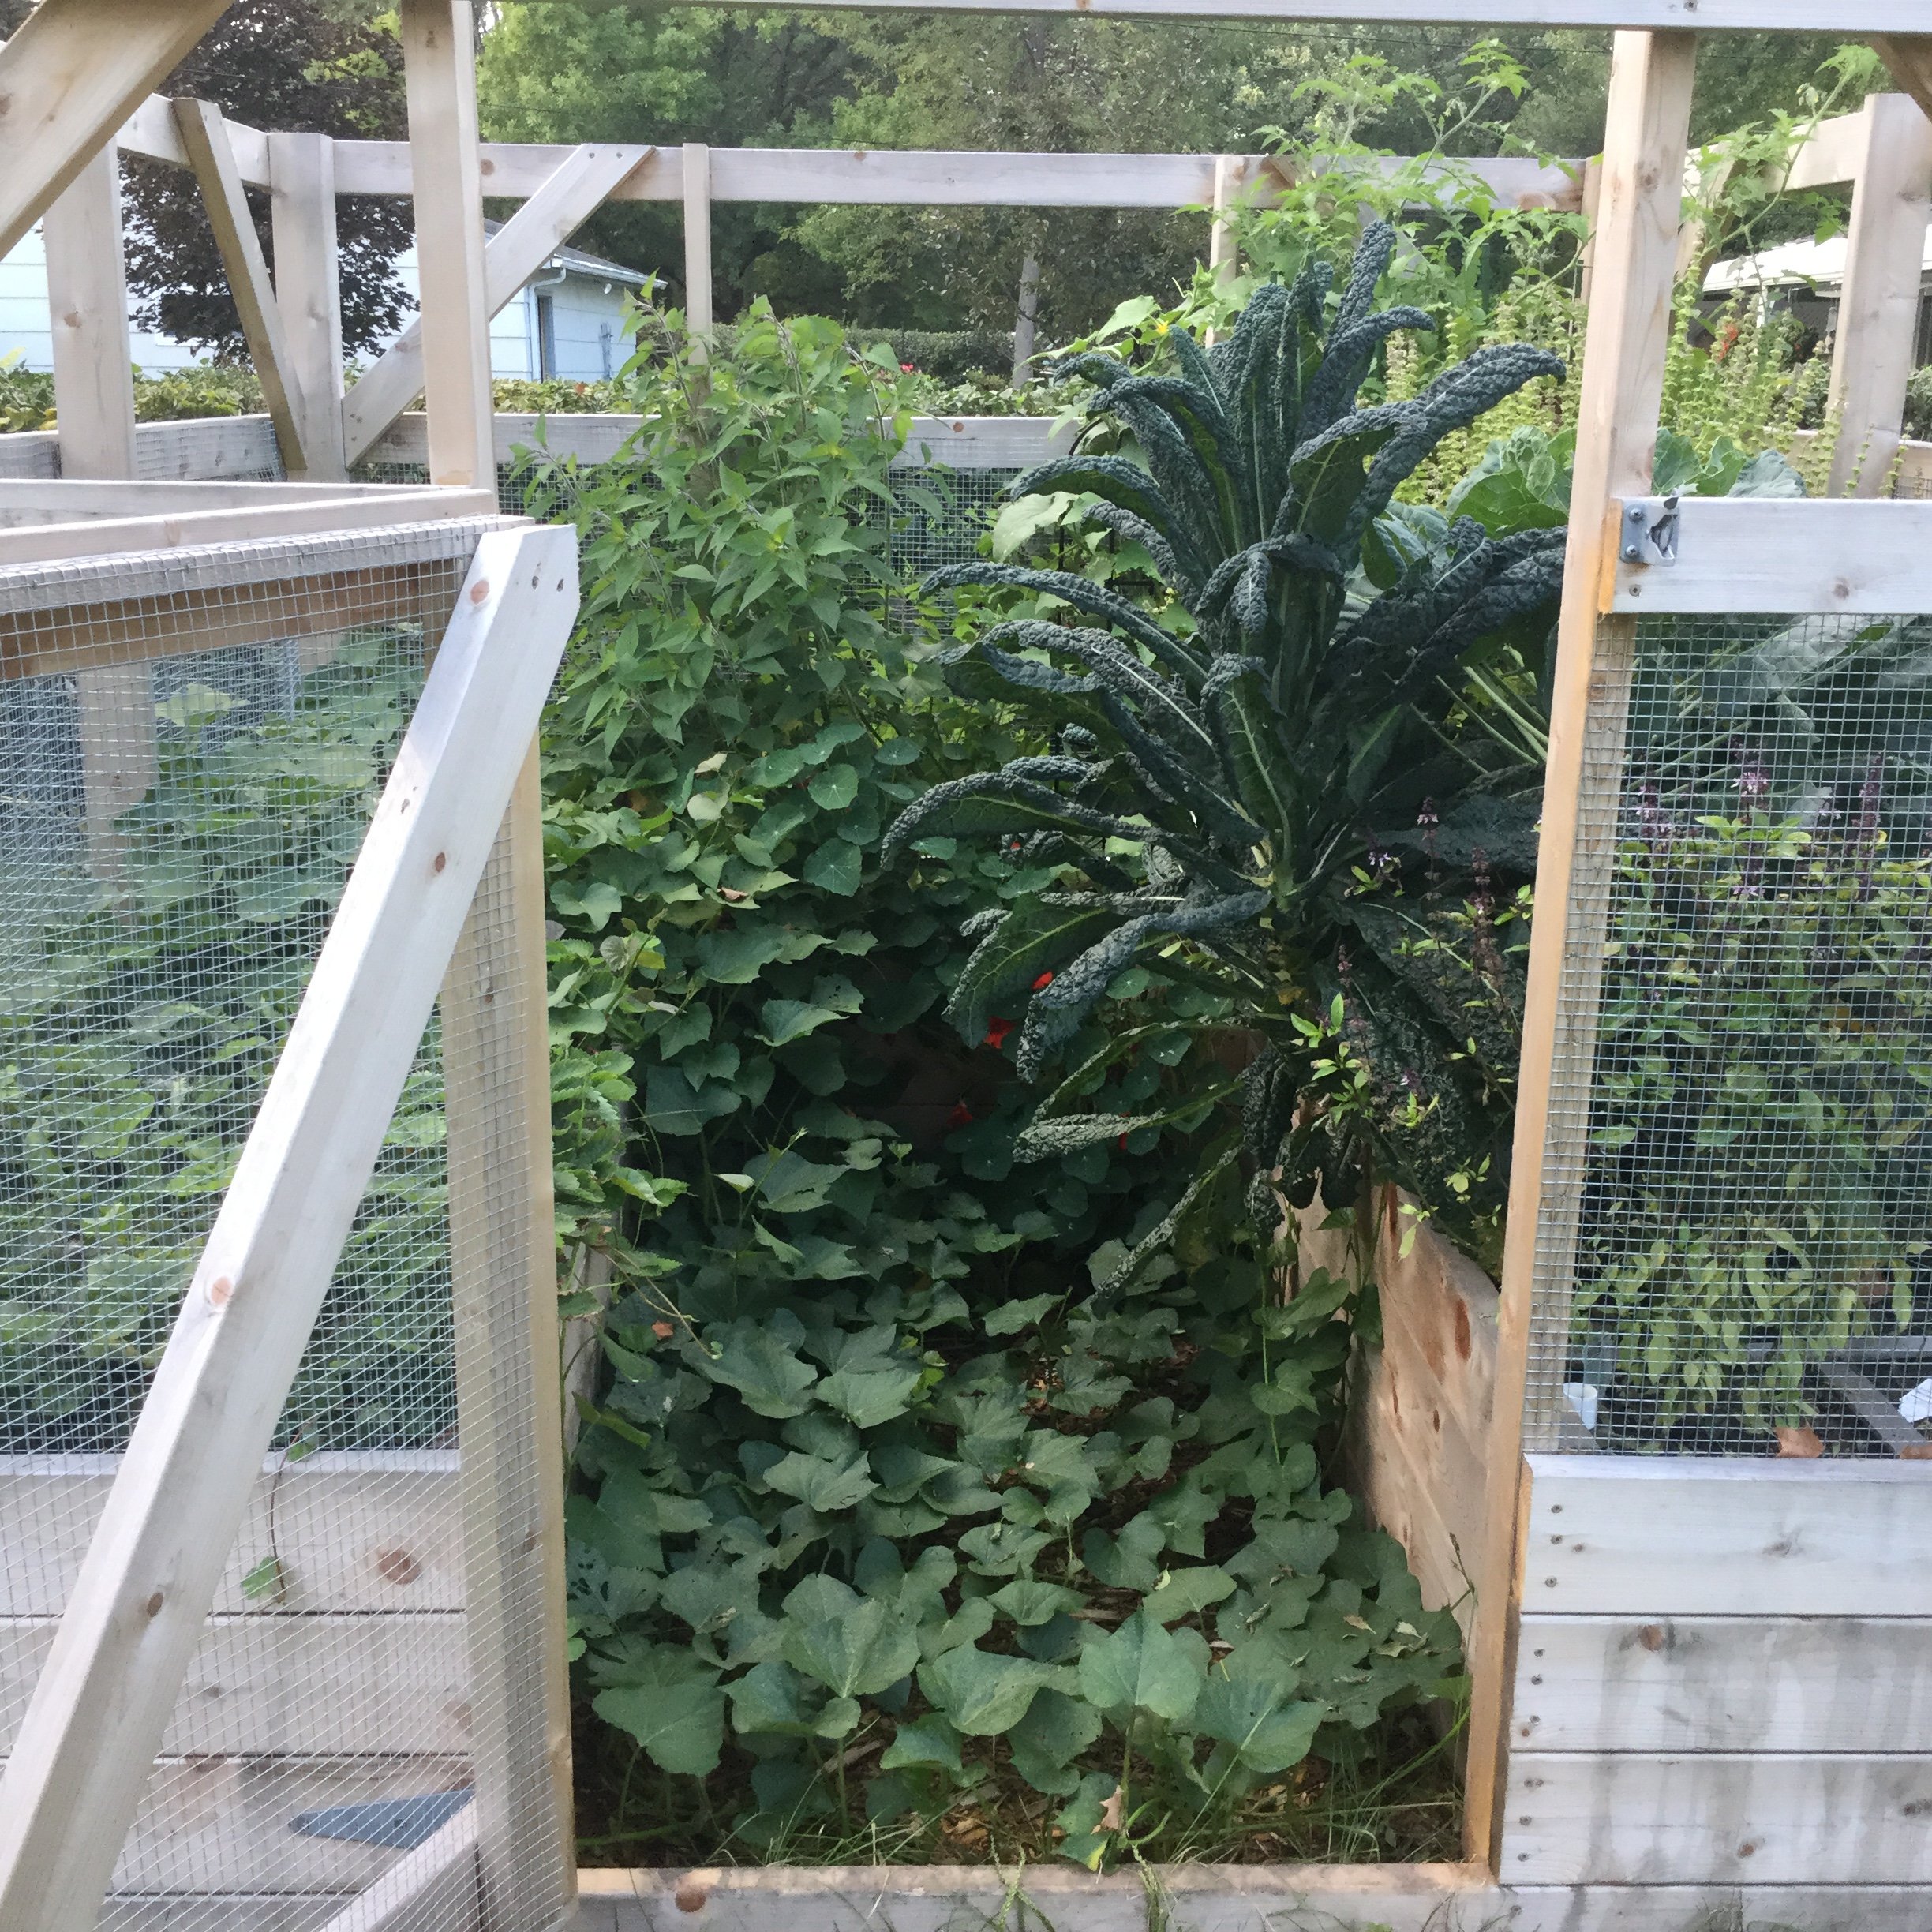
This was a fun project. The plans are written so that many of the boards don't need to be cut. It's made from cedar that (thank goodness) was on sale. I made the raised beds twice as deep as was called for in the plans because I wanted to minimize bending while I garden. That added to the cost of the lumber and the soil. I also like the way it looks.
I found it helpful to measure and cut the boards as I went. This was crucial for fitting the door. The most difficult part for us was working with the hardware cloth and trying to make it as smooth as possible.
It has been effective keeping deer and rabbits out of the garden. Things that can fly in are another issue.
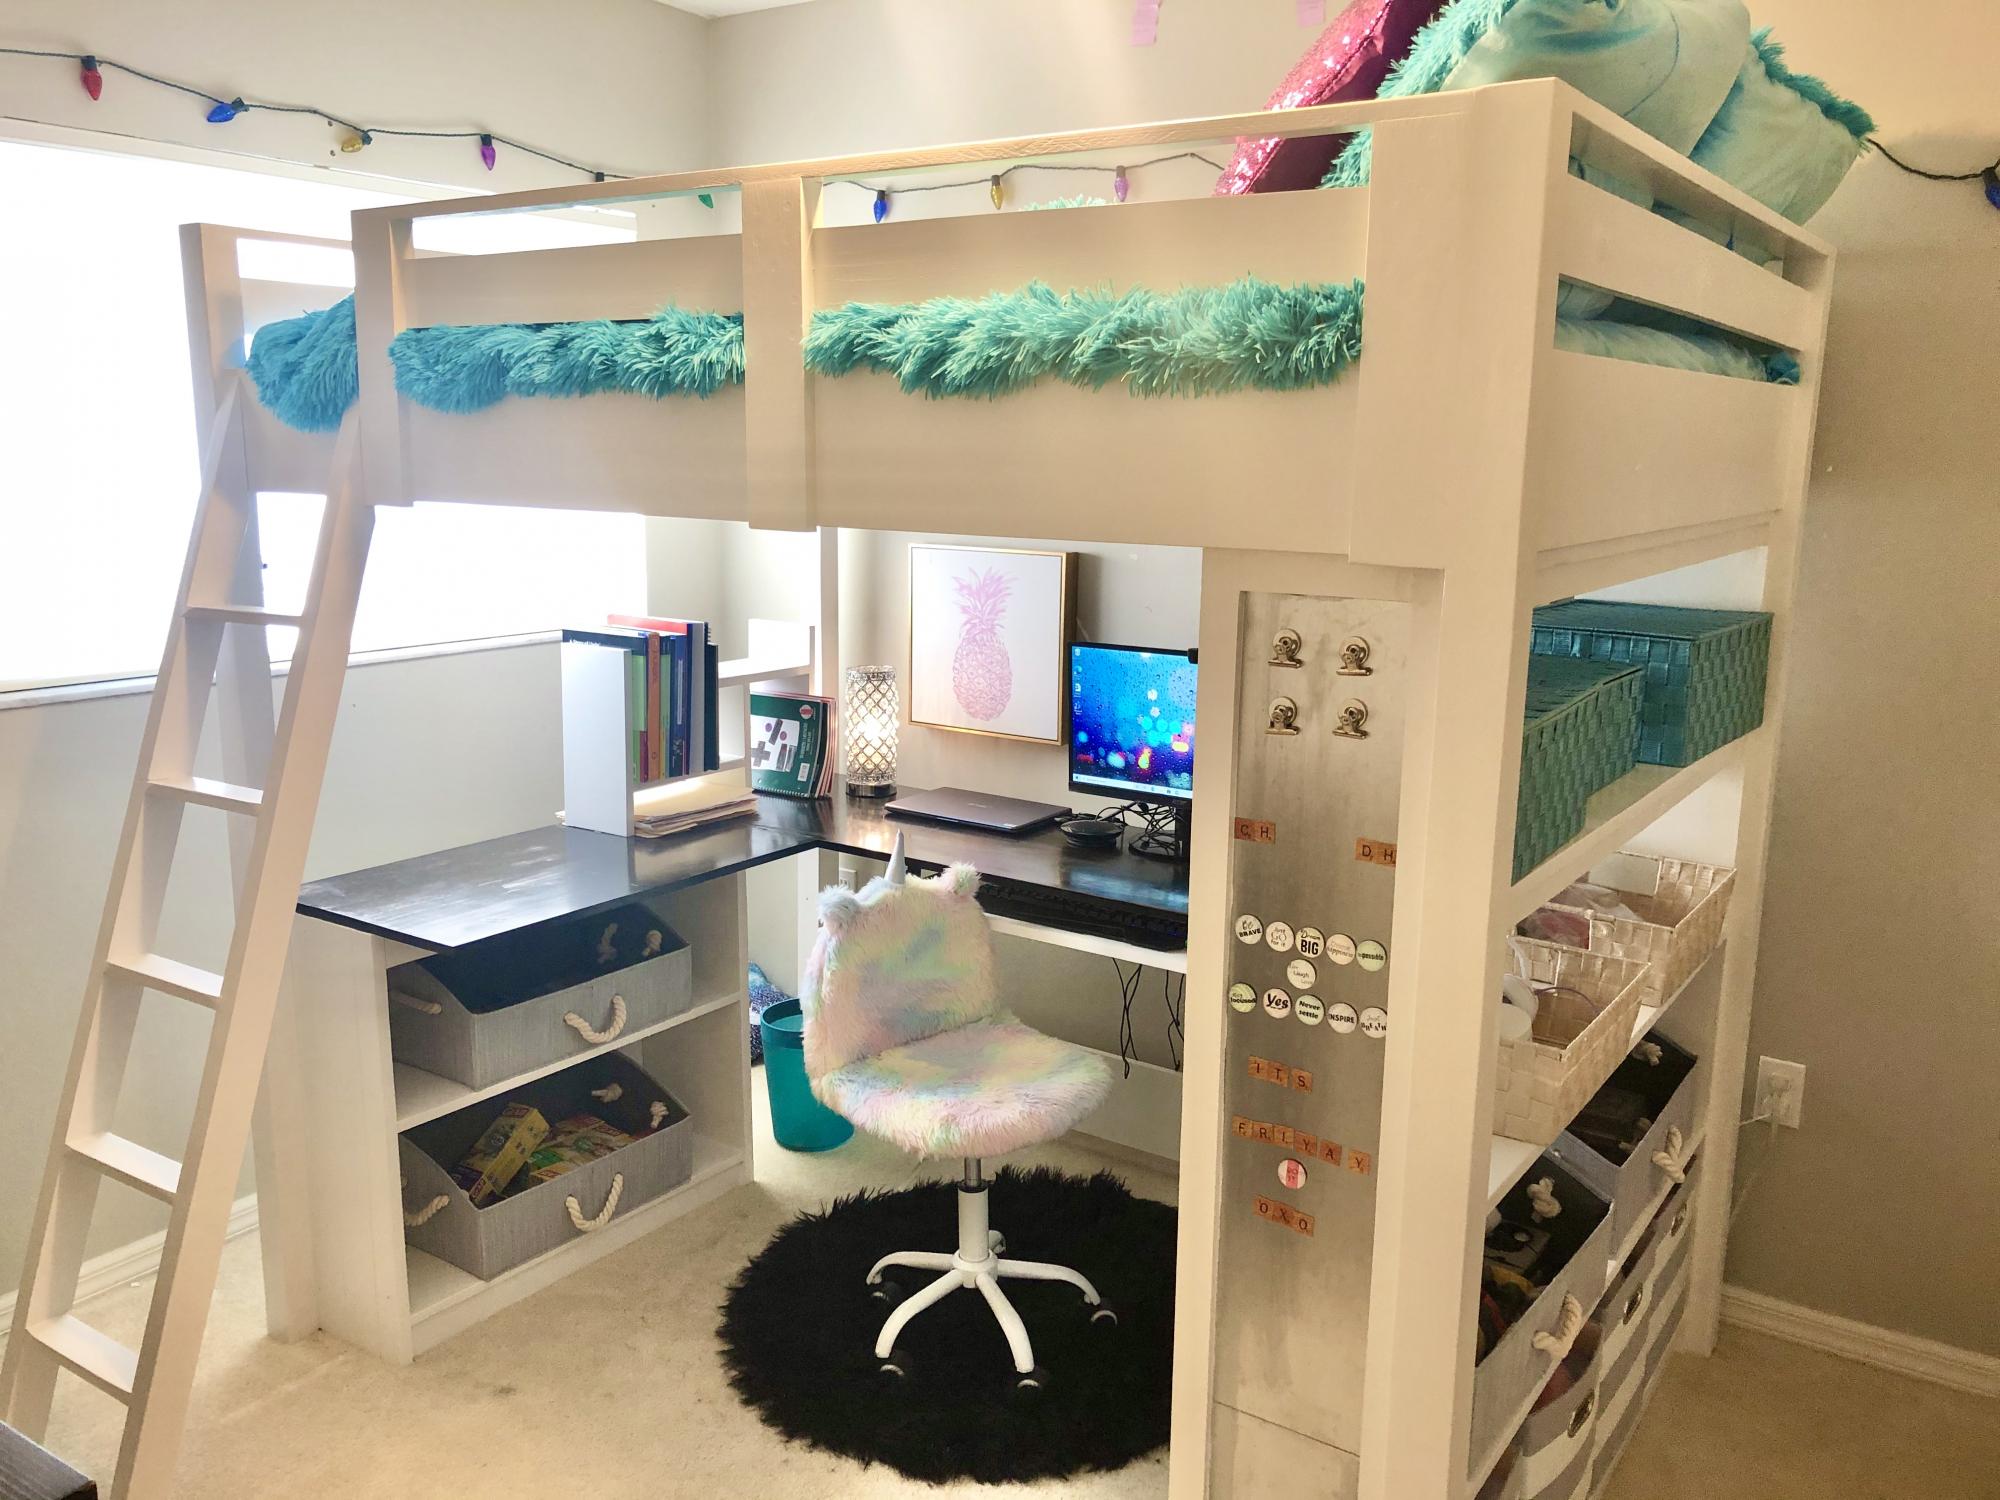
Our daughter has been asking us to build her a bed for months now. When eLearning became a reality for our household, we knew it was time to get to work. We usually do two to three big DIY projects a year, and have built from many of Ana White's plans. We often refer our the time together DIYing as "couples therapy".
We used Ana's plans for the Loft Bed and included the tall bookcase and desk system, with a few of our own modifiations and personal touches, such as:
- elimated the plywood backing on the bottom shelves of the tall bookcase
- only used one (1) bookshelf for desk system
- used toungue and groove paneling for back of small bookshelf, adding it to the sides as well
- made the desktop 19" wide
- added a framed magnet board
- added a sliding keyboard tray
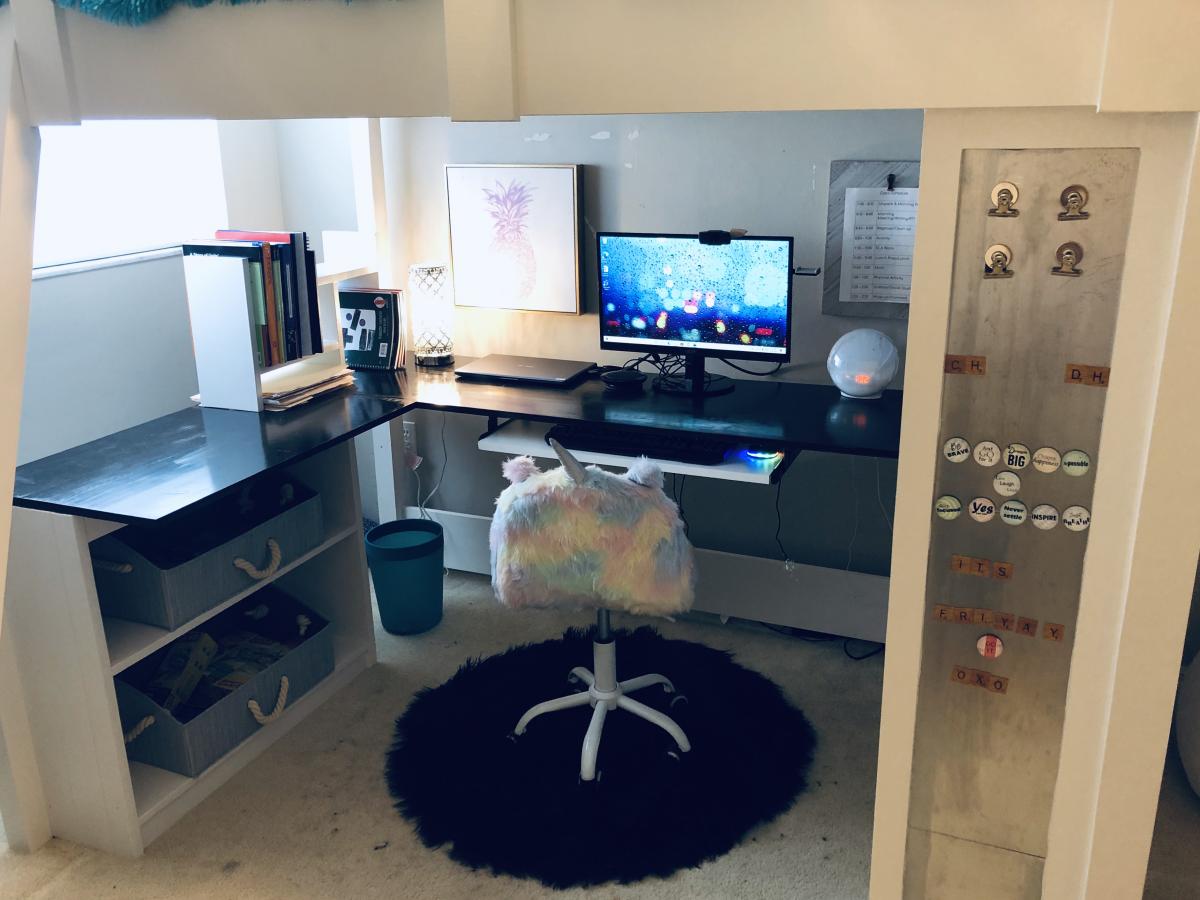
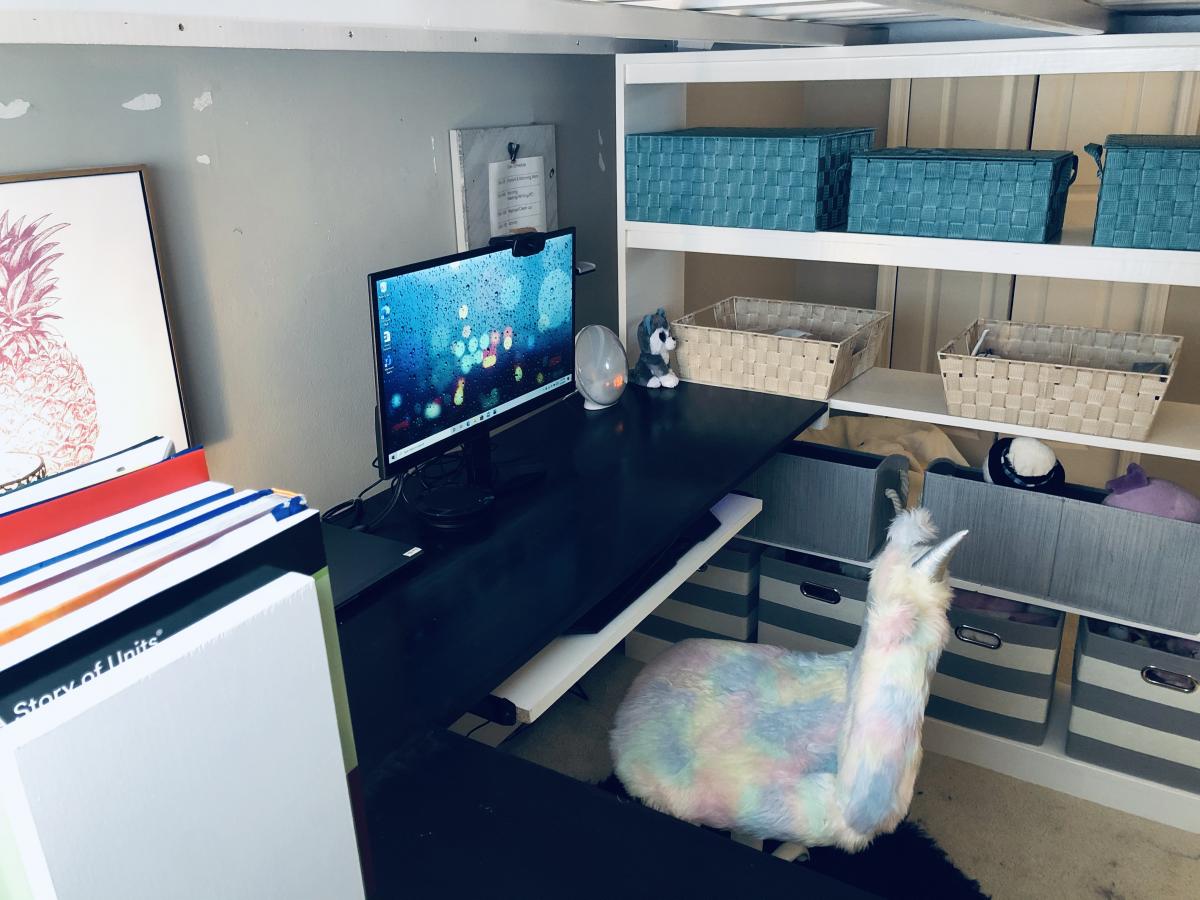
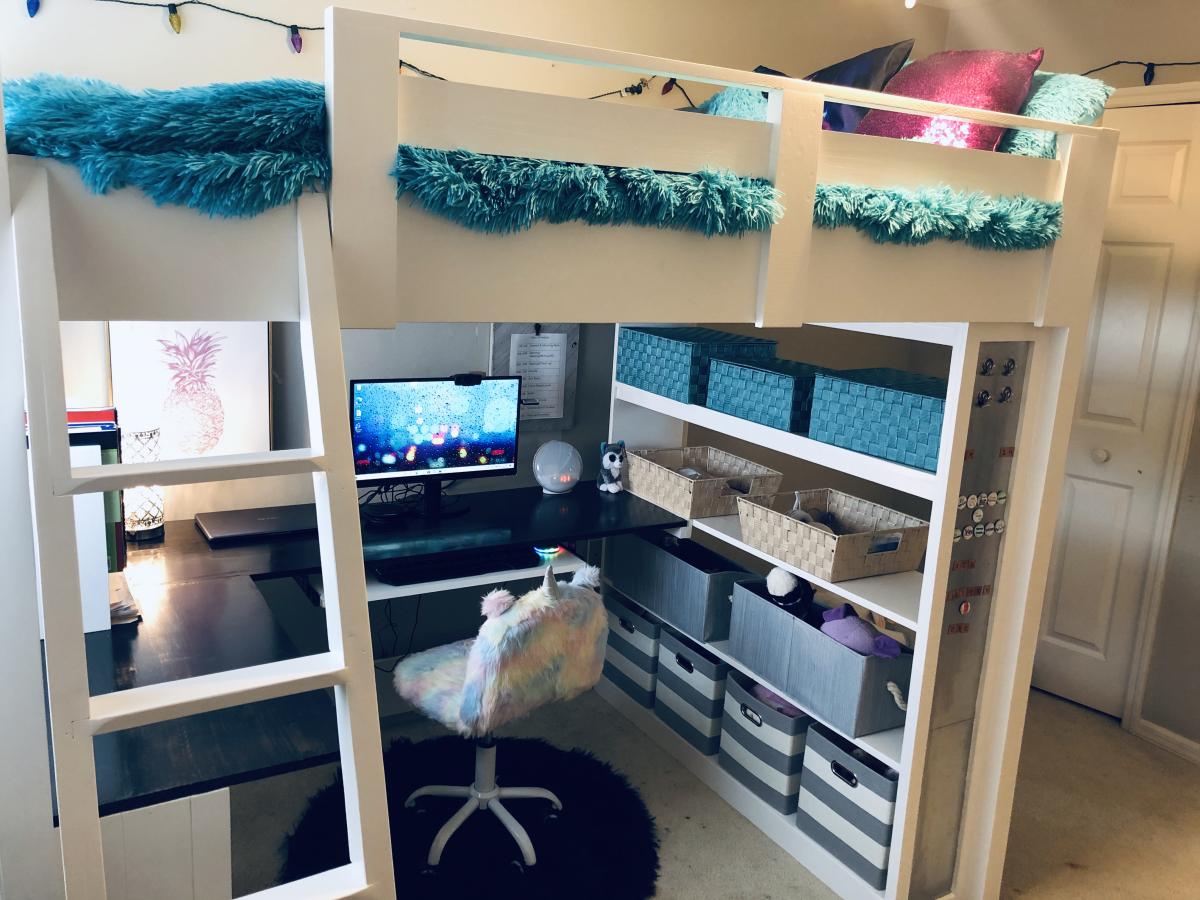


This DIY desk provides workspace for two people. A portion of the desk is for my oldest son during homeschooling and the other portion is for my husband while he continues to work from home. Cost : $35 Difference in length, width and height will result in a change in price.
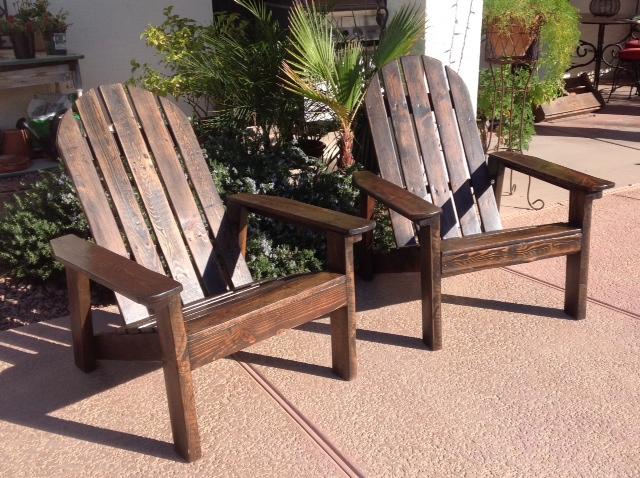
Adirondack chairs made from reclaimed pallets.
Mon, 01/09/2017 - 19:28
These plans were great! Have these as a Christmas gift....they loved it!

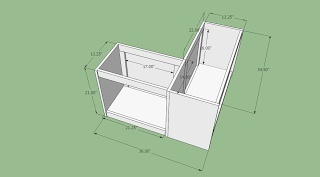
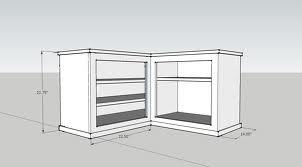
Custom shoe bench I built for a friend. See post on blog for more detail:
http://www.tools4moms.com/2012/06/build-corner-shoe-bench.html
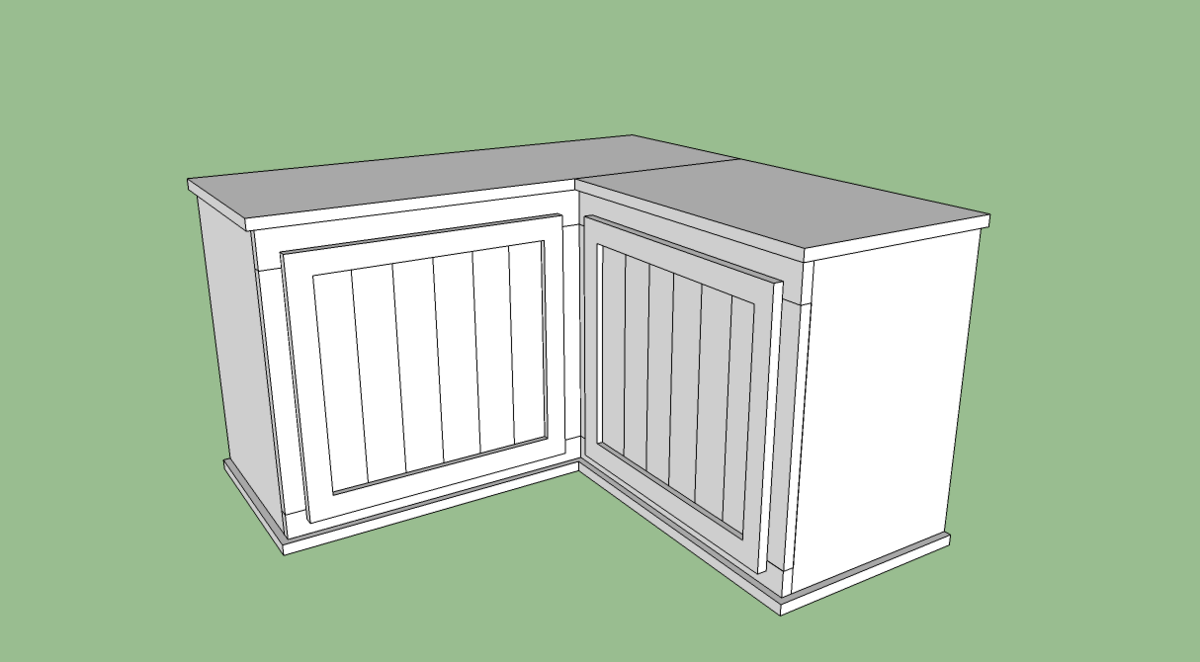
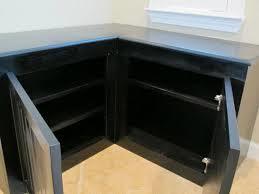
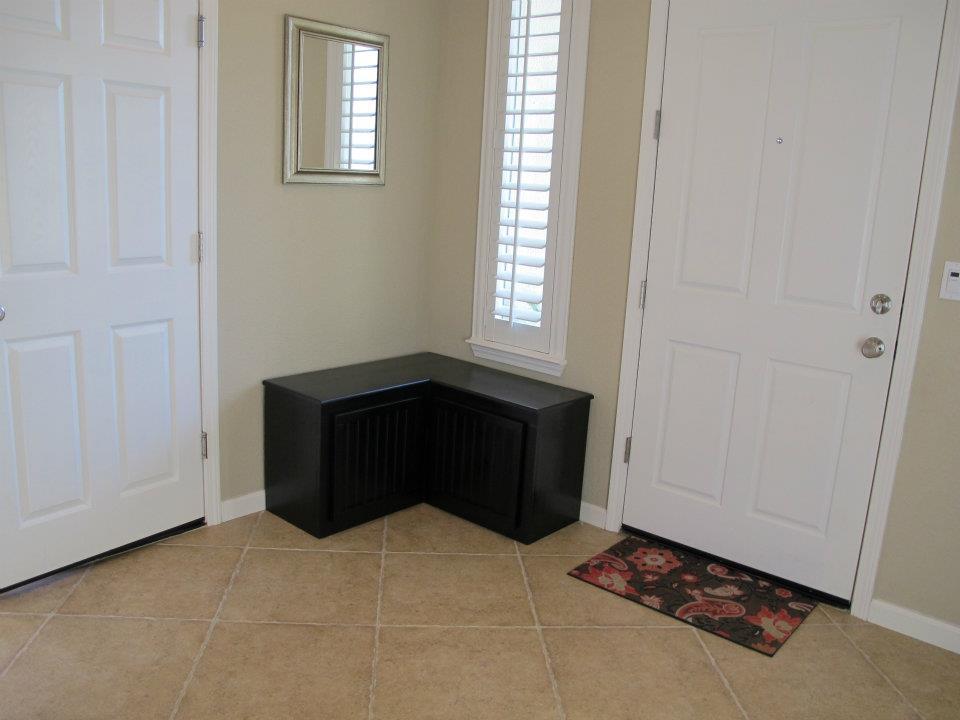

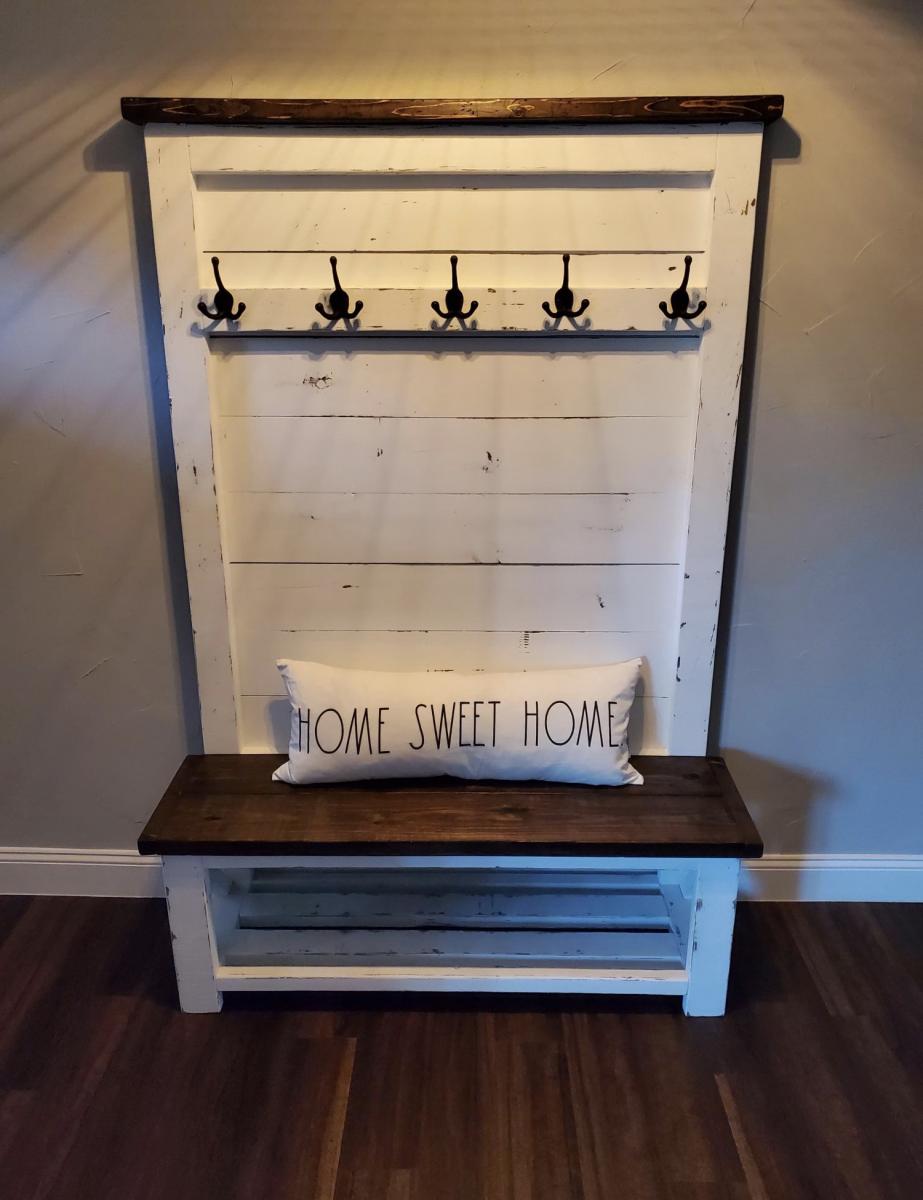
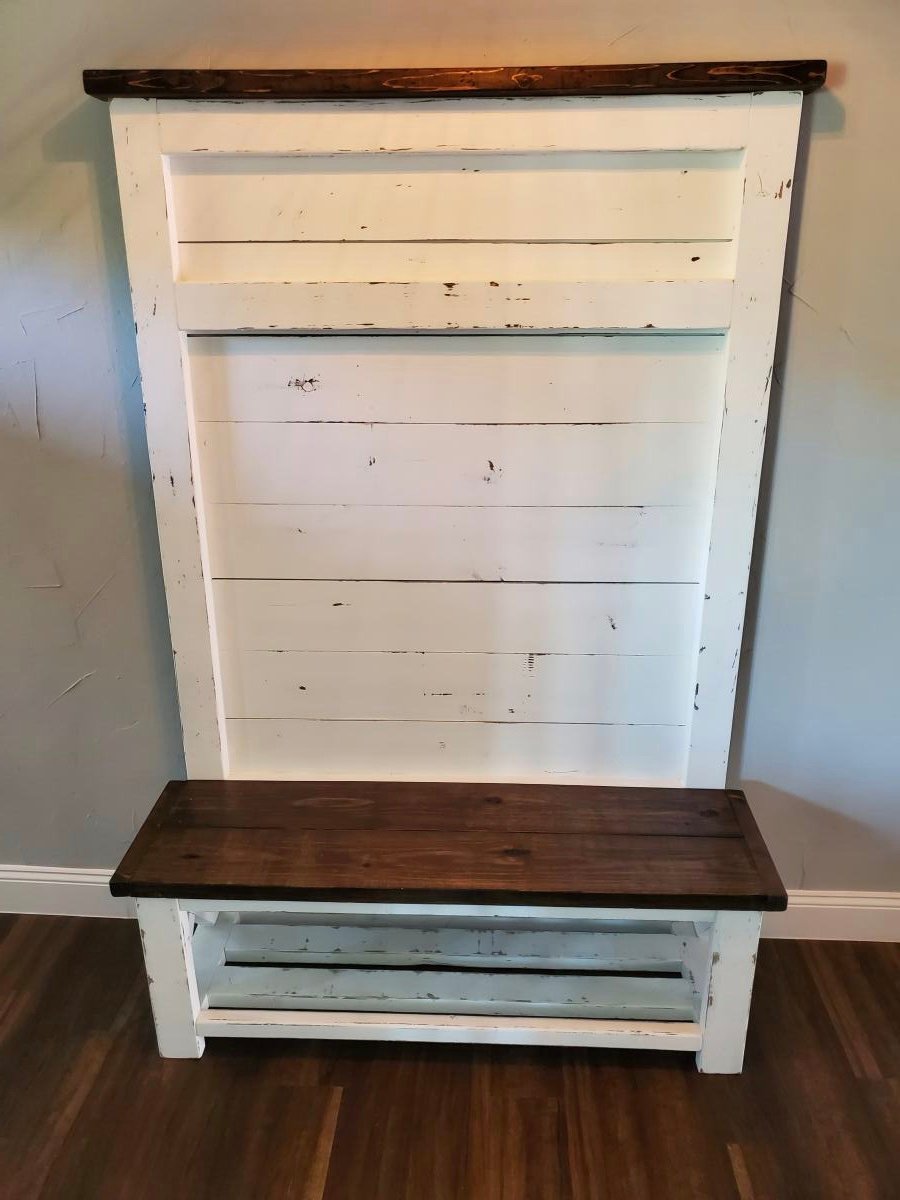
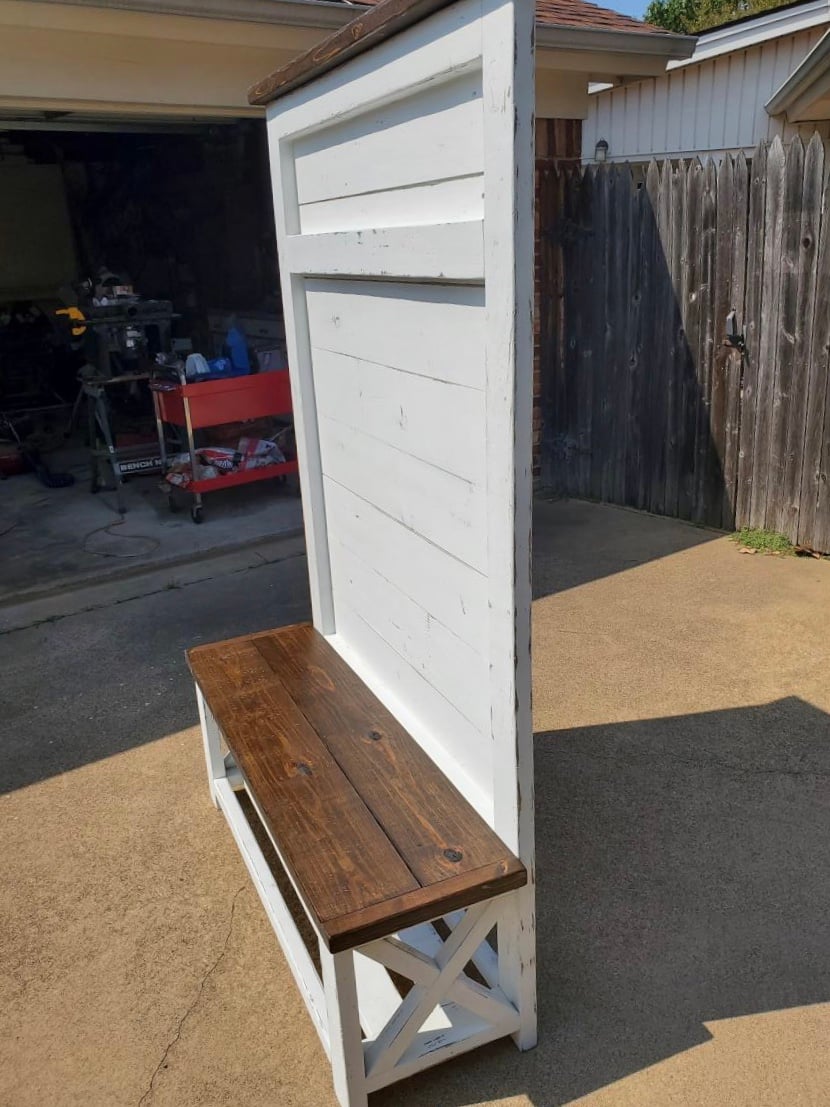
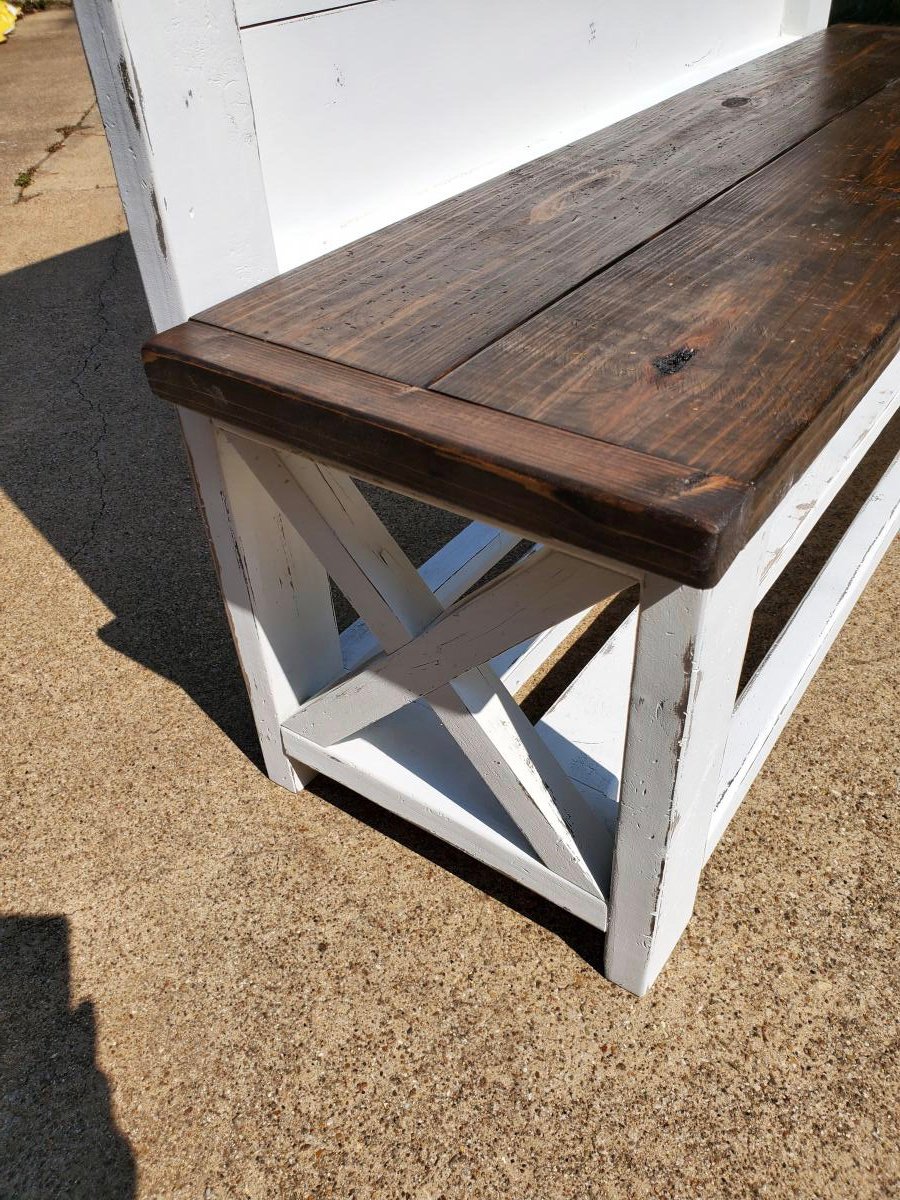
first furniture build from scratch. A few minor differences. I decided to distress by staining entire piece with minwax espresso stain, then painting over with white chalk paint and sanding through. Decided to leave bench and to molding stained for effect. Love the piece and so does my wife.