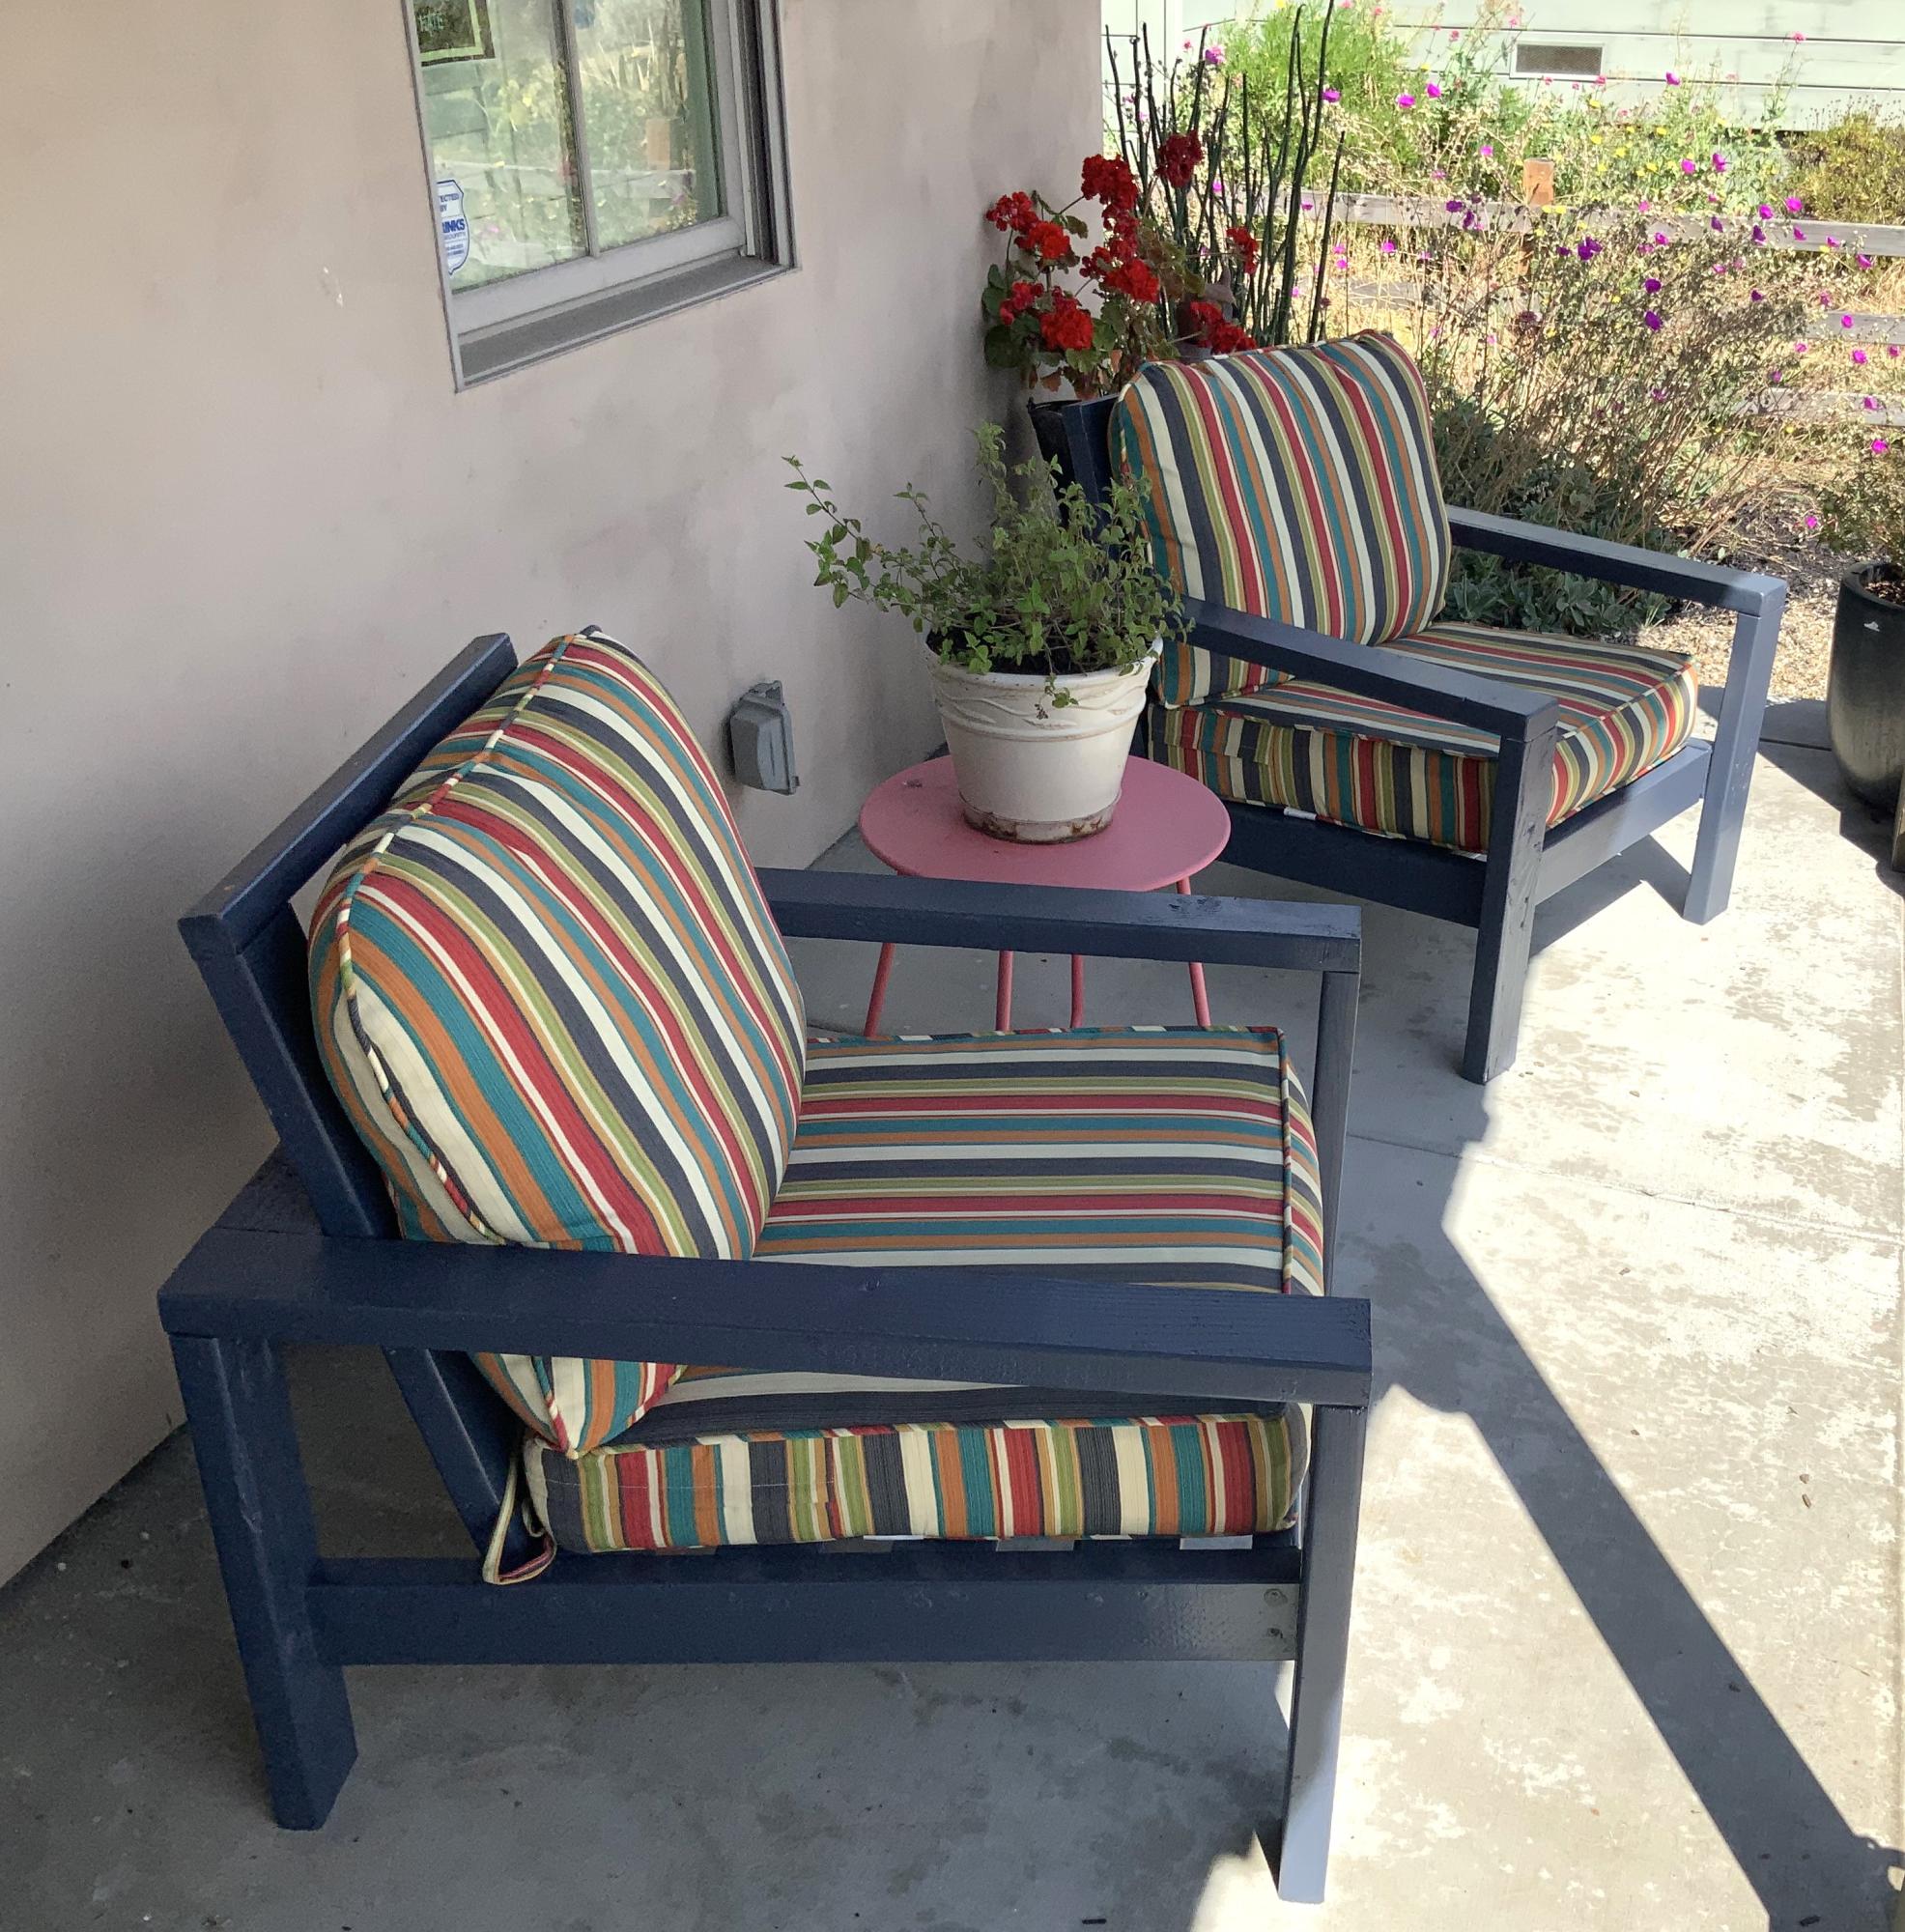
Adirondack Chairs with Foot Rest
Great set of outdoor chairs with foot rest!
RG Design & Build
Built from Plan(s)
Great set of outdoor chairs with foot rest!
RG Design & Build
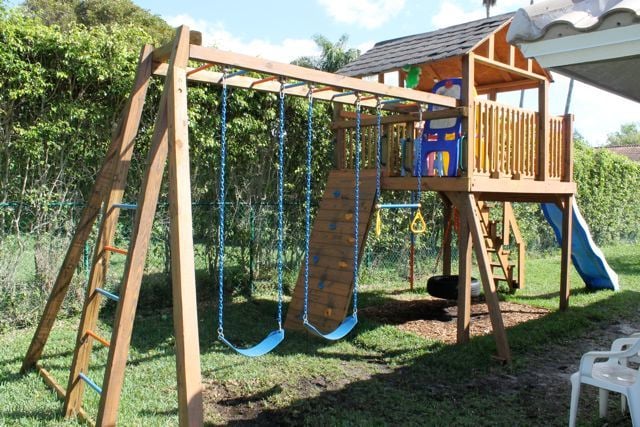
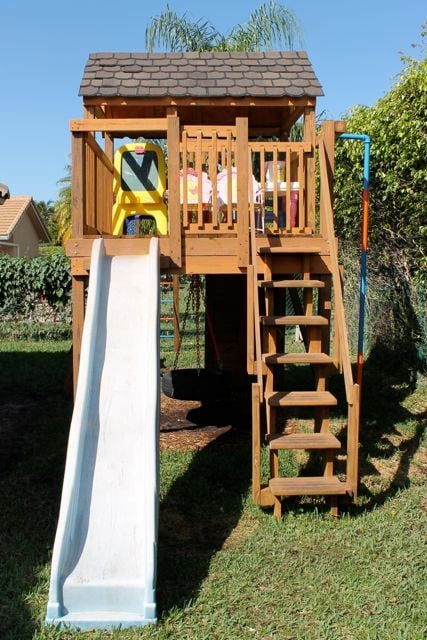
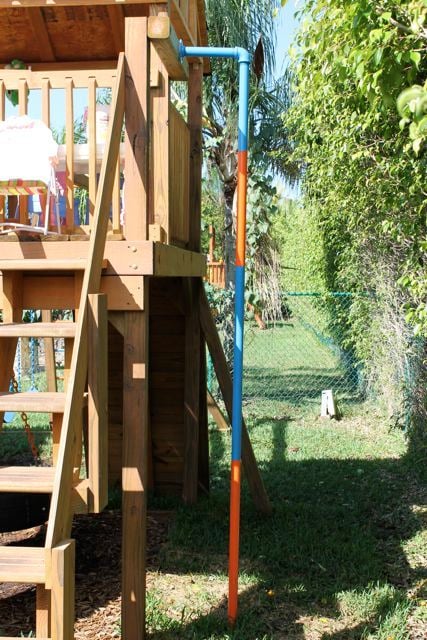
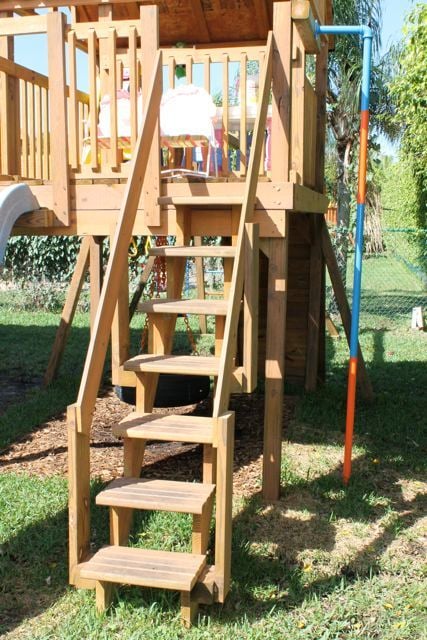
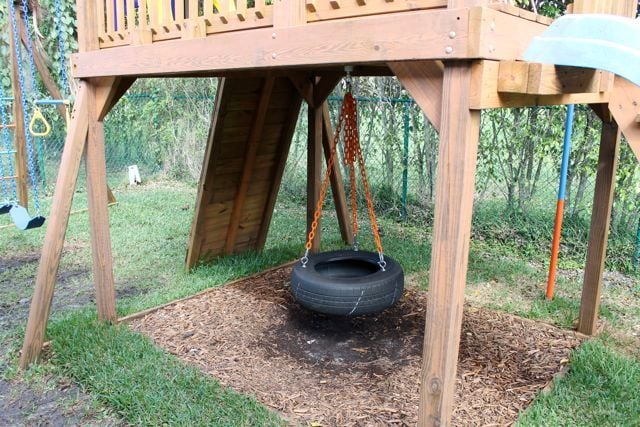
My husband Jon recently built this playhouse with/for a friend of his from work. It took them two months to complete and it's awesome! Jon's friend is also a die hard Gators fan so they made sure to add blue and orange as much as they could. Thanks Ana for giving them the courage to take on such a feat!


Wed, 03/21/2012 - 01:51
Great Job! All this says is "GO BRONCOS!" I'm an Idaho girl and I love the BOise State colors, lol! "Playhouse" is an understatement. This is a jungle. This is a huge play structure! and it is awesome.

In reply to Great Job! All this says is by birdsandsoap
Sat, 04/14/2012 - 07:08
Haha! Thanks birdsandsoap! I think it's awesome that you saw something special in a totally different way. Glad you liked our color scheme and project! ;)
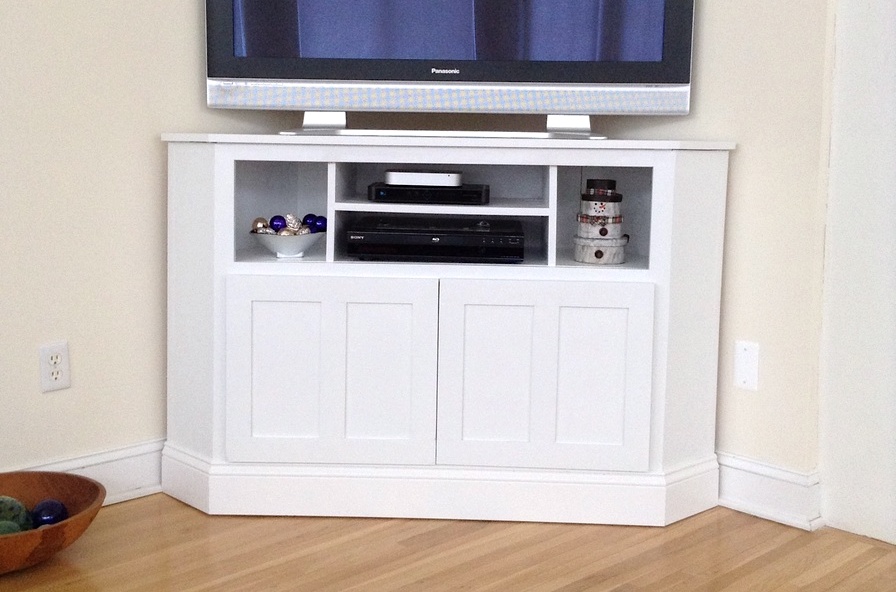
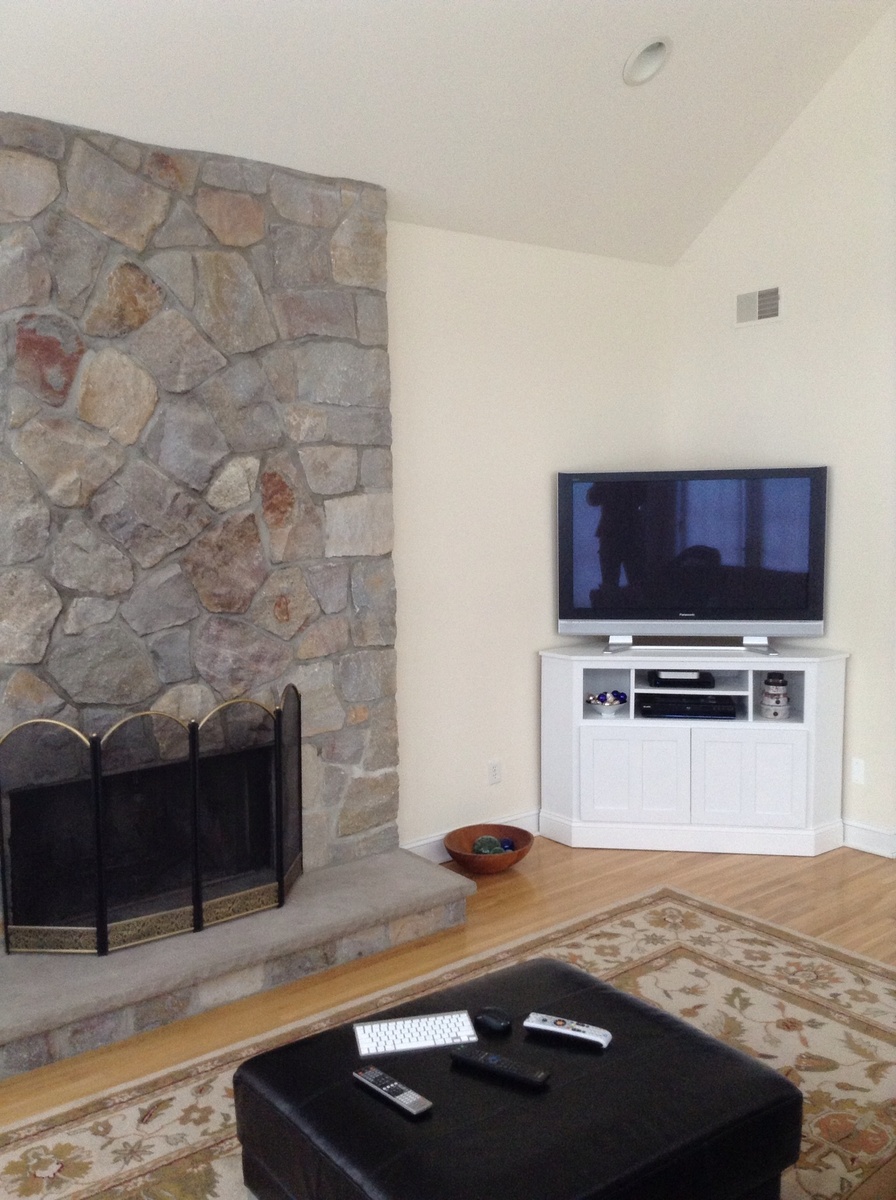
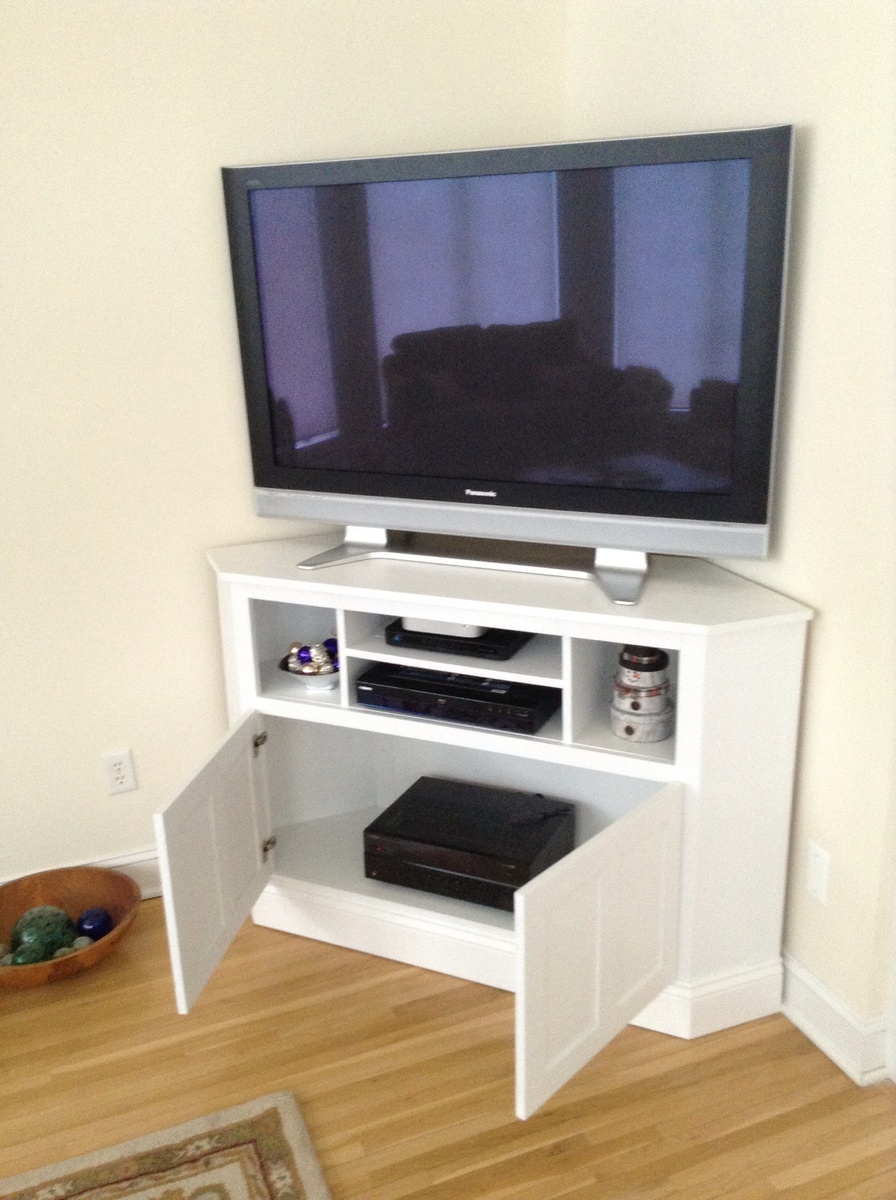
After a promise to get a new carpet and TV stand as an anniversary gift, I began a search for a corner stand that would fit a 50" flat screen and hid all of those ugly wires. Craig's List had nothing and the retail options were either cheaply made, ugly or crazy expensive. I stumbled upon Ann's page, and since my son has a wood shop in the basement, I figured why not try to build something. I used the original plan, but borrowed ideas from other brag posts to create a 36" tall model with overlay doors that we think looks great. Next project: bar stools for the kitchen island.
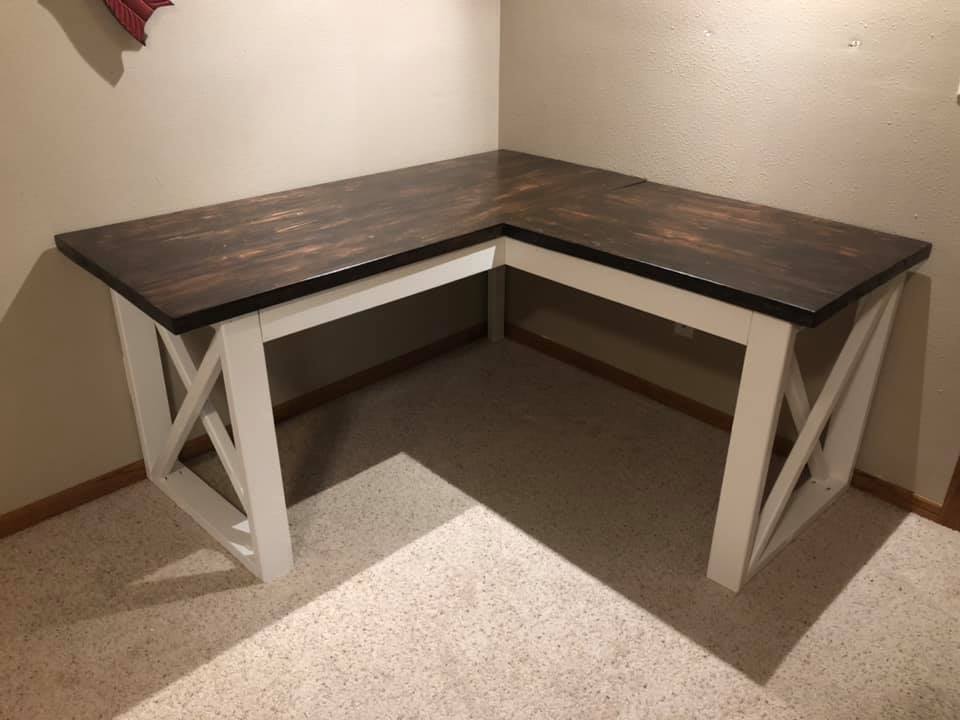
This was my first woodworking project in a couple years. I modified the size to make it about 60" on each side. Now that I am working from home now due to COVID-19 for the foreseeable future this has been perfect to use in order to have two monitors and enough room on the sides for other work.
Sun, 05/31/2020 - 19:39
Looks awesome! What stain did you use for the top?

Mon, 12/14/2020 - 14:08
can you tell me how you attached the two desk together? I have a lady wanting me to build an L shaped Fancy X desk, but I'm not sure how to attach without it sagging.
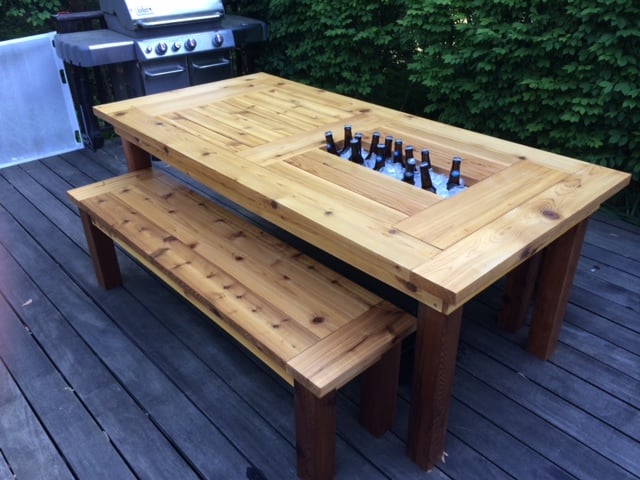
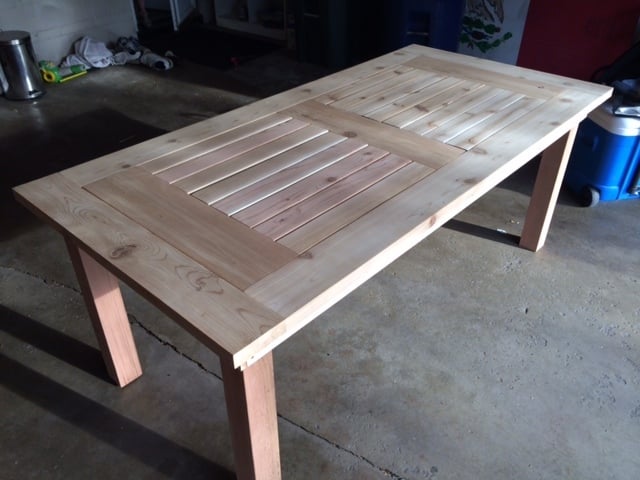
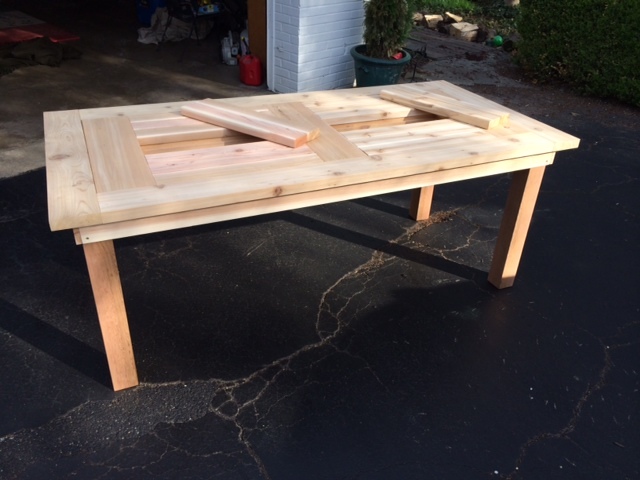
We needed a new patio table for our deck and I loved this design. I made it out of cedar which worked beautifully and made a few small tweaks:
- Needed it longer and wider so added two more 2x4's to the middle and added 2x6 end caps (as another poster had done).
- I did not add the holes to the cooler covers for uniformity, they slide in and out very easily.
- I used 4x4's as the legs and constructed the table skirting around it. This is a very sturdy design.
Built some benches for seating and they worked out great.
Overall I loved this build and it was fairly simple. Stained with Penofin deck stain (red label) and a spar varnish for protection.
Hope you like it!


Thu, 04/24/2014 - 07:43
Thank you! Local lumber yard that had great stuff. I will say though that I had to get some additional pieces from Home Depot and their cedar is fairly nice too. Beware though, they don't have true 1x cedar (at least here in St. Louis) it's more like 1/2 inch think.
Thu, 04/24/2014 - 07:43
Thank you! Local lumber yard that had great stuff. I will say though that I had to get some additional pieces from Home Depot and their cedar is fairly nice too. Beware though, they don't have true 1x cedar (at least here in St. Louis) it's more like 1/2 inch think.
Tue, 07/08/2014 - 20:00
Really well done with the two-tone stain. What particular colors of Penofin did you use? I'm working on a similar build and would like to use your color combination.
Mon, 05/04/2015 - 10:06
Do you happen to have your lumber list? I'm not the greatest with add ons, LOL! If you happen to have a step by step that's even better.
Thanks,
Jennifer
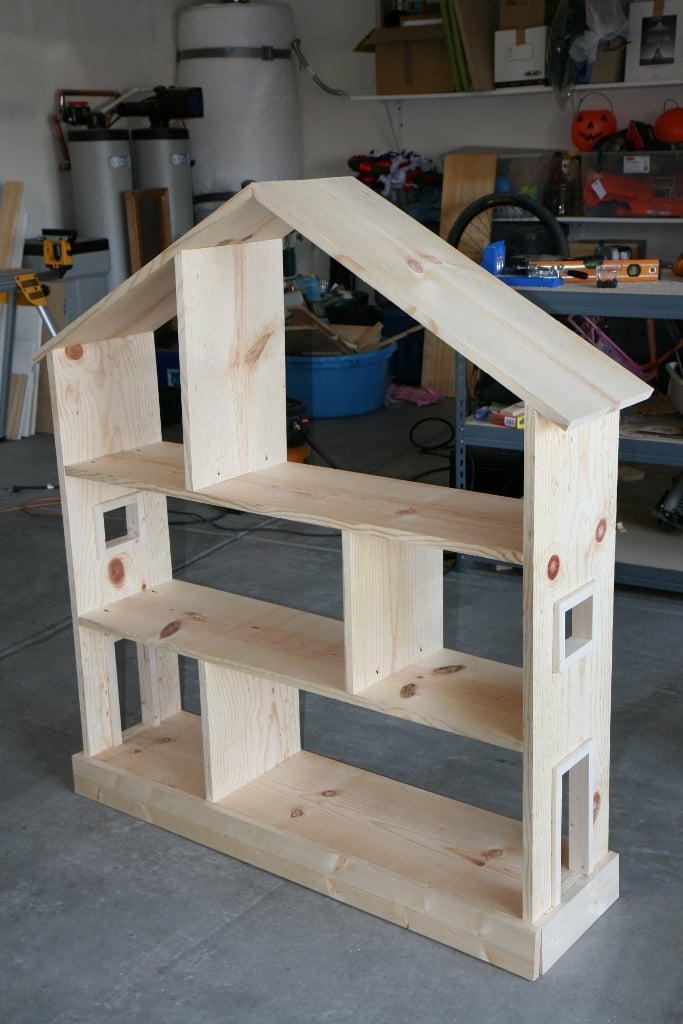
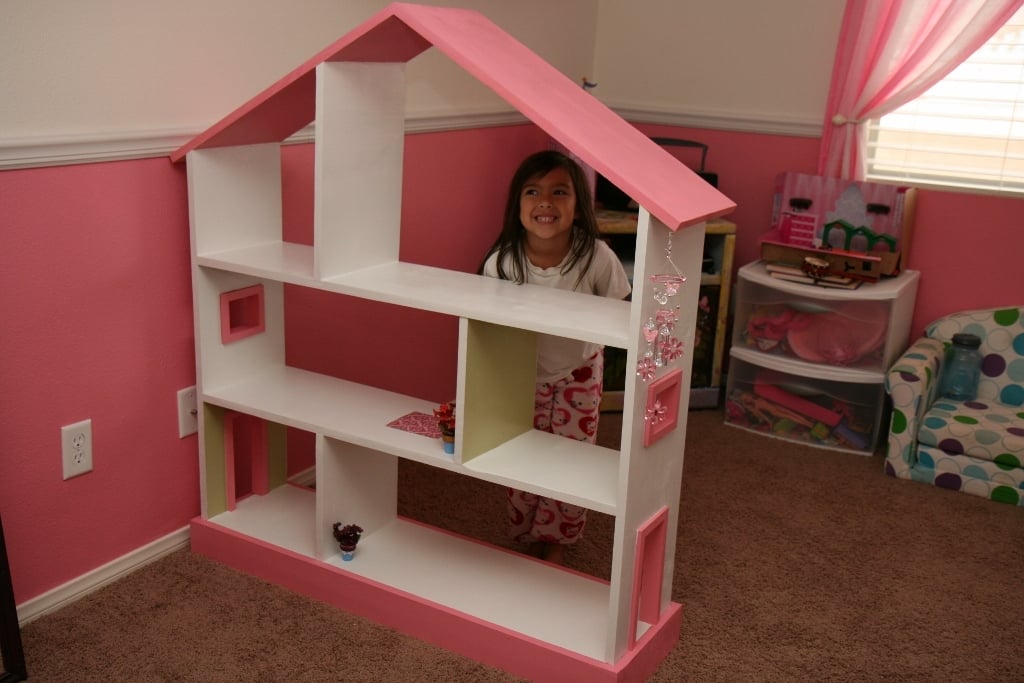
We built this for our daughter's 6th birthday! Love how it turned out :D As you can see we opted to leave the plywood backing off for the time being so she can use it as a doll house and play on both sides. When she grows out of the doll house phase we will either convert it to a book shelf, donate, or sell in a yard sale ... so many options!

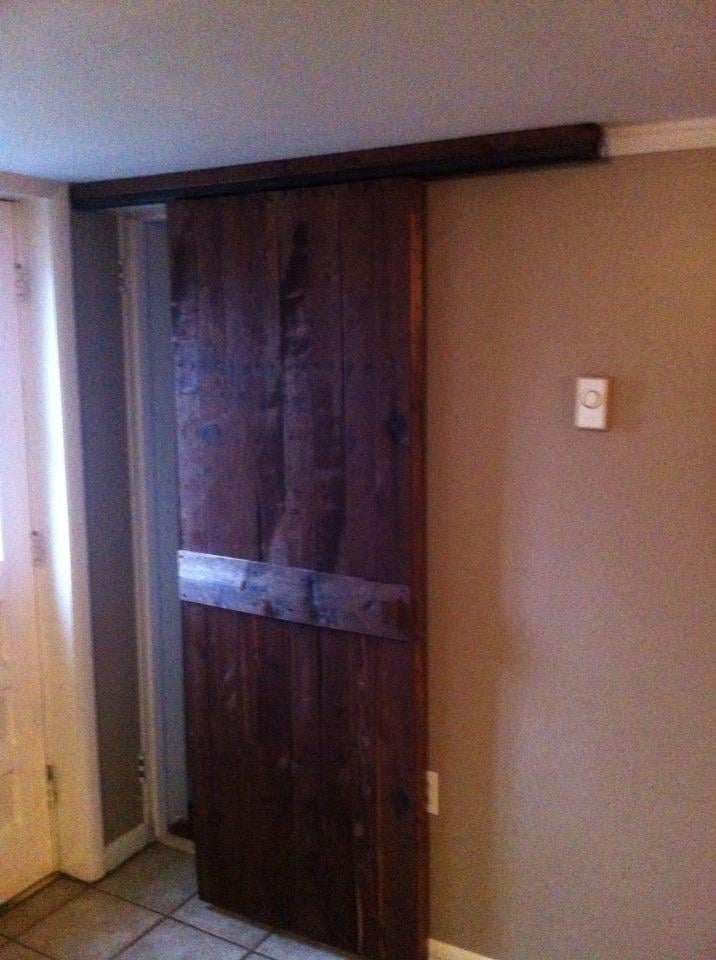
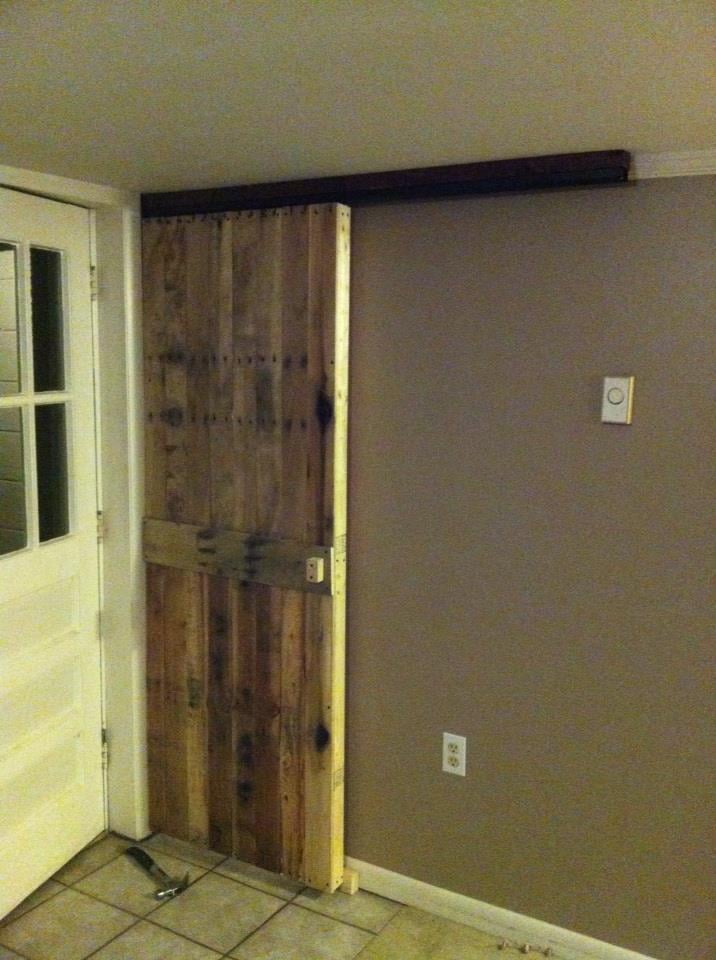
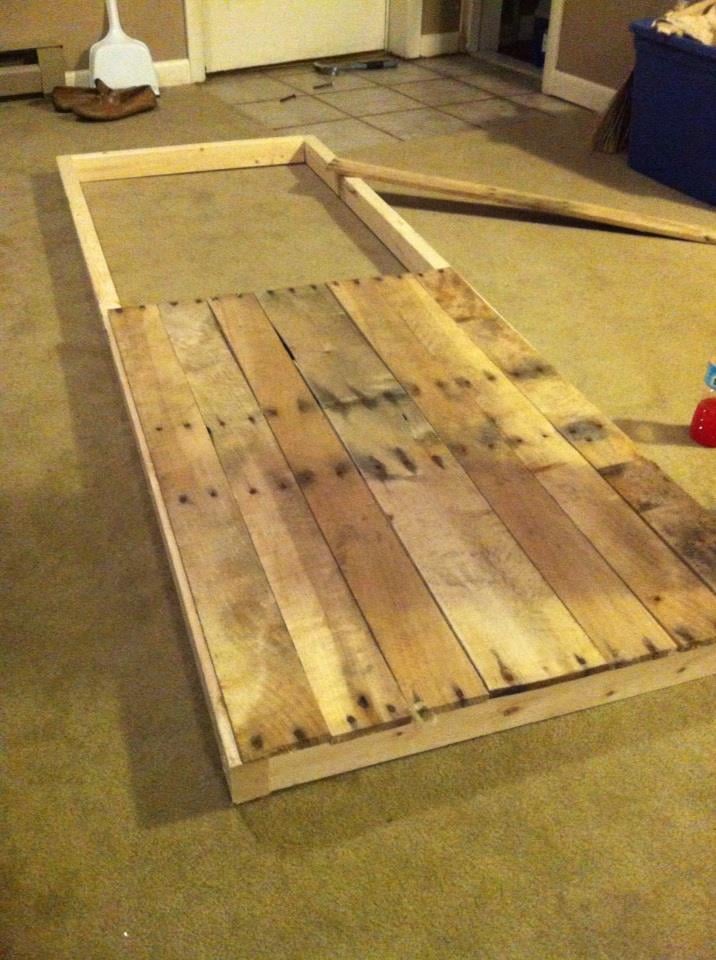
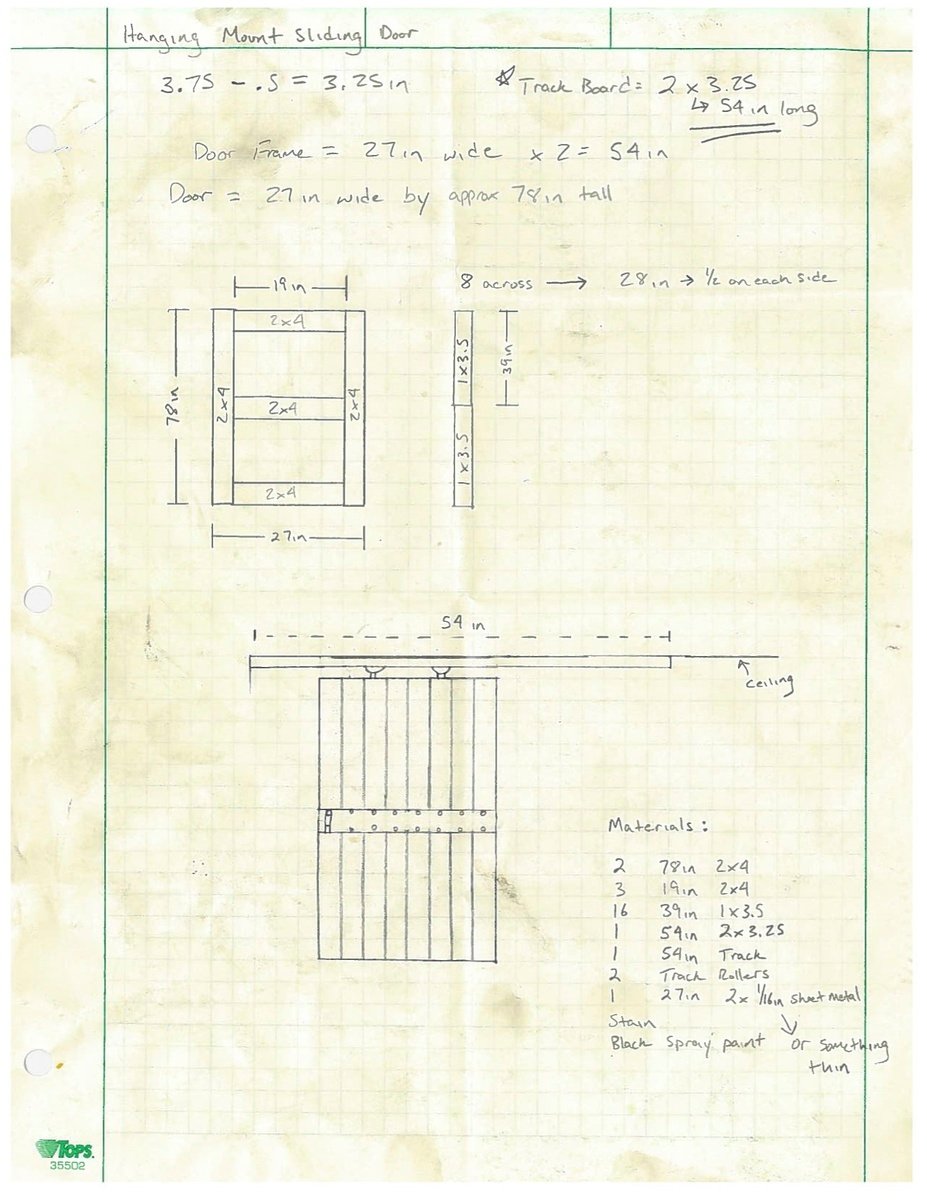
I saw many different sliding door projects online, so I did my own spin on one. I was able to get several old pallets for free (pine and oak). I went to Lowes and bought a few 2x3s which I used as the frame, and the track hardware which was only $13! Most doors I see are mounted from the wall, but since I have 7' ceilings downstairs I mounted mine from the ceiling. This project only took about 4 hours total and cost about $40 when you figure in costs for screws, stain, etc. The most difficult part was taking apart the pallets. Using a reciprocating saw with a 12'' demolition blade is the best way to take them apart. Thanks for the idea Ana.
Mon, 05/13/2013 - 20:00
Hi!!
This looks so awesome! I came across this and was hoping to repeat it. You mention that you found the door hanging hardware at Lowes for $13. I can't seem to find it. Do you happen to remember the name of it? I'm entering "hanging door hardware" into Lowes and Home Depot and can't seem to find any hanging door hardware at all. I'd appreciate the help. Thanks!
Tina
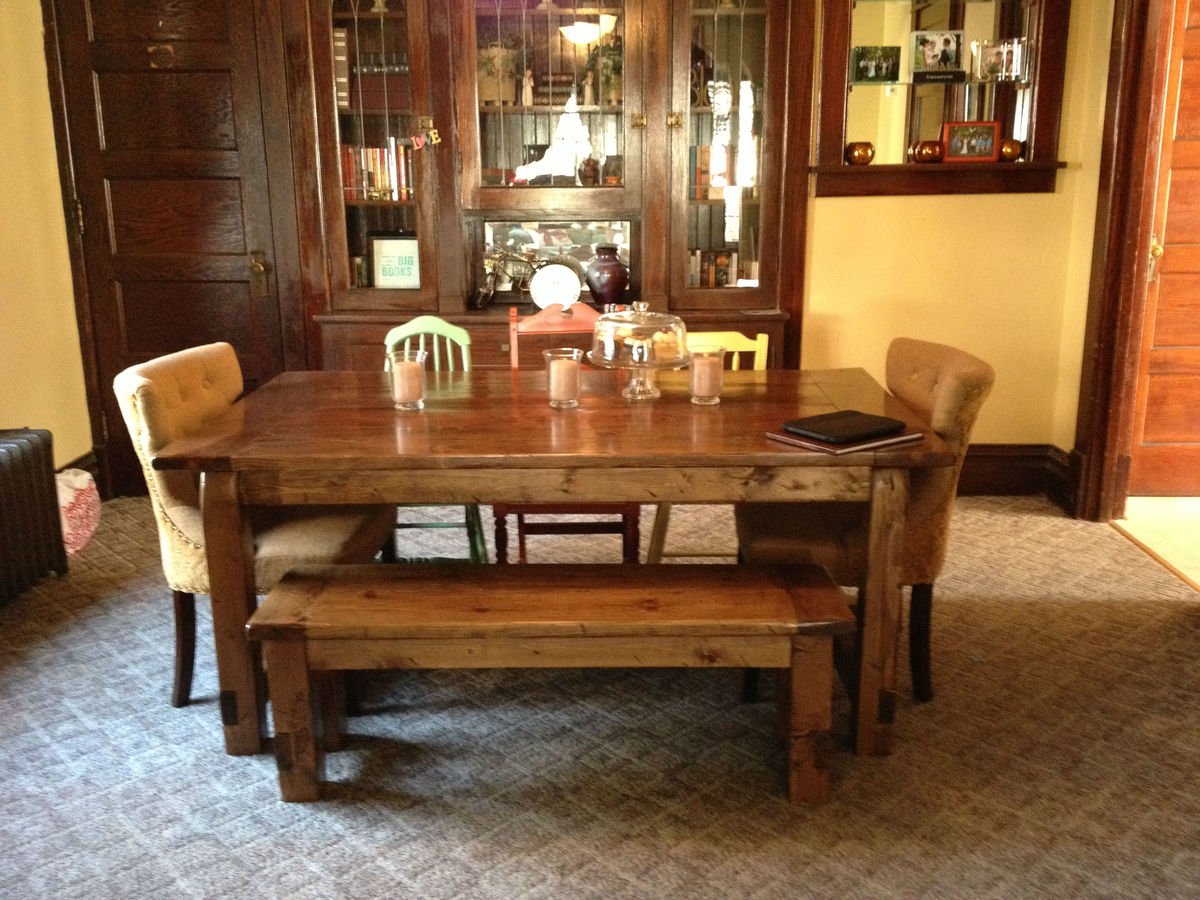
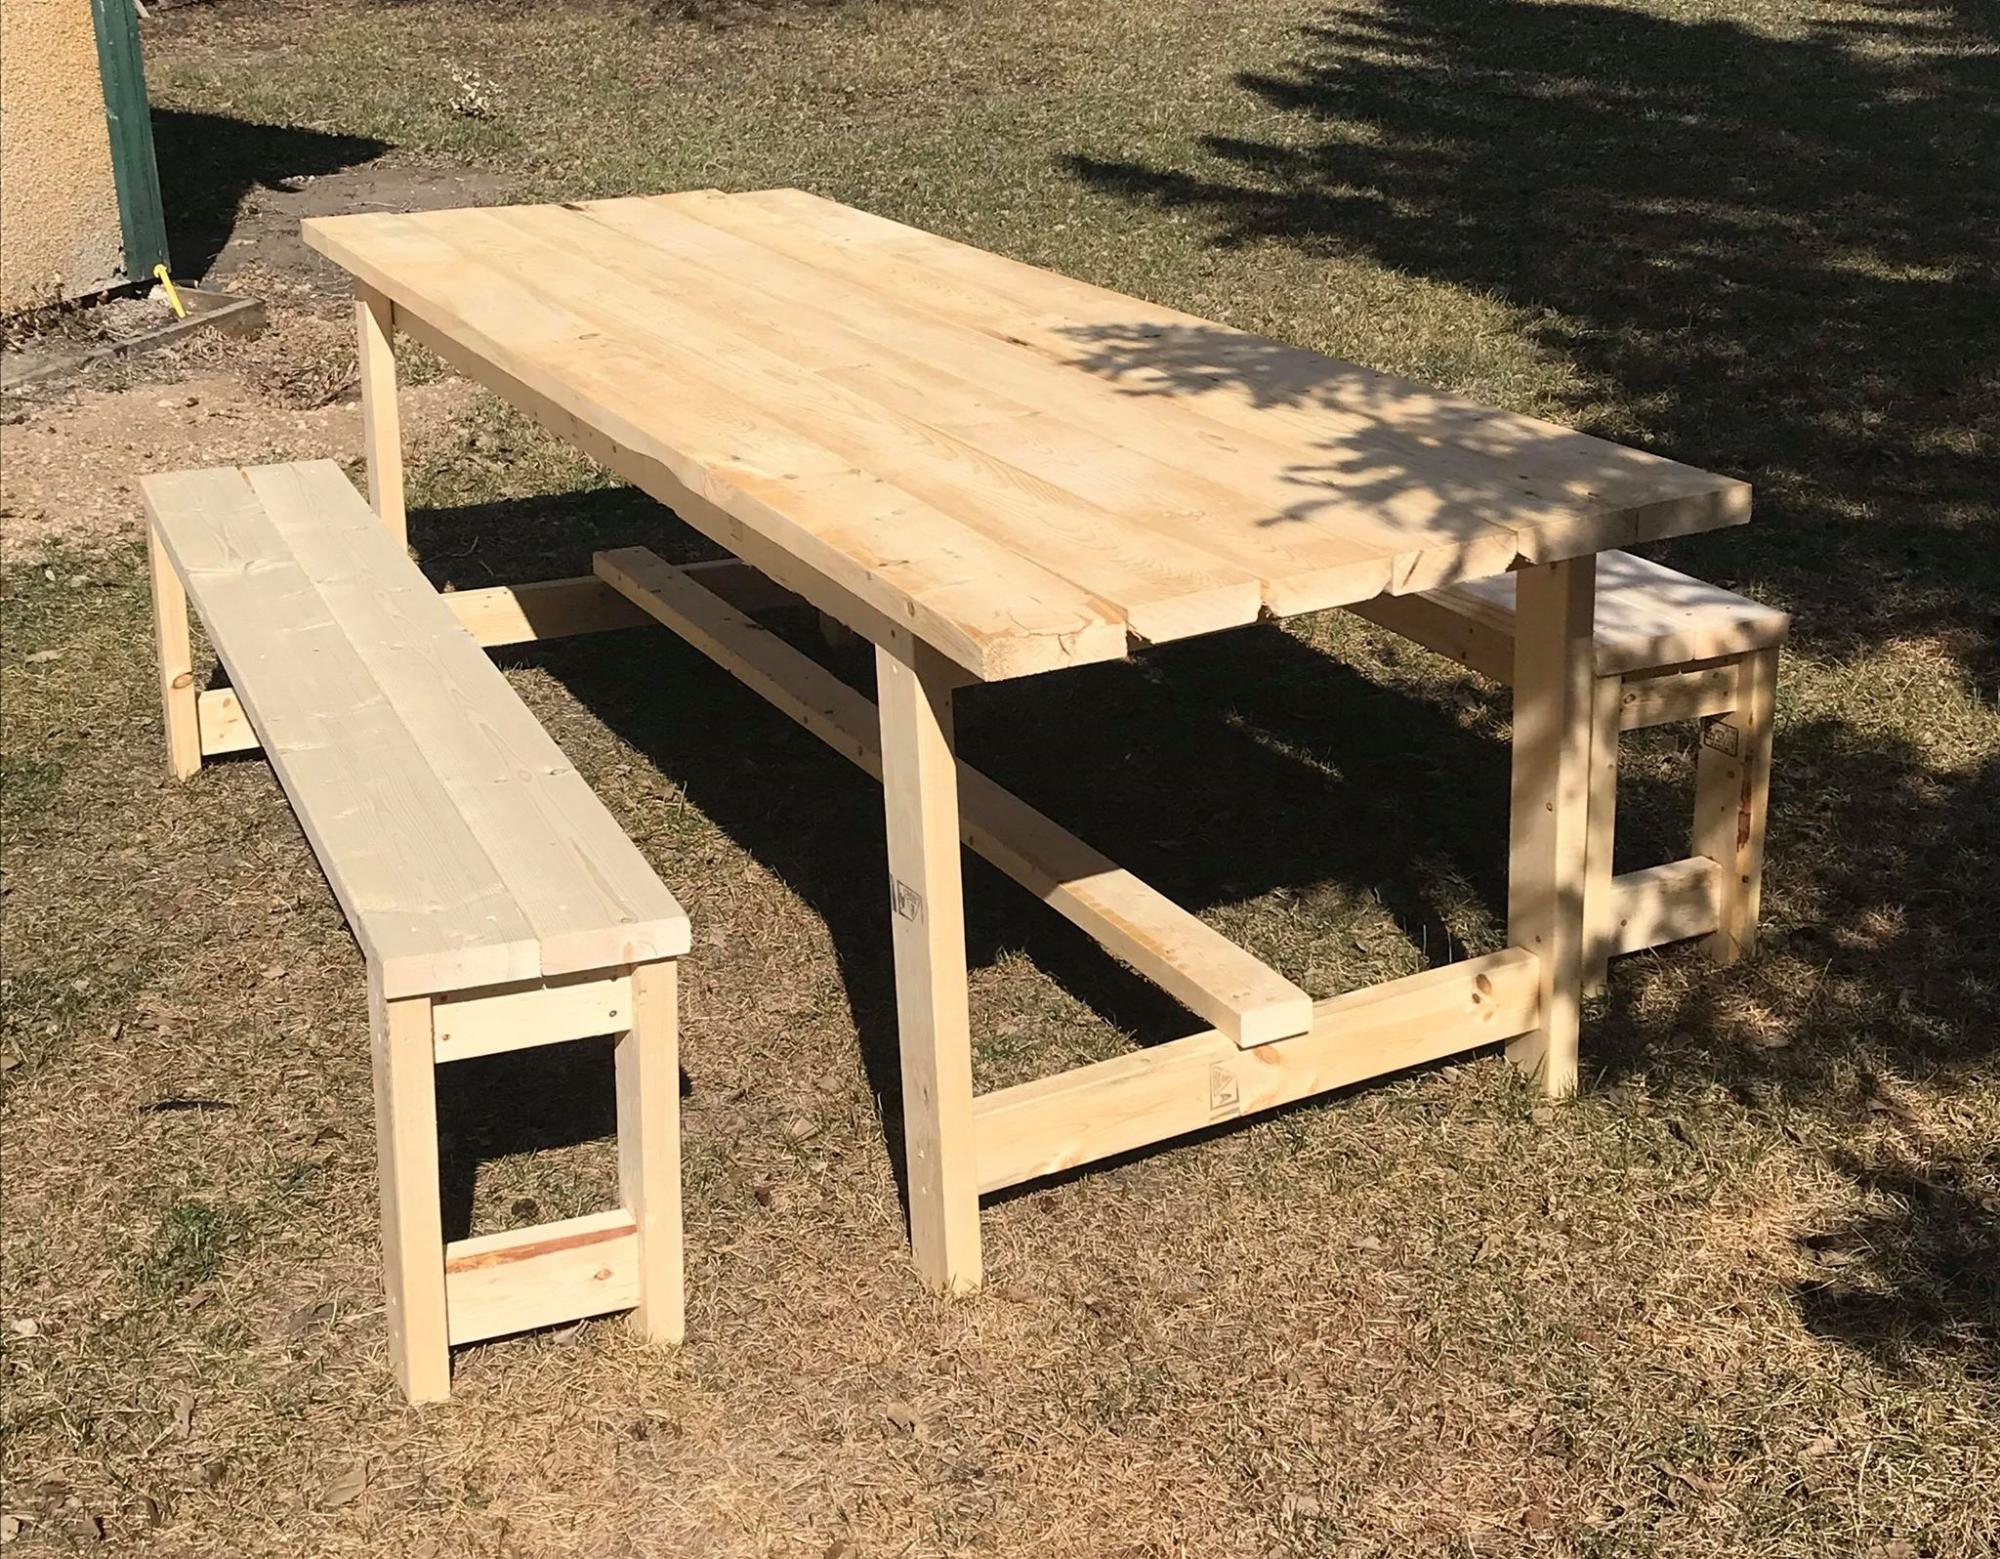
This was my first project. This was a birthday gift for my wife. She wanted one of these farmhouse tables but the cost was a little much for what we needed. I ran across a blog that followed the plans here and it walked me through step by step. It really wasn't that difficult of a build, and I almost want to sell this one(to the many people that have asked about buying one) and building another to fix the minor mistakes I learned while building it.(maybe triming the top so I would have nice tight seams, glue visible between boards, etc..) I started with the bench being this was my first project and first time using the kreg jig. The wife loved it. So much in fact that I took the scrap wood and made a coffee table and end tables for living room that matched. I did change the runner under the table and used another 4x4 instead of the 2x4. I like the beefier look with all the other 4x4 used for the legs. I also used the smaller table plans for the 72x41 plans as we didn't have room before building the larger one. With the extensions, we have comfortable seated 12.
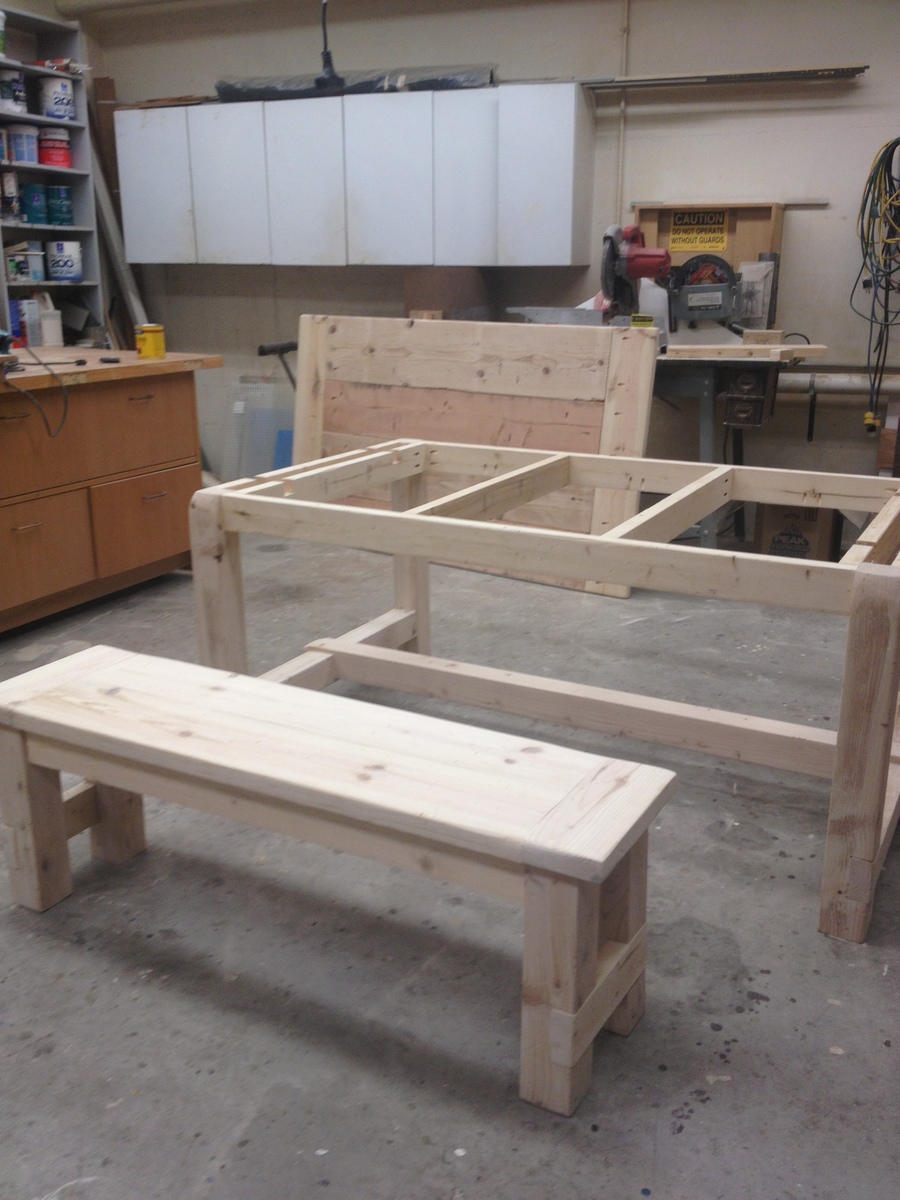
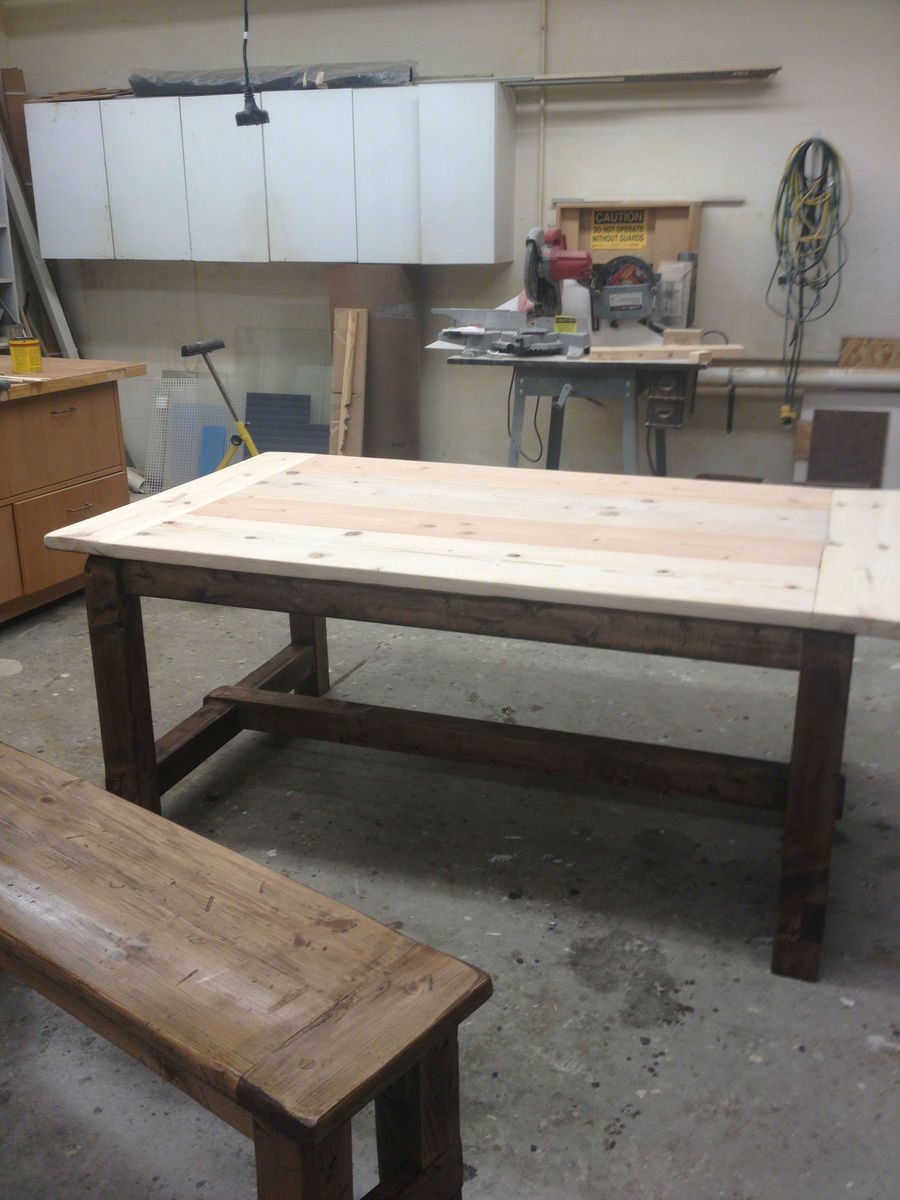
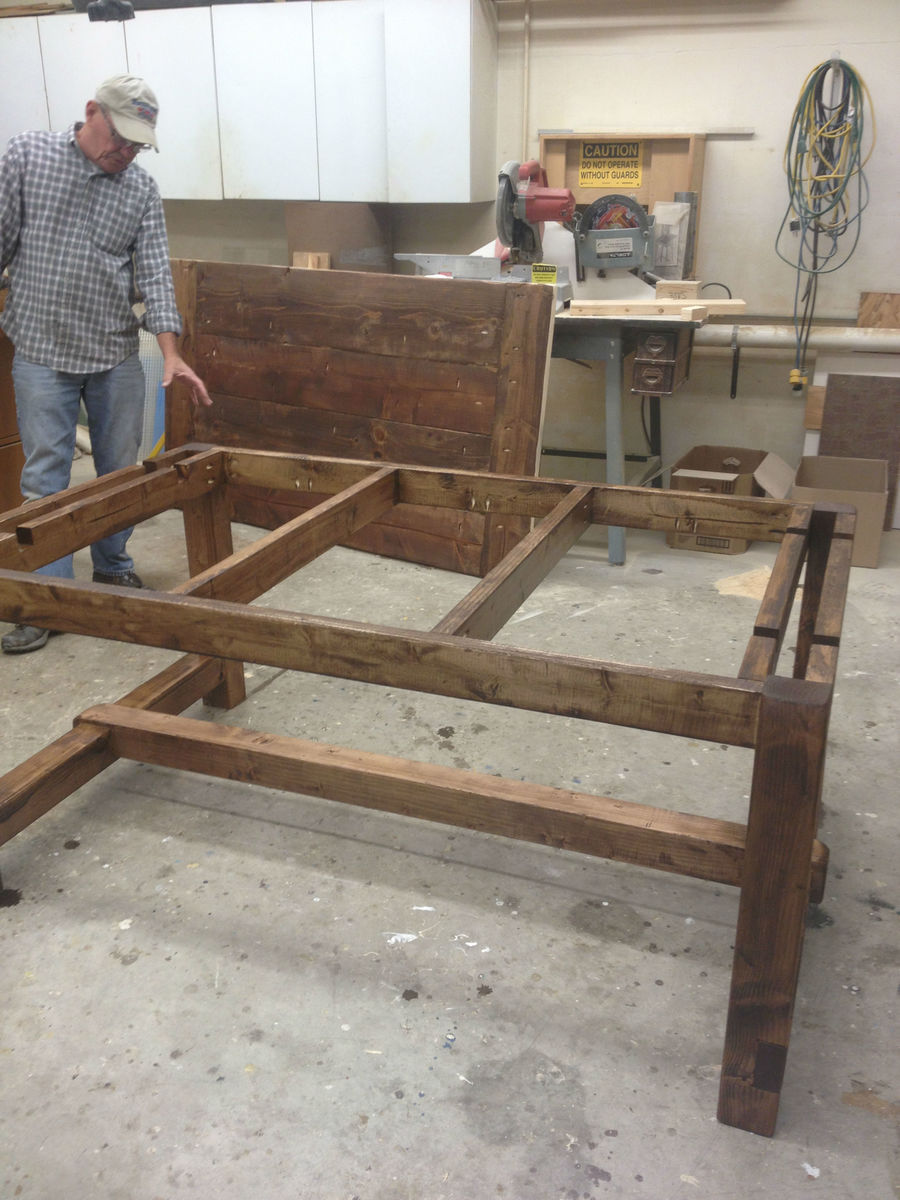
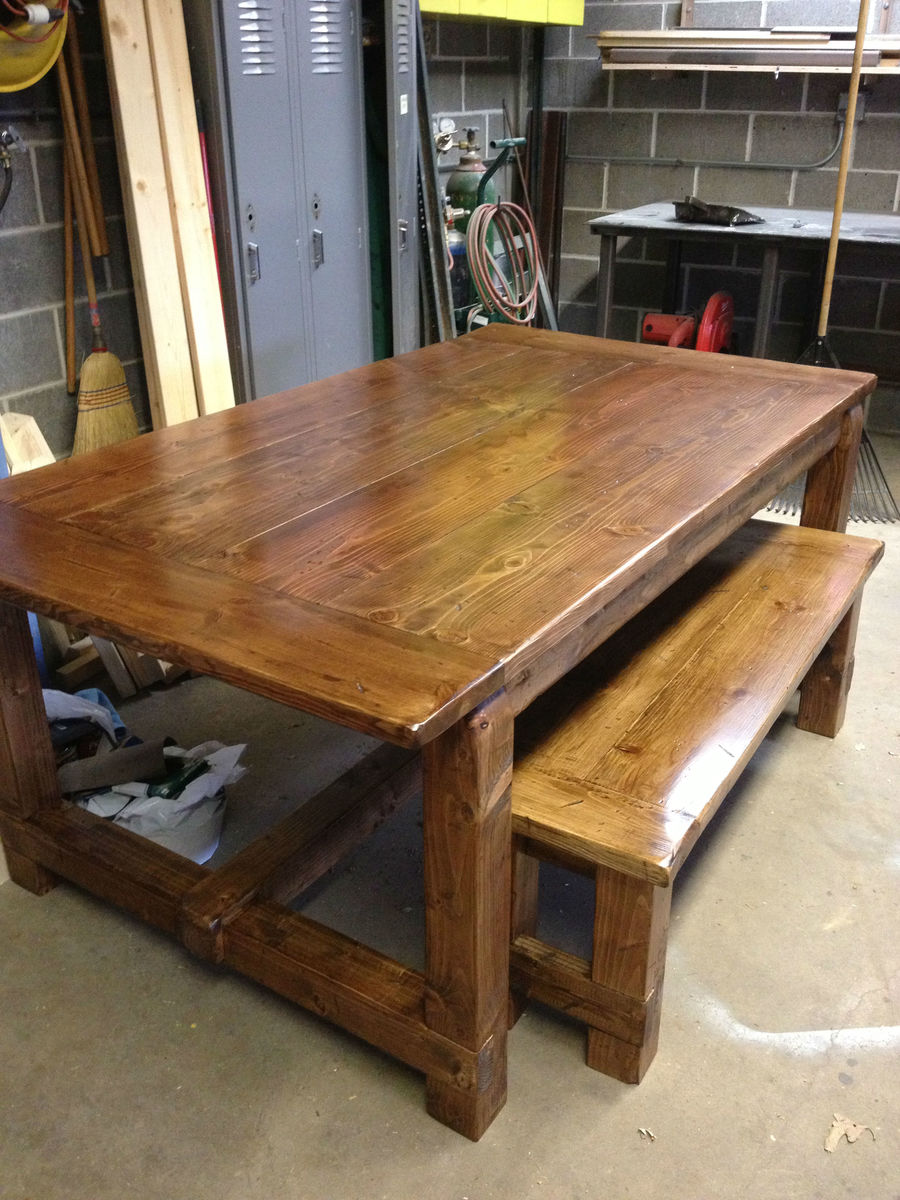
Mon, 12/31/2012 - 19:48
GREAT job! I just built this same table last weekend using what looks like the same plans (Tommy & Ellie?) and I had the same thought run through my mind about selling mine--even though it turned out great, I still wanted to improve on the minor things, like the tighter seams by ripping down the sides of the boards. I posted mine on CL to see what would happen and had it sold within 2 days at a $500 profit.
Yours turned out fantastic, I like the 4x4 lengthwise stretcher, that was a good call.
Thu, 06/06/2013 - 10:56
LOVE the table. LOVE your mix-n-match chairs & bench. Awesome job. I want to be like you!
Sat, 11/09/2013 - 09:18
Love your table! Looks amazing! Where would I find the smaller table plans? I think that is what I would need.
Sun, 07/12/2015 - 22:36
I love the table you made! I checked out the blog post and have been studying your plans for an hour now. I'm really wanting to make this table with my husband! We will be first timers so we don't have all the fancy clamps and stuff. Can this be done without the use of clamps? The original plans don't call for them, but it seems like every other post of people making the table uses clamps. Thanks so much!

Thu, 09/15/2016 - 16:53
very nice job , im going to tackle it this weekenddid you use 2x4 or 2x6? plans call for 2x4 but neveryone seems to use different sizes
paul
Mon, 11/06/2017 - 11:26
On your Farmhouse Table and Bench build from 2015, you substituted 4x4s for the leg supports under the table. In the original plans, the 2x4s are notched out to provide support for the other 2x4s. You can't do that if everything is 4x4s, so I was wondering how you connected the pieces...or did you notch out both pieces so they would rest in each other (kind of interlocking)? It's hard to tell from the pictures. Thank you. Sandy
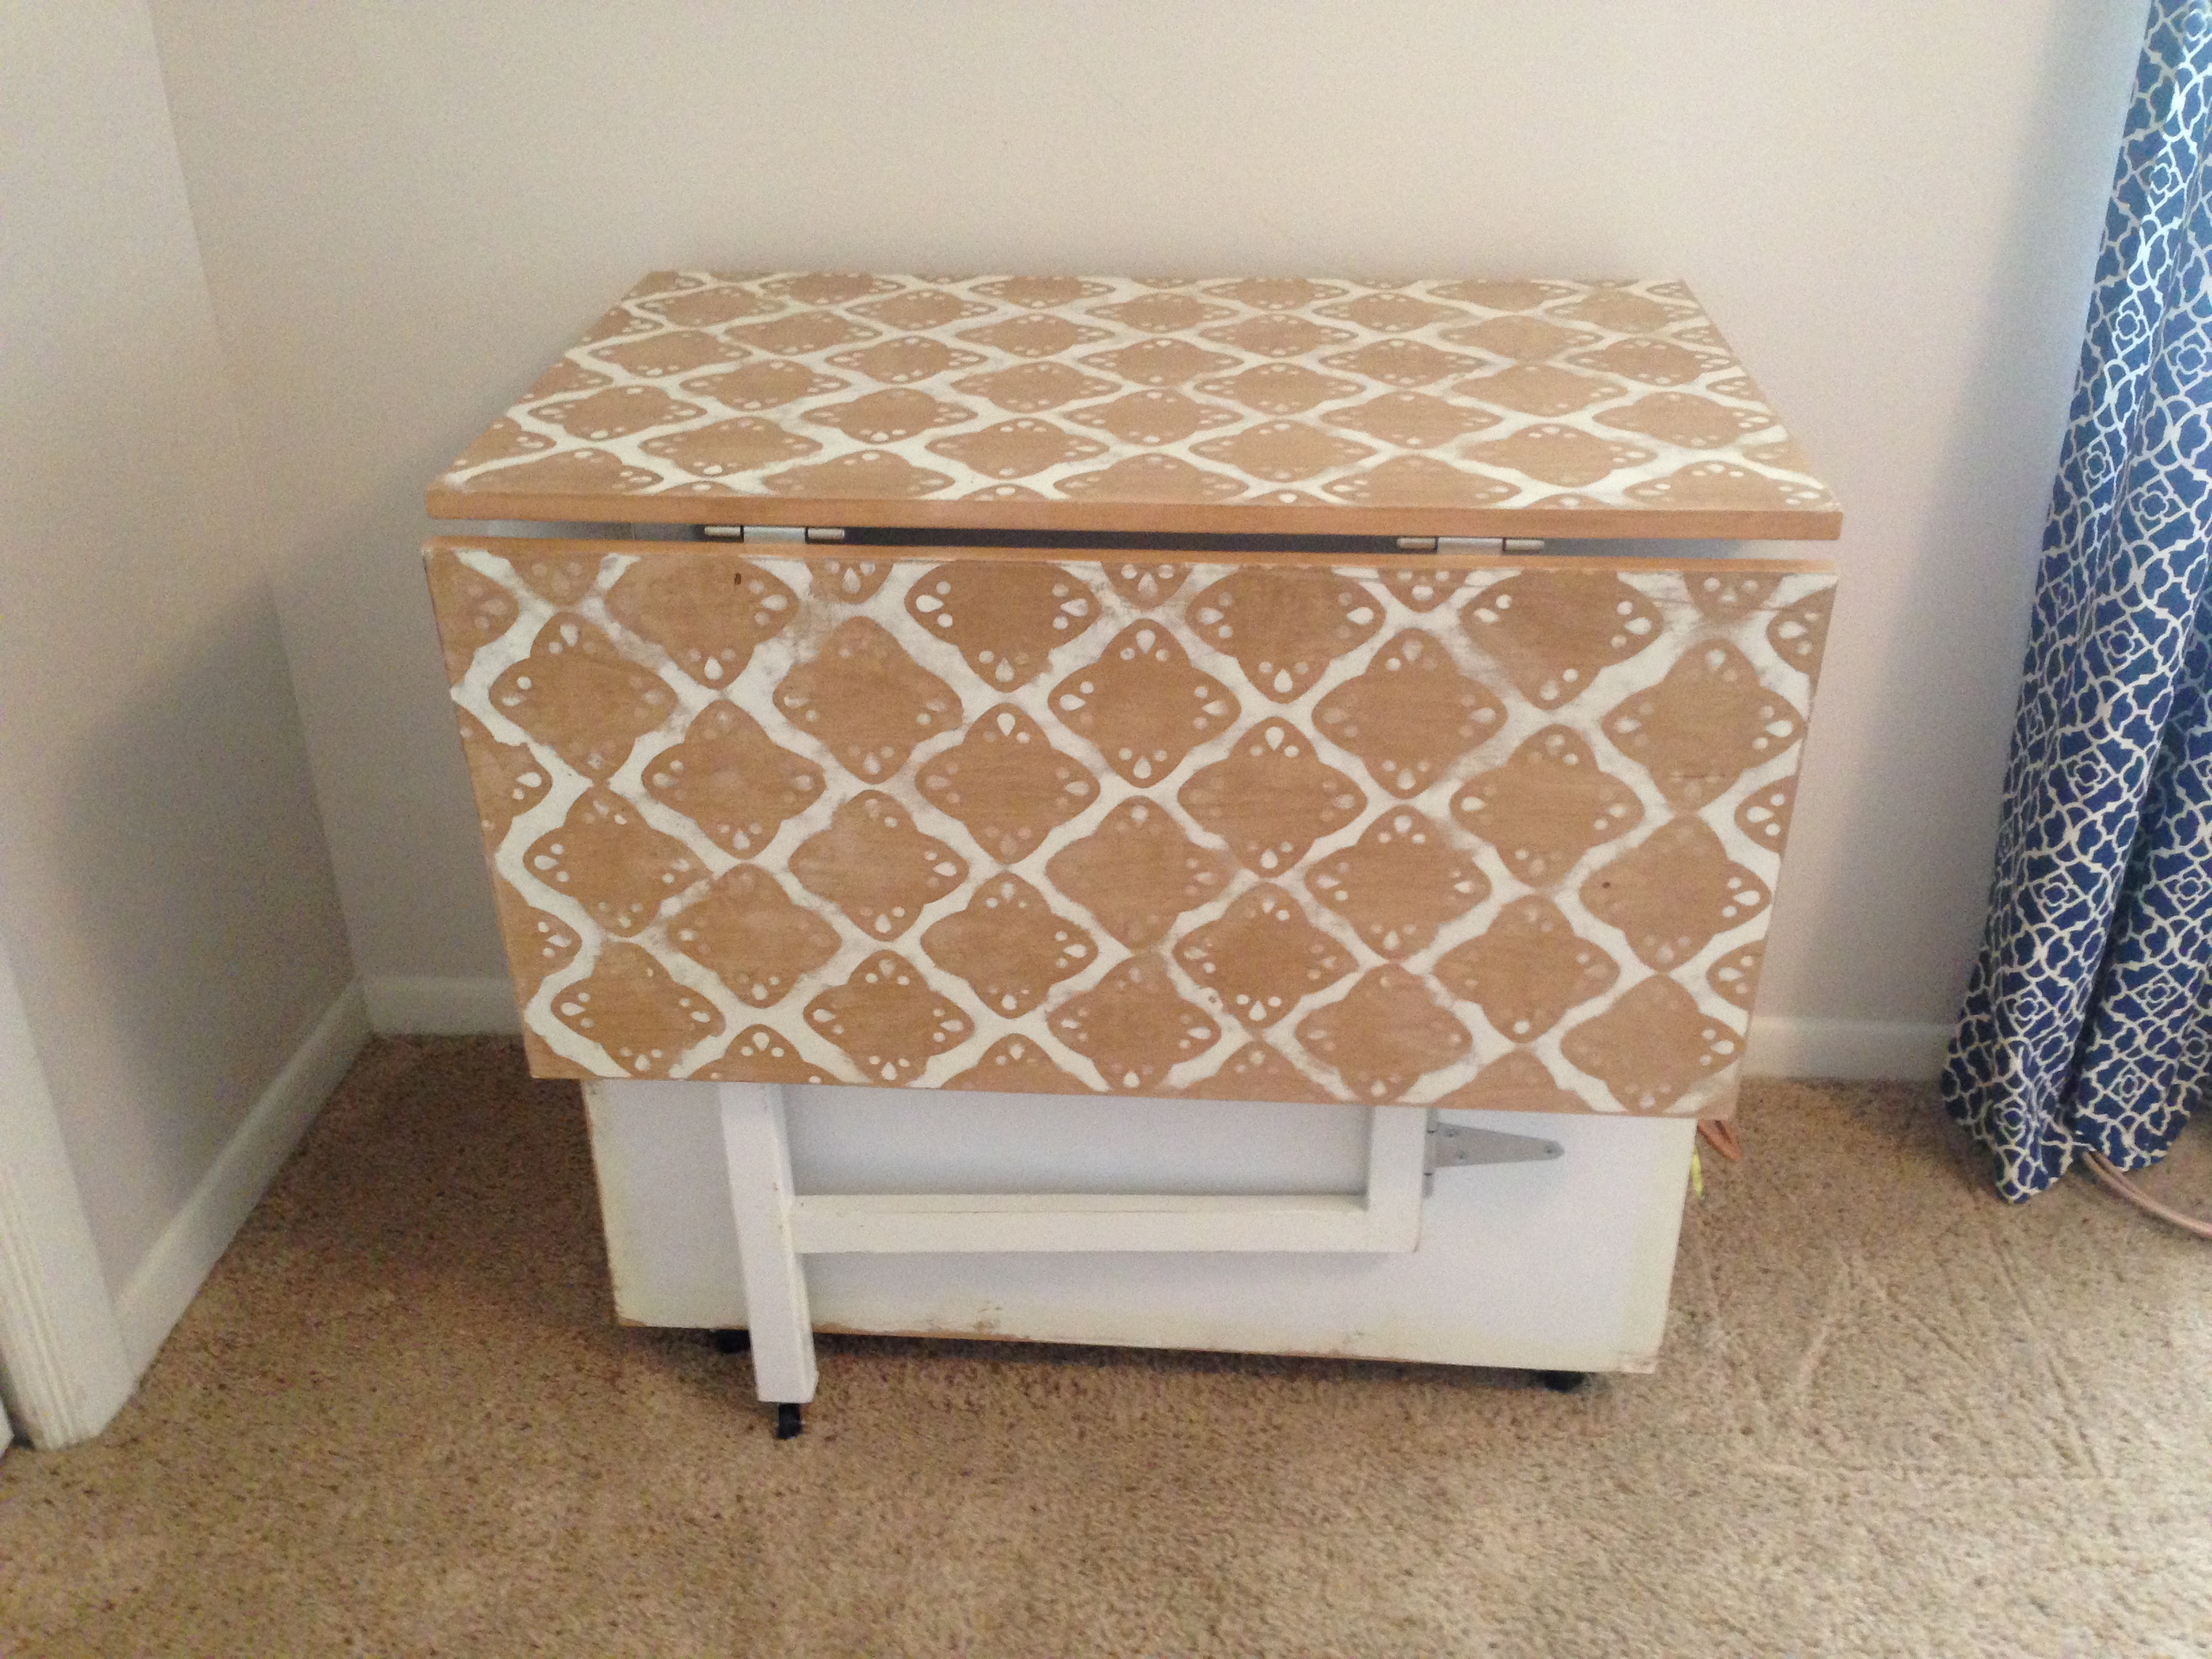
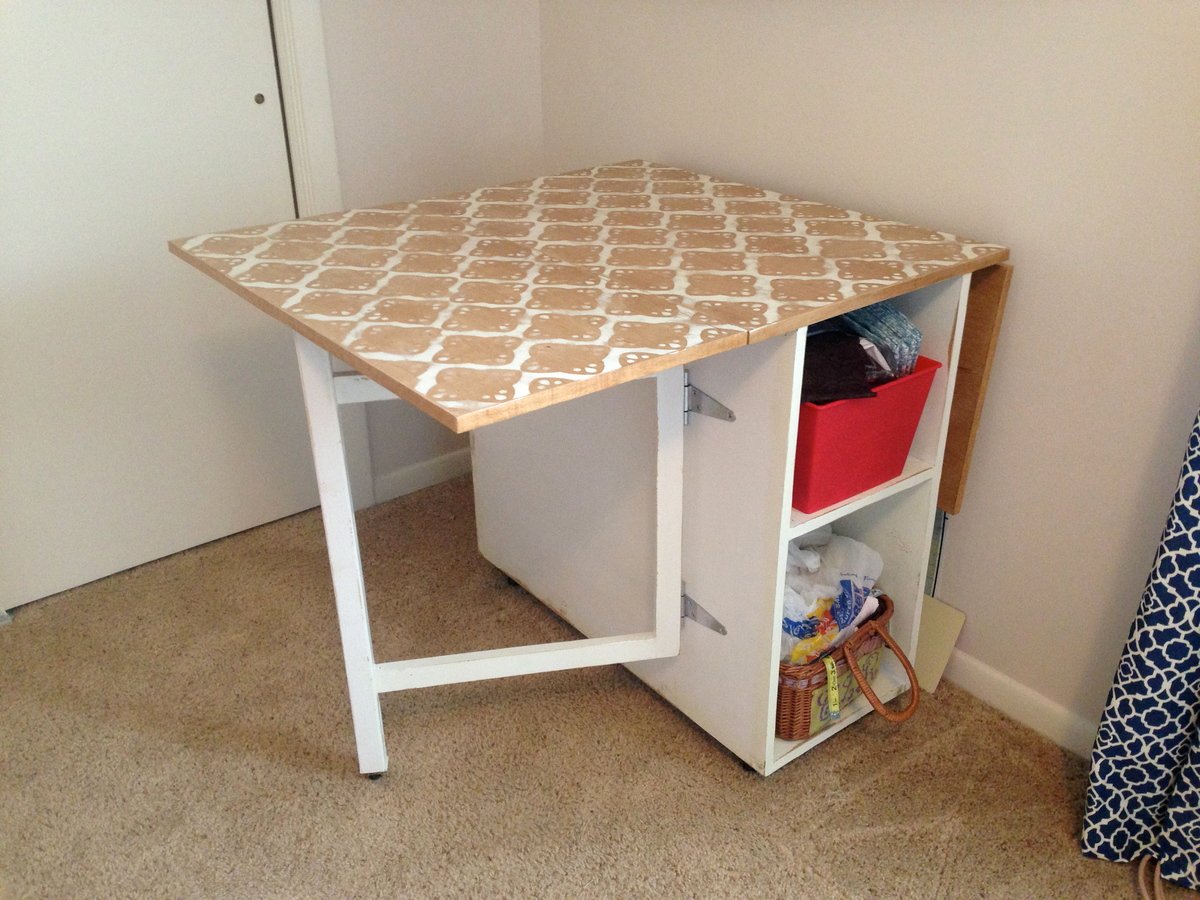
My husband and I built this table as our first project. We followed all of the dimensions from Ana's "Small Sewing Table" project here: http://ana-white.com/2010/10/plans/sewing-table-small-spaces?page=1 The only thing we changed was the size of the table top and the legs. We were worried about putting my heavy sewing machine on top of the leaf called for in the plan, so we created gate legs to support the leaves. Since the legs were going to be folded up in between the base and each leaf, we extended the center portion of the table top to accommodate the change. After it was assembled and stained, I decided that I didn't like the solid color, so I stenciled on a pattern with white latex enamel paint (what I had on hand) and continued to paint the base. After lightly scuffing it up with the sander, I layered 3 coats of poly on top. It has held up well, even after many large quilt projects! I just LOVE my sewing table!


Fri, 08/05/2016 - 13:41
Hi there. Could you please tell me what the brackets are you used with the gateleg? Do you remember where you got them? Thank you!!!
Fri, 05/26/2023 - 16:59
Hello I was wanting to know how to make the Gate-Legs for this project? Like the measurements and such. Thank you.
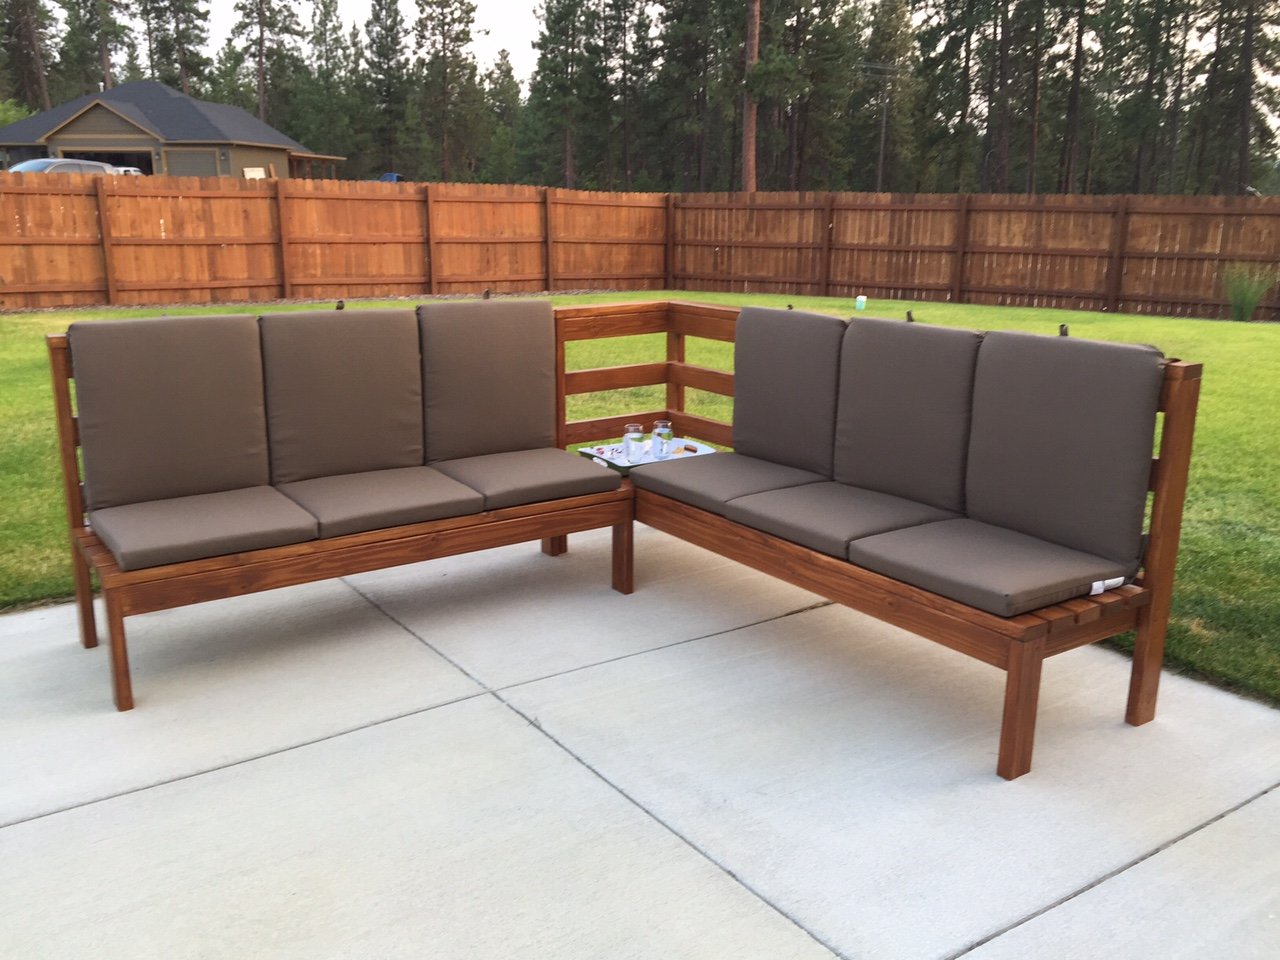
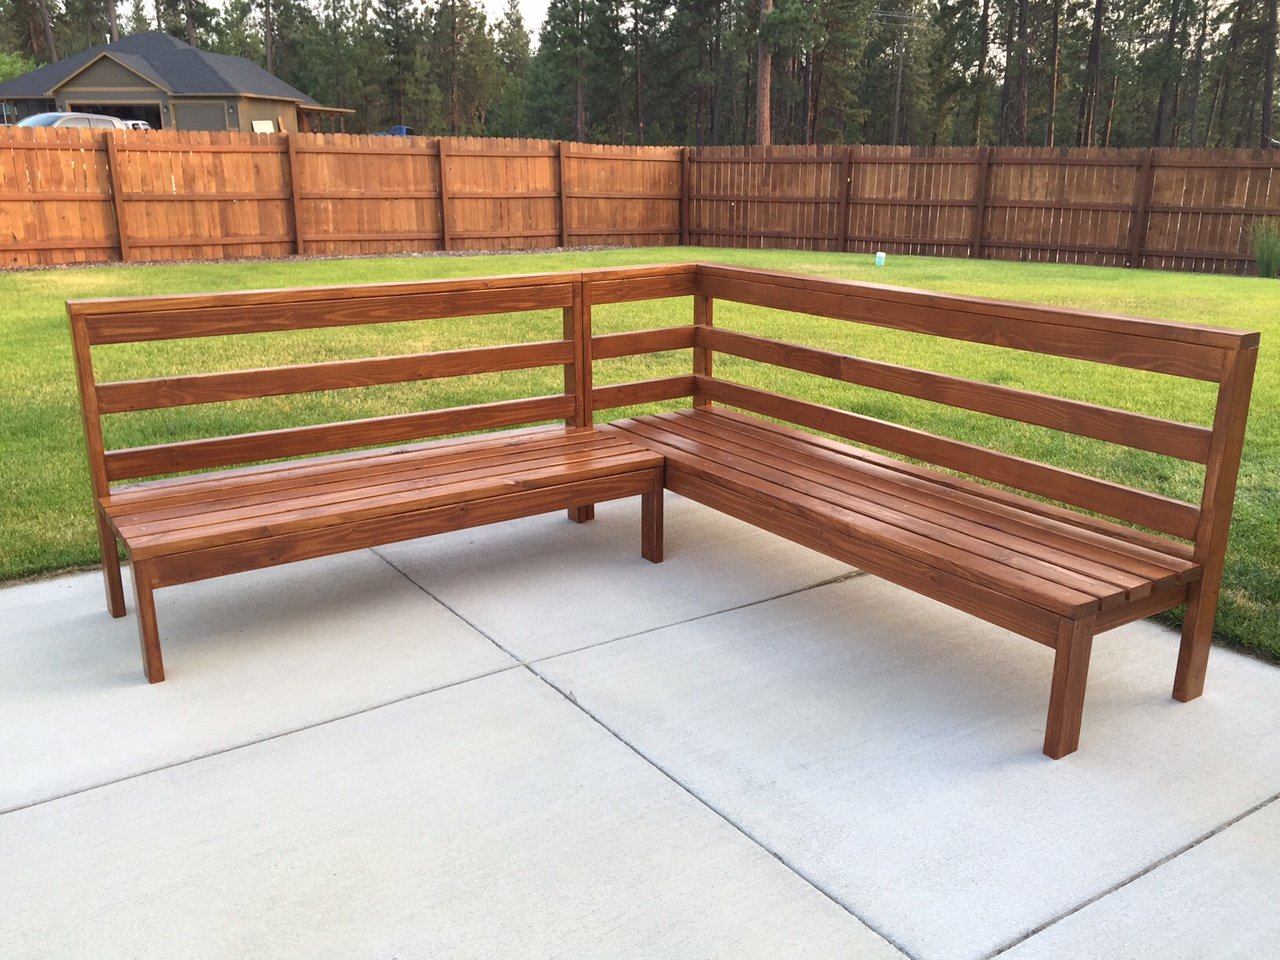
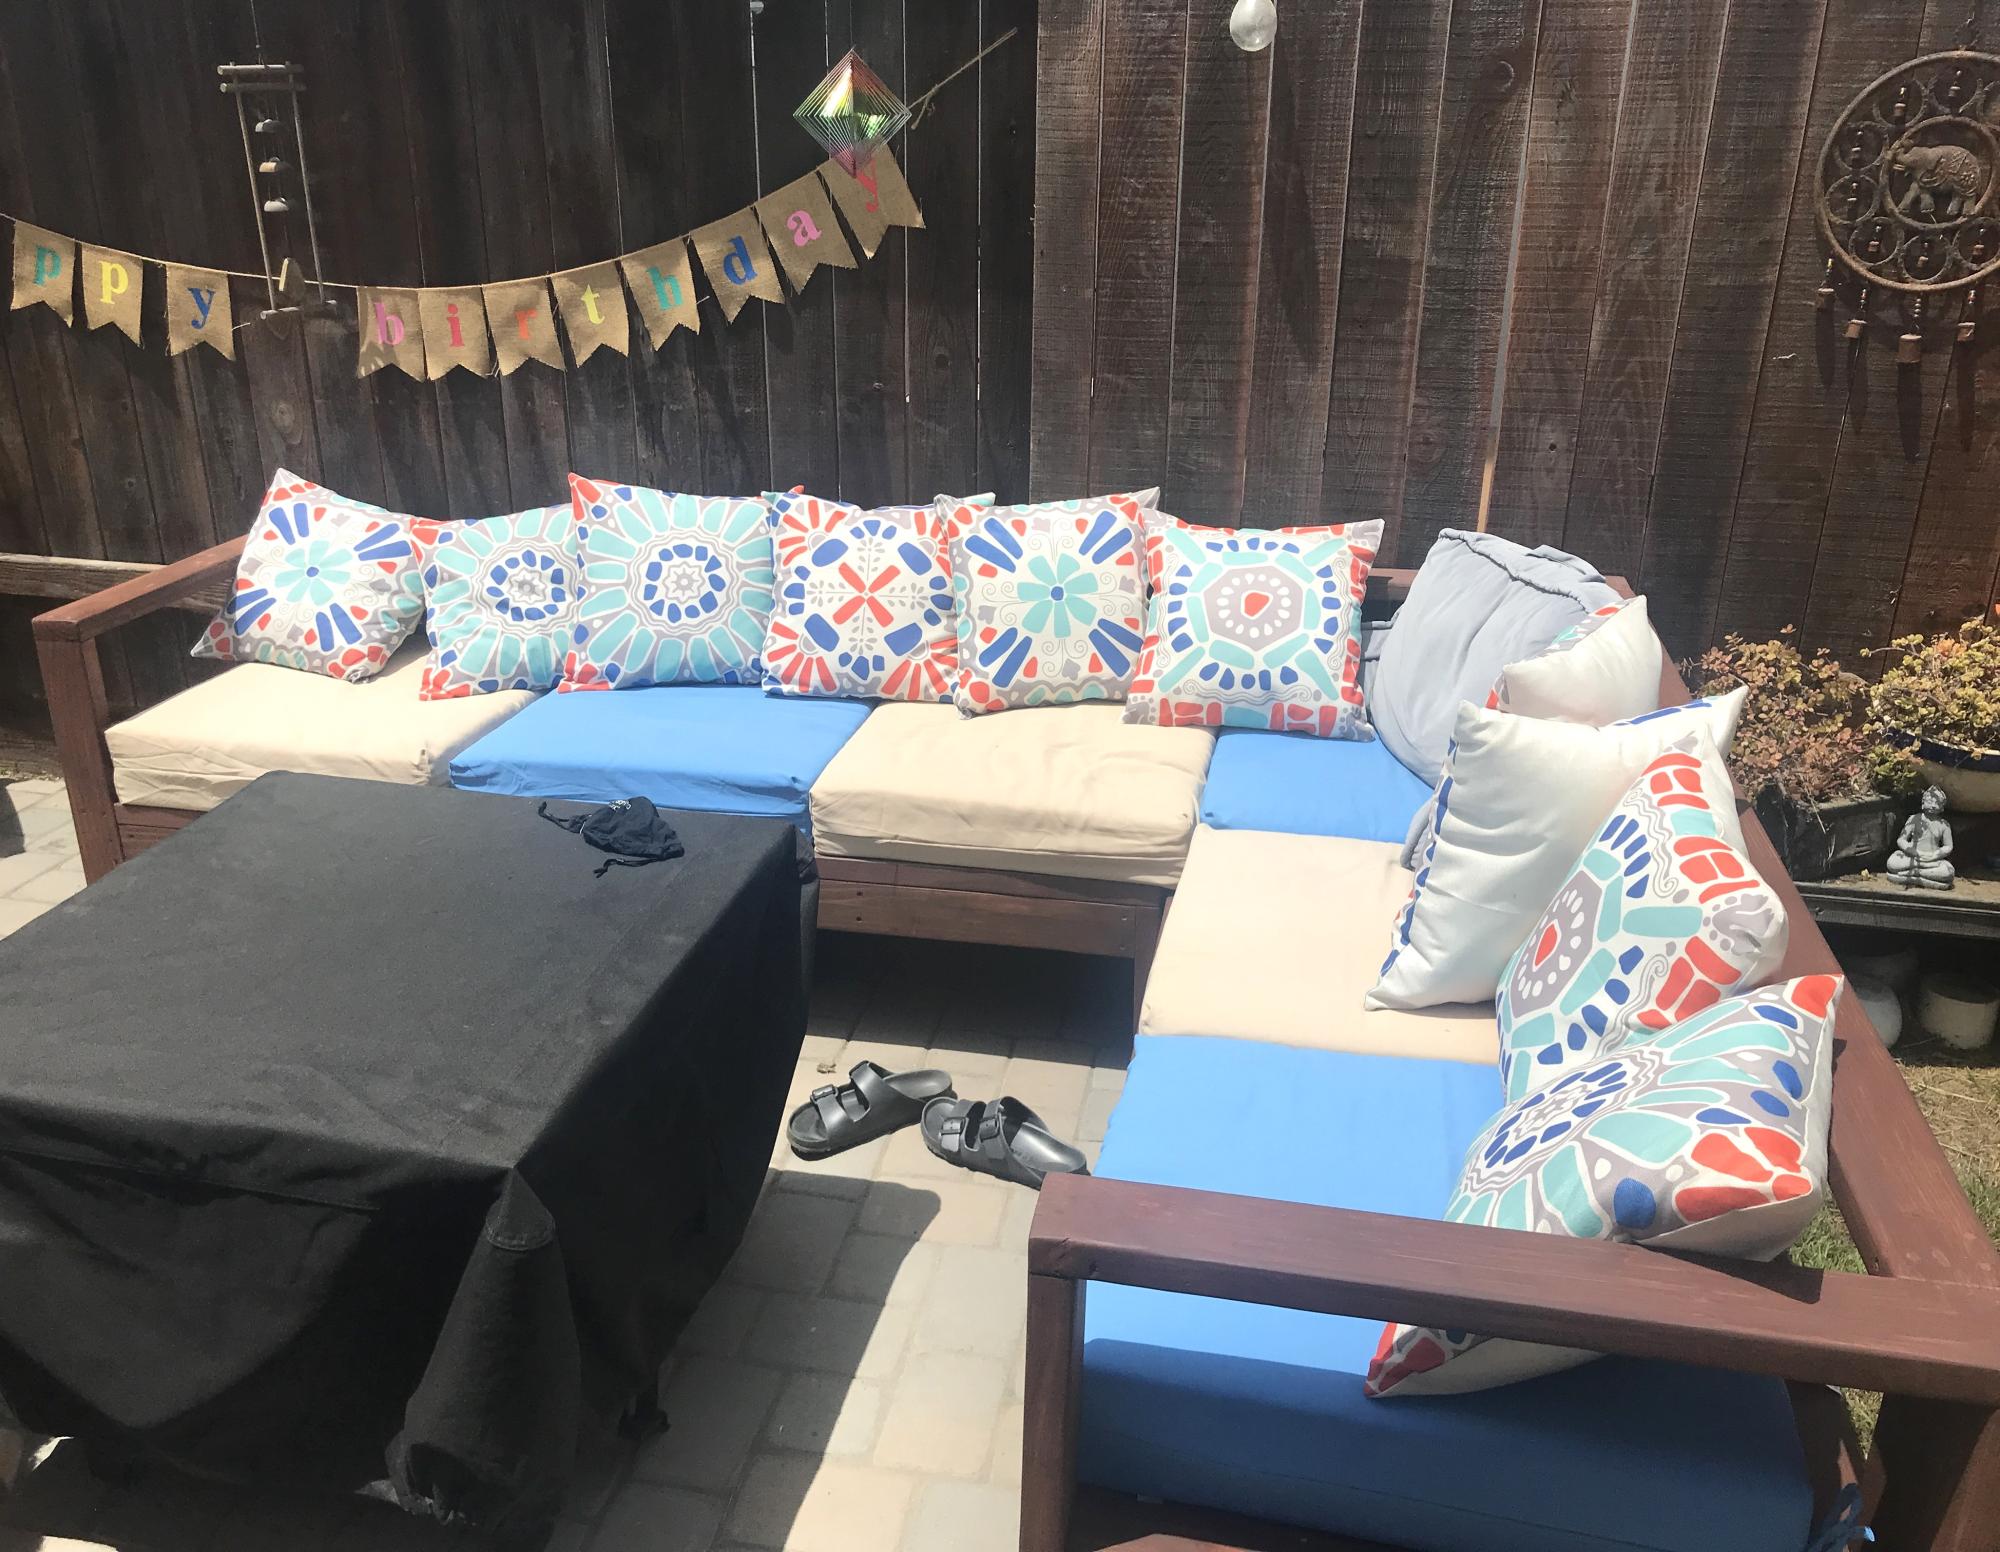
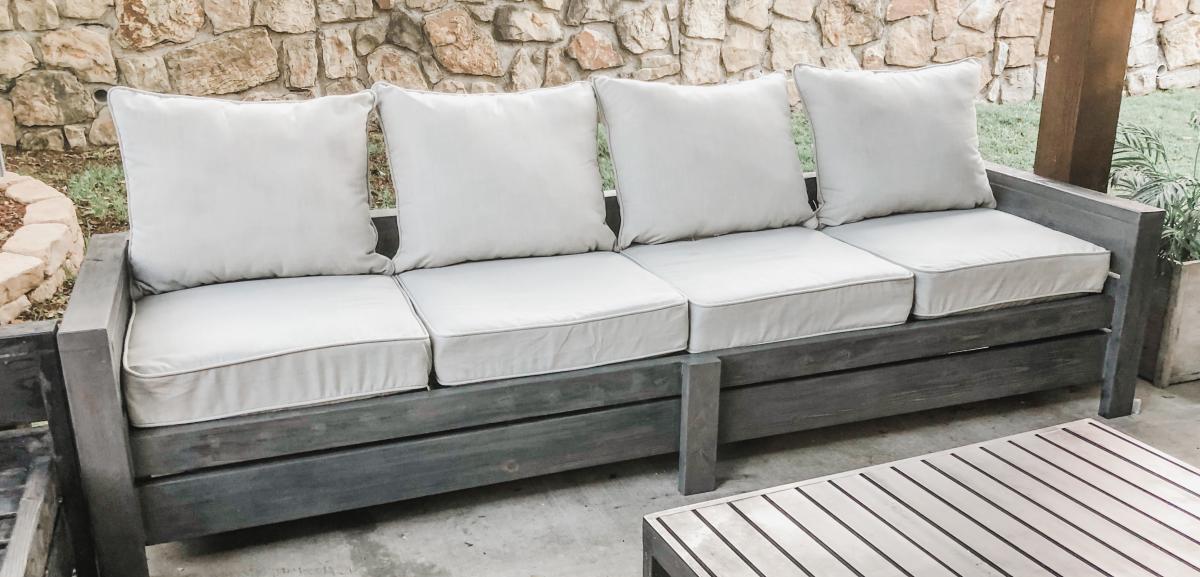
Here is my patio sectional made of 2x4s. Used my Kreg Jig for the first time to complete this project. I used pocket holes in as many places as possible, then finished it with two coats of leftover fence stain and two coats of semi-gloss outdoor Varathane spar urethane for a nice sheen. I modified the dimensions to fit the cushions that my wife purchased before I began the project. I made the back substantially taller to support the cushions and left the arms off of both ends of the sectional so people could sit facing sideways too. I left the corner of the sectional without a cushion so people would have a place to set drinks.
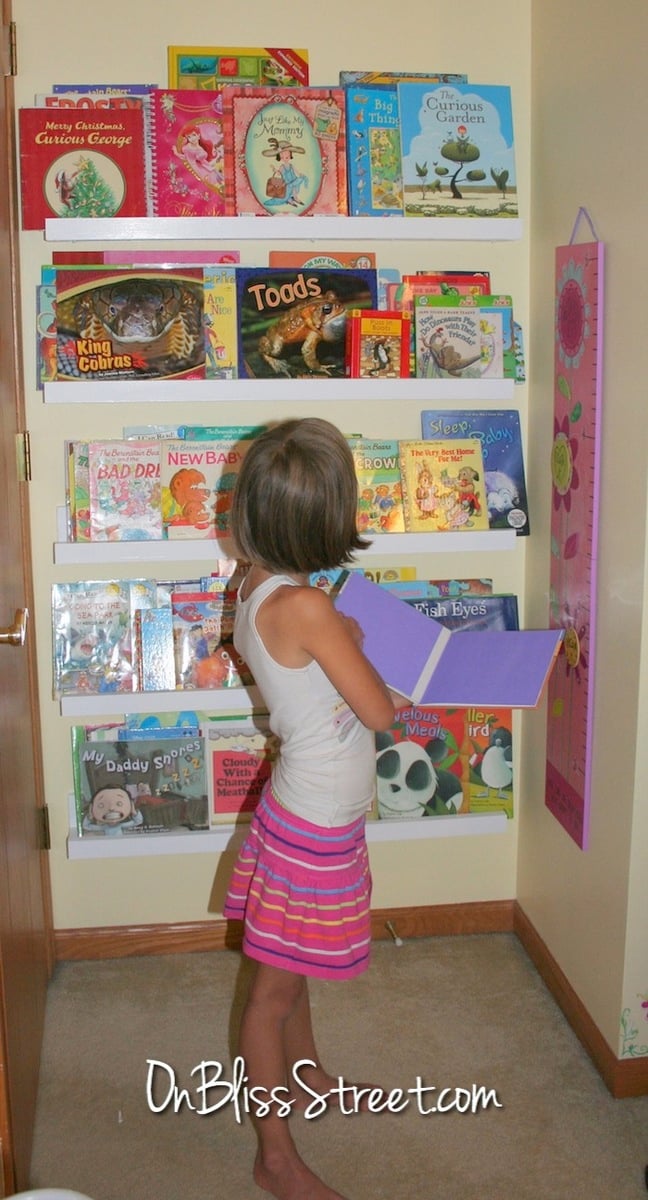
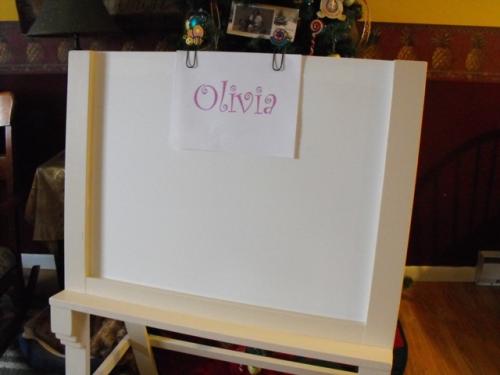
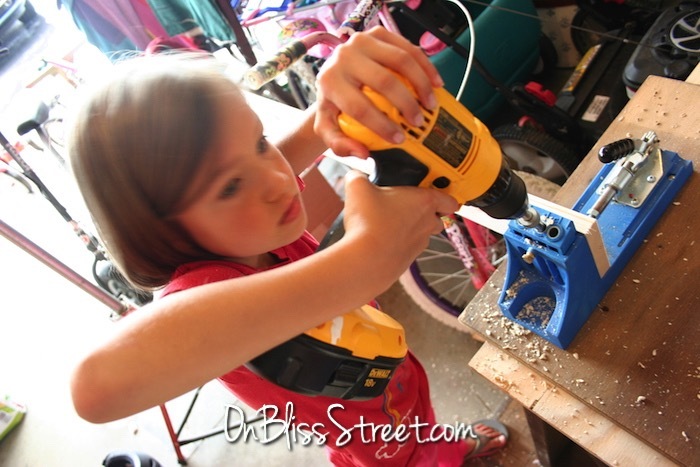
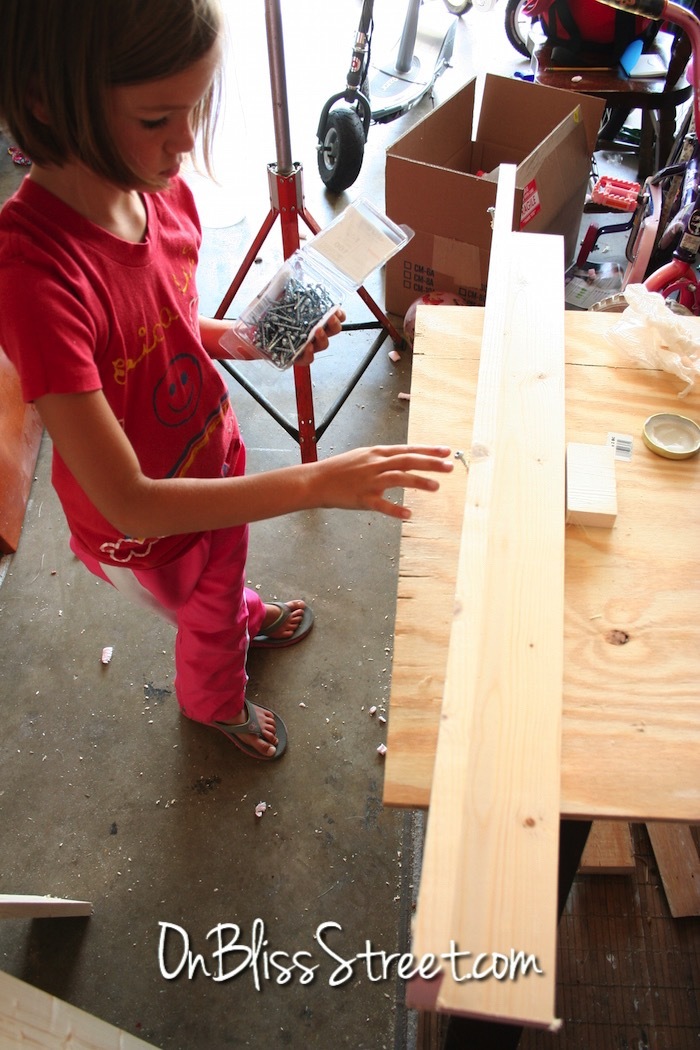
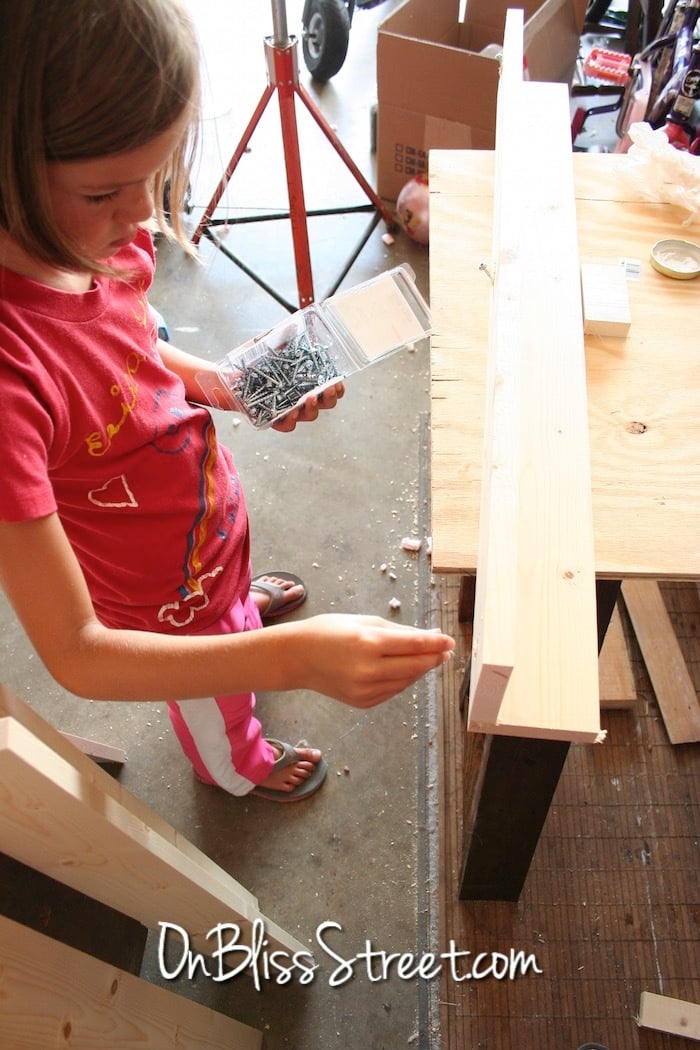
These ledges are incredibly versatile and will easily grow with any child. Books for the younger ones and then a gallery wall for when they grow. They are so easy to build that literally, a child can do it, as you can see. This was her first build that she completed by herself. After the boards were cut of course. Thanks Ana, this is a great plan and it was an AWESOME day for the girls!

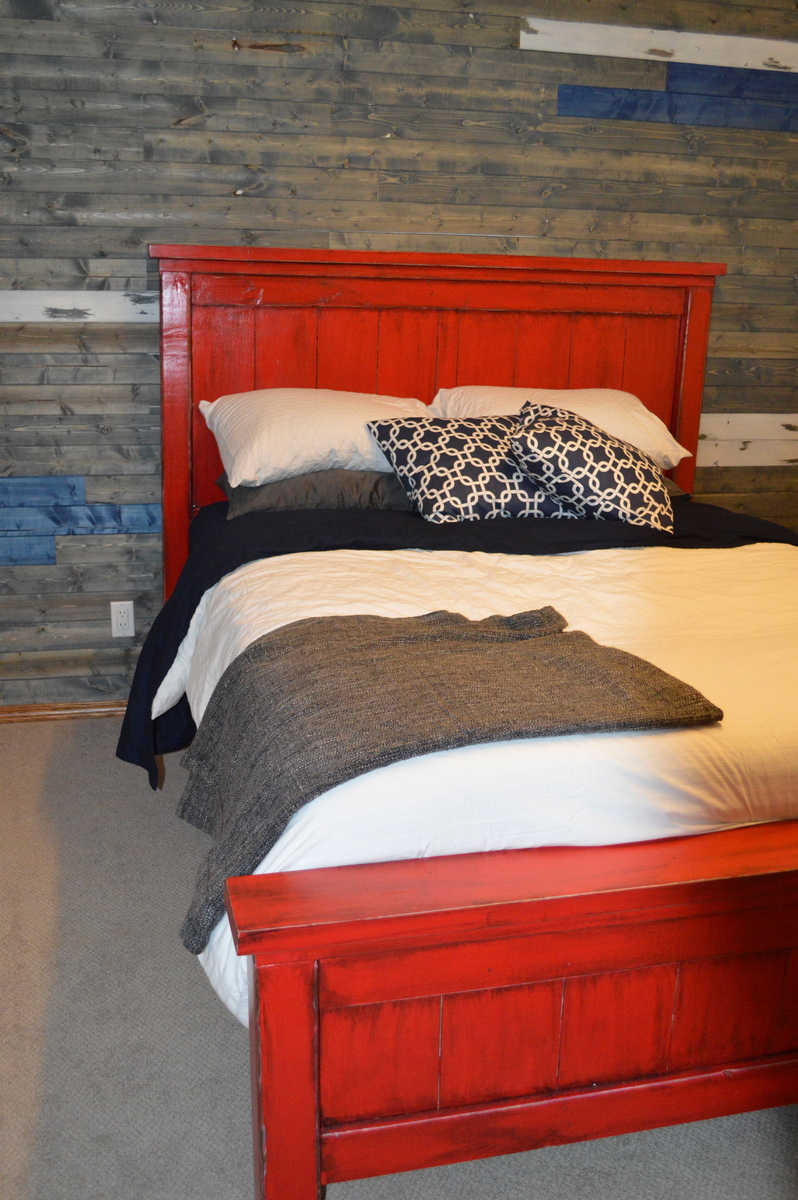
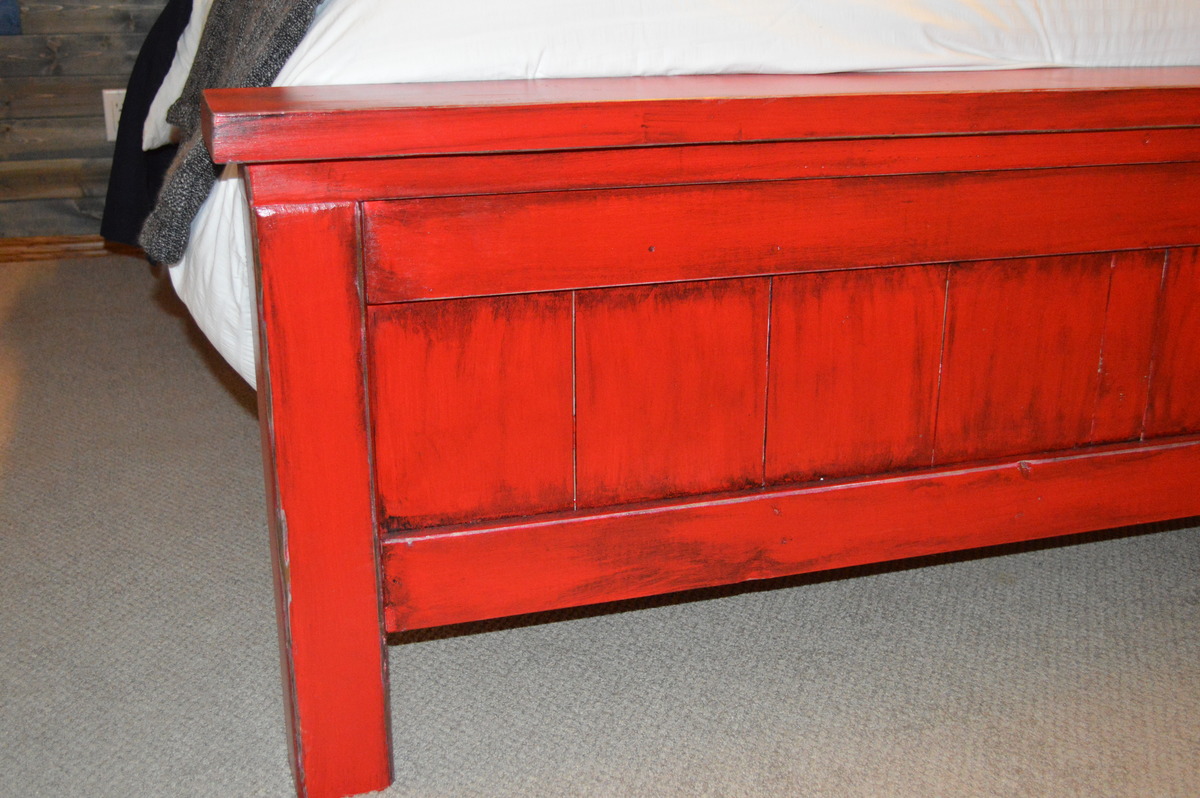
We loved the first farmhouse bed we built so much, that we decided to build another one for our guest bed. We loved the red paint, and weren't too sure how to accent it, so we went with a planked feature wall. Just need to build some night stands and hang some pictures and our guest room should be complete!
Sat, 11/02/2013 - 22:15
Love the bed and the wall!! Where did you find your plank wood??
Sun, 11/03/2013 - 19:22
We didn't have any old distressed wood, so we bought pine tongue and groove from the hardware store and stained them ourselves. Then we just used a nail gun to attach them to the studs on the wall. It was surprisingly easy to do, just a bit time consuming. And nerve wrecking, we figured it would look either really good, or just awful! W are very pleased with how it turned out!
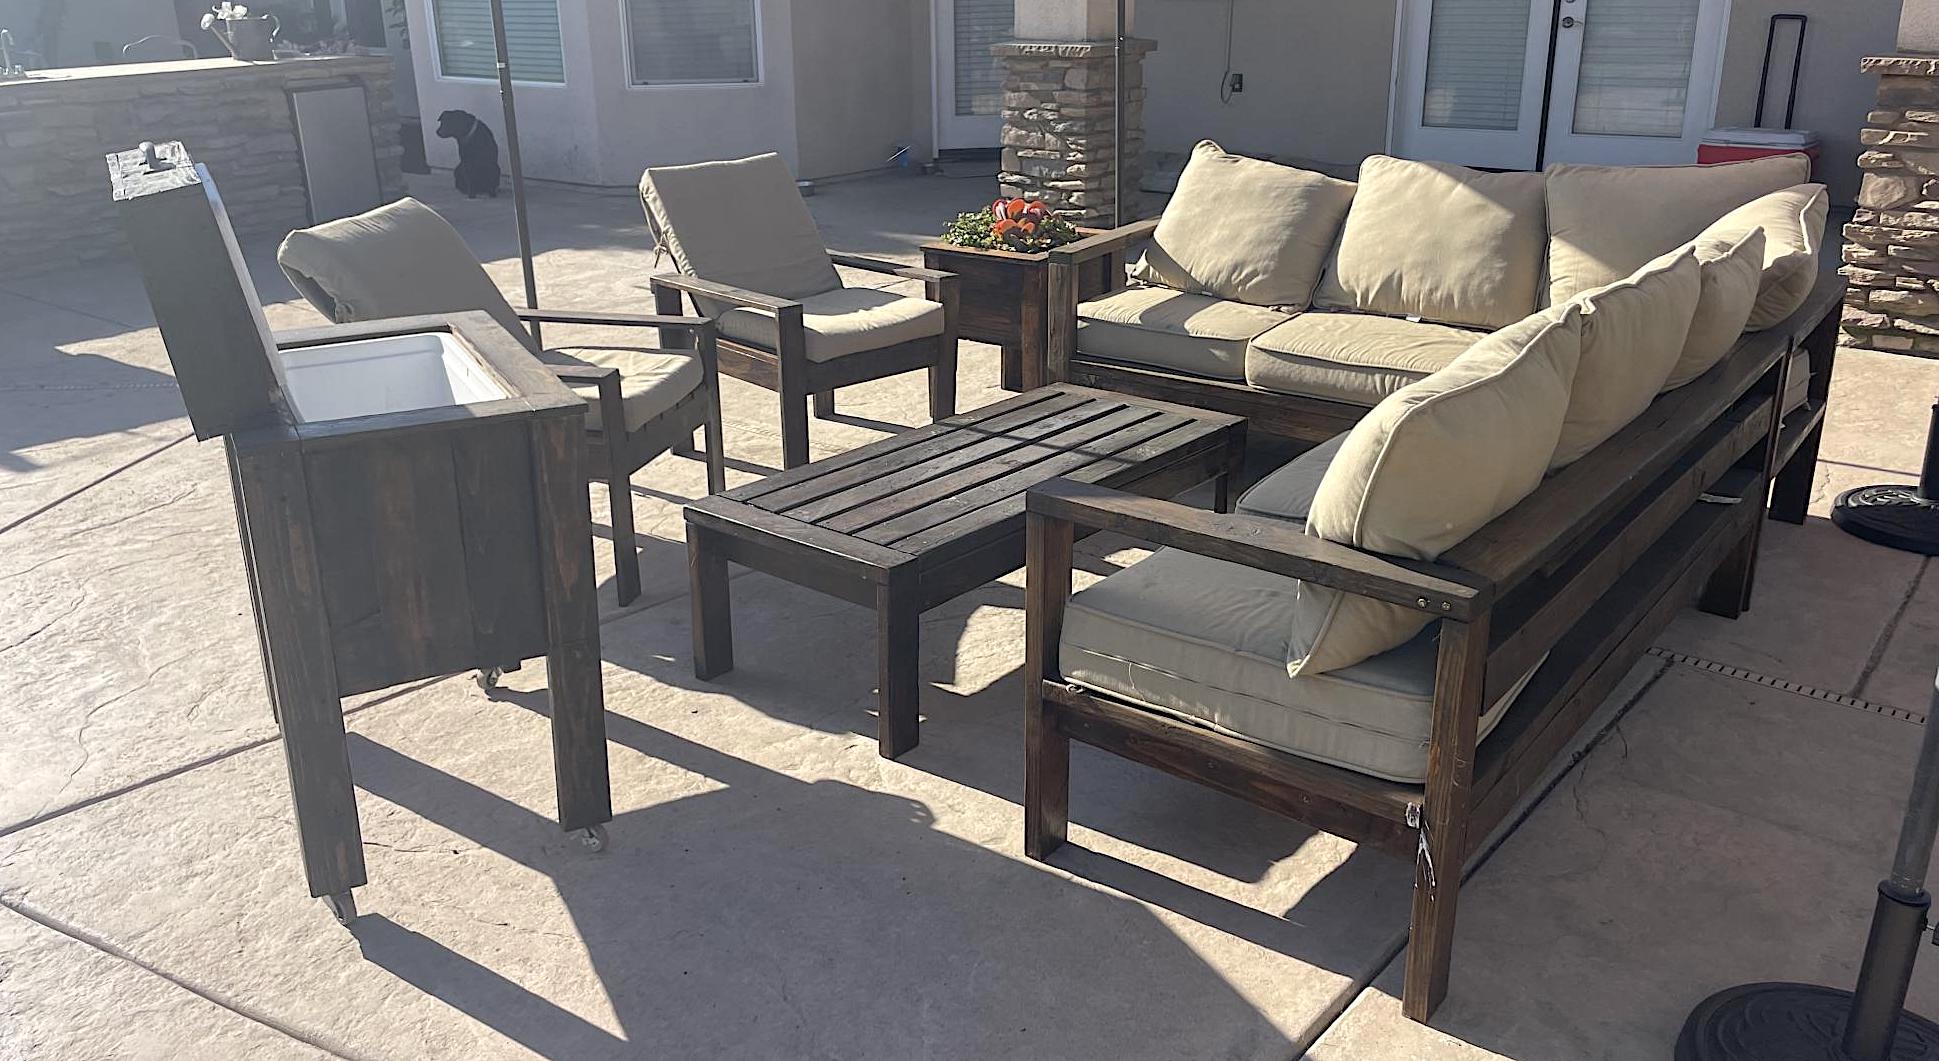
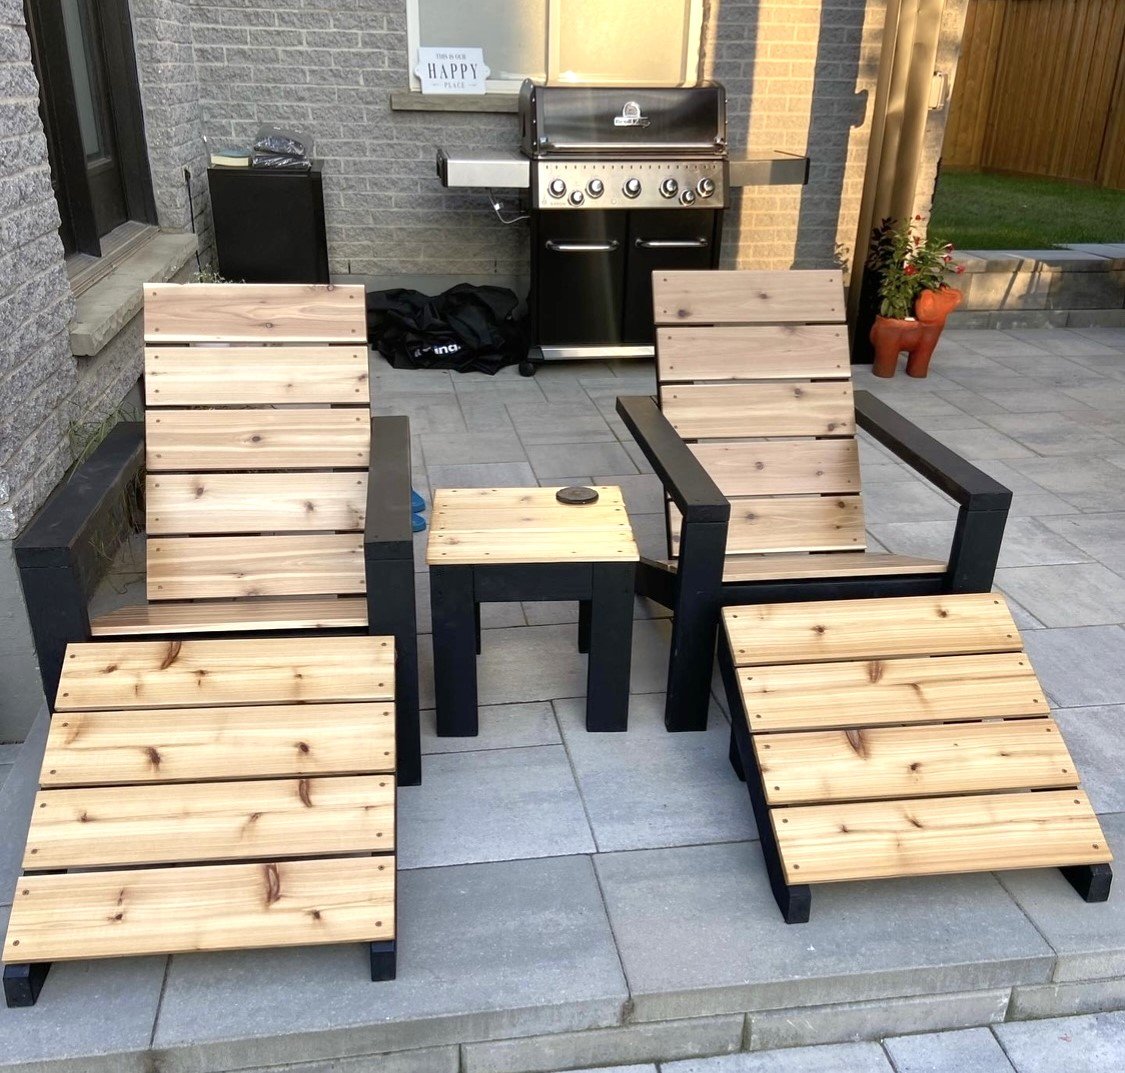
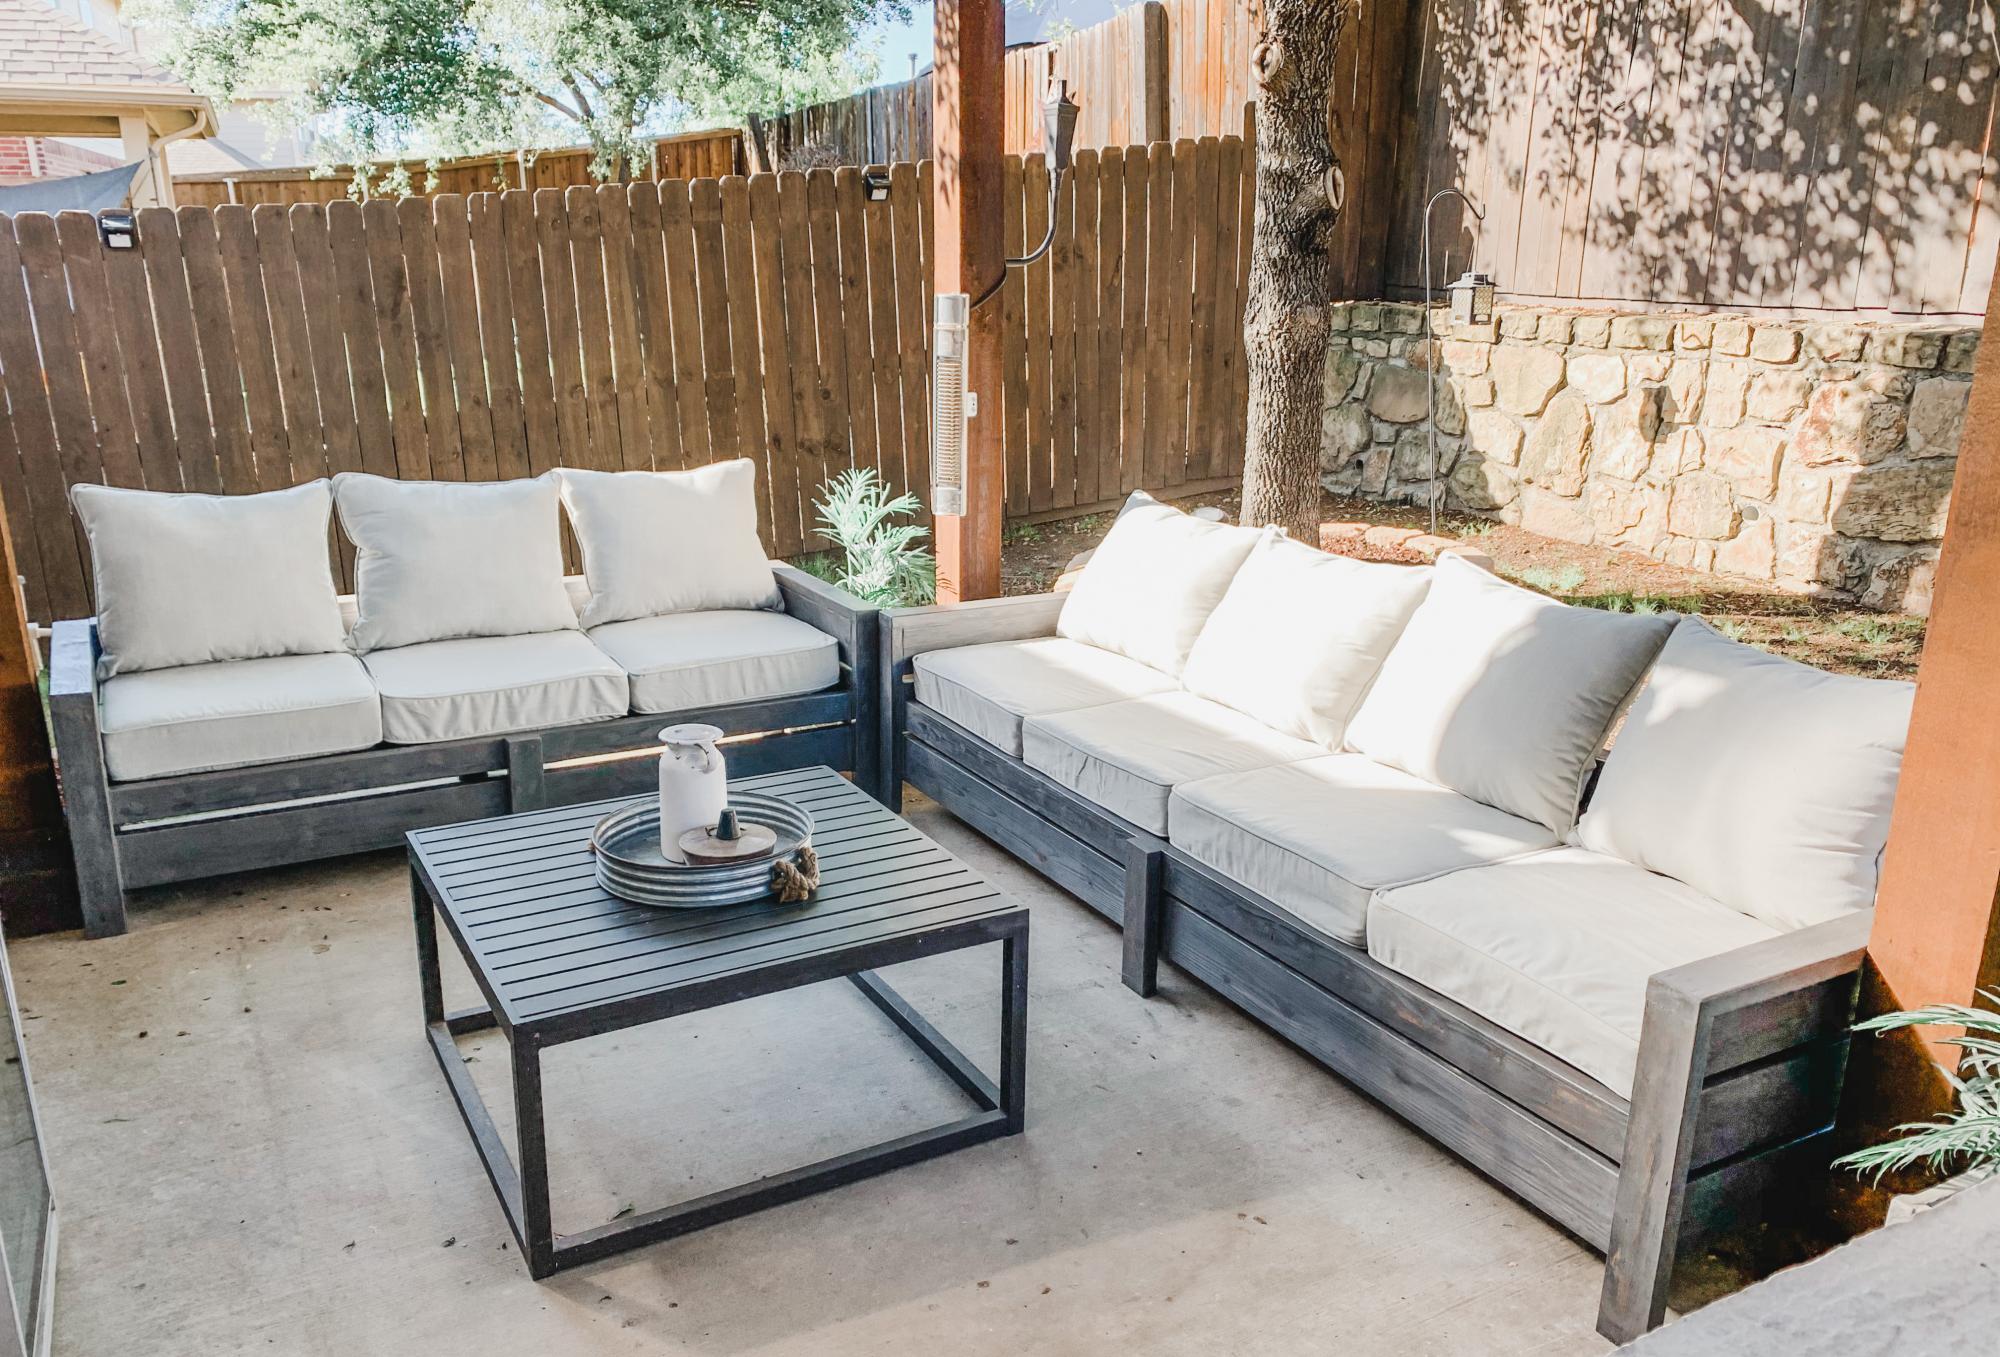
This is my homemade backyard inspired by plans from Ana. Used Ana's previous post to build all pieces. Stained in Mission Oak and bought pillows from Lowe's. Succulents from a local nursery.
Coffee Table
2 piece lounge
2 chairs
Ice chest
Planter Box
Mon, 05/15/2023 - 10:51
Your backyard looks amazing, well done! Thank you so much for sharing.
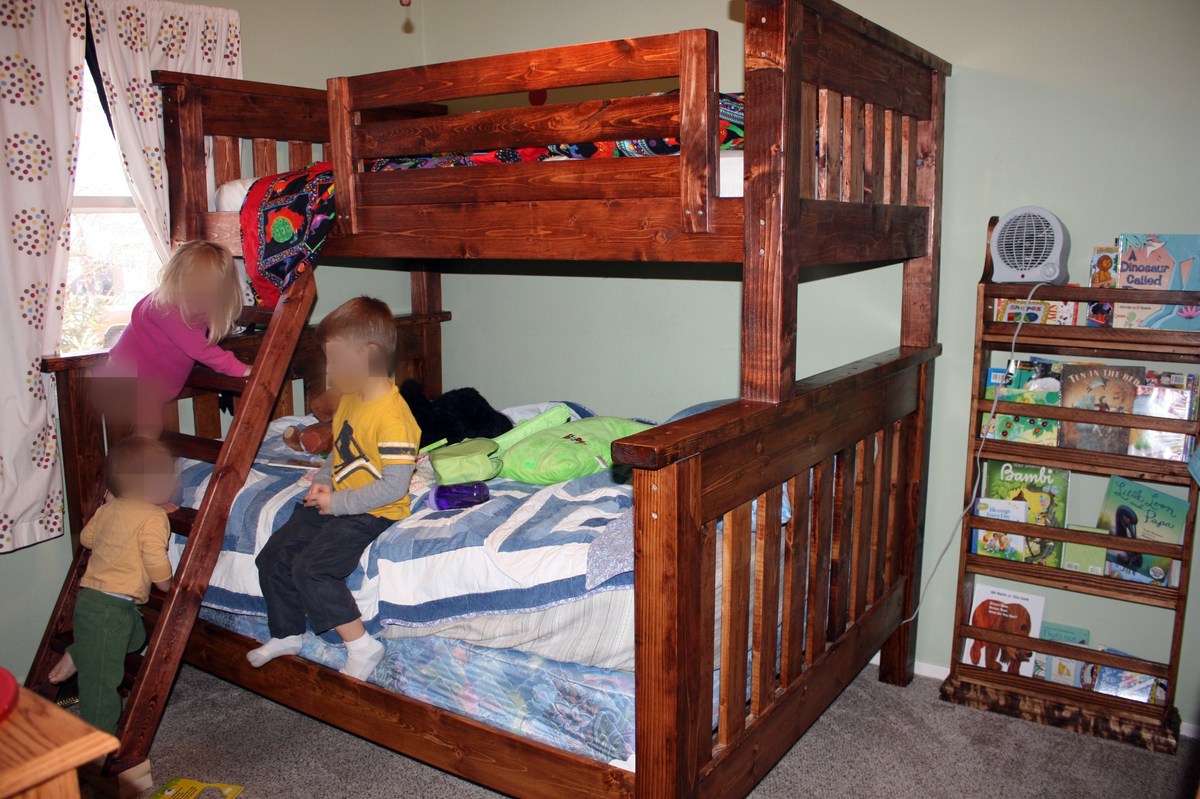
I am very happy to have completed the up portion of the bunk bed. The full size down was done quite sometime ago and I became sidetracked on other projects.
This is a sturdy bed and a favorite in my home. One day I even found my husband napping (hiding) on the top bunk.
The part that I like the best is when we graduate from bunk beds we still have two beds to use.
I also completed the ladder and it works, but I cut it just alittle shorter than the plan called for. Lets just put another on my to do list.
Thanks Ana! Appreciate all the plans and how much I’m learning.
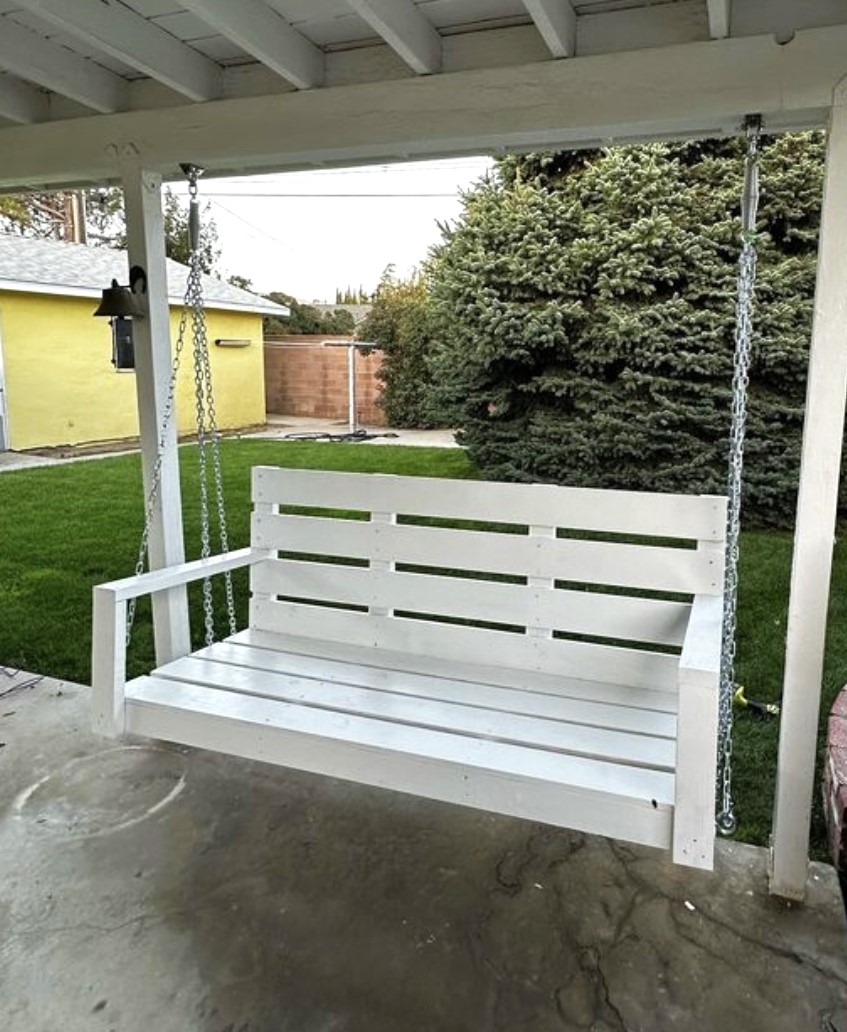
Outdoor couch is a delight.
Damian
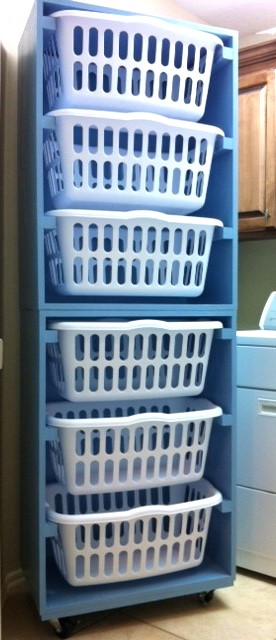
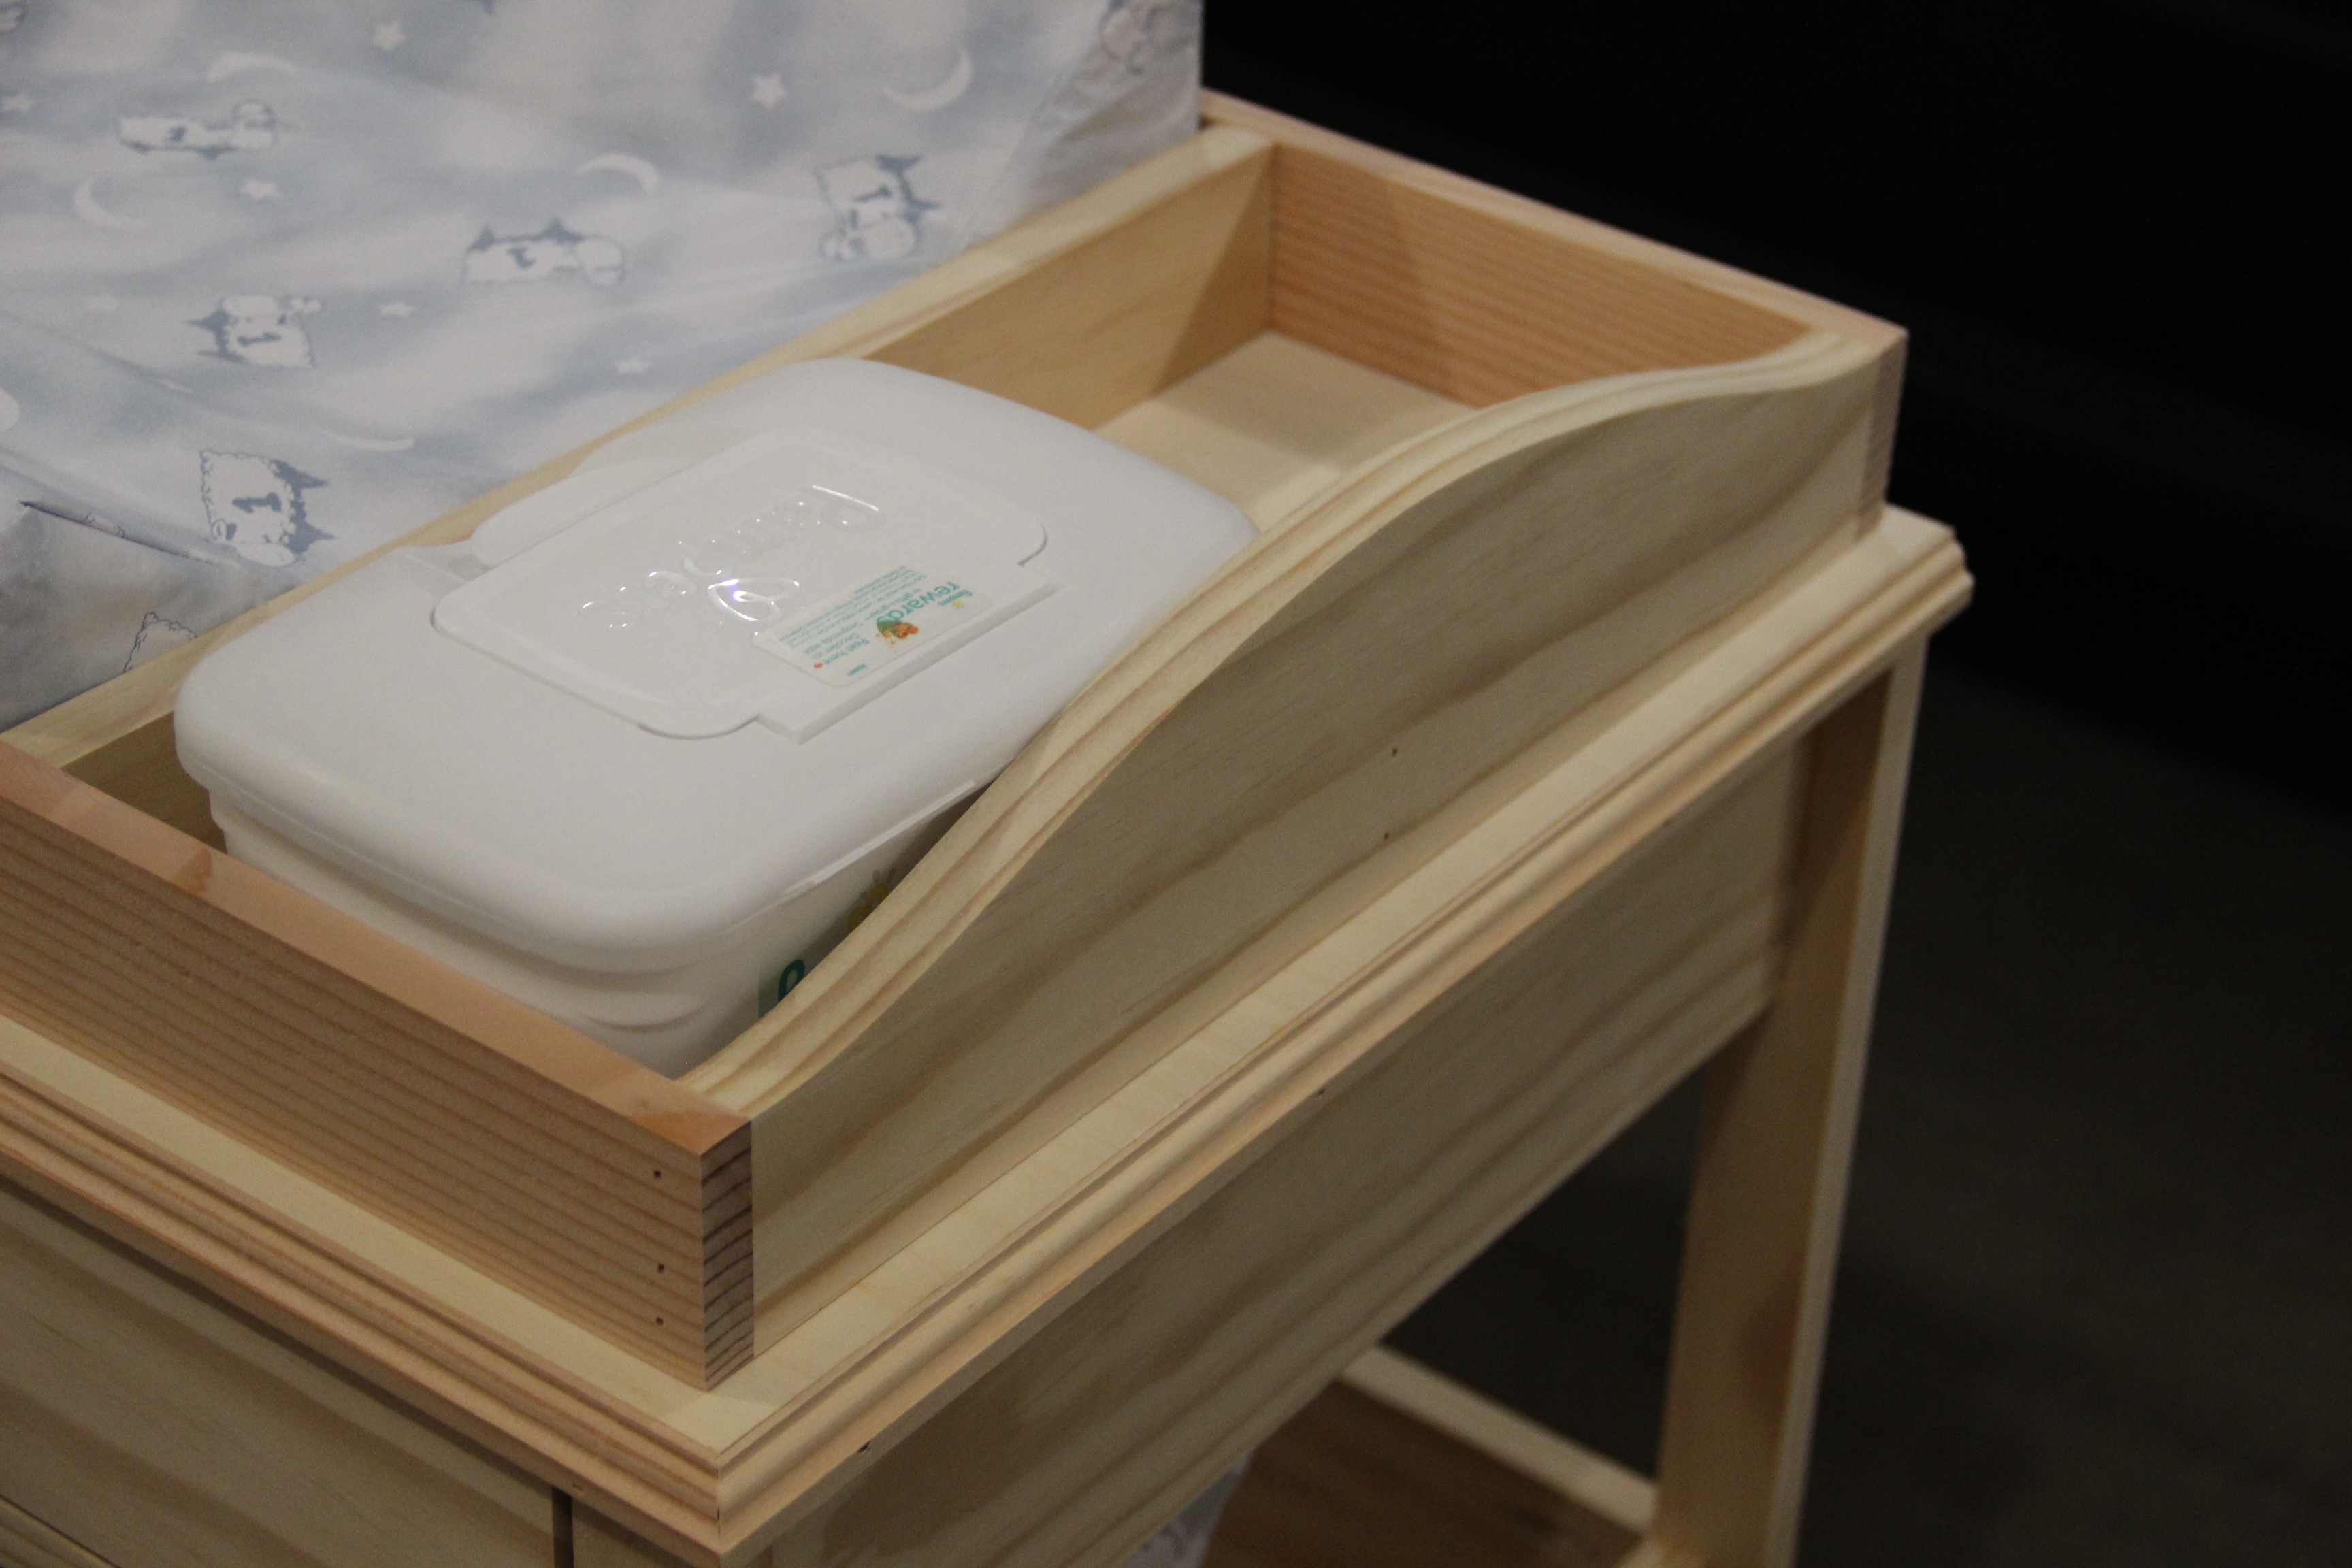
I saw this and thought - FINALLY...the answer to my laundry chaos! My husband built it for me this weekend with a couple of minor modifications. He put casters on the bottom, so I can move it to clean and sweep. He also added clear plastic drywall corner protectors over the 2x2's so that they paint is protected when the baskets slide in and out! Pretty clever! Oh, and I thought I was being super creative when I picked the color - and then saw that it is the EXACT color that you painted it! So much for that creative spark - but, I'll work on it! Thanks for the plans!
This was my first time building anything! The plans were so easy to follow along! Once I master some things like this, I can work on fine tuning things a bit more so I can build some more intricate plans. Thanks so much for your website! My kids are loving the BBQ's outside at the table!
Tue, 06/02/2020 - 15:09
re the farm table. your cut list calls for 8 2 x 4 at 28 1/2 inches but the plan actually only needs 4 of them. The pics do not show you doubling the 2 x 4s for legs. Am I missing something.
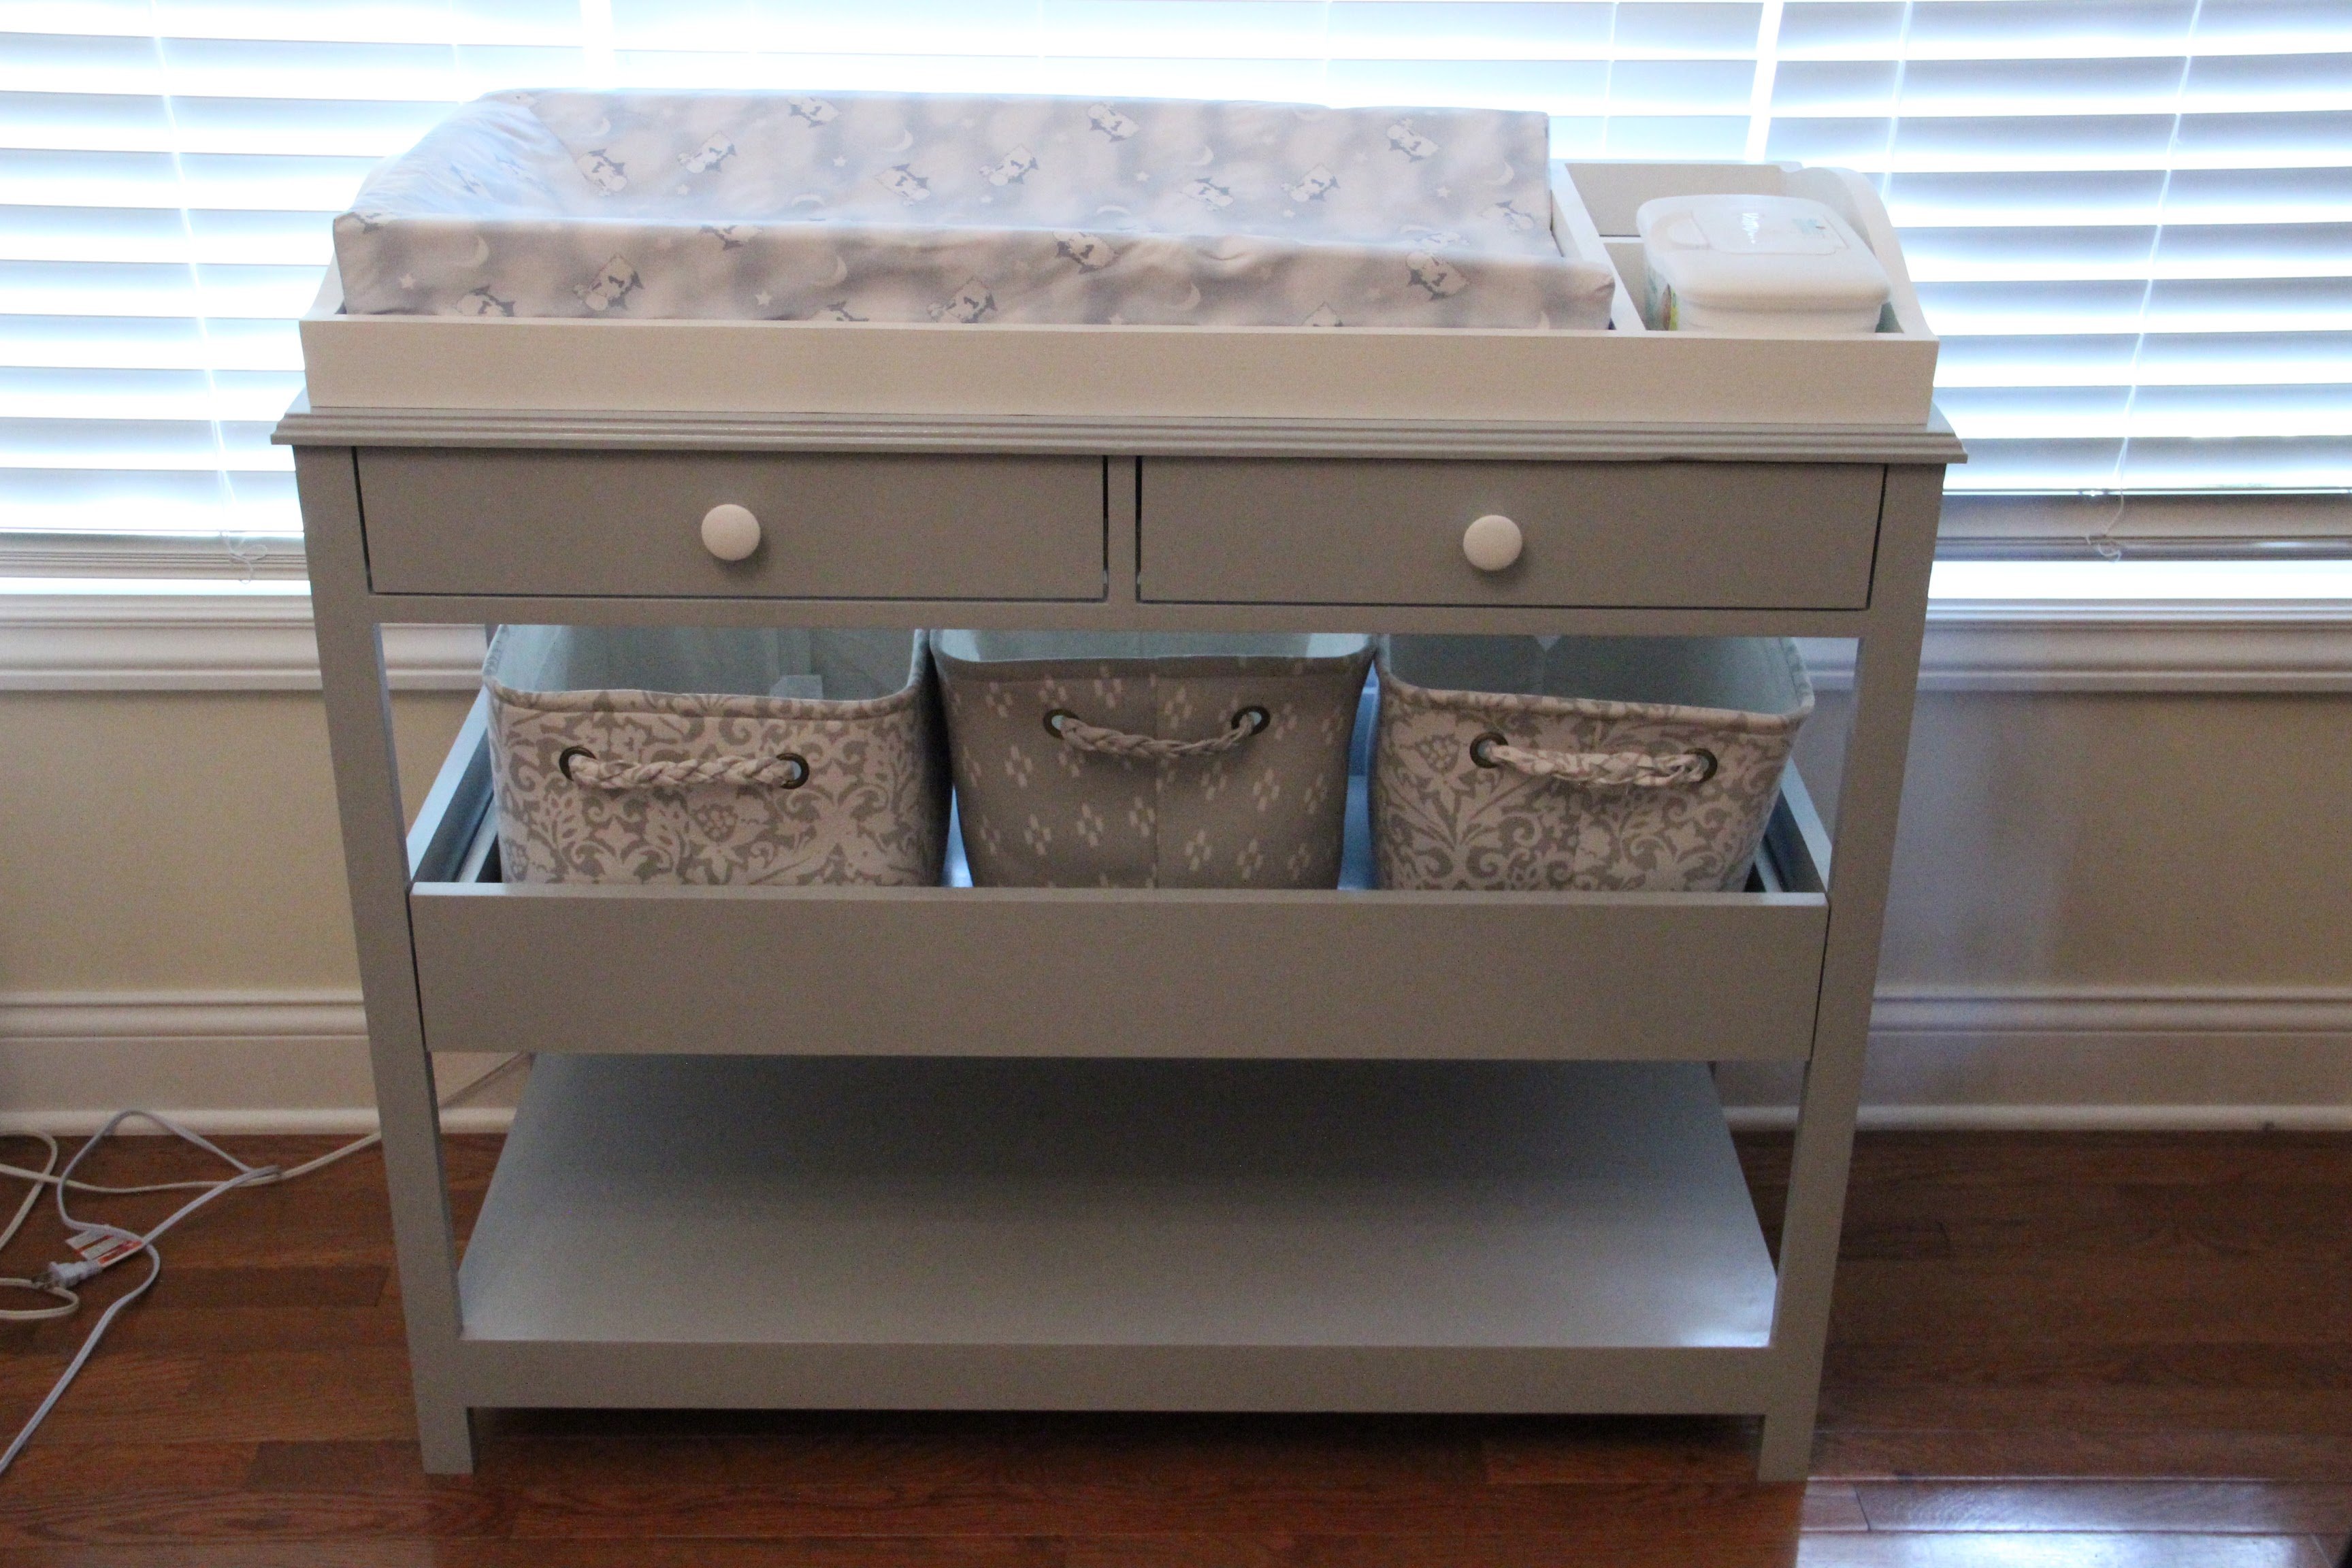
With the arrival of our first baby in 10 days, the wife wanted a changing table. My only vision of a changing table was the ones in public restrooms. With the help of Google, I came across all the great diy ideas on this site. I combined 3 plans into 1 and came up with this. The project took 2 days to build. Next step is to prime and paint.
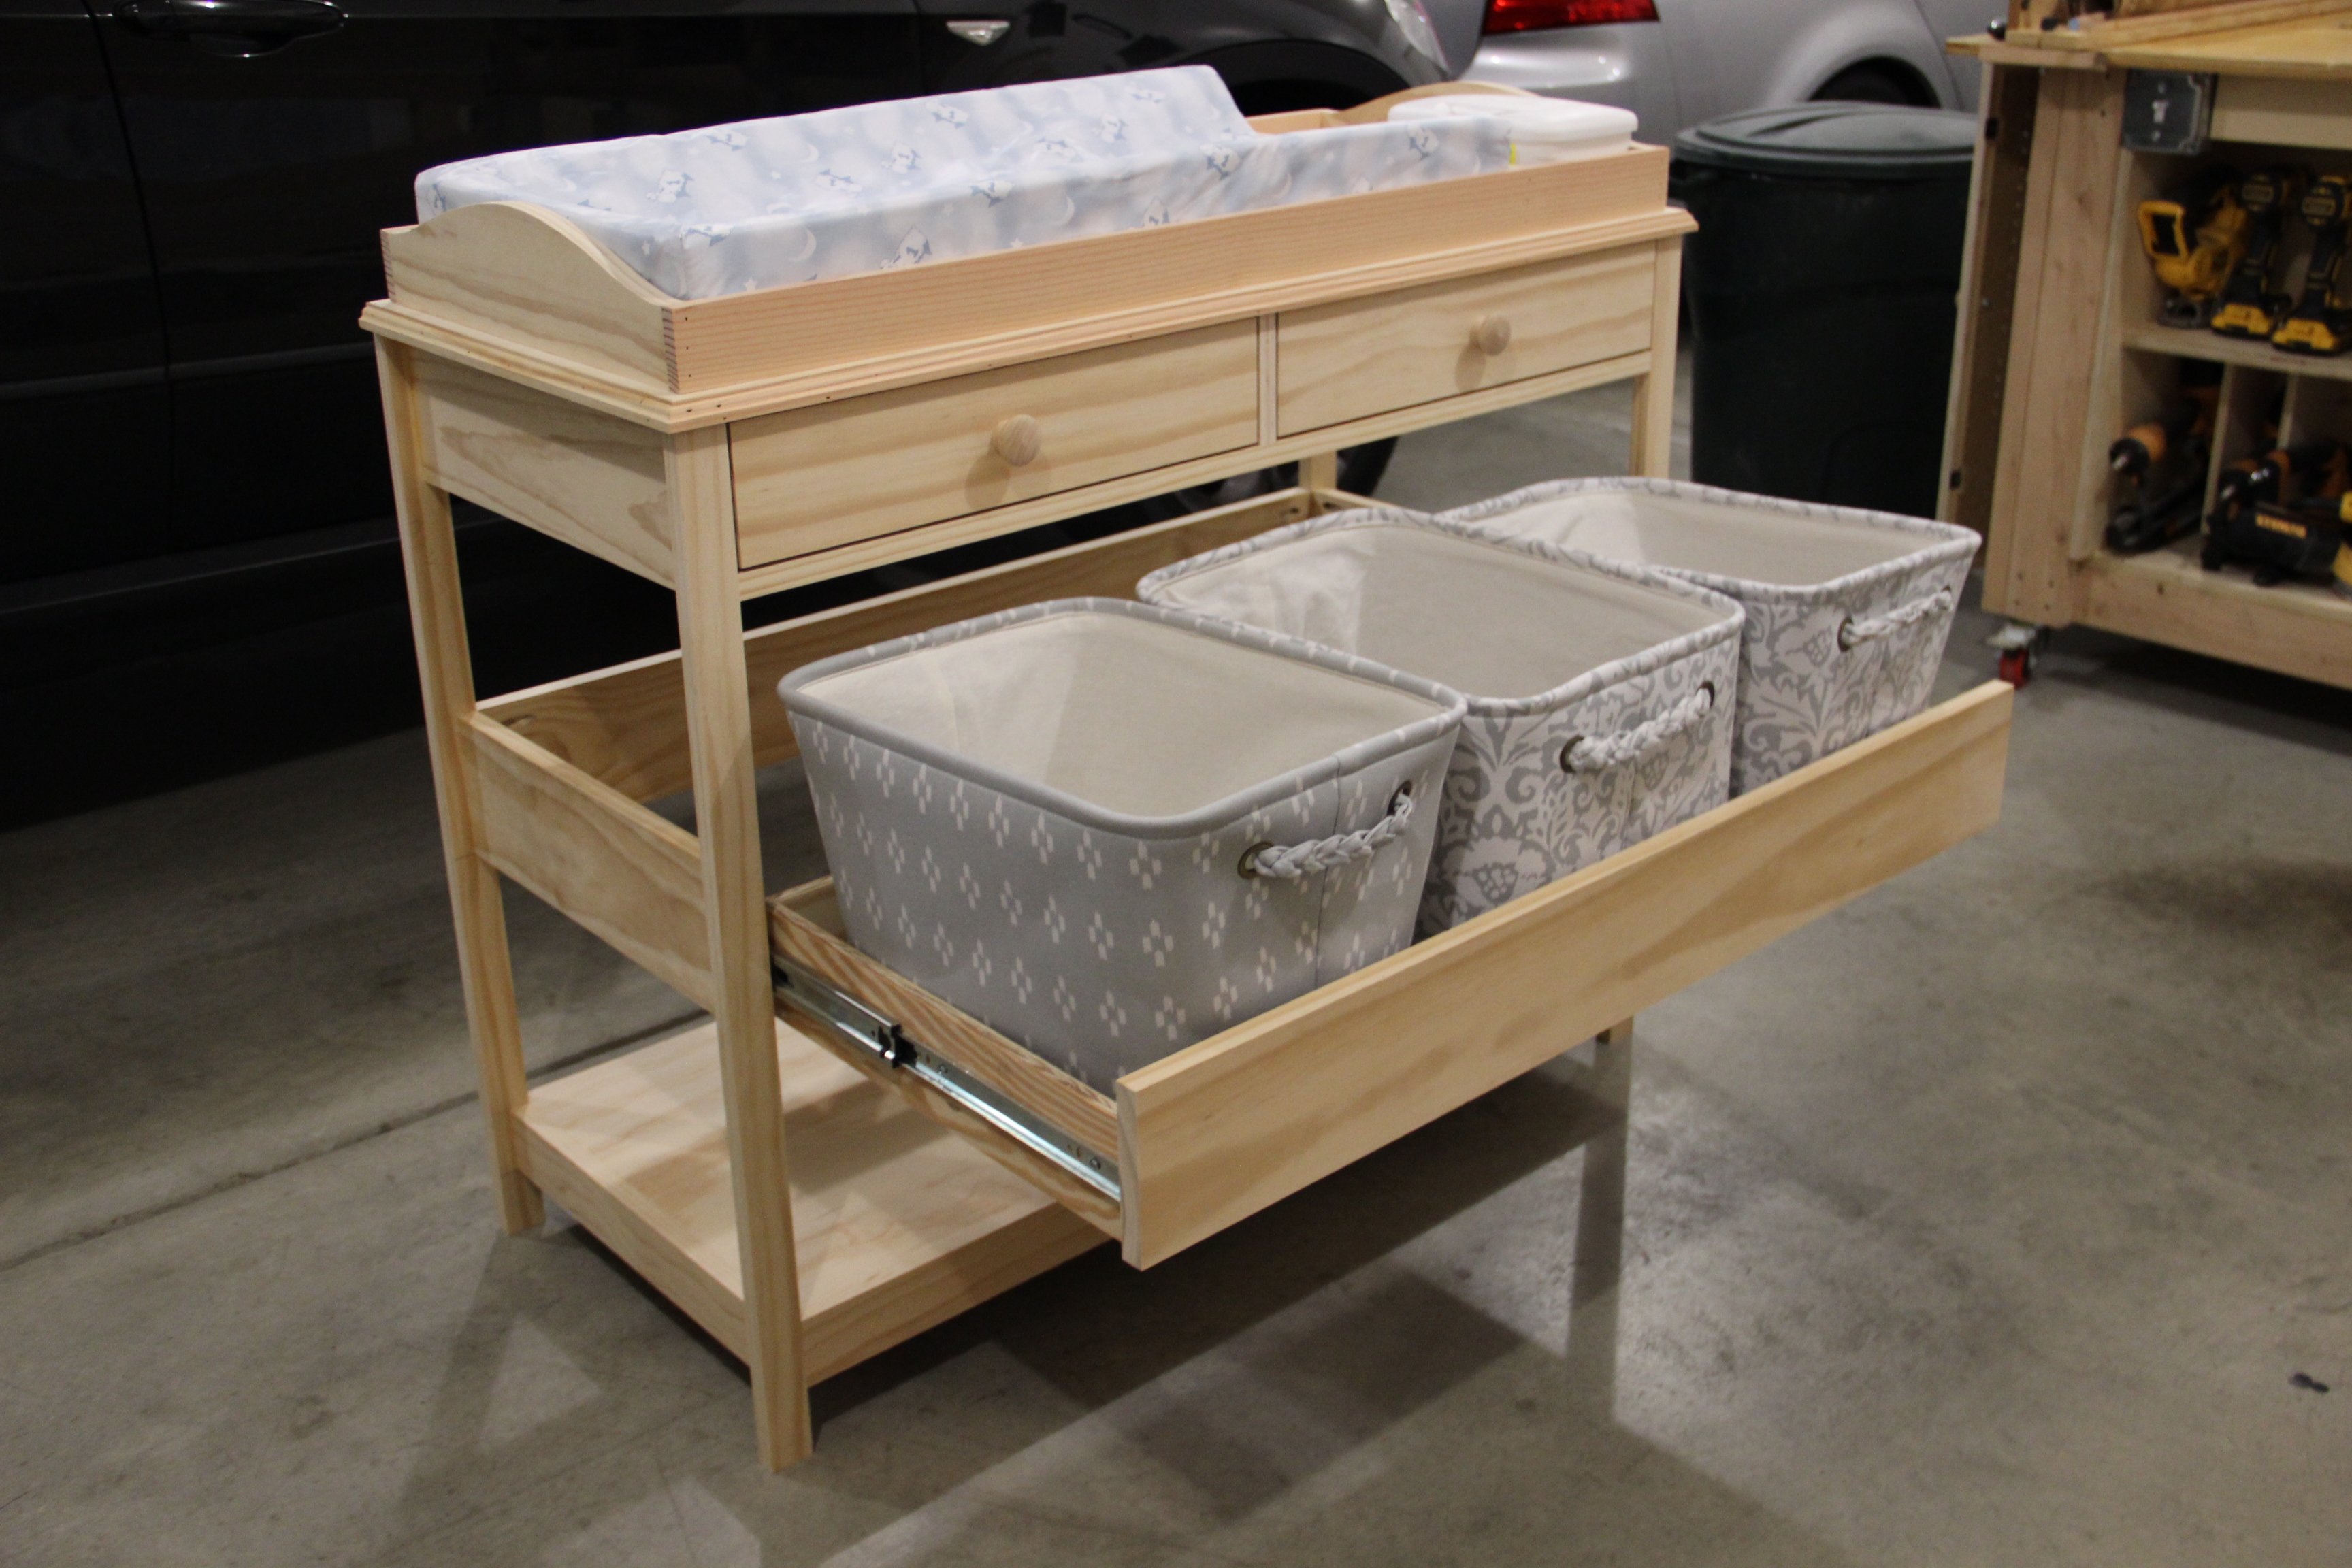
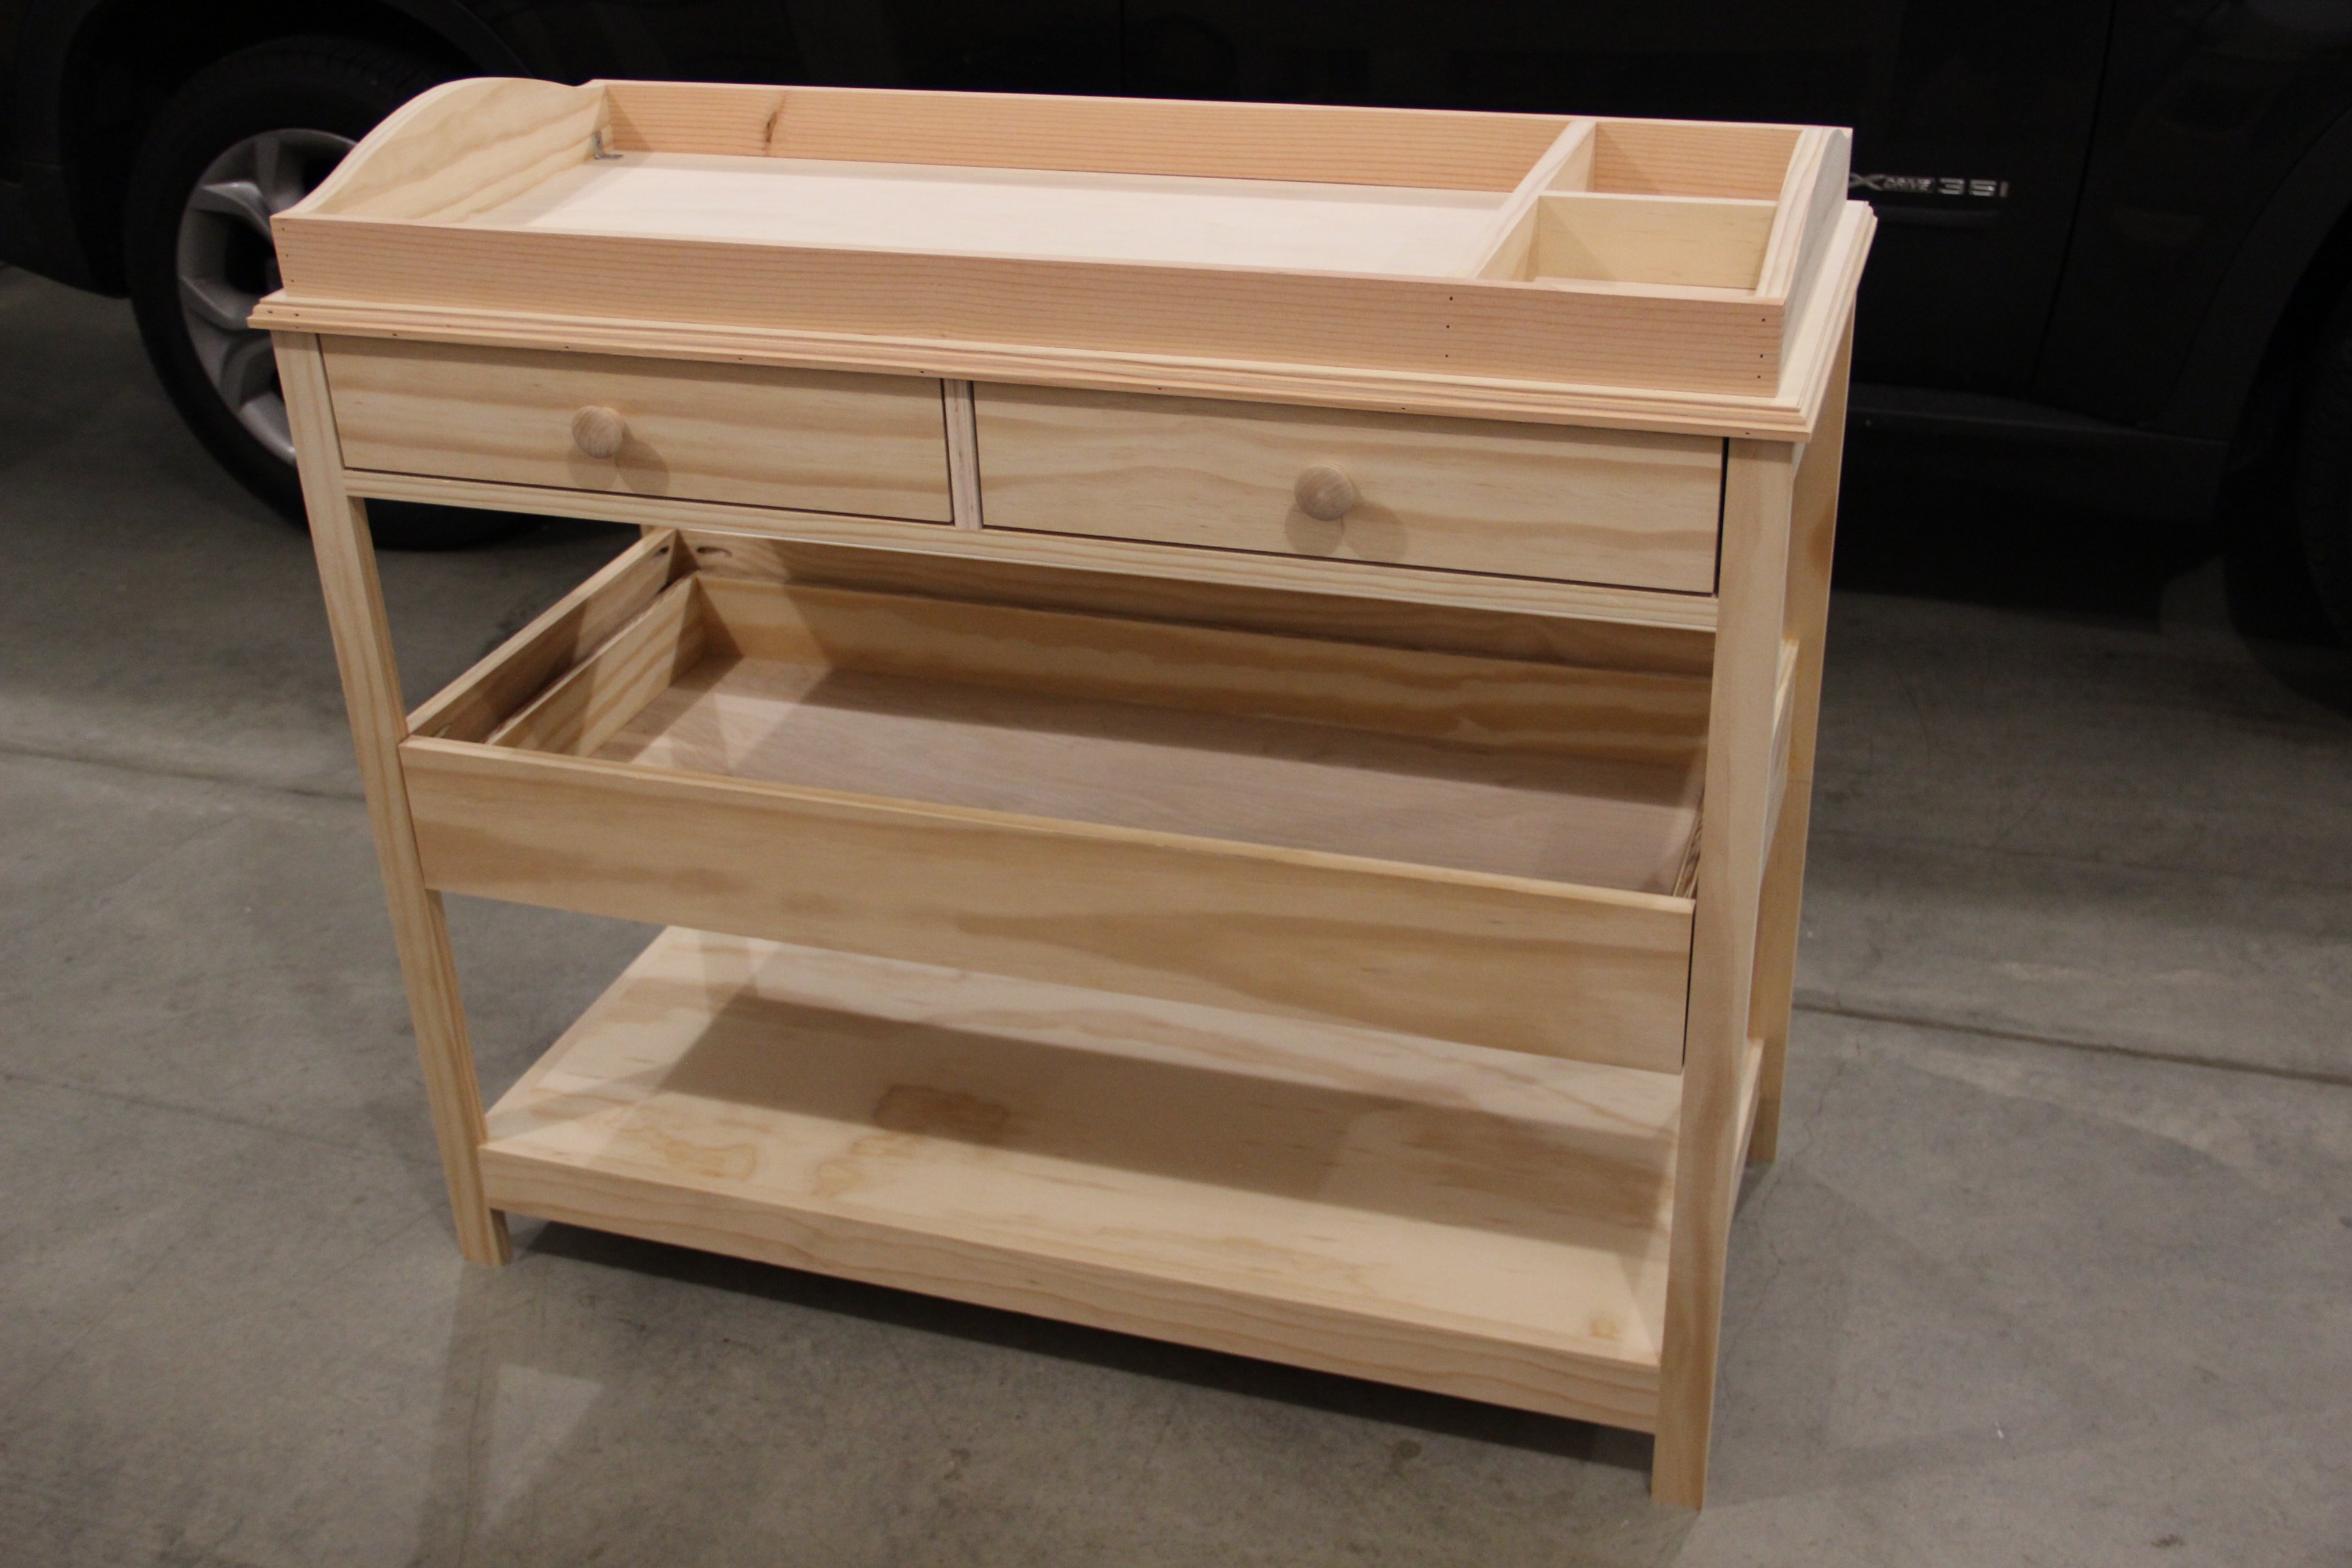
Tue, 12/24/2019 - 11:37
I live this changing table. I made the "Simple Changing Table" but would like to make this one. Are there plans for this one? Thanks!
Modified the loveseat plans and created a sofa as well. No one that sees these thinks I built them. They look so much nicer than anything you can buy!


Comments
Ana White Admin
Thu, 08/03/2023 - 09:27
Looks comfortable!
Great job, love the finish! Thanks for sharing.