Community Brag Posts
Ultimate Workshop Workbench
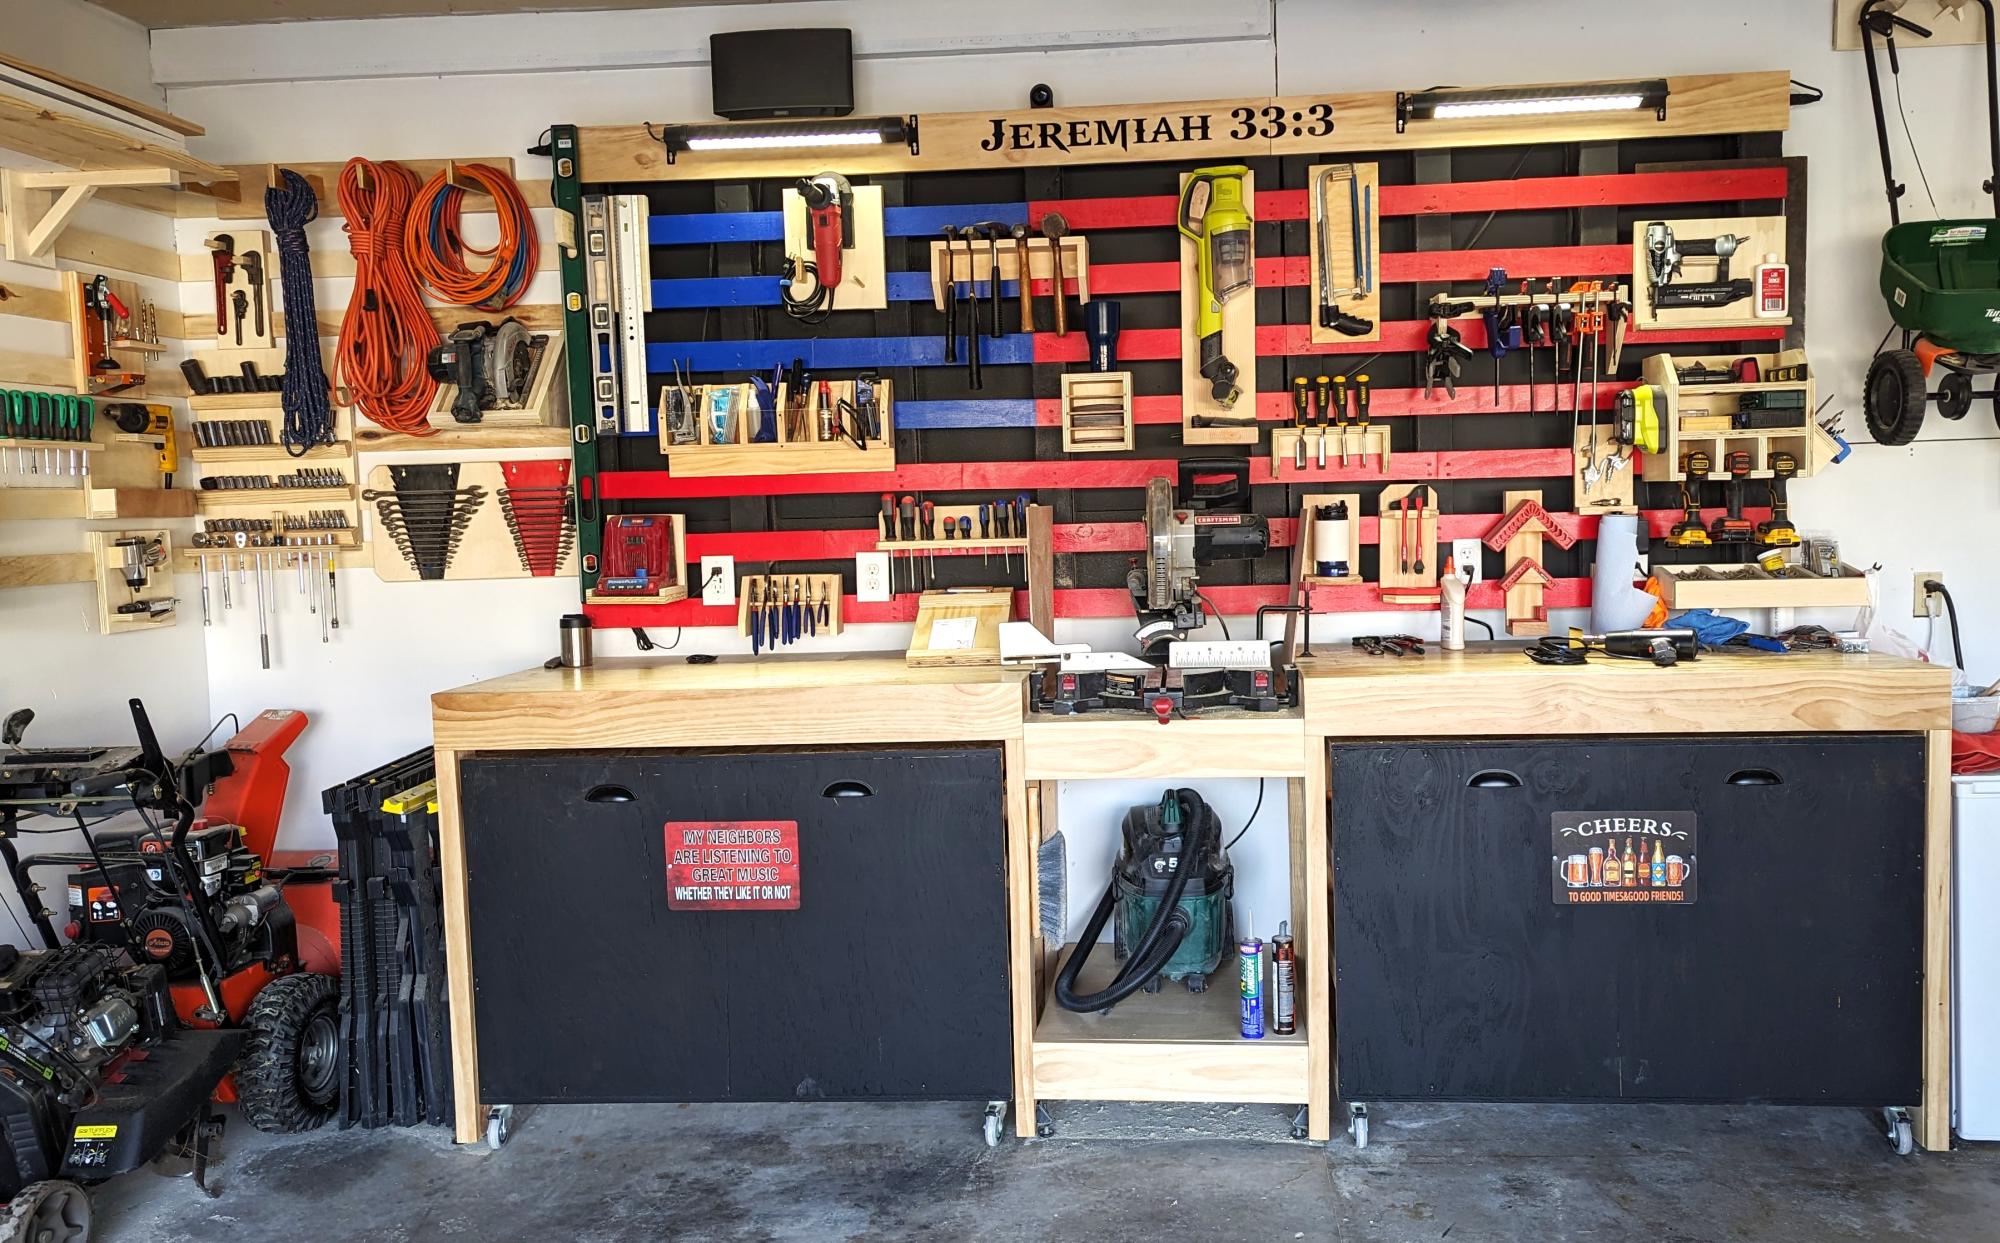
My garage needed an overhaul and I wanted to start a hobby in woodworking.
I found my way to Ana's website and found some of the best ideas and decided to try my attempt at building the Ultimate Roll Away Workbench with Miter Saw Stand.
This helped inspire me to augment my garage and build that workbench and new french cleat wall.
Thank you Ana for having such an awesome website and offering up ideas for free!!
Built from Plan(s)
Comments
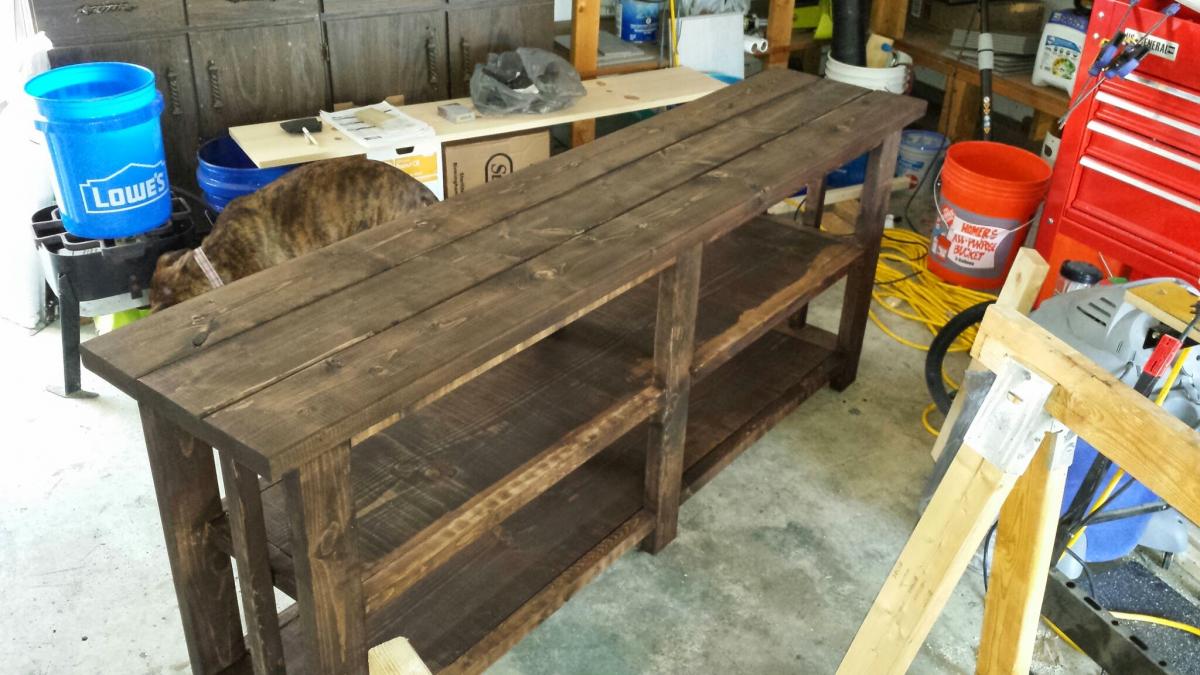
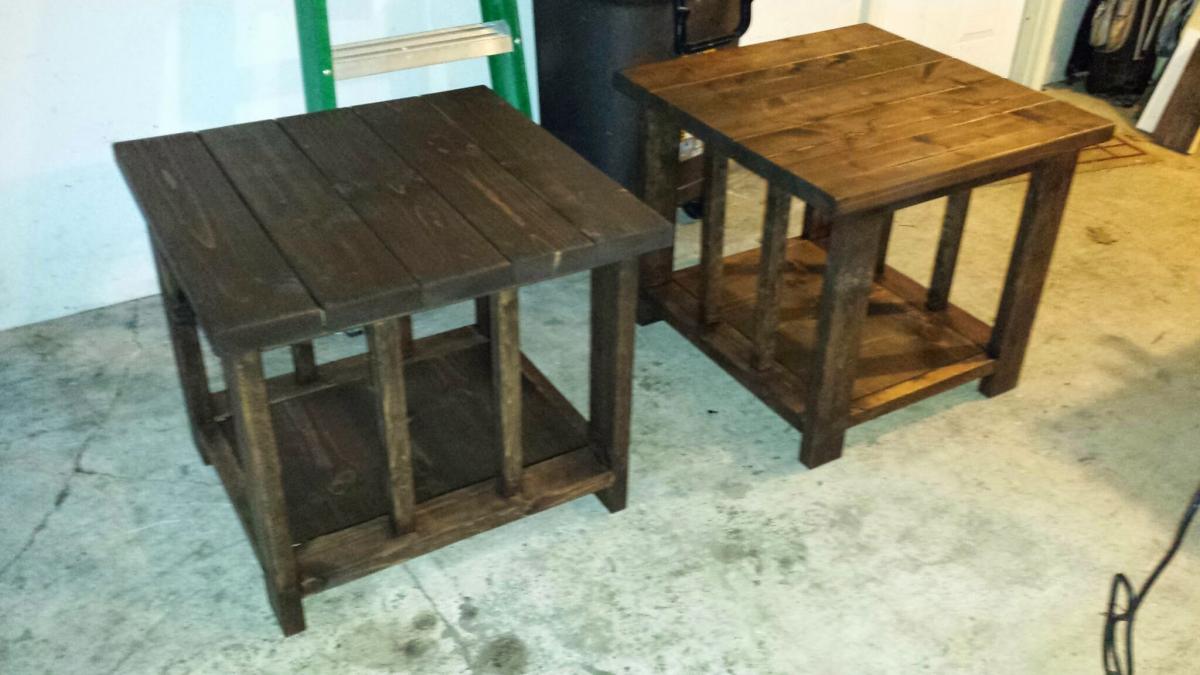
Rustic tables
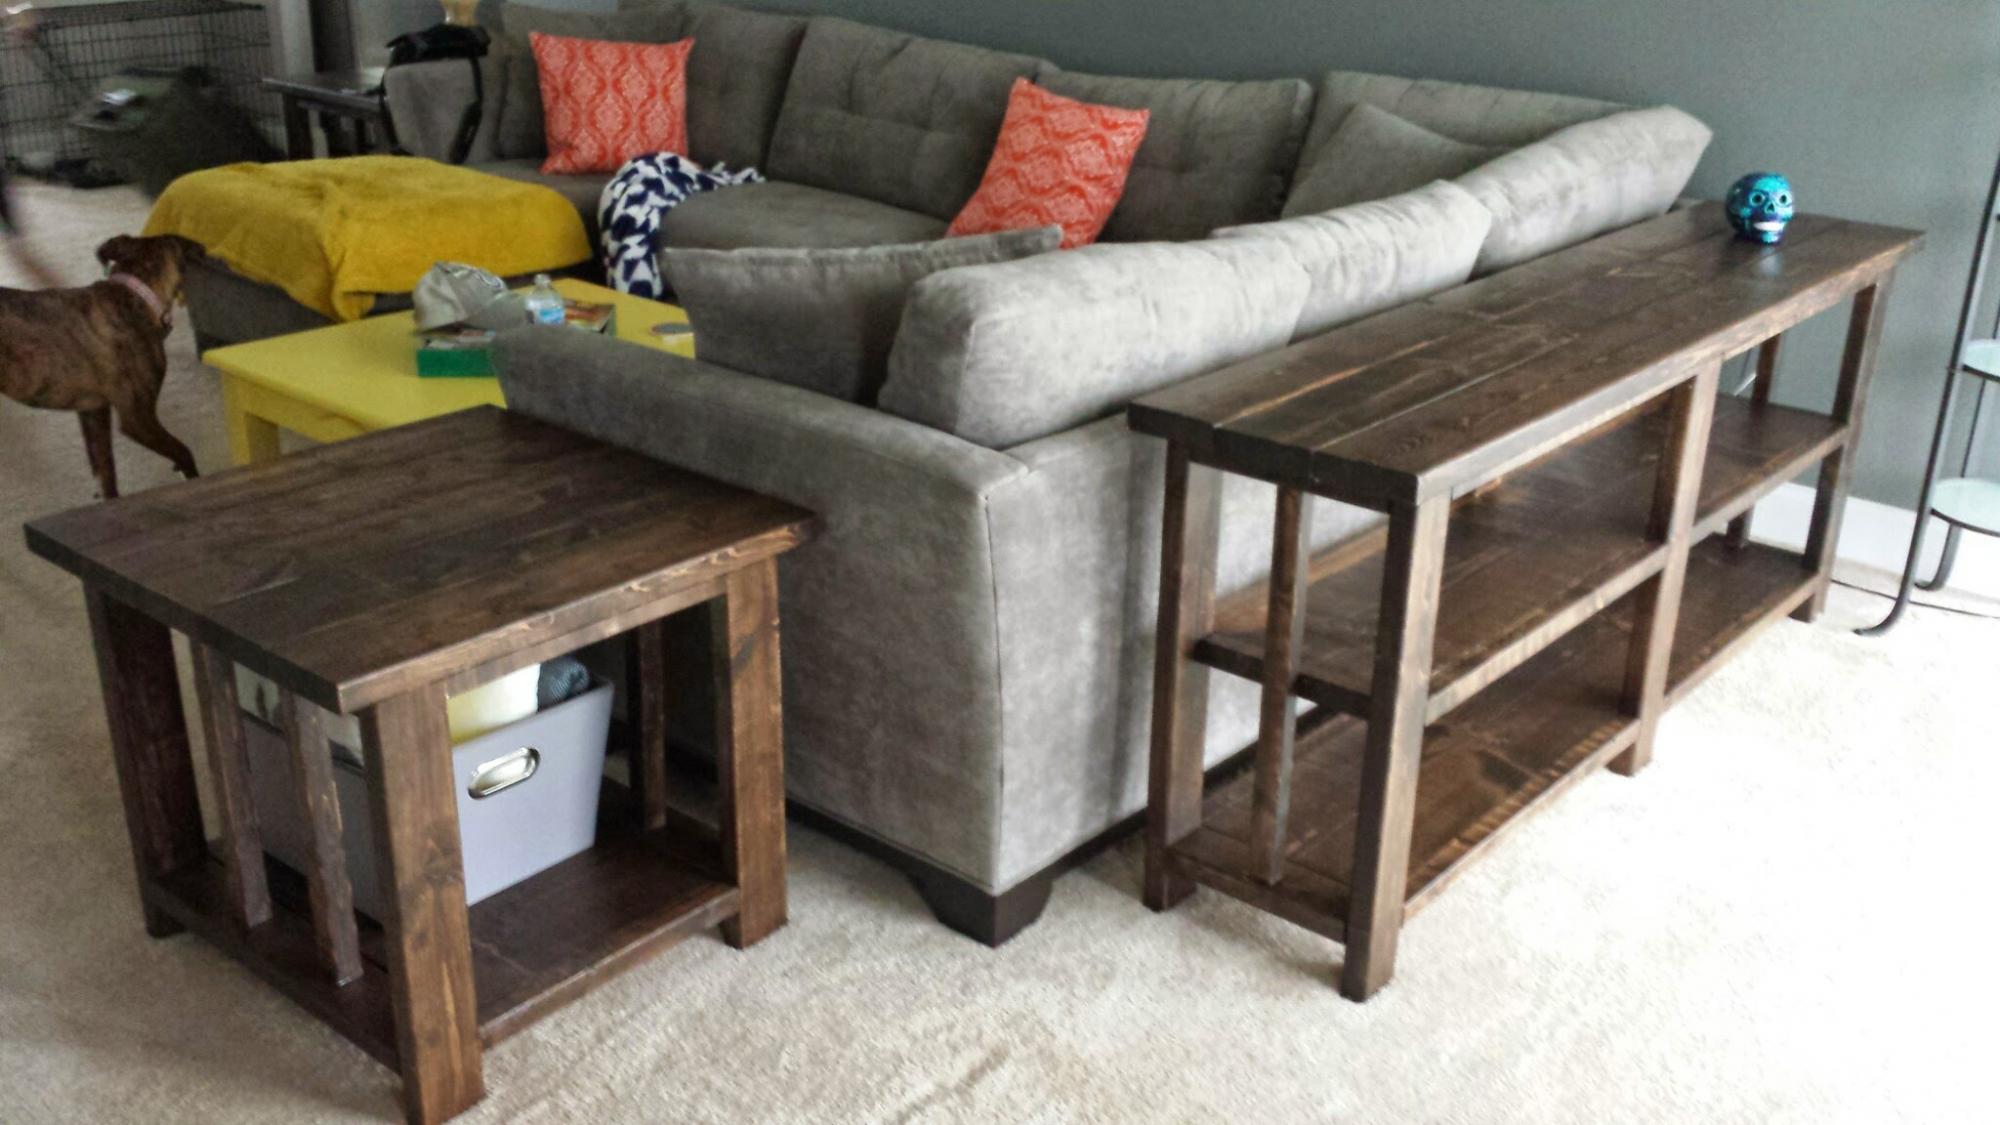
My first build! Didn't want the X's so I put a straight piece on each end.
Built from Plan(s)
Upholstery Bench
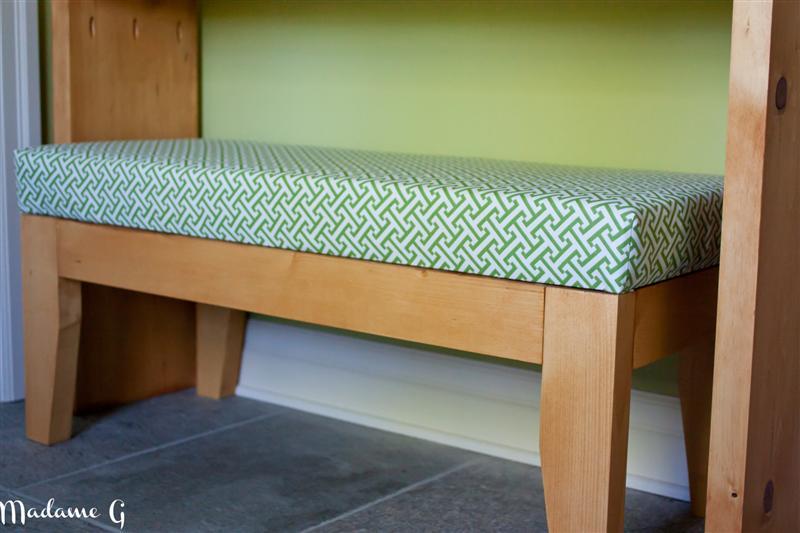
This is my second build and i really like it. I used pine and Waverly Cross Section Green to cover the foam. The plan is realy easy to follow and i used killer B method for the upholstery part. http://ana-white.com/2011/03/upholstered-bench. With two kiddos, it took me a couple of weeks to finish it but its a day project if your have more time than me! The only problem i had was to find high density foam. I finally find it at an upholstery shop but it cost me more for the foam then for the rest of the project. I used varathan oil base stain in light wallnut. I will finish it with a coat of vanish soon. Sorry for my bad english, my first language is french! Genevieve alias MadameG
Built from Plan(s)
Estimated Cost
120$ (85$ for foam only!)
Recommended Skill Level
Beginner
Comments

Wed, 06/06/2012 - 09:32
Genevieve, I always enjoy
Genevieve, I always enjoy your posts. Your English is good - better than some people who grew up speaking it here in the US!
I have a daughter named Genevieve. Her father thought Genevieve Bujold was beautiful and wanted to name his little girl for her.
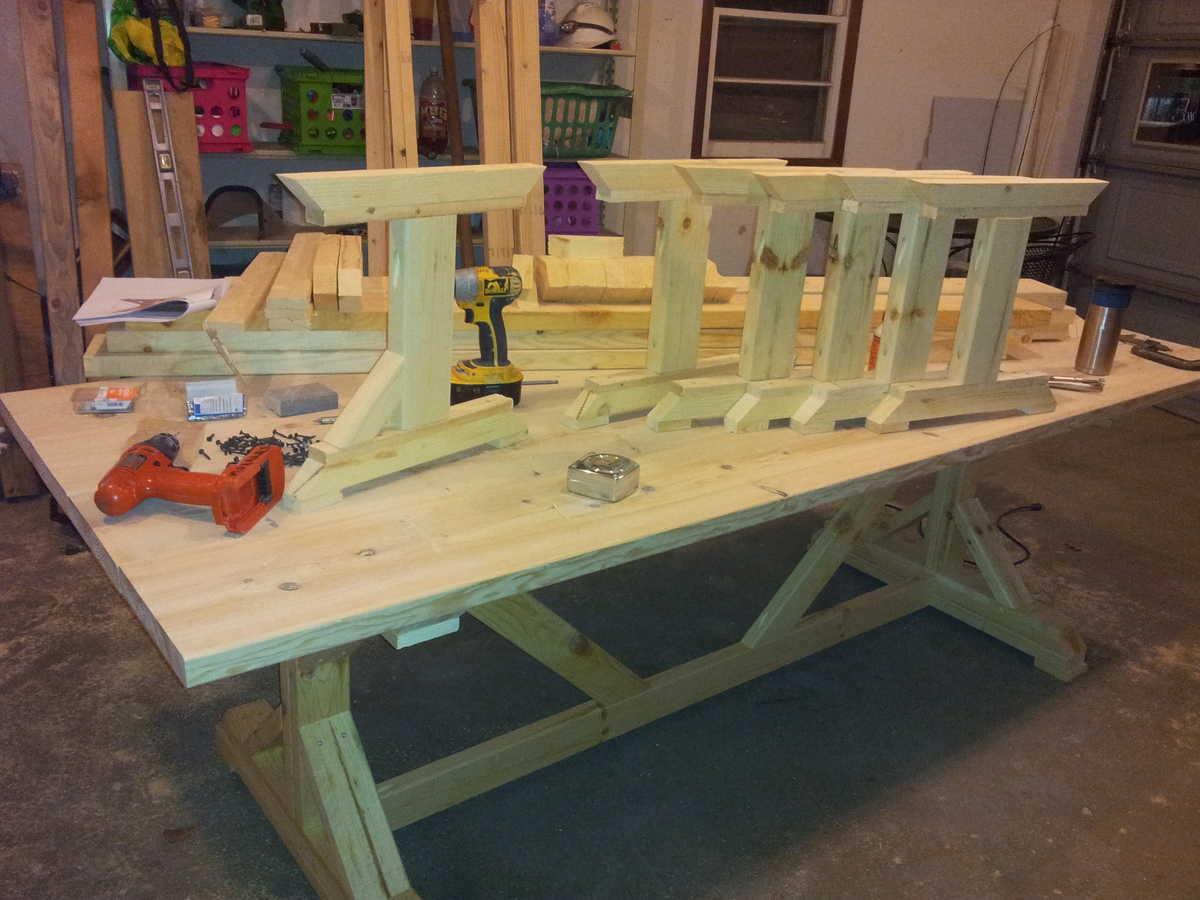
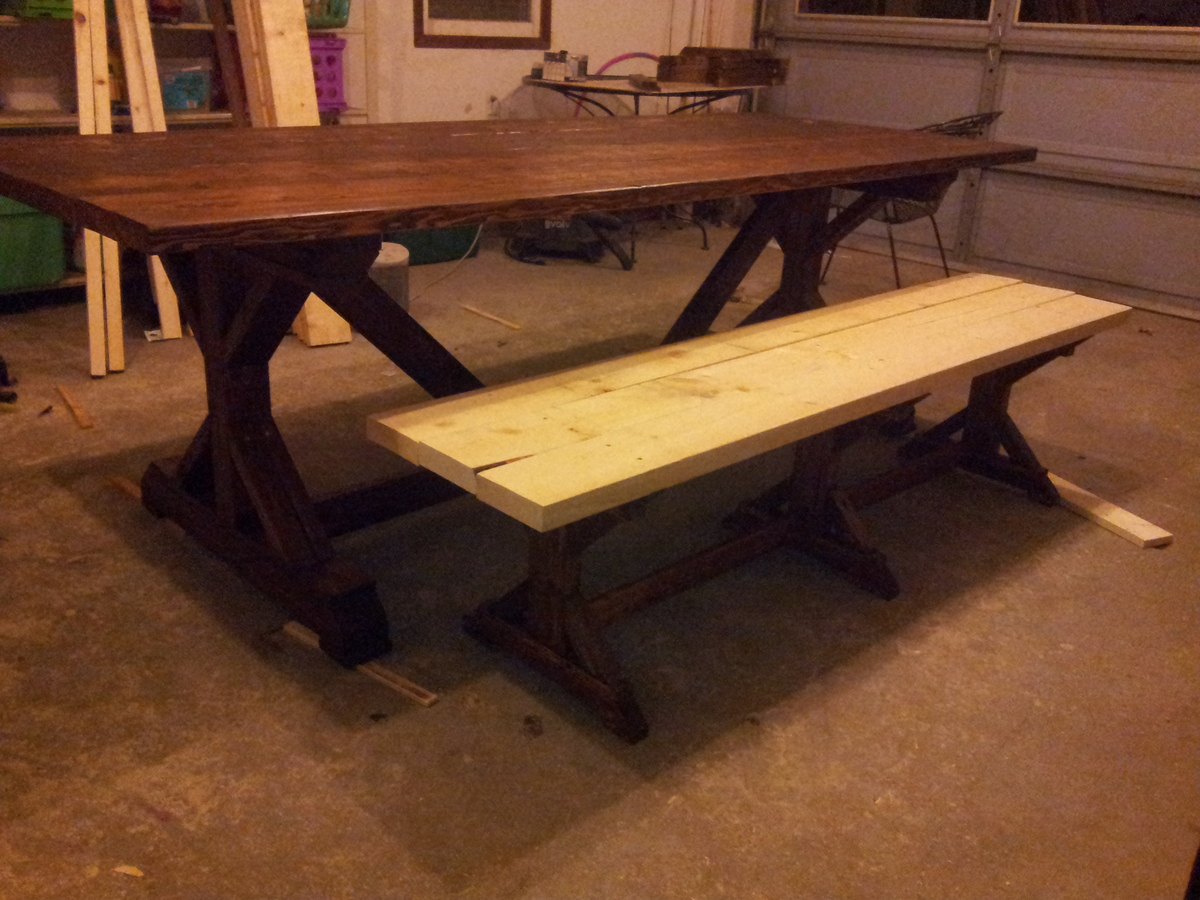
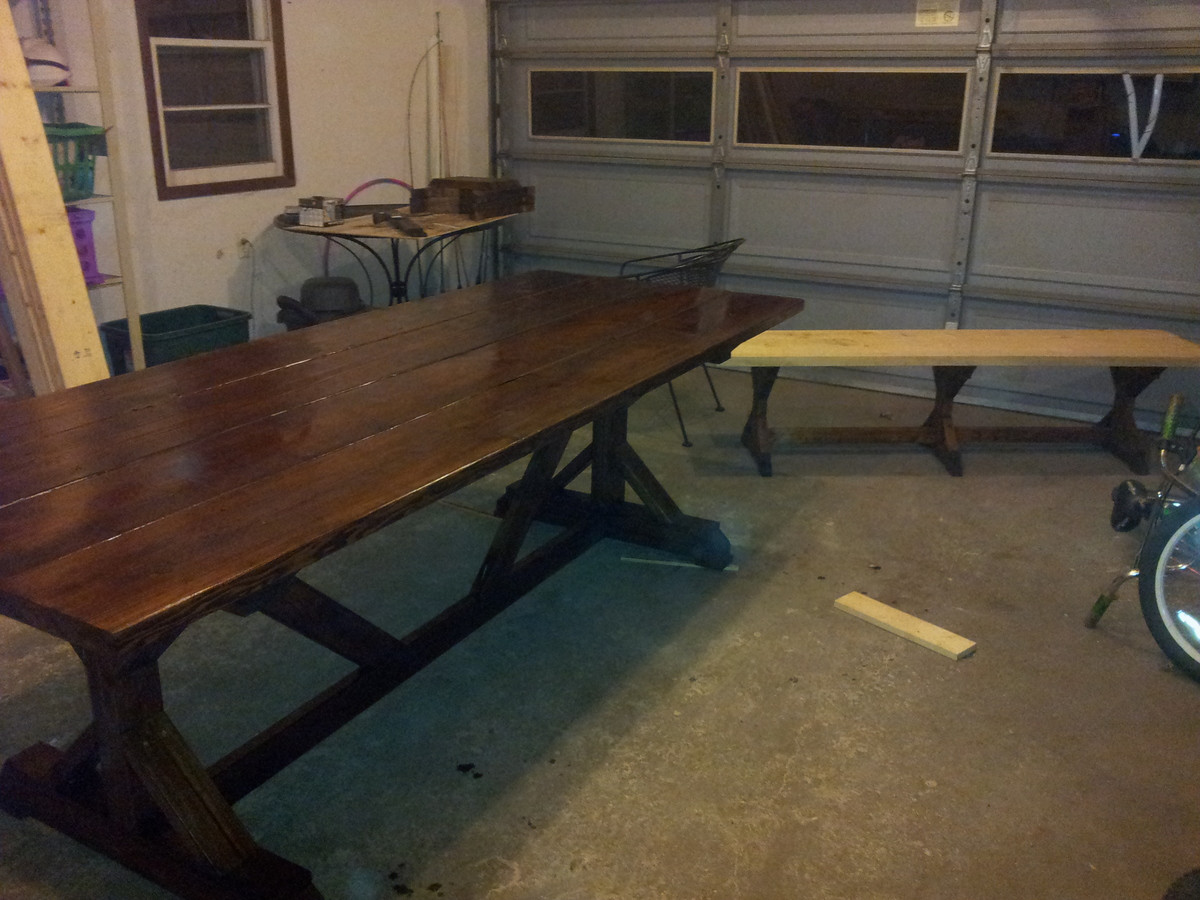
fancy x barn house table and benches

Well this is a project I made from plans from this site and we love it ! Is my first peace of furniture I've ever made and I think it was Farley easy my wife saw the pictures and ask me if I would make it & I was like I'll try and it turned out beautiful everyone who's seen it love it very sturdy actually it was completed right on time for thanksgiving day. I want to thank Anna and whoever posted those plans we love our big table and matching benches : )
Built from Plan(s)
Estimated Cost
about $200
Estimated Time Investment
Weekend Project (10-20 Hours)
Finish Used
Minwax pre-stain conditioner and minwax wood finish dark walnut 2716
Recommended Skill Level
Starter Project
Comments
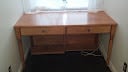
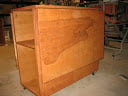
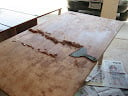
Colorful Custom Bedford Corner Desk with Live Edge Desktop
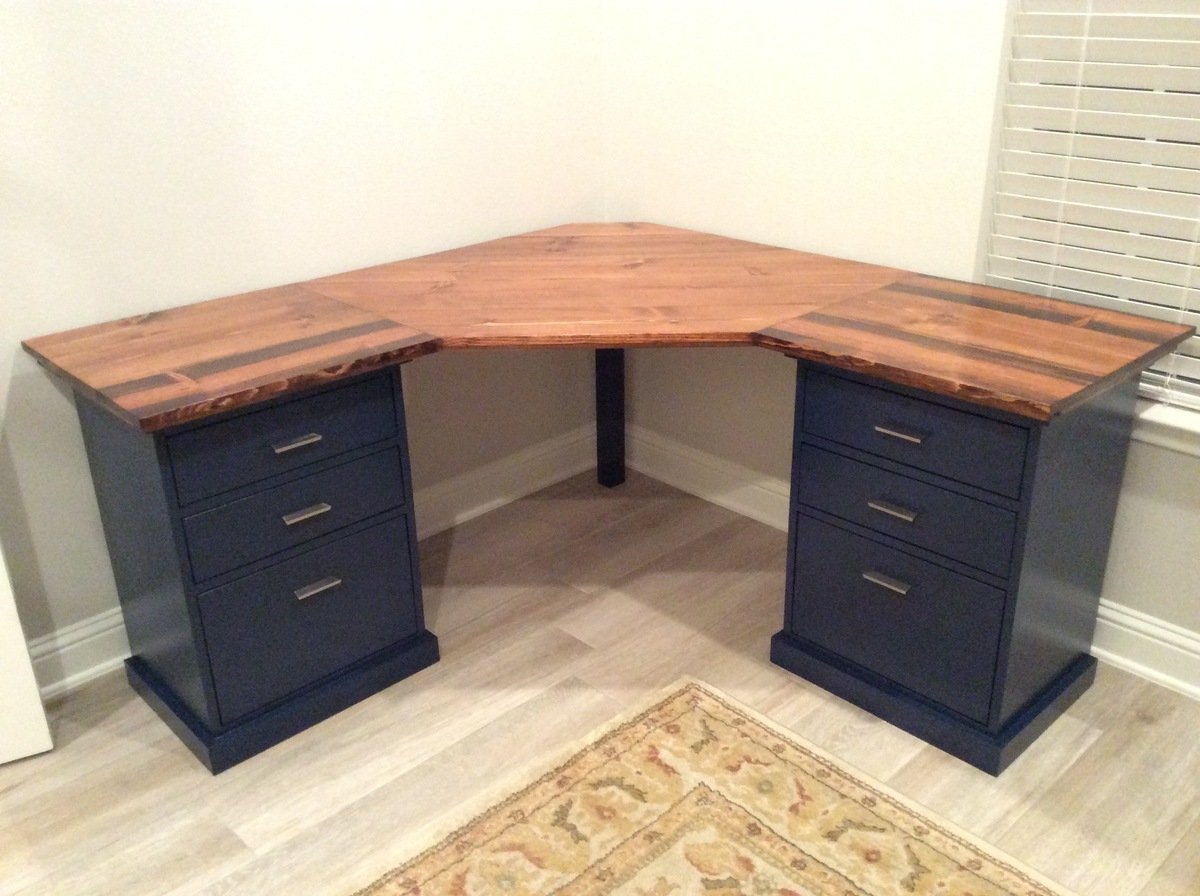
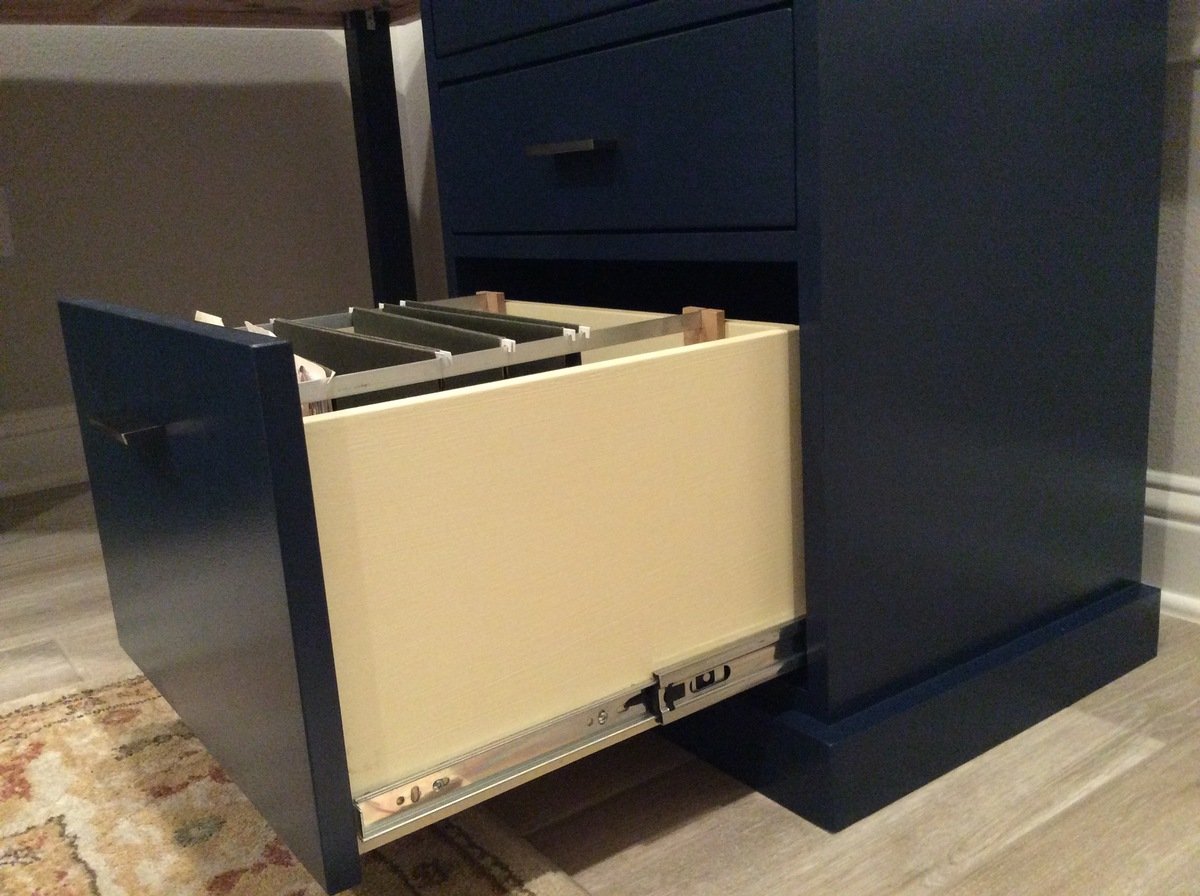
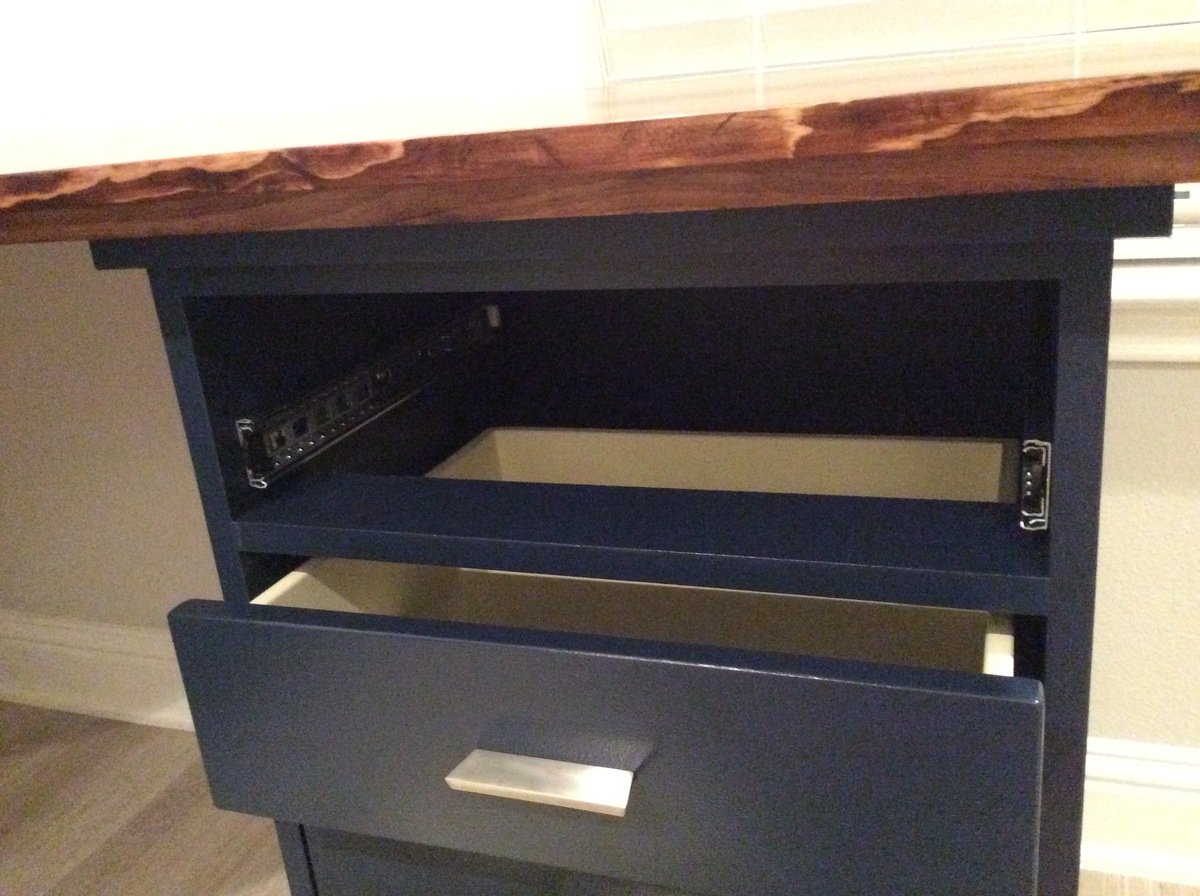
I followed the plans pretty closely. I added dividers to make 3 drawer units but I didn't find it necessary to have the top shelf go all the way to the back since it would never function as a shelf. I used scrap pieces for that and they weren't big enough to be full shelves.
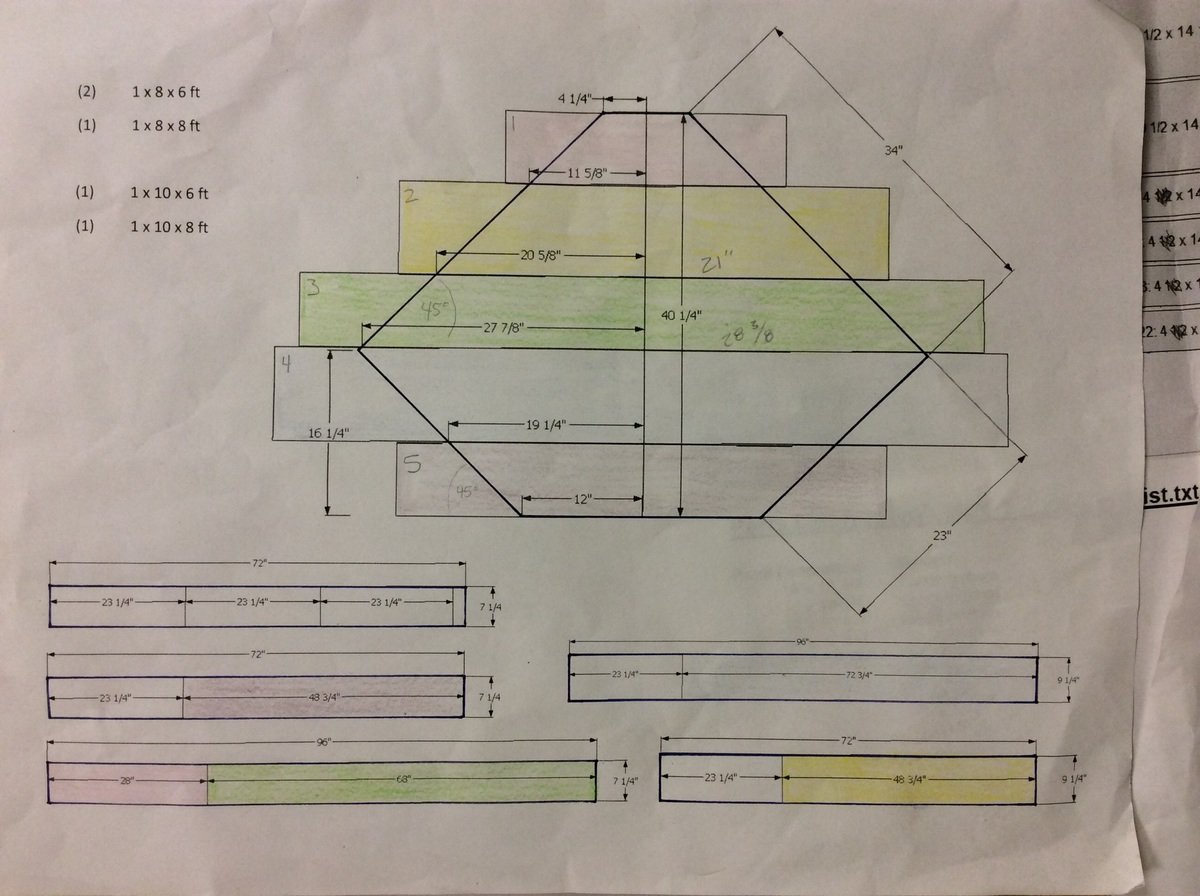
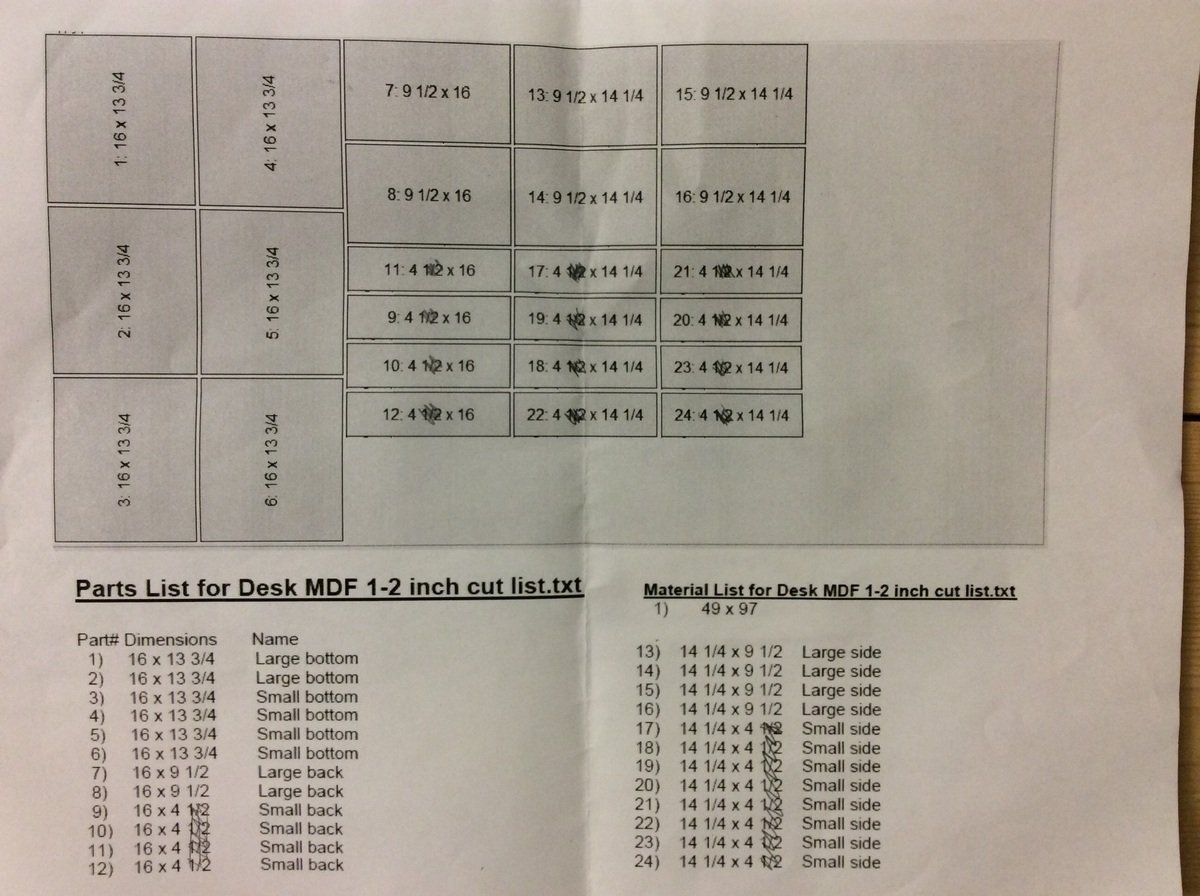
I used 1/2" MDF for the bottom, sides, and backs of the drawers to cut down on weight, cost, and general bulkiness. I used this free app called Cut List to figure out the easiest way to have the guys at Home Depot cut all the drawer panels after I learned I'm not that good with a circular saw. I used a hack saw to cut aluminum bars for hanging files and used scrap wood to make the little brackets to hold the bars upright in the drawer. The full extension drawer slides are functionally and asthetically better but it would have been so much easier to put in basic bottom mount slides.
I wanted a wood grain top and ended up with common pine boards over more expensive poplar or oak and I would use pine again without hesitation. I used Google SketchUp to figure out the widths of boards I needed to make the top with minimal cuts. Then joined them with glue and mending plates and sanded the hell out of them. I altered the dimensions slightly to make it the same size desktop as the Bedford desk. My two wing sections are 23" x 23" but I should have made them 23" deep by more like 24" or 25" long. I had to hack the bottom bracing to make a spot for the drawer units to slide into. If you alter the dimensions make sure you can secure a brace between the main body and the wing of the desktop and still have room for the brace at the edge of the wing.
My cost includes things like a Kreg jig, saw blade, clamps, paint brushes etc. so you may be able to do this for less. I could have gone with a middle of the line paint I think. This project was a beast for me because a) I'm not a furniture maker b) I don't own a table saw which would have been amazing c) I picked the hardest way to make the desktop and d) I modified some of the dimensions from the basic plans. I worked on this thing for weeks (granted sometimes I didn't touch it for several days or a week). But it was a fun and rewarding project.

Built from Plan(s)
Estimated Cost
$500-$600
Estimated Time Investment
Week Long Project (20 Hours or More)
Finish Used
Behr Marquee, Minwax wood conditioner, stain (honey) and stain poly
Recommended Skill Level
Intermediate
Comments

Tue, 08/27/2019 - 19:28
This is AMAZING!!! I'm so…
This is AMAZING!!! I'm so sad I did not see this earlier. Thank you so much for sending in pics!
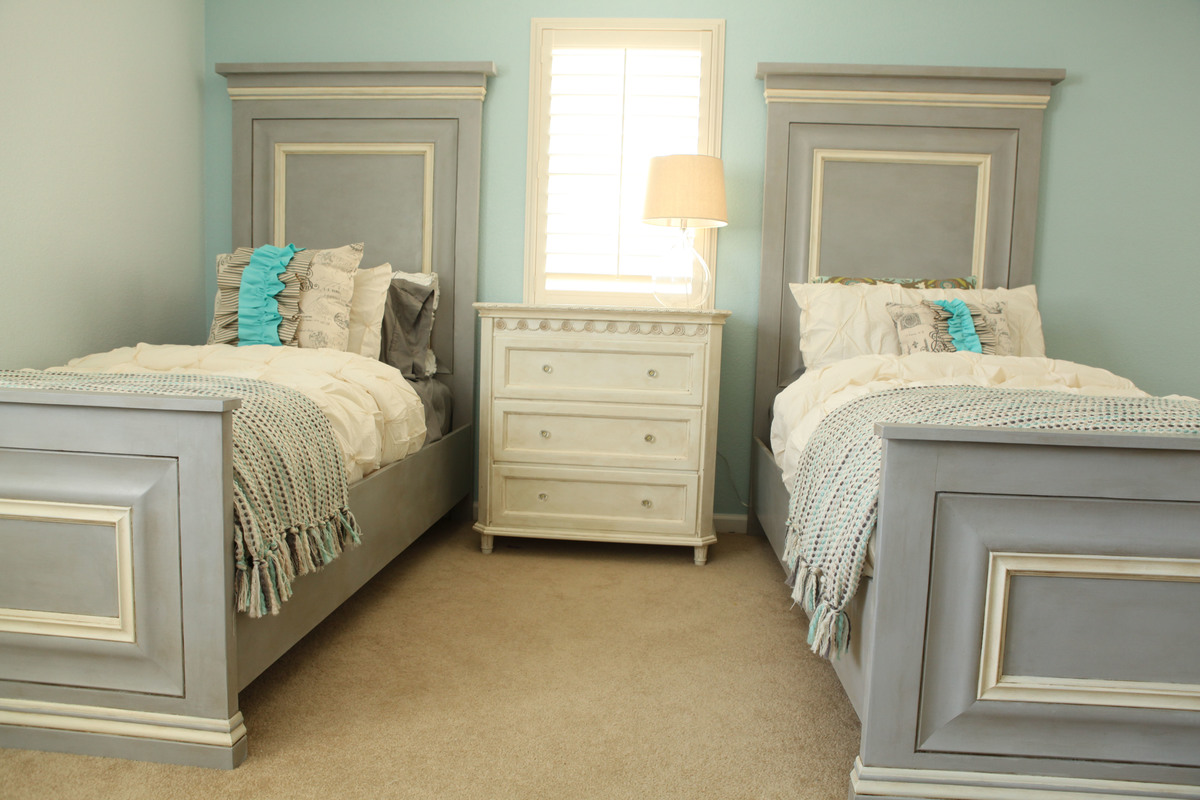
Twin Panel Bed
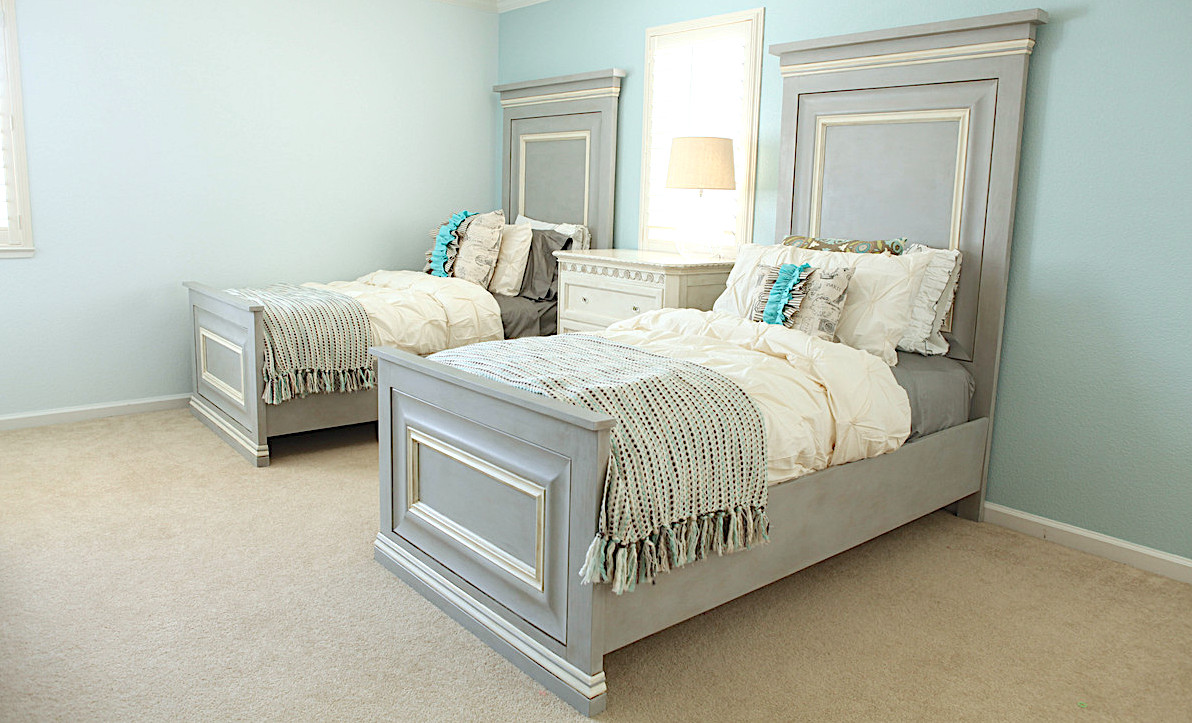
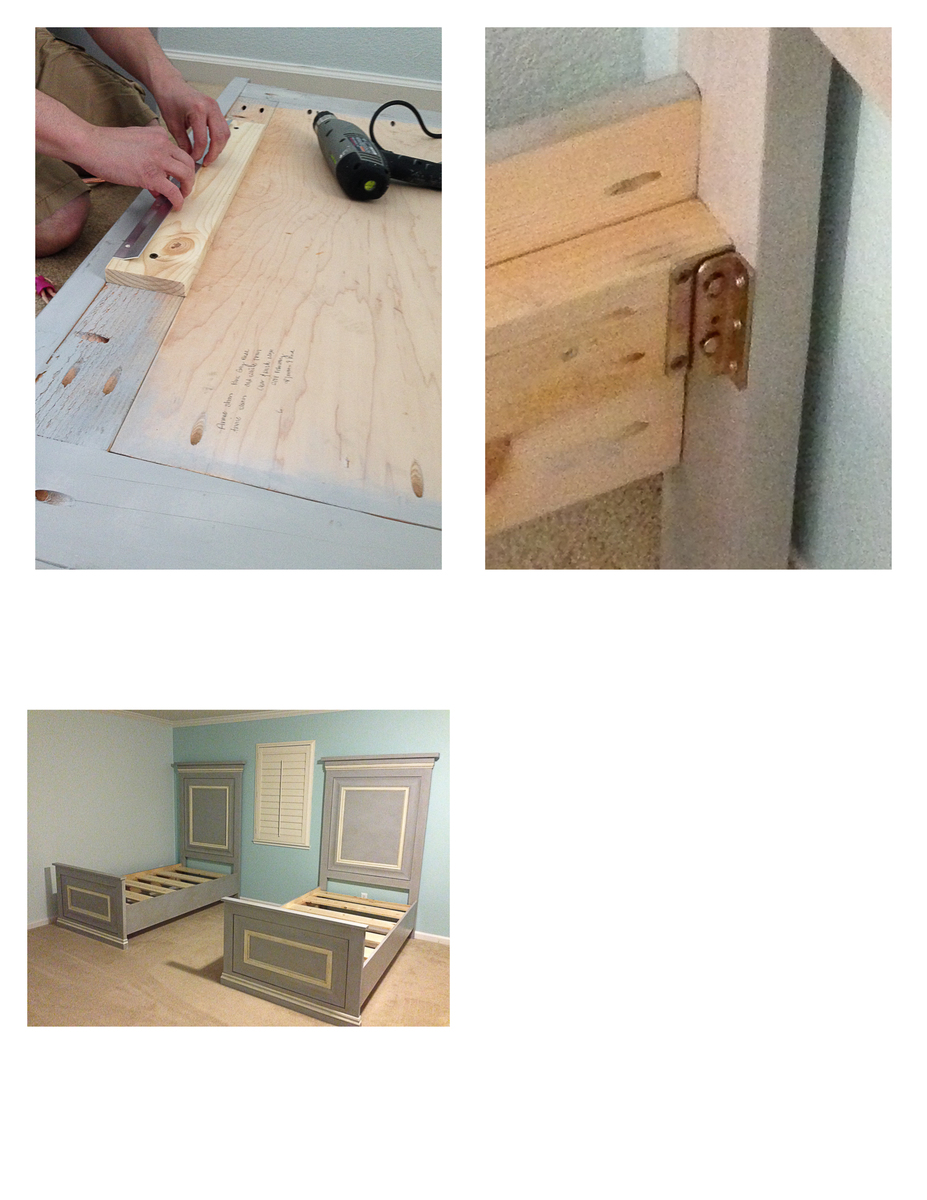
Thank you so much for these awesome plans. When I saw the original twin panel bed, I knew this was exactly what I wanted to build for my two daughters. I love super high head boards, and these are exactly that. I am in love. I did make some changes to the plan. I went with taller side rails, and used metal bed rail brackets. The brackets were super important. We move every few years being in the military, and I wanted something that would with-stand time and moves. I am also quite impressed how solid these beds are. I could never find anything this amazing in a store. I would also like to thank my husband for his help. It was our first build, but definitely not our last. Thank you!


Built from Plan(s)
Estimated Cost
200 per bed.
Estimated Time Investment
Week Long Project (20 Hours or More)
Finish Used
I used Annie Sloan Chalk paint. Paris Grey, and Old White. First I Clear waxed it, then finished it with a dark wax. This gave it more dimension.
Recommended Skill Level
Intermediate
Comments


Wed, 06/11/2014 - 17:27
Thank you for your very nice
Thank you for your very nice comments:
Here is some info, let me know if I can help further more.
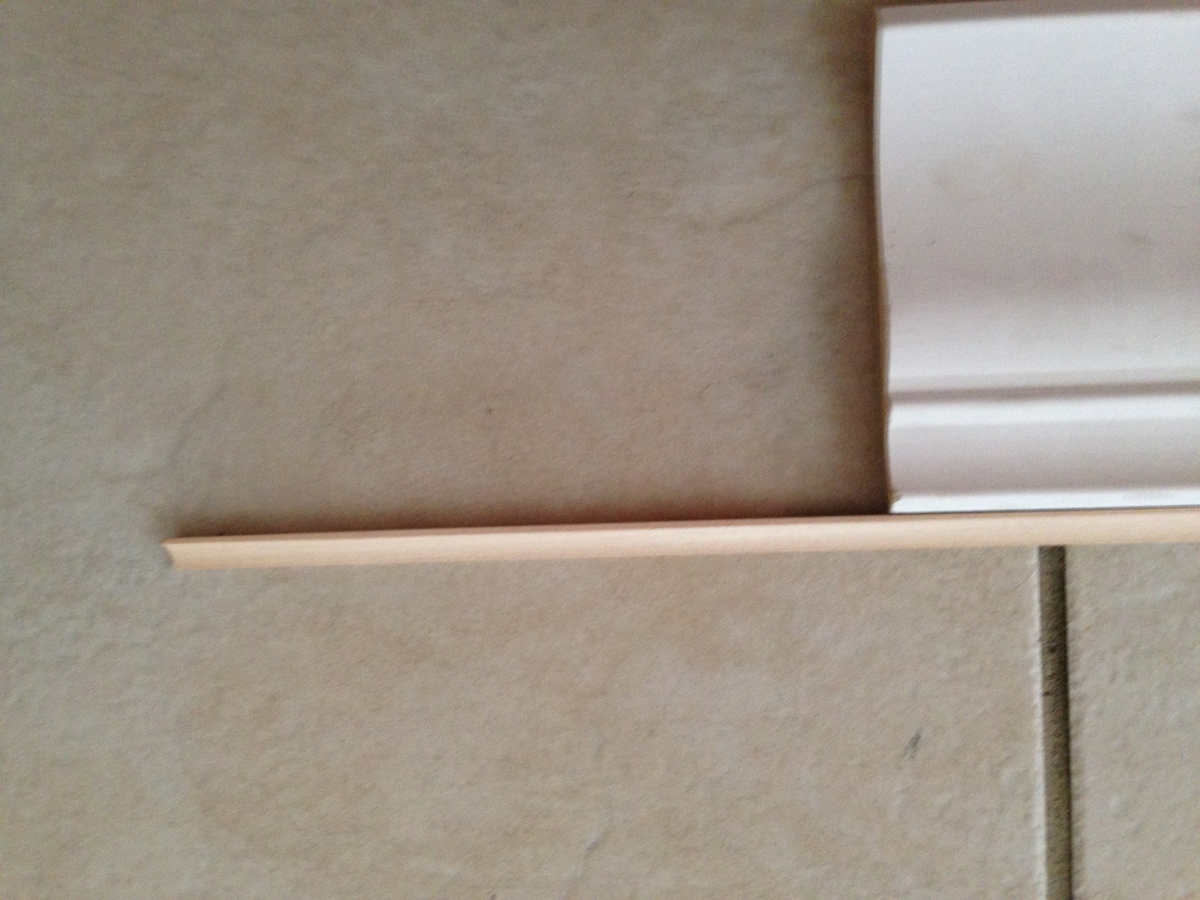
This is what we used for the base molding and the headboard molding at the top. http://www.homedepot.com/p/House-of-Fara-5-8-in-x-4-in-x-8-ft-MDF-Base-…
For the the inner molding we used two pieces of molding: This is the style (link below) we used, but ours was a little bigger, 5 1/4 inches. Couldn't find it on the home depot website, but this is exactly the same style.
The addition molding below is a finishing molding that we had to use since the above molding was not flush to the back board. It finished really nice. Glad we added this addition dimension. You can easily skip using it with different "above" molding.
http://www.homedepot.com/p/American-Wood-Moulding-LWM47-9-16-in-x-4-1-4…
http://www.homedepot.com/p/American-Wood-Moulding-WM100-11-16-in-x-11-1…
For the side rails we also used 10 inch boards. I thought it made the bed look more proportioned. I will add additional pics of the molding, so re-check pictures. Again, let me know if you have further questions.
Wed, 06/11/2014 - 17:27
Thank you for your very nice
Thank you for your very nice comments:
Here is some info, let me know if I can help further more.
This is what we used for the base molding and the headboard molding at the top. http://www.homedepot.com/p/House-of-Fara-5-8-in-x-4-in-x-8-ft-MDF-Base-…
For the the inner molding we used two pieces of molding: This is the style (link below) we used, but ours was a little bigger, 5 1/4 inches. Couldn't find it on the home depot website, but this is exactly the same style.
The addition molding below is a finishing molding that we had to use since the above molding was not flush to the back board. It finished really nice. Glad we added this addition dimension. You can easily skip using it with different "above" molding.
http://www.homedepot.com/p/American-Wood-Moulding-LWM47-9-16-in-x-4-1-4…
http://www.homedepot.com/p/American-Wood-Moulding-WM100-11-16-in-x-11-1…
For the side rails we also used 10 inch boards. I thought it made the bed look more proportioned. I will add additional pics of the molding, so re-check pictures. Again, let me know if you have further questions.
Mon, 07/20/2015 - 18:51
Your Bed is Beautiful!!!
I'm in awe!! Thank you so much for sharing, I just saw your beds and had to comment and say thank you for sharing and beautiful job! Ana

In reply to Your Bed is Beautiful!!! by Ana White
Sat, 11/28/2015 - 15:53
Thank you! You are the one
Thank you! You are the one made it possible. We truly feel inspired when we look at your page. Thank you for sharing all your plans. You are the best.
Sewing Tables
I have a friend who makes beautiful quilts. She's been doing this by sitting on the floor to cut her fabric and plopping her sewing machine on a wobbly folding table. When she decided to turn her guest room into a dual purpose sewing/guest room she asked me to build her something that would fit into a niche under her dormer window.
The built in table has two large drawers for sewing notions and is supported at the back by a shelving unit with adjustable shelves. She plans to store items that she seldom uses here. They will be accessible, but out of the way and barely visible when she has guests using her room.
I suggested that I also build Anna's sewing table for small spaces so that she use that as a night stand when not in use as a cutting table.
I usually don't finish projects I build for others - I'm just not good at it! But, my friend asked me to put a finish on it. She picked out the Minwax polyshades product, and I have to tell you that it was a nightmare! (You can read about that here: http://thewidowsworkshop.blogspot.com/2012/06/lessons-learned-again.html)
I ended up using a stripping product to remove that finish. The final finish, just a stain and rub on poly, turned out beautifully!
Installation was also a challenge, but using brute force - and a hammer! - I was able to fit it between those very out-of-square walls!
She's happy, I'm happy to be done!
Built from Plan(s)
Estimated Cost
$150 for both
Estimated Time Investment
Weekend Project (10-20 Hours)
Finish Used
Originally, Minwax polyshades, had to strip that off. Then I used Minwax wood finish in Colonial Maple. I applied 3 coats. Then I used Minwax rub on poly in semi-gloss and applied 3 coats of that (following directions for dry time and sanding). I finished it off with a minwax polishing wax to give it a really nice smooth finish.
Recommended Skill Level
Beginner
seesaw for big kids

I built a big kids see saw using 2x6's all around with a 2x8 seat. The center post is 30"h.


Built from Plan(s)
Estimated Cost
$25
Estimated Time Investment
An Hour or Two (0-2 Hours)
Finish Used
Minwax Helmsman 3 coats exterior grade clear satin poly
Recommended Skill Level
Intermediate
Adirondack Chair
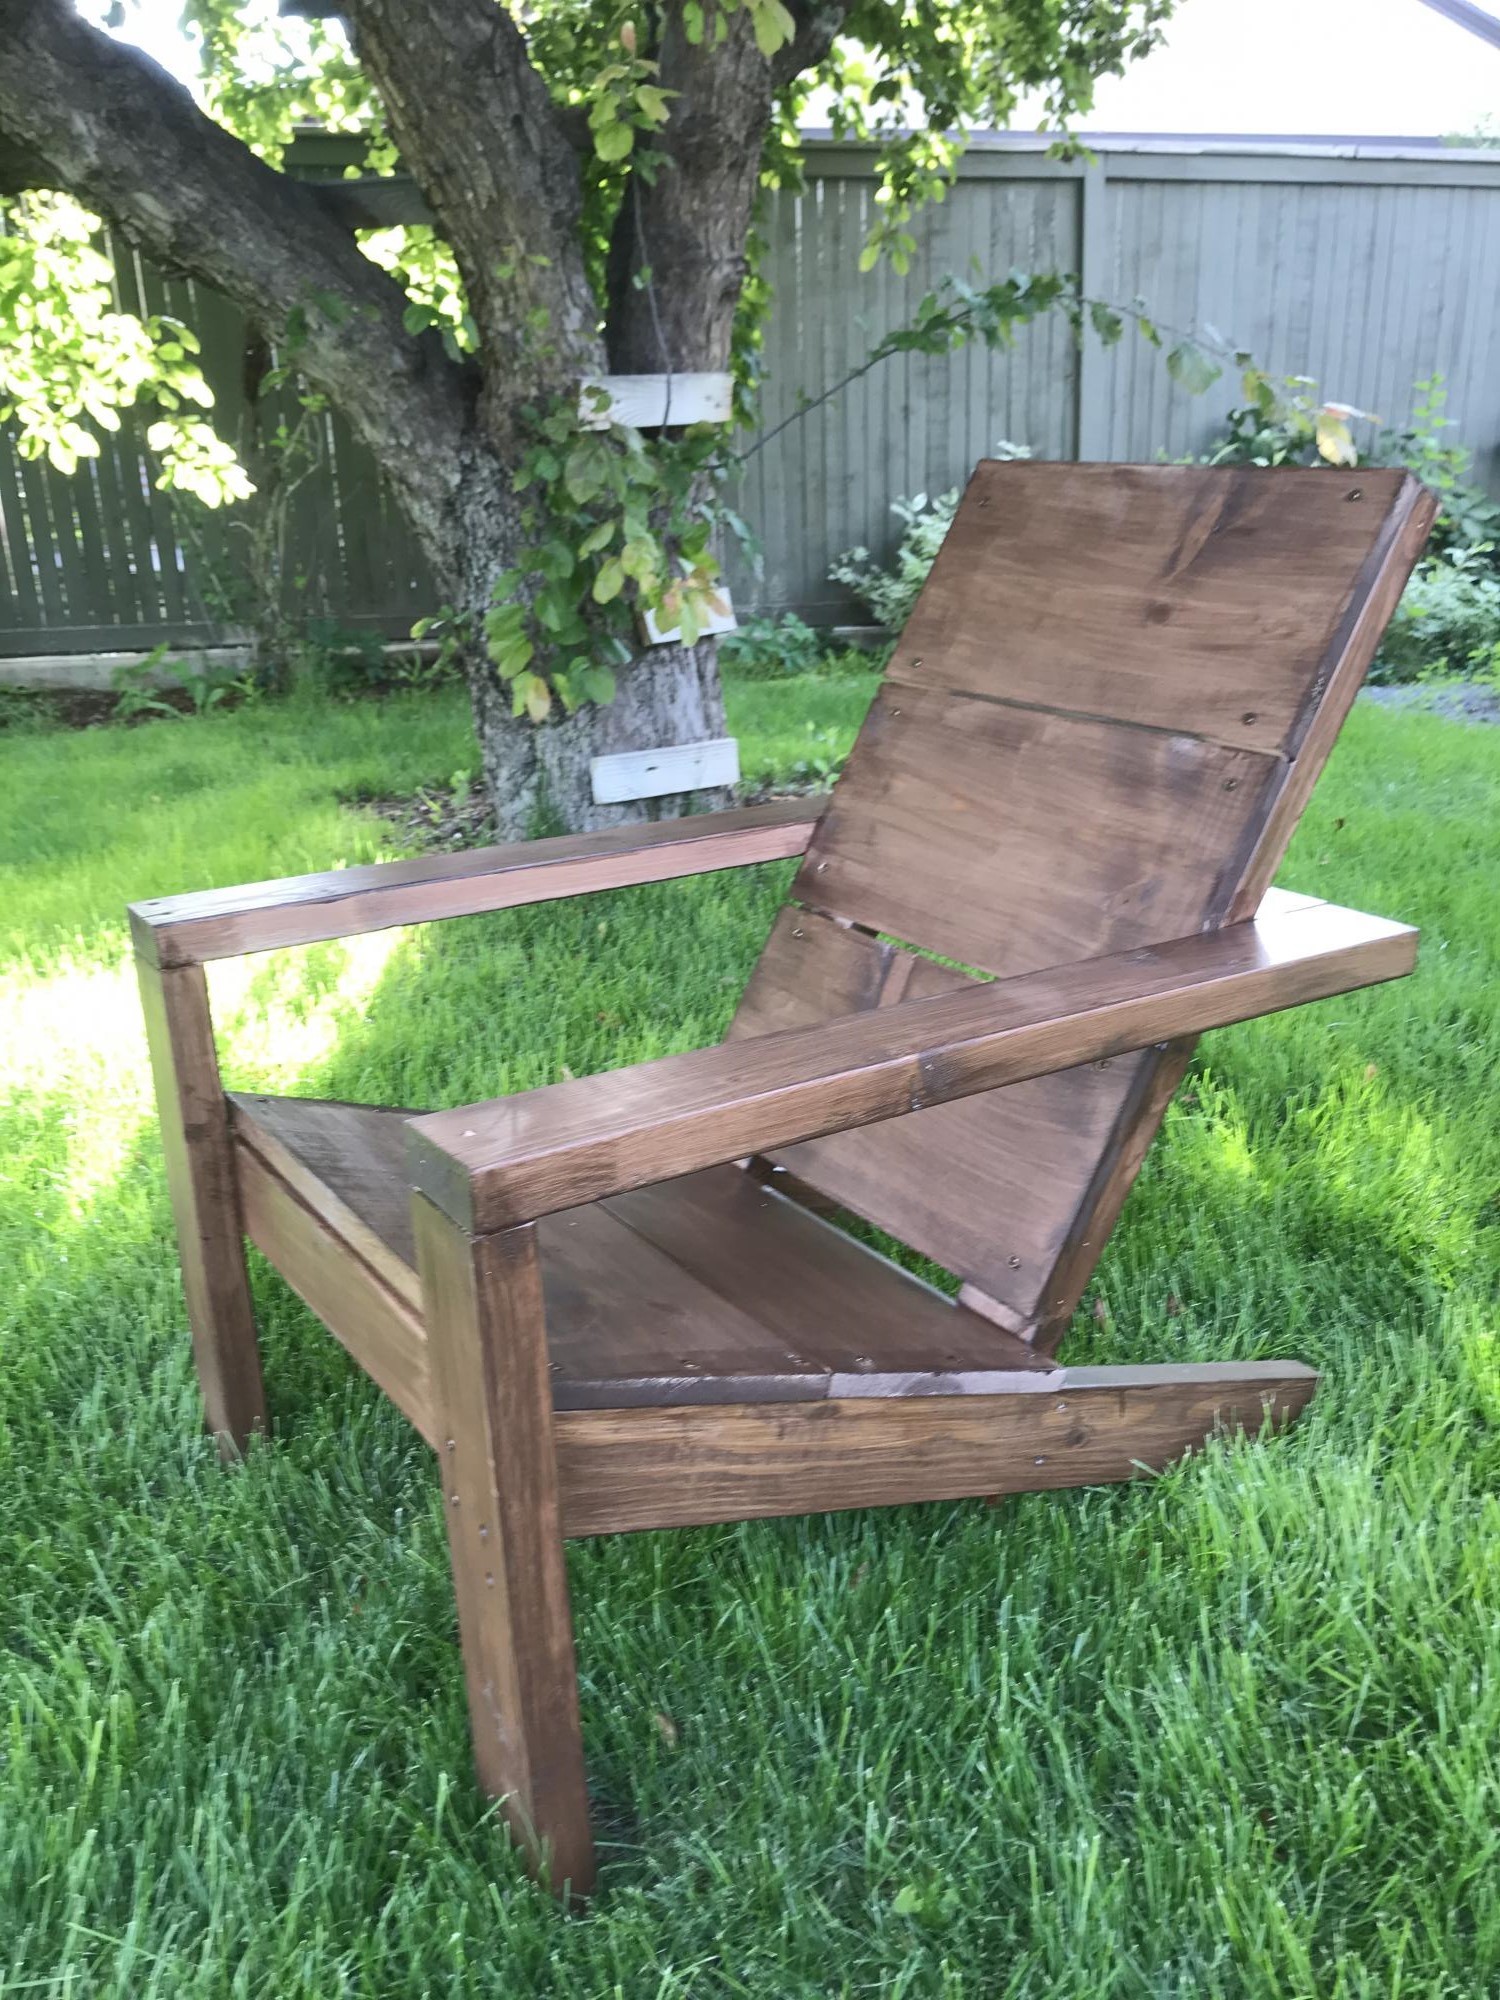
Followed Ana’s plans and turned out great. Stained it after it was assembled but would recommend doing that before assembly. Very comfy.
Built from Plan(s)
Estimated Cost
$35
Estimated Time Investment
Afternoon Project (3-6 Hours)
Hailey Wall Magazine Rack
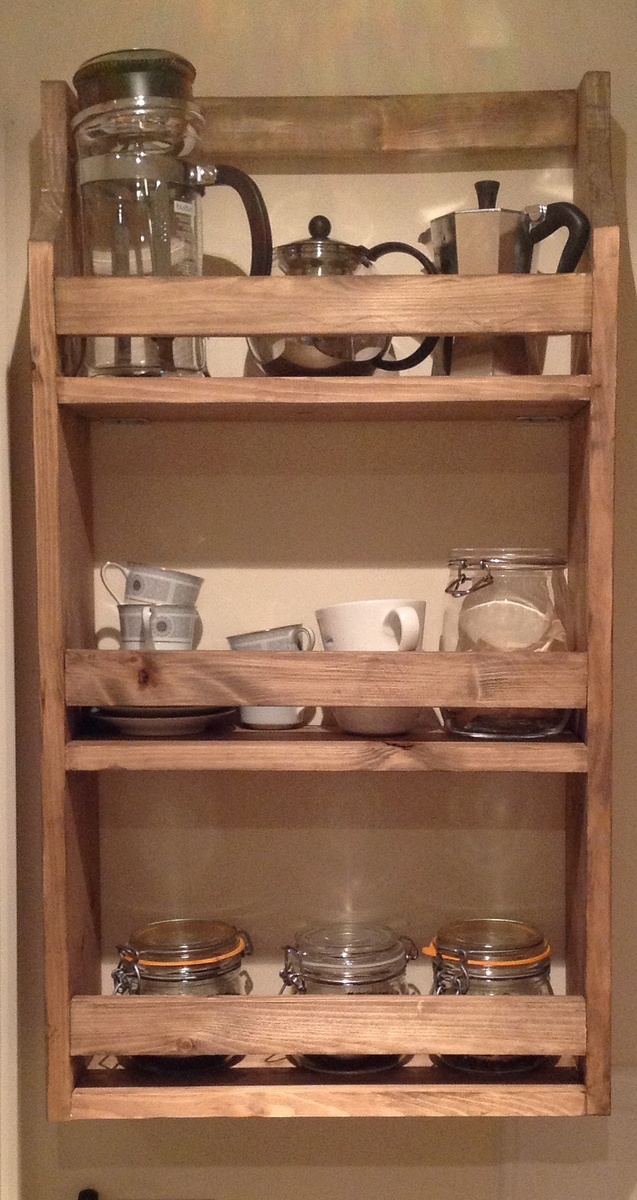
This was my first ever project. I initially intended to use it for office storage but it ended up taking its place in the kitchen - and proving most useful for storage there too!
Built from Plan(s)
Estimated Time Investment
Afternoon Project (3-6 Hours)
Finish Used
Colron wood dye - American Walnut
Recommended Skill Level
Starter Project
Comments

Flip Top Storage Bench
Ana's Flip Top Storage Bench. I made this ASAP, after I saw it in the book, and then online. I thought it was going to be longer and was thinking it would go great in the mudroom, but after it was finished it turned out to be the perfect size for a fireside seat.
This is my first time using hinges....are they supposed to show? By the time I got them on and working I was pooped and didn't want to test my luck. Maybe I'll have to get some more decorative looking ones!
Used my Kreg Jig, still had splitting issues.
Used finishing nails around the shelves to secure a bit.
Oh and HD didn't have a 1x12x12 so I had to get three 1x12x6 . Bet that cost more, but I'm happy to have some more scrap wood to play around with.
Thanks Ana!
Built from Plan(s)
Estimated Cost
Lost my reciept....maybe that's a good thing?!
Estimated Time Investment
Afternoon Project (3-6 Hours)
Finish Used
minwax color expressions walnut, about 2/3 of the tube.
Recommended Skill Level
Beginner
Comments
Sun, 10/21/2012 - 09:27
You did a great job on this
You did a great job on this table. What color stain did you use? And did you put a coat of poly on it?
Yes, the hinges are supposed to show. I made this table about two years ago when Ana first posted the pans, but I don't use it as a table. I use it as a bench in my entryway to hold gloves, hats, etc. It's held up great all these years, and now I'm thinking of building another one for by my garage door, since that's where we come in and out most times.
Sun, 10/21/2012 - 09:38
Stain
Thanks, I used Minwax color expressions in walnut, I haven't put poly on it yet, I thought I might just put a wax over it to make it a bit smoother. I don't really know what I'm doing quite yet, so I'll have to learn my options!
I'm thinking of making the longer version for the mud room....should go quicker on round two right!
:) Valerie

Mon, 10/22/2012 - 09:06
Hinges showing question
I think in order to get your hinges to be more minimally showing you can inset them by using wood chisels to shave a rectangle of wood from the surface where the hinge lays. I've used hinges on a couple things so far and that's what my husband said to do but I was being to lazy to get some chisels. You can get them at any hardware store for pretty cheap I think. Now I'm not positive on any of this since I haven't been doing this hobby for too long. Your bench looks great by the way!
Saddle Seat Stools

After a lot of cutting, screwing, chiseling and sanding... oh and a lick of paint! My new little Saddle Seat Stools are complete. Time will only tell whether they will hold up to the abuse the boys give them especially Brodie! These new stools only cost me $48 to make the pair and I got all the timber from Bunnings
Built from Plan(s)
Estimated Cost
$48
Estimated Time Investment
Weekend Project (10-20 Hours)
Finish Used
Teak and White Enamel Paint
Recommended Skill Level
Beginner
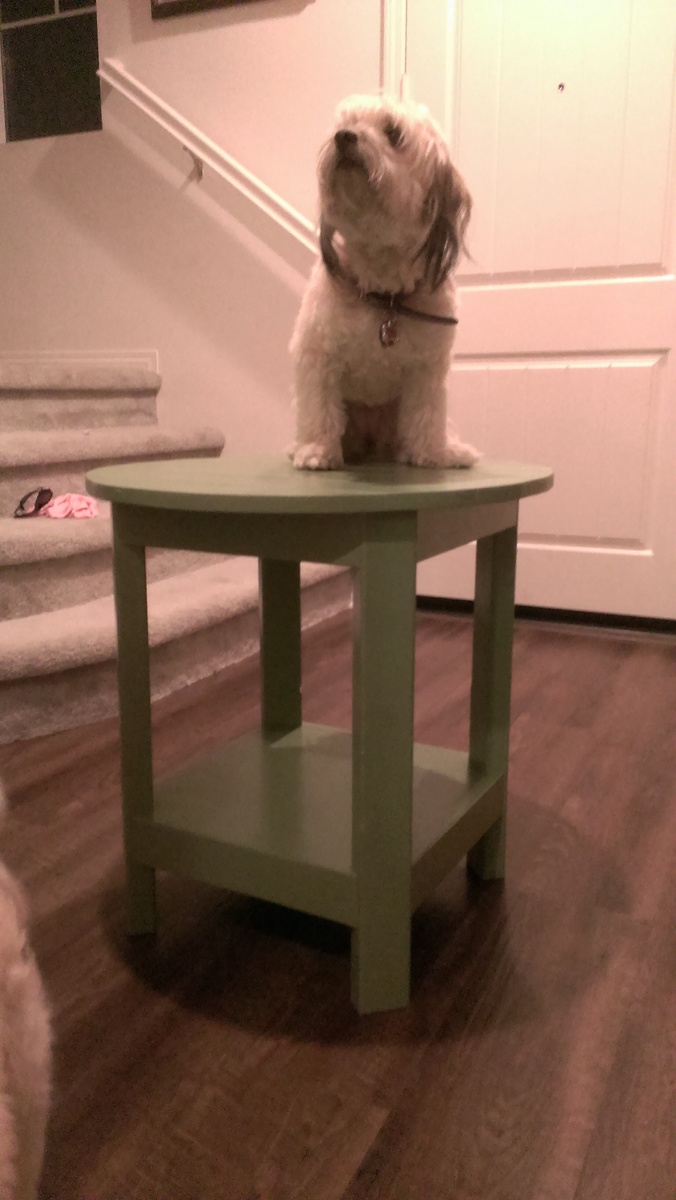
Benchright Round End Tables
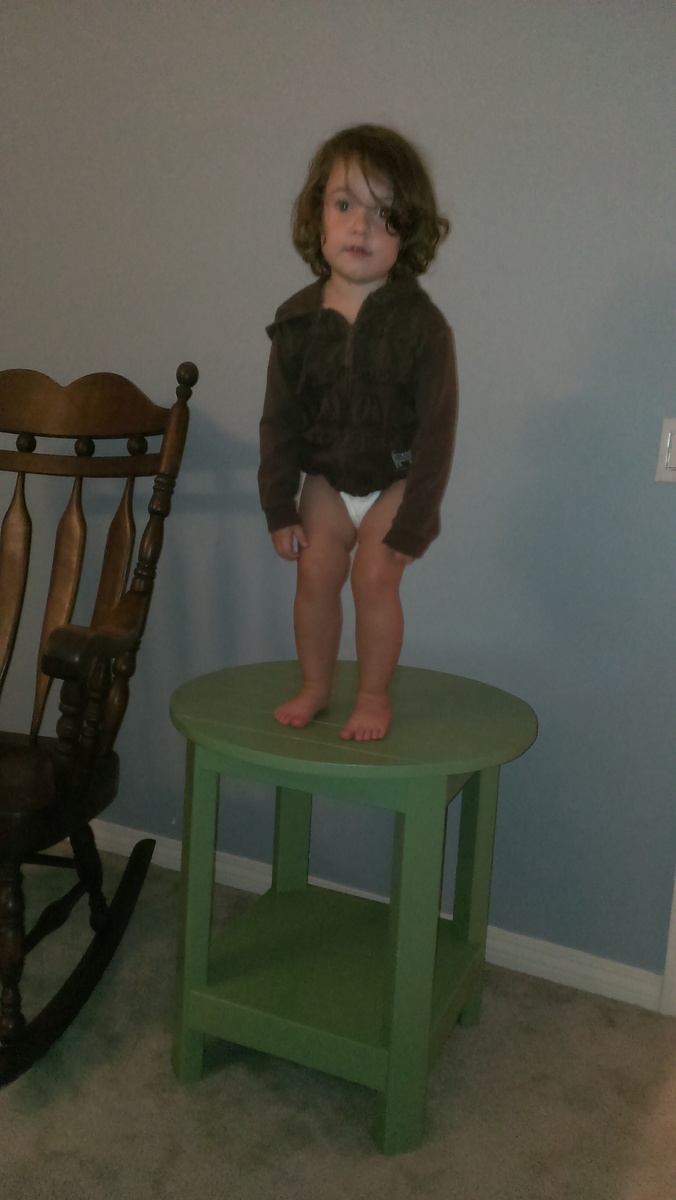
This project was a challenge because of the instructions regarding the "recommended" pocket holes for the aprons. I soon realized you can't put a 3/4 pocket hole on a 45 degree mitred edge, and when I adjusted the depth of the pocket hole, I could not for the life of me screw it into the legs without the apron getting sucked past the edge of the legs. I ended up putting the pocket screws on the outside which I know is a major faux pas for wood workers, but because I used Kreg wood plugs and painted it, you can't see the little ovals where the screws are.
The photos are just for scale. The little girl is a big 2 1/2 year old, and the dog is not a St. Bernard.
We love the table and it works great for baby brother's room.
Thank you Ana for another great project!
Built from Plan(s)
Estimated Cost
$50
Estimated Time Investment
Day Project (6-9 Hours)
Finish Used
Gripper primer and Semi-gloss paint
Recommended Skill Level
Beginner
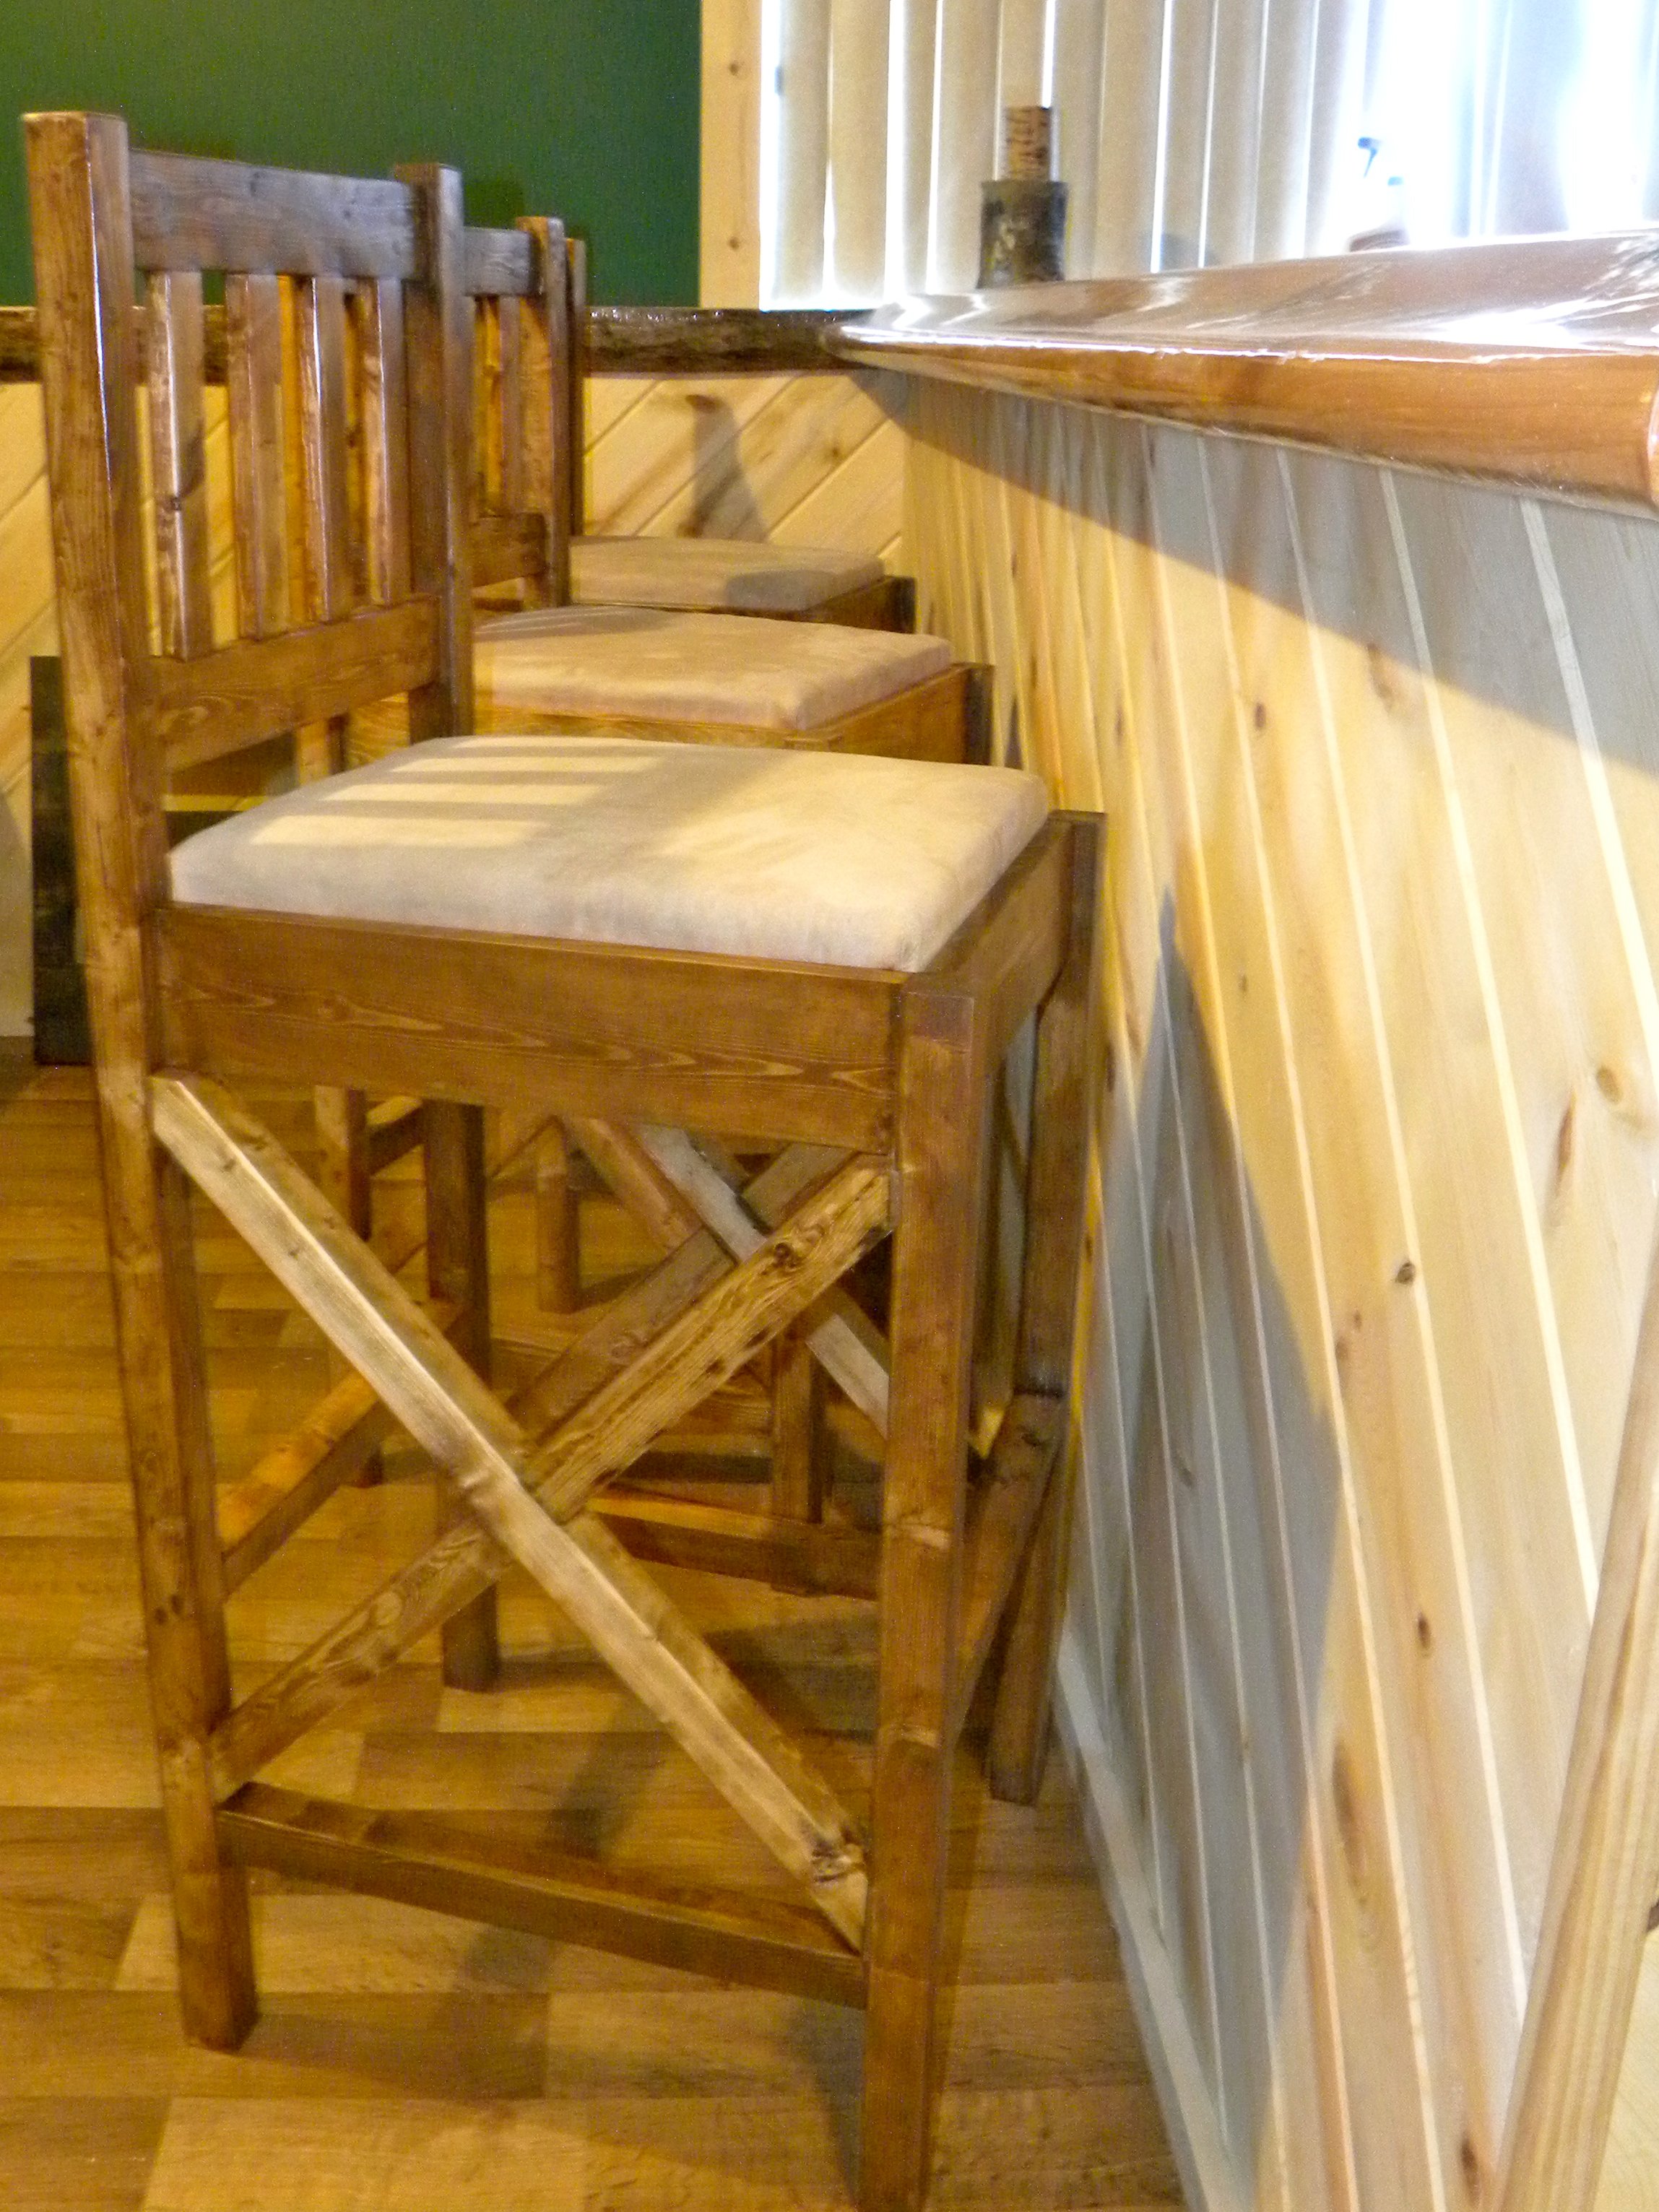
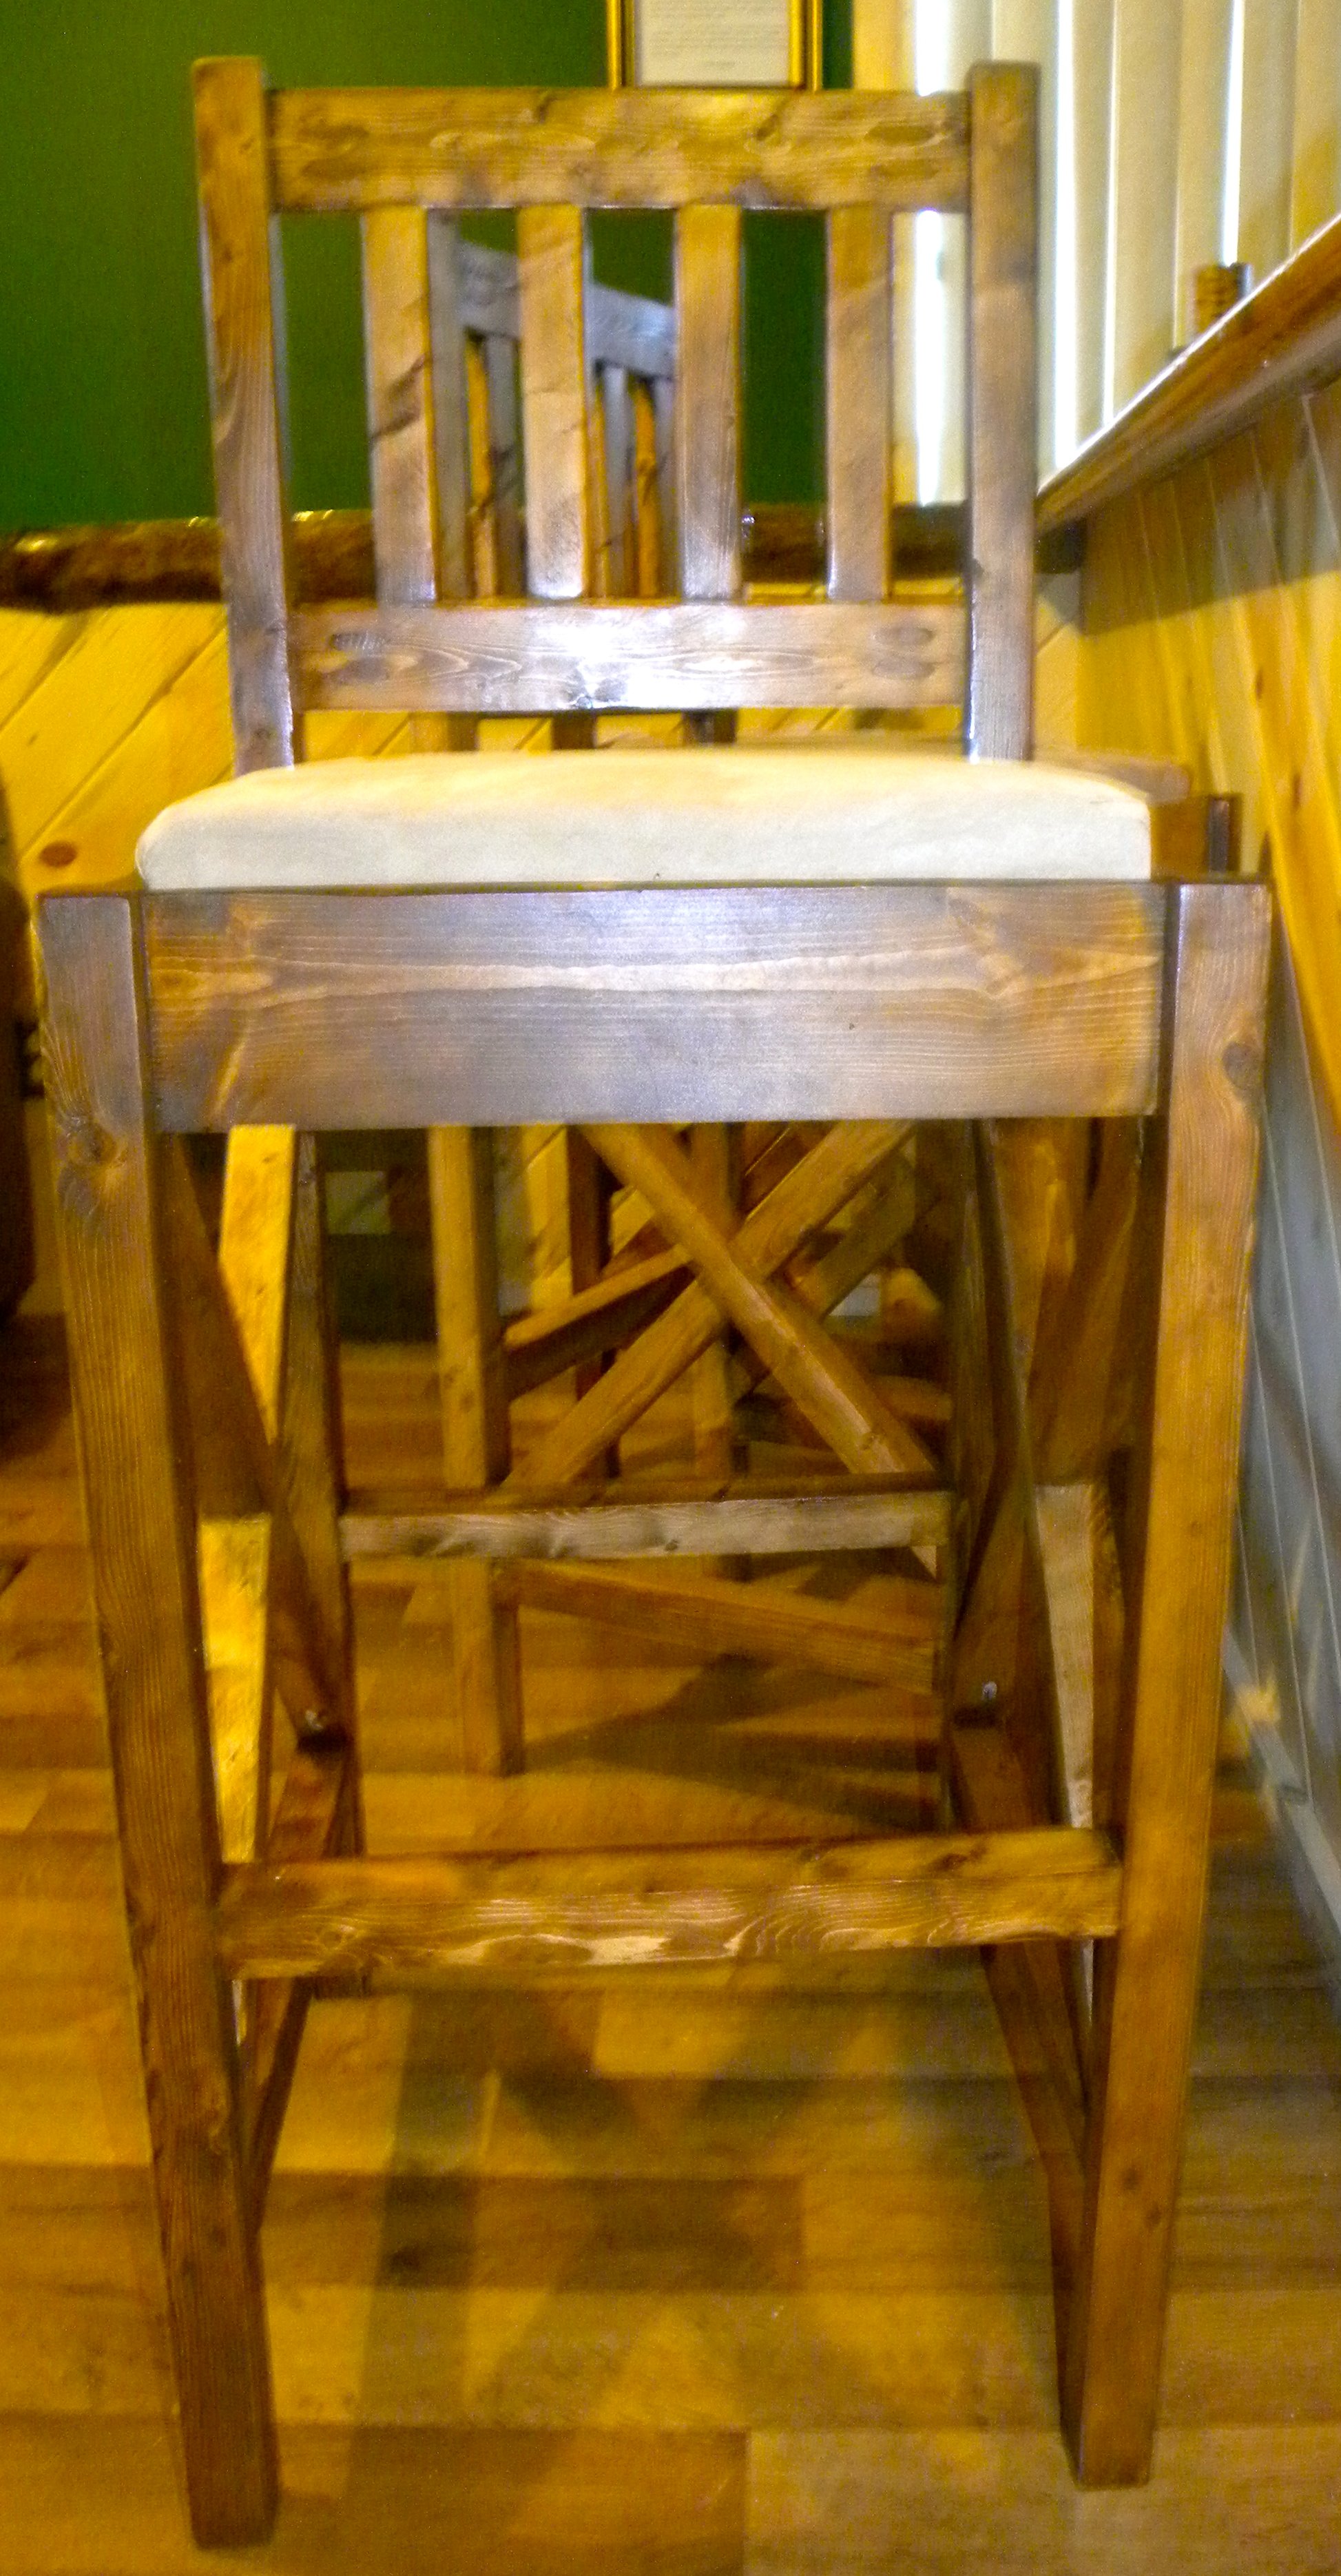
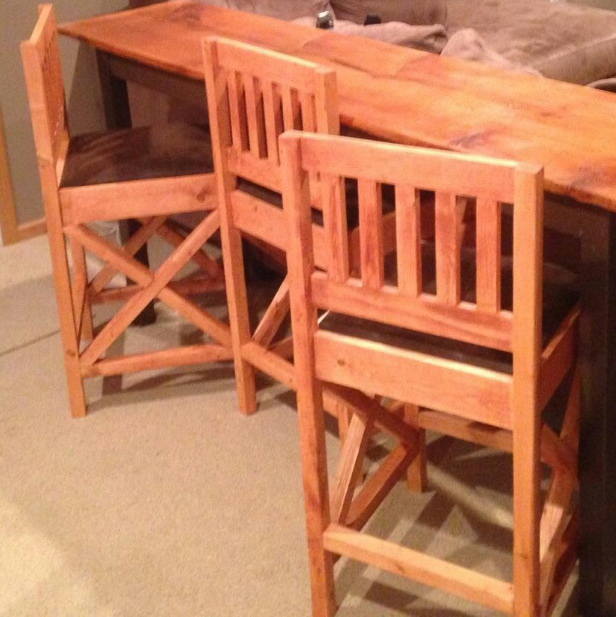
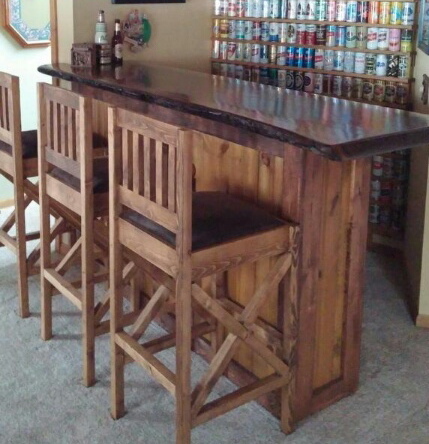
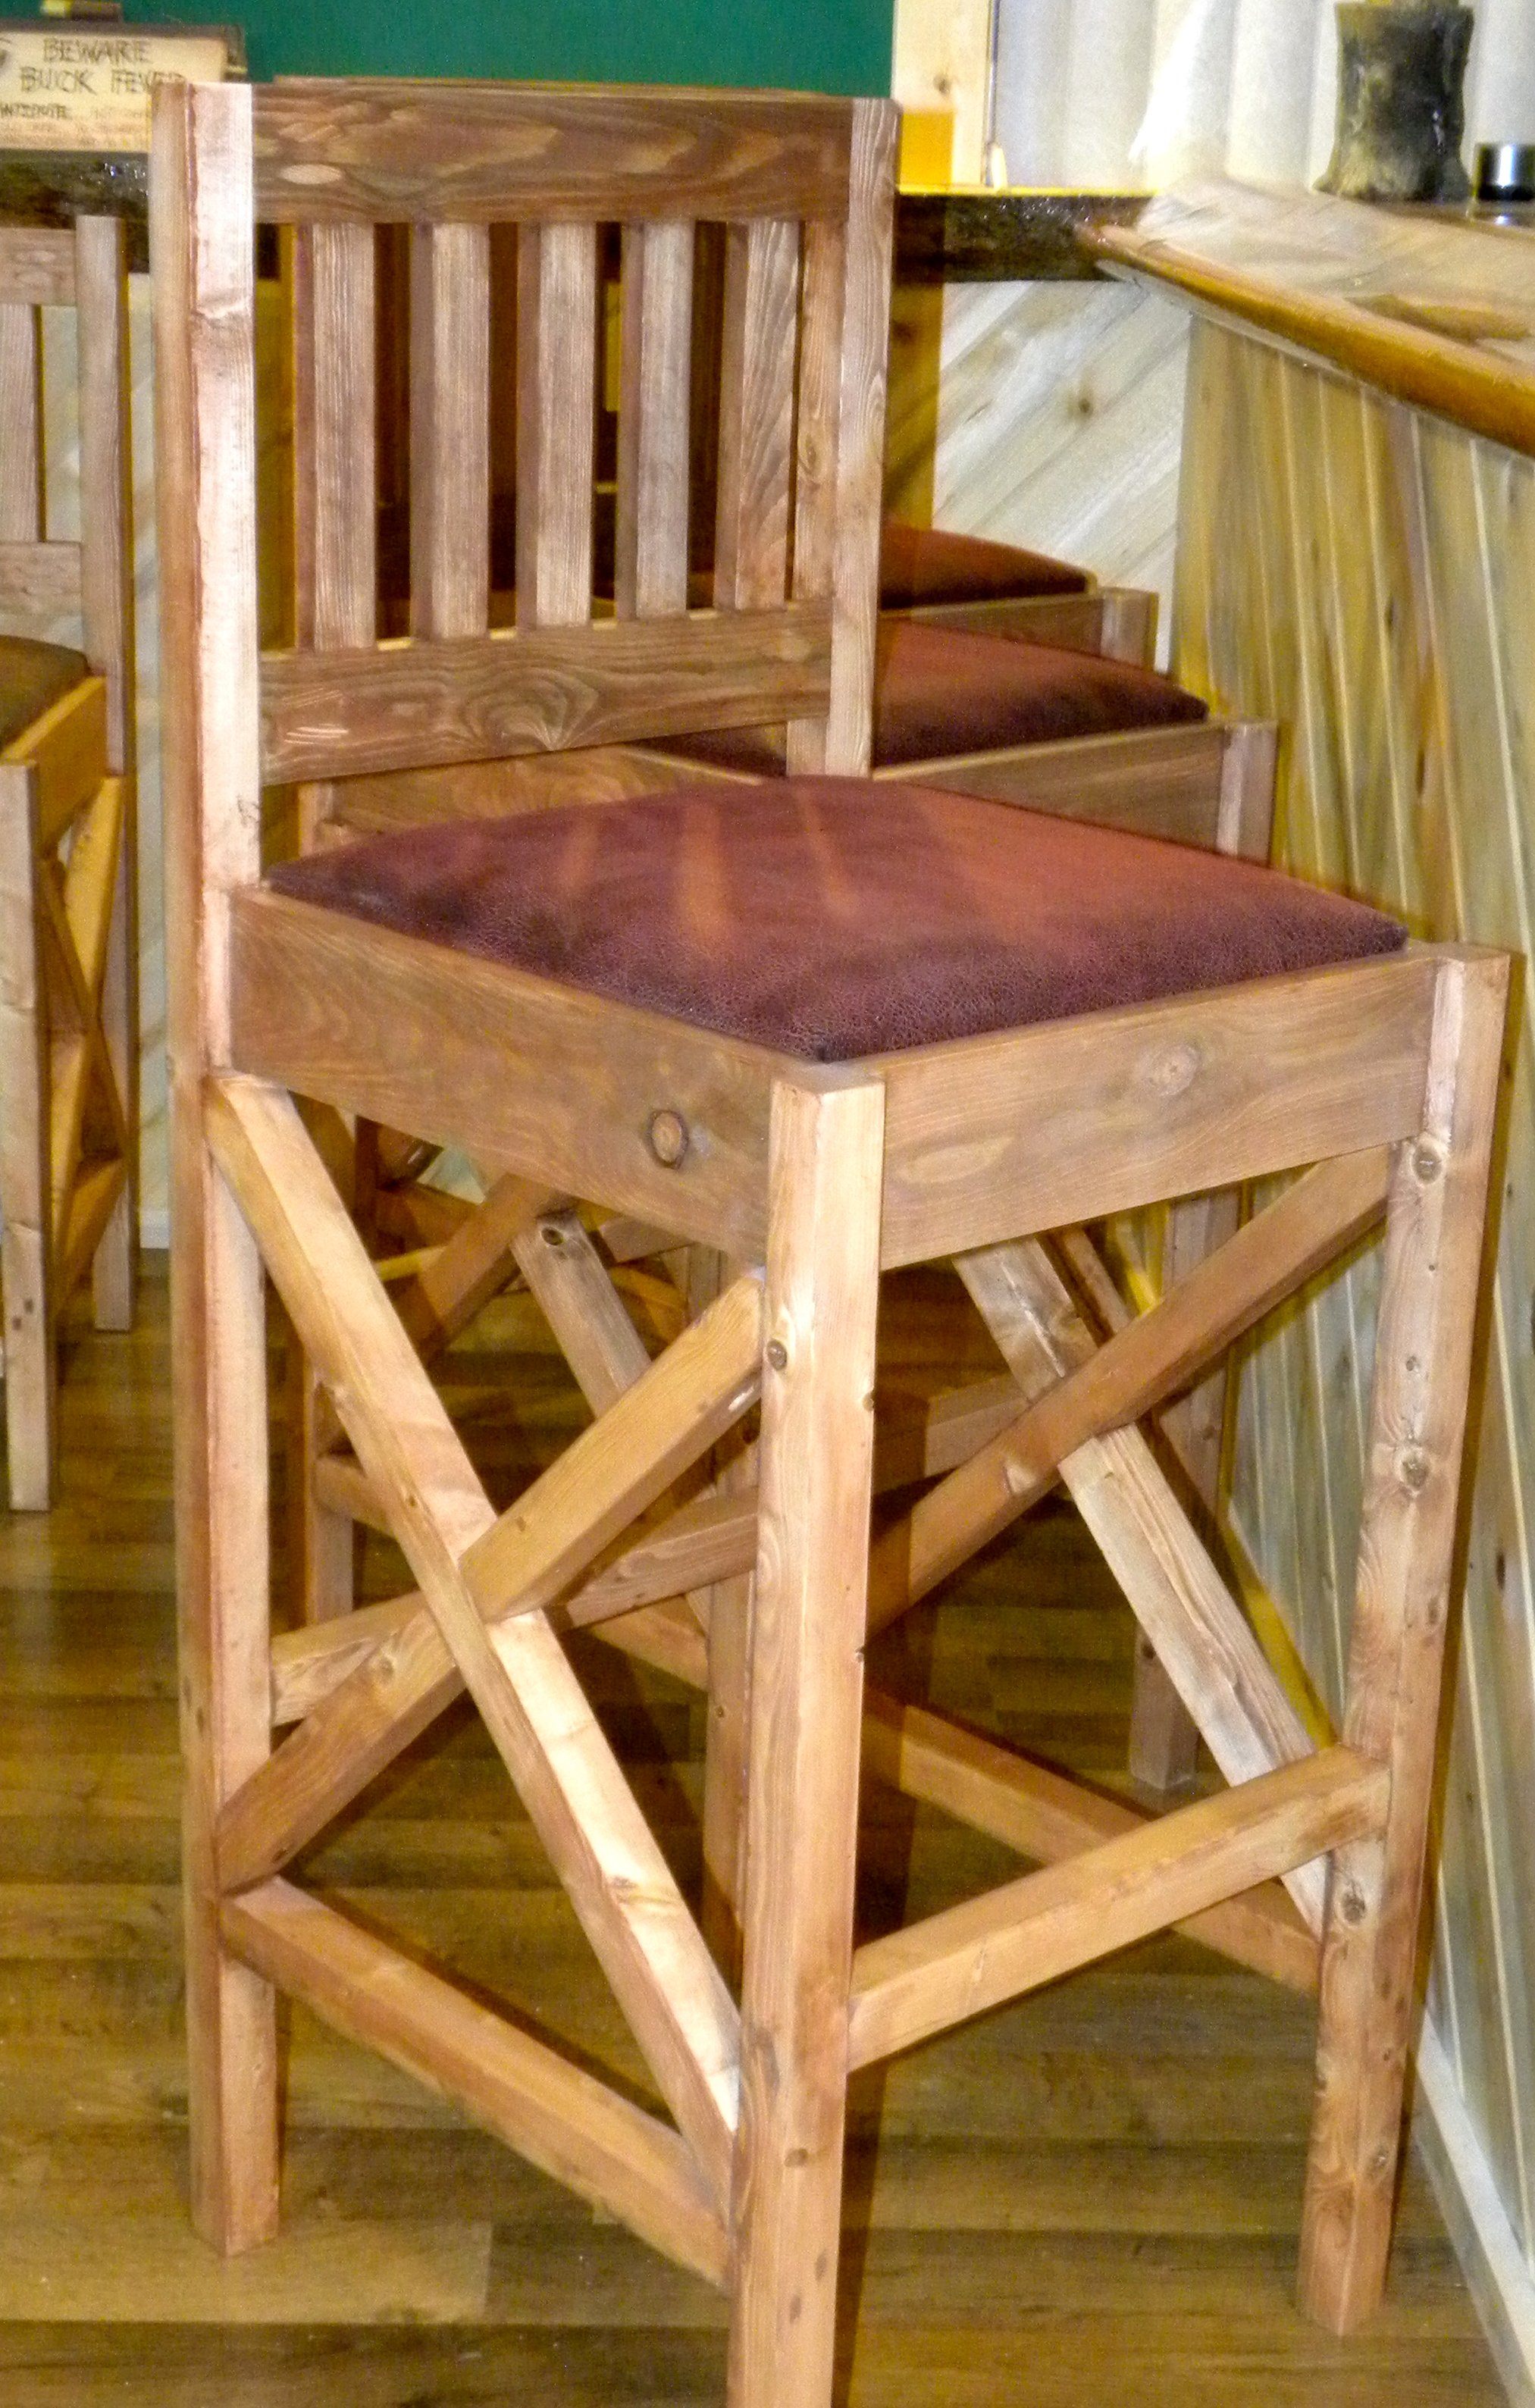
Rustic Bar Stools
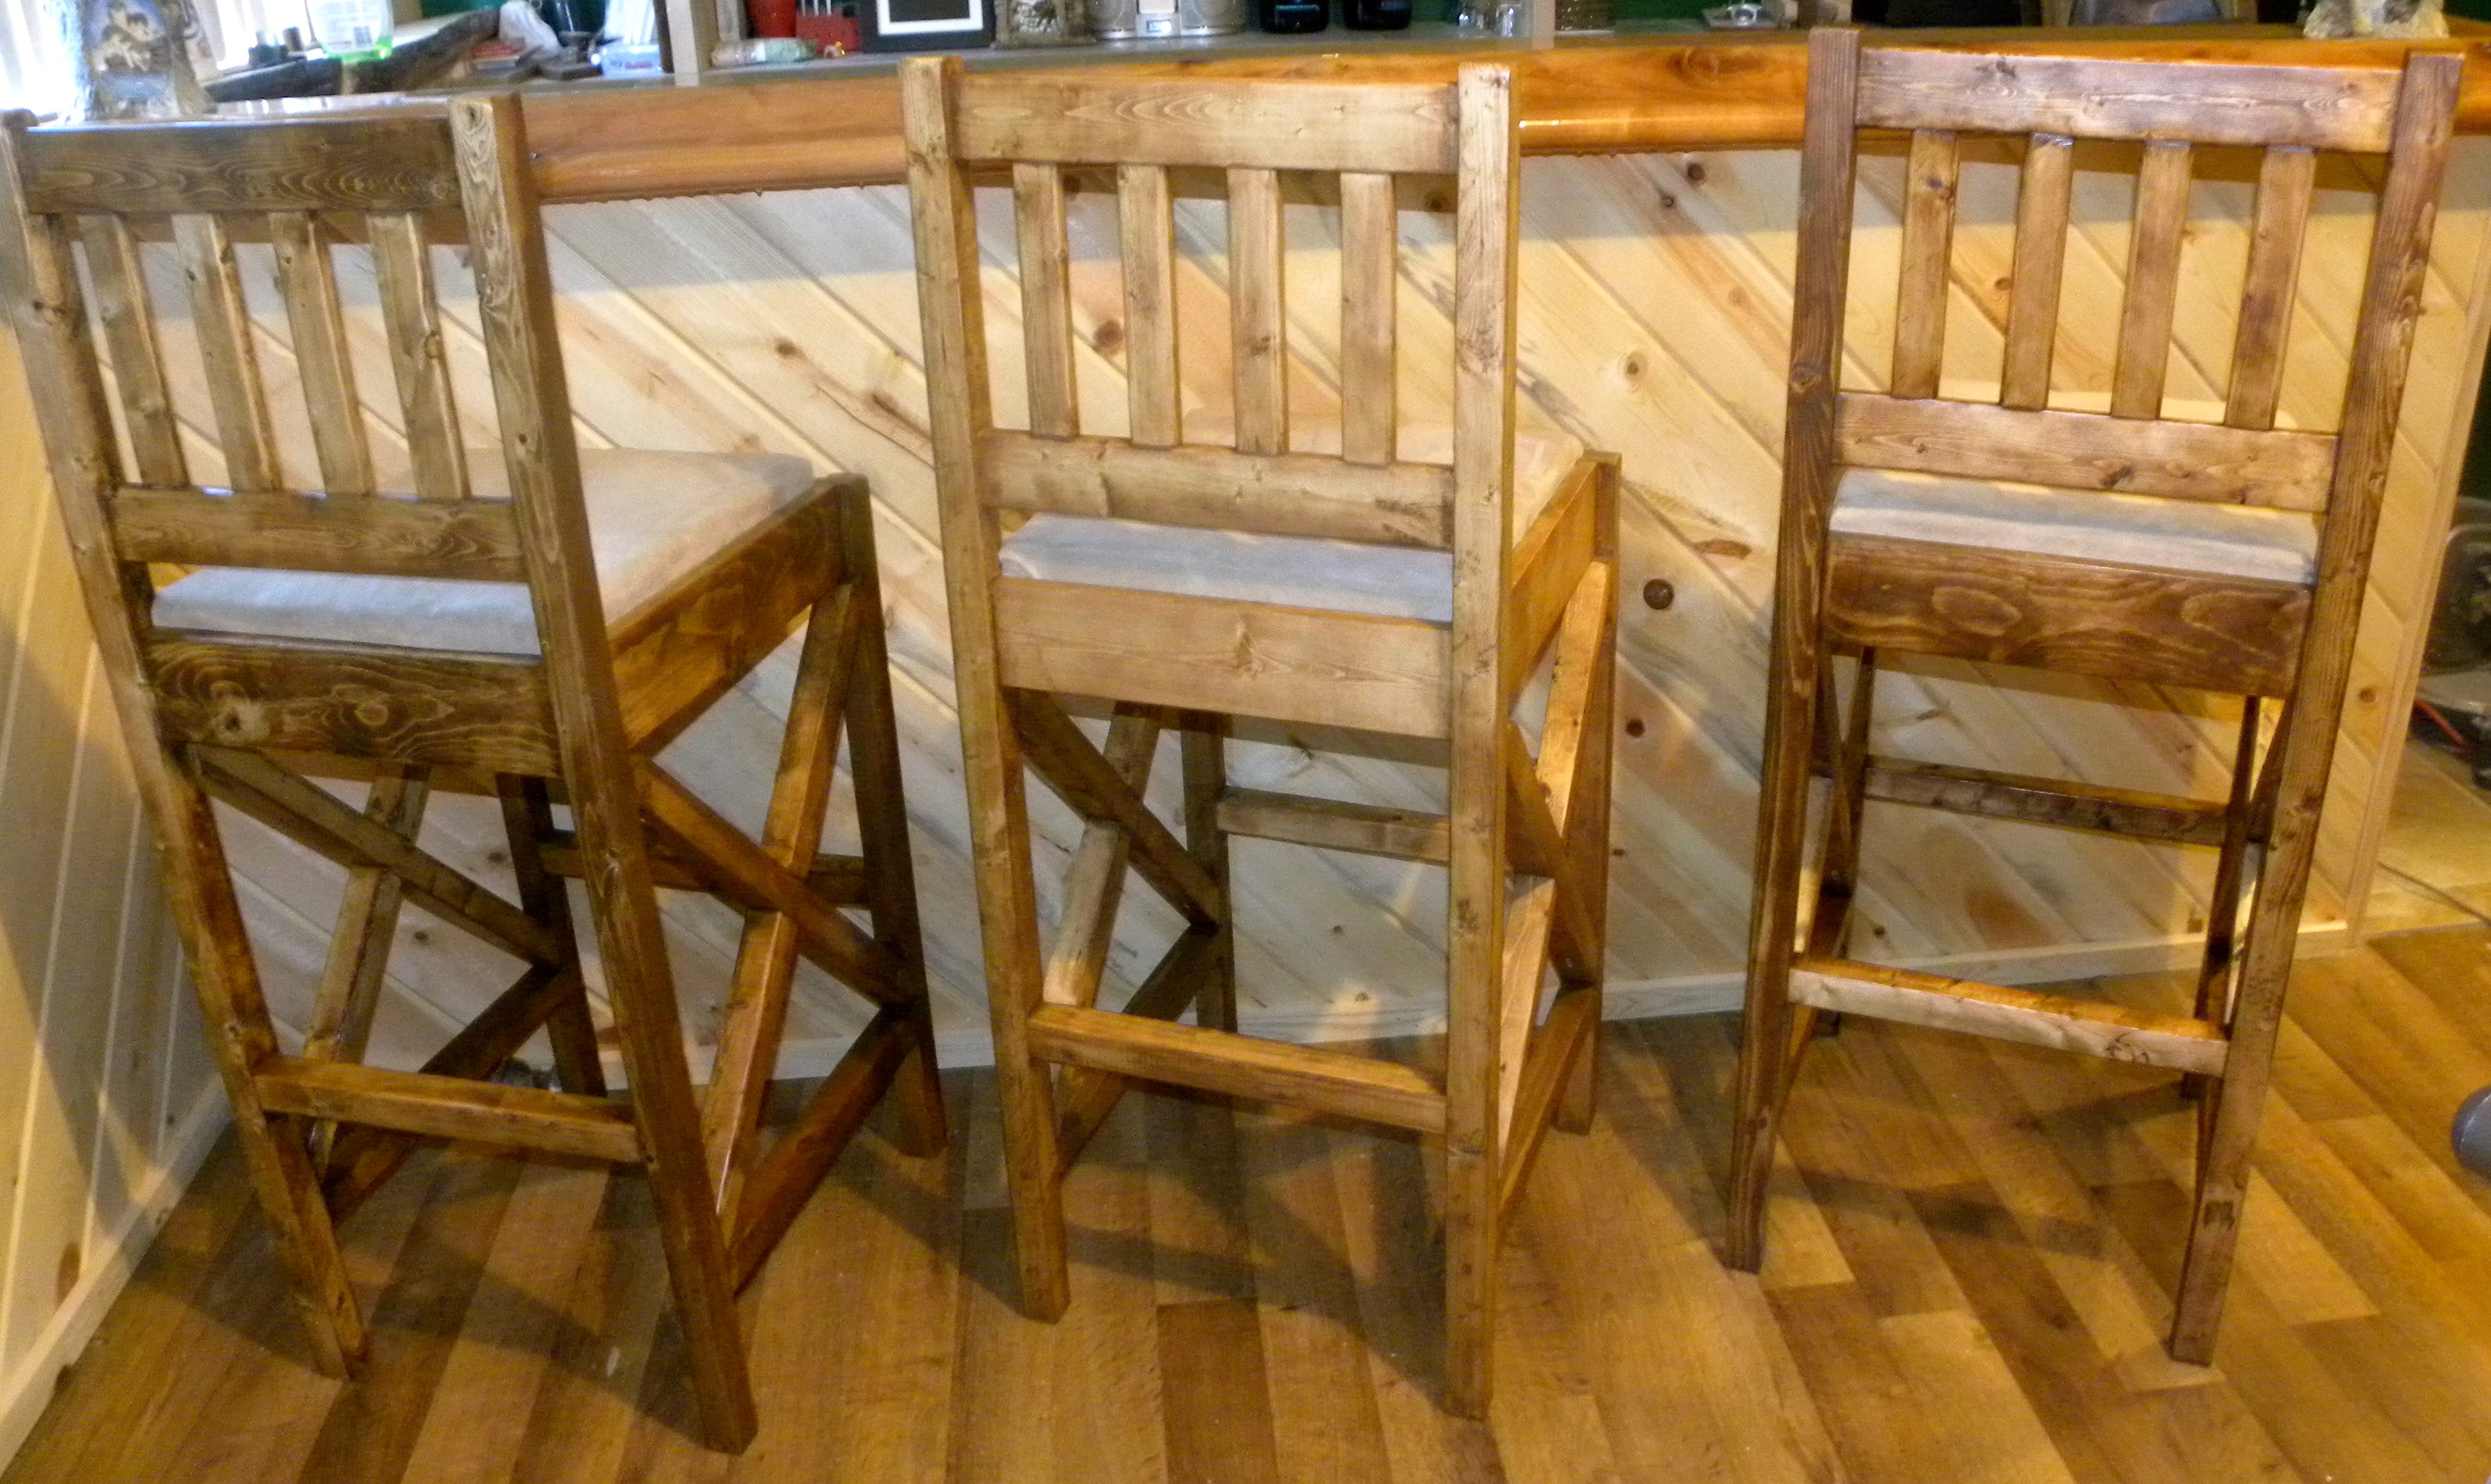
I needed new bar stools for our new bar that we designed and built in our basement family/entertaining room. Regardless of where I was looking, these things are silly expensive. I also wanted a little more of a country/rustic look that would suit my husband and my likes. I used the Vintage Bar Stool plans but my husband isn't a small guy and we have friends that aren't classified under the small frame category either, I needed more structure. After thinking about it for a few days, I liked the rustic X look and used that from so many plans. I also am all about comfort and the padded upholstered seats was a must. Can't wait for my next project. BTW. The cabinets behind the bar also came from here I simply modified for what we needed. We get compliments on it all of the time. Love this website, thank you so much for making simple to read instructions for things I actually want to do.
Built from Plan(s)
Estimated Time Investment
Week Long Project (20 Hours or More)
Finish Used
Minwax Early American
Recommended Skill Level
Starter Project
Comments
Mon, 06/26/2017 - 05:44
Rustix x bar stools
I need to build 24" bar stools with the rustic x look on the side. Do s anyone have plans to make them?

In reply to Rustix x bar stools by Daisypage
Sun, 07/01/2018 - 13:51
I am sorry. I just saw this.
I am sorry. I just saw this. Honestly I don't make any plans, I kind of fly by the seat of my pants. The X's are measured out at the end.
Thu, 12/26/2019 - 03:49
construction question???
These look great. I think that I'll add them to my build list that my wife seems to keep growing for me. How did you attach the back pieces? In the original design it showed pocket holes, but I don't see any on your work. Thanks for the help.
Tim

Sat, 06/06/2020 - 09:58
Bar stool legs notched out or not notched out
Could you please settle a discussion between myself and my husband? Are the legs notched out for the 1x4's to sink in , or are they just attached with pocket holes
2x4 Banquette Seat
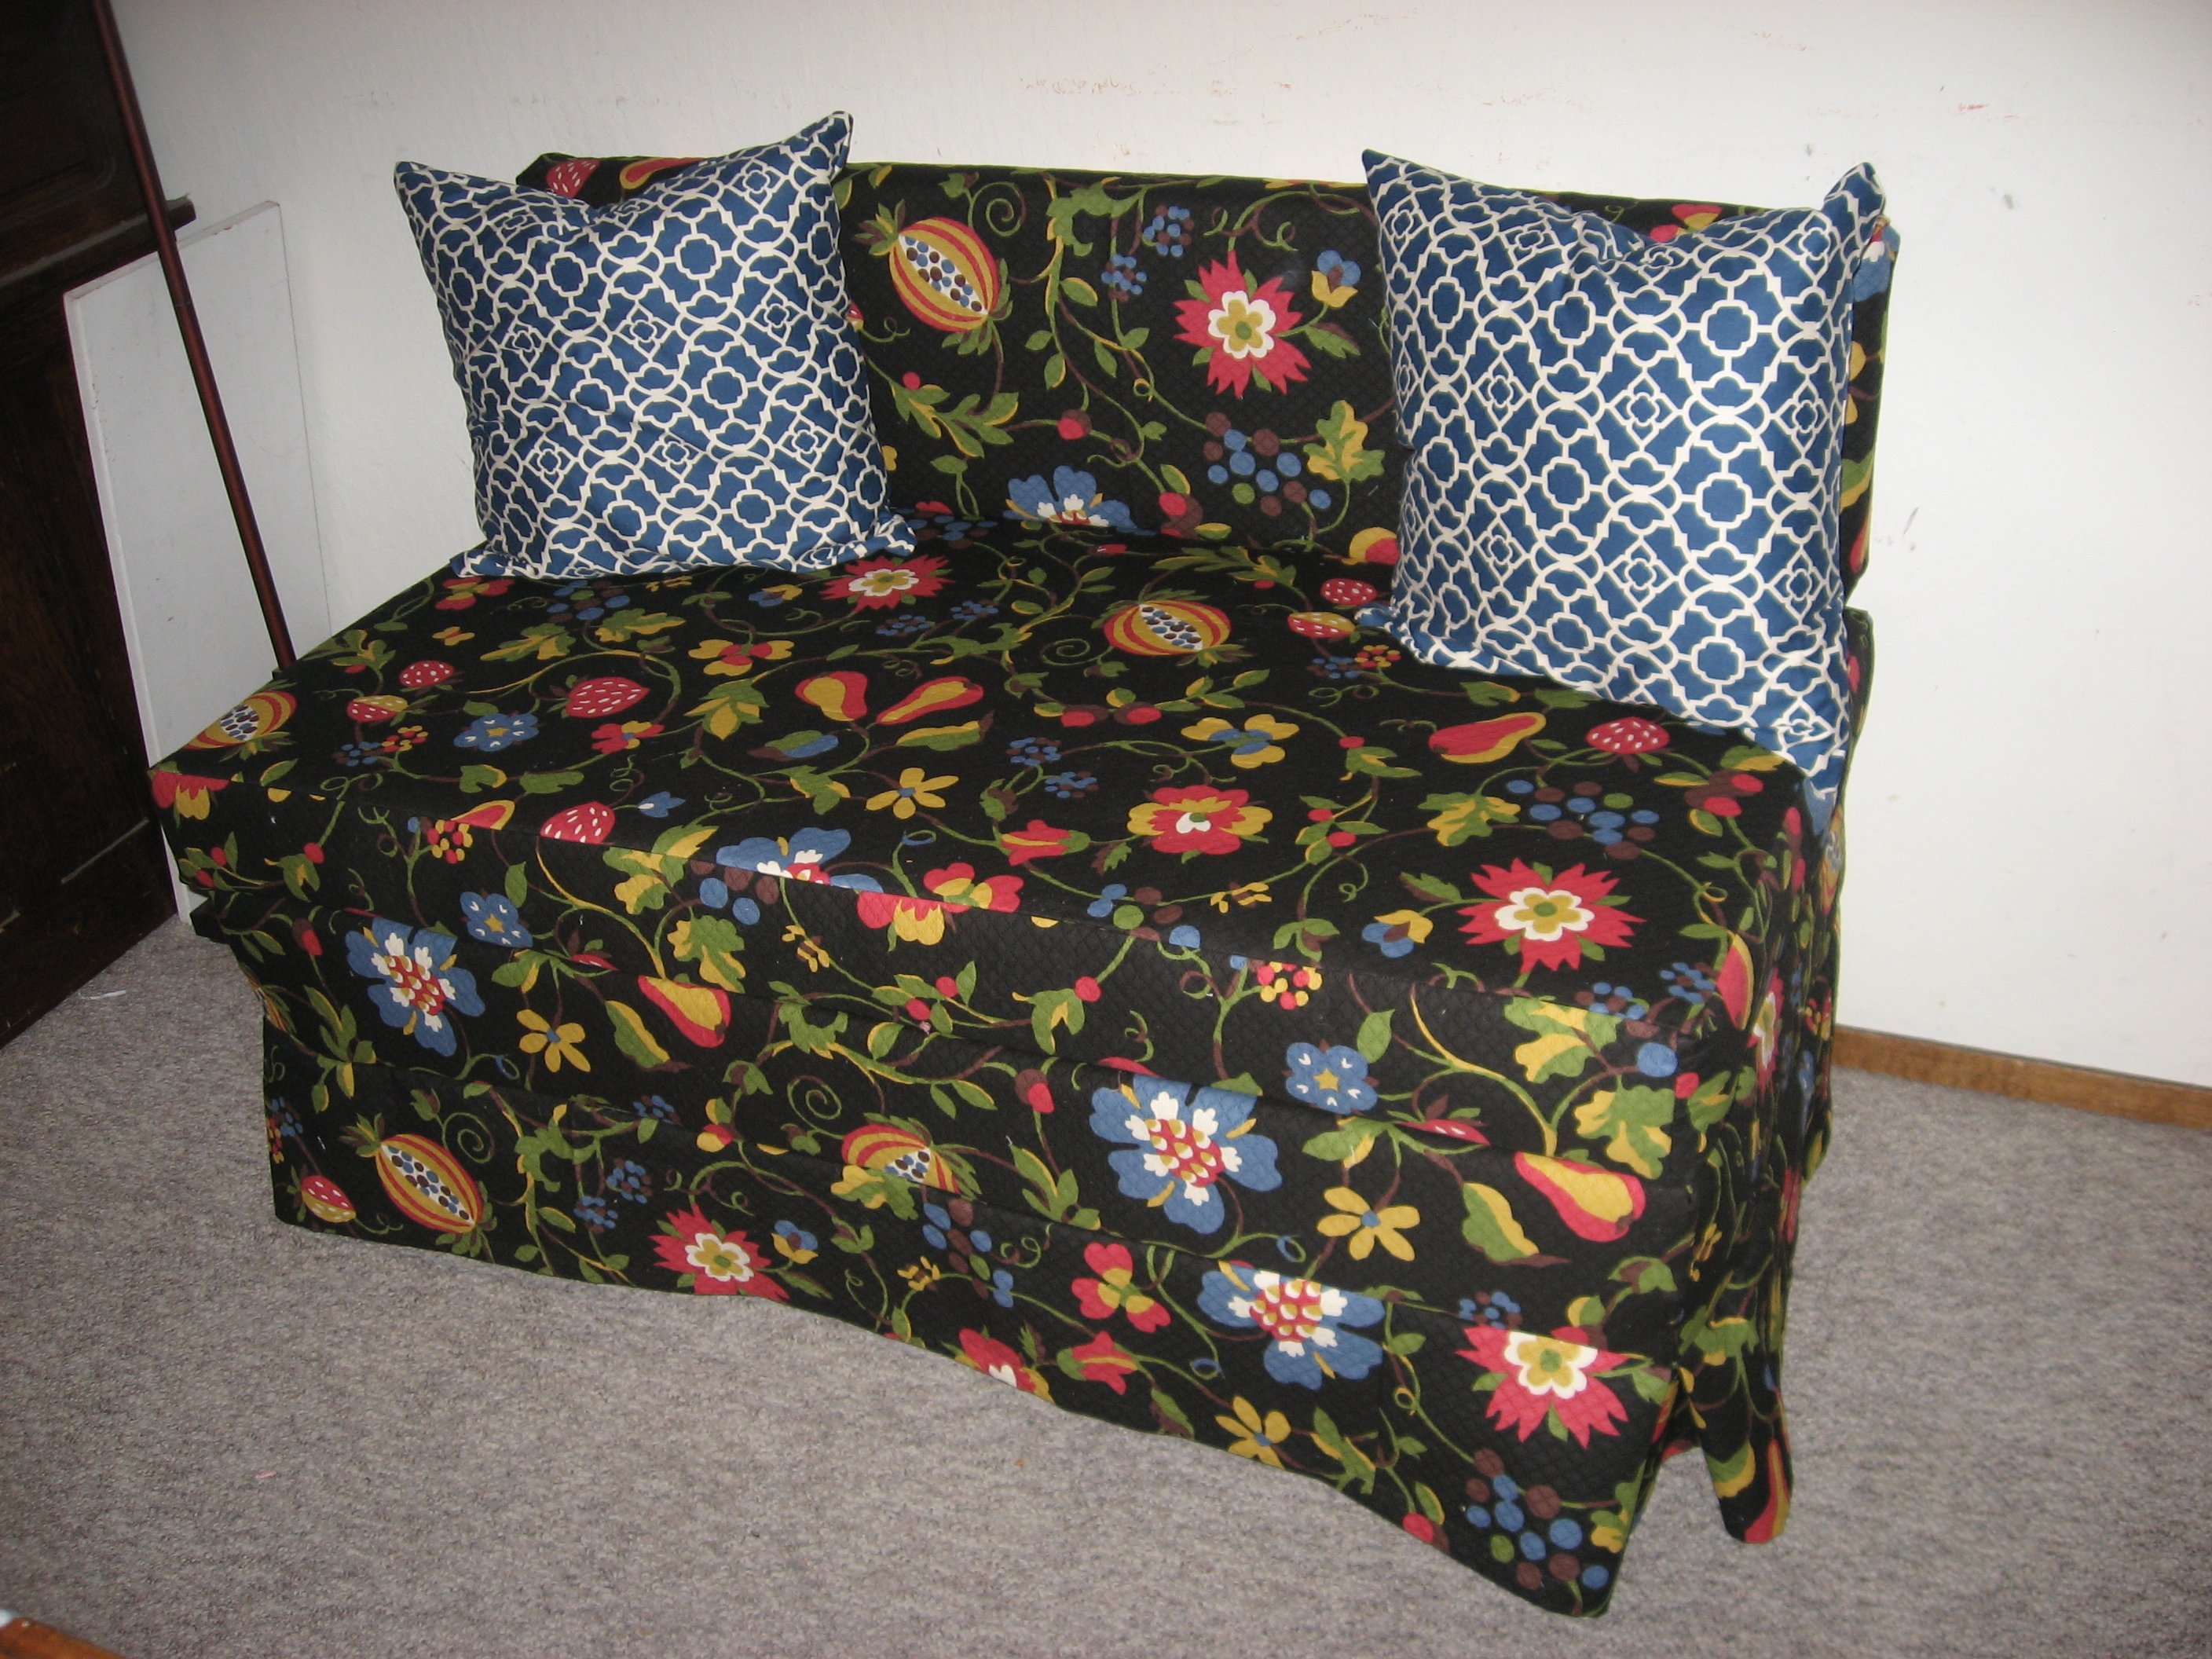
I have been wanting a banquette for years and when I spied Ana's version in the post about Grace's birthday party, I knew I could do it. I waited for the plans, and yesterday, I got out the tools and in 6 hours (real time - including cooking meals for kids, potty breaks, and life in general) I had my bench done.
I am so pleased with it. I had all the fabric on hand already, and was able to buy batting, foam and pillow forms all 50% off at Joann's, plus 2 zippers for the blue cushions. The woman who was cutting my foam asked me what I was making, and I told her I was building an upholstered bench for my dining room. She said "wouldn't it be less trouble to just buy one already made?" Clearly she has no idea how much this would have cost me. As it stands, I had the lumber and fabric on hand, so my total purchase price was just over $95.00. I would estimate the cost to build to be about $200.00 for everything, depending on how expensive your fabric is.
I love to sew, so I had no problem with the fabric portion of the project, though I did as Ana did and did not upholster the back of the bench. Instead of adding a piece of fabric across the back of the frame, I extended the side fabric by about 6 inches on each side and stapled it to the back. I hope that makes sense. I used a metal cleat to hold the seat back in place. I also used 3 L-brackets to attach the bottom to the frame. I think people will slide into their seat and I didn't want the seat cushion to move.
Not bad for a few hours work!
This project would be an easy starter project for building, though it is a little more advanced when you factor in the sewing. Here is the tutorial I used for the toss pillow cushions: http://sewmamasew.com/blog2/2011/02/add-a-zipper-to-your-pillow/, and here is another from the same blogger for boxed cushion covers (just leave the bottom off of yours for this project, since it will be stapled to the plywood, skip the zipper and handle, and add piping if you want to fancy your cushion up): http://sewmamasew.com/blog2/2008/07/summer-sewing-perfectly-portable-cu…
Thanks Ana for the constant inspiration!
Built from Plan(s)
Estimated Cost
$200.00
Estimated Time Investment
Afternoon Project (3-6 Hours)
Recommended Skill Level
Beginner
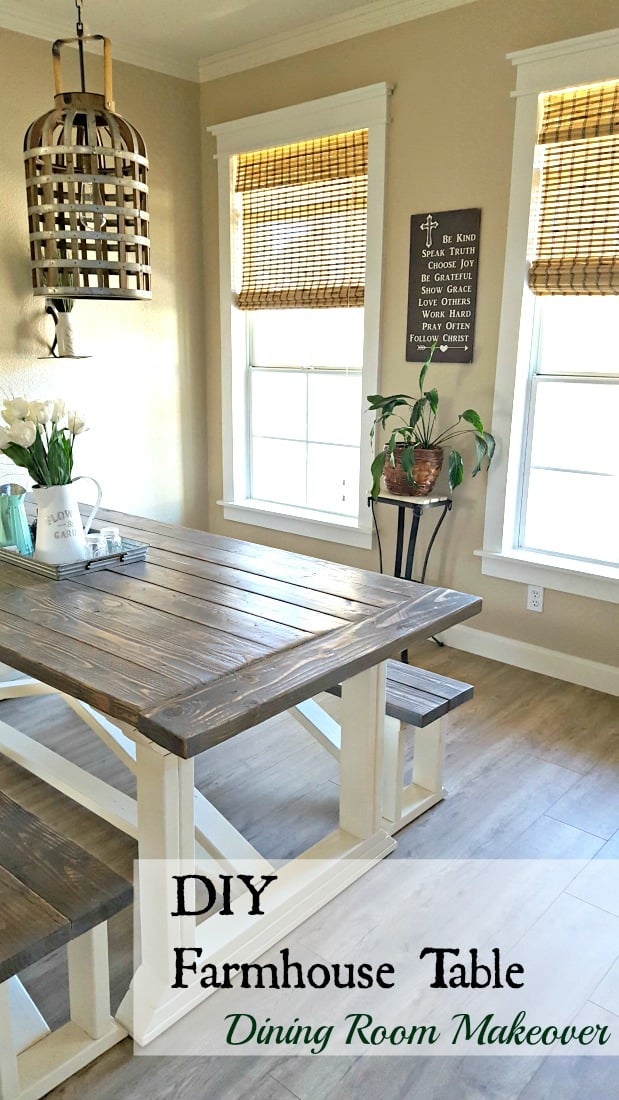
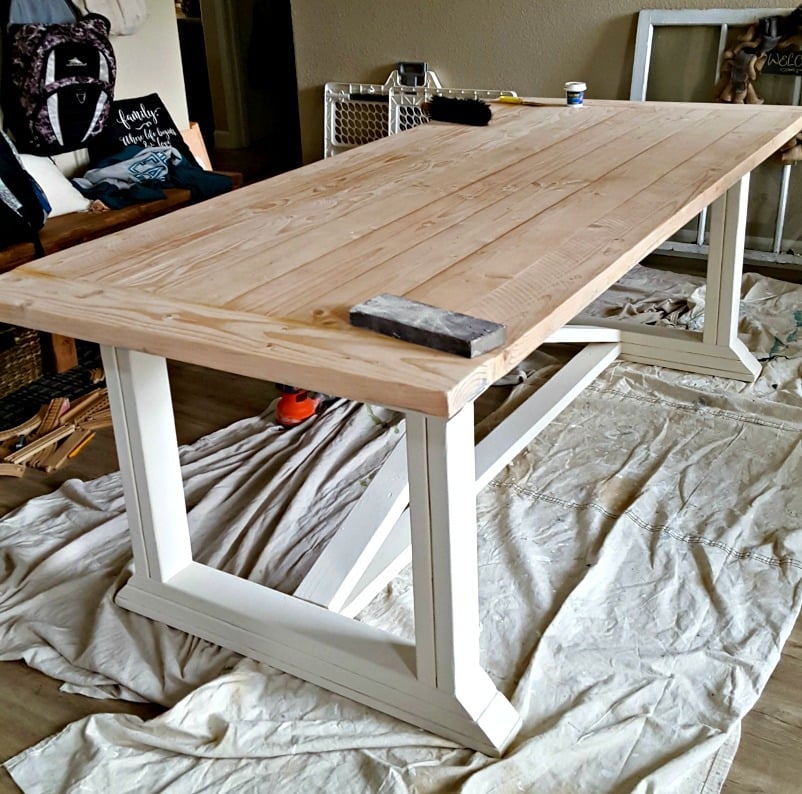
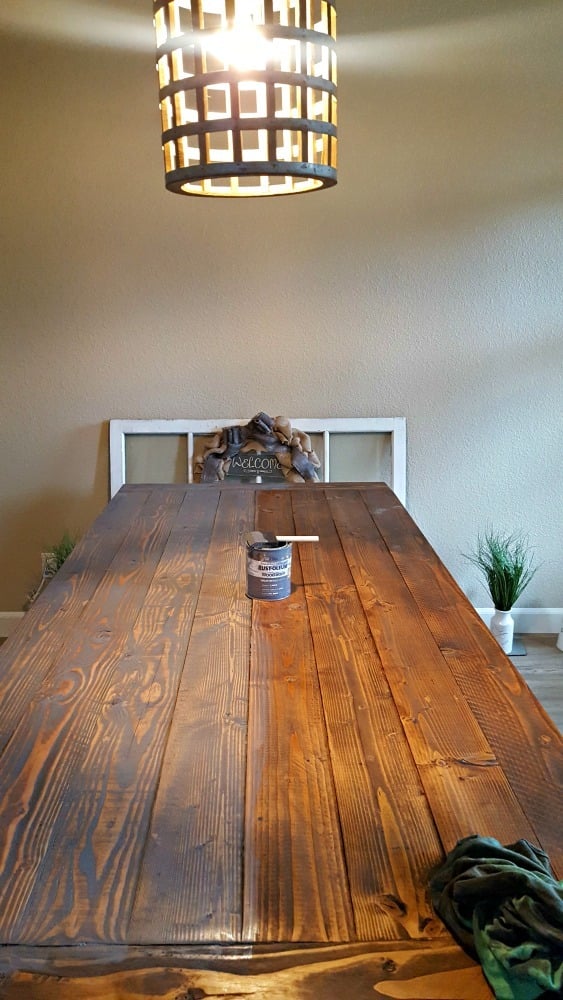
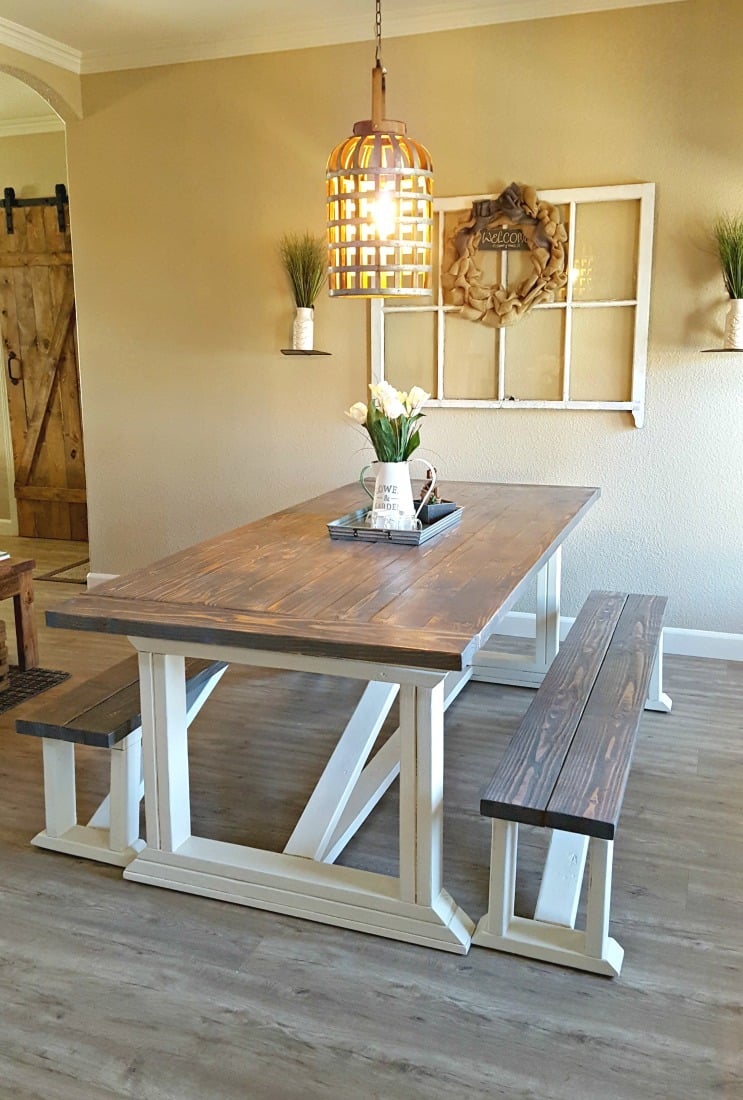
Rekourt Dining Room Table and benches
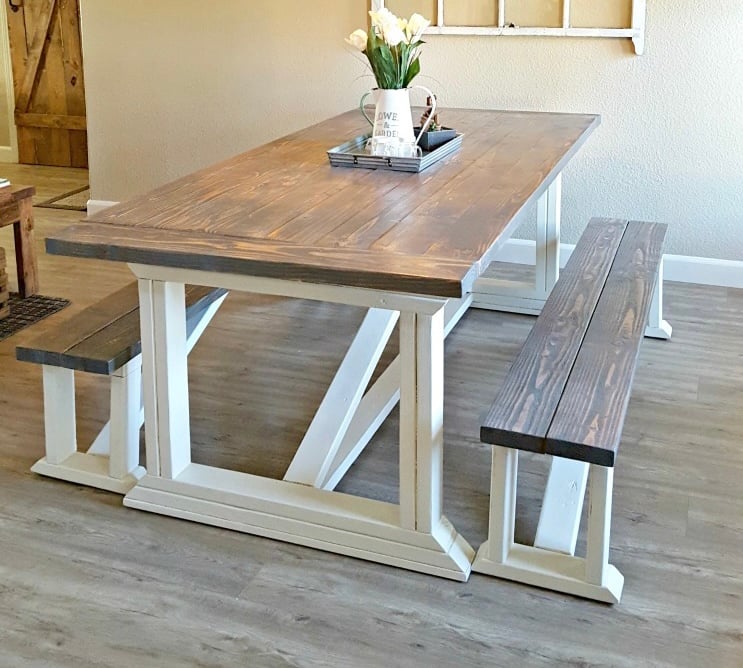
This was my first big build and I love how it came out! Thank you Ana White for amazing and straightforward plans to follow for both the farmhouse table and benches.
Built from Plan(s)
Estimated Cost
$150
Estimated Time Investment
Weekend Project (10-20 Hours)
Finish Used
Top MinWax Dark Walnut plus Rusteoleum Weathered Grey. Bottom is painted with ivory chalk paint.
Recommended Skill Level
Intermediate
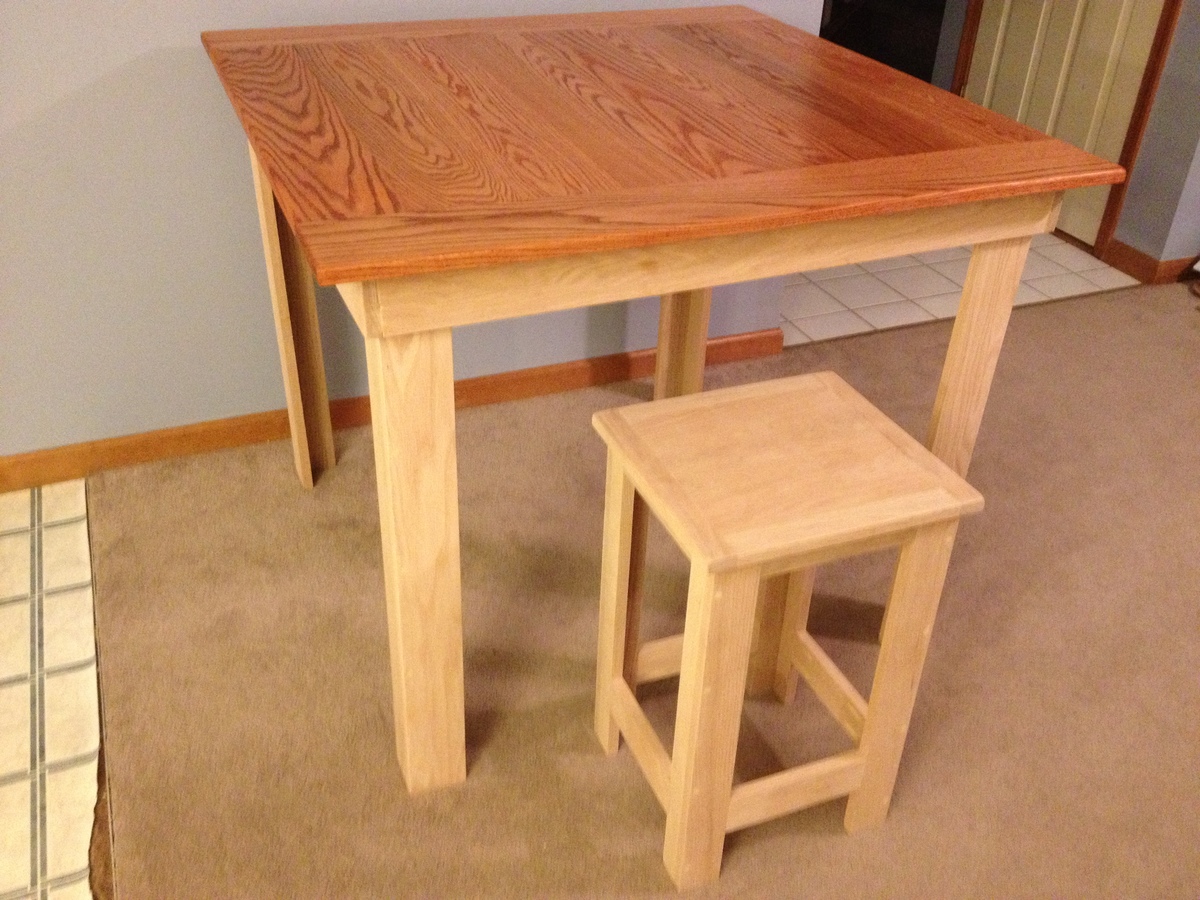
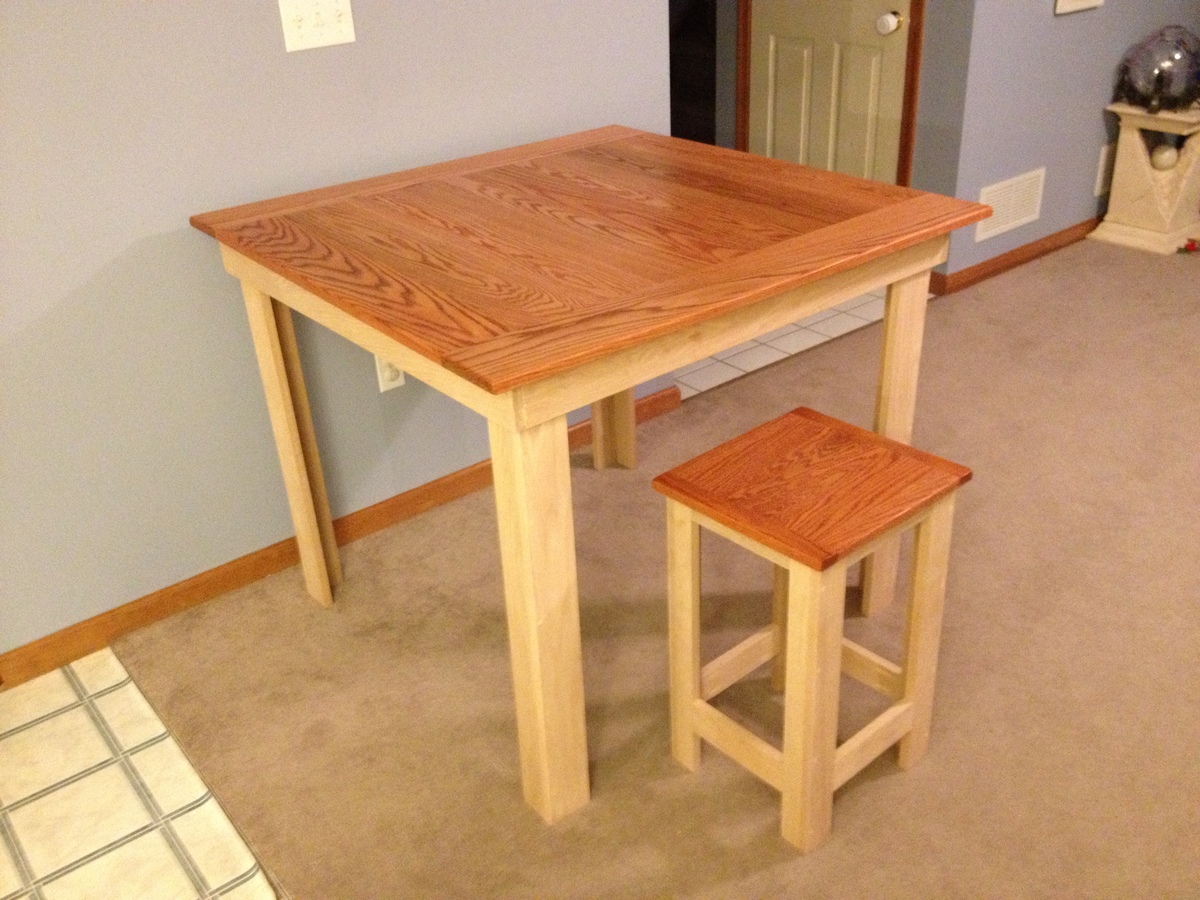
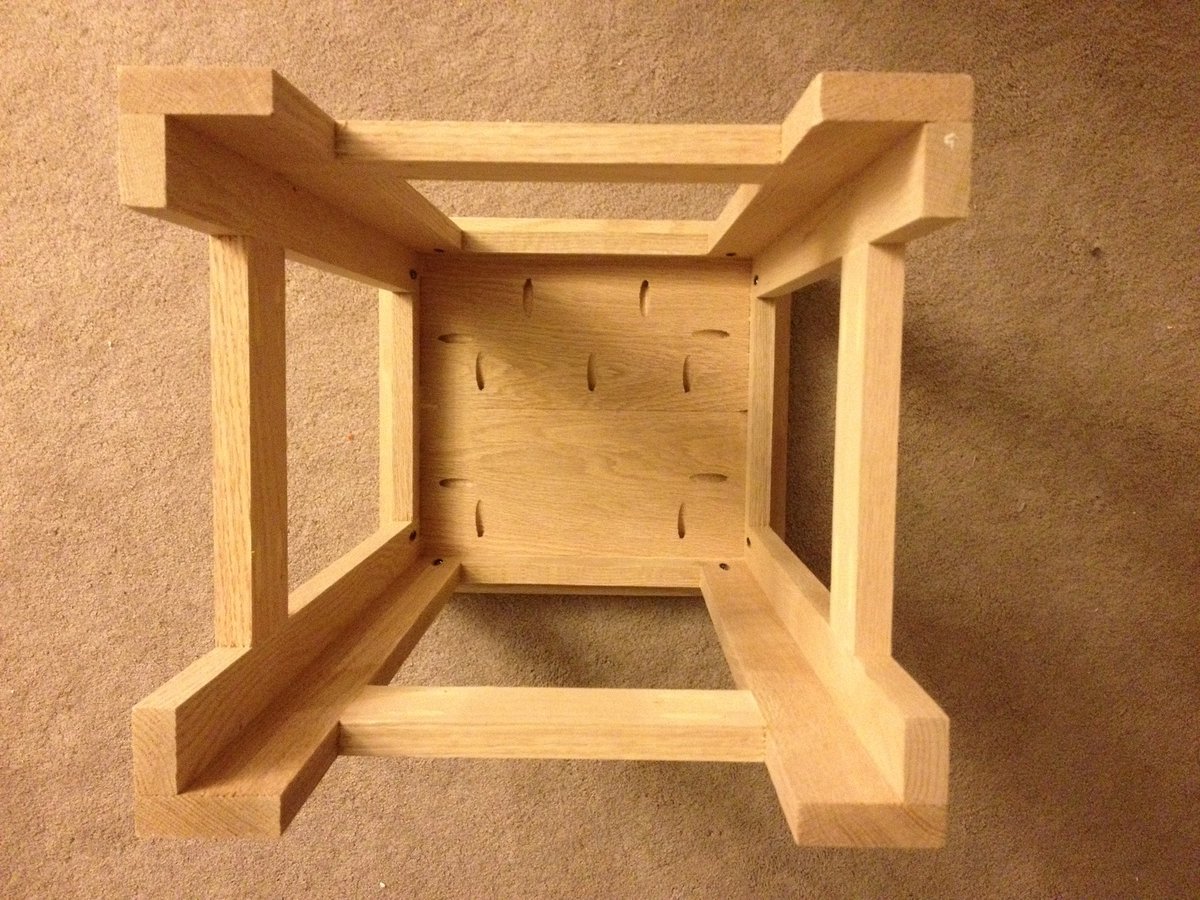
Pub table Stools
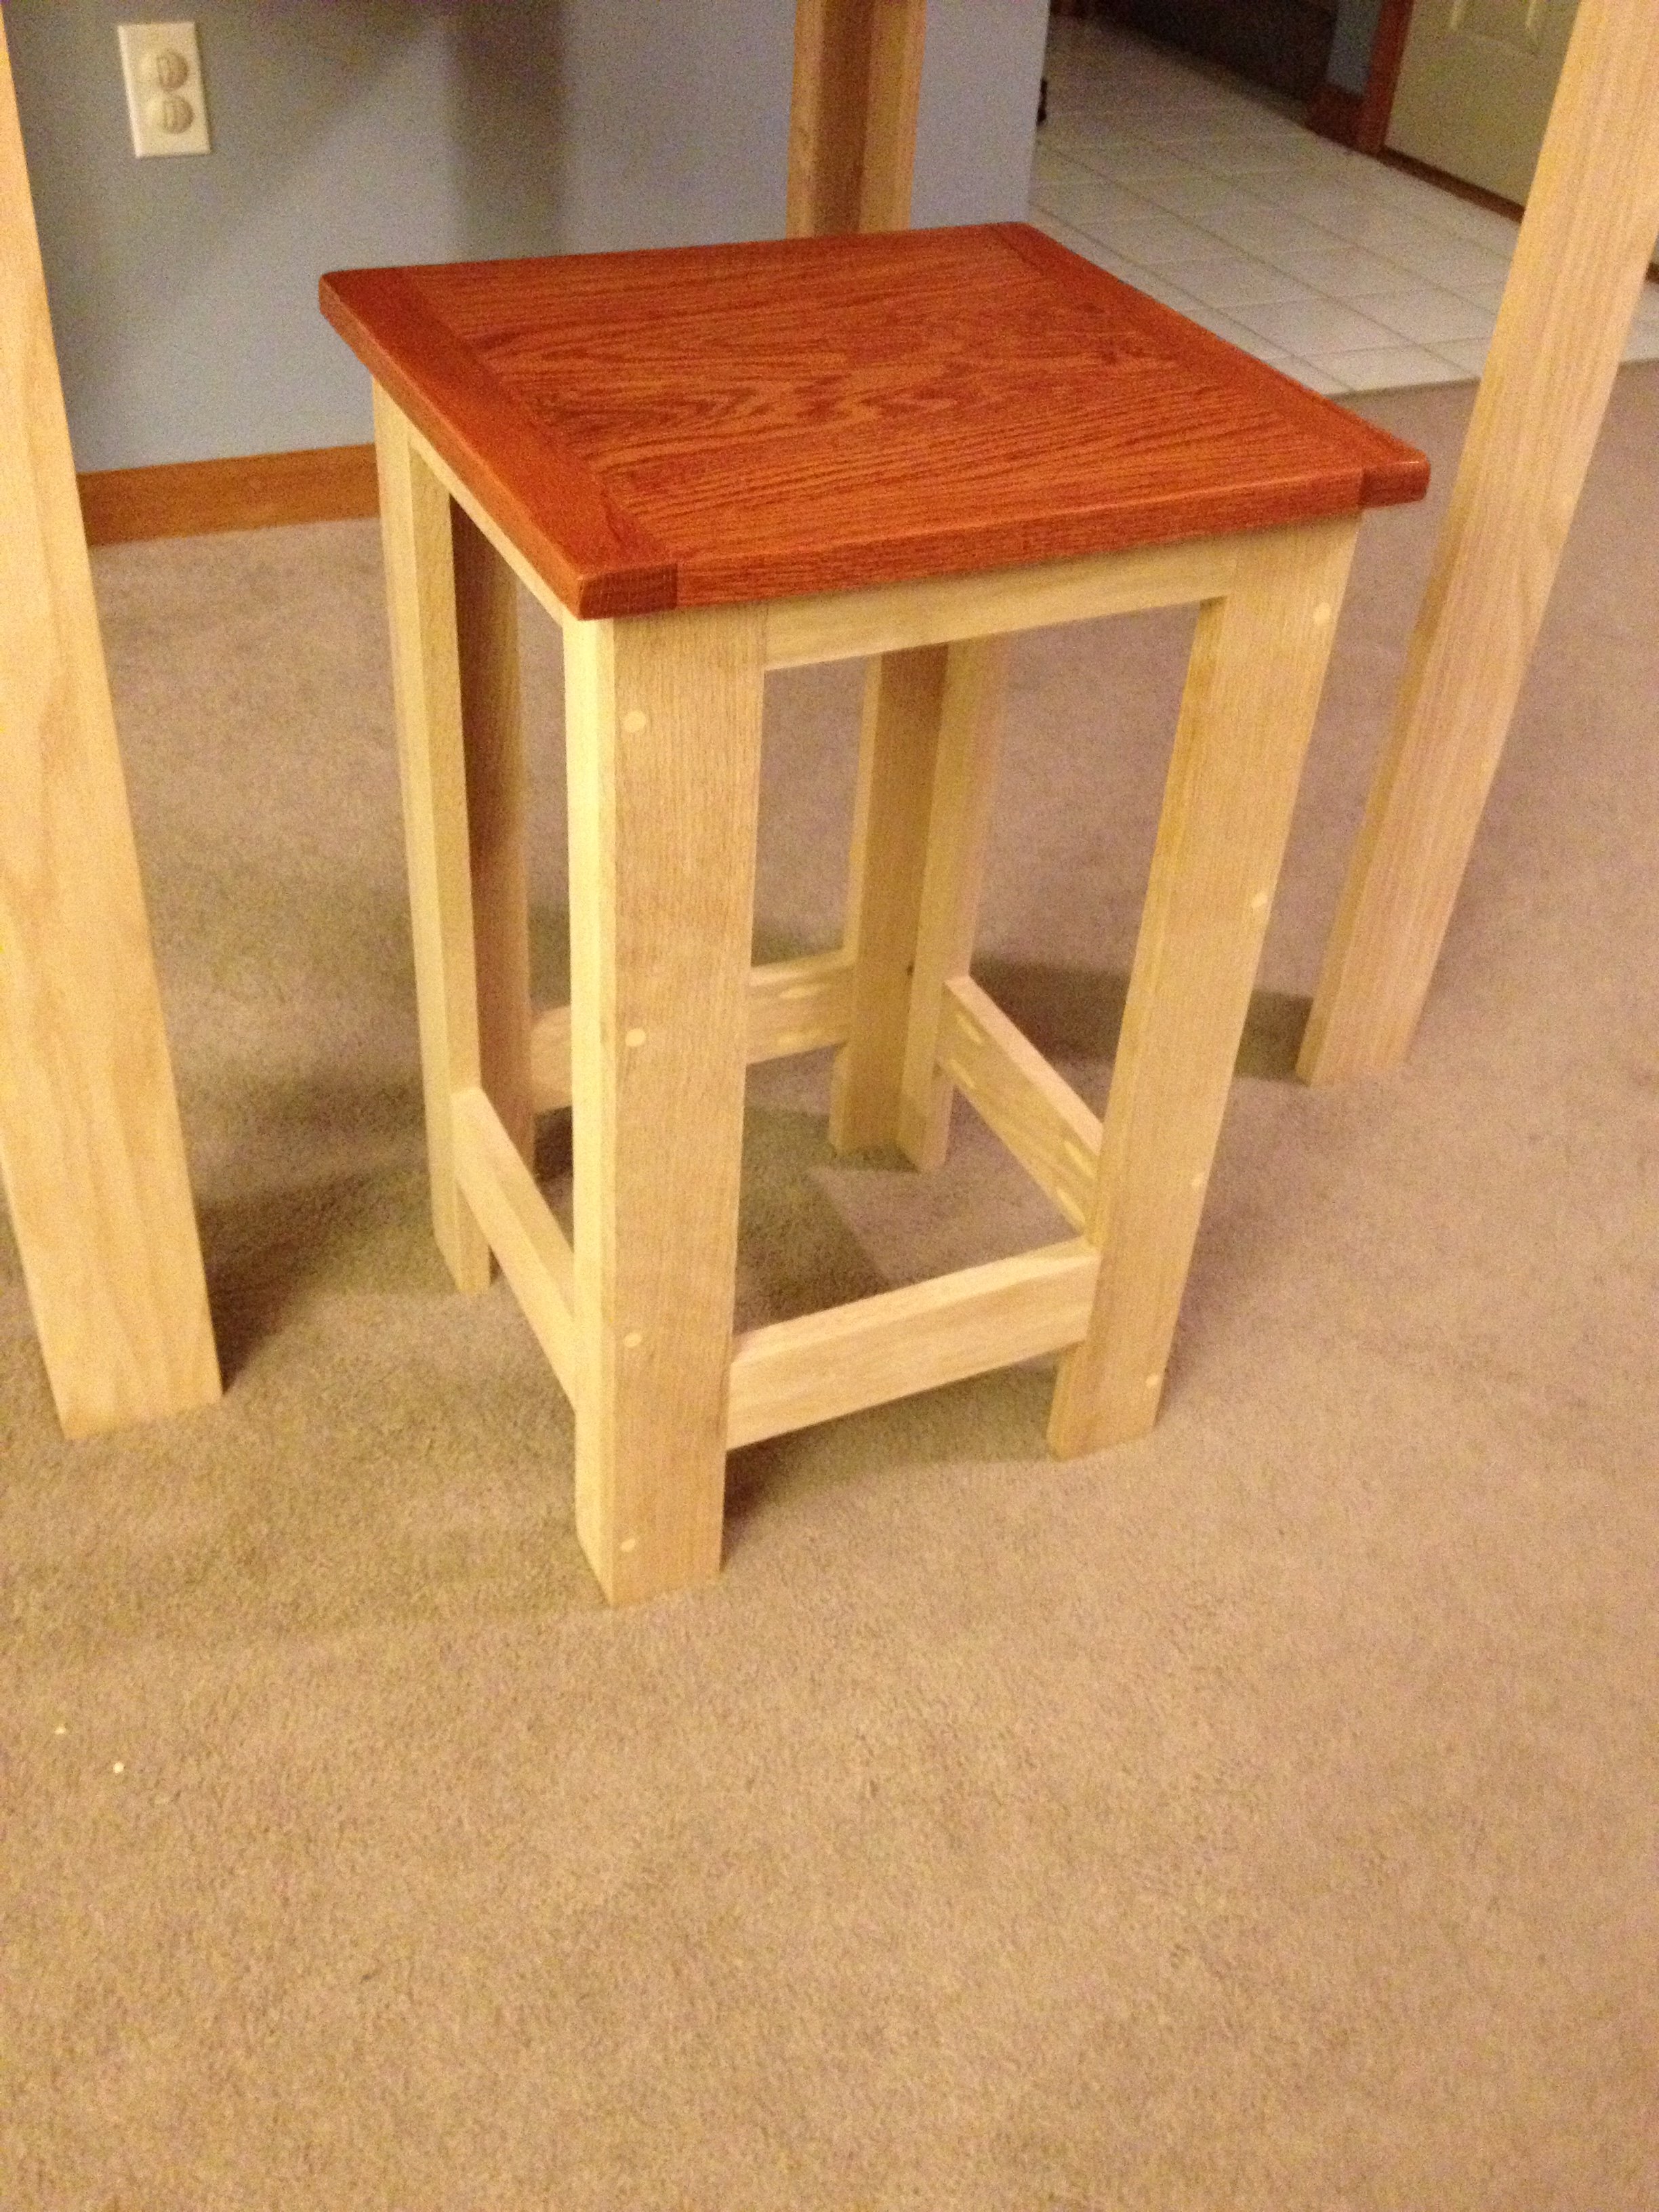
As stated in my table post, I just wasn't happy with what I was finding in the stores as nothing seamed sturdy nor made out of solid material. So I built a pub table and these stools to match.
I combined the stools from multiple projects and eventually just made my own measurements and mimicked the table construction that I made.
Although more expensive, I used Oak so it is sturdy and will take more than normal wear and tear (as I have three young boys under 10)
Built from Plan(s)
Estimated Cost
maybe $40 a stool
Estimated Time Investment
Weekend Project (10-20 Hours)
Finish Used
Rustoleum Traditional Cherry
Minwax Polyacrylic
Minwax Polyacrylic
Recommended Skill Level
Intermediate
Comments
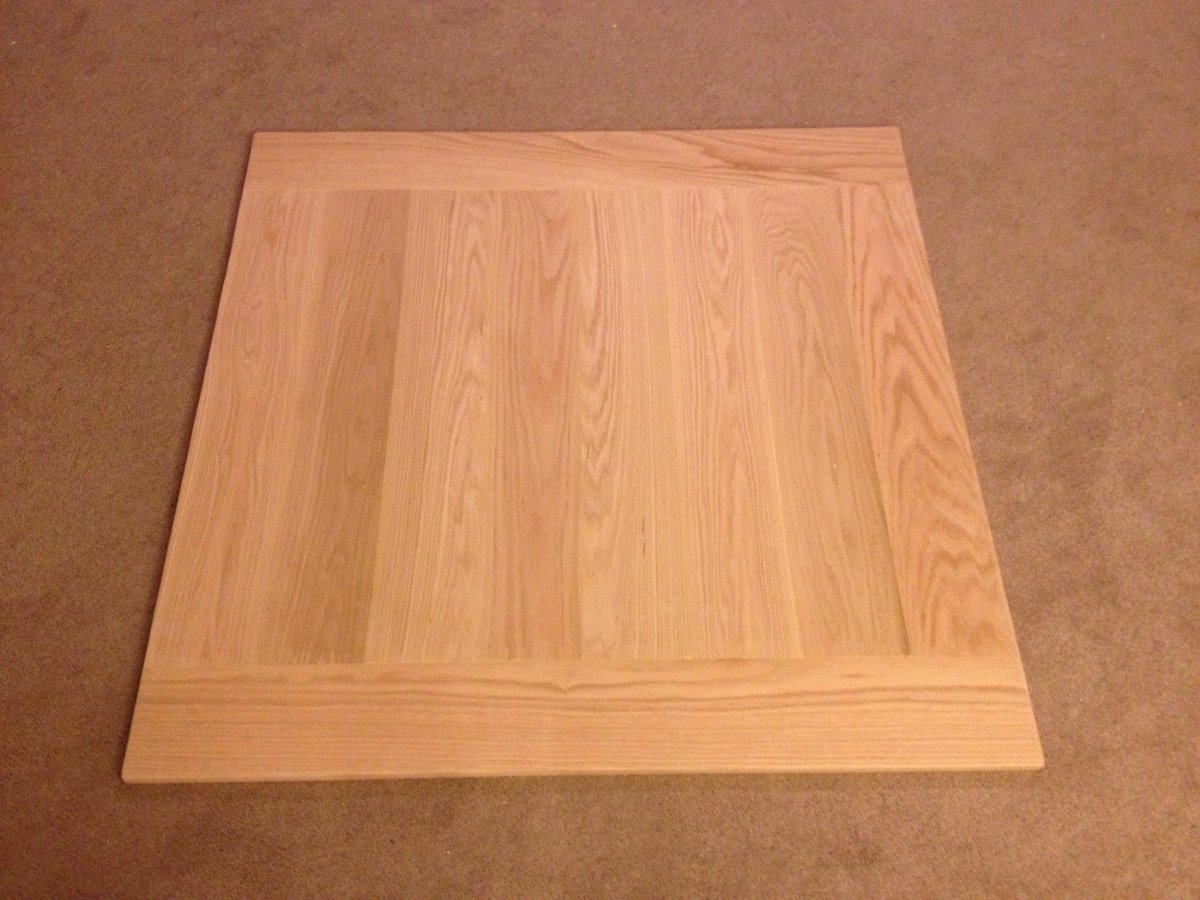
20 Sec Tidy Up Coffee Table
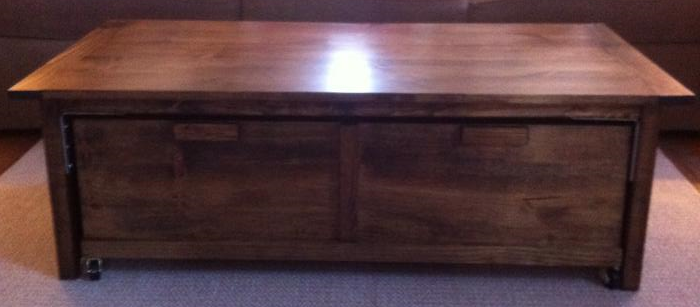
I made this coffee table almost a year ago. It has withstood the use and abuse of my five year old and still looks great!! Thanks Ana for the awesome design!
Built from Plan(s)
Estimated Time Investment
Weekend Project (10-20 Hours)
Recommended Skill Level
Intermediate
Loft Bed
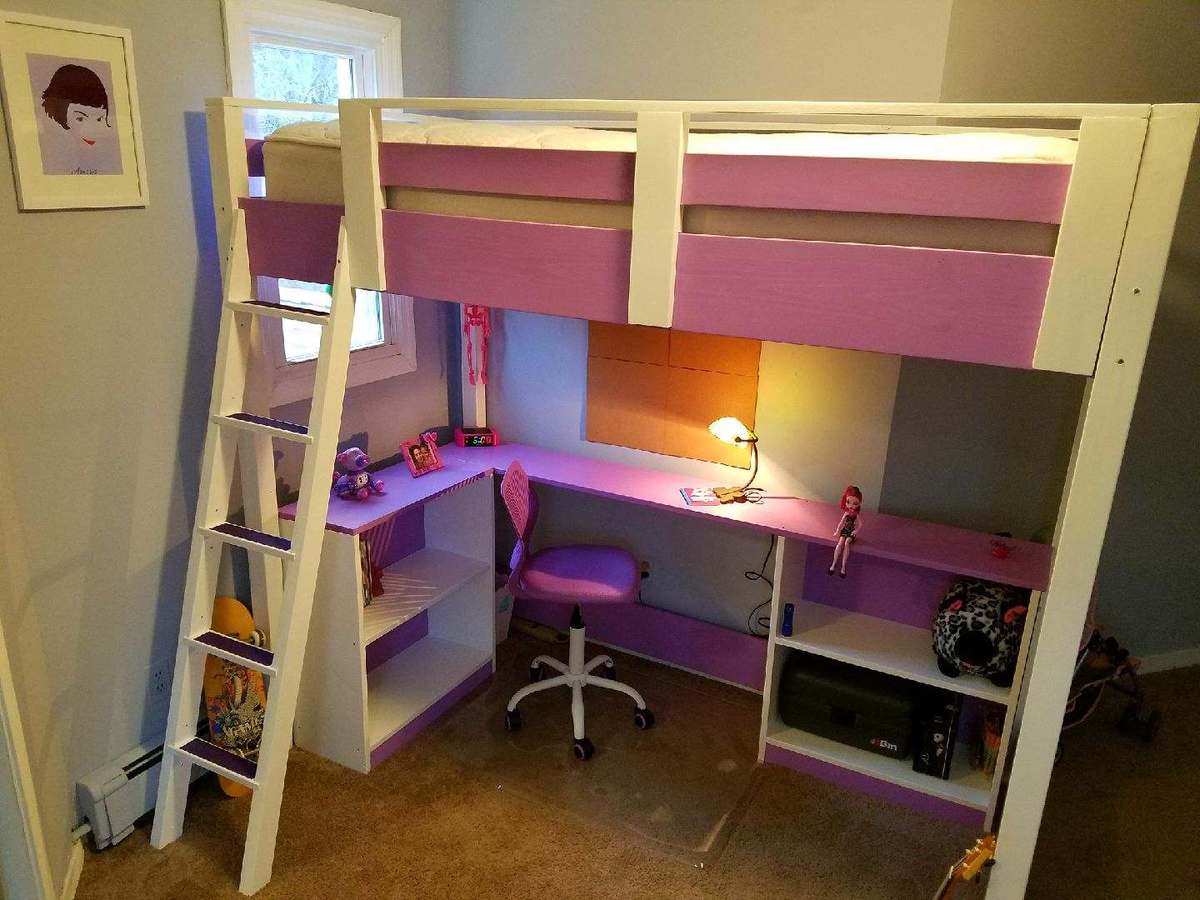
First "big" woodworking project. A lot of fun and my daughter couldn't be happier
Built from Plan(s)
Estimated Time Investment
Week Long Project (20 Hours or More)
Finish Used
Paint
Recommended Skill Level
Beginner
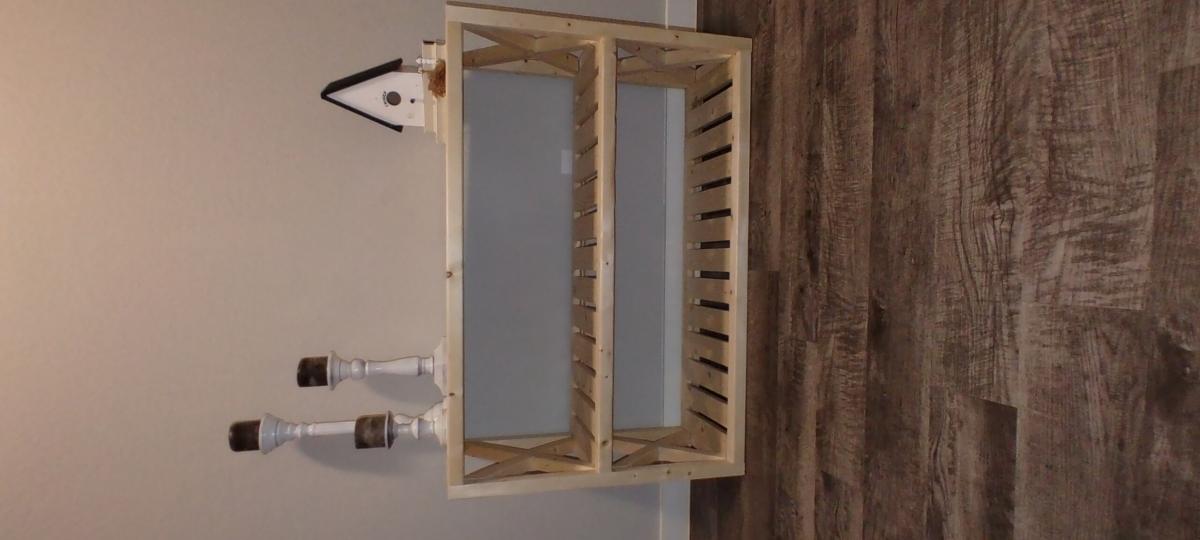
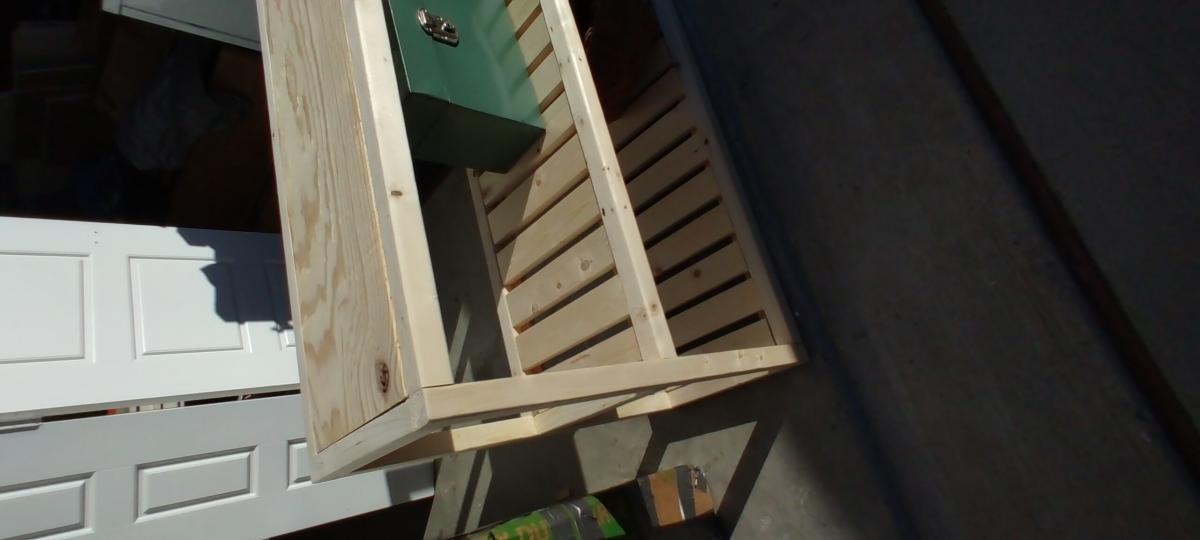
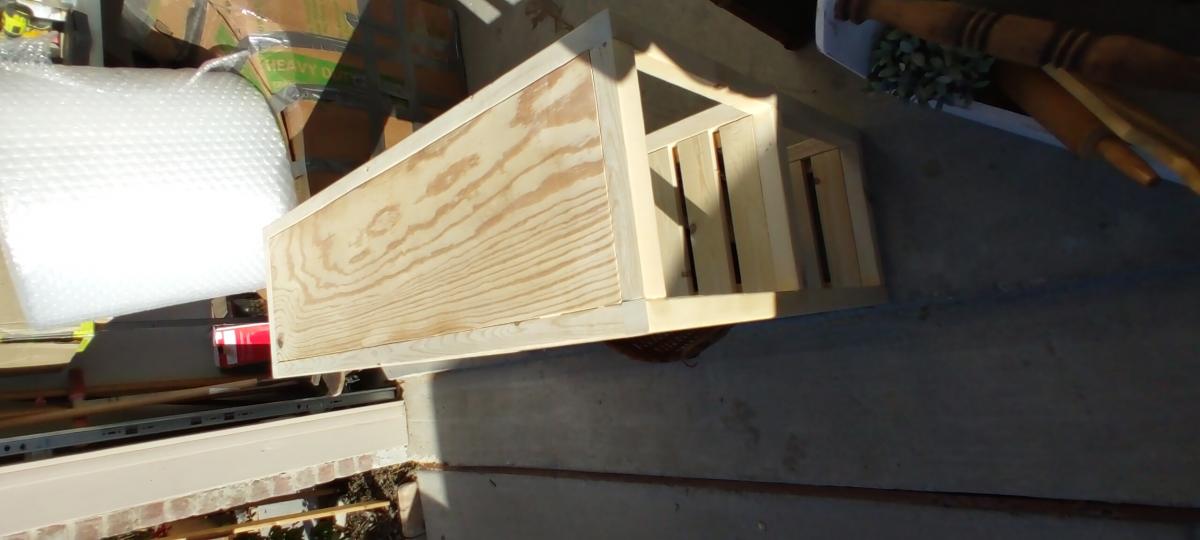
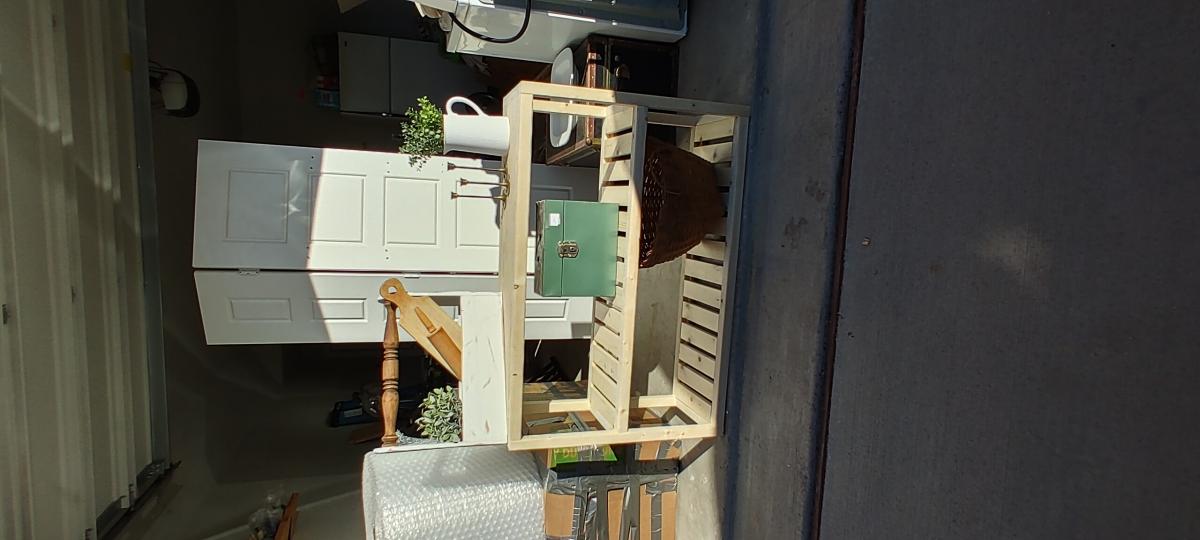
Console table
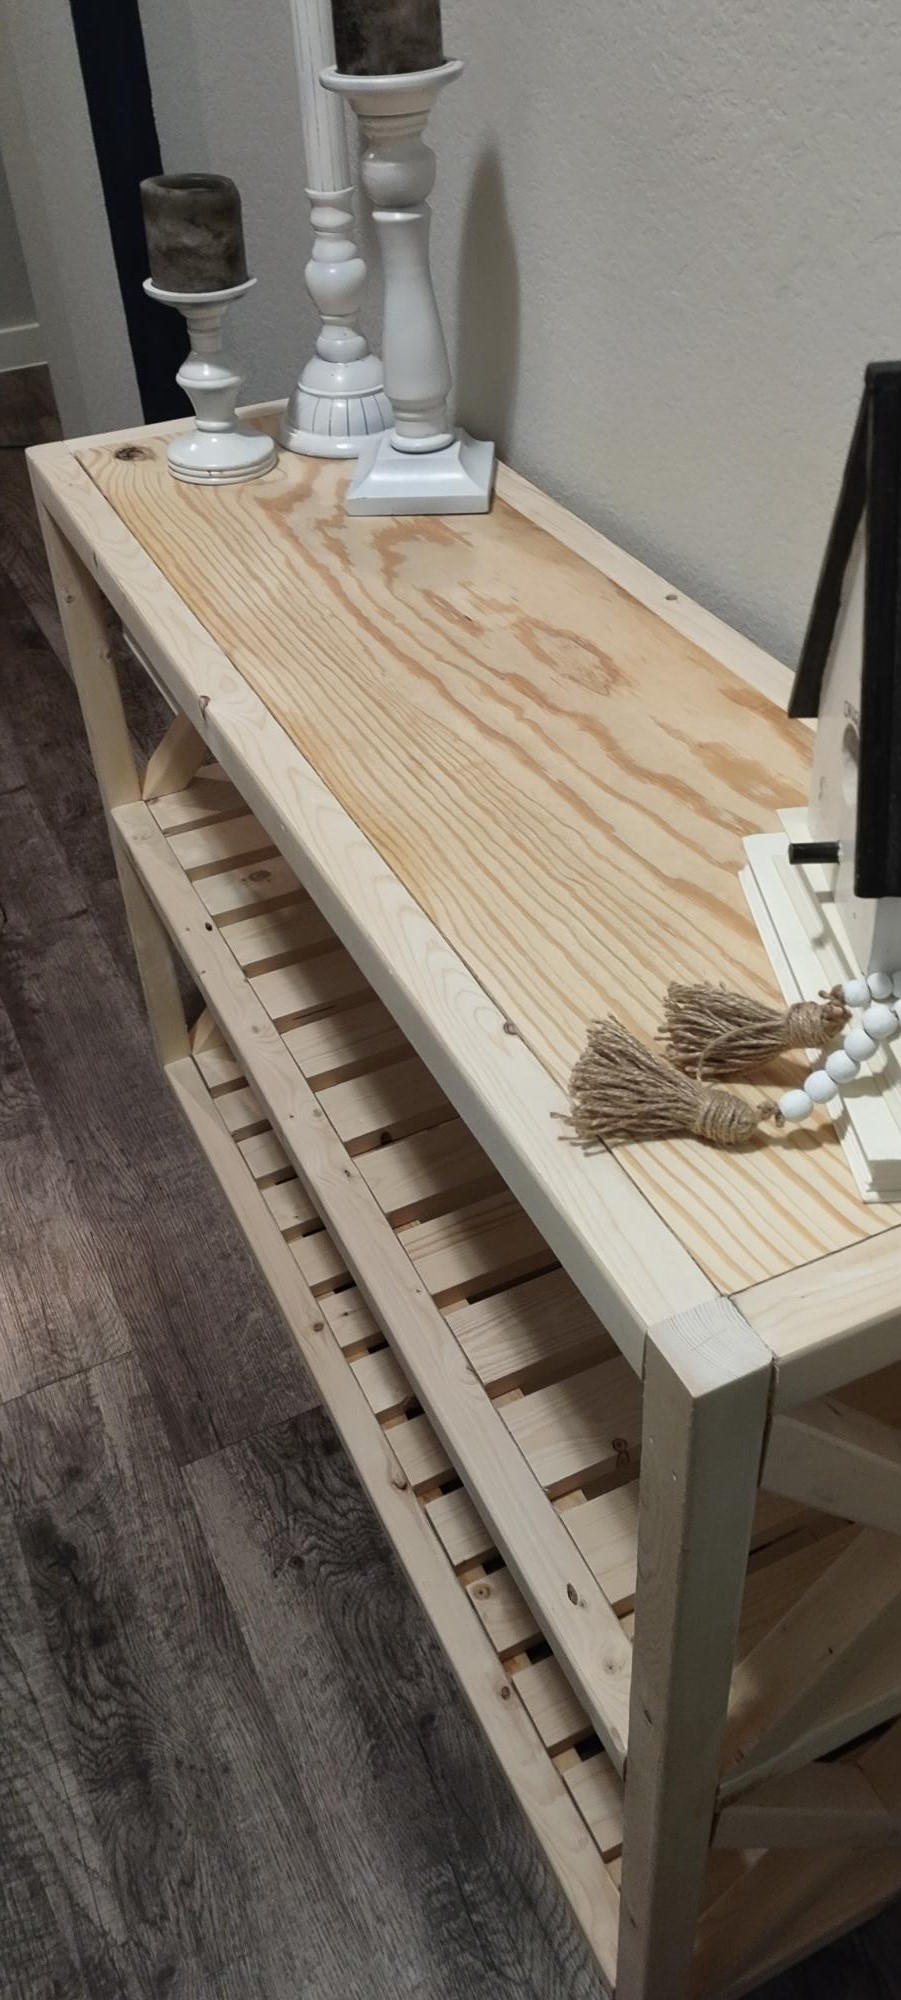
So the x's were hard but by the fourth one I got better. This table is super easy if you do the clears for slats. I cannot imagine doing all those pocket holes!

Built from Plan(s)
Estimated Cost
$36
Estimated Time Investment
Afternoon Project (3-6 Hours)
Recommended Skill Level
Intermediate