Simple 2x4 Potting Bench
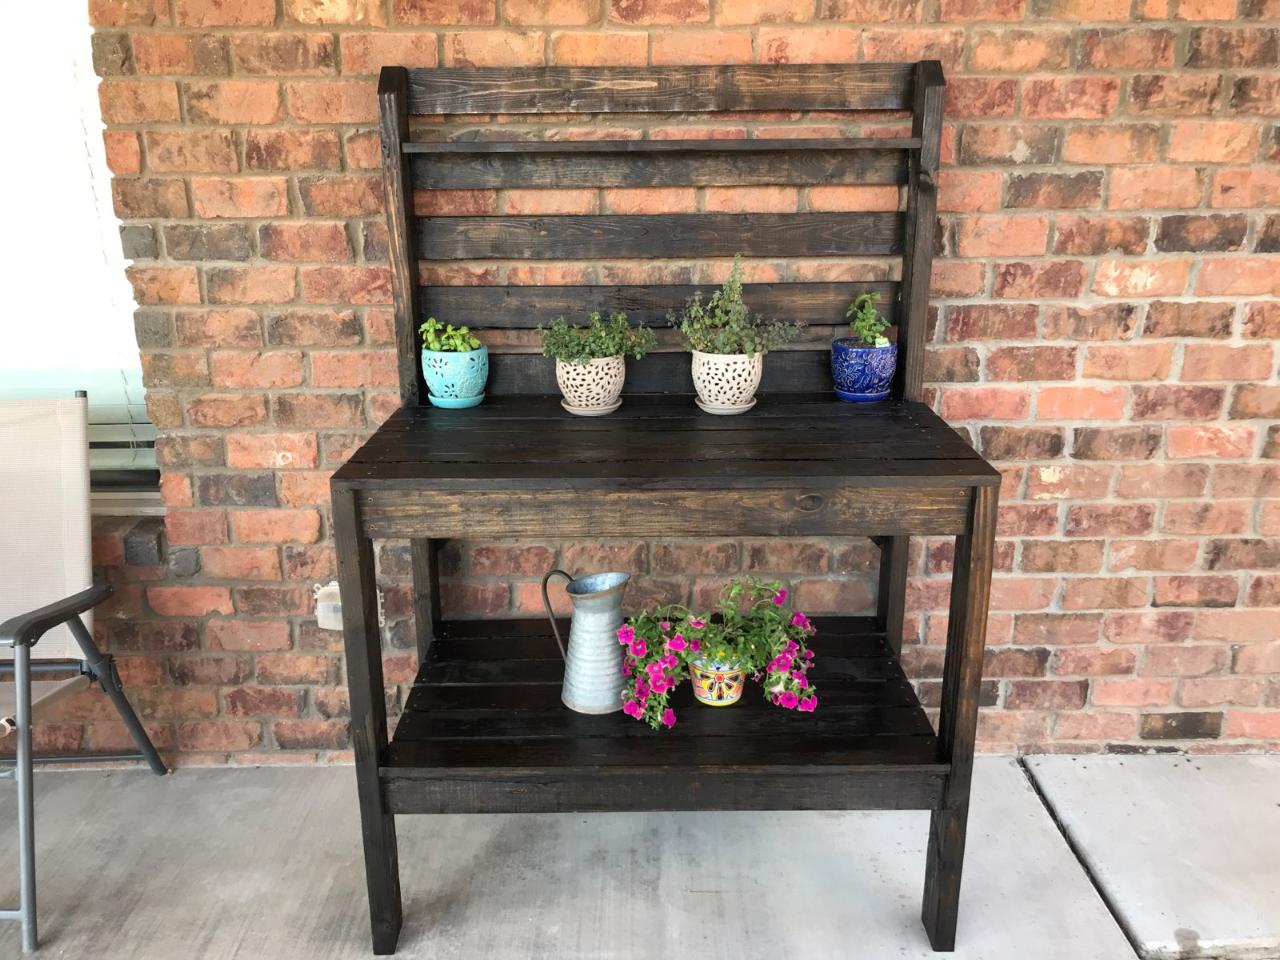
Simple 2x4 Potting Bench. Easy build and looks great!
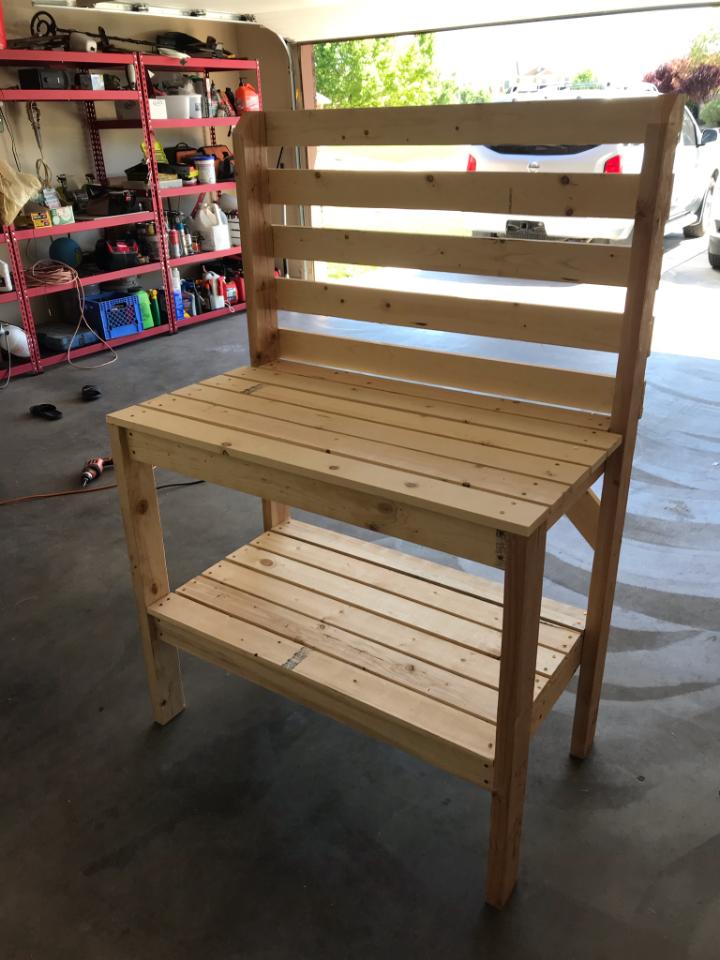
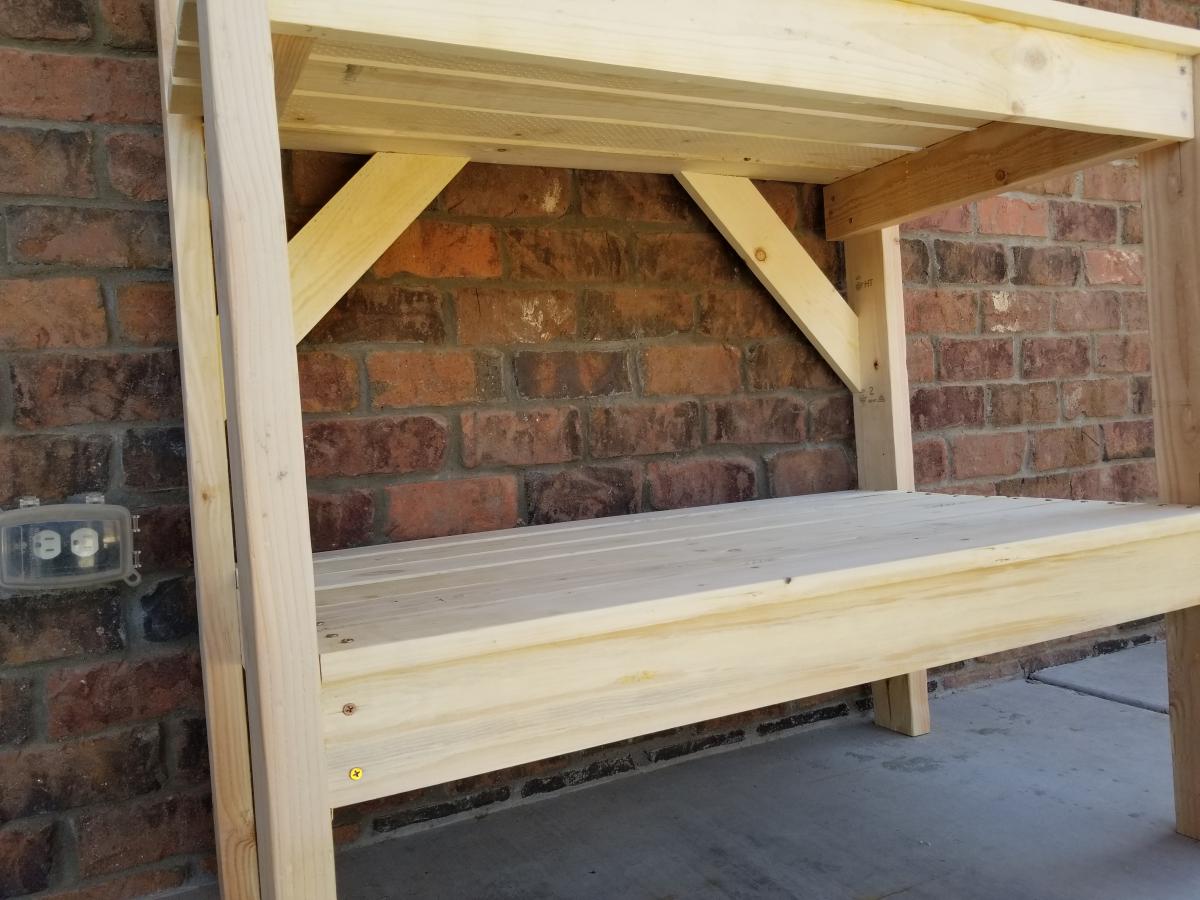
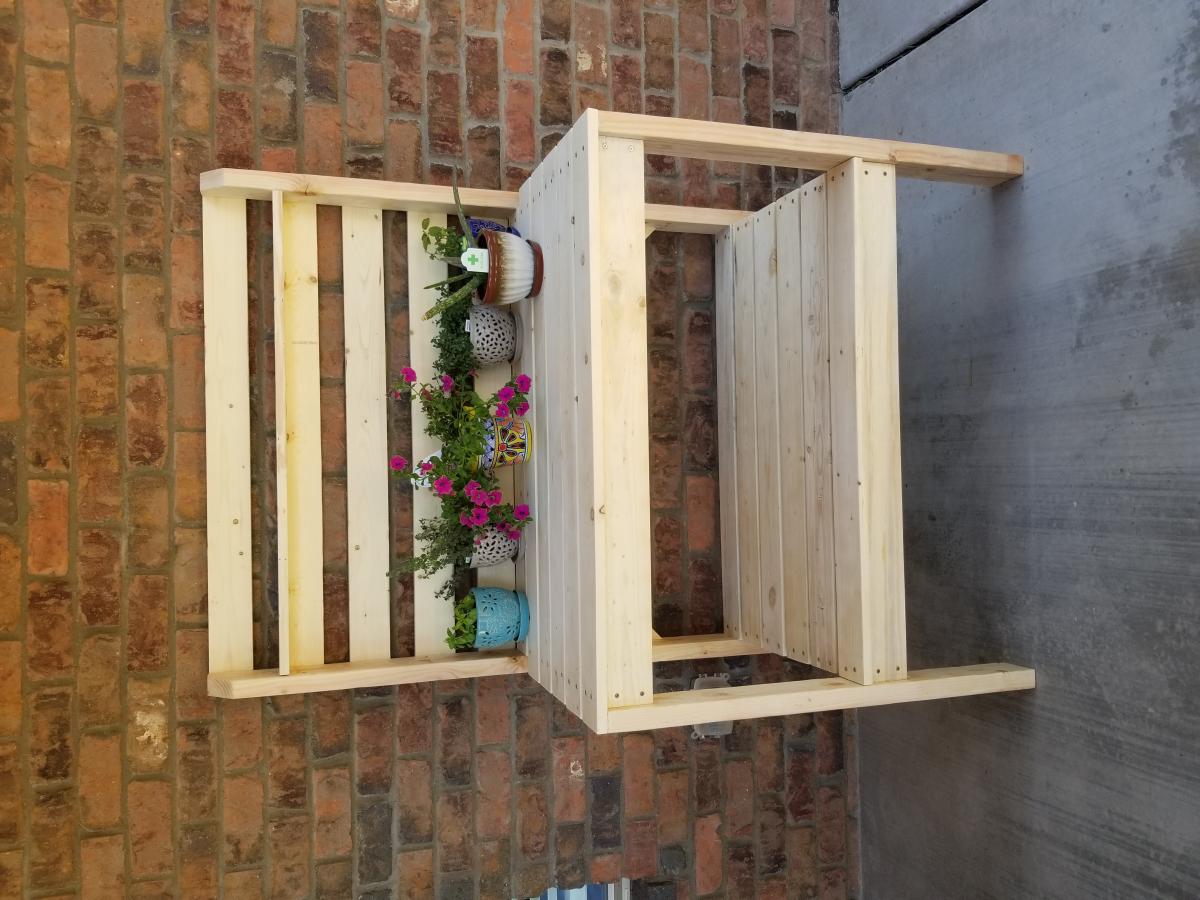

Simple 2x4 Potting Bench. Easy build and looks great!


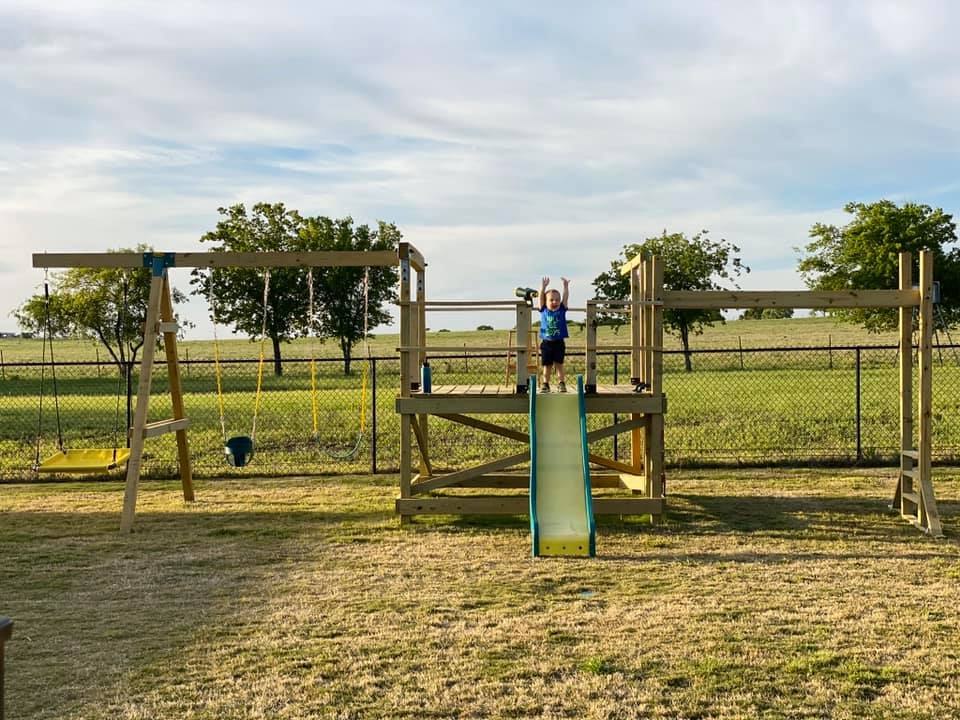
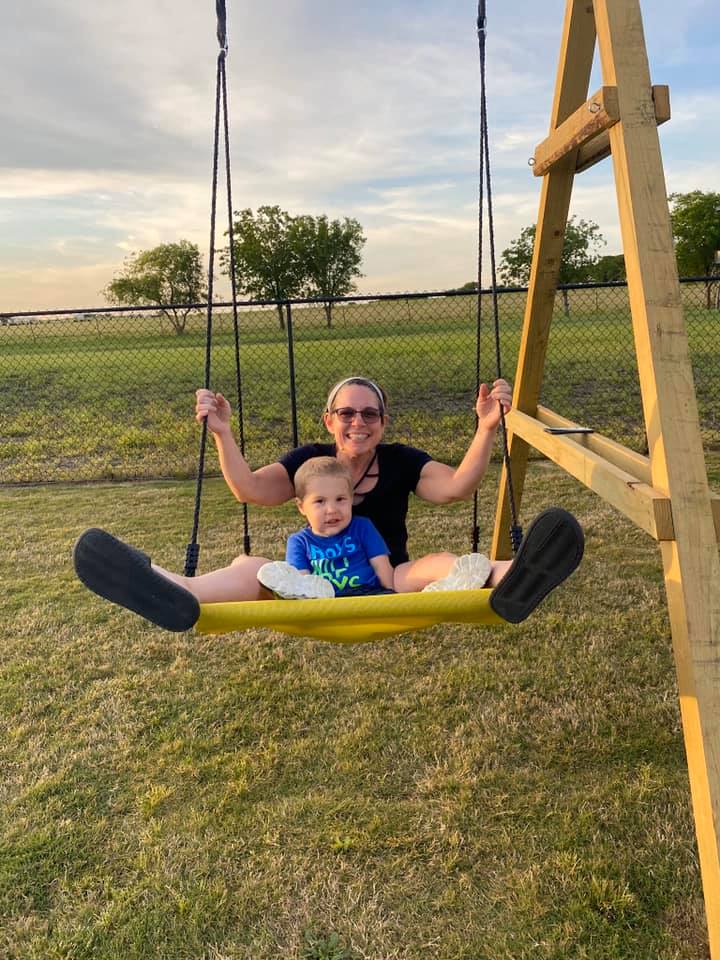
We are used to seeing our grandson every weekend but during the 2020 COVID quarantine we were unable to do so. Instead, we filled our time building him a swing set for our backyard. He loved it!! We are going to add more to the swing side but the hardware I want isn't available right now (apparently there is a lot of swing set building going on during this time). I look forward to many years of playing on this with our grandson and hopefully additional grandkids in the future... Our cost was pretty high mainly because our first round of lumber came from a local lumberyard that was willing to deliver within a few days (big box was going to take several weeks) and they had what is supposed to be higher end lumber (not sure I am convinced of that)....also, i chose some pretty expensive hardware (brackets) just for the added security.....


My kids needed a step stool and I had some scrap wood (2x10) left over from a previous project
Thu, 08/18/2016 - 20:12
Thank you! The dimensions are the same as the Ana White "Simple 1x10 Single Step Stool" except I used 2x10's instead of 1x10's like the plans called for. I also used some scrap pallet wood to make a design on the top of the stool.
- Stool height: 7 1/2" for legs, 1 1/2" for top, and 1/2" for scrap pallet wood; which gives a total height of 9"
- Stool width: 9 1/4" x 16"
- 5 degree angle cuts were made on the legs
Wed, 04/17/2024 - 09:21
Are the rails a 2x10 cut in half.? Or is it pallet wood?
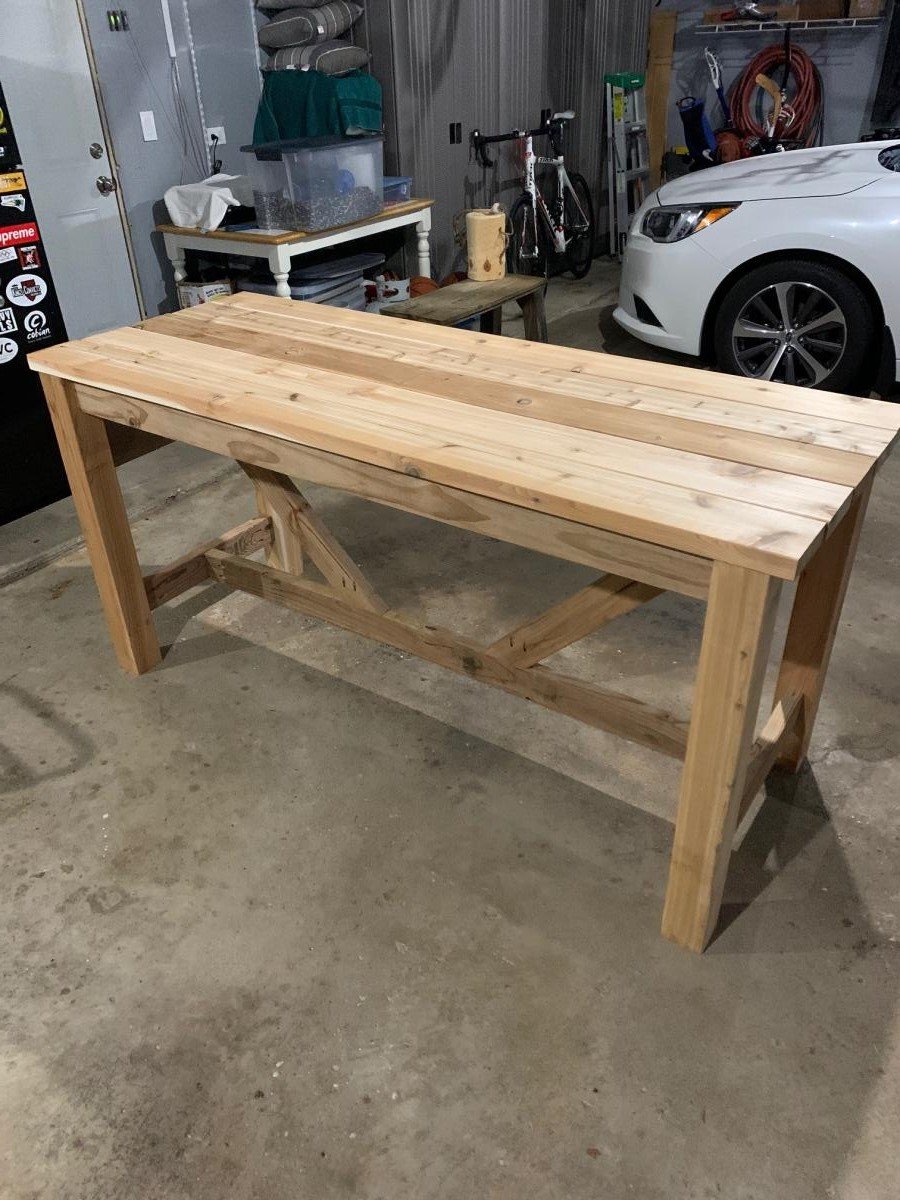
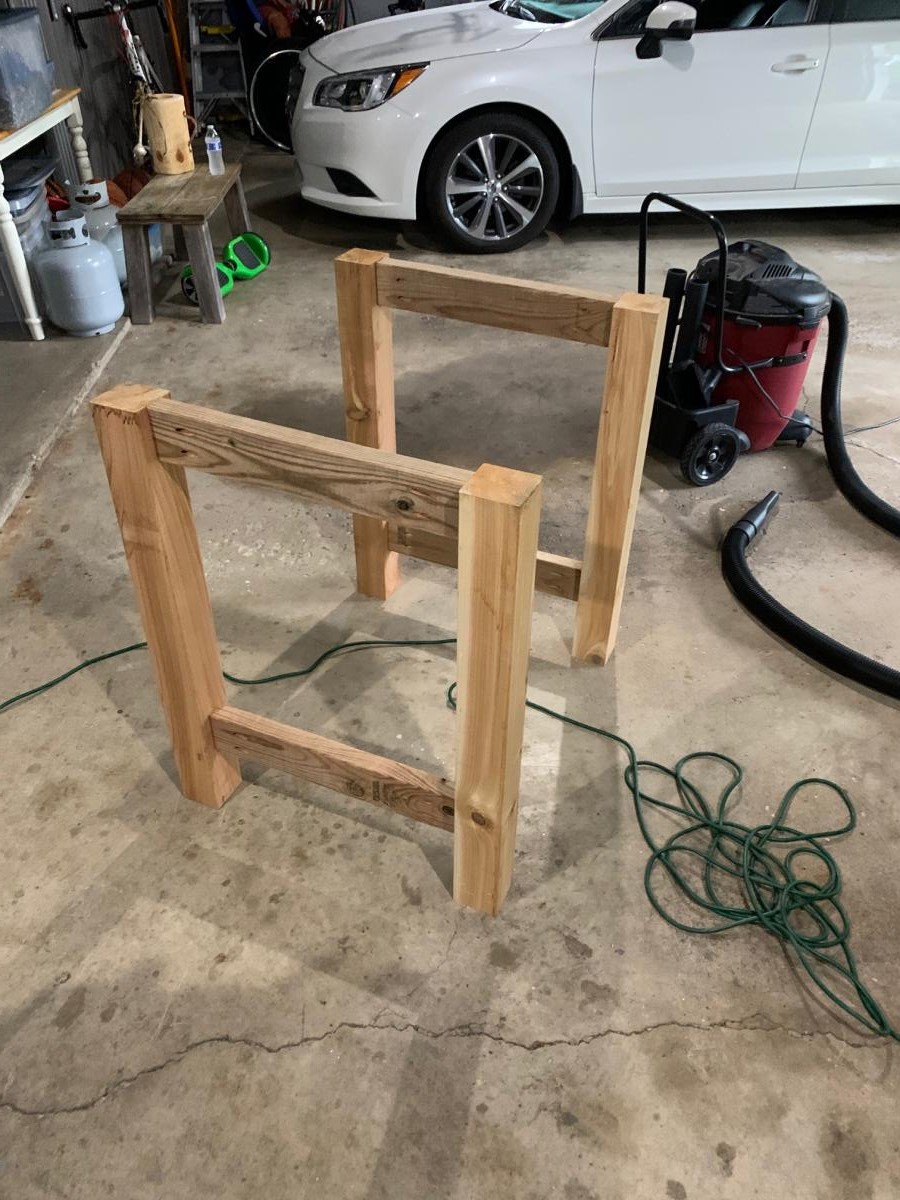
Not quite finished but love the table already. Trying to decide how to stain/paint it. The Kreg jig was a must for this project. It was my first of hopefully many! I used cedar for the 4x4s and 2x6 top pieces. The 2x4s are treated lumber (only because there were no more cedar ones....apparently lumber is getting hard to get lately!!!). Anyway....thanks for the great plans and motivation for this project.
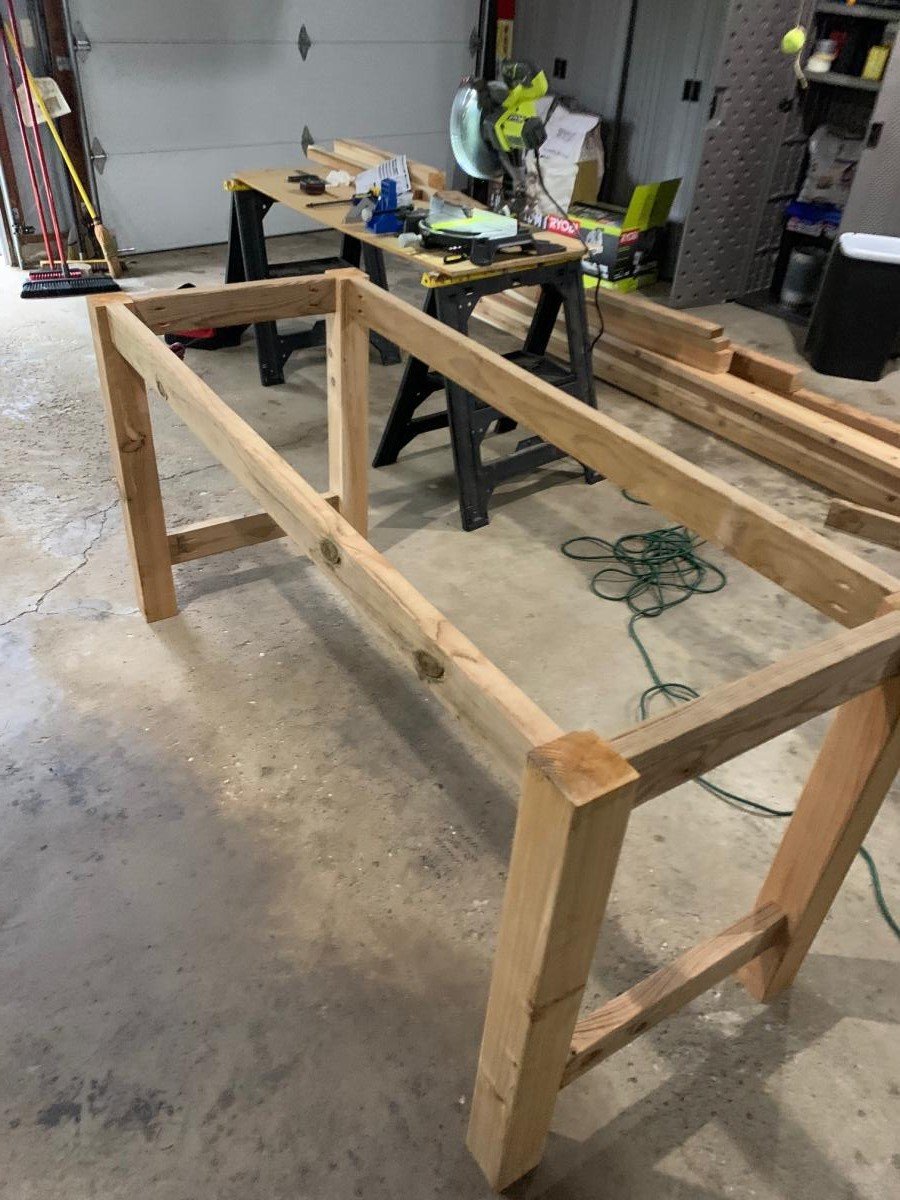
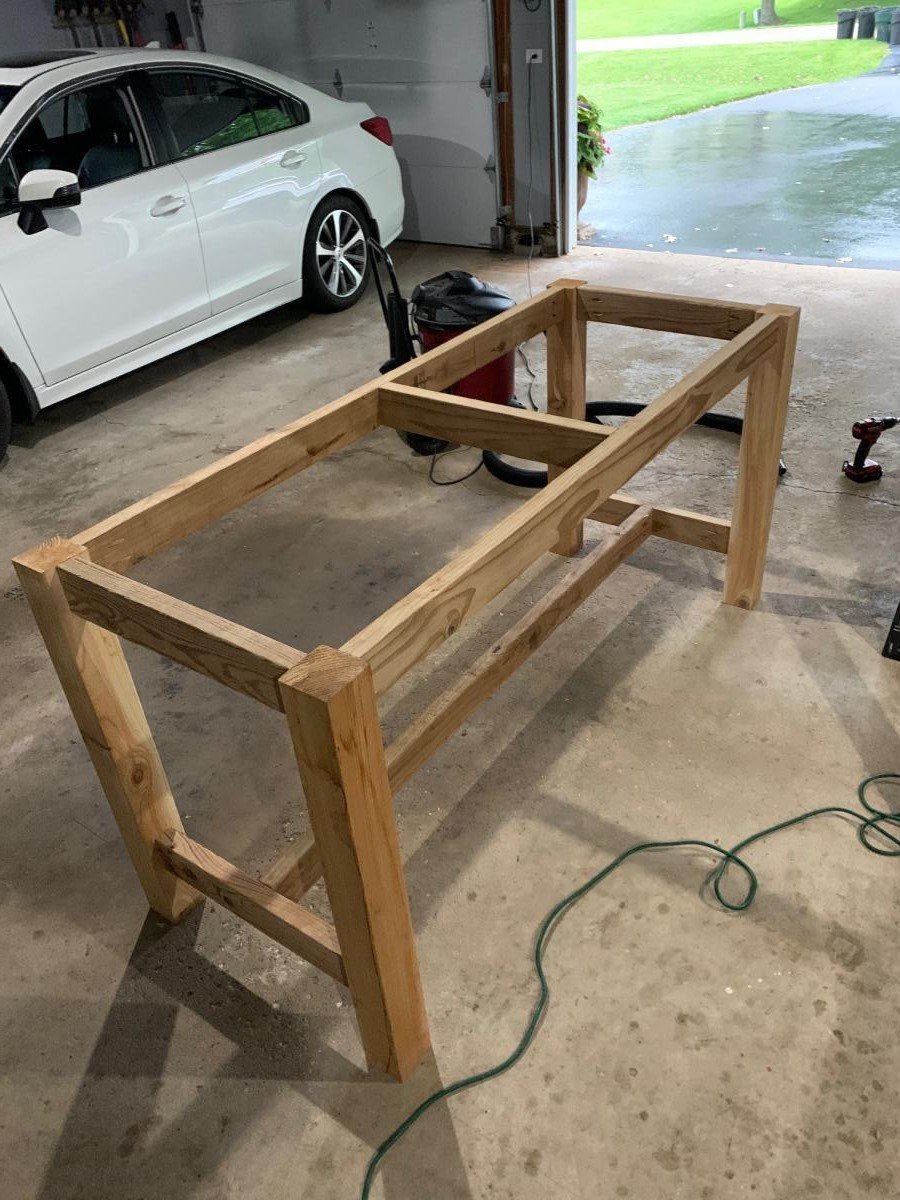
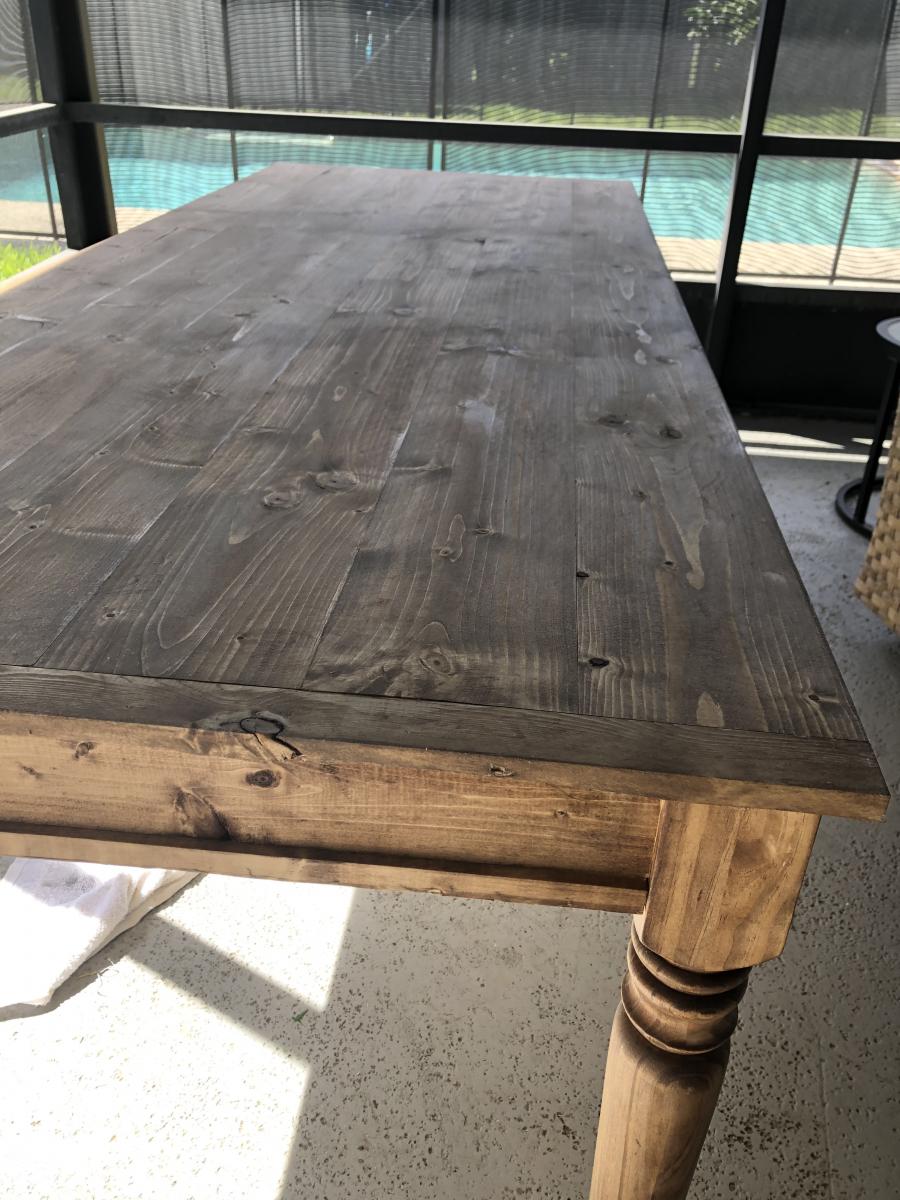
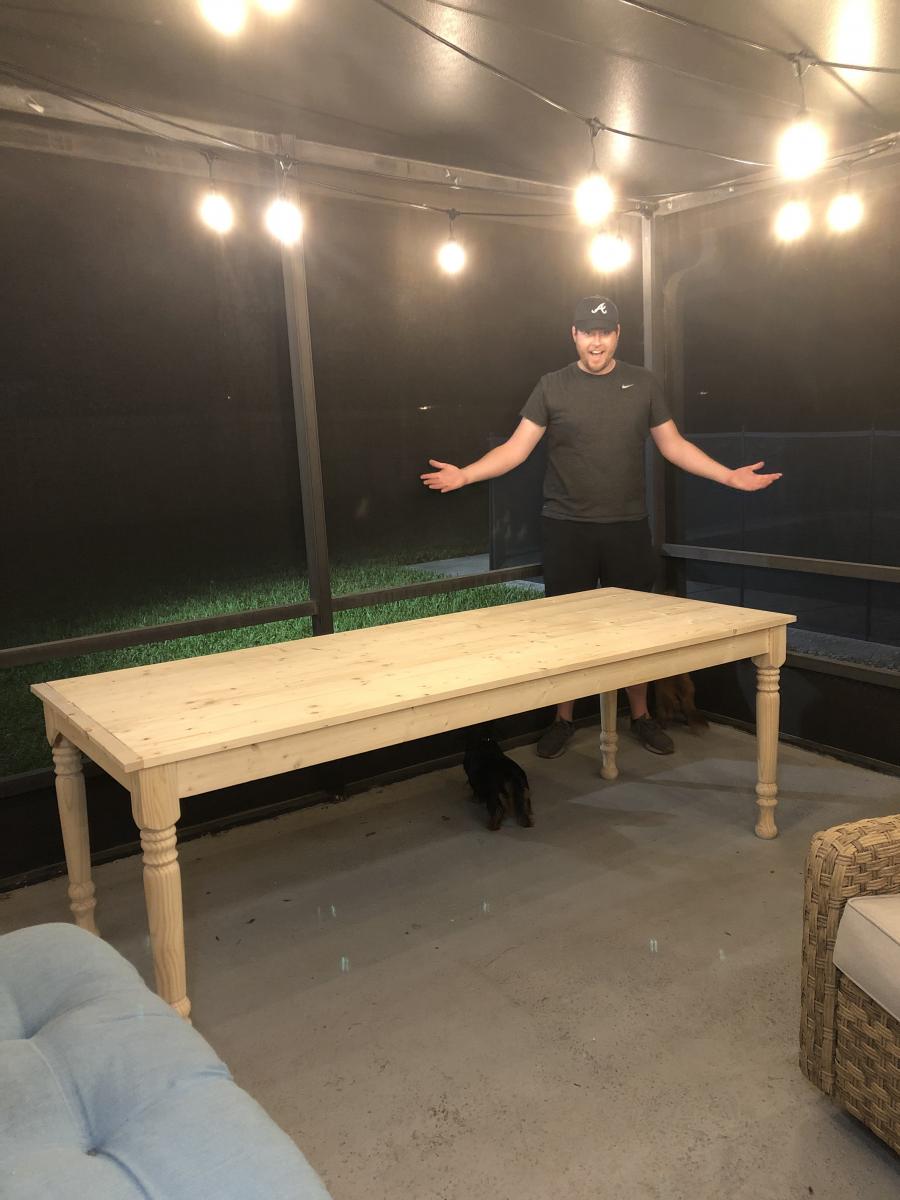
My wife and I were wanting a large outdoor farmhouse table that looked stylish, and like it could have been bought at Pottery Barn or another high-end furniture store. We found this plan that Ana white had made "Small Old English Style Farmhouse Dining Table". We often host groups from our church and will have 15-20 people on our patio or around our pool area, so we needed a bigger table... I just made some modifications to make it longer (7ft) in length to better fit our space and allow for more people to sit.
To make this plan longer, I simply adjusted the cut-list on the long 1x2s, 1x4s, and 1x6; and added a crossbar to prevent the longer tabletop from sagging. I also added the diagonal corner struts to make the table a little sturdier.
Adjusted Shopping List:
4 - 1x2 @ 8ft
5 - 1x4 @ 8 ft
6 - 1x6 @ 8ft
Waterproof 1 1/4" Kreg screws (for outdoor use)
Minwax Weathered Oak
Minwax Vintage Grey
Adjusted Cut-List
• 2 - 1x2 @ 26.5"
• 2 - 1x2 @ 76.5"
• 2 - 1x2 @ ~33.25"
• 2 - 1x4 @ 26.5"
• 2 - 1x4 @ 76.5"
• 4 - 1x4 @ 7.25" w/ 45º miter (diagonal corner supports)
• 1 - 1x4 @ ~28" (Crossbar - I forget the exact measurement)
• 6 - 1x6 @ 82"
For seating we just bought some inexpensive farmhouse weather resistant chairs from Walmart:
https://www.walmart.com/ip/Yaheetech-Metal-Dinning-Chairs-Stackable-Cof…
Tue, 03/02/2021 - 08:46
Love the to see the increased length on this plan. thanks for sharing!
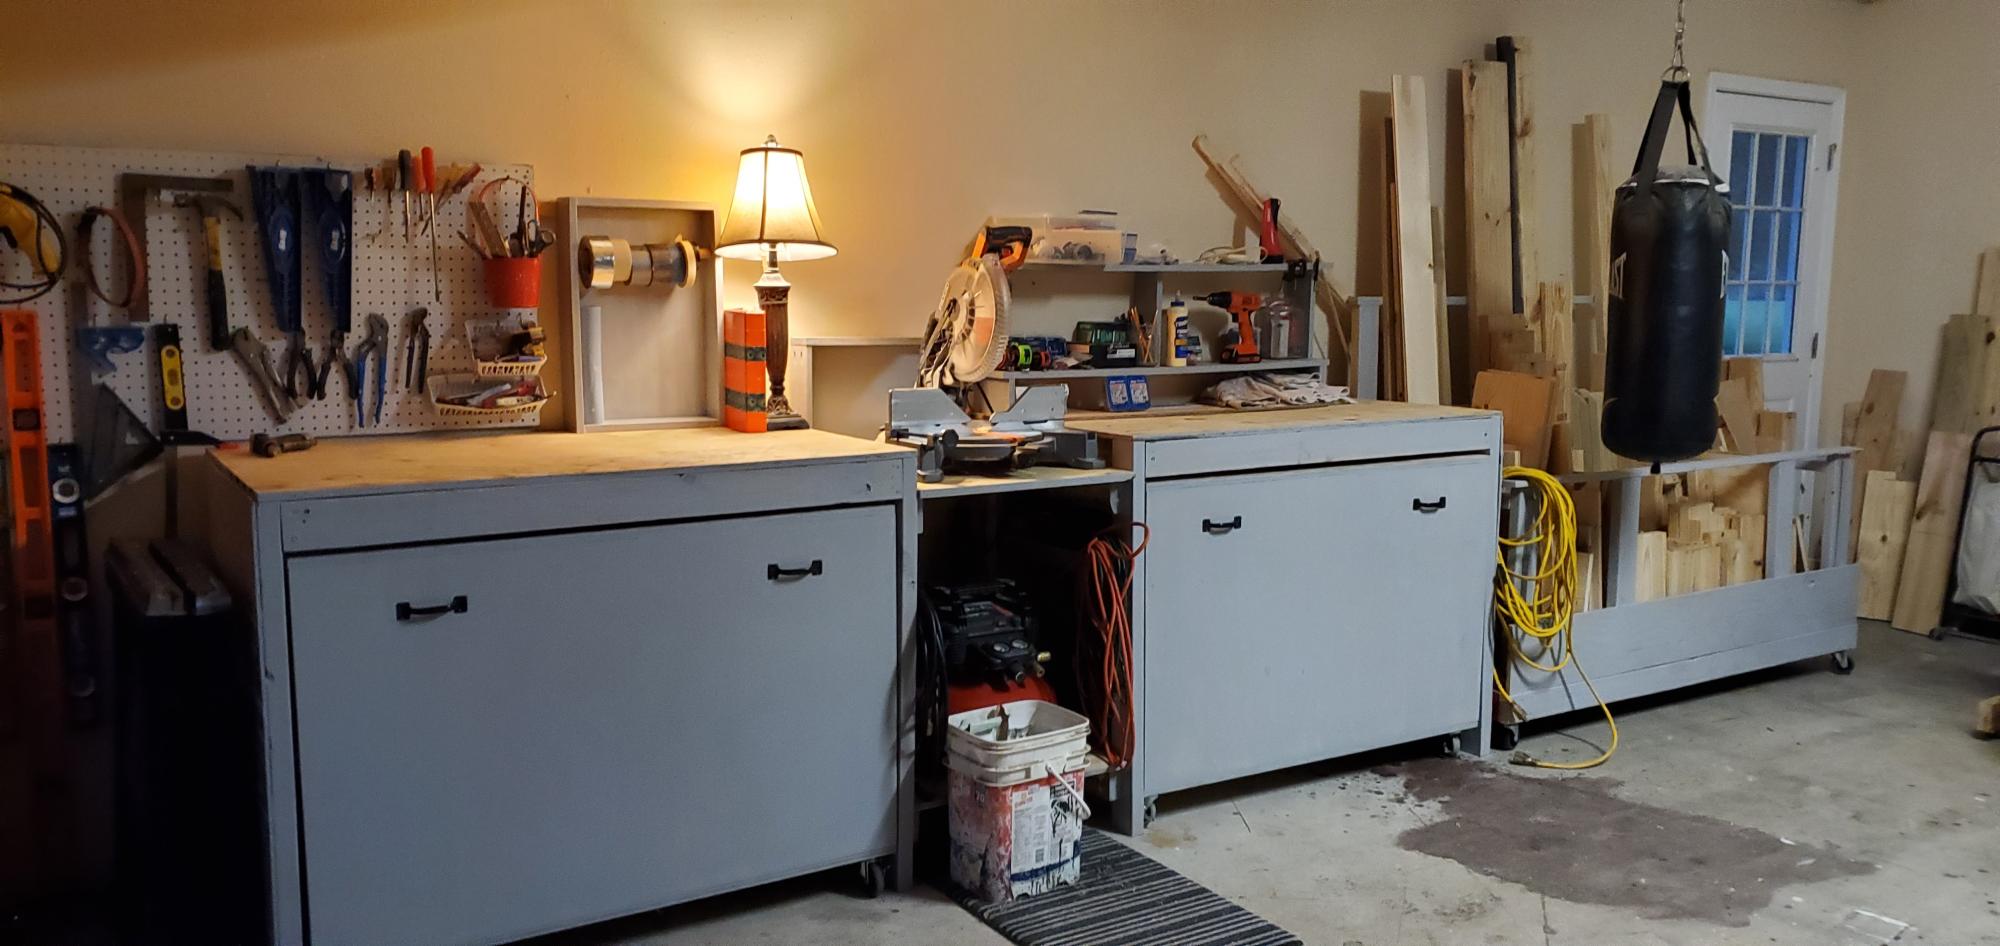
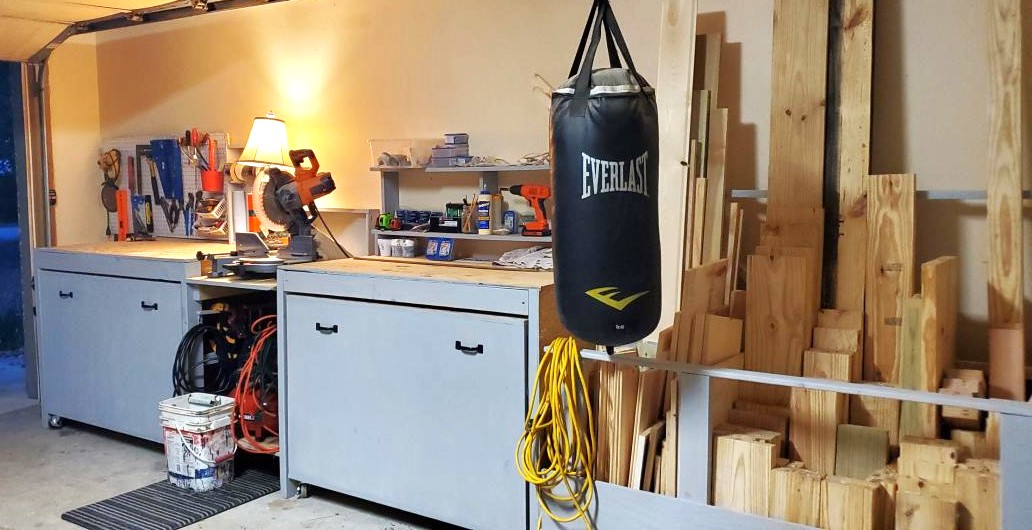
I finally finished my workbench this summer. I started the bench 2 years ago for my miter saw. Got busy with other builds, things for family, clients, etc. I still had most of the wood cut for the carts. Here it is in all its glory!!! Finally organization and I can actually park my car in my garage. Thanks Ana for all of your plans.
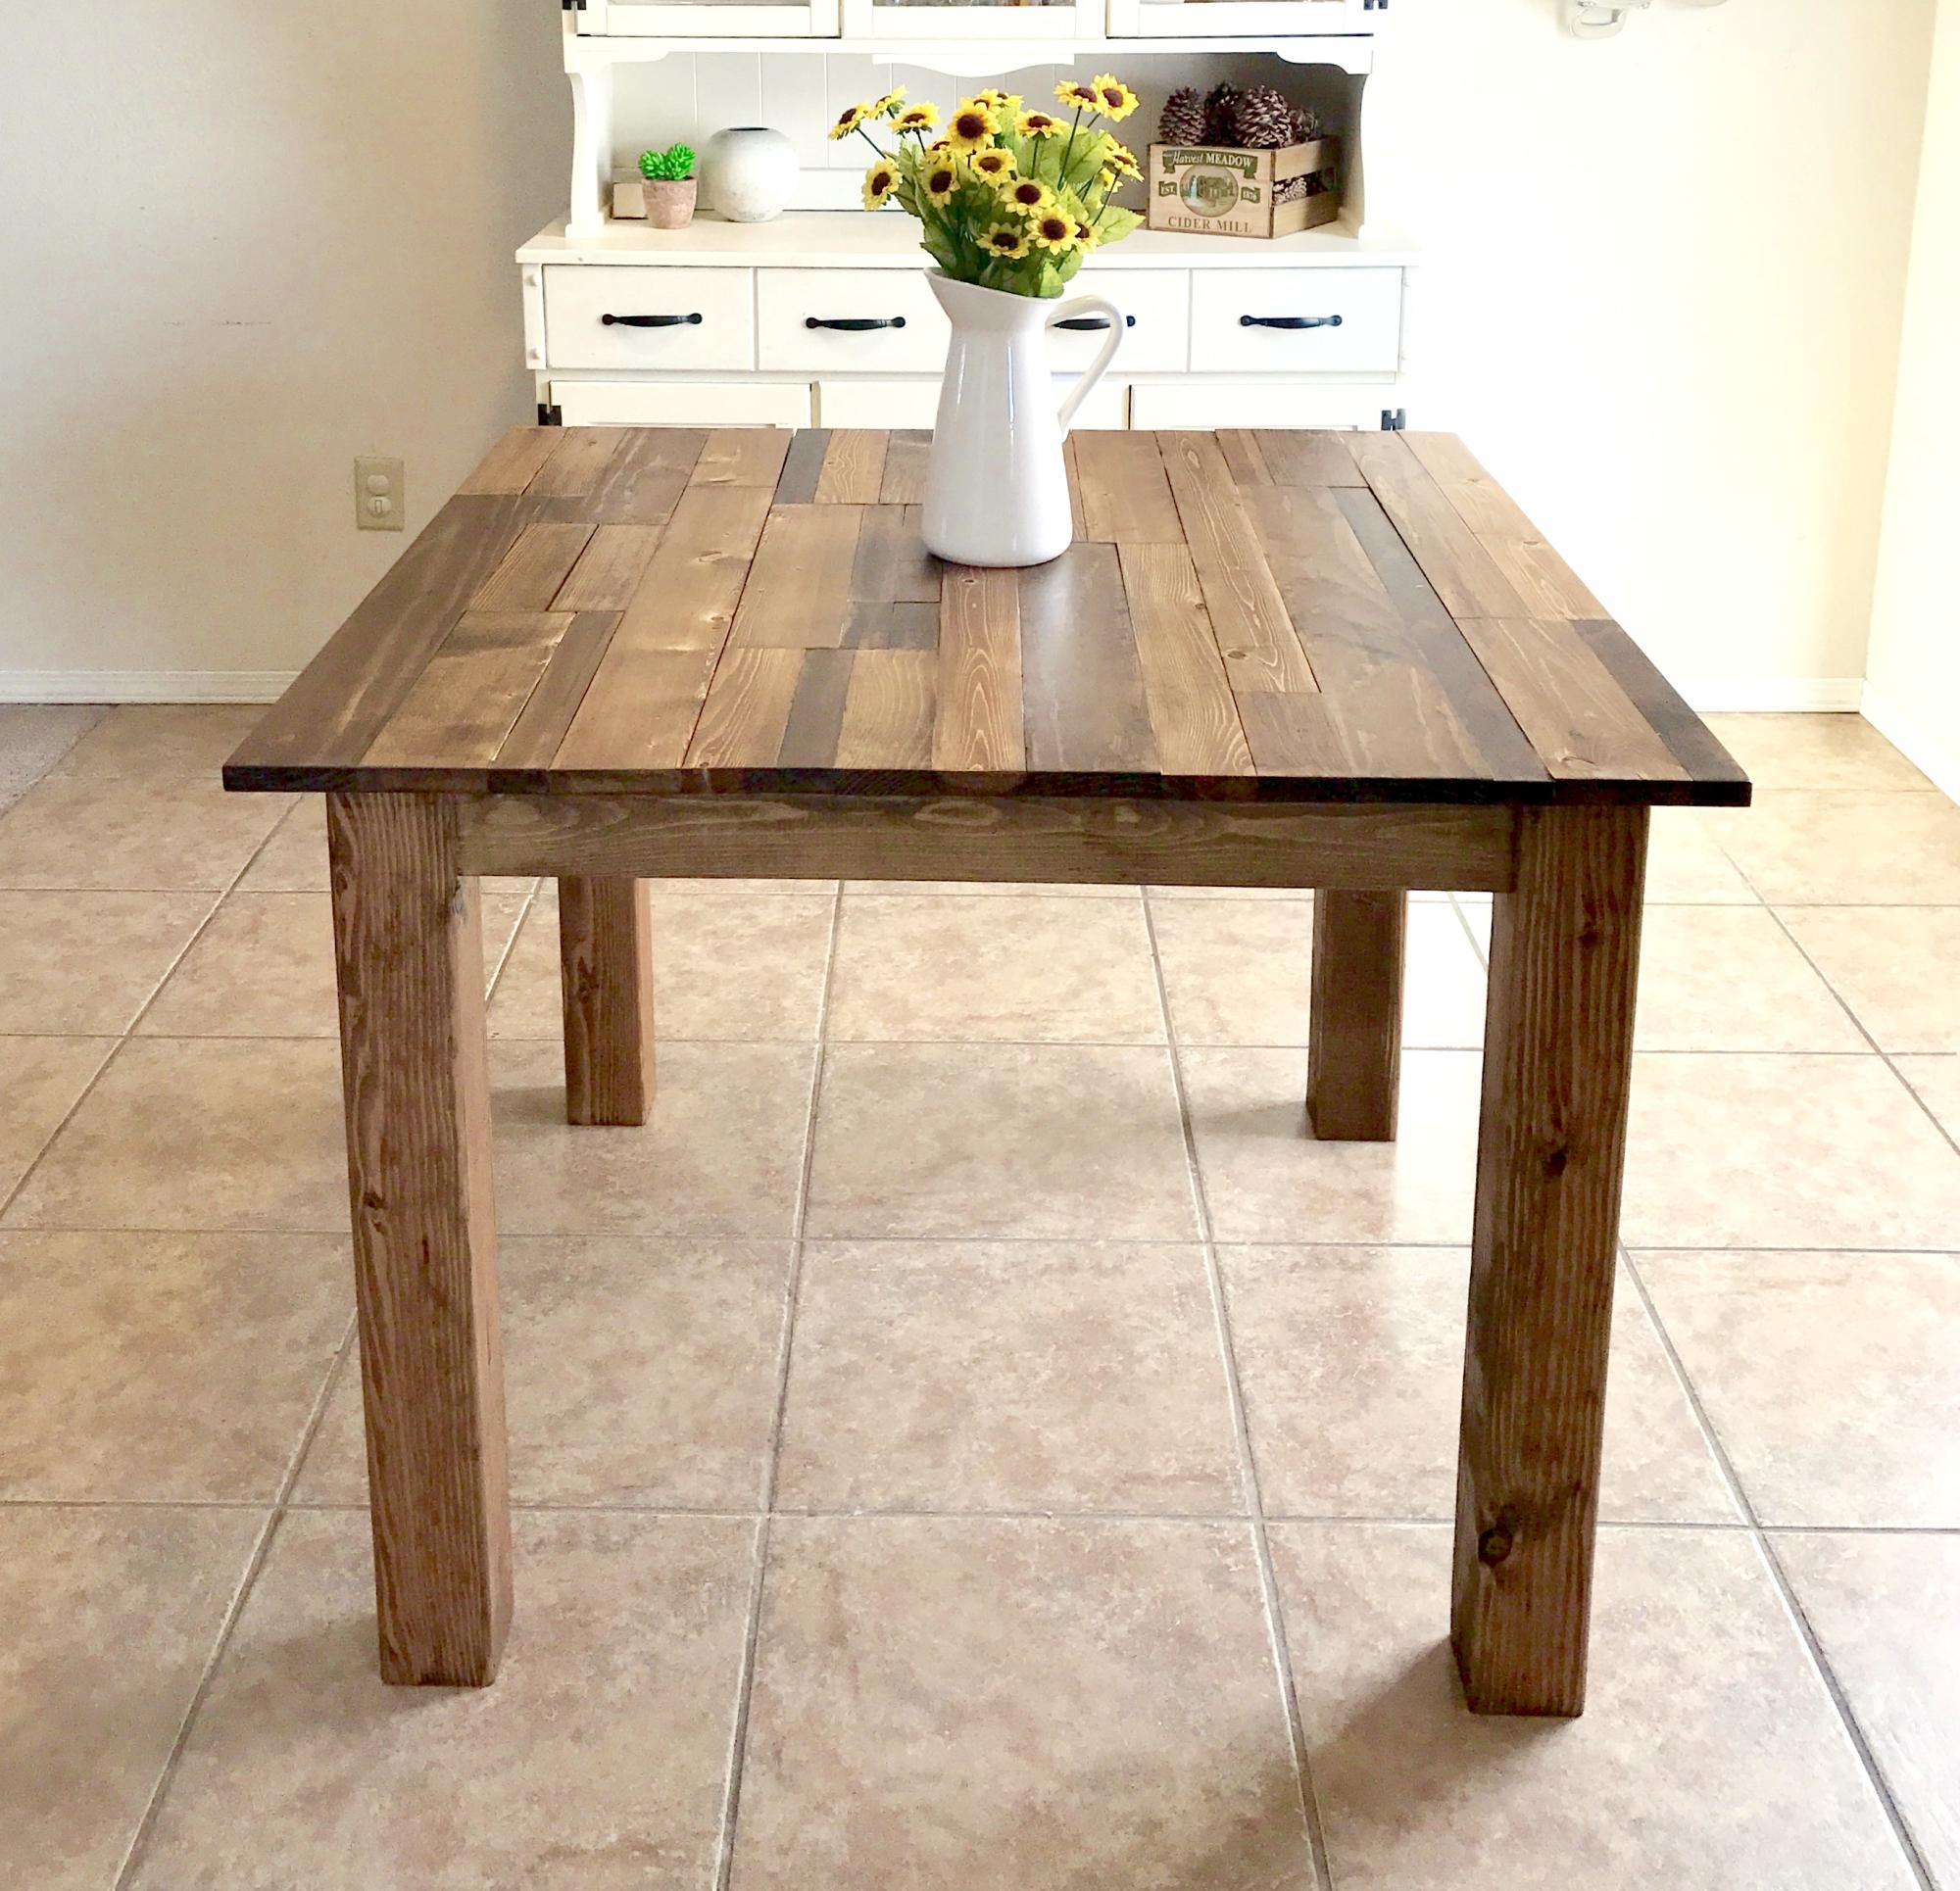
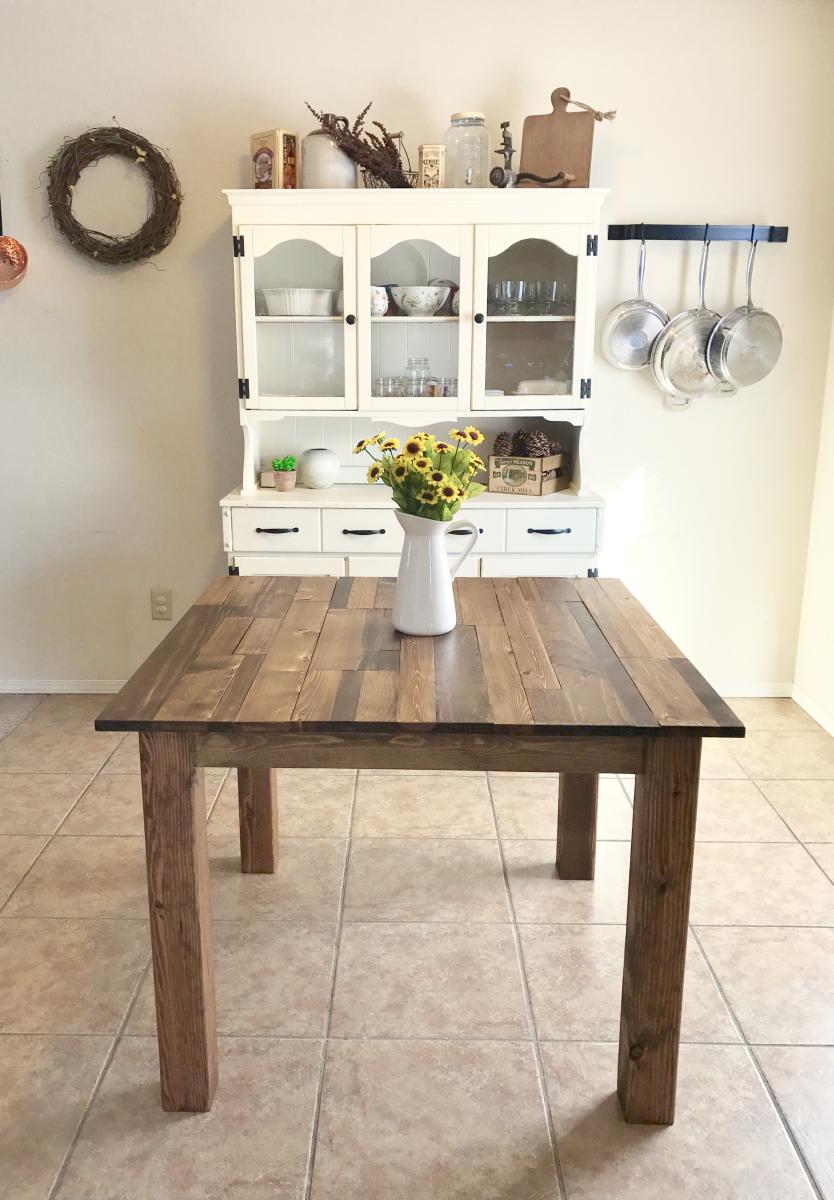
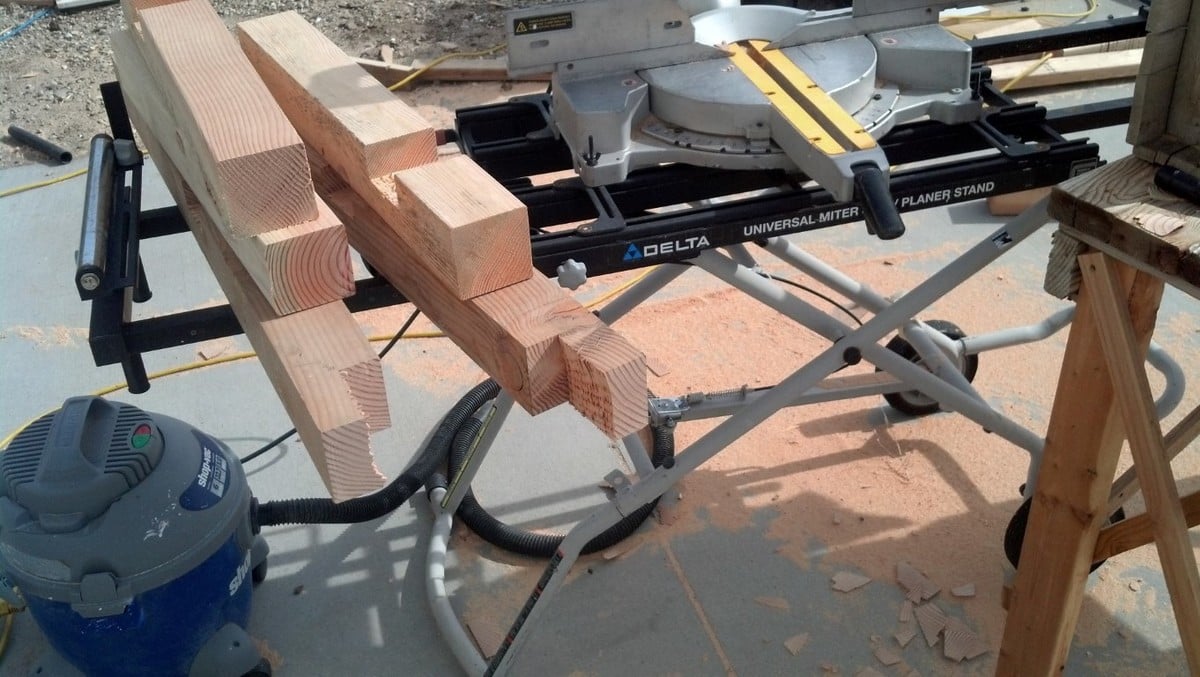
I built this table for a friend who wanted a rustic, plank-top kitchen table. She wanted a square table with 4x4 legs. Since I don't have clamps, I used pocket holes and wood glue for the table top. Also, I only have a 7&1/4" miter saw, which means the 4x4s were too thick to cut. So I made one cut in the legs, then flipped them and made another. It worked! :) I sanded down the sides of the table top with 80 grit. They needed to be evened up since some of the planks were a little longer than others. I back braced underneathe the top with (3) 1x3s. Then, I sanded all over with 120, vacuumed, then wiped it down with a damp towel. Fun build!!
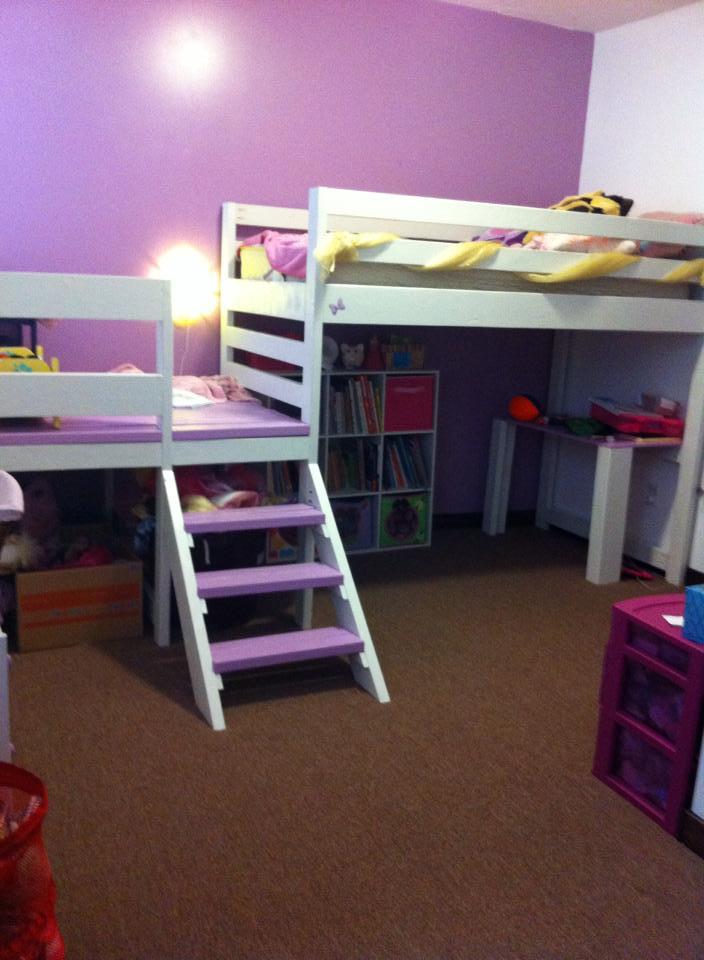
I extended the landing and added rails.
Mon, 06/01/2015 - 12:06
I love your modifications with extending the landing. Do you have more pictures that show the whole thing? Did you by chance write down any notes with what you did differently? We are building this bed next week and would love to make a "deck" like you did.
In reply to Questions by wrigleysmama
Sun, 01/22/2017 - 10:39
Hi, Ana here! I might suggest something like this -
[[{"type":"media","view_mode":"media_original","fid":"3154931926","attributes":{"alt":"","class":"media-image","height":"834","typeof":"foaf:Image","width":"891"}}]]
Basically just increase the length of the side pieces first to however long you would like the deck to be.
Then, if you need extra support, add legs on the inside of the platform where needed. On the front side if you are doing railing you could even extend the front leg up so it is part of the railing too.
You may need to add additional supports for the deck boards, shown in green above, but this should be easy enough to do.
Hope this helps!
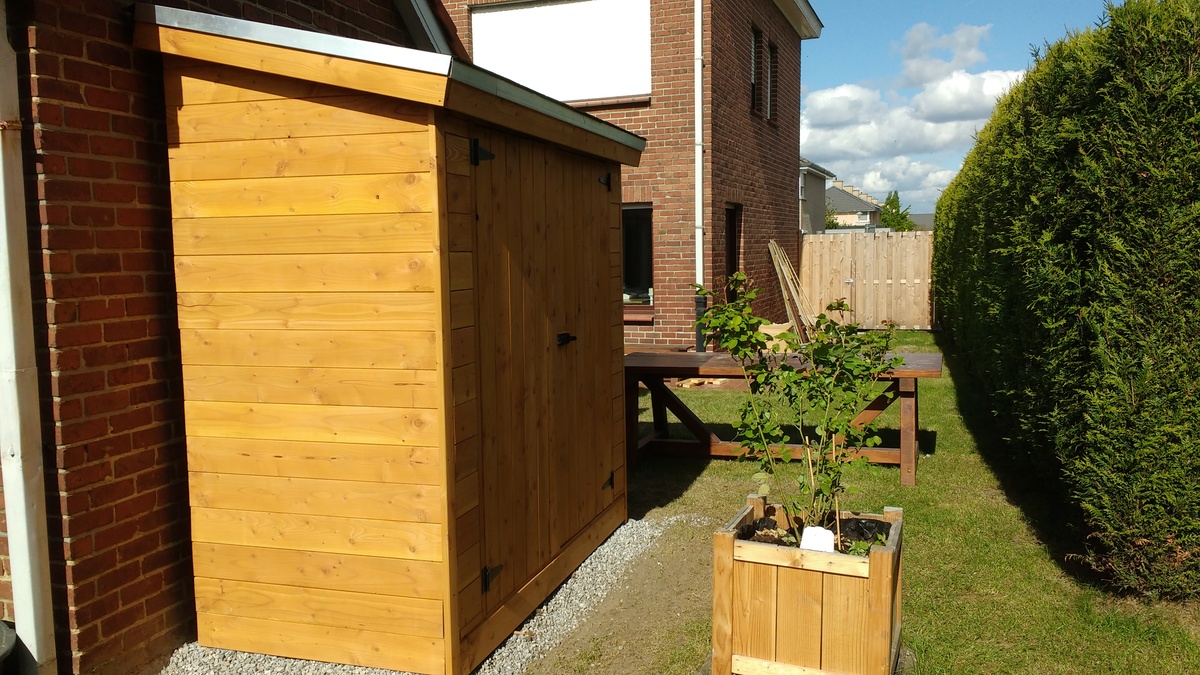
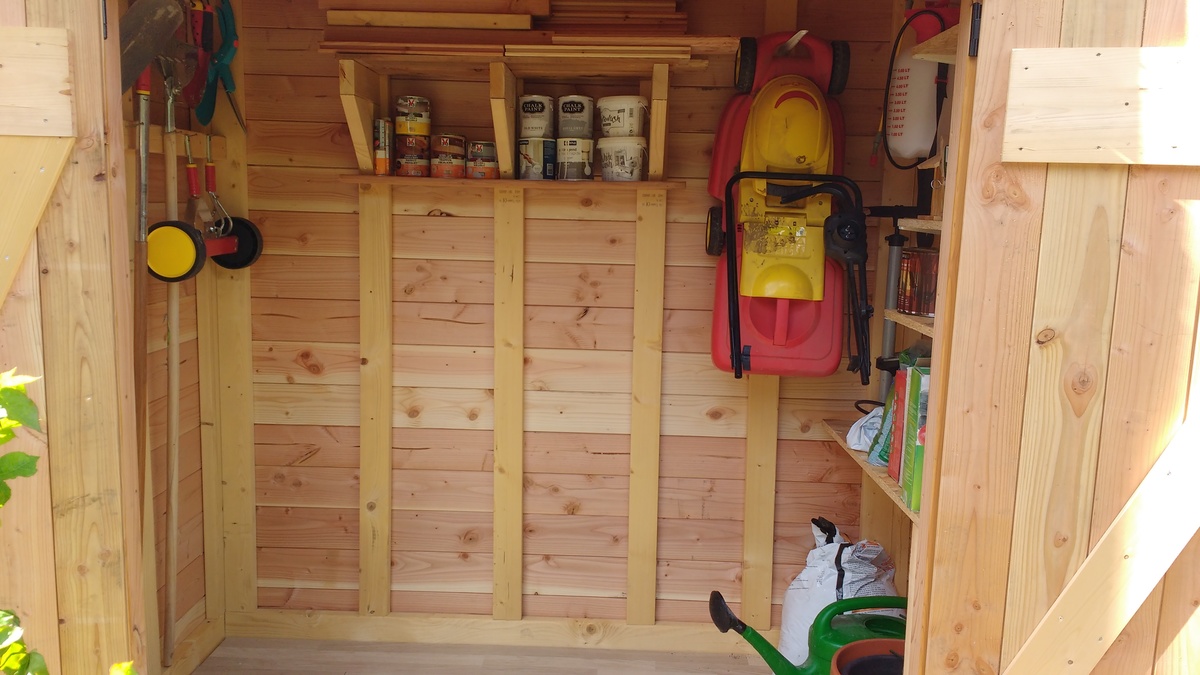
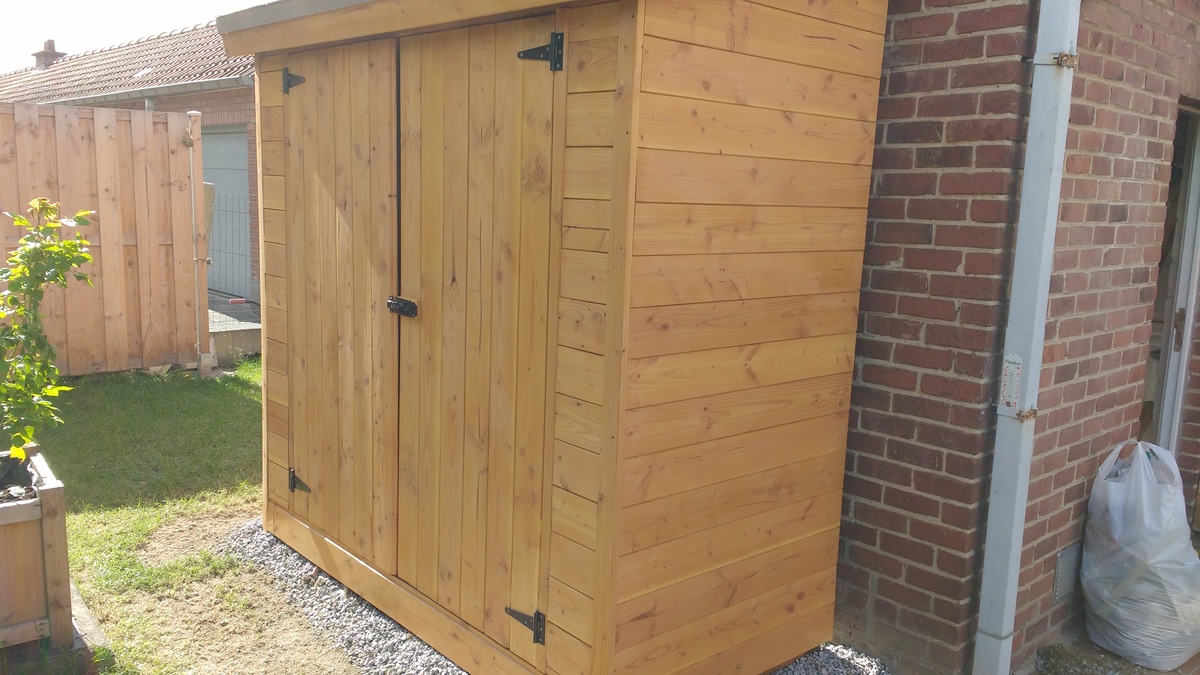
Garden Shed out of douglas wood
i added wooden floor .
Thu, 06/15/2017 - 12:48
Greetings, I like your workmanship - It looks great! I have a couple questions if you would be so kind as to answer them. I like how you turned the studs sideways. How did you attach the studs to the 2x4 plate that you have turned on its 1 1/2" edge both top and bottom. I am thinking of toenailing or driving 3 1/4" GRK screws through the 1 1/2" sides of the 2x4's and into the 1 1/2" edge of the top and bottom plate. I know that Kreg has a jig out that uses oversize screws-it is specifically designed for 1 1/2" and larger (up to 3 1/2").
How did you secure the bottom plate to the wooden floor. I am thinking that you may have used 1/4" or 5/16" lag bolts down through the 2x4 and on into the frame of your wooden floor.
Thanks for your reply,
Cliveous (Reggie) Ogg
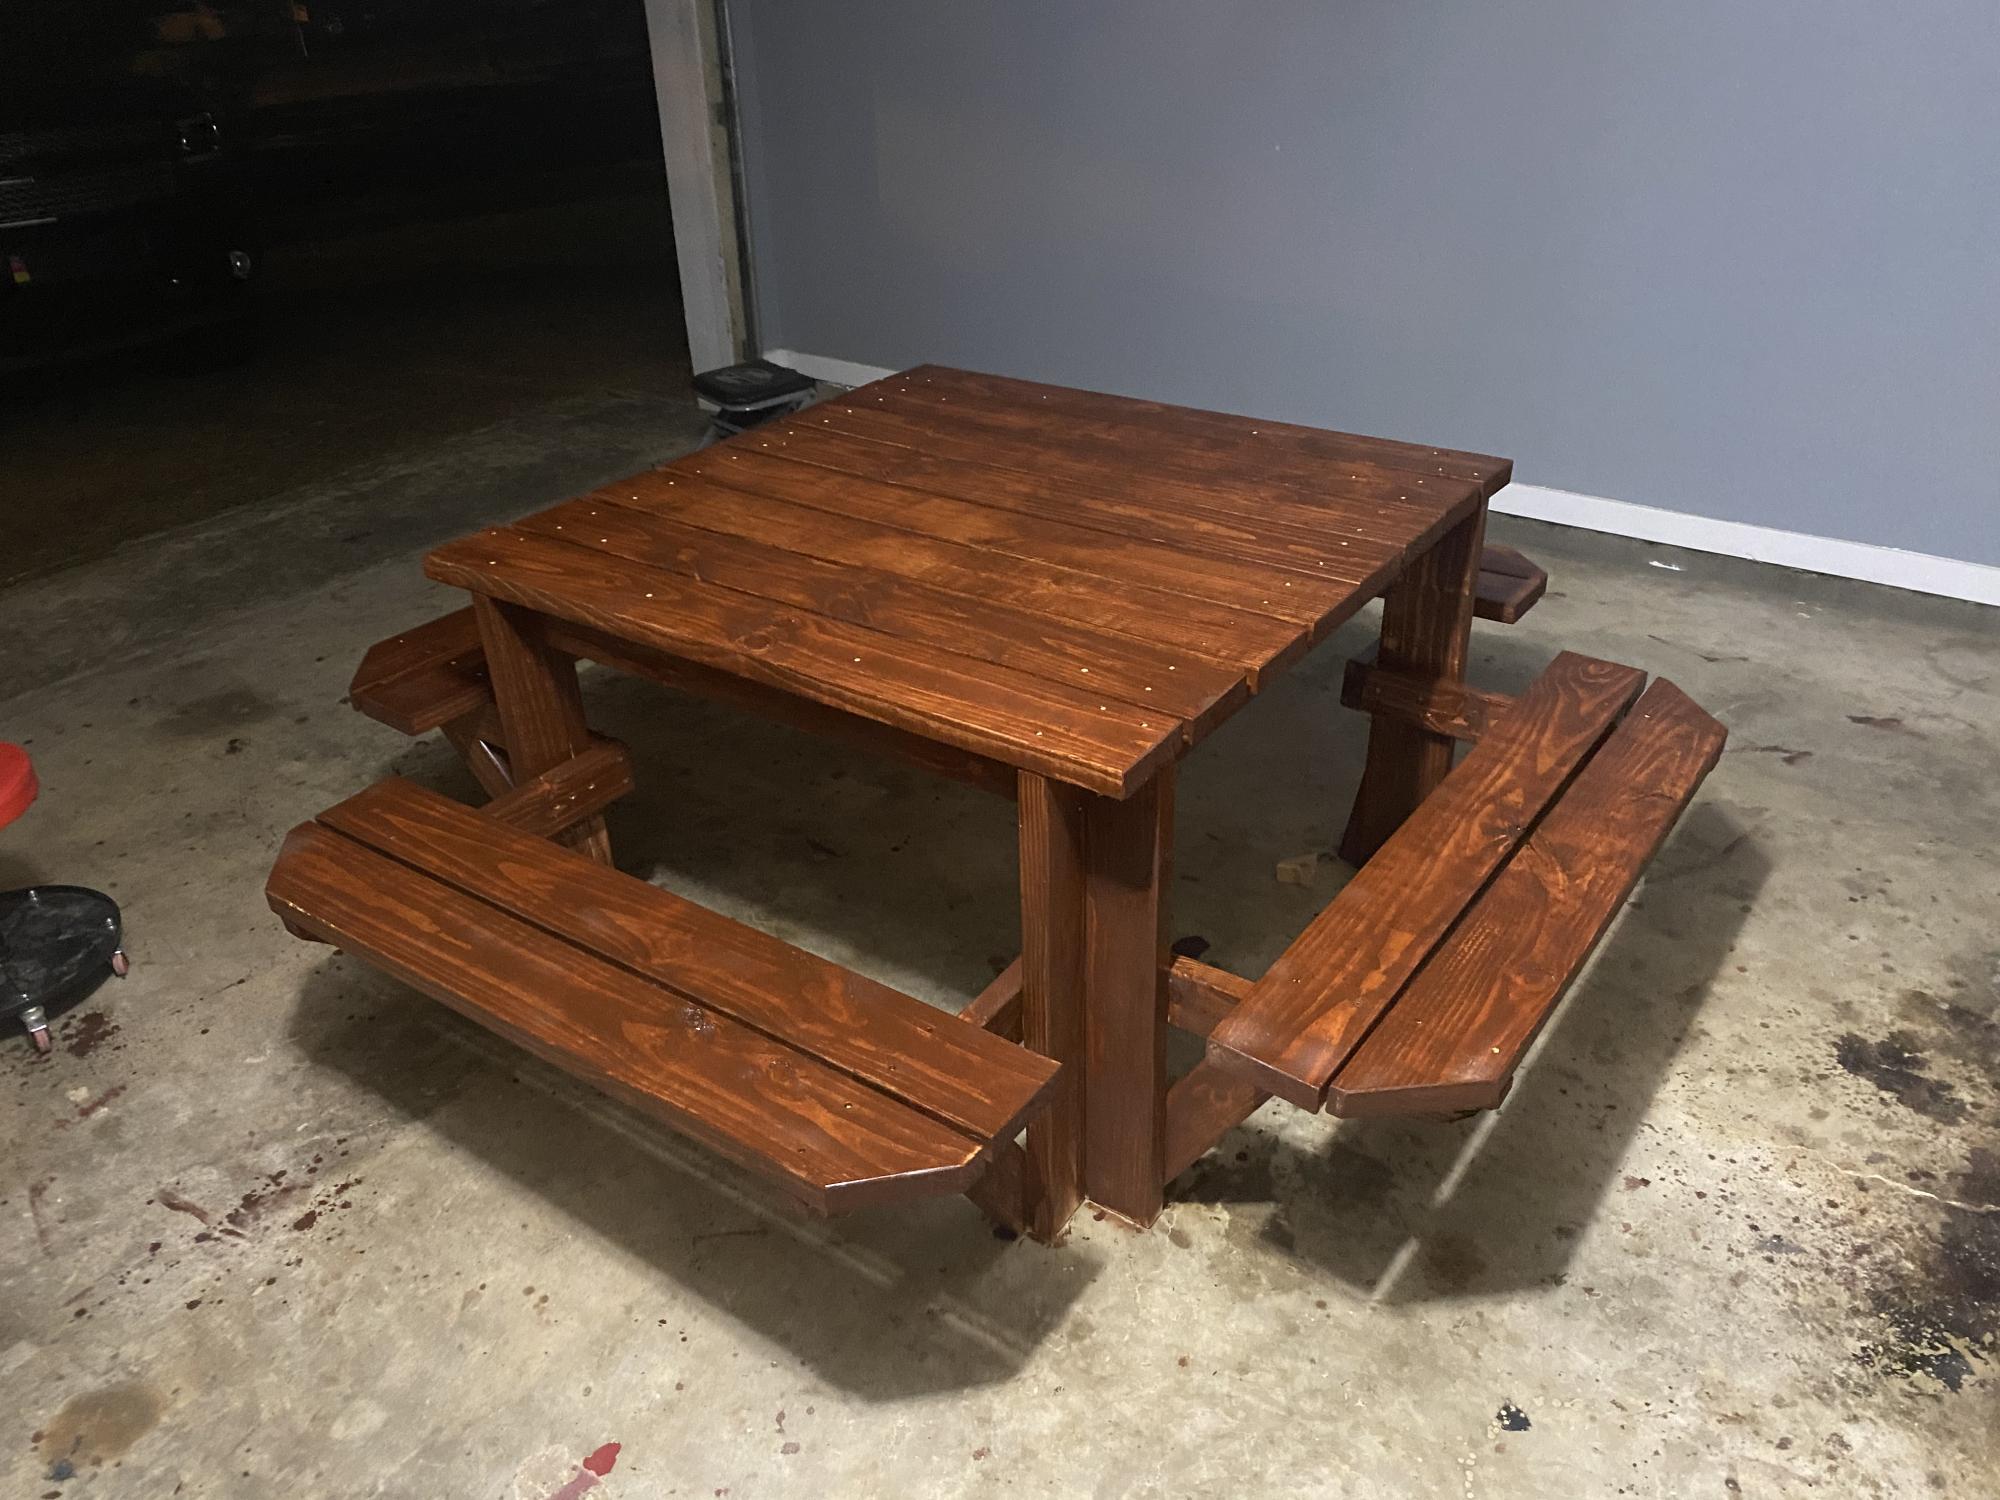
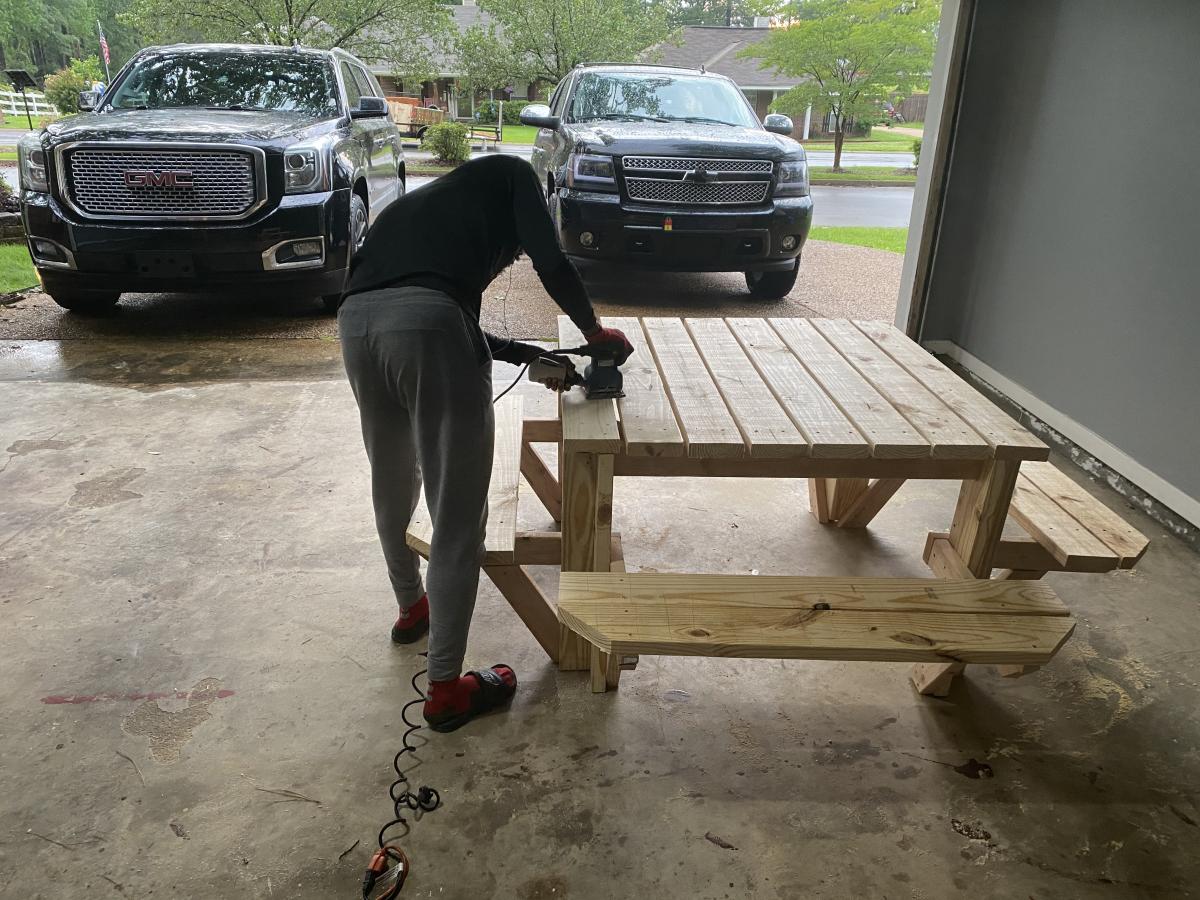
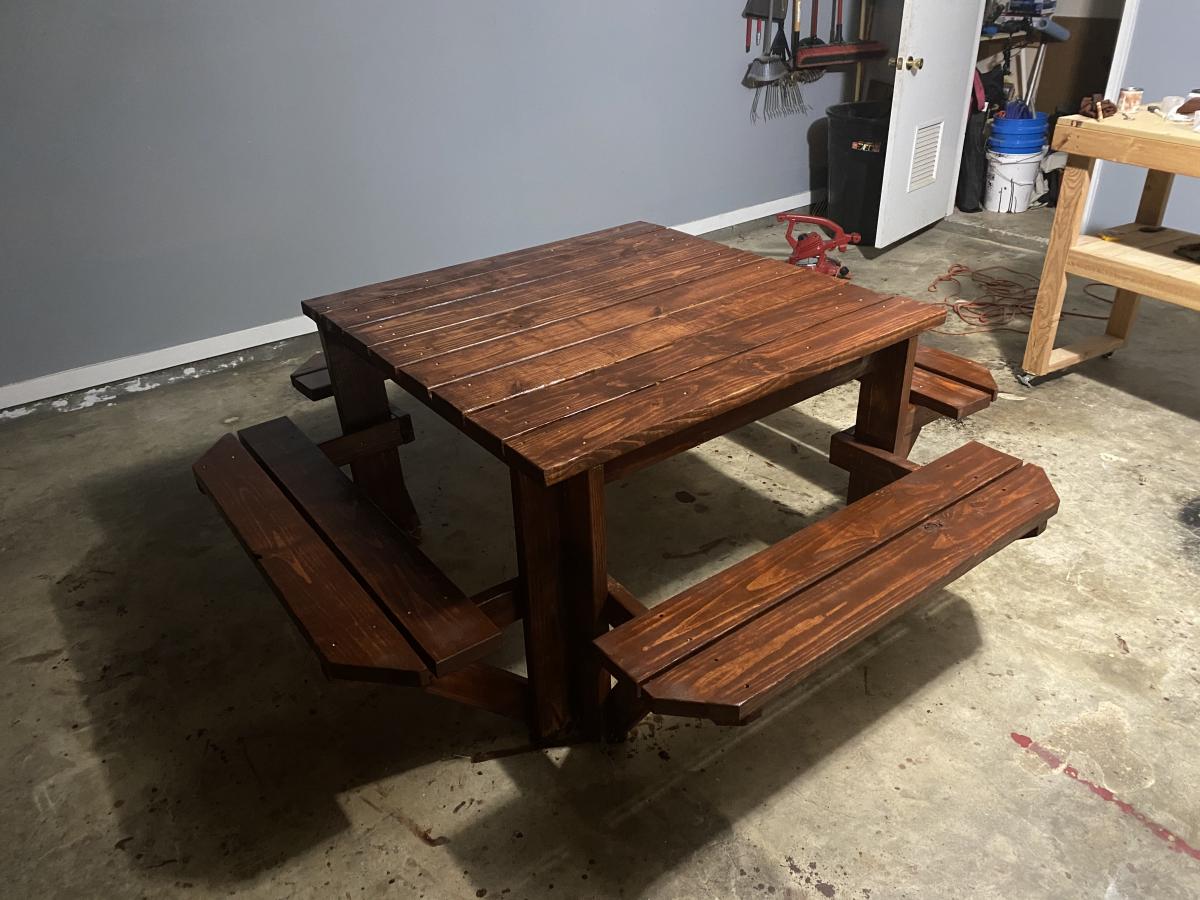
I built this picnic table for my mom’s Mother’s Day/Birthday gift. With the price of lumber being as high as it is I figured this table would be her gift this year. Fairly simple design. Ana was right about pre-sanding and staining. Would’ve made it a lot easier. I applied to coats of external poly for durability. Keep plans coming Ana!
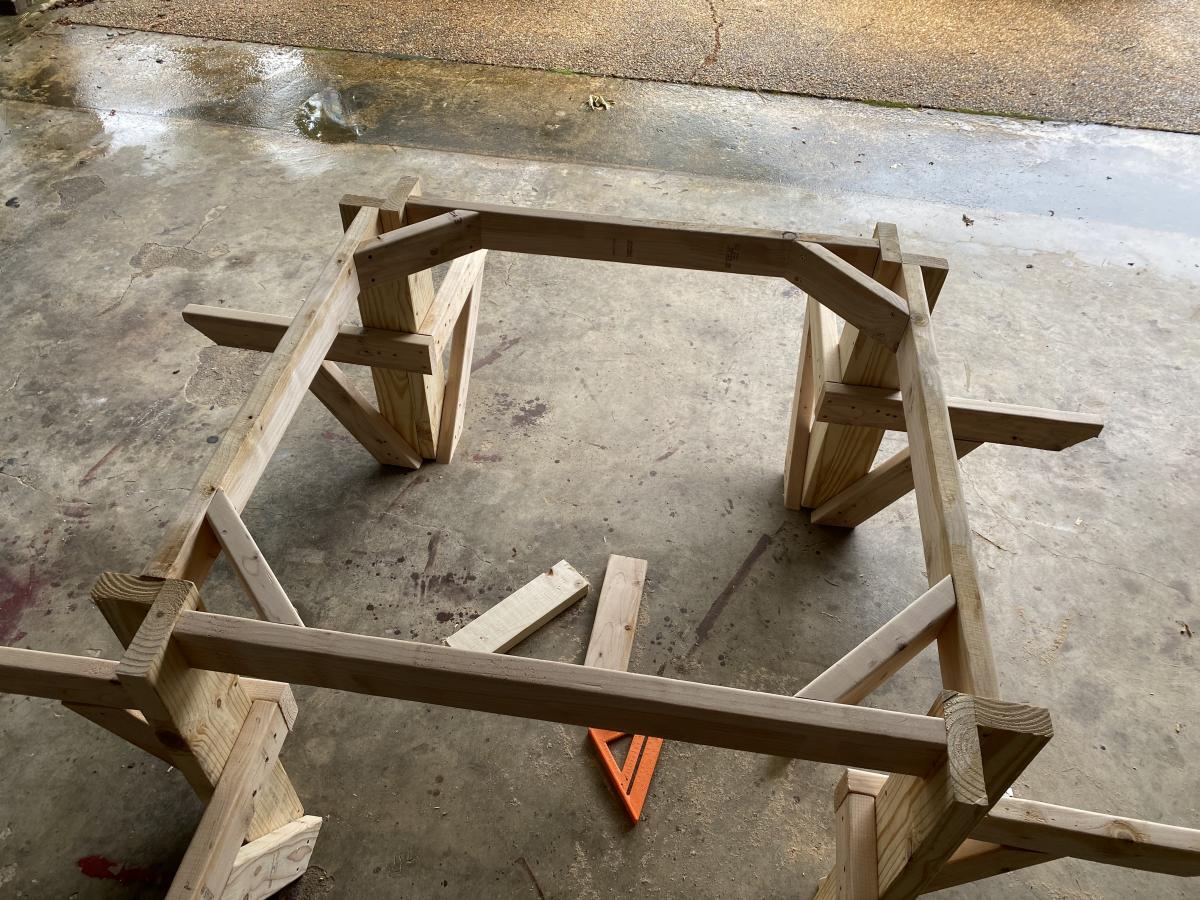
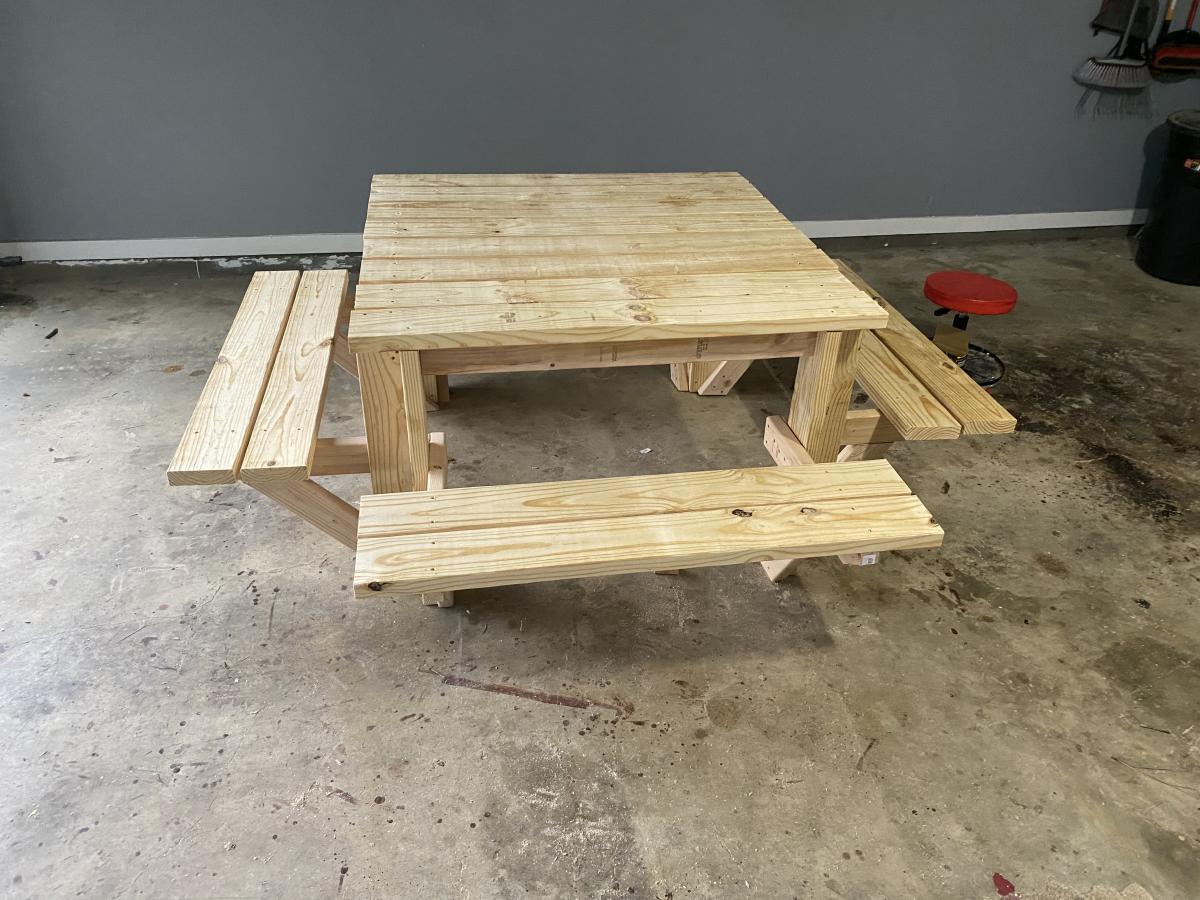
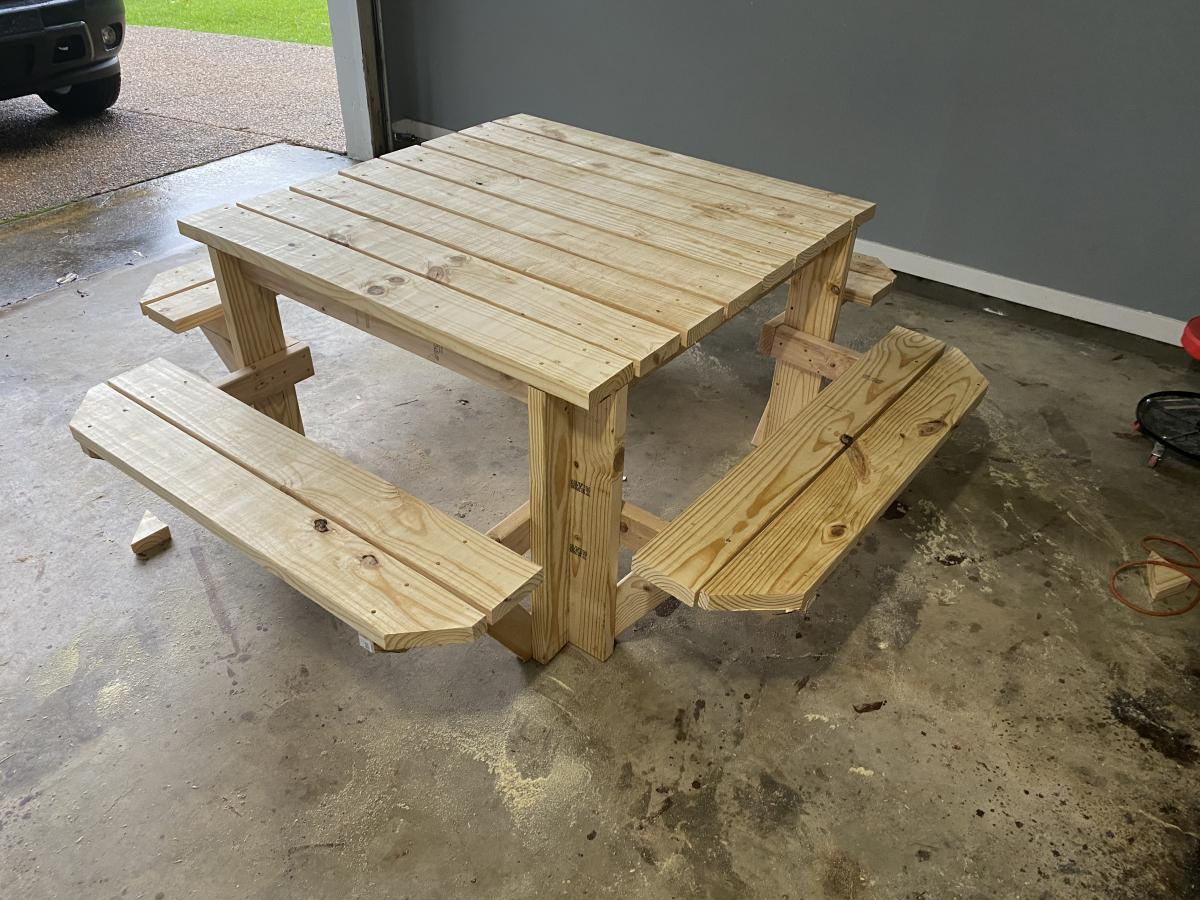
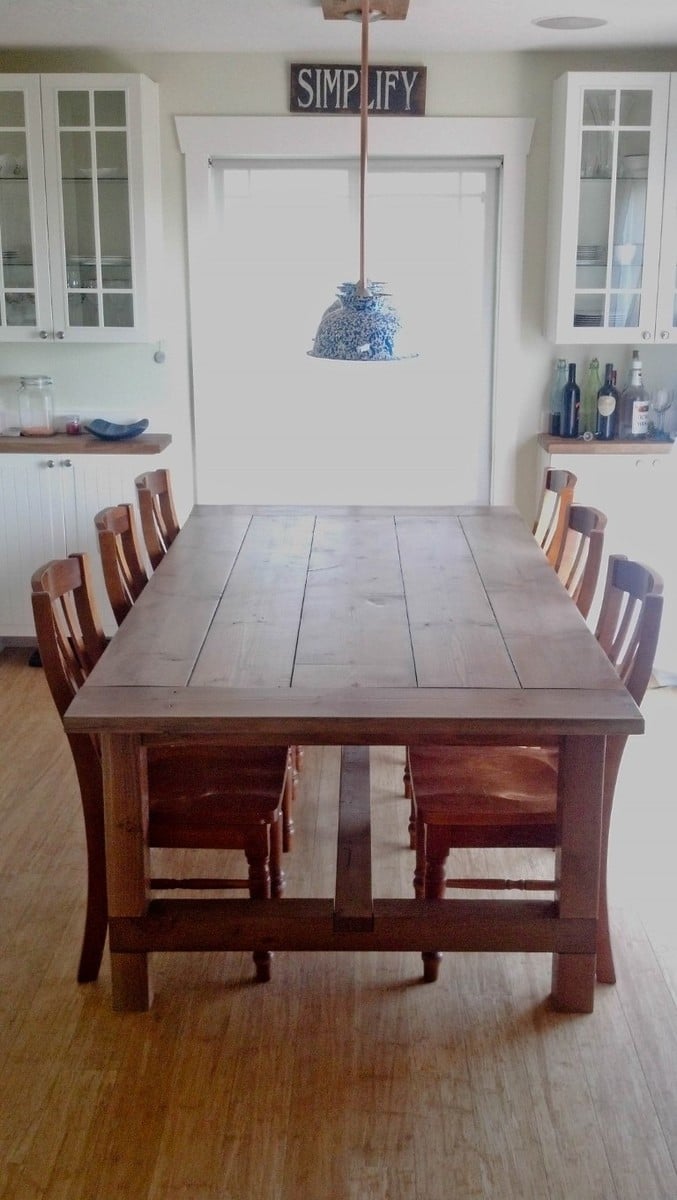
My wife and I really love the farmhouse look and feel. We saw one of these tables at a furniture store for $2000 with no chairs. I had already bought the Kreg Tool, something that I cannot believe I have done without for so long, when I went to build some $10 Shelves that Ana has on her site. My wife asked me how hard it would be to build the table and I told her I have never done anything like it. I also told her if she didn't like the end project, we could use it as a picnic table outside. It was fantastically easy with the plans and Kreg Jig. Thanks to Ana for all the helpful tips!
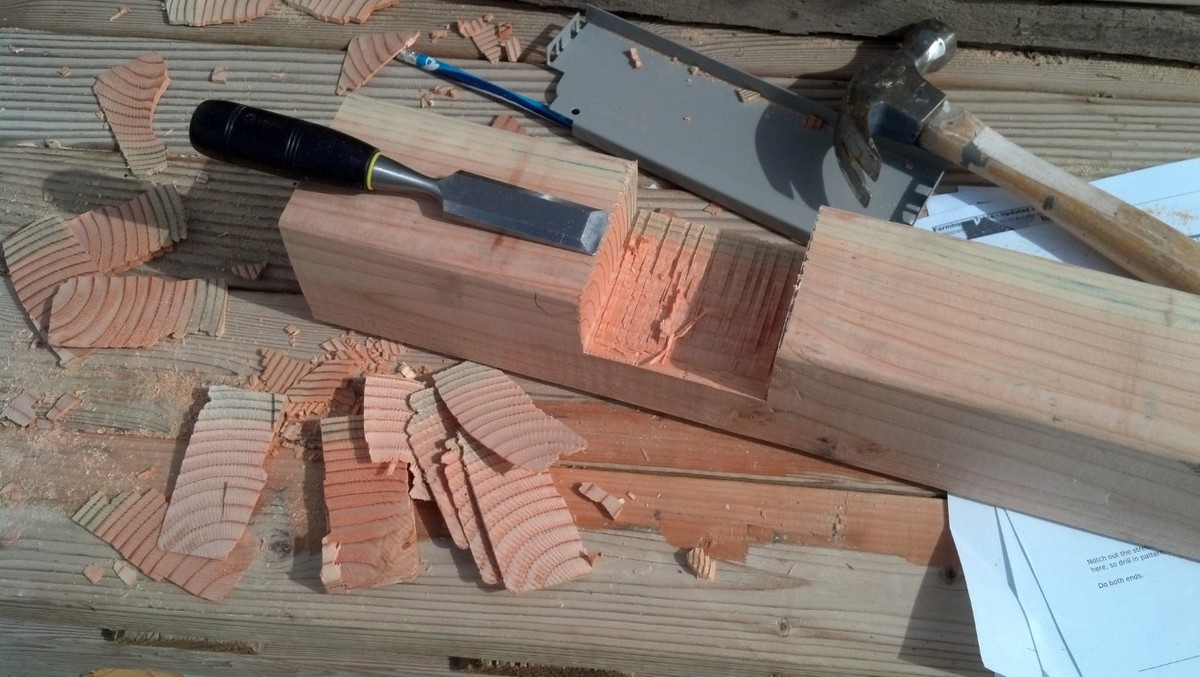
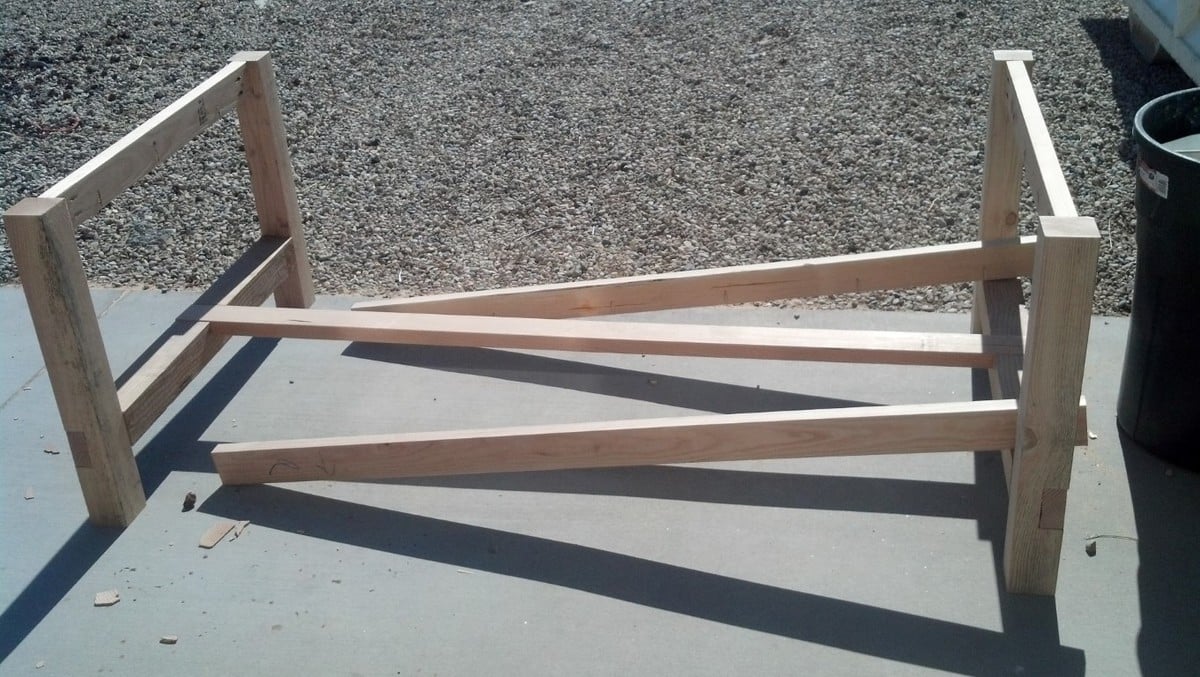
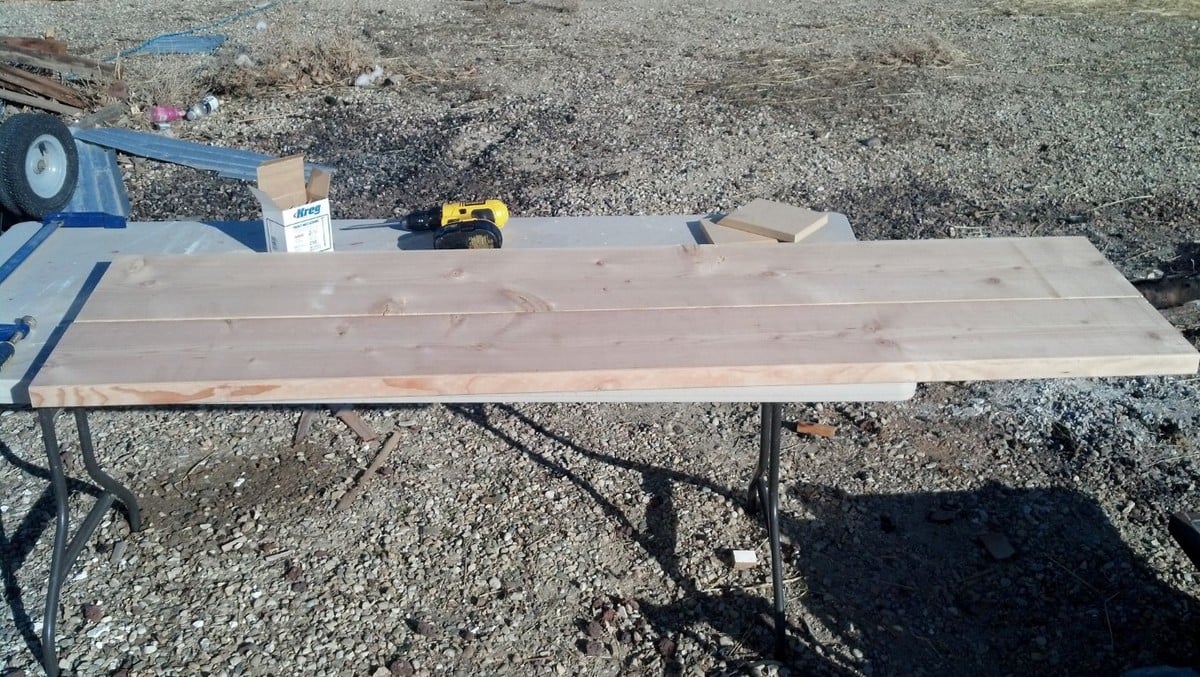
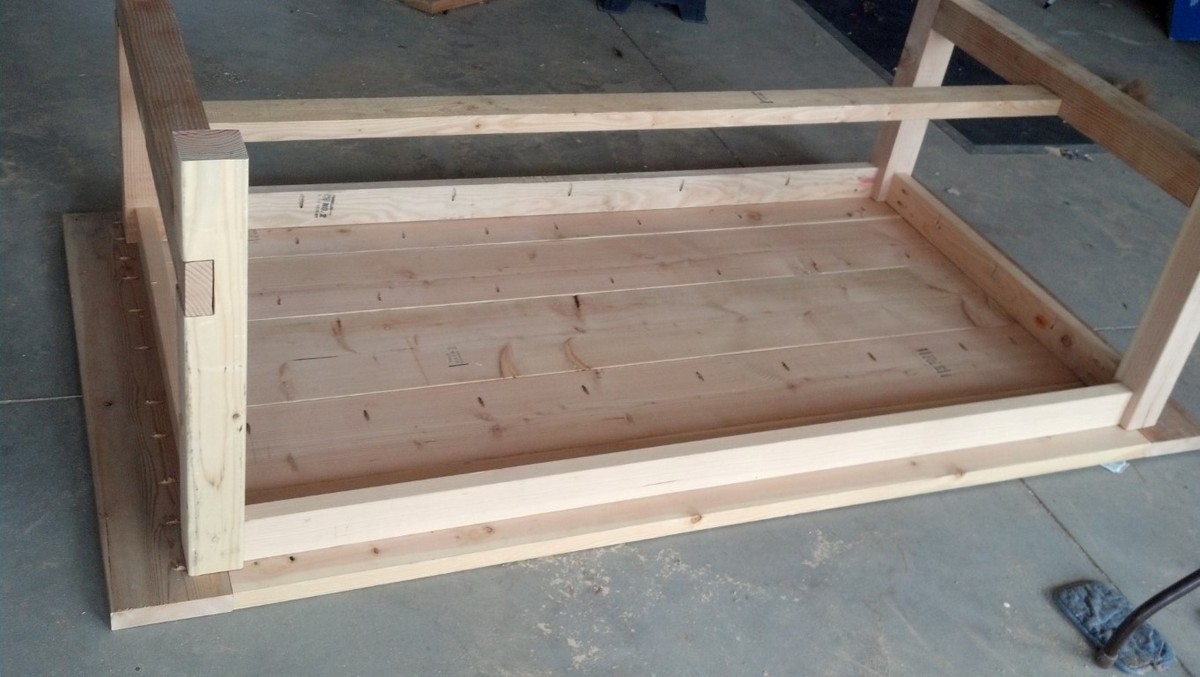
Now to the build. We decided that the table needed to be a bit wider and longer for our needs, so I adjusted the plans. It came out to 90"x48". The center board is a 2x12 with the other 4 being 2x10s. The end pieces are 2x8s that I had from building garden boxes. The benches that I also built were from scrap lumber, they are not pictured here as they need one more coat of stain and then three coats of polycrylic. They are 52" long and go on the ends where the kids can use the cross beam as a foot support.
Building this project was rather quicker than I thought. Of course, borrowing a radial arm saw helped out a bunch with the legs. Once it was all together, I sanded the table three times. I used 80, 150 then 220 grit. The palm sander got a real workout over the space of about a week and a half.
Finishing the project, I decided to follow the plans and went with Minwax Weathered Oak and topped that with Minwax Polycrylic. The legs and underside of the table received 2 coats of each, but the top I gave 3 coats of stain and 2 coats of the Poly with a very light sanding in between each coat.
The table then sat completed in the garage for 3 weeks as I had to find enough help to get it into the house. This is one heavy bugger. If we ever sell the place, it stays! There are ~150 screws and all but 12 of those had pocket holes.
Fantastic build and now I am going to build the farmhouse king size bed. And a murphy bed. And more shelves. And a shoe cubby with coat rack. And a wine rack. And a greenhouse... the list goes on and on...
Fri, 04/26/2013 - 12:50
thanks for posting some step by step pictures they were really helpful. Great table. Really suites your space.!
Fri, 04/26/2013 - 14:09
Could you have used heavy duty steel leg braces? These could slipped into saw kerfs on adjacent sides of the apron. Then used hanger bolts to fasten the legs. This would allow the legs to be removed if needed.
Fri, 04/26/2013 - 15:09
I thought about making the legs removable, but really, it was much easier this way and very sturdy. I had a lot of fun building this.
Fri, 04/26/2013 - 18:17
I looks amazing and you have been so detailed with your finishes, it is amazing ... Your wife is one lucky girl!!!
Sat, 04/27/2013 - 18:55
You have just joined the league of addict builders. You really did a great job on this table. Did you get the lumber from big orange or blue and have it jointed? The boards look really good and the fit is tight. Anyway I am sure we will see more of you in the future.
Wed, 05/01/2013 - 07:19
Hey everyone!
Thanks for your kind words. The chairs were from our previous table we bought some years ago. I was astounded to find that Ana's plans were the same height as our previous table. Great fit for the chairs.
As for the lumber, I got it from a local building supply company (one of the last, sad to say) and they were only a bit straighter. I got them tight by using clamps. Clamps and LOTS of pocket holes.
George
Thu, 08/08/2013 - 11:08
This table looks great and I've decided that its going to be my first project, I just have two questions.
1. What version of the Kreg Jig did you use for the pocket holes?
2. Did you use satin or semi-gloss for the Minwax Polycrylic?
Thanks
Wed, 08/26/2015 - 10:53
Hi! You did a wonderful job on this table. I would like to attempt it but am having trouble figuring out what type of wood to use. The only wood I could find in the 2x8 and 2x10 dimensions was contruction lumber fir. Is that right?
Thank you!
Fri, 01/01/2016 - 11:03
Sorry about not answering... my wife told me this has been pinned over 17k times on pintrist and that there are still some questions...
I used pine, but fir would be great too. The lumber dimentions for the top were 2x10s and a single 2x12 for the center piece. 2x8s for the ends. Really, though, any dimemtion works. Just keep going until you get the size you want.
George
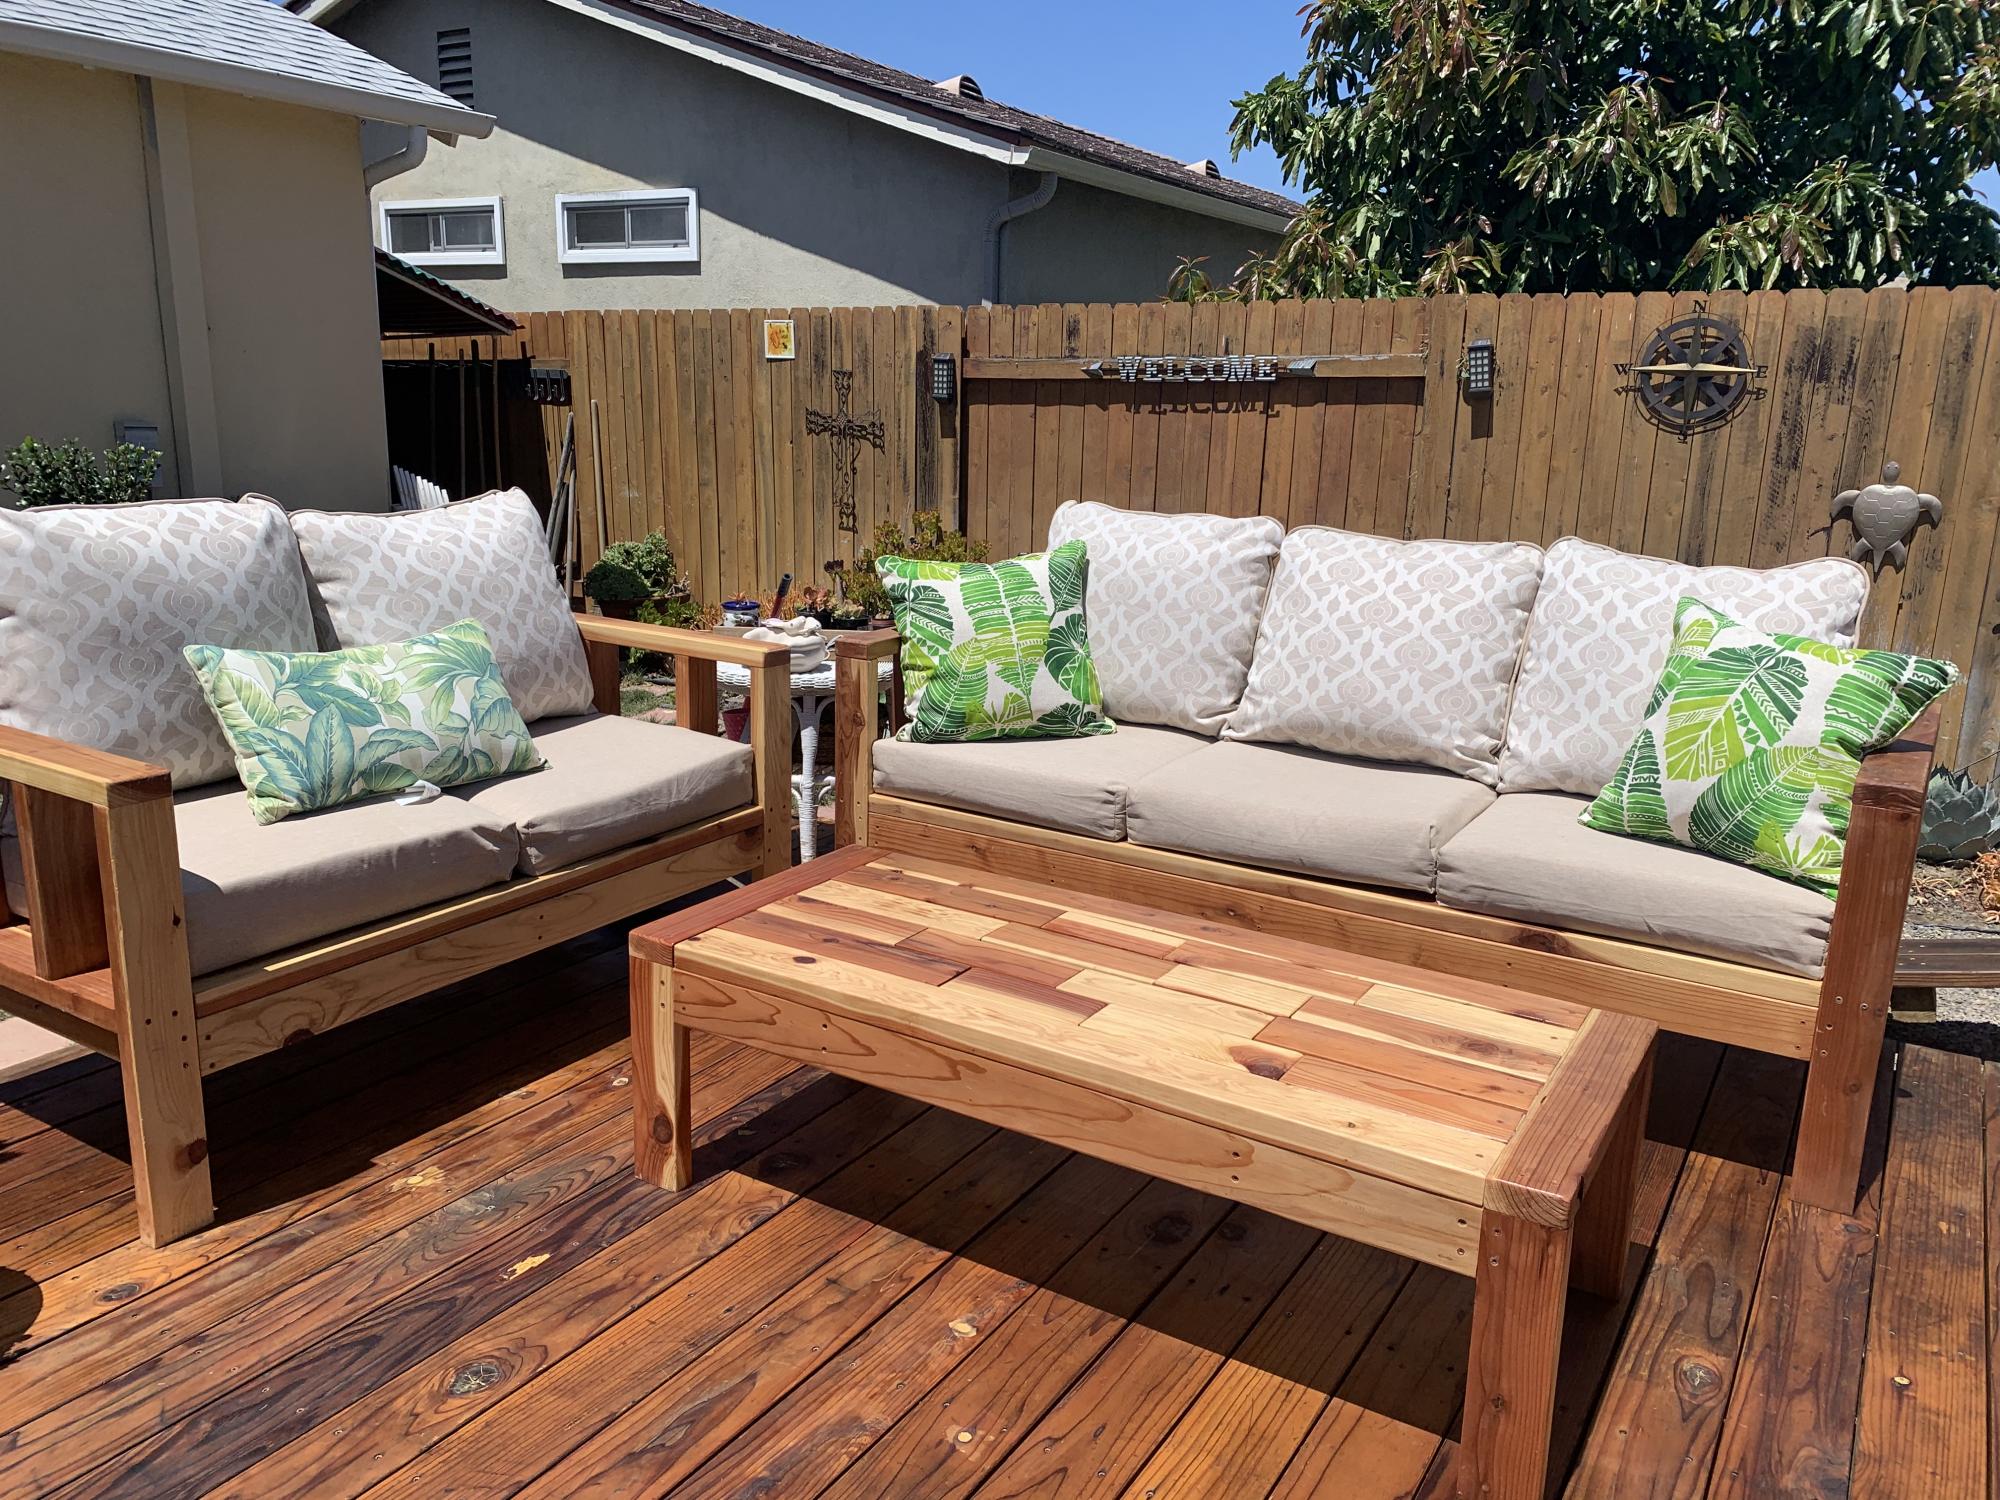
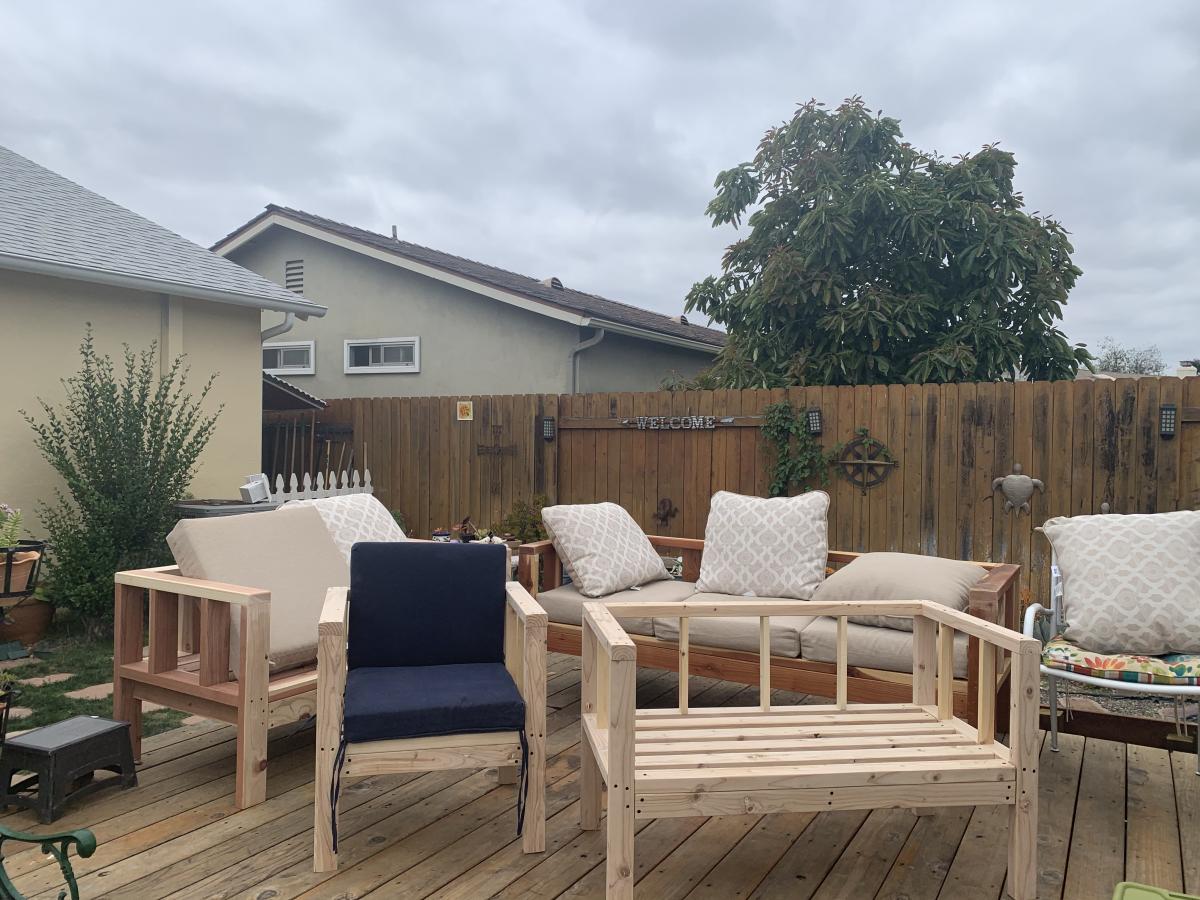
Followed Ana’s plans, very easy to follow. Chose two different sizes, different woods, and different cushions. Very pleased with outcome.
Tue, 10/05/2021 - 09:46
Very nice, love the different colors of wood! Thank you for sharing~
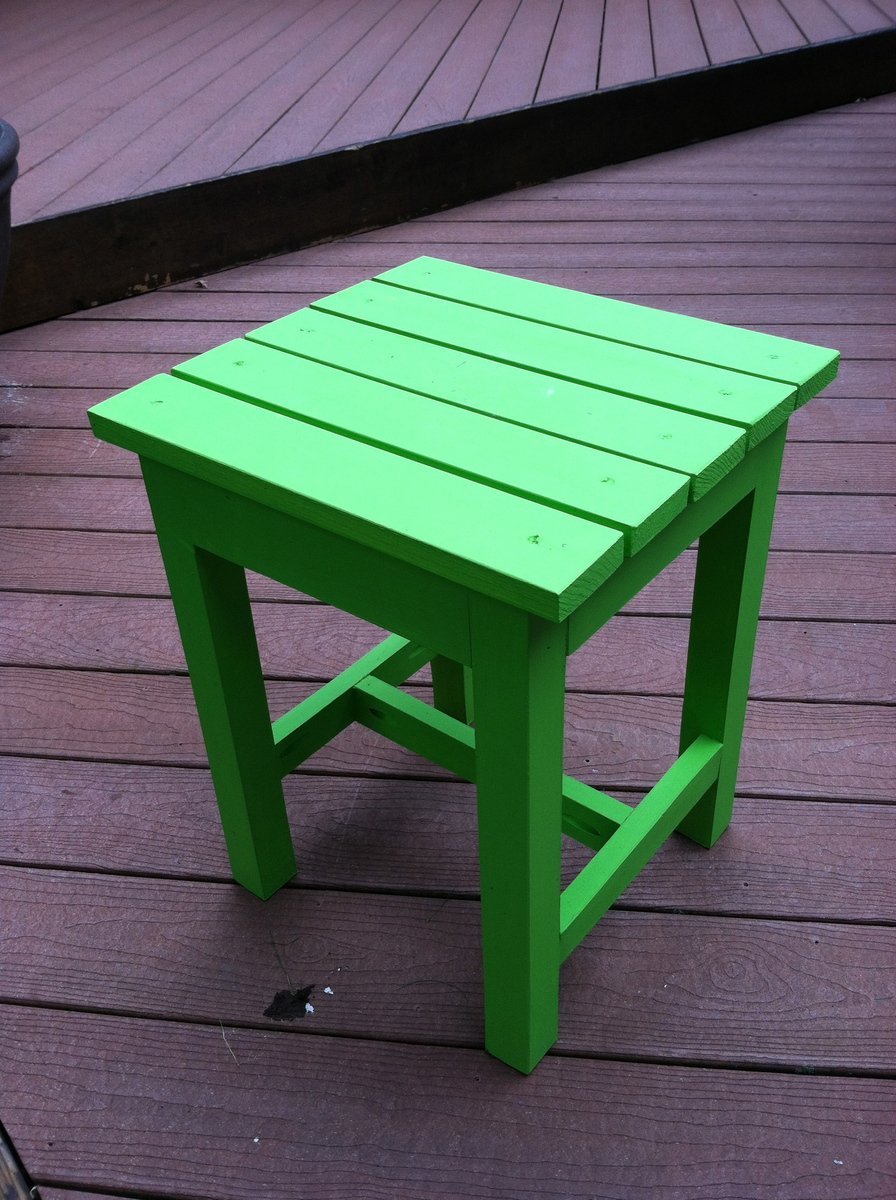
My First Project
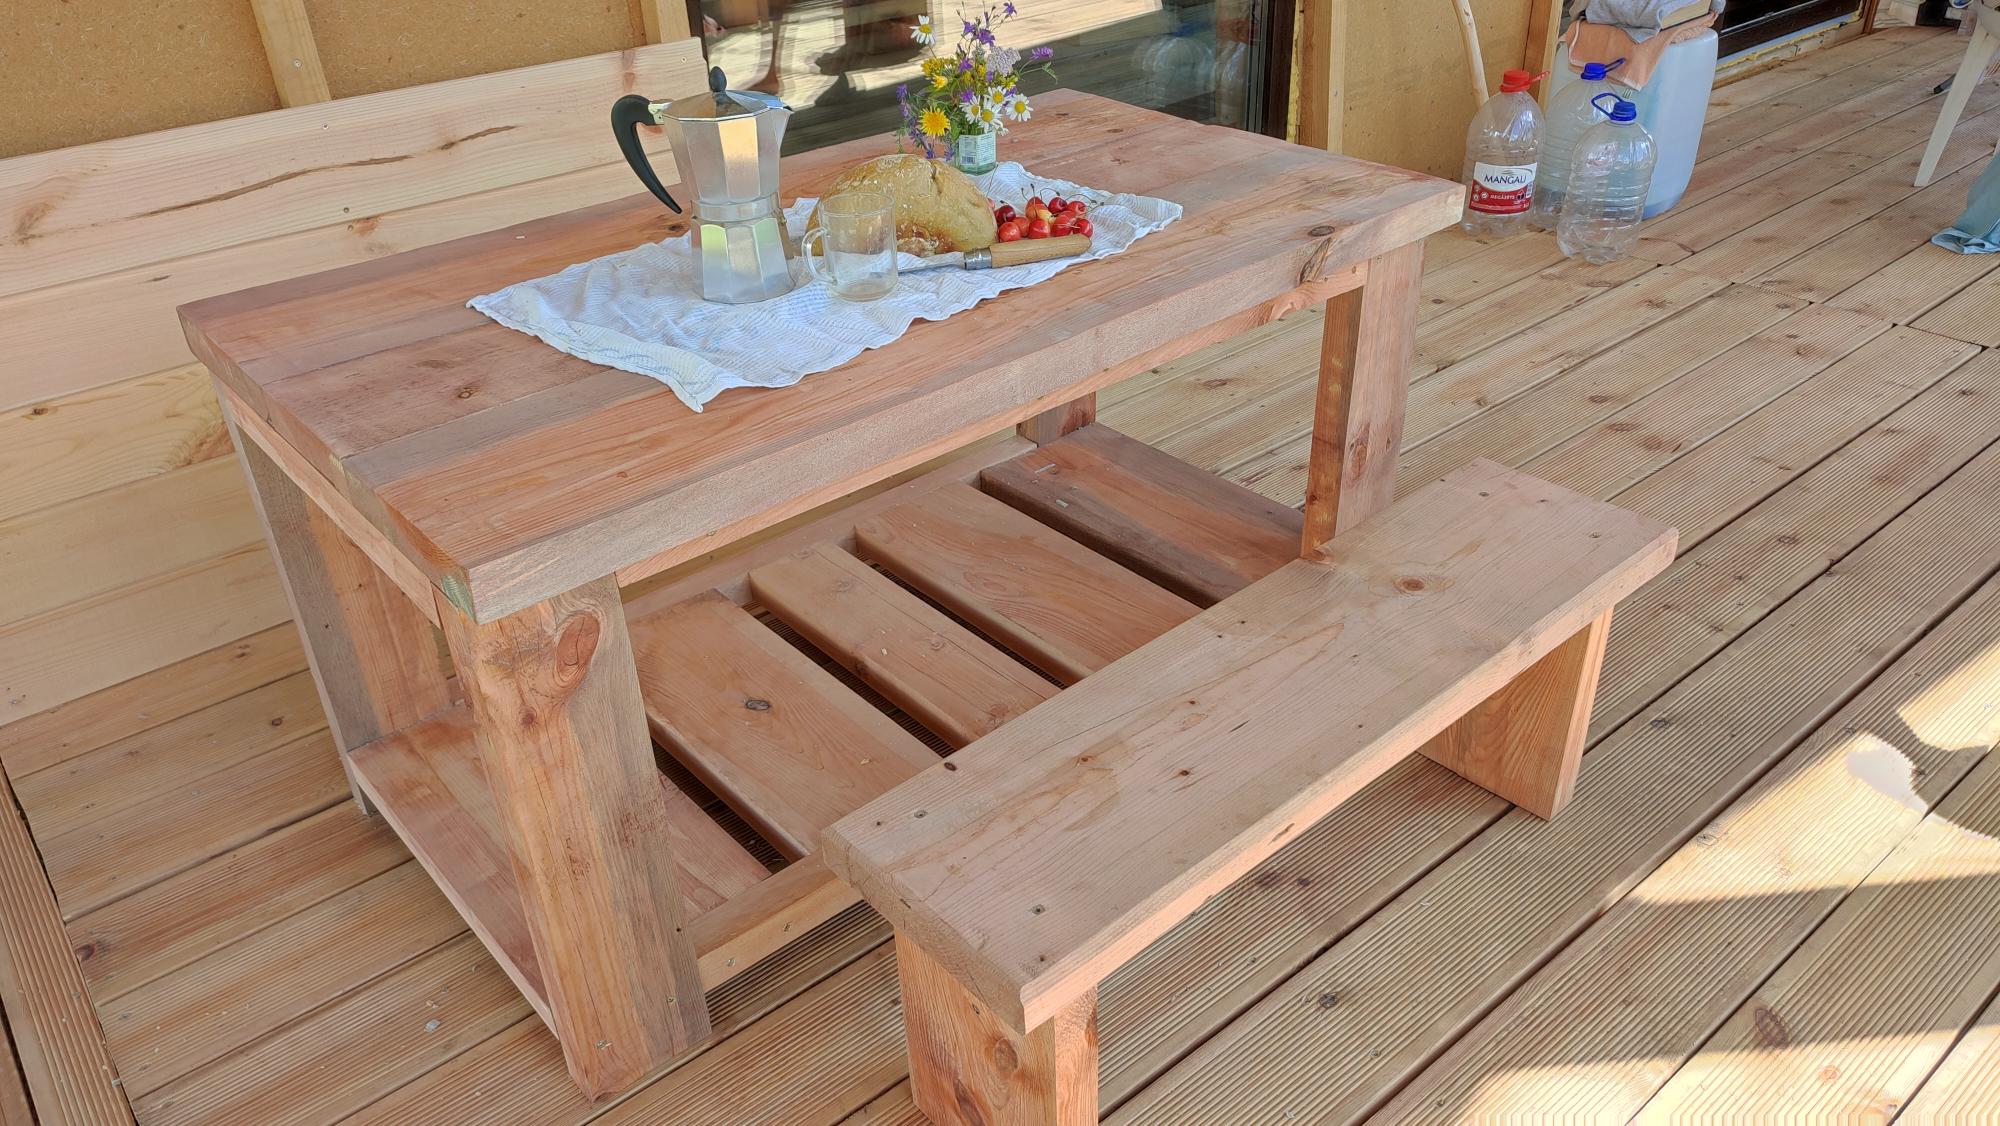
Table, based on Farmhouse coffee table project. Resized to roughly picnic table dimensions (1200*700 mm, 650 mm high), mostly as a means to recycle board cuttings, left over from building farmhouse itself. Didn't install X shaped sides, because there were no more suitable timbers remaining, which, it appears, my toddler greatly appreciated - bottom shelf makes a lovely crawl space. Shape of the shelf planks was a happy accident: what remained was sized 250 - 200 - 150 - 200 - 250 mm. Looks kinda nice doesn't it?
Mon, 07/11/2022 - 10:51
That turned out really nice indeed, thank you for sharing!
This was the plan that started my addiction! We had just gotten new mattresses, and we needed a new bed frame. All of the furniture stores have dark stains, and we wanted something natural and bright. I was searching one night found your site, and that was it. A few changes, increased the height of the headboard and footboard, wanted a slight overhang on the top of each as well. Also added an additional 2x4 between the legs of the headboard for support.
Wed, 01/11/2012 - 17:15
That looks great! The natural finish looks really great with your bedding. I love the higher headboard - we're planning to do the same with the farmhouse bed I'm planning so that my husband will be able to sit up in bed without hitting the back.
Did you end up using the boxspring, or is the mattress just in slats? I couldn't tell from your picture.
Wed, 01/11/2012 - 18:23
Hi, thanks for the positive response :) The mattress and box spring both are on here. In fact, I kept the bed itself on the original metal frame below, and added the side rails to hide it. Purchased the hardware for the side rails from Rockler
Fri, 01/13/2012 - 08:42
All I can say is wow. Definitely showing this to my wife today. We had plans to do something like this but yours is up up and away! Excellent job!
Fri, 01/13/2012 - 15:48
I'm glad you like the lights. I go back and forth on them. I hated that I had to drill holes into the wood to run the cord, as it does not give us the option to remove later on. Also, if you go with the lights, you might want to put some double sided tape on the back. Thanks!
Tue, 04/03/2012 - 09:41
My husband just forwarded me a link of your bed.
It is SO SO beautiful!!! Love the reading light. Where did you get that by the way?
The bed is so pretty. Love the natural wood look and the knots.
We too have mostly dark wood stain in the house and love this light color look. Did you stain it or coat it with something?
Sat, 04/28/2012 - 15:26
Hi Moldah,
Very impressive and great addition with the lights. Can you tell me how tall your final headboard and footboard are? Thanks.
Sat, 06/16/2012 - 04:46
LOVE IT! I love doing things like this and I am inspired by seeing your pictures!! I am especially impressed with the Star Wars case noted on your endtable LOL Right there I know you have great taste in films, too!!! I am going to do this project! Great job!
Wed, 09/04/2013 - 17:10
Wow, this is so beautiful! Great Job! We are very amateur builders and I had a couple questions. Do you have a blog with more details? How did you achieve the routered edges? And also, do you mind sharing the cost of the project? Thanks!
Sun, 11/03/2013 - 08:44
By how many inches did you increase the height of the headboard and footboard? I am thinking about doing the same when I build this bed and was hoping for some guidance.
Sun, 12/18/2016 - 06:00
We don't have boxsprings. How would you modify this plan for that?
Cost: $45
Made this bench smaller than the plan so it measures 48" X 18". Using it in a spare bedroom so it will eventually get stained to match the wood furniture.
Mon, 12/04/2017 - 09:17
That was my idea as well, to shorten it. My wife just asked me if we could part with a few chairs on the back side of our dining room table and if i would make a bench or two across the back wall. Well "of course" i said hahah!! Nice job on yours!! :{)
Sun, 09/13/2020 - 06:45
That's really beautiful. I think I'll look up the plans and try make one myself.
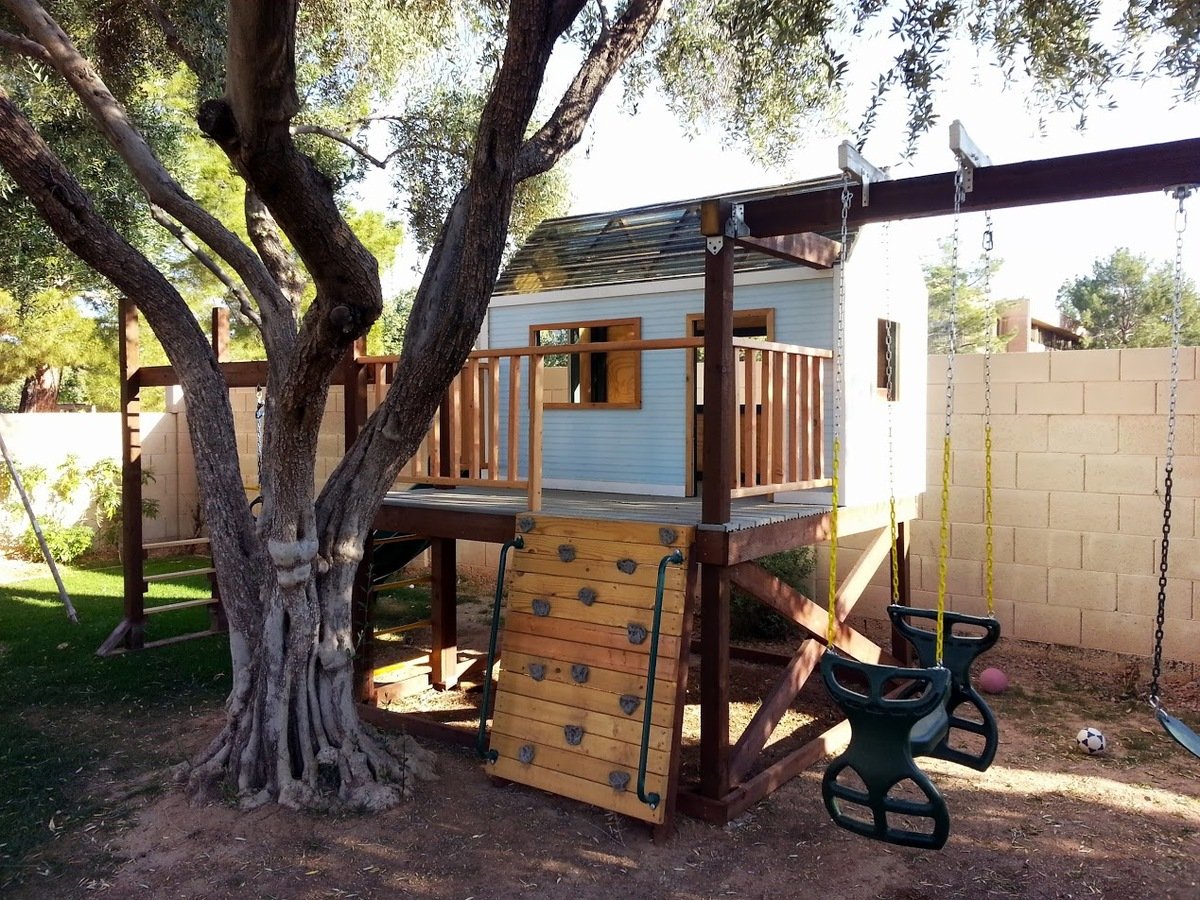
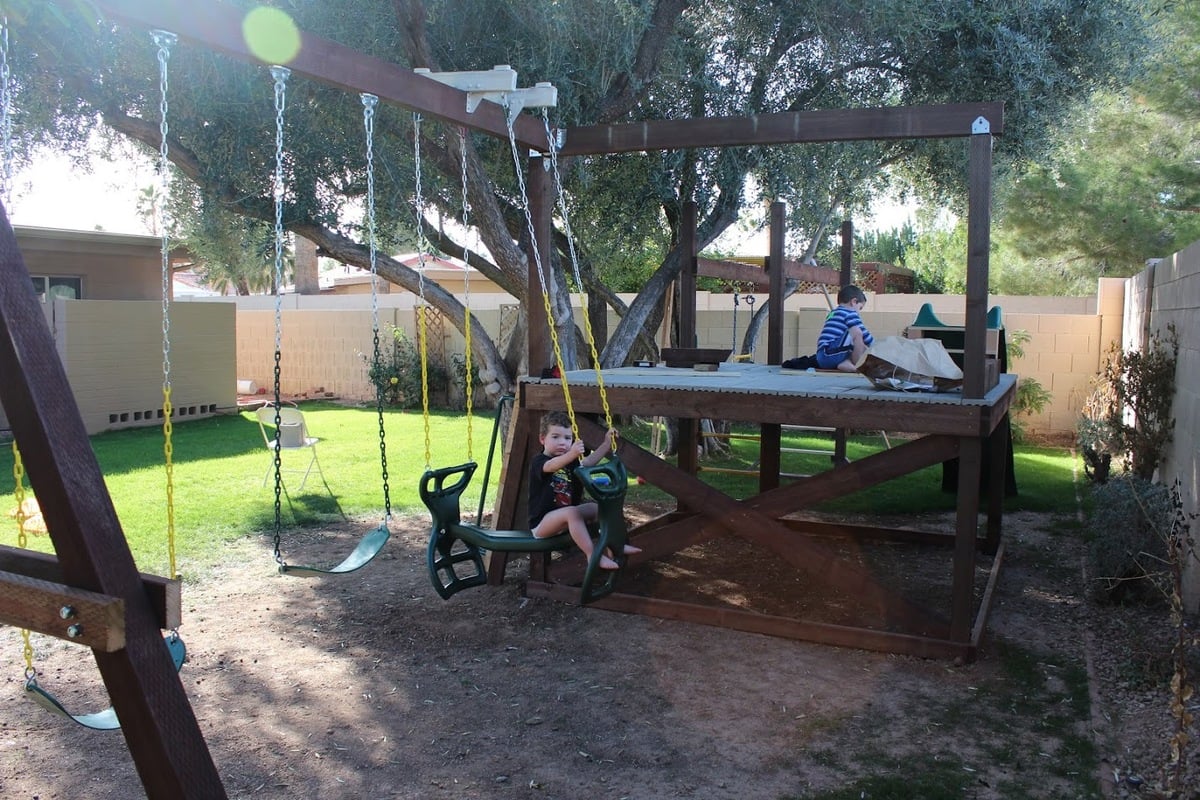
My second building project... this one took quite a while, building in the evenings after the kids went to bed.
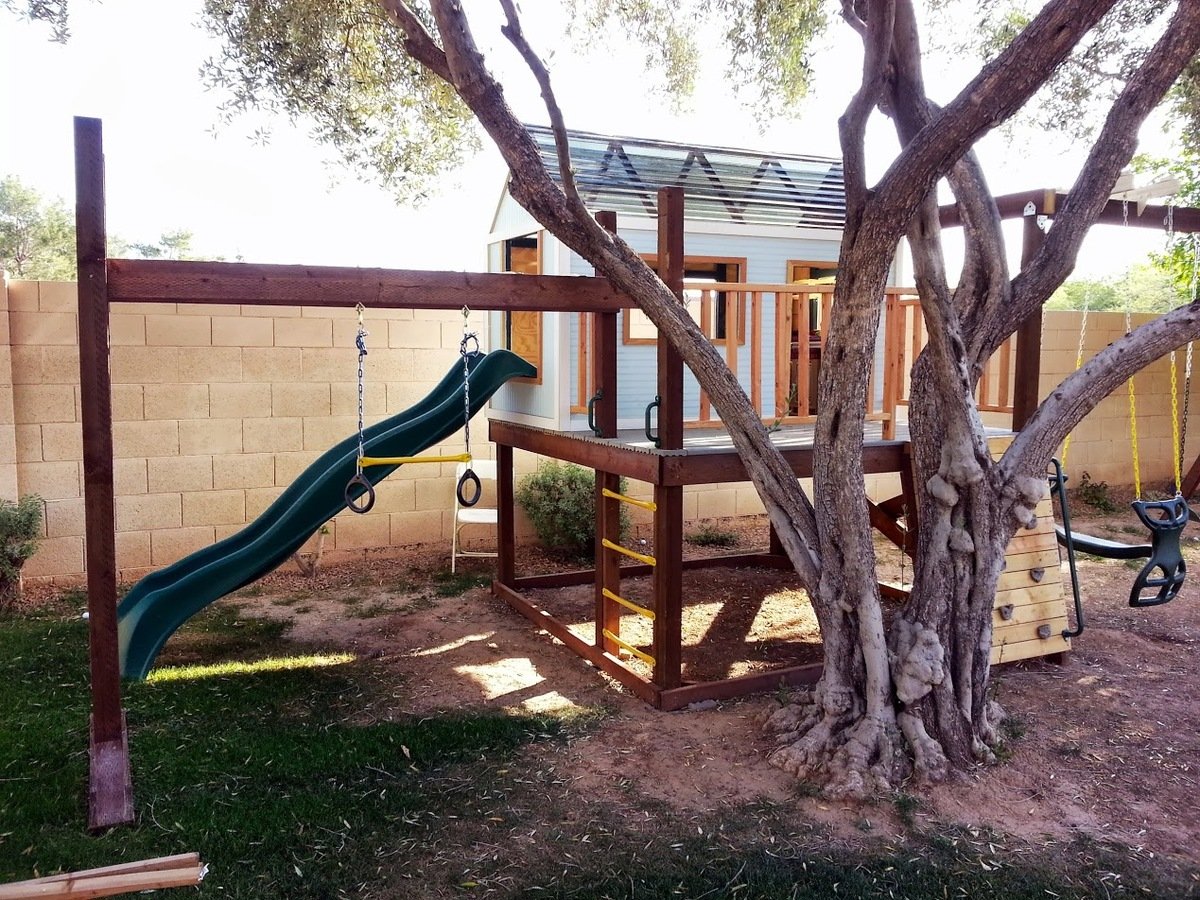
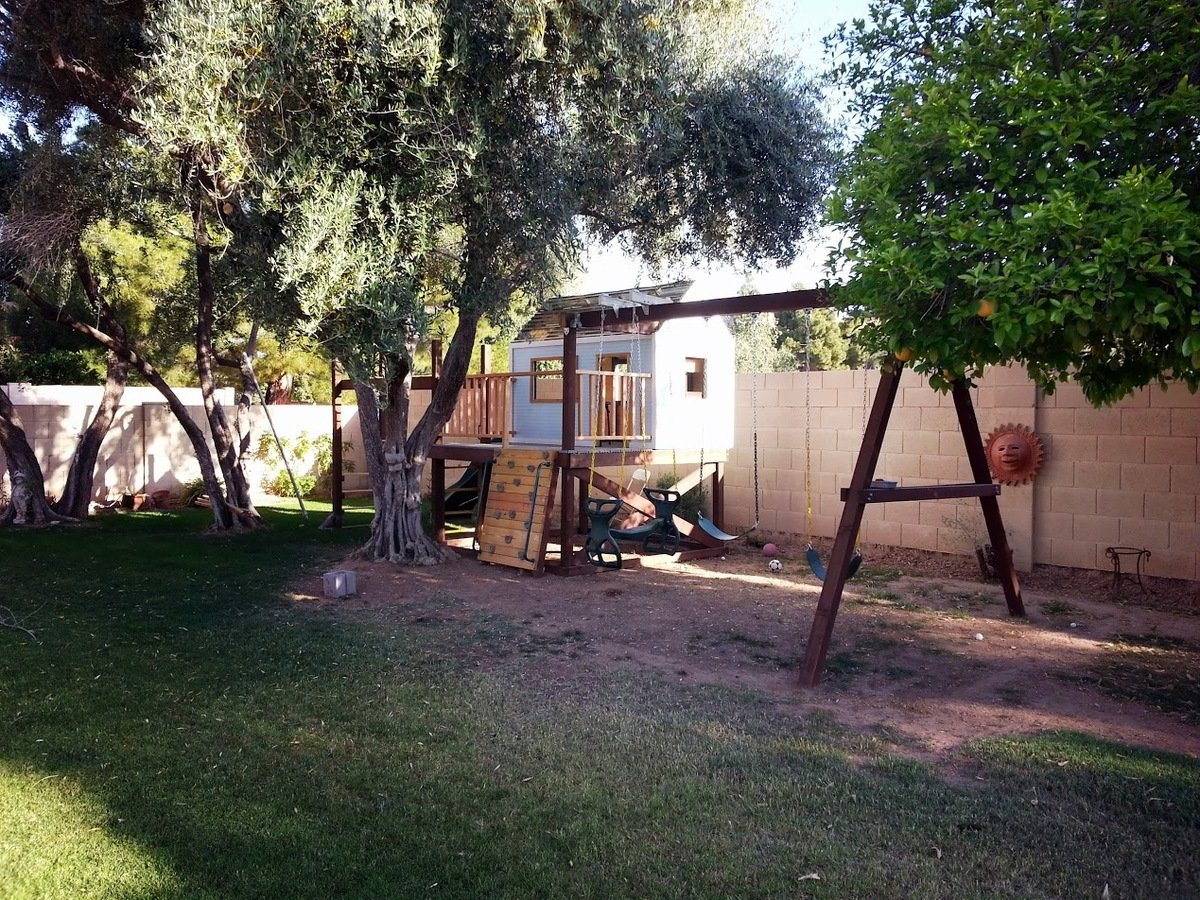
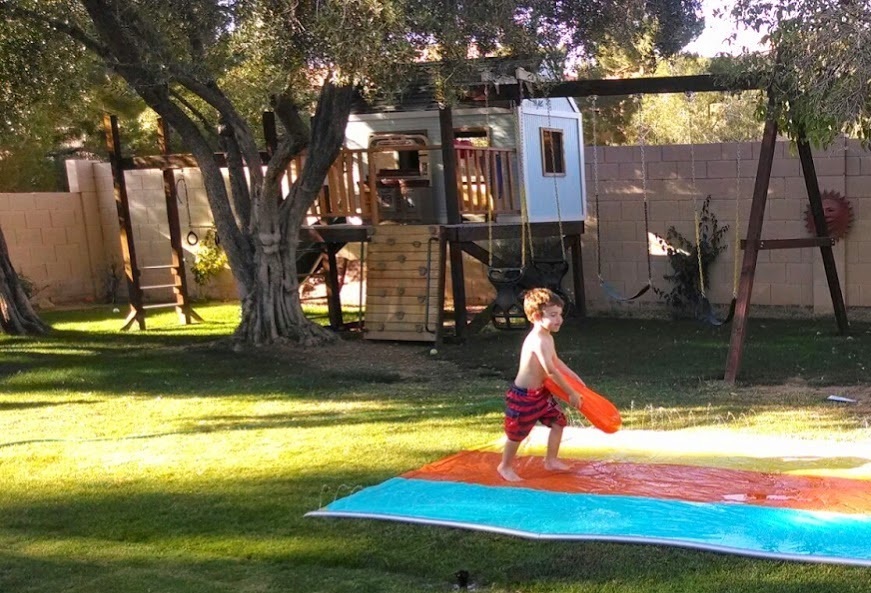
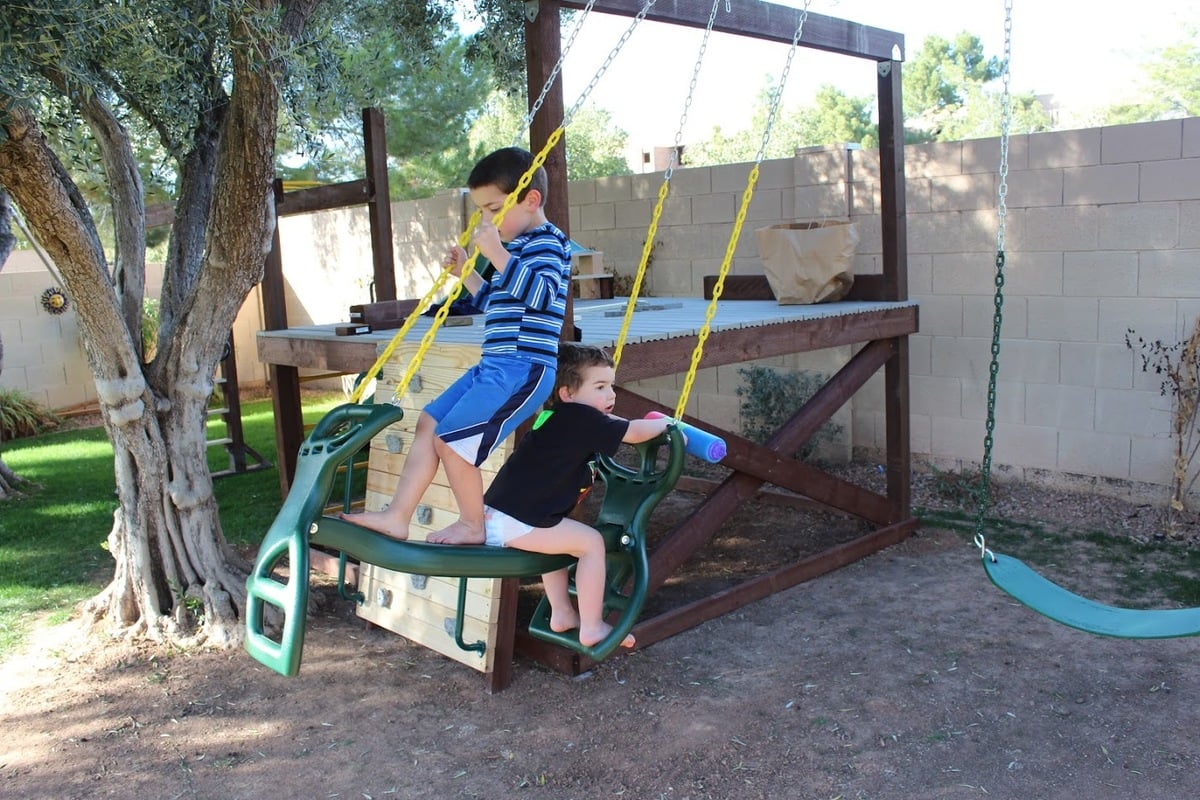
The playhouse is based off of Ana's Playhouse Building series, with some modifications to fit the space in my backyard and accommodate climbing wall, monkey bars, and slide.
To put the main deck structure into the ground for sturdiness while protecting from moisture, I dug out 5 holes to fit single hole cinder blocks (4 corners plus an extra 4x4 for the monkey bars; you can see an leftover block on the ground in one of the pictures). I placed some brick in the holes, then the cinder blocks on top. I then partially filled the cinder blocks with sand, put the pre-built deck in the cinder block holes (with help - it's heavy!), and then filled the rest of the cinder block holes with sand. It's worked remarkably well - the deck has been up for about a year now. I also sprayed some clear waterproof sealant on the bottom part of each beam near the ground for extra protection (deck, monkey bars, climbing walls, and swingset A-frame). This has allowed me to still run sprinklers near/around the playset and even grow grass underneath the swings!
Materials used:
* Playhouse: pine, plywood, Suntuf solar grey polycarbonate corrugated roofing panels (I live in Arizona, so little rain to worry about but lots of heat - the sheeting lets light in but blocks most of the UV rays, corrugated shape also provides venting at top when placed sideways)
* Deck/Swingset/Monkey bars: treated lumber, composite decking, pine for railings, monkey bars purchased from Amazon
* Climbing wall: pine, treated lumber, handholds/railing bought off ebay/Amazon
* Swings/slide/bongos/wheel, telescope: purchased from Amazon
Modifications:
* Turned playhouse 90 degrees to be in back of the deck, with swingset coming off the side. This meant the support beam for the swingset had to pass through the playhouse - modified the frame for that wall slightly and created a notch for the beam to pass through.
* Slide comes out one end of playhouse - made the "window" on that end larger than the plans called for in order to give room for the slide.
* Monkey bars come off one side of the deck - used extra 4x4 here to create support for the bars, and used extra bars to make a ladder on this side
* Climbing wall instead of ladder for main entrance
* Put large window in back wall of the playhouse
* Added cross bracing to side of decking on swingset end to make it more solid/cut down on sway when swinging
Tue, 04/29/2014 - 20:41
This is phenomenal - just the plan & design we've been looking for. Can you upload a few more pictures? Any sketches you can provide? Shopping list? Really great job - I hope your kids love it. It looks awesome.
Wed, 09/10/2014 - 14:03
Thanks! It's certainly nestled in right behind that tree - I originally was going to place it in between that tree and another one but then decided to just place it behind them in order to take better advantage of shade (critical in AZ) and fit in everything I wanted to put on it (monkey bars, swings, slide, climbing wall)
Mon, 07/08/2019 - 00:48
We've been looking at these type of players for our son, and good grief! Prices are astronomical for playsets that are NOTHING like this. This absolutely an amazing place for those boys to make memories. You're amazing! Do you mind if I ask what it cost once it was finished? I never imagined that it would cause a tic in my eye to look at the kids from Lowe's or anywhere else for that matter.
Tue, 08/20/2019 - 10:14
I don't remember how much it cost in the end... but probably around $900? That may include getting some tools that I needed but didn't have at the time. The slide was the most expensive single piece I bought - I think I got it from Amazon.
When it was all done, I remember thinking that what I got for my money was *way* beyond what I would have gotten by purchasing a kit or a pre-built play structure. Plus, by going my own way, I was able to build it to fit my space and the needs/abilities of my kids.
While the whole thing is big and looks like an intimidating build, it really isn't bad - the platform is a fairly blank base to design everything else off of, and is incredibly sturdy. Everything else is a discrete part that branches off of the platform and can be planned out as you need. Adding the monkey bars required putting in a 5th upright (the first 4 are the corners), but that was an easy modification since I knew I wanted it before building the platform. The playhouse just sat on top of the platform (screwed down, of course).
Sat, 08/01/2020 - 20:40
Hello. This is pretty cool, probably the best modification that I am looking for from Ana's default plans. Could you please add some more detail on the right side wall, and how you incorporated the support beam through the playhouse? (with maybe a picture from inside of that wall). And secondly, if you can add the dimensions for the monkey bar setup on the left side of the deck? Thanks, much appreciated
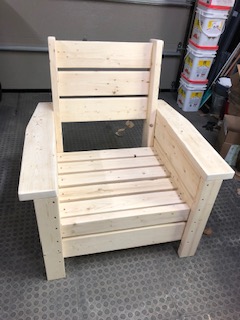
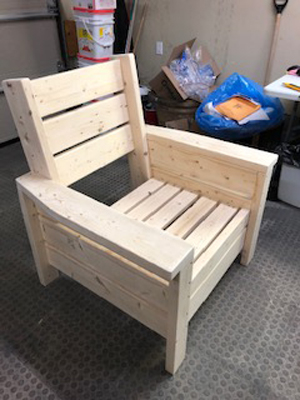
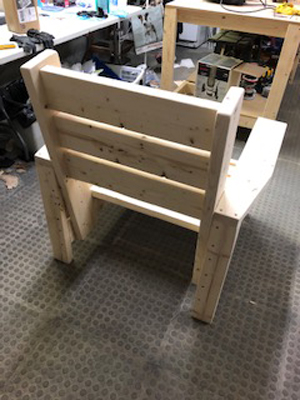
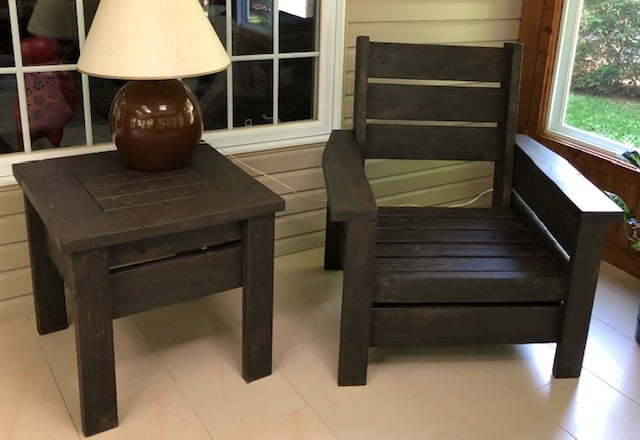
Modified with a high back and modern adirondack arms.
The base of the chair is built exactly to the plan except that the arms are done in a modern adirondack style.
The back was made independently to fit inside the base and then attached to the plan base.
Very comfortable but very heavy chair even without the modified back.
Not stained yet obviously.
Cushions are hard to find I think I would make it slightly smaller next time and maybe even find the cushions first and alter the plan to fit.
Tue, 06/09/2020 - 09:11
Stained with Saman: Urban Grey mixed with some left over brown 4:1 and now has a companion side table
Wed, 06/24/2020 - 07:33
Do you have the plans for the table you built? Im a brand ne beginner. I am trying the modern outdoor chairs and live this table with them.
Not pretty, but not bad for a start while working with an 11,7 and 5 yr old.
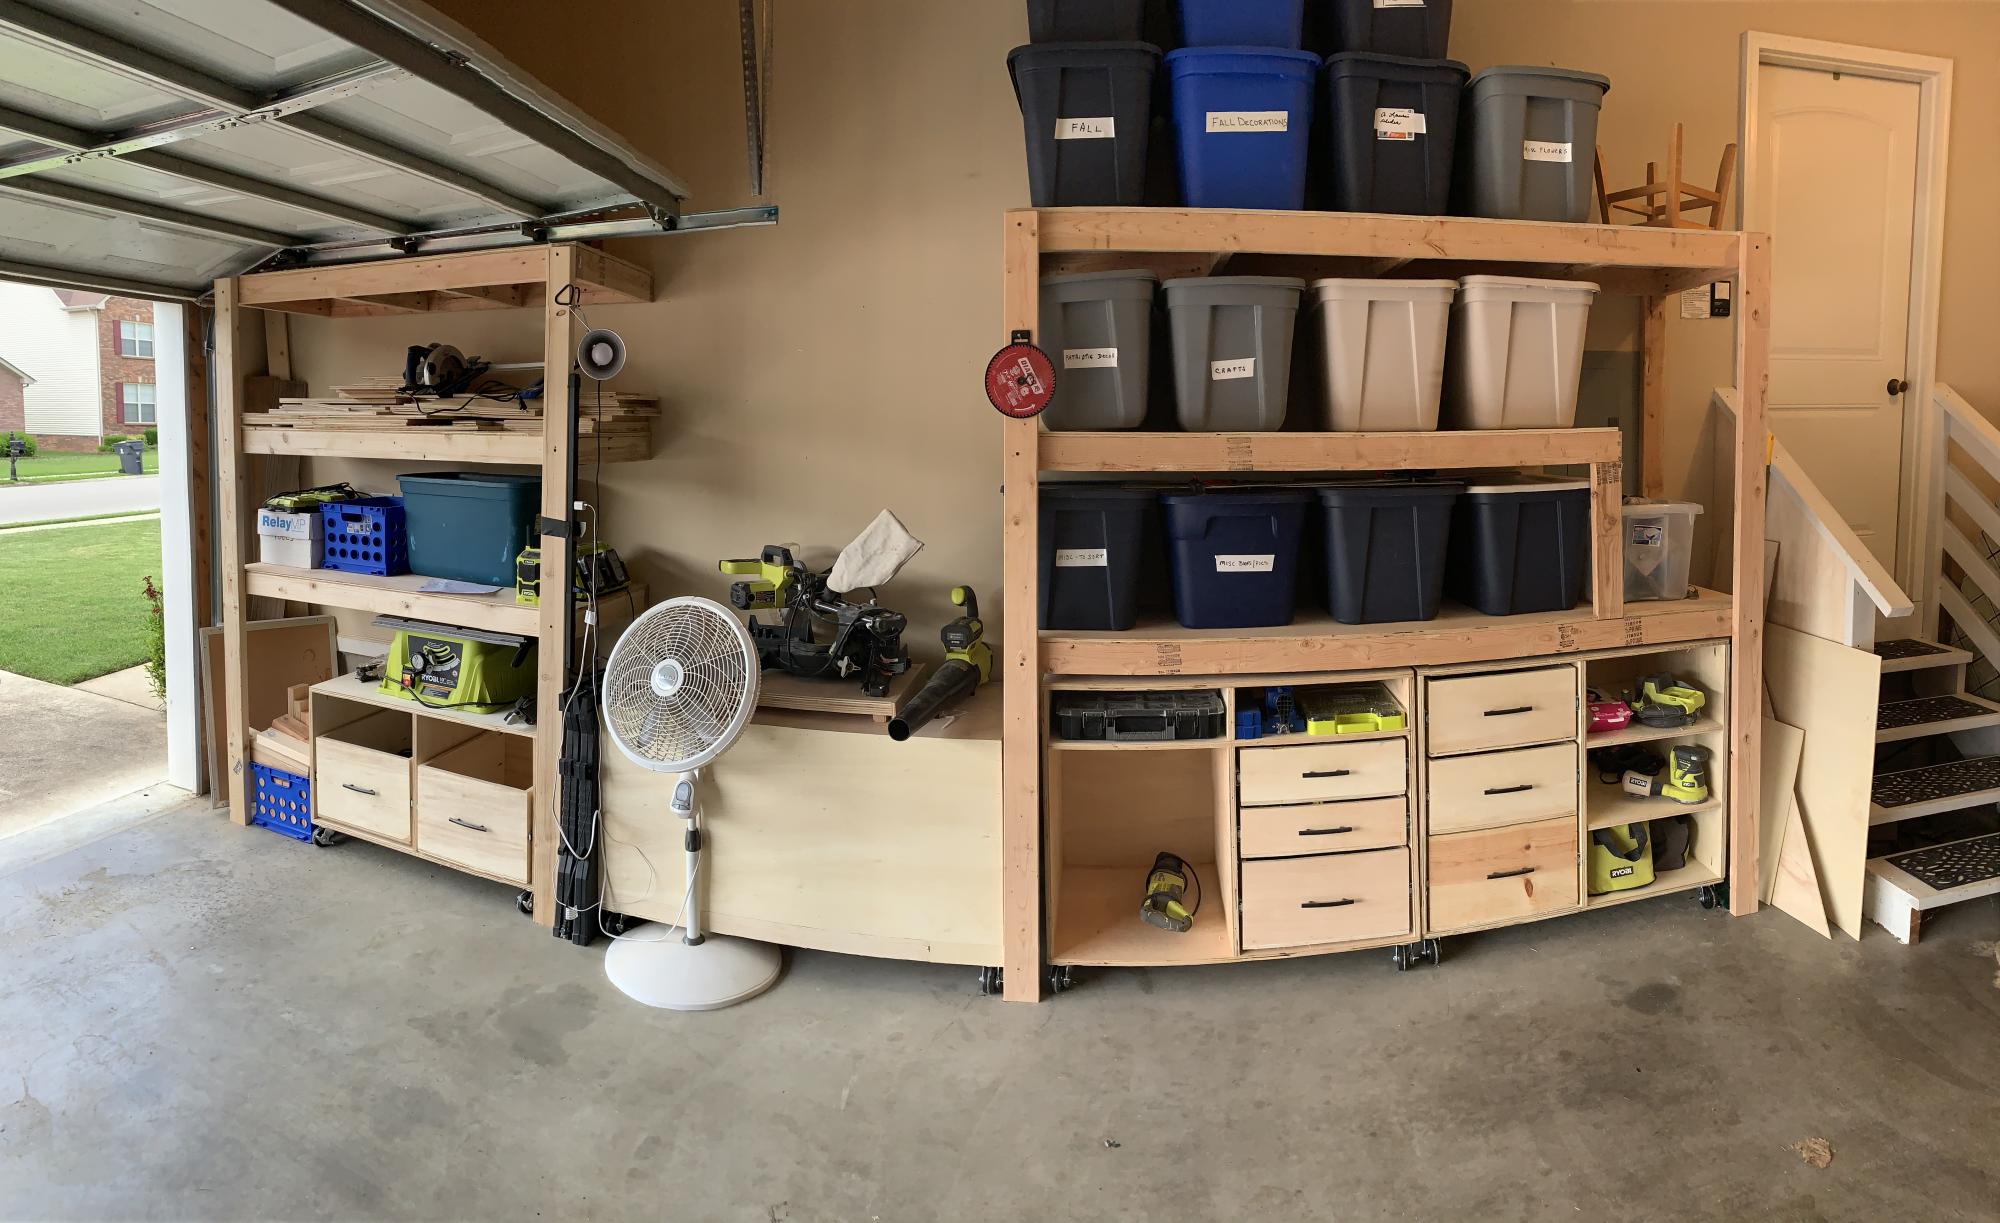
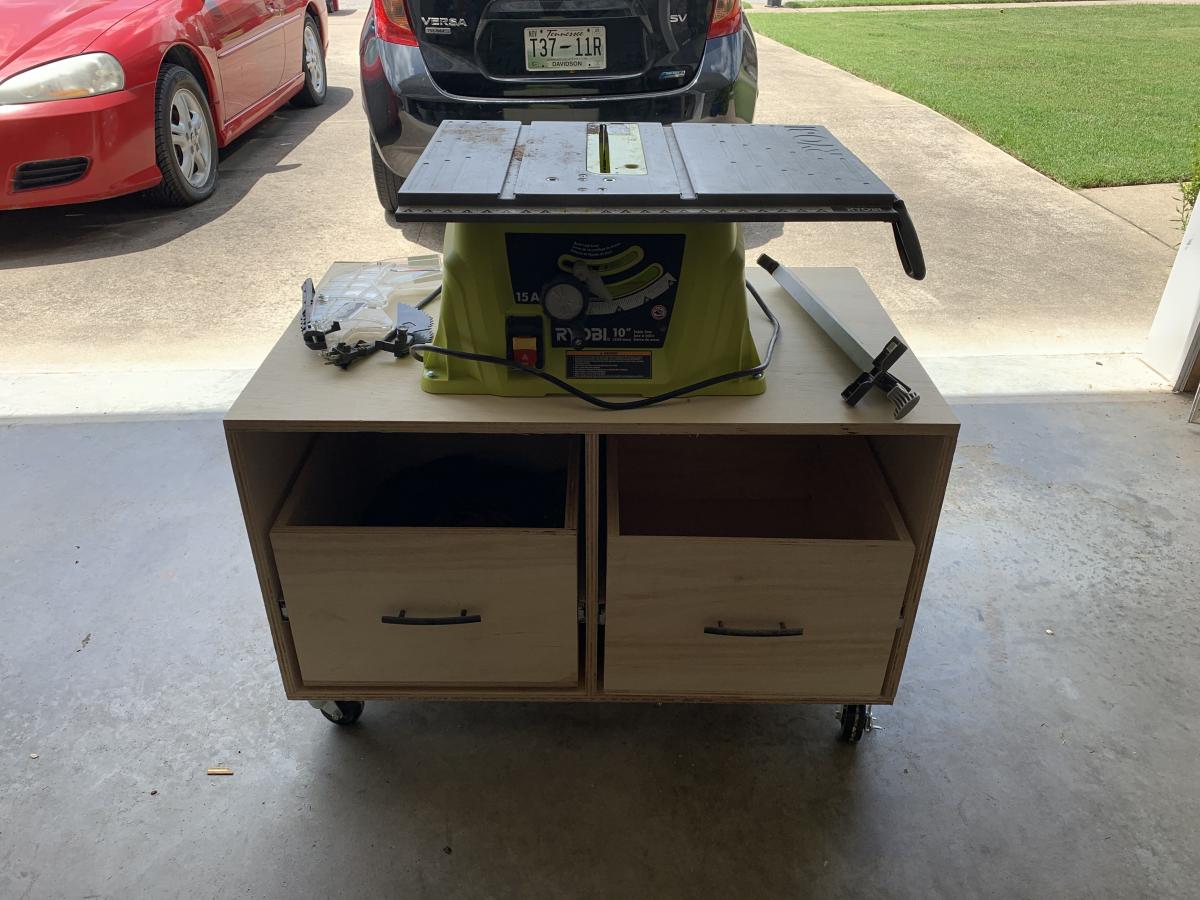
I bought a whole workshop full of Ryobi tools second hand from my brother over a year ago. I started researching workshop plans and came across Anna White’s Ryobi Nation Dream Workshop. I downloaded the plans and spent about 2-3 months working on it in my spare time. I made a lot of mistakes along the way but I’m pretty happy with it overall!
Comments
aimes91225
Sat, 07/04/2020 - 20:22
Weekend project
This plan was so easy to follow and do! My dad and I made this bench for my mom as a surprise! Thank you so much!!!! It literally only took us 2.5 house from start to finish of putting it together.