Community Brag Posts

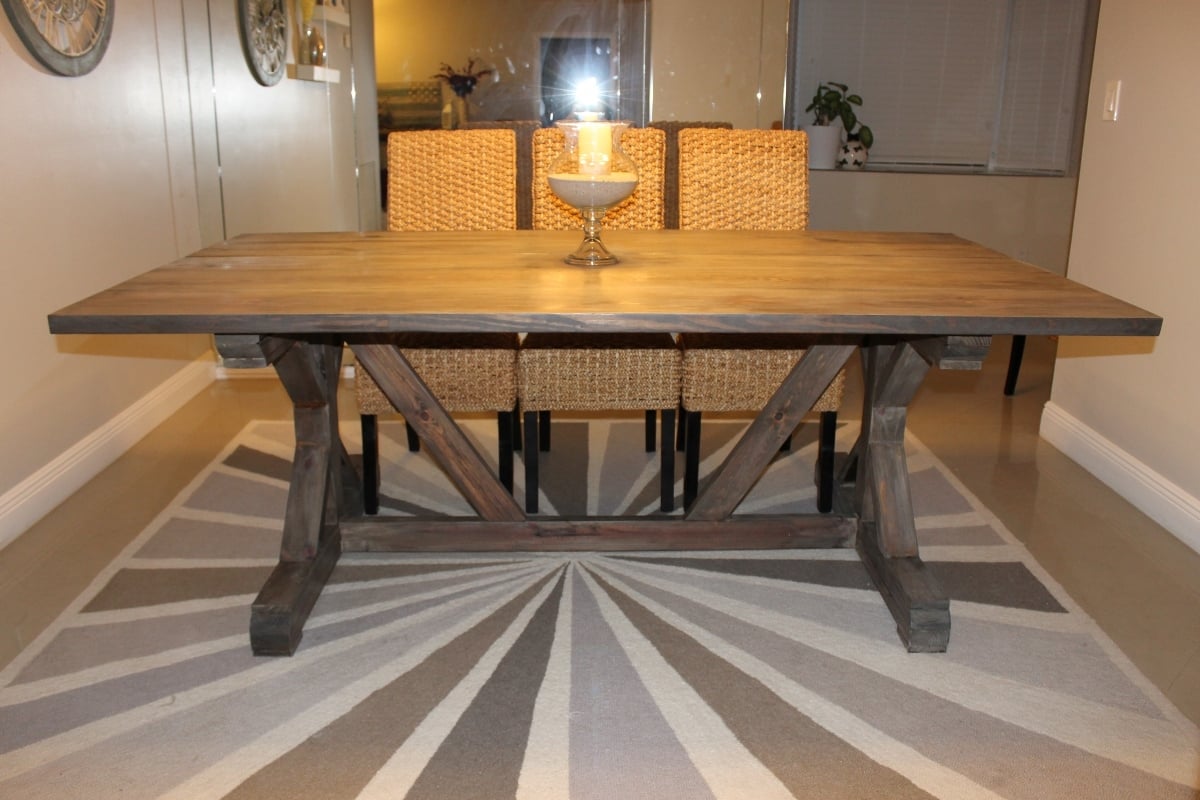
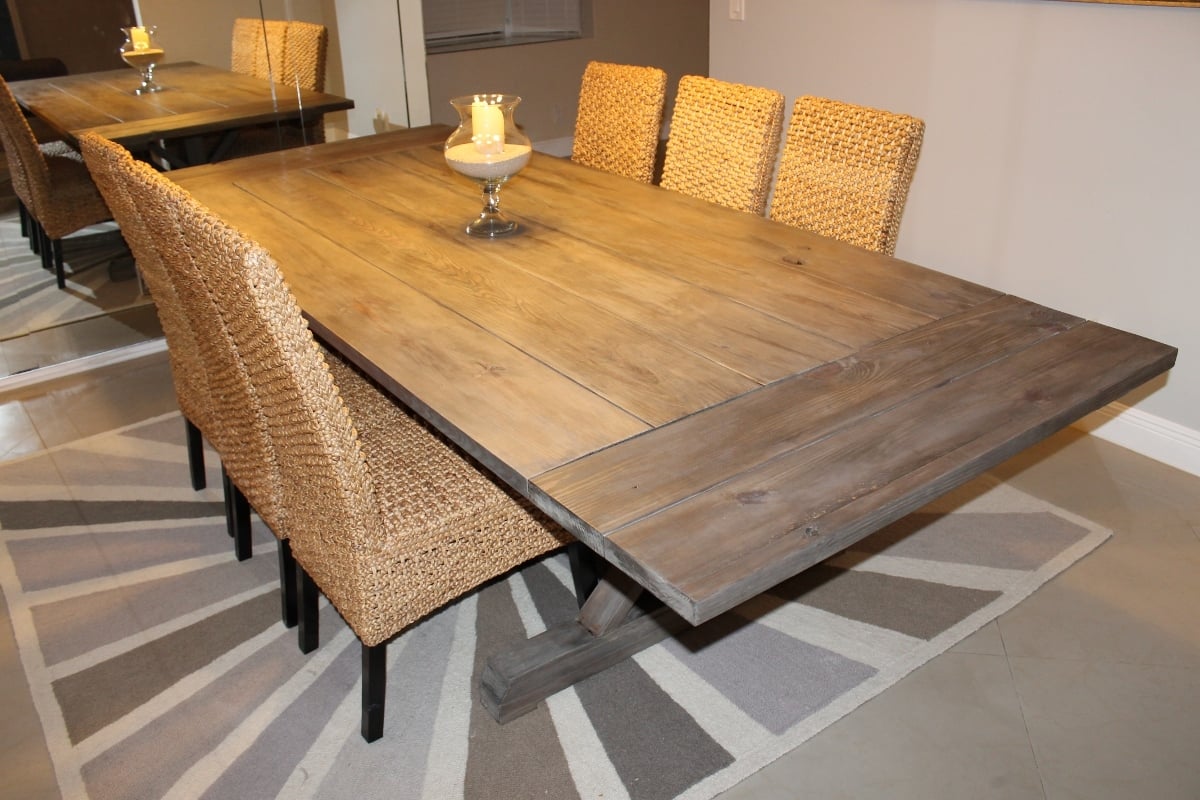
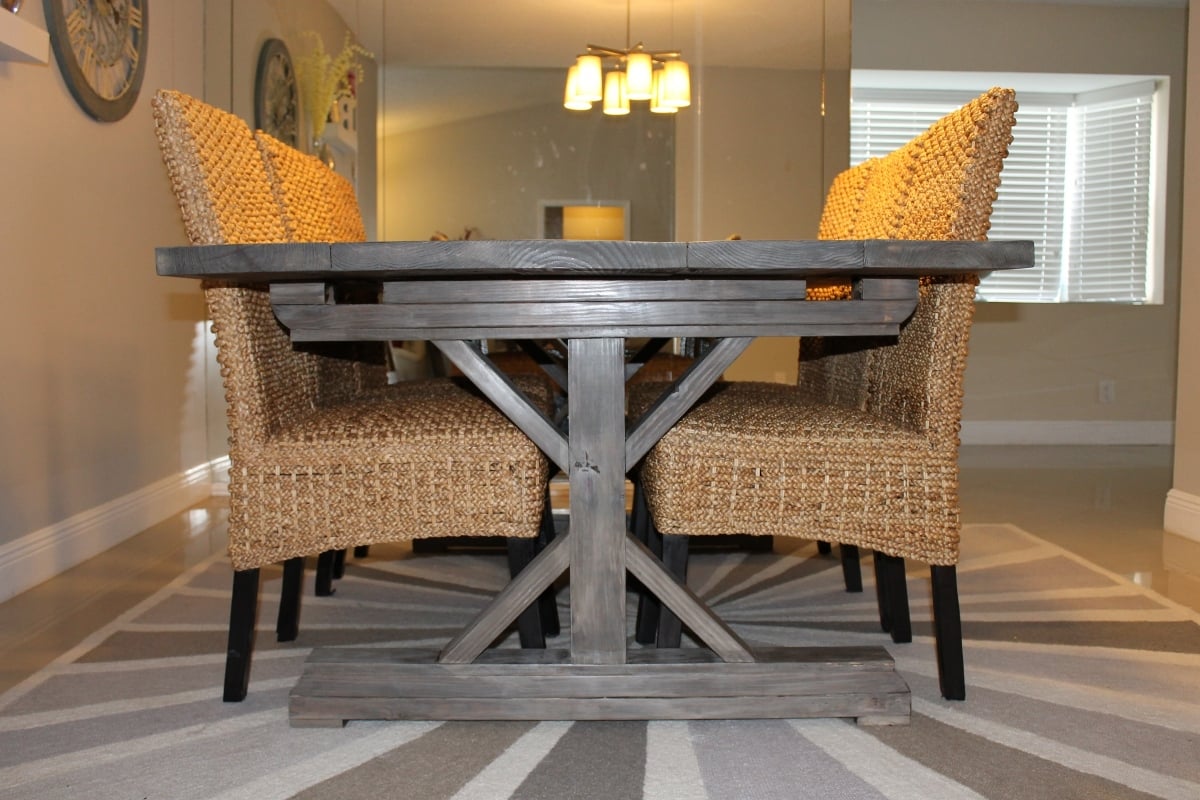
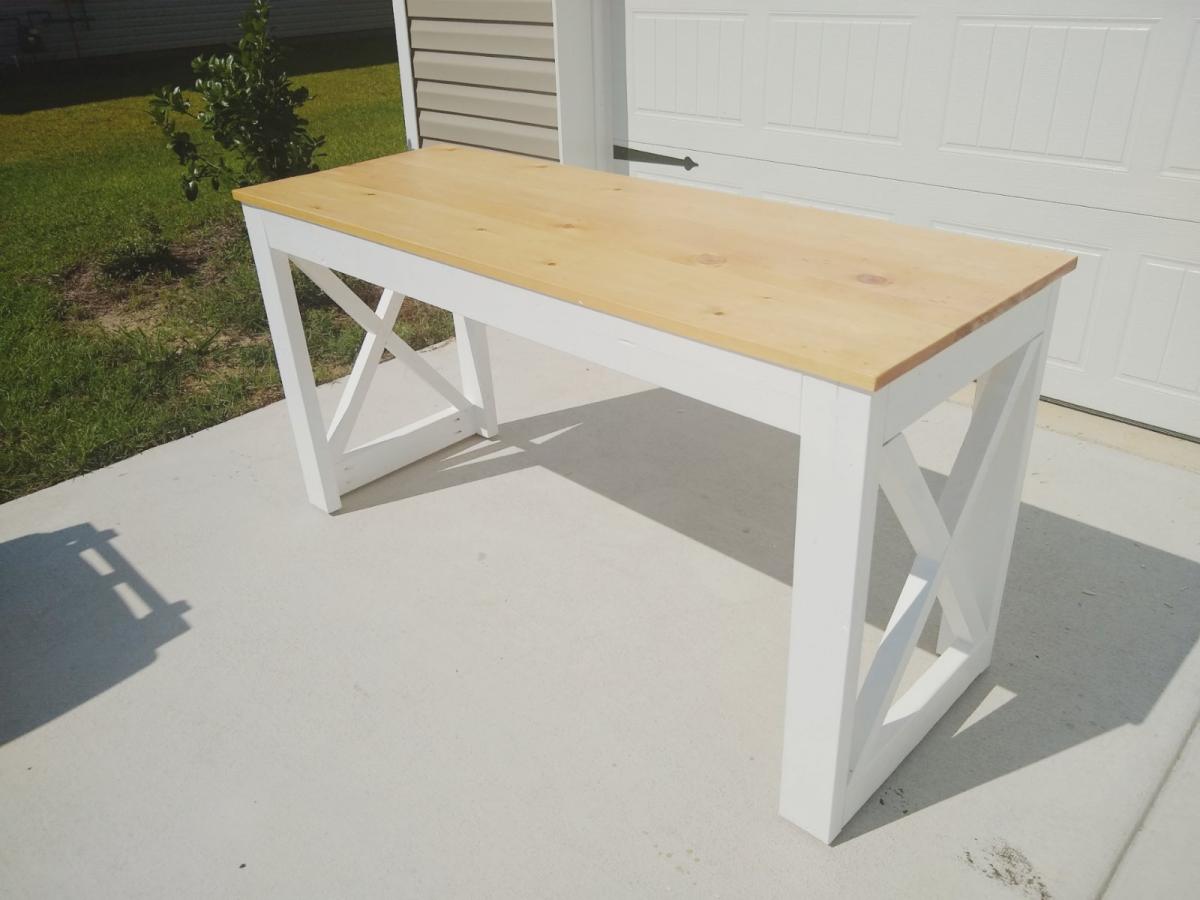
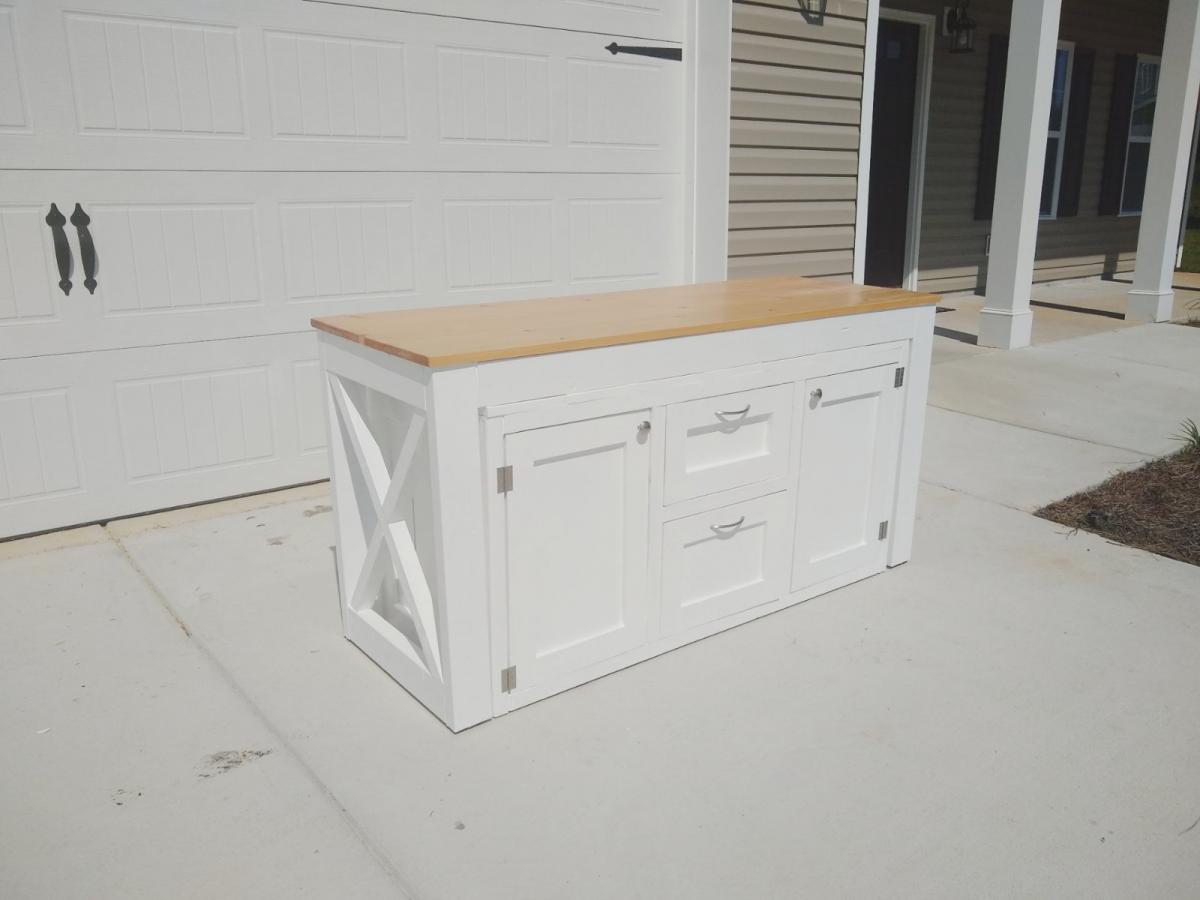
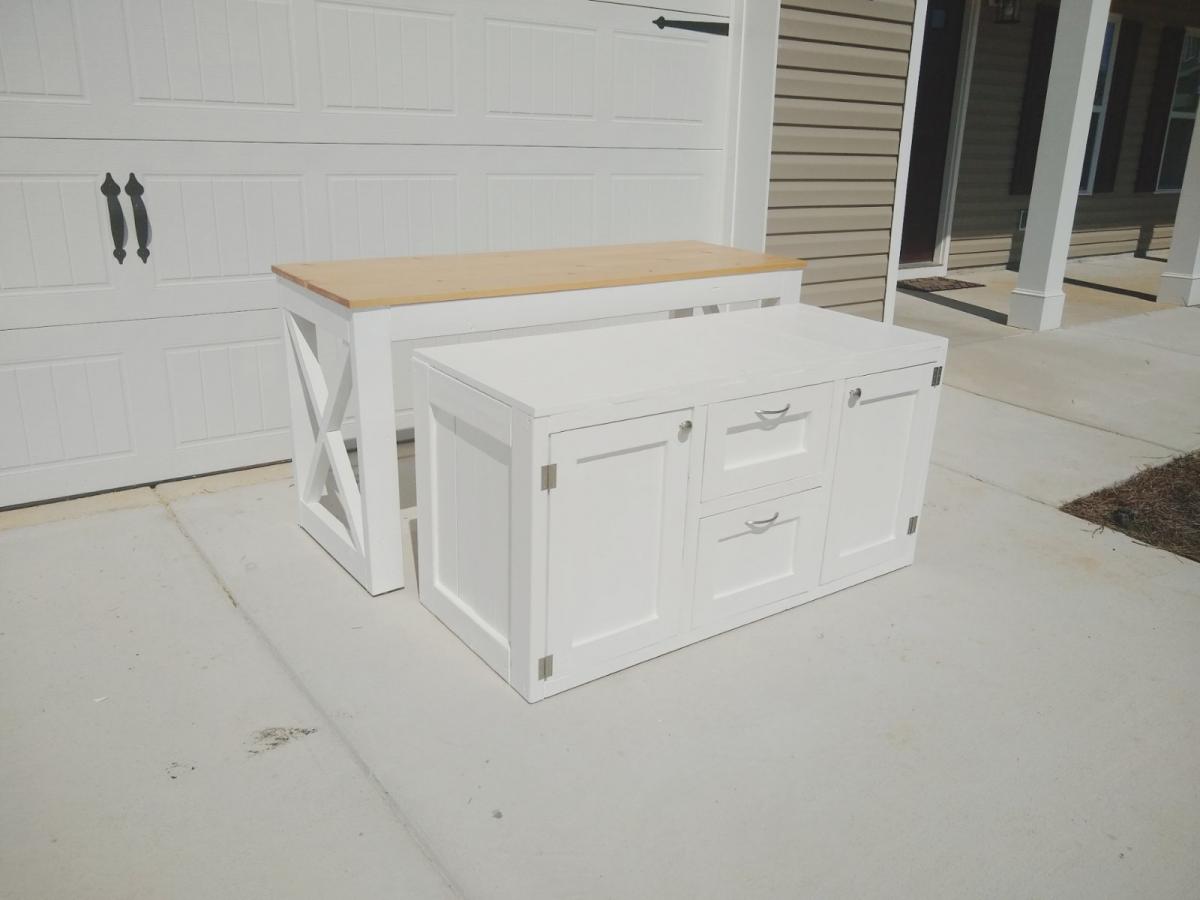
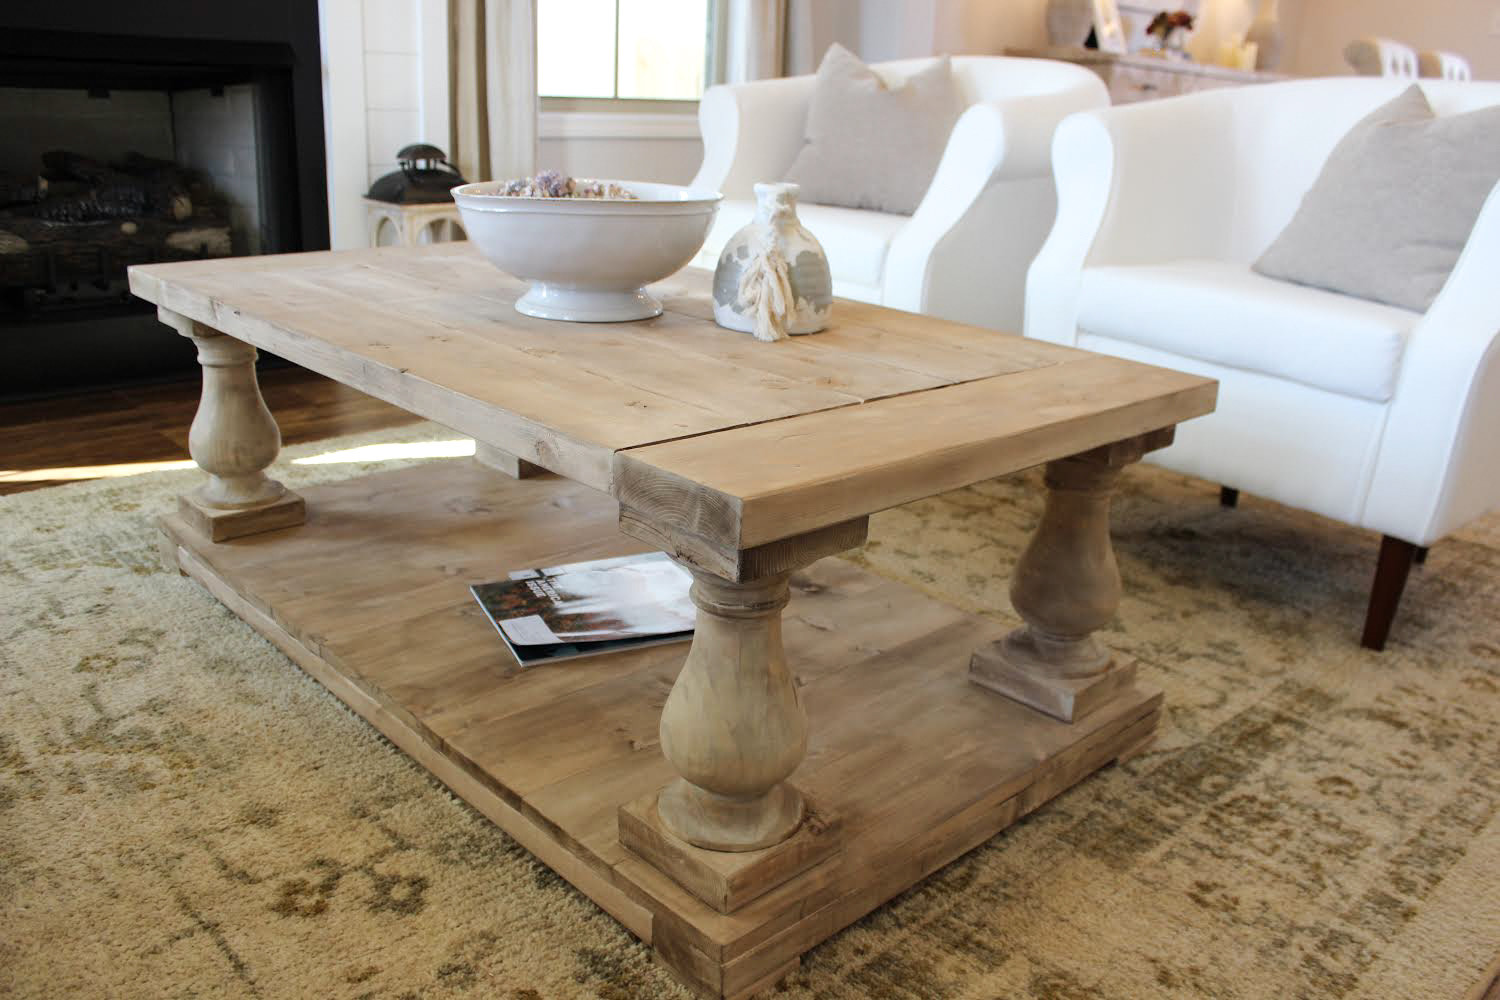
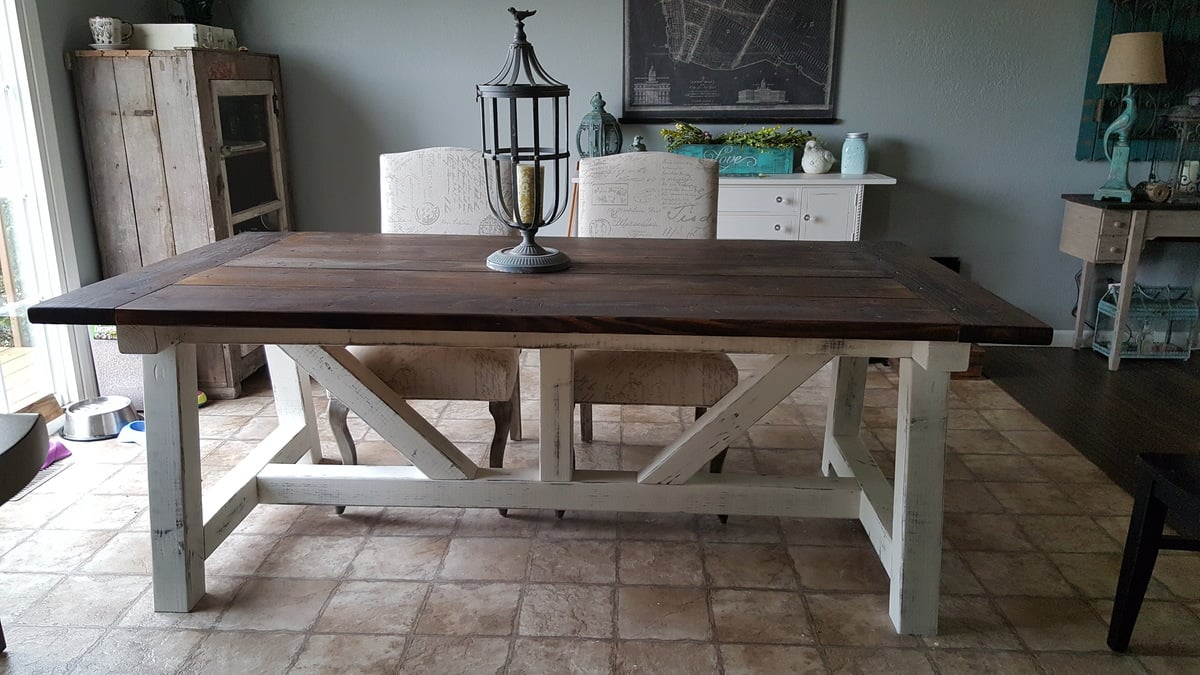
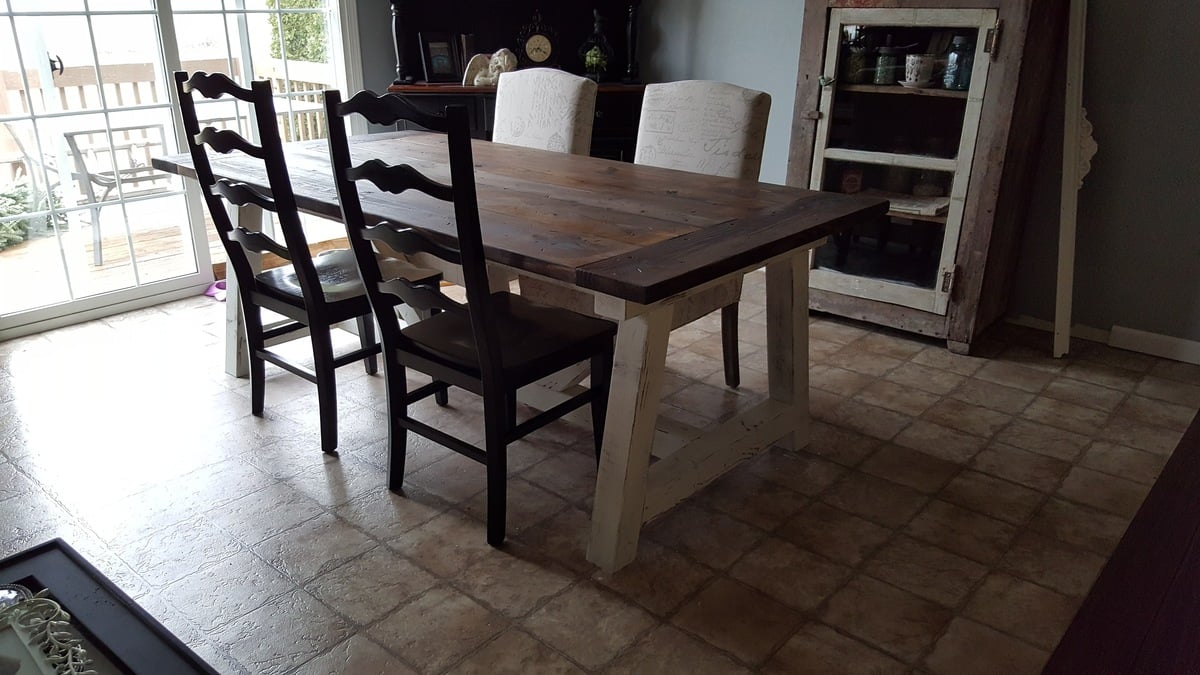
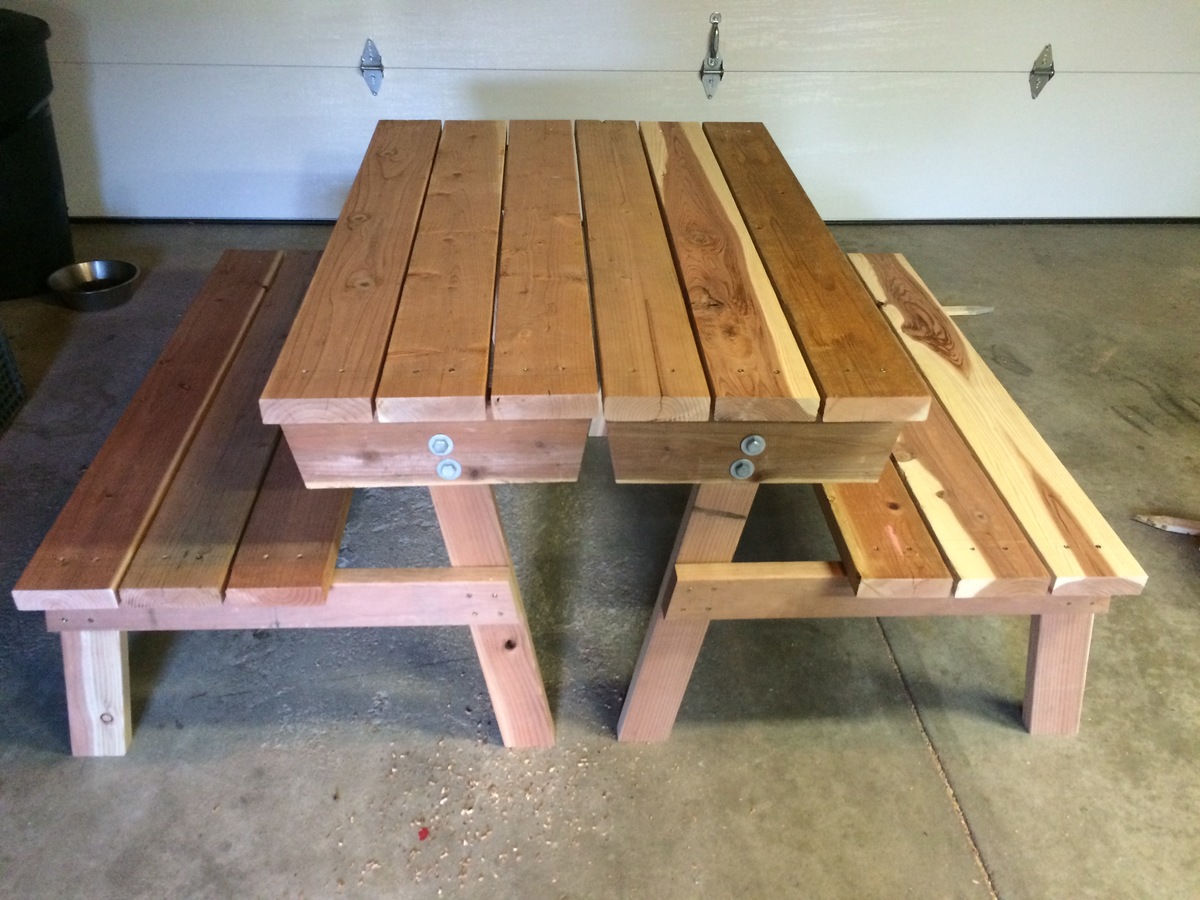
Weathered Gray Fancy X Farmhouse Table With Extensions

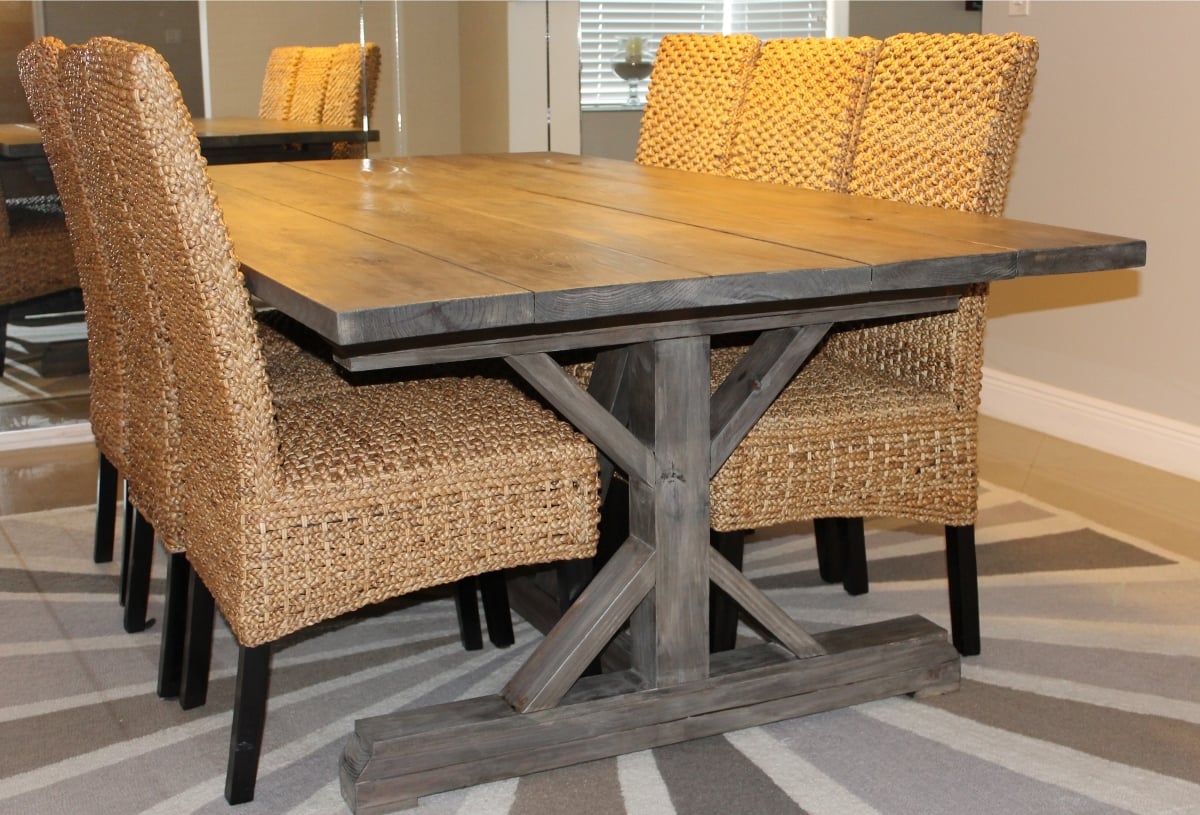
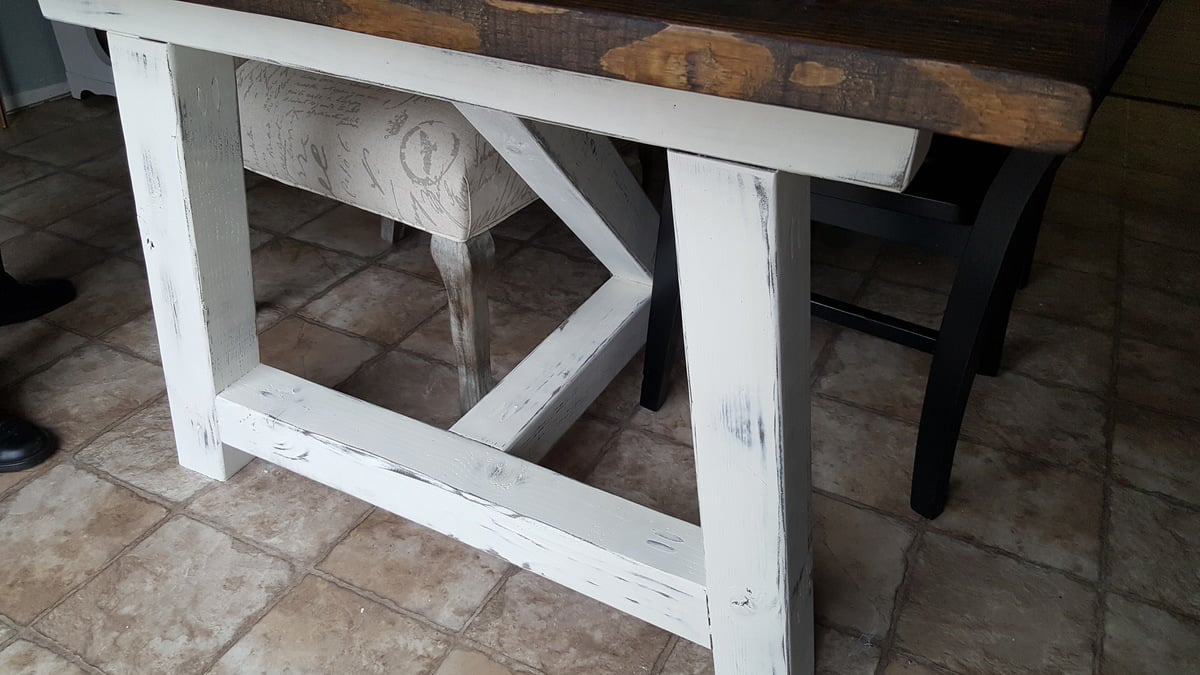
This is our attempt at the Fancy X Farmhouse Table. My husband and I built this over a weekend. We modified our table from the plans, making ours shorter and wider. We also added extensions and changed out a few boards for a bit of a different look from the exact plan. We created a custom finish with a few cheap and easy steps to get the look we wanted. Our table is 84" long by 46" wide. The original plans for the table called for it to be 96" long by 37" wide. We added a fifth board to our table top, thus making our tabletop 9.25" wider (since a 2x10 is actually 9.25" wide.) To account for this, we simply increased the width of the base boards by 9.25". As for the length, since our table was 12" shorter than the plan, we decreased the length of the two support boards running between the bases by 12" to account for that. We had to adjust the length of our decorative pieces somewhat, because of the wider base and shorter length. It was bit of trial and error but we were happy with what came out of it. For the center base post, instead of using 2x4's we used one 4x4 which was clean, square, and straight. We were happy with how things turned out for the base. Perhaps our biggest alteration was the fact that we added extensions to each end. To do this, we cut out 3.5" slots in the top of the base so a 2x4 could slide in. We then took two 2x8's and used pocket holes to bring them nice and tight. With the extensions in place, our table is nearly 10 feet long! As for the finish, we wanted a weathered gray color and were able to come up with it through a three step process. Its really beautiful in person! Thanks again for the plan

Built from Plan(s)
Estimated Cost
$80-$100
Estimated Time Investment
Weekend Project (10-20 Hours)
Finish Used
Custom!
Recommended Skill Level
Intermediate

Comments

Darcy Taylor (not verified)

Tue, 08/07/2012 - 03:10

Could you possibly give me a detailed explanation of how you finished this table? I love, love, love the color and want to replicate it.
Thanks!
Darcy

Jennifer Nealy (not verified)

Tue, 09/25/2012 - 09:06

Beautiful table, but I really want some information on the 3-step process you used to get the weathered gray look. Can you please provide that information? Thanks!

SawgrassHomeGirl

Sun, 04/07/2013 - 20:40

Thank you for your interest in the finish....we used regular pine from Orange and Blue. We used a mixture of steel wool and vinegar in a glass jar, let it sit for a night or two, then brushed it on evenly over each board. We then let that sit for a night or two and then proceed to whitewash the entire table (two parts water one part paint.) After that, we took Dark Walnut Stain and wiped it over each board, then quickly wiped/scrubbed it off after just a minute or two. That's how we did it!

Id suggest practicing first with some scrap , esp. with the steel wool mixture so you can see how the wood changes. :)

FLKS

Fri, 09/23/2016 - 15:24

Hi Emily! 


        I love your table. We are about to make one and love your stain. Would you be so kind to give me details of what you used to achieve the look? I read the above post, but could you give me brands and colors? I don't understand what is steel wash- is that the color? 

Thank you so much!


FLKS

ajdriscoll08

Mon, 09/09/2013 - 11:40

but when we brushed on the steel wool/vinegar mixture, the holes on the table top and base that we had filled in with putty didn't really stain...did you run across the problem? I don't see any areas on the top of your table where you can tell where the holes were??

rmf

Wed, 04/09/2014 - 09:05

I'm curious if you made the extensions permanent or if they can be removed and added as you need? I love this table!
Thanks,

Jenni2526

Wed, 08/13/2014 - 11:50
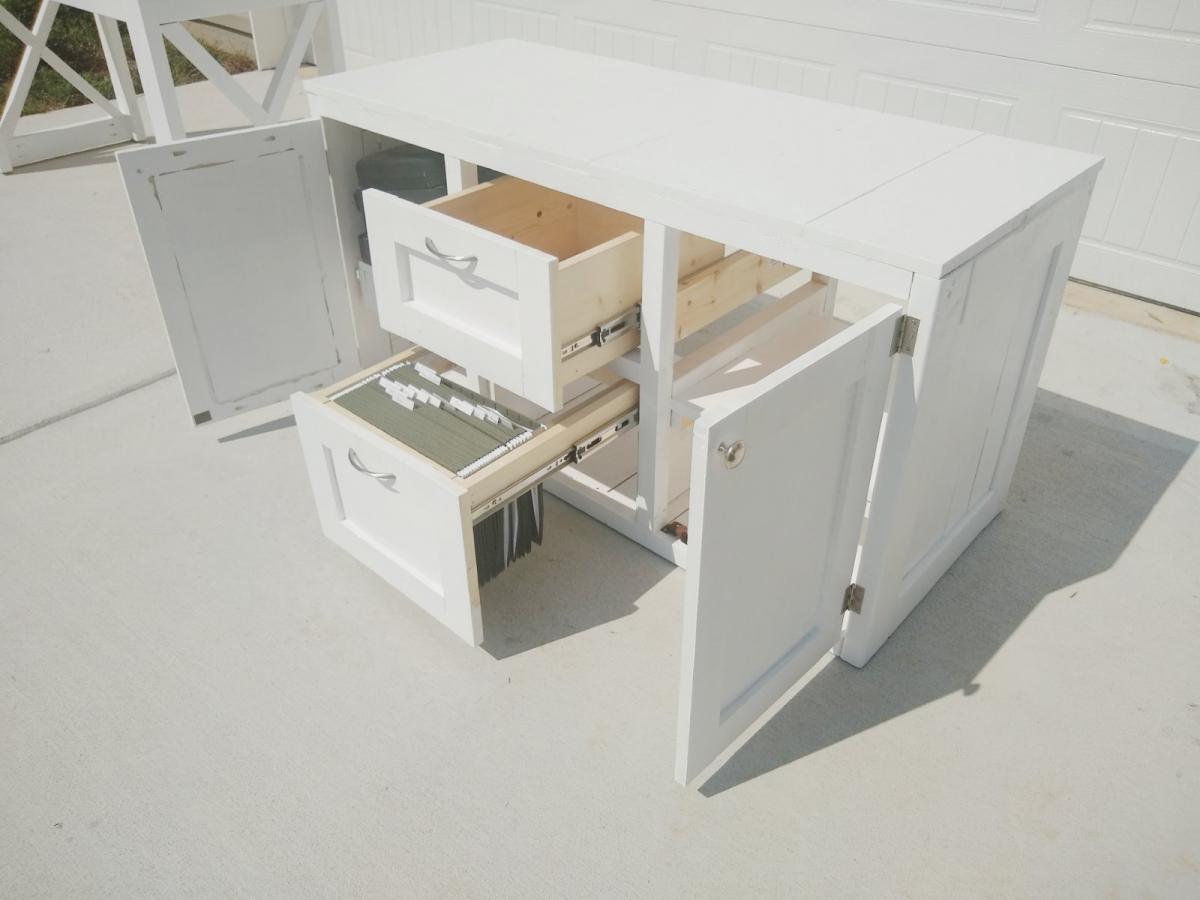
I am not understanding how you made the extensions from your description and then looking at the end pictures... Would you please explain this a little further and how they are stored and placed for use and how this works? Thank you!

Ren.K777

Tue, 10/07/2014 - 17:39

LOVE the finished product! I aim to get the hubby to make this one at some point!  But for now, we have just a bench in our kitchen that he made and I'd like to apply the same finish you did.  I've looked at a bunch of different tutorials but I like yours the best.  Here's the question...how long after I apply the paint/water mixture to I apply the walnut stain? Do I apply the water/paint and wipe off right away?  A few seconds later?  A minute later?  Do I allow the applied/wiped water/paint mixture to dry completely before adding the stain or do I want to apply the stain before it's throughly dry so that it mixes a bit for a softer look?  Thanks so much!  


Nesting Office Station

Submitted by Sb1212 on Tue, 07/14/2020 - 18:38

So loving this nesting office station❤️! We will have a sofa sleeper in the office as well. So we needed a desk that could be moved to the wall when the sofa sleeper is being used by guest. I saw a post from Ana for her Nesting Grill Station and I came up with the idea to make this nesting office station. The cabinet includes a file folder drawer (which is from Ana's mail boss plans), a regular drawer, cabinet doors with shelves. One of the shelves is a pull out shelf for the printer. I think it came together great! Design for nesting desk inspired by these plans: https://www.ana-white.com/woodworking-projects/nesting-grill-station https://www.ana-white.com/woodworking-projects/mail-boss

Estimated Time Investment
Weekend Project (10-20 Hours)
Finish Used
Minwax Golden Pecan
Valspar Signature Ultra White in satin
Recommended Skill Level
Intermediate

Comments

Sb1212

Sat, 10/03/2020 - 08:35

Hi, Thank you! Actually I didn't add wheels to the design since this will be in an office with thick carpeting. I added adjustable metal foot pads to the bottom of the desk.

Garage Shelves

Submitted by scoricha on Mon, 01/09/2017 - 11:01

I am loving my new garage shelves.  They were my first woodworking project and very easy to do!  I left the bottom right side open to fit my outdoor table and chairs in the winter (I live in Michigan).  I also used thicker plywood than plan because my shelves are a bit deeper.

Estimated Cost
$130
Estimated Time Investment
Weekend Project (10-20 Hours)
Finish Used
none
Recommended Skill Level
Beginner

Light Wash Balustrade Coffee Table

Inspired by the RH Balustrade Salvaged Wood Coffee Table.

Built from Plan(s)
Estimated Cost
250
Estimated Time Investment
Day Project (6-9 Hours)
Finish Used
General Finish Milk Paint (color: Linen) custom wash. Finished with glaze in Van Dyke Brown.
Recommended Skill Level
Beginner

Tack Box

Submitted by Evandgc on Tue, 12/30/2014 - 16:21

I made this box for my wifes christmas present. She has been riding horses for sometime and is planning on doing some shows. I built this box from Mimi's storage bench design, made it bigger, added a deeper box top and created the rest from looking at pictures online. Its all made of pine plywood and pine boards to keep it light. I added 4 castors to the bottom to make it easily moveable and hid them with the moulding around the bottom. Still has to be sanded and stained before it hits the barn. Its 39W X 24D X 29H. I used a piano hinge and routered the back to set the hing in. Added cove moulding around the bottom and to all the boxes around the front and side. Used a lot of pocket holes and finsh nails. Took me longer than it could have, because I planned everything as I went.  I will add more pictures when its finsihed. I would rate it intermediate to advanced depending on your skills with certain tools. 

Built from Plan(s)
Estimated Cost
Will all the hardware, wood materials, screws etc, I think it cost me around $250-$300
Estimated Time Investment
Week Long Project (20 Hours or More)
Finish Used
not finished yet
Recommended Skill Level
Intermediate

Comments

Our Lemonade Stand

Submitted by Anonymous (not verified) on Sun, 07/02/2017 - 14:42

This was a fun project... i really enjoyed it! It was my first time staining, so I learned some things, and it got a lot of compliments from customers!

Built from Plan(s)
Estimated Cost
50
Estimated Time Investment
Day Project (6-9 Hours)
Finish Used
2 coats of Early American stain.
Recommended Skill Level
Beginner

Patio Furniture

Submitted by Anonymous (not verified) on Mon, 10/04/2021 - 14:18

The Anna White patio set (2 chairs & love seat combo).
I added seat backs for comfort, painted them white and distressed the edges…
They are perfect for lake front-windy areas… They are heavy duty and will never blow away!

Comments

mh6558

Thu, 02/29/2024 - 07:29

I absolutely love the curved backs! I live in a semi-windy area and really like this look and the idea of more durability. Did you just add three vertical 1x6's and use a jigsaw to round them? Please advise as I would love to use this technique.

Miter Saw Cart

Submitted by Nermell on Wed, 07/31/2013 - 16:51

As a complete beginner in wood working (unless you count a year of woodshop over a decade ago), I decided that building a cart for the miter saw I just bought would be a great first project. So what did I do with that brand new miter saw? I left it in the box and made all of the cuts with a circular saw. Not sure what I was thinking there...

I mostly followed the excellent plan provided here but used wooden arms to prop up the wings in order to save on cost. I got the idea from the folding sling chair plan. It took quite a few screw ups and adjustments of the lower support bar before getting one of the wings level but I got it eventually.

Update 8/20/13: The miter saw has been a joy to use with the cart and the big flip up wings provide a ton of really convenient work space in addition to stabilizing 8 ft boards for cutting. I added a sliding drawer and some utility hooks for additional storage.

Built from Plan(s)
Estimated Cost
$70-80
Estimated Time Investment
Weekend Project (10-20 Hours)
Finish Used
none
Recommended Skill Level
Starter Project

Comments

davidmauer15

Thu, 08/01/2013 - 08:10

I originally just had a 2x2 and two blocks to hold up the wings on the cart. They kept falling out, so I replaced them with hinged arms, which were a pain to fit and install, but they work well. Your approach has the same advantage of hinging the support arms: the wood can't fall out and it looks way simpler to install than my system.

One hint if you try Nermell's approach: Flip the cart upside down when you fit and install the support arms. I did all kinds of complex sketches and measurements, then realized it was just faster to lean the support bracket at roughly 45 degrees, then I installed the two block (one on the side, one on the wing) to hold the bracket in place. Flip the cart over, and your wing will sit at a perfect 90 degrees to the sides of the miter saw cart.

Lounger

This was my 2nd wood working project. I found it was nice to have a 2nd set of hands to line up the top boards and put on the hinges. I did use a piano hinge for the back like another poster mentioned. It is smaller (not as thick) and helps keep the boards all even on the end when the back is lowered.

I really like the look of this lounger. I was worried that the boards on the edges would need more support, but they seem sturdy enough. If I notice them sagging later or starting to move, I will put some braces underneath.

Estimated Cost
$60.00
Estimated Time Investment
Weekend Project (10-20 Hours)
Finish Used
Olympic Maximum Stain + Sealant - Cedar Natural Tone
Recommended Skill Level
Intermediate

4x6 Truss Beam Farm Table

Submitted by Anonymous (not verified) on Thu, 03/10/2016 - 13:48

Easy project, had it done in about 8 hrs, staining and paid ting took another 4 hrs. Not bad at all.

Built from Plan(s)
Estimated Cost
175.00
Estimated Time Investment
Weekend Project (10-20 Hours)
Finish Used
Mike wax walnut and antique flat white latex paint.
Recommended Skill Level
Intermediate

Comments

adamwknox

Sun, 05/22/2016 - 06:16

The stain and distressed painting turned out fantastic. Do you remember which stain you used, or your process for the distressed white for the bottom?


Looking to jump into this project this weekend.

Desk with Drawer

Submitted by Anonymous (not verified) on Mon, 07/24/2023 - 12:45

Hi Ana
My granddaughter is starting first grade in the Fall. She needs a desk so I checked out your site and found this simple yet functional project. It worked up in no time. Now Gianna just needs to pick a paint color.

I also found a slight boo boo in the plans. See the marked up cut list.
Thanks for all you do.

David Grilli


Built from Plan(s)

Garden box

Submitted by Anonymous (not verified) on Sat, 04/09/2016 - 21:42

Pretty easy plan to follow and very sturdy 

Estimated Cost
$60
Estimated Time Investment
An Hour or Two (0-2 Hours)
Finish Used
None
Recommended Skill Level
Beginner

Custom Horse Handle Teeter Totter

Submitted by Anonymous (not verified) on Wed, 09/13/2023 - 09:28

This is the Seesaw I made for our Granddaughters, plans were easy to follow and the girls love it.

sawhorseworkshop

Built from Plan(s)

Comments

Took all day but worth it!

Submitted by Anonymous (not verified) on Tue, 09/06/2016 - 03:21

Loved the simple look and convertible design. Easy to visualize, hardest part was making sure of square 

Estimated Cost
$150
Estimated Time Investment
Day Project (6-9 Hours)
Finish Used
Unfinished now, but will be sanded and polyurethane applied
Recommended Skill Level
Intermediate
Seasonal And Holiday

Sweet Pea Bunk Bed

Submitted by Anonymous (not verified) on Thu, 02/09/2017 - 11:46

Sweet Pea bunk bed! I ended up making the lower half a playhouse since we had a play kitchen that fit perfectly inside.

Estimated Cost
350.00
Estimated Time Investment
Week Long Project (20 Hours or More)
Finish Used
Acrylic primer and semigloss paint
Recommended Skill Level
Intermediate

Comments

Back