Community Brag Posts

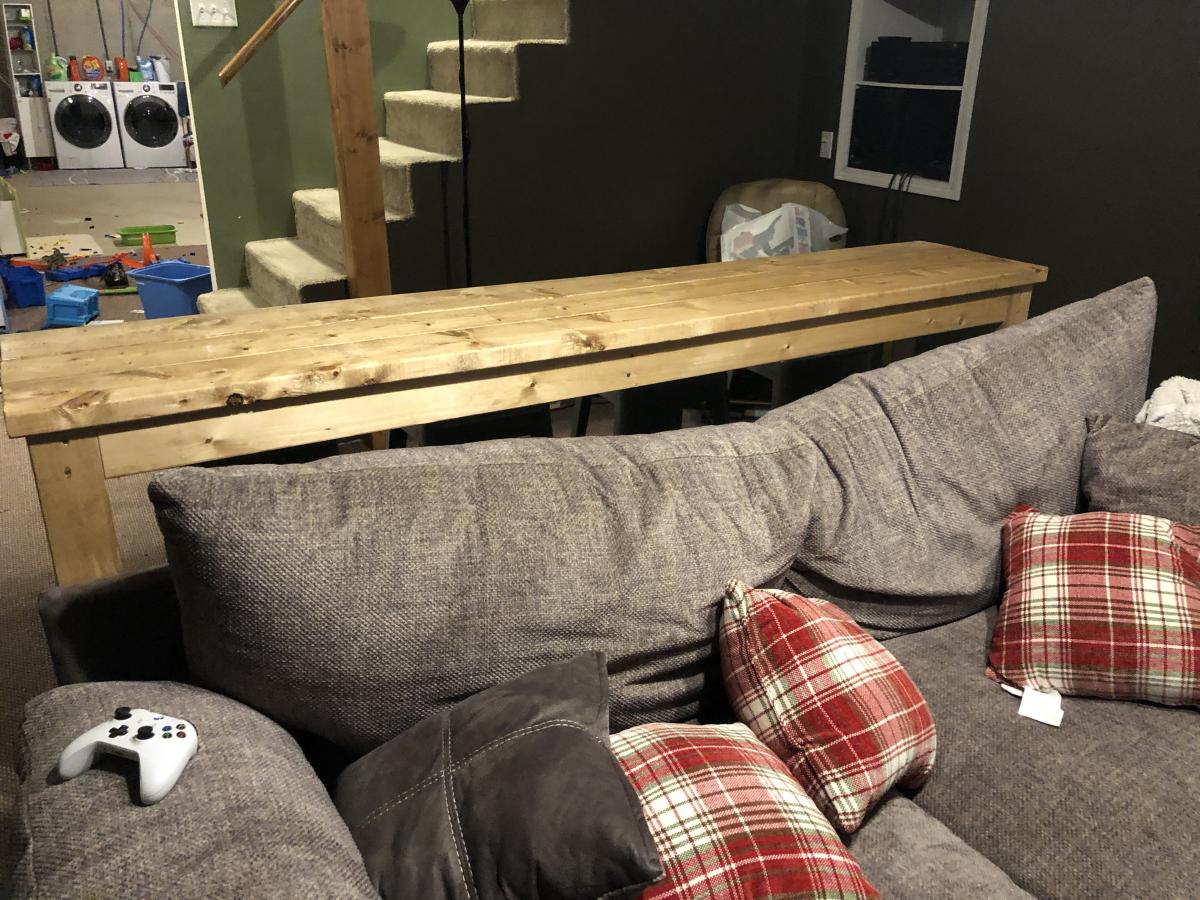
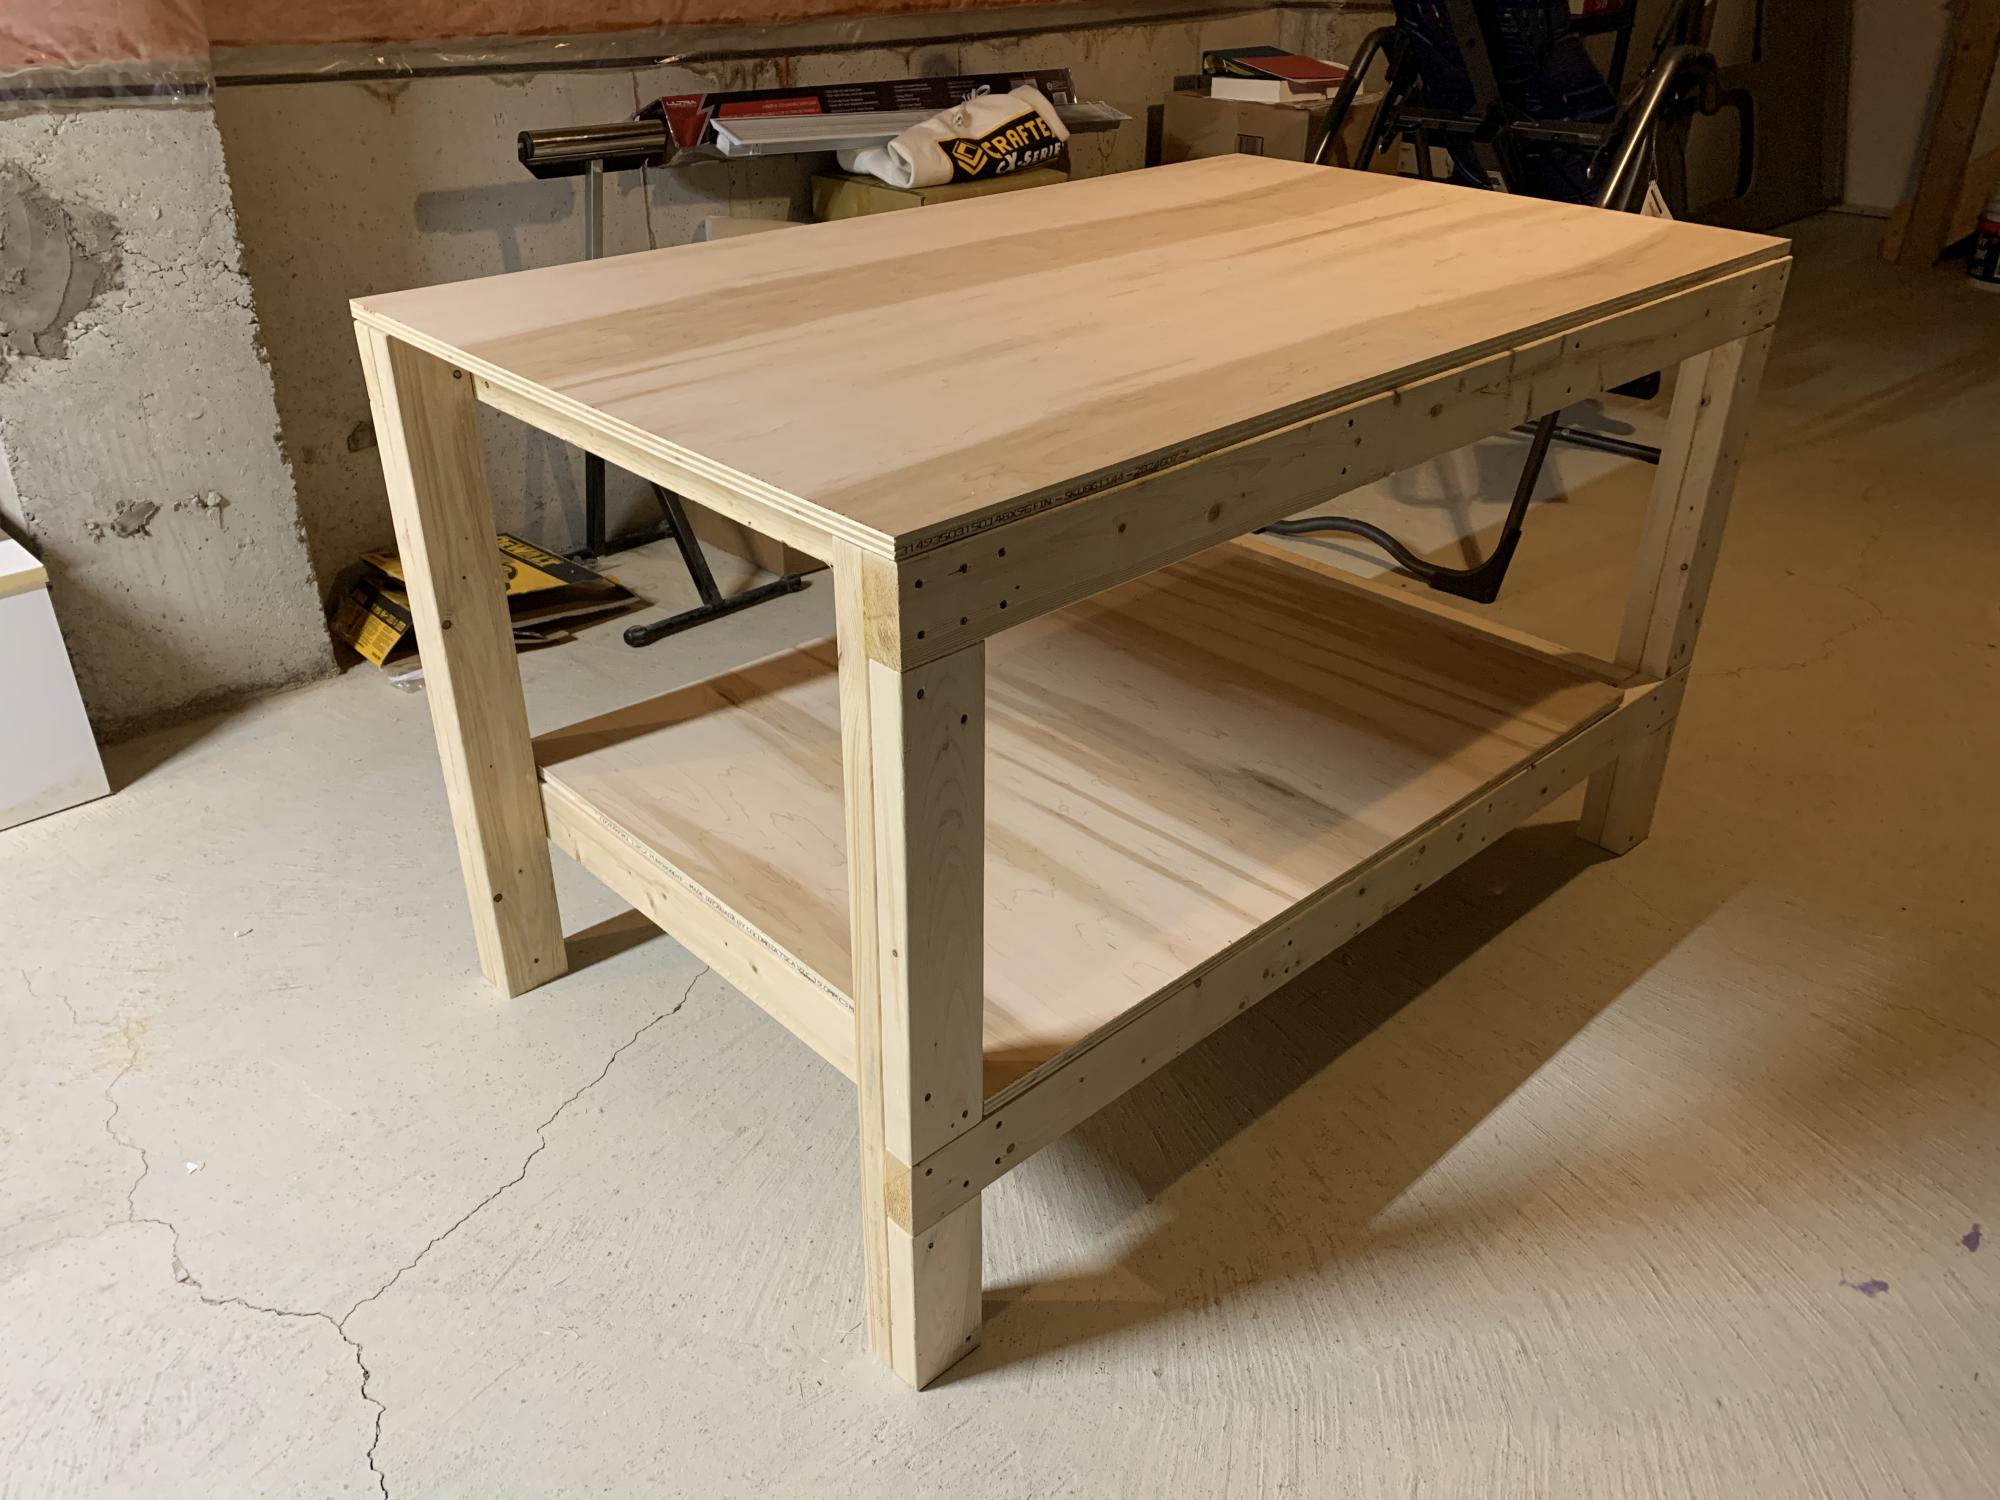
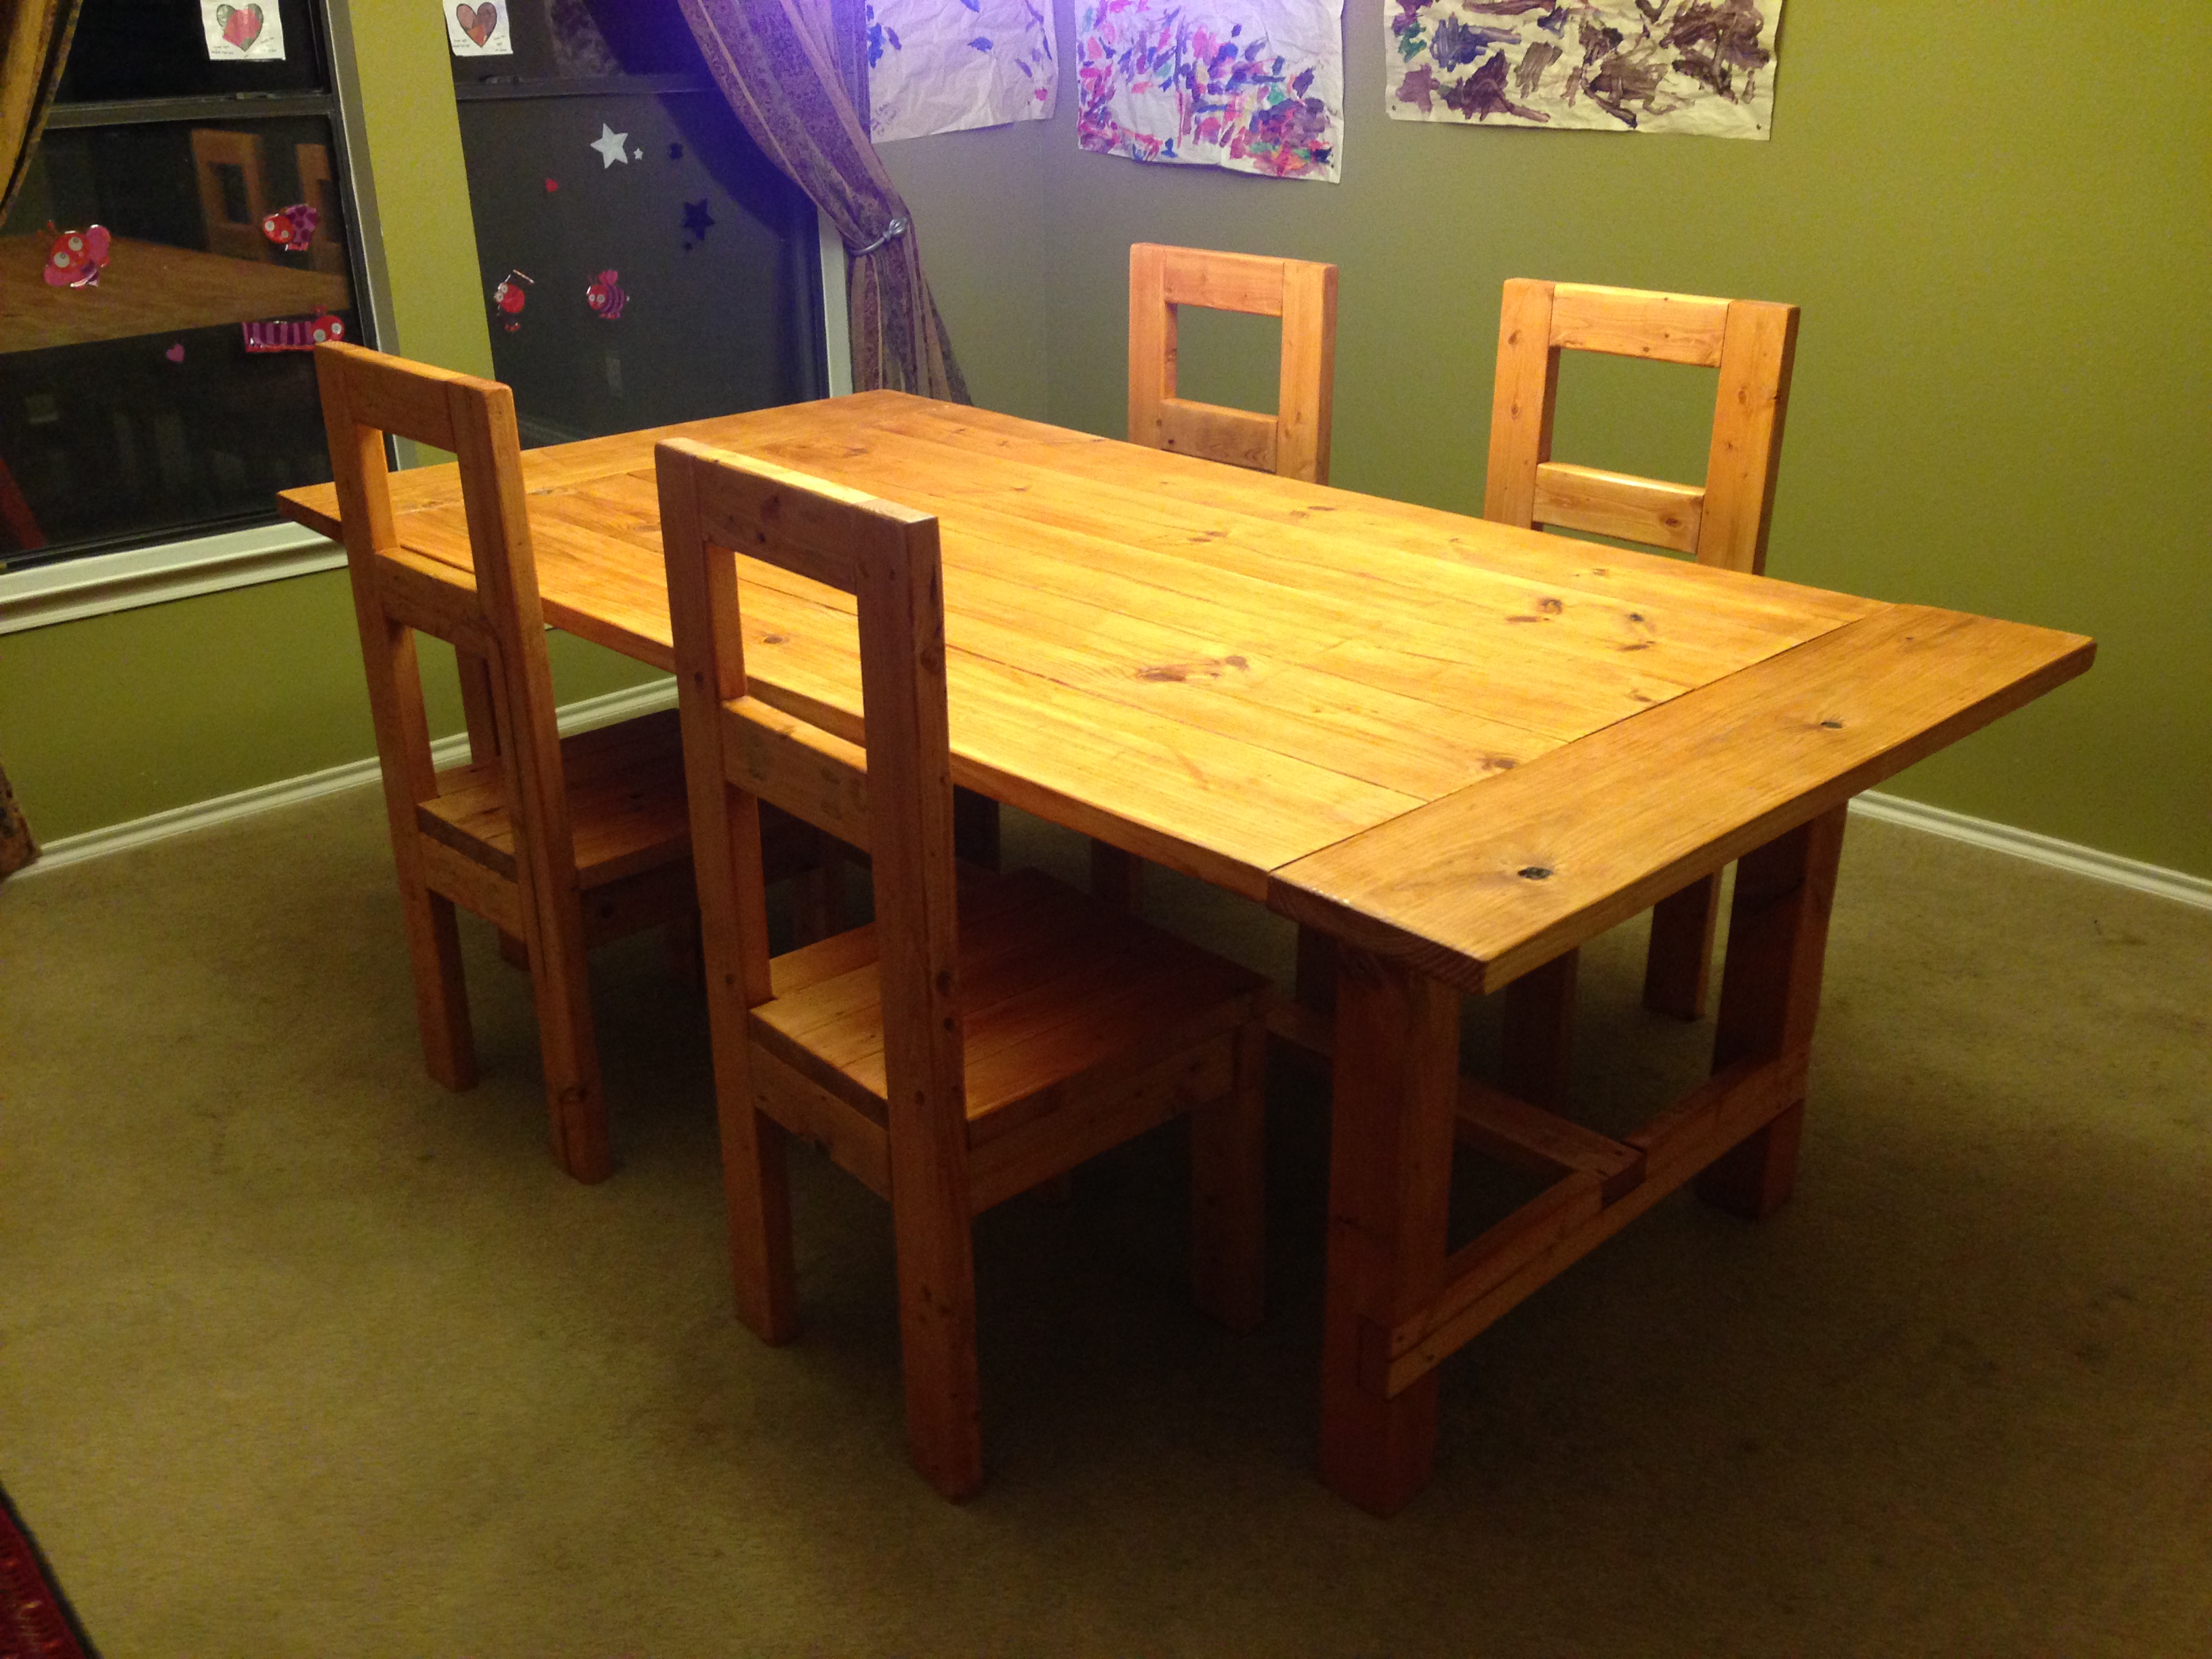
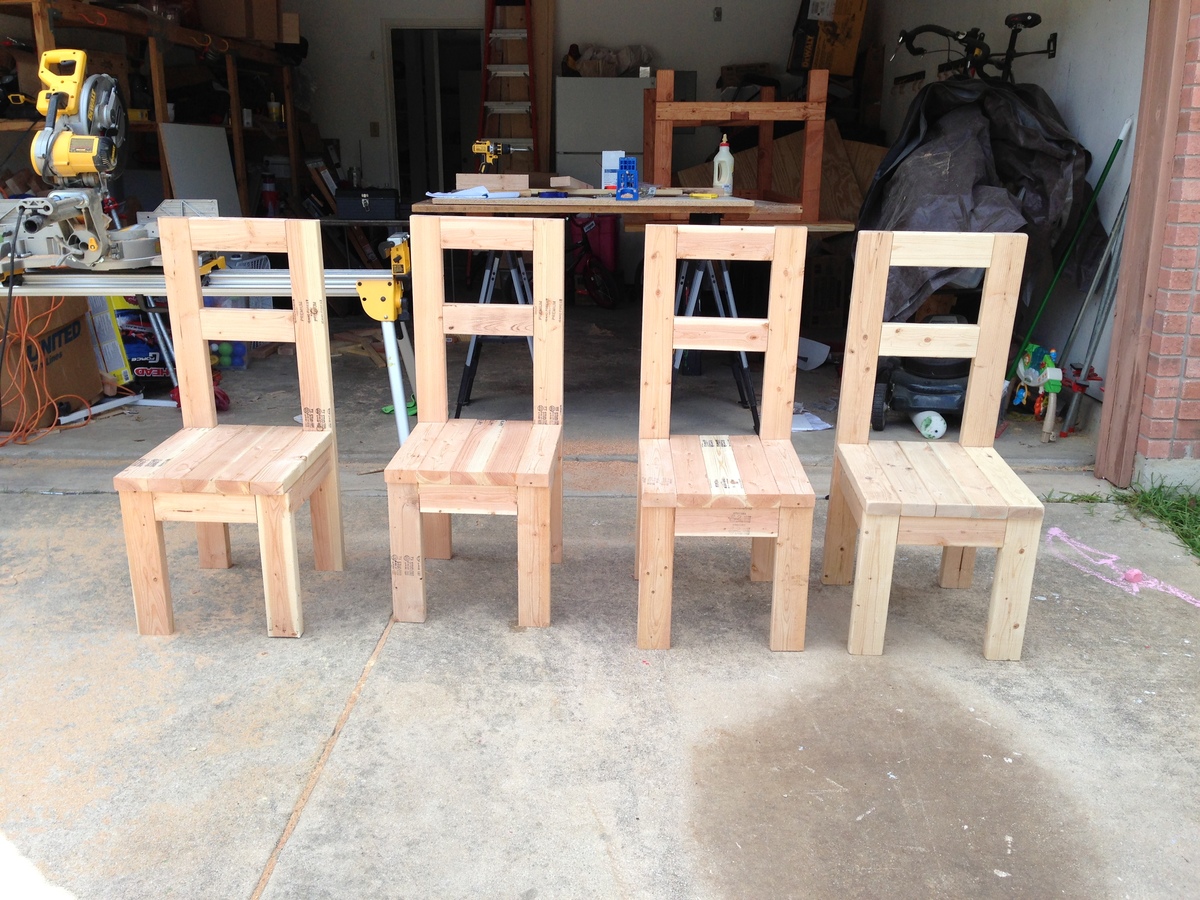
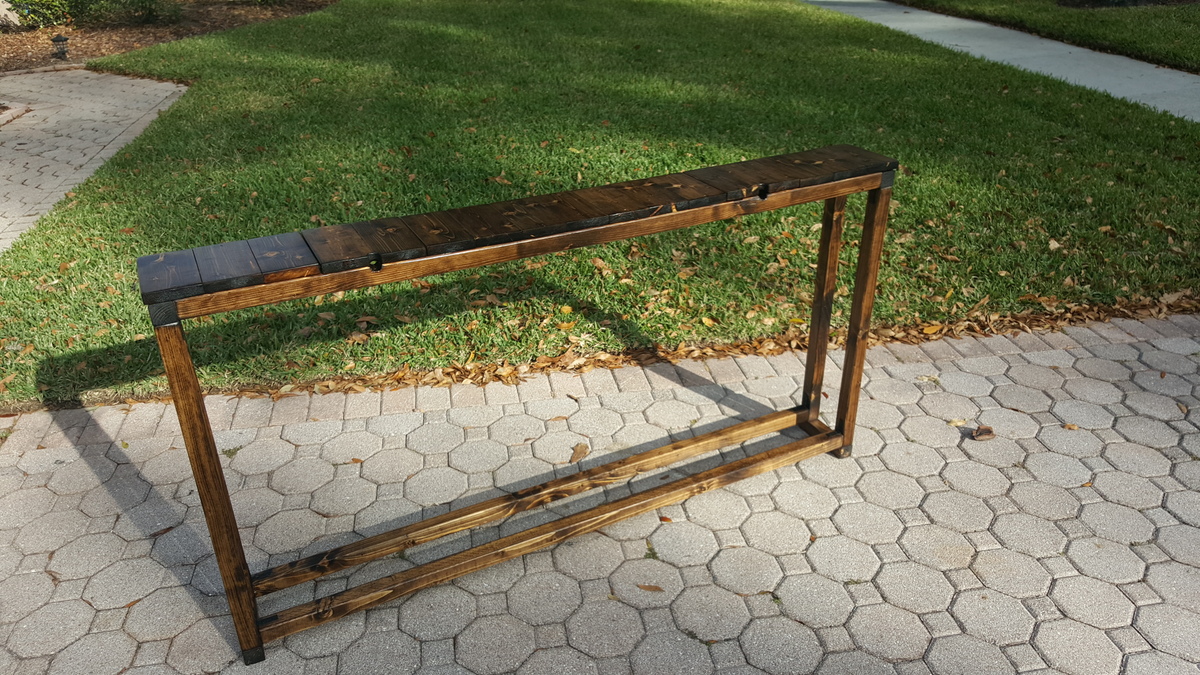
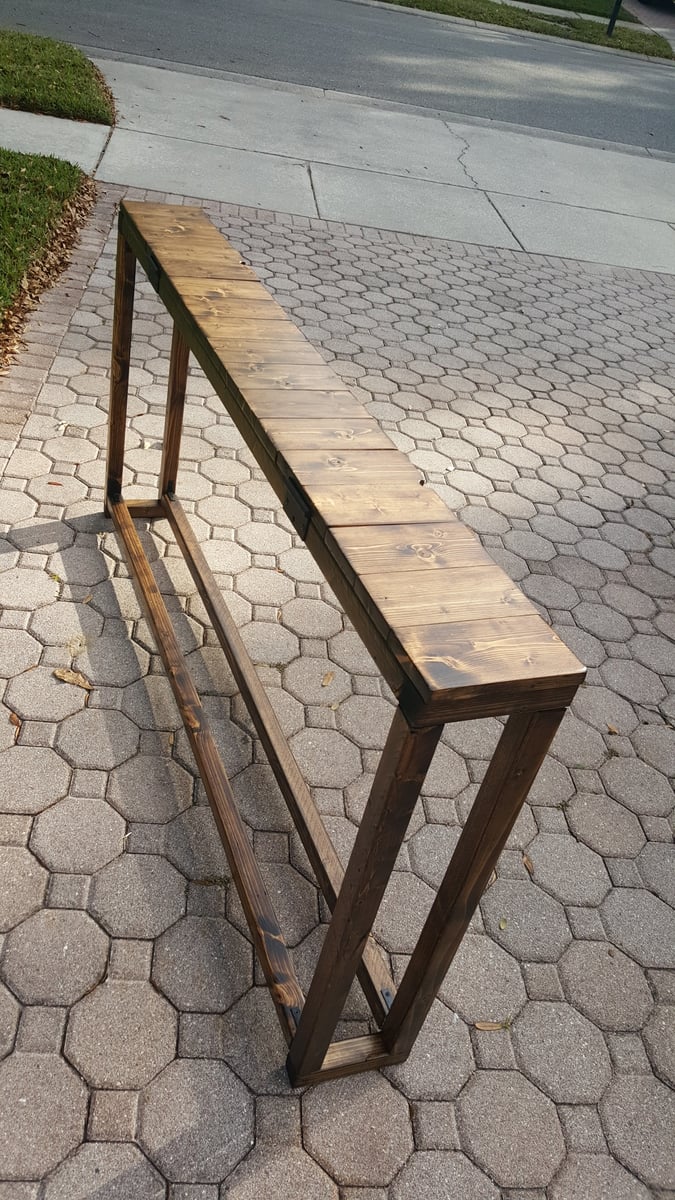
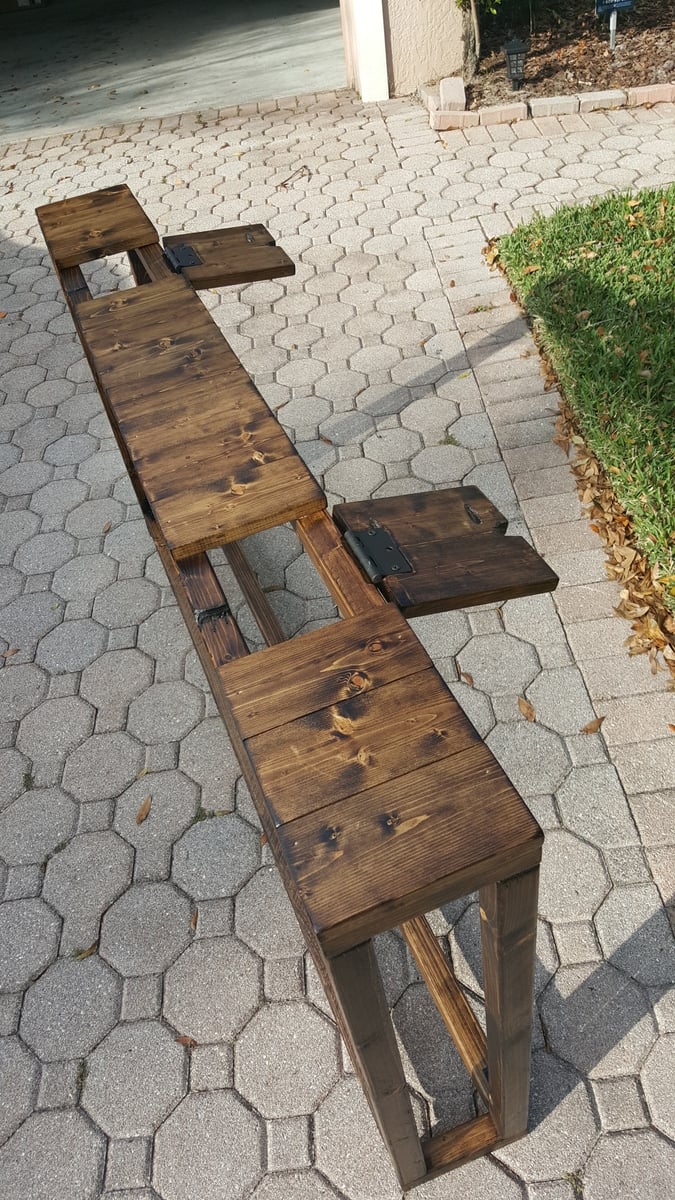
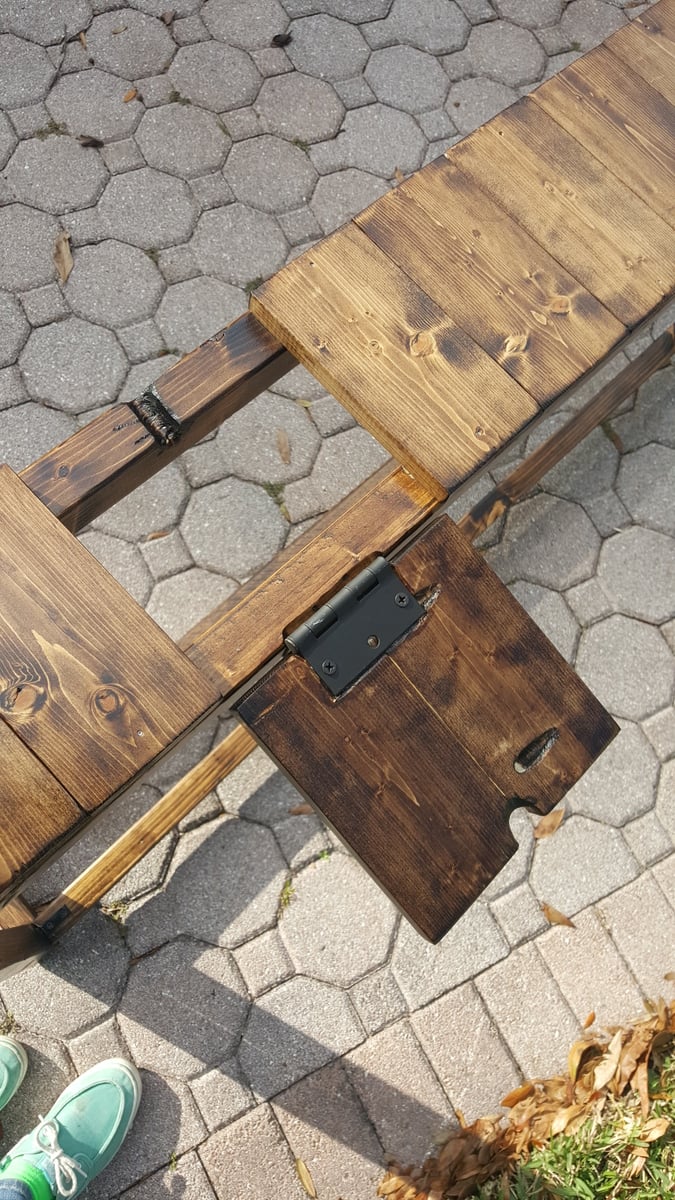
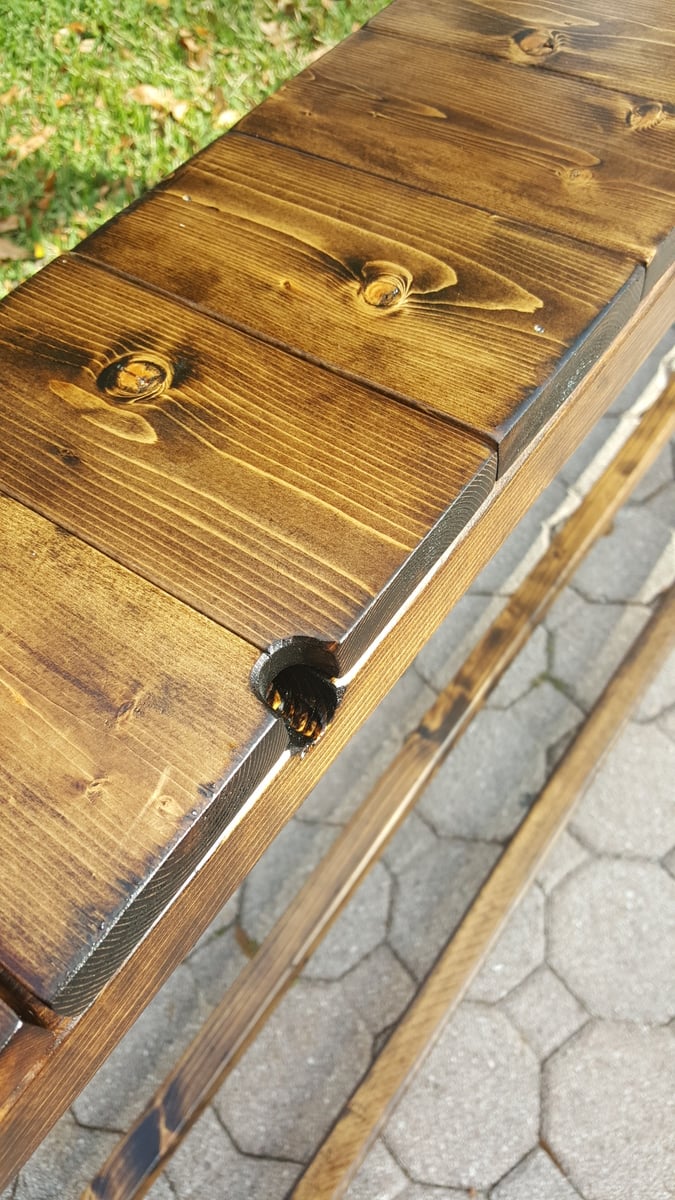
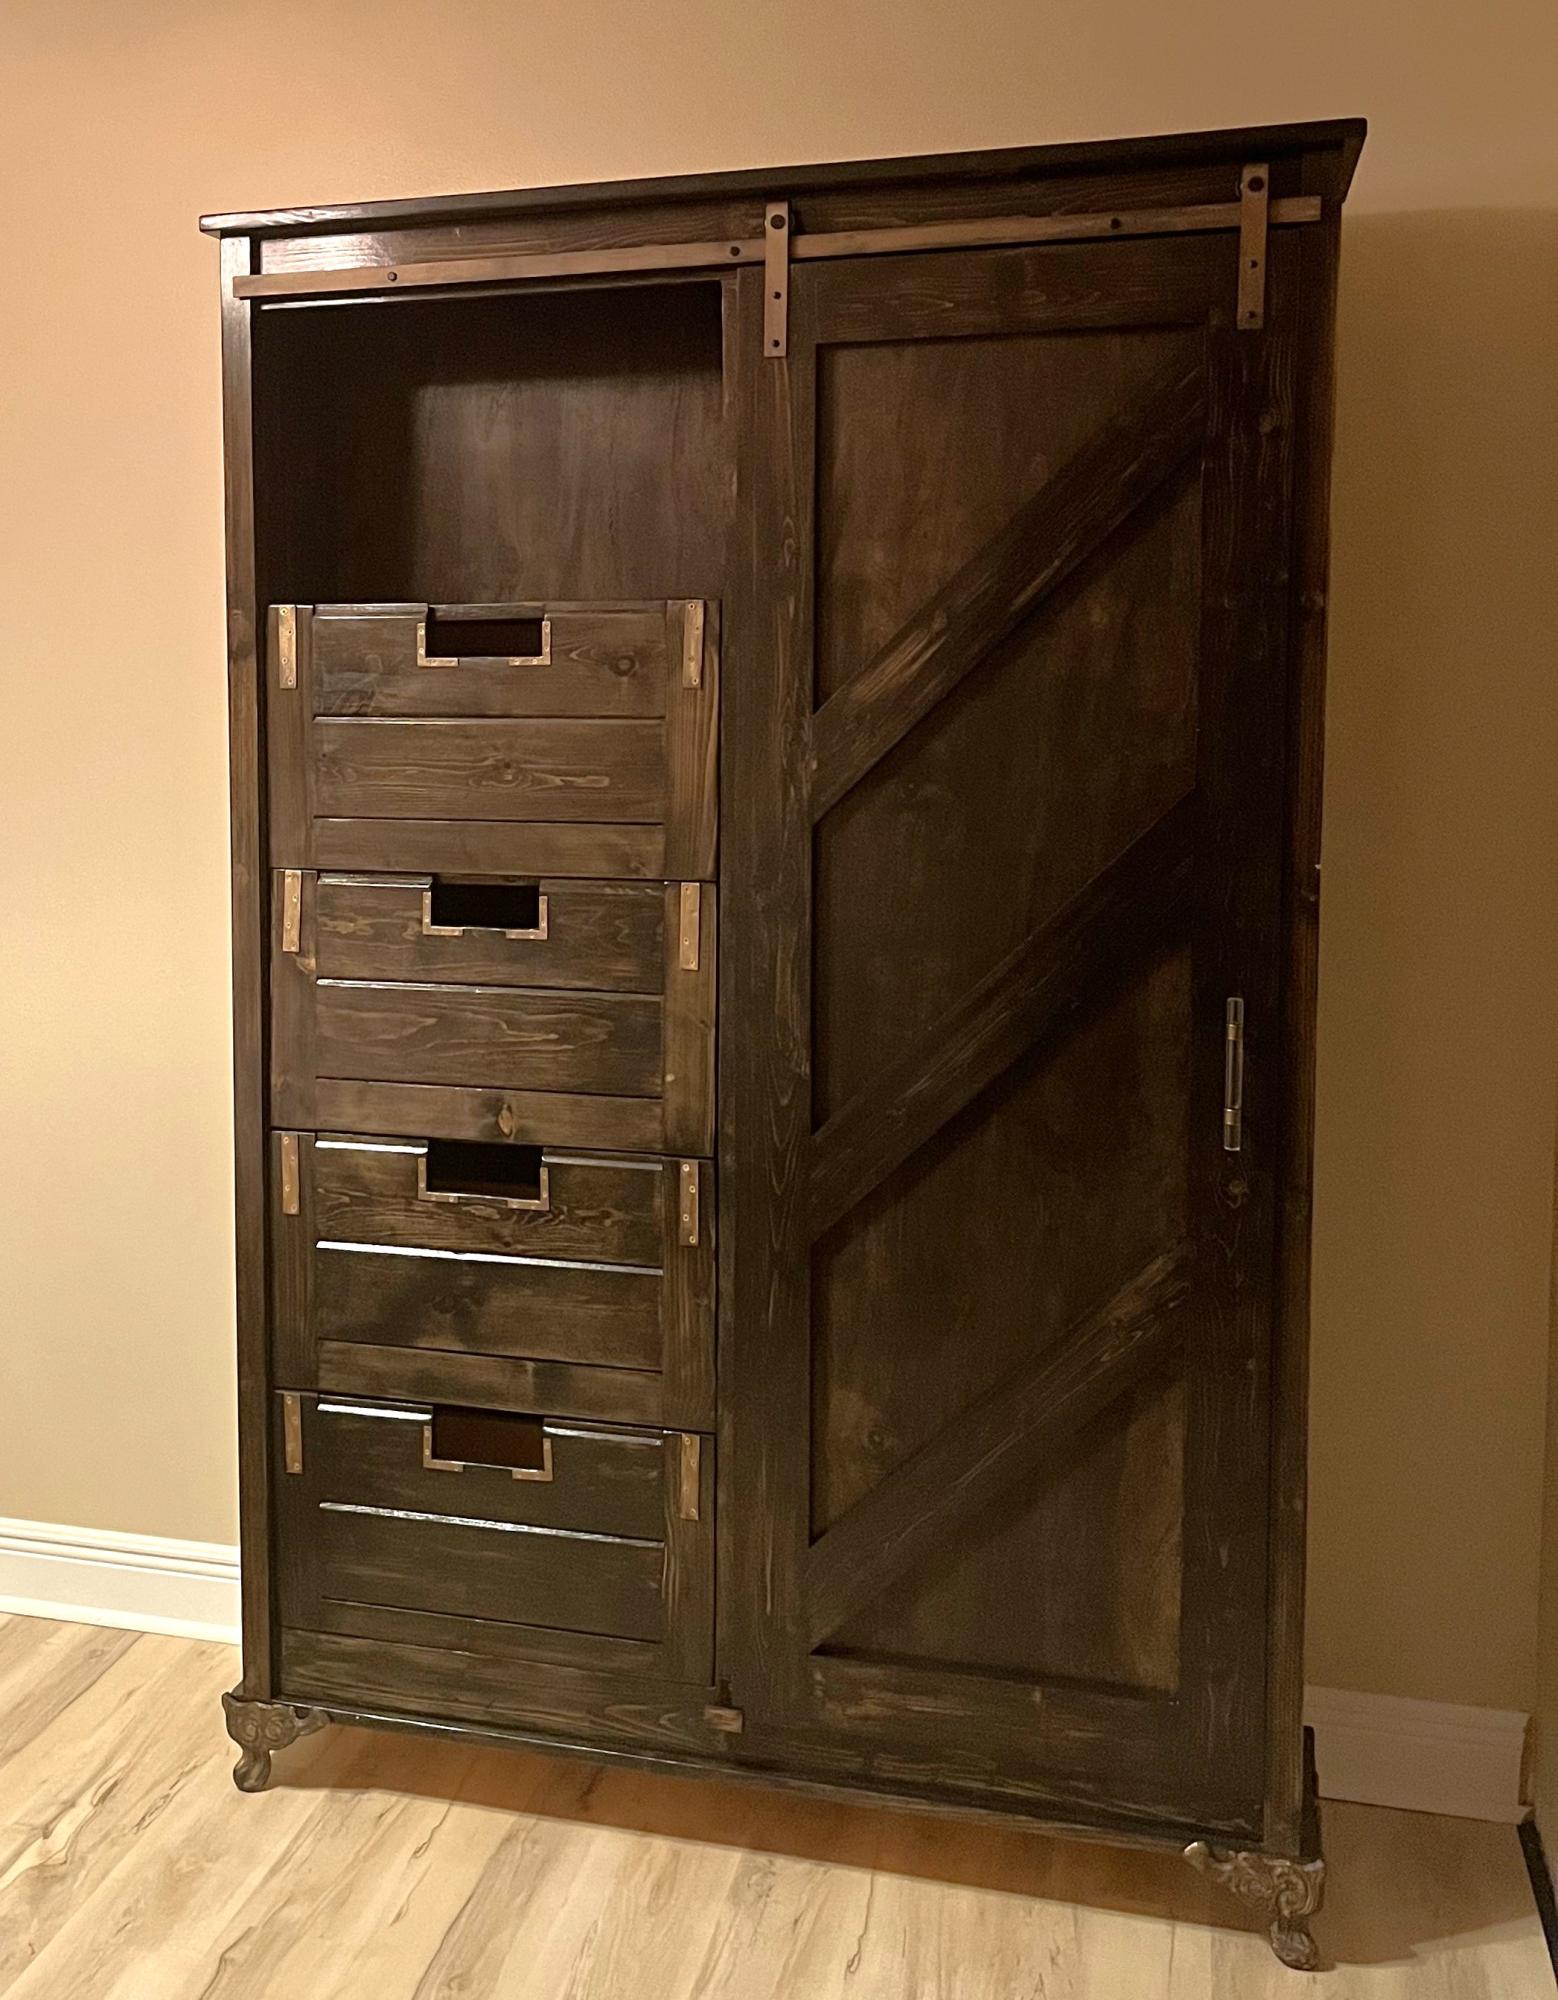
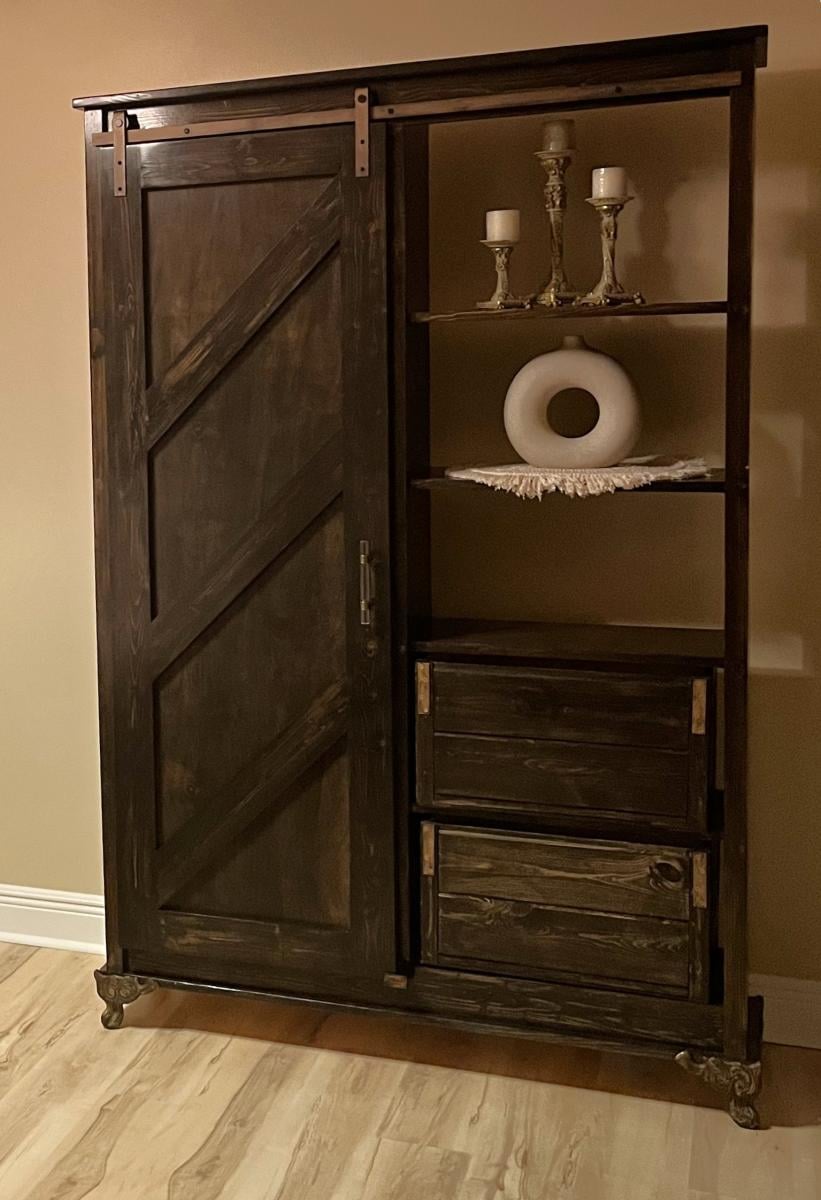
Basement Sofa Table Bar

Submitted by advanlente on Sat, 03/28/2020 - 12:04

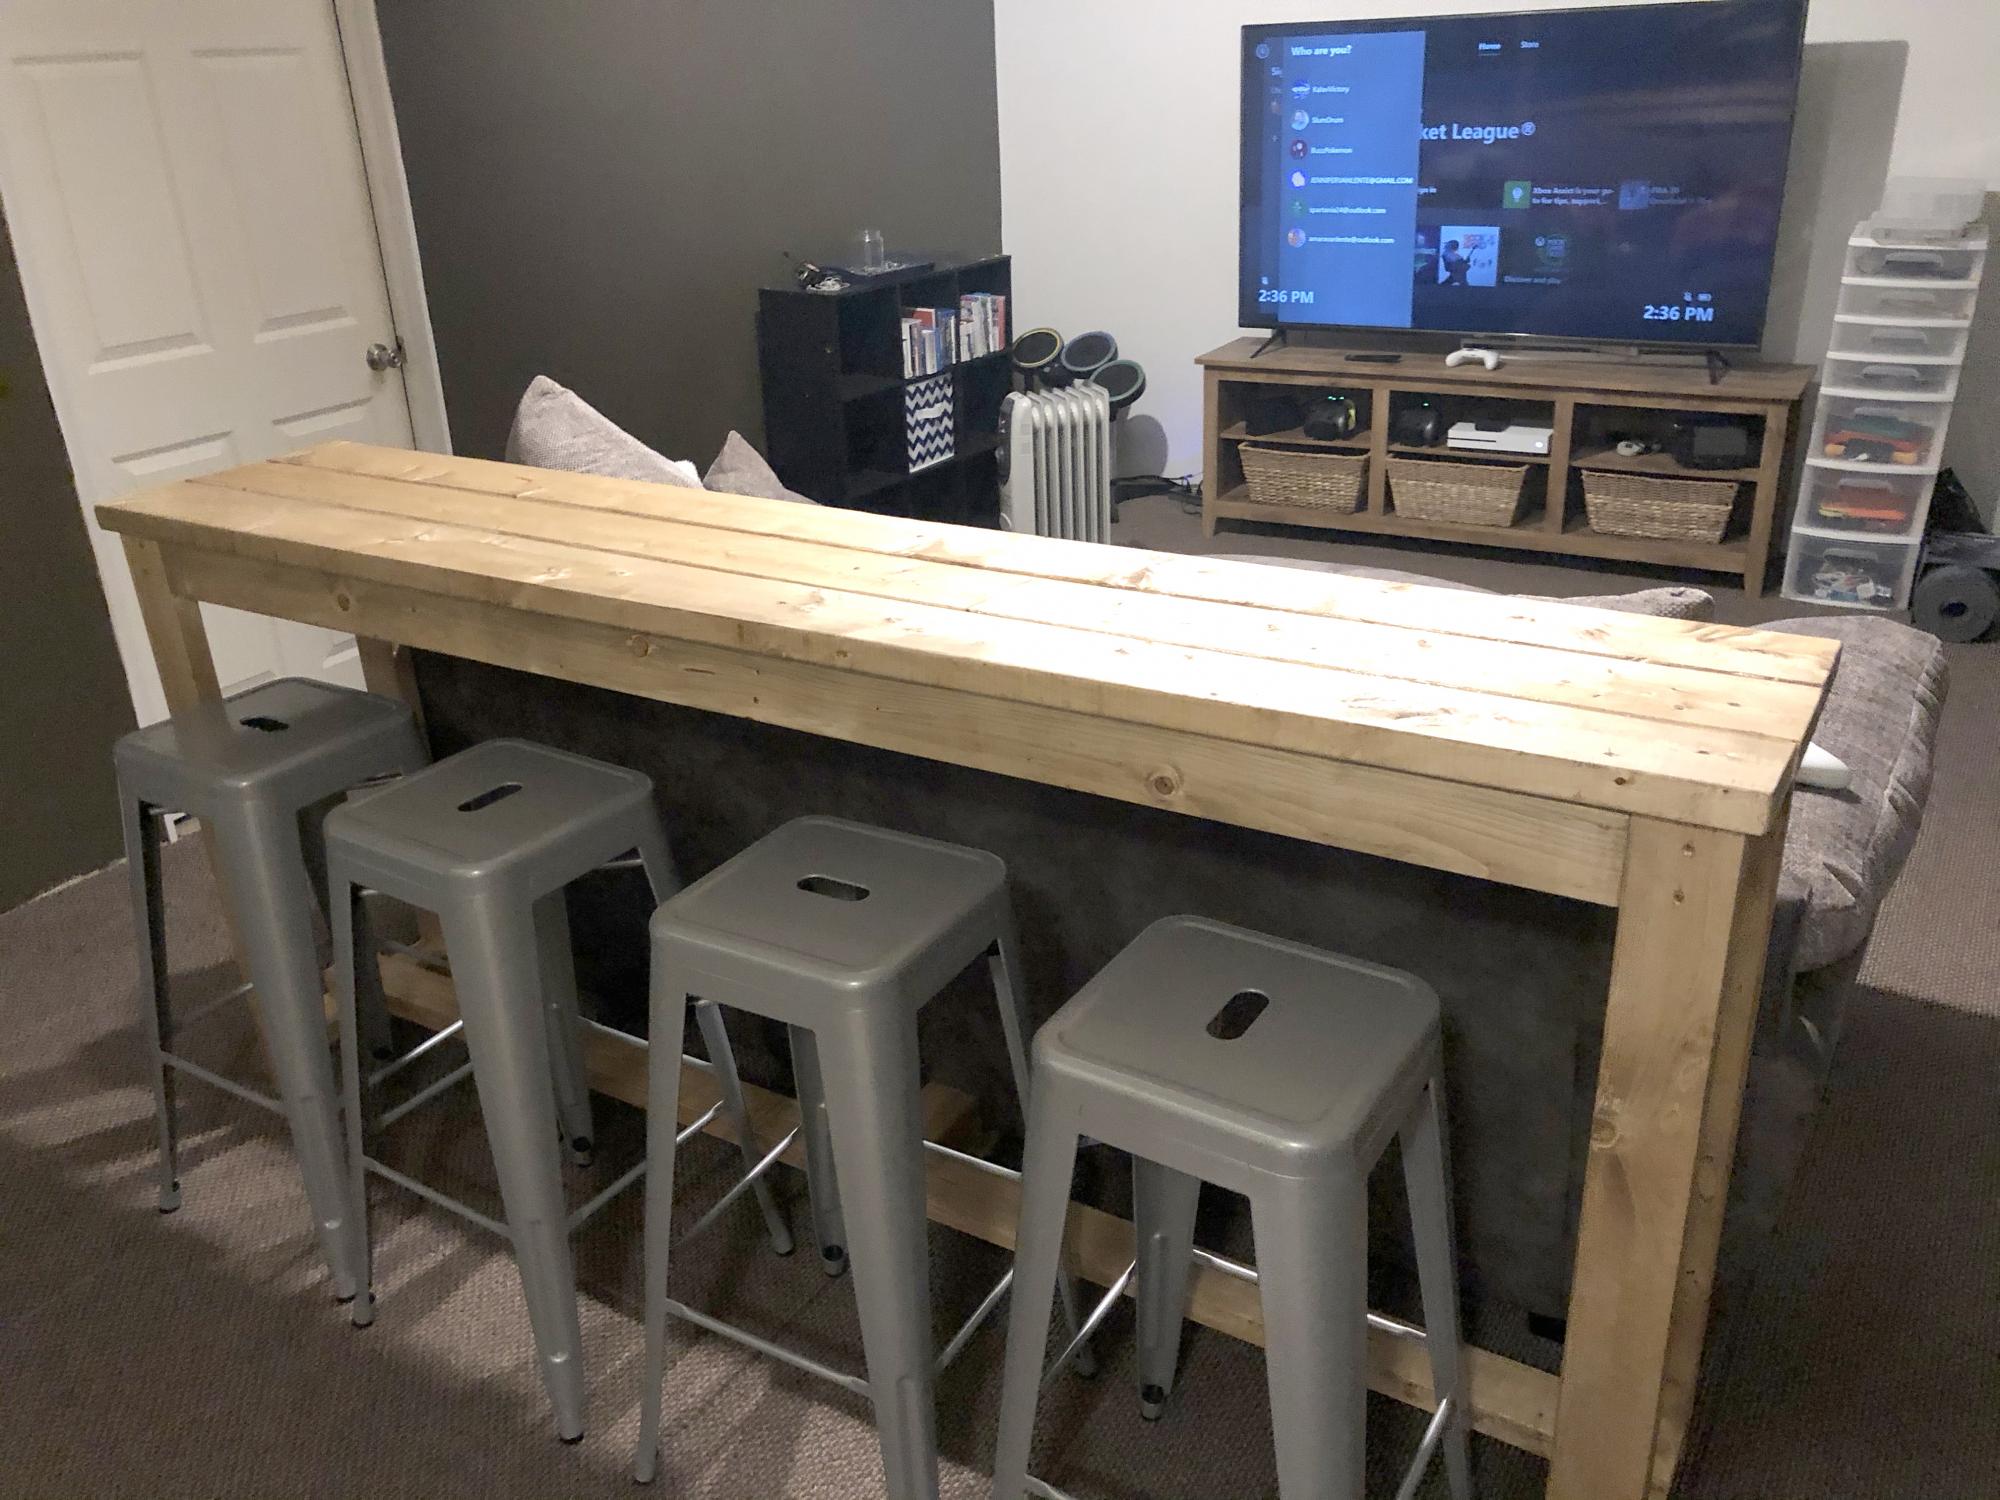
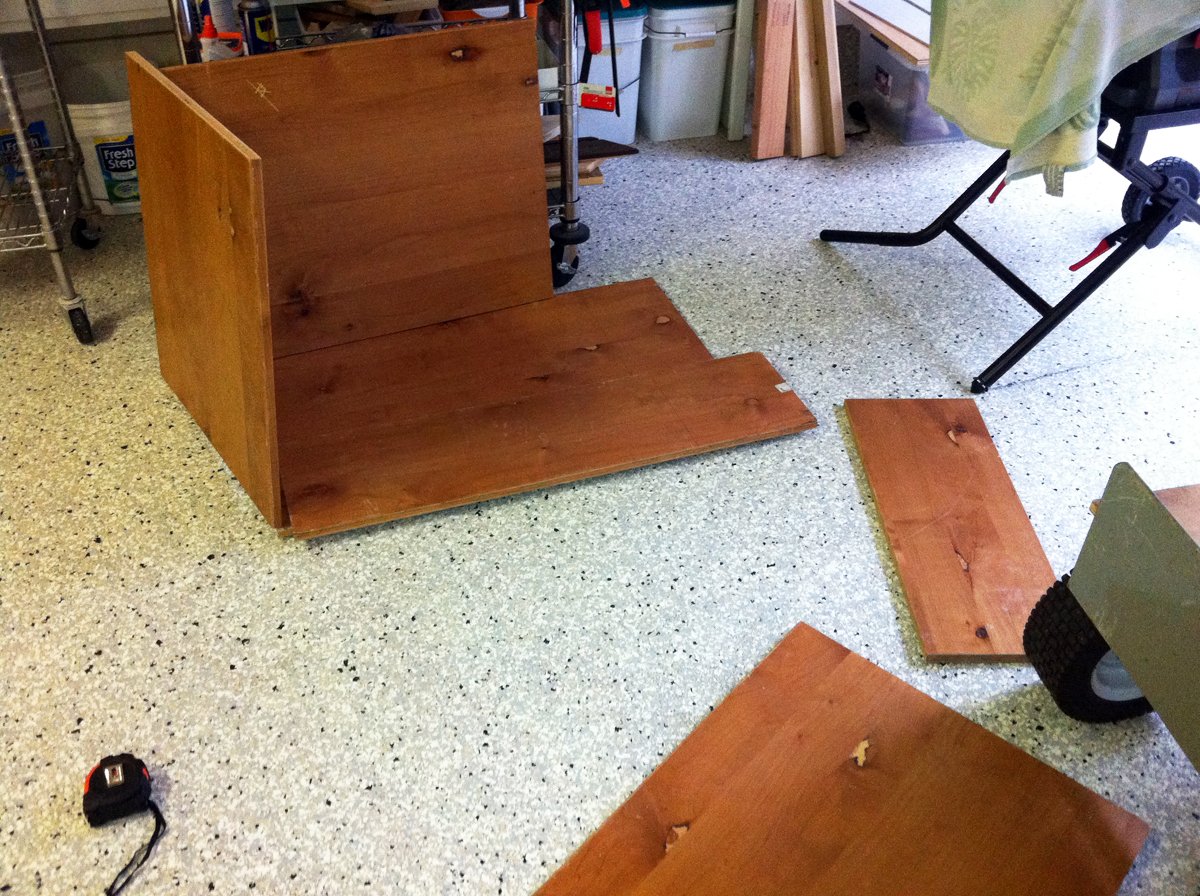
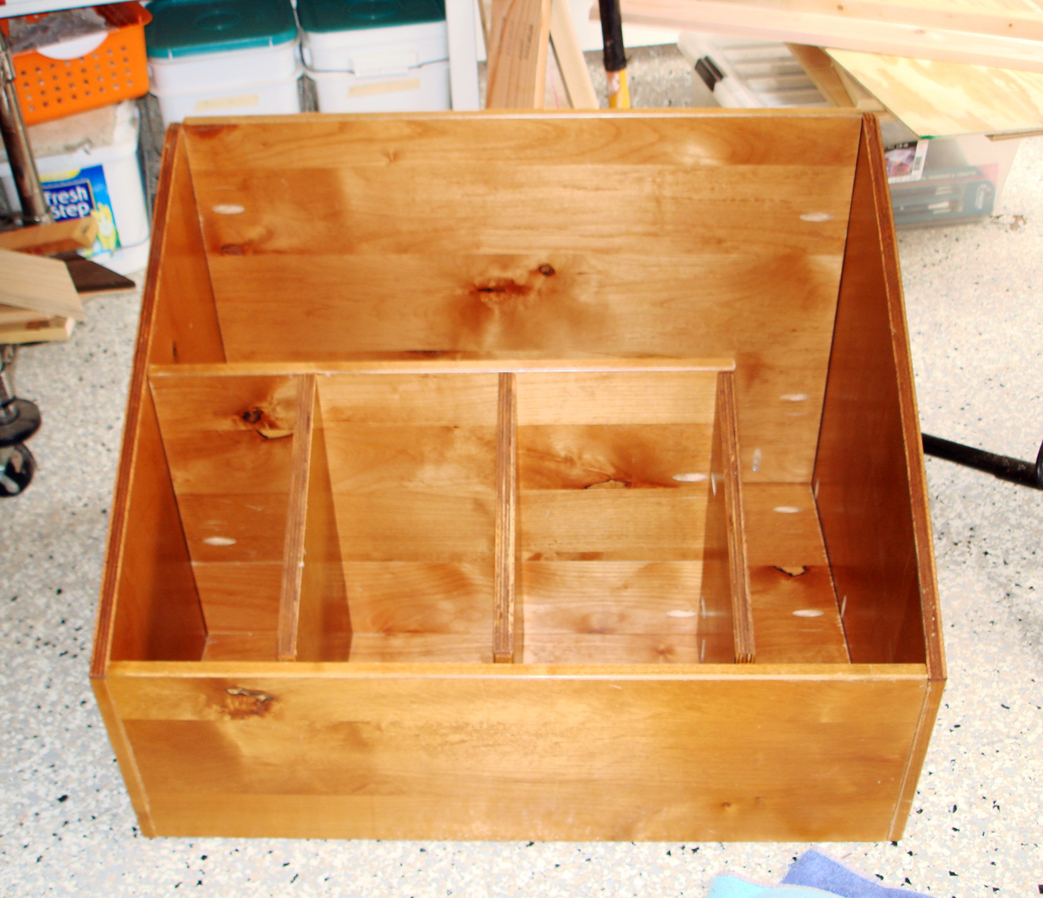
My husband and I had been looking at many different stores to try and find a bar table for behind our new couch in our basement. We wanted something that people could eat and drink at when we entertained and/or be able to sit at and play video games. I should have known we were better off to build our own rather than look in a store. It was only $30 in lumber and took 3 hours to build. And another project in the books!

Estimated Cost
$30
Estimated Time Investment
Afternoon Project (3-6 Hours)

Comments

megs502

Fri, 04/03/2020 - 11:03

do you have the plans for this? i've been looking and looking for what i needed and this is it!!

mferrara

Sat, 04/04/2020 - 05:39

Hi - exactly what I've been searching for....do you have plans available? Please and thank you!

beckaroo

Tue, 06/02/2020 - 23:04

Hello,
I would also love to see the plans for this sofa bar table.
Thank you
Becky

Petra's Doggie Day Bed

Submitted by Joni on Sat, 08/25/2012 - 10:33

Yes, my husband and I share our bedroom with 6 dogs and an occasional cat (or 4). Our older dog (Petra) has slept on our bed for over 10 years, and she's getting too old to jump anymore. We didn't want her to feel like she was getting kicked off the bed, so I made Petra her very own bed at the end of ours so that she wouldn't feel left out. I was inspired by MurdaRae's dog bed (http://ana-white.com/2012/06/doggie-daybed), and thought it was genius to use a toddler/crib bed. So I went looking for plans on Ana-White, and came up with a mixture between a couple of twin bed plans. I love that the plans are easy enough to modify my sizes, and come up with exactly the custom solution that I need. This was my first big project using Bri-Wax. The last one was kind of a disaster when the wax changed the stain color to something not-so-great. With this project, I learned to wait at least 2 weeks before attempting to wax it. I was blown away with the results. It is a beautiful subtle satin finish that feels great to the touch. Plus, I can easily touch up all the dog fingernail scratches that will inevitably occur. When I re-assembled the bed in my bedroom, I actually nicked it in a few places. No problem -- slap on some more Bri-Wax! My Bri-Wax was 11 years old, and pure liquid. I tossed it in the fridge (per Bri-Wax's recommendation), and it was as good as new. The only real problem I had with this project was leaking sap from one of the 4x4s. I'm still fighting this today. In talking with Rustoleum/Zinsser reps, they said that no sap could penetrate their "Seal Coat" shellac product. After 5 coats, the sap is still penetrating, but only if I turn it on it's side or upside down. I'm still baffled. I made the mattress cover out of a dog blanket, and made the cushions from some remnant fabric (suitable for dogs and weekly washing), so this was a fairly inexpensive project. It was a success because Petra slept in her bed from the fist night and loved that she had all the room to herself, and no boston terrorists (I mean terriers) attempted to bother her.

Estimated Cost
$65 for Wood, $60 for Crib Mattress, $7 for stain, $9 for Decorative Clavos
Estimated Time Investment
Weekend Project (10-20 Hours)
Finish Used
Combination of Minwax Water-based stains: 6 parts Colonial Pine: 1 part American Walnut, followed 4-5 Coats Bri-Wax (Light Brown)
Recommended Skill Level
Beginner

Comments

spiceylg

Sat, 08/25/2012 - 18:41

You did an amazing job! Looks professional and at first glance, you definitely can't tell it's a dog bed.

StacieM

Sun, 08/26/2012 - 10:24

It matches the woods in your bedroom so well and looks great! Also, I love the bolster pillows around the edges. That is something I need to make for our dog bed. Thanks for sharing.

8 Foot Picnic Table

Submitted by milleall on Wed, 07/22/2020 - 12:07

My teenage son and his father took over the bulk of the building duties this time. We chose to use treated lumber as untreated lumber with finish applied doesn't do well in Michigan weather in my experience. We made it more beautiful by using the treated lumber in cedartone. We used pocket holes to attach the top and seats to the supports to make for a smooth appearance. This is one large and heavy table! The plans were accurate and the build was fairly simple, but having many hands made working with the large piece easier.

Built from Plan(s)
Estimated Cost
$150
Estimated Time Investment
Afternoon Project (3-6 Hours)
Finish Used
None
Recommended Skill Level
Intermediate

Comments

Seasonal And Holiday

Chicken Coop

Submitted by Elloh on Tue, 08/11/2020 - 11:05

This was my biggest build yet and these plans along with being able to see a few brag posts with modicifactions made this project less intimidating. I extended the coop in order to add a walk in door. The drop down doors on both sides will give plenty of access and help with cleaning. I've added door latches to all the doors since putting it in place. My dad provided the cedar so that greatly reduced my costs. This project took about six days to complete. The fun part was getting it out of my carport : ) This was built for my daughter's chickens and she is thrilled with it. So am I! Thanks for the plans Ana!

Estimated Cost
Hardware, screws, hardware cloth and plywood - around $150

Clubhouse Bed - my first build

Submitted by dpeterson on Thu, 11/29/2012 - 19:32

So we wanted to build a simple twin size bed for our 5 year old son. That quickly expanded into my wife wanting me to build this PB replica (which happens to be her favorite kids bed). My response was "honey, you really don't understand my lack of ability." She insisted and after a couple of weeks the bed is done! Using Ana's plans made this not only doable but much easier than I thought (this was my first build).

We changed the design very slightly because the original was a few inches too tall (we have a ceiling fan that would have hit the top). We simply shortened the top half of the bed by 3 inches. At the suggestion of a friend (who's mitre and table saws we used for the cuts) we used dado instead of pocket holes for the stairs. We also used a lot of countersinking instead of pocket holes (for example to attach the vertical slats on the side walls).

We bought the cheapest wood we could get at Home Depot. All the wood and stain and materials cost about $250-300 (I still haven't checked the receipts exactly). However, I was told (quite sternly) that I severely overpaid for the wood by not going to a lumber yard. We used a Minwax oil-based stain (mission oak). We only did one coat.

Now that we're done with this we can't wait to get started on the next project (right after I get my dissertation going).

Built from Plan(s)
Estimated Time Investment
Week Long Project (20 Hours or More)
Finish Used
Minwax oil-based stain - Mission Oak, single coat applied using rags.
Recommended Skill Level
Intermediate

Comments

5 tator tots (not verified)

Fri, 12/07/2012 - 18:22

I've been wanting to build this for our youngest son. He will be three before we make it and the fact that it is enclosed makes me comfortable with having him in a lofted bed, but it also looks like changing the bedding would be really challenging. Seeing your picture smoothing the quilt begs the question, how hard is it?

Nice work on the bed-what a first project!

Workbench

Submitted by Anonymous (not verified) on Sun, 11/22/2020 - 05:47

Thanks for the simple plans Anna, they worked out great!. I resized the table to make maximum use of the material, still within the same quantity you specified in your plans. I glued the legs along the lengths of the table, and kept the table top and shelf screwed in, for easy dismantling, if necessary.

Finally I added pop down heavy duty wheels allowing me to move the table (not shown in this pic) easily. When the wheels are not being used they pop up, making the table very stable. The height of the table is about 1/2” lower than the table saw, making it an ideal outfeed table as well.

Great design, and fun build.

Estimated Cost
Cn$148 (went with a finished 3/4” 4x8’ ply board)
Estimated Time Investment
Day Project (6-9 Hours)
Finish Used
None
Recommended Skill Level
Intermediate

Comments

A-Frame Chicken Coop - Easy to Clean

Submitted by Anonymous (not verified) on Mon, 04/24/2017 - 14:25

Thanks for the free plans. I did have to make modifications for the doors. i hid the hinges to give it a clean look. i used cedar for the trim and Plywood Siding Panel T1-11 4 IN OC (Common: 19/32 in. x 4 ft. x 8 ft.; Actual: 0.563 in. x 48 in. x 96 in.) for the doors.  i used a metal flashing for the roof so it will vent.

Built from Plan(s)
Estimated Cost
$250
Estimated Time Investment
Week Long Project (20 Hours or More)
Finish Used
BEHR Transparent waterproofing finish (Cedar Natural Tone) NO 501
Recommended Skill Level
Intermediate
Seasonal And Holiday

Shoe Bench

Ana's spa bench inspired me this project. My shoe rack had been screaming 'foul' for a long time and I had been on the market looking for a three-tiered shoe bench. The benches I saw online were either too small or too expensive. So when I found this plan, I said "why not?" So the rest is history.

Estimated Cost
$70 - $85
Estimated Time Investment
Weekend Project (10-20 Hours)
Finish Used
Stain in Maple Walnut.
Recommended Skill Level
Starter Project

Farmhouse Storage bed with platform modification

Submitted by Anonymous (not verified) on Mon, 10/04/2021 - 13:06

Hi, I’m Joe and love working on my cabin in Stanley Idaho. I needed a queen size bed on the ground floor but the room is small so I incorporated the footboard into into the platform to gain 6 inches of space in the room. It took a couple months working off and on but all fun. I also made the drawers deeper front to back to maximize storage. I did this at the peak of lumber prices and spent like $900 on lumber. It came out great, my Airbnb guests love it!

Comments

Cat Tree/Condo

Submitted by Joni on Sat, 05/11/2013 - 07:22

I always wanted a cabin-type cat tree where my cats could crawl in and feel safe, but still have a great view of the birds out of a window. I tried to draw my vision on paper, but that had a hideous result. Learning Google SketchUp (at least the basics) was an absolute necessity. I could never have built this without drawing it in 3D first, and seeing how the boards would connect, etc.

For the scratch pad, I built a frame out of 2x4s on top of plywood, covered it with carpet, and dropped the standard size scratch pad in place. This is the cat's favorite feature. I put barn doors on the window with tiny hinges so that I can close for added privacy. The tree sits against a window so that the back side is totally open. I made cozy zippered cushions for the platforms (that can be taken off and washed). I covered the carpeted areas with spare carpeting.

Estimated Cost
Approx. $30 for can of paint, varnish and a 4x4 (all other was scrap material)
Estimated Time Investment
Weekend Project (10-20 Hours)
Finish Used
Combination of Minwax Water-based stains: 6 parts Colonial Pine: 1 part American Walnut, followed 3-4 coats Minwax Polycrylic
Recommended Skill Level
Intermediate

Comments

bhoppy

Fri, 07/12/2013 - 09:36

Would you mind sharing your dimensions for this? It is absolutely beautiful!

Jodi W

Sun, 08/25/2013 - 08:10

Do you have the plans somewhere? I really want to build this (even got the okay from the hubby!) but I don't think I could do it without some serious guidelines...

Joni

Fri, 08/30/2013 - 15:55

First, sorry for the late notice; I just happened to look and saw the comments/questions.

I don't have plans...all I have is a google sketchup diagram that I created as a guideline for my construction (which is included in the photos), which is not to scale. Actual measurements are:

* Base (green carpeted base): 33.5" x 19"
* 4x4 legs: 35" tall
* 'Mezzanine' scratch pad level: 22" x 17.5"
* Mid-level base: 18" x 32"
* Enclosed cabin: 18.25" x 22.5" x 17" high
* Highest point: 56"

This has turned out to be a fantastic hit with the cats. They use all 5 levels, but the scratch pad and cabin are their favorite spots. If you need anything else or additional pics, please contact me.

Jodi W

Fri, 08/30/2013 - 18:15

Thanks for the dimensions, Joni! I'm trying to learn SketchUp so I can draw up my own plans, also. If I can't figure it out, I'll hand it off to my 12 year old, who is a pro at it (go figure). I know my cats will love it if I can manage to get it built!

Joni

Thu, 10/31/2013 - 14:30

Bhoppy -- I looked at your cat tree on facebook. It's awesome! The sturdiness of it shocked me too. And I was initially worried that my cats might knock it down!!

The worst part of building it was getting that lower scratch pad level on straight with the 3 posts. I'd never want to do that again!
Thanks for sharing, Joni

gregmasciola

Fri, 01/02/2015 - 01:18

Funny, almost every time I'm looking for ideas or inspiration when I want to build something, I end up back on this site. I was searching for pictures of cat trees and this was the only one that made me say "Holy crap, that's EXACTLY what I want!" My cat will love it!

M0710NM4N

Mon, 04/27/2020 - 20:41

Not sure if anyone is still around to see this, but I fell in love with this tree the second I saw it. Wondering if anyone created a detailed plan and might have it handy or possibly a detailed sketchup and wouldn't mind sharing the save file?

In the event nobody has either... I'm planning on having someone else build this for me as I don't have the tools nor skill to do it myself. I have a few questions:

1. The tree base/platform, what's a good recommended thickness?
2. The platform for the scratchpad... is there any certain reason it's so much thicker compared to the other platforms?

Thanks.

whiteroses9

Sun, 09/12/2021 - 11:51

Reverse engineering this project, using just 2x4s. None of the photos show the undersides. How are the plywood pillow bases attached for the top and bottom of the cabin? and the base of the top viewing platform?

Simple Daybed/Farmhouse-Bed-Hybrid

Submitted by uli on Mon, 06/06/2011 - 08:05

I needed a bed for my guestroom and decided to build a mixture of the simple daybed and the farmhouse bed. The back and the front rail are attached with bed brackets for easy disassembling.

Estimated Cost
175 $
Estimated Time Investment
Day Project (6-9 Hours)
Finish Used
Acrylic paint in antique white
Recommended Skill Level
Beginner

Comments

Guest (not verified)

Tue, 06/21/2011 - 09:42

Dear Uli, I love the daybed you created and I'm planning to build my own next week for our guest bedroom, which doubles as my project room. Could you tell me what height you made the bed? It looks lower than the average headboard height, but higher than the average footboard height. I'd like to make mine close to your, which I think is just perfect.

Thanks,
Sara

In reply to by Guest (not verified)

uli

Tue, 06/21/2011 - 13:30

Thx :-) I've made the panels 19,5" high, and the legs measure 31,5". On top of the panels I screwed and glued a timber, which is a little bit thicker than a 2x4. So the overall height is 33,5". If you like I could send you my sketchup file.

Uli :-)

Guest (not verified)

Tue, 06/21/2011 - 19:42

Thanks Uli,

Those dimensions will be a big help. I've constructed more than 30 pieces now, thanks to Ana, so it's no big deal for me to design my own plans and dimensions now. I'm hoping to complete this project before my sister comes out for a visit. Wish me luck!

Sara

Miss Martina (not verified)

Fri, 08/19/2011 - 23:58

Hi, Uli! Do you think you could please help me out by sharing your sketchup notes for the "Farmhouse-Daybed-Hybrid"? This would really help me to get a handle on building this project.
Thank you from Martina.
P.S.-Though we now live near Palm Springs, California, we lived in Sachsenhausen for nearly 2 years & office was in Wiesbaden. Though I prefer the climate here, I still miss Germany.

Rockin'Robin

Wed, 06/20/2012 - 21:00

Dear Uli,

I am brand spanking new here on Ana-white and I love, love, love your daybed. I would like to give it a go for my daughters. Is it possible to get your sketch up notes? This will be my first build and I am so nervous about trying something without having a plan in front of me. My email is [email protected]
Blessings, Robin

Guest (not verified)

Wed, 09/14/2011 - 07:56

I would LOVE it if you could send me your sketchup file too. I want to build this for my guest room.

Helleni (not verified)

Wed, 08/31/2011 - 14:27

I would love to make this for my son's room. I am a beginner, can you provide the file for me to look at too?

Guest (not verified)

Fri, 09/23/2011 - 12:39

Uli,

I absolutely love this daybed and have been searching for such a bed, even to buy, but have found nothing. My husband is super handy and loves wood-working, so I think I am going to put him up to the task! :) Could you e-mail me your sketch-up file as well? My e-mail is [email protected].

Also, is there room to put a trundle underneath...this is a must-have for us. Do you happen to have any plans for a trundle? If not, hopefully my husband can come up with something for that!

Thanks so much for sharing your great idea and plans!
Amy

Siobhan (not verified)

Tue, 11/08/2011 - 17:56

Hi Uli,

Would you email me the plans for this bed please? It's perfect and exactly what I have been looking for!

Thanks so much,
Siobhan

kharrel

Wed, 12/28/2011 - 20:50

Hi Siobhan, I was wondering if you could possibly send me the plans for this bed in a Word document or through email. I tried to access the plans you attached above but my computer wouldn't allow me to open it. Also, I saw where someone else asked if a trundle would work with this bed and if you had plans for that, if so I would love to see if we can try to tackle that project as well. My email address is [email protected]. Thank you so much!...you have inspired me!!!!

Cheri (not verified)

Mon, 01/02/2012 - 09:58

I LOVE this bed. Would you mind sending me your sketch up and plans as well? Thanks so much and have a blessed and happy new year!

Jenny Briggs (not verified)

Mon, 01/30/2012 - 06:12

Hi, your bed is beautiful, could you please send me your dimensions, I would like to attempt, making this but kinda do an L, with a twin, and then a toddler mattress, at the head, the smaller mattress, would be like the short side of the L! Very new to this, but I would like to give it a go!

Guest (not verified)

Sat, 02/04/2012 - 09:35

Uli,

I love this so much and as others have said...it is the exact height I think I would need. This is my first solo project (without help from the man in my life) and i would love all the help I can get. Could you send me your plans for the hybrid? email address is [email protected]

Thanks much,
Raven

RachaelA (not verified)

Thu, 04/12/2012 - 10:31

Do you have a mertials list you used to buy the wood, etc for this bed. We are wanting to build a similar bed and add a trundle drawer underneath. Any guidance you can provide would be great!

Rach

RachaelA (not verified)

Fri, 04/27/2012 - 10:54

We figured it out and added one more layer to the project. We are combining the simple daybed, farmhouse daybed and trundle. So far so good.

Kris Frye

Wed, 02/25/2015 - 20:15

That's exactly what I want to do. I cannot download Google SketchUp, (It requires Windows 7 or newer. I am still running XP.) so I cannot access the plans provided. Could you please share yours? I also need the bed to accommodate XL twin mattresses (upper and lower beds). I could make those adjustments to your plans if need be.

Judith (not verified)

Wed, 05/09/2012 - 01:39

Hi Uli, I just love your bed, I'm new to building your own furniture but since I saw your bed I wanted to build it so I'm doing it. So far I have made the laterals and the back panels and now I'm putting it all together. I have some questions and maybe you can help me... you used bed brackets for the back panel, how did you put these so that they won't be seen? did you put them in the top and bottom of the panel?

Thank you very much

Judith

kad050209 (not verified)

Thu, 06/28/2012 - 10:14

Hey! I love the way you used the farmhouse bed for this daybed. It's perfect for what I'm looking for. I wanted to make my daughter the farmhouse bed but, we always wanted a daybed at the same time. This is perfect. Do you have any plans you can share with me so I can start making this? Thanks! [email protected] is my email if needed

SerinaDee (not verified)

Tue, 07/17/2012 - 10:26

I absolutely LOVE this bed and it is exactly what I want. I know many people have asked for the sketches, sooooo if anyone has received them, could they please forward them on to me??? (of Uli, if you see this and you have them) I would greatly appreciate it. You should definitely post this as a plan post because I'm sure many others would love it!

my email is [email protected]

THanks so much in advance!!! :) :) :)

Jason Lebo (not verified)

Thu, 07/19/2012 - 12:58

Hi Uli,

Outstanding work. I am going t make this for my 2 year old son. Quick Question.

I am confused about how to attach the posts to the panels for the head board. I assume you drill in from the far left and right of the posts? Do you use wood putty to hide the holes later? Could you use pocket holes? Or would that not be as structurally sound. Any advise would be appreciated.

From the instructions:

Now attatch the 4x4 posts to the panels. Make sure you pre drill half way through the post and use the 4 1/2" screws. Line the top edges of the panel and the post, keeping everything square as shown. Screw into the panel where it is sandwich 3 boards thick. Put at least 6 screws in each post.

Renee Glaze (not verified)

Fri, 10/12/2012 - 20:37

Can you send me a copy of the plans for the daybed. Does it have a regular mattress or just covered foam. Thank you

Val Manchuk

Sun, 04/07/2013 - 10:27

This is a great idea for a spare bed in our home office. Under bed drawers would be a good place for oir storage, too.

josie.a.richard

Sun, 09/28/2014 - 06:43

I LOVE this. Could i please get a copy of your sketch/plan? I am very new to this, and I don't think I could recreate one myself just yet!

Thanks

J

Chicken Coop with Run

Submitted by Jen Marzen on Fri, 06/17/2011 - 02:10

My husband and I live on a small hobby farm and are growing/raising a lot of our own food. We decided to venture into working with chickens. We wanted to start out small so we got 6 chickens and needed a home for them. We found a kids play house one day while shopping and got the idea of modifying it into a chicken coop with a run. We took off with this idea and with quite a bit of modification and some extra building materials we were able to raise it up in the air and attach a run so our chickens would have a nice home to protect them from preditors and the emements and not to mention one that looks good in our yard!

Built from Plan(s)
Estimated Time Investment
Weekend Project (10-20 Hours)
Finish Used
Cedar deck stain and white outdoor house paint
Recommended Skill Level
Beginner

Comments

Heather Dalton (not verified)

Tue, 02/21/2012 - 19:08

Are the plans available? I have Black Copper Marans and Lavender Ameraucanas and I really need to separate the LAs from the BCMs and this would be perfect!

madrona (not verified)

Tue, 02/28/2012 - 10:21

I'd also love the plans!
Great job - it's beautiful!

guest (not verified)

Tue, 02/28/2012 - 10:22

I'd also love the plans - thanks!

Eliza B (not verified)

Thu, 05/31/2012 - 10:02

Can you please post the plans you used? I have 4 week old chicks that need a coop. Thank you very much.

Jen Marzen

Sat, 06/02/2012 - 15:22

Sorry guys there are no plans for this coop. My husband and i just "winged it" and built it without any plans.

It is a play house that we found at Mills Fleet Farm and we modified it to make it a chicken coop. We put together the play house based on instructions from the box (with a few of our own modifications to make the window on the ground etc.) added some chicken wire to the doors and bay window, added some 4x4 "stilts" and a floor to get the house in the air, and constructed a frame around it with 2x4's and wire fencing to make the run

Sorry I dont have any plans to give you guys!

Seasonal And Holiday

Modern Farmhouse Dining Room table with 2x4 chairs

Submitted by NeekosMac on Thu, 08/01/2013 - 13:28

Modern Farmhouse Dining Room Table (with pocket hole) and 2x4 chairs with plans reposted from morelikehome.net.

Surfed the site for the right plans and dove right in. Thank you for the inspiration all!

Estimated Cost
$200
Estimated Time Investment
Week Long Project (20 Hours or More)
Finish Used
Minwax Golden Pecan and Poly coat.
Recommended Skill Level
Beginner

Comments

Wooden garden tools storage shed

Our last project was building a tiny garden tools storage shed. We used only 1 x 4 boards. We don't have any plans, but you can watch the entire building process on our YouTube channel. We are very proud of the way the project turned out.

Built from Plan(s)

Comments

Seasonal And Holiday

Amelia's Play Kitchen

Submitted by Mskirko on Thu, 01/05/2012 - 09:07

A play kitchen stove and sink for my 1.5 year old daughter for Christmas!

This was my second woodworking project ever. It was VERY involved. It took me about 3-6 months of planning, ordering, buying, figuring out, and finally building the thing.

I used magnetic primer on most of it. Some magnets do stick to it, but I learned some very important lessons: Magnetic primer is MESSY and it doesn't sand very well, so when you paint it on, it should be done in the smoothest possible way in the smallest area. I primed with it using a roller and when I sanded it, got metal shaving dust EVERYWHERE (because the metal shavings in the primer keep it magnetic, obviously).

Made the curtain and matching towel. Next on the list: Matching apron and kids oven mitts!

Estimated Cost
$215
Estimated Time Investment
Week Long Project (20 Hours or More)
Finish Used
2 coats of magnetic primer, primer, 3 coats of paint, 1 coat polyurethane
Recommended Skill Level
Beginner

Slatted Sofa Table

Submitted by raybwright on Sat, 02/13/2016 - 09:36

I based this design of the simple Sofa Table by Jenna Sue. Instead of a 2x8 across the top, I opted to use 1x4s side by side. This slatted look matched some of the other items in the house and to allowed me to create two hinged sections. These sections allow for easy access to wall plugs and include small notch for the cables to come through.

Estimated Cost
$35
Estimated Time Investment
Weekend Project (10-20 Hours)
Finish Used
Minwax Wodd Finish Dark Walnut Stain with Minwax Clear Satin Polyeurethane
Recommended Skill Level
Beginner

King Bed Frame for adjustable base

Submitted by Anonymous (not verified) on Tue, 10/08/2019 - 05:50

I could not find a frame which would accommodate my new adjustable king base. Modified Anna's plans by increasing the height of the headboard and footboard. Finished with chalk paint and antique finish for a rustic look. Side rails attached with mortises to allow for moving bed in 4 pieces if needed. Love my new bed

Estimated Cost
$300
Estimated Time Investment
Weekend Project (10-20 Hours)
Finish Used
Chalk paint (purchased from Habitat for Humanity re-store) using recycled paint. Finished with three coats of Annie Sloan wax
Recommended Skill Level
Intermediate

Comments

khowe791

Sat, 11/30/2019 - 03:31

Hi! We are making this headboard this weekend. We want to increase the headboard height and footboard as well. Do you happen to know the cut measurements or how you adjusted the height of the 1x6 (or 1x8 as others used) to make it work? Yours looks perfect! Thank you in advance for any feedback! 

Wood Storage Box

Submitted by Joni on Sun, 03/18/2012 - 10:42

My wood scraps were definitely getting out of control, and I needed something to store the wood vertically. I had some spare wood (free from Craigslist), so I put together a wood storage bin. All in all, the project cost me the price of some Kreg screws.

Estimated Cost
Free!
Estimated Time Investment
Afternoon Project (3-6 Hours)
Recommended Skill Level
Beginner

Comments

hoffer5353

Wed, 06/06/2012 - 13:21

I have been struggling to organize my space because my lumber is on one of my work spaces. I have the perfect space for that, thanks for the great post!

Raised bed planter

Submitted by Anonymous (not verified) on Tue, 06/02/2020 - 16:36

Hey Ana,

I saw your raised bed planter and decided to tackle it for ourselves. It measures 2'x8' and stands 28" to the bottom of the planter. I used redwood fencing for the sides and bottom at a cost of $1.79 each. I didn't use the wire mesh for the bottom but drilled 1/4" holes in the redwood fencing for drainage.

Thanks for the idea!!

Mike Howell

Estimated Cost
$45
Estimated Time Investment
Afternoon Project (3-6 Hours)
Finish Used
I left ours in it's natural state
Recommended Skill Level
Intermediate

Cedar flower box teacher's gift

Submitted by Benjies on Wed, 05/28/2014 - 10:02

My daughter is finishing her last week of preschool. I wanted to make a small "thank-you" gift for her 3 teachers. I pieced together different ideas from ana's site and other places on the Internet. The printout is from shanty 2 chic's website. I created 3 boxes using 2 six-foot cedar fence panels. I cut mine down to size based on the dimensions of the flowers I used. Drilled a few holes on each edge and used 1/4" sisal rope to make handles. Used hemp to tie the label's to each box. Each box took approximately 15 minutes to make. Including the cost of the flowers, each box cost less than $5 too!!

Estimated Cost
$5 / box
Estimated Time Investment
An Hour or Two (0-2 Hours)
Finish Used
No finishes. Just drilled some drainage holes. Cedar is great for outdoor use!
Recommended Skill Level
Starter Project
Back