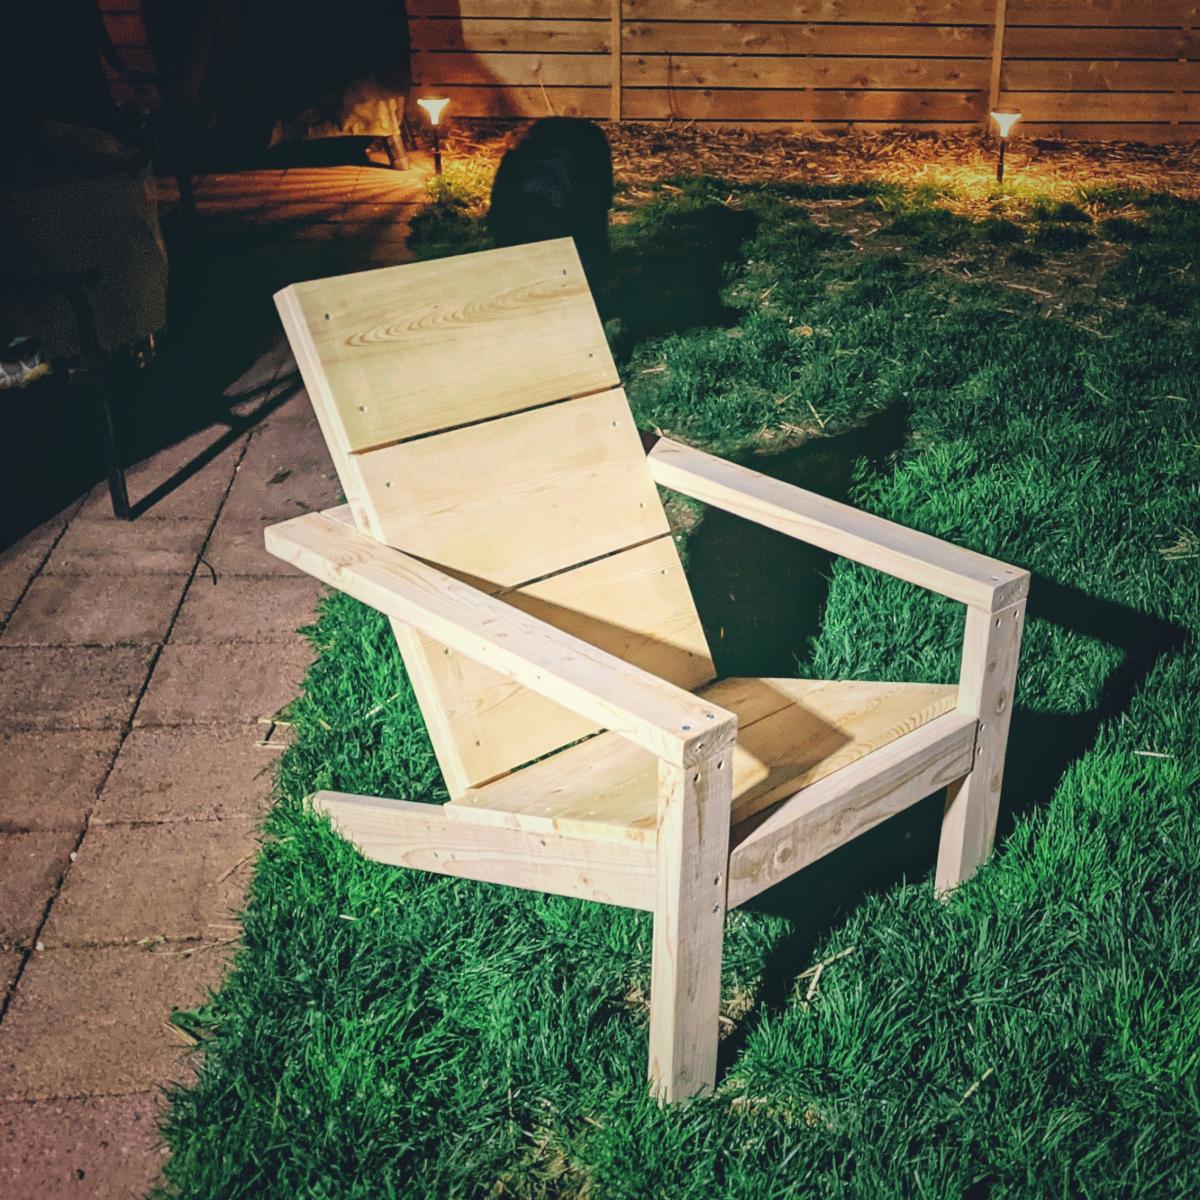
Modern adirondack chair
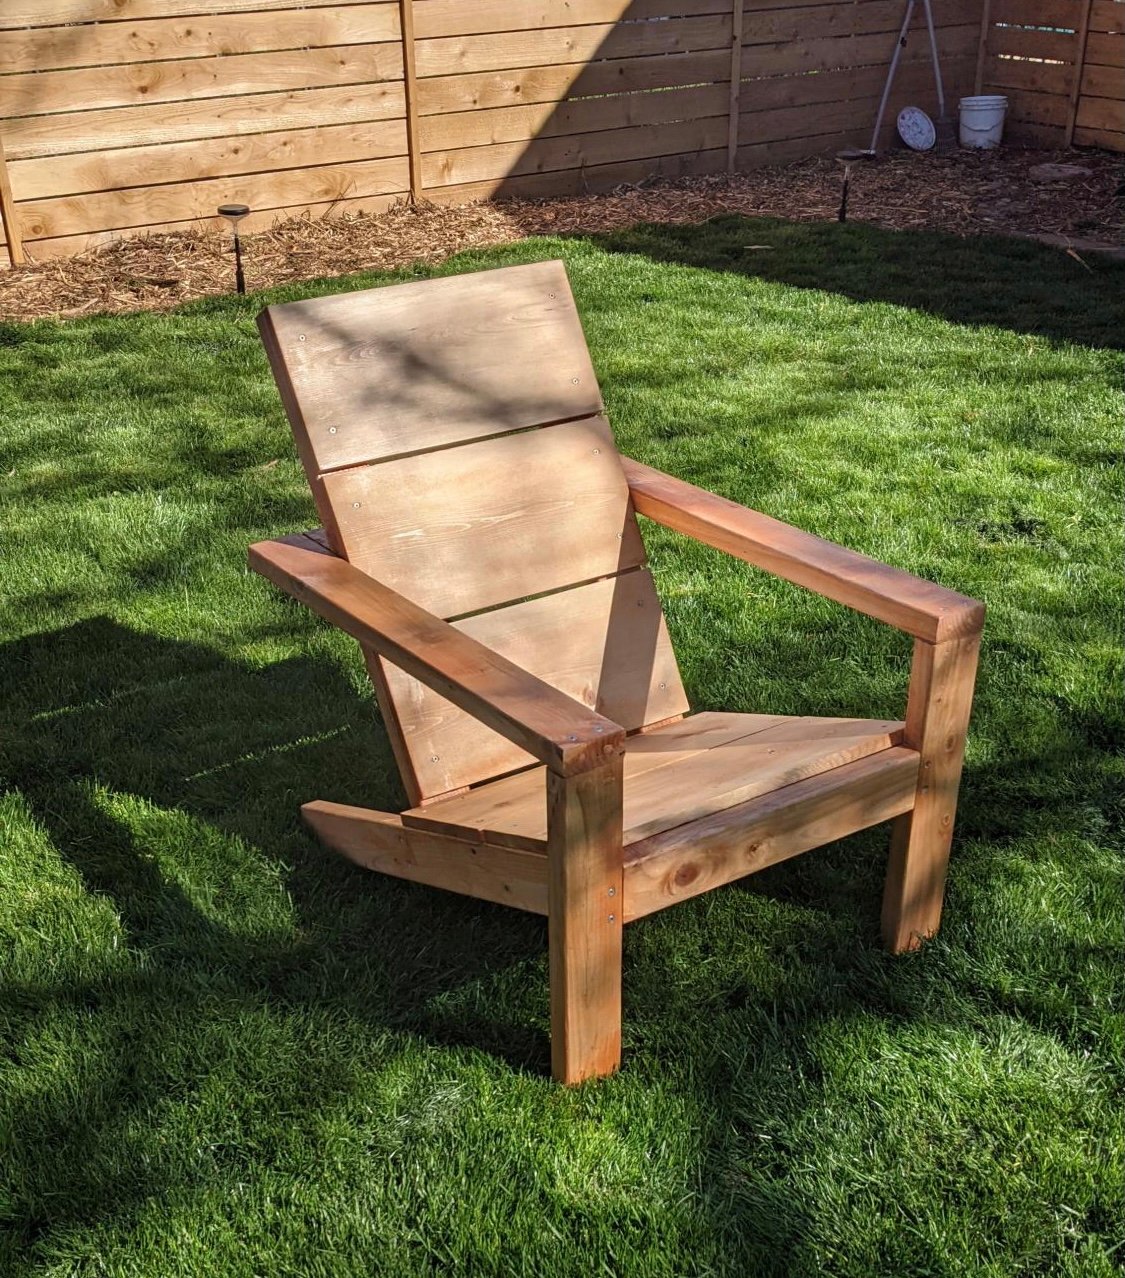
I've made 2 of the Modern adirondack chairs. Really enjoyed the plans and the video for help as I'm new to woodworking. I look for new plans all the time to see what I might build next
Built from Plan(s)
I've made 2 of the Modern adirondack chairs. Really enjoyed the plans and the video for help as I'm new to woodworking. I look for new plans all the time to see what I might build next

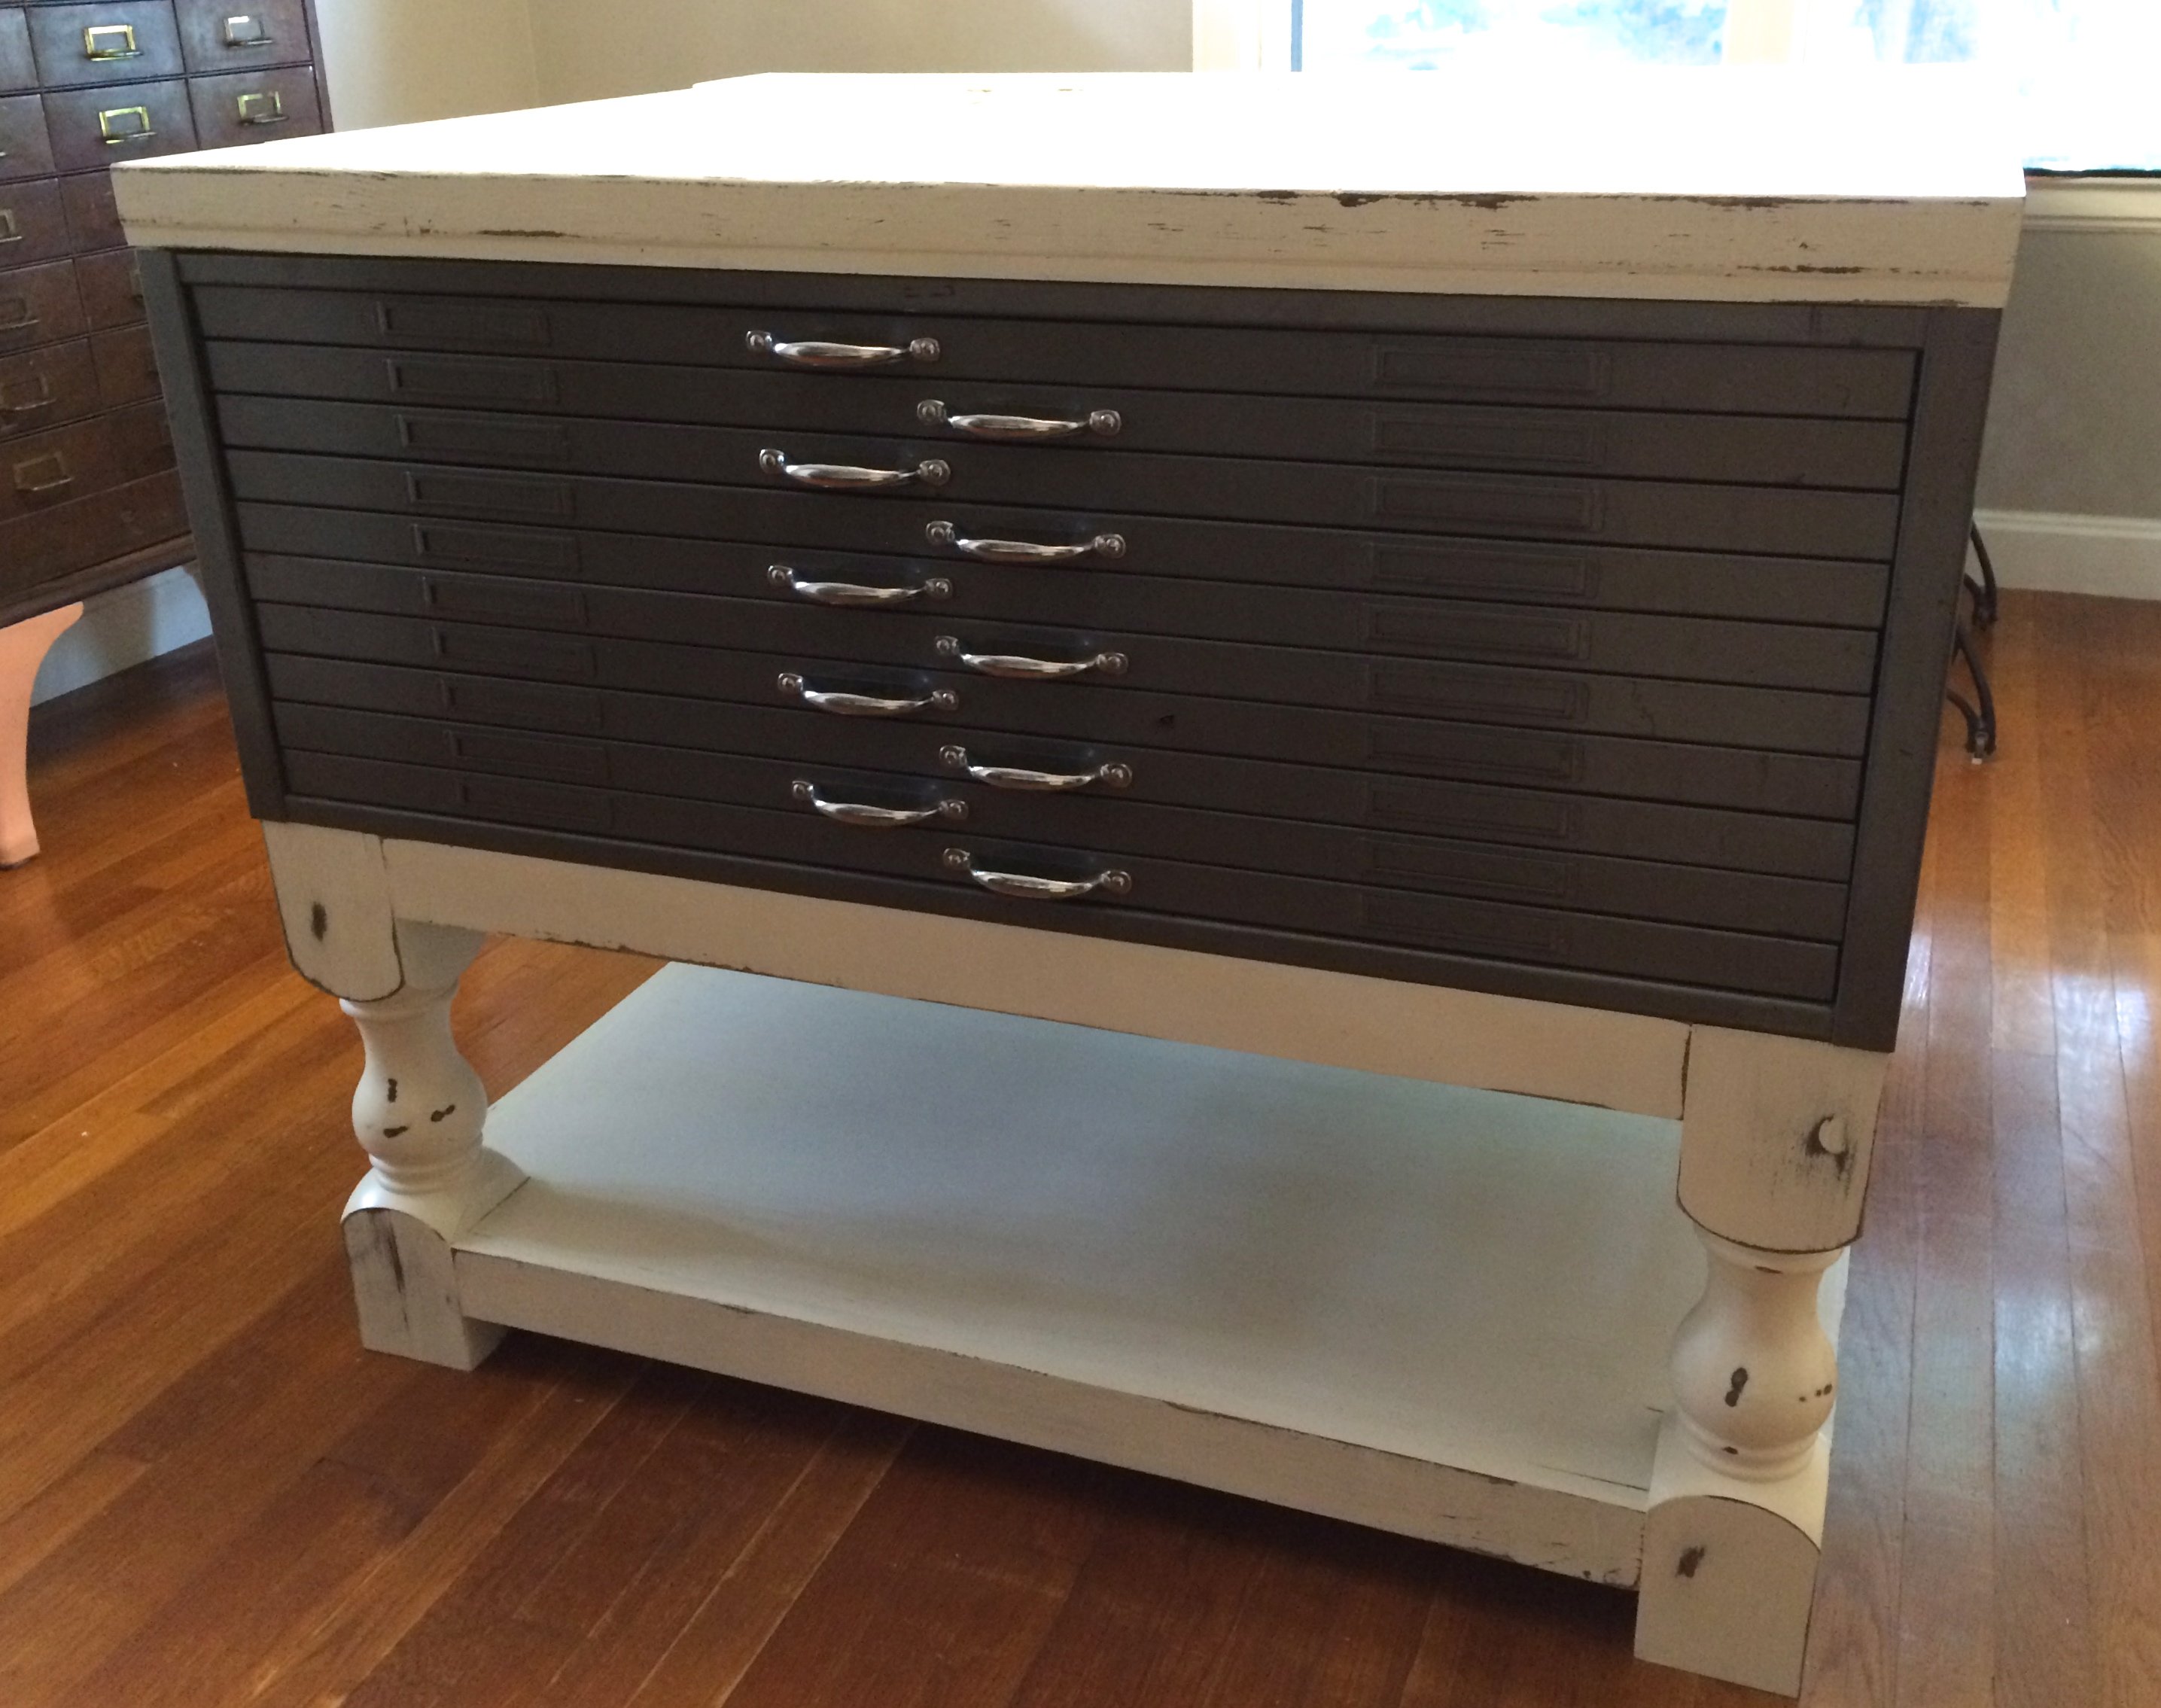
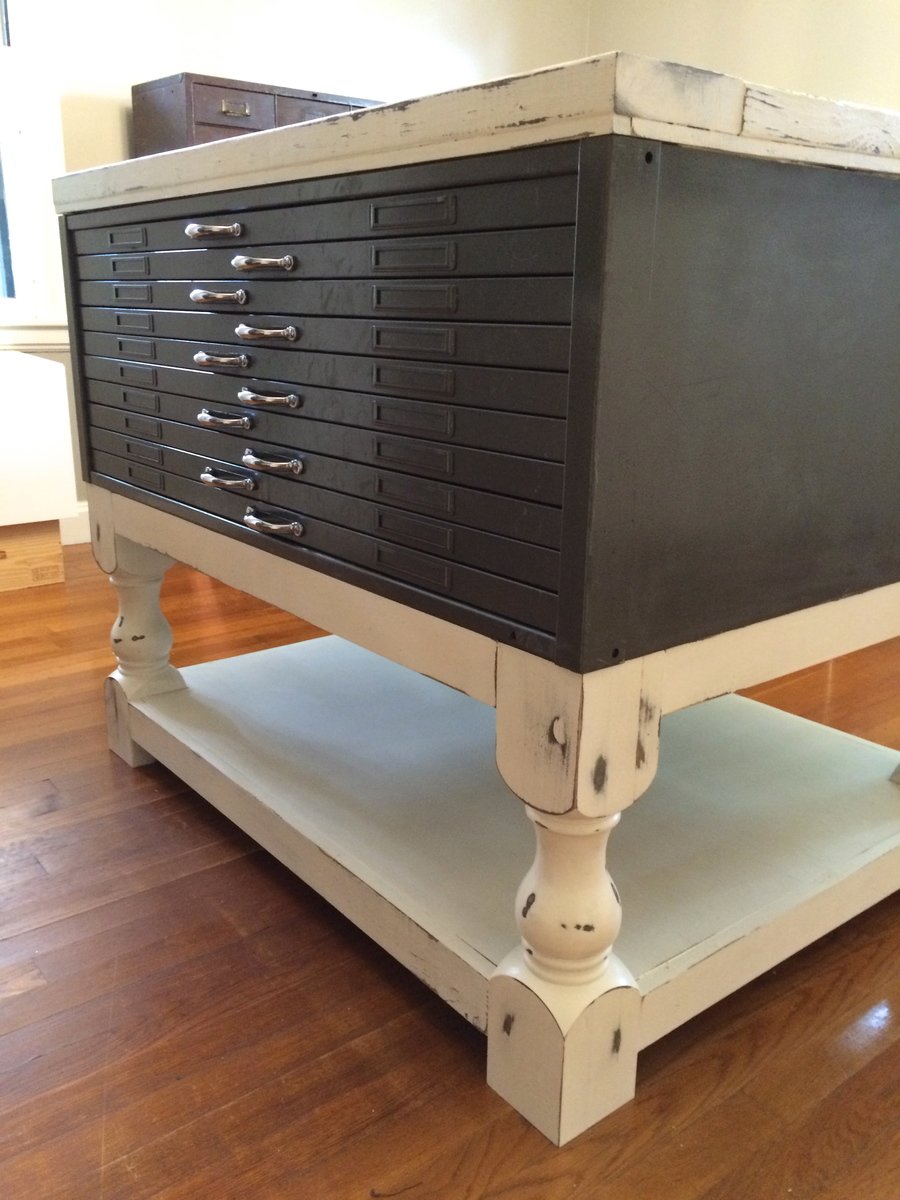
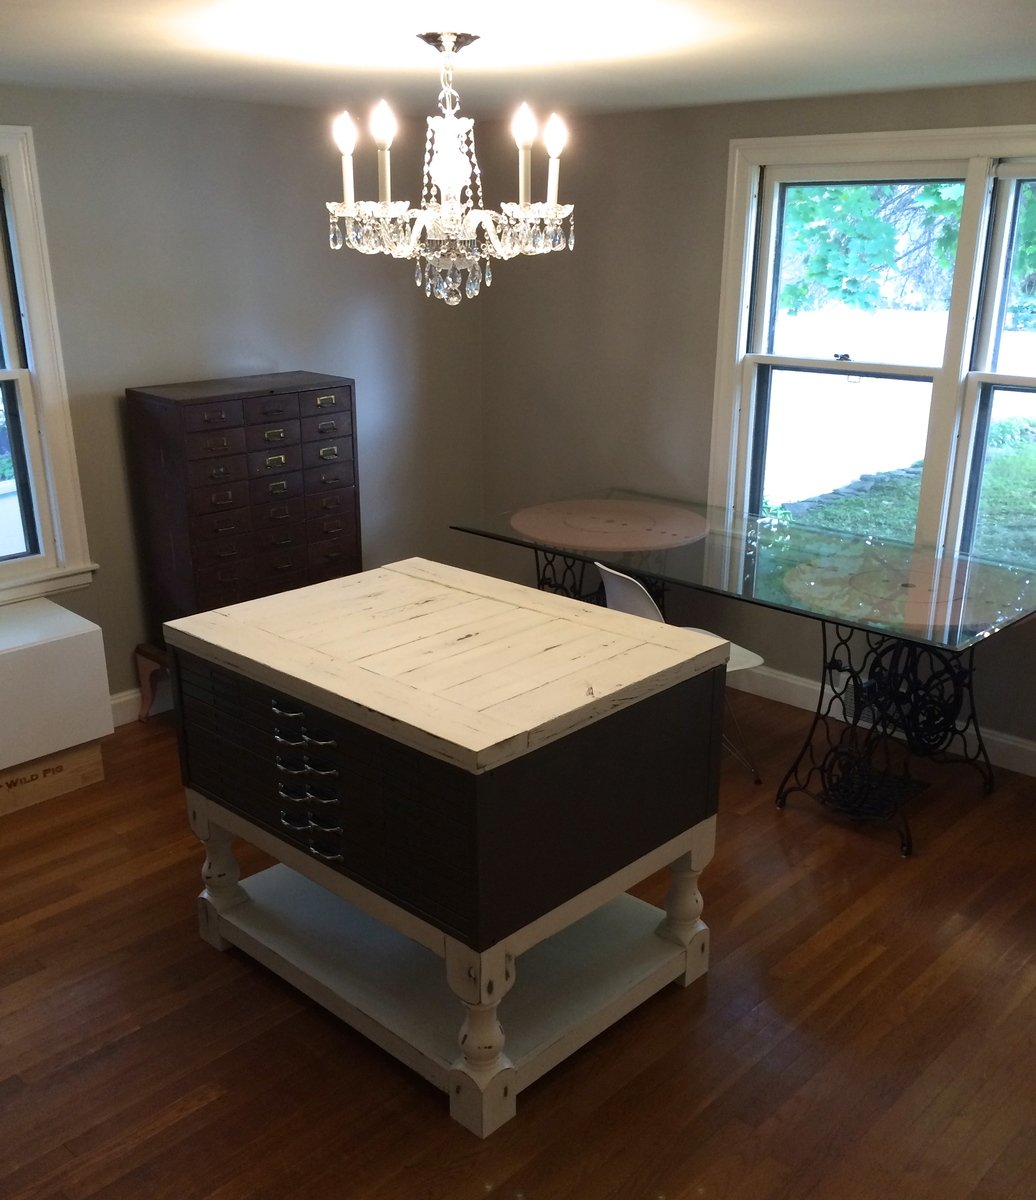
I found this fabulous vintage metal flat file cabinet at an antique store (Hunt & Gather Vintage Market, in Princeton, MA), but it didn't have a base or a top, so I went searching online for something that I could build. The Corona Coffee Table plans were going to be perfect! I just had to make a few adjustments:
LOVE how this table turned out! It's counter-height and the perfect centerpiece for my craft room.
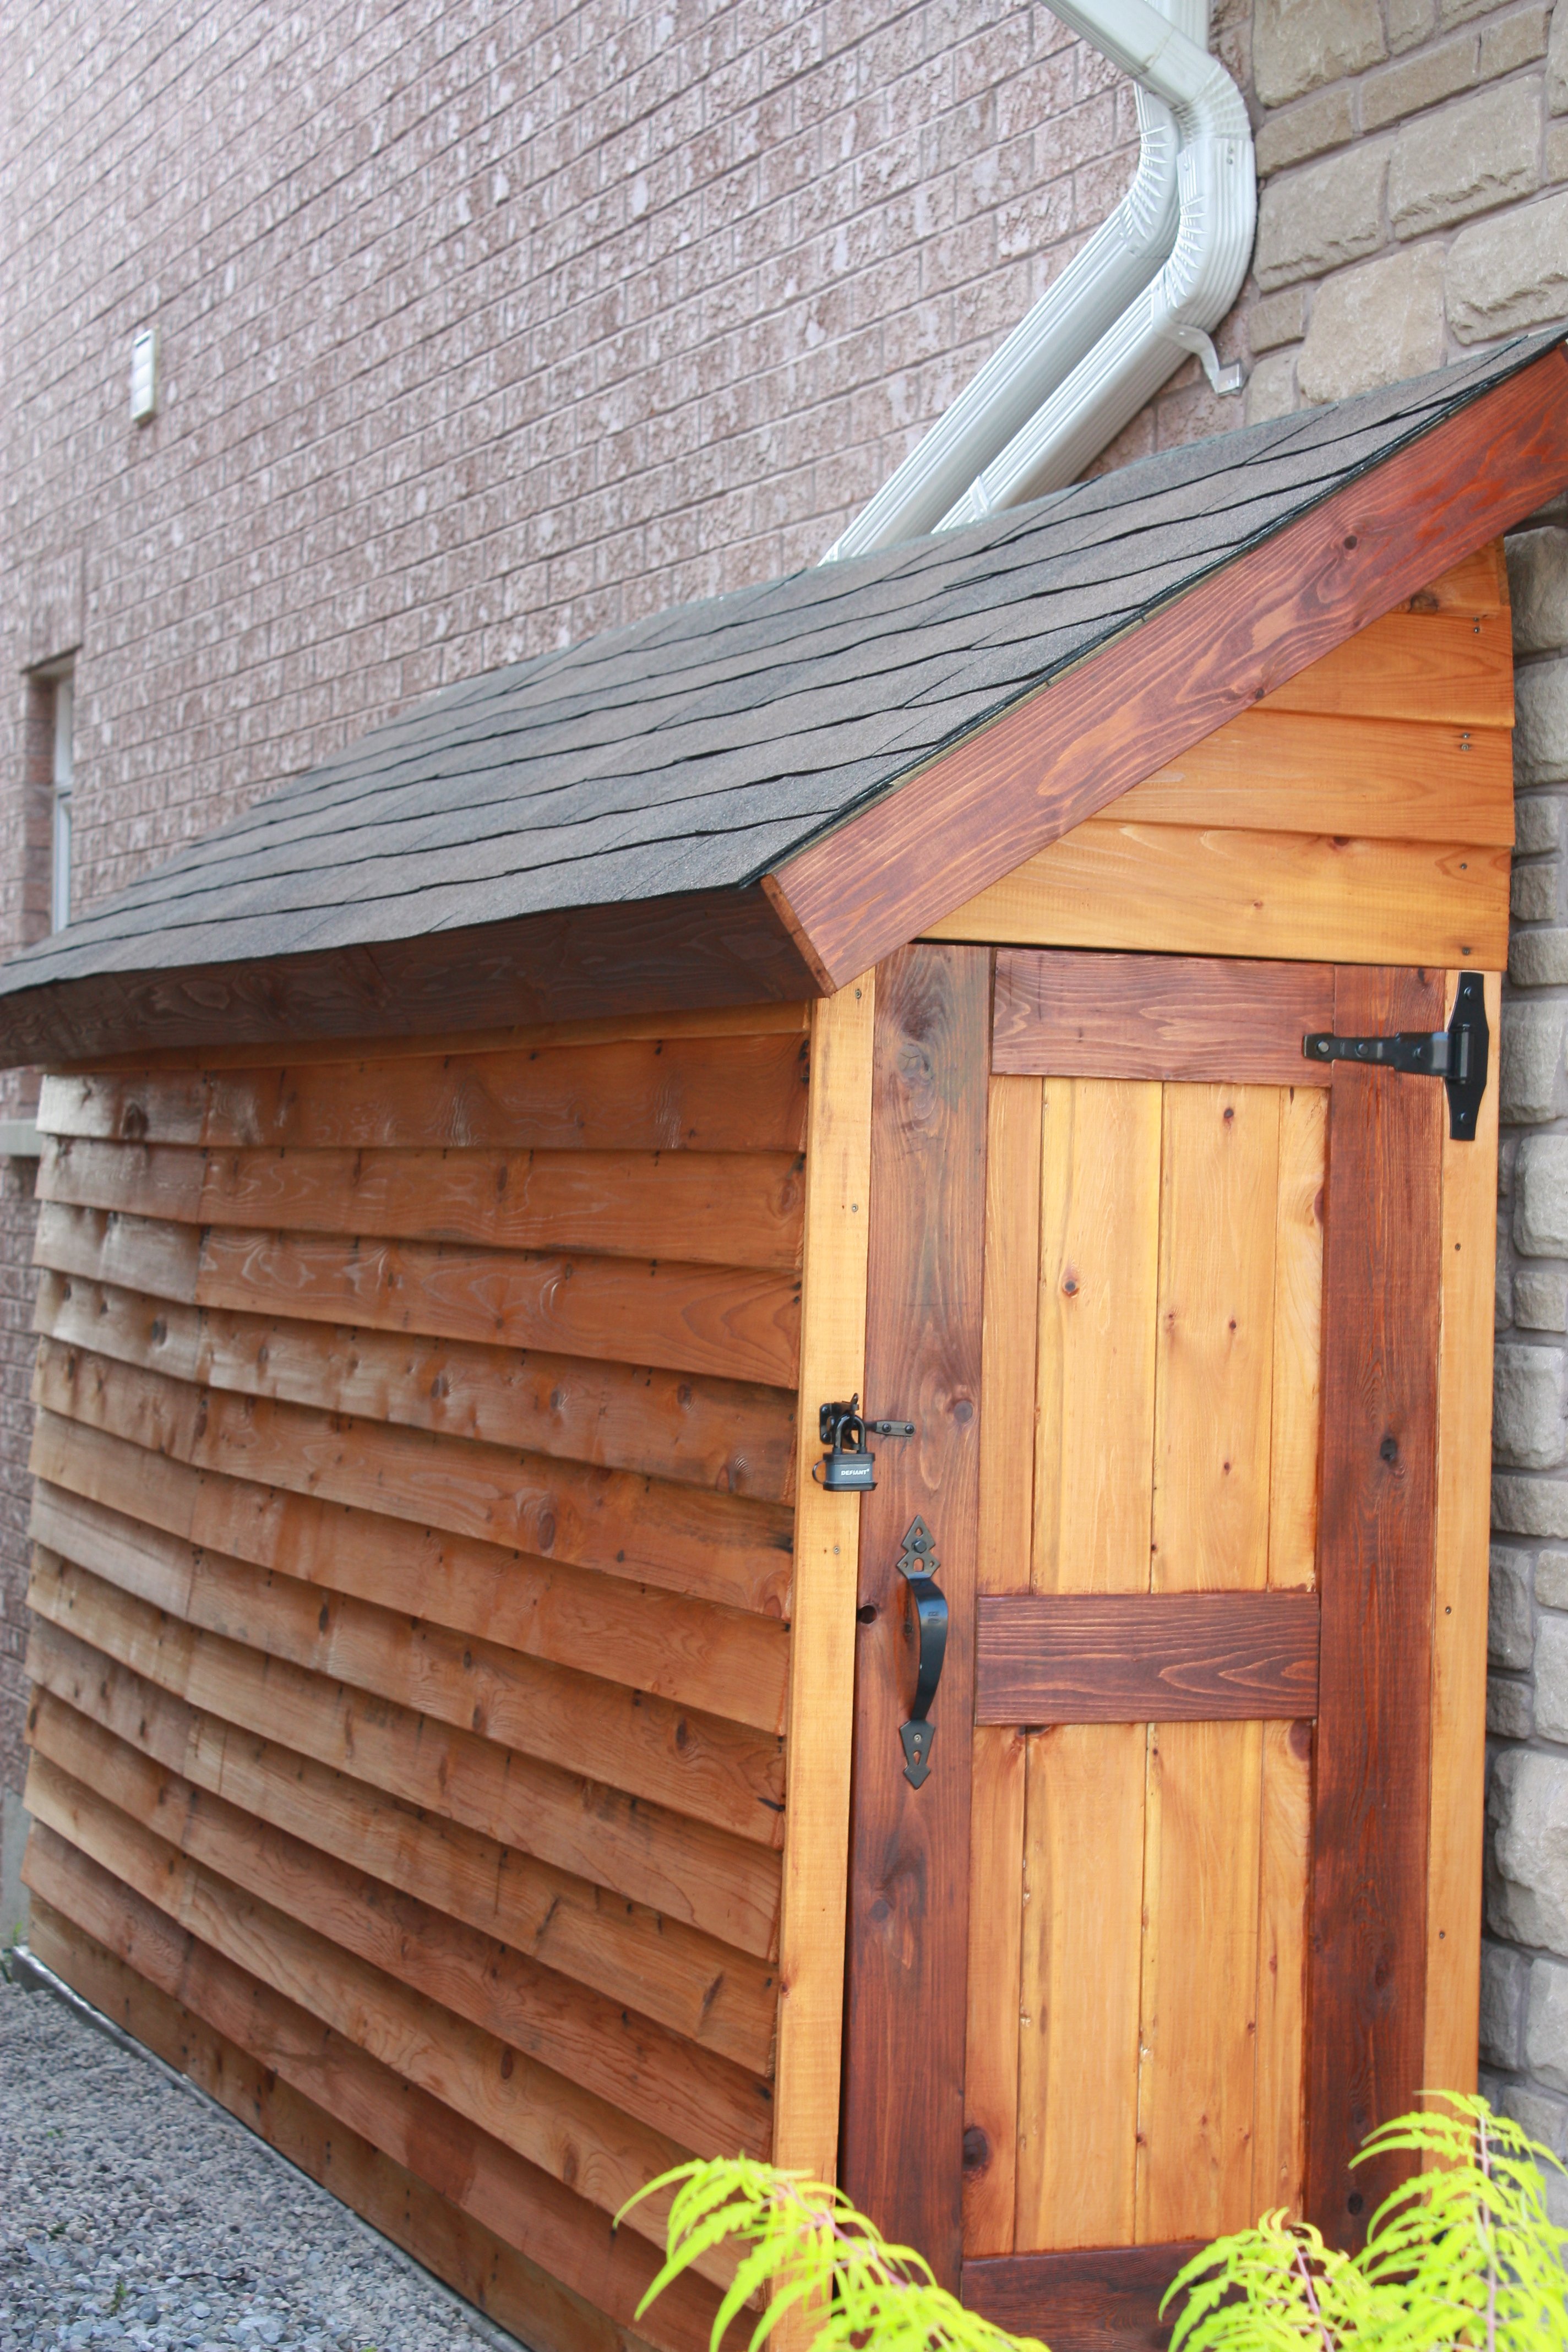
I had very little clearance on the long side of the shed, so I opted to put the door on the short side. Thanks for the plan, it was a great starting point for my project.
Tue, 09/10/2013 - 10:15
Thanks for posting! I plan to make this shed. Yours turned out beautiful!
Reader submitted photo
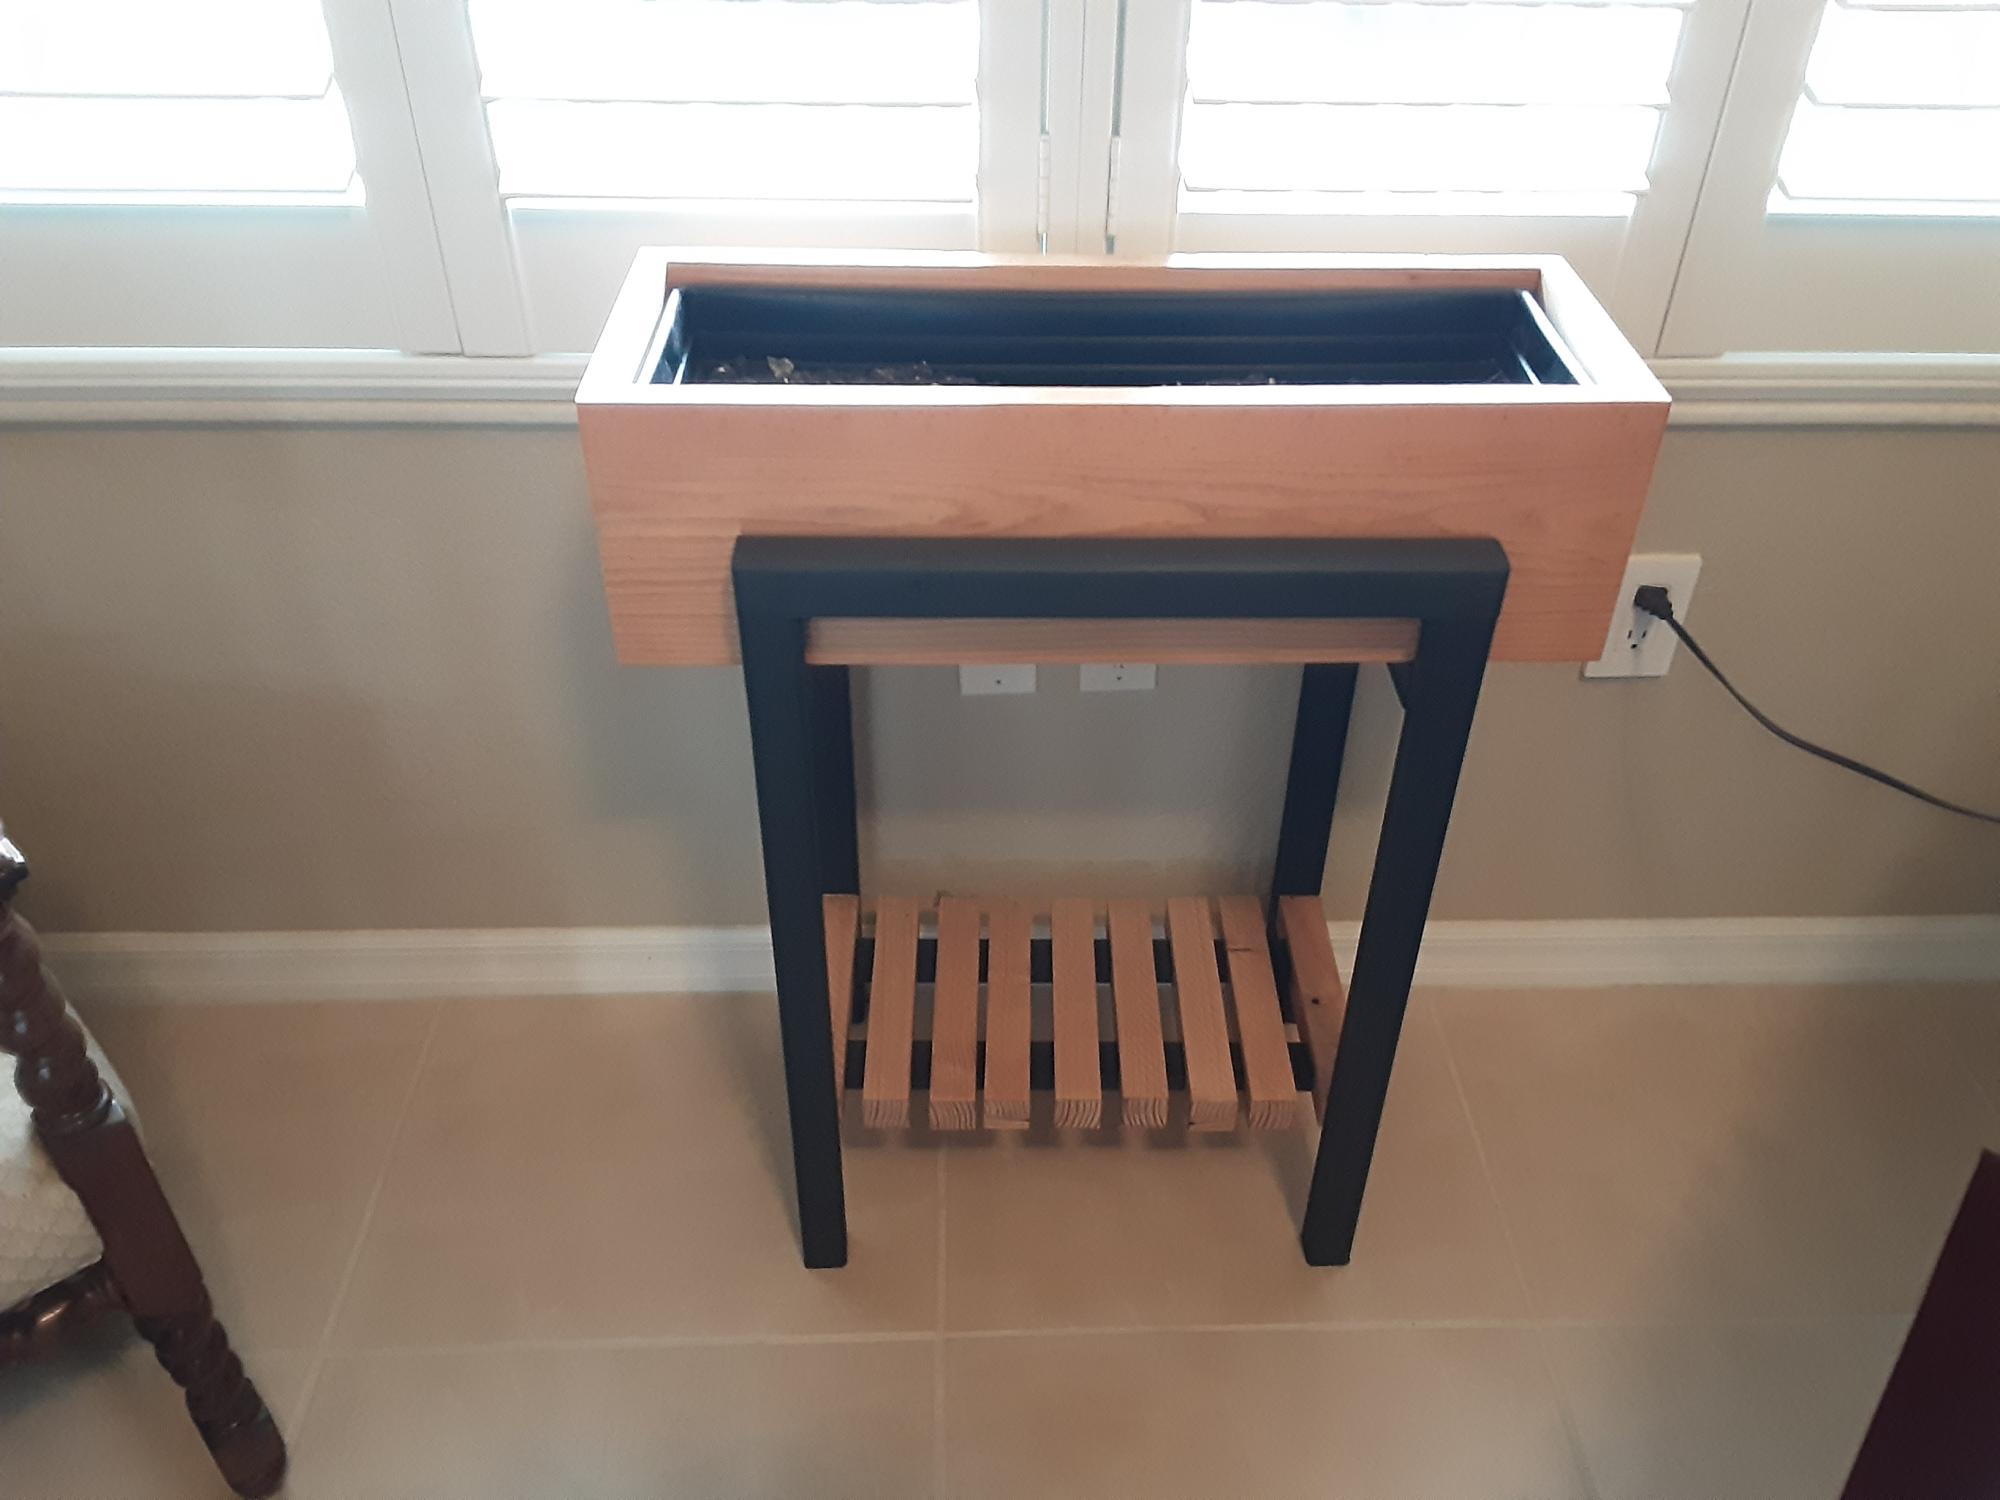
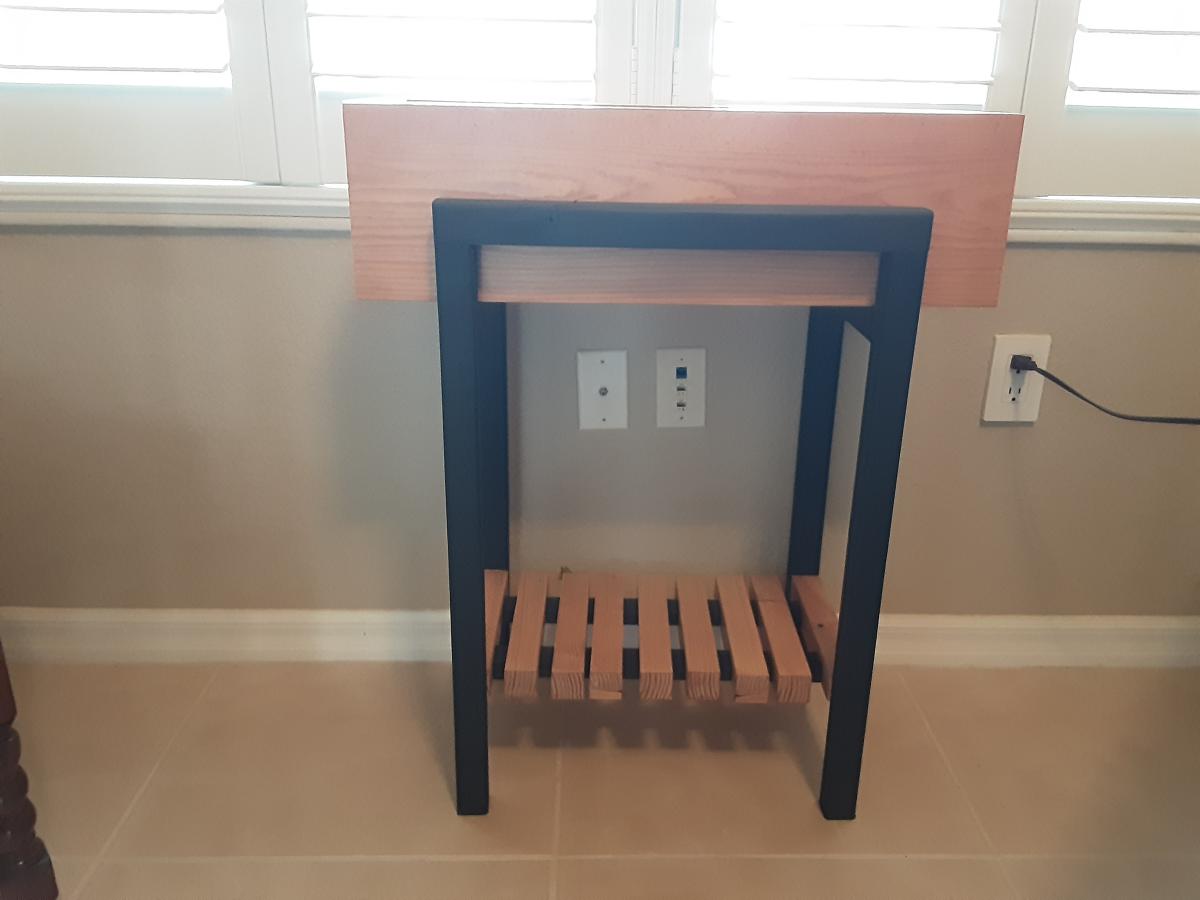
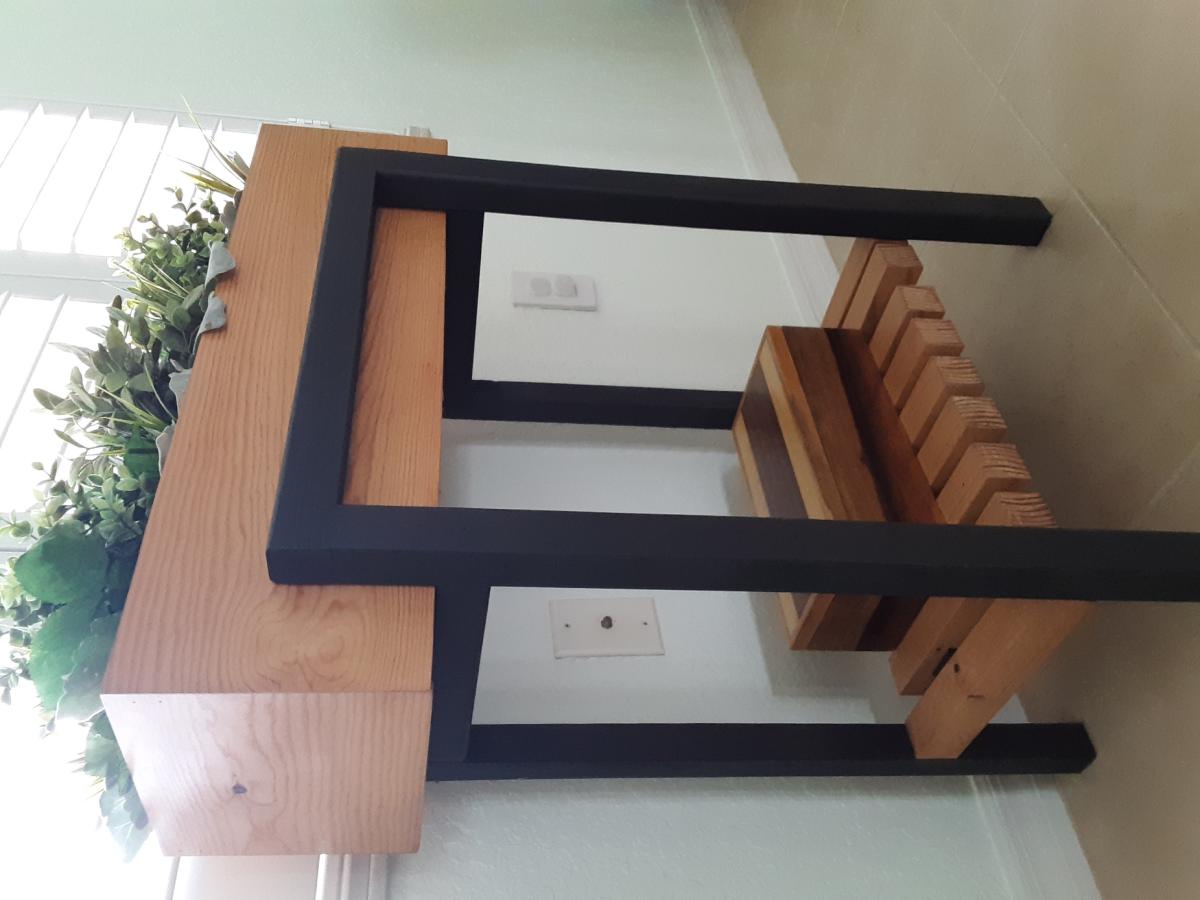
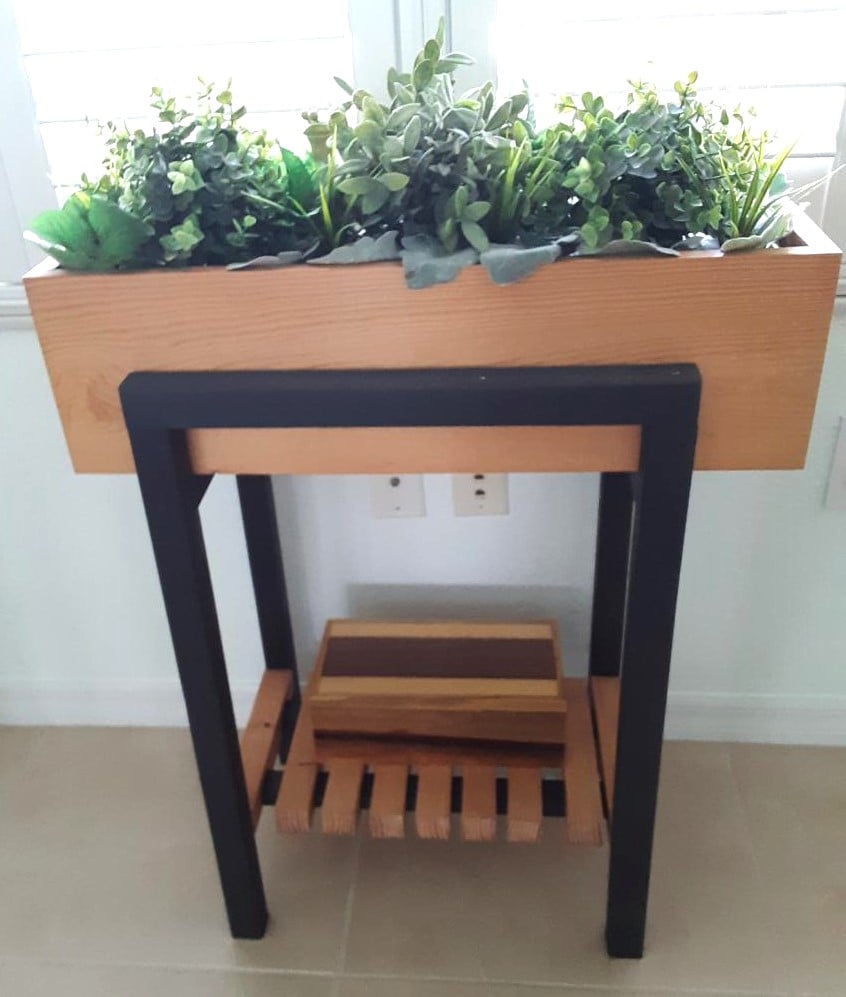
Created the stand for the raised planter using 2X2 assembled using dowels. Painted the stand mixing black with a bit of white to simulate metal. The actually plastic window box fits within a wood open box with mitered corners fir clean log. Bottom of the stand provides a shelf using (9) 2X2s with a dado placed on either end to fit on the runners of the stand.
Mon, 05/01/2023 - 08:24
It looks super high quality, love your take! Thanks for sharing.
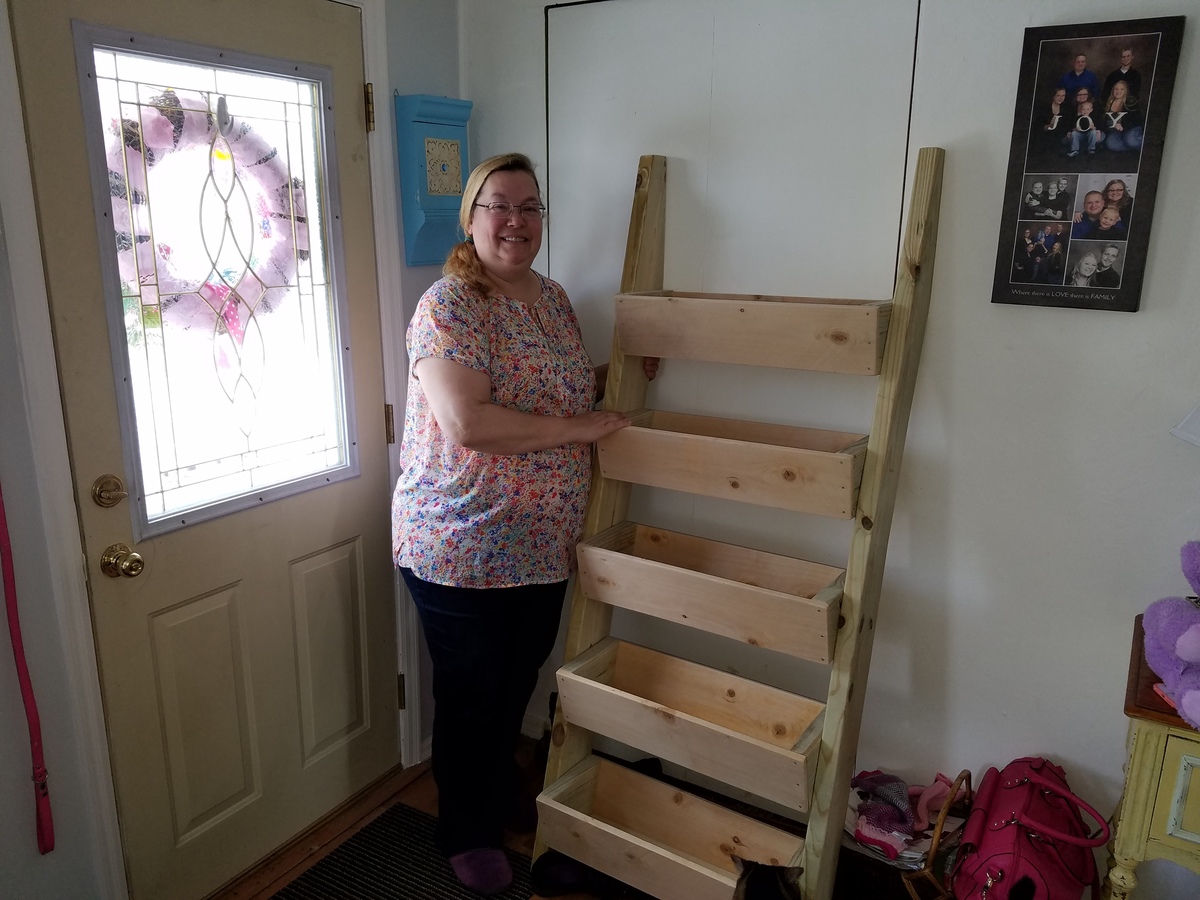
Had a blast building this for my mother. Only problem now is everyone in my family wants one!
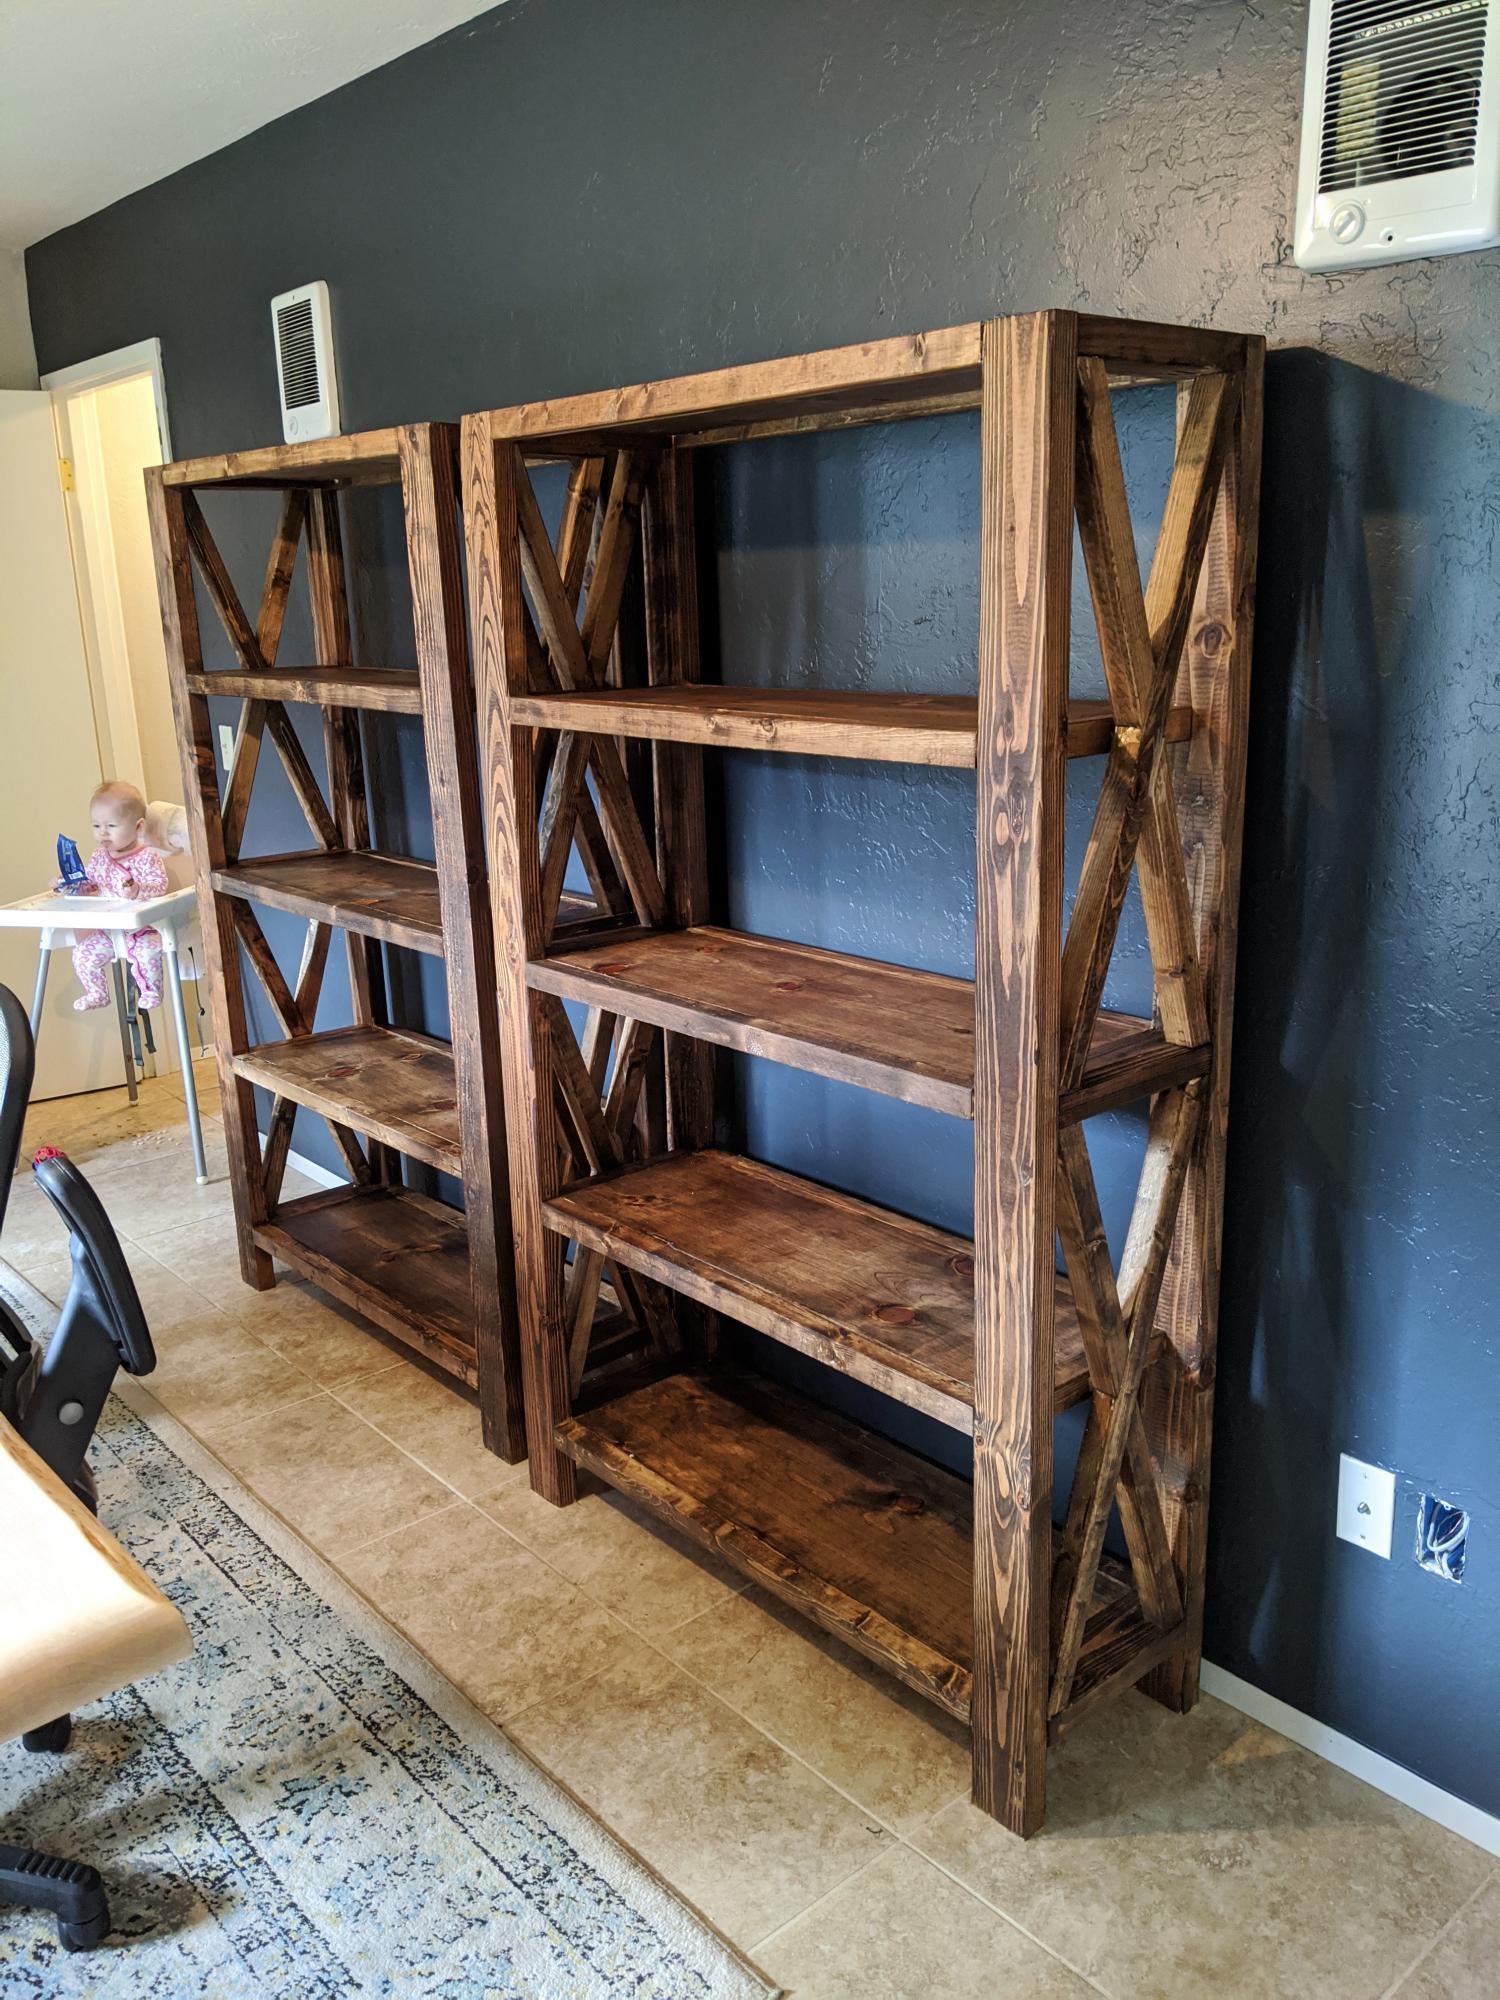
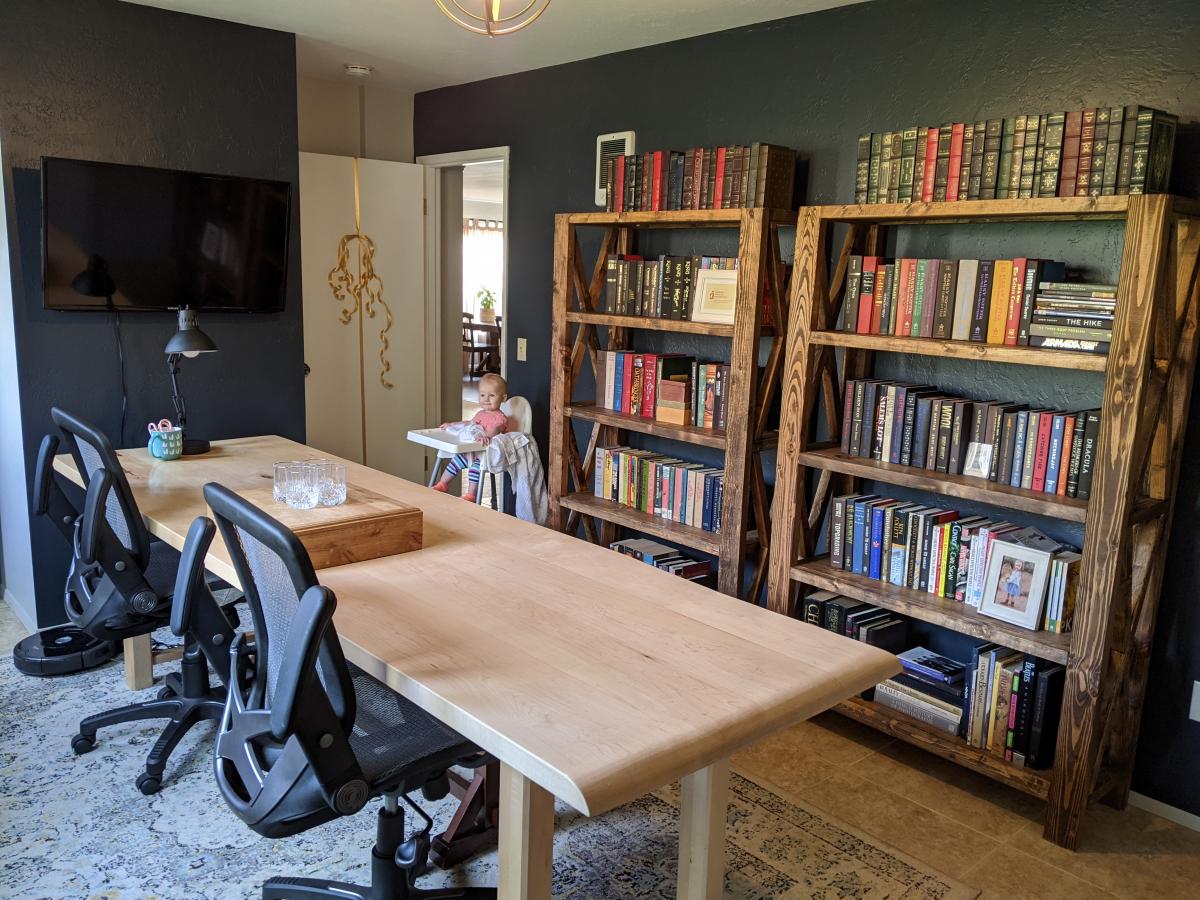
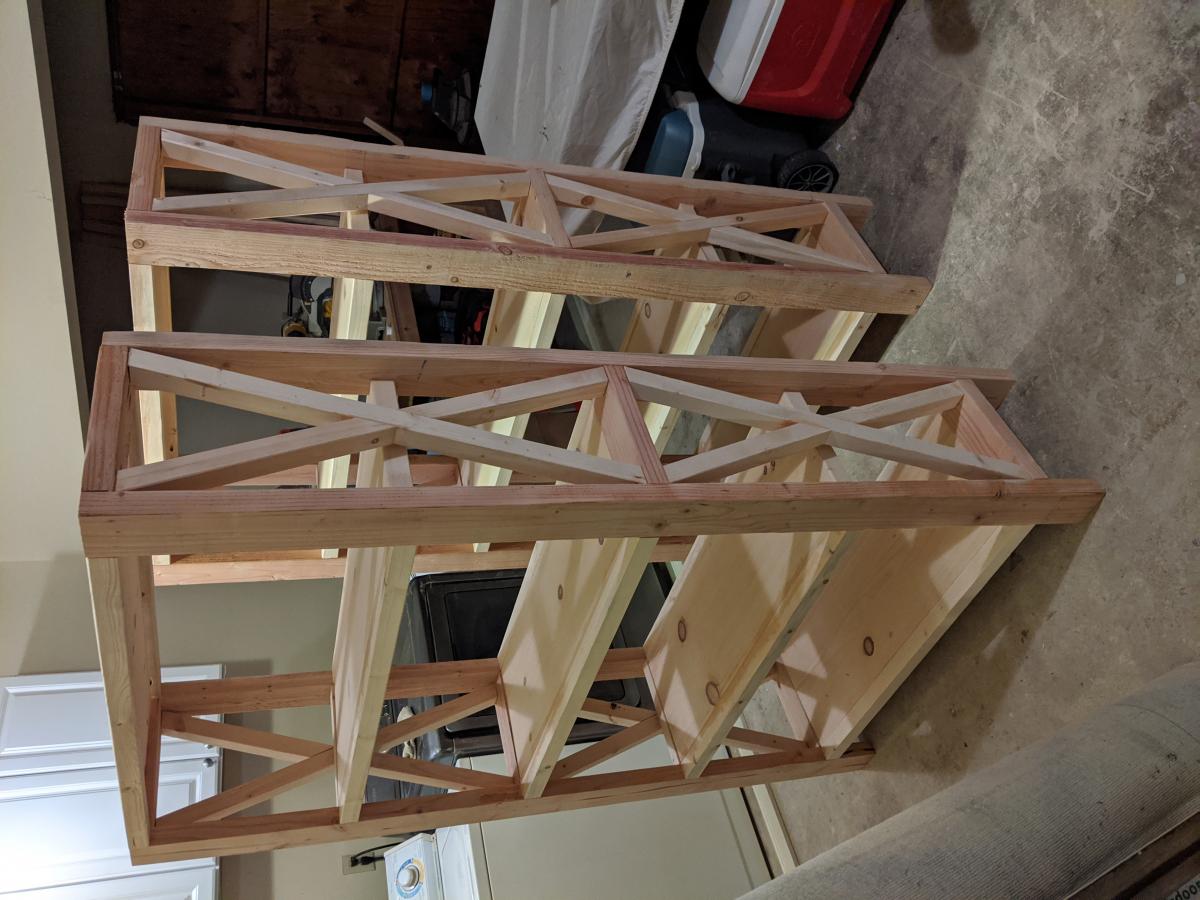
I followed the Rustic X Tall Bookshelf plan to make a set of bookshelves for my husband for Christmas! It was my second ever woodworking project. The plan was really easy to follow and so fun to make! I ended up using an additional shelf piece on the very top for a more modern spin on it. I also bought a pocket hole jig to use on this project. I'm happy with how it turned out!
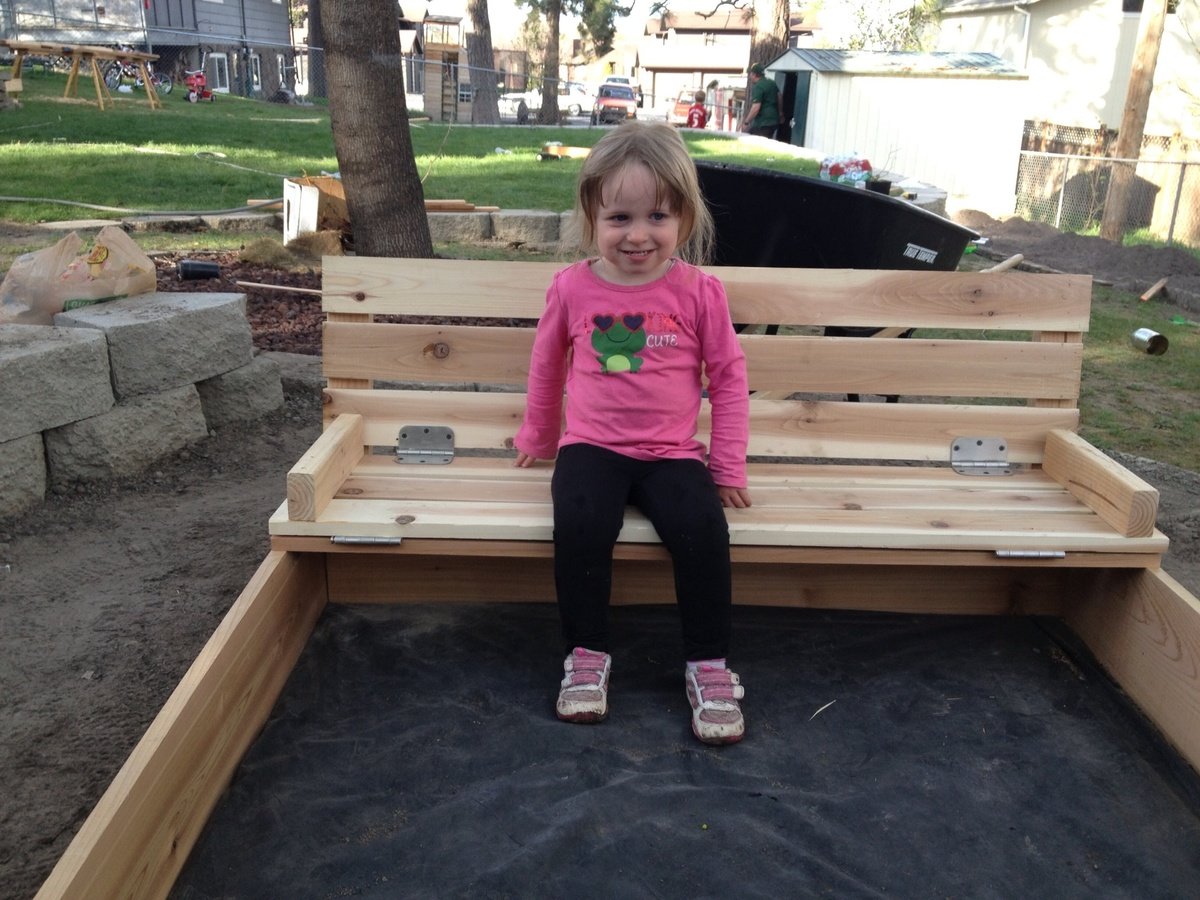
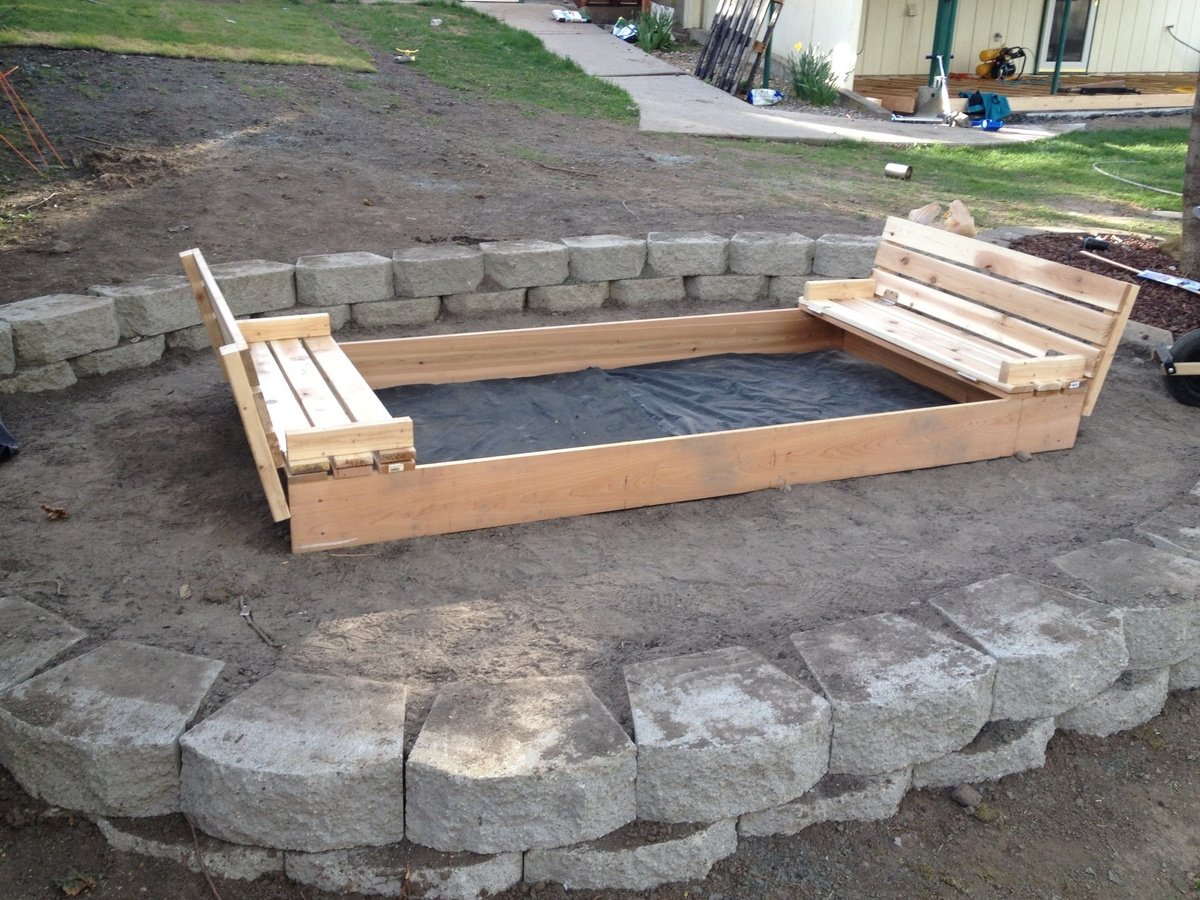
This was my first EVER wood working project.
With that being said, it took me more than just an afternoon.
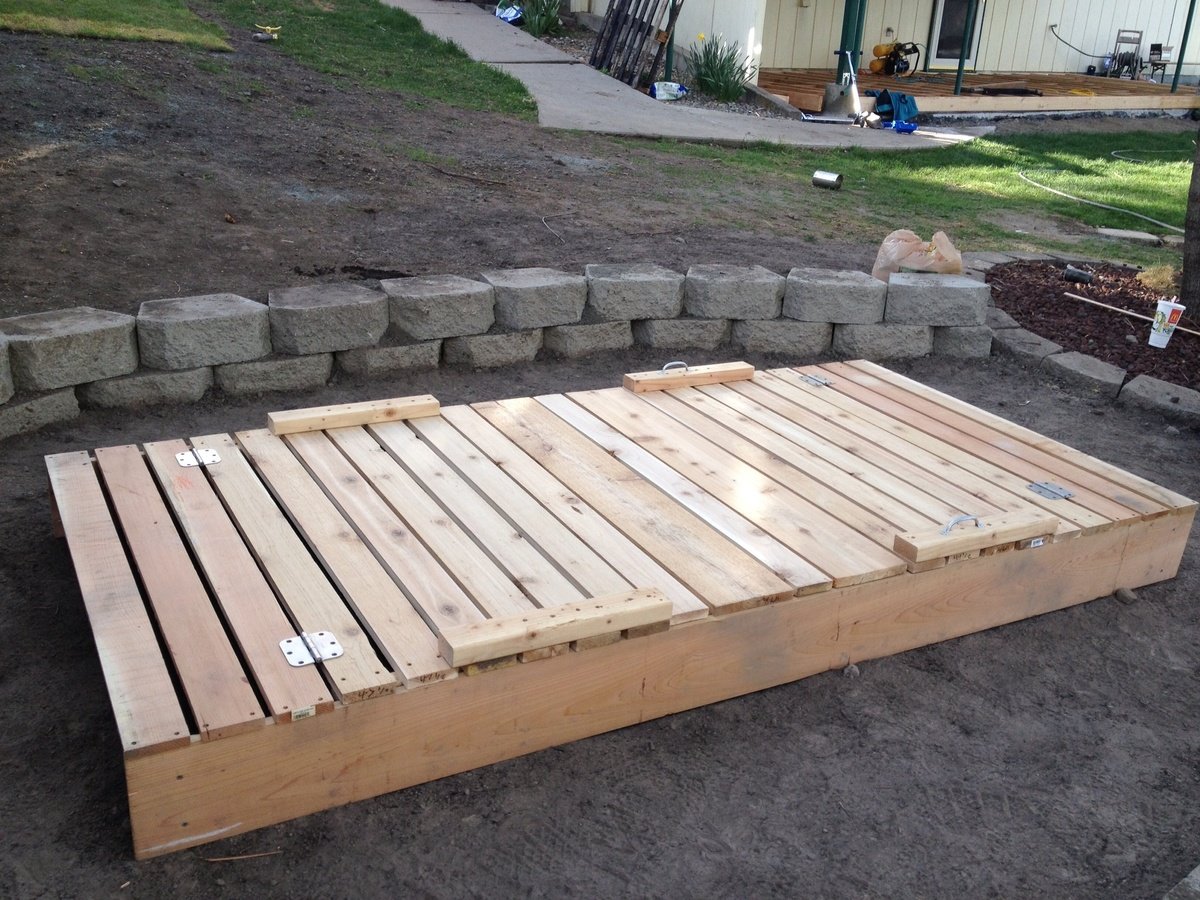
I used cedar, and all the materials on the cut list had to be sanded , since I didn't like the roughness of the cedar.
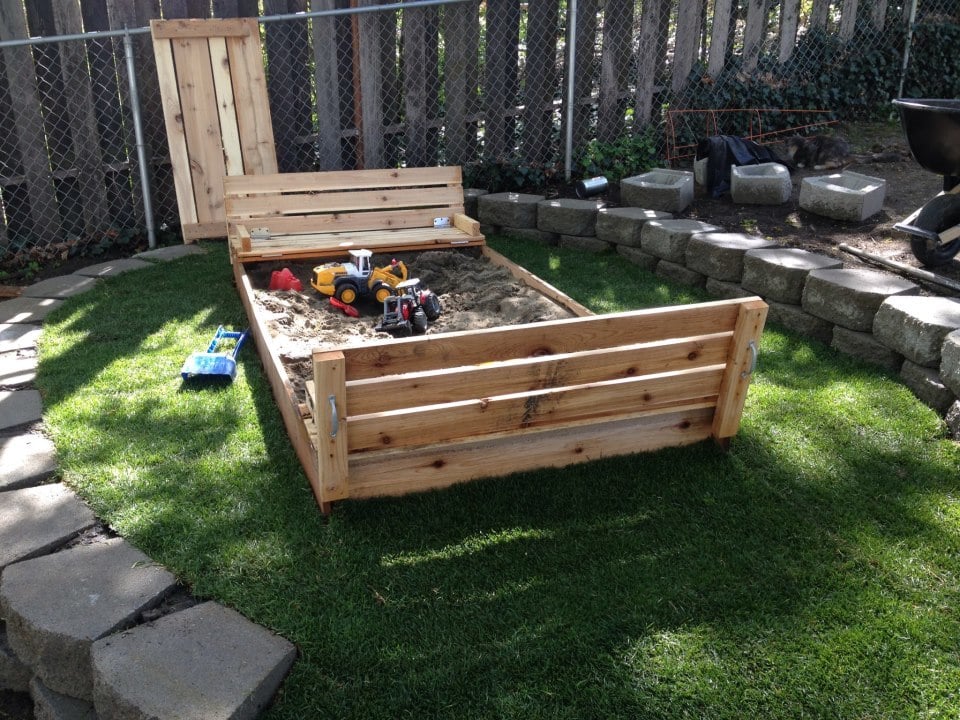
I also made the box 4x8. I didn't take into account that that would require a minimum of 48 inches for the top planks. So, some of my top planks are shorter.
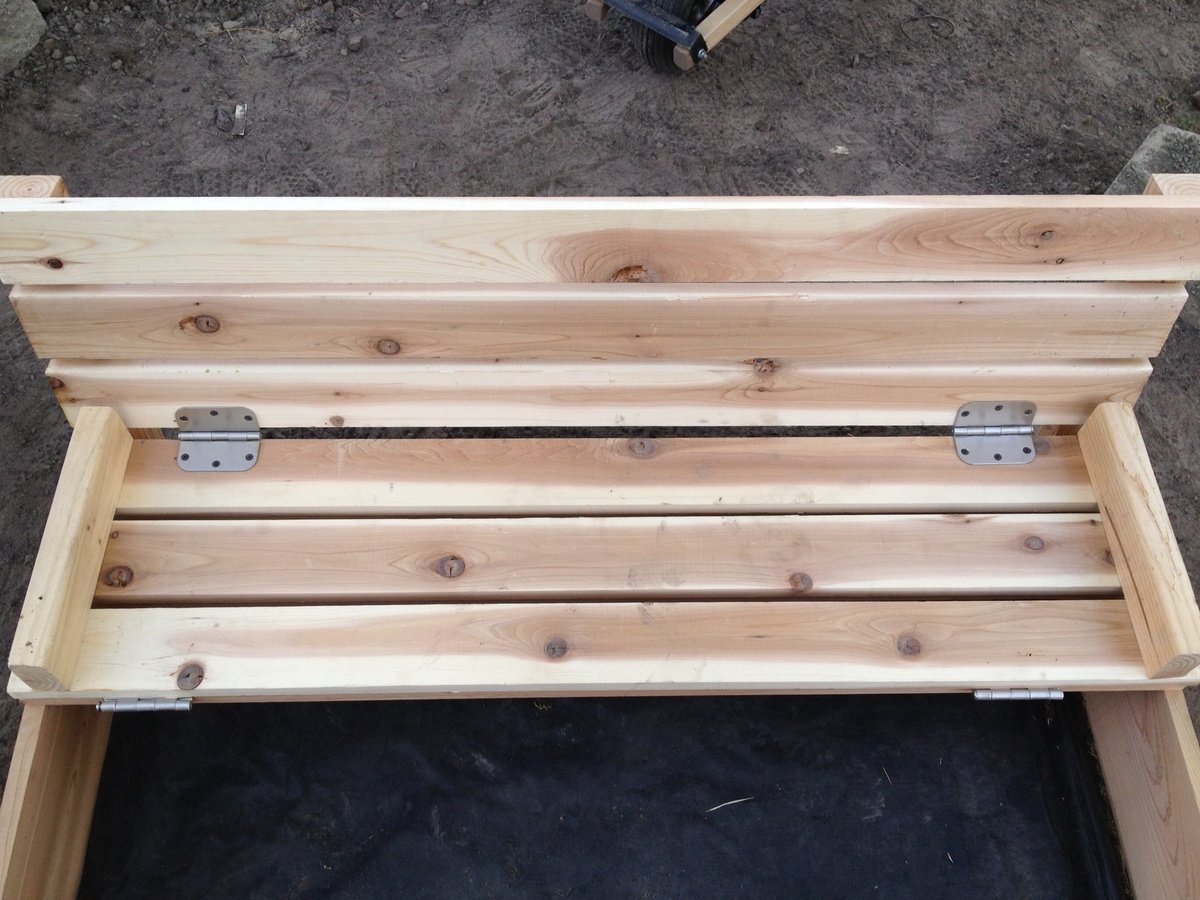
I also wished I had a little more instruction from which side to screw the screws in. May sound a little needy for some of you, but I never did anything with wood before. The instructions simply read attach top planks to arm rests (or something int that manner) and I wish it would have told me from which side to screw in (or give me a picture). Looking at some of the brag posts helped a lot.
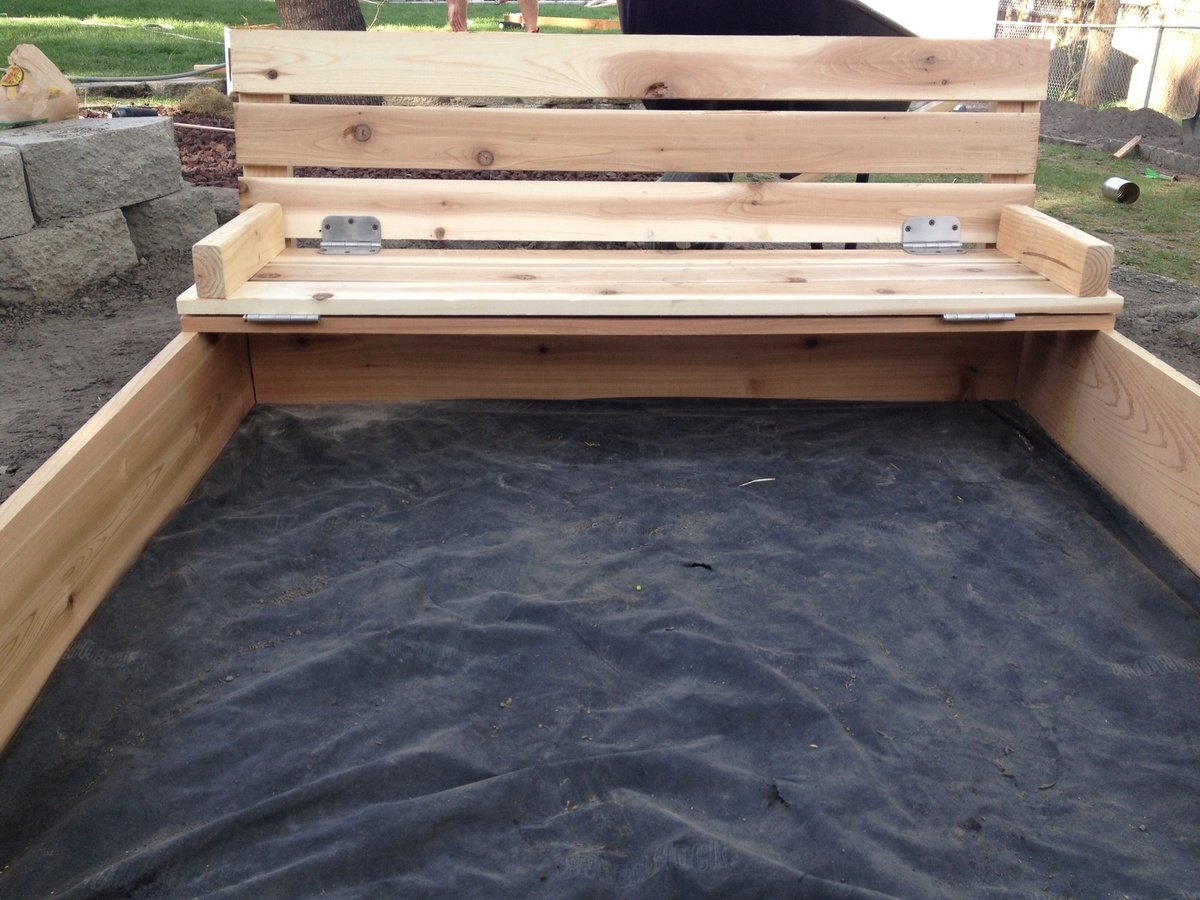
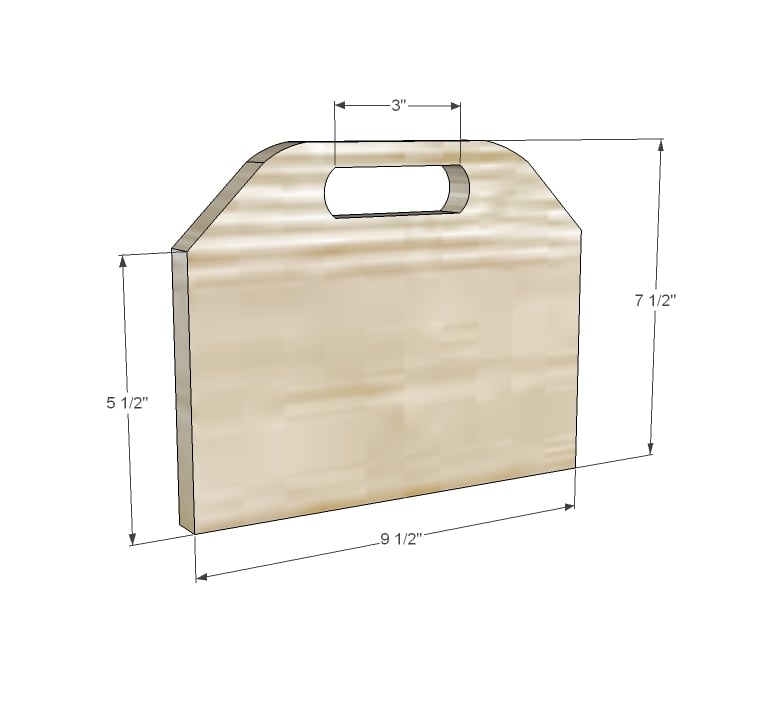
Because its larger size, I decided to make the seats 3 top planks wide (and also the back rest) and made another middle cover piece to bridge the additional gap when both seats are folded down.
Also, the cedar was VERY expensive, and all the screws, hinges, and handles almost cost me as much as the wood.
The sand to fill the box ran us another $80 (for good plays and), but that was because we made it so big.
All in all, a rather pricey sandbox, but worth it because of the large custom sizes, and the cute little seats.
Pictures show the sandbox without sand, and with some of the handles still missing. I also still need to fill the holes.
Will add a picture of finished box filled with sand when it is available.
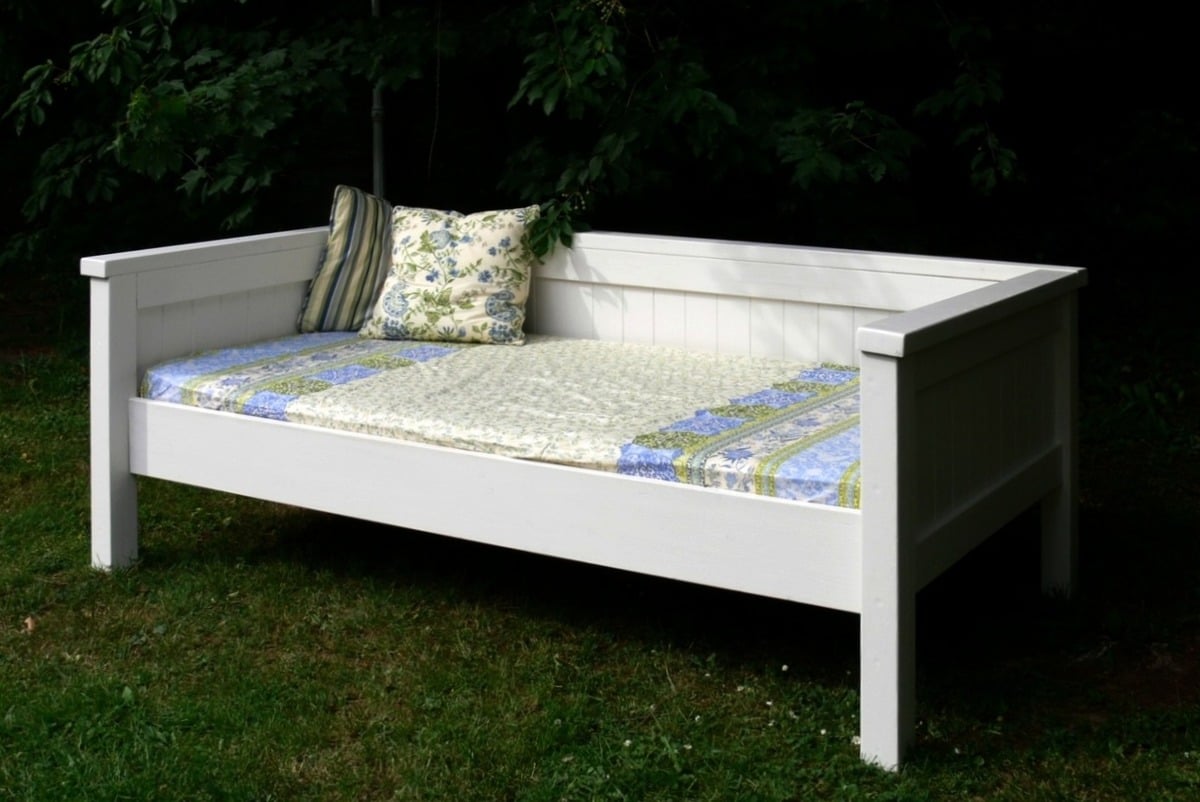
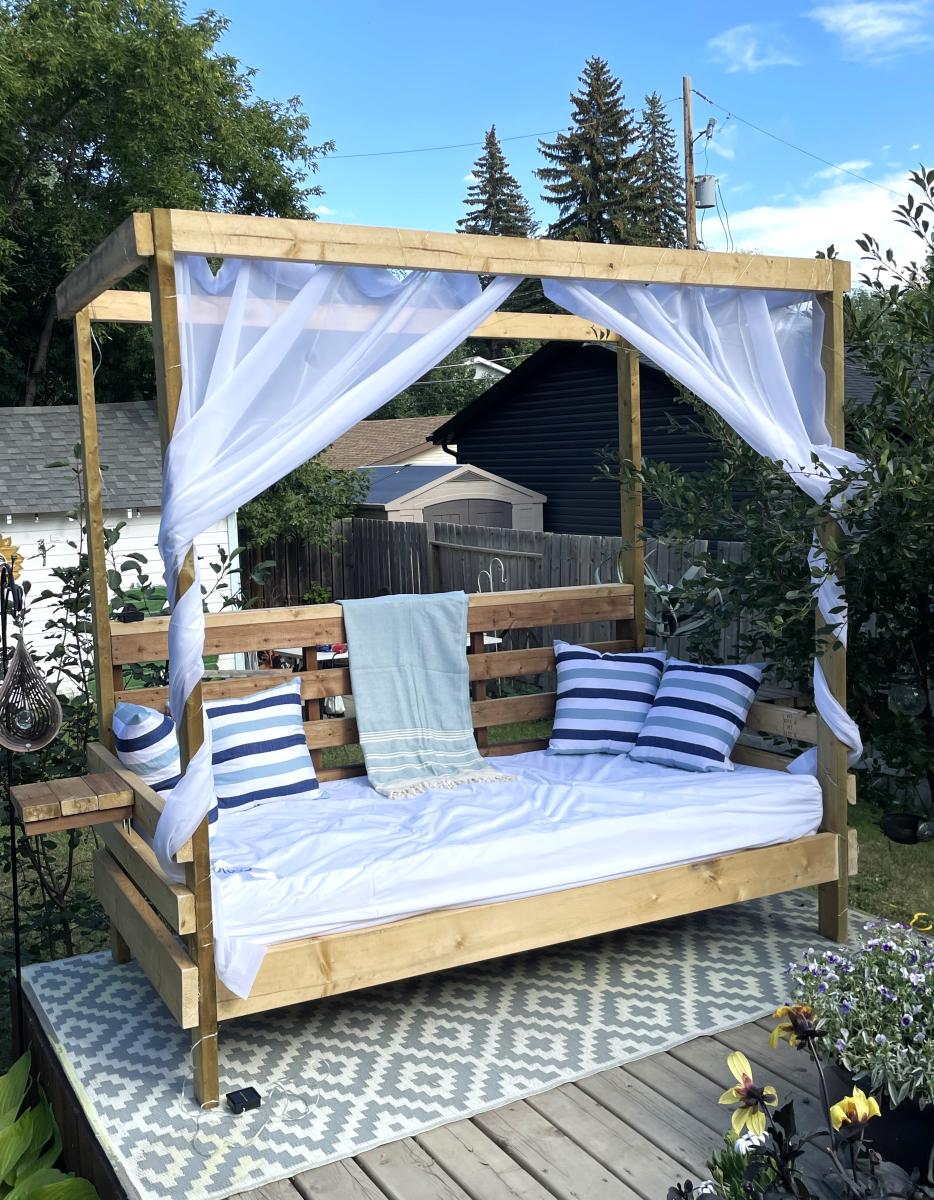
I needed a bed for my guestroom and decided to build a mixture of the simple daybed and the farmhouse bed. The back and the front rail are attached with bed brackets for easy disassembling.

Mon, 06/06/2011 - 13:45
I love the look you created, the blend of simple and farmhouse looks really great.
Tue, 06/21/2011 - 09:42
Dear Uli, I love the daybed you created and I'm planning to build my own next week for our guest bedroom, which doubles as my project room. Could you tell me what height you made the bed? It looks lower than the average headboard height, but higher than the average footboard height. I'd like to make mine close to your, which I think is just perfect.
Thanks,
Sara

In reply to Question about height by Guest (not verified)
Tue, 06/21/2011 - 13:30
Thx :-) I've made the panels 19,5" high, and the legs measure 31,5". On top of the panels I screwed and glued a timber, which is a little bit thicker than a 2x4. So the overall height is 33,5". If you like I could send you my sketchup file.
Uli :-)
Tue, 06/21/2011 - 19:42
Thanks Uli,
Those dimensions will be a big help. I've constructed more than 30 pieces now, thanks to Ana, so it's no big deal for me to design my own plans and dimensions now. I'm hoping to complete this project before my sister comes out for a visit. Wish me luck!
Sara
Fri, 08/19/2011 - 23:58
Hi, Uli! Do you think you could please help me out by sharing your sketchup notes for the "Farmhouse-Daybed-Hybrid"? This would really help me to get a handle on building this project.
Thank you from Martina.
P.S.-Though we now live near Palm Springs, California, we lived in Sachsenhausen for nearly 2 years & office was in Wiesbaden. Though I prefer the climate here, I still miss Germany.
In reply to Sketchup for Simple Daybed/Farmhouse-Bed-Hybrid by Miss Martina (not verified)
Sun, 08/21/2011 - 01:47
Hi Martina,
no problem, please give me your email-adress and I will send you that file.
Greetings from rainy Germany
Uli :-)
Sun, 08/21/2011 - 19:48
Yay! Thank you so much for the help.
[email protected]
MM-
The humidity is very low and average temperatures: 40C-46C during this time of year.
Wed, 06/20/2012 - 21:00
Dear Uli,
I am brand spanking new here on Ana-white and I love, love, love your daybed. I would like to give it a go for my daughters. Is it possible to get your sketch up notes? This will be my first build and I am so nervous about trying something without having a plan in front of me. My email is [email protected]
Blessings, Robin
Sun, 09/14/2014 - 17:23
Can you share the plans with me? [email protected]
also do you think a trundle... Specifically the Anna white trundle would fit underneath for a 2nd bed?
Wed, 09/14/2011 - 07:56
I would LOVE it if you could send me your sketchup file too. I want to build this for my guest room.
Wed, 08/31/2011 - 14:27
I would love to make this for my son's room. I am a beginner, can you provide the file for me to look at too?
Wed, 08/31/2011 - 15:35
Hello Helen,
yes, I can... but it will take till weekend. please send me your email-adress.
regards
uli
Sat, 09/17/2011 - 00:36
Hi Uli, I too LOVE what you did and would love it if you could send me the file of the sketch up too.
Thank you!
Jackie
Tue, 09/20/2011 - 12:58
Luv the bed. Would it be possible to obtain the plans?
Gratzie.
Fri, 09/23/2011 - 12:39
Uli,
I absolutely love this daybed and have been searching for such a bed, even to buy, but have found nothing. My husband is super handy and loves wood-working, so I think I am going to put him up to the task! :) Could you e-mail me your sketch-up file as well? My e-mail is [email protected].
Also, is there room to put a trundle underneath...this is a must-have for us. Do you happen to have any plans for a trundle? If not, hopefully my husband can come up with something for that!
Thanks so much for sharing your great idea and plans!
Amy
Sun, 09/25/2011 - 12:51
Mon, 09/26/2011 - 01:50
I've uploaded the daybed file to the Sketchup gallery
http://sketchup.google.com/3dwarehouse/details?mid=95f5c95ba96f7cee345d…
Wed, 07/29/2015 - 13:18
Hi Uli,
Could you email your sketch up? The link doesn't work for me :-(
Thank you so much
Tue, 11/08/2011 - 17:56
Hi Uli,
Would you email me the plans for this bed please? It's perfect and exactly what I have been looking for!
Thanks so much,
Siobhan
Wed, 11/09/2011 - 01:56
Hi Siobhan,
Wed, 12/28/2011 - 20:50
Hi Siobhan, I was wondering if you could possibly send me the plans for this bed in a Word document or through email. I tried to access the plans you attached above but my computer wouldn't allow me to open it. Also, I saw where someone else asked if a trundle would work with this bed and if you had plans for that, if so I would love to see if we can try to tackle that project as well. My email address is [email protected]. Thank you so much!...you have inspired me!!!!
Mon, 01/02/2012 - 09:58
I LOVE this bed. Would you mind sending me your sketch up and plans as well? Thanks so much and have a blessed and happy new year!
Mon, 01/02/2012 - 12:15
Please have a look here:
http://sketchup.google.com/3dwarehouse/details?mid=95f5c95ba96f7cee345d…
Mon, 01/30/2012 - 06:12
Hi, your bed is beautiful, could you please send me your dimensions, I would like to attempt, making this but kinda do an L, with a twin, and then a toddler mattress, at the head, the smaller mattress, would be like the short side of the L! Very new to this, but I would like to give it a go!
Sat, 02/04/2012 - 09:35
Uli,
I love this so much and as others have said...it is the exact height I think I would need. This is my first solo project (without help from the man in my life) and i would love all the help I can get. Could you send me your plans for the hybrid? email address is [email protected]
Thanks much,
Raven
Sat, 02/04/2012 - 10:25
Hi Jenny and Raven,
I don't have plans except the sketchup drawing which you can download from http://sketchup.google.com/3dwarehouse/details?mid=95f5c95ba96f7cee345d…
Have fun :-)
Uli
Thu, 04/12/2012 - 10:31
Do you have a mertials list you used to buy the wood, etc for this bed. We are wanting to build a similar bed and add a trundle drawer underneath. Any guidance you can provide would be great!
Rach
Fri, 04/27/2012 - 10:54
We figured it out and added one more layer to the project. We are combining the simple daybed, farmhouse daybed and trundle. So far so good.
Wed, 02/25/2015 - 20:15
That's exactly what I want to do. I cannot download Google SketchUp, (It requires Windows 7 or newer. I am still running XP.) so I cannot access the plans provided. Could you please share yours? I also need the bed to accommodate XL twin mattresses (upper and lower beds). I could make those adjustments to your plans if need be.
Wed, 05/09/2012 - 01:39
Hi Uli, I just love your bed, I'm new to building your own furniture but since I saw your bed I wanted to build it so I'm doing it. So far I have made the laterals and the back panels and now I'm putting it all together. I have some questions and maybe you can help me... you used bed brackets for the back panel, how did you put these so that they won't be seen? did you put them in the top and bottom of the panel?
Thank you very much
Judith
Mon, 05/14/2012 - 01:24
Hi Judith,
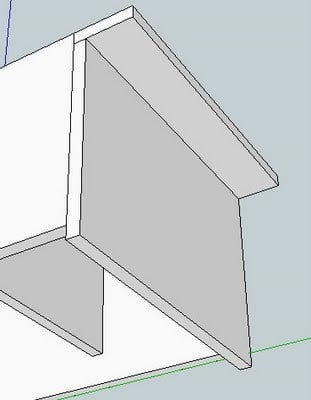
I used bed brackets at the front and back rail. They can't be seen because the mattress hides them. Additionally I connected the back panel to the sides in the way you can see at Step 4 here: http://ana-white.com/2009/12/plans-simple-daybed.html.
Hope I could help you :-)
Thu, 06/28/2012 - 10:14
Hey! I love the way you used the farmhouse bed for this daybed. It's perfect for what I'm looking for. I wanted to make my daughter the farmhouse bed but, we always wanted a daybed at the same time. This is perfect. Do you have any plans you can share with me so I can start making this? Thanks! [email protected] is my email if needed
Tue, 07/17/2012 - 10:26
I absolutely LOVE this bed and it is exactly what I want. I know many people have asked for the sketches, sooooo if anyone has received them, could they please forward them on to me??? (of Uli, if you see this and you have them) I would greatly appreciate it. You should definitely post this as a plan post because I'm sure many others would love it!
my email is [email protected]
THanks so much in advance!!! :) :) :)
Thu, 07/19/2012 - 12:58
Hi Uli,
Outstanding work. I am going t make this for my 2 year old son. Quick Question.
I am confused about how to attach the posts to the panels for the head board. I assume you drill in from the far left and right of the posts? Do you use wood putty to hide the holes later? Could you use pocket holes? Or would that not be as structurally sound. Any advise would be appreciated.
From the instructions:
Now attatch the 4x4 posts to the panels. Make sure you pre drill half way through the post and use the 4 1/2" screws. Line the top edges of the panel and the post, keeping everything square as shown. Screw into the panel where it is sandwich 3 boards thick. Put at least 6 screws in each post.
Mon, 08/27/2012 - 10:11
What did you use to support the mattress on the daybed? A boxspring would be make it too high. Thanks for any info. Can't wait to get started on this project!
Mon, 08/27/2012 - 11:15
I made a similar bed and use slats (piece of wood across) to support the mattress.
They were similar to these,
http://www.ikea.com/us/en/catalog/products/25844409/
In reply to I made a similar bed and use by jigganancy
Tue, 08/28/2012 - 16:36
That's the way I did it too.
Fri, 10/12/2012 - 20:37
Can you send me a copy of the plans for the daybed. Does it have a regular mattress or just covered foam. Thank you
Sat, 10/13/2012 - 05:05
Hi Renee,
I don't have plans, I worked with a sketchup drawing. You can download it here:
http://sketchup.google.com/3dwarehouse/details?mid=95f5c95ba96f7cee345d…
The bed is has slats for a latex mattress.
Fri, 02/08/2013 - 12:13
Hi! I would love the notes if its still possible! My email is
Thank you so much.
Celeste

Sun, 04/07/2013 - 10:27
This is a great idea for a spare bed in our home office. Under bed drawers would be a good place for oir storage, too.
Sun, 05/12/2013 - 08:52
oh my god this is adorable!!!! Please may I have the plans and directions to copy? Thank you!
Sun, 05/12/2013 - 08:54
my email addy is [email protected] for a copy of the plans,,,thanks!
Thu, 02/26/2015 - 19:16
When I use the link you provided for your plans in Sketchup, all that comes up is a diagram. Are there supposed to be dimensions and instructions? Maybe I just don't know how to use the program. Could you please provide details on how to make this? My e-mail is [email protected]
Thanks
Wed, 12/09/2015 - 12:08
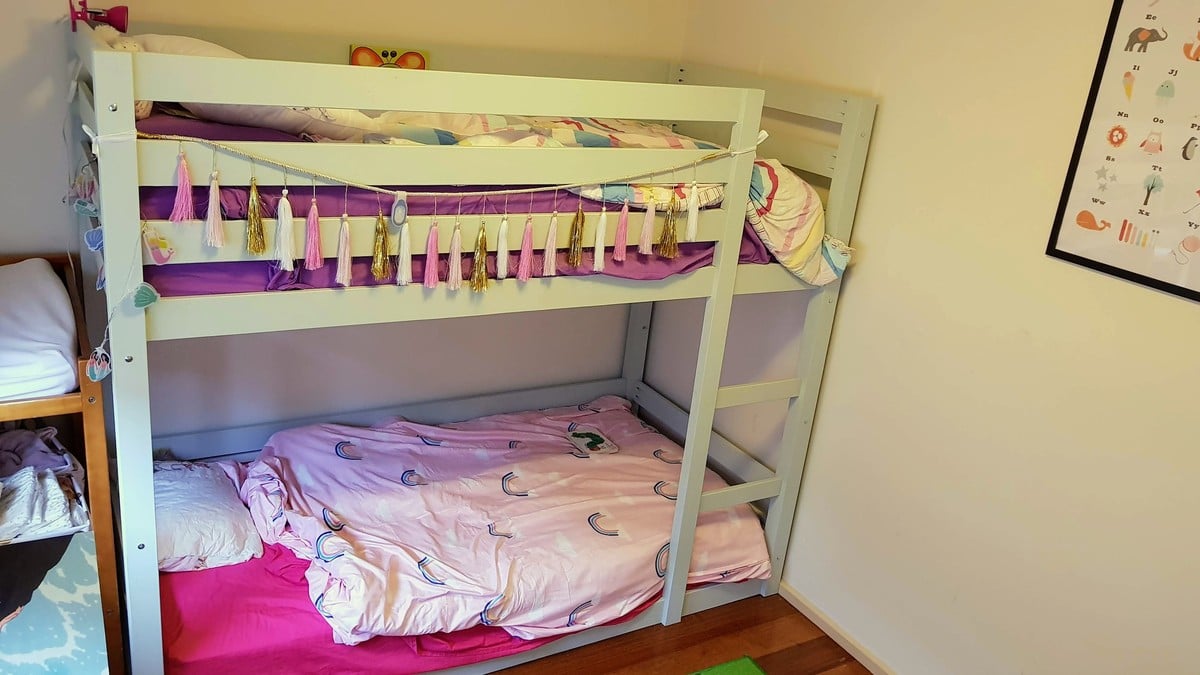
Uli,
Could you also send me the sketchup file? [email protected]. I just finished building a set of simple bunkbeds for my son. Now my daughter wants me to build this bed (with a trundle) for her! Thanks! -Bryan
Thu, 07/14/2016 - 07:29
Uli or Ana,
i need a sketch up of this plan. Mixing the 2 bed plans just confuses me. Sorry and thanks in advance. Please email to me at [email protected]
Tue, 12/26/2017 - 12:16
Can you please send me these plans? I know it’s been a while. [email protected]
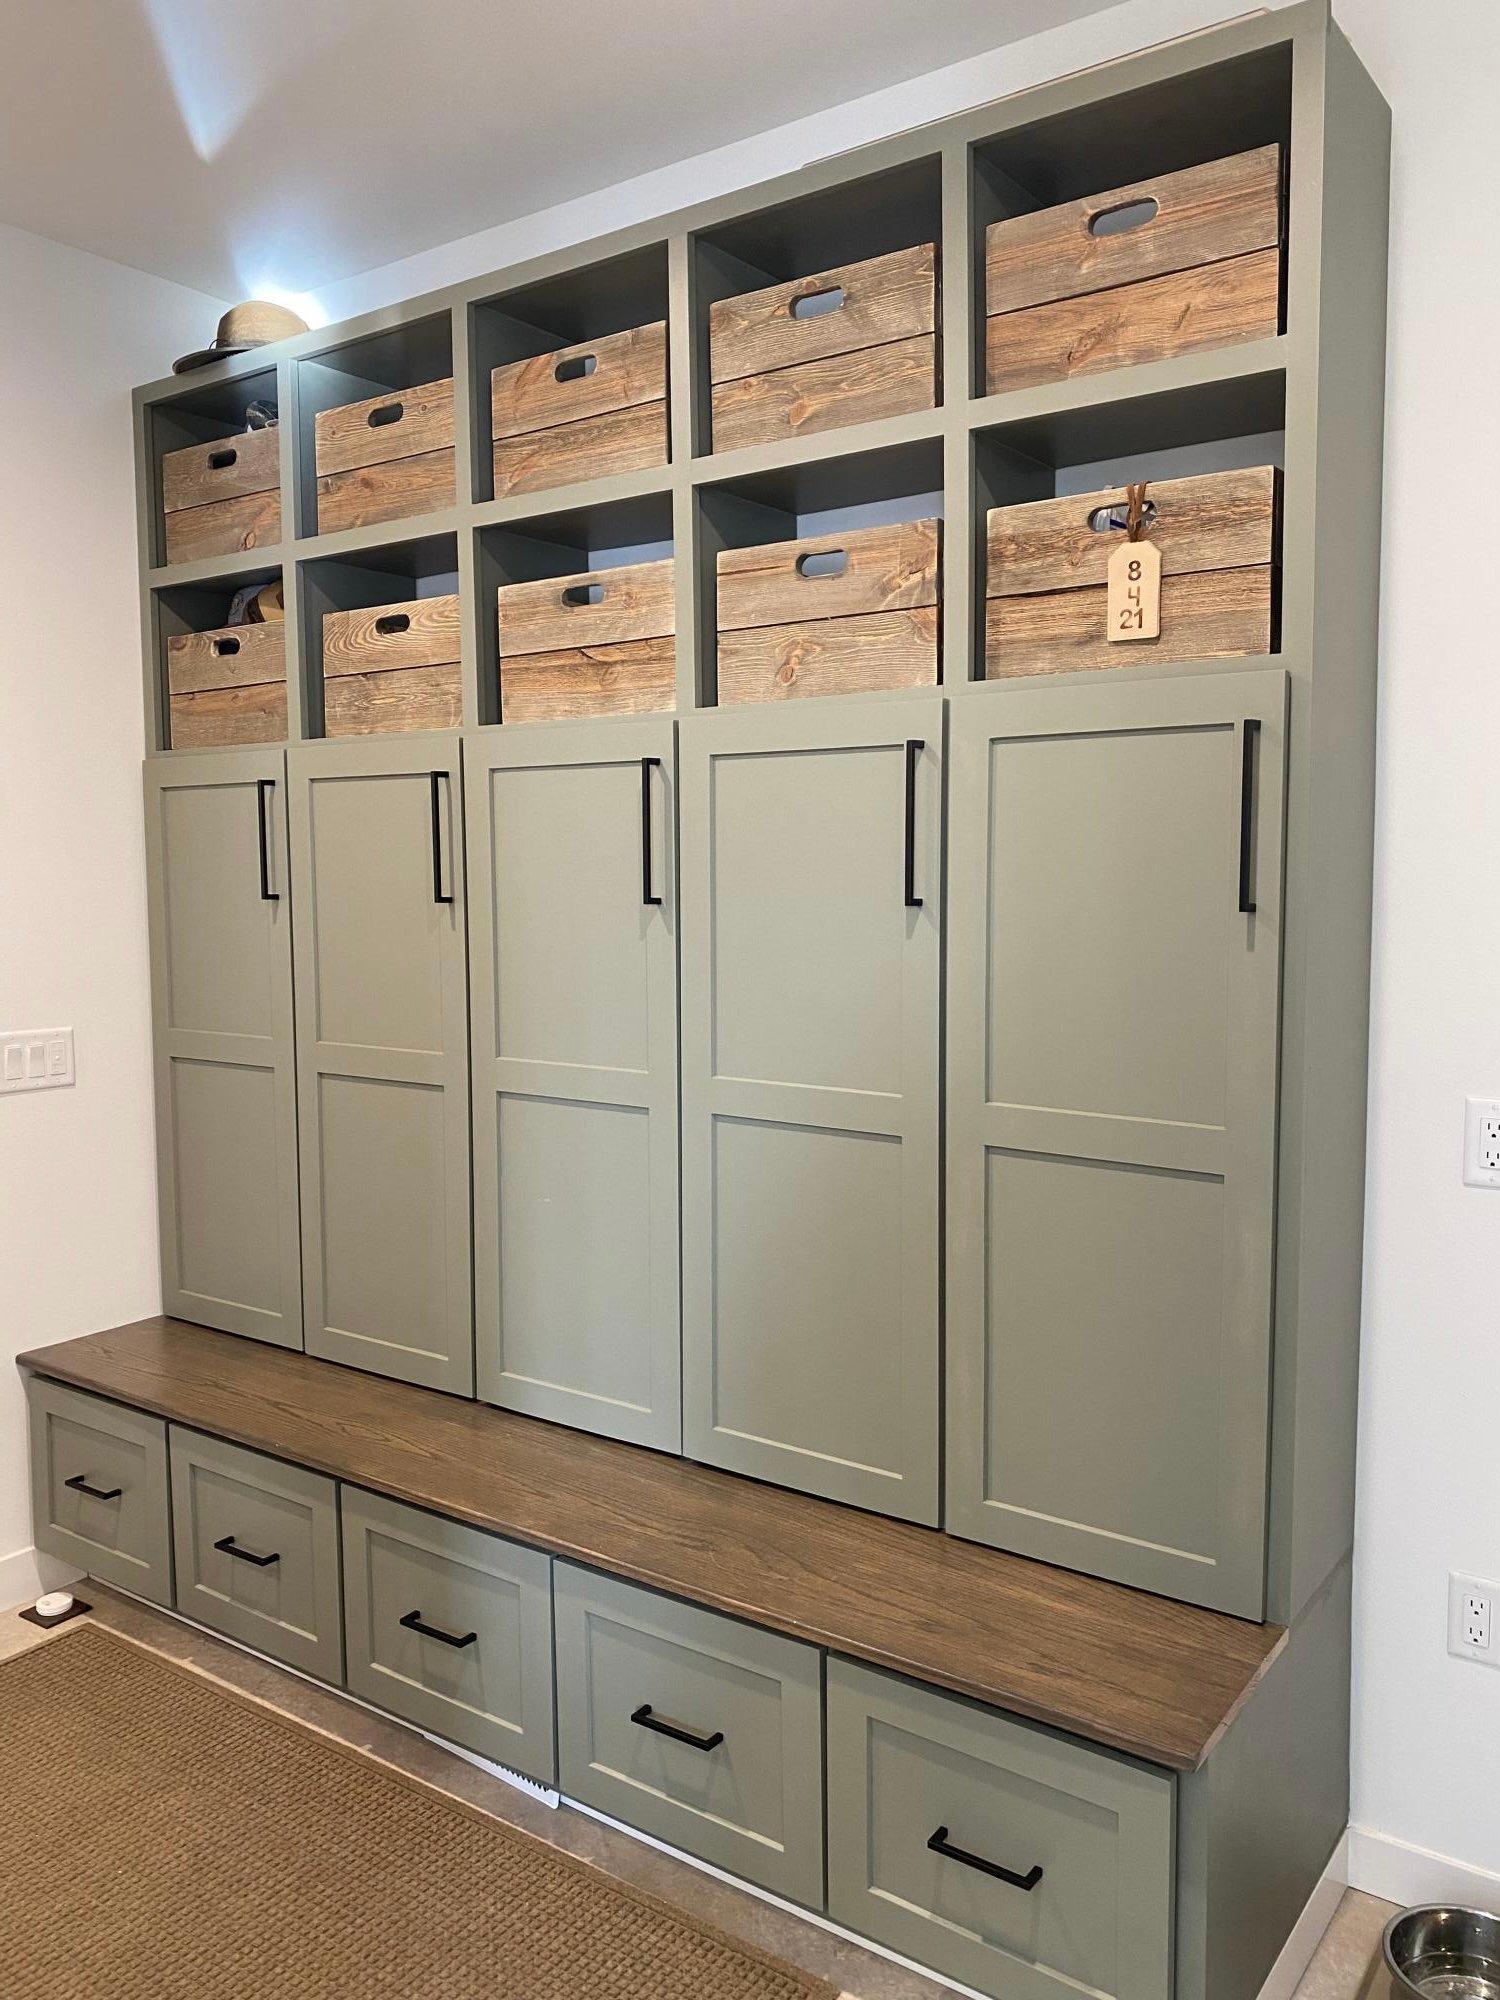
Thanks to Ana White we learned how to make these cubbies. The wood for the stained bench is from trees milled from my husband’s family farm.
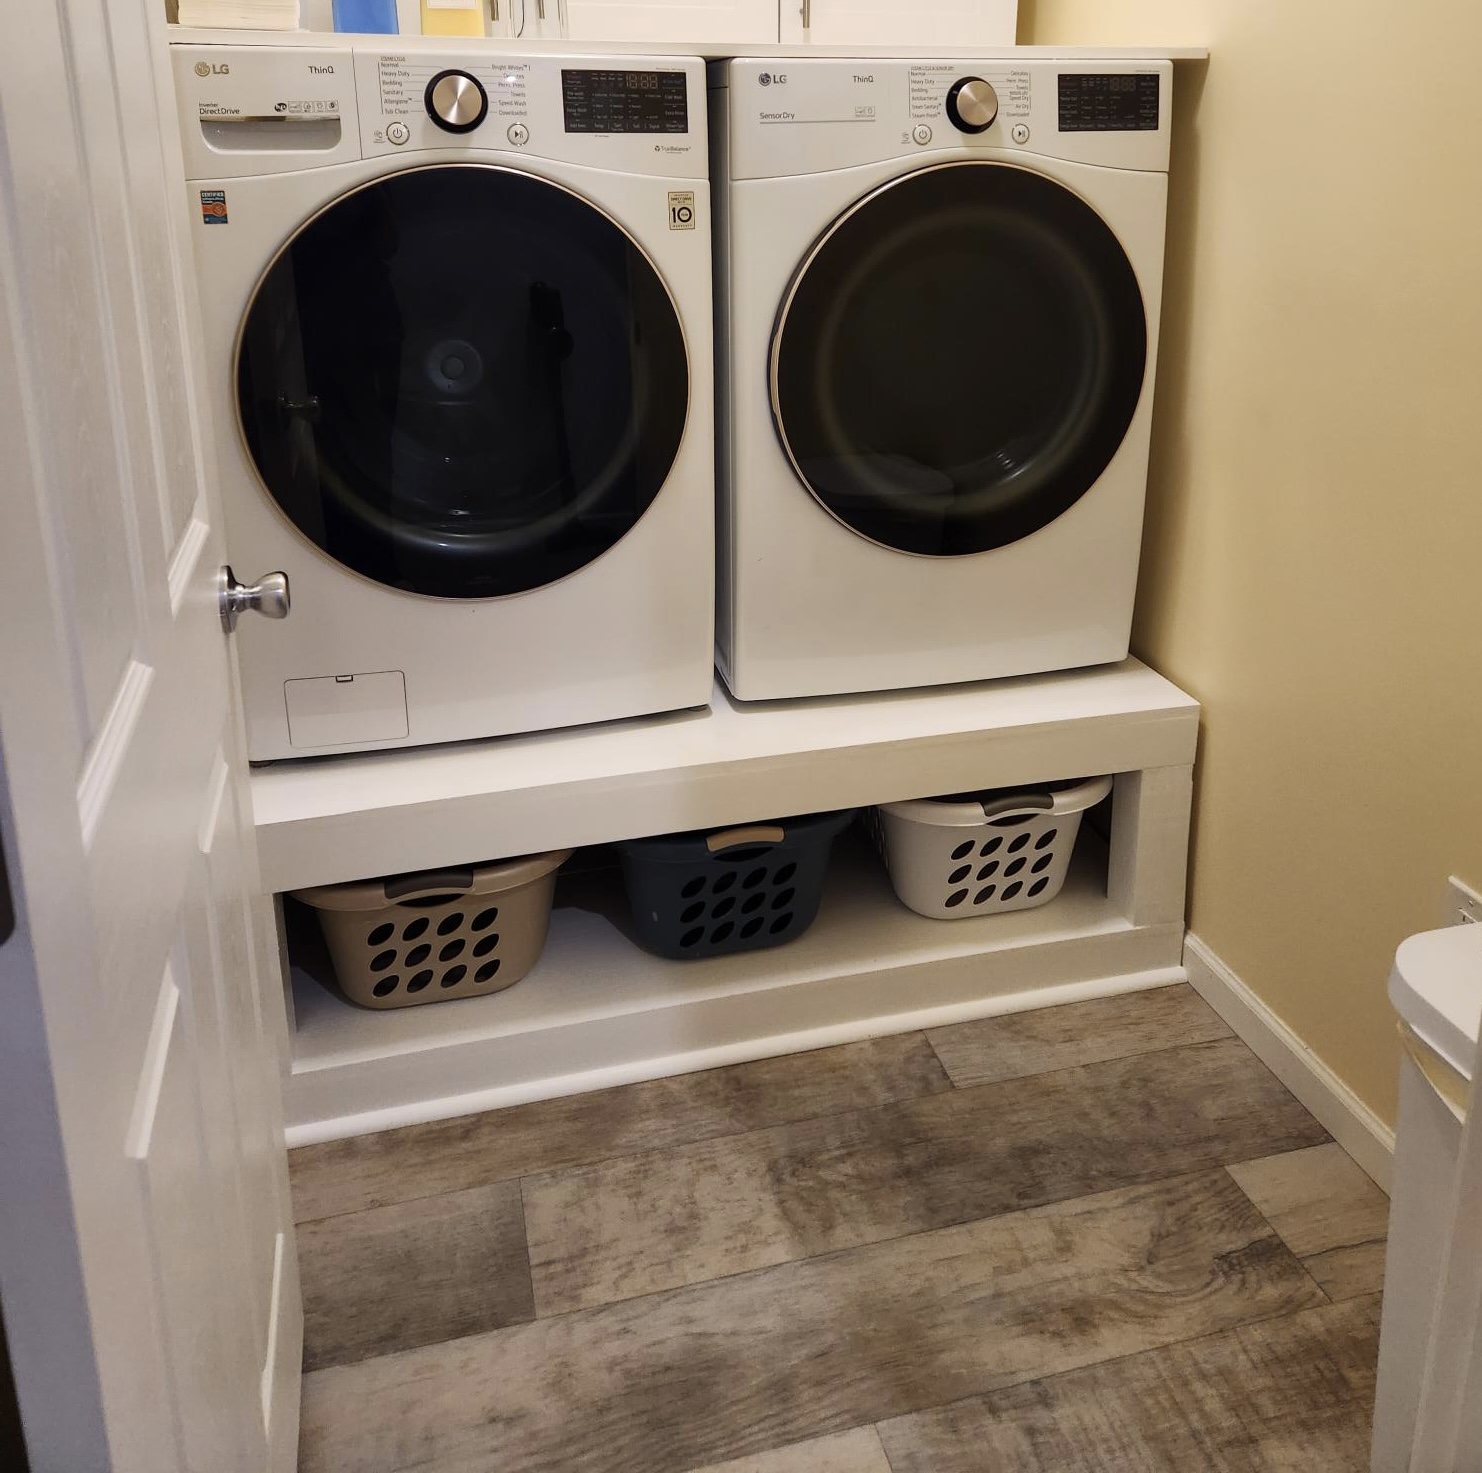
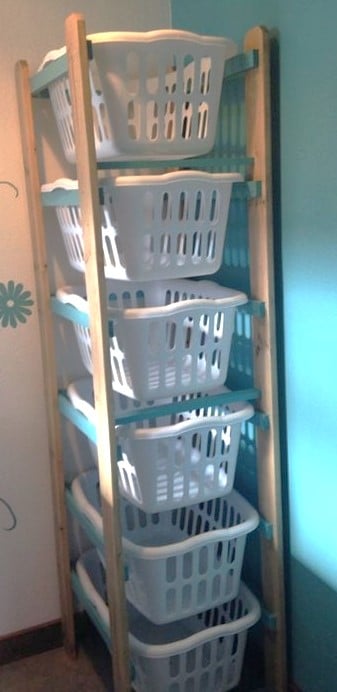
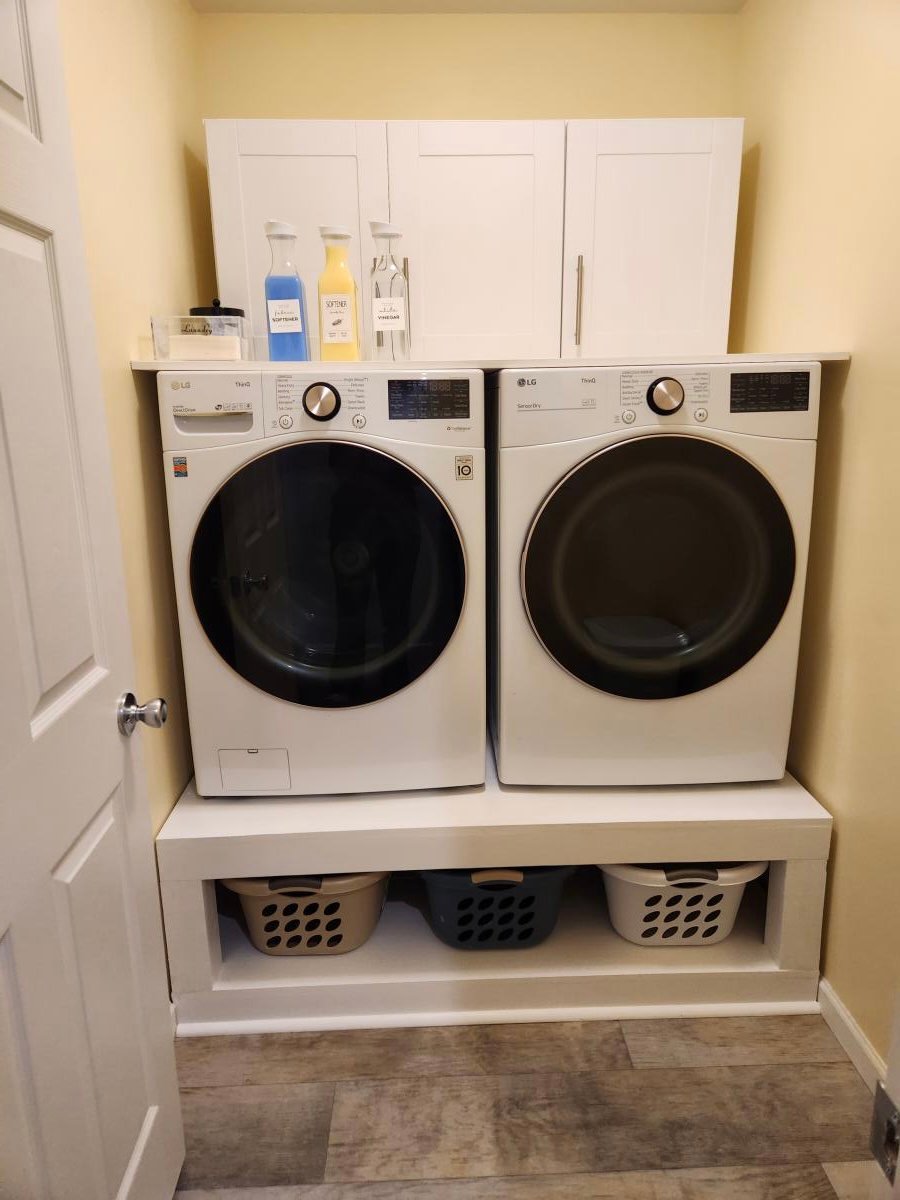
This pedestal base for the washer and dryer really created the perfect opportunity to organize and declutter our tiny laundry room. Had to resize it a bit to fit the space but it turned out perfect! I added a super easy top for an even counter space and bought some stock laundry room cabinets to sit in the back for extra storage. Such an upgrade!
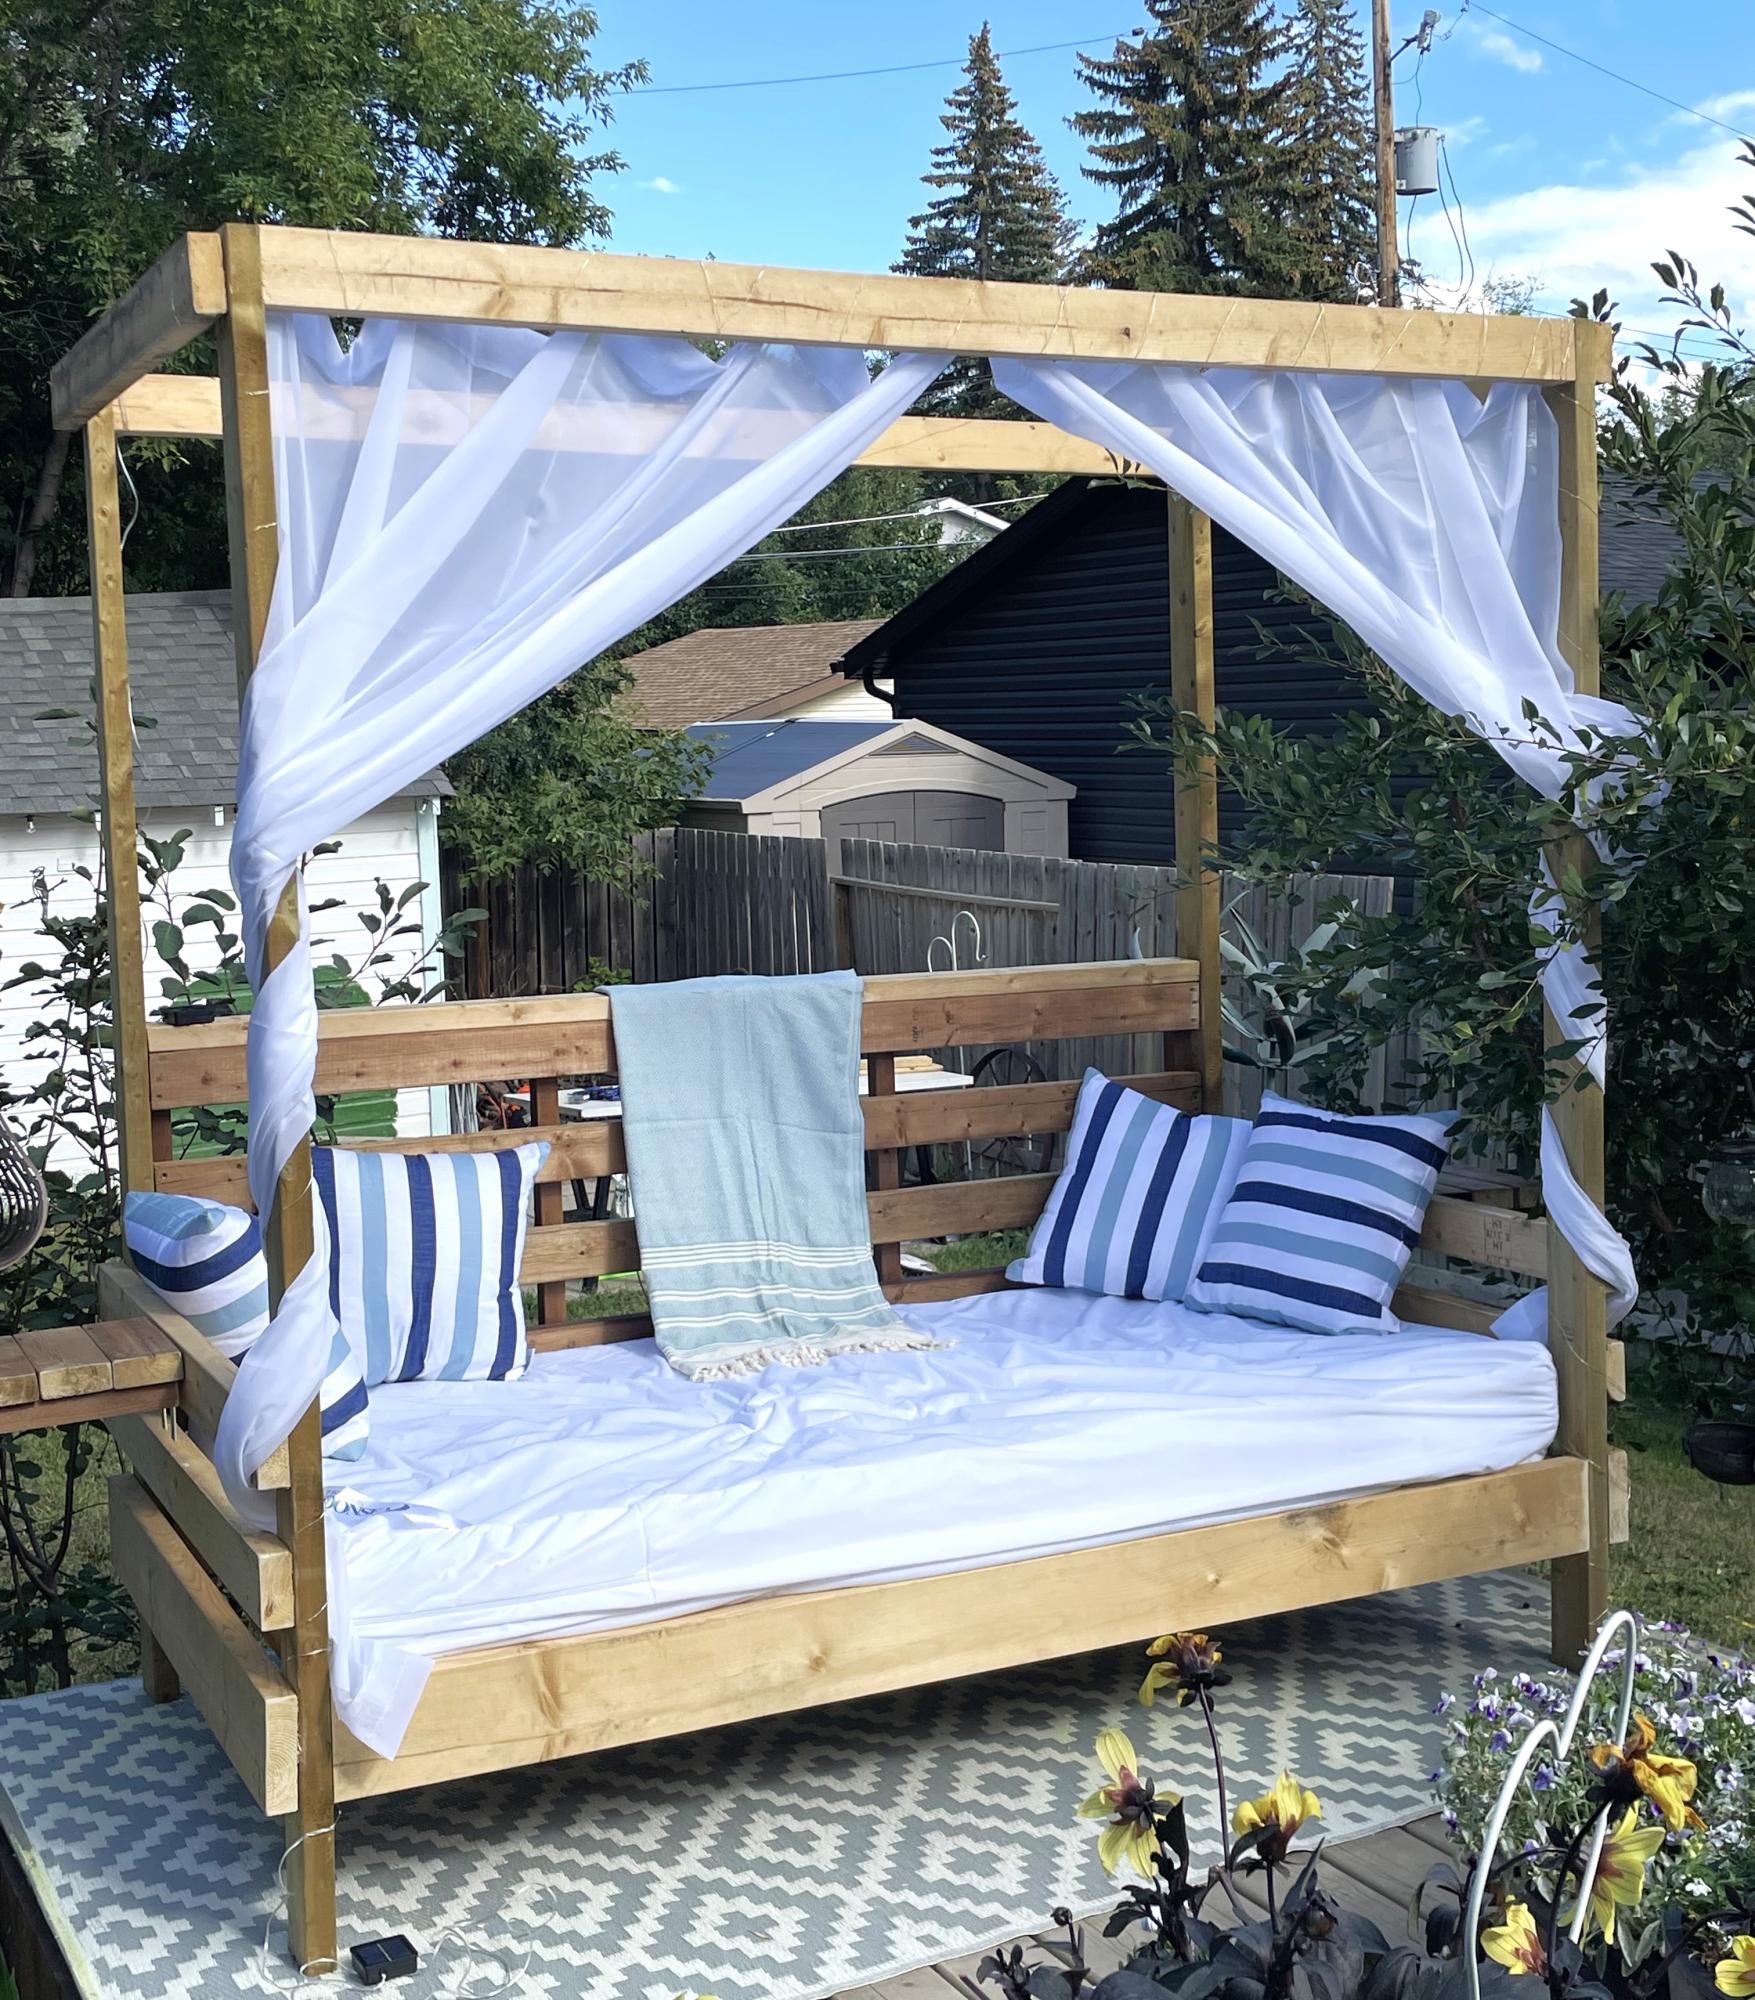
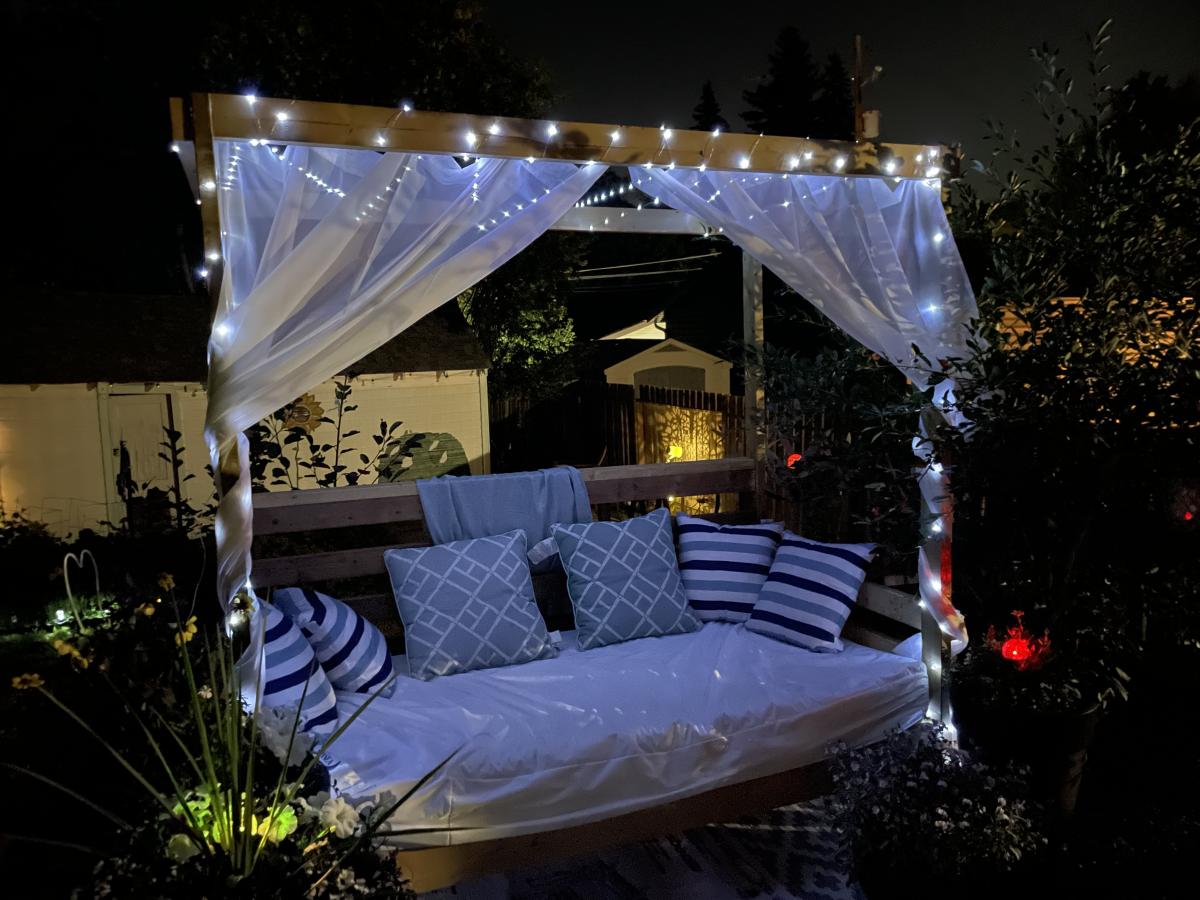
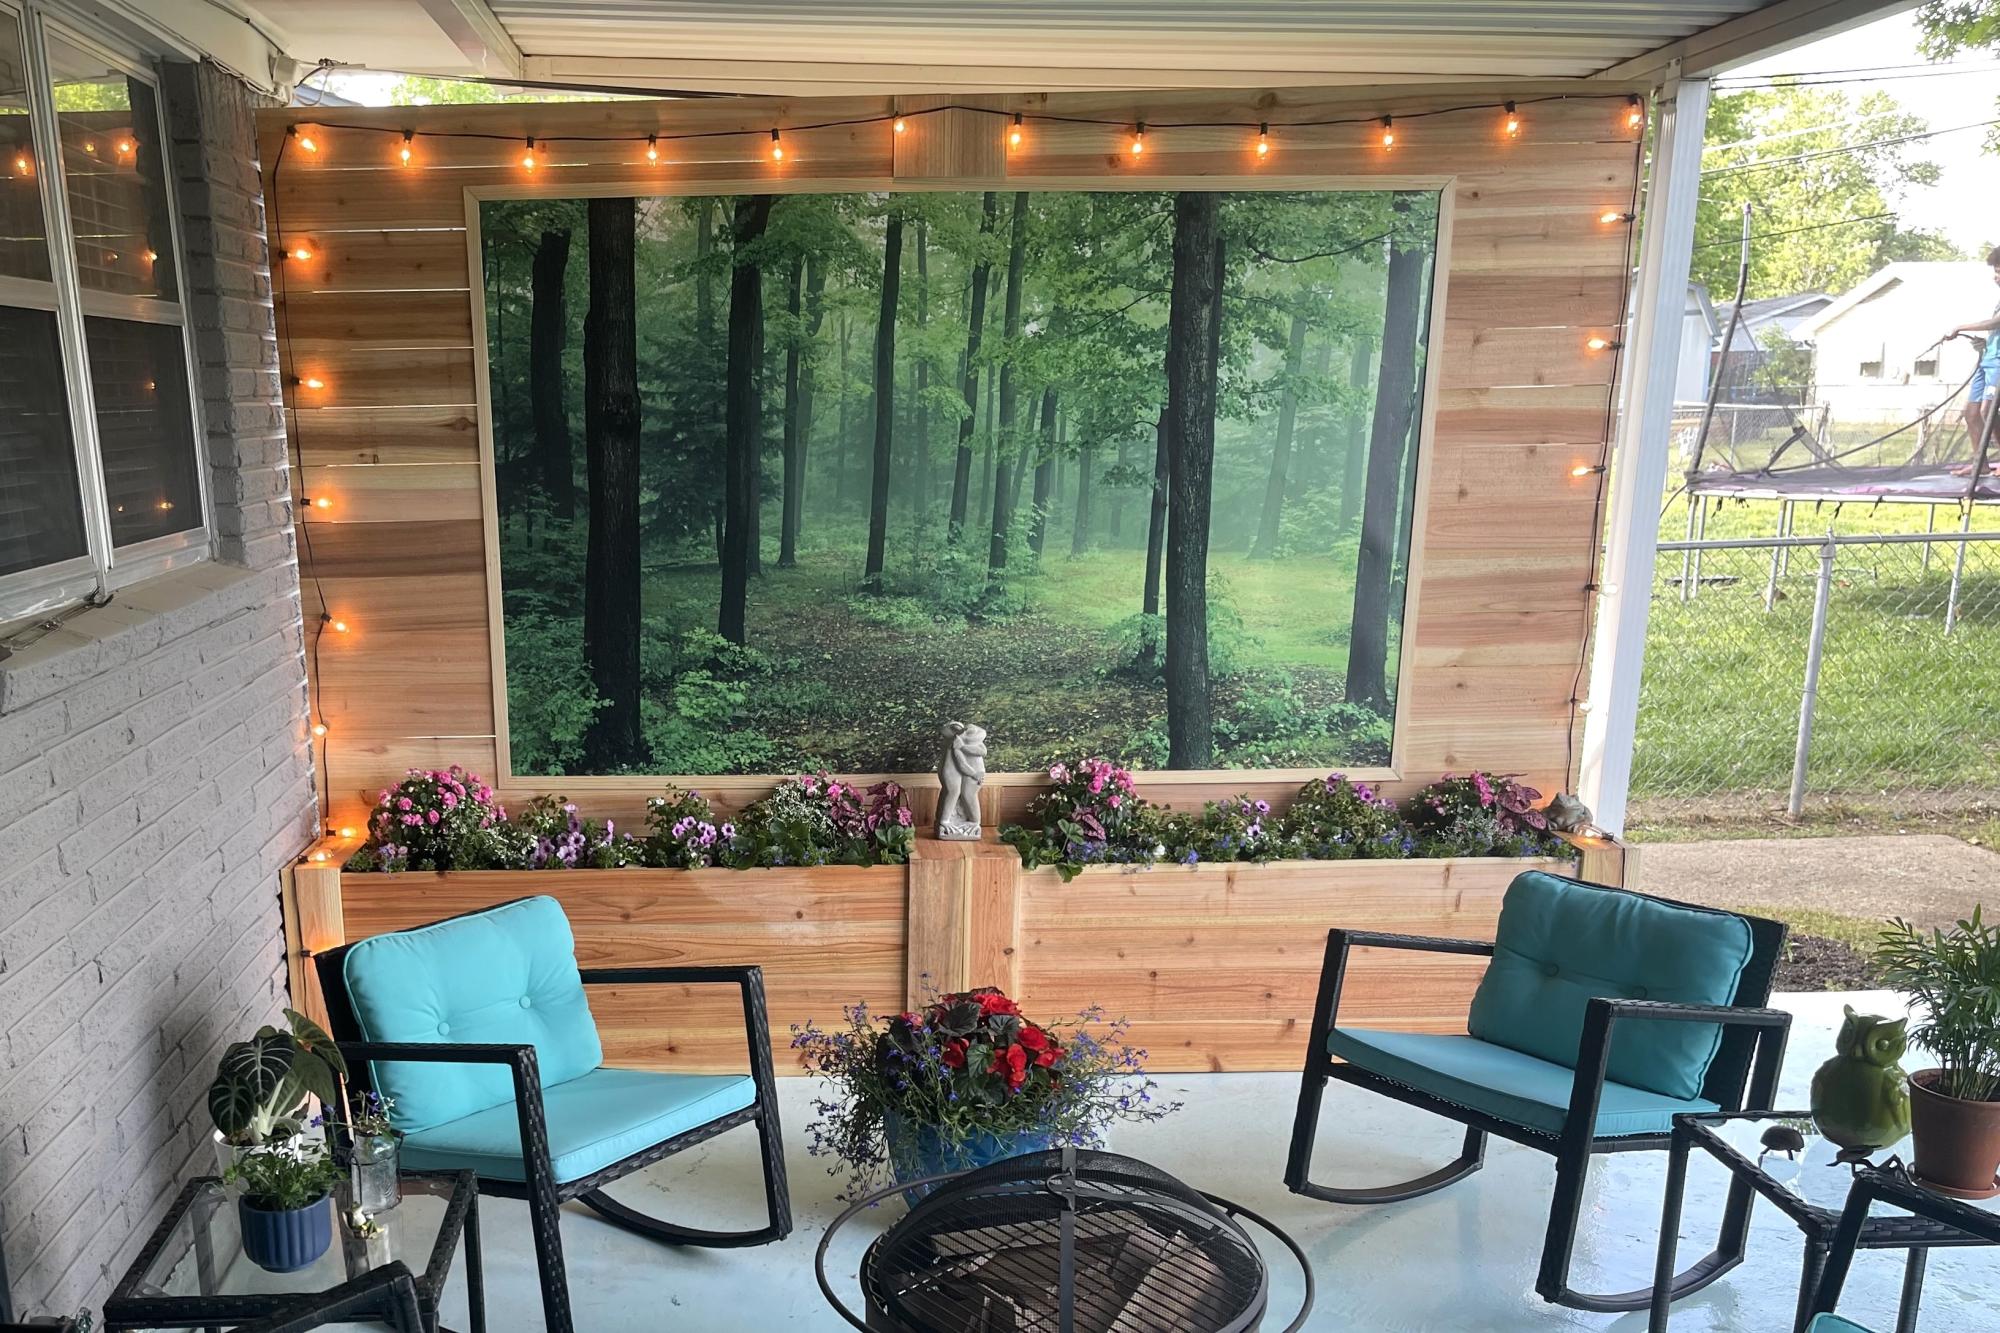
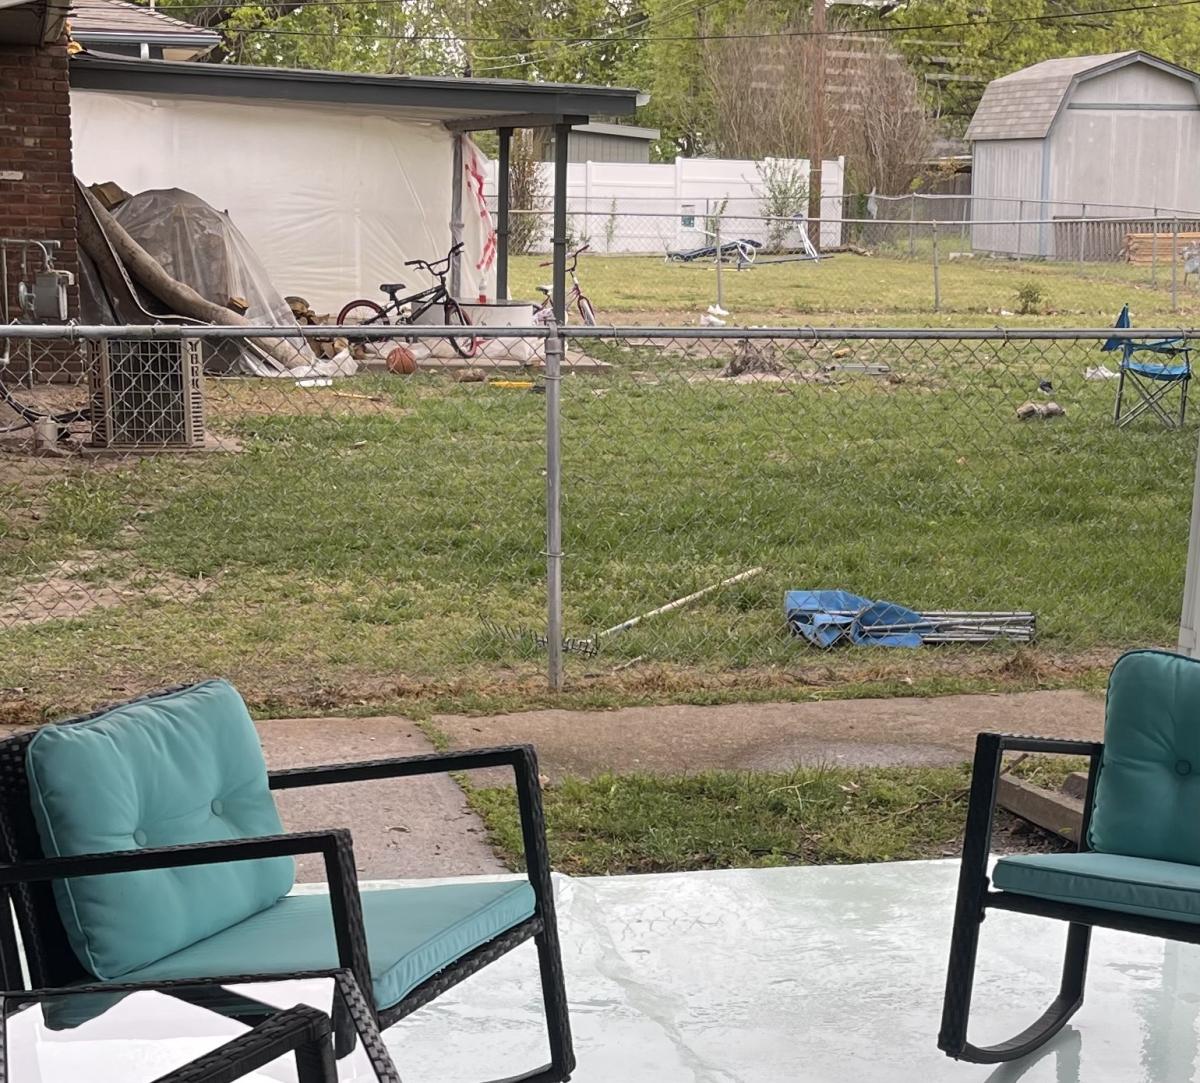
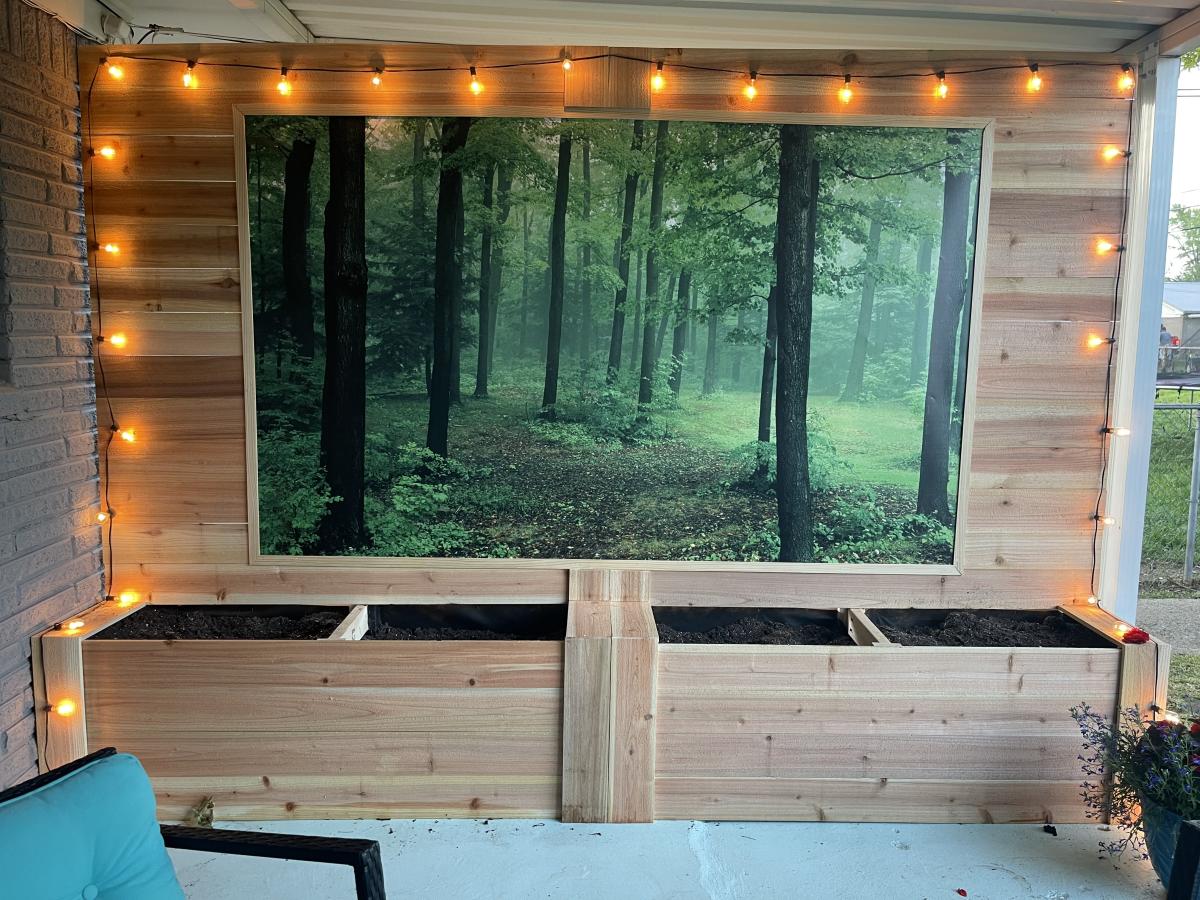
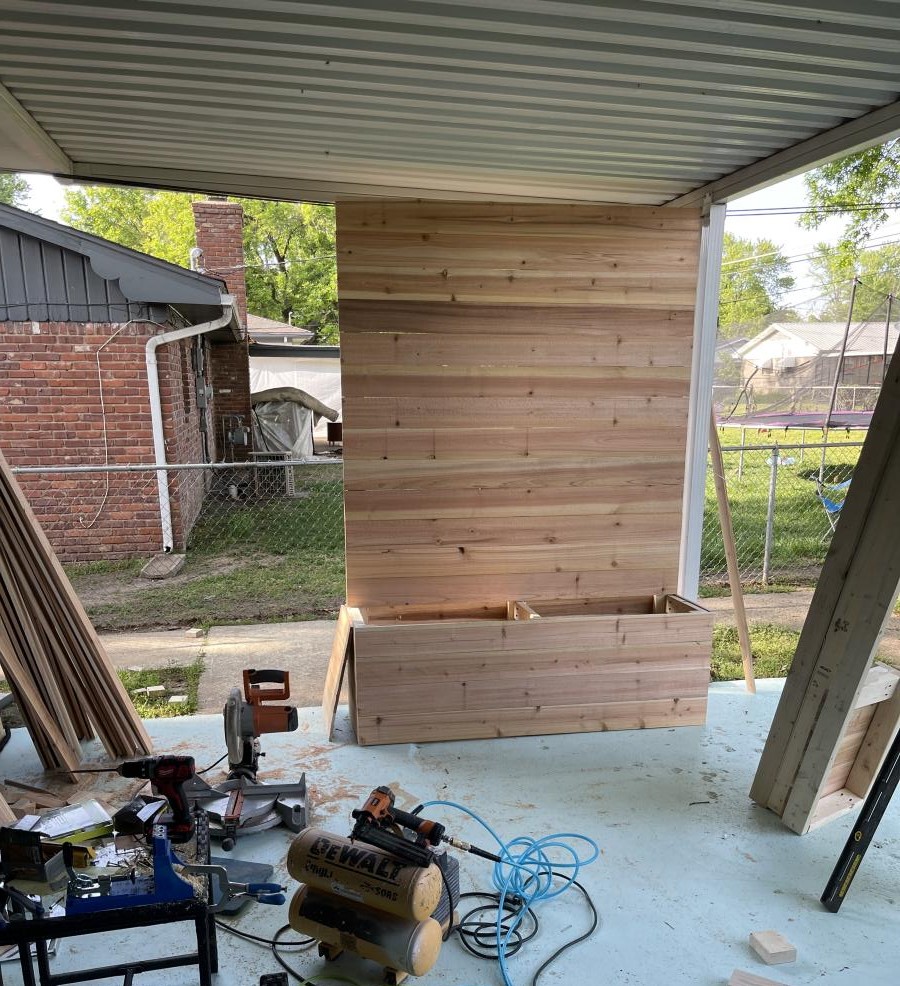
This was the first time I ever built anything - before this is hardly used a drill. It was big for a first build, and I did it entirely alone aside from a few text messages with questions. I added a couple little end tables to it for a book and a drink, and it’s now my favourite outside summer spot.
Facebook user @robyn.marie.3572

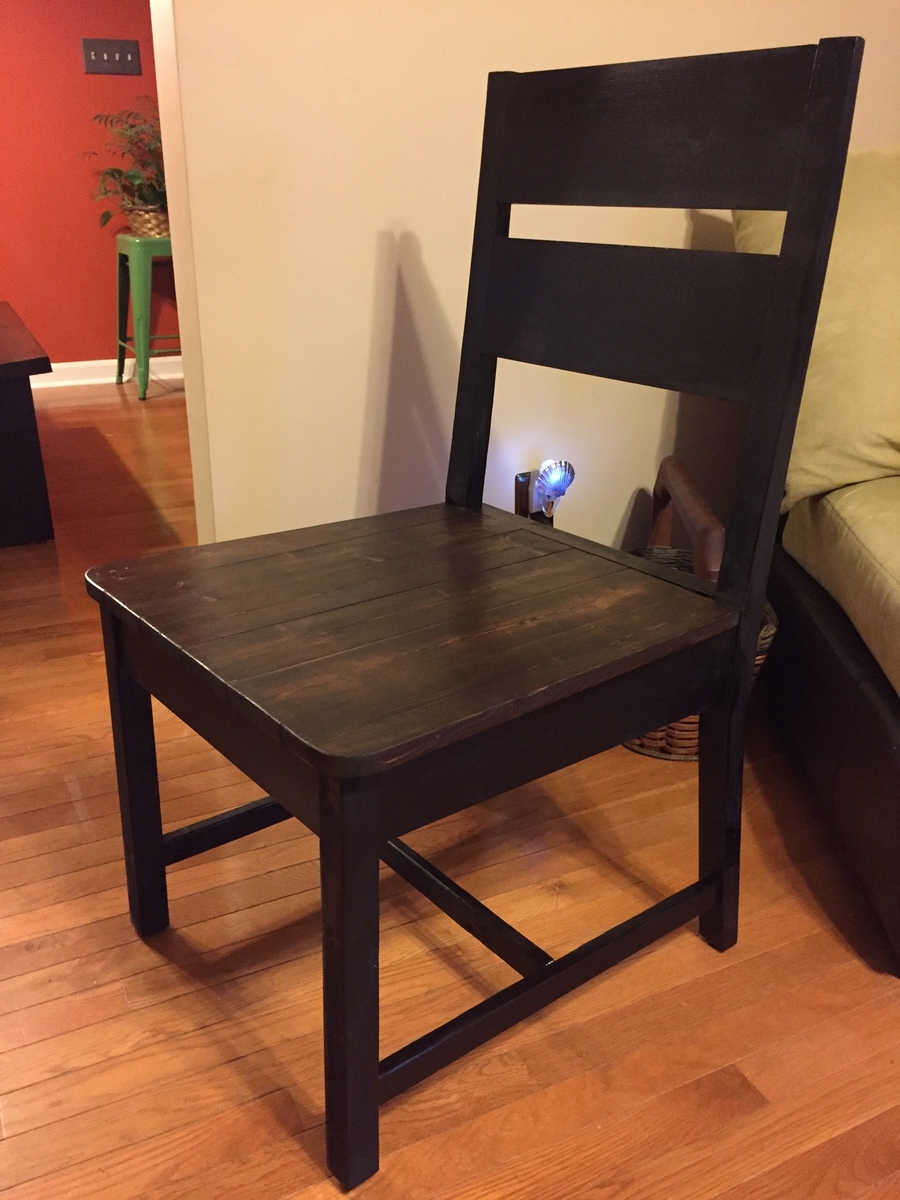
This was my first attempt at making furniture...but it turned out GREAT! My fiance was about to buy a VERY similar dining room set for $1300 before I stopped her and insisted that I could build it myself, finish it to match our kitchen/dining room, and save a TON of money!


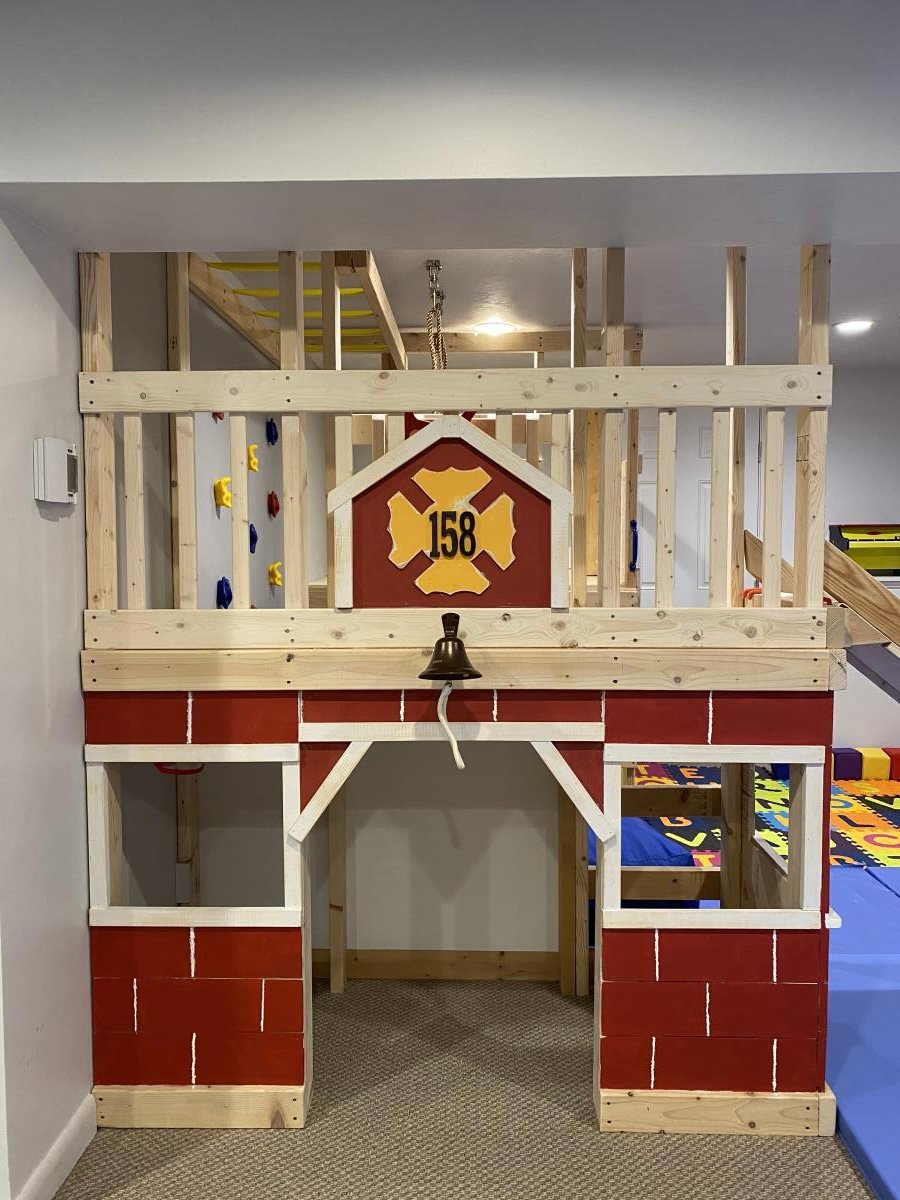
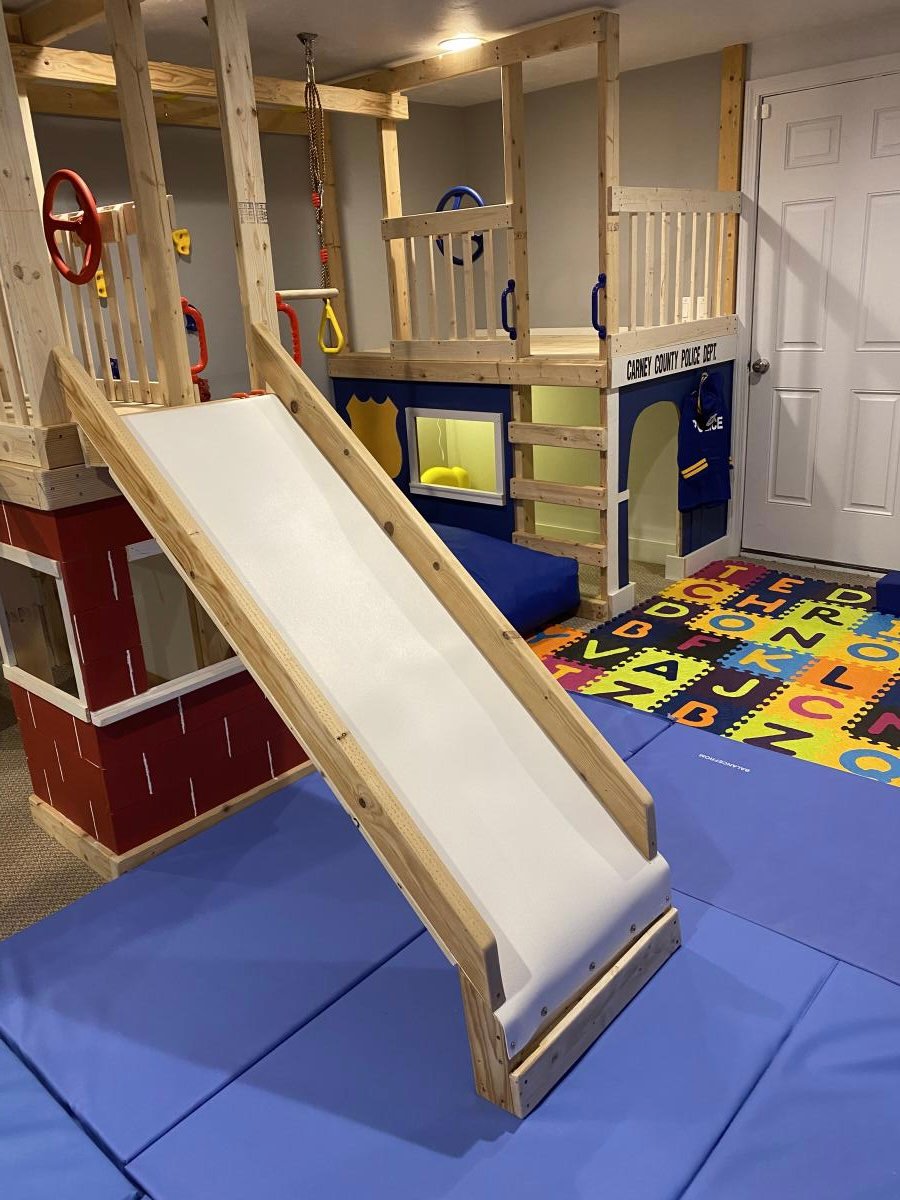
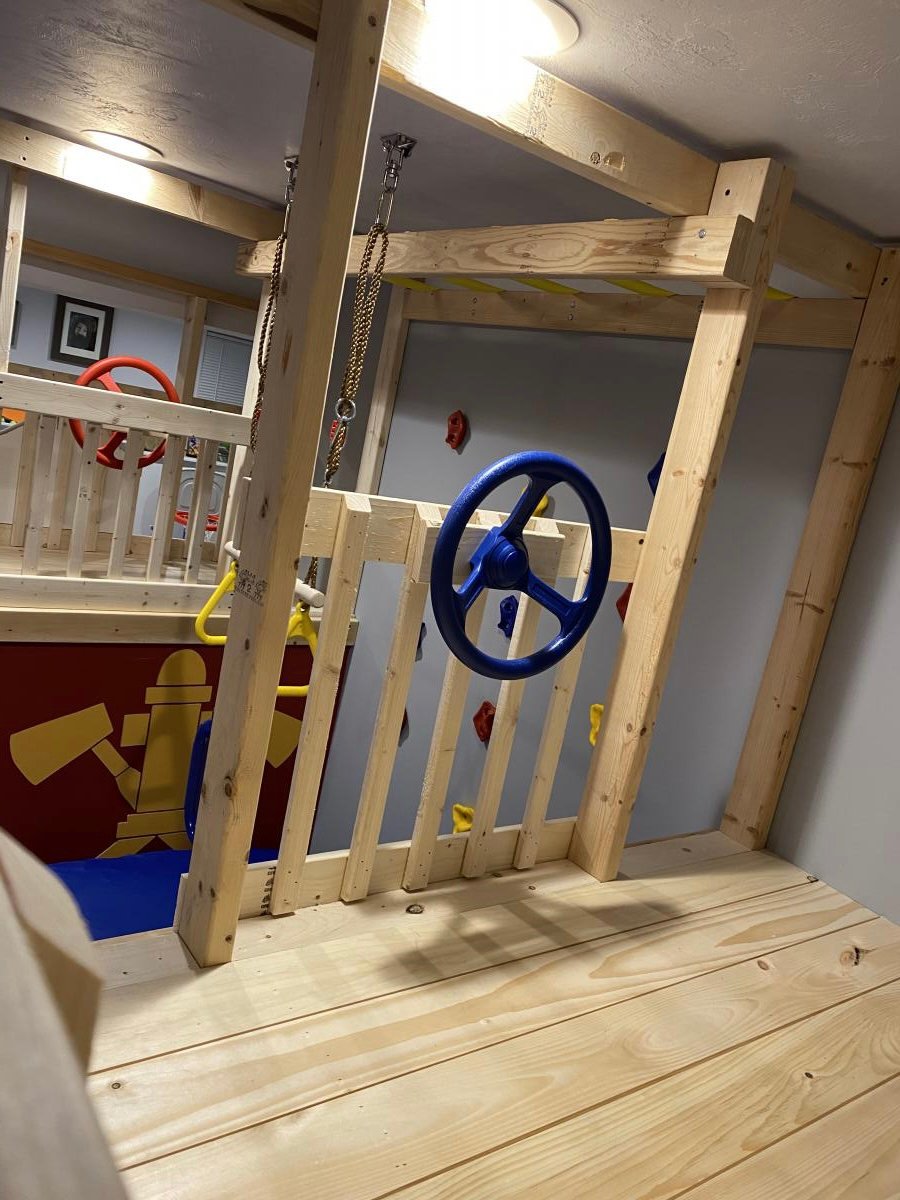
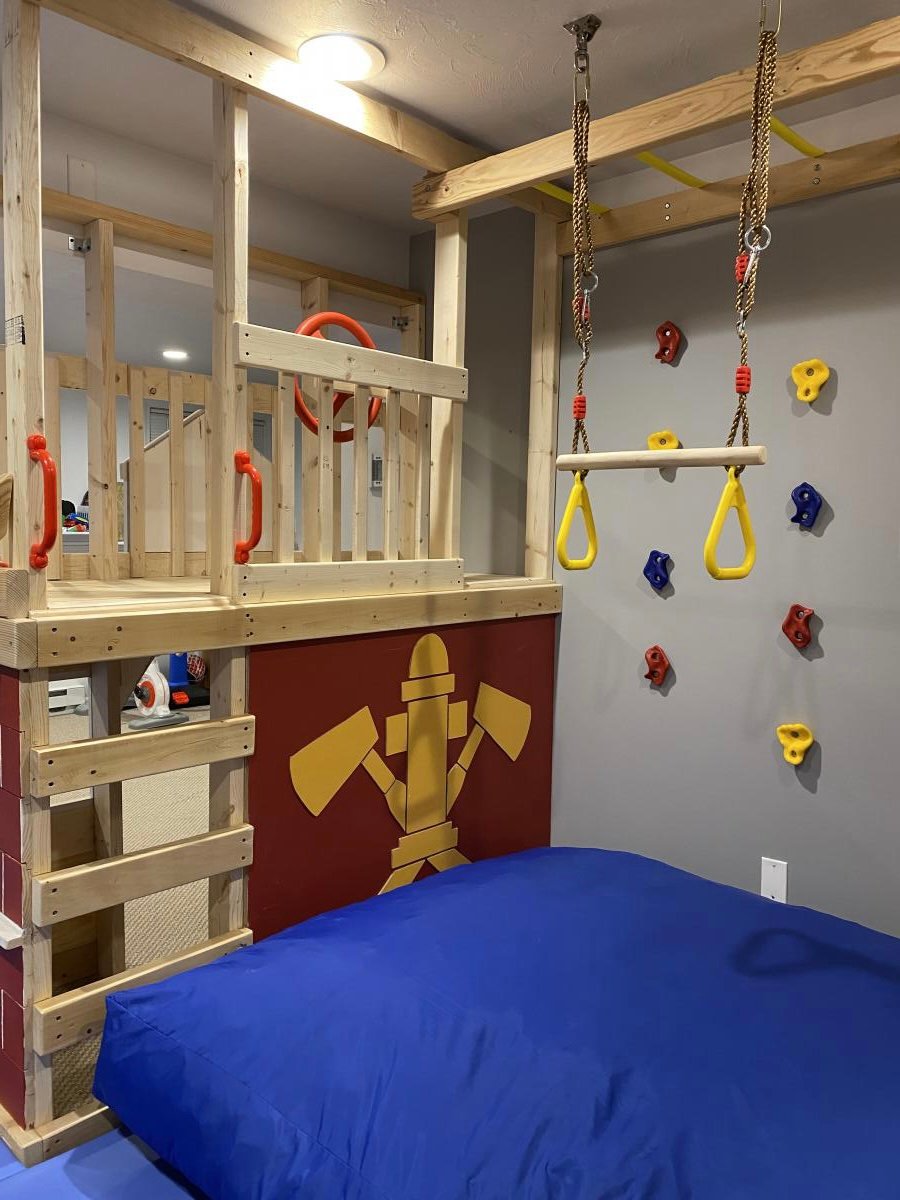
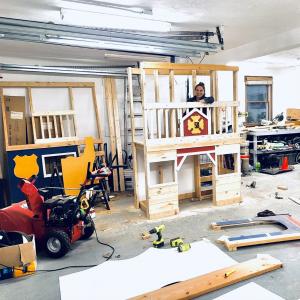
With Christmas approaching and the realization that my three young boys had way too much “stuff”, I enrolled the help of my dad to build this amazing basement play area. When I found Ana’s plans for the play gym with monkey bars, I knew we were in business. I modified the design to fit our space and we were off. Such a fun build and my boys absolutely love spending time down there. Thanks so much for your continued inspiration and the confidence you give us mamas to build with the big boys, Ana!!
In reply to Fabulous! by Ana White Admin
Fri, 01/08/2021 - 16:23
Thank you so much!! 🙏
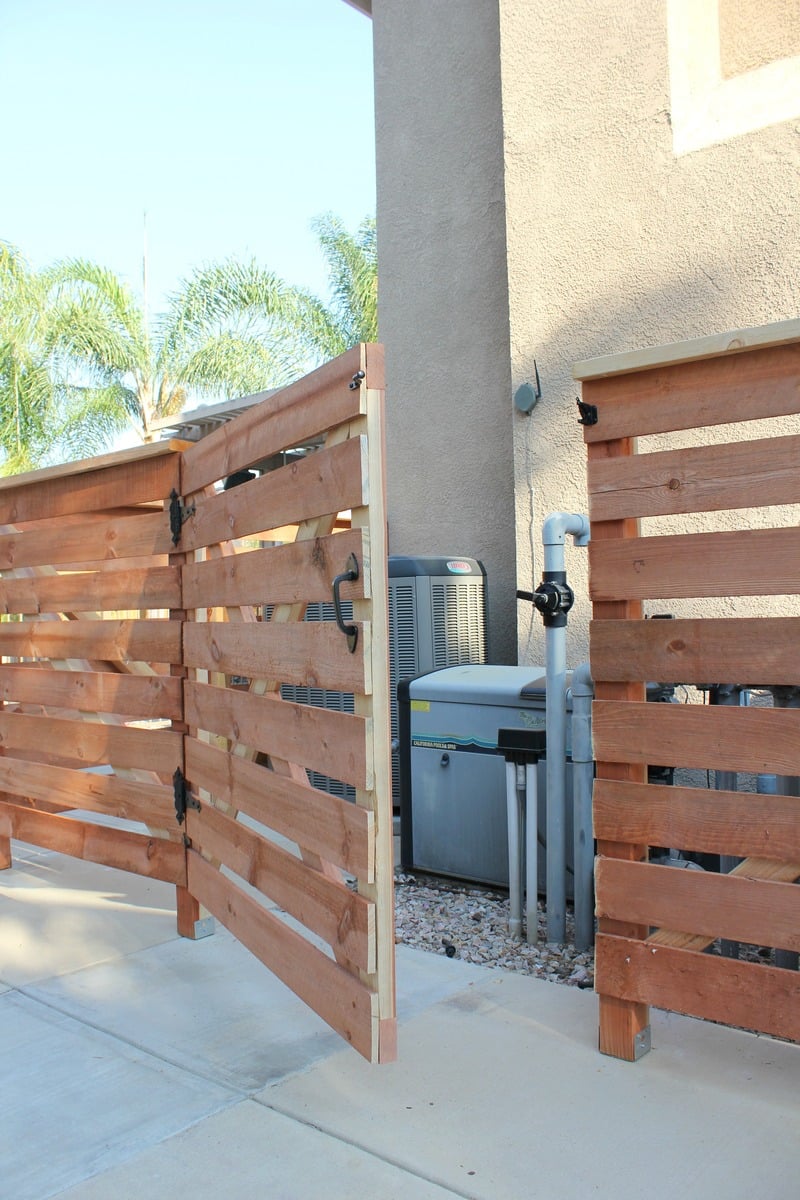
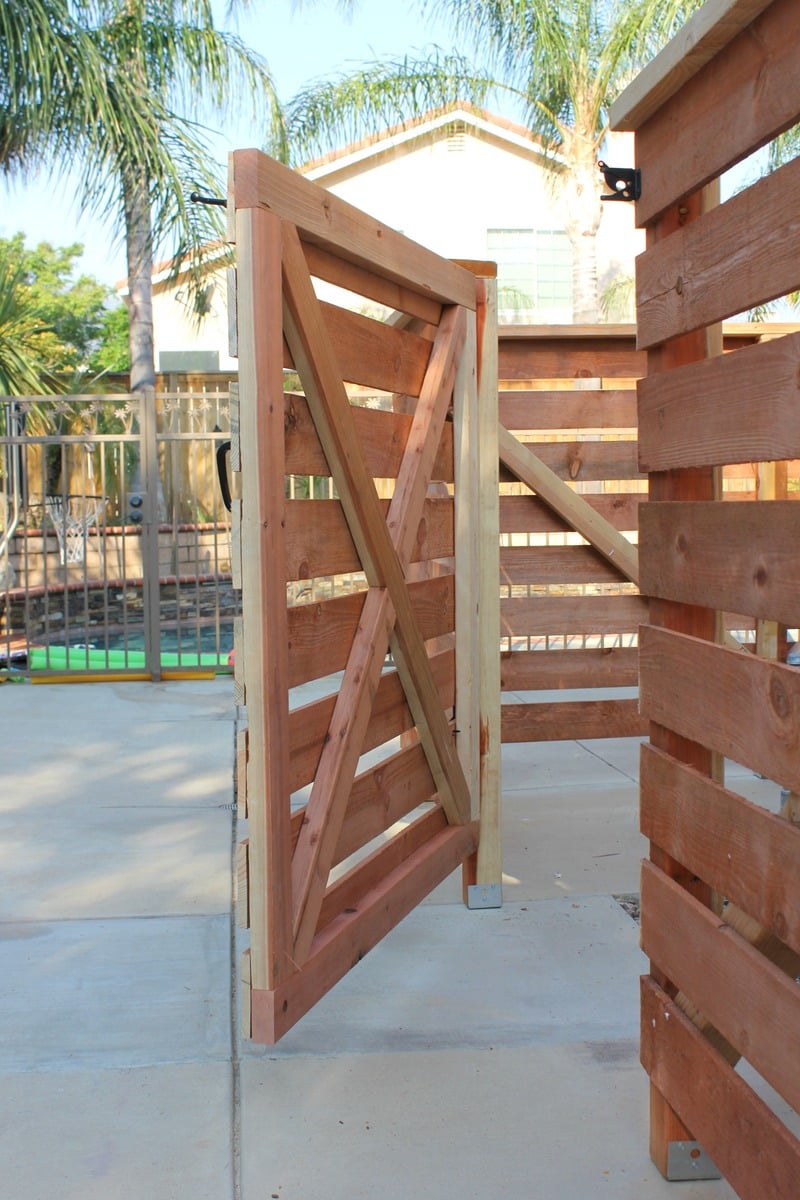
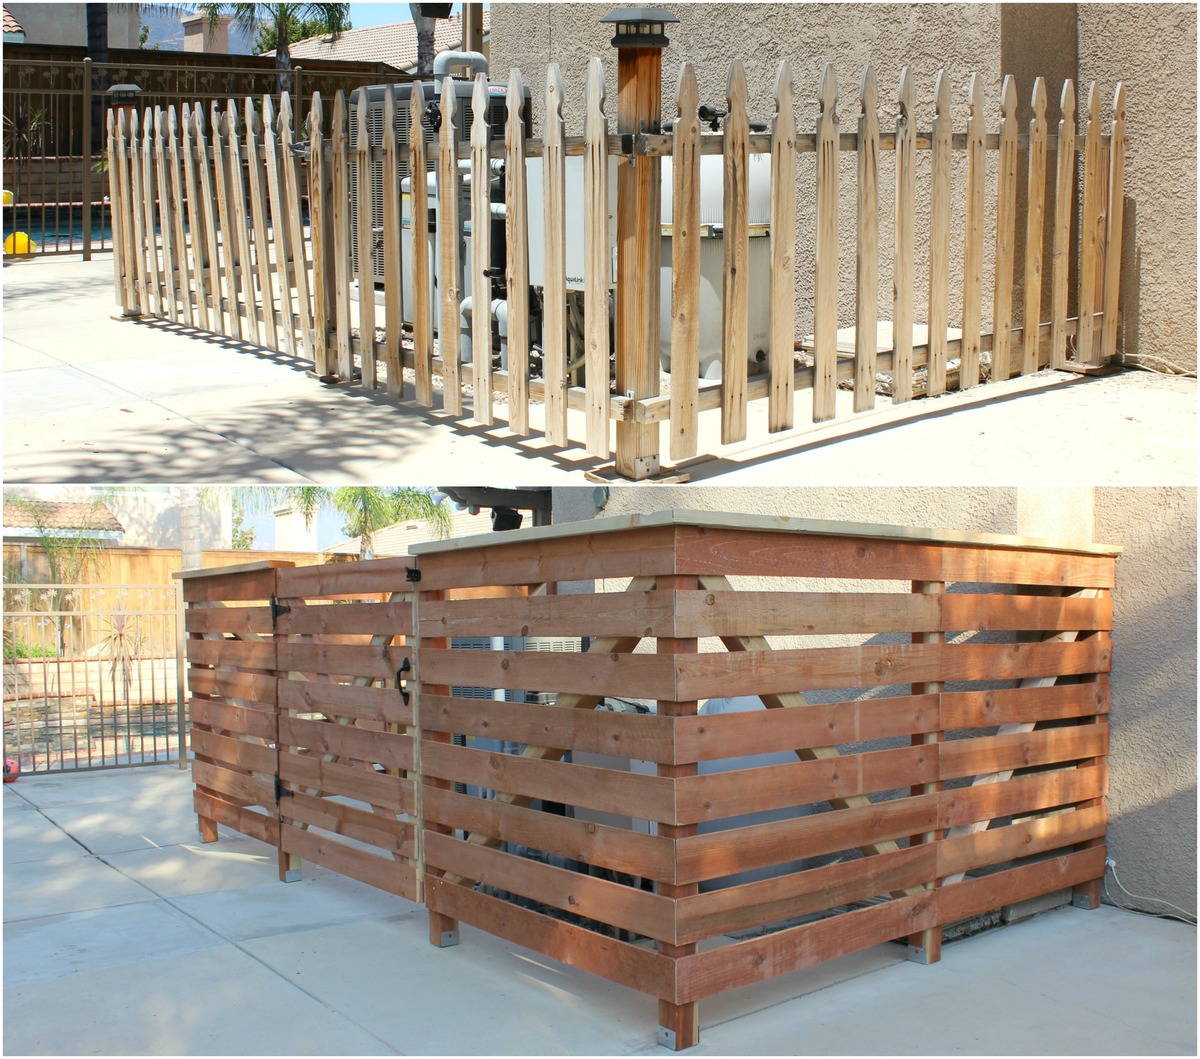
We love this fence refresh from the previous owner's solution to enclosing the pool equipment and a/c unit! It was the first time we fastened something to our house - drilling through stucco in the process. That was a big deal for us diy-ers! We made the frame out of 4x4's (which ended up being the most challenging part to the whole thing), applied the horizontal fencing boards and then used one of those $15 fence hardware kits - it was a great project that has made a huge difference in our backyard. Yay!

We bought a vacation home that has such a small kitchen. I knew we needed more storage. So I checked out Ana's plans and made this bad boy based on the Simplest Armoire plans.
The home is in the mountain/lakes area of northern New Hampshire, so I wanted to bring the outside colors in. I used Valspar Cabin Red paint and the Valspar Antiquing glaze over the top after distressing it a bit.


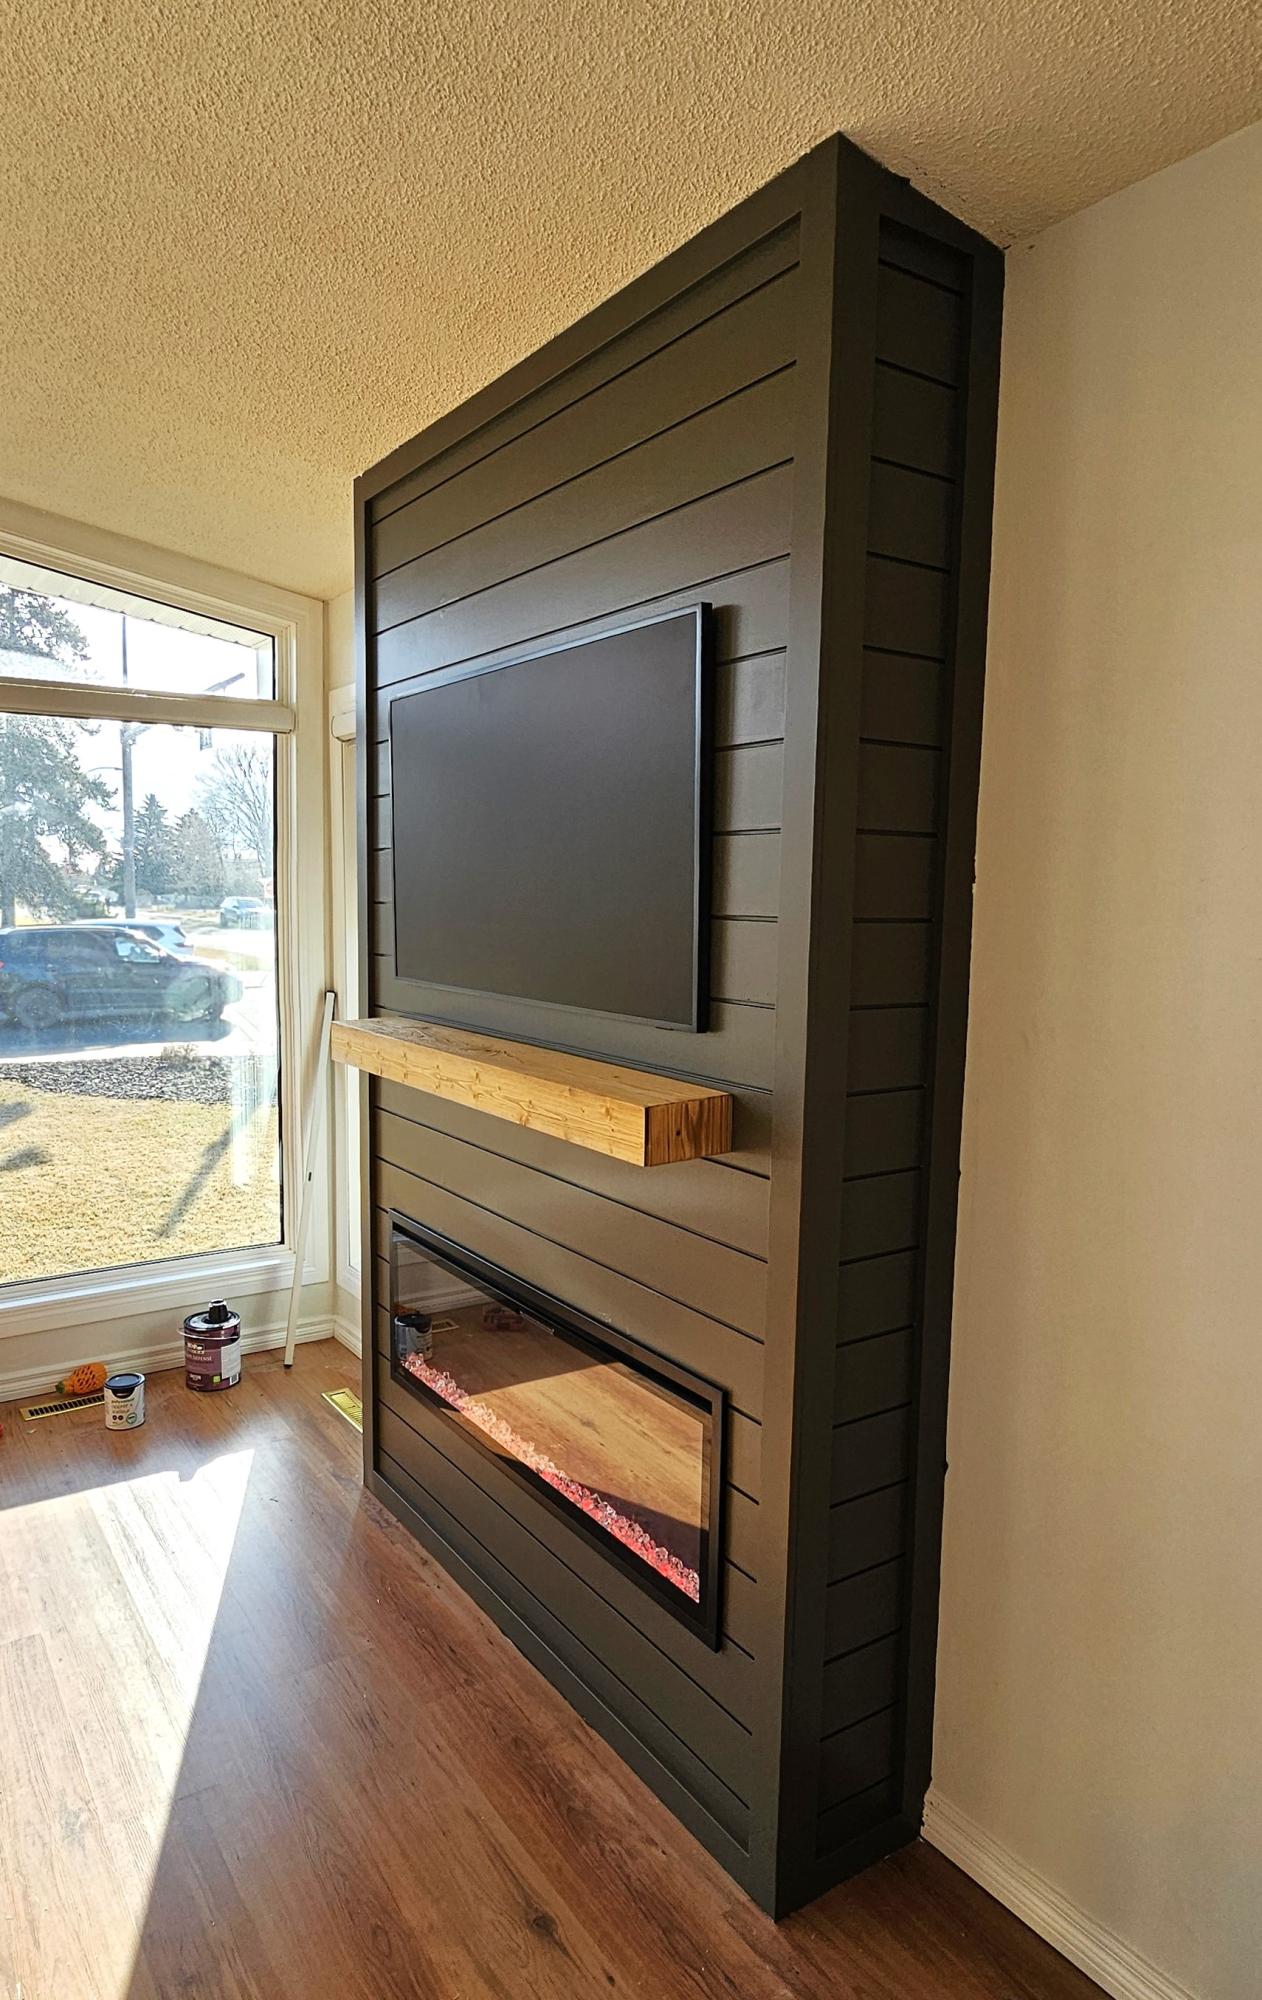
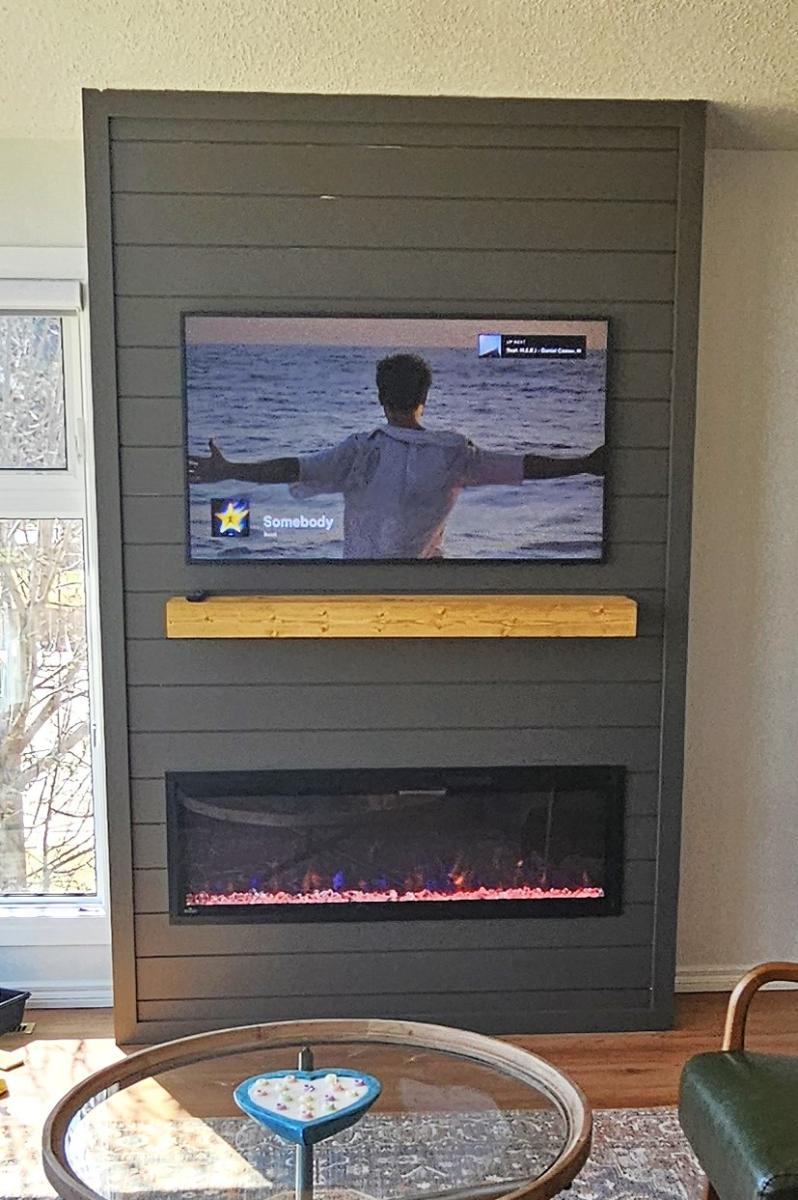
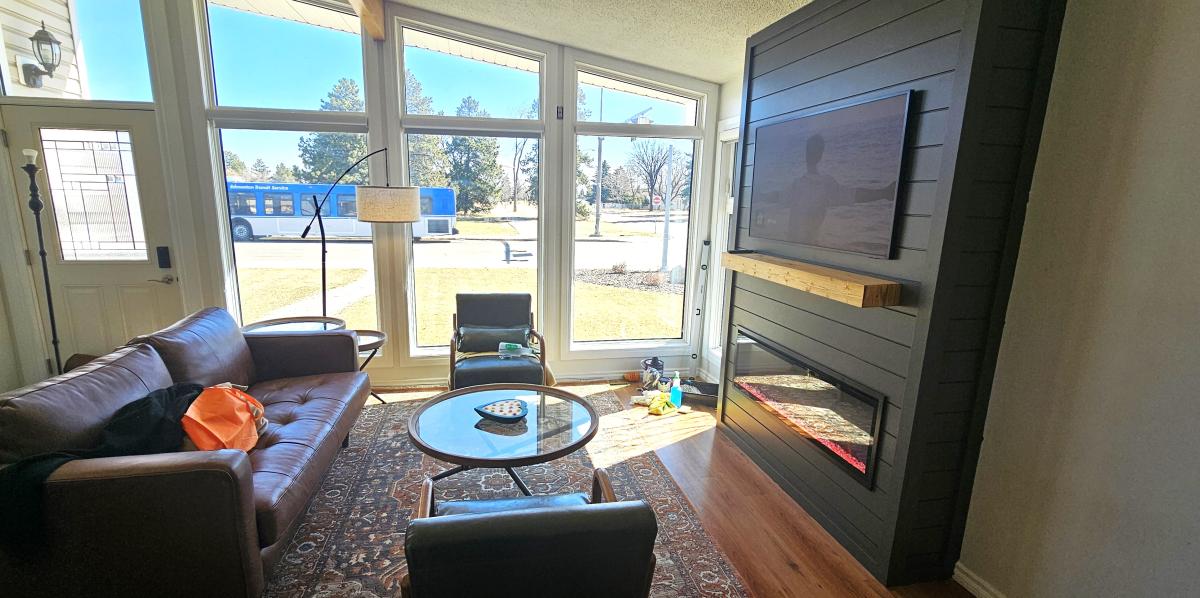
Used Ana's plans to build my floor to ceiling shiplap fireplace. Excellent guide made it easy.
Angelo

Had some old skis I've been wanting to make into a chair. The Home Depot plans worked perfectly for the base. Cut the back brace a bit longer to fit the skis
We removed the legs and added an extra piece to the top to bring the mattress height down.
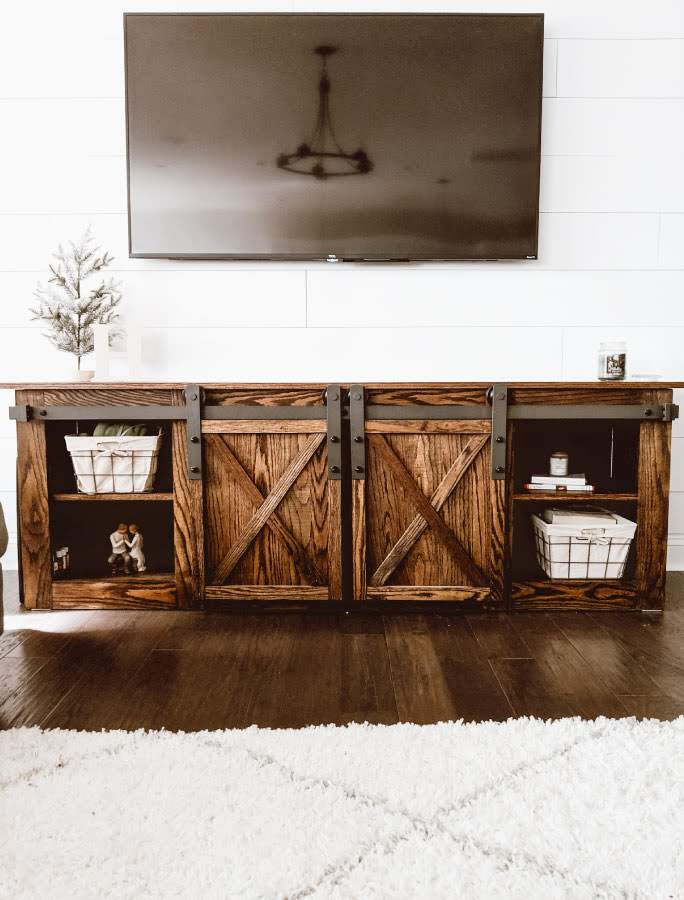
This was the second piece of furniture that my husband and I ever made. We had built a coffee table that had a lift up top so that we could eat dinner on the couch and store all of our board games. Once we tackled that, I thought we could conquer the world (even though the table was pretty basic). So when my now-husband was about to move into his first apartment without a roommate and I saw it as an opportunity to decorate my own place (even though I wasn’t living there). Luckily,he agreed it was time to get rid of his tiny Ikea TV stand that was probably 2ft off the ground and not a great height for a TV, and agreed to build this awesome TV console with me. To this day, it’s still my favorite piece of furniture in our house.
Sat, 11/09/2019 - 14:12
Love this, needing one in my front entry way. How long did it take?

Comments
Ana White Admin
Wed, 10/06/2021 - 10:27
Great job!
Thank you for sharing, it looks amazing!