Adirondack Chairs with Foot Rest
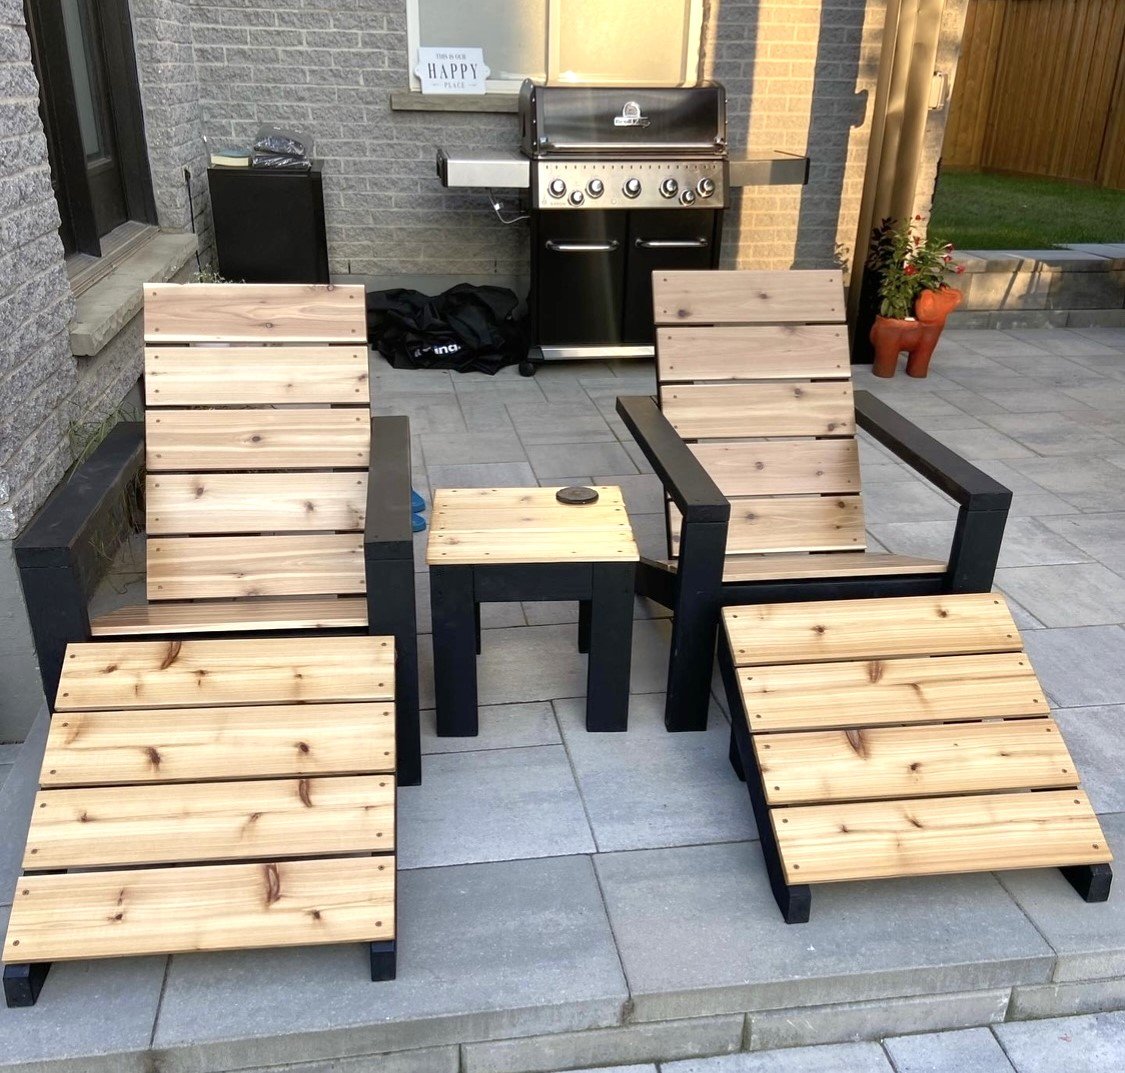
Great set of outdoor chairs with foot rest!
RG Design & Build
Built from Plan(s)
Great set of outdoor chairs with foot rest!
RG Design & Build
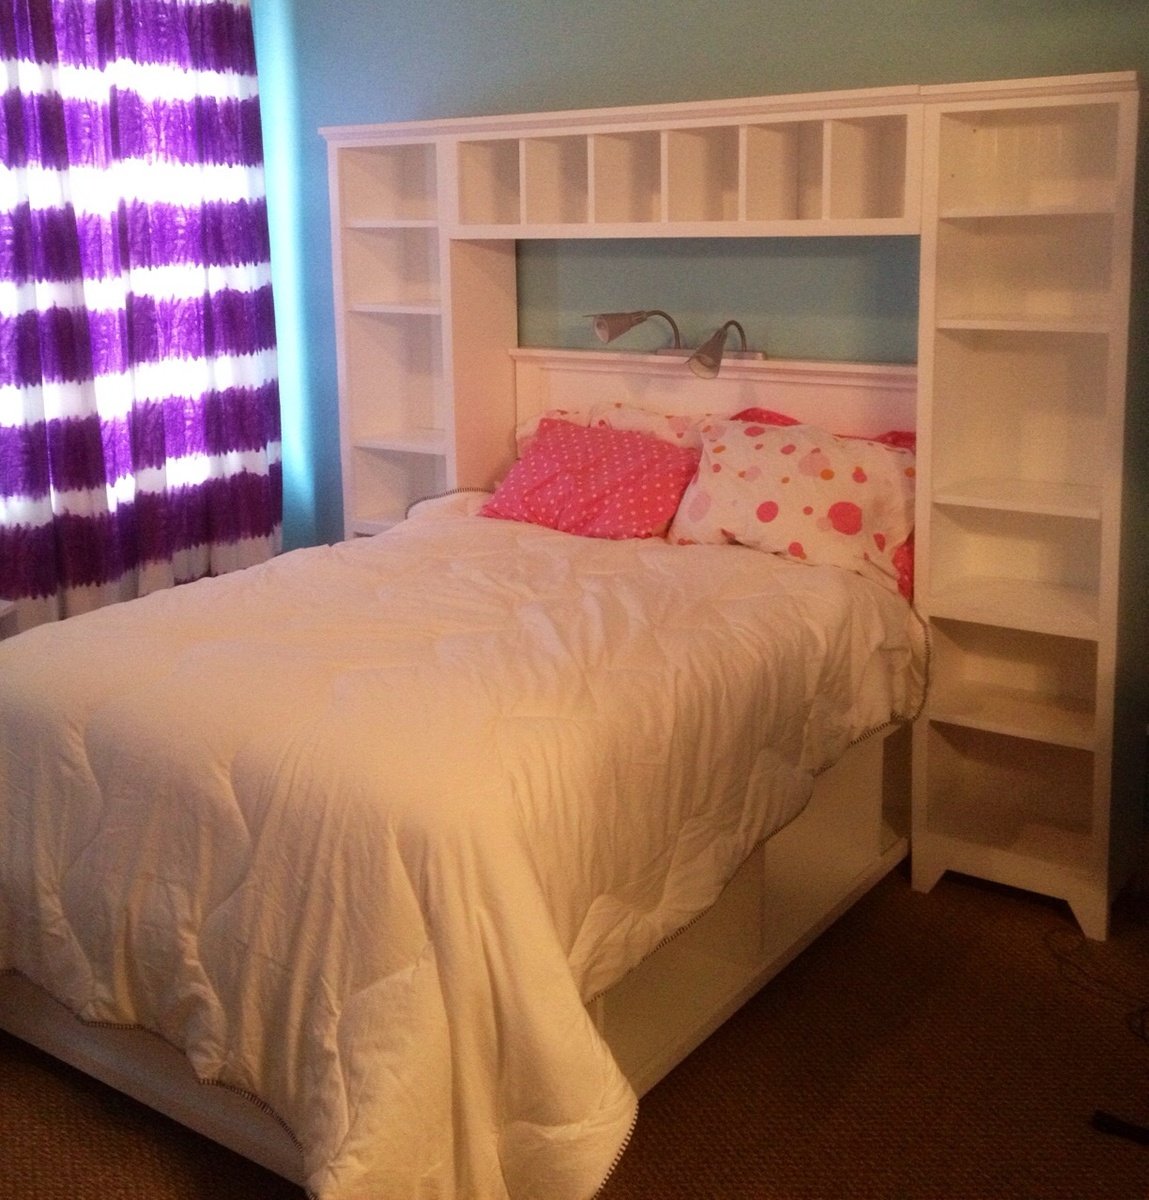
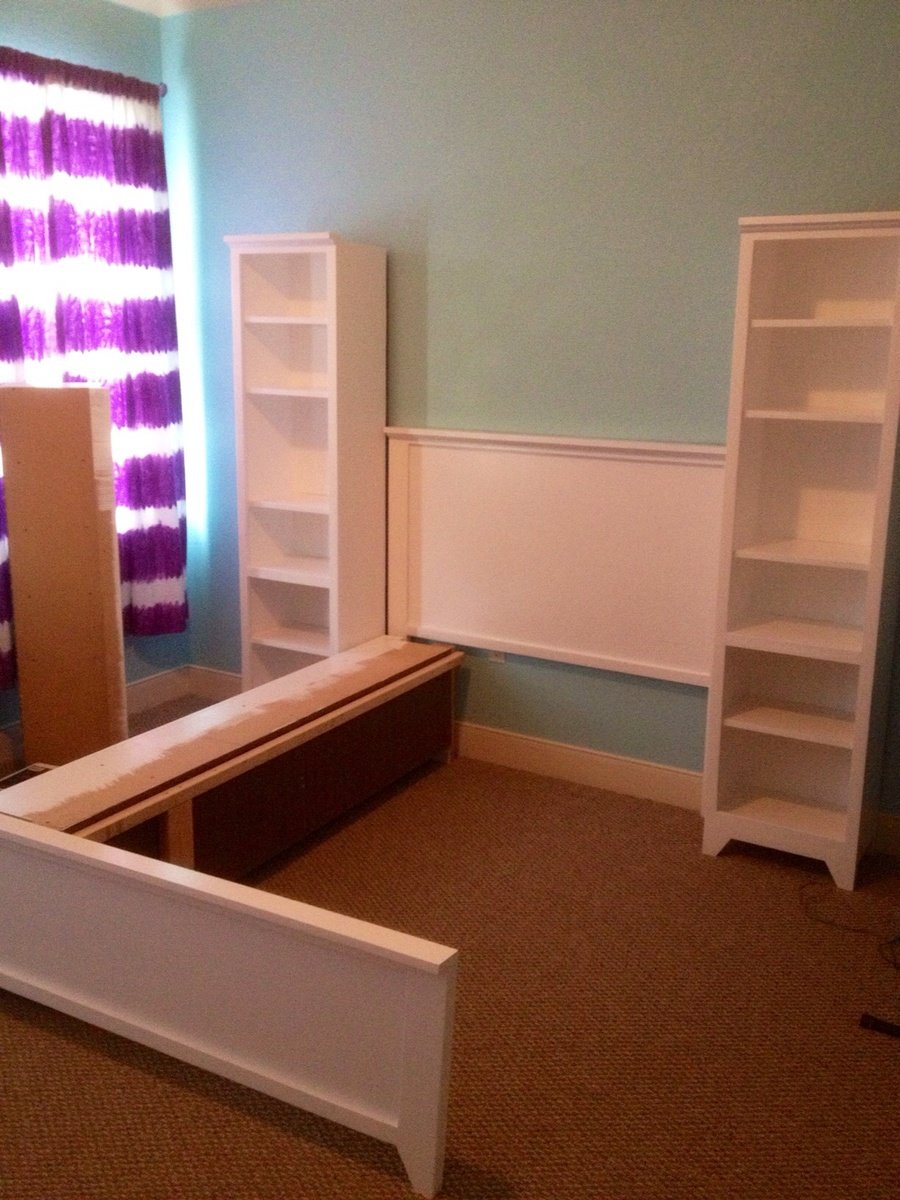
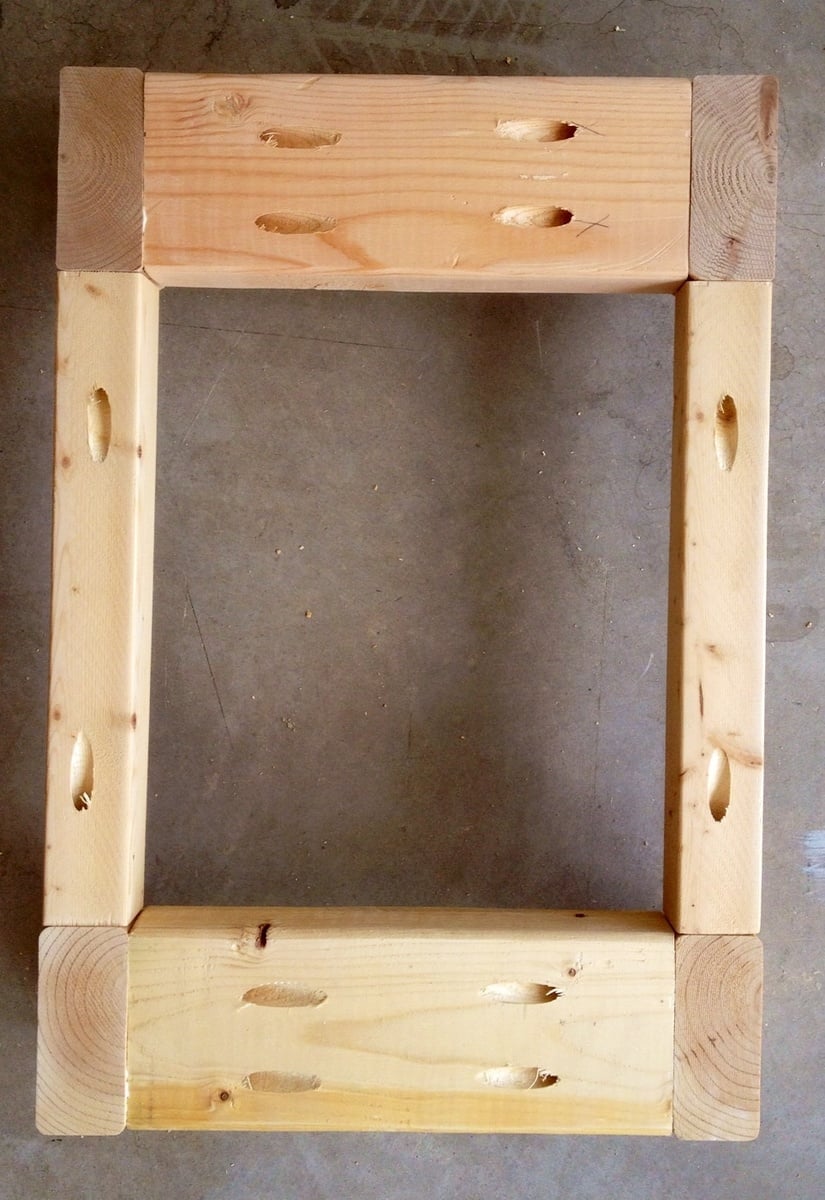
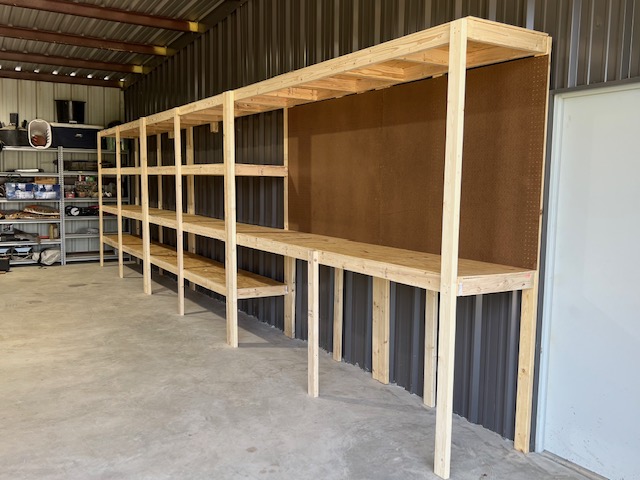
This project was our largest build to date, but the outcome was definitely worth the sweat! The build went relatively fast between my mom and I. I had a little problem assembling the tower bases, but we'll blame the 108 degree heat on my inability to figure out where to place my Kreg holes! I included a picture of how I did the tower base, in case anyone else runs into the same issue.
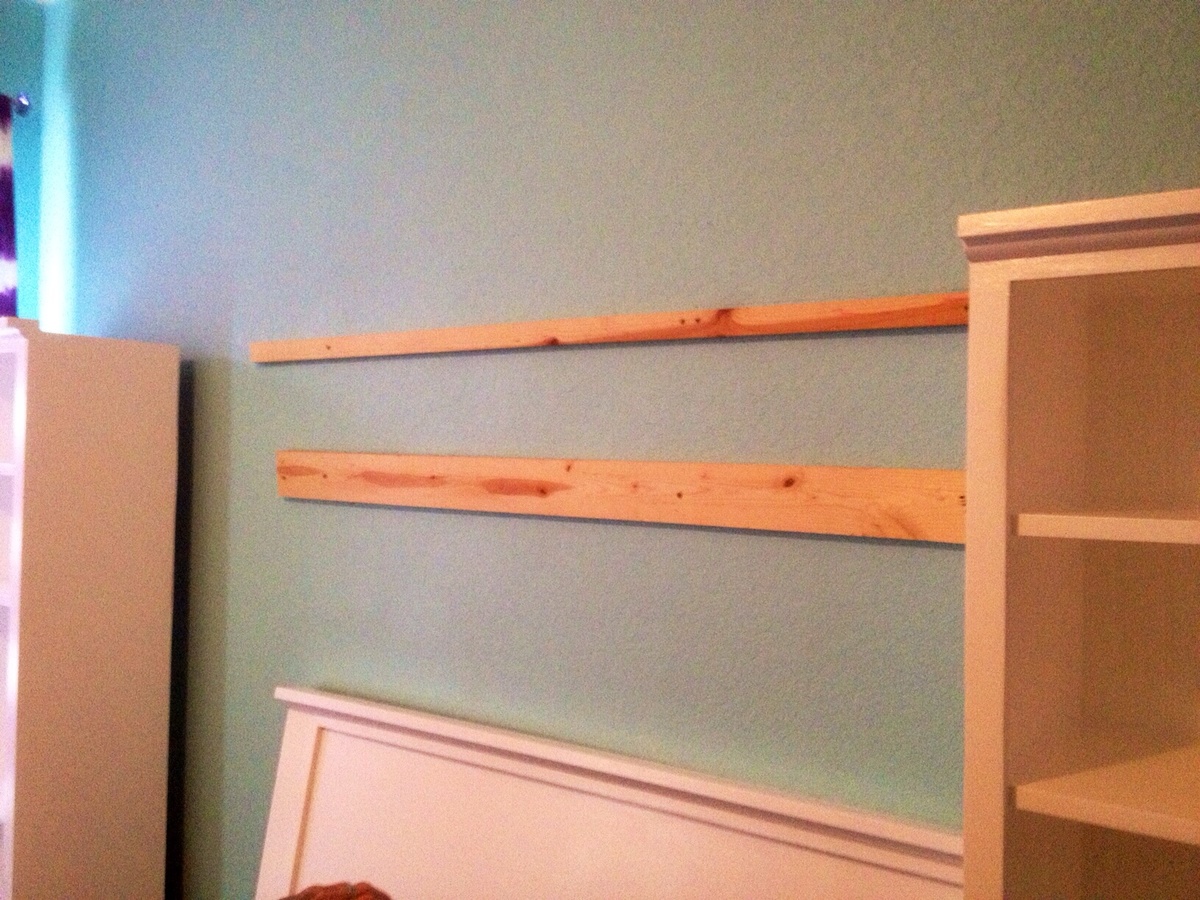
To accommodate for our base boards we added furring strips to the wall to bring all of the pieces flush. The hutch is secured into the studs with multiple L-brackets and so are the towers.
Finishing was very time consuming, but we'll worth the end result and look on my daughter's face! This system provides an incredible amount of storage. Thank you so much for the plans Ana!
I am a complete newbie to anything woodworking. I just turned 60 and used a drill for the first time about 9 months ago. Thanks to Anna and her plans and videos, I have developed some some self confidence in this art and absolutely loving it.
Farmhouse coffee table and king size bed is next.
Thank YOU Anna!!! You totally rock!!!!!!!!

In reply to Amazing! by Ana White Admin
Tue, 01/19/2021 - 14:31
Awwwww thank you sooooo much! That means so much coming from you! I appreciate you. 🤗🤗

I used Ana's plan as a base.
I changed it from 8x8 to 8x12, made the 4x4x8's to 4x4x10' for a higher main platform and swing platform, and added a 12' long monkey bar set to the other side. Also, an 8' climbing wall and a plank walkway to accompany the two slides.
For the clubhouse, I used Hardiplank 4x8 sheets for the siding and an EZ-Framer kit for the structure itself.
The slides I purchased from Lowes, monkey bars from Amazon, and the swing frame braces from Amazon as well. The swing kits I got from ebay.


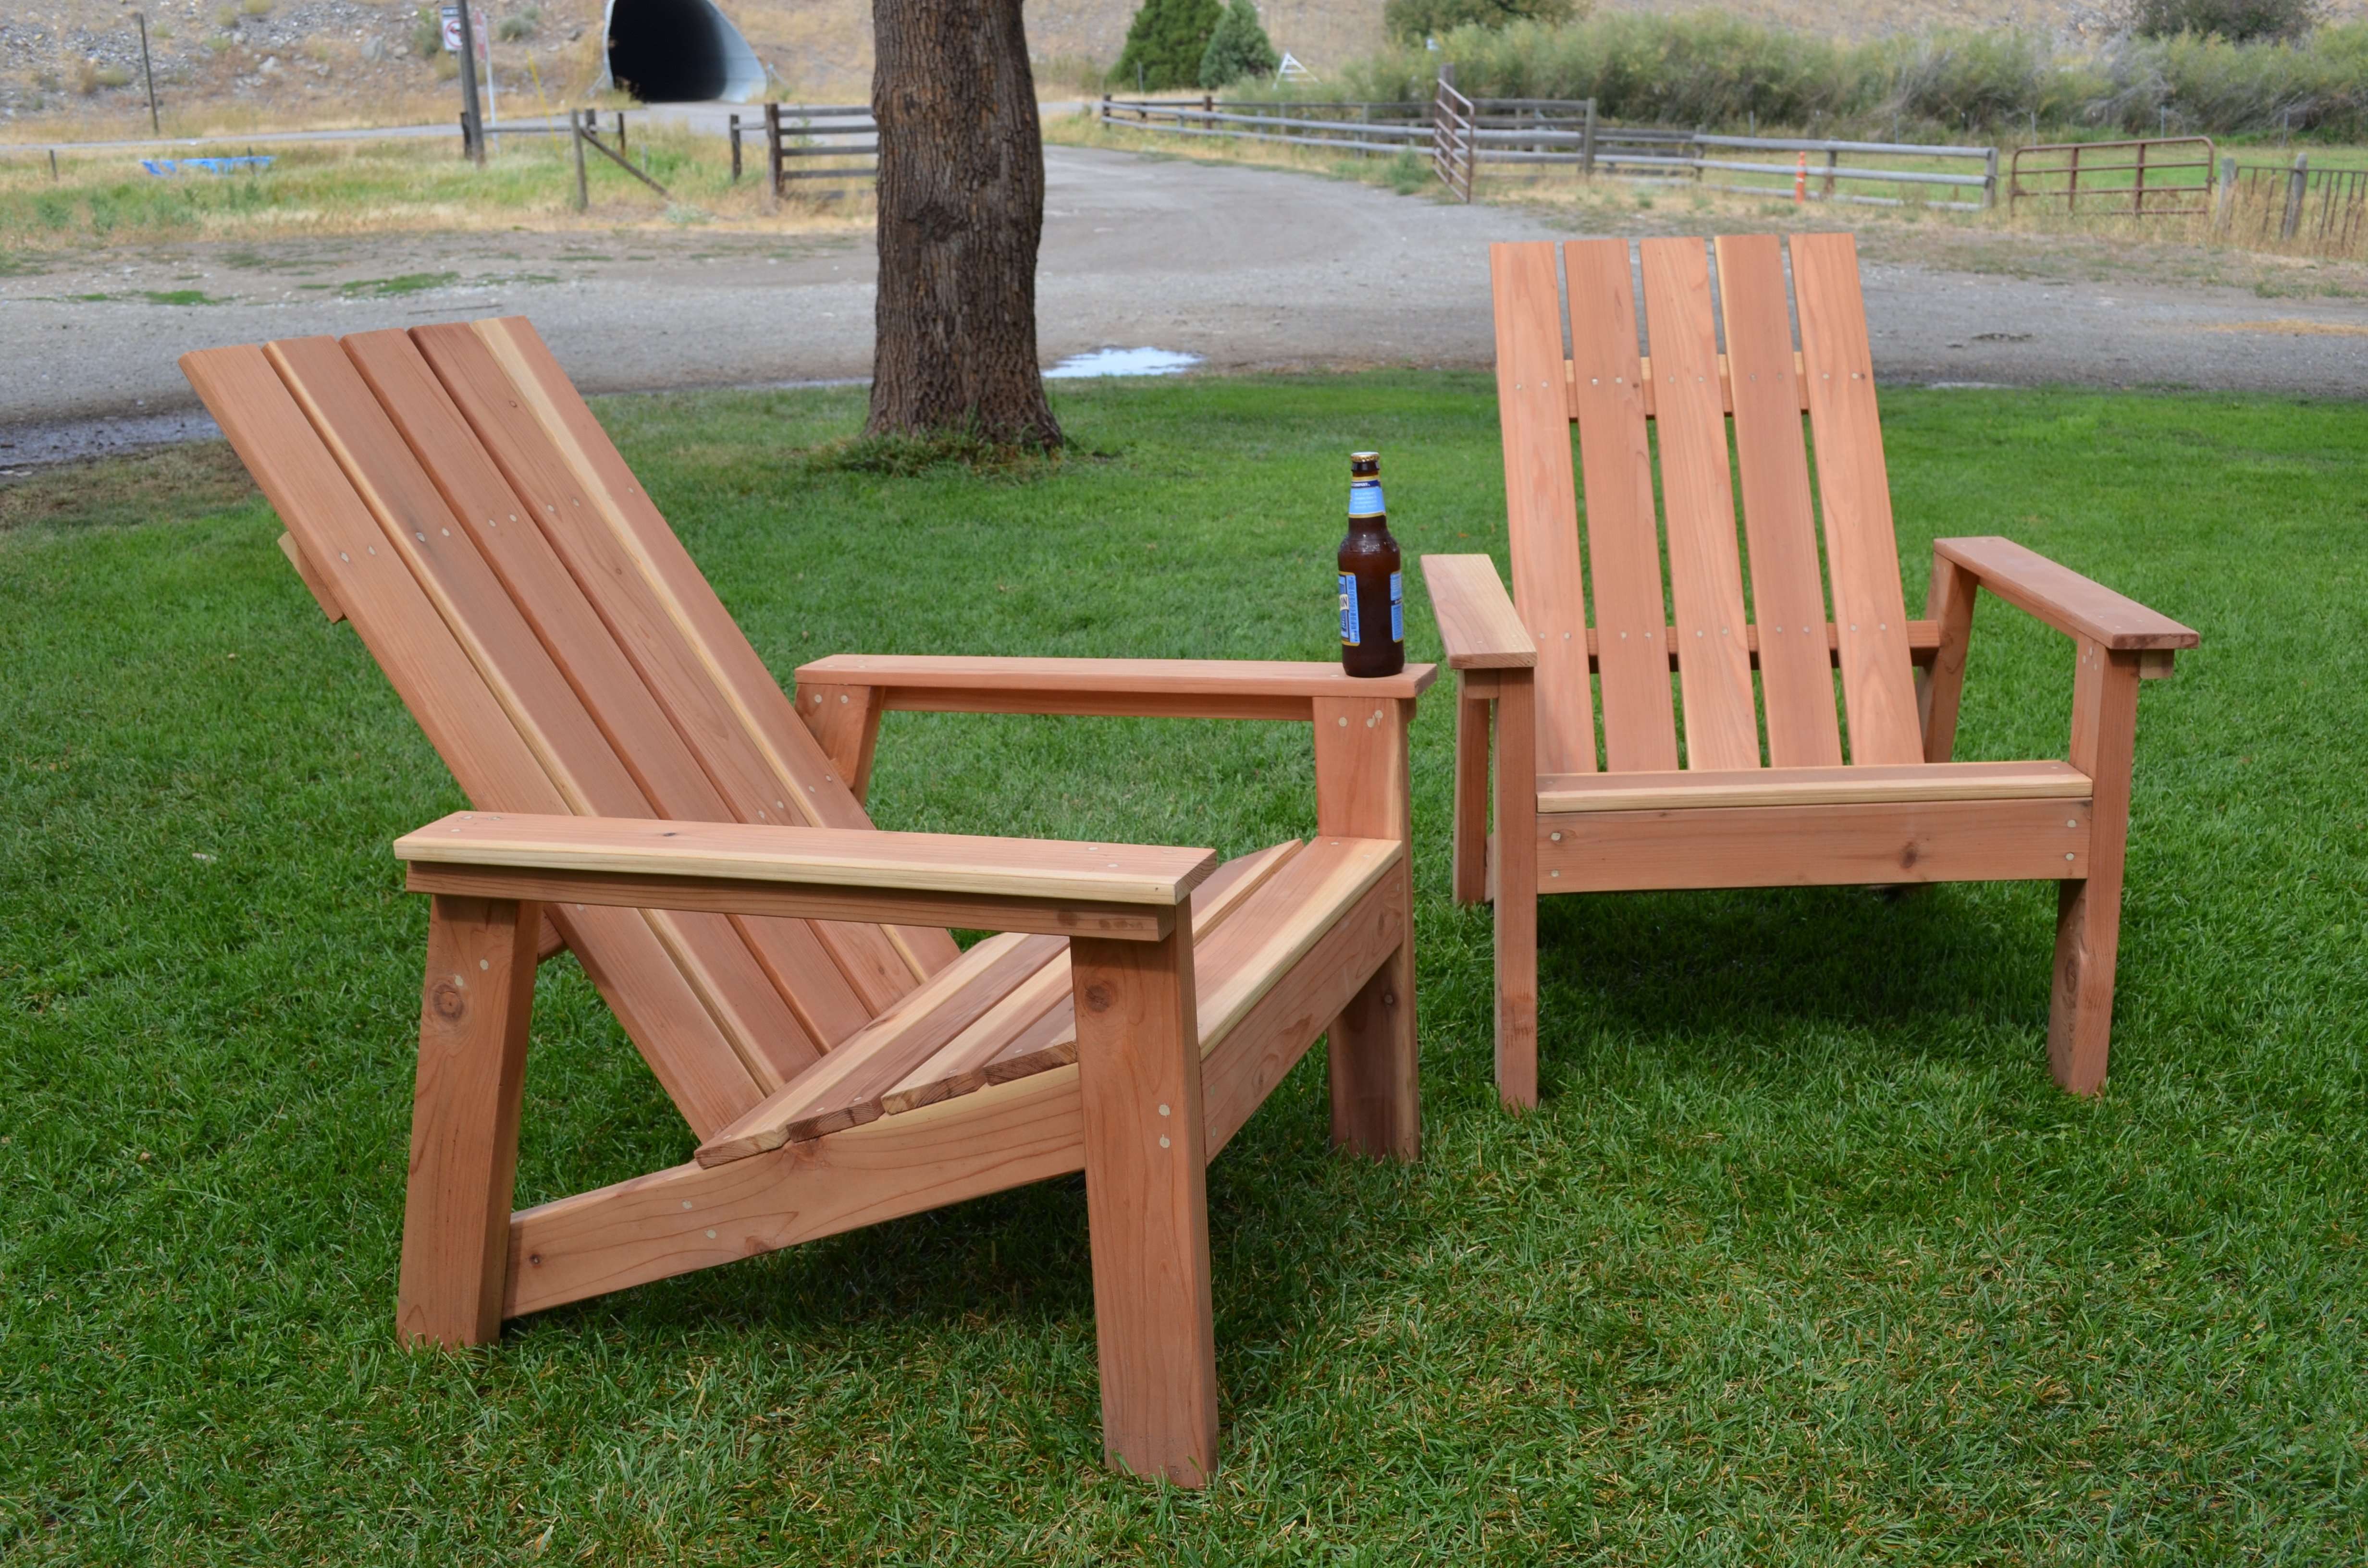
Love the results of my first building project.....a pair of redwood adirondack chairs. Angled cuts were a great way for a beginner to learn to use the miter saw.

Sat, 09/07/2013 - 19:59
Love these gorgeous redwood chairs! The color and grain on that wood is awesome, and the clear coat is perfect for it. You did a great job on this build! I popped over to your blog and I enjoyed your post on this build very much. Well done!

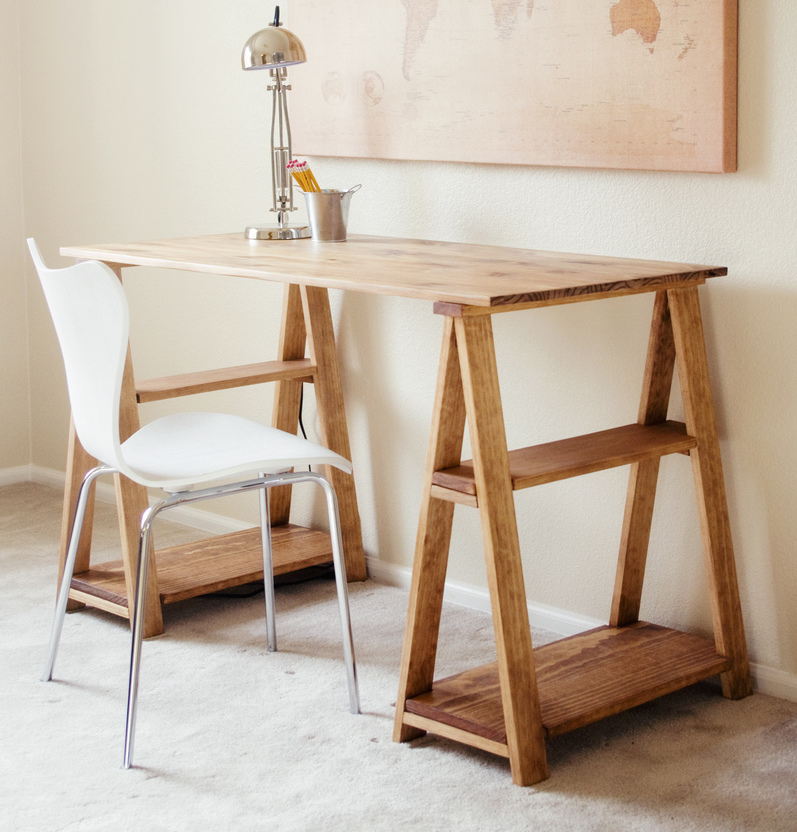
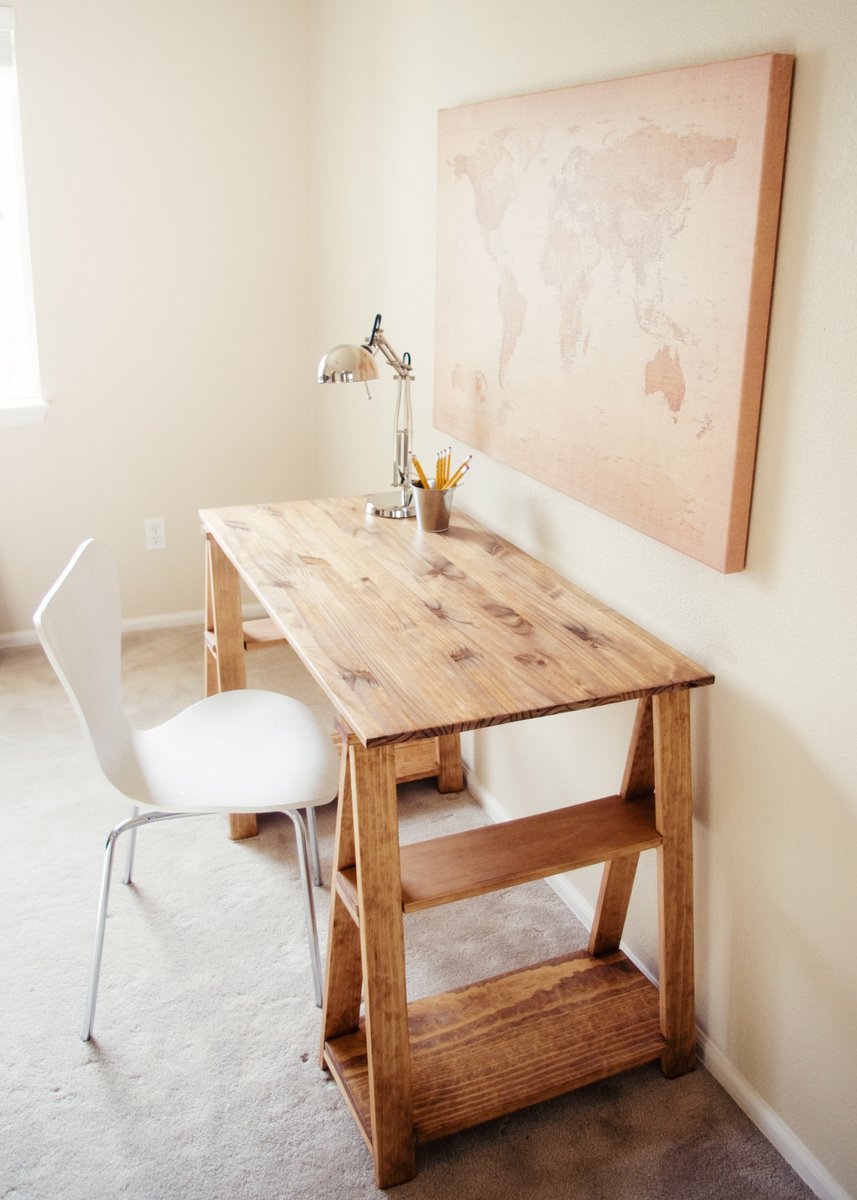
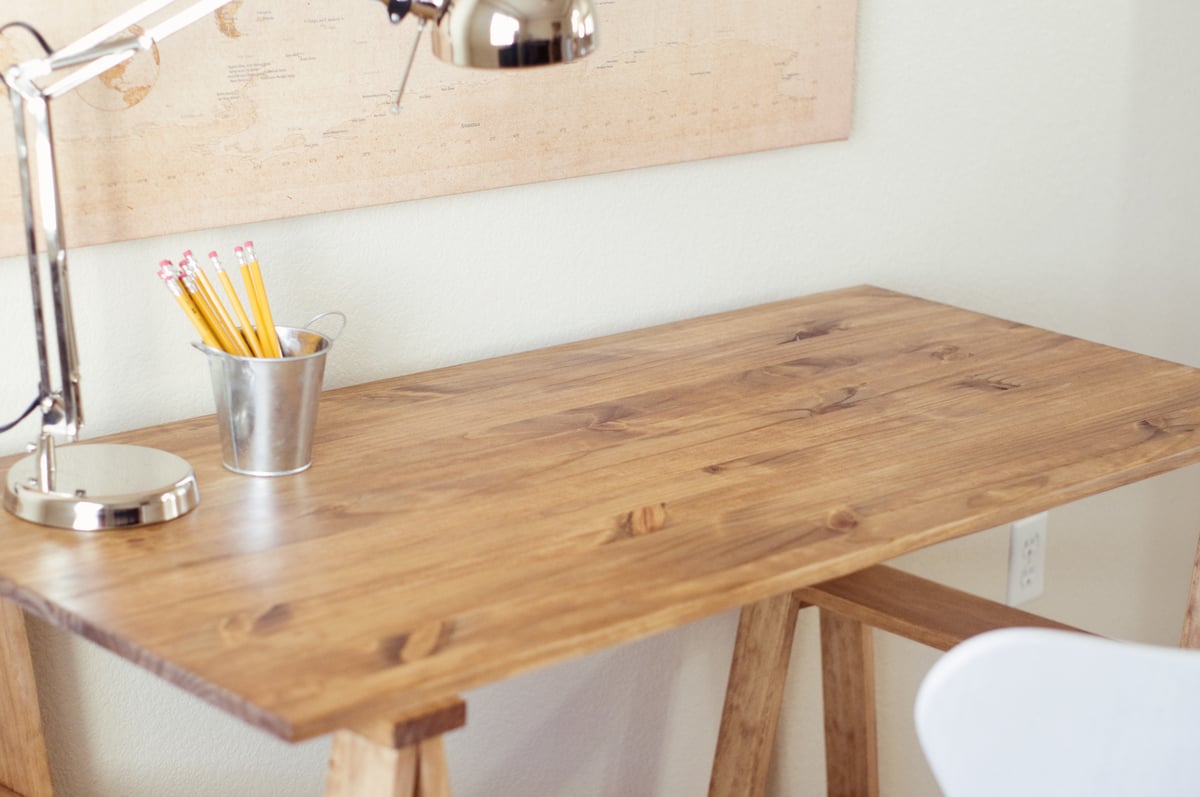
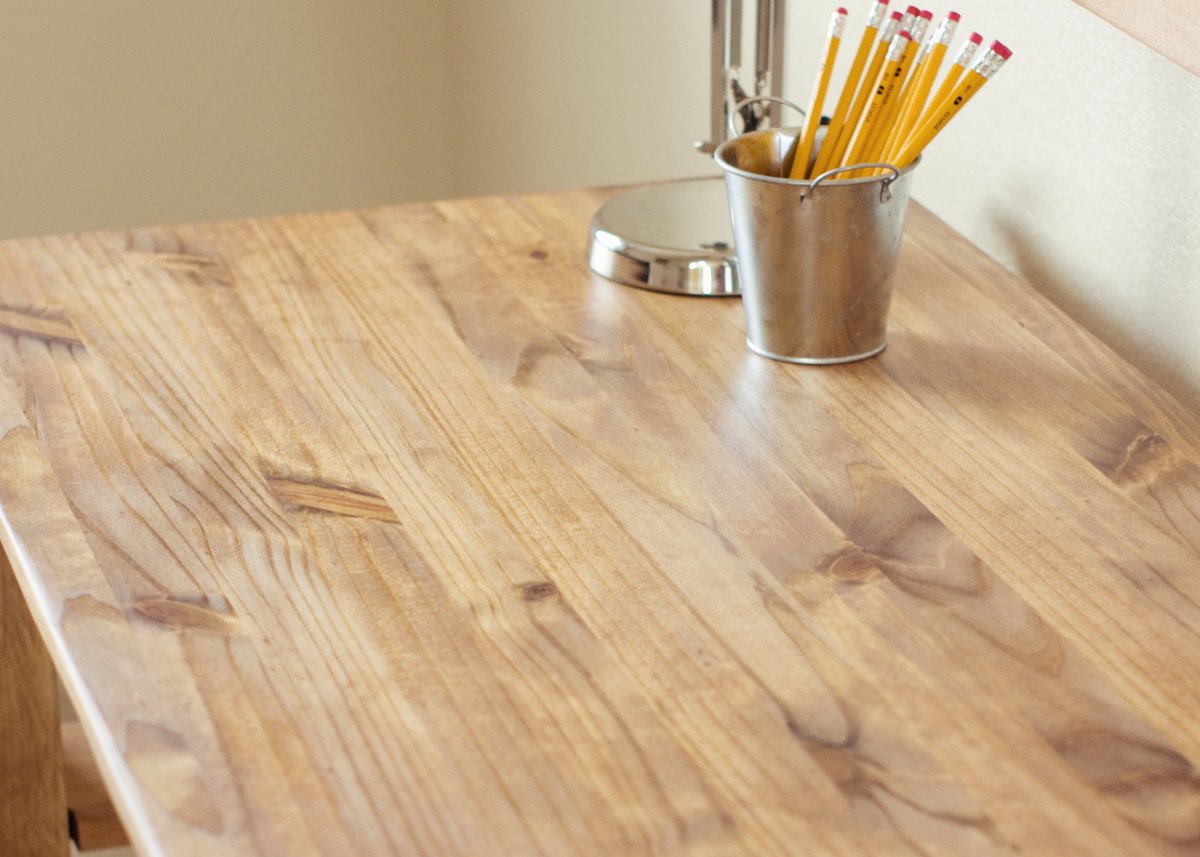
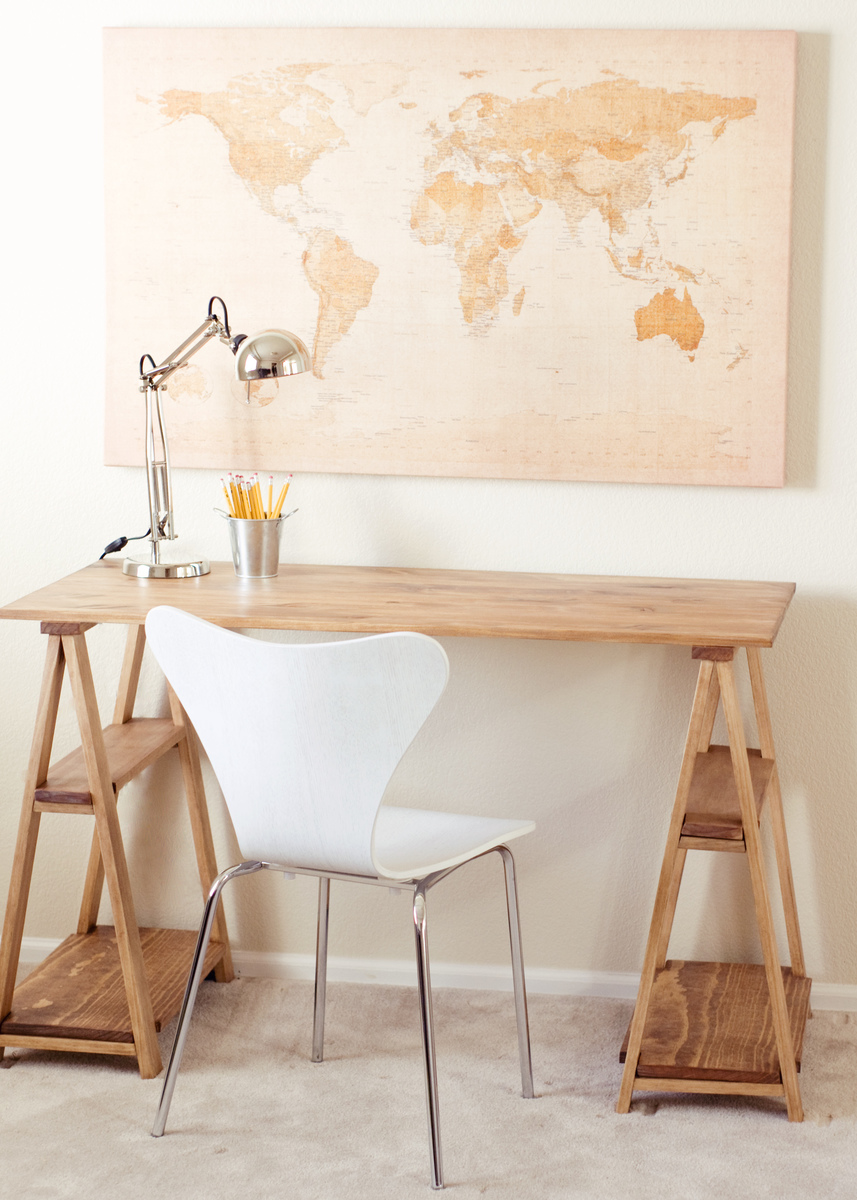
I slightly modified the Rustic X Desk plan to make my L shaped computer desk with a monitor platform! The desk surface is Shou Sugi Ban with an epoxy finish. All made from stock lumber and a lot of pocket hole screws. Thanks for posting your plan Ana to give me the idea! Construct for around $200.
Tue, 03/14/2023 - 18:34
Love your modifications, additions and finish! Thank you for sharing.
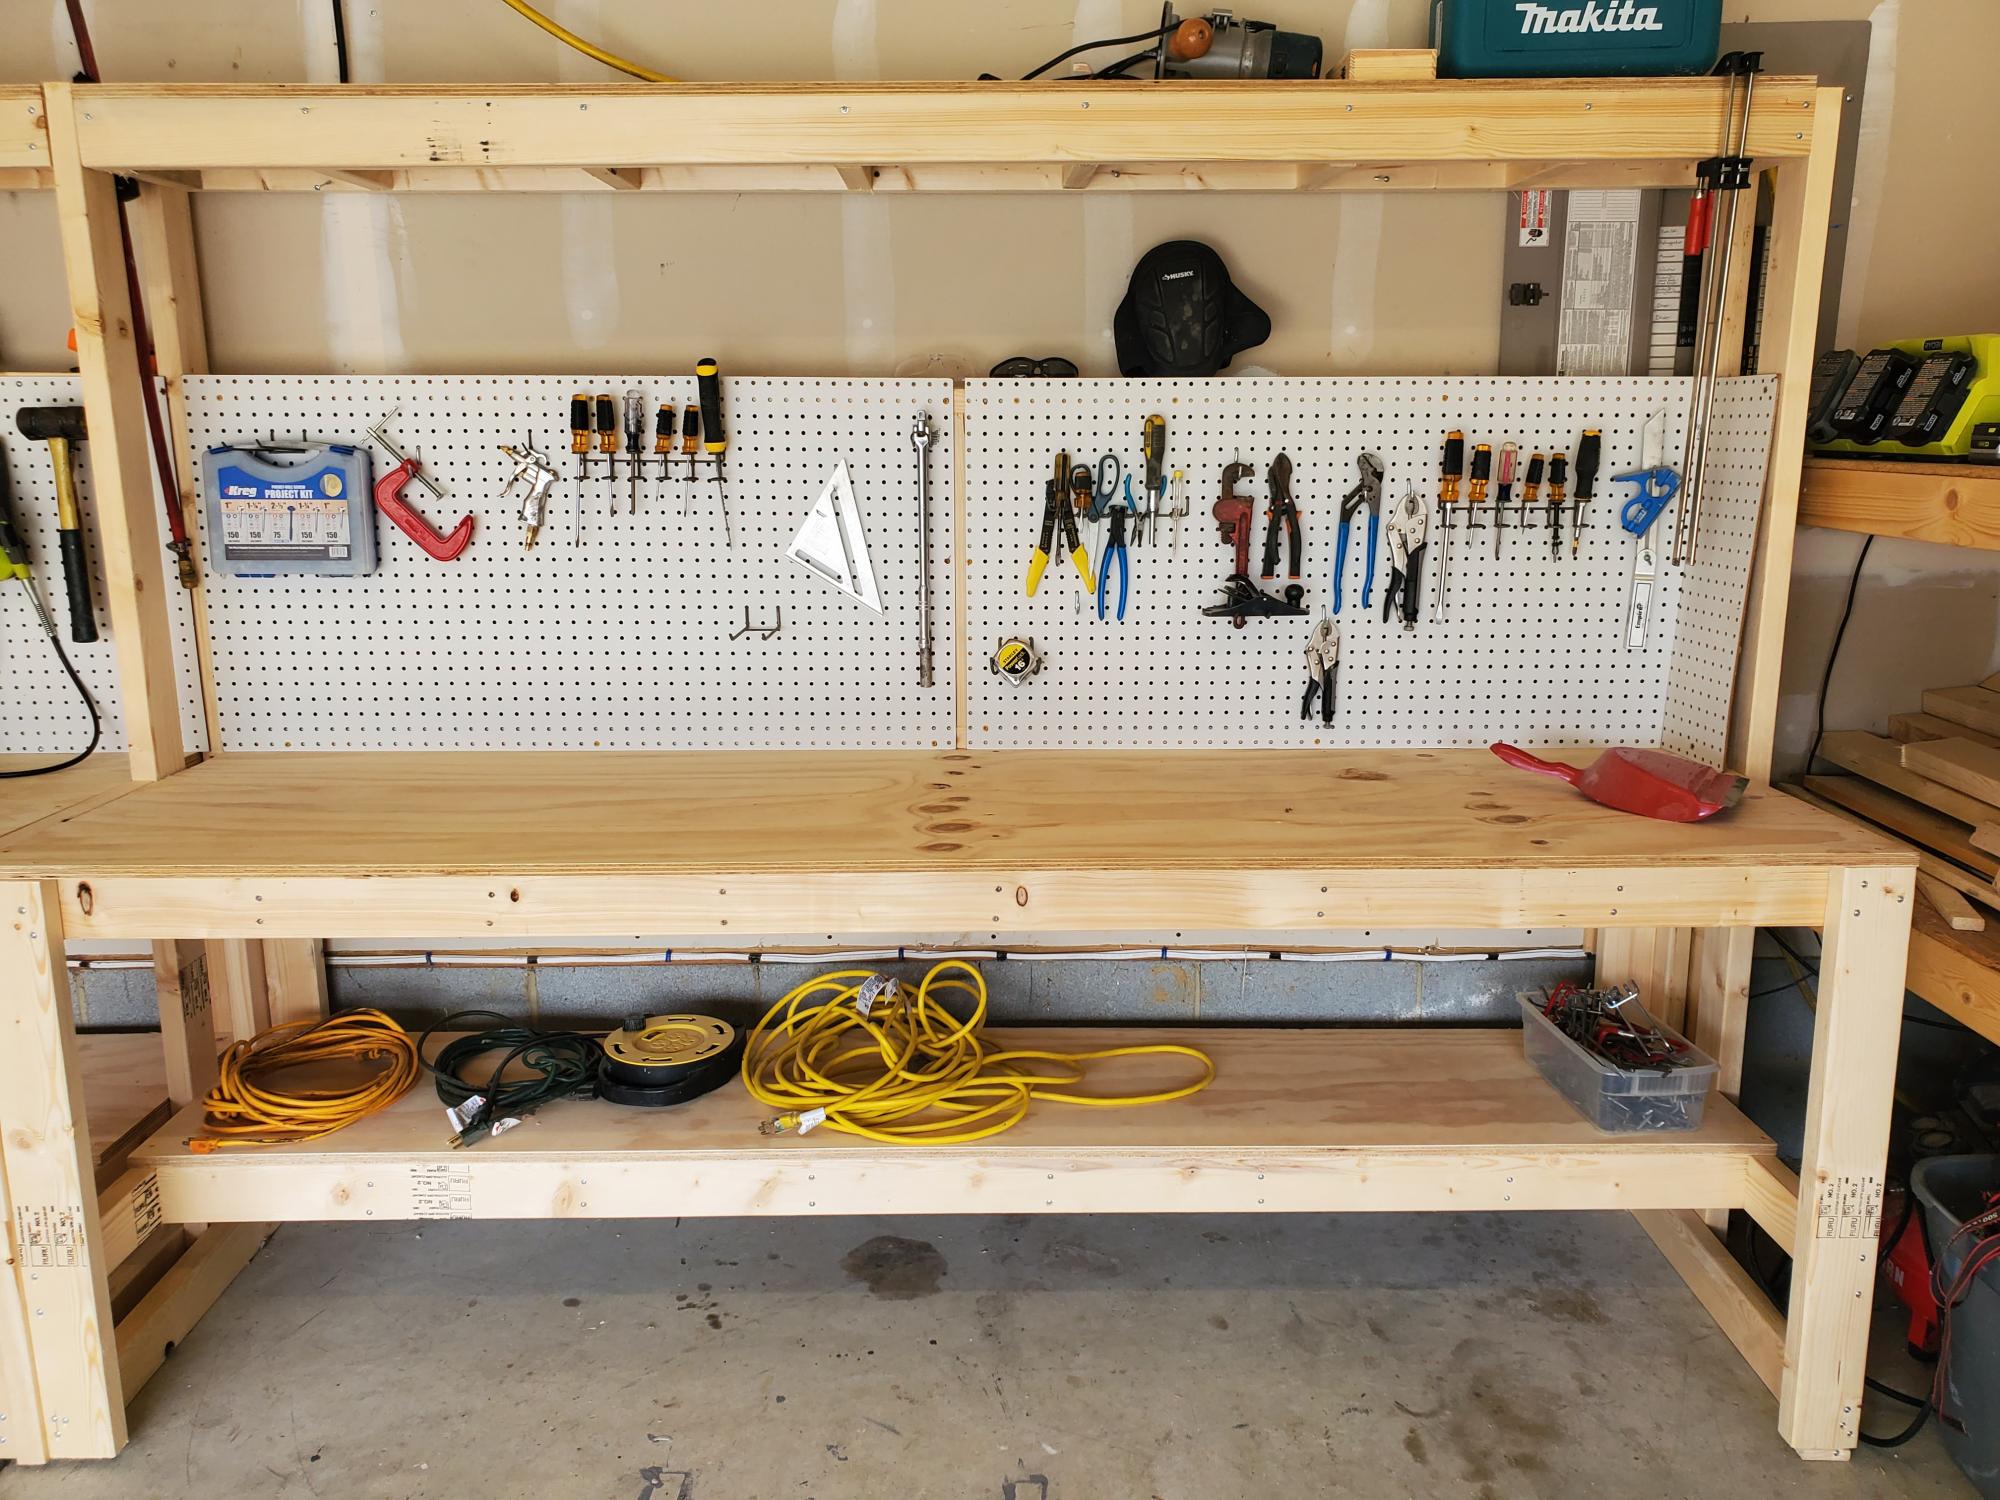
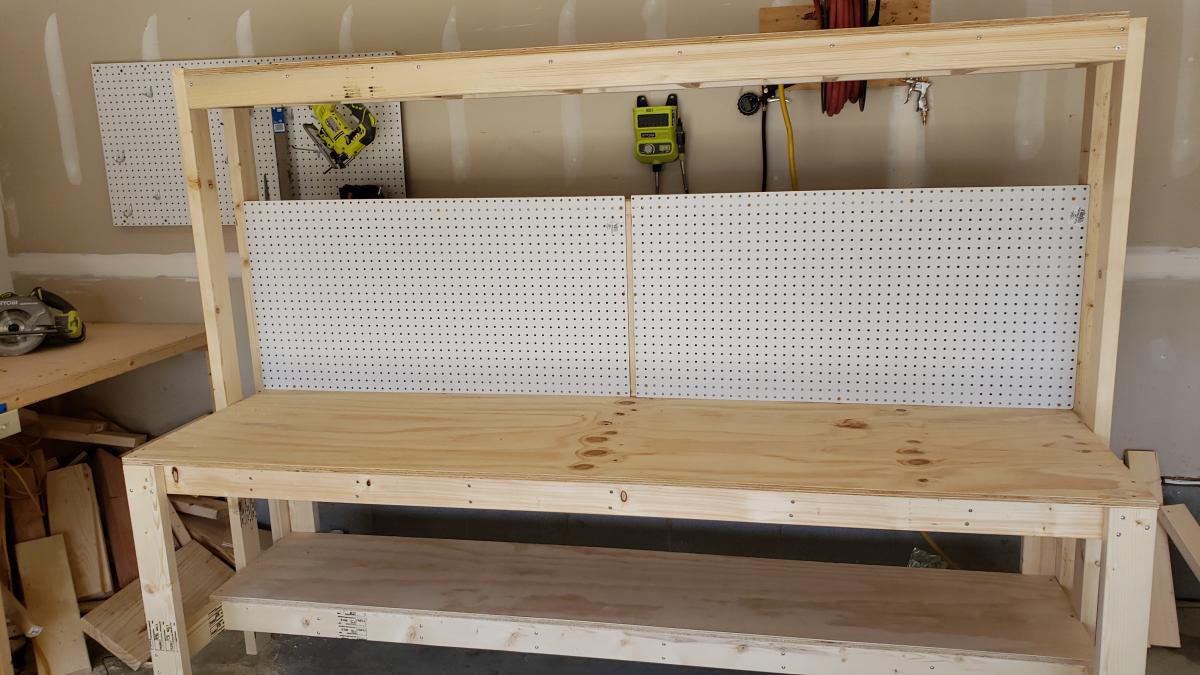
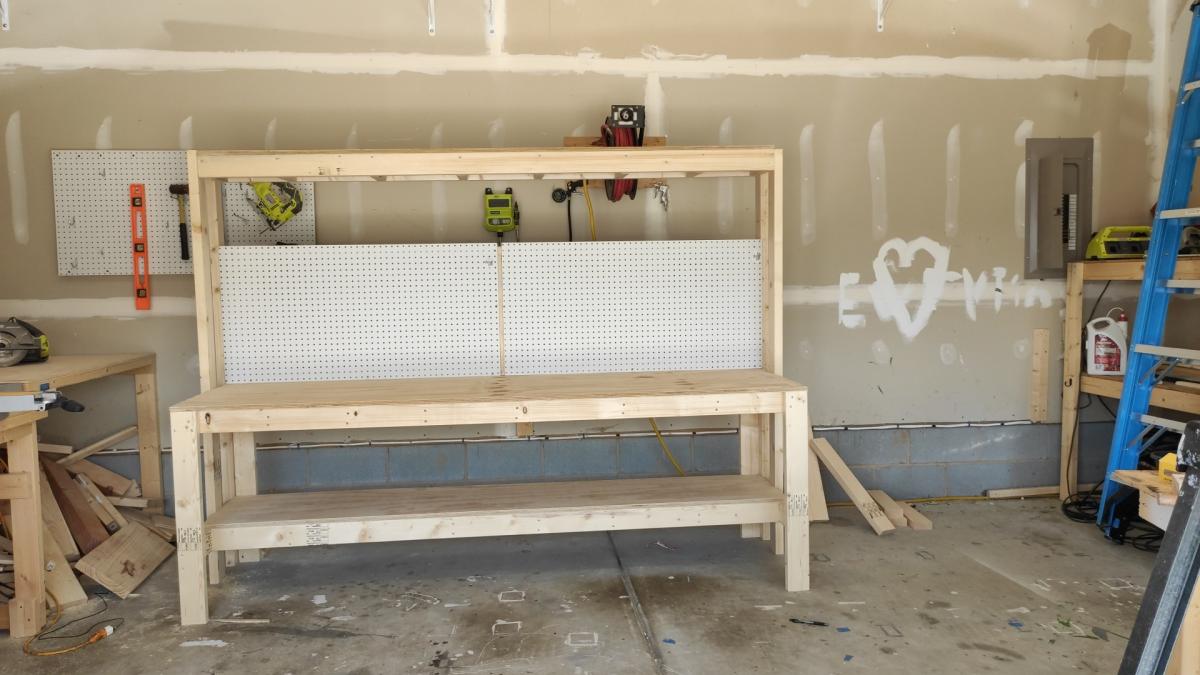
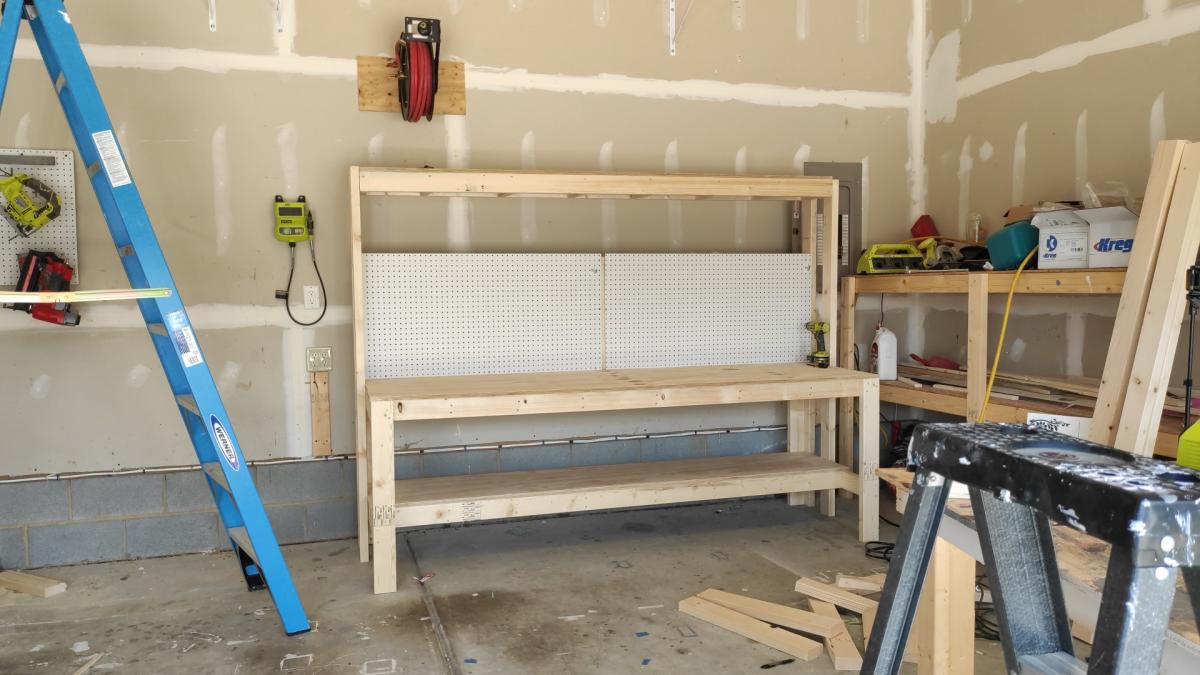
I made a workbench for my garage it was pretty easy. I also made an instructional youtube video if you want to learn how to make it. #diy #workbench #bench
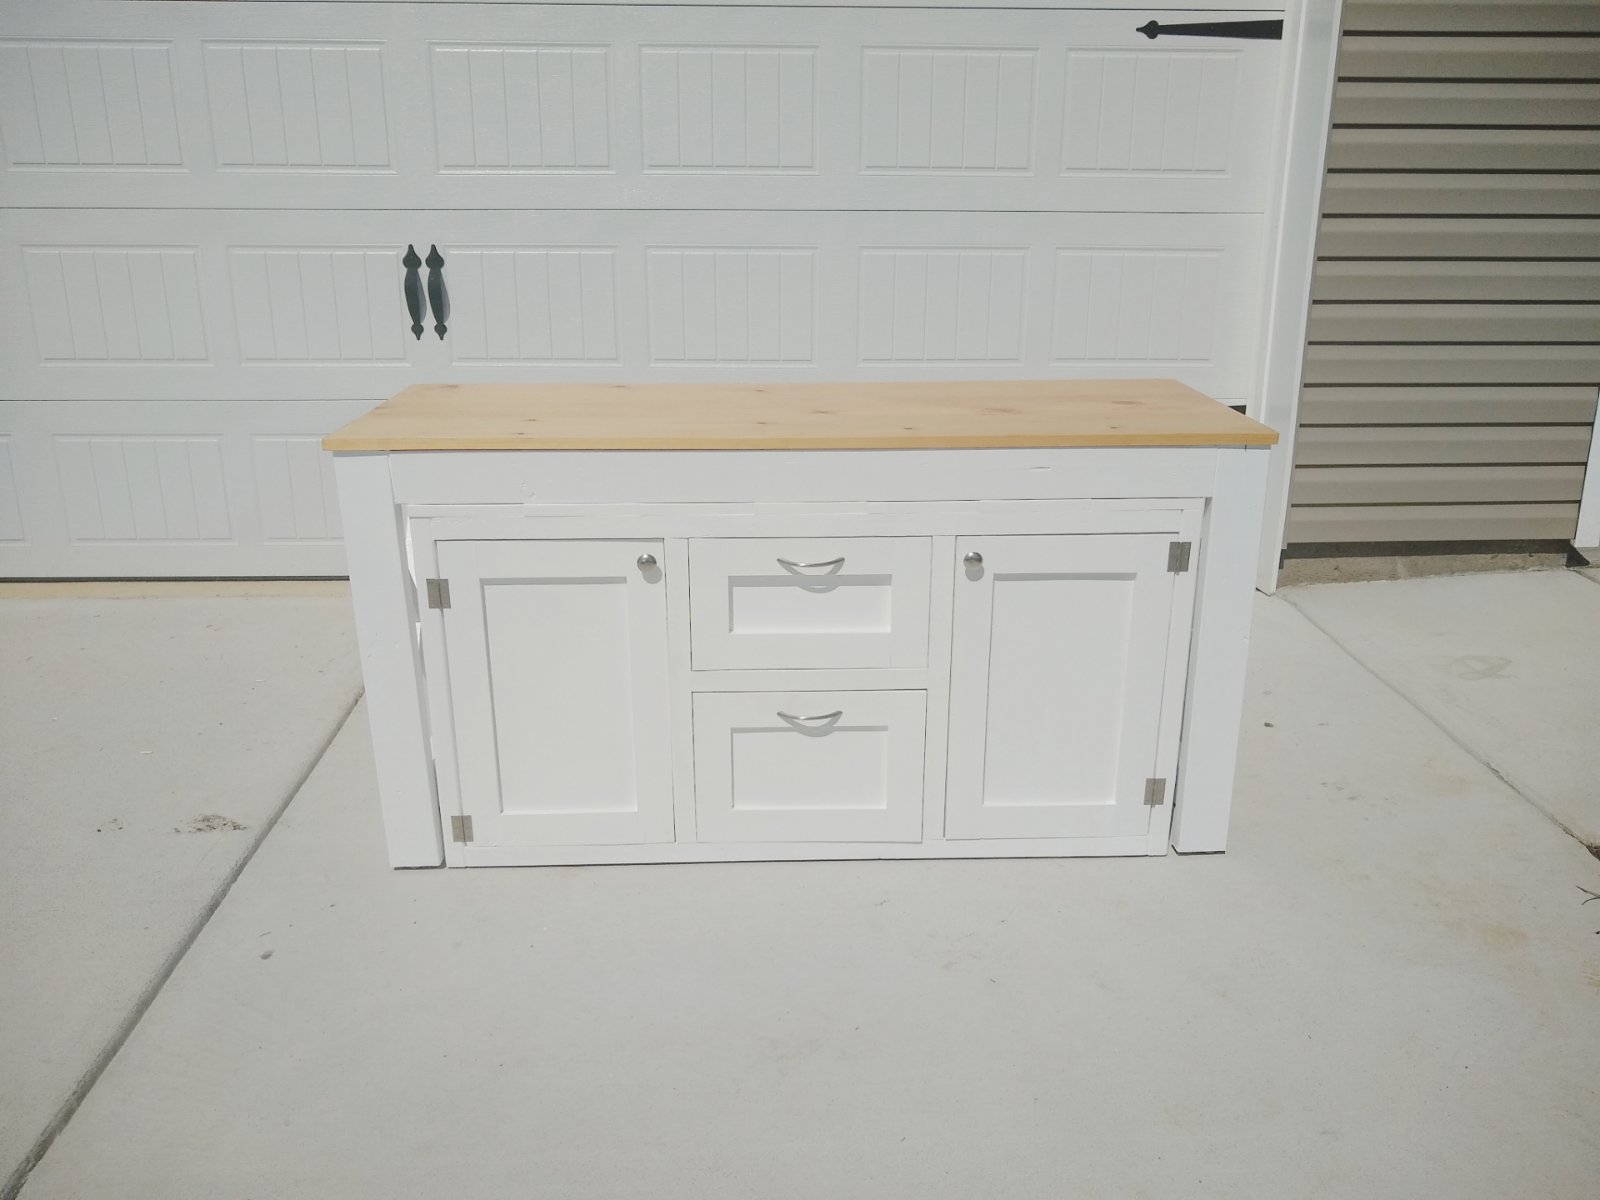
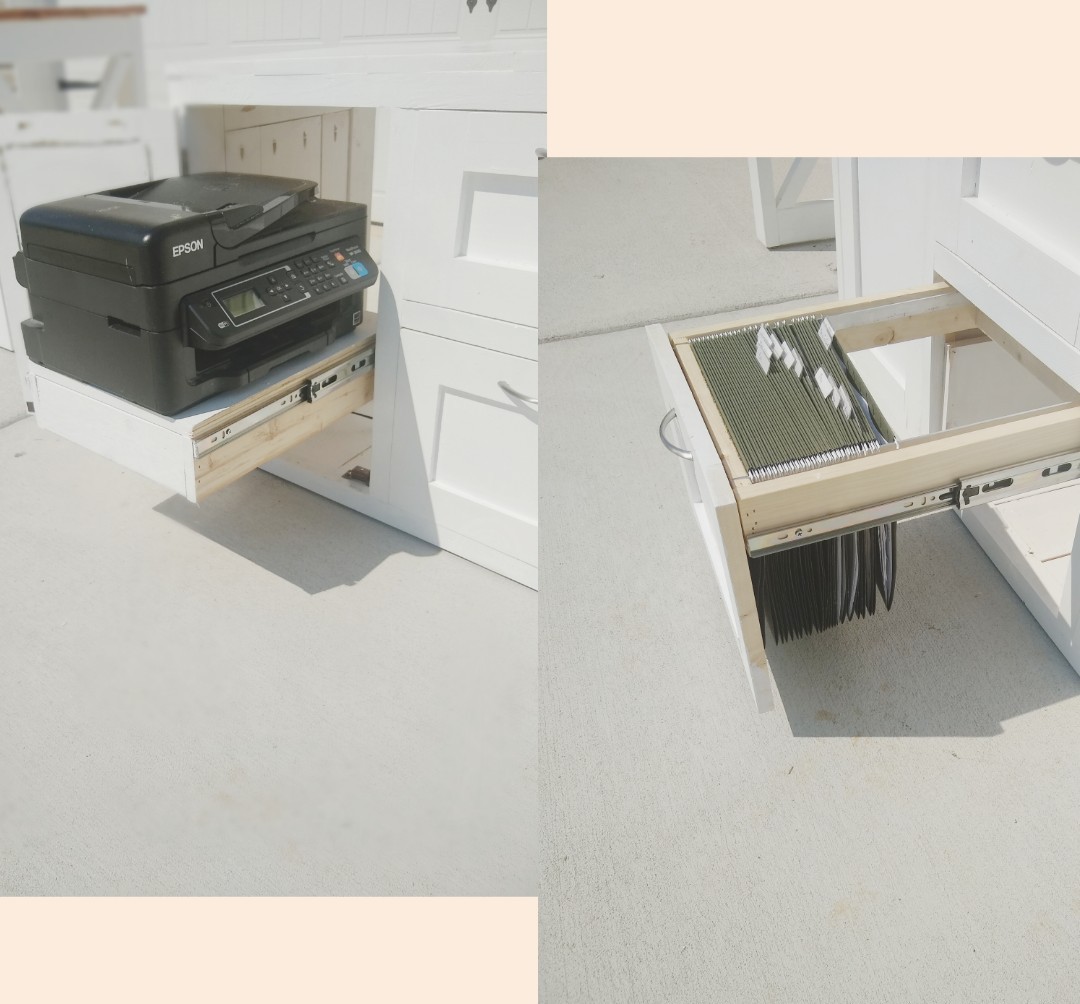
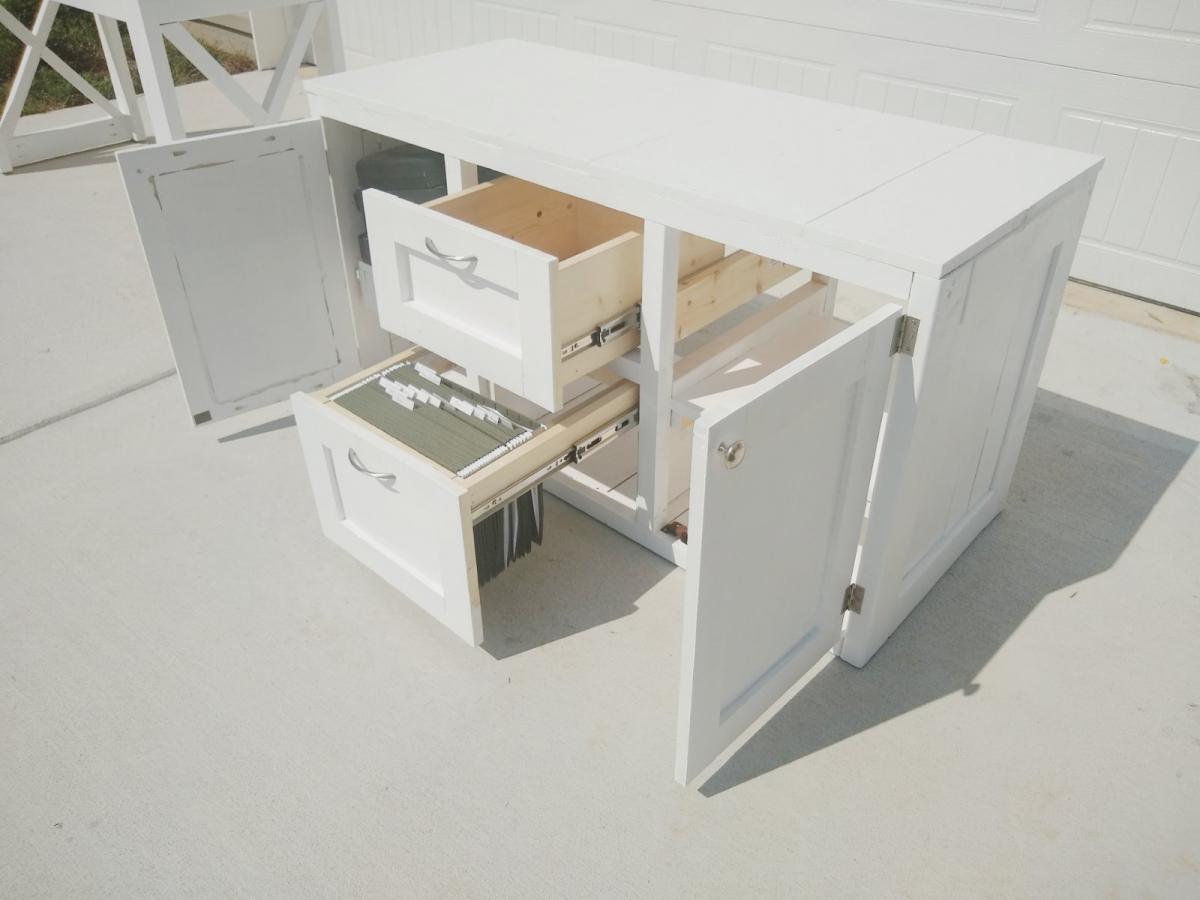
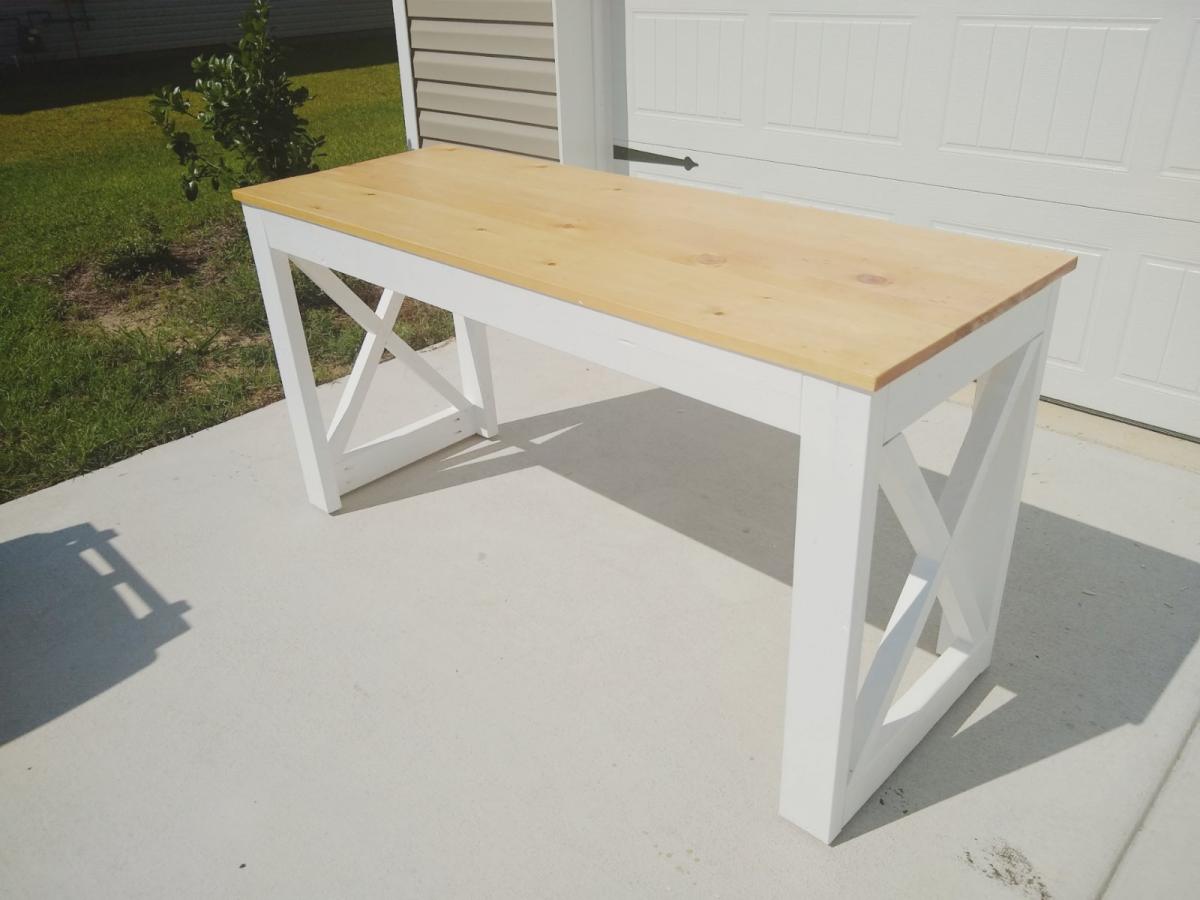
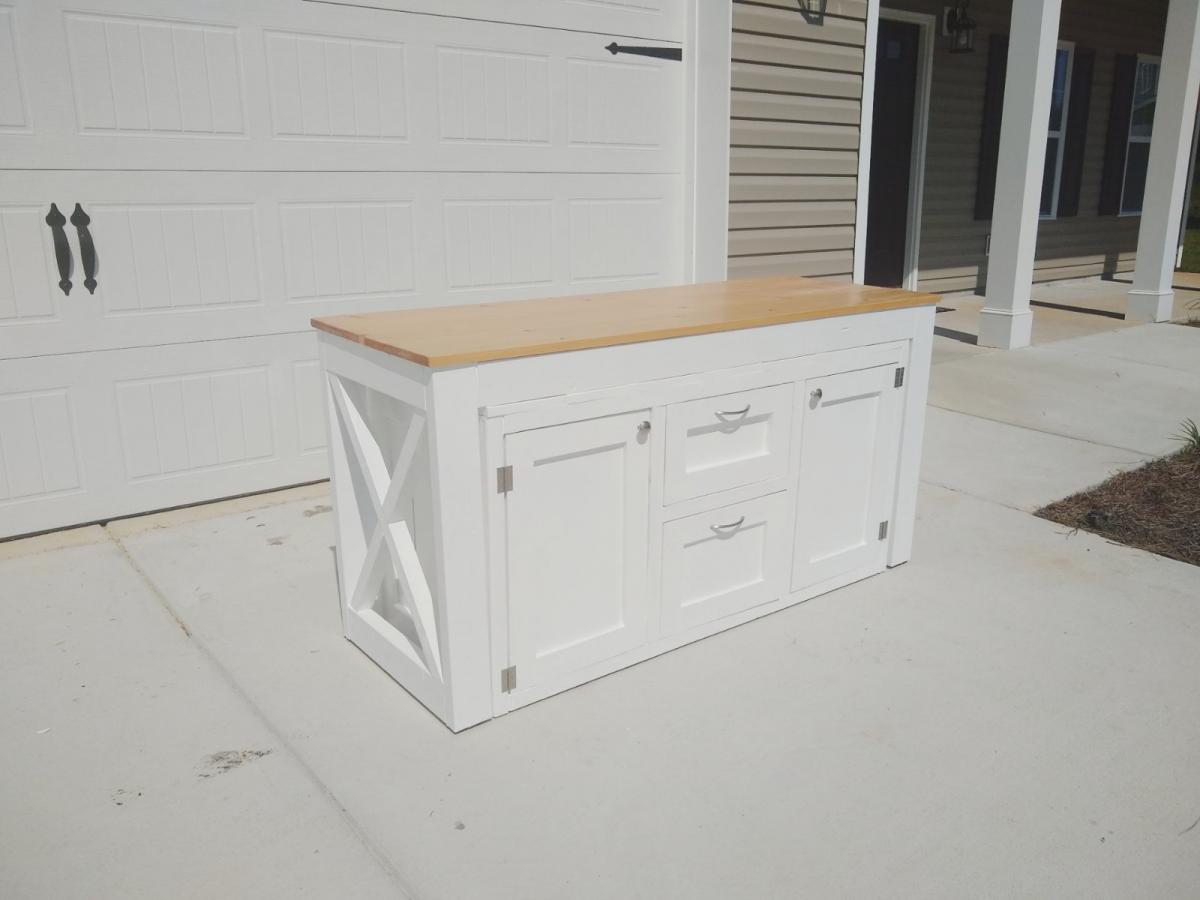
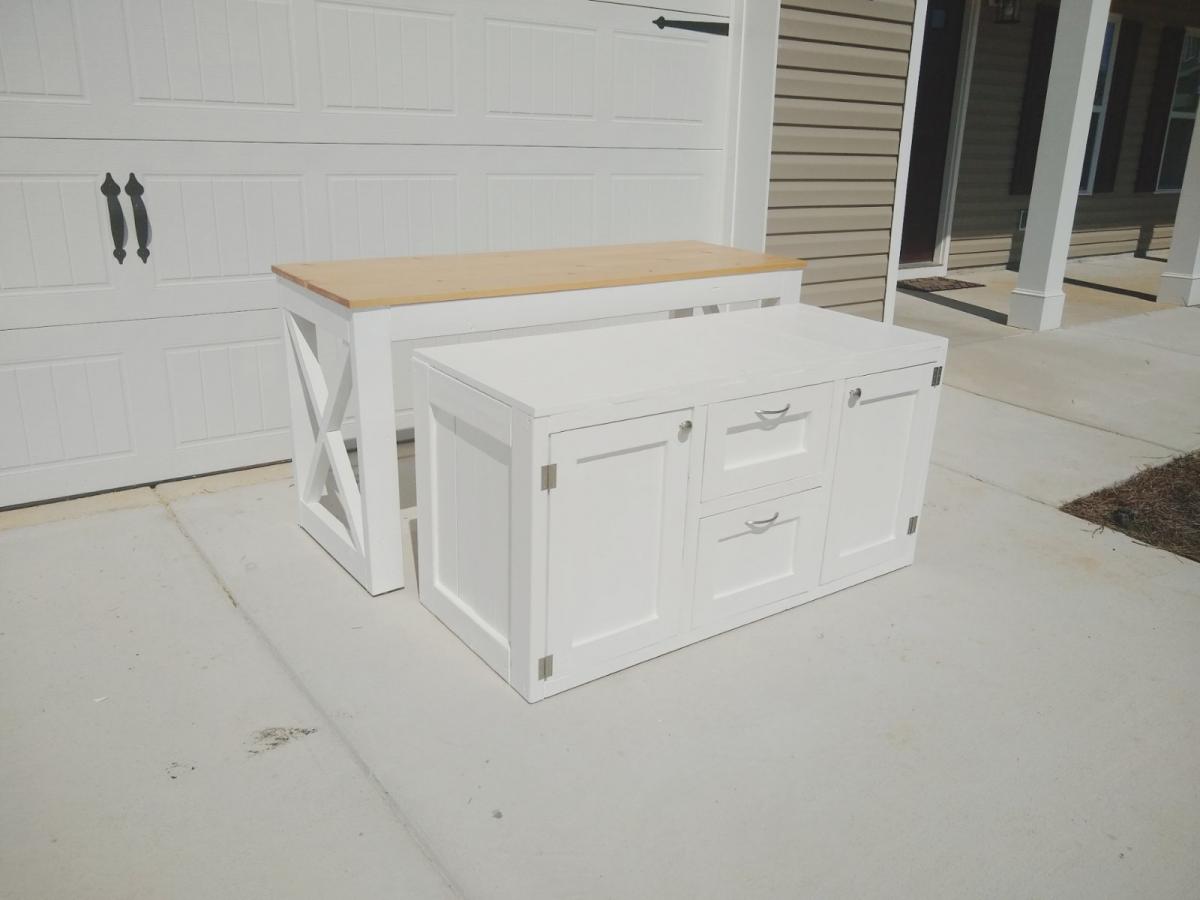
So loving this nesting office station❤️! We will have a sofa sleeper in the office as well. So we needed a desk that could be moved to the wall when the sofa sleeper is being used by guest. I saw a post from Ana for her Nesting Grill Station and I came up with the idea to make this nesting office station. The cabinet includes a file folder drawer (which is from Ana's mail boss plans), a regular drawer, cabinet doors with shelves. One of the shelves is a pull out shelf for the printer. I think it came together great! Design for nesting desk inspired by these plans: https://www.ana-white.com/woodworking-projects/nesting-grill-station https://www.ana-white.com/woodworking-projects/mail-boss
Wed, 07/15/2020 - 04:40
I love this! Very creative and practical design and oh so pretty. Nice job!
Mon, 08/31/2020 - 09:47
This looks so good. Great work. Do you mind sharing how you concealed the wheels? Do you have wheels on both pieces?
Sat, 10/03/2020 - 08:35
Hi, Thank you! Actually I didn't add wheels to the design since this will be in an office with thick carpeting. I added adjustable metal foot pads to the bottom of the desk.
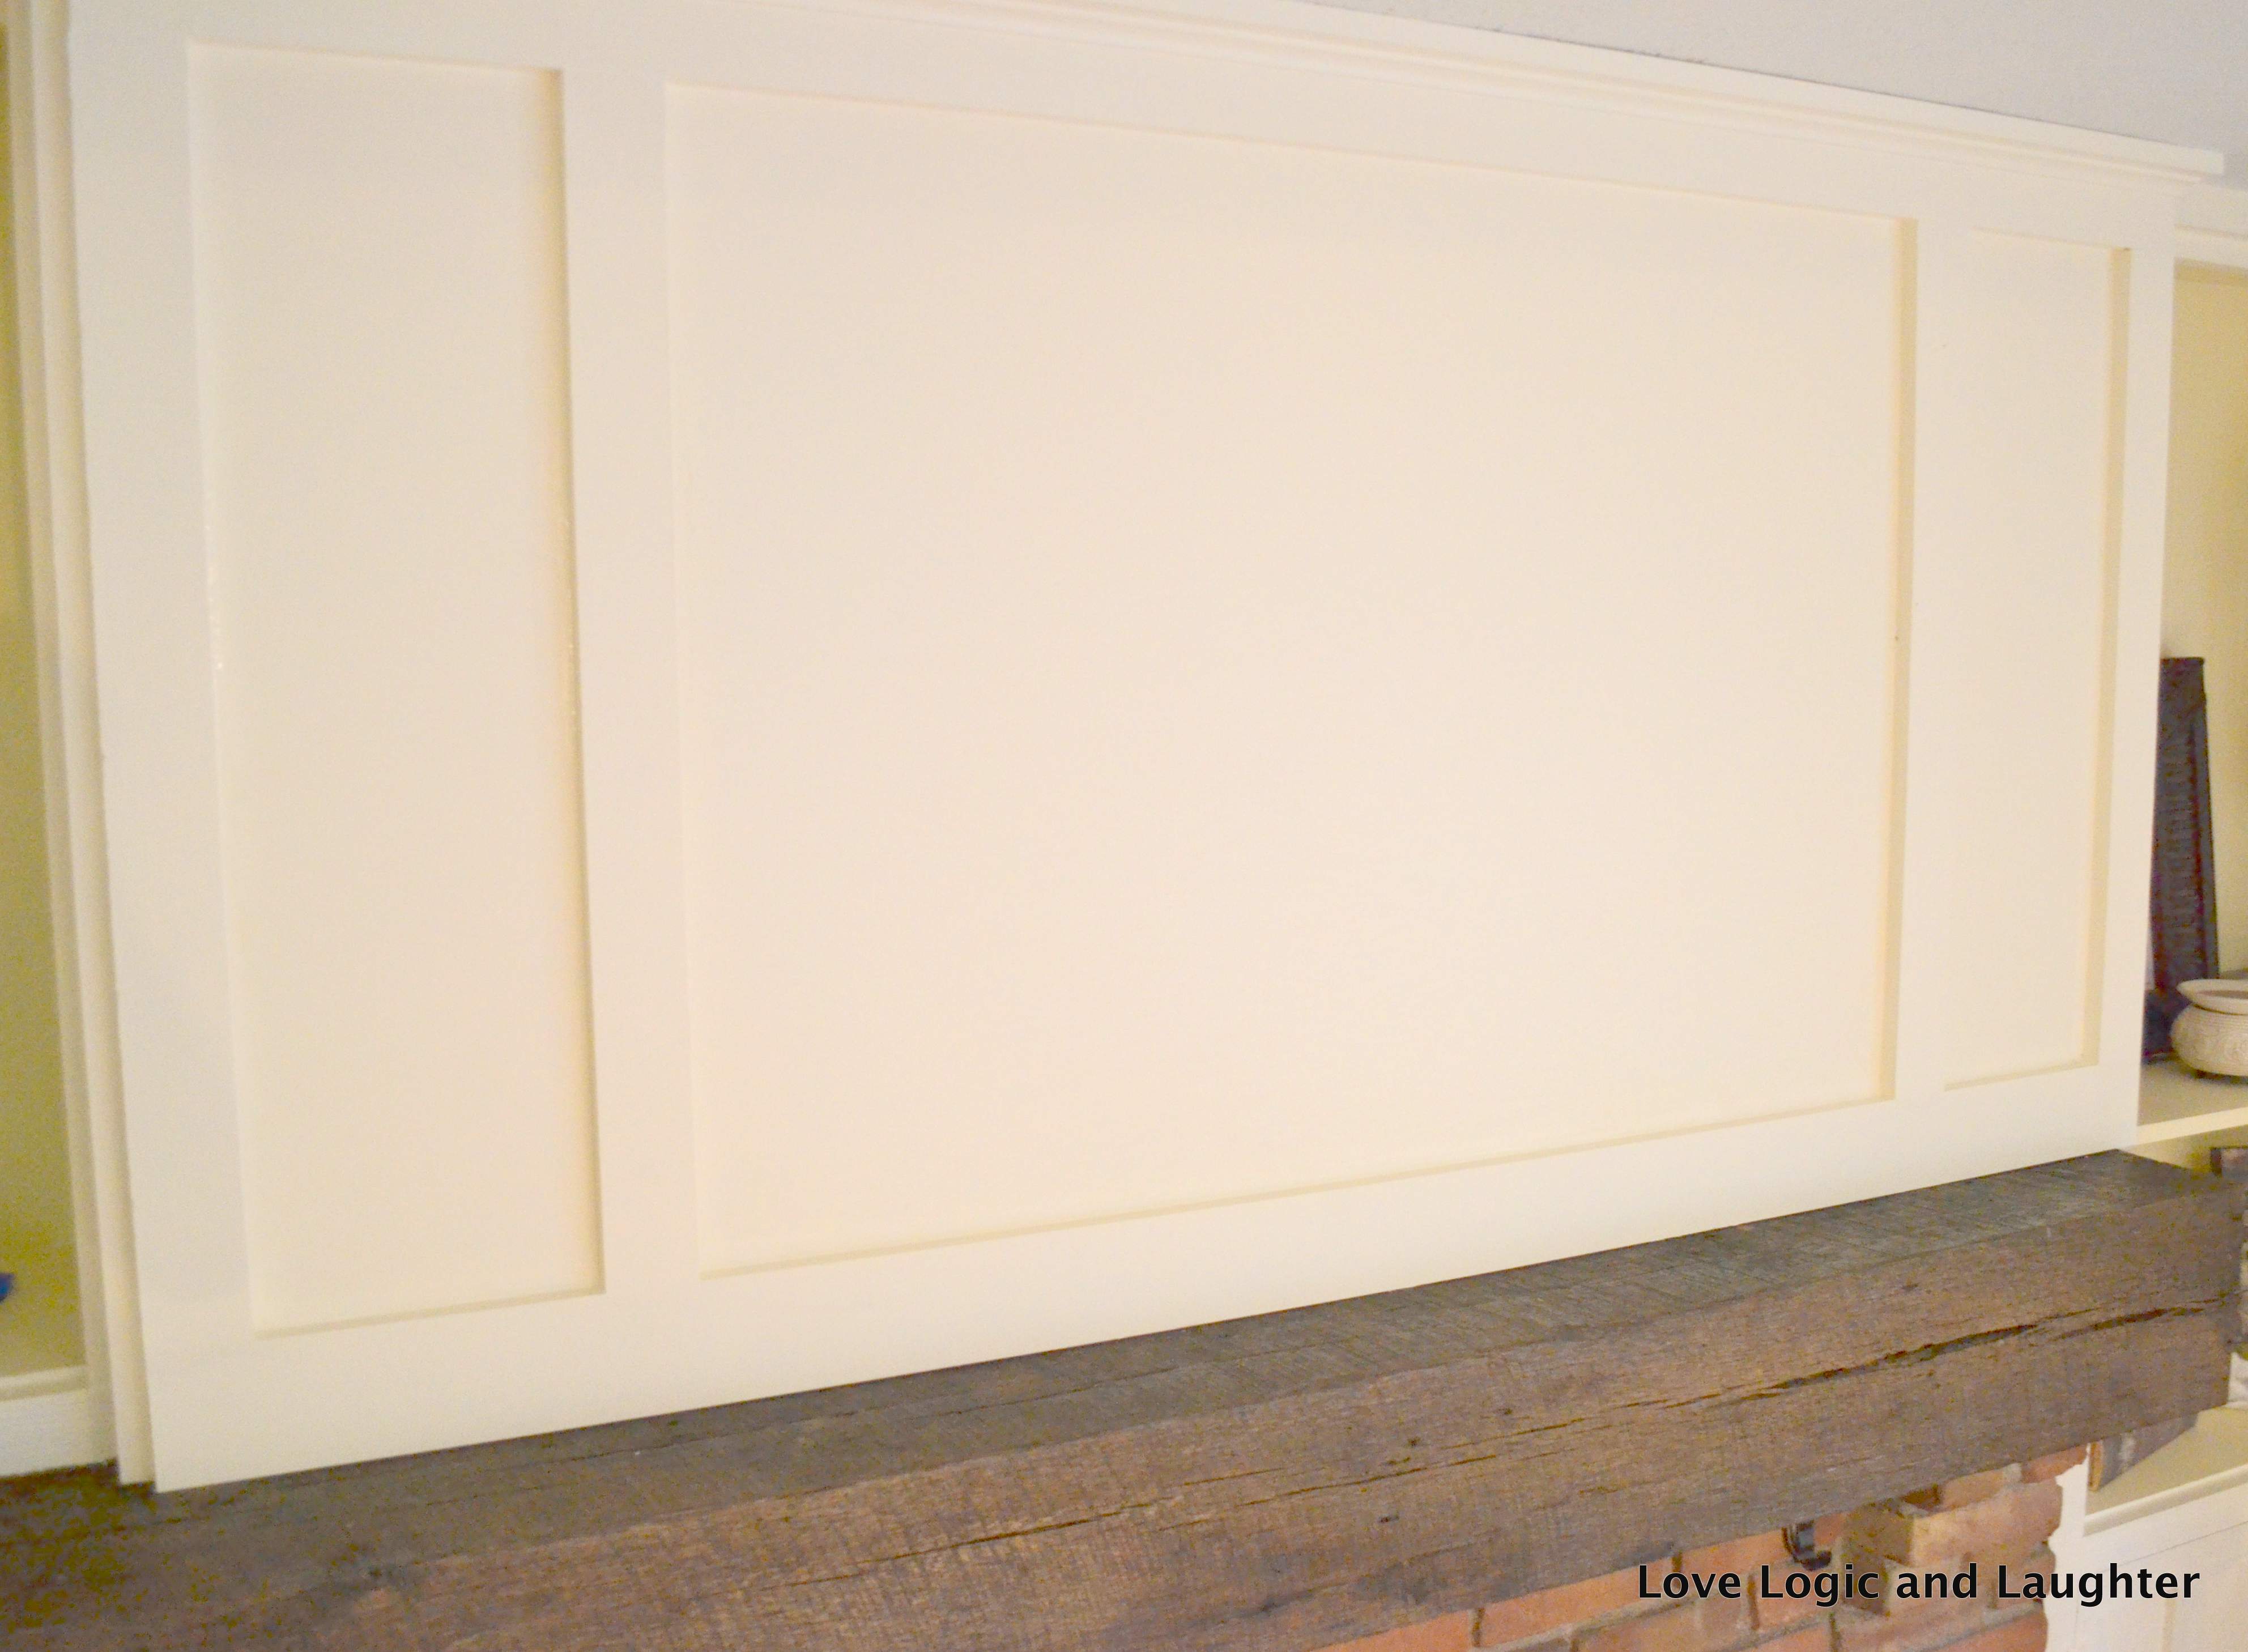
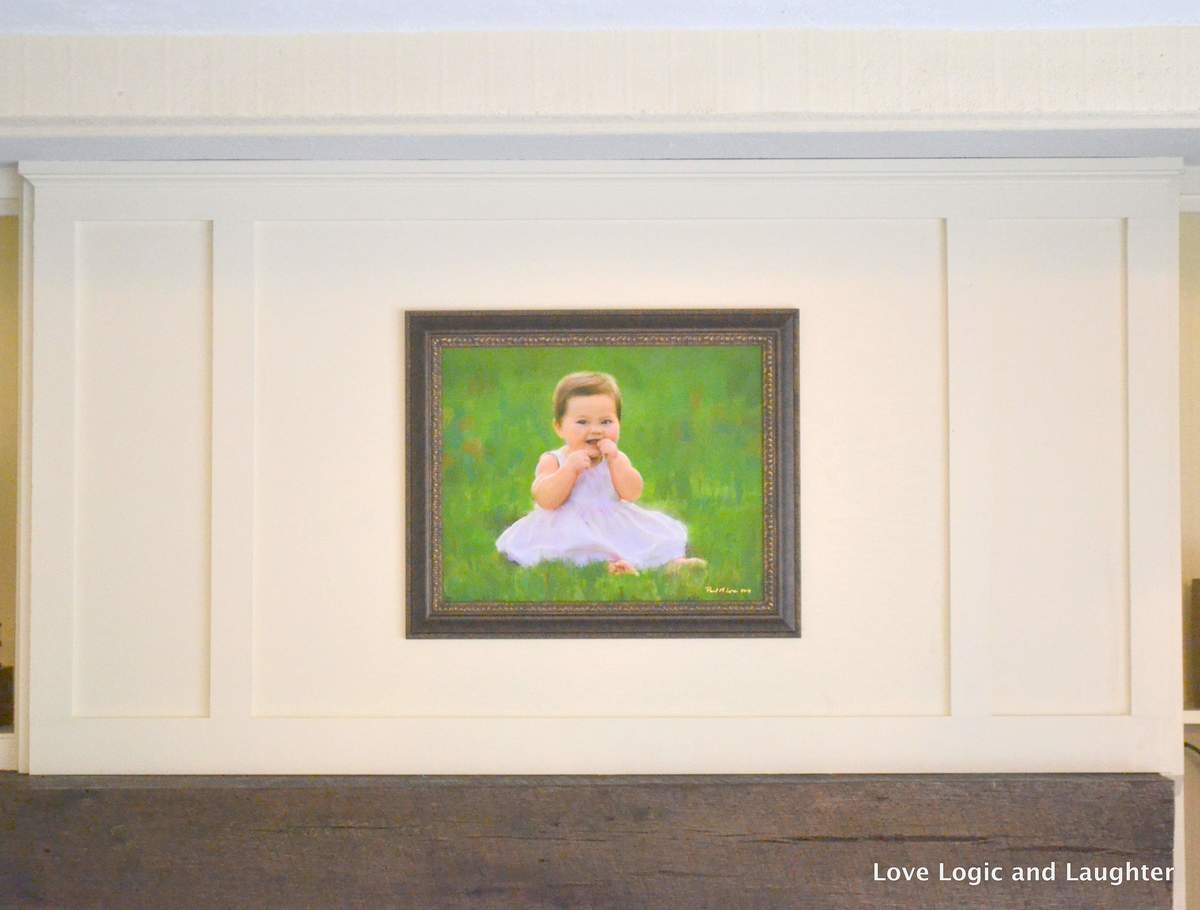
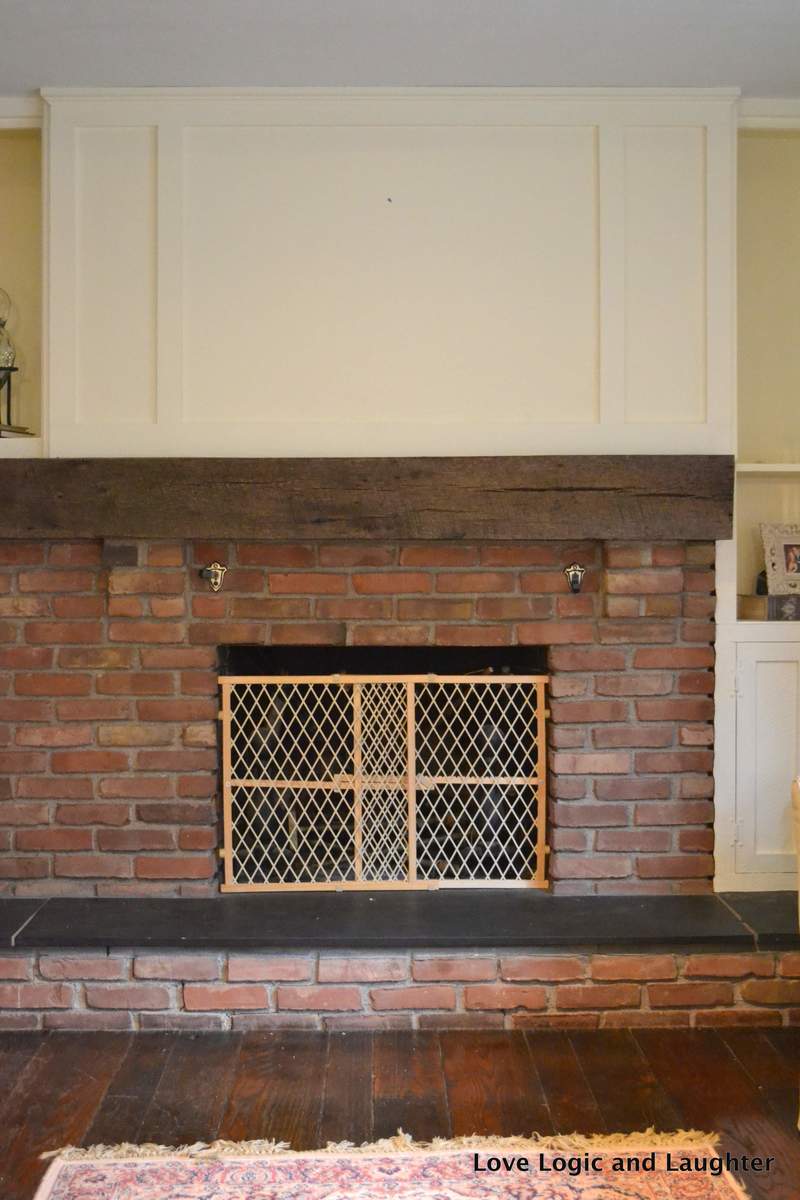
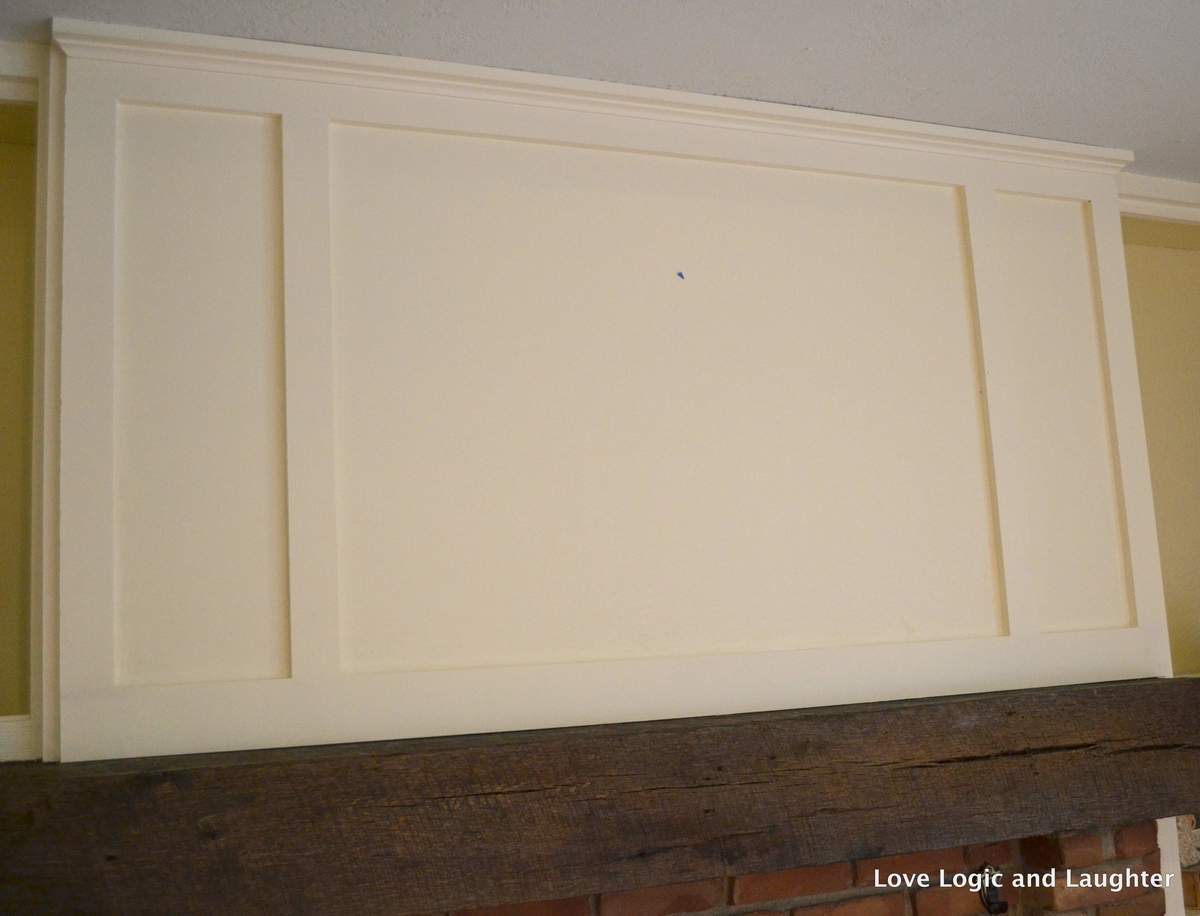
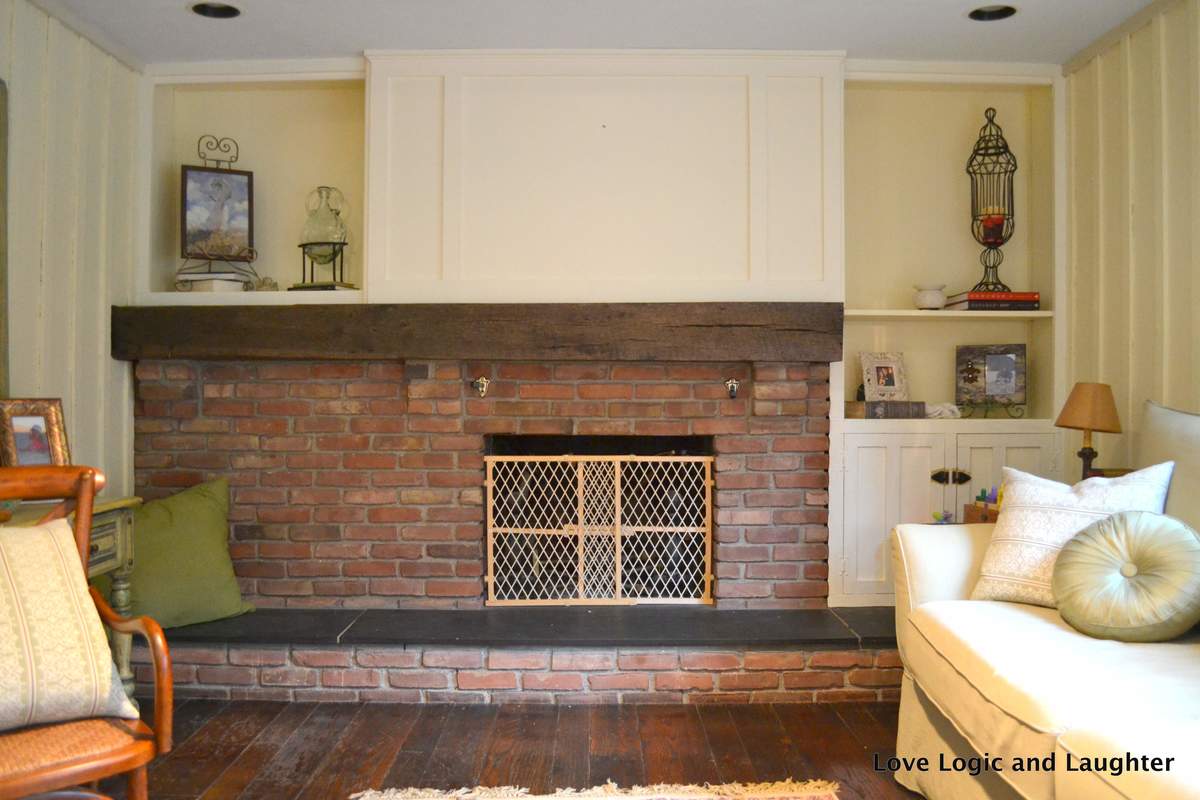
There was brick above my fireplace. I decided that I needed to lighten it up, but didn't want to necessarily paint the brick. Instead, I decided to panel above the fireplace using a board and batten style. I am so happy with the results! It is lighter and brighter in the room and goes with the style in the rest of the room (walls have board and batten as well).

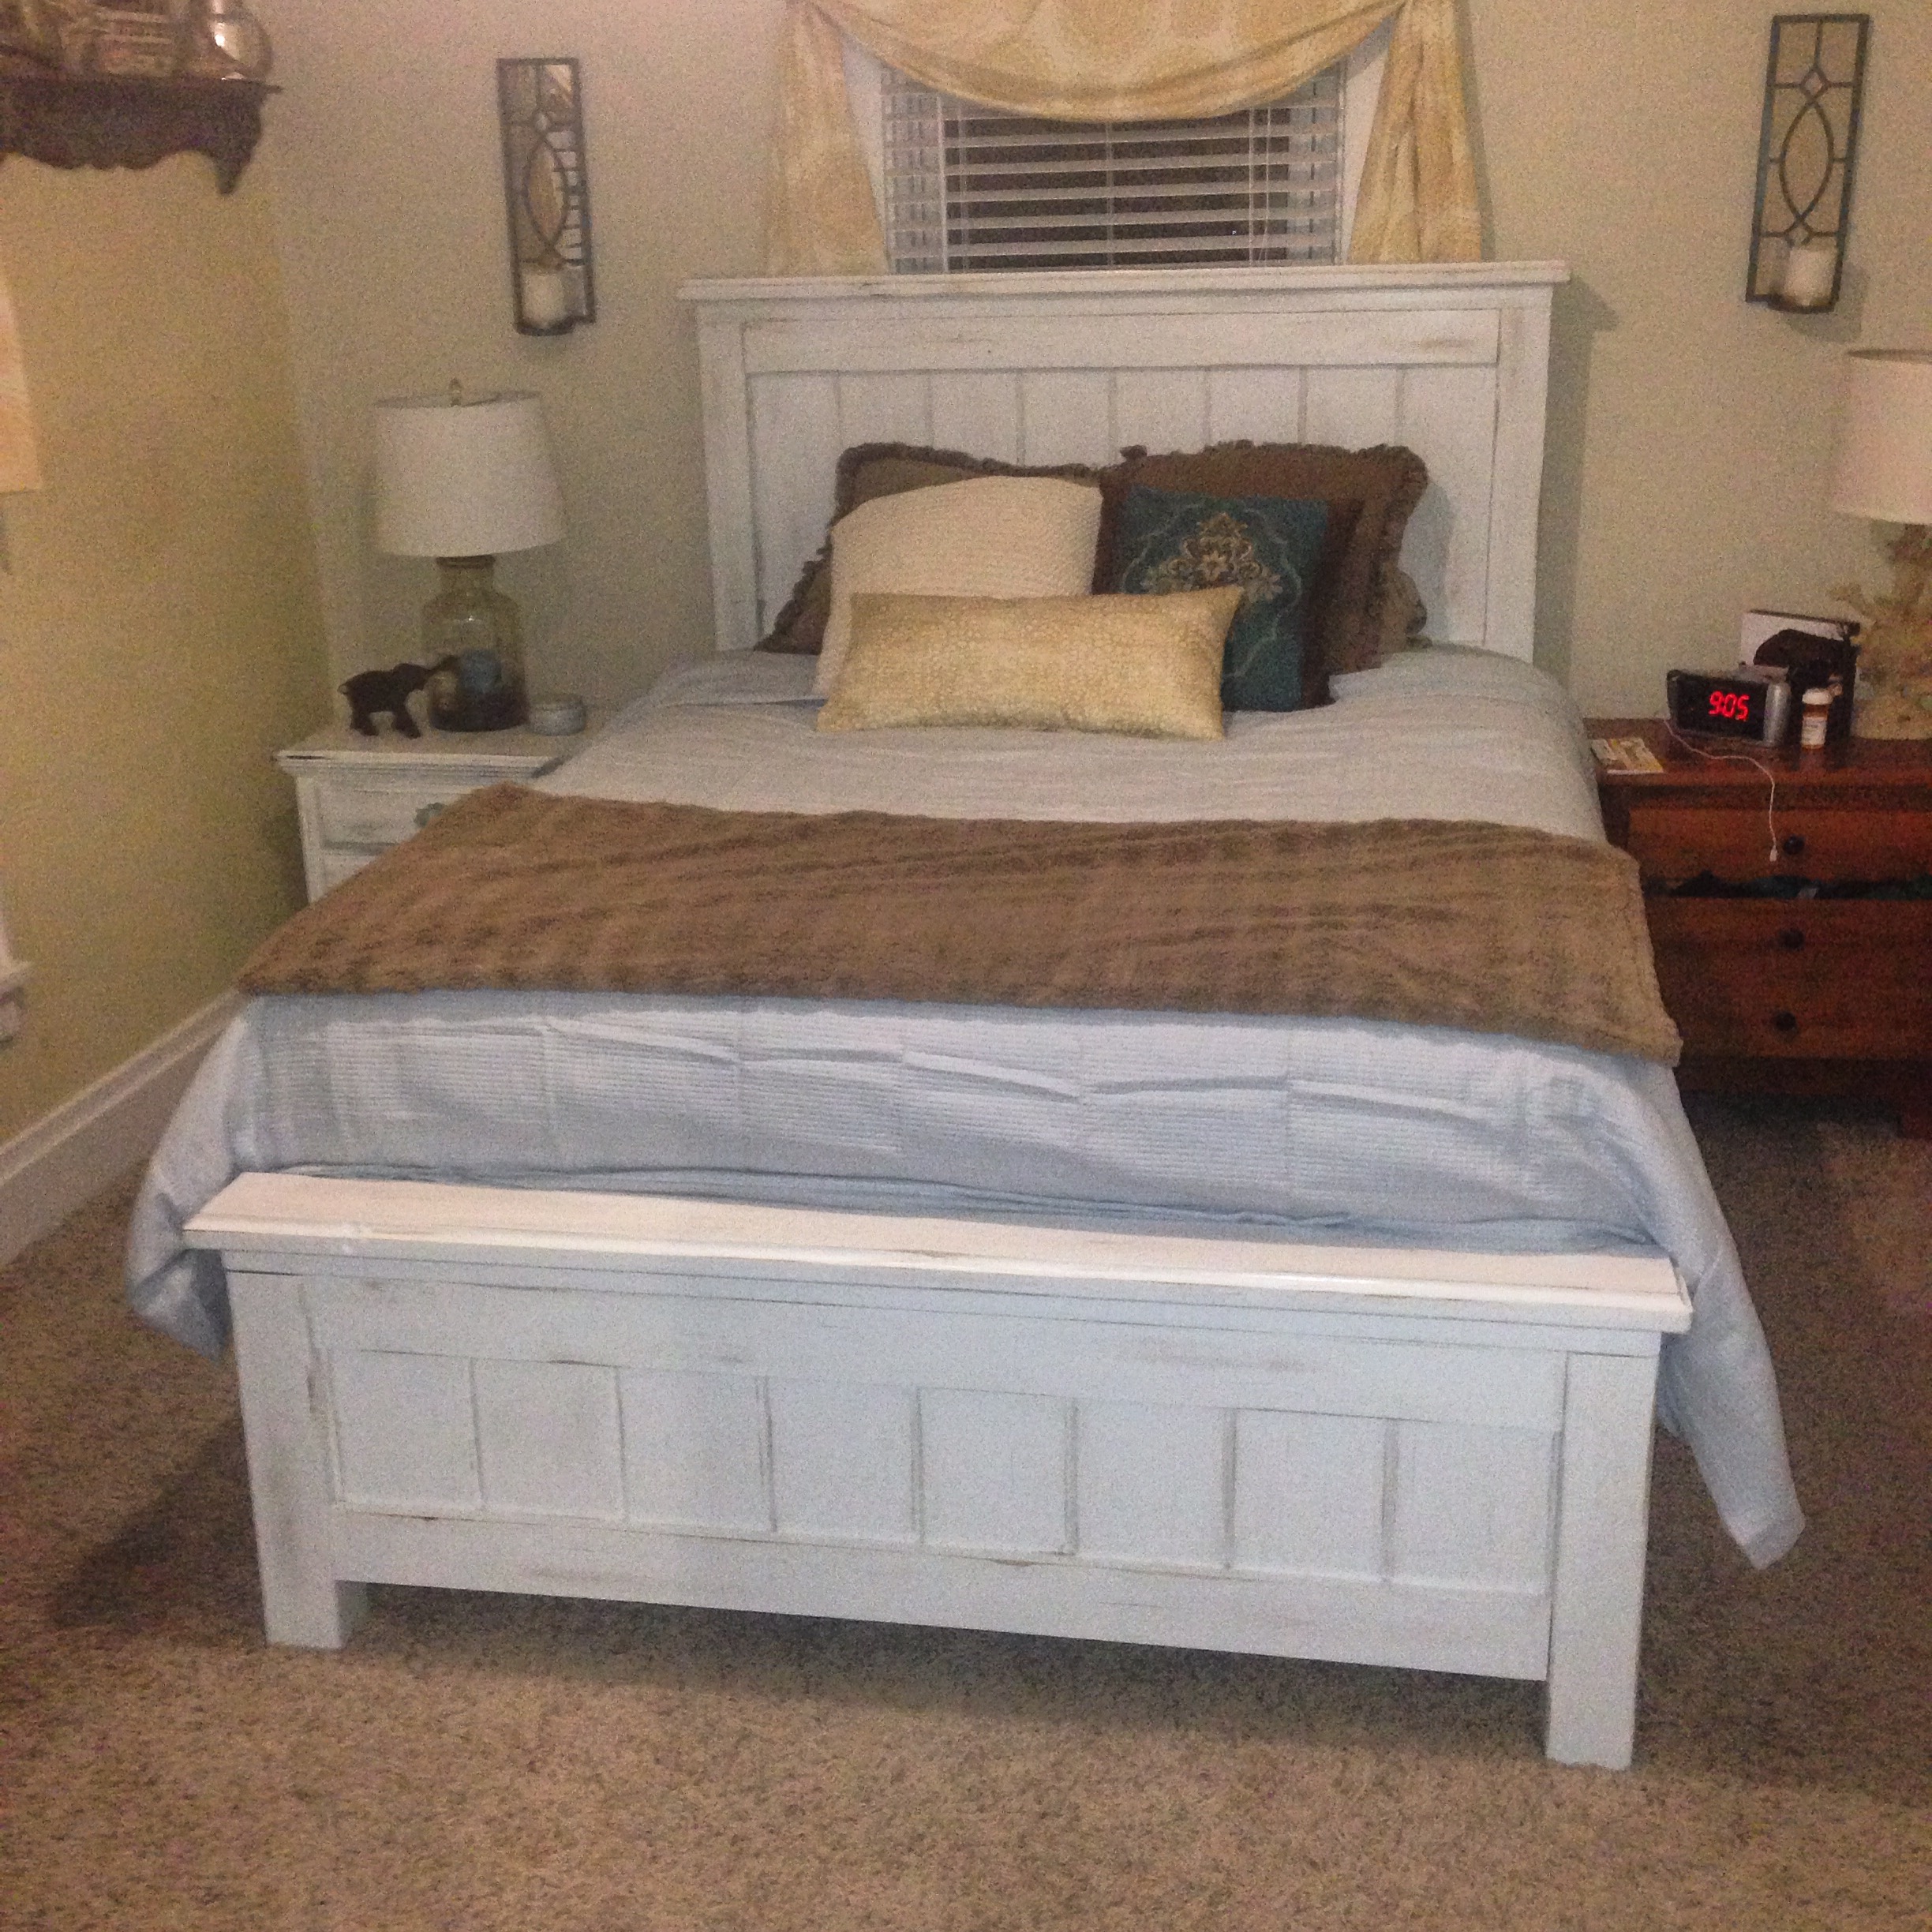
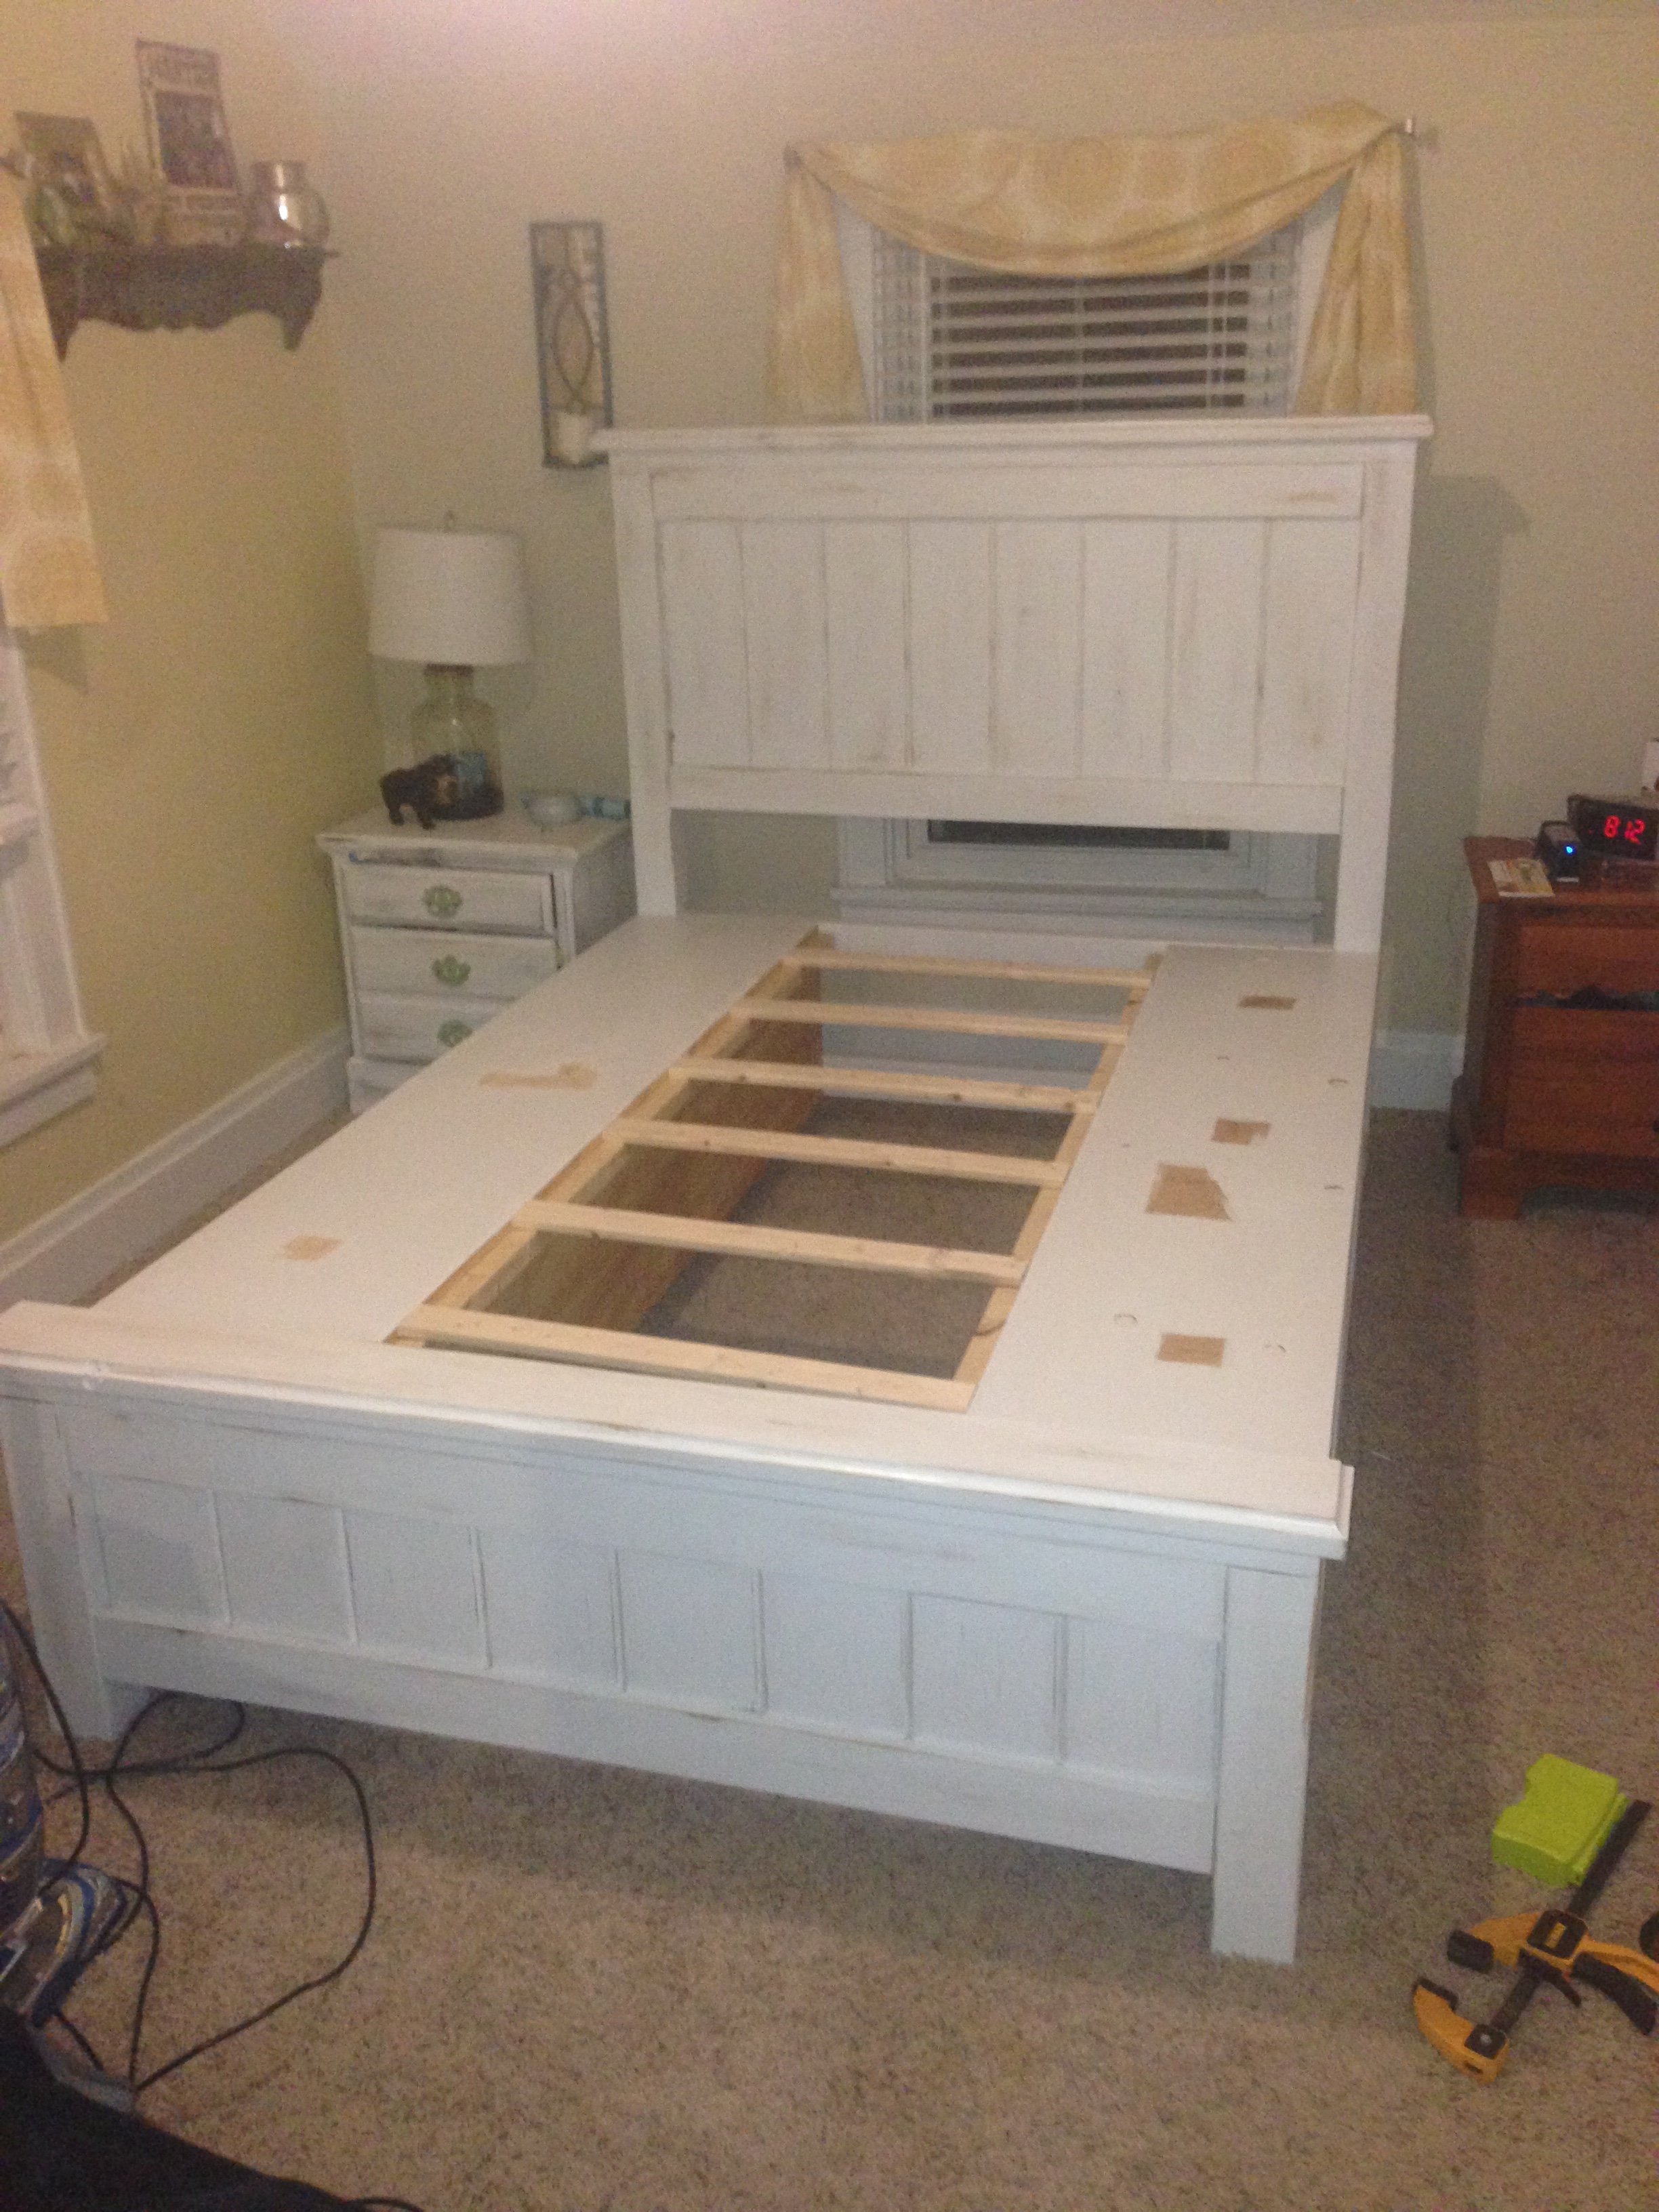
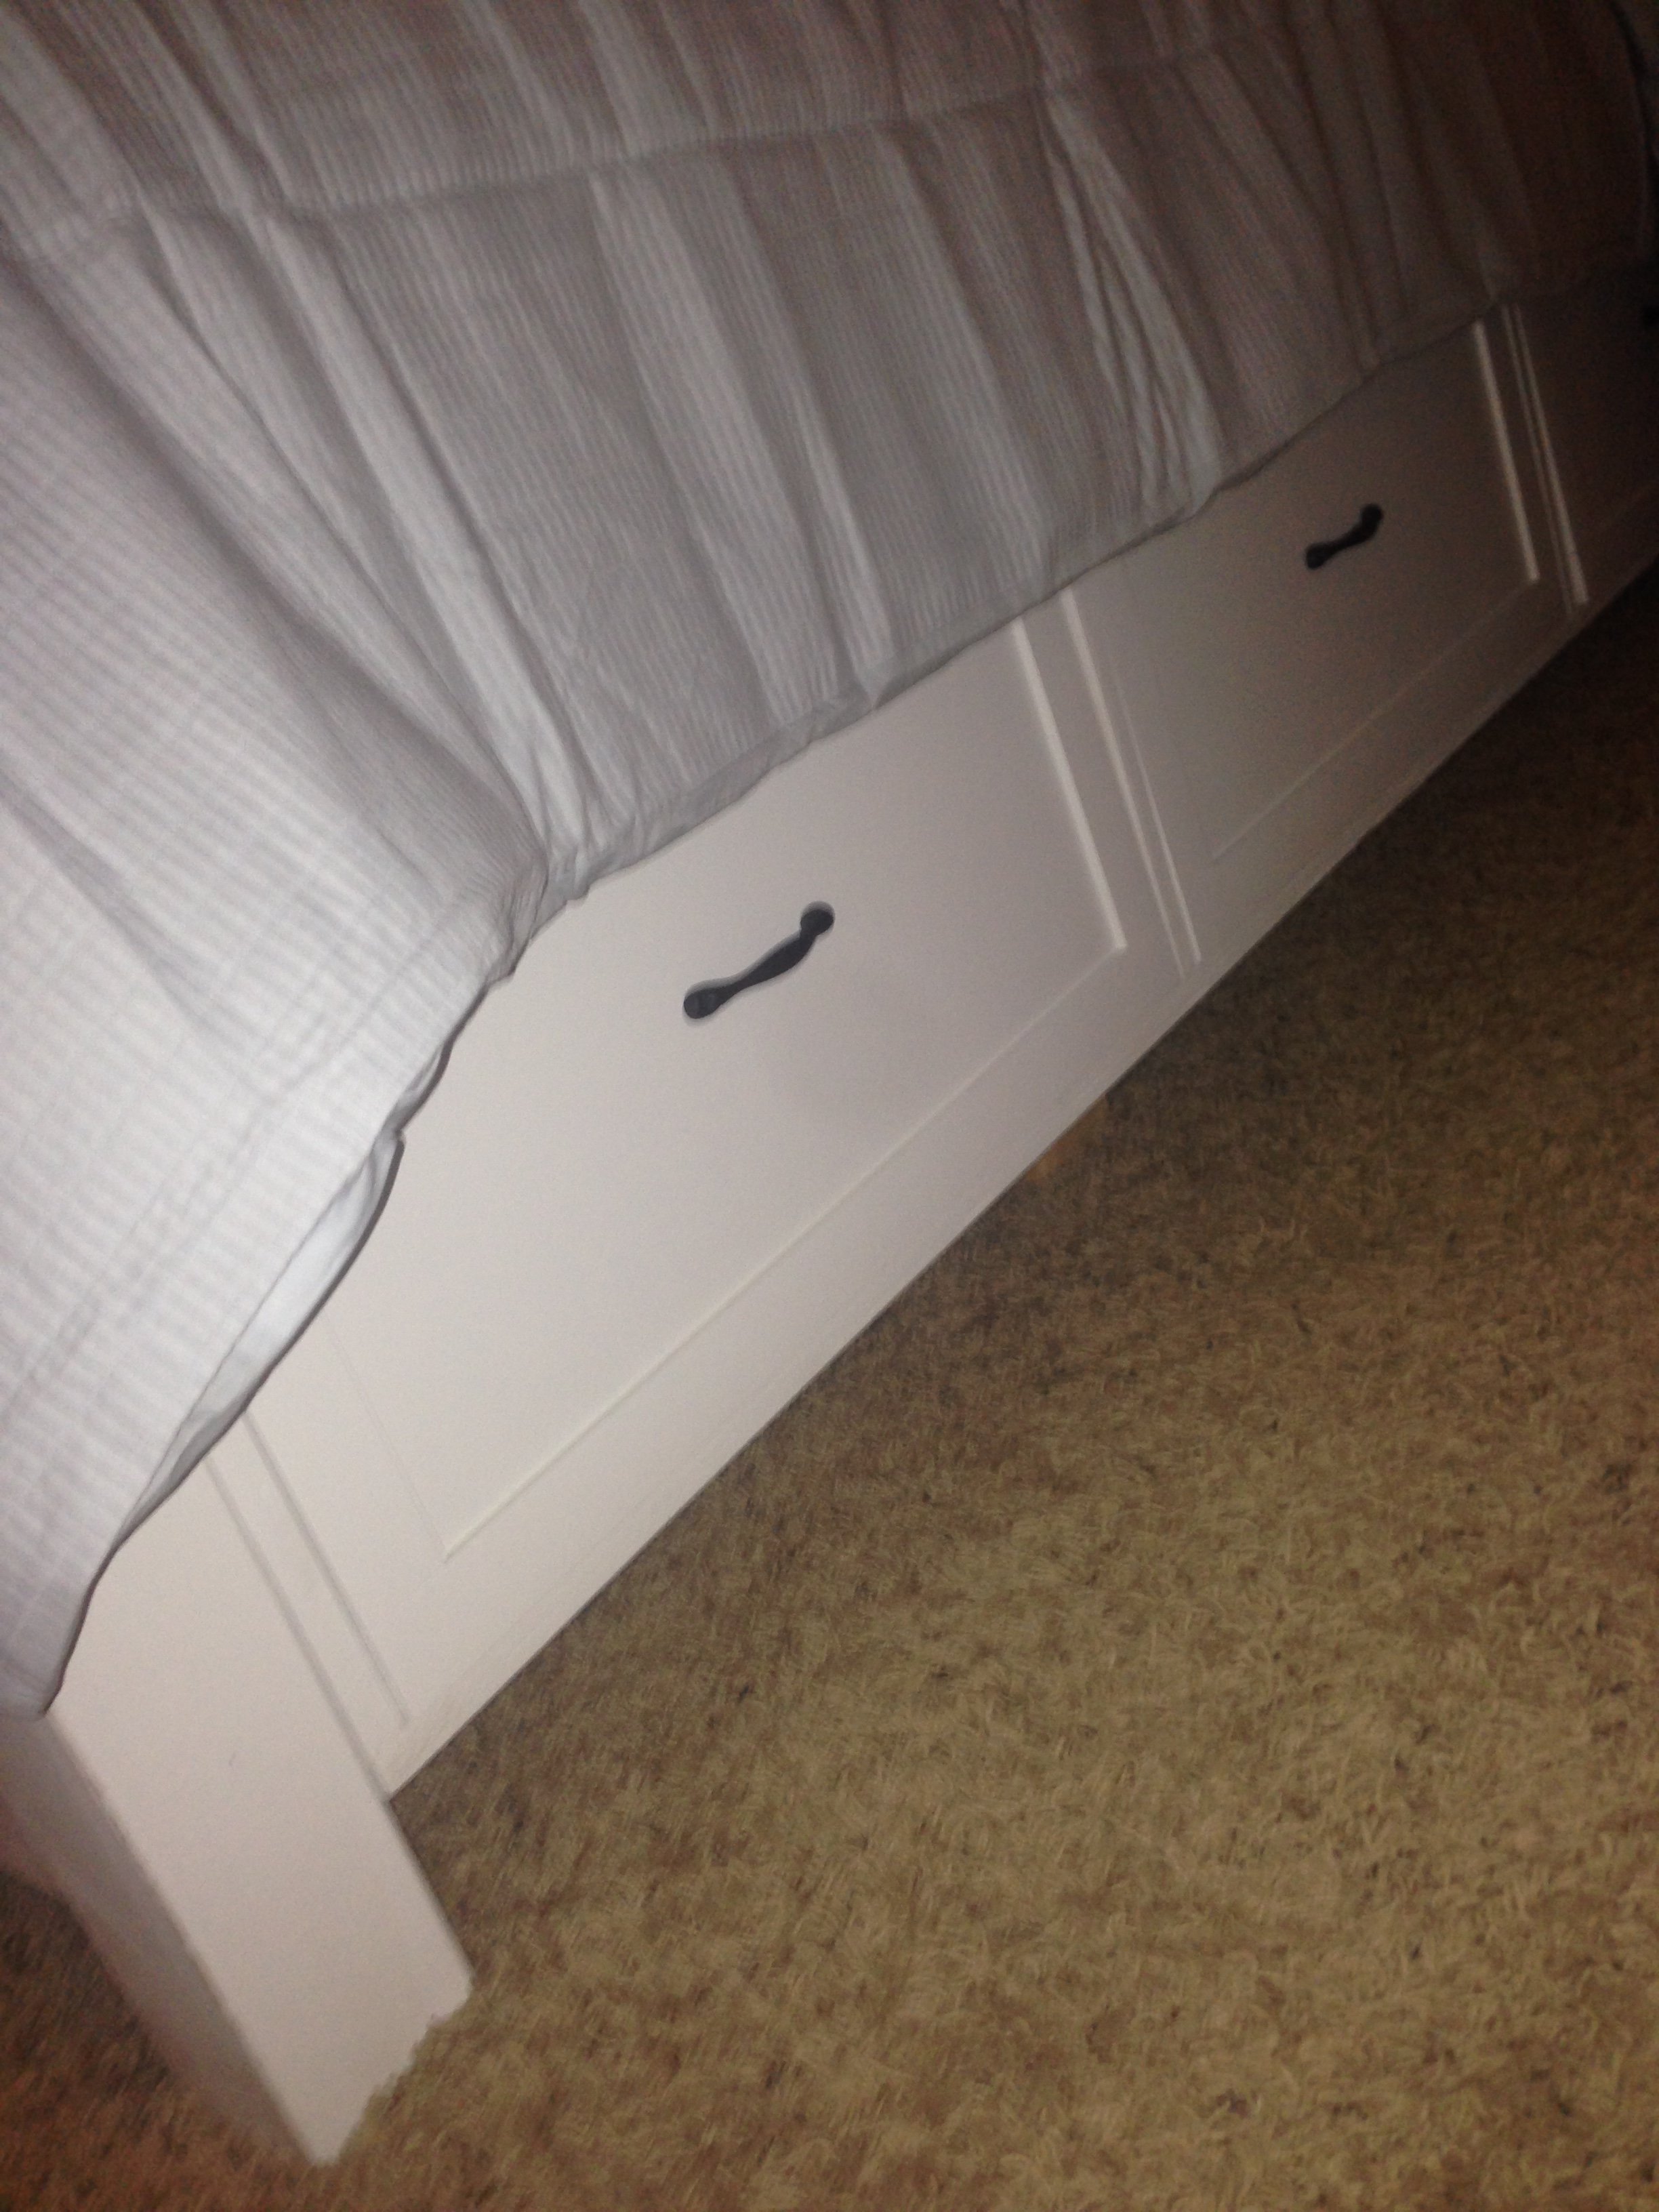
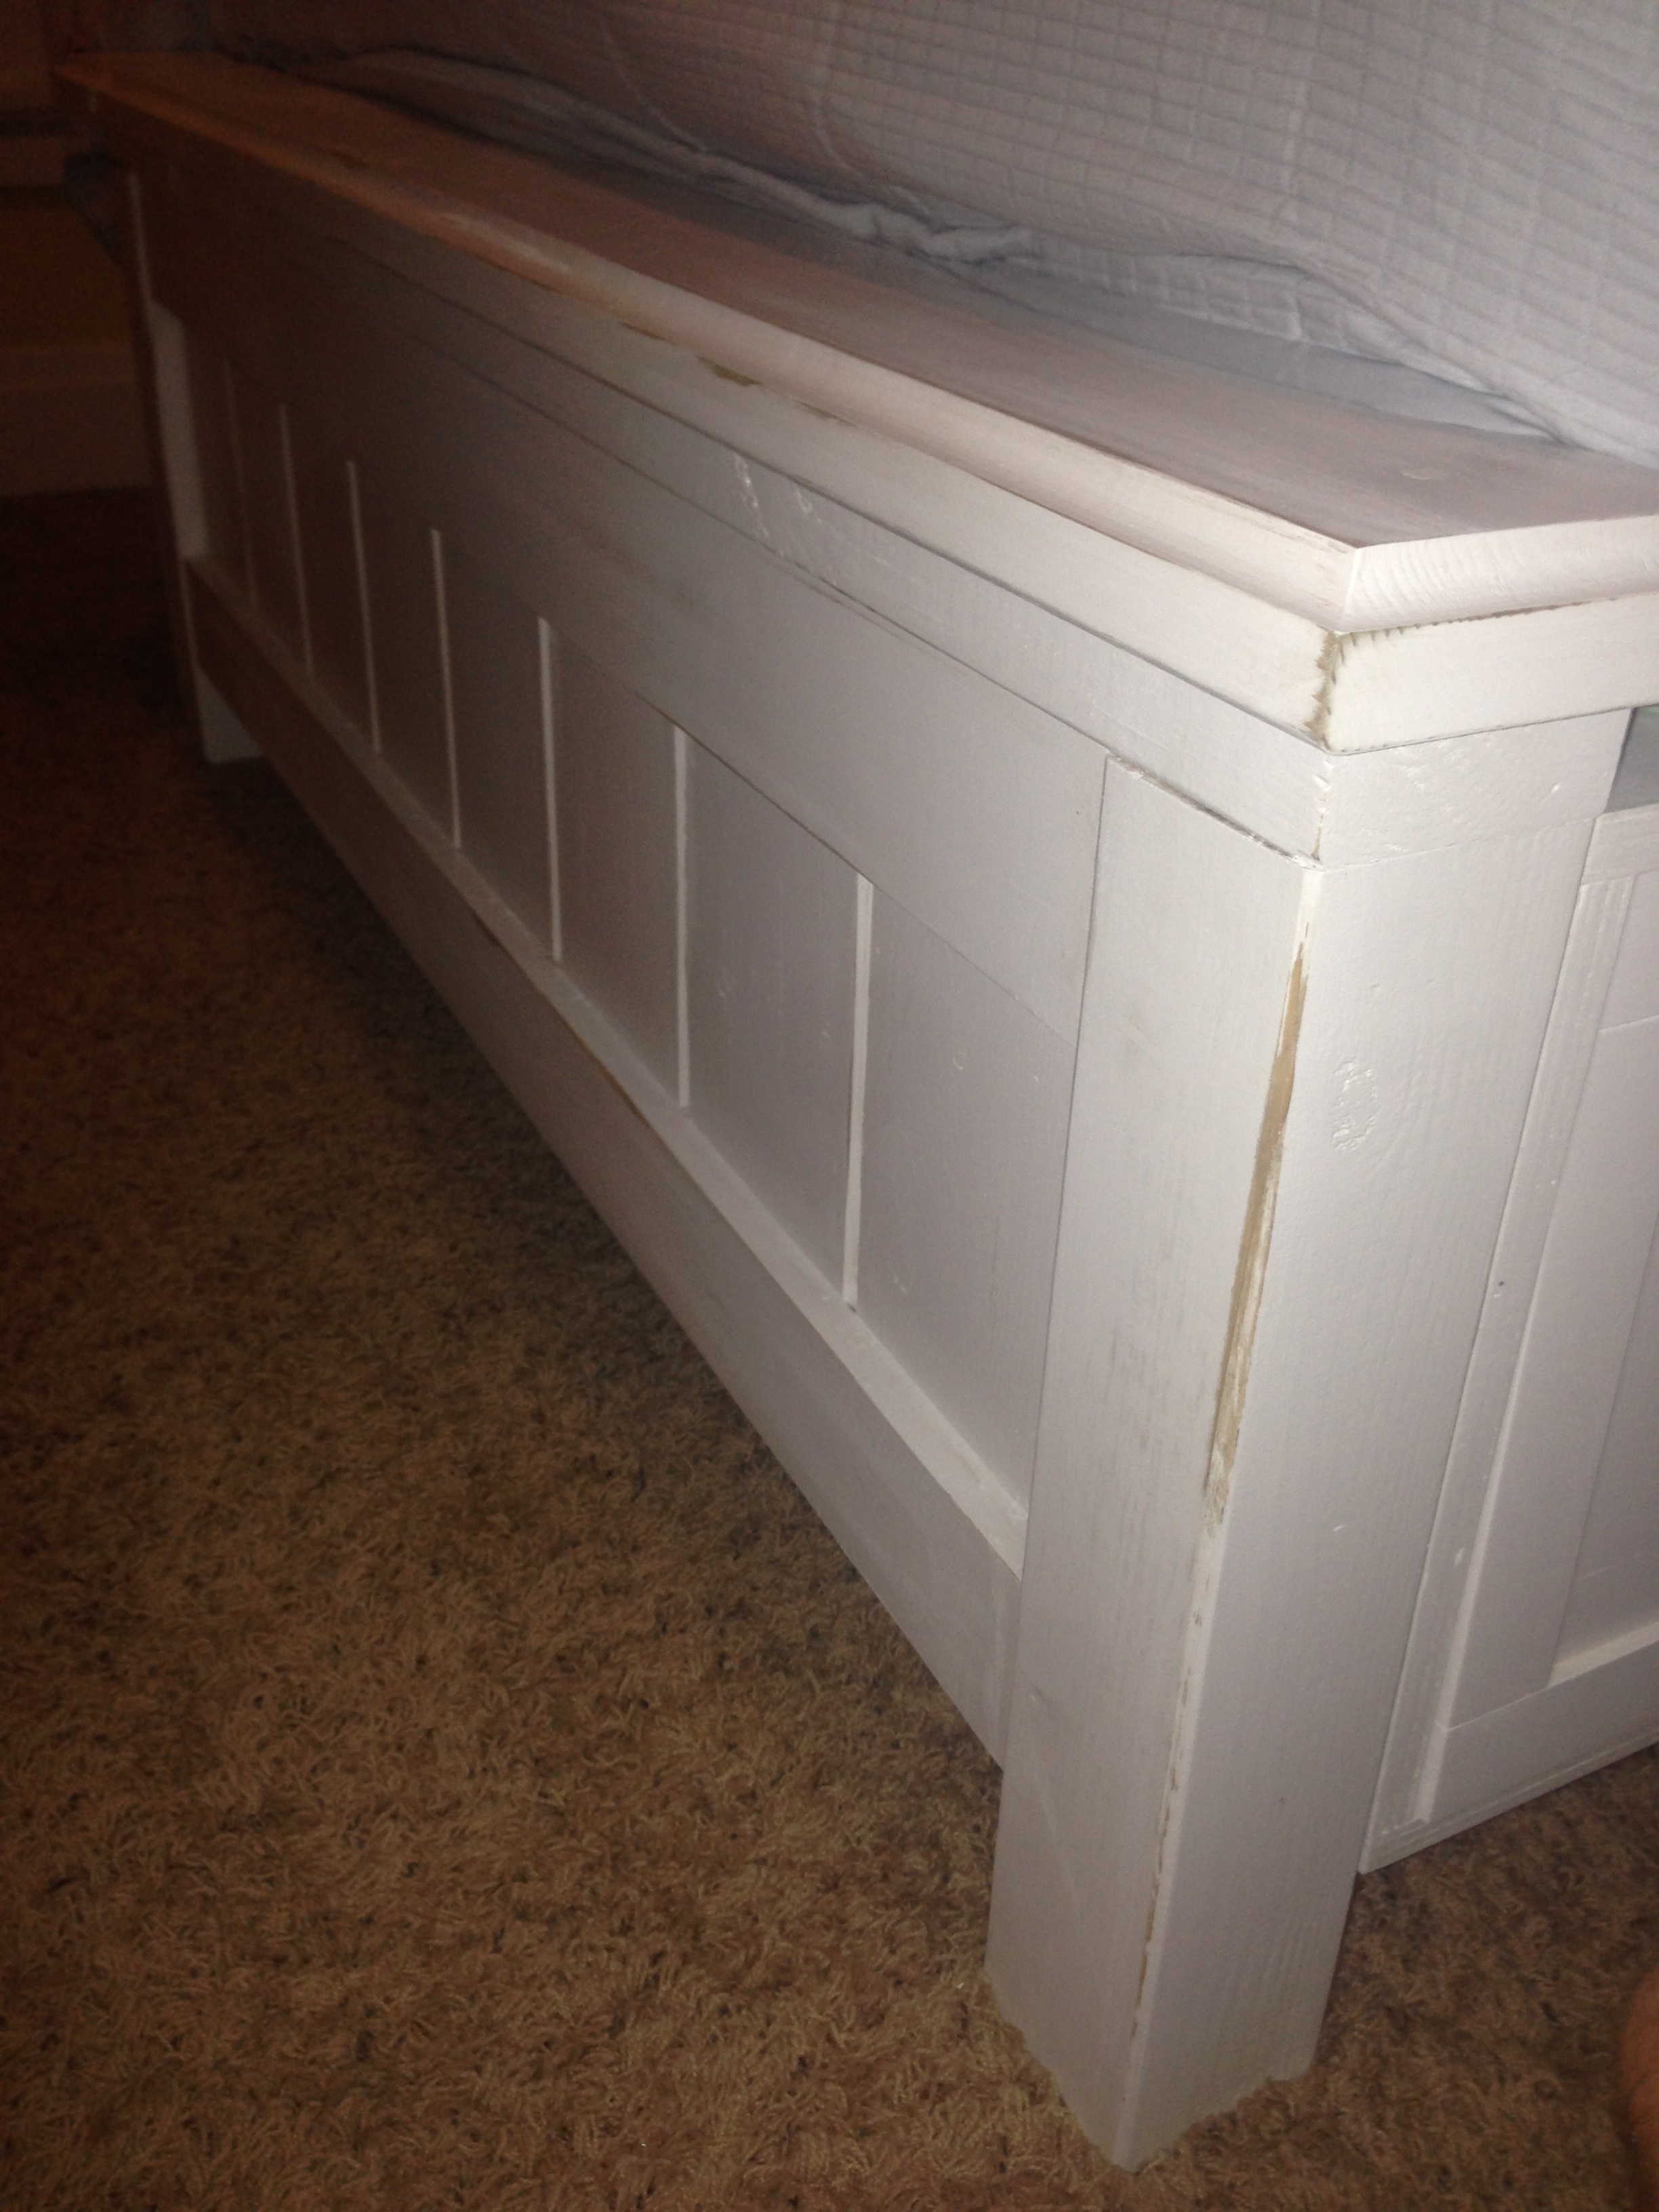
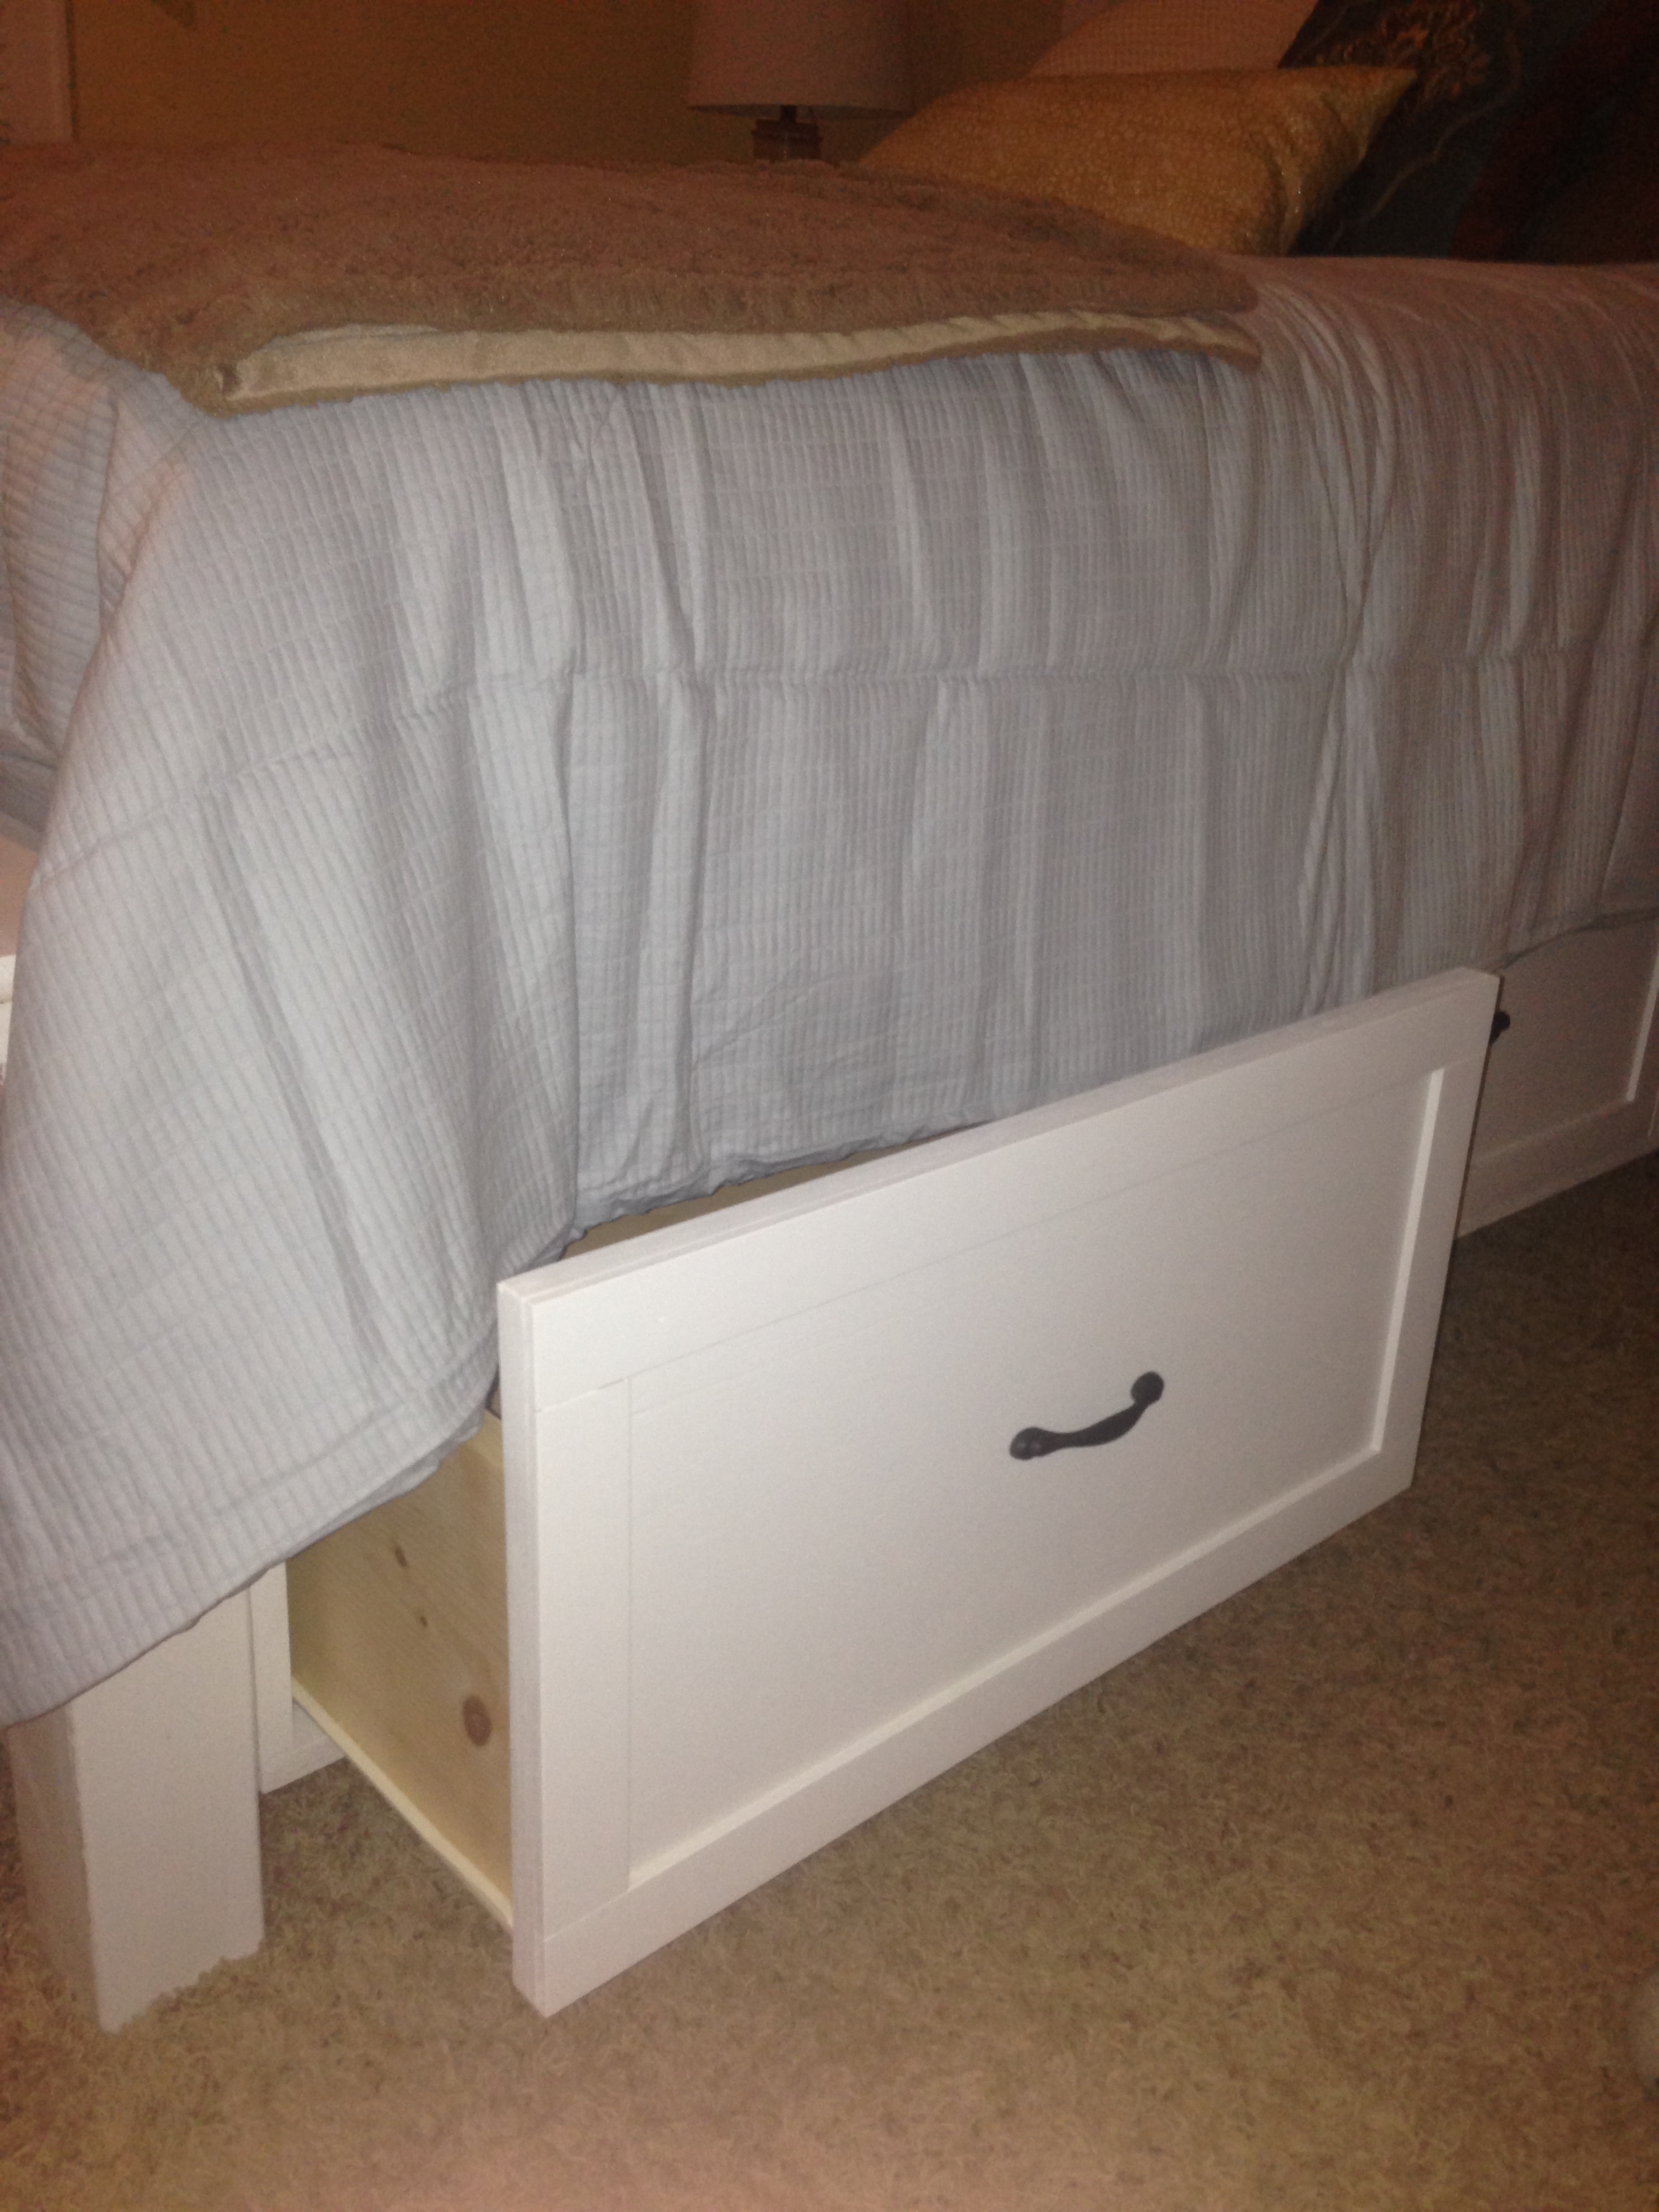
Using Ana's original plans, I made this farmhouse storage bed with almost no modifications. It was a Christmas gift to my fiancée. To give the board on top of the footboard/headboard just a little bit of an upgrade, I used my router with a cove bit along the edges. The drawers weren't that hard to make, they just took some time and ensuring that they were square. I used plywood and MDF for the drawers as opposed to solid wood planks to save money. There is one drawer that has trouble opening and closing. I think it might be just a hair too wide for the opening ... someday I'll fix it! I also added a few blocks (leftover from my 4x4 posts) underneath the bed to support it; otherwise, it was lifted only by screws. I tried using lag bolts to connect the boxes to the posts, but then realized the bolts would stick out and hit the drawers when I slid them back in, so I just used regular screws to attach. This thing is heavyyyyy, but solid as a rock! Love having additional storage in our 1930s house.
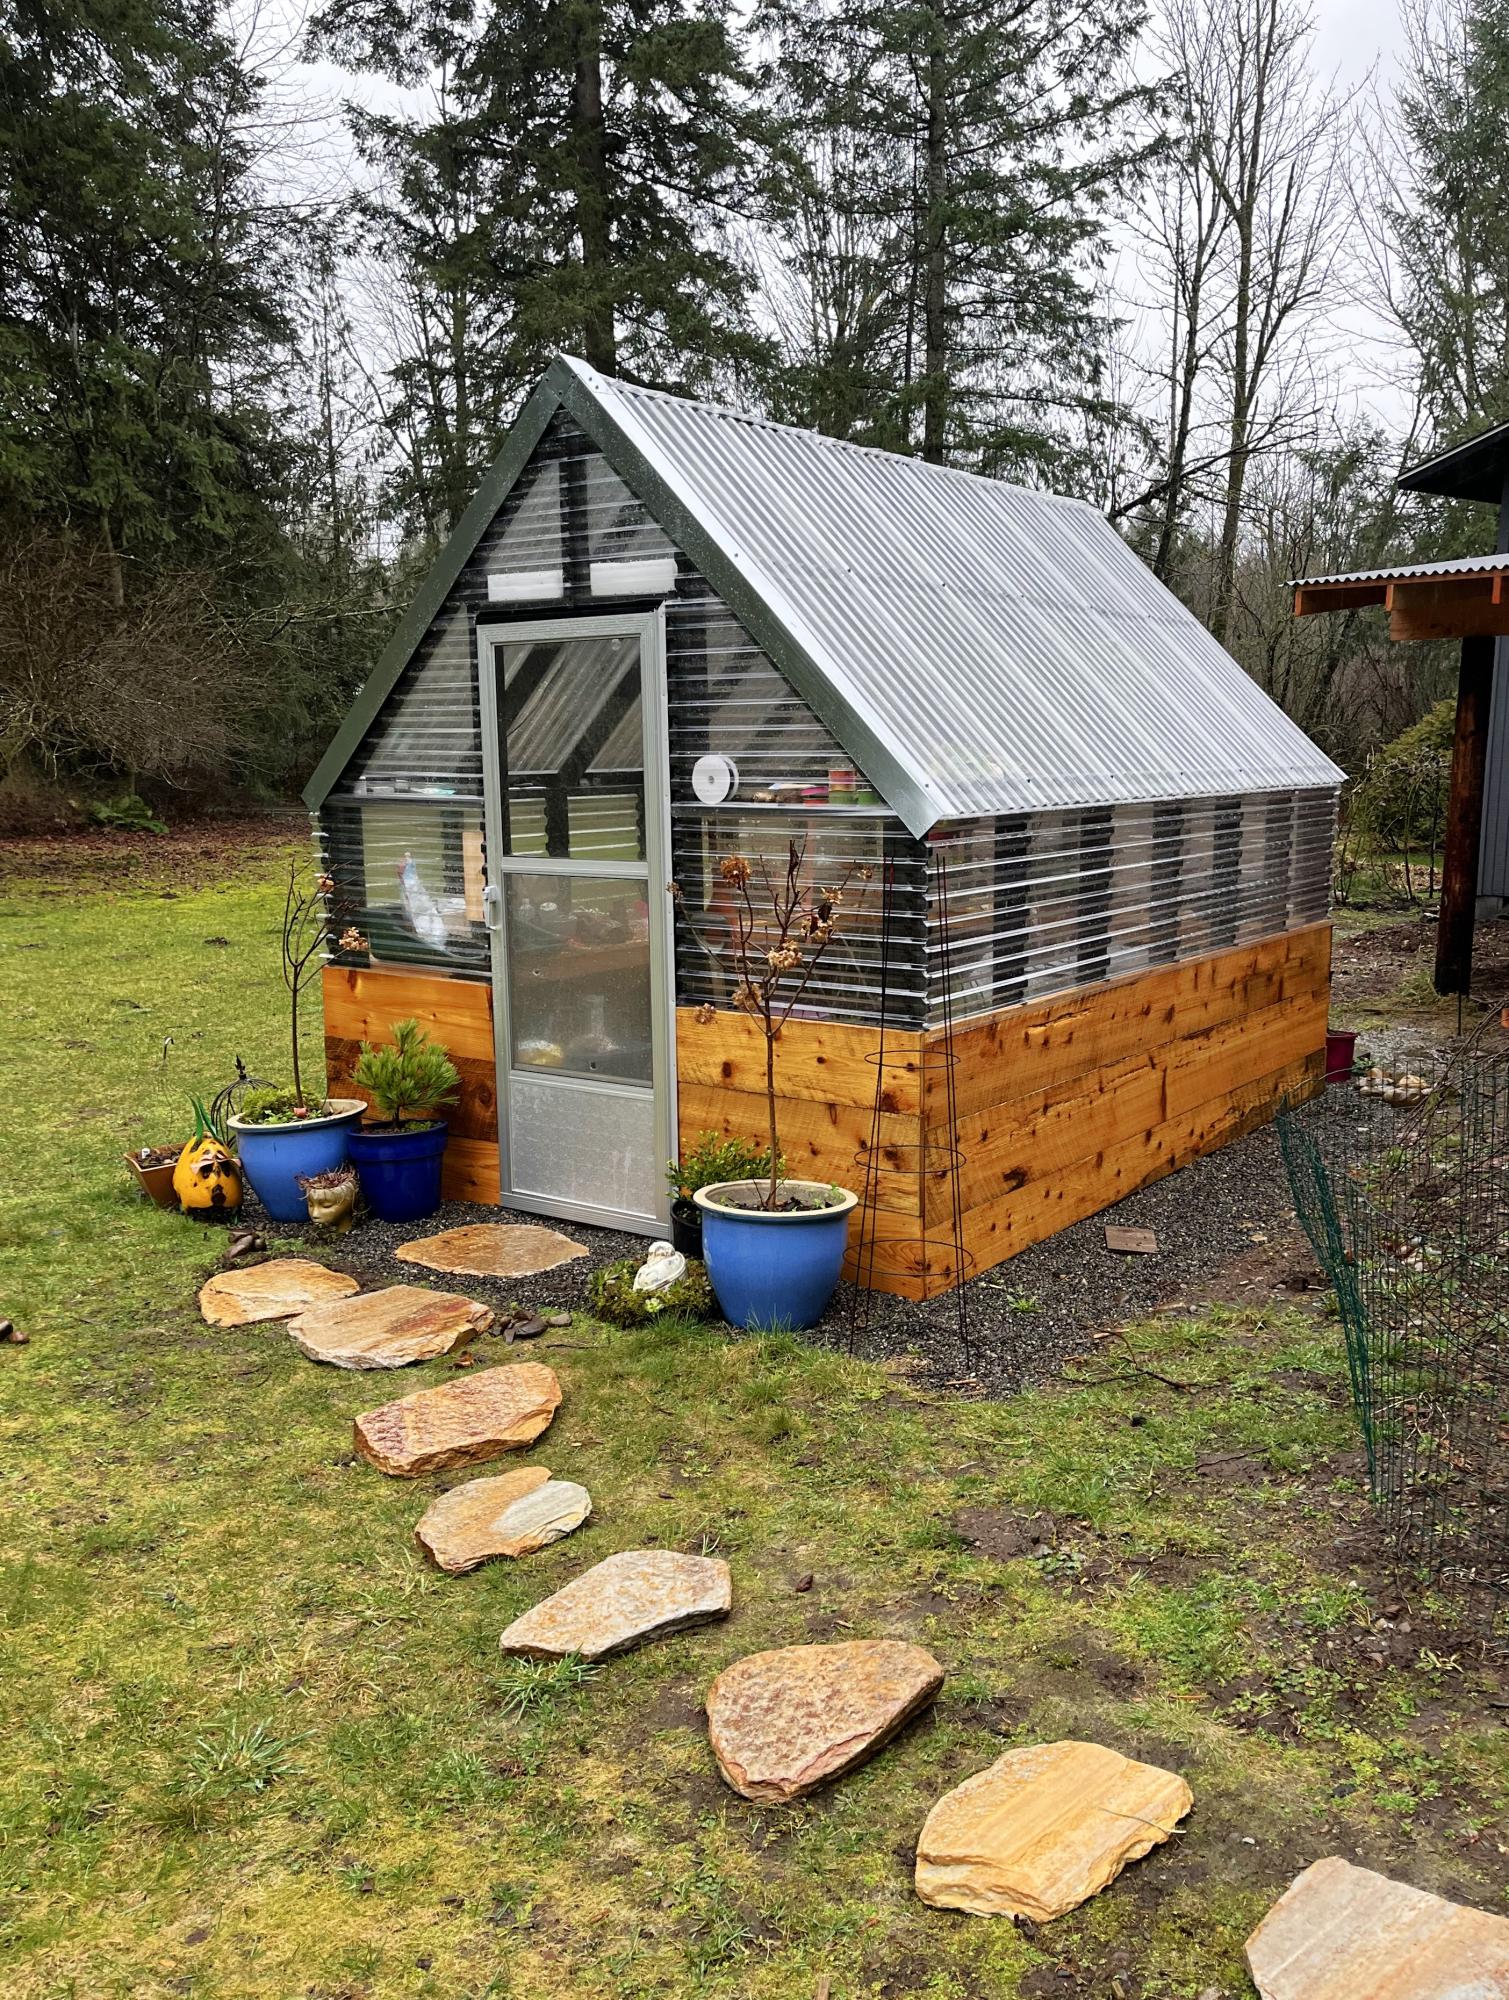
Best looking greenhouse and great size!
Mary McLachlan
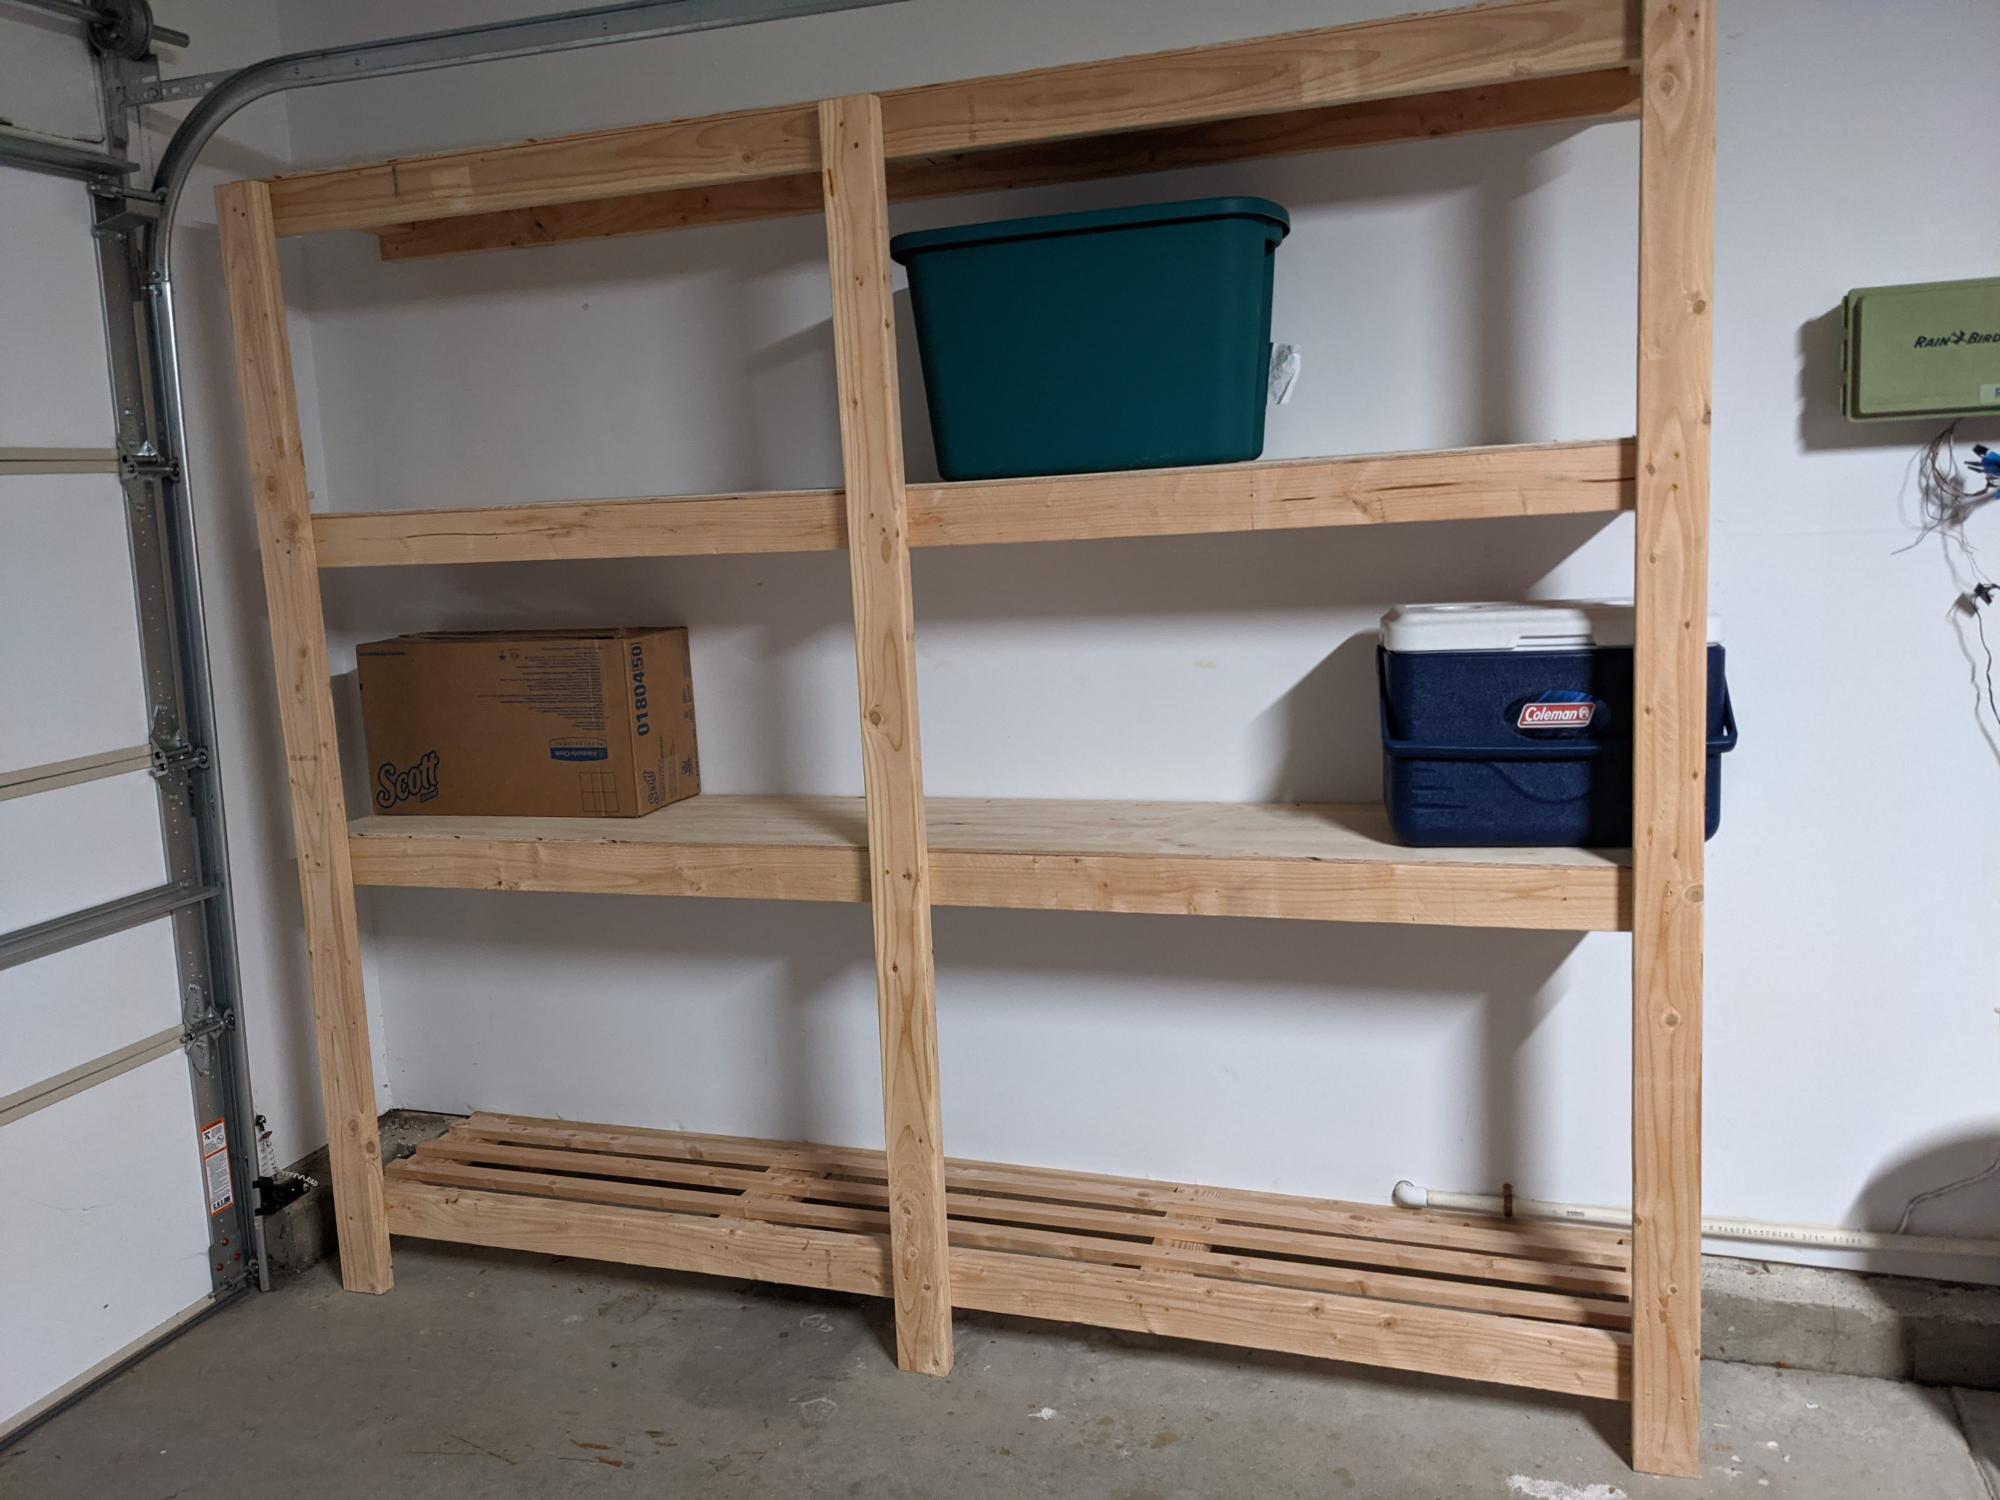
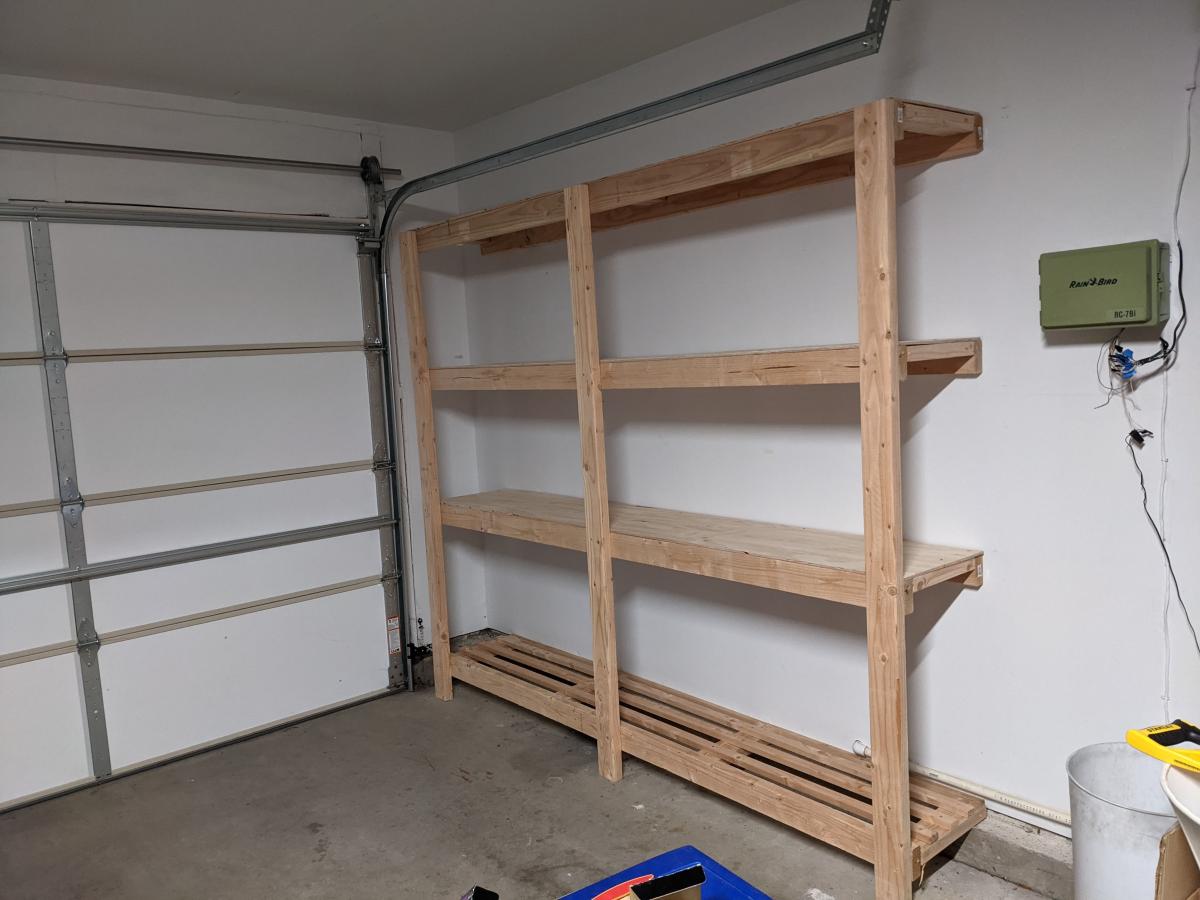
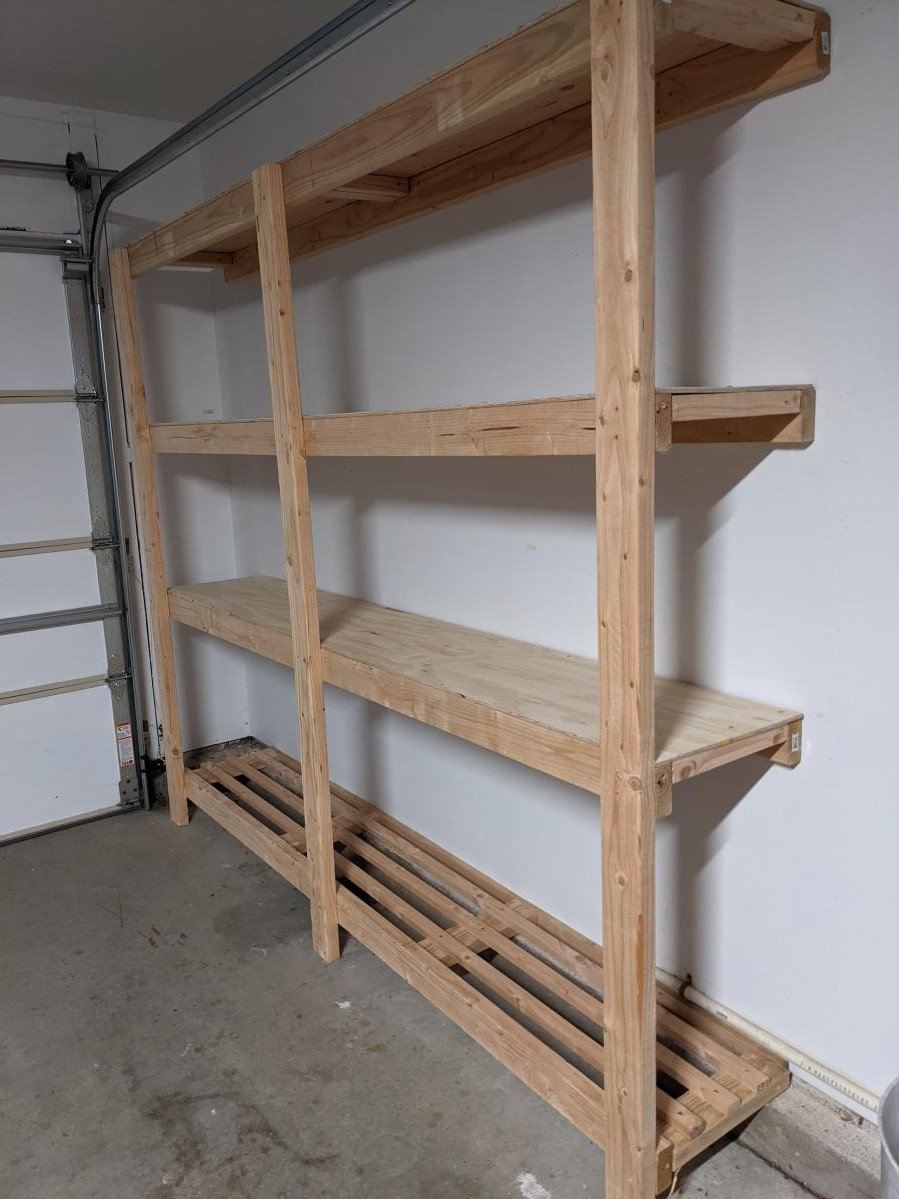
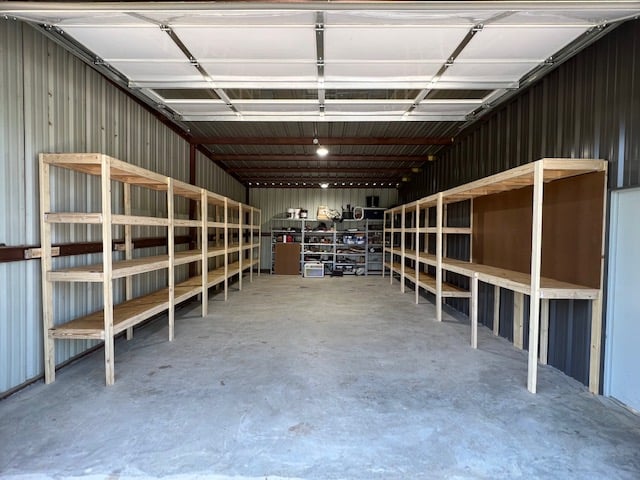
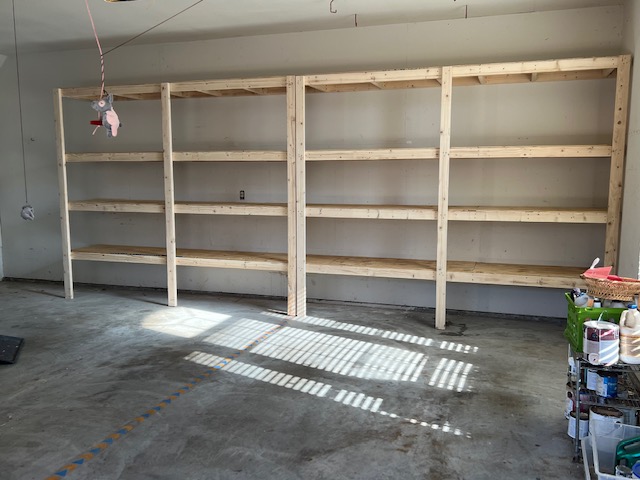
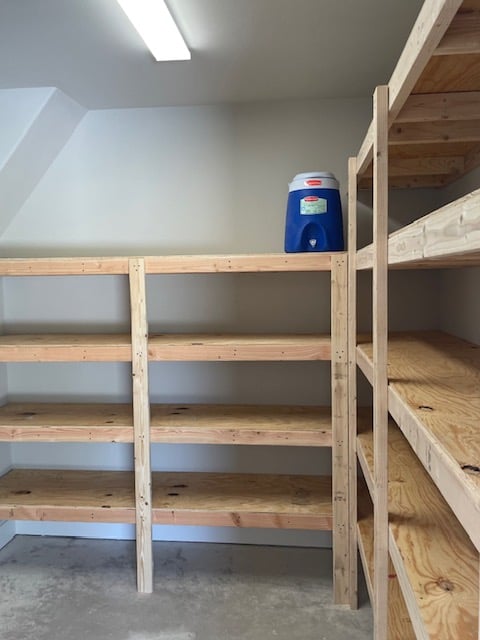
I just made this shelf using 2x4s 8 ft long wood. It is very strong and looks great. My garage size required the shelf to be max 16 in deep, so I used a 1 plywood sheet divided by 3 equal parts for the upper 3 shelfs. Since I made a 4th shelf, I used 3 1x2s for the 4th bottom shelf instead of a new plywood sheet and avoided having extra 2/3 of the sheet around and also saved like 30$ since the 2x1s were only 2$ea. That touch makes it look a bit stylish too so a win win. If you do that, here's a tip: use the outer 2x4s as rails - make sure that the cleats on the lower shelf are placed a bit lower ~ 1in. In such way, you can place the three 1x2 rails at the same level as the outer 2x4s and this you end up having 5 rails total in the shelf. Do use the wooden screws with star head if you can, they were muuuuuch easier to use compared with the regular ones. Note, this shelf is very strong, probably too strong for my needs. For a 8ft long, and my storage needs (camping, Christmas stuff, other lighter things), I'd probably use 2x2s instead of 2x4s. That would save costs, specially since wood isn't cheap these days( I spent ~$150 in materials Jan 2022).
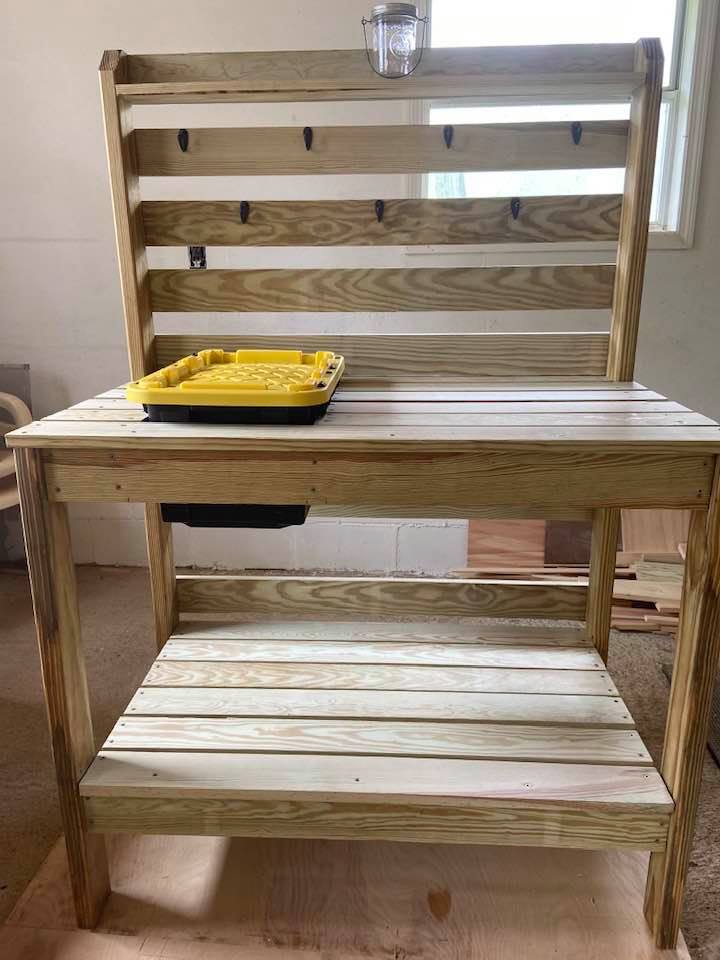
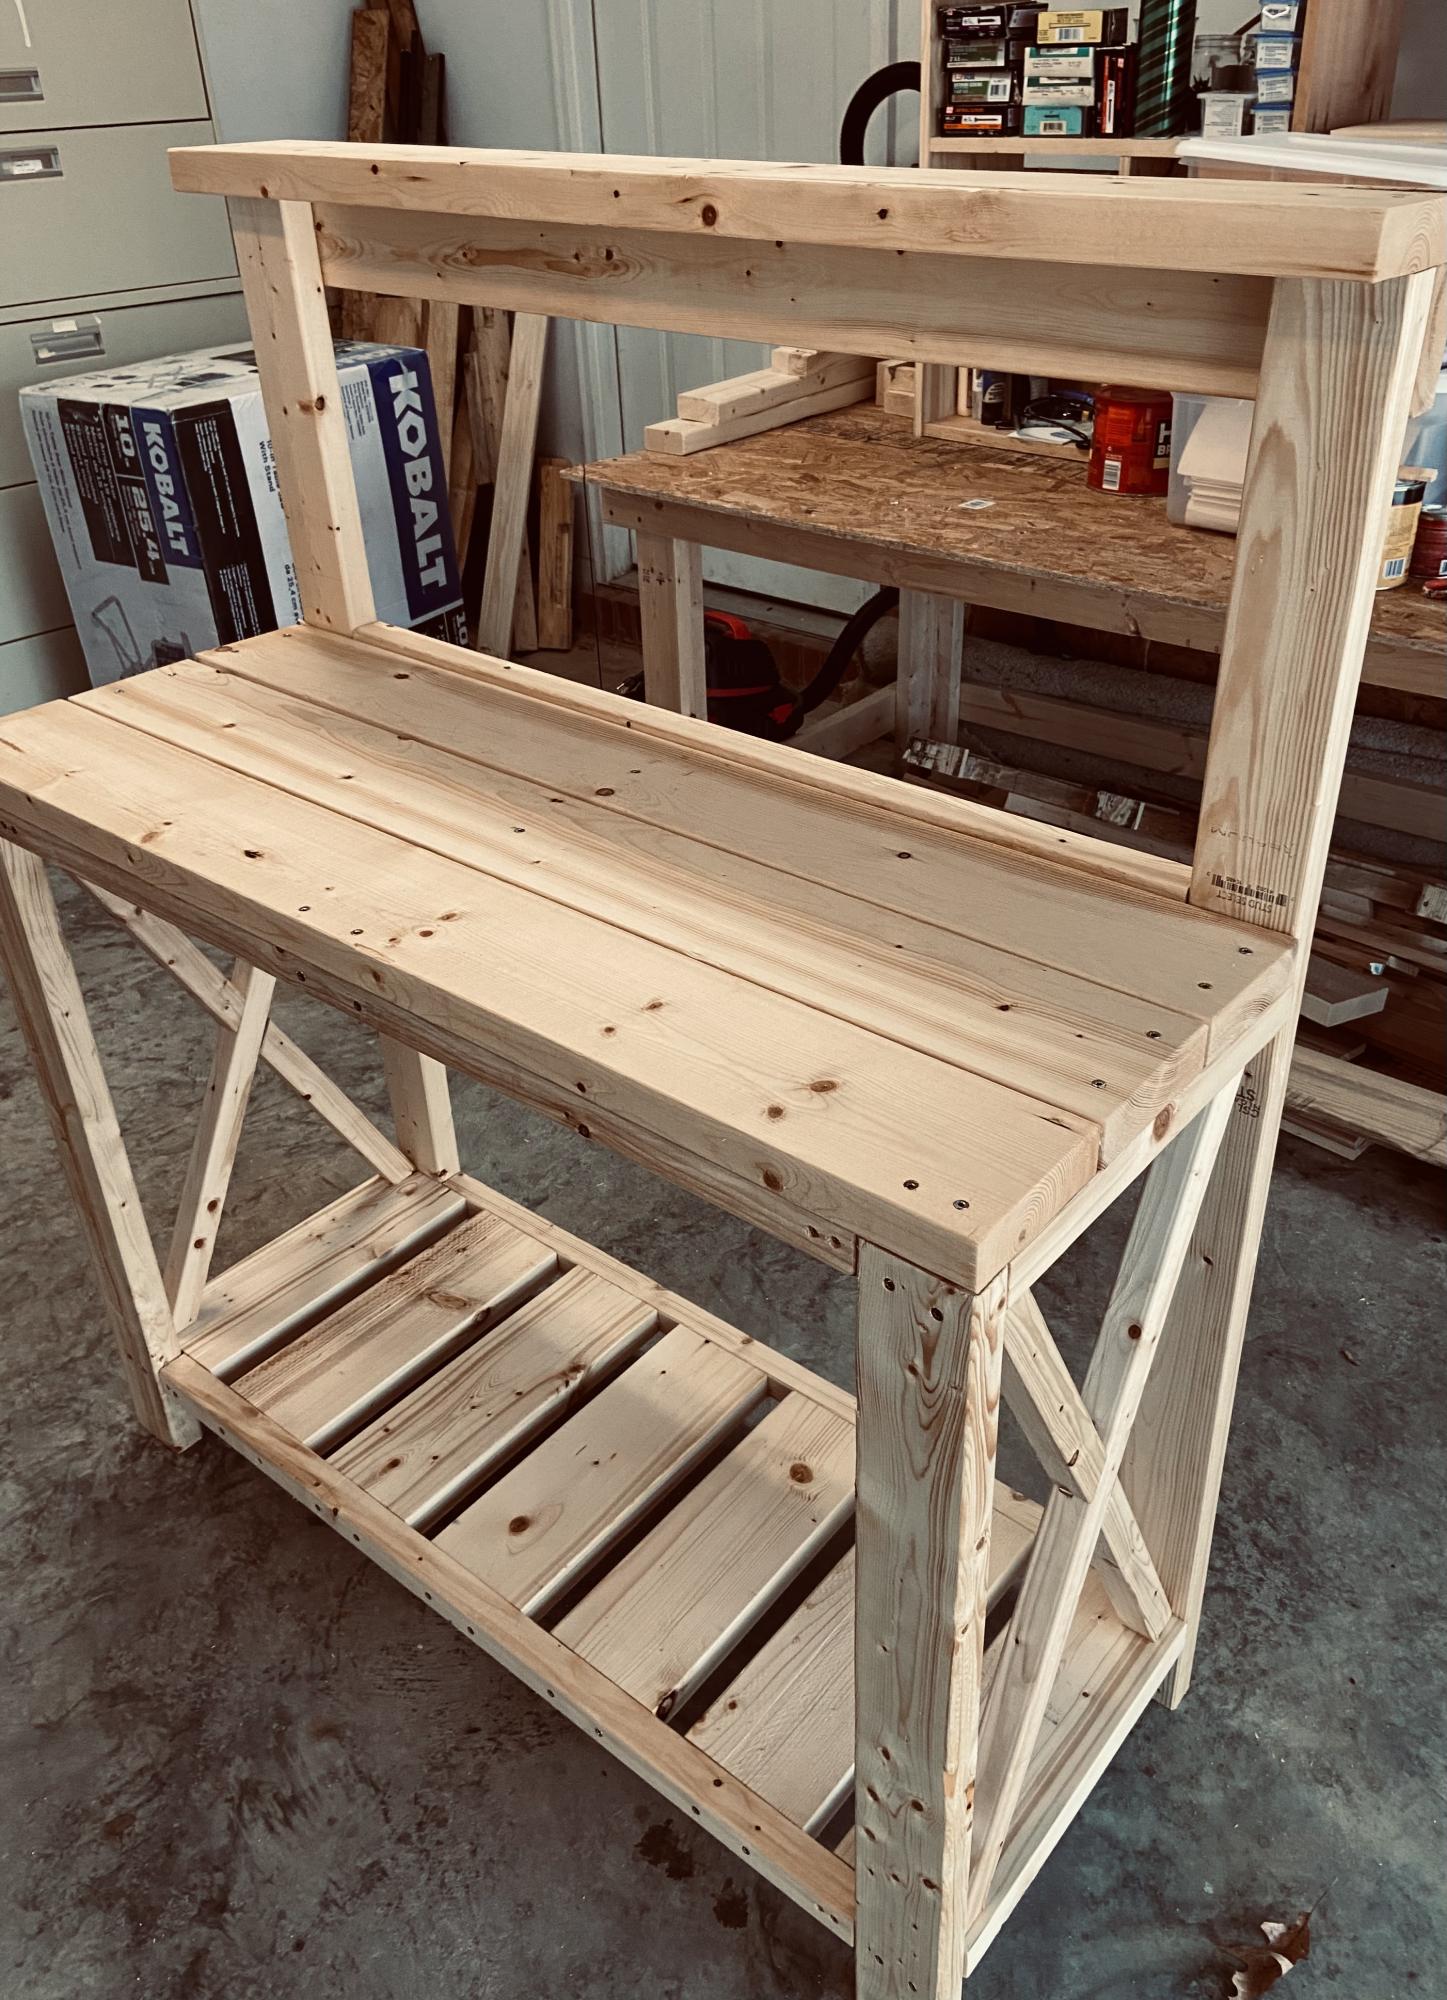
Made this for a friend who does cuttings of her plants for others. I used the Simple 2x4 potting bench plan and modified it to hold an inset 7 gal. Commander tote box with snapping lid with two 2x4 @ 22" braces to support the tote on each side attached to the front and back aprons. She wanted something that would hold a medium size bag of potting soil with a lid to keep snakes and other critters out since she lives in the country. There are plenty of hooks to hang tools and other items.

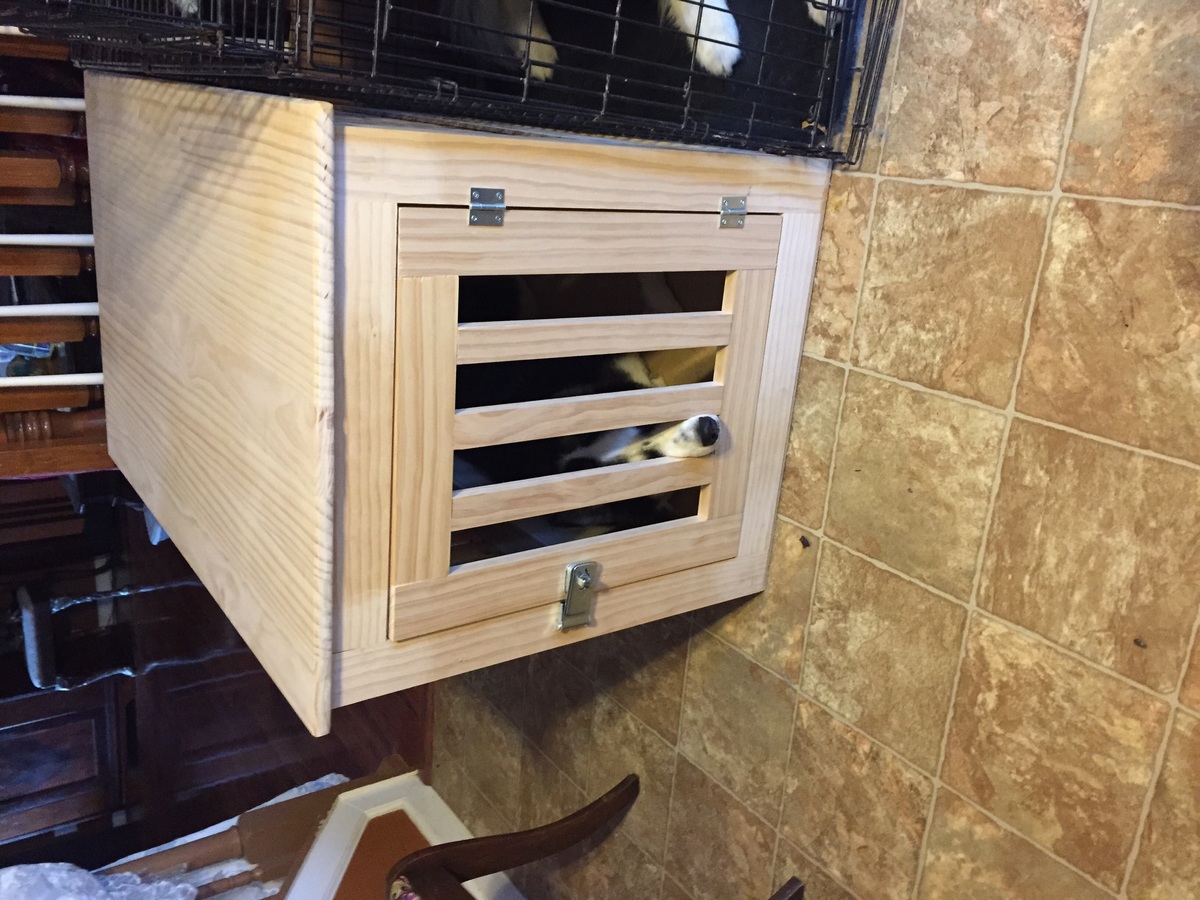
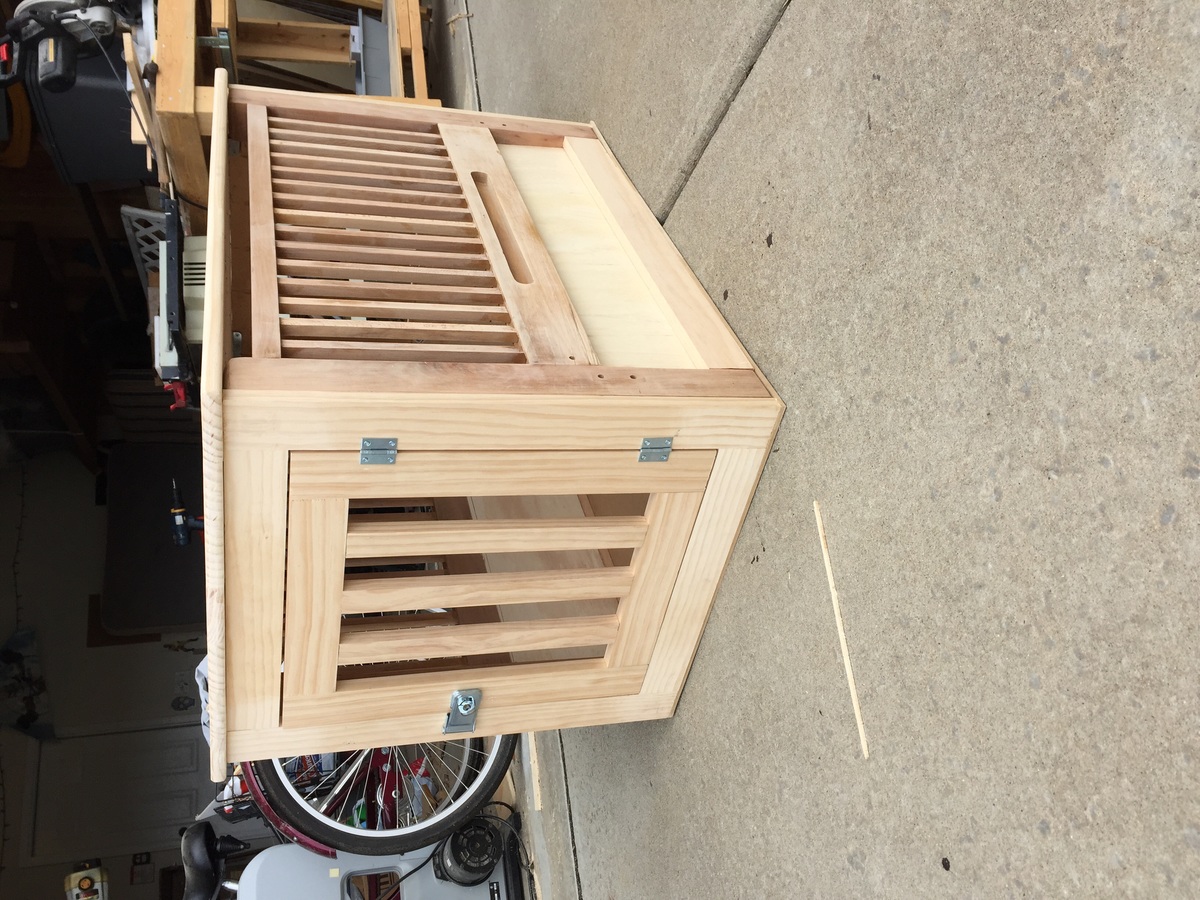
Used the inspiration of Ana-White dog kennel and made ours with an old bed frame that wasn't being used anymore. I'm very happy with how it turned out. I just need to paint and stain it. You can see the side is from the bed headboard and footboard.
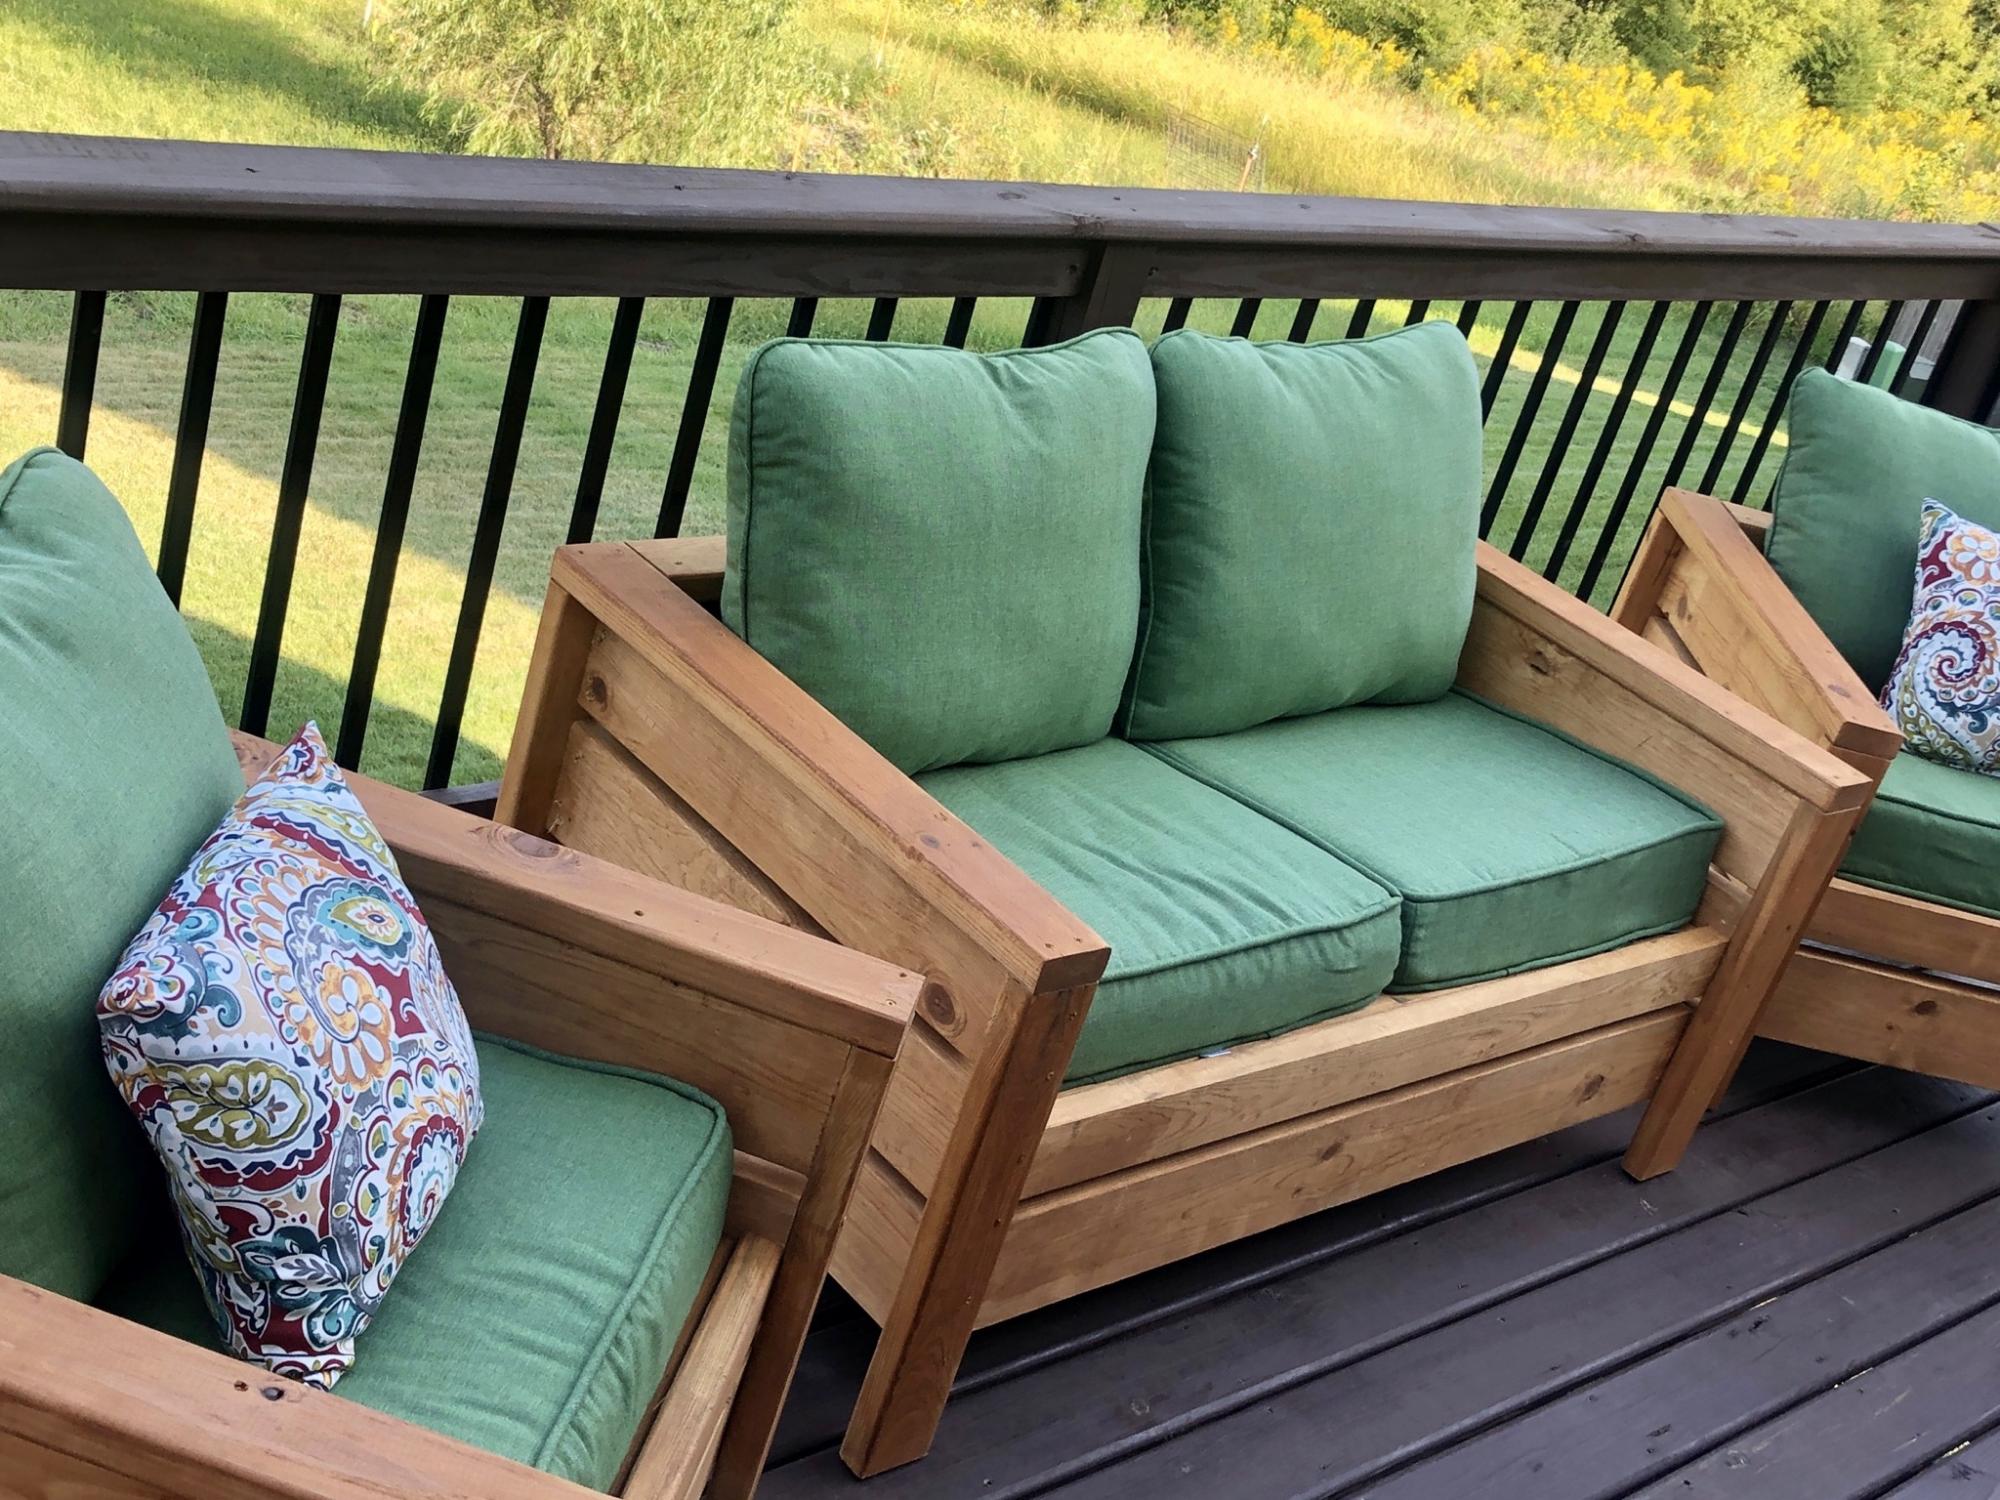
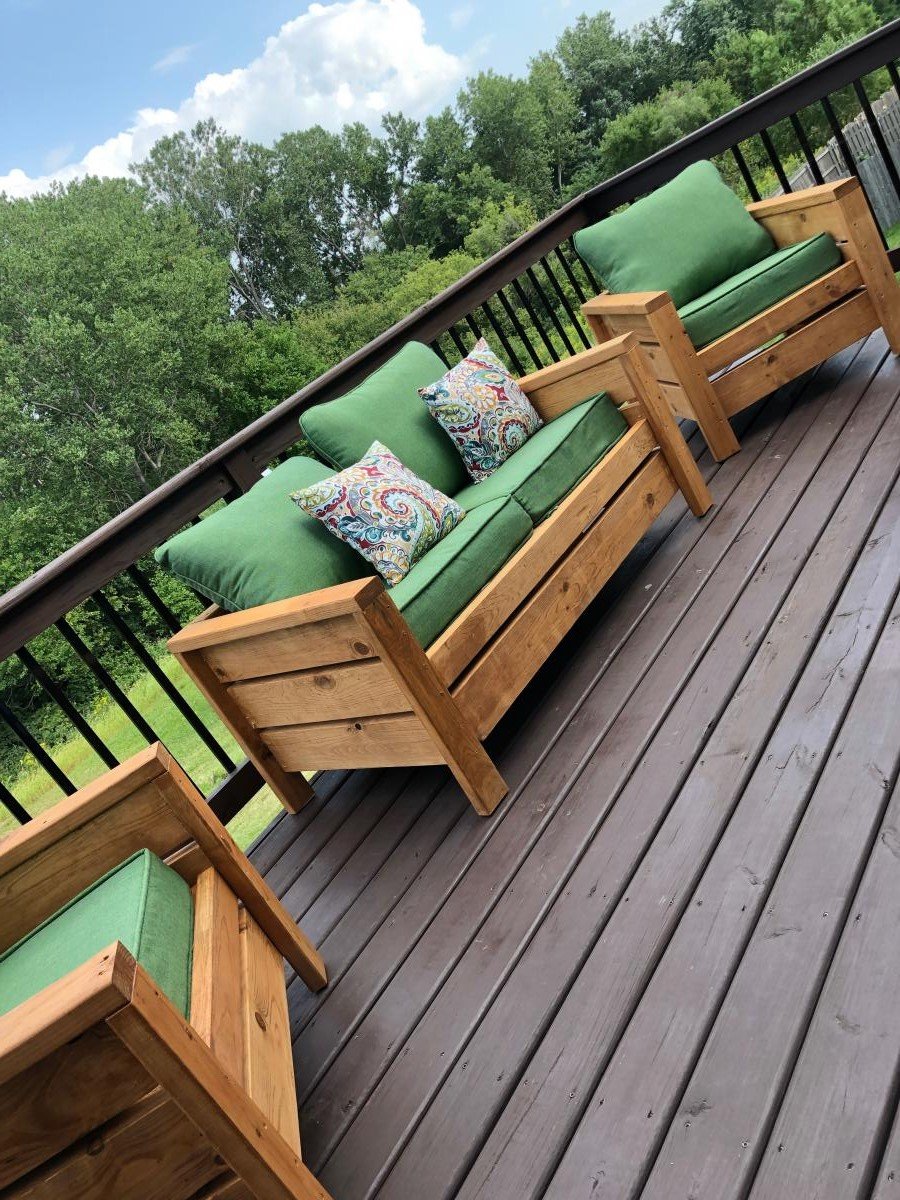
Built this over the weekend for my girlfriends sister. It was a great project and the whole family was able to work together on it, sanding and waterproofing it before assembling. The loveseat plans need a little tweaking. We ran ran the slats the same direction as the chair plans call for so we added a middle support for extra stability. We also pitched the seating down towards the back by 5* to make a more natural sitting position.
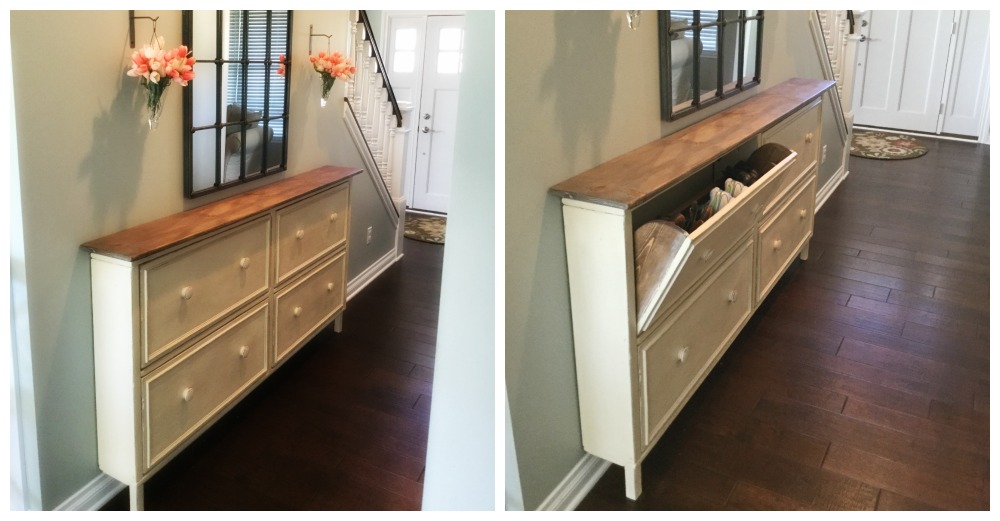
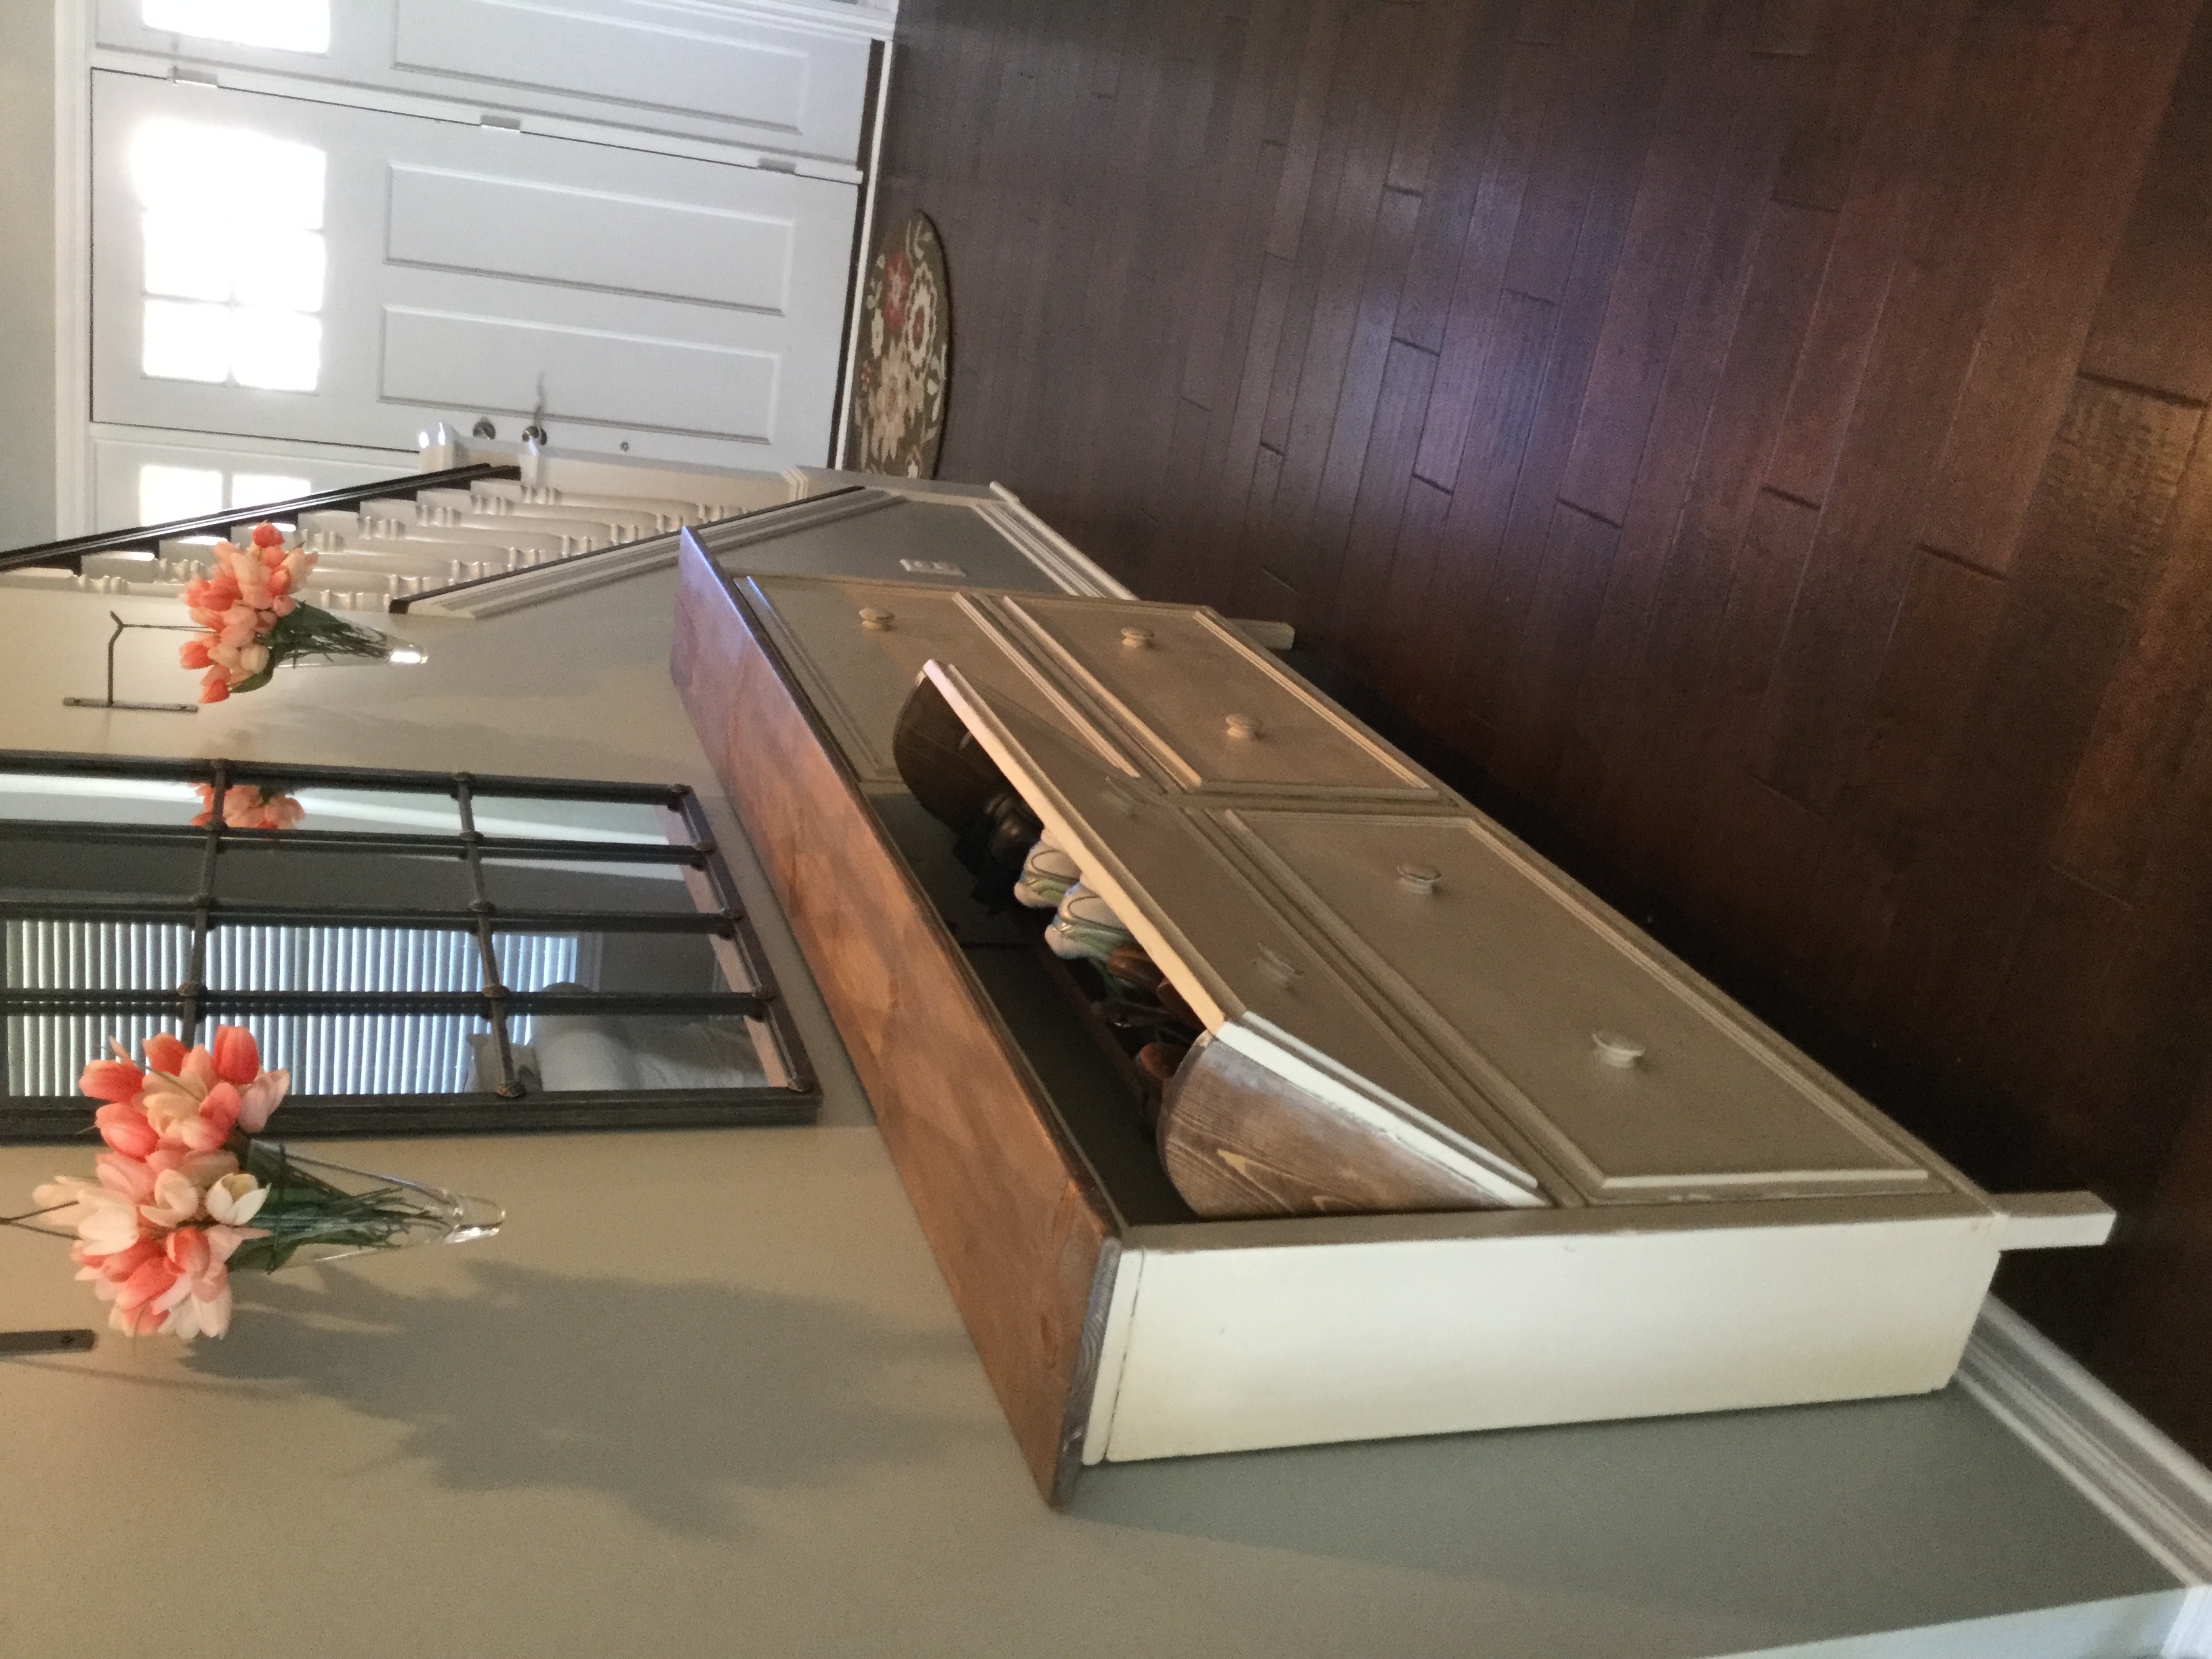
We used the shoe dresser instructions with some modifications to make it longer
I love this desk! My husband loves it too. He was surprised to come home from work one day and find it sitting in the office. Cutting the notches for the shelves was tricky. I bought the cheapest jigsaw from Home Depot, which would have been ok had I bought a decent blade to go with it. The blade it came with was terrible, but after much trial and error, and power sanding, it all worked out. I'm really happy with the finish. In person, it looks like the pit of an avocado, which is exactly what I was hoping for.


Thu, 03/21/2013 - 20:46
Beautiful! It looks like something out of a home decor magazine!
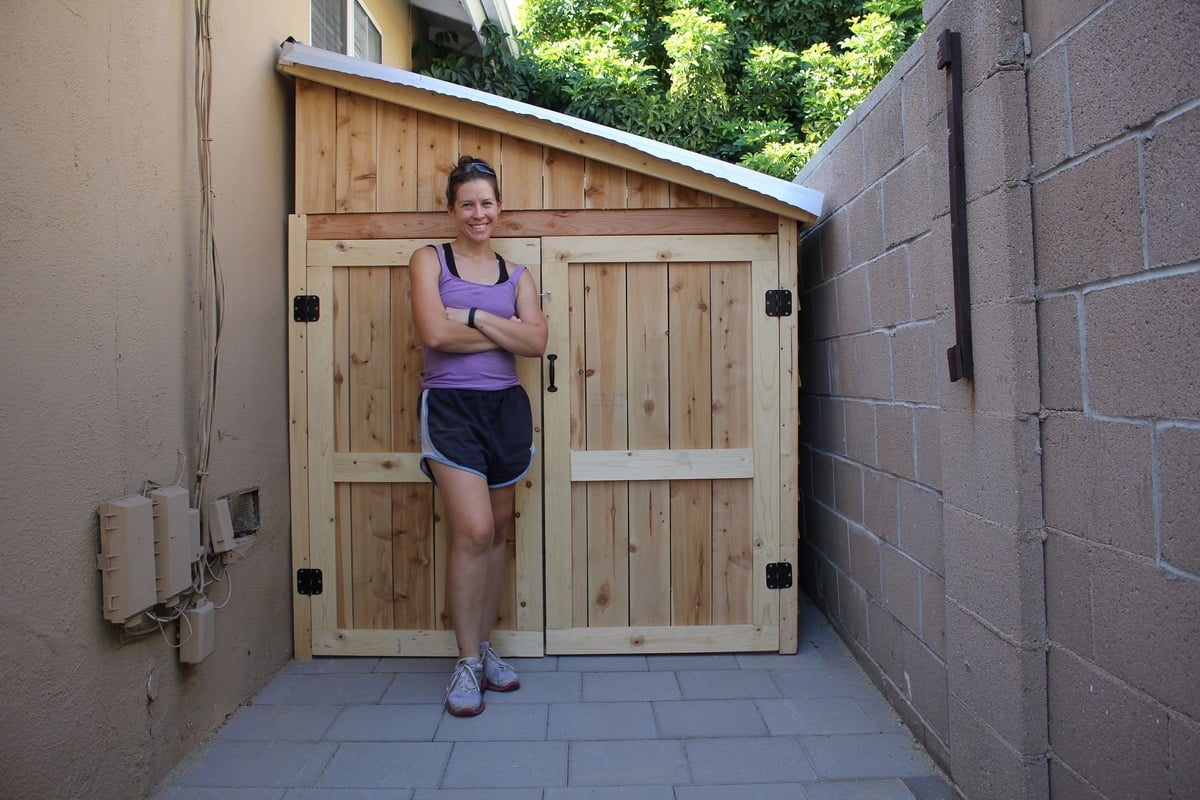
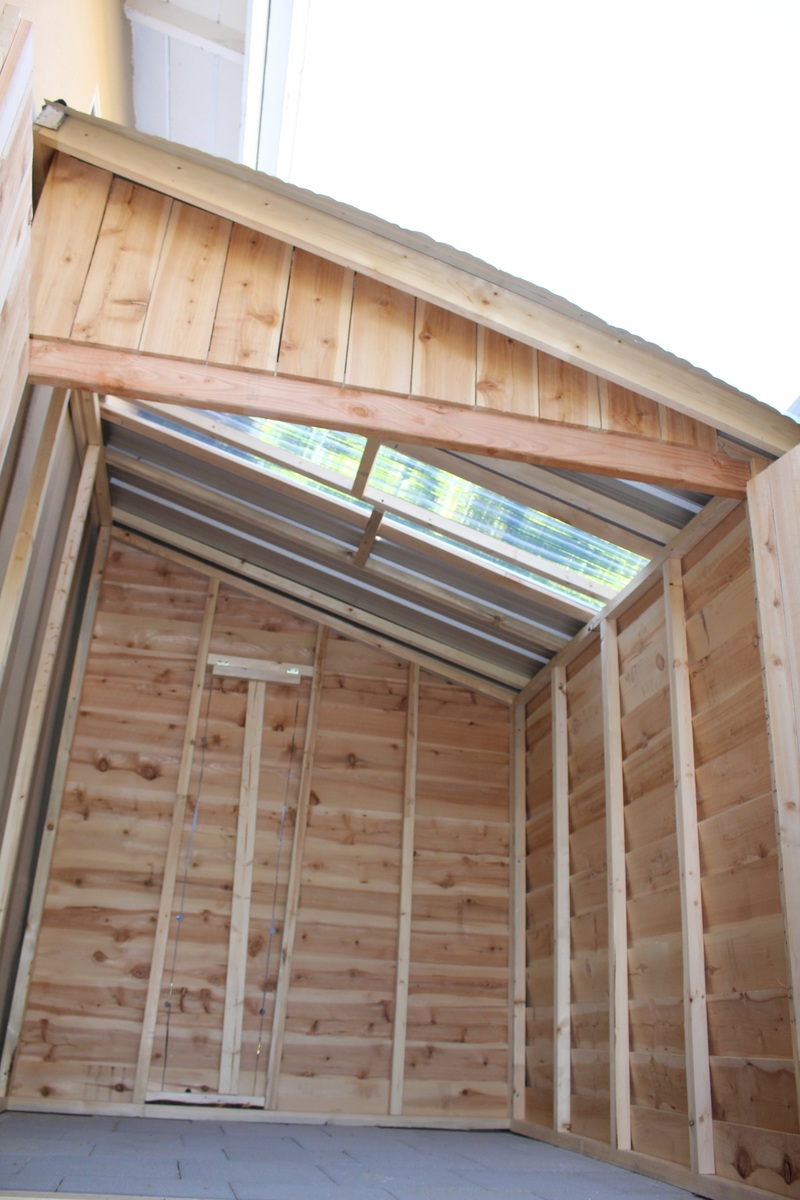
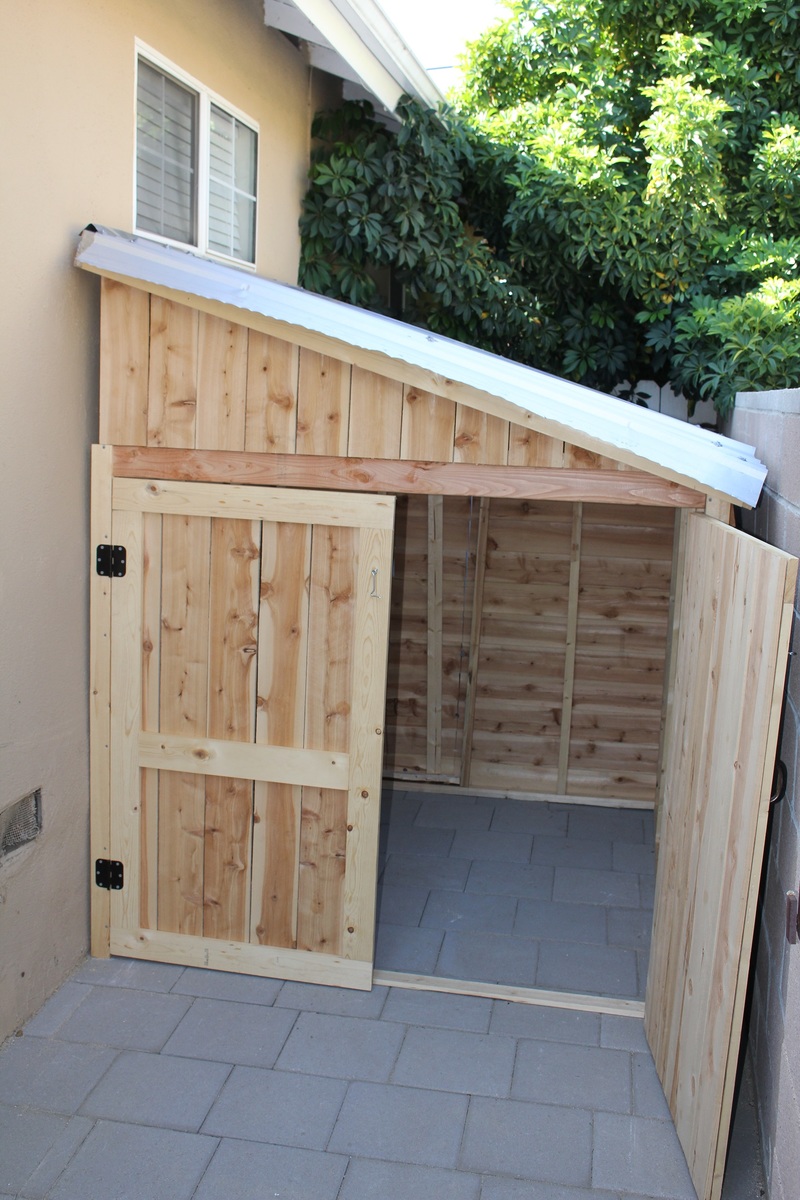
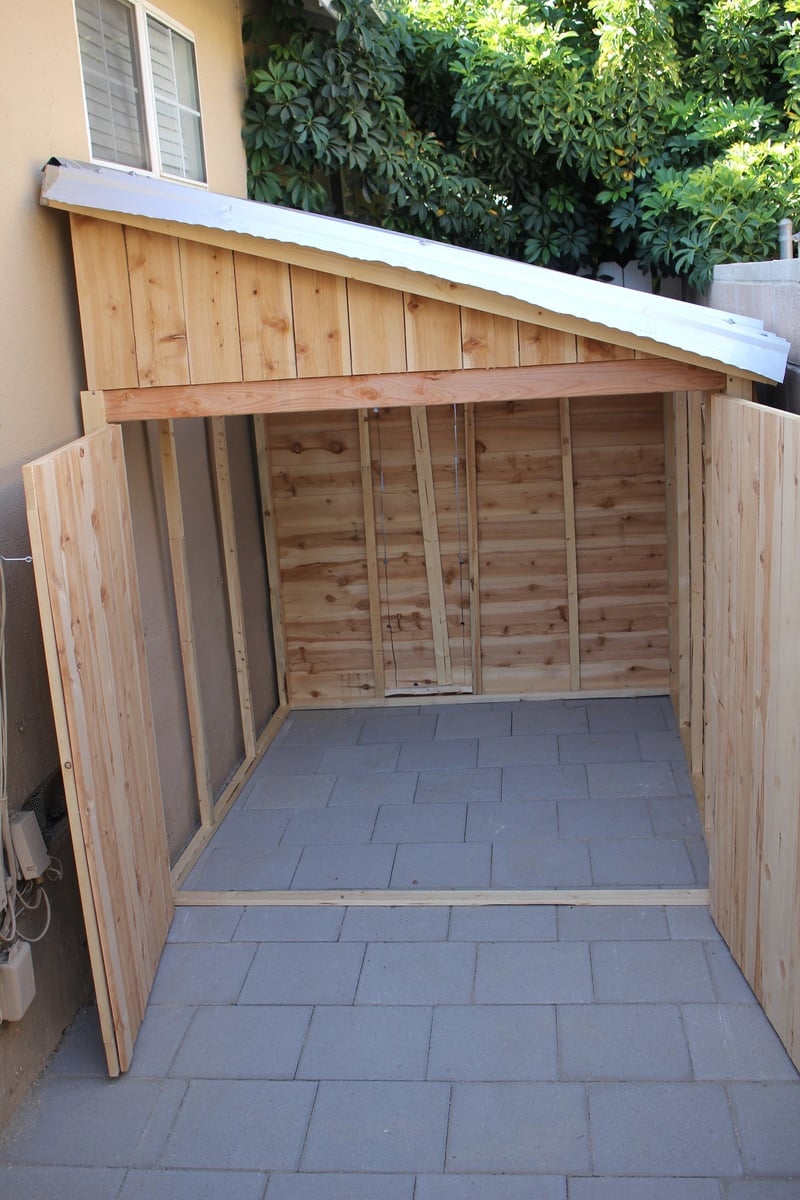
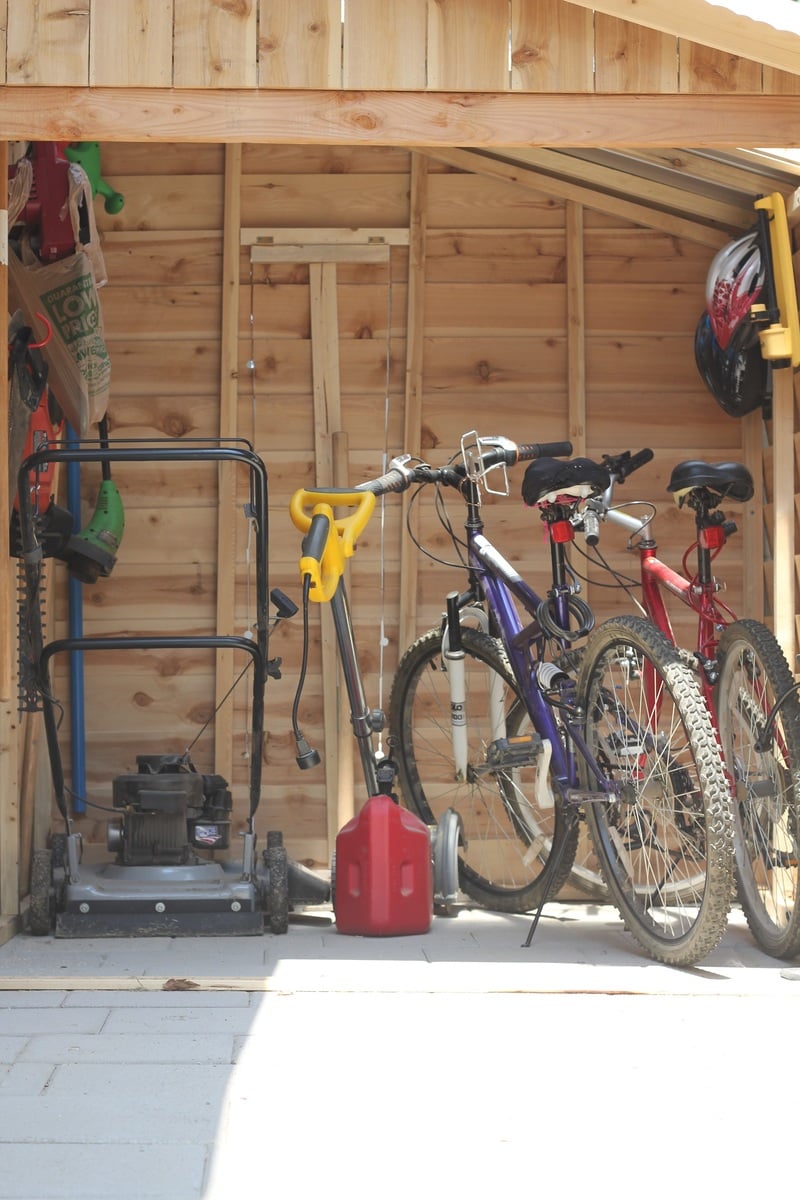
Needed a shed to store bikes and mowers, etc, so I'd have more room in the woodshop : ) I made a lot of modifications to the plan to fit my space and make it much larger. The completed size is 7 foot tall at the peak, 6 feet deep and 5.5 feet wide. I made it as a 3 sided shed, using the wall as the 4th to save on cost, increase air flow, and make the exterior house wall accessible. I also made an egress in the back of the shed in order to get behind the shed if needed.
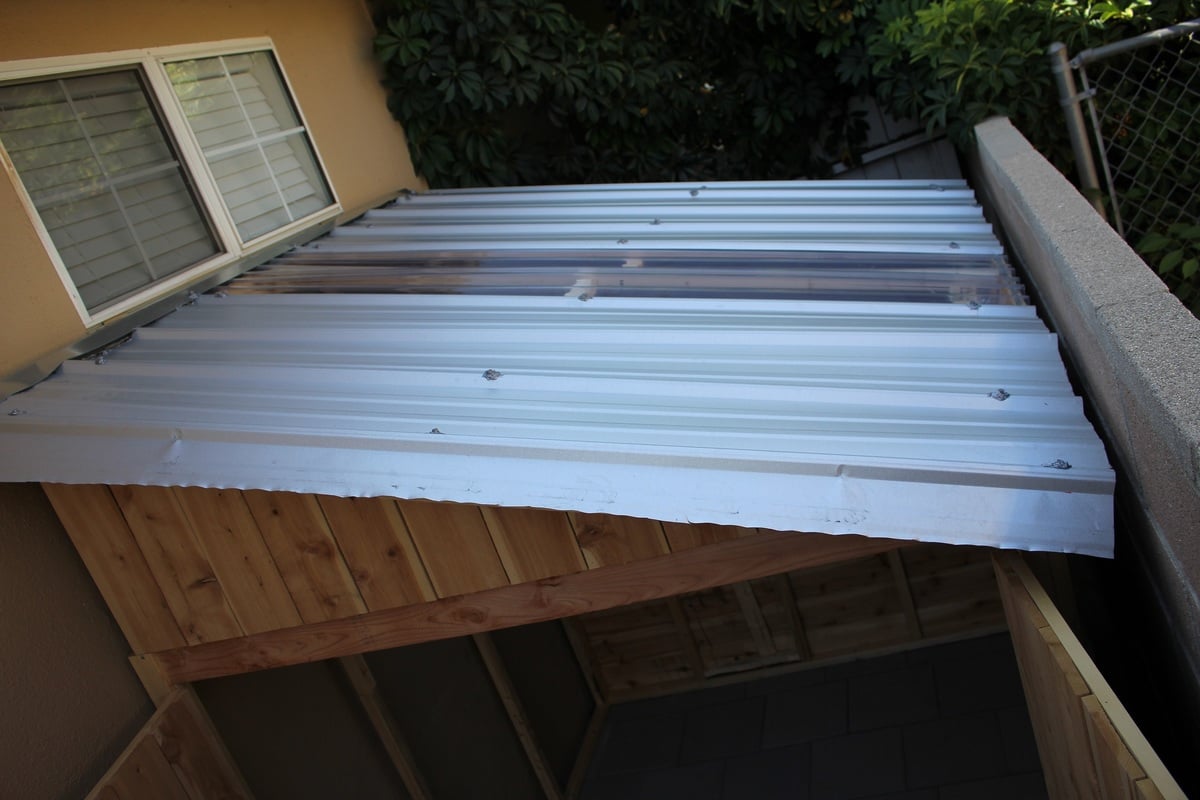
Instead of roofing shingles, I opted for ribbed metal sheets and one clear sheet in the middle to make a skylight, so there would be light in the shed. This is my favorite part of the project. It was a huge pain to attach the roofing from a ladder with very limited access, but it looks great and I love the light coming in. We have very little rain in CA, so I'll have to wait until winter/rainy season in order to test out its waterproofing.
Since the shed sits between the house and the neighbors block wall fence, and I wanted to use as much of the space as I could, I decided to design the shed to have the side wall against the house rather than the back wall, as shown in the plan. This took a large amount of modifications, but with careful planning and measuring, it can be done. This also meant blocking off access to behind the shed, so I cut an egress in the back wall and added hinges so you can lift the back cut out panel, and rest it on a stop block attached to the fence behind it in order to have access. That's what woodworking is about- problem solving. Love it.
As you can see by the full shed picture, it fits a large amount of stuff- 2 adult bikes, mower, edger, trimmer, chainsaw, hedge trimmer, garden tools, shovels, etc, with plenty of room for more. I now have a free corner in my garage that I've already filled with a DIY rolling workbench and more pegboard space for tool hanging. Woodshop increased space= happy Brittany.
I should also mention that building the frame and adding the pickets was quite a quick and easy job. The hardest and most time consuming part was the roof (I didn't have metal cutting tools), rolling each very heavy wall to the site (I was alone) and the previous 2 weeks in which I built the paver patio the shed sits on. Hard work, but worth it. I love it!
Thu, 08/20/2015 - 05:56
And for under $300! Nice touch with the skylight also. Two thumbs up.

In reply to This is awesome! by Cross35
Thu, 08/20/2015 - 09:42
Thank you! I'm very pleased with how it turned out!
Mon, 04/27/2020 - 10:28
SWEET!!! What a great use of space! That skylight was a brilliant idea. No lights needed to see what you need to get at in there. Well done!
In reply to SWEET!!! What a great use… by carewarner
Mon, 01/25/2021 - 13:15
It has been incredibly useful for storing! One thing about the skylight- Over time the sun has warped it and there is now a hole and crack there. So I wouldn't plan on the clear roofing being a long term solution- I will be replacing it with either thicker clear roofing or 2 layers.
Wed, 05/06/2020 - 13:15
Love the design and space saver idea, brilliant! How can I get the dimensions? Tks
In reply to Love the design and space… by shed man
Mon, 01/25/2021 - 13:25
I just went out and measured- 6' wide and deep, 7' tall at its tallest point, tapering down to about 5' tall. Hope this helps!
In reply to Love this! by V2theicki
Mon, 01/25/2021 - 13:14
I based it off of this plan, but heavily modded it to fit our space. https://www.ana-white.com/woodworking-projects/small-cedar-shed
Hope that helps!
Tue, 06/23/2020 - 20:26
This is exactly what I want to do for the side of my home , I also would love to get the plans for this .
In reply to This is exactly what I want… by ajg1972
Mon, 01/25/2021 - 13:16
I used Ana's plans here, but heavily modded it to fit my space: https://www.ana-white.com/woodworking-projects/small-cedar-shed
Sun, 02/21/2021 - 09:39
Did you use cedar pickets?
And what did you use for the roofing material?
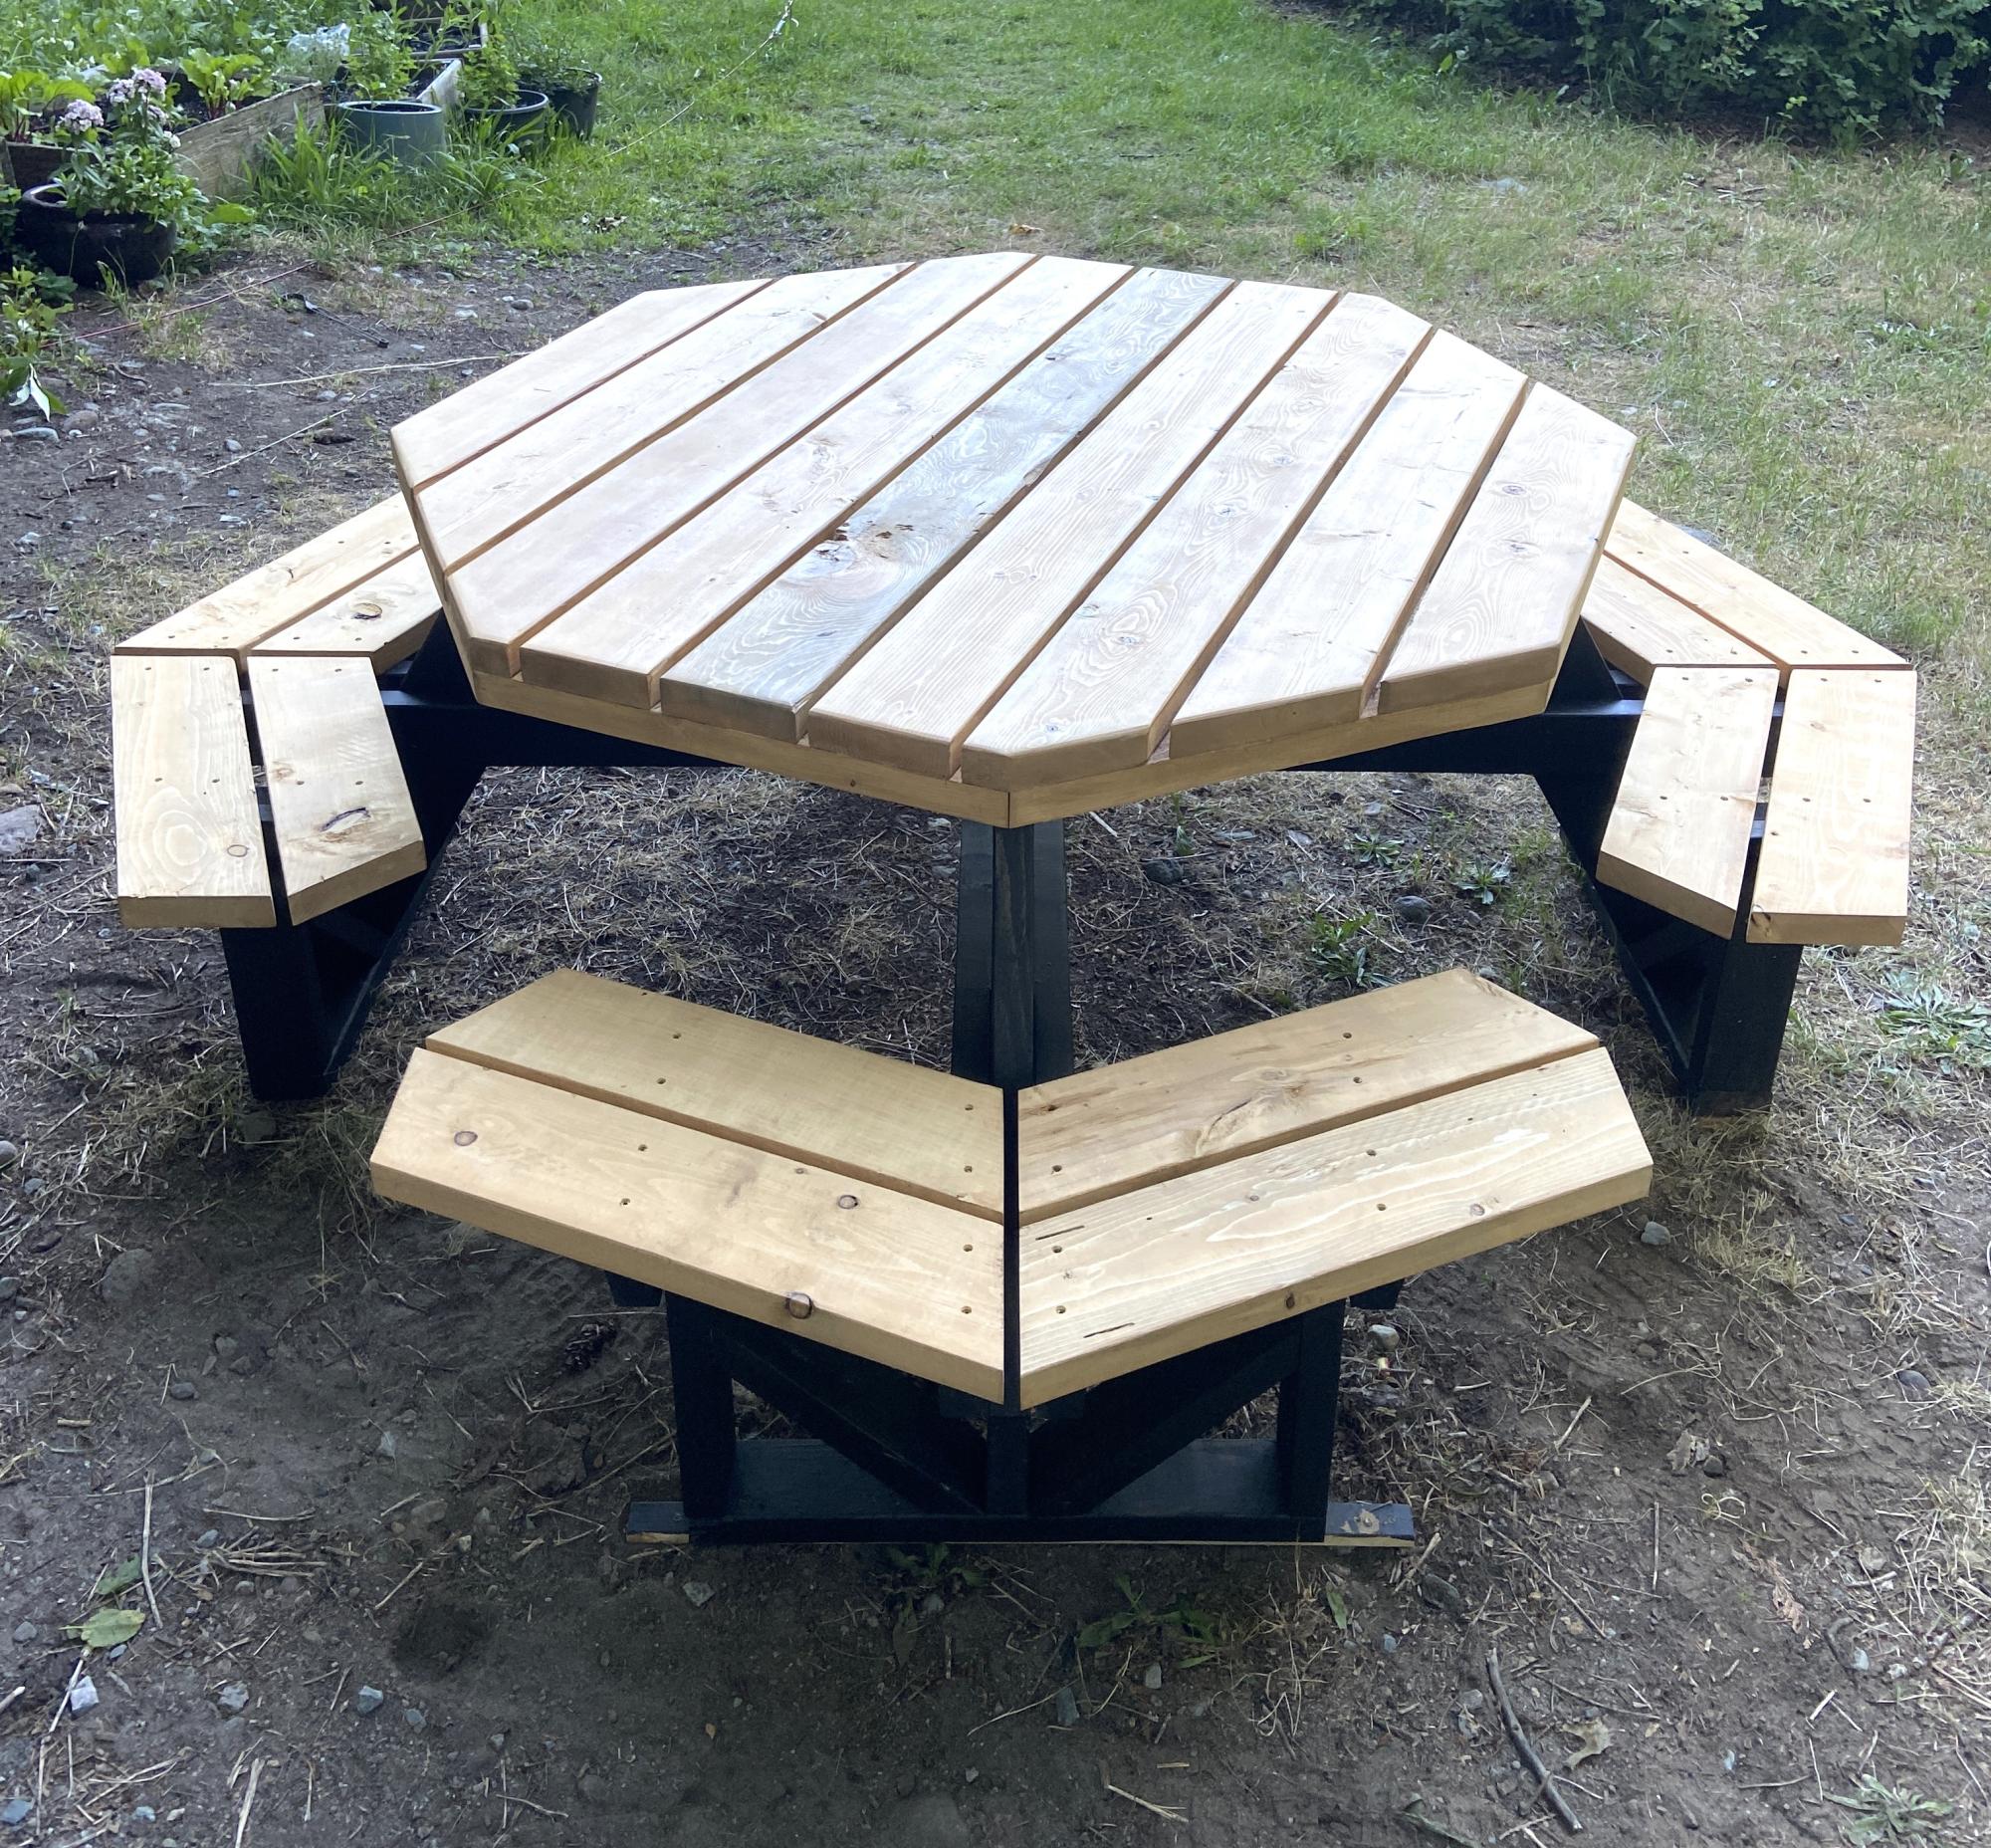
Octagon picnic table! Built exactly to plan. This challenged my carpentry skills but I managed to pull it off all by myself. Great plans easy to follow and a great design! Would build again!


Comments
Ana White Admin
Thu, 08/03/2023 - 09:27
Looks comfortable!
Great job, love the finish! Thanks for sharing.