Community Brag Posts

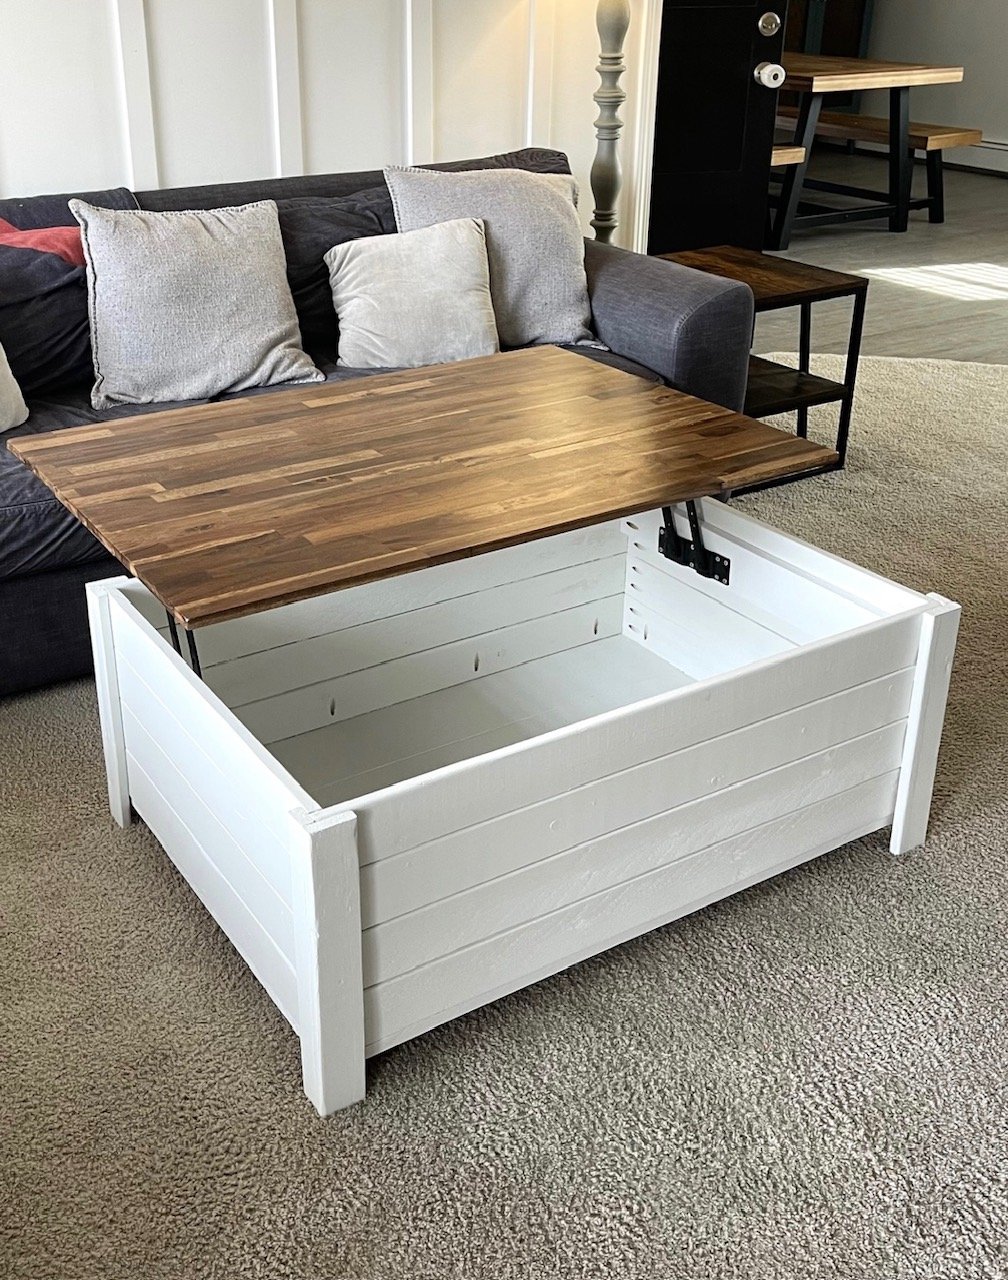
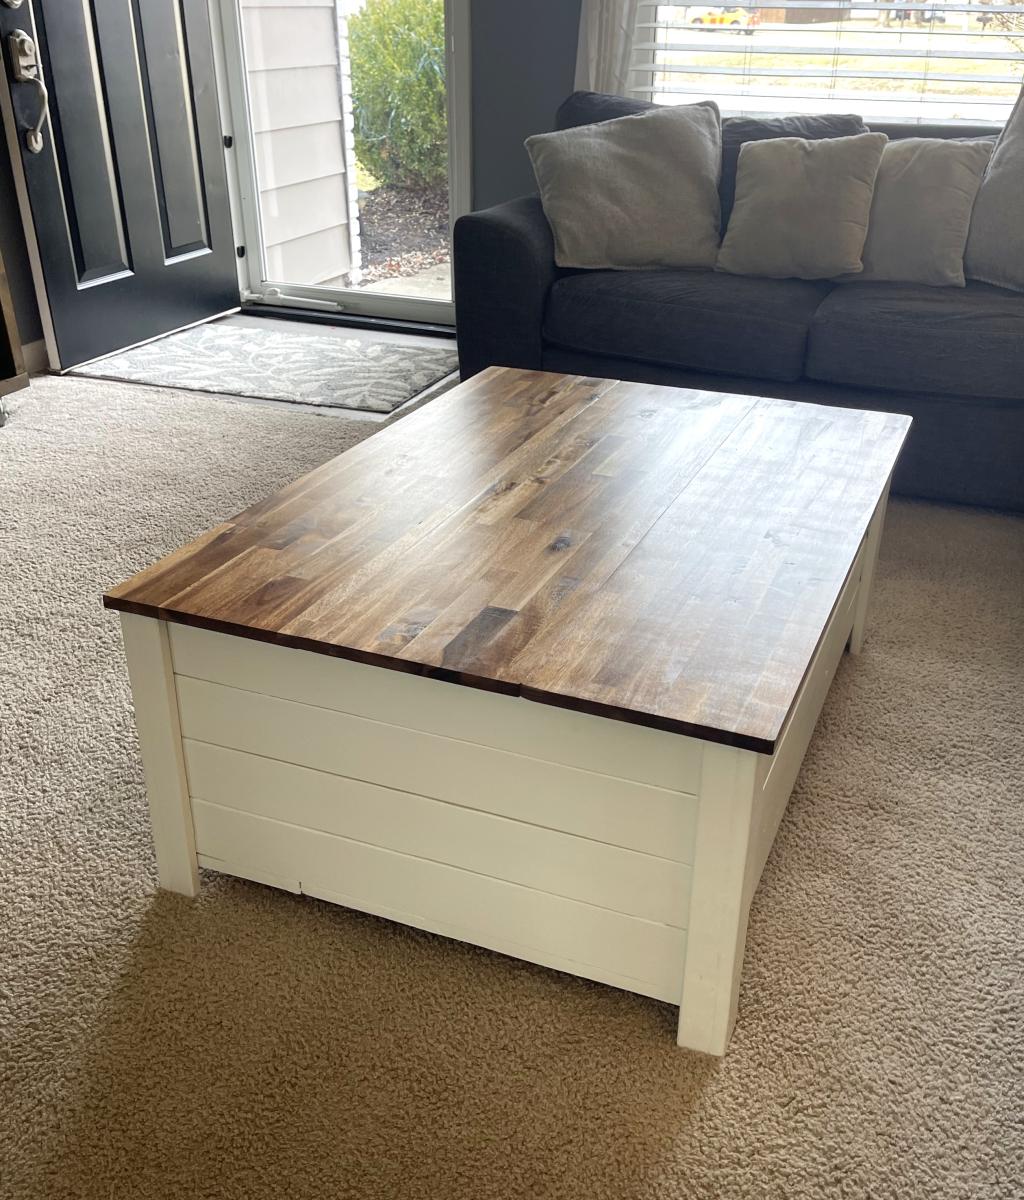
Cedar Top Modification

Submitted by Anonymous (not verified) on Sun, 05/01/2016 - 16:45

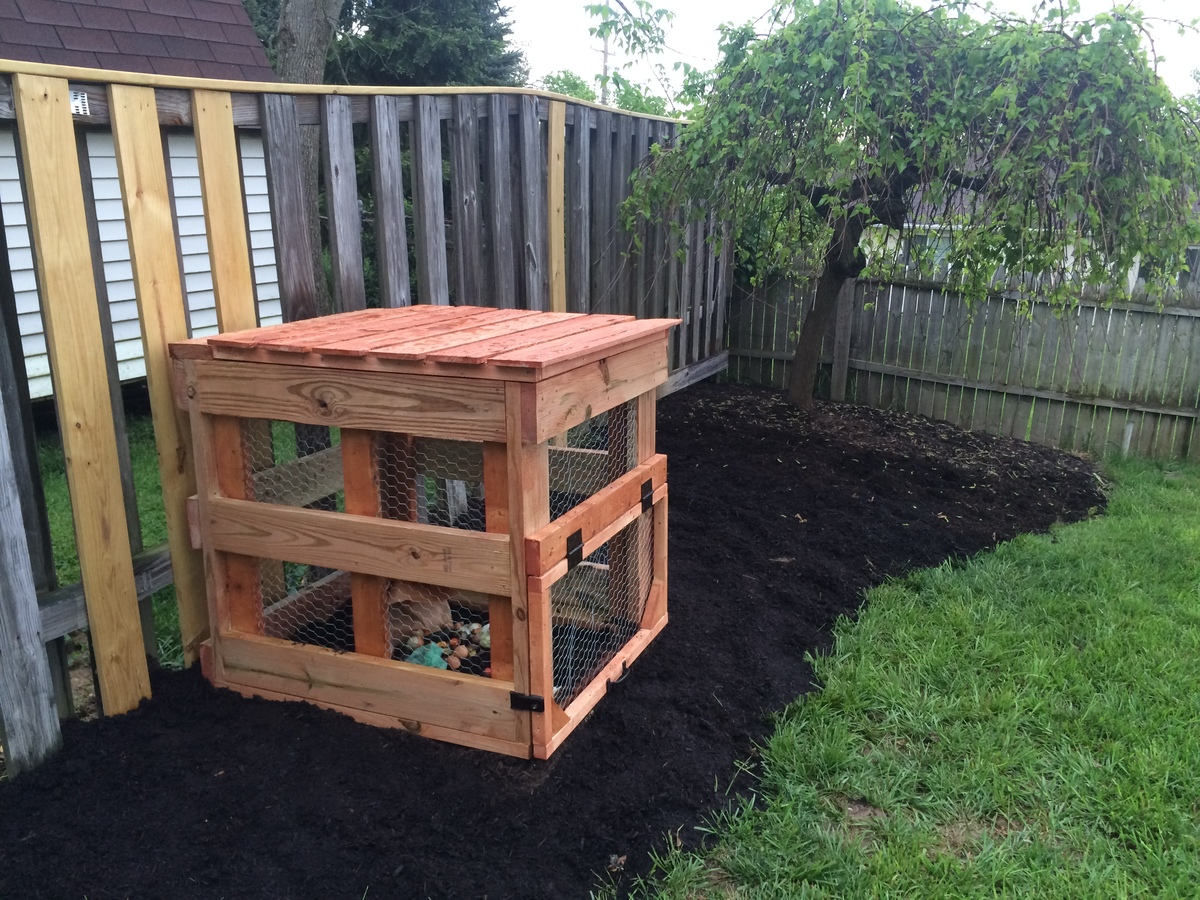
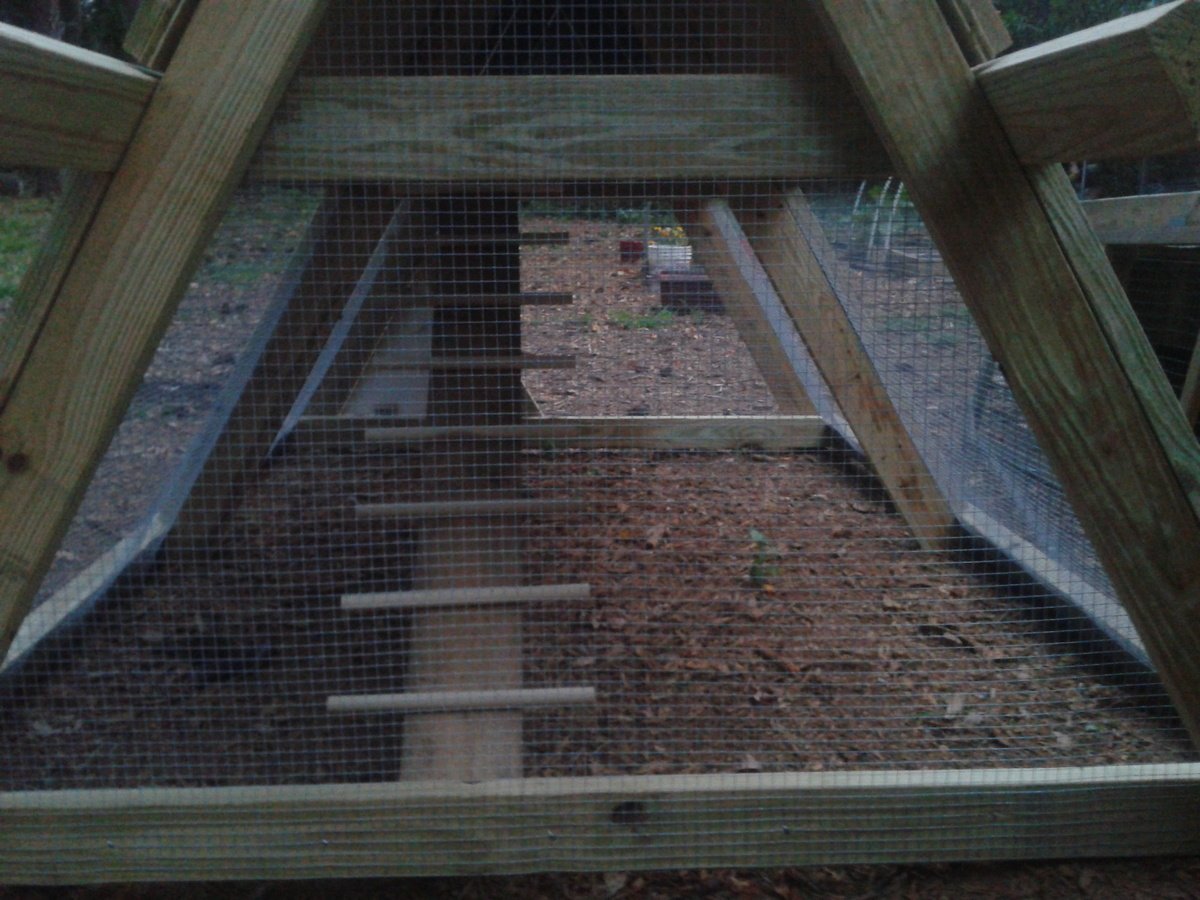
We needed a compost bin to replace the pile forming in a corner of the yard. We referred to it as "The Buffet" to reflect how much our new puppy enjoyed digging through the scraps. 


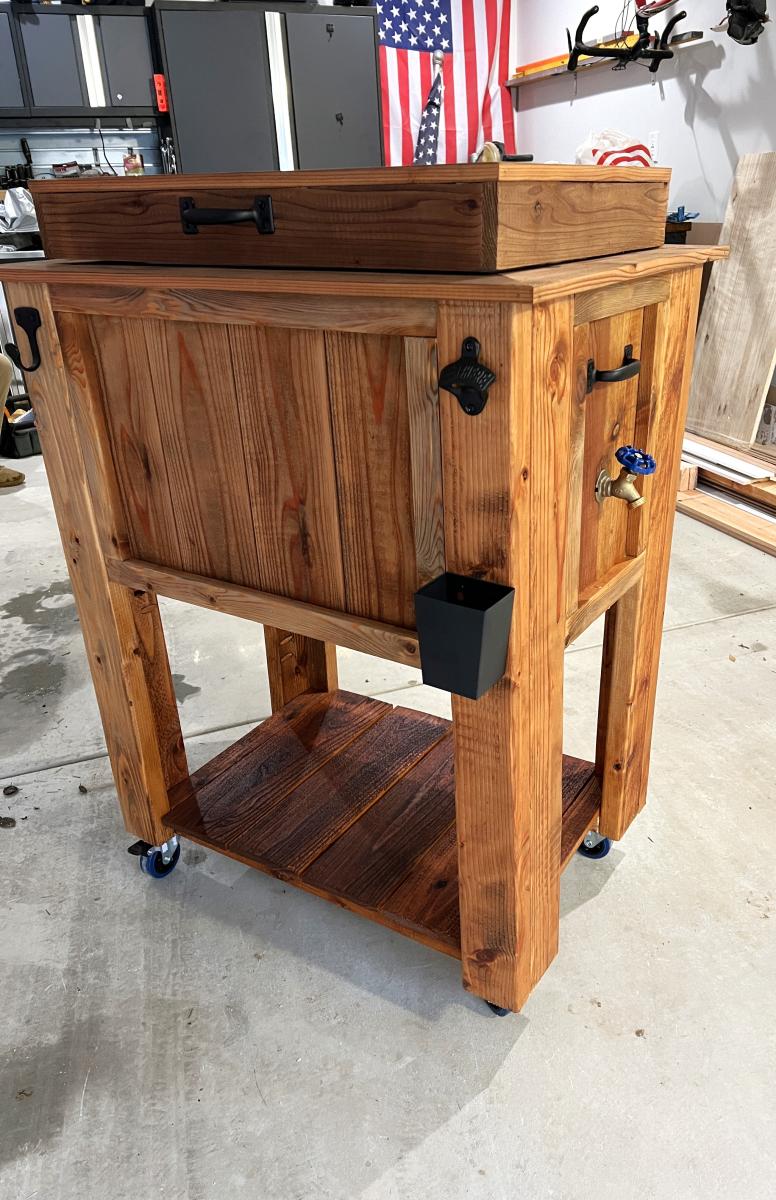
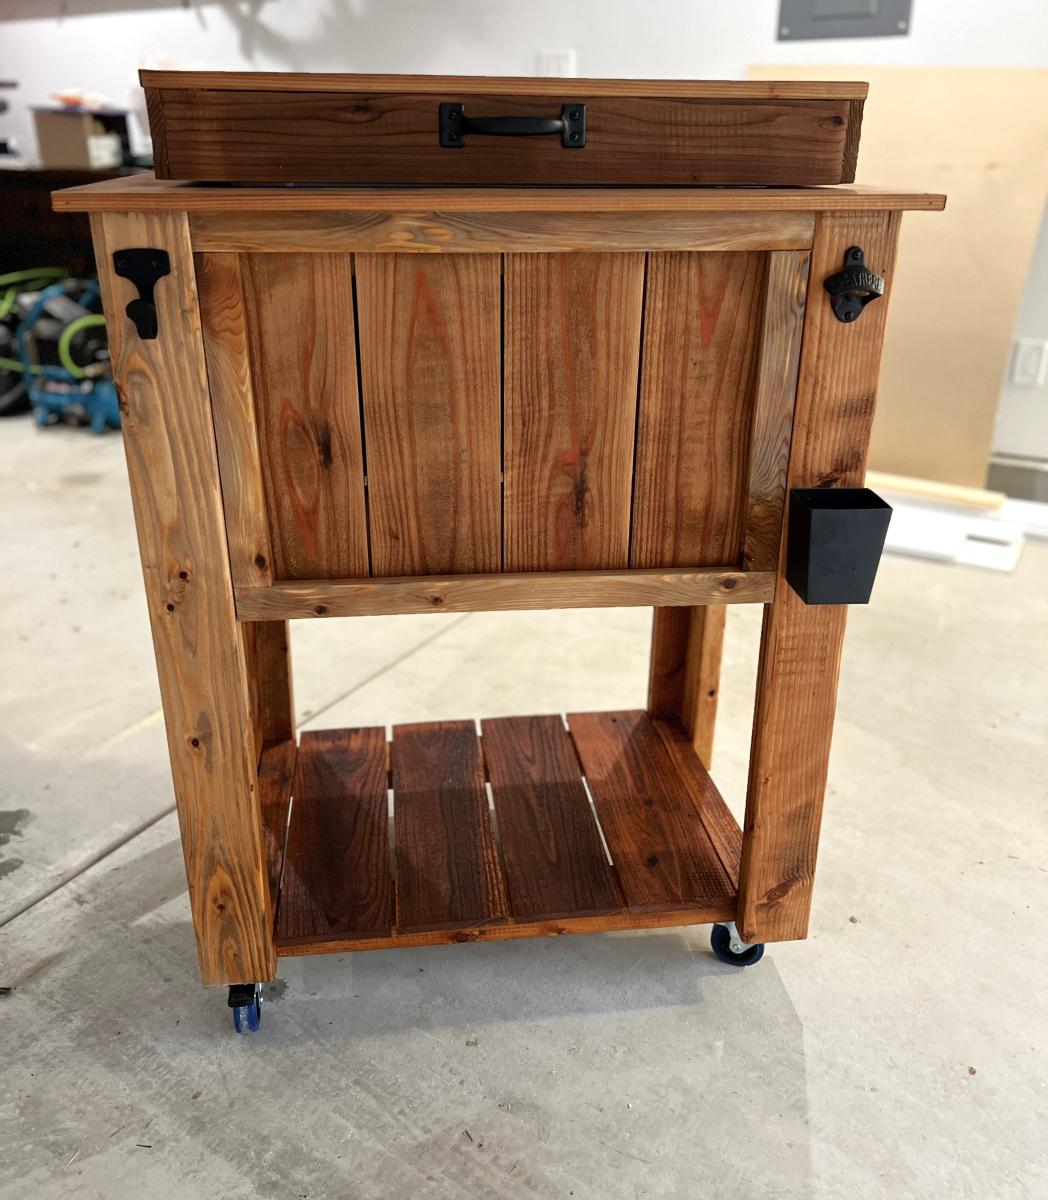
I I substituted cedar fencing to top the bin instead of the plastic sheeting. I just liked the way it looked and it was more cost effective. The most difficult part of the project really is wrangling the chicken wire. It's sharp!

Estimated Cost
I spent about $75 on materials for the project. I spent about another $75 on things like screws, a new staple gun, some waterproofing stain, etc all of which I have left overs and can use again.

I used treated lumber and a waterproofing deck stain. This is not for an edibles garden. I'm just using the soil to fill in low spots around the yard. If I was building it for a veggie garden I would have used all cedar wood with no stain or a natural shellac.
Estimated Time Investment
Day Project (6-9 Hours)
Finish Used
Thompson waterproofing deck stain. Brushed on.
Recommended Skill Level
Intermediate

DIY Shed Chicken Coop 6x8

Submitted by Anonymous (not verified) on Thu, 05/19/2016 - 19:50

 The project was used using the same plans but I extended the floor to be 6 feet wide vice 4 feet the additional 2 feet provided the perfect amount space I wanted. I also added an extra windows  to get cross ventilation.    I also insulated the coop and put paneling on the walls and lenolium on the floors.  I dropped the back wall sheeting 1.5 inches for additional airflow since the shed doesn't have a ridge vent.   The plans are easy to follow and easily adaptable.   

Built from Plan(s)
Estimated Cost
$700. You may think that is a lot but you will learn a lot. Coops we were looking at were $1,200. This coop was less expensive and bigger and better plus you can say you built that.
Estimated Time Investment
Week Long Project (20 Hours or More)
Finish Used
T1-11 with home depot behr exterior paint.
Recommended Skill Level
Beginner

Comments

Barstools

Submitted by lazyLiz on Sat, 06/09/2012 - 21:22

A 30" tall bar stools inspired by the plan simplest stool.

Built from Plan(s)
Estimated Cost
$ 40- $60
Estimated Time Investment
Afternoon Project (3-6 Hours)
Finish Used
valspar white paint
Recommended Skill Level
Beginner

Comments

Handygirl

Sat, 07/07/2012 - 18:47

I love these stools! I love the curve in the top. Are yours square on top or rectangle?
Also, what size of board is the top (seat)?

Rusty Cottage

Fri, 07/20/2012 - 05:32

I like your design. Finally made an account and will be making matching ones. Thanks for the inspiration. If the better half doesn't like the first one I will have a new stool for my workbench

MrsPowers

Fri, 08/31/2012 - 20:27

Hi! You're stools came out wonderful. I was wondering how you got the seat to be curved that way.
Thanks!

A-Frame Chicken Coop (with modifications)

Submitted by anniejw17 on Mon, 07/02/2012 - 18:39

We followed the plans for the A-frame chicken coop very closely, and then modified it a bit at the end.

1. Trim was added to two doors on each side, as suggested. They are secured with latches at the top, more to keep them from falling open than to keep critters from getting in. We used 2x4x10's instead of 2x4x8's on the middle horizontal rail, giving us foot-long handles on each side. My husband and I are able to move the coop about 15 feet at a time, which is pretty good considering it is STURDY!

2. We used 1/2" galvanized hardware cloth instead of chicken wire, as suggested by one commenter (and lots of others in blogland).

3. I cut 1/4" plywood to fit the loft space and coated it with vinyl stick-on tile. This should make it easier to clean. We didn't screw down the plywood, so if we have to, we can remove it to hose it off/scrub it.

4. I cut a triangle of plywood to make an egg door at the end of the roost. It hinges at the bottom (with a 2x4 ripped into a 1x4 to cover the hardware cloth and provide a mounting spot for hinges) and latches at the top. I plan to use cotter pins or something to secure the latch. There is also a piece of untreated 1x4 held in place with tabs at the egg door to prevent bedding from falling out once it's converted to the nesting box (I'm planning to get pullets, not ready to lay yet, so they won't even have a tempting nest box)

5. There was no bottom door in the plans (to allow free-ranging), so I cut a piece of 2x4 to make a triangle against the bottom (same size as the egg door). It folds out (just like the egg door) and will allow the chickens easy access to the yard. We do have hawks in our neighborhood so free time will always be supervised. We also have a dog (who I coaxed into the coop for the main picture, haha!) who will need supervising. She's been around chickens before but you never know what will make her turn on them!

6. There was also no roost in the plans (although if you look at Ana's coop, there is a 2x4 across the middle of the side walls). I had a leftover closet rod, so I mounted that in the covered section parallel to the ladder. The ladder was shifted to the side. For the ladder, I just used a piece of cedar fencing and cut 2 48" dowels into 4 pieces each, and secured those with screws from the underside. I hope my chickens will be able to get up the ladder!

7. I also made a tube feeder from PVC and a dog bowl, and am working on a nipple waterer. Will update post when those are finished!

Now I just have to get some hens! I've been searching craigslist and can't wait!

Built from Plan(s)
Estimated Cost
200
Estimated Time Investment
Day Project (6-9 Hours)
Finish Used
Unfinished except for plywood floor (vinyl stick-on tile) and plywood doors (white exterior acrylic paint)
Recommended Skill Level
Intermediate

Comments

Modern Adirondack

Submitted by Anonymous (not verified) on Wed, 06/10/2020 - 10:10

My wife and I were tired of the cheap plastic chairs but not wanting to spend a fortune. I came across Ana’s site and these great plans so I gave it a shot. Everything was pretty straightforward. I decided to use 1x6’s for the seat and back slats instead of 1x10’s. I also used dowel rods instead of wood filler to close all of the screw holes and I Roy fed the edge of the front seat slat one the router. I’m currently working on a partner for this chair with some adjustments (Making it 2” wider and using pocket hole and other techniques to hide the screws).

Estimated Cost
$40
Estimated Time Investment
Afternoon Project (3-6 Hours)
Finish Used
Minwax English Chestnut stain.
Valspar clear deck/outdoor furniture sealant.
Recommended Skill Level
Beginner

Comments

My Big Green Modern Porch Swing

Submitted by cbroughton on Wed, 08/15/2012 - 17:16

This is my version of the Large Modern Porch Swing. I did a couple of things different. I wanted a nice finish so I cut everything to length then did 3 coats of high gloss exterior paint. It feels pretty indestructible and I know it's covering all the surfaces well.

Since I painted everything ahead of time and I liked the finish I thought about the screws and nails and was able to assemble it using only screws and having none of them visible. I pocket drilled most of them, although without a jig so they're actually toenailed. The seat slats are screwed down with angle brackets underneath and the back slats screwed from the back side. That way there is no need for finishing nails or wood filler.

Other than that's it's pretty much to plan. The structure we have may have been for a swing at some point so I had a pipe to attach to. To be extra safe I doubled up the rope and used a pedigree cow hitch. It's very sturdy and if and one line breaks there is another piece as a backup.

I'm really happy with how it turned out. Out of all the porch swings I've seen this one best suits our style and taste.

Built from Plan(s)
Estimated Cost
$150 for materials, hardware and paint
Estimated Time Investment
Weekend Project (10-20 Hours)
Finish Used
High Gloss Exterior Paint
Recommended Skill Level
Beginner

Comments

cbroughton

Sat, 08/18/2012 - 23:46

We're not exactly sure what it is it's hanging from, it was here when we got the place. I don't have a picture but it's just 2 6.5' pipes cemented into the ground and one 7' pipe joined to them at the top with elbows. It's probably overkill, I think you'd be OK with a well built wooden structure but it's what I had available.

Hoosierdoc

Mon, 04/27/2020 - 08:58

I am not a fan of those attachment point. I made the same swing and used those attachment points. When my son was sitting on the back and the dog jumped up it flipped over backwards. I moved the back attachment hook a few inches from the bottom of the back piece and it's much more stable.

Papa’s Treehouse

Submitted by Anonymous (not verified) on Thu, 06/25/2020 - 02:53

Have 3 granddaughters; 3, 2 and 6 months, so far 😉 Saw your treehouse video and made a modified version of your triangle platform using the trees I had available. Kinda went over the top a bit, but give you all the credit. Repurposed mostly old deck PT wood and rough hewn beams from neighbors.
Thanks!
Bill Magyar
Duluth GA

Estimated Time Investment
Week Long Project (20 Hours or More)
Finish Used
PT Wood patina and tea/vinegar aging solution on new.
Recommended Skill Level
Advanced

Sewing/cutting table

Submitted by drc3924 on Thu, 06/19/2014 - 19:53

This has become my dream sewing/craft desk!! This project took about a week from start to finish (with work days in between). The shorter portion of the desk is used for my machine and sewing. The taller portion is used as a cutting table. The plans (dimensions) were tweaked some to get the perfect heights for me :).

Built from Plan(s)
Estimated Cost
$200
Estimated Time Investment
Weekend Project (10-20 Hours)
Finish Used
After sanding I painted 1 coat of interior primer the about 2-3 coats of mint flat interior paint. I decided not to add a clear coat just because I wanted to use my amazing desk ASAP!!!
Recommended Skill Level
Intermediate

Comments

tamaralyn79

Wed, 03/25/2015 - 06:31

Your desk is GORGEOUS!!!! It's exactly what I've been looking to build for my space. I would love to know how you modified the plan to make it.

TaylorMade1205

Wed, 03/25/2015 - 07:23

I also wanted to comment on the thread shelf you build, that is really awesome, you can see all your colors right in front of you. Mine are in a drawer and I have to pull the whole thing out to see what I need. This is really giving me ideas.

kchess

Fri, 09/04/2015 - 08:45

Would you please send the plan instructions (with measurments).  It is perfect for me as I sew and embrodery both and have two machines.  

American Girl Doll Closet

My Girls are having an american girl doll christmas this year. They're each getting a doll, with cars, horses, clothes, gymnastics bar, whatever you could want to go with it, lol. I decided last minute to make this closet for them as well to help organize their stuff. I made it 2" taller and added some more shelves. On the two little shelves, I am currently making a box out of the plastic embroidery sheets (I'm embroidering it with pink satin ribbon, instead of yarn to make it prettier). Walmart had a bunch of shoes for these dolls for just $1.50 a pair so I got them a lot of shoes for their stockings and needed little bins to hold all the shoes they are getting. I had fun building it. Because it was last minute and because I still need to install the quarter round on our laminate floor (hopefully before christmas), I was making this as quick as possible to I opted to not do the star cut out and just spent the $5 more to get the two handles. I also did easier hinges. We only have the washing machine for these dolls so I didn't need all the room on the bottom.

Estimated Cost
$35
Estimated Time Investment
Afternoon Project (3-6 Hours)
Recommended Skill Level
Beginner

Comments

momma2three

Sat, 12/15/2012 - 04:43

sorry the pictures are sideways, I uploaded them from my ipad and for some reason, they got switched to the side during the upload!

Brook Laundry Basket Dresser

Submitted by krochelle on Thu, 01/01/2015 - 15:42

Used square laundry baskets instead of regular rectangular baskets. The square ones aren't as deep but are a bit taller so I had to modify the plans. I added a backsplash and some wooden tags to the baskets to designate them for certain colors. I also added some decorative trim and finished the bottom in a gray stain and used white chalk paint for the top.

Estimated Cost
$70
Estimated Time Investment
Day Project (6-9 Hours)
Finish Used
Weathered gray stain
White chalk paint
Recommended Skill Level
Beginner

Fancy X Farmhouse Table

Submitted by Anonymous (not verified) on Mon, 04/24/2017 - 21:18

This is a table and bench that I built for our patio!

Built from Plan(s)
Estimated Cost
$200 (wood, fasteners, stain, urethane, sand paper, composite feet)
Estimated Time Investment
Weekend Project (10-20 Hours)
Finish Used
Minwax Ebony and Dark Walnut Stains, Minwax Helsman Spar Urethane.
Recommended Skill Level
Intermediate

Miter Stand and Rolling Storage Carts

Submitted by danicarby on Sat, 04/29/2017 - 11:21

I'm so happy that I found the plans for Ana's miter stand and rolling carts!  It was just what I needed for my garage shop... so everything can be organized and stored compactly but things can pull open and expand when I have a project (which is all the time, actually).

The actual miter stand was super easy to build - the carts took a few days working non-stop (when the kids permitted).


I made a few obvious changes from the plans:

-made deeper shelves on one of the carts

-added drawers on one of the carts

-added ped board on the end caps of miter stand


Something I didn't consider before building this was the slope of our garage floor.  There's a 3" difference from one end of the legs to the other so I had to use riser blocks to get everything perfectly level.  Unfortunately there's no way to level the carts as they aren't stationary but they slide in/out just fine.


I'd recommend this build to everyone!  Check Home Depot clearance often for deals on plywood!

Estimated Cost
It's hard to say as I used wood I had on hand, tried to buy clearance, etc. I'm estimating $200.
Estimated Time Investment
Week Long Project (20 Hours or More)
Finish Used
None
Recommended Skill Level
Intermediate

Comments

Kitchen Lazy Susan

Submitted by bsbdays on Mon, 04/06/2015 - 06:29

This is a sample of what I have done using Ana's plans. Thanks Ana!!! I will be posting my entire kitchen Reno in the near future.

Estimated Cost
Cabinet was $98.00, Lazy Susan was $145.00
Estimated Time Investment
Afternoon Project (3-6 Hours)
Recommended Skill Level
Intermediate

Comments

Eagle Project Workbench - Ultimate Roll Away Workbench with Miter Saw Stand

Submitted by nelsoncc on Mon, 10/18/2021 - 11:32

My son chose to make a workbench for his high school theater for his Eagle Scout project, and selected the Ultimate Roll Away Workbench with Miter Saw Stand as the basis for the project. The theater teacher wanted pegboard for tool storage, so we extended the rear legs on each workbench and notched the top to allow them to pass through. We built two frames from 1x3s to fit inside the rear legs, then put a pegboard inside each one.

To secure the extended legs, we added a riser shelf from 1x8s. We put a storage station for drills at one end of the riser shelf.

We also made all the cart shelves adjustable and added an adjustable shelf under the miter saw, and added lighting and power strips.

We left out the panels at the end of the workbench to allow access to the shelves there without having to remove the carts. Once we had constructed it, we added a brace at each end of the workbench to better support the outside front legs.

This plan was the perfect one for the theater, giving a stable work area for the miter saw and allowing for tool and materials storage. The carts can be rolled around to where a work surface is needed. This will come in handy for years of set construction in the theater. So proud of my son and all the leadership and hard work he put into this project!

Comments

Kitchen Cupboard Pull Out Drawers

Submitted by AndyH on Mon, 05/25/2015 - 15:23

Made four pull out drawers with full extension soft close drawer slides.

Two shallow ones to store large items in and two deep ones to help hold pan lids and frying pans.

I used select pine for the sides and routed a slot for a 1/4 inch plywood base.

I put the pocket holes on the inside so less visible.

Estimated Cost
$30 to $40 per drawer (slides alone cost $19)
Estimated Time Investment
Weekend Project (10-20 Hours)
Finish Used
Matte poly
Recommended Skill Level
Beginner

Library Cart turned Craft Cart

Submitted by kaleidiehl on Tue, 05/31/2011 - 19:57

I love the library cart idea, but needed something for my 4 yo and 7 yo crafter/artists to use to keep their supplies on hand and contained. I modified the cart to have 2 shelves (not angled). The top shelf is converted to a tray to keep supplies stable as the cart is moved around on its wheels. Stores in the closet and can be pulled out to use.

Built from Plan(s)
Estimated Cost
$35
Estimated Time Investment
Afternoon Project (3-6 Hours)
Finish Used
Outside:
Paint Brand: Walmart Brand
Color: Arctic White
Finish: Semi Gloss

Inside:
Paint Brand: Sherwin Williams
Color: Robin's Egg
Finish: Satin

Just used what I had available.
Recommended Skill Level
Beginner

Ten Dollar Ledges Fancied Up

Submitted by ipassat100 on Fri, 07/29/2011 - 22:55

I added crown molding to the bottom of my ten dollar ledges to add a little fancier look.

Built from Plan(s)
Estimated Time Investment
An Hour or Two (0-2 Hours)
Finish Used
White Paint
Recommended Skill Level
Intermediate

Comments

Ramie (not verified)

Sat, 07/30/2011 - 14:38

I have two that are ready to hang, but need to paint the wall first. Might add to them before I do.......thanks for sharing!

Guest (not verified)

Sat, 07/30/2011 - 16:00

so cute!! I want to make these!

loniwolfe

Tue, 09/20/2011 - 19:54

This looks great! What a wonderful idea! I have a question, Other than the moulding on the bottom, did you follow the plans exactly (Like used the same dimensional boards Ana said to use)? Just asking because yours came out looking so much better than mine (which very well could be the paint job and moulding fooling my eyes into thinking the other boards look smaller, lol)

Great job and thank you for sharing!

Becky Darrington (not verified)

Wed, 09/21/2011 - 10:16

I did use the same size boards that Anna said they just might be a different length.

Merbear (not verified)

Fri, 01/13/2012 - 12:15

I love the finished look! So classy!
Is there an added piece on the bottom of the moulding?

Guest (not verified)

Thu, 01/26/2012 - 20:02

wow that's amazing. I so need those. LOL everything you post is very stylish and functional. You know I work at a high school. I could see getting the art class (which makes projects like these) to do these for my classroom :)

Guest (not verified)

Thu, 02/02/2012 - 08:50

Where are the instructions posted?

mparks100 (not verified)

Wed, 02/15/2012 - 11:23

This is great as I am a photographer and love to switch up my photos often. Saves the walls from holes and is just a great idea! I also did not see all the instructions but will have my husband duplicate.

Charmaine (not verified)

Wed, 04/11/2012 - 15:07

This is great. I made the ledge and plan on adding the crown molding. How exactly did you hang them?

Gradyne (not verified)

Tue, 07/17/2012 - 13:11

I have high ceilings. I have been trying to figure out what to put at some of the windows to dress them up a bit. I think I may add them to the den area. Photos would be out of the reach of all the grandchildren, but photographs could been seen without cluttering tables.

sdaguinsin

Sat, 09/08/2012 - 09:00

Has anyone tried using a 1x3 for the back instead of a 1x4? Can anyone think of any reason it would not work?
Also thinking of making it deeper since the crown molding will provide extra support. I want to add more depth so that I can install a power strip under shelf, behind molding so that I can turn it into a charging station. Any thoughts on this? Would love to hear other opinions on this before I start building and then realize the problems that may exist in my plans.

Emmy Soren

Thu, 09/15/2016 - 18:54

I feel so stupid... I have never used any sort of molding before. How do you use it? I went to lowes tonight and I don't know where you get the edge piece. My husband (who doesn't build things except for computers) says he thinks you just use part of the long strip and cut at a 45° angle. Is that how?

then what do you use for the bottom portion to cover the gap?

sandy.p56

Sat, 08/12/2017 - 10:50

I found Ana's site a few years ago and have been dreaming about things I want to build for just as long.  I'm finally ready to get started, and I thought these ledges would be a great way to start.  I love the moulding on the bottom, but I have no idea what combination of pieces to use to get this look or what sizes of moulding to use with the 1x4 and 1x2 boards.  Can somebody help me?

Tsu Dho Nimh

Tue, 08/15/2017 - 13:21

Sandy - take the picture to any lumber molding department ad start trying combinations.


The original pic was using some crown molding, but a fancy baseboard or other molding would look good too.

Back