Raised Garden Planters

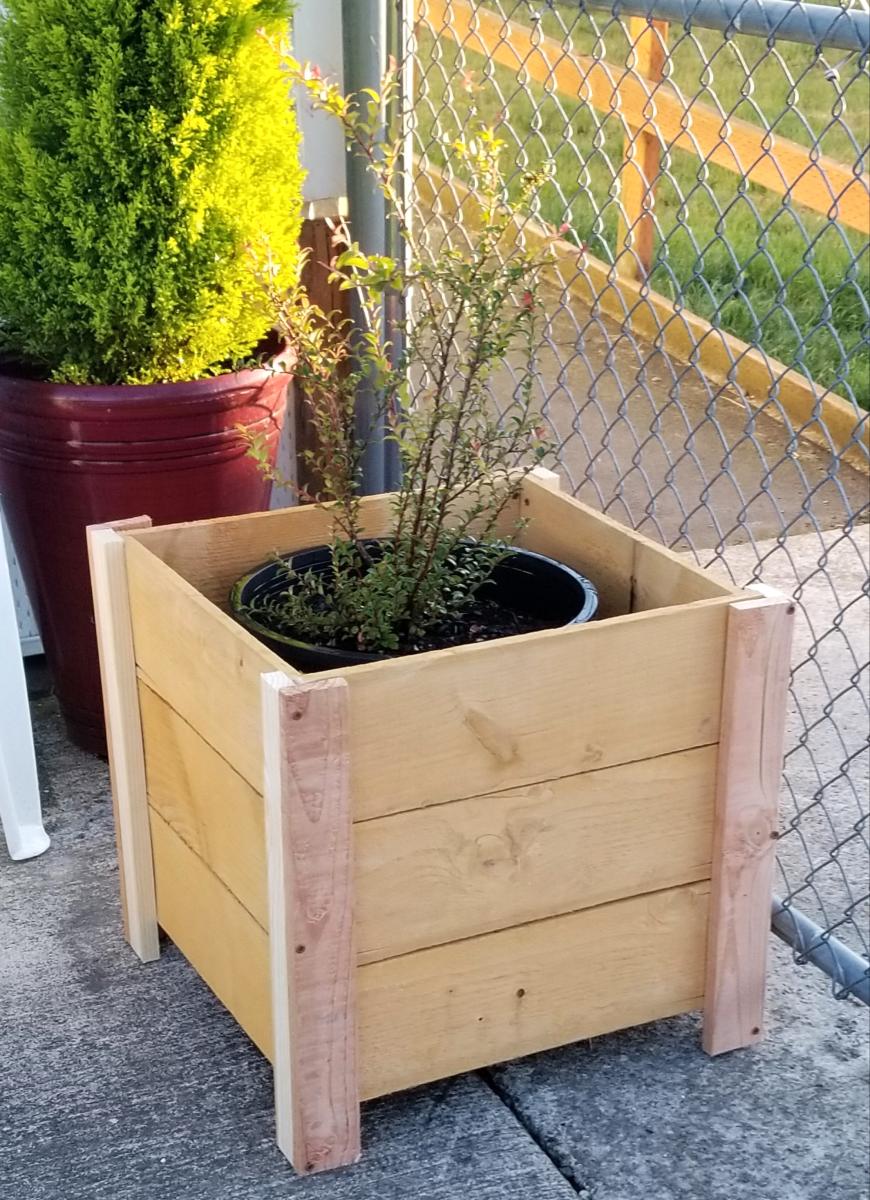
I built these planter boxes to hold my raspberry and blueberry plants. Also by connecting them with 2x2s, it keeps my dogs out of the garden
Built from Plan(s)
I built these planter boxes to hold my raspberry and blueberry plants. Also by connecting them with 2x2s, it keeps my dogs out of the garden
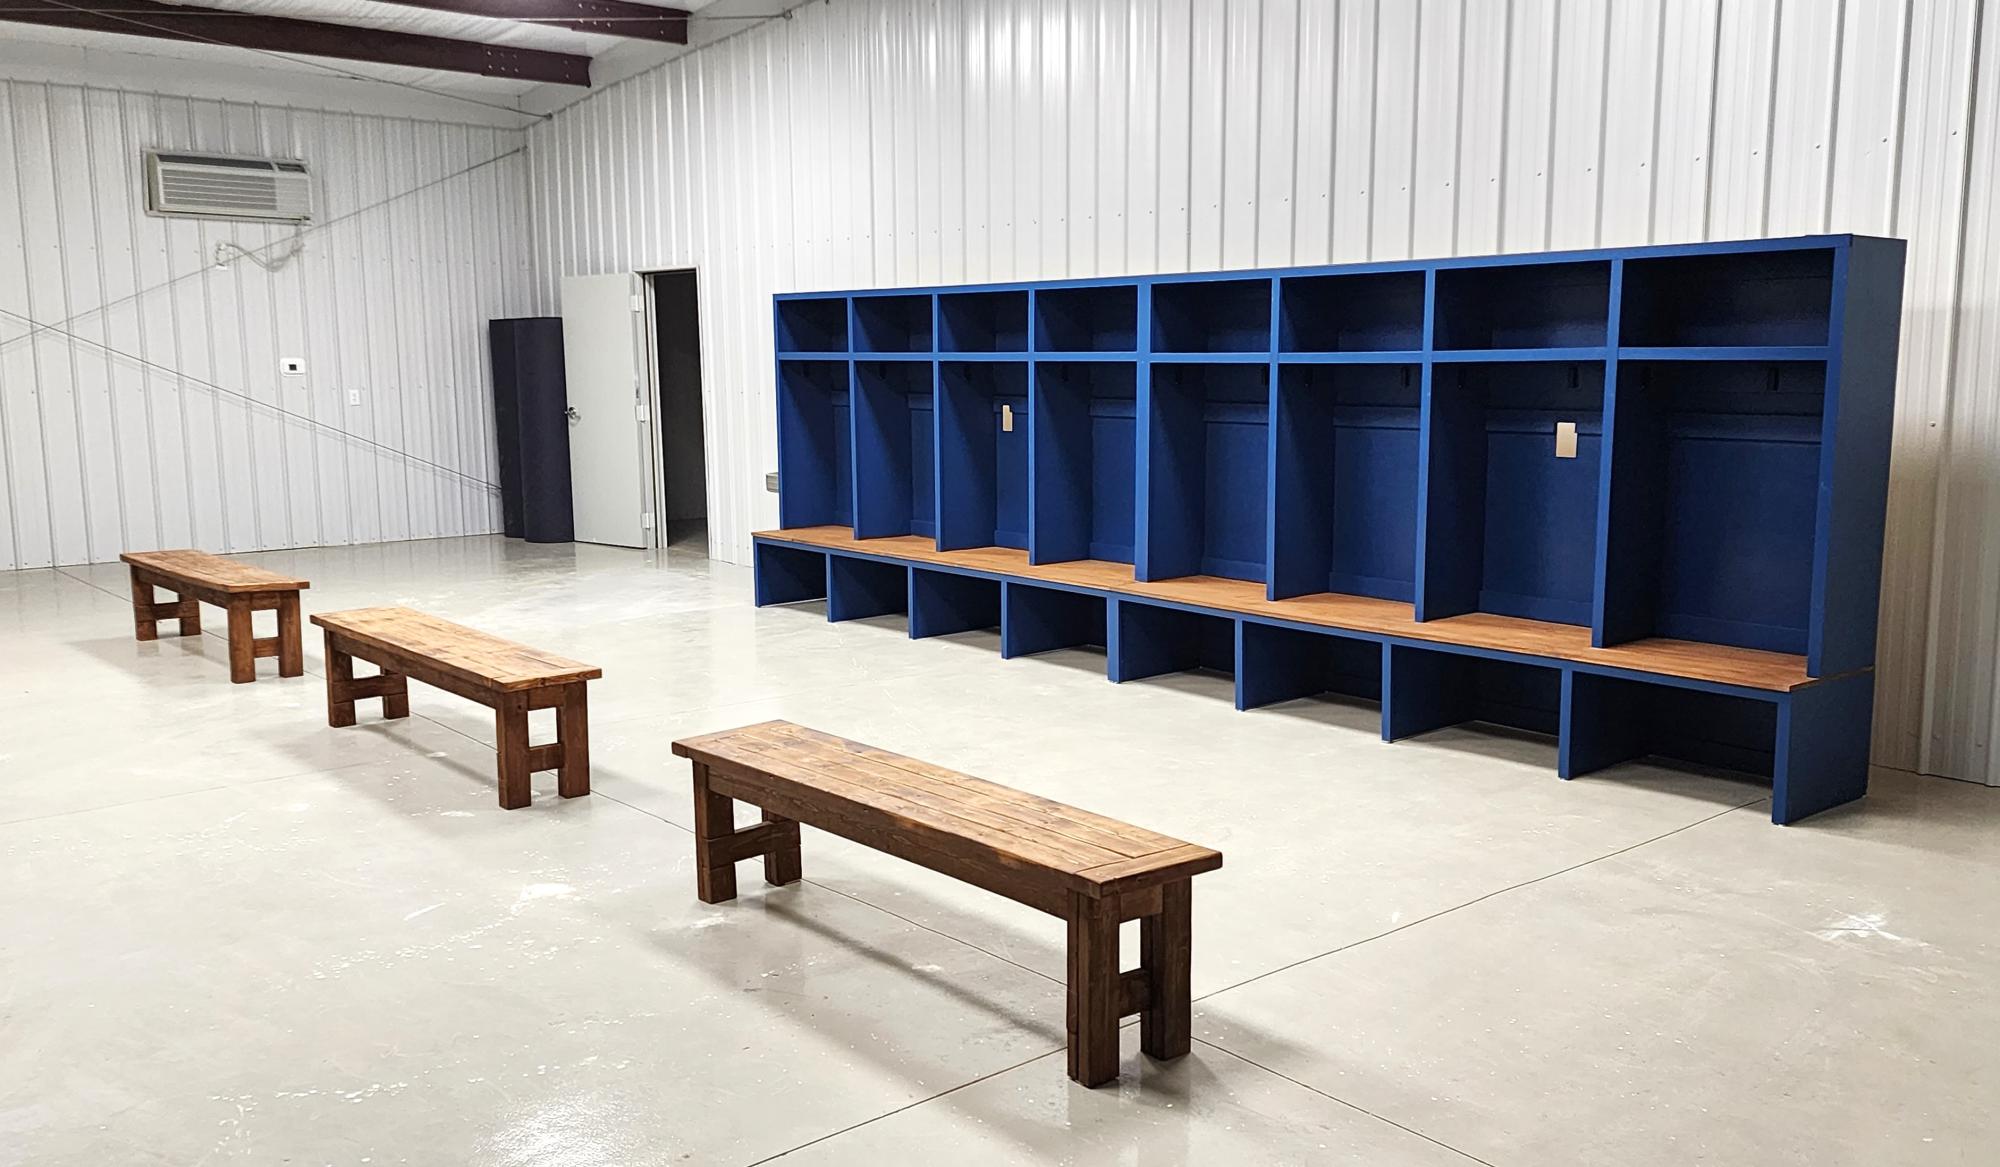
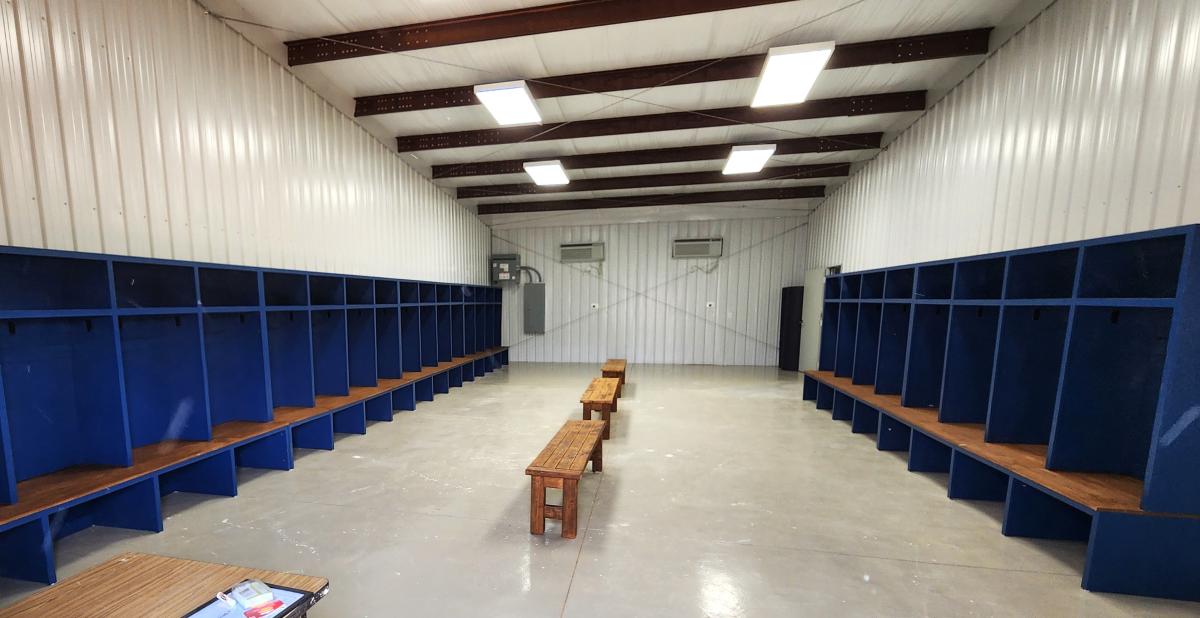
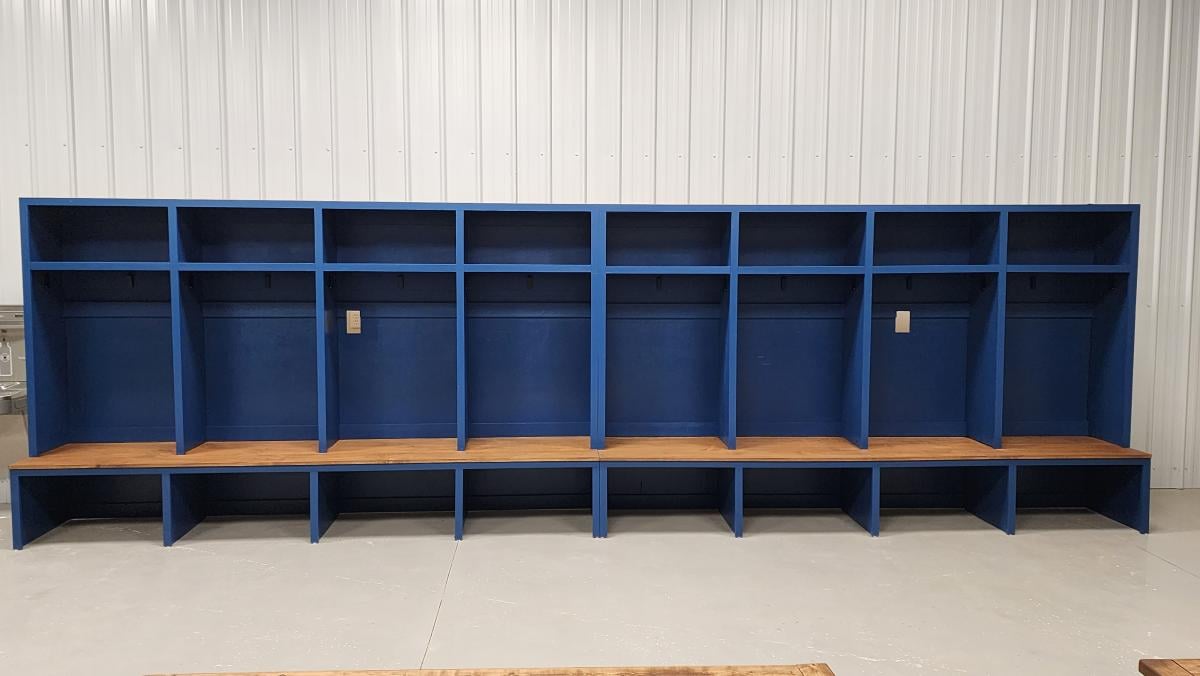
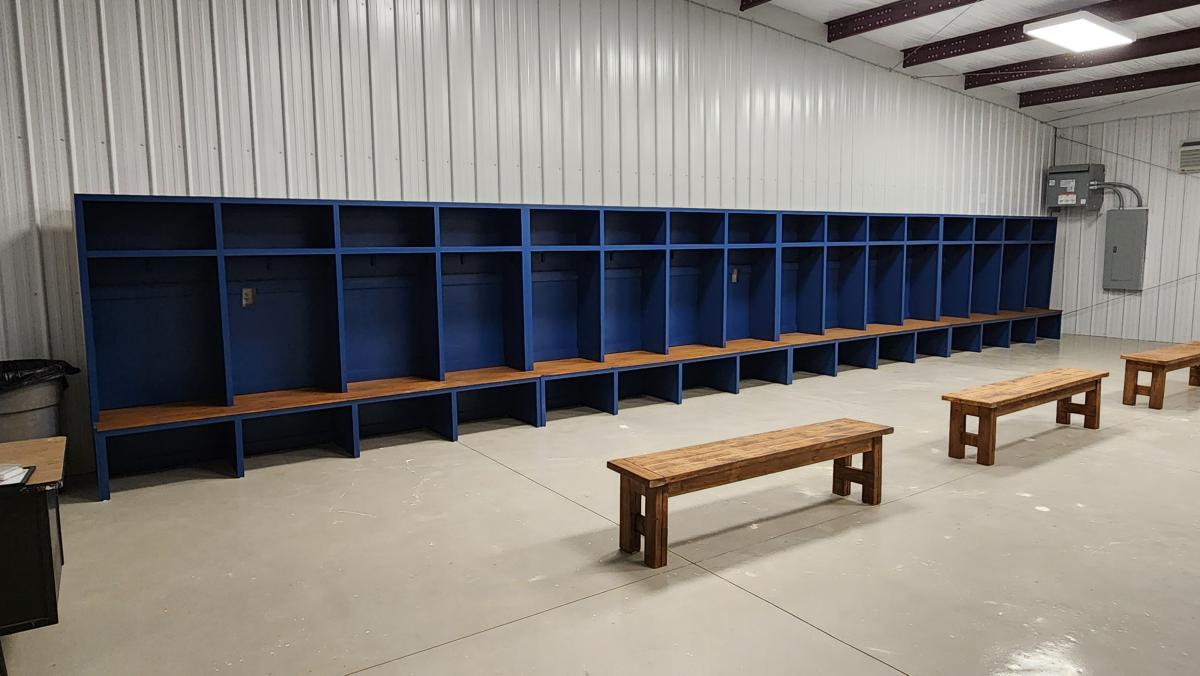
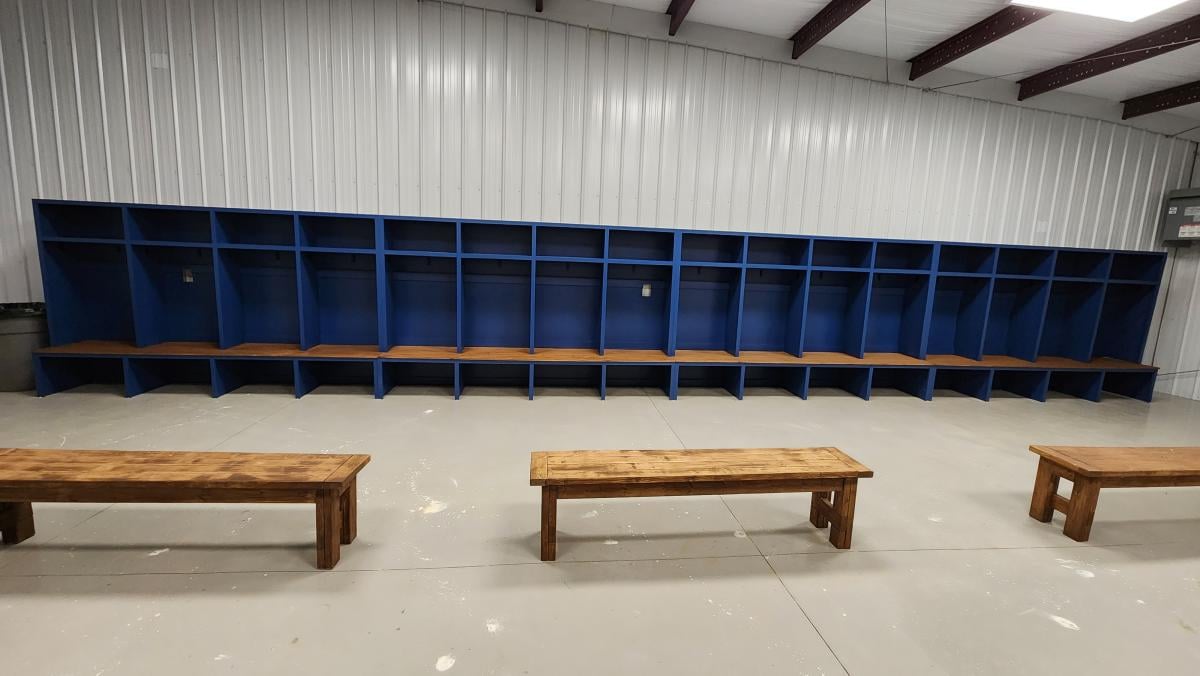
Here are a few pictures of the football lockers I built for our school. I used your mudroom locker plans and changed the dimensions to accommodate the boys' football gear. It worked great! I built 6 sets of 4 lockers, for a total of 24 lockers. I also used one of your plans to build 6 benches for the fieldhouse. Three for the home locker room and three for the visitor locker room. Each locker is 30 inches wide and 6 feet tall.
Melinda Glenn
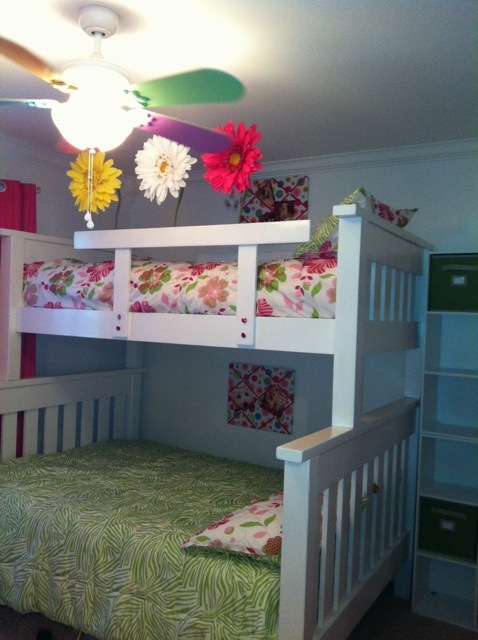
This is a Twin over Full Simple Bunk Bed for my girls who share a room. The bottom bunk leaves plenty of room for even adults to sit down without hitting their heads. We mounted Large decorative flowers on the railing to match the room just in case my daughter woke up in the middle of the night and decided to look over the edge. We were nervous she'd hit the ceiling fan and it's too hot in South Texas not to have ceiling fans. The flowers work perfectly in that area and she loves it. We pretty much followed the plans found here: http://ana-white.com/2011/01/plans/twin-over-full-simple-bunk-bed-plans. We have not added a ladder yet, but are thinking about it. On a side note, the girls like to mount blankets and cover the bottom bunk to create their "own" personal space/fort and it's pretty cool. Special note: Untreated wood for this project was hard to find. Only one of the local home improvement stores had it and it wasn't from a large chain.
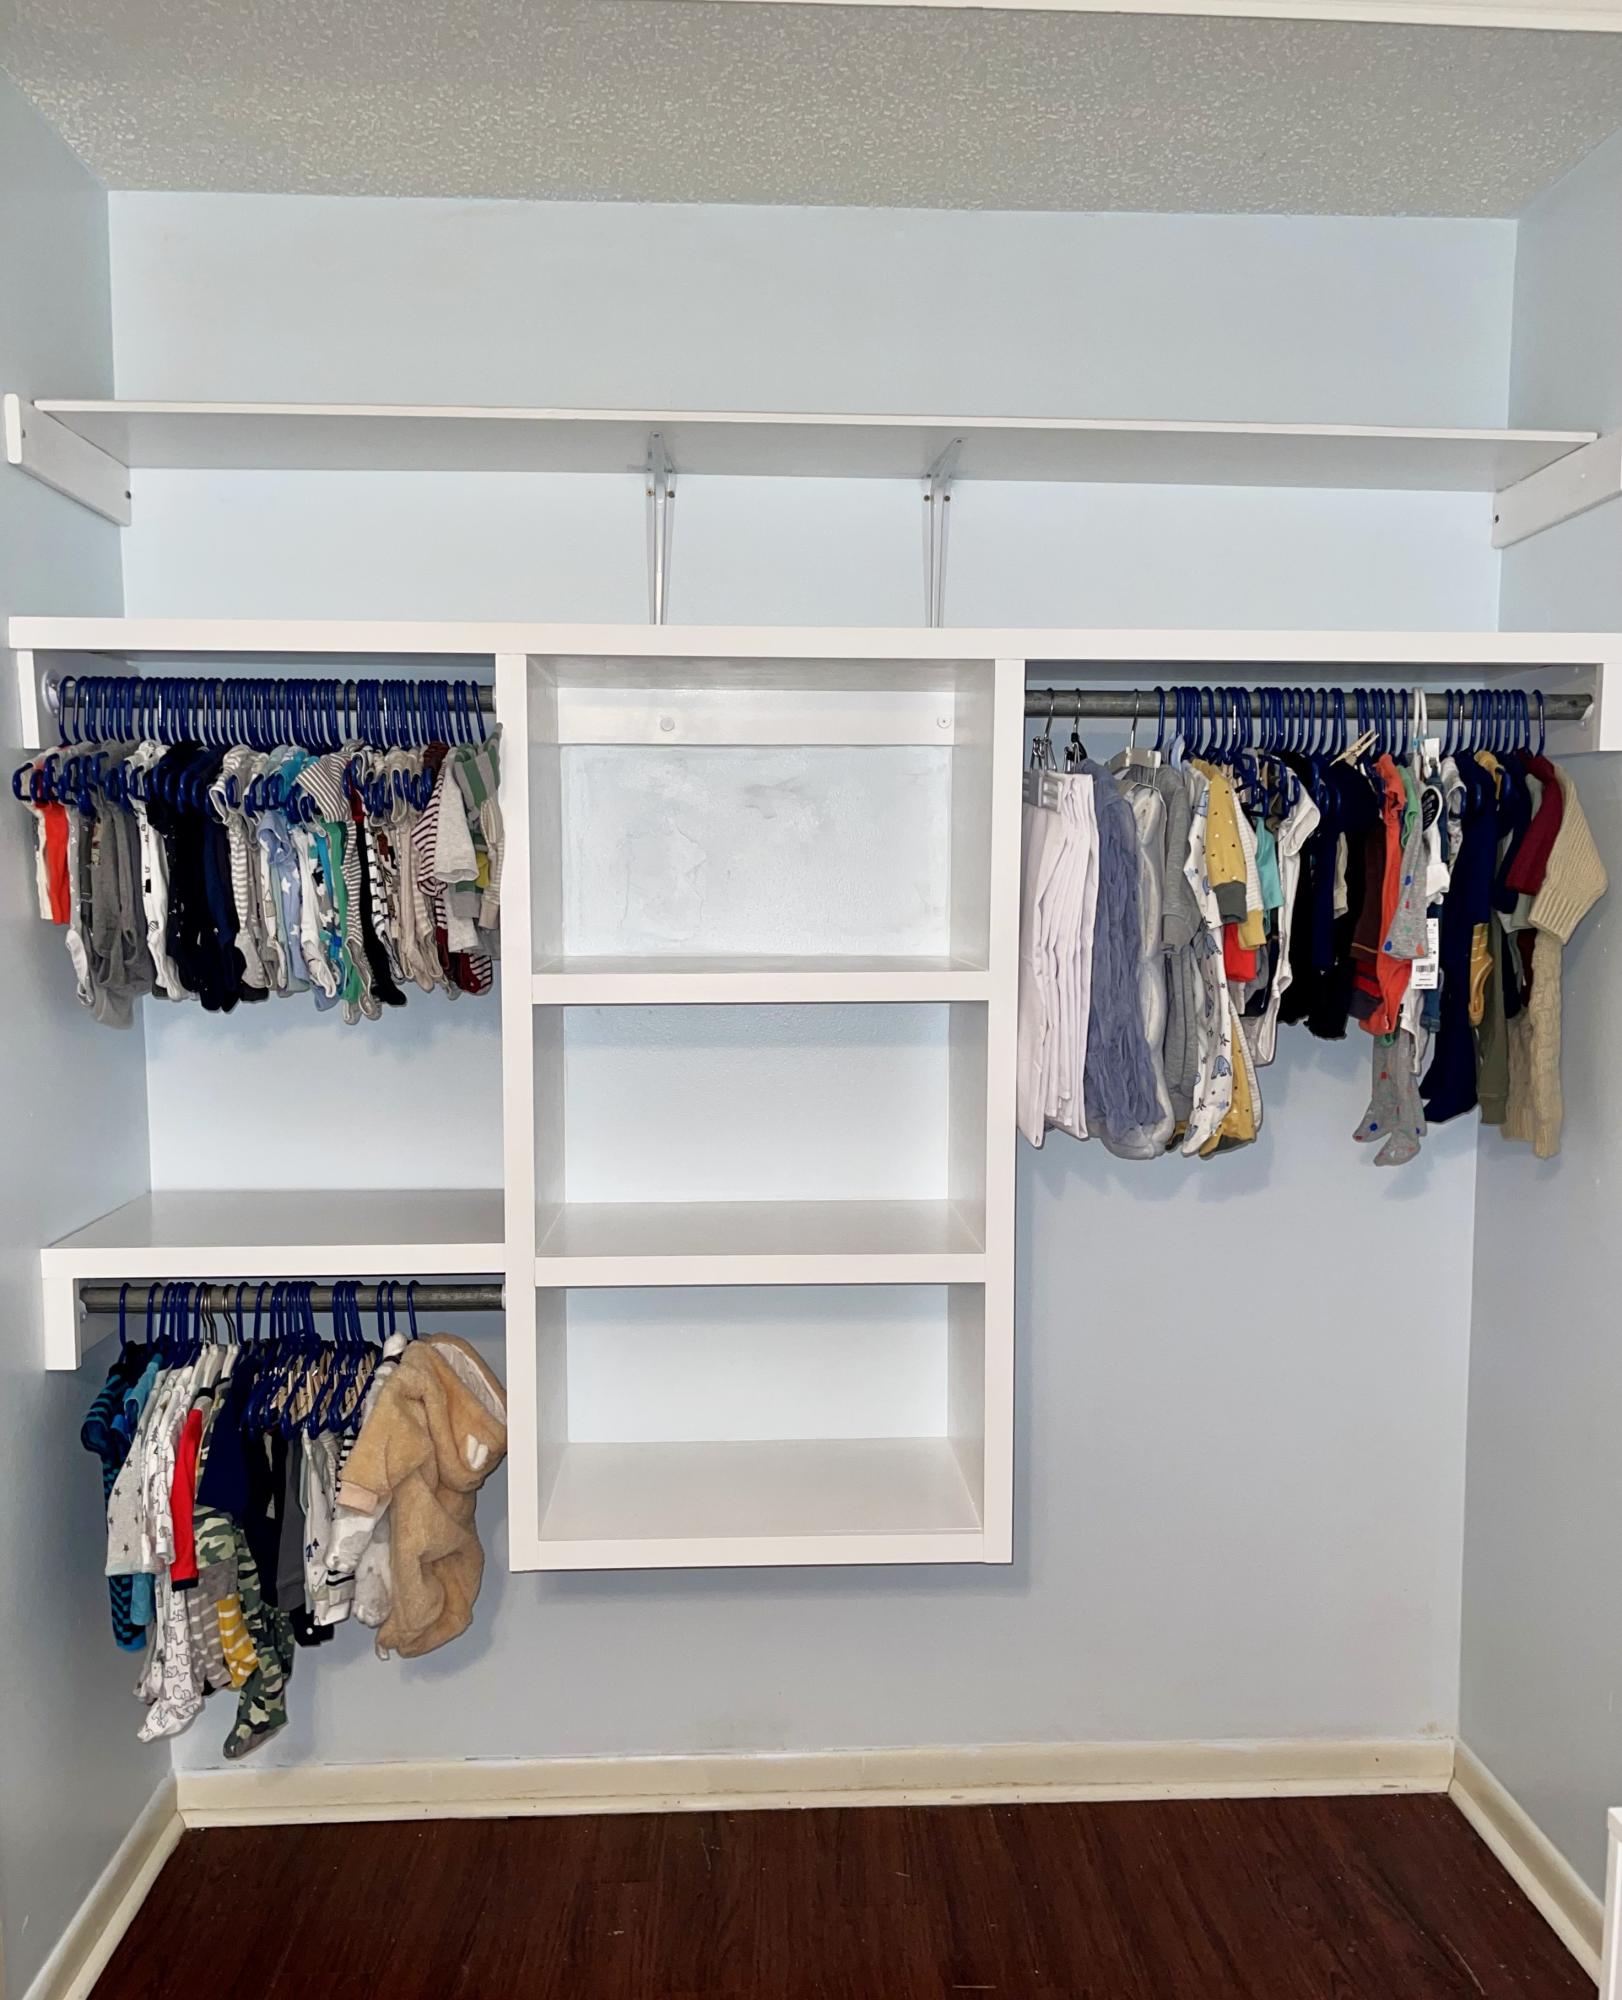
This project is based on the floating closet tower build. This is the first time I’ve attempted a renovation project of this size, and I feel satisfied with the results. I did not purchase my boards from shelf help, I cut mine from a sheet and a half of plywood. Thank you for providing your plans for free. They are very helpful for beginners like me!!
Charity P
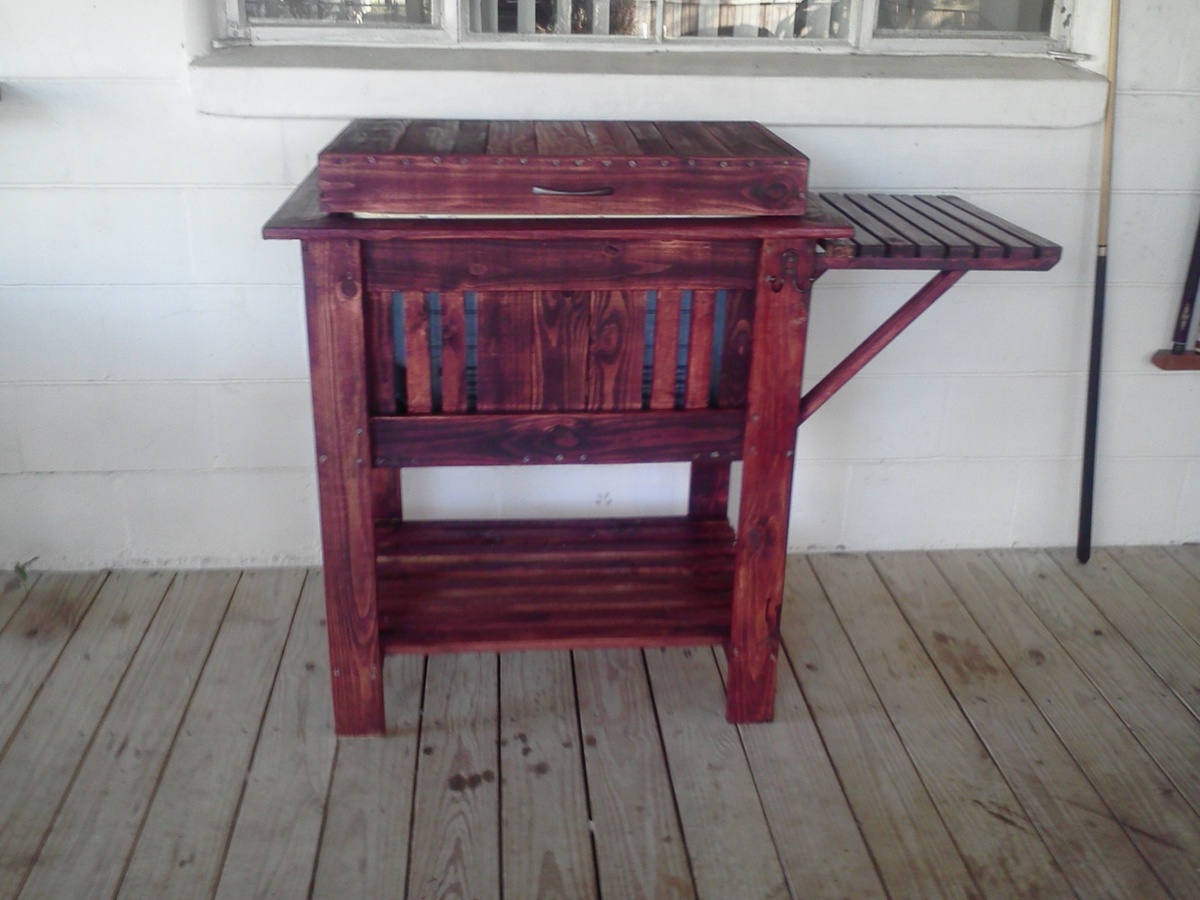
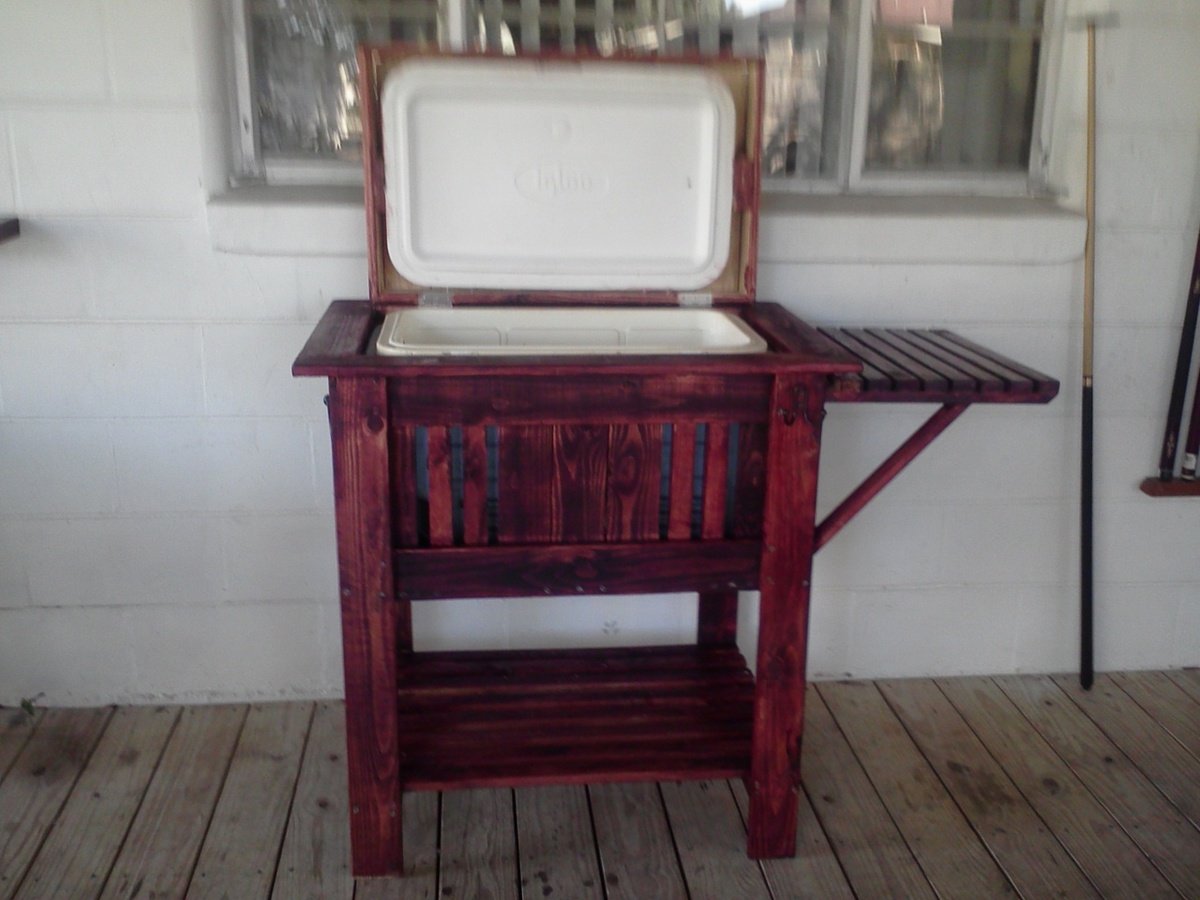
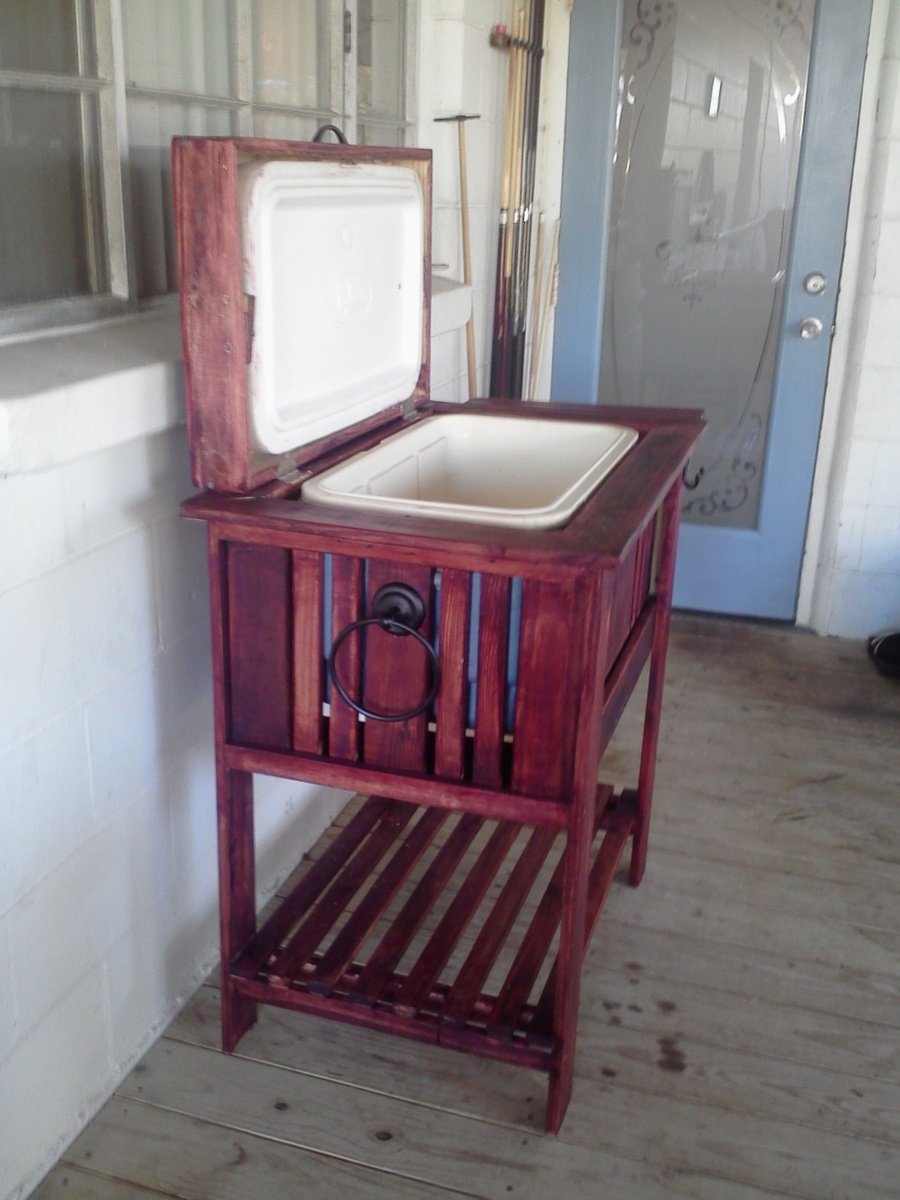
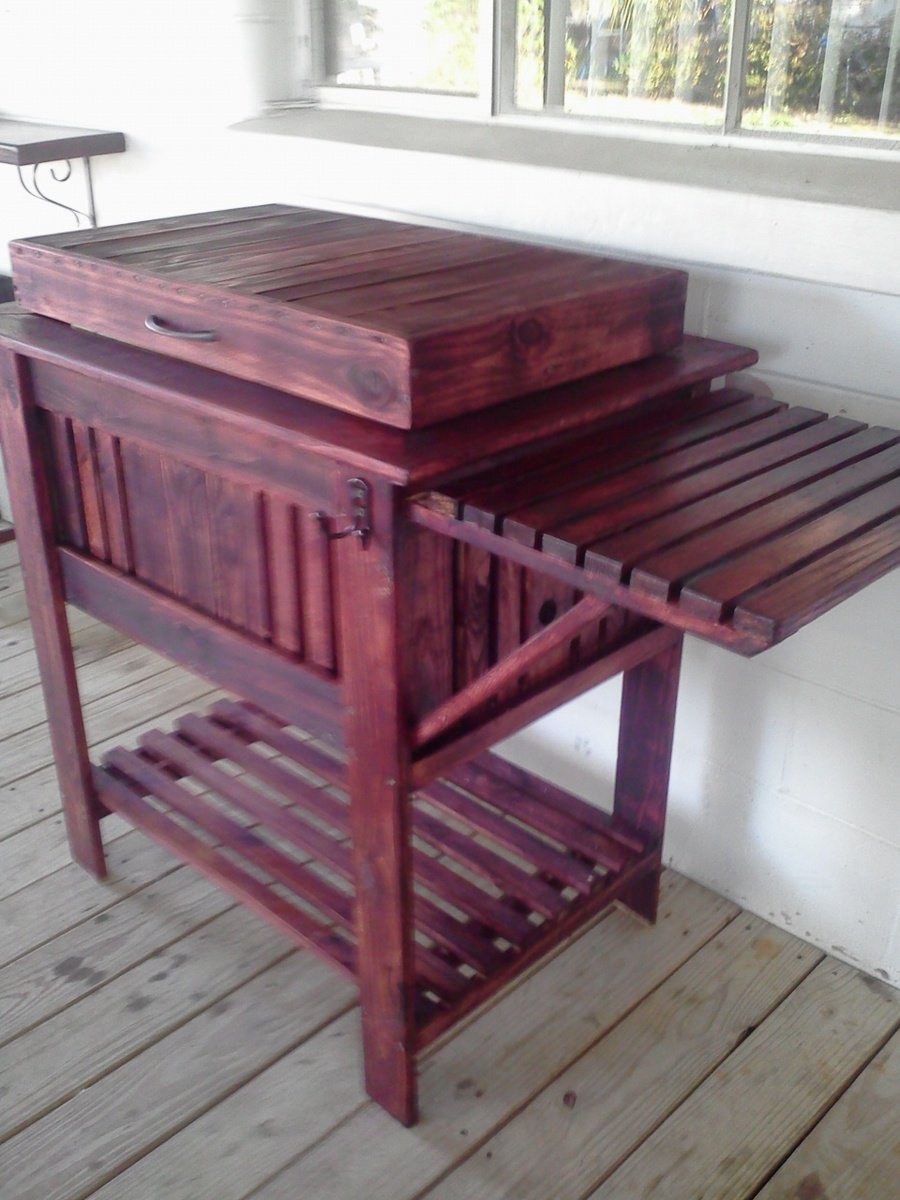
This was my second Ana build. I picked the cooler out of someone trash. (the wheels had broke off) Thank you brick house!!! I been wanting to do this plan for a while now, I'm just too cheap to buy the cooler.
The cooler stand plans were nice to have. I had lots of scrap from my hubby but I did have to buy two 1x3x8 to finish the lid. I had trouble with the lid lining up with the cooler. With the hinged attached to the lid, I lined up the cooler, mark it out and re-screwed it to the cooler . Easy. Next time I'll go to Habitat for Humanity or the like for the hardware. I will also remember to finish the wood before assembly. I didn't put the drain in the stand. After inspection of the cooler if won't drain completely if I did, so let it off.
It took me almost a week to finish between mom duties, volunteer work, and church but she's done.
Thanks Ana for the plans. I couldn't have done it without them.
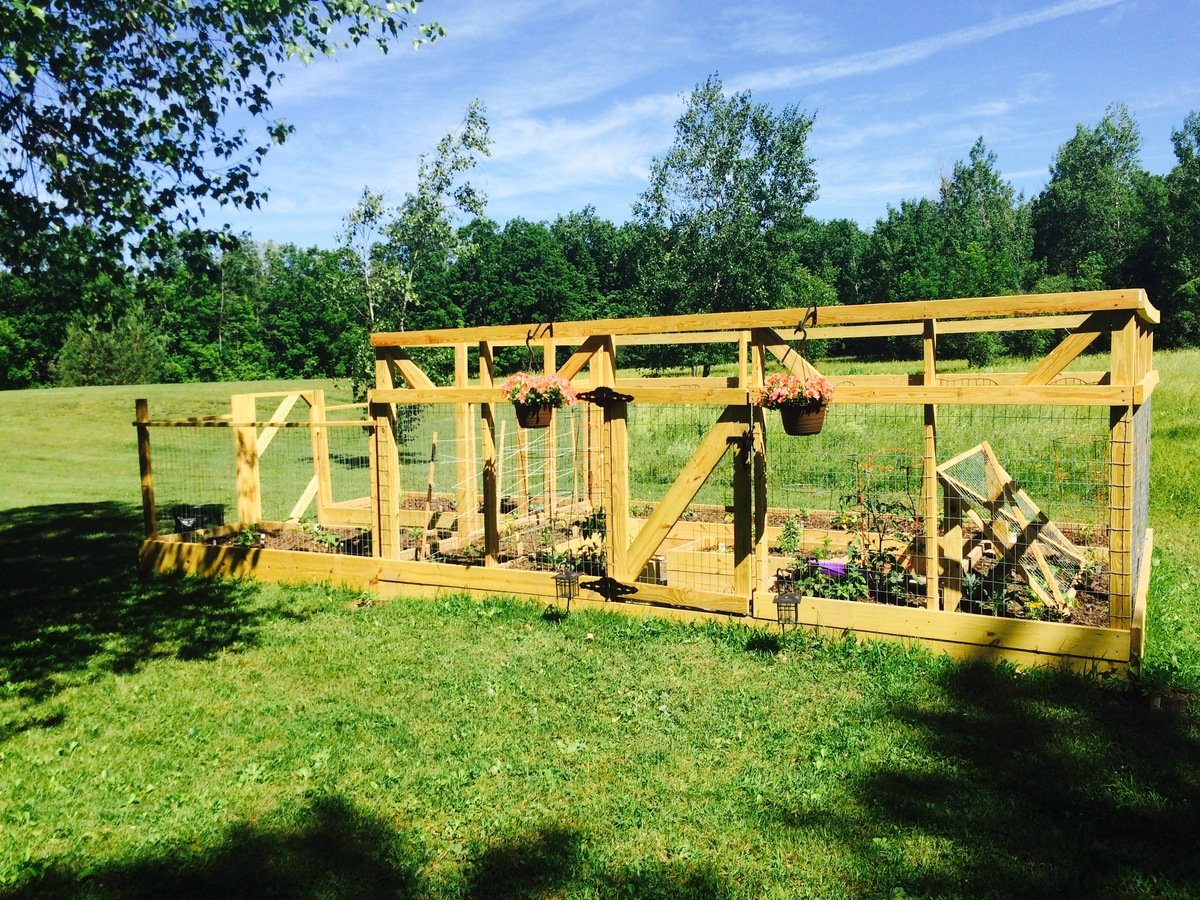
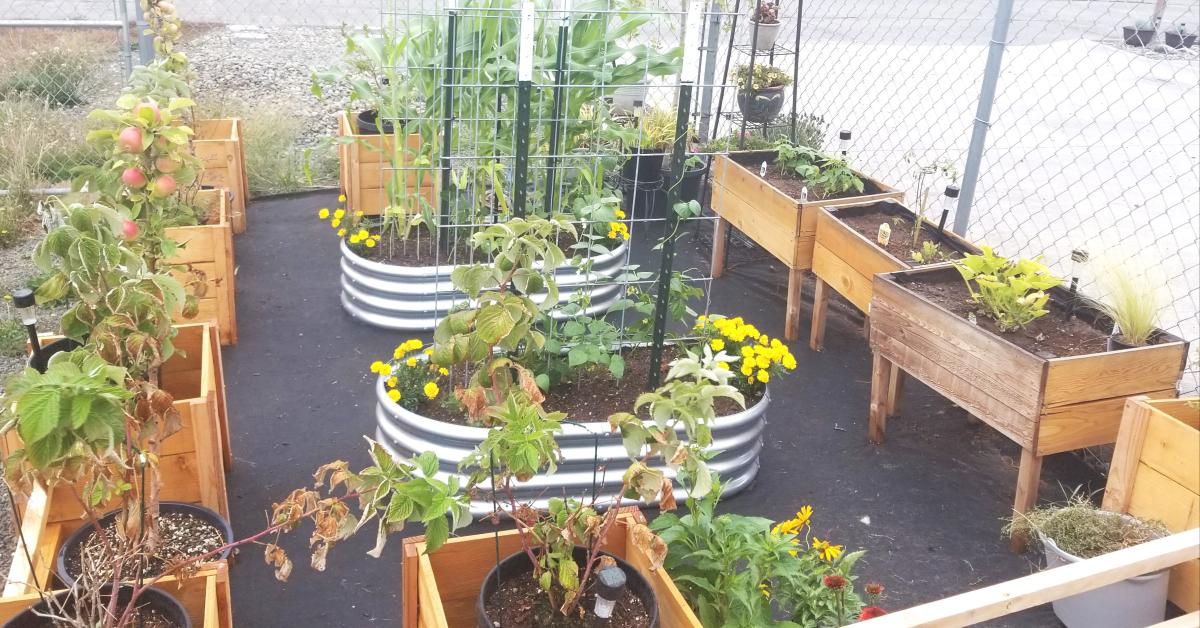
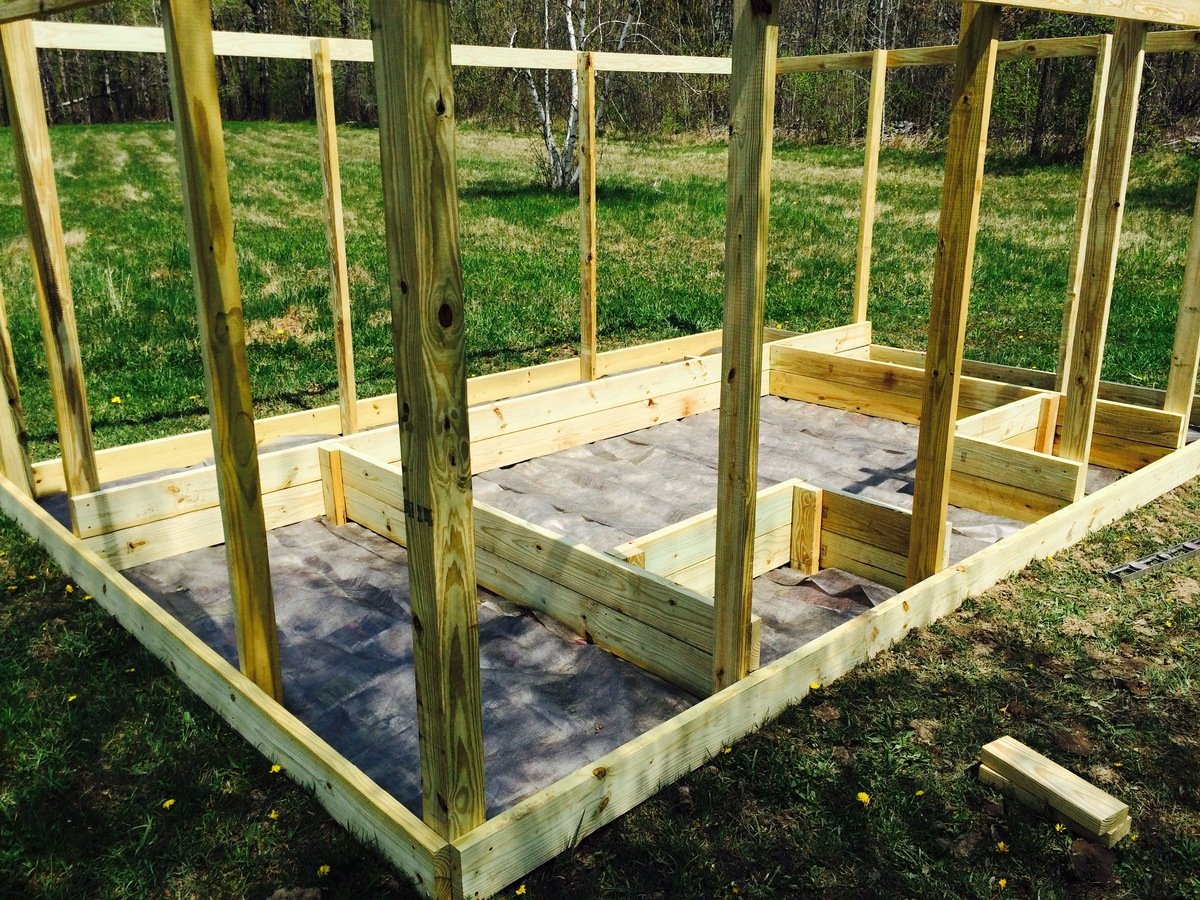
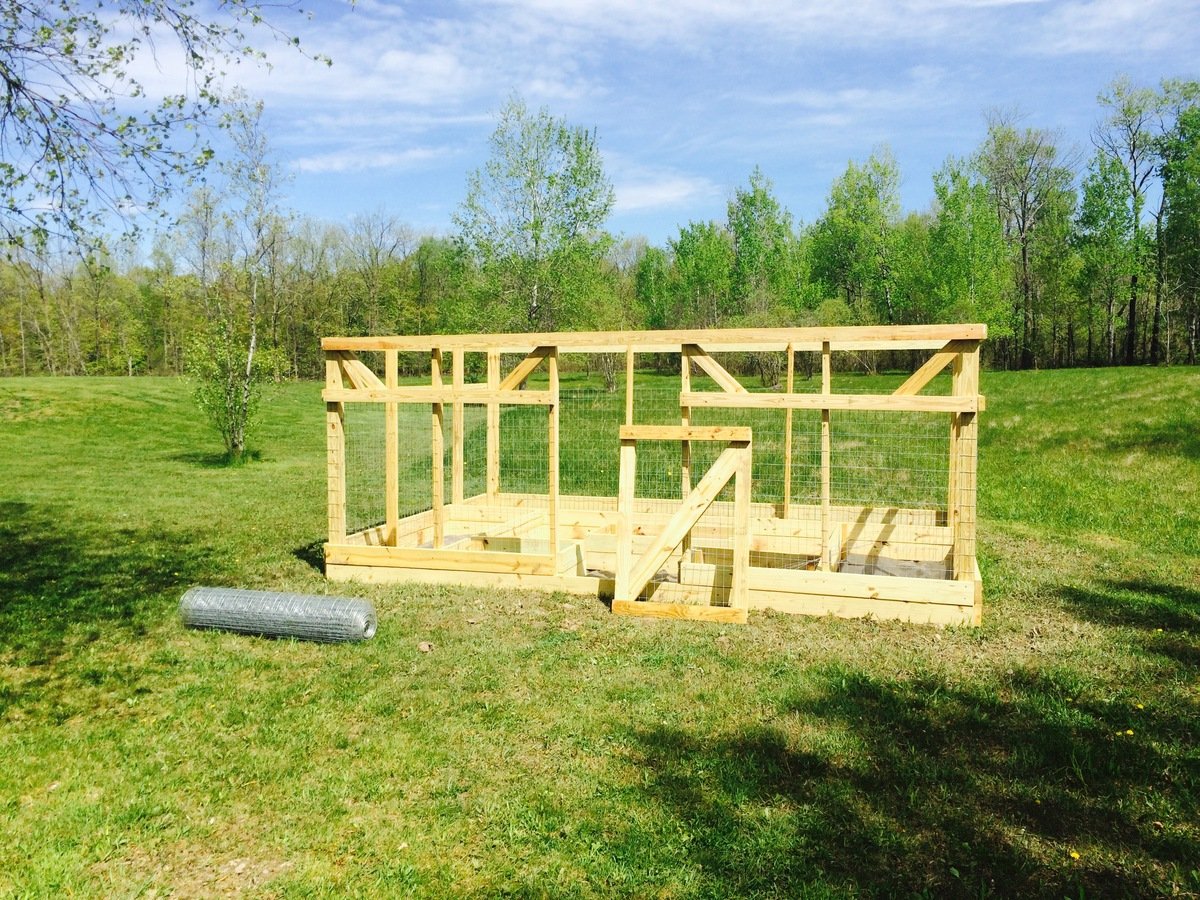
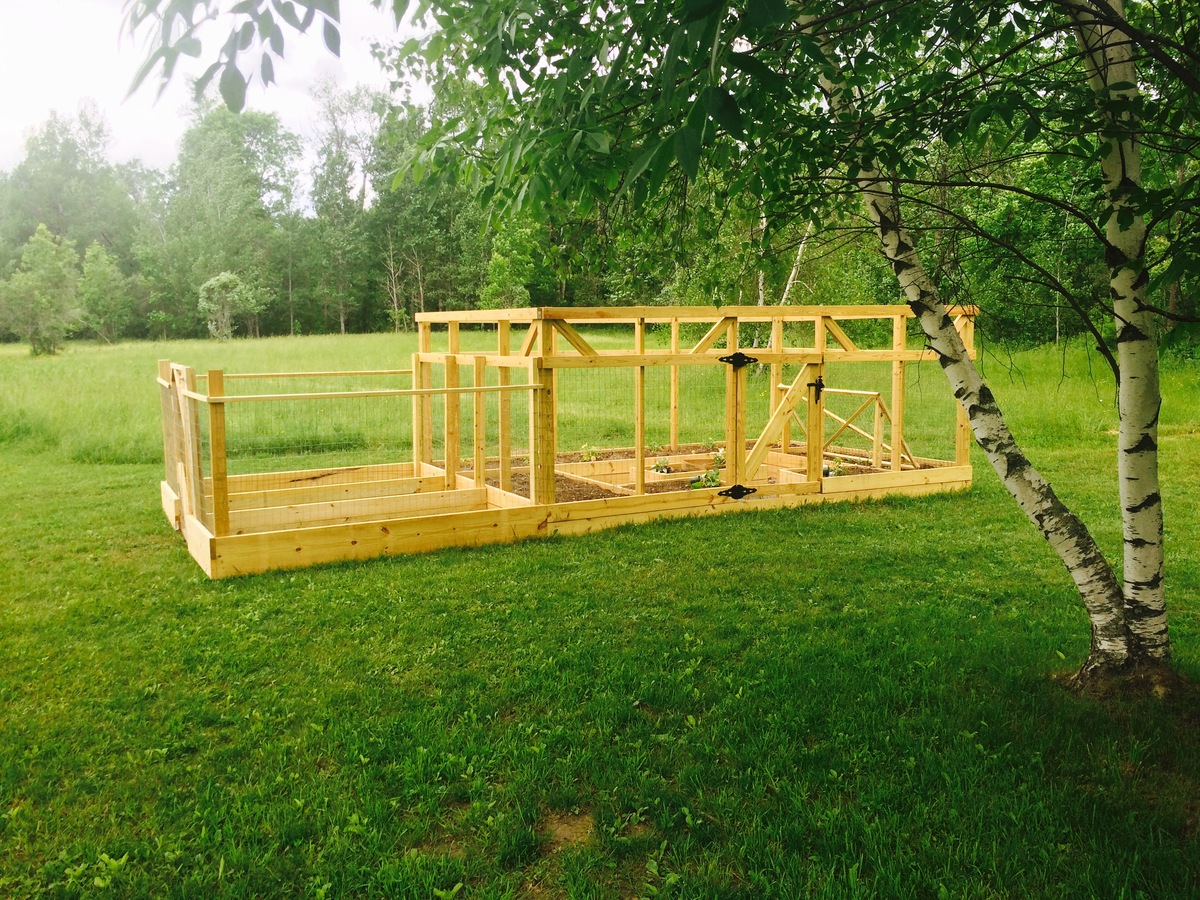
With lots of deer, rabbits, coyotes, and the occasional bear, garden enclosures are a must in our area (although I am not sure they will really help if a bear decides they're interested in our food). As our old garden enclosure was falling down due to the high winds and a quite a few winters in upstate New York, my mom found a horseshoe shaped garden with rasied beds that she loved. So, after searching around for a good plan, I found Ana White's collaboration with Home Depot for this enclosure.
While the original plan was far too small for our needs, I was able to expand the length of the enclosure creating enough room to add two small beds on either side of the door and a center bed, which is perfect for herbs. The build was not difficult as I was able to do most of it by myself (with the exception of contructing the frame and attaching the door) and I am sure this would go much quicker with an extra set of hands. As I did not have a large chunk of time to devote to this project, it did take me quite some time stretched over a few weeks. Nonetheless, I am very happy with how it turned out.
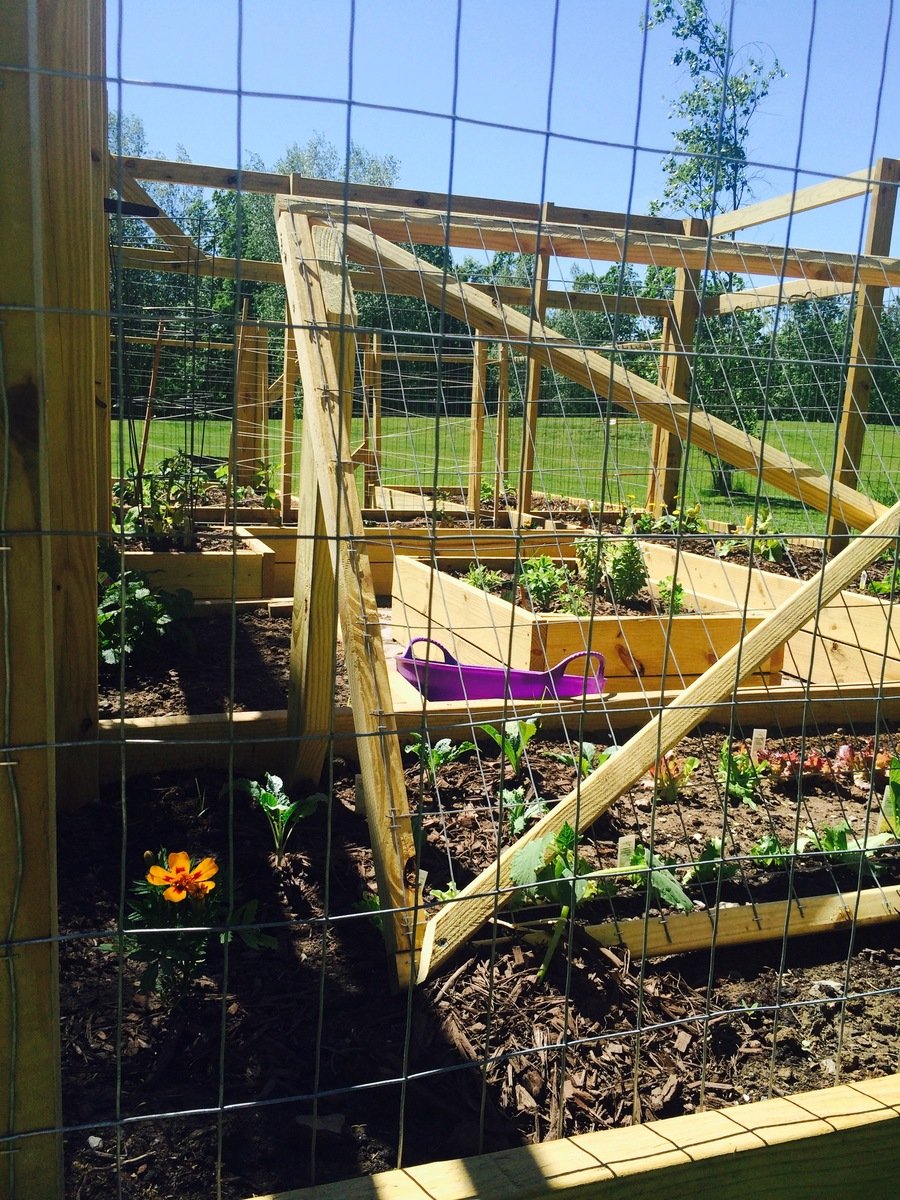
After construction, my family got a little garden happy and decided we wanted to plant even more vegetables than we had originally planned. So, we created a much simpler but nonetheless less pest-proof enclosure for two more beds to the left of our original project (shown in the photos).
Although this was an expensive project (exact price is unkown), it is quite sturdy and we expect it to last a long time and provide lots of vegetables. We added some hanging baskets for decoration and decided next year we will add some morning glories around the outside corners for some extra shade during the afternoons. Some minor alterations also included a latch that allows us to open and close the door from both sides, we actually picked up a gate latch kit for this part of the project, and using welded wire fencing instead of chicken wire. While the welded wire added to the cost, it will hold up better to the wind and snow and is still protective enough to keep out our main predators.
Thanks so much for the plans Ana! In the begining, our neighbors joked we were building a guest house :). I have included some photos from throughout the build as well.

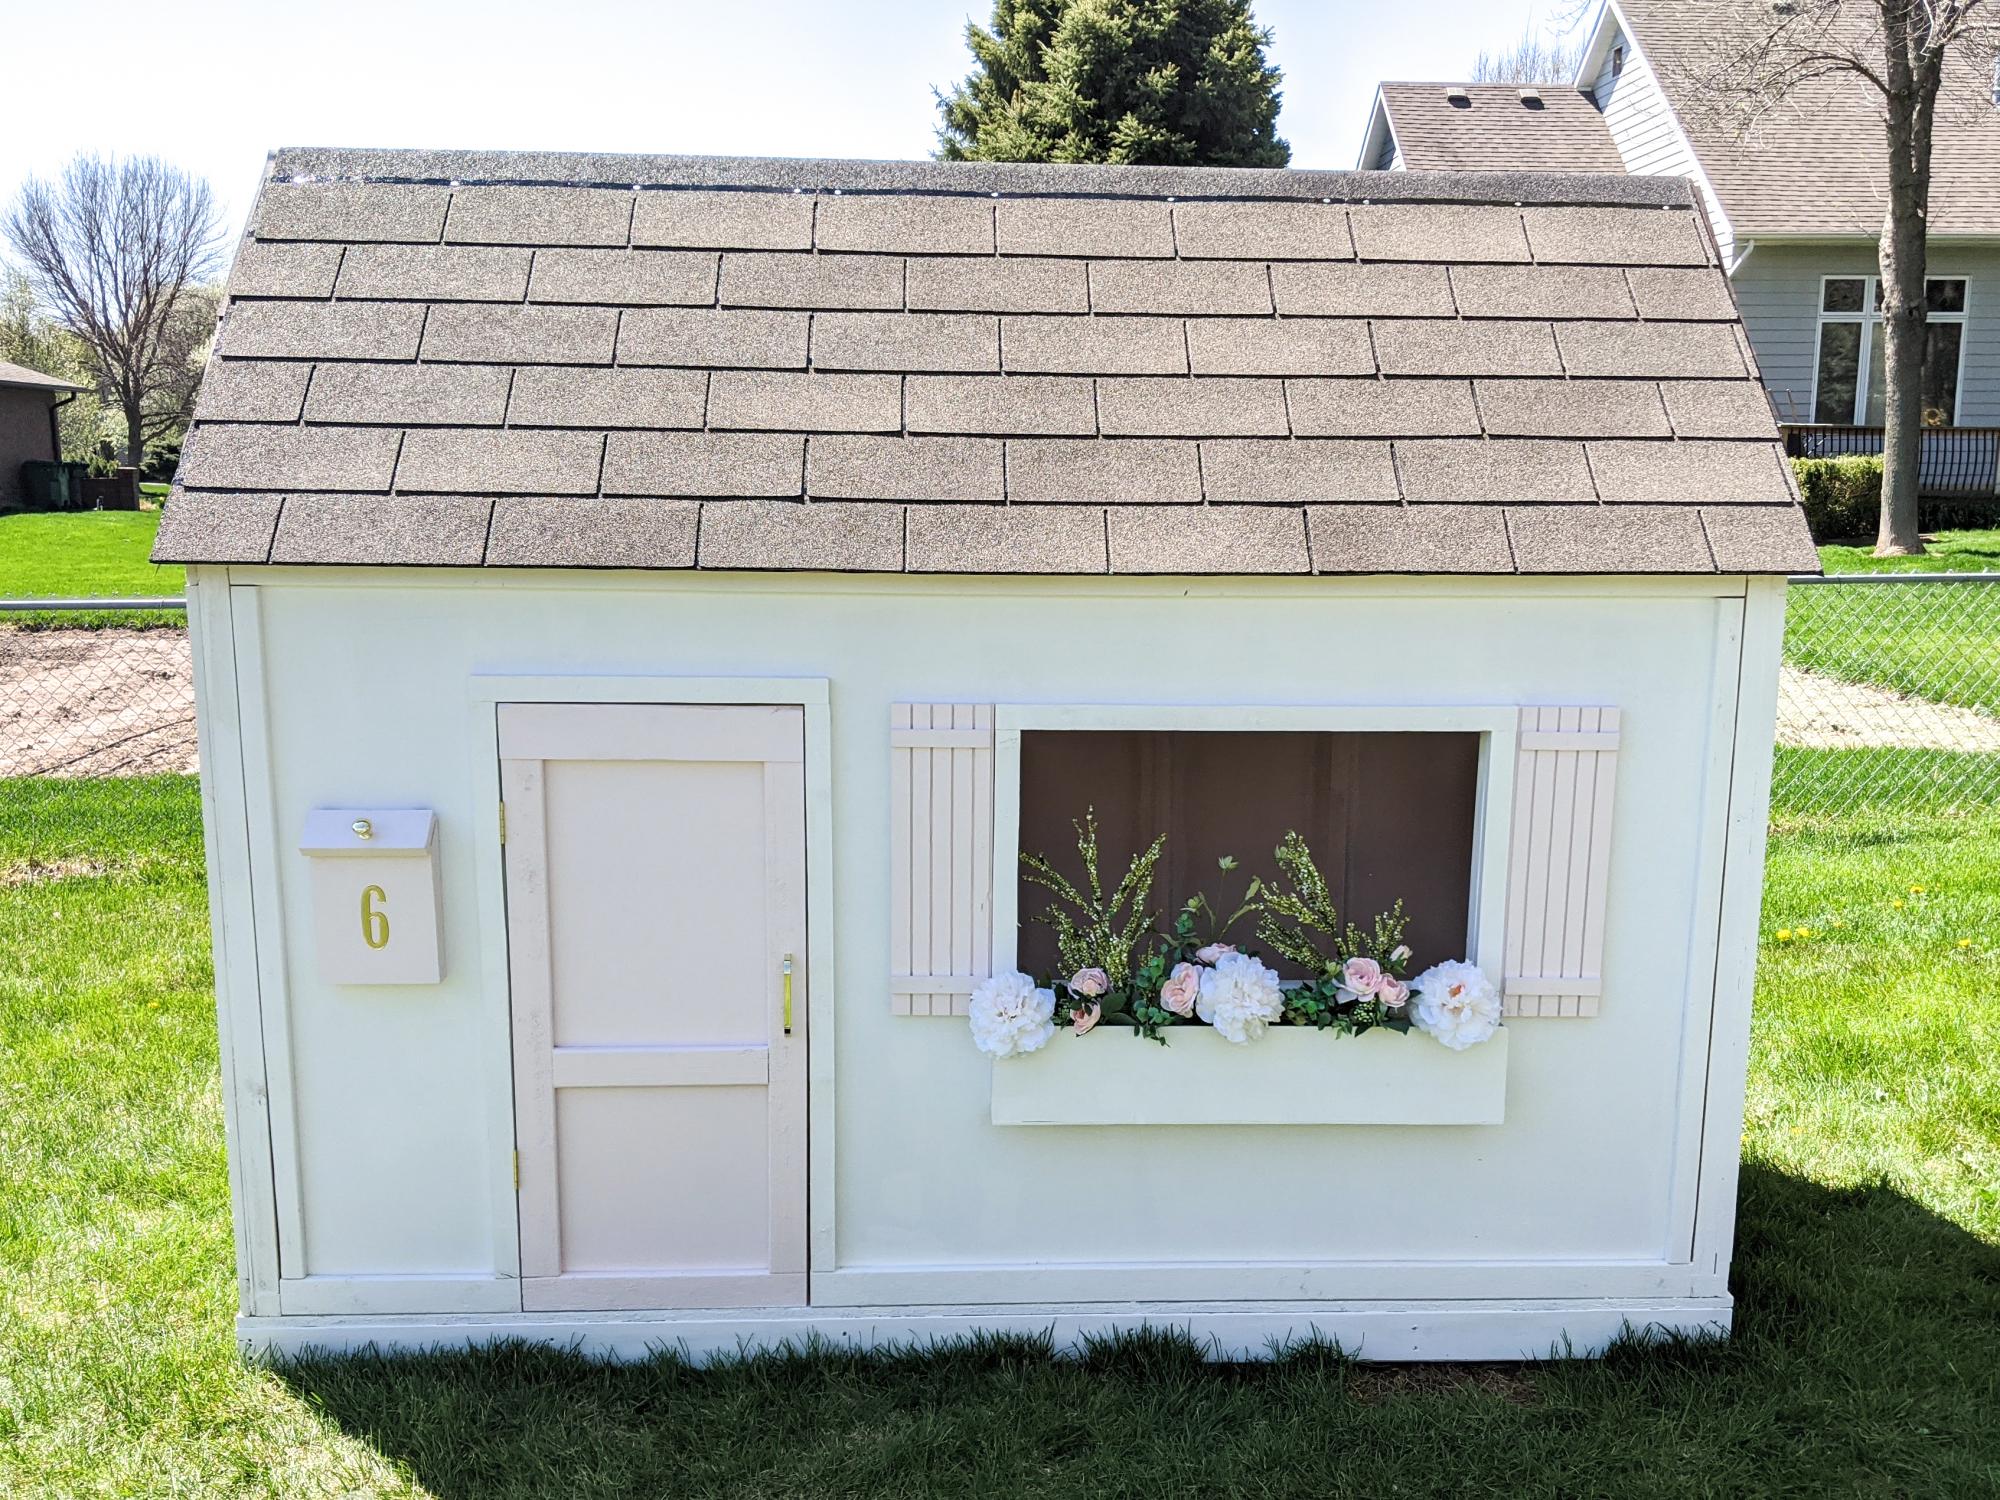
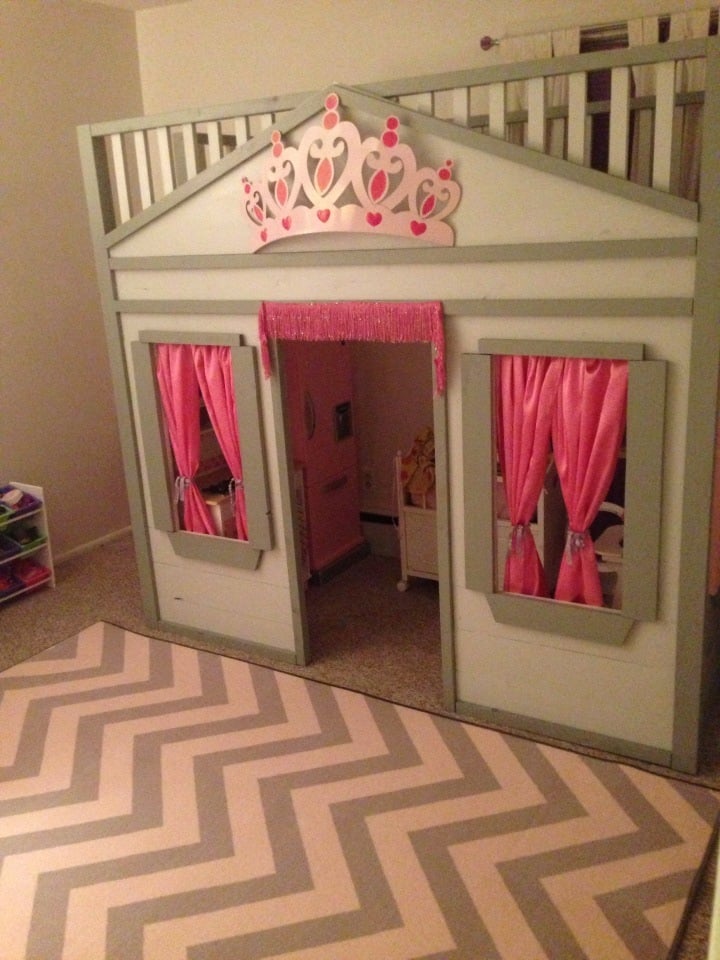
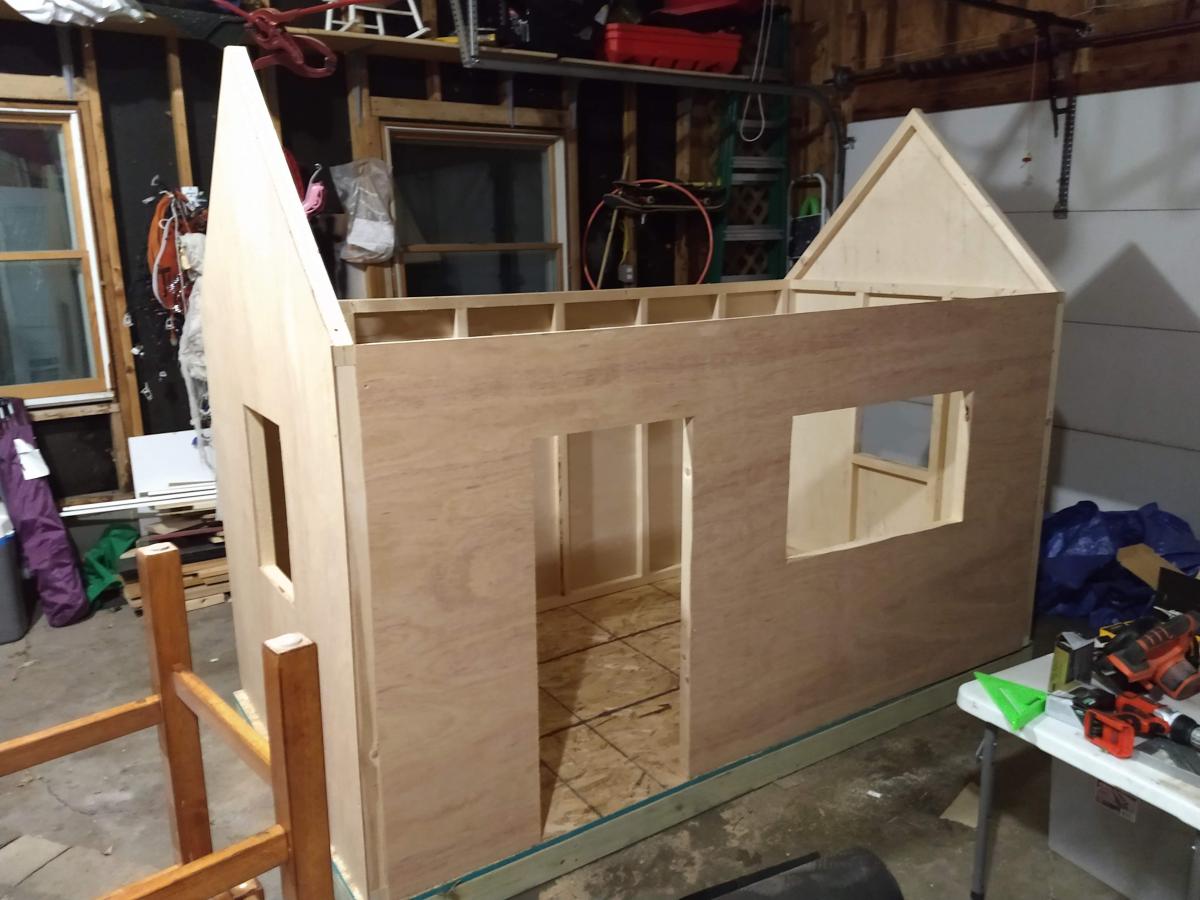
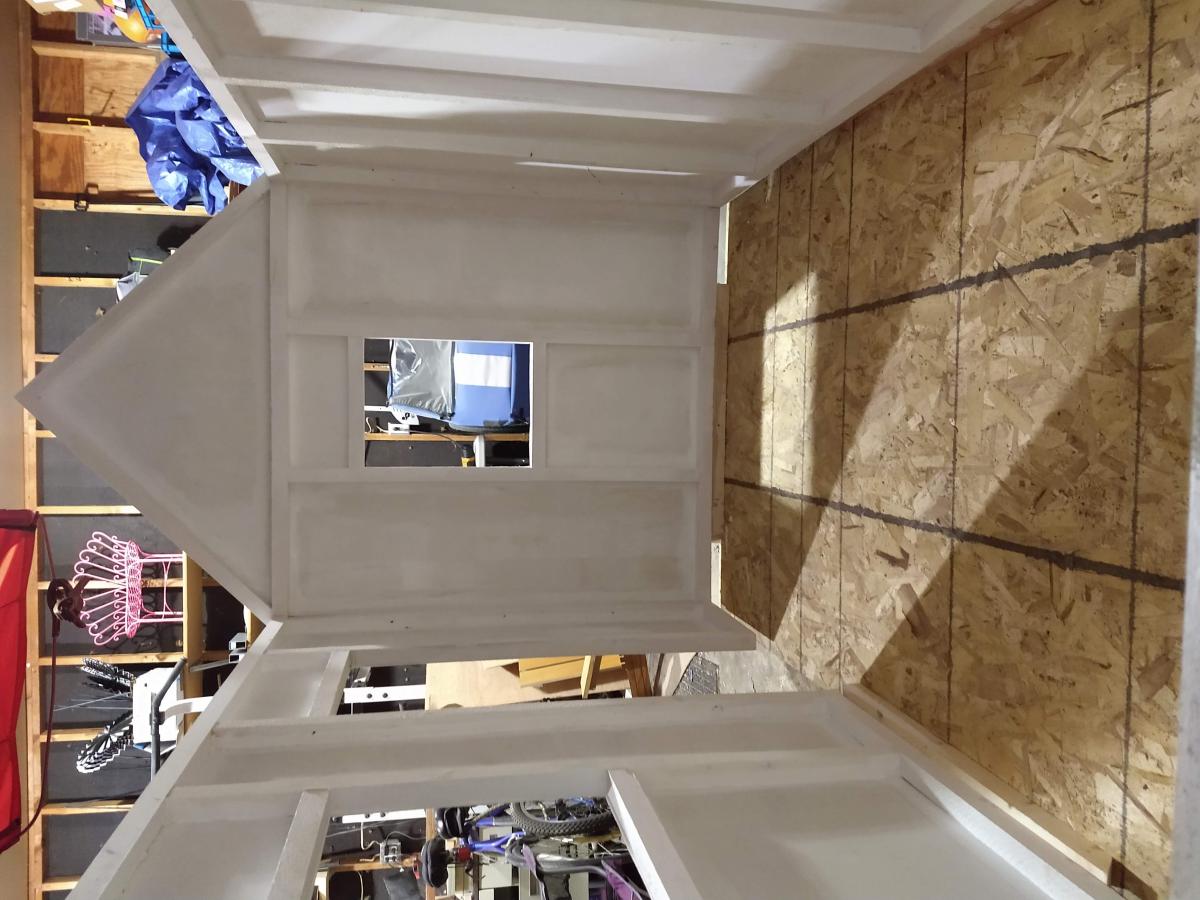
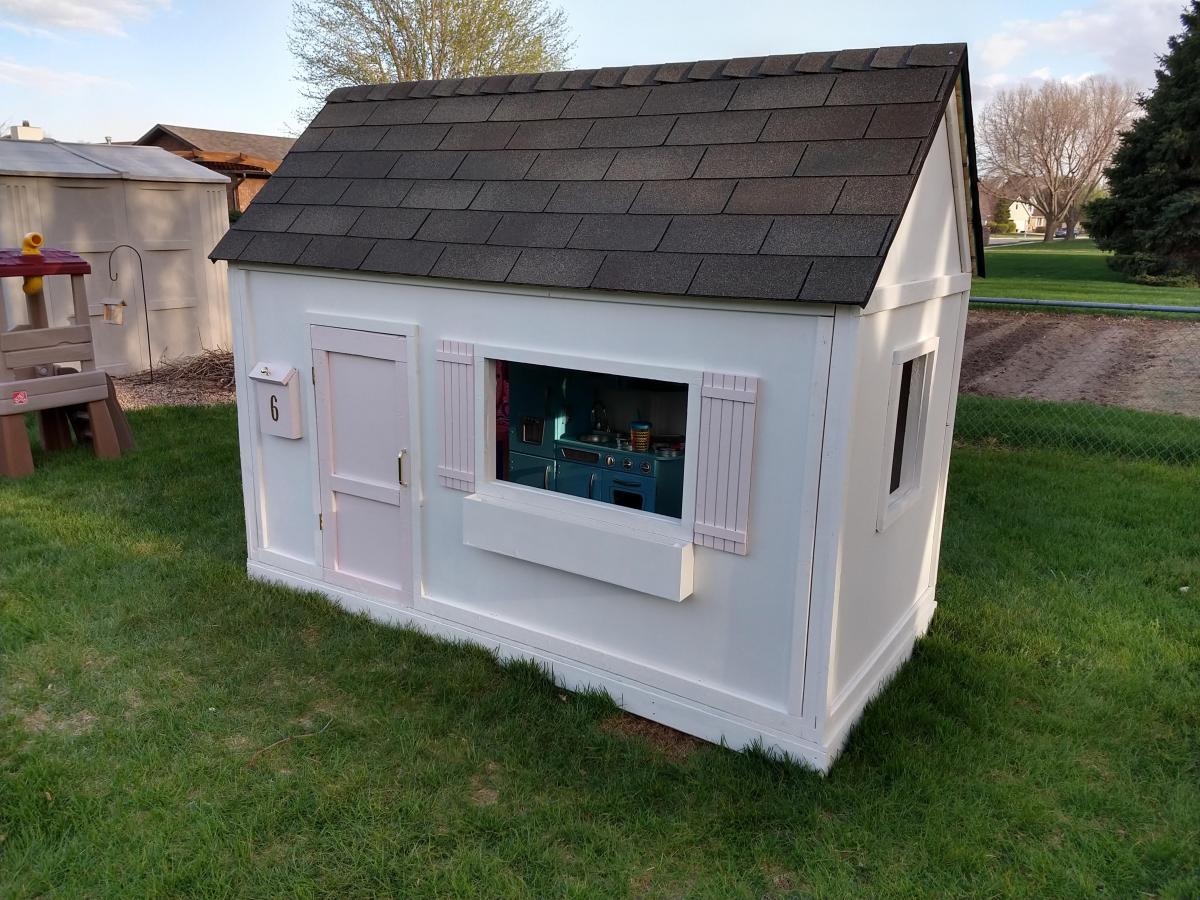
We built this playhouse for our daughter's 6th birthday. She absolutely loves it! We were looking at purchasing one, but they were way out of our budget. Ana saved the day with these plans :).
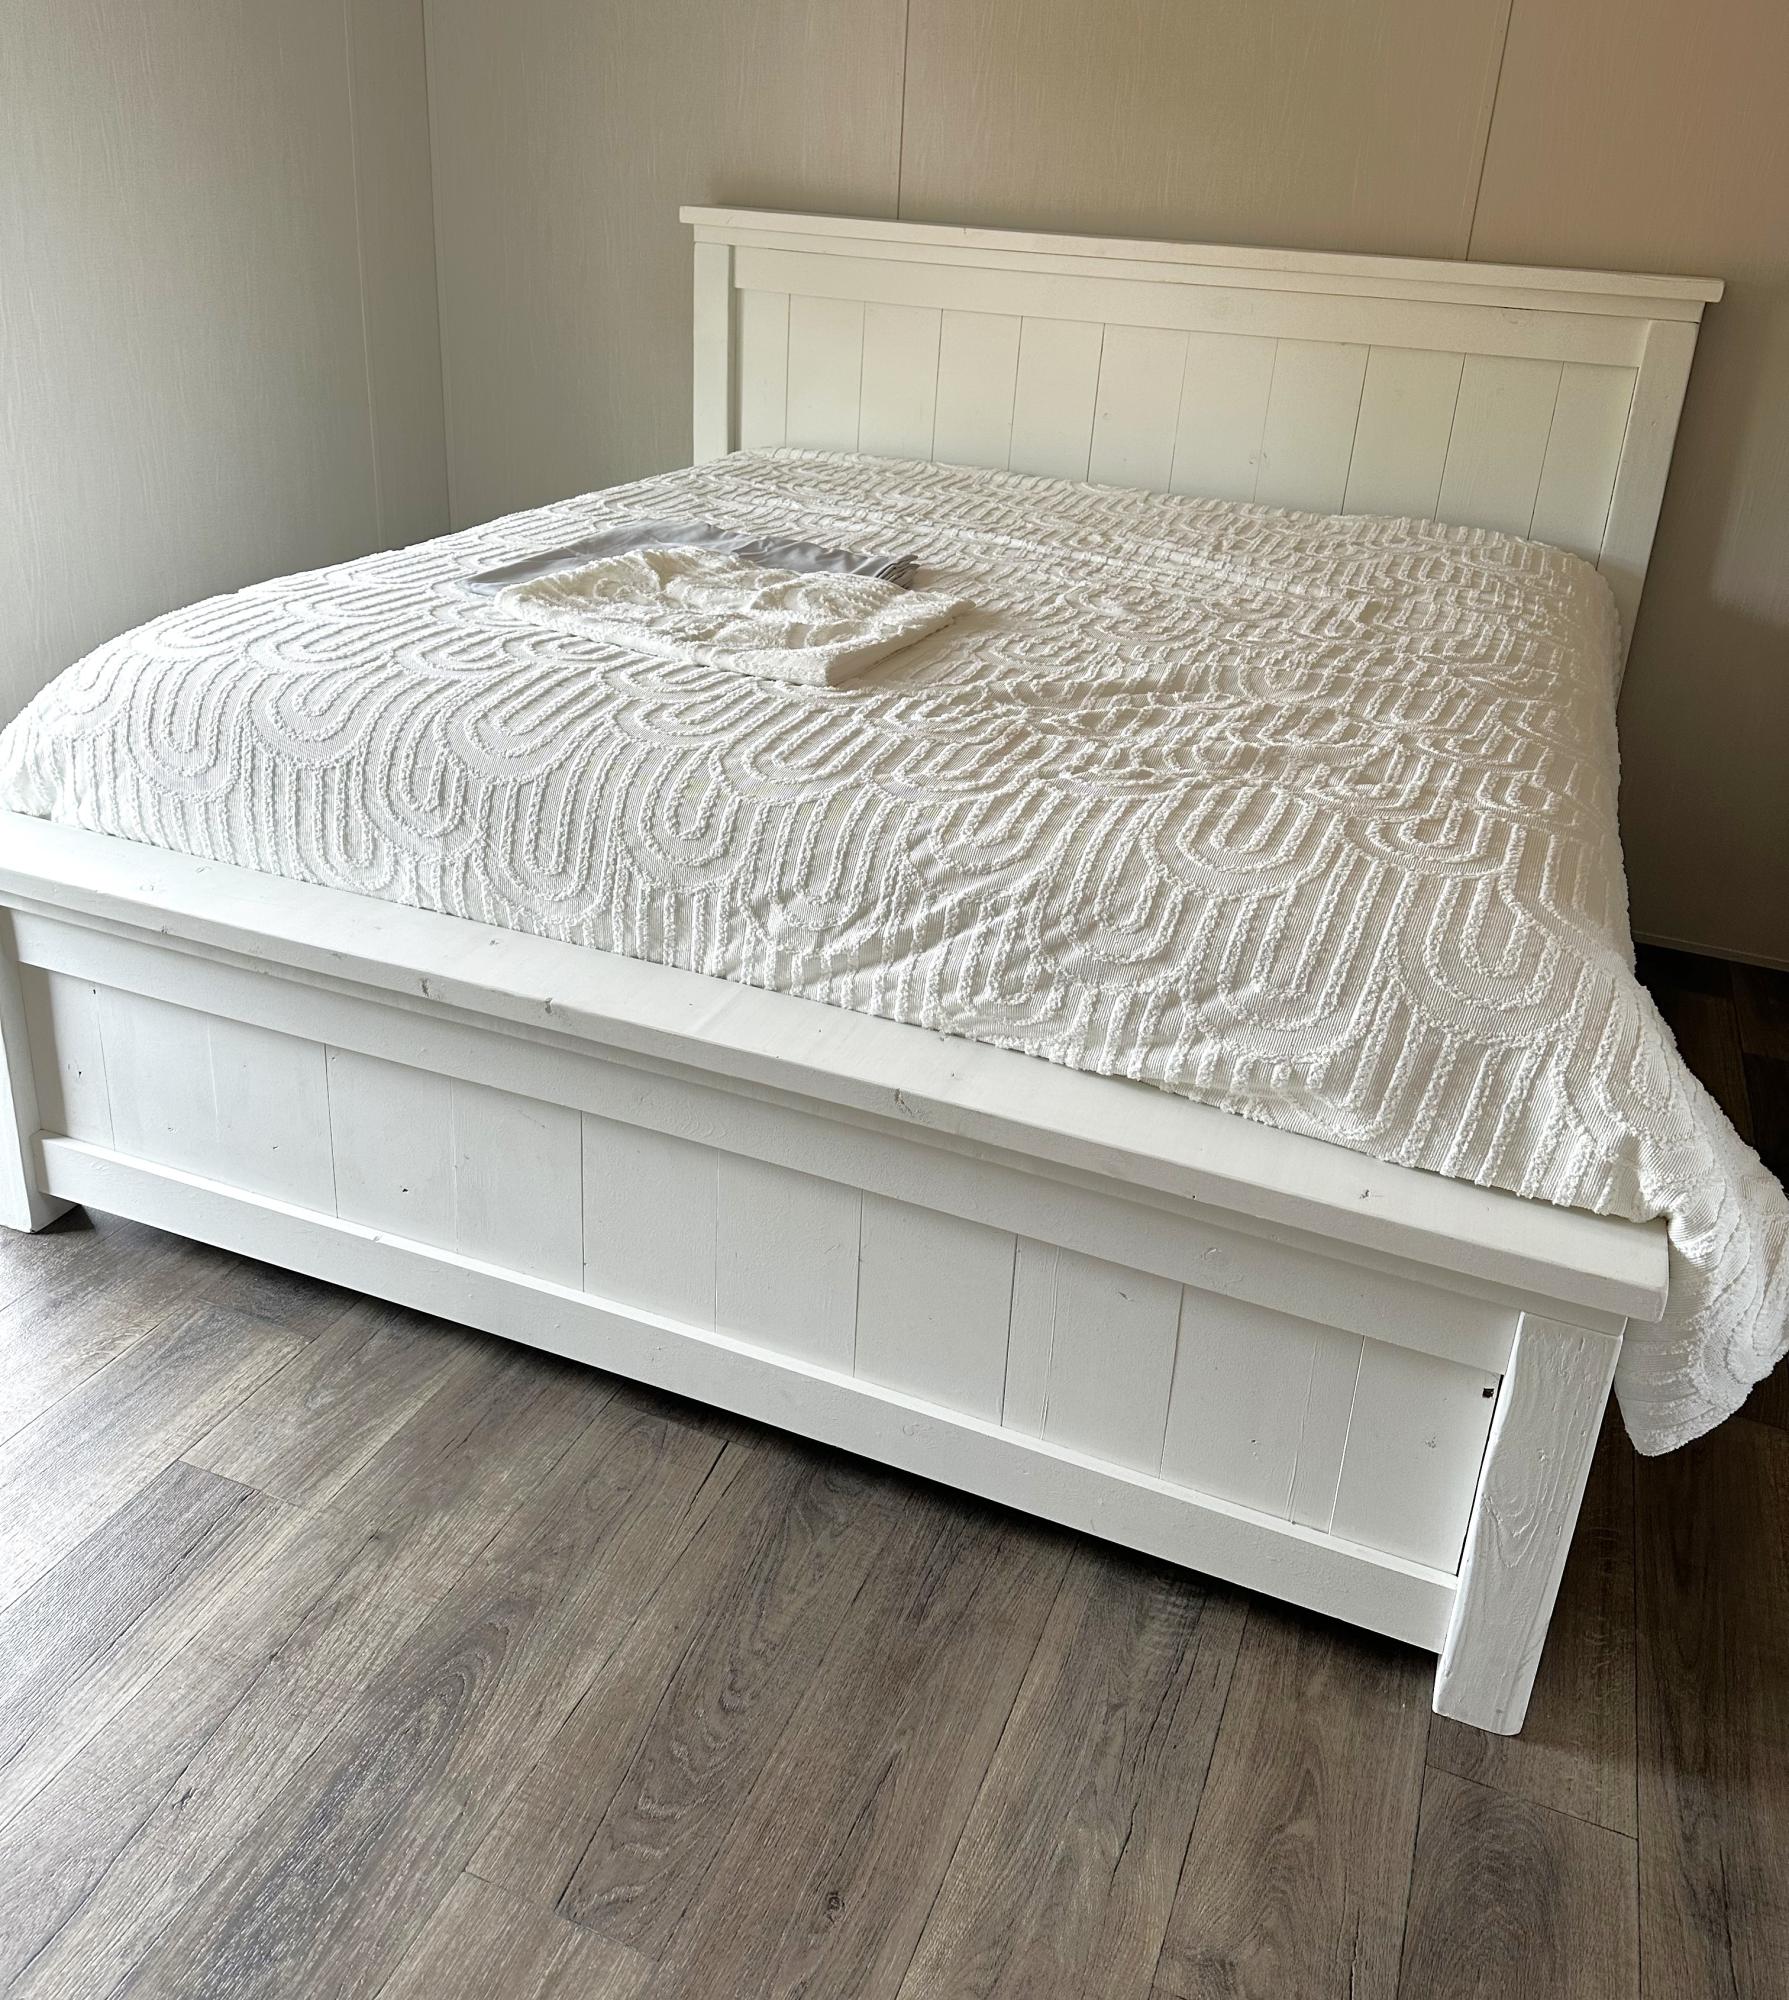
Fancy Farmhouse King Bed
Heather Kay
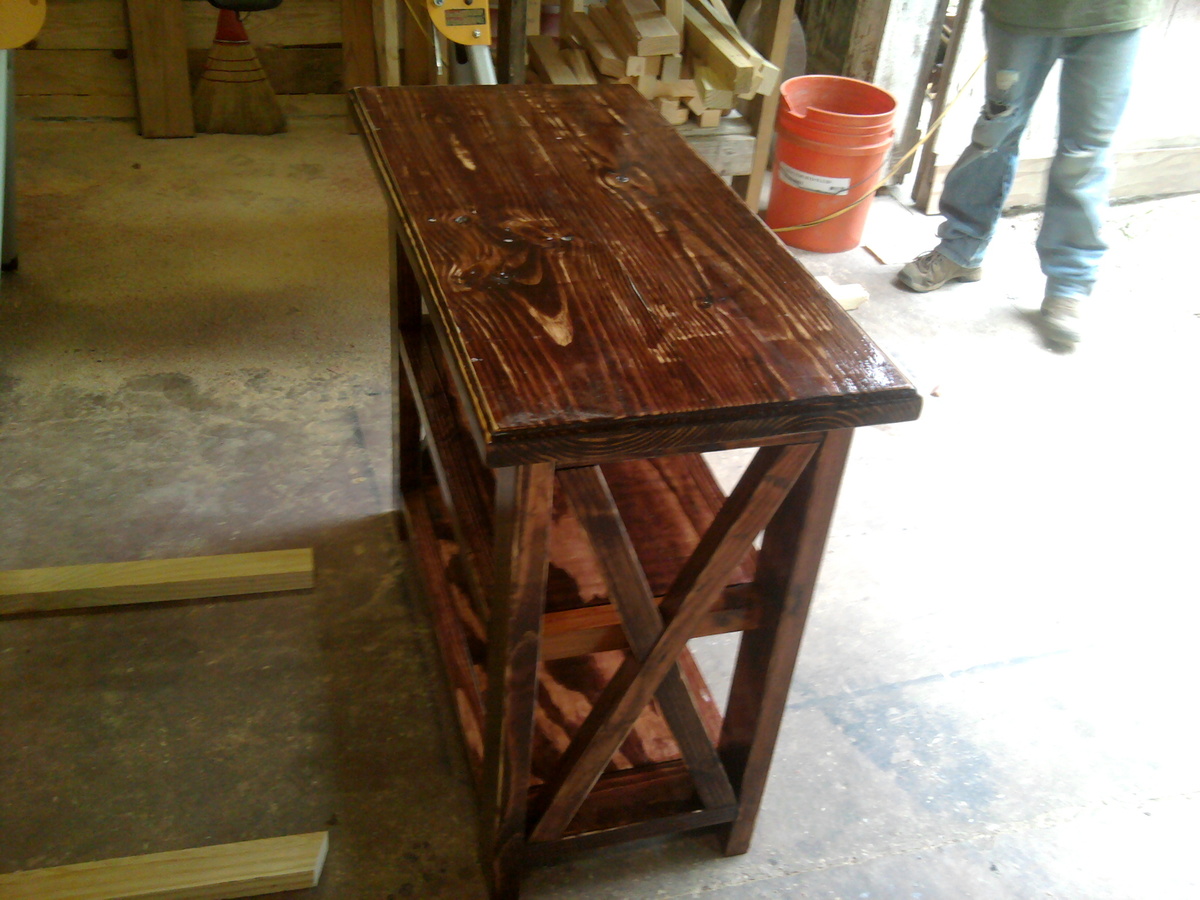
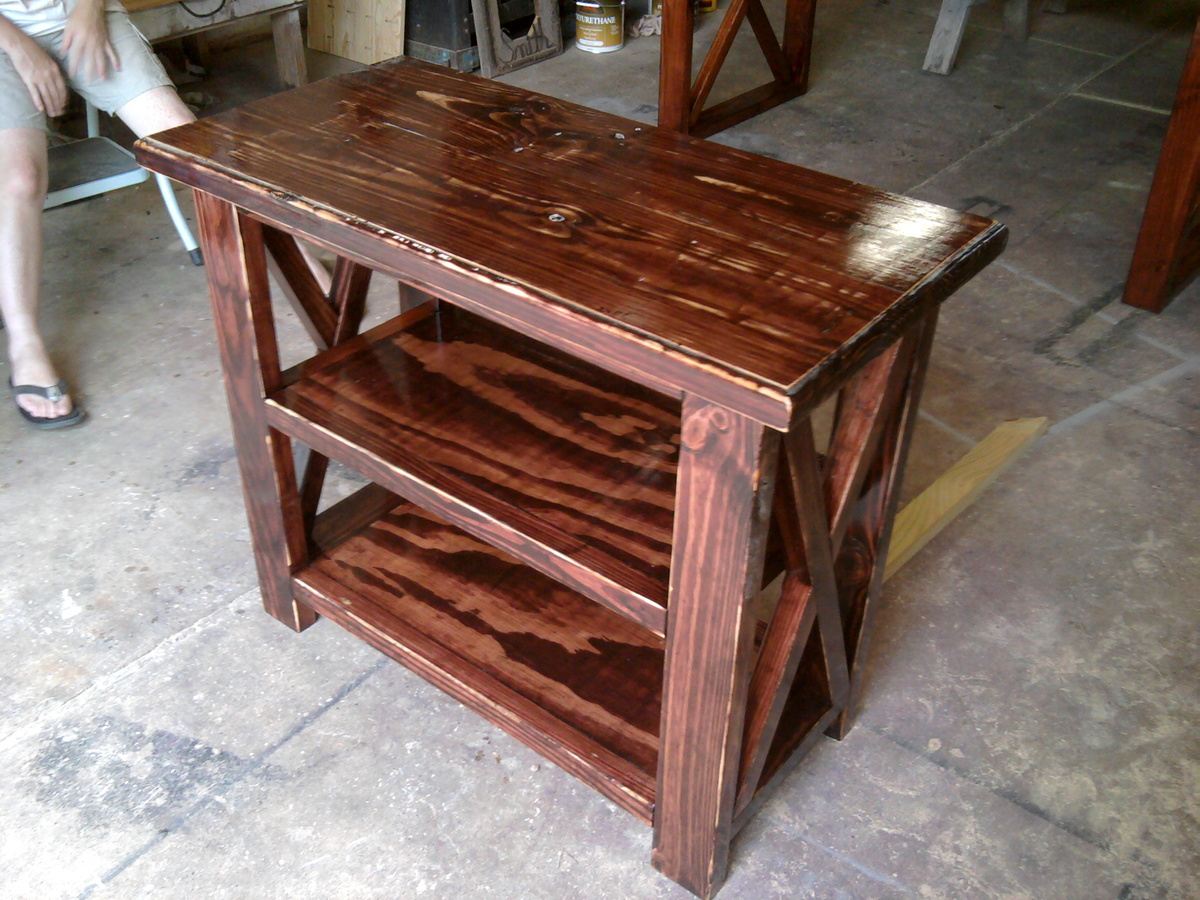
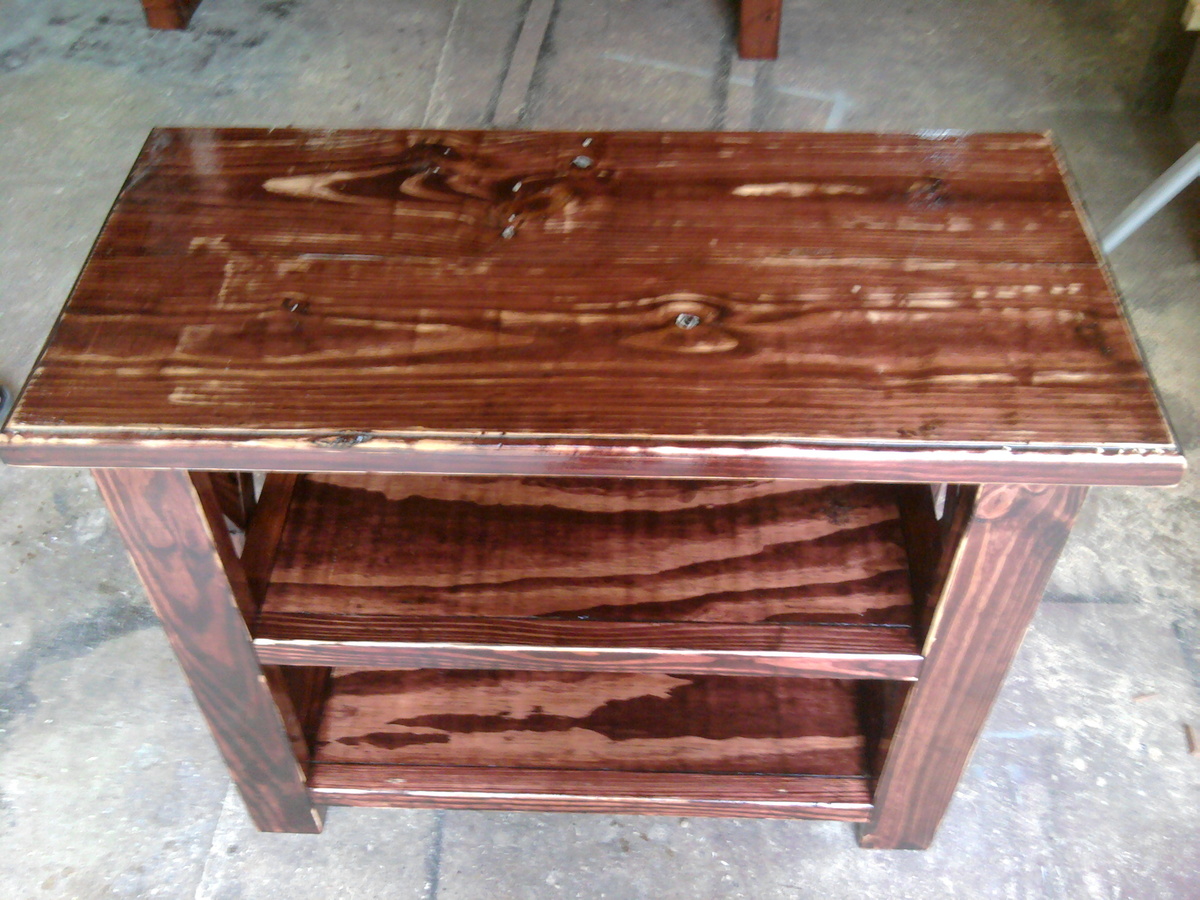
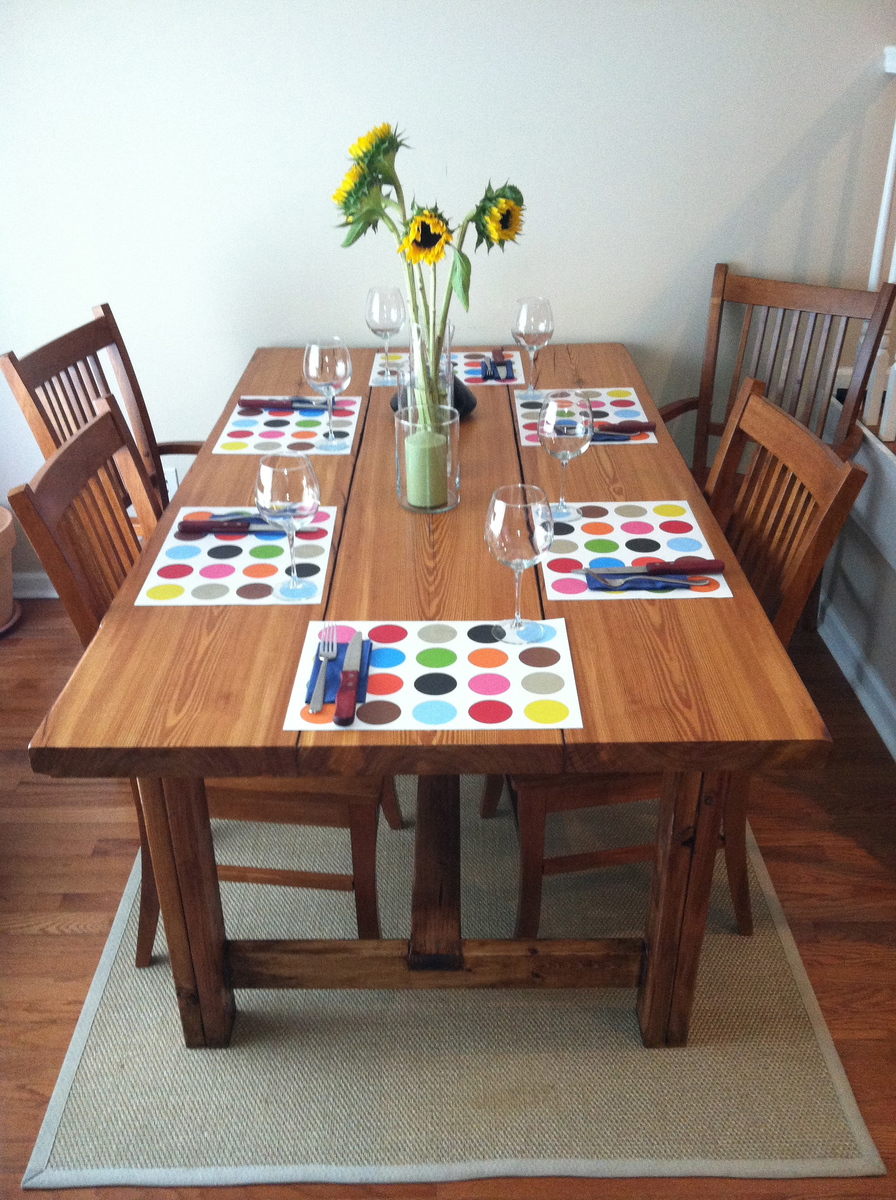
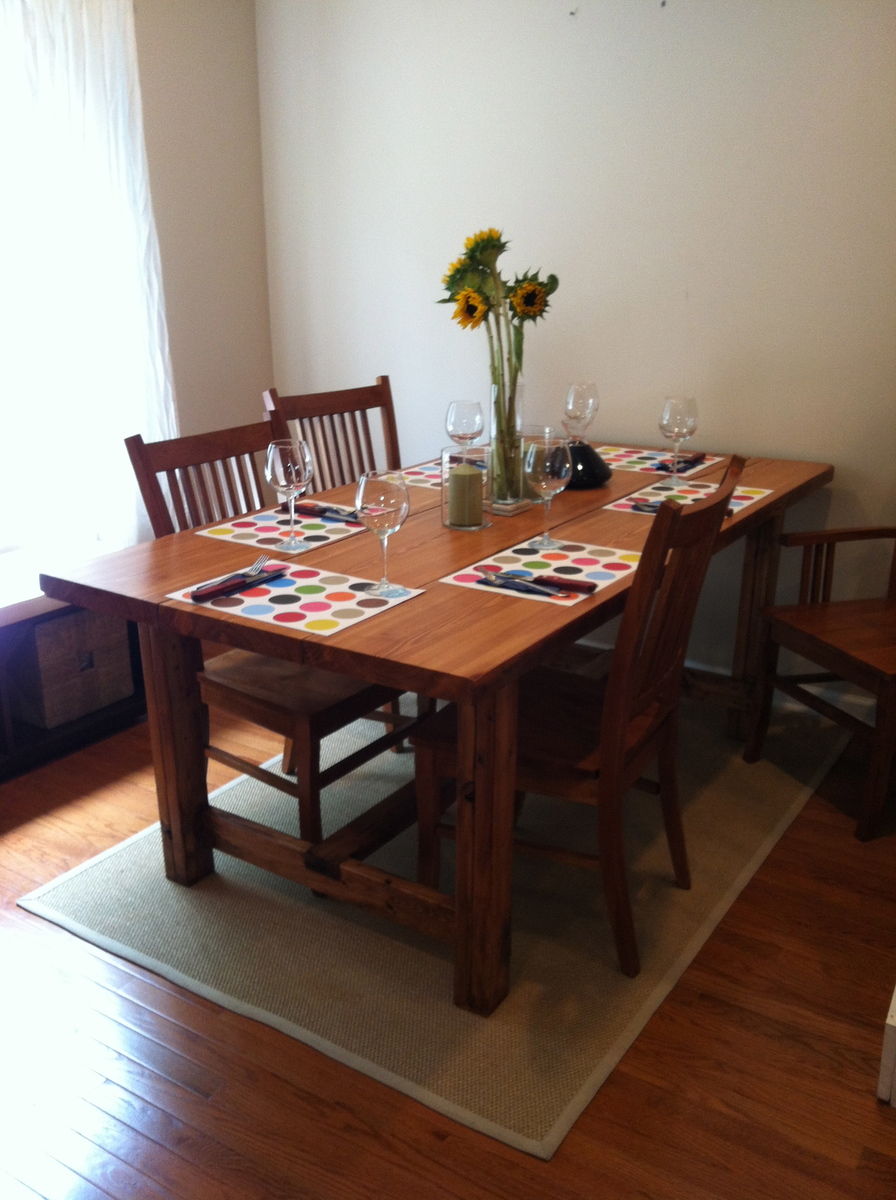
We took the rustic x console table plan and made it half the length and a bit narrower for the unity table at my daughters wedding. It is made of white pine 2x4's, white pine 2x10's for the top and the shelves are 3/4 pine plywood.It is stained minwax red mahogany and finished with 3 coats of ace brand gloss polyurethane. Lydia is using it for the TV in their apartment.Total cost was less than $25 so this was a bargain console.It only took a few hours to build and stain it. Due to the heat in Arkansas the finish was a chore . It dried too fast and had runs so I had to sand alot. It looked kinda rustic after I sanded so I just put 2 more coats on and eveyone loves it.
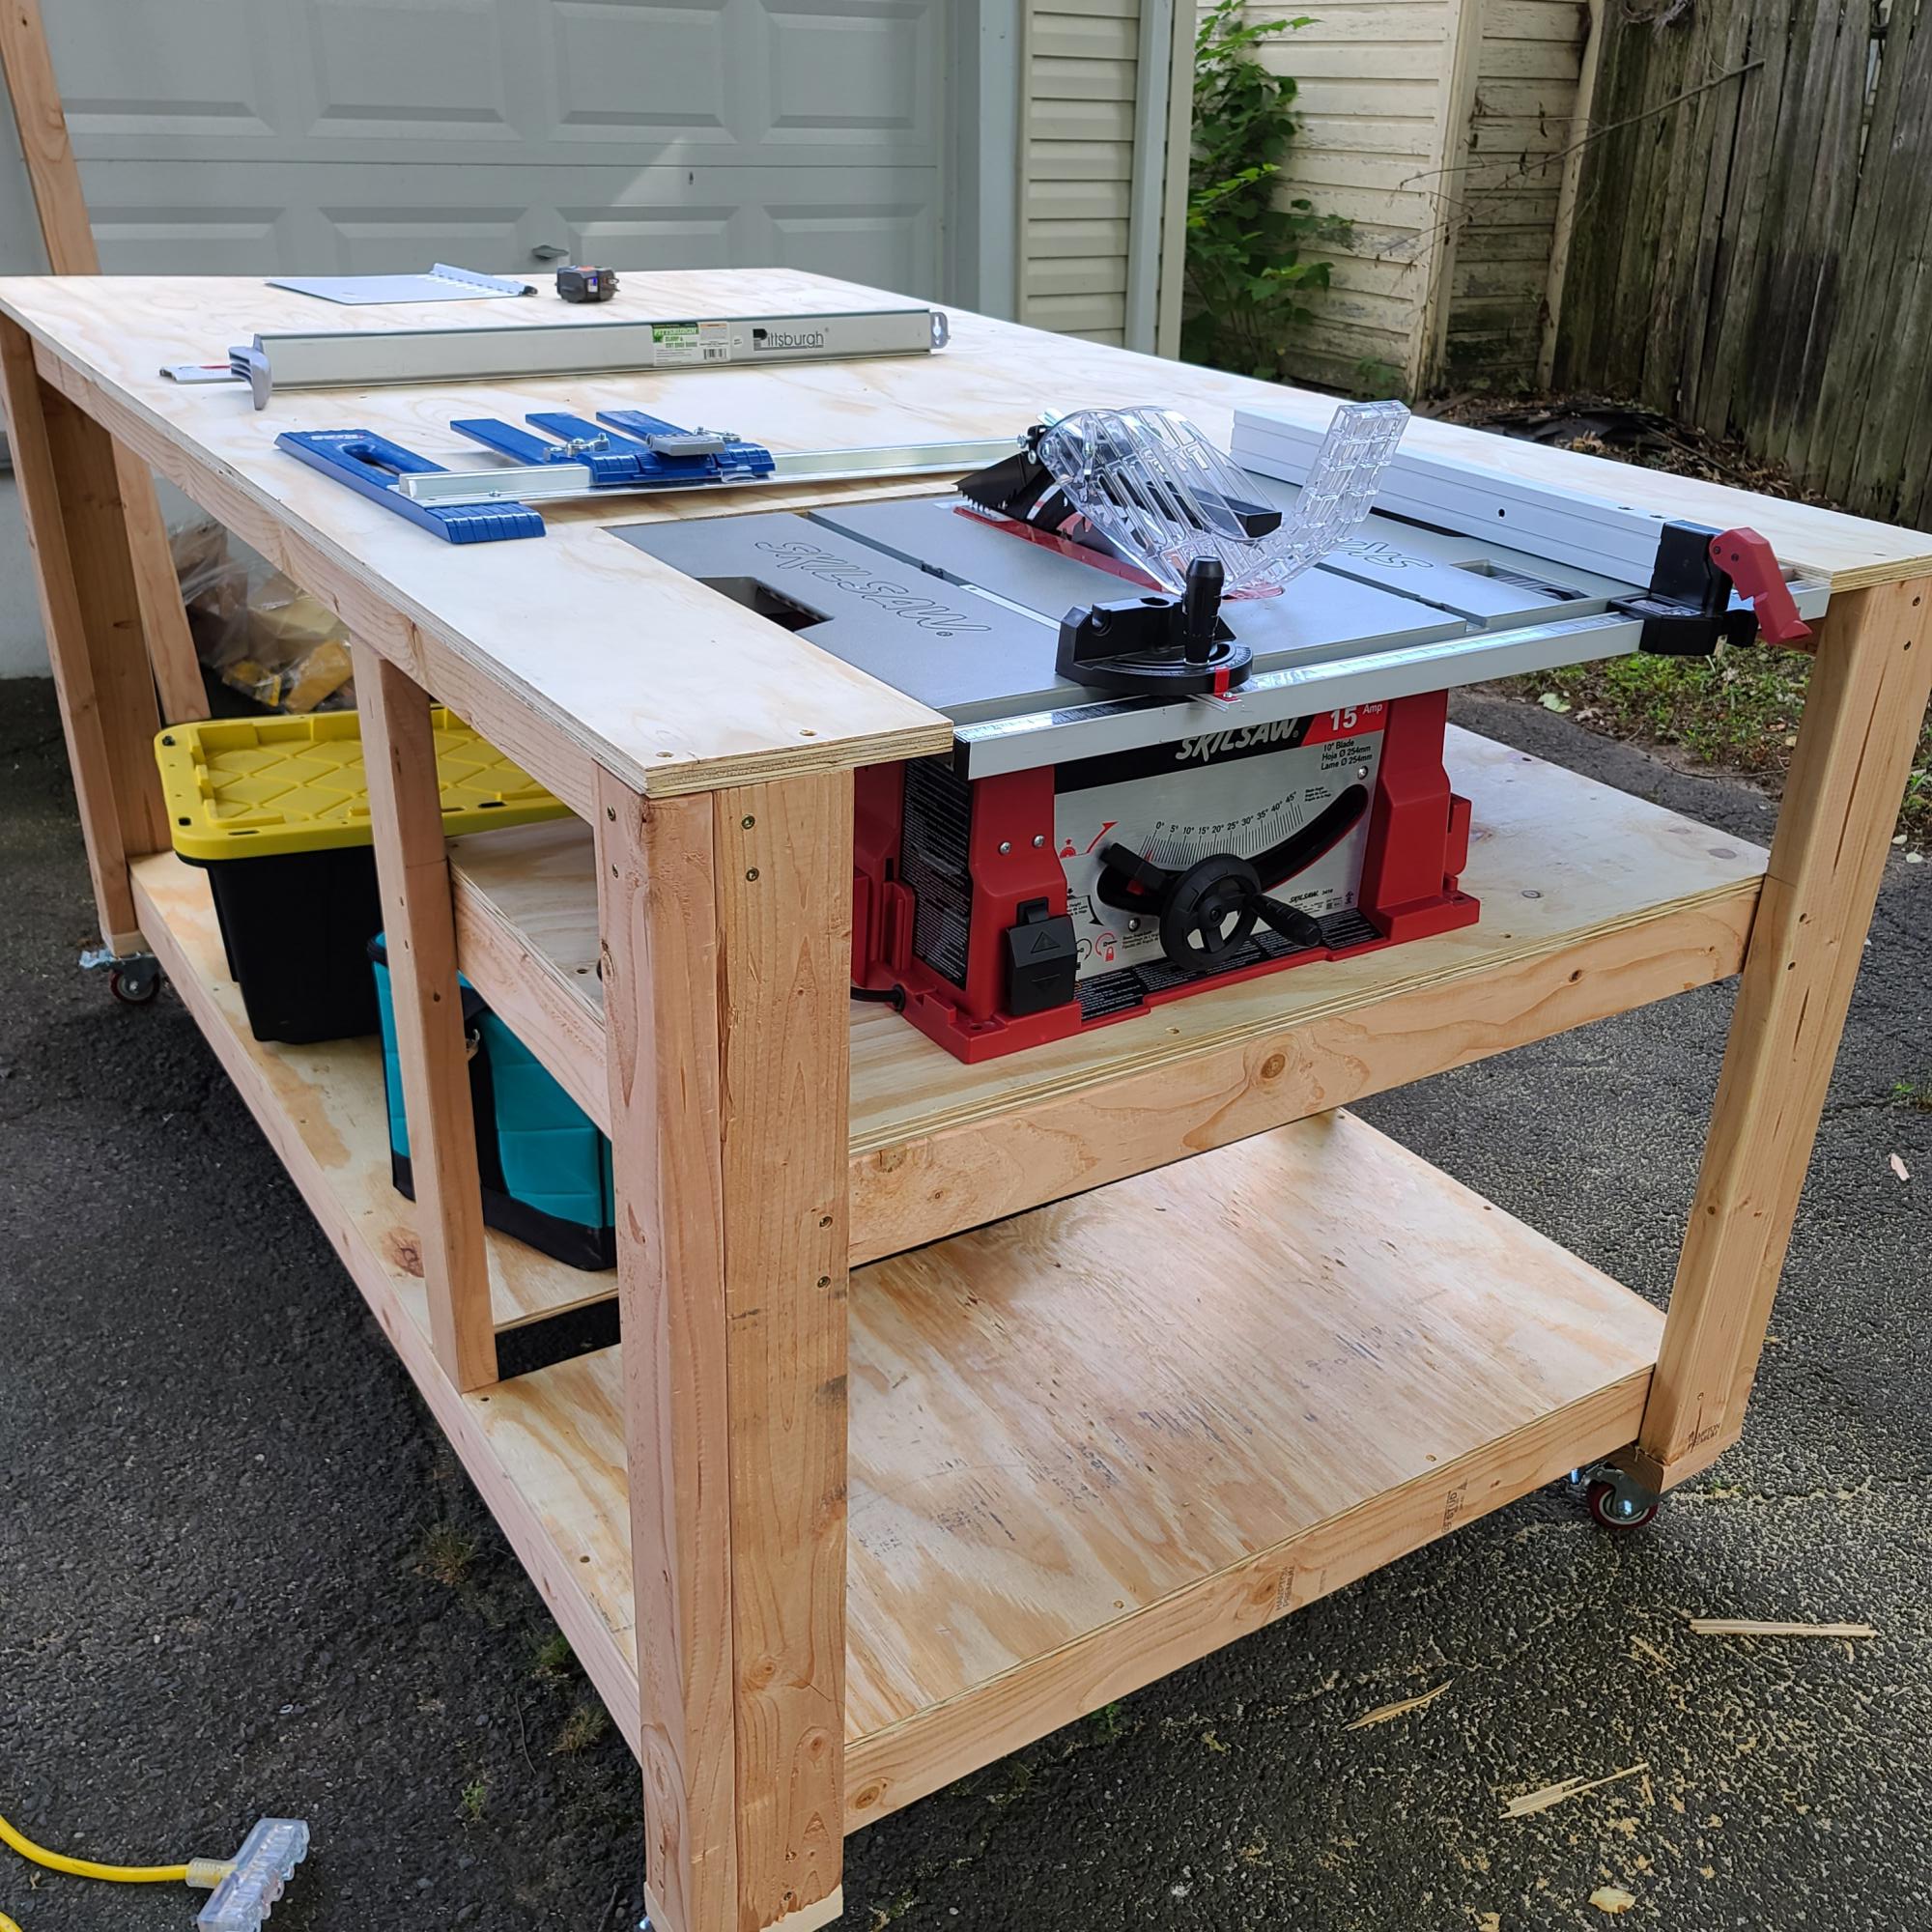
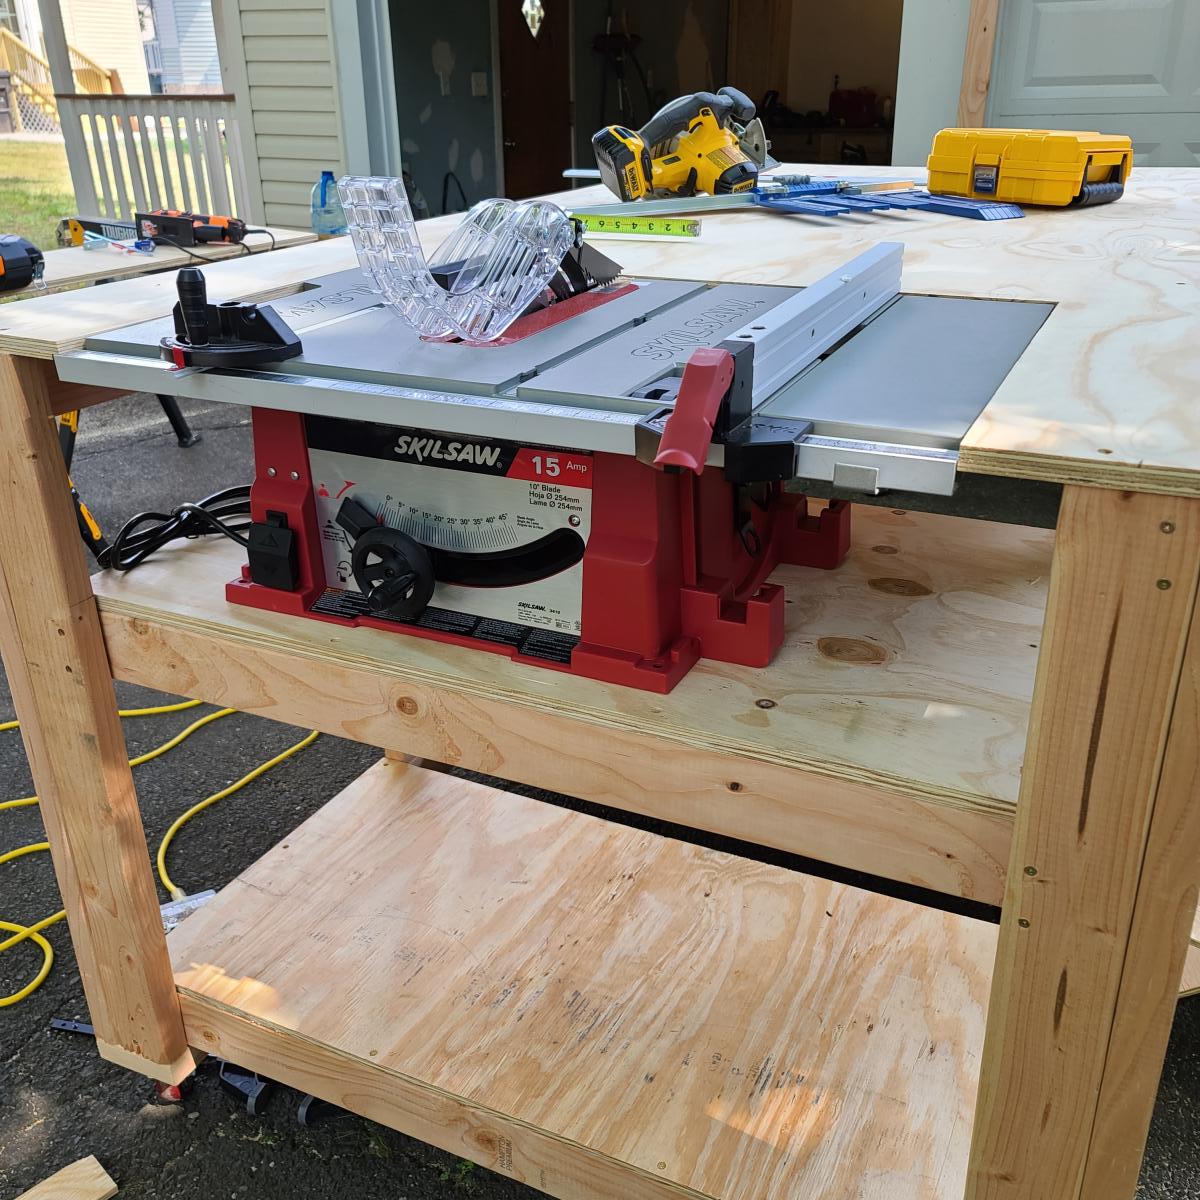
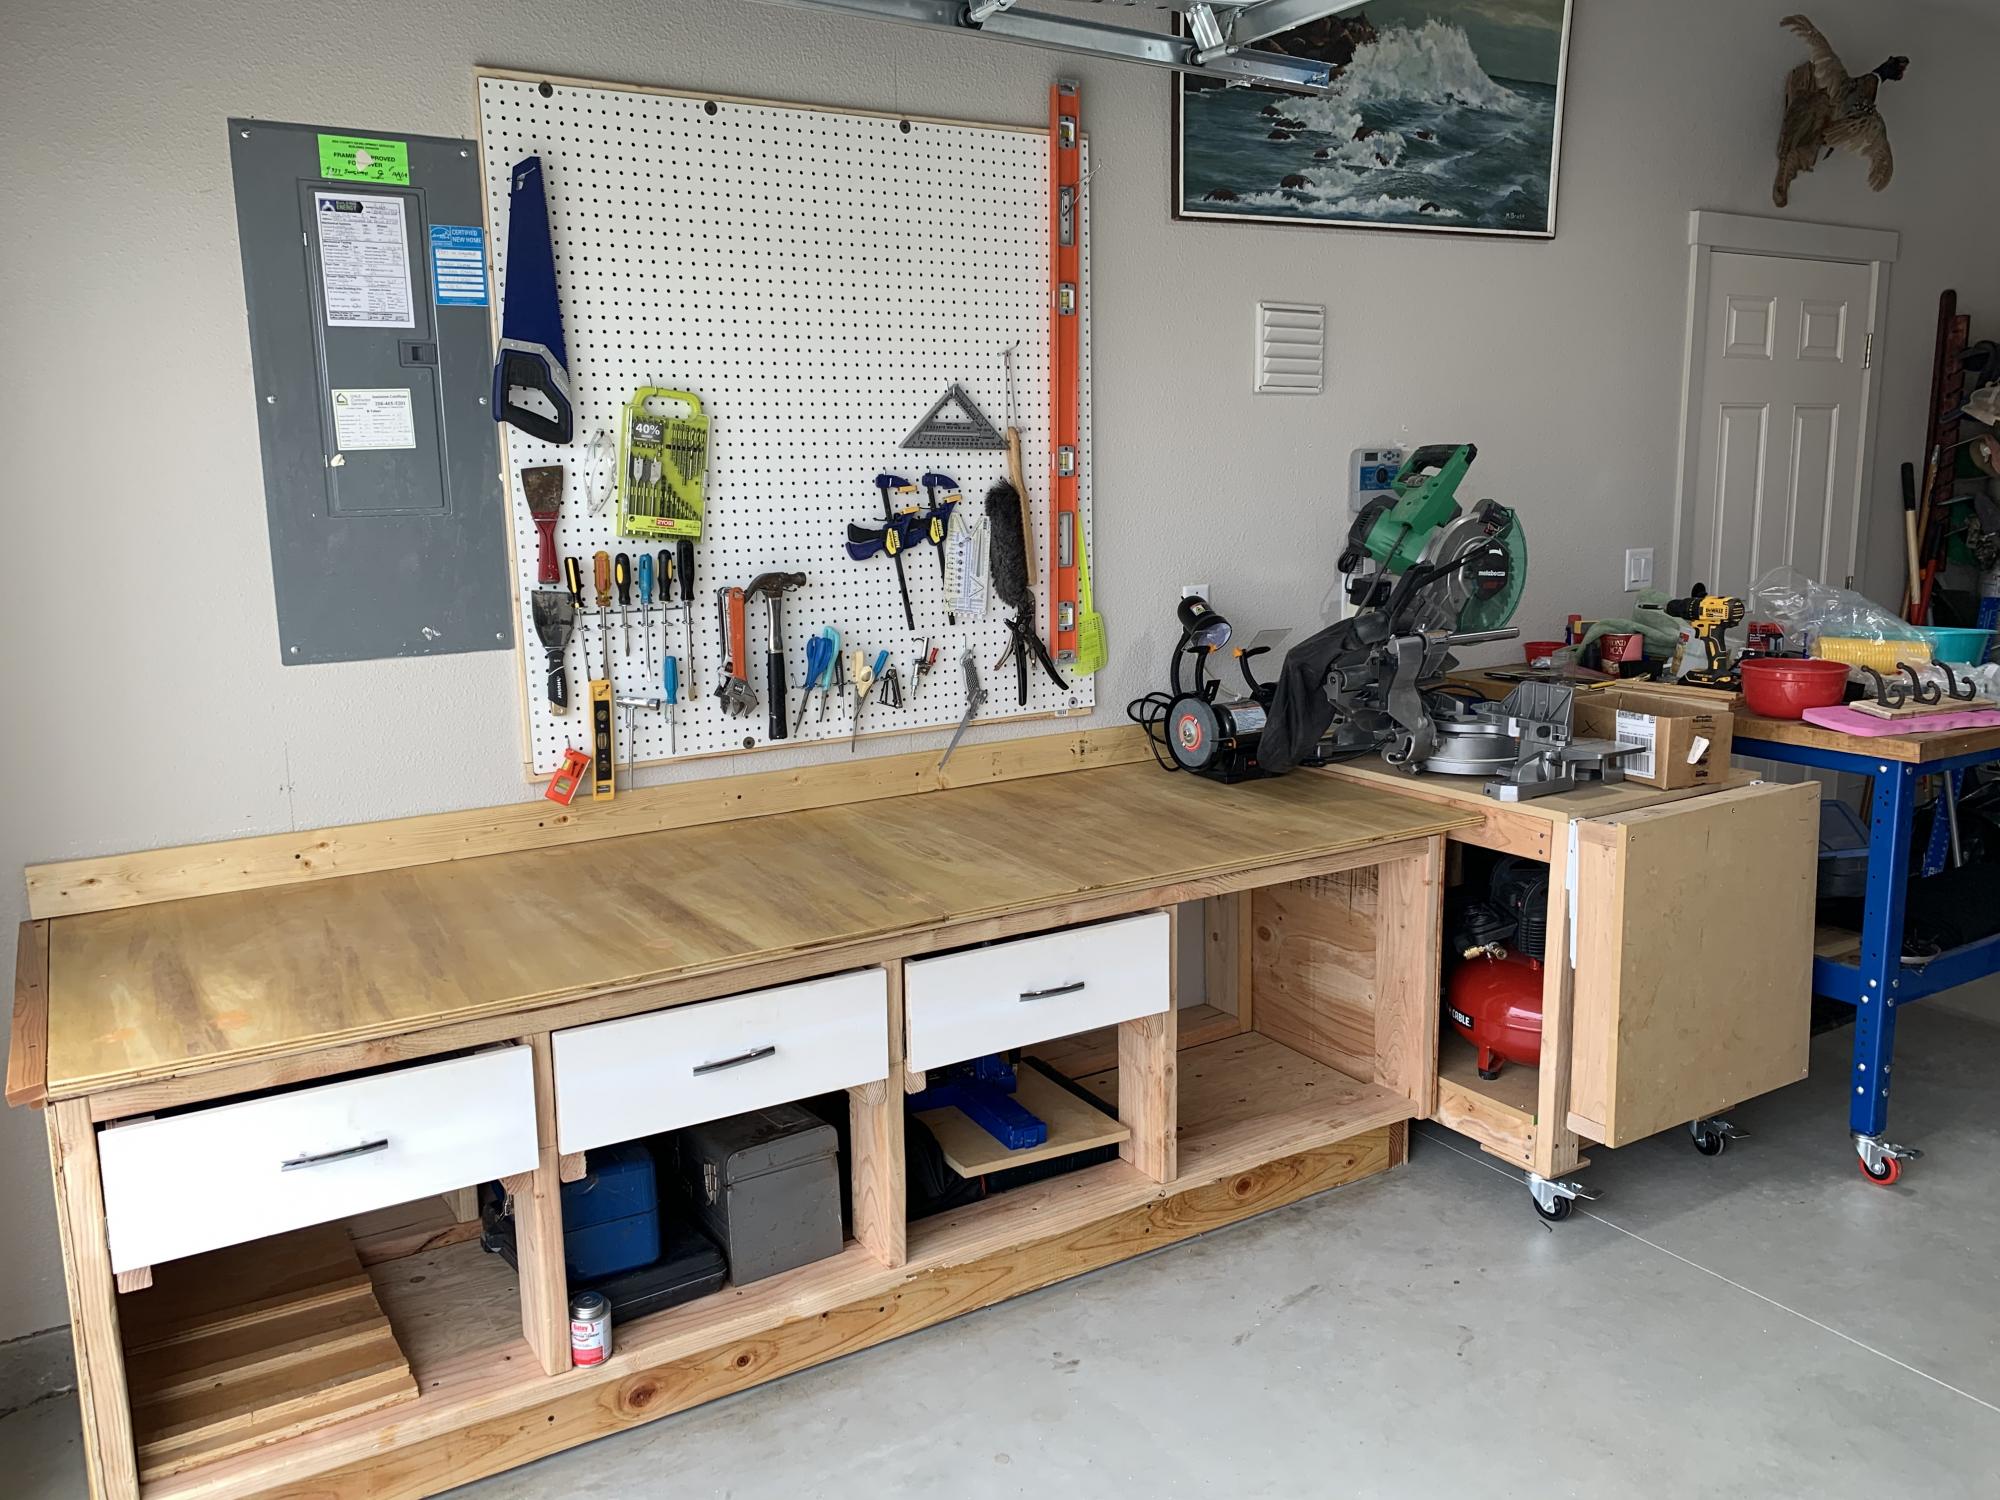
This is my first attempt and first woodwook project ever. I used the plans from this site for the workbench with space for a table saw. I changed the dimensions to 4'Wx7'Lx3'H (originally 3x6x2 1/2). It ended up bigger than I imagined though. But hopefully not bad for my 1st shot at a project of this scope. Next step is a polyethylene finish. It looks like the plan has been removed from this site though.
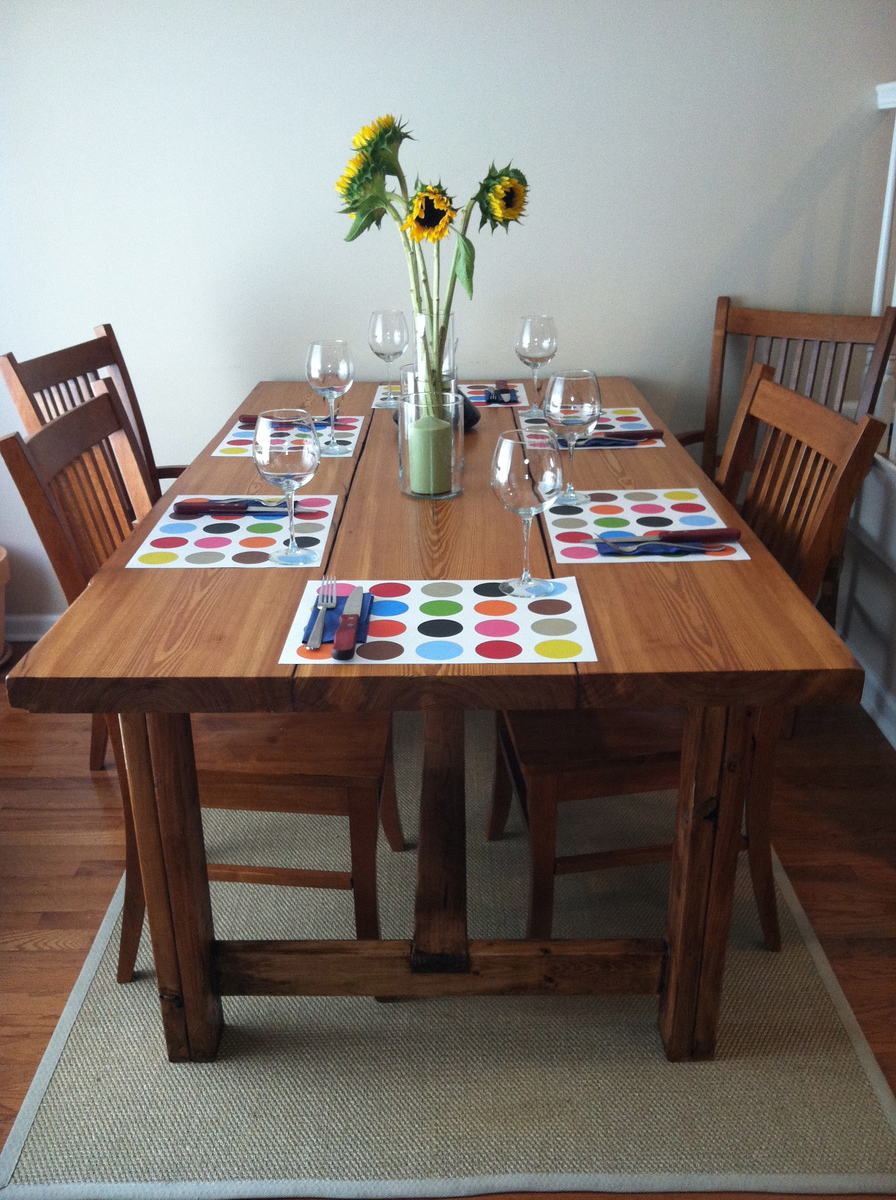
Farmhouse table. Tabletop is reclaimed from a church built in 1890 (bought at Manyunk Timer in Philadelphia). So glad we went that route (the knots, grain, etc match on the outer two pieces which you can see in the pic... it's really great, but it is expensive).
Top has only minwax polyurethane, there's no stain whatsoever. Frame is stained with Minwax "polyshades" (Mission Oak shade).
Chairs you see are the "Winslow" chairs from coaster. Highly recommend them. The match was luck.
Omitted the breadboard ends only because my tabletop pieces are 13 in (!) across: that would have been too wide for ends I thought.
Many thanks to this fantastic site for the plans. I am new at this and the table is KILLER; there's no possible way I could have expected it to turn out so well.
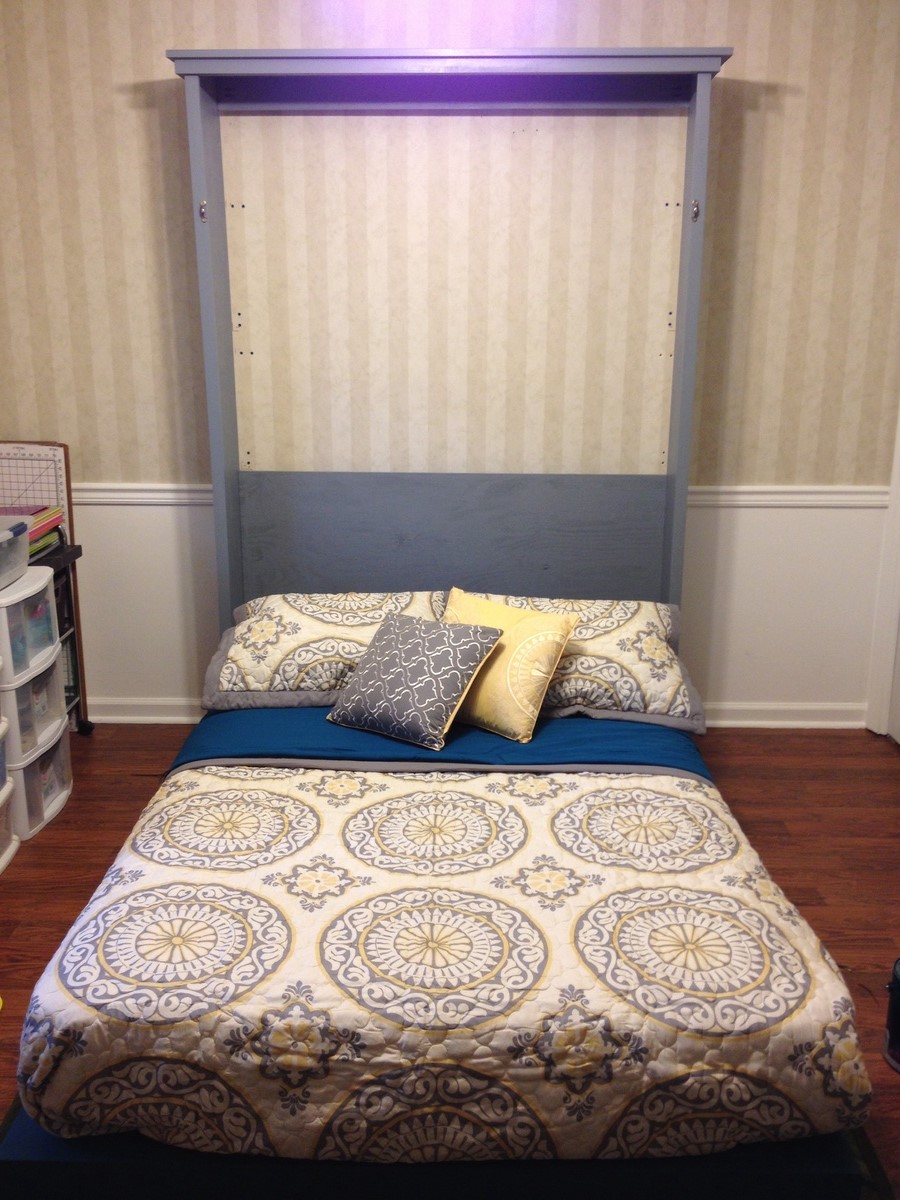
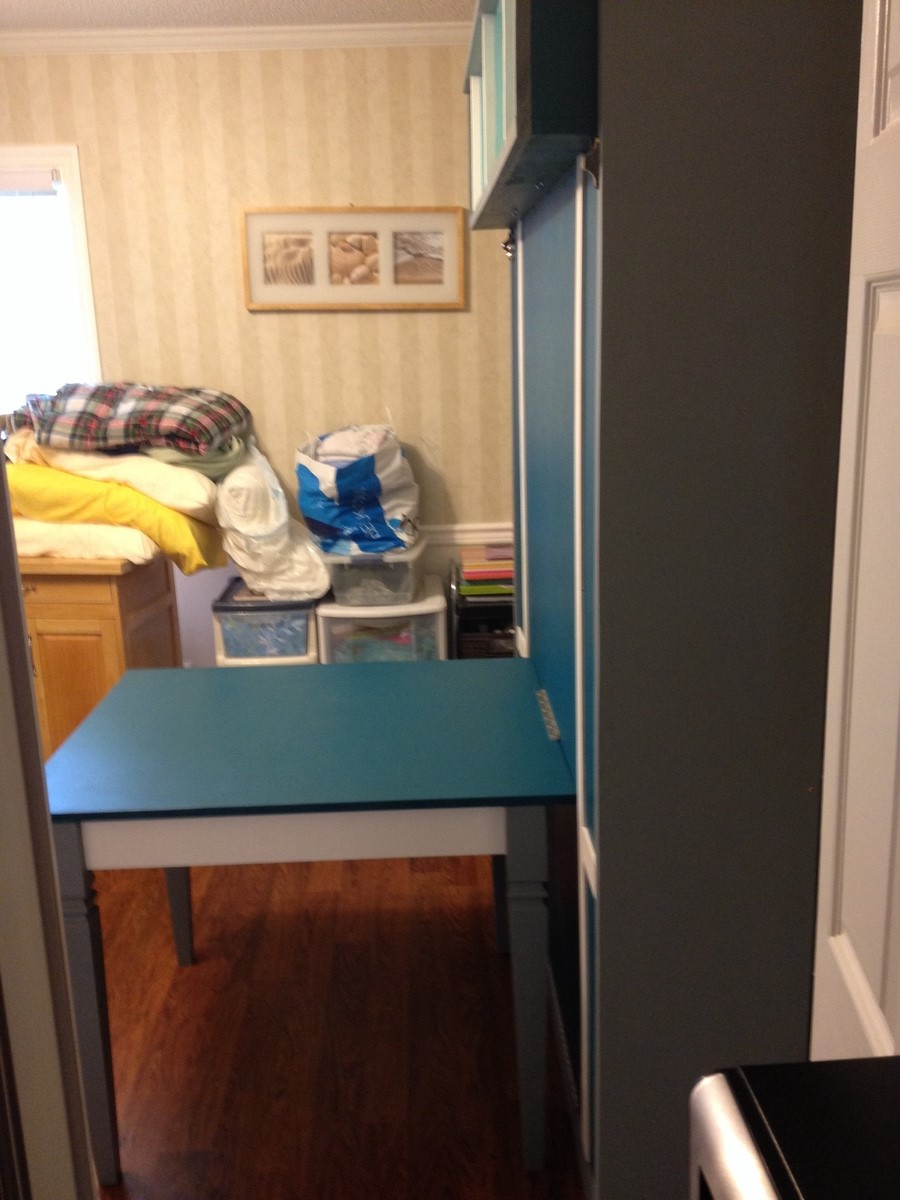
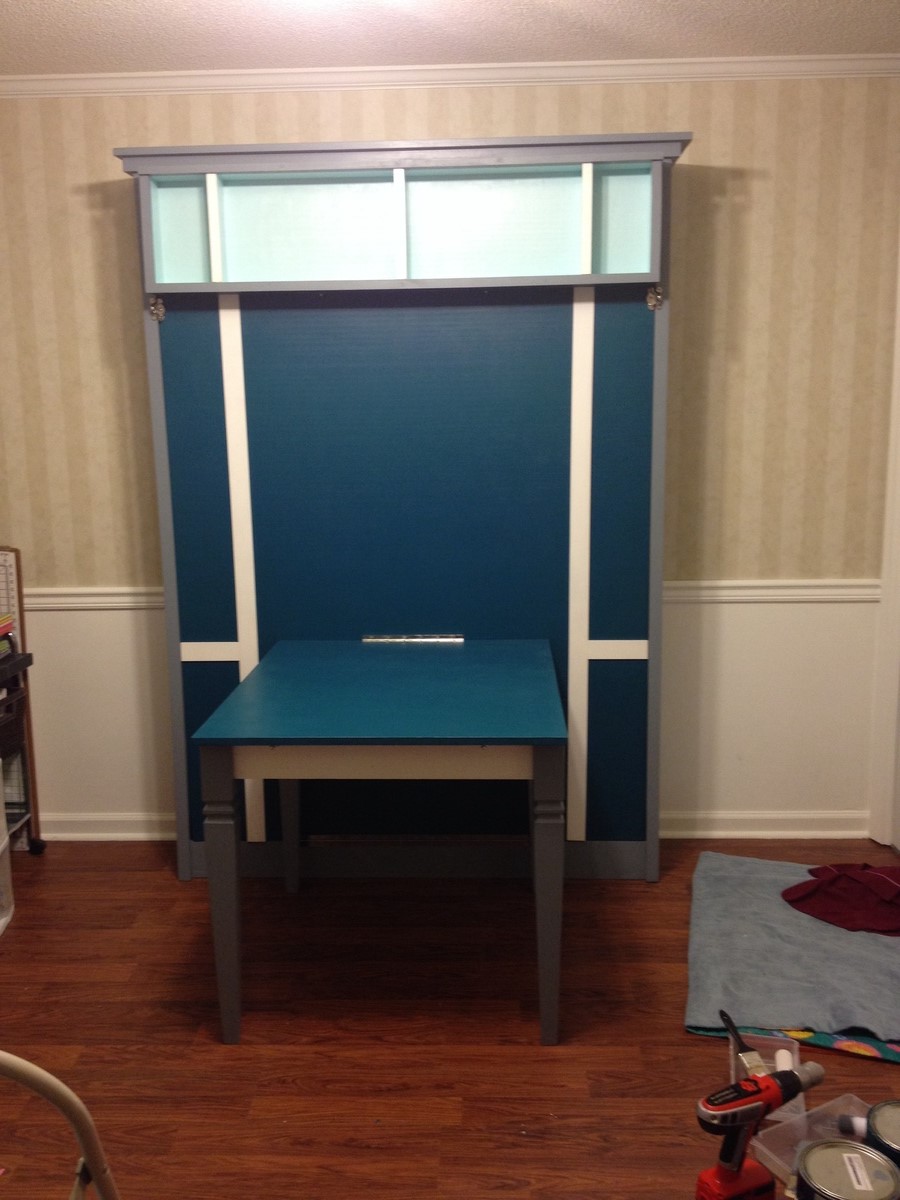
I followed most of the measurements with the Murphy bed with added dimensions for a full sized bed. I also added a shelf to provide support while the bed is down since I brought the platform off the floor. The table is also hinged to the bed platform so that it folds up and locks in place for a center support for the bed.
Fri, 07/25/2014 - 16:06
This is awesome! This is just what I need. I can't see how the table provides center support. Do the table legs come off?

Fri, 07/25/2014 - 16:52
What an awesome project! Love how the added shelf at the top creates the "legs" at the end of the bed when it is lowered (looks like it keeps the bed about 4" off the floor?). Are those window sash locks for closure? Those will keep it in place nice and tight when it's closed. The fold down desk is brilliant also, and love the legs and the colors!
Fri, 01/23/2015 - 14:13
Super job! Can you provide plan details for the table and feet for the off floor design?
Love your site. The 8’ pony wall I recently made was a great plan. I’m also going to build the outdoor storage plan you have. Thanks for your creativity!

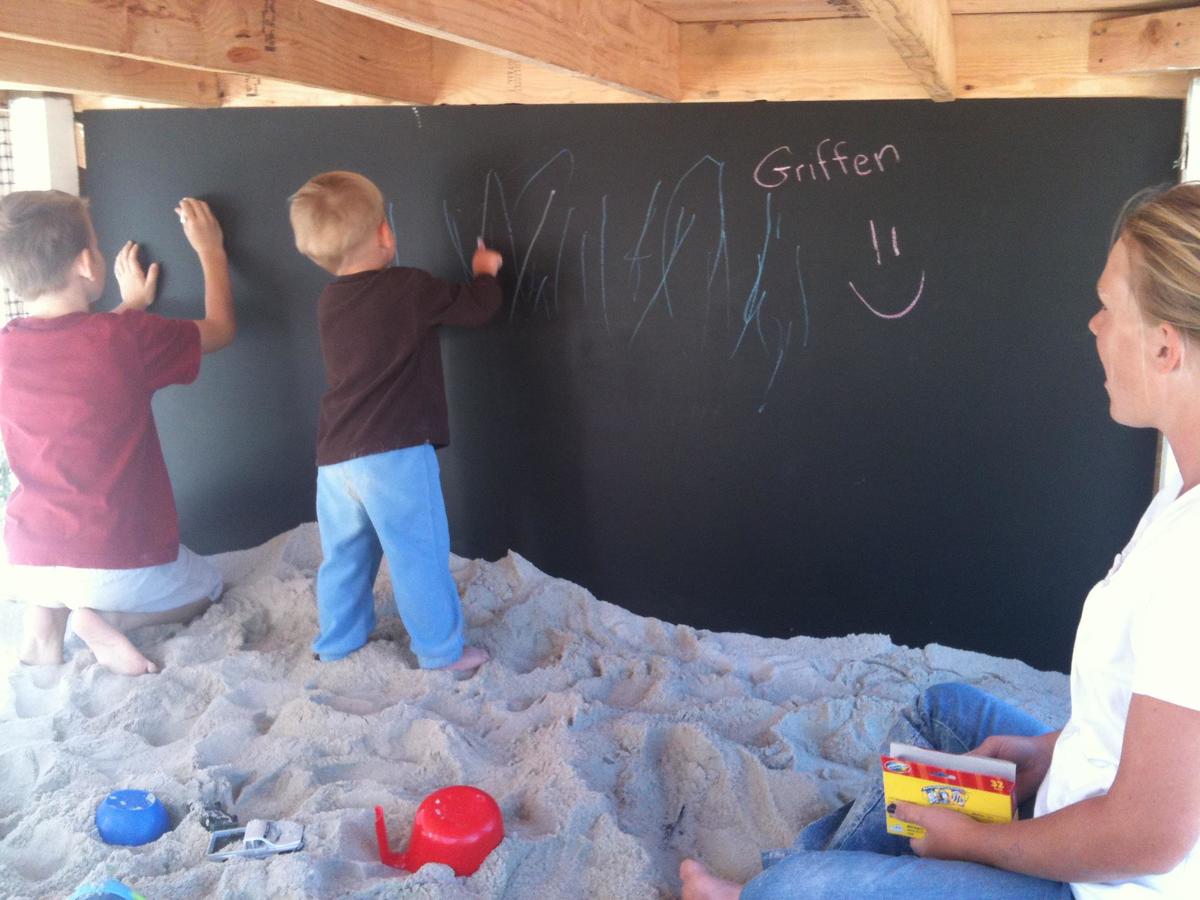
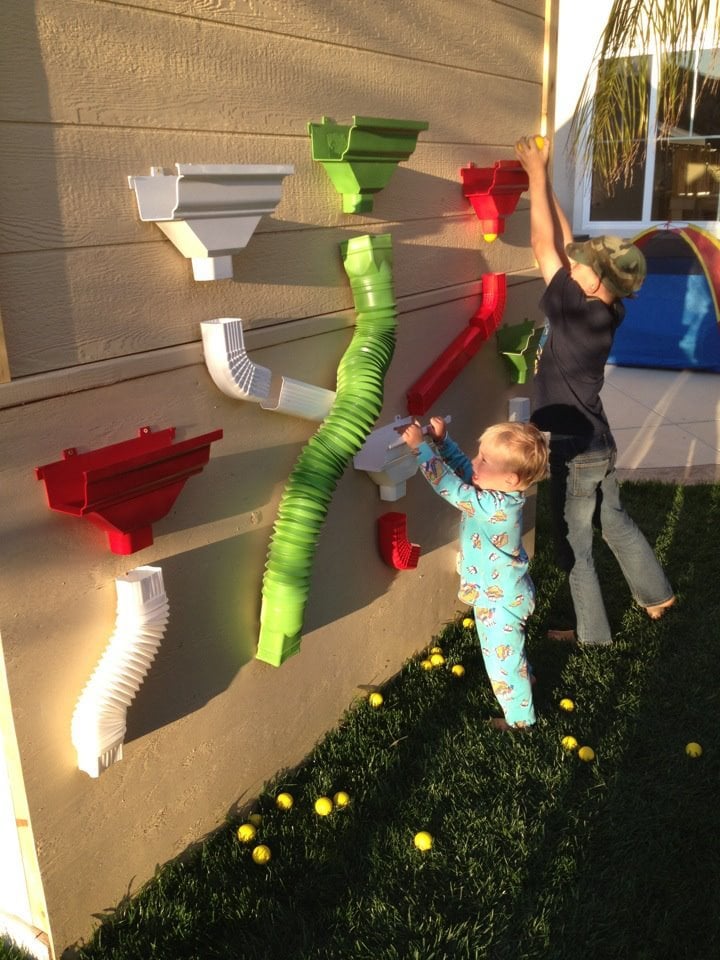
This was so much fun to do! Very easy and I added some personal touches. I made the lower level an enclosed sandbox area with a chalk board on the back wall. On the outside of the back wall, I added a "ball wall" that my kids love. I enclosed the bottom sandbox with plastic "chicken wire" to keep the cats out. :)
Thu, 11/22/2012 - 13:05
This is an awesome build. love the colours too, could you share them with us, including the roof colour. Thanku
Thu, 11/22/2012 - 15:34
Thanks! Glad you like it!
The paint was from Dunn Edwards: Roof was "Louisiana Mud", playhouse walls were "Drifting" and then the white was a snow white from Lowe's.
The slide and accessories were also from Lowe's.
Tue, 04/15/2014 - 09:35
I LOVE this! This is exactly what I'd like to build. Do you have plans you can share with us? I think I'd also like to add a couple of swings on one of the sides too. Thanks so much!
In reply to Love this! by m7hennen
Sun, 04/27/2014 - 08:39
I know I messed with the dimensions a bit but I don't remember exactly. I made the playhouse larger (deeper and taller than original plans) . I also cut the roof line on the deck side for more room. I put aluminum over the wood on the roof and then painted. The Ball Wall was made out of plastic gutter pieces that I painted and we used practice rubber golf balls to throw into them. I hope that helps! We sold that house, so I can't go out and measure it :)

In reply to Plans for Playhouse by Dawnybb
Thu, 05/28/2020 - 15:32
You may not get this as this is an old post. Did you dig post holes? I have older kids and I am thinking about building a plan like this but at a 6ft height. Wondered how much it moves around when there are a bunch of kids on there. The house I will build is also 6 ft heigh.
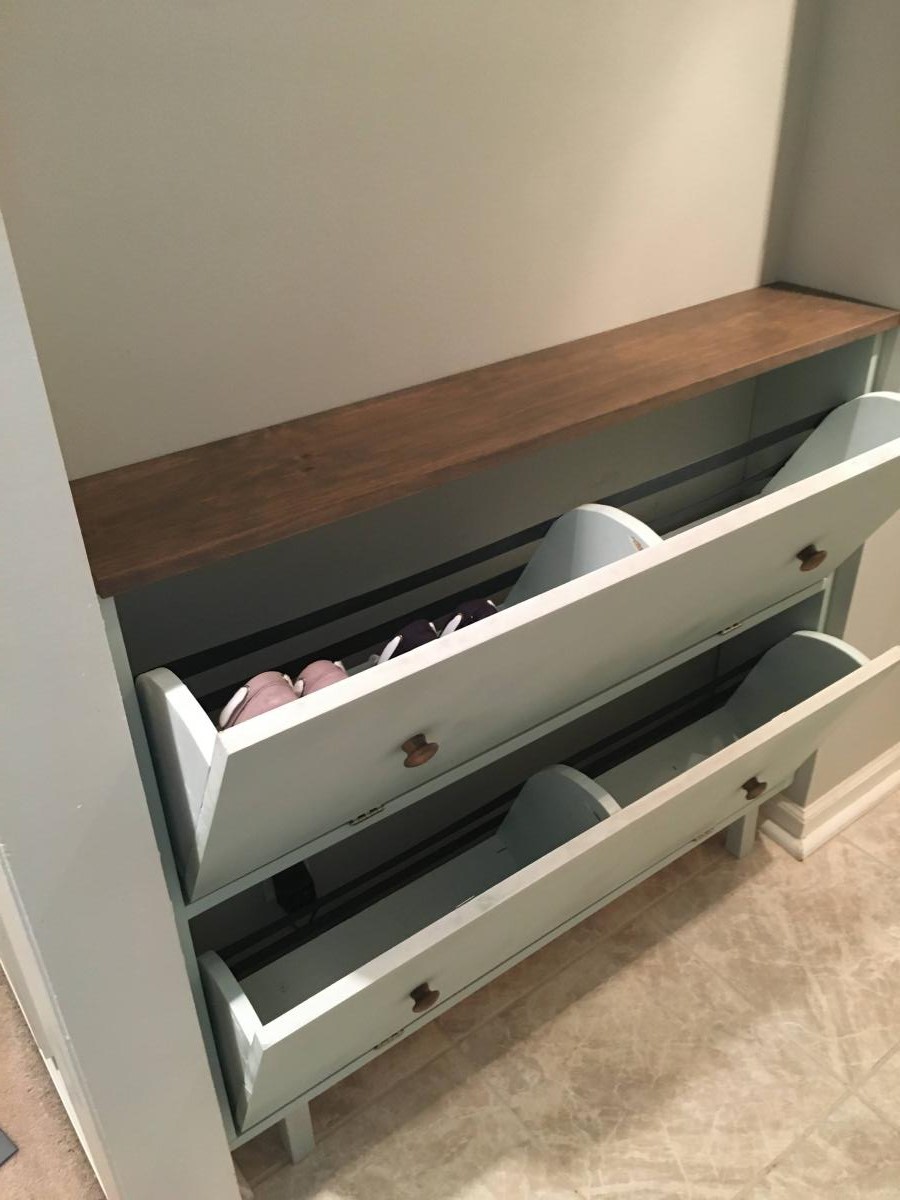
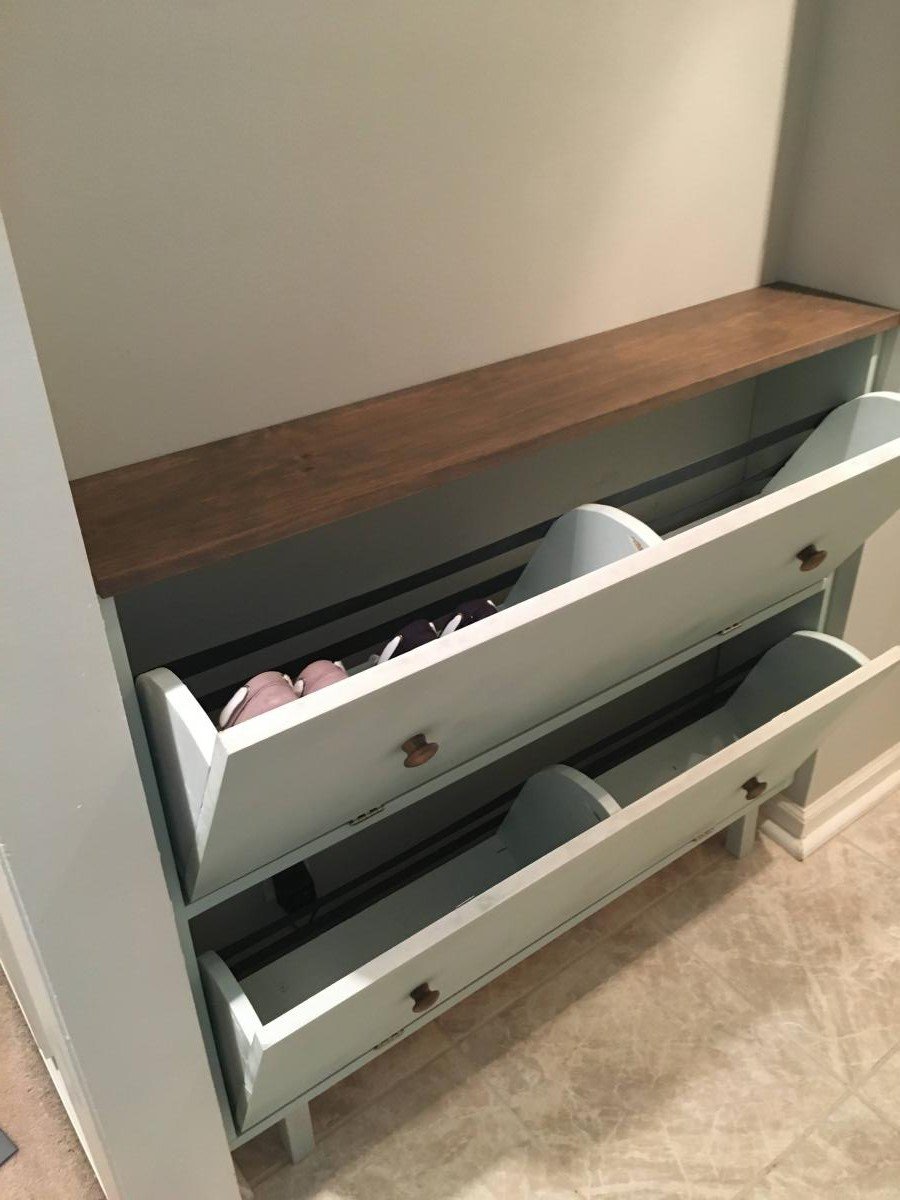
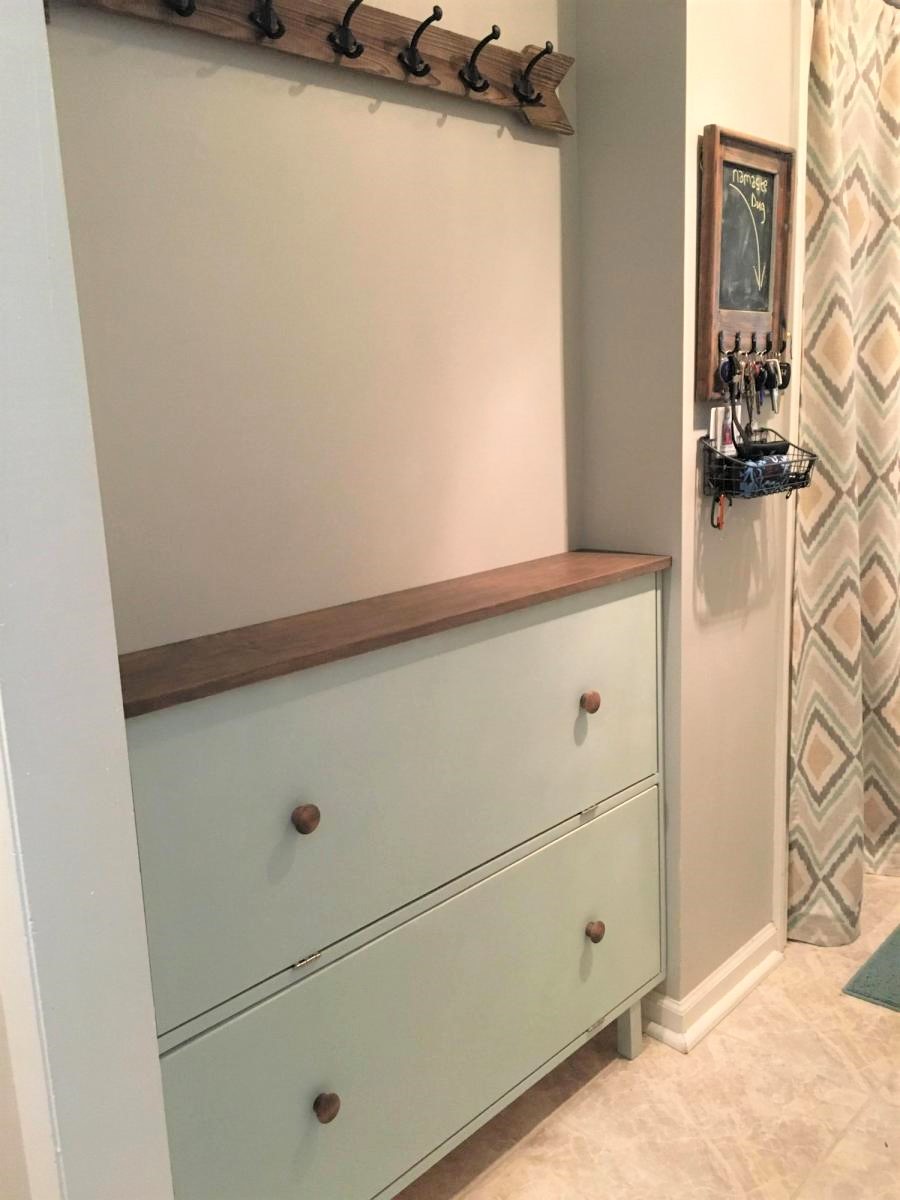
I had this space in my mudroom that was a perfect spot to make a custom shoe dresser. I adjusted the plans I found on this website to custom make storage for shoes. Now this weird little space is functional.
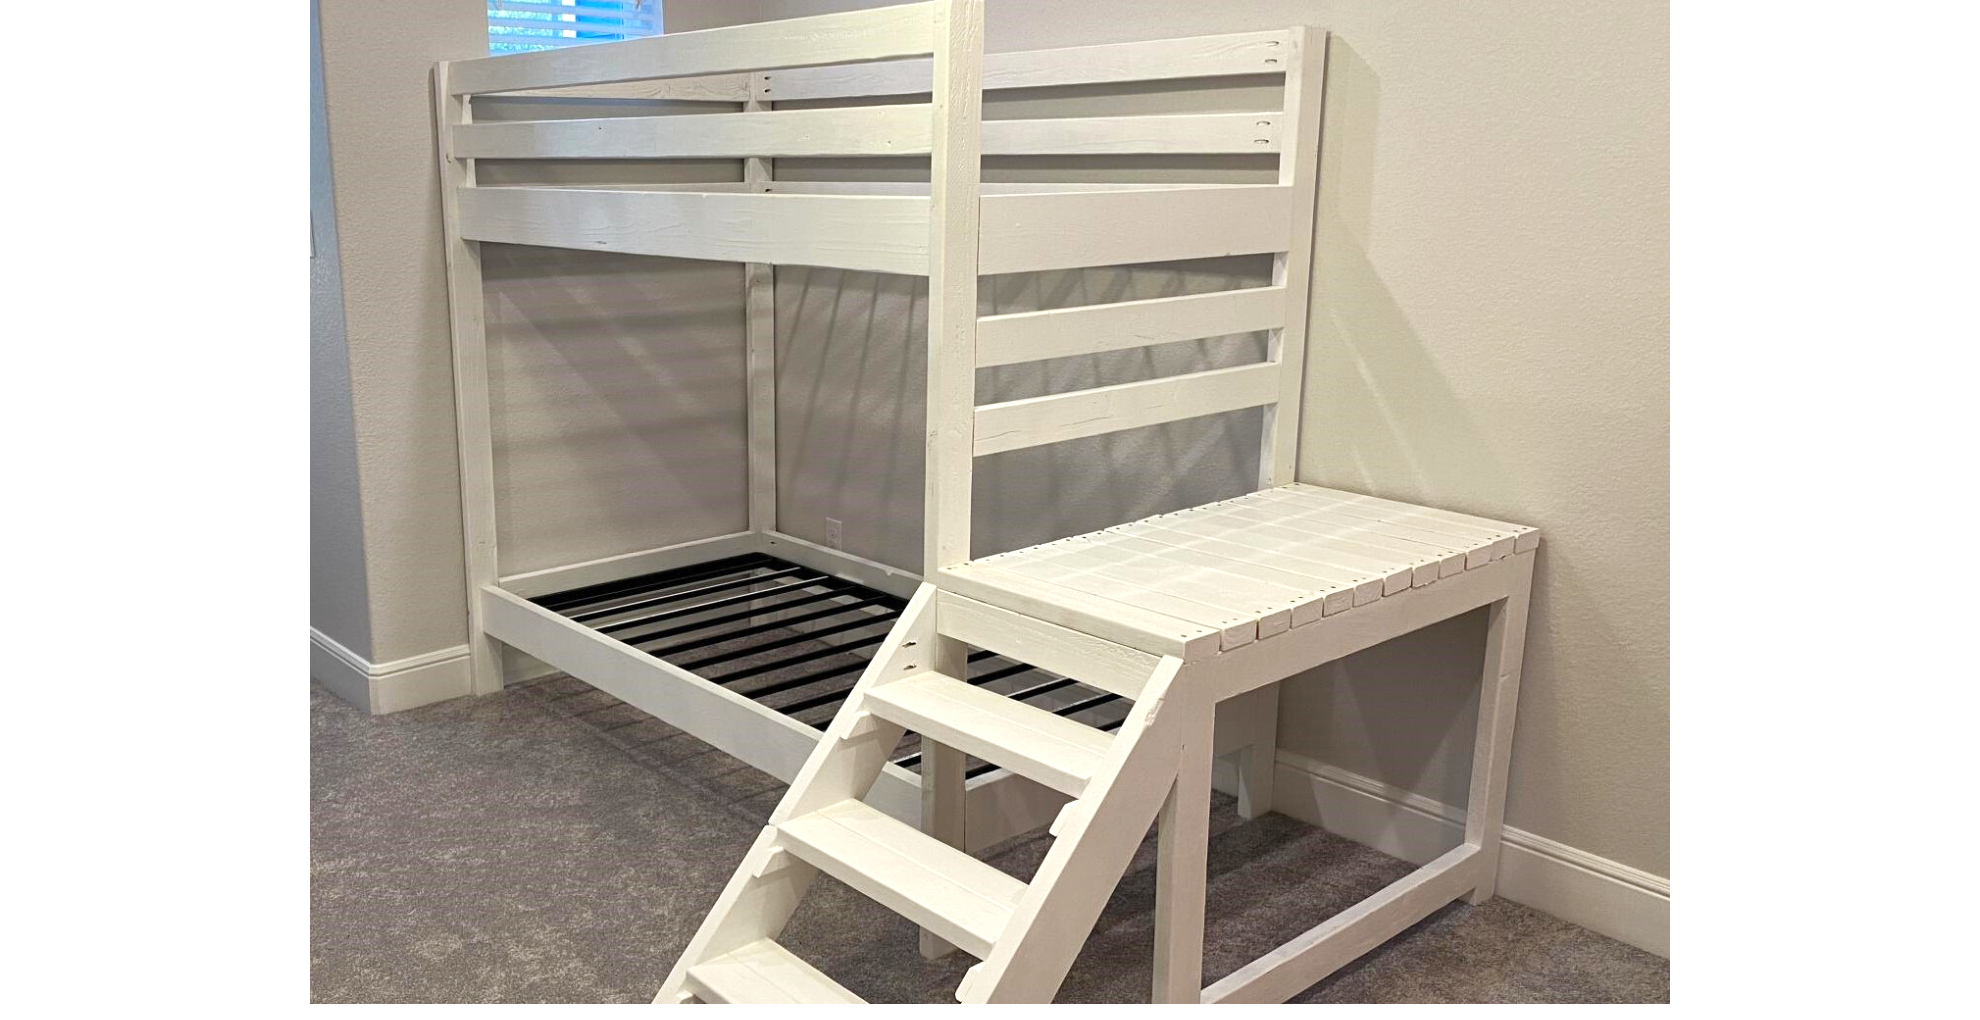
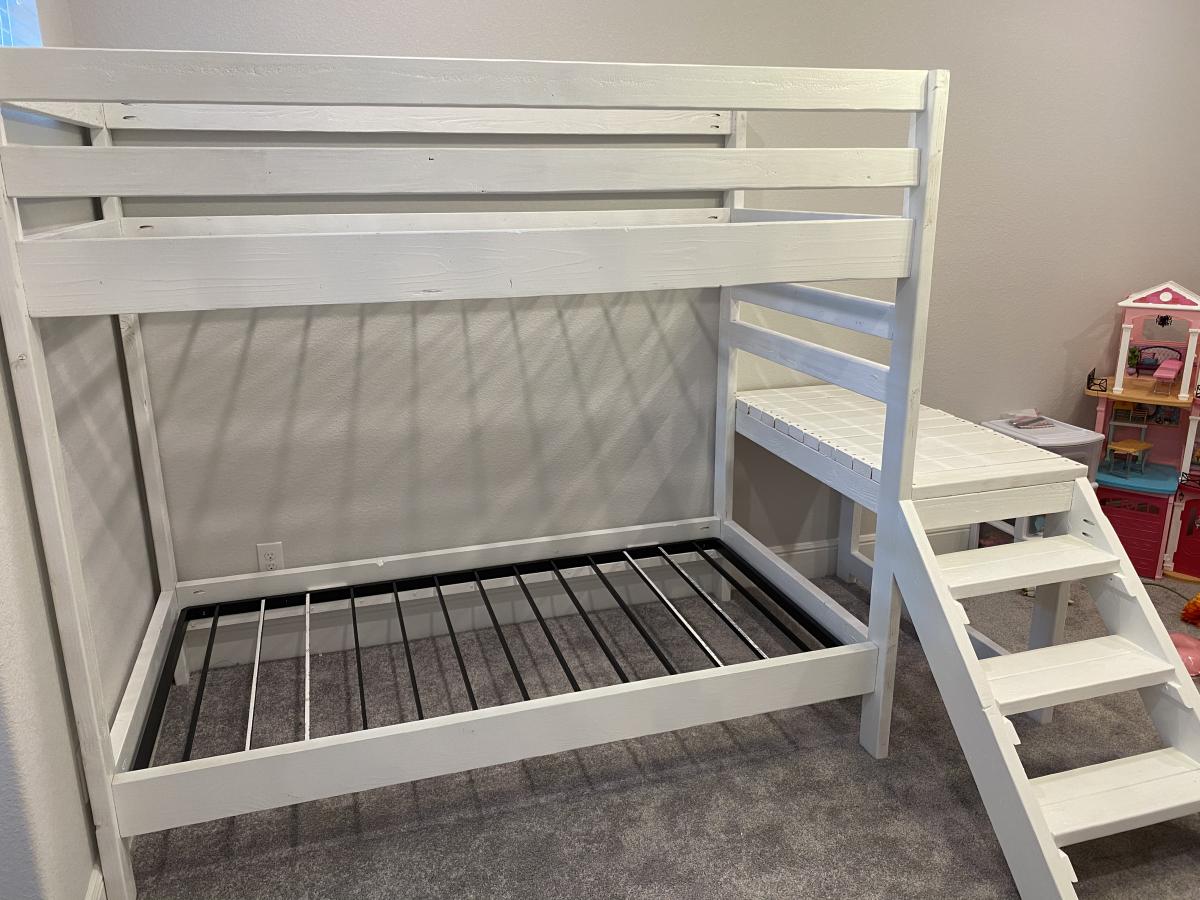
Used the Camp Loft Bed with Stairs Plans but double the bed rails. I just loved that the stairs and platform make it a little safer getting in and out.
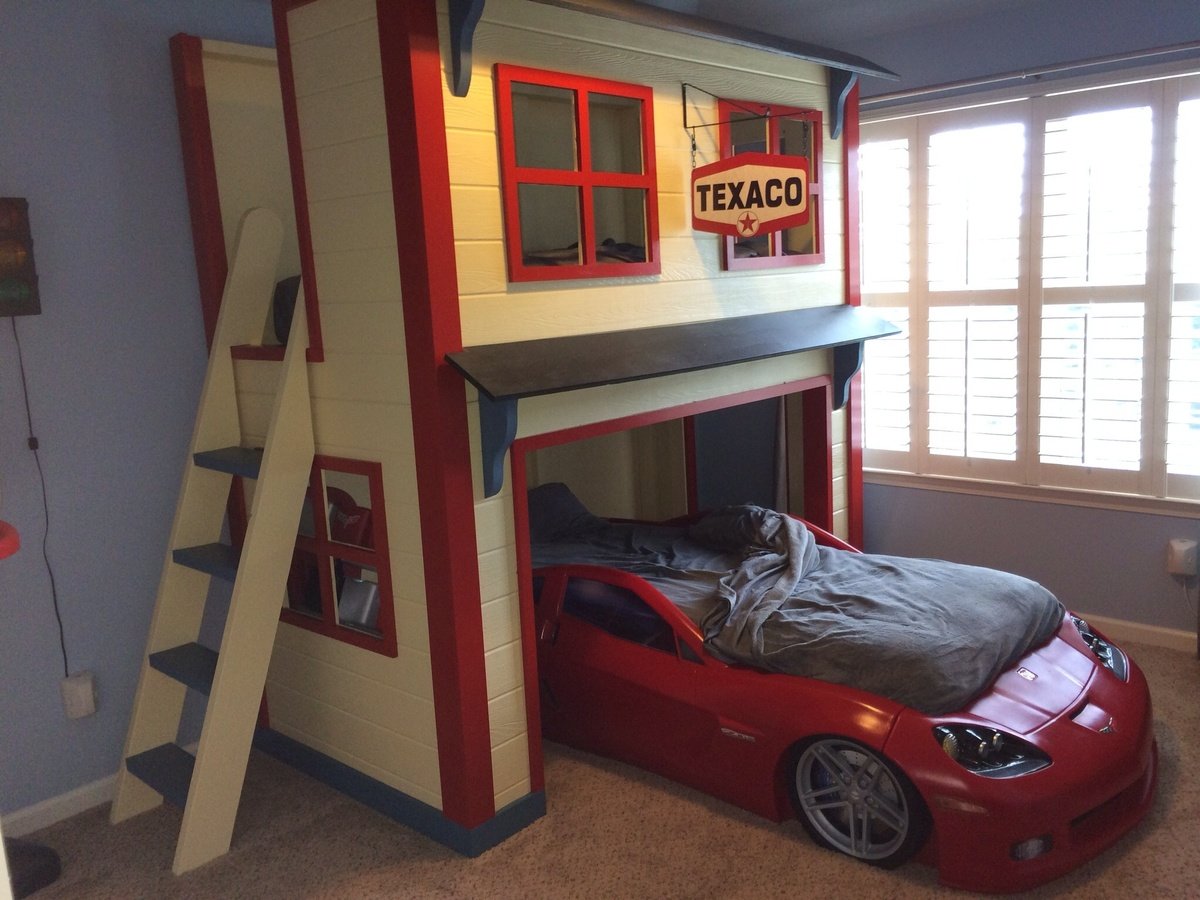
The garage loft bed was inspired by the plans on your site. I beefed up the framing with 2xs and found siding panels at my local big box.

Tue, 04/21/2020 - 13:23
Wondering if anyone has the plan to this my boys are wanting a garage themed room and this is perfect!!
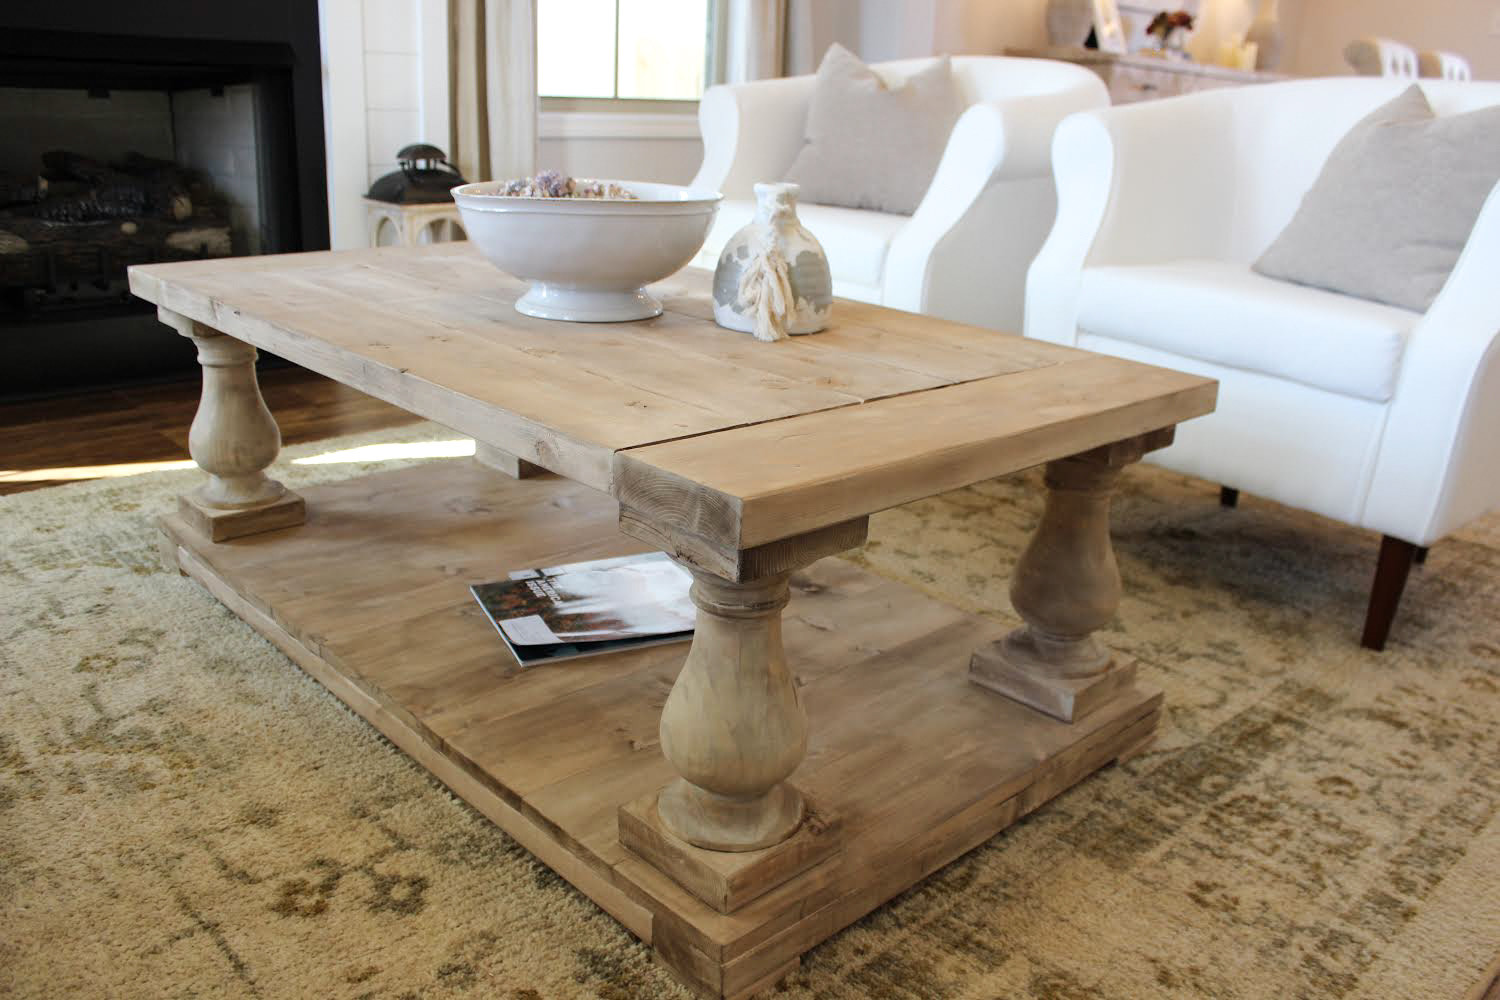
Inspired by the RH Balustrade Salvaged Wood Coffee Table.


This was my second project and my first piece of furniture I built from Ana's plans. We have a vaulted ceiling in the hallway near my entry and needed a really big piece to fill up the large blank wall. I always hated the space but now I Love It. The Gigantic sideboard is perfect there. I finished it with milk paint and paste wax. If you inspect it closely it is not perfect but for my first piece... I love it and it's supposed to be rustic right!
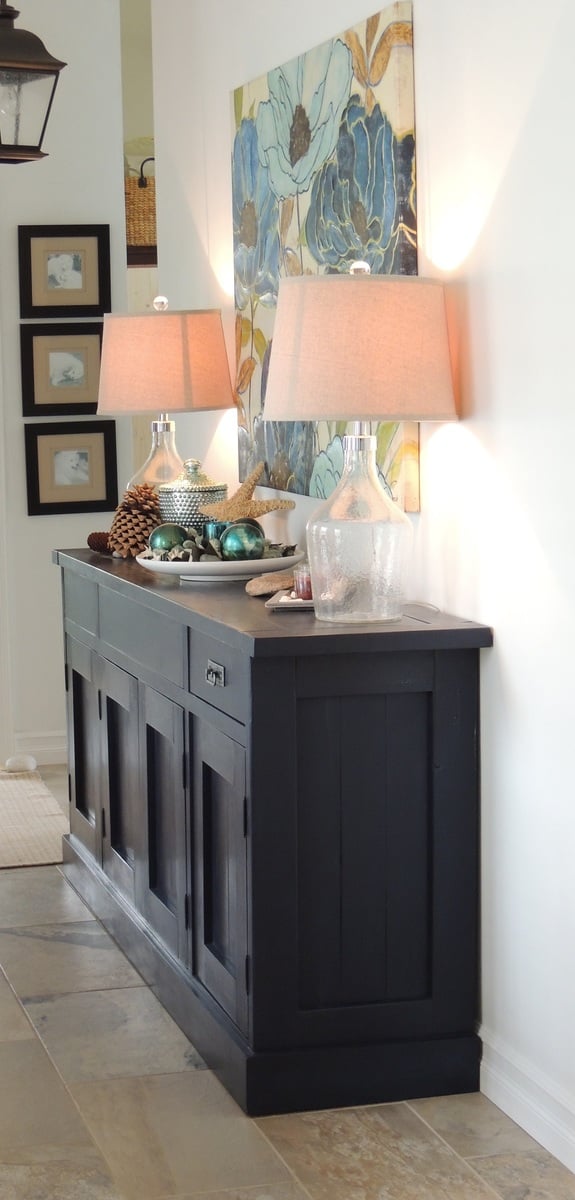
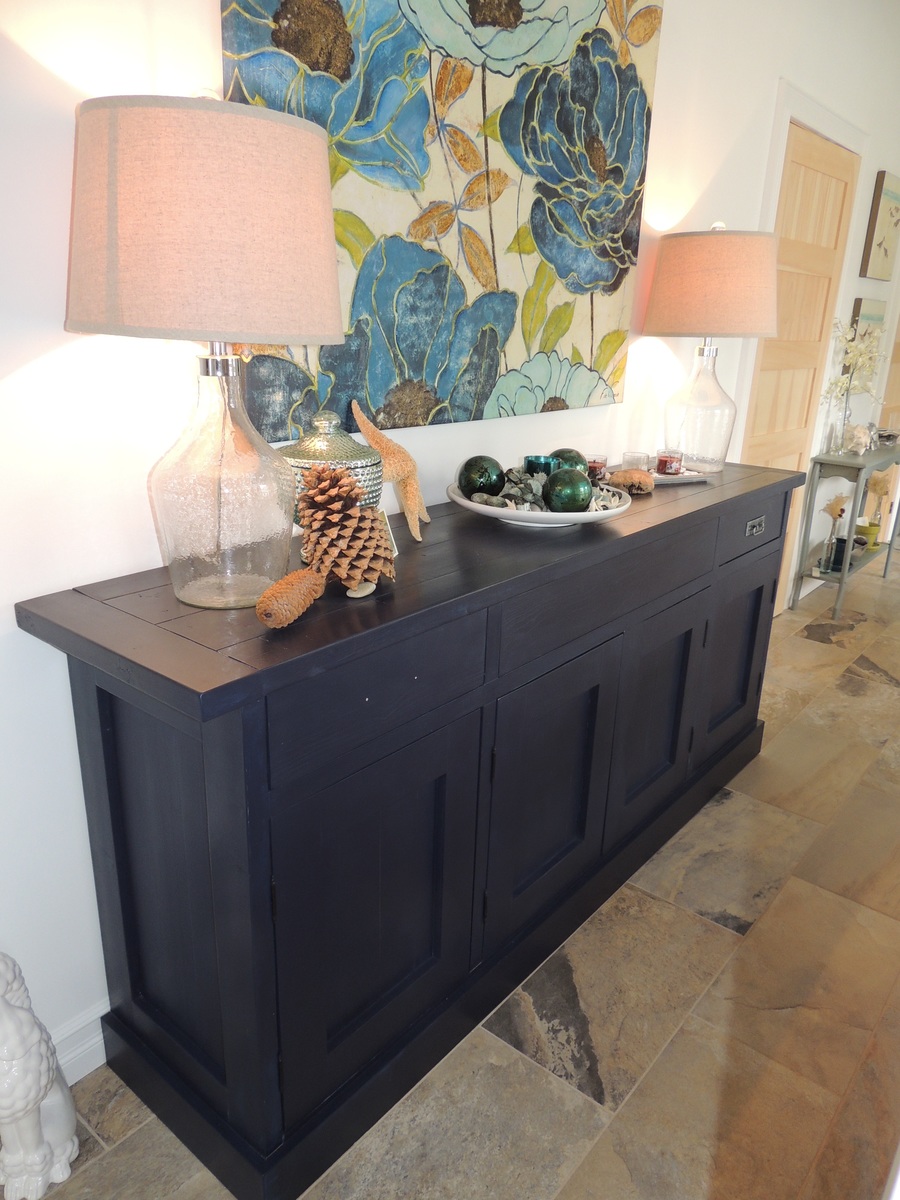
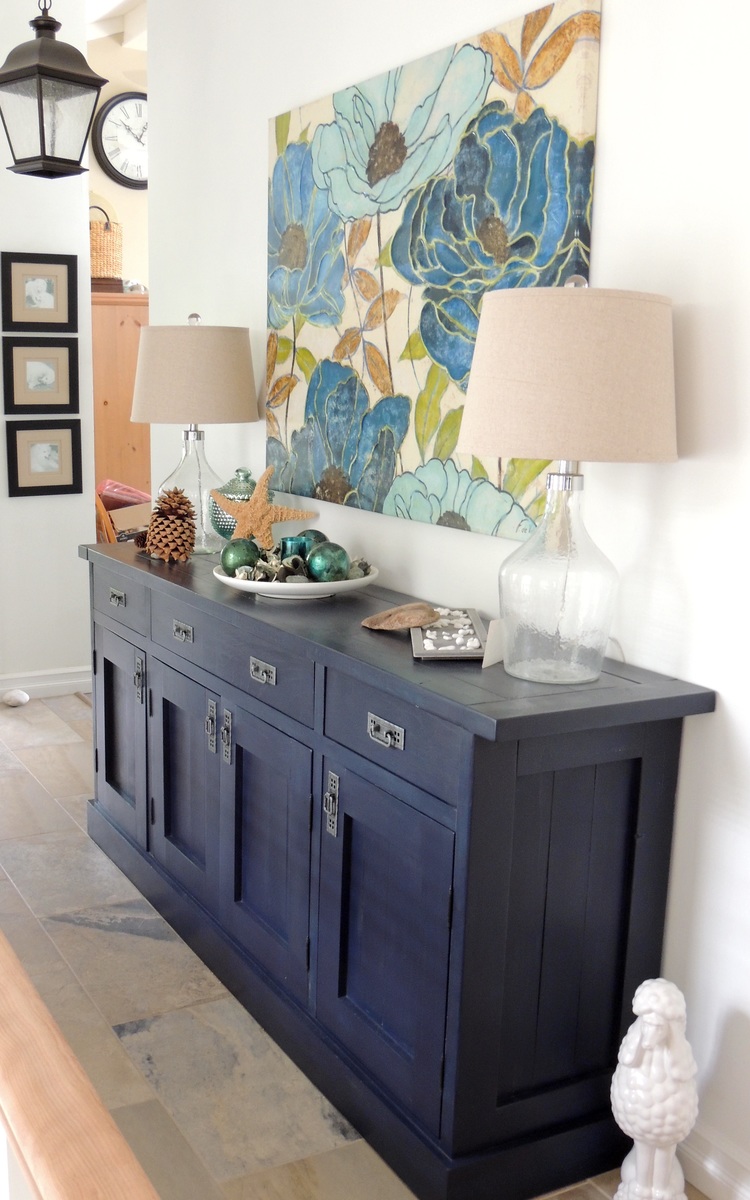

In reply to Hardware by jillcookie
Sun, 01/04/2015 - 18:08
I got the pulls at Richelieu hardware. Classic Metal Drop Pull - 750
Product #BP750908. http://www.richelieu.com/ca/en/category/decorative-hardware/cabinet-har…
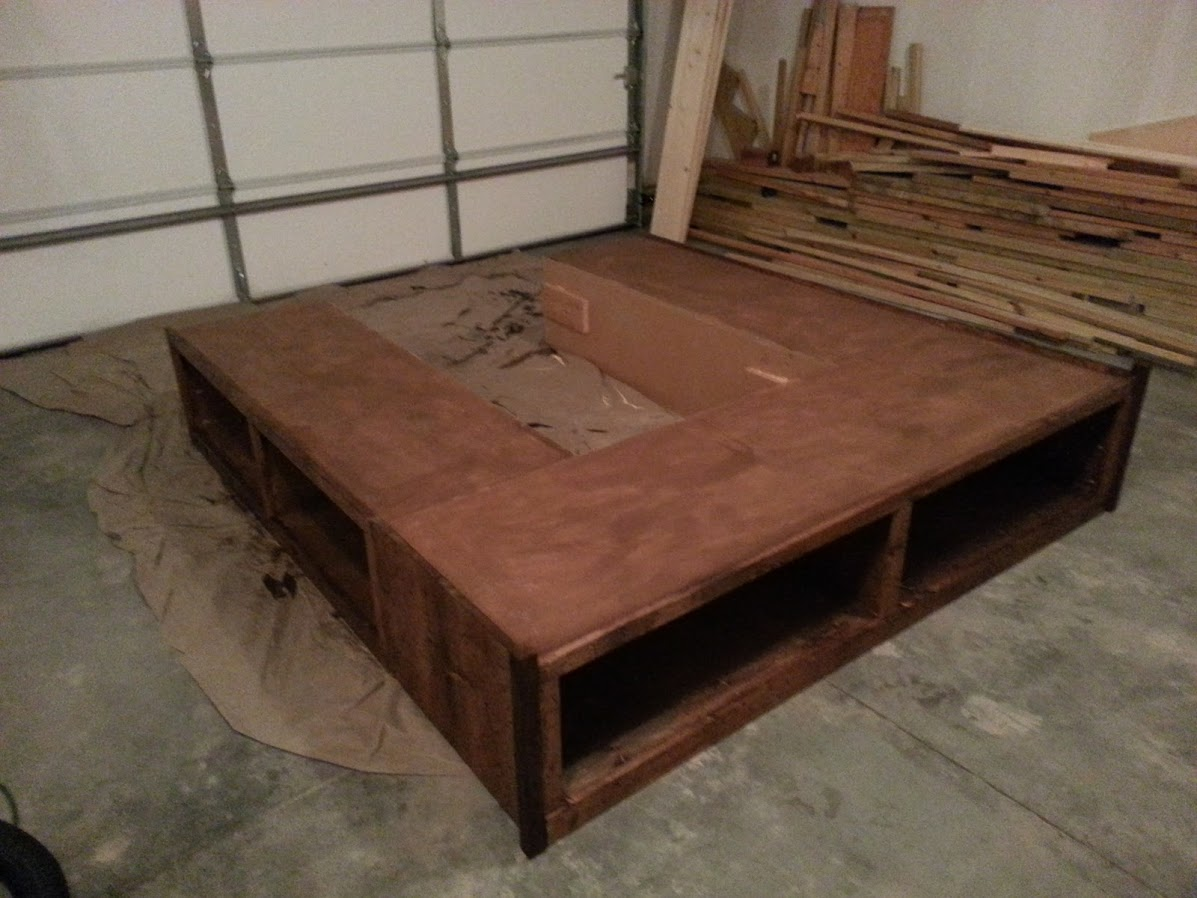
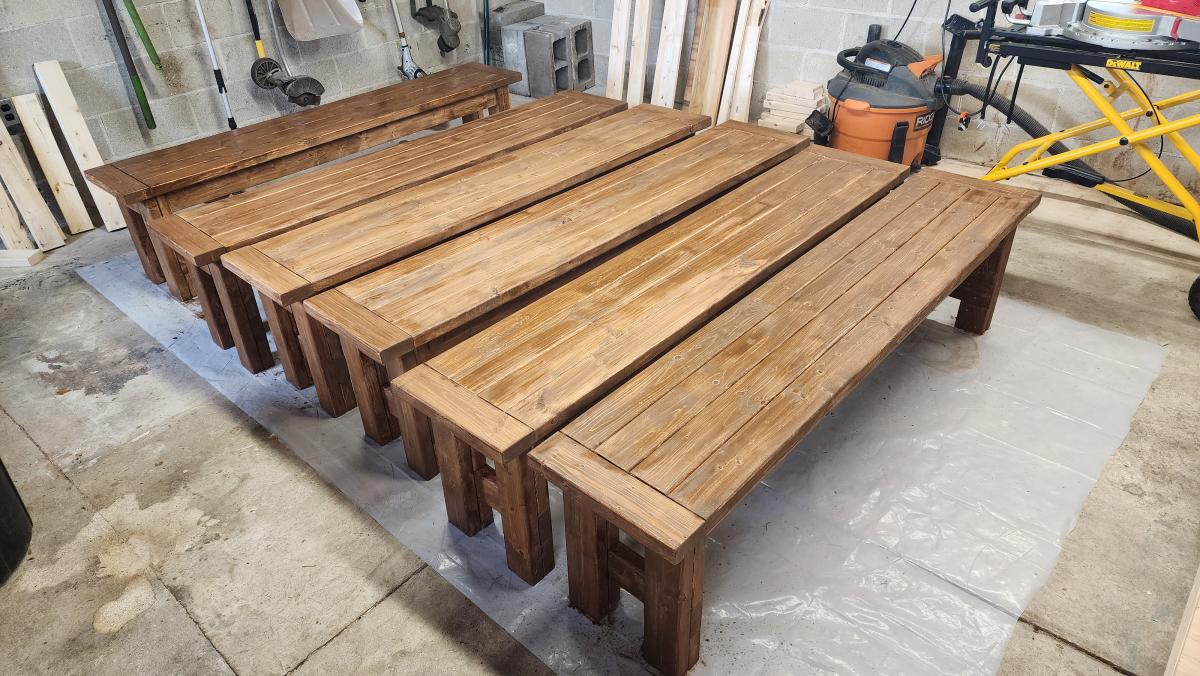
We followed the links below to create our bed frame and headboard. The last link had some good tips that helped us. My big contribution: Use bolts to fasten everything together. Taking careful measurements I created a track for for the 2x4 spacer. This makes setup of the spacer incredibly easy. Then I put all three benches together and drilled 3/8 holes and used 3/8 bolts, washers, and wingnuts to fasten. This makes everything easy to setup and take down. http://ana-white.com/2010/03/plans-reclaimed-wood-look-headboard-king-s…