Community Brag Posts

Corner Headboard Storage for Twin Beds

Submitted by Anonymous (not verified) on Sun, 05/08/2016 - 18:27

Corner unit for kids bedroom. Added fabric boxes from ikea. The fit perfectly 

Estimated Cost
$200.00. All the materials are from the Home Depot
Estimated Time Investment
Day Project (6-9 Hours)
Finish Used
Behr. Polar bear white
Recommended Skill Level
Beginner

Farmhouse Bed with Storage and Bookshelf footboard

Submitted by rbgreene04 on Sat, 05/21/2016 - 15:50

I altered the plans just a bit so that I could make use of the drawer closest to the headboard, while using bedside tables as well (not the ugly ones in the pictures, but some that only exist in my mind as of now). With the plan as is, I didn't think that first drawer would be able to open if you have a nightstand. So I left about a 17" gap that can be used as an open shelf for storage, and still had room for 3 drawers. I also wanted to include a bookshelf as the footboard to make it multifunctional. We have a ton of books and no place to store them (fear not, a large bookshelf/media center is coming soon!) I also altered the top of the headboard just a bit to give it more texture and visual appeal (hopefully, but beauty is in the eye of the beholder so I've been told). Lastly, I did not put the 1/4" plywood backing on the drawer carcasses. They were pretty sturdy as is, and only got more sturdy as they were attached to the headboard and footboard; I'm not worried about racking at all. Leaving the back off also allows me to pull the drawers out and access some hidden storage in between the two drawer carcasses. 

I wanted a simple finish, so I rubbed it with dark walnut Danish oil. Super simple finish and I think it'll hold up as the bed is not like a desk that needs poly or something. 

Estimated Cost
Cost? Great question! I build things, but don't keep track of receipts. Whoops! It's a major flaw of mine, and I'm working on it. I'd estimate just shy of $300.
Estimated Time Investment
Week Long Project (20 Hours or More)
Finish Used
I sanded to 120 and then lathered on Dark walnut Danish oil. I let it soak into the wood, and boy was the wood thirsty. Then reapplied after about 30 minutes and wiped off the excess, which there wasn't much excess--did I mention the wood was thirsty?
Recommended Skill Level
Intermediate

Comments

ciara5545

Sun, 08/28/2016 - 19:50

This bed turned out amazing.  I love the modifications and agree the first drawer will be more usable.

Rocking Moses Basket Stand

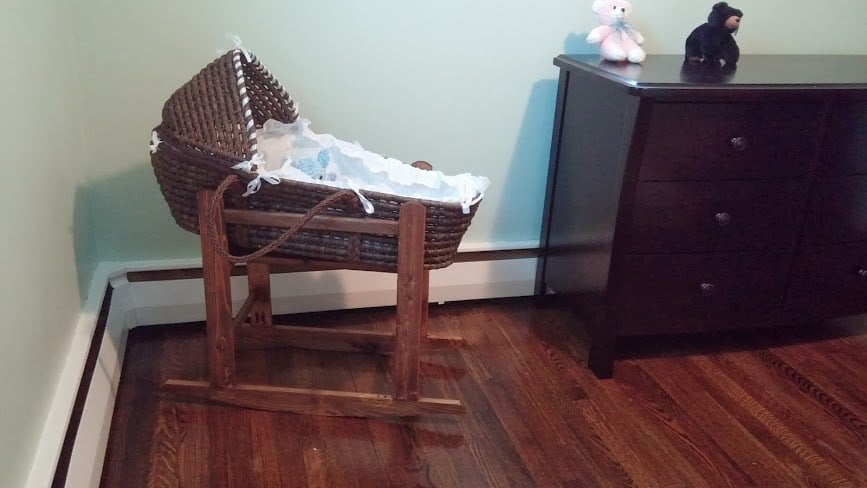
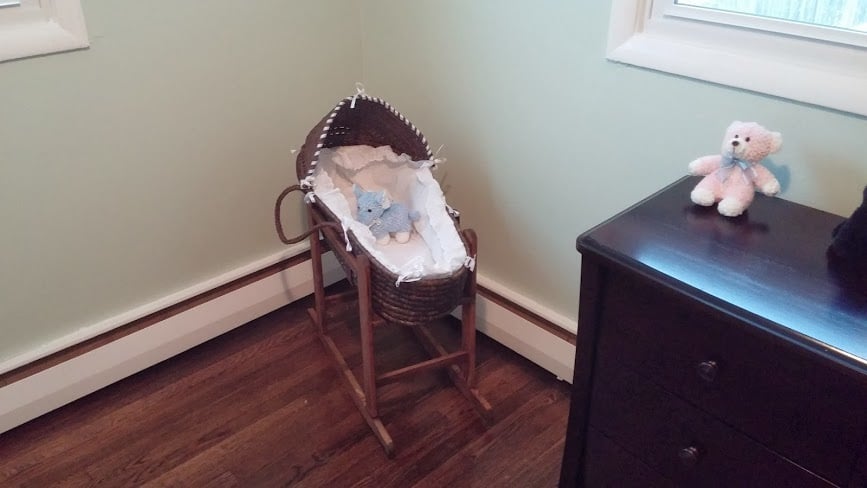
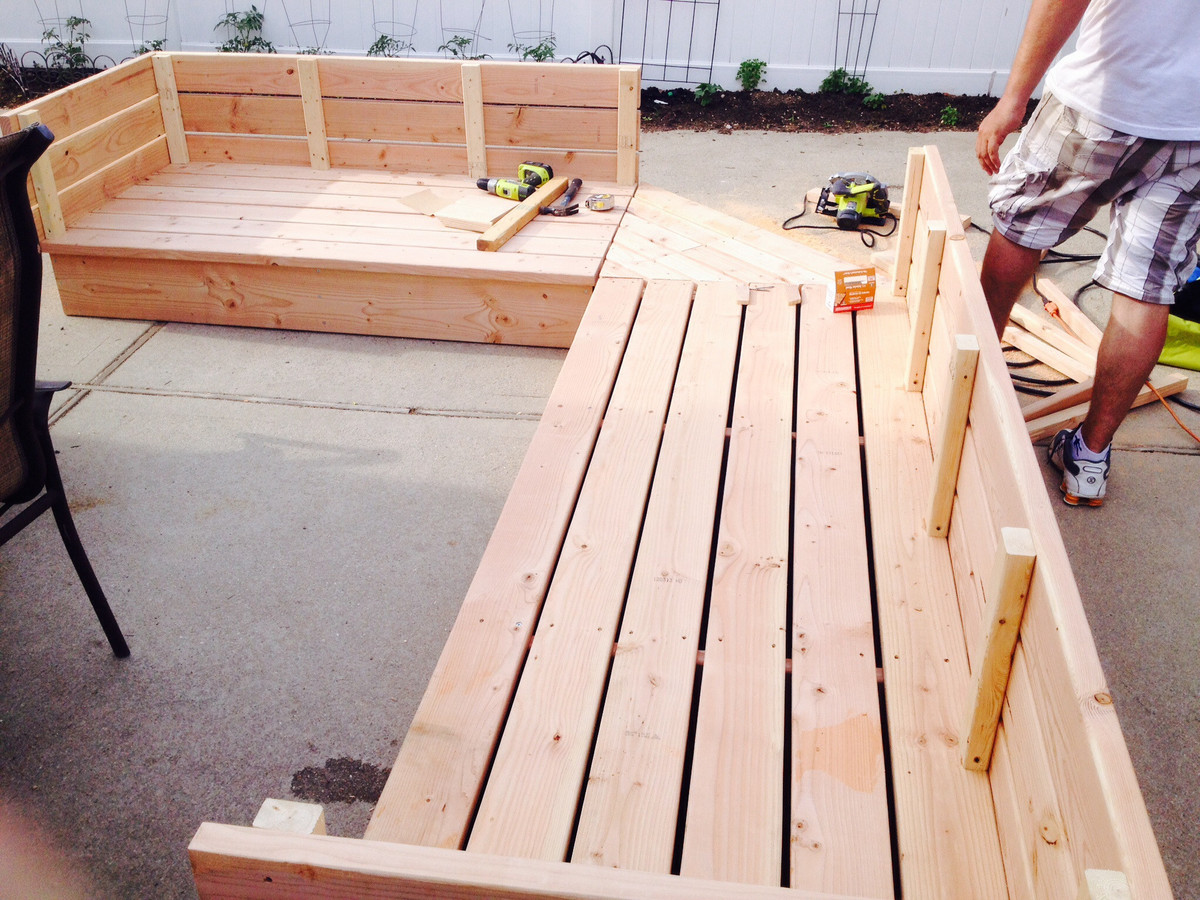
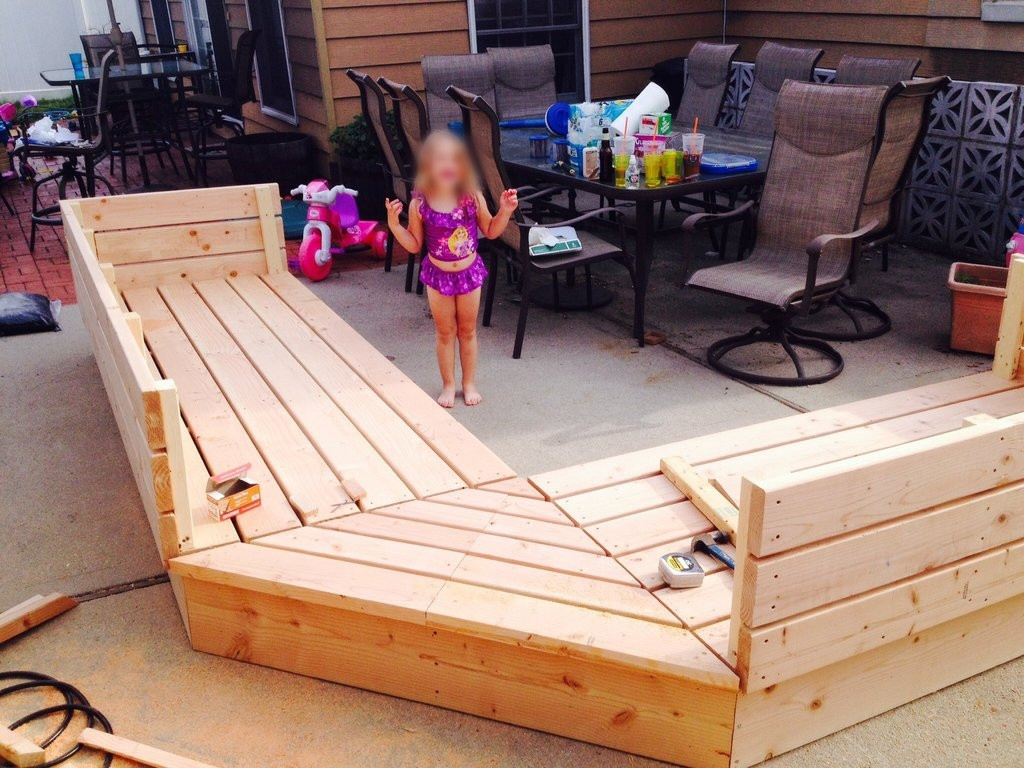
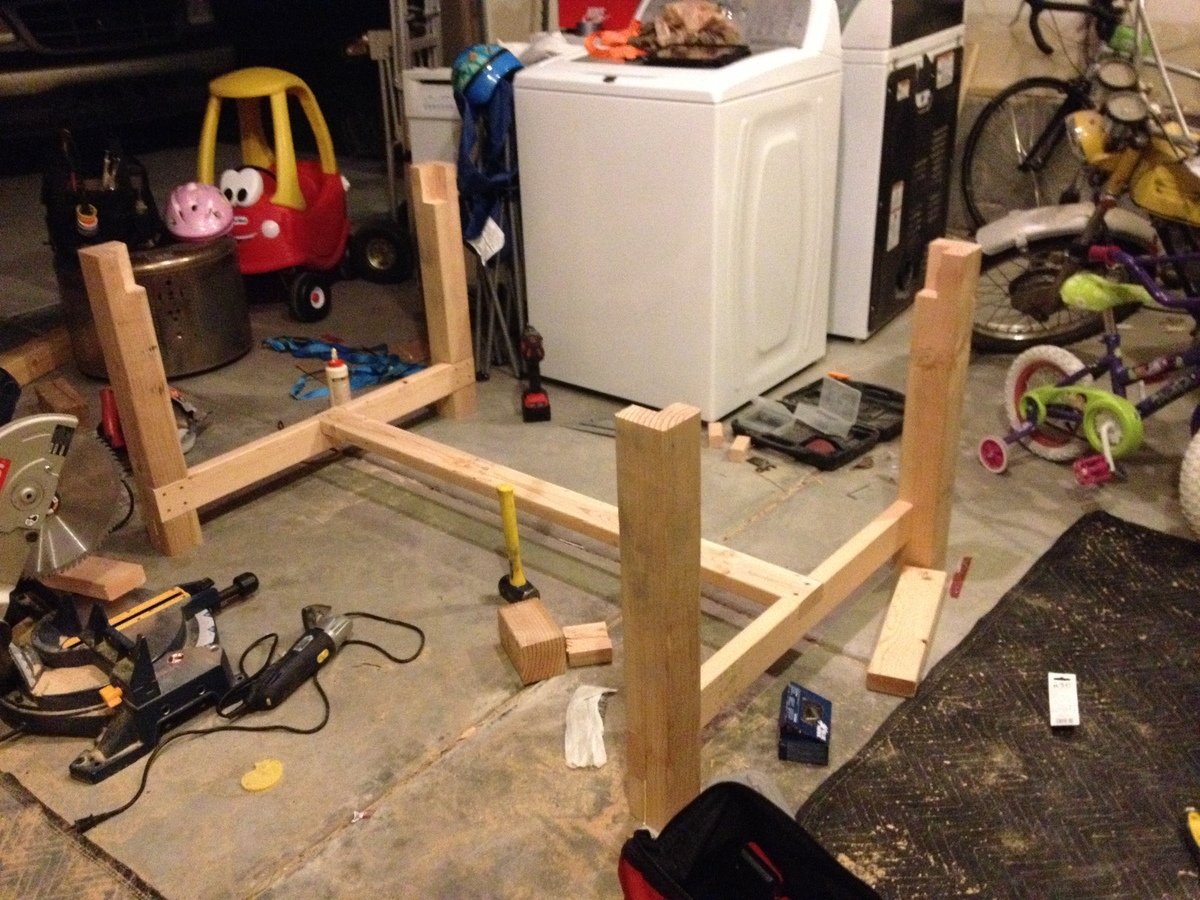
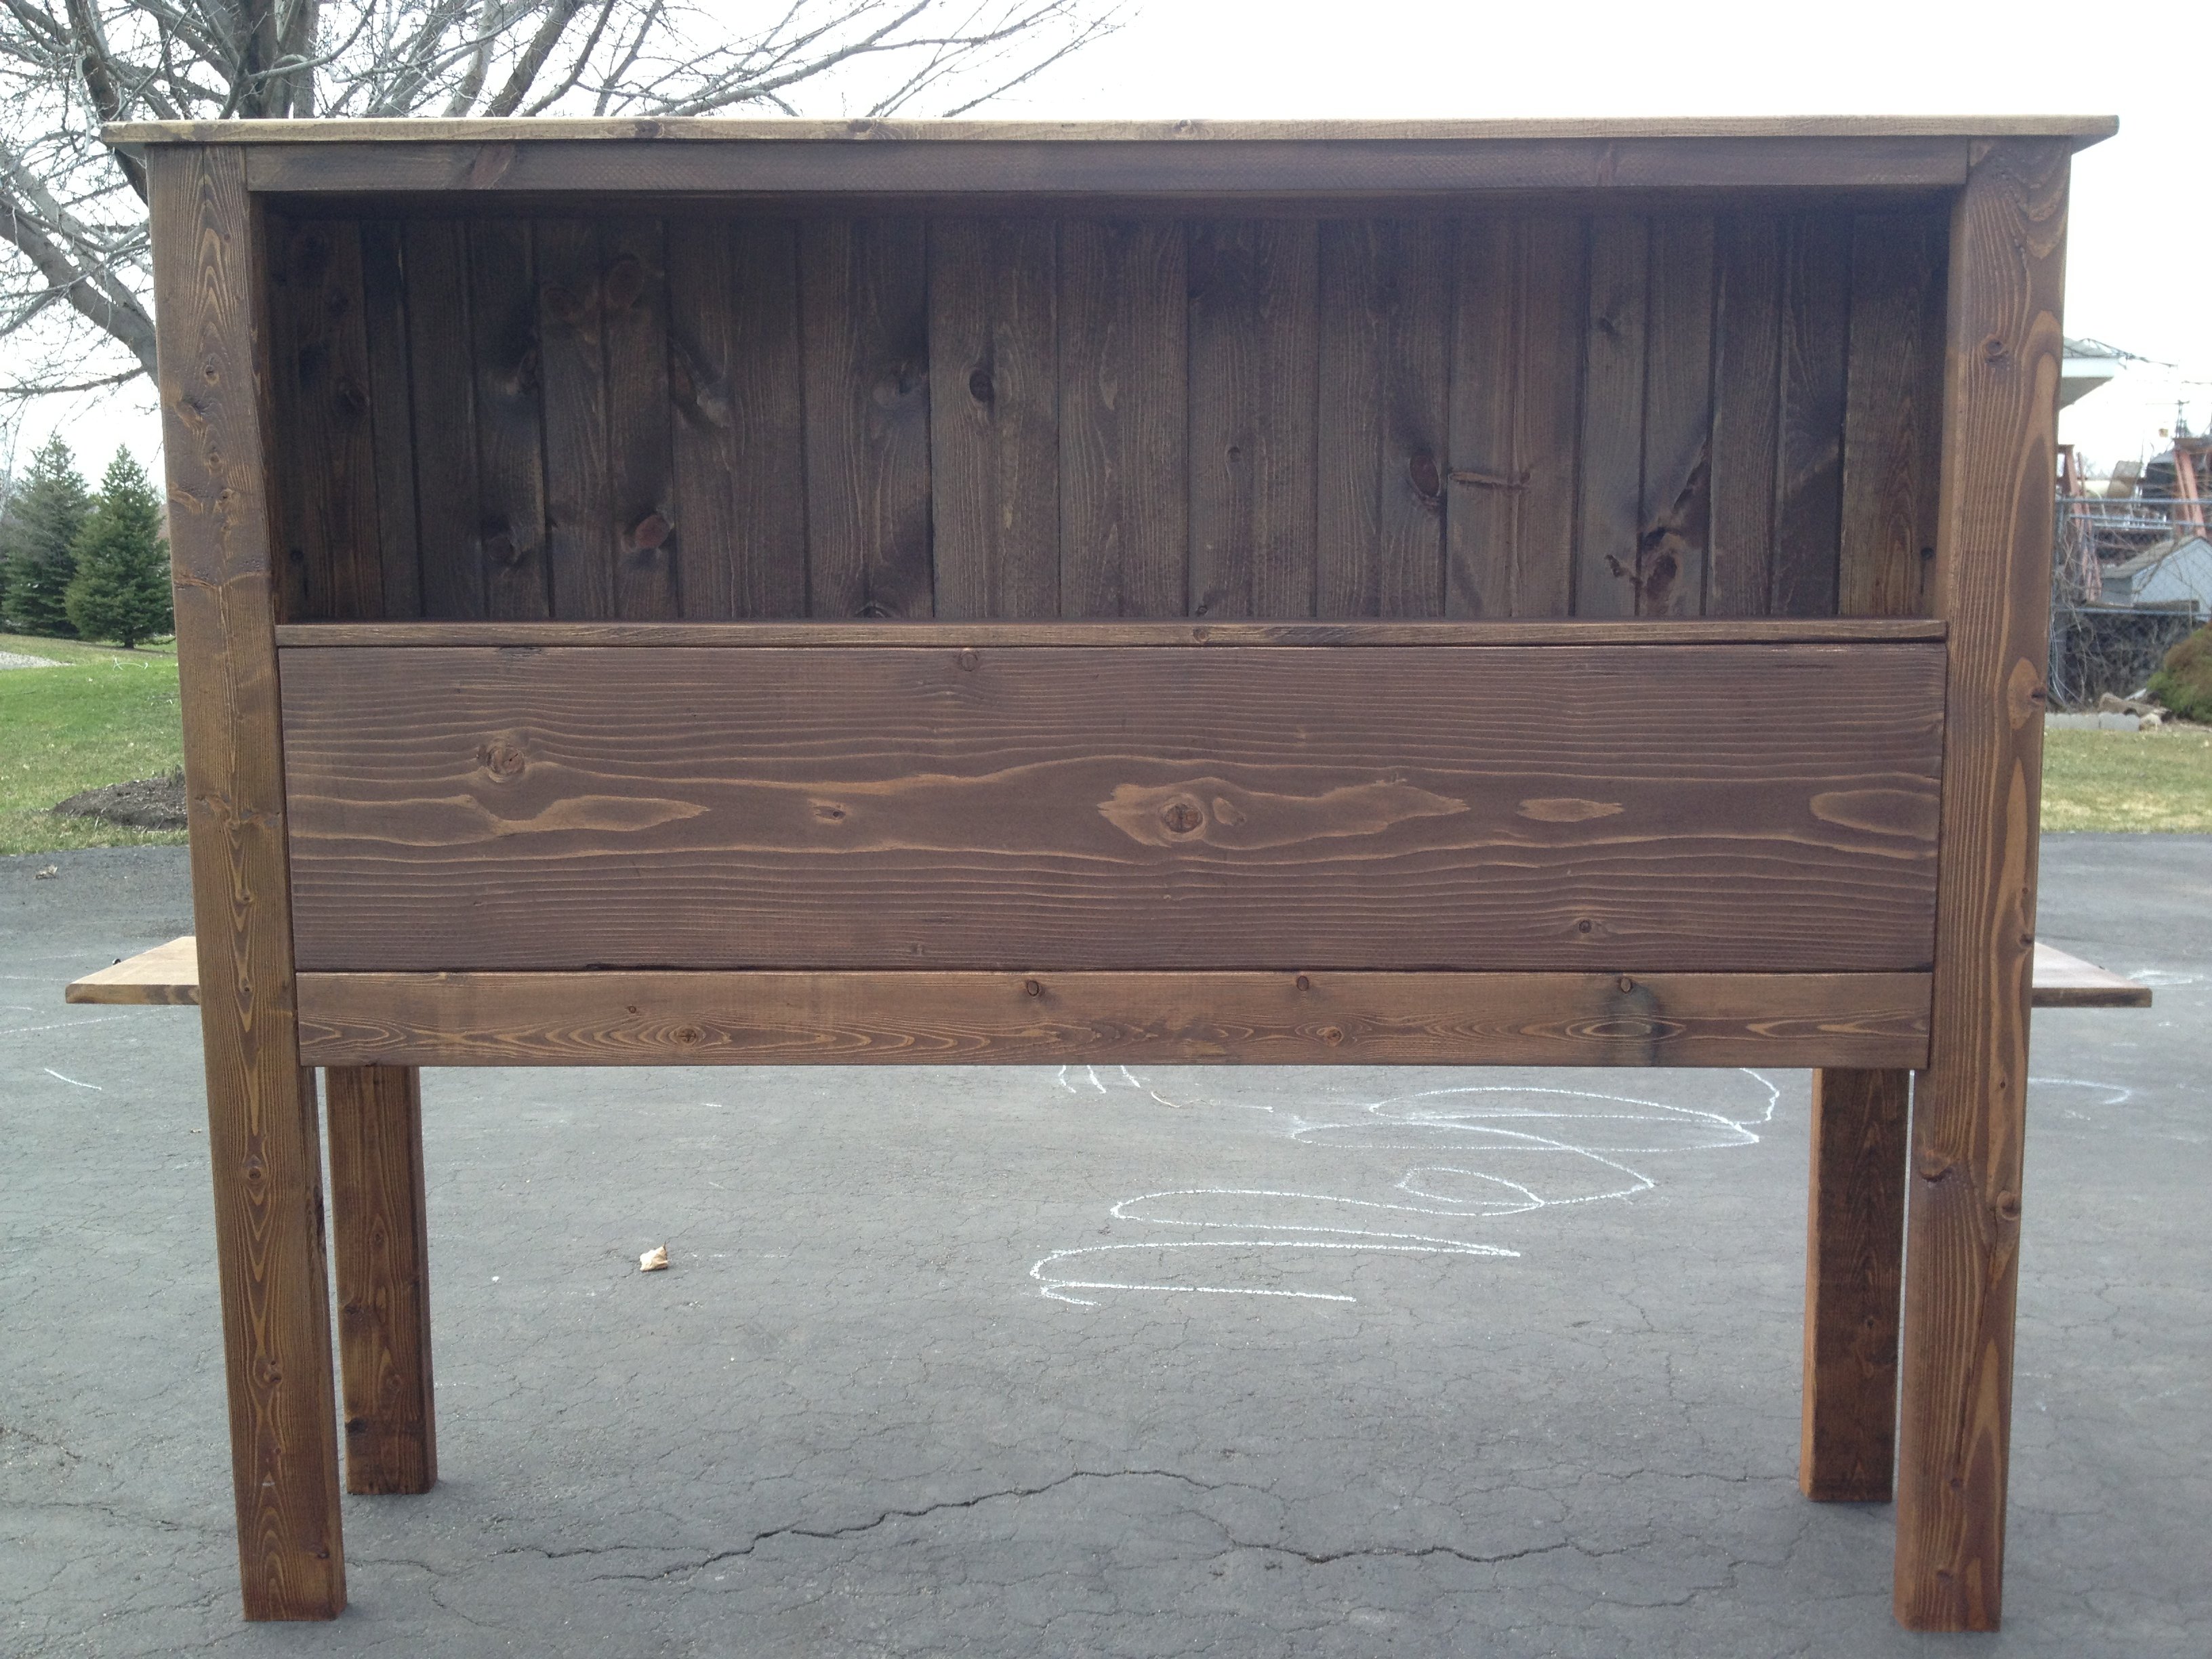
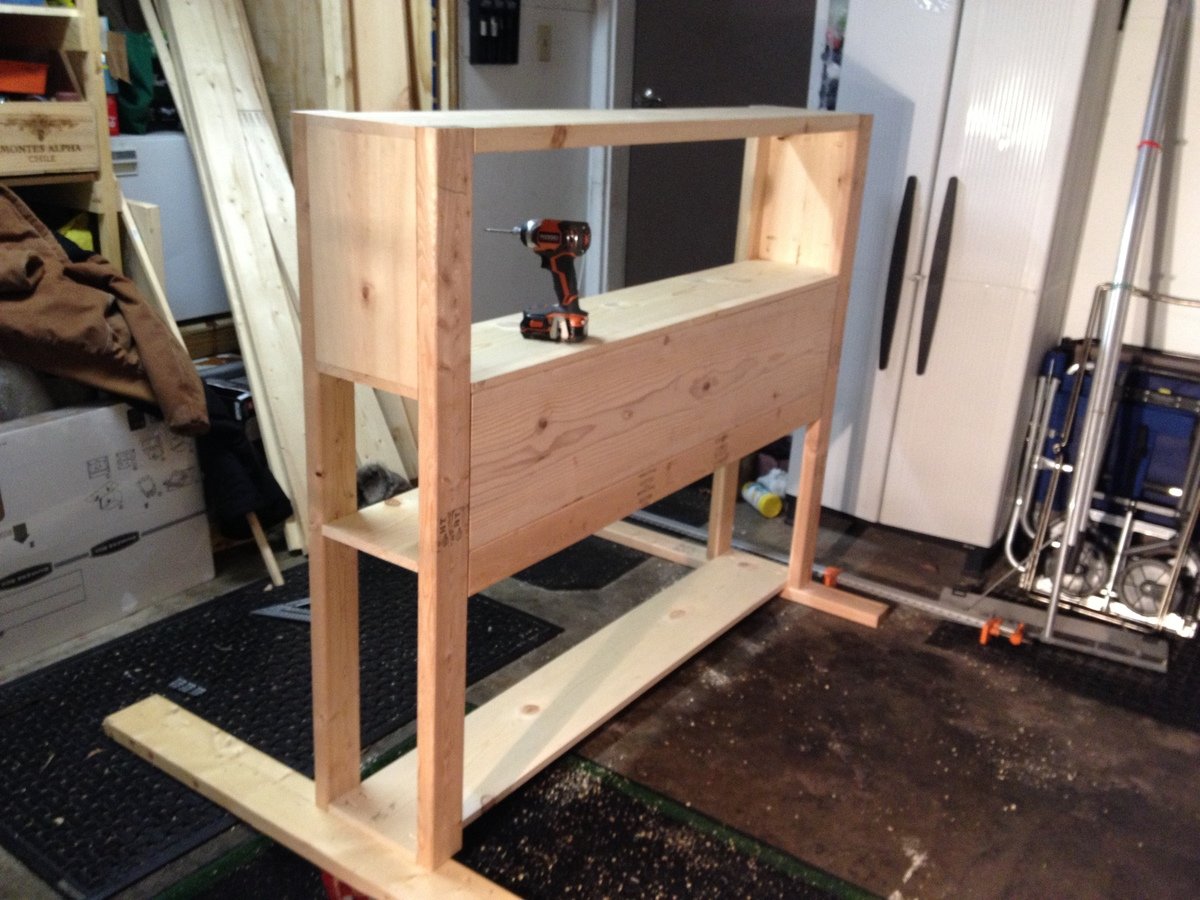
I made this over a weekend when this plan first was posted and have meant to upload these; however, this can be done in a day if you know what you are doing with the rockers. The main difference between the plan and mine was I kept the top of the rocker square, which made it a bit easier to attach the legs to it. I also made the mistake of making the curvature of the rocker too steep, which does not allow for smooth rocking and instead makes the rocker sort of hit only only 3 points.

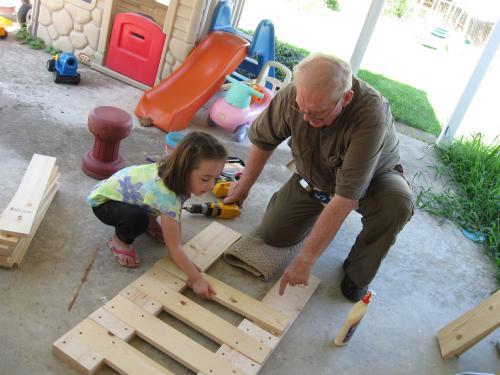
The advice I can offer on this, is to print out the rocker from the plan. I forced the picture to be as long as I wanted to rockers, then printed it out on multiple pages, taped it together and traced. If I had done this from the start my rockers would have gone much faster; instead, I did my own trace, then figured out it was too steep and then had to take what I had done apart and fix them with the stencil.

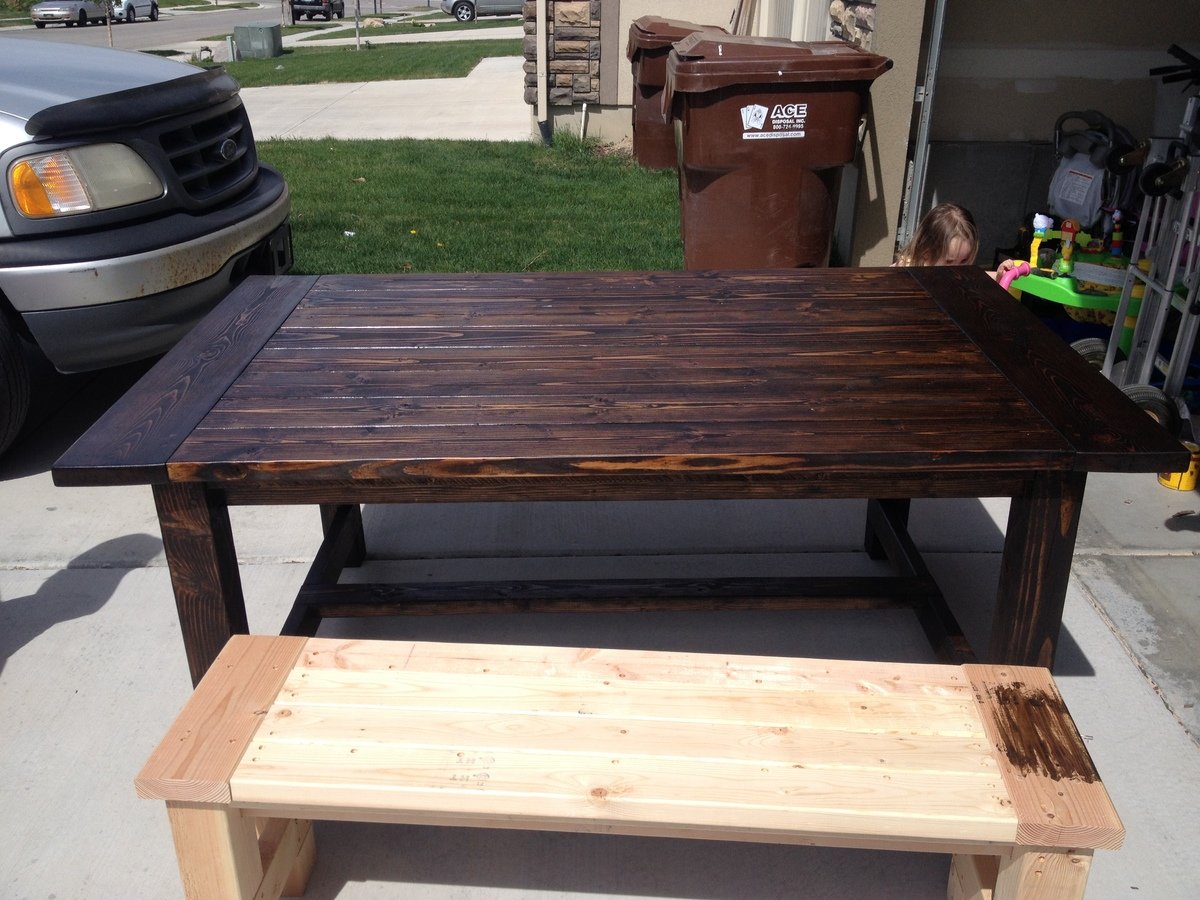
All in all, this was pretty easy and I spent under $8 on lumber, which is really awesome.

Built from Plan(s)
Estimated Cost
$40-50 (lumber and basket. add a bit more for stain if you have none)
Estimated Time Investment
Day Project (6-9 Hours)
Finish Used
Dark Walnut
Recommended Skill Level
Beginner

Comments

Toddler Bunk Beds

Submitted by Anonymous (not verified) on Sat, 07/16/2016 - 22:13

Modified the classic bunk bed plans to fit crib size matresses for our 1.5 & 2 year old girls, loved how my toddler bunk beds turned out! 


Estimated Cost
$200
Estimated Time Investment
Day Project (6-9 Hours)
Finish Used
Behr 'Rainwater' paint in satin
Recommended Skill Level
Intermediate

Comments

em01024

Mon, 08/01/2016 - 17:27

Hi,

Could you email me the change in measurements you used for the crib mattress? 

It would help me out so much. I want to build a similar one for my boys. 

Thank you.

Danielle S. 

Reclaimed-Wood Headboard

Submitted by keribeth on Fri, 07/06/2012 - 14:49

Reclaimed-wood headboard from pine boards with minwax aged oak gel stain and stain finish wipe-on polyacrylic. I distressed some of the board with a screwdriver, a pipe, and whatever else I found in the garage, and etched my and my wife's initials in a heart on one side. Aww!

Estimated Cost
~$85 in lumber
Estimated Time Investment
Day Project (6-9 Hours)
Finish Used
Minwax gel stain in aged oak
Recommended Skill Level
Starter Project

Comments

MichelleC

Fri, 07/06/2012 - 19:44

I was going to carve mine and my hubby's initials in a heart on our reclaimed headboard, too!!!!! I didn't end up doing it because I think we'll eventually sell it and build a headboard with padding on it since my husband likes something padded to lean against while watching tv at night.

King Size Platform Bed

Submitted by Anonymous (not verified) on Fri, 03/01/2024 - 07:33

followed your instructions for the "Essential Platform Bed Frame" -- made this as a king. 2x6's for all legs/center supports with mitered corners for a simple added style. only suggestion/modification is the the #of slats you suggested (10) is way too few, I ended up using 15 or more

Also, used the circle-corners instead of mitering because all our doorframes in the house have that type of corner, and then I wouldn't have to "match" the leaf design where the mitered corners meet

Thanks for your guide!

Jake in Spokane

Built from Plan(s)

Pallet style outdoor platform sectional (variation) with patio table

Submitted by SeanyMc on Tue, 06/17/2014 - 13:44

Saw the Outdoor sectional on your website and I just had to build it! Made some variations to the original plans, one being making it higher off the ground and the other was a necessity because Home Depot didn't have the right size wood and I wasn't about to go running around from store to store, so I used scraps to make a corner piece that fits perfectly. The most timely aspect was the sanding and removing all the rough edges. Also used Bondo to fill in all the holes that were on the outside to give it an all around smooth finish. The end result is just about the same though and the family and friends are in love with it! Thank you so much for the plans! Really could not even come close to justifying what it would cost to buy a sectional like this. Cushions were a huge concern and rightfully so. After building, I started searching and was mostly getting prices in the plus $800 range. It was breaking my heart knowing I was going to have to pay more than double what the entire sectional cost me. In the end though, was able to land some 25 x 25 x 6 cushions at Lowes for 50% off ($50 a piece).

Estimated Cost
$750 ($300 Wood & supplies. $40 paint. $400 for 50% off cushions)
Estimated Time Investment
Weekend Project (10-20 Hours)
Finish Used
Behr Premium Dark Walnut Paint, All in One.
Recommended Skill Level
Beginner

Comments

drhj84

Mon, 10/06/2014 - 08:18

I was wondering if you could tell us the model of your cushions.  I builth this over the weekend, but I ma having a tough time picking cushions.  thanks


HANLOP01

Mon, 03/16/2015 - 09:06

I love this modification. Did you use 2x8s or 2x10s for your base? It looks like you angles the back. How did you go about doing that? Thank you for posting this?! Great work!

longshot

Mon, 06/29/2015 - 18:00

nice build, when you get some time can you put up your modifications please:) would love to build this! Love the colours you used and how it looks!Me too..you cook like me, i make it my style...thats how i do my salsa ..my way i like it...

longshot

Mon, 06/29/2015 - 18:00

nice build, when you get some time can you put up your modifications please:) would love to build this! Love the colours you used and how it looks!Me too..you cook like me, i make it my style...thats how i do my salsa ..my way i like it...

tsmith@vanausd…

Wed, 07/22/2020 - 11:37

This looks great. This is exactly what I want to make. How is the height of the sectional? That's my only concern. Is there anything you would change if you were to do it all over again?

Seasonal And Holiday

Cornhole Boards

Submitted by SaraLodise on Fri, 09/23/2016 - 13:15

Cornhole boards for friends and family :)       Used 1x4s for framing and legs, 1/2" ply for top.


"R" set:  Birch plywood tops w/ (2) coats of Miniwax Weathered Oak oil stain. Red stripe is Behr 'Cherry Cola.'  (3) coats of Polycrylic finish.


"AW" set:  Regular plywood tops w/ (1) coat of Miniwax Special Walnut oil stain & Glidden 'Clemson Orange' stripe.   (3) coats of Polycrylic finish.

Estimated Cost
$100/set (2 boards)
Estimated Time Investment
Weekend Project (10-20 Hours)
Finish Used
(see description)
Recommended Skill Level
Intermediate

Comments

Seasonal And Holiday

Farmhouse Table and Bench

Submitted by SNukem on Thu, 07/03/2014 - 21:10

This was our first furniture building project. It took us about 20 hours to complete and we couldn't be more happy with the results. We used 4x4's instead of 2x4's for the legs. We also changed the dimensions of the table so that it was the perfect size for our kitchen. After completing the table we decided to build a bench as well. It is the same plan as the table, just miniaturized. We used Minwax Jacobean stain on the table and then topped with a clear coat. It is a very heavy, sturdy table.

Estimated Cost
150
Estimated Time Investment
Weekend Project (10-20 Hours)
Finish Used
Minwax Jacobean stain - 1 coat applied with rag, We didn't wipe any of the excess off.
Minwax Fast-Drying Polyurethane in Satin - 3 coats applied with a soft brush, light sanding in-between each coat.
Recommended Skill Level
Starter Project

Screen door with built in dog door

Our old screen door wasn't cutting it anymore, so I built a new one, and to kill two birds with one stone, I included a built-in dog door. Now I just need to find the motivation to close off the old dog door.

I have the plans to build this screen door with a built-in dog door posted via the blog link below for anyone interested.

Estimated Cost
80
Estimated Time Investment
Afternoon Project (3-6 Hours)
Finish Used
white exterior paint
Recommended Skill Level
Intermediate

Chicken shed

Submitted by diegaeb on Wed, 10/07/2020 - 08:32

I had started this project last year in September and finished it finally 2020 in March because I get my chicken then.
I did modify the chicken coop a little bit due to the material I got.
The instructions and most of all the cutting list I like best!

Antje

Built from Plan(s)
Estimated Time Investment
Week Long Project (20 Hours or More)

Comments

Sliding Door Cabinet for TV

Submitted by Anonymous (not verified) on Mon, 01/23/2017 - 18:55

This Project took about a day and a half.  Hardware was from amazon for about $70 plus another $30 for additonal rollers since the set only comes with metal bar and 2 rollers.  Stained in Weathered oak.  Its built with poplar wood.  This was about $400 to build with all the hardware.

Built from Plan(s)
Estimated Cost
400
Estimated Time Investment
Weekend Project (10-20 Hours)
Finish Used
minx weathered oak
Recommended Skill Level
Intermediate

Comments

Square picnic table

Submitted by Anonymous (not verified) on Sat, 05/08/2021 - 14:13

Followed Anna White’s plans except I beveled all the edges and flooded the table leg bottoms with penetrating epoxy sealer. The table looks great!

Built from Plan(s)
Estimated Cost
$425
Estimated Time Investment
Weekend Project (10-20 Hours)
Finish Used
2 coats exterior semi-transparent sealer (Padre)
Recommended Skill Level
Intermediate

Comments

Modern outdoor chairs

Submitted by Anonymous (not verified) on Tue, 06/08/2021 - 08:01

Love these plans! Made a modification and added backs to the chairs. Also, built ottomans to match the chairs which can also be used as additional seating.
Many compliments on the set. Thanks Ana!

Comments

Ana White Cabinet Builder Google Sheet converted to Microsoft Excel

I was trying to use the google sheets cabinet calculator that Ana posted and found that others were accessing and editing the master at the same time. I thought perhaps a Microsoft Excel version of the calculator to download may be useful.

I wasn't able to upload to this site so I've created a Brag Post to link to it on my site.

UPDATE: Ana's website has been updated and the file is now an Excel Spreadsheet which can be downloaded.

Estimated Cost
none, just converted the functions and calculations to work in excel
Estimated Time Investment
An Hour or Two (0-2 Hours)
Recommended Skill Level
Intermediate

Headboard based on PB Oxford Storage Bed

Although I didn't build this from a plan I wanted to be sure and share it as it is because of my experience building from Ana's plans that I felt comfortable giving this a shot.

My in-laws were just updated their lake cabin and wanted a storage headboard as space is a premium and it will be the only furniture in the guest rooms. It is unique as it has shelves on either side which can pull out to function as a small night stand, perfect for cell phones, books etc. The back of the piece is tongue and groove knotty pine which for the more rustic look they wanted.

I will probably do things a little different when I build the next headboard but overall I am satisfied with the end result. I chose not to do a lower storage area, mainly to keep the cost down. It could be done very easily but this piece is already very heavy and that there is plenty of storage.

Estimated Time Investment
Weekend Project (10-20 Hours)
Finish Used
Special Walnut stain with semi-gloss Polycrylic. All of the wood was sanded and then I applied wood conditioner. One coat of the stain and three coats of the semi-gloss. I live in Minnesota and build it in my garage so I had to wait until this week when temperatures finally were warm enough to apply the finish.
Recommended Skill Level
Beginner

Comments

White Bunk beds with ladder instructions

I redid this whole room for less than $600! Make sure you take your time with cuts and fitting. I did this with my father in law (my daughter even got to help out!), and it's less than perfect due to some rushing! More details on my blog.

I also couldn't find any 4x4's. Instead of doubling up on 2x4's, I just used one. That allowed me to change the tops of the head/foot boards to only 48" instead of 50 1/2. You can get enough for a head and foot board out of one board this way.

After looking at a TON of bunk bed ladders online, I designed my own. Just some leftover 2x4's. The sides are 47 1/2 inches long, and the rungs are 13 1/2 inches long. It's screwed to the bunk bed from the back so you don't see the screws.

Estimated Cost
$300
Estimated Time Investment
Weekend Project (10-20 Hours)
Finish Used
Sanded the heck out of everything, then two coats of Behr primer, followed by 2-3 coats of Behr semi-gloss in New Day Dew (it's a Disney color)
Recommended Skill Level
Beginner

Wedding Picnic Table

Submitted by leeannraye on Mon, 04/13/2015 - 06:27

I made this picnic table for my upcoming wedding with the intent of using it as our guestbook.  I'm hoping to have people sign, carve, and woodburn their names or a message on the table.  I painted the legs and supports white and stained the top and seats with a cherry stain.  I still need to put some finish on the whole thing, but overall I'm really happy with how it turned out.  And so are my dogs.

Estimated Cost
about $70
Estimated Time Investment
Weekend Project (10-20 Hours)
Finish Used
White paint and cherry stain
Recommended Skill Level
Beginner

Comments

Linda7

Mon, 04/13/2015 - 09:46

I love your idea for a picnic table as a guest book! There are several brags showing benches used as guest books on this site, but no picnic tables. Not wanting to sound like a know-it-all, I would caution you to use paint pens rather than a permanent magic marker if you have guests who aren't comfortable using a woodburning pen (such as an elderly person). Magic marker ink smears when you apply a finish over it. (I read a comment from a mom who made her daughter a guestbook bench. They used permanent magic marker, then applied a poly finish over it, which then ruined all of the signatures.)

leeannraye

Mon, 04/13/2015 - 11:08

Thank you for your suggestion about the paint pens. I hadn't had much time to do research and was planning on just using sharpies. But now I can avoid making that mistake. :)