Community Brag Posts

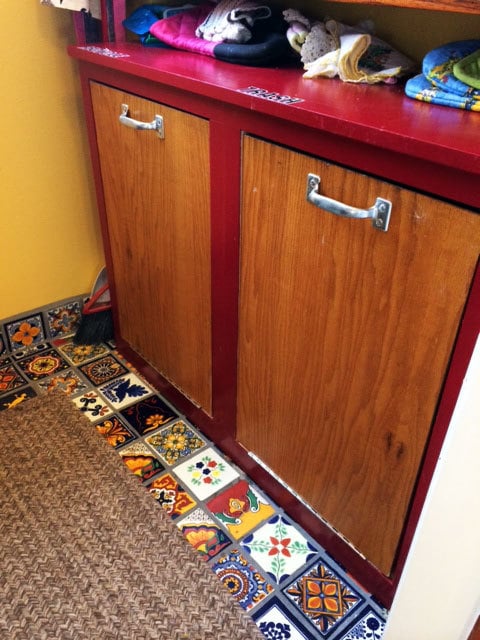
Double Tilt-Out Trash & Recycle Bin – DIY

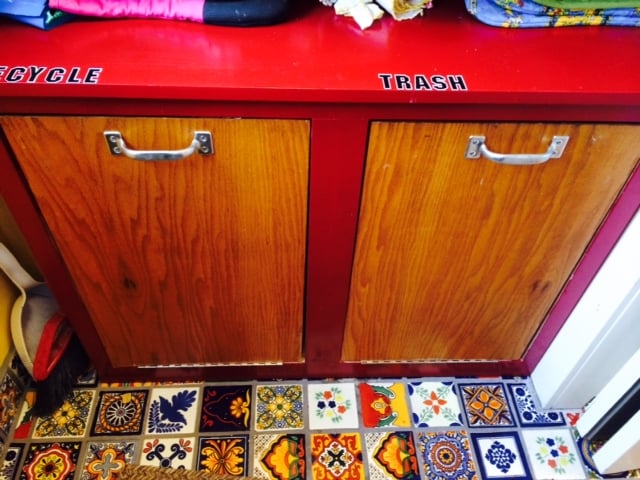
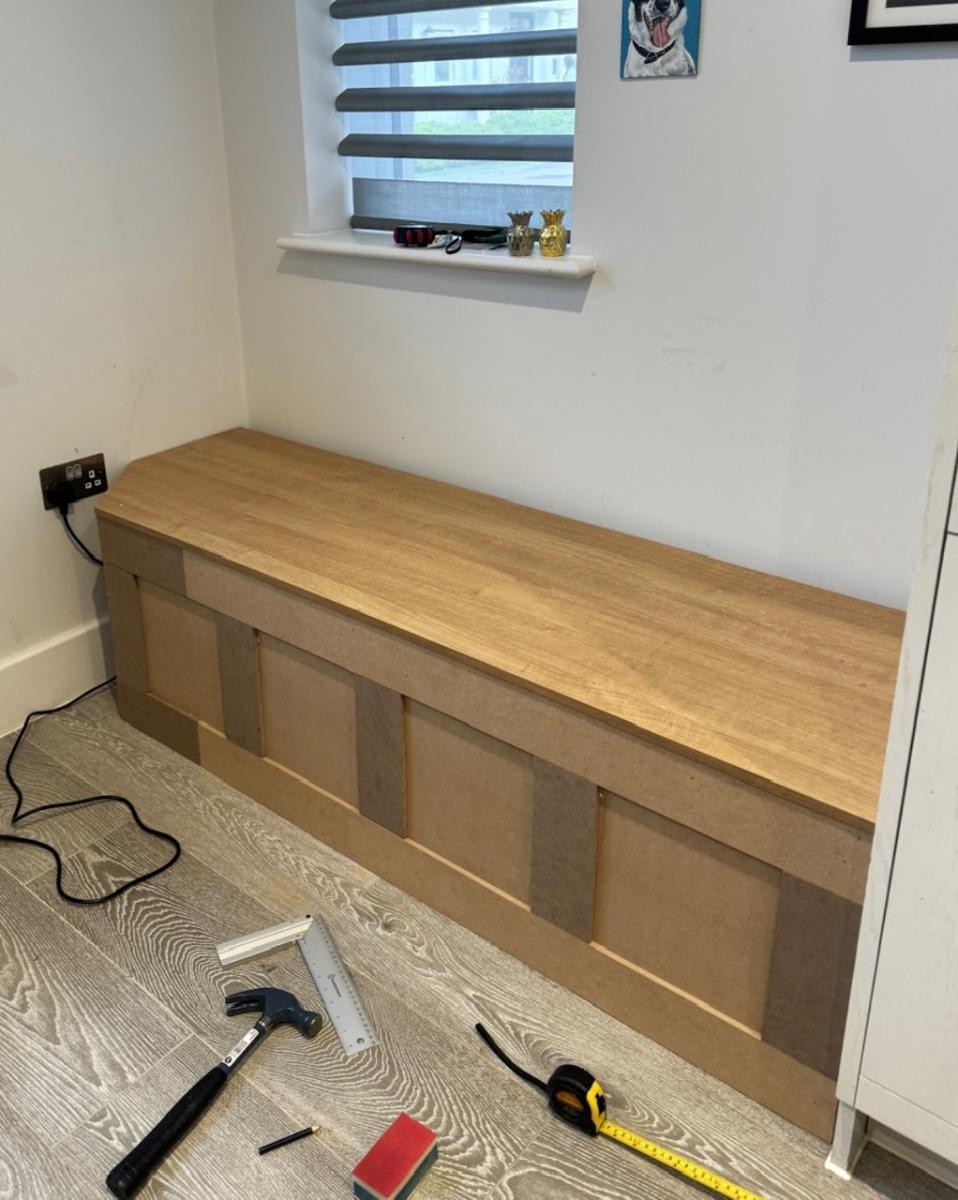
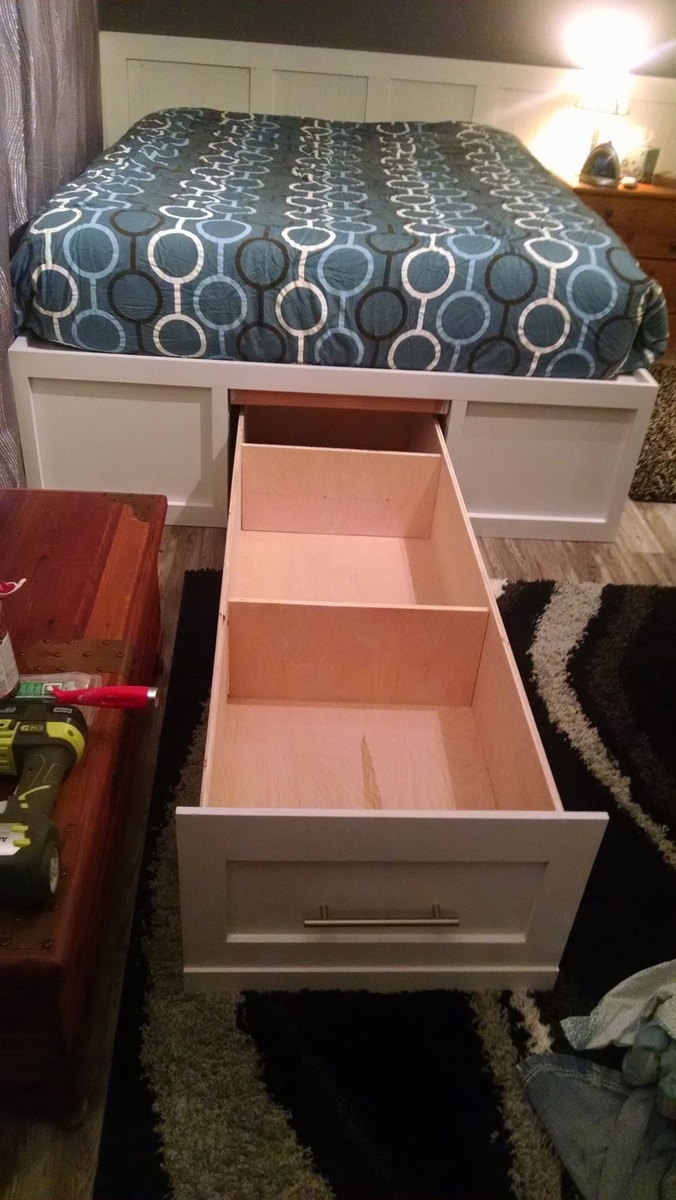
When we built our small mudroom and pantry addition, I new I needed a tilt out trash bin, nothing on the market fit the space the way I wanted. So I of course came here to Ana-white.com :) the "wood tilt out trash can or recycling cabinet plans" were perfect with a bit of hacking I made it fit exactly!

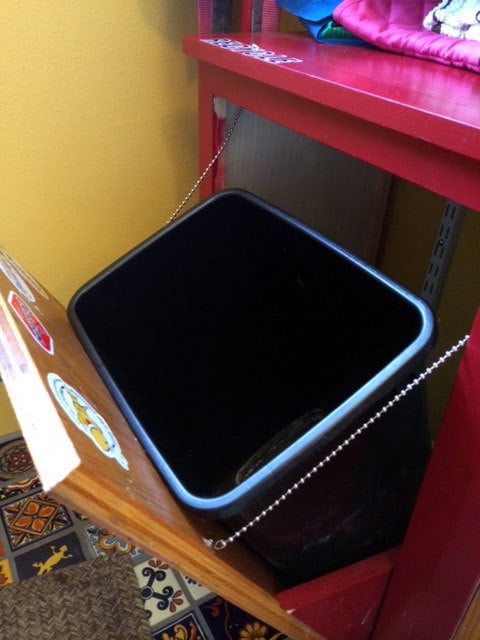
I made 2 cabinets into 1 unit,
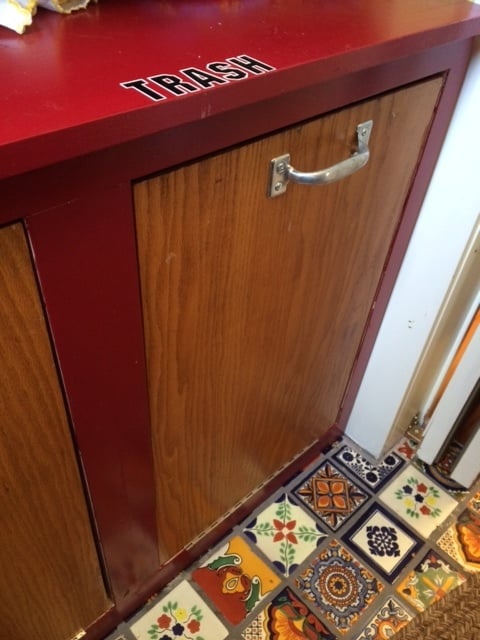
used salvage/old cabinet door fronts I cut to size
Painted the box red and kept the oak cabinets all wood grain
Added handles
Added ball chain to keep the doors from falling over.

LOVE this! fits perfect in our mudroom and it was a pretty quick project too!

Estimated Cost
$60
Estimated Time Investment
Day Project (6-9 Hours)
Finish Used
red satin house paint, polyurethane satin finish for door fronts.
Recommended Skill Level
Intermediate

Beginner Farm Table & Benches

This was my first time building anything! The plans were so easy to follow along! Once I master some things like this, I can work on fine tuning things a bit more so I can build some more intricate plans. Thanks so much for your website! My kids are loving the BBQ's outside at the table!

Estimated Time Investment
Afternoon Project (3-6 Hours)
Finish Used
I haven't added a finish yet but will be soon.
Recommended Skill Level
Starter Project

Comments

Beryl

Tue, 06/02/2020 - 15:09

re the farm table. your cut list calls for 8 2 x 4 at 28 1/2 inches but the plan actually only needs 4 of them. The pics do not show you doubling the 2 x 4s for legs. Am I missing something.

Changing table

Submitted by markmart74 on Thu, 07/07/2016 - 03:40

With the arrival of our first baby in 10 days,  the wife wanted a changing table. My only vision of a changing table was the ones in public restrooms. With the help of Google, I came across all the great diy ideas on this site. I combined 3 plans into 1 and came up with this. The project took 2 days to build. Next step is to prime and paint. 

Estimated Cost
90 - 100
Estimated Time Investment
Weekend Project (10-20 Hours)
Finish Used
Primer and paint
Recommended Skill Level
Intermediate

Comments

Storage Dining Bench

Submitted by Anonymous (not verified) on Fri, 03/22/2024 - 07:34

Kitchen dining bench with storage. Due to the plugs being in an awkward position, I opted to build this bench with a facade as opposed to adding a back and sides. This also meant it had to be panelled in situ which was a fun challenge! It has piano hinges as well as soft close pistons making for a great storage bench that is in keeping with the rest of our kitchen.

Farmhouse table

Submitted by Anonymous (not verified) on Thu, 06/18/2020 - 19:25

First table build! We modified the plans with no breadboard ends since we live with lots of humidity and wanted to allow the wood movement. We also used 4x4s for the legs. White chalk spray paint legs and custom mix of special walnut and weathered oak stains. We LOVE it!!

Estimated Cost
200
Estimated Time Investment
Weekend Project (10-20 Hours)

Custom Toy Box

Submitted by Anonymous (not verified) on Sat, 04/27/2024 - 11:30

Your plan for this toy box was sooo easy to follow, but I added the feet. My grandson loved it. I have 2 other projects from your plans for him as well.

Charlene

Built from Plan(s)

Eric's Cedar Shed!!

Submitted by Anonymous (not verified) on Mon, 07/06/2020 - 21:35

Thank you for the plans, shed turned out great! My association required me to match the siding color, roof color, and anchor to a concrete slab. So I poured 25 bags of 80lbs concrete to make a 9x5 slab. Redid the plans for an 8x4 shed, built the frame with 2x4s and not 2x2's, installed flashing, ice/water shield + felt + matching shingles since I'm near Chicago, and used a flexio finishing sprayer to paint the shed. Saved some $ by using 2 Redwood Grain Fiber siding panels for $22 each at HD.

All in all very happy with my shed and all my dangerous yard tools and woodworking tools can be put away from my toddler.

Built from Plan(s)
Estimated Cost
400
Estimated Time Investment
Weekend Project (10-20 Hours)
Finish Used
Behr Premium Plus exterior paint
Recommended Skill Level
Intermediate

Modern Outdoor Sofa and Loveseat

Modified the loveseat plans and created a sofa as well. No one that sees these thinks I built them. They look so much nicer than anything you can buy!

Estimated Cost
$350
Estimated Time Investment
Week Long Project (20 Hours or More)
Finish Used
First coat SW New Ebony Stain
second coat Varathane Briarsmoke
Recommended Skill Level
Beginner

Comments

PERFECT BIRTHDAY GIFT FOR OUR GRAND NIECES

Eaasy to build. Just measure the wood. I used My finish nailer and pocket hole screws and counter sunk wood screws. I used 1/8 piece  masonite instead of the plywood. My wife also knited blankets and  my mother made the mattress and pillows. They just loved them.

Estimated Cost
12.00
Estimated Time Investment
Afternoon Project (3-6 Hours)
Finish Used
Spray paint
Recommended Skill Level
Beginner

Octagonal Picnic Table

Submitted by Tbear on Fri, 07/25/2014 - 11:54

Living in a cottage on a lake during the summers, I needed a picnic table that would take care of a big family so I built the Octagonal picnic table on Ana's site, however with a twist.

Since we are under a bunch of trees, I wanted to be able to scrub the table easily and not have to do any maintenance on it over the long term. So I built the top and the benches using Trex. Yes, it was more expensive but the result (if I do say so myself) was incredible.

Since Trex isn't as structural as 2 x 6's, I reinforced the seats using 2x4s laid horizontally underneath the seam of each of the two bench pieces. I also drove a few extra screws through the Trex benches along the 2 x 4's to further strengthen seating area.

Aesthetically, I didn't care for the 1/2 inch spacing for the table top and benches so I reduced it to 1/4 inch and cut the length of the Trex accordingly. I used decking screws that exactly matched the color of the Trex.

I did take the advice of one of the former builder's of this table and staggered the legs to make it easier to get in and out. That was a worth while suggestion.

The only 'warning' I was given about using Trex was that it could get 'hot' if in the sun for long periods during the day during the summer. This table is in the shade almost all the time, but having said that I have read that the Trex as decking gets no hotter than treated lumber stained the same color.

This is a great design at it was lots of fun to build.

Built from Plan(s)
Estimated Cost
$500
Estimated Time Investment
Weekend Project (10-20 Hours)
Finish Used
Olympic Maximum Stain and Sealer
Recommended Skill Level
Intermediate

Garage Storage

Submitted by jlrd13 on Sun, 11/16/2014 - 11:00

I improvised on this a bit.  I envisioned being able to put small items on the shelves at some point so I made it with solid shelves instead of all 2x4's.  Except the stuff I bought for the shelves was so flimsy I had to add the support pieces. Ahh, well.  I'm learning.  And with the three support pieces (2x4's cut to size) running widthwise, it turned out to be a solid shelf.  LOVE this site!!  Thank you again, Ana!  Next project is a bathroom vanity.


Estimated Time Investment
Afternoon Project (3-6 Hours)
Recommended Skill Level
Starter Project

Comments

Modified Grandy Console with inset doors

I wanted to switch things up. I have made and sold many of the Grandy consoles with barn doors but my current new (to us) home was more modern traditional, definitely not very farm house. The Grandy plan makes a solid piece of furniture which is exactly what I need for it to survive amongst the giant teenagers that we are raising BUT I wanted to switch up the doors and add some traditional elements with a pop of modernish hardware. Make sure that your face frame openings are square. Add some non-mortise hinges, latch bolts and L brackets and this plan appears transformed!

Built from Plan(s)
Estimated Time Investment
Weekend Project (10-20 Hours)
Finish Used
Kilz primer, sw Dover white with a poly clear coat for added durability. Sand between all coats (time consuming but it adds a professional edge to your finishes).I use a critter sprayer from Amazon for the exterior and for poly. Foam rollers for the inside. Stain color for X doors was kona and lighter toned doors was a process (see Instagram post) but involved white wax.
Recommended Skill Level
Intermediate

Comments

Guitar Stand

Submitted by Eddie K on Thu, 03/02/2017 - 13:49

Built this guitar stand basically by using on-hand materials left over from another project.  Used 1x12's; 18" tall fir for sides and back braces (cut at 5 degrees on each side).  Added felt strips to protect the instrument.

Estimated Cost
Probably around $20-25. Need about 4' of 1x12 fir and Minwax Polyshades in Classic Oak. All materials were on hand except the roll felt, so hard to pinpoint.
Estimated Time Investment
Afternoon Project (3-6 Hours)
Finish Used
Minwax Polyshades in Classic Oak.
Recommended Skill Level
Beginner

Comments

Custom Industrial Style Closet

Submitted by slug on Tue, 12/09/2014 - 09:03

We remodeled our house and now had a new 9x6 master closet to fill. During construction I saw this design on ana-white.com and liked the style, but wanted to customize the layout. I found an online closet designer and played around until I found something my wife and I liked. We ended up with a 9 foot long his/hers double hanging on the ends and a long hanging section in the middle. And on the other side 8 feet of shelving (leaving about a foot for other storage).

I bought the pipe as a 10 foot pipe to be cut and threaded (for free by the store). I did have to change the design a little because the store cannot thread pipe less than 14 inches. So I ended up replacing the short pipes and T's with 2x4s. That made it a little cheaper and I still like the end result.

We stained all the wood using Minwax "Early American". This probably accounts for most of the build time.

Then I put together the supports and brought them into the closet to add all the pipes and slats. I started with the wall for hanging. And later did the shelving.


Here's another forum with more pictures of this project:

http://woodworking.formeremortals.net/me-mo-community/#/discussion/866/…

Built from Plan(s)
Estimated Cost
<$400 for whole closet.
Estimated Time Investment
Weekend Project (10-20 Hours)
Finish Used
Minwax "Early American"
Recommended Skill Level
Beginner

Comments

Bed with storage

Submitted by trwarner6 on Mon, 01/05/2015 - 16:32

I used two benches on each side attached the two with 2x4s and built a drawer on wheels for the middle

Built from Plan(s)
Estimated Cost
$300
Estimated Time Investment
Weekend Project (10-20 Hours)
Finish Used
Sutle touch hi gloss
Recommended Skill Level
Beginner

Comments

Cascading cedar planter

Submitted by Anonymous (not verified) on Sat, 04/08/2017 - 17:18

Instead of the 2X6, we used an additional cedar board to complete the sides and the ends of the planters.  This was more cost effective and still provides enough support to hold the planters.  This is a great alternative to the more expensive items we found online.  We will be building multiple to put in an unused space in our yard.  Great project!!

Built from Plan(s)
Estimated Cost
15 each
Estimated Time Investment
An Hour or Two (0-2 Hours)
Finish Used
no finish, we prefer the look of aged cedar
Recommended Skill Level
Starter Project

Kendal Dresser - upgraded

Submitted by Mobrien07 on Tue, 02/03/2015 - 15:59

I added front drawer trim & a walnut stained top to this already great design  


Built from Plan(s)
Finish Used
Minwax Special Walnut
Varathane clear coat
Sherwin Williams high gloss white
Recommended Skill Level
Intermediate

Comments

kmom721

Sat, 06/22/2019 - 08:44

It looks like they just bought some moulding and attached it