Community Brag Posts

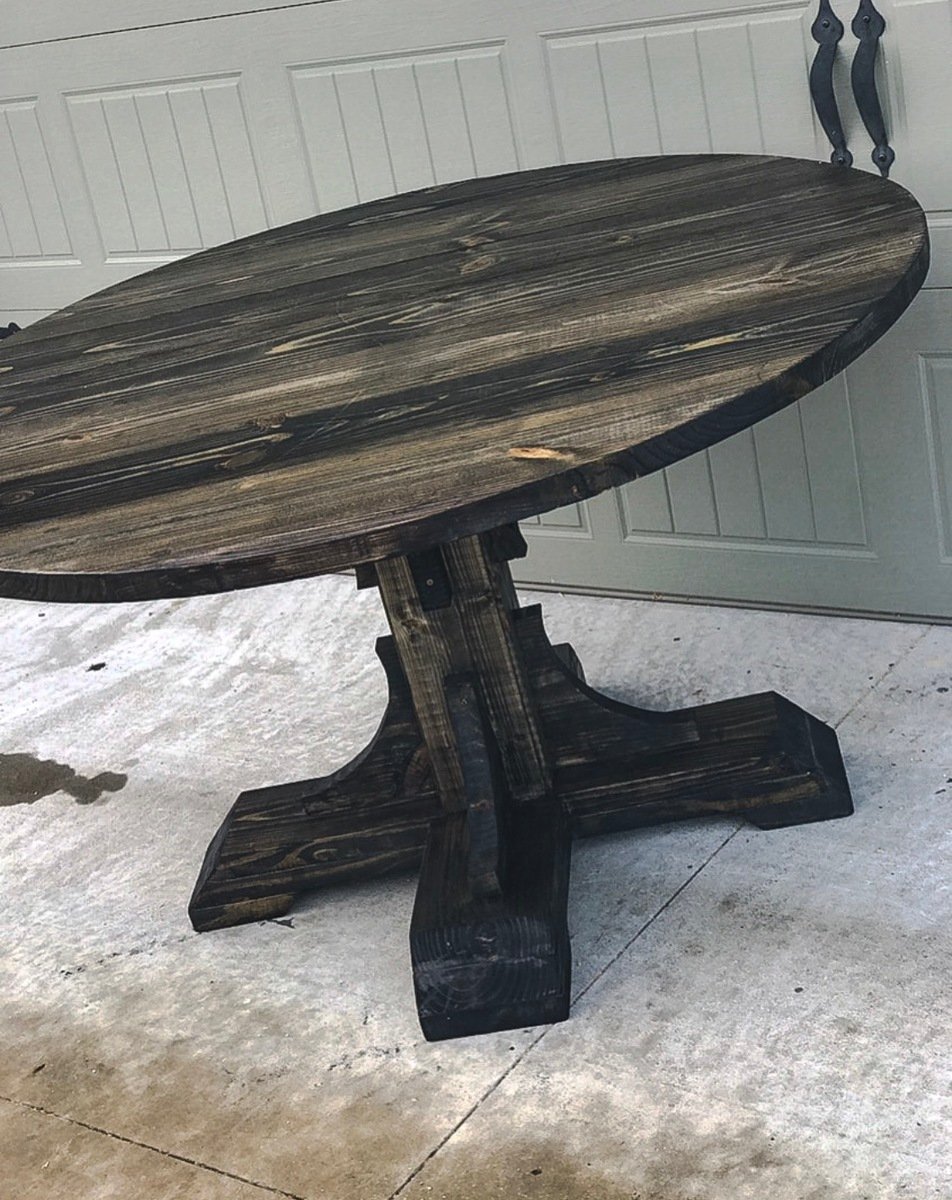
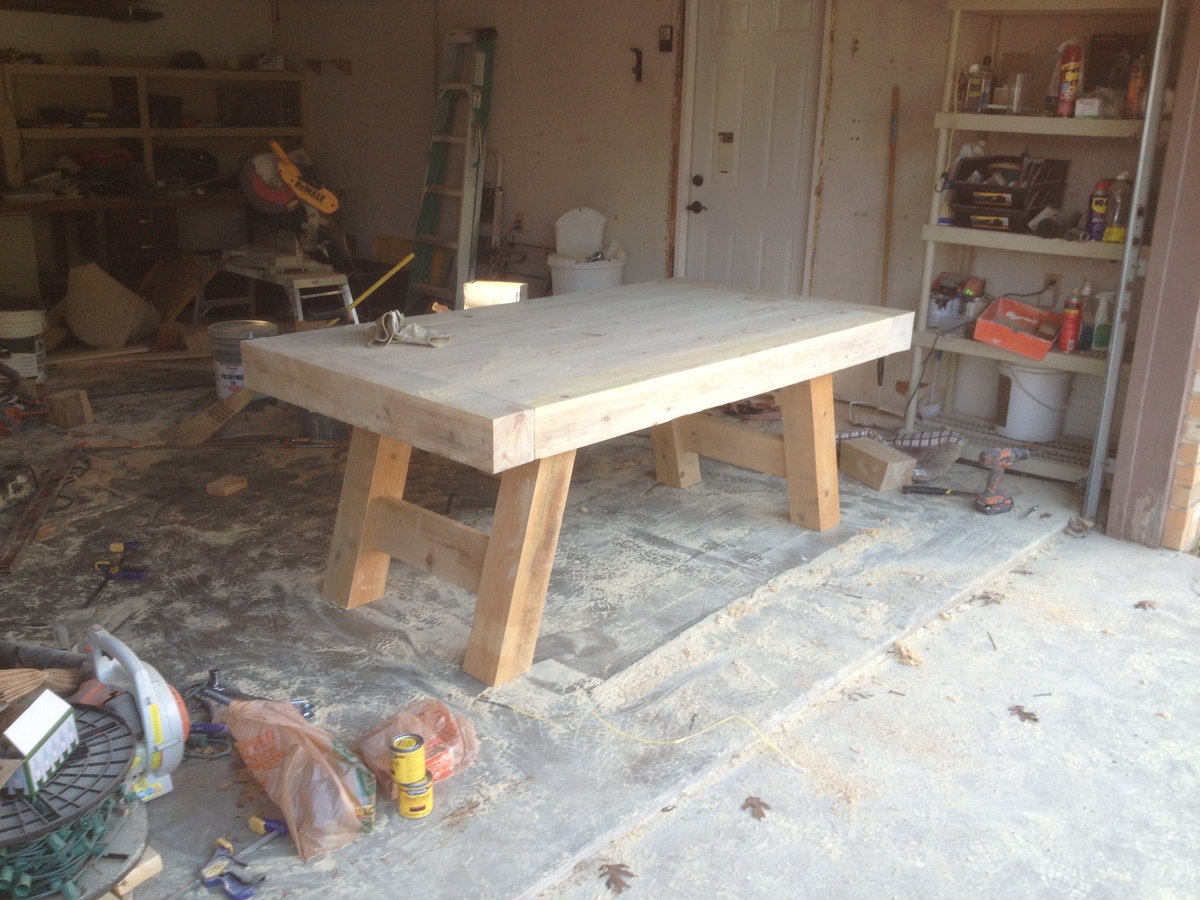
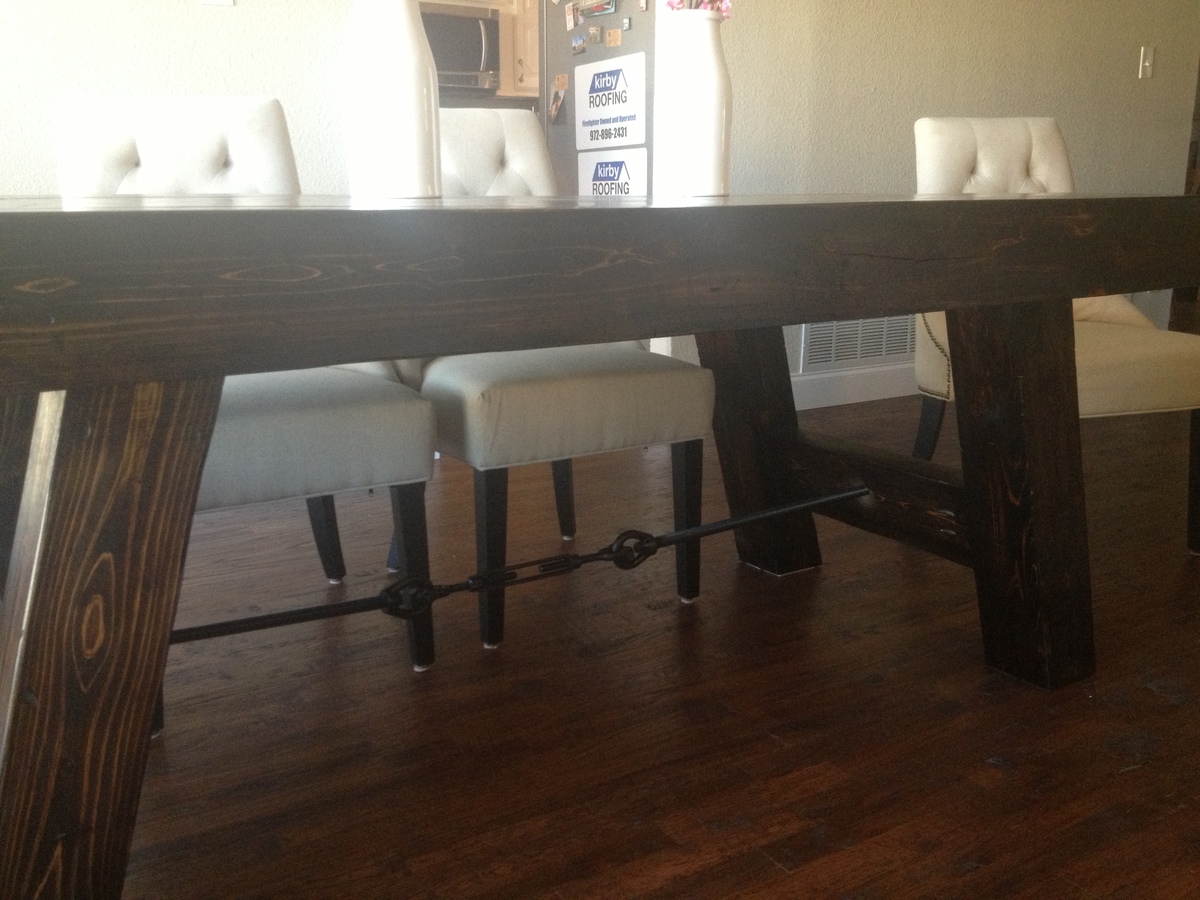
Outdoor Rustic X Console Table With Mosaic

Submitted by Anonymous (not verified) on Tue, 07/07/2020 - 19:58

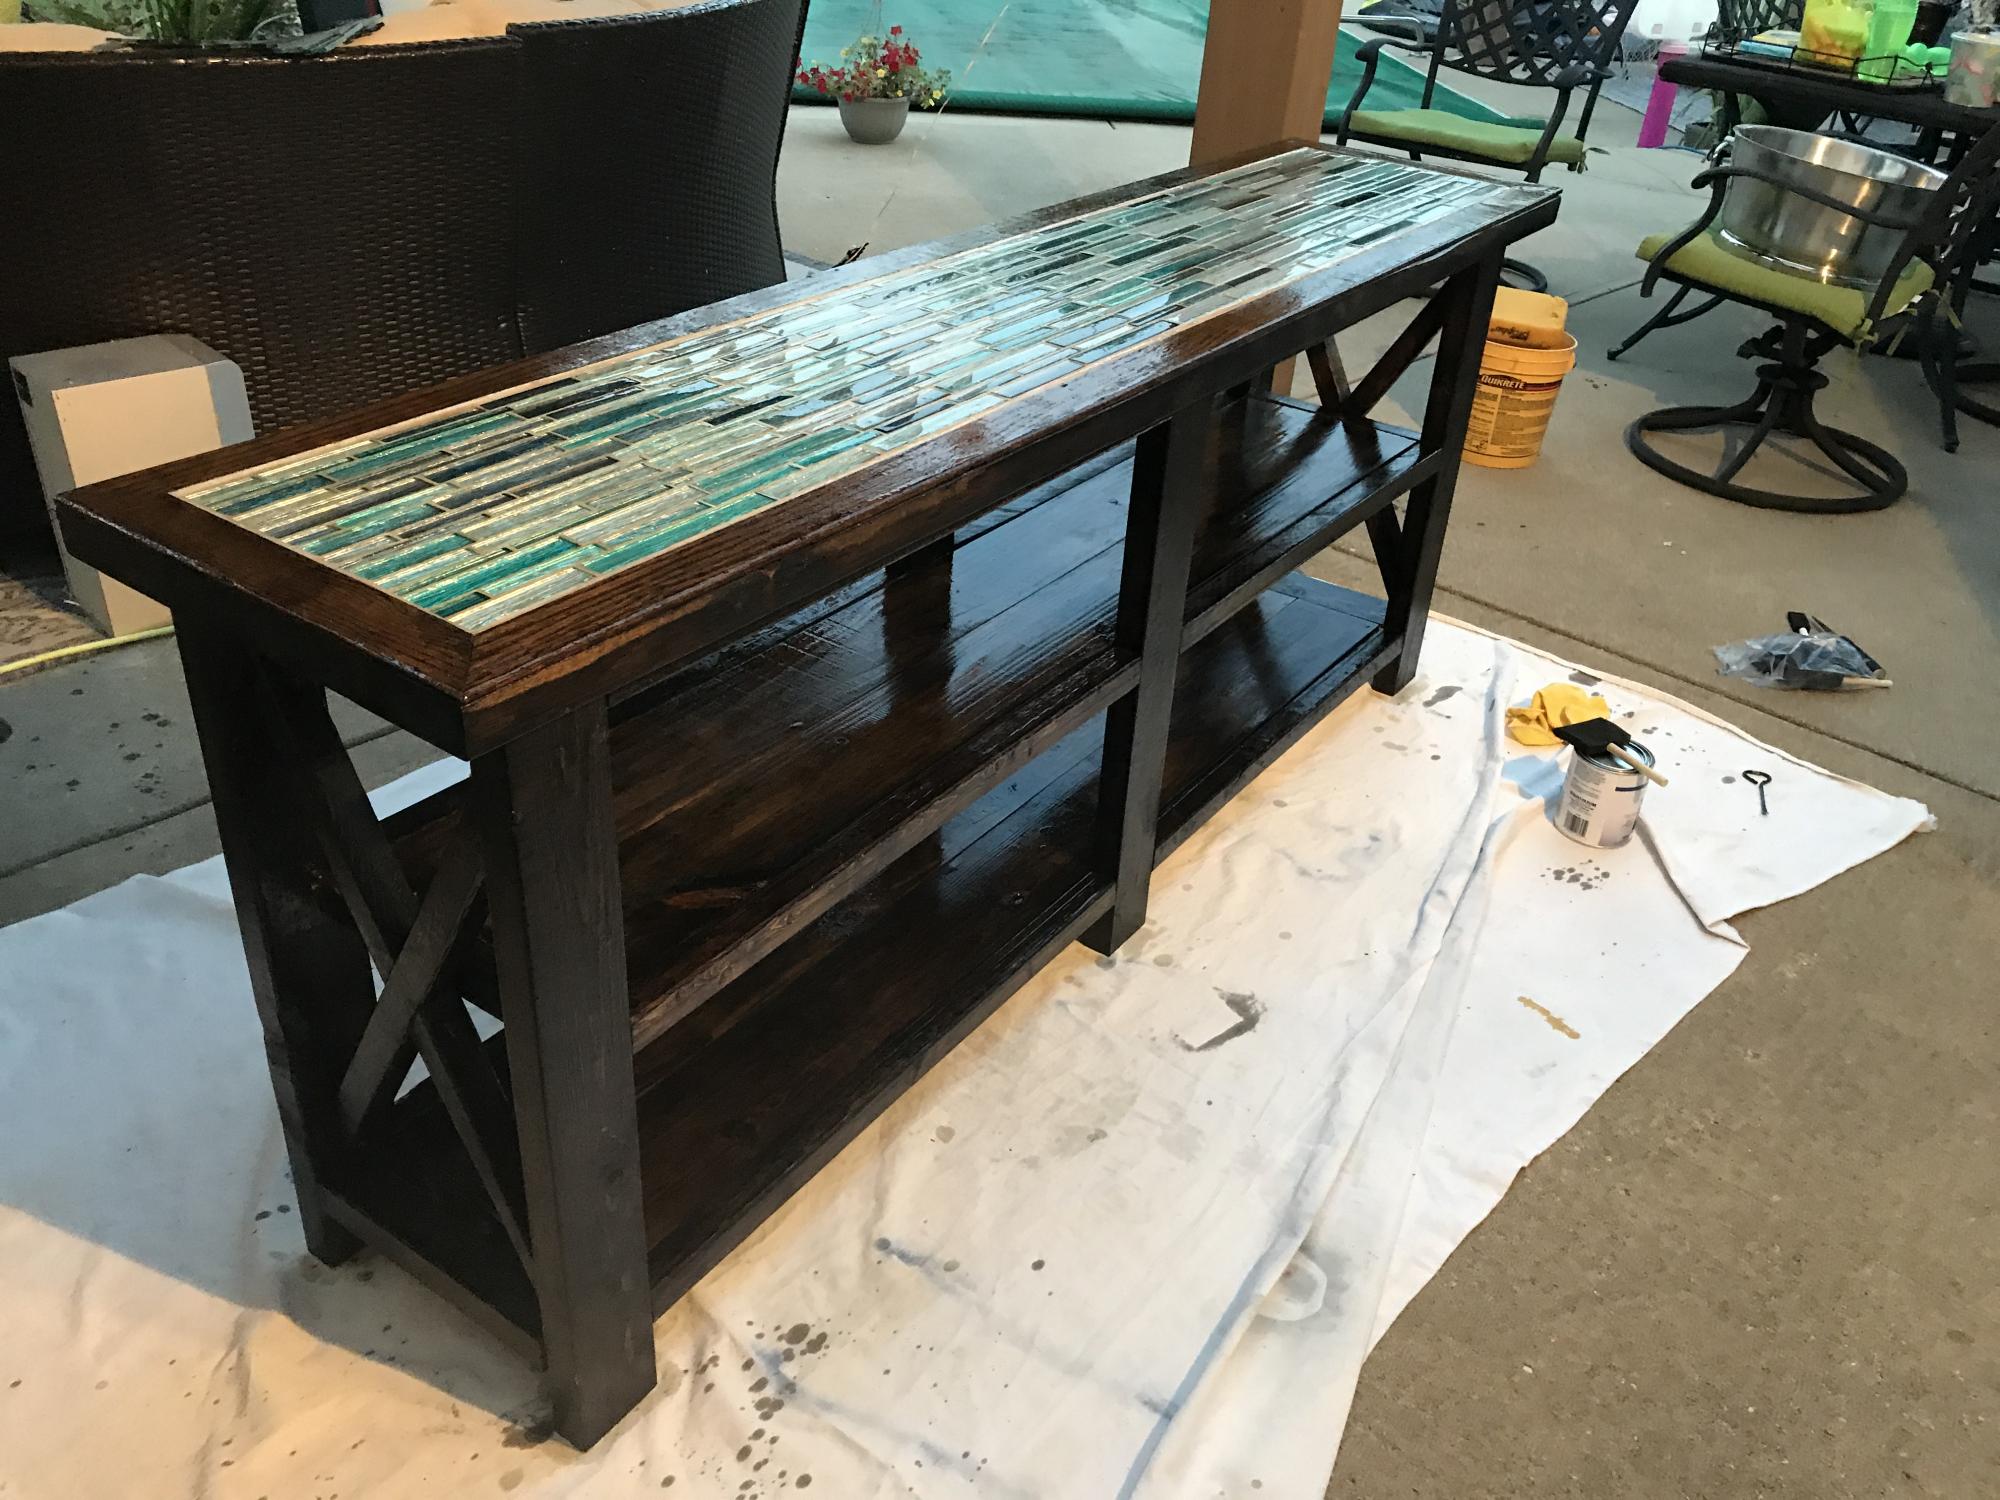
I took the rustic x console table but wanted it to be a nice piece for our outdoor seating area. I used some ebony stain, purchased mosaic tile from lowes, and finished with Spar Varnish. Around the tile, I used some old hardwood flooring strips as trim. Sanded and stained the trim to match. I'm very happy with how it turned out. And the varnish is UV resistant so it'll stand up to the rain and won't fade in the sun.

Built from Plan(s)
Estimated Cost
$150
Estimated Time Investment
Weekend Project (10-20 Hours)
Finish Used
Rust-oleum high gloss spar varnish. Ebony interior (gasp!) stain. Three coats of varnish. The UV protection should prevent the stain from fading.
Recommended Skill Level
Intermediate

Console Display/Sofa Table

Submitted by BigEBama on Thu, 07/10/2014 - 20:06

My wife had purchased a few antique printing press trays a few years ago to use to display family keepsakes. She also wanted a sofa table for the Living Room so I combined the two concepts into one table. I used the Rustic X Console table concept and modified it to fit my space and added the drawer compartments for the trays to slide into. I added two glass pieces to the top and there you have a sofa/display table. I used pine boards, hammer to distress the piece, Early American stain and a couple of coats of poly for the finish. The glass pieces we the biggest expense at $50. The table itself was built for around $55 before the glass was added.

Built from Plan(s)
Estimated Cost
$55 plus $50 for glass
Estimated Time Investment
Weekend Project (10-20 Hours)
Finish Used
Early American stain and Minwax Poly
Recommended Skill Level
Beginner

Pegboard Organizer with Magnetic Chalkboard

Submitted by katie0910 on Fri, 07/25/2014 - 10:59

I built two of these pegboard organizers for my boys to hang in their rooms. The magnetic chalkboard allows them to write fun messages or doodle, plus they can hang pictures on it with magnets. The pegboard helps keep their smaller toys organized and the hooks keep their hats from being scattered all over the house.

Estimated Time Investment
Weekend Project (10-20 Hours)
Finish Used
Minwax special walnut
Minwax fast-drying polyurethane
Recommended Skill Level
Beginner

Comments

Modified Simple Rolling Bar Cart

I honestly think Ana is a mind reader. Whenever I need plans for a particular piece of furniture, they magically appear on her site. Of course if she was a true mind reader, everything will be exactly as I need it requiring no modifications. That's what makes her plans so amazing. I can build bigger and better because I've learned to modify her plans to fit my current needs.

This Cart was no exception. I had to make mine a few inches deeper and change the height of the legs and it was a piece of cake. I put this together in less than 2 hours and finishing was easy too.

I did a blog post all about what I did differently including how I constructed a towel bar instead of the pipe. Check it out at www.thepursuitofhandyness.com

Built from Plan(s)
Estimated Cost
$25 Depending upon the type of casters used
Estimated Time Investment
Afternoon Project (3-6 Hours)
Finish Used
Oil Based Primer & Rustoleum Painters Touch Spray Paint in Paprika Satin
Recommended Skill Level
Starter Project

Mediocre man makes an the outdoor sofa!

Submitted by Anonymous (not verified) on Fri, 08/07/2020 - 10:23

I made this awesome sofa based on the plan. I'm not very good at this stuff however, these plans were great. Easy to follow and gave me a great excuse to buy a mitre saw.
It looks great with the blue cushions. It's quite comfy and a great size.

Now complete - a mod I will make is to add a second 2x4 in front of the back brace as I find it too deep.

I really appreciate you sharing these plans!

Built from Plan(s)
Estimated Cost
$90 CAD
Estimated Time Investment
Afternoon Project (3-6 Hours)
Finish Used
Cabot Stain (I need to get better.
Recommended Skill Level
Beginner

54" Round Pedestal Table

This was such a fun build. Instead of the square table top I opted for a 54" round table top and I also altered the plans for the base. I upped the size for each board used to give it a chunkier look ( Ex: instead of 2x4s, I used 2x6s and so on)

Estimated Cost
$110
Estimated Time Investment
Weekend Project (10-20 Hours)
Finish Used
1 Coat Minwax - Wood Conditioner
1 Coat Minwax - Ebony
3 Coats Minwax - Polycrylic
Recommended Skill Level
Intermediate

Comments

Storage twin beds with Corner unit and secret hideout!

Submitted by stacie_b on Thu, 09/11/2014 - 11:48

This is my biggest build yet! I combined plans from this site and then modified them slightly to create two twin storage beds, a corner headboard unit with cubbies, and a secret hideout underneath!

The beds are two benches - I left off the headboard and footboards to allow for a secret passageway for my girls to access the space under the headboard unit. I also left the backing off of the benches on the wall side of each bed so that they can be used for storage. (I also left the backing off of one of the cubbies on the room-side bench to allow additional access/exit points for the hideout.)

For the hideout, I followed the Corner Unit plans, except I stopped the headboard pieces at the level of the beds rather than making them go all the way to the floor. 

I added trim on the edges of the headboard unit - partly to cover imperfections, but I love the look of it! 

Now the girls have a secret hideout (complete with a light and pillows for lounging and reading), the space under the headboard unit is not wasted, and MOM did it all! :) I'm so proud of this project and I love the example it sets for my girls that powertools are for everyone! 

Estimated Cost
$150 for everything!
Estimated Time Investment
Week Long Project (20 Hours or More)
Finish Used
White high gloss enamel
Recommended Skill Level
Intermediate

Comments

Asian inspired outdoor bench (no screws!)

Submitted by jennibee on Sat, 09/13/2014 - 14:47

This is made by using treated lumber and concrete deck piers. The genius of this bench is that there are no screws. It fits together like a puzzle and sits on concrete deck piers. I left it untreated for a bit and decided to let the piers stay gray. The original plans called for the piers to be stained black and a stain to be applied to the wood. I wanted to post this as inspiration but will add the link to the template for the wood pieces at a later time. 

Estimated Time Investment
Afternoon Project (3-6 Hours)
Finish Used
I have future plans to use simple decking stain in a cherry color for the wood part and black concrete stain for the concrete deck piers.
Recommended Skill Level
Beginner

Mom's Lego Table

Submitted by adobbins29 on Wed, 12/26/2012 - 13:34

My son Bryce built the Lego Table for the Bell County Youth Fair and Livestock Show. He was entered as the youngest student at 9 years old and competed in the Junior Woodworking division. The table placed third out of 9 entries and he was the youngest kid to place. He was so excited! The table was easy to build and looks fantastic. Thank you for the plans. We are currently about to start work for this year's show.

Estimated Cost
$150
Estimated Time Investment
Week Long Project (20 Hours or More)
Finish Used
Painted base and stained top
Recommended Skill Level
Beginner

Dresser/Toddler Changing Table

Submitted by milleall on Thu, 11/06/2014 - 10:52

My 15 month old needed a new dresser and a place to put his changing pad as he outgrew the changing table with rails but still fits on the pad itself. I stained the drawers dark to match his existing crib. I used plywood for the drawer faces and attached 3/4 inch square poplar as pulls. I wanted an integrated look and the bonus is that my son has a harder time getting a good hold to open the drawers. I used the plans for the three drawer dresser but omitted the face frame because I wanted to cut costs (I used poplar not pine or else it would not have added much). I just made the plywood wider and I added some stabilizing pieces in the back.

Built from Plan(s)
Estimated Cost
125
Estimated Time Investment
Weekend Project (10-20 Hours)
Finish Used
White paint, Kona stain, and semi gloss polycrylic
Recommended Skill Level
Intermediate

Comments

Mater Chair for a child.

Submitted by justjeff52 on Mon, 12/01/2014 - 13:44

This is a chair I made from the Super Easy Adirondack Chair plan from your website.

Estimated Cost
$75.00
Estimated Time Investment
Weekend Project (10-20 Hours)
Finish Used
paint
Recommended Skill Level
Intermediate

Comments

Balustrade coffee table

Submitted by mandi10uga on Wed, 03/08/2017 - 05:36

Made from plans, no modifications. I've made it twice, once in a weathered natural look and once with a darker stain. 

Built from Plan(s)
Estimated Cost
$300
Estimated Time Investment
Day Project (6-9 Hours)
Recommended Skill Level
Beginner

Comments

Economical Basement Shelving

Submitted by Veronica P on Tue, 12/09/2014 - 07:17

I needed something to get the camping stuff, toys, strollers and everything else organized and up off the floor of our unfinished basement so my boys can ride their trikes inside over the winter. This was perfect! Just changed it slightly (made it deeper) to accommodate some larger items. Thanks again Ana!

Estimated Cost
$100
Estimated Time Investment
An Hour or Two (0-2 Hours)
Finish Used
None
Recommended Skill Level
Starter Project

Clear pine bunk bed

We started this late 2013 and finished it June 2014. We used an old IKEA bed hardware for the middle support for the full mattress. We had to use Hemlock Fir "white wood" for the 4x4's (found at Menards in Wisconsin). We used Satin polyurathane from Minwax and allowed a month for the fumes to die down. My boys and guests seem to enjoy the bed. 

Estimated Cost
$700 or so
Estimated Time Investment
Week Long Project (20 Hours or More)
Finish Used
Minwax Satin Polyurathane
Recommended Skill Level
Intermediate

Julie's benchmark media console

Submitted by Timjuliek on Sun, 03/19/2017 - 16:42

My wife used the benchmark media console plans with her own idea for the doors

Built from Plan(s)
Estimated Cost
$200
Estimated Time Investment
Week Long Project (20 Hours or More)
Finish Used
Sherman Williams pro classic
Recommended Skill Level
Intermediate

Mudroom Closet Makeover

Submitted by Anonymous (not verified) on Thu, 01/21/2021 - 07:10

The concept of hidden boot storage at the back is genius!!! I knew as soon as I saw your plan that I needed that in this space! Thank you so much for what you do!

Finish Used
Bench seat was wood conditioner, minwax early American, minwax weathered oak. Then finished with shellac. The coat hooks are from Amazon. The ring pull is from Lee Valley.

Comments

Large Entertainment Center

Submitted by rmseama on Sun, 01/24/2021 - 17:28

My Biggest build so far. We have a large living room and needed something large for that wall. I really had fun on this one. It took longer than I wanted but in the end, I’m really proud I finished. This was my first time to use the router and learned how build shaker style doors. -Instagram.com/theorthfam

Estimated Cost
1000
Estimated Time Investment
Week Long Project (20 Hours or More)
Recommended Skill Level
Intermediate

Benchwright Table

My wife loved the Benchwright table at pottery barn, and I did not love the price. Got a lot of ideas from this site and tried to make it my own. The outside and legs are made from 5"x5" Cypress, purchased from a local saw mill. I used a kreg jig on the entire thing along with lag bolts and glue. It is very heavy and I can jump up and down on it. Bought the hardware from Fastenal. Fun project, took about 16 hours total.

Estimated Cost
$400
Estimated Time Investment
Weekend Project (10-20 Hours)
Finish Used
Minwax Poly - 3 Coats
Recommended Skill Level
Advanced

Comments

jbayer80

Sat, 03/02/2013 - 20:21

This is by far my favorite table I've seen on here. Wow...its all I can say. I wish it was not in the $400 range.

BTW, that is some serious saw dust. haha

In reply to by jbayer80

chasekirby80

Sun, 03/03/2013 - 05:50

Thank you,
I helped a buddy make on shortly after I made mine. He used 4x4 pine, it looks a little smaller and the pine did not stain as dark, but it is still a very nice looking table. He made it for under $150, so that might be a good option.

jbayer80

Sun, 03/03/2013 - 07:37

That is a great option. Hopefully when its time for a table like this I can afford the 5X5's.

What a statement that table has!

Simple Outhouse

Submitted by Anonymous (not verified) on Thu, 04/20/2017 - 12:26

I had my nephew build this outhouse for our new 70 acre lot - no neighbours in sight so I had him put in an acrylic window (with a view).  I left off the deck and had him put the boards tight together so 'critters' didn't get in as easily. I made a sign for above the door - 'Waste Management' for a touch of humour.  The plans were easy to follow and I love it.  Thanks, Ana.

Built from Plan(s)
Estimated Cost
Approx. $300 for material and $250 for my nephew's labour.
Estimated Time Investment
Weekend Project (10-20 Hours)
Finish Used
sealer
Recommended Skill Level
Beginner

Comments

Bypass Closet Doors

Submitted by Mama2Three on Fri, 04/05/2013 - 08:49

After discovering a leak, we are in the process of a master bathroom/bedroom remodel. In the bedroom, we had replaced all of the windows, painted and installed crown moulding with rope lighting in the bedroom. Then we looked at our closet doors leading to our walk-in closet, and realized they really needed to go to. They were heavy, mirrored with brass trim and regularly would jump off their track. Unfortunately the leak had caused more damage than we originally thought, and our remodel had expanded to replacing two exterior walls as well so we were over budget. Just to get an idea of how much it would cost to buy new doors, I got online and thankfully I found these plans. Although I used to watch my Grandfather build things in his wood shop, I had never actually built something all by myself. My contractor let me use his Kreg Jig and miter saw. After purchasing the wood, I quickly put together the door frames. Since we were on a strict budget for these doors, I decided to use bead board instead of glass. I bought a 4 x 8 sheet of beadboard and had the store rip it in half. I then attached it to the back of the doors with small wood screws and glue. I painted the doors with white gloss trim paint to match the other doors in the room. Since my closet is a walk-in closet, I did paint both sides. My closet entrance had no trim, so used a piece of moulding and attached it to the bypass door track. We are not finished with the flooring or baseboards yet, but once complete we will be installing guides along the bottom.

Estimated Cost
100
Estimated Time Investment
Day Project (6-9 Hours)
Finish Used
White high-gloss enamel paint
Recommended Skill Level
Beginner

Comments

White and ceder nest boxes

Submitted by Anonymous (not verified) on Thu, 06/01/2017 - 21:35

I mostly followed Ana's plans but used 1 5/8 screws and had a problem with wood splitting so for the ceder I used a finish nailer instread which worked great. I also painted before nailing the ceder pieces so they would really stand out and I also cut a few inches off the front ceder piece as I think 5.5in is too high and covers too much of the entrance. 

Built from Plan(s)
Estimated Cost
30 dollars
Estimated Time Investment
Afternoon Project (3-6 Hours)
Finish Used
Just an exterior white paint on the pine.
Recommended Skill Level
Starter Project