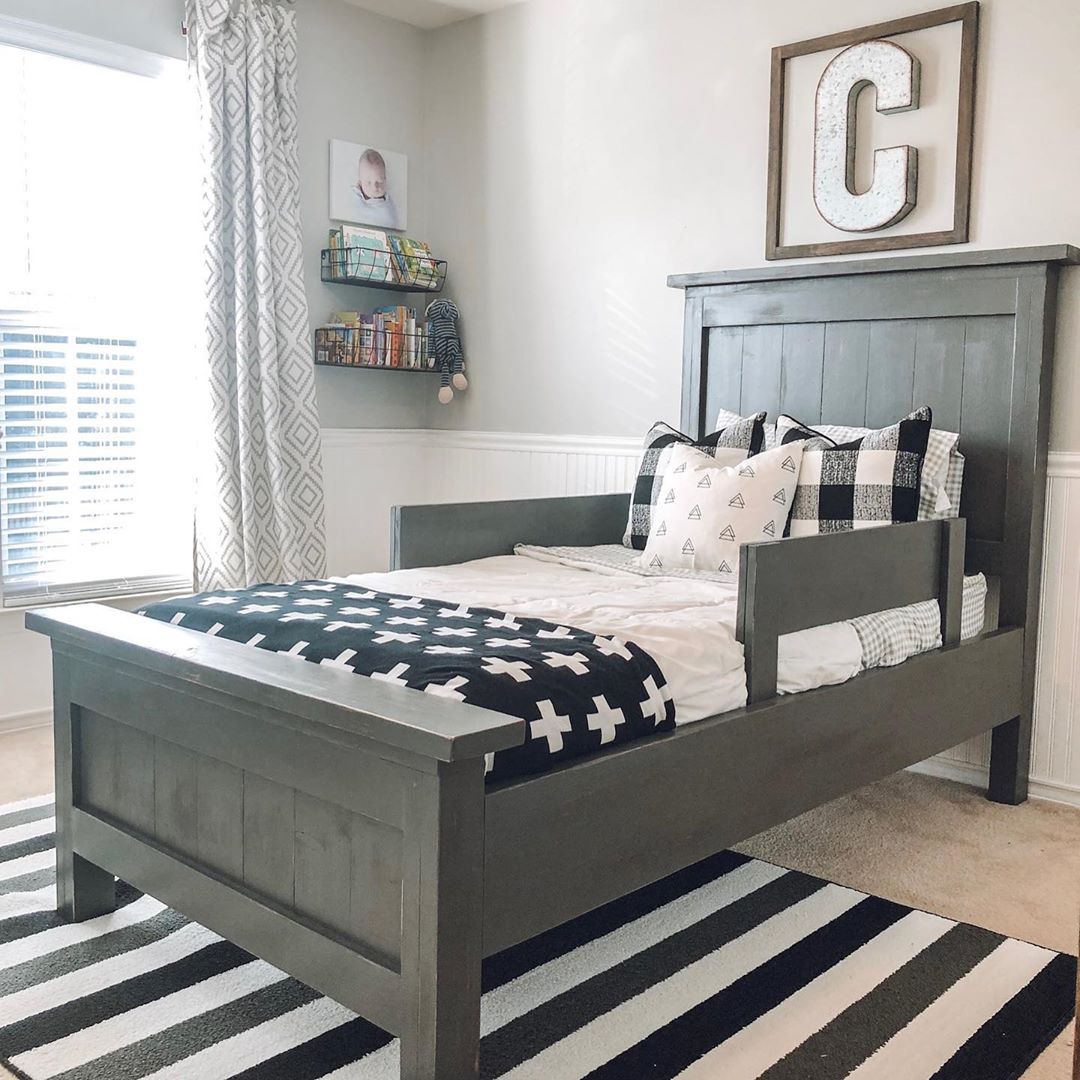
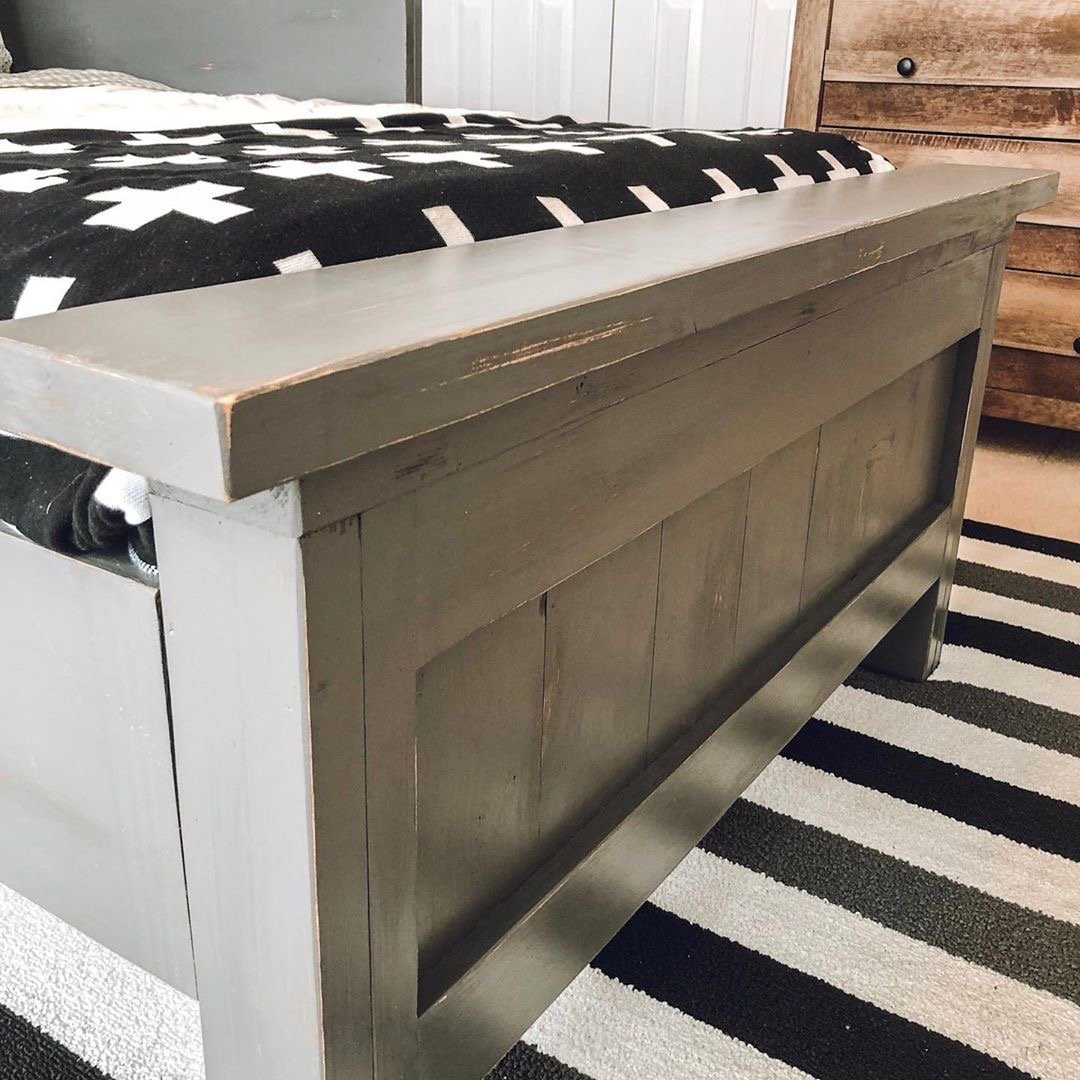
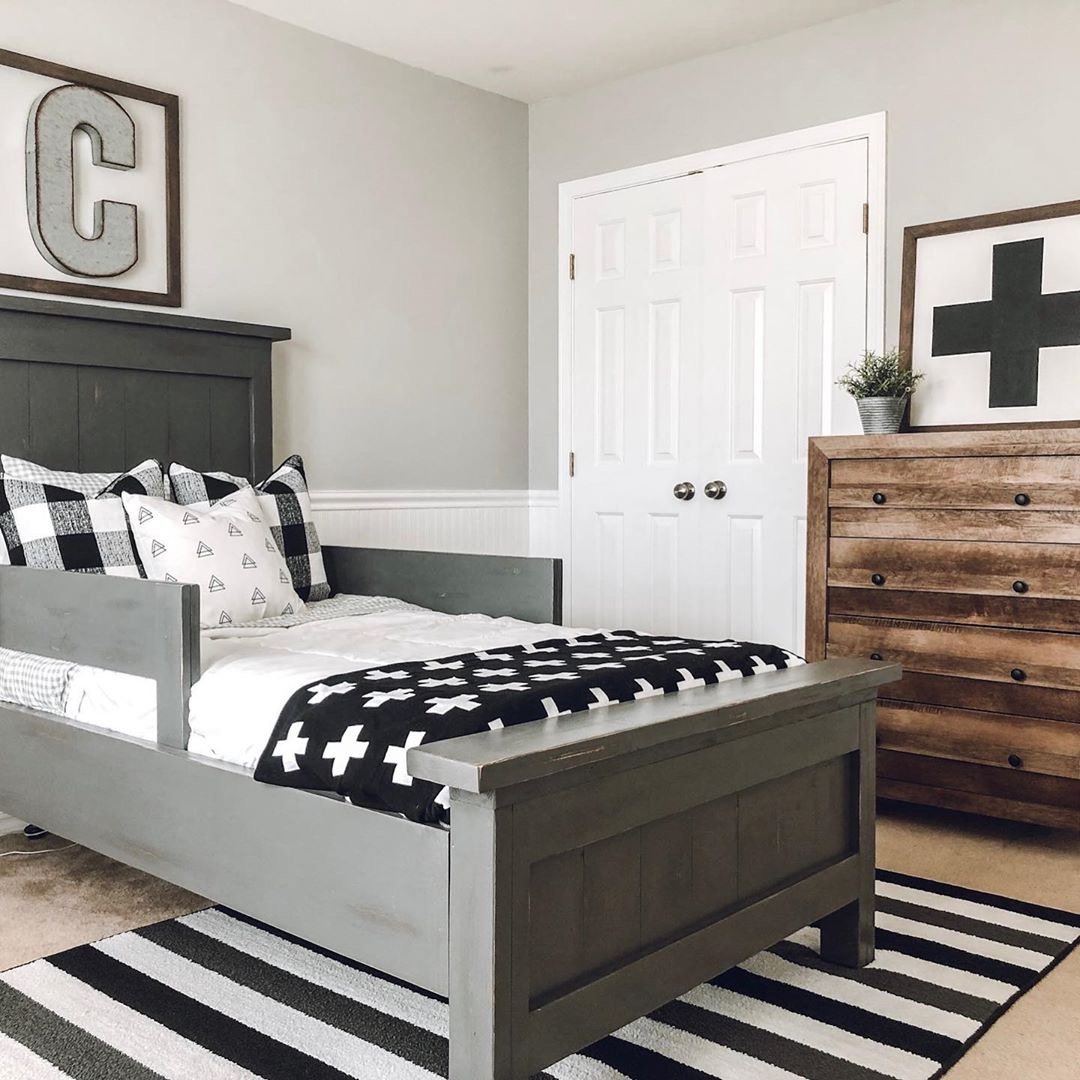
Community Brag Posts

Farmhouse Queen Bed

Submitted by frmoody on Tue, 07/28/2020 - 17:35

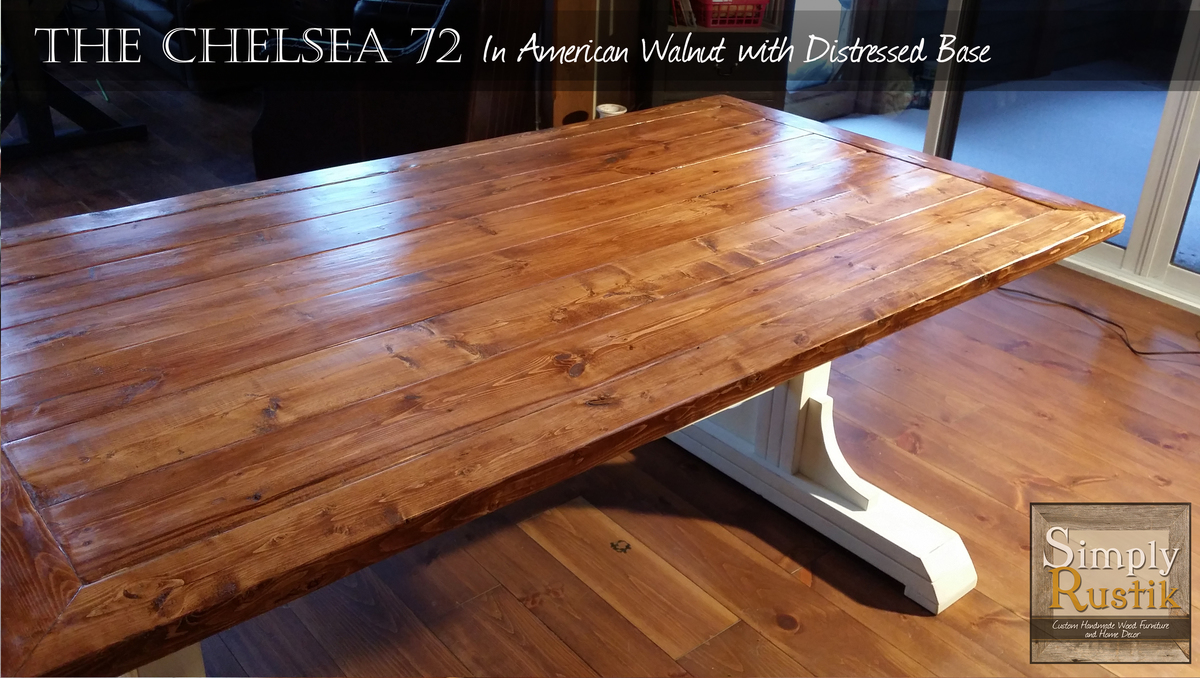
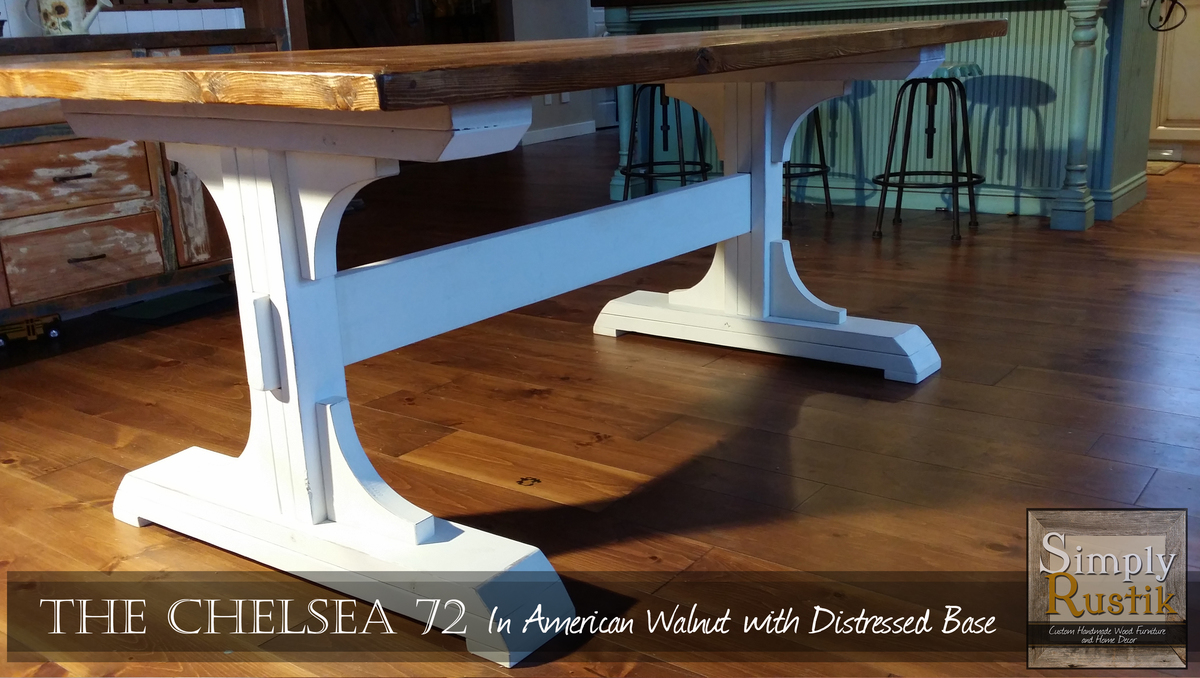
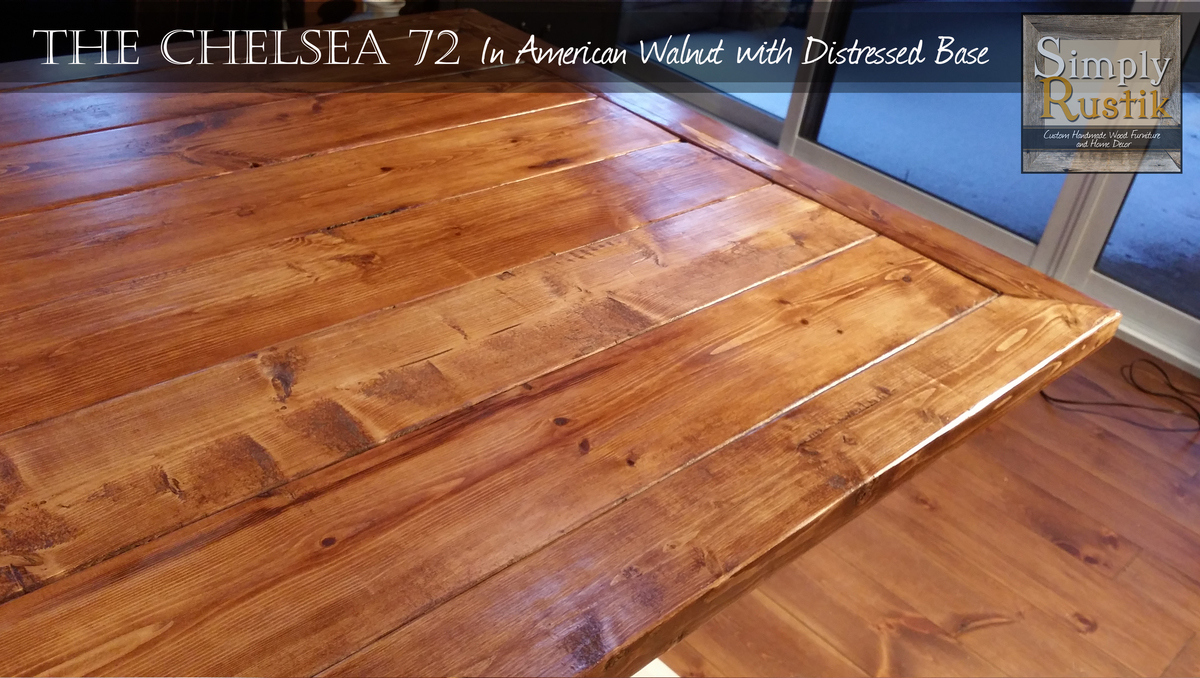
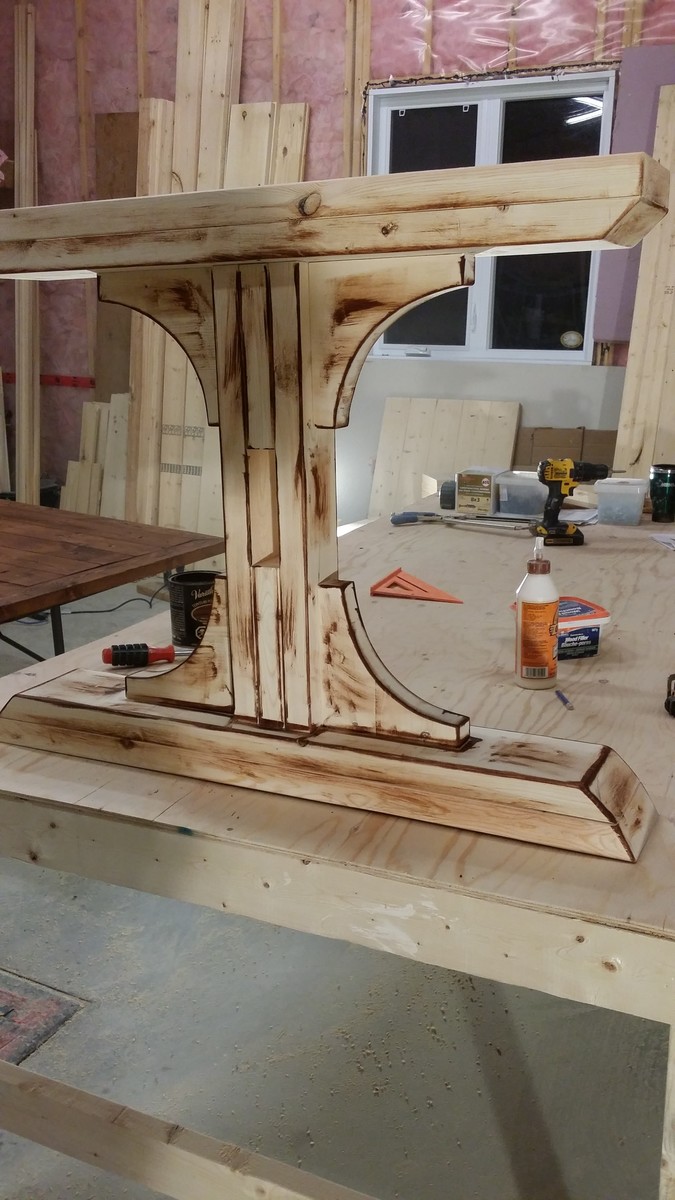
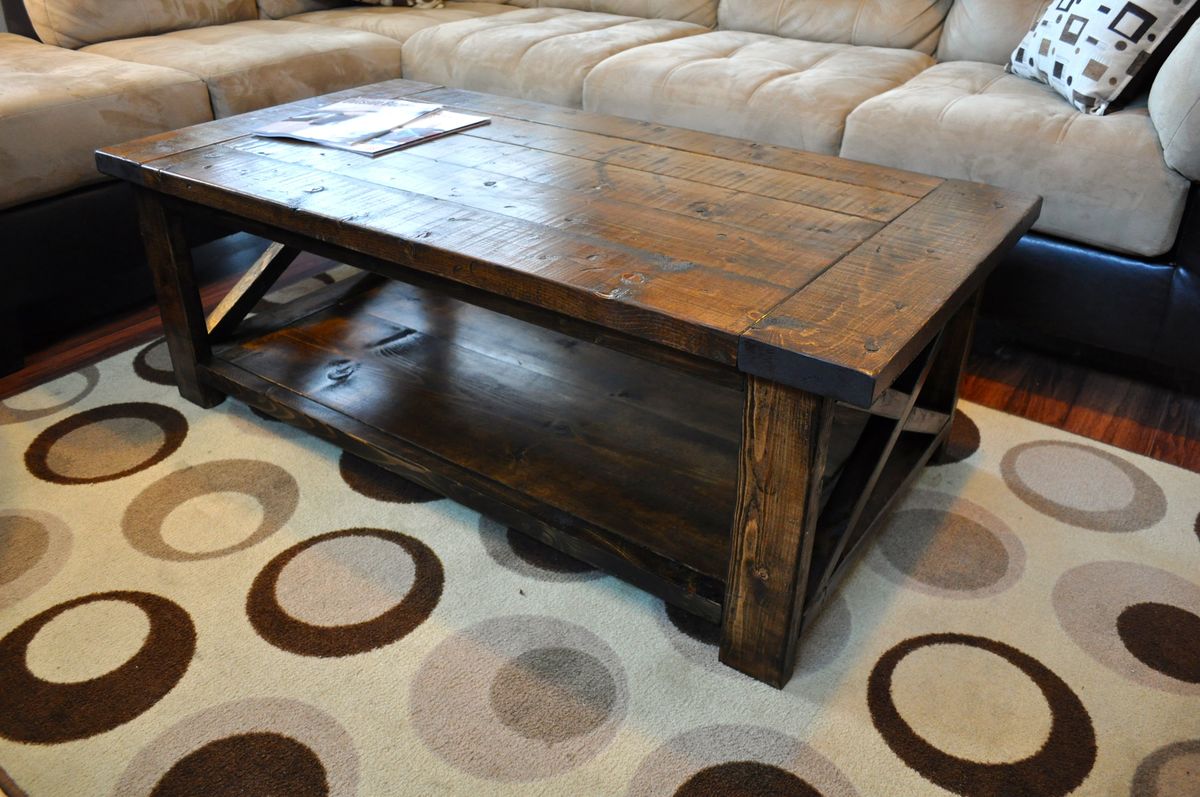
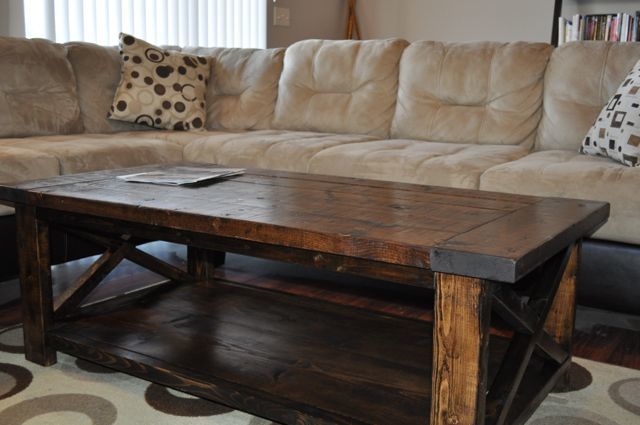
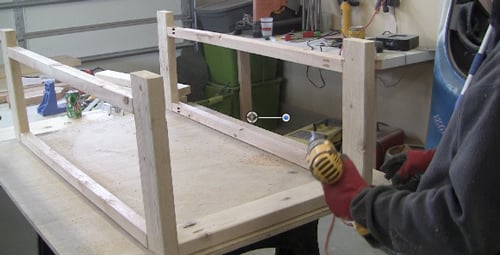
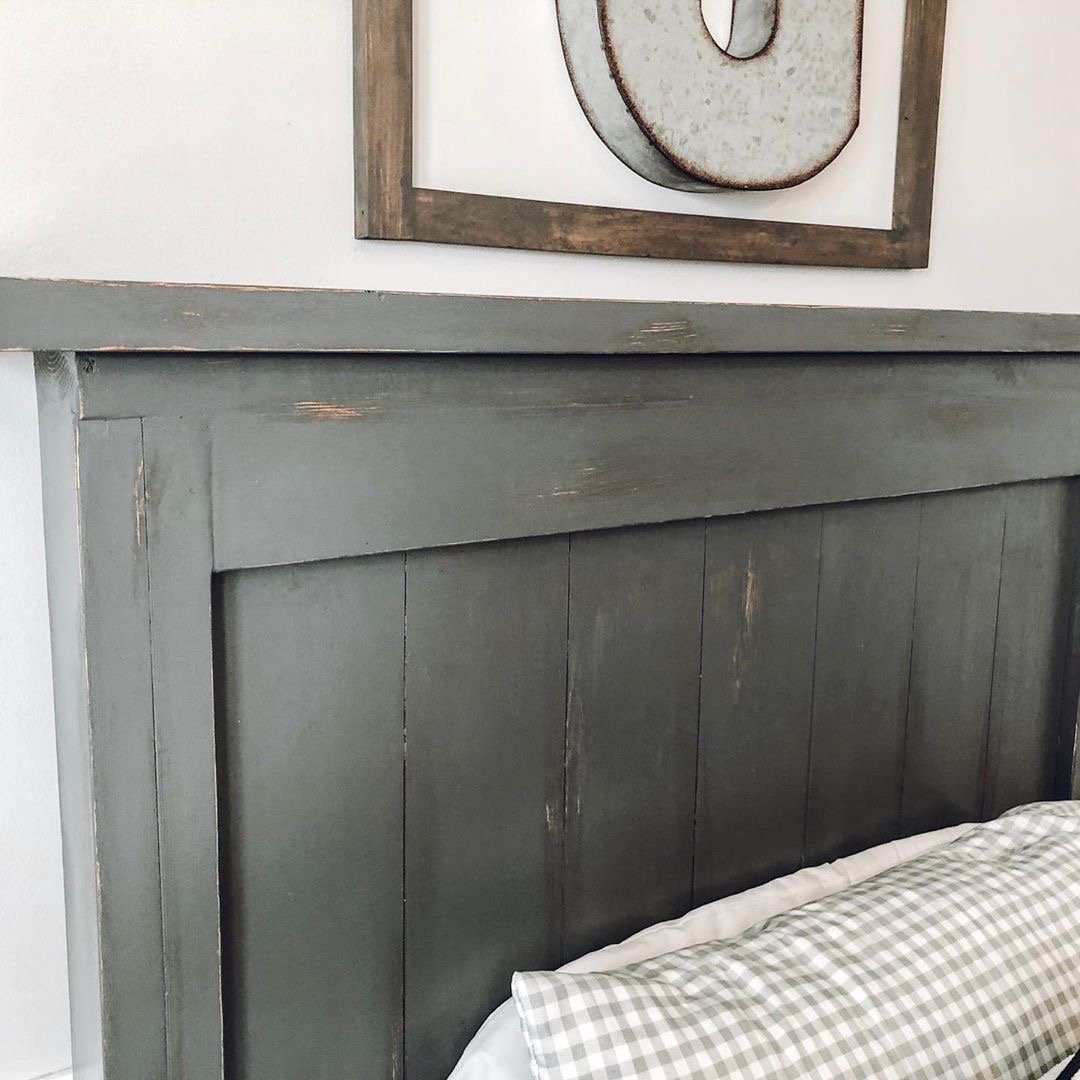
I have built two of these modern farmhouse beds. One from the original farmhouse bed plans and one from the updated plan. This bed was basically the original plan but with the headboard and footboard built with horizontal boards. I did not like the revised farmhouse bed plans and the sides were way to heavy and more complex than they had to be. The were also supported only by pocket screws but I did block underneath each end to add more support. For the slats I also purchased #1 prime 1 x 4's as opposed to construction grade. They were nice and smooth and no need to sand or paint.

Estimated Time Investment
Week Long Project (20 Hours or More)
Finish Used
Customer just wanted a very light white finish so I used a diluted white paint more as a wash and then a couple of coats of matte varathane.
Recommended Skill Level
Intermediate

Comments

mmade

Sat, 02/20/2021 - 21:02

I love this! It’s exactly what I want. It’s like the mix of Ana’s two different farmhouse bed plans. I like the horizontal boards instead of the vertical and I didn’t want the ledges on the side trails. Thanks for showing me the way. :)

Kids Toy Outdoor Storage Box

Submitted by MattCad on Sat, 08/01/2020 - 20:28

First time making anything half decent and it turned out ok. Followed the Cedar Box plans with a few adaptations. I live in regional Australia so used different materials, also extended the length. Used an app on the phone to convert the measurements to as close as I could. Worked out well, a few teething issues but does the job.

Estimated Cost
70 AUD
Estimated Time Investment
Day Project (6-9 Hours)
Finish Used
Intergrain Merbau Stain
Recommended Skill Level
Beginner

Comments

New Computer Desk - From Seaten Console

Submitted by DIYER_MD on Sat, 09/06/2014 - 18:10

I used the Seaten Console Plan as the basis for this project.  I made the legs longer to raise the desk up to the height of a computer desk.  I also added extra sections to the top to proved extra storage areas for books, etc.

Built from Plan(s)
Estimated Cost
$150.00
Estimated Time Investment
Weekend Project (10-20 Hours)
Finish Used
Olympic One Black Paint with Stained Top (Rustoleum)
Recommended Skill Level
Intermediate

Comments

booksnotbombs

Sat, 09/06/2014 - 18:30

Did you build this to be the height of a standing desk? It looks great either way! I am looking for a good plan to modify. I like the staging of Ana's website on the monitors. :)

DIYER_MD

Sun, 09/07/2014 - 08:26

No, it is still a regular height desk.  The legs are actually 28 1/4 inches.  This makes the desk right at 29 inches.  I set the monitors up on the top because I like them a little higher and it frees up the desk space.  It makes them comfortable viewing for me.  I appreciate your nice comments.  If you want a nice but simple desk, this is the perfect plan.  I started building this one right after I saw it on the site.

Double Pedestal Farmhouse Dining Table

I based this build on the Triple Pedestal Farmhouse Table found on this site.  I fell in love with the table and I just had to build one!

This table is only 72" long, so I ended up removing the third pedestal.  I also removed the decorative apron that is pictured in the original plan.  I also added a picture frame border using 2x4's with 45 degree angles on the corners. I think I like how this look turned out! I kept the legs the same size as the original plan called for.

This entire build took me about a day and the staining process another 2-3 days. I stained the table top using Varathane's American Walnut stain and I painted the base using an off-white milk paint. But before painting the base, I stained the corners with the same American Walnut stain so that when I was ready to add the distressed look, I could simply just sand the paint until the stain appeared through the white.

Visit my facebook page for more of my builds!
www.facebook.com/simplyrustik

Built from Plan(s)
Estimated Cost
Approx. $140
Estimated Time Investment
Weekend Project (10-20 Hours)
Finish Used
Varathane American Walnut;
Varathane Satin Oil Polyurethane;
Limestone Milk Paint (from Homestead House Paint Company);
Recommended Skill Level
Beginner

Comments

Farmhouse Style Rustic X Coffee Table

Submitted by petesveen on Fri, 03/22/2013 - 07:43

Ana's design caught my eye and I had to build one that was similar. I decided to modify the top because I really like the look of breadboard style tops. So the main difference is that I cut the top boards 41" long and added two 2x6 pieces for breadboards (about 27-27.5" long). So the total width still comes to 52". Turned out pretty cool!

Built from Plan(s)
Estimated Cost
$45 for wood - Stain/poly extra
Estimated Time Investment
Weekend Project (10-20 Hours)
Finish Used
I distressed it with nails, a hammer, some scratch marks, and a saw blade. I then used a vinegar/steel wool mixture to bring out the distressed areas a bit more. Then followed with 1 coat of dark walnut stain (applied with towel) and 3 coats of semi-gloss poly. I applied the first two coats with a brush and then lightly sanded between the second and last coat. The final coat was applied very thin using a towel.
Recommended Skill Level
Beginner

Comments

Courtlh

Sat, 03/30/2013 - 23:10

I have been looking through the brags to find one that had a color to go with our new couch...turns out you have the exact same couch as me!! It looks awesome! Now I have an awesome example to follow :)

Outdoor Entertaining Space

Submitted by ikeymedesu on Sun, 05/30/2021 - 06:09

A 2-month long project to create an entertaining space in our small backyard. I started with a dining set for 6, then went on to seating around our firepit. I actually doubled the size of the Modern Outdoor Loveseat and built a 4-seat couch (added a center section for support. I also built 2 loveseats, 2 small side tables, and took some creative liberties to design a coffee table/foot rest combo. The major modification I made to the couch and loveseats was adding a back for some additional height. This really improved the comfort when leaning back. Had a great time completing this project! When lumber prices come down I'll continue the build. (2 pictures keep uploading and converting to an upside down image - no idea why, but sorry for the weird view)

Estimated Time Investment
Week Long Project (20 Hours or More)
Finish Used
Behr Premium Transparent Natural Cedartone Weatherproof
Recommended Skill Level
Intermediate

Comments

Ana White Admin

Sun, 05/30/2021 - 09:58

Love the coffee table foot rest, would love to see more of the outdoor table as well! It all looks amazing and came together perfectly! Thank you for sharing, check out our Facebook page, just shared!

Seasonal And Holiday

DIY Wooden Toy Truck

I built a wooden toy truck using a leftover 1x4 board in my garage.  For this build I used Ana White's plans for the wood wheelie cars.  This was a quick and easy project  and my first project using my scroll saw. Not too shabby for my first go at toy making.  However, I am not happy with the finished toy.  If I did it all over again, I would take my time with the finish.  Also, the driver was not perpendicular to the truck's body when I created the holes for the axles, so the truck leans slightly. My son does not seem to notice its flaws, so I will try to overlook them as well!  Check out the blog link for more project details!

Estimated Cost
I had most of the supplies on hand. I had to purchase a wood dowel and some wooden wheels, so no more than $5.
Estimated Time Investment
Afternoon Project (3-6 Hours)
Finish Used
Acrylic Craft paint sealed with Mod Podge (Matte Finish)
Recommended Skill Level
Starter Project

Green House

Submitted by Anonymous (not verified) on Thu, 07/13/2017 - 08:31

I built this amazing green house following your plans!  My wife and I moved our family from the city to an amazing 5 acre homestead out in the country here in Wisconsin. We are super happy that we will be able to keep our new garden going longer!  Thanks so much for the plans!

Built from Plan(s)
Estimated Cost
We spent about $800 for the frame and plastic panels. Then we spent another $250 for the reclaimed barnwood siding. We found the door at a reclamation site for $25.
Estimated Time Investment
Week Long Project (20 Hours or More)
Finish Used
I followed Ana's plan pretty closely. This was the first building I ever built from scratch. It was a little difficult to get the foundation level. But I figured it out. I used pressure treated 6x6s on top of gravel. I was able to screw the actual walls down to the 6x6s.

I'm actually building a second building from these plans to use as a chicken coop. Once it's done I will post photos.
Recommended Skill Level
Intermediate

Comments

Seasonal And Holiday

Simple Outhouse

I built this outhouse to go with a dry cabin I'm working on, and also as an emergency backup for my house. I used treated lumber on the base/deck and splurged on T-111 for the siding. I wanted to use greenhouse polycarbonate for the roof, but found a piece of metal roofing in my shed that was exactly the right size so I used that instead. I thought about doing a fancy cutout on the door but ended up going with a half moon because it was easy. I'm thinking about cutting out stars of different sizes all over the rest of the door to let in more light. I'll trim and stain it next summer.

Built from Plan(s)
Estimated Cost
$450 - I used T-111 which is $40/sheet here in Alaska. I also used treated lumber where recommended and stainless steel screws.
Estimated Time Investment
Weekend Project (10-20 Hours)
Recommended Skill Level
Beginner

Comments

CH

Mon, 01/13/2020 - 15:25

WHAT HAPPENS TO THE 'STUFF' THAT YOU DEPOSIT IN THE TOILET?  I DIDN'T READ ANYTHING ABOUT DIGGING A PIT/TREATMENTS, ETC.  PLEASE LET ME KNOW.  THANK YOU!  CH.

Coffee table

Thank u so much Ana for making this possible

Comments

$235 Weatherly Pergola

This is the first time I've ever taken on a project of this scale. The pergola is 12 x 11, and I was able to get it all done for $235 by having Lowe's price match a lumber yard in the next town over. I skipped out on the fancy base covers because I'll eventually make those pretty with limestone stacking rock - and because the lumber for those alone would cost about $121.
Once the treated lumber seasons, I'll stain it a darker color.

Built from Plan(s)
Estimated Cost
$235
Estimated Time Investment
Weekend Project (10-20 Hours)
Recommended Skill Level
Beginner

Comments

weatherly sofa

Love this sofa! Shown primed and in the process of painting a chocolate brown now. Super easy to make!

Built from Plan(s)
Estimated Cost
$35
Estimated Time Investment
Weekend Project (10-20 Hours)
Recommended Skill Level
Beginner

Curved Bench

Submitted by stevez8420 on Sat, 08/08/2015 - 13:41

I followed your idea but i think my bench is a touch smaller. I decided to add arm rests on each end, I kept the top beverage ledge or "Bever-ledge" as I call it and ofcourse I added rope lighting along the underside. This was my first ever DIY project.

Estimated Cost
150
Estimated Time Investment
Weekend Project (10-20 Hours)
Finish Used
I used a Cedar Tone semi-transparent finish which turned out a little more orange than i though but it still looks good!
Recommended Skill Level
Intermediate

Craft Paper Holder

I made this in a few minutes. The kids were too excited to try it out; they didn't want me to fill and paint it. I made it out of scrap wood.

Built from Plan(s)
Estimated Cost
$1.00
Estimated Time Investment
An Hour or Two (0-2 Hours)
Finish Used
The kids grabbed it before I could finish it :)
Recommended Skill Level
Starter Project

DIY Barn Door and Hardware for around $80!

I really wanted to put a barn door in my husband's home office, but have you looked at the prices of the kits?  No way was I going to spend that for a door.  So I decided to fabricate it myself.  For the rail hardware- I used a 72" steel rod, copper pipe fittings, and lag screws.  For the door hardware, I used 12"ish, long pieces of steel, pulleys, and carriage bolts.

The door itself is made from plywood siding, 1 x 4's, 1 x 6's, and 1 x 3's.  The entire door and hardware cost around $80 to make myself.  It's functional and looks amazing!  The entire tutorial is up on my blog!

Estimated Cost
$80
Estimated Time Investment
Day Project (6-9 Hours)
Finish Used
white paint
Recommended Skill Level
Beginner

Comments

Fireplace with hidden Mantle storage and side bookshelves

Submitted by ibseenu on Thu, 12/01/2022 - 14:30

Thank you Ana for you Fireplace design as it was exactly what I needed! We’ve lived in our house for 3 years now and I’ve wanted a fireplace ever since. Your plan was perfect and with a few modifications I made it come to life. My 9yr daughter as I was almost done building thought there should be a shelf for books and movies below the fire place. It gave me the idea of adding storage on the sides. I had already had the idea of the mantle storage and just used a floating shelf idea and made that. This was a lot of fun!! It took me a little over a week to build. But can’t wait to build something else for our house… like the mudroom!

Amy

Comments

jtemperley

Sun, 01/08/2023 - 19:02

That looks awesome! My husband and I are planning on doing this as well. I do have a question, as I see you have carpet just like us. Did you cut out the carpet where you built out, and if so how did you go about that, or did you just build on top of it?

Book Ledges { $10 Ledge Plan }

Submitted by Shorty on Fri, 10/25/2013 - 14:58

We used a pocket hole jig to build the ledges (to practice using our pocket hole jig), and loved how easy it was to put these together. We made each ledge 32" so we only had to use 1 1x2 and 2 1x4.

Turns out these ledges work perfectly to "house" or baby's books (and a couple of our own in the mean time). Love this build –and so much cheaper than buying (or building) a bookshelf!

Built from Plan(s)
Estimated Cost
$20
Estimated Time Investment
Afternoon Project (3-6 Hours)
Finish Used
Behr's Swiss Coffee in Satin
Recommended Skill Level
Starter Project

Bedroom Remodel

Submitted by Anonymous (not verified) on Thu, 01/21/2016 - 18:35

We had 2 empty closets in our 100 year old home. The custom shelves took a day to build and have worked amazingly for our organization.

Built from Plan(s)
Estimated Cost
$200
Estimated Time Investment
Weekend Project (10-20 Hours)
Recommended Skill Level
Starter Project

Pool supplies storage shed

Submitted by Anonymous (not verified) on Sun, 06/25/2023 - 18:50

I was looking for a shed to keep pool towels and other deck and pool items. This shed hit every feature I was looking
for. My husband loved the plans. He's always saying he can build anything with a measured drawing and a
cut list. The only thing we changed was the roofing material. we were given some metal roofing by a friend.

Built from Plan(s)

Comments