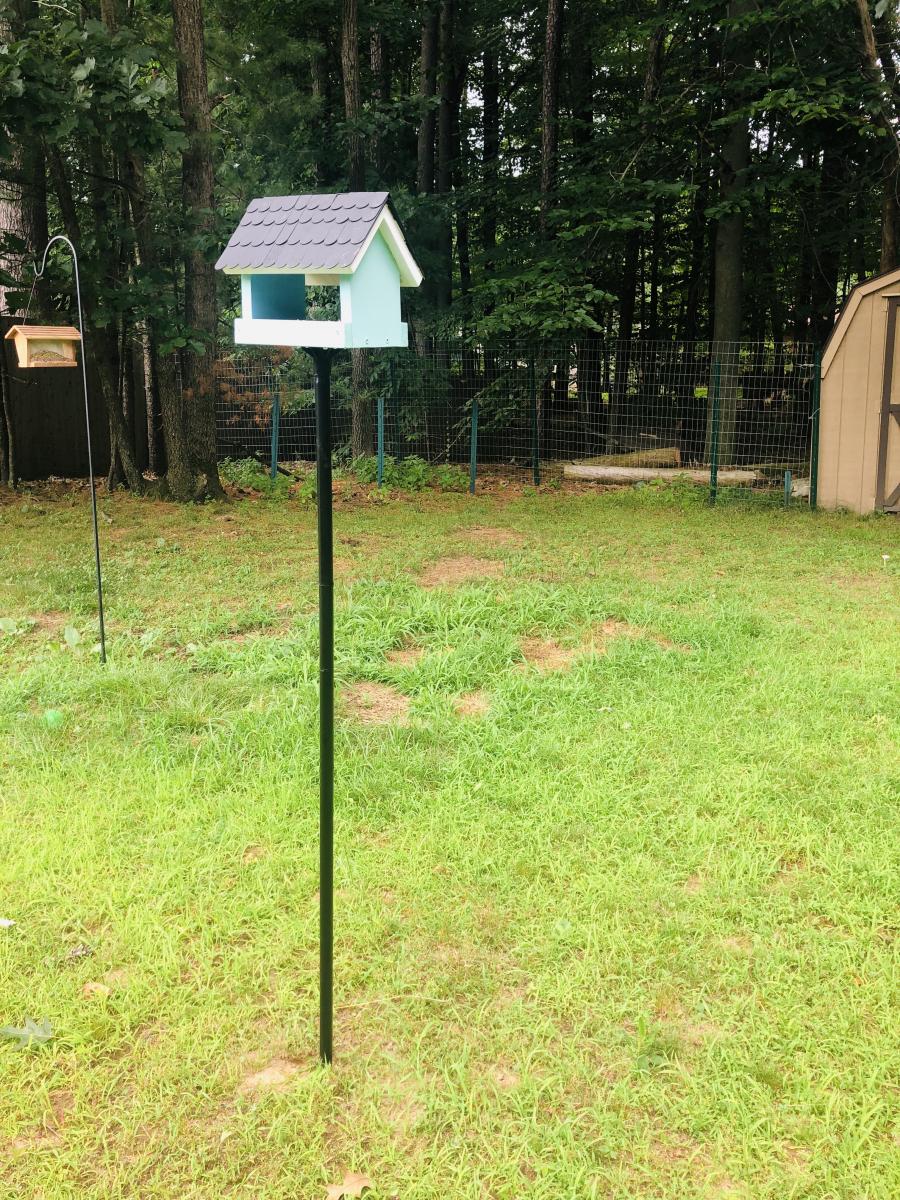
DIY Cedar Bird Feeder
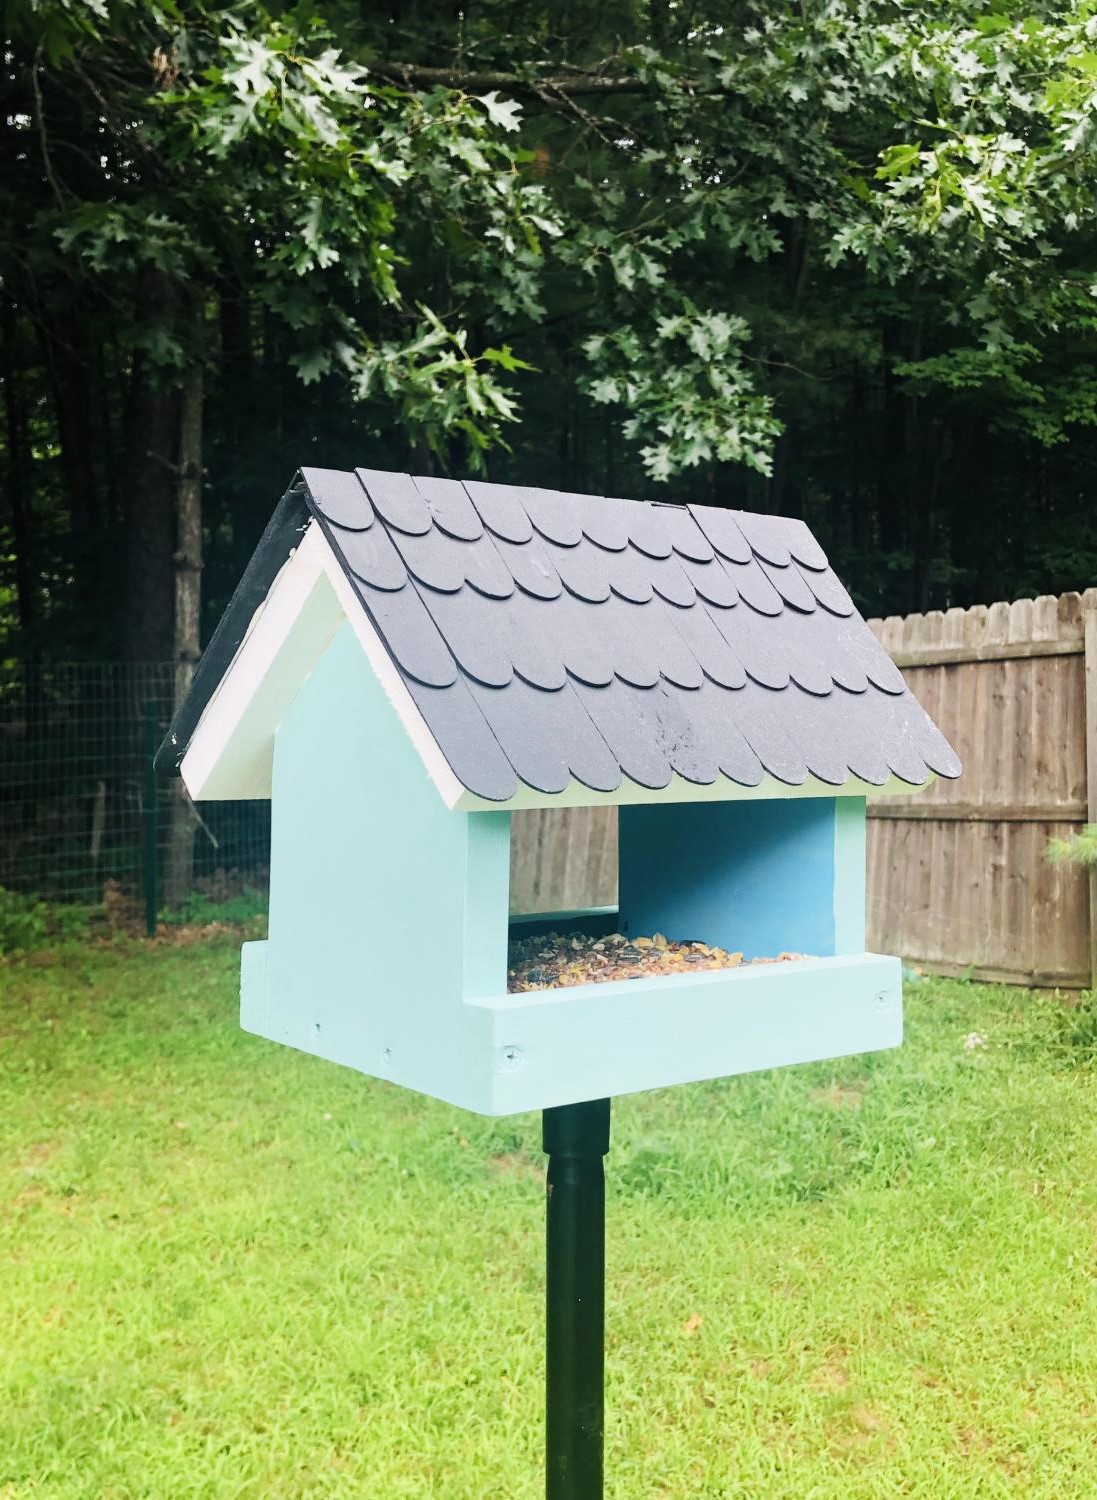
Took some liberties on this one. Used paint stirrer sticks for the roof.
Our wine fridge died, and we didn't really need to replace it. Since we can always use more storage space in the kitchen, the hubby made me this coffee bar as adapted from a coffee bar brag post that was adapted from Michela's Kitchen Island plan. He was able to make it with all 2x4s and created the 4x4 legs by gluing 2 boards together. Put it on some caster wheels and we have a perfect coffee bar!!
I built all the furniture for this room using Anna's plans.
Sat, 11/16/2013 - 12:06
What a lucky little lady! Everything is just beautiful! I especially love the bed.
Sat, 11/16/2013 - 16:24
This room is just darling! You did a beautiful job, congratulations on an awesome room!
I saw your outdoor chairs so decided made 2 out of 2x4 from your plans. I put the 1 that is finished in my sun/ coffee room. I love it and ha e had many brags so I give them your info and a couple of friends are making them. Thank you
Tailored this to fit our space to provide us with more storage that is easy on the eyes 😍 took our time completing it and love how it turned out. First big woodworking project I’ve completed!! My furry assistant is featured in some of the pictures 🤩
Wed, 10/02/2019 - 13:37
Beautiful! And what a cute pup!
I think we have the same living room setup too!
I stumbled upon the Ana White website (and subsequently the farmhouse bed plans) via something I saw on Pinterest. I had been bugging my husband for bedroom furniture for years, but there were always other bills to pay. So when I came accross that BEAUTIFUL and super-inexpensive-to-build bed, you can imagine my excitement! I sent a link to my husband, who was equally excited, and a few days later we have this georgeous new bed!
Fri, 01/27/2012 - 08:20
I asked my husband what his stain concoction was, and he said he used a 1:1 mixture of Minwax's Fruitwood and Red Oak stains. He did first use a wood conditioner so the wood would accept the stain more evenly. Hope this helps!
Sun, 01/29/2012 - 10:21
I really love the warmth of the stain color. I will have to try the concoction on my next project. Thanks again. :-)
Sun, 01/29/2012 - 13:36
I think after supplies it was probably closer to $100. I am amazed though every time I walk into our bedroom that our bed was so inexpensive and easy to build! It really is a beautiful piece. I defintely think you won't be disappointed. Happy building :o)
In reply to I think after supplies it was by jessabender
Sun, 01/29/2012 - 15:59
Yup, inexpensive and SOLID wood! something that will last and irreplaceable.
Thu, 07/10/2014 - 20:11
I have been admiring your bed. It is lovely. So I am seeking your advice. I am wondering how you sandwiched the panels between the 1x4s. I don't see any nail/putty marks through your stain. I am obsessing about how I can finish this bed without like 32 little patched nail holes on the front of the headboard and the footboard. I would really love to stain the bed similar to the color you used but I'm worried about the nails. sigh. Did you use nails? Did you only nail the boards from behind so they are not visible? I have been scrutinizing your bed, but i just cannot tell. if you did use little nails and putty them, you did a great job of blending them in. I don't have a kreg jig, but i think that would solve the problem. hmmmm. I am so worried about this that I can't take the plunge and just make the bed. On the areas that are screwed together, I plan on using wood plugs, but for the panels I'm stumped. The plans call for sooooo many nails. I simply just don't want to see them on the front of the bed. Thanks for anyone that can help. If i were painting the bed it would not be a problem, but for staining I think the patched nail holes would not be good. Any thoughts?
Tue, 12/08/2015 - 17:38
it is probably something stupid simple. but what are you guys using to connect the side rails to the head and foot board? mainly the foot board.
Thanks in advance.
I used treated lumber for my project. One chair took me 2 to 3 hours from start to finish and the 2nd chair went a lot faster! The plans were so easy to follow, Thanks Ana!
- Built by Kara
Lattice Fence Build Video
I built a lattice fence above a masonry wall dividing us from our neighbors after they cut down a bush that had formerly blocked the view. I time lapsed the whole thing, and thought you might find it of interest (or humor)
It took me 3 days instead of the 1 that I expected- am I the only one who greatly overestimates their speed at home projects? : )
Anyways, really happy with how it turned out. That’s the thing I love about woodworking. It always looks janky to begin and doesn’t show much promise, and then suddenly, it’s a work of art. Tis a thing of beauty.
There are a good amount of tips and tricks in the video of how to overcome difficulties in the build.
I’m no carpenter but this went well. I did it all with pressure treated because it is in the open. They filled in the area where there used be a hot tub. Surprisingly comfortable, too. Thanks Ana
Inspired by the hanging day bed- everything was built as directed- then 5in X 3/8in lag bols used to secure to wall, as well as eye bolts and rope. Extra support added with ladder
Thu, 03/20/2014 - 10:48
I am wondering if you put both a box spring and mattress on this? Is there any way to see what it looked like all finished and set up? We are thinking of doing this is our daughters room so that we can put up two, but she may not go for it if it has no box spring. :)
Fortunate enough to live on a beautiful river, my wife and I decided we were done bringing the folding chairs out for each weekly bon fire. Our three girls love s’mores and we wanted a great atmosphere with a place to easily grab wood and snacks in the dark while we enjoyed the outdoors. The combination of plans took us about a week to finish. The kids were away for the weekend and we rented an auger to drill the post holes. This proved to be the most difficult part of the project. It took nearly the whole weekend to dig out the unexpected granite and all the patience that we had in reserves. Once the posts were set, it was only a slightly uphill battle.
My wife made the bench in the time it took to return the auger and come home. The fire pit benches were also a pleasure to assemble and the most functional part of the project. I suspect the whole thing would have been faster if the large posts were easier to cut through. That treated lumber can eat saw blades! When setting the top posts it was also a two ladder and two person job. They were quite heavy and a little nerve wracking to set if you don’t love heights and a heavy load. We would do this project again in a heartbeat as it is a feature in our yard and makes for many enjoyable family and friend gatherings. The fire pit bench top is also great for hosting the entire bbq meal assortments to select from.
King Sized bed with Storage. Added a found headboard and found Nightstands!
A novice at best
My son wanted a way to display his snowboard, so I modified the pallet display rack plans to fit his snowboard. It's constructed with 2x4s for the sides and 1x4s and a 1x2 for everything else. The 2x4s have an angled notch cut out so the snowboard can slide in and out. I built a top and bottom shelf to display pictures, as well as provide storage. The hooks are great for hanging boots, gloves, etc. He loves the way it came out.
This is our second bed from Ana and definitely our favorite. This bed is one nice, sturdy piece of furniture. It went together easily and everything was right on. We did make a couple changes. Instead of putting two legs on the end of the bench in back, we put three - one where the center divider is and one on the dividers on each side of the center. We changed it so you wouldn't be able to see the bench legs from under the bed. It worked perfectly! Also, we added a 1x4 top trim to the back and arms instead of just stopping with the 1x3. Thank you so much for saving us hundreds of dollars!
Tue, 06/18/2019 - 13:47
What a beautiful room! Thank so much for taking photos and sharing!
I didn’t want to have to paint or cut the metal angles - plus I wanted 4 basket tall so I used pre-drilled melamine for the sides making the unit 48” tall. Then cut top and bottom same as plans and bought 5mm L shelf pegs and had shelves cut 24 1/4”. Used white wainscot panel for back. Very easy - especially since I had big box store make all my cuts! Just have to make sure you have peg holes lined up at bottom or you won’t be level.
Deb D.
Wed, 09/13/2023 - 09:38
Thanks for sharing, it looks like the perfect fit and solution for your laundry room!
I'm only moderately handy and these were fun and pretty easy.
Learned a lot and got better as I went along.
I found ways to make it as cheap as possible, probably did all three projects for 150 bucks.
I designed this headboard on the back of a napkin, after we couldn't find one at a box store that met our needs. I used Douglas fir 2x10 for the headboard/shelves and Pine T&G for the backing. My fiance etched a mountain range into an unframed mirror, which I then framed from the scrap fir wood, and stained to match. Also attached an LED Lightbar above the mirror, Dimmer switch LEDs on each bookshelf, and a recessed USB/Plug port. This wasn't the cheapest project with the electrical accessories added, but we now have a custom wooden headboard with bookshelves, lighting and chargers that will last us years and be far beyond anything we could have bought at a big box store for the same cost.
Hand made breakfast bar check us out on Facebook marney Marie
My parent organization at the elementary school had just bought a brand new popcorn machine but had nowhere to store it. So, I offered to try my hand at building a stand with storage. I knew that we needed the stand to be mobile as the idea was to pop the popcorn in different classrooms for incentives, etc. I modified the kitchen prep cart to have a large cabinet underneath to store the popcorn, bags, etc. The pullout drawer was home to the measuring cups, directions, etc. I used my Cricut and cut out our school logo, placed on the popcorn machine and then polyurethaned it to the side. It turned out great!!! I could not be happier :)
Adapted Ana's full length mirror storage idea. I needed to recess the cabinet into the stud cavity to save needed floor space. Opened two cavities and made the interior the same length as the cheap $6 behind the door mirror. Was able to just sit them on a ledger board and the shelves hold them from falling forward.
The cabinet looks wonderful and holds a TON of things. Thanks Ana for the inspiration!
Thu, 07/25/2019 - 18:20
I love this!! So smart to make it recessed. Thanks so much for sharing the photos!
Sun, 02/27/2022 - 15:58
I am wanting to build a thin or recessed cabinet for an incredibly small area in my bathroom and knew to go right to Ana White! The combination of these two projects is perfect and exactly what I was looking for! Now here’s to praying I can pull it off!! 😬
This is my banquette bench I made over the past few weeks after I saw your pictures and plans on your website. I absolutely love it. I am refinishing a table and chairs to use with it. Now I have room for lots of guest. Thank you for your great ideas.