Adirondack Chairs
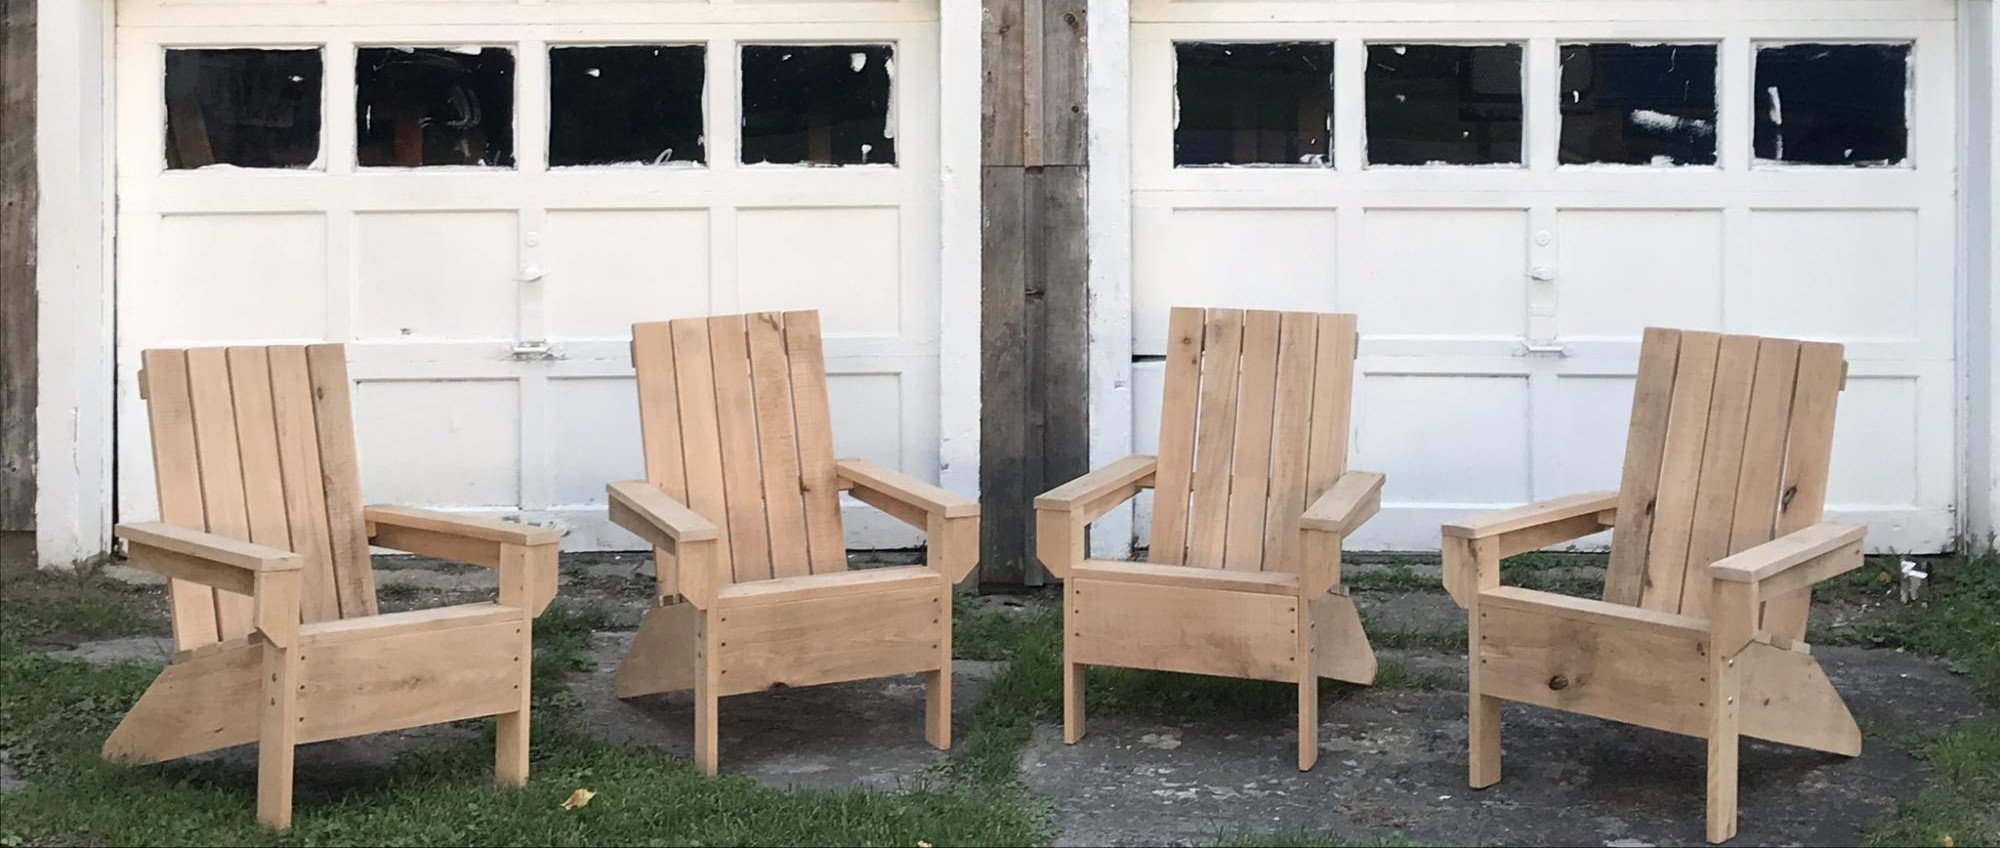
Needed some chairs, quick, for my daughter’s new fire pit. Used your design and the they love them.

Built from Plan(s)
Needed some chairs, quick, for my daughter’s new fire pit. Used your design and the they love them.
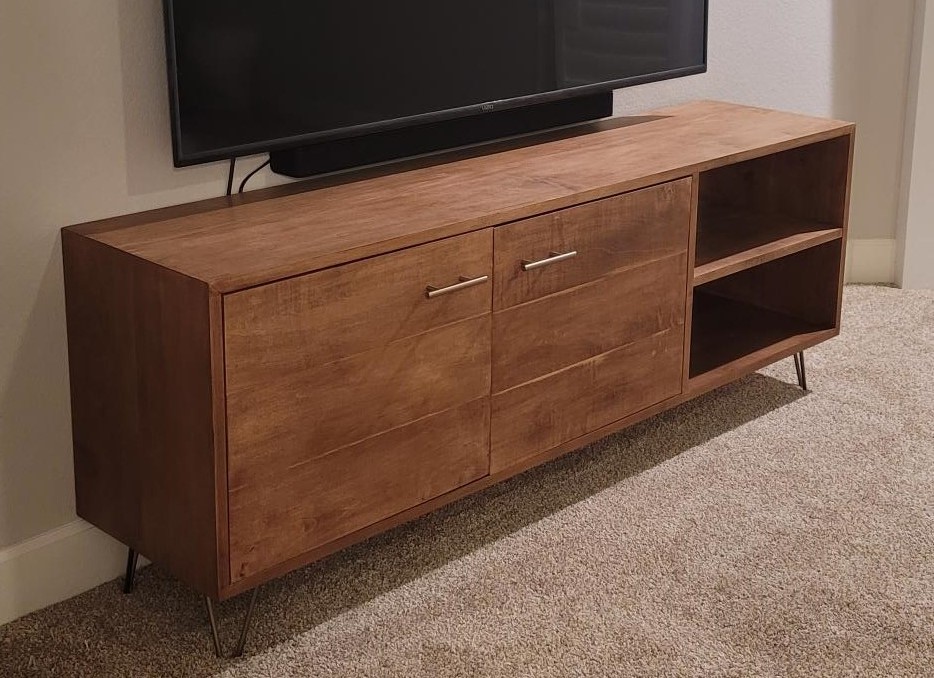
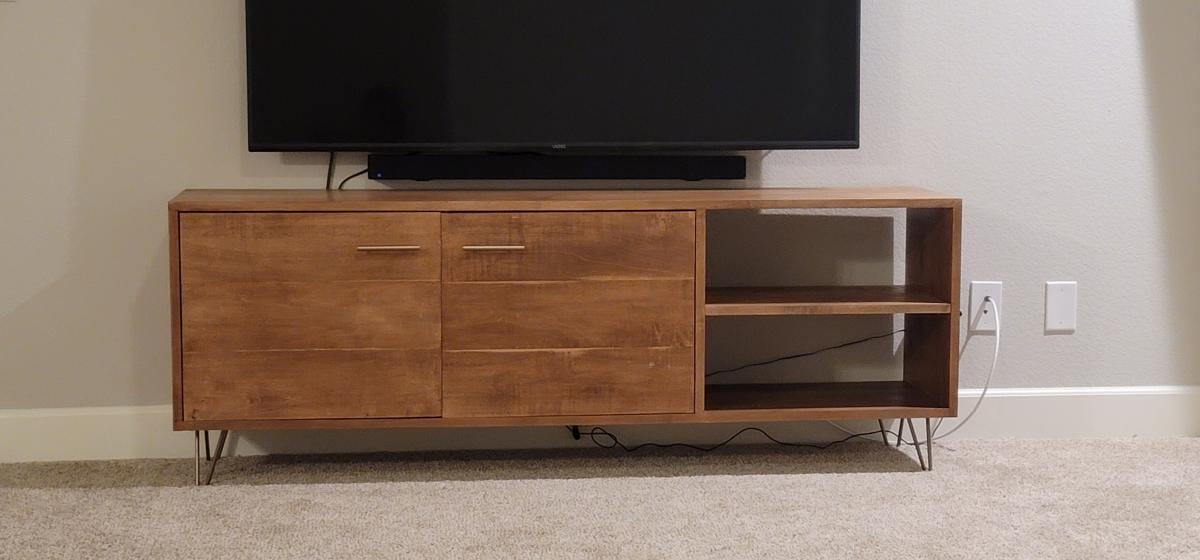
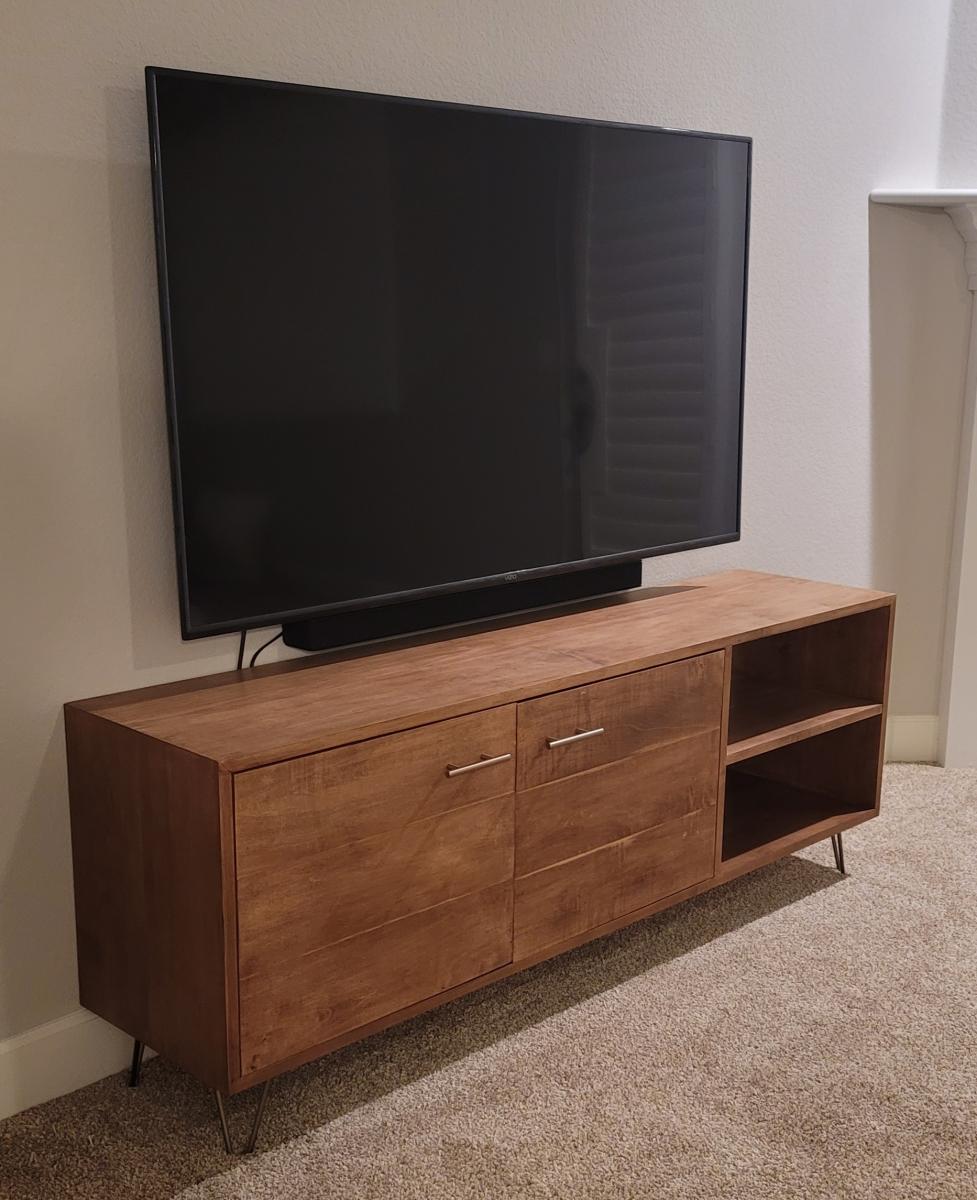
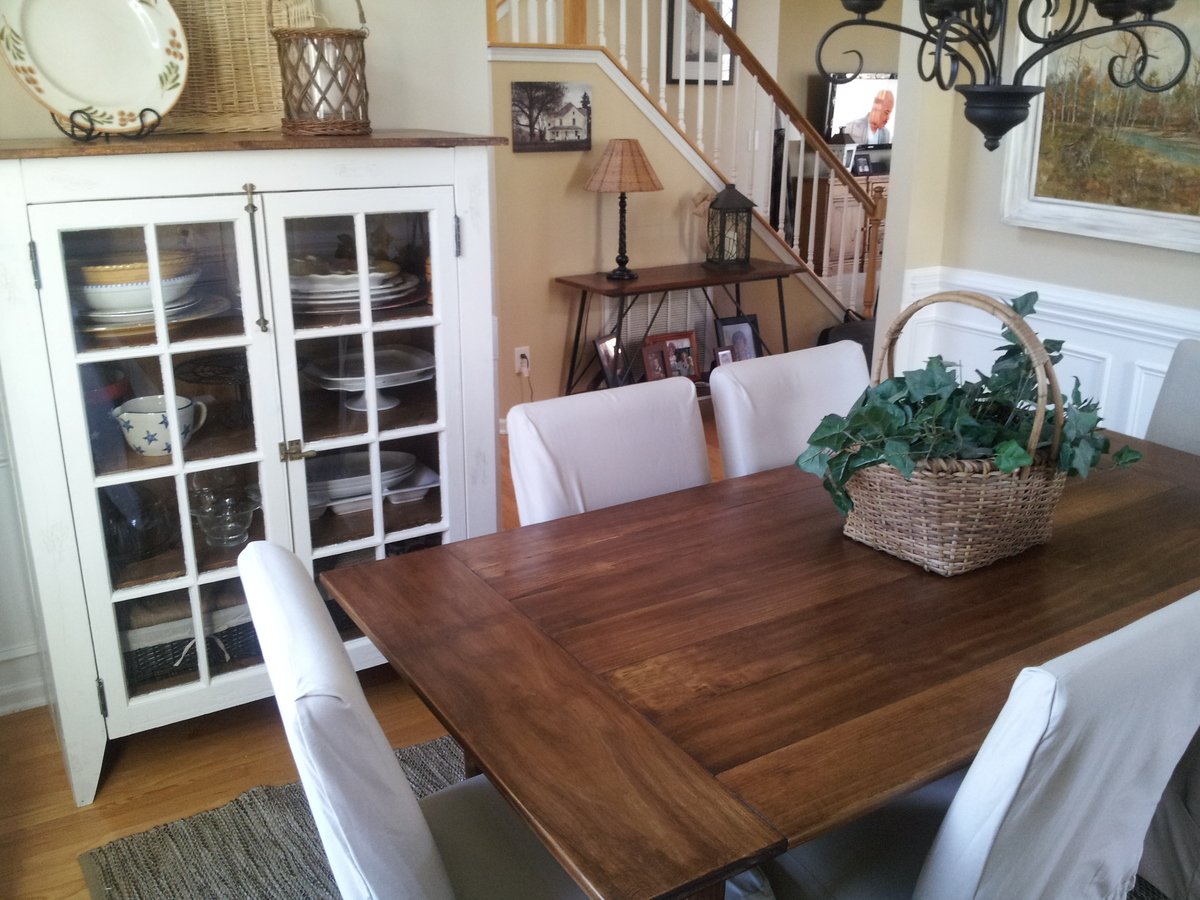
This console table was a pretty easy build and looks great. We had the lumber store rip the boards to the size we needed. We used solid maple boards instead of plywood. We mitered the corners to avoid seeing end grain. Followed the plans pretty close. Used 6" hairpin legs from Amazon painted antique bronze to match handles. Very pleased!
We have a laundry problem in our house. It piles up in un-organized piles and takes days to sort through and actually get in the washer. Honestly, we could do laundry every single day of the week and still fall behind. I guess that comes with the territory when you have 3 small boys in the house.
This organinzer is going to be great. We currently use it for whites, colors and "grown-up clothes". This keeps us from accidentally washing some of Mommy's more delicate items in the general colors wash which saves me money when we don't ruin her clothes.
The plans call for the 1 x 16's, but I had extra 2 x 4's laying around so I just built a frame using my kreg jig. The most expensive part was the beadboard for the sides and I used some S4S 1 x 4's for the top. Overall the project tooks me months, but that was more a product of my "shop" time coming after 8 pm and general apathy.
I definitely have the bug and have already starting a new project!
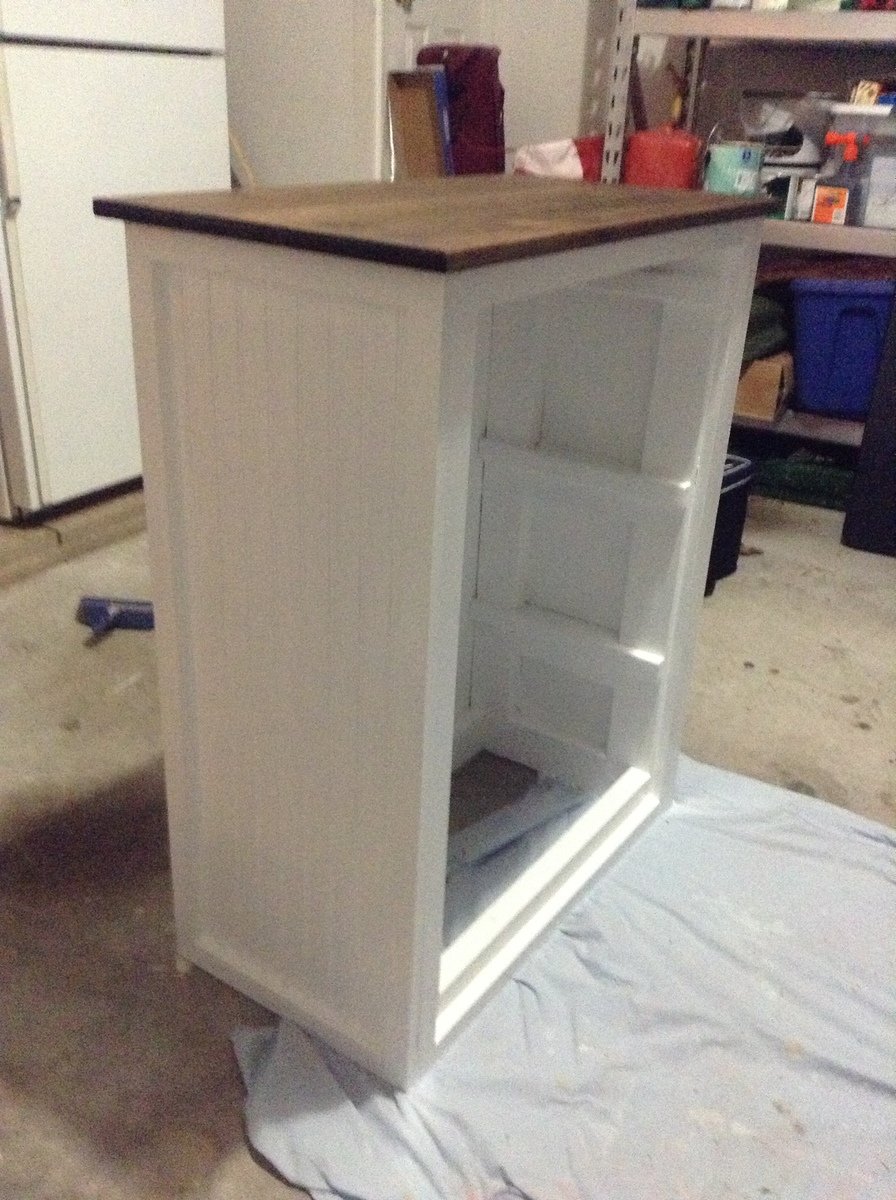
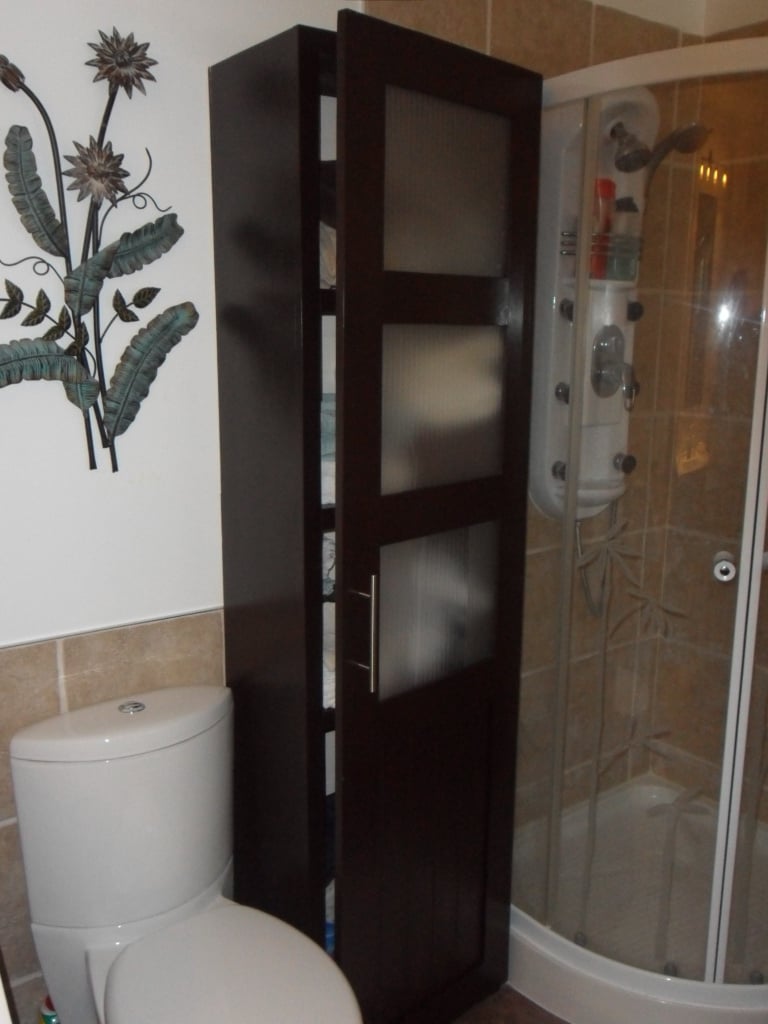
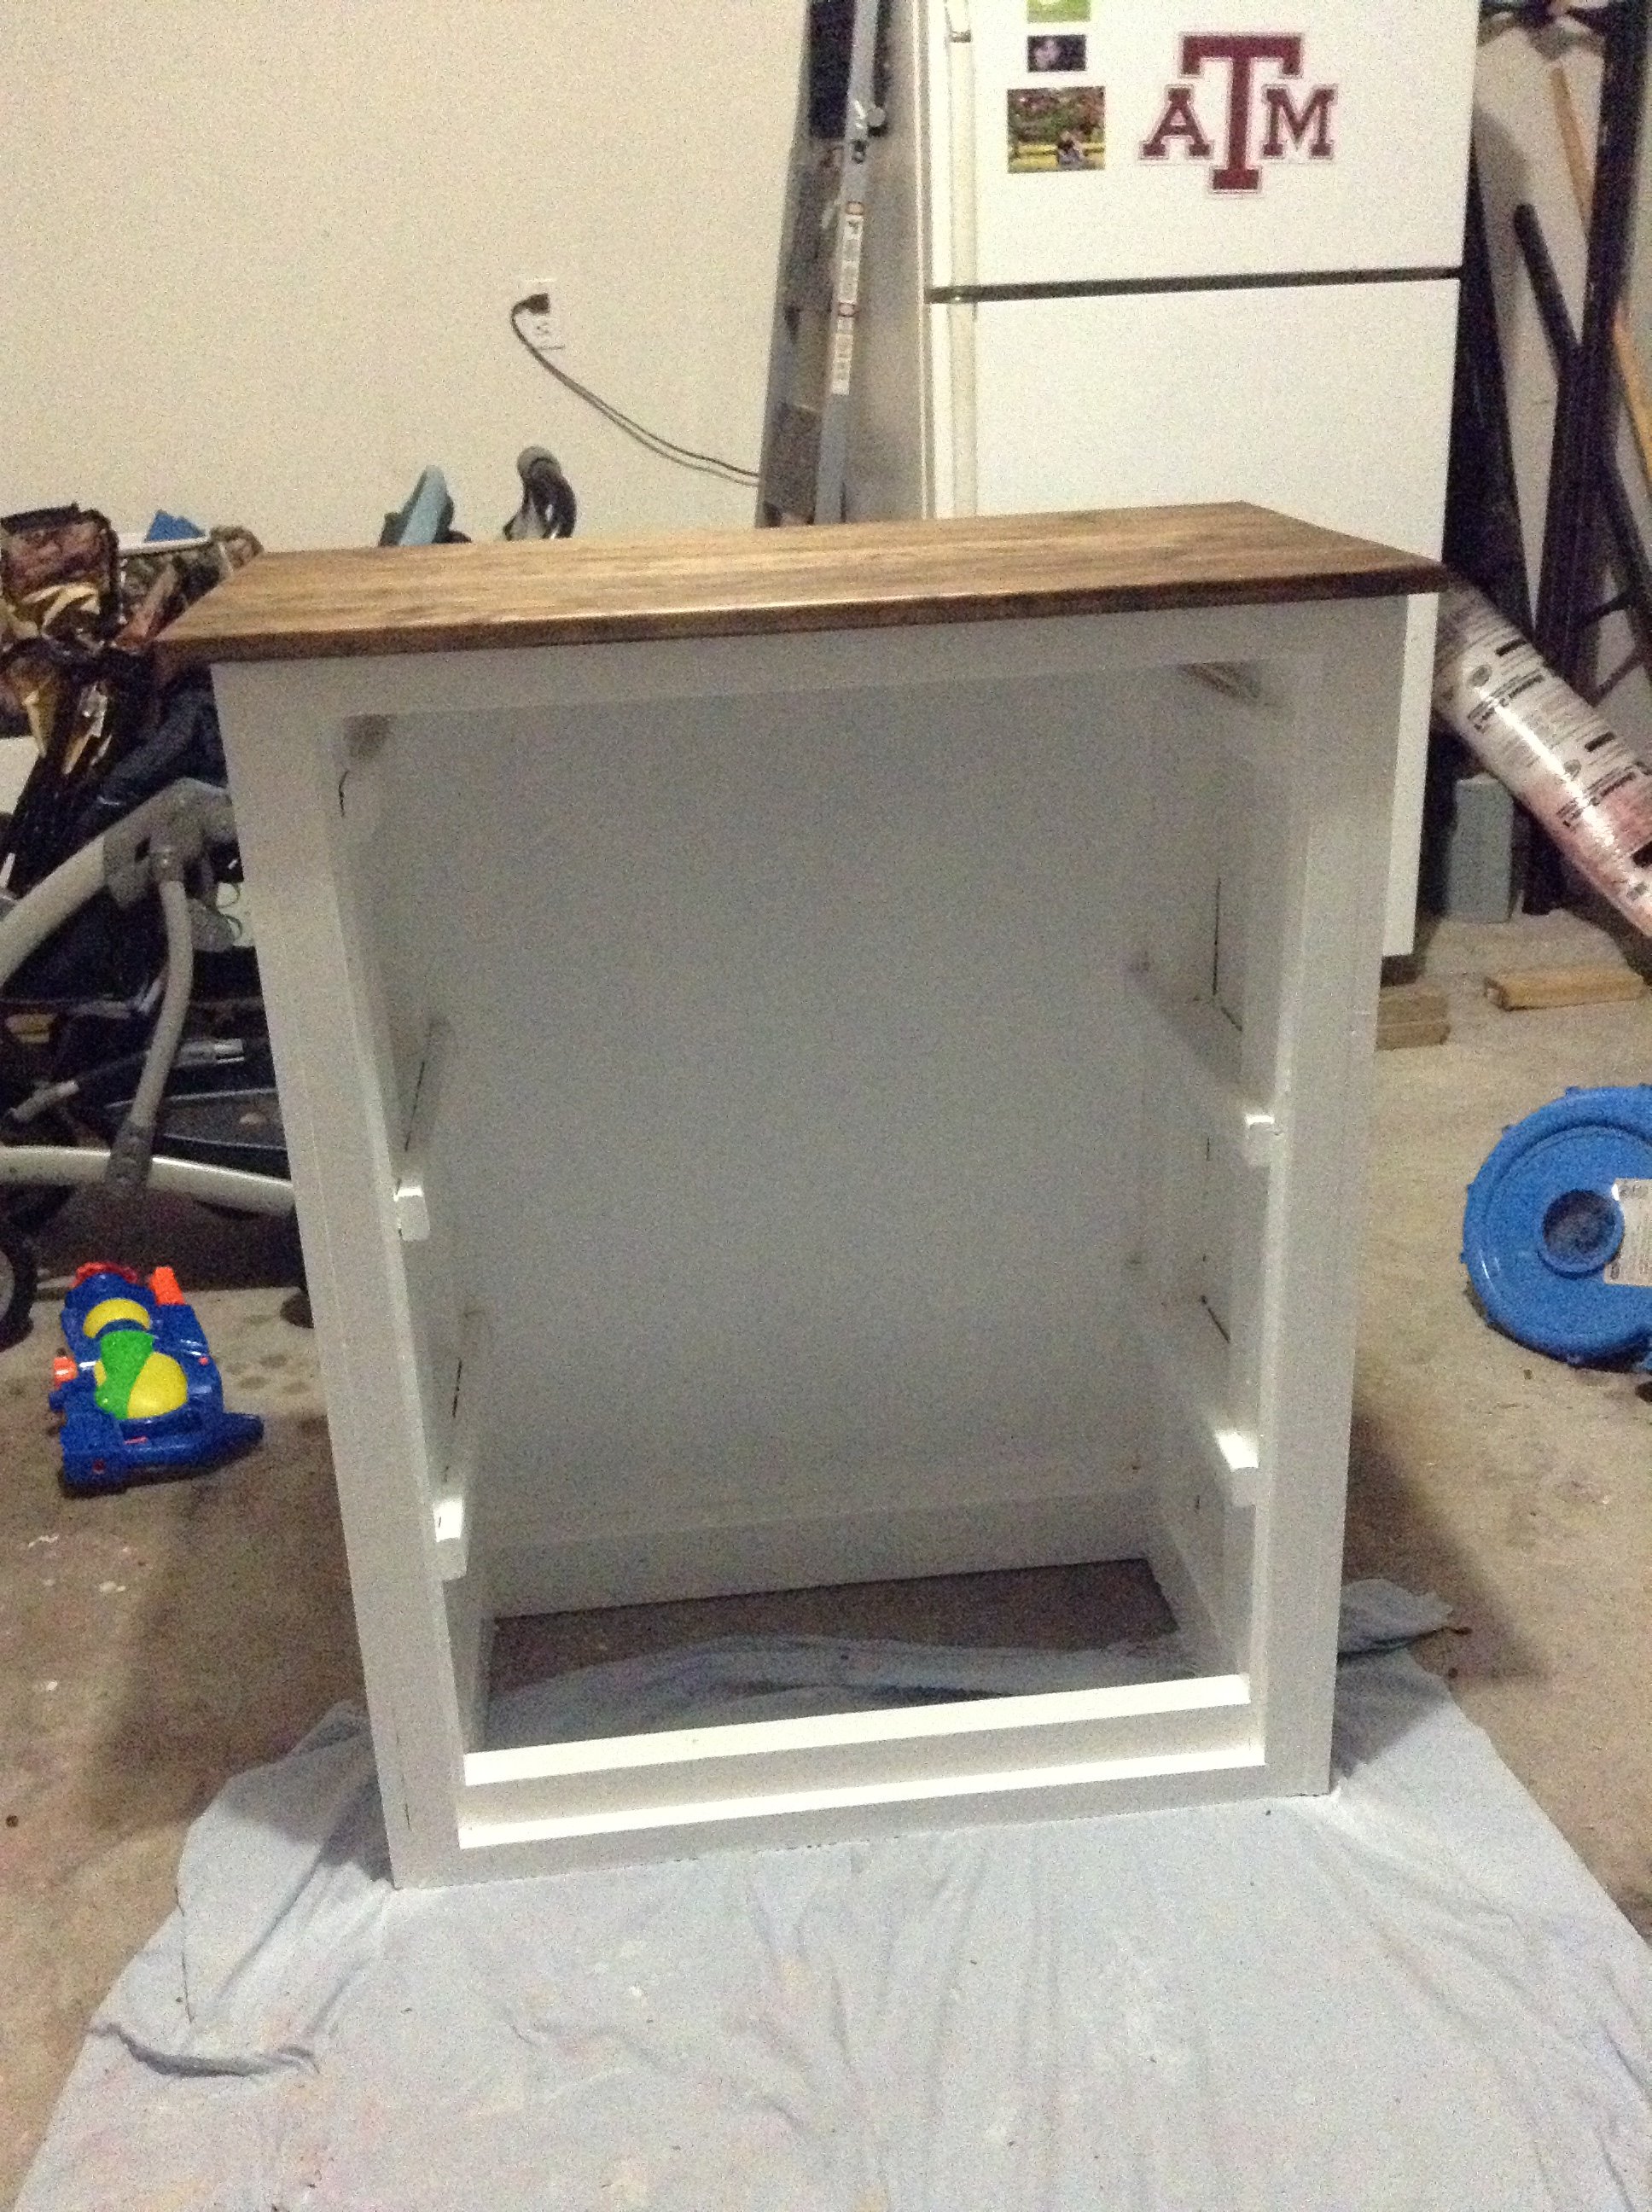
I loved the look of the Craft room Storage tower but modified to suit my wife's bathroom theme/decor. The inside back (MDF beadboard) is painted a milk coffee color to lighten it up. The door inserts are plexiglass, which was more expensive than glass but with 2 boys 6 and 2 it is well spent, and the MDF beadboard. Covered the plexiglass with self-adhesive film for glass on both sides to hide the towels inside. This project took me about 12 hours to complete but over a 3 month period, mostly spent on finishing the project with my boys underfoot or at 12-2am. YIKES!!! If i keep this up she will want to buy instead of letting me build.
Price List:
wood: $100
Stain/Paint: left over from house reno. would have been $15 stain $20 Varnish 30$ quart of paint
Handle: $7
Hinges: $4 basic style
I wanted to use Eurostyle hinges but opted to buy the Kreg system instead of Forstner drill bits.
Will be building another just different dimensions for laundry room makeover.
Sat, 01/26/2013 - 12:18
Thanks! It was my first furniture building project! I did a huge reno that i did on my house but that is construction and 1/8th in isnt as big of an issue as in furniture.

Mon, 01/28/2013 - 20:45
I've been wanting to build something similar for my bathroom! Yours turned out great. It inspires me to get to work!
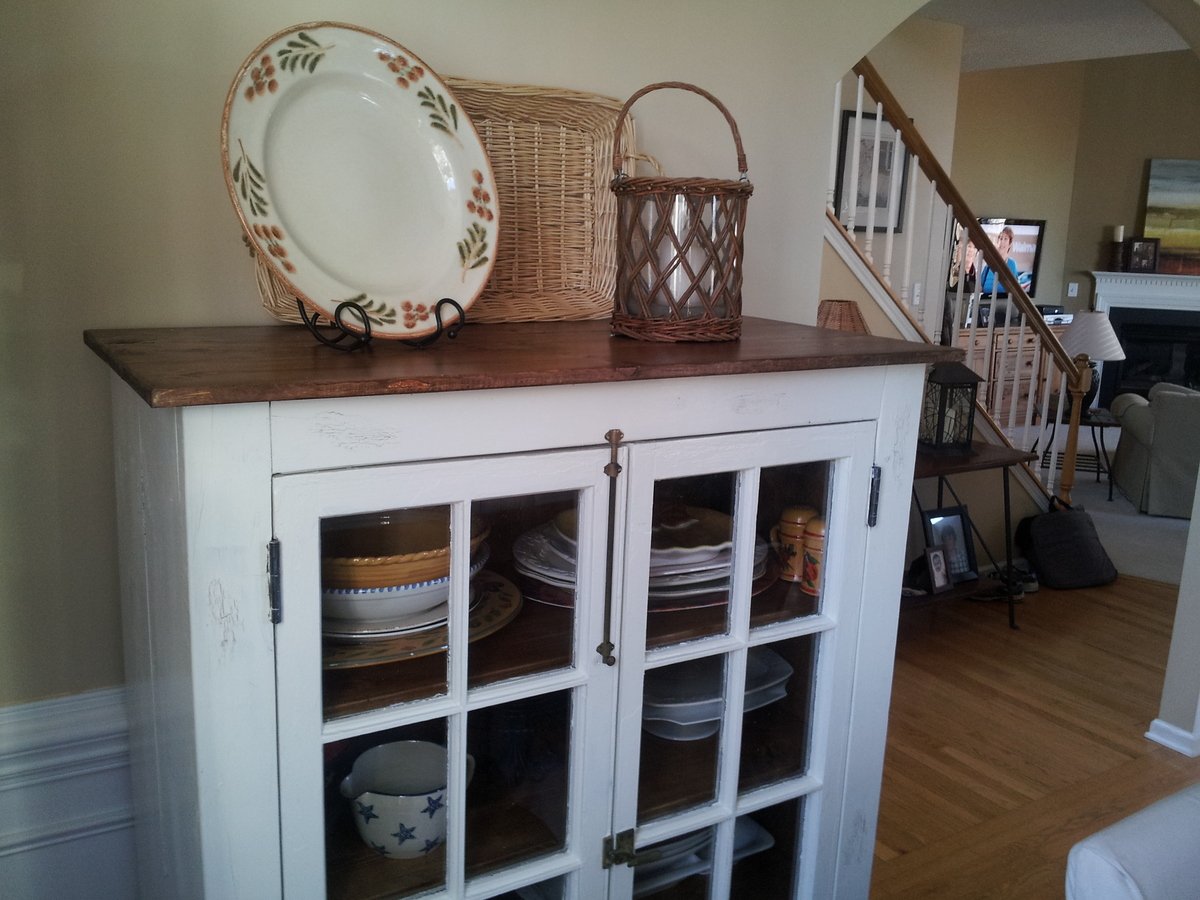
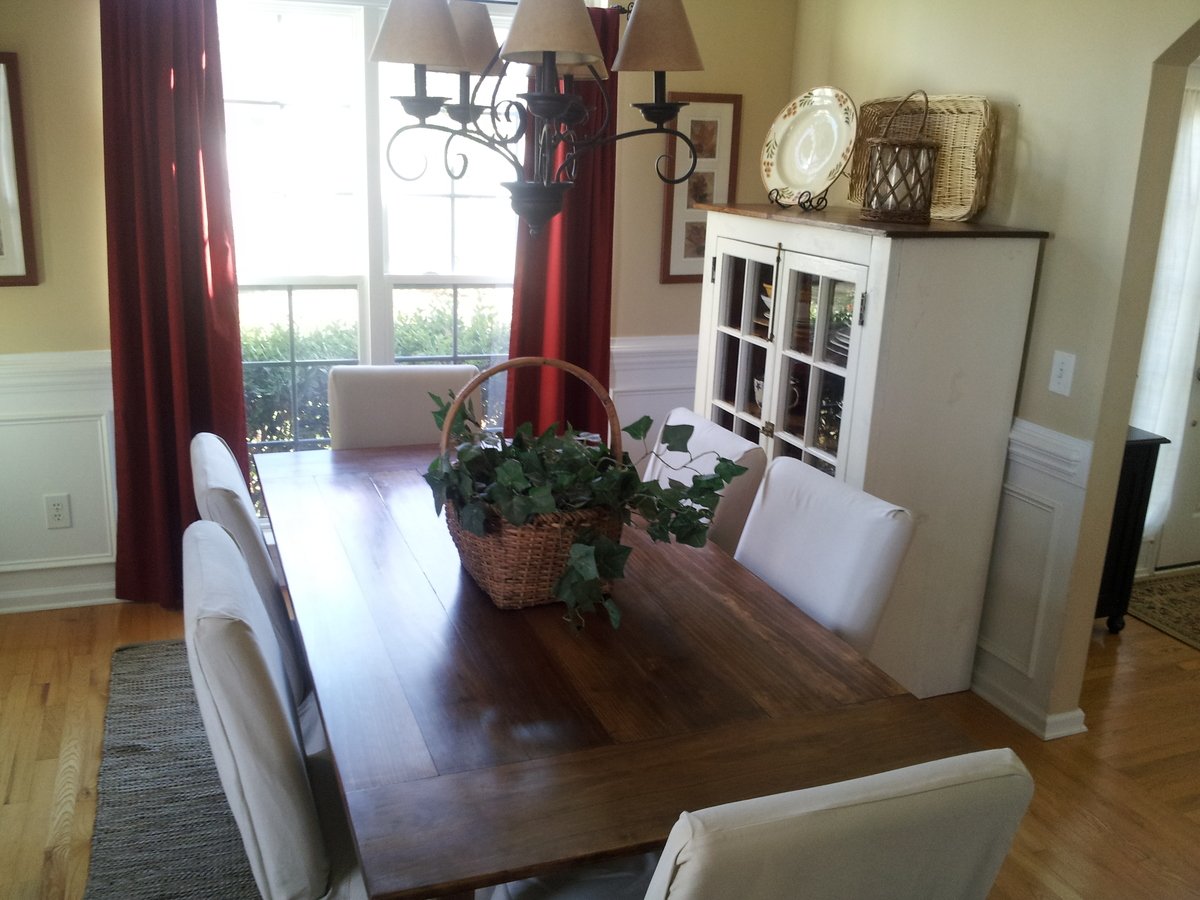
We found two old windows with the original hardware. They were covered with chipping lead based paint so we pulled off what paint we could (safely). We then painted them over with oil based Kilz before the final coat. We then built the cupboard from there. We decided to go with a more rustic look since the windows were still a little rough. We applied a crackle finish in a few spots using white glue to add to the rustic texture.
Followed your plan but added extra 1 x 2 trim to the sides, feet made from 1 × 3 and 1x 3 trim around the top
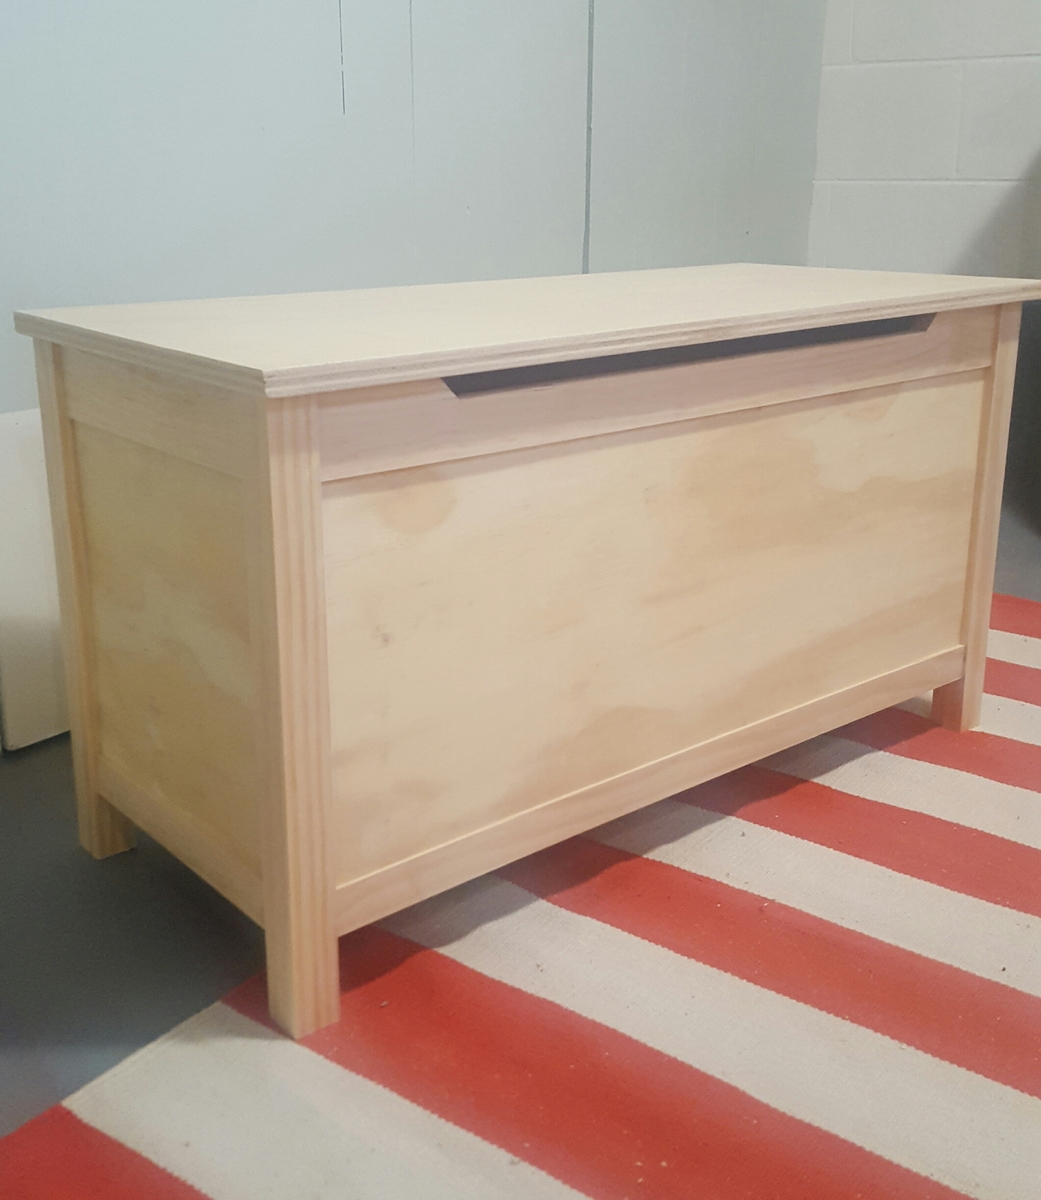
I had a wonderful time making this toy box and learning new techniques. Having access to a table saw really made this project turn out awesome. I was able to get 1/4" shims made that allowed for easy, precise offsets. The family just loved it!
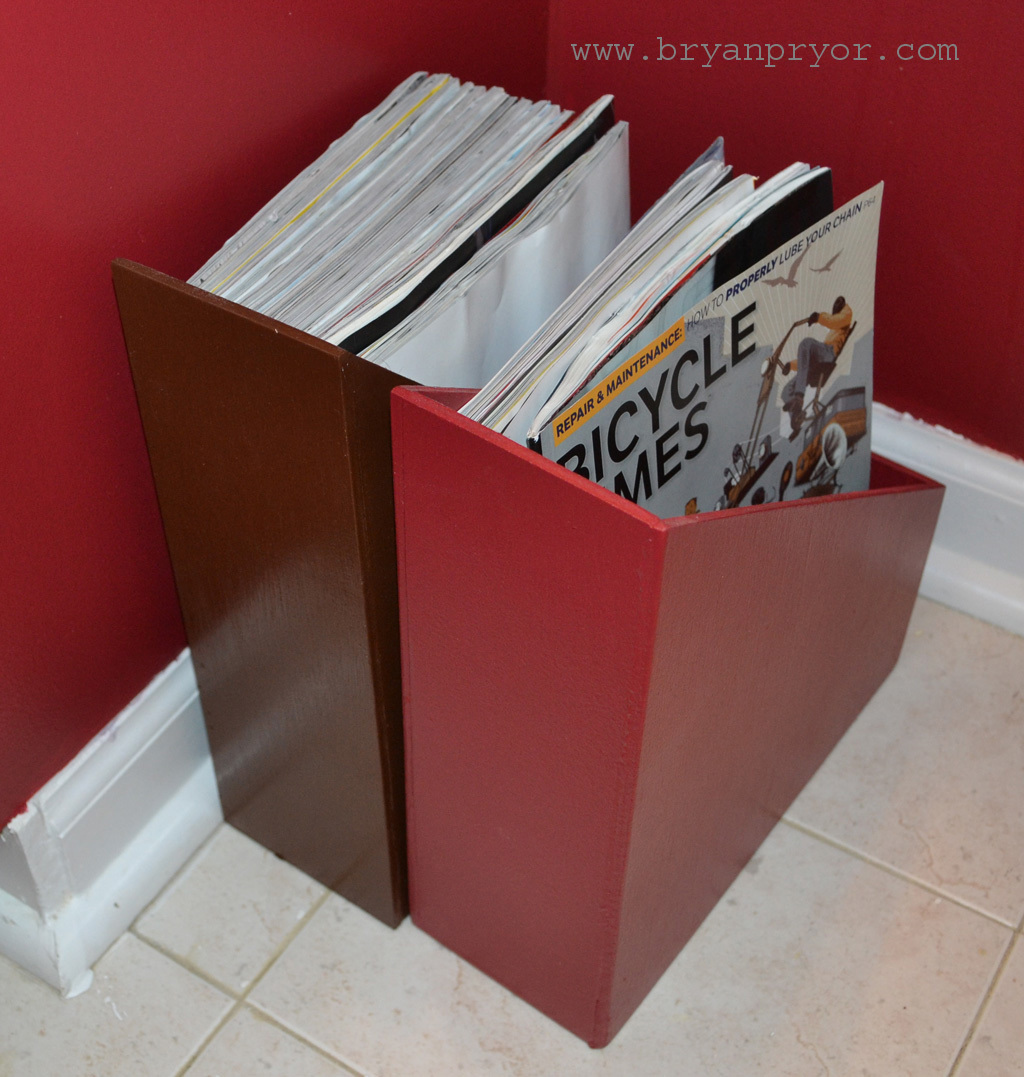
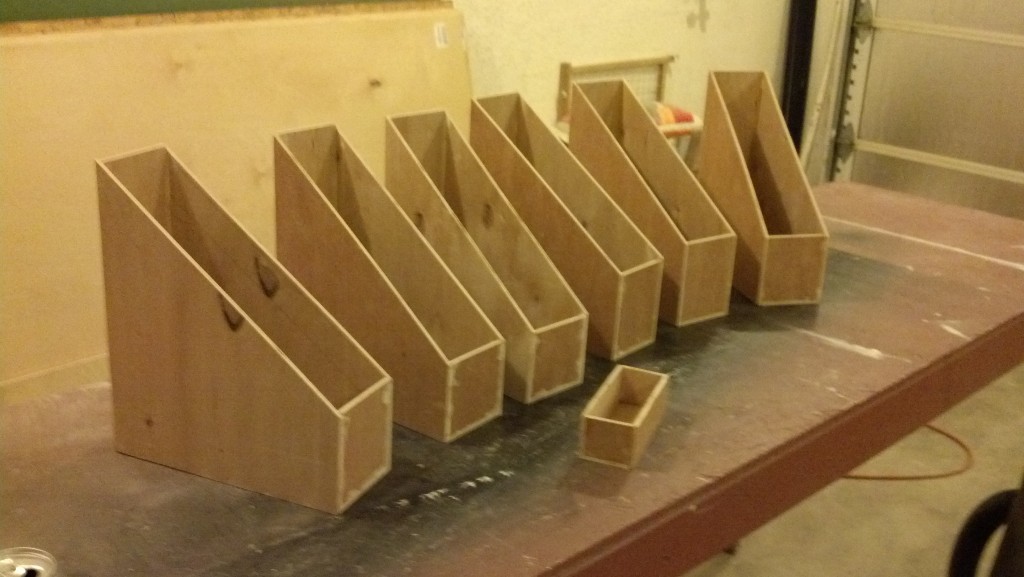
These are my wooden magazine files made after looking at Ana's plans. I chose to paint these to match my bathroom.
See more of my build process at http://www.bryanpryor.com/2013/01/26/magazine-holders/
Wed, 02/13/2013 - 21:20
Great idea for corraling the magazines that pile up in the bathroom! I really like the colors, too.
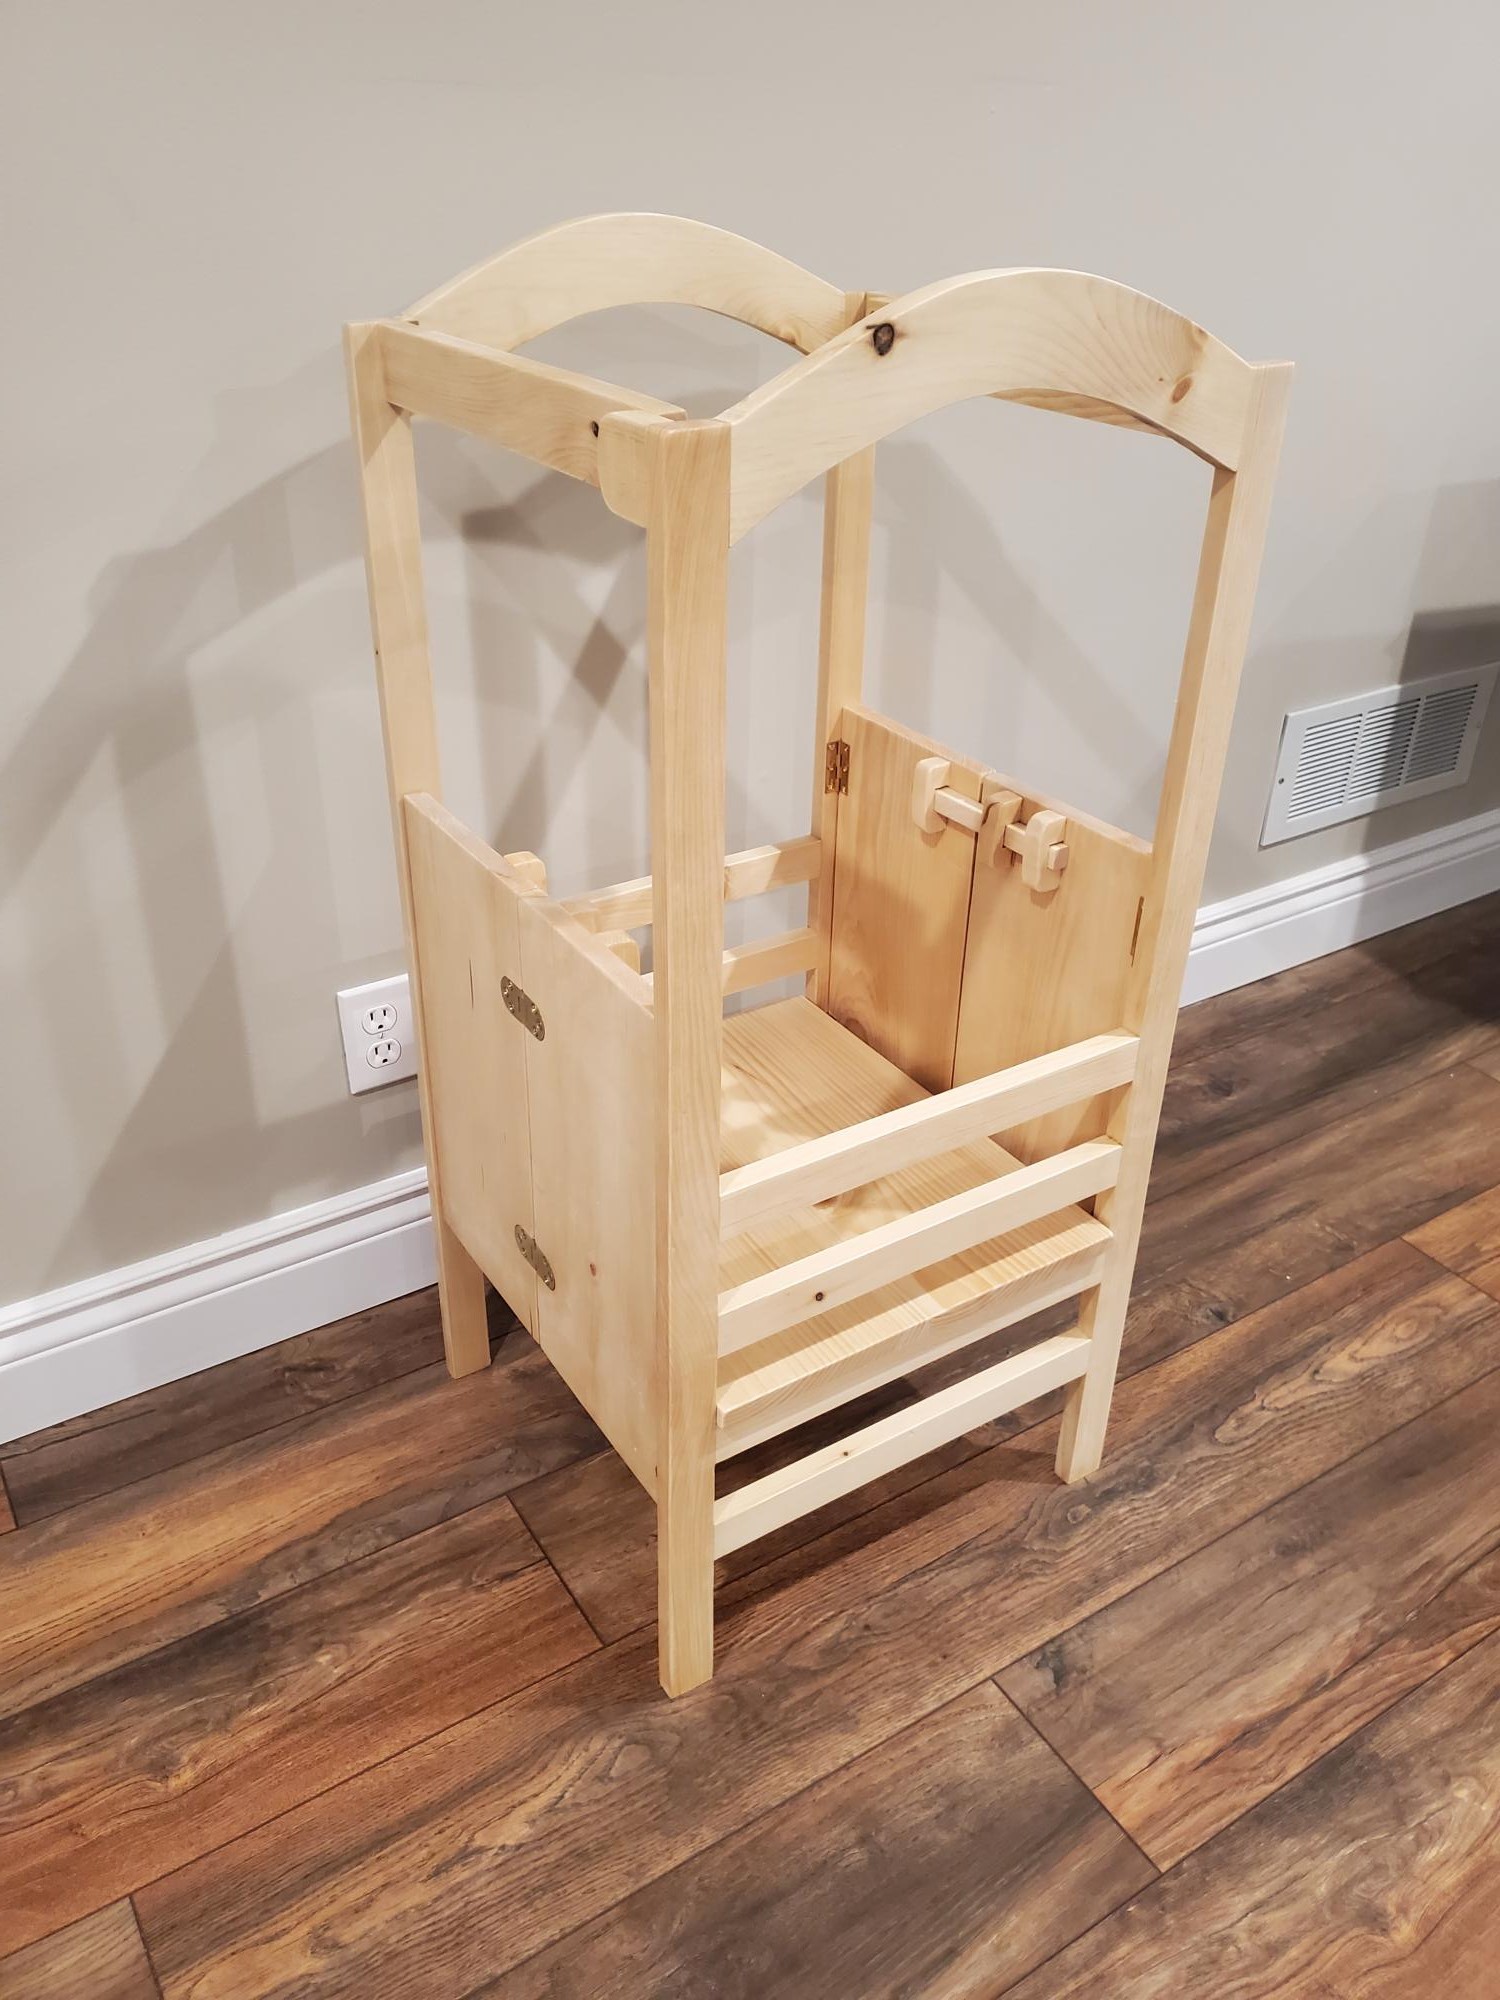
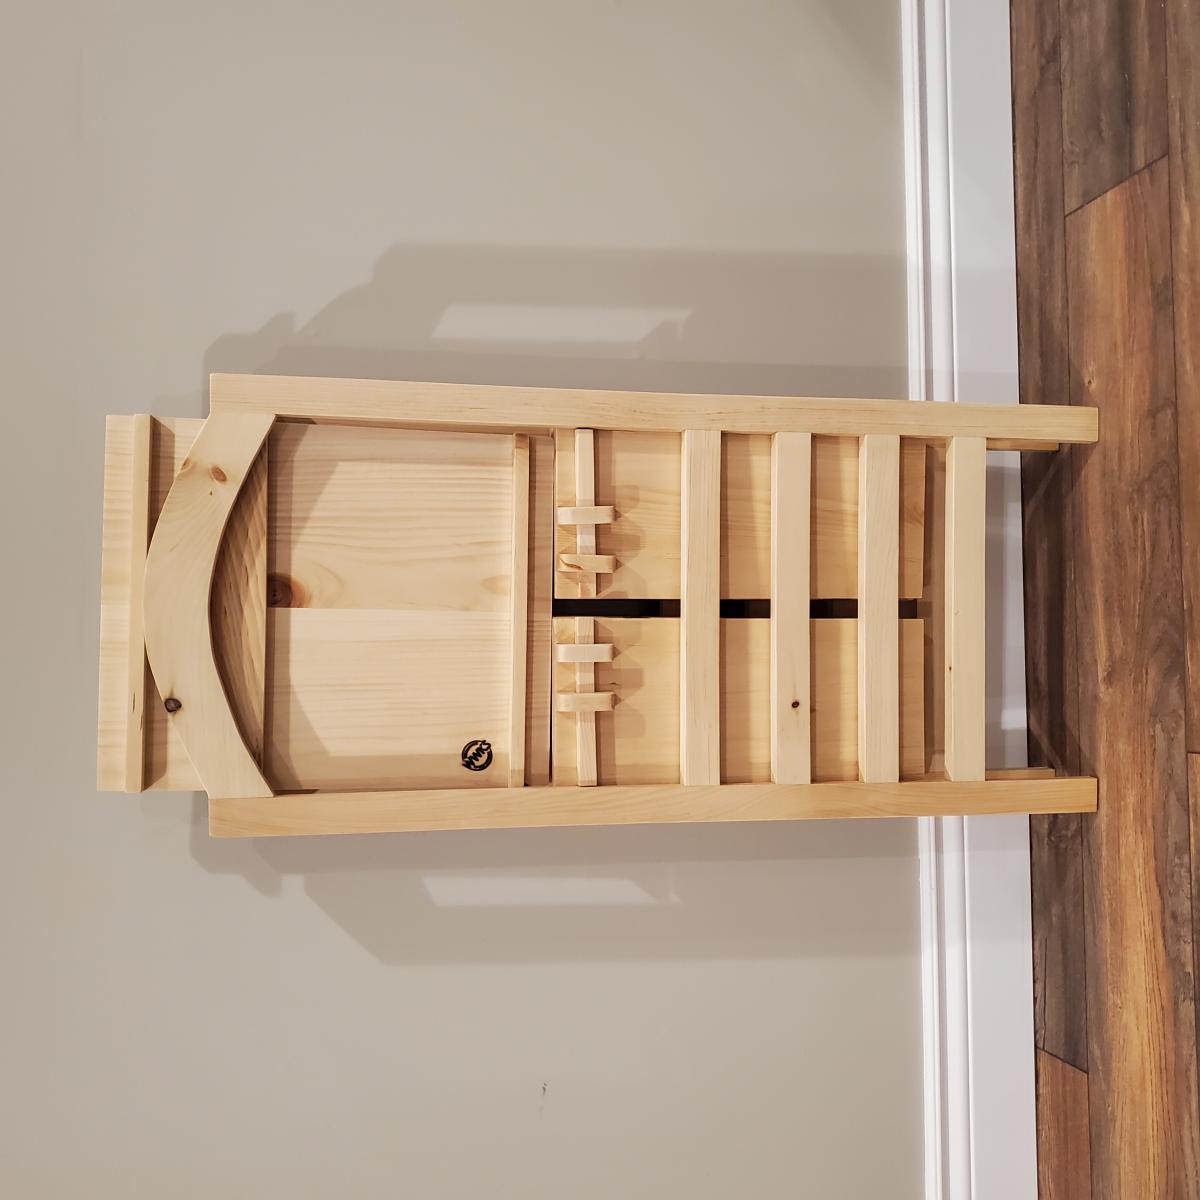
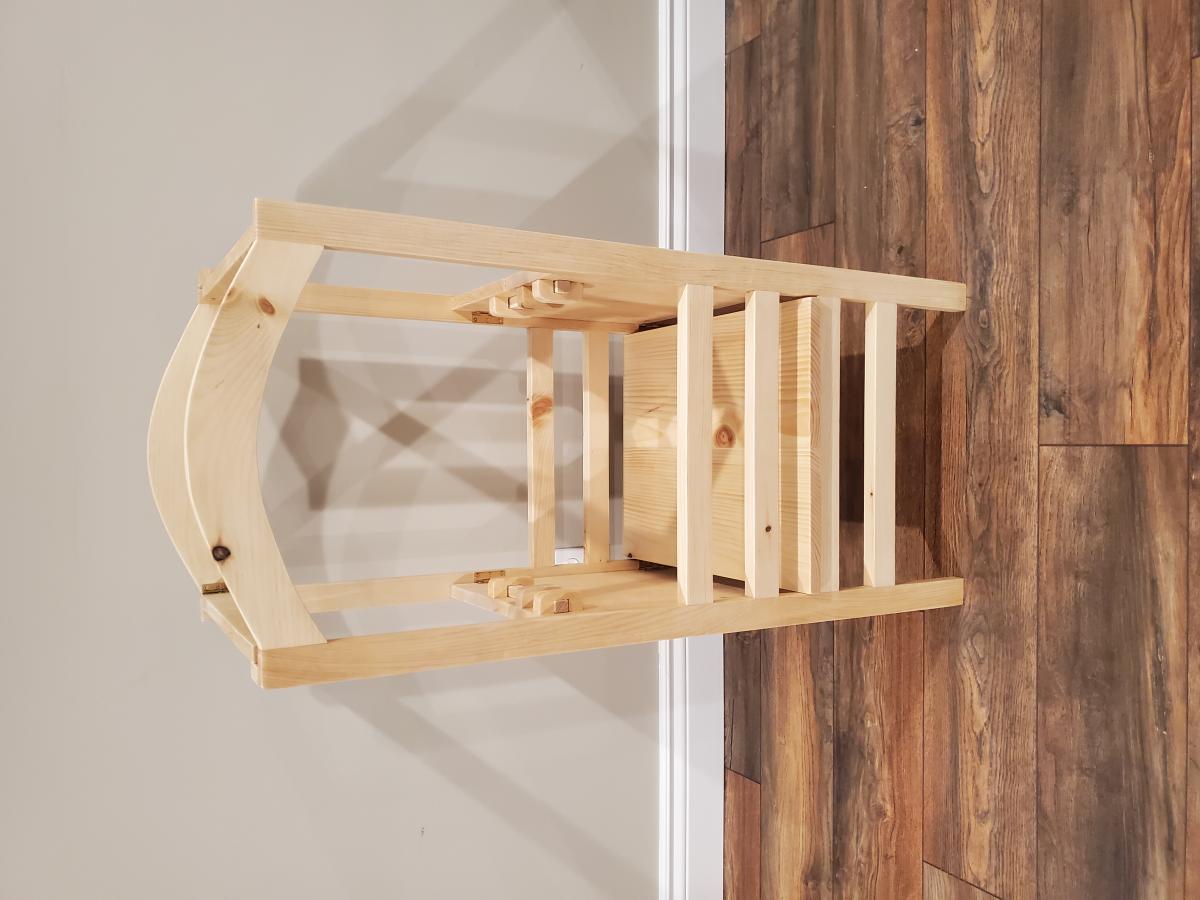
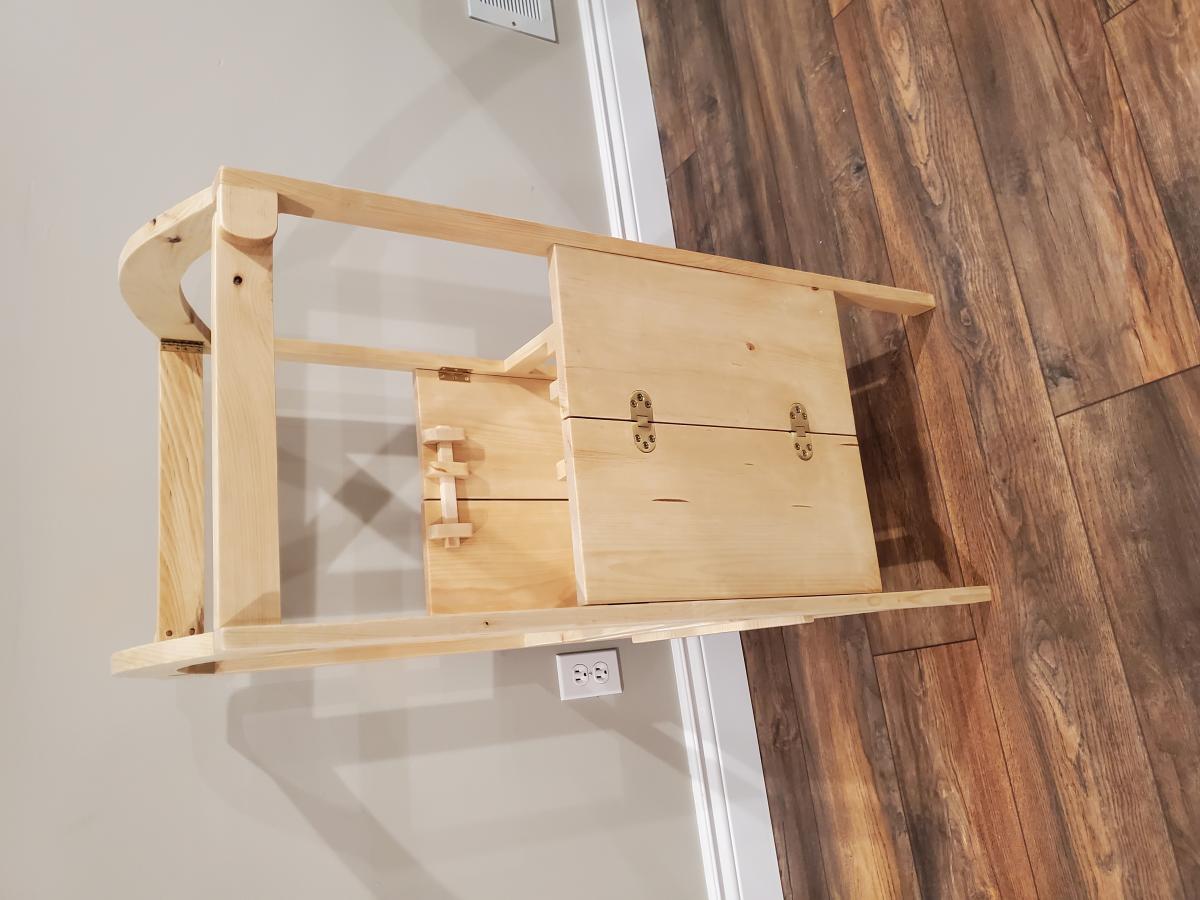
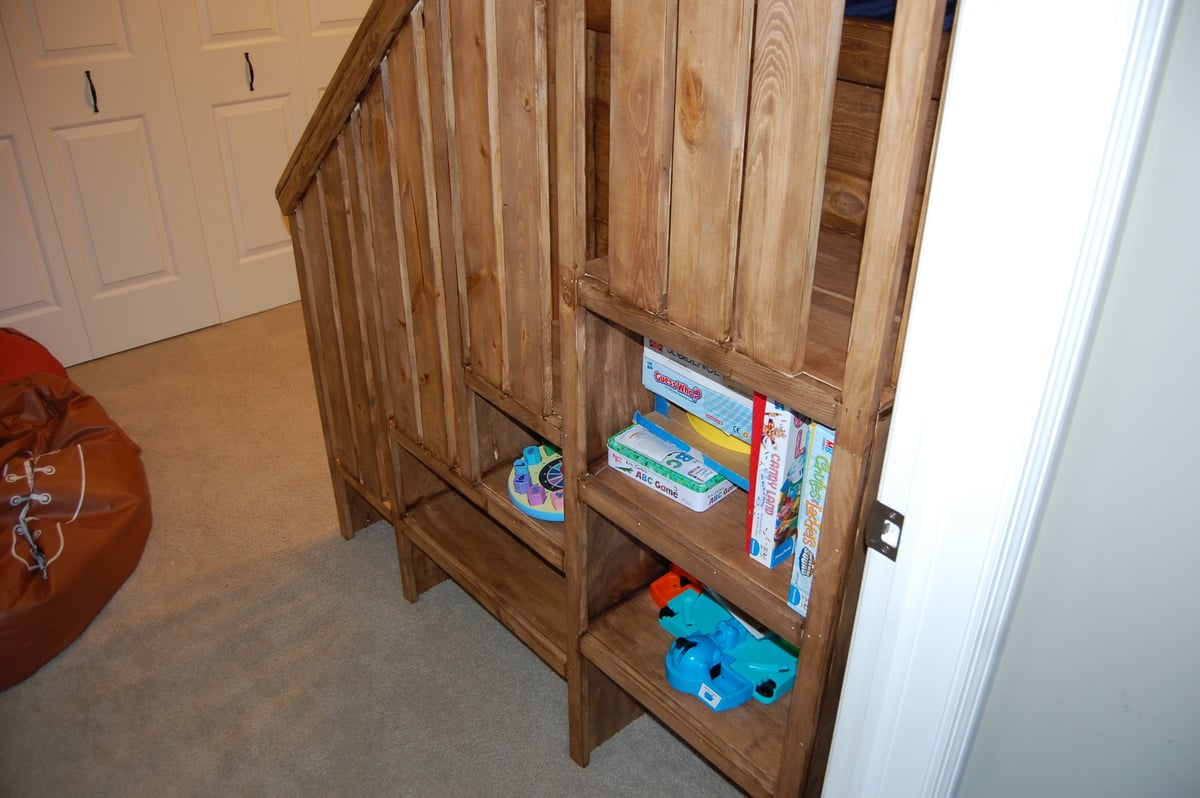
My variation of the "Littlest tower help" plans I found here on Ana white. I loved the design of the original but wanted it to be able to easily store away when not in use. Thanks for looking, Eric
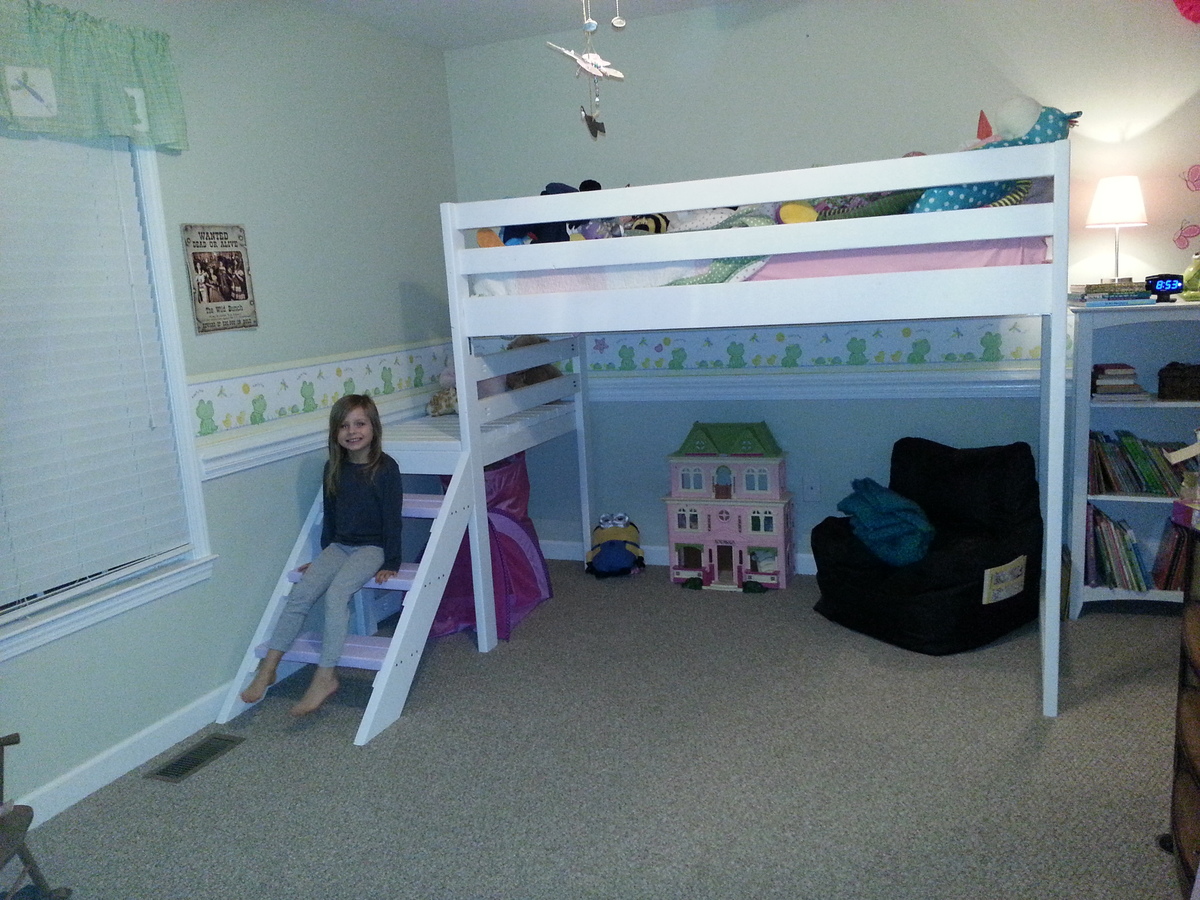
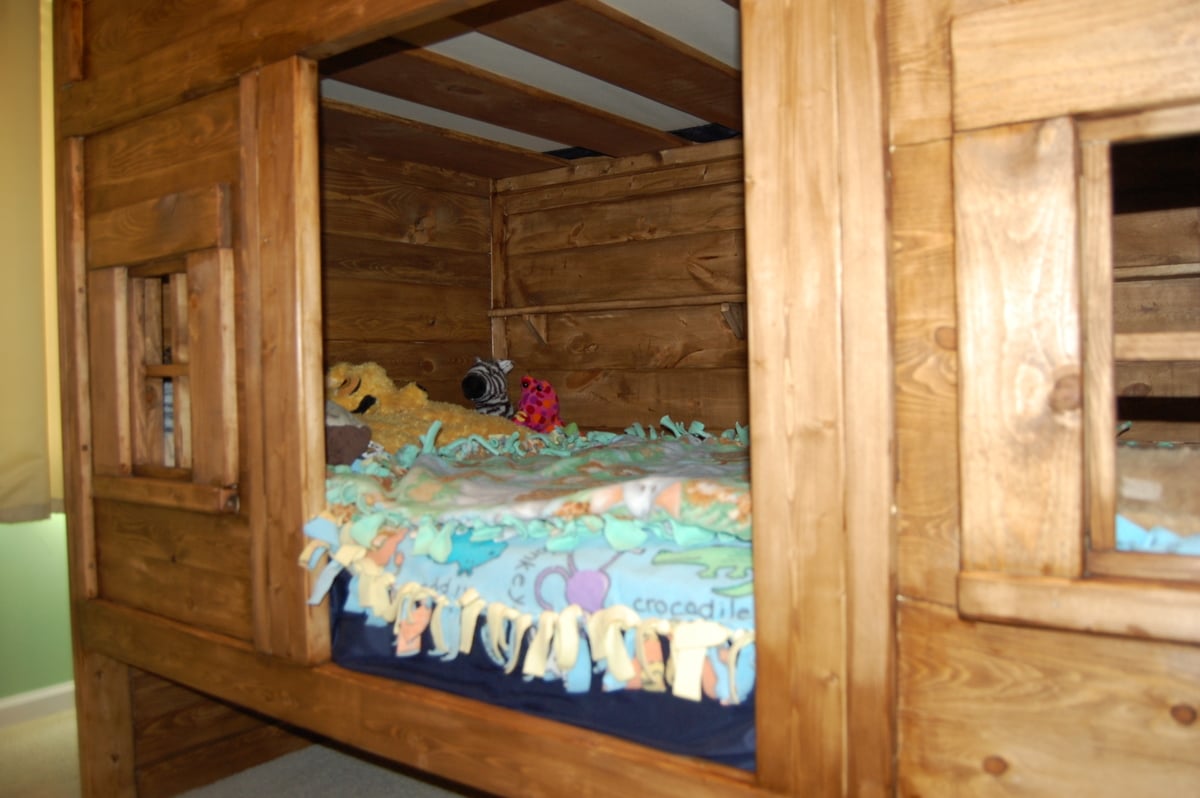
We had a blast building this bed for our daughter. It was our first build and I think it turned out perfect! Thank you Ana White for the inspiration and fantastic directions to get us through! Now onto the next project!
Amy
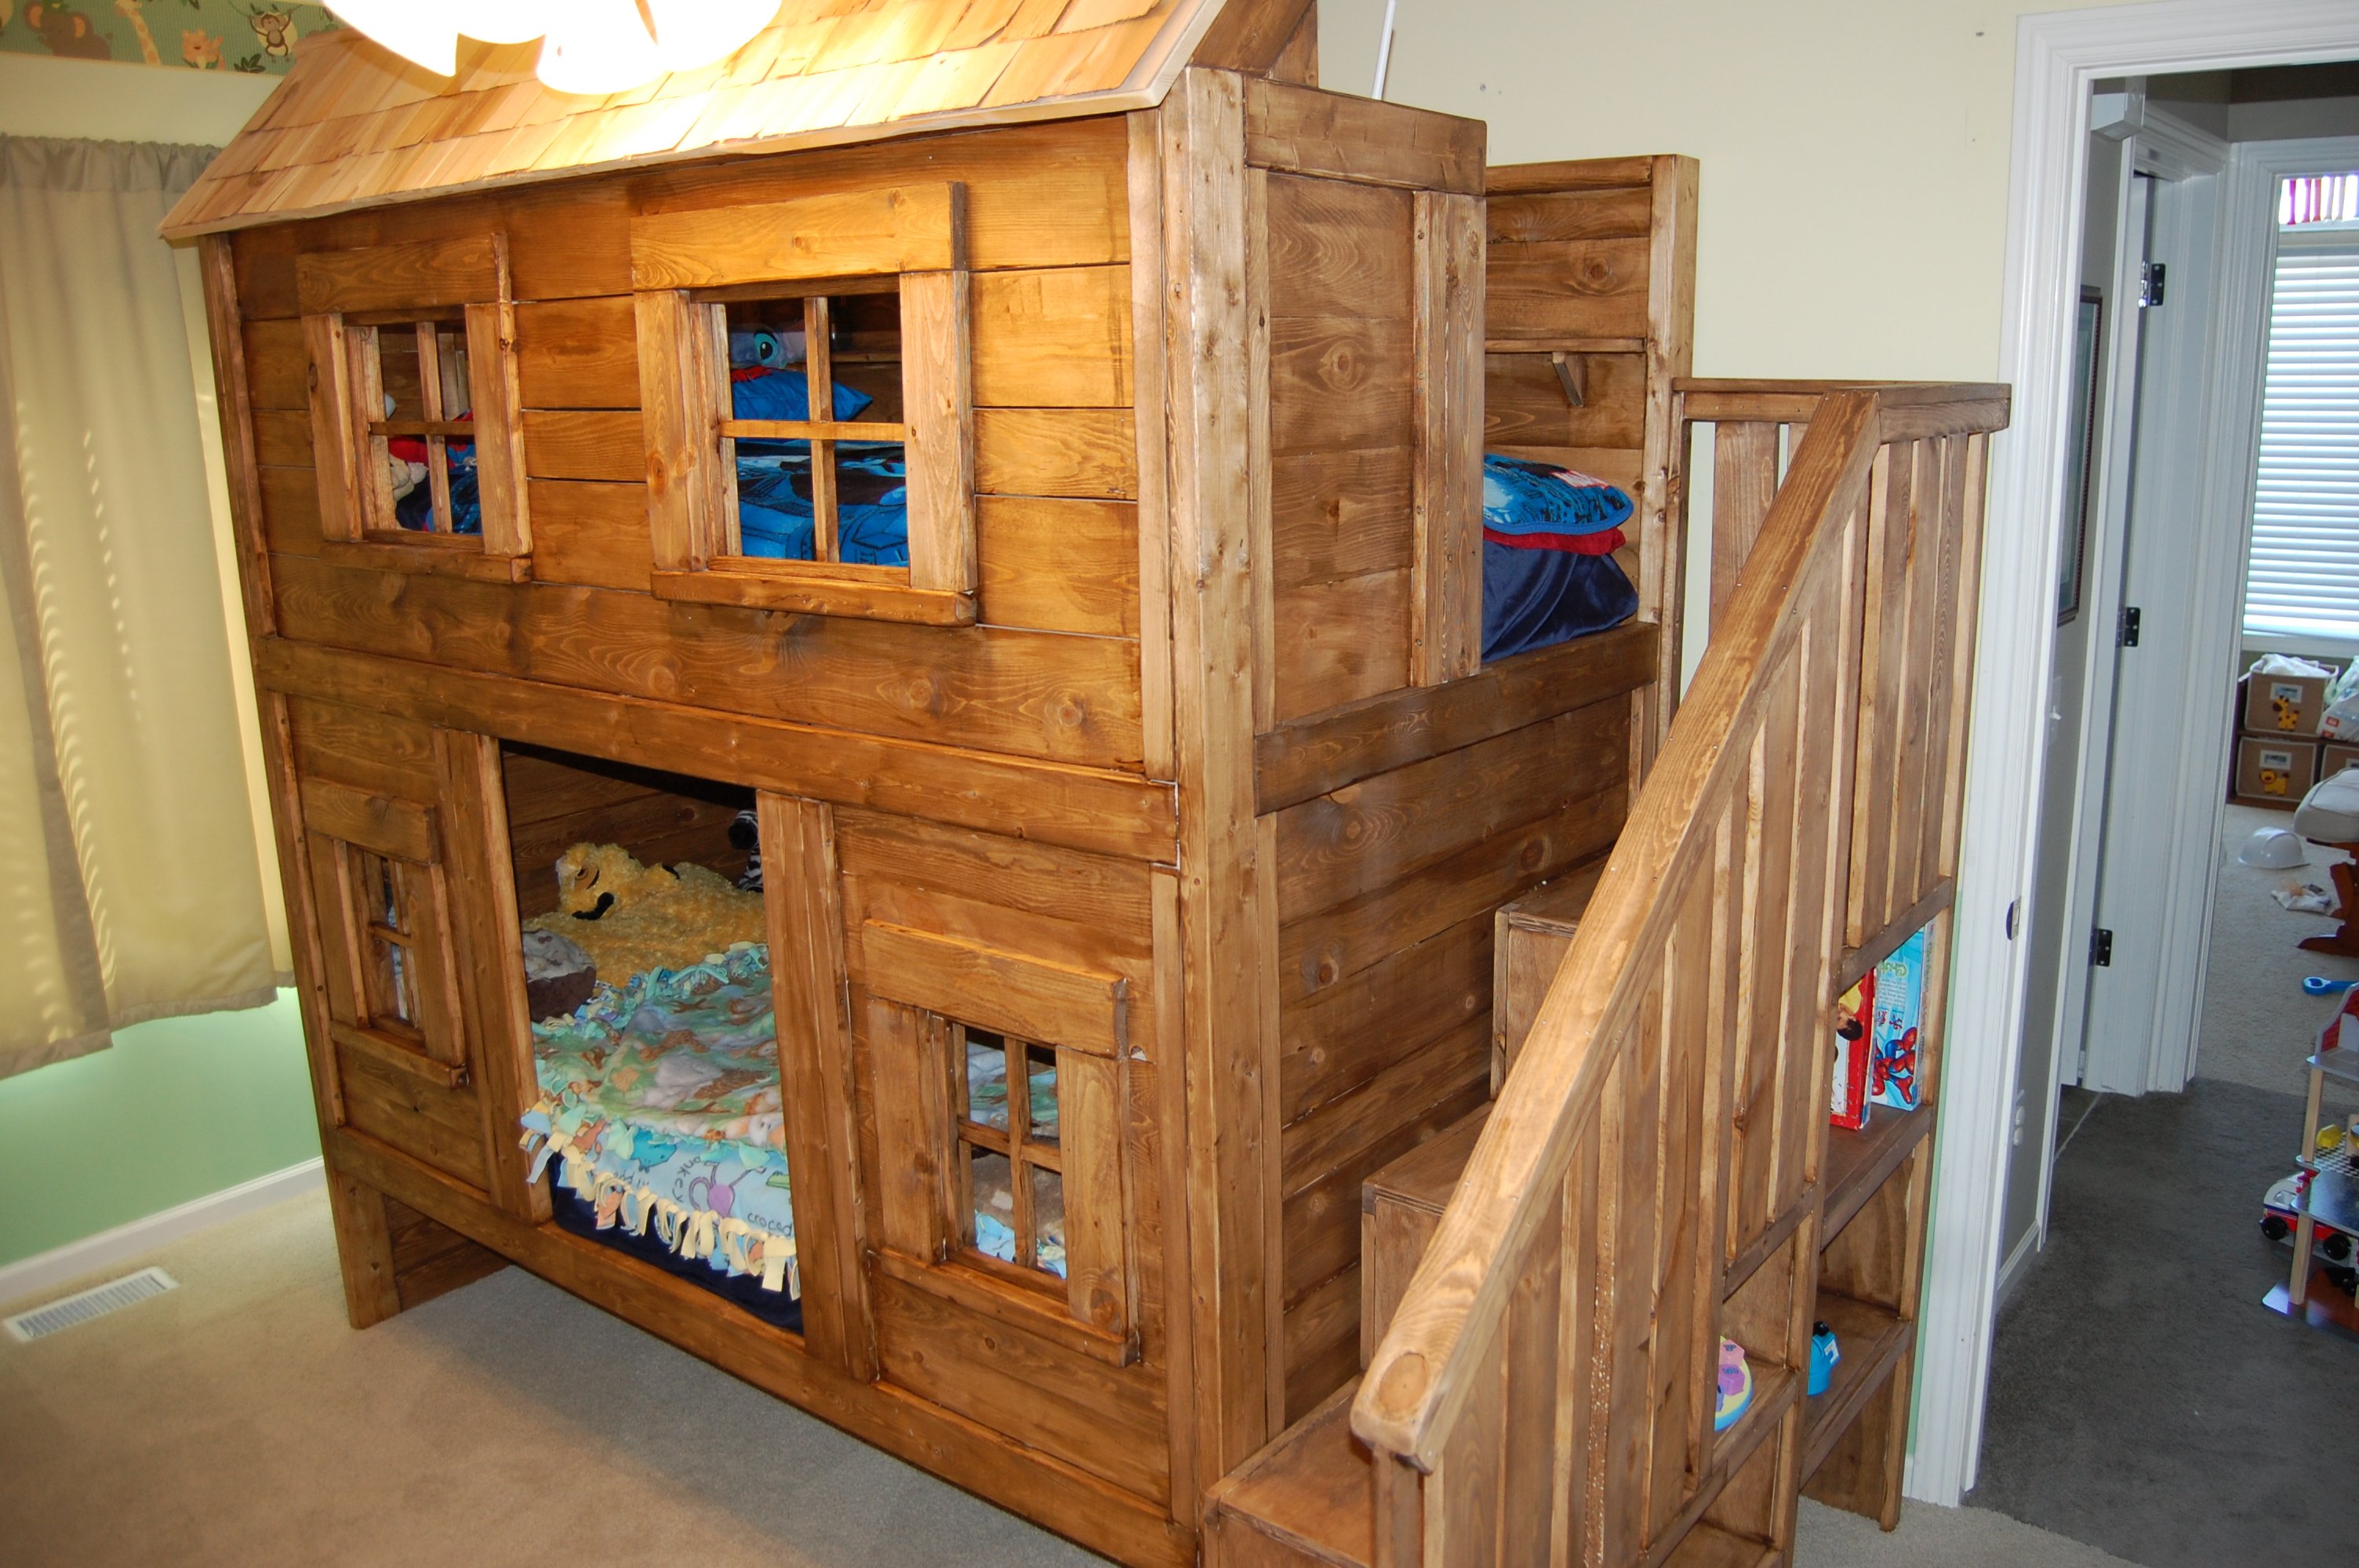
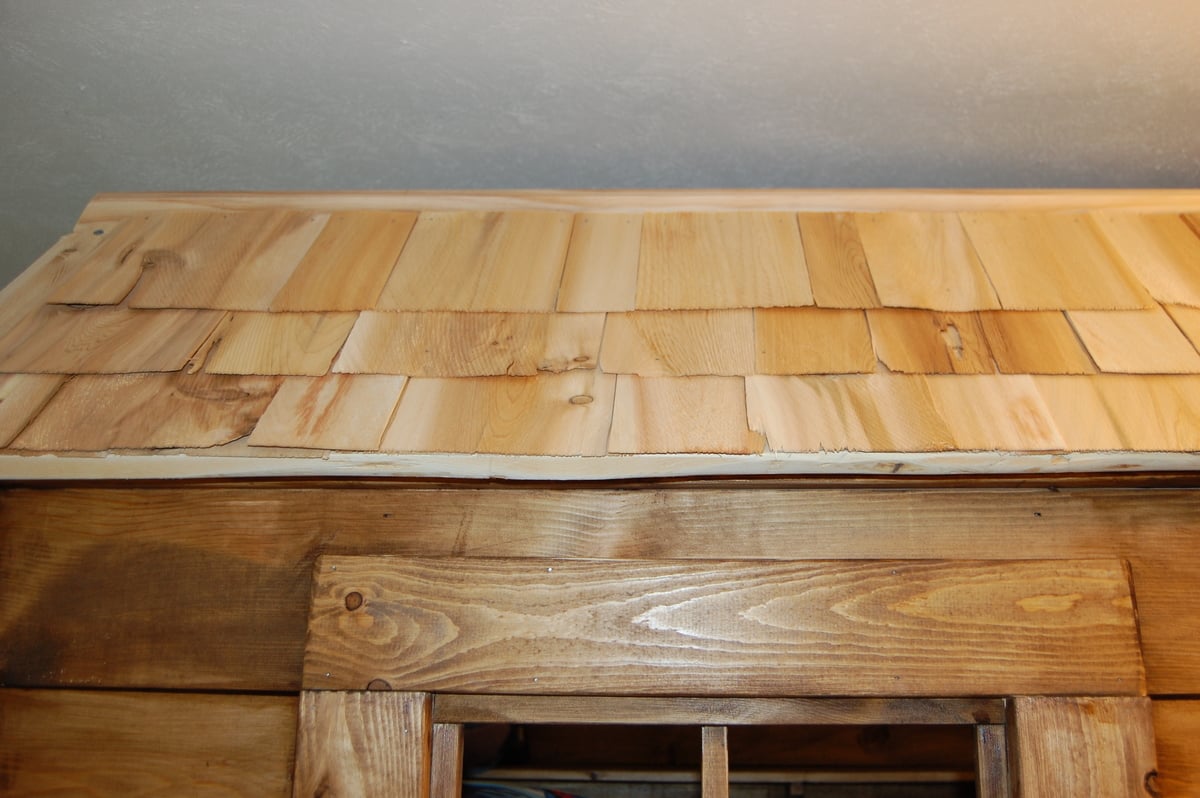
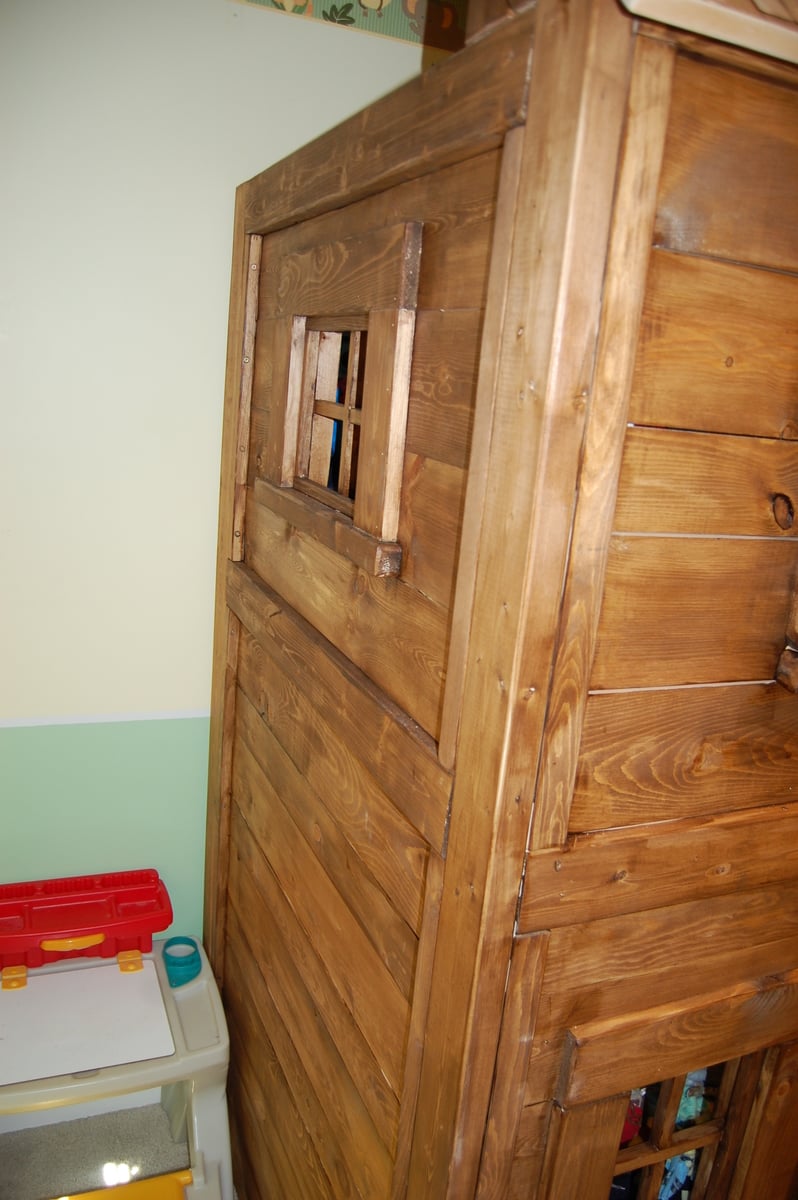
This took me and my father a few weekends to complete simply because that is all the time I had to work on it (was the weekends). We put a lot of effort into it and made sure everything was neat and safe. We modified the original plan a bit to give some more boy feel to this bed, and we added window bars to keep my children from climbing out of them. You know boys! We also added a window on the far side of the top bunk. We should have added one to the bottom too since it is so dark, but he likes it anyway! If you want to see some step by step photos, you can go to http://www.facebook.com/media/set/?set=a.10151477424866465.1073741825.5…
P.S. The estimated cost was for the bed only, not the mattresses or stain


Sun, 03/17/2013 - 14:53
My daughter walked in and said.....AH! I wanna sleep on the top! HAHA. Good job
Sun, 03/24/2013 - 08:08
I love this! You did a fantastic job. I think the stain makes it look great!
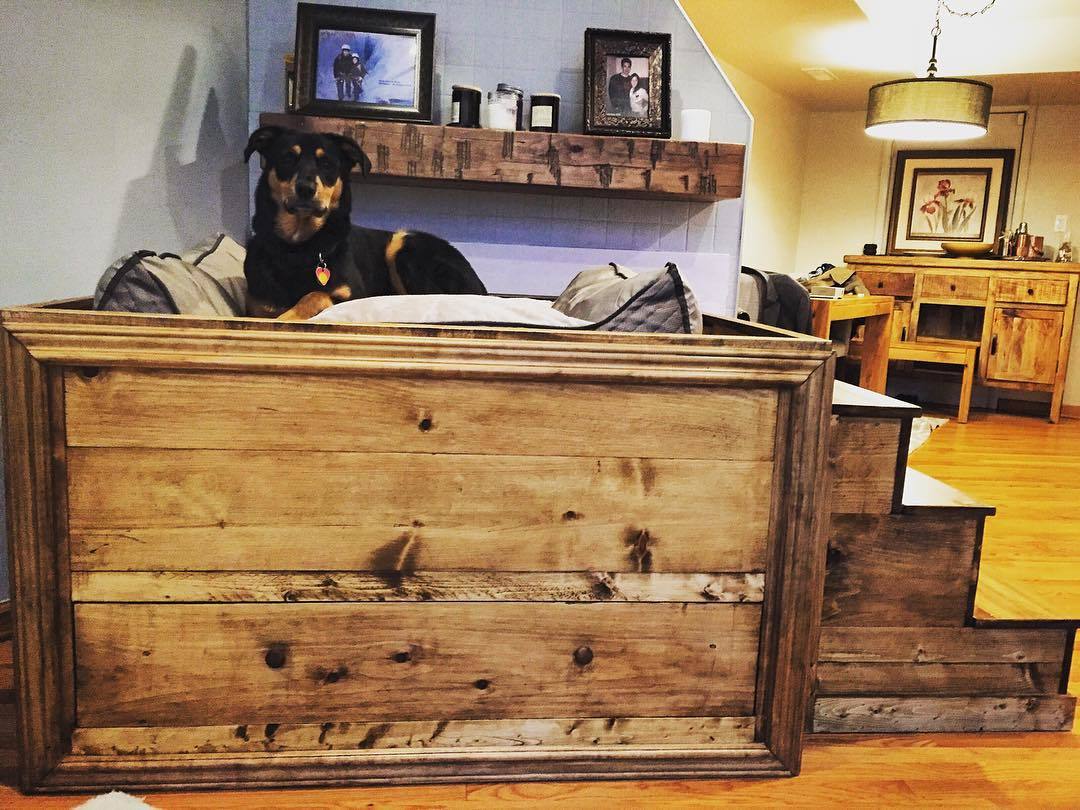
This dog bed was built with furniture grade pine and stained in Minwax Golden Oak. I added stairs and a storage drawer in the bottom.
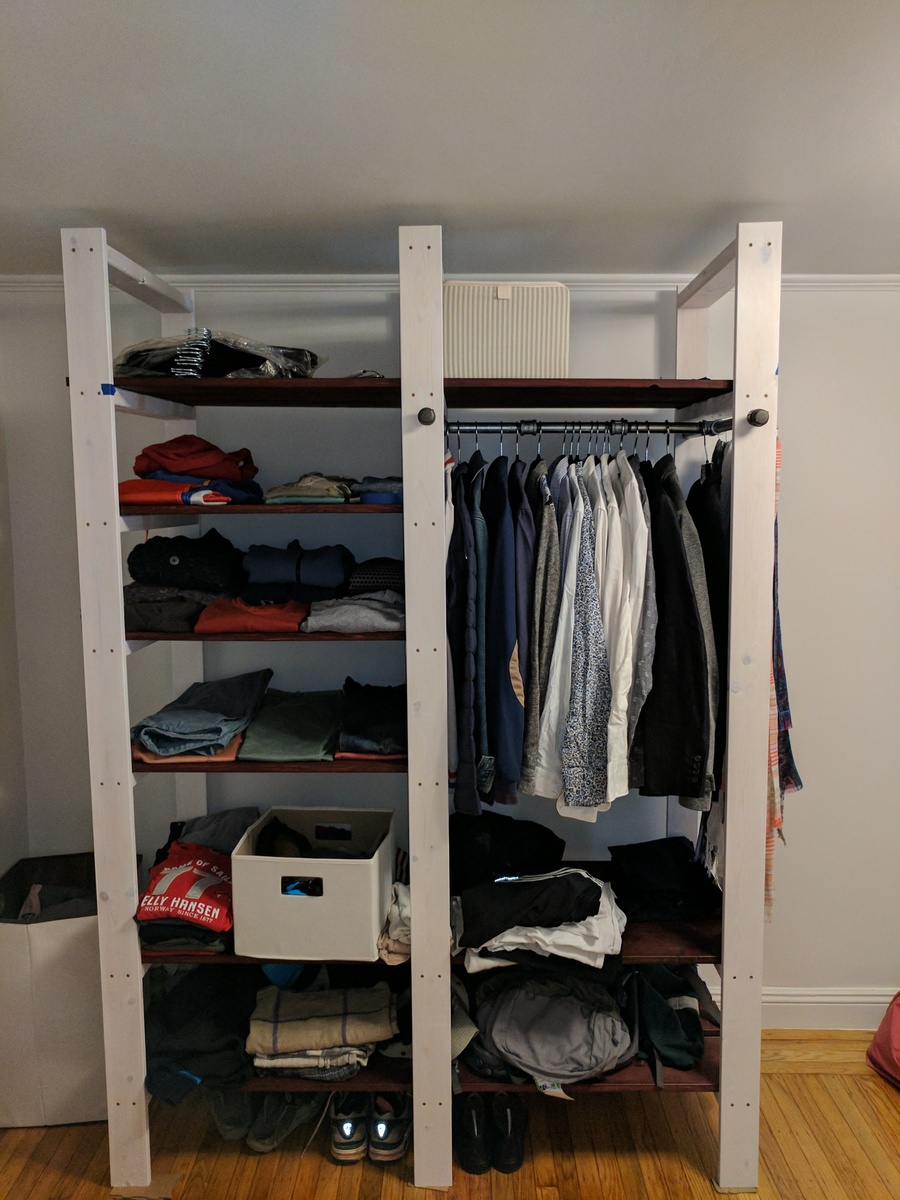
I couldn't find any wardrobe that I was really happy with - and then I stumbled upon Ana's design, and I loved it! I went for two different colors (white for the supports and rosewood for the shelves) to give it more presence. Dimensions are 60" wide X 22" deep x 86" tall
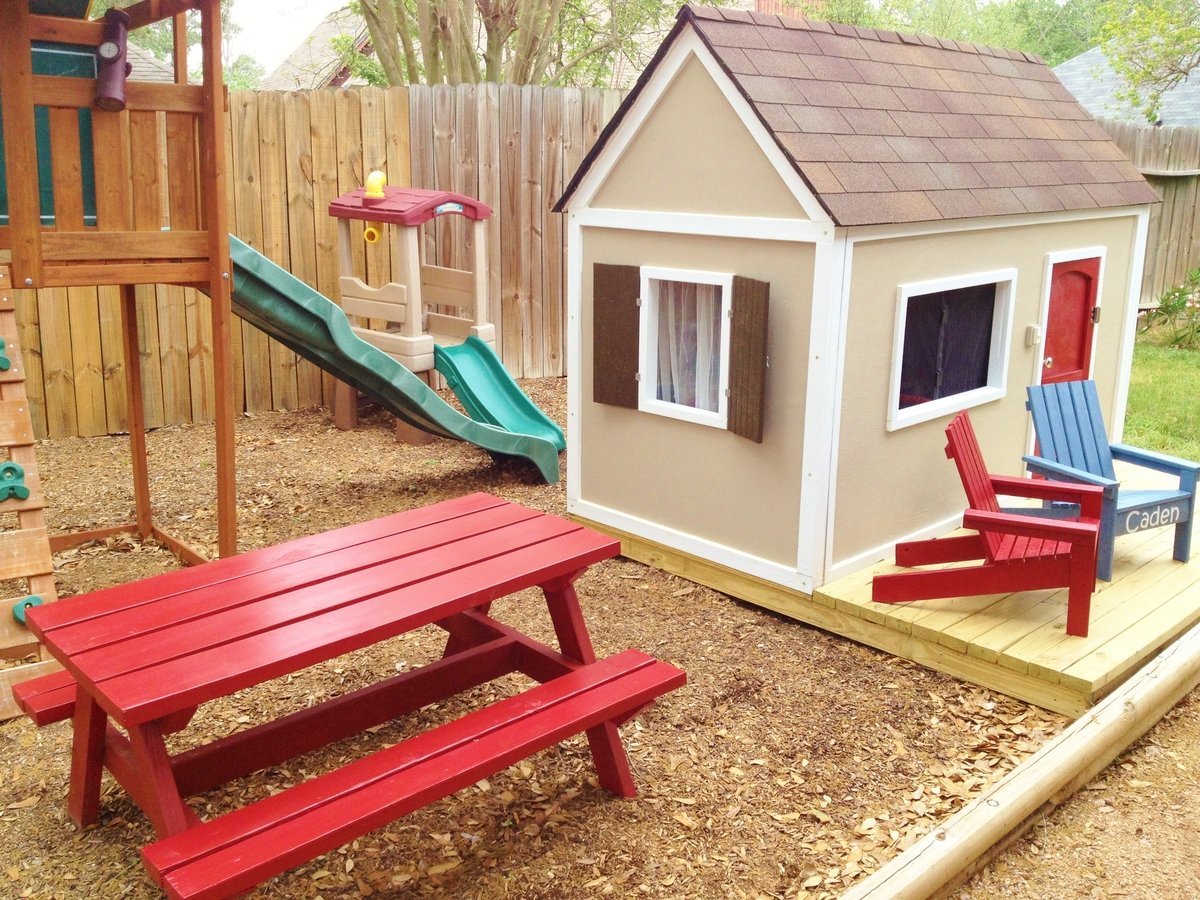
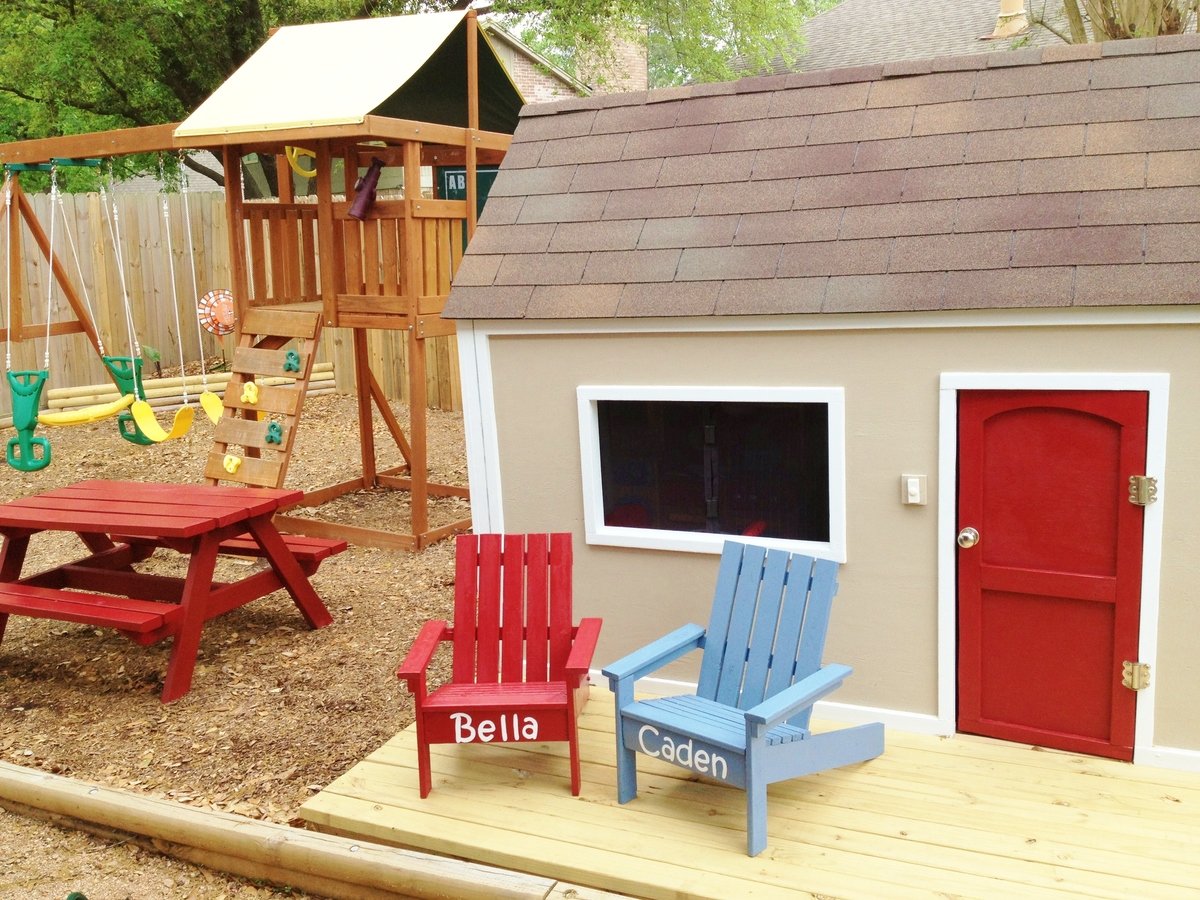
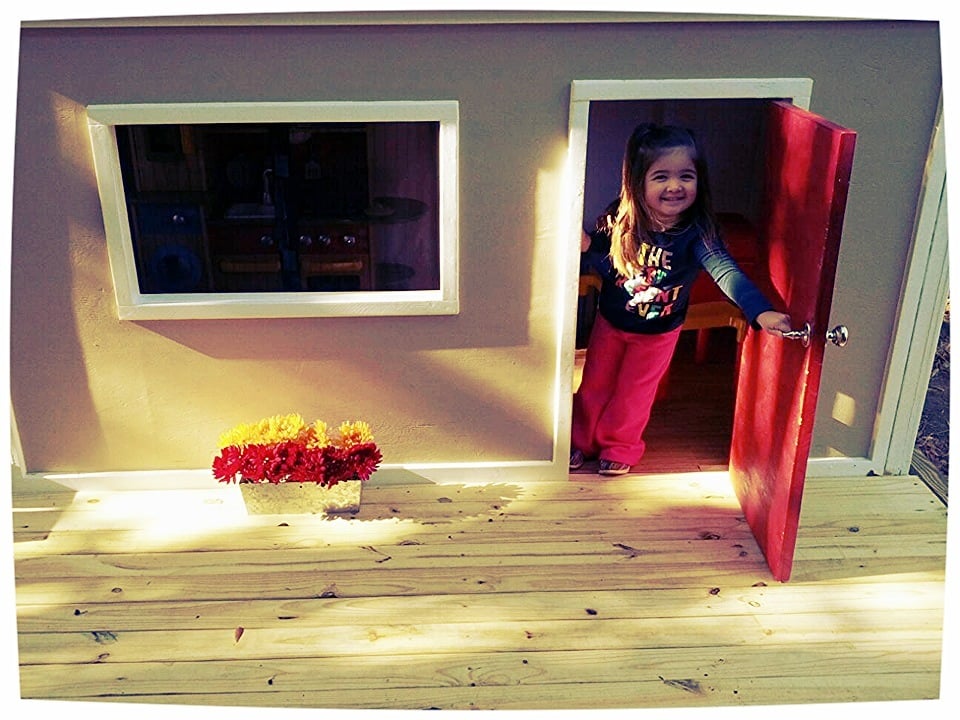
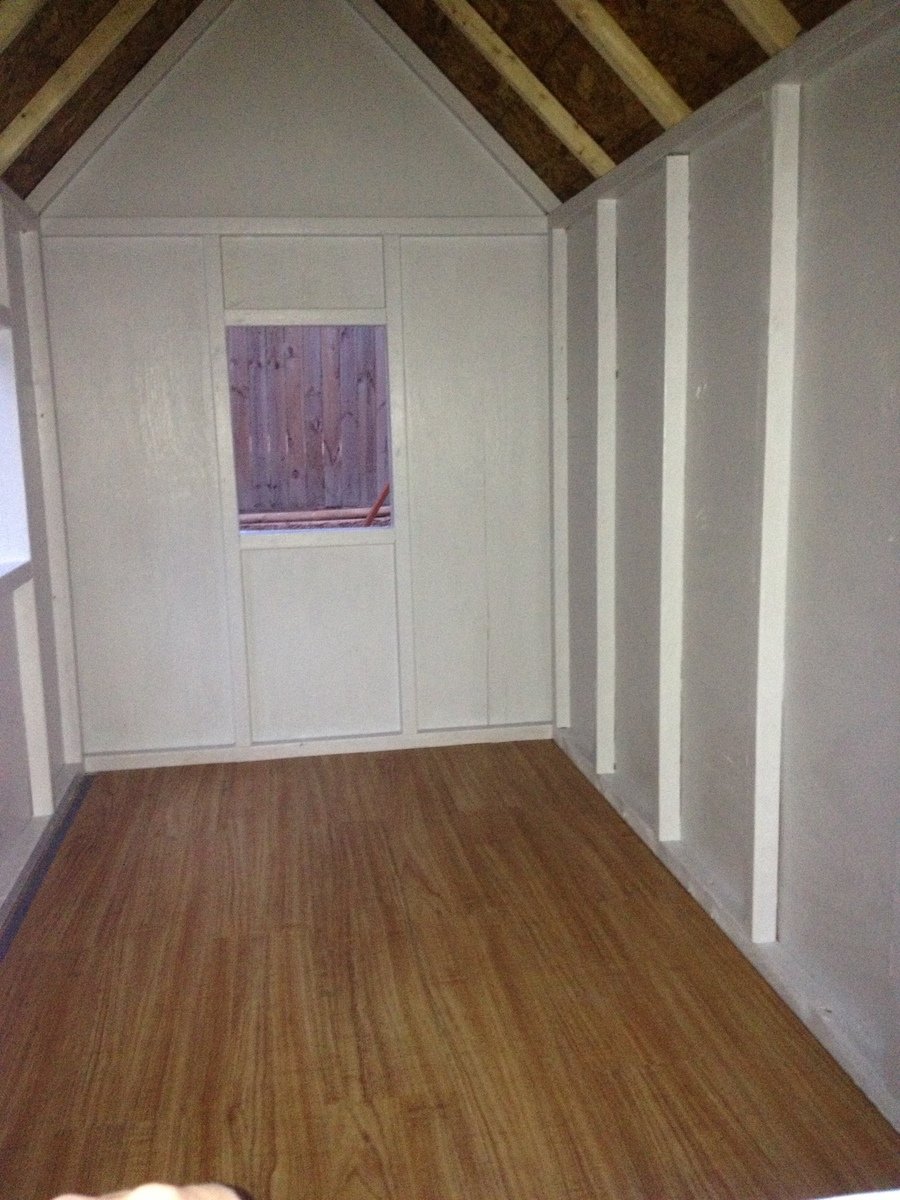
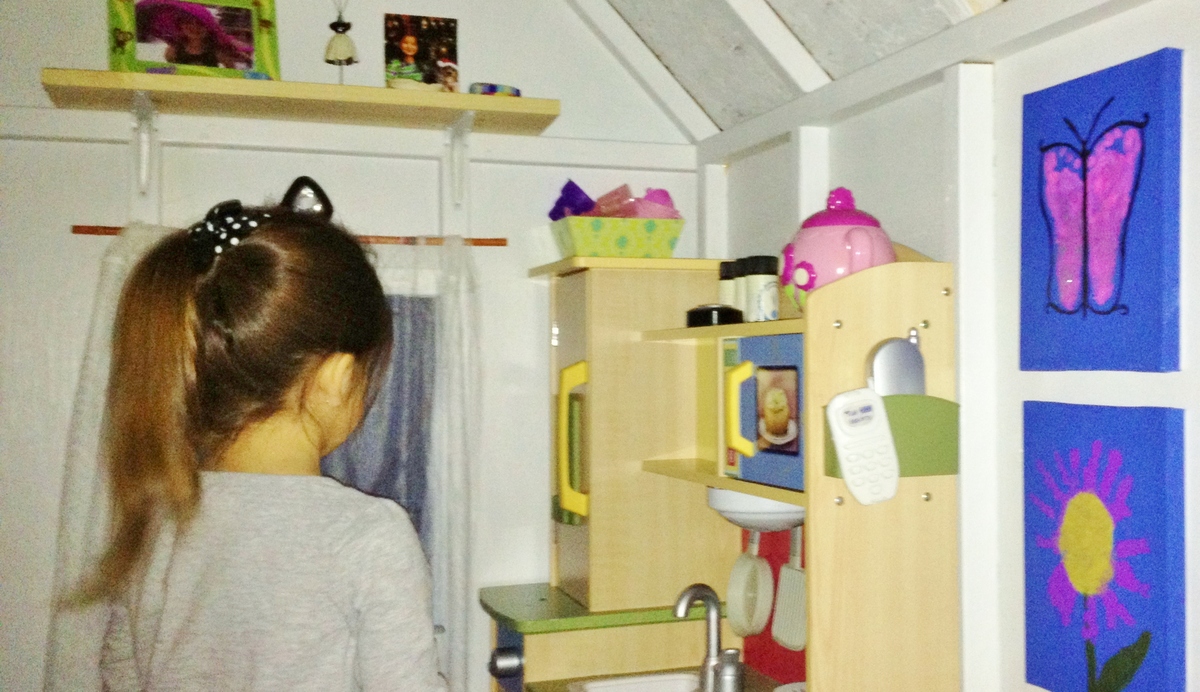
My first project ever was the red picnic table about a year ago and have built many more as housewarming/kid's bday gifts. This Christmas, instead of buying my daughter more toys, I decided to build her a playhouse. Not only was it a very special gift for her but also freed up space in my house being able to put her play kitchen, table, and other toys in it. The small changes we made were the size of the deck to better fit our available space and the shutters (made out of scrap 1x2s and hinged to close with a hook and eye). We put down 3/4" treated plywood as the base and then used 1 box of vinyl plank flooring that looks like wood to hold up to the Texas humidity. I eventually want to make accordion-like shutters for the front window but have up a bug curtain (used for regular size doorways and closes together with magnets) that I cut in half to fit. We have bad mosquitoes here in Texas! I also added a wireless doorbell.

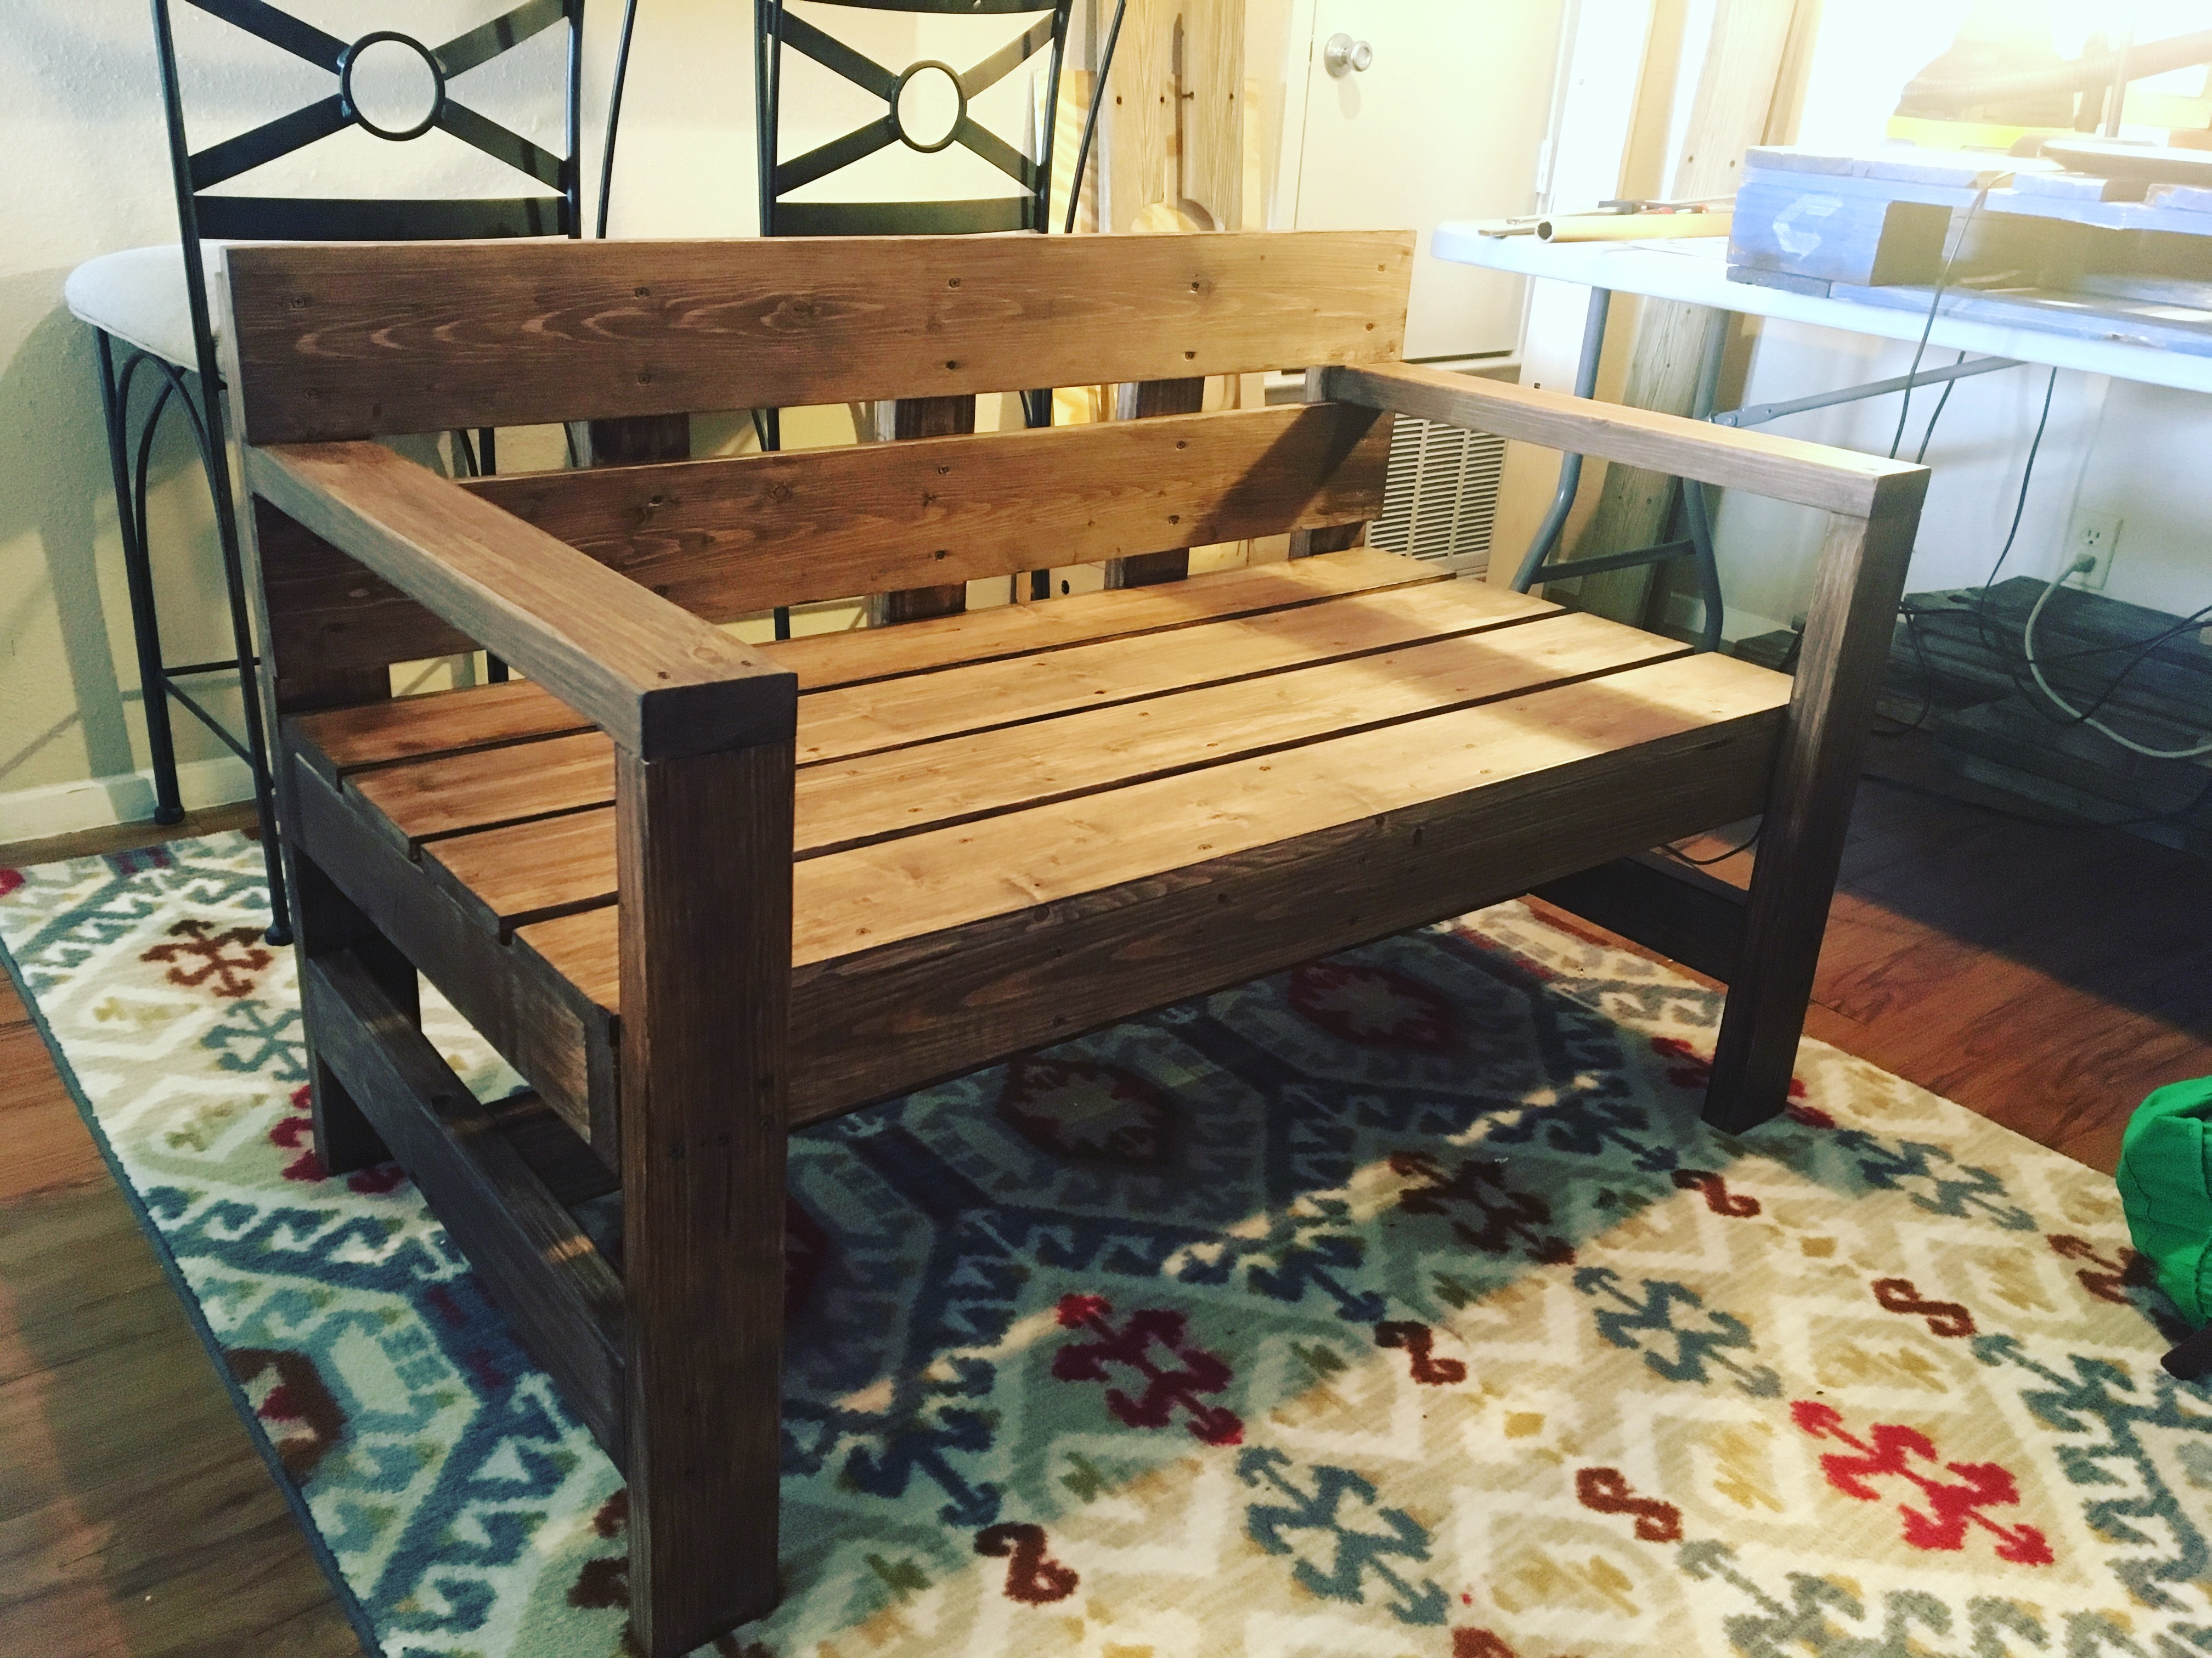
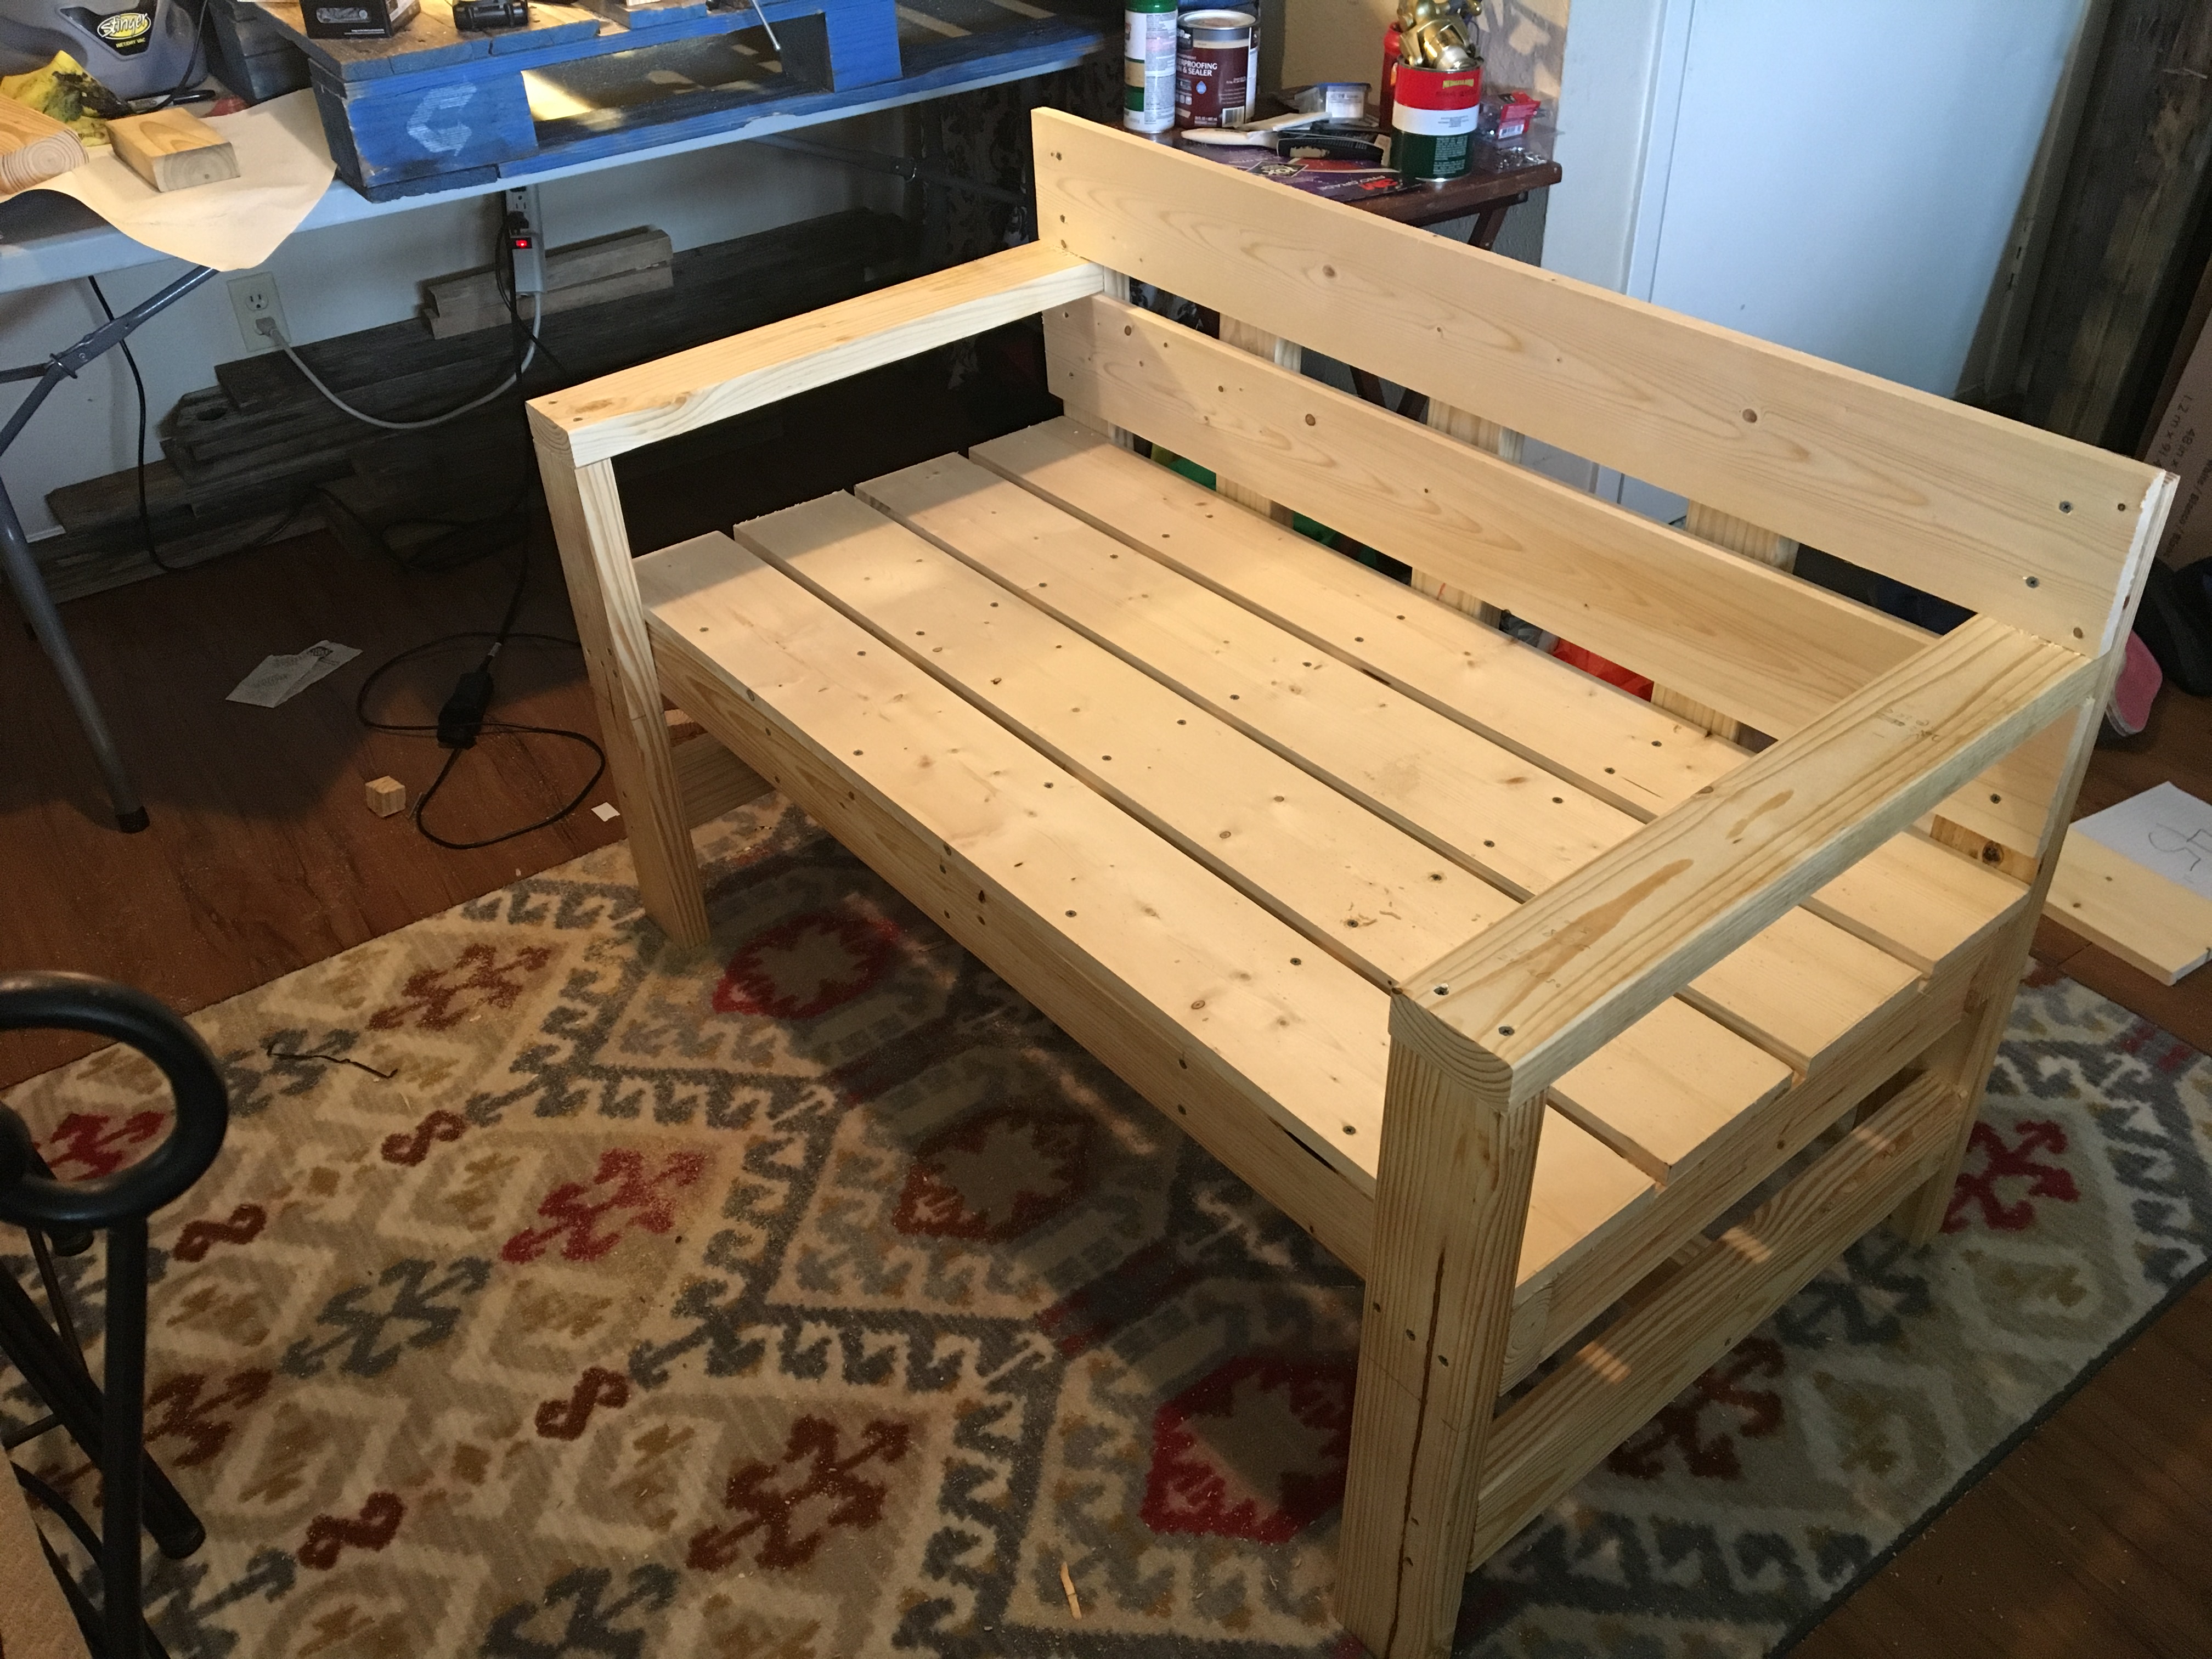
I've been doing only little projects here and there, so when I got an order for a bench, I was a little apprehensive, but of course I said YES! I immediately started scouring the web for ideas on how to, and what the cost would be to build. I came across Ana White's modern bench design and knew this was the one. I priced out all the materials and gave my customer a quote which she, without hesitation, accepted. The next day, I took a trip to the local lumber yard and purchased all I needed. Now, here's where I messed up a bit. Like I said, I priced everything out before purchasing. Well, I priced out the wrong 1x6s which threw me almost $35 over my original budget. Womp womp, right? I still made a little profit. But this bench cost me $100 to build. The customer ordered this bench for her garden and wanted it to be stained rather than painted. So, the wood, the decking screws, waterseal, and the outdoor waterproof stain and sealer was my purchase for the build. Totally worth it! The bench turned out great! I am delivering it to her in a couple of hours from now and I cannot wait for her to see it. I think it turned out beautiful especially for my first! Thank you, Ana, for making the design so easy to follow!
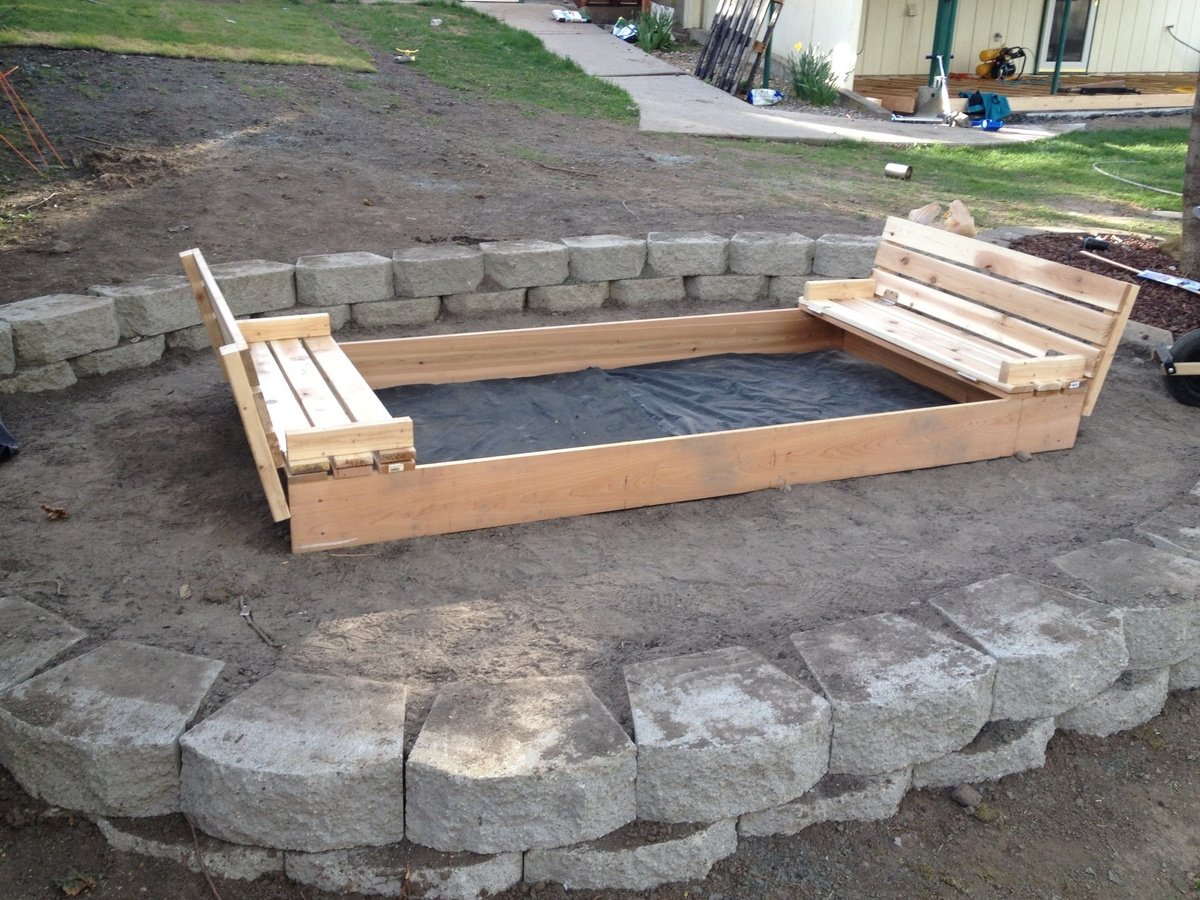
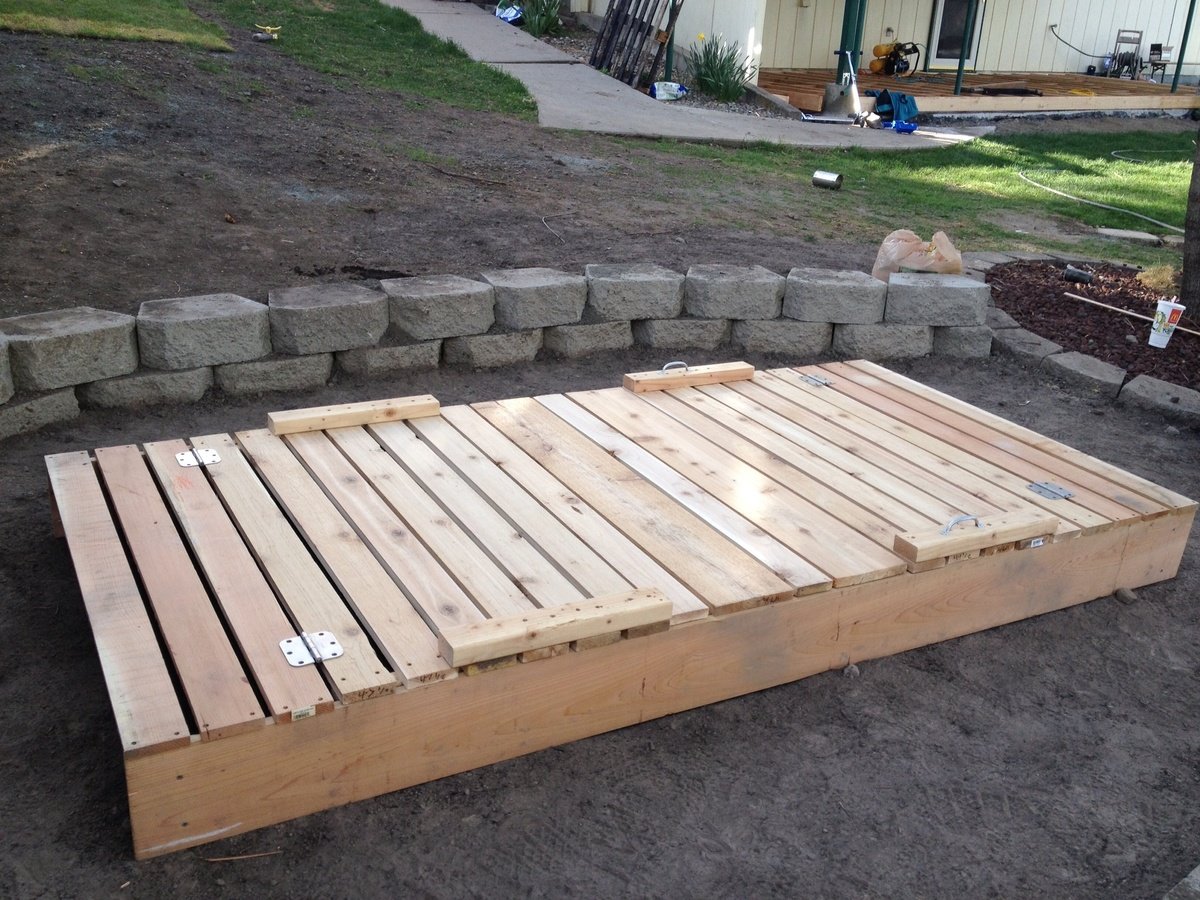
This was my first EVER wood working project.
With that being said, it took me more than just an afternoon.
I used cedar, and all the materials on the cut list had to be sanded , since I didn't like the roughness of the cedar.
I also made the box 4x8. I didn't take into account that that would require a minimum of 48 inches for the top planks. So, some of my top planks are shorter.
I also wished I had a little more instruction from which side to screw the screws in. May sound a little needy for some of you, but I never did anything with wood before. The instructions simply read attach top planks to arm rests (or something int that manner) and I wish it would have told me from which side to screw in (or give me a picture). Looking at some of the brag posts helped a lot.
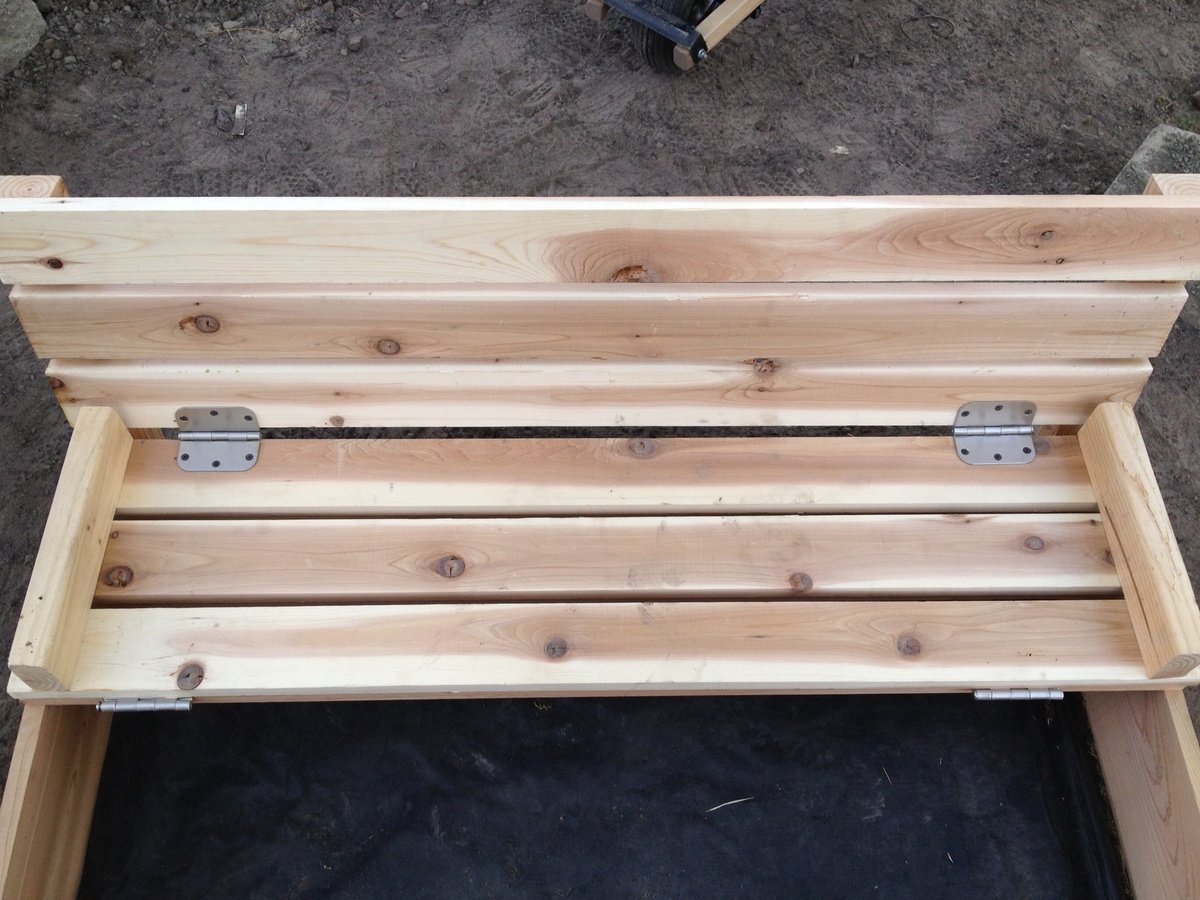
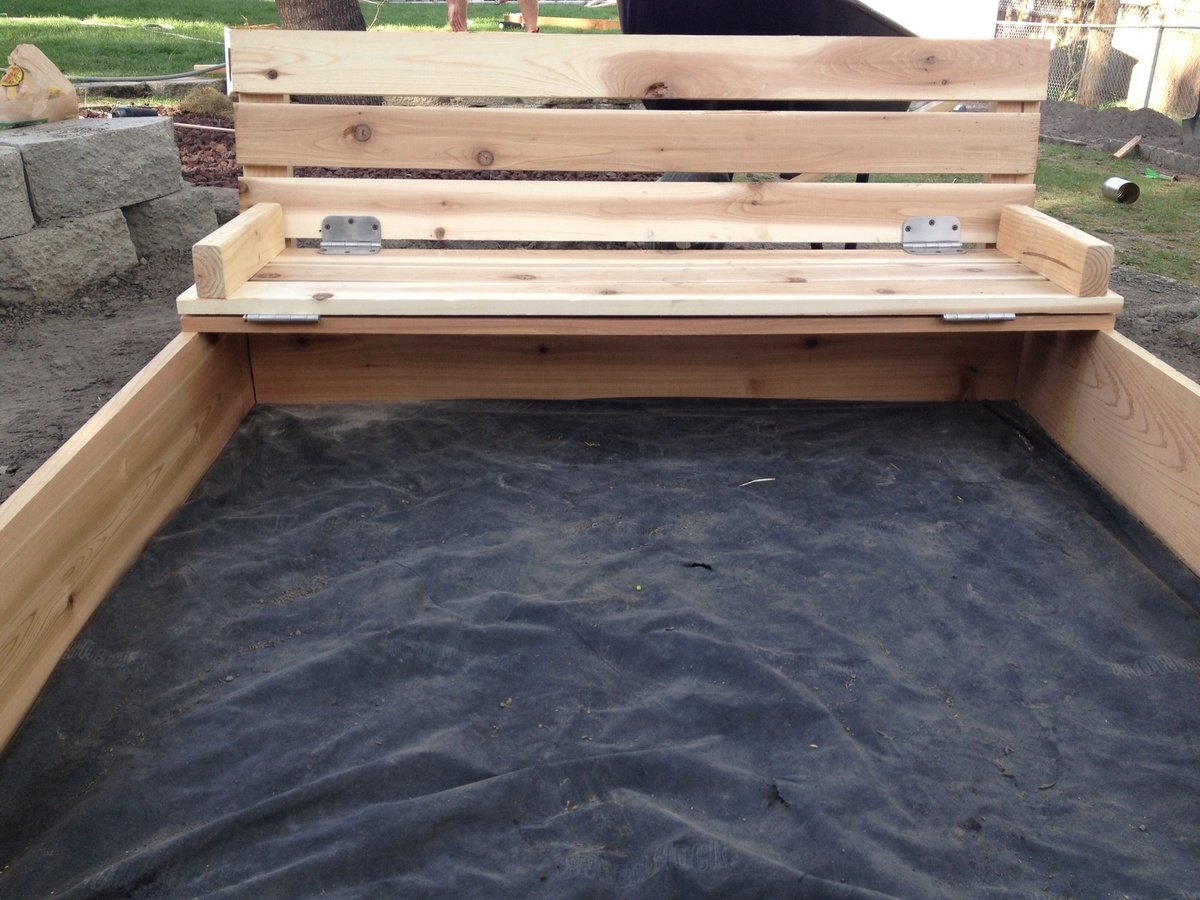
Because its larger size, I decided to make the seats 3 top planks wide (and also the back rest) and made another middle cover piece to bridge the additional gap when both seats are folded down.
Also, the cedar was VERY expensive, and all the screws, hinges, and handles almost cost me as much as the wood.
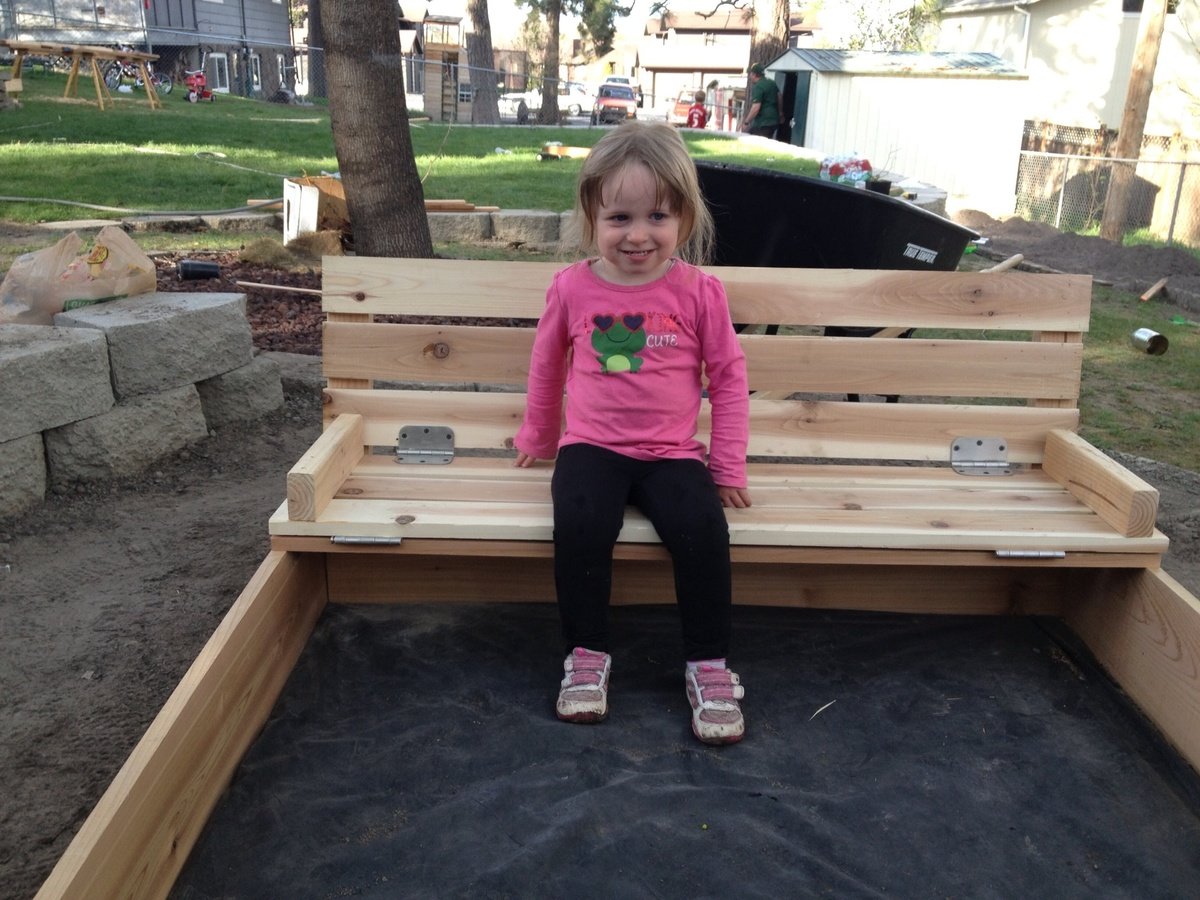
The sand to fill the box ran us another $80 (for good plays and), but that was because we made it so big.
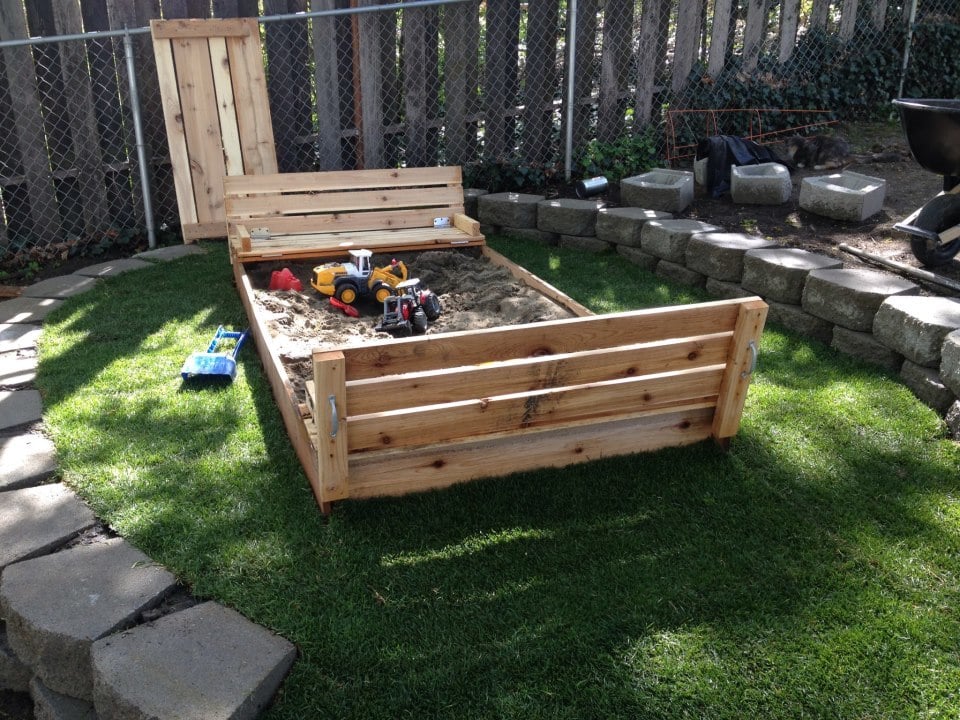
All in all, a rather pricey sandbox, but worth it because of the large custom sizes, and the cute little seats.
Pictures show the sandbox without sand, and with some of the handles still missing. I also still need to fill the holes.
Will add a picture of finished box filled with sand when it is available.
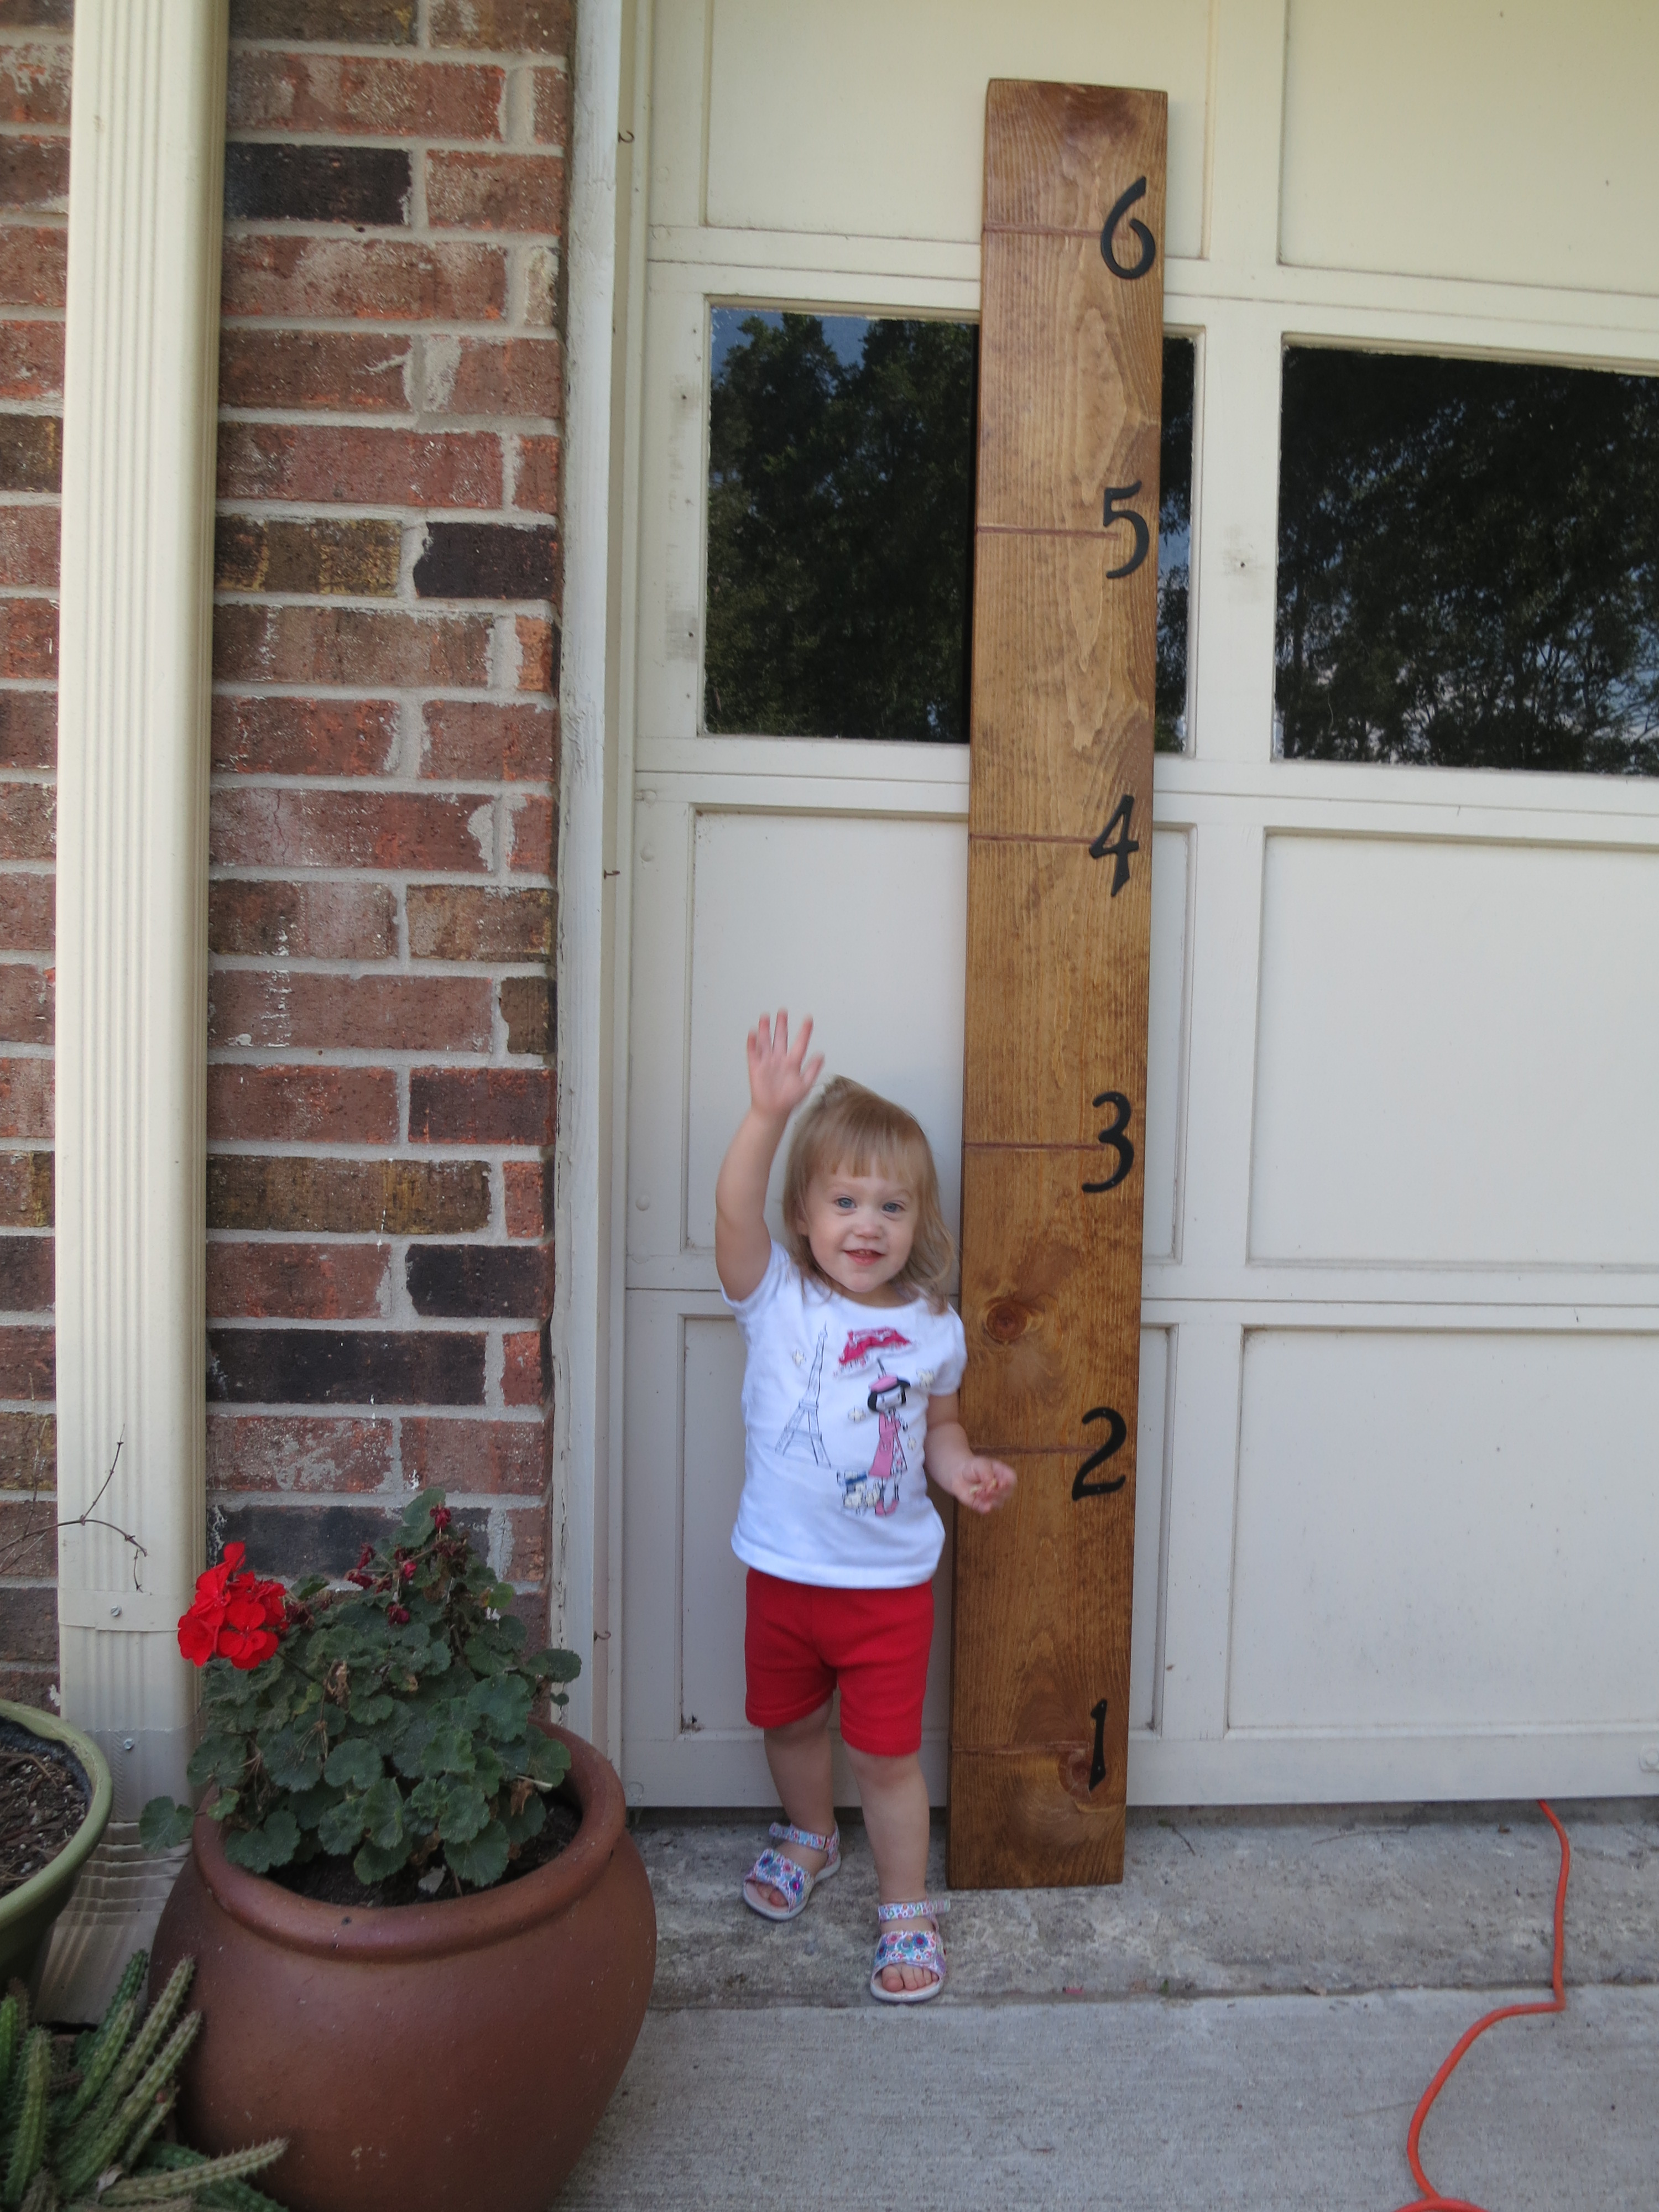
We bought the house my husband actually grew up in. In the garage, on the wall, is theire family's height chart. When they moved taking it with them wasn't really do able. So, for Mother's day we wanted to give his mom a NEW (relocatable) height chart for her grandbabies.
One long board, another small board to insert at each foot mark, some house address numbers, and two different colors of stain, and we had what we wanted.
My husband made this in no time.
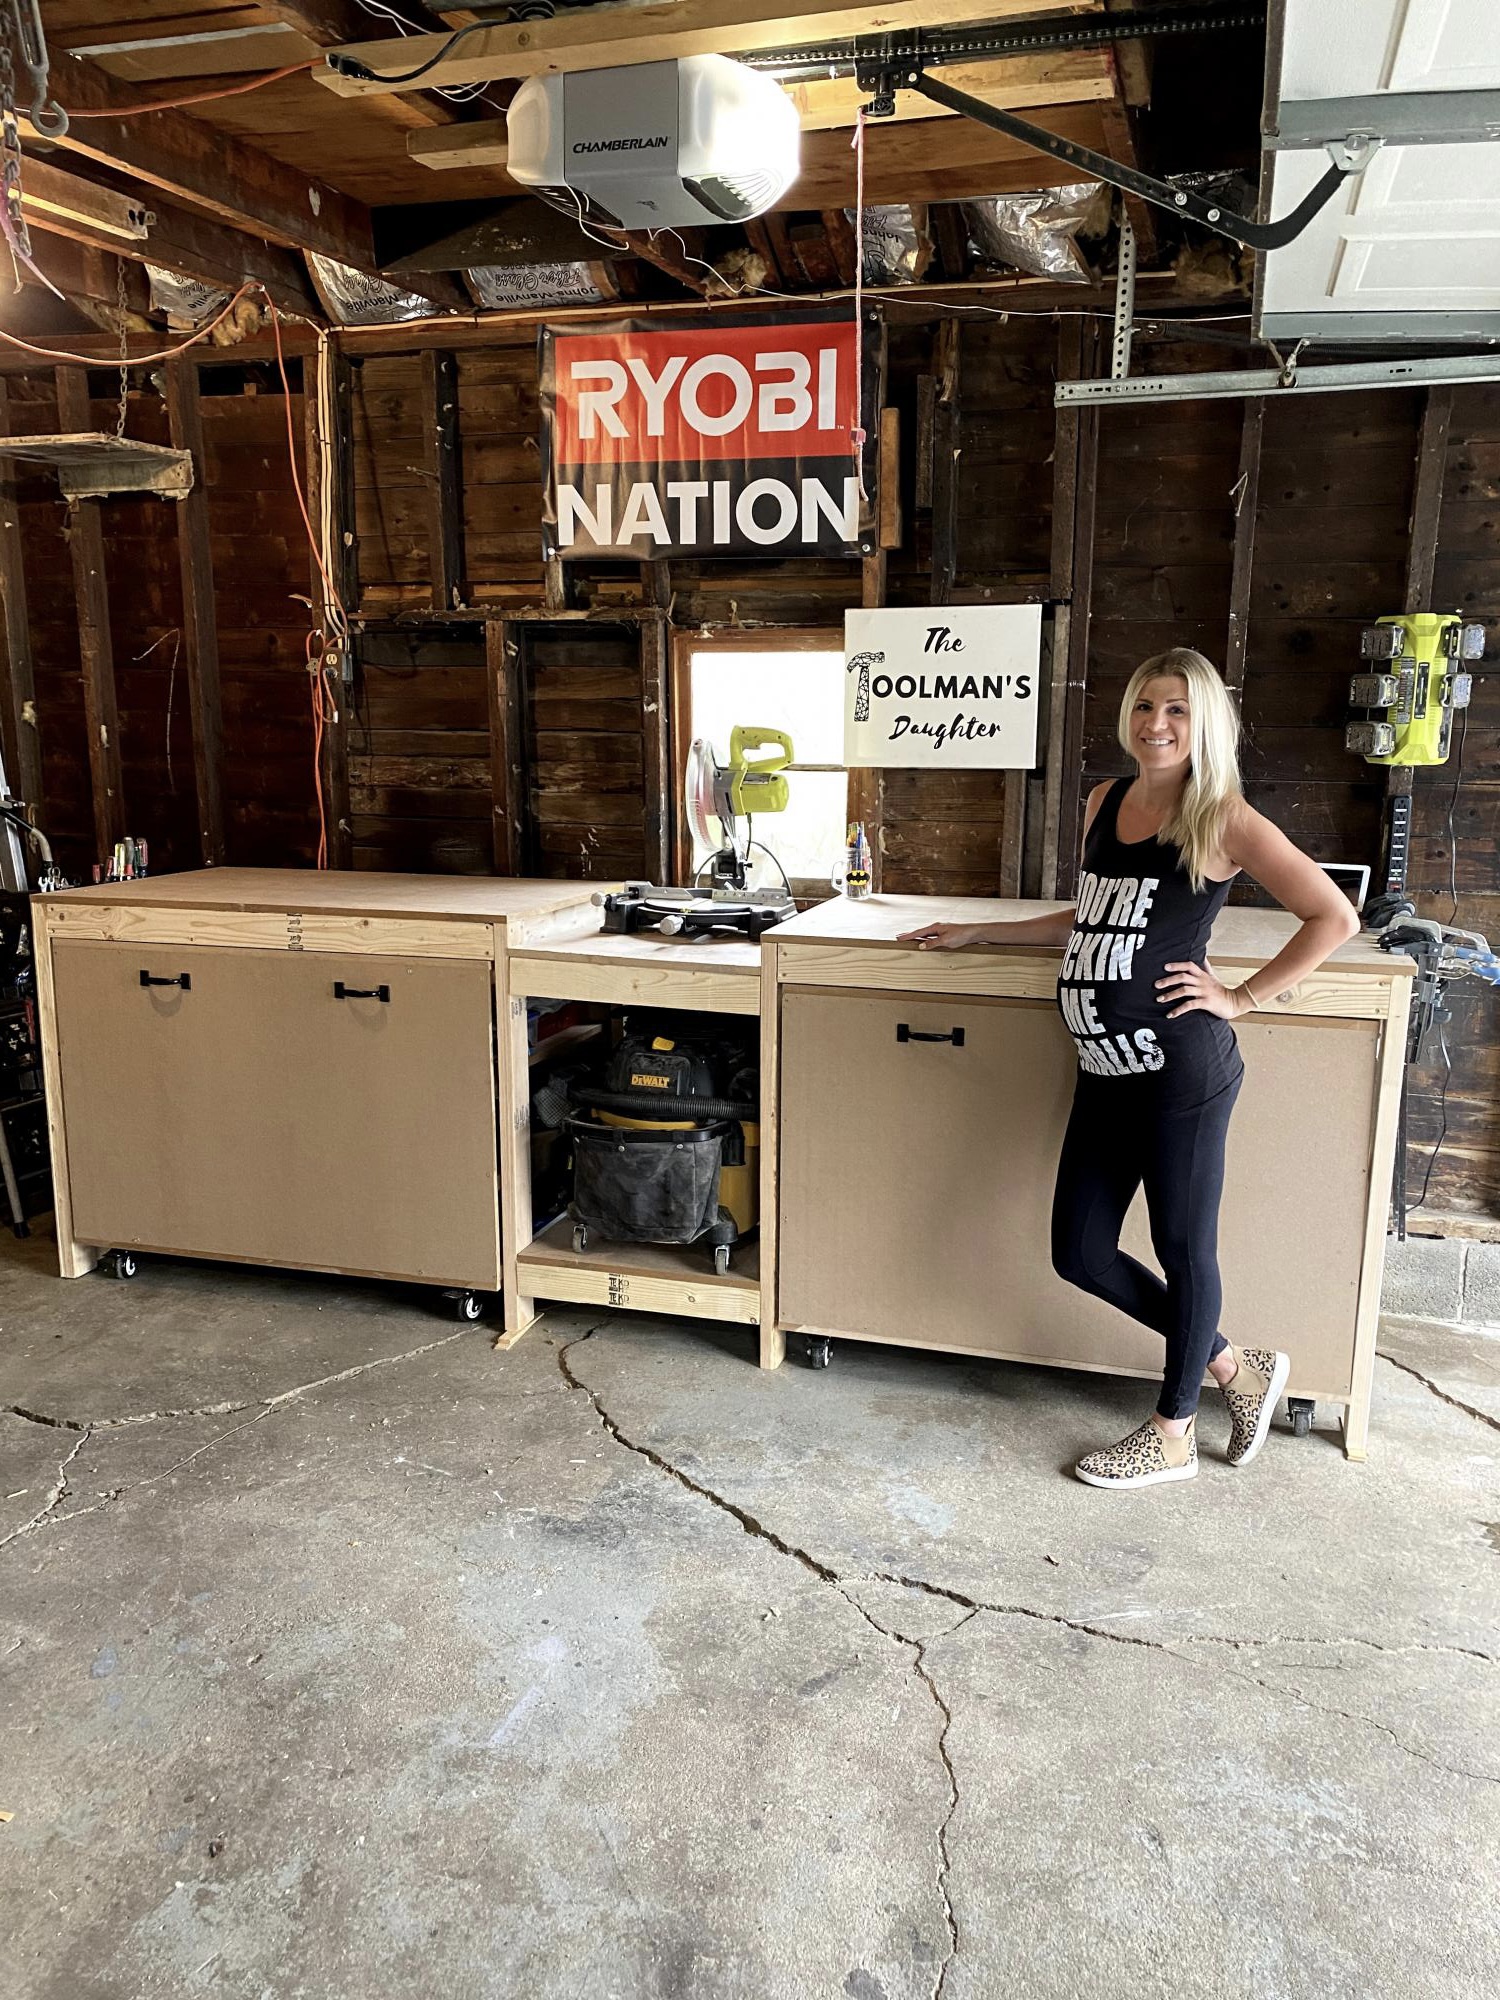
When I was 8 months pregnant and going through my “nesting phase” I knew I needed to get my garage organized. Prior to building this, my tools were all over the place. To try to get it done before the baby came, I called my dad to help me out, and we built it together in just a couple days. It was a weekend I will never forget and I smile every time I walk into my shop knowing we did it together.
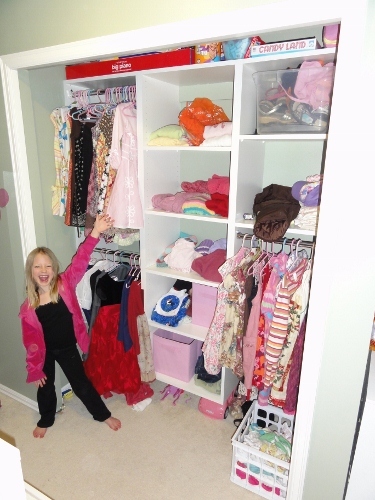
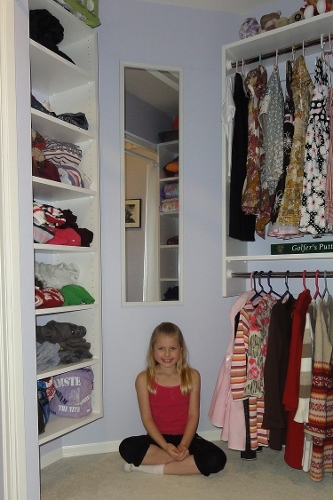
I used Ana's 'Simple Closet Organizer' plan as a starting point and then went a little nuts. :) If you read the comments below the plan, a wonderful, professional closet designer gave some fantastic tips and then another person shared EasyClosets.com.
So I plugged all of the dimensions into the Easy Closets website and used the plan I drew up based on its recommendations and my daughter's needs. :) She has three usable walls.
This was also my very first time using my Kreg Jig. I got it for my birthday months ago, but wasn't sure which project to "learn" on. :) I did quite a few tests on scrap before starting. Melamine coated particle board is SLIPPERY stuff so have LOTS and LOTS of clamps or your joints will not be square. Wow!
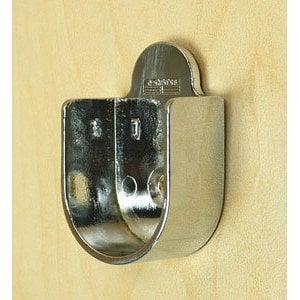
I got these chrome closet rods at The Container Store – so cheap and they'll cut them to size for you! Like $3~ a rod!? In the photos below, I'm using large, plastic closet rod flanges that I found at Orange, but I have these pretty chrome (peg-friendly) flanges ordered from Amazon. They're really cheap too! They will fit the 1-inch diameter rods I bought much better than the plastic ones and are made specifically for the pre-drilled 32mm closet boards. :) Yay!
Only other thing I did differently was use 1x4 boards to square the closet boxes up. I just cut them to the same width as the shelves and pocket-screwed them into the very top and very bottom of each box. Then I painted them to match her purple wall color.
I was so happy with how it turned out that I did my other daughter's closet that next weekend! I used the same website to design it too. LOVE IT!
Anyhoo, here are the finished closets for both of my daughters! Thank you Ana! I would never have done this if you hadn't have posted that plan! Totally inspired me! Can't wait do do our master closet! EEEK!


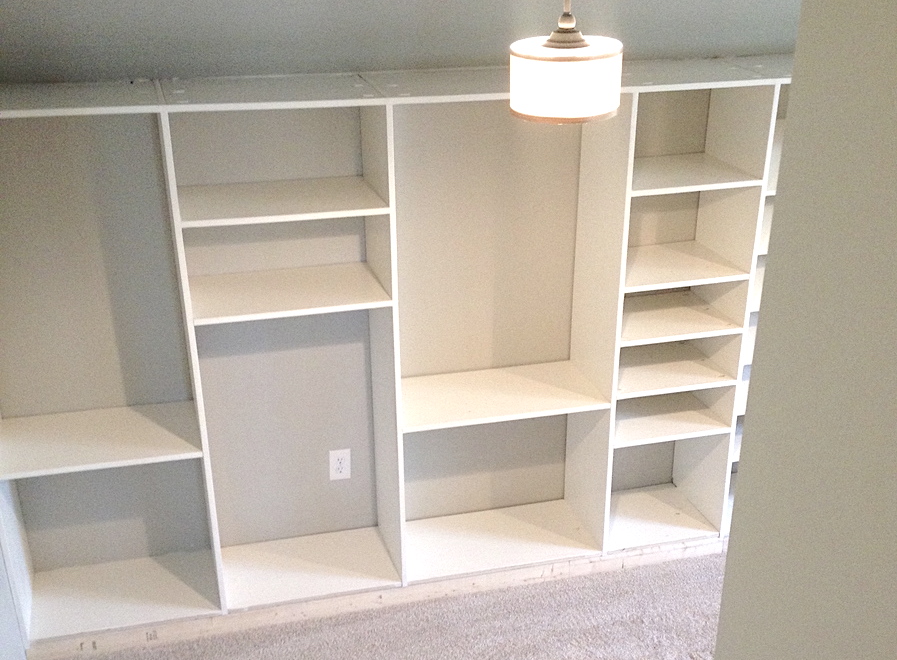
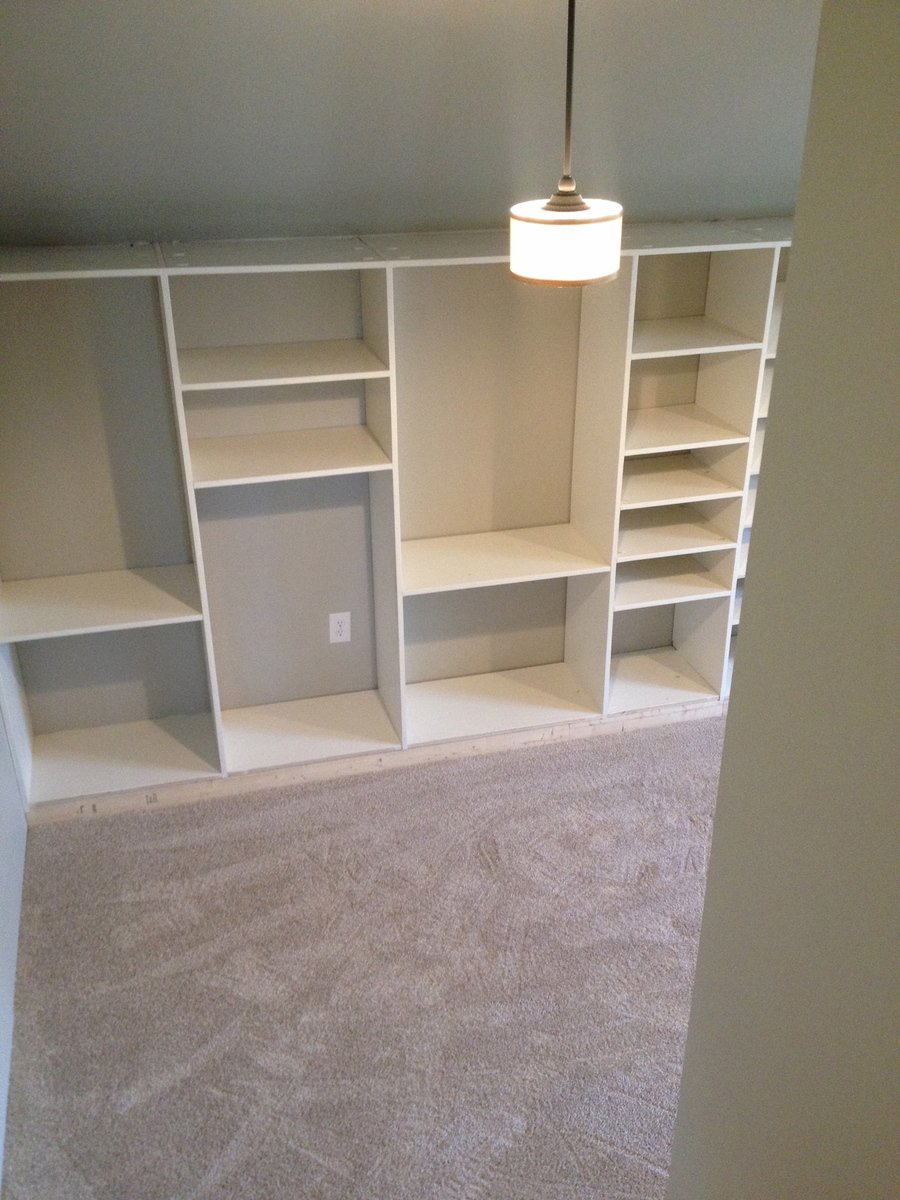
We used an unfinished attic space above our garage that was connected to our bedroom to make a walk-in closet with great shelving. This project took a lot of time but we are so happy with the results! There is a side for my husband and a side for me. Although it is hard to see we also incorporated a small door/bookshelf into the room to allow us access to attic storage space.


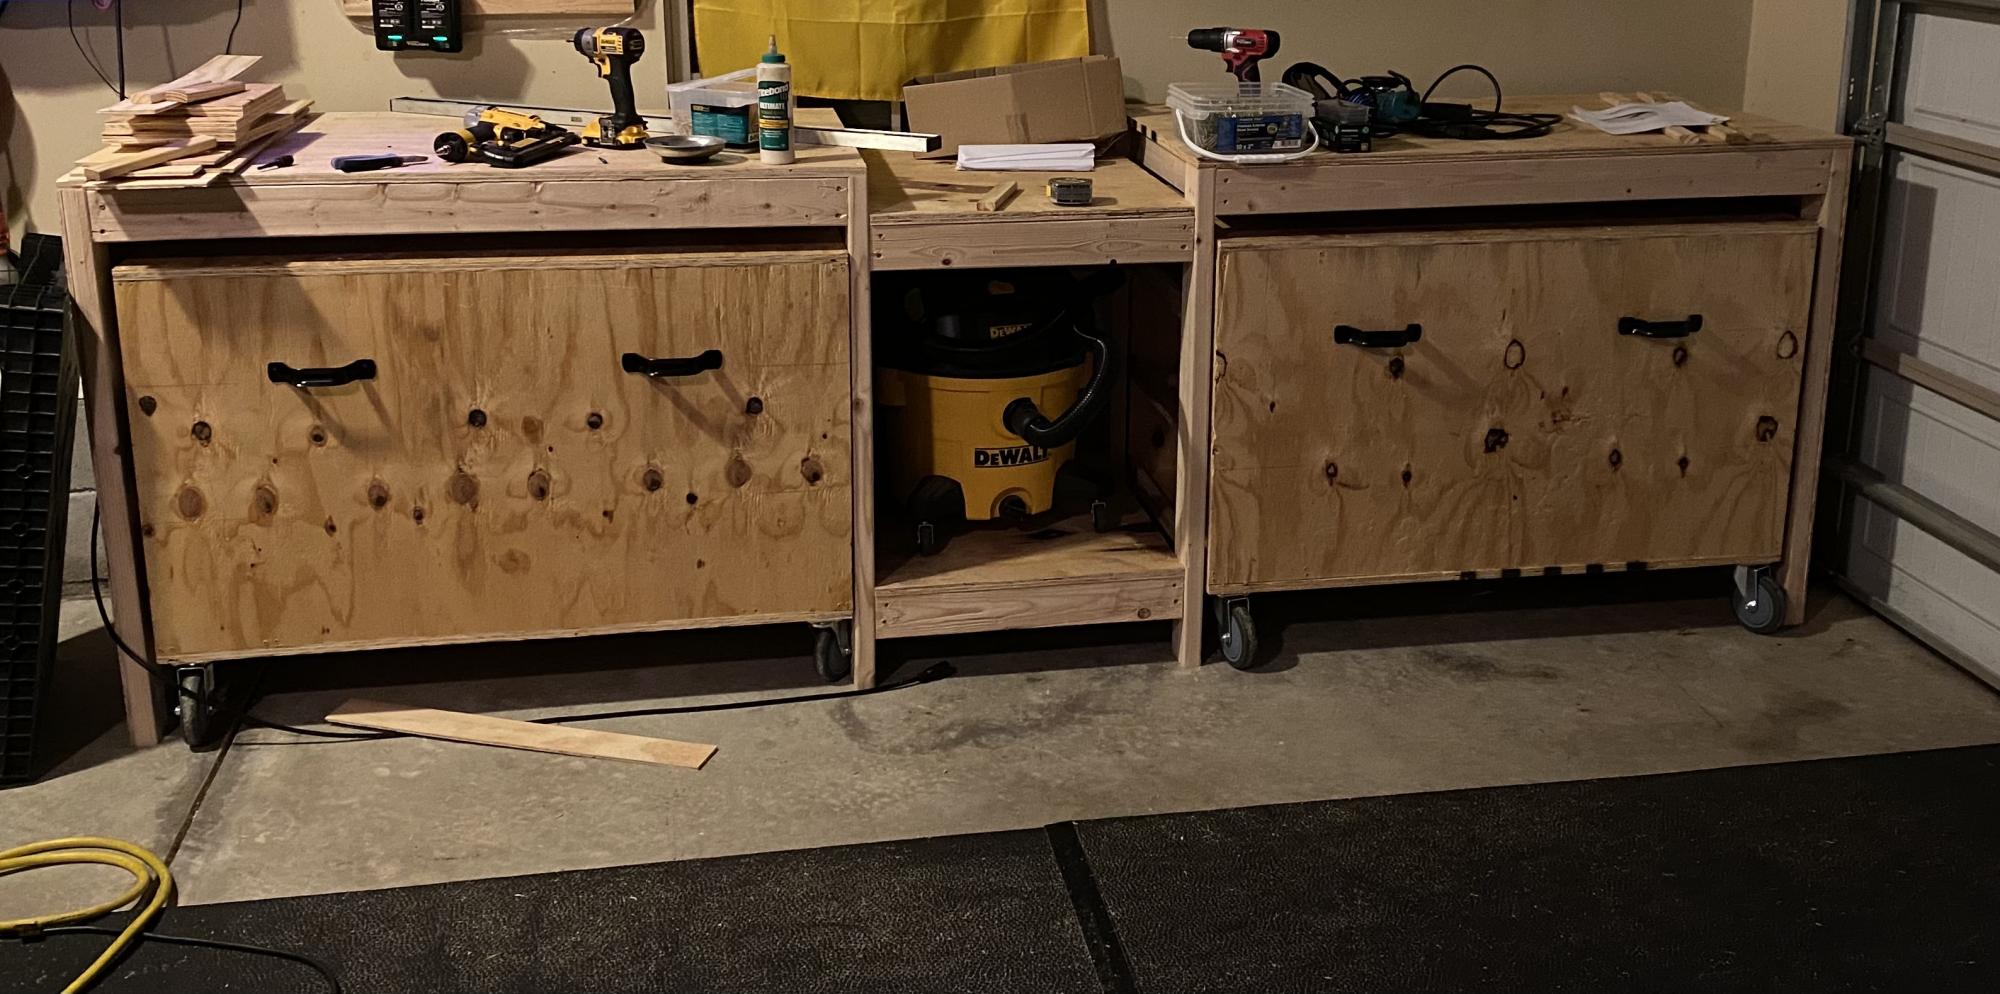
I have been searching for a way to maintain some neatness in my garage. Search stopped the second I found these plans. I am able to fit everything I need while keeping the garage neat and full of open space! I would most definitely recommend this build for anyone looking to save space, build something that is practical, and is completely customizable. Also, it took a buddy of mine and myself a day of hanging out to get the project done to include breaks for pizza!