Community Brag Posts

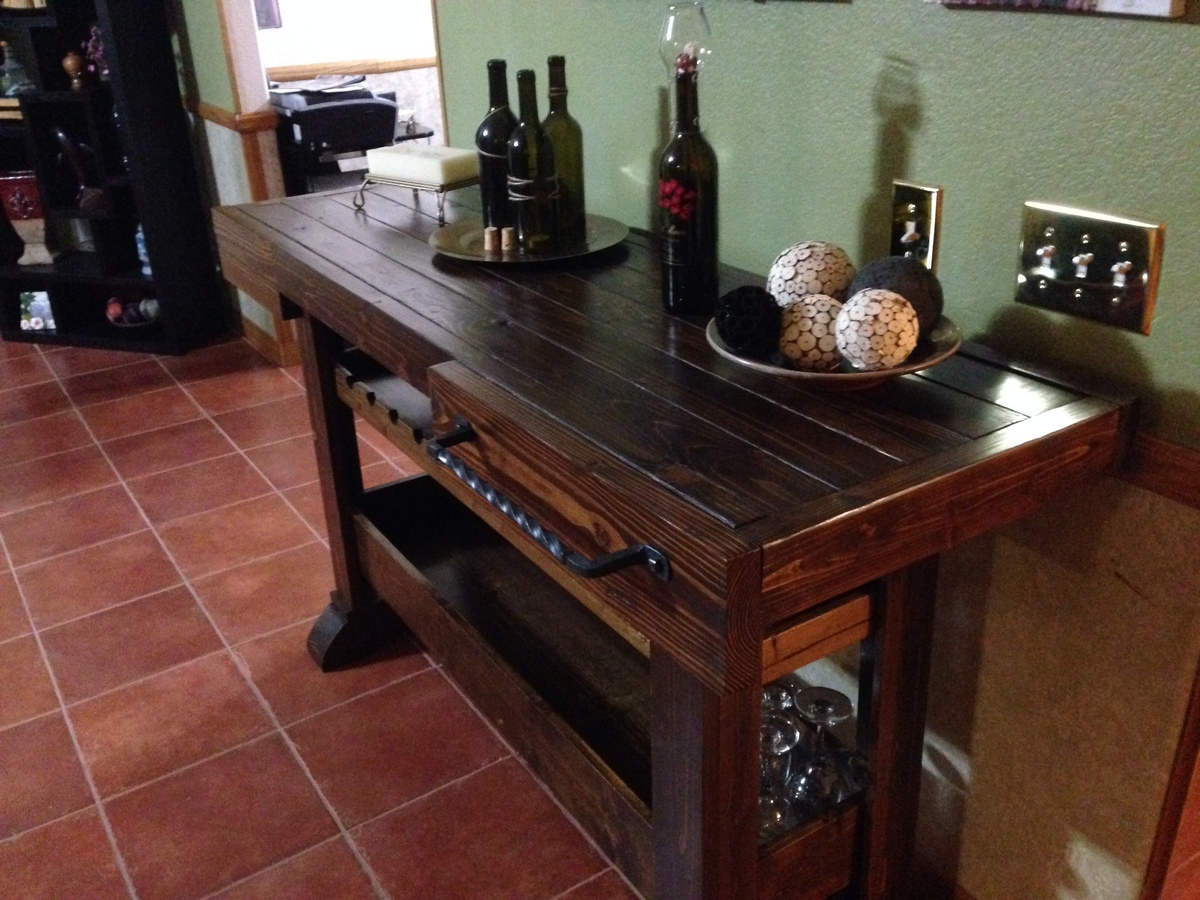
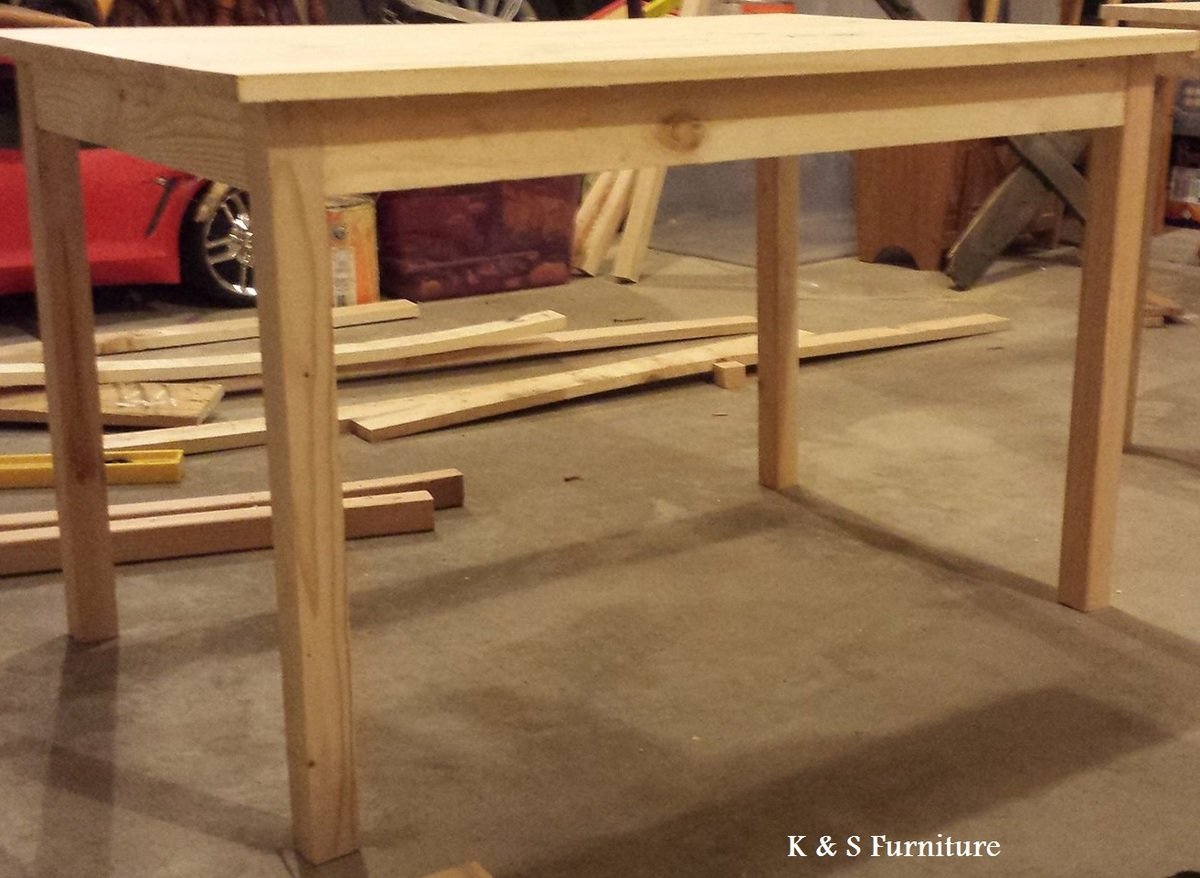
End table- modified smaller plans!

Submitted by crgates89 on Wed, 01/03/2018 - 07:32

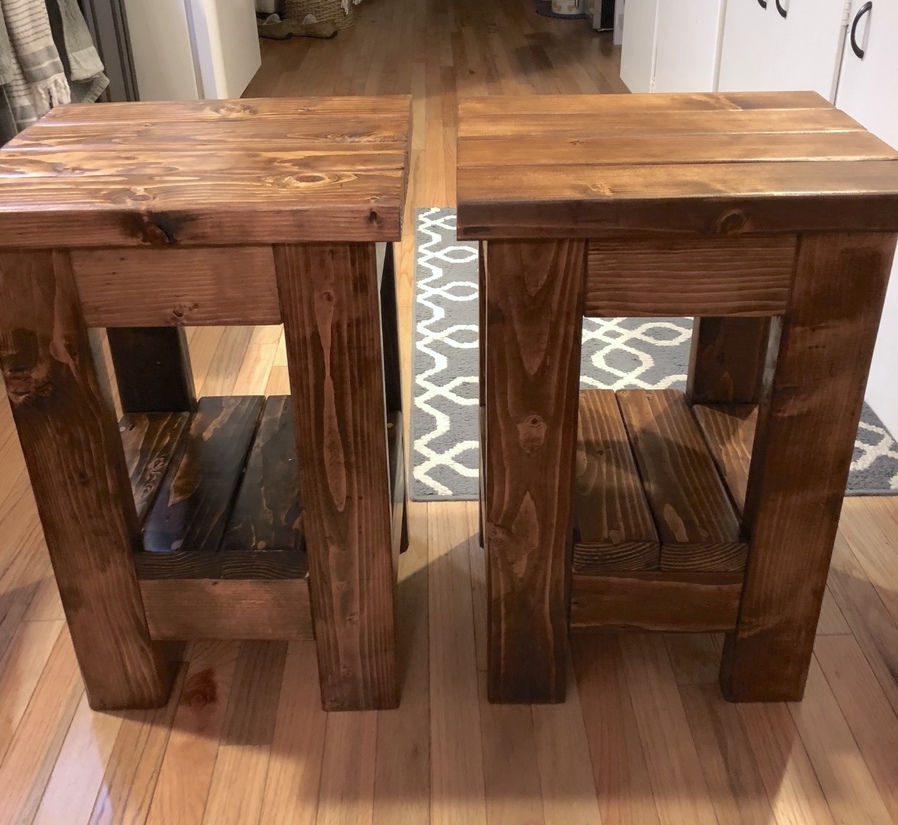
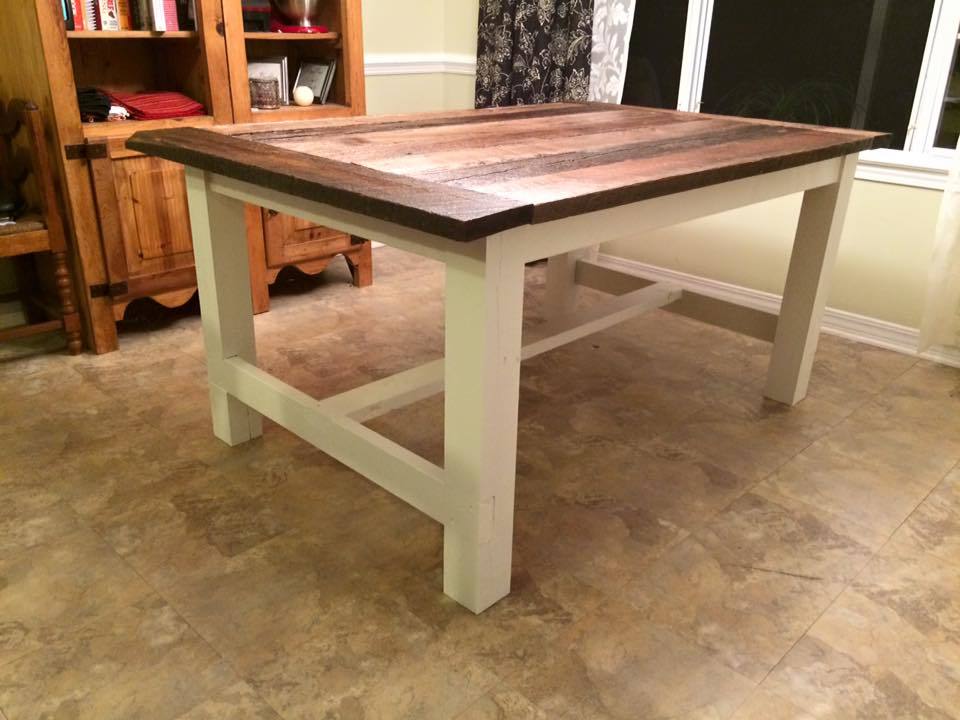
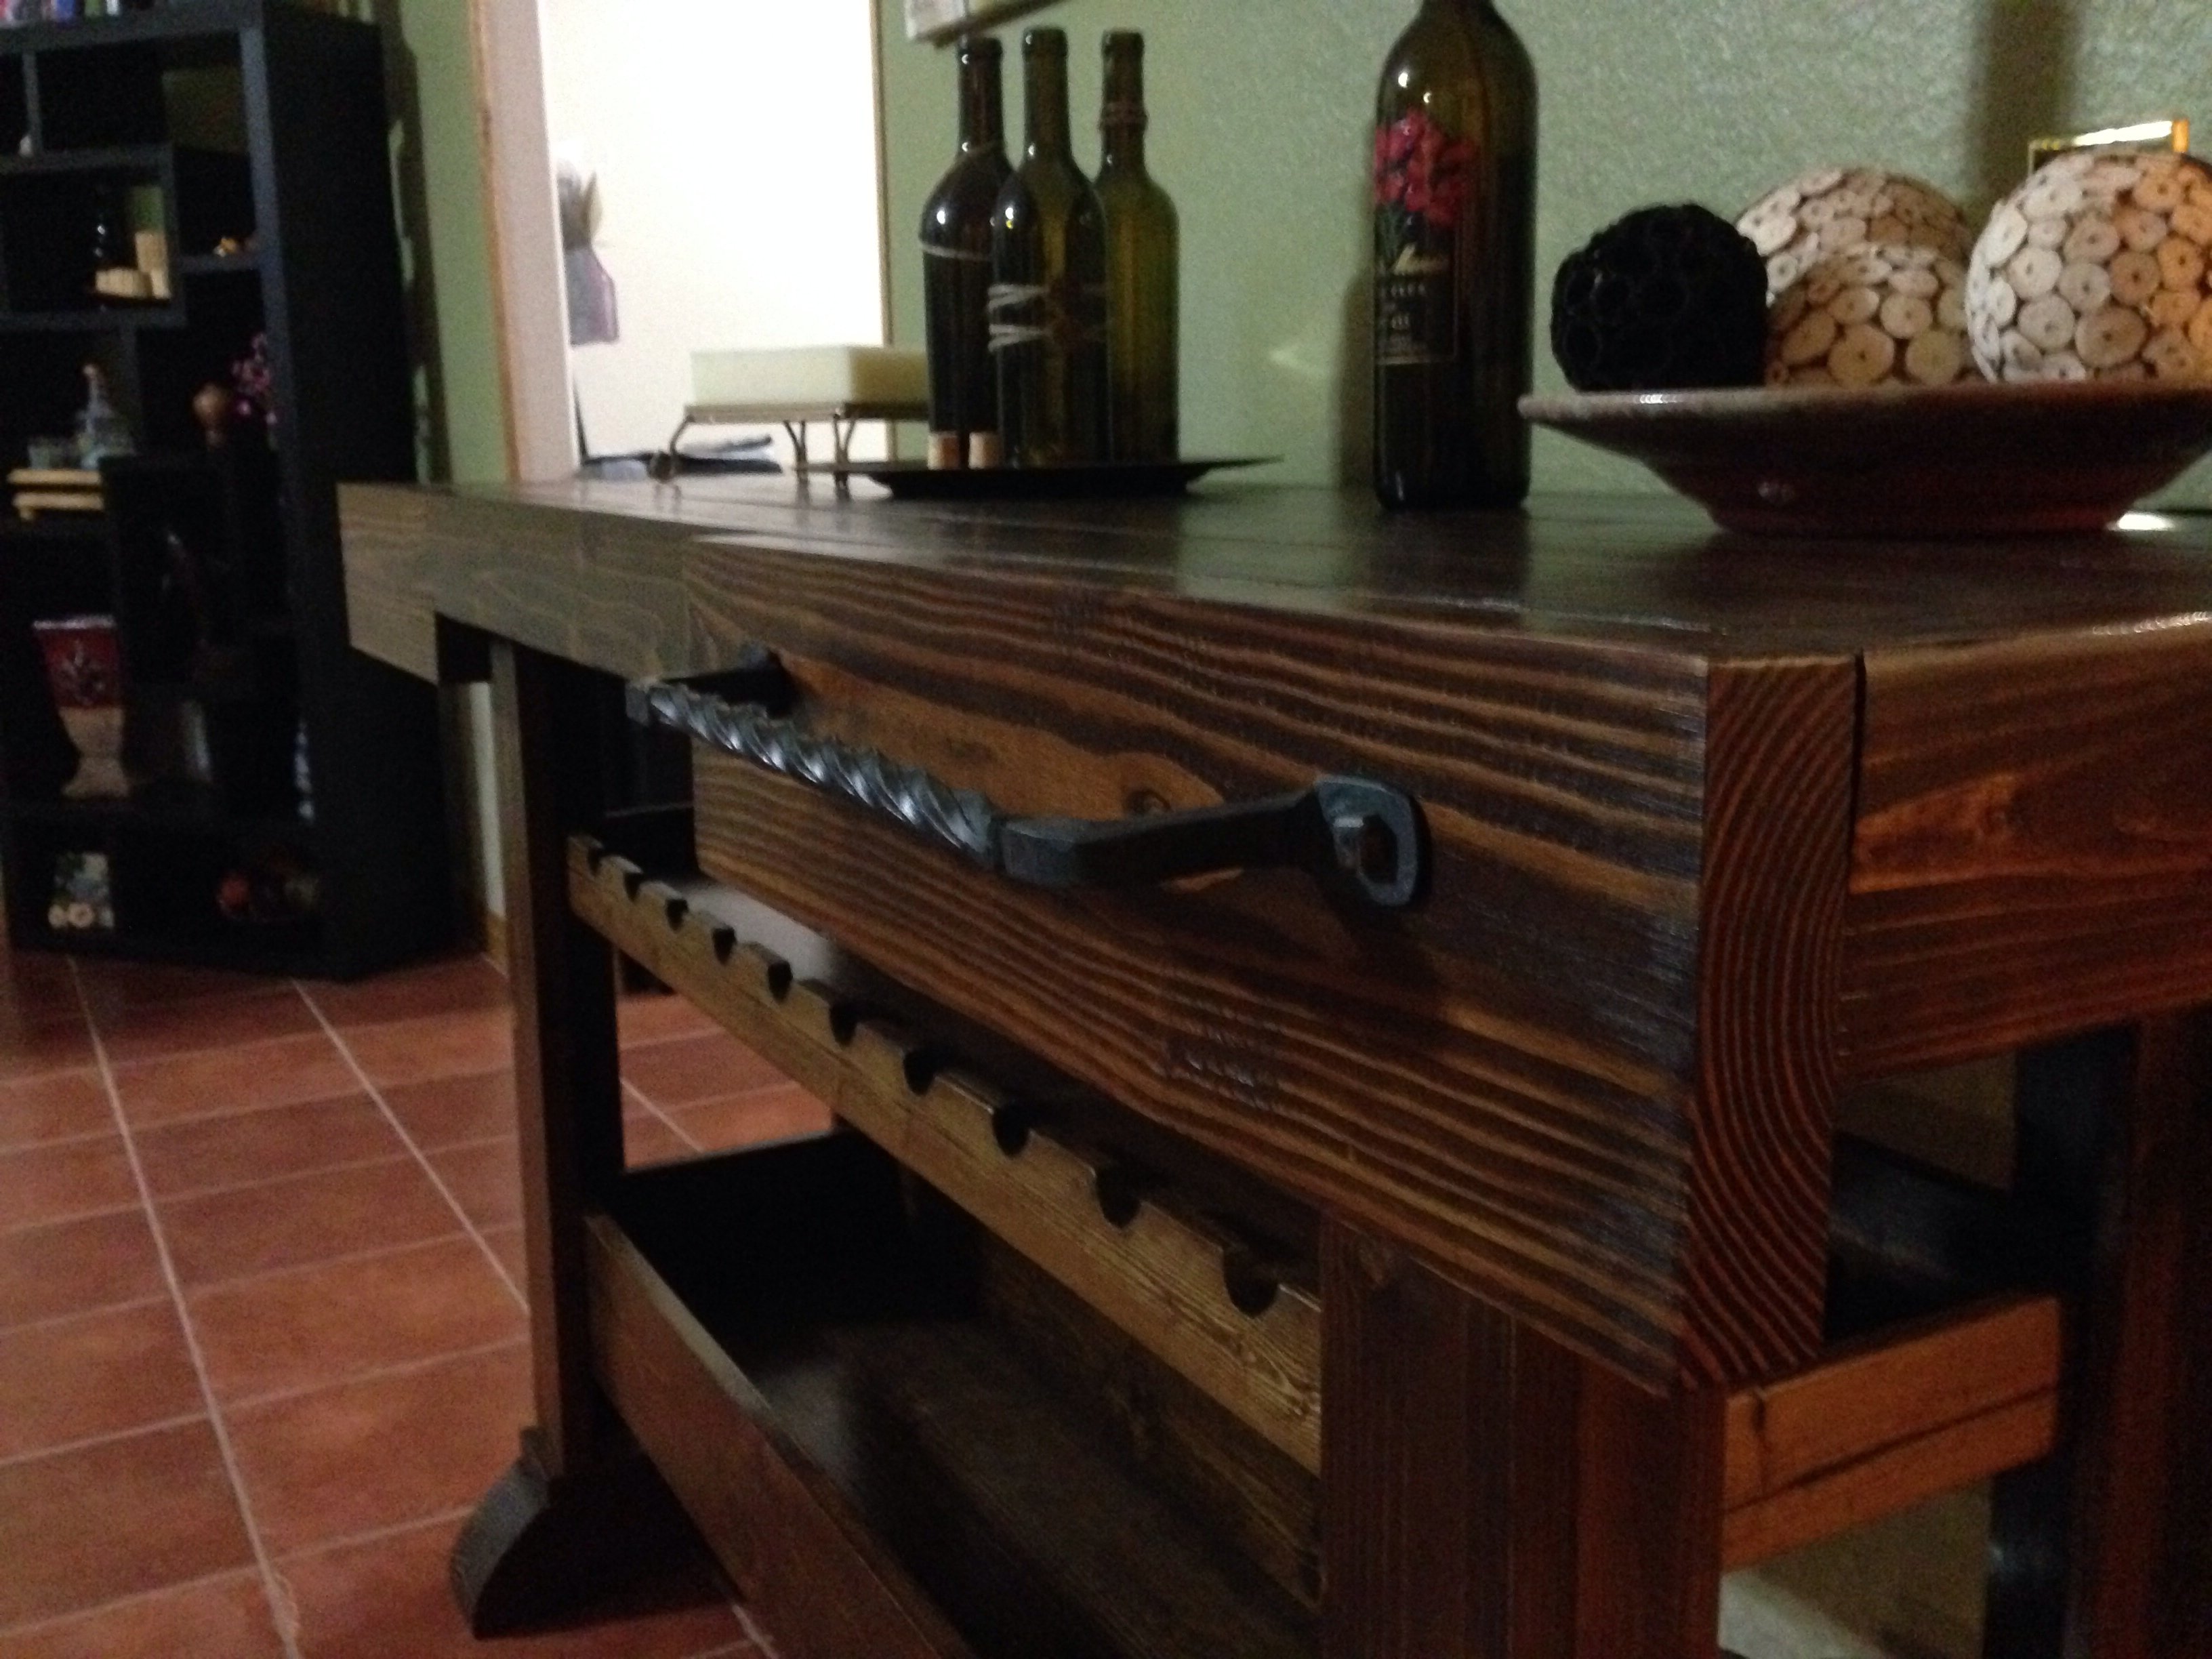
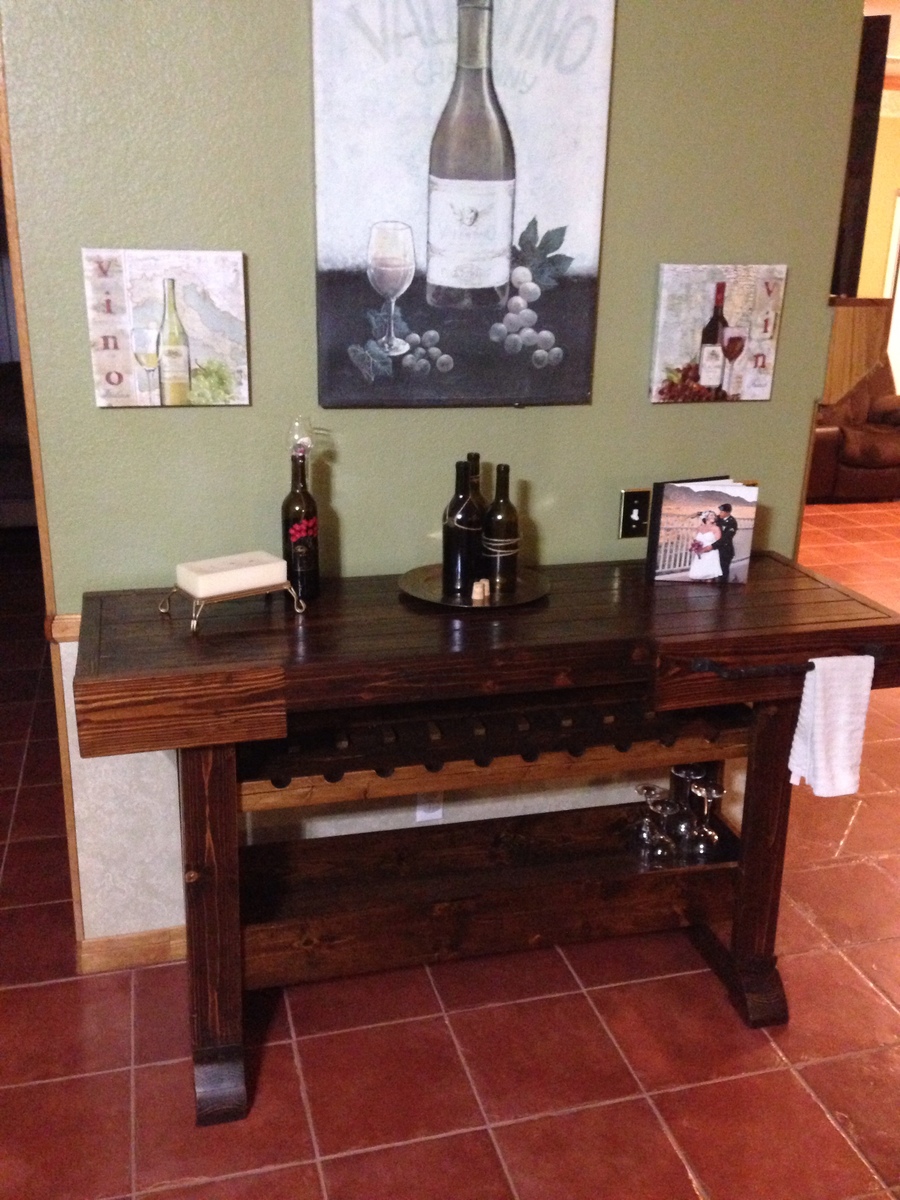
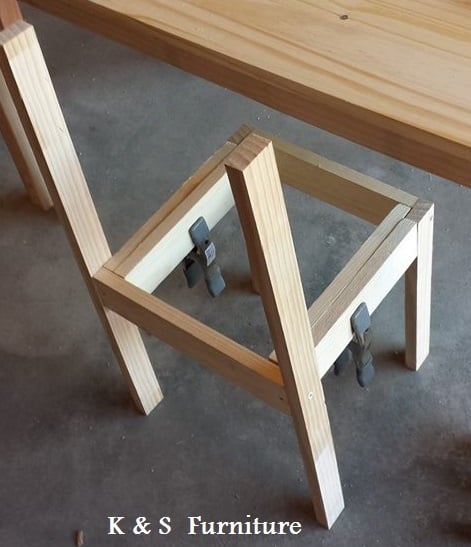
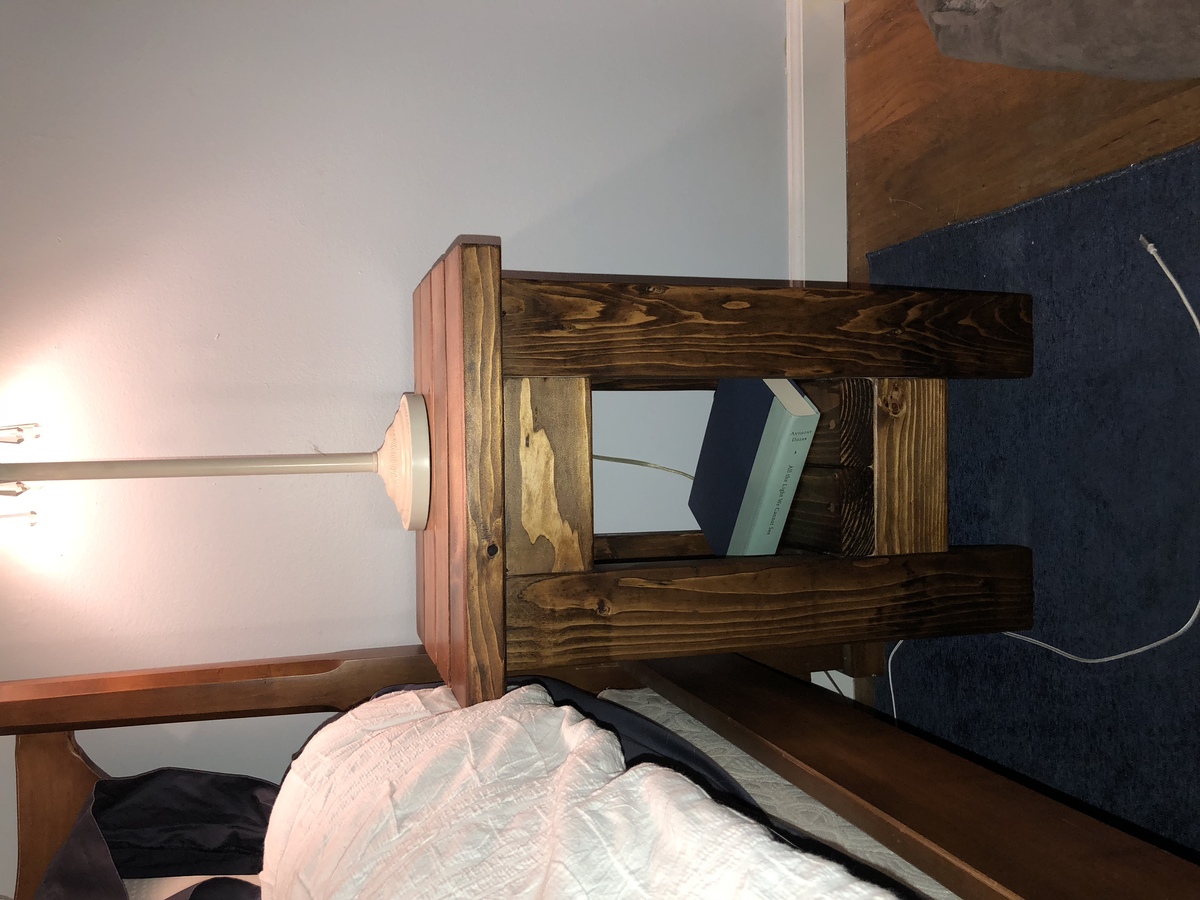
I wanted to build my wife a matching set of bedside tables for her birthday and loved these plans! However when I measured the space on either side of the bed found that these plans were too large. Some quick calculations later I modified the plans to create some smaller tables and it worked out perfectly! I removed two 2x4s from the top and the bottom shelf and took 7 inches off each of the aprons and voila, smaller tables!


i used minwax wood conditioner, “honey” stain and two coats of polyurethane. Very pleased with how they turned out and the wife was so surprised and happy! Thank you!

Estimated Cost
$50
Estimated Time Investment
Weekend Project (10-20 Hours)
Finish Used
Minwax honey stain with wood conditioner and polyurethane
Recommended Skill Level
Intermediate

Closet mud room

Submitted by Smaynes on Wed, 07/31/2013 - 08:44

We were replacing the floors in our house so we decided to build a closet mud room. We used the plans for the smiling mudroom and altered them slightly. We didn't end up building the partitions because the left and right seats would have been too closed in. We installed bead board on the back wall and used moulding on the shelf and bench. The only hard part was that we had to actually assemble the shelves and bench in the closet because they wouldn't have fit in once built! The Kreg Jig was extremely helpful and well worth the purchase.

Built from Plan(s)
Estimated Cost
$150
Estimated Time Investment
Weekend Project (10-20 Hours)
Finish Used
Paint / Matte Polyurethane
Recommended Skill Level
Beginner

Comments

mandiebuth

Thu, 01/02/2014 - 13:37

I am going to do this in our laundry room which you walk into from the garage - what do you suggest doing when you remove the doors for the current closet? I do not want to install all new trim since that was just done recently, before the mudroom idea came! Thanks!

Great Shelves - made to measure!

Submitted by tailspin10 on Fri, 09/04/2015 - 08:54

Thanks for the plans Ana!

I stuck to the design but changed the dimensions to suit the space and the boxes we intend to store. This made the shelves 7.5 feet high by 8.5 feet wide. The timber was supplied in 17’ lengths so this also meant very little wastage. The frame is composed of 2x4’s, the shelves are 4.5 x 1.5’s  - as I wanted the shelves slightly shallower this meant I could get away with three boards for each shelf instead of 4 as on the plans. 

For the short cross pieces I used woodglue and screws – to attach the long shelf pieces I just used screws. I predrilled holes in the first piece for each of the screws, but I didn’t drill a pilot hole in the next piece, the screws were self-tapping and didn’t need one.

The back wall is concrete block and I screwed each upright to the wall using wall plugs and screws. I’ve 2 young children and as the shelves are quite high I was afraid they might climb on them and tip them over otherwise. The attachment to the wall definitely makes the whole thing feel much sturdier – the structure is completely rigid.

The only real issue I encountered was that some of the boards were slightly twisted or warped – and I had to apply some force to keep everything square when I was gluing up. Overall I’m very happy with the end product, and found it reasonably easy to put together. Now its time to put the shelves to good use and start tidying up the garage!

Estimated Cost
$180 including screws - I'm in Ireland and unfortunately wood seems to be more expensive here :-(
Estimated Time Investment
Day Project (6-9 Hours)
Finish Used
I gave it a quick wipe of some old danish oil I was going to throw out, I'm not that bothered about finish as the shelves are in the garage.
Recommended Skill Level
Beginner

Ana's Pockethole Farmhouse Table

Submitted by Angie C. on Sun, 10/18/2015 - 19:50

My cousin and I fell in love with the farmhouse table so, when we discovered some old barn wood at my dad's house, we knew we had to build that table using the barnwood for the top.  I love each and every imperfection in the barn wood.  This was a fun project and I look forward to building another of Ana's plans.

Estimated Time Investment
Day Project (6-9 Hours)
Finish Used
Polyacrylic on the top and primer/paint on the base.
Recommended Skill Level
Beginner

Simple 2x4 potting bench modified to include antique window.

Submitted by Anonymous (not verified) on Mon, 08/08/2022 - 10:57

I made this for my mom for her birthday. I just modified the measurements to accommodate the window and added some cool hardware.

Built from Plan(s)

Comments

Tilt-Out Trash Can (Slightly Modified)

We built this tilt-out cabinet for our trash and plan to build a matching one for our recycling. We modified it a little and used bead board on the face of the cabinet to match some other elements in our kitchen. We painted it bright red using some leftover paint and absolutely love it!

We ended up not using any mechanism to prevent the drawer from falling to the ground - the trash can we purchased is JUST big enough that it stops the drawer from opening all the way, which is great!

There are more pictures below and on our blog, http://strawbridgestuff.com

Estimated Cost
$25
Estimated Time Investment
Afternoon Project (3-6 Hours)
Finish Used
We painted the cabinet using Valspar's "Fabulous Red" in semi-gloss.
Recommended Skill Level
Beginner

Comments

rosie4bw

Tue, 05/15/2012 - 14:00

Hi, I really like the way you did the brash bin with the beadboard door. Could you
tell me what size the door frame is. I just started doing different projects and are still new at it. THanks Linda.

Jodieth

Fri, 09/07/2012 - 12:35

Your trash bin looks great. I too love the beadboard. I am putting a lot of beadboard in a small house I am planning on renting until my kids are out of college, then I want to make it into a place I can teach sewing and make furniture covers.

scothershman

Thu, 10/29/2015 - 08:51

Is there a sketchup file for this plan? I would like to modify it alittle but it would take me awhile to reproduce due to my bad sketchup skills.


Thanks!

Wooden Heart

Sun, 03/27/2016 - 01:31

I love this! I live in a one bedroom apartment and I just have a space between the fridge and a cabinet for pots and pans where the bin sits. I've always found this ugly to be honest but haven't known how to change it but this is perfect, thank you!

Cornhole Boards

Submitted by Anonymous (not verified) on Wed, 02/08/2023 - 18:09

I made one set for my son, the one with the stained top. His friends liked it so much and kept borrowing his set, that he wanted to surprise them with their own and asked me to build them one with the LSU colors. Thought they turned out great! Thank you for the plans!

Comments

Wine Console Table

So this is my first attempt at woodworking. In fact it's the first time I've really created anything with my hands. I came across this website and saw all of the wonderful creations people have made and decided I wanted to give it a try. I saw the Workbench Console and loved the design of it. I knew my sister-in-law was looking for a console table for her new house and being a wine lover I figured I'd give those plans a go. I added a second shelf for wine bottle storage and flipped around the tabletop. I really wanted to have a towel rack attached to it as well but after scouring the hardware stores I couldn't find anything that "fit" the look I wanted so I called a buddy of mine who is a blacksmith and with his expert guidance he taught me how to make the towel rack I wanted. I'm proud to say I made everything on that table including the hardware (minus all of the wood screws of course ;)

To be honest, when I went into this project I wasn't too sure about what the results would be, but I was very pleasantly surprised with how well it turned out when it was finished. So much so that after surprising my sister with her new table I've already started on another console for my own living room wall. This site has been very inspirational and has shown me that anyone can build fantastic pieces as long as the desire is there! Thanks Ana!

P.S. This project took a long time for me to complete mainly because I had no experience at all going into it. Now that I've put one together I've noticed the next one coming together much faster.

Built from Plan(s)
Estimated Cost
$120
Estimated Time Investment
Week Long Project (20 Hours or More)
Finish Used
Started with a coat of Minwax Dark Walnut and finished with two coats Minwax Anitque Walnut Polyblend.
Recommended Skill Level
Beginner

Comments

spiceylg

Thu, 11/07/2013 - 05:29

Fantastic first project and also impressed with your newly found blacksmith skills!

Honestabe37

Fri, 11/08/2013 - 21:27

Thank you for the kind words. It's been fun to see the response from friends and family. It's kind of hilarious to me that I've only built one table and now I have requests coming from family, friends and co-workers for everything from end tables to entertainment centers! But first things first, I'm piecing together my new console table for the living room. I just wish I had more time during the day to spend on it!

Outdoor day bed

Submitted by TamTamW on Wed, 07/03/2019 - 09:28

Loved making this. Used old sun curtains and a sheet for extra splendor. 

Built from Plan(s)
Estimated Time Investment
Weekend Project (10-20 Hours)
Finish Used
None.
Recommended Skill Level
Beginner

Comments

Exotic Wood Farmhouse Style Bed

Submitted by Anonymous (not verified) on Fri, 06/30/2023 - 11:09

I loved your farmhouse bed , so decided to make my own , but with wood wat is available here(Philippines) the post and the frame is made of Mango wood , the tree fell down during the typhoon, so I made boards and beams out of it , for the headboard and also the footboard used Moldave/Mahogany/Ipalipal/and a few kinds I don't know the name

Built from Plan(s)

Full Size Bunk

Submitted by Anonymous (not verified) on Fri, 07/07/2023 - 11:30

Almost finished but I managed to alter the plans into a full over full! Just use 2×4 instead of 2×1 and use 2×6 for the legs.

Antonio

Built from Plan(s)

4x4 Truss Table and Benches

Submitted by Anonymous (not verified) on Sun, 11/24/2019 - 12:41

Modified so that it could fit 12 people comfortably.

Estimated Time Investment
Week Long Project (20 Hours or More)
Recommended Skill Level
Intermediate

Comments

Seasonal And Holiday

Laundry basket dresser with a drop-down ironing board

Submitted by getcz on Sun, 04/22/2012 - 18:35

I used Ana's Laundry Basket Dresser plans but I added a drop-down ironing board and and made the entire top surface ready to iron on. A swing-out leg under the ironing board helps to stabilize while ironing.

Built from Plan(s)
Estimated Time Investment
Weekend Project (10-20 Hours)
Finish Used
Laundry
Recommended Skill Level
Intermediate

Comments

Childrens table and chairs

We built Two children's table and 8 stackable chairs for one of our daycare's. It took a lot of work but once we figured out the first chair it was a breeze for the other 7.

Estimated Cost
$30
Estimated Time Investment
Week Long Project (20 Hours or More)
Finish Used
We stained the wood in a Cherry Stain and finished with multiple coats of Poly.
Recommended Skill Level
Beginner

Comments

timh

Sat, 02/08/2014 - 15:54

Awesome! I built one for our homeschool and it works great. Yours look very nice.

Farmhouse Coffee Table

Submitted by cabinK on Wed, 02/05/2020 - 17:42

Had a great time building the Farmhouse Coffee Table plans from Ana! As with the Farmhouse Queen Bed, I used the old barn wood, ran it through the planer until I liked the look of the grains and then built away. I haven't decided on a finish yet but I'm more than likely going to epoxy the top only, so as to protect it from drink spills and water rings.  THANK YOU ANA!!

Estimated Cost
Screws and glue
Estimated Time Investment
Weekend Project (10-20 Hours)
Finish Used
None as of yet. Will probably use tabletop epoxy.
Recommended Skill Level
Beginner

Loft Bed

Modified to a twin xl from the loft bed plan. Wood has not been finished. 

Built from Plan(s)
Estimated Cost
200
Estimated Time Investment
Day Project (6-9 Hours)
Recommended Skill Level
Intermediate