Community Brag Posts

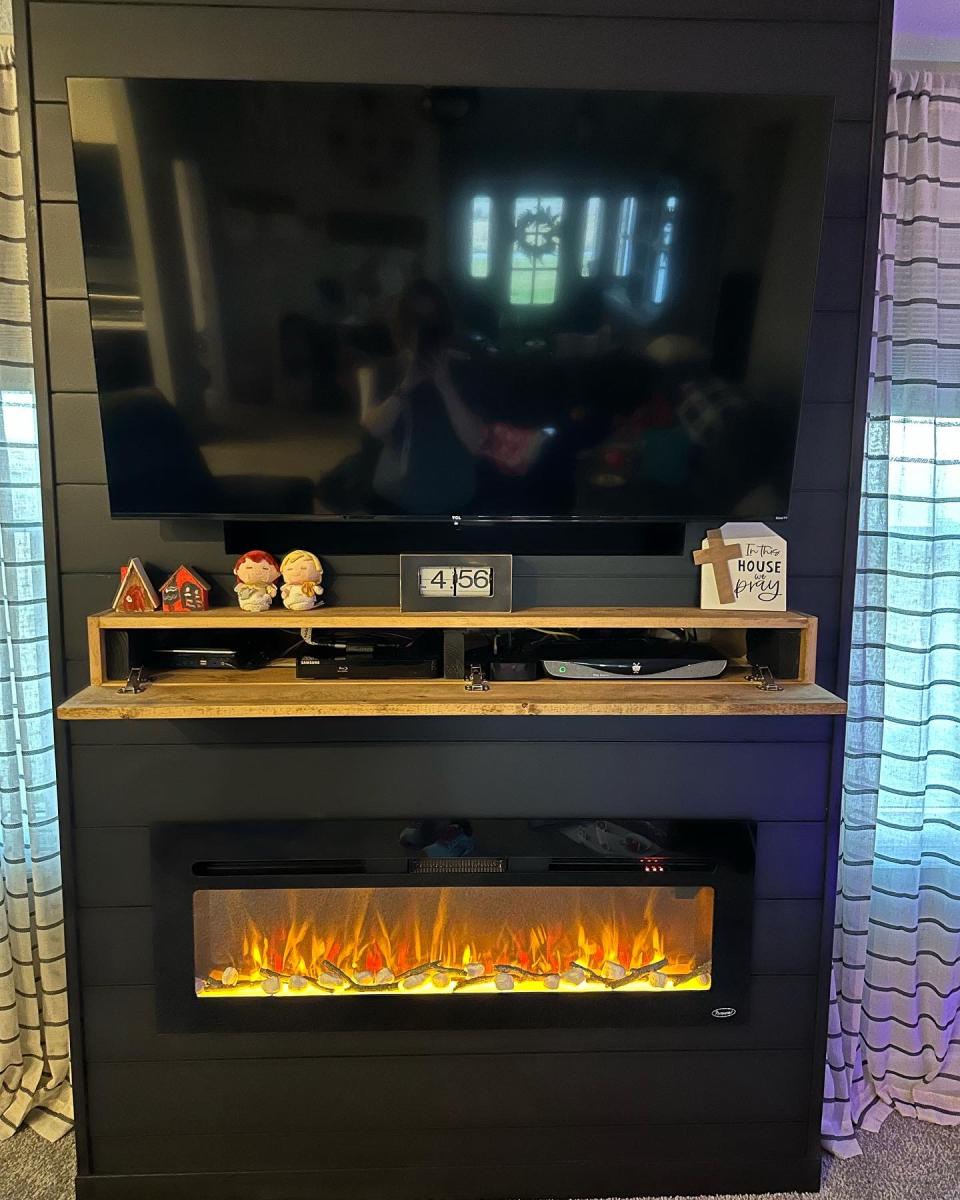
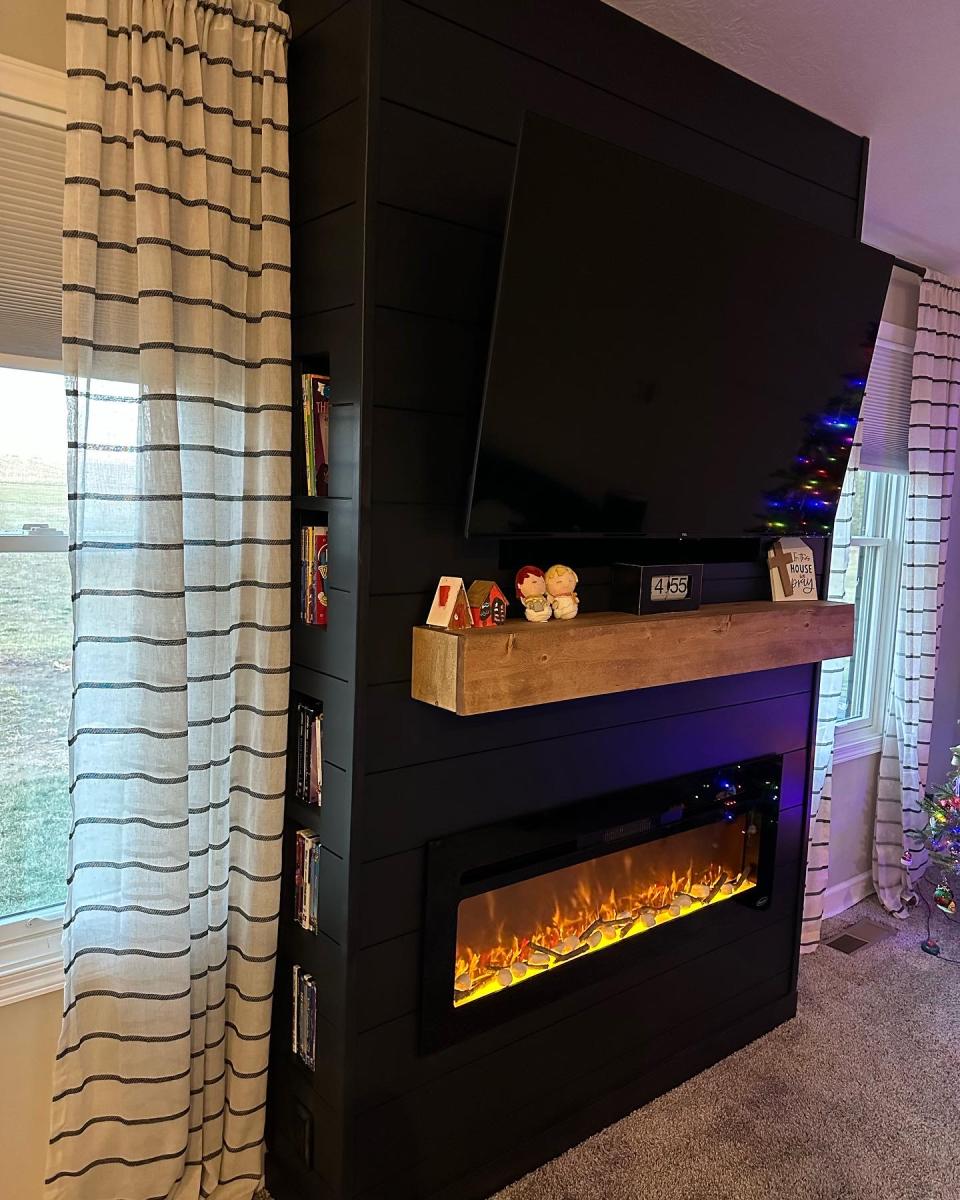
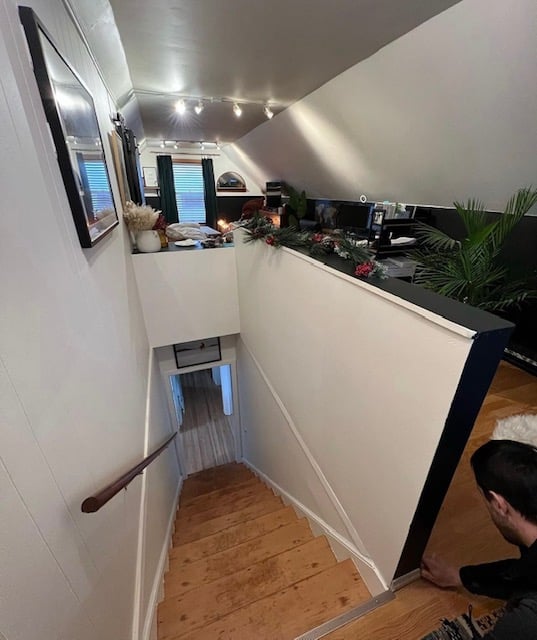
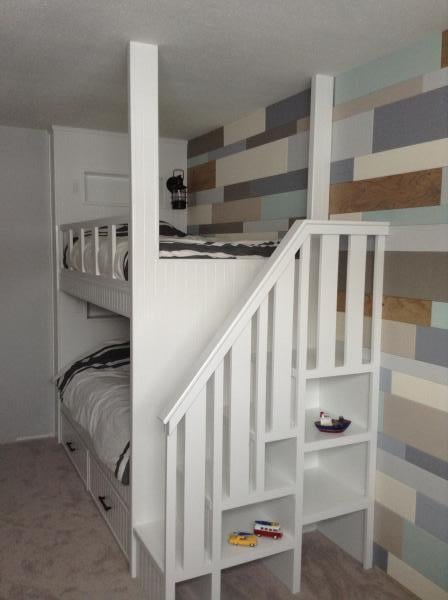
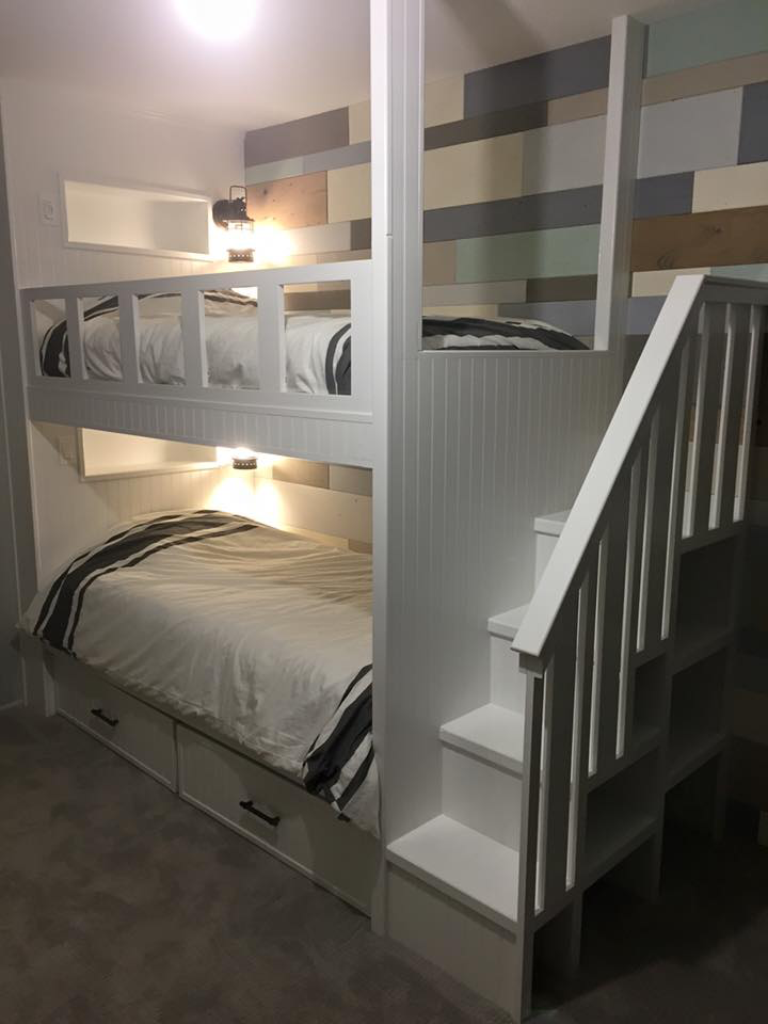
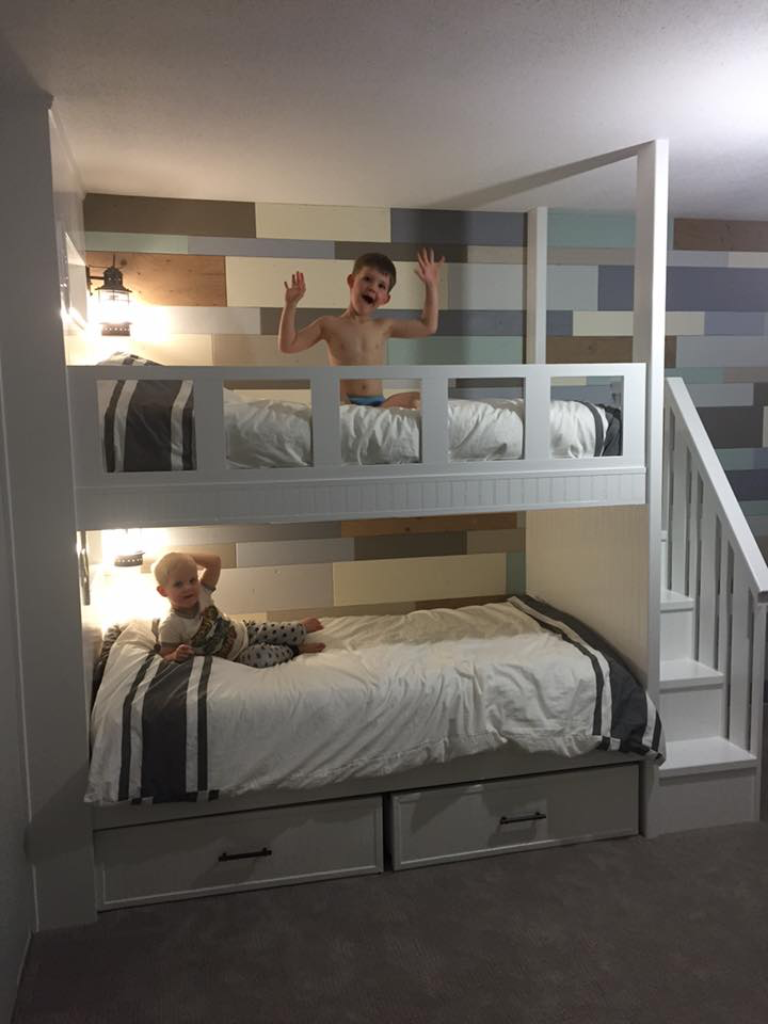
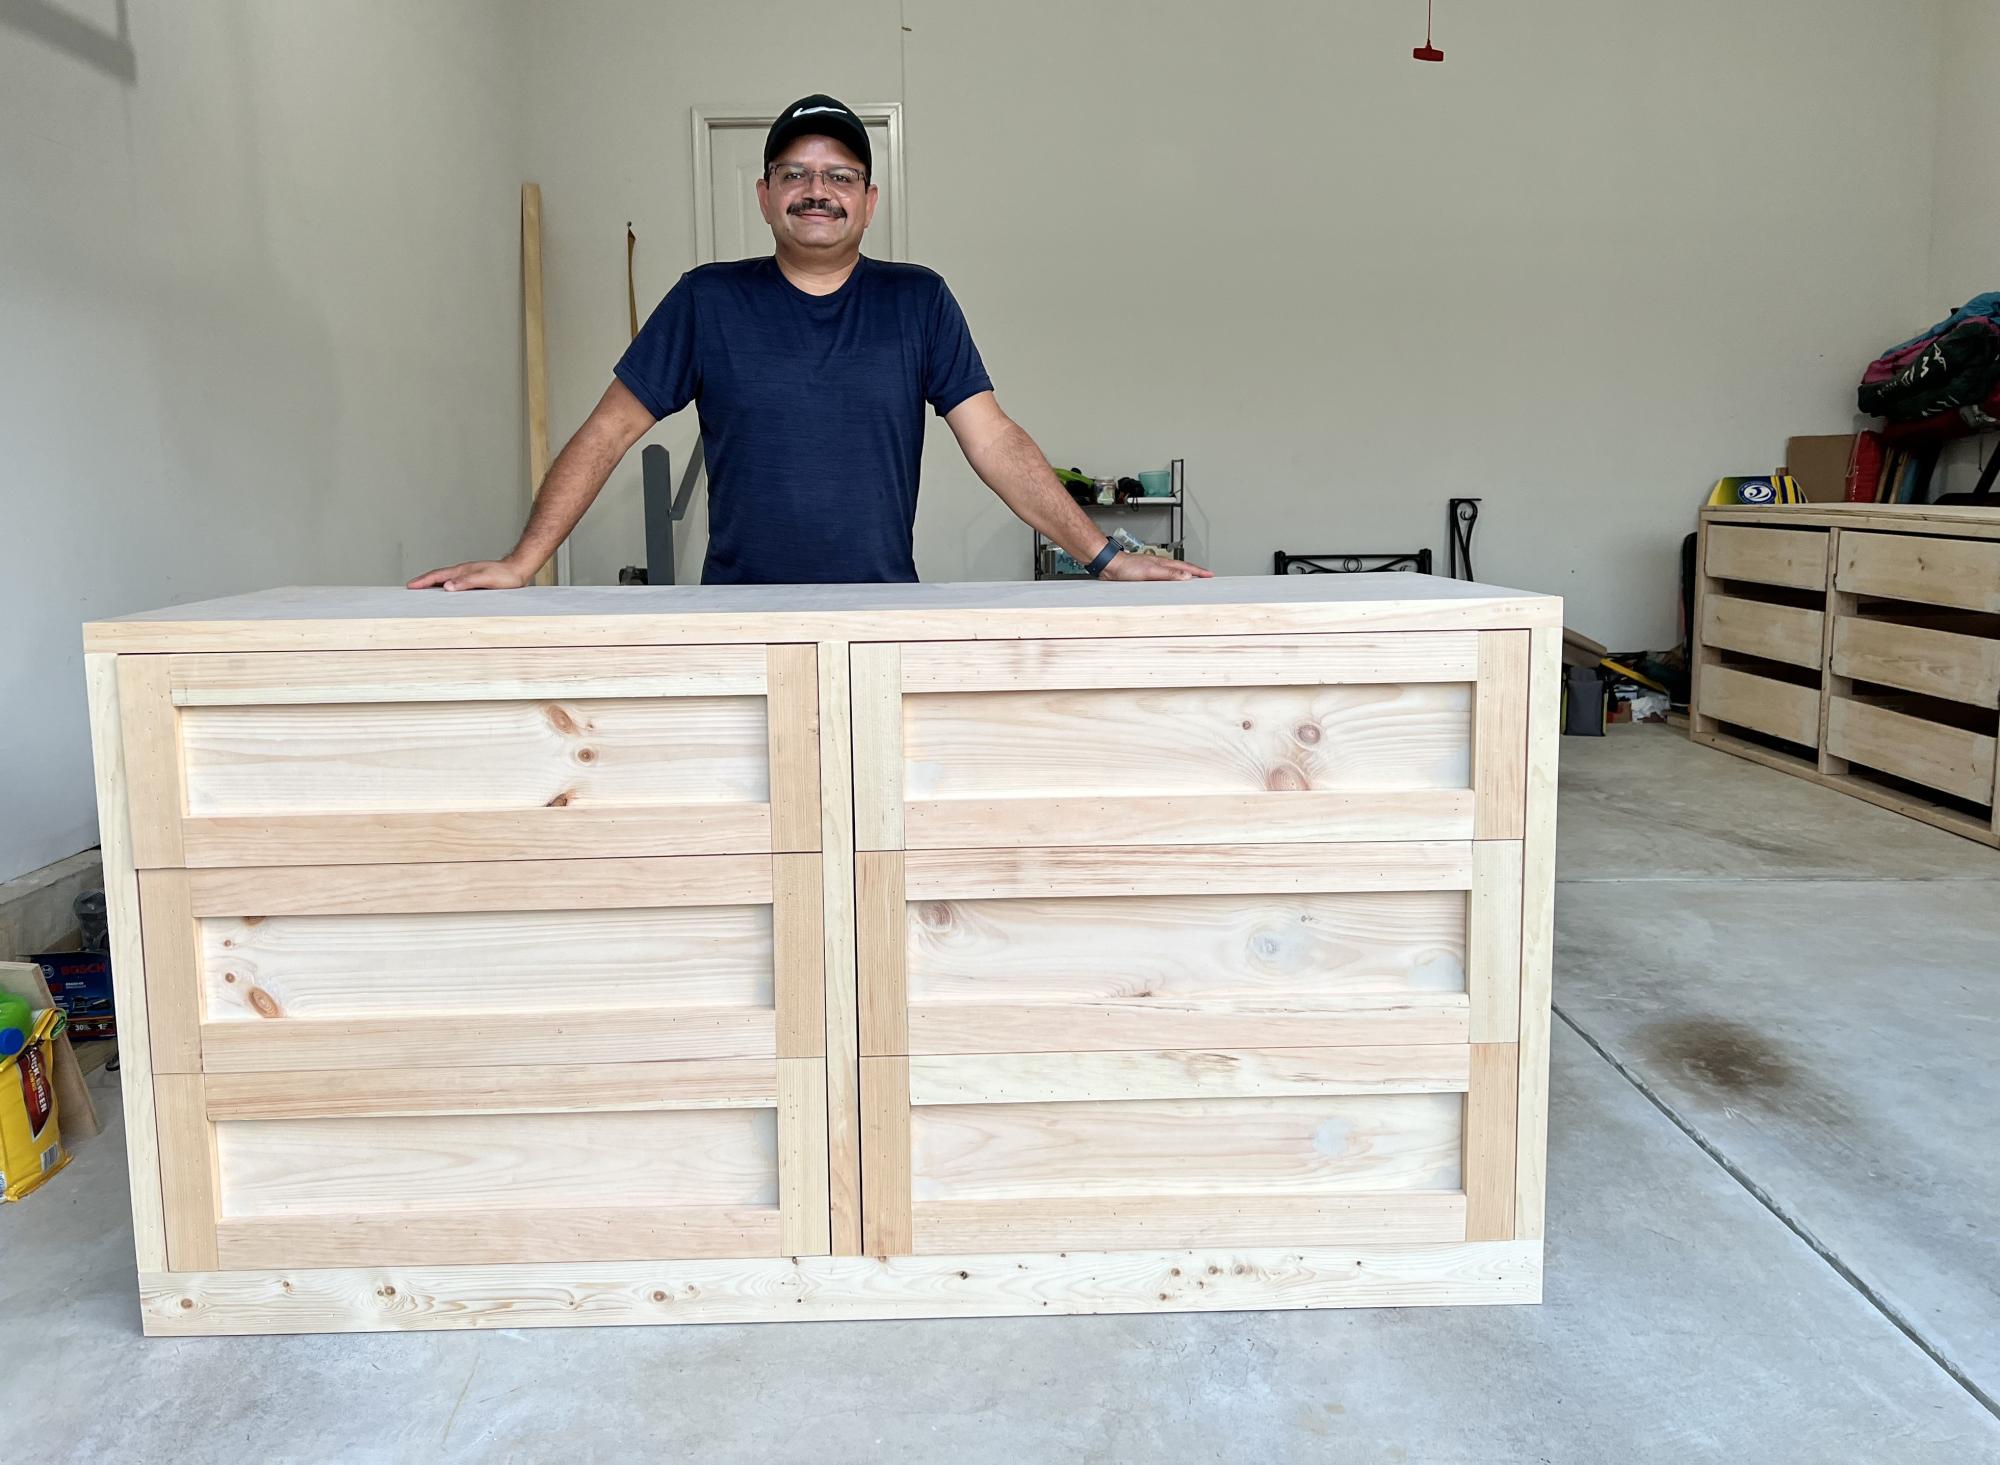
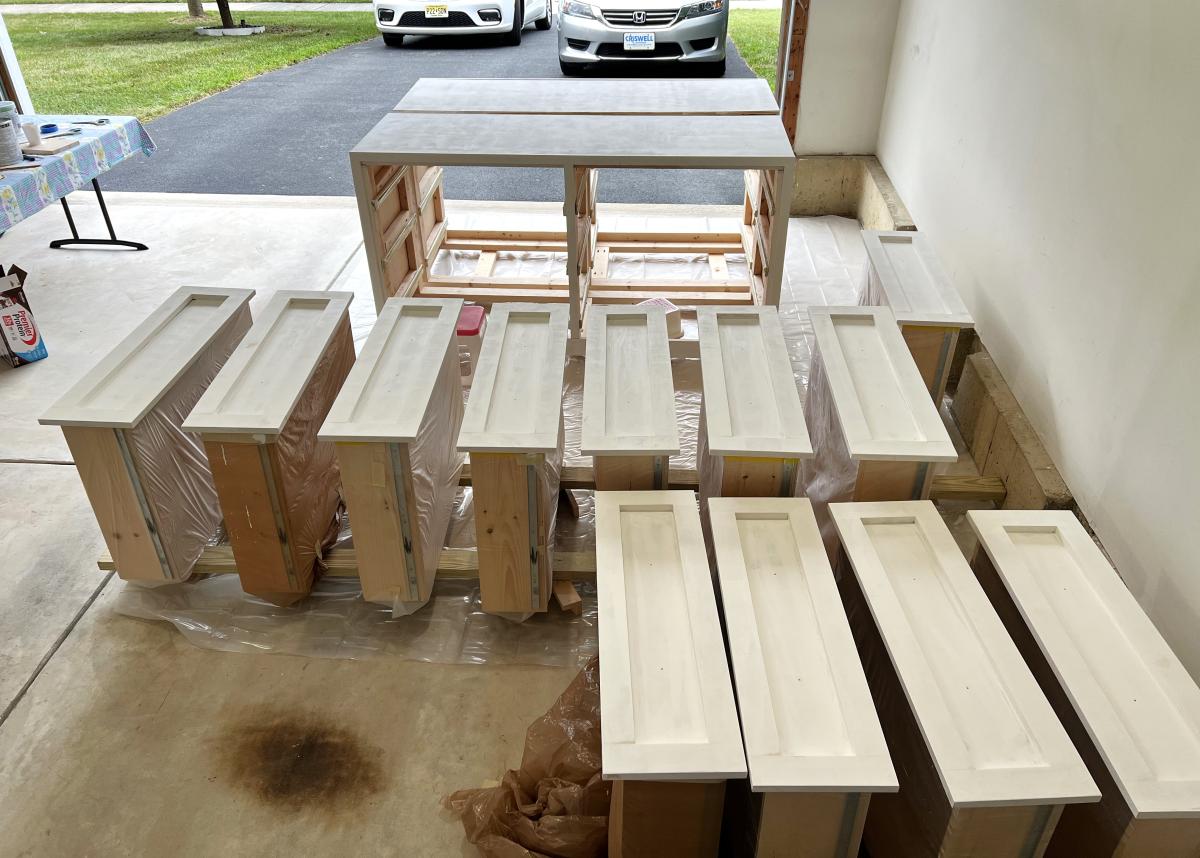
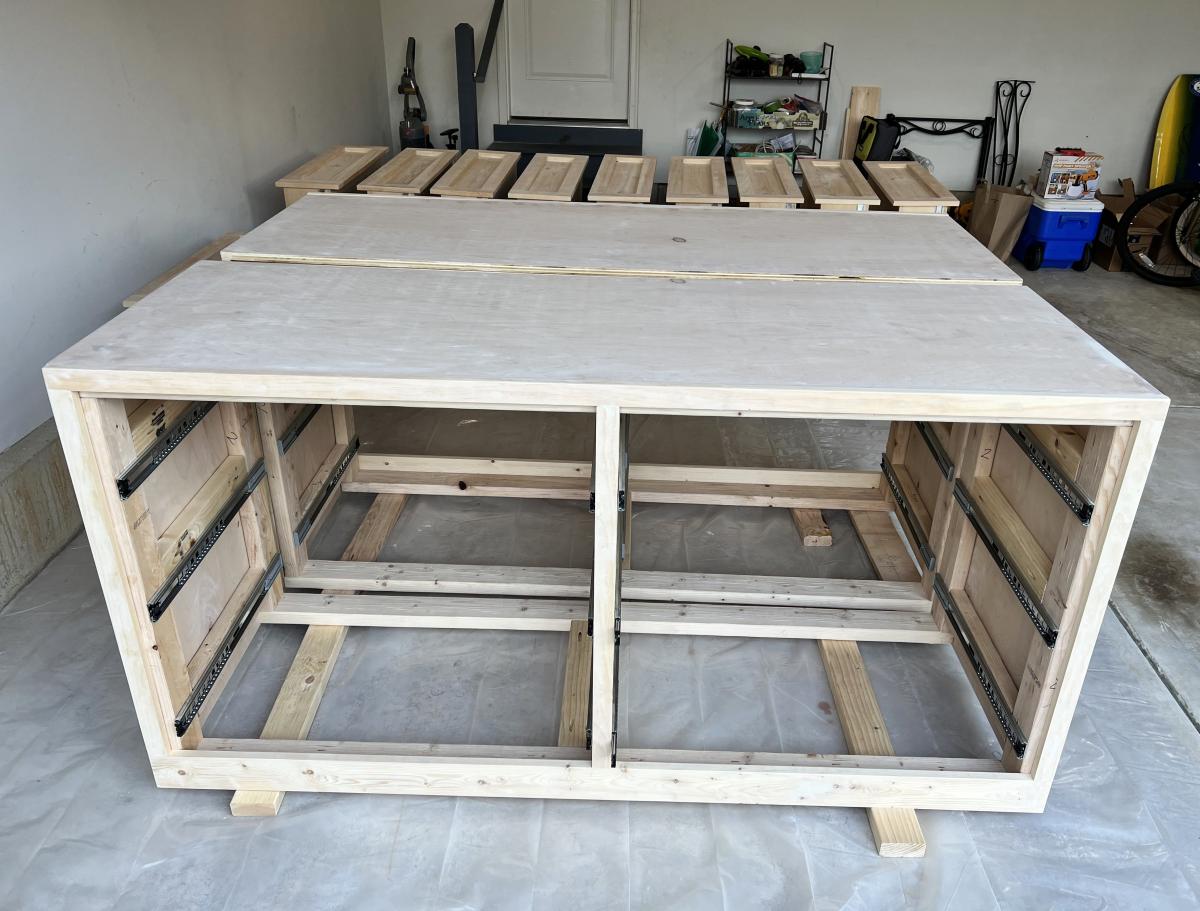
Fireplace with hidden Mantle storage and side bookshelves

Submitted by ibseenu on Thu, 12/01/2022 - 14:30

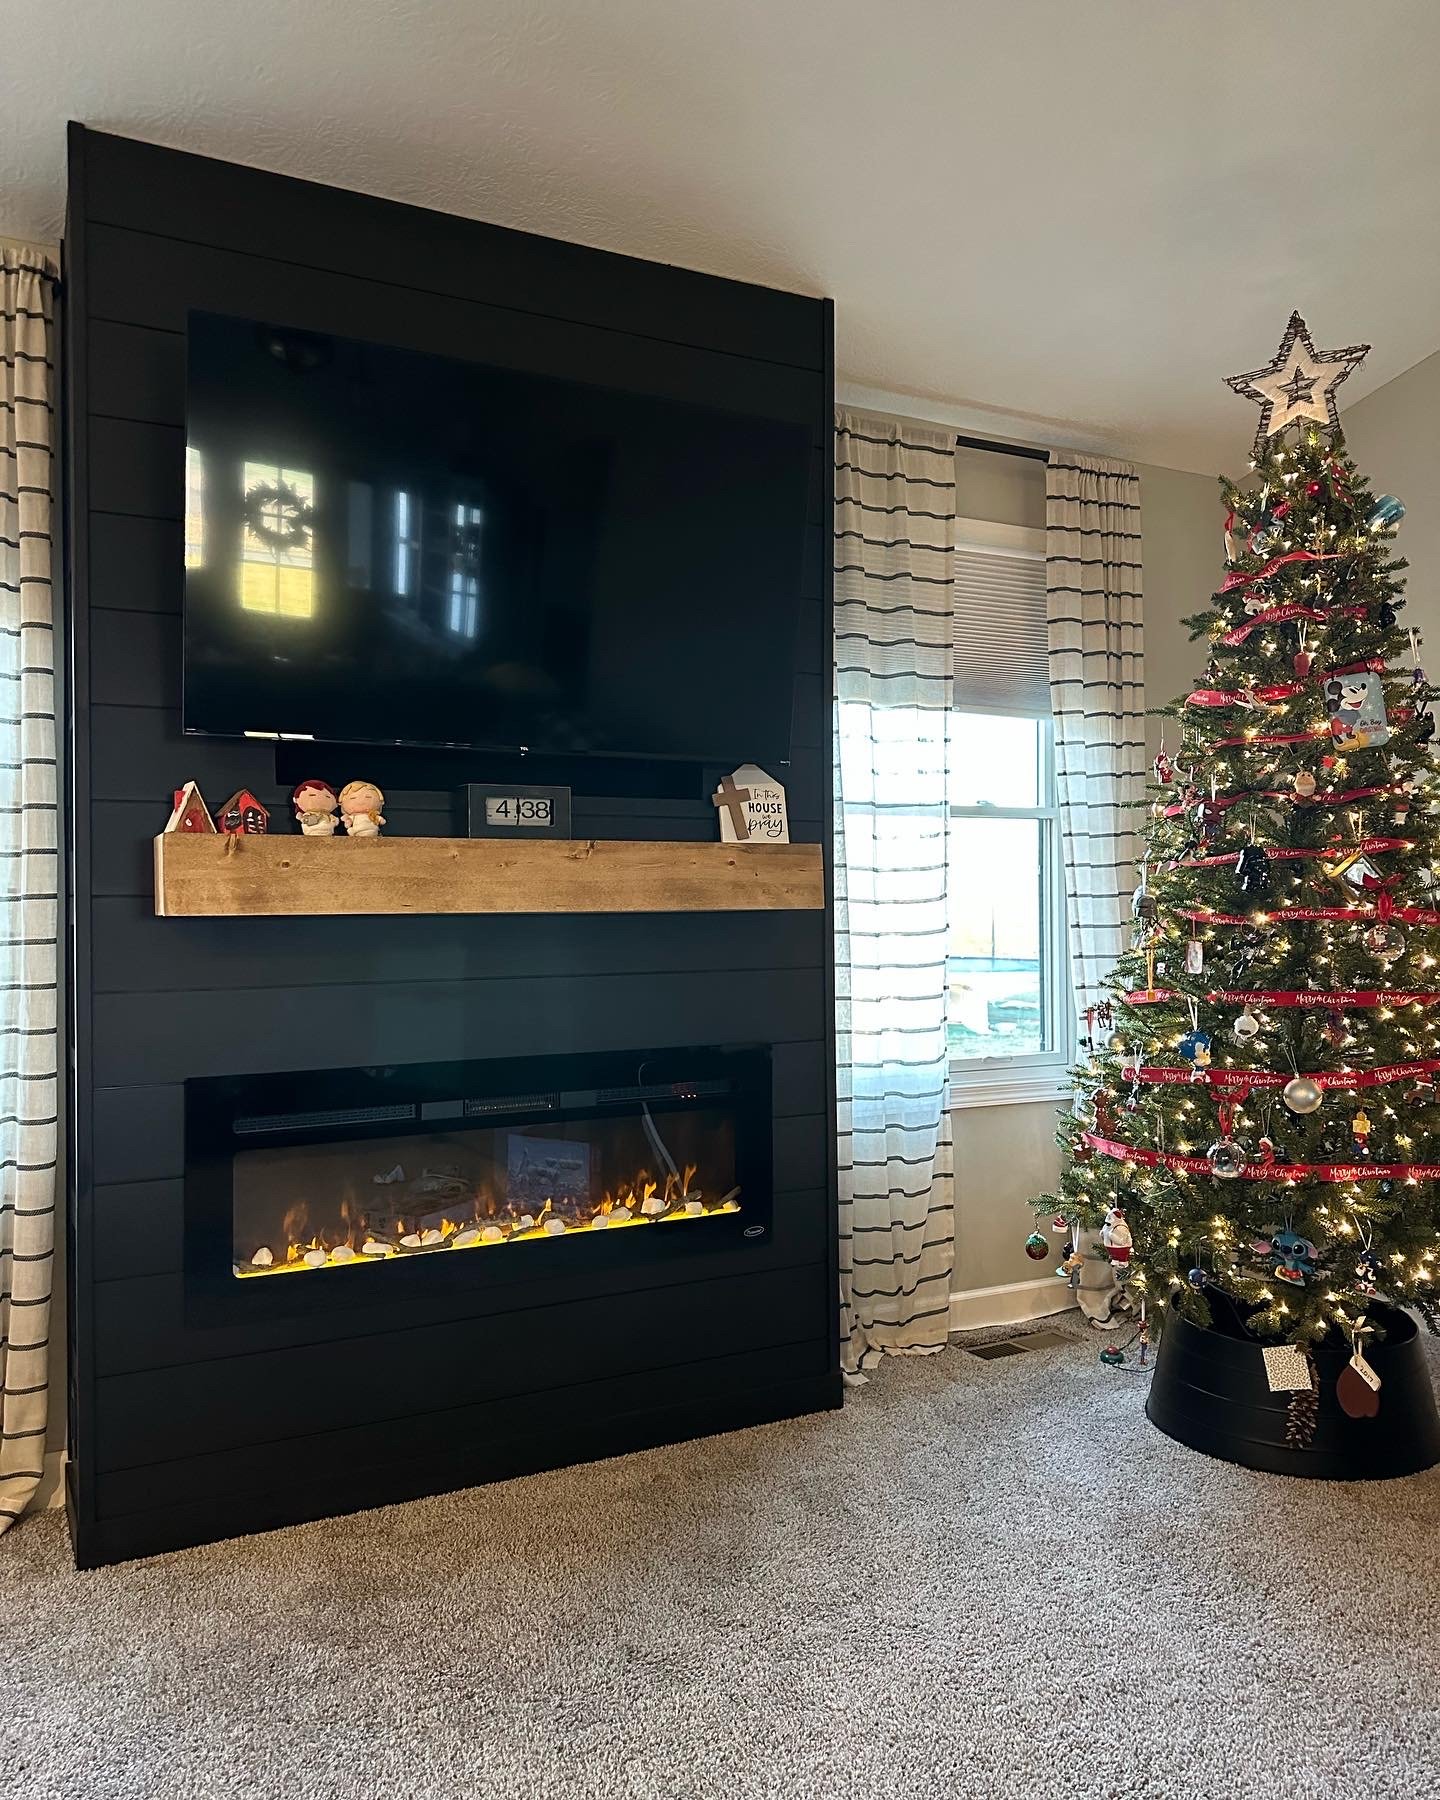
Thank you Ana for you Fireplace design as it was exactly what I needed! We’ve lived in our house for 3 years now and I’ve wanted a fireplace ever since. Your plan was perfect and with a few modifications I made it come to life. My 9yr daughter as I was almost done building thought there should be a shelf for books and movies below the fire place. It gave me the idea of adding storage on the sides. I had already had the idea of the mantle storage and just used a floating shelf idea and made that. This was a lot of fun!! It took me a little over a week to build. But can’t wait to build something else for our house… like the mudroom!

Amy

Comments

jtemperley

Sun, 01/08/2023 - 19:02

That looks awesome! My husband and I are planning on doing this as well. I do have a question, as I see you have carpet just like us. Did you cut out the carpet where you built out, and if so how did you go about that, or did you just build on top of it?

Jewelry Box 2

Submitted by yhaas on Thu, 12/17/2015 - 20:58

I built this as a Christmas gift for my office partner/best friend.

Built from Plan(s)
Estimated Cost
$50 (bit of a guess, more if I add finishes which I already had, less if using scrap wood)
Estimated Time Investment
Weekend Project (10-20 Hours)
Finish Used
I used wood conditioner, then stained with Goudey stain in Rosewood. Next was a shellac washcoat, followed by glaze in Van Dyke brown, another washcoat, and finished with 2 coats of Tried and True varnish oil, then another 2 of Tried and True original wood finish. Knobs and felt were from Lee Valley.
Recommended Skill Level
Beginner

Comments

Sandbox with built-in seats

I modified this a tad from the original plans to suit my needs. I will eventually be adding a platform with attached slide and swing set.

Plans were easy to follow. My store didn't have 1x8's so I stacked 1x4's and used my Kreg jig to join them together and then I added extra bracing.

I had seen this on Pinterest a couple years ago and thought it was the coolest thing! Io excited I was able to build it myself!

Built from Plan(s)
Estimated Cost
About $40
Estimated Time Investment
Day Project (6-9 Hours)
Finish Used
None yet. I will stain and seal everything when I get the entire play set finished.
Recommended Skill Level
Beginner

My simple Outhouse

Submitted by Anonymous (not verified) on Wed, 07/31/2019 - 17:14

<p>I worked on this for about 2 weeks in my free time. I modified the original plans from this site to accommodate my needs. I just wanted a “#1” only place near my pool so I didn’t have to dry off and walk all the way up to the house. The trash can is for the TP and I will just toss it when I need to. I used a traffic cone as a pee funnel and attached&nbsp;tubing to the end of the funnel&nbsp;that I buried down along the slope of my yard against the fence line.&nbsp;I ended up adding an area for boys since I didn’t want the inside all gross. I added solar deck lights to the outside and a light inside too.&nbsp; It turned out amazing!!!</p>

Built from Plan(s)
Estimated Cost
$300
Estimated Time Investment
Week Long Project (20 Hours or More)
Finish Used
Varathane Premium fast dry oil based stain in the color “Ipswich Pine” and Varathane Ultimate Spar Urethane oil based in clear satin. One coat of each.
Recommended Skill Level
Intermediate

Comments

modern outdoor lounge chair

Just finished this beauty, entirely made with 2x4, plans were modify to match our outdoor sofa and coffee table. I think our best looking project so far ;) Thank you for inspiring me to build !!!

Estimated Time Investment
Week Long Project (20 Hours or More)
Recommended Skill Level
Beginner

Comments

Seasonal And Holiday

My Simple Outdoor Lounge Chair with 2x4 modification

I modified this chair with 2x4's as the base and 2x2 for decoration on arms, this is prior to sanding and finishing

Built from Plan(s)
Estimated Cost
$15-$20 dollars, depending on local lumber prices and finishing options.
Estimated Time Investment
An Hour or Two (0-2 Hours)
Finish Used
Unfinished
Recommended Skill Level
Beginner

Comments

RandyW

Sat, 06/13/2020 - 16:33

I always take my sander to the sharp edges and round them off

Kentwood Bookshelf

Submitted by BeckySmith on Thu, 05/10/2012 - 05:11

This was one of my first bigger builds. I am so happy with the way it turned out!

Estimated Time Investment
Day Project (6-9 Hours)
Finish Used
Golden Oak. I applied the stain with a foam brush and wiped off excess after about five minutes.
Recommended Skill Level
Beginner

Comments

canadianlam

Thu, 05/19/2016 - 19:05

This bookcase wouldn't be out of place amongst the Pottery Barn's bookcases. In fact, it inspired me to go out this afternoon and buy some cedar boards so I can start building my own version first thing tomorrow. Thank you, Becky.

Texas Flag Adirondack Chair

Submitted by pacificslu on Thu, 10/06/2016 - 06:37

Built from scrap lumber during my deployment with the US Navy to Camp Lemonnier, Djibouti, Africa, and brought home to Texas on my return Sept 2016. 

Built from Plan(s)
Estimated Cost
Since I used reclaimed wood from construction projects around the base, the cost of the project was almost zero. Paint, screws, and some clear-coat. That's about it.
Estimated Time Investment
Afternoon Project (3-6 Hours)
Finish Used
Spray paint and clear-coat. Now that I'm home, I plan to sand it and apply a coat of polyurethane to protect it from the weather.
Recommended Skill Level
Beginner

Comments

Modified firepit bench

Submitted by kkushner on Sat, 08/15/2020 - 23:11

I built the one bench using the original plan with the storage and table top unit but needed two additional seating benches to go around the firepit without the bulk of the backside of the bench.

I modified the original plan as follows:

Shopping List:
(2) 2X6X8
(3) 2X4X8
(2) 1X6X8

Cutting List:
(2) 2X4X17" front legs, 15 degree cuts, parallel long to short
(2) 2X4X23" back support, 15 degree cuts, parallel long to short
(2) 2X4X20.75" back legs, 15 and 60 degree cuts, not parallel long to long
(2) 2X4X24.75" under seat, 15 degree cuts, not parallel long to long
(2) 2X4X30" bottom support, 15 degree cuts, not parallel long to long
(1) 2X4X42" bottom cross brace between leg sets, 90 degree cuts
(2) 2X6 cut equally in half, 3 for the seat and 1 for the top plate
(2) 1X6 cut equally in half, 3 for the back rest and 1 to be tucked under the seat overhang

Estimated Cost
$40.00
Estimated Time Investment
An Hour or Two (0-2 Hours)
Finish Used
Brown outdoor wood preservative.
Recommended Skill Level
Beginner

Comments

jwood4

Thu, 09/08/2022 - 11:23

Great work! Have you had any tipping issues with the benches without the table back? If you kneel on the bench backwards and lean on the back do you think it would tip? Ha I clearly have kids around to be asking such strangely specific questions... TIA!

kkushner

Sat, 02/25/2023 - 08:56

I built these for my daughter/son-in-law and their young family. I have grandkids that use them and have never tipped them. However a strong wind gust 100km/hr did flip one over but not the other. I would suggest adding a horizontal ground level ‘foot’ extension on one or both back legs to alleviate any concerns of tipping.

Fancy French Farmhouse Table

Submitted by LumbeeDiva on Wed, 11/28/2012 - 09:37

After seeing the Fancy X Farmhouse Table on pinterest we wanted to try and build one ourselves, but using the pallets we gathered from the new construction next door and the scrap lumber they were throwing away. The only thing we had to purchase was a sheet of 11/32 plywood to attach the pallet strips to for more stabilization, Screws, Nails, Wood Putty, Stain, and Polyurethane. I filled in all of the cracks to child proof food messes. We used Minwax Provincial Stain on the top with two coats of poly and a distressed antique white paint around the egdes to give it a more french look. The base was one coat of privincial stain with a good rasp/sanding of the edges to age the piece. Our goal was to build something that looked over 100 years old to match all of the china that will be sitting on it when we entertain! I think it looks very stately! This was our first project! :D

Built from Plan(s)
Estimated Cost
100.00
Estimated Time Investment
Week Long Project (20 Hours or More)
Finish Used
Minwax Provincial Stain and Lowes Antique White Paint distressed with course sandpaper and a quick rub of stain to age. All of the edges on the base were rasped after the stain to give a worn look.
Recommended Skill Level
Intermediate

Comments

bkstyles

Mon, 04/21/2014 - 10:32

hi there - This is so so cool and I went out first thing this morning and collected a bunch of pallets from all over to start! I was wondering how you got your pallets apart without destroying them? I am finding that very difficult!

Modern Outdoor Collection

Submitted by Anonymous (not verified) on Tue, 10/27/2020 - 16:06

Great plans - thanks so much! Started with two chairs, and kept going...

MODS: Once built, we felt there wasn't enough back support, so added a 2x4 then 4x4 on top. Also added a 2x2 in back of the seat bed, so our 25" x 25" seat cushions didn't float around.

Recommend paint gun vs. painting by hand.

Estimated Time Investment
Weekend Project (10-20 Hours)
Finish Used
Two coats of Behr waterproof stain + sealer (BM swiss coffee)
Recommended Skill Level
Beginner

Comments

Seasonal And Holiday

Extra tall bar stool

Submitted by Jbonacci3 on Sat, 01/26/2013 - 12:18

I built a breakfast bar into an existing wall shared between our kitchen and living room. I built it on the taller side of average since I wanted to have room to install new electrical outlets above the counter on the kitchen side. After the project was done we went to buy bar stools to use with the new bar and found that even the "tall" stools were too short to work. Research into extra tall stools showed that what we needed was going to $400-600 each! Luckily my wife found these stools on your site and we were able to make three of them for around $115. Also, they are much sturdier than anything we looked at to buy.

Built from Plan(s)
Estimated Cost
$115
Estimated Time Investment
Day Project (6-9 Hours)
Finish Used
Painted frames with Valspar paint + primer (black). Padded and covered seats with a canvas material.
Recommended Skill Level
Beginner

Comments

Breibee23

Mon, 11/11/2013 - 23:53

This is a saving grace... We didn't want to spend 600-1400 on extra tall bar stools that actually look good and this plan rocks as a stand in :)

corner shelf

This was very easy to make. Stained with minwax dark walnut. It's very sturdy too.

Built from Plan(s)
Estimated Time Investment
Day Project (6-9 Hours)
Finish Used
Minwax dark walnut
Recommended Skill Level
Beginner

Comments

School Students

Submitted by gwert01 on Thu, 02/26/2015 - 09:35

This is how we modified your plans. The project was built on the school campus then transported to the final site. We made this in frame sections and then assmbled with let in bracing to give ridgidness to the structure. We coverd with corrigated metalm and corrigated clear PVC glass. THe edges were covered with 2" x 2" dripedge. We will set it up on block and fill the middle with gravel to support water runoffand to give a solid walking surface. Our goal was to make a good quality movable greenhouse at the lowest cost possible.

Notes: If i was not concerned about cost, I would have used cedar 2x4 and would have used a heaviedr guage metal and glass. these two changes will raise the cost to around $1200.00

Built from Plan(s)
Estimated Cost
This project cost us $750.00 for all materials
Estimated Time Investment
Week Long Project (20 Hours or More)
Finish Used
Cedar stain
Recommended Skill Level
Beginner

Clubhouse based on Ana's Plan

Submitted by MattSl on Tue, 05/03/2011 - 09:18

I used Ana's plan as a base.

I changed it from 8x8 to 8x12, made the 4x4x8's to 4x4x10' for a higher main platform and swing platform, and added a 12' long monkey bar set to the other side. Also, an 8' climbing wall and a plank walkway to accompany the two slides.

For the clubhouse, I used Hardiplank 4x8 sheets for the siding and an EZ-Framer kit for the structure itself.

The slides I purchased from Lowes, monkey bars from Amazon, and the swing frame braces from Amazon as well. The swing kits I got from ebay.

Estimated Cost
1500
Estimated Time Investment
Week Long Project (20 Hours or More)
Recommended Skill Level
Intermediate
Seasonal And Holiday

Bunk bed

Built this bunk bed for my two boys. Used the sweet pea storage stairs plan as a starting point and altered things from there to suit. The wall is just 3/8 plywood cut into planks and painted various colours. 

Finish Used
White semigloss. Monamel from General paint.
Recommended Skill Level
Intermediate

Comments

Jumbo Wood Dressers

Submitted by Anonymous (not verified) on Sun, 09/10/2023 - 13:17

Built two jumbo sized dressers 72 by 36 3/4 by 24 3/4. Painting is still pending. One can see playlist here


Rasik

Rustic X Garden Shelf

My wife wanted a Garden Shelf to replace the one that just gave up the ghost, so I browsed my favorite site for plans similar to what I was thinking.  Thats when I found the Rustic X Book Case.  Perfect.

I need to stuff larger objects then books in there, so I changed it to 3 shelves and I put those on top of the cross members.  That was easier and it gives it that work bench look.

For the X's, I had the wood to risk so I tried recessing them.  I dry fitted (chop saw highly recommended) and marked them and when I flipped them over, they aligned perfectly.  With a circular saw set to just slightly less then 1/2 depth, and some very careful cutting, they fit together quite well.

Sturdy with a bit of class.  I'm pleased.  Thanks.

Built from Plan(s)
Estimated Cost
Less then $100
Estimated Time Investment
Weekend Project (10-20 Hours)
Finish Used
Thompson's Wood Seal - Honey Amber
Recommended Skill Level
Intermediate

Tilt Out Recycling Center

Submitted by ppavel on Fri, 09/18/2020 - 07:36

Tilt Out Recycling Center to match the floating desk and barn door in the same room. Great project from the recycling center plans. (slight modification)

Estimated Cost
$80
Estimated Time Investment
Weekend Project (10-20 Hours)
Finish Used
Espresso Stain (Minwax)
Polyurethane Finish (3 coats)
Recommended Skill Level
Beginner

Comments

Back