Community Brag Posts

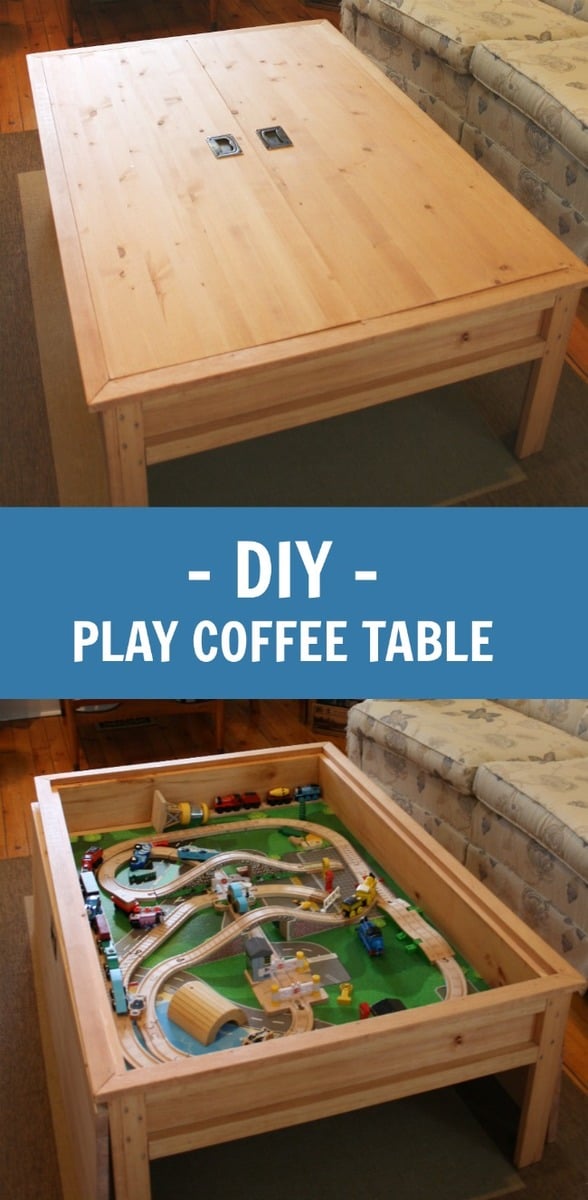
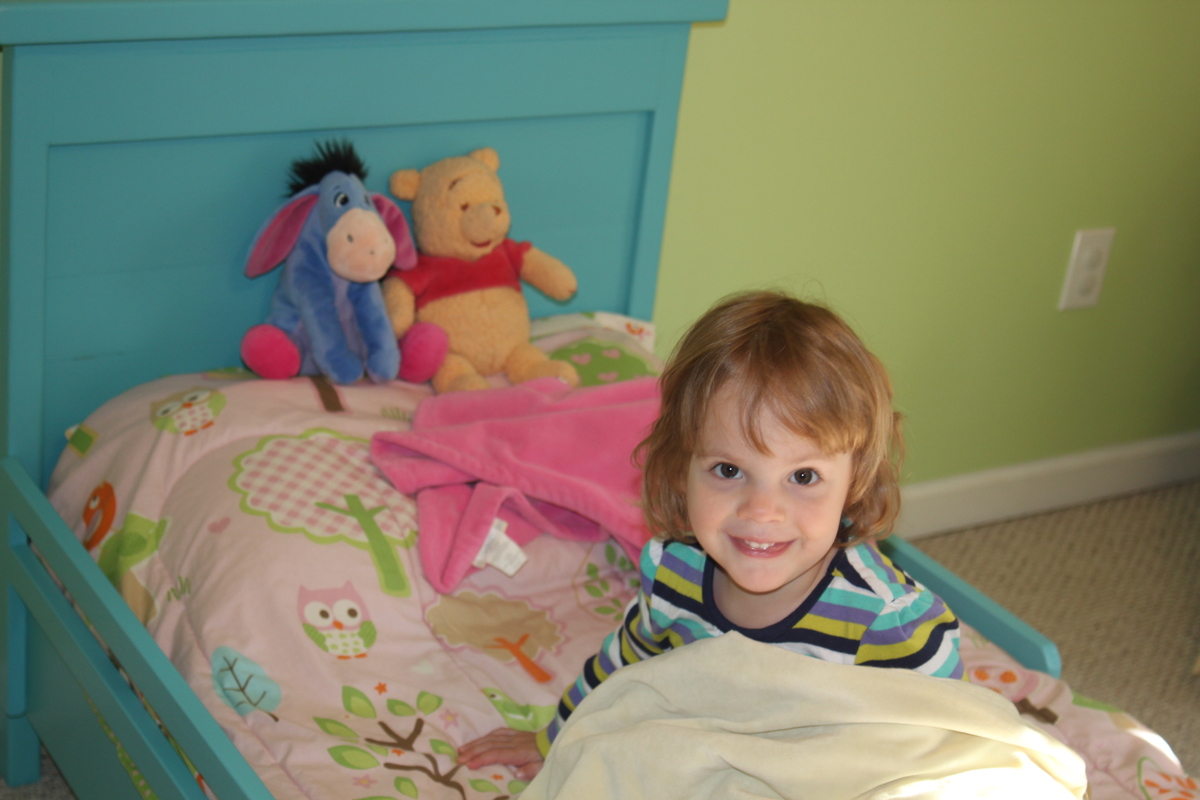
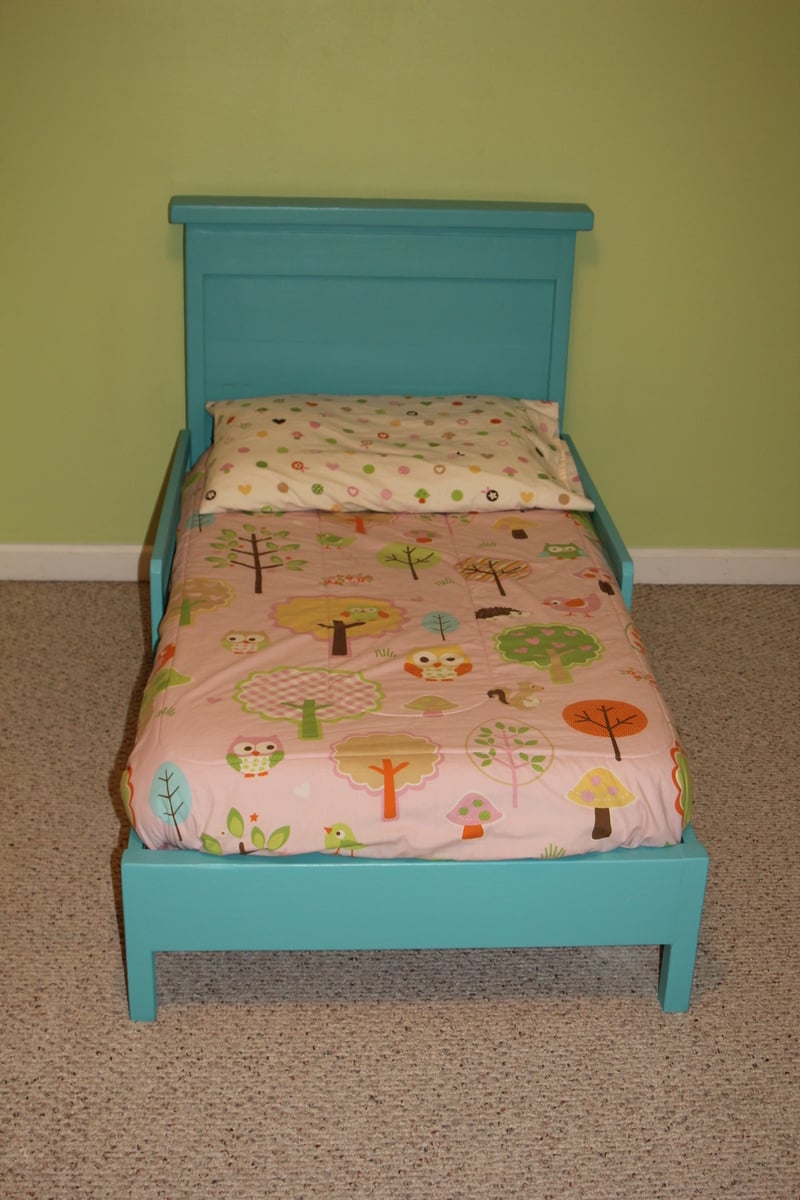
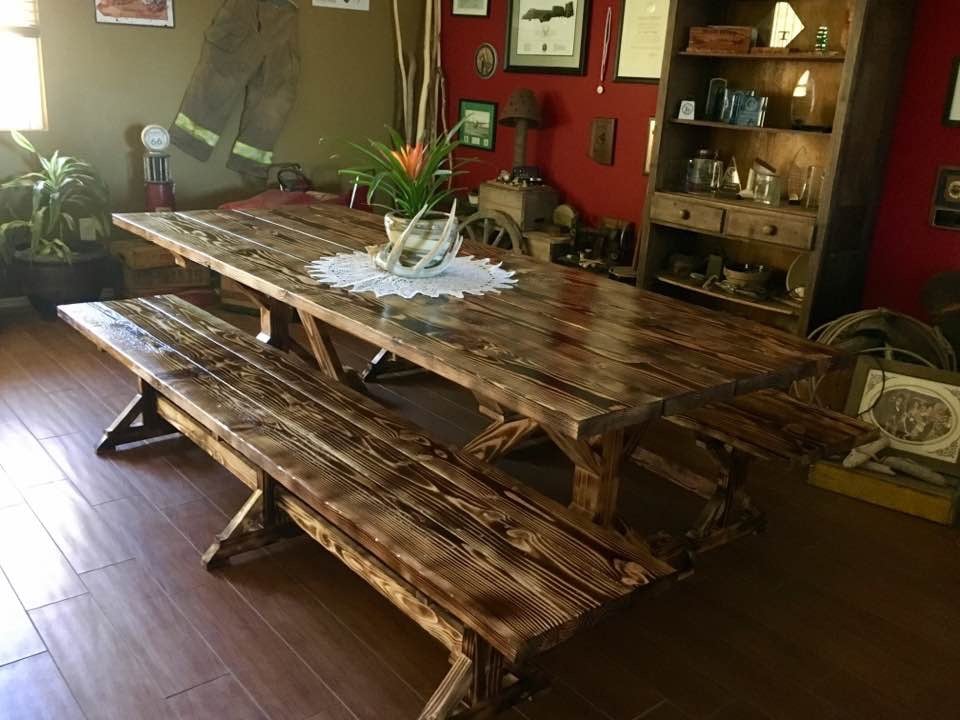
Mom's Train Table - our version

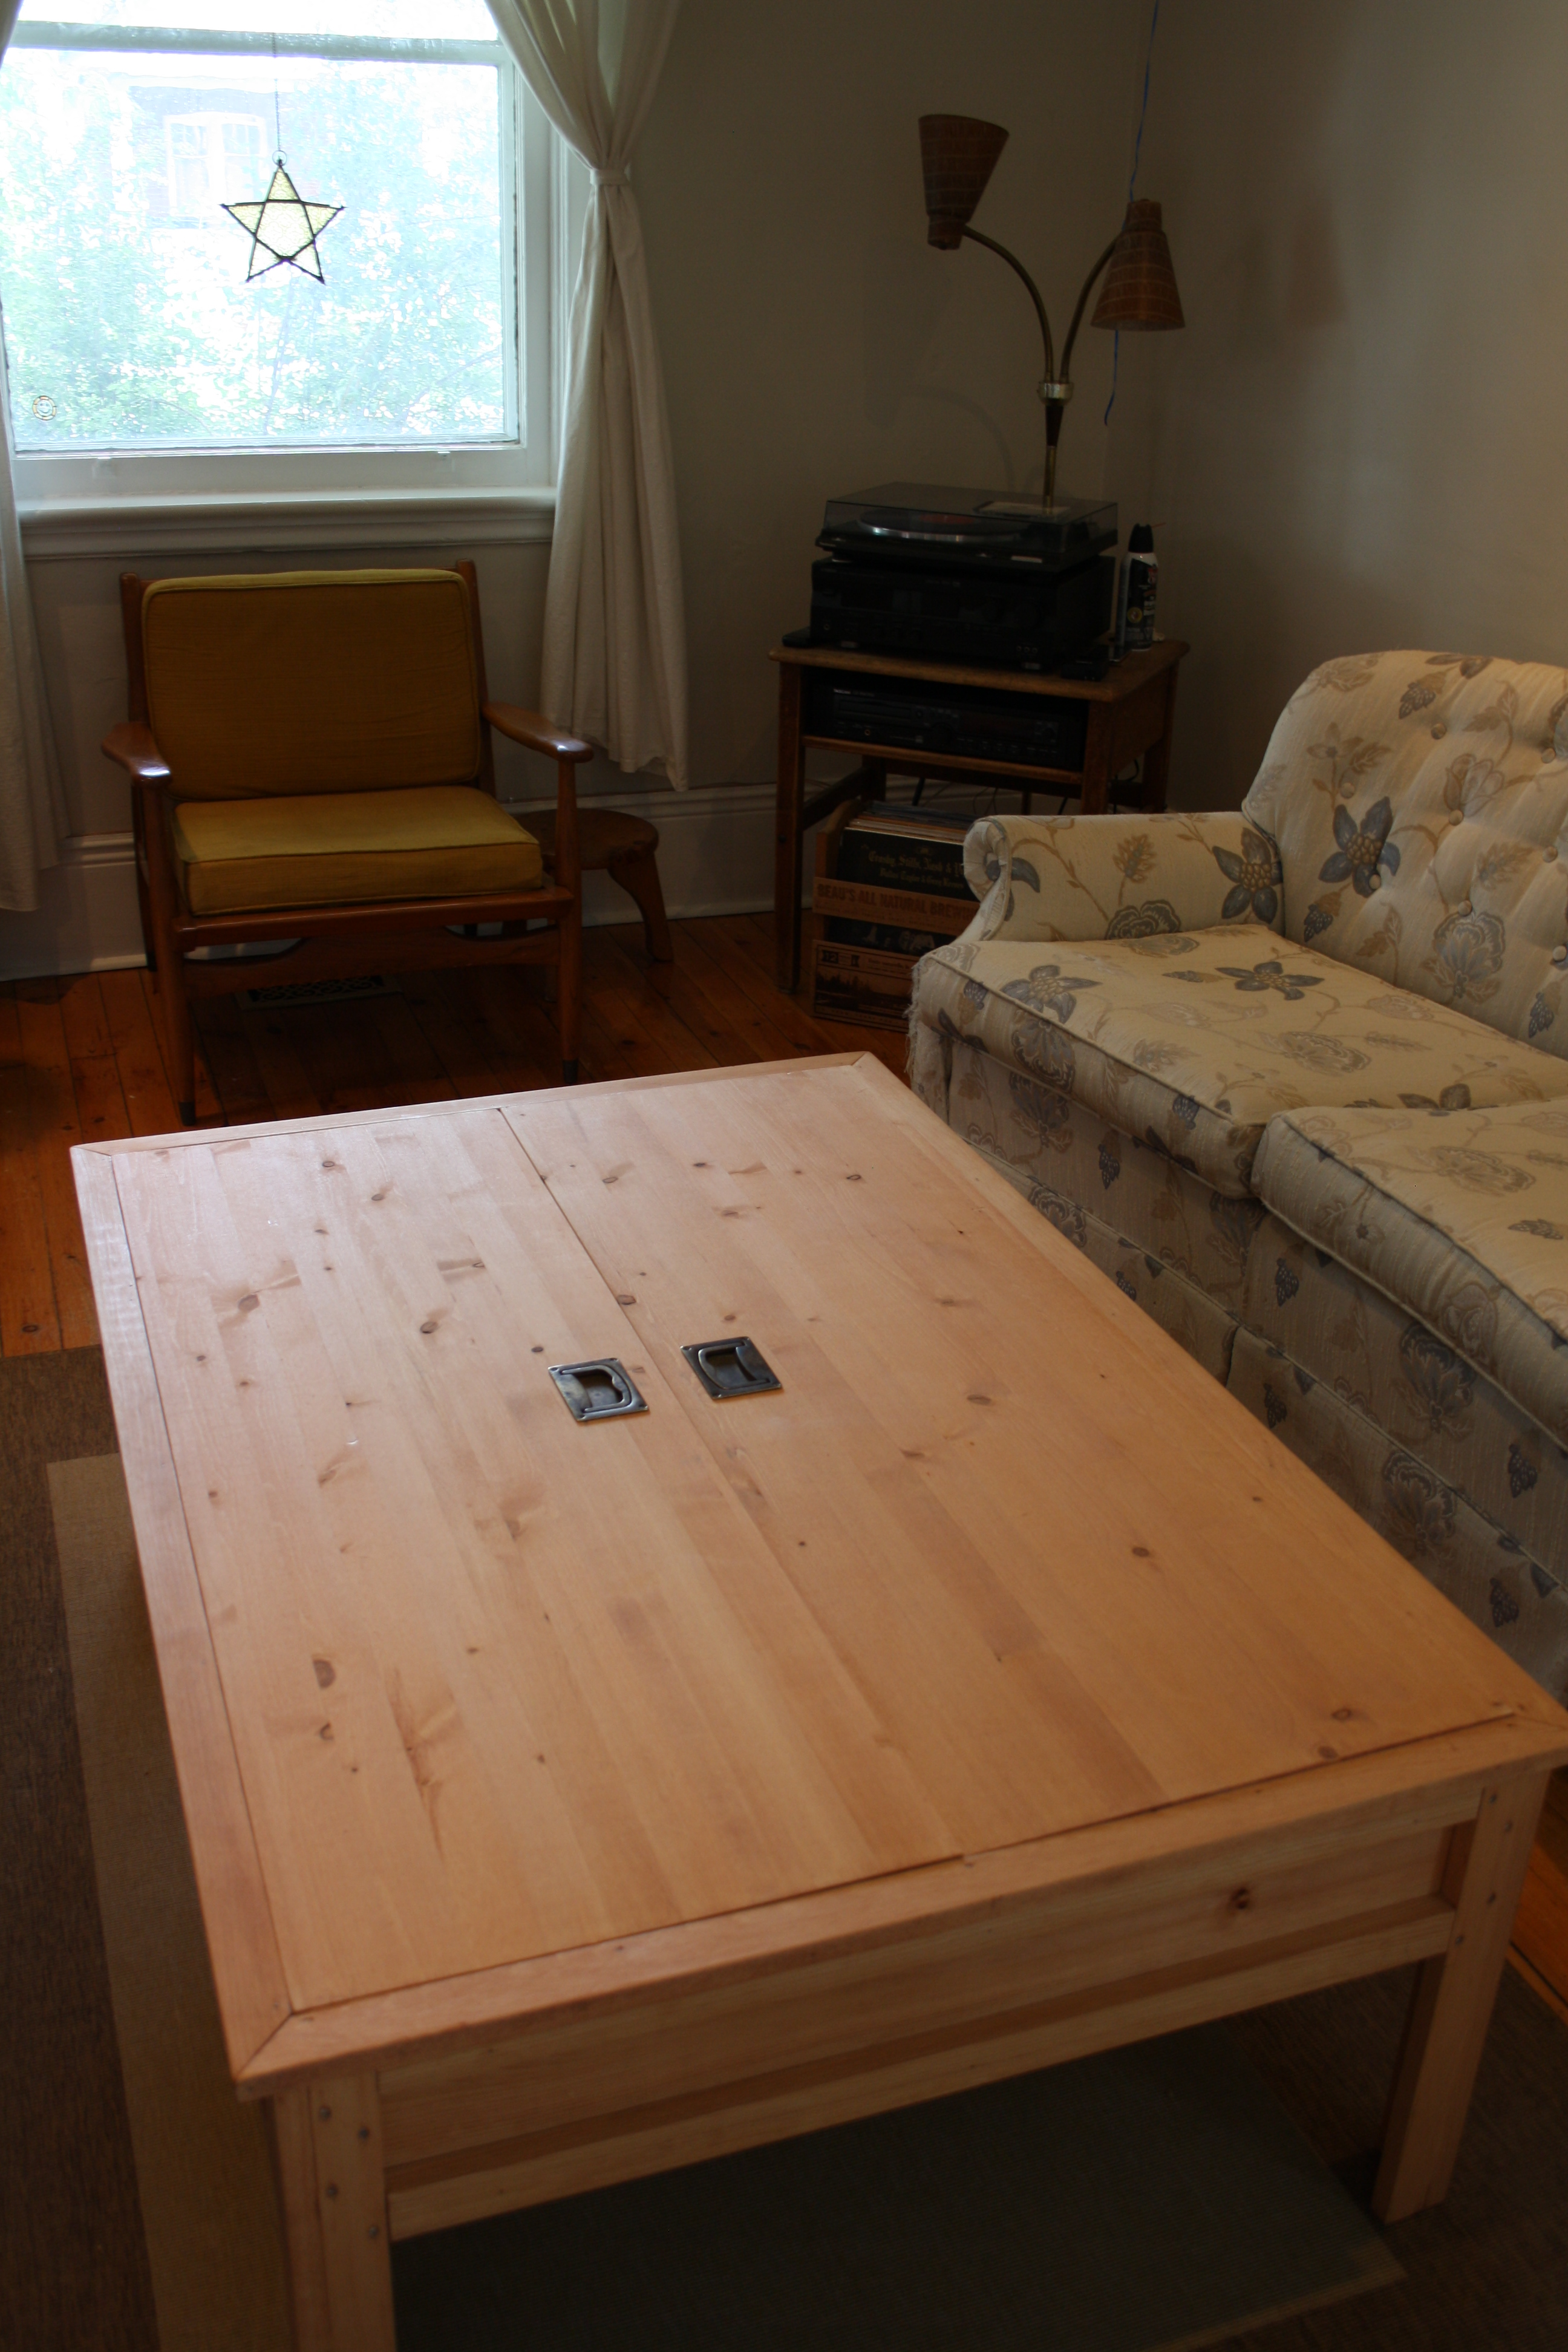
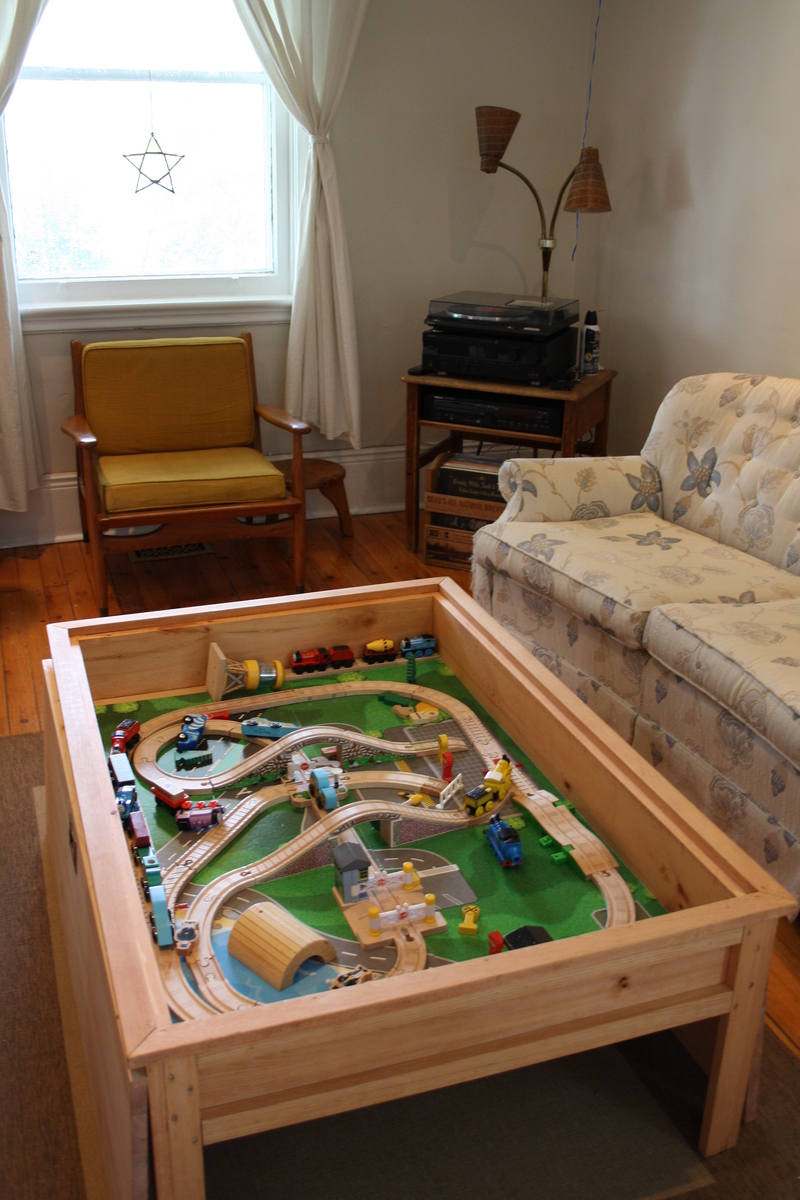
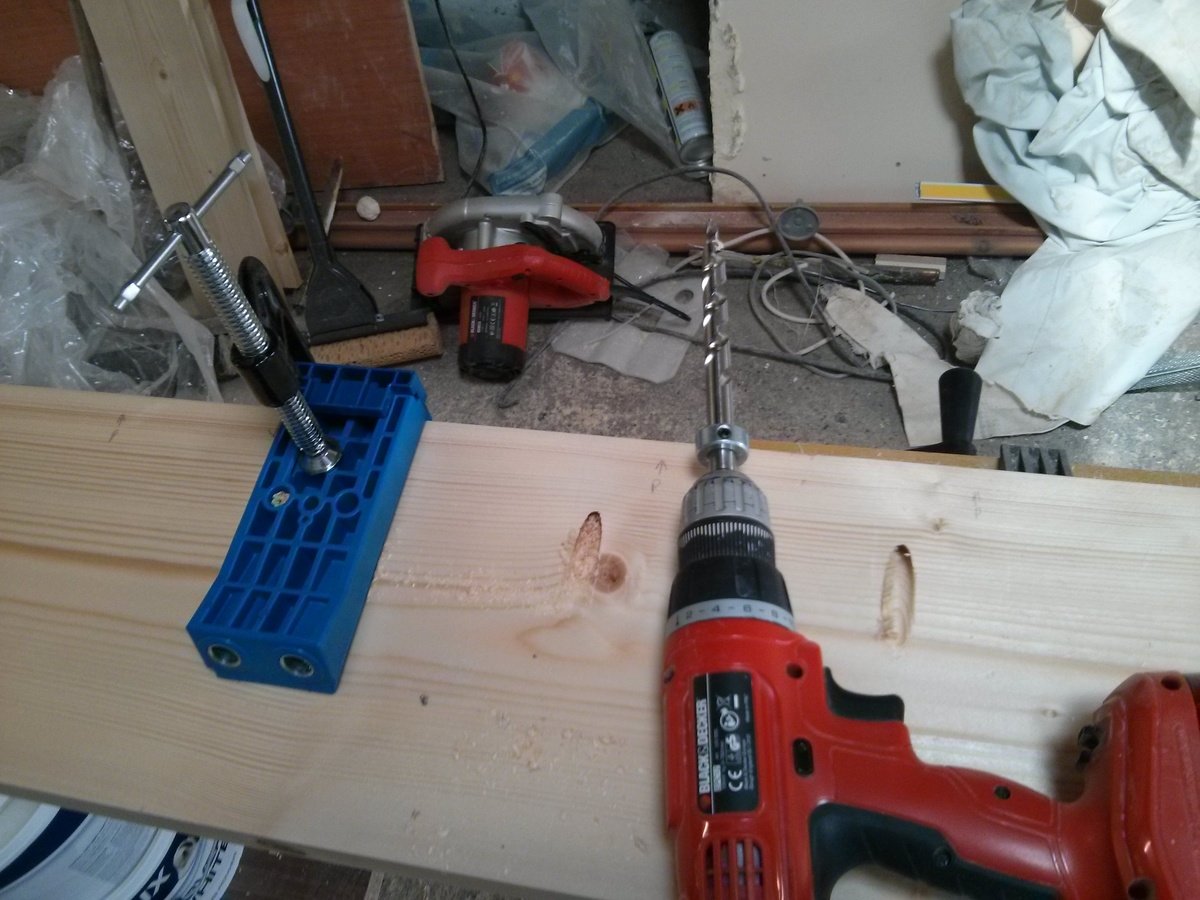
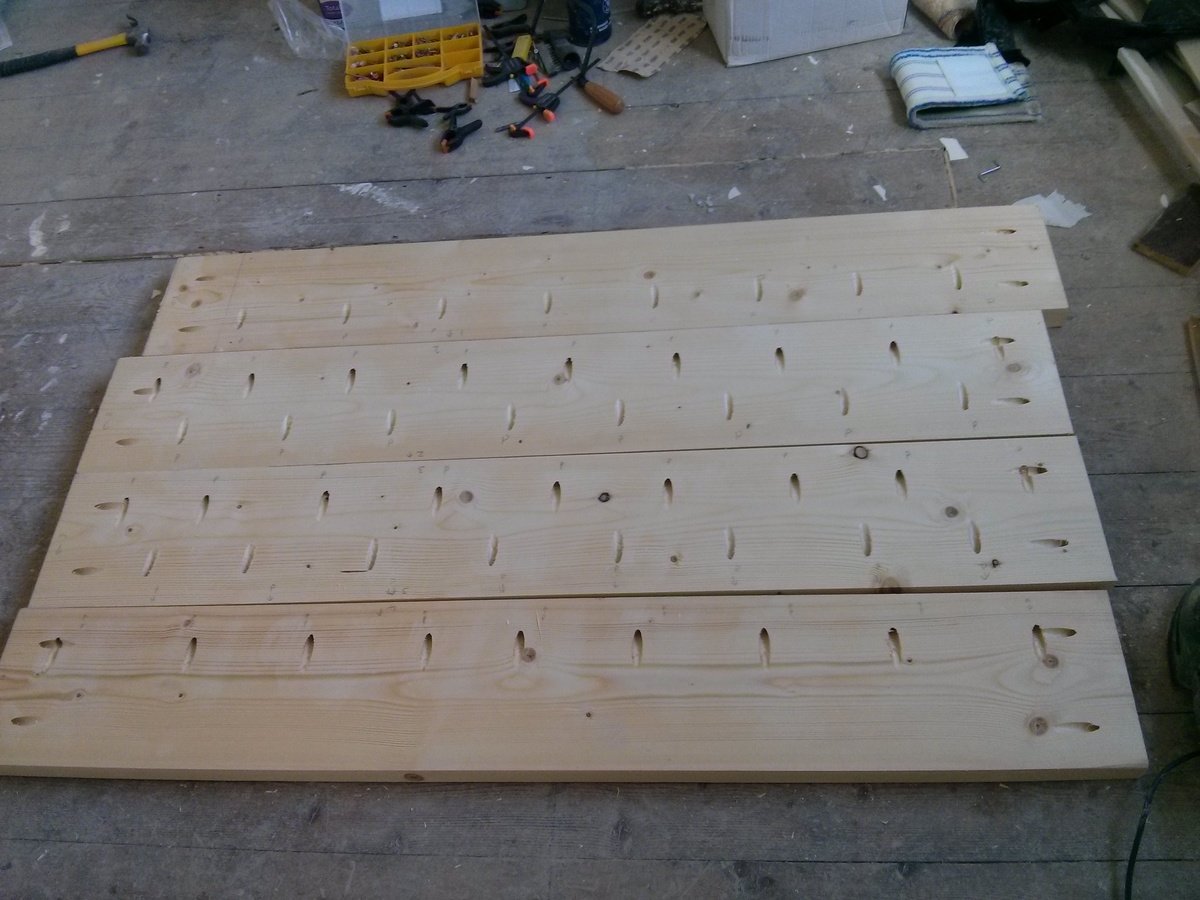
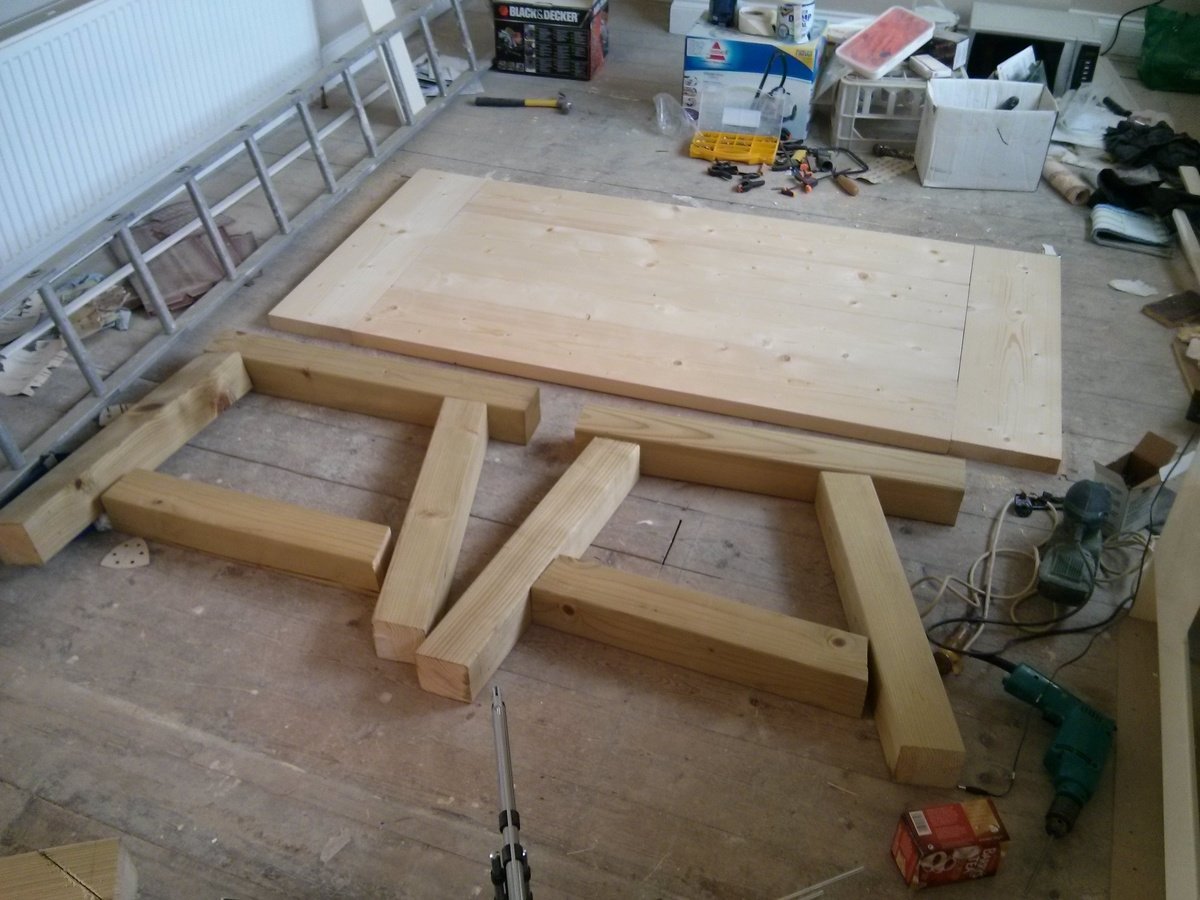
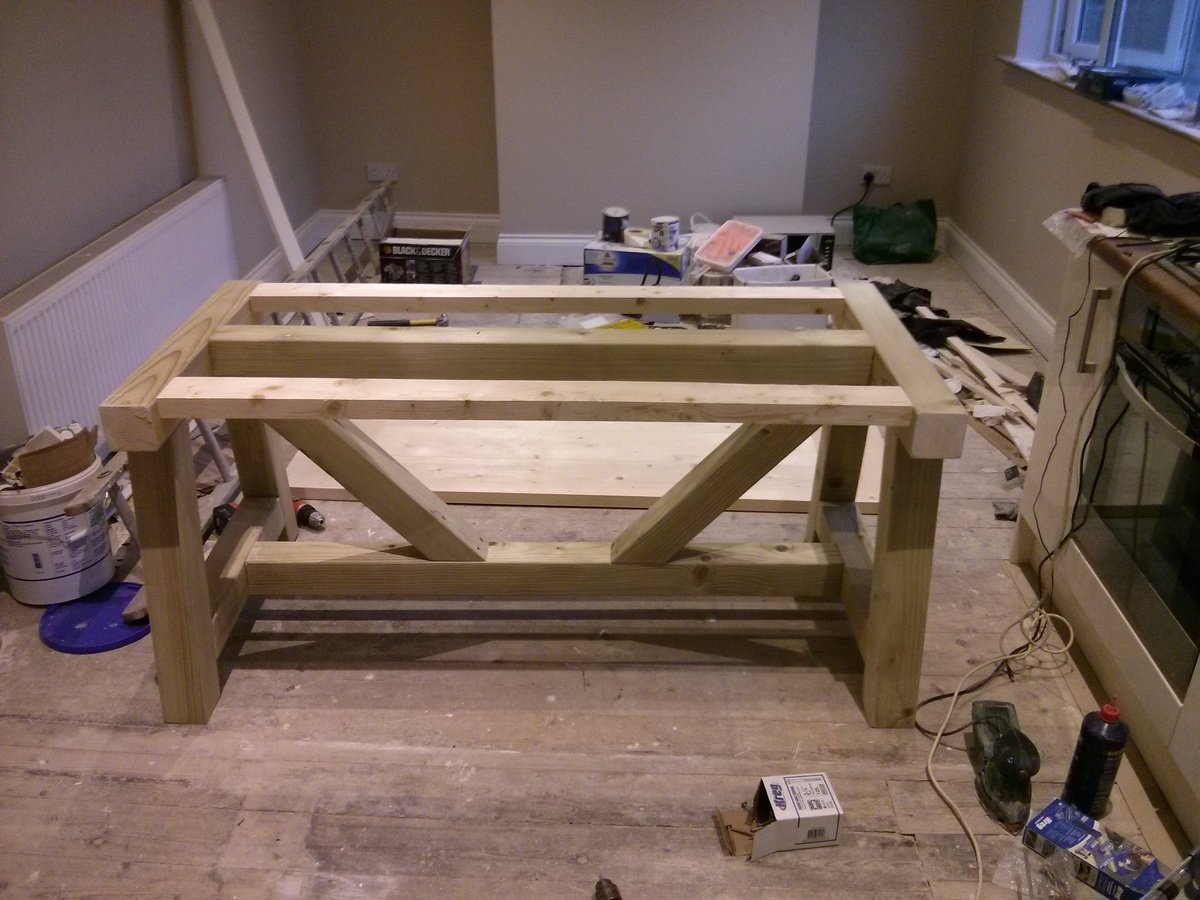
I was planning to make a train table trundle for my son's bed, but once I saw this plan everything changed. I'm so SO happy with it. Modifications: 1) We took off the bottom shelf because hubby likes to stretch his long legs out underneath. 2) We used laminated pine project panels for the top, they cost more, but they were already the correct size, and the finished look of the top would be nicer. We altered the design to make the panels go lengthwise. So far so good, neither have bowed whatsoever. 3) we used inset handles from Lee Valley with an antiqued finish. I had yet to lacquer this when I took the photo because we couldn't wait to get the trains in there! I have since done 3 coats of minwax Poly to protect it from little hands, crayons, etc.... We're hoping this table will graduate cars, then to legos, and then....who knows!? Thanks to Ana and all the contributors here.


Built from Plan(s)
Estimated Cost
$150 with the hardware
Estimated Time Investment
Afternoon Project (3-6 Hours)
Finish Used
Minwax Stain in Golden Pecan, one coat
Recommended Skill Level
Beginner

Comments

Toilet step stool

This was my first project at building some sort of furniture. we wanted a stool that really fits out toilet bowl shape, the height, etc. and 2x6's worked perfectly. I could have bought 2x12's for the sides, but it would have cost significantly more and with the inside support board it is plenty sturdy.

I bought 2# 2"x6"x6 foot coarse pine boards from Home Depot (not the expense Select Pine boards. They cost about $6 each. Then I bought a 100 count package of Kreg 1.25" coarse screws.

Cut lengths
2 @ 15 3/4" for lower sides
2 @ 10 1/4" for upper sides
5 @ 14" for steps and fronts
1 @ 12 1/2" for inside support

I used my Kreg Jig and connected all the pieces along with wood glue. I sanded the whole thing down after and tried to round/smooth the corners.

Estimated Cost
$17
Estimated Time Investment
An Hour or Two (0-2 Hours)
Finish Used
none yet.
Recommended Skill Level
Starter Project

Comments

pADDY1957

Tue, 03/01/2016 - 10:29

Does anybody have plans for a potty seat. I would like to build a childs chairs that has a ptty

Tall Wedding Planters

Submitted by swhitead on Mon, 07/20/2020 - 10:14

Made the planters to hold flowers for a small garden wedding. Used 3-1/2" wide fence boards as my HD was out of standard 5-1/2" boards. Used 11 boards for finished height of 38" top was 18" wide, bottom 12-1/2" using a 4° angle. Ripped fence boards to size to use in place of 1x2/1x3 boards. Added center trim as on another brag post, as well as, framed the top to finish off the planter.

Built from Plan(s)
Estimated Cost
$20 each
Estimated Time Investment
Afternoon Project (3-6 Hours)
Finish Used
None
Recommended Skill Level
Intermediate

Comments

8 Foot Picnic Table

Submitted by milleall on Wed, 07/22/2020 - 12:07

My teenage son and his father took over the bulk of the building duties this time. We chose to use treated lumber as untreated lumber with finish applied doesn't do well in Michigan weather in my experience. We made it more beautiful by using the treated lumber in cedartone. We used pocket holes to attach the top and seats to the supports to make for a smooth appearance. This is one large and heavy table! The plans were accurate and the build was fairly simple, but having many hands made working with the large piece easier.

Built from Plan(s)
Estimated Cost
$150
Estimated Time Investment
Afternoon Project (3-6 Hours)
Finish Used
None
Recommended Skill Level
Intermediate

Comments

Seasonal And Holiday

Farmhouse Table 4x4 truss

Submitted by ayoung82 on Mon, 07/28/2014 - 15:40

This is my first attempt to build anything since the age of 17 (school!). I have recently bought a house and tried my arm at installing skirting (base boards in the US I think?) and it piqued my interest. The family needed a table, so I built one..

Its not perfect, but I'm looking forward to many family meals with our young family :)

Built from Plan(s)
Estimated Cost
€162 euro in wood (white deal) and left over stain and varnish from my floors
Estimated Time Investment
Weekend Project (10-20 Hours)
Finish Used
Rustins Medium maple & satin varnish
Recommended Skill Level
Beginner

Comments

bclute

Mon, 07/28/2014 - 19:48

Great job! ... it looks great. I know you are not in US, but did you just use the cheap pine? I made a farmhouse bed with it this past fall and I have had problems with it shrinking on me. I want to do this table, and I know that the kreg will keep it tight ... I just need to buy one. Good work!

ayoung82

Fri, 08/01/2014 - 08:32

Hi bclute... thanks for the comment and the compliment. As for your question about the type of pine, I’m so new at this I’m not sure really. I understand there are grades of timber, but I went to my local timber yard and got what they had. Construction grade I believe. The bed is my next project so it's interesting to hear about your project. I suppose letting the wood dry fully is an option, but that takes a lot of time. I used the Kreg HD, it was great and easy to use, although clamping it each time makes for a slower job than the standard jig. Thanks again A

Farmhouse Kitchen Table

Submitted by Anonymous (not verified) on Tue, 11/22/2016 - 18:28

This Farmhouse table and bench were made, stained, and painted over the course of two weekends. This makes a great project for a beginner woodworker to cut their teeth on.  You can make something fantastic while learning various woodworking techniques (i.e. joinery, planing, sanding, and staining). The chairs were purchased separately at the At Home store for $150 each. 

Estimated Cost
$150
Estimated Time Investment
Weekend Project (10-20 Hours)
Finish Used
Special walnut stain and 3 coats of satin clearcoat on top. The legs are stained, then painted with spun cotton paint (behr), then scuffed for a Farmhouse look, and finally sealed with 2 coats of satin clearcoat.
Recommended Skill Level
Beginner

For my grandson's 2nd bday to match his new race car bed

I built this for my grandson for his 2nd birthday to go along with the new race car bed that he got.  I left off the pump handle and hose as a safety precaution since he is only 2 and a handful.  This was definitely the gift that everyone was talking about!  I love your plans Ana...keep 'em coming!!!

Estimated Cost
$120
Estimated Time Investment
Week Long Project (20 Hours or More)
Finish Used
Kilz Primer - followed by Rust-oleum Painter's Touch Apple Red, Rust-oleum Semi-Gloss Black, and Rust-oleum Semi-Gloss White - the lettering was printed out and traced with carbon paper underneath and then filled in with Elmer's Paint Markers in White and Black
Recommended Skill Level
Beginner

Workbench

Submitted by MaryL220 on Mon, 08/24/2020 - 21:20

I needed a legit workbench and I had a bunch of wood to use up. I got a bunch of 1x8x6s from my local hardware store's scrap pile. There's a reason they were free... But I couldn't just toss them. I used all scrap, from the hardware store, my garage, and my brother-in-law's farm, except 3 2x4s that I bought new.

For this workbench, I used slats on the top and the bottom shelf. The frame is 2x4s. I had some idea I could use the space in between the slats to cut wood, but after adding 2in casters, it appears it might be a bit too tall. Even still, the spaces in between the slats make for excellent clamp storage.

And now I finally have a legit, mobile workbench to keep all my chaos somewhat contained.

Estimated Cost
$50-75
Estimated Time Investment
Afternoon Project (3-6 Hours)
Finish Used
None. I sanded the whole thing down to reduce the splinters but didn't feel that my workbench needed anything else.
Recommended Skill Level
Beginner

Large Bench

This bench is freaking huge but I love how it turned out. A lot of pocket holes for the back so it took a lot of putty to cover those up but that’s to be expected. Proud of this one.

Estimated Cost
40
Estimated Time Investment
Weekend Project (10-20 Hours)
Recommended Skill Level
Beginner

Traditional Toddler Bed with Rustic Headboard

Submitted by jenmac75 on Tue, 11/27/2012 - 17:42

After my daughter started escaping from her crib I knew it was time to build her a new bed. I didn't think she was quite ready for a full size yet so I thought a toddler size would work for at least the next year.

I started with the Traditional Toddler Bed plans and scaled down the size of the Rustic Headboard and incorporated that. The biggest thing I learned in the process was to measure your mattress first! I don't think I realized the size variation in crib mattresses and ended up having to recut my slats and rails to accommodate my larger mattress. Also, our mattress is 5 inches deep, which means that the safety rails only extend about an inch over the top of the bed. This seems to be fine for my daughter and she hasn't fallen out - yet - but I think if you have a very restless sleeper or just want to play it safe, you might want to add an extra inch or two to the height of the guardrails.

I also used a 2 x 6 for the foot rail as this allowed the legs to be inset further and gave it a more solid look on the bottom.

Estimated Cost
$60
Estimated Time Investment
Day Project (6-9 Hours)
Finish Used
Valspar Primer and 2 coats of Olympic Premium in Caruso
Recommended Skill Level
Beginner

Comments

Living Wall

Submitted by Rantzay on Thu, 10/02/2014 - 16:16

Found the plans for the little 3 tiered planter really interesting.  I built a few of the boxes when my wife says "You know...." She has wanted a "living wall" for years, so I modified some of the sizes to make the boxes 18 inches long to accommodate my 37" inch wall.  I added a french cleat to the back of each box, cut down a couple furring strips that I anchored to the wall and added the other half of the french cleat to the frame.  Woot! Together in moments.  The individual planters can be easily removed and rearranged.  I added LED's to the bottoms of the planters for additional lighting and it's really a cool affect.

Estimated Cost
$25 using cedar pickets
Estimated Time Investment
Afternoon Project (3-6 Hours)
Finish Used
sanded smooth and treated with linseed oil
Recommended Skill Level
Beginner

Comments

My First ever creation

This was the first thing i have ever built. I enjoyed it so much and can't wit to start my next project. The plans were easy to follow even with me changing the dimensions slightly as i was using reclaimed wood, so had to go with the sizes i had already.

Built from Plan(s)
Estimated Time Investment
Week Long Project (20 Hours or More)
Finish Used
I used a beach hut blue to paint the seat and shed stain for the top.
Recommended Skill Level
Beginner

Comments

Extra Long Bed

Submitted by Lumi on Fri, 10/24/2014 - 16:36

My hubby is 6'5'' tall. Since most matresses are 80 inches long, he mostly ends up with his feet hanging out of the bed (since you don't lay your head down at the very beginning of the mattress, right?). So I tried to solve this problem by making the bed 4'' longer than the plans suggested. I added 2'' of foam on each end of the bed, so now its 84'' long and my hubby fits perfectly!

Thanks for the great plans, I had a blast building my own bed!

Estimated Time Investment
Weekend Project (10-20 Hours)
Recommended Skill Level
Beginner

Garage Storage from Rescued Lumber

My daughter and I used these easy plans to build these two shelving units for the garage. We altered the plan slightly.The sizes that I used were determined by the lumber I had available as we used rescued lumber for this project. The height on each is 5' (tallest 2x4's we had) and the length is 64". All I had for 2x4's were 48" pieces so we used some other rescued lumber for the shelves. We used whatever we had. So they are made from misc lumber. The 2x material made for the strongest shelves. Depth is 17" as in original plans. 

We added additional brackets for support under a couple of the shelves. We also attached to the wall to avoid tipping. I absolutely love these. So useful. No more unstacking each tote to find out what's in the bottom one. I LOVE IT! Thanks for the plans.

We completed these in one afternoon. 

Estimated Cost
Used rescued lumber and screws already on hand.
Estimated Time Investment
Afternoon Project (3-6 Hours)
Recommended Skill Level
Starter Project

Fancy X Farm House Table

Submitted by Anonymous (not verified) on Sun, 02/05/2017 - 12:24

Great way to turn inexpensive pine into a beautiful piece. Our wood was quite wet so we were extra careful to keep it tight and straight. Once the top was assembled, out came the torch! The torch provided an instant partial drying of the wood causing a great bonding and snug fit. The flame brought out the grain in various colors. We opted to use polyurethane as a finish.

Of course we had to make benches to match! 

Estimated Cost
$120
Estimated Time Investment
Weekend Project (10-20 Hours)
Finish Used
Torch Polyurethane
Recommended Skill Level
Beginner

Rocketship Bookcase

Submitted by Anonymous (not verified) on Sat, 10/31/2020 - 17:27

Pretty much followed the steps as outlined in the rocket bookcase plans. Googled astronaut and spaceship stencils and free hand drew those on construction paper. This bookcase is heading to my 3 year old son's room and he's pretty excited to fill it with toys and books.

Built from Plan(s)
Estimated Cost
$70
Estimated Time Investment
Day Project (6-9 Hours)
Finish Used
Semi gloss blue and red paint. A sparkling orange spray paint for the fire, metallic gray for the fins and stencils. Covered it with spray poly for a protective coat.
Recommended Skill Level
Intermediate

Comments

To fit the whole family

Submitted by MWdesign on Mon, 11/02/2020 - 16:24

First table build. Took the farmhouse X and just made it for the dinner table. Took me a long time, learned a lot and bought more tools then needed. Having a little problem when the kids lean on it moves down just a touch. Any info to help that much appreciated.

Used red mahogany for stain and glaze coat for top. First time for epoxy also. Legs are cracked slate.

Built from Plan(s)
Finish Used
Glazed coat

Comments

Rectangular Industrial Coffee Table

I modified this plan from square to rectangular to fit my space. It is exactly what was needed! Modified size: 27.5" x 55"

Estimated Time Investment
An Hour or Two (0-2 Hours)
Finish Used
Minwax Polyshades Black
Matte Poly top coat
Recommended Skill Level
Beginner

Comments

Outdoor Loveseat & Table

Submitted by 3G1B on Fri, 11/27/2020 - 07:41

Tired of cheap store bought chair getting blown around in the Texas winds. If these piece get blown off the patio I’ll be looking for the Wizard of Oz.

Estimated Cost
400
Estimated Time Investment
Week Long Project (20 Hours or More)
Recommended Skill Level
Beginner

Comments