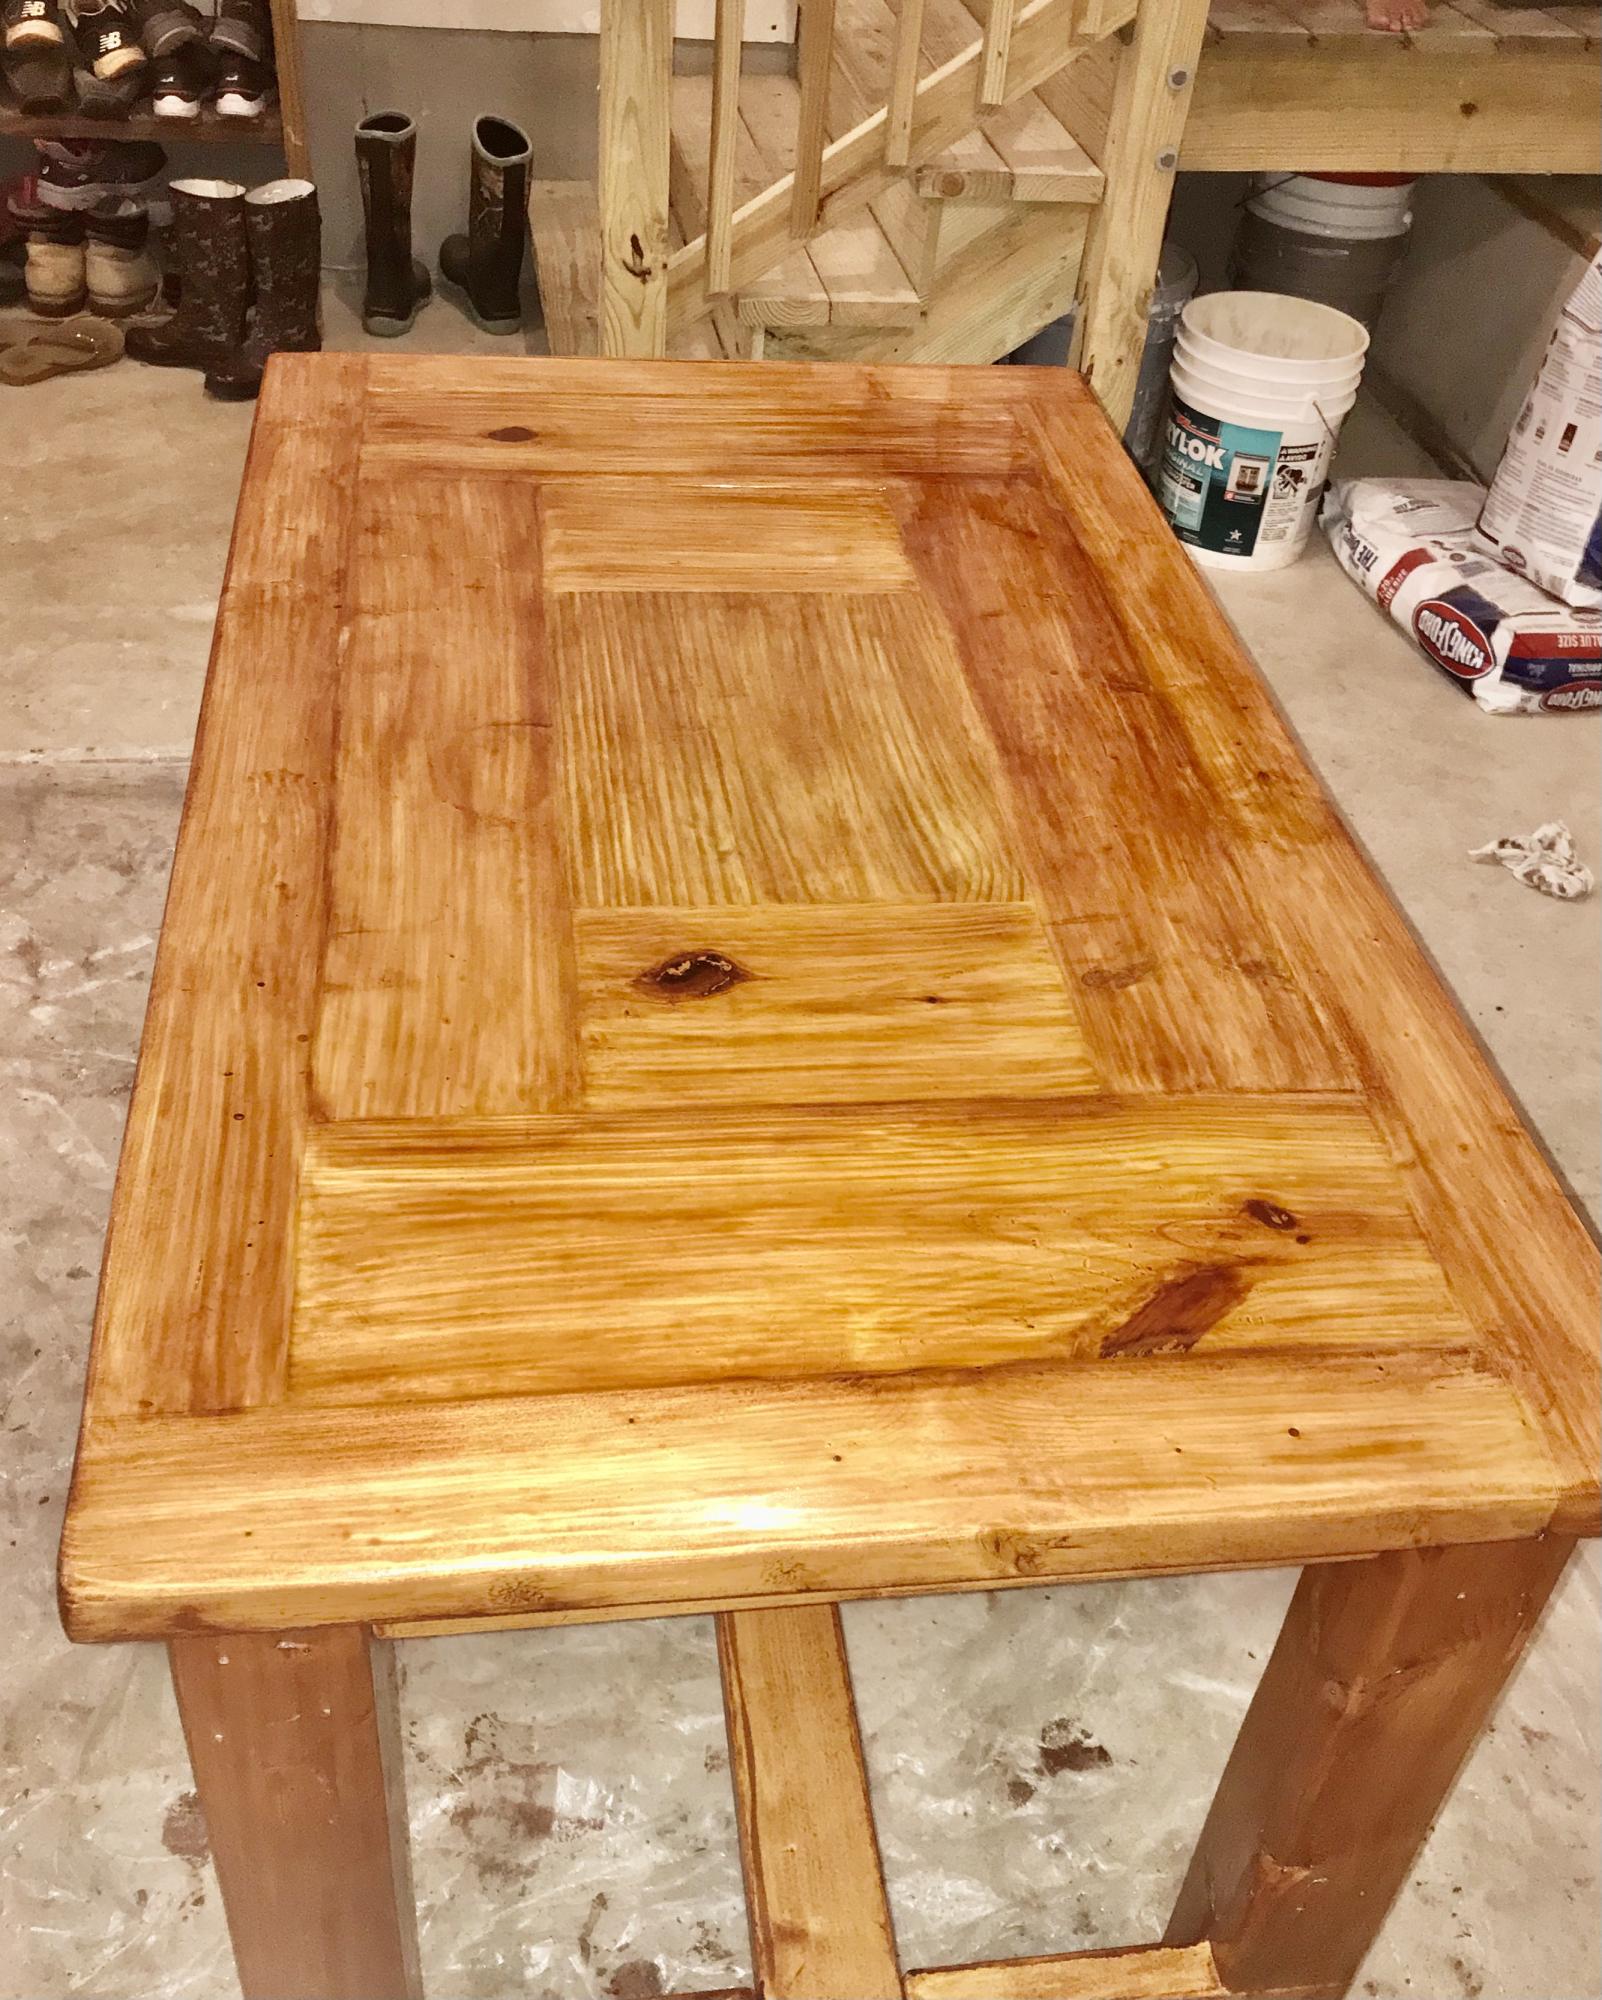
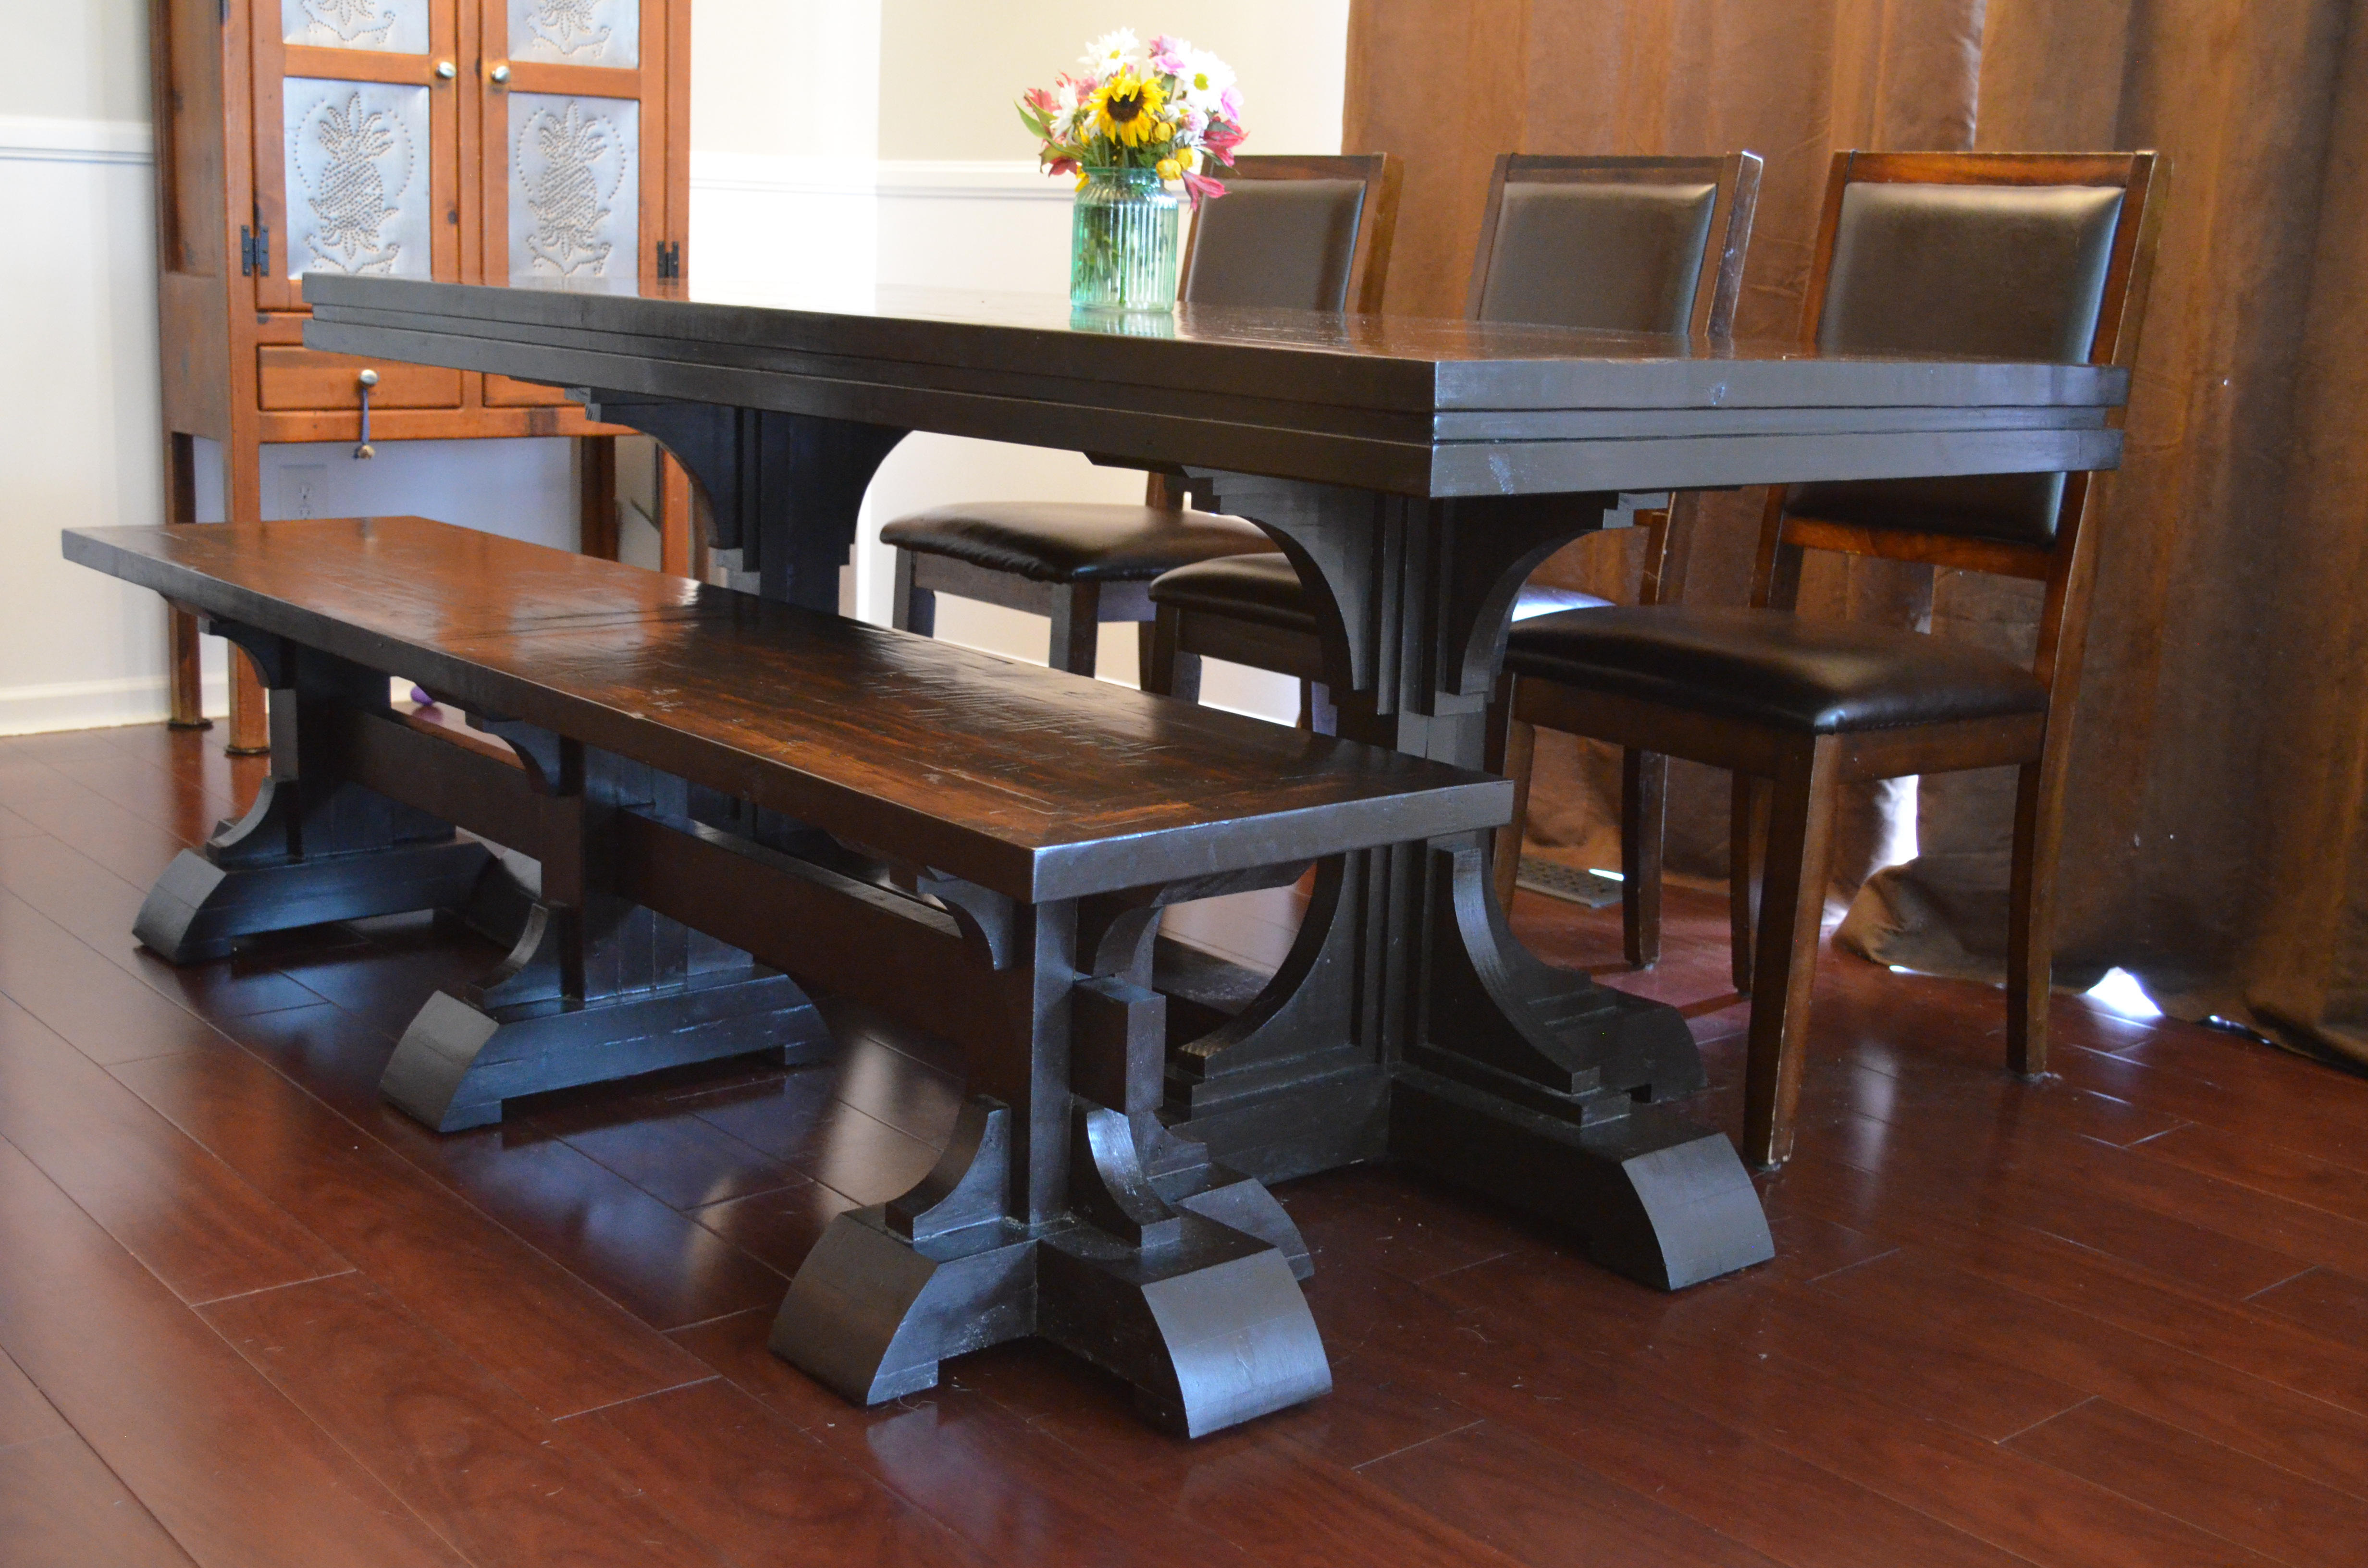
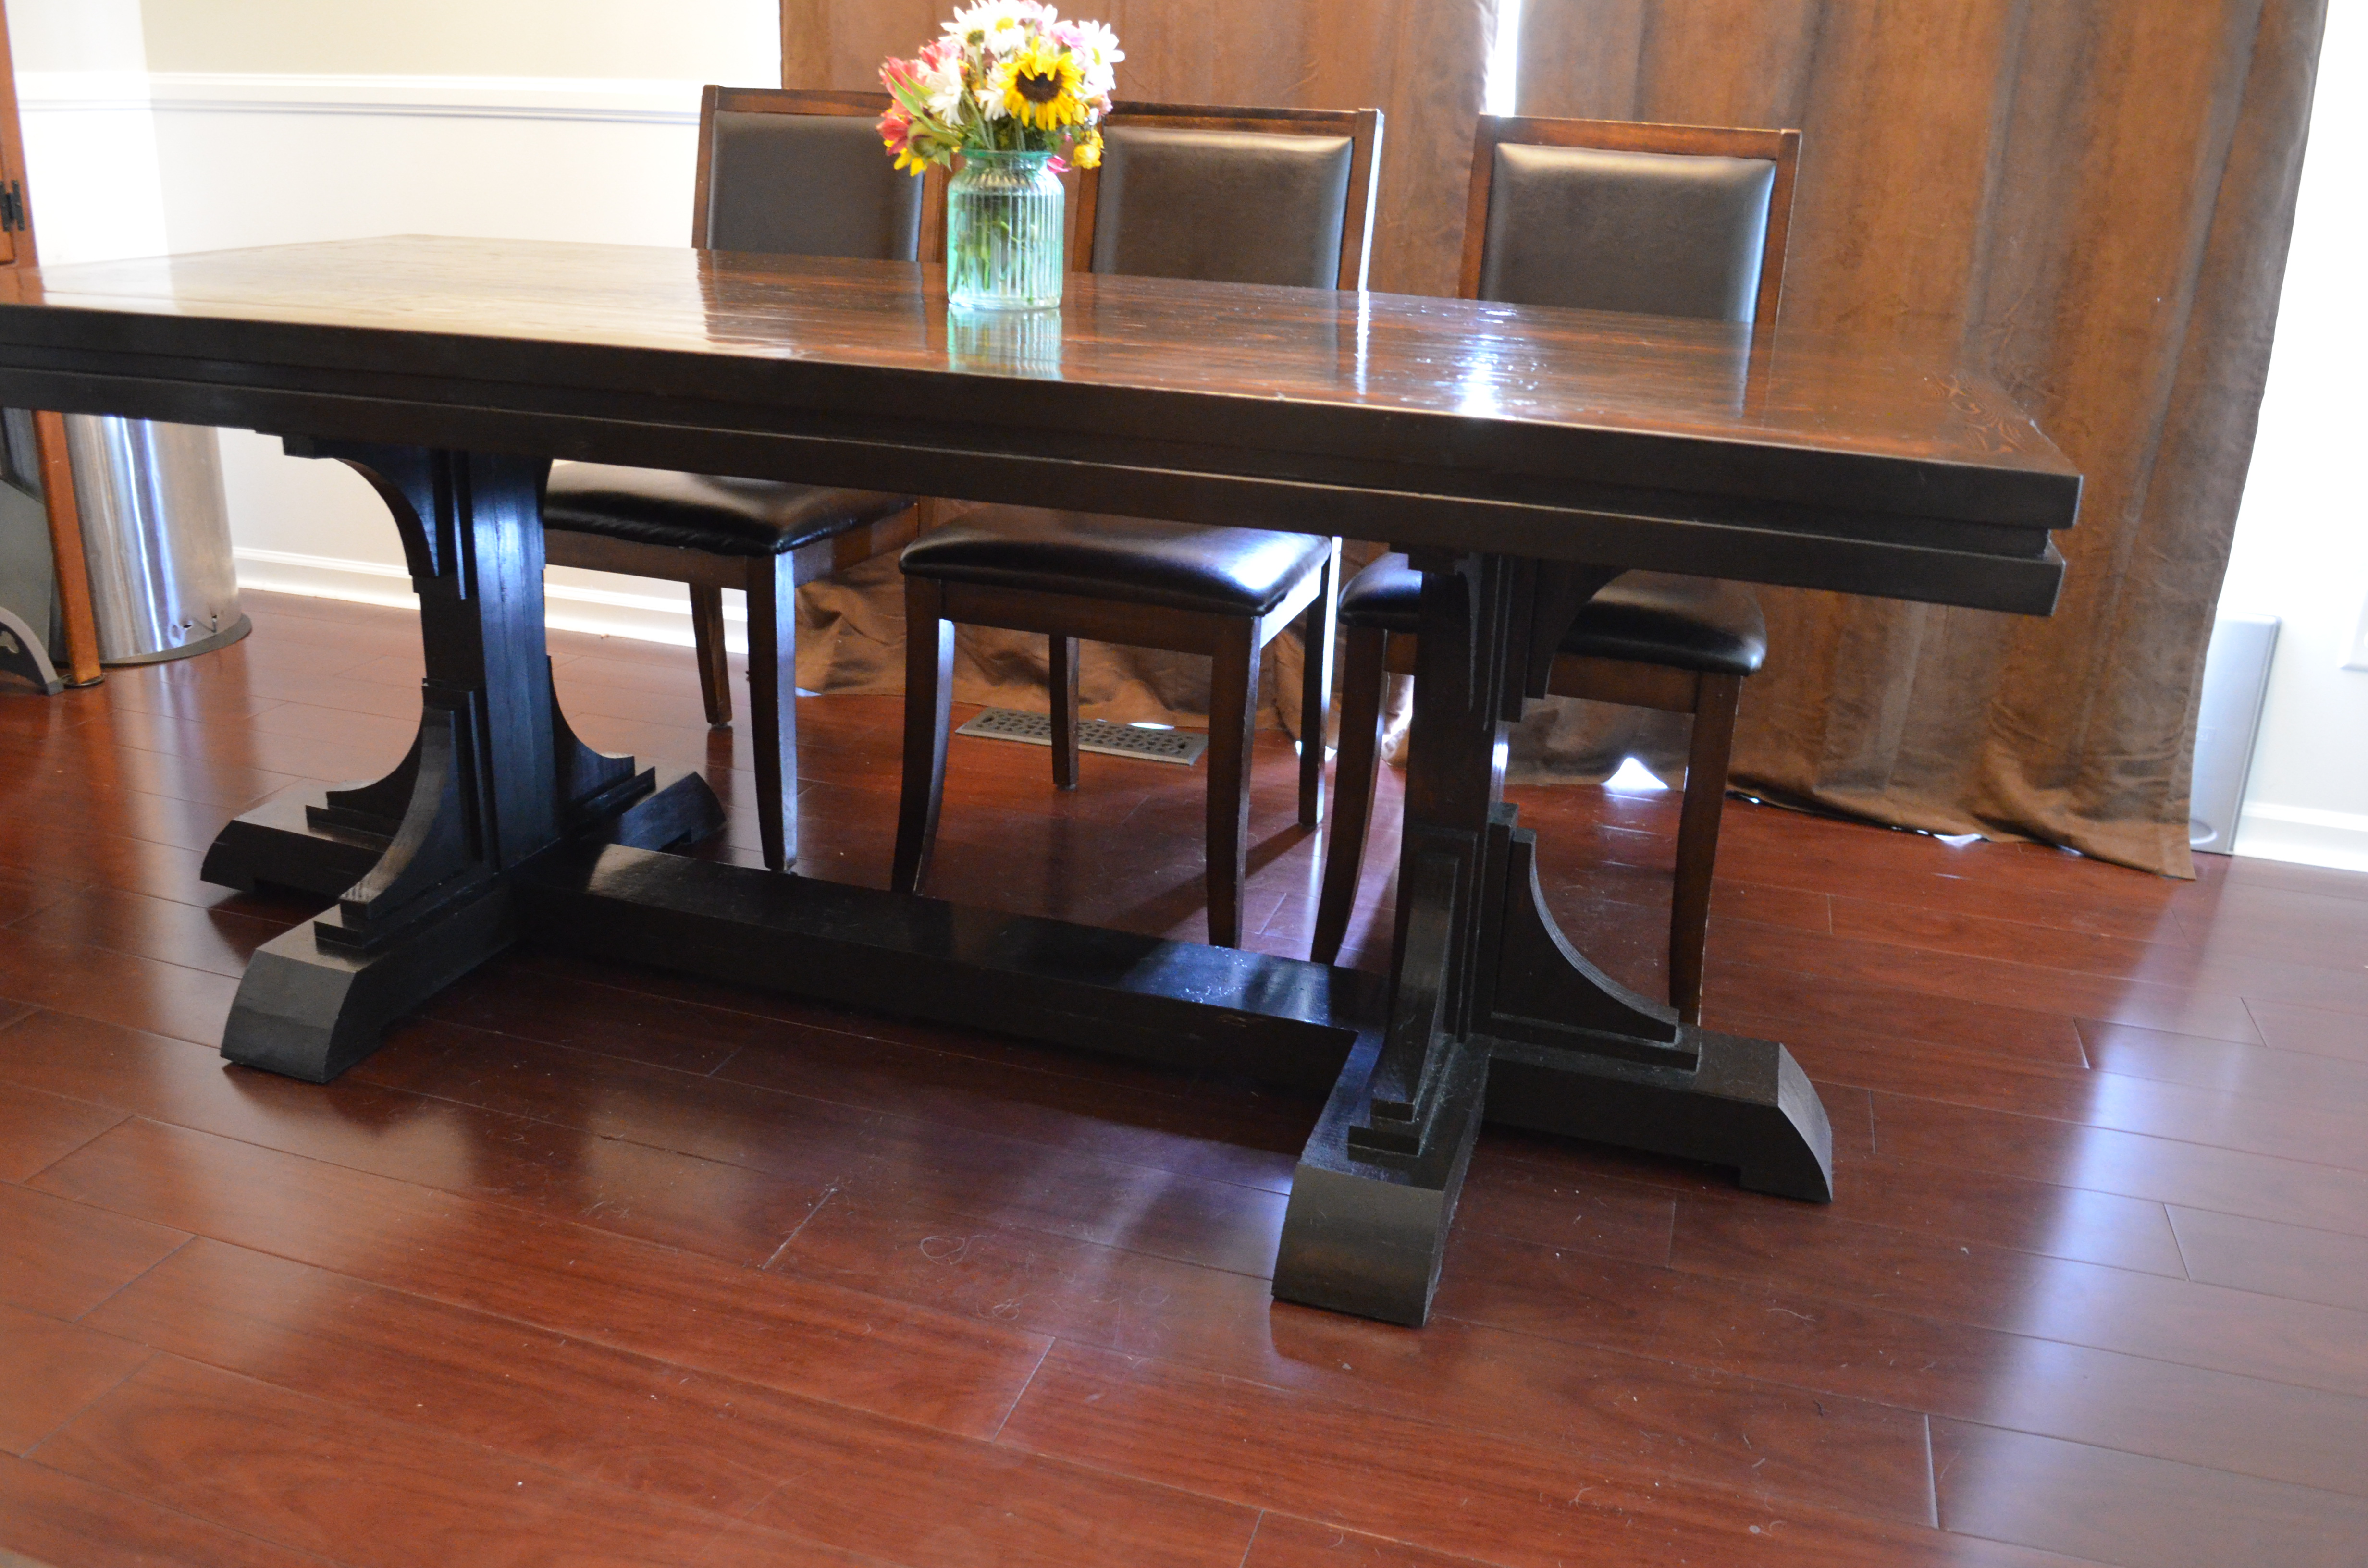
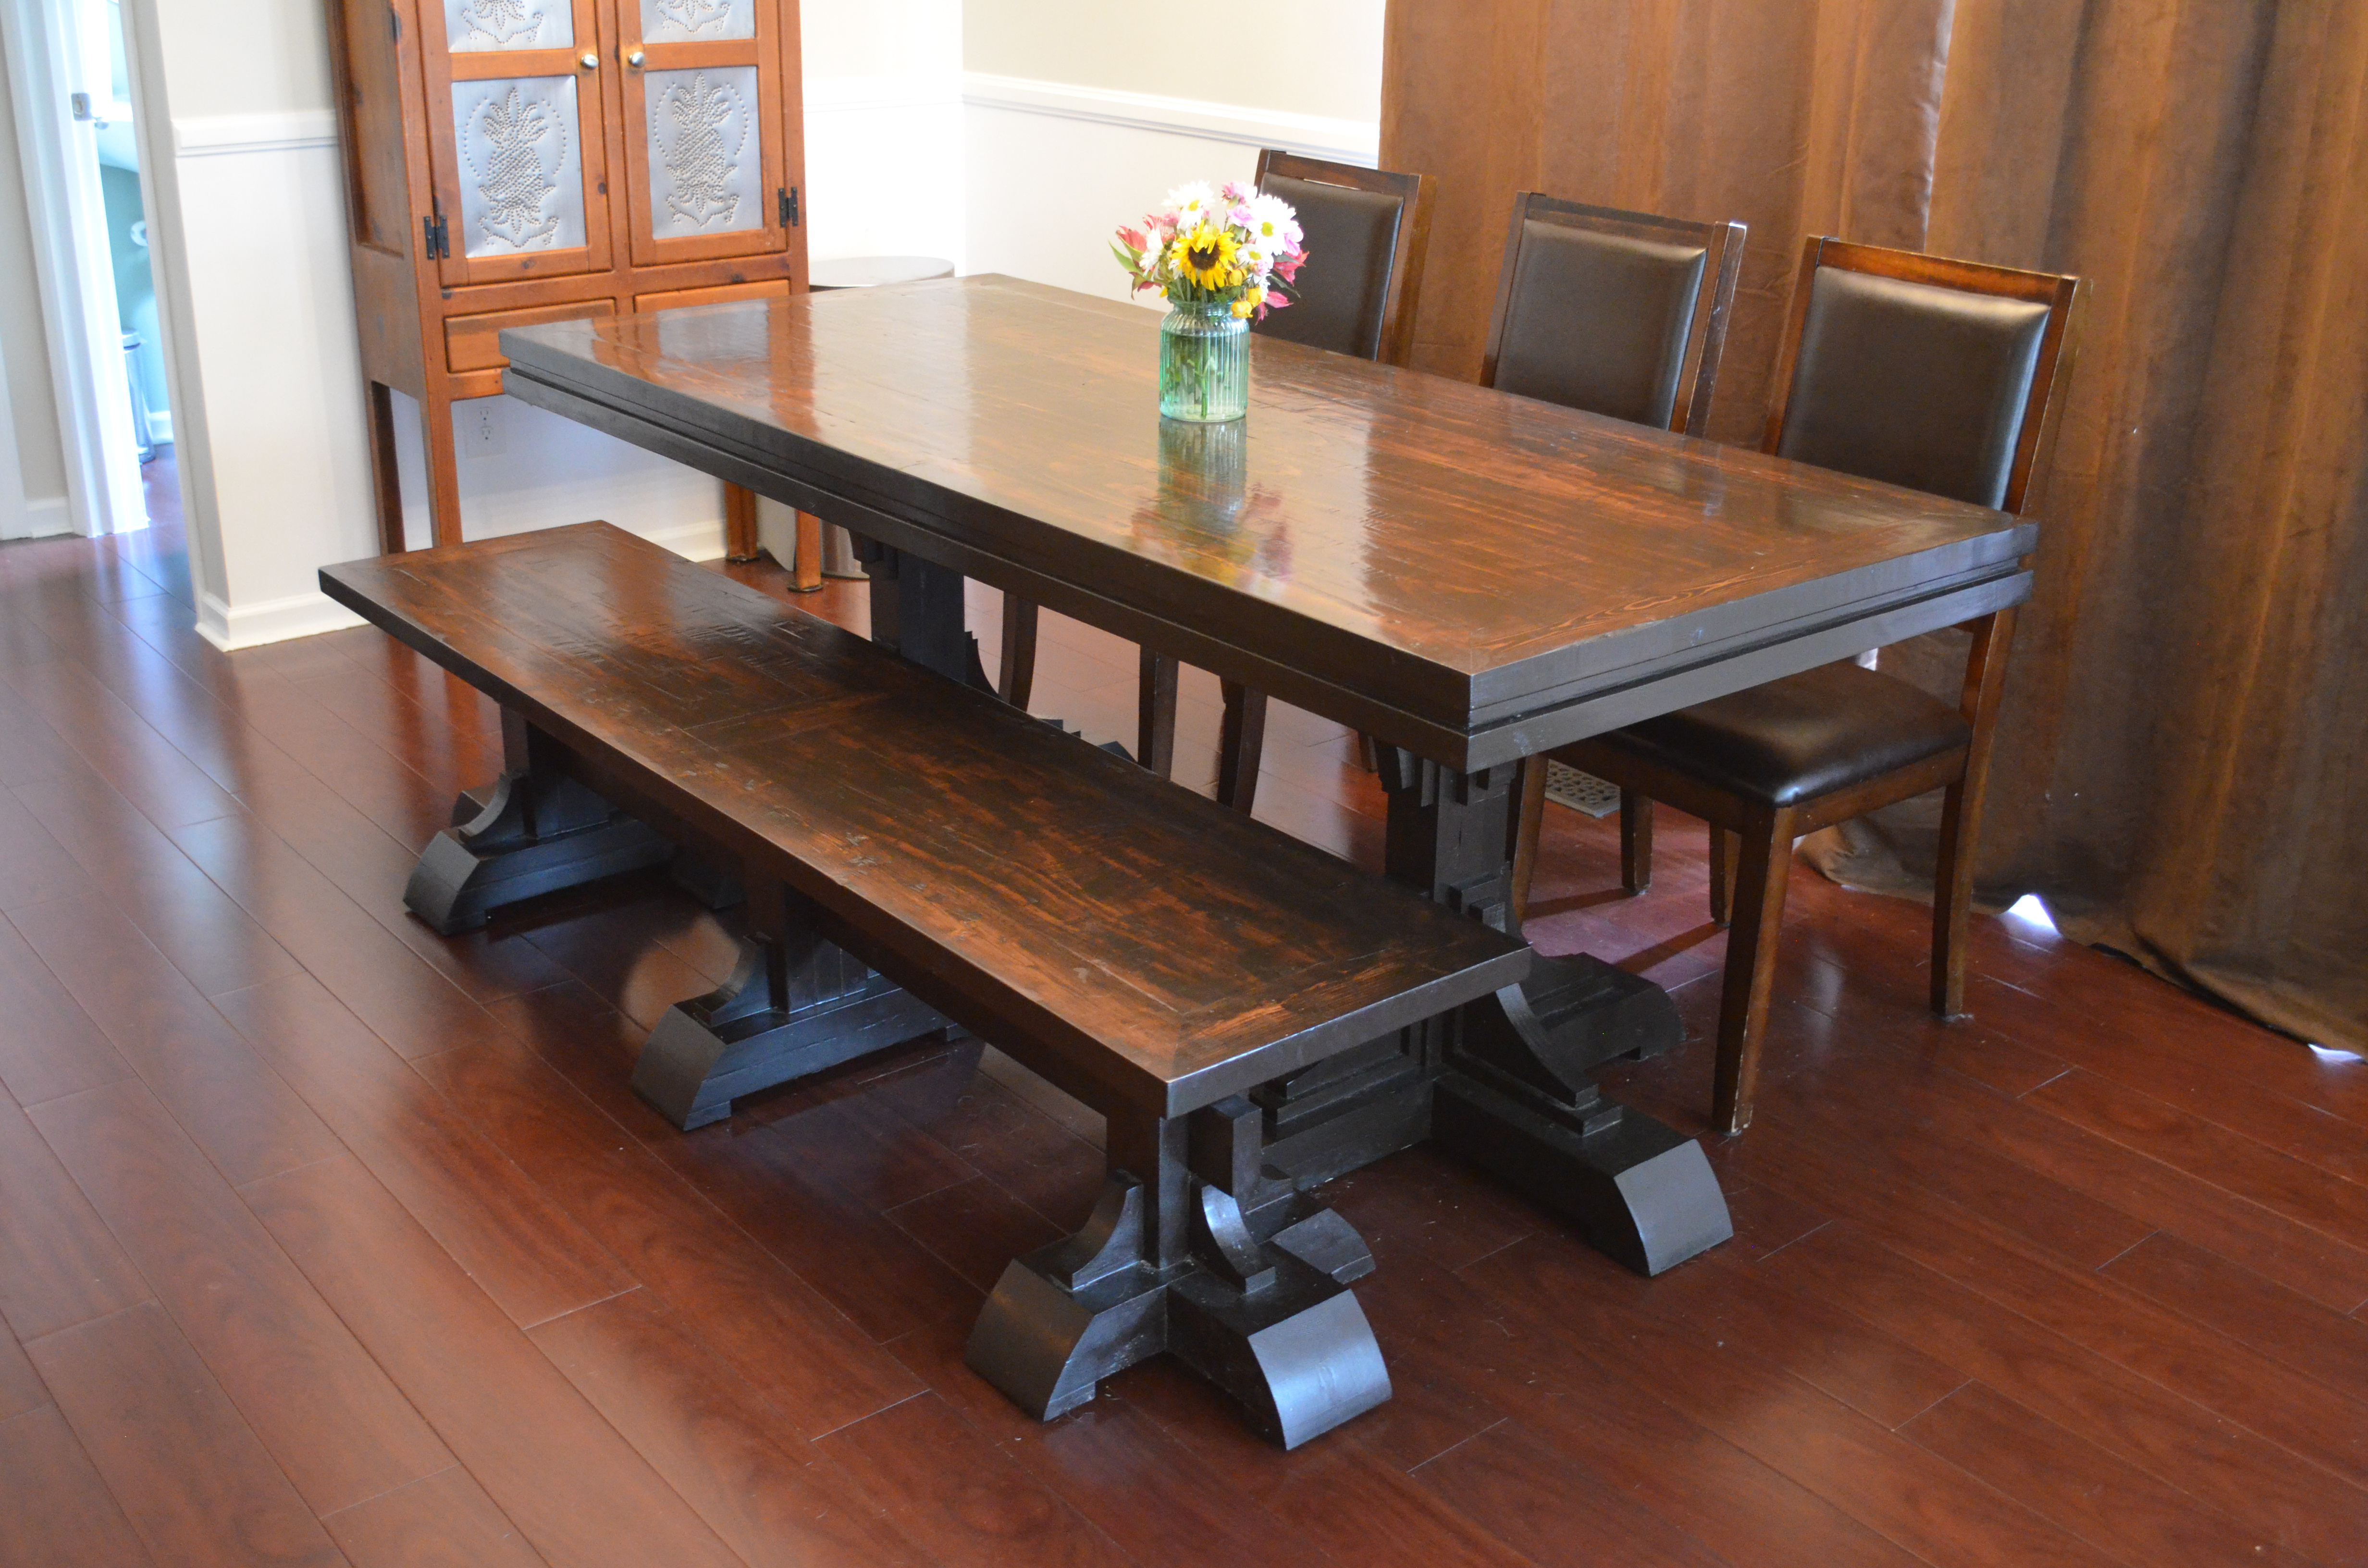
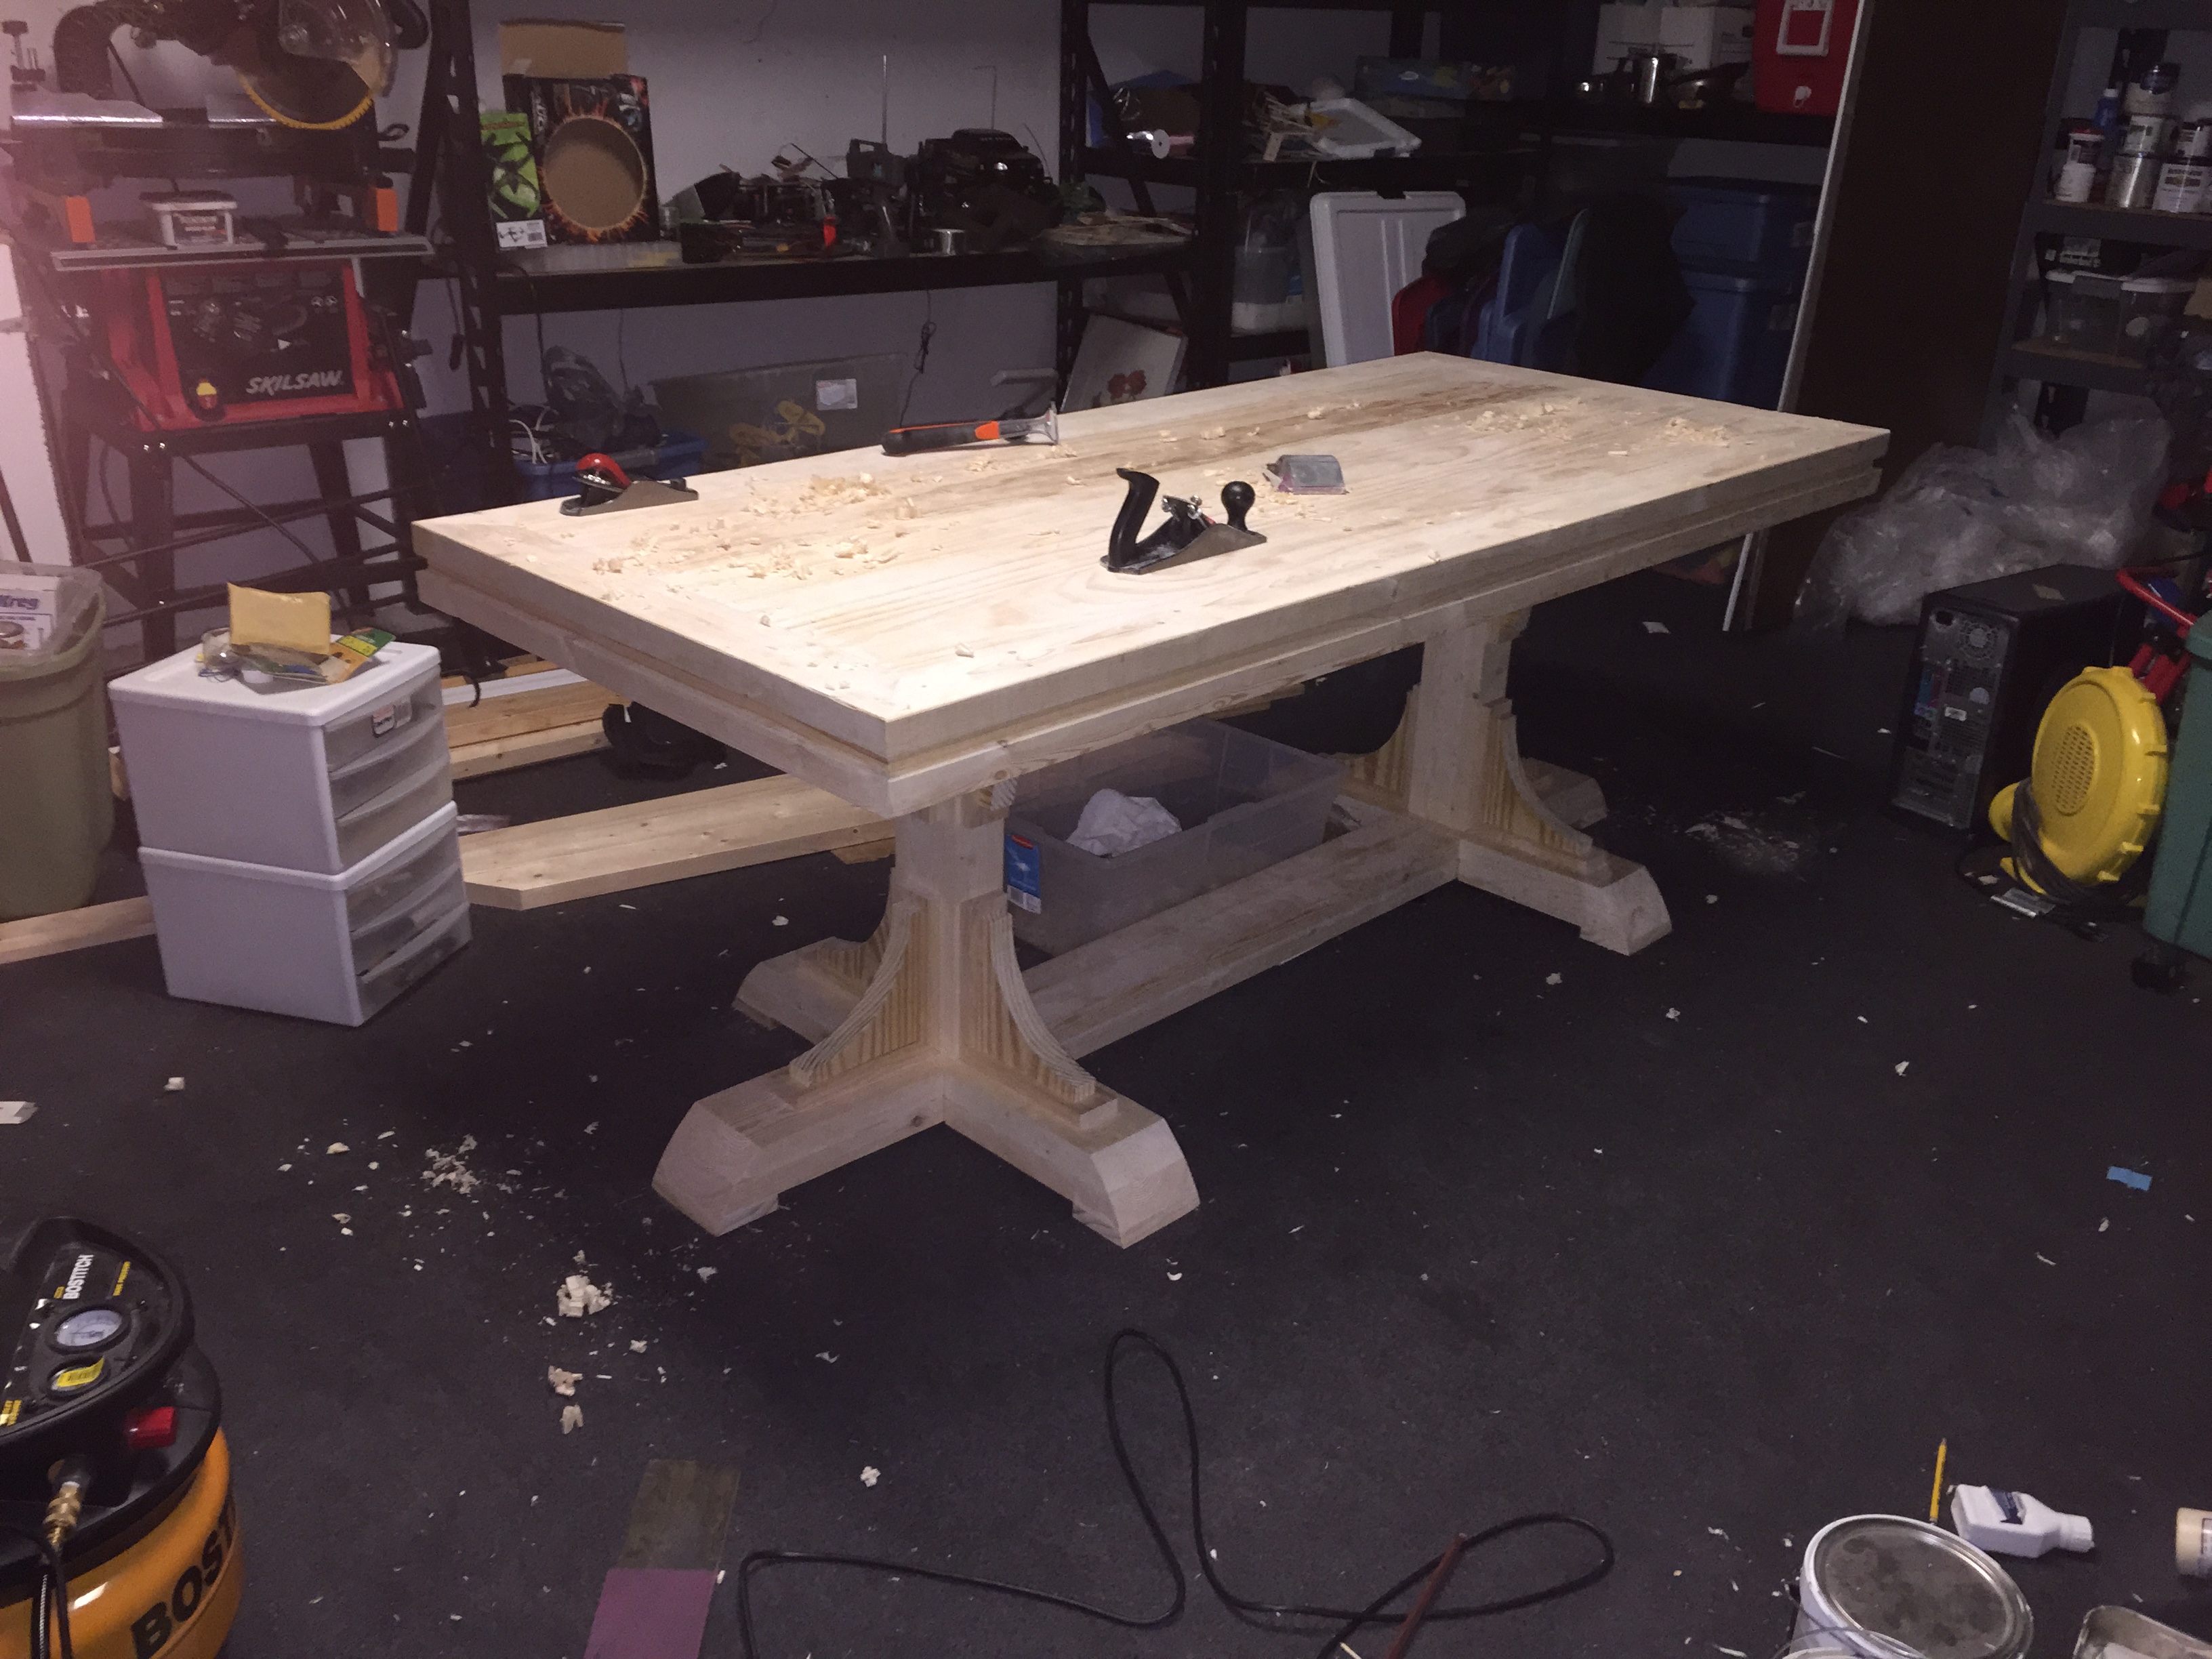
Community Brag Posts

X-Frame Farm Table

Submitted by whittlevin on Fri, 03/13/2015 - 12:48

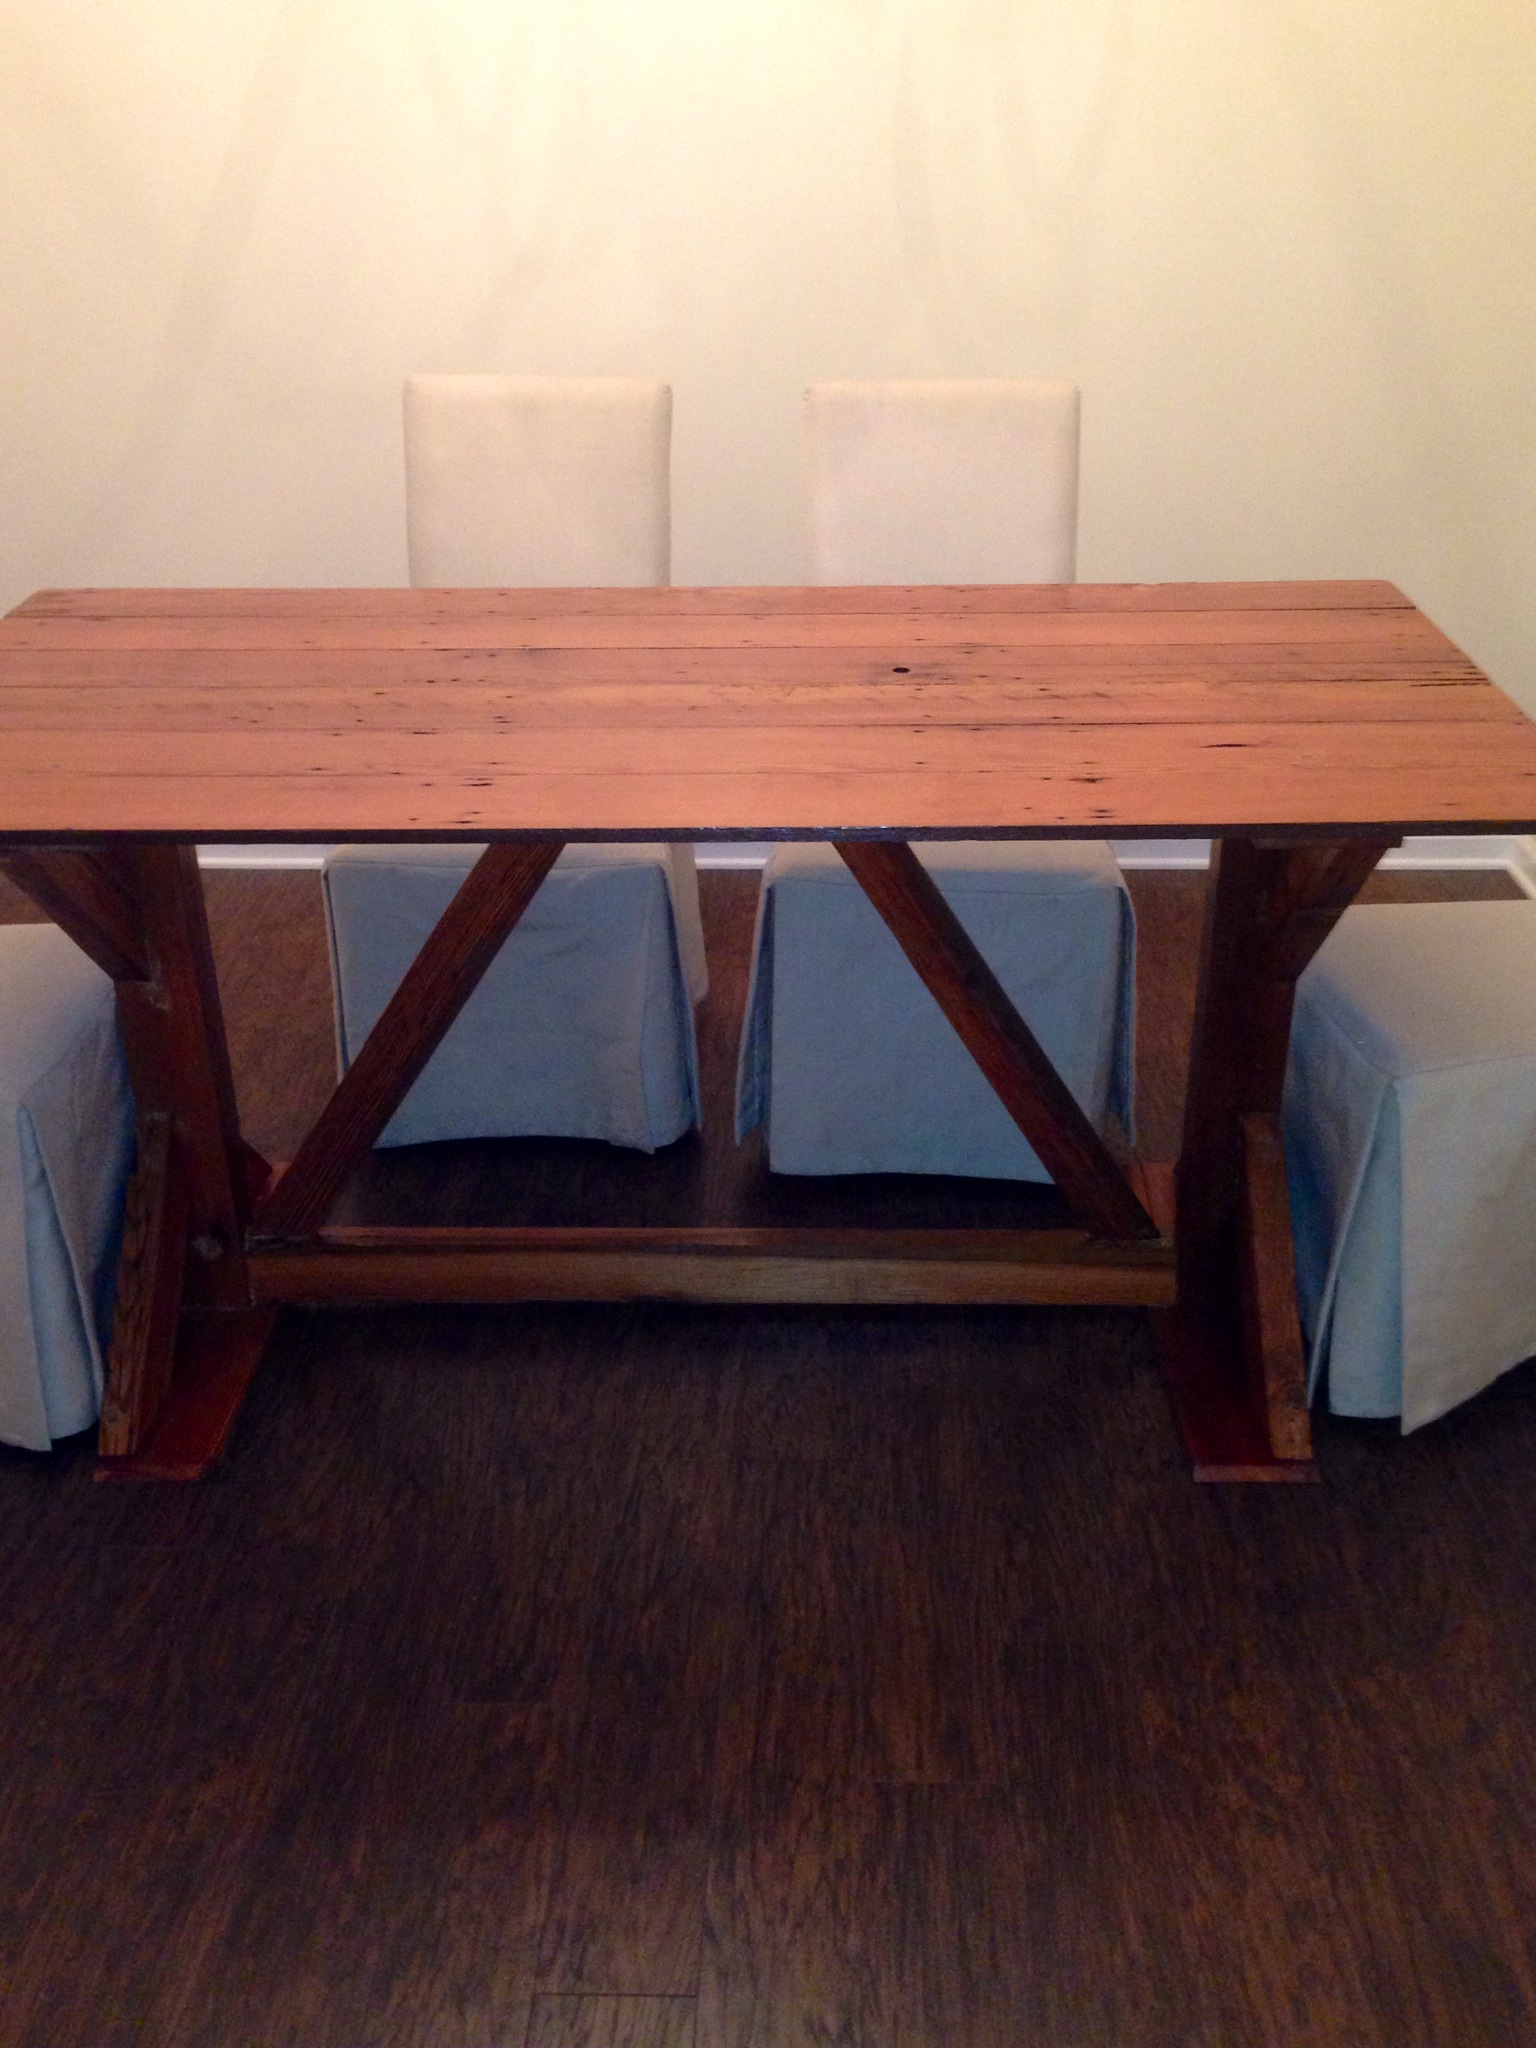
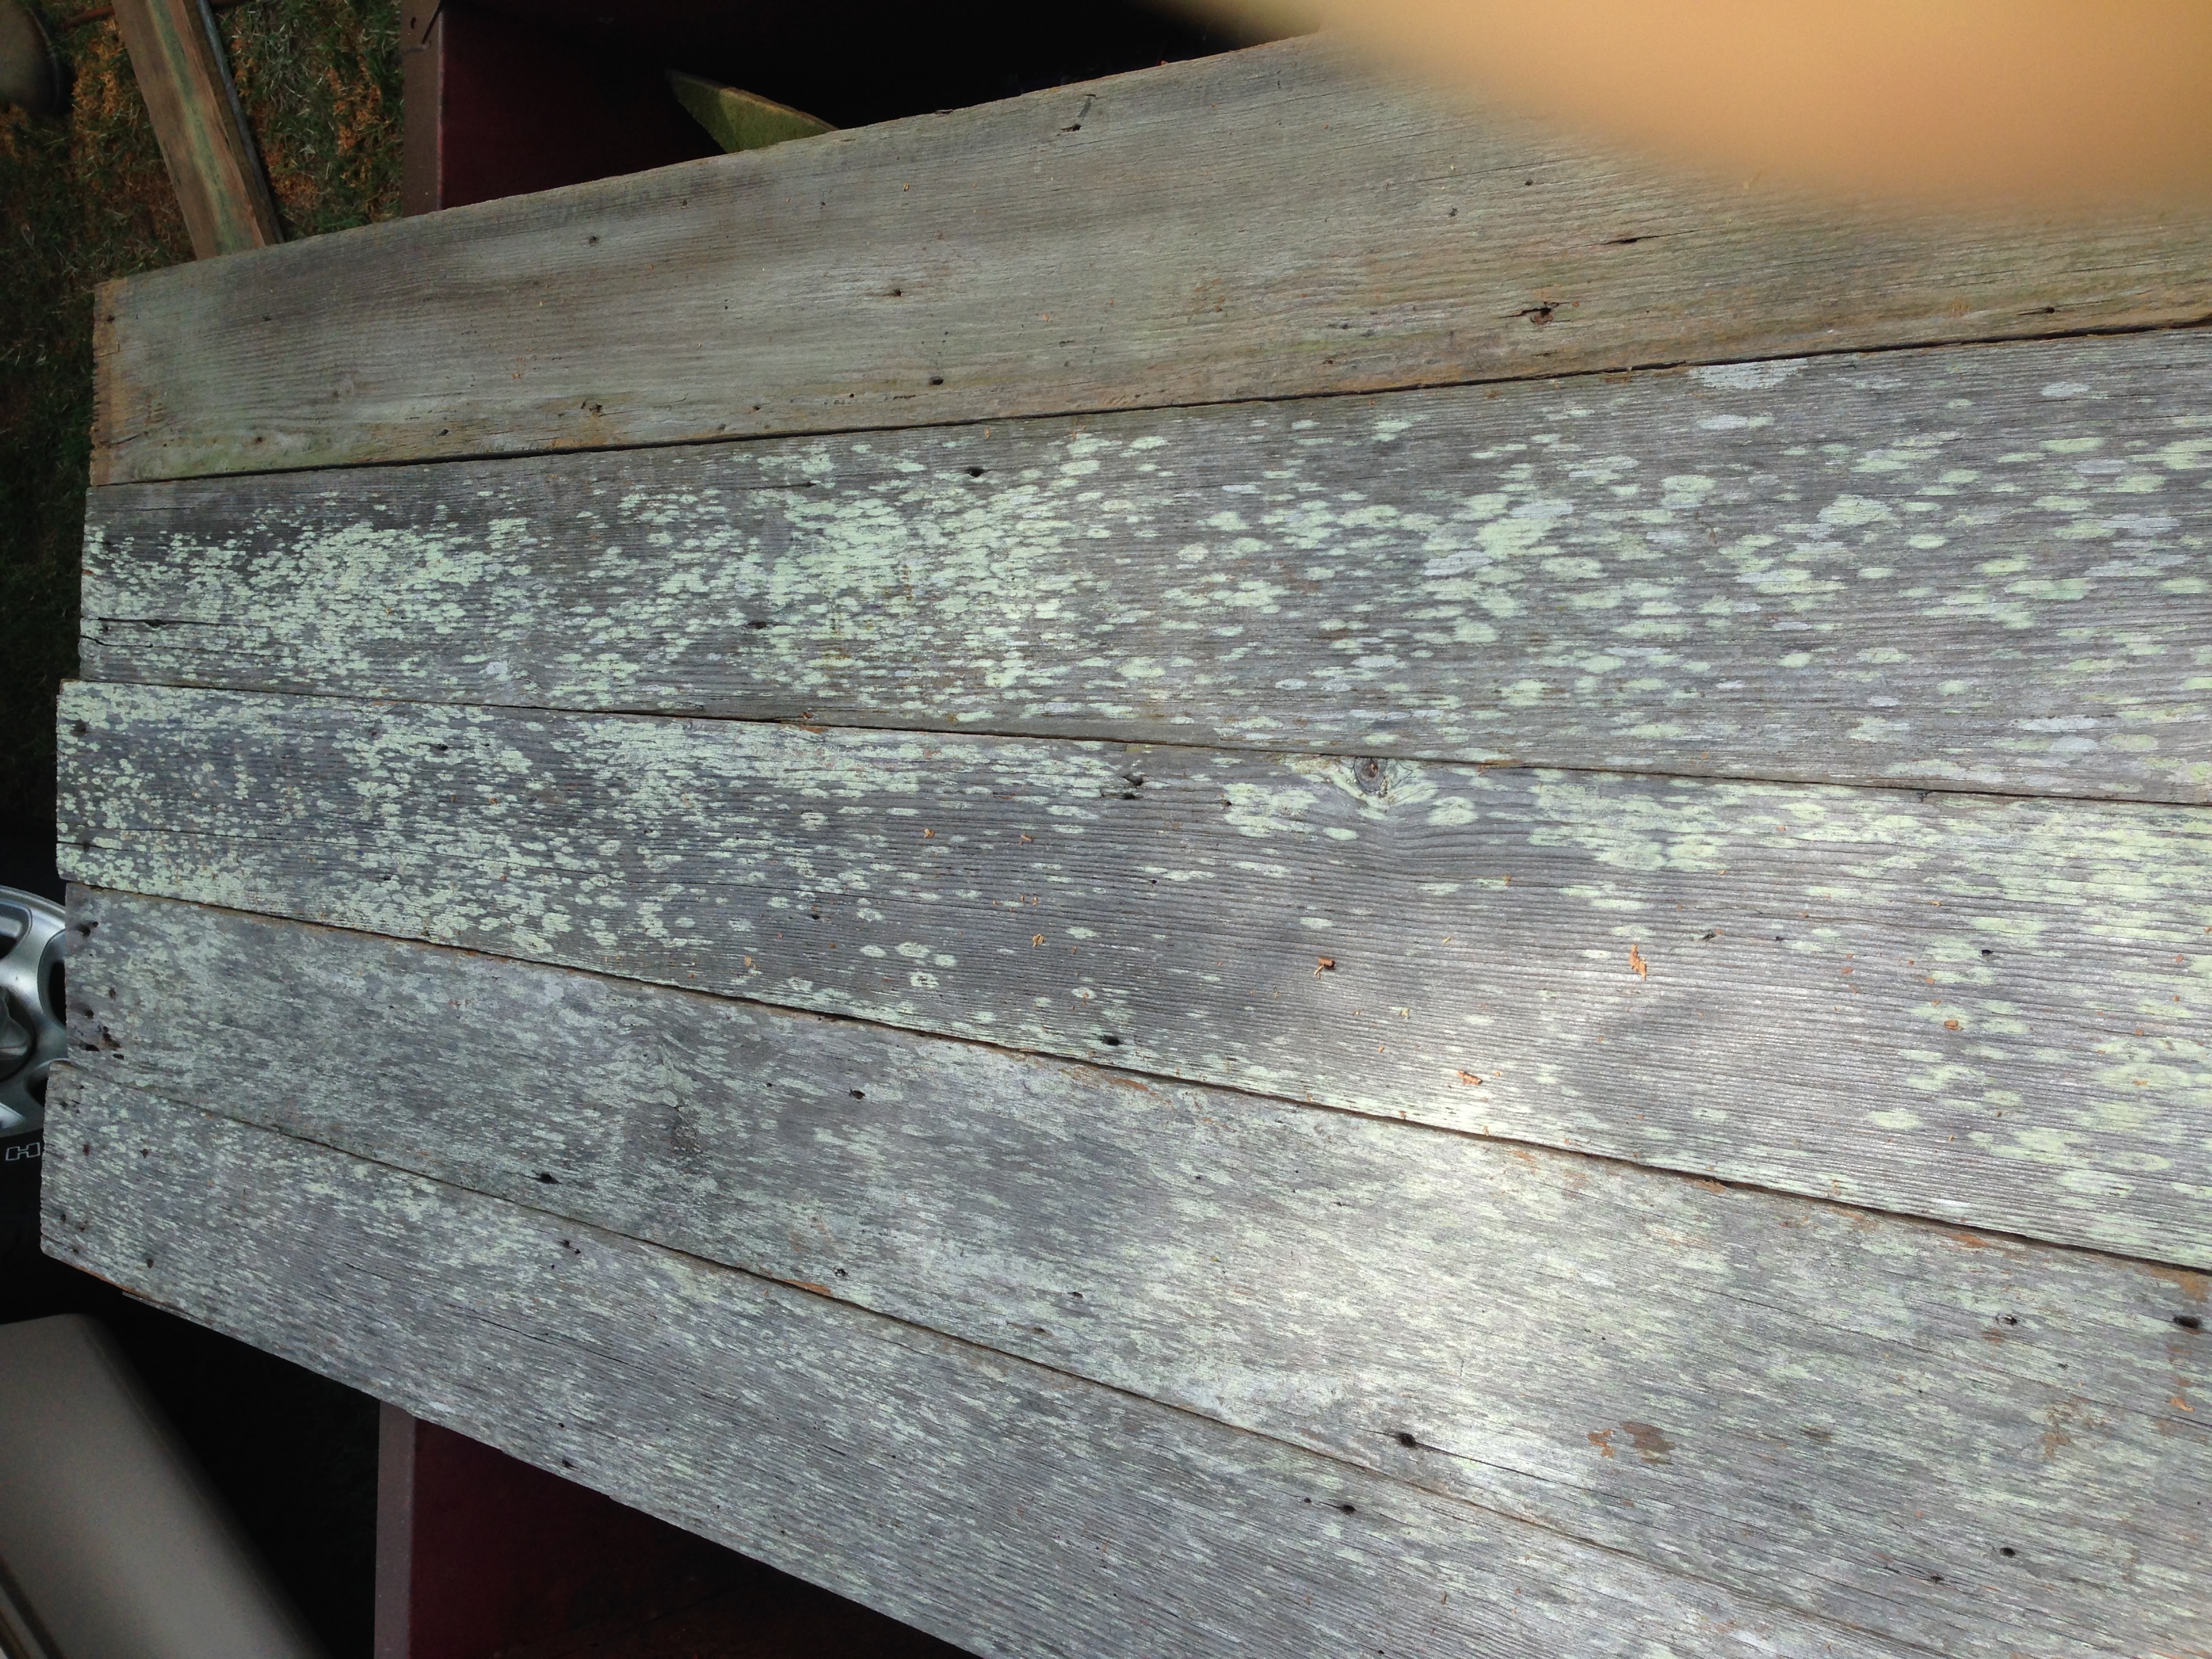
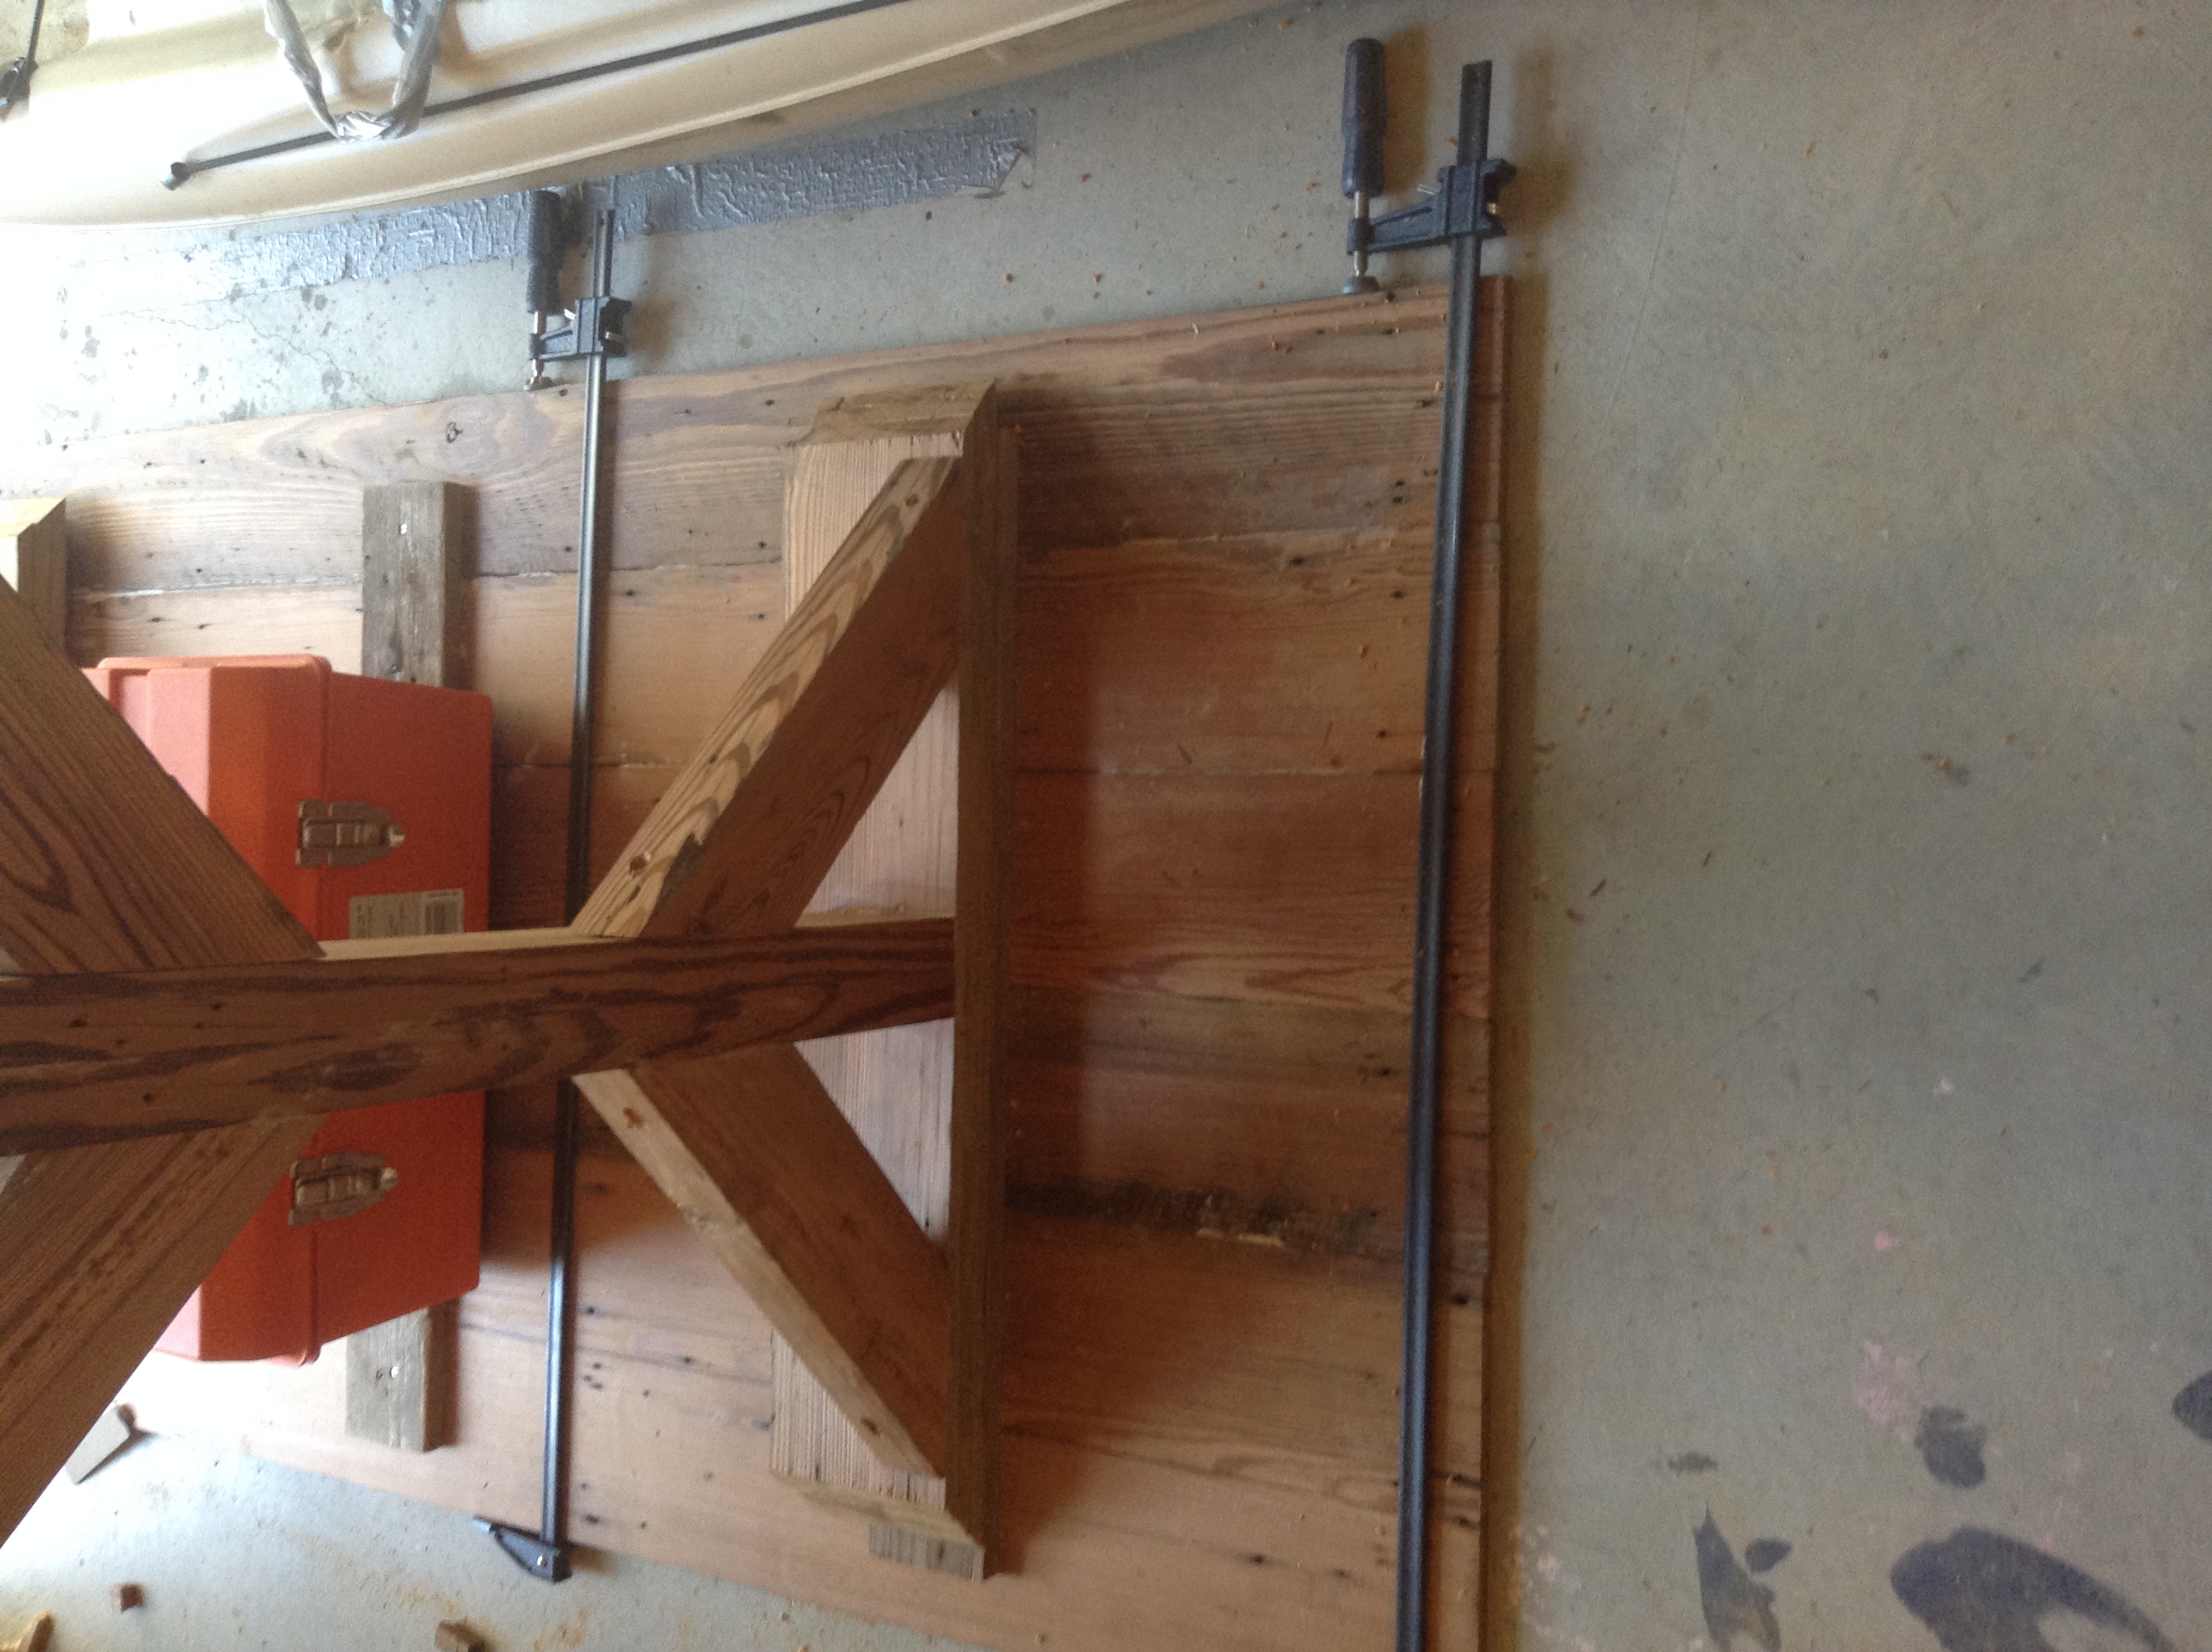
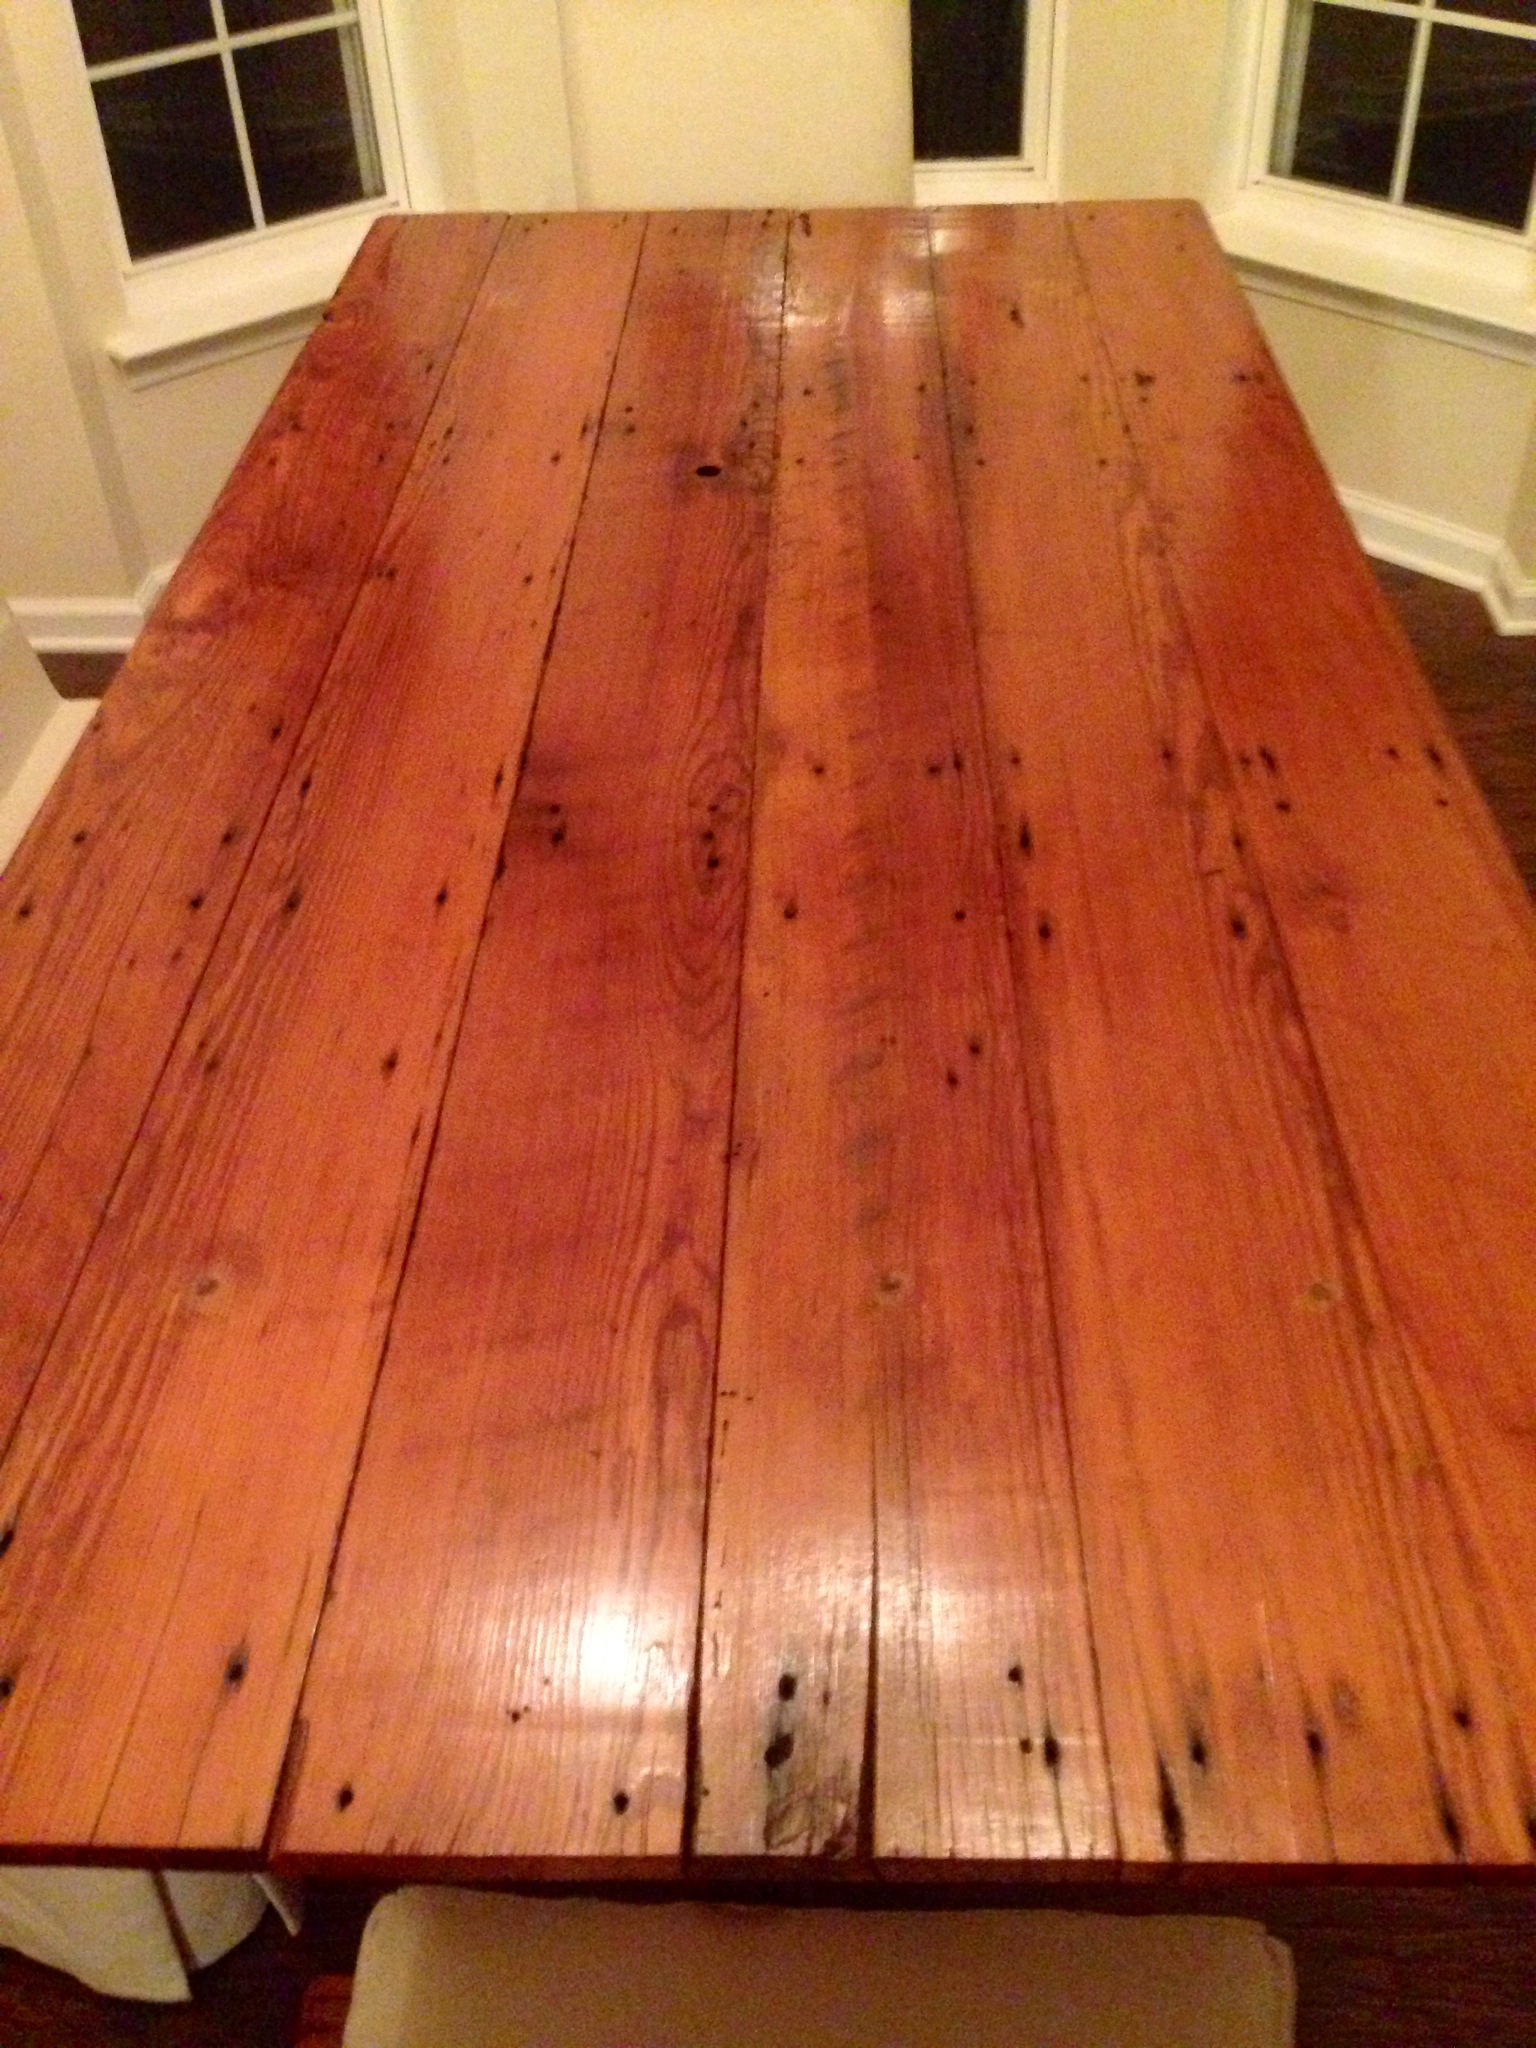
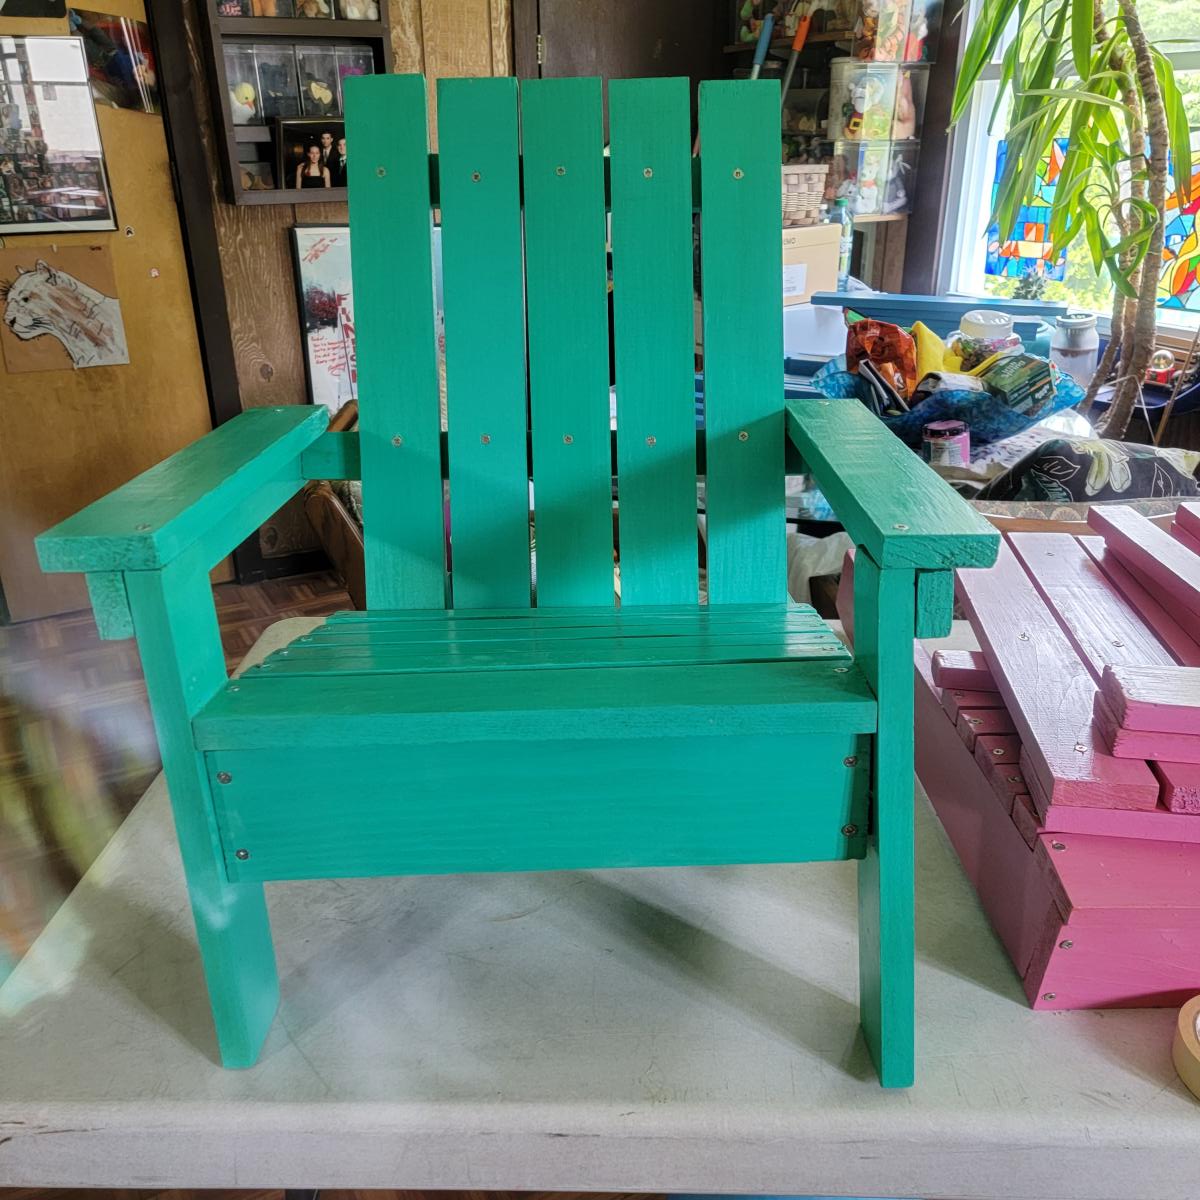
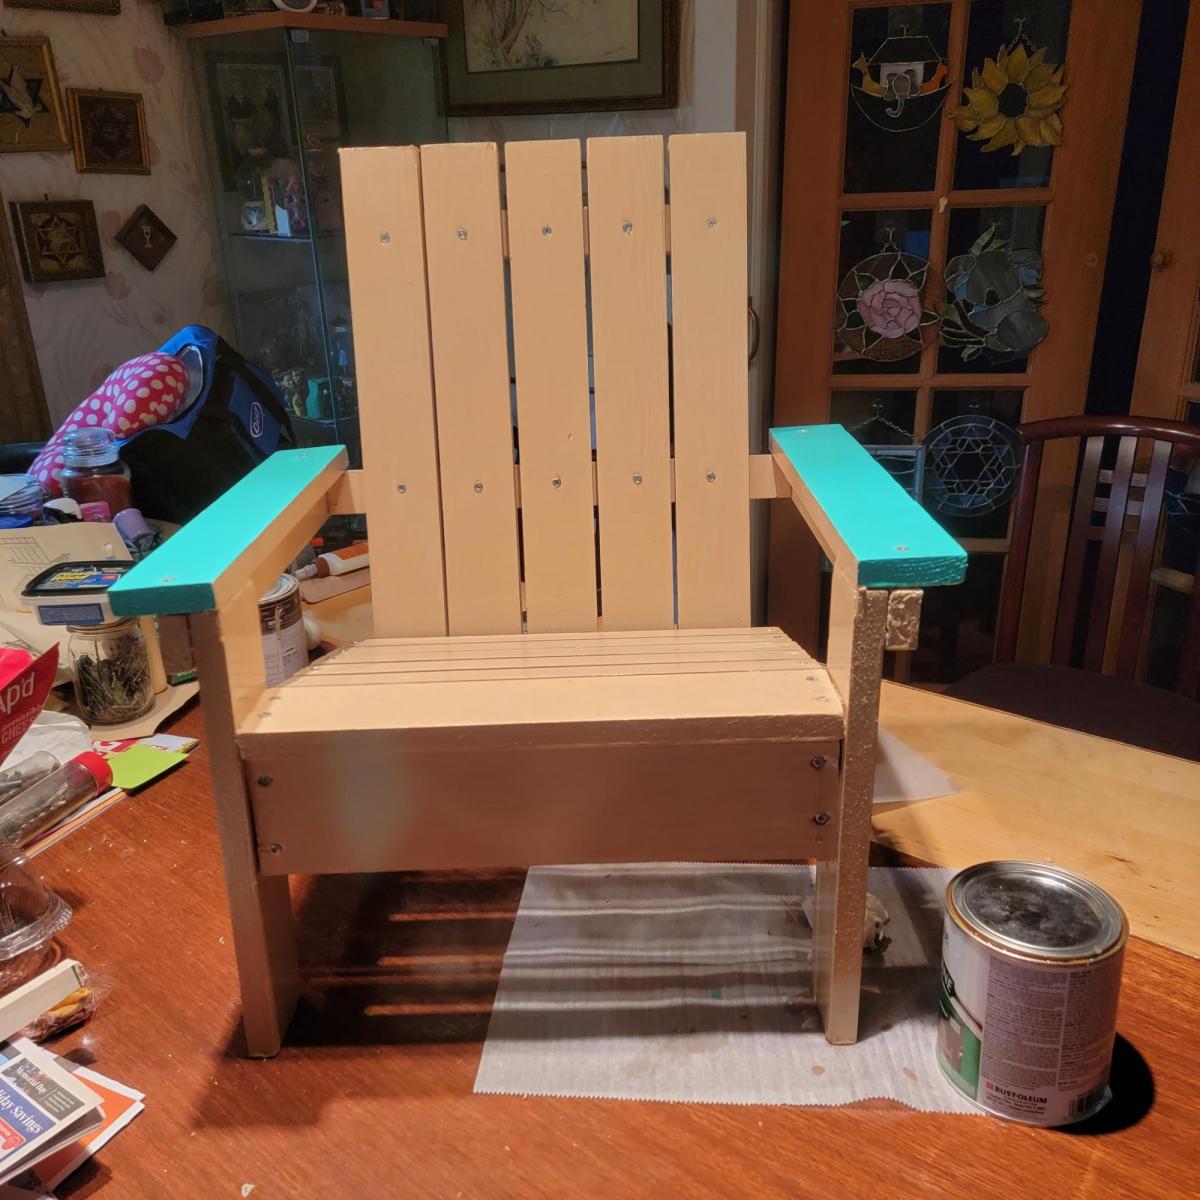
This was my first attempt at a farm table. I found the fancy x plan for inspiration. The length is 6ft. I had to modify all of the measurements. All of the boards came off my grandad's old barn. The posts are laminated together from guide posts from his corral. There is a lot of history and character to the table. I did have to make the bench to match it. I'll post pictures of that soon. Most importatnly, my wife loves it!!!! Happy wife, happy life!!!

Built from Plan(s)
Estimated Time Investment
Week Long Project (20 Hours or More)
Recommended Skill Level
Intermediate

Comments

DBoggs56

Mon, 05/18/2015 - 12:00

Hello, awesome job on the table. Was wondering if you would mind sharing the table top dimensions. I have a smaller space and was thinking of modifying to make something in the 6ft range as well. Thanks

Storage Sofa / Convertible to Bed

Submitted by SRA16 on Sun, 03/22/2015 - 09:06

I used the plan for the base idea for my sofa. I decided I'd prefer arms to curl up in and also to add a convertible feature turning an ottoman using the same base plans into an extension option for using the set as a bed or lounge area. Twice the storage, twice the function!

Built from Plan(s)
Estimated Cost
$400-$500
Estimated Time Investment
Week Long Project (20 Hours or More)
Finish Used
I used natural duck cloth for the fabric. Easy to clean and water resistant.
Recommended Skill Level
Intermediate

Comments

sam5657

Fri, 07/23/2021 - 19:33

I was planning on building your storage sofa, but when I saw the one with the arms; I thought that I would rather build that one. In the spot where the plans should have been; it refers you to the storage sofa. The problem is; it doesn't tell you what you need for or how to build the arms. If they are somewhere else; could you tell me what heading that they are under.

Sandra Cahoon

[email protected]

Gardening Shelf

Submitted by MMTruncale on Thu, 05/09/2013 - 08:23

I wanted a gift for my mom. Something special and unique I think she would really like. Once on a guest post Ana posted a jewelry holder using a board, and some mismatched knobs.

My mom likes to garden. She works so hard on her back yard, and spends a lot of her time there. How could I make this outside proof? A few Pinterest finds later I found my answer: Water Spigots.

Voila! This is what we came up with.

** It's not going to hang by a string. It will be attached to her fence. This is just for picture purposes.

http://www.countryliving.com/homes/makeovers/fast-makeover-projects?src…

Estimated Cost
$20
Estimated Time Investment
An Hour or Two (0-2 Hours)
Finish Used
No finish. We wanted a rustic look. It came out perffect.
Recommended Skill Level
Starter Project

Craft Closet

When I was given a stack of MDF sheets from a friend, I knew this was the desk I wanted to build with it first! We recently moved into my husband's grandmother's house, and have been making some improvements. We took out the dark old built in, and I replaced it with three 4' long gallery shelves, and the Parson's Desk modified to 4' long. It fits perfectly in my space, and looks so chic and modern against our teal walls. It's the perfect craft nook and workspace! I added a mason jar pendant light I DIY'd from the IKEA bulb kit, and also sewed a reversible runner to match my handmade duvet cover. The fabric is Deer Valley, from Free Spirit. I also had the glass top from the original desk cut down at Lowe's for free, and it's a perfect fit.

Estimated Cost
$30 for ledges, $30 for desk
Estimated Time Investment
Day Project (6-9 Hours)
Finish Used
I sanded the 2x2's with 150, then followed up with three coats of semi gloss white paint, sanding with 220 in between coats.
Recommended Skill Level
Intermediate

Small Farmhouse table

Submitted by Anonymous (not verified) on Mon, 10/04/2021 - 14:24

I used scrap wood from a squat rack I built. In the process of making 2 benches for it

Comments

Entry Shoe Bench

I've officially stopped stalking and started building! First project a modified spa bench. Still have to stain it, but it already makes the big pile of shoes by the door look neater! I'm a hands-on person and not afraid of power tools (got a band saw for my birthday!) but it's still a challenge building a piece of furniture. I've already learned lots of do's and don't do's for next time!
Thanx a bunch for your site, Ana! It definitely gets the mind plotting great projects to come!

Built from Plan(s)
Estimated Cost
~50$ (honestly, I can't remember!)
Estimated Time Investment
Day Project (6-9 Hours)
Finish Used
PolyShades Royal Mission, several coats... and a spray can of clear coat too.
Recommended Skill Level
Beginner

Chicken Coop A Frame

Submitted by mdownie on Wed, 05/22/2013 - 11:54

I built this A-Frame Chicken Coop using the Ana White plans. It turned out adorable, strong, and I am very pleased. Final cost was $250, and it took me 4 days (in real time, as a mom of 3). One Saturday at Lowes shopping, one Sunday afternoon cutting, and two days of assembly. Then a 5th for painting. Give or take a dozen extra runs to the hardware store! My brother-in-law helped cut the angles on his miter saw, and my uncle helped with assembly. I kinda doubt this could be done for $100 - maybe if you have a bunch of scrap materials and spare paint. We even have 7 or 8 hens in there! I only intended 3 to live in it, but my uncle added the extras and they all get along happily. I found the roof cap at Home Depot (didn't find at Lowes).

I would also like to point out that I was very afraid to do carpentry - I was afraid to even buy the lumber. But I asked for a lot of help from a lot of Lowe's and Home Depot people, and resisted the naysayers, and just got brave and did it. And it came out beautifully! If you are new to using power tools, get someone to assist, and you would need help anyway with holding things up while another drills.

Built from Plan(s)
Estimated Cost
250.00
Estimated Time Investment
Week Long Project (20 Hours or More)
Recommended Skill Level
Beginner

Comments

mdownie

Wed, 05/22/2013 - 11:59

As an extra note, I used Hardware cloth, not chicken wire. Wire will not keep dogs or predators out (and my dog immediately tried but failed to claw his way in). I bought I believe 36 inch tall rolls - the standard size that I could tell (not 30 inches like in the plans). But it fit perfectly, so I think maybe the plans had a typo? Lay out the lumber according to the plans and it will fit perfectly.

Chicago White sox replica scoreboard loft bed

Submitted by Anonymous (not verified) on Mon, 10/04/2021 - 19:15

I started off building the loft bed. It was a lot of fun. I cut every single piece of this, and hand everything, other than the white sox and players decals. I made the light up pinwheel signs that light up whenever the white sox hit a home run. I had fond memories of the famous scoreboard going to games at the old comiskey park, and my 5 year old son loves the white sox, and this bed! There is a door as well that opens up and goes into the locker room. Underneath there is a rv, with a chair, and some other cool amenities good enough for a real major league player. I won’t tell the secret of how I designed the pinwheel light boxes, and the led lights. I had to get realllly creative. This was a huge project that completely consumed me for months. I love it though, and wanted to thank Ana for the great plans on the loft style bed! Thank you Ana white!!! Your the best

Modern adirondack chair

Submitted by Anonymous (not verified) on Tue, 10/05/2021 - 08:48

I've made 2 of the Modern adirondack chairs. Really enjoyed the plans and the video for help as I'm new to woodworking. I look for new plans all the time to see what I might build next

Comments

Triple foot farmhouse table with runner, triple pedestal bench

My first attempt at a real furniture project, I would have never tried this without all the plans and support here at Ana-White! These are 7' for the kitchen/breakfast area.  Since the table is only 7', it has 2 pedestals.  I modified these a bit from the triple pedestal farmhouse bench and table plans by using a runner along the floor instead of a stringer board on the table and adding triple feet on the outside pedestals.   I also added 1x3 trim under the arches to add some detail and hide the grooves between the three 2x4 leg supports.  The top has mitered 2x4s around the outside with 1x6s on the inside.  One issue I ran into was that the 2x4s shrank a lot as they dried, while the kiln-dried 1x6s did not.  To make an easier to clean surface I planed the top smooth, and then added minimal texture by hand scraping.  My plan is to build a big 12' version of this table for the dining room. 

Estimated Cost
Under $300 for both.
Estimated Time Investment
Week Long Project (20 Hours or More)
Finish Used
2 coats of kona stain, wiped more off the top than the legs. The top shows grain, the legs are almost solid brown. I used hand-rubbed satin poly. 3 coats on the bench turned out great. 6 coats on the table top turned out too shiny and easily scratches. I will refinish the table at some point, possibly with a softer finish.
Recommended Skill Level
Intermediate

Comments

Walk mounted can organizer

Submitted by Anonymous (not verified) on Tue, 10/05/2021 - 20:13

Love this! My husband used this project to help boys learn to use power tools and work with wood. They made one and he did the others. THANK YOU!

Built from Plan(s)

Comments

My Garden box

Submitted by Kabarie on Thu, 05/30/2013 - 13:29

Built this with the help of my Dad! Learned about threads as I've never used them before. Because of all the controversy surrounding having pressure treated wood touch the veggies and because I could not afford or find cedar 4x4's I decided to use the left over cedar to build a little cover around the 4x4's so my soil and veggies will never come into contact with it. Love it and the veggies are growing great!

Estimated Cost
$50/60
Estimated Time Investment
Afternoon Project (3-6 Hours)
Finish Used
I forget the stain I used on the outside of cedar...something natural looking.
Recommended Skill Level
Beginner

Comments

Janettx

Fri, 05/31/2013 - 04:22

I'm glad you were able to follow my plans. I'm not a plan writer so I wasn't sure if I gave good enough instruction. It is a shame you can not get all cedar. Sealing the legs will definitly help them last longer and with all that work you certainly want them to last! Just a hint...you can make 3 for not much more than you spent making one....Great job and thanks for the brag post LOVE LOVE LOVE

Planked Wood Headboard in Cal King

This project was a blast to make. And, it really is doable and a lot less time then you would think. And finishing it with milk-based paint is even more enjoyable. I used screws and a drill (pre-drill!) and it was wonderful.

Here's some advice for the plan:

- Mount the back of the headboard with a piece of wood and use a metal support as shown here. Just make sure the board is wide enough to be level with your back trim, or else the metal support won't be even when you screw it down. And when you pre-drill this board, make sure you don't go all the way through, or else you will have holes through the front! It stunk to have to putty them all in, but thank heavens for putty.
- Although the instructions say to make your top 1 x 3" trim to fit in line with the top of the headboard, I made mine one inch longer on both sides, and then the 2 x 4" one inch longer to go on top of that 1 x 3" on both sides. That was just the look I wanted. Although you can get your wood pre-cut, I would recommend cutting it all yourself, especially since you will need these cut afterward once the rest of your headboard is put together.
- Ana's 'get started' tips are very helpful. Be sure to check them out first!
- Make sure, make sure, make sure you dry thoroughly between coats. Patience is a virtue.

Estimated Cost
$125
Estimated Time Investment
Week Long Project (20 Hours or More)
Finish Used
I distressed with milk-based paint... it always gives it such a unique look every time! Here's what I did:

- Stain your wood with a foam brush that you can by essentially anywhere--craft stores, home improvement stores--going along the grain of the wood. Do this for all painting and staining. For a dark finish underneath, use a dark stain. I used Minwax in Dark walnut. Leave the stain on for at least 15 MINUTES before you wipe it with an old t-shirt or a lint-free rag, like the one you would use to polish your car.

-Buff with a crinkled brown paper bag. You won't need to do this too intensely, but make sure you're thorough.

- If you want some of those big, antiqued stain spots, take a candle and really rub certain spots, such as the knots and the edges of the wood. However, it can be easy to forget where you rubbed with the candle, so you might want to draw up a rough diagram of a headboard and mark an X where you rubbed the candle. Rubbing with the candle will make the spot of the paint come off much easier--you'll see how well it will come off when you sand. But I would hesitate from rubbing it too much, because it makes your paint 'peel off' eventually if you do it in excess.

- Paint your headboard, giving it at least thee coats. My first coat was really thin so during my first coat I went right ahead and painted it again right then. Then I did a second and third coat. Let it dry completely between your second and third coat. I waited at least eight hours between coats.

- Once it's dry, sand your headboard BY HAND with at least 100 grit sandpaper. If you want your piece to have a more distressed look all-around and not just in certain places, sand your piece after each coat of paint dries. Just rub with your hand smoothly in strokes, and you will see how easily the paint comes off, and how it will give you that distressed look like magic. I did this for my dresser and I loved the look. However, I did not use the candle-wax method because I sanded after each coat. If you wait until after the third coat to sand, you will have to work harder, but your paint will still come off and look distressed very nicely.

- Stain the top of your paint (I used the same dark dark walnut color). Immediately rub off the stain with an old t-shirt or a lint-free rag. Rub it down to get the desired look of your stain. If you choose to have it a little less antiqued, you can skip this step.

- Finish with a Polyacrylic topcoat. They are safe and it really gives a nice, finished (and less DIY) look.

- Mount it with bolts on to your bed frame!
Recommended Skill Level
Starter Project

Top Bunk Organizer

Submitted by Bradnag on Wed, 09/13/2017 - 05:52

Built this to go along with my son's new Chelsea loft bed so he'd have a place to set a glass of water and some books. I was able to use almost entirely scrap wood, except for the 1x4. Cutting and assembly took less than an hour, and the thing is rock solid. Sealed it with polycrylic, because it will probably get spilled on many, many times. Probably the easiest project I've done, and I think it would make a great starter project for anyone looking to try out using pocket holes for the first time.

Built from Plan(s)
Estimated Cost
$5
Estimated Time Investment
An Hour or Two (0-2 Hours)
Finish Used
PPG Speedhide paint, Minwax Polycrylic finish
Recommended Skill Level
Starter Project

Planters

Submitted by Liz H. on Thu, 03/31/2011 - 11:33

This was a fun easy build...I took the toy box plans and used 1X4s instead of solid sides and bottom.  I cut the legs short and put finals on.  

Estimated Cost
$25
Estimated Time Investment
Afternoon Project (3-6 Hours)
Finish Used
Black outdoor paint.
Recommended Skill Level
Starter Project

Cedar Toy box

Submitted by Kassidy_D on Fri, 11/19/2021 - 19:22

My first project, I've never done any kind of wood working at all. I made and noticed several mistakes however, I'm still very pleased with how it turned out. I learned from all my mistakes and now know the best ways to avoid them in the future. Super excited to begin my next project!

Built from Plan(s)

Comments

Chalkboard Cubby

This cubby was my very first project! I just finished remodeling my kitchen, all that was missing was a place for my keys, dog leashes etc. My little house doesn't have a proper entryway so I created a "welcome station" with this cubby. The trickiest part was definitely cutting the sides, but I was able to get those tight circles with a little forethought and a lot of sanding :) I used leftover paint and samples from choosing colors for the kitchen, so it automatically coordinated with the rest of the decor.

Built from Plan(s)
Estimated Cost
~$40
Estimated Time Investment
Day Project (6-9 Hours)
Finish Used
3 coats of Behr "Polar Bear" white paint and samples (Rainwater, also Behr) with LOTS of taping! I think I spent ore time taping than I did actually painting! I also did 3 coats of clear satin coat. I didn't sand in between because I like the look of brush strokes :)
Recommended Skill Level
Intermediate

DIY Planter Box

Submitted by Anonymous (not verified) on Sun, 12/12/2021 - 17:37

My very first project. Was so easy thanks to Ana's instructions. Dark walnut gel stain and Fusion Seaside. Thank you so much Ana.

Comments