Community Brag Posts

Bathroom Storage Cabinet

I built this cabinet to store magazines and diapers (towels when the time comes) in the small 1/2 bath.

The top was made with left over oak pieces from when I ripped out the carpet and 2x12 stairs and replaced with oak treads.

Estimated Cost
$20 (already had the treads)
Estimated Time Investment
An Hour or Two (0-2 Hours)
Finish Used
jacobean stain on top, pale sandy beige paint with jacobean stain used as glaze on body.
Recommended Skill Level
Beginner

Comments

Debi G

Wed, 07/27/2011 - 11:15

I just created something similar. The way the top and body coordinate, and how the top cubbies are sized make this a stand-out.
Something similar would work for my classroom, too.

Tree Shelf

Thank you so much for these plans!  As soon as I saw them, I knew I HAD to build it!  I absolutely love it - and now all my friends are asking for one!


I chose to use 3/4" plywood for the back board as it's what I had on hand.  I used my kreg jig and just attached it with pocket hole screws.


Edited:  After posting pictures of my finished shelf on facebook, I've had friends request I build them shelves.  I've just completed my NINTH shelf!  The picture shown is the first set of 3 that I finished and have already been delivered to their new home. :)


Thanks again!

Built from Plan(s)
Estimated Time Investment
Afternoon Project (3-6 Hours)
Finish Used
Minwax English Chestnut
Recommended Skill Level
Beginner

Comments

Seasonal And Holiday

Workbench w/Mitre

Submitted by mdgurnoejr on Tue, 01/31/2023 - 21:45

Still need a couple more drawers, plus stain and seel, but I just couldn’t wait to post. Took me most of the day (drawers suck), but it was extremely helpful to have the article and visuals to aid. Can’t wait to move on the the next project. I’m slowly becoming obsessed and a “wood whore”

Built from Plan(s)

Comments

14 foot table

Submitted by Anonymous (not verified) on Sun, 03/24/2019 - 18:37

I made a 14 foot table using Ana's plans. I am remodeling my parents house that they built in 1966.  I was able to use some 4x6's for the legs from walls that I took down.  

Estimated Cost
300.00
Estimated Time Investment
Week Long Project (20 Hours or More)
Finish Used
Briarsmoke
Recommended Skill Level
Intermediate

Comments

lisadrisco

Tue, 06/04/2019 - 20:07

Hi that looks amazing! I’m looking to make the same size table.  Could you please tell me the measurements of your legs?  Also what length support boards did you use.  Thanks

2x4 Truss bench

Submitted by Anonymous (not verified) on Tue, 03/07/2023 - 14:52

We've been eyeballing this plan since it was first posted. We tend to accumulate extra 2x4s from other projects. Great easy build, was able to knock it out in a morning. The finish is a custom blend.

Built from Plan(s)

Comments

Sliding Door console with Cedar pickets

Submitted by KathrynK13 on Tue, 01/12/2016 - 18:46

My first big build and I love it! I followed the plans in concept but changed the materials. My frame is still 2x3, but all the trim and siding is cedar fence pickets. I love these! They need a lot of finish work (sanding for days!), but the look is so rustic and real.

I also came up with a great way to get the sliding door look for only $9 in materials. The other tutorials I found online would have been $60+ and I just didn't want to spend that much. Make sure to check out my tutorial for the sliding door hardware.

Built from Plan(s)
Estimated Cost
Under $100 with some scraps that will be used on the second matching piece
Estimated Time Investment
Day Project (6-9 Hours)
Finish Used
DIY distressed finish. Stained cedar pickets with Early American then did a quick painting with basic white I had on hand. Lightly sanded to reveal a bit of wood grain and distress.
Recommended Skill Level
Beginner

My Modern Farmhouse Table

Submitted by samsam06 on Wed, 11/30/2011 - 16:20

Started on Saturday Afternoon around 5pm and finished building on Sunday, sanding on Monday, stain and poly on Tuesday and we ate Thanksgiving Dinner on it on Thursday. All that is left is the wood putty! Not perfect but VERY happy with it :)

Built from Plan(s)
Estimated Cost
$70
Estimated Time Investment
Weekend Project (10-20 Hours)
Finish Used
Minwax Providence Stain & Satin Poly
Recommended Skill Level
Beginner

Farmhouse Table with Extensions

This was my first build and I learned A LOT and watched A LOT of youtube diy videos. The main take-away from this project is not to build in the freezing cold if the finished project is for inside. I finished this project in below freezing temperatures and I noticed that the wood expanded (increasing slightly the gap between the finished boards on the top) when it was brought inside.

I built this from the original farmhouse table plans with no kreg jig although I did buy and use a pocket kreg jig to make the extensions. The main modifications were using 4x4s such as were used in the Country Living magazine spread that inspired this build and also making modifications to allow the addition of 15" extensions at each end of the table's bread boards.

My first challenge was figuring out how to build with the 4x4 legs instead of the 2 2x4s screwed together. In order to accomplish this i had to use a chisel to create the corner lip that the table top frame would sit on. I added photos of this so I hope it will help someone. Chiseling these 4 corners (one on each post) only took an hour or two and was so worth it for the look of the 4x4s. Just measure carefully and work carefully with a sharp chisel. I actually removed half the wood by sawing off the corner at a 45 degree angle. Remember when cutting your boards for the table ends that a 4x4 has different dimensions than 2 2x4s screwed together. Compensate for this in your cuts.

Another challenge was hiding the screws on the table legs and table top. I was leaving the finish natural so didn't want to use wood fill. I accomplished this by getting a countersink bit and then buying wooden dowels the same diameter. For these screw holes, after finishing screwing, I put a dab of wood glue in the countersink hole, inserted the dowel as far as it would go, used a fine hand saw to cut off the dowel flush with the table and then used a hammer to make sure the dowel was in tight and flush.

I had trouble figuring out how to attach the table top frame to the table legs with the long screws from the plans so I included a picture of this step. Its really easy but I was not able to use three screws as the plan calls for. I used two instead and it has been very solid. I used the long screws as proscribed.

Finally, I wanted to build extensions (2 2x8 boards kreg jigged together) so I could increase seating up to a max. of 12 persons, so I needed to cut out 2x2 gaps on the table ends. I also included a picture of these in place. To make room for the 2 2x2s that extend under the bread boards and table top to brace the extensions, I left out one of the 2x2 cross beams at each end of the underside of the table (the boards that the table top boards screw into).

I hope this is helpful to you!

Estimated Cost
$250
Estimated Time Investment
Week Long Project (20 Hours or More)
Finish Used
Vinegar and Steel Wool Solution (soak steel wool for 24 hours in vinegar and be sure to test on a sample) to "age" the wood. Tung oil over this sealed the stain/wood. over this I applied a wax finish. First I used Briwax Liming Wax to enhance the gray finish and leave a slight white wash patina. This finish was enhanced because I had steel brushed with the grain to remove some soft wood so the liming wax would enhance the grain. I finished the project with clear briwax. We have been using this as our everyday table since February and there are no stains or problems with this finish.
Recommended Skill Level
Starter Project

Comments

dyemond47

Mon, 02/10/2014 - 11:55

Great job on the table! I love...I had visions of this table before I saw it. I wanted to use the 4x4's for the legs as well, the same finish. I am concerned now about the 4x4's because I am an amateur and I think that may throw too many wrenches into my plan. I started with the bench, finished in 3 hours I have patted myself on the back. Plotting on a Kreg jig right now.

epweigel92

Sun, 07/24/2016 - 09:57

Love the look of this table! Just to make sure I'm following correctly, the extensions are ones you can add and remove, not fixed? Do you have a pic of how they slide in or out?

Kitchen Table

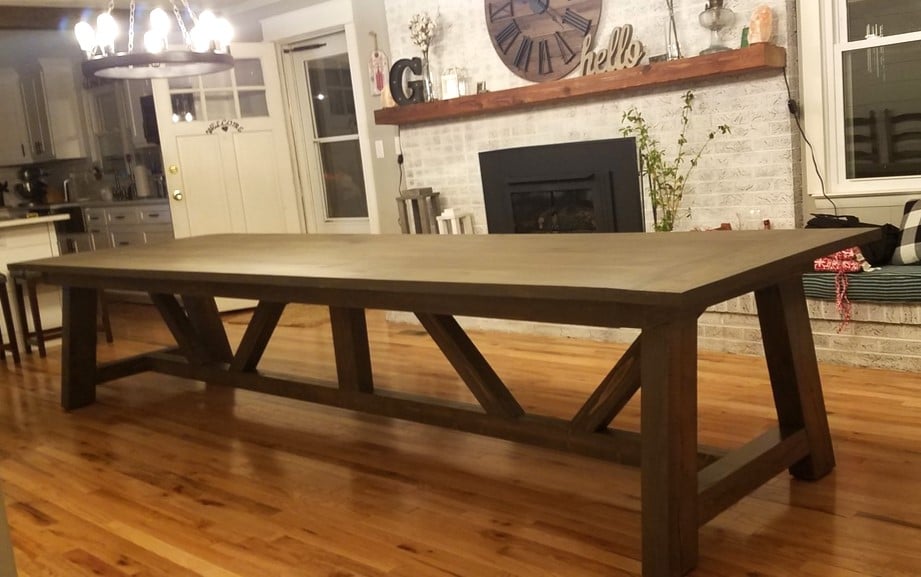
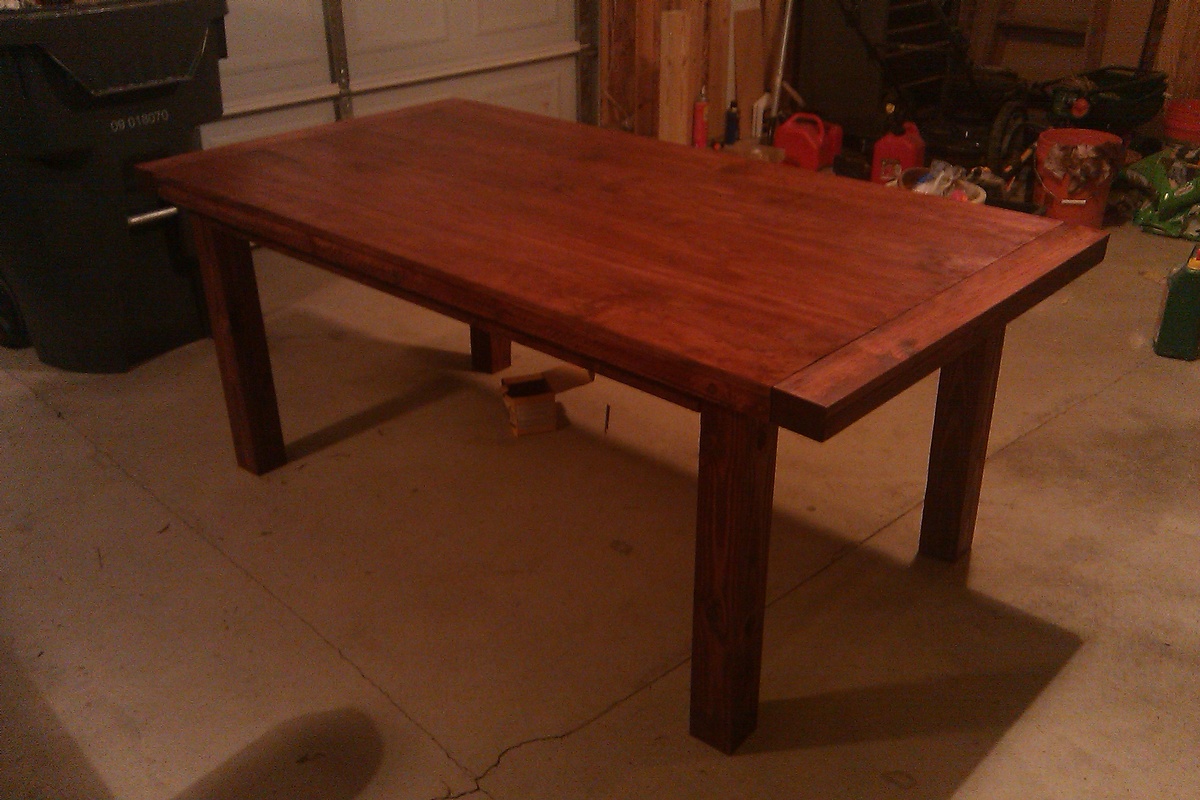
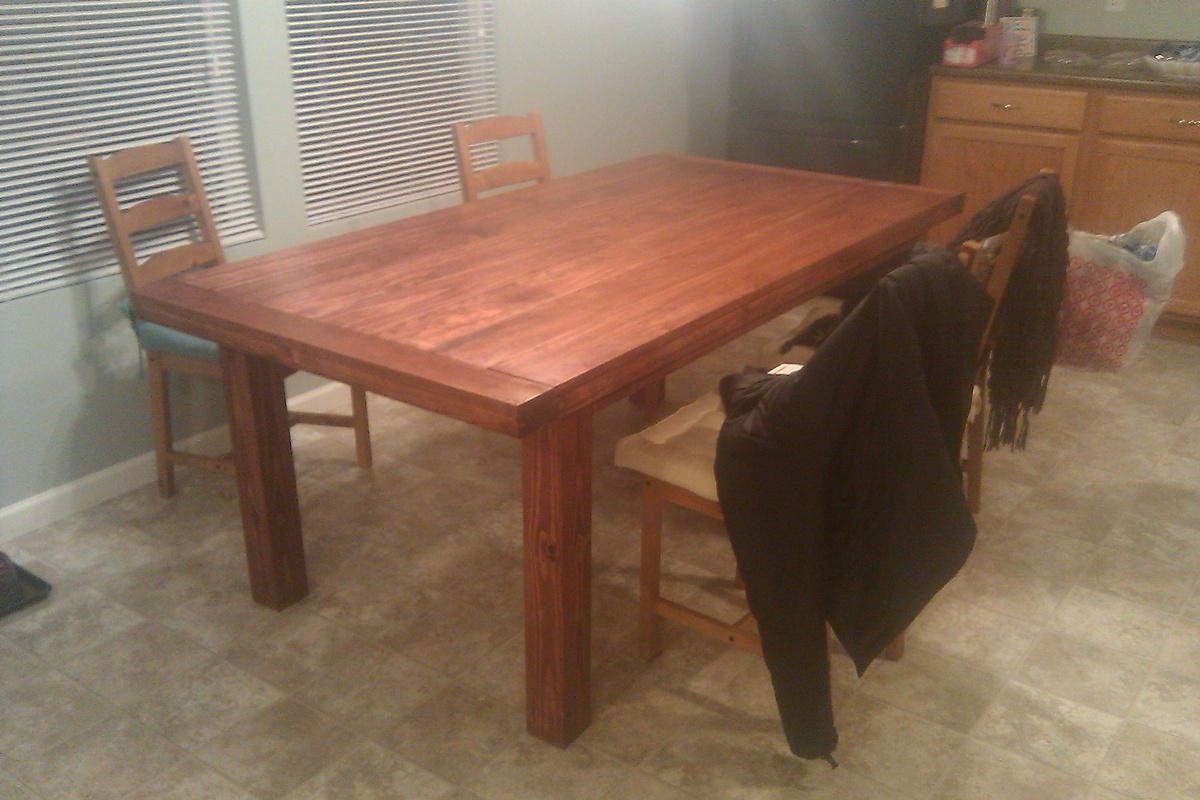
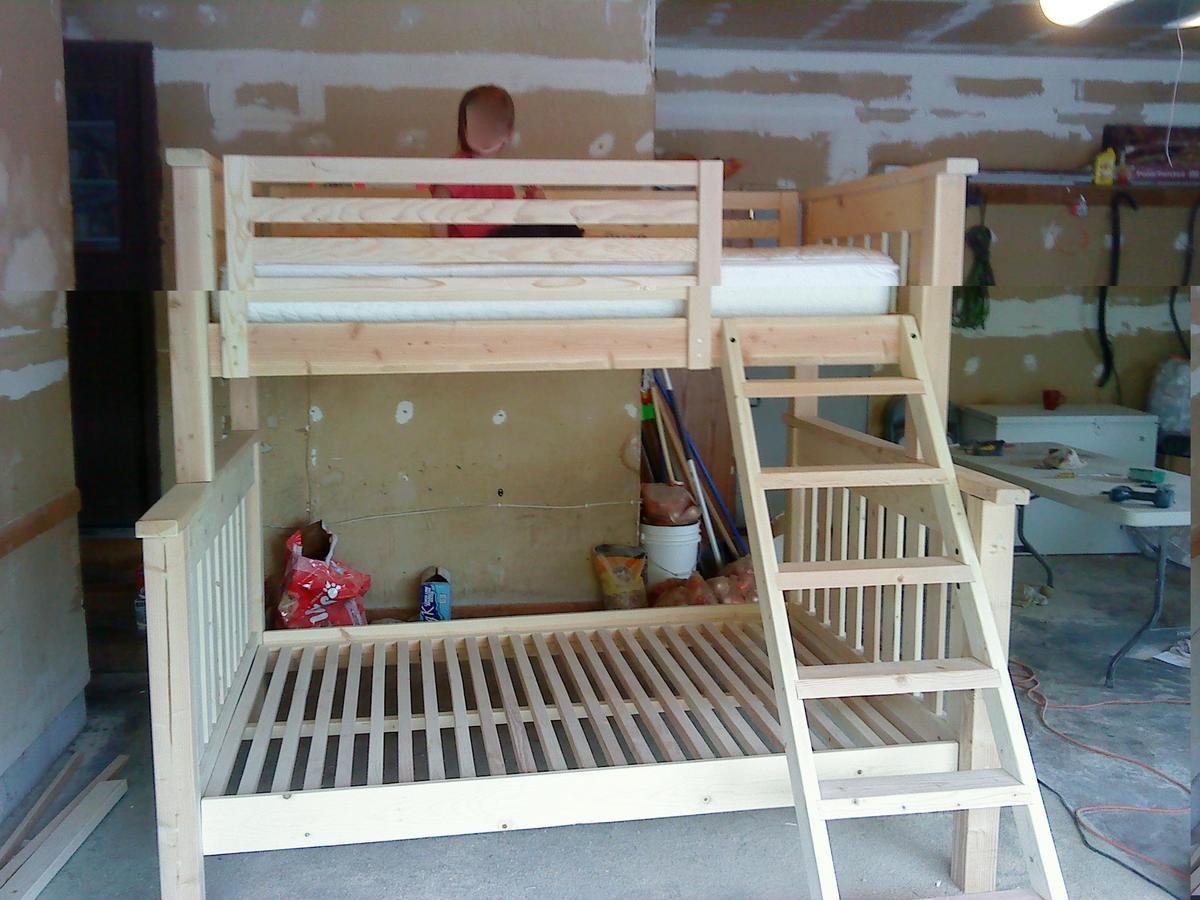
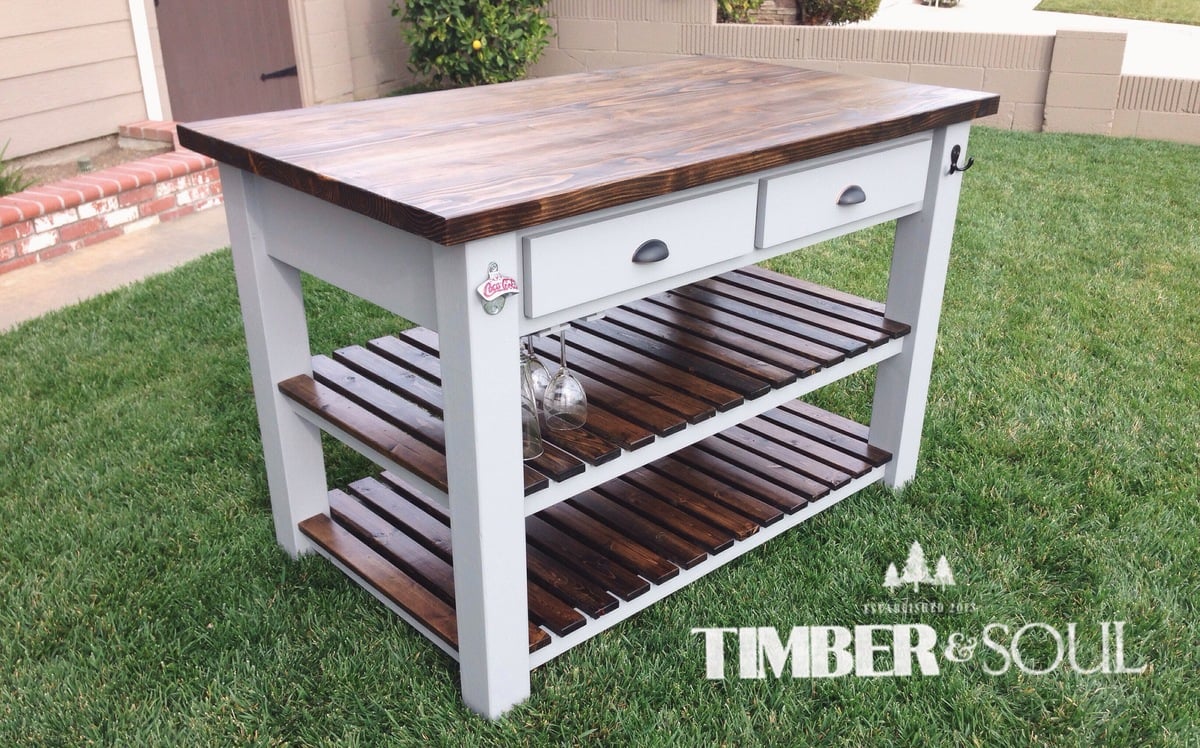
Well, this is my second project and was built to replace the first one I did about 2 years ago.

Two summers ago I built the Modern Farm Table and, quite frankly, screwed it up. I rushed that job, not taking the time to be selective about my lumber and forgetting to heed the old axiom of "measure twice, cut once". In short, the table turned out 27" wide and the the table-top surface was as uneven as a highway's rumble strips. Yeah. I know. A sad showing on my part.

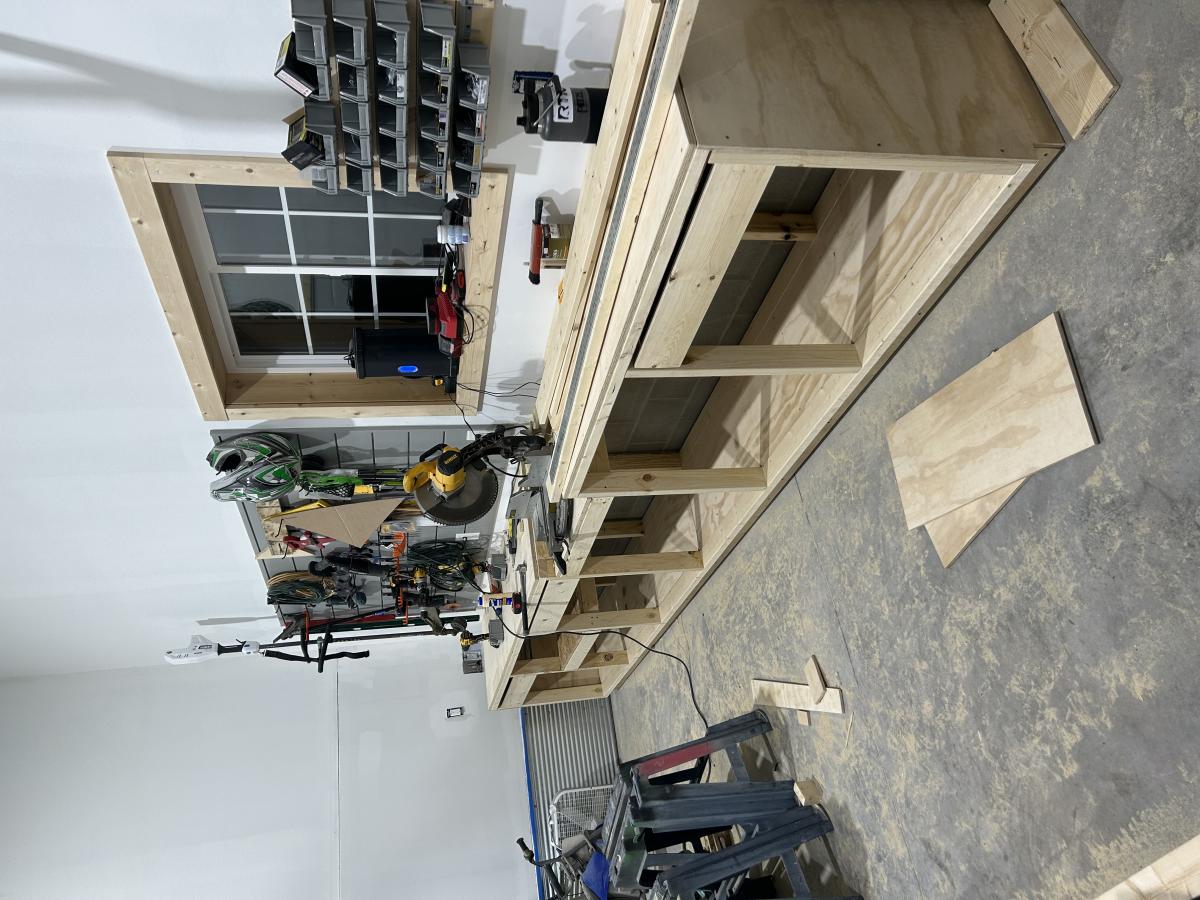
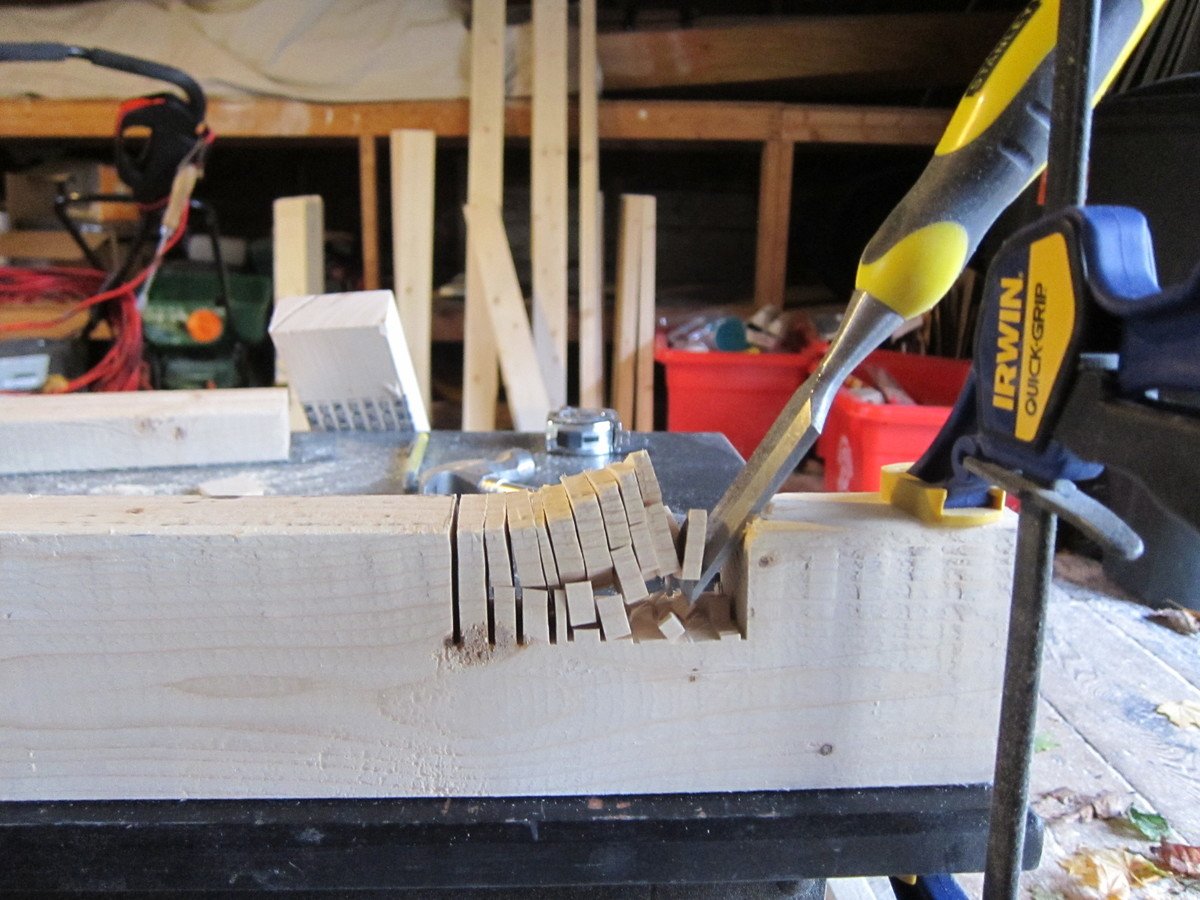
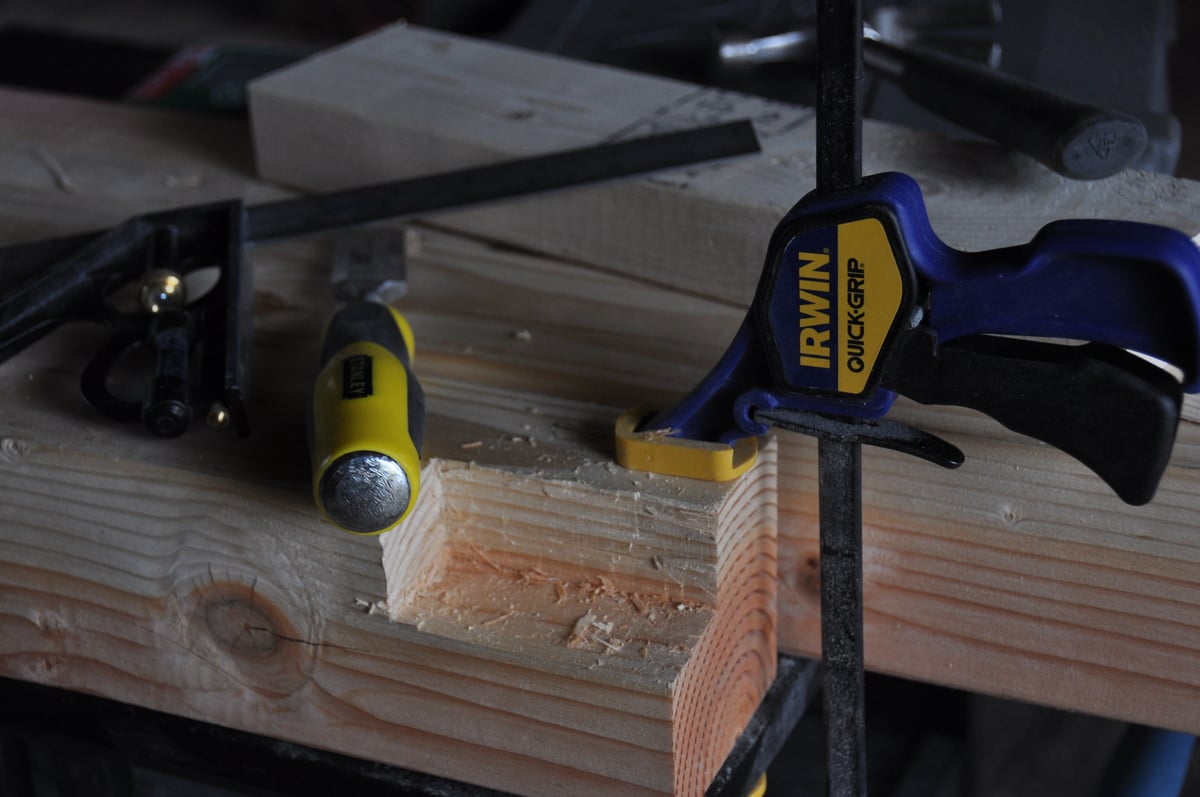
This project was a different story. I took my time; and by time I mean it took about 10 hours total, including 3 trips to Home Depot to buy things that I didn't take into consideration (like mineral spirits for brush clean up after polyurethane).

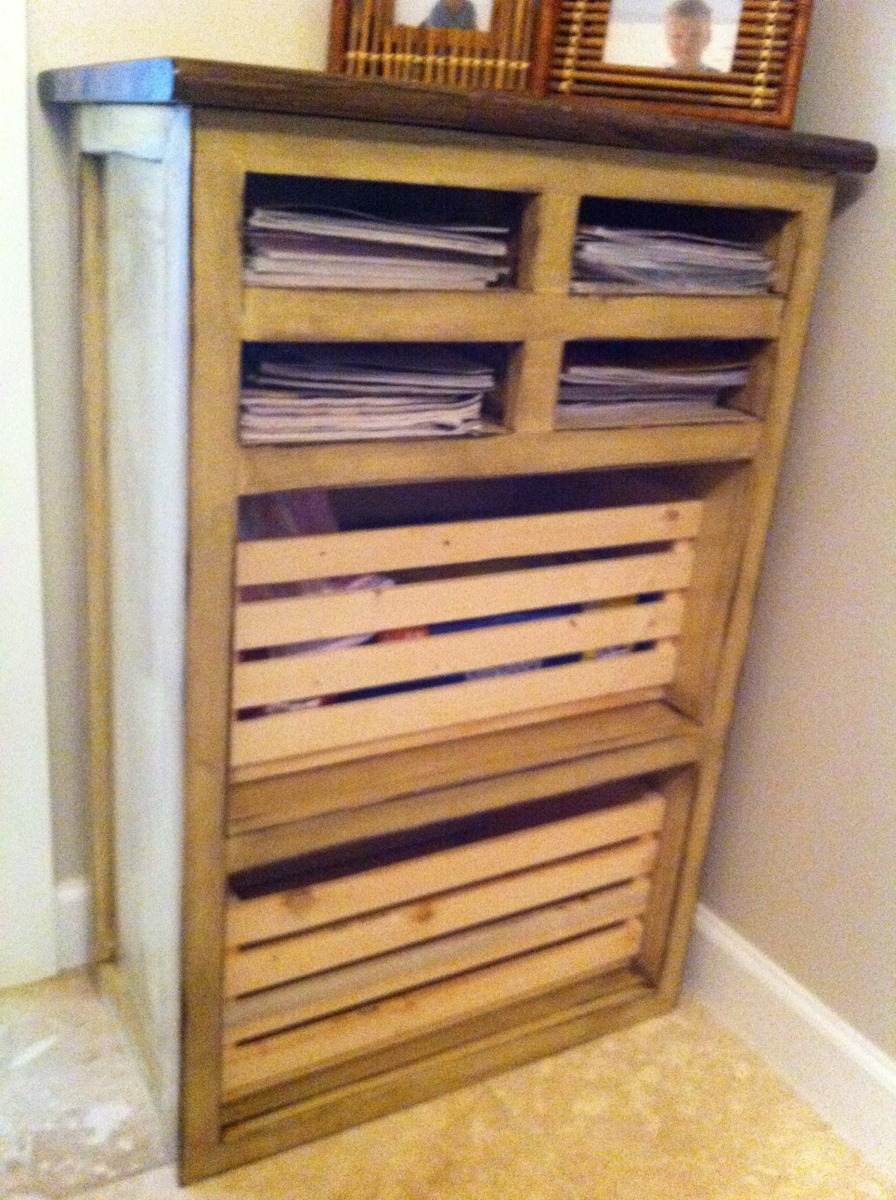
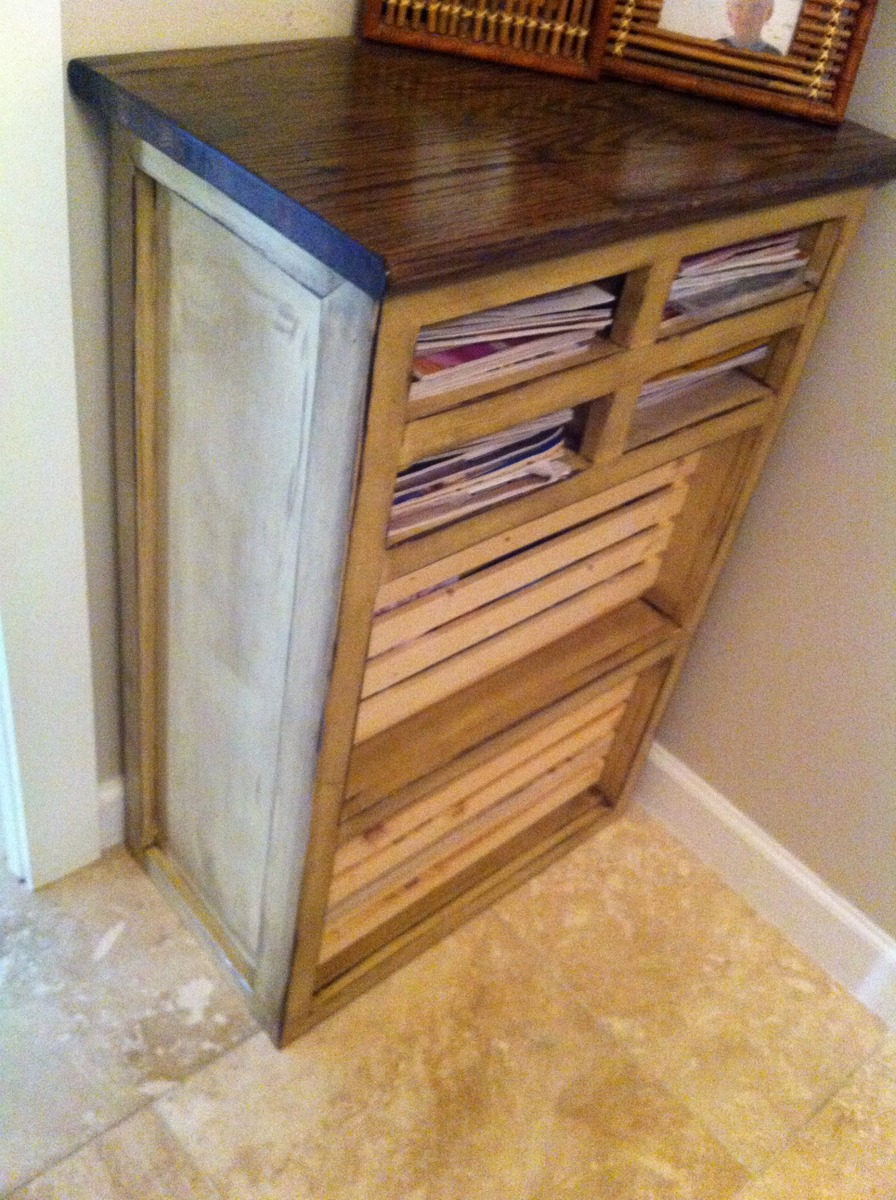
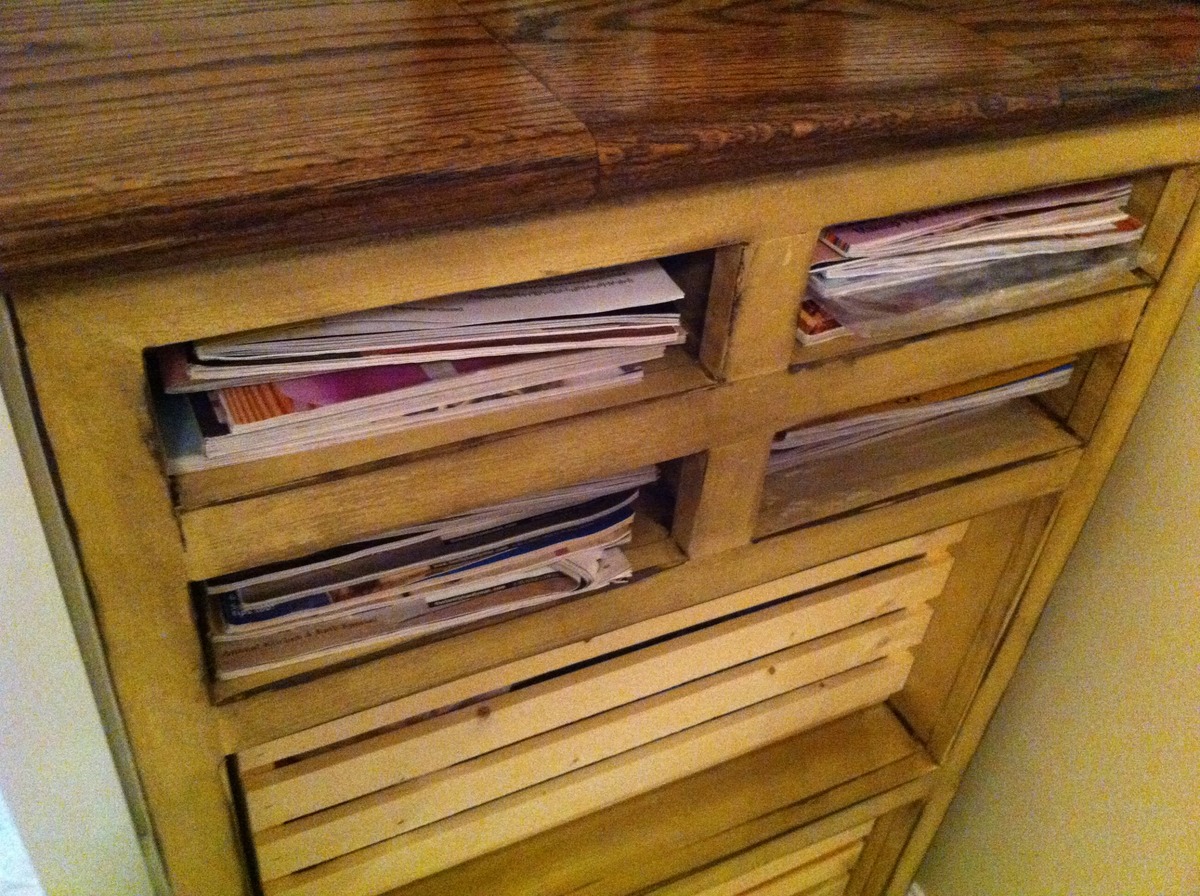
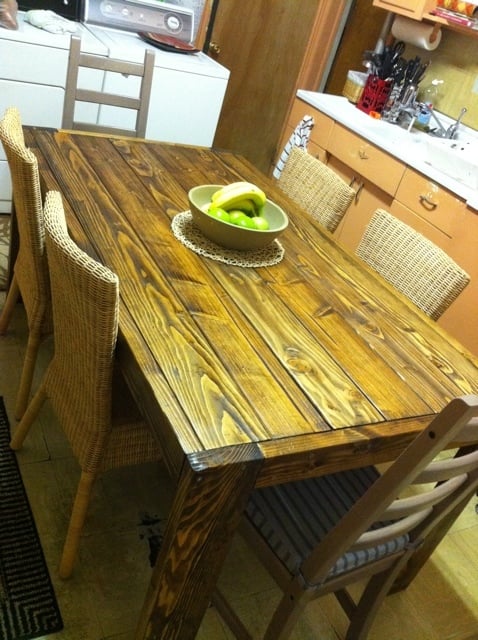
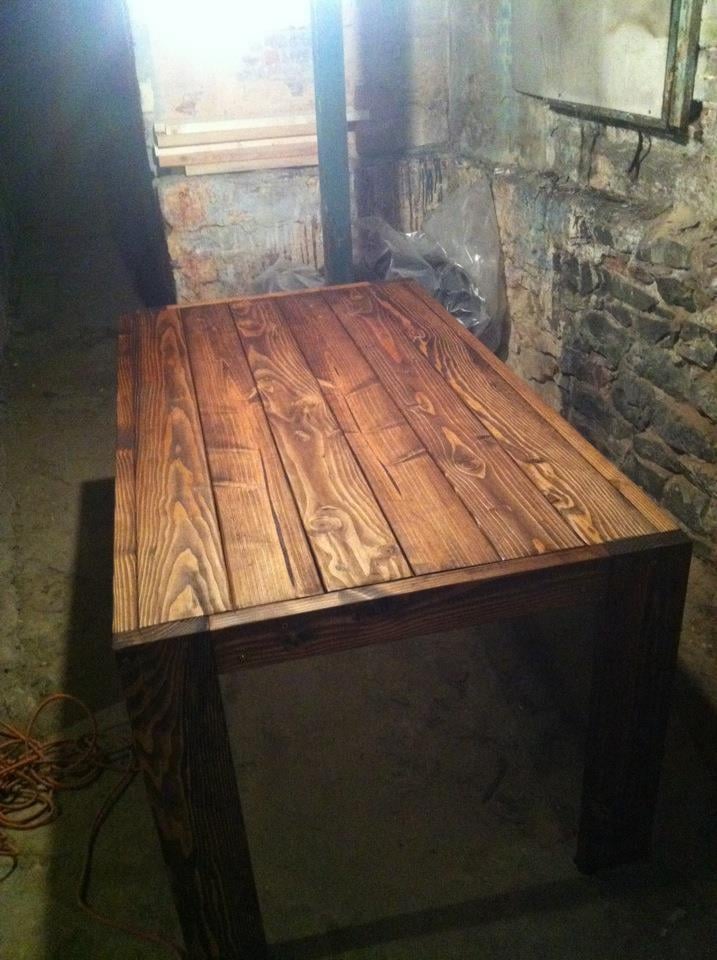
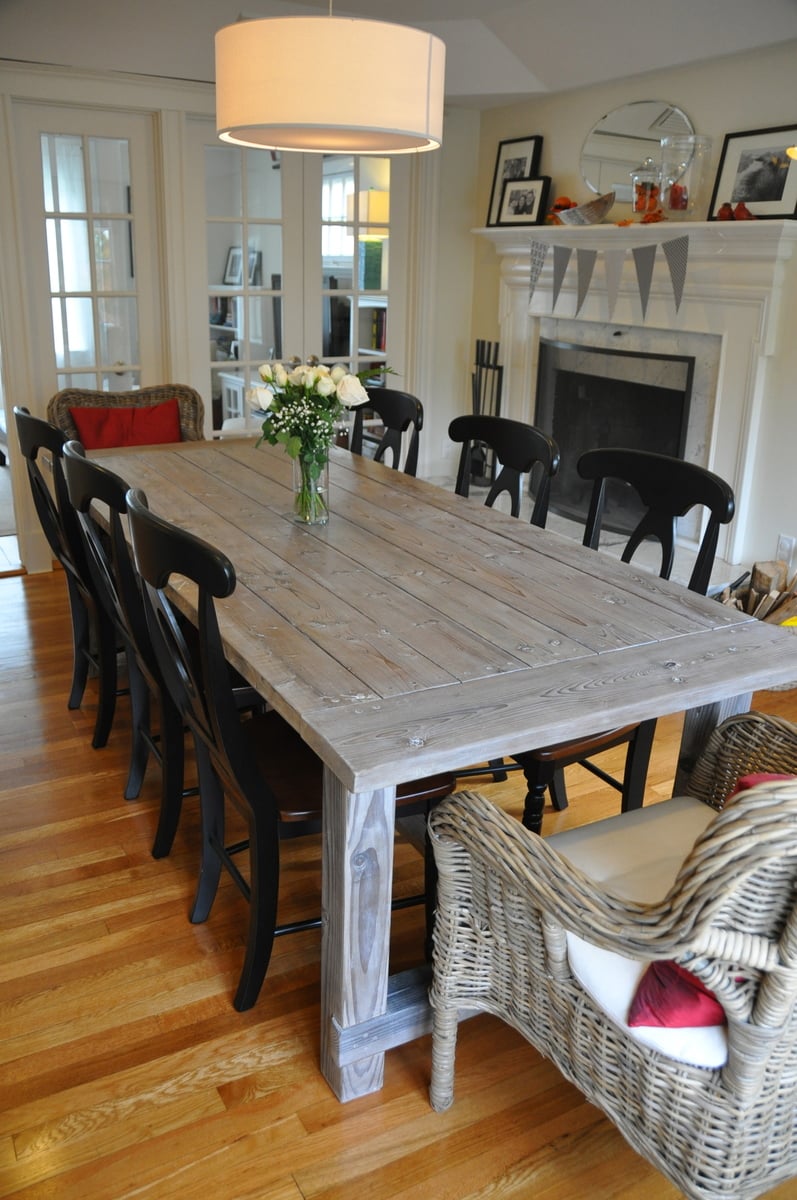
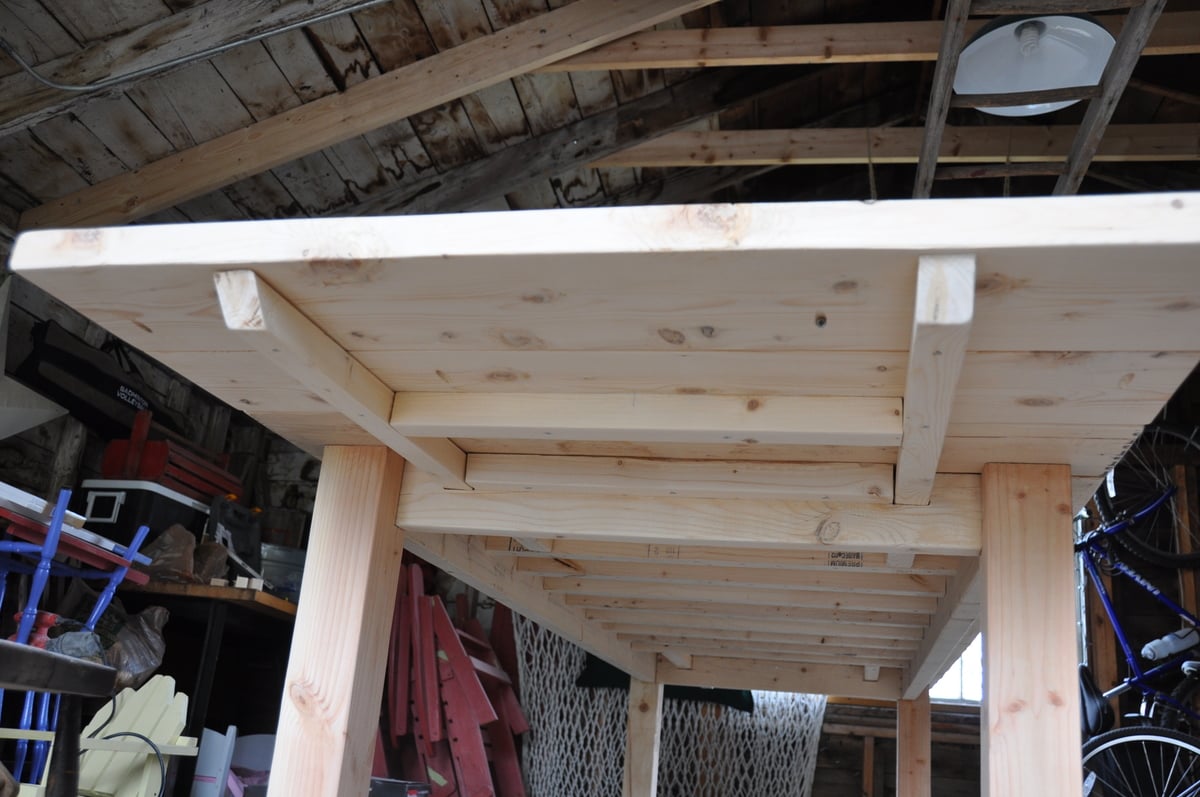
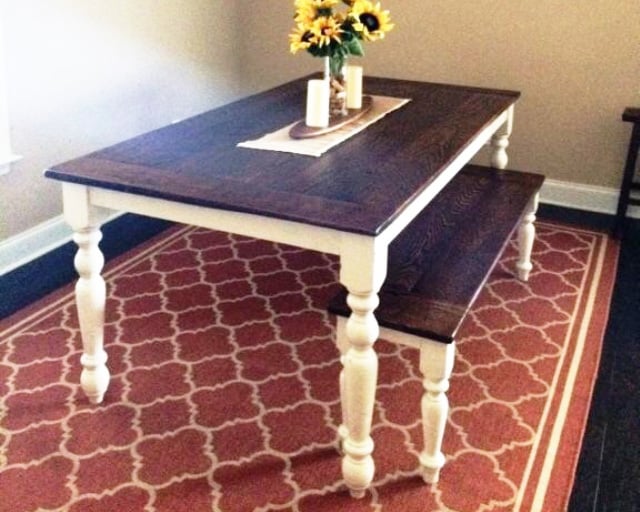
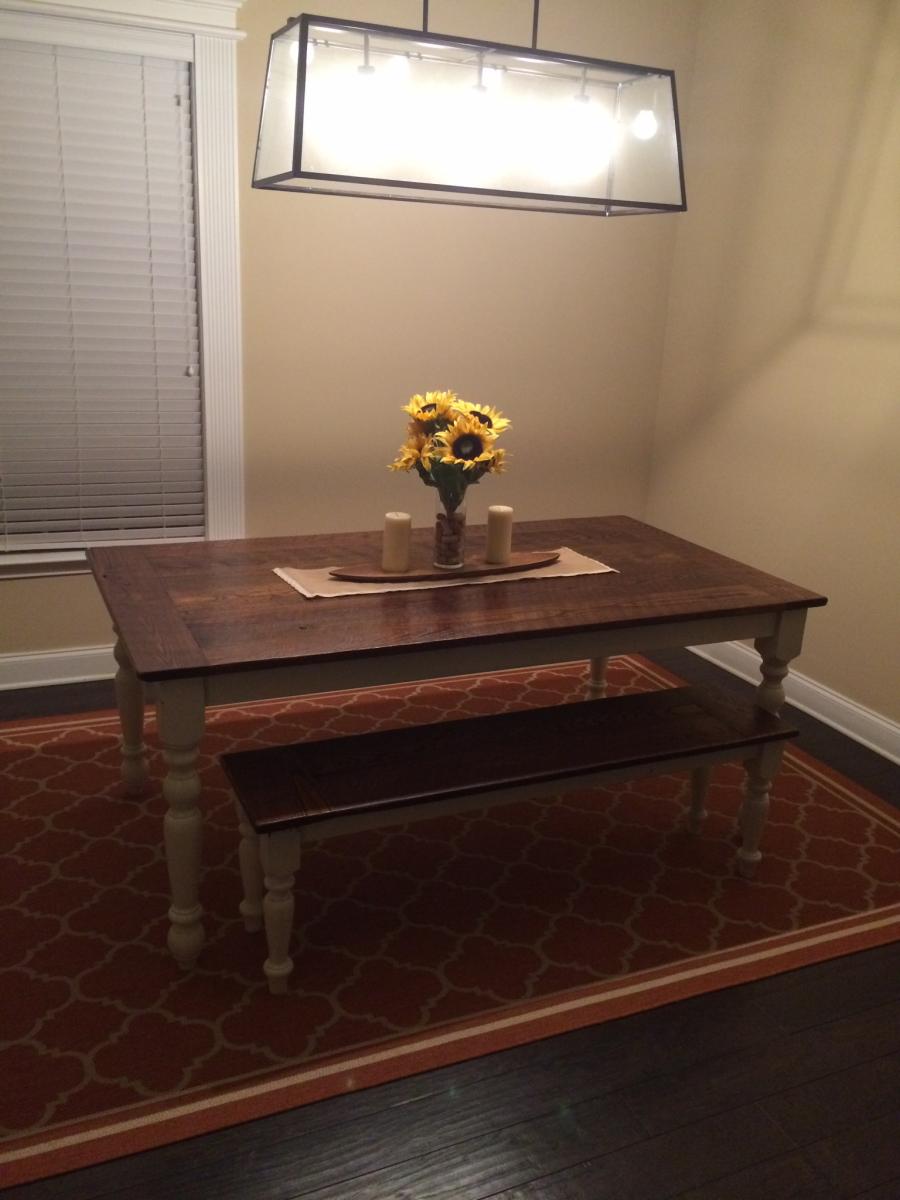
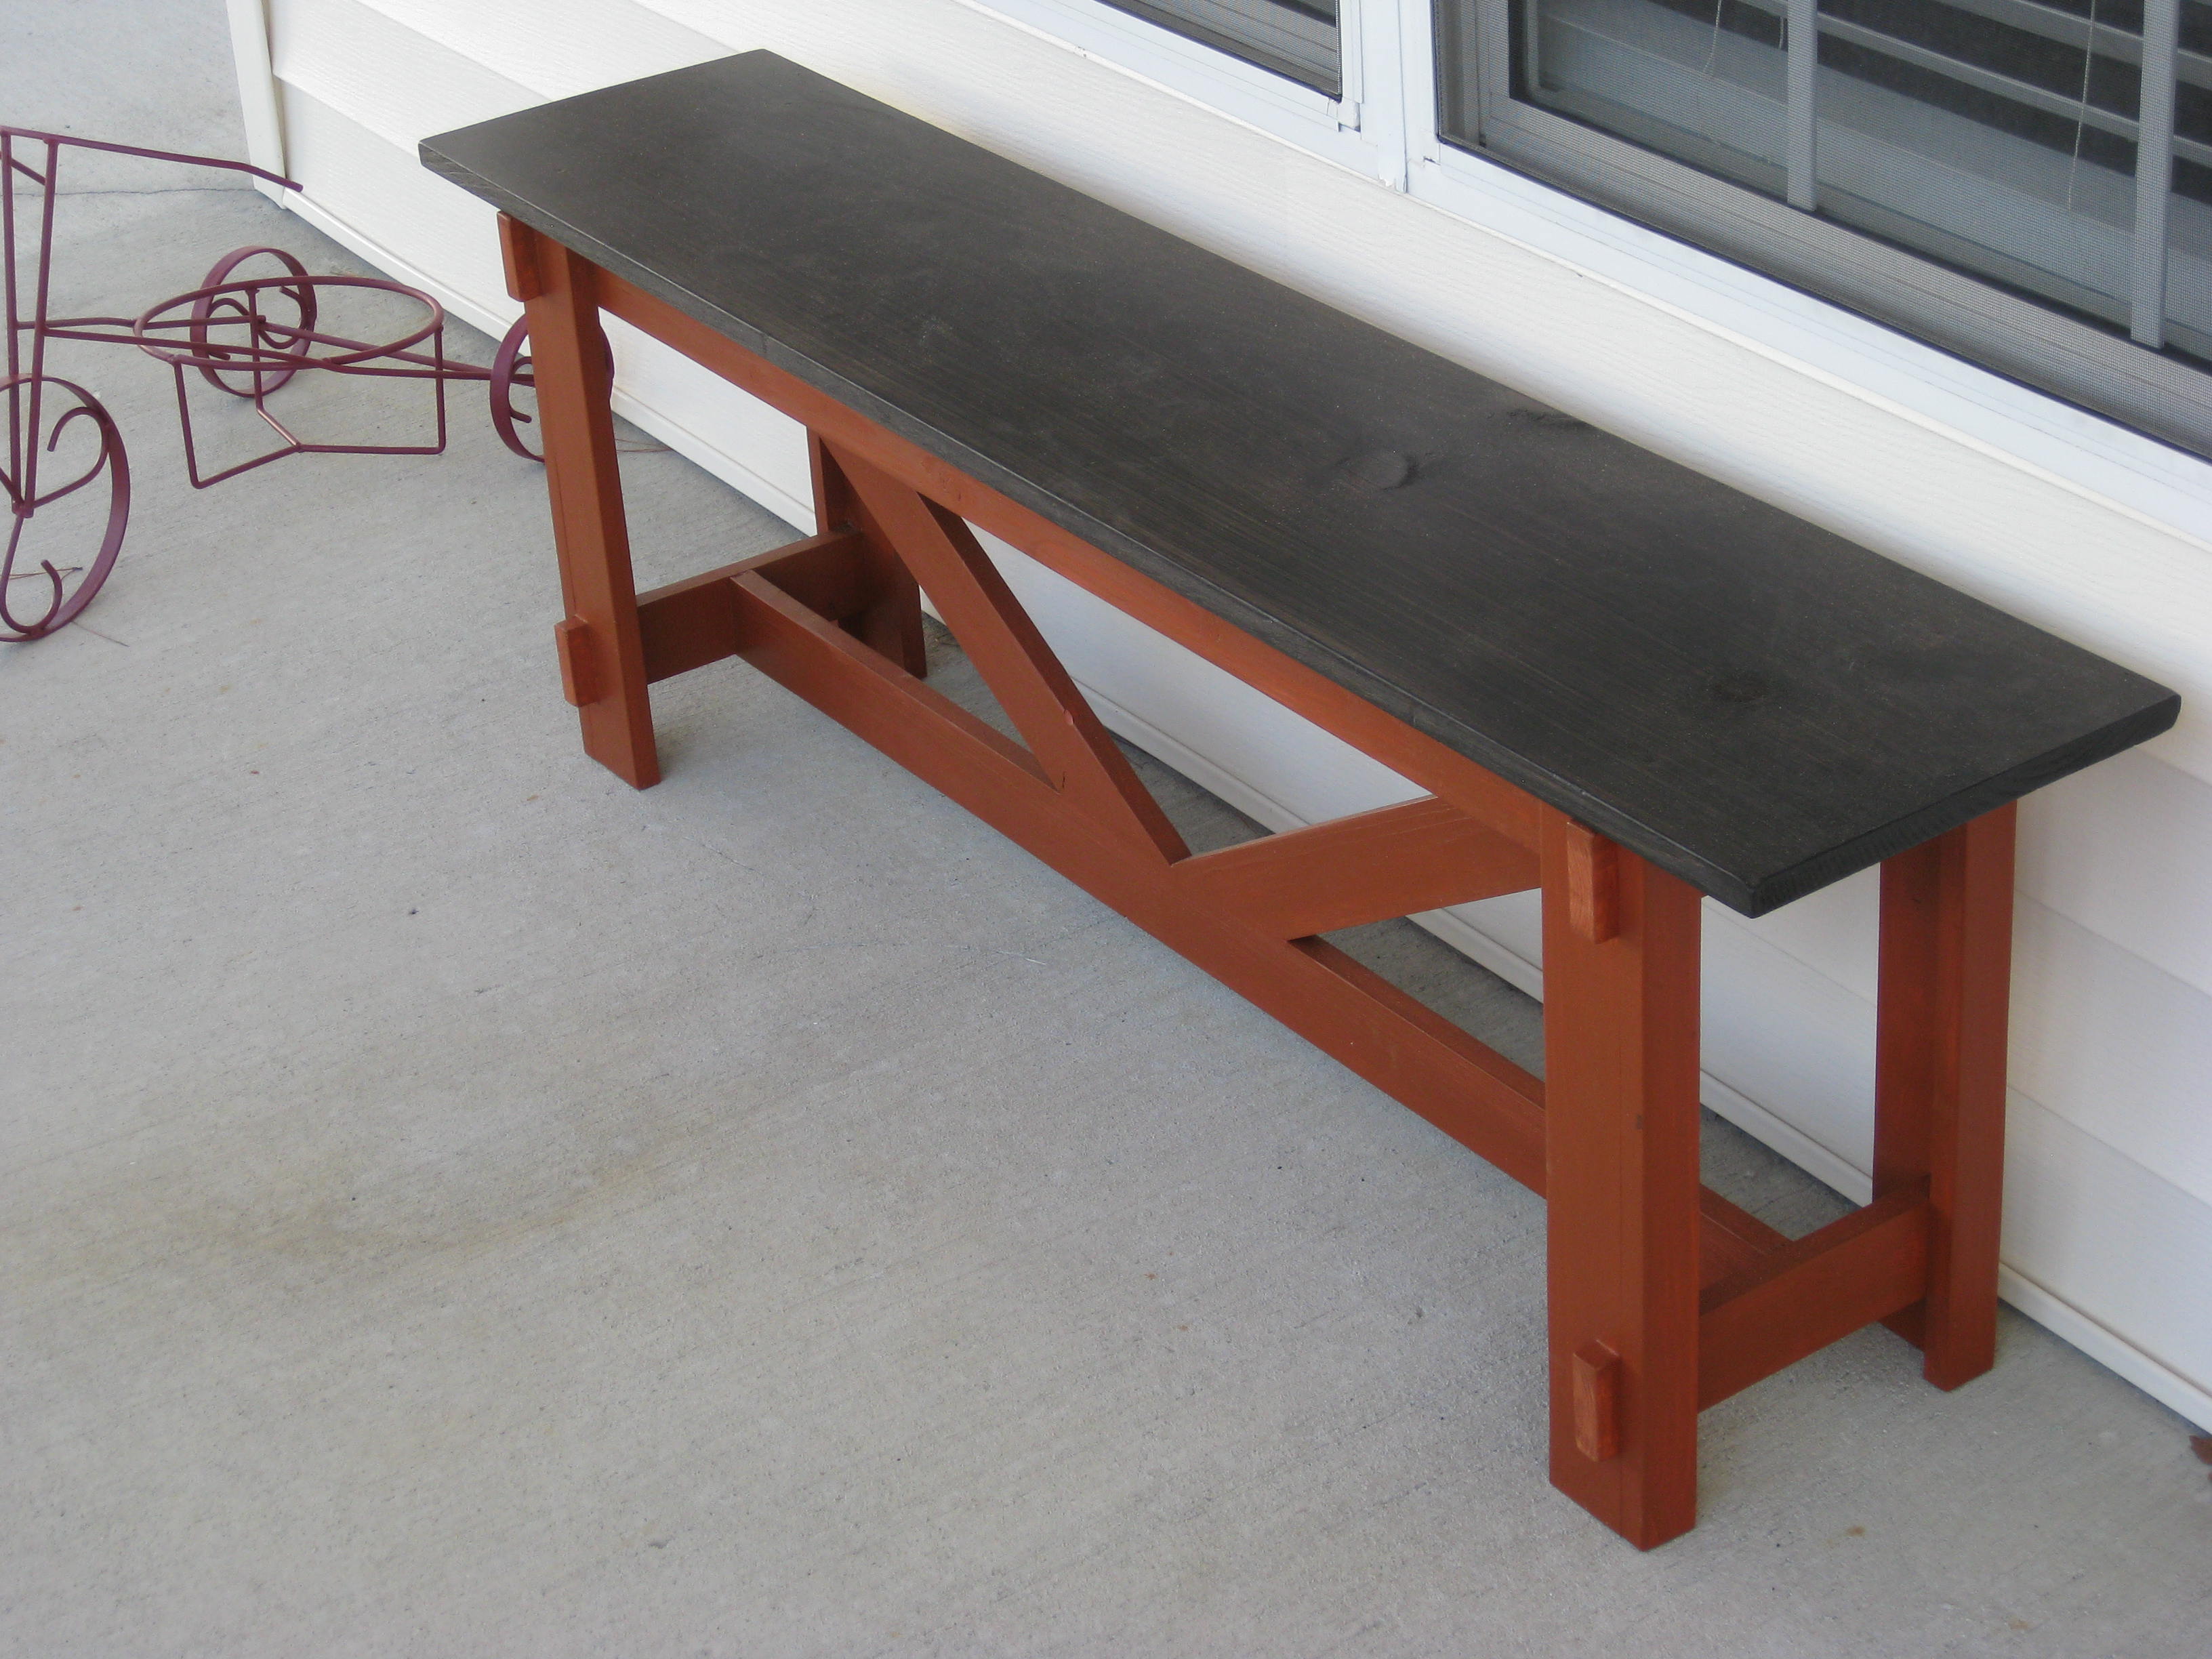
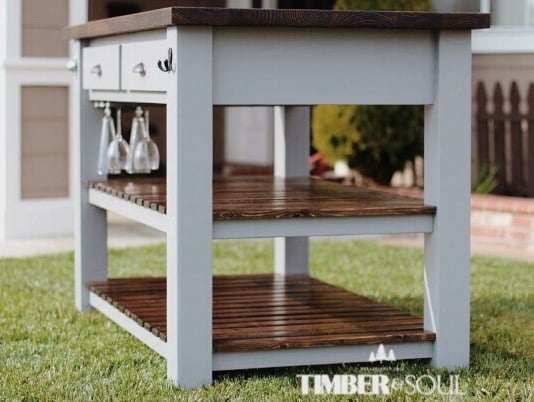
Anyway, this table is a mix between a regular Tryde Table and the Benchwright Table. I liked the thick, heavy look of the Benchwright Table's top, but did not want to sacrifice the ends' leg space by including the trestle.

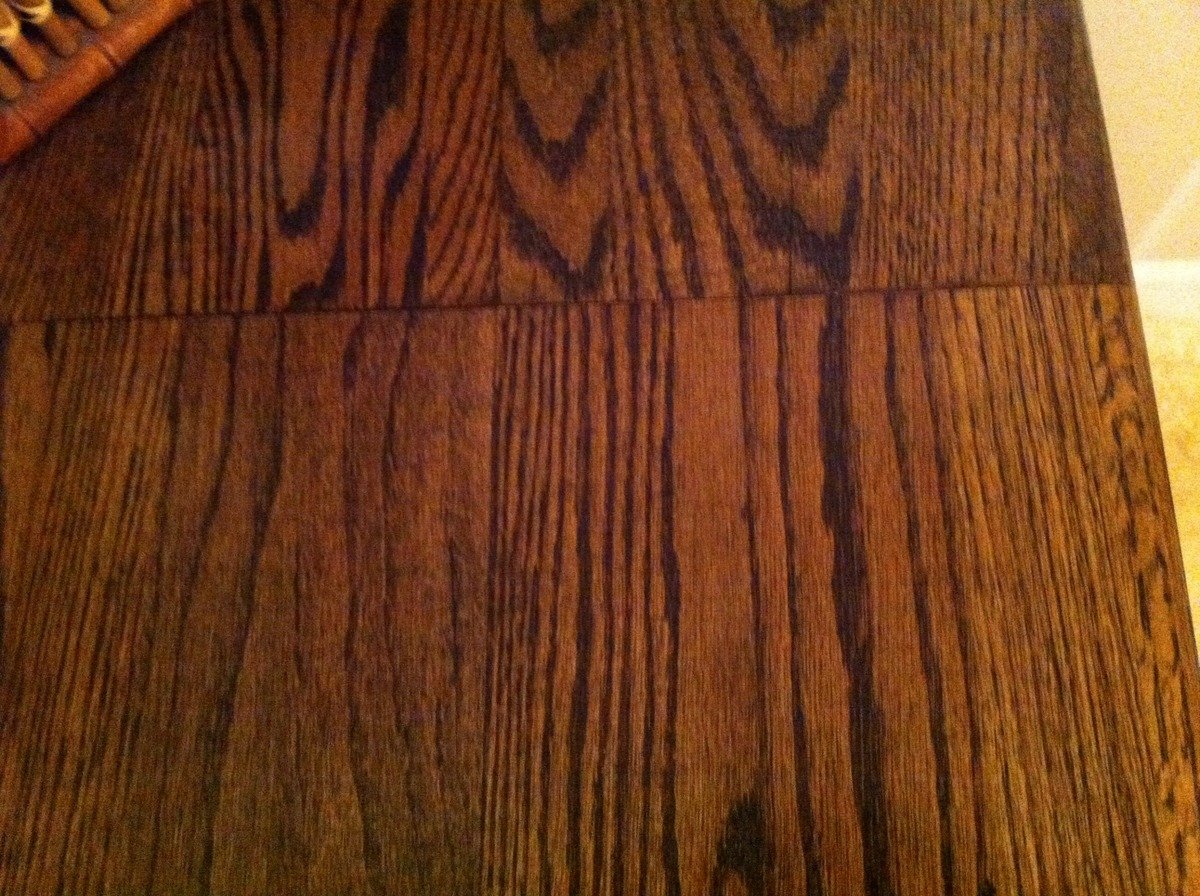
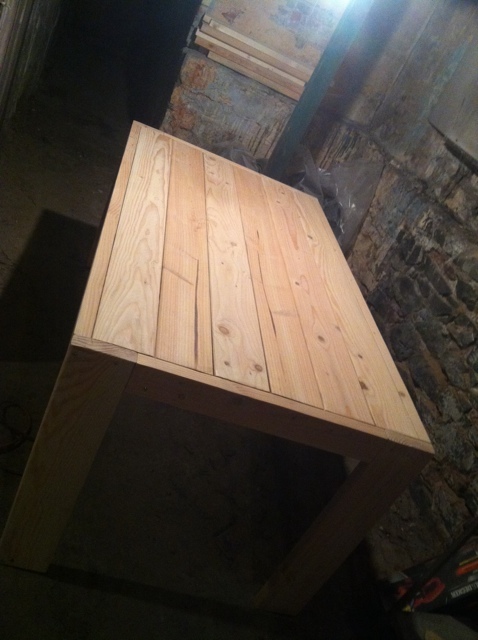
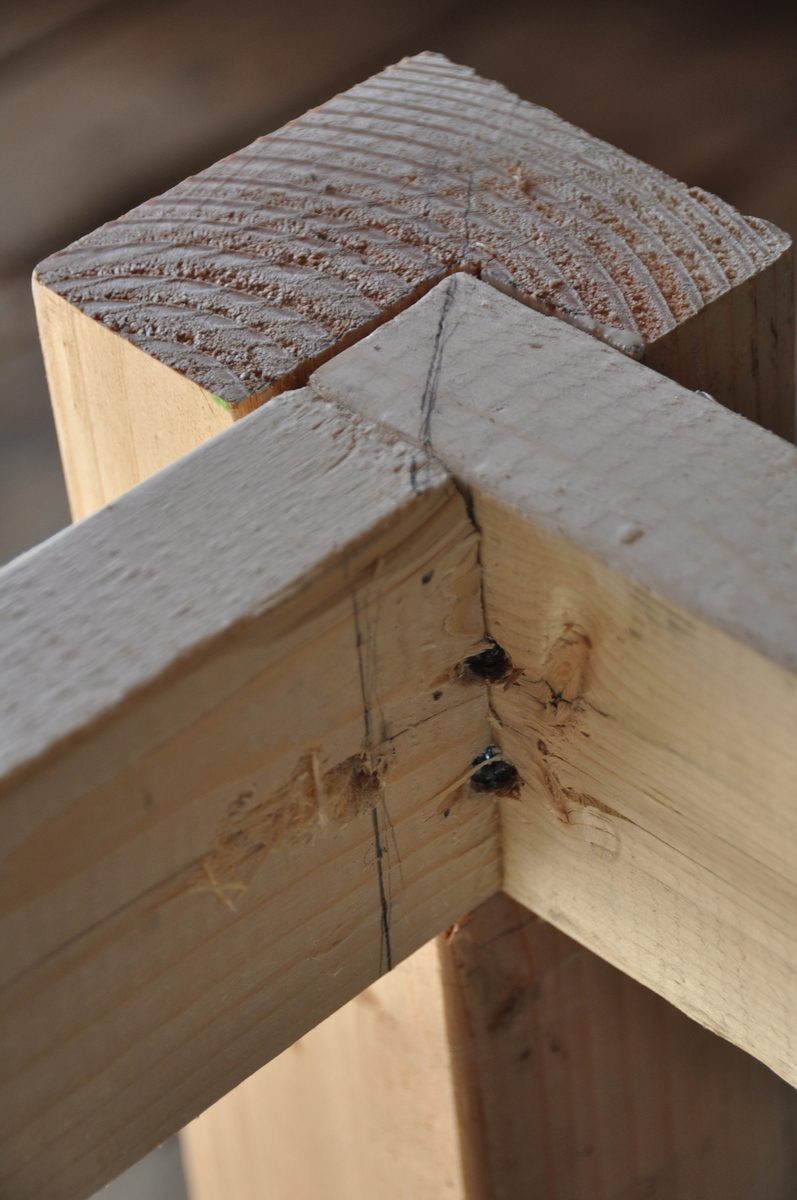
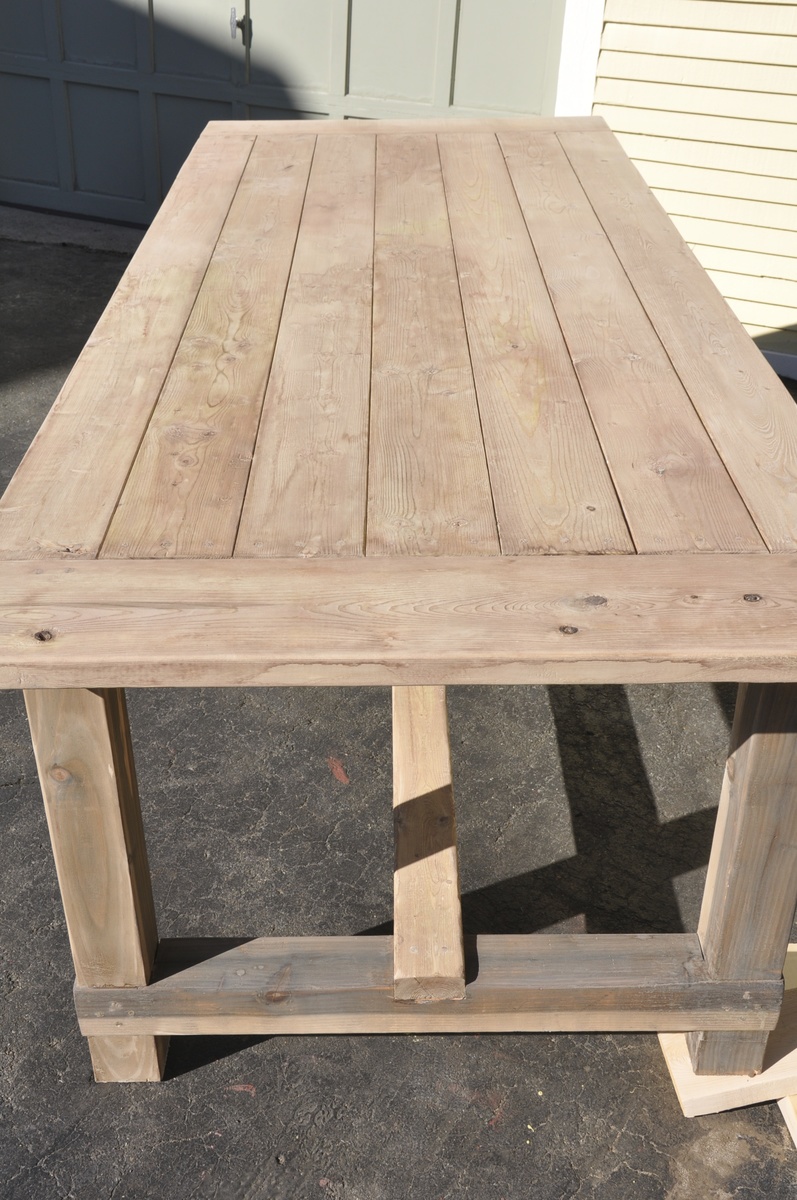
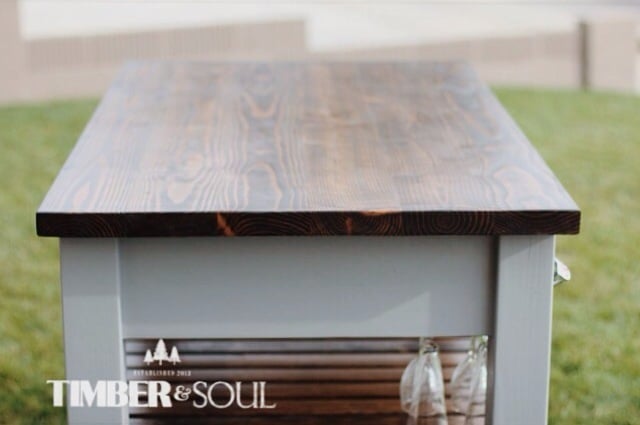
So, this is pretty much a Tryde Table, with the faux-thick top of the Benchwright and 4" x 4" legs. I used Select Appearance Pine for the top boards. I did this more to ensure I got straight edges than for the surface finish quality. But I like the end result.

Dimensions: 74 1/4"L X 38.5"W X 30"H

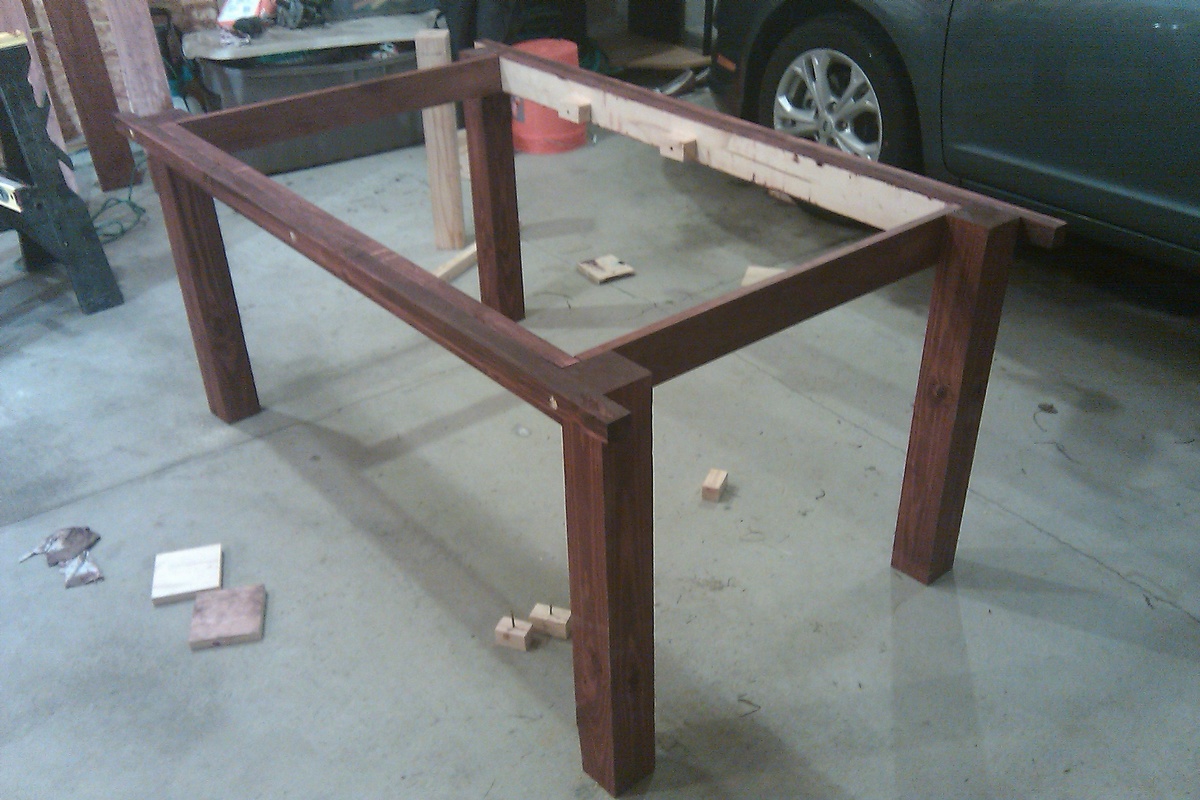
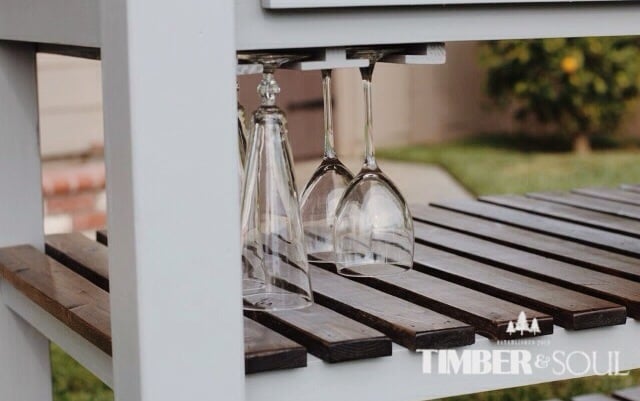
Lumber: 4" X 4" legs, S4S 1" pine boards top, 2" X 4" aprons.

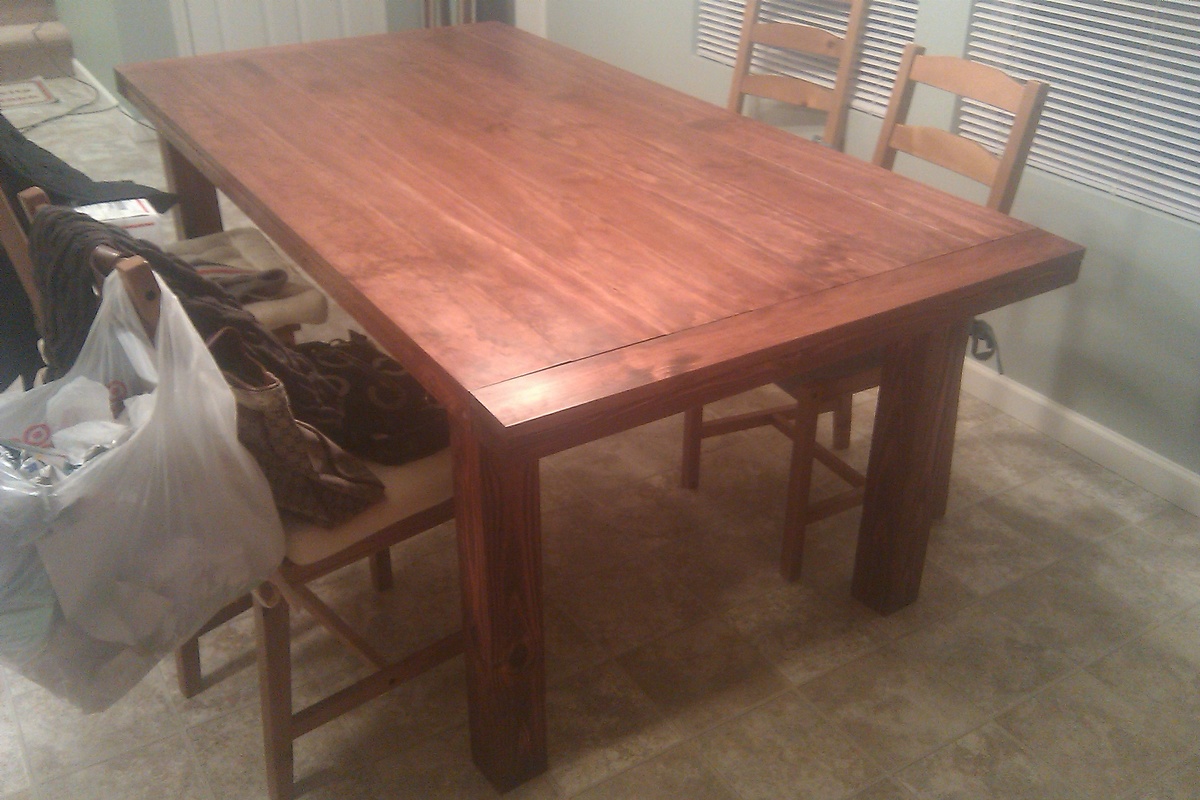
Finish: Red Mahogany

Cost: $160

Total time: 10 hours.

Estimated Time Investment
Day Project (6-9 Hours)
Finish Used
Red Mahogany
Recommended Skill Level
Beginner

Comments

mikejillnelson

Mon, 12/05/2011 - 17:28

You should be proud of yourself for not only doing a wonderful job on this table but for trying again! I love Ana's site because it allows each of us to begin small and build (no pun intended) bigger and more complicated as we learn!

Built-In Desk

Hi there! I made a built-in desk for our long rectangular living room using a granite top on 4 cabinets... modified from a simple base cabinet plan. It was a blast to build & my family really enjoys it! :D

Estimated Time Investment
Weekend Project (10-20 Hours)
Finish Used
Latex paint
Recommended Skill Level
Intermediate

Twin over Full for my Girls!

Submitted by brguad on Sat, 11/16/2013 - 11:44

I have two girls and my youngest was getting out of a crib. I could build another bed or include both girls and build a bunk bed. I chose the bunk bed route with the approval of my wife and got started. I loved the plans from ana-white.com and decided to pull the trigger.
Total cost for bed not including the new full mattress was around $300. A huge savings from the estimated $1,500 from comparable beds on the market. This took me about 2 weeks total but that was a couple hours here and there. I would describe most of the work as beginner skill level but a couple of the steps had challenges but you could figure it out. My girls were out there helping me build and paint so it was also very memorable. Thank you again for all you do Ana.

Bobby

Estimated Time Investment
Weekend Project (10-20 Hours)
Finish Used
Sanded with 120, used a primer and finished with 2 coats of Pixie Dust. It's almost white but has a touch of pink.
Recommended Skill Level
Beginner

Comments

Lindsayayer

Wed, 12/18/2013 - 09:34

I'm new to the site & love this for a potential kids room. Where can I fin the plans w/ specs & materials? Thanks.

brguad

Wed, 12/18/2013 - 12:09

I used the twin simple bed plans, full simple bed plans and the twin over full plans for the ladder. It was easier to just print them all off. Hope that helps

Outdoor Daybed by Ana made by Kevjewel

Submitted by kevjewel on Sun, 02/14/2016 - 17:56

I wanted a Daybed so I could relax outside and read. I found this bed plan on Ana's site. My hubby helped me a lot (I had no wood working experience).  I ended up staining and putting on Spar to protect from there Texas sun.  I use a blowup camping mattress and twin bed mosquito canopy netting!

Love love, my bed. 

Thanks Ana! 

Jewels 

Estimated Cost
$200
Estimated Time Investment
Day Project (6-9 Hours)
Finish Used
Stain, spar varnish (Texas sun)
Recommended Skill Level
Beginner

Farmhouse Table

Submitted by Anonymous (not verified) on Thu, 10/03/2019 - 10:02

Received the wood from grandfather who had it rough sawn in Henry’s valley PA. I cut it down and made a more rustic top to go along with the standard base from osbourne and local lumber shop. Added the final touch with in memory of grandfather after his recent passing, at the time.

Built from Plan(s)
Estimated Cost
$200
Estimated Time Investment
Week Long Project (20 Hours or More)
Finish Used
Base was gel stain with homemade chalk paint. Top was general walnut stain
Recommended Skill Level
Beginner

Comments

Super Easy DIY Upholstered X Bench

Submitted by Anonymous (not verified) on Thu, 03/10/2016 - 16:36

I've wanted a nail head upholstered ottoman for forever. I came across this tutorial & Roque Engineers tutorial and combined them Super super easy guys! We made ours at 6' in length x 12" in width ( our room is SUPER small ) Check out our blog for more details.

Built from Plan(s)
Estimated Cost
45.00
Estimated Time Investment
Afternoon Project (3-6 Hours)
Recommended Skill Level
Starter Project

twin over full bunkbed

Submitted by sjknecht on Sun, 02/26/2012 - 14:38

This project was so much easier than I thought it would be when we started. If you follow ana's plans your bunkbed will be much stronger than anything you can buy for a fraction of the price. I would never do it but I honestly think I could park my truck on these beds. The finish is red mahogany stain with a couple coats of polyurethane over it. They say not to use dark stain over pine because of the uneven coat but i like the way it striped the grain. Not everyone's cup of tea but we love it.
We've all heard the saying "give a man a fish and you feed him for a day, teach a man to fish and you feed him for life. Thank You Ana for teaching me to fish. This was the first, but will not be the last project i do from your site.

Estimated Cost
about 200
Estimated Time Investment
Week Long Project (20 Hours or More)
Finish Used
minwax red mahogany stain, and 3 coats of minwax polyurethane
Recommended Skill Level
Beginner

Comments

Rustic bench

Submitted by Brian on Sun, 03/04/2012 - 08:39

Fun little bench to make for our front porch. We liked it so much we built 2 more smaller ones one for each of the kids to go with mommy and daddy's bench. Bought all the material at the home store and decided to use stain since it was going to stay outside. Used the same method with all my other projects sanded using 180 than 220 grit, wood filled all the cracks and the Kreg Jig made this simple.

Estimated Cost
30.00
Estimated Time Investment
Weekend Project (10-20 Hours)
Finish Used
2 in 1 stain samples
Recommended Skill Level
Beginner

Cedar 4x4 Truss Beam Table

We had gotten a piece of granite for free, so my husband modified the plans to fit the slab. We made one in pressure treated lumber and loved the look so we decided to make a nicer one in cedar. The benches are a little wider because of the size boards available. We could have ripped them down, but we prefer the wider seat. I will sand the seats and seal the wood to keep it looking fresh longer. We look forward to many great memories at our new table by our outside fireplace. Thank you for the great plans!

Estimated Time Investment
Day Project (6-9 Hours)
Recommended Skill Level
Intermediate

Kitchen Island

Kitchen Island built from ana white's plans. I attached a wine rack to the underside and changed the design of the shelves to support more weight.

Built from Plan(s)
Estimated Time Investment
Week Long Project (20 Hours or More)
Finish Used
Summit grey paint by sherwin williams and jacobean stain by minwax
Recommended Skill Level
Beginner

Comments

alpinecwt

Wed, 01/15/2014 - 09:34

Really like the contrast between the stain and the paint. Great job on your new kitchen island.

dragonsbb16

Tue, 09/02/2014 - 12:19

Did you use pocket screws for the shelf supports? Also, what were your dimensions for the shelf supports and shelf tops? They look like about 2 1/2" wide for the tops and 3" for the supports. Thanks in advance.