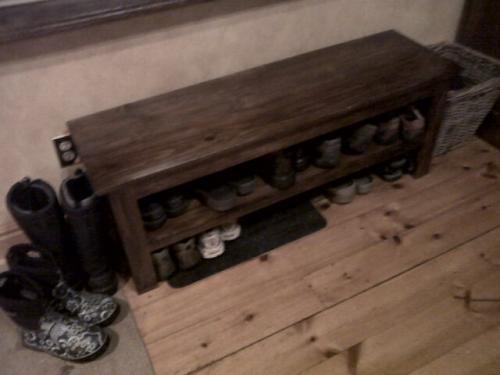
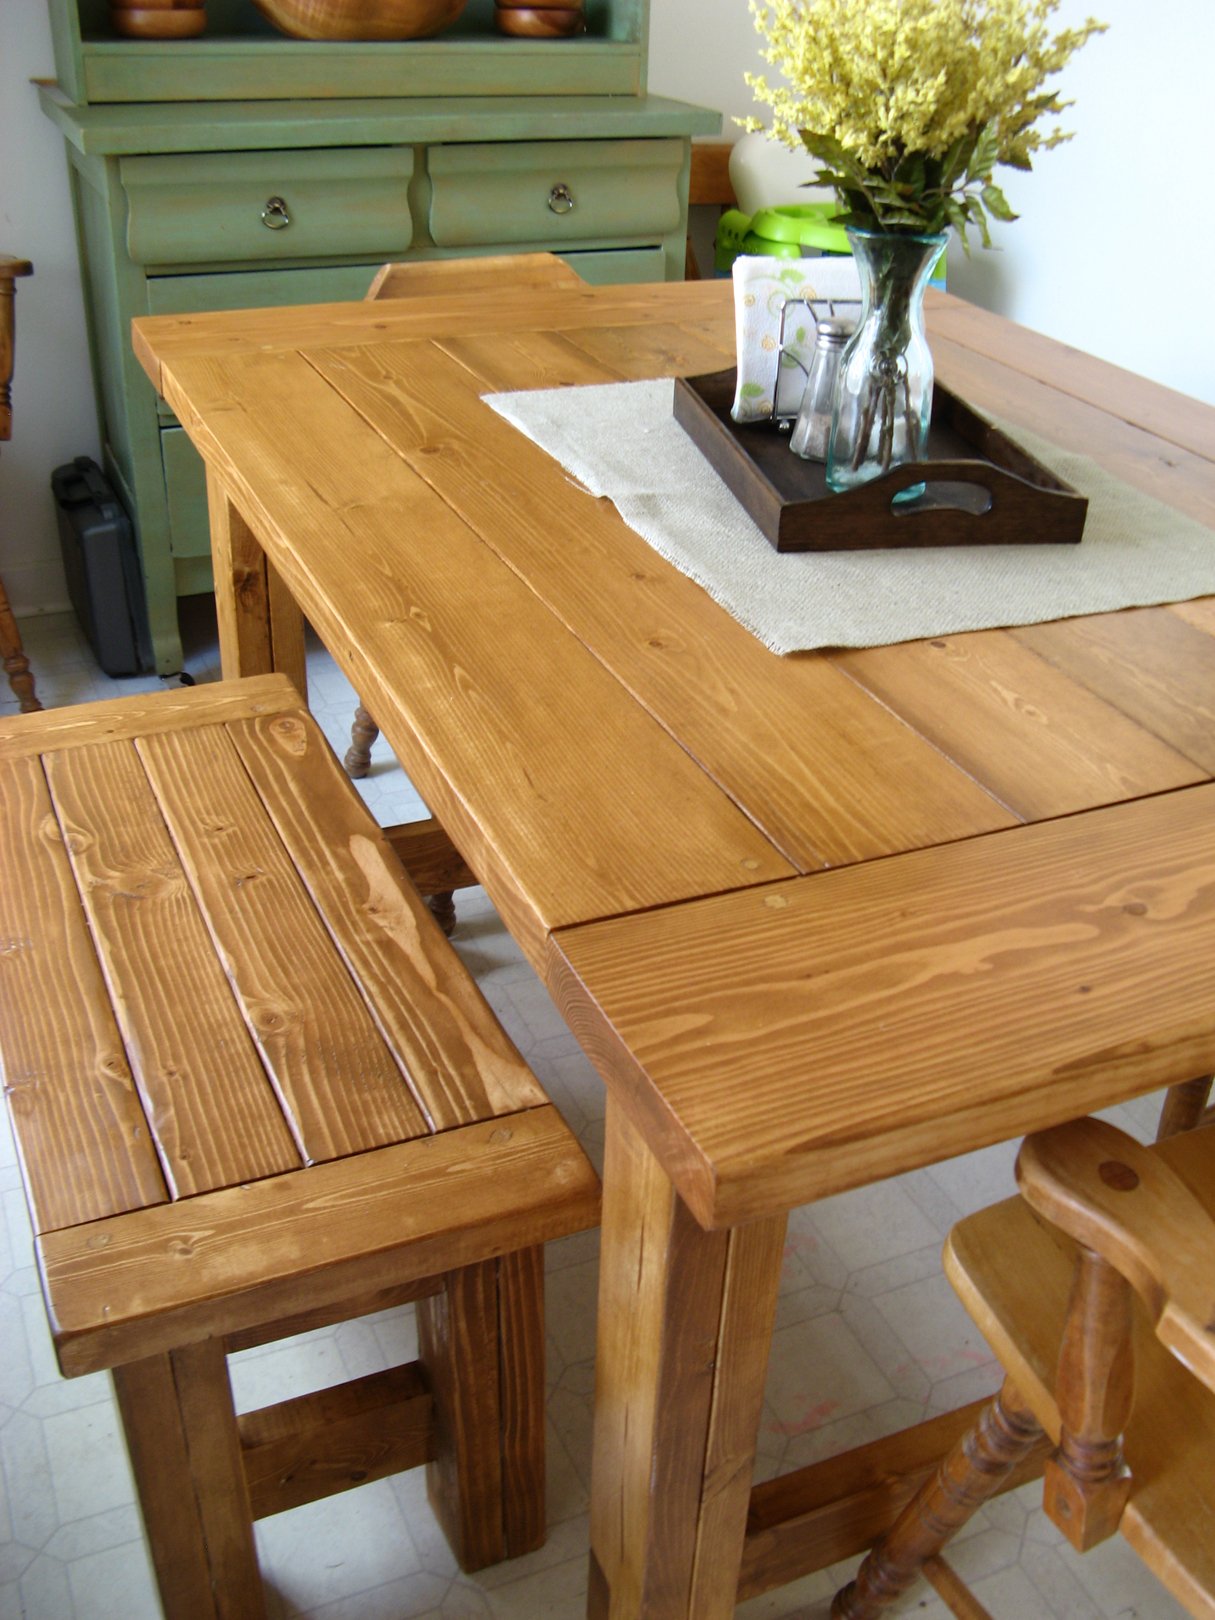
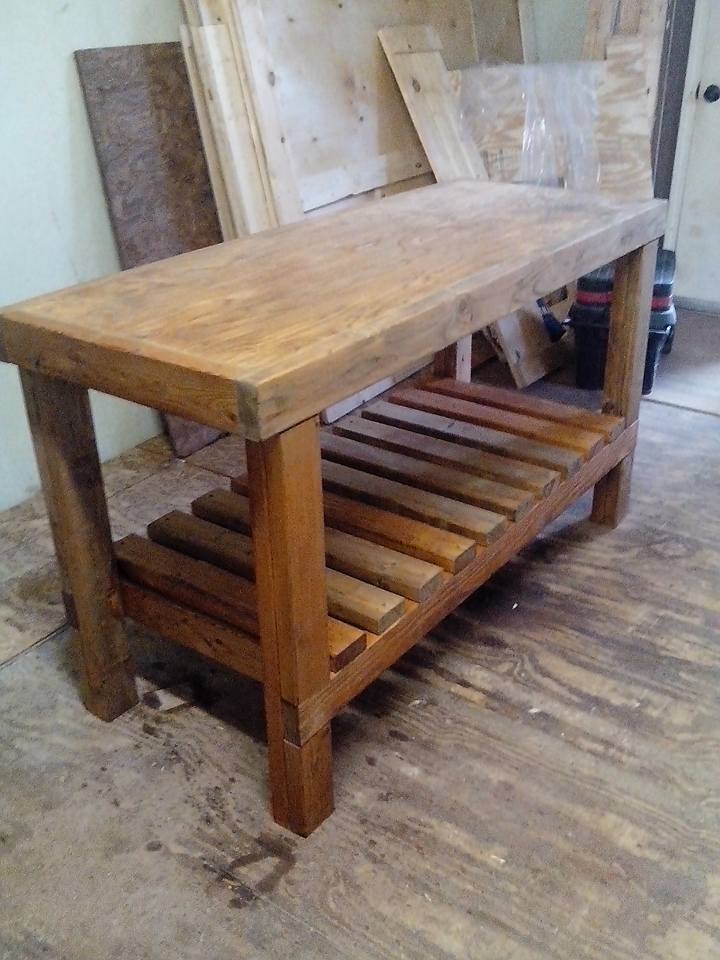
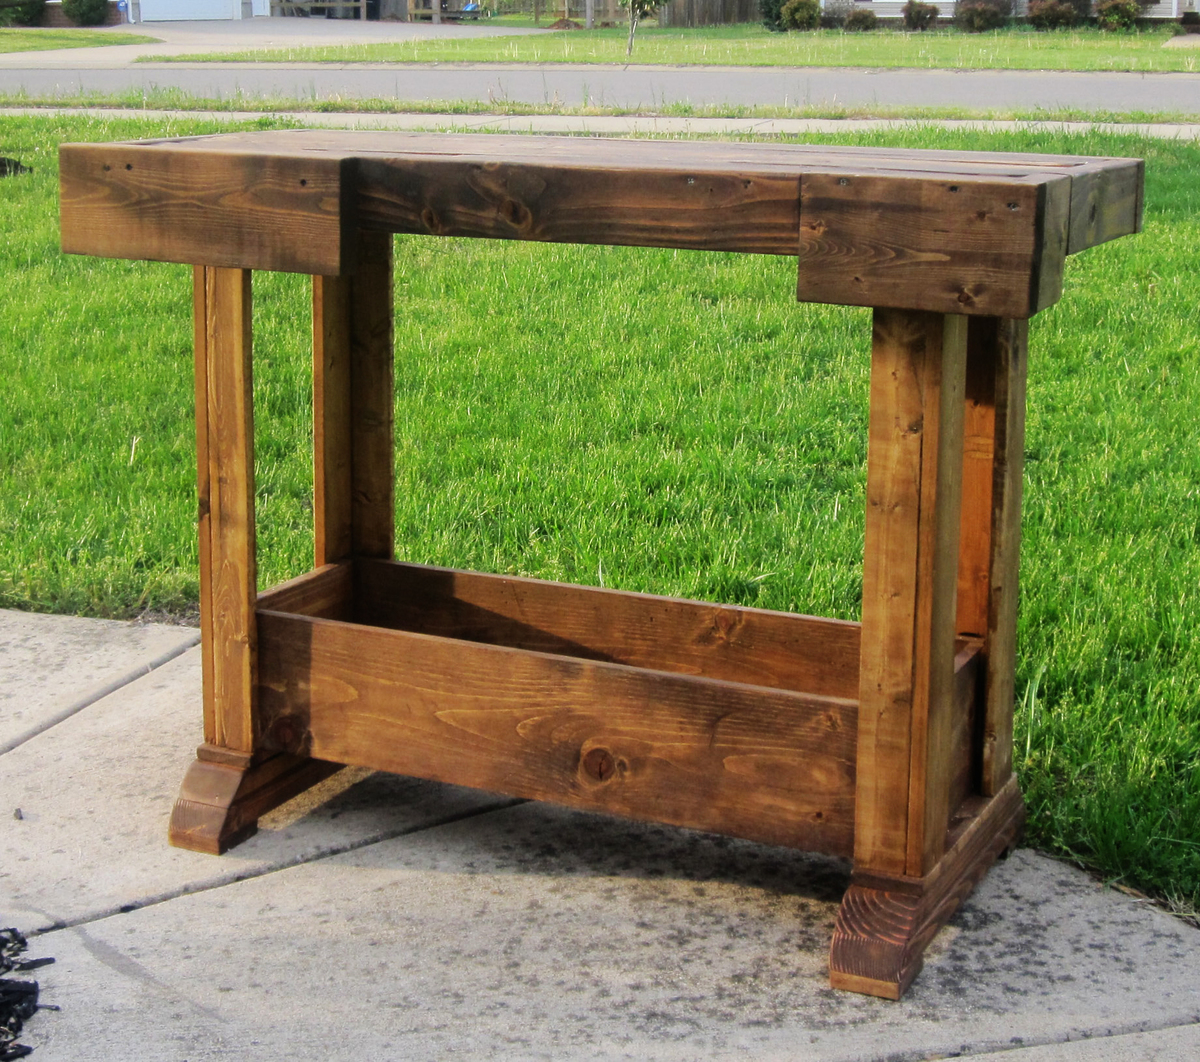
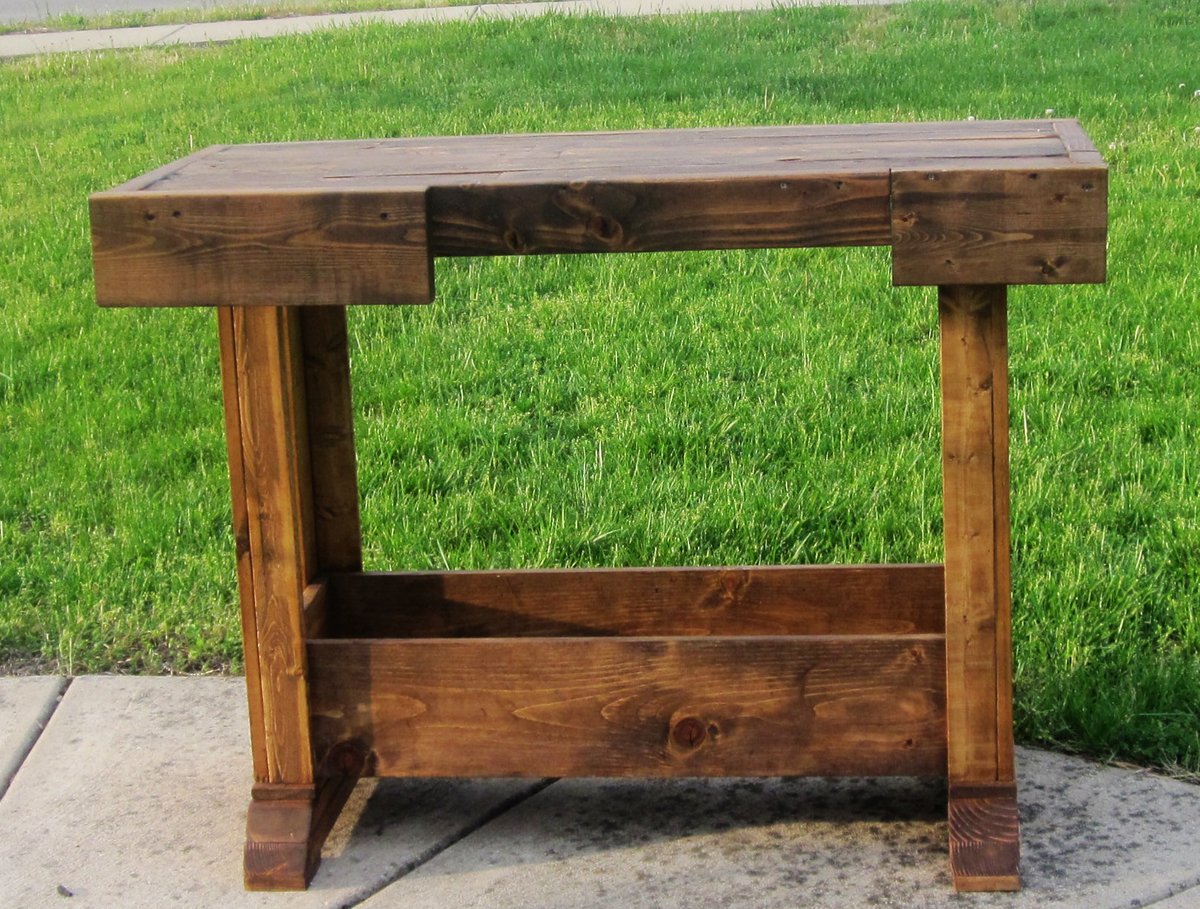
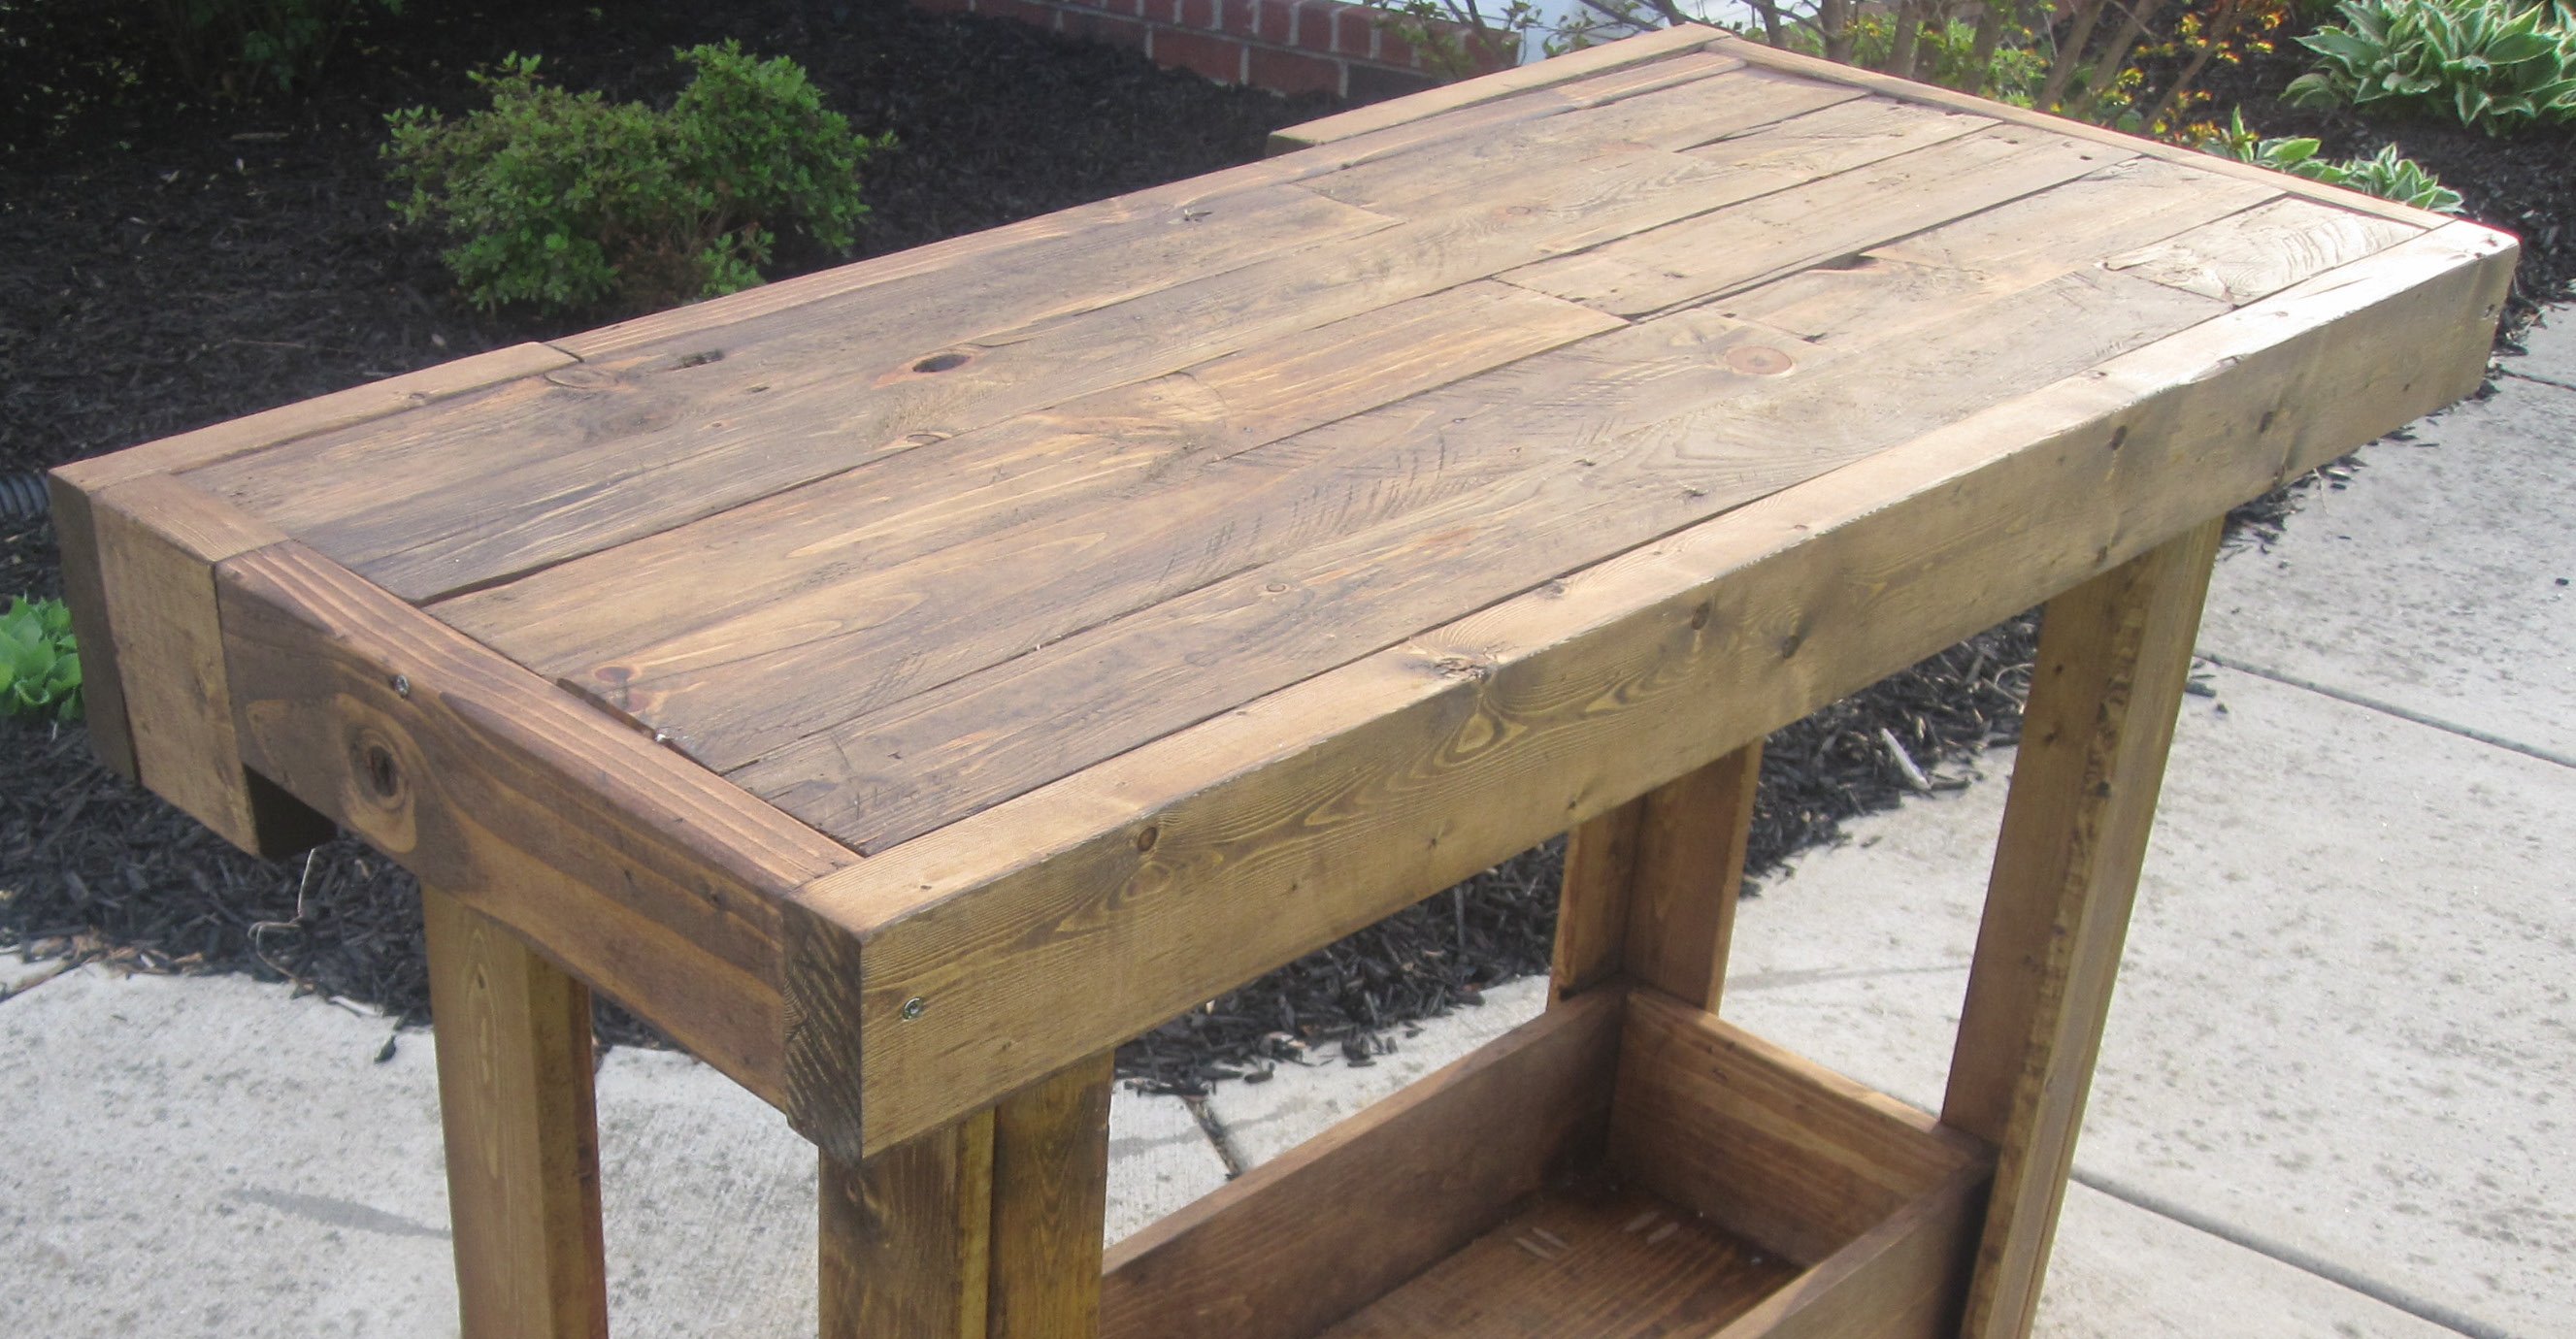
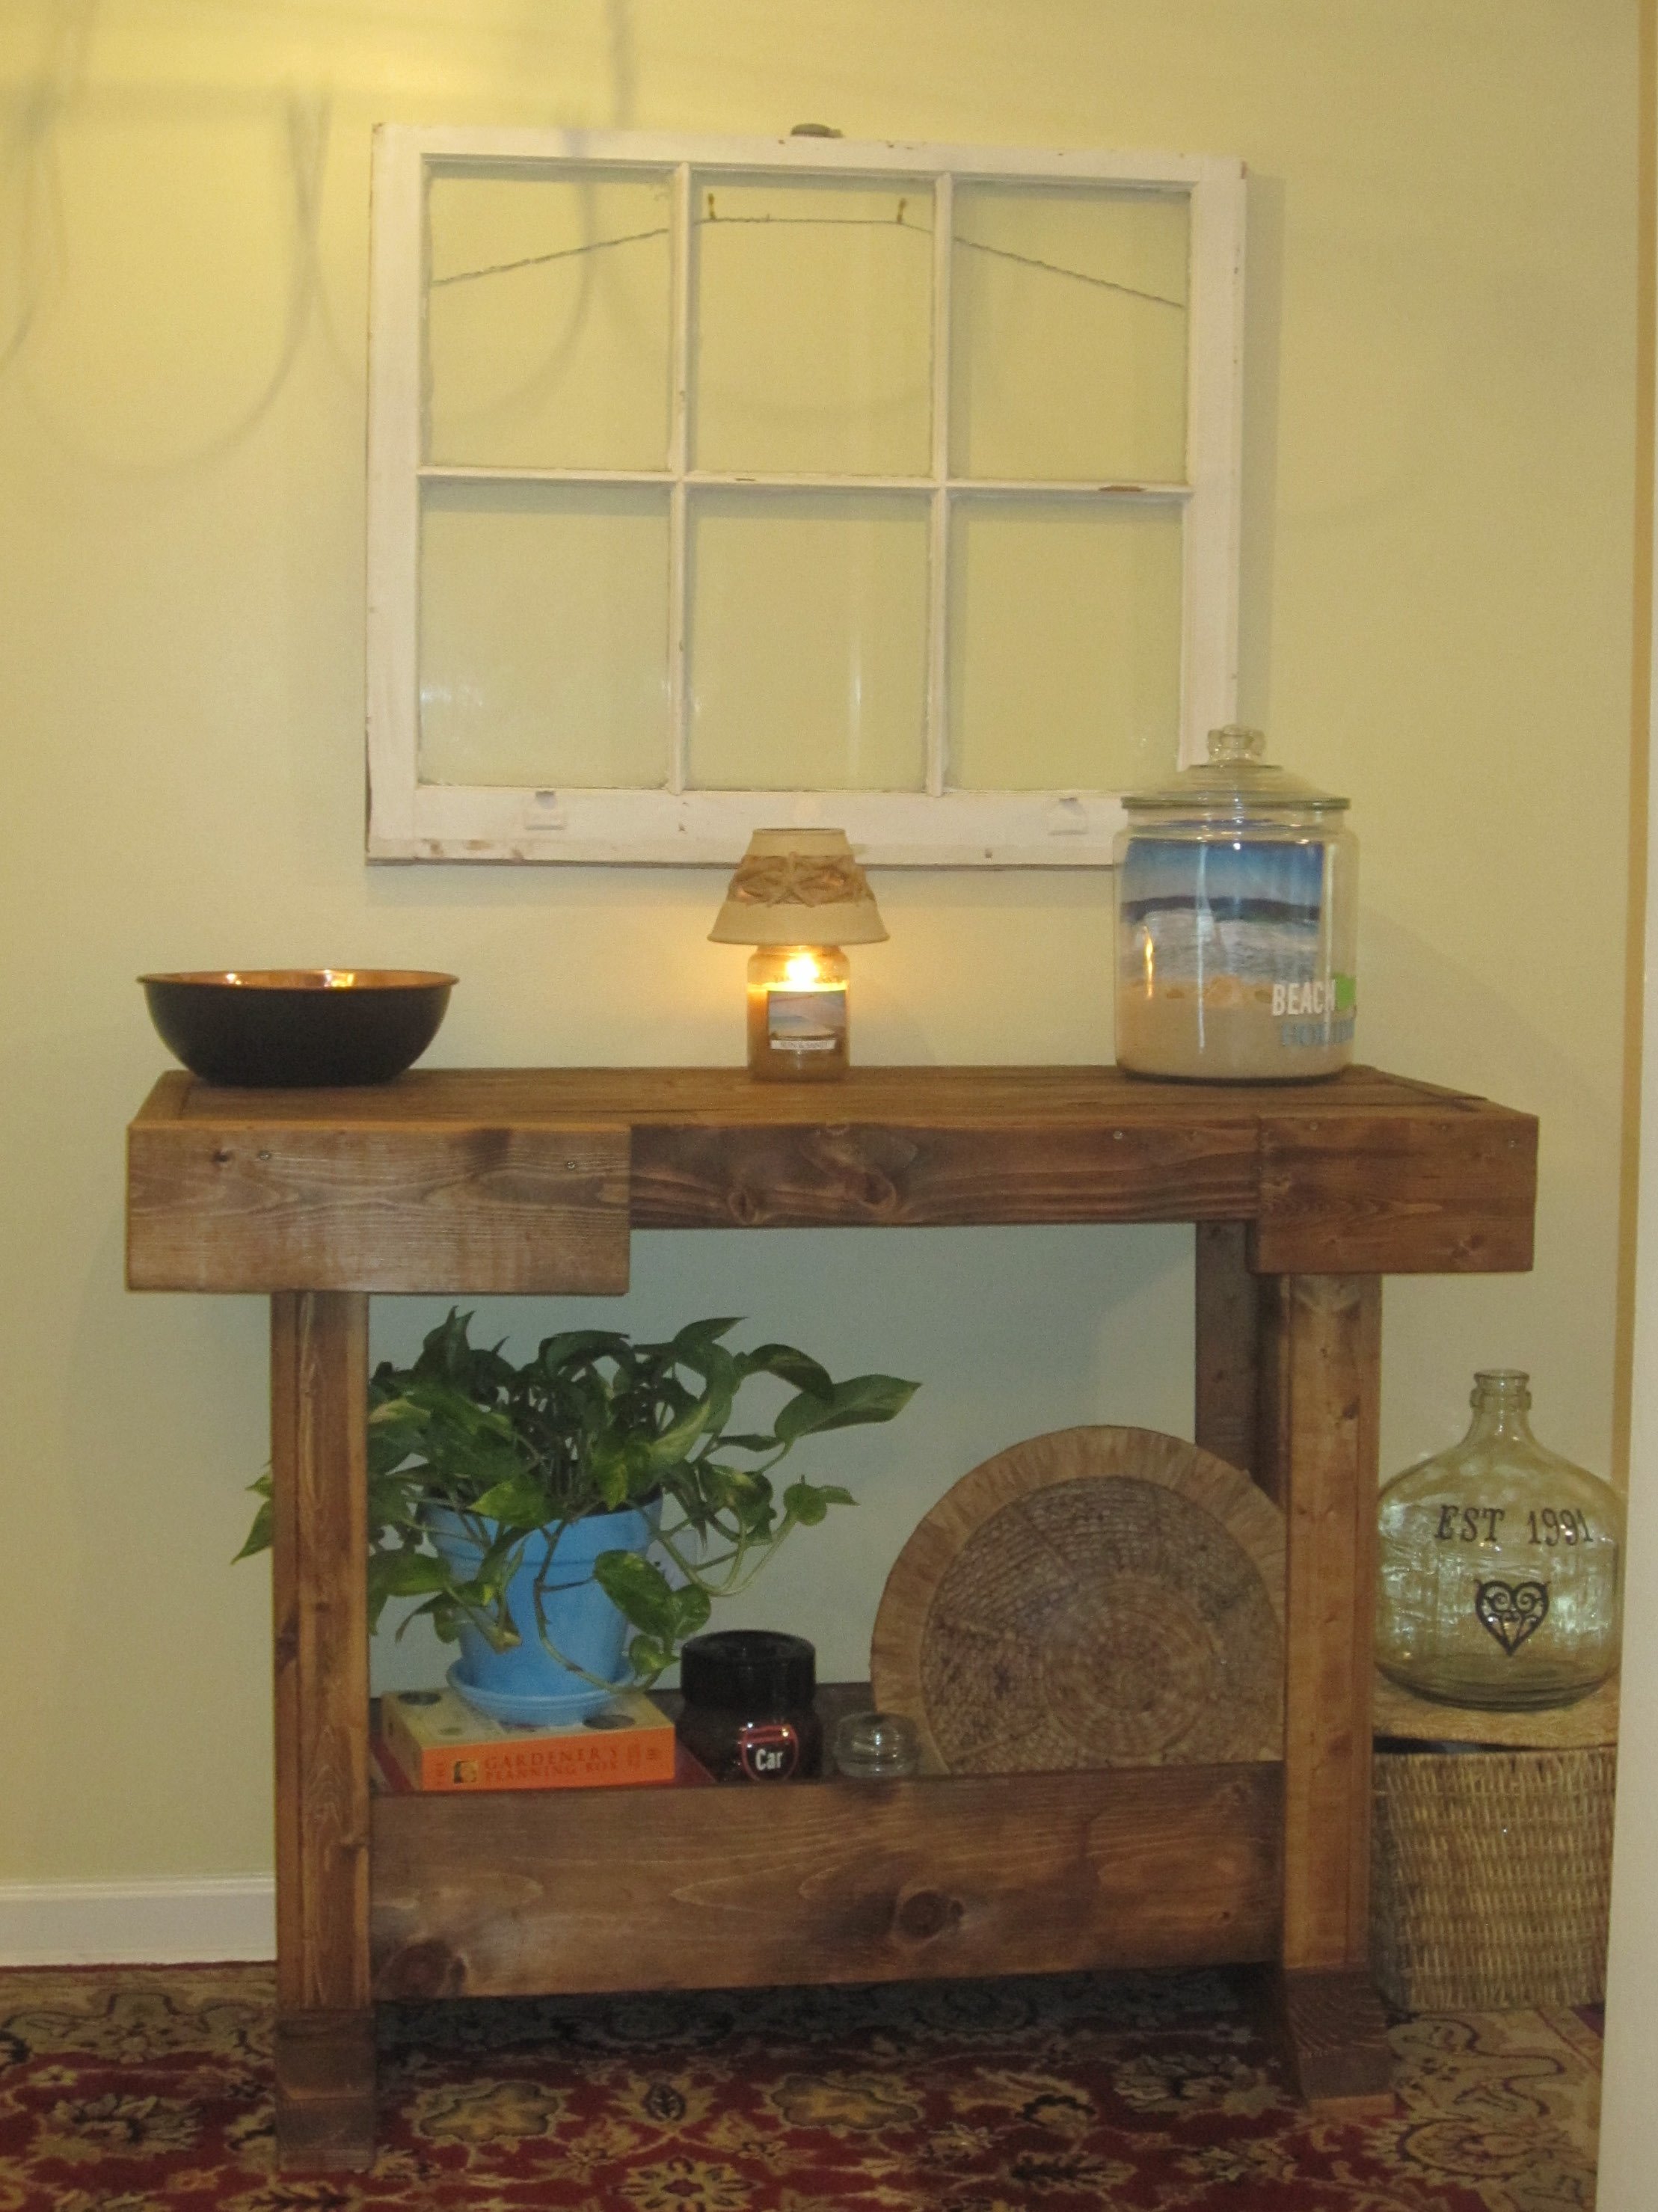
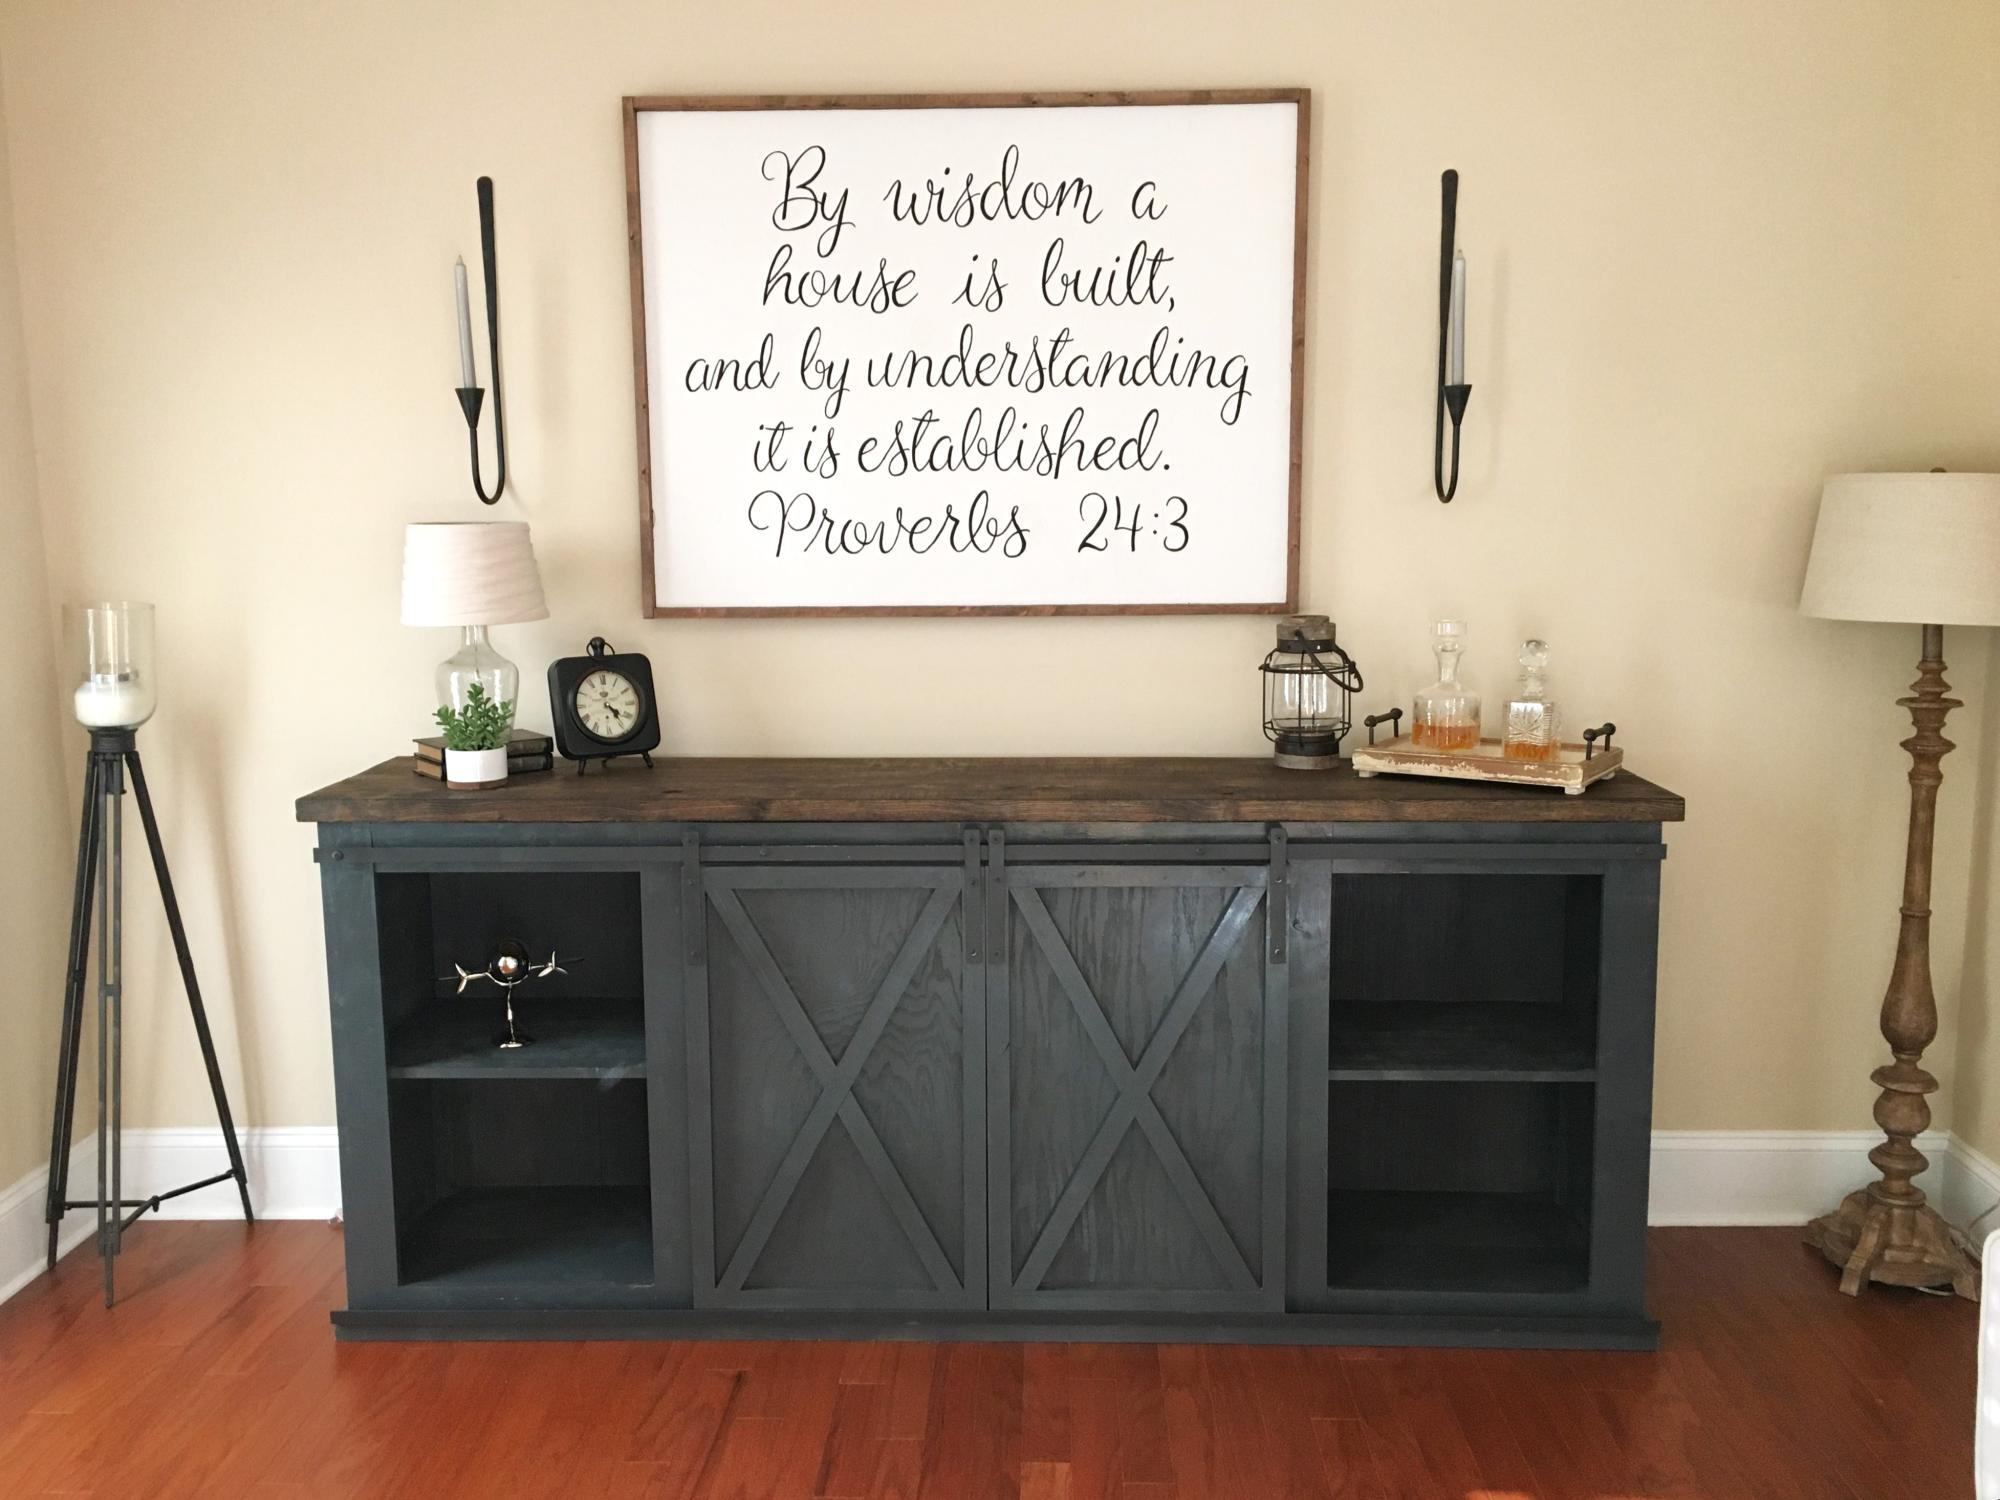
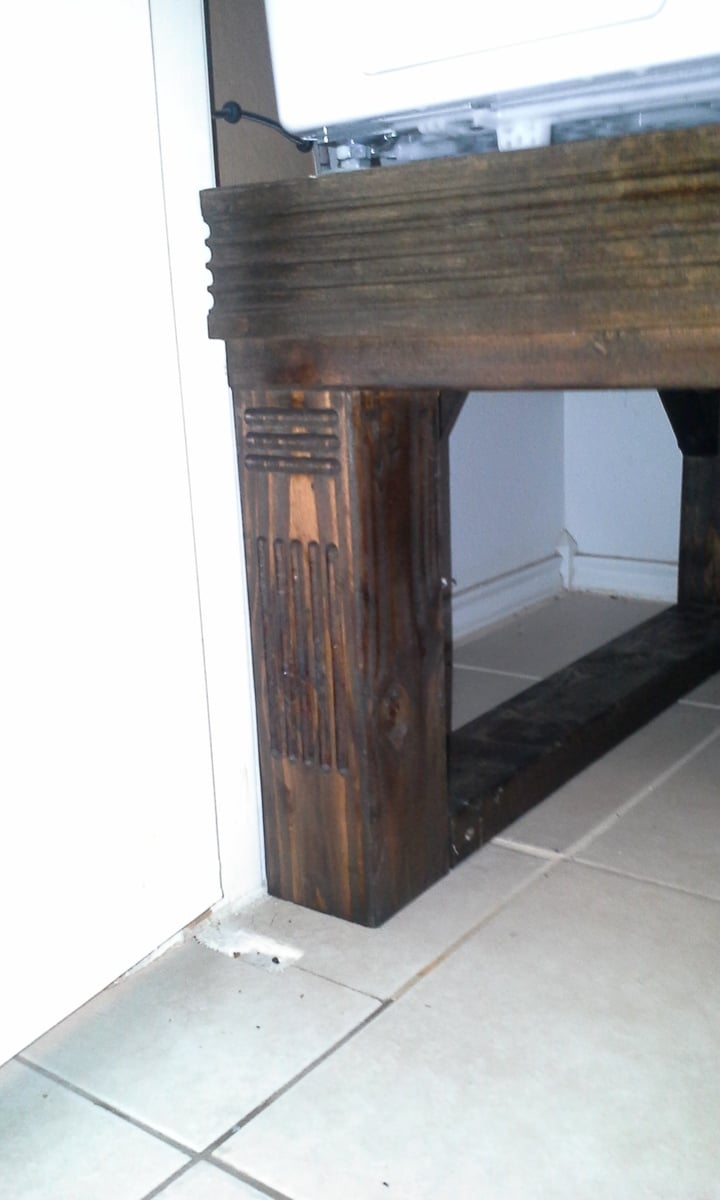
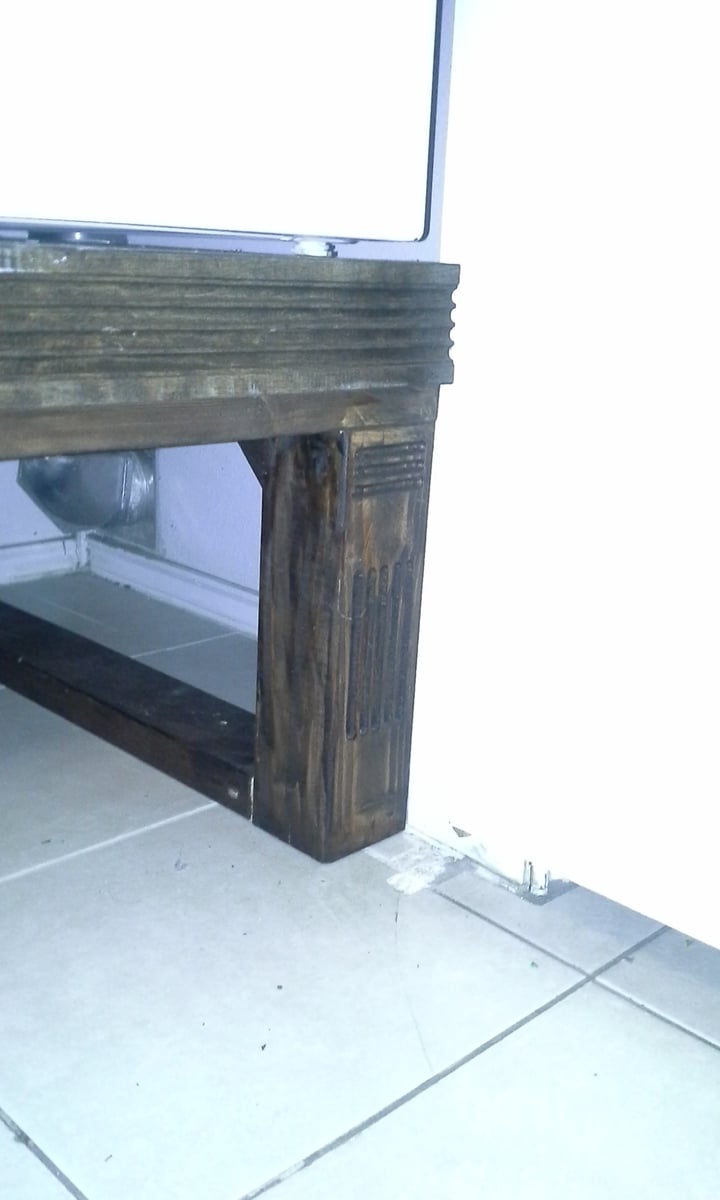
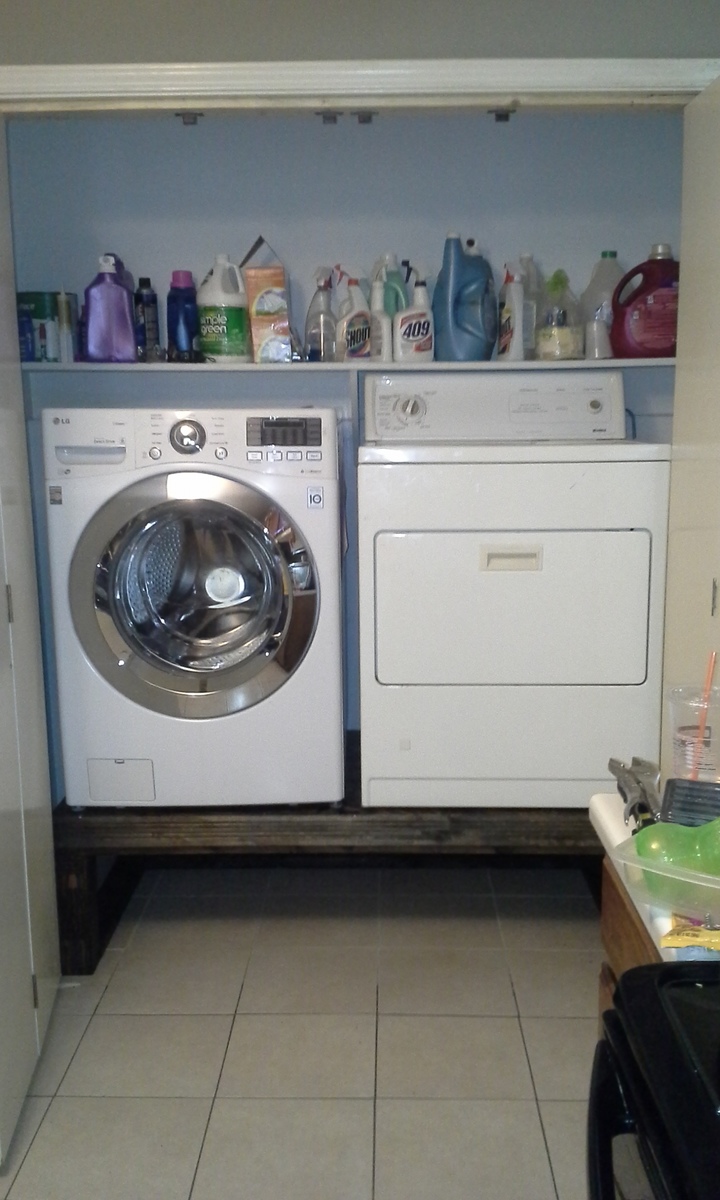
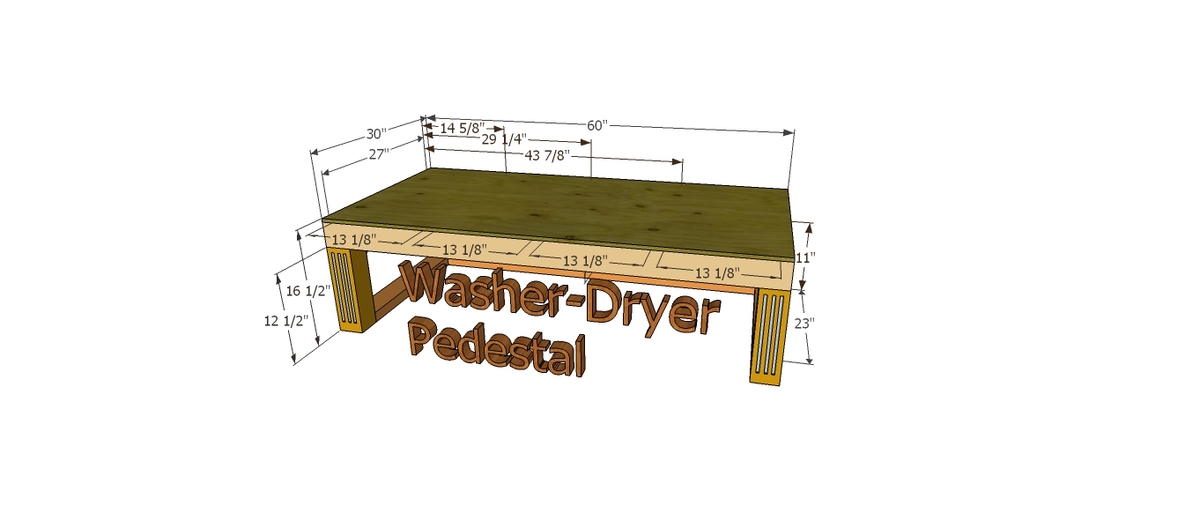
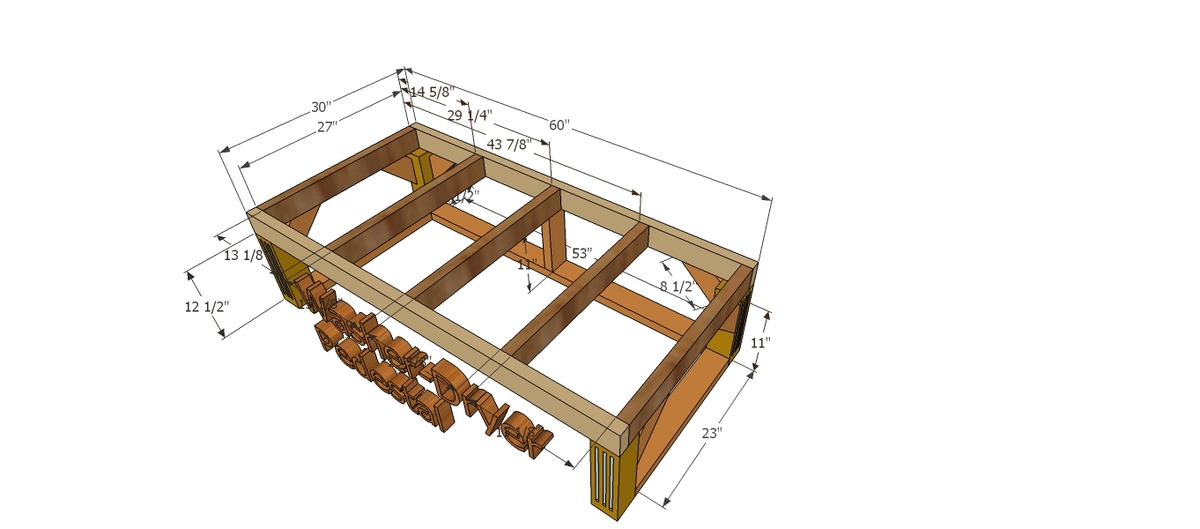
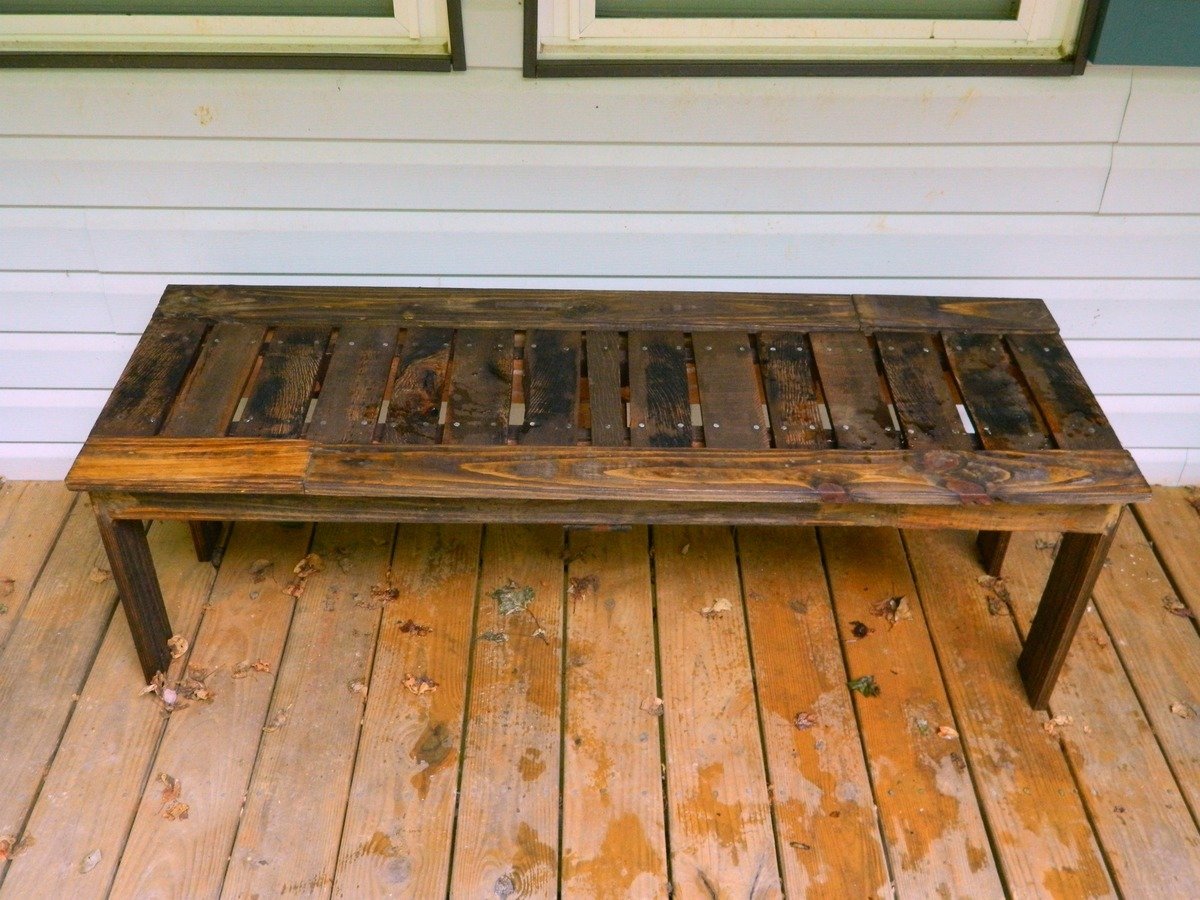
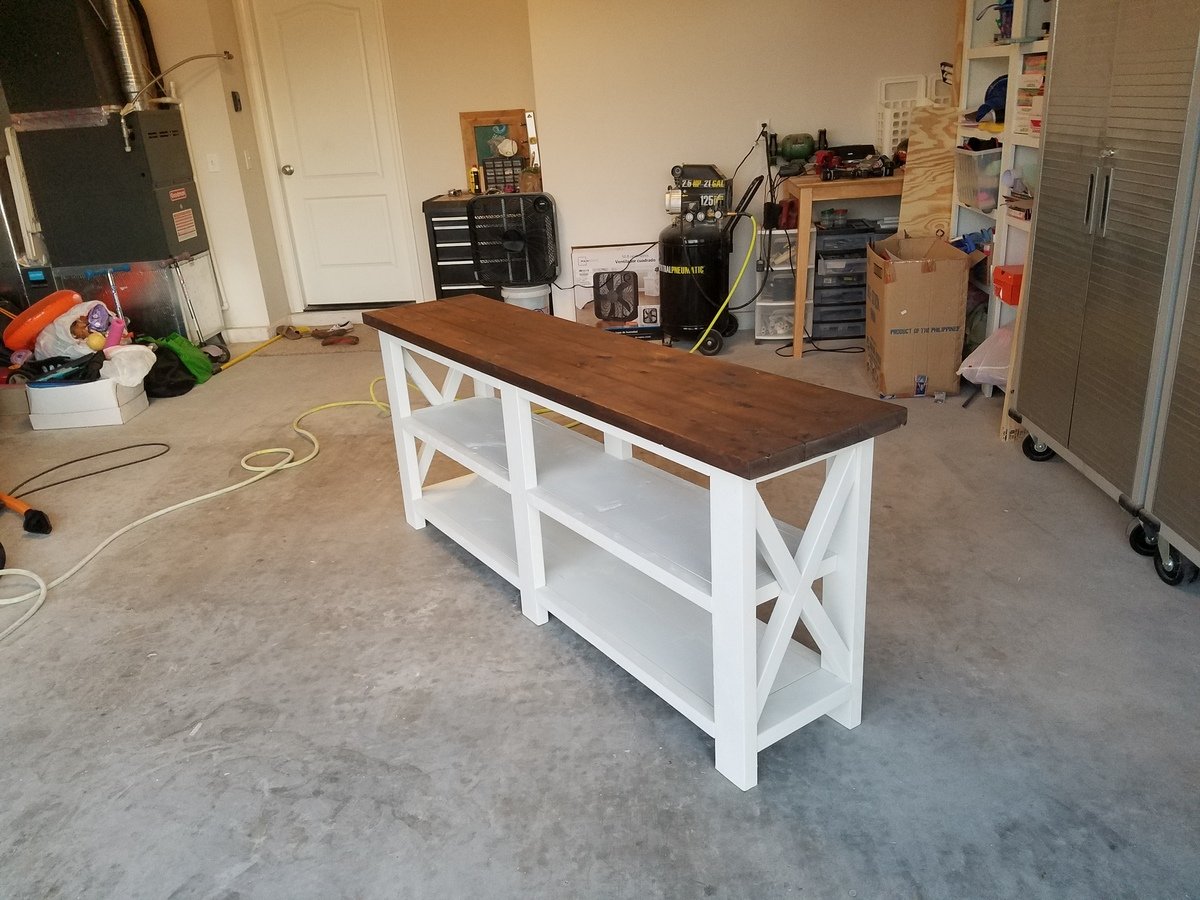
Community Brag Posts

Console Table

Submitted by wangbw on Sun, 06/11/2017 - 15:32

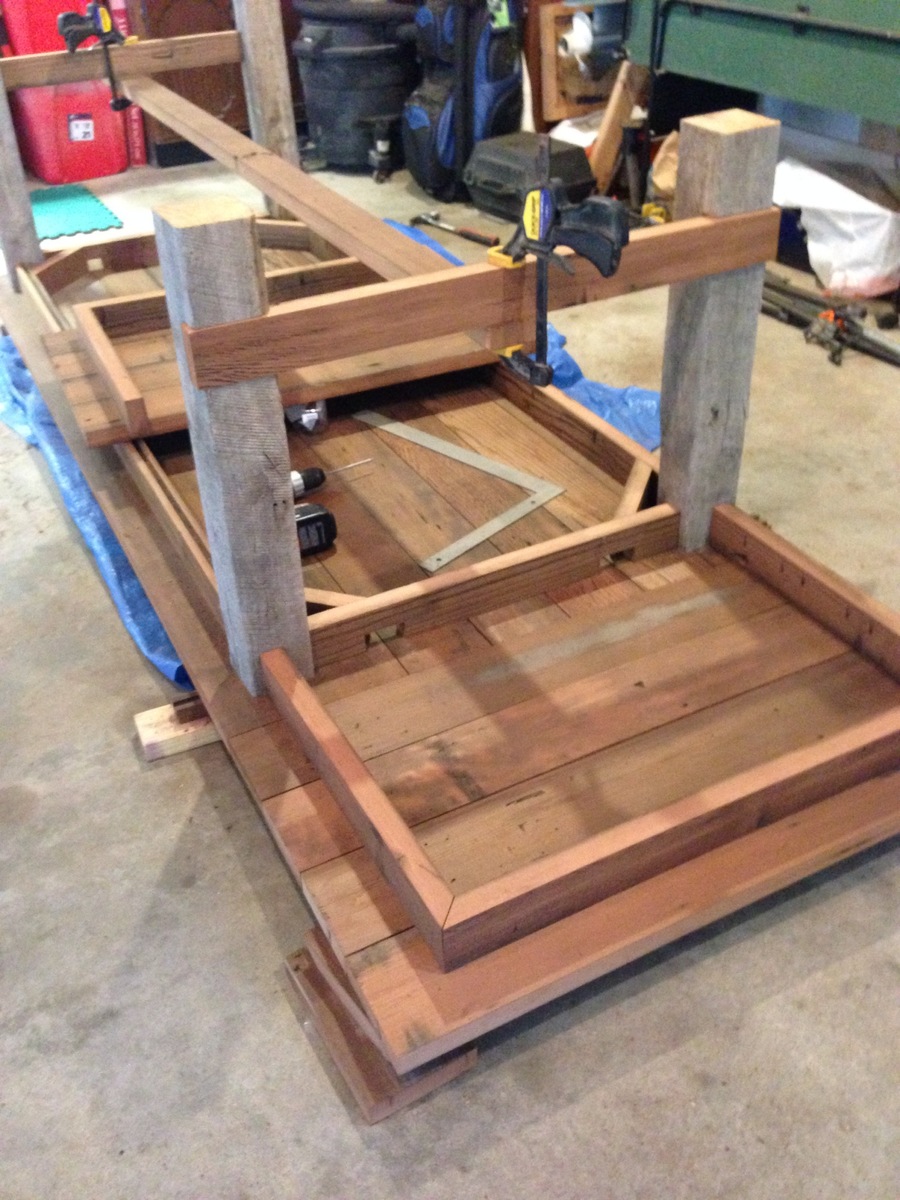
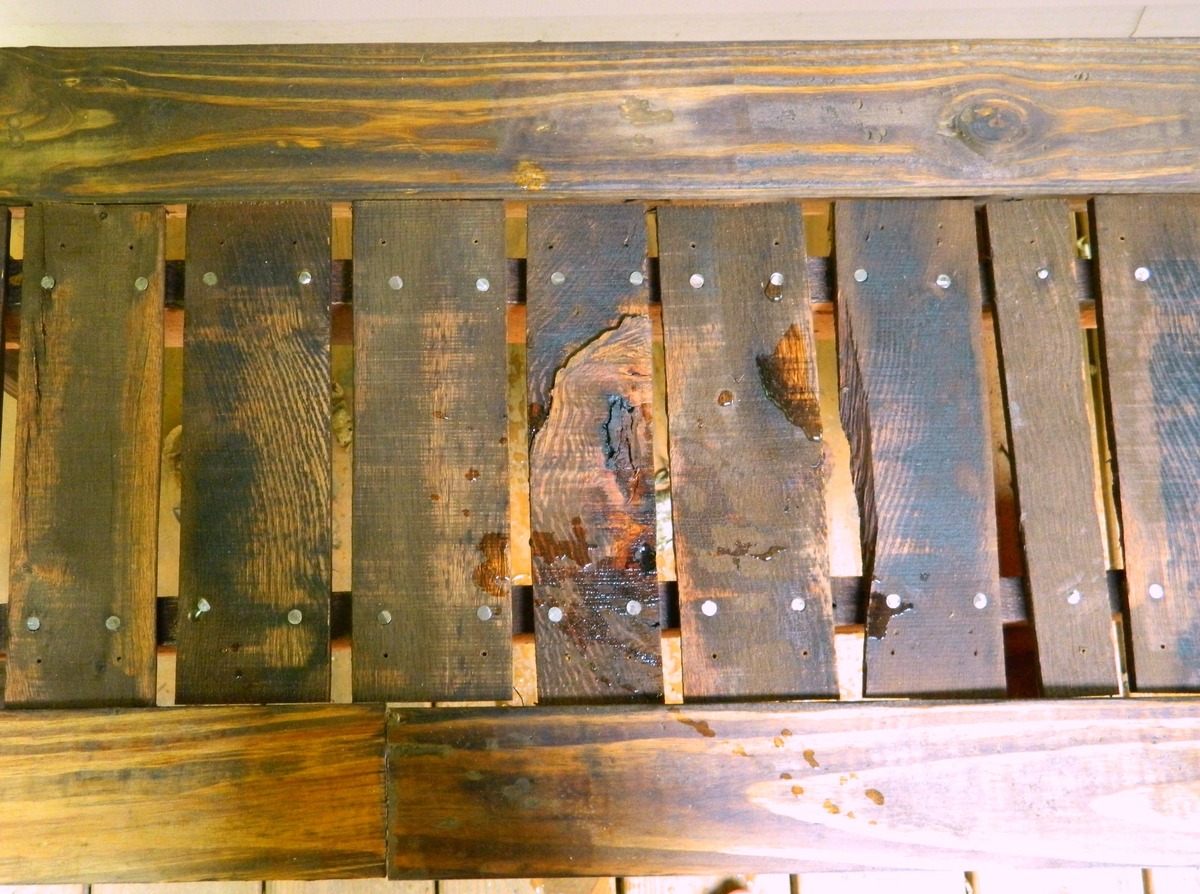
Quick and easy to follow plans.  Only issue I ran into was that my miter saw only cuts up to a 50° angle.  I set up a jig to hold the 2x2 perpendicular to the saw and set the miter to 30°.  Viola, easy 60° angles!  Pic attached for reference.


Built from Plan(s)
Estimated Cost
$80
Estimated Time Investment
Afternoon Project (3-6 Hours)
Recommended Skill Level
Beginner

My first DIY project!

Submitted by Celeste808 on Sun, 05/05/2013 - 10:30

Finally Completed!!! Thank you rainy Saturday! So I wanted a new entertainment center of sorts... couldn't find one that was just what I wanted..... so why not just build what I want! Just DIY it. ;)

I used the faux fireplace plan and modified it to have attached shelves on the sides. I also added an extra strip at the top of the fireplace opening so I could mount an LED bar light.

I used 1/4 plywood to make a tile base, penny tile, and 1/2 quarter round to finish out around the entire bottom.

Total project cost was less than $200 including the tile and light!

Best part is the whole thing is movable!

Thanks Anna White for such an awesome plan to start with!

Estimated Time Investment
Week Long Project (20 Hours or More)
Finish Used
MDF & plywood
Recommended Skill Level
Beginner

Comments

spkramer

Wed, 07/03/2013 - 10:24

This whole unit is great. My wife LOVES it, which means I will be building it! Did you purchase the two shelf units or build them yourself? Did you use a pattern or plan? Thanks!

Alisonwunderland

Wed, 07/31/2013 - 13:09

This is amazing! Exactly what I'm looking for! Did you change the depth of the mantel to make sure the shelves would be deep enough to hold things?

Celeste808

Sat, 08/03/2013 - 18:25

I did make the depth of the fireplace deeper so I could have room for the halves on the side. I just sketched out the dimensions I wanted the side shelves and built them along the same lines as the fireplace. Wasn't hard to figure out and just made it to fit the size I needed. The inset of the fireplace does not go all the way back to the wall either, that way the power strip can fit on the floor behind it. Glad you like it and thanks for the compliments!

EAnne

Wed, 07/23/2014 - 14:54

Hi Celeste 808, What a wonderful faux fireplace WITH the bookcases, especially. I'm hoping I can try this in our space challenged bedroom. Did you by any change reply to the chap who asked if you had some kind of dimensions or plans you could pass along to us? I would love to see if we can make it work in the space we have available.
Thanks again for the inspiration,
e

jrybolt26

Mon, 10/28/2013 - 18:25

I absolutely love what you did with this. I am going to have my fiance help me make this for our house. If you still have the dimensions and details of how you built the whole unit I would greatly appreciate it if you could post it.

mommyof2cuties

Sun, 04/13/2014 - 13:00

This is gorgeous & I can't believe it's your 1st project. I would love to build this too. Did you use any particular plans for the side units? If you have any tips or information to share, that would be great! I've actually been trying to make up my own plans using Sketch Up, but that's not working too good, lol. Again, great job & thank you.
Lynda

emswave

Sun, 02/08/2015 - 12:31

I'm dying to know the dimensions you added to the width. Also, the dimensions of the book shelf. I have been trying to draw up plans for the last week and I'm stuck with trying to figure it out by looking at your pictures.

PLEASE HELP!

Thanks!!

mrittgers1

Mon, 07/27/2015 - 09:15

Do you have the blue print of how you built the mantel and side book shelves? I am wanting to go buy supplies to build this tonight!!!


Thank you!

Triple Printer Console (Dresser)

Submitted by jbolson21 on Tue, 04/07/2015 - 16:03

My wife and I need a big dresser for the new addition to our home.  So instead of a media console we turned this into a dresser.

Estimated Cost
$350
Estimated Time Investment
Week Long Project (20 Hours or More)
Finish Used
Danish Oil
Recommended Skill Level
Intermediate

Comments

handmadewithash

Tue, 04/07/2015 - 20:37

Beautiful job!!! I am currently in the process of building the triple printers console as well. I love you choice of drawer pulls. I may have to reconsider my selection ;)

Entry Shoe Bench

I've officially stopped stalking and started building! First project a modified spa bench. Still have to stain it, but it already makes the big pile of shoes by the door look neater! I'm a hands-on person and not afraid of power tools (got a band saw for my birthday!) but it's still a challenge building a piece of furniture. I've already learned lots of do's and don't do's for next time!
Thanx a bunch for your site, Ana! It definitely gets the mind plotting great projects to come!

Built from Plan(s)
Estimated Cost
~50$ (honestly, I can't remember!)
Estimated Time Investment
Day Project (6-9 Hours)
Finish Used
PolyShades Royal Mission, several coats... and a spray can of clear coat too.
Recommended Skill Level
Beginner

Playhouse Loft Bed with Storage Stairs

I changed this plan and made it into Full size. Feel free to contact me if you would like more information about how to do this too. 

Estimated Cost
$350
Estimated Time Investment
Week Long Project (20 Hours or More)
Recommended Skill Level
Beginner

Walk mounted can organizer

Submitted by Anonymous (not verified) on Tue, 10/05/2021 - 20:13

Love this! My husband used this project to help boys learn to use power tools and work with wood. They made one and he did the others. THANK YOU!

Built from Plan(s)

Comments

Our New Table...the table of my dreams!!

I have added hundreds of plans on my to do list, and some of them may have been a little easier, but I really wanted this table. Badly.

So, my husband and I, decided one weekend to build the Modern Farmhouse Table. Even though we have a saw, we decided since this was our first project, we would have Lowes cut our wood. Big mistake.

When we got home, we organized the wood as to what is what, and measured. It was while we were measuring, when we noticed that a lot of the wood was cut wrong :(

So let that be a lesson...ALWAYS CUT YOUR OWN WOOD!

We went ahead and put the table together, and even though there are some gaps, which I'm planning on filling, I am proud with it.

It's been 3 weeks since we've built the table, and I still have A LOT of sanding to do, and I still need to finish it, but I am proud of what my hubby and I built together so I have to brag!

Next on our list is to build the benches...

Built from Plan(s)
Estimated Time Investment
Week Long Project (20 Hours or More)
Recommended Skill Level
Starter Project

Planked Wood Headboard in Cal King

This project was a blast to make. And, it really is doable and a lot less time then you would think. And finishing it with milk-based paint is even more enjoyable. I used screws and a drill (pre-drill!) and it was wonderful.

Here's some advice for the plan:

- Mount the back of the headboard with a piece of wood and use a metal support as shown here. Just make sure the board is wide enough to be level with your back trim, or else the metal support won't be even when you screw it down. And when you pre-drill this board, make sure you don't go all the way through, or else you will have holes through the front! It stunk to have to putty them all in, but thank heavens for putty.
- Although the instructions say to make your top 1 x 3" trim to fit in line with the top of the headboard, I made mine one inch longer on both sides, and then the 2 x 4" one inch longer to go on top of that 1 x 3" on both sides. That was just the look I wanted. Although you can get your wood pre-cut, I would recommend cutting it all yourself, especially since you will need these cut afterward once the rest of your headboard is put together.
- Ana's 'get started' tips are very helpful. Be sure to check them out first!
- Make sure, make sure, make sure you dry thoroughly between coats. Patience is a virtue.

Estimated Cost
$125
Estimated Time Investment
Week Long Project (20 Hours or More)
Finish Used
I distressed with milk-based paint... it always gives it such a unique look every time! Here's what I did:

- Stain your wood with a foam brush that you can by essentially anywhere--craft stores, home improvement stores--going along the grain of the wood. Do this for all painting and staining. For a dark finish underneath, use a dark stain. I used Minwax in Dark walnut. Leave the stain on for at least 15 MINUTES before you wipe it with an old t-shirt or a lint-free rag, like the one you would use to polish your car.

-Buff with a crinkled brown paper bag. You won't need to do this too intensely, but make sure you're thorough.

- If you want some of those big, antiqued stain spots, take a candle and really rub certain spots, such as the knots and the edges of the wood. However, it can be easy to forget where you rubbed with the candle, so you might want to draw up a rough diagram of a headboard and mark an X where you rubbed the candle. Rubbing with the candle will make the spot of the paint come off much easier--you'll see how well it will come off when you sand. But I would hesitate from rubbing it too much, because it makes your paint 'peel off' eventually if you do it in excess.

- Paint your headboard, giving it at least thee coats. My first coat was really thin so during my first coat I went right ahead and painted it again right then. Then I did a second and third coat. Let it dry completely between your second and third coat. I waited at least eight hours between coats.

- Once it's dry, sand your headboard BY HAND with at least 100 grit sandpaper. If you want your piece to have a more distressed look all-around and not just in certain places, sand your piece after each coat of paint dries. Just rub with your hand smoothly in strokes, and you will see how easily the paint comes off, and how it will give you that distressed look like magic. I did this for my dresser and I loved the look. However, I did not use the candle-wax method because I sanded after each coat. If you wait until after the third coat to sand, you will have to work harder, but your paint will still come off and look distressed very nicely.

- Stain the top of your paint (I used the same dark dark walnut color). Immediately rub off the stain with an old t-shirt or a lint-free rag. Rub it down to get the desired look of your stain. If you choose to have it a little less antiqued, you can skip this step.

- Finish with a Polyacrylic topcoat. They are safe and it really gives a nice, finished (and less DIY) look.

- Mount it with bolts on to your bed frame!
Recommended Skill Level
Starter Project

Farmhouse table & bench!

Submitted by jamie_C on Sun, 04/03/2011 - 19:42

This was quite the project- took us several weekends to finish (we don't have a garage or really any good working area- we rent.  Oh and we also have a toddler).  We assembled the table in the living room, stained it on our front sidewalk, did a couple coats of poly in the backyard, and finished the last coat of poly in the dining room!  (we know how heavy this table is, that's for sure!  We modified the original farmhouse table dimensions so that this table would fit in our oh-so-tiny dining room.  As you can tell, we also decided to build a bench to go with it.  We are extremely pleased with the results!

Estimated Cost
$125
Estimated Time Investment
Week Long Project (20 Hours or More)
Finish Used
Used wood filler on screw holes, and did LOTS of sanding. Used two coats of Cabot Early American stain. Followed by 3 coats of polyurethane, and 2 coats of Minwax Polycrylic on the table top.
Recommended Skill Level
Beginner

Chalkboard Cubby

This cubby was my very first project! I just finished remodeling my kitchen, all that was missing was a place for my keys, dog leashes etc. My little house doesn't have a proper entryway so I created a "welcome station" with this cubby. The trickiest part was definitely cutting the sides, but I was able to get those tight circles with a little forethought and a lot of sanding :) I used leftover paint and samples from choosing colors for the kitchen, so it automatically coordinated with the rest of the decor.

Built from Plan(s)
Estimated Cost
~$40
Estimated Time Investment
Day Project (6-9 Hours)
Finish Used
3 coats of Behr "Polar Bear" white paint and samples (Rainwater, also Behr) with LOTS of taping! I think I spent ore time taping than I did actually painting! I also did 3 coats of clear satin coat. I didn't sand in between because I like the look of brush strokes :)
Recommended Skill Level
Intermediate

Kid sized picnic table

Submitted by Anonymous (not verified) on Sun, 12/26/2021 - 12:22

My daughter and I did this project together. It was our first wood working and painting project. Learned a lot in a short time. Plan was as said “Easy” although maybe a bit hard for us given we had no experience. All drawings and paintings were free hand.

Built from Plan(s)

Comments

Work Table

Instead of having the plywood top sit on top of the frame, I sunk it into the frame instead with 2x4 supports underneath.

Built from Plan(s)
Estimated Cost
$50
Estimated Time Investment
Weekend Project (10-20 Hours)
Finish Used
oak stain
Recommended Skill Level
Starter Project

Antique Workbench Console

Submitted by momofaj on Sat, 04/23/2011 - 12:14

This was an easy project although it took us 3 weekends to get it finished.  My son loves to help now but it slows down the process.  We used wood we already had and reclaimed oak to make this table. 

We had to resize the table to fit our entryway.  The table design  was 64” long and we made ours 48” in length.  It was easy to do the math, the cuts for length were 75% of the original size.  For example,  the table top trim piece calls for a 64” cut,  take 64 x 75% and you get 48.  So that cut piece would be 48” instead of 64”.    We kept all other measurements the same, both width and height.   The only other change we made was in bottom shelf,  it calls for a 1x12 and we already had a 2x12.

 I am still looking for a metal piece(towel holder) to go on the front of the table.

Built from Plan(s)
Estimated Cost
15.00
Estimated Time Investment
Weekend Project (10-20 Hours)
Finish Used
Minwax English Chestnut
Recommended Skill Level
Beginner

Nursery Room Book Shelves from $10 Ledge Plan

Submitted by karahart on Wed, 05/11/2011 - 08:42

I built these bookshelves with the help of my husband for our daughter's nursery. They were so simple to build, the finishing work is what took the most amount of time. They're very sturdy, and we get tons and tons of compliments on the 'feel' that they add to the nursery!

Built from Plan(s)
Estimated Cost
$35
Estimated Time Investment
Afternoon Project (3-6 Hours)
Finish Used
I put on a coat of white primer, and then painted quite a few coats of ultra-white paint on each shelf. I sanded between each coat of paint, and finished it off with a top coat of polycrylic. I also filled in the screw holes with white caulk and painted over that once they were all mounted.
Recommended Skill Level
Starter Project

Grandy Sliding Barn Door Console

I pretty much followed the plans to the T. I did use 3/4" plywood for the middle shelf instead of the suggested wood. The hardware was the hardest part and mostly followed the previously posted DIY from Jamie's website with a few modifications. 

Built from Plan(s)
Estimated Cost
$250ish including all hardware, paint and stain.
Estimated Time Investment
Week Long Project (20 Hours or More)
Finish Used
Dark Walnut on the top and charcoal spray paint for the body.
Recommended Skill Level
Intermediate

Addison’s room

Submitted by aderosa on Thu, 02/01/2018 - 12:45

It was time for Addison to get a big girl bed. We used the Kentwood design and the trundle bed plans. 

Estimated Cost
140
Estimated Time Investment
Weekend Project (10-20 Hours)
Finish Used
Valspar cabinet paint
Recommended Skill Level
Beginner

DIY Mobile Lumber Cart

I followed plans from Woodworking for Mere Mortals. Steve Ramsey has a great build video for the project. You can check out the video on his YouTube channel. This lumber cart replaces a previous one that I built a few years ago. My old lumber rack could not store sheet goods and took up too much floor space in my garage.  I disassembled the 2x4s from it and hope to recycle them for a future shop project.

For complete build details continue reading my DIY blog here.

Estimated Cost
$100 - 125 for two sheets of plywood, screws and caster wheels
Estimated Time Investment
Day Project (6-9 Hours)
Recommended Skill Level
Beginner

12 ft farmhouse table with extensions - reclaimed wood

I had no experience building furniture prior to this project but I wanted a 12 ft outdoor table and could not find one.  This tables center section is 8 ft and was built roughly following the plans for the farmhouse table.  I added two 2 ft extensions at each end making the overall table 12 ft.  The extensions included aprons so when installed they look to be part of the table.  The extensions just plug into the end apron of the center section with 2x4 oak braces which engage in the apron and under the table approximately 2 ft from end.  There is no visual sagging of the extensions. I finished the table with Sikkens DEK finish.


Estimated Cost
The lumber was reclaimed and cost approximately $400 for this project.
Estimated Time Investment
Week Long Project (20 Hours or More)
Finish Used
Sikkens DEK transparent
Recommended Skill Level
Beginner

Simple bench from pallets

I had some left over wood from pallets and I really liked the look of the simple outdoor bench. One pallet was made out of some type of red colored wood and I decided the slats for the seat would look good in the red colored wood. The rest of the bench was from a lighter colored pallet. I used nails and glue to attach the seat slats so that my daughter could help. She loves to help, but does not like my drill even if she has hearing protection. See more at http://www.makeitlovely.com

Estimated Cost
Free
Estimated Time Investment
Afternoon Project (3-6 Hours)
Finish Used
Minwax Early American wood stain (1 coat)
Recommended Skill Level
Beginner