Community Brag Posts
Storage End Tables
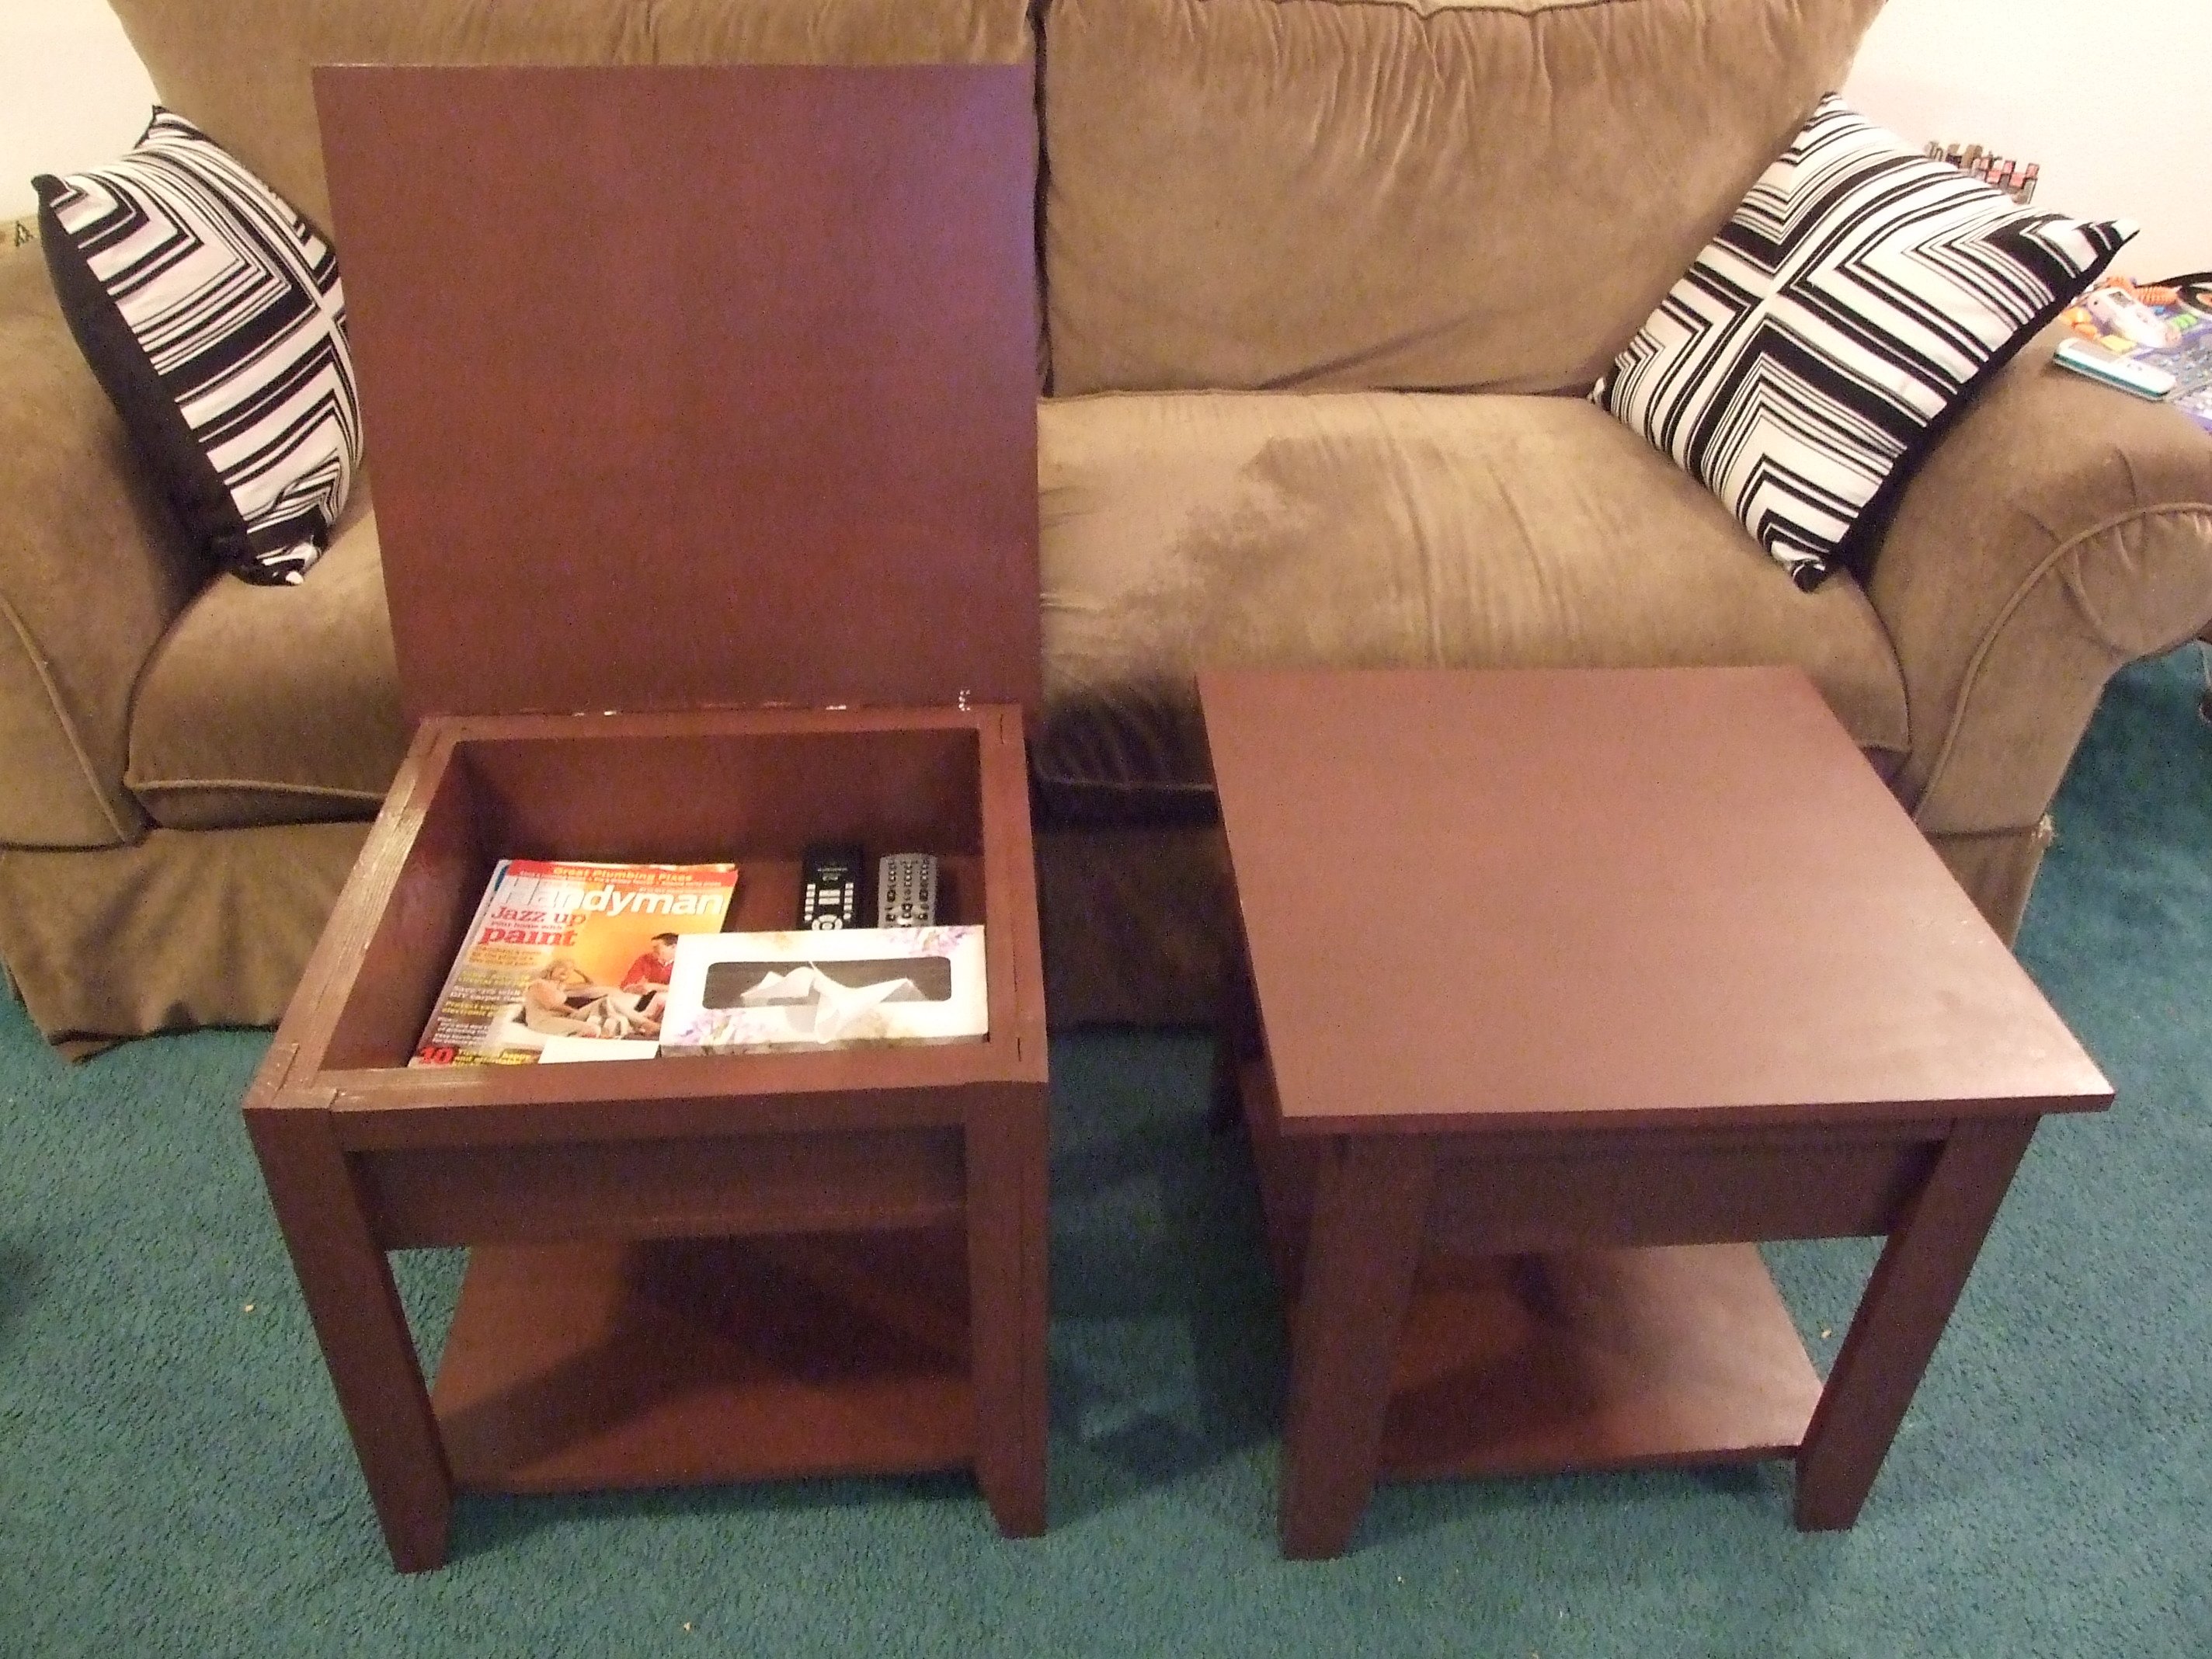
This was my first build ever. I loved the storage lego table, but it wouldn’t work well in our long, narrow living room so I decided to make them end tables instead. I also changed them so that the tops were hinged to the back. I love the way they turned out! Now on to the long list of other things I want to build from this site. Thanks so much Ana!
Built from Plan(s)
Estimated Cost
About $40 each
Estimated Time Investment
Afternoon Project (3-6 Hours)
Finish Used
One coat primer followed by three coats Behr "bear rug"
Recommended Skill Level
Starter Project

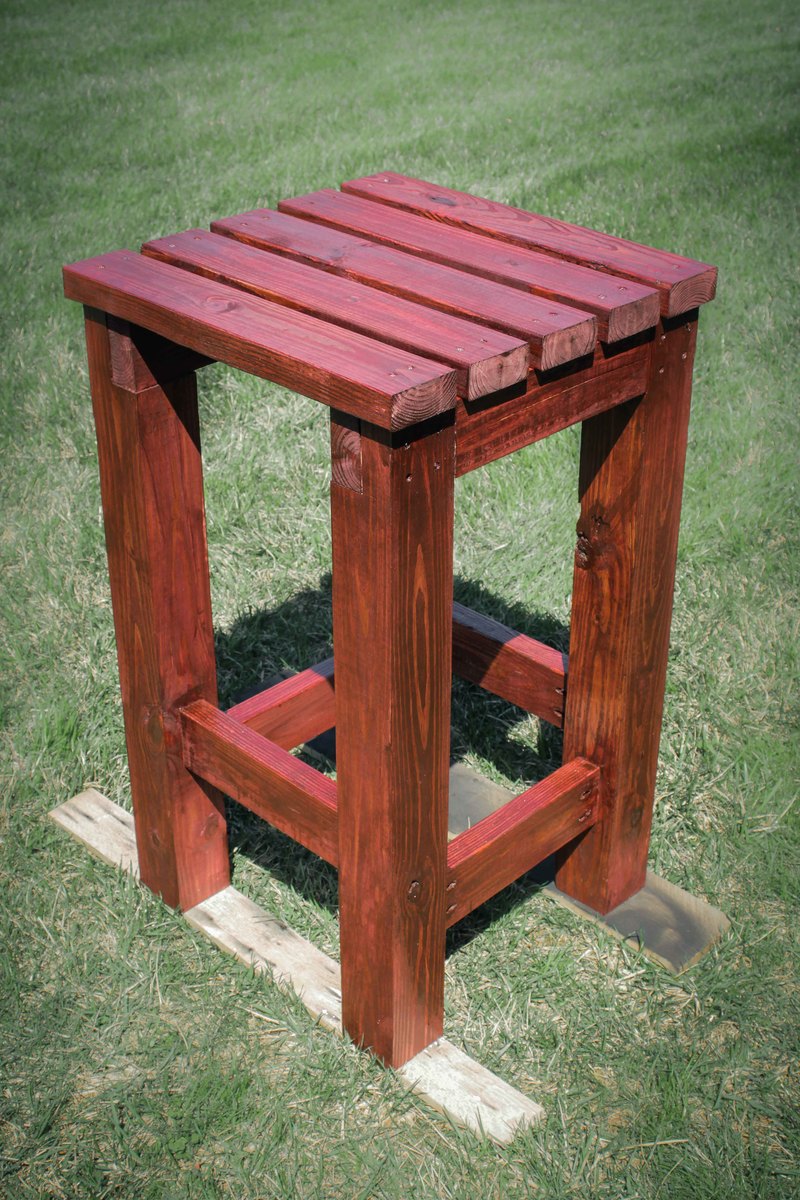
Rain Barrel Stand and Installation
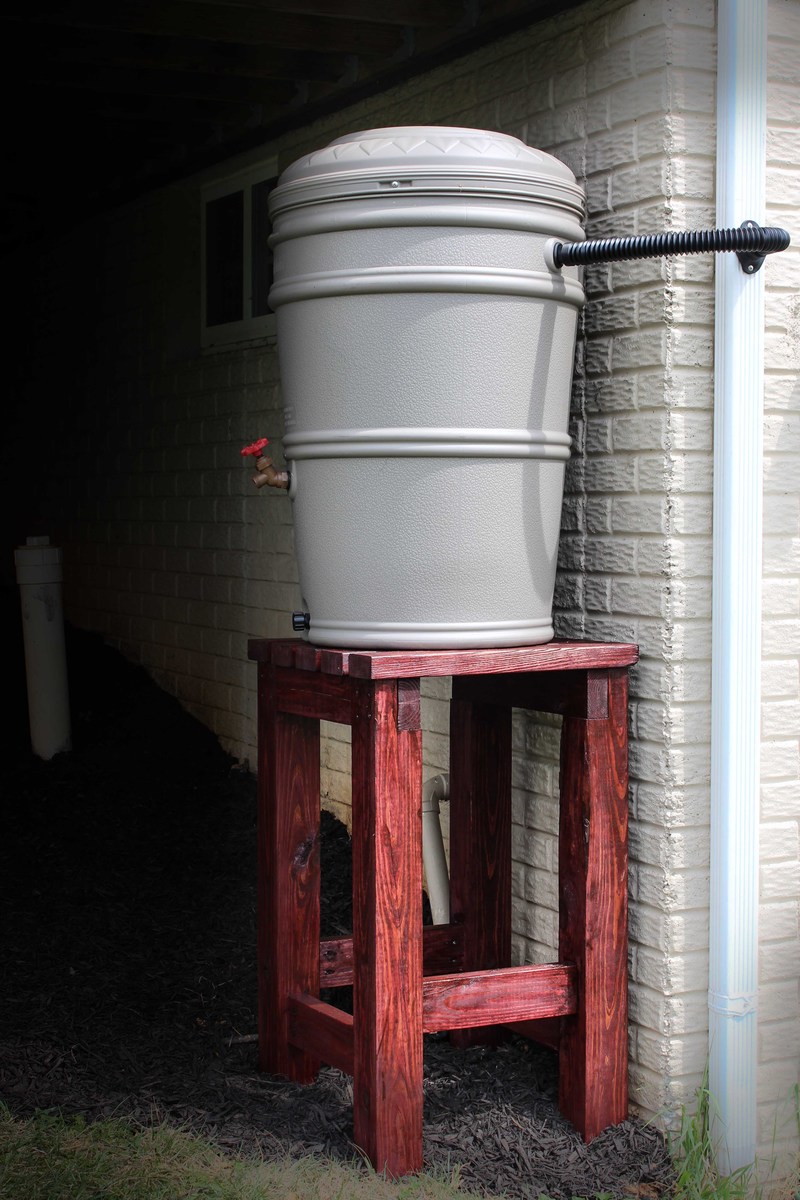
Build Instructions;
http://www.instructables.com/id/Rain-Barrel-Stand-and-Installation/
Video of Build:
Estimated Time Investment
Afternoon Project (3-6 Hours)
Finish Used
Stain
Recommended Skill Level
Starter Project
Miter Saw Stand
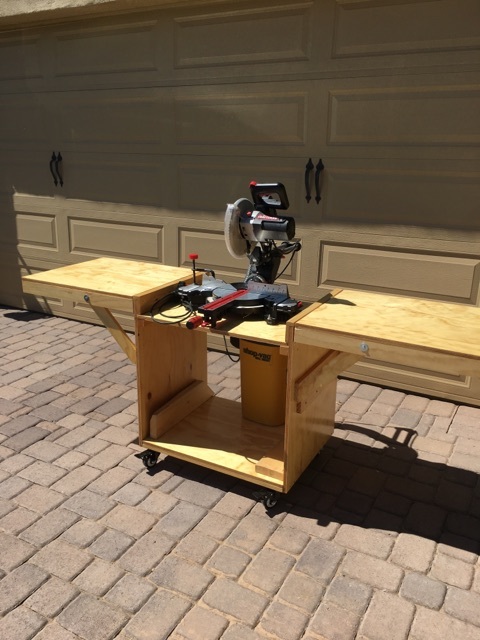
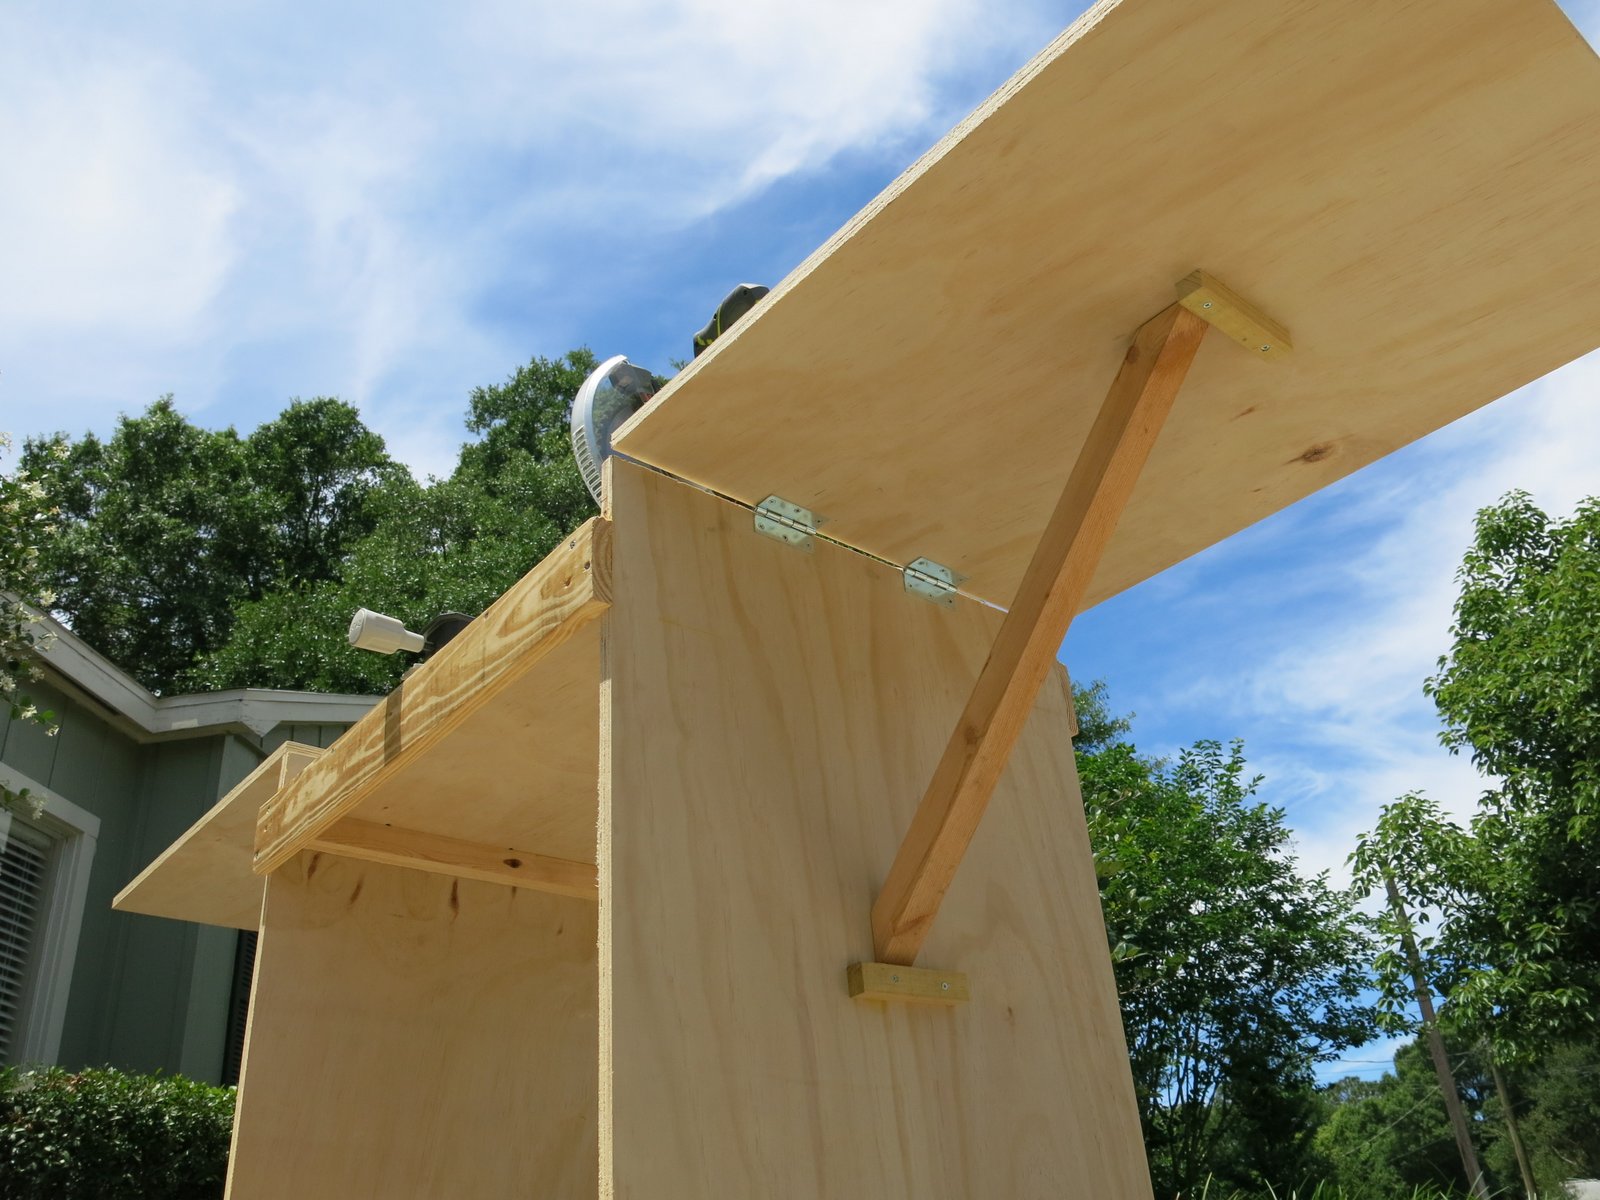
I copied your plans with just 2 exceptions. Instead of the shelf brackets to hold the wings up, I copied the idea from the Family Handyman Magazine. Also, the sides where the boards would rest would get all chipped up in use, so I made them 3/4" shorter and added a 1 x 2 to protect the plywood underneath.
Estimated Cost
$35.00
Estimated Time Investment
Weekend Project (10-20 Hours)
Finish Used
Min-wax oil based Polyurethane
Recommended Skill Level
Beginner
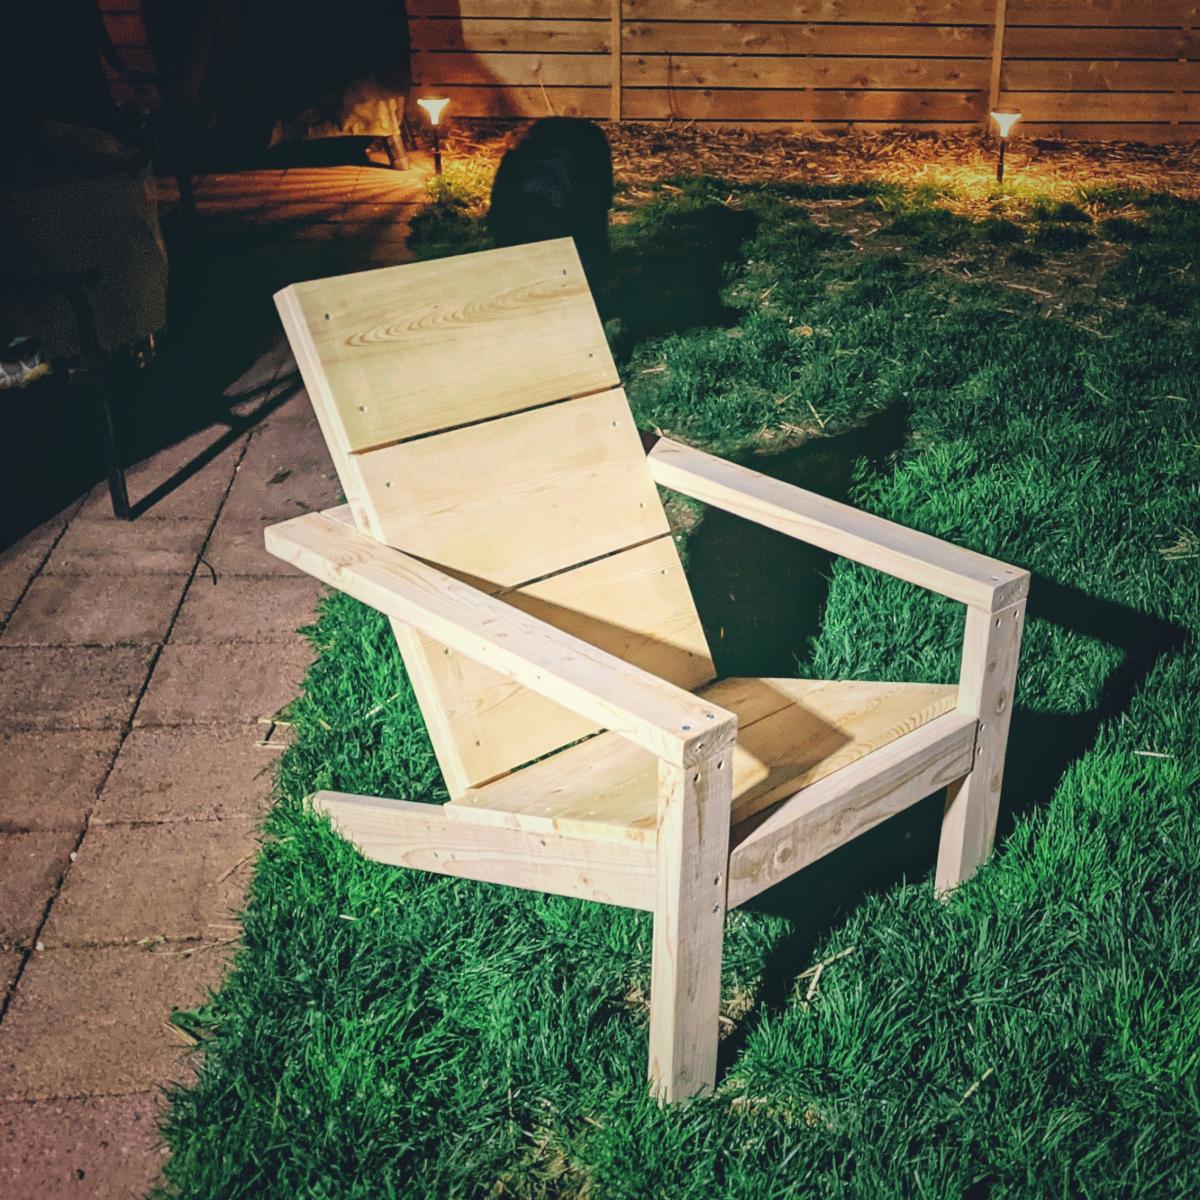
Modern adirondack chair
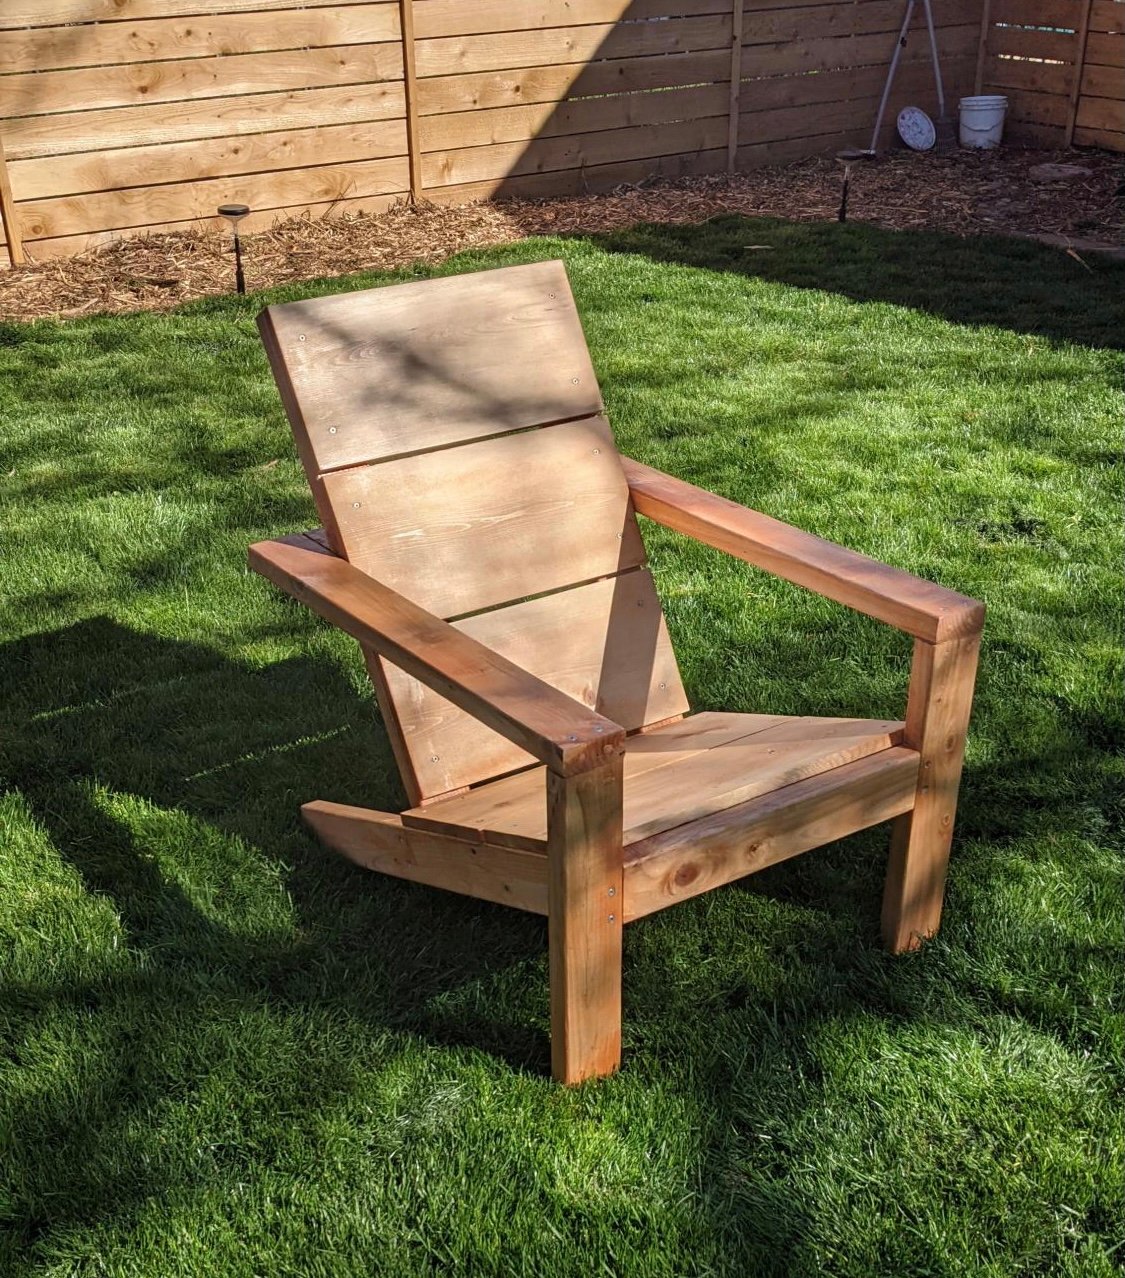
I've made 2 of the Modern adirondack chairs. Really enjoyed the plans and the video for help as I'm new to woodworking. I look for new plans all the time to see what I might build next
Built from Plan(s)
Comments
Big Kids Picnic Table
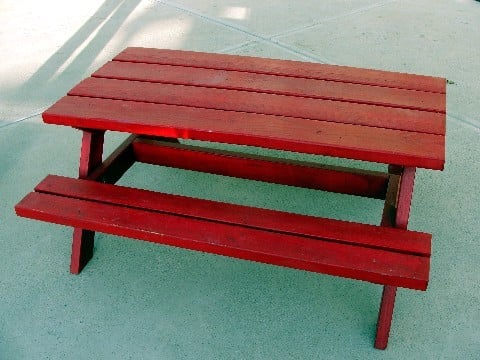
I made this last summer for my neice and nephew. I don't know why, but it did take me a long time. It's all done and cute now though.

Built from Plan(s)
Estimated Cost
can't remember
Estimated Time Investment
Weekend Project (10-20 Hours)
Finish Used
My sister painted it red. It still needs it's second coat.
Recommended Skill Level
Intermediate
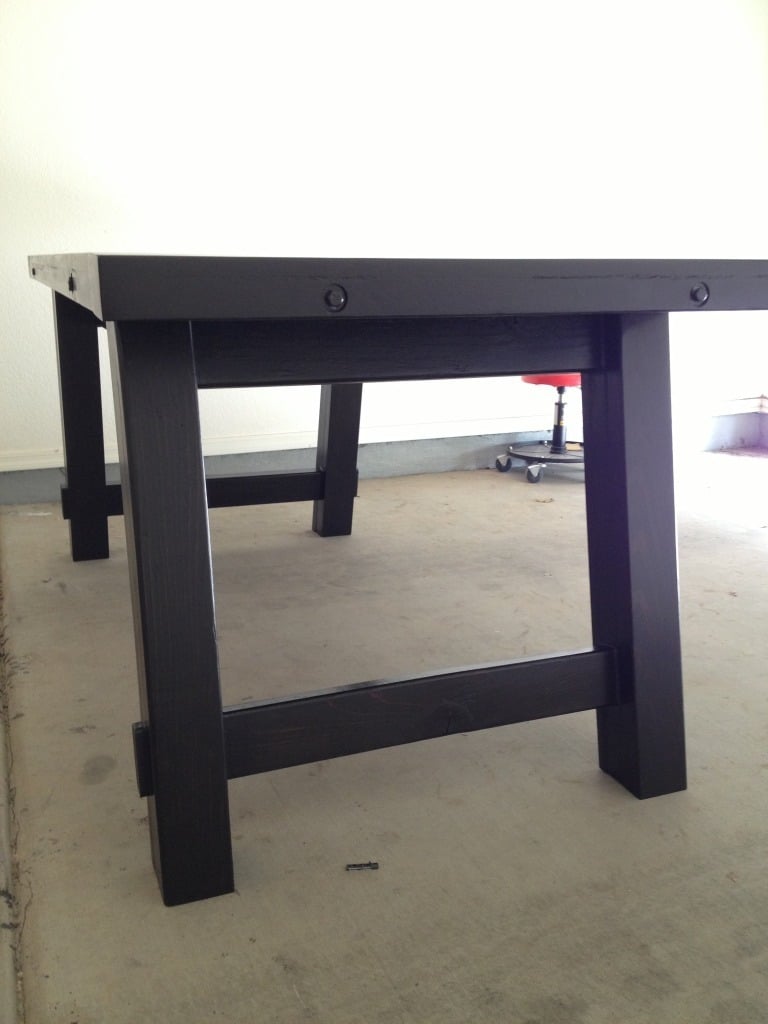
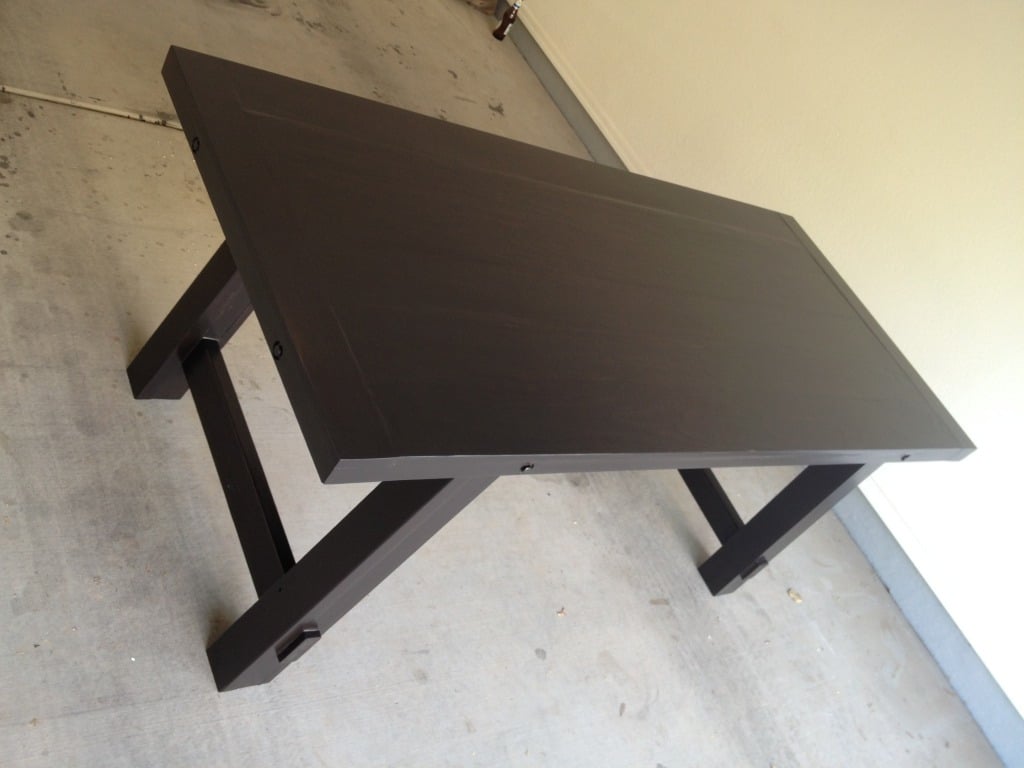
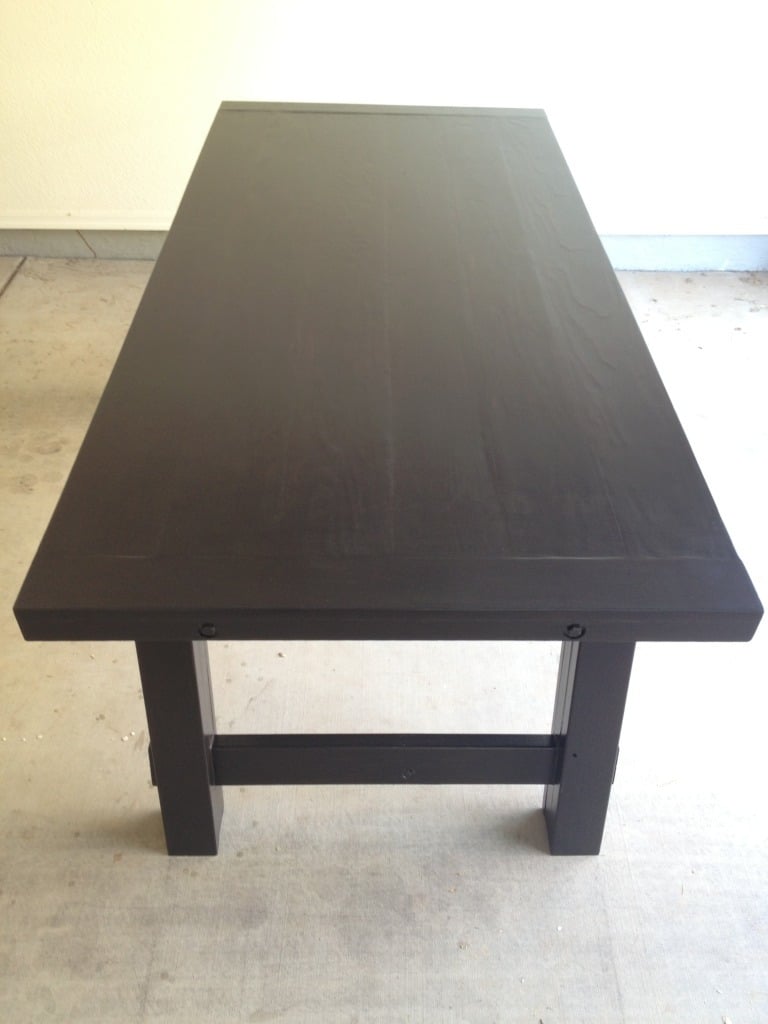
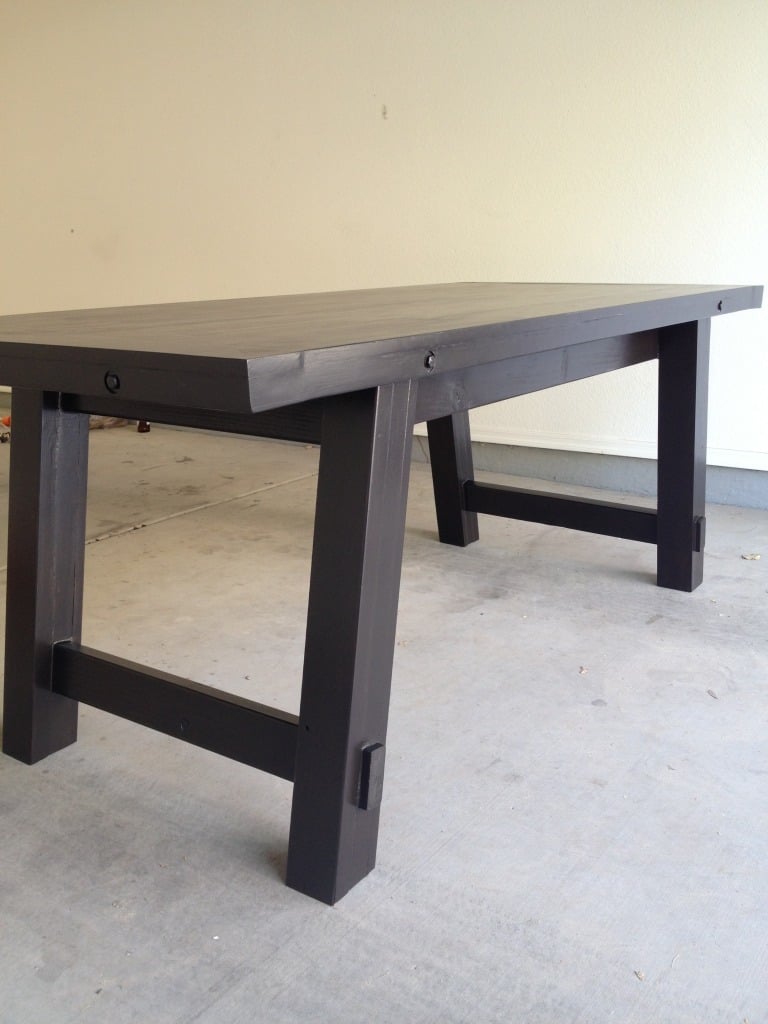
Farmhouse Benchright Table Build
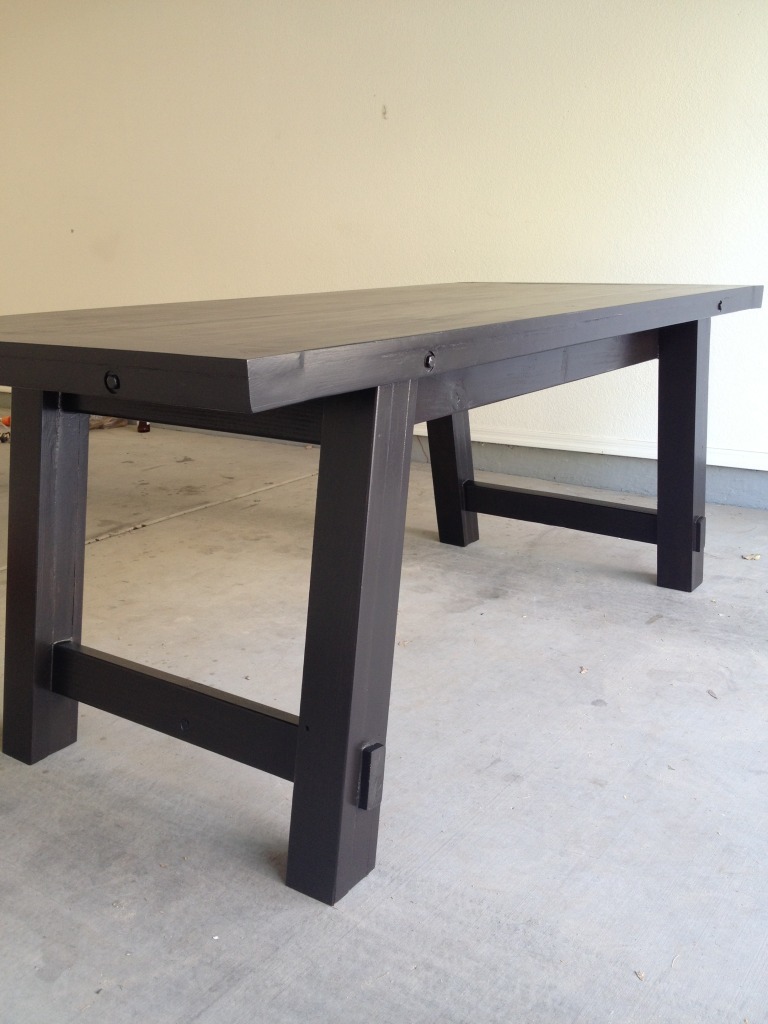
After doing my first build, pallet media center, I was hooked. My family and I desperately needed a dining room table. We wanted a rustic looking table and I was thankful I found the benchright table plan. Thanks Ana!! This build was fairly easy. I did mess up a couple times with the angle/bevel cuts. Totally ruining a couple boards. Which I had to run back to Lowes and purchase a couple more boards. I used 3/8 hardware bolts/washers/nuts in galvanized for the sides (3") and breadboards (6"). The stain basically painted them, which we love. I still need to add the hardware for the bottom (threaded rods, turnbuckle, nuts/bolts/washers, etc). The pics above really dont show the detail with the stain. The pics make the table look black. But you can actually see the wood grain on the table top. The table looks amazing in person, we love it!!! Thanks again Ana!!
Built from Plan(s)
Estimated Cost
250
Estimated Time Investment
Weekend Project (10-20 Hours)
Finish Used
Rustoleum Kona stain and Rustoleum Satin Polyurethane. 2 coats of stain and 3 coats of urethane.
Recommended Skill Level
Beginner
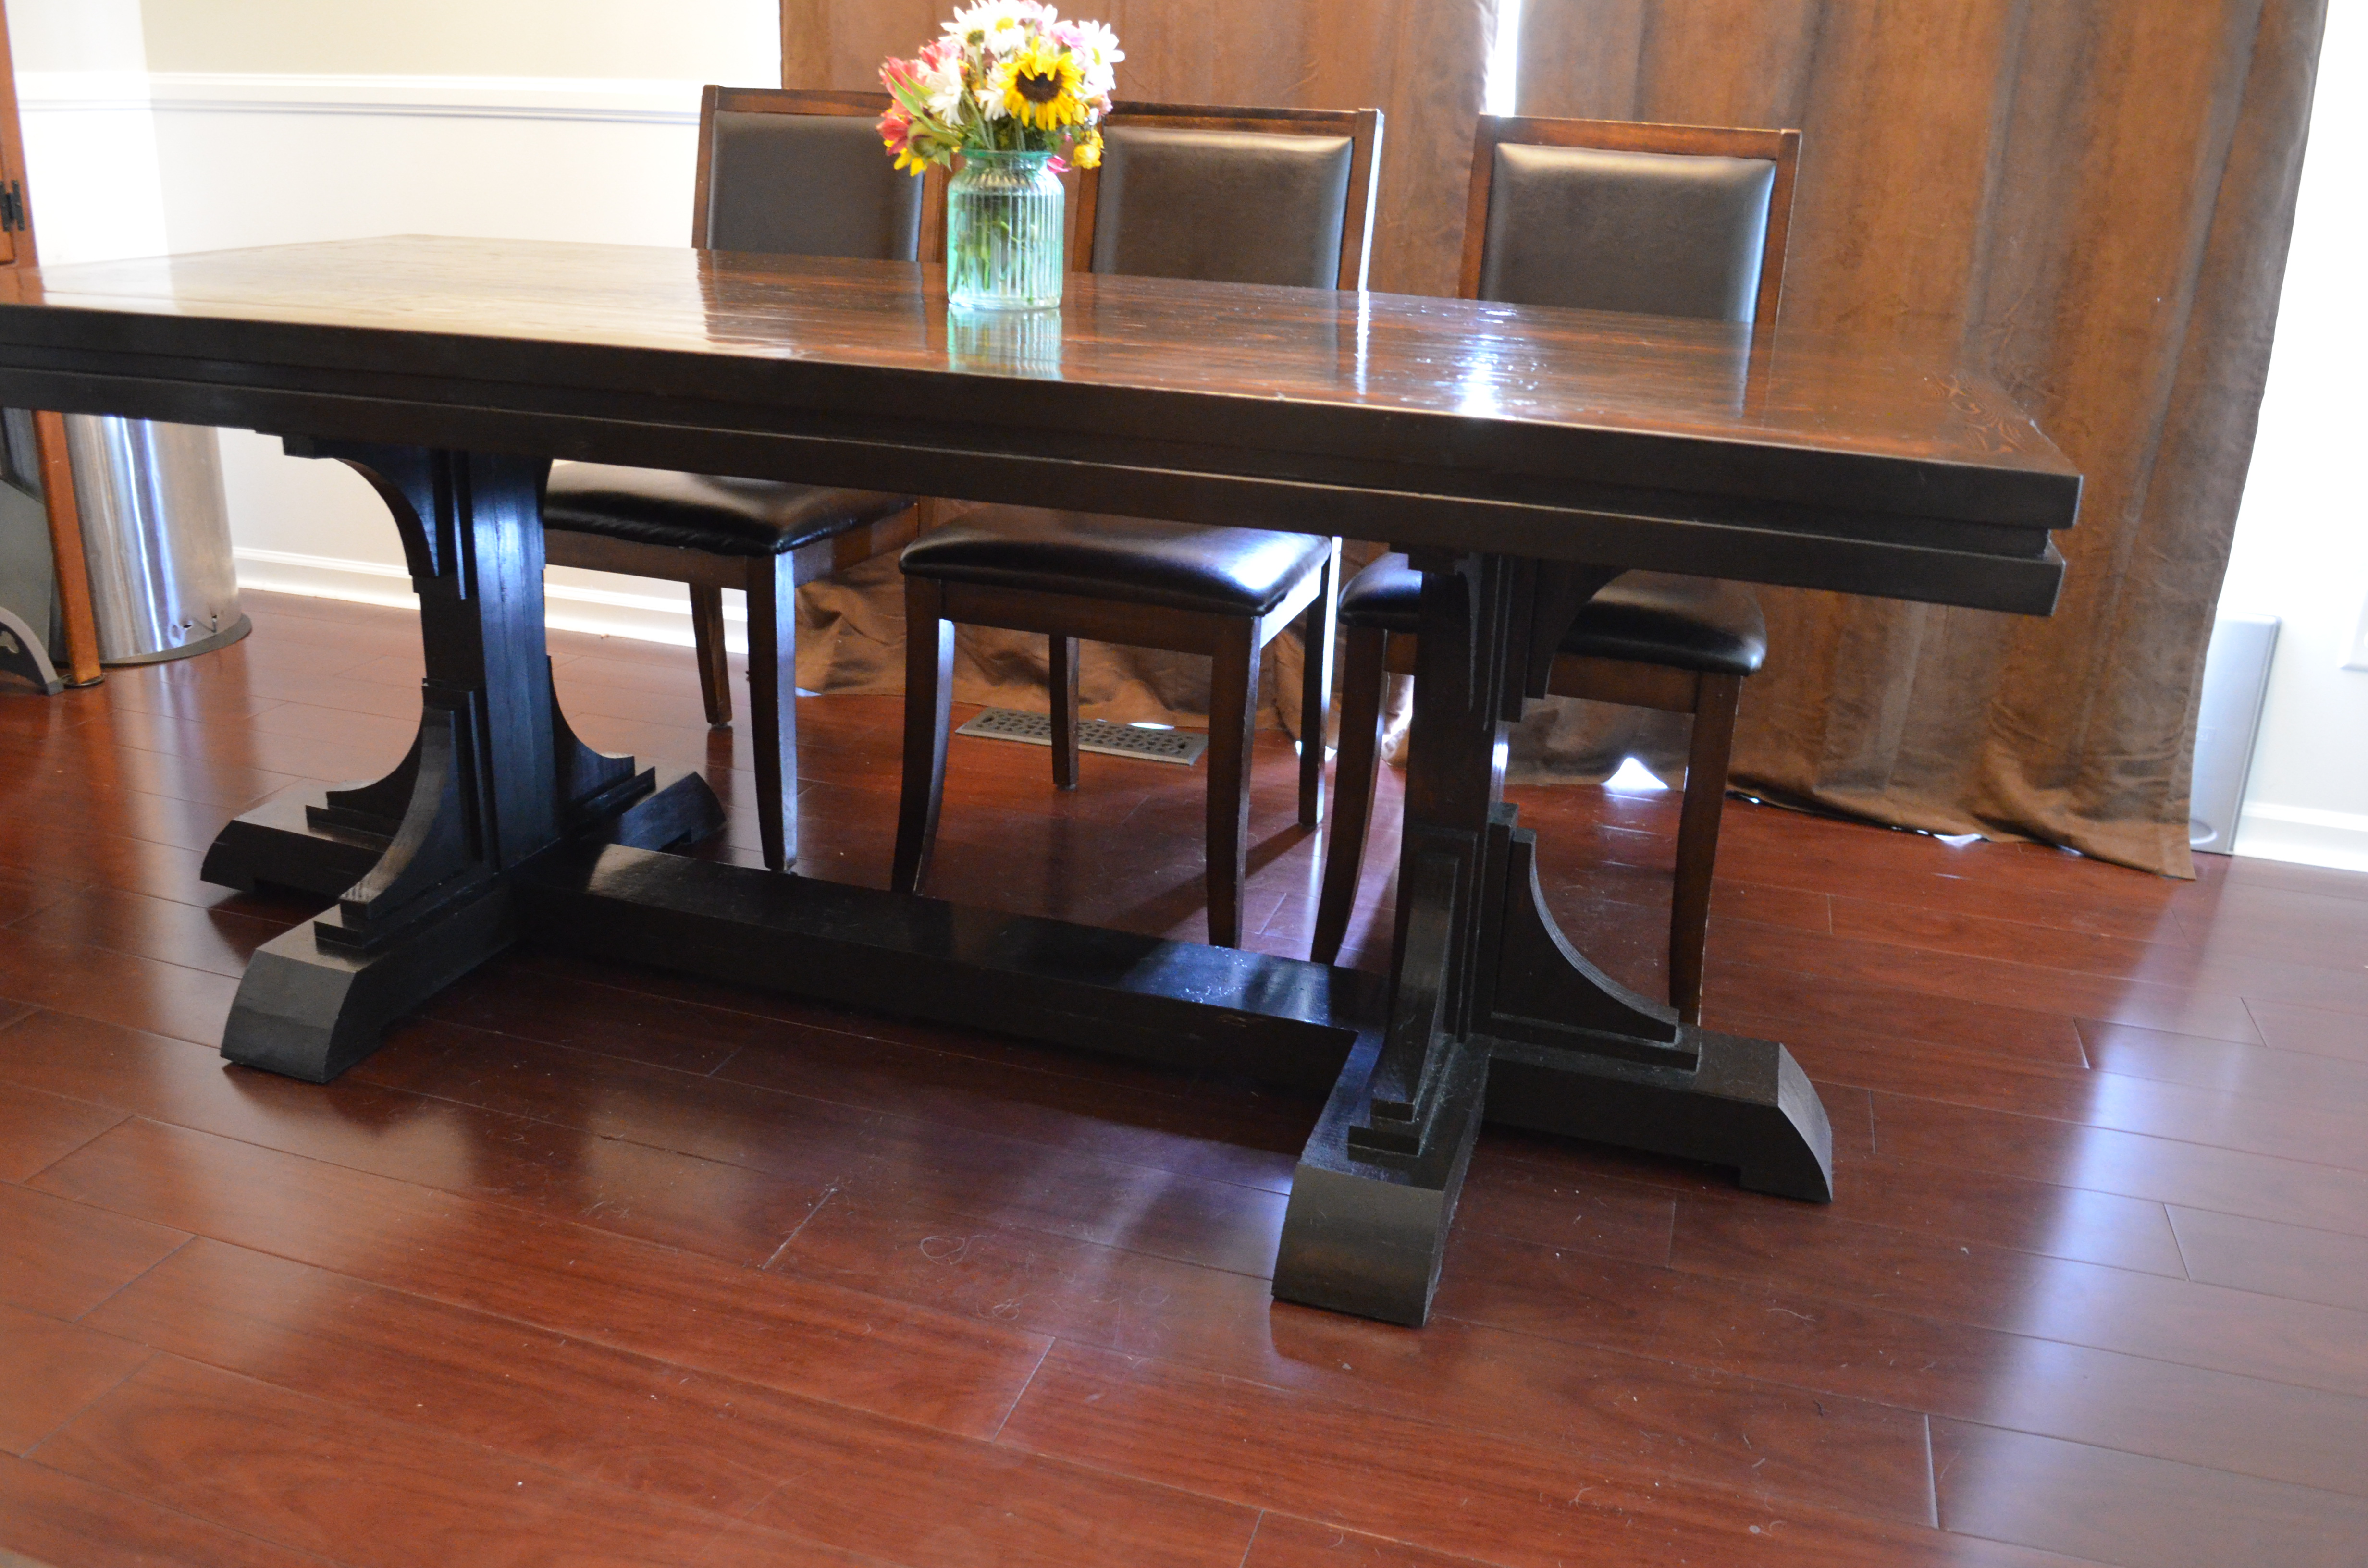
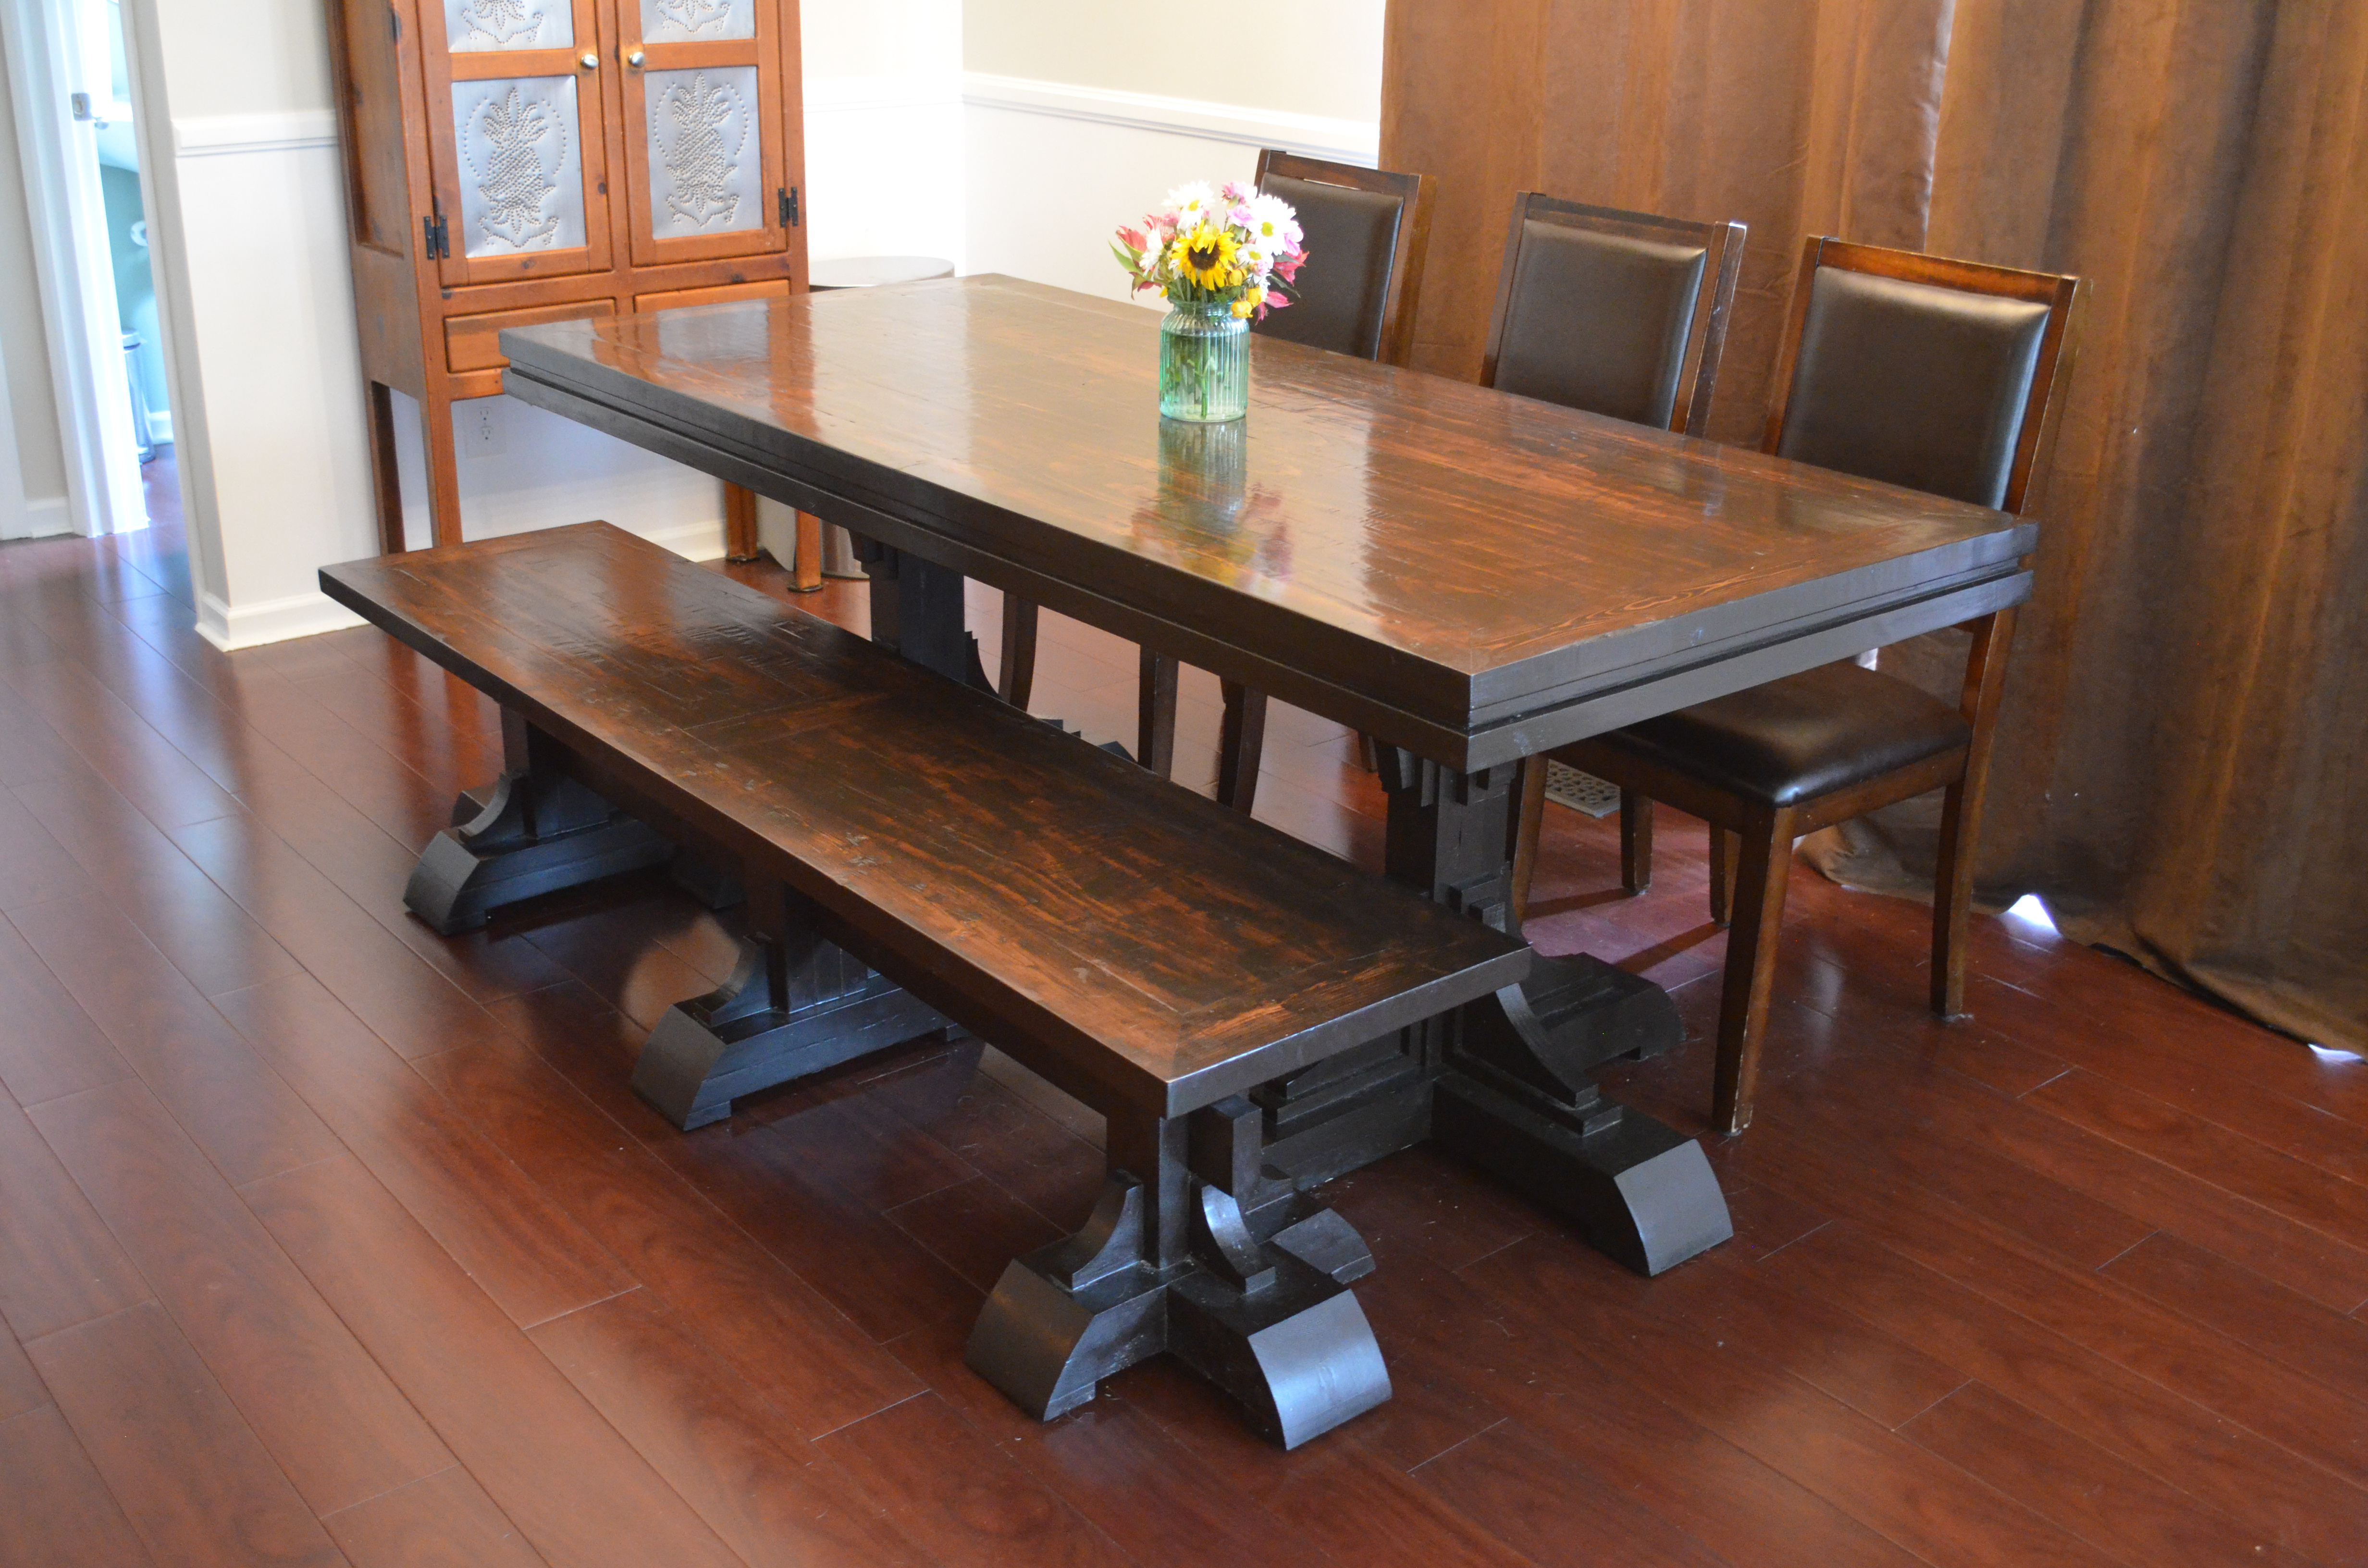
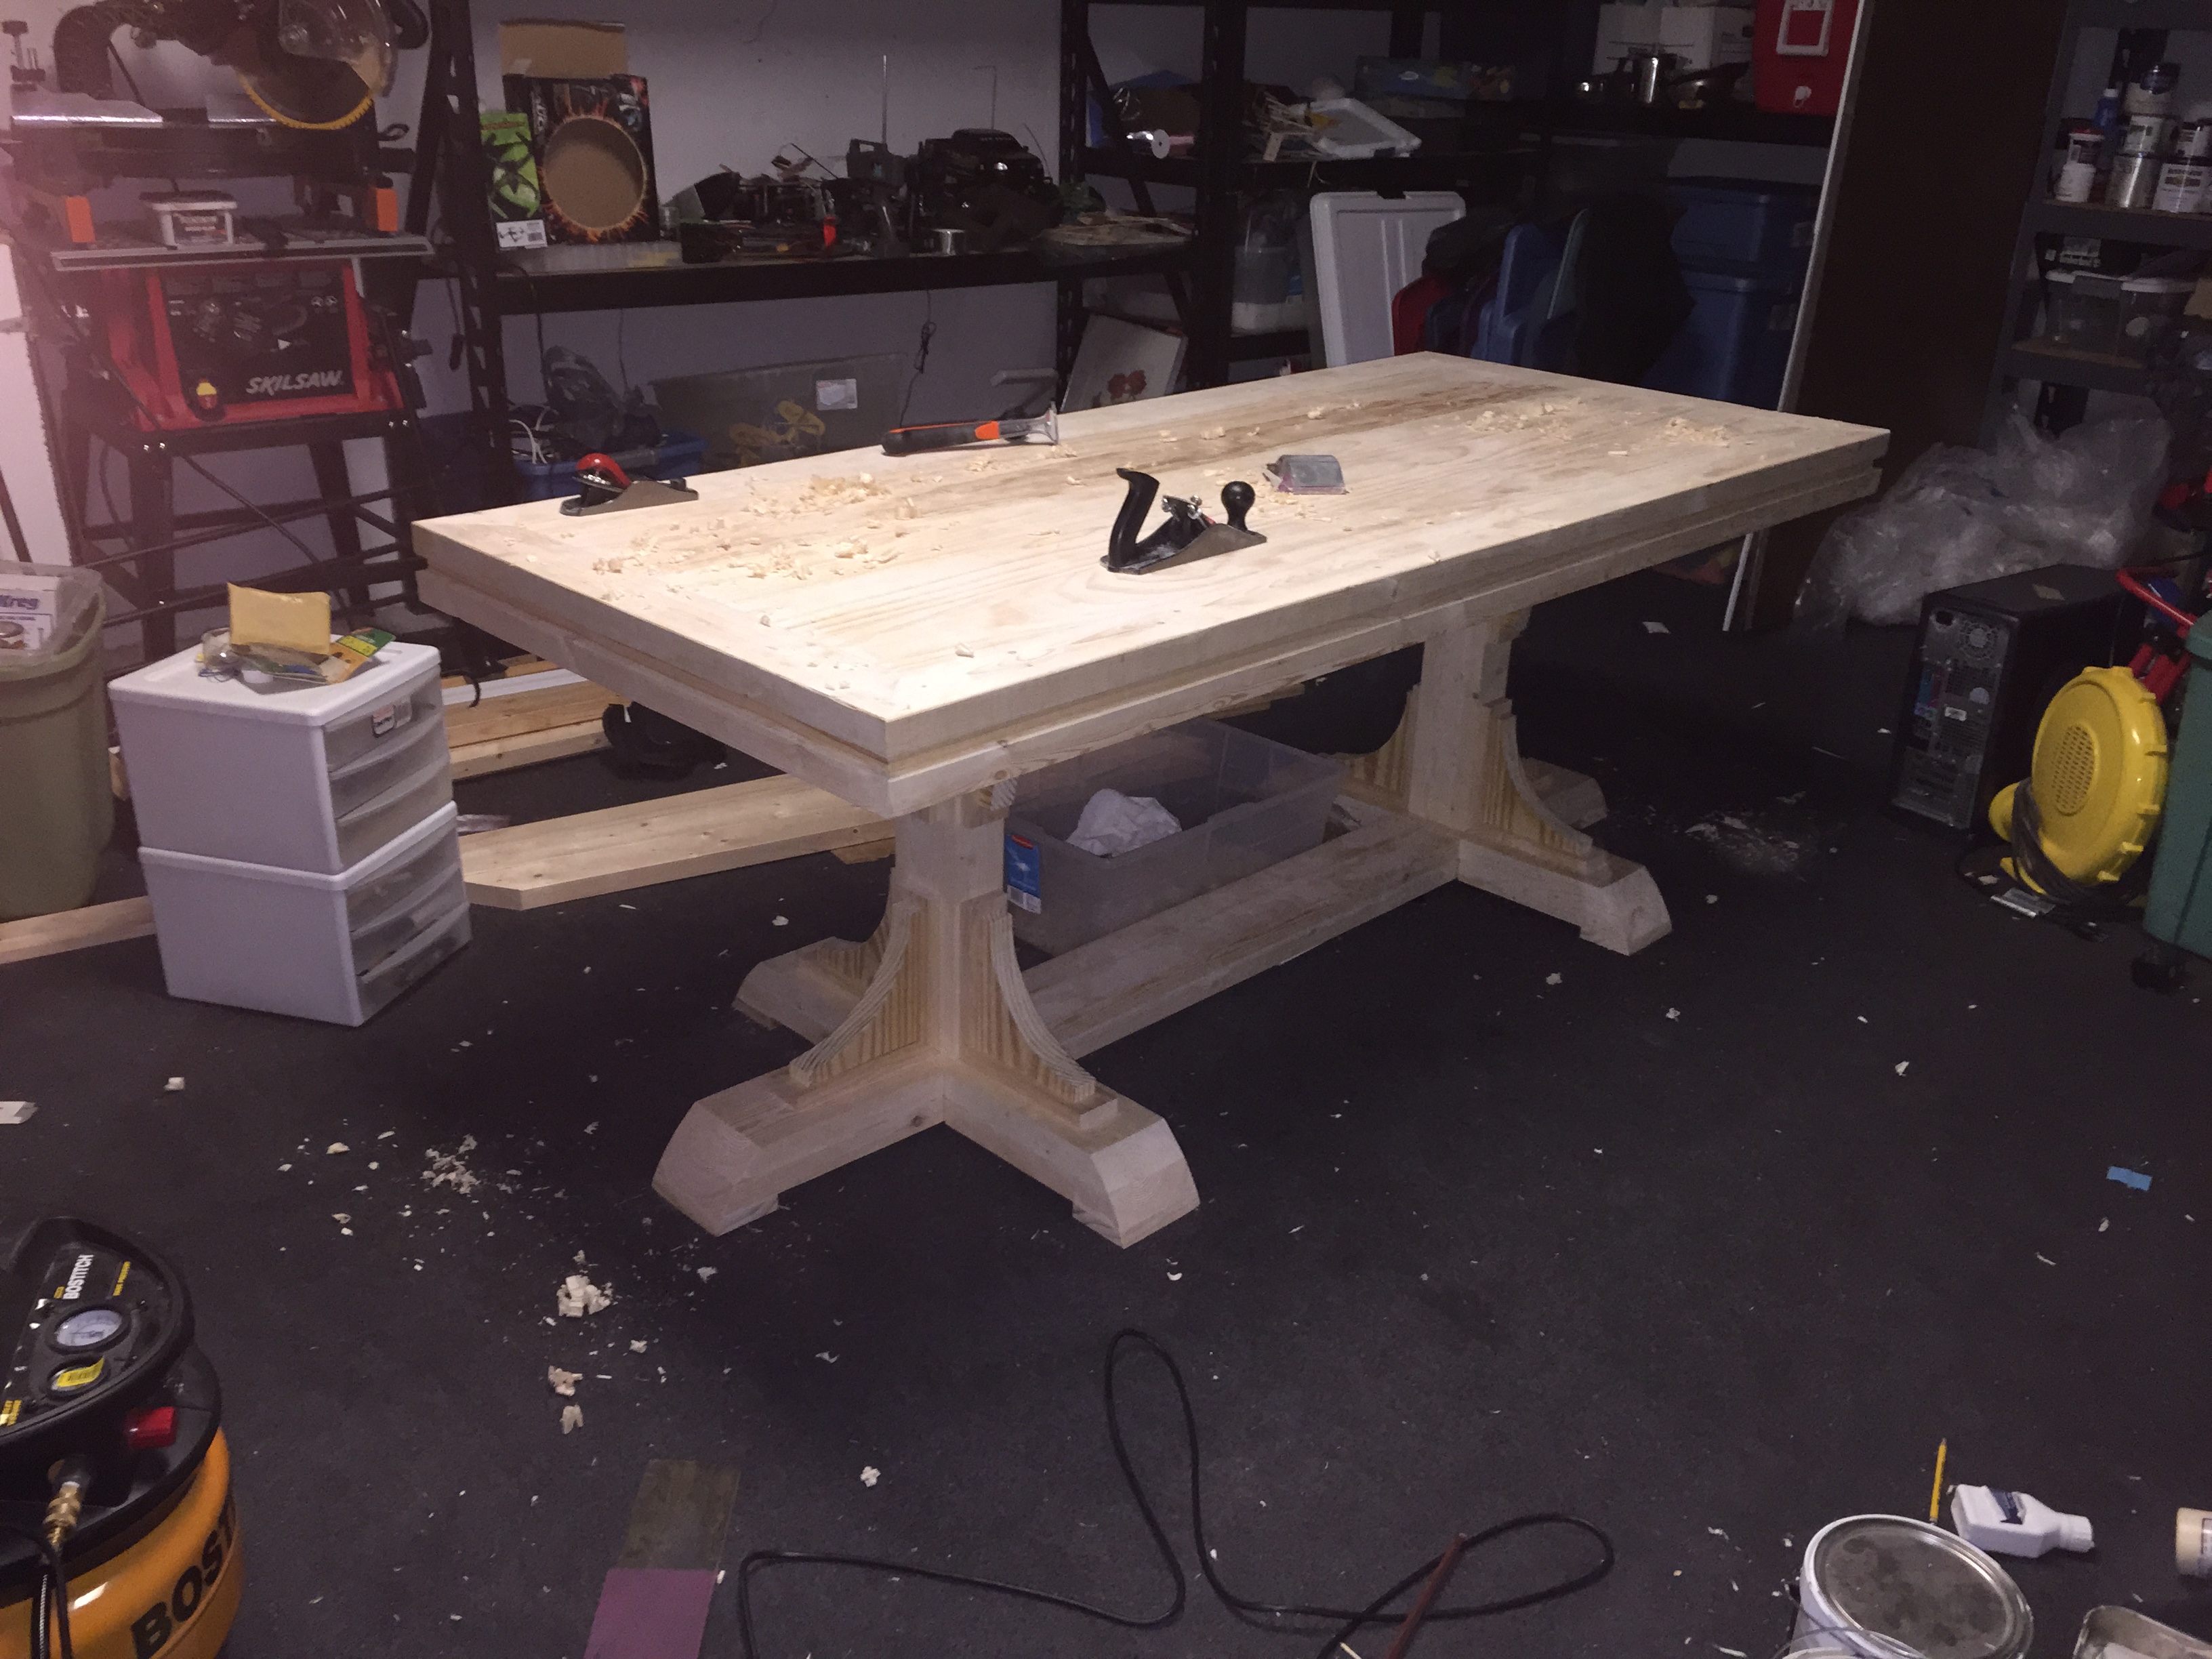
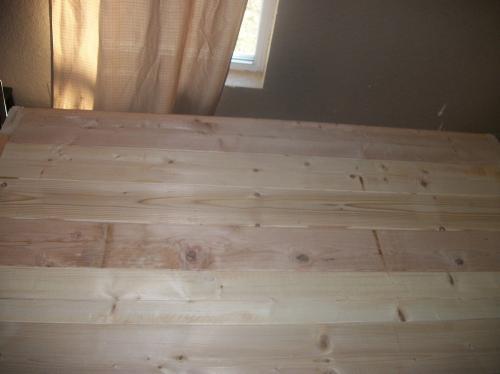
Triple foot farmhouse table with runner, triple pedestal bench
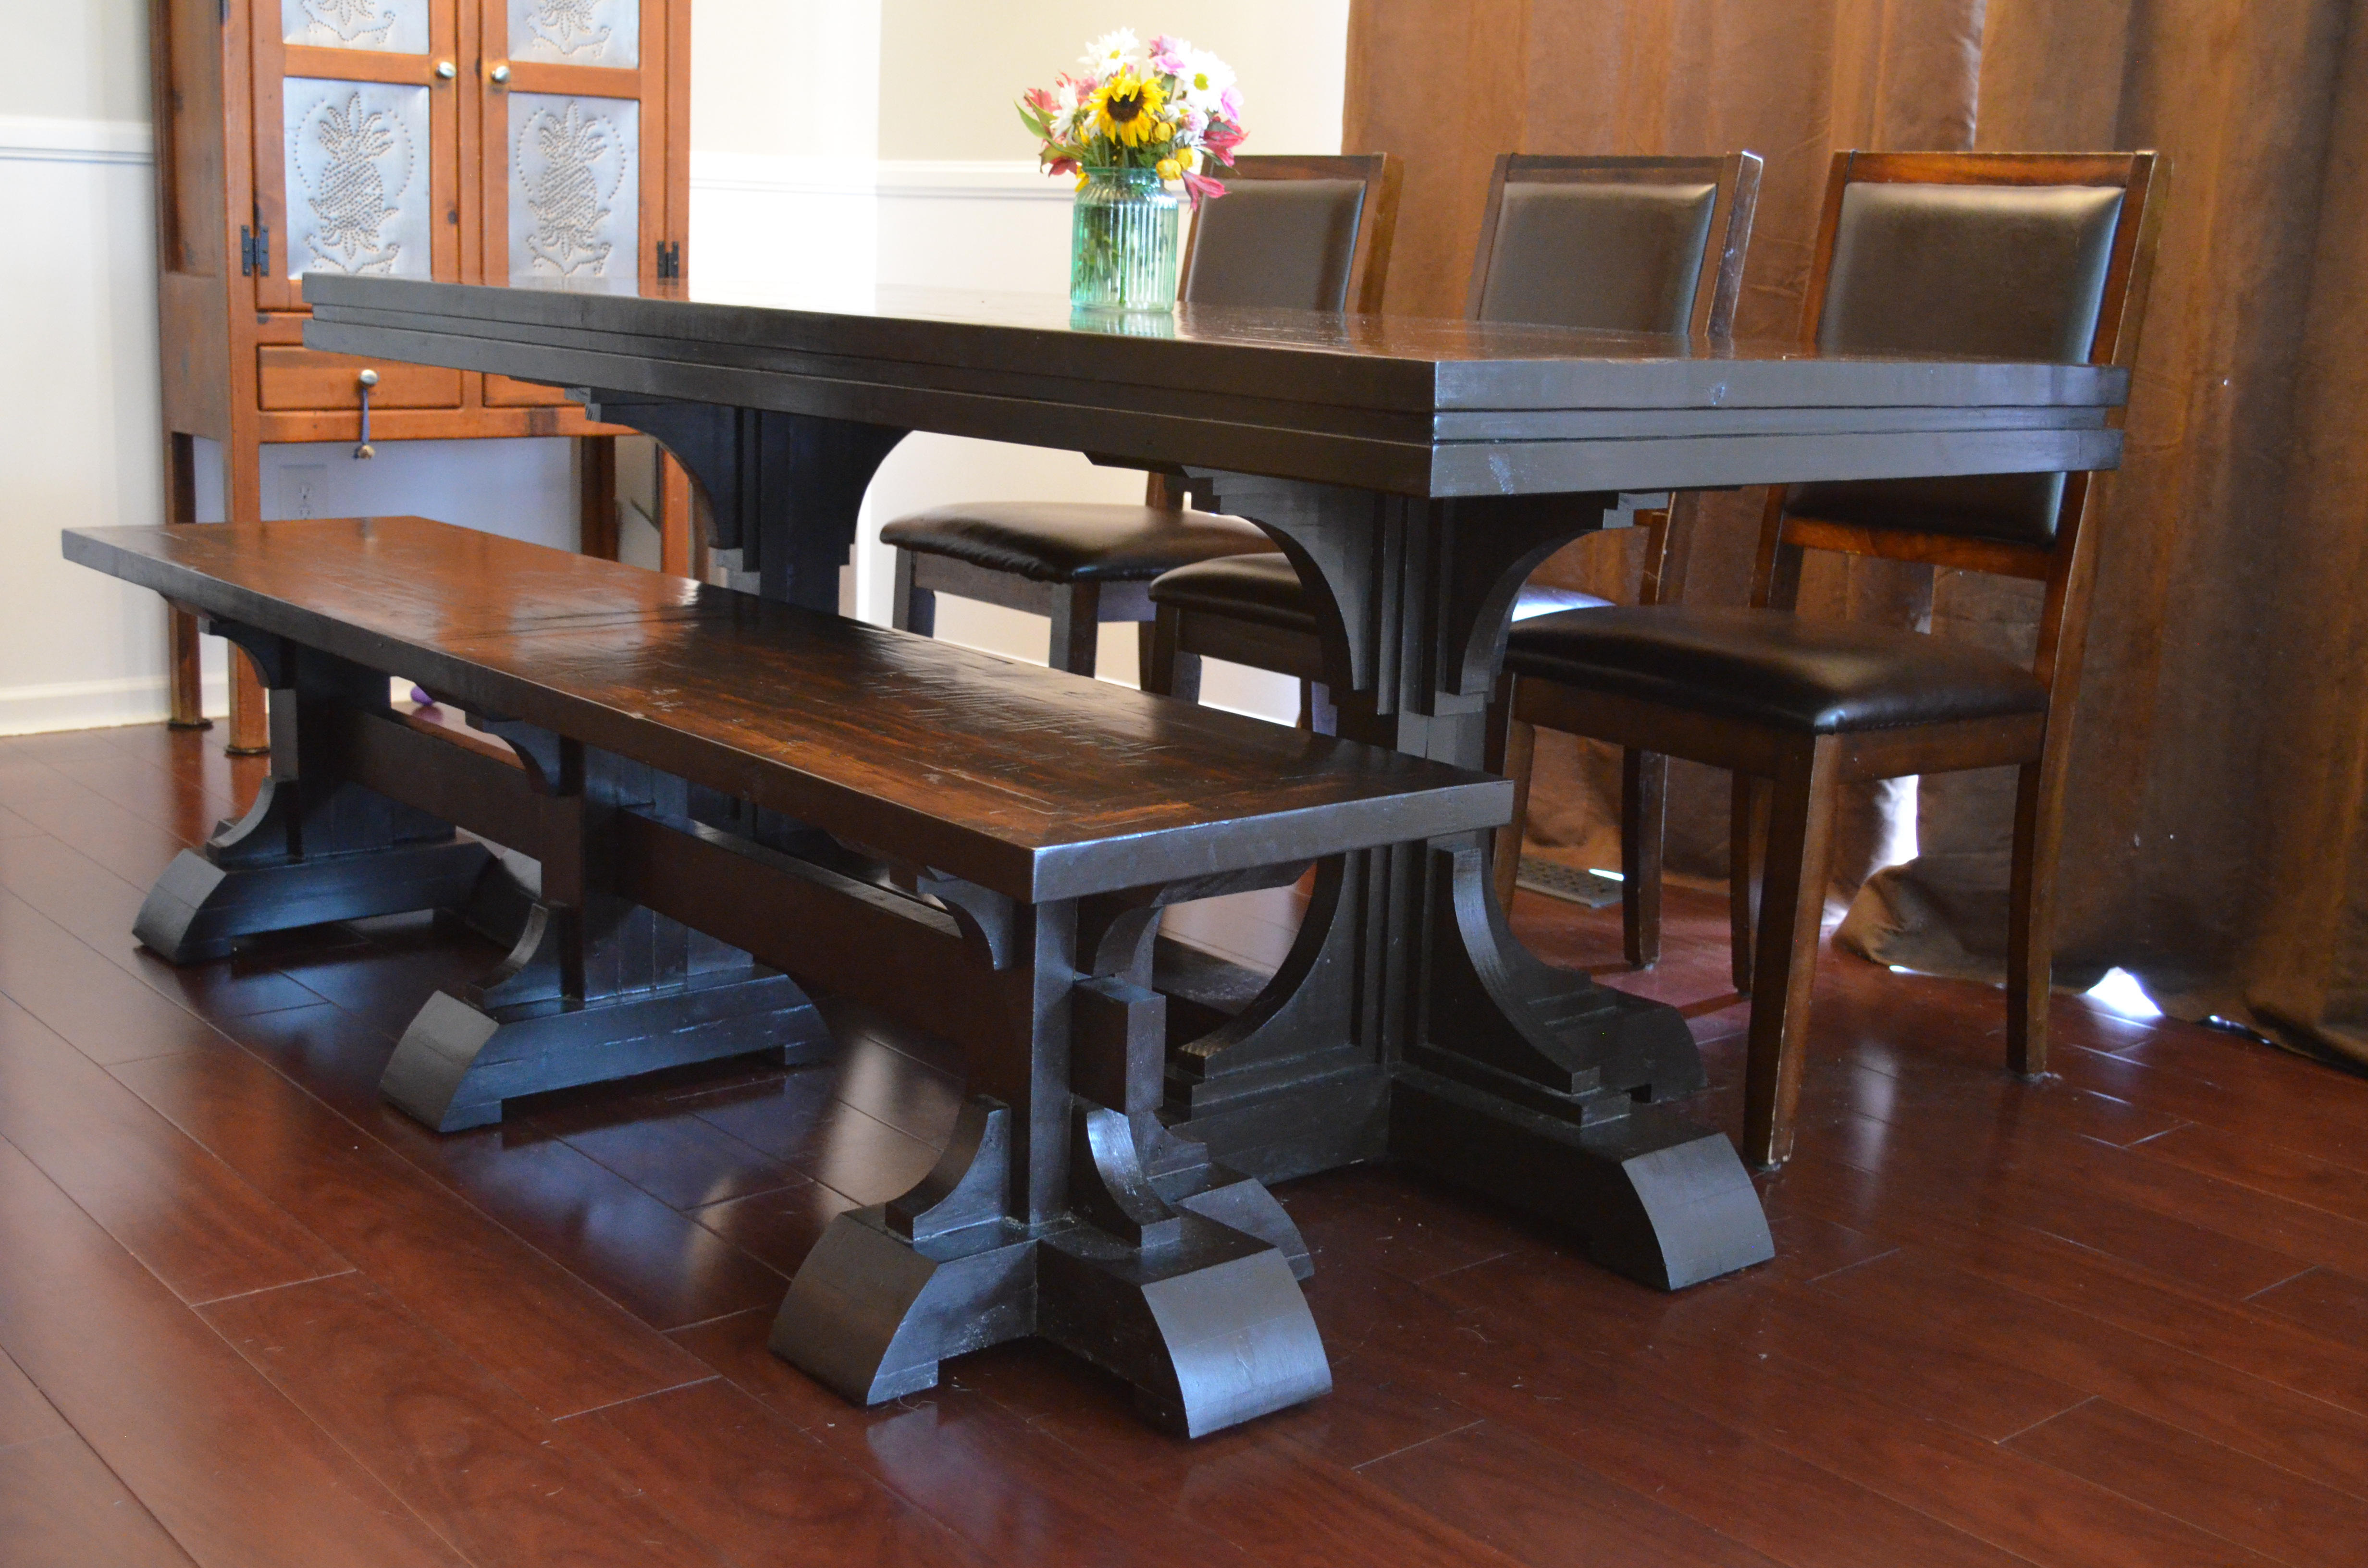
My first attempt at a real furniture project, I would have never tried this without all the plans and support here at Ana-White! These are 7' for the kitchen/breakfast area. Since the table is only 7', it has 2 pedestals. I modified these a bit from the triple pedestal farmhouse bench and table plans by using a runner along the floor instead of a stringer board on the table and adding triple feet on the outside pedestals. I also added 1x3 trim under the arches to add some detail and hide the grooves between the three 2x4 leg supports. The top has mitered 2x4s around the outside with 1x6s on the inside. One issue I ran into was that the 2x4s shrank a lot as they dried, while the kiln-dried 1x6s did not. To make an easier to clean surface I planed the top smooth, and then added minimal texture by hand scraping. My plan is to build a big 12' version of this table for the dining room.
Built from Plan(s)
Estimated Cost
Under $300 for both.
Estimated Time Investment
Week Long Project (20 Hours or More)
Finish Used
2 coats of kona stain, wiped more off the top than the legs. The top shows grain, the legs are almost solid brown. I used hand-rubbed satin poly. 3 coats on the bench turned out great. 6 coats on the table top turned out too shiny and easily scratches. I will refinish the table at some point, possibly with a softer finish.
Recommended Skill Level
Intermediate
Comments

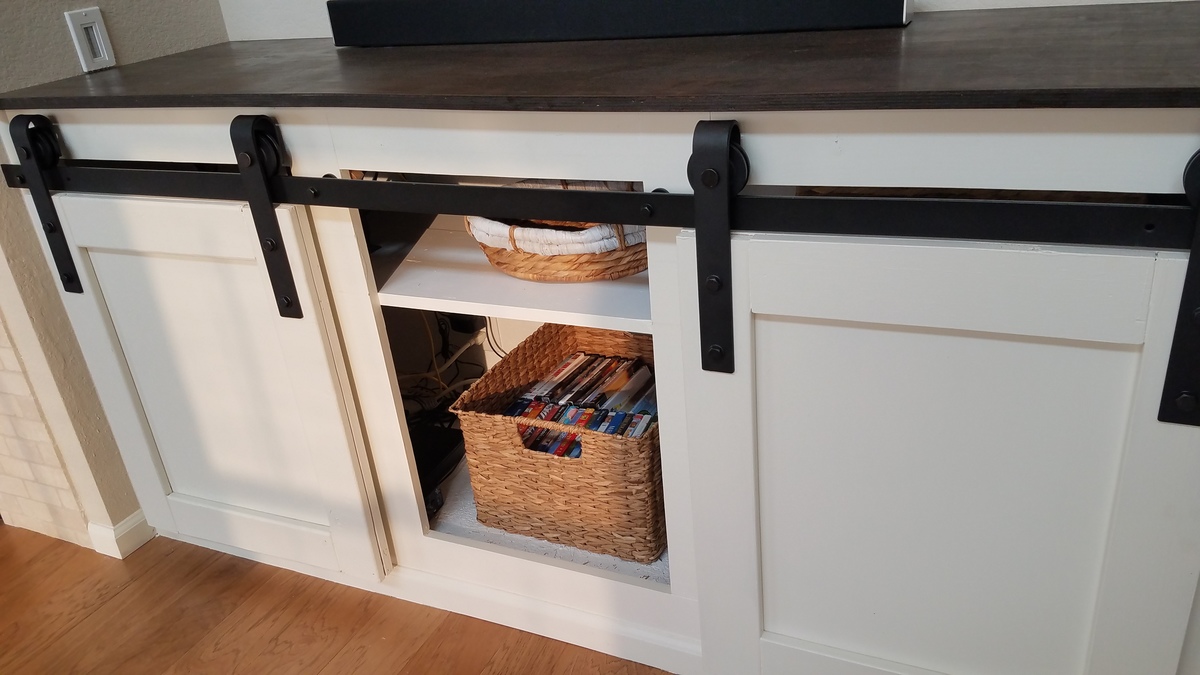
Built-in sliding door console
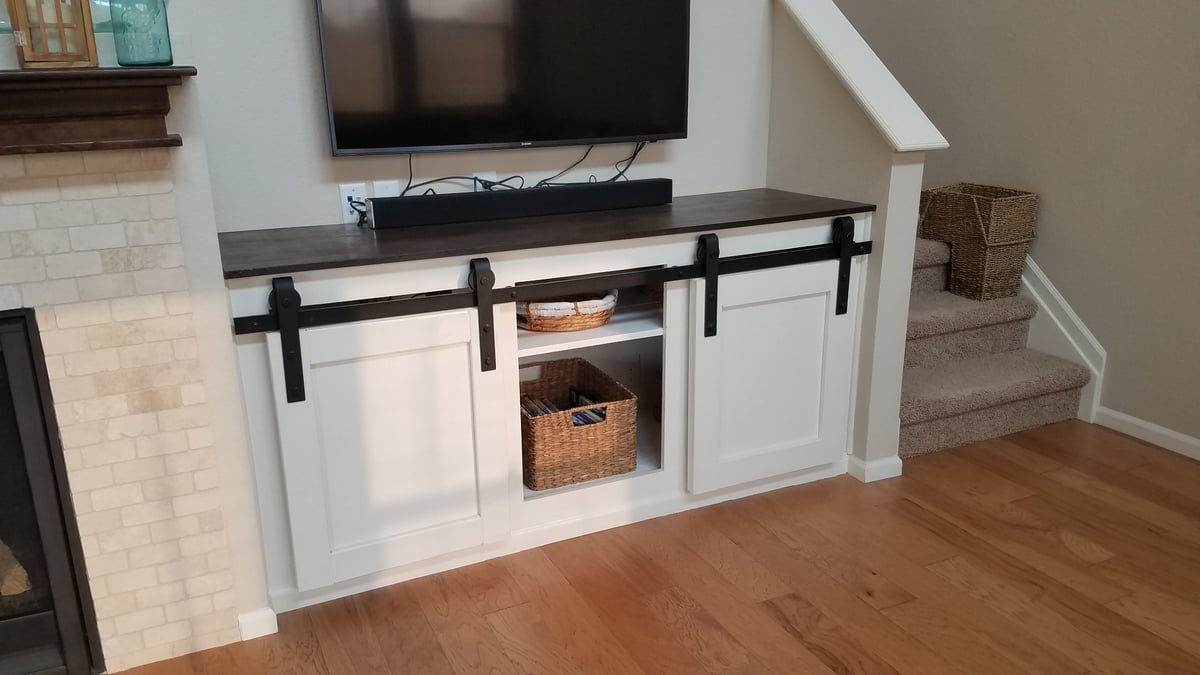
I wanted a sliding barn door concept but as a built-in piece. I had a drywall niche that the builders had made that I've always hated so I ripped that out, and used those measurements to create my version of the sliding door console from Nikki and Ana. This was a big project but so worth it! I ordered the door hardware from Amazon but had to drill my own holes because they did not line up where I needed them to be.
Built from Plan(s)
Estimated Cost
$200 including hardware
Estimated Time Investment
Weekend Project (10-20 Hours)
Recommended Skill Level
Intermediate
Our New Table...the table of my dreams!!
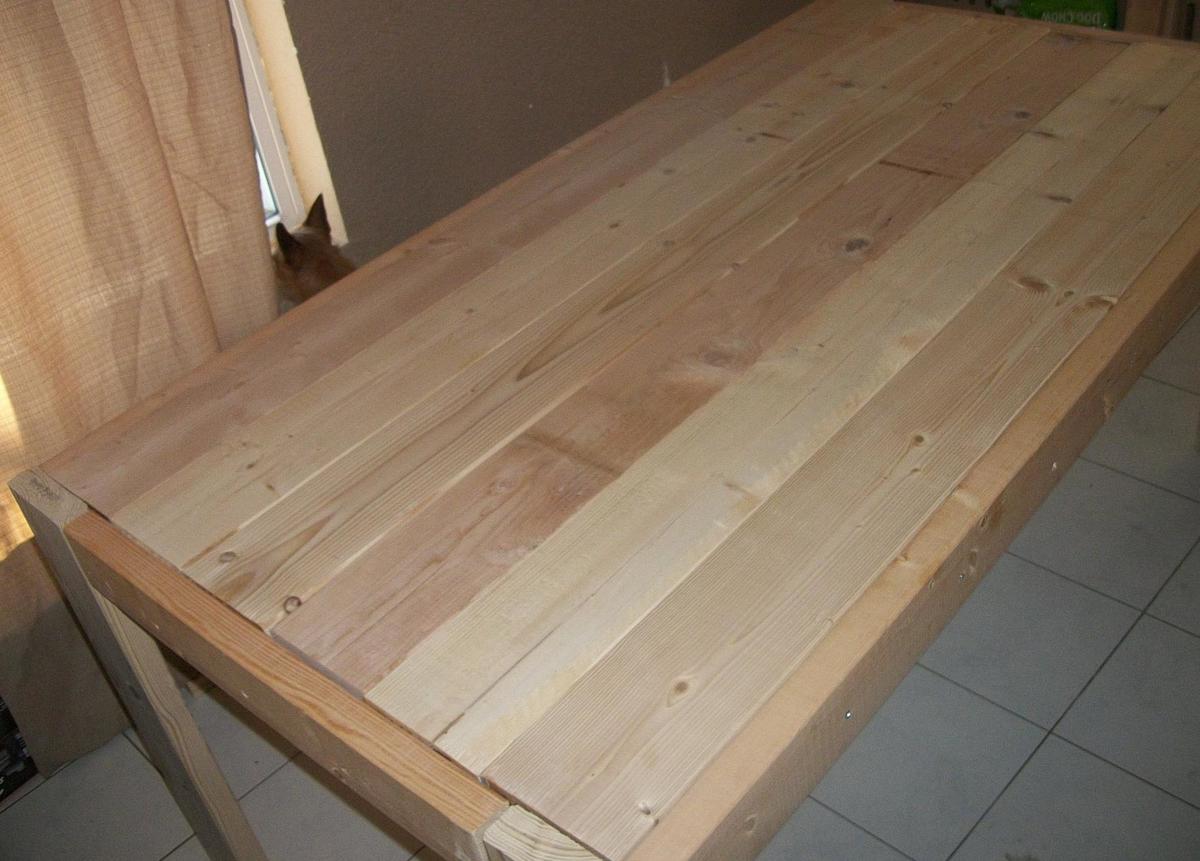
I have added hundreds of plans on my to do list, and some of them may have been a little easier, but I really wanted this table. Badly.
So, my husband and I, decided one weekend to build the Modern Farmhouse Table. Even though we have a saw, we decided since this was our first project, we would have Lowes cut our wood. Big mistake.
When we got home, we organized the wood as to what is what, and measured. It was while we were measuring, when we noticed that a lot of the wood was cut wrong :(
So let that be a lesson...ALWAYS CUT YOUR OWN WOOD!
We went ahead and put the table together, and even though there are some gaps, which I'm planning on filling, I am proud with it.
It's been 3 weeks since we've built the table, and I still have A LOT of sanding to do, and I still need to finish it, but I am proud of what my hubby and I built together so I have to brag!
Next on our list is to build the benches...

Built from Plan(s)
Estimated Time Investment
Week Long Project (20 Hours or More)
Recommended Skill Level
Starter Project
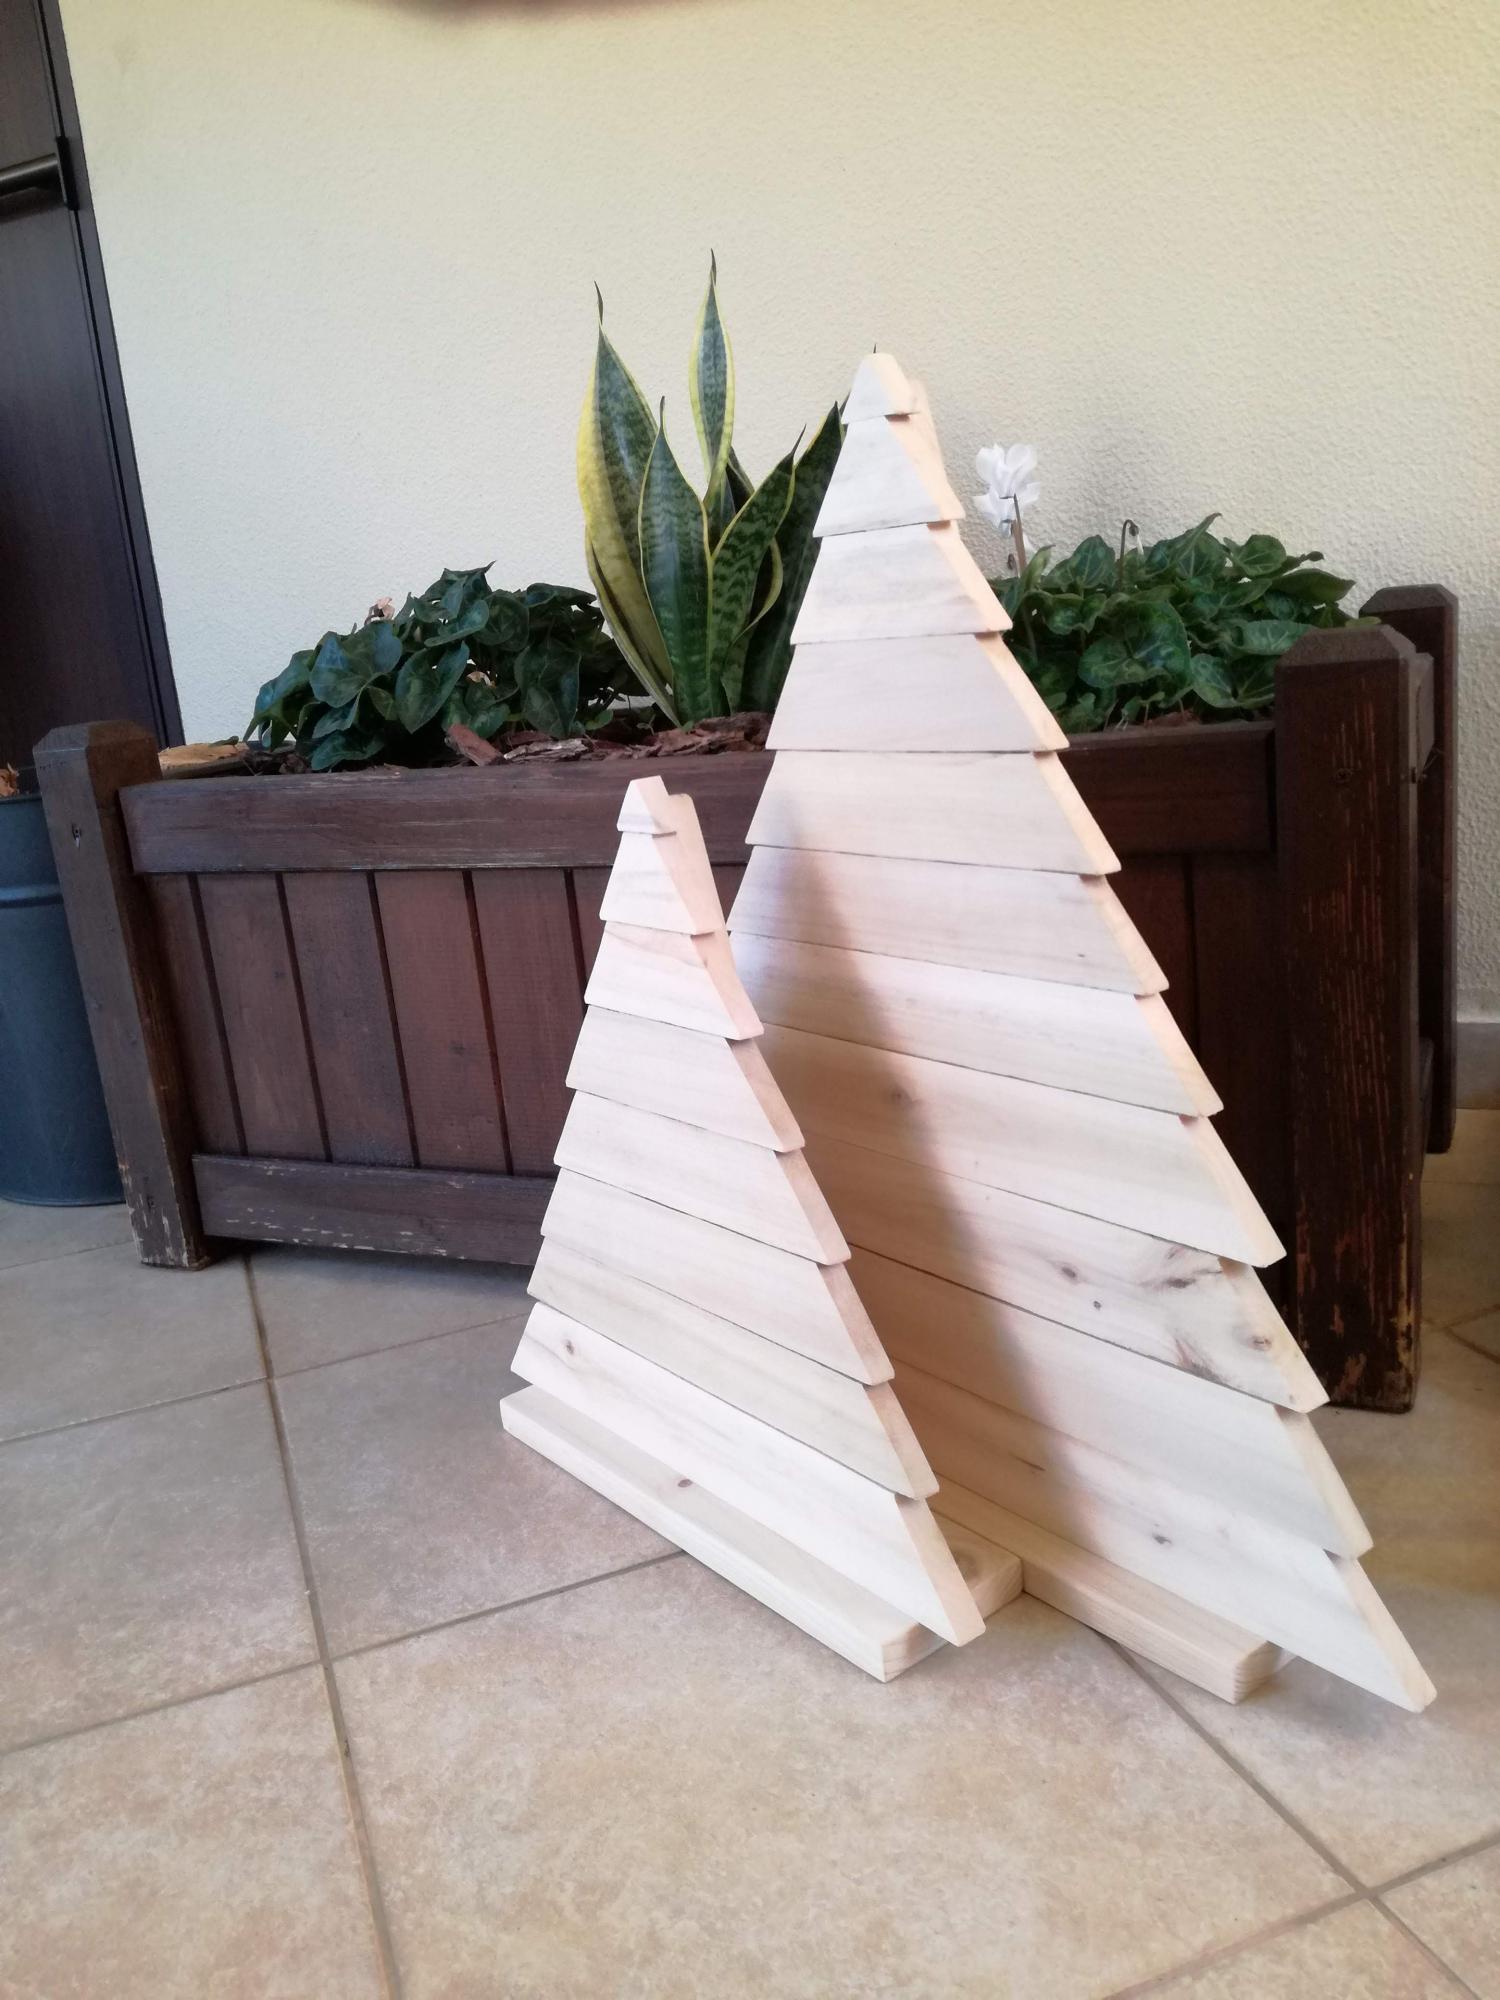
My Garden box

Built this with the help of my Dad! Learned about threads as I've never used them before. Because of all the controversy surrounding having pressure treated wood touch the veggies and because I could not afford or find cedar 4x4's I decided to use the left over cedar to build a little cover around the 4x4's so my soil and veggies will never come into contact with it. Love it and the veggies are growing great!
Built from Plan(s)
Estimated Cost
$50/60
Estimated Time Investment
Afternoon Project (3-6 Hours)
Finish Used
I forget the stain I used on the outside of cedar...something natural looking.
Recommended Skill Level
Beginner
Comments

Fri, 05/31/2013 - 04:22
awesome job
I'm glad you were able to follow my plans. I'm not a plan writer so I wasn't sure if I gave good enough instruction. It is a shame you can not get all cedar. Sealing the legs will definitly help them last longer and with all that work you certainly want them to last! Just a hint...you can make 3 for not much more than you spent making one....Great job and thanks for the brag post LOVE LOVE LOVE
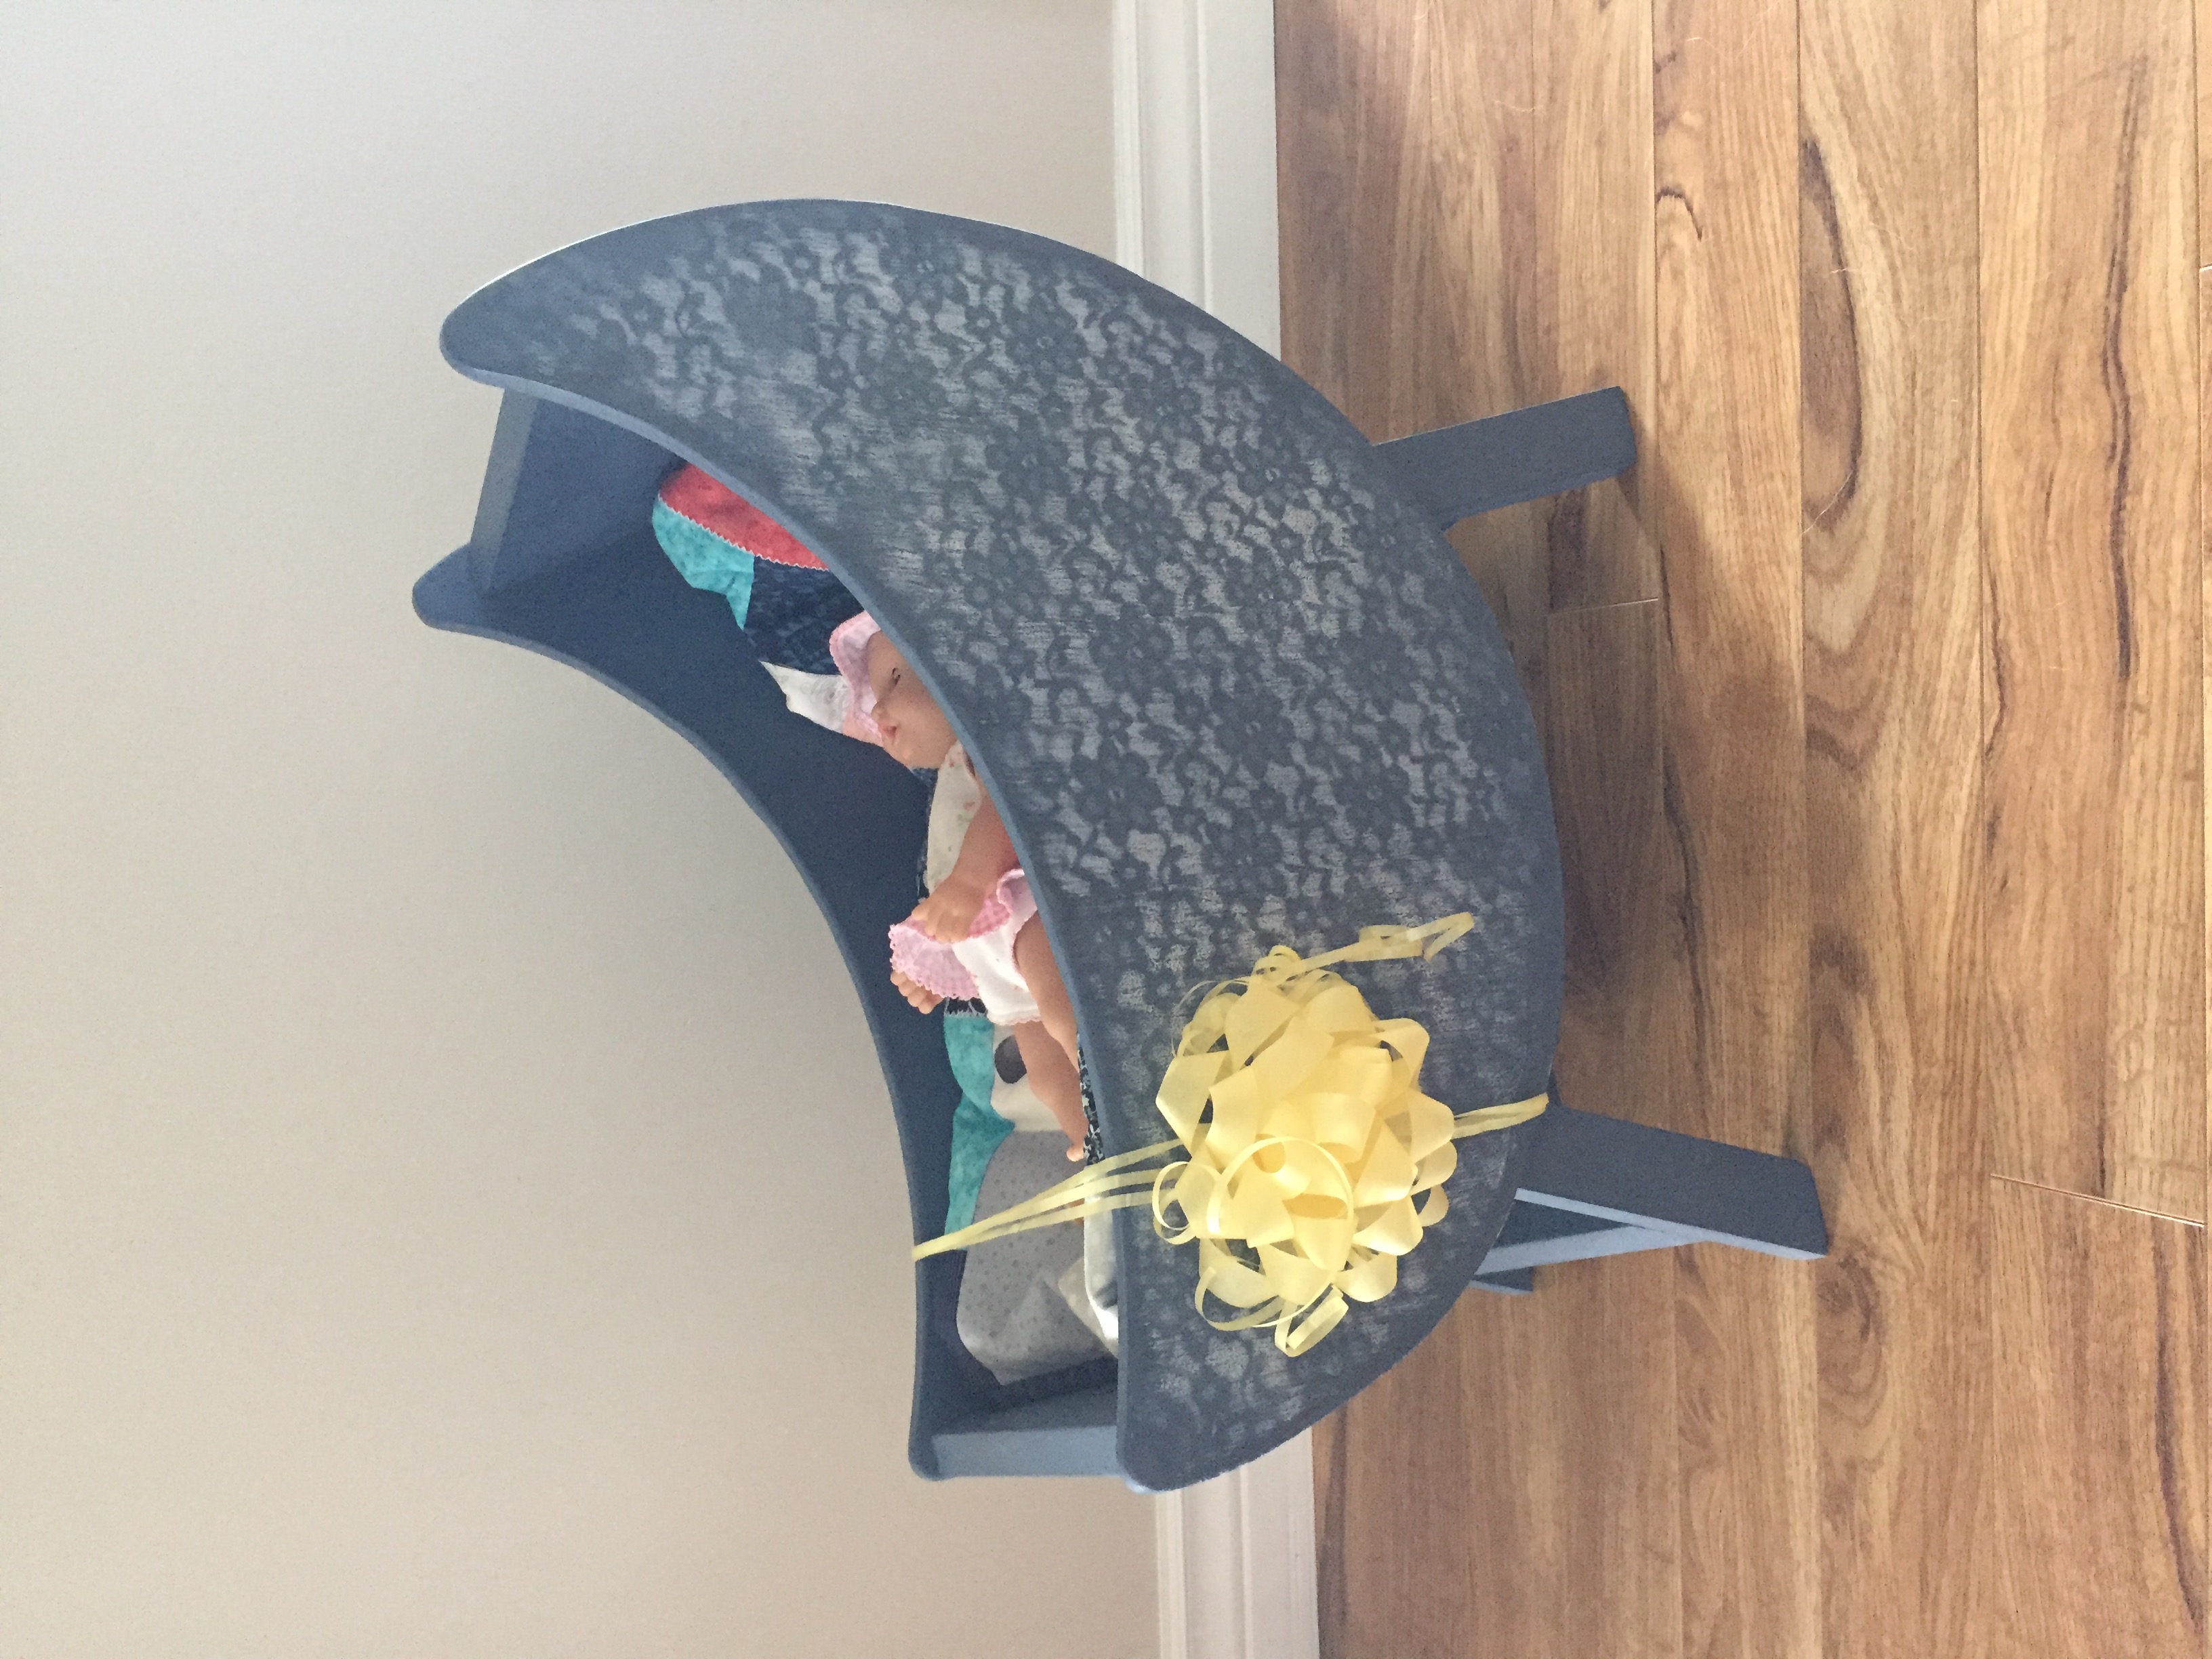
Doll Crib

Built for my daughters 2nd birthday.
Built from Plan(s)
Estimated Time Investment
Day Project (6-9 Hours)
Finish Used
Chalk paint, and white spray paint sprayed over lace. Distressed and dry brushed the blue chalk paint back over for a worn look.
Recommended Skill Level
Beginner
Bathroom Shelf
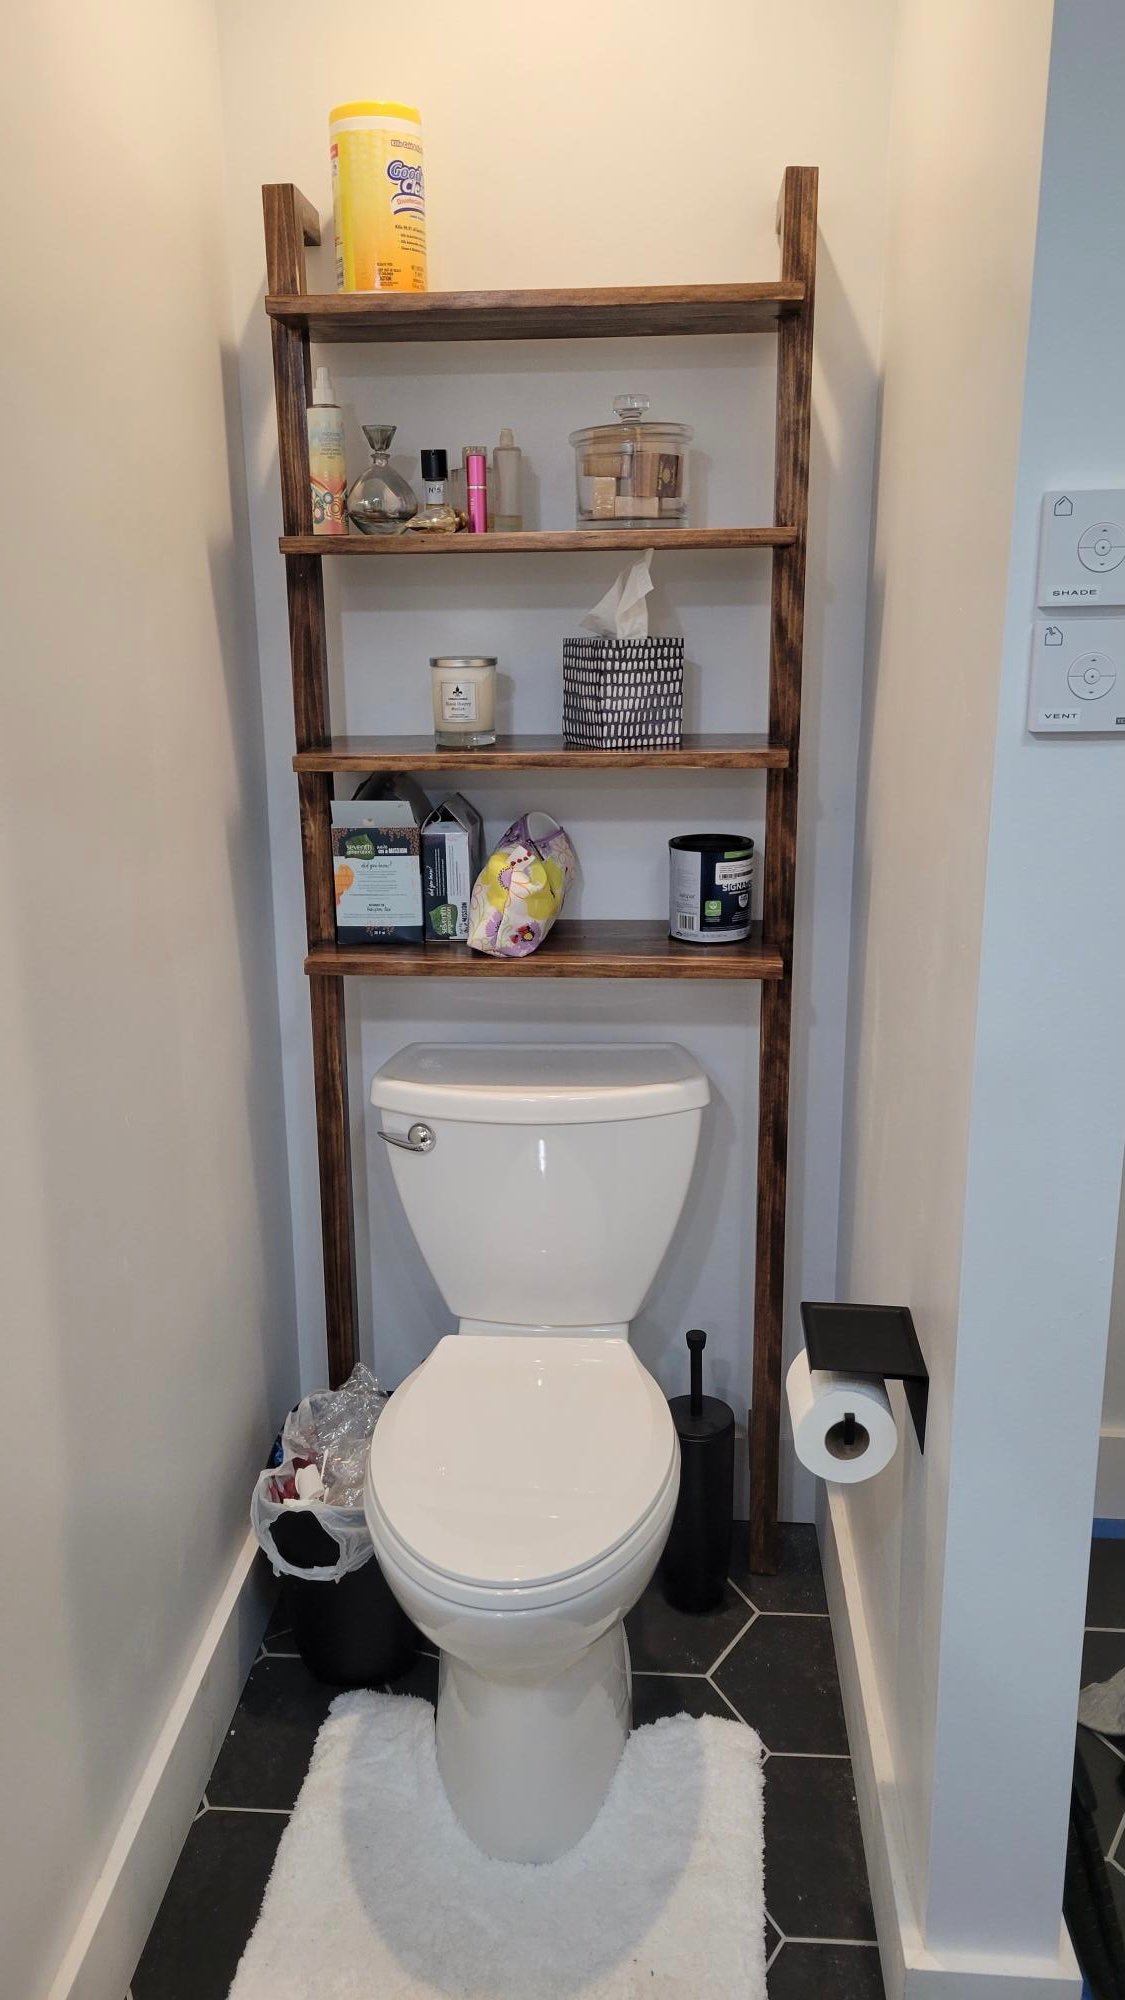
Quick little project
Built from Plan(s)
Comments
Thu, 10/07/2021 - 06:50
Nice bathroom shelf!
That looks pretty and functional, way to go! Thank you for sharing:)
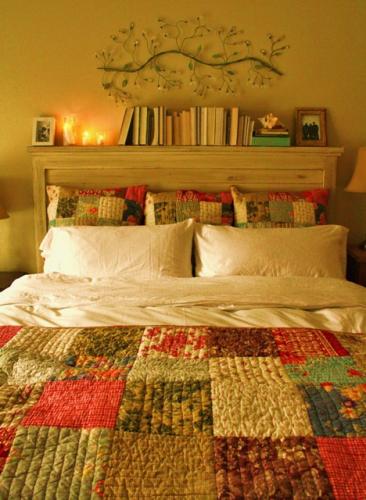
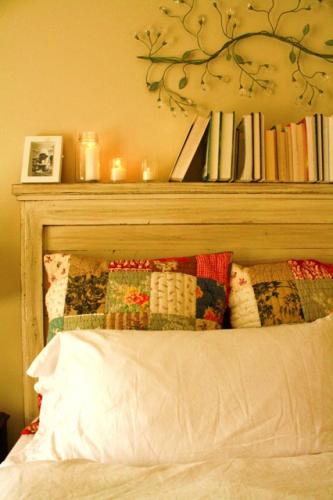
Planked Wood Headboard in Cal King
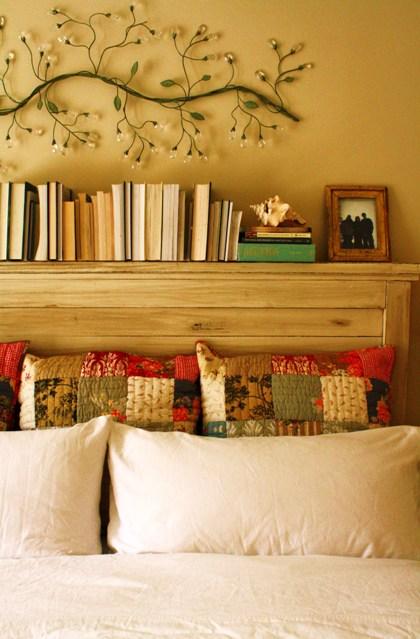
This project was a blast to make. And, it really is doable and a lot less time then you would think. And finishing it with milk-based paint is even more enjoyable. I used screws and a drill (pre-drill!) and it was wonderful.
Here's some advice for the plan:
- Mount the back of the headboard with a piece of wood and use a metal support as shown here. Just make sure the board is wide enough to be level with your back trim, or else the metal support won't be even when you screw it down. And when you pre-drill this board, make sure you don't go all the way through, or else you will have holes through the front! It stunk to have to putty them all in, but thank heavens for putty.
- Although the instructions say to make your top 1 x 3" trim to fit in line with the top of the headboard, I made mine one inch longer on both sides, and then the 2 x 4" one inch longer to go on top of that 1 x 3" on both sides. That was just the look I wanted. Although you can get your wood pre-cut, I would recommend cutting it all yourself, especially since you will need these cut afterward once the rest of your headboard is put together.
- Ana's 'get started' tips are very helpful. Be sure to check them out first!
- Make sure, make sure, make sure you dry thoroughly between coats. Patience is a virtue.

Built from Plan(s)
Estimated Cost
$125
Estimated Time Investment
Week Long Project (20 Hours or More)
Finish Used
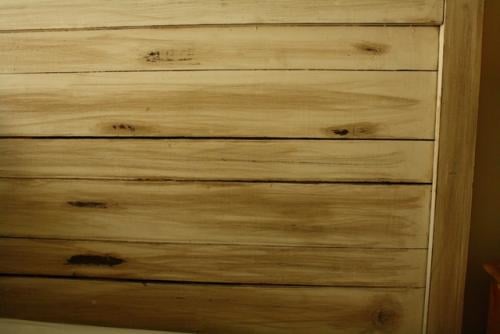
I distressed with milk-based paint... it always gives it such a unique look every time! Here's what I did:
- Stain your wood with a foam brush that you can by essentially anywhere--craft stores, home improvement stores--going along the grain of the wood. Do this for all painting and staining. For a dark finish underneath, use a dark stain. I used Minwax in Dark walnut. Leave the stain on for at least 15 MINUTES before you wipe it with an old t-shirt or a lint-free rag, like the one you would use to polish your car.
-Buff with a crinkled brown paper bag. You won't need to do this too intensely, but make sure you're thorough.
- If you want some of those big, antiqued stain spots, take a candle and really rub certain spots, such as the knots and the edges of the wood. However, it can be easy to forget where you rubbed with the candle, so you might want to draw up a rough diagram of a headboard and mark an X where you rubbed the candle. Rubbing with the candle will make the spot of the paint come off much easier--you'll see how well it will come off when you sand. But I would hesitate from rubbing it too much, because it makes your paint 'peel off' eventually if you do it in excess.
- Paint your headboard, giving it at least thee coats. My first coat was really thin so during my first coat I went right ahead and painted it again right then. Then I did a second and third coat. Let it dry completely between your second and third coat. I waited at least eight hours between coats.
- Once it's dry, sand your headboard BY HAND with at least 100 grit sandpaper. If you want your piece to have a more distressed look all-around and not just in certain places, sand your piece after each coat of paint dries. Just rub with your hand smoothly in strokes, and you will see how easily the paint comes off, and how it will give you that distressed look like magic. I did this for my dresser and I loved the look. However, I did not use the candle-wax method because I sanded after each coat. If you wait until after the third coat to sand, you will have to work harder, but your paint will still come off and look distressed very nicely.
- Stain the top of your paint (I used the same dark dark walnut color). Immediately rub off the stain with an old t-shirt or a lint-free rag. Rub it down to get the desired look of your stain. If you choose to have it a little less antiqued, you can skip this step.
- Finish with a Polyacrylic topcoat. They are safe and it really gives a nice, finished (and less DIY) look.
- Mount it with bolts on to your bed frame!
Recommended Skill Level
Starter Project
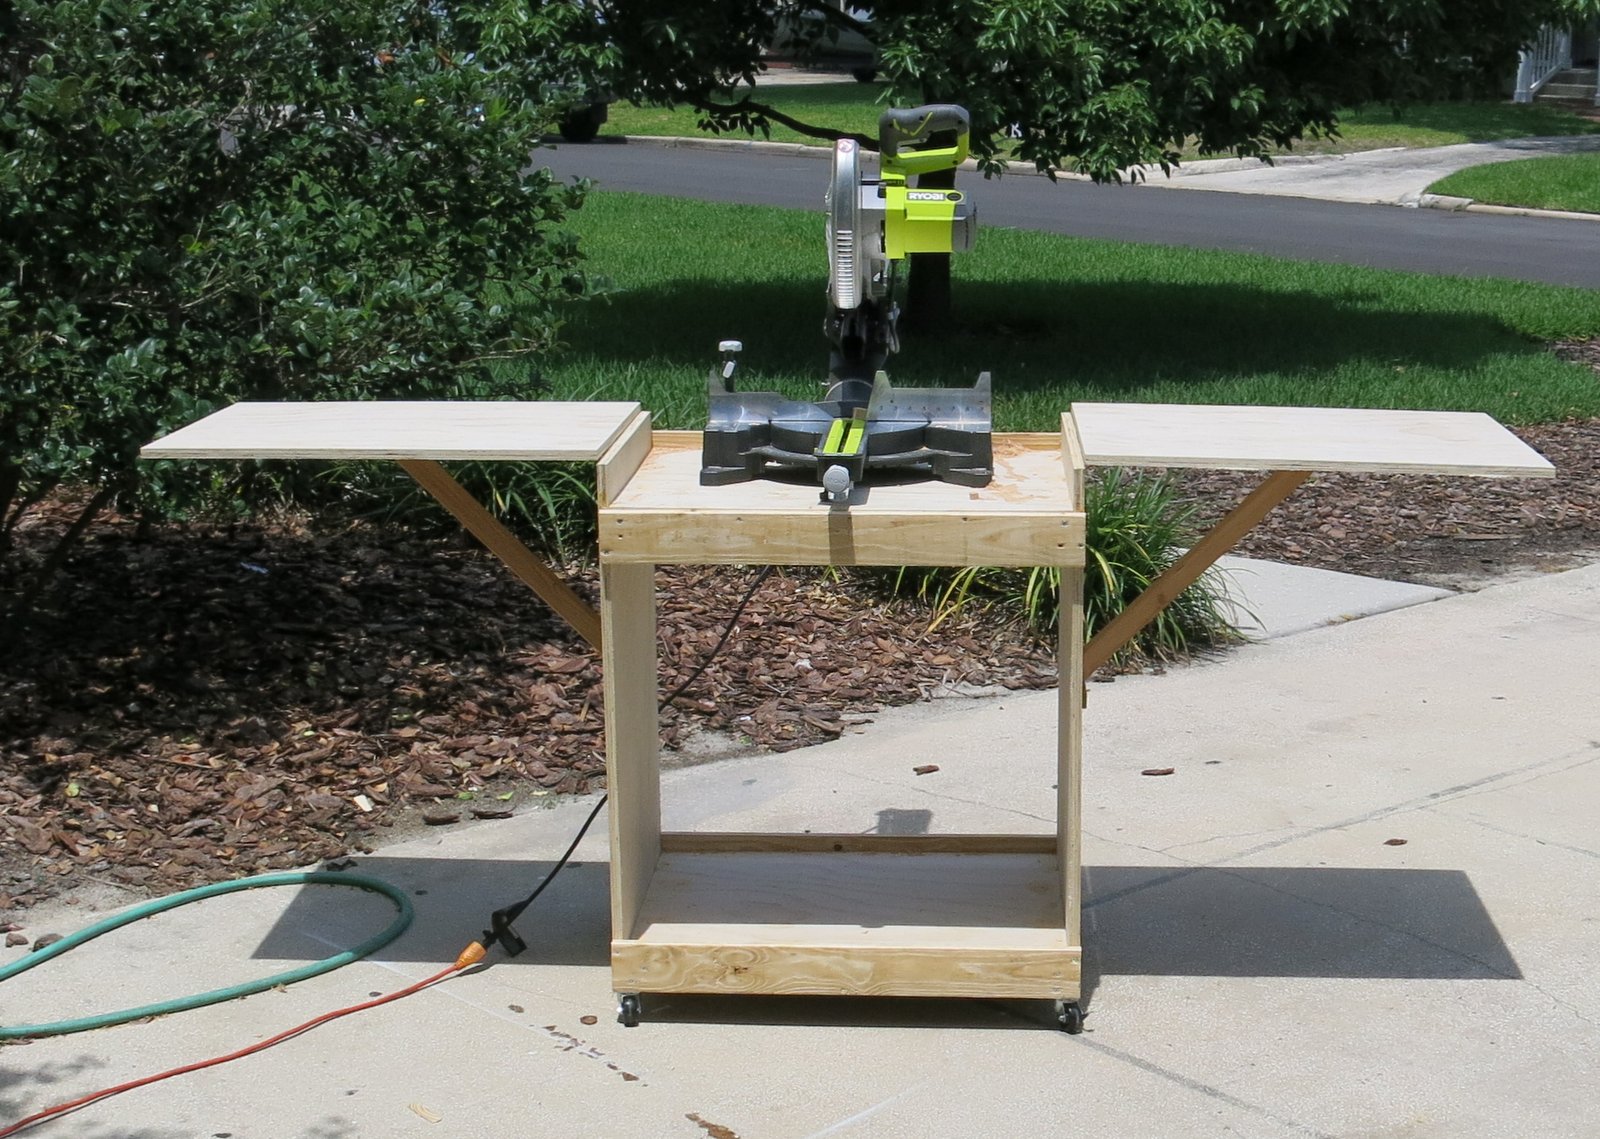
Used 2X2s to support the wings.
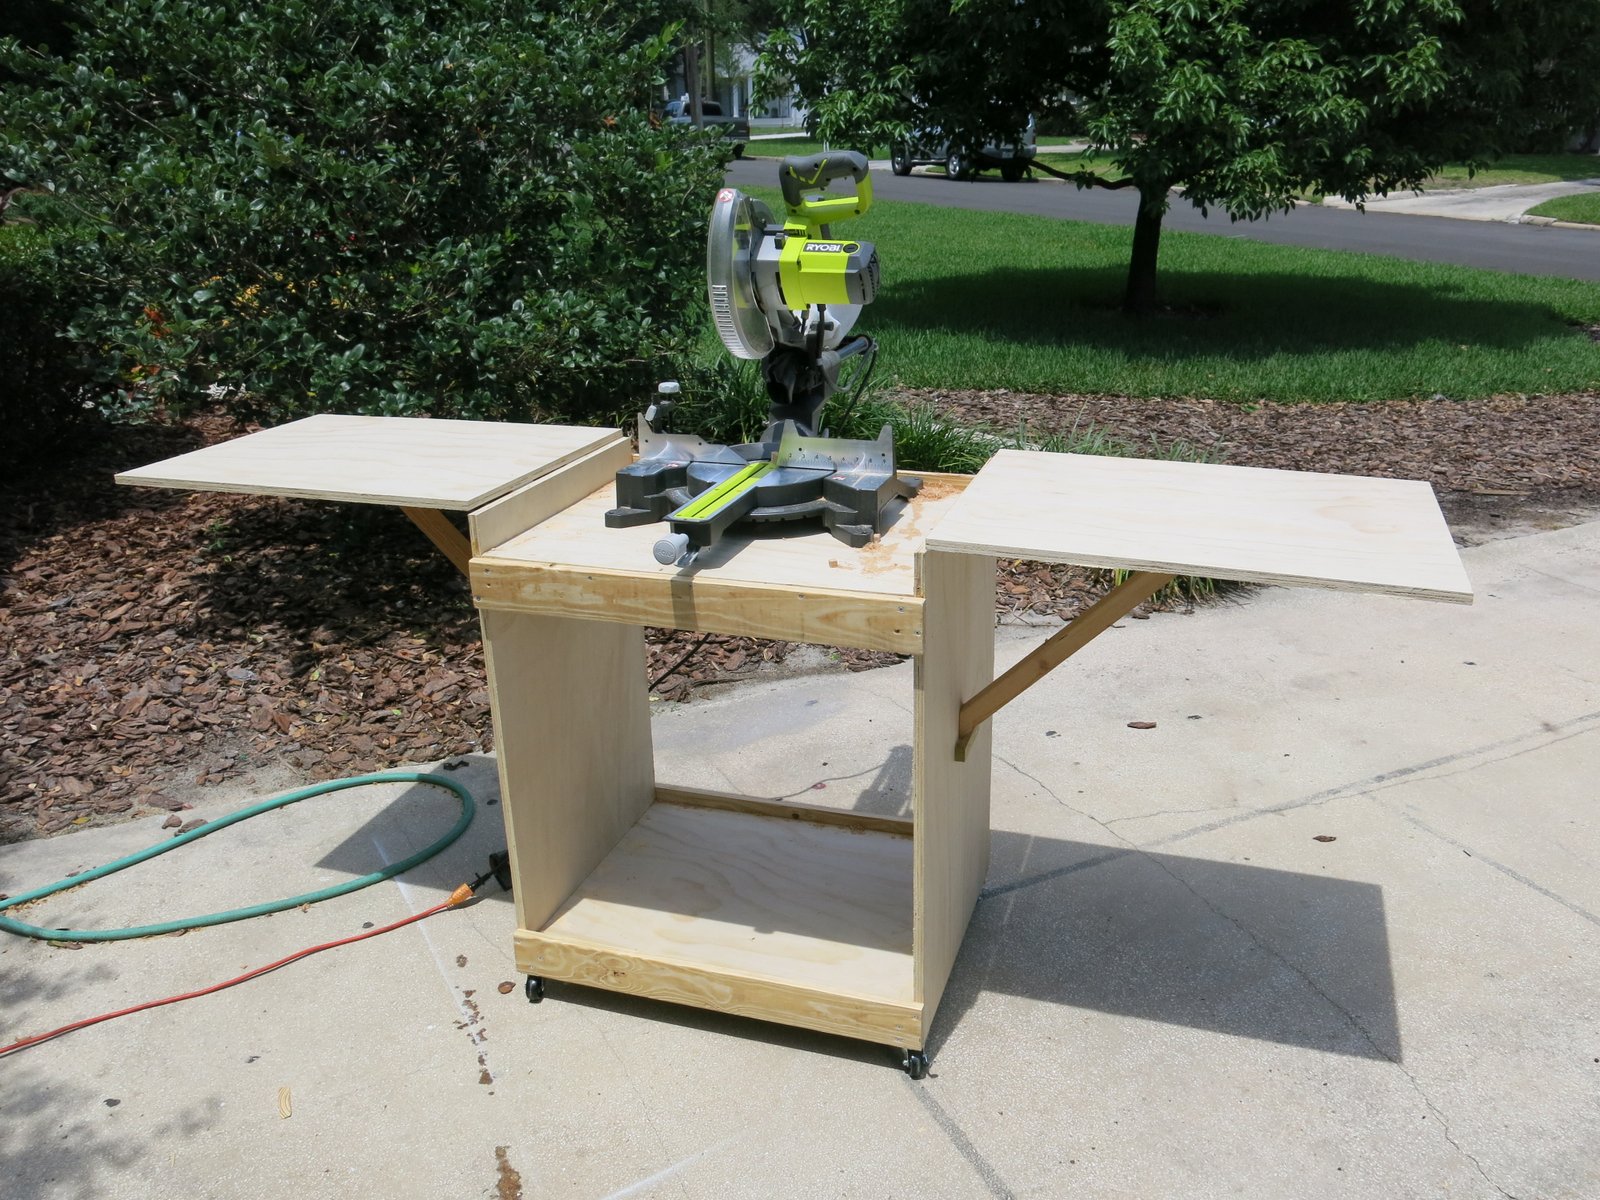
I essentially stuck to the main plan - except to support the wings I used 2X2 boards and standard hinges.
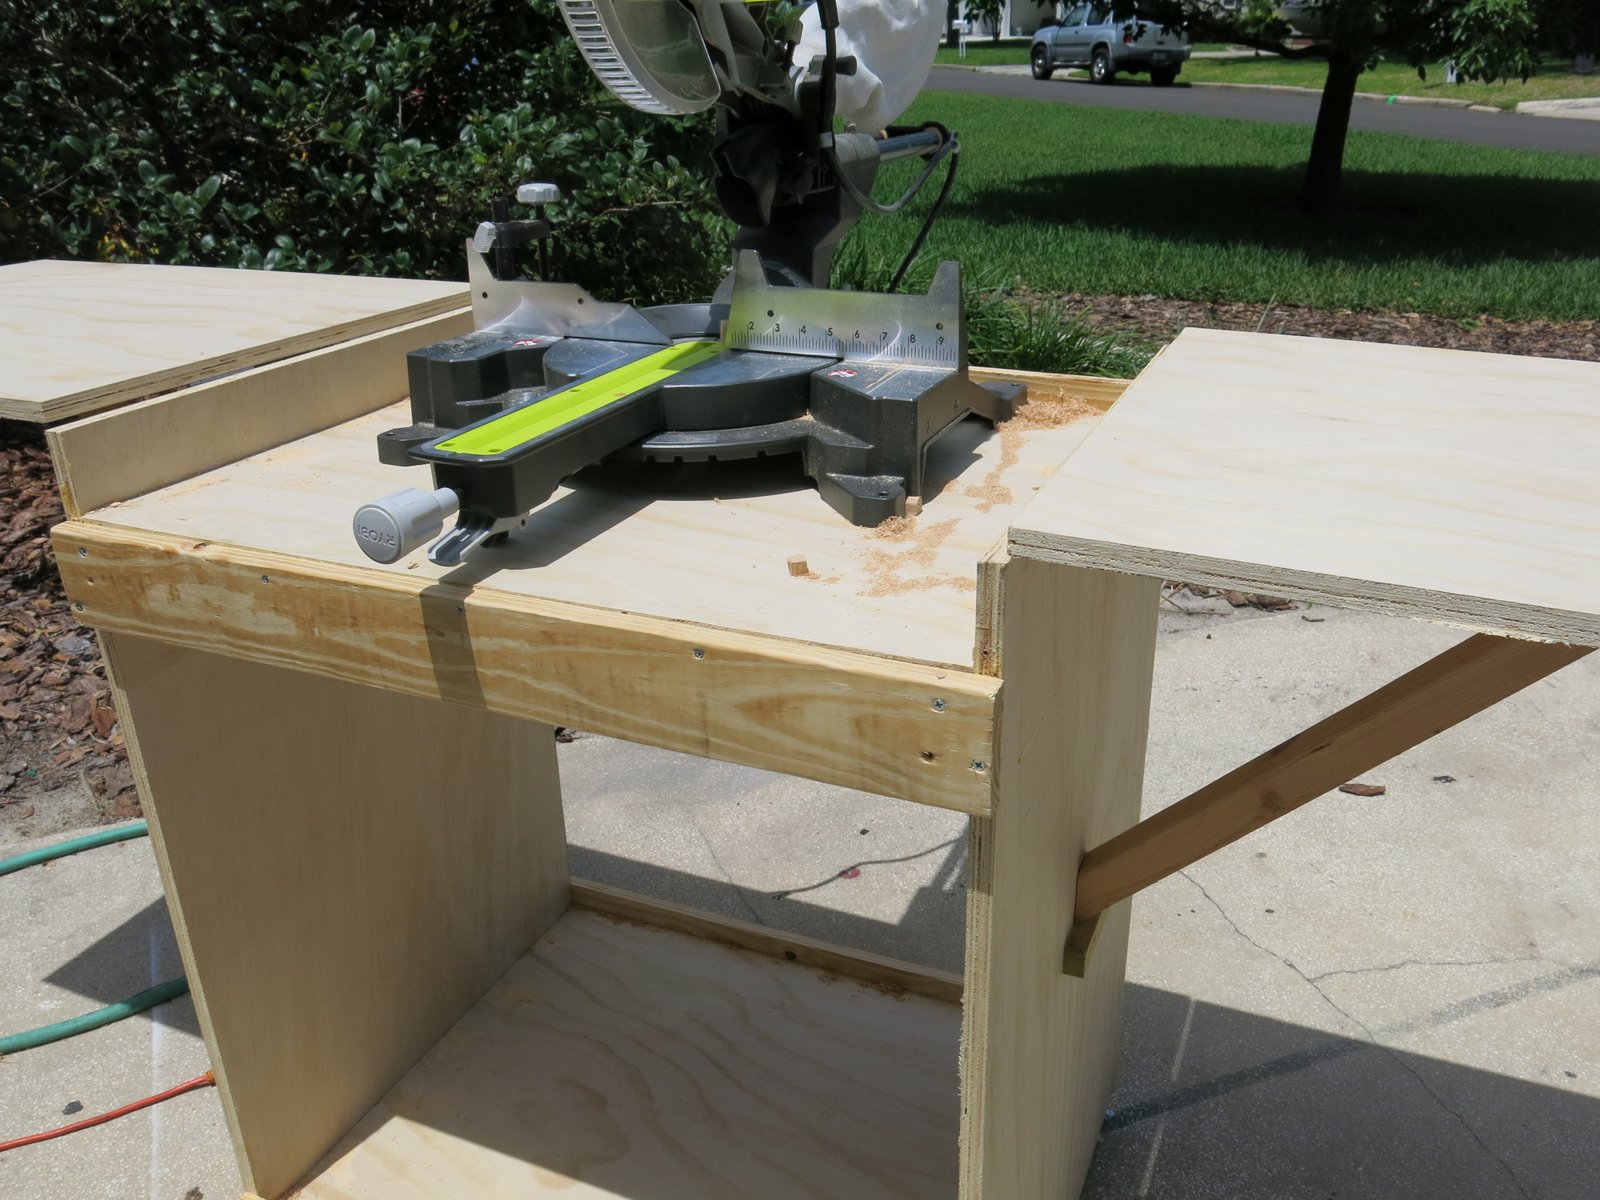
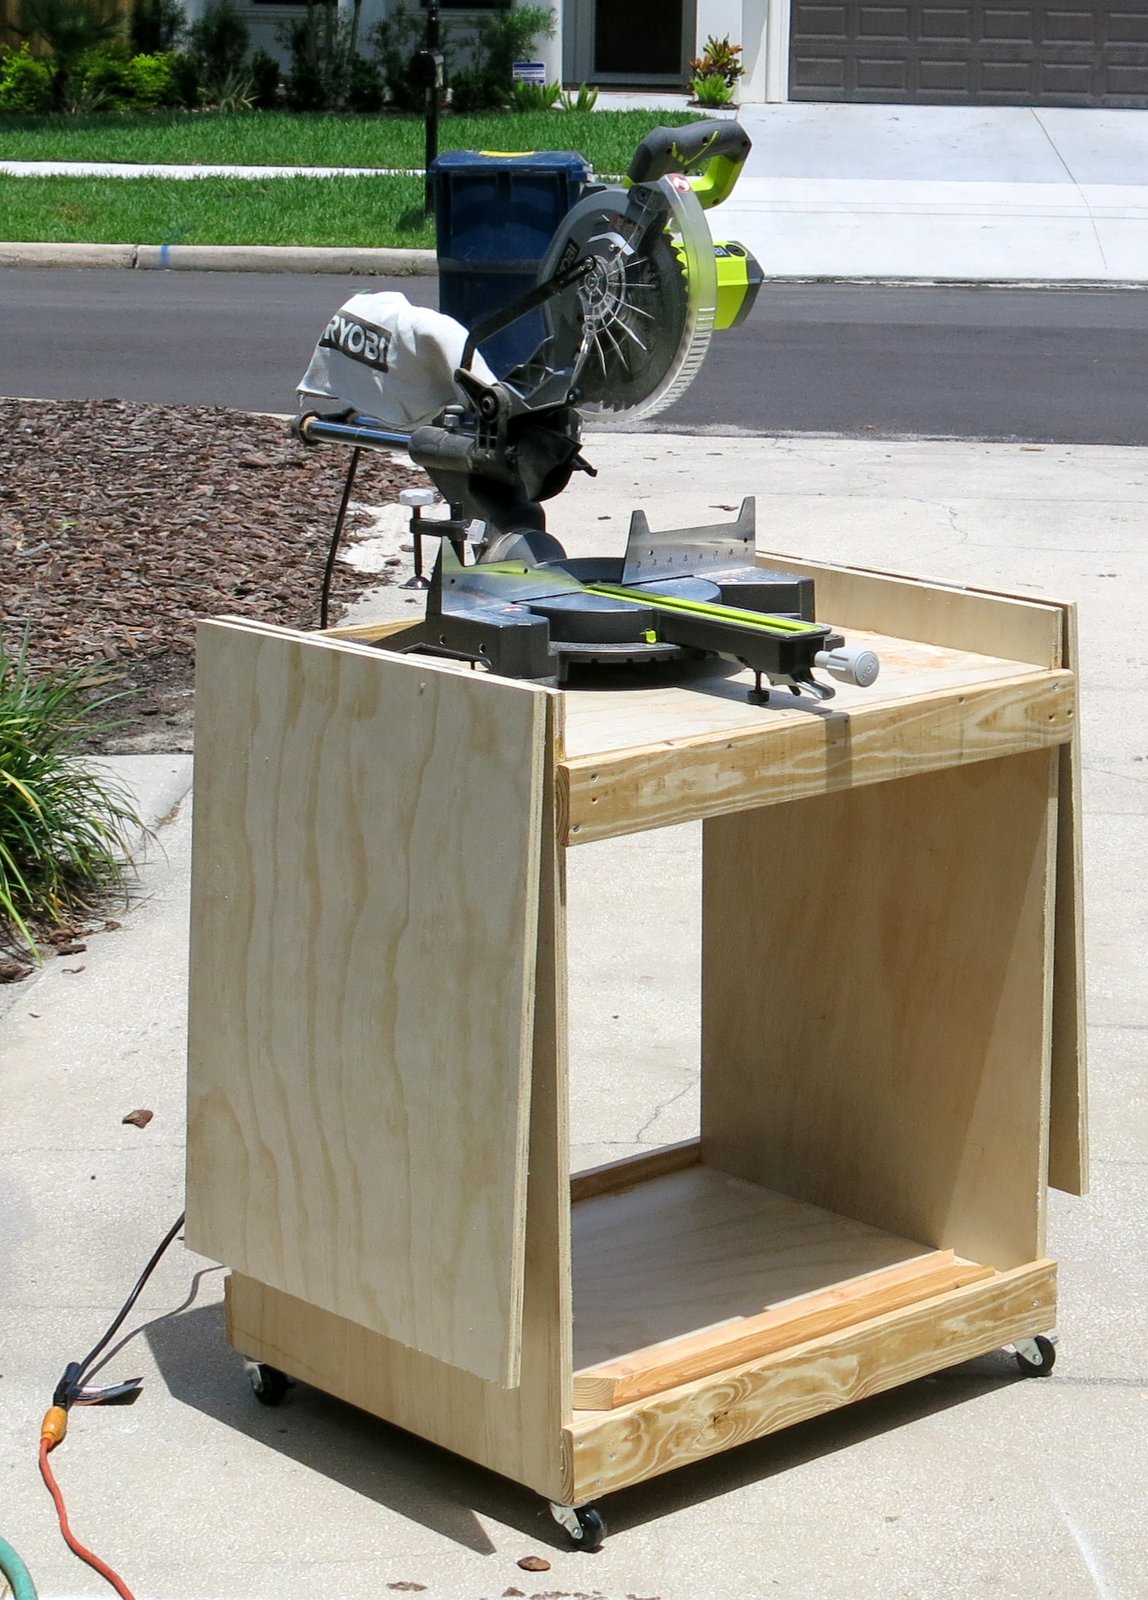
I was worried that there may not be enough space for my Ryobi 10" sliding miter saw because of the slide however, it fits nicely and there is plenty of space.
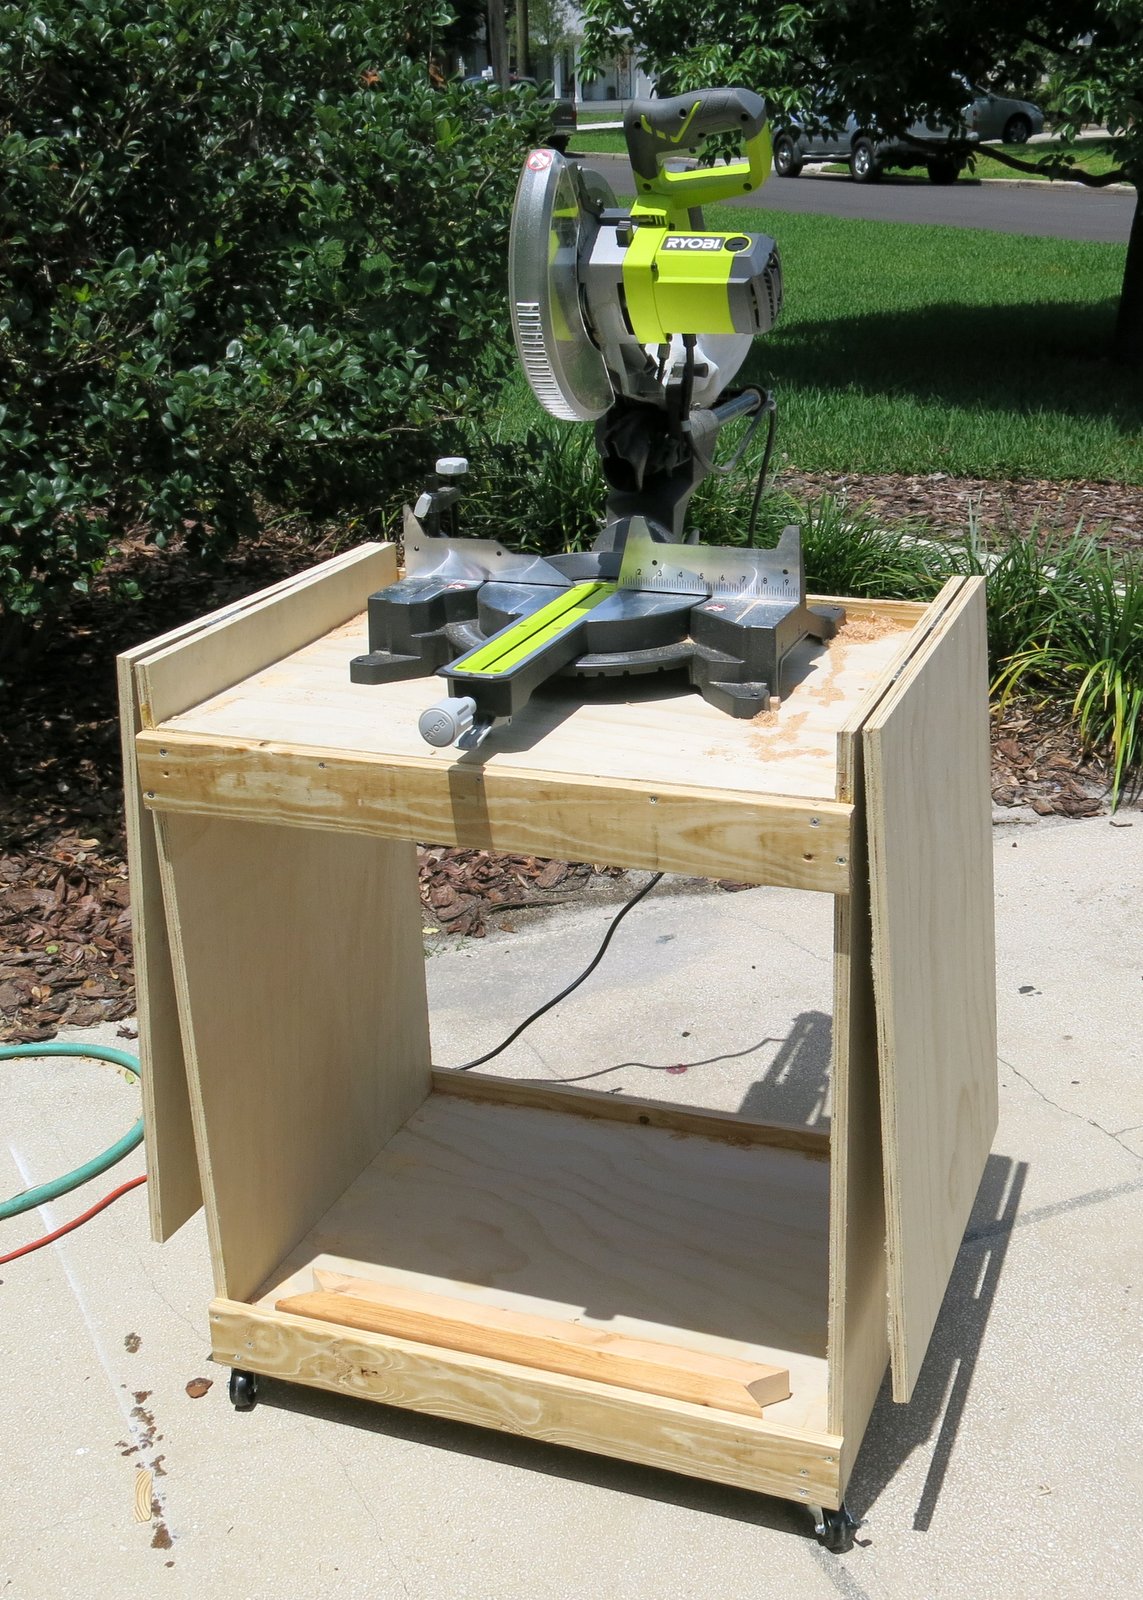
Thank you for the wonderful plan. This was my first project of this size and I am very happy with the results!
Built from Plan(s)
Estimated Cost
More than I expected. $39 for the plywood (sanded), $16 for the 4 hinges, $17 for the 4 caster wheels. The boards I already had.
Finish Used
None
Recommended Skill Level
Intermediate
Comments
Fri, 05/01/2015 - 08:10
Fantastic!
This is great. I am currently getting my Dad's help to turn an old kitchen cabinet into a miter saw cabinet with wings like this. (it was a 1940's solid wood kitchen cabinet we took out of the house when we remodeled). I really like your 2x2 support struts. Have you considered putting a shelf in the middle of your box? It would add extra support and also more room to store stuff.
Sat, 05/02/2015 - 09:09
re: shelf idea
Good idea. I did consider adding a shelf however I have now decided to use the lower area to store my small router table. I discovered that it would fit in the spot however it leaves not enough room for a shelf.
Mon, 05/18/2020 - 14:12
I know it’s been a while but…
I know it’s been a while but do you remember the angle you used on the 2x2 supports? I struggle when it comes to cutting angles.
Top Bunk Organizer

Built this to go along with my son's new Chelsea loft bed so he'd have a place to set a glass of water and some books. I was able to use almost entirely scrap wood, except for the 1x4. Cutting and assembly took less than an hour, and the thing is rock solid. Sealed it with polycrylic, because it will probably get spilled on many, many times. Probably the easiest project I've done, and I think it would make a great starter project for anyone looking to try out using pocket holes for the first time.

Built from Plan(s)
Estimated Cost
$5
Estimated Time Investment
An Hour or Two (0-2 Hours)
Finish Used
PPG Speedhide paint, Minwax Polycrylic finish
Recommended Skill Level
Starter Project
Love My Sectional
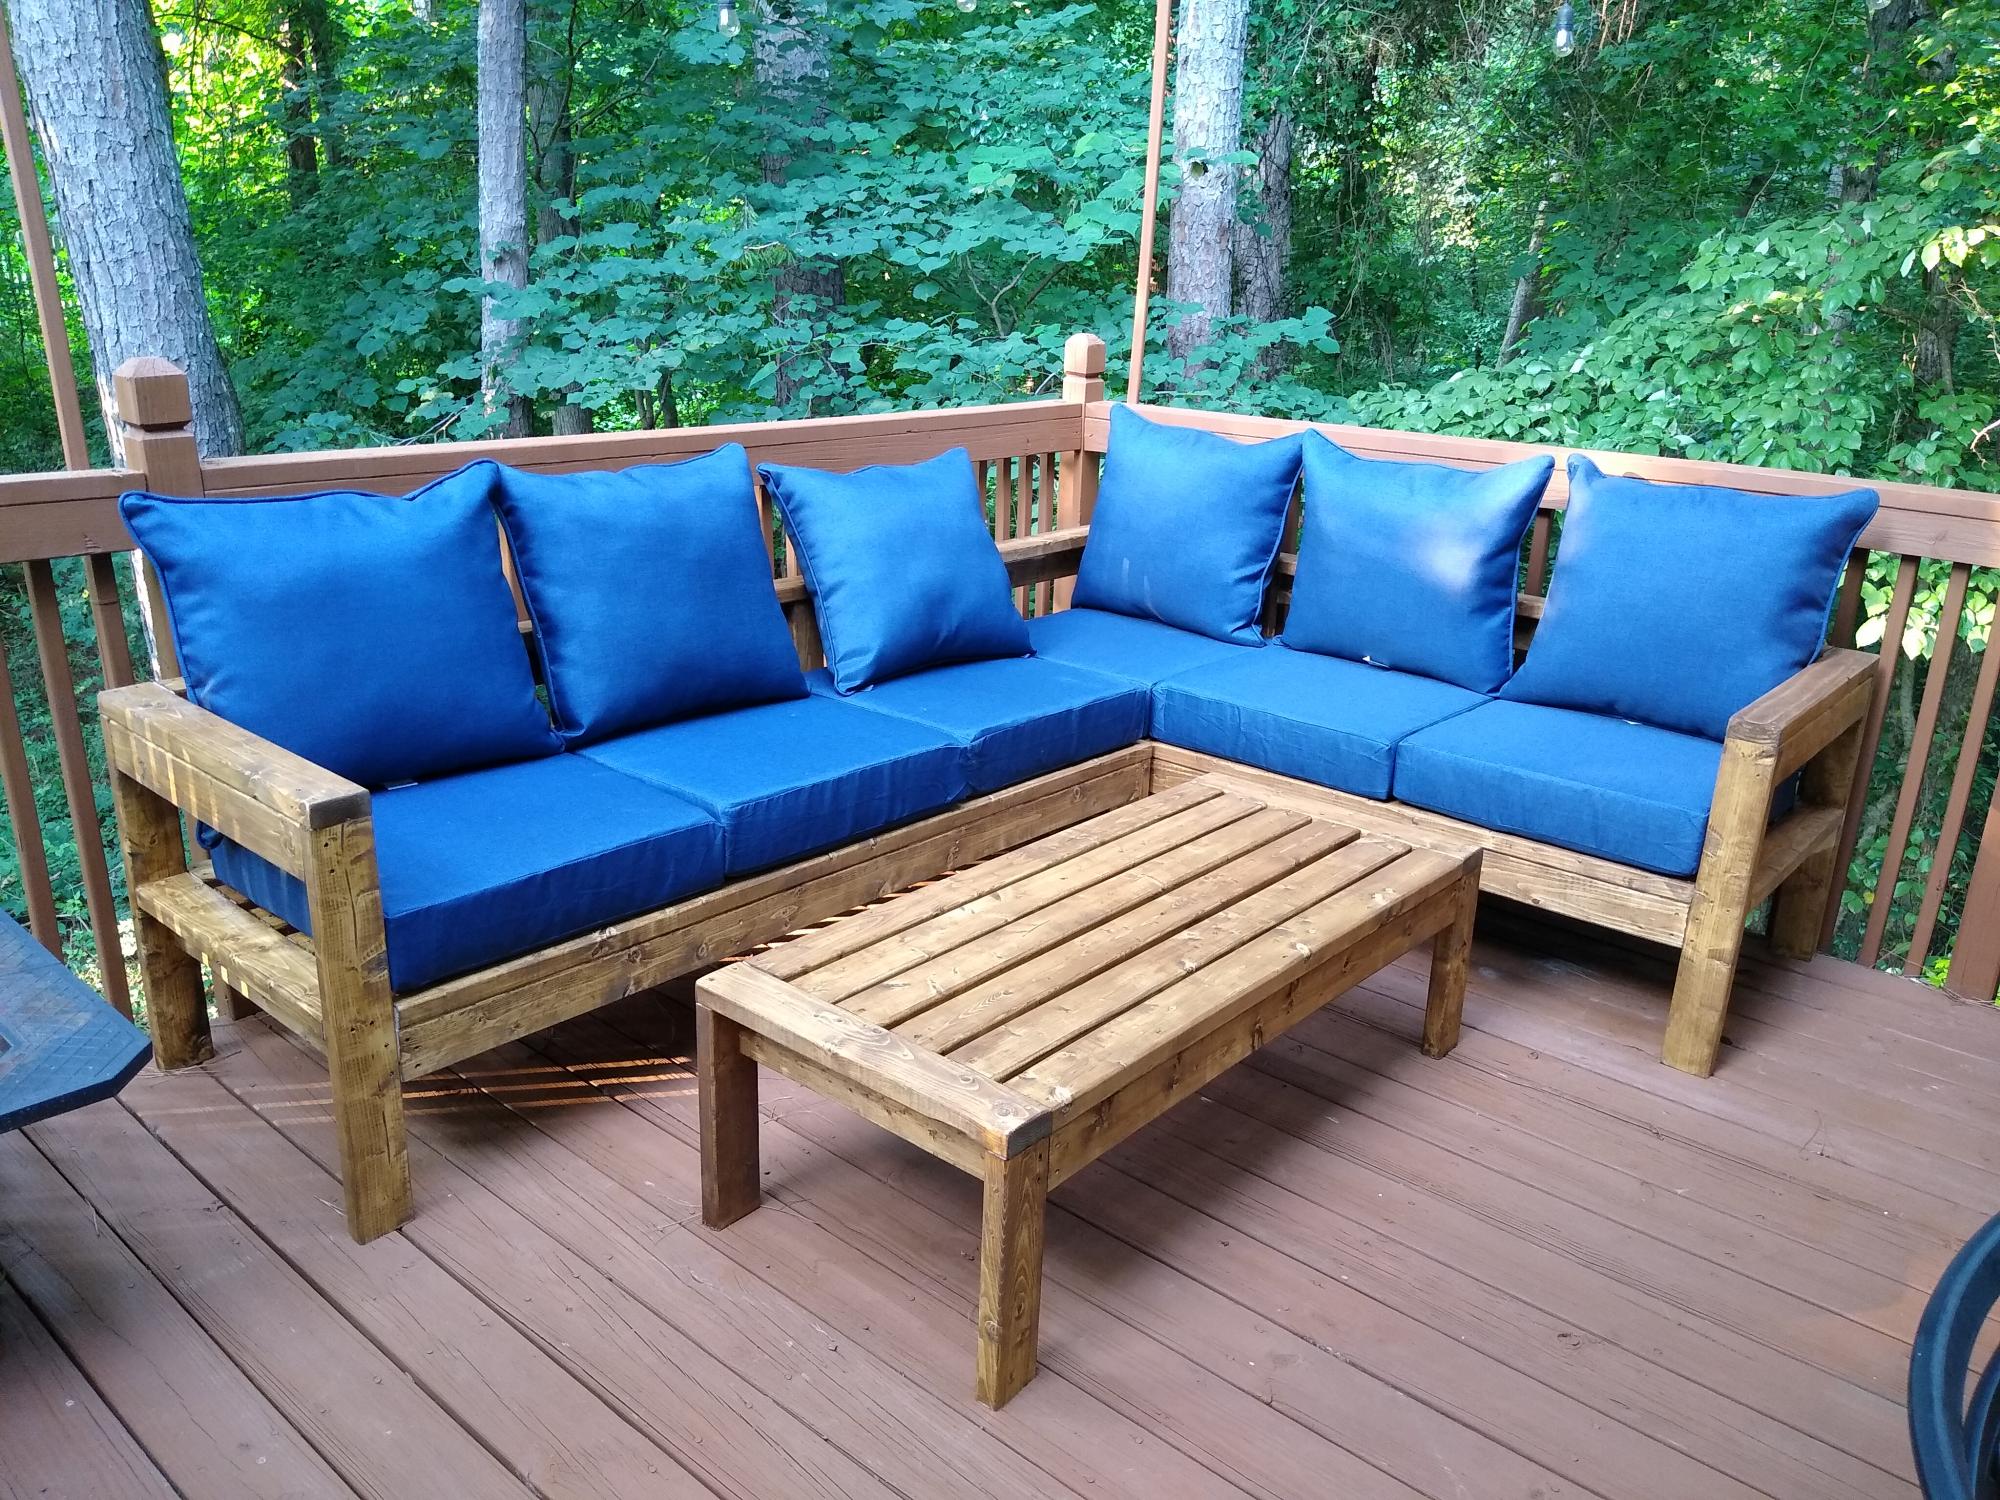
Ana did an awesome job explaining everything in the plans. Make sure you buy your cushions first and build your sectional around your cushion size. I added more 2X4's on the back seat and back rest so the cushions would not slide through the opening and to minimize the feeling of the one 2x4 going across your back. I get so many compliments from this beautiful sectional. Thanks Anna!
Comments
Fri, 10/08/2021 - 10:42
We love it too!
Such a perfect addition to a peaceful place, thank you for sharing!
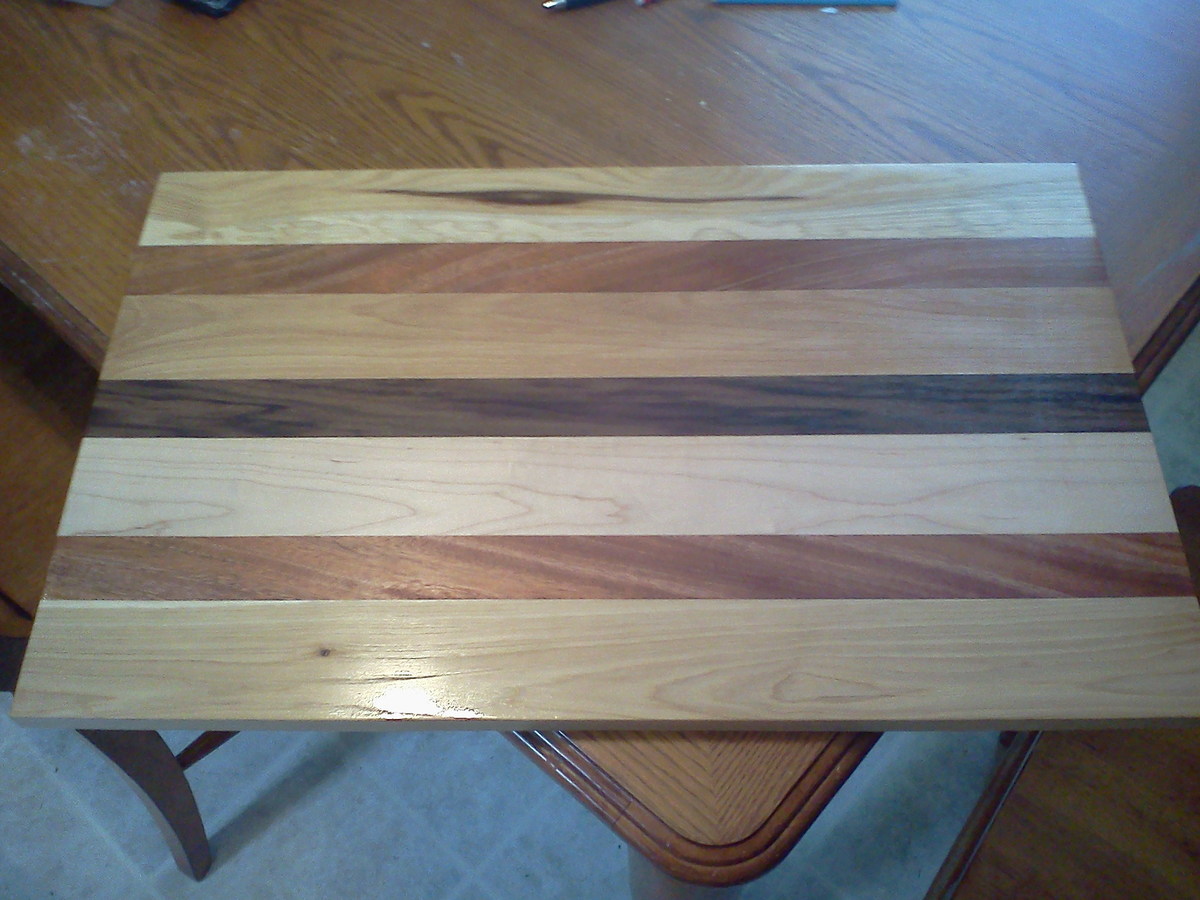
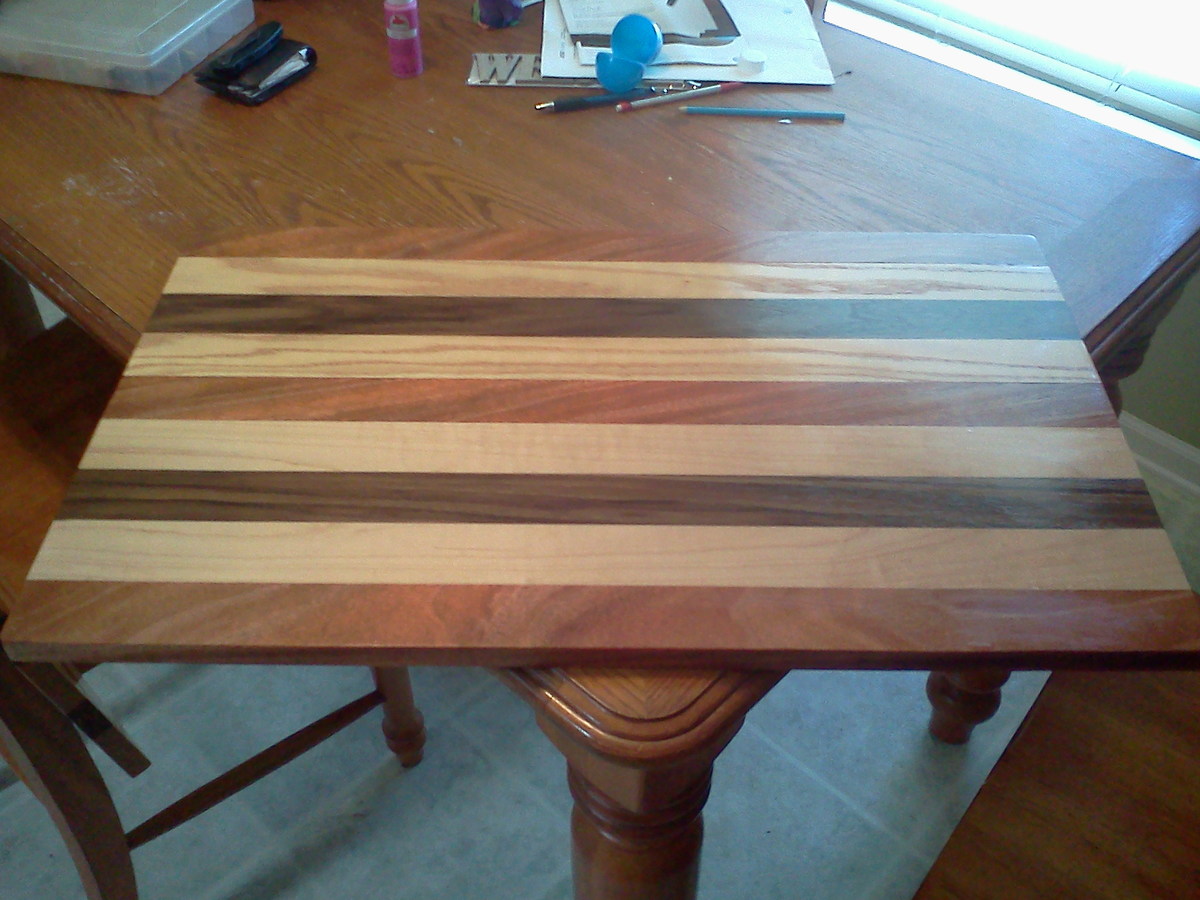
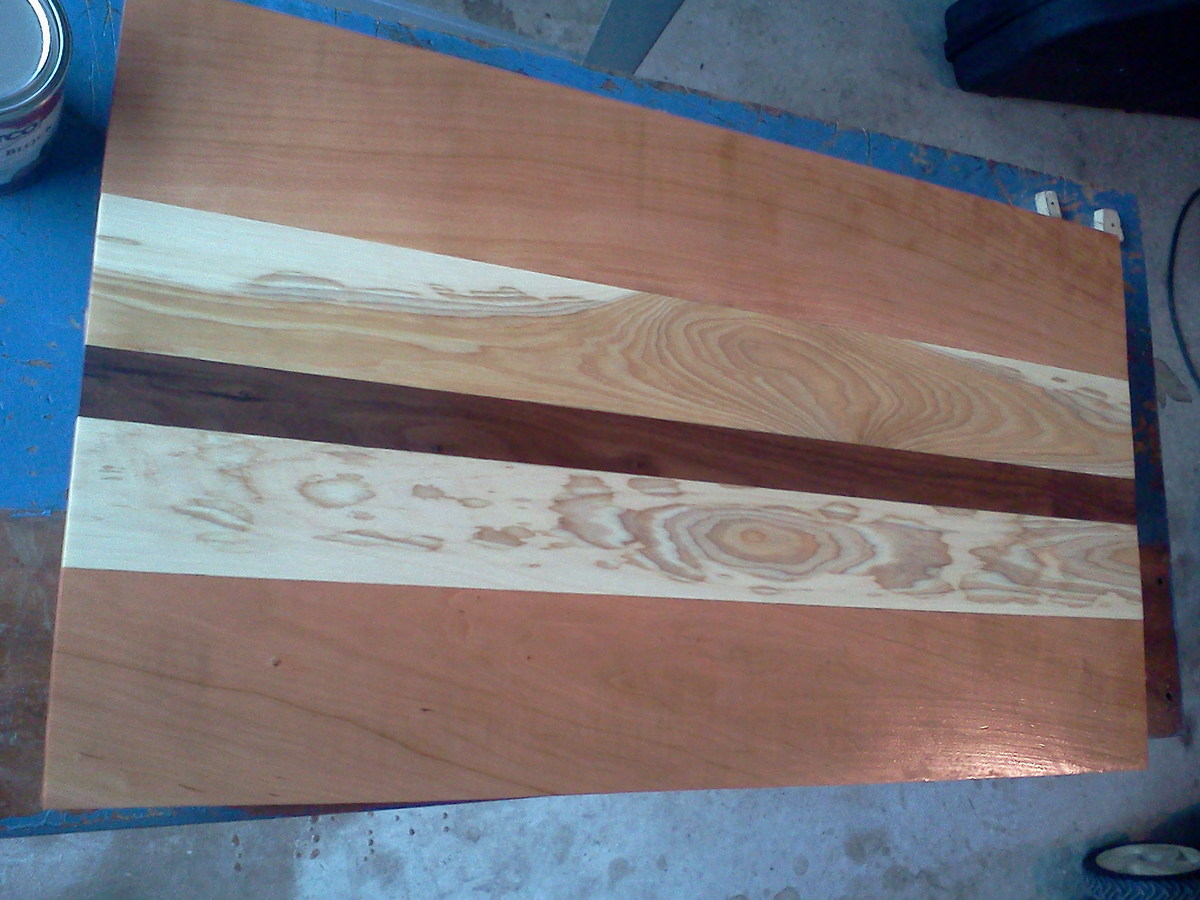
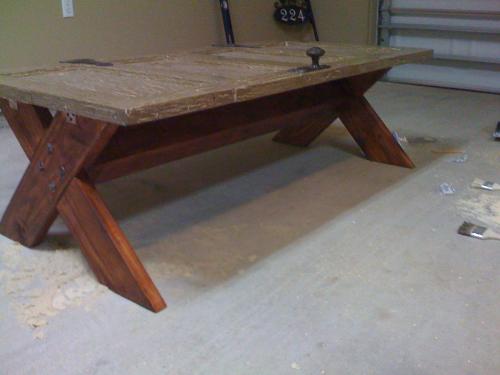
Old Door Cofee Table
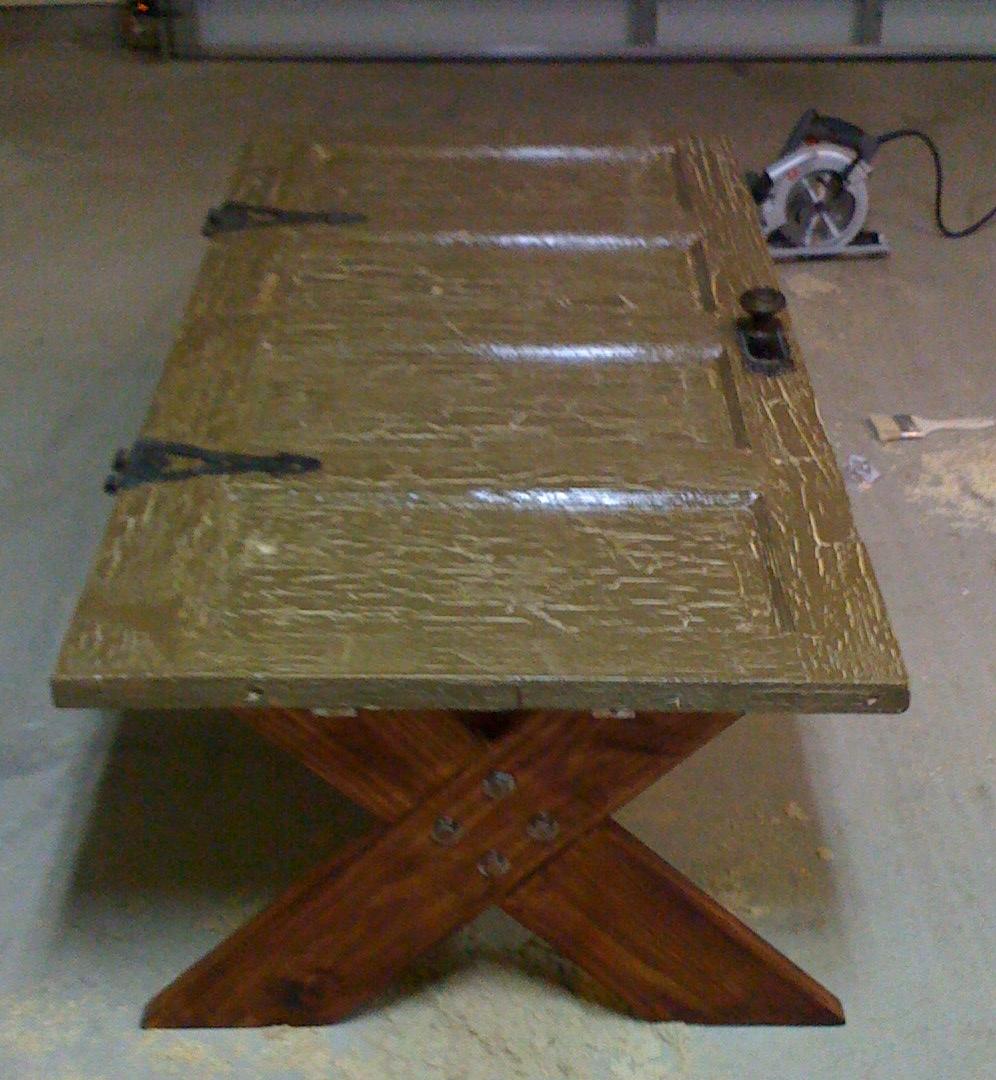
This table was built out of an old 5 panel door and some scrap would that we had lying around. old hinges and knob came from a local antique store. To finish the door my wife crackled the top and clear coated it.
Estimated Cost
50.00
Estimated Time Investment
Afternoon Project (3-6 Hours)
Recommended Skill Level
Beginner
Rustic X Farmhouse Table
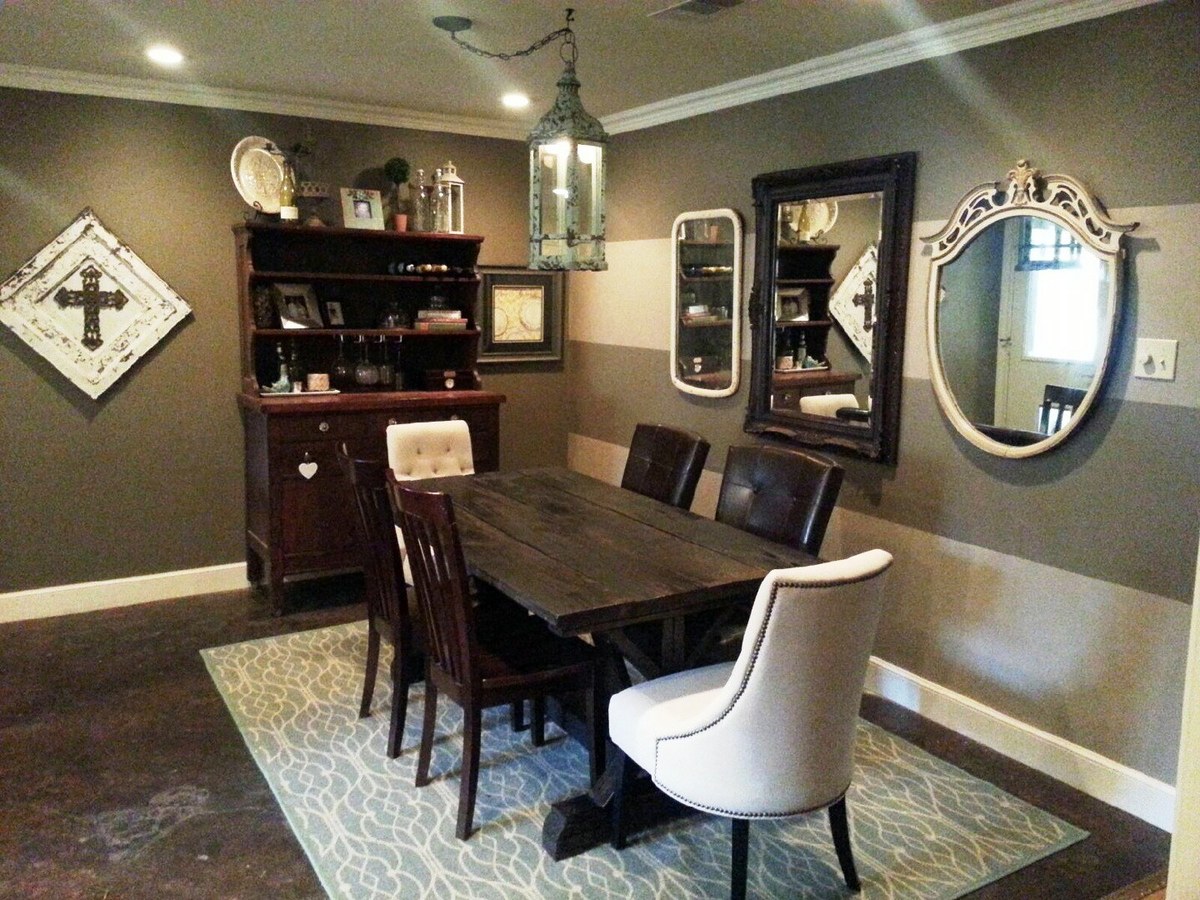
We were able to finish this table after work one afternoon and stain it the next day. (we have a 16 month old also, so you can do it! :) ) I wanted a similar style I had found at World Market that retailed for $700 we were able to complete this entire table for $100 including all hardware and stain. LOVE it so much and get SO many compliments on it. Thanks so much!
Shelby
The Dandy Lion
Estimated Time Investment
Day Project (6-9 Hours)
Finish Used
A satin poly with espresso stain in one
Recommended Skill Level
Intermediate