Community Brag Posts

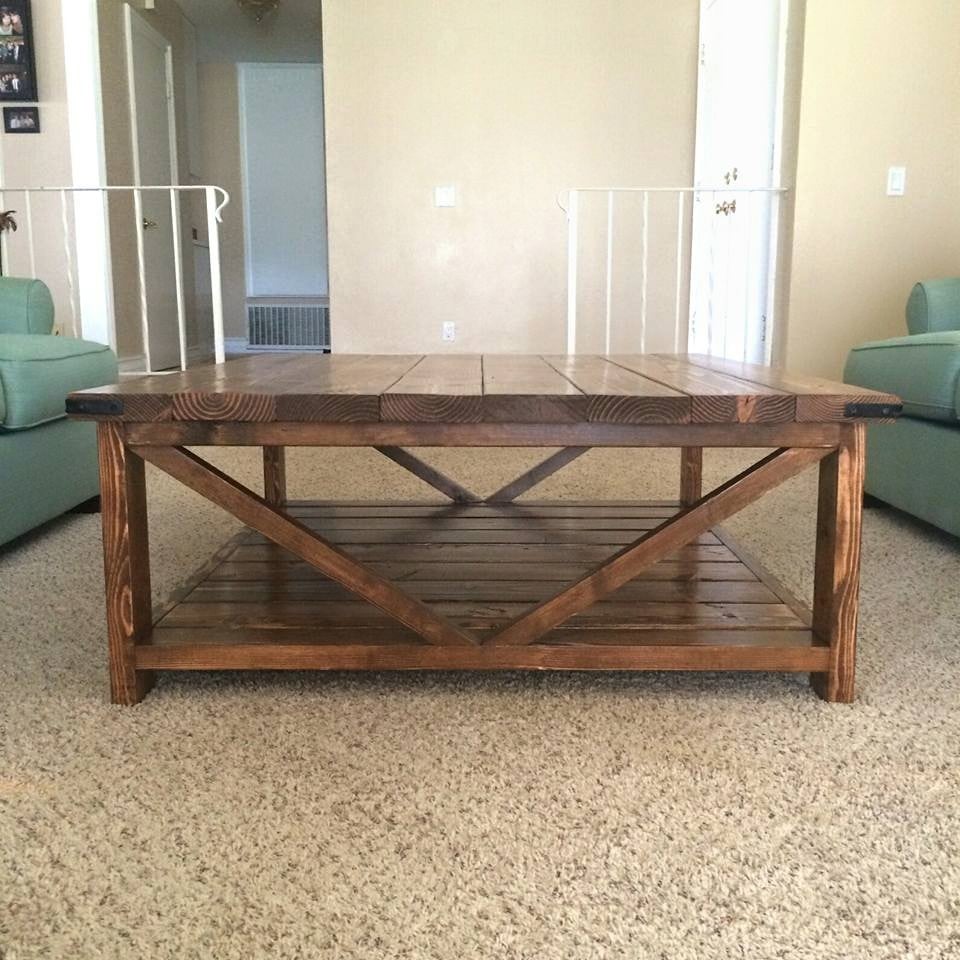
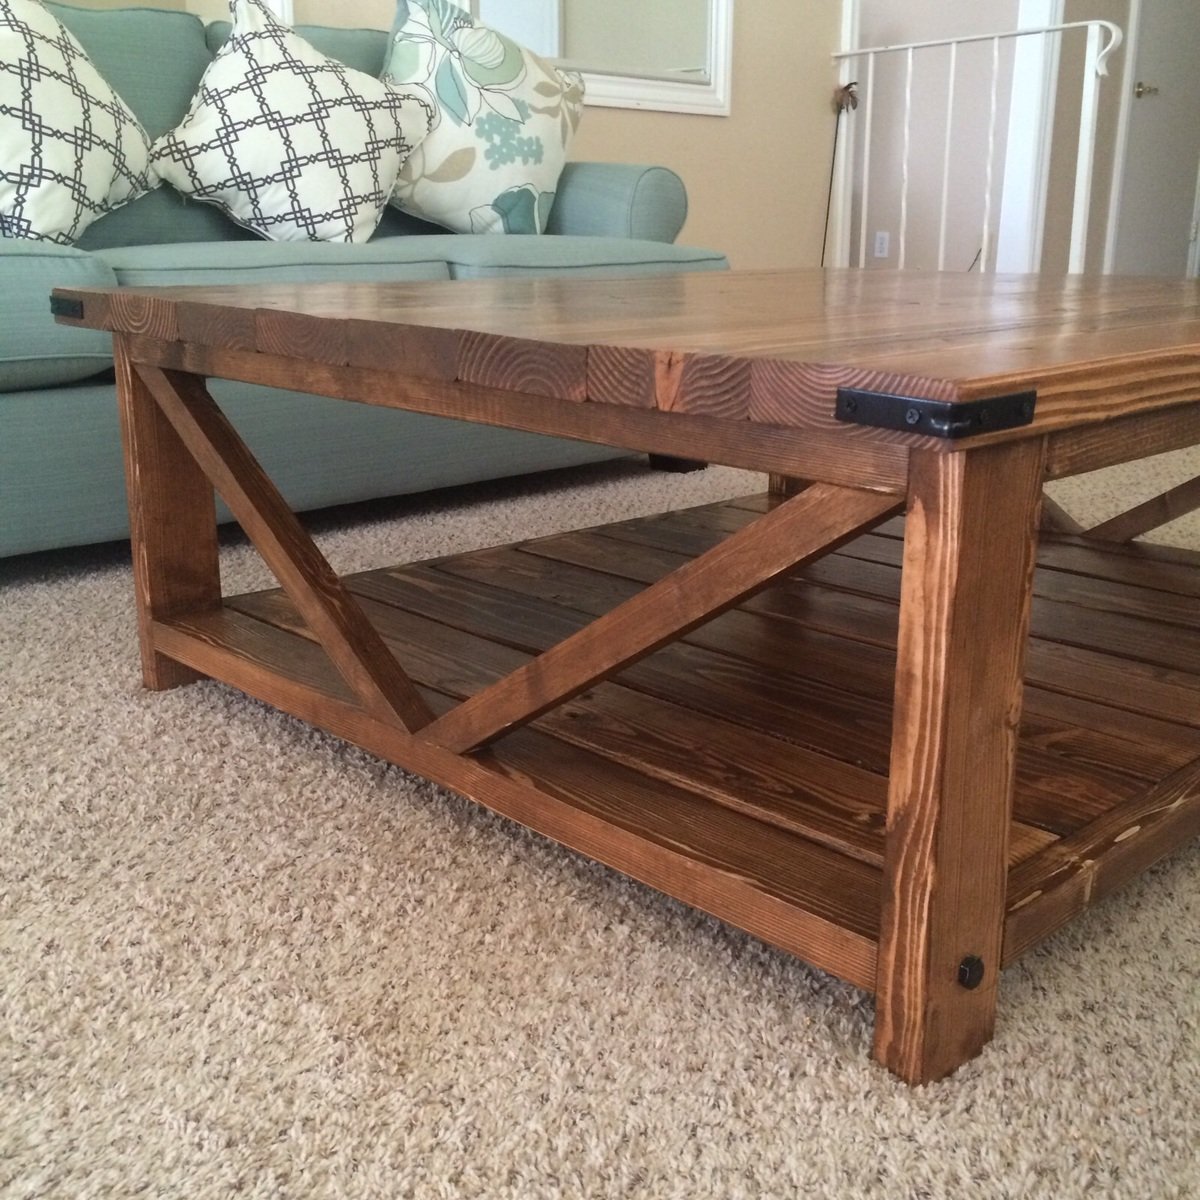
Modified Rustic X Coffee Table

Submitted by PamC03 on Sun, 10/18/2015 - 22:28

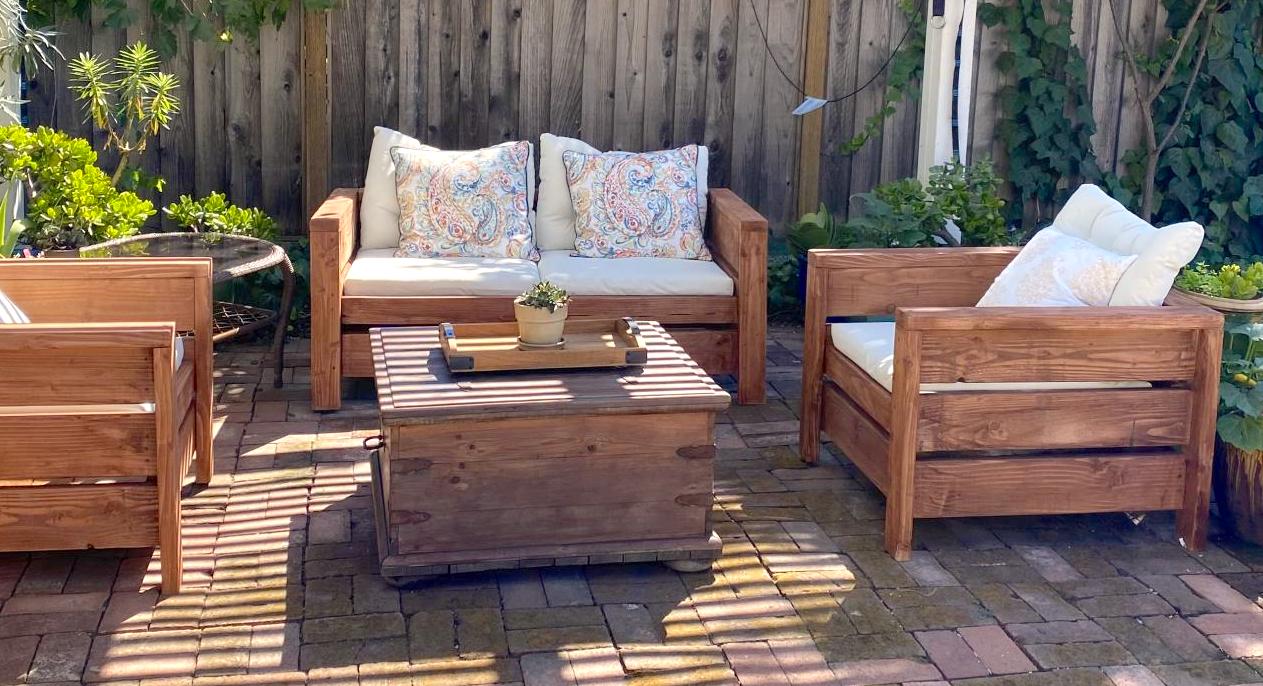
As a beginner at woodwork, this table was pretty easy to make. The instructions were easy to follow. I modified the table by adding 2x6 planks on the bottom and changing up the "X" design. The angles are tricky to get right, but i used scrap wood until i got the perfect angles then used my 2x2's for the final cuts. I also changed the finished dimensions of the table to fit in the room I was making it for, so this table was quite a bit wider than the original. It took me about a day and a half/two days to fully build and then I finished slowly over the rest of the week by staining and using a satin poly finish (I gave the top 4 coats so it took a little longer than normal). I'm so happy with the finished table I've already bought the wood to make another smaller one!

Built from Plan(s)
Estimated Cost
$70 for wood and hardware
Estimated Time Investment
Weekend Project (10-20 Hours)
Finish Used
Varathane Early American w/ Satin Poly
Recommended Skill Level
Beginner

Comments

Audrey Wright

Thu, 10/22/2015 - 05:02

For a beginner, you'd done a great job. I'm a beginner too and I can hardly do this in two days.. 

Garden Shed

Submitted by Deborah on Sat, 08/18/2012 - 23:01

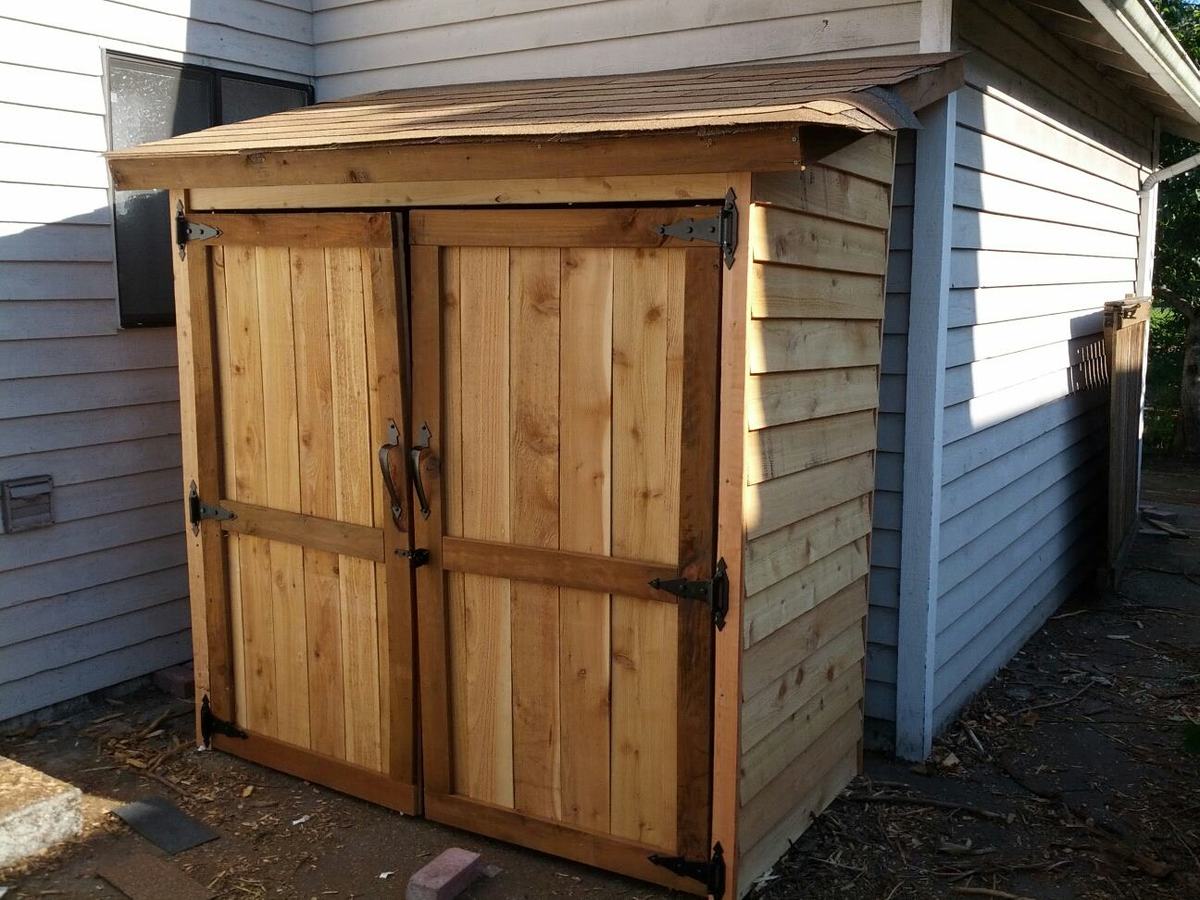
I have been dreaming about building so many things featured on this website, and I finally buckled down and built something. I figured that an outside garden shed would be a bit more forgiving than a project requiring a bit more precision, and from the picture, you can see that it's not perfect! I'm still working on trimming the shingles and I still have to stain/seal it. I've got to admit, when I first picked up the wood for the project at the store, I wondered what I had gotten myself into. But I just jumped in, and here it is.

Built from Plan(s)
Estimated Cost
$300
Estimated Time Investment
Weekend Project (10-20 Hours)
Finish Used
Plan to stain it with some sort of deck stain.
Recommended Skill Level
Beginner

Comments

Modern Dorm Mini Refrigerator Microwave Cabinet

Submitted by rachelcb on Sat, 07/31/2021 - 12:35

I changed plan to make deeper. I also modified the bottom trim and top. I put a ball bearing soft door drawer guide on modern door so it can slide back and forth. I feel we need more modern plans on here but with a bit of creativity and using plans you can make anything. I have never built anything before. I love General Finishes Milk Paint in Snow White and I brushed rolled it on (sanded between 3 coats). It’s basically self leveling and leaves a nice matte finish. Used door glide in picture bought from homedepot in the 24 inch and that’s how wide door was and it was 36” tall. Door glide I only used one on top of the door not on bottom as well. Door piece of fiberboard with just strips glued on and quarters spacing them correct.

Estimated Cost
$200
Estimated Time Investment
Weekend Project (10-20 Hours)
Finish Used
Dorm mini refrigerator microwave cabinet
Recommended Skill Level
Starter Project

Comments

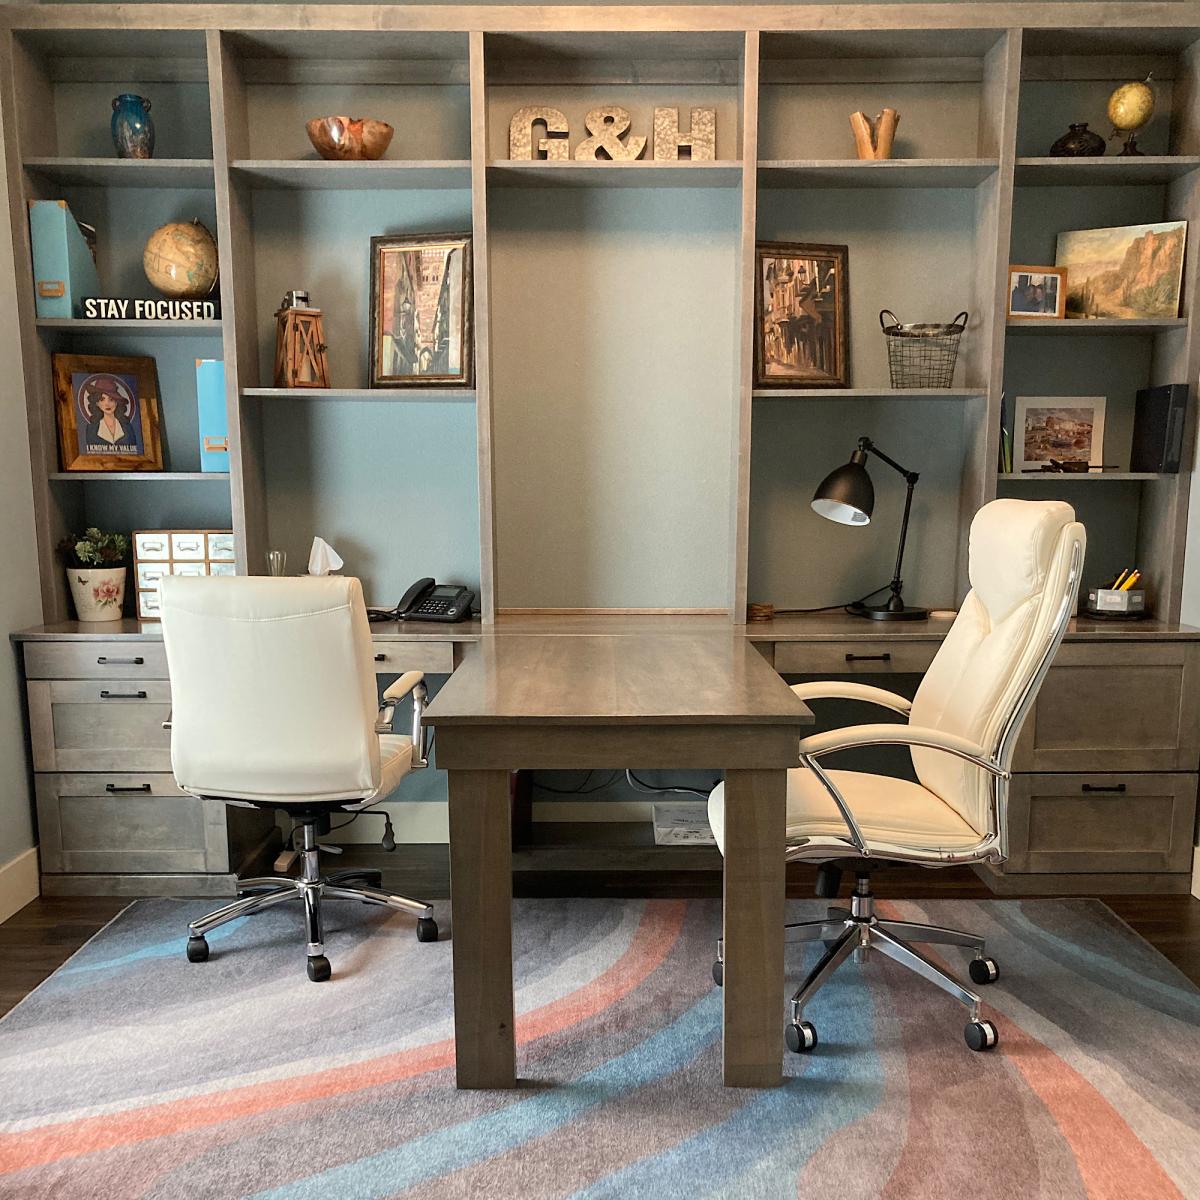
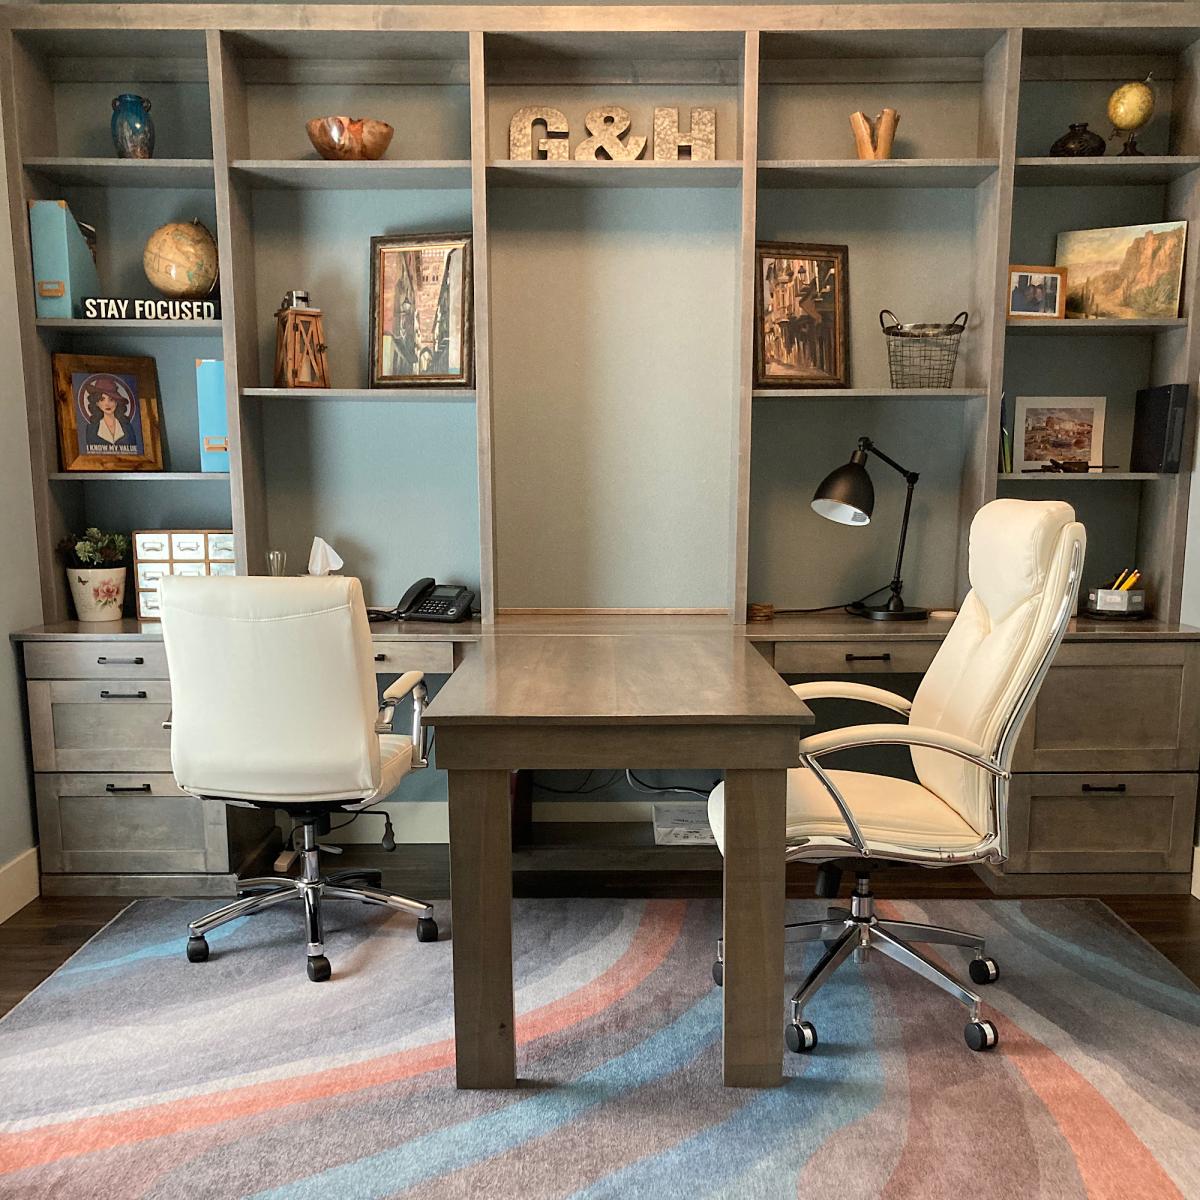
Homemade Home Office with Peninsula Desk

Thank you Ana for so many amazing plans and shelf help that helped me get this monster built! Now my husband has a nice office where he can work from home. I was so impressed with how easy it was to make the plans in shelf help and how quickly it all arrived. (I can’t link the drawer slide trick plans, but they were key and I based the middle table off of the foldable farmhouse idea)

Comments

Chicken Coop with Run

Submitted by Jen Marzen on Fri, 06/17/2011 - 02:10

My husband and I live on a small hobby farm and are growing/raising a lot of our own food. We decided to venture into working with chickens. We wanted to start out small so we got 6 chickens and needed a home for them. We found a kids play house one day while shopping and got the idea of modifying it into a chicken coop with a run. We took off with this idea and with quite a bit of modification and some extra building materials we were able to raise it up in the air and attach a run so our chickens would have a nice home to protect them from preditors and the emements and not to mention one that looks good in our yard!

Built from Plan(s)
Estimated Time Investment
Weekend Project (10-20 Hours)
Finish Used
Cedar deck stain and white outdoor house paint
Recommended Skill Level
Beginner

Comments

Heather Dalton (not verified)

Tue, 02/21/2012 - 19:08

Are the plans available? I have Black Copper Marans and Lavender Ameraucanas and I really need to separate the LAs from the BCMs and this would be perfect!

madrona (not verified)

Tue, 02/28/2012 - 10:21

I'd also love the plans!
Great job - it's beautiful!

guest (not verified)

Tue, 02/28/2012 - 10:22

I'd also love the plans - thanks!

Eliza B (not verified)

Thu, 05/31/2012 - 10:02

Can you please post the plans you used? I have 4 week old chicks that need a coop. Thank you very much.

Jen Marzen

Sat, 06/02/2012 - 15:22

Sorry guys there are no plans for this coop. My husband and i just "winged it" and built it without any plans.

It is a play house that we found at Mills Fleet Farm and we modified it to make it a chicken coop. We put together the play house based on instructions from the box (with a few of our own modifications to make the window on the ground etc.) added some chicken wire to the doors and bay window, added some 4x4 "stilts" and a floor to get the house in the air, and constructed a frame around it with 2x4's and wire fencing to make the run

Sorry I dont have any plans to give you guys!

Seasonal And Holiday

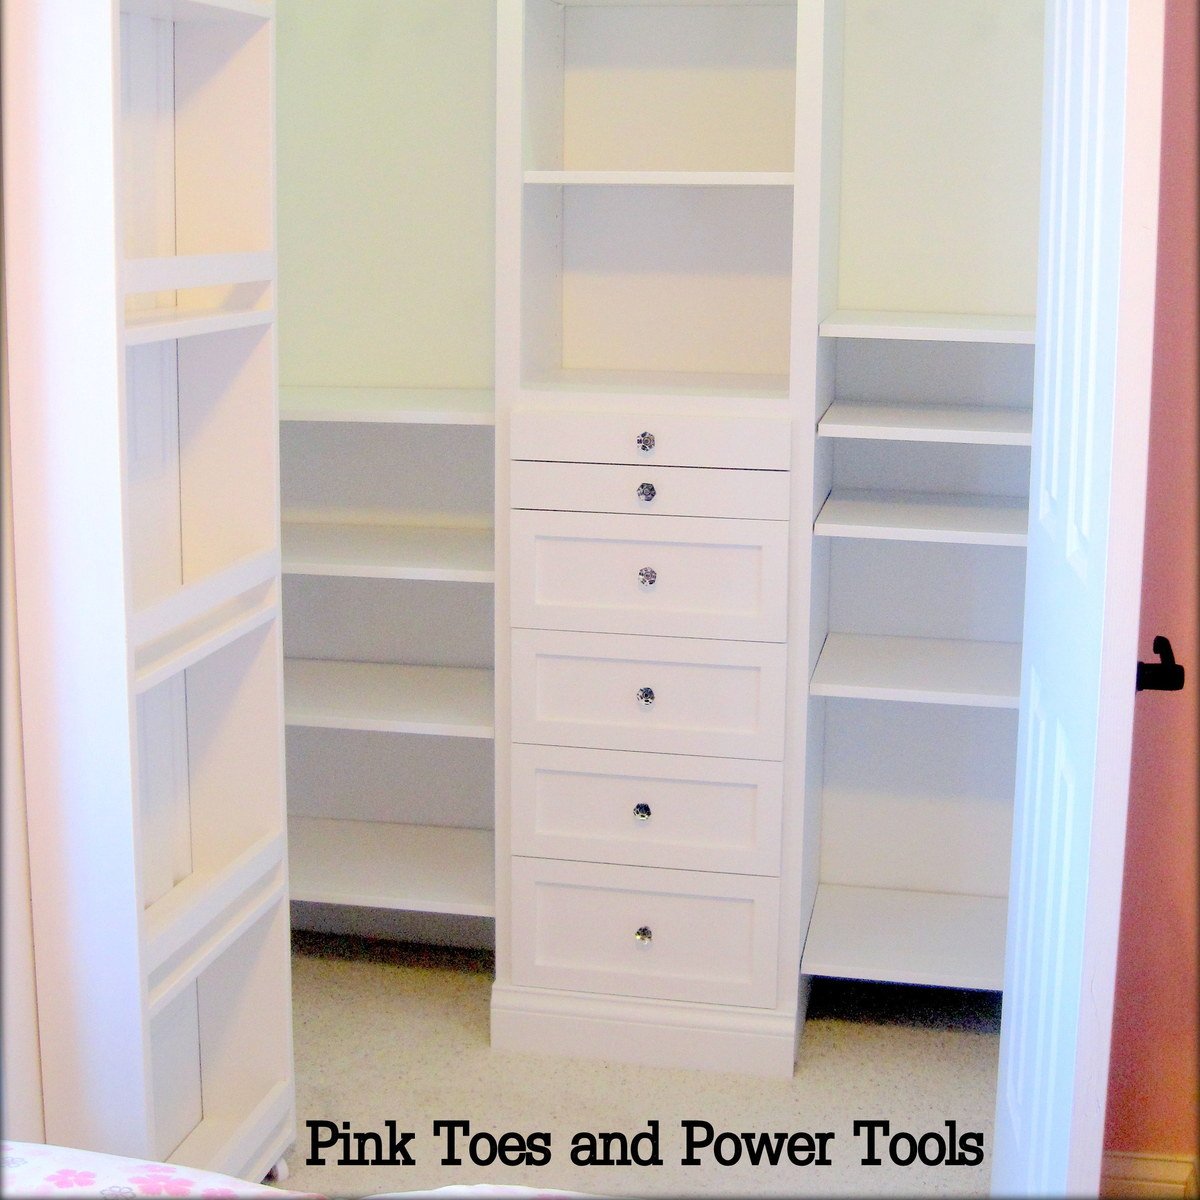
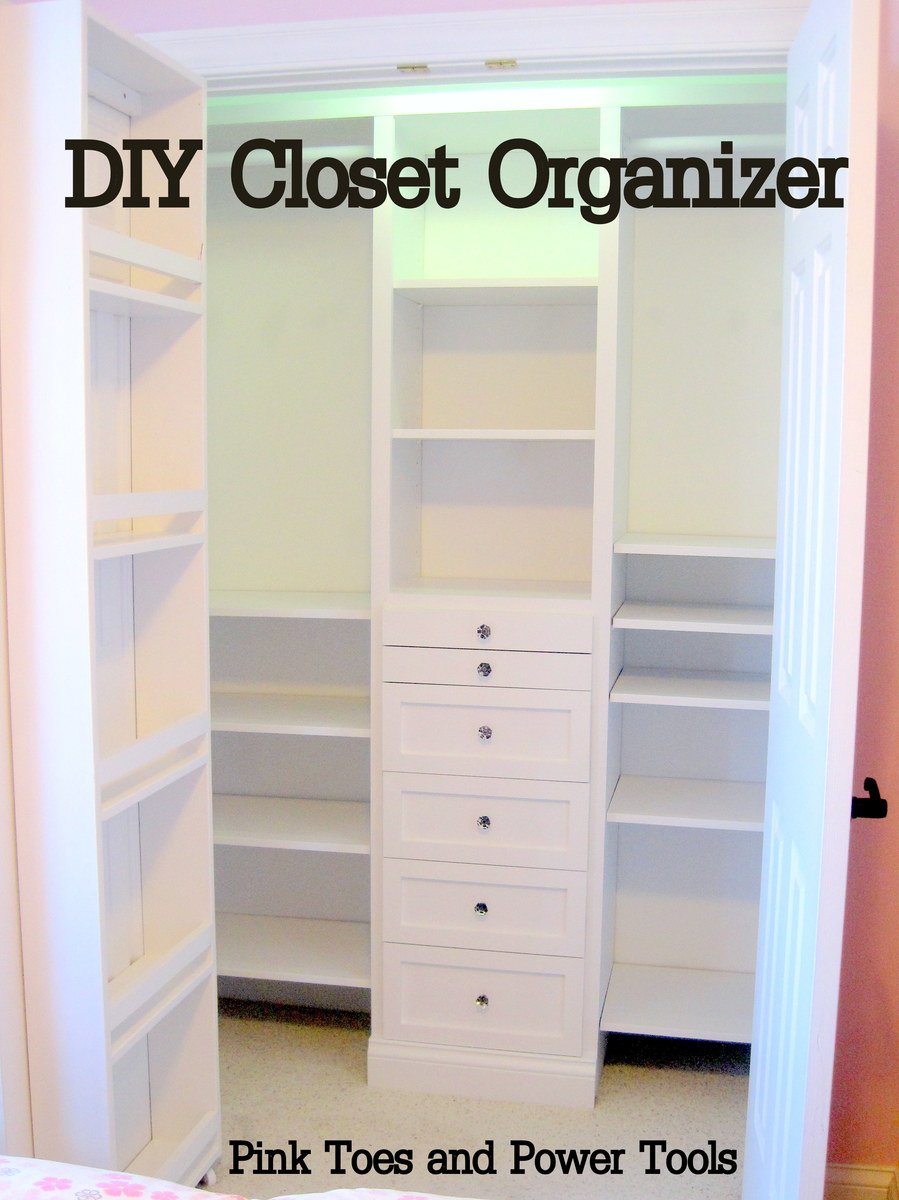
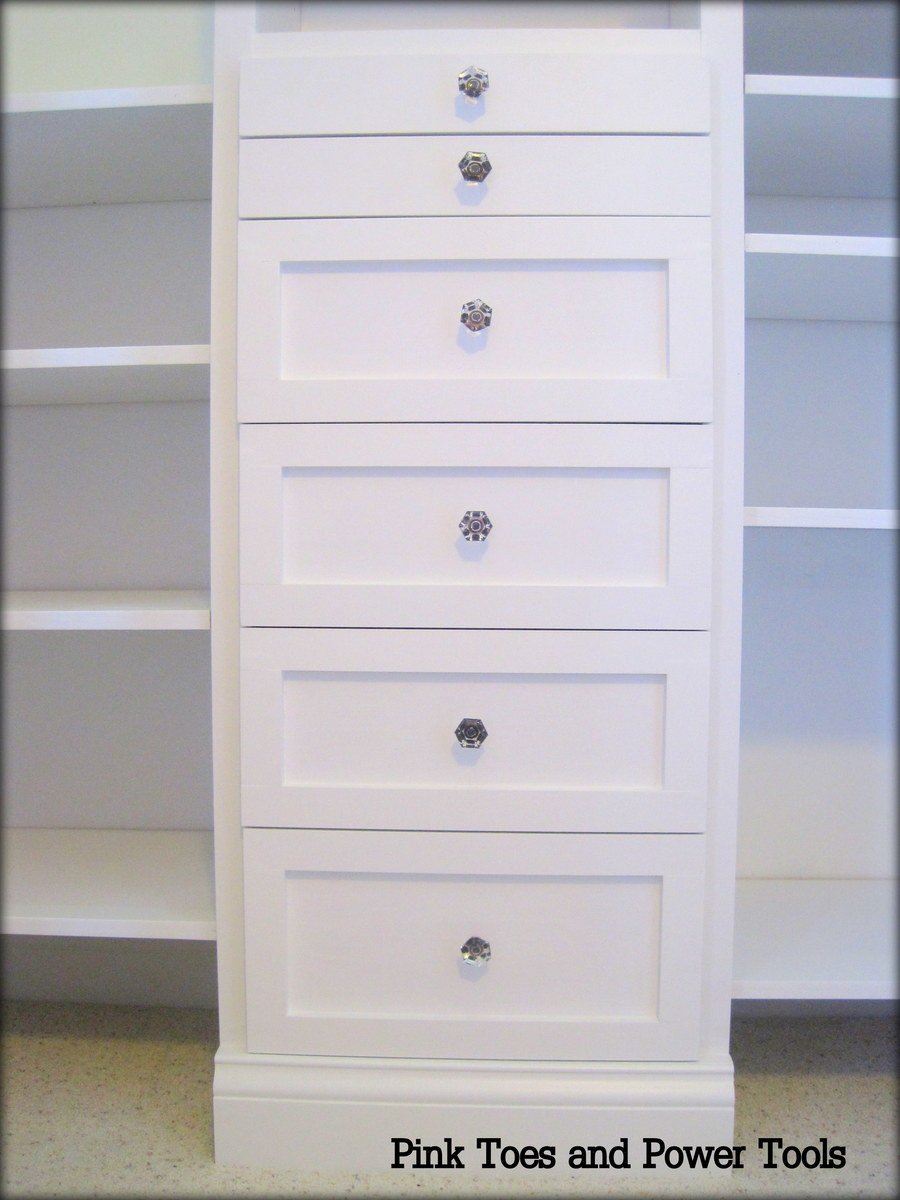
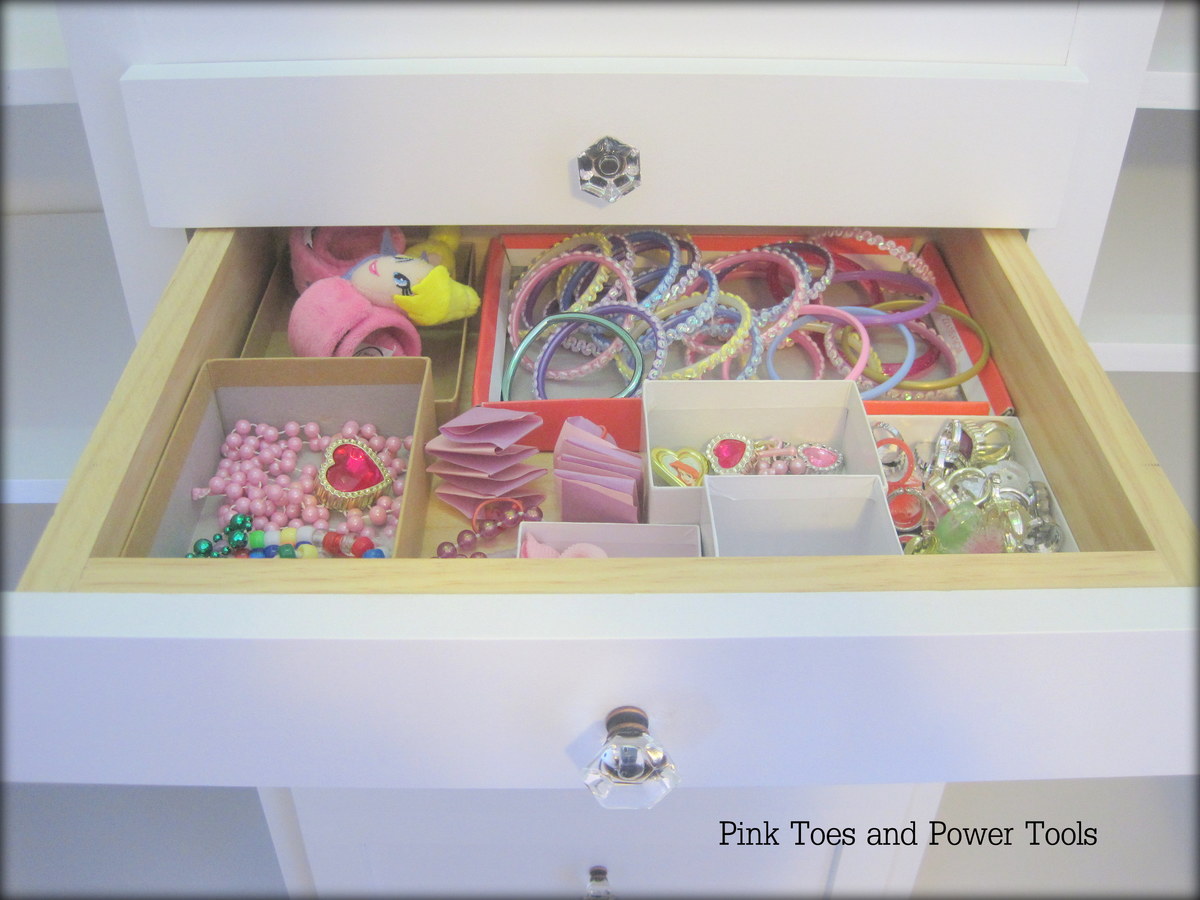
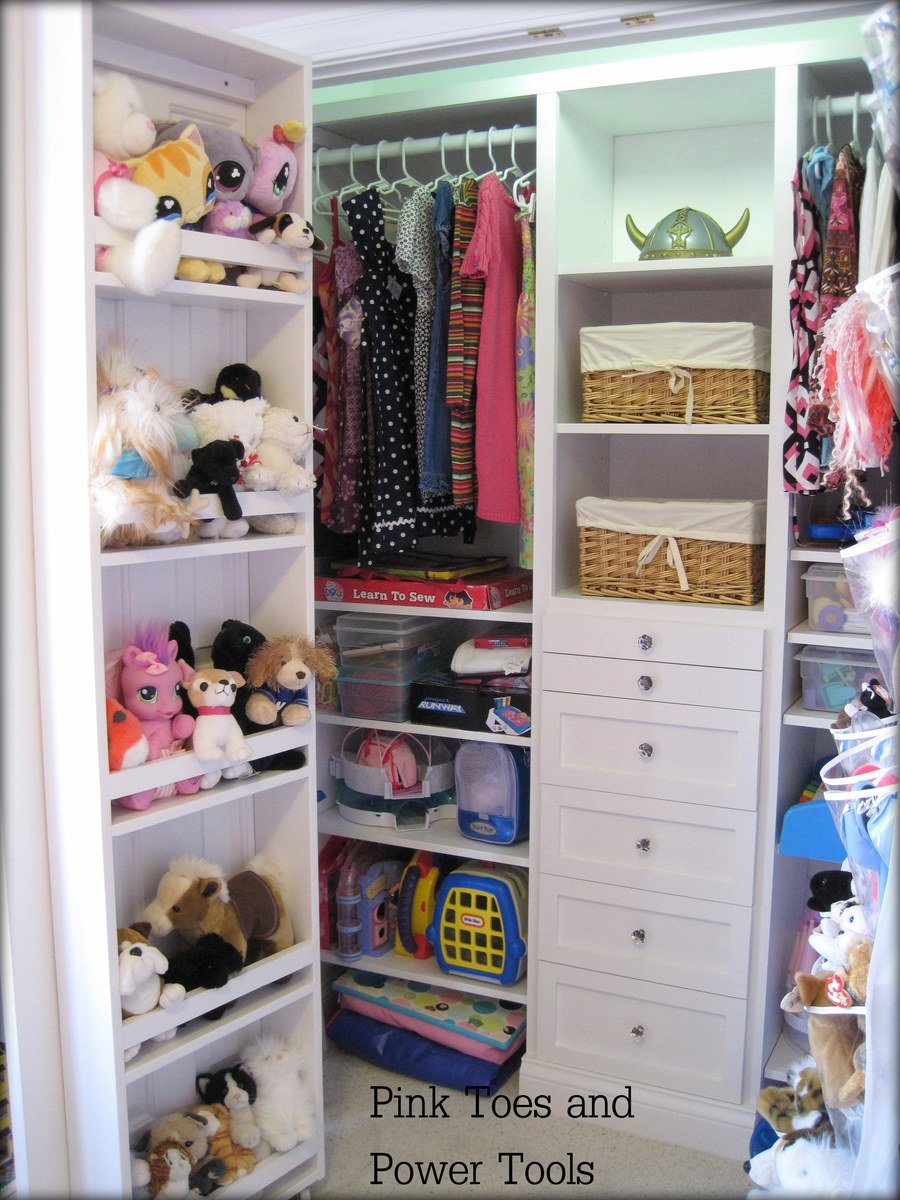
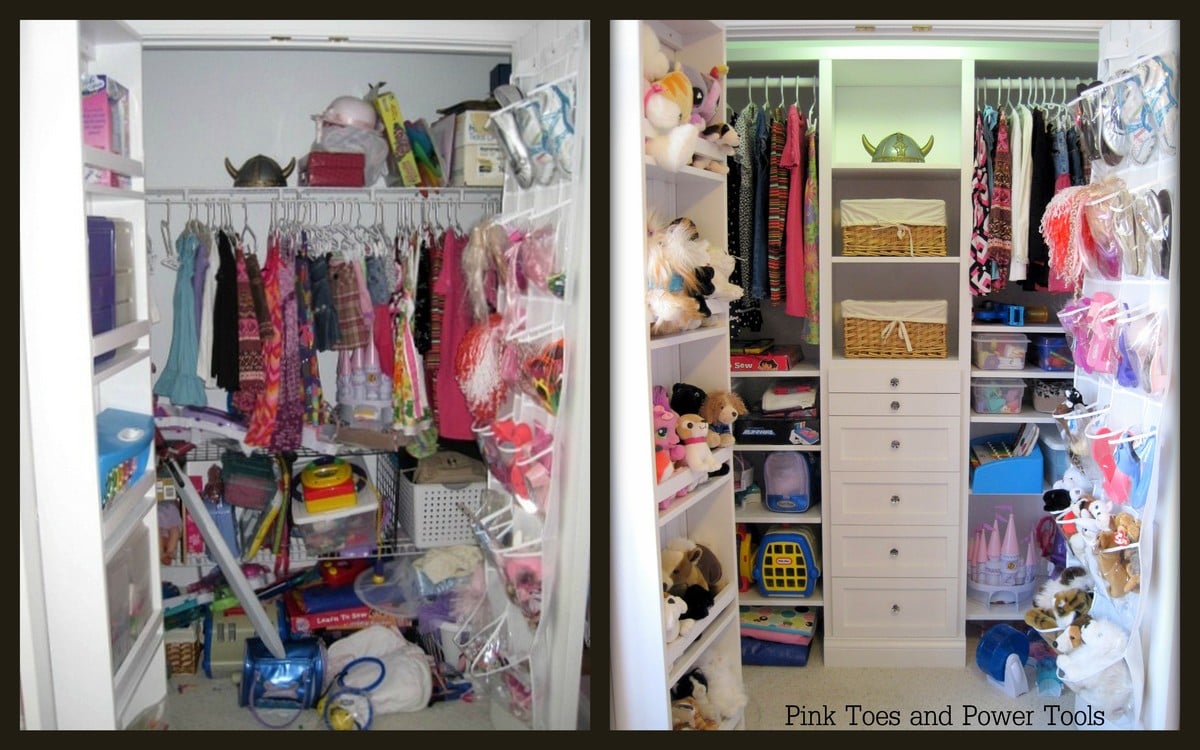
Closet Organizer

Submitted by kristen on Sun, 02/05/2012 - 10:26

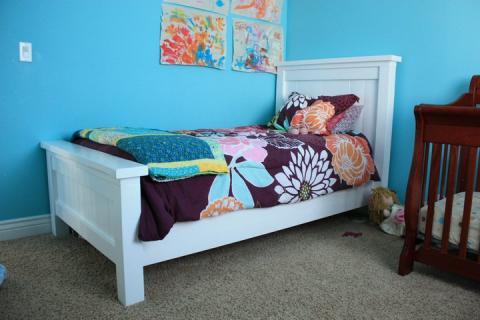
I needed a closet organizer for my daughter's room that could grow and change with her age. Right now it needed to have lots of shelves at her height to hold the massive amount of stuff an 8 year old can accumulate.

Once she transitions out of the toys, I plan on moving the shelves all to one side or the other for shoes, and adding another rod. Another possibility is shoes in the door organizer and 4 sections of hanging clothes...regardless, the end result has options that will grow with her!

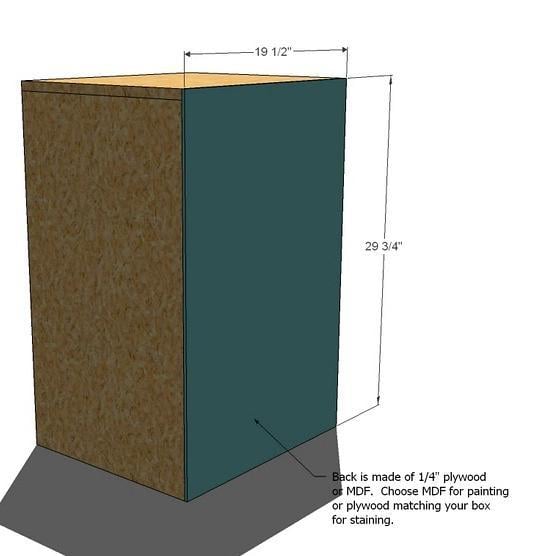
I was able to keep the cost of this down because I used all scrap plywood to make the drawers. I did splurge in S4S pine lumber rather than trying to make rougher cuts nice.

On the left door is Ana's Behind Closet Door Storage plan as well :)

Estimated Time Investment
Week Long Project (20 Hours or More)
Finish Used
Kilz No VOC primer, Olympic No VOC paint in semi-gloss (white off-the-shelf tint)
Recommended Skill Level
Intermediate

Comments

Guest (not verified)

Sun, 02/05/2012 - 11:17

I love the idea of the stuffed animals on the door! Those things multiply so fast and get in the way of making the bed - great closet!

Cindy from Indiana (not verified)

Sun, 02/05/2012 - 18:58

Right now DD's room is a blank canvas. One of the first projects (after getting her window in) is to figure out the closet. I think this will be my inspiration!

Looks great!

kristen

Sun, 02/05/2012 - 19:25

Thank you! I am loving how organized her whole room is because of the closet being in good shape. And everything has a spot now, so it's easy for her to get it back where it needs to go!

Oh, those stuffed animals. I mentioned to her the idea of paring her collection down and she was horrified at the idea!

In reply to by kristen

claydowling

Mon, 02/06/2012 - 06:40

A shocking notion. I think there's a box in our storage area with my wife's stuffed animals somewhere. Keep in mind, my wife isn't a 20-something who just moved out of her parents' house. We have a grand-daughter. Stuffed animals are forever. In fact I think one of my nephews still has my teddy bear.

kristen

Mon, 02/06/2012 - 09:04

...at the bottom of the basket where her stuffed animals used to live, were two of mine from when I was little, lol!

But you bring up a good point about forever. I think I need to put a ban on any new ones joining her stuffed animal family from here on out. Pretty soon I'm going to need to add another closet to her room just for those!

Guest (not verified)

Thu, 02/23/2012 - 17:32

How did you build and incorporate the drawers?

In reply to by Guest (not verified)

kristen

Sat, 06/30/2012 - 20:46

claydowling

Thu, 02/23/2012 - 19:12

The easiest way to do a quick drawer, if you don't know how to do dovetails (and that's a simple skill totally worth learning), is to drill holes through the sides and into the front, and pin it with hardwood dowels. Use a domestic hardwood, you'll be a better dowel and a dimension that matches drills you own. The cheaper white imported dowels don't match any drill diameters that I can find.

hoffer5353

Thu, 06/28/2012 - 13:18

I am wanting to add shelves and drawers on a closet and am afraid it will be too big for the space. How wide is your closet?

In reply to by hoffer5353

kristen

Sat, 06/30/2012 - 20:53

Here is the post with the plan mock-up with dimensions:

http://pinktoesandpowertools.com/2012/01/24/how-to-build-a-closet-organ…

It says 65.5" wide on there, and I don't believe I made any changes, so that should be accurate. I think you could get away with having an approximately 46" wide closet. You could have the drawers in the middle and then 12" wide shelves on either side that would fit sweaters, jeans, shoes. If you made them adjustable like mine, then you could really maximize the space in there. Just make sure you give yourself plenty of room in front of the shelves if there is wall there--you want to be able to easily take things in and out.

Good luck!

mrs.T.La Forme

Mon, 02/04/2013 - 17:49

i just want to say I`m jealous i wish my closet looked like this. cant wait until I`m skilled enough to try it .

kristen

Tue, 02/05/2013 - 15:08

I'm looking forward to doing this to my closet too!! It's a good project to take on once you want to try out drawers for the first time--since it's behind doors, it doesn't have to be perfect. Good luck!

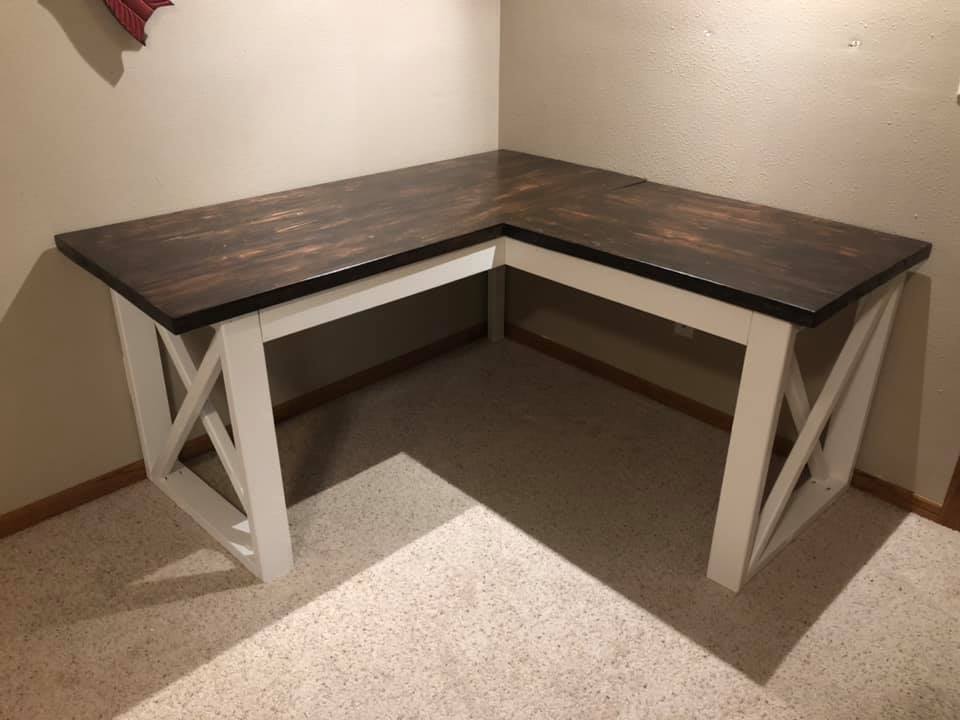
Modified L Shaped Desk

This was my first woodworking project in a couple years. I modified the size to make it about 60" on each side. Now that  I am working from home now due to COVID-19 for the foreseeable future this has been perfect to use in order to have two monitors and enough room on the sides for other work. 

Estimated Cost
70
Recommended Skill Level
Beginner

Comments

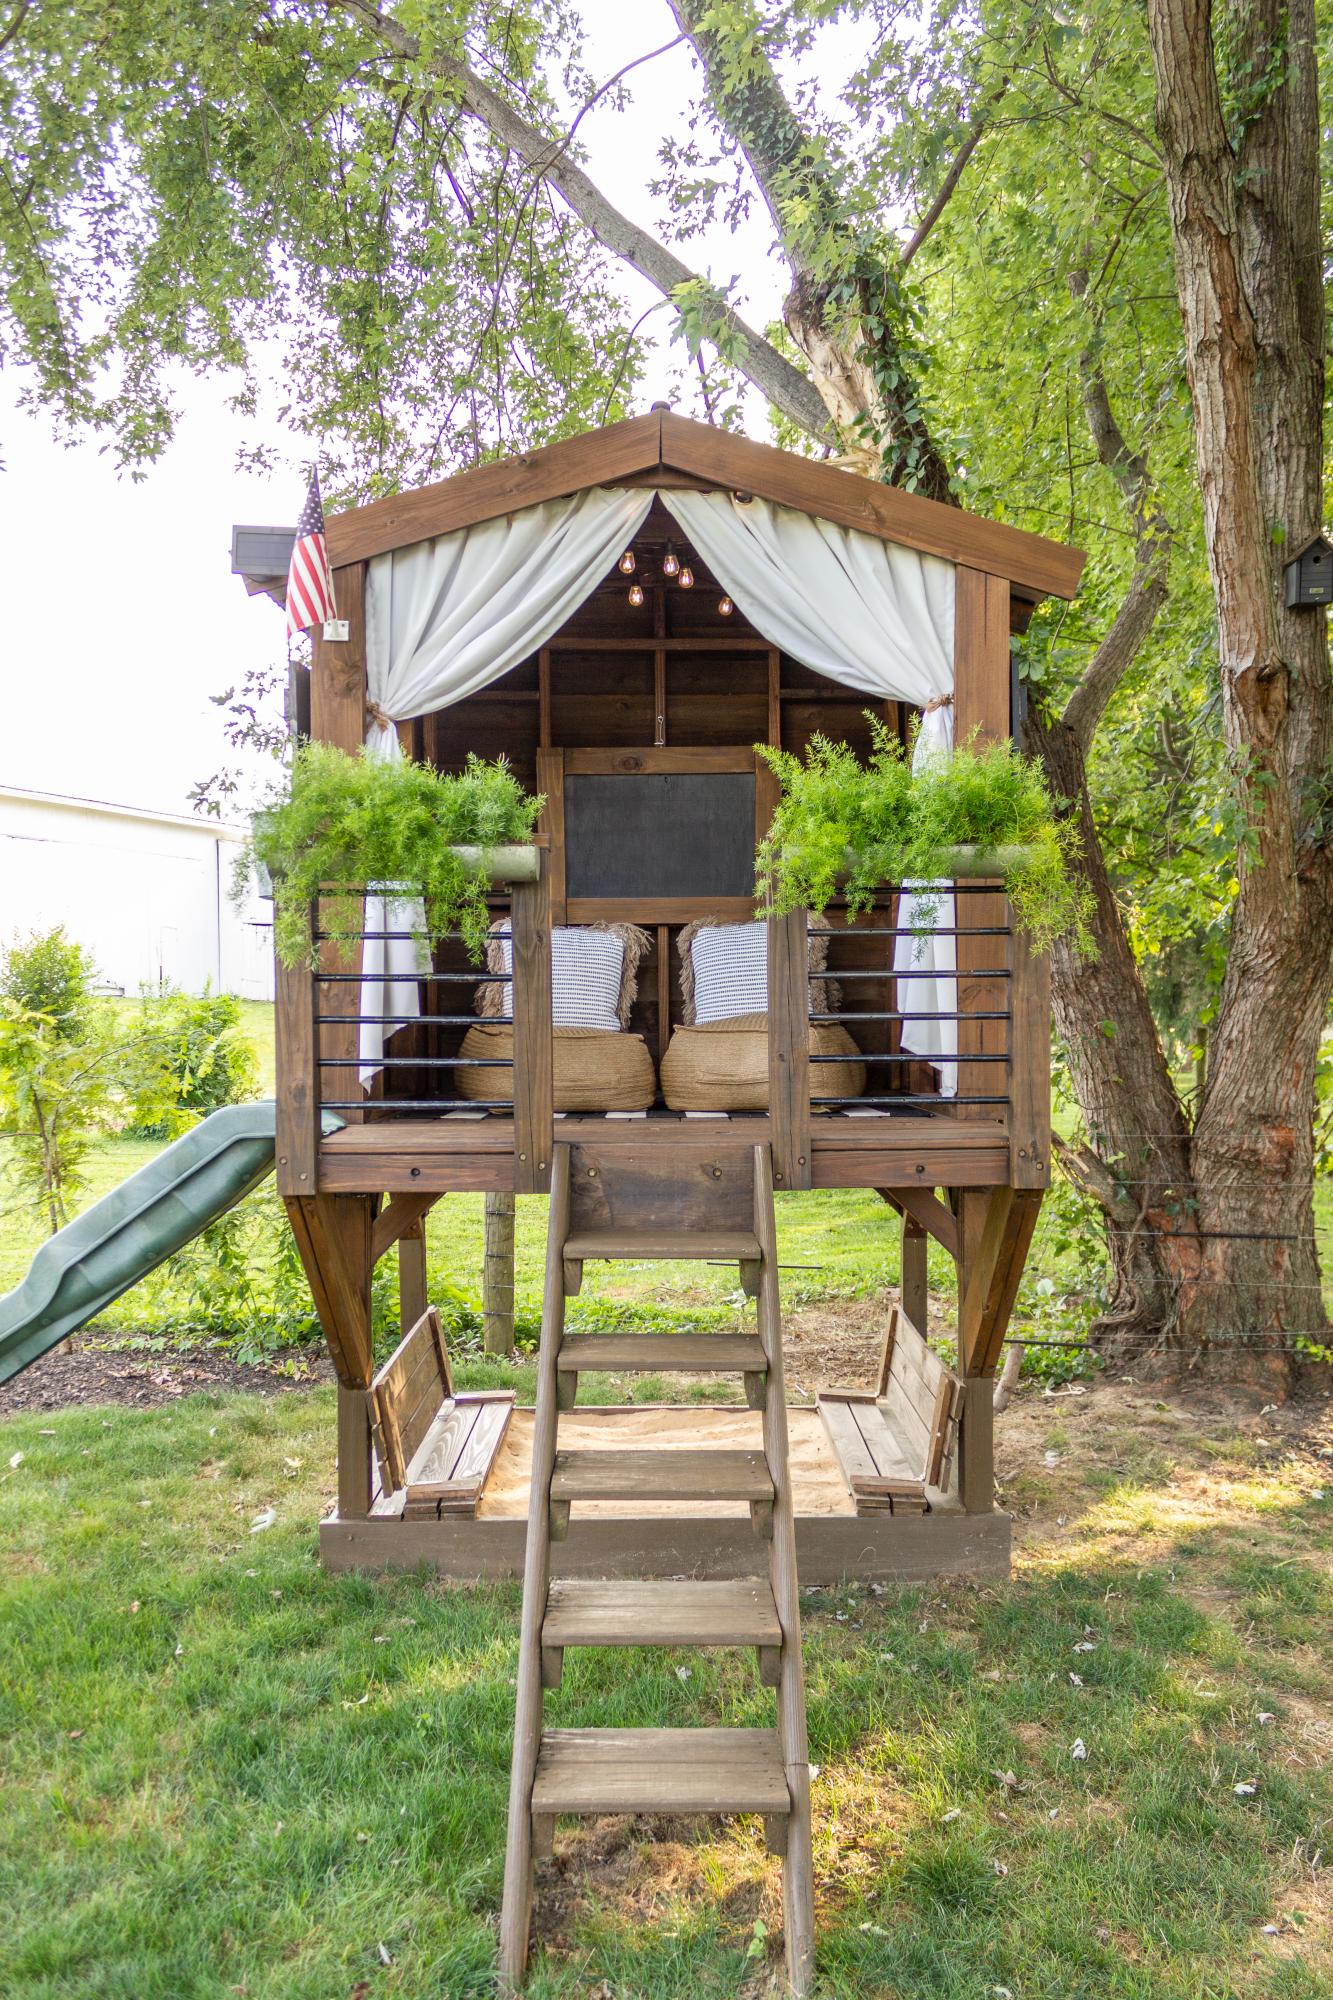
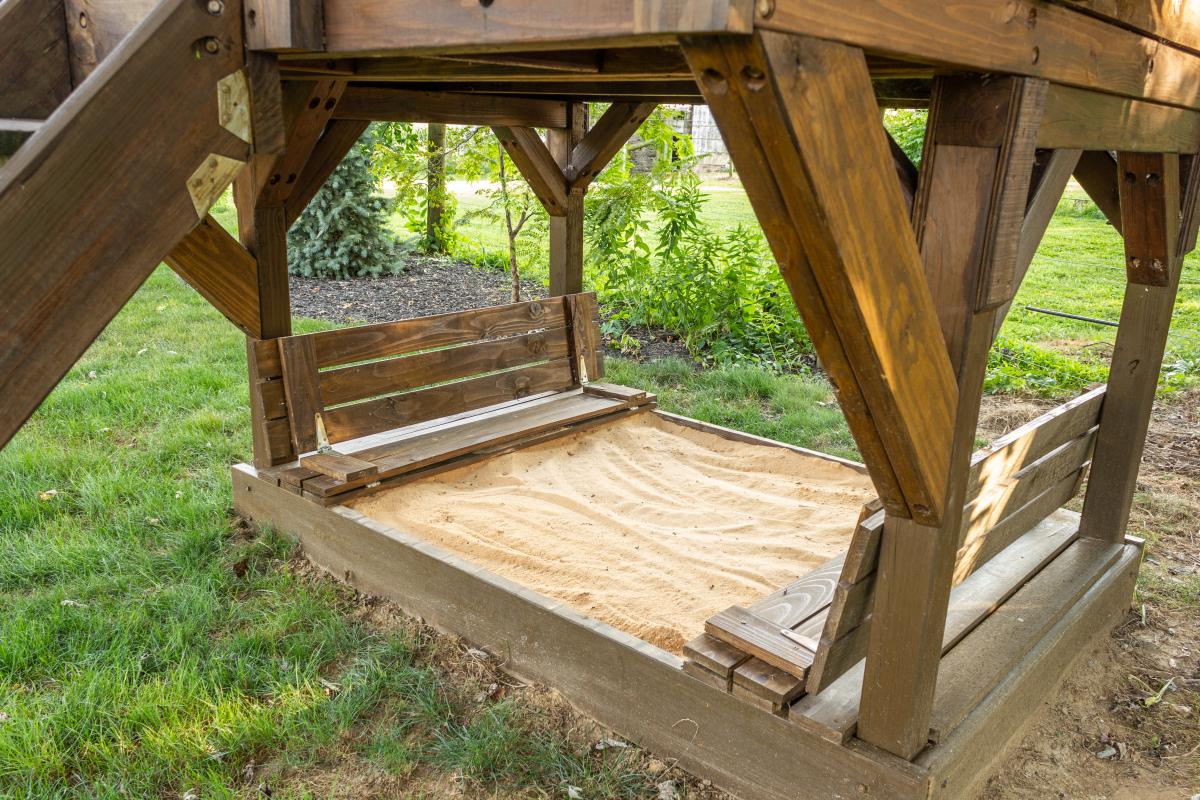
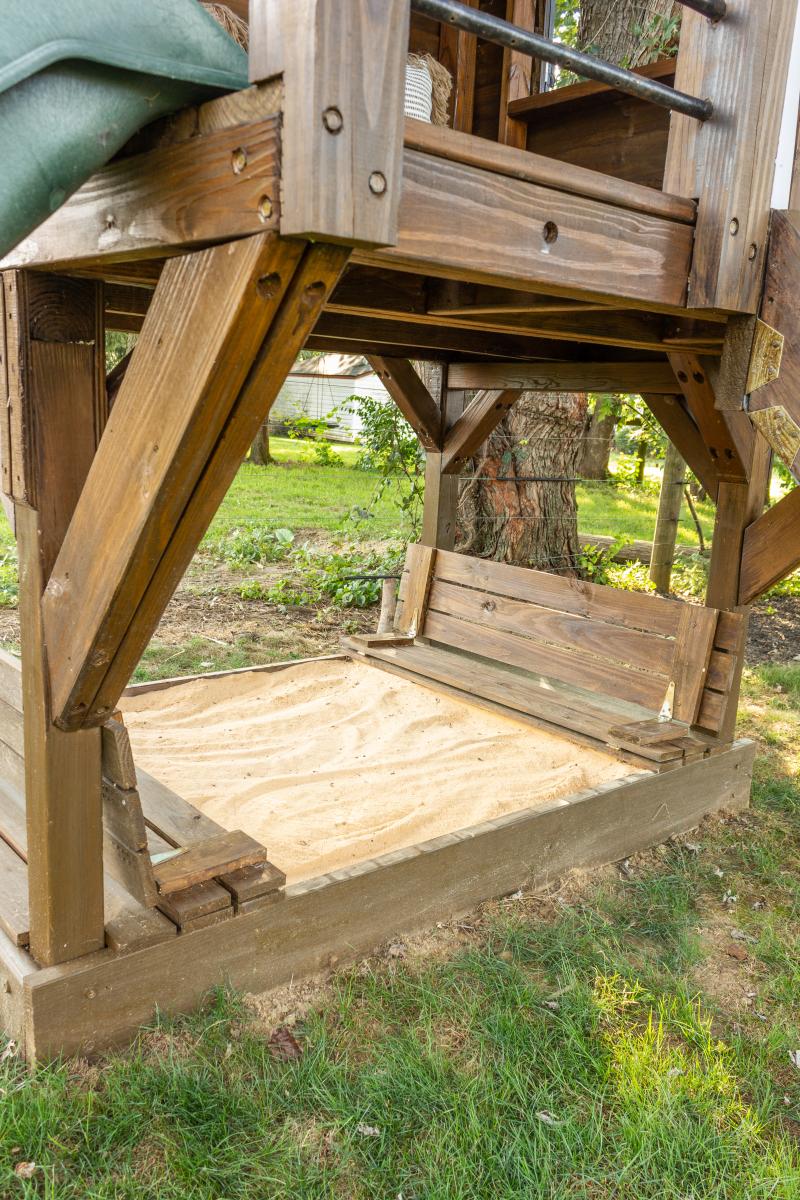
Sandbox with built-in seats in our playhouse

Submitted by Anonymous (not verified) on Thu, 09/10/2020 - 10:55

The base of our playhouse felt like the perfect spot to use the sandbox plan with built-in seats. The bench seats actually fold flat to create a lid for the sandbox when it’s not in use. I followed Ana’s plans exactly and used the list of materials she provided. The only modification I made was eliminating the back supports. It was not necessary for me to add the back supports since we have the playhouse posts to support the back of the bench.

Built from Plan(s)
Estimated Cost
$60
Estimated Time Investment
Afternoon Project (3-6 Hours)
Finish Used
Stain
Recommended Skill Level
Beginner
Seasonal And Holiday

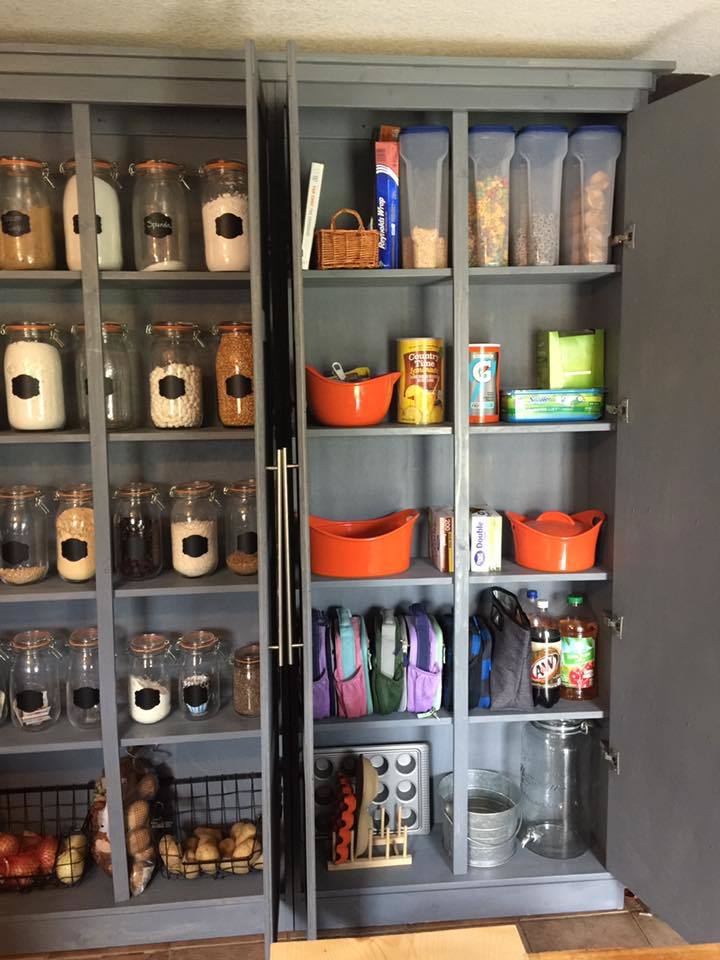
Pantry Wall

Submitted by amiles573 on Tue, 03/28/2017 - 13:41

I modified the origianl plans by making the cabinet taller.  I also built 2 cabinets and trimmed them both together to make it appear as if it is 1 giant cabient.  It measure over 7 feet tall and just over 6 feet wide.  I did add an additional 1x2 brace in the center of the cabinet to help support.  I also cut an additional 1x4 to use a brace when anchoring it to the wall.  I also chose to add an additional 2 trim pieces to each door because they are much taller than the original plan doors.  

Built from Plan(s)
Estimated Cost
$400
Estimated Time Investment
Weekend Project (10-20 Hours)
Finish Used
Varathane Stain, Weathered Grey
15 7/8" center to center cabinet pulls
Fully Inset, Frameless Hinges
Recommended Skill Level
Beginner

Comments

Special Teacher Gifts

My son Jack, has Down syndrome. He's had the same preschool teacher for the last 3 years, and now it's time to move on to kindergarten. Not only does he have a dedicated teacher, but he has two paraprofessionals (teacher's aides) that take turns in helping him 1:1 all day long. I figured that it was time for all three of them to relax this summer. So, in appreciation, I made three of the adult sling chairs so they can enjoy their much deserved relaxation.

Estimated Cost
$25 - $30
Estimated Time Investment
Afternoon Project (3-6 Hours)
Finish Used
Since I used cedar, I didn't want to do anything to it except put a coat of Thompson's water sealer on it.
Recommended Skill Level
Beginner

Comments

mamma_joy

Tue, 06/21/2011 - 00:00

As an OT in the schools, I can understand your connection to the dedicated teacher and staff that work for your son. I'm sure that these gorgeous chairs will show your appreciation! What great choices in fabric, too!

marlaandwilliam

Wed, 06/22/2011 - 14:17

thanks!! i just love fabric! but mod-ish colors and designs really are so striking to me - LOVE it! :)

Sherry (not verified)

Fri, 09/23/2011 - 19:31

Would you mind sending the instructions for these chairs. I think this is something that I could do and would love to make a set for my husband for Christmas. We are all about homemade. That would be so great!

debandtom25

Wed, 09/28/2011 - 20:05

Hi Sherry. To find the page where I got the plans, just click on the words "Wood folding sling chair - adult" next to the bolded "From Plan" listed above. That will take you directly to Ana's plan.

Seasonal And Holiday

Great plans!

Submitted by Anonymous (not verified) on Mon, 07/06/2020 - 07:34

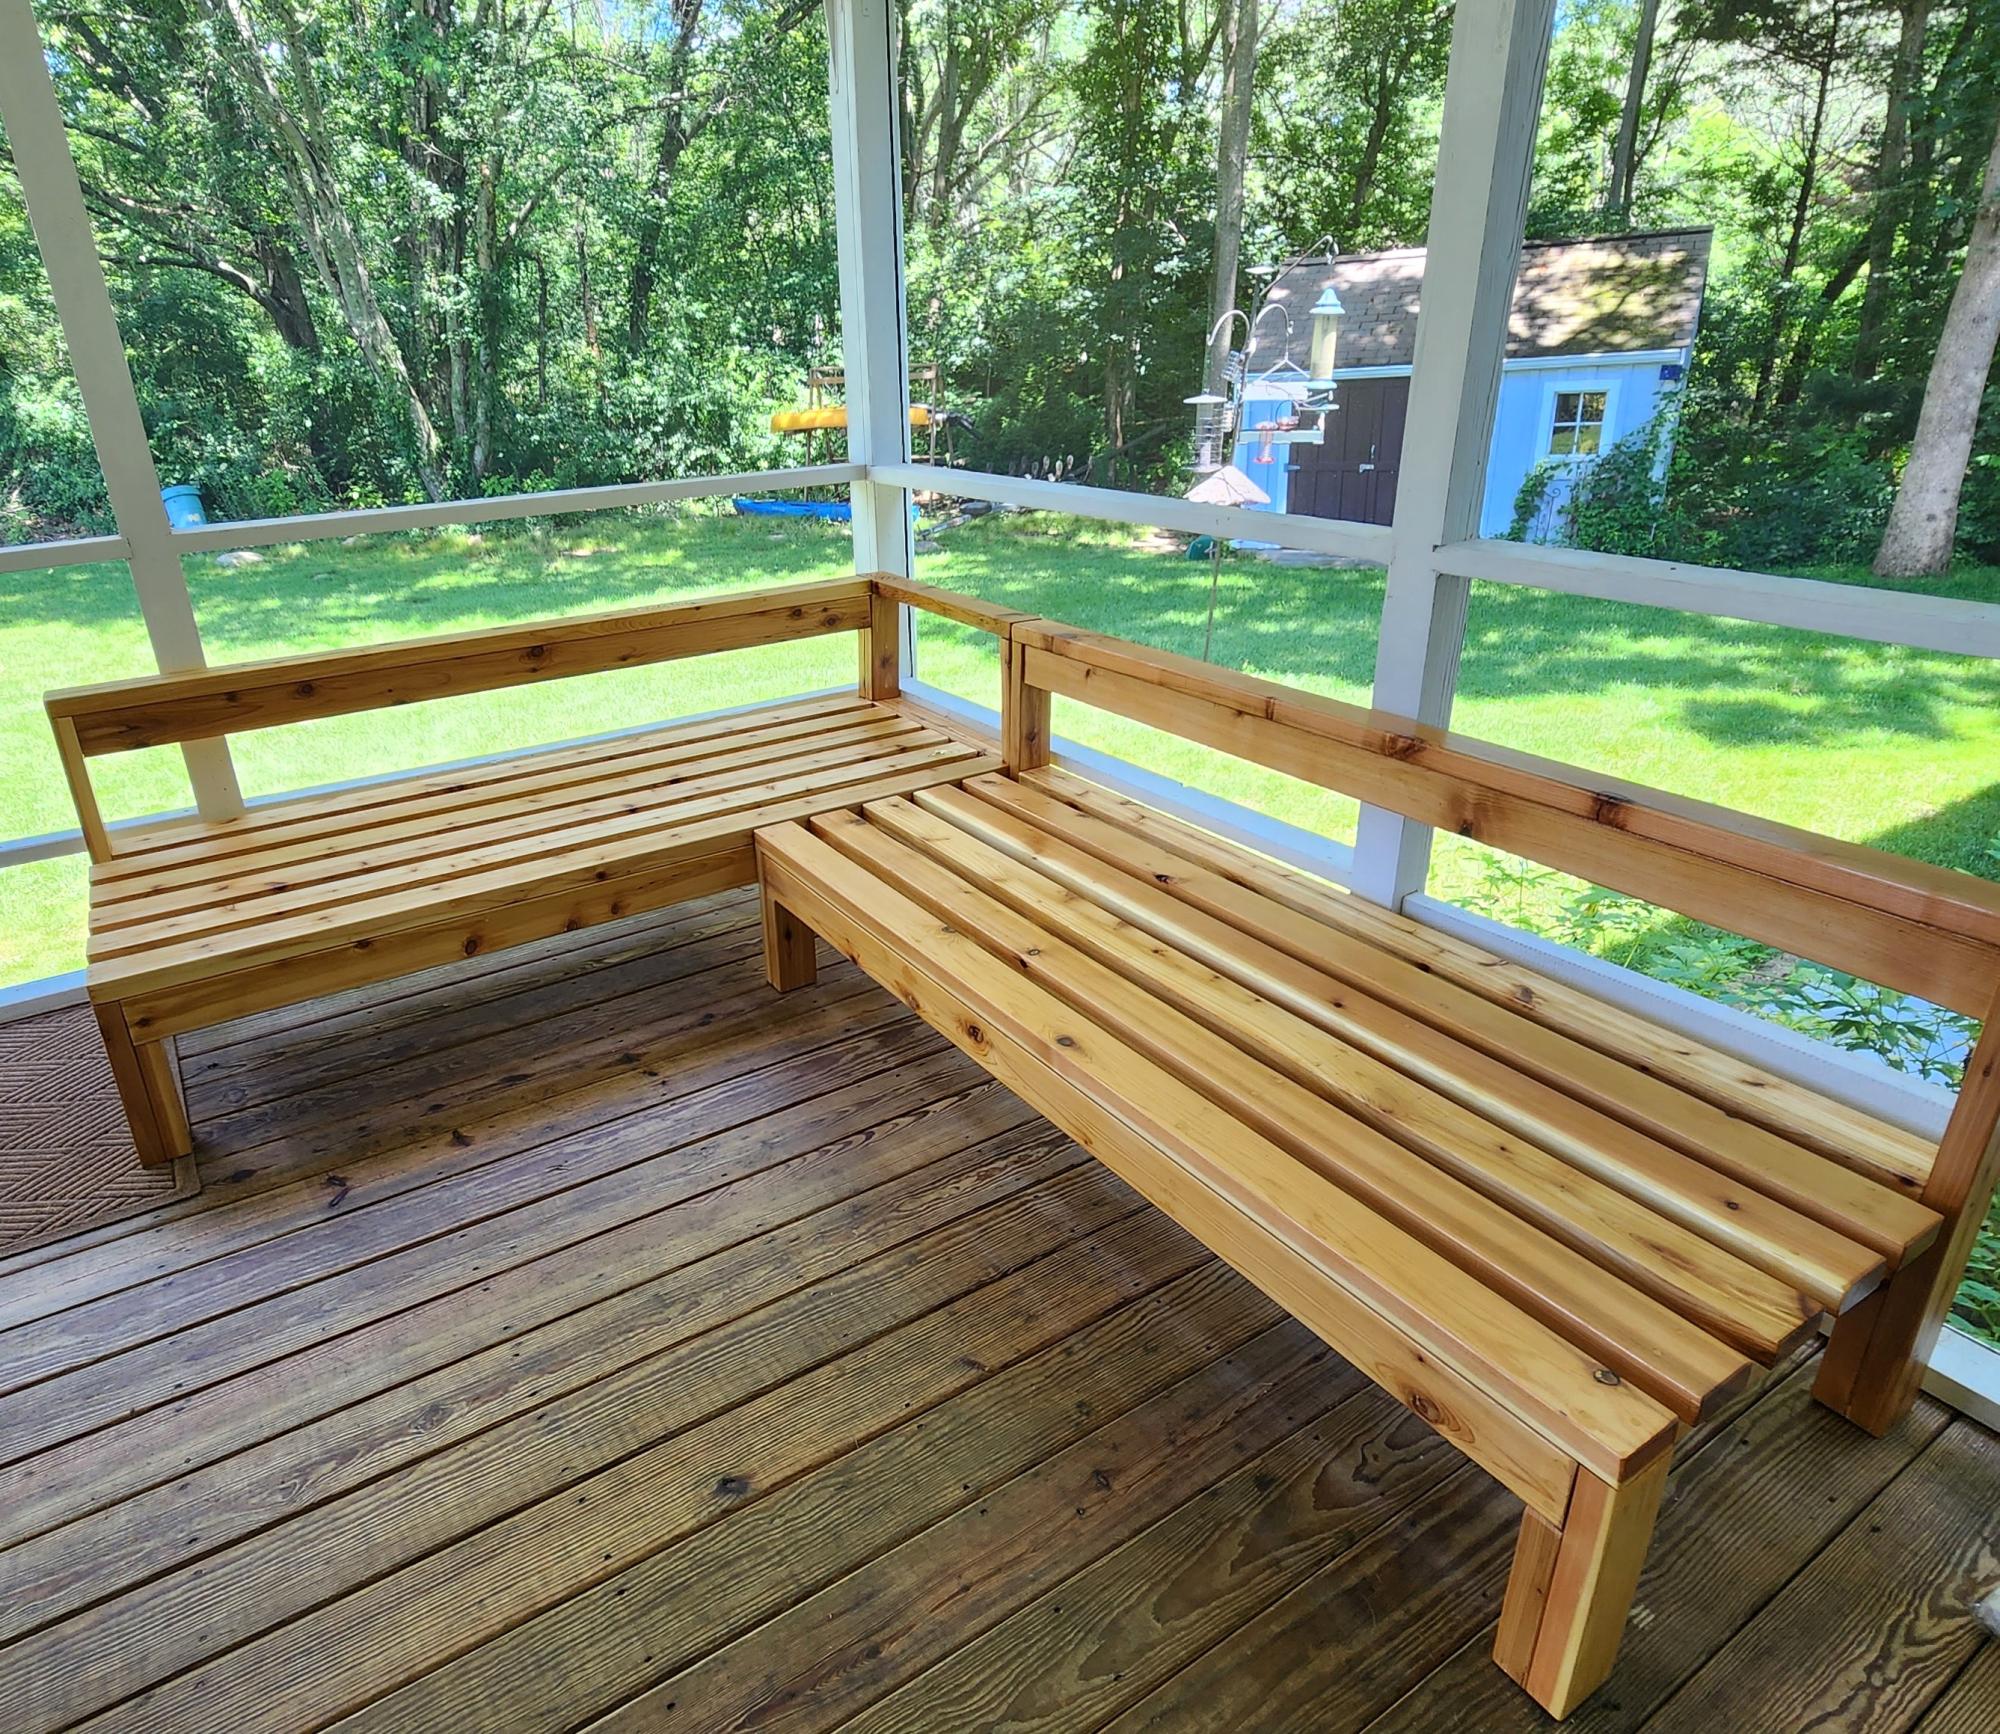
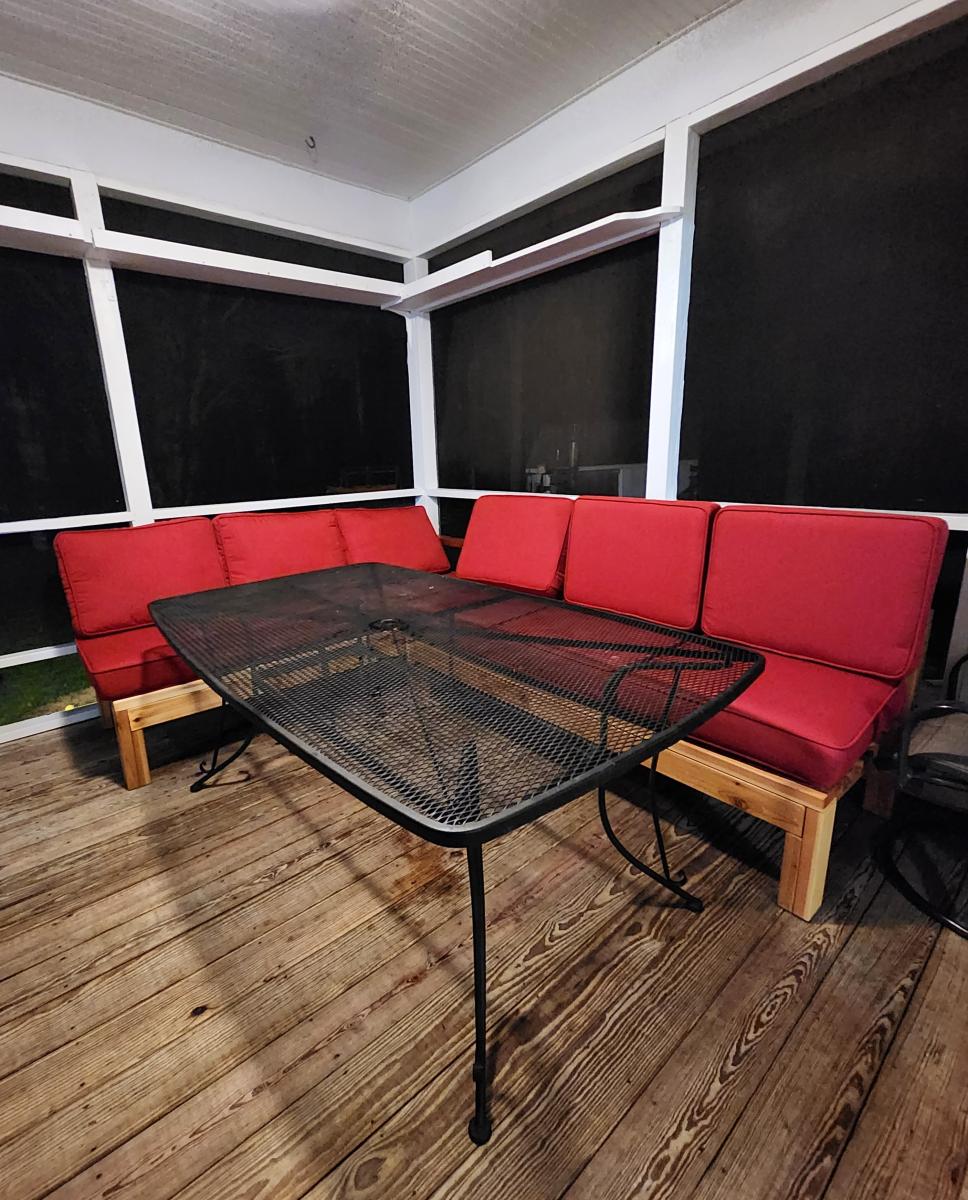
These plans were great. Easy to put together and they look quite amazing. And they are solid! Bought cushions from IKEA and the wood from Home Depot. Stained and sealed.

Estimated Cost
250
Estimated Time Investment
Day Project (6-9 Hours)
Finish Used
Behr stain and seal
Recommended Skill Level
Beginner

Comments

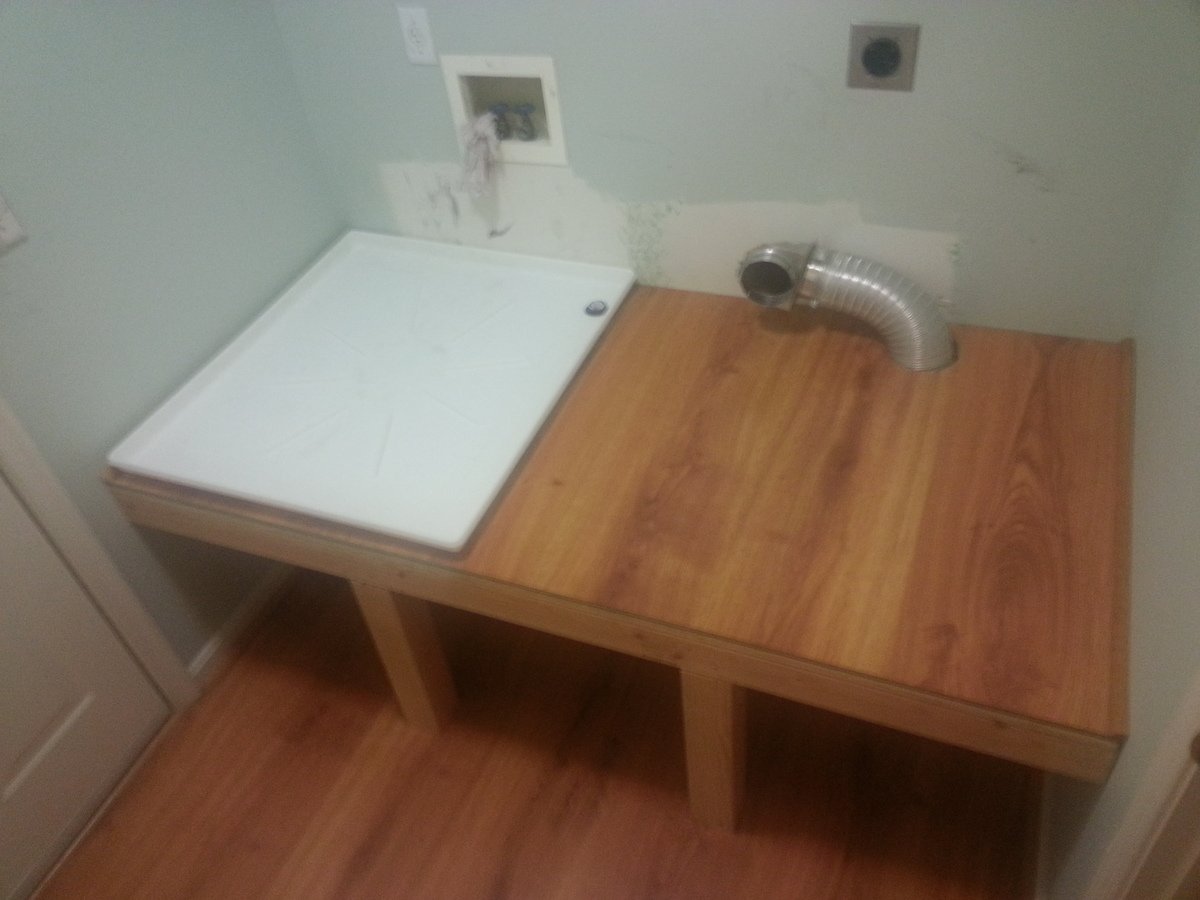
Washer/Dryer Platform Pedestal

Submitted by Dimarc67 on Fri, 04/17/2015 - 10:45


THE MOTIVATION
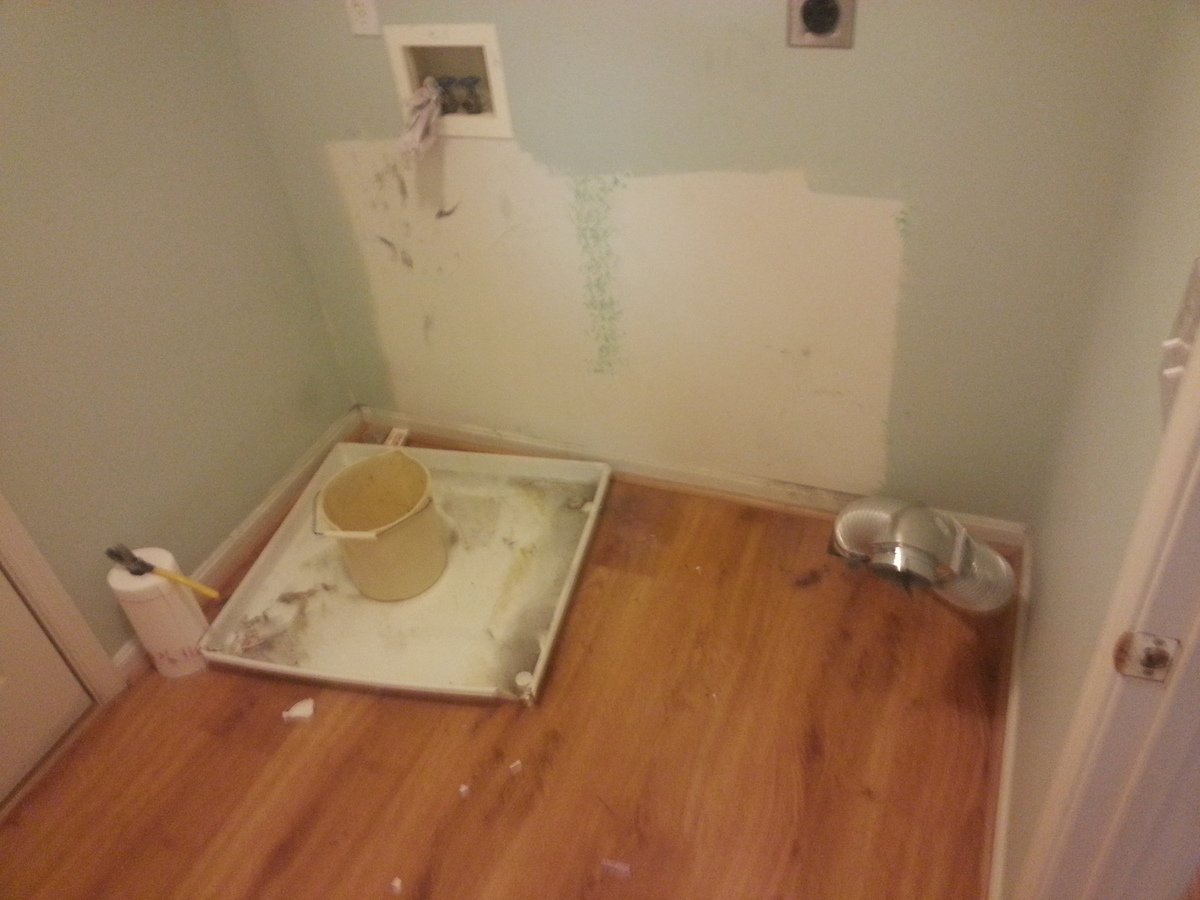
After a recent washer outage (that I was ultimately able to repair myself), my wife and I talked about eventually replacing our front-loading washer/dryer set.  One of the bullets I hate biting is paying the exhorbitant prices for the matching pedestals for new washer/dryer sets.

Having just bought a good set of cordless powertools, and having watched my father when I was a kid build countless household fixtures, window dressings, furniture pieces, etc., I decided to try my hand and construct a permanent platform for our current washer/dryer set, thereby eliminating the need to ever buy manufacturer pedestals again.

The existing pedestals were a standard 15" high, with a storage drawer, which we felt was still not high enough for comfort.  And, the washer pedestal drawer was entirely inaccessibl due to the 2" walls on the washer drain pan, so its drawer was totally useless, wasted space.

And, lastly, we really wanted more space for clothes baskets full of laundry, which we generally stacked (full and haphazardly) on top of the machines.


THE CHALLENGES
The largest challenges were mainly logistics, and gravity.  The washer/dryer would have to be unavailable for at least 2-3 days while they sat disconnected in the next room waiting for their new home.  So I coordinated with the family so they'd know when they needed to have their laundry done, or tough it out until I was done.

There was no way to know for sure what the drain connection for the washer pan looked like until I got the washer out.  So it was a small gamble that I'd be able to get the parts needed to extend the drain pipe up to the new platform right when I was ready for them.  Fortunately, this was no issue at all.

The biggest challenge turned out to be toward the end when it came time to lift our 230-lb. washer onto the new platform.  I seriously considered disassembling the washer to the point that I could remove its molded concrete counter-weights, but instead (and arguably stupidly) elected to use a large hydraulic car jack to raise the washer.  This ultimately worked, but I have to STRONGLY ADVISE AGAINST trying this.


THE SPACE
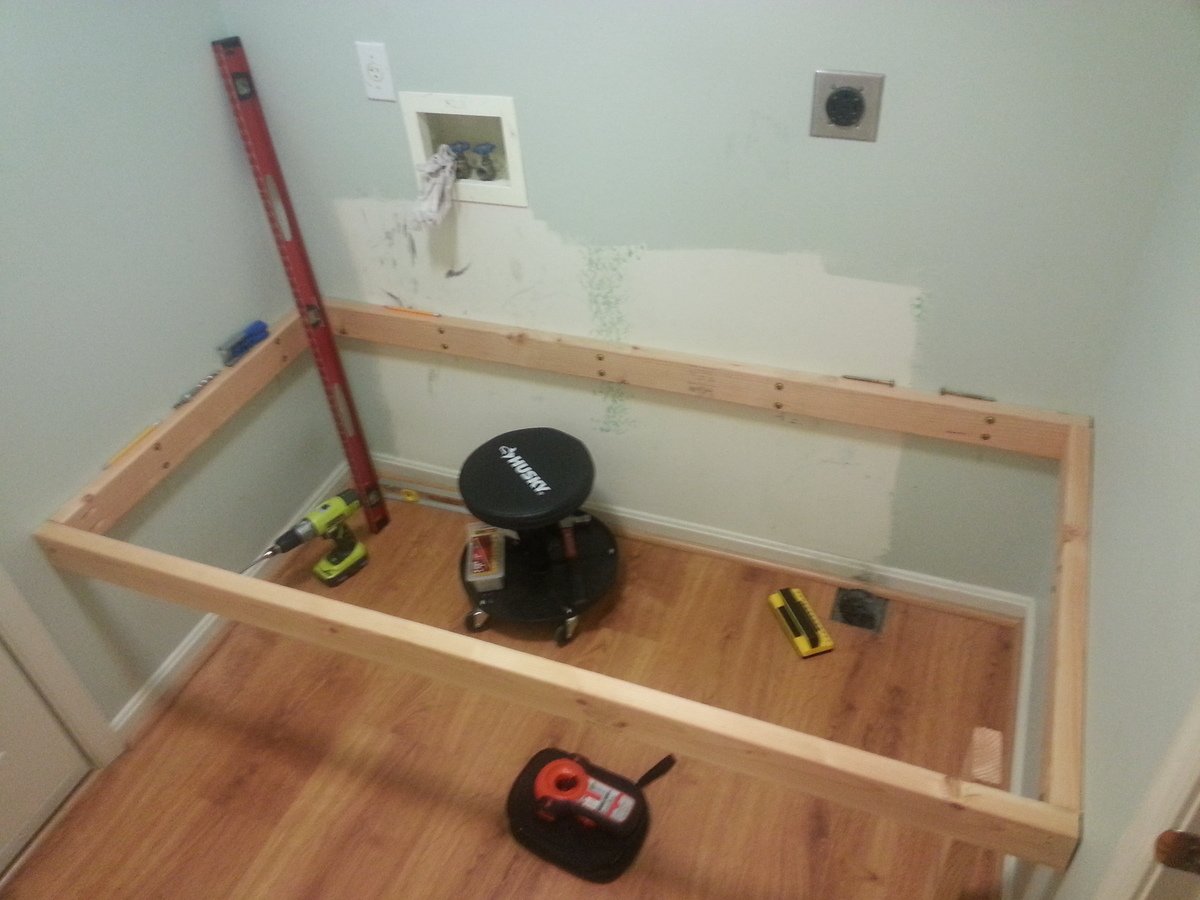
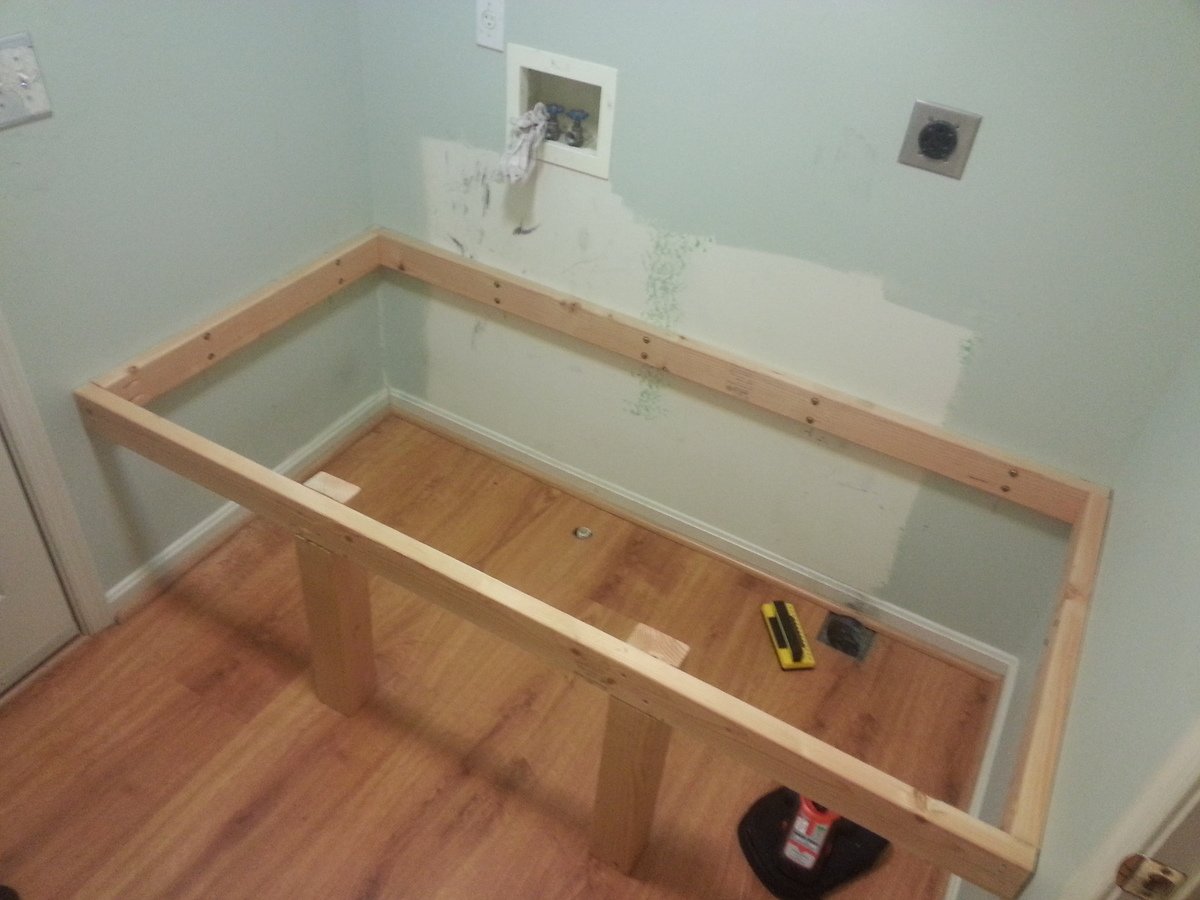
Our laundry room is also the "mud room" between our kitchen and the garage.  It is only large enough for the two machines, and the walk way between the two doors--in total, about 70.5" square.  Building the platform from wall-to-wall made the most sense, and minimized framing by fastening edge framing directly to the wall studs. 


THE PLAN
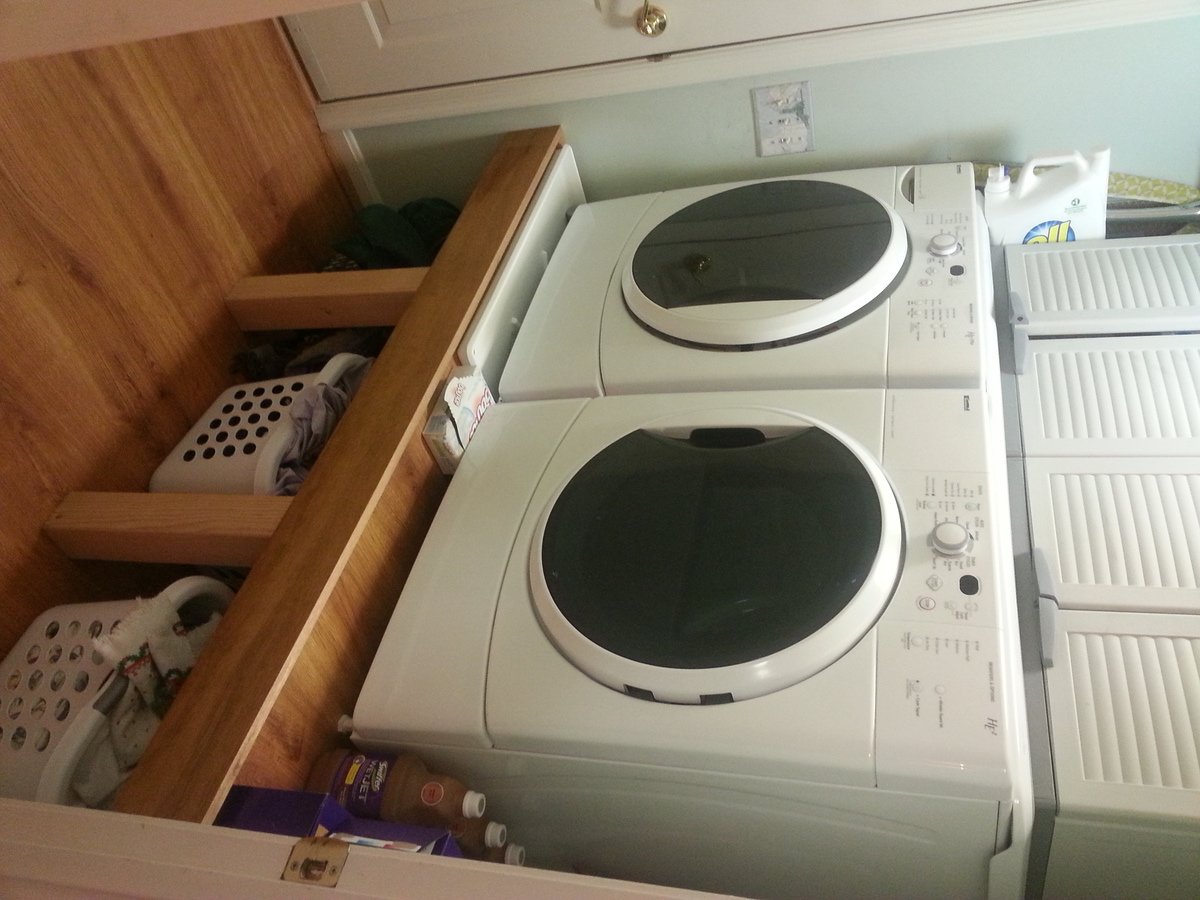
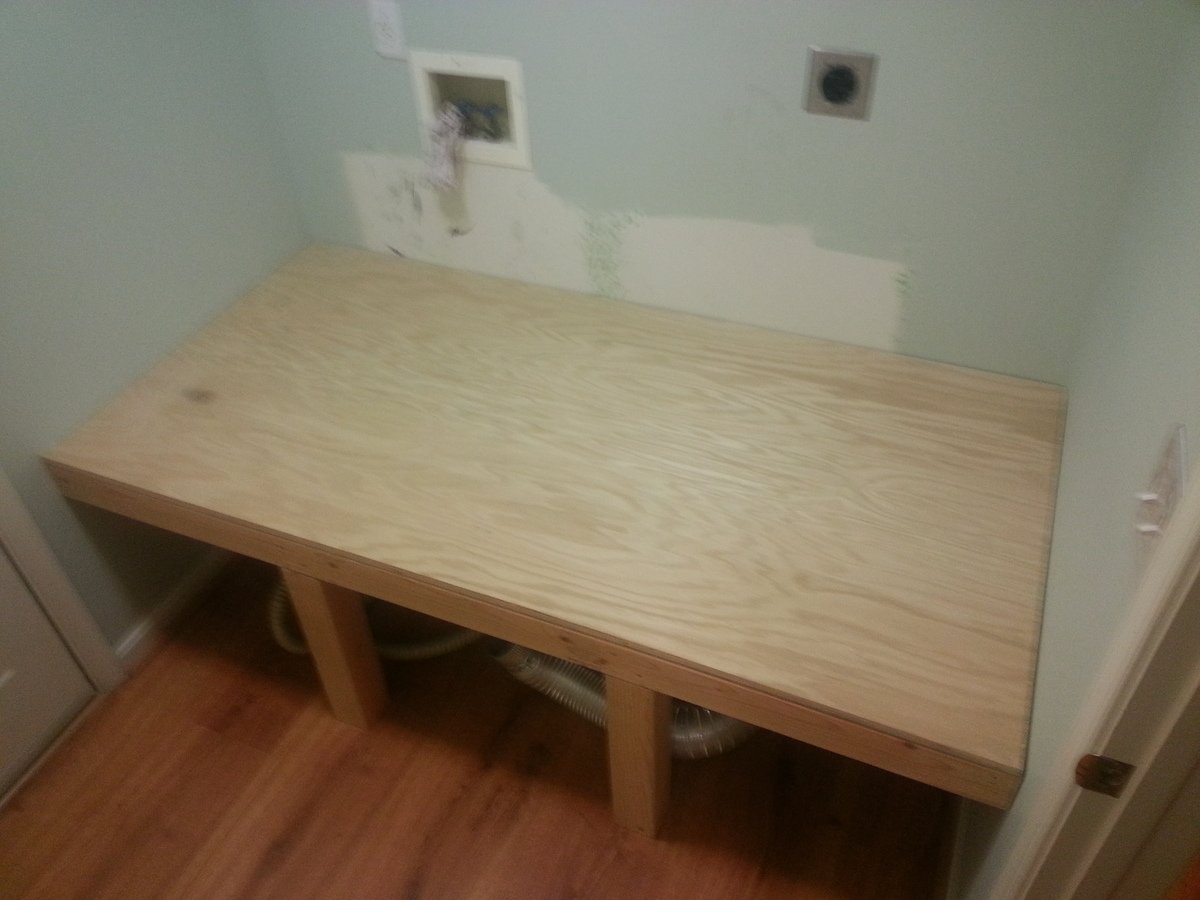
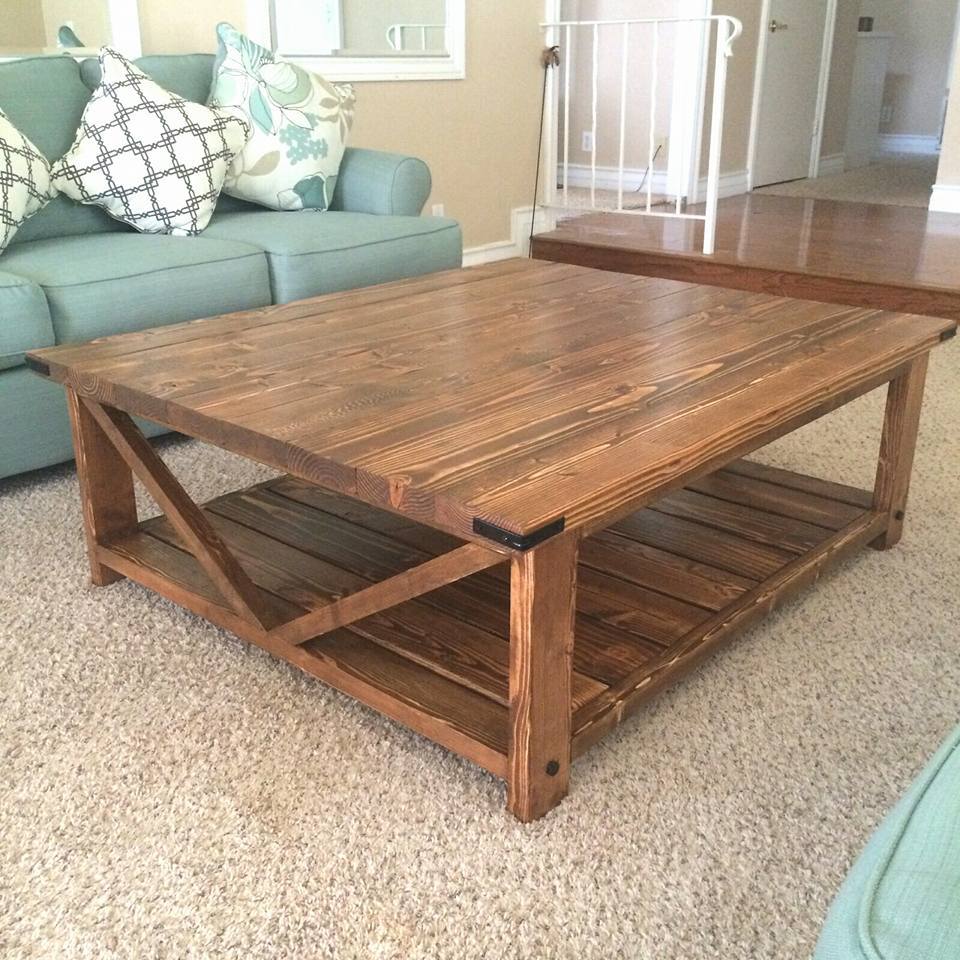
Pretty basic:  2x4's all around for the edge framing--back and sides fastened directly to the wall studs, and front 2x4 supported by two, notched 4x4 legs.  3/4" plywood for the subsurface, and 1/4" laminate faux-wood flooring on top (left over from reflooring, so it matches the floor below).  Bore holes for the washer pan drain and the dryer vent.  1" quarter-round molding on the sides, and 5.5" face piece flush with the top of the molding across the front (spare lauan I had looks perfect).  I also made a point of putting the machines on the platform before the face piece since it might have been in the way or damaged.

Anyone will tell you that it's best to at least sketch out what you want to do so you can minimize surprises, forgotten parts, etc.  I, of course, did virtually none of that, and made several course changes and corrections along the way.  For this project, I was lucky that I didn't need to backtrack at any point, and probably won't learn this lesson any time soon anyway.  However, you SHOULD.


TAKE-AWAYS
The main mistake I made was while gathering the platform dimensions for cutting the plywood.  It was only blind luck that kept me from having to do it more than once (and having to buy more than one 4x8 sheet).  I know that it's actually very unlikely that two adjacent walls are perfectly square, so I made a point to measure the width between the walls at the back and at the front--and, sure enough, found a 1/8" difference--wider at the front.  But when I measured and marked the plywood for cutting, I measured both distances from the precut edge, and then cut.  By doing this, I inadvertently assumed that one of the back corners was perfectly square. 

What I should have done was used a carpenter's square in each back corner to extend a square line from the back edge to the front, and then measured from the square lines to their respective side wall.  This would have accounted for neither back corner being square.

Fortunately, my mistake wasn't big enough to keep the plywood from fitting, but it was very, VERY close.


GIDDY
I honestly couldn't be happier with the finished project (or more smug).  We've raised the washer/dryer 9" higher than they were (24" off the floor), and we now have basket storage underneath all the way across.  I placed two 24" plastic cabinets on top, which still leaves room for the detergent right over the soap inlet on the washer.

And, most importantly, I got to use every powertool I own.  Kinda beats "the quick brown fox jumped over the lazy dog" thing, huh?
 

Estimated Cost
Most of my project made use of spare lumber and materials I've had on hand forever. The 4x8 sheet of plywood was about $30 at Home Depot.
Estimated Time Investment
Weekend Project (10-20 Hours)
Finish Used
Natural. No finishing, staining, or painting. Lauan has a natural stained oak coloring, so it was perfect for the facing. (A soft wood, Lauan--"lao-AHN", also sometimes called "Philippine Mahogany" simply for the darker color--used to be as readily available as pine, but I haven't seen it in stores for many years.)
Recommended Skill Level
Intermediate

Comments

Clubhouse based on Ana's Plan

Submitted by MattSl on Tue, 05/03/2011 - 09:18

I used Ana's plan as a base.

I changed it from 8x8 to 8x12, made the 4x4x8's to 4x4x10' for a higher main platform and swing platform, and added a 12' long monkey bar set to the other side. Also, an 8' climbing wall and a plank walkway to accompany the two slides.

For the clubhouse, I used Hardiplank 4x8 sheets for the siding and an EZ-Framer kit for the structure itself.

The slides I purchased from Lowes, monkey bars from Amazon, and the swing frame braces from Amazon as well. The swing kits I got from ebay.

Estimated Cost
1500
Estimated Time Investment
Week Long Project (20 Hours or More)
Recommended Skill Level
Intermediate
Seasonal And Holiday

Cedar Boxes

Submitted by drowland on Sat, 07/09/2011 - 07:18

We built these before we saw these plans, but they are pretty much the same... We added the chicken wire to keep the rabbits (and our dog) out of the garden. We added the owl to keep the birds out. We've gotten a ton of tomatoes, onions, and bell peppers so far. Next year, we'll add a few more beds. We also added the verticle garden to take up less space, but its not deep enough. We'll make the next one deeper.

Estimated Cost
$30
Estimated Time Investment
An Hour or Two (0-2 Hours)
Finish Used
none
Recommended Skill Level
Starter Project

Comments

KatieO (not verified)

Sat, 07/09/2011 - 20:11

Wow! LOVE IT! I love the taller posts so you can incorporate the chicken wire! I SOOOO needed to do something like that this year. Also, the vertical garden boxes are BRILLIANT! LOVE IT!

drowland

Thu, 11/17/2011 - 07:59

We ended up getting a ton of tomoatoes and green peppers from the garden boxes. We've actually built a couple more. We'll probably double again before next spring. We're looking at adding more veggies.

We now have ton of stuff planted for the fall...

Guest (not verified)

Tue, 03/13/2012 - 10:46

How did you build the upright planter boxes? Do you mind explaining the building process/design? I really want to plant this in my yard!
colton's mom (not verified)

Tue, 04/03/2012 - 06:19

i love the vertical boxes. I am just trying my hand at the world with a green thumb and could use as much advice as possible about how to make as well as to line the boxes or not to line them. All advice appreciated!

berman (not verified)

Fri, 11/23/2012 - 21:53

Hi, my name is berman. I found you pin from my pinterest and your box garden is so great. I am a newbie in this field and so interested to build garden in my house. If i can ask you some question, could you please to answer that?

cheers,
berman

Seasonal And Holiday

Great plan - added to make it even bigger

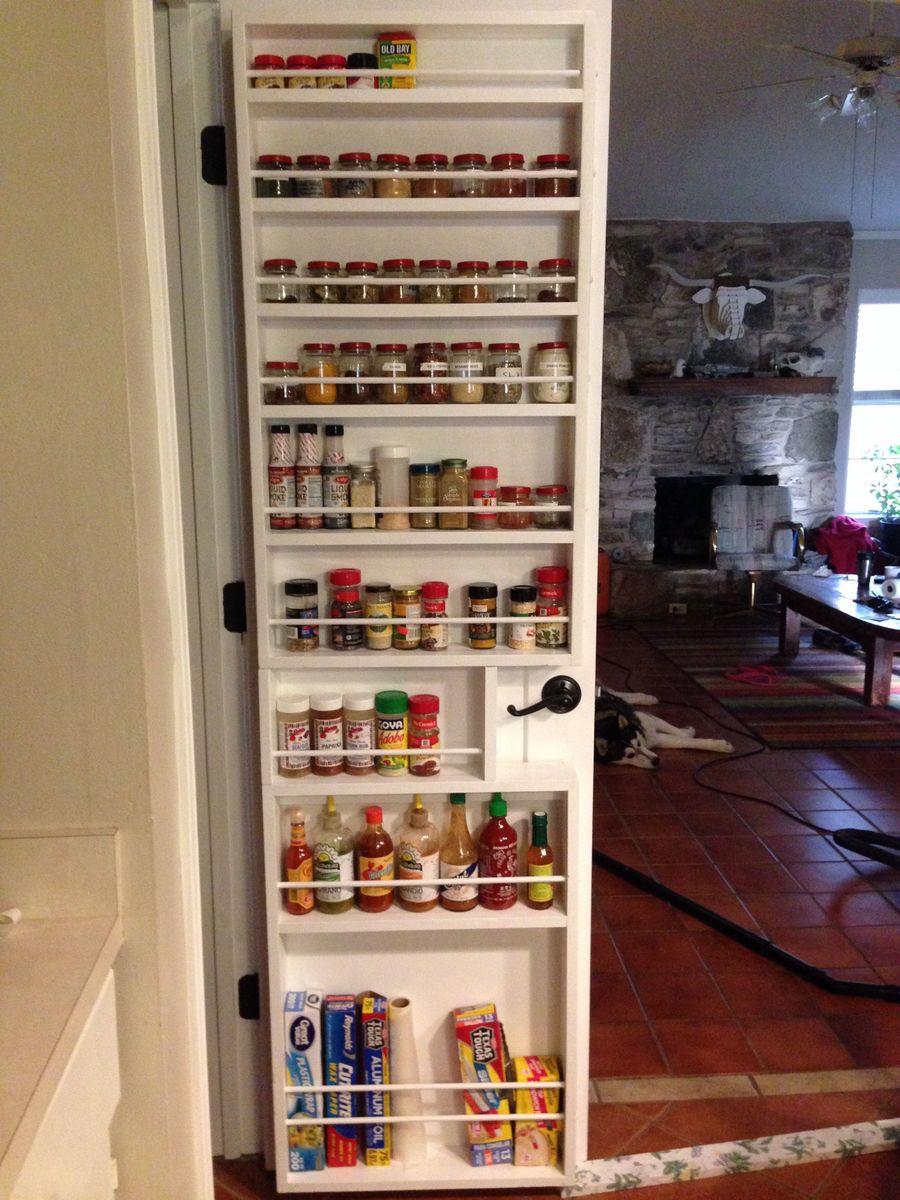
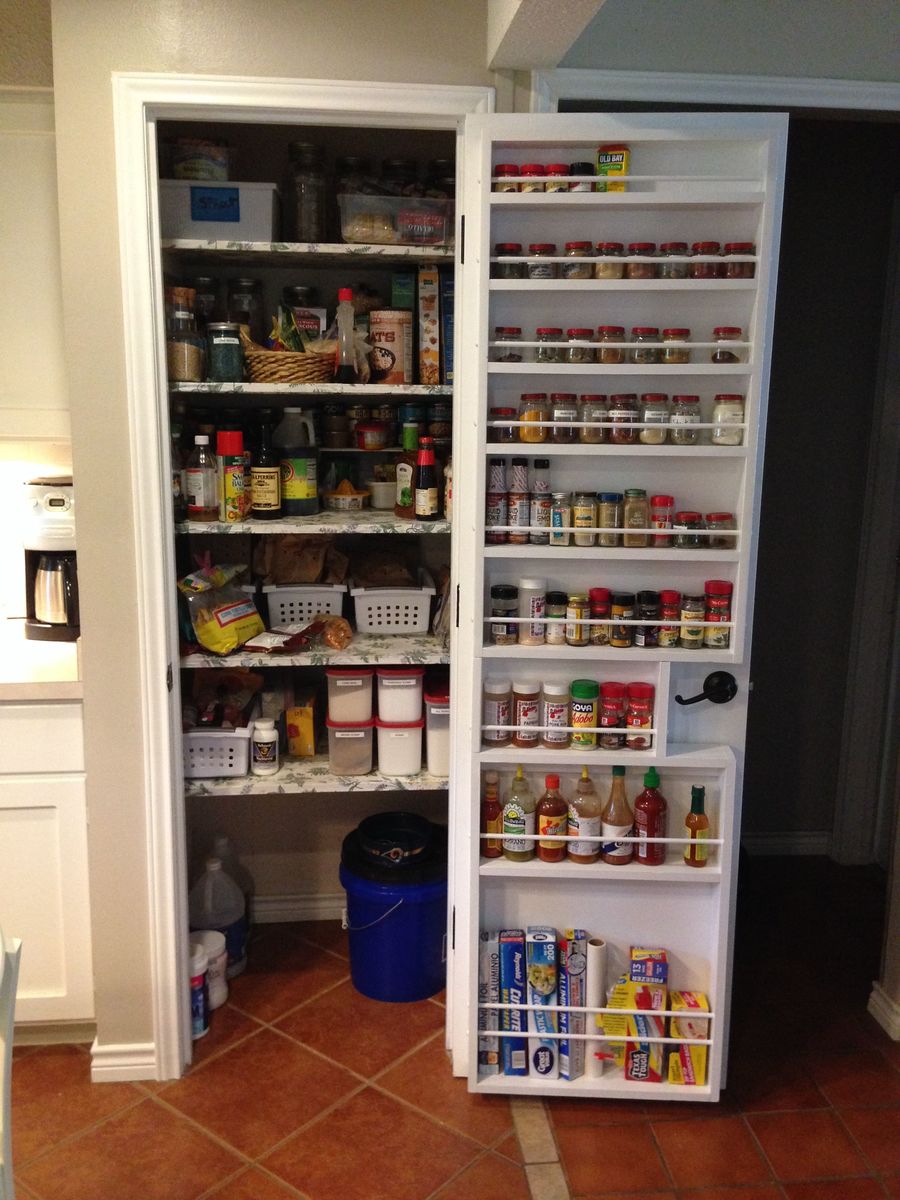
The plan is great, I followed the instructions exactly.  Then altered the plan to build a second rack that would fit the bottom of the door, with foil, saran and bag storage at the bottom.  Consequently it was heavy and I was very skeptical of the hollow core door anchors, but I installed 3 at the top and 2 at the bottom of both pieces.  It's very solid and secure....would probably have worked fine with even less. This door is only 32" wide but has plenty of room for this project.  Thank you, looking forward to trying more of your plans.

Built from Plan(s)
Estimated Time Investment
Day Project (6-9 Hours)
Finish Used
Primer and latex paint.
Recommended Skill Level
Intermediate

Comments

Farmhouse table

Submitted by Anonymous (not verified) on Thu, 06/18/2020 - 19:25

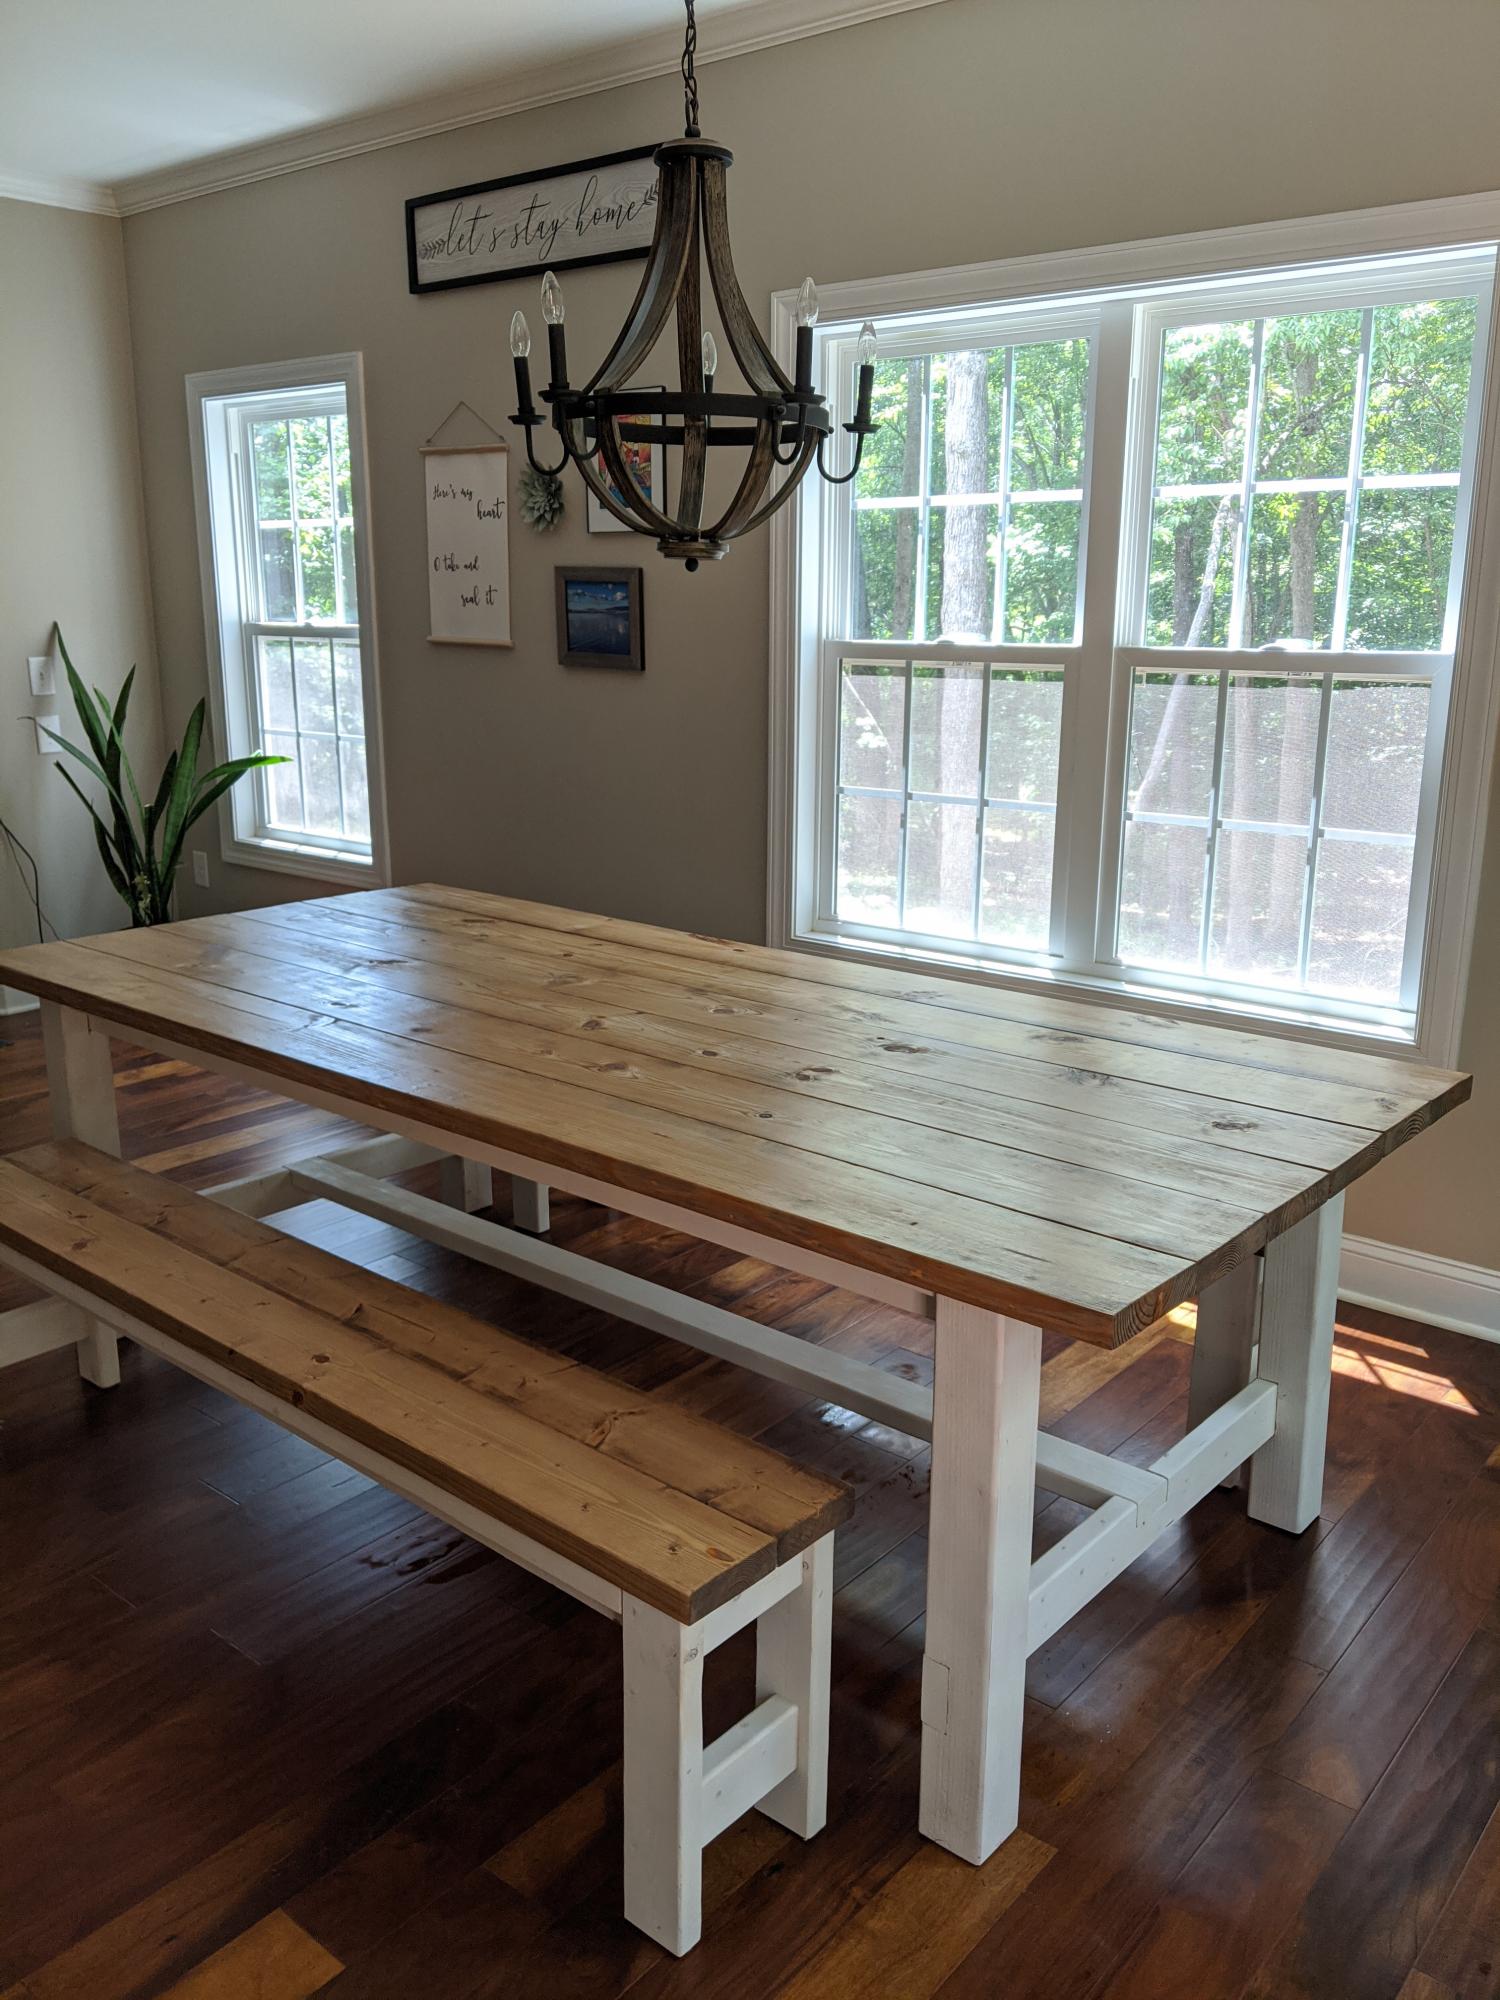
First table build! We modified the plans with no breadboard ends since we live with lots of humidity and wanted to allow the wood movement. We also used 4x4s for the legs. White chalk spray paint legs and custom mix of special walnut and weathered oak stains. We LOVE it!!

Estimated Cost
200
Estimated Time Investment
Weekend Project (10-20 Hours)

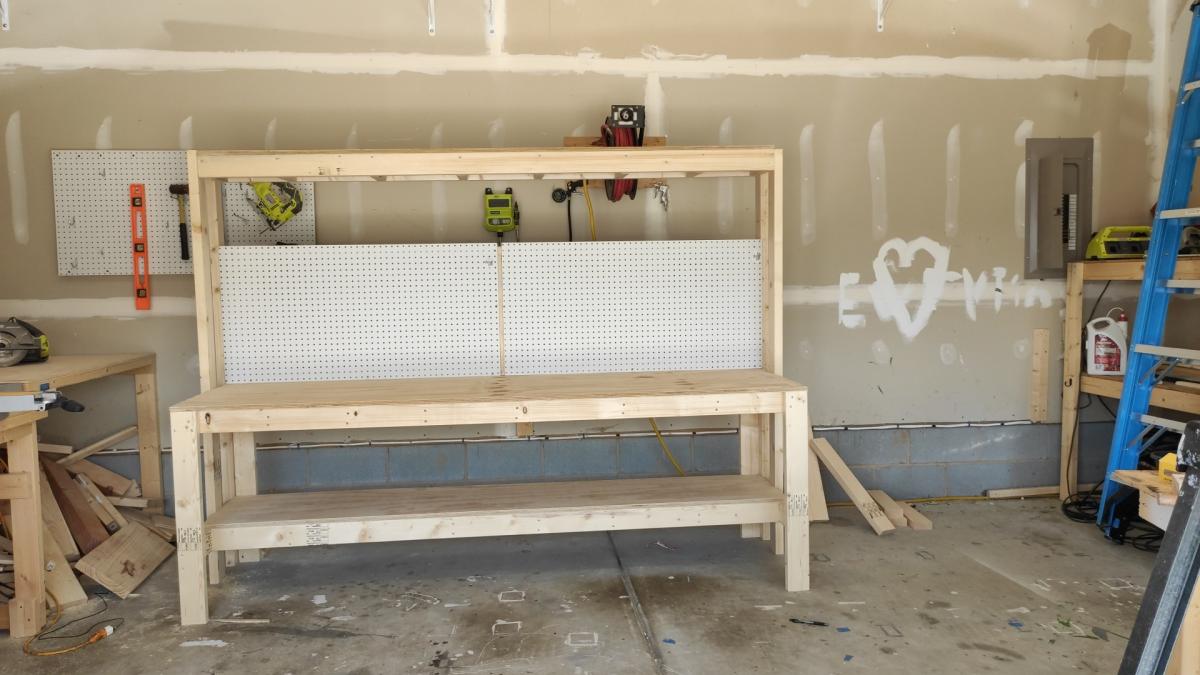
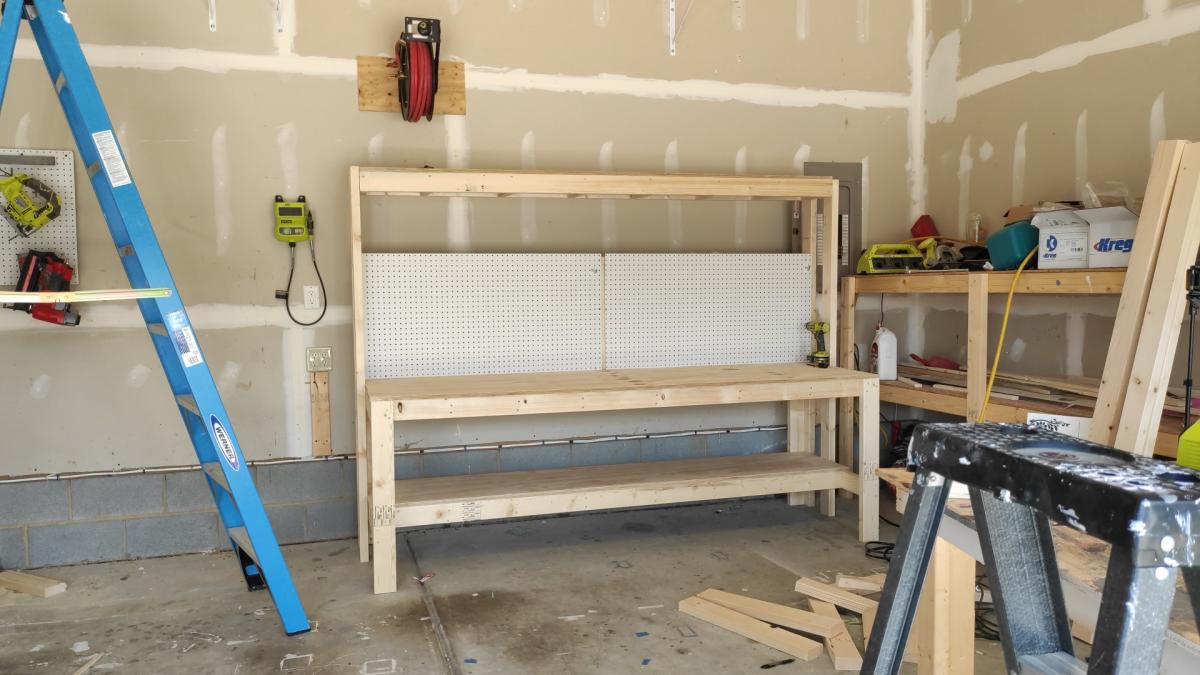
Workbench with pegboard

Submitted by bredbu on Wed, 07/01/2020 - 18:37

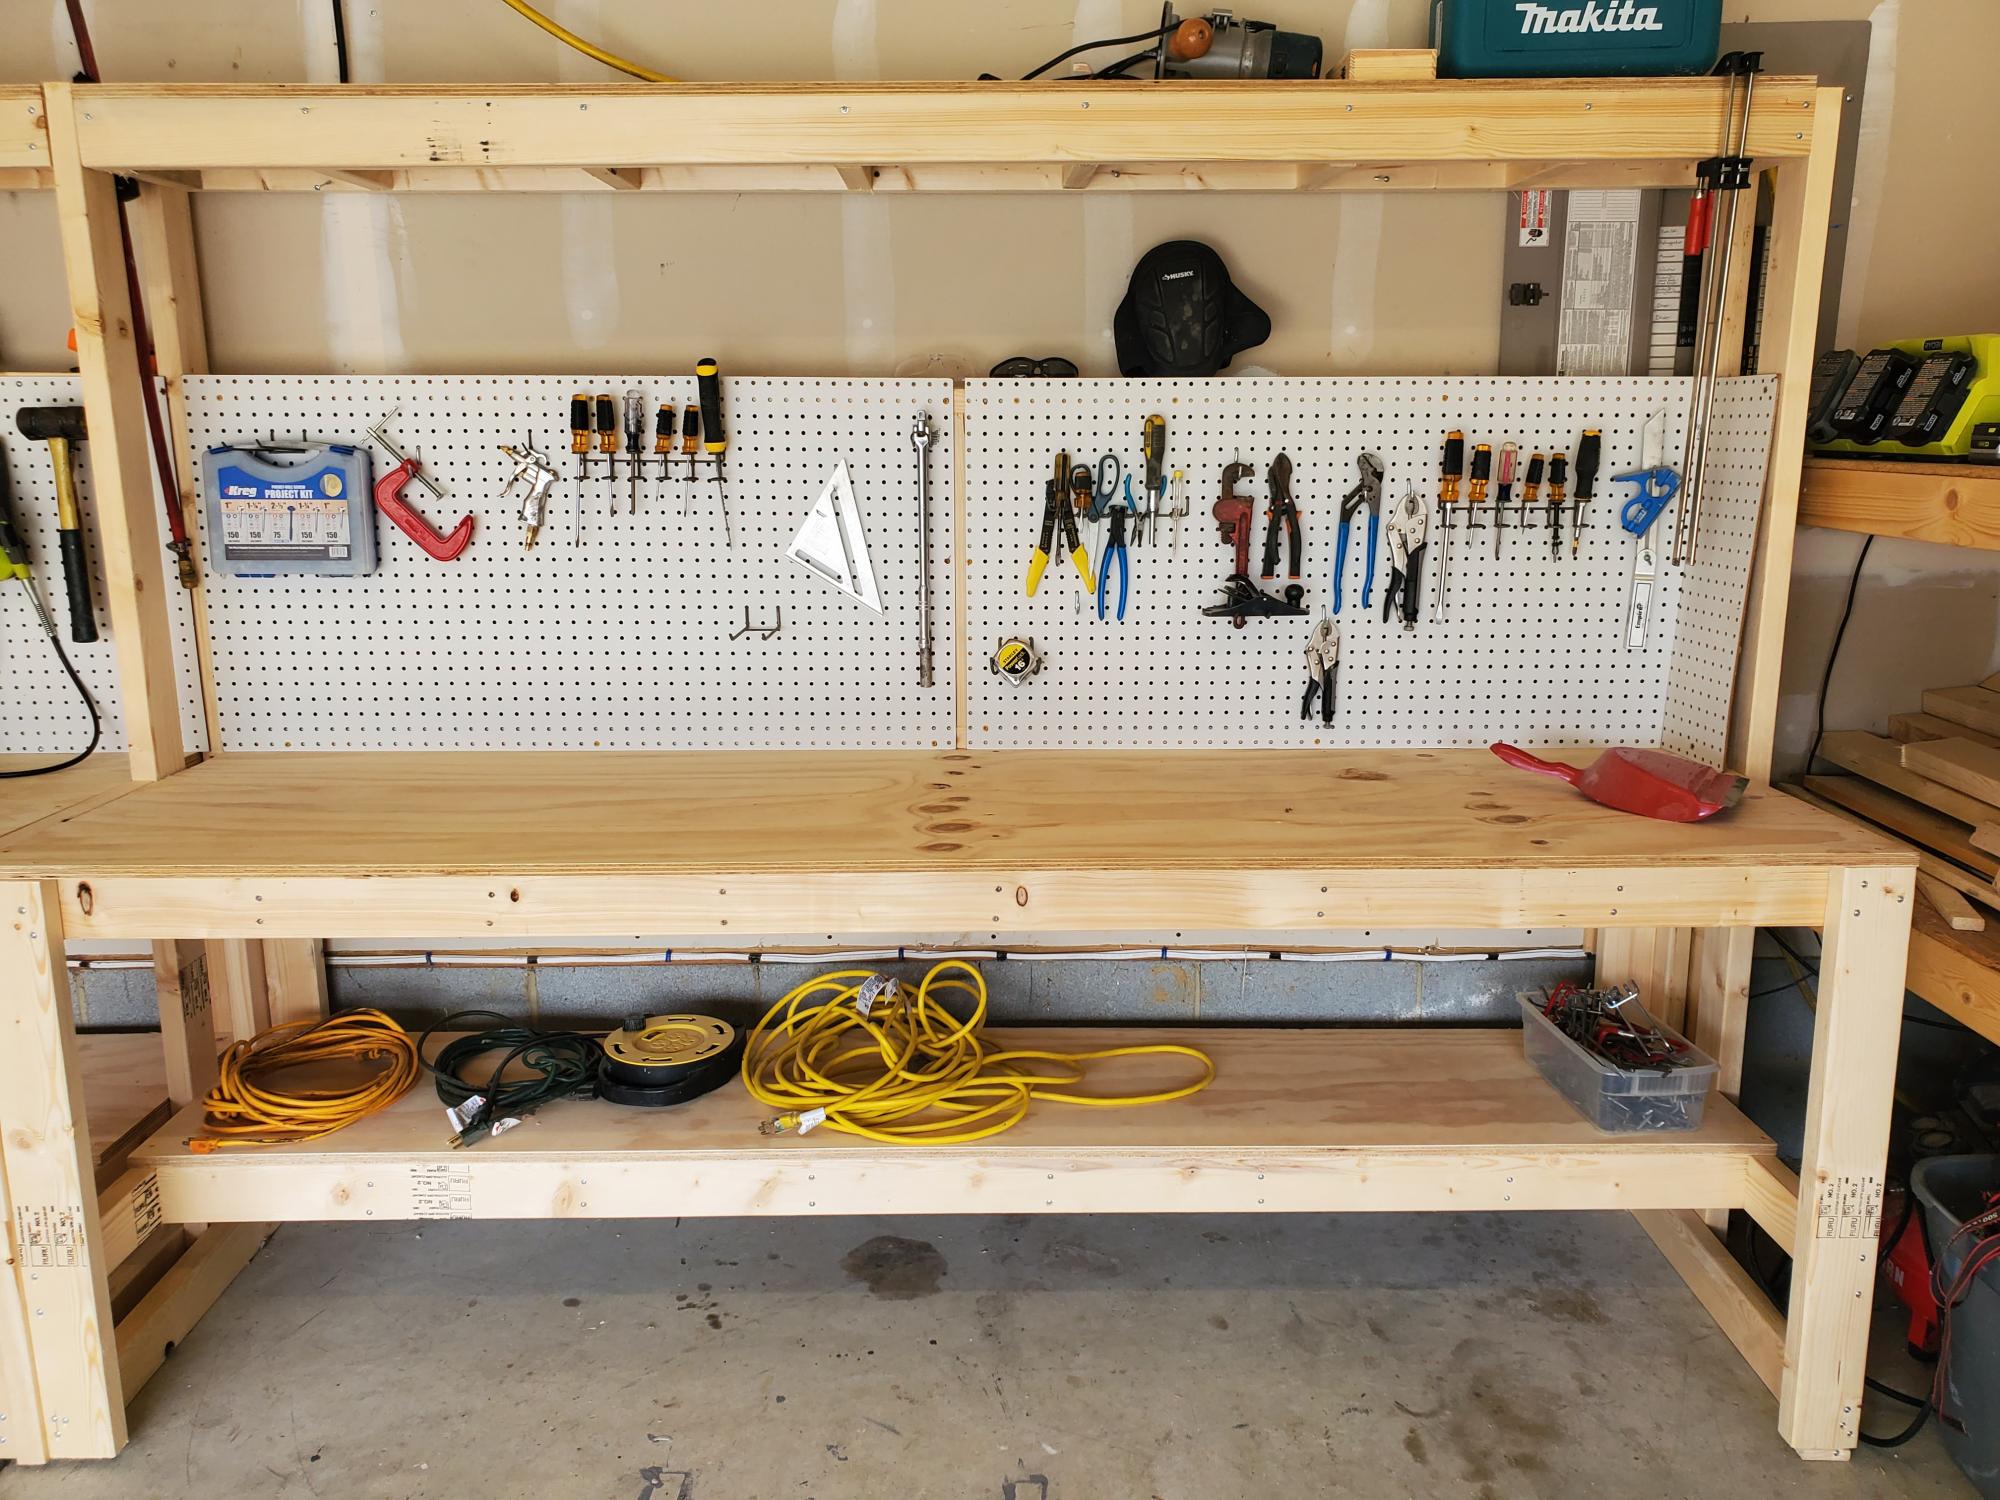
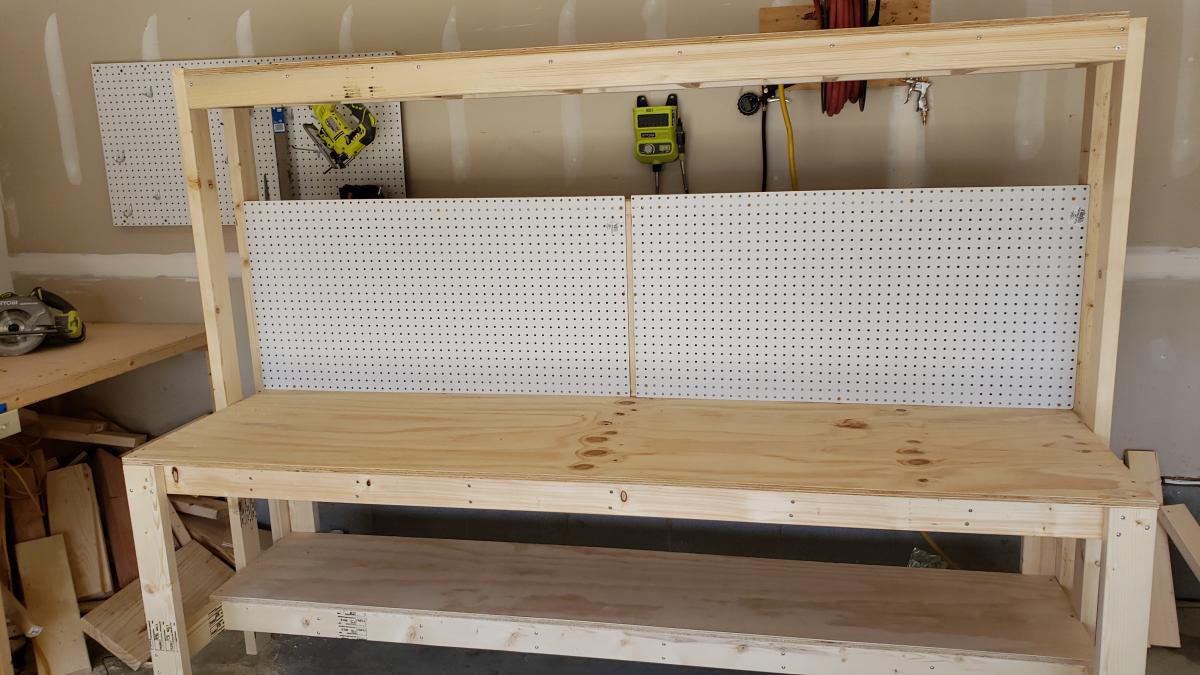
I made a workbench for my garage it was pretty easy. I also made an instructional youtube video if you want to learn how to make it. #diy #workbench #bench

Estimated Cost
125
Estimated Time Investment
Afternoon Project (3-6 Hours)
Finish Used
none
Recommended Skill Level
Beginner

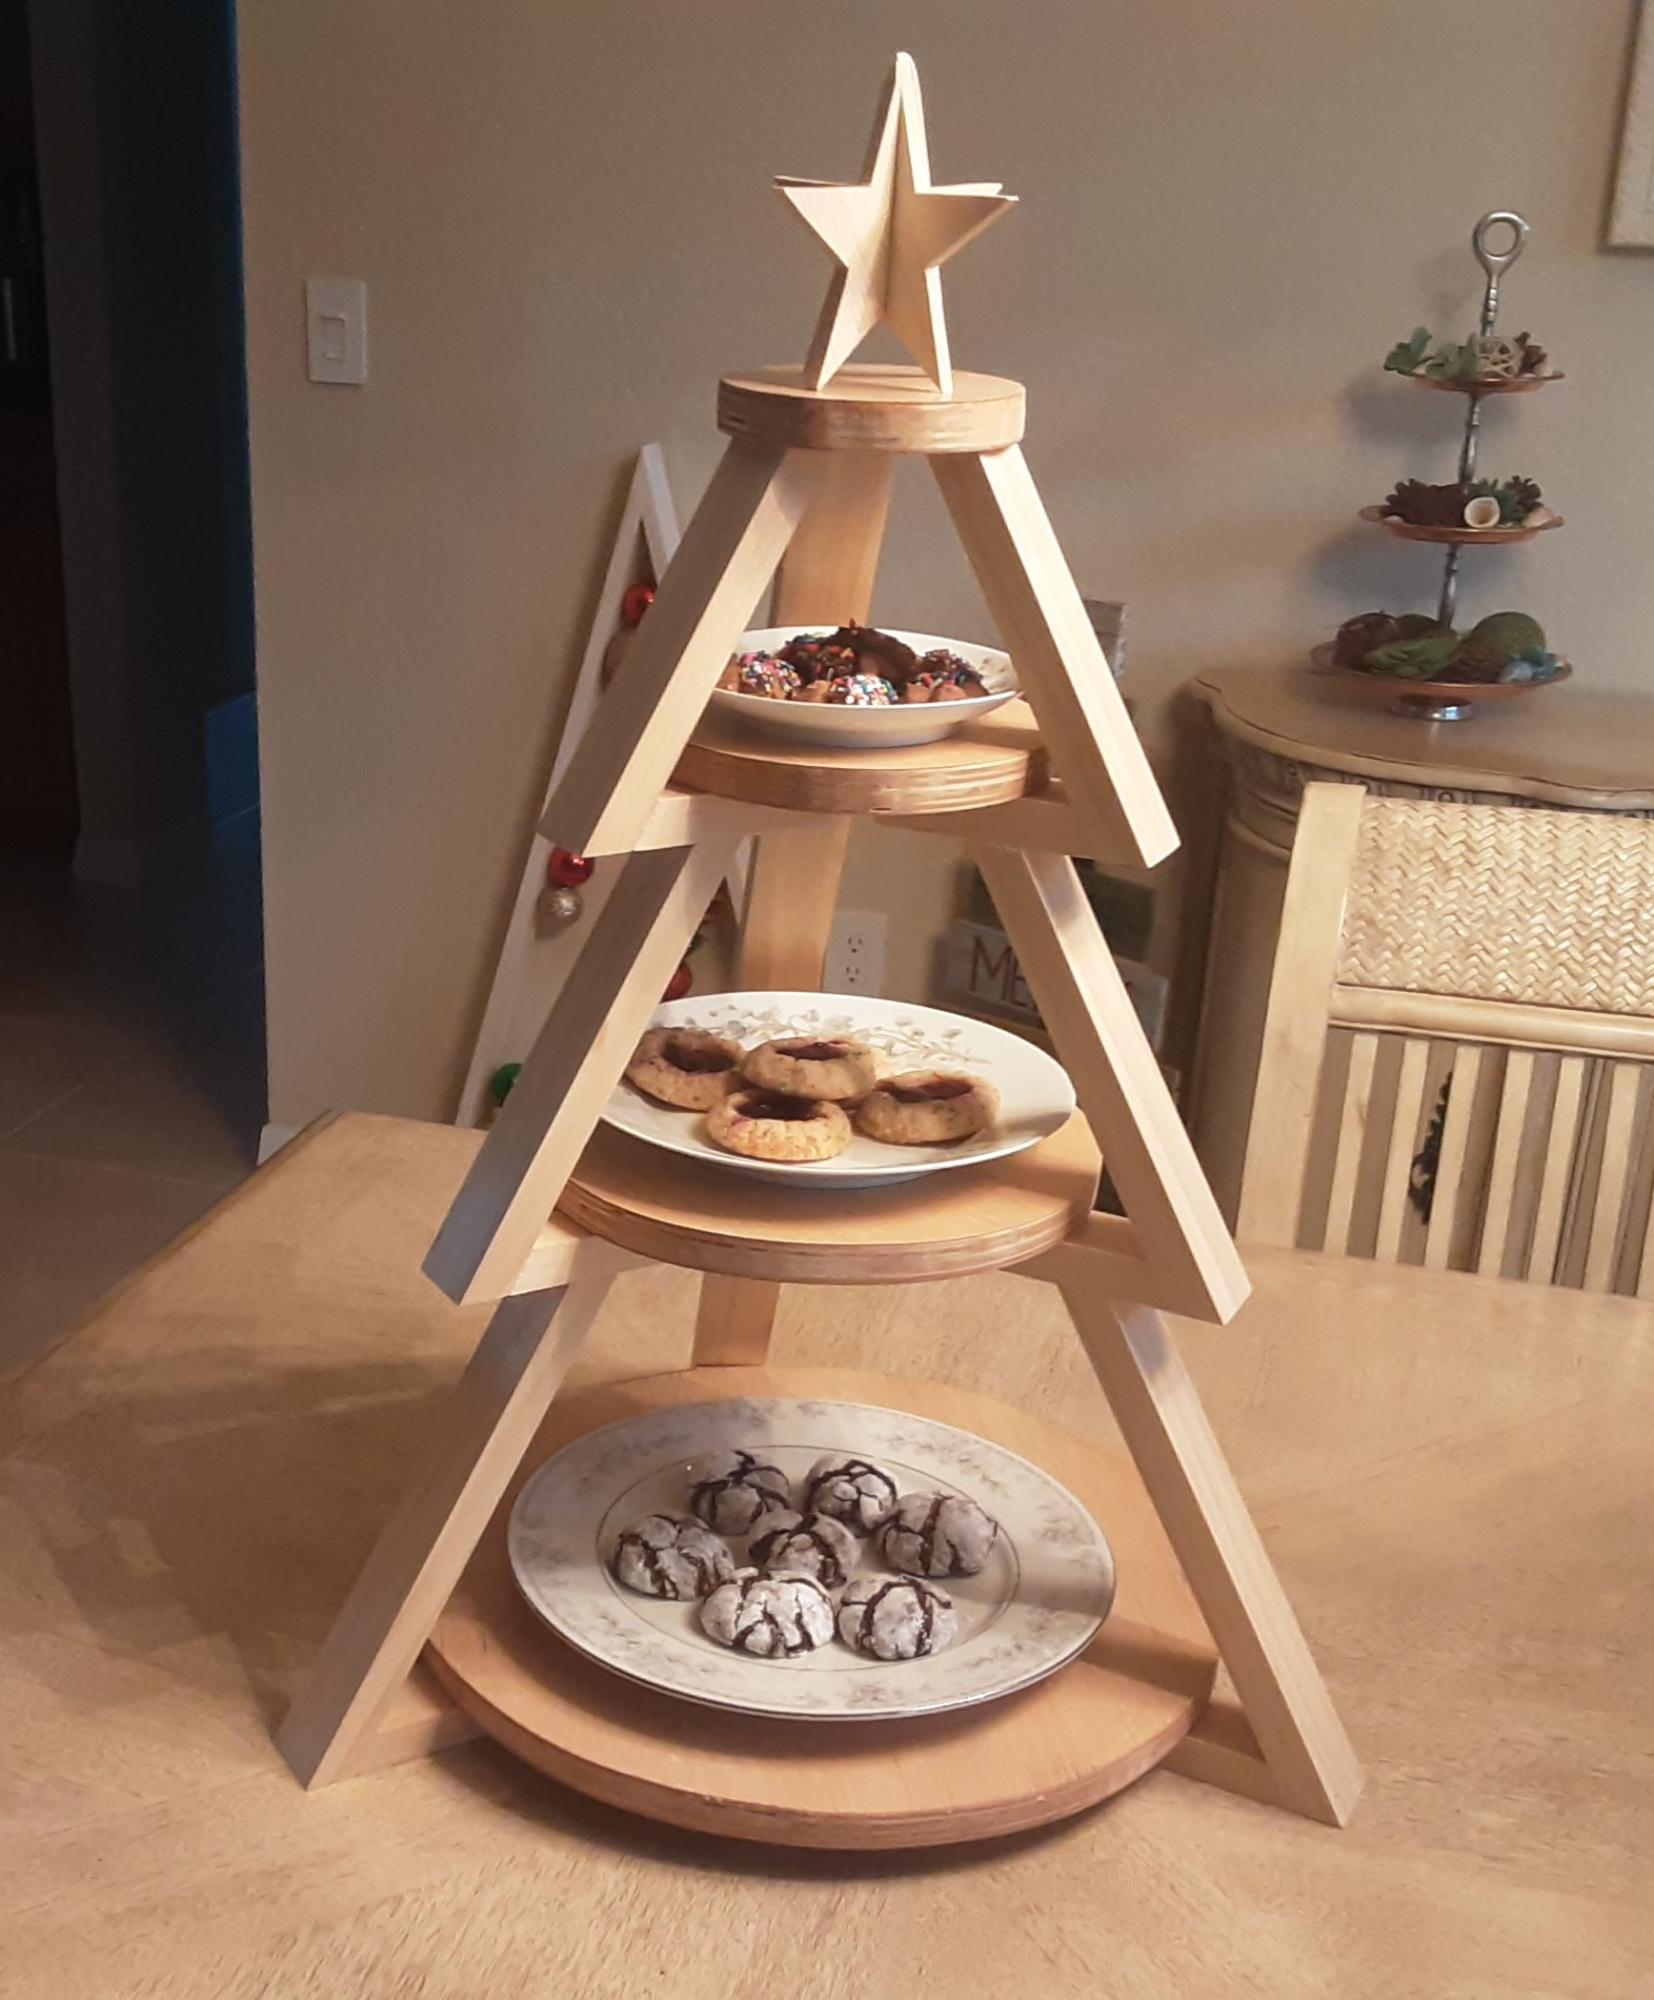
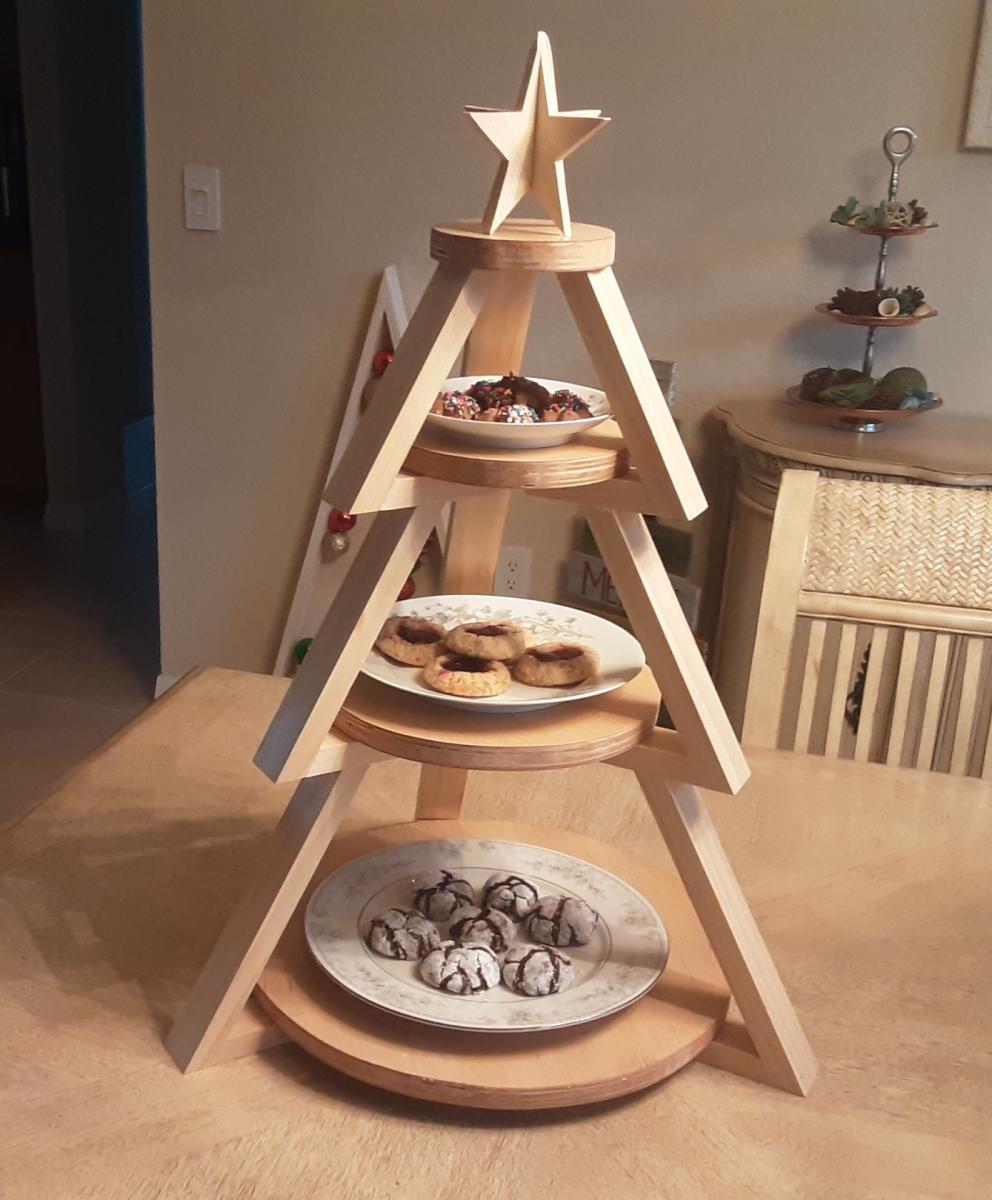
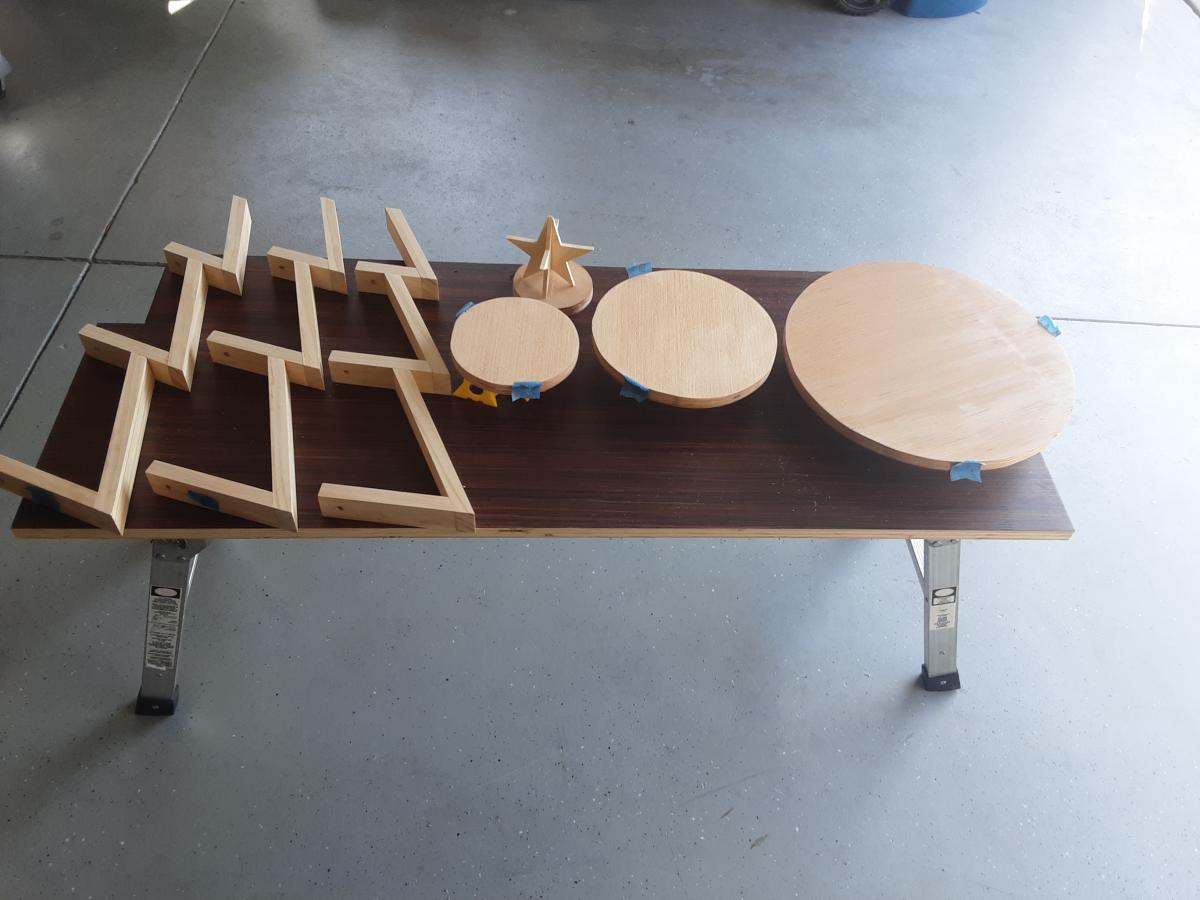
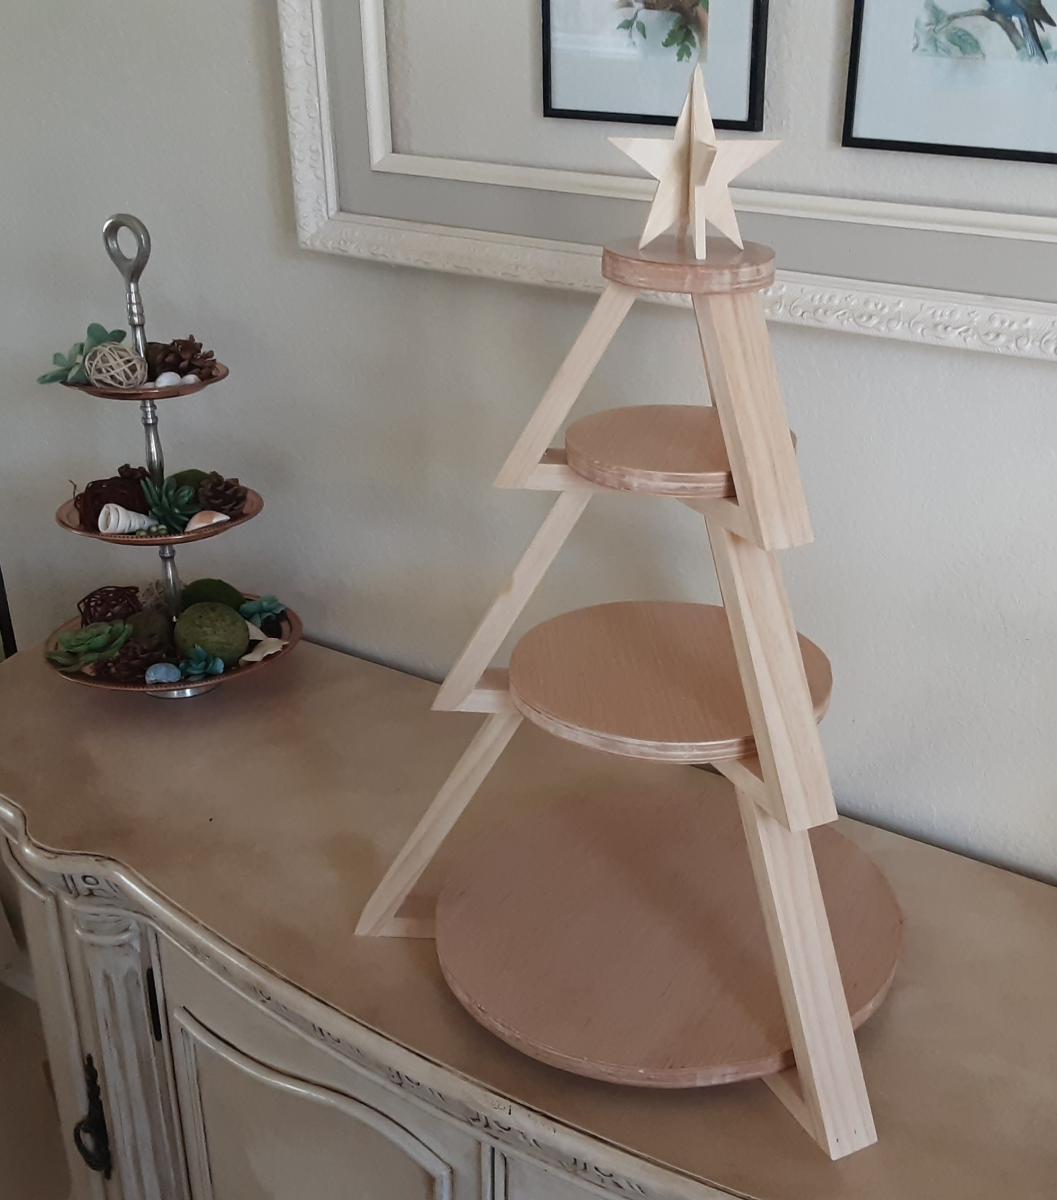
Christmas 3-tier cookie stand

Submitted by calcowoods on Thu, 12/31/2020 - 12:51

Inspired by Shara of Woodshop Diaries, created this 3 tier tray for displaying cookies for Santa. Added a 3 dimensional star as the topper and simply followed the excellent photos and schematics on Shara's website.

Estimated Cost
$5
Estimated Time Investment
Afternoon Project (3-6 Hours)
Finish Used
Minwax paste wax
Recommended Skill Level
Beginner

Comments

Back